
MICRO DTR 1560-2 - Satellite receiver GRUNDIG - Free user manual and instructions
Find the device manual for free MICRO DTR 1560-2 GRUNDIG in PDF.


| Product Type | Digital Satellite Receiver |
| Brand | Grundig |
| Model | MICRO DTR 1560-2 |
| Dimensions (W x H x D) | 100 x 25 x 75 mm |
| Weight | 86 g |
| Power Supply | DC 12 V via mains adapter (230 V~, 50 Hz) |
| Power Consumption | Max. 6 W |
| Reception Frequency Range | 67 - 862 MHz (VHF/UHF) |
| COFDM Modes | 2k and 8k |
| Constellation | QPSK, 16 QAM, 64 QAM |
| Number of Channels | 4000 |
| Antenna Power Supply | +5 V, max. 30 mA |
| OSD Languages | Up to 10 languages |
| Channel Search | Automatic and manual |
| Last Station Memory | Yes |
| Teletext Decoder | Yes |
| Software Update | OTA (Over the Air) |
| Remote Control | Tele Pilot 766 S |
| TV Integration | Compatible with Grundig G2 chassis (Digi 200) |
| Timer Functions | Up to 8 recording timers |
| Parental Lock | Yes, with PIN code |
| Package Contents | Receiver, remote control, batteries, Euro/AV cable, mains adapter, infrared receiver, manual |
| Safety | Do not open; disconnect during storms; avoid moisture |
| Environmental Note | Recyclable; do not dispose with household waste |
Frequently Asked Questions - MICRO DTR 1560-2 GRUNDIG
User questions about MICRO DTR 1560-2 GRUNDIG
0 question about this device. Answer the ones you know or ask your own.
Ask a new question about this device
Download the instructions for your Satellite receiver in PDF format for free! Find your manual MICRO DTR 1560-2 - GRUNDIG and take your electronic device back in hand. On this page are published all the documents necessary for the use of your device. MICRO DTR 1560-2 by GRUNDIG.
USER MANUAL MICRO DTR 1560-2 GRUNDIG
DIGITAL SATELLITE RECEIVER
DTR 1560-2 MICRO
CONTENTS
4 General information
4 Packing contents
4 Receiving digital stations
4 Special features of your digital receiver
5 Set-up and safety
6-7 Overview
6 The digital receiver
6 The infrared receiver
7 The remote control
8-9 Connection and preparation
8 Connecting the antenna
8 Connecting the television
8 Connecting the infrared receiver
9 Connecting the mains adapter
9 Inserting batteries in the remote control
10-13 Upgrading the television
10 Connecting the GRUNDIG television with G2 chassis (Digi 200)
11 Installing on the GRUNDIG television set
12-13 Operating the GRUNDIG television remote control
14-17 Basic settings
14 The menu
15-16 Searching for stations
17 Editing the station list
18-20 Basic functions
18 Switching on and off
18 Mode selection
18 Selecting preset channels
18 Using the options
19 Adjusting the volume
19 Muting the sound
19 Selecting stations from lists
19 Switching from the current station to the previous one
20 TV guide
21 Teletext mode
21 Teletext
21 Additional functions
22-27 Settings
22-23 Picture settings
23-24 Language Settings
25-26 Menu settings
26-27 General settings
28-31 Additional functions
28 Automatic station search
29 Manual station search
30 Timer functions
31 Safety
32-33 Special settings
32 Resetting the receiver to its original state
32 Updating the digital receiver software
33 Changing remote control levels
34-37 Information
34 Displaying station reception properties
34 Displaying device information
35 Technical data
35 Environmental note
36 Troubleshooting
37 Additional Information for units sold in the UK.
GENERAL INFORMATION
Packing contents
1 DTR 1560-2 MICRO Digital Satellite Receiver
2 Tele Pilot 766 S remote control
3 Two batteries for the remote control (2 x 1.5 V, Mignon, e.g. UM-3 or AA)
4 Euro/AV (Scart) extension
5 Mains adapter
6 Infrared receiver
7 Instruction Manual
Receiving digital stations
To use your new DTR 1560-2 MICRO digital receiver you need a digital outdoor or indoor antenna.
Unlike analogue broadcasting, not every station has its own transmission frequency. Instead, several stations are grouped into what are known as bouquets on a regional or national level.
You can find the current transmission information on teletext from various broadcasters, or look in a TV guide or on the Internet.
Special features of your digital receiver
The DTR 1560-2 MICRO digital receiver can receive and process all unencrypted digital stations. This digital receiver has a built-in digital receiver unit. The receiver unit converts the signals from digital stations to provide outstanding audio and picture quality.
The TV guide tells you of any schedule changes at short notice, and provides an overview of all the stations' schedules for the next few hours.
If the broadcaster provides it, you can call up detailed information on each programme at the touch of a button.
This digital receiver has a very comprehensive, user-friendly menu system.
The menu is displayed on the television screen, and the functions of the remote control buttons are explained.
This receiver is prepared with the Digi 200 chassis for upgrading GRUNDIG televisions.
The user guide for the receiver can be integrated into the television user guide by following a brief installation procedure. The receiver can be controlled with the television remote control once it is installed. The remote control, the infra-red mouse and the power supply for the receiver will then no longer be needed.
SET-UP AND SAFETY
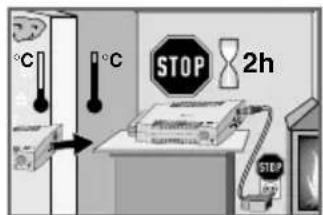
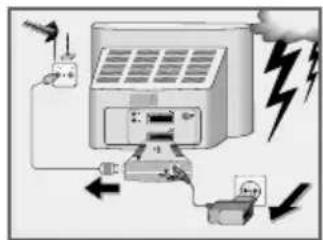
To ensure that this high quality, easy-to-use digital receiver gives you lasting entertainment and enjoyment, please note the following information.
This digital receiver is designed to receive, record and play back video and audio signals. Any other use is expressly prohibited.
When setting up the device, make sure the mains plug is easily accessible.
If the digital receiver is subject to a sudden change in temperature, for example when brought in from the cold to a warm room, let it stand for at least two hours before you connect it to the mains supply.
Do not expose the digital receiver to any moisture.
The digital receiver is designed for use in dry rooms. If you do use it outdoors, please ensure that it is protected from moisture, such as rain or splashing water.
Thunderstorms are a danger to all electrical devices. Even if the digital receiver is switched off, it can be damaged by a lightning strike to the mains or the antenna.
Always disconnect the mains and antenna plugs during a storm.
Never open the digital receiver casing under any circumstances. Warranty claims are excluded for damage resulting from improper handling.
Note:
Do not connect any other equipment while the device is switched on. Switch off the other equipment as well before connecting it.
Only plug the device into the mains socket after you have connected the external devices and the antenna.
OVERVIEW
The digital receiver
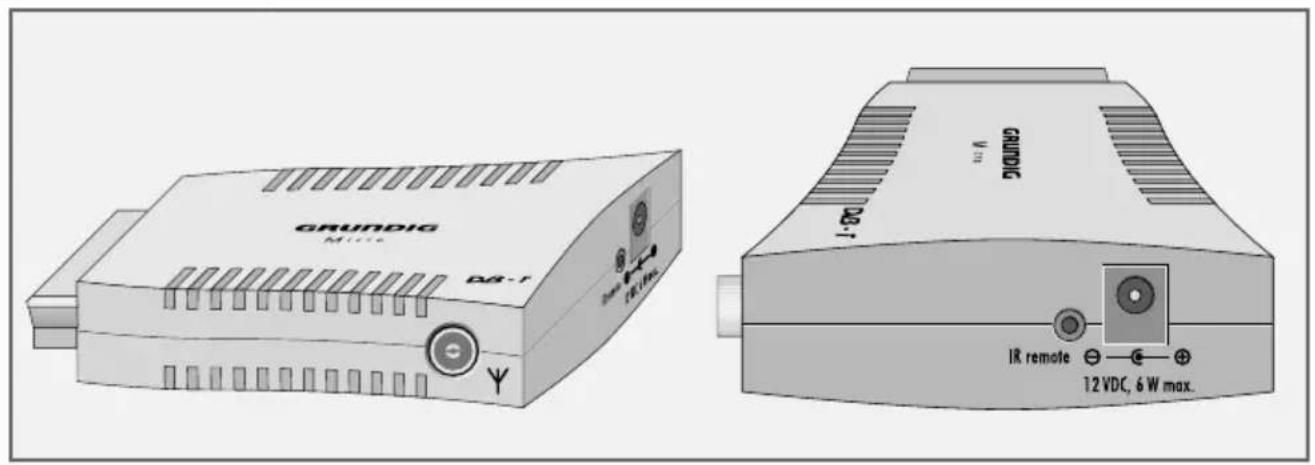

Socket for the indoor or outdoor antenna.
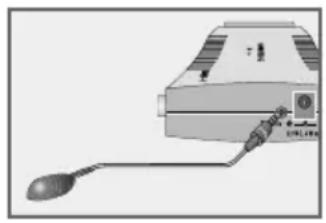
IR remote Connection socket for the infrared receiver.
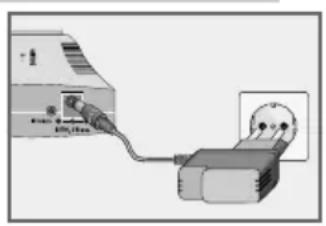
12 VDC, 6 W max. Connection socket for the mains adapter supplied.
EURO AV Euro AV (output) plug for the television.
The infrared receiver
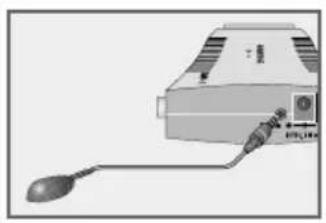
natural_image
Illustration of a vintage electronic device with a coiled cable and a sensor, no visible text or symbolsThe infrared receiver receives the infrared signals of the remote control and forwards the commands by wire to the receiver. Position the infrared receiver so that it can receive the remote control commands.
When you switch on from standby, the receiver switches to the last selected station (Last Station Memory).
● (red) The digital receiver is in standby mode.
● (green) The digital receiver is switched on.
OVERVIEW
The remote control
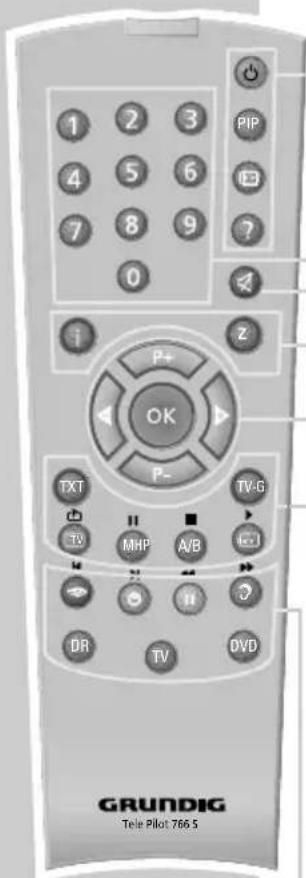
Switches the digital receiver to standby, and from standby to the channel last selected.
? Displays programme information.
1 ... 0 Select stations.
Switches the sound to mute and on again.
i Opens the main menu.
z Exits the current menu level.
Adjust the volume.

P+ Switch channels up and down one by one.
P-
OK Calls up the station list.
Press A/B to switch between the station list and the favourites list.
TXT Switches from television mode to teletext mode.
TV-G Calls up the TV guide.
TV Switches to TV mode.
A/B Switches between the two most recently selected channels.
RADIO Switches to radio mode.
Displays the time.
Switches between audio channels.
? Calls up options (not available for all stations).
DR, TV Switches to operating a GRUNDIG digital receiver, DVD GRUNDIG television or GRUNDIG DVD player. Keep the appropriate button (»DR«, »TV«, »DVD«) pressed down. Then press the appropriate button.
Note:
The functions available depend on the model of the device you are using. Just try it out.
CONNECTION AND PREPARATION
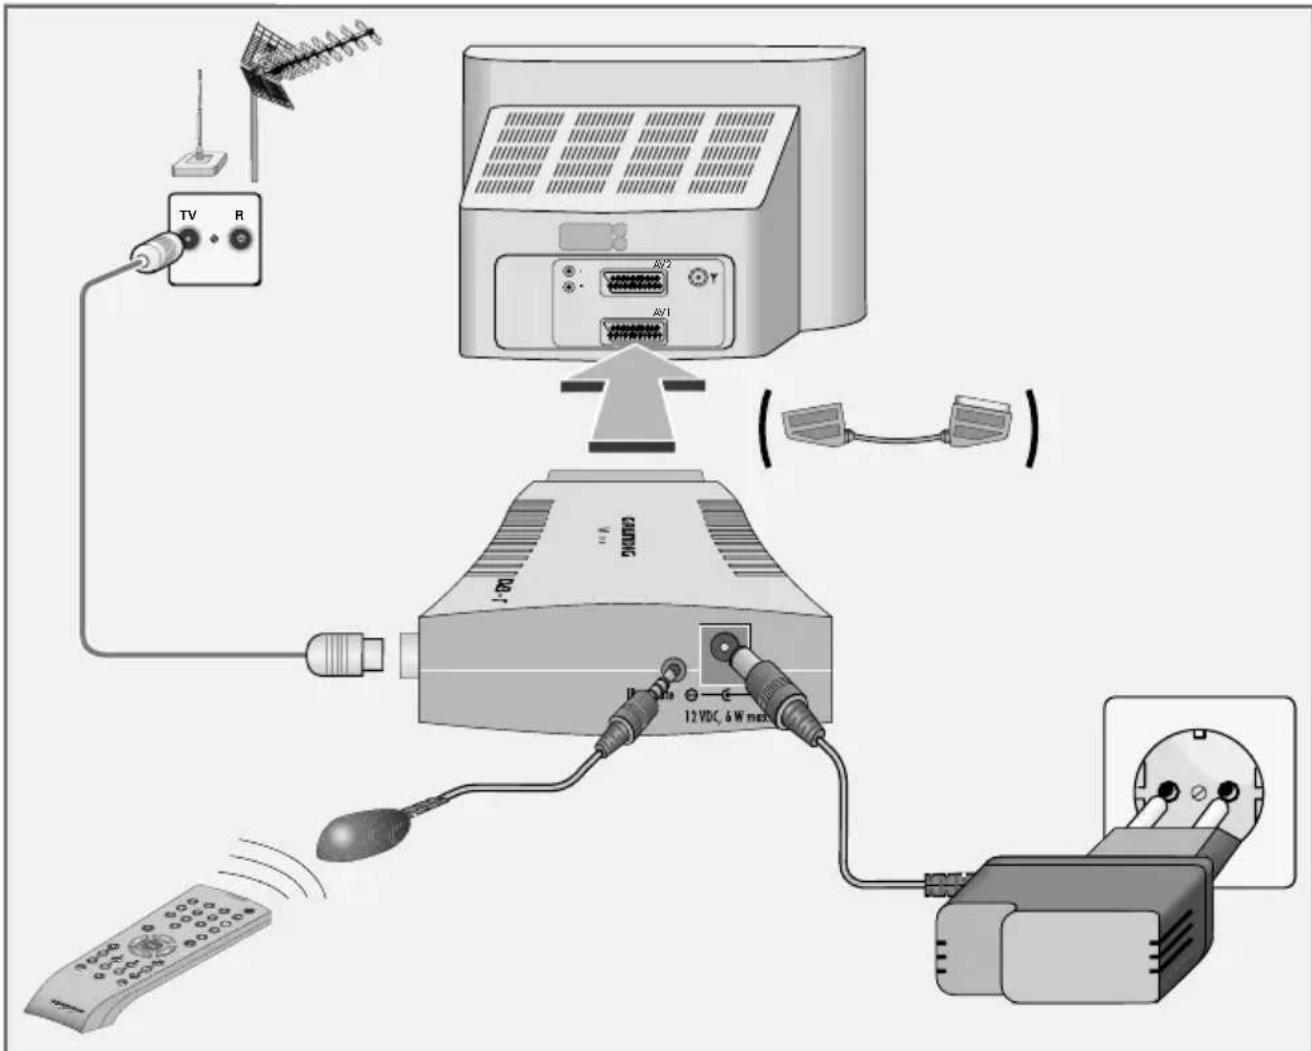
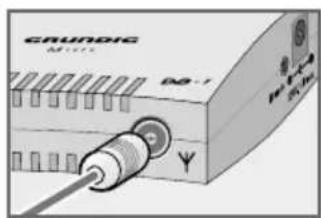
natural_image
Close-up of a BAUNDIG Micro device with a USB cable connector (no visible text or symbols)Connecting the antenna
1 Connect the cable of the indoor or outdoor antenna to the »Y« socket on the digital receiver.
Note:
When connecting an indoor antenna you may have to try it out at different positions until you get the best reception.
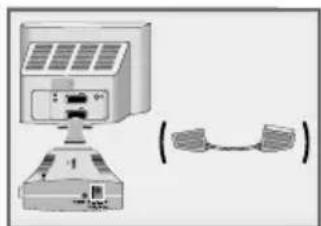
Connecting the television
1 Plug the digital receiver into the corresponding Euro AV socket (e.g. EURO-AV, SCART) of the television (use the Euro AV extension if required).
natural_image
Computer monitor connected to a cable via a network (no text or symbols visible)CONNECTION AND PREPARATION
natural_image
Illustration of a vintage computer with a scroll and antenna (no text or symbols)Connecting the infrared receiver
1 Insert the plug of the infrared receiver into the »IR remote« socket.
Connecting the mains adapter
1 Plug the plug of the mains adapter supplied into the »12 VDC« socket on the digital receiver.
2 Plug the mains adapter into the socket.
Notes:
Only plug the device into the mains socket after you have connected the television and the antenna.
The only way to disconnect the digital receiver from the mains supply is to pull the plug.
natural_image
Diagram showing a device connected to a motor with a cable, no text or symbols presentInserting batteries in the remote control
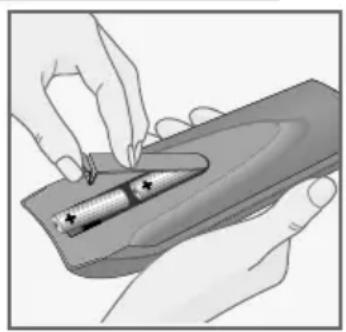
1 Open the battery compartment by removing the lid.
2 Insert the batteries (Mignon type, for example UM-3 or AA, 2x 1.5 V).
Observe the polarity (marked on the base of the battery compartment).
3 Close the battery compartment.
natural_image
Illustration of hands using a tool to apply a pen on a surface (no text or symbols visible)Note:
If the digital receiver no longer reacts properly to remote control commands, the batteries may be flat. Always remove used batteries.
The manufacturer accepts no liability for damage resulting from leaking batteries.
Environmental note
Batteries, including those which contain no heavy metal, should not be disposed of with household waste. Please dispose of used batteries in an environmentally responsible manner. Find out about the legal regulations which apply in your area.
UPGRADING THE TELEVISION
Connecting the GRUNDIG television with G2 chassis (Digi 200)
You can fit a television with G2 chassis (Digi 200) with this digital receiver as of software version "Ver SG21603-010 xxxxxx". "xxxxxx" stands for the date the software was created. The date is not important for the compatibility. You can display the software version of the television when »EASY DIALOG« is showing (main menu), by pressing the green button.
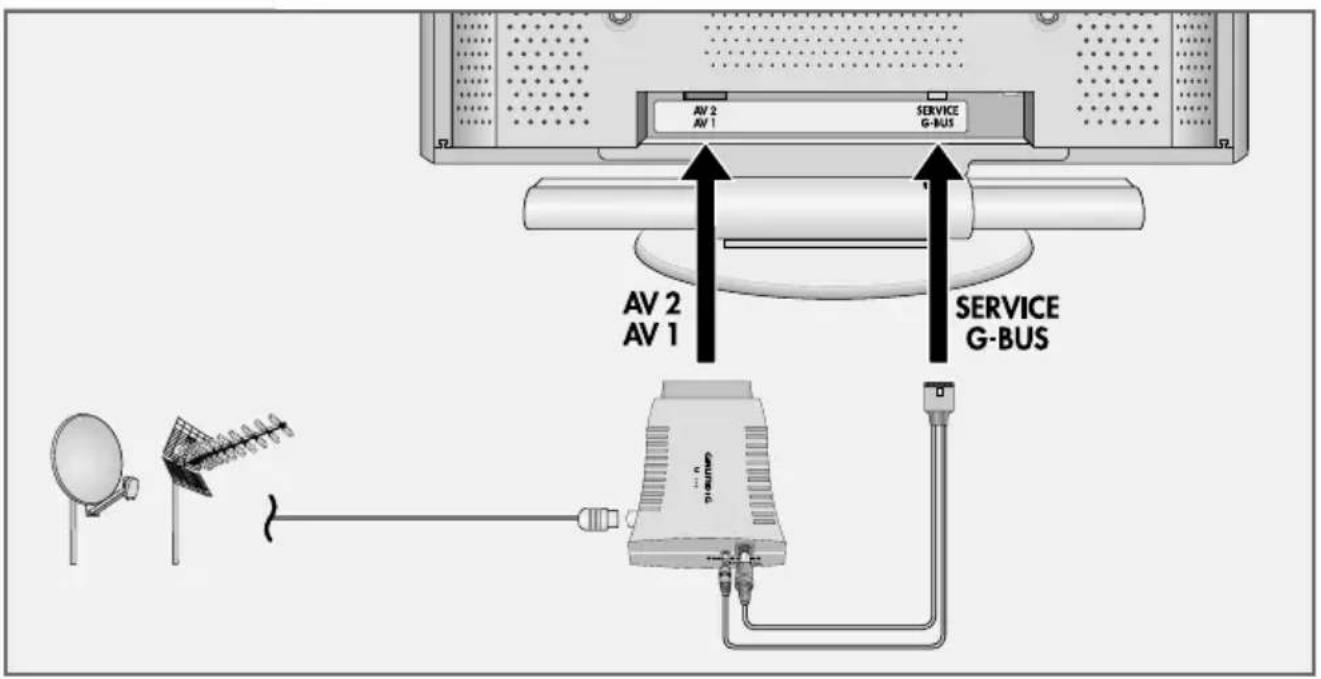
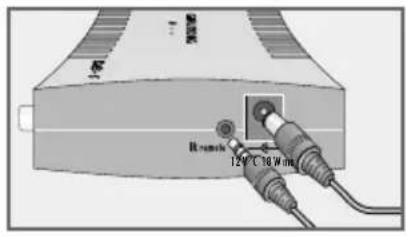
Connecting the communication line to the receiver
1 Plug the communication line into the »IR remote« and »12 VDC« sockets.
Note:
The communication line is supplied with the appropriate television.
Connecting the communication line to the television
1 Plug the communication line into the »SERVICE G-BUS« socket on the television.
Note:
The remote control, the infra-red mouse and the power supply for the receiver will then no longer be needed.
UPGRADING THE TELEVISION
Installing on the GRUNDIG television set
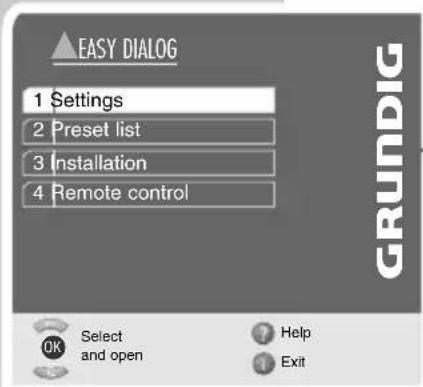
1 Switch on the television.
2 Open the »EASY DIALOG« menu by pressing » i«.
3 Select »Installation« with »P++ or »P-« and press »OK« to confirm.
4 Select »Devices« with »P+« or »P-« and press »OK« to confirm.
5 Select »G-Bus« with »P+« or »P-« and press »OK« to confirm.
6 Select »Picture signal on plug« with »P++ or »P-« and press »OK« to confirm.
7 Select the Euro AV socket with »P+« or »P-« and press »OK« to confirm.
8 Select »Install external module« with »P+« or »P-« and start the installation with »OK«.
Note:
When the installation has been successfully completed, the »First Time Installation« page appears.
You can find further settings in the "Searching for stations" chapter on page 15.
UPGRADING THE TELEVISION
Operating the GRUNDIG television remote control
Note:
The receiver must be connected and installed at the G bus on the television set via the communication line.
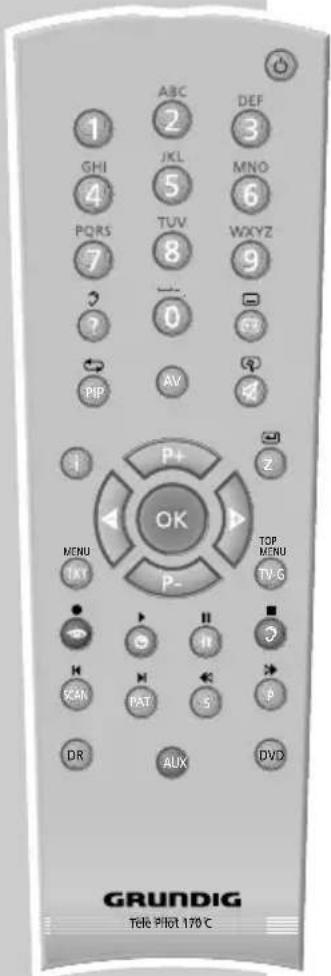
Switches the television off (standby).
1...0 Switches the television on from standby mode. Selects channels directly.
? Displays information on the selected function. You receive the station information of the digital receiver after changing station or by looking in the electronic TV guide.

Opens the »Format« menu. Then use P+ or P- to make the selection.
PIP Displays an inset picture. Returns to normal picture.
AV Opens the pre-selection for AV channels. Then select with P+ or P-.
Sound on/off (mute).
i Opens the television »EASY DIALOG« menu (main menu). You can find the main menu of the digital receiver in the »EASY DIALOG« menu.
Z Switches back one menu level in the receiver.
P+, P- Switch the television on from standby; select stations step by step; move the cursor in the menus up and down.
Adjust the volume; move the cursor left/right.
OK Opens the station or favourites list in the receiver; activates various functions.
TXT Switches between teletext mode and TV mode on the television (only the television teletext can be used).
TV-G Opens and closes the electronic TV guide on the receiver.
UPGRADING THE TELEVISION
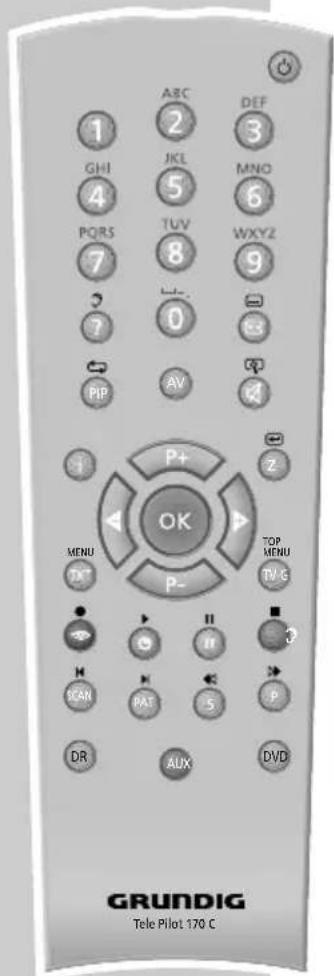
Opens the »Picture« menu of the television.
Shows/hides the time and station information.
Freeze-frame.
? Opens the »Sound« menu of the television.
SCAN Switches to TV mode.
PAT Selects the split screen function.
S Switches to radio mode.
P Switches between the last two selected stations; switches from the station list to the favourites.
DR, DVD Switches to operation of a GRUNDIG digital receiver, GRUNDIG digital receiver with hard disc (PDR), GRUNDIG DVD players or GRUNDIG DVD recorder. Keep the appropriate button (»DR«, »DVD«) pressed down. Then press the appropriate button.
Note:
The »DR« button has been programmed for operating a GRUNDIG digital receiver (remote control level 1). The »DVD« button has been programmed for operating a GRUNDIG DVD player.
To change this programming, see »AUX« button. The functions available depend on the model of the device you are using. Just try it out.
AUX Programming the remote control for operating external devices.
Press and hold down »AUX« and press three number buttons to enter the code:
»1«, »2«, »3« for a GRUNDIG DVD player.
»4«, »5«, »6« for a GRUNDIG DVD recorder.
»1«, »4«, »7« for a GRUNDIG digital receiver (remote control level 1).
»2«, »5«, »8« for a GRUNDIG digital receiver (remote control level 2).
»3«, »6«, »9« for a GRUNDIG digital receiver with a hard disc (PDR).
BASIC SETTINGS
The menu
This digital receiver has a very comprehensive, user-friendly menu system. The menu is displayed on the television screen.
The digital receiver responds to many functions which you select on the remote control with informative menus and icons on the television screen.
It enables you to select many different settings and contains information on using your digital receiver.
The menu contains the most important controls for your digital receiver. Its menu system controls the dialogue between you and the digital receiver.
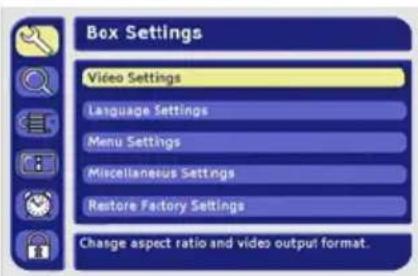
Press »i« to open the main menu. Press »P-« or »P+« to navigate in the menu and select the desired symbol. The selected symbol is highlighted.
When you press »OK« to confirm your selection, a sub-menu appears. Here too, you can navigate by pressing »P-« or »P++ and select the item you want. The selected item is highlighted.
Press »OK« to confirm. Normally another menu then appears, where you can use »P-« or »P++« to navigate and make the setting. Make settings using »P-«, »P++«, »◀« or »▶«.
Press »z« to quit the current menu level. Press »i« to quit the menu entirely.
BASIC SETTINGS
Searching for stations
The automatic search looks for receivable stations among the available bouquets of digital stations.
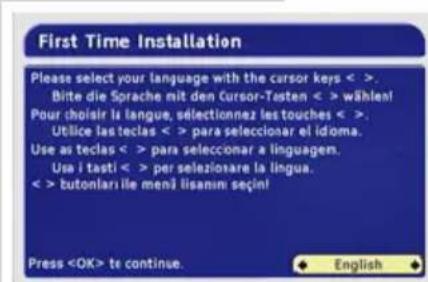
1 Press » ⏻ to switch on the digital receiver.
- The »Erstinstallation« (Initial installation) page appears when the device is first switched on.
2 Press »OK« to start initial installation.
3 Select your language using » ◀ or »▶« and press »OK« to confirm.
- The »Settings« menu appears.
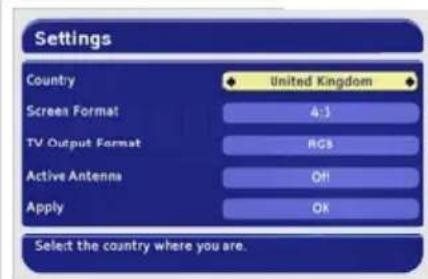
Only switch on the antenna voltage if the antenna is an active indoor antenna with a signal amplifier with no power supply of its own from a mains adapter or similar source. Otherwise you may cause a short circuit and irreparably damage your antenna.
8 Press » ◀« or »▶« to switch the antenna voltage on or off.
Caution!
If »Antenna short circuit« appears on the screen, switch off the digital receiver and remove the cause. The antenna has an excessive current consumption (max. 30 mA) or a short circuit.
- You can retain the values for the start and end frequency.
- Select the »All« option in »Channels to search for« if you would also like to receive encoded stations.
BASIC SETTINGS
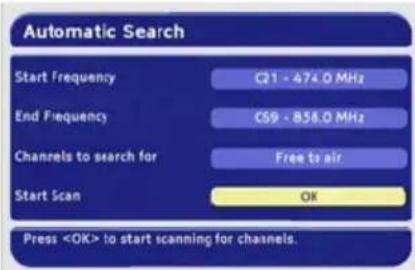
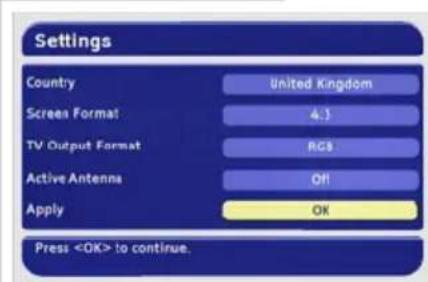
10 Select »Start Scan« with »P+« or »P-« and press »OK« to start the search.
- A message will appear once the search has ended.
11 Press »OK« to end initial installation.
- The stations that have been found are stored.
12 Press »OK« to go to the first channel position.
- You can change the order of the preset stations as required and delete stations you do not need (see the section on editing the station list on page 17).
BASIC SETTINGS
Editing the station list
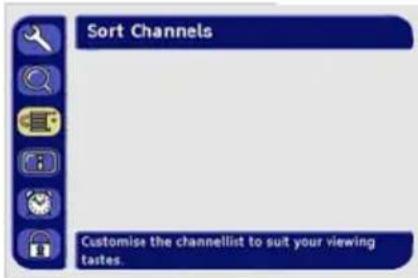
You can change the order of preset stations as required and delete stations you do not need.
You can select your favourite stations and save them in a list.
— 1 In the main menu, select »Sort Channels« with »P+« or »P-« and press »OK« to confirm.
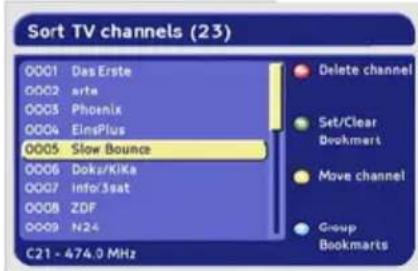
Deleting stations
1 Use »P-« or »P+« to select the station you want to delete.
2 Press » 🗑 to delete the station.
3 Select »Yes« (delete station) or »No« (do not delete station) with »◀« or »▶« and confirm with »OK«.
Moving stations
1 Press »P-« or »P+« to select the station to move and press »□□□□ to confirm.
- The station name is indented.
2 Select desired station position with »P-« or »P+«.
3 Press » to move the station.
Marking favourite stations
Favourite stations are stored in a separate list.
1 Select desired station position with »P-« or »P+«.
2 Press » ⏻ to mark the selected station as a favourite station.
- Favourite programmes are marked with a star.
- Pressing »!« again removes the mark.
- Press »?« to move favourite stations to the top of the station list.
Ending the settings
1 Press »Z« to finish the setting.
BASIC FUNCTIONS
Switching on and off
1 Press »◀« to switch on the digital receiver from standby mode.
– The mode indicator lights up green.
2 Press » ⏻ to switch the digital receiver to standby mode.
– The indicator lights up red.
Mode selection
You can choose between TV and radio modes.
Selecting preset channels
1 Move up and down the channels by pressing »P+« or »P-« as required.
2 Enter single-digit or multi-digit preset channel numbers by pressing »1 ... 0« on the remote control.
- Channels with no stations assigned are ignored.
Note:
Every time you switch stations, the current channel number, the name of the station, the time, the title, and the start time of the current and following programmes are shown on the screen.
If you press and hold down »?«, you will receive detailed information about the current programme. If you press »▶« you will receive information about the next programme. By pressing »◀« you return to information about the current programme.
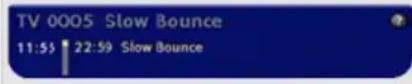
Using the options
Some stations occasionally offer multiple camera perspectives, audio tracks and/or teletext.
The symbol appears in the top right corner if one or more of these options are available.
This means that there is either a picture, audio or teletext option or that there is a combination of selection options.
1 Press » Ⓝ«.
2 Press »P+« or »P-« to select the option and press »OK« to confirm.
Note:
It is possible that picture and audio options are available. In this case you must press »?« repeatedly to select the desired option.
BASIC FUNCTIONS
Adjusting the volume
You cannot change the volume in menu mode.
1 Adjust the volume by pressing » ◀ or »▶«. - A volume scale is shown on the television screen.
Muting the sound
1 Press » « on the remote control to mute the sound.
2 Press » ◇ « on the remote control to switch the sound on again.
- You can hear the sound at the volume previously set.
Selecting stations from lists
You can select stations from various lists (e.g. TV stations, TV favourites).
— 1 Press »OK« to open the station list.
- The most recently activated station list appears.
1 Press »OK« to open the station list.
- The most recently activated station list appears.
2 Press »A/B« to switch the station list.
3 Press » « or »» to scroll through the lists.
5 Press »Z« to quit the station list.
4 Press »P-« or »P+« to select the station and press »OK« to call it up.
Switching from the current station to the previous one
The digital receiver remembers the station which was last selected, provided it was selected for at least one second.
1 Press »A/B« to switch from the current station to the previous one.
2 Press »A/B« to switch back to the current station.
Note:
You can only switch over when no menu is shown on the screen.
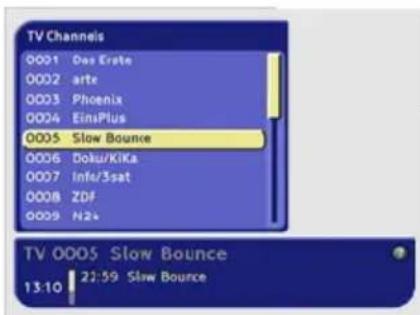
The electrical TV guide offers an overview of all programmes that will be broadcast on the current station in the next week.
1 Press »TV-G« to view the station information.
- All today's programmes are shown.
Notes:
Not all stations supply a detailed TV guide.
Many broadcasters supply the daily programme but no detailed descriptions.
Some broadcasters do not supply any information.
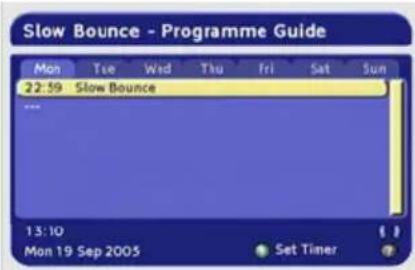
— 2 Press »P-«, »P+«, »◀« or »▶« to select the programmes.
Notes:
You can use the colour buttons to switch directly to the morning, afternoon or evening programmes.
3 Press » ?« to see the information on the selected programme.
4 Scroll through the station information with »P-«, »P+«, »◀« or »▶«.
5 Press »Z« to return to today's programmes.
6 Press » 🔊« and »OK« to add the selected programme to the recording timer.
(See the section on the recording timer on page 30.)
7 Press »Z« to quit the TV guide.
Teletext
Teletext is a service offered by some broadcasters which is provided along with the video and audio signals, is converted by the digital receiver and can be displayed on the TV screen.
1 Select the television station whose teletext pages you want to see.
2 Press »TXT« to call up teletext.
- After a short time, teletext page 100 appears on the television screen.
Note:
You may have to press »OK« so that teletext appears.
3 Select the teletext page with »1 ... 0« or one of the coloured buttons.
7 Press » to scroll backwards 10 pages.
8 Press »TXT« to activate mix mode. – The teletext is superimposed on the television picture.
9 To switch off teletext, press »TXT« again.
Additional functions
Selecting a teletext page directly
Most main pages display three digit page numbers that you can select directly.
1 Select the page number with » « or »«. - There is a cursor on the first or last page number.
2 Press »OK« to call up the teletext page.
Increasing the character height
If you have difficulty reading the text on the screen, you can double the character height.
1 To enlarge the character height of a teletext page, press »A/B«.
Calling up the station overview
1 Open teletext page 300 with »TV-G«.
Picture settings
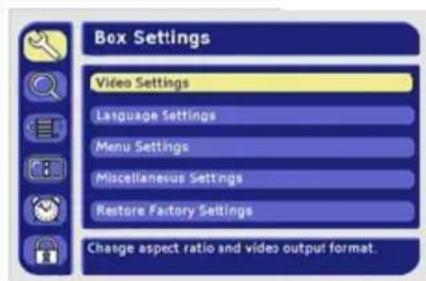
1 Press »i« to open the main menu.
- The main menu is displayed.
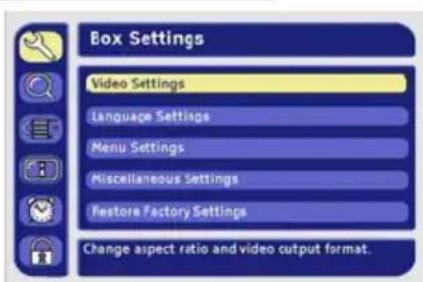
2 Select »Box Settings« by pressing »P++ or »P-« and press »OK« to confirm.
- The »Box Settings« menu appears.
3 Select »Video Settings« with »P-« or »P+« and press »OK« to confirm.
Note:
Additional operations are explained in the following sections.
Selecting the television picture format
If you have a 16:9 format television or flat screen, select the »16:9/Widescreen TV« setting.
If you have a 4:3 format television or flat screen, the following settings are available:
»4:3 (Pan&Scan/CCO)« for wide-screen playback without black bars on the top and bottom edges of the screen. The picture is cropped on the left and right.
»4:3 (Letterbox 14:9)« and »4:3 (Letterbox 16:9)« for widescreen playback, with black bars at the top and bottom of the television screen.
The transmitted screen format can differ from the displayed screen format.
AFD recognises and corrects the display when switched on.
1 Select »AFD Automatic« with »P-« or »P+«.
2 Press » ◀« or »▶« to switch AFD on or off.
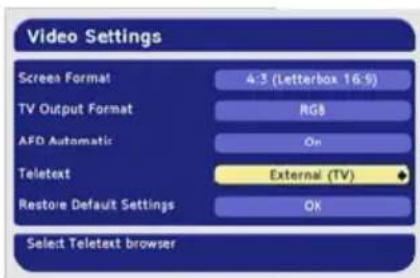
Teletext
With this function you can select whether teletext should be displayed on the receiver of the television.
1 Select »Teletext« with »P-« or »P+«.
2 Press » ◀« or »▶« to adjust the setting.
Selecting the standard setting
You can reset the screen settings back to the default settings (factory settings) with this function.
1 Select »Restore Default Settings« with »P-« or »P+« and press »OK« to confirm.
Ending the settings
1 Press »i« to finish the setting.
Language settings
1 Press »i« to open the main menu.
- The main menu is displayed.
2 Select »Box Settings« by pressing »P++ or »P-« and press »OK« to confirm.
– The »Box Settings« menu appears.
3 Select »Language Settings« with »P-« or »P++« and press »OK« to confirm.
Note:
Additional operations are explained in the following sections.
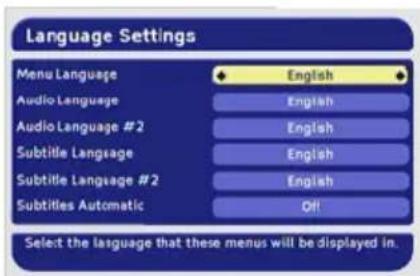
Setting the menu language
1 Select »Menu Language« with »P-« or »P+«.
2 Press » ◀« or »▶« to select the language.
Selecting the preferred audio language
You can set a preferred language for all programmes.
1 Select »Audio Language« with »P-« or »P+«.
2 Press » ◀« or »▶« to select the language.
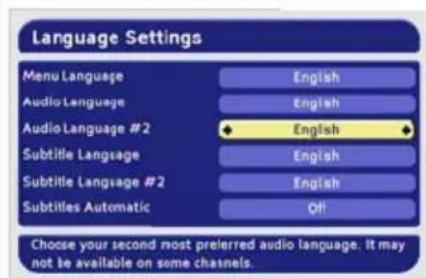
Selecting a second audio language
If the programme is not broadcast in the language selected in »Audio Language«, the »Audio Language #2« is used.
Selecting the subtitle language
You can select the language for the subtitles.
Selecting the second subtitle language
If the subtitles are not broadcast in the language selected in »Subtitle Language«, the »Subtitle Language #2« is used.
1 Select »Subtitle Language #2« with »P-« or »P+«.
You can set the subtitles so that they automatically appear when they are transmitted in the selected subtitle language.
1 Select »Subtitles Automatic« with »P-« or »P+«.
2 Press » ◀« or »▶« to switch this function on or off.
Ending the settings
1 Press »i« to finish the setting.
Menu settings
1 Press »i« to open the main menu.
- The main menu is displayed.
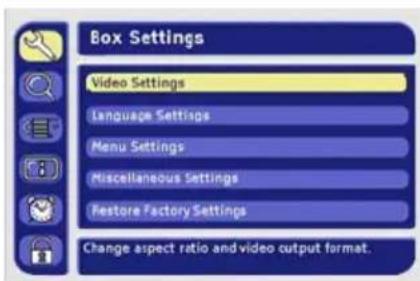
— 2 Select »Box Settings« by pressing »P+« or »P-« and press »OK« to confirm.
- The »Box Settings« menu appears.
3 Select »Menu Settings« by pressing »P-« or »P+« and press »OK« to confirm.
Note:
Additional operations are explained in the following sections.
Info banner display duration
You can determine how long the info banner is displayed when you switch stations.
Select »None« if you do not want the info banner to appear.
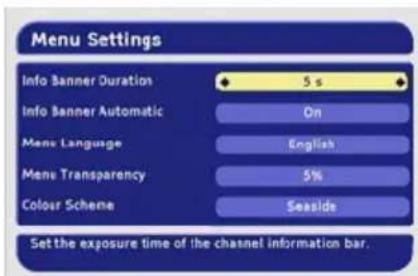
1 Select the »Info Banner Duration« display duration with »P-« or »P+«.
You can determine whether the info banner should be displayed when a new programme starts.
1 Select »Info Banner Automatic« with »P-« or »P+«.
2 Press » ◀« or »▶« to switch this function on or off.
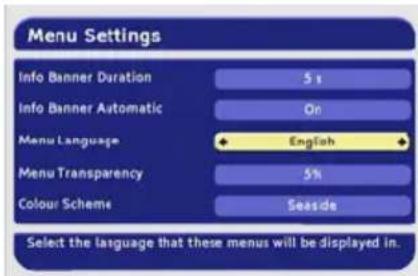
Setting the menu language
Selecting the transparency of the OSD
You can adjust the transparency of the OSD menu.
Selecting the colours of the OSD
You can adjust the colours of the OSD menu.
1 Select »Colour Scheme« with »P-« or »P+«.
2 Select desired station position with » ◀ or »+«.
Ending the settings
1 Press »i« to finish the setting.
General settings
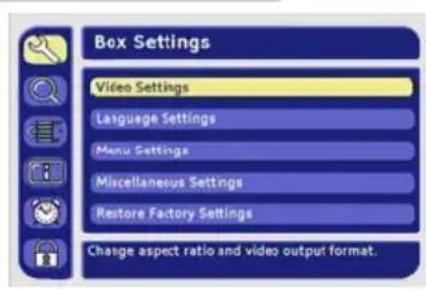
1 Press »i« to open the main menu.
- The main menu is displayed.
2 Select »Box Settings« by pressing »P+« or »P-« and press »OK« to confirm.
– The »Box Settings« menu appears.
3 Select »Miscellaneous Settings« with »P-« or »P+« and press »OK« to confirm.
Note:
Additional operations are explained in the following sections.
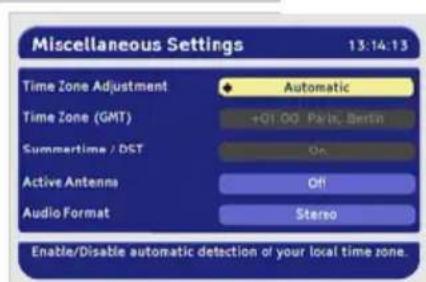
Automatic or manual time zone
You can set the time difference to Greenwich meantime yourself or let the receiver set it automatically.
Setting the time zone
You can only set the time zone if the »Manual« option is selected in the »Set time zone« menu option.
1 Select »Time Zone (GMT)« with »P-« or »P+«.
2 Press » ◀« or »▶« to select your time zone.
Selecting summer time
You can only select summer time if the »Manual« option is selected in the »Set time zone« menu option.
Switching the voltage for an active indoor antenna on and off
An active indoor antenna with a signal amplifier can be powered via the »Y« connection with a +5 V DC supply (max. 30 mA). However, only switch on the antenna voltage if the antenna is an active indoor antenna with a signal amplifier with no power supply of its own from a mains adapter or similar source. Otherwise you may cause a short circuit and irreparably damage your antenna.
1 Select »Active Antenna« with »P-« or »P+«.
2 Press » ◀« or »▶« to switch the power supply on or off.
Stereo/two channel, mono
If the device receives two-channel sound programmes, e.g. a film with the original sound on sound channel B (display: »Mono left channel«) and the dubbed version on sound channel A (display: »Mono right channel«), you can select the sound channel you want to hear.
If the device receives stereo programmes, it switches automatically to stereo sound (display: »Stereo«).
You can switch the sound to »Mono (Left + Right)« if the stereo reception quality is poor.
1 Select »Audio Format« with »P-« or »P+«.
2 Select the television sound with » « or »+«.
Ending the settings
1 Press »i« to finish the setting.
ADDITIONAL FUNCTIONS
Automatic station search
The automatic search looks for receivable stations among the available bouquets of digital stations.
1 In the main menu, select »Search for Channels« with »P-« or »P+« and press »OK« to confirm.
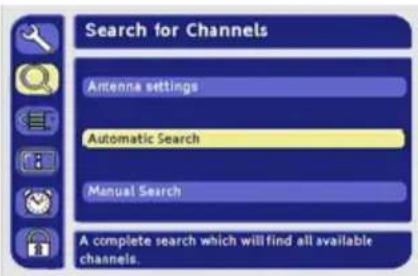
Note:
You only need to change the antenna settings if the antenna type (passive, active) has changed.
2 Select »Automatic Search« with »P-« or »P+« and press »OK« to confirm.
Note:
You can retain the values for the start and end frequency. Select the »All« option in »Channels to search for« if you would also like to receive encoded stations.
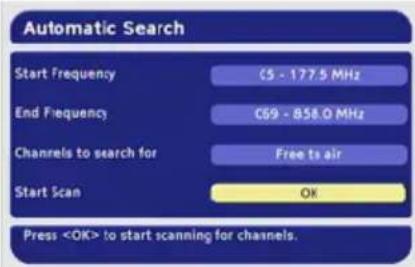
3 Select »Start Scan« with »P+« or »P-« and press »OK« to start the search. – A message will appear once the search has ended.
4 Press » ◀« or »▶« to select one of the following options:
»Yes, add new channels«
– The stations that have been found are added to the station list.
»Yes, replace old channellist«
- The old station list is overwritten with the new stations.
»No, discard new channels«
- The new stations are not stored.
5 Press »OK« to confirm.
6 Press »i« to finish the setting.
ADDITIONAL FUNCTIONS
Manual station search (expert search)
You enter the channel to be searched directly during the manual search.
1 In the main menu, select »Search for Channels« with »P-« or »P+« and press »OK« to confirm.
Note:
You only need to change the antenna settings if the antenna type (passive, active) has changed.
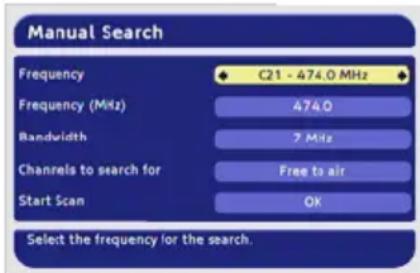
2 Select »Manual Search« with »P-« or »P+« and press »OK« to confirm.
3 Select »Frequency« with »P-« or »P+«.
4 Select the channel with »◀« or »▶«, or type the frequency directly into the »Frequency (MHZ)« line using the number buttons.
5 Select »Bandwidth« with »P-« or »P+«.
6 Select the wavelength with » ◀« or »▶«.
Note:
Select the »All« option in »Channels to search for« if you would also like to receive encoded stations.
7 Select »Start Scan« with »P+« or »P-« and press »OK« to start the search.
– A message will appear once the search has ended.
8 Press » ◀« or »▶« to select one of the following options:
»Yes, add new channels«
- The stations that have been found are added to the station list.
»Yes, replace old channellist«
- The old station list is overwritten with the new stations.
»No, discard new channels«
- The new stations are not stored.
9 Press »OK« to confirm.
10 Press »i« to finish the setting.
ADDITIONAL FUNCTIONS
Timer functions
You can set a connected video recorder to record a programme. A total of 8 recording timers are available.
Programming the recording timer
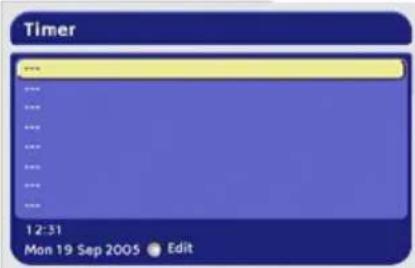
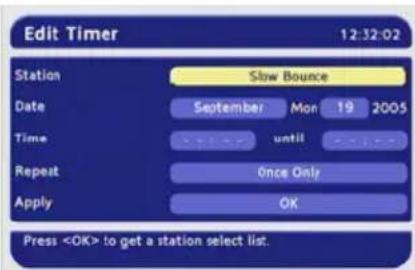
1 In the main menu, select »Timer« with »P-« or »P+« and press »OK« to confirm.
2 Press »P-« or »P++« to select the timer position (---) and press »OK« to confirm.
3 Select »Station« with »P-« or »P++« and press »OK« to confirm.
4 Press »P-« or »P++« to select the station from the list and press »OK« to confirm.
5 Select the month with » ◀« or »+« and press »OK« to confirm.
6 Press » ◀◀ or »▶◀ to select the day and press »OK« to confirm.
7 Use »0« to »9« to enter the start and end time in four digits.
8 Press » ◀◀ or »▶◀ to select the cycle and press »OK« to confirm.
9 Press »OK« to store the timer.
- The timer is saved to the timer list.
- You can delete single timers by pressing »©« and all timers by pressing »□□□
10 Press »i« to finish the setting.
- The digital receiver switches to the selected station at the set time.
Notes:
Your video recorder must also be programmed accordingly.
Entries by remote control are not possible during timer recording.
You can interrupt the timer recording by pressing »©« and »OK«.
If the receiver is in standby mode before the timer starts, it switches back to standby when the timer has finished.
ADDITIONAL FUNCTIONS
Safety
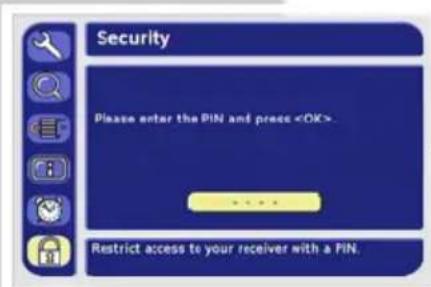
1 Press »i« to open the main menu. - The main menu is displayed.
— 3 Enter the PIN code with the buttons from »0« to »9« and confirm with »OK«.
Note:
The default PIN code is 0000.
Additional operations are explained in the following sections.
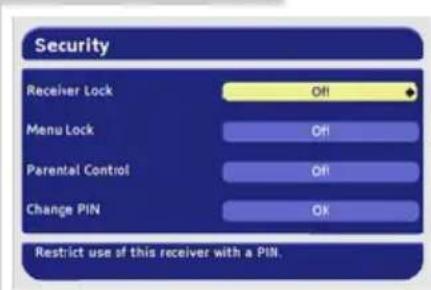
Device lock
The complete receiver is locked.
— 2 Press » ◀« or »▶« to switch the device lock on or off.
Menu lock
The menu is locked and can only be called up when the PIN code is entered.
You can set a minimum age for certain programmes here.
1 Select »Parental Lock« with »P-« or »P+«.
Changing the PIN code
You can set your personal PIN code here.
1 Select »Change PIN« with »P-« or »P++« and press »OK« to confirm.
2 Enter the current PIN code with the buttons from »0« to »9« and confirm with »OK«.
3 Enter the new PIN code with the buttons from »0« to »9« and confirm with »OK«.
4 Enter the new PIN code again to confirm with the buttons from »0« to »9« and confirm with »OK«.
Ending the settings
1 Press »i« to finish the setting.
SPECIAL SETTINGS
Resetting the receiver to its original state
This function enables you to delete the station lists and all custom settings.
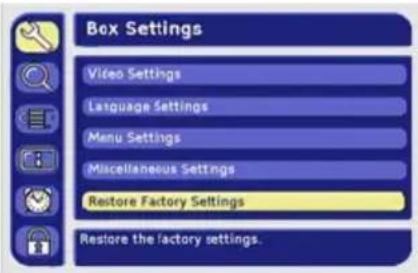
1 In the main menu, select »Box Settings« with »P-« or »P+« and press »OK« to confirm.
2 Select »Restore Factory Settings« with »P-« or »P++ and press »OK« to confirm.
3 Press » ◀◀ or »▶◀ to select »Yes« and press »OK« to confirm.
- The receiver switches itself off and then on again.
- The »Initial installation« menu appears.
4 Reprogram the device as described on page 15.
Updating the digital receiver software
The digital receiver's technology enables you to update the software.
The digital receiver must be in standby to receive software updates. The receiver checks for software updates every night between 01:00 and 05:00. If there is an update, the receiver will automatically update its software.
You can also search for updates manually.
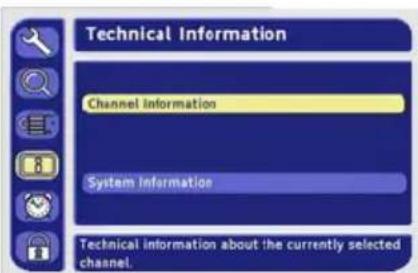
1 In the main menu, select »Technical Information« with »P-« or »P+« and press »OK« to confirm.
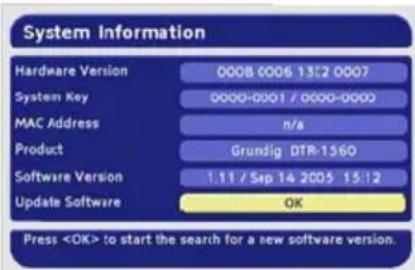
2 Select »System Information« with »P-« or »P++« and press »OK« to confirm.
3 Select »Update Software« with »OK«
4 Press » ◀ or » to select »Yes« and press »OK« to confirm.
- The receiver checks for a more recent update. The actual update is always carried out in the time period mentioned above.
Note:
An interruption during the downloading process (for example by pulling out the mains plug) can damage the operating software of the digital receiver.
Read the instructions in the menus carefully.
SPECIAL SETTINGS
Changing remote control levels
If you are operating two digital receivers with the TP 766 S remote control, you must enter a separate remote control level for each digital receiver.
Changing to remote control level 2
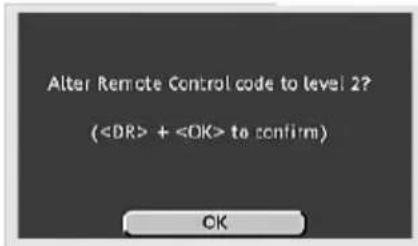
— 1 Press »DR« and »@« at the same time for about five seconds until "Alter Remote Control code to level 2?" appears.
Note:
If you do not want to change over to remote control level 2, press »Z« to quit the menu.
2 Press and hold down »DR« and press »OK« to confirm.
- If you now want to use the digital receiver with the second remote control level, you must first press and hold down »DR« while pressing the button on the remote control with the required function.
Returning to remote control level 1
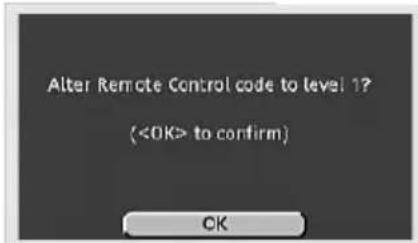
— 1 Press »« for about five seconds until "Alter Remote Control code to level 1?" appears.
Note:
If you do not want to change over to remote control level 1, press and hold down »DR« while pressing »Z«.
2 Press »OK« to confirm.
- Remote control level 1 has been selected.
Displaying station reception properties
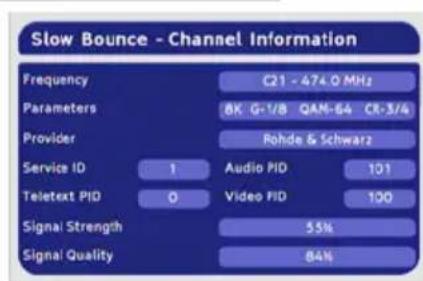
1 In the main menu, select »Technical Information« with »P-« or »P+« and press »OK« to confirm.
— 2 Select »Channel Information« with »P-« or »P++ and press »OK« to confirm.
- The »Channel Information« menu appears.
Notes:
The signal strength not only depends on the settings of your receiver unit, but also on the channel which is currently active. Remember this when aligning your antenna using the signal level display.
3 Press »i« to quit the menu.
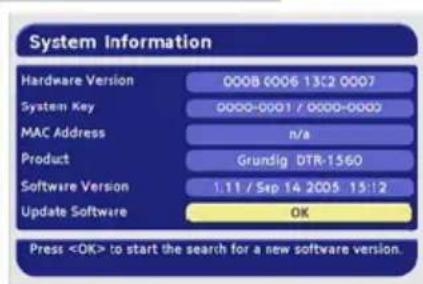
Displaying device information
1 In the main menu, select »Technical Information« with »P-« or »P+« and press »OK« to confirm.
— 2 Select »System Information« with »P-« or »P++ and press »OK« to confirm.
- It contains information on the product designation, the hardware version and the software version.
3 Press »i« to quit the menu.
Technical data
CE
This product fulfils the European directives 89/336/EEC, 73/23/EEC and 93/68/EEC.
This device conforms to the safety regulation DIN EN 60065 (VDE 0860) and thereby the international safety regulation IEC 60065.
Channels: 4000 in total
Reception range: 67-862 MHz
Hyperband tuner with: - VHF/UHF
- Bandwidth: 7 MHz and 8 MHz
- COFDM modes: 2 k and 8 k
- Constellation: 16 QAM, 64 QAM, QPSK
- Antenna power supply +5 V/max. 30 mA
OSD: Display and programming func-
tion in up to 10 languages
Search: Automatic/manual
Last station memory: For the last station selected
Teletext, VPS: Teletext decoder installed,
supports the teletext of the tele- vision set
Software download: OTA (Over the air)
Mains supply: DC 12 V with mains adapter
230 V\~, 50 Hz
Power consumption: In operation max. 6 W
Ambient temperature: +5 °C to +40 °C
Dimensions: W x H x D:
100 × 25 × 75 mm
Weight: 86 g
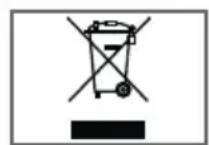
Environmental note
This product has been made from high-quality parts and materials which can be re-used and recycled.
Therefore, do not throw the product away with normal household waste at the end of its life. Take it to a collection point for recycling electrical and electronic devices. This is indicated by this symbol on the product, in the operating manual and on the packaging.
Please find out about collection points operated by your local authority.
Help protect the environment by recycling used products.
Troubleshooting
If a fault occurs, first refer to this information before you take the digital receiver for repair.
If you are unable to rectify the fault using the information given here, contact your local dealer or service specialist.
Under no circumstances should you attempt to repair the digital receiver yourself, as this will invalidate the guarantee.
| PROBLEM | POSSIBLE CAUSE | REMEDY |
| No function, mode indicator not lit | Power cord incorrectly connected | Connect the power cord correctly |
| No picture | Euro-AV (Scart) cable not properly connected, incorrect settings in the »Video output TV« menu | Connect the Euro-AV cable correctly, correct the menu settings |
| No sound | The sound is muted, the Euro-AV cable is incorrectly connected or the receiver volume is set to low | Switch on the sound, connect the Euro-AV cable correctly, turn up the volume |
| Message; »Faulty signal« | The antenna is not properly connected or positioned | Connect the antenna correctly. Move the antenna around to find the best position |
| The remote control does not work. | No batteries are inserted, or they are low, or the remote control is not directed at the infrared sensor | Insert the batteries correctly, put in new batteries, point the remote control at the infrared sensor |
| The time is not displayed correctly | Deviation from local time | Correct the difference |
| Display »Antenna short circuit« | The antenna has an excessive current consumption or a short circuit | Switch off/unplug the device immediately. Unplug the antenna and set the »Active antenna« option to »Off« in the »General« menu |
Additional Information for units sold in the UK.
Units sold in the UK are suitable for operation from a 240V ac, 50Hz mains supply.
The range of multi-system receivers is built to work in most European countries. However, the mains plug and socket system for the UK differs from many European countries.
This appliance has been supplied with a fitted, non-removable, approved converter plug for use in the UK. This converter plug is fitted with a 5A rated fuse.
In case this appliance is supplied with a moulded 2-pin Euro plug only, which is unsuitable for UK operation, this must be cut off and immediately disposed of. An approved 13A, 3-pin UK plug should then be fitted by a qualified electrician.
Note:
The severed Euro plug must be destroyed to avoid a possible shock hazard should it be inserted into a socket elsewhere.
If a non-rewireable 3-pin plug or a rewireable 13A (BS1363) 3-pin plug is used, it must be fitted with a 5A ASTA or BSI approved BS1362 fuse. If any other type of plug is used it must be protected by a 5A fuse either in the plug, or at the distribution board. If this type of plug becomes defective, ensure that the fuse is removed before disposal, to eliminate potential shock hazard.
If it is necessary to change the fuse in the non-rewireable plug, the correct type and rating (5A ASTA or BSI approved BS1362) must be used and the fuse cover must be refitted. If the fuse cover is lost or damaged, the lead and plug must not be used until a replacement is obtained. Replacement fuse covers should be obtained from your dealer.
Important:
The wires in the mains lead are colour coded in accordance with the following code:
BLUE - NEUTRAL
BROWN - LIVE
As the colours of the wires in the mains lead of your appliance may not correspond with the coloured marking identifying terminals in your plug, proceed as follows:
Connect the BLUE coloured wire to plug terminal marked with the letter "N" or coloured black.
Connect the BROWN coloured wire to the plug terminal marked with the letter "L" or coloured red.
In no circumstance must any of the wires be connected to the terminal marked with the letter "E", earth symbol "ħ", coloured green, or green & yellow.
- DIGITAL SATELLITE RECEIVER
- CONTENTS
- General information
- Set-up and safety
- 6-7 Overview
- 8-9 Connection and preparation
- 10-13 Upgrading the television
- 14-17 Basic settings
- 18-20 Basic functions
- Teletext mode
- 22-27 Settings
- 28-31 Additional functions
- 32-33 Special settings
- 34-37 Information
- GENERAL INFORMATION
- Packing contents
- Receiving digital stations
- Special features of your digital receiver
- SET-UP AND SAFETY
- Note:
- OVERVIEW
- The digital receiver
- The infrared receiver
- The remote control
- CONNECTION AND PREPARATION
- Connecting the antenna
- Connecting the television
- Connecting the infrared receiver
- Connecting the mains adapter
- Notes:
- Inserting batteries in the remote control
- Environmental note
- UPGRADING THE TELEVISION
- Connecting the GRUNDIG television with G2 chassis (Digi 200)
- Connecting the communication line to the receiver
- Connecting the communication line to the television
- Installing on the GRUNDIG television set
- Operating the GRUNDIG television remote control
- BASIC SETTINGS
- The menu
- Searching for stations
- Caution!
- Editing the station list
- Deleting stations
- Moving stations
- Marking favourite stations
- Ending the settings
- BASIC FUNCTIONS
- Switching on and off
- Mode selection
- Selecting preset channels
- Using the options
- Adjusting the volume
- Muting the sound
- Selecting stations from lists
- Switching from the current station to the previous one
- Teletext
- Additional functions
- Selecting a teletext page directly
- Increasing the character height
- Calling up the station overview
- Picture settings
- Selecting the television picture format
- Selecting the standard setting
- Language settings
- Setting the menu language
- Selecting the preferred audio language
- Selecting a second audio language
- Selecting the subtitle language
- Selecting the second subtitle language
- Menu settings
- Info banner display duration
- Selecting the transparency of the OSD
- Selecting the colours of the OSD
- General settings
- Automatic or manual time zone
- Setting the time zone
- Selecting summer time
- Switching the voltage for an active indoor antenna on and off
- Stereo/two channel, mono
- Automatic station search
- Manual station search (expert search)
- Timer functions
- Programming the recording timer
- Safety
- Device lock
- Menu lock
- Changing the PIN code
- SPECIAL SETTINGS
- Resetting the receiver to its original state
- Updating the digital receiver software
- Changing remote control levels
- Changing to remote control level 2
- Returning to remote control level 1
- Displaying station reception properties
- Displaying device information
- Technical data
- CE
- Troubleshooting
- Additional Information for units sold in the UK.
- Important:
Brand : GRUNDIG
Model : MICRO DTR 1560-2
Category : Satellite receiver