
C4CHIPSKIT - Surveillance Camera CONCEPTRONIC - Free user manual and instructions
Find the device manual for free C4CHIPSKIT CONCEPTRONIC in PDF.


| Product Type | 4-Channel IP Surveillance Kit (NVR + Cameras) |
| Brand | Conceptronic |
| Model | C4CHIPSKIT |
| Number of Channels | 4 |
| Video Resolution (Main Stream) | 1280x720 (HD) at 25 fps |
| Video Resolution (Sub Stream) | 352x288 at 25 fps |
| Compression | H.264 (implied) |
| Storage | Internal HDD up to 1 TB (included), SATA interface |
| Power Supply | DC 12V, external adapter |
| Connectivity | RJ45 Ethernet, HDMI, VGA, USB 2.0 |
| Network Protocols | DHCP, Static IP, DDNS, ONVIF |
| Mobile App | NVR Viewer2 (iOS & Android) |
| Audio | G.711U compression, 1-way audio (with MIC) |
| Alarm Features | Motion detection, video loss, device alarm, email alert |
| PTZ Control | Supported (for PTZ cameras via RS-485 or network) |
| Dimensions (NVR) | Approx. 260 x 190 x 45 mm (estimated) |
| Weight (NVR with HDD) | Approx. 1.5 kg (estimated) |
| Operating Temperature | 0°C to 40°C (estimated) |
| Warranty | 2 years (typical for Conceptronic) |
| Maintenance | Clean with dry cloth; avoid liquids; keep vents clear |
| Spare Parts / Repair | HDD user-replaceable; firmware updates via USB; contact support for other repairs |
Frequently Asked Questions - C4CHIPSKIT CONCEPTRONIC
User questions about C4CHIPSKIT CONCEPTRONIC
0 question about this device. Answer the ones you know or ask your own.
Ask a new question about this device
Download the instructions for your Surveillance Camera in PDF format for free! Find your manual C4CHIPSKIT - CONCEPTRONIC and take your electronic device back in hand. On this page are published all the documents necessary for the use of your device. C4CHIPSKIT by CONCEPTRONIC.
USER MANUAL C4CHIPSKIT CONCEPTRONIC
4-Channel IP Surveillance Kit
C4CHIPSKIT

Contents
1. Installation....1
1.1. HDD Installation....1
1.2. Front /rear Panel and connection ....2
1.3. Remote Operation .... 3
1.4. Previewing window icon....3
2. Fast Operation....4
2.1. Normal Login....4
2.2. Temporary Login 5
3. Menu Operation....5
3.1. IP Camera....7
3.2.View Layout....8
3.3. Sequence Interval....8
3.4. Video Adjust....8
3.5. Zoom....9
3.6. PTZ....10
3.7. Clients 10
3.8. Snapshot....11
3.9. Photos....11
3.10. Record Function....13
3.11. Playback....13
3.12. Clear Alarm....15
3.13.Shutdown 16
4. System Setup....16
4.1. Basic set....17
4.2. Channel....20
4.3. Network 24
4.4. Alarm Set....25
4.5. System Management....29
4.6. Peripherals ....31
5. Mobile software 35
5.1. Install APP software....35
5.2. Create an account or visitor login 36
5.3. Add NVR....37
5.4. Connect video 39
1. Installation
1.1. HDD Installation
- Ensure Power supply has been disconnected, open the case cover;
- Connect HDD data line, power line first, then fix the HDD in the case;
- Install the cover, connect the power, which with adaptor, press the power switch;
- Format the HDD (Please check details from : System Setup—Peripherals—Storage—Format);
- NVR can normally make snapshot and video.
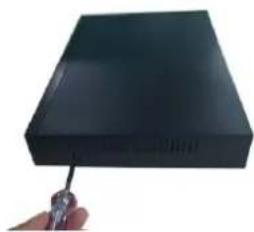
Remove the screws

Remove the cover
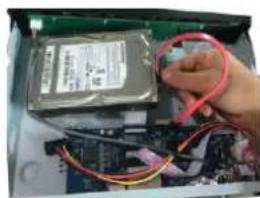
Connect Hard disk data cable

Connect Hard disk power cable

Fix the Hard disk

Fix the screws of the disk

Close the cover

Fix the screws of the box
1.2. Front /rear Panel and connection

Front panel

Rear panel
![graph TD A["RJ45 Ethernet"] --> B["DC Converter - 12V"] C["HDMI"] --> B D["VGA"] --> B E["Your Router / Access Point (Not included)"] --> B F["VGA/HDMI to PC Monitor or TV BNC to Security Camera Monitor (Not included)"] --> B G["Power from 220V"] --> B H["RJ45 Ethernet"] --> I["DC Converter - 12V"]…](/content/2026/05/860347/images/f9b03f894f23bbf3fbbf1c19662d0e6c7cbf89ceb83397473a2a02889b8027ef.jpg)
1.3. Remote Operation

| No. | Description |
| 1 | Single/quad screen switch |
| 2 | Playback video |
| 3 | number |
| 4 | Return to previous menu |
| 5 | Move selection |
| 6 | Press this key, it will recycling show Right Click Menu, Main Menu and Status Menu, it also has enter function |
| 7 | Device match ID, can make the Remote and NVR one-to-one control |
| 8 | Playback control and record |
1.4. Previewing window icon
| Icon | Description |
 | Means recording |
 | Means client-end is linking this channel. |
 (Yellow) (Yellow) | means that this channel is set alarm, but is not triggered |
 (Red) (Red) | Means the alarm is triggered. |
2. Fast Operation
2.1. Normal Login
After starting system, right click and popup the main menu list, select System setup, it will popup the login windows, after login user can make other operation.
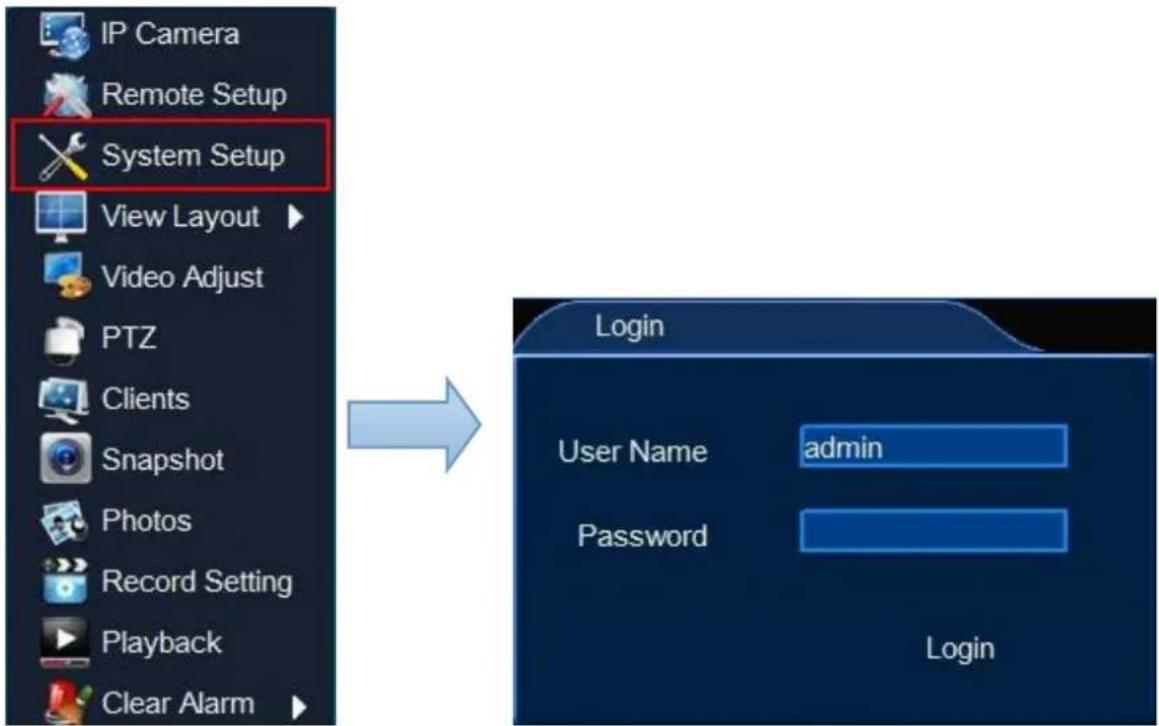
- [User Name] input default user name 'admin';
- [Password] is empty, not input anything
- Single click [Login], then finish login operation.
Default Settings
| IP Address | 192.168.1.8 |
| User | admin |
| Password | (No Need) |
Remarks: If login failure for 3 times, mouse will be locked for 10 seconds, NVR will alarm until login successfully.
2.2. Temporary Login
If forget user name and password and make login failure, can use temporary login.
Steps:
- Error login again, note [error code],
- Contact with customer service, they will tell a temporary user name and password.

3. Menu Operation
Menu Operation is functions at [Right Click Menu] and [Main Menu], in order to make operation more easily.

Right Click Menu: IP Camera, Remote Step, System Setup, View layout, Video Adjust, PTZ, Clients, Snapshot, Photos, Record setting, Playback, clear Alarm;

Main Menu: : System Setup, View Layout, Sequence Interval, Zoom, Video Adjust, PTZ, Snapshot, Photos, Record Setup, Playback, Shutdown.
3.1. IP Camera
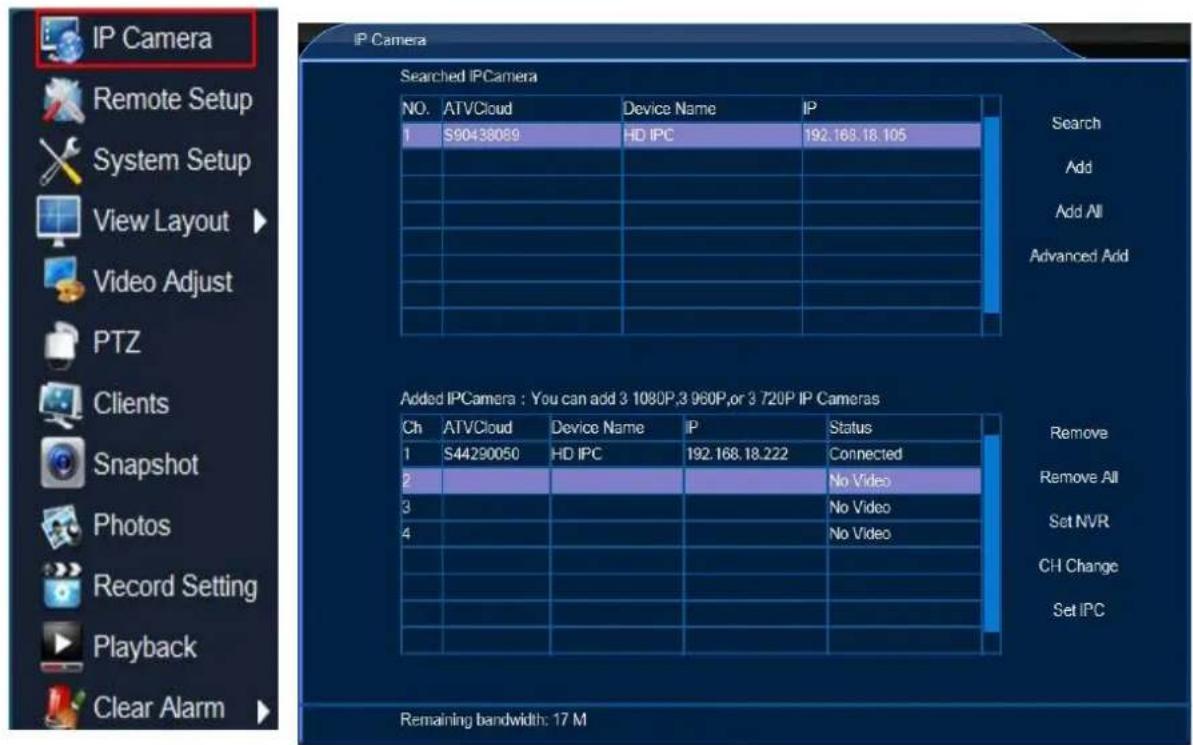
Search/connect steps :
- Right click and select "IP camera" to enter into add IP camera menu.
- Search: search the IP camera in this LAN;
- Add: Add the select camera to the added camera list
- Add all: add all camera to the added camera list
- Advanced add: input IP camera ID and password manually
- Remove: delete the selected camera from the added camera list
- Remove all: delete all the camera in the added camera list.
- Set NVR: configure the NVR network
- CH Change: change the camera channel sequence
- Set IPC: Set camera password/Net setup/Stream/Video adjust/
3.2.View Layout

Main Menu:

Function Summary: while previewing, it can adjust screen distribution mode, can choose View1, View4.
3.3. Sequence Interval
Function Location: Main Menu:
Function Summary: [Sequence interval] can show the previewing screen in turns, after finishing Sequence Interval, the screen layout will be the same with that before this function.
-
Setup how time interval ;
-
Single click [OK], then start 'Sequence Interval'

- Single click button, can stop Sequence interval function.
3.4. Video Adjust
Function Location: Right Click Menu:

Main Menu:


Function Summary: can setup different video effects,
Lightness/Contrast/Chroma/Sharpness/Scene/AUTO AWB/Mirror/Turn/NOCOLOR/Enable WDR
3.5. Zoom
Function Location:: main menu:

Function Summary: To enlarge the picture part of the contents of the target channel.

3.6. PTZ
Function Location: Right Click Menu:

PTZ
Main Menu:

Function Summary:
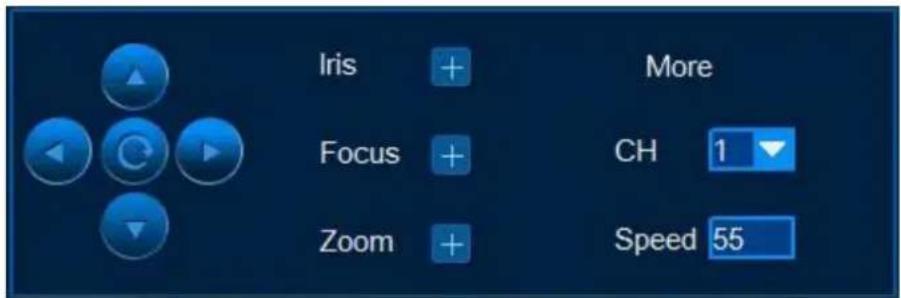
[PTZ Adjust] can adjust PTZ lens direction, Iris, Focus, Zoom, Speed, Aux open, Preset, Patrol

3.7. Clients
Function Location: Right Click Menu:

Clients
Function Summary:
- Count client-end numbers that connecting with the NVR;
- Disconnect any connection, or disconnect all connections.

All client-end connection information: channel, IP, Port, and Connections all information can check here.
3.8. Snapshot
Snapshot function includes [Snapshot], [Photos] two functions.
Function Location: Right Click Menu:

Snapshot
Main Menu:

Function Summary: : Make snapshot of object image and store into the HDD.
3.9. Photos
Function Location: Right Click Menu:

Photos
Main Menu:

Function Summary:
-
Can query the snapshot stored in the NVR, include manual snapshot, alarm snapshot, record snapshot.
-
Can copy the snapshot into USB disk.

Snapshot Query
- [Search Type] choose snapshot type, default is All Picture;
- [Channel] choose the channel for snapshot, default is All channels;
- [Start] \~[End] is snapshot time range (Longest is 1 month), default is 'today';
- [Search] button, single click, then the right list can show the eligible snapshot.
Remarks: single click can show the snapshot contents.
Picture Backup
- Connect FAT32 format U disk into the NVR USB port;
-
Single click to choose a picture and it can only choose one;
-
Single click [Backup to U-disk], after the prompt shown backup successfully can take away the U disk.
3.10. Record Function
Record function includes:
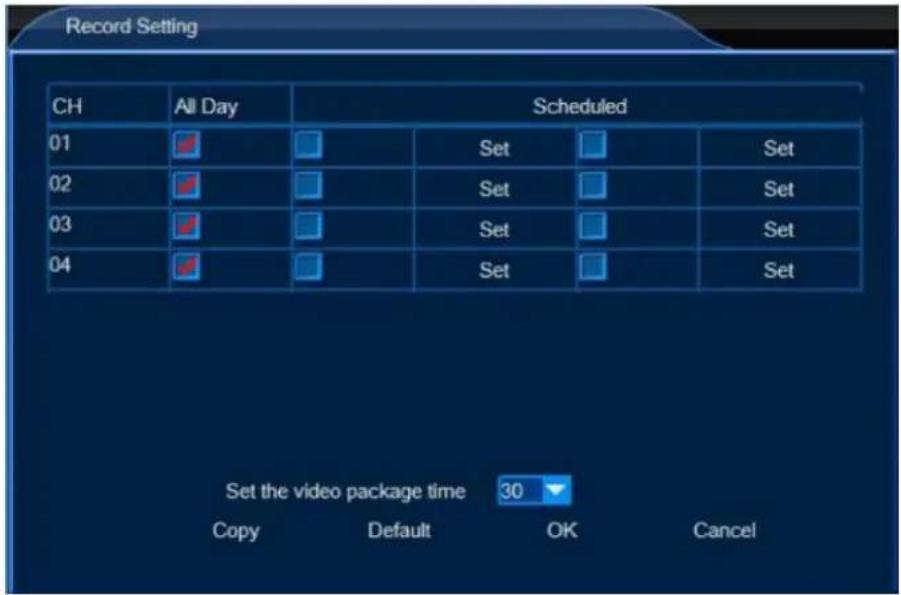
Record Setup: open/close Manual Record (default is open), open/close scheduled record;
Function Location: Right click menu:

Record Setting
Main Menu:

Function Summary:
- Can open/close each channel Manual Record;
- Can open/close each channel Scheduled Record.
3.11. Playback
Function Location: Right Click Menu:

Playback
Main Menu:

Function Summary:
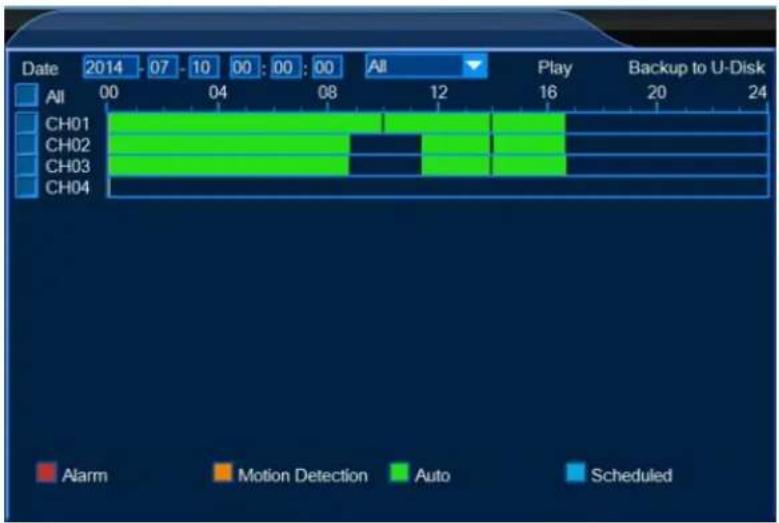
- It can query, playback record file of any channel;
- It can backup file into U disk.
Playback Adjusting
When playback, users can adjust the speed and progress.

| Serial No. | Name | Description | Serial No. | Name | Description |
| 1 | Playback time | Current playback time | 9 | Fast Backward | Fast backward display, single click to switch X8/X16 |
| 2 | Progress Bar | Progress of the current playback file in 1 hour | 10 | Snapshot | Snapshot for object screen |
| 3 | Sound | Open/close sound playback | 11 | Pause | Pause display |
| 4 | Condition | Playback Condition | 12 | Display | Display the video |
| 5 | Window | Choose the operation window | 13 | Fast Display | Accelerate display, single click to switch X2/X4/X8/X16 |
| 6 | Shutdown | Exit the playback | 14 | Slow Display | Decelerate display, single click to switch X1/2 ,X1/4, X1/8, X1/16 |
| 7 | A Hour Ago | Choose the window andplayback the video a hour ago | 15 | Single Frame | Each single click can go ahead 1frame |
| 8 | Backward | Each single click chosen widow ,it will back up 2S | 16 | Next a Hour | Choose the window and display the video next hour |
Backup
Backup the record file into U-disk.

Operation Steps:
- Single click [Backup], open the backup interface;
- Modify the backup start time;
- Modify the backup time range;
- Choose Record Type, Scheduled/ Manual/Alarm/ Motion detection record;
- Choose backup channel;
- Single click [Backup to U-disk] to backup the file selected into U disk;
- Install the display plug-in, then can use Media Player to display the backup file.
3.12. Clear Alarm

Function Location: Right Click Menu:
Function Summary: can clear some channel or all channel Alarm effect.
- Right click alarming channel, choose [Clear Alarm/ Current] can clear alarming of current channel;
- Right click all channels, choose [Clear Alarm/ Clear All] can clear alarming of all channels.
3.13. Shutdown
Function Location: Main Menu

Function Summary: Logout, Shutdown and Restart.

4. System Setup

Function Location: Right Click Menu:

4.1. Basic set

Functions:
General: for example: Language, Transparency, VGA Resolution, Device ID, Wizard, etc.
Time: for example date format, Set Date/Set Time, Auto Synchronize Time, Time zone setting;
User: Local User, Network User Add/Delete/ Edit.
General
Function Summary: Set language/Transparency/Device ID/VGA/Wizard

Time
Function Summary: Setup system time, for example Set date, Set Time, Timezone Setting, Auto Synchronize Time, etc.

User
Local User
Function Summary:
- It allows local users login the NVR and make allowed operation;
- It allows add/edit/delete local users.


Network User
Function Summary: while remote monitoring, this setting will be as the user name and password in client-end.


4.2. Channel
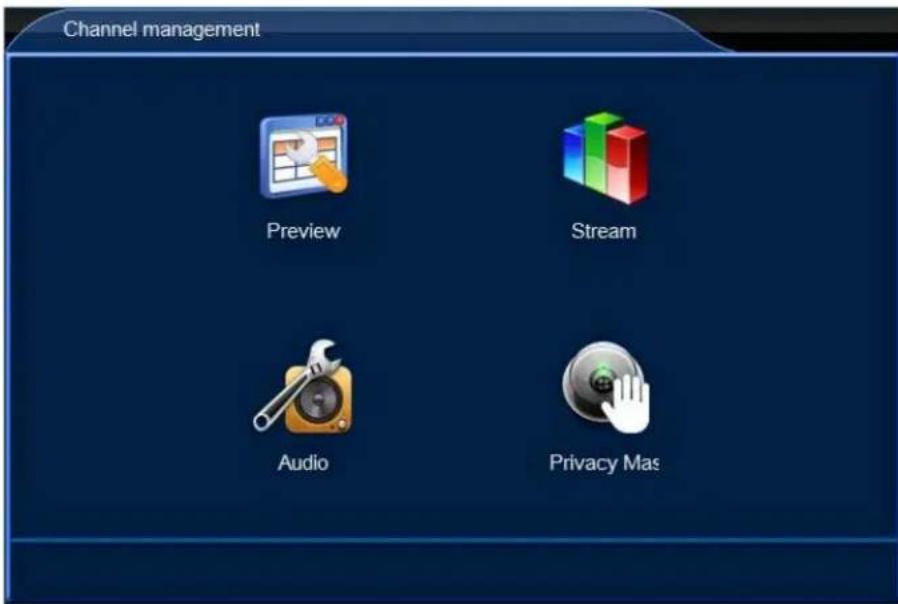
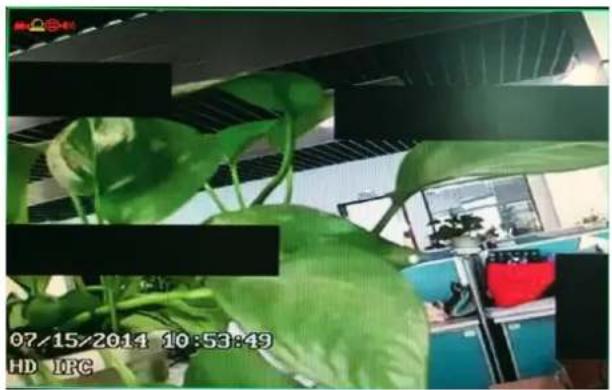
Function: 1. Preview: Channel name, OSD position, Hide video, Privacy mark;
2. Stream: Main code stream image size and code rate; minor code stream image size, kbps, fluency
3. Audio setting: Audio compression, Audio monitoring
4. Privacy Mask: Each channel most support
Preview adjustment
Function introduction: 1.Modify channel name;
- Modify OSD position
- Hide video

Stream setting
Function introduction: 1. Record stream setting—stream for local record; 2. Network stream setting—stream for network transmission

Audio setting
Function introduction: Audio record setting—Record audio open/close;

Privacy mask
Function introduction: Hide the part of camera, max 4 privacy mask.


4.3. Network
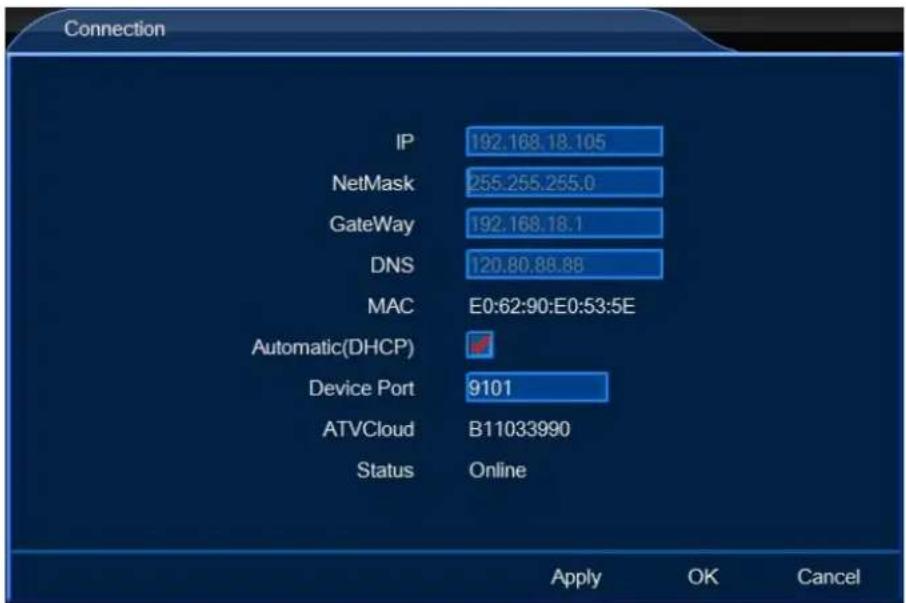
Function introduction: 1.Connection: DHCP gets IP automatically in LAN, Manual setting IP in LAN, Device Port, NVR viewer2 ID, Status.
- Service: HTTP service port, ONVIF service, DDNS(DYNDNS/NO-IP/Myq_see, etc)

Connection
Function introduction: IP manually setup, DHCP(Auto get IP address), Device port, NVR viewer2, Status.
Service:
Function introduction: HTTP port(default port is 80),ONVIF Service(connect other brand camera via ONVIF protocol),DDNS(support DYNDNS/NO-IP/MYQ_SQEE,etc)

4.4. Alarm Set
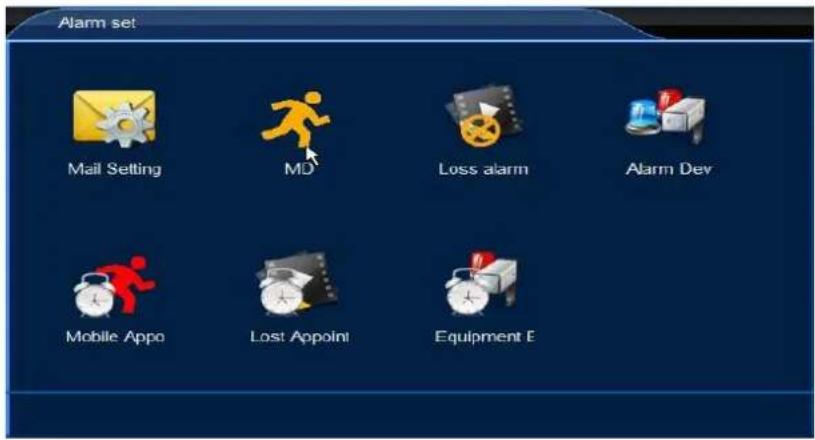
Function introduction:
- Set E-mail alert
- Set motion detection alarm, alarm output
- Set video lost alarm, alarm out
- Set device alarm, alarm out
- Set motion alarm task
- Set video lost alarm task
- Set device alarm task
E-mail setting
Function introduction: setting email parameters: sender setting, receiver setting, Interval etc

Motion detection
Function introduction: When there is an object move, NVR can alarm and send alarm-out
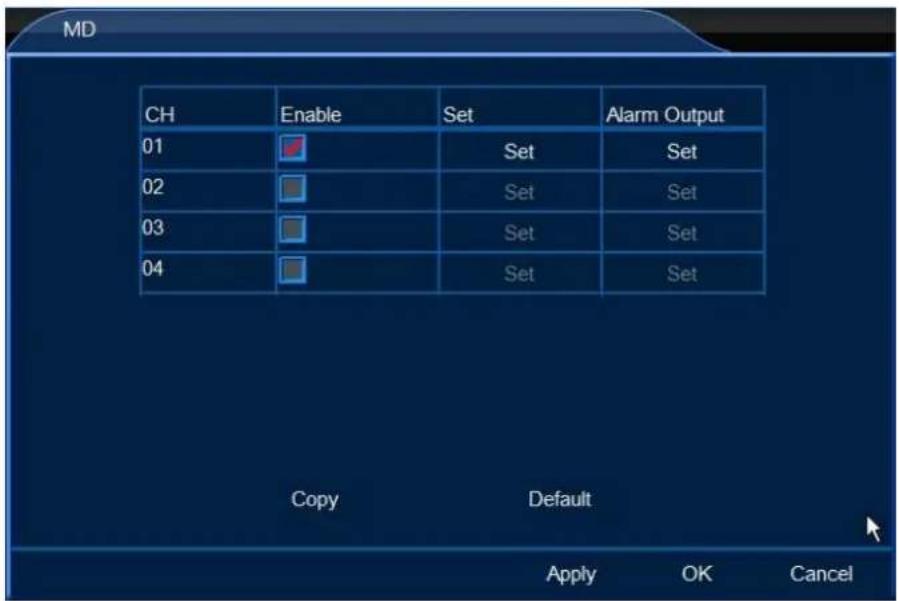
Enable Motion detection

Set motion detect area/sensitivity
(Note: The more number, the more sensible, the much easier to detect the move object)

Set motion alarm trigger output
- Keep Alarm:1-999s available
- Turn on the Buzzer: NVR will send out buzzer alarm
- Send to Client: It will send alarm to Client-end
- Video channel: the Client-end connect with this channel
- E-mail alert: It will send emails to collection box
- Send picture in attachment
- Snapshot, take alarm picture
- Call PTZ camera preset(Only support PTZ camera)
-
Start record: It will record the selected channels
-
Output Module: It will open alarm for the relative device (normal close)
No video
Function introduction: When detect no video, NVR will send alarm alert

Alarm device
Function introduction: When touch alarm device, it will send alarm out.
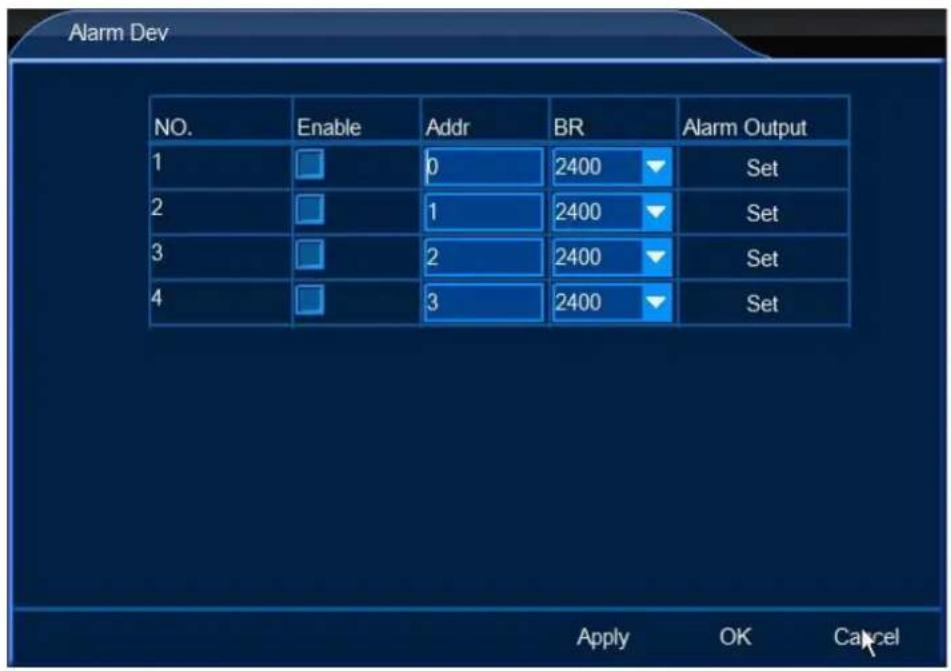
Alarm task(Motion alarm / lost Video alarm /Device alarm)
Function introduction: It only send alarm output in preset time

4.5. System Management
Function introduction:
1.Log: IP camera and NVR logo
2. Maintenance: Reboot setup, software update, Register, Reset factory.
- Informatoin : NVR hardware/software information
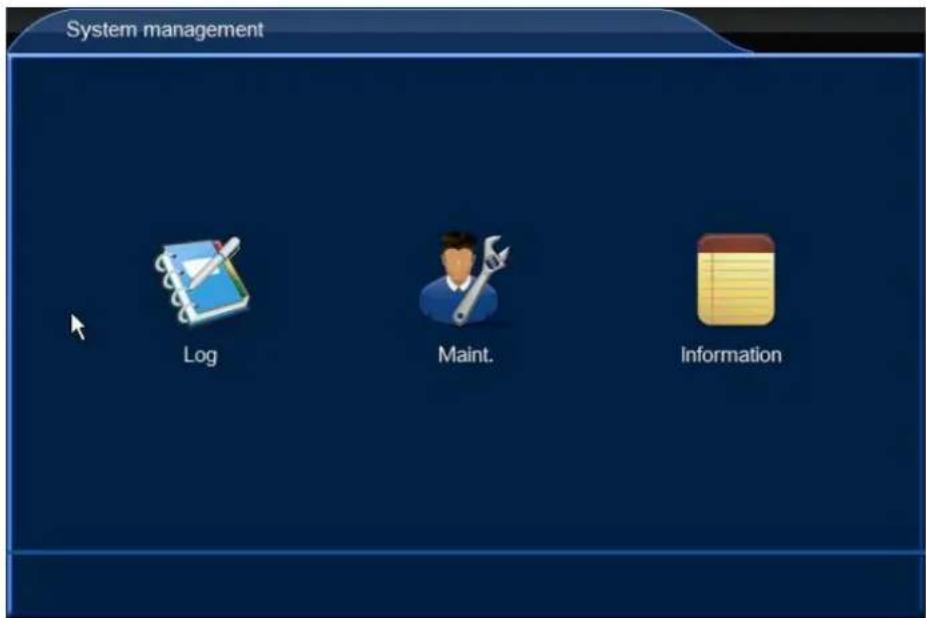
Log:
Function introduction : 1. Search NVR operation log
- Save the logs to U-disk

Maintenance
Function:
- Time reboot: This NVR can be set reboot schedule.
- Software update: U-Disk
-
Register: Register the NVR on internet
-
Reset factory : Reset NVR setting to factory setting.

Information:
Function: Display the NVR NVR VIEWER2/Serial number/version/software release time.

4.6. Peripherals
Function introduction:
- Storage: Disk work mode/Format Disk.
- PTZ Setting: Configure PTZ function (Only support PTZ camera)

Storage
Function: 1. Query hard disk's working mode.
- Format hard disk.
- When hard disk is full, select "Overlay write" or "Stop Recording".

PTZ Setting(Only support PTZ camera)
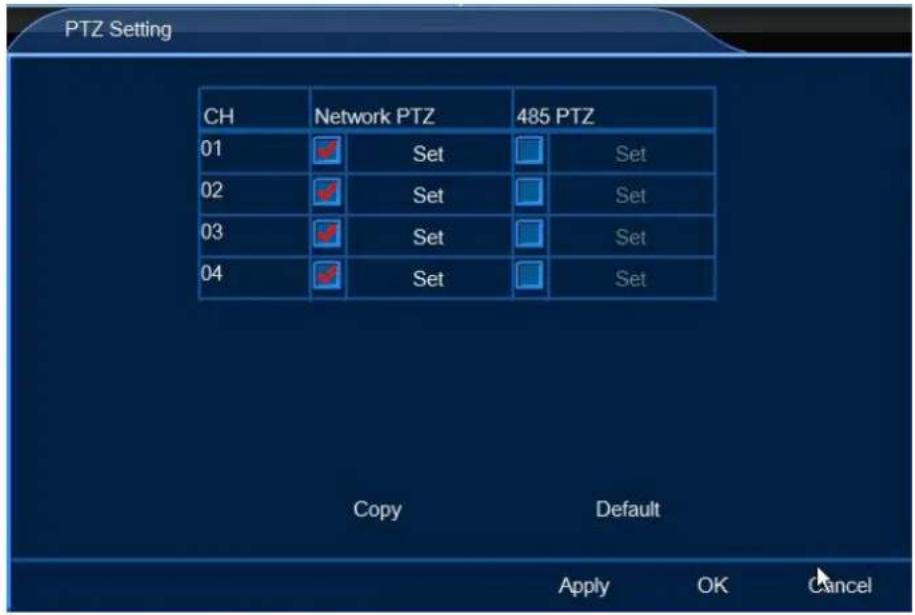
PTZ setting

Network PTZ(PTZ IP camera)

485 PTZ (Connect camera RS-485 to NVR 485 port)
Default Settings
| IP Address | 192.168.1.8 |
| User | admin |
| Password | (No Need) |
5. Mobile software
The NVR support Android(v1.6 or above) and IPHONE/IPAD IOS(V4.3 or above) system.
5.1. Install APP software
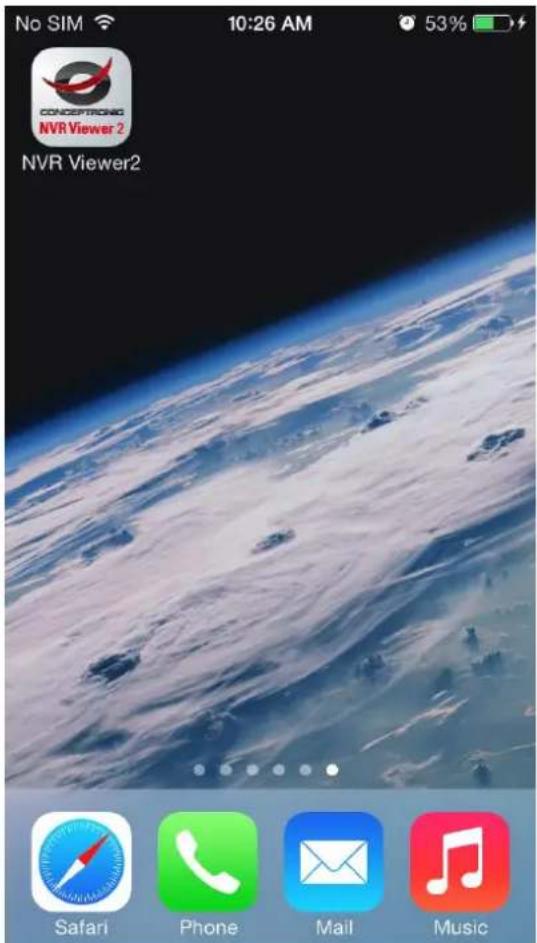
Search and download "NVR VIEWER2" in Apple APP Store and GOOGLE play store.
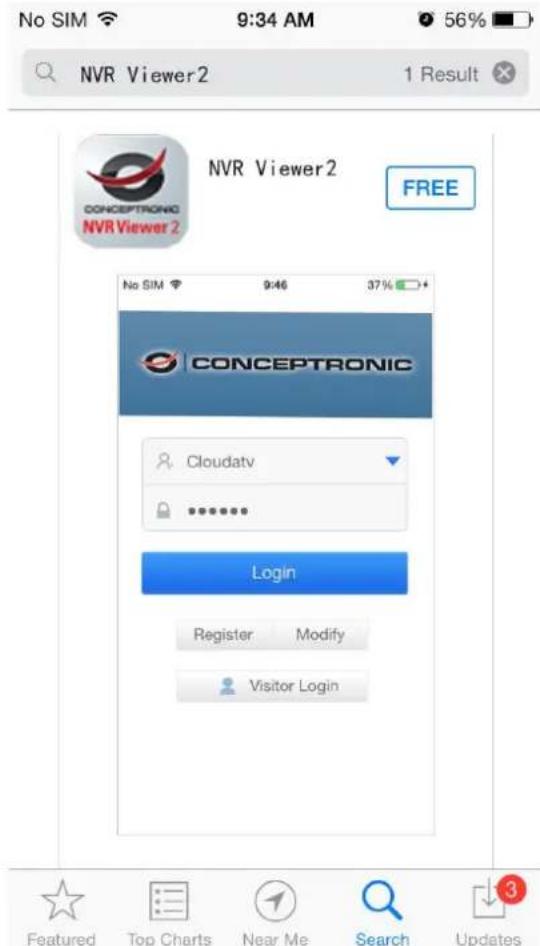
5.2. Create an account or visitor login

① Run NVR VIEWER2
② Input user name / password / confirm password
③ Visitor login, needn't register an account

① Modify account password
② Input user name / old password / new password / confirm password
5.3. Add NVR


No device Please add the device
① Input user /password and click login
② Click to add NVR


③ Check the ATVCloud ID in NVR network setting, input ATVCloud ID.
④ Input NVR user name and password.
⑤ Click save.
5.4. Connect video


① Click the icon
② If the NVR is online, it display online; if the NVR is offline, it displays offline
③ The NVR channels list


④ Camera video
⑤ Audio: Listen to the channel audio, the camera must has MIC
⑥ PTZ Control: Control camera PTZ, the camera must has PTZ function
⑦ Playback: Remotely playback the NVR video
⑧ Capture :Snap video photo
⑨ Megaphone: Talk with NVR
⑩ Video: Record camera video on mobile phone
⑪ More function setting of the software
Europe - EU Declaration of Conformity

For complete DoC please visit
http://www.conceptronic.net/download.php
GPL License Agreement
GPL may be included in this product, to view the GPL license agreement goes to http://download.conceptronic.net/GPL/GPL.pdf
For GNU General Public License (GPL) related information, please visit
http://www.conceptronic.net/download.php
Enjoy the use of your Conceptronic 4-Channel IP Surveillance Kit!


- 4-CHANNEL IP SURVEILLANCE KIT
- C4CHIPSKIT
- CONTENTS
- INSTALLATION....1
- FAST OPERATION....4
- MENU OPERATION....5
- SYSTEM SETUP....16
- MOBILE SOFTWARE 35
- INSTALLATION
- HDD INSTALLATION
- FRONT /REAR PANEL AND CONNECTION
- REMOTE OPERATION
- PREVIEWING WINDOW ICON
- FAST OPERATION
- NORMAL LOGIN
- TEMPORARY LOGIN
- MENU OPERATION
- IP CAMERA
- 3.2.VIEW LAYOUT
- SEQUENCE INTERVAL
- VIDEO ADJUST
- ZOOM
- PTZ
- FUNCTION SUMMARY
- CLIENTS
- SNAPSHOT
- PHOTOS
- SNAPSHOT QUERY
- PICTURE BACKUP
- RECORD FUNCTION
- PLAYBACK
- PLAYBACK ADJUSTING
- BACKUP
- OPERATION STEPS
- CLEAR ALARM
- SHUTDOWN
- SYSTEM SETUP
- BASIC SET
- FUNCTIONS
- GENERAL
- TIME
- USER
- LOCAL USER
- NETWORK USER
- CHANNEL
- PREVIEW ADJUSTMENT
- STREAM SETTING
- AUDIO SETTING
- PRIVACY MASK
- NETWORK
- CONNECTION
- SERVICE
- ALARM SET
- FUNCTION INTRODUCTION
- E-MAIL SETTING
- MOTION DETECTION
- SET MOTION ALARM TRIGGER OUTPUT
- NO VIDEO
- ALARM DEVICE
- ALARM TASK(MOTION ALARM / LOST VIDEO ALARM /DEVICE ALARM)
- SYSTEM MANAGEMENT
- LOG
- MAINTENANCE
- FUNCTION
- INFORMATION
- PERIPHERALS
- STORAGE
- MOBILE SOFTWARE
- INSTALL APP SOFTWARE
- CREATE AN ACCOUNT OR VISITOR LOGIN
- ADD NVR
- CONNECT VIDEO
- GPL LICENSE AGREEMENT
Brand : CONCEPTRONIC
Model : C4CHIPSKIT
Category : Surveillance Camera