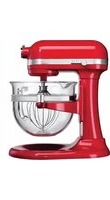
5KSM6521XEER - Hand blender KITCHENAID - Free user manual and instructions
Find the device manual for free 5KSM6521XEER KITCHENAID in PDF.


| Product Type | Stand Mixer |
| Model | 5KSM6521X (also 5KSM7580X, 5KSM7591X, 5KPM5) |
| Power Consumption | 500 Watts |
| Voltage | 220-240 V AC |
| Frequency | 50/60 Hz |
| Bowl Capacity | 5 Quart (Approx.) |
| Speed Settings | 10 speeds (Stir, Slow Mix, Mixing, Beating, Fast Beating) |
| Soft Start Feature | Yes, starts at lower speed to reduce splashing |
| Bowl Lift Type | Bowl-lift lever mechanism |
| Included Attachments | Flat Beater, Stainless Steel Wire Whip, Spiral Dough Hook, Pouring Shield* and Lid** (*except 5KSM6521X, **included with 5KSM6521X) |
| Attachment Hub | Yes, for optional attachments (e.g., food grinder, pasta maker) |
| Housing Material | Die-cast metal |
| Dimensions (Approx.) | 14.4 x 11.2 x 16.5 inches (36.6 x 28.4 x 41.9 cm) |
| Weight (Approx.) | 25 lbs (11.3 kg) |
| Dishwasher Safe Parts | Bowl, Flat Beater, Dough Hook |
| Hand Wash Only | Wire Whip, Pouring Shield, Lid |
| Material of Bowl | Stainless steel |
| Safety Features | Polarized plug, grounding, automatic shut-off (resettable overload protector) |
| Warranty | 5 years full warranty (Europe, Middle East, Africa) |
| Country of Origin | USA (KitchenAid brand) |
Frequently Asked Questions - 5KSM6521XEER KITCHENAID
User questions about 5KSM6521XEER KITCHENAID
0 question about this device. Answer the ones you know or ask your own.
Ask a new question about this device
Download the instructions for your Hand blender in PDF format for free! Find your manual 5KSM6521XEER - KITCHENAID and take your electronic device back in hand. On this page are published all the documents necessary for the use of your device. 5KSM6521XEER by KITCHENAID.
USER MANUAL 5KSM6521XEER KITCHENAID
5KSM7580X, 5KSM7591X, 5KPM5, 5KSM6521X

natural_image
Exterior view of a modern kitchen stand mixer (no visible text or symbols)KitchenAid


English 5
Deutsch 00
Français 00
Italiano....00
Nederlands 00
Español 00
Português....00
Ελληνικά......00
Svenska 00
Norsk....00
Suomi....00
Dansk....00
Íslenska....00
Русский 00
Polski....00
Český 00
العربية 00


STAND MIXER INSTRUCTIONS
TABLE OF CONTENTS
STAND MIXER SAFETY
Important safeguards....6
Electrical requirements 7
Electrical equipment waste disposal....7
PARTS AND FEATURES....8
ASSEMBLING THE STAND MIXER
Attaching the bowl and beaters....9
Adjusting the beater to bowl clearance.... 10
Removing the bowl and beaters.... 12
TIPS FOR GREAT RESULTS
Stand Mixer use....12
Mixing time....13
Mixing tips 13
ATTACHMENTS 13
CARE AND CLEANING....14
TROUBLESHOOTING 15
WARRANTY AND SERVICE
KitchenAid Stand Mixer warranty 16
Customer service 16
STAND MIXER SAFETY
Your safety and the safety of others are very important.
We have provided many important safety messages in this manual and on your appliance. Always read and obey all safety messages.

This is the safety alert symbol.
This symbol alerts you to potential hazards that can kill or hurt you and others.
All safety messages will follow the safety alert symbol and either the word "DANGER" or "WARNING." These words mean:
! DANGER
You can be killed or seriously injured if you don't immediately follow instructions.
WARNING
You can be killed or seriously injured if you don't follow instructions.
All safety messages will tell you what the potential hazard is, tell you how to reduce the chance of injury, and tell you what can happen if the instructions are not followed.
IMPORTANT SAFEGUARDS
When using electrical appliances, basic safety precautions should always be followed, including the following:
I. Read all instructions.
2. To avoid risk of electrical shock, do not put Stand Mixer in water or other liquid.
3. This appliance can be used by children aged from 8 years and above and persons with reduced physical, sensory or mental capabilities or lack of experience and knowledge if they have been given supervision or instruction concerning use of the appliance in a safe way and understand hazards involved. Children shall not play with the appliance. Cleaning and user maintenance shall not be made by children without supervision.
-
Unplug Stand Mixer from outlet when not in use, before putting on or taking off parts, and before cleaning.
-
Avoid contacting moving parts. Keep hands, hair, and clothing, as well as spatulas and other utensils away from beater during operation to reduce the risk of injury to persons and/or damage to the Stand Mixer.
-
Do not operate Stand Mixer with a damaged cord or plug or after the Stand Mixer malfunctions, or is dropped or damaged in any manner. Return appliance to the nearest Authorized Service Center for examination, repair or electrical or mechanical adjustment.
-
The use of attachments not recommended or sold by
STAND MIXER SAFETY
KitchenAid may cause fire, electrical shock, or injury.
- Do not use the Stand Mixer outdoors.
- Do not let the cord hang over edge of table or counter.
-
Remove Flat Beater, Stainless Steel Whip, or Spiral Dough Hook from Stand Mixer before washing.
II. To avoid product damage, do not use the mixer bowls in areas of high heat such as an oven, microwave, or on a stovetop. -
This product is designed for household use only. SAVE THESE INSTRUCTIONS
Electrical requirements
WARNING

Electrical Shock Hazard
Plug into a grounded outlet.
Do not remove ground prong.
Do not use an adapter.
Do not use an extension cord.
Failure to follow these instructions can result in death, fire, or electrical shock.
Volts: 220-240 A.C.
Hertz: 50/60 Hz
Wattage: 315 Watts for model 5KPM5
500 Watts for models
5KSM7580X, 5SM7591X,
and 5KSM6521X
NOTE: The power rating for your Stand Mixer is printed on the serial plate, placed under your Stand Mixer.
Do not use an extension cord. If the power supply cord is too short, have a qualified electrician or serviceman install an outlet near the appliance.
The wattage rating is determined by using the attachment that draws the greatest load (power). Other recommended attachments may draw significantly less power.
Electrical equipment waste disposal
Disposal of packing material
The packing material is 100% recyclable and is marked with the recycle symbol. The various parts of the packing must therefore be disposed of responsibly and in full compliance with local authority regulations governing waste disposal.
Scrapping the product
- This appliance is marked in compliance with European Directive 2002/96/EC, Waste Electrical and Electronic Equipment (WEEE).
- By ensuring this product is disposed of correctly, you will help prevent potential negative consequences for the environment
and human health, which could otherwise be caused by inappropriate waste handling of this product.

- The symbol / on the product or on the accompanying documentation indicates that it should not be treated as domestic waste but must be taken to an appropriate collection centre for the recycling of electrical and electronic equipment.
For more detailed information about treatment, recovery and recycling of this product, please contact your local city office, your household waste disposal service or the shop where you purchased the product.
PARTS AND FEATURES

* Material, style, and size may differ depending on model.
** Pouring shield included only for models 5KPM5, 5KSM7580X and 5KSM7591X / Lid included only for models 5KPM5 and 5KSM6521X.
ASSEMBLING THE STAND MIXER
Attaching the bowl and beaters

Turn speed control to "0" (OFF), and unplug Stand Mixer.

natural_image
Mechanical assembly diagram showing a valve and lever mechanism with a downward arrow indicating motion (no text or symbols present)2 Place bowl lift lever into down position.
English

3 Fit bowl supports over locating pins; press down on back of the bowl until bowl pin snaps into the spring latch. If not securely snapped into place, bowl will be unstable and wobble during use.

natural_image
Technical line drawing of a mechanical assembly with a central component and directional arrow (no text or symbols)4 Slip a beater (flat, wire whip, or dough hook) onto the beater shaft and press upward as far as possible. Turn beater to the right, hooking it over the pin on the beater shaft.

5 If using the pouring shield*, from the front of the Stand Mixer, slide the pouring shield over the bowl until it is centered. The bottom rim of the pouring shield should fit within the bowl.

natural_image
Mechanical assembly diagram showing a piston and lever mechanism with an upward arrow (no text or symbols)6 Raise the bowl into mixing position by rotating the bowl lift lever counterclockwise to the straight up position. The bowl must always be in the raised position when mixing.
NOTE: Rotate the pouring shield* so the motor head covers the U-shaped gap in the shield. The pouring chute will be just to the right of the attachment hub as you face the Stand Mixer.
ASSEMBLING THE STAND MIXER
Adjusting beater to bowl clearance
Your Stand Mixer is adjusted at the factory so the flat beater just clears the bottom of the bowl. If, for any reason, the flat beater hits the bottom of the bowl or is too far away from the bowl, you can correct the clearance easily.

Turn speed control to "0" (OFF), and unplug Stand Mixer.

natural_image
Mechanical assembly diagram showing a valve and lever mechanism with a downward arrow indicating motion (no text or symbols)2 Lower the bowl to the down position.

natural_image
Diagram of a mechanical device with a rotating arrow and circular component, no text or symbols present3 Turn beater height adjustment screw (A) slightly counterclockwise (left) to raise the flat beater; or turn clockwise (right) to lower the flat beater. Adjust so that the flat beater just clears the surface of the bowl. If you over adjust the screw, the bowl lift lever may not lock in place.
NOTE: When properly adjusted, the flat beater will not strike on the bottom or side of the bowl. If the flat beater or the wire whip is so close that it strikes the bottom of the bowl, the coating may wear off the flat beater (for coated beaters) or wires on the wire whip may wear.
Scraping sides of bowl may be necessary under certain conditions regardless of beater adjustment. The Stand Mixer must be stopped to scrape bowl or damage to Stand Mixer may occur.
All speeds have the Soft Start feature that automatically starts the Stand Mixer at a lower speed to help avoid ingredient splash-out and "flour puff" at start-up, then quickly increases to the selected speed for optimal performance.

English
| Speed | Used for Accessories | Description | |
| 1 | Stirring For slow stirring, combining, mashing, starting all mixing procedures. Use to add flour and dry ingredients to batter, and add liquids to dry ingredients. Do not use Speed I to mix or knead yeast doughs. | ||
| 2 | Slow mixing, For slow mixing, mashing, faster Kneading Use to mix and knead yeast doughs, heavy batters, and candies; start mashing potatoes or other vegetables; cut shortening into flour; mix thin or splashy batters. | stirring. | |
| 4 | Mixing, For mixing semi-heavy batters, such Beating as cookies. Use to combine sugar and shortening and to add sugar to egg whites for meringues. Medium speed for cake mixes. | ||
| 6 | Beating, For medium-fast beating (creaming) Creaming or whipping. Use to finish mixing cake, doughnut, and other batters. High speed for cake mixes. | ||
| 8-10 | Fast beating, Whipping, boiled frostings. For whipping small Fast whipping amounts of cream, egg whites or final whipping of mashed potatoes. | For whipping cream, egg whites, and |
NOTE: Use Speed 2 to mix or knead yeast doughs. Use of any other speed creates high potential for Stand Mixer failure. The dough hook efficiently kneads most yeast dough within 4 minutes.
Removing the bowl and beaters

Turn speed control to "0" (OFF), and unplug Stand Mixer.

natural_image
Technical diagram of a mechanical assembly with a downward arrow indicating motion or force (no text or symbols present)2 Lower the bowl to the down position.

natural_image
Mechanical diagram showing a rotating component with directional arrows indicating motion (no text or symbols)3 Press the beater up as far as possible and turn left, then pull beater from the beater shaft.

natural_image
Line drawing of a hand using a tool to press down a bowl, with no text or symbols present.4 Grasp the bowl handle and lift it straight up and off the locating pins.
TIPS FOR GREAT RESULTS
Stand Mixer use
WARNING
PERSONAL INJURY HAZARD
To avoid personal injury and damage to the beater, do not attempt to scrape bowl while mixer is operating; turn mixer off. Should scraper or other object drop into bowl, turn motor OFF before removing.
The bowl and beater are designed to provide thorough mixing without frequent scraping. Scraping the bowl once or twice during mixing is usually sufficient.
The Stand Mixer may become warm during use. Under heavy loads with extended mixing time periods, you may not be able to comfortably touch the top of the Stand Mixer. This is normal.
TIPS FOR GREAT RESULTS
Mixing time
Your KitchenAid Stand Mixer will mix faster and more thoroughly than most other electric mixers. Therefore, the mixing time in most recipes must be adjusted to avoid overbeating.
To help determine the ideal mixing time, observe the batter or dough and mix only until it has the desired appearance described in your recipe, such as "smooth and creamy." To select the best mixing speeds, use the "Speed control guide" section.
Mixing tips
Adding Ingredients
Always add ingredients as close to side of bowl as possible, not directly into moving beater. The Pouring Shield can be used to simplify adding ingredients. Use Speed I until ingredients have been blended. Then gradually increase to desired speed.
Adding Nuts, Raisins, or Candied Fruits
Follow individual recipes for guidelines on including these ingredients. In general, solid materials should be folded in the last few seconds of mixing on Speed 1. The batter should be thick enough to keep the fruit or nuts from sinking to the bottom of the pan during baking. Sticky fruits should be dusted with flour for better distribution in the batter.
Liquid Mixtures
Mixtures containing large amounts of liquid ingredients should be mixed at lower speeds to avoid splashing. Increase speed only after mixture has thickened.
NOTE: If ingredients in very bottom of bowl are not thoroughly mixed, then the beater is not far enough into the bowl. See the "Setting up your Stand Mixer" section.
ATTACHMENTS
KitchenAid optional attachments are designed to assure long life. The attachment power shaft and attachment hub socket are of a square design, to eliminate any possibility of slipping during the transmission of power to the attachment. The hub and shaft housings are tapered to assure a snug fit, even after prolonged use and wear. KitchenAid attachments require no extra power unit to operate them; the power unit is built-in.

* Optional attachment, not part of the mixer.
** Style may vary depending on model.
CARE AND CLEANING
WARNING
ELECTRICAL SHOCK HAZARD ALWAYS BE SURE TO UNPLUG MIXER BEFORE CLEANING TO AVOID POSSIBLE ELECTRICAL SHOCK.
Wipe mixer with a damp cloth. DO NOT IMMERSE IN WATER. Wipe off beater shaft frequently, removing any residue that may accumulate.

natural_image
Diagram showing two electrical components: a plug inserted into a socket and a switch, with no visible text or symbols.|
Always be sure to unplug Stand Mixer before cleaning. Wipe Stand Mixer with a soft, damp cloth. Do not use household/commercial cleaners. Wipe off beater shaft frequently, removing any residue that may accumulate. Do not immerse in water.

natural_image
Diagram showing a kitchen appliance with a door, handle, and cup (no text or symbols)2
The bowl, flat beater, and dough hook may be washed in a dishwasher. Or, clean them thoroughly in hot sudsy water and rinse completely before drying. Do not store beaters on shaft.

natural_image
Diagram showing a crossed-out kitchen machine with a showerhead above its lid, alongside a close-up of the showerhead and a bowl (no text or symbols)3
IMPORTANT: The wire whip, pouring shield, and lid are not dishwasher safe. Clean thoroughly in hot sudsy water and rinse completely before drying. Do not store wire whip on shaft.
TROUBLESHOOTING
WARNING

Electrical Shock Hazard Unplug before servicing.
Failure to do so can result in death or electrical shock.
Please read the following before calling your service center.
I. The Stand Mixer may warm up during use. Under heavy loads with extended mixing time periods, you may not be able to comfortably touch the top of the unit. This is normal.
- The Stand Mixer may emit a pungent odor, especially when new. This is common with electric motors.
- If the Flat Beater hits the Bowl, stop the Stand Mixer. See the "Setting Up Your Stand Mixer" section.
If your Stand Mixer should malfunction or fail to operate, please check the following:
- Is the Stand Mixer plugged in?
- Is the fuse in the circuit to the Stand Mixer in working order? If you have a circuit breaker box, be sure the circuit is closed.
- Turn off the Stand Mixer for 10-15 seconds, the turn it back on. If the mixer still does not start, allow it to cool for 30 minutes before turning it back on.
- If the problem is not due to one of the above items, see the "Customer service" section.
WARRANTY AND SERVICE
KitchenAid Stand Mixer warranty
| Length of Warranty: | KitchenAid Will Pay For: | KitchenAid Will Not Pay For: |
| Europe, Middle East and Africa:For models 5KPM5, and 5KSM7591X: One year full warranty from date of purchase.For models 5KSM7580X, 5KSM6521X:Five years full warranty from date of purchase. | The replacement parts and repair labor costs to correct defects in materials or workmanship. Service must be provided by an Authorized KitchenAid Service Center. | A. Repairs when Stand Mixer is used for operations other than normal household food preparation.B. Damage resulting from accident, alterations, misuse, abuse, or installation/operation not in accordance with local electrical codes. |
KITCHENAID DOES NOT ASSUME ANY RESPONSIBILITY FOR INDIRECT DAMAGES.
Customer service
In U.K. and Ireland:
For any questions, or to find the nearest KitchenAid Authorized Service Center, please find our contact details below.
NOTE: All service should be handled locally by an Authorized KitchenAid Service Center.
Contact number for U.K. and Northern Ireland:
Tollfree number 0800 988 1266 (calls from mobile phones are charged standard network rate)
Contact number for Ireland:
Tollfree number +44 (0) 20 8616 5148
E-mail contact for U.K. and Ireland:
Go to www.kitchenaid.co.uk, and click on the link "Contact Us" at the bottom of the page.
Address for U.K. and Ireland:
KitchenAid Europa, Inc.
PO BOX 19
B-2018 ANTWERP II
BELGIUM
In other countries:
For all product related questions and after sales matters, please contact your dealer to obtain the name of the nearest Authorized KitchenAid Service/Customer Center.
www.KitchenAid.eu
© 2013. All rights reserved.
Specifications subject to change without notice.


natural_image
Solid dark gray horizontal bar with no text, symbols, or discernible featuresEnglish



- STAND MIXER INSTRUCTIONS
- TABLE OF CONTENTS
- STAND MIXER SAFETY
- ASSEMBLING THE STAND MIXER
- TIPS FOR GREAT RESULTS
- WARRANTY AND SERVICE
- Your safety and the safety of others are very important.
- ! DANGER
- WARNING
- IMPORTANT SAFEGUARDS
- When using electrical appliances, basic safety precautions should always be followed, including the following:
- Electrical requirements
- Electrical equipment waste disposal
- Disposal of packing material
- Scrapping the product
- PARTS AND FEATURES
- Attaching the bowl and beaters
- Adjusting beater to bowl clearance
- Removing the bowl and beaters
- Stand Mixer use
- PERSONAL INJURY HAZARD
- Mixing time
- Mixing tips
- Adding Ingredients
- Adding Nuts, Raisins, or Candied Fruits
- Liquid Mixtures
- ATTACHMENTS
- CARE AND CLEANING
- TROUBLESHOOTING
- Please read the following before calling your service center.
- If your Stand Mixer should malfunction or fail to operate, please check the following:
- KITCHENAID DOES NOT ASSUME ANY RESPONSIBILITY FOR INDIRECT DAMAGES.
- Customer service
- In U.K. and Ireland:
- In other countries:
Brand : KITCHENAID
Model : 5KSM6521XEER
Category : Hand blender