
532 - Cooking thermometer Taylor - Free user manual and instructions
Find the device manual for free 532 Taylor in PDF.


| Product Type | Wireless Cooking Thermometer with Remote Pager and Timer |
| Brand | Taylor |
| Model | 532 |
| Base Unit Dimensions | Approximately 4 x 3 x 1 inches (10.2 x 7.6 x 2.5 cm) |
| Remote Unit Dimensions | Approximately 3.5 x 2.5 x 1 inches (8.9 x 6.4 x 2.5 cm) |
| Weight (each unit) | Approximately 4 oz (113 g) |
| Power Supply | 2 AAA batteries (included) per unit |
| Battery Life | Not specified; low battery indicator available |
| Temperature Range (Probe) | Up to 500°F (260°C) |
| Display | LCD with backlight |
| Wireless Range | Up to 200 feet (61 meters) in open air |
| Meat Presets | Beef, Veal, Lamb, Pork, Poultry, Fish (with taste levels: Rare, Medium Rare, Medium, Well Done) |
| Timer | Up to 39 hours, 59 minutes, 59 seconds |
| Clock Feature | Yes, programmable |
| Alerts | Audible beeps, vibration, and flashing lights on remote; beeps and flashing on base |
| Temperature Unit | °F or °C (switchable) |
| Auto-Off | Base: after 30 min inactivity; Remote: after 5 min signal loss or base off |
| Low Battery Warning | Icon on base LCD; light on remote |
| Care and Cleaning | Sterilize metal probe before use; wipe base/remote with dry cloth; do not immerse in water |
| Safety Precautions | Do not touch hot probe; keep away from children; do not use in microwave; avoid direct flame |
| Warranty | 1-year limited warranty |
| FCC Compliance | Class B digital device, Part 15 |
| Country of Origin | China |
Frequently Asked Questions - 532 Taylor
User questions about 532 Taylor
0 question about this device. Answer the ones you know or ask your own.
Ask a new question about this device
Download the instructions for your Cooking thermometer in PDF format for free! Find your manual 532 - Taylor and take your electronic device back in hand. On this page are published all the documents necessary for the use of your device. 532 by Taylor.
USER MANUAL 532 Taylor
For your questions regarding this product, please contact us at:
Taylor Precision Products
2220 Entrada Del Sol, Suite A
Las Cruces, New Mexico 88001
1-866-843-3905
www.taylorusa.com
Please contact us before returning to retailer.
Thank you for purchasing a TayWireless Thermometer with Remote Pager plus Timer
This product helps to eliminate over-cooking or under-cooking foods. Presetting the thermometer to the recommended cooking temperatures and/or cooking times is simple and ensures that food will be cooked to your preferred taste. Please read this instruction manual carefully before use. Keep these instructions handy for future reference.
Battery Information
The base thermometer unit operates on 2 AAA batteries (included). The remote unit operates on 2 AAA batteries (included).
The thermometer units are equipped with a low battery warning: Base Unit: A low battery icon appears in the upper right corner of the LCD.
Remote Sensor:
The low battery light illuminates.
If these warnings appear, or if readings grow dim or irregular, the batteries may need to be replaced.
To install or replace the batteries on both units:
I. Use 2 AAA batteries for each unit. Always replace both batteries at the same time; do not combine old and new batteries.
2. Remove the battery compartment cover, located on the back of the unit.
3. Remove the old batteries from the battery compartment (if applicable).
4. Place the new batteries into the compartment as indicated.
5. Replace the battery compartment cover.
NOTE: Do not dispose of batteries in fire. Batteries may explode or leak. Do not mix old and new batteries. Do not mix Alkaline, carbon-zinc (standard) or Nickel-Cadmium (rechargeable) batteries. Remove the batteries if the thermometer will not be used for a long period of time.
On/Off Operation
I. Place the base unit as close as possible to the remote sensor. This will ensure easy synchronization between the base and remote. After set up is complete, keep the units within effective transmission range (within 200 feet).
- Turn on the base unit first by pressing the On/Off button. The LCD will turn on and the unit will beep.

Press "On/Off" on base unit
- Turn on the remote unit by pressing the On/Off button (located on the back). The remote will vibrate, beep and the “ Light will blink.

- Set volume on remote: Off–Low–High. The volume switch is located on the top of the remote.

Select volume level
- The remote will automatically search for a signal from the base. The remote's ready light "A will blink, indicating the remote is receiving a signal from the base. The ready light will continue to blink every 8 seconds again indicating that the remote is receiving signals from the base.

- If transmission is interrupted, the ready light will stop blinking and the remote will vibrate 3 times every 30 seconds. To synchronize the units again, place the base and remote near each other and press and hold the “” button located on the back of the base unit.

No green light & remote vibrates= Press "A" on base
- Auto off feature to conserve battery power: The base unit will automatically turn off after 30 minutes if there is no change in temperature or no buttons are pressed. The remote unit will vibrate then automatically turn off if the transmission signal is lost for 5 minutes. The remote unit will also turn off automatically if the base is turned off.
Positioning the thermometer units
I. The base unit may be placed on a flat surface using the clip stand on the back of the unit. It may also be attached to a metal surface using the magnets on the back.
2. The remote sensor's clip stand may be used to stand the remote on a flat surface or clip on a belt loop. The magnets may be used to attach it to a metal surface. Use the lanyard to wear it around the neck (take care not to allow the remote to touch hot items or working appliances). Simply thread the lanyard through the opening on the remote and loop the lanyard through itself.
3. During use, keep the base unit and remote sensor within effective transmission range, which is 200 feet in usual circumstances.
4. Do Not stick to surfaces that exceed 200°F (100°C).
Thermometer Programming Operation
I. Your thermometer is preset to read temperatures in Fahrenheit. To switch to Celsius, push the switch on the back of the base unit to °C.
- If necessary, press the "On/Off" buttons. The default setting "Beef" appears.

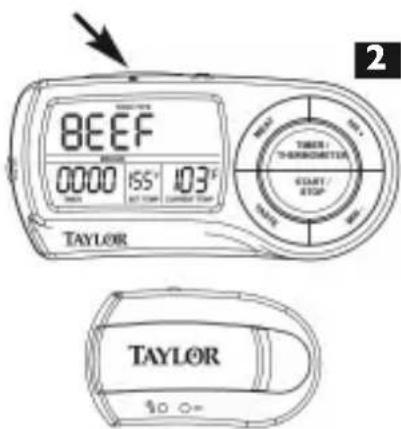
Turn on base, then remote
- Press the “Meat” button to scroll through the meat choices. Press the “Select” button to select the displayed meat type. The default taste setting “Medium”

Press "Meat"

then "Select"
- Press the “Taste” button to scroll through the taste choices. Press the “Select” button to select the displayed taste. The Set Temperature digits will blink.
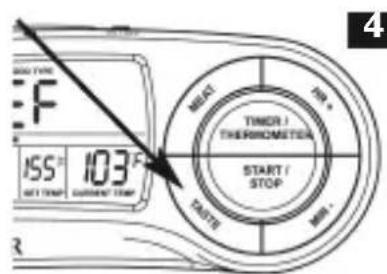
Press "Taste"

then "Select"
- Press the “Select” button to accept the Set Temperature displayed. Or change the temperature manually. Press the “Hr/+” button to increase the temperature by I degree or press the “Min/-” button to decrease the temperature by I degree. (Note: when the

Can press “Hr/+” or “Min/-” to change temperature
temperature is manually changed, a “CUST” icon will appear to note a custom temperature has been programmed.)
- Press "Select" when the desired temperature is displayed. The Set Temperature digits stop flashing. The unit will beep, indicating the thermometer is set.

Press "Select". Unit beeps and is set.
- To change the programming, press the Meat button and repeat the steps above.
General Cooking Procedures
I. Preheat the grill or oven to desired cooking temperature. Place the food in the oven or grill.
2. Sterilize the metal probe by inserting it into an appropriate solution such as boiling water for several minutes. Make sure the sensor plug on the end of the cord is plugged into the thermometer base unit. (Note: if the probe is not plugged in
properly, the display will show "LL.L".)
- Insert the metal probe into the thickest part of the food to be cooked. Do not come in contact with bone, fat or gristle, as these areas will not provide accurate temperature readings.

Sensor plug
-
Place the food into the oven or grill. The thermometer display unit must be placed outside of the oven or grill (do not put the plastic display unit in the oven or grill). The probe cord will be held in place by the oven door. Be careful not to crimp the probe cord with the oven door or grill lid. Note: If cooking on a grill, be sure the grill lid does not crimp the cord – the lid should be open enough to allow space for the cord. The cord should not come into direct contact with cooking surface or flame.
-
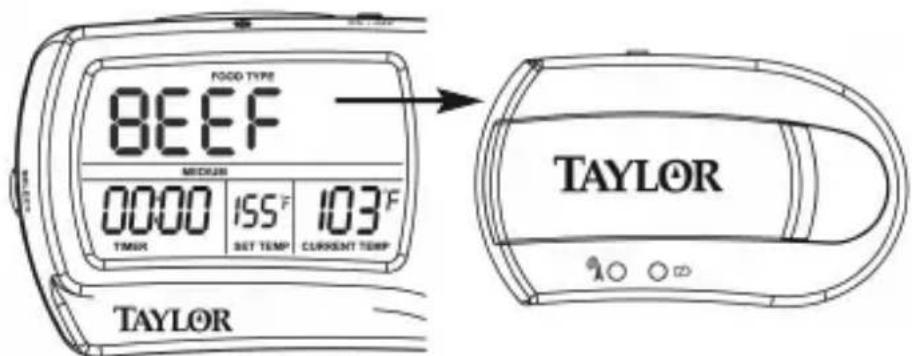
The current internal temperature of the food appears on the LCD screen of the base unit. As cooking progresses, the base and remote units will signal temperature alerts in the following manner: • When the current temperature is within 20 degrees of the target temperature, the remote will beep 3 times, vibrate and flash; the base will beep 3 times and flash. Note: the unit uses to different beep tones to help you identify between thermometer and timer notifications. Only the remote will vibrate.

3 beeps =
20 degrees from done
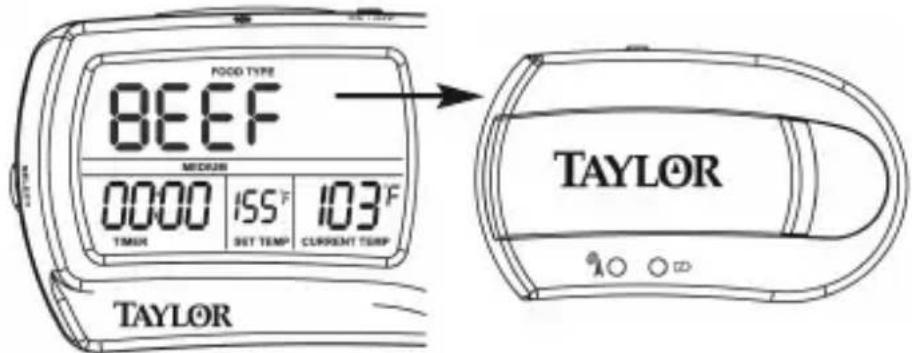
- When the current temperature is within 10 degrees of the target temperature, the remote will beep 5 times, vibrate and flash. The base will beep 5 times and flash.
5 beeps =
10 degrees from done
- When the current temperature and target temperature are equal (indicating the food is done), the units consistently beep, vibrate and flash (base will not vibrate). Press the “Start/Stop” button to turn off the alarm.
Constant beeps = done.
Press "Start/Stop to stop beeps.
-
When the food is ready, remove it from the oven or grill with a heat resistant glove. DO NOT TOUCH THE HOT PROBE OR FOOD WITH YOUR BARE HANDS!
-
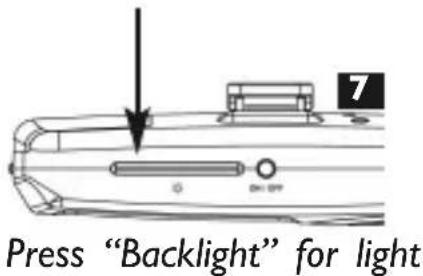
The base unit has a convenient backlight feature for easy temperature viewing. While the unit is on, press the Backlight button to turn on the backlight for 10 seconds. The base backlight will also automatically illuminate when any key is depressed.
- The food may continue to cook after removed from heat. The probe may be left in the food to continue monitoring internal temperature.
Timer Operation
This unit is also equipped with a convenient timer. It can operate as an independent timer or work along with the thermometer function.
I. If necessary, turn the base and remote on (see on/off operation).
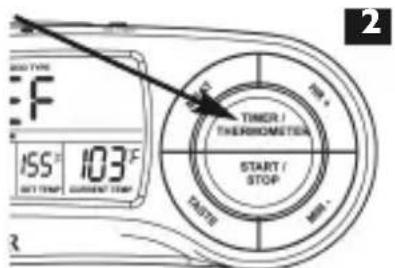
2. Press the “Timer/Thermometer” button. The Timer digits flash.

Press "Timer/ Thermometer"
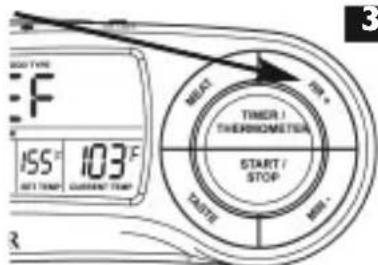
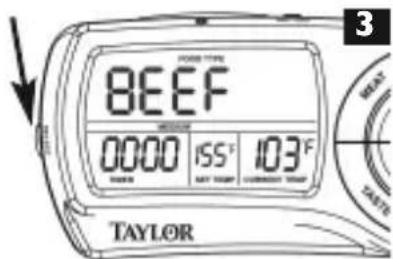
- Press the “Hr/+” button to set the hours. Press the “Min/-” button to set the minutes. Press “Start/Stop” to confirm. Press and hold the buttons to advance the digits quickly.
Press "Hr/+"
3

Press "Min/-"
then "Select"
-
Press the "Start/Stop" button to start timer countdown.
-
Press the “Start/Stop” button to pause timer. Press “Start/Stop” again to resume timer countdown. To add extra time, press “Start/Stop” to pause, “Hr/+” or “Min/-” to in
crease time, and “Start/Stop” to resume. To reset timer to zero, first pause the timer, then press “Hr/+” and “Min/-” at the same time to clear.

Press "Start/Stop"
- As time progresses, the base and remote units will signal timer alerts in the following manner:
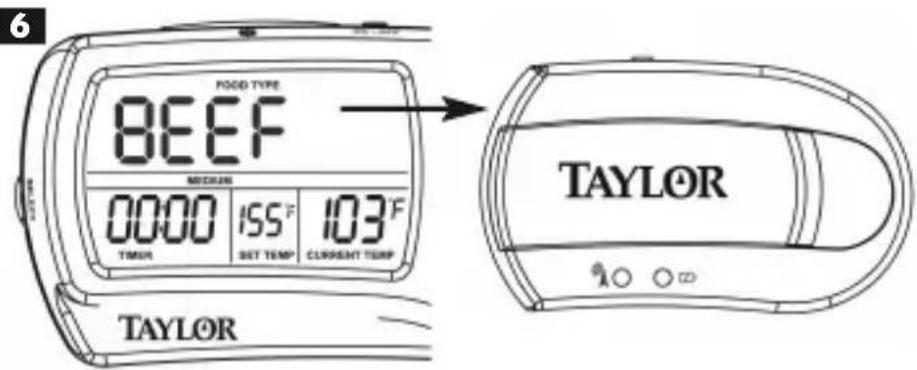
• 10 minutes before the time is up, the remote will beep 3 times, vibrate and flash. The base will beep 3 times and flash.
Note: that the unit uses to different beep tones to help you identify between thermometer and timer notifications. Only the remote will vibrate.
6
3 beeps =
10 minutes from done
- 5 minutes before the time is up, the remote will beep 5 times, vibrate and flash. The base will beep 5 times and flash.
6
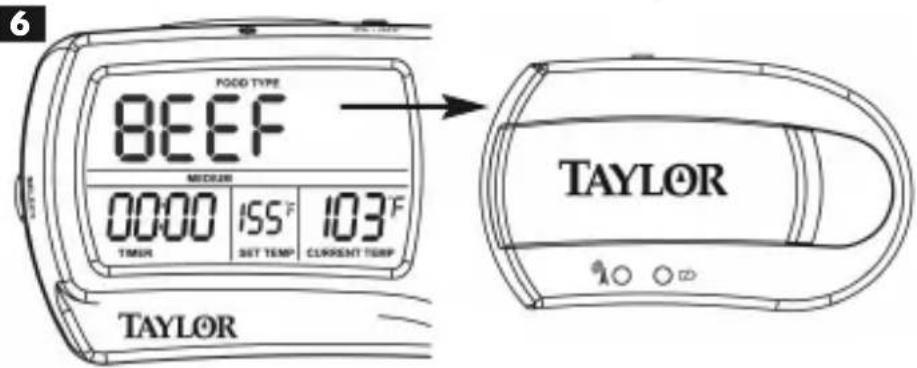
5 beeps =
5 minutes from done
- When the timer reaches zero, the units consistently beep, vibrate and flash (only remote vibrates)
6

Constant beeps = done
Press "Start/Stop" to stop beeps
-
Press the "Start/Stop" button on the base unit to stop the alarm and timer.
-
The timer will time up to 39 hours, 59 minutes and 59 seconds. (The seconds will appear when remaining time is less than one minute).
Clock Feature
To program the clock:
I. While the base unit is off, press the "Select" button. The clock digits flash.

Press "Select"
- Press the “Hr/+” button to change the hour. Press the “Min/-” button to change the minutes. Press and hold the buttons to advance the digits quickly.
Press "Hr/+" and then

Press "Min/-" to set time
- Press "Select". The clock is set.

Press "Select"
RESET: If you are having problems with the unit, you can press the reset button on the
back of the base. This will cause the same effect as taking the batteries out. The unit will reset itself.
Care and Precautions
I. Always wear a heat resistant glove when touching the metal probe or cord during or just after cooking. DO NOT TOUCH WITH BARE HANDS!
-
Keep the metal probe and cord away from children.
-
Sterilize metal probe each time before use.
-
Do not expose the thermometer to: water, direct heat, a hot surface or direct sunlight for an extended period of time. This may cause damage to the plastic casing or the electric circuits and components inside.
-
Do not expose the probe directly to flames. Do not put the probe in foods to exceed cooking temperatures of 500^ F ( 260^ C), as this may reduce the life and accuracy of the thermometer sensor.
- Do not use this thermometer in a microwave oven.
- Moisture inside the plug-in opening of the thermometer will result in an incorrect temperature reading. Dry the sensor plug with a cloth every time before plugging it into the thermometer.
- DO NOT USE THE CORD AND PROBE FOR OVEN TEMPERATURES HIGHER THAN 500°F (260 °C).
- Do not dispose of batteries in fire. Batteries may explode or leak. Do not mix old and new batteries. Do not mix Alkaline, carbon-zinc (standard) or Nickel-Cadmium (rechargeable) batteries. Remove the batteries if the thermometer will not be used for a long period of time.
Minimum Internal Cooking Temperatures as Recommended by the USDA\*
IMPORTANT! These are the minimum INTERNAL temperatures that food much reach to be considered safe to eat, no matter how you prepare them. We recommend the following guide lines but personal taste temperatures may be different from the below. The temperature can be manually changed if desired. Press “HR/+” to increase or “MIN/-” to decrease the temperature by 1 degree.
Fresh Ground Beef, Veal, Pork 160°F / 72°C
Beef, Veal, Lamb - roast, steaks, chops
*Rare 140°F / 60°C
Medium Rare 145°F / 63°C
Medium 160°F / 72°C
Well Done 170°F / 77°C
Fresh Pork - roast, steaks, chops
Medium 160°F / 72°C
Well Done 170°F / 77°C
Ham
Fresh (Raw) 160°F / 72°C
Precooked (to reheat) 140°F / 60°C
Poultry
Ground Chicken, Turkey 165°F / 74°C
Whole Chicken, Turkey 165°F / 74°C
Breast, Roasts 165°F / 74°C
Thighs and Wings 165°F / 74°C
Fish - cook until opaque and
flakes easily with fork 145°F / 63°C
Stuffing - cooked alone or in bird
Egg Dishes
Leftovers, Casseroles
165°F / 74°C
160°F / 72°C
165°F / 74°C
*The USDA does NOT recommend RARE 140°F as a safe eating temperature.
Whenrunningthe probecableinto anovenbesureto gentlyclose thedoortoavoid crimpingor severingthecable.
TransmissionCollision
Signals from other household devices, such as doorbells, home security systems and entry controls, may interfere. This is normal and does not affect the general performance of this product. The transmission will resume once the interference recedes.
Note: This equipment has been tested and found to comply with the limits for a Class B digital device, pursuant to Part 15 of the FCC F. These limits are designed to provide reasonable protection against harmful interference in a residential installation. This equipment generates, uses and can radiate radio frequency energy and, if not install and used in accordance with the instructions, may cause harmful interference to radio communications. However, there is no guarantee that interference will not occur in a particular installation. If this equipment does cause harmful interference to radio or television reception which can be determined by turning the equipment off and on, the equipment is encouraged to try to correct the interference by one or more of following measures:
--Reorient or relocate the receiving antenna.
--Increase the separation between the equipment and receiver.
Modifications not authorized by the manufacturer may void users authority to operate this device.
One Year Limited Warranty
Taylor® warrants this product to be free from defects in material or workmanship for one (1) year from date of original purchase for original purchaser. It does not cover damages or wear resulting from accident, misuse, abuse, commercial use, or unauthorized adjustment and/or repair.
If service is required, do not return to retailer. Should this product require service (or replacement at our option), please pack the item carefully and return it prepaid, along with store receipt showing the date of purchase and a note explaining reason for return to:
Taylor Precision Products 2220 Entrada Del Sol, Suite A Las Cruces, New Mexico 88001 www.taylorusa.com
There are no express warranties except as listed above. This warranty gives you specific legal rights, and you may have other rights which vary from state to state.
Questions about this product:
If service is required, do not return to retailer. For service call I (866) 843-3905 from 7:30 am to 4:30 pm, Mountain Standard Time, Monday through Friday. To assist us in serving you, please have the model number and date of purchase available.
For additional product information, or warranty information in Canada or elsewhere outside the USA, please contact us through www.taylorusa.com.
Made to our exact specifications in China.
© 2009 Taylor Precision Products and its affiliated companies, all rights reserved. Taylor® and Leading the Way in Accuracy are registered trademarks of Taylor Precision Products and its affiliated companies. All rights reserved.
CPI479.818 10.09
- Thank you for purchasing a TayWireless Thermometer with Remote Pager plus Timer
- Battery Information
- Remote Sensor:
- To install or replace the batteries on both units:
- On/Off Operation
- Positioning the thermometer units
- Thermometer Programming Operation
- General Cooking Procedures
- Timer Operation
- Clock Feature
- Care and Precautions
- Minimum Internal Cooking Temperatures as Recommended by the USDA\*
- TransmissionCollision
- One Year Limited Warranty
- Questions about this product:
Brand : Taylor
Model : 532
Category : Cooking thermometer