
M420VT - Screen VIZIO - Free user manual and instructions
Find the device manual for free M420VT VIZIO in PDF.


| Product Type | 42-inch Full HD LCD TV |
| Model | M420VT |
| Brand | VIZIO |
| Screen Size (Diagonal) | 42.02 inches |
| Aspect Ratio | 16:9 |
| Resolution | 1920 x 1080 pixels |
| Display Compatibility | 1080p (FHDTV) |
| Brightness | 450 cd/m² (typical) |
| Contrast Ratio (with DCR) | 100,000:1 |
| Response Time | 5 ms (typical) |
| Viewing Angle (H/V) | 178° / 178° (typical) |
| Colors | 1.06 Billion |
| Panel Life | 60,000 hours to half brightness |
| Power Consumption | 86.6 W (typical), <1 W standby |
| Voltage Range | 120 VAC, 60 Hz |
| Dimensions (with stand) | 39.75" W x 26.73" H x 9.92" D |
| Dimensions (without stand) | 39.75" W x 26.25" H x 1.76" D |
| Net Weight (with stand) | 44.09 lbs |
| Net Weight (without stand) | 37.48 lbs |
| Gross Weight | 54.01 lbs |
| Wall Mount Pattern | VESA 200 mm x 200 mm, M6 screws (10 mm length) |
| Inputs | 1x RF (ATSC/QAM/NTSC), 4x HDMI with HDCP, 1x Component YPbPr (with stereo audio), 1x RGB PC (with stereo audio), 1x USB |
| Outputs | 1x Optical Audio (SPDIF) |
| Built-in Speakers | 2 x 10 W, 82 ± 3 dB @ 1 m/W |
| Audio Technology | SRS TruSurround HD, TruVolume |
| Certifications | UL, FCC Class B, Energy Star 4.0, ATSC A/65 |
Frequently Asked Questions - M420VT VIZIO
User questions about M420VT VIZIO
0 question about this device. Answer the ones you know or ask your own.
Ask a new question about this device
Download the instructions for your Screen in PDF format for free! Find your manual M420VT - VIZIO and take your electronic device back in hand. On this page are published all the documents necessary for the use of your device. M420VT by VIZIO.
USER MANUAL M420VT VIZIO
Congratulations on your new VIZIO High Definition LCD Television purchase. This User Manual covers the following models: M420VT and M470VT, for specific difference between the models please refer to the specification sheets in Chapter 9. Thank you for your support. For maximum benefit of your set, please read these instructions before making any adjustments, and retain them for future reference. We hope you will experience many years of enjoyment from your new VIZIO HDTV High Definition Television.
For assistance, please call 877-MYVIZIO (877-698-4946) or e-mail us at www.VIZIO.com.
To purchase or inquire about accessories and installation services for your VIZIO HDTV, please visit our website at www.VIZIO.com or call toll free at (888) 849-4623.
We recommend you register your VIZIO HDTV either at our website www.VIZIO.com or fill out and mail your registration card. For peace of mind and to protect your investment beyond the standard warranty, VIZIO offers on-site extended warranty service plans. These plans give additional coverage during the standard warranty period. Visit our website or call us to purchase a plan.
Write down the serial number located on the back of your HDTV for easy reference when obtaining warranty support:
Serial #:
Purchase Date
VIZIO is a registered trademark of VIZIO, Inc. dba V, Inc.
HDMI logo and "High Definition Multimedia Interface" are registered trademarks of HDMI Licensing LLC.
Manufactured under license from Dolby Laboratories.
Dolby and the double-D symbol are trademarks of Dolby Laboratories.


and

TruSurround HD and TruVolume technologies are incorporated under license from SRS Labs, Inc.

This product qualifies for ENERGY STAR in the "factory default blame" uses the setting in which power savings will be achieved. Changing the factory default picture setting or enabling other features will increase power consumption that could exceed the limits necessary by Statifying En
THE TRADEMARKS SHOWN HEREIN ARE THE PROPERTY OF THEIR RESPECTIVE OWNERS; IMAGES USED ARE FOR ILLUSTRATION PURPOSES ONLY. VIZIO, THE V LOGO, WHERE VISION MEETS VALUE AND OTHER VIZIO TRADEMARKS ARE THE INTELLECTUAL PROPERTY OF VIZIO INC. PRODUCT SPECIFICATIONS ARE SUBJECT TO CHANGE WITHOUT NOTICE. © 2010 VIZIO INC. ALL RIGHTS RESERVED.
Important Safety Instructions
Your HDTV is designed and manufactured to operate within defined design limits, and misuse may result in electric shock or fire. To prevent your HDTV from being damaged, the following instructions should be observed for the installation, use, and maintenance of your HDTV. Read the following safety instructions before operating your HDTV. Keep these instructions in a safe place for future reference.
- To reduce the risk of electric shock or component damage, switch off the power before connecting other components to your HDTV.
- Unplug the power cord before cleaning your HDTV. A damp cloth is sufficient for cleaning your HDTV. Do not use a liquid or a spray cleaner for cleaning your HDTV. Do not use abrasive cleaners.
• Always use the accessories recommended by the manufacturer to insure compatibility.
- When moving your HDTV from an area of low temperature to an area of high temperature, condensation may form in the housing. Wait before turning on your HDTV to avoid causing fire, electric shock, or component damage.
- Use only with the cart, stand, tripod, bracket, or table specified by manufacturer or sold with your HDTV. When a cart is used, use caution when moving the cart/HDTV combination to avoid injury from tip-over. Do not place your HDTV on an unstable cart, stand, or table. If your HDTV falls, it can injure a person and cause serious damage to your HDTV. Use only a cart or stand recommended by the manufacturer or sold with your HDTV.
- A distance of at least 3 feet should be maintained between your HDTV and any heat source, such as a radiator, heater, oven, amplifier etc. Do not install your HDTV close to smoke. Operating your HDTV close to smoke or moisture may cause fire or electric shock.
- Slots and openings in the back and bottom of the cabinet are provided for ventilation. To ensure reliable operation of your HDTV and to protect it from overheating, be sure these openings are not blocked or covered. Do not place your HDTV in a bookcase or cabinet unless proper ventilation is provided.
- Never push any object into the slots and openings on your HDTV cabinet. Do not place any objects on the top of your HDTV. Doing so could short circuit parts causing a fire or electric shock. Never spill liquids on your HDTV.
- Your HDTV should be operated only from the type of power source indicated on the label. If you are not sure of the type of power supplied to your home, consult your dealer or local power company.
- Do not apply pressure or throw objects at your HDTV. This may compromise the integrity of the display. The manufacturer's warranty does not cover user abuse or improper installations.
- The power cord must be replaced when using different voltage than the voltage specified. For more information, contact your dealer.
- Your HDTV is equipped with a three-pronged grounded plug (a plug with a third grounding pin). This plug will fit only into a grounded power outlet. This is a safety feature. If your outlet
does not accommodate the three-pronged, have an electrician install the correct outlet, or use an adapter to ground your HDTV safely. Do not defeat the safety purpose of the grounded plug.
- When connected to a power outlet, power is always flowing into your HDTV. To totally disconnect power, unplug the power cord.

natural_image
Symbolic icon of a person climbing a ladder inside a circle with a diagonal line (no text or symbols)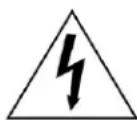
persons.
- The lightning flash with arrowhead symbol with in an equilateral triangle is intended to alert the user to the presence of un-isolated, dangerous voltage within the inside of your HDTV that may be of sufficient magnitude to constitute a risk of electric shock to

- The excia ionapoint within an equilateral triangle is intended to alert the
user to the presence of important operating and servicing instructions in the literature accompanying your HDTV.
- Do not overload power strips and extension cords. Overloading can result in fire or electric shock.
- The wall socket should be installed near your HDTV and easily accessible.
- Only power of the marked voltage can be used for your HDTV. Any other voltage than the specified voltage may cause fire or electric shock
- Do not touch the power cord during lightning. To avoid electric shock, avoid handling the power cord during electrical storms.
- Unplug your HDTV during a lightning storm or when it will not be used for long period of time. This will protect your HDTV from damage due to power surges.
- Do not attempt to repair or service your HDTV yourself. Opening or removing the back cover may expose you to high voltages, electric shock, and other hazards. If repair is required, contact your dealer and refer all servicing to qualified service personnel.
- Keep your HDTV away from moisture. Do not expose your HDTV to rain or moisture. If water penetrates into your HDTV, unplug the power cord and contact your dealer. Continuous use in this case may result in fire or electric shock.
- Do not use your HDTV if any abnormality occurs. If any smoke or odor becomes apparent, unplug the power cord and contact your dealer immediately. Do not try to repair your HDTV yourself.
- Avoid using dropped or damaged appliances. If your HDTV is dropped and the housing is damaged, the internal components may function abnormally. Unplug the power cord immediately and contact your dealer for repair. Continued use of your HDTV may cause fire or electric shock.
- Do not install your HDTV in an area with heavy dust or high humidity. Operating your HDTV in environments with heavy dust or high humidity may cause fire or electric shock.
- Follow instructions for moving your HDTV. Ensure that the power cord and any other cables are unplugged before moving your HDTV.
- When unplugging your HDTV, hold the power plug, not the cord. Pulling on the power cord may damage the wires inside the cord and cause fire or electric shock. When your HDTV will not be used for an extended period of time, unplug the power cord.
• To reduce risk of electric shock, do not touch the connector with wet hands.
- Insert batteries in accordance with instructions. Incorrect polarities may cause the batteries to leak which can damage the remote control or injure the operator.
- If any of the following occurs, contact the dealer:
- The power cord fails or frays.
- Liquid sprays or any object drops into your HDTV.
- Your HDTV is exposed to rain or other moisture.
- Your HDTV is dropped or damaged in any way.
- The performance of your HDTV changes substantially.
VIZIO M420VT User Manual
Television Antenna Connection Protection
External Television Antenna Grounding
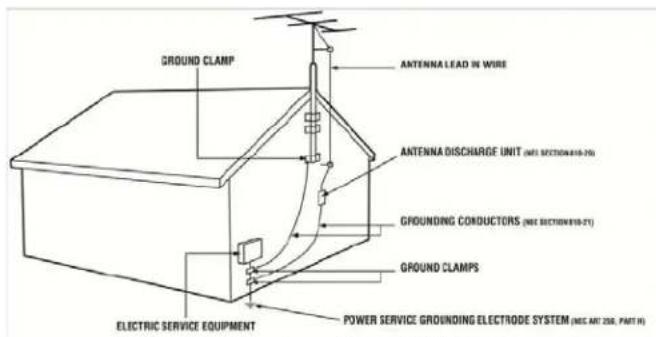
If an outside antenna/satellite dish or cable system is to be connected to the TV, make sure that the antenna or cable system is electrically grounded to provide some protection against voltage surges and static charges.
Article 810 of the National Electrical Code, ANSI/NFPSA 70, provides information with regard to proper grounding of the mast and supporting structure, grounding of the lead-in wire to an antenna discharge unit, size of the grounding conductors, location of antenna discharge unit, connection to grounding
electrodes, and requirements of the grounding electrode.
Lightning Protection
For added protection of the TV during a lightning storm or when it is left unattended or unused for long periods of time, unplug the TV from the wall outlet and disconnect the antenna or cable system.
Power Lines
Do not locate the antenna near overhead light or power circuits, or where it could fall into such power lines or circuits.
Remember, the screen of the coaxial cable is intended to be connected to earth in the building installation.
FCC Bulletin for New TV Owners
The nationwide switch to digital television broadcasting will be complete on June 12, 2009, but your local television stations may switch sooner. After the switch, analog-only television sets that receive TV programming through an antenna will need a converter box to continue to receive over-the-air TV. Watch your local stations to find out when they will turn off their analog signal and switch to digital-only broadcasting. Analog-only TVs should continue to work as before to receive low power, Class A or translator television stations and with cable and satellite TV services, gaming consoles, VCRs, DVD players, and similar products.
ation, please contact the parties distributed below, is appropriate:
FCC (US Federal Communications Commission)
http://www.fcc.gov/
C (1-888-225-5322) Phone: 1-888-CALL-FC
TTY: 1-888-TELL-FCC (1-888-835-5322)
Fax: 1-866-418-0232
E-mail: fccinfo@fcc.gov
NTIA (National Telecommunications and Information Administration)
Listings of US Television Stations: http://www.high-techproductions.com/usTVstations.htm
Note: Your HDTV comes with a built-in tuner capable of processing digital broadcasts. No extra converter box is needed.
Table of Contents
Important Safety Instructions....2
Television Antenna Connection Protection 4
FCC Bulletin for New TV Owners....4
Opening the Package....7
CHAPTER 1 SETTING UP YOUR HDTV....8
Attaching the TV Stand....8
Wall Mounting Your HDTV 9
CHAPTER 2 BASIC CONTROLS AND CONNECTIONS....10
Front Panel....10
Side Panel Controls....10
Rear and Side Panel Connections 11
Remote Control Buttons 13
Programming the Remote Control....14
SEARCHING AUTOMATICALLY FOR THE CODES....14
Remote Control Range....15
VIZIO Remote Control Precautions....15
Inserting the remote control batteries....15
Using a Cable or Satellite Remote 15
CHAPTER 3 CONNECTING EQUIPMENT....16
Connecting Your Cable or Satellite Box 17
Using HDMI....17
Using Component Video 19
Connecting Coaxial (RF) 20
Using Your Antenna or Digital Cable for DTV 20
Using Your Antenna or Cable for TV 20
Using the Antenna or Cable through your VCR....20
Connecting Your DVD Player....21
Using HDMI....21
Using Component Video 23
Using Composite (AV) Video....24
CONNECTING A USB (FAT32 FORMAT) STORAGE DEVICE 24
Connecting an external Receiver/Amp 25
Connecting a PC (Computer) 26
CHAPTER 4 GETTING STARTED....27
CHAPTER 5 USING YOUR HDTV FOR THE FIRST TIME....28
Watching a TV Program 28
Select Input Source 28
Viewing Digital TV Program Information 29
INFO Button 29
CHAPTER 6 YOUR HDTV SETTINGS ....30
Using the HDTV Settings Menu 30
TV Menu 30
Timer Menu 30
Multimedia Menu 30
Wide Menu 30
Audio Menu 31
Picture Menu 31
Parental Menu 31
VIZIO M420VT User Manual
Help Menu 31
CC (Closed Caption) Menu 31
CHAPTER 7 ADJUSTING YOUR HDTV SETTINGS ....32
TV Settings 32
Input 32
Channels 32
Menu Language....33
Date & Time....33
PC Settings....33
Timer Menu 34
Multimedia Menu 34
Wide Menu 36
Audio Menu 38
Picture Menu 39
Parental Menu 41
Help Menu 43
CC (Closed Caption) Menu 43
CHAPTER 8 MAINTENANCE AND TROUBLESHOOTING ....44
Cleaning the TV and Remote Control 44
Troubleshooting Guide 44
Telephone & Technical Support 47
Compliance....47
FCC Class B Radio Interference Statement 48
CHAPTER 9 SPECIFICATIONS ....49
Preset PC Resolutions 51
CHAPTER 10 WARRANTY....52
Index 54
Code for Programming the Remote Control....55
Opening the Package
Your VIZIO HDTV and accessories are carefully packed in a cardboard carton that has been designed to protect it from transportation damage. Now you have opened the carton check that your HDTV is in good condition and that all of the accessories are included.
Due to the weights and sizes of your HDTV models, we strongly advise that you have at least 2 people to unpack and install the HDTV.
The screen can easily be scratched or broken so please handle the product gently and never place the HDTV with the glass facing downwards on a surface without protective padding.
IMPORTANT: Save the carton and packing material for future shipping.
Package Contents
VIZIO M420VT or M470VT
Detachable Stand Base
4 Thumbscrews (to attach Stand)
VIZIO Remote Control
Screen Cleaning Cloth
This User Manual
Quick Setup Guide
Registration Card
2 AA Batteries for the Remote Control

natural_image
Modern flat-screen TV displaying a scenic lake surrounded by lush green hills and small boats (no text or symbols visible)Caution: Do not apply pressure or throw objects at your HDTV. This may compromise the integrity of the display. The manufacturer's warranty does not cover user abuse or improper installations.
HDTV Accessories and Services
Additional certified accessories for your HDTV are sold separately, including:
- Wall mounts
• High Definition cables
• Extra or replacement remote controls - Sound Bars
• Blu-ray DVD Players
VIZIO also offers installation services and extended warranty services for your HDTV.
To purchase or inquire about additional accessories and services for your VIZIO HDTV, visit our website at www.VIZIO.com or call us toll free at 877-MYVIZIO (877-698-4946).
Chapter 1 Setting Up Your HDTV
- Read this user manual carefully before installing your HDTV.
- For the power consumption of your HDTV, please check the specification sheet for your model in Chapter 6. When an extension cord is required, use one with the correct power rating. The cord must be grounded and the grounding feature must not be compromised.
• Install your HDTV on a flat surface to avoid tipping. - For proper ventilation, you must allow a 1" space between the back of your HDTV and the wall.
- Avoid installing your HDTV in places with high humidity, dust, or smoke so you do not shorten the service life of the electronic components.
• Install your HDTV in a level, landscape orientation, with the VIZIO logo at the bottom to prevent poor ventilation and excessive component damage. - If you want to mount your HDTV on the wall, see below for additional information.
- Read this user manual carefully before installing your HDTV.
VIZIO offers professional installation. Contact VIZIO for more information on these services at 877-MYVIZIO (877-698-4946) or www.VIZIO.com.
Attaching the TV Stand
Note: We strongly recommend that two people perform the setup and assembly due to the weight and size of the TV.
To unpack the TV and stand base:
- Remove the remote control, batteries, and power cord from the foam end caps.
- Remove the two top foam end caps.
- Remove the stand base under foam end cap.
- Remove the TV from the box and lay it face down on a clean, flat surface.
Note: Make sure that the surface is free of debris to prevent the TV screen from getting scratched.
natural_image
Close-up of a mechanical component with a circular opening and mounting holes, highlighted by an orange ring (no text or symbols visible)

natural_image
Metallic electronic component with multiple slots and a highlighted circular area (no text or symbols)To attach the TV stand base:
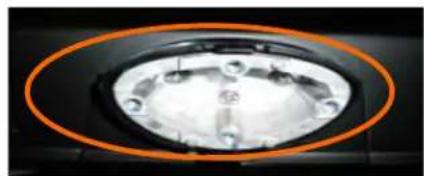
- Line up the stand neck (attached to the TV) with the stand base.

- Push the stand base onto the stand neck.
- On the bottom of the base, insert the included (Qty. 4) thumbscrews and tighten it.
- Move the TV into an upright position.

natural_image
Large CRT television displaying a scenic lake surrounded by dense green forest and hills, with two small boats visible on the water.Caution: Do not apply pressure to the screen or throw objects at your HDTV. This may compromise the integrity of the display. The manufacturer's warranty does not cover user abuse or improper installations.
To remove the base stand:
- Unplug all cables from the HDTV.
- Place your HDTV face down on a soft and flat surface (blanket, foam, cloth, etc) to prevent any damage to the TV.
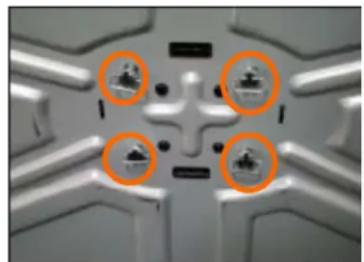
- Remove the total of eight (4) screws holding the base stand to the TV.
- Carefully remove the stand, pulling the base towards you.
natural_image
Close-up of a mechanical component with four circular annotations highlighting features (no readable text or symbols)To find the perfect mount for your HDTV, browse VIZIO's certified mount selection at www.VIZIO.com or call directly 888-VIZIOCE (888-849-4623).
Wall Mounting Your HDTV
Your HDTV can be mounted on the wall for viewing. If you choose to mount your HDTV on the wall, follow the instructions below.
- Write down the serial number located on the back of your HDTV in the space provided on page 1 to have it handy if you need to call for support.
- Remove the stand base and neck:
a. Disconnect the cables from your HDTV.
b. Place your HDTV face down on a soft, flat surface to prevent damage to the screen.
c. Remove the TV stand base per above instructions.
natural_image
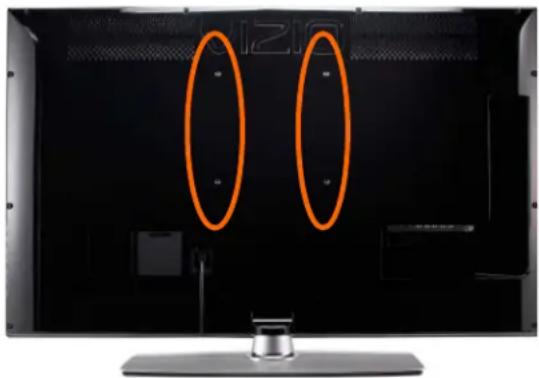
Front view of a modern flat-screen TV with two orange oval overlays on the back panel (no visible text or symbols)- Mount your HDTV on the wall:
a. Attach your HDTV to a wall mount
(sold separately) using the mounting holes in the back panel of your HDTV (see illustration at the right).
b. Read the instructions that came with your specific wall mount to properly hang your HDTV.
| M420VT/M470VT Wall Mounting Specifications | |
| Screw Size | • M6 |
| Screw Length | • 10 mm |
| Screw Pitch | • 1.0mm |
| Hole Pattern | • VESA standard 200mm x 200mm |
NOTE: If using wall mounts different from our certified ones, please verify that they are UL/CSA/ETL listed wall mount brackets with suitable weight specs.
Chapter 2 Basic Controls and Connections
Front Panel
POWER 'VIZIO' LIGHT— The VIZIO name lights white when powered on and it will get dimmer when powered off.
REMOTE CONTROL SENSOR – This is the window through which all of the remote control signals pass to the sensor. Point the remote control directly at this window for the best response to the remote signal.
Side Panel Controls
(💡) – Press this button once to power your TV on. Press the button again to power the TV off.
MENU – This button activates the On Screen Display (OSD). If a sub-menu is active, pressing this button will return to the previous menu level.
CH ▲▼ – Use these buttons to step up or down the TV channels. While the OSD is active, these buttons function as up and down controls in the OSD menus.
VOL ◀▶ – Use these buttons to increase or decrease to the speaker volume. While the OSD is active, these buttons function as left and right controls in the OSD menus.
INPUT (ENTER) – Repeated pressing of this button steps through the input sources in the following sequence: DTV/TV, AV, COMPONENT, HDMI1, HDMI2, HDMI3, HDMI4, RGB and Multimedia. Once you have stepped through the entire sequence, you will return to the beginning of the sequence.
Additionally, when the OSD is active, press this button to exit from the OSD menu. When the OSD is not active, this button will show the current input selections.

natural_image
Computer monitor displaying a scenic lake surrounded by lush green hills and a small boat on the water (no text or symbols visible)

natural_image
Close-up of a black rectangular object with a vertical black stripe and small white markings on the left side (no readable text or symbols)
natural_image
Close-up of a black vertical electronic device with an orange oval highlight on its side (no text or symbols visible)Note: When using the A/V input (usually, a composite signal) the video signal (yellow color coded cable) need to be connected to the green jack connector
Rear and Side Panel Connections

| No. | Connection Description | |
| 1 | RGB PC /PC Audio | Connect the video from a computer here. Connect the audio (1/8 in. mini plug stereo connector) from a computer here. |
| 2 | COMPONENT (YPb/CbPr/Cr with Audio L/R) | Connect your primary source component (like a DVD Player or set top box) here. From left to right, use green for Y, blue for Pb (or Cb), and red for Pr (or Cr) inputs. Use white for left audio and red for right audio. When using the A/V input (usually, a composite signal) the video signal (yellow color coded cable) need to be connected to the green jack connector. |
| 3 | DTV/TV (Cable/Antenna) | Connect to an antenna or digital cable for digital TV. For digital TV stations in your area visit www.antennaweb.org. |
| 4 | SERVICE | For factory service only. Use of this input for any purpose other than factory authorized service will void the manufacturer's warranty of this equipment. |
| 5 | USB | Connect a storage source (format FAT32) JPEG, MP3 and Video files (like a hard drive or thumb drive or card reader). It is recommended to back up your important document files as a precaution to prevent lost of data. |
| 6 | HDMI | Best connection in the field to transmit digital Audio and Video content. Connect an audio/video source for digital video such as a DVD multimedia player, a digital set-top box for cable or satellite receiver system. Your TV comes with four HDMI inputs. |
| 7 | SPDIF | Connect an SPDIF Optical cable from your HDTV to your home theater system to play digital audio through your home speakers. |
Note: When using the A/V input (usually, a composite signal) the video signal (yellow color coded cable) need to be connected to the green jack connector. Expect to see a black/white video in the Component input, if it is selected by accident.
Certified HDMI and HDMI-DVI cables are available for purchase from www.VIZIO.com or by calling 888-VIZIOCE (888-849-4623)
Remote Control Buttons
SET — Use to program a different device (DVD, AUDIO SYSTEM, TV and CABLE/SATELLITE BOX) to be controlled by this control.
POWER ( ⏻ ) — Press to turn the TV on from the Standby mode. Press it again to return to the Standby mode.
DVD, AUDIO, TV and CABLE — Press the button of the equipment you would like to control using this remote control. Make sure that the remote has been set up the code to the specific device.

RECORD, PAUSE, PLAY and STOP —
Only PAUSE (pause the slideshow), PLAY (start the slideshow) and STOP (stop the slideshow) are active buttons for your HDTV. The RECORD button does not operate your TV.

SKIP BACK, BACKWARDS, FAST
FORWARD and SKIP FORWARD — These buttons are used in the Multimedia feature. They are also function keys used by other devices, mainly DVD and DVR devices. Skip Back allows jumping to previous chapter in DVD and DVR. Backwards (Rewind in the old VCRs) allows reviewing previous scenes. Fast Forward allows to reviewing the next scenes. Skip Forward allows jumping to next chapter in DVD and DVR.
HDMI — Press to select the HDMI input. Press repeatedly to cycle through the HDMI inputs.
COMP — Press to select the Component input.
AV — Press to select the AV or Composite input.
TV — Press to select the TV or RF input.

Color-Coded Programmable Keys — These
buttons are keys which could be customized with most used commands, they usually perform cable, satellite and teletext functions.
LIST — This button is most commonly used by cable and satellite boxes to display the list of your recorded programs. This key allows opening the channels list OSD of your HDTV.
INPUT — Press to cycle through the various devices connected to your TV (called Inputs). The inputs cycle in the following sequence: DTV/TV, AV COMPONENT, HDMI 1, HDMI 2, HDMI 3, HDMI 4, RGB and USB. Once you have stepped through the entire sequence, you will return to the beginning.
EXIT— Press to exit from open menus.
MENU — Press it to bring up the OSD menu on your HDTV.Up (▲),
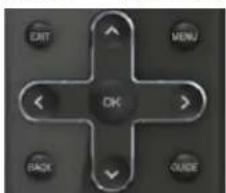
Down (▼), Left (◀) or Right (▶) navigation buttons — Press to navigate open menus,
adjust other TV settings such as Brightness and Contrast, or turn menu options On and Off.
OK —When the OSD menu is up, pressing this key select the highlighted option in the menu.

BACK — When use with the TV, this button behaves in the same way as the LAST button. It is used as a functional key on the set-top box for cable and satellite services with DVR features. It allows skipping back to previous prerecorded programs.
GUIDE — This button does not function with your TV, follow the INFO description to see programming information.
VOL ▲/▼— Press it to either increase or decrease the volume level of the sound.
MEDIA — Use to select viewing of pictures, play music and watch video on a USB device connected to the USB port.
LAST — Press to recall the previously viewed channel. When the Menu is active, press this button repeatedly to go to the previous levels of the OSD.

— Press to turn the sound on and off.
CH ▲/▼— Press to change the channels up or down.
Number Button Pad — Press to select a channel or enter a password.
INFO — Press to display program and channel information.

(DASH) — Press to insert a dash between the main and sub-
channels. For example, channel 28-2 would be selected by the button sequence 2, 8, DASH, 2.

Programming the Remote Control
The included remote control can be programmed to control different devices: DVD players, Audio Players, TV and Set-Top Boxes. Please, refer to the tables at the end of this User's manual for the different codes to match the different manufacturers including the codes for VIZIO preferred accessories and equipment systems. The following procedure is required to do the programming:
-
Find the matching code and write it down, some makers may have more than one code. It may require trying all of them to find the one matching your specific model.
-
Press and release the key matching your equipment: DVD, AUDIO, TV or CABLE.
-
Press and hold down the SET key until the light indicator blinks twice.
-
Release the SET key, and press the 5-digits code you had written down on Step 1.
-
The light indicator should blink twice again after you had entered the last digit, it means that the remote control has accepted the code. At this point, you should try to use the power button to turn off and on the equipment.
-
Try different keys to confirm that your accessory or equipment responds properly. If it is not the case and other codes are applicable, please try Steps 1 through 5 to the next code until the correct code is found.
Searching Automatically for the Codes
If the device does not respond to the remote control after trying all listed codes for the brand, or if the brand is not listed, then try searching for code as follows:
- Turn on the device.
- Press and hold the device key for 3 seconds. LED indicator comes ON. Release key.
- Press and release PLAY key, the indicator goes OFF during pressing and comes ON after release.
- Aim the remote control at the device. Press either the channel up or channel down key to start searching.
- If the device turns off a working code has been found. Press OK key to save this code and exit the code search. The LED indicator flashes slowly 4 times and it goes OFF.
Remote Control Range
- The effective range of the remote control is approximately 26 feet (8 meters) from the front of the receiver window and 13 feet (4 meters) when 30^ to the left and right, 20^ up and down.
- Point the remote control at the remote control sensor on the front of your HDTV to send commands.
- Do not place any obstacles between the remote control and the remote control sensor.
VIZIO Remote Control Precautions
- Keep the remote dry and away from heat sources and humidity.
- If your HDTV responds erratically to the remote control or does not respond at all, check the batteries. If the batteries are low or exhausted, replace them with fresh batteries.
- When not using the remote control for a long period of time, remove the batteries.
- Do not take the batteries apart, heat them, or throw them into a fire.
- Do not subject the remote control to undue physical stress, such as striking or dropping it.
- Do not attempt to clean the remote control with a volatile solvent. Wipe it with a clean, damp cloth.
- Do not mix old and new batteries or different types of batteries.
Inserting the remote control batteries
- Remove the battery cover on the back of the remote control.
- Insert two AA batteries (included) into the remote control, making sure you match the (+) and (-) symbols on the batteries with the (+) and (-) symbols inside the battery compartment.
- Re-attach the battery compartment cover.
Precautionary Tips for Inserting the Batteries:
- Only use the specified AA batteries.
- Do not mix new and old batteries. This may result in cracking or leakage that may pose a fire risk or lead to personal injury.
- Inserting the batteries incorrectly may also result in cracking or leakage that may pose a fire risk or lead to personal injury.
- Dispose of the batteries in accordance with local laws and regulations.
- Keep the batteries away from children and pets.
Using a Cable or Satellite Remote
Your VIZIO remote uses codes 11758 and 10178 to work your LCD HDTV. To use a cable or satellite remote to work the LCD HDTV, refer to your cable or satellite remote user guide for more information on how to program the remote. If your cable or satellite remote uses a 5-digit code (like most Direct TV units), first try 11758 and then, if that does not work, 10178. If your cable or satellite remote uses a 4-digit code, try 1758 and then 0178 as an alternative. If your cable or satellite remote uses a 3-digit code (EchoStar or Dish Network for example), use code 627.
Cleaning the Housing and Remote Control
- Use a soft cloth for cleaning.
- If the housing or remote control is seriously contaminated, use a soft cloth moistened with diluted neutral cleaner to clean the display. Wring water out of the cloth before cleaning to prevent water from penetrating into the housing. Wipe the display with a dry cloth after cleaning.
Chapter 3 Connecting Equipment
Your HDTV has six different ways to connect your video equipment from a basic connection to the most advanced for digital signals.
| Connection Quality (type) | Connector Description | |
| Best (digital) |  | HDMI (High-Definition Multimedia Interface). It is the first and only industry-supported, uncompressed, all-digital audio/video interface. HDMI provides an interface between any audio/video source, such as a set-top box, DVD player, or A/V receiver and an audio and/or video monitor, such as a digital television (DTV), over a single cable. |
| Best (digital) |  | DTV Coaxial RF. When used for MPEG2 encoded bit streams from ATSC broadcast programming, this input takes advantage of the High Definition content. TV Coaxial RF. This is the connection for standard NTSC TV using antenna or cable. |
| Good (analog) | ||
| Best (analog) | 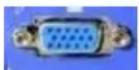 | RGB PC (VGA). This video input has separate red, green and blue color components. The signal carries horizontal and vertical sync information on the green signal. This is most commonly used for PC input. |
| Better (analog) | 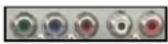 | Component. The video signal is separated into three signals, one containing the black-and-white information and the other two containing the color information. This enhancement over S-Video takes advantage of the superior picture provided by progressive scan DVD players and HDTV formats. |
| *Good (analog) | 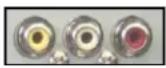 | Composite. The complete video signal is carried through this single pin connector. This is the most commonly used video connection. |
| Best (digital) | 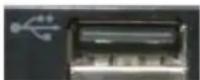 | USB (Universal Serial Bus). USB is an interface port designed to connect storage devices holding data (FAT32 format) files without a need to power off the host (TV) unit. |
*Note: You can use your HDTV Component input to accept A/V signal (Composite) from a source with A/V out, please plug your video signal (yellow connector) into the Component input (green connector) and match up the audio connectors (R and L) for the sound. Expect to see a black/white video in the Component input, if it is selected by accident.
Connecting Your Cable or Satellite Box
Using HDMI
Cable and Satellite Boxes that have a HDMI digital interface should be connected to the HDMI input of the LCD HDTV for optimal results.
Note: To maintain the display quality, use a VIZIO certified HDMI cable. Lengths are available up to 10 Meters. See www.vizio.com or call 1-888-VIZIOCE (1-888-849-4623) for details.
Connecting your Cable or Satellite Box (Best)
- Turn off the power to the LCD HDTV and HDTV Set-Top Box.
- Connect a HDMI cable to the HDMI output of your HDTV Set-Top Box and the other end to the HDMI Input at the side of the LCD HDTV.
- Turn on the power to the LCD HDTV and HDTV Set-Top Box.
- Select HDMI using the INPUT button on the remote or side of the LCD HDTV, or directly by pressing the HDMI button on the Remote Control.


Note:
- The HDMI input on the LCD TV supports High-bandwidth Digital Content Protection (HDCP). HDCP encrypts the transmission between the video source and the digital display for added security and protection.
- If you are already using the HDMI1 input for another component, or you do not want to use the HDMI1 input for the Set-Top Box, you can connect the Set-Top Box to the HDMI2, HDMI3 or HDMI4 input.
- Refer to your HDTV Set-Top Box user manual for more information about the video output requirements of the product or consult your cable or satellite operator.
For Cable or Satellite Boxes with DVI:
-
Turn off the power to the LCD HDTV and HDTV Set-Top Box.
-
Using a HDMI-DVI cable, connect the DVI end to your HDTV Set-Top Box and the HDMI end to the HDMI2 Input at the side of the LCD HDTV.
-
Using an audio cable (1/8' stereo connector on the going into the TV), connect the cable to the audio output connectors associated with the DVI output on your HDTV Set-Top Box and connect the other end to the audio
associated with the RGB input (blue area) at the rear of the LCD HDTV.


Turn on the p4. ower to the LCD HDTV and HDTV Set-Top Box.
- Select HDMI2 using the INPUT button on the remote o pressing the HDMI button on the Remote Control.
r side the MCDrHIDtctly by
Note:
- The HDMI input on the LCD TV supports High-bandwidth Digital Content Protection (HDCP). HDCP encrypts the transmission between the video source and the digital display for added security and protection.
- If you are already using the HDMI2 input for another component, or you do not want to use the HDMI2 input for the Set-Top Box, you can connect the Set-Top Box to the HDMI1, HDMI3 or HDMI connection. The LCD TV will recognize the DVI connection and obtain audio information from the audio connectors on the rear of the TV.
- Refer to your HDTV Set-Top Box user manual for more information about the video output requirements of the product or consult your cable or satellite operator.
Using Component Video
Connecting your Cable or Satellite Box (Better)

- Turn off the power to the LCD HDTV and HDTV Set-Top Box.
- Connect the Y (green color) connector on your HDTV Set-Top Box to the corresponding Y (green color) connector in the Component input at the rear of the LCD HDTV.
- Connect the PbCb (blue color) connector on your HDTV Set-Top Box to the corresponding Pb (blue color) connector in the Component input at the rear of the LCD HDTV.
- Connect the PrCr (red color) connector on your HDTV Set-Top Box to the corresponding PrCr (red color) connector in the Component input at the rear of the LCD HDTV.
- Using an audio cable (white and red connectors), connect the cable to the audio output connectors associated with the Component output on your HDTV Set-Top Box and connect the other end to the audio connectors associated with the Component input at the rear of the LCD HDTV.
- Turn on the power to the LCD HDTV and HDTV Set-Top Box.
- Select Component using the INPUT button on the remote or side of the LCD HDTV, or directly by pressing the COMP button on the Remote Control.
Note:
- Refer to your HDTV Set-Top Box user manual for more information about the video output requirements of the product or consult your cable or satellite operator.
Connecting Coaxial (RF)
Using Your Antenna or Digital Cable for DTV
- Turn off the power to the LCD HDTV.
- Connect the coaxial (RF) connector from your antenna or digital cable to the DTV/TV CABLE/ANTENNA connector at the rear of the LCD HDTV.
- Turn on the power to the LCD HDTV.
- Select TV using the INPUT button on the remote or side of the LCD HDTV, or directly by pressing the TV button on the Remote Control.

Note:
- Not all digital TV broadcasts are High Definition (HD). Refer to the program guides, or consult your cable, satellite or TV station operator.
- Digital broadcasts are not available in all areas. Refer to www.antennaweb.org for detailed information.
- Make sure the antenna and coaxial cable are correctly grounded.
Using Your Antenna or Cable for TV
- Turn off the power to the LCD HDTV.
- Connect the coaxial (RF) connector from your antenna or cable to the DTV/TV CABLE/ANTENNA connector at the rear of the LCD HDTV
- Turn on the power to the LCD HDTV.
- Select TV using the INPUT button on the remote or side of the LCD HDTV, or directly by pressing the TV button on the Remote Control.

Using the Antenna or Cable through your VCR
- Turn off the power to the LCD HDTV and VCR.
- Connect the "Output to TV", "RF Out" or "Antenna Out" connector on the rear of your VCR to the DTV/TV CABLE/ANTENNA connector at the rear of the LCD HDTV.
- Turn on the power to the LCD HDTV and VCR.
- Select TV using the INPUT button on the remote or side of the LCD HDTV, or directly by pressing the TV button on the Remote Control.

Note: If you have an off-air antenna or cable TV, connect it to the "Antenna In" connector on the rear of your VCR.
Connecting Your DVD Player
You have several options for connecting your DVD player to your HDTV: HDMI, Component and Composite inputs. Based on your home theater configuration, you can decide which option is the right one for you.
Using HDMI
DVD players that have a digital interface such as HDMI (High Definition Multimedia Interface) should be connected to the HDMI input of you HDTV for optimal results.
Note: To maintain the display quality, use a VIZIO certified HDMI cable. Length is available up to 10 meters. See www.VIZIO.com or call 1-888-VIZIOCE (1-888-849-4623) for details.
Connecting your DVD Player (Best):
- Turn off the power to the LCD HDTV and DVD player.
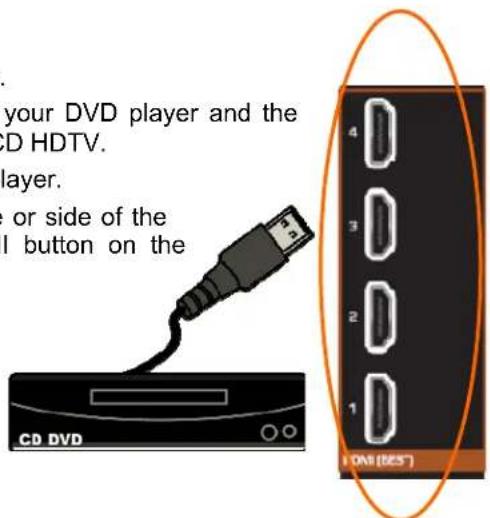
- Connect a HDMI cable to the HDMI output of your DVD player and the other end to the HDMI Input at the side of the LCD HDTV.
- Turn on the power to the LCD HDTV and your DVD player.
- Select HDMI using the INPUT button on the remote or side of the LCD HDTV, or directly by pressing the HDMI button on the Remote Control.
Note:
- If you are already using the HDMI1 input for another component, or you do not want to use the HDMI1 input for the DVD player, you can connect the DVD player to the HDMI2, HDMI3 or HDMI4 connection.
- Refer to your DVD player user manual for more information about the video output requirements of the product.
For DVD Players with DVI:
- Turn off the power to the LCD HDTV and DVD player.
- Using a HDMI-DVI cable, connect the DVI end to your DVD player and the HDMI end to the HDMI Input at the side of the LCD HDTV.
- Using an audio cable (1/8' stereo connector on the going into the TV), connect the cable to the audio output connectors associated with the DVI output on your DVD player and connect the other end to the audio associated with the RGB input (blue area) at the rear of the LCD HDTV.
- Turn on the power to the LCD HDTV and your DVD player.
- Select HDMI-Side using the INPUT button on the remote or side of the LCD HDTV, or directly by pressing the HDMI button on the Remote Control.
Note:
- If you are already using the HDMI1 input for another component, or you do not want to use the HDMI input for the DVD Player, you can connect the DVD player to the HDMI2, HDMI3 or HDMI4 input. The LCD TV will recognize the DVI connection and obtain audio information from the audio connectors on the rear of the TV.
- Refer to your DVD player user manual for more information about the video output requirements of the product.

Using Component Video
Connecting your DVD Player (Better):
-
Turn off the power to the LCD HDTV and DVD player.
-
Connect the Y (green color) connector on your DVD player to the corresponding Y (green color) connector in the Component input at the rear of the LCD HDTV.
-
Connect the PbCb (blue color) connector on your DVD player to the corresponding PbCb (blue color) connector in the Component input (yellow color area) at the rear of the LCD HDTV.
-
Connect the PrCr (red color) connector on your DVD player to the corresponding PrCr (red color) connector in the Component input at the rear of the LCD HDTV.
-
Using an audio cable (white and red connectors), connect the cable to the audio output connectors associated with the Component output on your DVD player and connect the other end to the audio connectors associated with the Component input at the rear of the LCD HDTV.
-
Turn on the power to the LCD HDTV and DVD player.
-
Select Component using the INPUT button on the remote or side of the LCD HDTV, or directly by pressing the COMP button on the Remote Control.


Note:
- Refer to your DVD player user manual for more information about the video output requirements of the product.
Using Composite (AV) Video
Connecting your DVD Player (Good):
-
Turn off the power to the LCD HDTV and DVD player.
-
Connect the Video (yellow color) connector on your DVD player to the Video Y (green color) connector in the Component input of

connectors at the rear of the LCD HDTV.
-
Connect the R (red color) and L (white color) audio connectors on your DVD player to the corresponding R (red color) and L (white color) audio input connectors in the Component input at the rear of the LCD HDTV.
-
Turn on the power to the LCD HDTV and DVD Player.
-
Select AV using the INPUT button on the remote or side of the LCD HDTV, or directly by pressing the AV button on the Remote Control.

natural_image
Three colored electrical connectors (yellow, red, white) with black wires, no text or symbols visible
Notes:
- Refer to your DVD player user manual for more information about the video output requirements of the product.
- Expect to see a black/white video if Component input is selected by accident.
Connecting a USB (FAT32 Format) Storage Device
- Connect a thumb drive, directly inserting it into the USB connection or by using an extension (if thumb drive housing is too big to have it fit in place) cable. Connecting a portable hard drive or card reader to this input is also possible
- If your HDTV has been turned off, please turn it on.
- The TV will start reading the contents in the USB device automatically to make sure of compatibility of files (MP3 or JPEG format).
- Please follow the instructions in the Multimedia section to either see the pictures (picture by picture or as a slideshow) or listen to music (single song or all selected songs) or watch video.

Note: This input is also used as factory service port. Please back up important files to prevent lost of data. Format your device to FAT32 and load your picture files, and enjoy your viewing. A high speed FAT32 storage device is also needed; preferable, new and memory emptied device for a better performance at least a 1Gb of memory device must be used.
Connecting an external Receiver/Amp
If your sound system has a SPDIF (optical) digital audio input you can connect it to the optical SPDIF OUT at the rear of the TV. This is active when receiving audio with the programs being viewed no matter what input is being used.

-
Turn off the power to the HDTV and Receiver/Amp.
-
Using an audio cable (optical cable), connect the cable to the audio input connectors on the Receiver/Amp and connect the other end to the SPDIF OUT audio optical connector at the side of the LCD HDTV.
-
Turn on the power to the HDTV and Receiver/Amp.
-
Then press the MENU button on the remote control to bring up the On-Screen Display (OSD) menu.
-
Press ◀ button on the remote control to select the Audio menu.
-
Press OK on the remote control to enter the Audio submenu. Press the ▼ button to highlight SPEAKERS.
-
Press ◀ or ▶ key to select Off so that the sound from the TV will now be routed through your Receiver/Amp system.
-
Press EXIT key to exit the menu display.

Note:
• Refer to your Receiver/Amp user manual to select the corresponding audio input.
• The audio output is not amplified and cannot be connected directly to external speakers.
Connecting a PC (Computer)

- Turn off the power to the LCD HDTV and Personal Computer.
- Connect a 15-pin D-Sub RGB (VGA) cable to the RGB output of your computer and the other end to the RGB PC input (blue area) at the rear of the LCD HDTV.
- Using a 1/8" stereo cable, connect the Audio Out on your computer to the RGB PC Audio input (blue area) at the rear of the LCD HDTV.
- Turn on the power to the LCD HDTV and Personal Computer.
- Select RGB using the INPUT button on the remote or side of the LCD HDTV.
Note:
- For a better picture quality when connecting a personal computer through RGB PC, set your computer timing mode to VESA 1920x1080 at 60HZ.
- Refer to your computer user manual for more information about the video output requirements of the product.
- A RGB (VGA) cable and stereo mini jack cable are not included and can be purchased at an electronics store.
Chapter 4 Getting Started
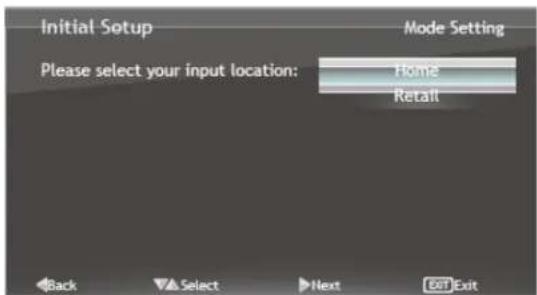
Your HDTV has a built-in setup Wizard that runs when you turn on your TV for the first time. Follow the on-screen directions to easily setup your new HDTV.
- Insert the batteries into the remote control.
- Plug the attached power cord into an AC wall socket.
- Connect your devices to your HDTV (see Chapter 6 for detailed steps).
- Turn on your TV. The Setup Wizard will automatically play and guide your thru the initial setup of your HDTV. Use the Arrow and MENU/OK buttons to navigate through the setup App. During the setup process you will:

- Choose your Menu language
- Select the TV to Home Mode for the best picture and most efficient energy usage.
- Select the signal input (Antenna or Cable)
- Scan your TV channels (unless you have a Cable/Satellite Set-Top Box)



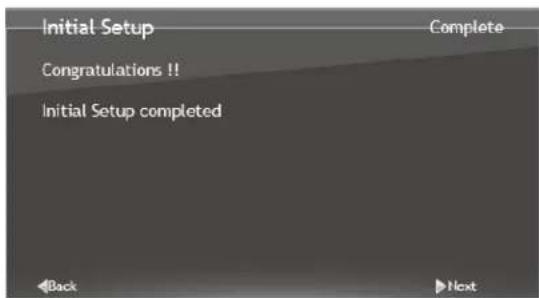
Chapter 5 Using your HDTV for the first time
When pressing the MENU or OK button, your HDTV displays the following OSD main menu.
Watching a TV Program
Before you start watching TV, please make sure that any cable, satellite or off-air antenna connections are secure. Also, verify that the AC power cord is plugged into a correctly grounded electrical outlet or surge protector.
- Press the power button on the remote control.
- Select the input to which your device is connected that provides TV programming (e.g. TV, HDMI, COMP).
Note: You should be able to see a picture. If you do not, make sure that all of your HDTV connections are secure and you have selected the correct video input source. Each press of the INPUT button on the remote control will cycle through the available inputs. Press the button until the input associated with the device you want to view is shown.

- When using the TV input, press the channel buttons on the remote control or the CH ▲ or ▼ buttons to change the channel.
Note: The Channel buttons and on the remote control will not work if you are watching a program using HDMI, Component, or AV (Composite video) inputs.
Select Input Source
Select the input source for your HDTV by pressing the INPUT button on the remote control or the side of your TV. Pressing this button will cycle you through the following options: DTV/TV, AV, COMPONENT, HDMI1, HDMI2, HDMI3, HDMI4, RGB, and MULTIMEDIA.
Turn on your device and you will see a picture on your HDTV. If there is no picture, make sure you have selected the correct input on your HDTV.
Note: If the selected device is RF connected, your HDTV needs to be in TV mode and on either channel 3 or channel 4 matching the channel which has been selected on the back of the VCR, Cable Box, External TV Tuner or Satellite Receiver. Please refer to the User's Manual of the respective equipment for details.

Viewing Digital TV Program Information
INFO Button
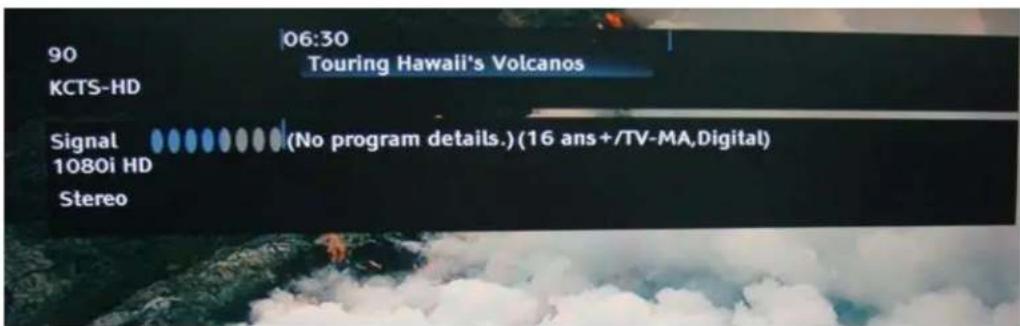
When you press the INFO button, an information header is shown over the picture for a few seconds. Each press of the INFO button will display more information about the program:
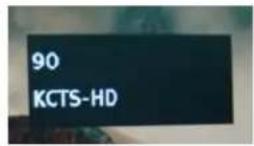
Press a second time, you will see the following display:

Press a third time and the display should be as shown below
Chapter 6 Your HDTV Settings
Using the HDTV Settings Menu
The remote control or the buttons on the front of the TV can control all the function settings. The HDTV Settings Menu allows you to adjust contrast, brightness and other settings. The TV will save changes made to the settings, even if the TV is turned off.
The HDTV Settings Menu consists of several menu options. The main menu options may vary depending on your selected input source.
Note: Some of the main menu options may have additional submenus, for example, the TV settings submenu for PC Settings.
- Press the MENU button on the remote control. The HDTV OSD menu opens.
- Use the navigation keys around the OK button to select one of the menu options.
- Press OK to select the option or feature you want to adjust.
- Once the menu option is displayed, press arrow Up or Down Navigation buttons to select one of the items to adjust.
- Press OK to select, and then press Up, Down. Left or Right Navigation buttons to adjust the selection.
- Press LAST once to return to the previous screen when finished making adjustments.
- Press EXIT to close the HDTV Settings Menu.
TV Menu
When first selected the OSD shows the TV menu as the default option for your HDTV, this menu provides the following options: Input, Channels, Menu Language, Date & Time and PC Setting.
Timer Menu
Select the timer to turn off the TV in 30, 60, 90, 120 minutes.
Multimedia Menu
This menu provides the user with the different parameters and options to make viewing photos more enjoyable. The options under this menu are: Photo, Music, Video, Sort, File and Thumbnail Size.
Wide Menu
Select how the picture displays on the screen. As you select through the options, you will see the screen adjusting to the different sizes. The options vary depending on the selected input and the TV program, the following are the different view modes: Normal, Wide, Zoom, Panoramic and Stretch.
Audio Menu
This menu provides all options to be adjusted to set the sound preferences from the built-in speakers. Under this menu the options are: SRS TruSurround HD™, SRS TruVolume™, Equalizer Settings, Bass & Treble, Balance, Speakers, Digital Audio Out, Analog MTS, Digital MTS and Reset Audio Mode.
Picture Menu
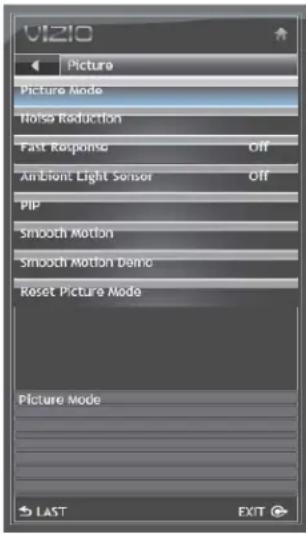
This menu provides the options to customize your preferences on the looks and feel of the content of the signal being viewed. The following are the different settings and options under this menu: Picture Mode, Noise Reduction, Fast Response, Ambient Light Sensor, PIP, Smooth Motion, Smooth Motion Demo and Reset Picture Mode. If changes beyond these options are required, Picture Mode needs to be selected as Custom.
Parental Menu
This menu provides the user with the options to restrict the viewing of programs or content according to preset values and ratings provided by the signal being watched. If a Set-Top box is being used, these options could be part of the box settings. Please refer to your cable/satellite set-top box user manual for more information.

Help Menu
Under this menu you find the options to obtain the TV system information and the resetting of the TV settings to factory defaults.
CC (Closed Caption) Menu
This menu is used to setup the closed caption content (being received with the signal) according to your preferences. The following are the options under this menu: Analog Closed Caption, Digital Closed Caption and Digital CC Style.
Chapter 7 Adjusting Your HDTV Settings
The following is a more detailed description of the different OSD (On-Screen Display) menu settings and adjustments regarding the options and features which are part of your HDTV. Starting with the default TV Menu and then in sequence according to the main OSD menu.
It is recommendable to use your remote control navigation buttons to select the parameters to be adjusted.

Up (▲), Down (▼), Left (◀) or Right (▶) navigation buttons — Press to navigate open menus, adjust other TV settings such as Brightness and Contrast, or turn menu options On and Off.
MENU — Press to bring up the OSD menu.
OK — When the OSD menu is up, pressing this
key select the highlighted option in the menu.
TV Settings
When you first turned on your HDTV you set up your TV for DTV / TV channels using the Initial Setup screens. If you did not do this or if your setup has changed, you can do this from the TV menu.
Input
- Input Source: Select the Input Source for your HDTV. Choose from DTV/TV, AV, COMPONENT, HDMI1, HDMI2, HDMI3, HDMI4, RGB and Multimedia.
- Input Naming: Use this option to rename the input being watched to your preferred name; i.e. DTV/TV could be called Cable or Antenna.
Channels
-
Signal Source: Select the type of signal (Antenna or Cable) being fed into the HDTV. This option is only for over the air signal or cable service without set-top box.
-
Master List: When selected this option displays the list of channels to which your TV can be tuned. It also allows selecting all channels (Mark All) or deselected all channels (Unmark All) as well as to select only the digital (Digital Only) channels.
-
Additional Scan: Selecting Additional Scan to On (activated) allows to scan for more channels without losing the channels already in the master list. This option is handy when relocating the TV or repositioning the direction of the antenna.
-
Scan Channels: If the original channel scanning had been skipped, this option allows you to perform this step. This option is also used after Additional Scan has been set to On.


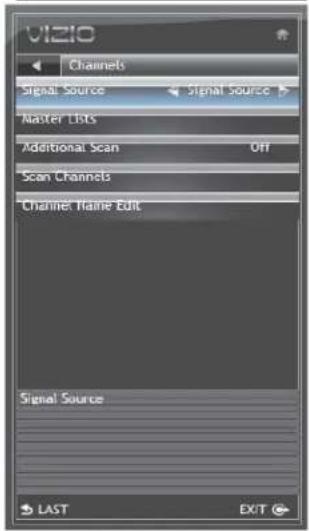
- Channel Name Edit: If it is desired to change the name of the channel to a more comprehensive or favorite name, this option provides you with a choice. A small keyboard will be displayed and using the navigation keys, you rename the channel to your preference.
Menu Language
This option allows changing the language being used on the OSD menu to either English or French or Spanish. English is the default language.
Date & Time
- Time Zone: Select this option to set the correct time zone for you area, this will ensure that the correct time is shown when the INFO button on the remote control is pressed. The time zones are as follows: Newfoundland, Atlantic, Eastern, Central, Mountain, Pacific, Alaska, Hawaii, Indiana and Arizona.
- Daylight Saving: When enabled, this option will automatically display the correct time in the zones in which Daylight Saving time applies.
- Auto Update: If you decide to manually change the date and time, set this option to Disable. This will allow the navigation buttons to be used to make the changes.

PC Settings
Select if you are connecting to your PC (computer). This option can only be selected when you are in the RGB input.
- Auto Sync: The TV will automatically position and tune the display for optimum performance.
- Horiz. Position: Adjust the horizontal (left/right) position of the image.
- Vertical Position: Adjust the vertical (up/down) position of the image.
- Fine Tune: Fine tunes the image for crisp content over the entire display area.
Timer Menu
Select this option to have the HDTV turning off automatically using increments of 30 minutes, the options are: Off, 30 minutes, 60 minutes, 90 minutes and 120 minutes. The default being Off.
Multimedia Menu
When using a USB device with multimedia files as data, the following options and settings are available for you to use.
Note: The connected USB device must:
- Have a minimum 1 GB of memory.
- Be formatted as FAT32.
• Have a write speed higher than 10Mb/sec (USB1.1 or higher). - Contain no other files.
Sort
Select to change the order of viewing the files in the desired folder.
Photo
- Date: Select it to organize your photos according to the date they were taken.
- Name: Using this option will organize your photos according the file name in alphabetical order.
Music
- Name: To organize your music files according to their names, please use this option.
- Genre: To organize your music files according to their genre, please use this option.
- Artist: If the artist information is available, using this option would organize your music files accordingly.
- Album; If the album information is known, using this option would organize your files according to that information.


VIDEO
- Type: To organize your video files according to their type, please use this option.
- Date: To organize your video files according to their date, please use this option.
- Name: To organize your files in alphabetical order, please use this option.
File
Select this option to organize your folders and photos.
- List: This option shows your photos, music and video files in the folder based on their names.
- Thumbnail: This option displays your photos, music and video files as thumbnails, making it easier to select them.
Thumbnail Size
Select this option to change the size of the thumbnails being displayed, the sizes are Small, Medium and Large.
Wide Menu
The following table shows the different screen modes and display sizes according to the content being sent to the HDTV.
| Screen Mode | |||||
| Type | 480p/480i(4:3) | 480i/480p/720p(16:9) | 1060i/1080p(16:9) | RGB(4:3) | RGB(16:9) |
| Content | 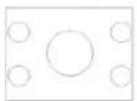 |  | 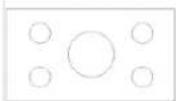 |  |  |
| Normal |  |  | 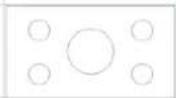 |  |  |
| Wide |  | 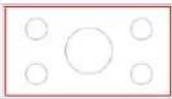 |  |  |  |
| Zoom |  |  | 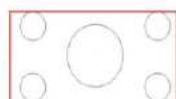 |  |  |
| Panoramic |  |  |  |  |  |
| Stretch |  |  |  | 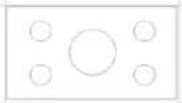 |  |
Note: The red lines show the video signal being overscanned.
Normal SD(4:3) with cropping 3% and maintain aspect. SD/HD(16:9) with no cropping. RGB with no cropping.
For signal with Letter Box, 4:3 signal --the H cropping: 3%. V cropping: 14% (reference only) 16:9 signal --the H cropping: 14%. V cropping: 14% (reference only)
Panoramic H & V overscan cropping 3% and stretched out full screen(Only support for SD(4:3))
Wide
SD (4:3) H & V with cropping 3%. SD/HD (16:9) H & V with cropping 2.5%
Stretch

ing 12.5% V overscan with port for SD/HD(16:9)) screen with cropping 12.5%
The following paragraphs describe in detail the differences of the Aspect Ratio being processed by the TV:
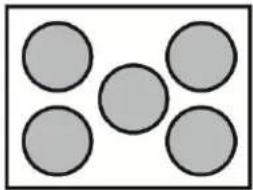
Normal Mode
The original 4:3 aspect ratio (1.33:1 source) is preserved, so black bars are added to the left and right of the display image. Standard TV broadcasts are displayed with a 4:3 Aspect Ratio. Movies in 4:3 Aspect Ratio may be referred to as pan-and-scan or full frame.
natural_image
Five gray circles arranged in a V-shape within a rectangular border (no text or symbols)Wide Mode
When watching a standard broadcast or full-frame movie in this mode, the display image is stretched proportionately to fill the TV screen. When watching a widescreen (1.78:1 source) program or movie, the display image fills the TV screen. If you are watching a widescreen (1.85:1 or 2.35:1 source) program or movie, there will still be black bars at the top and bottom of the screen.

natural_image
Five gray circles arranged in a 2x2 grid, no text or symbols presentZoom Mode
When watching a widescreen (1.78:1, 1.85:1, or 2.35:1 source) program or movie, the display image is zoomed proportionally to fill the width of the screen. The top and bottom are cut off to remove most of the source material's black bars. This mode is good for programs or movies with sub-titles.

natural_image
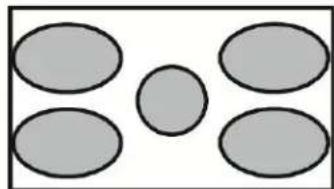
Five gray circles arranged in a 2x2 grid within a rectangular border (no text or symbols)Panoramic Mode
When watching a standard broadcast or full frame movie in this mode, the 4:3 Aspect Ratio (1.33:1 source) display image is stretched horizontally on the left and right sides to fill the TV screen. The center of the image is not stretched.
natural_image
Simple diagram with five gray oval shapes arranged in a grid (no text or symbols)Stretch Mode
When watching a widescreen program (1.78:1 source) with black bars on the sides, the display image will stretch to fill the TV screen. People will appear wider than they really are. If you are watching a widescreen (1.85:1 or 2.35:1 source) program or movie, there will still be black bars at the top and bottom. This mode is available only when watching a widescreen program.

natural_image
Five gray oval shapes arranged in a staggered pattern within a rectangular frame (no text or symbols)Audio Menu
Your HDTS/TsuDiviseptimized by the use of SRS TruSurround HD™ and SR different options gate available if you decide to explore the differences in HD Au
^TM technologies,
uSurround HD™ SRS Tr
This technology creates an immersive, feature-rich surround sound experience from two speakers, complete with rich bass, high frequency detail and clear dialog.
SRS TruVolume™
This technology provides the listener with a comfortable and consistent volume level, preventing the sudden fluctuations of the sound level. VIZIO recommends turning TruVolume off when listening to music content.
Note: WhenoSRS TruSurround HD is ON, Equalizer adjustments are available.
qualizer Settings E
To select this option it requires that the SRS TruSurround HD features to be Off (disable), the preset choices are: Off, Classical, Disco, Flat, Jazz, Pop and Rock.

Bass & Treble
These options allow setting the values of the low and high tones to your preference. Keep in mind that they are adjustable as long as the SRS feature is Off.
Balance
Using balance allows you to distribute the level of the sound evenly or either to the left or right audio channels.
Speakers
Selecting this option will allow to set the internal speakers either Off or On, especially, if the audio is being routed through your Home Theater System.
Digital Audio Out
If you are planning to process the audio out of your HDTV through a Home Theater System, it is recommended the use of this output and select either Auto or Force PCM option.
Analog MTS (Multichannel Television Sound)
This feature allows hearing the second audio program (SAP) when broadcast as well as to listen to simulated stereo sound if it is being used. The choices are Mono, Stereo and SAP.
Digital MTS
This option has the choices of English, French and Spanish languages.
Reset Audio Mode
Use this option when if you do not want to keep any changes made to the audio settings. It will reset the HDTV back to the factory defaults.
Picture Menu
This menu provides the options to customize your preferences on the looks and feel of the content of the signal being viewed.
Picture Mode
Use this option to adjust the different parameters of the content to satisfy your personal preferences. There are five preset modes: Home, Game, Movie, Retail and Photo which values cannot be adjusted and a sixth mode called Custom Mode which allows you to make the necessary adjustments.
Custom Mode
If selected, the following options and parameters are available to be adjusted to your preferences:
-
Brightness: Use this option to adjust the black levels. If the brightness is too low you will not be able to see the detail in darker parts of the picture and if the brightness is too high the picture will look washed out.
-
Contrast: Use this option to adjust the white levels. If the contrast is too low the picture will look washed out and if the contrast is too high you will not be able to see any detail in the bright parts of a picture.
-
Color: Use this option to adjust the saturation of colors in the image or picture.
-
Tint: Use this option to adjust the skin or flesh tone for a realistic appearance. If people's faces look too orange try reducing the level of color first.
-
Sharpness: Use this option to adjust the edge enhancement of the picture. It does not produce detail that otherwise does not exist. This adjustment is helpful when viewing Standard Definition sources.
-
Backlight: Use this option to adjust the brightness of the screen without affecting the Black and Contrast levels.
-
Adaptive Luma: Use this option to control the Average Picture Level (APL) which will prevent the overall picture from looking too light.
-
Color Enhancement: Use this option to increase the picture reproduction performance by reducing oversaturation of certain colors and improving flesh tones.
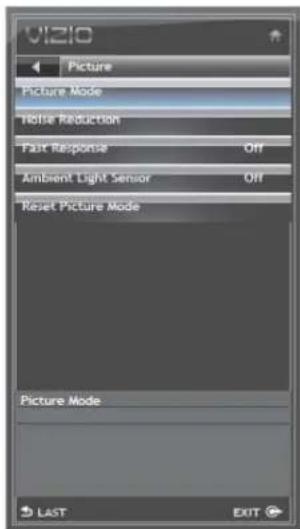


- Color Temperature: Use this option to control the "warmness" or "coolness" of the white areas of the picture. Choose from Custom, Cool, Normal, or PC. Normal is the setting for television broadcasting. Custom allows you to set a preset calibrated for a white point to suit individual preferences. Cool produces a blue-hued image. PC sets the white point at the established setting for a computer display. Each preset may also be adjusted for a customized setting.
- DCR (Dynamic Contrast Ratio): Use this option to improve the black level performance and increase contrast ratio.
- Reset Picture Setting: By selecting this option, all changes or values applied to the different features would be brought back to original or factory default values, without affecting any other parameter or feature settings.
Noise Reduction
This feature diminishes picture artifacts caused by the digitizing of image motion content that may be present in the picture. Choose from Off, Low, Medium, or High.
Fast Response
This feature is mainly used when the signal originates from a game or computer device.
Note: When Fast Response is On, PIP function is not available.
Ambient Light Sensor
Choose On or Off. When set to On, your HDTV will automatically adjust to light changes in the room.
PIP (Picture-in-Picture)
The option on PIP allows viewing two different programs or contenting simultaneously. The choice for the sound (which program would be listened) depends on user preference. This feature also allows having two different programs in same size screens (POP), the display is split in half.
Note: When PIP function is On, Fast Response, Rating Enable and Smooth Motion options are not available.
Smooth Motion ^tm
This feature suppresses motion judder. Judder is often observed as a 'stuttering' of the image when the camera pans across a scene, or there is horizontal motion in the scene. Film is typically shot at 24 frames per second. Any time that film is displayed at a frame rate that is not an even multiple of 24, judder will result. For presentation on a TV, film goes through a process and comes out at frame-rate of 30 or 60, which are those used in TV.
Smooth Motion Demo
This option splits the screen in half, displaying the picture without Smooth Motion processing on the left half of the screen, and with Smooth Motion processing on the right half of the screen. This allows you to determine the best results for your settings. Press the EXIT key to exit demo.
Reset Picture Mode
Use this option to return all Picture Settings which have been changed to original or factory default values, when it is selected, a second screen appears asking to verify and confirm the resetting.
Parental Menu
This menu has all the different options to restrict certain channel and program viewing, this can be done by turning on the Parental Control. Selected programs, movies and channels can then be made available only after an authorized password has been entered and accepted by the TV. When this feature is selected, the first screen will ask for the default password or PIN, which is 0000. Then the following options will appear:
Rating Enable
Select from ON or OFF. If set to OFF, you will not be able to set the US TV, US Movie, Canadian English, or Canadian French Ratings.
Note: PIP feature is not available when Rating Enable is On.
Channel Locks
Block individual channels from being displayed.
USA-TV
Press OK to block (locked) or allow (unlocked) channels by the following US TV ratings:
TV-Y – All children
TV-Y7 – Older children
TV-G – General audience
TV-PG – Guidance suggested
TV-14 – Strongly cautioned
TV-MA – Mature audience

You can also customize the TV ratings for the following content:
A – All sub-ratings
FV – Fantasy violence
D – Sexual dialog
L - Adult language
S – Sexual situations
V - Violence

USA-Movie
Press the OK button to block (locked) or allow (unlocked) channels by the following US Movie ratings:
G - General audience
PG – Parental guidance suggested
PG-13 – Recommended for children 13 years of age or older
R - Mature audience
NC-17 – No one under 17 years of age
X – No one under 17 years of age
CAN-English
Press the OK button to block (locked) or allow (unlocked) channels by the following Canadian English ratings:
C - Children
C8+ – Children 8 years or older
G – General Programming, suitable for all audiences
PG – Parental guidance
14+ – Viewers 14 years or older
18+ – Adult programming
CAN-French
Press the OK button to block (locked) or allow (unlocked) channels by the following Canadian French ratings:
G – General audience
8 ans+ - General - not recommended for young children
13 ans+ – Not suitable for children under 13 years of age
16 ans+ – Not suitable for under 16 years of age
18 ans+ – Adults only

Alt Rating Region
This option applies to locations with rating systems different from ratings in standard regions.
Block Unrated Shows
This option allows blocking programming that does not have a rating.
User Control Lock
Use this option to restrict the use of the HDTV by locking the mechanical control buttons on the side of the TV.
Change PIN (Password)
Enter a new, 4-digit password using the number buttons on the remote control. Enter it a second time to confirm you entered it correctly

Notes: 1. If you decide to change the password, make sure you write down and store the new password in a secure place. The Reset Locks feature does NOT reset the password.
- All option adjustments can be done only if the Rating Enable option is set to ON.
Help Menu
Under this menu the following options are available:
System Info
Display information about your TV, such as signal format and current software version.
System Reset
This option gives you two choices on resetting the values.
- Start Setup Wizard: Use this function to return to the Initial Setup menu. Please refer to the Getting Started section for more information. This option will remove all previously scanned channels.
- Reset All Settings: Return all Picture and Audio settings to factory default. A screen will come up to confirm your selection or to cancel it.
Note: Both choices of System Reset will display a confirmation screen after being selected.

CC (Closed Caption) Menu
To select the options in the CC sub-menu, press the OK button or the right navigation button. A new menu will be displayed showing the following CC settings:
Analog Closed Caption
The CC feature is available when watching regular analog (NTSC) TV. Select from CC1, CC2, CC3, CC4, or Off. Closed Caption for regular TV is usually CC1 or CC2.
Digital Closed Caption
The CC feature is available when watching digital TV. Select from CS1, CS2, CS3, CS4, CS5, CS6, or Off.
Digital CC Style
The Digital CC Style feature is available when watching digital TV. Select either As Broadcaster or Custom. If Custom is selected then you can customize the way Closed Caption is displayed. The options available are:

• Caption Style (custom or as broadcast).
Note: the following options will only be available if Caption Style is set to Custom.
- Text Size (letter size)
- Color (text color)
- Opacity (color of the background where Closed Caption is displayed)
- Background Color (color of the background where Closed Caption is displayed)
• Background Opacity (sets the transparency of the background)
• Window Color (color of the area where characters are displayed)
• Window Opacity (transparency of the area where characters are displayed)
Chapter 8 Maintenance and Troubleshooting
Cleaning the TV and Remote Control
- Remove the TV power cable from the wall outlet.
- Use a soft cloth moistened with diluted neutral cleaner to clean the TV and remote control. VIZIO recommends using an HDTV cleaning solution which can be purchased at any major retailer.
- Wring liquid out of the cloth before cleaning to prevent water from penetrating into the housing.
- Wipe the TV and remote control with a dry cloth after cleaning.
Important:
- Do not use volatile solvent (such as toluene, rosin and alcohol). Such chemicals may damage the housing, screen glass, and remote control, and cause labeling to peel.
- The screen glass is very fragile. Do not scrape it with any sharp object.
- Do not press or tap the screen to avoid cracking.
Troubleshooting Guide
If the TV fails or the performance changes dramatically, check the display in accordance with the following instructions. Remember to check the peripherals to pinpoint the source of the failure. If the display still fails to perform as expected, contact the VIZIO for assistance by calling 1-877-MYVIZIO (698-4946) or e-mail us at techsupport@VIZIO.com.
| General TV Problems Solution | |
| Receive the error message“No Signal.” | Press the INPUT button on the remote control to select a different input source.If you are using cable connected directly to the TV or an antenna, scan for channels from the Tuner menu in the on-screen menu. |
| No power. | Make sure the power button is ON.Make sure the AC power cord is firmly connected to a live outlet.Plug another electrical device to the power outlet to verify that the outlet is working. |
| No sound. | Press Volume (Up) on the remote control.Press MUTE on the remote control to make sure that MUTE is not ON.Check your audio settings. The audio may be set to SAP, or the speakers are set to off.Check the audio connections of external devices that may be connected to your HDTV.If you are using an antenna, the signal strength of the channel may be low.Make sure your antenna is connected securely to the TV and move the antenna around the room or close to a window. |
| Black screen. | Make sure the power button is ON (in the case of indoor antenna use).Press the INPUT button on the remote control to select a different input source.Check the connections of external devices that may be connected to yourHDTV. |
| Power is ON but there is no image on the screen. | Make sure all cables attached to your HDTV are connected to the correct output on the external device.Adjust brightness, contrast or backlight.Press the INPUT button on the remote control to select a different input source. |
| Wrong or abnormal colors appear. | Check Color and Tint settings in Picture Menu.Reset Picture settings.Check the video cables to make sure they are securely connected.If you are using an antenna, the signal strength of the channel may be low.Make sure your antenna is connected securely to the TV and move the antenna around the room or close to a window (in the case of indoor antenna use). |
| Control buttons do not work. | Press only one button at a time. |
| Remote control does not work. | Point the remote control directly at the remote sensor on your TV.Remove any obstacles between the remote control and the remote sensor.Replace dead batteries with new ones.Make sure you have selected TV mode on the remote control. |
| There appear to be image quality issues. | If you are using an antenna, the signal strength of the channel may be low.Make sure your antenna is connected securely to the TV and move the antenna around the room or close to a window (in the case of indoor antenna use).For best image quality, view HD wide-screen programs where possible.If HD content is not available view “Standard Definition” from a digital source.Standard, analog TV will always be noticeably inferior to HD because your digital flat panel TV has video that is many times better than old TV so you will see interference and deficiencies you did not know you had. |
| You cannot see a picture. | Make sure the power button is ON.Make sure AC power cord is firmly connected to a live outlet.Press the INPUT button on the remote control to select a different input source.Check the connections of external devices that may be connected to your HDTV.If you are using an antenna, the signal strength of the channel may be low.Make sure your antenna is connected securely to the TV and move the antenna around the room or close to a window (in the case of indoor antenna use). |
| You see a distorted picture or hear unusual sound. | You may be getting interference from electrical appliances, cars, motorcycles, or fluorescent lights. If you have not mounted it on the wall, try moving your HDTV to another location to see if this is the cause of the problem. |
| The picture has abnormal patterns. | Check the connections of external devices that may be connected to your HDTV.Make sure the specifications of external devices meet the specifications of your HDTV (i.e. resolution).If you are using an antenna, the signal strength of the channel may be low.Make sure your antenna is connected securely to the TV and move the antenna around the room or close to a window (in the case of indoor antenna use). |
| The display image does not cover the entire screen. | If you are in RGB mode (Computer), make sure that H-Size and V-Position in the on-screen menu are set correctly.If you are using TV, AV or Component with 480i input, press MENU button on the remote control and scroll to Wide on OSD menu. |
| You can see a picture but you | Press Volume (Up) on the remote control. |
| cannot hear sound. | Press MUTE on the remote control to make sure that MUTE is not ON.Check your audio settings. The audio may be set to SAP, or the speakers are set to off.Check the audio connections of external devices that may be connected to your HDTV. |
| The TV has pixels (dots) that are always dark or colored. | Your HDTV is manufactured using an extremely high level of precision technology, however, sometimes some pixels of your HDTV may not display. Pixel defects within industry specifications are inherent to this type of product and do not constitute a defective product. |
| You see “noise” or “trash” on the screen. | When your HDTV’s digital capabilities exceed a digital broadcast signal, the signal is up-converted (increased) to match your TV’s display capabilities. Up-converting can cause noise or trash.If you are using an antenna, the signal strength of the channel may be low. Make sure your antenna is connected securely to the TV and move the antenna around the room or close to a window (in the case of indoor antenna use). |
| You switch to a different input and the screen size changes. | The TV remembers the viewing mode from the last time you used a particular input (AV, Component, HDMI and TV). |
| Tips for High-Definition Users. | Your HDTV is an ideal platform for viewing High Definition Content.Best image quality will be achieved by HDMI. The next best is Component, followed by Composite.Due to variances in broadcast practices, it is possible some image distortions can occur. |
| Tips for Letterbox Content Users. | Some Letterboxed (or “Widescreen”) versions of DVD movies are formatted for standard 4:3 Televisions. Your HDTV has the ability to expand this content so the entire screen is filled at the expense of image accuracy. |
| Media Viewer Problems | Solution |
| USB device is not recognized. | Make sure the device is correctly inserted.Make sure the device is FAT32Make sure it contains the supported files.Make sure files are .jpg or .jpeg, MP3 and video format. |
| Image is interrupted or distorted. | Make sure the device is correctly inserted.Make sure that the file complies with the supported format, bit rate and/or profile. Also check the file for damage.Some files that comply with the supported format may not play back or display properly. |
| Slideshow doesn’t start. | Make sure the viewer isn’t in pause. |
Telephone & Technical Support
Products are often returned due to a technical problem rather than a defective product that may result in unnecessary shipping charges billed to you. Our trained support personnel can often resolve the problem over the phone. For more information on warranty service or repair, after the warranty period, please contact our Support Department at the number below.
Customer support and quality service are integral parts of VIZIO's commitment to service excellence.
For technical assistance contact our VIZIO Technical Support Department via email or phone.
Email: techsupport@VIZIO.com
(877) 698-4946 Fax: (949) 585-9563
Hours of operation: Monday - Friday: 6 am to 9 pm
Saturday – Sunday: 8 am to 4 pm
Please have your VIZIO model number, serial number, and date of purchase available before you call.
VIZIO
Address:
39 Tesla
Irvine, CA 92618, USA
Telephone: (888) 849-4623 (949) 428-2525 Fax: (949) 585-9514
Web: www.VIZIO.com
Compliance
Caution: Always use a power cable that is properly grounded. Please use the AC cords listed below for each area.
USA: UL
Canada: CSA
Germany: VDE
UK: BASE/BS
Japan: Electric Appliance Control Act
FCC Class B Radio Interference Statement
NOTE: This equipment has been tested and found to comply with the limits for a Class B digital device, pursuant to Part 15 of the FCC Rules. These limits are designed to provide reasonable protection against harmful interference in a residential installation. This equipment generates uses and can radiate radio frequency energy, and if not installed and used in accordance with the instructions, may cause harmful interference to radio communications. However, there is no guarantee that interference will not occur in a particular installation. If this equipment does cause harmful interference to radio or television reception, which can be determined by turning the equipment off and on, the user is encouraged to try to correct the interference by one or more of the following measures:
- Reorient or relocate the receiving antenna.
- Increase the separation between the equipment and receiver.
-
Consult the dealer or an experienced radio/TV technician for help.
-
Connect the equipment into an outlet on a circuit different from that to which the receiver is connected.
Notice:
- The changes or modifications not expressly approved by the party responsible for compliance could void the user's authority to operate the equipment.
- Shielded interface cables and AC power cord, if any, must be used in order to comply with the emission limits.
- The manufacturer is not responsible for any radio or TV interference caused by unauthorized modification to this equipment. It is the responsibilities of the user to correct such interference.
Chapter 9 Specifications
Product specifications may change without notice or obligation.
| M420VT Specifications | |
| Panel 42" Diagonal (42.02" Diagonal viewing), 16:9 Aspect Ratio | |
| Resolution 1920 x 1080 pixels | |
| Pixel (Dot) Pitch 0.4845mm x 0.4845mm | |
| Display Compatibility 1080p (FHDTV) | |
| Colors | 1.06 Billion |
| Brightness | 450 ^2 (typical)/m |
| Contrast with DCR 100,000 :1 | |
| Response Time 5ms (typical) | |
| Viewing Angle Horizontal and Vertical 178° (typical) | |
| Inputs 1x Coaxial RF (ATSC/QAM/NTSC), 4x HDMITM** with HDCP, 1x Component YPbPr plus Stereo Audio, 1x RGB PC plus Stereo Audio (1/8" stereo jack), 1xUSB | |
| Outputs 1x Optical Audio Out (SPDIF), | |
| Features | HDMI v1.3, ATSC/Clear QAM Tuner, Noise Reduction, CC, V-Chip 2.0, 3D Comb Filter, Freeze, Picture Enhancement, Dynamic Contrast Ratio Technology, MPEG-2 Decoding via DTV input, NTSC Video decoding via Video (AV or Component), Support Motion Enhancement and Motion Correction, Progressive Scan Video via HDMITM**, Component, HDTV via HDMITM**, Component or RGB (Set-Top Box required), Computer 640x480, 800x600, 1024 x 768, 1920 x 1080 via RGB or 1920 x 1080 via HDMI, Color Temperature Adjustments of 6500K/9300K/11500K, Independent RED/GREEN/BLUE adjustments for Color Temperature Fine Tuning, Built-in SRS (TruSurroundHDTM/TruVolumeTM) Audio Technology, HDMI V.1.3, Dolby Digital Decoding, |
| Speakers 2 x 10Watts speakers, '82 +/-3dB@1m/W | |
| Panel Life | 60,000 hours to half the original brightness |
| Power | |
| Input | IEC Connector for direct power line connection |
| Voltage Range | 120VAC at 60HZ |
| Power Consumption | 86.6W, <1W Standby |
| Environmental Conditions | |
| Operating | Temperature: 5°C~35°C, Relative Humidity: 20~80%, Altitude: 0~6,561 ft |
| Non-Operating | Temperature: -20°C~50°C, Relative Humidity: 10~90%, Altitude: 0~40,000 ft |
| Dimensions | 39.75" W x 26.73" H x 9.92" D with stand; 39.75" W x 26.25" H x 1.76" D without stand |
| Net Weight | 44.09lbs with stand, 37.48lbs without stand |
| Gross Weight | 54.01lbs |
| Certifications | UL, FCC Class B, Energy Star 4.0, ATSC Spec A/65, EIA/CEA-766-A |
| M470VT Specifications | |
| Panel 47" Diagonal (46.96" Diagonal viewing), 16:9 Aspect Ratio | |
| Resolution 1920 x 1080 pixels | |
| Pixel (Dot) Pitch 0.5415mm x 0.5415mm | |
| Display Compatibility 1080p (FHDTV) | |
| Colors | 1.06 Billion |
| Brightness | 450 ^2 (typical)d/m |
| Contrast with DCR 100,000 :1 | |
| Response Time 5ms (typical) | |
| Viewing Angle Horizontal and Vertical 178° (typical) | |
| Inputs 1x Coaxial RF (ATSC/QAM/NTSC), 4x HDMITM** with HDCP, 1x Component YPbPr plus Stereo Audio, 1x RGB PC plus Stereo Audio (1/8" stereo jack), 1xUSB | |
| Outputs 1x Optical Audio Out (SPDIF), | |
| Features | HDMI v1.3, ATSC/Clear QAM Tuner, Noise Reduction, CC, V-Chip 2.0, 3D Comb Filter, Freeze, Picture Enhancement, Dynamic Contrast Ratio Technology, MPEG-2 Decoding via DTV input, NTSC Video decoding via Video (AV or Component), Support Motion Enhancement and Motion Correction, Progressive Scan Video via HDMITM**, Component, HDTV via HDMITM**, Component or RGB (Set-Top Box required), Computer 640x480, 800x600, 1024 x 768, 1920 x 1080 via RGB or 1920 x 1080 via HDMI, Color Temperature Adjustments of 6500K/9300K/11500K, Independent RED/GREEN/BLUE adjustments for Color Temperature Fine Tuning, Built-in SRS (TruSurroundHDTM/TruVolumeTM) Audio Technology, HDMI V.1.3, Dolby Digital Decoding, |
| Speakers 2 x 10Watts speakers, '82 +/-3dB@1m/W | |
| Panel Life | 60,000 hours to half the original brightness |
| Power | |
| Input | IEC Connector for direct power line connection |
| Voltage Range | 120VAC at 60HZ |
| Power Consumption | 86.6W, <1W Standby |
| Environmental Conditions | |
| Operating | Temperature: 5°C~35°C, Relative Humidity: 20~80%, Altitude: 0~6,561 ft |
| Non-Operating | Temperature: -20°C~50°C, Relative Humidity: 10~90%, Altitude: 0~40,000 ft |
| Dimensions | 39.75" W x 26.73" H x 9.92" D with stand; 39.75" W x 26.25" H x 1.76" D without stand |
| Net Weight | 44.09lbs with stand, 37.48lbs without stand |
| Gross Weight | 54.01lbs |
| Certifications | UL, FCC Class B, Energy Star 4.0, ATSC Spec A/65, EIA/CEA-766-A |
Preset PC Resolutions
M420VT/M470VT Preset PC Resolutions
If connecting to a PC through the RGB PC input, set the TV timing mode to VESA 1920x1080 at 60Hz for better picture quality (refer to the graphic card's user guide for questions on how to set this timing mode). See the table below for the factory preset resolutions.
| Refresh (Hz) | Resolution | H.Freq (kHz) | H.Sync | V.Freq (Hz) | V.Sync | Pixel Freq (MHz) |
| 60 | 640 x 480 | 31.469 | N | 59.94 | N | 25.175 |
| 75 | 640 x 480 | 37.5 | N | 75 | N | 31.5 |
| 70 | 720 x 400 | 31.46 | N | 70.08 | P | 28.32 |
| 60 | 800 x 600 | 37.897 | P | 60.317 | P | 40 |
| 75 | 800 x 600 | 46.875 | P | 75 | P | 49.5 |
| 60 | 1024 x 768 | 48.363 | N | 60.004 | N | 65 |
| 70 | 1024 x 768 | 56.476 | N | 70.069 | N | 75 |
| 75 | 1024 x 768 | 60.023 | N | 75.026 | N | 78.75 |
| 60 | 1920 x 1080 | 66.587 | P | 59.934 | P | 138.5 |
Chapter 10 Warranty
ONE-YEAR LIMITED WARRANTY ON PARTS AND LABOR
Covers units purchased as new in United States and Puerto Rico Only
VIZIO provides a warranty to the original purchaser of its products against defects in materials and workmanship for a period of one year of non-commercial usage and ninety (90) days of commercial use. If a VIZIO product is defective within the warranty period, VIZIO will either repair or replace the unit at its sole option and discretion.
To obtain warranty service, contact VIZIO Technical Support via email: TechSupport@VIZIO.com or via phone at 877 MY VIZIO (877.698.4946) from 6:00AM to 9:00PM Monday through Friday and 8:00AM to 4:00PM Saturday and Sunday, Pacific Time, or visit www.VIZIO.com. Proof of purchase in the form of a purchase receipt or copy thereof is required.
Parts and Labor
There will be no charge for parts or labor during the warranty period. Replacement parts and units may be new or recertified at VIZIO's option and sole discretion. Replacement parts and units are warranted for the remaining portion of the original warranty or for ninety (90) days from warranty service or replacement, whichever is later.
Types of Service
Units 30" or larger will usually be serviced in-home. In-home service requires complete and easy access to the unit and does not include de-installation or re-installation of the product. However, in some cases, it may be necessary to send the unit to a VIZIO service center. VIZIO will cover the transportation charges to and from the same customer location.
Units less than 30" must be sent to a VIZIO service center. VIZIO is not responsible for transportation costs to the service center, but VIZIO will cover return shipping to the customer. PRE-AUTHORIZATION IS REQUIRED BEFORE SENDING ANY UNIT IN FOR SERVICE.
Any returns to VIZIO's service centers must utilize either the original carton box and shipping material or a replacement box and material provided by VIZIO. VIZIO technical support will provide instructions for packing and shipping the unit to the VIZIO service center.
Limitations and Exclusions
VIZIO's one-year limited warranty only covers defects in materials and workmanship. Items not covered include but are not limited to cosmetic damage, normal wear and tear, misuse, signal issues, power surges, and damages from shipping, acts of God, any sort of customer misuse, installation, customer modifications, adjustments, and set-up issues. Units with unreadable or removed serial numbers, "image burn-in", and routine maintenance are not covered. This warranty does not cover products sold "AS IS", "FACTORY RECERTIFIED", or by a non-authorized reseller.
THERE ARE NO EXPRESS WARRANTIES OTHER THAN THOSE LISTED OR DESCRIBED ABOVE. ANY IMPLIED WARRANTIES, INCLUDING ANY IMPLIED WARRANTY OF MERCHANTABILITY AND FITNESS FOR A PARTICULAR PURPOSE, SHALL BE LIMITED IN DURATION TO THE PERIOD OF TIME SET FORTH ABOVE. VIZIO'S TOTAL LIABILITY FOR ANY AND ALL LOSSES AND DAMAGES RESULTING FROM ANY CAUSE WHATSOEVER SHALL IN NO EVENT EXCEED THE PURCHASE PRICE OF THE DISPLAY. VIZIO SHALL NOT BE RESPONSIBLE FOR LOSS OF USE, COMMERCIAL LOSS, LOST REVENUE OR LOST PROFITS, OR OTHER INCIDENTAL OR CONSEQUENTIAL DAMAGES. SOME STATES DO NOT ALLOW LIMITATIONS ON HOW LONG AN IMPLIED WARRANTY LASTS OR THE EXCLUSION OF INCIDENTAL OR CONSEQUENTIAL DAMAGES, SO THE ABOVE LIMITATIONS OR EXCLUSIONS MAY NOT APPLY TO YOU. THIS WARRANTY GIVES YOU SPECIFIC LEGAL RIGHTS, AND YOU MAY ALSO HAVE OTHER RIGHTS, WHICH VARY FROM STATE TO STATE. THIS WARRANTY IS SUBJECT TO CHANGE WITHOUT NOTICE. CHECK www.VIZIO.com FOR THE MOST CURRENT VERSION.
Personal Data
If your VIZIO product is capable of storing personal data and other information, ALL CONTENTS AND INFORMATION WILL BE DELETED IN THE COURSE OF SOME IN-HOME AND ALL SHIP-IN WARANTY SERVICE. If this occurs, your product will be restored to you configured as originally purchased. You will be responsible for restoring all applicable data and passwords. Recovery and reinstallation of user data is not covered under this Limited Warranty. In order to protect your personal information, VIZIO recommends that you always clear all personal information from the unit before it is serviced, regardless of the servicer.
ZERO BRIGHT PIXEL DEFECT GUARANTEE
This policy covers “zero bright pixels” defects for the duration of the limited “ONE YEAR WARRANTY” on select new product purchases. To determine if this guarantee applies to your product, refer to the “DETAILS” tab of the model’s product information page (www.VIZIO.com) or look for the “zero bright pixel” guarantee on the box.
Index
16:9 26
4:3 26
Accessories....7
Adjustments Volume....10
Advanced Adjustments 26
Antenna....18
Aspect Ratio....26
Blackbars 26
Cable Box Connecting....19
Cleaning 39
Coaxial connection Satellite box....24
Coaxial Connection cable TV 24
Component Connector....18
Composite Connector ....18
Computer Equipment Connecting....25
Connecting Computer 25
Connecting Equipment Cable....19
DVD 22
Home Theater 25
Rear Panel Connections ...... 11
Satellite Box 19
Contents....7
Controls Front Panel....10
DVD Player Connecting....22
DVI Cable Box 20
DVD Player 22
Satellite Box 20
Getting Started....15
Grounding 4
HDMI....18
Help Menu
System Info 38
Home Theater
Connecting....25
INFO Button 17
Input Source Choosing....16
Inputs Antenna....4 Connectors....18
Maintenance of TV 39
Parental Controls Rating Enable 37
Photo Menu 26,30
Remote Control....13
Batteries....13
Precautions 13
Range 13
RGB 18
Safety Instructions 2
Satellite Box Connecting....19
Setting up....8
Specifications 44
S-Video 18
Technical Support 42
Troubleshooting 39
TV Menu 26
TV Settings App....26 Input Menu....26
Timer Menu 26,30
Wide Menu 26
TV Settings Menu Input Source Menu....28
TV Stand Attaching 8
Wall mounting 9
Watching TV Getting your Programs....16 Program Information....17
Wide 26
Code for Programming the Remote Control


- Important Safety Instructions
- Television Antenna Connection Protection
- External Television Antenna Grounding
- Lightning Protection
- Power Lines
- FCC Bulletin for New TV Owners
- Table of Contents
- CHAPTER 1 SETTING UP YOUR HDTV....8
- CHAPTER 2 BASIC CONTROLS AND CONNECTIONS....10
- SEARCHING AUTOMATICALLY FOR THE CODES....14
- CHAPTER 3 CONNECTING EQUIPMENT....16
- CONNECTING A USB (FAT32 FORMAT) STORAGE DEVICE 24
- CHAPTER 4 GETTING STARTED....27
- CHAPTER 5 USING YOUR HDTV FOR THE FIRST TIME....28
- CHAPTER 6 YOUR HDTV SETTINGS ....30
- VIZIO M420VT User Manual
- CHAPTER 7 ADJUSTING YOUR HDTV SETTINGS ....32
- CHAPTER 8 MAINTENANCE AND TROUBLESHOOTING ....44
- CHAPTER 9 SPECIFICATIONS ....49
- CHAPTER 10 WARRANTY....52
- Opening the Package
- Package Contents
- HDTV Accessories and Services
- Chapter 1 Setting Up Your HDTV
- Attaching the TV Stand
- To unpack the TV and stand base:
- To attach the TV stand base:
- To remove the base stand:
- Wall Mounting Your HDTV
- Chapter 2 Basic Controls and Connections
- Front Panel
- Side Panel Controls
- Rear and Side Panel Connections
- Remote Control Buttons
- Programming the Remote Control
- Searching Automatically for the Codes
- Remote Control Range
- VIZIO Remote Control Precautions
- Inserting the remote control batteries
- Precautionary Tips for Inserting the Batteries:
- Using a Cable or Satellite Remote
- Cleaning the Housing and Remote Control
- Chapter 3 Connecting Equipment
- Connecting Your Cable or Satellite Box
- Using HDMI
- Connecting your Cable or Satellite Box (Best)
- Note:
- For Cable or Satellite Boxes with DVI:
- Using Component Video
- Connecting your Cable or Satellite Box (Better)
- Connecting Coaxial (RF)
- Using Your Antenna or Digital Cable for DTV
- Using Your Antenna or Cable for TV
- Using the Antenna or Cable through your VCR
- Connecting Your DVD Player
- Connecting your DVD Player (Best):
- For DVD Players with DVI:
- Connecting your DVD Player (Better):
- Using Composite (AV) Video
- Connecting your DVD Player (Good):
- Notes:
- Connecting a USB (FAT32 Format) Storage Device
- Connecting an external Receiver/Amp
- Connecting a PC (Computer)
- Chapter 4 Getting Started
- Chapter 5 Using your HDTV for the first time
- Watching a TV Program
- Select Input Source
- Viewing Digital TV Program Information
- INFO Button
- Chapter 6 Your HDTV Settings
- Using the HDTV Settings Menu
- TV Menu
- Timer Menu
- Multimedia Menu
- Wide Menu
- Audio Menu
- Picture Menu
- Parental Menu
- Help Menu
- CC (Closed Caption) Menu
- Chapter 7 Adjusting Your HDTV Settings
- TV Settings
- Input
- Channels
- Menu Language
- Date & Time
- PC Settings
- Sort
- Photo
- Music
- VIDEO
- File
- Thumbnail Size
- Normal Mode
- Wide Mode
- Zoom Mode
- Panoramic Mode
- Stretch Mode
- uSurround HD™ SRS Tr
- SRS TruVolume™
- qualizer Settings E
- Bass & Treble
- Balance
- Speakers
- Digital Audio Out
- Analog MTS (Multichannel Television Sound)
- Digital MTS
- Reset Audio Mode
- Picture Mode
- Custom Mode
- Noise Reduction
- Fast Response
- Ambient Light Sensor
- PIP (Picture-in-Picture)
- Smooth Motion tm
- Smooth Motion Demo
- Reset Picture Mode
- Rating Enable
- Channel Locks
- USA-TV
- USA-Movie
- CAN-English
- CAN-French
- Alt Rating Region
- Block Unrated Shows
- User Control Lock
- Change PIN (Password)
- System Info
- System Reset
- Analog Closed Caption
- Digital Closed Caption
- Digital CC Style
- Chapter 8 Maintenance and Troubleshooting
- Cleaning the TV and Remote Control
- Important:
- Troubleshooting Guide
- Telephone & Technical Support
- VIZIO
- Compliance
- FCC Class B Radio Interference Statement
- Notice:
- Preset PC Resolutions
- M420VT/M470VT Preset PC Resolutions
- Chapter 10 Warranty
- ONE-YEAR LIMITED WARRANTY ON PARTS AND LABOR
- Parts and Labor
- Types of Service
- Limitations and Exclusions
- Personal Data
- ZERO BRIGHT PIXEL DEFECT GUARANTEE
- Index
- Code for Programming the Remote Control
Brand : VIZIO
Model : M420VT
Category : Screen