
BD-HP80U - Blu-ray player SHARP - Free user manual and instructions
Find the device manual for free BD-HP80U SHARP in PDF.
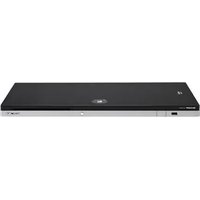


| Product Type | Blu-ray Disc/DVD Player |
| Brand | Sharp |
| Model | BD-HP80U |
| Disc Compatibility | BD, BD-R/RE, DVD, DVD±R/RW, CD, CD-R/RW |
| Video Output | HDMI (up to 1080p, 3D support) |
| Audio Output | HDMI, Optical Digital Audio (PCM/Bitstream) |
| Network | Wireless LAN (802.11 b/g/n), Ethernet (10/100) |
| USB Port | 1 x USB 2.0 (front, DC 5V 500mA) |
| Power Supply | DC 12V, 14W (AC adapter supplied) |
| Dimensions (Approx.) | 430 mm (W) x 250 mm (D) x 50 mm (H) |
| Weight (Approx.) | 2.5 kg |
| Remote Control | Included with AAA batteries (×2) |
| Special Features | AQUOS LINK, BD-LIVE, BONUSVIEW, 3D, streaming (Netflix, VUDU, Pandora) |
| Safety | Class 1 Laser Product, FCC/IC compliant |
| Cleaning Instructions | Use soft dry cloth; avoid chemicals |
| Repairability | Refer servicing to qualified personnel |
Frequently Asked Questions - BD-HP80U SHARP
User questions about BD-HP80U SHARP
0 question about this device. Answer the ones you know or ask your own.
Ask a new question about this device
Download the instructions for your Blu-ray player in PDF format for free! Find your manual BD-HP80U - SHARP and take your electronic device back in hand. On this page are published all the documents necessary for the use of your device. BD-HP80U by SHARP.
USER MANUAL BD-HP80U SHARP




BD-Video



dts-HD TM
Master Audio | Essential


HDMI®
HIGH-DEFINITION MULTIMEDIA INTERFACE
AVCHD
x.v.Color

AQUOS LINK
OPERATION MANUAL
ENGLISH
For future reference, record the model and serial number (located on the rear of the product) in the space provided.
Model No.:
Serial No.:
Introduction
SAFETY INFORMATION
WARNING: TO REDUCE THE RISK OF FIRE OR ELECTRIC SHOCK, DO NOT EXPOSE THIS APPLIANCE TO RAIN OR MOISTURE.

CAUTION
RISK OF ELECTRIC SHOCK DO NOT OPEN

CAUTION:
TO REDUCE THE RISK OF ELECTRIC SHOCK, DO NOT REMOVE COVER. NO USER-SERVICEABLE PARTS INSIDE. REFER SERVICING TO QUALIFIED SERVICE PERSONNEL.

This symbol warns the user of uninsulated voltage within the unit that can cause dangerous electric shocks.

This symbol alerts the user that there are important operating and maintenance instructions in the literature accompanying this unit.
CAUTION:
USE OF CONTROLS OR ADJUSTMENTS OR PERFORMANCE OF PROCEDURES OTHER THAN THOSE SPECIFIED HEREIN MAY RESULT IN HAZARDOUS RADIATION EXPOSURE.
AS THE LASER BEAM USED IN THIS UNIT IS HARMFUL TO THE EYES, DO NOT ATTEMPT TO DISASSEMBLE THE CABINET. REFER SERVICING TO QUALIFIED PERSONNEL ONLY.
• This Player is classified as a CLASS 1 LASER product. - The CLASS 1 LASER PRODUCT label is located on the bottom cabinet. - This product contains a low power laser device. To ensure continued safety do not remove any cover or attempt to gain access to the inside of the product. Refer all servicing to qualified personnel.

WARNING—FCC Regulations state that any unauthorized changes or modifications to this equipment not expressly approved by the manufacturer could void the user's authority to operate this equipment.
INFORMATION
This equipment has been tested and found to comply with the limits for a Class B digital device, pursuant to Part 15 of the FCC Rules. These limits are designed to provide reasonable protection against harmful interference in a residential installation. This equipment generates, uses and can radiate radio frequency energy and, if not installed and used in accordance with the instructions, may cause harmful interference to radio communications. However, there is no guarantee that interference will not occur in a particular installation. If this equipment does cause harmful interference to radio or television reception, which can be determined by turning the equipment off and on, the user is encouraged to try to correct the interference by one or more of the following measures:
—Reorient or relocate the receiving antenna. —Increase the separation between the equipment and receiver. —Connect the equipment into an outlet on a circuit different from that to which the receiver is connected. —Consult the dealer or an experienced radio/TV technician for help.
FCC Compliance Statement
This device complies with part 15 of the FCC Rules. Operation is subject to the following two conditions:
(1) This device may not cause harmful interference, and (2) this device must accept any interference received, including interference that may cause undesired operation.
Wireless Radio
For product available in the USA/Canada market, only channel 1–11 can be operated. Selection of other channels is not possible. This device is going to be operated in 2.412–2.462GHz frequency range, it is restricted in indoor environment only.
Important: Any changes or modifications not expressly approved by the party responsible for compliance could void the user's authority to operate the equipment.
FCC Radiation Exposure Statement: This equipment complies with FCC radiation exposure limits set forth for an uncontrolled environment. This equipment should be installed and operated with minimum distance 20cm between the radiator & your body.
Industry Canada Statement
This Class B digital apparatus complies with Canadian ICES-003.
Operation is subject to the following two conditions:
(1) This device may not cause harmful interference, and (2) this device must accept any interference received, including interference that may cause undesired operation of the device. This device and its antenna(s) must not be colocated or operation in conjunction with any other antenna or transmitter.
Wireless Radio
For product available in the USA/Canada market, only channel 1–11 can be operated. Selection of other channels is not possible. The device could automatically discontinue transmission in case of absence of information to transmit, or operational failure. Note that this is not intended to prohibit transmission of control or signaling information or the use of repetitive codes where required by the technology.
Important: Any changes or modifications not expressly approved by the party responsible for compliance could void the user's authority to operate the equipment.
IC Radiation Exposure Statement: This equipment complies with IC RSS-102 radiation exposure limits set forth for an uncontrolled environment. This equipment should be installed and operated with minimum distance 20 cm between the radiator & your body.
Thank you for your purchase of the SHARP Blu-ray Disc/DVD Player. To ensure safety and many years of trouble-free operation of your product, please read the Important Safety Instructions carefully before using this product.
IMPORTANT SAFETY INSTRUCTIONS
Electricity is used to perform many useful functions, but it can also cause personal injuries and property damage if improperly handled. This product has been engineered and manufactured with the highest priority on safety. However, improper use can result in electric shock and/or fire. In order to prevent potential danger, please observe the following instructions when installing, operating and cleaning the product. To ensure your safety and prolong the service life of your Blu-ray Disc/DVD Player, please read the following precautions carefully before using the product.
1) Read these instructions. 2) Keep these instructions. 3) Heed all warnings. 4) Follow all instructions. 5) Do not use this apparatus near water. 6) Clean only with dry cloth.
7) Do not block any ventilation openings. Install in accordance with the manufacturer's instructions.
8) Do not install near any heat sources such as radiators, heat registers, stoves, or other apparatus (including amplifiers) that produce heat.
9) Do not defeat the safety purpose of the polarized or grounding-type plug. A polarized plug has two blades with one wider than the other. A grounding type plug has two blades and a third grounding prong. The wide blade or the third prong are provided for your safety. If the provided plug does not fit into your outlet, consult an electrician for replacement of the obsolete outlet.
10) Protect the power cord from being walked on or pinched particularly at plugs, convenience receptacles, and the point where they exit from the apparatus.
11) Only use attachments/accessories specified by the manufacturer.
12) Use only with the cart, stand, tripod, bracket, or table specified by the manufacturer, or sold with the apparatus. When a cart is used, use caution when moving the cart/apparatus combination to avoid injury from tip-over.
13) Unplug this apparatus during lightning storms or when unused for long periods of time.
14) Refer all servicing to qualified service personnel. Servicing is required when the apparatus has been damaged in any way, such as power-supply cord or plug is damaged, liquid has been spilled or objects have fallen into the apparatus, the apparatus has been exposed to rain or moisture, does not operate normally, or has been dropped.

Additional Safety Information
15) Power Sources—This product should be operated only from the type of power source indicated on the marking label. If you are not sure of the type of power supply to your home, consult your product dealer or local power company. For products intended to operate from battery power, or other sources, refer to the operating instructions. 16) Overloading—Do not overload wall outlets, extension cords, or integral convenience receptacles as this can result in a risk of fire or electric shock. 17) Object and Liquid Entry—Never push objects of any kind into this product through openings as they may touch dangerous voltage points or short-out parts that could result in a fire or electric shock. Never spill liquid of any kind on the product. 18) Damage Requiring Service—Unplug this product from the wall outlet and refer servicing to qualified service personnel under the following conditions:
a) When the AC cord or plug is damaged, b) If liquid has been spilled, or objects have fallen into the product, c) If the product has been exposed to rain or water, d) If the product does not operate normally by following the operating instructions. Adjust only those controls that are covered by the operating instructions as an improper adjustment of other controls may result in damage and will often require extensive work by a qualified technician to restore the product to its normal operation,
e) If the product has been dropped or damaged in any way, and
f) When the product exhibits a distinct change in performance - this indicates a need for service.
19) Replacement Parts—When replacement parts are required, be sure the service technician has used replacement parts specified by the manufacturer or have the same characteristics as the original part. Unauthorized substitutions may result in fire, electric shock, or other hazards.
20) Safety Check—Upon completion of any service or repairs to this product, ask the service technician to perform safety checks to determine that the product is in proper operating condition.
21) Wall or ceiling mounting—When mounting the product on a wall or ceiling, be sure to install the product according to the method recommended by the manufacturer.
22) The main AC plug is used as disconnect device and shall always remain readily operable.
IMPORTANT SAFETY INSTRUCTIONS
- Water and Moisture—Do not use this product near water - for example, near a bath tub, wash bowl, kitchen sink, or laundry tub; in a wet basement; or near a swimming pool; and the like.
- Stand—Do not place the product on an unstable cart, stand, tripod or table. Placing the product on an unstable base can cause the product to fall, resulting in serious personal injuries as well as damage to the product. Use only a cart, stand, tripod, bracket or table recommended by the manufacturer or sold with the product. When mounting the product on a wall, be sure to follow the manufacturer's instructions. Use only the mounting hardware recommended by the manufacturer.
- Selecting the location—Select a place with no direct sunlight and good ventilation.
- Ventilation—The vents and other openings in the cabinet are designed for ventilation. Do not cover or block these vents and openings since insufficient ventilation can cause overheating and/or shorten the life of the product. Do not place the product on a bed, sofa, rug or other similar surface, since they can block ventilation openings. This product is not designed for built-in installation; do not place the product in an enclosed place such as a bookcase or rack, unless proper ventilation is provided or the manufacturer's instructions are followed.
- Heat—The product should be situated away from heat sources such as radiators, heat registers, stoves, or other products (including amplifiers) that produce heat.
- Lightning—For added protection for this product during a lightning storm, or when it is left unattended and unused for long periods of time, unplug it from the wall outlet. This will prevent damage to the product due to lightning and power-line surges.
- To prevent fire, never place any type of candle or flames on the top or near the product.
- To prevent fire or shock hazard, do not expose this product to dripping or splashing. No objects filled with liquids, such as vases, should be placed on the product.
- To prevent fire or shock hazard, do not place the AC cord under the product or other heavy items.
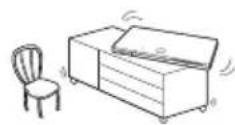

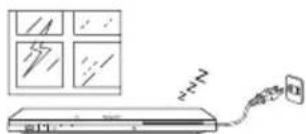

Precautions on viewing stereoscopic 3D images
- Do not view stereoscopic 3D images if you have a history of photosensitivity, heart disease or poor health. This may cause the symptoms to worsen.
- If you experience any health problems such as fatigue and discomfort while viewing stereoscopic 3D images, immediately discontinue viewing. Continuing viewing after symptoms appear may cause health risks. Take a break until the symptoms have completely disappeared.
- Ages of 5–6 or over are recommended for viewing stereoscopic 3D images. Symptoms such as fatigue and discomfort are difficult to determine in young children, therefore they may suddenly become ill. When viewing 3D images with children, please watch for eye strain symptoms.
- When viewing stereoscopic 3D images, take a moderate break after watching one title. Viewing for extended periods may cause visual strain.
Precautions when cleaning this product
- Turn off the main power and unplug the AC cord from the wall outlet before handling. • To clean the outer cabinet, periodically wipe it with a soft cloth (cotton, flannel, etc.).
- For severe dirt, soak a soft cloth (cotton, flannel, etc.) in some neutral detergent diluted with water, wring the cloth out thoroughly, wipe off the dirt, then wipe again with a soft, dry cloth.
- Do not use chemicals or a chemically treated cloth for cleaning. It may damage the cabinet finish.
Notes on using Wireless LAN
- When this player is connected to a wireless LAN network, transmissions between the wireless LAN components inside this player and a wireless LAN compatible broadband router (commercially available) are carried out.
Precautions on using Wireless LAN
- The following devices, radio stations, etc. use the same frequency bands. Do not use wireless LAN near them. Manufacturing/scientific/diagnostic equipment such as pacemakers, etc. Specified low power radio stations (radio stations that do not require a license) If this player is used near these devices, there is a possibility that radio wave interference may occur. Therefore transmission may not be possible or speed may be reduced.
- Mobile phones, radios, etc. use different radio frequency bands from wireless LAN, so there will not be any effect on the transmissions of these devices or wireless LAN if this player is used near them. However, if a wireless LAN product is placed near one of these devices, audio or video noise may occur due to the electromagnetic waves that emit from wireless LAN products.
- Radio waves will pass through the wood, glass, etc. used in standard housing, however they will not pass through reinforcing bars, metal, concrete, etc. Radio waves will not pass through walls and floors if these materials are used.
Introduction
SAFETY INFORMATION ......1-2
DEAR SHARP CUSTOMER ....3
IMPORTANT SAFETY INSTRUCTIONS ....3-4
PRECAUTIONS ....5
Contents......6-7
What would you like to do with this Player? ......8
About Media Types ......9–11
Blu-ray Disc 9
Types of Discs that Can Be Used with This Player ...... 9
Discs that Cannot Be Used with This Player 9
About Disc Contents 11
BD Video 11
Title, Chapter and Track 11
Icons Used on DVD Video Disc Cases 11
The Icons Used in This Operation Manual 11
Important Information ....12
Disc Precautions 12
License and Copyright 12
Getting Started ....13
Major Components ....14–16
Main Unit (Front) 14
Main Unit (Rear) 15
Remote Control Unit 16
Player setup orientation ....17
Removing and replacing the terminal cover 17
Remote control sensor setting 17
Connection
Video Connection ....18
Connecting to the HDMI Terminal 18
Audio Connection ....19
Connecting to the Digital Audio Terminal 19
Broadband Internet Connection .....20-21
Internet Connection (LAN cable) 20
Internet Connection (Wireless LAN) 21
Playback
Before Starting Playback ....22-26
Loading the Batteries in the Remote Control 22
Approximate operating range of remote control ..... 22
Connecting the AC adapter.... 23
Turning the Power On 23
Turning the power on 23
Entering standby 23
Indicators on the Player 23
Language Setting 24
Changing the on-screen display language 24
Operating a SHARP TV Using the Remote Control ..... 24
TV function control 24
Turning Off the Indicator Lights.... 24
Using AQUOS LINK 25
Controlling the Blu-ray disc player using AQUOS LINK....25
Using 3D 25
Control Panel 26
Video/Picture/Music Playback 27-33
Loading a Disc/Ejecting a Disc 27
BD/DVD Video Playback 27
Displaying the disc information 27
BD/DVD Menus 28
Start playback by selecting a title from the top menu.... 28
Using the disc menu 28
Using the pop-up menu 28
Enjoying BONUSVIEW or BD-LIVE 29
Use of Picture in Picture function (secondary audio/video playback) 29
Virtual Package 29
BD-LIVE 29
DVD-R/-RW (VR format) / BD-RE/-R (BDAV format)
Playback 30
Playback by selecting a title 30
Playback by selecting a Playlist 30
Audio CD Playback 31
Playback from the beginning 31
To skip the track during playback 31
Operation procedure for the "Functions" menu ..... 31
Audio Data (MP3 File) Playback.... 32
Playing back Audio data (MP3 files) 32
To play another file during Playback 32
To skip the file during Playback 32
Displaying Still Images (JPEG files) 33
Displaying Still Images (JPEG files) 33
Playing back Slide Show 33
Setting slide show speed/repeat playback 33
Playback Functions ....34-36
Fast Forward/Reverse (Search) 34
Skipping to the Next or the Start of the Current Chapter (Track/Title)....34
Pause/Frame Advance Playback 34
Slow Playback 34
Skip Search 34
Replay 34
Repeat Playback of a Title or Chapter (Repeat Playback) 35
Partial Repeat Playback (Repeat Playback of a Specified Part) 35
Displaying the Audio Information 36
Switching Subtitles.... 36
Switching the Angle 36
Displaying the Angle Mark 36
Settings During Playback ....37-38
Function Control 37
Function control operation procedure 37
Functions which can be set 38
Settings
SETTINGS....39-51
Common operations 39
Basic Operation for Playback Setting 39
Audio Video Settings 40
Smart Settings 41
AQUOS LINK 41
Playback Setting 41-42
On Screen Language 42
Version 42
System 42
Communication Setup 43-46
Sets whether "Cable" or "Wireless" is used for the network connection 43
When selecting Cable 43-44
When selecting Wireless 44-45
The operation procedure for inputting characters manually....46
USB Memory Management 47
Software Update Settings 48-49
Manual Update from Network 48
Manual Update from USB memory device ..... 49–50
Digital Audio Output Selection Formats 51
Streaming content
Playing back streaming content ....52-56
Instantly Watching Movies from Netflix 52-53
Enjoying Movies and Internet Application with VUDU....54–55
Enjoying Pandora radio 56
Appendix
Troubleshooting......i-iii
To Reset this Player.... iii
On-screen Error Messages ....iv
Specifications v-vi
Glossary ...... vii-ix
Network Service Disclaimer ....x
About Software License ....xi
LIMITED WARRANTY ...... xii-xiii
What to do first:
Refer to "Getting Started" (p. 13) to prepare for using this player.
Introduction (pp. 1–17)
Explains the important operation information.
Connection (pp. 18–21)
Shows the connecting options provided by this Player.
Playback (pp. 22–38)
Shows simple playback and useful functions.
Settings (pp. 39–51)
Gives you more options to suit your circumstances.
Streaming content (pp. 52–56)
Shows the Internet streaming services available with this player.
Appendix (pp. i–xiii)
Provides troubleshooting tips and more information.
The illustrations and on-screen displays in this operation manual are for explanation purposes and may vary slightly from the actual operations.
What would you like to do with this Player?
Watch high quality movies on Blu-ray discs
This Player offers full high-definition Blu-ray disc playback.
Video/Picture/Music Playback (p. 27)
Enjoy stereoscopic and powerful 3D images
This player can play 3D content from 3D compatible Blu-ray discs through an HDMI cable. To watch 3D images, connect a 3D compatible TV to this player using an HDMI cable and play the 3D content while wearing 3D glasses.
Using 3D (p. 25)
Enjoy different kinds of media sources
Use this player to enjoy video, picture or music content from various types of media sources such as DVDs, USB memory devices and via the Internet.
About Media Types (pp. 9–11) Video/Picture/Music Playback (p. 27)
Simple connection and operation through HDMI
This Player is equipped with an HDMI terminal. You can connect it to the TV using HDMI and no other cable will be needed to enjoy movies. If your TV is compatible with AQUOS LINK, you can control both the TV and this Player with simple operations.
Video Connection (p. 18)
Enjoy BD-LIVE functions through the Internet
This Player is compatible with BD-LIVE. You can enjoy bonus content such as movie trailers through the Internet when playing back BD-Video discs compatible with BD-LIVE.
Enjoying BONUSVIEW or BD-LIVE (p. 29)
Enjoy Internet streaming content on your TV
This player supports streaming services using the Internet. By connecting this player to the Internet, you can enjoy various content streamed on your TV.
Playing back streaming content (pp. 52–56)
Blu-ray Disc
Blu-ray Disc is the ultimate next generation optical media format, offering the following key features:
- Largest capacity (25 GB single layer – 50 GB dual layer) – with over 5 times the amount of content possible with current DVDs, particularly well suited for high definition feature films with extended levels of interactive features
- Pristine picture quality with the capability for full high definition 1920 x 1080p resolution
- Best audio possible with uncompressed surround sound (higher quality than even theater audio)
- Broadest industry support – ensuring more choice for consumers in the marketplace
- Hardware products will be backward compatible with DVDs, allowing continued enjoyment of existing DVD libraries.
- Disc Durability – new breakthroughs in hard coating technologies gives Blu-ray Discs the strongest resistance to scratches and finger prints.
Types of Discs that Can Be Used with This Player
- The following discs can be played back in this Player. Do not use an 8 cm (3") to 12 cm (5") adapter.
- Use discs that conform to compatible standards as indicated by the presence of official logos on the disc label. Playback of discs not complying with these standards is not guaranteed. In addition, the image quality or sound quality is not guaranteed even if the discs can be played back.
| Disc Type | Recording Format | Contents | Disc Size | |
| BD Video | Region code A/ALL | — Audio | + Video (Movie) | 12 cm (5") |
| BD-RE DLBD-R DL | BDMV/BDAV format | |||
| DVD Video | Region code 1/ALL | Video format Audio | + Video (Movie) | 12 cm (5")8 cm (3") |
| DVD+RW/DVD+R DVD-RW/DVD-R DVD+R DL/DVD-R DL | Video/VR/ AVCHD format (finalized disc only) | Audio + Video (Movie) | 12 cm (5")8 cm (3") | |
| DivX | ||||
| JPEG* | Still image (JPEG file) | |||
| MP3*3 | Audio | |||
| Audio CD* | Audio CD (CD-DA) | Audio | 12 cm (5")8 cm (3") | |
| CD-RW/CD-R Audio CD | (CD-DA) | Audio | ||
| JPEG* | Still image (JPEG file) | |||
| MP3*3 | Audio | |||
| DivX Audio | + Video (Movie) | |||
- BD/DVD video players and discs have region codes, which dictate the regions in which a disc can be played. This Player's region code is A for BD and 1 for DVD. (Discs marked ALL will play in any player.)
- BD/DVD video operations and functions may be different from the explanations in this manual and some operations may be prohibited due to disc manufacturer's settings.
- If a menu screen or operating instructions are displayed during playback of a disc, follow the operating procedure displayed.
- The audio component of a DVD video recorded at 96 kHz (Linear PCM) will be output as 48 kHz audio during playback.

NOTE
- Playback for some of the discs in the left side column tables may not be possible depending on the disc.
- “Finalize” refers to a recorder processing a recorded disc so that it will play in other DVD players/recorders as well as this player. Only finalized DVD discs will play back in this player. (This player does not have a function to finalize discs.)
- Some discs cannot be played back depending on the recording format.
Discs that Cannot Be Used with This Player
The following discs cannot be played back or will not play back properly on this Player. If such a disc is mistakenly played back, speaker damage may occur. Never attempt to play back these discs.
CDG, Video CD, Photo CD, CD-ROM, CD-TEXT, SVCD, SACD, PD, CDV, CVD, DVD-RAM, DVD-Audio, BD-RE with the cartridge, CD-WMA
Discs with unusual shapes cannot be played.
- Discs with unusual shapes (heart-shaped or hexagonal discs, etc.) cannot be used. The use of such discs will cause malfunction.
The following BD video discs cannot be played.
- Discs not displaying "A" or "ALL" for the region code (discs sold outside the authorized marketing area).* • Discs produced illegally. • Discs recorded for commercial use. * The region code for this product is A.
The following DVD video discs cannot be played.
- Discs not displaying "1" or "ALL" for the region code (discs sold outside the authorized marketing area).* • Discs produced illegally. • Discs recorded for commercial use. * The region code for this product is 1.
The following BD-RE/R, DVD-RW/R and DVD+RW/R discs cannot be played.
- Discs on which data has not been recorded cannot be played back.
The following Audio CD *1 discs cannot be played.
- Discs containing a signal for the purpose of protecting copyrights (copy control signal) may not be played back with this Player.
- This Player has been designed on the premise of playing back Audio CDs that comply with CD (Compact Disc) standards.
The following CD-RW/R discs cannot be played.
- Discs on which data has not been recorded cannot be played back.
- Discs recorded in a format other than an Audio CD and JPEG/MP3 file format cannot be played back.
- Discs may not be played back depending on their recording status or the status of the disc itself.
- Discs may not be played back depending on their compatibility with this Player.
*2 About the JPEG file format
JPEG is a type of file format for storing still-image files (photos, illustrations, etc.). The Player lets you play JPEG format still-image files.
File formats that are not compatible.
- Still images in formats other than JPEG (such as TIFF) cannot be played.
- There may be some files that cannot be played even if they are in JPEG format.
- Progressive JPEG files cannot be played.
- Moving image files as well as Motion JPEG format files cannot be played, even though they are JPEG files.
Other files that cannot be played back.
- You may not be able to play some still images which you have created, touched up, copied or otherwise edited on your computer.
- You may not be able to play some still images you have processed (rotated or saved by overwriting other images you have imported from the Internet or e-mail).
You may experience one or more of the following symptoms when playing files.
- It may take some time to play files depending on the number of folders, number of files and volume of data involved.
- EXIF information will not be displayed. EXIF stands for Exchangeable Image File Format, and is a standard for storing interchange information in image files, especially those using JPEG compression. (Refer to http://exif.org for more information.)
*3 About the MP3 file format
MP3 files are audio data compressed in the MPEG1/2 Audio layer-3 file format. "MP3 files" have ".mp3" as extensions.
(Some files that have ".mp3" extensions or files that have not been recorded in MP3 format will produce noise or cannot be played.)
Playing the MP3 file format
- The MP3 files are not played in the order they were recorded.
- It is recommended to record data at a lower speed as data recorded at a fast speed can produce noise and may not be able to be played.
- The more folders there are, the longer the reading time.
- Depending on the folder tree, reading MP3 files can take time.
- The playing time may not be correctly displayed during MP3 file playback.
The following files cannot be played on this player.
- When both Audio CD [CD-DA] format and JPEG/MP3 file formats are recorded on a disc. (The disc is recognized to be an Audio CD [CD-DA] only tracks in Audio CD [CD-DA] format are played back.)
- Multi-session discs cannot be played.
About files/folders for Still images (JPEG files) and audio data (MP3 files)
You can play still images (JPEG files) /audio data (MP3 files) with this unit by making folder(s) on discs or USB memory devices as shown below.
Example of a folder structure:
Root![graph TD A["001.jpg/001.mp3"] --> B["01 Folder"] C["xxx.jpg/xxx.mp3"] --> B B --> D["Folder"] D --> E["001.jpg/001.mp3"] D --> F["256.jpg/256.mp3"] B --> G["001.jpg/001.mp3"] B --> H["255.jpg/255.mp3"] B --> I["001.jpg/001.mp3"] B --> J["256.jpg/256.mp3"]](/content/2026/05/858839/images/5e1fcf69ea3eff41d0a193c8378d6f31be6148327fe0a0f98749979ce96d1744.jpg)
*4 Including the root directory, the maximum number of folders and files in each folder is limited to 256 in total.
File and folder requirements
- The discs or USB memory devices which this player can play back (recognize) are limited to the following properties: Contains EXIF format files (only JPEG files) Picture resolution: Between 32 x 32 and 6528 x 3672 pixels (only JPEG files) Maximum number of folders and files in each folder: 256 Maximum hierarchy level of folders: 5 File size: 8 MB or less (JPEG files) 200 MB or less (MP3 files)

NOTE
- File and folder names displayed on this player may differ from those displayed on PCs.
About DivX VIDEO
DivX® is a digital video format created by DivX, Inc. This is an official DivX Certified device that plays DivX video. Visit www.divx.com for more information and software tools to convert your files into DivX video.
About DivX VIDEO-ON-DEMAND
This DivX Certified® device must be registered in order to play DivX Video-on-Demand (VOD) content. To generate the registration code, locate the DivX VOD section in the device setup menu. Go to vod.divx.com with this code to complete the registration process and learn more about DivX VOD.
About Disc Contents
BD Video
Enjoy BD-specific functions including BONUSVIEW (BD-ROM Profile 1 Version 1.1), such as picture-in-picture, and BD-LIVE (page 29).
For the BD video discs compatible with BONUSVIEW/BD-LIVE, you can enjoy additional contents by copying the data from the discs or downloading it via the Internet. For instance, this function is capable of playing the original movie as the primary video while playing video commentary from the film director on a small screen as a secondary video.

NOTE
The available functions differ depending on the disc.
Title, Chapter and Track
- Blu-ray discs and DVDs are divided into "Titles" and "Chapters". If the disc has more than one movie on it, each movie would be a separate "Title". "Chapters", on the other hand, are subdivisions of titles. (See Example 1.)
- Audio CDs are divided into "Tracks". You can think of a "Track" as one tune on an Audio CD. (See Example 2.)
Example 1: Blu-ray disc or DVD![graph TD A["Blu-ray Disc"] --> B["Title 1"] C["Video"] --> D["Chapter 1"] C --> E["Chapter 2"] C --> F["Chapter 3"] G["Title 2"] --> H["Chapter 1"]](/content/2026/05/858839/images/c0dc74e637e894b6d16d86ea51ec088f0b0c9ca0da44b8a3153c325e6884f863.jpg)
Example 2: Audio CD

Icons Used on DVD Video Disc Cases
The back of the case of a DVD that is commercially available usually contains various information about the contents of the disc.

1 Audio tracks and audio formats
DVD discs can contain up to 8 separate tracks with a different language on each. The first in the list is the original track.
This section also details the audio format of each soundtrack — Dolby Digital, DTS, MPEG etc.
Dolby Digital
A sound system developed by Dolby Laboratories Inc. that gives movie theater ambience to audio output when the Player is connected to a Dolby Digital processor or amplifier.
DTS
DTS is a digital sound system developed by DTS, Inc. for use in cinemas.
Linear PCM
Linear PCM is a signal recording format used for Audio CDs and on some DVD and Blu-ray discs. The sound on Audio CDs is recorded at 44.1 kHz with 16 bits. (Sound is recorded between 48 kHz with 16 bits and 96 kHz with 24 bits on DVD video discs and between 48 kHz with 16 bits and 192 kHz with 24 bits on BD video discs.)
2 Subtitle languages
This indicates the kind of subtitles.
3 Screen aspect ratio
Movies are shot in a variety of screen modes.
4 Camera angle
Recorded onto some BD/DVD discs are scenes which have been simultaneously shot from a number of different angles (the same scene is shot from the front, from the left side, from the right side, etc.).
5 Region code
This indicates the region code (playable region code).
The Icons Used in This Operation Manual
BD VIDEO ..... Indicates the functions that can be performed for BD Video discs. BD-RE ...... Indicates the functions that can be performed for BD-RE discs. BD-R ..... Indicates the functions that can be performed for BD-R discs. DVD VIDEO ..... Indicates the functions that can be performed for DVD Video discs. DVD-RW ..... Indicates the functions that can be performed for DVD-RW discs. DVD-R ..... Indicates the functions that can be performed for DVD-R discs. AUDIO CD ...... Indicates the functions that can be performed for Audio CDs. CD-R ..... Indicates the functions that can be performed for CD-R discs. CD-RW | .... Indicates the functions that can be performed for CD-RW discs. USB ...... Indicates the functions that can be performed for USB memory devices.
Disc Precautions
Be Careful of Scratches and Dust
- BD, DVD and CD discs are sensitive to dust, fingerprints and especially scratches. A scratched disc may not be able to be played back. Handle discs with care and store them in a safe place.
Proper Disc Storage
| Place the disc in the center of the disc case and store the case and disc upright. |  |
| Avoid storing discs in locations subject to direct sunlight, close to heating appliances or in locations of high humidity. |  |
| Do not drop discs or subject them to strong vibrations or impacts. |  |
| Avoid storing discs in locations where there are large amounts of dust or moisture. |  |
Handling Precautions
- If the surface is soiled, wipe gently with a soft, damp (water only) cloth. When wiping discs, always move the cloth from the center hole toward the outer edge.

- Do not use record cleaning sprays, benzene, thinner, static electricity prevention liquids or any other solvent.
- Do not touch the surface.
- Do not stick paper or adhesive labels to the disc.
- If the playing surface of a disc is soiled or scratched, the Player may decide that the disc is incompatible and eject the disc, or it may fail to play the disc correctly. Wipe any dirt off the playing surface with a soft cloth.
Cleaning the Pick Up Lens
- Never use commercially available cleaning discs. The use of these discs can damage the lens.
- Request the nearest service center approved by SHARP to clean the lens.
Warnings about dew formation
- Condensation may form on pick up lens or disc in the following conditions:
– Immediately after a heater has been turned on. - In a steamy or very humid room. - When the Player is suddenly moved from a cold environment to a warm one.
When condensation forms:
- It becomes difficult for the Player to read the signals on the disc and prevents the Player from operating properly.
To remove condensation:
- Take out the disc and leave the Player with the power off until the condensation disappears. Using the Player when there is condensation may cause malfunction.
License and Copyright
Audio-visual material may consist of copyrighted works which must not be recorded without the authority of the owner of the copyright. Refer to relevant laws in your country.
- "This item incorporates copy protection technology that is protected by U.S. patents and other intellectual property rights of Rovi Corporation. Reverse engineering and disassembly are prohibited."
- Manufactured under license from Dolby Laboratories. "Dolby" and the double-D symbol are trademarks of Dolby Laboratories.
- Manufactured under license under U.S. Patent #'s: 5,451,942; 5,956,674; 5,974,380; 5,978,762; 6,226,616; 6,487,535; 7,392,195; 7,272,567; 7,333,929; 7,212,872 & other U.S. and worldwide patents issued & pending. DTS and the Symbol are registered trademarks, & DTS-HD, DTS-HD Master Audio | Essential and the DTS logos are trademarks of DTS, Inc. Product includes software. ©DTS, Inc. All Rights Reserved. • is a trademark.
- "BD-LIVE" logo is a trademark of Blu-ray Disc Association. • DVD is a trademark of DVD Format/Logo Licensing Corporation.
- HDMI, the HDMI logo and High-Definition Multimedia Interface are trademarks or registered trademarks of HDMI Licensing LLC.
- "x.v.Color" and "x.v.Color" logo are trademarks of Sony Corporation.
- Java and all Java-based trademarks and logos are trademarks or registered trademarks of Sun Microsystems, Inc. in the United States and/or other countries.
- "BONUSVIEW" logo is a trademark of Blu-ray Disc Association.
- "AVCHD" and the "AVCHD" logo are trademarks of Panasonic Corporation and Sony Corporation.
- "Blu-ray 3D" and "Blu-ray 3D" logo are trademarks of Blu-ray Disc Association.
- Netflix and the Netflix logo are the registered trademarks of Netflix, Inc.
- VUDU™ is a trademark of VUDU, Inc.
- DivX®, DivX Certified® and associated logos are registered trademarks of DivX, Inc. and are used under license.
ENERGY STAR® Program Information

ENERGY STAR
Products that have earned the ENERGY STAR® are designed to protect the environment through superior energy efficiency.
ENERGY STAR® is a U.S. registered mark.
Step 1: Unpacking
Make sure the following accessories are provided with the product.
| Remote control unit | “AAA” size battery (×2) | AC cord |
 |  Page 22 Page 23 Page 22 Page 23 |  |
| AC adapter | ||
 Page 23 Page 23 |
WARNING: The AC adapter and AC cord supplied with this player must not be used with other equipment.
Step 2: Selecting equipment to connect
Connection varies with the equipment used. Refer to Connection (Pages 18–21). Turn off the devices before connecting.
Enjoying BD-LIVE and streaming services
To enjoy BD-LIVE content or streaming content on your TV, after an Internet connection is made, communication setup is required. Refer to “Communication Setup” (Pages 43–46).
Step 3: Playing back video/picture/music content
Play back video, picture or music content from the desired media source such as Blu-ray and DVD discs, or via the Internet. Refer to Playback (Pages 22–38) and streaming content (Pages 52–56).
Step 4: Adjust settings to suit your preference
Adjust settings to enjoy various features and other functions for playing discs/content. Refer to Settings (Pages 39–51).
Main Unit (Front)
1 Remote control sensor "Top" (p. 17) 2 BD/DVD/CD mode indicator (p. 23) 3 Disc slot (p. 27) 4 EJECT (p. 27)
5 POWER (ON/STANDBY) indicator (p. 23) 6 AQUOS PURE MODE indicator (pp. 23, 25) 7 3D indicator (pp. 23, 25)
8 USB terminal (p. 32) 9 POWER (p. 23) 10 Remote control sensor "Front" (p. 17)
Main Unit (Rear)
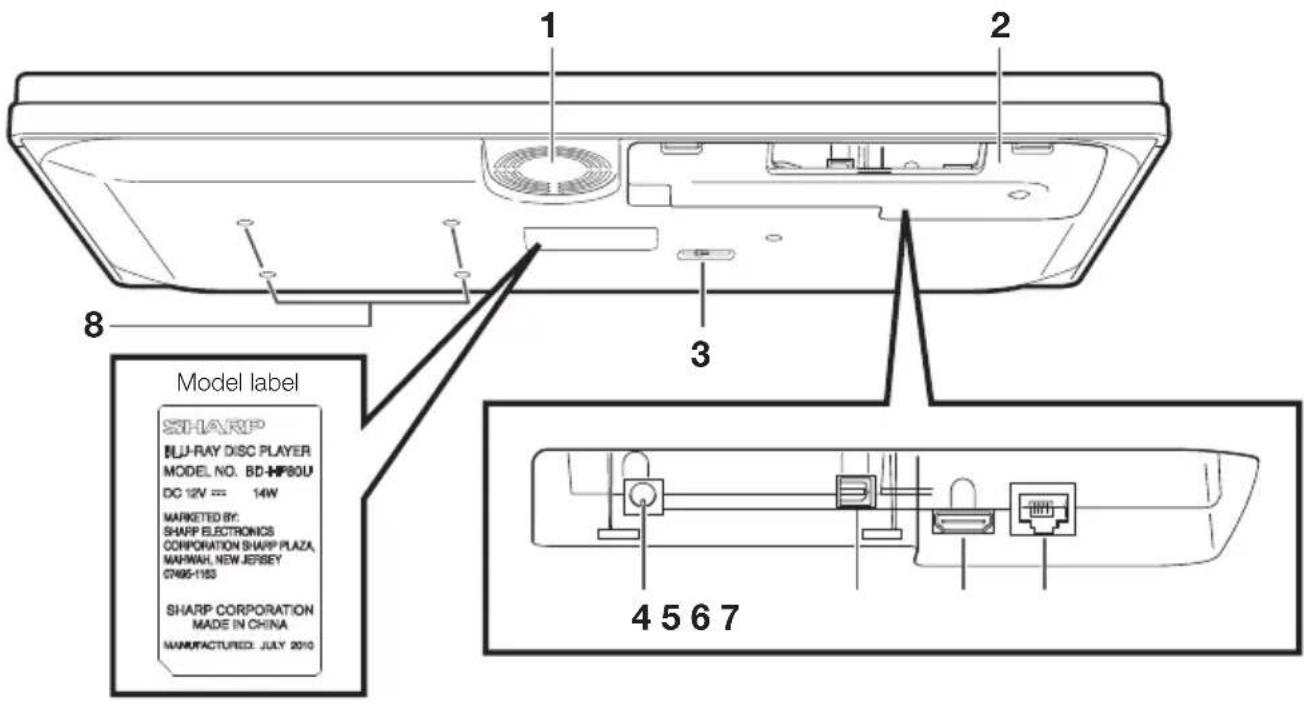
1 Cooling fan The cooling fan operates while the power to the Player is on. 2 Terminal cover (p. 17) 3 Selector switch for Remote control sensor (p. 18) 4 DC IN terminal (p. 23)
5 OPTICAL DIGITAL AUDIO OUT terminal (p. 20) 6 HDMI OUT terminal (p. 19) 7 ETHERNET terminal (p. 21) 8 Screw holes for VESA 75 Mount Screw size: M4 (Maximum length = Mount plate thickness + 6 mm) Recommended tightening torque for M4 screws: 1.2±0.1N·m (12.2±1kgf·cm)

NOTE
Some optical and/or HDMI cables may not fit in the compartment.
Remote Control Unit

Buttons under the cover

NOTE
- This remote control unit is equipped with two ENTER buttons (5 and 31 listed above). The ENTER button under the cover is useful when using with the number buttons.
1 POWER (p. 23) 2 ▲ EJECT (p. 27) 3 TOP MENU/TITLE LIST (pp. 28, 30) 4 DISPLAY (pp. 27, 35) 5 Cursor buttons (▲/▼/◄/►), ENTER (pp. 24, 39) 6 EXIT (p. 39) 7 A (Red), B (Green), C (Blue), D (Yellow) (pp. 30, 31, 33, 46) 8 AUDIO (p. 36), SUBTITLE (p. 36), ANGLE (p. 36) 9 PinP (p. 29)
10 REPEAT (p. 35), OFF (for REPEAT) (p. 35)
11 REV (p. 34)
12 SKIP (pp. 30, 34)
13 REPLAY (p. 34)
14 🔒 (Lock) (See below.)
15 LIGHT (p. 24)
16 TV CONTROL buttons (p. 24)
17 HOME (pp. 24, 39)
18 POP-UP MENU (p. 28)
19 FUNCTION (p. 37)
20 RETURN (pp. 31, 35)
21 PAGE ∧/∨ (p. 30)
22 ▶ PLAY (p. 27)
23 ▶▶ FWD (p. 34)
24 || PAUSE (pp. 32, 34)
25 SKIP/▶ (pp. 30, 34)
26 SKIP SEARCH (p. 34)
27 STOP (p. 27)
28 3D (p. 25)
29 VIDEO OUTPUT RESET (p. 40)
30 Number buttons (p. 38)
31 ENTER (p. 38) This button is the same operation as 5 ENTER.
32 CLEAR (p. 38) To clear the input number.
33 VUDU (p. 54)
34 Non-functional buttons They have no operation at all. These buttons on the remote control are non-functional.
Keylock function
You can set the keylock to prevent accidental operations. This function allows TVs compatible with AQUOS LINK to also perform a Key Lock on the player.
Press and hold Ⓞ(Lock) for more than 2 seconds.
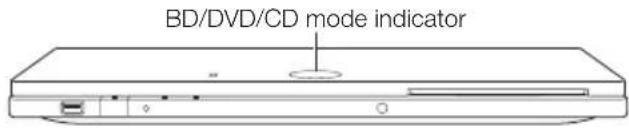
• Each time you perform this operation, the function is activated or deactivated. In such cases, the BD/DVD/CD mode indicator blinks.
- When operating the player in a status where the keylock function is set, the BD/DVD/CD mode indicator will blink for approximately 2 seconds.
Removing and replacing the terminal cover
Before connecting the player to a TV, the AC adapter, etc., remove the terminal cover on the bottom of the player.
1 Remove the terminal cover on the bottom of the player.

2 Make the necessary connections to the player (pages 18–21, 23). 3 Replace the terminal cover.
- Pass the cables through the center of the terminal cover.

Pass the cables through here.
- Replace the terminal cover so the cables pass through the center of the cover.


Securing bracket for the HDMI cable
The terminal cover has a securing bracket to prevent breakage of the HDMI cable. When the HDMI cable is not passed straight through the securing bracket, the terminal cover cannot be closed.
▼ Back of the terminal cover
Remote control sensor setting
You can select the remote control sensor from "Front" or "Top" depending on the orientation of the player and the usage situation. In most cases, the selector switch should be set to "Front".

Remote control sensor "Front"

Selector switch for Remote control sensor
Connecting to the HDMI Terminal
- You can enjoy high quality digital picture and sound through the HDMI terminal.
- When you use AQUOS LINK, make sure to use a certified HDMI cable.
- For details on digital audio output formats (PCM/bitstream), refer to the digital audio output format selection table on page 51.
STEPS
1 Be sure to turn off this Player and the equipment before making any connections. 2 Firmly connect an HDMI cable (commercially available) to the HDMI terminals (① and ②).
![graph TD A["This Player"] --> B["NOTE"] B --> C1["• Audio transmitted in DTS-HD High Resolution Audio and DTS-HD Master Audio formats is output from the HDMI terminal as Bitstream. Connect an amplifier with a built-in decoder to enjoy the fine sound quality."] B --> C2["• When using an HDMI output,…](/content/2026/05/858839/images/e5991abe1777cc60034b5a45abedadf43bca23e7ca34537b8f1b4397e3b2a4cf.jpg)
After connecting
- If desired, connect audio equipment. (Page 19)
- If necessary, perform the Audio Video Settings. (Page 40) • Refer to AQUOS LINK function. (Pages 25 and 41)
- Prepare the desired disc or content and start playback. (Pages 27–33)
Connecting to the Digital Audio Terminal
- You can connect audio equipment or the TV to the OPTICAL DIGITAL AUDIO OUT terminal.
- For details on digital audio output formats (PCM/bitstream), refer to the digital audio output format selection table on page 51.
STEPS
1 Be sure to turn off this Player and the equipment before making any connections. 2 Firmly connect an optical digital cable (commercially available) to the optical digital audio terminals (① and ②).
![graph TD A["This Player"] --> B["Device with Digital Audio Out"] B --> C{To Optical Digital Audio Out terminal} C -->|①| D["Optical digital cable (commercially available)"] C -->|②| E["Optical digital audio IN terminal"] D --> F["AmplifierTV"] E --> F G["NOTE: 7.1 ch Audio is available via the HDMI…](/content/2026/05/858839/images/ac336987e6b8d8802696a39b21b051a7862761cb3181e5a9a7c06decd65ae255.jpg)
Audio equipment with a digital audio input terminal
After connecting
- If necessary, perform the Audio Video Settings. (Page 40)
- Prepare the desired disc or content and start playback. (Pages 27–33)
Internet Connection (LAN cable)
- By connecting this player to the Internet, you can enjoy a variety of content on your TV using BD-LIVE functions, video streaming services and also perform software updates.
- When using the Internet, a broadband Internet connection as shown below is required.
STEPS
1 Be sure to turn off this Player and the equipment before making any connections. 2 Firmly connect a LAN cable (commercially available) to the ETHERNET terminal (① and ②).
![graph TD A["Server"] --> B["To Ethernet terminal ①"] B --> C["LAN cable (commercially available)"] C --> D["To LAN terminal ②"] D --> E["LAN"] F["Client"] --> G["Server"] G --> H["Computer"]](/content/2026/05/858839/images/ab9444d9ba3b2ba75bf5007e068e49317df7bca506528a7d0d29416fba452fcc.jpg)
Internet Modem Hub or broadband router PC
Example of a Broadband Internet Connection
After connecting
- Perform the communication settings. (Pages 43–46)
- When enjoying content on your TV using BD-LIVE functions and video streaming services, refer to BD-LIVE (pages 29 and 42) or video streaming services (pages 52–56). • To update the software via the Internet, perform Software Update Settings. (Page 48)
Internet Connection (Wireless LAN)
- By connecting this player to the Internet, you can enjoy a variety of content on your TV using BD-LIVE functions, video streaming services, and also perform software updates.
- You can connect to a network using a wireless router/access point.
STEPS
Be sure to turn off this player and the equipment before making any connections.
This player
- When an Internet connection is made, wired and wireless connections cannot be used at the same time. Use only one of the connection types (see page 43).
- This player is equipped with an IEEE 802.11n internal wireless unit, which also supports the 802.11b/g standards.

CAUTION
- When using a broadband Internet connection, a contract with an Internet service provider is required. For more details, contact your nearest Internet service provider.
- Refer to the operation manual of the equipment you have, as the connected equipment and connection method may differ depending on your Internet environment.

NOTE
- You must use a wireless router/access point that supports IEEE 802.11 b/g/n. (n is recommended for stable operation of the wireless network.)
- Wireless LAN, in its nature, may cause interference, depending on the usage conditions (access point performance, distance, obstacles, interference by other radio devices, etc.).
- Set the wireless router/access point to Infrastructure mode. Ad-hoc mode is not supported.
- SHARP cannot guarantee that all brands' wireless routers will operate with this player.
![graph TD A["Wireless router/ access point"] --> B["PC"] B --> C["InternetModem"] C --> D["Computer"]](/content/2026/05/858839/images/31bcd0458e2078e178b4a72497484b485966dee57fed7a27dabadaef6847251f.jpg)
Example of a Broadband Internet Connection
After connecting
- Perform the communication settings. (Pages 43–46)
- When enjoying content on your TV using BD-LIVE functions and video streaming services, refer to BD-LIVE (pages 29 and 42) or video streaming services (pages 52–56).
- To update the software via the Internet, perform Software Update Settings. (Page 48)
Loading the Batteries in the Remote Control
1 Hold in the tab on the battery cover and pull the cover towards the direction of the arrow.

2 Load the two "AAA" size batteries (R-03 size, UM/SUM-4). Place batteries with their terminals corresponding to the + and - indications in battery compartment.

3 Insert the smaller tab of the battery cover into the opening ①, and press down on the cover until it clicks in place ②.

NOTE
- Do not subject the remote control unit to shock, water or excessive humidity.
- The remote control unit may not function if the Player's remote sensor is in direct sunlight or any other strong light.
- Incorrect use of batteries may cause them to leak or burst. Read the battery warnings and use the batteries properly.
- Do not mix old and new batteries, or mix different brands.
- Remove the batteries if you will not use the remote control unit for an extended period of time.
WARNING
- Do not use or store batteries in direct sunlight or other excessively hot places, such as inside a car or near a heater. This can cause batteries to leak, overheat, explode, or catch fire. It can also reduce the life or performance of batteries.
Approximate operating range of remote control
You can select the remote control sensor from "Front" or "Top" depending on the orientation of the player and the usage situation. In most cases, the selector switch should be set to "Front". See page 17 to switch the remote control sensor.

Connecting the AC adapter
① Plug the AC adapter cord into the DC IN terminal on the rear of the Player. ② Plug the supplied AC cord into the AC adapter. ③ Then, plug into an AC outlet.


NOTE
- Place the Player close to the AC outlet, and keep the power plug within reach.
- TO PREVENT RISK OF ELECTRIC SHOCK, DO NOT TOUCH THE UN-INSULATED PARTS OF ANY CABLES WHILE THE AC CORD IS CONNECTED.
- The AC adapter may become warm after long-time use. This is normal and does not indicate malfunction.
- If you are not going to use this Player for a long period of time, be sure to remove the AC cord from the AC outlet.
Turning the Power On
Turning the power on
Press POWER on the remote control or on the Player to turn on the power of the Player.
• The POWER indicator lights green.

NOTE
- When you turn on this player for the first time after purchase, or when you turn on this player after performing "System Reset" (see page 42), the language setting screen will be displayed. Please perform the language setting (see step 4 on page 24).
Entering standby
Press POWER on the remote control or on the player to enter standby.
• The POWER indicator lights red. - If you press POWER again immediately after entering standby, the player may not turn on. If this happens, wait for 10 seconds or more and then turn on the power again.
Indicators on the player
POWER (ON/STANDBY) indicator
| Green on Power on | |
| Red on Standby |
AQUOS PURE MODE indicator
| Green on Output in AQUOS PUREMODE (See page 25.) |
BD/DVD/CD mode indicator
| Blue on Playing back | |
| Blue blinks Loading a disc/updating | |
3D indicator
| Green on Video signal output is 3Dimages (See page 25). |
Language Setting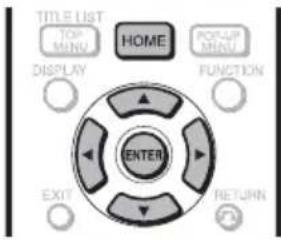
Changing the on-screen display language
1 Press HOME to display the menu screen.
- The same operation can be performed by pressing ENTER after selecting the HOME icon on the Wall Paper screen.
2 Press ▲/▼ to select "Settings", then press ▶ or ENTER.
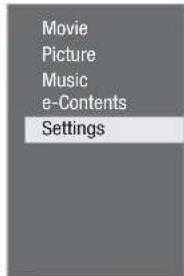
3 Press ▲/▼ to select "On Screen Language", then press ▶ or ENTER.

4 Press ▲/▼ to select the language you want to display on the screen, then press ENTER.
NOTE
- To select the DVD disc language, such as subtitle language, etc., see page 28.
Operating a SHARP TV Using the Remote Control
The Universal Remote Control may operate the basic functions of the SHARP TV.
TV function control
• TV Power: POWER • TV-AV Selector: INPUT • TV Volume up/down: VOL +/− • TV Channel up/down: CH ∧/V
Turning Off the Indicator Lights
If you feel that the indicators on the player are too bright when watching movies, you can turn them off except for the POWER indicator.

Press LIGHT to turn the indicators on or off.
• Each time the button is pressed, the indicators are turned on or off. - The on/off setting can also be performed using the menu screen (See page 41).
Using AQUOS LINK
Controlling the Blu-ray disc player using AQUOS LINK
What is AQUOS LINK?
Using the HDMI CEC (Consumer Electronics Control), with AQUOS LINK you can interactively operate this player with your SHARP AQUOS TV.
What you can do with AQUOS LINK
When you connect this player to the LCD TV compatible with AQUOS LINK using an HDMI cable, you can perform the functions listed below. (See page 18 for connecting to the HDMI terminal).
● Automatic input select function
When you start playback of this player, the input selector of the LCD TV will automatically switch to the LCD TV input terminal connected to the player and the playback image will appear on the screen, even if you are watching a TV program.
● Automatic power off function
If you turn off the LCD TV when this player is in stop mode, the power of this player will be turned off automatically. (However, when playing back a disc or other content using this player, the power does not turn off.)
● Automatic power on function
When you switch to the LCD TV input terminal connected to this player, the power of this player will be turned on automatically.
AQUOS PURE MODE
When you connect this player to an AQUOS LCD TV compatible with AQUOS LINK and set "AQUOS LINK" to "Yes" (page 41), images automatically adjusted to the most suitable image quality for the AQUOS TV are output from the HDMI OUT terminal of this player.
The AQUOS PURE MODE indicator on the player lights in green.

AQUOS PURE MODE indicator
NOTE
- In order to make AQUOS LINK available, connect an LCD TV to this player using an HDMI terminal. Set "AQUOS LINK" to "Yes" (See page 41). Refer to the Operation Manual of the TV for details regarding setup.
Using 3D
This sets output of 3D images.
To view 3D images, playback of 3D content (3D BD video) is necessary with a 3D compatible TV and 3D glasses in addition to this player.

Press 3D to change to the 3D mode.
- Each time the button is pressed, the mode switches between "Auto(3D)" and "2D". The status of the selected mode will be displayed on the TV screen.
Auto: Video signals are output as 3D when 3D content (3D BD video) is played or as 2D when 2D content is played.
2D: Even if 3D content (3D BD video) is played, video signals are output as 2D at all times.
- This setting (Auto(3D)/2D) can also be performed using the menu screen (See page 42).
Regarding the 3D indicator
The 3D indicator lights green only when playing 3D content (3D BD video) with the setting "Auto(3D)" selected.
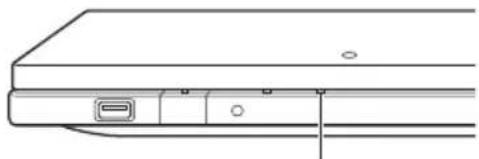
3D indicator
NOTE
- The 3D mode can be switched only when playback is stopped.
- Depending on the connected TV, the images during playback may switch to 2D images due to changes in the resolution, etc. Make sure the 3D image setting is performed on the TV.
- The 3D images may not be output as set in "HDMI Video Out".
- When performing Fast Forward/Reverse, images are shown in 2D.
CAUTION
- When viewing 3D images, viewing for a long period of time or lying on your back may cause eye strain and discomfort. In addition, 3D images may affect the eyesight of young children/infants, so keep them from viewing the images.
Control Panel
This function allows you to operate this player using the TV remote control by displaying the control panel on the TV screen.
- To operate this function, connect this player to a TV compatible with HDMI CEC (Consumer Electronics Control) using an HDMI cable (See page 18). Make sure that "Control Panel" is set to "Yes" (See page 41). When the settings are completed, perform the following operations.
NOTE
- The control panel may not be displayed depending on the TV. Also, it may not be available depending on the content.
- When operating using the remote control of the player, the control panel does not appear.
- When playing video streaming content available with this player, the control panel cannot be displayed.
1 Switch the TV input to the input source to which this player is connected (HDMI input).
2 Press the PLAY button on the TV remote control.
- The control panel appears on the TV screen.
Control Panel
- When there is no operation for approximately 10 seconds, the control panel disappears automatically. To display the control panel, press the PLAY button on the TV remote control.
3 Press ▲/▼/◄/► on the TV remote control to select the desired button icon, then press ENTER.
- The function of the selected button icon is available.
Major functions of each button icon
POP-UP MENU
- Display the pop-up menu screen for BD video and the menu screen for DVD video.
TOP MENU TITLE LIST
- Display the top menu screen for BD video and DVD video.
FUNC.
- Display the Function Control screen for BD video, DVD video, etc.

Fast reverse (search).

Play.

Fast forward (search).

Skip to the beginning of a chapter.

Pause.

Skip to the next chapter.
INSTANT REPLAY
- Jump backward (approx. 10 seconds). (This function is used when you want to re-watch a scene that has just been shown.)

Stop.
SKIP SEARCH
- Jump ahead (approx. 30 seconds).
PANEL OFF
Turn off the control panel.
Loading a Disc/Ejecting a Disc


EJECTPOWER
1 Press POWER to turn on the power. 2 Load a disc into the disc slot.
- Insert the disc with the label face up.
- In case of disc recorded on both sides, face down the side to play back.

To eject a disc
While in stop mode, press EJECT.
BD/DVD Video Playback
BD-RBD VIDEO BD-RE
DVD VIDEO DVD-R
DVD-RW
This section explains playback of commercially available BD Video and DVD Video discs (like movies) and recorded DVD-RW/R discs.
- This player supports DVD upscaling during DVD playback.
- For a description of other playback functions, refer to "Playback Functions" on pages 34–36.


1 Load a disc.
- Playback may begin automatically, depending on the disc.
- Playback begins from the first title.
- The menu may be displayed first, depending on the disc. Perform playback operation by following the directions on the screen.
- When loading a disc containing 3D content (3D BD video) with "Yes" selected in the "3D Notice" setting (page 42), playback will be stopped and the 3D notice will be displayed on the TV screen. In such cases, press ENTER for confirmation, and then playback will start.
2 Press ▶ PLAY if playback does not begin automatically or playback is stopped.

NOTE
- The disc load time may vary depending on the disc.
Regarding playback of BD video discs
- Some of the newly released BD video discs cannot be played back unless you update the player software to the latest version. Therefore, it may be required to update the software of the player. Refer to pages 48–50 for more information regarding software updates for the player.
To stop playback
Press ■ STOP.
Resume playback function
- If you press ▶ PLAY next, playback will resume from the point where the Player was previously stopped. To playback from the beginning, cancel resume mode by pressing ■ STOP, then press ▶ PLAY. (This may not work depending on the type of disc.)

NOTE
- Resume playback may not function depending on the disc.
- The resume playback function for discs will be cancelled if streaming content is viewed after disc playback. Disc playback will start from the beginning after viewing streaming content.
Displaying the disc information

Press DISPLAY during playback.
• Each time you press DISPLAY, the display switches as follows. Disc Information Screen A
![graph TD A["①"] --> B["BD-VIDEO"] C["②"] --> B D["③"] --> B E["④"] --> B B --> F["1/1"] B --> G["1 0 /1 1"] B --> H["00:00:12"] B --> I["03/: 1 2 :"] J["Disc Information Screen B"] --> K["④"] K --> L["00:00:12"] K --> M["03/: 1 2 :"] N["No Display"] --> K](/content/2026/05/858839/images/52f399649b55788737c8f67d75e56f37fad348bc1e3cf82cf092fcc5531ab97a.jpg)
① Type of disc ② Title number being played / Total number of Titles ③ Chapter number being played / Total number of Chapters ④ Elapsed playback time / Total playback time for the Title

NOTE
- Disc Information Screen A disappears after about 1 minute elapses without performing any operations.
- For some commercially-released BD VIDEO discs, the total playback time display for the Chapter/Title may not appear.
BD/DVD Menus
- This section explains how to play back a BD/DVD video disc with a top menu, disc menu, or pop-up menu.
- The titles listed in the top menu and a disc guide (for options like subtitles and audio languages) are given in the disc menu.
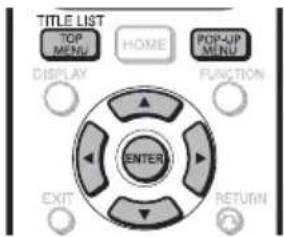
Start playback by selecting a title from the top menu
BD VIDEO DVD VIDEO
1 Press TOP MENU/TITLE LIST.
- The top menu screen is displayed if present on the BD/DVD video disc.
Example
2 Press ▲/▼/◄/► to select the title, then press ENTER.
• The selected title is played back.
NOTE
- The procedure explained on this page is the basic operation procedure. Procedures vary depending on the BD/DVD video disc, so you may need to follow the instructions in the BD/DVD video disc manual or the instructions displayed on the screen.
Top menu
- With some BD/DVD discs, the top menu may be referred to as the "Title Menu". Use TOP MENU/TITLE LIST on the remote control when the instructions refer to "Title Menu".
- If no top menu is available, the TOP MENU/TITLE LIST button will have no effect.
Using the disc menu
DVD VIDEO
Example: Select "SUBTITLE LANGUAGE".
1 Press TOP MENU/TITLE LIST.
- The disc menu screen is displayed if present on the DVD video disc.
2 Press ▲/▼ to select "SUBTITLE LANGUAGE", then press ENTER.
- The screen for selecting the subtitle language is displayed.
Example
3 Press ▲/▼ to select the subtitle language, then press ENTER. 4 Press TOP MENU/TITLE LIST to exit.
Using the pop-up menu
BD VIDEO
1 Press POP-UP MENU during playback.
- The pop up menu screen is displayed. - The menu contents displayed vary depending on the disc. For details on how to see and operate the pop-up menu, refer to the manual for the disc.
Example
2 Press ▲/▼/◄/► to select the desired item, then press ENTER.
3 Press POP-UP MENU to exit.
- The pop-up menu will automatically disappear for some discs.
Enjoying BONUSVIEW or BD-LIVE
BD VIDEO
This Player is compatible with additional functions of BD-Video, BONUSVIEW (BD-ROM Profile 1 Version 1.1) and BD-LIVE.
For BD-Video discs compatible with BONUSVIEW, the functions of Picture in Picture and Virtual Package are available. For BD-LIVE compatible discs, you can enjoy a variety of functions via the Internet in addition to the BONUSVIEW functions.
Virtual Package/BD-LIVE data is saved in Local Storage (USB memory device connected to this Player). To enjoy these functions, connect a USB memory device (2GB or greater) supporting USB 2.0 High Speed (480Mbit/s) to the USB terminal on this player.
When you insert or remove a USB memory device, be sure to turn the main power off.

- If there is insufficient storage space, the data will not be copied/downloaded. Delete unneeded data or use a new USB memory device.
- If a USB memory device containing other data (previously recorded) is used, the video and audio may not play back properly.
- If the USB memory device is disconnected from this player during playback of Virtual Package/BD-LIVE data, playback of the disc will stop.
- Some time may be required for the data to load (read/write).
- Refer to "USB Memory Management" on page 47 for erasing the Virtual Package data and the BD-LIVE data in the USB memory device.
NOTE
- SHARP cannot guarantee that all brands' USB memory devices will operate with this player.
- Only USB memory devices formatted with FAT 32/16 are compatible. When formatting a USB memory device using a PC, perform the following settings. Format File System: FAT32 Allocation Unit Size: Default Allocation Size
- Do not use a USB extension cable when connecting a USB memory device to the USB terminal of the player.
- Using a USB extension cable may prevent the player from performing correctly.
Use of Picture in Picture function (secondary audio/video playback)
BD-Video that includes secondary audio and video compatible with Picture in Picture can be played back with secondary audio and video simultaneously as a small video in the corner.

1 Press PinP during playback to show the 2-picture screen.

2 To remove the secondary video, press PinP again.
NOTE
- To listen to secondary audio, set the digital audio output setting (See "Audio Out" on page 40) according to the digital audio output format selection table on page 51.
- The secondary audio and video for Picture In Picture may automatically play back and be removed depending on the content. Also, playable areas may be restricted.
Virtual Package
For BD-Video discs compatible with Virtual Package, data is copied from the discs or Internet to local storage. It is automatically copied to the local storage prior to playback. You can enjoy a variety of additional functions including secondary video, secondary audio, subtitles, movie trailers, etc.
- The playback methods vary depending on the disc. For details, refer to the disc manual.
BD-LIVE
In this Player, a variety of contents with interactive functions are available through BD-LIVE compatible Blu-ray discs by connecting to the Internet. You can enjoy the download of bonus features such as latest movie trailers to the USB memory device, communication compatible BD-J interactive games, etc.
The available functions differ depending on the disc.
NOTE
- Regarding playback method of BD-LIVE contents, etc., perform the operations in accordance with the instructions in the BD disc manual.
- To enjoy BD-LIVE functions, perform the broadband Internet connection (pages 20–21) and communication settings (pages 43–46).
- Before using this function, please read "Network Service Disclaimer" (page x).
- Refer to page 42 regarding the setup to restrict access to BD-LIVE contents.
- If the BD-LIVE screen does not appear for a while after you select the BD-LIVE function in the BD disc menu, the USB memory device may not have enough free space. In such cases, eject the disc from the player, and then erase the data in the USB memory device in the "USB Memory Management" menu on page 47.
DVD-R/-RW (VR format) / BD-RE/-R (BDAV format) Playback
DVD-R
DVD-RW
BD-RE BD-R
You can play back a recorded disc (DVD: VR format finalized disc only / BD: BDAV format disc only).
- For a description of other playback functions, refer to "Playback Functions" on pages 34–35.


NOTE
- "Finalize" refers to a recorder processing a recorded disc so that it will play in other DVD players/recorders as well as this player. Only finalized DVD discs will play back in this player. (This player does not have a function to finalize discs.)
- Some discs cannot be played back depending on the audio format.
- BD-RE/-R discs recorded from a BD recorder comply with AACS copyright protection technology. As this player is not intended to be compliant with AACS, such discs cannot be played back. (AACS: Advanced Access Content System)
Playback by selecting a title
1 Load a recorded disc.
• Disc playback will begin automatically. - Playback begins from the first title.
2 Press ■ STOP.
3 Press TOP MENU/TITLE LIST.
- The Title List screen is displayed.

① Information of selected title ② Title Name
Recording Date
Recording Duration
③ Button Guide
- When loading a BD disc with usage restrictions placed by a BD recorder, the password input screen appears. Then, input your password. If you input a wrong password three times, the disc will be ejected. Load the disc into the disc slot again, and then input a correct password.
4 Press ▲/▼ to select the desired title, then press ENTER to start playback.

- If you want to select additional titles, switch pages by pressing PAGE / . The same operation can be performed by pressing
- You can playback by pressing ▶ PLAY instead of pressing ENTER.
5 Press ■ STOP to stop playback.
Playback by selecting a Playlist
1 Press C (Blue) while the Title List screen is displayed. - The Playlist screen is displayed. 2 Press ▲/▼ to select the desired title, then press ENTER to start playback. 3 Press ■ STOP to stop playback.
Audio CD Playback
AUDIO CD
This Player can play back audio CDs.
- For a description of other playback functions, refer to "Playback Functions" on pages 34–35.

Playback from the beginning
1 Load an audio CD.
• The CD screen is displayed. (The CD screen is displayed only when a compact disc recorded in the CD-DA format is inserted.) - Playback may begin automatically, depending on the disc.
Example: when playing back Track 6

2 Press ▶ PLAY if playback does not begin automatically or playback is stopped.
3 To pause the playback at any time, press || PAUSE.
- Press || PAUSE or ▶ PLAY to return to playback.
4 Press ■ STOP to stop playback.
NOTE
- Time display for each track will not be indicated on the screen until the track is played back.
To skip the track during playback
Press

SKIP or

SKIP/▶
- Press

SKIP to skip backward.
- Press
▶▶▶
SKIP/▶ to skip forward.
Operation procedure for the "Functions" menu
1 Press D (Yellow) (Functions) when the CD screen is displayed.
- The "Functions" menu is activated.

2 Press ▲/▼ to select the desired setting, then press ENTER.
- When playback is stopped, only "Track" can be selected.
- For a description of each setting, see "Functions which can be set" (Page 38).
3 Press ▲/▼/◄/► to set, then press ENTER.
- Operations vary depending on the setting. Follow the operation instructions on the screen.
4 Press 📍 RETURN or D (Yellow) to exit the "Functions" menu.
NOTE
- The displayed items vary depending on the disc. • Audio channel and time skip functions are not available.
Audio Data (MP3 File) Playback
CD-R CD-RW
DVD-R
DVD-RW
USB
This Player can play back audio data (MP3 files) recorded on CD-R/RW discs, DVD-R/RW discs and USB memory devices.
- For details on the audio data that you can play using this player, refer to page 10.

Playing back Audio data (MP3 files)
When you insert or remove a USB memory device, be sure to turn the main power off.
1 Load a disc or insert a USB memory device containing audio data (MP3 files), then press HOME to display the menu screen. 2 Press ▲/▼ to select "Music", then press ▶ or ENTER. 3 Press ▲/▼ to select "DVD/CD*" or "USB Memory Device", then press ▶ or ENTER. * Display name varies depending on the type of media inserted. - If only a "DVD/CD" or a USB memory device is inserted, the "DVD/CD" or "USB Memory Device" selection screen does not appear. In such cases, after step 2, proceed to step 4.
4 Press ▲/▼ to select a folder or file.
- When you select a folder, press ENTER to open it, and then press ▲/▼ to select a file in the folder.

5 Press ENTER to play back the selected file. - Playback of the selected file will begin.

- When MP3 files are played, the "Functions" menu is not available.
6 To pause the playback at any time, press || PAUSE. - Press || PAUSE or ▶ PLAY to return to playback.
7 Press ■ STOP to stop playback.
To play another file during Playback
Press ▲/▼ to select the file you want to play, then press ENTER.
• The chosen file will be played.
To skip the file during Playback
Press | SKIP or SKIP/▶. - Press | SKIP to skip backward. - Press | SKIP/▶ to skip forward.
NOTE
- The Fast Forward/Reverse function does not work. • The Repeat function does not work.
- When data in the USB memory device is played back, playback from the USB memory device will stop when EJECT on the remote control or the player is pressed or when a disc is inserted into the player.
Displaying Still Images (JPEG files)
CD-R CD-RW
DVD-R
DVD-RW
USB
This Player can display still images (JPEG files) recorded on CD-R/RW discs, DVD-R/RW discs and USB memory devices.
- For details on the still images that you can display using this player, refer to page 10.
- Still images are played one by one while during "Slide show", they are automatically replaced one after another.

Displaying Still Images (JPEG files)
When you insert or remove a USB memory device, be sure to turn the main power off.
1 Load a disc or insert a USB memory device containing Still Images (JPEG files), then press HOME to display the menu screen. 2 Press ▲/▼ to select "Picture", then press ▶ or ENTER. 3 Press ▲/▼ to select "DVD/CD*" or "USB Memory Device", then press ▶ or ENTER. * Display name varies depending on the type of media inserted. - If only a "DVD/CD" or a USB memory device is inserted, the "DVD/CD" or "USB Memory Device" selection screen does not appear. In such cases, after step 2, proceed to step 4.
4 Press ▲/▼ to select a folder or file.
- When you select a folder, press ENTER to open it, and then press ▲/▼ to select a file in the folder.
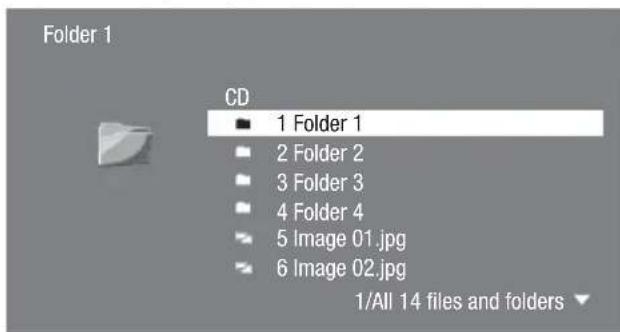

NOTE
- Thumbnail data will be displayed when JPEG files from a digital camera contain thumbnail data.
- An icon will be displayed for JPEG files which do not contain thumbnail data.
- When data in the USB memory device is played back, playback from the USB memory device will stop when EJECT on the remote control or the player is pressed or when a disc is inserted into the player.
5 Press ENTER to display the selected file.
• The selected still image appears on the screen.

6 Press ◀◀◀ SKIP or ▶▶◀ SKIP/▶ to replace one image with another.
- The same operation can be performed by pressing REV/▶ FWD.
- Press 📄 RETURN if you wish to return to the selection screen.
7 To stop the still image display at any time, press STOP.
Playing back Slide Show
1 To play back Slide Show, in Step 6 of the "Displaying Still Images (JPEG files)", press ▶ PLAY (Slide Show). - The still images inside the selected folder are played as a slide show. 2 To pause the playback at any time, press || PAUSE. - Press ▶ PLAY to return to playback of a slide show. 3 To stop the playback at any time, press STOP.
Setting slide show speed/repeat playback
1 Press D (Yellow) (Slide Show Menu) while the selection screen is displayed. - The setting screen for "Slide Show Speed"/"Repeat Mode Setting" appears.
2 Press ▲/▼ to select "Slide Show Speed", then press ▶ or ENTER.
3 Press ▲/▼ to select the desired speed, then press ENTER.
- The slide show speed may be selected from "Fast", "Normal", "Slow1" and "Slow2".
4 Press ▲/▼ to select "Repeat Mode Setting", then press ▶ or ENTER.
5 Press ▲/▼ to select the desired item, then press ENTER. • The desired item may be selected from "Yes" or "No".
6 Press EXIT to exit.


NOTE
- Some operations in the following playback functions cannot be performed depending on the specifications of the disc.
Fast Forward/Reverse (Search)
BD VIDEO BD-R BD-RE
DVD VIDEO DVD-R DVD-RW
AUDIO CD
The Fast Forward/Reverse function is enabled when
◀◀ REV or ▶▶ FWD is pressed during playback. Example: When ▶▶ FWD is pressed
- The search speed will change each time you press the button.
When playing back a DVD
- You cannot perform Fast Forward/Fast Reverse from one title and continue to another title (except when playing audio CDs). At the end or beginning of the title, Fast Forward/Fast Reverse will be cancelled and normal playback will automatically resume.

NOTE
- Subtitles are not played back with BD/DVD video discs during Fast Forward and Fast Reverse.
Skipping to the Next or the Start of the Current Chapter (Track/Title)
BD VIDEO BD-R BD-RE
DVD VIDEO DVD-R DVD-RW
AUDIO CD CD-R CD-RW USB
The Skipping (to the beginning of a chapter, track or title) function is enabled when SKIP or SKIP/▶ is pressed during playback.
Pause/Frame Advance Playback
BD VIDEO BD-R BD-RE
DVD VIDEO DVD-R DVD-RW
The Pause function is enabled when || PAUSE is pressed during playback. (If you are playing back an audio CD, audio data [MP3 files] or still images [JPEG files], these will also pause.)
The Frame Advance Playback function is enabled when SKIP/▶ is pressed during pause.
- Frame Advance Playback may not function properly with discs other than DVD-RW/R (VR format).

NOTE
- Some BD/DVD Video discs are not compatible with Pause/Frame Advance Playback.
- Frame Reverse Playback cannot be performed with this player. • Frame Advance Playback does not work for BD-R/-RE.
Slow Playback
BD VIDEO BD-R BD-RE
DVD VIDEO DVD-R DVD-RW
The Slow Playback function is enabled when
▶▶▶ SKIP/▶ or is pressed for more than 2 seconds during pause.
- Press ▶ PLAY to return to normal playback.

NOTE
• This doesn't work for audio CDs. - You cannot perform Slow Playback between titles. At the end of the title, Slow Playback will be cancelled and normal playback will automatically resume. - Reverse Slow Playback cannot be performed with this player.
Skip Search
BD VIDEO BD-R BD-RE
DVD VIDEO DVD-R DVD-RW
Playback skips 30 seconds ahead when SKIP SEARCH is pressed during playback.
Replay
BD VIDEO BD-R BD-RE
DVD VIDEO DVD-R DVD-RW
Playback jumps back 10 seconds when REPLAY is pressed during playback.
Repeat Playback of a Title or Chapter (Repeat Playback)
BD VIDEO BD-R BD-RE
DVD VIDEO DVD-R DVD-RW
AUDIO CD
1 Play back the title or chapter you want to repeat. 2 Press REPEAT. 3 Press ▲/▼ to select the type of Repeat Playback.
- Playback Title: Repeats the title currently being played back.
- Playback Chapter: Repeats the chapter currently being played back.
- Scene Selection: Repeats the specified scene of title or chapter.
Playback Title
Playback Chapter
Scene Selection
- Press 📊 RETURN to cancel without setting the type of Repeat Playback.
- For Audio CD, you can select "Playing Disc", "Playing Track" and "Specify The Part" as Repeat Playback options.
4 Press ENTER.
Example: Repeat playback of a title (TITLE)

5 Press REPEAT-OFF or REPEAT to return to normal playback.
NOTE
"Scene Selection" operation is not available for BD video.
Partial Repeat Playback (Repeat Playback of a Specified Part)
DVD VIDEO DVD-R DVD-RW
AUDIO CD
1 Press REPEAT during playback. 2 Press ▲/▼ to select "Scene Selection", then press ENTER.
- "Set Start Point" displays.
Playback Title
Playback Chapter
Set Start Point Scene Selection
3 Press ENTER at the scene where you want to set the start point.
- "Set End Point" displays.
4 Press ENTER at the scene where you want to set the end point.
- You can press ▶▶ FWD to fast forward to the scene where you want to set the end point. When you reach the desired scene, simply press ▶ PLAY and then ENTER to set the end point. To cancel Repeat Playback, press REPEAT-OFF or REPEAT.
NOTE
- Press ▶▶▶ SKIP/▶, the Repeat Playback is cancelled and the next chapter being play back.
- Press SKIP once, the Repeat Playback is cancelled and the player returns to the start of current chapter (track).
- If you press SKIP again (within about 5 seconds) the player will skip to the beginning of the previous chapter (track).
- For Partial Repeat Playback, set the start and end points within the same title.
- Repeat Playback may be forbidden depending on the disc.
- Partial Repeat Playback may not work in multi-angle scenes.
- If you press DISPLAY, you can confirm the Repeat Playback status.
Displaying the Audio Information
You can display the audio information on the disc currently being played back by pressing AUDIO.
- The displayed contents vary depending on the disc.
BD VIDEO DVD VIDEO
The audio channel currently being played back will be displayed.
If multiple audio channels are recorded, you can switch the audio channel by pressing AUDIO.
DVD-RW DVD-R
When a recorded broadcast with stereo or monaural audio is played back:
“Stereo” is displayed. (Audio cannot be switched.)

NOTE
- When you play a program recorded in stereo or monaural, and if you are listening to the Bitstream sound via the digital output jack, you cannot select the audio channel. Set the digital audio output setting to "PCM" (page 40).
- Settings for audio can also be changed in the Function Control screen (Page 37).
- The operation of audio differs according to each disc. You may need to refer to the operation manual of the disc.
- The display for audio information automatically disappears after 5 seconds.
Switching Subtitles
BD VIDEO DVD VIDEO
If subtitles are provided in multiple languages, you can switch between them.
Press SUBTITLE during playback.
- The display indicates the subtitle number currently being played back, and the subtitles appear. Each time SUBTITLE is pressed, the subtitles change.
- “—” is displayed if a disc has no subtitles.
- You can also select "Off".

NOTE
- Settings for subtitles can also be changed in the Function Control screen (Page 37).
- The operation of subtitles differs according to each disc. You may need to refer to the operation manual of the disc.
- The display for subtitle information automatically disappears after 5 seconds.
Switching the Angle
BD VIDEO DVD VIDEO
If multiple angles are recorded, you can switch between them.
Press ANGLE during playback.
- The display indicates the angle number currently being played back. Each time you press ANGLE, the angle switches.
To return to the previous angle, press ANGLE to cycle through the angles until you return to the original angle.

NOTE
- The displayed items vary depending on the disc.
- If you access the Function Control screen during playback of a BD/DVD video, it may be impossible to operate the BD/DVD video playback. In cases like this, close the Function Control screen.
- The operation of angles differs according to each disc. You may need to refer to the operation manual of the disc.
- The display for angle information automatically disappears after 5 seconds.
Displaying the Angle Mark
BD VIDEO DVD VIDEO
You can change settings so that Angle Mark appears in the right bottom part of the screen when multiple angles are recorded. The settings can be changed in "Settings" – "Playback Setting" – "Angle Mark Display" (Page 41).
Function Control
BD VIDEO BD-R BD-RE

DVD VIDEO
DVD-R
DVD-RW
AUDIO CD
This allows you to adjust various settings at once, like subtitles, angle settings and the title selection for Direct Playback. You can adjust the video and audio to suit your preferences. The operations are the same for BD and DVD.
Function Control screen
① Playback status display
Shows the operation status and the disc type.
② Setting items
Selects a title (or track) or chapter for playback, or performs video/audio settings.
• Title/Track Number (Direct Title/Track Skip) • Chapter Number (Direct Chapter Skip) • Playback Elapsed Time (Direct Time Skip) • Subtitle Language • Angle Number • Audio • Repeat
③ Operation guide display
Provides help on remote control button operations.
Function control operation procedure

1 Press FUNCTION during playback.
- The Function Control screen is displayed on the TV.
2 Press ▲/▼ to select the desired setting, then press ENTER.
- For a description of each setting, see "Functions which can be set" (Page 38).

3 Press ▲/▼/◄/► to set, then press ENTER.
- Operations vary depending on the setting. Follow the operation instructions on the screen.
4 Press RETURN or FUNCTION to close the Function Control screen.
NOTE
- If "--" is displayed for an option like title number or subtitles, the disc has no titles or subtitles which can be selected. • The displayed items vary depending on the disc.
- If you access the Function Control screen during playback of a BD/DVD video, it may be impossible to operate the BD/DVD video playback. In cases like this, close the Function Control screen.
Functions which can be set
Title/Track Number (Direct Title/Track Skip)
- Shows the title number being played back (or track number when playing back an audio CD). You can skip to the start of the title (or track).
- To skip to the start of a selected title (or track), press the Number buttons to enter the title (or track) number when this option is highlighted.
Chapter Number (Direct Chapter Skip)
• Shows the chapter number being played back. You can skip to the start of the chapter. - To skip to the start of a selected chapter, press the Number buttons to enter the chapter number when this option is highlighted.
Playback Elapsed Time (Direct Time Skip)
- Shows the time elapsed from the beginning of the current disc title (or track). This lets you skip to a specific time.
- Press ◀/▶ to select the Hour, Minute or Second, then press ▲/▼ or the Number buttons to set the time. Press ENTER to start playback at the set time.
NOTE
- ENTER button under the Cover: Enters the input number.
- CLEAR button under the Cover: Clears the input number.
Subtitle Language
- Shows the currently selected subtitle language. If subtitles are provided in other languages, you can switch to your preferred language.
Angle Number
- Shows the currently selected angle number. If the video is recorded with multiple angles, you can switch the angle.
Audio
Shows the currently selected type of audio. You can select the desired type of audio.
Repeat
- The current Title (or Chapter) or partial segments can be repeatedly played back. Repeat Playback is also possible with the REPEAT button on the remote control.
NOTE
These functions may not work with all discs.

Common operations
The "menu" enables various audio/visual settings and adjustments on the functions using the remote control unit. You need to call up the On Screen Display to perform settings for this player. The following is the explanation for the basic operations of the "menu".
Example: Setting "AQUOS LINK"

Display the menu screen
Movie
Picture
Music
e-Contents
Settings
Press HOME to display the menu screen.
- The same operation can be performed by pressing ENTER after selecting the HOME icon on the Wall Paper screen. Press ▲/▼ to select "Settings", then press ▶ or ENTER.

Select a menu item
Press ▲/▼ to select "AQUOS LINK", then press ▶ or ENTER.
Audio Video Settings
Smart Settings
AQUOS LINK
Playback Setting
On Screen Language
Communication Setup
Version
USB Memory Management
Software Update Settings
System

Select the next item
Press ▲/▼ to select the desired item, then press ENTER.
Press 📄 RETURN to return to the previous "menu" page.


Exit the menu screen
Press HOME or EXIT to exit.
Basic Operation for Playback Setting
Example: Setting "Parental Control" under "Playback Setting"
1 Press HOME to display the menu screen.
- The same operation can be performed by pressing ENTER after selecting the HOME icon on the Wall Paper screen.
2 Press ▲/▼ to select "Settings", then press ▶ or ENTER.
3 Press ▲/▼ to select "Playback Setting", then press ▶ or ENTER.
4 Press ▲/▼ to select "Parental Control", then press ▶ or ENTER.
- When you operate this Player for the first time, the password setting screen will be displayed. See "When setting the password for the first time" below.
5 Enter your 4-digit password.
- You cannot move to the next setting screen until you can input the correct password.
When setting the password for the first time.
① To set the password for the first time, press ▲/▼ to select "Yes" to enter the password setting menu, then press ▶ or ENTER.
② Enter a 4-digit number for the password, then the same 4-digit number for confirmation. ③ Press ENTER to complete the password setting procedure and move to the next setting screen. 6 Press ◀/▶ to select the parental control level for DVD VIDEO/BD-ROM, and then select the country code. Press ENTER after making each selection.
Example: when the selected parental control level is "8"
![Parental Control Disc Language Angle Mark Display Password Setting BD Internet Access < 8 [Adult] USA](/content/2026/05/858839/images/79aa90f8dcc3a893f4d8a305afee99b30e871f2afb486aa061cf98d352a3e16c.jpg)
7 Press HOME or EXIT to exit.
Audio Video Settings
TV Aspect Ratio
You can set the screen aspect ratio of the connected TV, and adjust the video output.
If you switch your TV (i.e. because you have bought a new one) and the screen aspect ratio of the connected TV changes, you will have to change the "TV Aspect Ratio" setting.
Item
Wide 16:9: Select this when connecting to a TV with a 16:9 screen aspect ratio.
Normal 4:3: Select this when connecting to a TV with a 4:3 screen aspect ratio.
Item
Letter Box: If you connect to a TV with a screen aspect ratio of 4:3 and playback a DVD with 16:9 video, the video will be played back with black bands at the top and bottom while maintaining the 16:9 ratio.
Pan Scan: If you connect to a TV with a screen aspect ratio of 4:3 and playback a DVD with 16:9 video, the video will be played back with the left and right sides of the image cut off to display in 4:3 screen aspect ratio. (This function works if the disc is labelled for 4:3PS.)
HDMI Video Out
This sets the resolution of the HDMI video output. Some TVs are not fully compatible with the Blu-ray disc player, which may cause the image distortion. In this case, press VIDEO OUTPUT RESET on the remote control for five seconds. "HDMI Video Out" will be reset to "Auto" (factory preset value).
Item
Auto, 1080p, 1080i, 720p, 480p

NOTE
- When the BD player is connected to a 1080p 24Hz compatible TV and the "HDMI Video Out" is set to "Auto", 1080p 24Hz will automatically be displayed when compatible discs are played back.
Audio Out
This lets you set the digital audio output format according to the capabilities of the connected audio equipment.
- To listen to the secondary audio of Blu-ray discs, select "PCM" or "Bitstream (Mix)".
- For details, refer to the digital audio output format selection table on page 51.
Item
PCM, Bitstream (Mix), Bitstream

NOTE
- Make sure to select a compatible digital audio output format, otherwise you will hear no sound or a garbled noise.
- If the HDMI device (Receiver, TV) is not compatible with compressed formats (Dolby Digital, DTS), the audio signal outputs as PCM. Secondary and Effect audio is not present on DVD video.
- This setting has no effect on the analog (L/R) audio or HDMI audio output to your TV. It is only valid for the optical and HDMI audio output to a receiver.
- If you play MPEG audio soundtracks, the audio signal format will be PCM regardless of digital audio output format selection (PCM or Bitstream).
Dynamic Range Control
This lets you adjust the range between the loudest and softest sounds (dynamic range) for playback at average volume. Use this when it is hard to hear dialog.
Item
Normal: The same audio output range is played as the original recorded audio output range.
Shift*: When Dolby Digital audio is played back, the dynamic range of the audio is adjusted so that the dialog portion can be heard easily. (If the audio sounds abnormal, set to "Normal".)
Auto: When you play back audio in the Dolby TrueHD format, the dynamic range is automatically adjusted.
* Lower the audio volume before setting. If you do not do so, the speakers may emit a loud sound or excessive output may be applied to the speakers.
Smart Settings
Auto Power Off
This sets the Player so that power is automatically shut off if playback is stopped and you do not perform any operations for about 10 minutes.
Item
Yes, No
Front LED
If you feel that the indicators on the player are too bright when watching movies, you can turn them off except for the POWER indicator.
Item
On, Off
Control Panel
This lets you set display of the control panel on the TV screen to on or off.
Item
Yes, No
Screen Saver
This function helps prevent burn-in on the TV screen by leaving the player with the power turned on for a long period of time. This lets you set the length of time before it activates.
Item
This lets you set the Player to receive the control signal from the AQUOS LINK remote control via the HDMI cable.
Item
Yes, No

NOTE
For details, refer to the operation manual of the TV.
Playback Setting
Parental Control
This lets you set the Parental Control for BD-ROM/DVD-video depending on the disc content.
The 4-digit password number needs to be entered before the Parental Control Levels and the Country Code are set. The Parental Control Levels and the Country Code cannot be set if a password has not been created or the password is not entered.
Select the rating level appropriate for the age of the user.
Item (Parental control level)
8 and Off: All BD-video/DVD-video can be played.
1–7: Prohibits play of BD-video/DVD-video with corresponding ratings recorded on them.
Item (Country code)
Select the country code.
- The ratings differ according to the country.

NOTE
- Refer to "Basic Operation for Playback Setting" on page 39 for details.
Disc Language (Disc Priority Language)
This lets you select the language for subtitles, audio, and menus displayed on the screen.
Item (Subtitle)
Select the subtitle language you want to display.
Item (Audio)
Select the audio language you want to hear.
Item (Menu)
Select the menu language you want to display.

NOTE
- When "Auto" is selected, the priority language of the disc will be played back.
Angle Mark Display
This lets you turn the Angle Mark Display on or off when BD/DVD video recorded with multiple angles is played back. (The Angle Mark is displayed in the lower right screen.)
Item
Yes, No
Password Setting
This sets the password for setting or changing the Parental Control Level.
Item
Yes: Enter the 4-digit number. No

NOTE
- When you forget the password, you can reset the current password using "System Reset" under "Settings". (See this page.)
- You can also set the new password if desired.
BD Internet Access
This allows you to set access restriction to BD-LIVE contents.
Item
Permit: Allows all BD-LIVE discs. Limit: Allows only discs with owner certification. Prohibit: Prohibits all BD-LIVE discs.

NOTE
- The available functions differ depending on the disc.
- Regarding playback method of BD-LIVE contents, etc., perform the operations in accordance with the instructions in the BD disc manual.
- To enjoy BD-LIVE functions, perform the broadband Internet connection (pages 20–21) and communication settings (pages 43–46).
3D mode
This sets output of 3D images.
To view 3D images, playback of 3D content (3D BD video) is necessary with a 3D compatible TV and 3D glasses in addition to this player.
Item
Auto: Video signals are output as 3D when 3D content (3D BD video) is played or as 2D when 2D content is played. 2D: Even if 3D content (3D BD video) is played, video signals are output as 2D at all times.

CAUTION
- When viewing 3D images, viewing for a long period of time or lying on your back may cause eye strain and discomfort. In addition, 3D images may affect the eyesight of young children/infants, so keep them from viewing the images.
3D Notice
This sets whether or not a notice is displayed ("On" or "Off") on the connected TV every time 3D content (3D BD video) is played.
Item
On, Off
On Screen Language
You can set the language you want to display on the screen.
Item
English, Español, Français
Version
When you select "Version", the system software version and Netflix ESN are displayed.
System
System Reset
You can reset all settings to the factory presets.
Item
Reset, Not Reset
Netflix Deactivate
You can deactivate your Netflix information on the player.
Item
Yes, No
DivX Registor
The DivX registration code is displayed.
Item
Yes, No

NOTE
To learn more, visit www.divx.com/vod.
DivX Deactivate
You can deactivate your DivX information on the player.
Item
Yes, No

NOTE
To learn more, visit www.divx.com/vod.
VUDU Deactivate
You can deactivate your VUDU information on the player.
Item
Yes, No
Communication Setup
This allows you to perform and/or change the communication settings and select the type of Internet connection from Cable or Wireless (built-in). This setting is required to use BD-LIVE functions, video streaming services and software updates that connect to the Internet.

NOTE
- Make sure that the LAN cable is connected to this player if a wired Internet connection is made. Make sure that the wireless router/access point is connected to the Internet if a wireless Internet connection is made. (See pages 20–21.)
- For manually performing the setting, the following information of the connected router or modem is required. Confirm the information prior to the setting.
- IP address, netmask, gateway, DNS address

Sets whether "Cable" or "Wireless" is used for the network connection
1 Press HOME to display the menu screen. 2 Press ▲/▼ to select "Settings", then press ▶ or ENTER. 3 Press ▲/▼ to select "Communication Setup", then press ▶ or ENTER. 4 Press ▲/▼ to select "Cable/Wireless Select", then press ▶ or ENTER. 5 Press ▲/▼ to select "Cable" or "Wireless", then press ENTER. - If selecting "Cable", follow the [When selecting Cable] directions below, then go to step 4. - If selecting "Wireless", follow the [When selecting Wireless] directions on the next page, then go to step 4.
When selecting Cable
1 Press HOME to display the menu screen. 2 Press ▲/▼ to select "Settings", then press ▶ or ENTER. 3 Press ▲/▼ to select "Communication Setup", then press ▶ or ENTER. 4 Press ▲/▼ to select "Ethernet Setup (Cable)", then press ▶ or ENTER.
5
Press ▲/▼ to select "Change", then press ENTER.

- For initializing the current setting, select "Initialize", then press ENTER.
6
For setting the IP address, press ◀/▶ to select "Yes" or "No", then press ENTER.
![graph TD A["Do you obtain the IP address automatically?"] --> B{Yes No} B --> C["IP Address"] C --> D["—"] C --> E["—"] C --> F["—"] C --> G["—"] C --> H["—"] C --> I["—"] C --> J["—"] C --> K["—"] C --> L["Next"]](/content/2026/05/858839/images/7882fd4a450274235ca82733e803706cb610490c6faf906feff18ad7eac2b903.jpg)
- If selecting "Yes": The IP address is automatically obtained.
- If selecting "No": The IP address, netmask and gateway are manually entered using the screen for inputting characters. (See page 46.) Regarding each of the setup values, confirm the specifications of your broadband router.
7
Select "Next", then press ENTER.
- If selecting "Yes" in the step 5, go to the step 9.
8
Enter your DNS address.

- The primary and secondary DNS addresses are entered using the screen for inputting characters. (See page 46.) Regarding each of the setup values, confirm the specifications of your broadband router.
9
Select "Next", then press ENTER.
10 For testing the connection to the Internet, after confirming the settings, press ▲/▼ to select "Test", then press ENTER.
- "Test" is available only when setting to obtain the IP address automatically. "Test" cannot be selected if the IP address has not been obtained automatically.

- As a result of the test, if the Internet connection fails, enter the setup values manually.
11 Press ▲/▼ to select "Complete", then press ENTER.
When selecting Wireless

CAUTION
- When performing the wireless communication setup, security information for the wireless router/access point (WEP, WPA or WPA2 key) is required. Check your wireless router/access point's information prior to setup.

NOTE
- Before this player can access the Internet wirelessly, setup of a wireless router/access point is required.
1 Press HOME to display the menu screen. 2 Press ▲/▼ to select "Settings", then press ▶ or ENTER. 3 Press ▲/▼ to select "Communication Setup", then press ▶ or ENTER. 4 Press ▲/▼ to select "Ethernet Setup (Wireless)", then press ▶ or ENTER. 5 Press ▲/▼ to select "Change", then press ENTER.

- To initialize the current setting, select "Initialize" and press ENTER.
6 The player scans all available access points and displays them on the screen, along with the "Other Network" selection bar.
- While searching for access points, "Accessing..." appears on the screen.
- Up to 6 items (5 access points and the "Other Network" selection bar) are displayed on the screen.
- When there are six or more items retrieved, select "Next" and press ENTER to display the next screen. (The "Other Network" selection bar is always displayed last.) If no available access points are retrieved, only the "Other Network" selection bar is displayed on the screen.
7 Use ▲/▼ to select the desired access point or "Other Network", then press ENTER.
- For access points that have their SSID hidden via the wireless router, select "Other Network" to set the access point.

- If you select a desired access point, go to step 10.
- If you select "Other Network", go to the next step.
8 Press ENTER, then enter the access point name.
- The access point name is entered manually using the character input screen. (See page 46.)

9 Select "Next" and press ENTER.
10 Use ▲/▼ to select your appropriate security key, then press ENTER.
- When selecting WPA/WPA2, the selectable security keys are PSK/TKIP and PSK/AES.

11 Press ENTER, then enter the security key code.
- Enter the exact same security key which has been set in the wireless router. - The security key code is manually entered using the screen for inputting characters. (See page 46.)

12 Select "Next", then press ENTER.
13 For testing after confirming the settings, select "Test", then press ENTER.
- If the test has failed, an error message appears. Retry to perform the settings after checking that the connection (page 21) is performed properly.

14 Follow steps 6–11 of "When selecting Cable" on pages 43–44 to complete the network connection settings.
Information on MAC addresses
A MAC address is a unique ID number for network equipment. A MAC address is necessary for MAC address filtering on the wireless router/access point.
Before the wireless communication setup is performed, we recommend writing down the MAC address and keeping it in a safe place. (The MAC address is displayed on the "Current Ethernet setup info." screen when wireless communication is set (See step 5 of page 44).)
MAC address
The operation procedure for inputting characters manually

NOTE
- Numeric characters such as IP address can be entered on the input screen either by selecting each of the characters in the "Numeric" mode or using the Number buttons on the remote control.

1 Press ENTER at the boxes in which characters are to be entered, and the input screen will appear.

2 Press ▲/▼ to select the desired input mode. 3 Press ◀/▶ to select a number/character, then press ENTER.
4 Repeat the step 3 to display all of the desired characters/numbers in the input field.
Example: The screen for inputting numeric characters
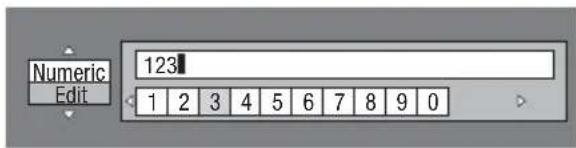

NOTE
- Press RETURN (Del.Char.) to delete a number/character you have input. Input numbers/characters can also be deleted by pressing A (Red).
- To change a number/character you have input, press B (Green) (Left) or C (Blue) (Right) to select the number/character you want to change, and press RETURN (Del.Char.). Then, press ◀/▶ to select a new number/character you want to input, and press ENTER.
5 Press D (Yellow) (Complete) to fix the numbers which have been input.

6 Repeat steps 1 to 5 to finish inputting all the required characters.
Input character list
| 1ABC (Alphabet/numeric character) | |||||||||||
| Num. ABC DEF GHI JKL MNO PQRS TUVWXYZ Spc. | |||||||||||
| Num. 1 2 3 4 5 6 7 8 9 0 ABC A B C a b c DEF D E F d e f | |||||||||||
| GHI G H I g h i JKL J K L j k l M N O M N O m n o | |||||||||||
| PQRS P Q R S p q r s TUV T U V t u v WXYZ W X Y Z w x y z | |||||||||||
| Spc. (space) | |||||||||||
| Numeric | |||||||||||
| 1 2 3 4 5 6 7 8 9 0 | |||||||||||
| Sign | |||||||||||
| @ . , : ; _ - \ % ! ? & # + * = / | " : ^ ( ) < > [ ] Spc. | |||||||||||
| @ . , : @ . , : ; _ - \ ; _ - \ | ; _ - \ ; _ - \ | % ! ? | $ % ! ? | ||||||||
| & # + * & # + * = / | ~ = / | ~ | “ ^ ” | “ ^ ^ ” | |||||||||
| ( ) < > ( ) < > [ ] { } [ ] { } Spc. (space) | [ ] { } [ ] { } | [ ] { } | |||||||||
| Edit | |||||||||||
| Cancel Left Right Complete Del.Char.* The same operation as the colored buttons and ⚫ RETURN can be performed by selecting each of the items and pressing ENTER.“Del.Char.” stands for deleting characters. | |||||||||||
Before using the USB memory device
CAUTION:
- Do not remove the USB memory device or unplug the AC cord while the operations for "USB Memory Management" or "Software Update (Manual Update from USB memory device)" are being performed.
- Do not use a USB extension cable when connecting a USB memory device to the USB terminal on the player.
- Using a USB extension cable may prevent the player from performing correctly.
NOTE:
- SHARP cannot guarantee that all brands' USB memory devices will operate with this player.
- Only USB memory devices formatted with FAT 32/16 are compatible. When formatting a USB memory device using a PC, perform the following settings. Format File System: FAT32 Allocation Unit Size: Default Allocation Size
USB Memory Management
The following instructions explain how to delete data such as the Virtual Package data and the BD-LIVE data in a USB memory device.

When you insert or remove a USB memory device, be sure to turn the main power off.
1 Insert the USB memory device into the USB terminal on this player.

2 Press HOME to display the menu screen. 3 Press ▲/▼ to select "Settings", then press ▶ or ENTER.
4 Press ▲/▼ to select "USB Memory Management", then press ▶ or ENTER.
- The "USB Memory Management" screen is displayed.
- "No USB Memory" appears when no USB memory is inserted.
5 Press ▶ or ENTER to proceed.
Erase: Deletes only BD-VIDEO data written on the USB memory device such as BD-LIVE data.
- If you want to delete all of the data or delete only the unneeded software update data after the software is updated, delete the data on the USB memory device using a PC.
6 Press ▲/▼ to select "Yes", then press ENTER.
7 Start the process.
- The screen for the current operation will display.

8 Press ENTER.
NOTE
- Data which has been saved to the player's internal memory (game score, etc.) will also be deleted.
Software Update Settings
In this player, the software version can be updated using either one of the following methods.
- Manual Update from Network
- Manual Update from USB memory device
Manual Update from Network
This function allows you to perform the update operation by accessing an Internet connection manually to check if there is a new firmware version.

NOTE
- Make sure that the LAN cable is connected to this player if a wired Internet connection is made. Make sure that the wireless router/access point is connected to the Internet if a wireless Internet connection is made. (See pages 20–21.)
- Make sure to perform the communication settings. (See pages 43–46.)
- It may take time to access and download the update depending on the Internet connection and other factors.

CAUTION
- While downloading or updating the software, do not remove the LAN cable when it is used for the Internet connection, do not unplug the AC cord, do not remove any cables from the router/access point and do not turn off the router/access point.

1 Press HOME to display the menu screen. 2 Press ▲/▼ to select "Settings", then press ▶ or ENTER. 3 Press ▲/▼ to select "Software Update Settings", then press ▶ or ENTER. 4 Press ▶ or ENTER to move to the menu to the right. 5 Press ▲/▼ to select "Network", then press ENTER.
During access to the network and checking the latest version of firmware, "Accessing" blinks.
- The current version of this unit software and the latest version of the update file on the network are displayed when latest version of firmware has been found. To update this player software with update file, select "Yes", and go to step 7.


- If the firmware has already been updated to the latest version, the following message appears.
Present version of firmware is latest version. You do not need to update.

- If the Internet connection has failed, an error message appears. Retry the update after checking if the broadband Internet connection (pages 20–21) and communication settings (pages 43–46) are performed properly.
7
Press ENTER to start updating.

8
When the software is successfully updated, a screen is displayed indicating that the update process is completed.
- If the update has failed, an error message appears. Retry the update after checking if the broadband Internet connection (pages 20–21) and communication settings (pages 43–46) are performed properly.
9
Press POWER to turn off the player.
Manual Update from USB memory device
This function allows software updates by inserting a USB memory device with the update file into the USB terminal on this player.
- When a software update is performed, the software update data must be written onto the USB memory device in advance using a PC.
- The USB memory device must be clear of all files except software update data to allow new software uploading.
To check for the availability of a software update, visit www.sharpusa.com/products/support/. If you have any questions, please call 1-800-BE-SHARP (800-237-4277).
- When software update data is released, copy the data onto a USB memory device after downloading it to a PC.
- For methods such as downloading and copying to a USB memory device, carefully read the description shown on the website before performing the operation.

NOTE
- Only USB memory devices formatted with FAT 32/16 are compatible. When formatting a USB memory device using a PC, perform the following settings. Format File System: FAT32 Allocation Unit Size: Default Allocation Size
- Do not extract the firmware update file to any folders other than the root directory on the USB memory device. The firmware update file must be only one file directly in the root directory.
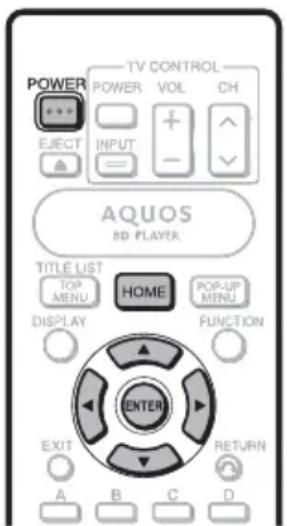

CAUTION
- Do not remove the USB memory device or unplug the AC cord while the software is being updated.
When you insert a USB memory device, be sure to turn the main power off.
1 Insert the USB memory device with the update file into the USB terminal on this player.

2
Press POWER to turn on the power.
- The screen shown in part ② of step 9 will be automatically displayed. (Go to part ② of step 9.)
- If "No" is selected in part ② of step 9 and you wish to update the software manually, perform the operations from step 3.
3
Press HOME to display the menu screen.
4
Press ▲/▼ to select "Settings", then press ▶ or ENTER.
5
Press ▲/▼ to select "Software Update Settings", then press ▶ or ENTER.
6
Press ▶ or ENTER to move to the menu on the right.
7
Press ▲/▼ to select "USB Memory", then press ENTER.
- If you have not yet set the password, go to step 8.
8
Press ENTER to start checking data in the USB memory device.

9
① During the data checking, “Checking” blinks.

② The current version of this unit software and the version of the update file on the USB memory device are displayed. To update this player software with update file, select "Yes", and press ENTER.
Software update file is detected in the USB memory device. Start update?
Current Ver. : xxxxxxxxxxx Update Ver. : yyyyyyyyyy

③ If the USB memory device is not properly installed or the correct update file cannot be found on the USB memory device, an error message is displayed. Check the file on the USB memory device, and then reinsert the USB memory device correctly.
Software update file is not detected in the USB memory device. Confirm that you have transferred the file to the USB memory device and retry software update. Confirm that you have inserted the USB memory device into the correct device.

There is more than one software file in the USB memory device. Confirm that only the software update file is in the USB memory device.

10 Press ENTER to start updating.
- The screen becomes dark for a while until the update screen can be displayed. Please wait for the update screen to appear. Do not unplug the AC cord.

11 When the software is successfully updated, a screen is displayed indicating that the update process is completed.
- If the update has failed, check the file in the USB device and try Software Update again.
12 Remove the USB memory device.
13 Press POWER to turn off the player.
- Delete unneeded software update data using a PC after the software update process is completed.
Digital Audio Output Selection Formats
| Setup Definition | Output terminal | Audio Stream | |||||||
| PCM | Dolby Digital | Dolby Digital Plus | Dolby TrueHD | DTS | DTS-HD HR | DTS-HD MA | |||
| PCM | Decodes Primary, Secondary and Effect audio streams together into PCM audio. | HDMI OUT PCM PCM PCM PCM | PCM 7.1ch | PCM 7.1ch | |||||
| OPTICAL PCM 2ch PCM | 2ch PCM 2ch PCM 2ch PCM PCM 2ch PCM 2ch PCM 2ch PCM 2ch PCM 2ch PCM 2ch PCM 2ch PCM 2ch PCM 2ch PCM 2ch PCM 2ch PCM 2ch PCM 2ch PCM 2ch PCM 2ch PCM 2ch PCM 2ch PCM 2ch PCM 2ch PCM 2ch PCM 2ch PCM 2ch PCM 2ch PCM 2ch PCM 2ch PCM 2h PCM 2h PCM 2h PCM 2h PCM 2h PCM 2h PCM 2h PCM 2h PCM 2h PCM 2h PCM 2h PCM 2h PCM 2h PCM 2h PCM 2h PCM 2h PCM 2h PCM 2h PCM 2h PCM 2h PCM 2h PCM 2h PCM 2h PCM 2h PCM 2h PCM 2n PCM 2n PCM 2n PCM 2n PCM 2n PCM 2n PCM 2n PCM 2n PCM 2n PCM 2n PCM 2n PCM 2n PCM 2n PCM 2n PCM 2n PCM 2n PCM 2n PCM 2n PCM 2n PCM 2n PCM 2n PCM 2n PCM 2n PCM 2n PCM 2n PCM 2m PCM 2m PCM 2m PCM 2m PCM 2m PCM 2m PCM 2m PCM 2m PCM 2m PCM 2m PCM 2m PCM 2m PCM 2m PCM 2m PCM 2m PCM 2m PCM 2m PCM 2m PCM 2m PCM 2m PCM 2m PCM 2m PCM 2m PCM 2m PCM 2m PCM 2n PCM 2n PCM 2n PCM 2n PCM 2n PCM 2n PCM 2n PCM 2n PCM 2n PCM 2n PCM 2n PCM 2n PCM 2n PCM 2n PCM 2n PCM 2n PCM 2n PCM 2n PCM 2n PCM 2n PCM 2n PCM 2n PCM 2n PCM 2n PCM 2h PCM 2h PCM 2h PCM 2h PCM 2h PCM 2h PCM 2h PCM 2h PCM 2h PCM 2h PCM 2h PCM 2h PCM 2h PCM 2h PCM 2h PCM 2h PCM 2h PCM 2h PCM 2h PCM 2h PCM 2h PCM 2h PCM 2h PCM 2h PCM 2r PCM 2r PCM 2r PCM 2r PCM 2r PCM 2r PCM 2r PCM 2r PCM 2r PCM 2r PCM 2r PCM 2r PCM 2r PCM 2r PCM 2r PCM 2r PCM 2r PCM 2r PCM 2r PCM 2r PCM 2r PCM 2r PCM 2r PCM 2r PCM 2r PCM 2n PCM 2n PCM 2n PCM 2n PCM 2n PCM 2n PCM 2n PCM 2n PCM 2n PCM 2n PCM 2n PCM 2n PCM 2n PCM 2n PCM 2n PCM 2n PCM 2n PCM 2n PCM 2n PCM 2n PCM 2n PCM 2n PCM 2n PCM 2n PCM 2r PCM 2r PCM 2r PCM 2r PCM 2r PCM 2r PCM 2r PCM 2r PCM 2r PCM 2r PCM 2r PCM 2r PCM 2r PCM 2r PCM 2r PCM 2r PCM 2r PCM 2r PCM 2r PCM 2r PCM 2r PCM 2r PCM 2r PCM 2r PCM 2m PCM 2m PCM 2m PCM 2m PCM 2m PCM 2m PCM 2m PCM 2m PCM 2m PCM 2m PCM 2m PCM 2m PCM 2m PCM 2m PCM 2m PCM 2m PCM 2m PCM 2m PCM 2m PCM 2m PCM 2m PCM 2m PCM 2m PCM 2m PCM 2r PCM 2r PCM 2r PCM 2r PCM 2r PCM 2r PCM 2r PCM 2r PCM 2r PCM 2r PCM 2r PCM 2r PCM 2r PCM 2r PCM 2r PCM 2r PCM 2r PCM 2r PCM 2r PCM 2r PCM 2r PCM 2r PCM 2r PCM 2r PCM 2f PCM 2f PCM 2f PCM 2f PCM 2f PCM 2f PCM 2f PCM 2f PCM 2f PCM 2f PCM 2f PCM 2f PCM 2f PCM 2f PCM 2f PCM 2f PCM 2f PCM 2f PCM 2f PCM 2f PCM 2f PCM 2f PCM 2f PCM 2f PCM 2f PCM 2r PCM 2r PCM 2r PCM 2r PCM 2r PCM 2r PCM 2r PCM 2r PCM 2r PCM 2r PCM 2r PCM 2r PCM 2r PCM 2r PCM 2r PCM 2r PCM 2r PCM 2r PCM 2r PCM 2r PCM 2r PCM 2r PCM 2r PCM 2r PCM 2l PCM 2l PCM 2l PCM 2l PCM 2l PCM 2l PCM 2l PCM 2l PCM 2l PCM 2l PCM 2l PCM 2l PCM 2l PCM 2l PCM 2l PCM 2l PCM 2l PCM 2l PCM 2l PCM 2l PCM 2l PCM 2l PCM 2l PCM 2l PCM 2l PCM 2 l PCM 2 l PCM 2 l PCM 2 l PCM 2 l PCM 2 l PCM 2 l PCM 2 l PCM 2 l PCM 2 l PCM 2 l PCM 2 l PCM 2 l PCM 2 l PCM 2 l PCM 2 l PCM 2 l PCM 2 l PCM 2 l PCM 2 l PCM 2 l PCM 2 l PCM 2 l PCM 2 l PCM 2 l PCM 2 m PCM 2 m PCM 2 m PCM 2 m PCM 2 m PCM 2 m PCM 2 m PCM 2 m PCM 2 m PCM 2 m PCM 2 m PCM 2 m PCM 2 m PCM 2 m PCM 2 m PCM 2 m PCM 2 m PCM 2 m PCM 2 m PCM 2 m PCM 2 m PCM 2 m PCM 2 m PCM 2 m PCM 2 m PCM 2 n PCM 2 n PCM 2 n PCM 2 n PCM 2 n PCM 2 n PCM 2 n PCM 2 n PCM 2 n PCM 2 n PCM 2 n PCM 2 n PCM 2 n PCM 2 n PCM 2 n PCM 2 n PCM 2 n PCM 2 n PCM 2 n PCM 2 n PCM 2 n PCM 2 n PCM 2 n PCM 2 n PCM 2 n PCM 2 m PCM 2 m PCM 2 m PCM 2 m PCM 2 m PCM 2 m PCM 2 m PCM 2 m PCM 2 m PCM 2 m PCM 2 m PCM 2 m PCM 2 m PCM 2 m PCM 2 m PCM 2 m PCM 2 m PCM 2 m PCM 2 m PCM 2 m PCM 2 m PCM 2 m PCM 2 m PCM 2 m PCM 2 r PCM 2 r PCM 2 r PCM 2 r PCM 2 r PCM 2 r PCM 2 r PCM 2 r PCM 2 r PCM 2 r PCM 2 r PCM 2 r PCM 2 r PCM 2 r PCM 2 r PCM 2 r PCM 2 r PCM 2 r PCM 2 r PCM 2 r PCM 2 r PCM 2 r PCM 2 r PCM 2 r PCM 2 r PCM 2 l PCM 2 l PCM 2 l PCM 2 l PCM 2 l PCM 2 l PCM 2 l PCM 2 l PCM 2 l PCM 2 l PCM 2 l PCM 2 l PCM 2 l PCM 2 l PCM 2 l PCM 2 l PCM 2 l PCM 2 l PCM 2 l PCM 2 l PCM 2 l PCM 2 l PCM 2 l PCM 2 l PCM 2 n PCM 2 n PCM 2 n PCM 2 n PCM 2 n PCM 2 n PCM 2 n PCM 2 n PCM 2 n PCM 2 n PCM 2 n PCM 2 n PCM 2 n PCM 2 n PCM 2 n PCM 2 n PCM 2 n PCM 2 n PCM 2 n PCM 2 n PCM 2 n PCM 2 n PCM 2 n PCM 2 n PCM 2 l PCM 2 l PCM 2 l PCM 2 l PCM 2 l PCM 2 l PCM 2 l PCM 2 l PCM 2 l PCM 2 l PCM 2 l PCM 2 l PCM 2 l PCM 2 l PCM 2 l PCM 2 l PCM 2 l PCM 2 l PCM 2 l PCM 2 l PCM 2 l PCM 2 l PCM 2 l PCM 2 l PCM 2 i n PCM 2 i n PCM 2 i n PCM 2 i n PCM 2 i n PCM 2 i n PCM 2 i n PCM 2 i n PCM 2 i n PCM 2 i n PCM 2 i n PCM 2 i n PCM 2 i n PCM 2 i n PCM 2 i n PCM 2 i n PCM 2 i n PCM 2 i n PCM 2 i n PCM 2 i n PCM 2 i i n PCM 2 i i n PCM 2 i i n PCM 2 i i n PCM 2 i i n PCM 2 i i n PCM 2 i i n PCM 2 i i n PCM 2 i i n PCM 2 i i n PCM 2 i i n PCM 2 i i n PCM 2 i i n PCM 2 i i n PCM 2 i i n PCM 2 i i n PCM 2 i i n PCM-10000000000000000000000000000000000000000000000000000000000000000000000000000000000000000000000000000 | ||||||||
Blu-ray discs may include three audio streams.
• Primary Audio: The audio soundtrack of the main feature • Secondary Audio: Additional soundtrack such as director or actor's commentary. • Interactive Audio: Interactive sounds will be heard when selected. Interactive Audio is different on each Blu-ray Disc.

NOTE
Digital audio cannot be copied from the OPTICAL DIGITAL AUDIO OUT terminal.
Playing back streaming content
Instantly Watching Movies from Netflix
Please check that the most current software is loaded on this player by using the software update function (See pages 48–50) or by visiting http://www.sharpusa.com/products/support/ to check for a download of the newest software version.
This function allows you to enjoy Netflix through the Internet.
Netflix is an online DVD and Blu-ray Disc rental service, offering rental-by-mail and streaming instantly to Netflix unlimited members.
- To enjoy this function, make a broadband Internet connection to both your PC and this player (See pages 20–21), and then set communication settings (See pages 43–46), then perform the following operation.
- Before using this function, please read "Network Service Disclaimer" (page x).
NOTE
- Disc playback and this function cannot be used at the same time.
- As the registration process takes time, we recommend setting "Auto Power Off" to "No" before starting the registration. (See page 41.)
- The streaming quality (SD or HD) depends on the network speed and original bit rate of the title.
- For more information on Netflix, visit http://www.netflix.com/help or log in to your Netflix account and click "Help" at the top of the page. • Netflix is only available in the US.
- Illustrations are examples and may differ from the actual Netflix screens.
The buttons which can be used:

Settings for watching Netflix content on your TV
1 Press HOME to display the menu screen. - The same operation can be performed by pressing ENTER after selecting the HOME icon on the Wall Paper screen.
2 Press ▲/▼ to select "e-Contents", then press ▶ or ENTER.
The screen of this player shown on the TV
3 Press ▲/▼ to select "Netflix", then press ▶ or ENTER.
4 Read the Disclaimer displayed on the screen. If you agree, press ▲ on the last page to select "Agree", then press ENTER. (If you do not agree, this service cannot be used.)
5 Obtain the Netflix activation code.
If you don't have a Netflix account
① Press ▲/▼ to select "no-start my FREE trial", then press ENTER. The screen of this player shown on the TV

② Subscribe by visiting http://www.netflix.com/sharp from your PC.
③ Press ▲/▼ to select "I'm now a member", then press ENTER. The screen of this player shown on the TV

If you have a Netflix account
Press ▲/▼ to select "yes-activate instant streaming from Netflix", then press ENTER. The screen of this player shown on the TV

6 You will see the following window.
- The activation code is displayed.
The screen of this player shown on the TV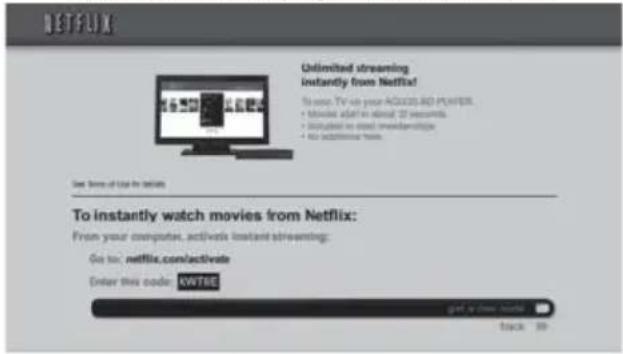
7 Using your PC, visit http://www.netflix.com/activate, and then enter the activation code displayed in step 6.
The screen of the PC
- After a period of time, the player will be activated, and the empty instant Queue screen will be displayed on your TV from the player.
Adding content to the Instant Queue
8 To add a movie to the instant Queue of this player, select the "Add to Instant" button on Netflix "Watch Instantly" web page using your PC.
• After a period of time, the instant Queue registered using your PC will appear on your TV screen.
Playing back content on your TV
9 The title selection screen in the Instant Queue is displayed.
- Once this function is set and the registration is completed, the next time this service is used instant Queue screens such as the following can be displayed directly by pressing ENTER after selecting the NETFLIX icon on the Wall Paper screen.
The screen of this player shown on the TV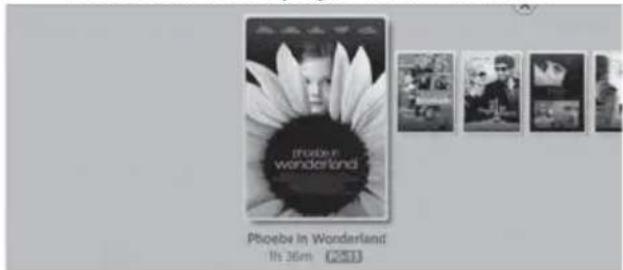
- When you want to display movies by genre, press ▲, select the desired genre by pressing ◀/▶, then press ENTER. The title selection screen for the selected genre will be displayed.
10 Press ◀/▶ to select the desired title, then press ENTER.
11 The title you selected is displayed.
• To return to step 10, press ▲.
Press ▲/▼ to select "play", then press ENTER or ▶ PLAY to start playback.
The screen of this player shown on the TV
The screen of this player shown on the TV

• After a period of time, playback of the movie begins.
12 To pause the playback at any time, press II PAUSE.
- Press || PAUSE or ▶ PLAY to return to playback.
13 To stop the playback or go to step 11, press ▲ or ■ STOP.
14 Press EXIT to exit.
Fast Forward/Reverse
The Fast Forward/Reverse function is enabled when REV or FWD is pressed during playback.
Enjoying Movies and Internet Application with VUDU
You can enjoy movies and Internet applications with VUDU.
VUDU Movies is the leading HD on-demand video service. VUDU Movies is built into your BD Player and utilizes your existing Internet connection to deliver the highest quality on-demand video available today.
Example
VUDU Movies features:
- True 1080p HD, the only service to offer 1080p quality video on-demand • Over 16,000 titles available on-demand • Over 3,000 titles available in HD, more than are available anywhere else
- 5.1 surround sound, delivered through state-of-the-art Dolby Digital Plus • The latest Hollywood hits available the same day as DVD • No subscription fees required
NOTE
- To enjoy this function, make a broadband Internet connection to both your PC and the BD player (See pages 20–21), and then set Communication Setup (see pages 43–46), then perform the "Getting Started" operation to the right.
- Before using this function, please read "Network Service Disclaimer" (page x).
- For more information on VUDU, visit http://www.VUDU.com.
- Your Internet connection is vital to your VUDU experience. Please refer to the chart below for minimum bandwidth requirements: SD (DVD quality): 480p 1 Mbps to 2 Mbps HD (HDTV quality): 720p 2.25 Mbps to 4.5 Mbps HDX (BD quality): 1080p 4.5 Mbps to 9 Mbps • VUDU Movies is only available in the U.S.
- Illustrations are examples and may differ from the actual VUDU screens.
- Disc playback and this function cannot be used at the same time.
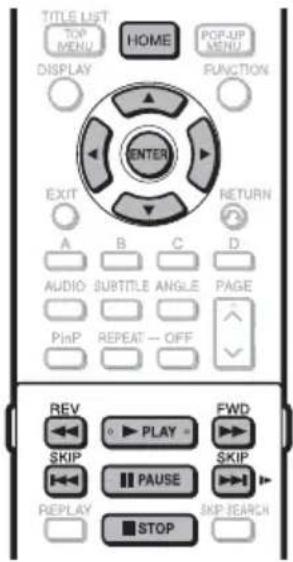
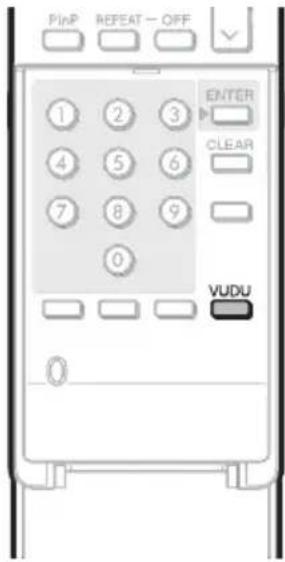
Getting Started
1 Press HOME to display the menu screen. 2 Press ▲/▼ to select "e-Contents", then press ▶ or ENTER. 3 Press ▲/▼ to select "Vudu", then press ▶ or ENTER.
- The VUDU application screen is displayed.
- The same operation can be performed by pressing ENTER after selecting the VUDU icon on the Wall Paper screen.
- You can also display the VUDU application screen by pressing VUDU.
4 Press ▲/▼/◄/► to select the desired item, and then press ENTER.
- Follow the instructions on the screen.
Watching a Movie on VUDU
When it comes time to watch a movie on VUDU, you will need to set up an account.
1 Press ▲/▼/◄/► to select "Sign up for VUDU now! Click here to get started", and then press ENTER. 2 Press ◀/▶ to select "SIGN up now", and then press ENTER. 3 Enter your e-mail address. - An activation e-mail will be sent to your PC. Click on the link to complete the activation process. - Following the instructions on the screen, make all the necessary settings.
If the Settings on the PC Are Incorrect
The screen as shown below will be displayed.
Following the instructions on the screen, send e-mail again and make all the necessary settings.
Example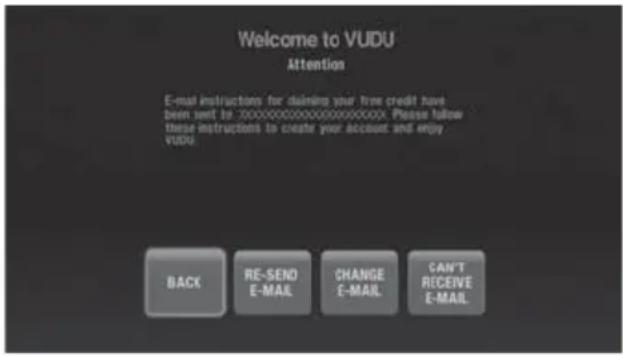
Operational buttons during playback
| Buttons | Description |
| Hold down to go in reverse. | |
| Starts playback. | |
| Hold down to fast forward. | |
| Playback stops. | |
| Sets pauses and still pictures. | |
| Pressing quickly once takes you to the start of the chapter currently playing. Each time you press it, you move back to the start of the previous chapter. | |
| Pressing quickly once takes you to the start of the next chapter. Each time you press it, you move ahead to the start of the next chapter. |
Deactivating the VUDU Function
You can deactivate streaming from VUDU to your player using "VUDU Deactivate" in the "Settings" menu (See page 42).
Troubleshooting - VUDU
VUDU cannot be accessed.
- If you are not able to access other network service (e.g. BD-LIVE) from your device, but are not able to access VUDU, please contact VUDU Customer Care at 1-888-554-VUDU (8838).
- If you are not able to access any network service (e.g. BD-LIVE) from your device, please contact your device manufacturer for assistance.
The activation e-mail was not obtained.
- Check your junk or spam e-mail folders. If you are unable to find the activation e-mail in the folders, reconfirm the e-mail address you have entered, and then try your account settings again.
If you encounter any other issues during activation, refer to the following online resources:
Detailed VUDU Manual: Available at http://www.VUDU.com/Docs. This introduces you to all aspects of the revolutionary VUDU service with easy-to-follow instructions.
VUDU FAQ: To learn more about VUDU, visit the Frequently Asked Questions at http://www.vudu.com/support.
VUDU Customer Care: When you need to talk live with someone, contact VUDU Customer Care at 1-888-554-VUDU (8838) 7 a.m. to 8 p.m. Pacific, 7 days a week (except holidays).
Enjoying Pandora radio
You can instantly listen to personalized radio stations, streamed over the Internet, from Pandora via this player.
- To enjoy this function, make a broadband Internet connection to both your PC and this player (See pages 20–21), and then set communication settings (See pages 43–46), then perform the following operation.
- Before using this function, please read "Network Service Disclaimer" (page x).
NOTE
- Disc playback and this function cannot be used at the same time. • Pandora Radio is only available in the U.S.

Activating your player
Before using the Pandora streaming service via the Internet, you are required to activate your player.
1 Press HOME to display the menu screen. 2 Press ▲/▼ to select “e-Contents”, then press ▶ or ENTER. 3 Press ▲/▼ to select "Pandora", then press ▶ or ENTER. - The same operation can be performed by pressing ENTER after selecting the Pandora icon on the Wall Paper screen. 4 If you don't have a Pandora account, you will need to create one. Select "No" by pressing ◀/▶, then press ENTER. If you have a Pandora account, select "Yes", then press ENTER. Enter your e-mail and password to sign in to your account. 5 The activation code number appears. Make sure to note the activation code number and the website address.
6 Using your PC, visit the website address you have noted in step 5. 7 Complete the Pandora registration process with the activation code you have noted in step 5. 8 On your player, press ENTER to complete the activation.
NOTE
- For questions regarding the Pandora service, please visit http://www.pandora.com/help or e-mail: pandora-support@pandora.com.
Troubleshooting
The following problems do not always suggest a defect or malfunction of this Player. Refer to the problems and lists of possible solutions below before calling for service.
Power
| Problem Possible causes and solutions | |
| The Player power cannot be turned on. | Make sure that the AC adapter cord is connected to the DC IN terminal on the rear of the player, the AC cord is connected to the AC adapter and the AC cord is plugged into an AC outlet. (Page 23)Reset the player. (Page iii) |
| The Player power is turned off. Is “Auto Power Off” set to “Yes”? When “Auto Power Off” is set to “Yes”, the power will be automatically turned off after 10 continuous minutes of inactivity (no playback). (Page 41) | |
Basic Operation
| Problem Possible causes and solutions | |
| The remote control does not work. Use the remote control within its operating range. (Page 22)Replace the batteries. (Page 22)Reset the remote control.- Press and hold 1 (the number button) first and then POWER on the remote control together for more than 5 seconds. | |
| Cannot operate the Player. Are you operating the Player within the specified operating temperature range?(Page v) |
Playback
| Problem Possible causes and solutions | |
| The Player cannot play a disc. Take out | the disc and clean it. (Page 12)Make sure that the disc is loaded properly (label-side up). (Page 27)Make sure that region code on the disc matches that of this Player. (Page 9)Allow any condensation in or near the Player to dry. (Page 12)Check that the disc is recorded in the compatible TV system (PAL or NTSC).The Player cannot play back video which was not recorded normally. (Page 9)Proper playback may be impossible due to the state of the disc recording, a scratched, warped or dirty disc, the state of the pick-up, or compatibility issues between this Player and the disc being used. (Pages 9, 12)When the recorded time of a disc is unusually short, playback may not be possible.BD-RE/R discs recorded in a format other than BDMV/BDAV cannot be played back. (Page 9) |
| The disc is automatically ejected after loading a disc. | Make sure that the disc is loaded properly (label-side up). (Page 27)Take out the disc and clean it. (Page 12)Make sure that the disc is playable. (Page 9) |
| Video stops. Has the Player been subjected to shock or impact? Are you using it in an unstable location? The Player will stop if it senses shock or vibration. | |
| The Player makes a snapping sound when starting playback or loading a disc. | The player may sometimes make a snapping sound when starting playback if it has not been operated in a while. These sounds are not malfunctions of the player but are normal operating conditions. |
Picture
| Problem Possible causes and solutions | |
| No picture. Make sure that the cables | are connected correctly. (Page 18)Make sure that the connected TV or the AV receiver is set to the correct input.(Page 18)Take out the disc and clean it. (Page 12)Make sure that region code on the disc matches that of this Player. (Page 9)There is no picture from the HDMI output.- Are the settings performed correctly? Please check the settings. (Page 40) |
| Screen freezes and operation buttons do not work. | Turn off the power and turn on the power again.If the power is not turned off, perform a reset. (Page iii)Is the disc damaged or dirty? Check the condition of the disc. (Page 12) |
| Widescreen video appears vertically stretched, or black bands appear at the top and bottom of the screen. | Is “TV Aspect Ratio” set to match the connected TV? (Page 40)If you are using a widescreen TV, is the “TV Aspect Ratio” set to “Wide”? (Page 40) |
| Square noise (mosaic) appears on the screen. | Blocks in images may be visible in scenes with rapid movement due to the characteristics of digital image compression technology. |
| Audio is not output, or images are not played back properly. | The audio may not be output or the images may not be played back properly for some discs in which copyright-protected contents are recorded. |
| 3D images cannot be output to a TV. | Is an HDMI cable used?Are a 3D compatible TV and 3D glasses used?Is a proper connection made between the HDMI OUT terminal of the player and the HDMI input terminal of the 3D compatible TV?Is the 3D setting on this player correct? (Pages 25, 42)Is the 3D setting on the TV correct?Is a 3D compatible BD disc being played back? |
| Noise appears on the screen. When you watch TV broadcasts with the power of this player turned on, noise may appear on the TV screen. In such cases, turn off the power to this player or keep this player away from the TV. | |
Sound
| Problem Possible causes and solutions | |
| No sound, or sound is distorted. If the | volume of the TV or amplifier is set to minimum, turn the volume up.There is no sound during still mode, slow motion playback, fast forward and fast reverse. (Page 34)Check that the audio cable is connected correctly. (Page 19)Check that the cable plugs are clean.Take out the disc and clean it. (Page 12)Audio may not be output depending on the audio recording status, such as when audio other than an audio signal or non-standard audio is recorded for the audio content of the disc. (Page 9) |
| Audio is not output, or images are not played back properly. | The audio may not be output or the images may not be played back properly for some discs in which copyright-protected contents are recorded. |
Network
| Problem Possible causes and solutions | |
| Cannot connect to the Internet. | When the wired Internet connection is madeIs the LAN cable connected properly?Is the wrong cable such as a modular cable used? Connect a LAN cable to the ETHERNET terminal. (Page 20)Is the power for the connected equipment, such as a broadband router or modem turned on?Is the broadband router and/or modem properly connected?Is the proper value(s) set in the network setting? Check “Communication Setup”. (Pages 43–45)When the wireless Internet connection is madeIs the power for the connected equipment, such as a wireless router or access point turned on?Is the wireless router or access point properly connected?Are there any obstacles, such as physical structures (brick and concrete walls, etc.) and electronics (microwave, etc.) between the wireless router/access point and the player? As this may cause interference with the wireless signal, make sure to keep obstacles away.Is the proper value(s) set in the network setting? Check “Communication Setup”. (Pages 43–45) |
| Cannot download BD-LIVE contents. | Make sure that this player is connected to the Internet.Is the USB memory device properly connected? Check that the USB memory device is connected to the USB terminal of this Player.Check if the BD disc supports BD-LIVE.Check the setting for “BD Internet Access”. (Page 42) |
Other
| Problem Possible causes and solutions | |
| The TV operates incorrectly. Some TVs with wireless remote control capability may operate incorrectly when using the remote control of this Player. Use such TVs away from this Player. | |
| The Player heats up during use. When using this Player, the console cabinet may heat up depending on the usage environment. This is not a malfunction. | |
| POWER indicator will remain lit. When the AC cord is removed from the outlet, the POWER indicator will remain lit for a short period. This is normal and is not a malfunction. |
To Reset this Player
If this Player receives strong interference from a source such as excessive static electricity, strong external noise, malfunction of power supply, or voltage caused by lightning during use, or if a wrong operation is sent to the Player, errors like the Player not accepting an operation may occur.
Press and hold POWER on the Player until the POWER indicator disappears.

- When a reset is performed while the power is on, the Player will turn off. Turn the power on again. At this point, it may take a few moments for the system processing to finish before the Player is ready for use. During the system processing, the BD/DVD/CD mode indicator on the Player will blink. Once the system processing has finished, the indicator will finish blinking and then light up normally. You can operate the Player when the BD/DVD/CD mode indicator is lit.
- Since all settings including the language setting stored in memory are also reset when a reset has been performed, they must be set again.
- When the problem persists even after performing a reset, unplug the AC cord and plug it in again. If this does not solve the problem, contact the nearest service center approved by SHARP.
On-screen Error Messages
The following messages appear on the TV screen in case of an error during operation.
| Error message Possible | Error Suggested Solution | |
| Cannot play. The disc cannot be played | be checked the disc, and load it correctly.• this Player. | |
| Incompatible disc. If you load a disc which | • cannot be played with this Player (i.e. a scratched disc), or if you load a disc upside down, this message will appear, and the disc will automatically pop out. | |
| • Recovers if the loaded disc cannot be played because it is a non-standard disc or scratched, etc. | ||
| Cannot operate. Occurs if an operation is incorrect. | —— | |
| This USB memory is not formatted properly. Please format the memory in USB memory management. | • Occurs if there is a formatting error.• Occurs if the USB memory is not formatted with FAT 32/16. | • Format the USB memory again.• Format the USB memory with your PC. |
| The Connected USB Memory cannot be used. It should be compliant with USB 2.0 | • Compress if USB2 of High Speed compliant with USB 2.0 High Speed (480Mbit/s) is used (i.e. USB 1.0/USB 1.1). | • (480Mbit/s) compliant USB memory. |
Specifications are subject to change without notice.
General
| Power requirements DC 12V (with the supplied AC adapter) | |
| Power consumption (Normal) 16 W (with the supplied AC adapter at AC 120V, 60 HZ) | |
| Power consumption (Standby) 0.4 W (with the supplied AC adapter at AC 120V, 60 HZ) | |
| Dimensions | Approx. 17 × 21/2 × 85/8 inch (W × H × D)Approx. 430 mm × 36 mm × 218 mm (W × H × D) |
| Weight Approx. 5.1 lbs. (2.3 kg) | |
| Operating temperature 41°F to 95°F (5°C to 35°C) | |
| Storage temperature -4°F to 140°F (-20°C to 60°C) | |
| Operating humidity 10 % to 80 % (no condensation) | |
| TV systems NTSC system | |
Playback
| Playable discs BD-ROM, BD-RE, BD-R, | DVD Video, DVD+RW/+R/-RW/-R (Video/VR/AVCHD/JPEG file/MP3 file/DivX format), Audio CD (CD-DA), CD-RW/R (CD-DA/JPEG file/MP3 file/DivX format) |
| Region code A or ALL for BD, 1 or ALL | for DVD |
Input/Output
| HDMI HDMI 19-pin standard connector | (1080p 24Hz output)HDMI® (Deep Color, x.v.Color, Dolby TrueHD, DTS-HD Master Audio | Essential) |
| Digital audio optical output Terminal: Square Optical terminal | |
| USB input USB 2.0 High Speed (480Mb)it/s) correspondence (for Local storage/Softwareupdate/JPEG, MP3 and DivX playback) | |
| ETHERNET 10BASE-T/100BASE-TX | |
AC Adapter
| Power requirements AC 100–240V, 50/60Hz | |
| Rated output DC 12V, 5A | |
Wireless LAN (Internal antenna)
| Frequency band Draft 802.11n Radio: 2.4GHz | 802.11g Radio: 2.4GHz802.11b Radio: 2.4GHz2.412 – 2.462GHz (channel 1–11) | |
| Modulation DBPSK @ 1Mbps | DQPSK@ 2MbpCCK@ 5.5/11 MbpsBPSK@ 6/9 MbpsQPSK@ 12/18Mbps16-QAM@ 24/36 Mbps64-QAM@ 48/54 Mpb and above, Rx up to 300Mbps | |
| Transport power and sensitivity | Tx output power:(Typical) | 11b 16.5 +/- 1 dBm11g 16 +/- 1 dBm@54Mbps11n 15 +/- 1 dBm |
| Rx sensitivity: (Typical) | -84 dBm @11 Mbps-72 dBm @54 Mbps-64 dBm @64-QAM, 20MHz channel spacing-61 dBm @64-QAM, 40MHz channel spacing | |
| Security AP (Infrastructure) mode supports | - Static WEP that support both 64 and 128 bit keys.- WPA(TKIP) with PSKAd-hoc mode supports- None (plaintext)- Static WEP that supports both 64 and 128 bit keys. | |
Ad-hoc mode (page 21)
Ad-hoc mode is a wireless LAN communication format. This performs direct communication between equipment without an access point. (Ad-hoc mode is not supported.)
AVCHD (page 9)
AVCHD (Advanced Video Codec High Definition) refers to a recording format (specification) for digital video cameras which can record to a disc such as 8 cm DVD disc and play back digital high definition images.
BDAV (page 9)
BDAV (Blu-ray Disc Audio/Visual, BD-AV) refers to one of the application formats used for writable Blu-ray discs such as BD-R, BD-RE, etc. BDAV is a recording format equivalent to DVD-VR (VR mode) of the DVD specifications.
BD-J application
The BD-ROM format supports Java for interactive functions. “BD-J” offers content providers almost unlimited functionality when creating interactive BD-ROM titles.
BD-LIVE (page 29)
A variety of interactive content is available from BD-LIVE compatible Blu-ray discs via the Internet.
BDMV (page 9)
BDMV (Blu-ray Disc Movie, BD-MV) refers to one of the application formats used for BD-ROM which is one of the Blu-ray Disc specifications. BDMV is a recording format equivalent to DVD-video of the DVD specification.
BD-R (pages 9, 27)
A BD-R (Blu-ray Disc Recordable) is a recordable, write-once Blu-ray Disc. Since contents can be recorded and cannot be overwritten, a BD-R can be used to archive data or for storing and distributing video material.
BD-RE (pages 9, 27)
A BD-RE (Blu-ray Disc Rewritable) is a recordable and rewritable Blu-ray Disc.
BD-ROM
BD-ROMs (Blu-ray Disc Read-Only Memory) are commercially produced discs. Other than conventional movie and video contents, these discs have enhanced features such as interactive content, menu operations using pop-up menus, selection of subtitle display, and slide shows. Although a BD-ROM may contain any form of data, most BD-ROM discs will contain movies in High Definition format for playback on Blu-ray Disc players.
Blu-ray Disc (BD) (page 9)
A disc format developed for recording/playing high-definition (HD) video (for HDTV, etc.), and for storing large amounts of data. A single layer Blu-ray Disc holds up to 25 GB, and a dual-layer Blu-ray Disc holds up to 50 GB of data.
Chapter number (pages 37, 38)
Sections of a movie or a music feature that are smaller than titles. A title is composed of several chapters. Some discs may only be comprised of a single chapter.
Control Panel (page 26)
This function allows you to operate this player using the TV remote control by displaying the control panel on the TV screen.
Copy guard
This function prevents copying. You cannot copy discs marked by the copyright holder with a signal which prevents copying.
Deep Color
Deep Color can reproduce rich colors, increasing the number of bits describing colors. This Player is compatible with Deep Color. You can enjoy this function by connecting to a Deep Color compatible TV using an HDMI cable.
Disc menu (page 28)
This lets you select things like the subtitle language or audio format using a menu stored on the DVD video disc.
Dolby Digital
A sound system developed by Dolby Laboratories Inc. that gives movie theater ambience to audio output when the product is connected to a Dolby Digital processor or amplifier.
Dolby Digital Plus
A sound system developed as an extension to Dolby Digital. This audio coding technology supports 7.1 multi-channel surround sound.
Dolby TrueHD
Dolby TrueHD is a lossless coding technology that supports up to 8 channels of multi-channel surround sound for the next generation optical discs. The reproduced sound is true to the original source bit-for-bit.
DTS
This is a digital sound system developed by DTS, Inc. for use in cinemas.
DTS-HD High Resolution Audio
DTS-HD High Resolution Audio is a new technology developed for the next generation high definition optical disc format.
DTS-HD Master Audio
DTS-HD Master Audio is a lossless audio compression technology developed for the next generation high definition optical disc format.
DTS-HD Master Audio | Essential
DTS-HD Master Audio | Essential is a lossless audio compression technology developed for the next generation high definition optical disc format.
DVD upscaling (page 27)
Upscaling (upconverting) refers to a function of various players and devices that enlarge the image size to fit the size of the screen of video equipments such as a TV.
DVD video (pages 9, 27)
A disc format that contains up to eight hours of moving pictures on a disc the same diameter as a CD. A single-layer single-sided DVD holds up to 4.7 GB; a double-layer single-sided DVD, 8.5 GB; a single-layer double-sided DVD, 9.4 GB; a double-layer double-sided DVD, 17 GB. The MPEG-2 format was adopted for efficient video data compression. It is a variable rate technology that encodes the data according to the status of the video for reproducing high-quality images. Audio information is recorded in a multi-channel format such as Dolby Digital, allowing for a realistic audio presence.
DVD+/-R (pages 9, 27)
A DVD+/-R is a recordable, write-once DVD. Since contents can be recorded and cannot be overwritten, a DVD+/-R can be used to archive data or for storing and distributing video material. The DVD+/-R has two different formats: VR format and Video format. DVDs created in Video format have the same format as a DVD video, while discs created in VR (Video Recording) format allow the contents to be programmed or edited.
DVD+/-RW (pages 9, 27)
A DVD+/-RW is a recordable and rewritable DVD. The re-recordable feature makes editing possible. The DVD+/-RW has two different formats: VR format and Video format. DVDs created in Video format have the same format as a DVD video, while discs created in VR (Video Recording) format allow the contents to be programmed or edited.
HDMI (page 18)
HDMI (High-Definition Multimedia Interface) is an interface that supports both video and audio on a single digital connection. The HDMI connection carries standard to high definition video signals and multi-channel audio signals to AV components such as HDMI-equipped TVs, in digital form without degradation.
Infrastructure mode (page 21)
Infrastructure mode is a wireless LAN communication format. This performs wireless communication through an access point.
Interlace format
Interlace format shows every other line of an image as a single “field” and is the standard method for displaying images on television. The even-numbered field shows the even-numbered lines of an image, and the odd-numbered field shows the odd-numbered lines of an image.
JPEG (pages 9, 10, 33)
JPEG (Joint Photographic Experts Group) is a still image data compression format and is used in most digital cameras.
Letter Box (LB 4:3) (page 40)
A screen size with black bars on the top and bottom of the image to allow viewing of wide-screen (16:9) material on a connected 4:3 TV.
Linear PCM Sound
Linear PCM is a signal recording format used for Audio CDs and on some DVD and Blu-ray discs. The sound on Audio CDs is recorded at 44.1 kHz with 16 bits. (Sound is recorded between 48 kHz with 16 bits and 96 kHz with 24 bits on DVD video discs and between 48 kHz with 16 bits and 192 kHz with 24 bits on BD video discs.)
MP3 (pages 9, 10, 32)
MP3 files are audio data compressed in the MPEG1/2 Audio layer-3 file format. "MP3 files" have ".mp3" as extensions.
MPEG-2
MPEG-2 (Moving Picture Experts Group phase 2) is one of the video data compression schemes, which is adopted for DVD videos and digital broadcasts worldwide. Some Blu-ray Discs also use high bitrate MPEG-2.
Multi Angle (pages 36–38)
This is a feature of DVD and BD video discs. In some discs, the same scene is shot from different angles, and these are stored in a single disc so you can enjoy playback from each angle. (This function can be enjoyed if the disc is recorded with multiple angles.)
Multi Audio
This is a feature of DVD and BD video discs. This function makes it possible to record different audio tracks for the same video, so you can enhance your enjoyment by switching the audio. (You can enjoy this function with discs recorded with multiple audio tracks.)
Netflix (pages 52, 53)
Netflix is an online DVD and Blu-ray Disc rental service, offering rental-by mail and streaming instantly to Netflix unlimited members.
Pandora Radio (page 56)
Pandora Radio is a personalized Internet radio service that helps you find new music based on your old and current favorites.
Pan Scan (PS 4:3) (page 40)
A screen size that cuts off the sides of the image to allow viewing of wide-screen (16:9) material on a connected 4:3 TV.
Parental control (page 41)
In some digital broadcasts and BD/DVD video discs, a control level for disc viewing is set depending on the age of the viewer. With this Player, you can set the control level for viewing such broadcasts and discs.
Pop-up menu (page 28)
An enhanced menu operation available on BD video discs. The pop-up menu appears when POP-UP
MENU is pressed during playback, and can be operated while playback is in progress.
Progressive format
Compared to the Interlace format that alternately shows every other line of an image (field) to create one frame, the Progressive format shows the entire image at once as a single frame. This means that while the Interlace format can show 30 frames/60 fields in one second, the Progressive format can show 60 frames in one second. The overall picture quality increases and still images, text, and horizontal lines appear sharper.
Region code (page 9)
Code identifying a geographic region of compatibility for a BD/DVD.
Resume playback (page 27)
If you stop playback while it is in progress, the Player stores the stop position in memory, and this function lets you playback from that point.
Skip (pages 31, 32, 34)
This returns to the start of the chapter (or track) being played, or skips to the next chapter (or track).
Subtitles (pages 36–38)
These are the lines of text appearing at the bottom of the screen which translate or transcribe the dialog. They are recorded on many DVD and BD video discs.
Time number
This indicates the play time which has elapsed from the start of a disc or a title. It can be used to find a specific scene quickly. (It may not work with some discs.)
Title number (pages 37, 38)
These numbers are recorded on DVD and Blu-ray discs. When a disc contains two or more movies, these movies are numbered as title 1, title 2, etc.
Top menu (page 28)
In a BD/DVD video, this is the menu for selecting things like the chapter to be played back and the subtitle language. In some DVD videos, the top menu may be called the “Title Menu”.
Track number (pages 37, 38)
These numbers are assigned to the tracks which are recorded on audio CDs. They enable specific tracks to be located quickly.
VUDU (pages 53–54)
VUDU is an on-demand video service for renting or buying movies that can be watched instantly on TV.
x.v.Color
x.v.Color reproduces a greater range of color than before, showing almost all of the colors that the human eye can detect. (Applicable for JPEG files only with this system)
This Sharp device facilitates the access to content and services provided by third parties. The content and services accessible via this device belong to and may be proprietary to third parties. Therefore, any use of such third party content and services must be in accordance with any authorization or terms of use provided by such content or service provider. Sharp shall not be liable to you or any third party for your failure to abide by such authorization or terms of use. Unless otherwise specifically authorized by the applicable content or service provider, all third party content and services provided are for personal and non-commercial use; you may not modify, copy, distribute, transmit, display, perform, reproduce, upload, publish, license, create derivative works from, transfer or sell in any manner or medium any content or services available via this device.
Sharp is not responsible, nor liable, for customer service-related issues related to the third party content or services. Any questions, comments or service-related inquiries relating to the third party content or service should be made directly to the applicable content or service provider.
You may not be able to access content or services from the device for a variety of reasons which may be unrelated to the device itself, including, but not limited to, power failure, other Internet connection, or failure to configure your device properly. Sharp, its directors, officers, employees, agents, contractors and affiliates shall not be liable to you or any third party with respect to such failures or maintenance outages, regardless of cause or whether or not it could have been avoided.
ALL THIRD PARTY CONTENT OR SERVICES ACCESSIBLE VIA THIS DEVICE IS PROVIDED TO YOU ON AN "AS-IS" AND "AS AVAILABLE" BASIS AND SHARP AND ITS AFFILIATES MAKE NO WARRANTY OR REPRESENTATION OF ANY KIND TO YOU, EITHER EXPRESS OR IMPLIED, INCLUDING, WITHOUT LIMITATION, ANY WARRANTIES OF MERCHANTABILITY, NON-INFRINGEMENT, FITNESS FOR A PARTICULAR PURPOSE OR ANY WARRANTIES OF SUITABILITY, AVAILABILITY, ACCURACY, COMPLETENESS, SECURITY, TITLE, USEFULNESS, LACK OF NEGLIGENCE OR ERROR-FREE OR UNINTERRUPTED OPERATION OR USE OF THE CONTENT OR SERVICES PROVIDED TO YOU OR THAT THE CONTENT OR SERVICES WILL MEET YOUR REQUIREMENTS OR EXPECTATIONS.
SHARP IS NOT AN AGENT OF AND ASSUMES NO RESPONSIBILITY FOR THE ACTS OR OMISSIONS OF THIRD PARTY CONTENT OR SERVICE PROVIDERS, NOR ANY ASPECT OF THE CONTENT OR SERVICE RELATED TO SUCH THIRD PARTY PROVIDERS.
IN NO EVENT WILL SHARP AND/OR ITS AFFILIATES BE LIABLE TO YOU OR ANY THIRD PARTY FOR ANY DIRECT, INDIRECT, SPECIAL, INCIDENTAL, PUNITIVE, CONSEQUENTIAL OR OTHER DAMAGES, WHETHER THE THEORY OF LIABILITY IS BASED ON CONTRACT, TORT, NEGLIGENCE, BREACH OF WARRANTY, STRICT LIABILITY OR OTHERWISE AND WHETHER OR NOT SHARP AND/OR ITS AFFILIATES HAVE BEEN ADVISED OF THE POSSIBILITY OF SUCH DAMAGES.
Information on the Software License for This Product
Software composition
The software included in this product is comprised of various software components whose individual copyrights are held by SHARP or by third parties.
Software developed by SHARP and open source software
The copyrights for the software components and various relevant documents included with this product that were developed or written by SHARP are owned by SHARP and are protected by the Copyright Act, international treaties, and other relevant laws. This product also makes use of freely distributed software and software components whose copyrights are held by third parties. These include software components covered by a GNU General Public License (hereafter GPL), a GNU Lesser General Public License (hereafter LGPL) or other license agreement.
Obtaining source code
Some of the open source software licensors require the distributor to provide the source code with the executable software components. GPL and LGPL include similar requirements. For information on obtaining the source code for the open source software and for obtaining the GPL, LGPL, and other license agreement information, visit the following website:
http://www.sharpusa.com/gpl
We are unable to answer any questions about the source code for the open source software. The source code for the software components whose copyrights are held by SHARP is not distributed.
Acknowledgements
The following open source software components are included in this product:
- directfb-extra • cairo • directfb • iconv • openssl • curl • freetype • jpeg • expat • mng • png • xml • zlib • kernel • net-tools
- GNU bash • busybox • cramfs • dhcpd • e2fsprogs • fdisk • TinyLogin • sysutils • iptables • mtd-utils • ntfs-3g • sfdisk • hotplug
- utelnetd • procps • GNU termcap • libusb • uClibc • tcpdump • strace • hdparm • libpcap • portmap
Software License Notice
Software License Notice Requirements
The software components incorporated into this product include components whose copyright holders require license notices. The license notices for these software components are shown below.
OpenSSL License
This product includes software developed by the OpenSSL Project for use in the OpenSSL Toolkit. (http://www.openssl.org)
Original SSLeay License
This product includes cryptographic software written by Eric Young (eay@cryptsoft.com).
BSD License
This product includes software developed by the University of California, Berkeley and its contributors.
CONSUMER LIMITED WARRANTY
(Valid for warranty service in the U.S. and PUERTO RICO only)
CONSUMER LIMITED WARRANTY
SHARP ELECTRONICS CORPORATION warrants to the first consumer purchaser that this Sharp brand product (the "Product"), when shipped in its original container, will be free from defective workmanship and materials, and agrees that it will, at its option, either repair the defect or replace the defective Product or part thereof with a new or remanufactured equivalent at no charge to the purchaser for parts or labor for the period(s) set forth below.
This warranty does not apply to any appearance items of the Product or if the serial number or model number affixed to the Product has been removed, defaced, changed, altered or tampered with. This warranty does not cover installation or signal reception problems. This limited warranty will not apply if the Product has been or is being used in a commercial setting or application; this warranty is meant solely for the non-commercial, household use of the Product by consumers in their home or residence.
In order to enforce the rights under this limited warranty, the purchaser should follow the steps set forth below and provide proof of purchase to the servicer.
To the extent permitted by applicable state law, the warranties set forth are in lieu of, and exclusive of, all other warranties, express or implied. Specifically ALL OTHER WARRANTIES OTHER THAN THOSE SET FORTH ABOVE ARE EXCLUDED, ALL EXPRESS AND IMPLIED WARRANTIES INCLUDING THE WARRANTIES OF MERCHANTABILITY, FITNESS FOR USE, AND FITNESS FOR A PARTICULAR PURPOSE ARE SPECIFICALLY EXCLUDED. IF, UNDER APPLICABLE STATE LAW, IMPLIED WARRANTIES MAY NOT VALIDLY BE DISCLAIMED OR EXCLUDED, THE DURATION OF SUCH IMPLIED WARRANTIES IS LIMITED TO THE PERIOD(S) FROM THE DATE OF PURCHASE SET FORTH BELOW. THIS WARRANTY GIVES YOU SPECIFIC LEGAL RIGHTS. YOU MAY ALSO HAVE OTHER RIGHTS WHICH VARY FROM STATE TO STATE.
The warranties given herein shall be the sole and exclusive warranties granted by Sharp and shall be the sole and exclusive remedy available to the purchaser and only for the time periods set forth herein. No other representations or promises made by anyone are permitted. Correction of defects, in the manner and for the period of time described herein, shall constitute complete fulfillment of all liabilities and responsibilities of Sharp to the purchaser with respect to the Product, and shall constitute full satisfaction of all claims, whether based on contract, negligence, strict liability or otherwise. Sharp does not warrant nor shall Sharp be liable, or in any way responsible, for Products which have been subject to abuse (including, but not limited to, improper voltage), accident, misuse, negligence, lack of reasonable care, alteration, modification, tampering, improper operation or maintenance or any damages or defects in the Product which were caused by repairs or attempted repairs performed by anyone other than a Sharp authorized servicer. Nor shall Sharp be liable or in any way responsible for any incidental or consequential economic or property damage. Some states do not allow limits on warranties or on remedies for breach in certain transactions; in such states, the limits herein may not apply.
THIS LIMITED WARRANTY IS VALID ONLY IN THE FIFTY (50) UNITED STATES, THE DISTRICT OF COLUMBIA, AND PUERTO RICO.
Model Specific Section
Your Product Model Number & Description:
BD-HP80U BLU-RAY DISC/DVD PLAYER
(Be sure to have this information available when you need service for your Product.)
Warranty Period for this Product: One (1) year parts and labor from the date of purchase.
Additional Item(s) Excluded from
Warranty Coverage (if any): Non-rechargeable batteries.
Where to Obtain Service:
From a Sharp Authorized Servicer located in the United States. To find the location of the nearest Sharp Authorized Servicer, call Sharp toll free at 1-800-BE-SHARP.
What to do to Obtain Service:
Please transport the Product in its original packaging and ensure that the Product is covered to avoid scratches and damage. Sharp shall not be responsible for lost, stolen or misdirected mail or for damage to the product incurred during shipping.
TO OBTAIN PRODUCT INFORMATION, CALL 1-800-BE-SHARP OR VISIT www.sharpusa.com
SHARP®
SHARP ELECTRONICS CORPORATION
Sharp Plaza, Mahwah, New Jersey 07495-1163
SHARP CORPORATION


- OPERATION MANUAL
- SAFETY INFORMATION
- WARNING: TO REDUCE THE RISK OF FIRE OR ELECTRIC SHOCK, DO NOT EXPOSE THIS APPLIANCE TO RAIN OR MOISTURE
- CAUTION
- WARNING—FCC REGULATIONS STATE THAT ANY UNAUTHORIZED CHANGES OR MODIFICATIONS TO THIS EQUIPMENT NOT EXPRESSLY APPROVED BY THE MANUFACTURER COULD VOID THE USER'S AUTHORITY TO OPERATE THIS EQUIPMENT
- INFORMATION
- FCC COMPLIANCE STATEMENT
- WIRELESS RADIO
- INDUSTRY CANADA STATEMENT
- IMPORTANT SAFETY INSTRUCTIONS
- ADDITIONAL SAFETY INFORMATION
- PRECAUTIONS ON VIEWING STEREOSCOPIC 3D IMAGES
- PRECAUTIONS WHEN CLEANING THIS PRODUCT
- NOTES ON USING WIRELESS LAN
- PRECAUTIONS ON USING WIRELESS LAN
- INTRODUCTION
- CONNECTION
- PLAYBACK
- SETTINGS
- STREAMING CONTENT
- APPENDIX
- WHAT TO DO FIRST
- INTRODUCTION (PP. 1–17)
- CONNECTION (PP. 18–21)
- PLAYBACK (PP. 22–38)
- SETTINGS (PP. 39–51)
- STREAMING CONTENT (PP. 52–56)
- APPENDIX (PP. I–XIII)
- WHAT WOULD YOU LIKE TO DO WITH THIS PLAYER
- WATCH HIGH QUALITY MOVIES ON BLU-RAY DISCS
- ENJOY STEREOSCOPIC AND POWERFUL 3D IMAGES
- ENJOY DIFFERENT KINDS OF MEDIA SOURCES
- SIMPLE CONNECTION AND OPERATION THROUGH HDMI
- ENJOY BD-LIVE FUNCTIONS THROUGH THE INTERNET
- ENJOY INTERNET STREAMING CONTENT ON YOUR TV
- BLU-RAY DISC
- TYPES OF DISCS THAT CAN BE USED WITH THIS PLAYER
- NOTE
- DISCS THAT CANNOT BE USED WITH THIS PLAYER
- THE FOLLOWING CD-RW/R DISCS CANNOT BE PLAYED
- ABOUT THE JPEG FILE FORMAT
- FILE FORMATS THAT ARE NOT COMPATIBLE
- OTHER FILES THAT CANNOT BE PLAYED BACK
- YOU MAY EXPERIENCE ONE OR MORE OF THE FOLLOWING SYMPTOMS WHEN PLAYING FILES
- ABOUT THE MP3 FILE FORMAT
- PLAYING THE MP3 FILE FORMAT
- THE FOLLOWING FILES CANNOT BE PLAYED ON THIS PLAYER
- ABOUT FILES/FOLDERS FOR STILL IMAGES (JPEG FILES) AND AUDIO DATA (MP3 FILES)
- FILE AND FOLDER REQUIREMENTS
- ABOUT DIVX VIDEO
- ABOUT DIVX VIDEO-ON-DEMAND
- ABOUT DISC CONTENTS
- BD VIDEO
- TITLE, CHAPTER AND TRACK
- ICONS USED ON DVD VIDEO DISC CASES
- AUDIO TRACKS AND AUDIO FORMATS
- DOLBY DIGITAL
- DTS
- LINEAR PCM
- SUBTITLE LANGUAGES
- SCREEN ASPECT RATIO
- CAMERA ANGLE
- REGION CODE
- THE ICONS USED IN THIS OPERATION MANUAL
- DISC PRECAUTIONS
- BE CAREFUL OF SCRATCHES AND DUST
- HANDLING PRECAUTIONS
- CLEANING THE PICK UP LENS
- WARNINGS ABOUT DEW FORMATION
- WHEN CONDENSATION FORMS
- TO REMOVE CONDENSATION
- LICENSE AND COPYRIGHT
- ENERGY STAR® PROGRAM INFORMATION
- STEP 1: UNPACKING
- STEP 2: SELECTING EQUIPMENT TO CONNECT
- ENJOYING BD-LIVE AND STREAMING SERVICES
- STEP 3: PLAYING BACK VIDEO/PICTURE/MUSIC CONTENT
- STEP 4: ADJUST SETTINGS TO SUIT YOUR PREFERENCE
- MAIN UNIT (REAR)
- REMOTE CONTROL UNIT
- KEYLOCK FUNCTION
- REMOVING AND REPLACING THE TERMINAL COVER
- SECURING BRACKET FOR THE HDMI CABLE
- REMOTE CONTROL SENSOR SETTING
- CONNECTING TO THE HDMI TERMINAL
- STEPS
- AFTER CONNECTING
- CONNECTING TO THE DIGITAL AUDIO TERMINAL
- INTERNET CONNECTION (LAN CABLE)
- EXAMPLE OF A BROADBAND INTERNET CONNECTION
- INTERNET CONNECTION (WIRELESS LAN)
- LOADING THE BATTERIES IN THE REMOTE CONTROL
- WARNING
- APPROXIMATE OPERATING RANGE OF REMOTE CONTROL
- CONNECTING THE AC ADAPTER
- TURNING THE POWER ON
- ENTERING STANDBY
- INDICATORS ON THE PLAYER
- CHANGING THE ON-SCREEN DISPLAY LANGUAGE
- OPERATING A SHARP TV USING THE REMOTE CONTROL
- TURNING OFF THE INDICATOR LIGHTS
- USING AQUOS LINK
- CONTROLLING THE BLU-RAY DISC PLAYER USING AQUOS LINK
- WHAT IS AQUOS LINK
- WHAT YOU CAN DO WITH AQUOS LINK
- ● AUTOMATIC INPUT SELECT FUNCTION
- ● AUTOMATIC POWER OFF FUNCTION
- ● AUTOMATIC POWER ON FUNCTION
- AQUOS PURE MODE
- USING 3D
- REGARDING THE 3D INDICATOR
- CONTROL PANEL
- PRESS ▲/▼/◄/► ON THE TV REMOTE CONTROL TO SELECT THE DESIRED BUTTON ICON, THEN PRESS ENTER
- MAJOR FUNCTIONS OF EACH BUTTON ICON
- POP-UP MENU
- TOP MENU TITLE LIST
- FUNC
- INSTANT REPLAY
- SKIP SEARCH
- PANEL OFF
- LOADING A DISC/EJECTING A DISC
- TO EJECT A DISC
- BD/DVD VIDEO PLAYBACK
- REGARDING PLAYBACK OF BD VIDEO DISCS
- TO STOP PLAYBACK
- RESUME PLAYBACK FUNCTION
- DISPLAYING THE DISC INFORMATION
- BD/DVD MENUS
- START PLAYBACK BY SELECTING A TITLE FROM THE TOP MENU
- PRESS TOP MENU/TITLE LIST
- PRESS ▲/▼/◄/► TO SELECT THE TITLE, THEN PRESS ENTER
- TOP MENU
- USING THE DISC MENU
- PRESS ▲/▼ TO SELECT "SUBTITLE LANGUAGE", THEN PRESS ENTER
- USING THE POP-UP MENU
- PRESS POP-UP MENU DURING PLAYBACK
- PRESS ▲/▼/◄/► TO SELECT THE DESIRED ITEM, THEN PRESS ENTER
- PRESS POP-UP MENU TO EXIT
- ENJOYING BONUSVIEW OR BD-LIVE
- USE OF PICTURE IN PICTURE FUNCTION (SECONDARY AUDIO/VIDEO PLAYBACK)
- VIRTUAL PACKAGE
- BD-LIVE
- DVD-R/-RW (VR FORMAT) / BD-RE/-R (BDAV FORMAT) PLAYBACK
- PLAYBACK BY SELECTING A TITLE
- PLAYBACK BY SELECTING A PLAYLIST
- AUDIO CD PLAYBACK
- AUDIO CD
- PLAYBACK FROM THE BEGINNING
- TO SKIP THE TRACK DURING PLAYBACK
- OPERATION PROCEDURE FOR THE "FUNCTIONS" MENU
- AUDIO DATA (MP3 FILE) PLAYBACK
- PLAYING BACK AUDIO DATA (MP3 FILES)
- TO PLAY ANOTHER FILE DURING PLAYBACK
- TO SKIP THE FILE DURING PLAYBACK
- DISPLAYING STILL IMAGES (JPEG FILES)
- PLAYING BACK SLIDE SHOW
- SETTING SLIDE SHOW SPEED/REPEAT PLAYBACK
- FAST FORWARD/REVERSE (SEARCH)
- WHEN PLAYING BACK A DVD
- SKIPPING TO THE NEXT OR THE START OF THE CURRENT CHAPTER (TRACK/TITLE)
- PAUSE/FRAME ADVANCE PLAYBACK
- SLOW PLAYBACK
- REPLAY
- REPEAT PLAYBACK OF A TITLE OR CHAPTER (REPEAT PLAYBACK)
- PARTIAL REPEAT PLAYBACK (REPEAT PLAYBACK OF A SPECIFIED PART)
- DISPLAYING THE AUDIO INFORMATION
- BD VIDEO DVD VIDEO
- DVD-RW DVD-R
- WHEN A RECORDED BROADCAST WITH STEREO OR MONAURAL AUDIO IS PLAYED BACK
- SWITCHING SUBTITLES
- PRESS SUBTITLE DURING PLAYBACK
- SWITCHING THE ANGLE
- PRESS ANGLE DURING PLAYBACK
- DISPLAYING THE ANGLE MARK
- FUNCTION CONTROL
- ① PLAYBACK STATUS DISPLAY
- ② SETTING ITEMS
- ③ OPERATION GUIDE DISPLAY
- FUNCTION CONTROL OPERATION PROCEDURE
- PRESS FUNCTION DURING PLAYBACK
- PRESS ▲/▼ TO SELECT THE DESIRED SETTING, THEN PRESS ENTER
- PRESS ▲/▼/◄/► TO SET, THEN PRESS ENTER
- PRESS RETURN OR FUNCTION TO CLOSE THE FUNCTION CONTROL SCREEN
- FUNCTIONS WHICH CAN BE SET
- TITLE/TRACK NUMBER (DIRECT TITLE/TRACK SKIP)
- CHAPTER NUMBER (DIRECT CHAPTER SKIP)
- PLAYBACK ELAPSED TIME (DIRECT TIME SKIP)
- SUBTITLE LANGUAGE
- ANGLE NUMBER
- AUDIO
- REPEAT
- COMMON OPERATIONS
- DISPLAY THE MENU SCREEN
- SELECT A MENU ITEM
- SELECT THE NEXT ITEM
- EXIT THE MENU SCREEN
- BASIC OPERATION FOR PLAYBACK SETTING
- AUDIO VIDEO SETTINGS
- TV ASPECT RATIO
- ITEM
- HDMI VIDEO OUT
- AUDIO OUT
- DYNAMIC RANGE CONTROL
- SMART SETTINGS
- AUTO POWER OFF
- FRONT LED
- SCREEN SAVER
- PLAYBACK SETTING
- PARENTAL CONTROL
- ITEM (PARENTAL CONTROL LEVEL)
- ITEM (COUNTRY CODE)
- DISC LANGUAGE (DISC PRIORITY LANGUAGE)
- ITEM (SUBTITLE)
- ITEM (AUDIO)
- ITEM (MENU)
- ANGLE MARK DISPLAY
- PASSWORD SETTING
- BD INTERNET ACCESS
- D MODE
- D NOTICE
- ON SCREEN LANGUAGE
- VERSION
- SYSTEM
- SYSTEM RESET
- NETFLIX DEACTIVATE
- DIVX REGISTOR
- DIVX DEACTIVATE
- VUDU DEACTIVATE
- COMMUNICATION SETUP
- SETS WHETHER "CABLE" OR "WIRELESS" IS USED FOR THE NETWORK CONNECTION
- WHEN SELECTING CABLE
- WHEN SELECTING WIRELESS
- INFORMATION ON MAC ADDRESSES
- THE OPERATION PROCEDURE FOR INPUTTING CHARACTERS MANUALLY
- BEFORE USING THE USB MEMORY DEVICE
- USB MEMORY MANAGEMENT
- SOFTWARE UPDATE SETTINGS
- MANUAL UPDATE FROM NETWORK
- MANUAL UPDATE FROM USB MEMORY DEVICE
- PRESS ENTER TO START UPDATING
- PLAYING BACK STREAMING CONTENT
- INSTANTLY WATCHING MOVIES FROM NETFLIX
- THE BUTTONS WHICH CAN BE USED
- SETTINGS FOR WATCHING NETFLIX CONTENT ON YOUR TV
- IF YOU DON'T HAVE A NETFLIX ACCOUNT
- IF YOU HAVE A NETFLIX ACCOUNT
- ADDING CONTENT TO THE INSTANT QUEUE
- PLAYING BACK CONTENT ON YOUR TV
- FAST FORWARD/REVERSE
- ENJOYING MOVIES AND INTERNET APPLICATION WITH VUDU
- VUDU MOVIES FEATURES
- GETTING STARTED
- WATCHING A MOVIE ON VUDU
- IF THE SETTINGS ON THE PC ARE INCORRECT
- DEACTIVATING THE VUDU FUNCTION
- TROUBLESHOOTING - VUDU
- ENJOYING PANDORA RADIO
- ACTIVATING YOUR PLAYER
- TROUBLESHOOTING
- TO RESET THIS PLAYER
- ON-SCREEN ERROR MESSAGES
- AD-HOC MODE (PAGE 21)
- AVCHD (PAGE 9)
- BDAV (PAGE 9)
- BD-J APPLICATION
- BD-LIVE (PAGE 29)
- BDMV (PAGE 9)
- BD-R (PAGES 9, 27)
- BD-RE (PAGES 9, 27)
- BD-ROM
- BLU-RAY DISC (BD) (PAGE 9)
- CHAPTER NUMBER (PAGES 37, 38)
- CONTROL PANEL (PAGE 26)
- COPY GUARD
- DEEP COLOR
- DISC MENU (PAGE 28)
- DOLBY DIGITAL PLUS
- DOLBY TRUEHD
- DTS-HD HIGH RESOLUTION AUDIO
- DTS-HD MASTER AUDIO
- DTS-HD MASTER AUDIO | ESSENTIAL
- DVD UPSCALING (PAGE 27)
- DVD VIDEO (PAGES 9, 27)
- DVD+/-R (PAGES 9, 27)
- DVD+/-RW (PAGES 9, 27)
- HDMI (PAGE 18)
- INFRASTRUCTURE MODE (PAGE 21)
- INTERLACE FORMAT
- JPEG (PAGES 9, 10, 33)
- LETTER BOX (LB 4:3) (PAGE 40)
- LINEAR PCM SOUND
- MP3 (PAGES 9, 10, 32)
- MPEG
- MULTI ANGLE (PAGES 36–38)
- MULTI AUDIO
- NETFLIX (PAGES 52, 53)
- PANDORA RADIO (PAGE 56)
- PAN SCAN (PS 4:3) (PAGE 40)
- PARENTAL CONTROL (PAGE 41)
- POP-UP MENU (PAGE 28)
- PROGRESSIVE FORMAT
- REGION CODE (PAGE 9)
- RESUME PLAYBACK (PAGE 27)
- SKIP (PAGES 31, 32, 34)
- SUBTITLES (PAGES 36–38)
- TIME NUMBER
- TITLE NUMBER (PAGES 37, 38)
- TOP MENU (PAGE 28)
- TRACK NUMBER (PAGES 37, 38)
- VUDU (PAGES 53–54)
- X.V.COLOR
- INFORMATION ON THE SOFTWARE LICENSE FOR THIS PRODUCT
- SOFTWARE COMPOSITION
- SOFTWARE DEVELOPED BY SHARP AND OPEN SOURCE SOFTWARE
- OBTAINING SOURCE CODE
- ACKNOWLEDGEMENTS
- SOFTWARE LICENSE NOTICE
- SOFTWARE LICENSE NOTICE REQUIREMENTS
- OPENSSL LICENSE
- ORIGINAL SSLEAY LICENSE
- BSD LICENSE
- CONSUMER LIMITED WARRANTY
- MODEL SPECIFIC SECTION
- SHARP®
- SHARP ELECTRONICS CORPORATION
- SHARP CORPORATION
Brand : SHARP
Model : BD-HP80U
Category : Blu-ray player