
DE320 - DVD Recorder BENQ - Free user manual and instructions
Find the device manual for free DE320 BENQ in PDF.


| Type | DVD Recorder |
| Brand | BenQ |
| Model | DE320 |
| Dimensions (W x D x H) | 430 x 330 x 59 mm |
| Weight | 4.3 kg |
| Power Supply | AC 100-240V, 50/60 Hz, 27W |
| Supported Playback Discs | DVD, DVD-R, DVD-RW, DVD+R, DVD+RW, VCD, SVCD, Audio CD, MP3 CD, Photo CD |
| Supported Recording Discs | DVD+R, DVD+RW |
| Recording Modes | HQ (1h), SP (2h), LP (3h), EP (4h), SLP (6h) |
| TV Tuner | Built-in analogue (PAL/NTSC) |
| Video Inputs | Composite, S-Video, DV (IEEE 1394), SCART, RF Antenna |
| Video Outputs | Composite, S-Video, Component, SCART |
| Audio Outputs | Analog stereo, Digital coaxial, Digital optical |
| Audio Formats | MPEG-1, MPEG-2, Dolby Digital |
| Safety | Class 1 laser, high voltage warning |
| Maintenance | No user-serviceable parts; clean disc with soft cloth |
| Accessories | Only use BenQ approved media and accessories |
| Region Code | Depends on purchase region (default may be 2) |
| Additional Features | Timer recording, parental control, chapter editing, sleep timer, repeat play, zoom |
Frequently Asked Questions - DE320 BENQ
User questions about DE320 BENQ
0 question about this device. Answer the ones you know or ask your own.
Ask a new question about this device
Download the instructions for your DVD Recorder in PDF format for free! Find your manual DE320 - BENQ and take your electronic device back in hand. On this page are published all the documents necessary for the use of your device. DE320 by BENQ.
USER MANUAL DE320 BENQ
Copyright 2005 BenQ Corporation. All rights reserved. www.BenQ.com
No part of this publication may be copied, recorded, reproduced, transmitted, transcribed, stored in a retrieval system, translated into any language or computer language, in any form or by any means, electronic, mechanical, magnetic, optical, chemical, manual or otherwise, without the prior written permission of BenQ Corporation.
ji Disclaimer
BenQ Corporation makes no representations or warranties, either expressed or implied, with respect to the contents hereof and specifically disclaims any warranties, merchantability or fitness for any particular purpose. Furthermore, BenQ Corporation reserves the right to revise this publication from time to time and to make changes in the contents hereof without obligation to notify any person of such revision or changes.
DOLBY® Dolby and the double-D symbol are registered trademarks of Dolby Laboratories.
All trademarks or product names used in this document are the registered property of their respective owners.
Precautions
Please read these precautions carefully before use. Keep this document for future reference.
- Only ever place the device on a stable, level and flat surface.
- Do not expose the device to extreme temperatures, humidity, dust, direct sunlight, rain, or spray.
- Do not block the vents on the rear panel of the device, as poor ventilation over a long period may result in damage to internal components and device failure.
- Do not change the mains plug to a different type or allow the power cable to be damaged.
- The mains plug on the power cable can used as a power disconnection device, and must remain readily accessible at all times. Disconnect and isolate the device from the power supply when it isn't going to be used for an extended period of time (e.g. holidays away).
- Follow the battery instructions for the remote. Make sure the batteries are correctly and properly installed. Do not use batteries of different types or different brands at the same time. Remove batteries when it isn't going to be used for an extended time (e.g. holidays away).
- Use only BenQ approved accessories and recording media. Incorrect media types may not work as expected, and could cause damage to the device.
- Do not attempt to repair the device under any circumstances. There are no user-servicable parts in this device. Refer all servicing only to suitably qualified and experienced personnel.
iv Safety Information
Laser warning
The laser component in this device is rated Class 1 – capable of emitting invisible laser radiation which can cause eye damage. To avoid exposure to the laser beam, do not remove any covers and look into the device whilst it is turned on.
High Voltage warning
This device uses high voltage capable of causing burns and possible death should you come into contact with live parts. To avoid exposure to high voltage, do not remove any covers and reach into the device whilst it is turned on.
Refer all servicing only to suitably qualified and experienced personnel.

Table of Contents
Introduction ....1
Features ....1
Compatible media types ....1
Input/output interface 2
Getting to know the BenQ DE320 DVD Recorder ....3
Front panel ....3
Rear panel 4
The Remote Control 5
Front display panel 7
On-screen display (OSD) menus 8
Playback Status box 8
Timer and Tuner Information Box 9
'SETUP' menu 9
'T/C Tools' menu 10
'Edit Chapters' menu ....11
Connecting the DVD Recorder 12
Connecting to a display device (TV or projector) ......12
Recording TV channels 12
Connecting to a sound system 12
Connecting the DVD Recorder to a TV using a component video cable ....13
Connecting the DVD Recorder to a TV using an S-Video cable .....14
Connecting the DVD Recorder to a TV using an A/V cable ......15
Connecting the DVD Recorder to a TV using a SCART cable ......16
Connecting the DVD Recorder to the TV antenna cable ......17
Connecting the DVD Recorder to your surround sound system ......18
Connecting the DVD Recorder to your stereo sound system ......20
Connecting an A/V device to the DVD Recorder 21
Connecting a VCR to the DVD Recorder using an S-video cable ......22
Connecting a VCR to the DVD Recorder using an A/V cable ......23
Connecting a satellite receiver or VCR to the DVD Recorder using a SCART cable 24
Connecting a Camcorder to the DVD Recorder using a DV cable .....25
Connecting a Camcorder to the DVD Recorder using an A/V cable ....26
Initializing the DVD Recorder 27
Manually resetting options 27
Remote control setup ......28
Connecting power 29
Initial startup (virgin mode) 30
Setting Time and Date 32
Manually searching for TV channels 34
Re-positioning/adding/deleting TV channels 35
Language settings 38
Setting the 'Setup' clock 39
Playing a disc 40
General information ....40
Loading a disc 40
Playing a disc 42
Playing a recordable DVD 43
Playing a music CD 45
Playing an MP3 CD 46
Playing a VCD/SVCD 48
Operations while playing a disc 49
Searching a disc ....50
Still picture 52
Repeat play 53
Repeat a sequence (A-B) 54
Changing the camera angle ....55
Zoom 56
Audio language 57
Subtitle language 58
Surround sound effect 59
Playing a photo CD 60
Viewing a photo 60
Viewing thumbnails in different pages and folders 60
Recording 63
Record mode 64
Changing record mode 64
Manual recording 65
Sleep mode recording 66
How to activate the Sleep mode timer: 66
Satellite Recording 67
Pausing recording 68
Timer recording 69
General Information 69
Setting up timer recording 70
Changing or erasing timer setting 71
How to change a timer setting: 71
Managing recordings 72
General information 72
Managing recordings on DVD discs 72
Adding chapter markers during playback 72
Hiding/showing chapters 74
Deleting chapters 75
Editing title (name) 76
Playing all titles (including hidden chapters) ....77
Dividing titles 78
Erasing a recording/title ....79
Disc Settings 80
User selectable DVD Recorder preferences 85
Video Setup 85
TV Shape: 85
Black Level 85
Video Shift: 86
YUV Output: 86
Video Output: 86
Sound Setup 86
Digital Output: 86
Analog Output: 86
Night Mode 87
Feature Setup 87
Access control 87
Status Display 87
Resume 87
Auto Standby 87
Low Power Standby 87
Language Setup 88
Audio 88
Subtitle 88
Menu 88
Country 88
Record Setup 88
Record Mode: 88
Filter Mode 88
Auto Chapters: 88
SAT Record 89
Dual Language 89
System Setup 89
Auto Install: 89
Manual Search: 89
Sort TV Channels: 89
Time & Date: 89
Resetting the DVD Recorder to default factory settings 89
Parental control 90
Parental control levels 90
Activating/deactivating parental control (child-lock) 92
How to activate parental control ....92
How to deactivate parental control 92
Changing the access control country setting 93
Changing/deleting the parent control password ....94
How to change parent control password ....94
Troubleshooting 95
Product Specifications 99

Introduction
Thank you for purchasing the BenQ DE320 DVD Recorder. With the DVD Recorder, you can either:
- play your prerecorded DVDs and CDs, or
- record TV programs or video device (VCR or Camcorder) recordings onto DVDs.
The easy menu system also provides you with ready access to its advanced features, such as programmed recording, disc content editing and more.
This manual describes all the features of the DVD Recorder. Refer to it whenever you need assistance, and please pay attention to all notes, cautions and warnings.
Features
• Real-time recording using a DVD+RW or DVD+R disc
• Built-in TV tuner for recording from TV/CATV programs
- Recorded discs can be played on most DVD players
- Timer recording
- Records two-channel audio in MPEG-1, Layer II or Dolby Digital formats
- Multiple recording modes (for recording time of up to 6 hours on one DVD)
• Disc write protection
- On-screen display (OSD) 'SETUP' menu
Compatible media types
Recording and Playback

DVD+R
Recordable digital video discs (DVD), which means you can record data on the disc once, however, you can record at several different times until the disc is full, and cannot erase them after recording.

DVD+RW
ReWritable digital video discs (DVD), which means you can erase data previously recorded on the disc and record new data on the disc.
Playback


DVD
The BenQ DE320 DVD Recorder is equipped with a region code copyright protection mechanism appropriate for the region where you purchased the unit. In some countries, you can only play DVDs with a region code which matches that of your DVD Recorder.

DVD-R

DVD-RW
DVD-R and DVD-RW must be recorded and finalized in Video Mode.

Audio CD

VCD, VCD2.0

SVCD

CD-R music/MP3 music

CD-RW music/MP3 music
Photo CD
Input/output interface
SCART input/output
• SCART input/output to other auxiliary A/V devices
• SCART input/output to TV
Inputs for Recording
• TV Antenna
• DV input: IEEE 1394 (Firewire)
• S-Video input
• Analog (composite) video input
- Analog audio input

Tips
Should you have multiple input devices connected using separate video inputs (Composite Video, S-Video or SCART) you should switch on and use only the video input source device you wish to have the DVD Recorder record onto DVD, and turn off all other video input source devices not in use. When both S-Video and Composite Video inputs are present, the DVD Recorder will automatically select the S-Video input.
Outputs
• TV Antenna (loop through)
• S-Video output
• Analog (composite) video output
- Component video output
• Digital audio output
• Analog audio output
Getting to know the BenQ DE320 DVD Recorder
Front panel
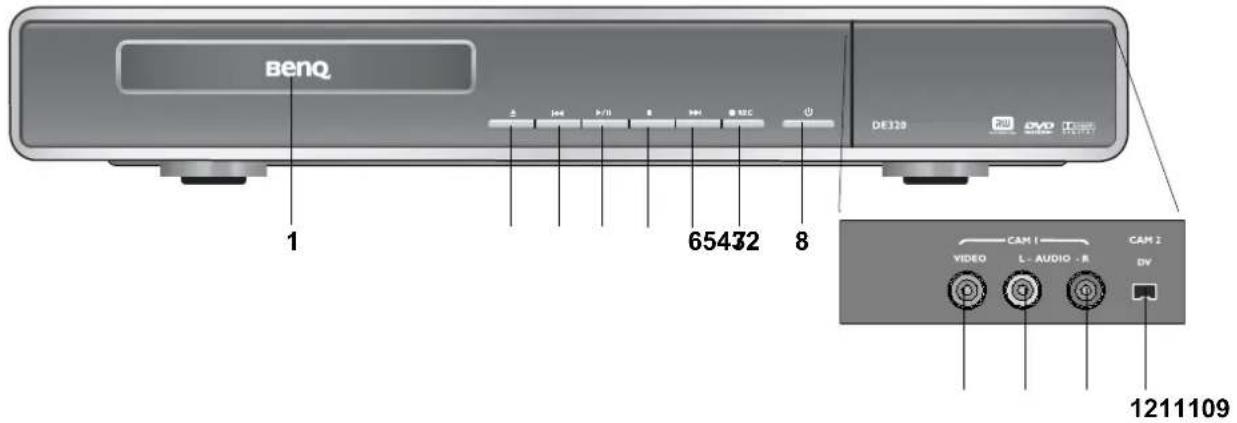
| No: | Button Description | |
| 1 | Disc tray Place disc face down | (label side up) here. |
| 2 | ▲ Open/Close | Press to open and close the disc tray. |
| 3 | |◀| Previous | Press to jump to previous chapter/track. |
| 4 | ▶ / || Play/pause | Press to play a disc. |
| 5 | ■ Stop | Press to stop playing or recording. |
| 6 | ▶▶| Next | Press to jump to next chapter/track. |
| 7 | ●REC REC | Press to start recording from an audio/video source (e.g. TV program). |
| 8 | ◀ Power | Press to turn the DVD Recorder On or Off (standby). |
| 9 | Video input For connecting to the video output terminal of other devices. | |
| 10 | Audio input (left channel) | For connecting to the audio output (left channel) terminal of other devices. |
| 11 | Audio input (right channel) | For connecting to the audio output (right channel) terminal of other devices. |
| 12 | DV input | For connecting to a DV or other devices using IEEE 1394 FireWire. |
Rear panel
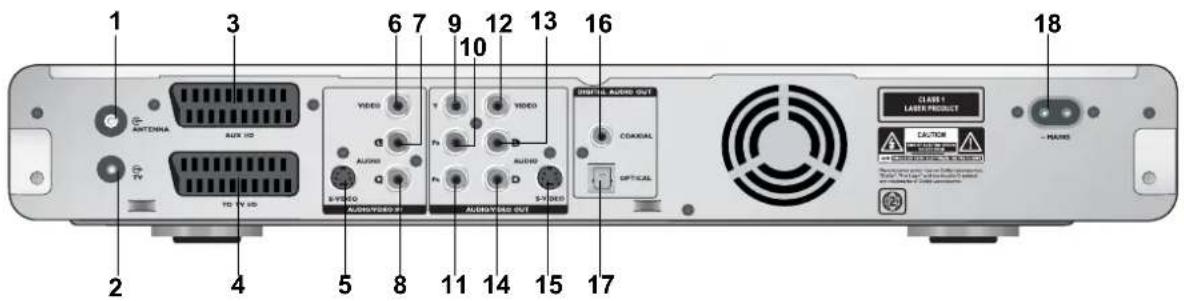
| No. Button Description | ||
| 1 Antenna input For connecting the TV antenna or a CATV cable. | ||
| 2 Antenna output For connecting to the antenna input terminal of your TV. | ||
| 3 SCART auxiliary input/output | For connecting to the SCART input/output socket on other A/V devices. | |
| 4 SCART TV input/output For connecting to the SCART input/output socket on your TV. | ||
| 5 S-Video input (Black) For connecting to the S-Video output terminal of other devices. | ||
| 6 Composite Video input (Yellow) | For connecting to the video output or component output terminal of other devices. | |
| 7 Audio input (Left channel/White) | For connecting to the audio output (left channel) terminal of other devices. | |
| 8 Audio input (Right channel/Red) | For connecting to the audio output (right channel) terminal of other devices. | |
| 9, 10, 11 | Component output (Red/Blue/Green) | For connecting to the component/progressive scan video input terminal of other devices. |
| 12 Composite Video output (Yellow) | For connecting to the composite video input terminal of other devices. | |
| 13 Audio Out (Left channel/White) | For connecting to the audio input (left channel) terminal of other devices when using component output. | |
| 14 | S-Video output (Black) | For connecting to the S-Video input terminal of other devices. |
| 15 Audio output (Right channel/Red) | For connecting to the audio input (right channel) terminal of other devices when using component output. | |
| 16 Digital audio output (coaxial) | For connecting to the digital audio input terminal on other devices (e.g. receivers or amplifiers) with digital multi-channel sound decoders. | |
| 17 Digital audio output (optical) | For connecting to the digital audio input terminal on other devices (e.g. receivers or amplifiers) with digital multi-channel sound decoders. | |
| 18 Power For connecting the power cord. | ||
The Remote Control
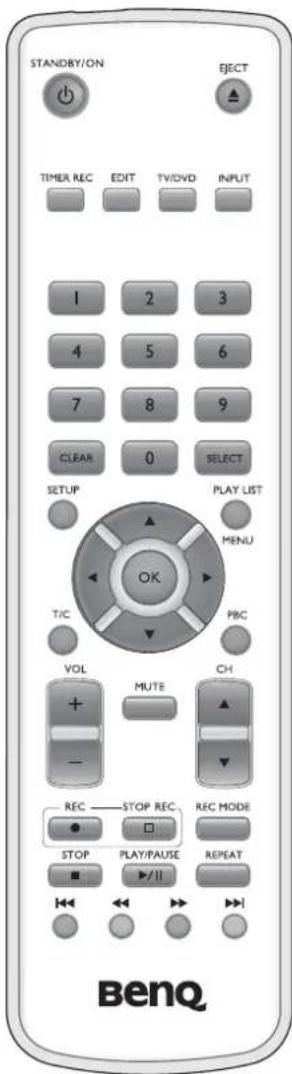
| Icon Button | Description | |
 | Power on/ standby | Press to turn the DVD Recorder ON or OFF (standby). |
| [setm] | Eject Press to | open or close disc tray. |
 | Timer recording | Press to show/hide the 'Timer recording' menu. |
 | Edit Press to show/hide the 'Edit' menu. | |
 | TV/DVD Press | to switch between TV and DVD modes. |
 | Input Press to switch between signal sources. | |
 ~ 9 ~ 9 | Numbered buttons | Use for numeric inputs. |
 | Clear Press to clear settings in a menu. | |
| [WWT] | Select Press to select an item on the 'SETUP' Menu. | |
 | Setup Press to show/hide the 'SETUP' menu. | |
 | Play list/ menu | Press to show/hide the play list or menu screen. |
 | Up Press to move the highlight bar upward in the 'SETUP' menu. | |
 | Down Press to move the highlight bar downward in the 'SETUP' menu. | |
 | Left Press to move the highlight bar to the left in the 'SETUP' menu. | |
 | Right Press to move the highlight bar to the right in the 'SETUP' menu. | |
 | ||
| OK | OK | Press to confirm a selected item in the 'SETUP' menu. |
 | ||
| [TC] | Title/chapter | Press to show/hide the T/C Tools menu and select a title or chapter while playing a disc. |
 | ||
| PBC | PBC | Press to display the 'PBC' disc menu of the VCD that is being played. |

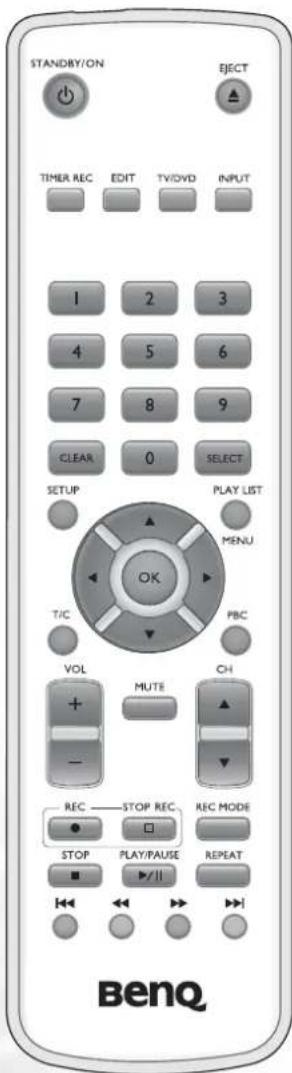
| Icon Button Description | ||
| Volume Press to increase or decrease audio volume. | ||
| Mute Press to turn off sound temporarily. Press again to resume sound. | ||
| Channel Press to select the previous or next channel. | ||
| Record Press to start recording from the presently selected input source. | ||
| STOP REC | Record stop Press to stop playing or recording. | |
| REC MODE | Record mode Press to select the recording mode. This affects the video quality and possible recording length. | |
| STOP | Stop Press to stop playing or recording. | |
| PLAY/PULSE | Play/pause Press to start playing a disc, or press to pause playing/recording. | |
| REPEAT | Repeat mode Press to select a repeat mode. | |
| Reverse Press to fast reverse the media content at different rewind rates. | ||
| Forward Press to fast forward the media content at different forward rates. | ||
| Previous | Press to jump to the previous title/chapter while playing a DVD. | |
| Next | Press to jump to the next title/chapter while playing a DVD. | |
Front display panel
The front panel features a multifunction display located on the right. Information displayed and their respective meanings are shown in the table below:
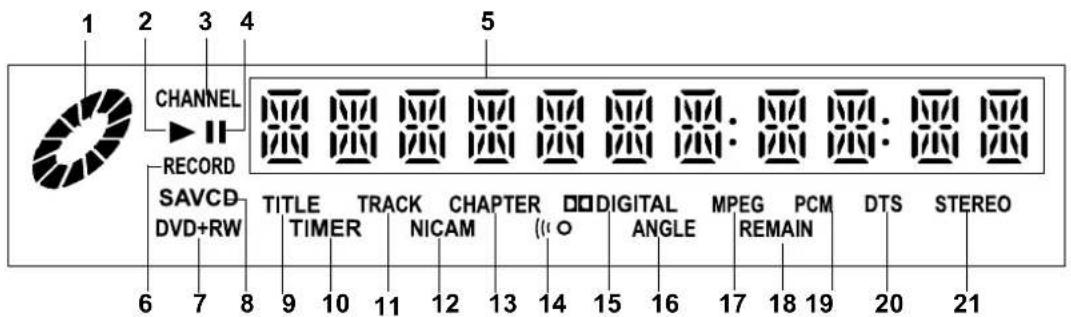
| No. | Description |
| 1 | Lit when playing is in progress. |
| 2 | Lit when playing is in progress. |
| 3 | Lit when TV antenna/cable input is selected. |
| 4 | Lit when playback/record paused. |
| 5 | Displays status messages:IS TV ON?: The DVD Recorder is currently in the initial setup mode. Refer to "Initializing the DVD Recorder" on page 27 for initial setup details.OPENING: Disc tray opening.TRAY OPEN: Disc tray open.CLOSING: Disc tray closing.READING: Disc being read.NO DISC: No disc has been inserted for recording. If a disc has been inserted, perhaps it cannot be read.INFO: Information on the inserted DVD is displayed on-screen.WAIT: Please wait until this message disappears. The DE320 is busy performing a task.ERASING: The entire disc is being erased.BLANK DISC: The disc inserted is either new or has been completely erased (no recordings).EMPTYDISC: The disc inserted is either new or has been completely erased (no recordings)PROTECTED: The disc is protected against recording.CHxx: Current TV channel where xx represents the channel number.DISC FULL: The disc is full. There is no space for new recordings.DISC ERR: An error occurred when the title was being written.BLOCKED: It is not possible to close/open the disc tray. |
| 6 | Lit when recording is in progress. |
| 7 | Various segments lit to indicate the type of inserted DVD disc: DVD, DVD+R, DVD+RW.(disc types DVD-R and DVD-RW are shown as DVD.) |
| 8 | Various segments lit to indicate the type of CD inserted: SAVCD, VCD, CD. |
| 9 | Lit when the number displaying above it is the selected title number of the DVD. |
| 10 | Lit when a recording timer has been programmed (and other functions are disabled). |
| 11 | Lit when the number displaying above it is the selected track number of the CD. |
| 12 Lit when receiving a Nicam audio signal (in regions using PAL systems only). | |
| 13 Lit when the number displaying above it is the currently selected/playing chapter. | |
| 14 Lit when a remote control signal is being received. | |
| 15 Lit when a Dolby digital audio signal is available on the digital audio output. | |
| 16 Lit when an alternate camera angle is available/selected. | |
| 17 Lit when an MPEG audio signal is available on the digital audio output. | |
| 18 Lit when the number displaying above it is the remaining playback time of the disc being played. | |
| 19 Lit when a PCM audio signal is available on the digital audio output. | |
| 20 Lit when a DTS audio signal is available on the digital audio output. | |
| 21 Lit when 2 channel (stereo) audio is available on the analog audio outputs. | |
On-screen display (OSD) menus
Playback Status box
The Playback Status box located on the right top corner of the screen contains information about the playback status of current disc. This box appears when the Status Display option is selected in the Feature menu.
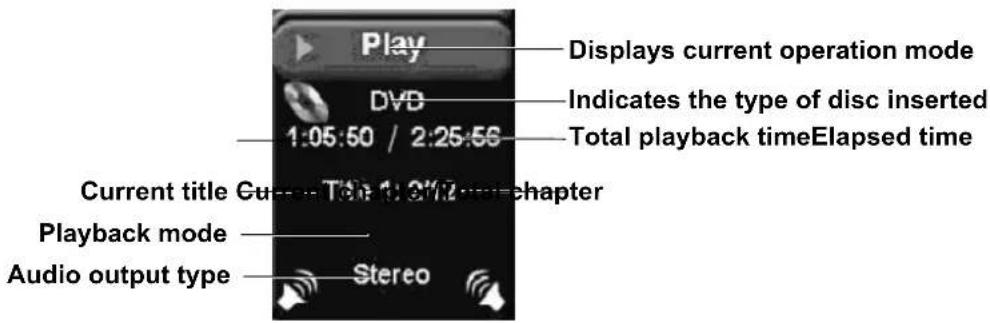
Operation mode icons in the Playback status Box
| Icon Description | |
| Record | Recording in progress |
| Record1 | Playback stopped |
| Record2 | Playing disc |
| Record3 | Pause play |
| Record4 | Record paused |
| Record5 | Next/Forward search in progress |
| Record6 | Previous/Reverse search in progress |
| Record7 | Slow forward in progress |
| Record8 | Slow reverse in progress |
| Record9 | Slow motion in progress |
 | Disc tray closing |
 | Disc tray opening |
Timer and Tuner Information Box
In the Timer and Tuner Information box, you can check the status of TV tuner and external signal source and view information about timer recordings.
| Icon Description | |
 | A recording has been programmed on a certain day or at a certain period (if there is one on that day). |
 | Current time (no recording has been programmed). |
 | Current channel/selected input source. |
 | • TV channel signal not available.• External device disconnected or shut down. |
'SETUP' menu
You can define the initial setup of the DVD Recorder from the 'SETUP' menu or change the settings of other items to suit your preferences.
Launch the 'SETUP' menu by pressing the Setup button on the remote control.
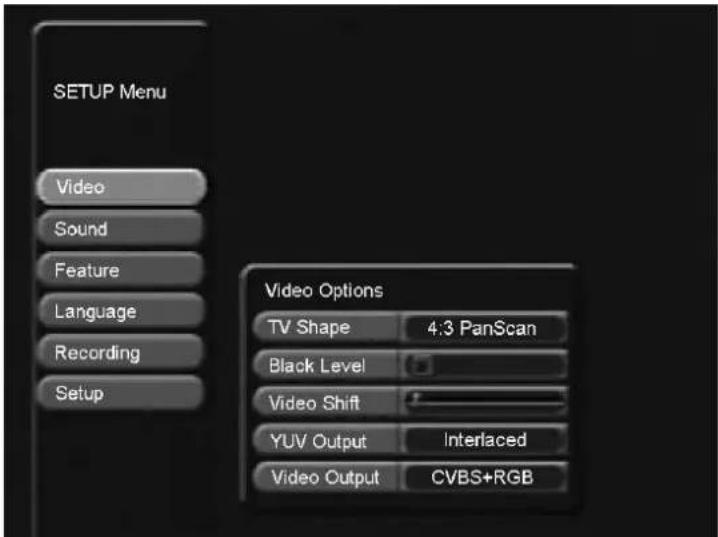
Navigating the 'SETUP' menu
Press the Down or Up button on the remote control to move the highlight bar to the desired item.
Press the Right button on the remote control to enter (activate) the currently selected (highlighted) menu item.
Press the Left button on the remote control to return to the parent menu.
Press the OK OK button on the remote control to confirm the selection.
'T/C Tools' menu
When playing a disc, the 'T/C Tools' menu allows you to perform certain operations such as searching the disc or changing audio settings.
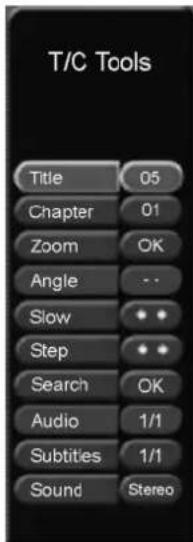
Launch the 'T/C Tools' menu by pressing the Title/chapter button on the remote control.
Navigating the 'T/C Tools' menu
Press the Down ▼ or Up ▲ button on the remote control to move the highlight bar to the desired item.
Press the Right or Left button on the remote control to select an option.
Press the OK OK button on the remote control to confirm the selection.
'Edit Chapters' menu
When playing an unfinalized DVD+R or DVD+RW disc, the 'Edit Chapters' menu allows you to edit current playing chapter.
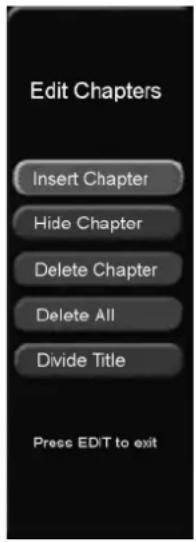
Launch the 'Edit' menu by pressing the Edit button on the remote control.
Navigating the 'Edit Chapters' menu
Press the Down ▼ or Up ▲ button on the remote control to move the highlight bar to the desired item.
Press the OK OK button on the remote control to confirm the selection.
2 Connecting the DVD Recorder
Connecting to a display device (TV or projector)
The DVD Recorder needs to be connected to a display device so that you can view a DVD being played, and so that you can use the DVD Recorder On-Screen Display (OSD) menus.
You can connect the DVD Recorder to a display device using one of these possible methods:
- Component video cable: (not provided) See "Connecting the DVD Recorder to a TV using a component video cable" on page 13.
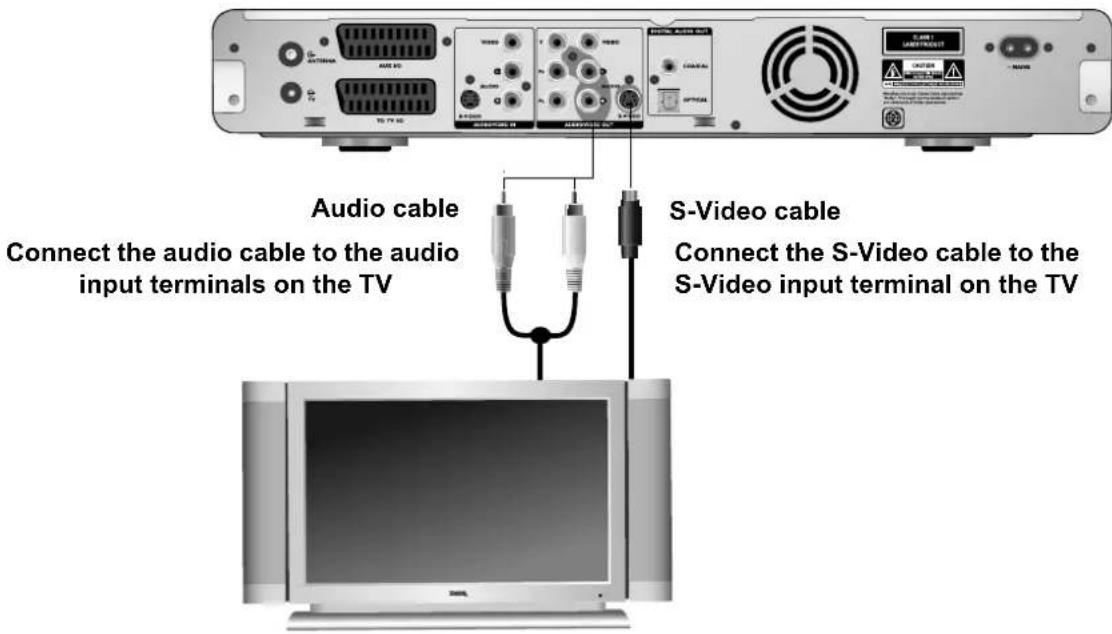
- S-Video cable: (not provided) See "Connecting the DVD Recorder to a TV using an S-Video cable" on page 14.
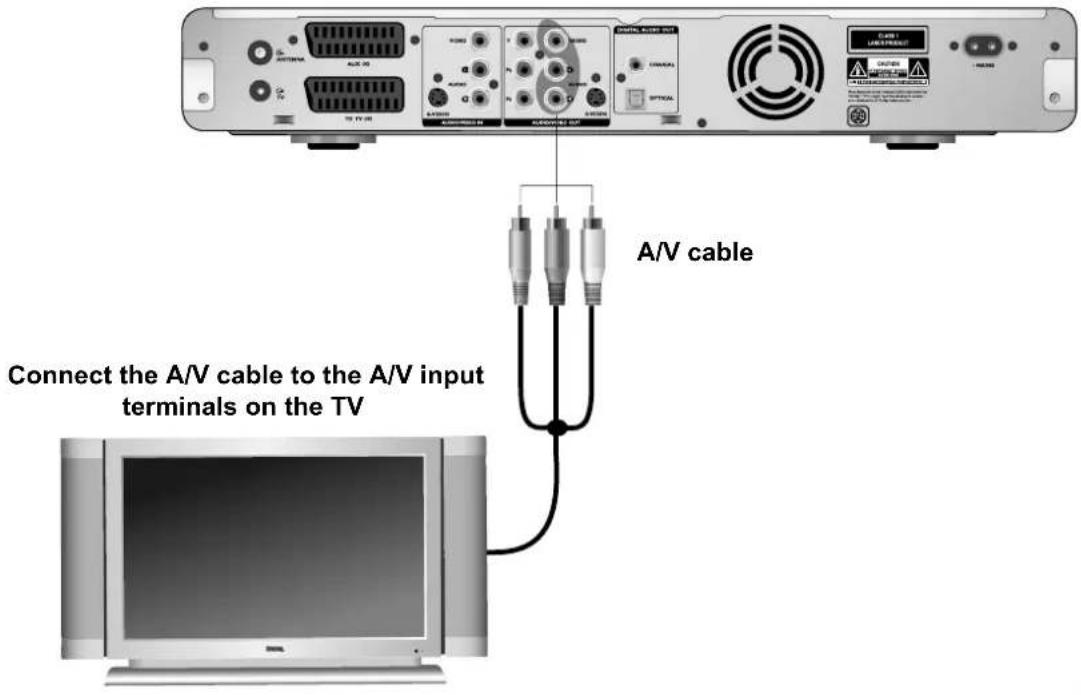
- Audio/Video cable (composite video): (provided) See "Connecting the DVD Recorder to a TV using an A/V cable" on page 15.
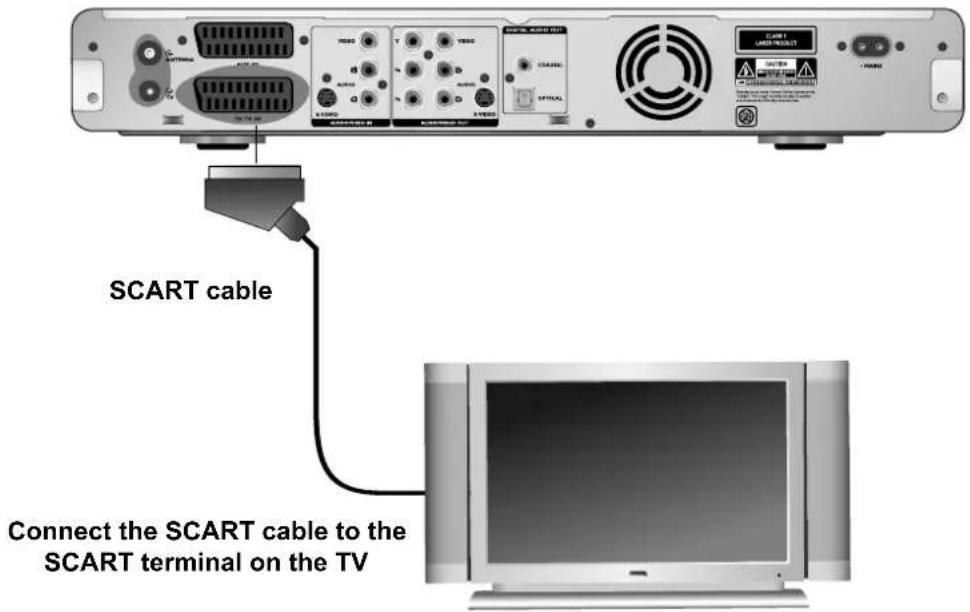
- SCART cable (composite video): (not provided) See "Connecting the DVD Recorder to a TV using a SCART cable" on page 16.
You need only connect the DVD Recorder to your display device using just one of the above methods, as each provides a different level of video quality. The method you choose will most likely depend upon the availability of terminals provided on the display device itself.
Best video quality
The best available video connection method is component video (not to be confused with composite video). Digital TVs and projectors use component video natively, so if available on your display device, this should be your connection method of choice.
Better video quality
The S-Video method provides a better quality analog video than standard A/V. If you have both A/V and S-Video input terminals on your display device, you should elect to use the S-Video option.
Least video quality
You at least need a display device (TV or projector) with A/V or SCART compatibility. This is a composite analog video and will result in a perfectly acceptable, but less than optimal result from your DVD player, being the least video quality of the available methods described here.
Recording TV channels
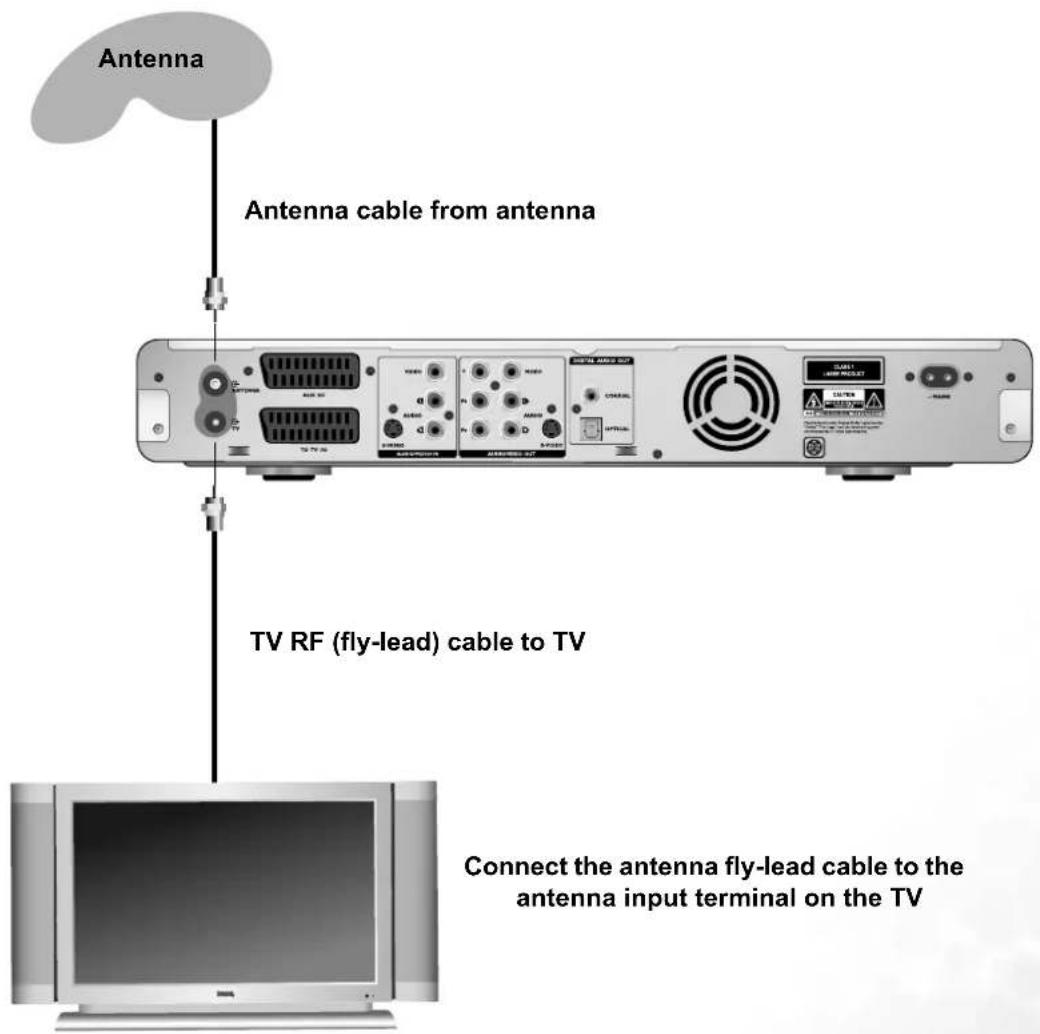
The DVD Recorder also needs to be connected to the TV antenna cable so that it can record TV signals onto DVD for you. The TV RF (fly-lead) cable allows you to select and view a TV channel on the TV, even while the DVD Recorder is recording another channel, or is turned off. See "Connecting the DVD Recorder to the TV antenna cable" on page 17.
Connecting to a sound system
You can connect the DVD Recorder to a digital or analog audio device (such as a sound system) using an appropriate audio cable (not provided).
See "Connecting the DVD Recorder to your surround sound system" on page 18, or see "Connecting the DVD Recorder to your stereo sound system" on page 20.
Connecting the DVD Recorder to a TV using a component video cable
Examine your TV to determine if it has unused component video sockets available:
- If so, you can continue with this procedure.
- If not, you will need to reassess which cables you can use to connect to the TV.
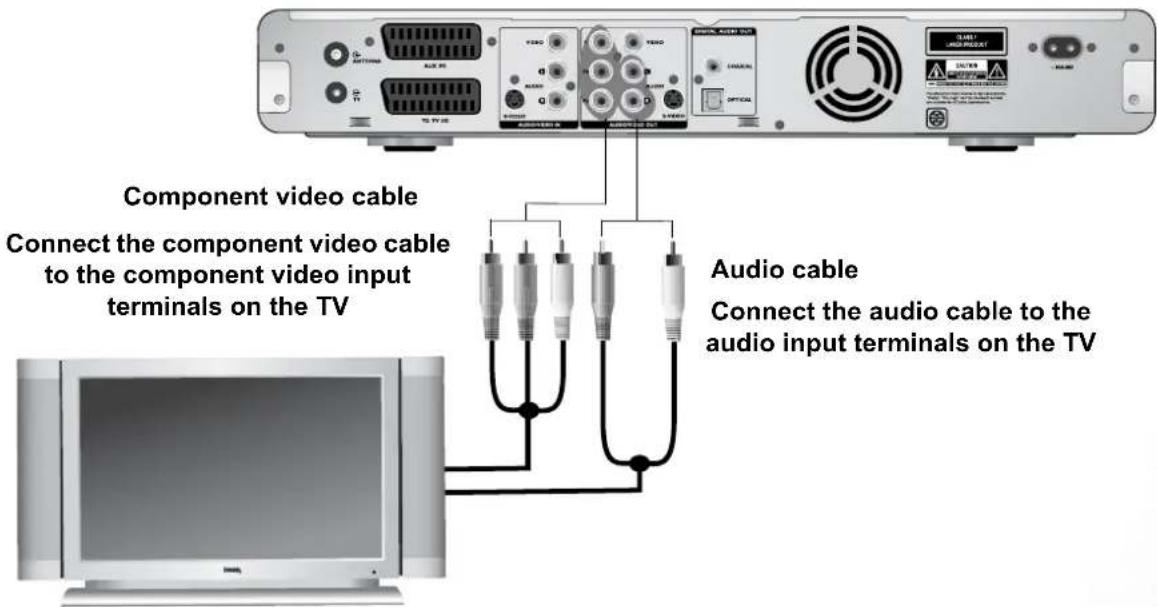
How to connect the DVD Recorder to a TV using a component video cable
1 Take a suitable component video cable (not provided) and connect one end to the OUT terminals on the rear of the DVD Recorder labelled 'COMPONENT'.
2 Connect the other end of the component cable to the appropriate component video sockets on the TV.
3 Take a suitable stereo audio cable (not provided) and connect one end to the OUT terminals on the rear of the DVD Recorder labelled 'AUDIO'.
4 Connect the other end of the audio cable to the appropriate audio input sockets on the TV (or sound system).
The final connection path should be like that shown in the following diagram:
Connecting the DVD Recorder to a TV using an S-Video cable
Examine your TV to determine if it has an unused S-Video socket available:
- If so, you can continue with this procedure.
- If not, you will need to reassess which cables you can use to connect to the TV.
How to connect the DVD Recorder to a TV using an S-Video cable
1 Take an S-Video cable (not provided) and connect one end to the OUT terminal on the rear of the DVD Recorder labelled 'S-VIDEO'.
2 Connect the other end of the S-Video cable to the appropriate S-Video socket on the TV.
3 Take a suitable stereo audio cable (not provided) and connect one end to the OUT terminals on the rear of the DVD Recorder labelled 'AUDIO'.
4 Connect the other end of the audio cable to the appropriate audio input sockets on the TV (or sound system).
The final connection path should be like that shown in the following diagram:
Connecting the DVD Recorder to a TV using an A/V cable
Examine your TV to determine if it has unused composite Video A/V sockets available:
- If so, you can continue with this procedure.
- If not, you will need to reassess how you can connect to the TV.
How to connect the DVD Recorder to a TV using an A/V cable
1 Take the A/V cable (provided) and connect one end to the OUT terminals on the rear of the DVD Recorder labelled 'VIDEO'.
2 Connect the other end of the A/V cable to the appropriate composite Video A/V sockets on the TV.
The final connection path should be like that shown in the following diagram:
Connecting the DVD Recorder to a TV using a SCART cable
Examine your TV to determine if it has unused SCART socket available:
- If so, you can continue with this procedure.
- If not, you will need to reassess how you can connect to the TV.
How to connect the DVD Recorder to a TV using the SCART cable
1 Take a SCART cable (not provided) and connect one end to the SCART terminal on the rear of the DVD Recorder labelled 'TO TV I/O'.
2 Connect the other end of the SCART cable to the SCART terminal on the TV.
The final connection path should be like that shown in the following diagram:
Connecting the DVD Recorder to the TV antenna cable
You should connect the DVD Recorder to the TV antenna cable between the antenna and the TV. The DVD Recorder has an Antenna input socket and a TV output socket on the rear panel for this purpose. This is a loop-through terminal, provided so that the DVD Recorder can record TV signals onto DVD for you. This also allows you to select and view a TV channel on the TV, even while the DVD Recorder is recording another channel, or is turned off.
How to connect the DVD Recorder to the TV antenna cable
1 Locate the TV antenna cable on the rear of the TV, and unplug it from the TV.
2 Plug this cable into the rear of the DVD Recorder in the socket labelled 'ANTENNA'.
3 Take the separate TV RF (fly-lead) cable (provided), connect one end to the DVD Recorder in the socket labelled 'TV', and the other end into the appropriate socket on the rear of the TV (where you removed the antenna cable from in step 1 above).
The final connection path should be like that shown in the following diagram:
Connecting the DVD Recorder to your surround sound system
You can connect the DVD Recorder to a digital audio multi-channel decoding device (such as an amplifier or device equipped with MPEG2, Dolby Digital, DTS, or 2-channel PCM decoding function) using the digital audio outlet. This requires a digital coaxial audio cable terminated with an RCA connector (which is usually orange colored), or an optical digital TOSLINK type cable.
Digital audio will only be available when a DVD is being played which contains suitable digital audio tracks.
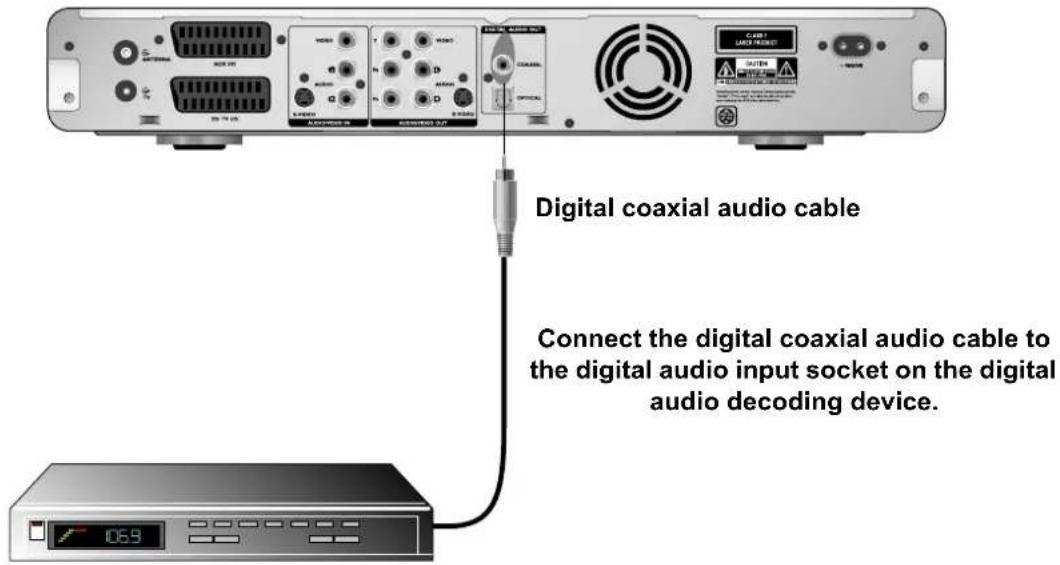
How to connect to a digital audio decoding device using a coaxial digital cable
1 Take a suitable coaxial digital audio cable (not provided) and connect one end to the COAXIAL terminal on the rear of the DVD Recorder labelled 'DIGITAL AUDIO OUT'.
2 Connect the other end of the digital coaxial audio cable to an appropriate audio input socket on your surround sound system decoding device.
You will need to select this input on the sound system when playing DVDs.
The final connection path should be like that shown in the following diagram:
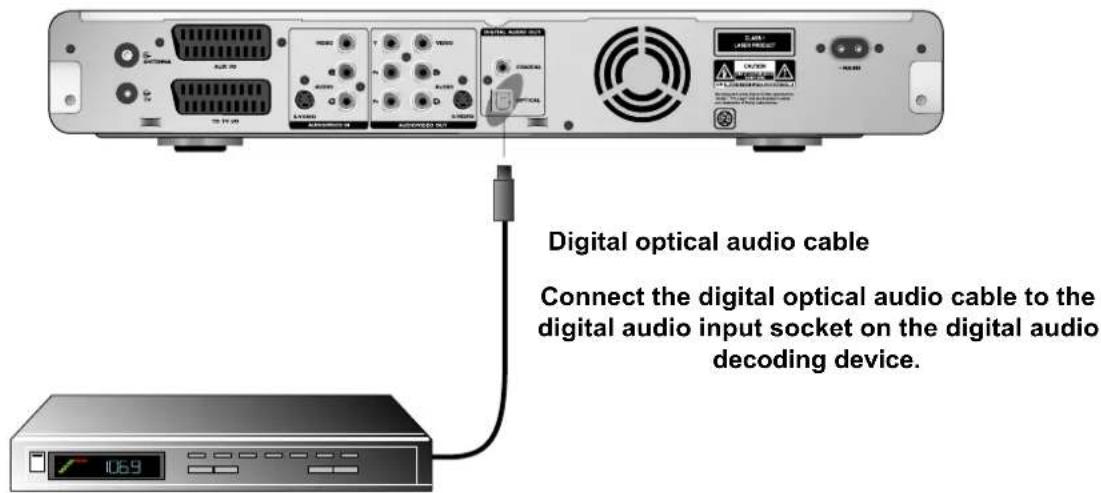
How to connect to a digital audio decoding device using a digital optical cable
1 Take a suitable optical digital audio cable (not provided) and connect one end to the OPTICAL terminal on the rear of the DVD Recorder labelled 'DIGITAL AUDIO OUT'.
2 Connect the other end of the digital optical audio cable to an appropriate audio input socket on your surround sound system decoding device.
You will need to select this input on the sound system when playing DVDs. The final connection path should be like that shown in the following diagram:
Connecting the DVD Recorder to your stereo sound system
You can connect the DVD Recorder to an analog audio device (such as a stereo) using a stereo audio cable.
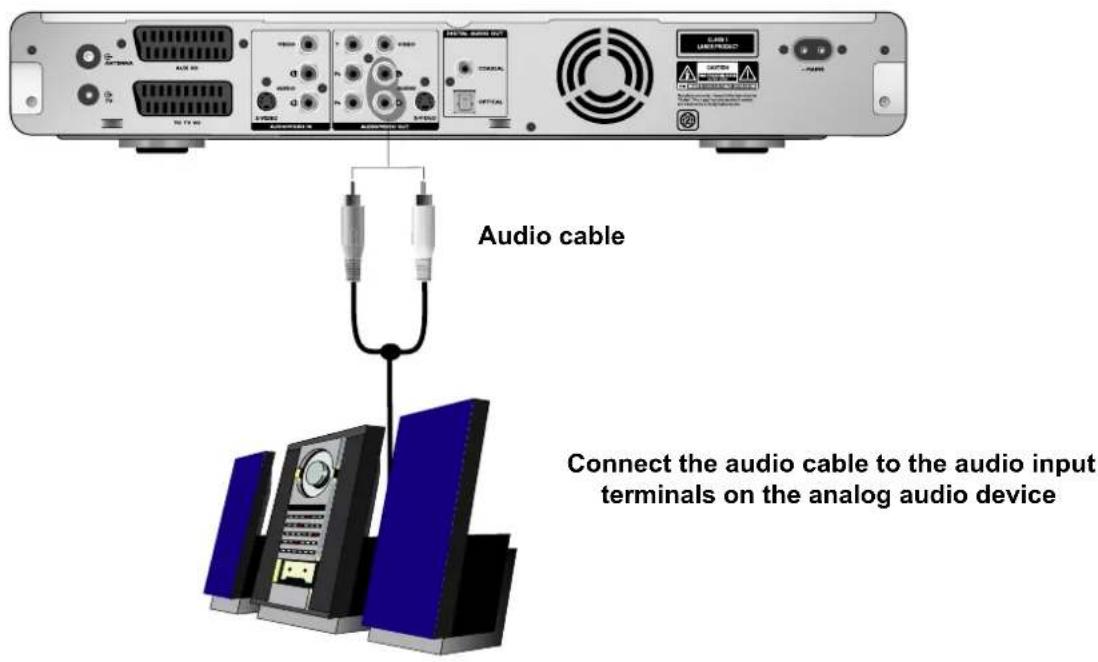
How to connect to a stereo system using a stereo audio cable
1 Take a suitable stereo audio cable (not provided) and connect one end to the OUT terminals on the rear of the DVD Recorder labelled 'AUDIO'.
2 Connect the other end of the audio cable to appropriate audio input sockets on the rear of your stereo sound system.
You will need to select this input on the sound system when playing audio DVDs or CDs.
The final connection path should be like that shown in the following diagram:
Connecting an A/V device to the DVD Recorder
You can connect an A/V device like a Video Cassette Recorder (VCR), satellite receiver, Digital Video (DV) camera or Digital-8 Video camera to the DVD Recorder so that you can record from a satellite receiver or copy your videos onto DVDs.
Permanent connections
The BenQ DE320 DVD Recorder has three video input connectors on the rear panel for permanent connection to Audio Video (A/V) equipment like a VCR using either:
- S-Video, or
• S C A R T, or - Composite video (A/V).
See "Connecting a VCR to the DVD Recorder using an S-video cable" on page 22, or See "Connecting a VCR to the DVD Recorder using an A/V cable" on page 23.
Temporary connections
The BenQ DE320 DVD Recorder also has two video input connectors on the front panel for temporary connection of Audio Video (A/V) equipment like a video camera using either:
• Digital Video (IEEE 1394 – Firewire), or
- Composite video (A/V).
See "Connecting a Camcorder to the DVD Recorder using a DV cable" on page 25, or See "Connecting a Camcorder to the DVD Recorder using an A/V cable" on page 26.
Video quality
You need only connect the A/V device to your DVD Recorder using just one of the above methods, as each provides a different level of video quality. The method you choose will most likely depend upon the availability of terminals provided on the A/V device itself.
For a description of video quality using these methods, see "Connecting to a display device (TV or projector)" on page 12.
Connecting a VCR to the DVD Recorder using an S-video cable
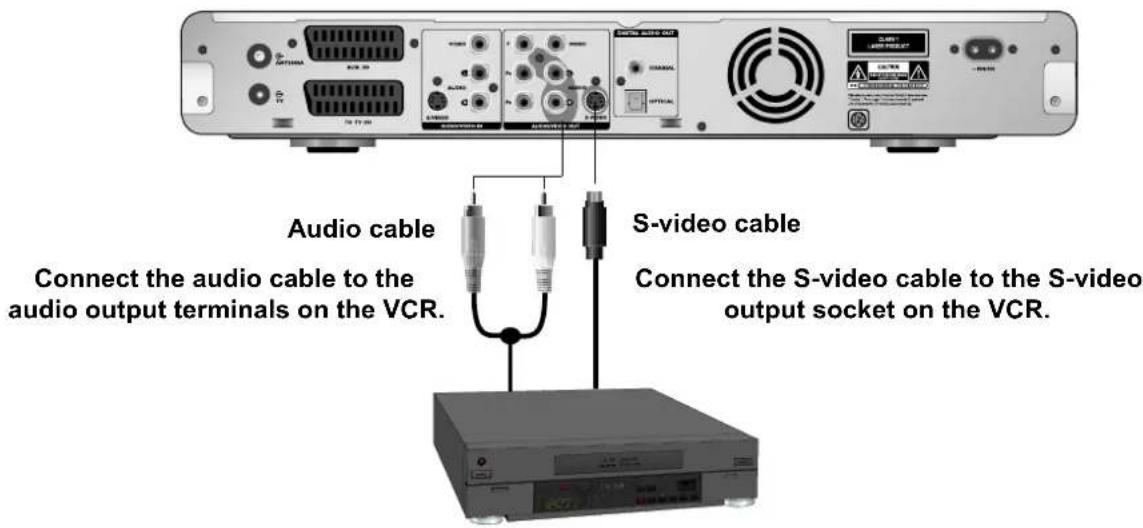
How to connect a VCR using an S-Video cable:
1 Locate a suitable S-Video cable (not provided) and connect one end to the IN terminal on the rear of the DVD player labelled 'S-VIDEO'.
2 Connect the other end of the S-Video cable to the appropriate S-Video socket on the rear of the VCR.
3 Take a suitable stereo audio cable (no provided) and connect one end to the IN terminal on the rear of the DVD Recorder labelled 'AUDIO'.
4 Connect the other end of the audio cable to the appropriate audio output socket on the rear of the VCR.
The final connection path should be like that shown in the following diagram:
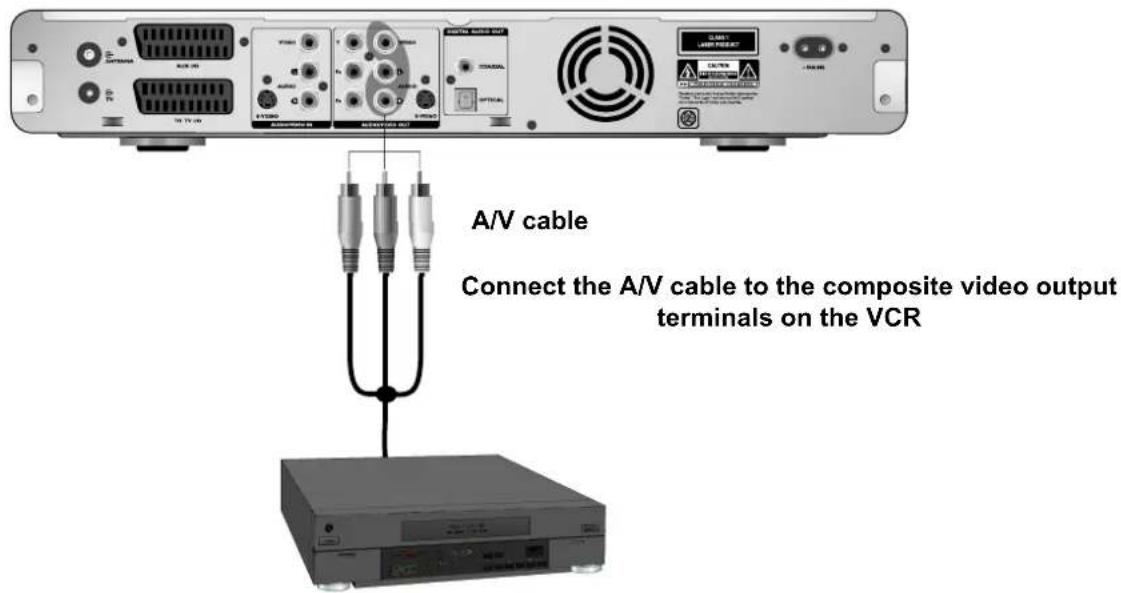
Connecting a VCR to the DVD Recorder using an A/V cable
How to connect a VCR using an A/V cable:
1 Locate the A/V cable (provided) and connect one end to the IN terminals on the rear of the DVD player labelled 'VIDEO'.
2 Connect the other end of the A/V cable to the appropriate A/V sockets on the rear of the VCR. The final connection path should be like that shown in the following diagram:
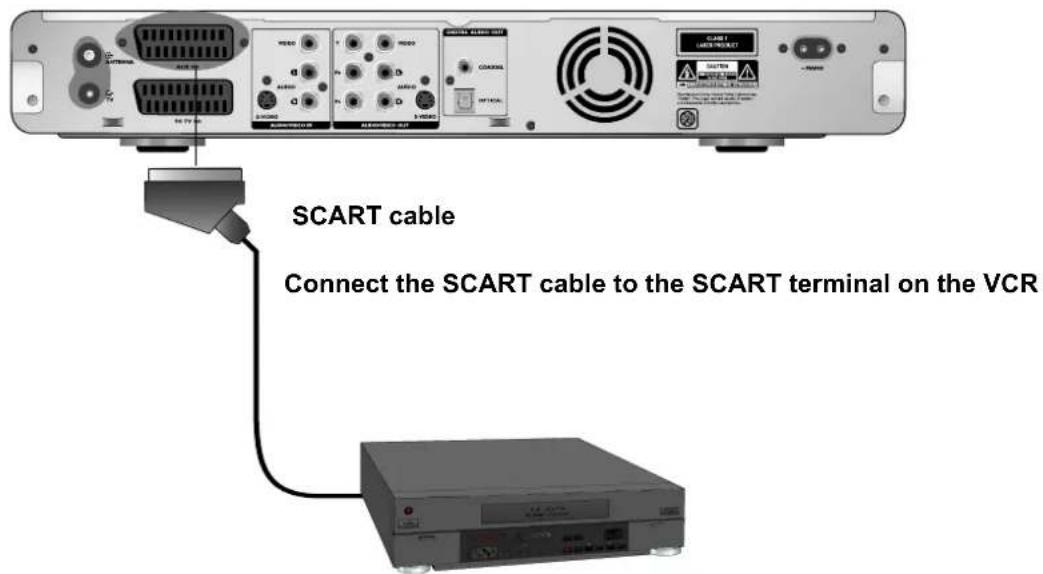
Connecting a satellite receiver or VCR to the DVD Recorder using a SCART cable
How to connect a VCR using a SCART cable:
1 Take a SCART cable (not provided) and connect one end to the SCART terminal on the rear of the DVD player labelled 'AUX I/O'.
2 Connect the other end of the SCART cable to the SCART terminal on the rear of the VCR or satellite receiver.
The final connection path should be like that shown in the following diagram:
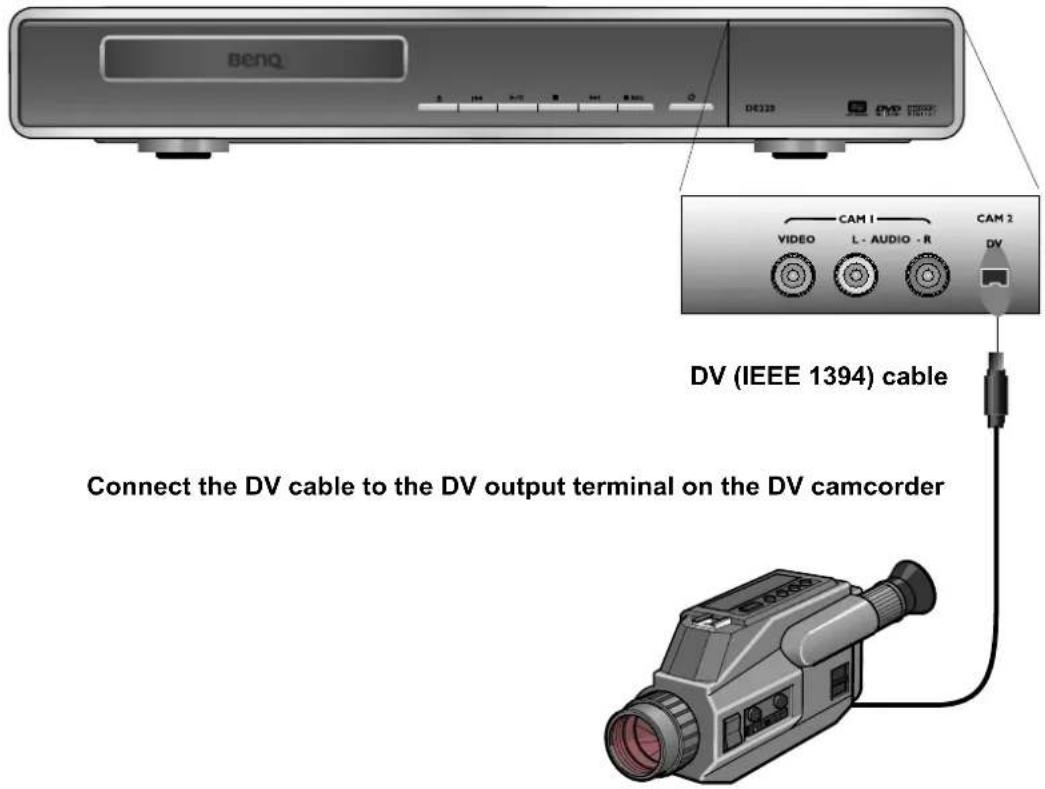
Connecting a Camcorder to the DVD Recorder using a DV cable
By connecting a Digital Video (DV) or Digital-8 Camcorder to the DVD Recorder, you can copy your movies from the camcorder onto DVDs.
How to connect a DV Camcorder using a DV cable:
1 Locate a suitable DV (IEEE 1394) cable (no provided), and connect one end of it to the appropriate socket in the front panel of the DVD Recorder.
2 Connect the other end of the DV cable to the appropriate DV socket on the Digital Camcorder.
The final connection path should be like that shown in the following diagram:
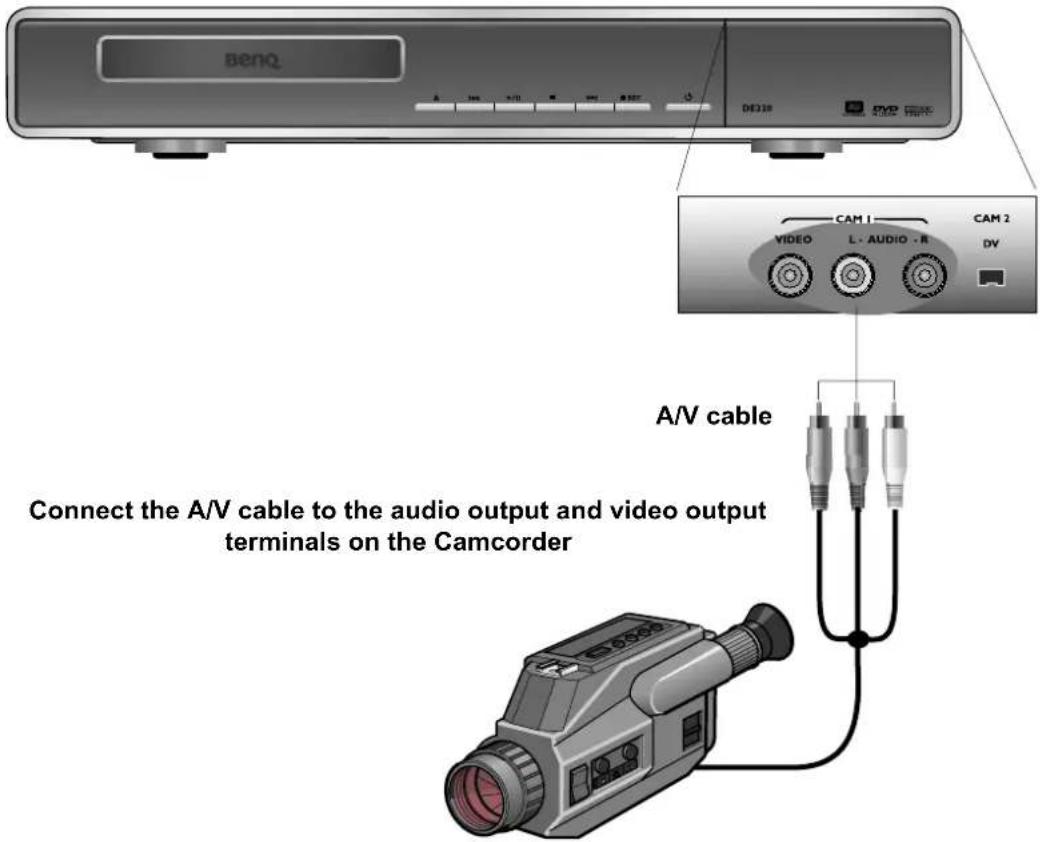
Connecting a Camcorder to the DVD Recorder using an A/V cable
If your Camcorder has A/V sockets, you can use an A/V cable to connect it to the DVD Recorder.
How to connect a Camcorder using an A/V cable:
1 Locate the A/V cable (provided), and connect one end of it to the appropriate A/V sockets in the front panel of the DVD Recorder.
2 Connect the other end of the A/V cable to the appropriate A/V sockets on the Camcorder.
The final connection path should be like that shown in the following diagram:
3 Initializing the DVD Recorder
When you first connect power to the DVD Recorder, it will automatically display an initial setup screen (virgin mode), and won't operate normally until it is setup. This startup behavior only ever needs to take place once, as the DVD Recorder permanently remembers its settings once set. You can use the system menus to alter these settings at any time in the future.
When in virgin mode, the DVD Recorder requires you to select the On-Screen Display (OSD) language, set the built-in clock, and let it search for and store any TV channels it finds on the antenna connection.
IMPORTANT
1 BEFORE you plug the power cord into the DVD Recorder or turn the power point on, you should connect the display device (TV or projector) and turn that on so that you will be able to view the OSD menu of the DVD Recorder when it first starts. See "Connecting the DVD Recorder" on page 12.
2 If you intend to record TV programs onto DVDs using the DVD Recorder, you will also need to connect the TV antenna cable to the DVD Recorder BEFORE proceeding any further. The DVD Recorder initial startup will attempt to search for and store all TV channels it finds on the antenna connection. You can sort and edit this list using the OSD 'SETUP' menu commands at any later time that suits you. See "Connecting to a display device (TV or projector)" on page 12.
3 You will need to setup the remote control for use before you can make any initialization selections. See "Remote control setup" on page 28.
4 See "Initial startup (virgin mode)" on page 30 for the initial setup instructions.
You can always manually readjust these initialization settings at any time in the future.
Manually resetting options
TV Channel Searching
If you wish to reset and re-search for TV channels, see "Manually searching for TV channels" on page 34.
Adding/deleting TV channels
If you wish to add/delete TV channels, see "Re-positioning/adding/deleting TV channels" on page 35.
Languages
If you wish to reset the language played and displayed, see "Language settings" on page 38.
Remote control setup
How to install the batteries in the remote control
1 Locate the two AA (UM3) batteries and the remote control unit.
2 Unpack the remote control and turn it over to expose its back side. Open the battery compartment cover by sliding it as indicated in the following picture:
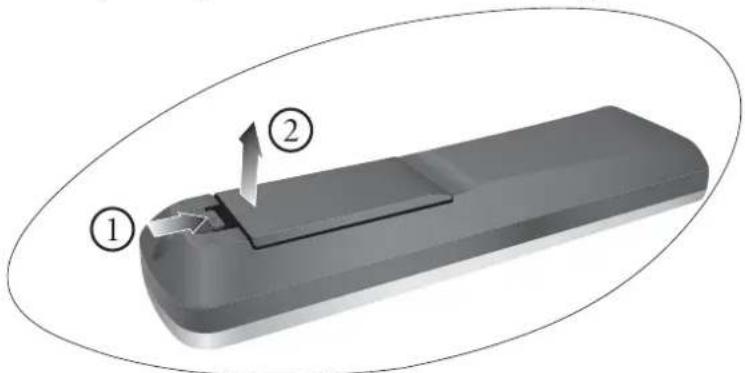
3 Unpack and install the batteries into the battery compartment, paying attention to the correct alignment of polarities (+/-) as indicated in the battery compartment:
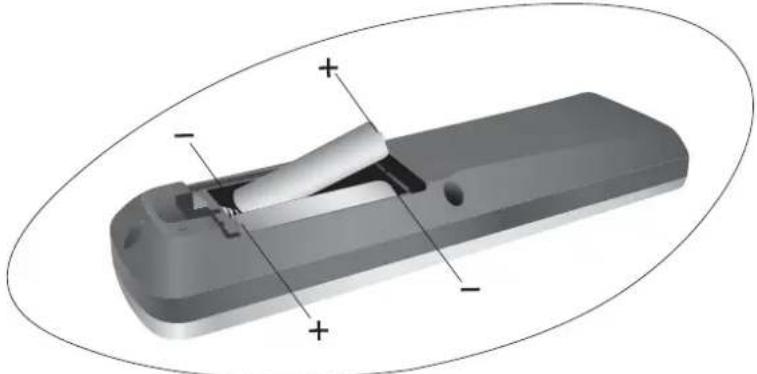
natural_image
3D rendering of a remote control switch with labeled ports and mounting holes (no text or symbols present)4 Refit the cover of the battery compartment by aligning the lugs and sliding it into position:
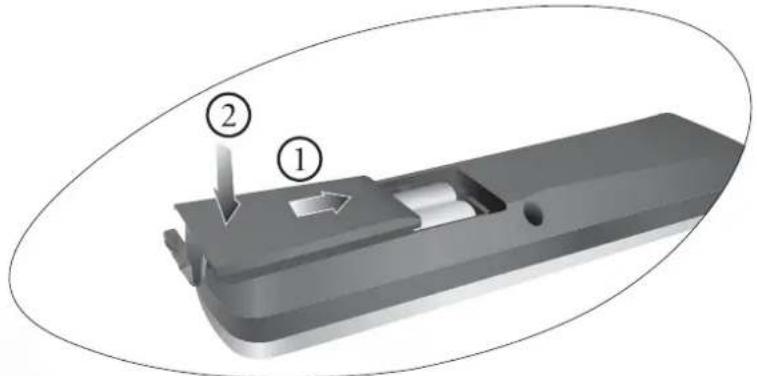
natural_image
3D mechanical component diagram showing a slot with labeled parts (1 and 2), no text or symbols present.Tips for using the remote control
- Point the front end of the remote control directly towards the front panel of the DVD Recorder, not the TV screen. If you can't see the front panel of the DVD Recorder, the remote control will likely not work properly with it.
- Do not use the remote control when something (people, furniture, etc.) is blocking the direct line-of-sight between the remote control and the front panel of the DVD Recorder. In cases like this, either remove the obstruction or move the remote control to a clear line-of-sight position.
Connecting power
1 Locate the power cord from the package.
2 Connect the DVD Recorder to mains power using the power cord.
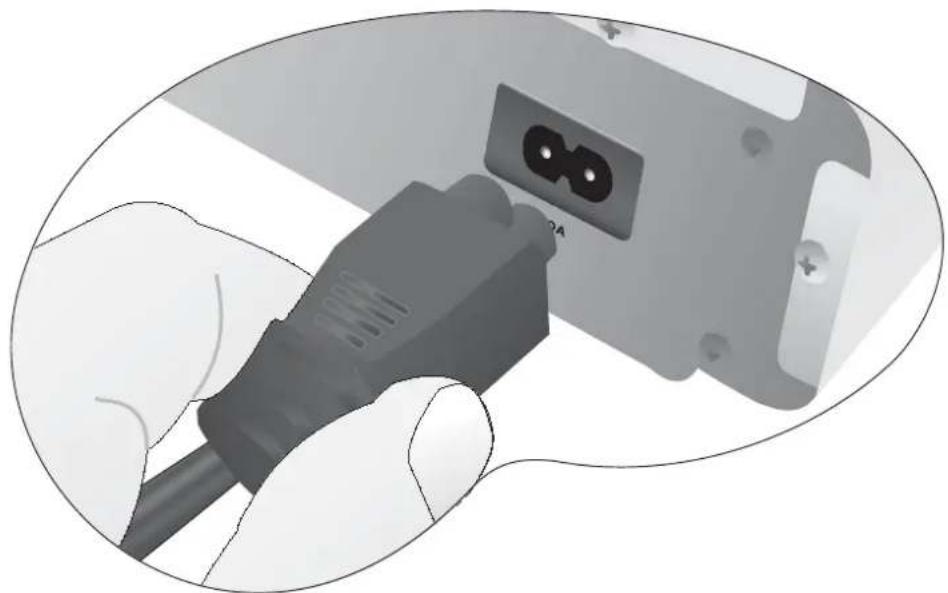
natural_image
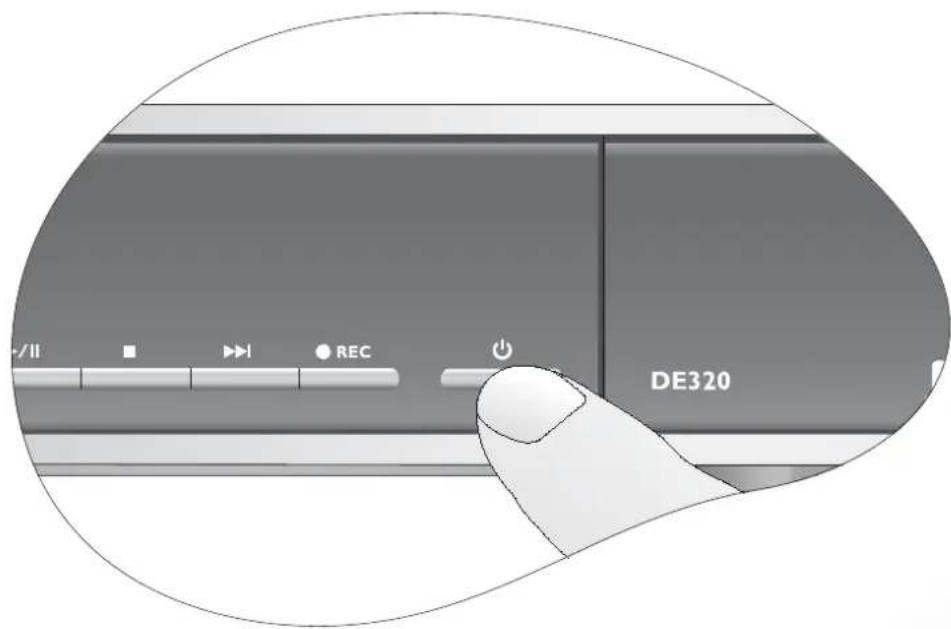
Close-up of a hand holding an electrical plug with a socket, showing internal wiring (no text or symbols visible)3 Press the power button on the front panel to turn on the DVD Recorder.
Initial startup (virgin mode)
This procedure is only required when the DVD Recorder is plugged in and powered up for the first time ever. Before you proceed, you must have already connected the DVD Recorder to a display device and turned that device on so that you can see the OSD 'SETUP' menu of the DVD Recorder. You must also have connected the DVD Recorder to the TV antenna (if required), and have assembled the remote control (i.e. fitted the batteries correctly). For details, see "Initializing the DVD Recorder" on page 27, and "Remote control setup" on page 28.
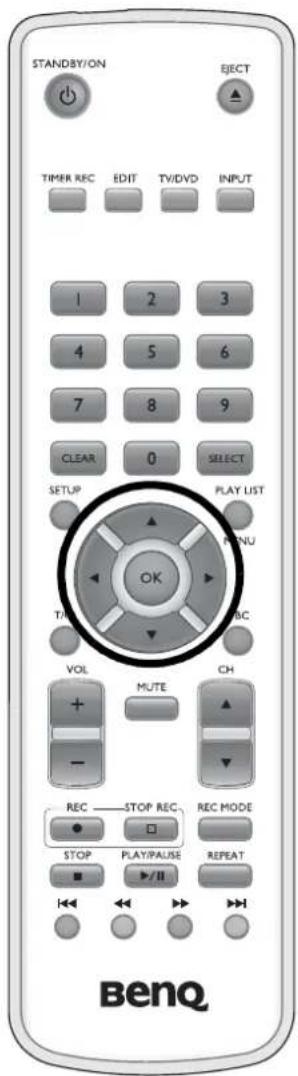
- The initial setup menu will display on-screen starting with audio language setup. This is the language which will be used when playing a DVD. The default is 'English'.
If you wish to retain 'English' as the audio language, press the Down button on the remote control.
Should you wish to change to another language, press the OK OK button, then press the Down
or Up button on the remote control to select your desired language. Press the OK button to make the selection. Press the Down
button on the remote control to proceed to the next item.
- Now you can select the subtitle language. This is the language that will be used for displaying the subtitle when playing a supported DVD. The default is 'Off'.
If 'Off' is retained as the subtitle language, the DVD Recorder will display subtitle using the default setting of the DVD when playing. Press the Down
button on the remote control to retain 'Off' as the subtitle language.
- Should you wish to change to another language, press the OK OK button, then press the Down
or Up button on the remote control to select your desired language. Press the OK button to make the selection. Press the Down
button on the remote control to proceed to the next item.
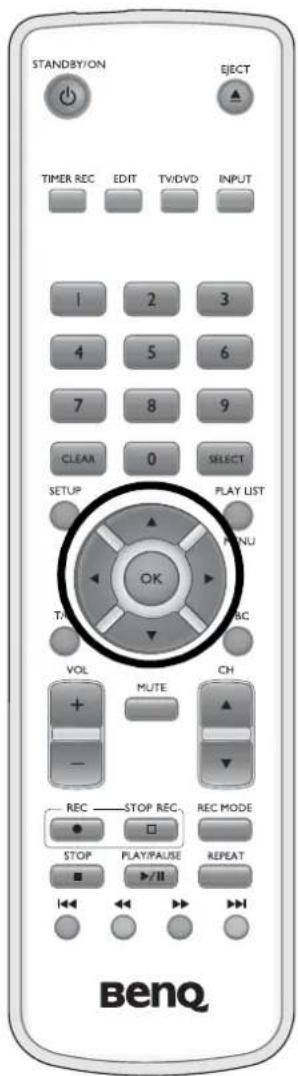
- You will then be asked to select the menu language. This is the language which will be displayed on screen in the 'SETUP' menu by the DVD Recorder. The default is 'English'. If you wish to retain 'English' as the menu language, press the Down button on the remote control.
Should you wish to change to another language, press the OK OK button, then press the Down or Up button on the remote control to select your desired language.
Press the OK OK button to make the selection. Press the Down button on the remote control to proceed to the next item.
- You will then be asked to select your country. Press
the OK OK button, then press the Down or Up button on the remote control to select your country from the list. If your country is not on the list, select 'Other'. Press the OK OK button to make the selection. Press the Down button on the remote control to proceed to the next item.
- Next you will be asked to select a TV shape (screen format). This allows you to adjust the video output for the playback of pre-recorded wide-screen movies to suit your display screen shape.

Note:
This option will only have effect with pre-recorded movies which were recorded in a wide-screen mode.
Press the OK OK button, then press the Up

or Down button to select a screen format:
4:3 Letterbox - full screen. for viewing 4:3 aspect ratio movies on a 4:3 aspect ratio screen
4:3 Panscan - full screen for viewing a 16:9 aspect ratio movie in full height on a 4:3 aspect ratio screen. This scales the whole picture to a larger size until the 4:3 screen height is reached, then crops the left and right edges to the width of the 4:3 screen.
16:09 - for viewing a 16:9 ratio movie on a 16:9 ratio screen. Has no effect on a 4:3 ratio screen.
Press the OK OK button to confirm.
- Press the Setup button on the remote control. You will be prompted to make sure if TV or CATV antenna is connected. If you wish to record TV programs onto DVDs using the DVD Recorder, you should connect the antenna cable to the DVD Recorder before continuing with the initialization process. See "Connecting the DVD Recorder to the TV antenna cable" on page 17 for details.
Press the OK button on the remote control to continue. Even if no antenna cable is connected, you must proceed with this step so that the DVD Recorder can complete initialization.
The DVD Recorder will automatically search for and store TV or CATV Channel frequencies that it finds on the 'ANTENNA' cable connection. You can always use the 'SETUP' menu to search for TV channels at a later time.
This will approximately take 5 \~ 6 minutes because the DVD Recorder searches all TV frequencies and tests for a station signal. The progress is displayed on-screen.
-
After the channels are scanned and stored, the DVD Recorder will attempt to download time and date information from your local TV or CATV broadcasting system, and 'Downloading Time & Date' will display on-screen. If your local TV or CATV system does not support automatic setup of time and date, you will be asked to perform time and date setup.
-
The time and date will be used by the DVD Recorder when it saves video files onto DVD, and for determining timer functions. It is also displayed on the front panel when the DVD Recorder is in standby mode after initialization.
Setting Time and Date
How to set the Date
Press the numbered buttons to enter the date in 2 digit format, so enter a leading zero (0) for the dates 1 to 9.

Tip:
You can also use the Up or Down buttons to adjust the value.
For example:
To enter the date for the 9th of the month, press 0' and '9'. To enter the date for the 25th of the month, press 2' and '5'.
How to set the Month
The highlight bar will move to the 'Month' item automatically. Press the numbered buttons to enter the month in 2 digit format, so enter a leading zero (0) for the months 1 to 9.
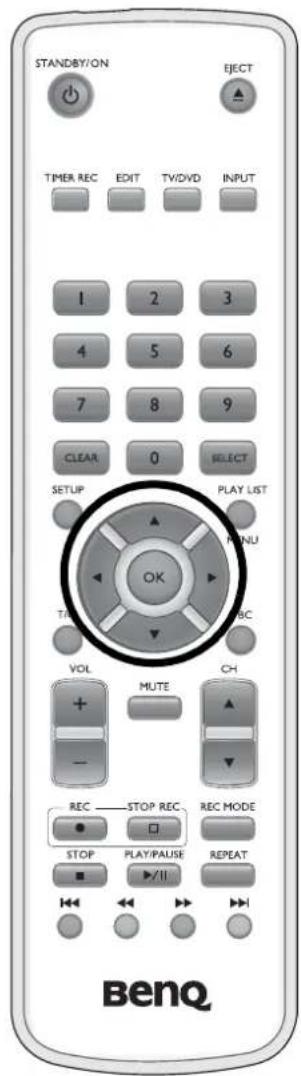

Tip:
You can also use the Up or Down buttons to adjust the value.
For example:
To enter the month of February, press '0' and '2'.
How to set the Year
The highlight bar will move to the 'Year' item automatically. Press the numbered buttons to enter the year in 2 digit format.

Tip:
You can also use the Up or Down buttons to adjust the value.
For example:
To enter the year 2005, press '0' and '5'.
How to set the Time
Press the Right button to move the highlight bar to the hour item. Press the numbered buttons to enter the hour in 24 hour format, so enter a leading zero (0) for the hours 1 to 9. The highlight bar will move to the minute item automatically. Press the numbered buttons to enter the minute, so enter a leading zero (0) for the minutes 1 to 9.

Tip:
You can also use the Up or Down buttons to adjust the value.
For example:
To enter the time 4:15, press '0', '4', '1' and '5'.
To enter the time 12:34, press '1', '2', '3' and '4'.
How to save the settings
Press the Setup button on the remote control to store the settings. The power of the DVD recorder will be turned off automatically.
How to start using the DVD Recorder
To start using the DVD Recorder, either insert a DVD (see "Playing a recordable DVD" on page 43) or press the Power
on/standby STANDBY/ON button to turn it on, and then the Input

button to select a suitable video input for viewing.
How to reset the settings to factory default
Refer to "How to reset DVD recorder settings to factory default?" on page 97 for details.
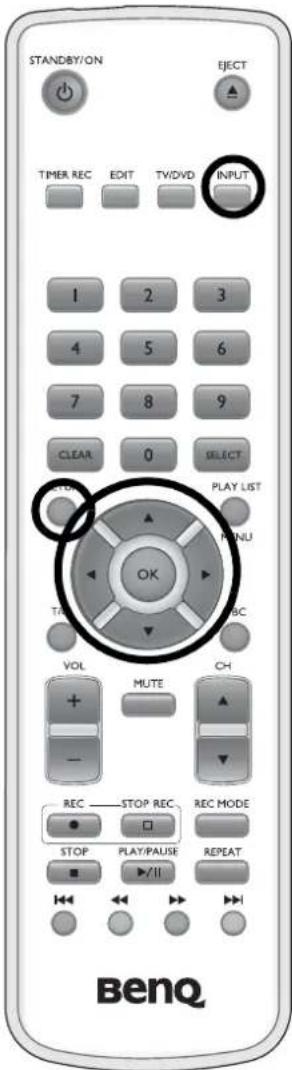
Manually searching for TV channels
You can make the DVD Recorder reset and replace its previously stored channel data with new channel data by running the channel searching command.

CAUTION
This will erase all previously stored channel settings.
- If a disc is playing, press the Stop button on the remote control; or the Stop button on the DVD Recorder to stop playing the disc.
- Press the Setup button on the remote control to launch the 'SETUP' menu.
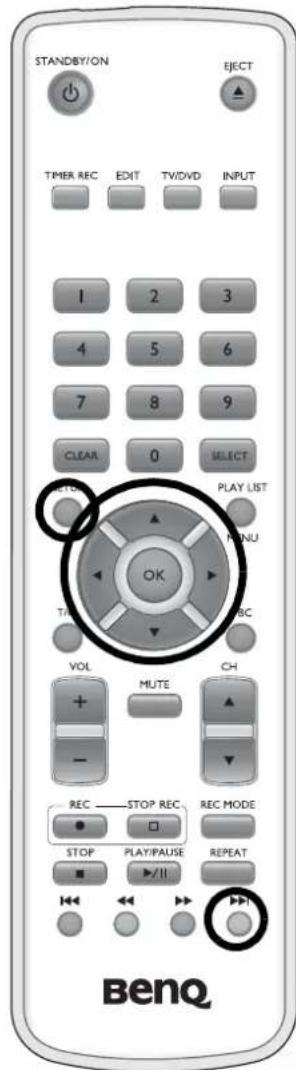
- Press the Up or Down button to select 'Setup'.
- Press the Right button, and then press the Up or Down button to select 'Auto Install'.
- Press the OK button on the remote control. The DVD Recorder will store all channels that it finds. This may take several minutes.
- Press the Setup ⬤ button to close the menu.
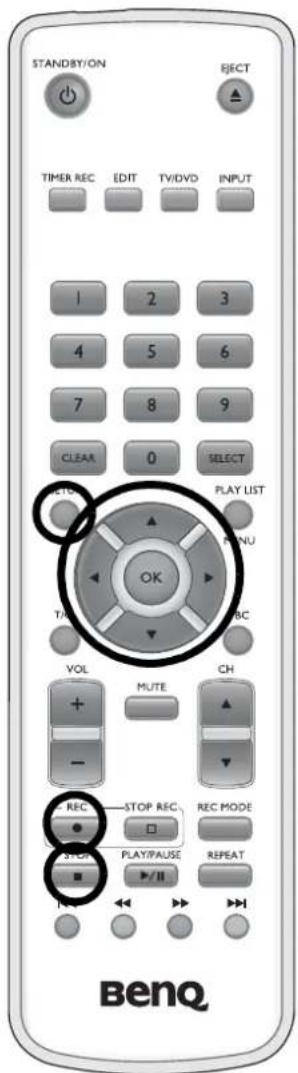
Re-positioning/adding/deleting TV channels
How to view a listing of stored TV channels:
- Press the Setup button on the remote control to launch the 'SETUP' menu.
-
Press the Up or Down button to select 'Setup'.
-
Press the Right button, and then press the Up

Channels' and then press the OK OK button.
This is a scrolling list which can store up to 99 channel frequencies. All the channel frequencies found during the automatic channel search will be listed in order of being found (by frequency).
The position of each channel frequency in the list is indicated by the position number 'P. xx' where 'xx' represents the two digit channel position number. This number is recorded in the name of a video when a DVD recording is being made from the 'ANTENNA' input.
How to re-position channels:
- Display the channel frequency list. See "How to view a listing of stored TV channels:" above.
- Press the Up or Down buttons to move the highlight bar to the channel frequency you wish to re-position, and then press the OK button.
- Press the Up or Down buttons to move the highlight bar to the new position, and then press the OK button. The selected channel will be moved to the new position.
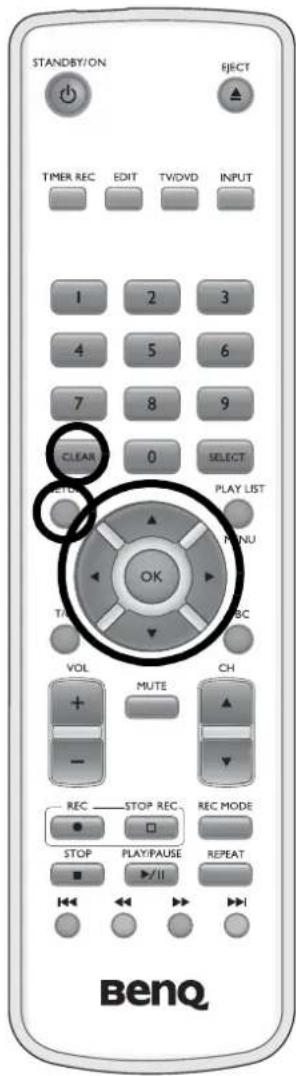
How to delete channels:
- Display the channel frequency list. See "How to view a listing of stored TV channels:" above.
- Press the Up or Down buttons to move the highlight bar to the channel frequency you wish to delete, and then press the Clear button. The selected channel will be deleted.
How to manually add channels:
You can use this function to manually add channels that are weak or not found during automatic channel search.
-
Press the Setup button on the remote control to launch the 'SETUP' menu.
-
Press the Up or Down button to select 'Setup'.
-
Press the Right

button, and then press the Up

or Down button to select
'Manual Search' and then press the OK OK button.
- Press the Up

or Down

button

ve the
highlig
ght bar
to one
following options:
Channel/Freq.: Display/entry of frequencies
Entry/Search :Display/entry of special programs
Program #: Display/entry of programs
Press the OK button to make your selection, and then press the Down button to continue.
- If 'Channel/Freq.' is selected in the previous step, you can either let the DVD Recorder scan the channel you wish to add, or enter the frequency number of the channel you wish to add manually. To start scanning the channel you wish to add,
press the OK button. If the desired channel is found and you wish to stop scanning, press the OK button again.
To enter the frequency of the channel you wish to add, press the numbered buttons on the remote control.
For example:
To enter the frequency 122.5, press '1', '2', '2' and '5'.
If 'Entry/Search' or 'Program #' is selected in the previous step, you can either let the DVD Recorder scan the channel you wish to add, or enter the number of the channel you wish to add manually.
To start scanning the channel you wish to add, press the OK button. If the desired channel is found and you wish to stop scanning, press the OK button again.
To enter the number of the channel you wish to add, press the numbered buttons on the remote control.
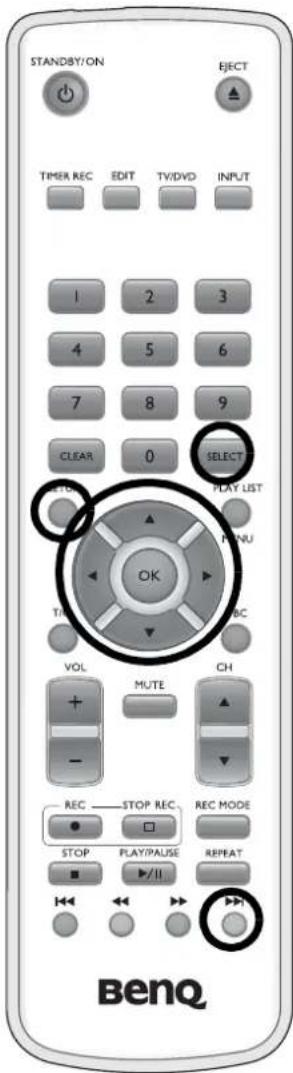
For example:
To enter the channel number 35, press '1' and '5'.
-
Press the Down button to highlight 'Program #' and enter the number of the new channel using the numbered buttons on the remote control.
-
(Optional) Press the Down button to highlight 'Channel Name' and press the OK button.
To enter a character, press the Up or Down button until the desired character displays on-screen. To toggle between upper and lower case characters, press theSelect

button. To start entering the next character, press the Right button.
Repeat the procedure above to enter more characters. You can enter up to 5 characters.
Press the OK

button to confirm, and then the Next 🔊 button to continue.
- The 'Decoder' item will be highlighted automatically. Some TV channels send coded TV signals that can only be viewed properly with a purchased or rented decoder. You can connect such a decoder (descrambler) to your DVD Recorder. Press the OK button and toggle the following options using the Up or Down button: On: select this item if a decoder is used
Off: select this item if no decoder is used
Press the OK OK button to confirm your selection and continue.
- Press the Down button to highlight 'NICAM' and then press the OK button. Toggle the following
options using the Up or Down button:
On: select this item if NICAM is supported by your local TV/ CATV broadcasting system
Off: select this item if NICAM is not supported by your local TV/ CATV broadcasting system
Press the OK OK button to confirm your selection and continue.
- (Optional) Press the Down button to highlight 'Fine Tuning' and then press the OK button. Fine-
tune the signal reception using the Left or Right
button until you get a clear image on the screen.
- Press the Setup button to save settings and close the menu.
Language settings
You can select a default language other than English for playback of audio and subtitles on appropriate DVDs which have been authored to include more than one language. You can also select a language for the DVD Recorder OSD (On-Screen Display) 'SETUP' menus. The default for all is 'English' (unless a different default language was selected during the initial setup).
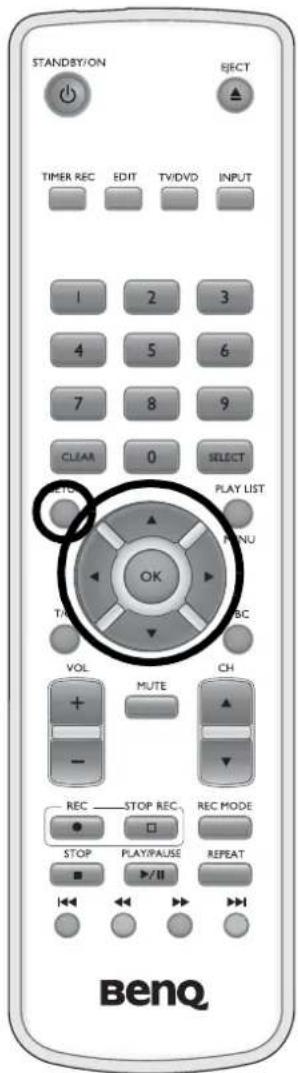
- Press the Setup button on the remote control to launch the 'SETUP' menu.
- Press the Up or Down button to select 'Language'.
- Press the Right button, and then press the Up
or Down button to select a category.
Audio: DVD playback audio language
Subtitle: DVD playback subtitle language
Menu: DVD Recorder 'SETUP' menu language
Country: The country where the DVD Recorder is installed
- Press the OK OK button to edit the category.
- Press the Up or Down button to select a language for this category.
- Press the OK OK button to confirm the selection.
- Press the Setup button to exit and close the 'SETUP' menu.
Setting the 'Setup' clock
The 'Setup' clock is used by the DVD Recorder when it saves video files onto DVD, and for determining timer functions. The time is also displayed on the front panel when the DVD Recorder is in standby mode (after initialization).
Should you need to manually alter the 'Setup' clock, you can use the numbered buttons on the remote control to enter the time and date directly into the DVD Recorder.
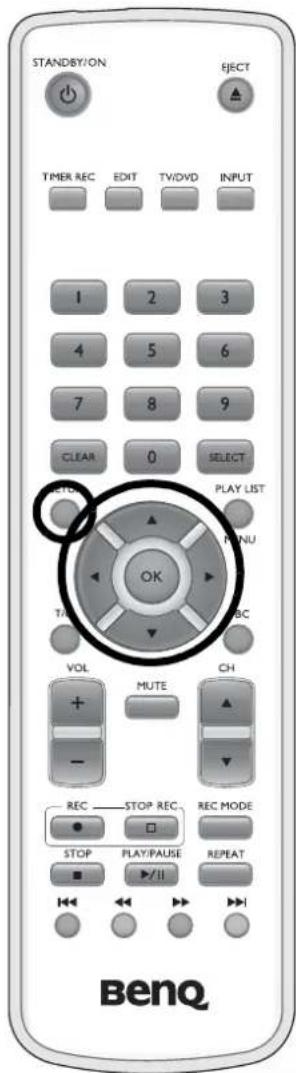
- Press the Setup button on the remote control to launch the 'SETUP' menu.
- Press the Up or Down button to select 'Setup'.
-
Press the Right button, and then press the Up or Down button to select 'Time & Date'.
-
Refer to "Setting Time and Date" on page 32 for information about how to set the time and date.

Playing a disc
General information
The DVD Recorder supports playback of the following types of discs:
• DVD (prerecorded)
• VCD/SVCD
• D V D + R W
• DVD+R (video mode, finalized)
• DVD-RW (video mode, finalized)
• DVD-R (video mode, finalized)
• CD-RW
• CD-R
- Music CD
• M P 3 C D
- Photo CD
You can play a loaded disc on the DVD Recorder by pressing the Play button on either the remote control or the front panel.
See "Loading a disc" on page 40, and "Playing a disc" on page 42.

Note:
When turning on the DVD Recorder, please wait (approximately 10 seconds) for the unit to initialize before it outputs a signal to your display device.
Once a disc has been loaded
- If the word 'PIN' displays on the front display panel:
- The disc is locked for adults only. See "Parental control" on page 90 for details.
- If the disc won't play and region code information displays on-screen:
- Playback is not possible. Refer to "The disc may be the wrong region code for your region:" on page 95.
- If a ’’ sign displays on-screen:
- The current function is inactive.
Loading a disc
To open the disc tray, you can press either:
- the Eject button on the remote control; or
- the Eject button on the DVD Recorder.
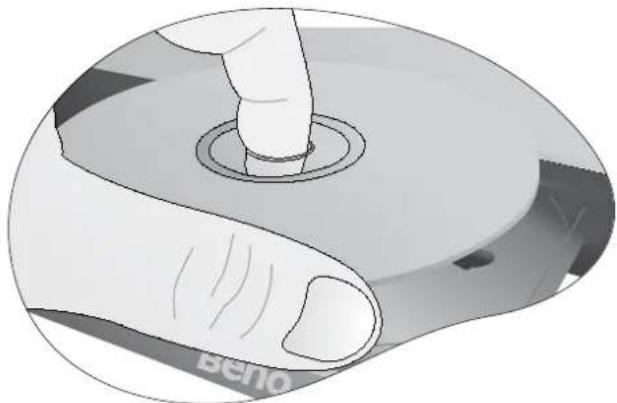
while the tray is opening, the message 'OPENING' shows on the DVD Recorder's display panel. Once the disc tray is open, and while the tray remains open, the message 'TRAY OPEN' displays.
natural_image
Close-up of a finger pressing a circular button on a computer mouse (no text or symbols visible)5 Place the disc on the tray with the label side facing upward—with disc recording surface down.
6 To close the disc tray, press the Eject button once more.
The message 'CLOSING' and then 'READING' will display.
The DVD Recorder will read the disc automatically:
- If the disc is a recordable DVD which is still editable (has not been protected or finalized), the DVD Recorder will display the Picture Index list on screen, open for editing or playback.
- If the disc is a recordable DVD which is not editable (has been protected or finalized), the DVD Recorder will play the Picture Index list on screen, only for playback. Editing will be disabled.
- If the disc is a new DVD+R disc, you will be prompted to format the disc. Press the OK button on the remote control to start formatting the disc.
- If the disc is a prerecorded DVD, the DVD Recorder will play the DVD on screen.
- If the disc is a prerecorded VCD, the DVD Recorder will play the VCD on screen.
- If the disc is a music CD or MP3 CD, the DVD Recorder will play the CD output from the audio output sockets and if appropriate, display the CD music information on screen.
- If the disc is a photo CD, the directory information will display on screen.
Note:
Double-sided discs are readable on both sides and have only very small labels around the central rim of the disc. Place the side you want to play face down on the disc tray.
Playing a disc
How to start playing a disc:
To start playing a stopped or paused disc, press either:
- the Play/pause button on the remote control; or
- the Play button the DVD Recorder.
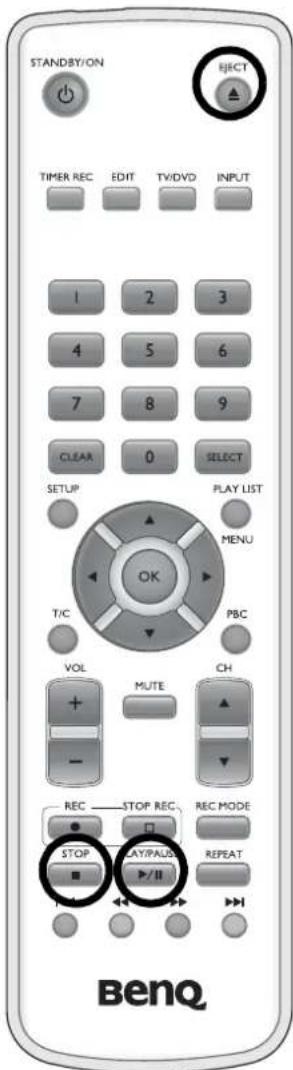
How to stop playing a disc:
To stop playing a disc, press either:
- the Stop STOP button on the remote control; or
- the Stop Button on the DVD Recorder.
How to eject a disc:
To open the disc tray, press either:
- the Eject button on the remote control; or
- the Eject 🔊 button on the DVD Recorder.

Tip:
To navigate around a playing disc, see "Operations while playing a disc" on page 49.
Playing a recordable DVD
If a recordable DVD is protected against recording (DVD+RW) or has been finalized (DVD+R), the DVD Recorder will play the disc automatically. If it doesn't, you can manually start play. See below.
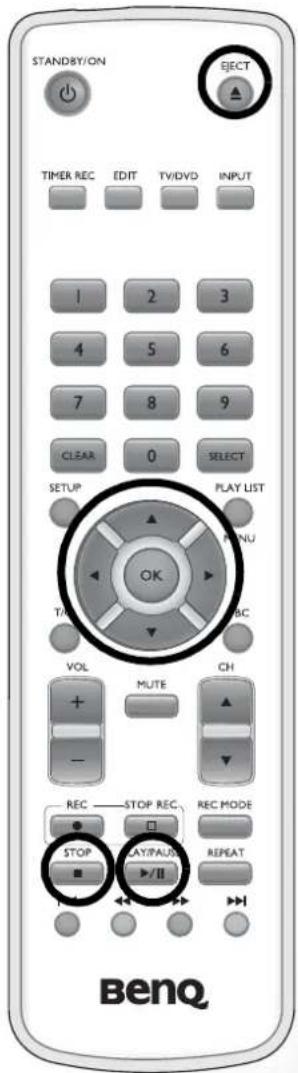
If a recordable DVD can be edited (it is either unprotected or not finalized), then the Picture Index list will display. In that case, use the Up 🎨 or Down 🎨 button on the remote control to select the title you wish to play from the list and then press the OK 🎨 or Play/pause button.
How to start playing a DVD:
To start playing a stopped or paused disc, press either:
- the Play/pause PLAY/Pause button on the remote control; or - the Play button on the DVD Recorder.
The current title/chapter and playing time information will display momentarily on screen.
How to start playing a DVD recorded on other DVD recorders:
- DVD + R
A DVD+R disc recorded by other DVD recorders must be finalized on that DVD recorder before it can be played by your DE320.
To start playing the DVD+R disc, press either:
- the Play/pause PLAY/PULSE button on the remote control; or
- the Play button on the DVD Recorder.
- DVD + RW
Before you start playing a DVD+RW disc recorded on other DVD recorders, you need to take the following steps to make the disc menu system created on other DVD recorders compatible to that of the DE320. This operation only needs to be performed once.
-
Insert the DVD+RW disc and then press the Stop button on the remote control.
-
Press the button on the remote control.
-
Press the Up or Down button to select 'Feature', and then press the Right button.
-
Press the Up or Down button to select 'Adapt Disc Format', and then press the OK button.
-
The 'Adapt Disc Menu' dialogue will display on-screen. Press the Up or Down button on the remote control to select 'OK to Replace Menu', and then press the OK button.
- Press the button on the remote control, and then press the Play/pause button on the remote control; or the Play ▶ button on the DVD Recorder to start playing the disc.
How to stop playing a DVD:
To stop playing a disc, press either:
- the Stop button on the remote control; or
- the Stop button on the DVD Recorder.
The current title/chapter and playing time information will display on screen.
How to eject a disc:
To open the disc tray, press either:
- the Eject ⬤ button on the remote control; or
- the Eject 🔊 button on the DVD Recorder.
Playing a music CD
You can play a music CD on the DVD Recorder, and the audio will be output to the audio out terminals on the rear of the DVD Recorder.
How to start playing a music CD:
To start playing a stopped or paused disc, press either:
- the Play/pause button on the remote control; or
- the Play button on the DVD Recorder.
If the screen is on, the Track and Length information will display on-screen.
How to play a specific track on the music CD:

Note:
To be able to select the track you wish to play, the screen must be turned on.
-
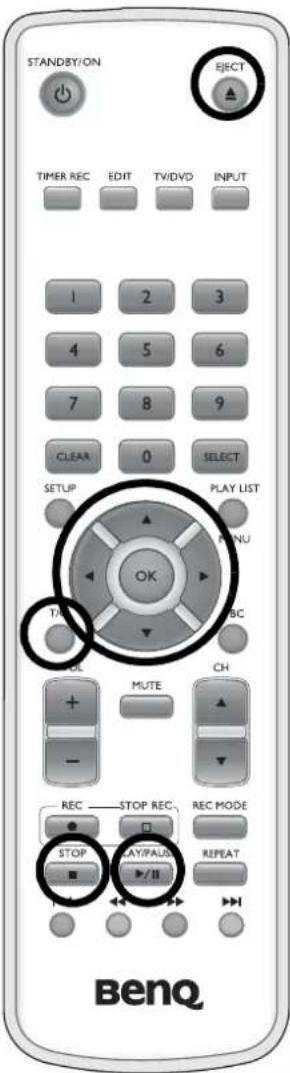
When playing a music CD, press the Title/chapter button on the remote control. The T/C Tools menu will display on-screen.
-
With the 'Track' item highlighted, press the Left

or the Right

button on the remote control
to select the track you wish to play.
- Press the Title/chapter ☐ button to close the T/C Tools menu.
How to search the music CD by time:

Note:
To be able to search the music CD by time, the screen must be turned on.
-
When playing a music CD, press the Title/chapter button on the remote control. The T/C Tools menu will display on-screen.
-
Press the Up ▲ or Down ▼ button to select 'Search', and then press the OK OK button.
-
Enter the time where the desired part of a track starts using the numbered buttons in hour-minute-second format.
For example:
If the desired track begins approximately 1 hour, 20 minutes and 10 seconds after the disc starts playing, enter '0', '1', '2', '0', '1', '0'.
- Press the OK OK button and the DVD Recorder will jump to the time specified.
How to stop playing a music CD:
To stop playing a disc, press either:
- the Stop button on the remote control; or
- the Stop button on the DVD Recorder.
How to eject a disc:
To open the disc tray, press either:
- the Eject button on the remote control; or
- the Eject 🔊 button on the DVD Recorder.
Playing an MP3 CD
MP3 (MPEG1 Audio Layer-3) is a highly compressed media file format. This technology can compress data to a tenth of its original size. You can record about 10 hours of CD quality music on a single CD.
If you want to play an MP3 CD on the DVD Recorder, please note the following requirements when making an MP3 CD:
- File system: ISO9660
- Directory levels: no more than 8
- File format: *.mp3
- Filename length: no more than 256 characters
- Albums (folders) and tracks: 32 albums and 999 titles, max.
- Sampling frequency: 32, 44.1 and 48 Hz (music recorded with other sampling frequencies will be skipped)
- Bit per second: 32, 64, 96, 128, 192 and 256 kbps
ID3 label: Ver. 1 and 1.1. In later versions, directory names will be displayed as album names and filenames as tracks.
⚠️ Important note for playback:
According to the SDMI (Secure Digital Music Initiative) regulations, digital output will be disabled while playing MP3 music. Only the first segment of a CD with multiple segments will be played.
How to start playing an MP3 CD:
To start playing a stopped or paused disc, press either:
- the Play/pause button on the remote control; or - the Play button the DVD Recorder.
If the screen is on, the Album, Track and Length information will display on screen.
How to play a specific track on the music CD:

Note:
To be able to select the track you wish to play, the screen must be turned on.
-
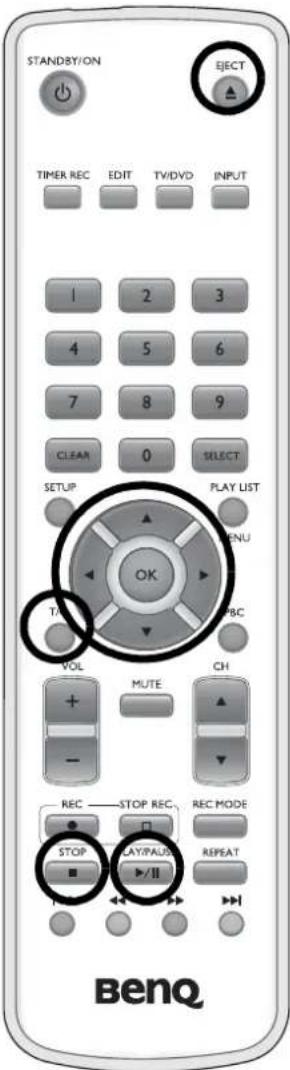
When playing a music CD, press the Title/chapter button on the remote control. The T/C Tools menu will display on-screen.
-
With the 'Album' item highlighted, press the Left or the Right button on the remote control to select the album you wish to play.
-
Press the Up or Down button on the remote control to highlight 'Track', and then press the Left or the Right button on the remote control to select the track you wish to play.
-
Press the Title/chapter button to close the T/C Tools menu.
How to stop playing an MP3 CD:
To stop playing a disc, press either:
- the Stop STOP button on the remote control; or
- the Stop button on the DVD Recorder.
How to eject a disc:
To open the disc tray, press either:
- the Eject button on the remote control; or
- the Eject 🔊 button on the DVD Recorder.
Playing a VCD/SVCD
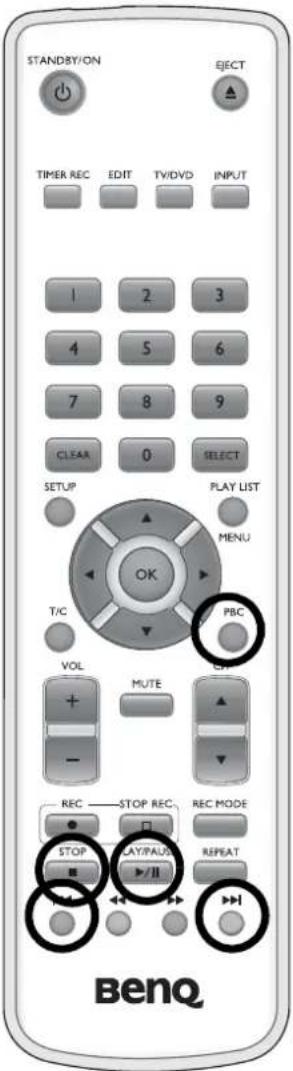
Some VCDs/SVCDs are equipped with PBC (Play Back Control) function, which means that it supports special playback functions (e.g. menu function). To use these functions, the VCDs/SVCDs must be compatible with PBC (see instructions on the VCD package), and the PBC function of the DVD Recorder must be activated.
How to enable the PBC function of the DVD Recorder:
- Press the Setup button on the remote control. The 'SETUP' menu will display on-screen.
- Press the Up or Down button to select 'Feature', and then press the Right button.
- Press the Up or Down button to select 'PBC Enable', and then press the OK button to check the checkbox.
- Press the Setup button to close 'SETUP' menu.
How to use the PBC function:
- Load a VCD/SVCD into the DVD Recorder. If the DVD Recorder does not play the disc automatically, press the Play ▶ or ▶/□ button to start playing.
- Press the PBC button on the remote control. The PBC menu displays on-screen.
- Press the Previous 🎨 or Next 🔊 button or the numeric keys on the remote control to select an item on the menu.
If the PBC menu includes a title list, you can select the desired title directly from the menu.
You can press the PBC button to return to the previous menu.
- Press the Stop ■ or Stop STOP button to stop playing.
Operations while playing a disc
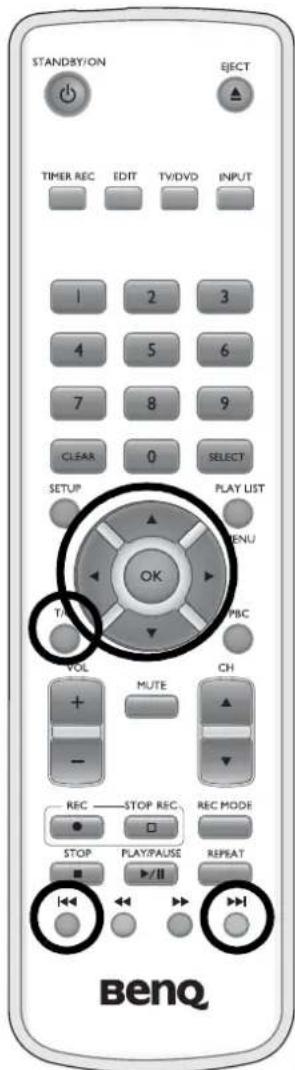
If a DVD contains many titles or chapters, you can jump to a different title or chapter by following the instructions below:
How to select a title on a DVD:
- While playing a DVD, press the Title/chapter button. The T/C Tools menu displays on-screen.
- Make sure the 'Title' item is highlighted. If not, press the Up or Down button on the remote control to highlight it.
- Press the Left or Right button to select a different title, or enter the number of the desired title using the numbered buttons.
How to select a chapter on a DVD:
- While playing a DVD, press the Title/chapter button. The T/C Tools menu displays on-screen.
- Press the Up or Down button on the remote control to highlight the 'Chapter' item.
- Press the Left or Right button to select a different chapter, or enter the number of the desired chapter using the numbered buttons.
How to move around within a playing disc:
While playing a DVD, press the Next 🔊 button to jump to the next title.
Press the Previous 🔊 button to jump to the previous title.
Searching a disc
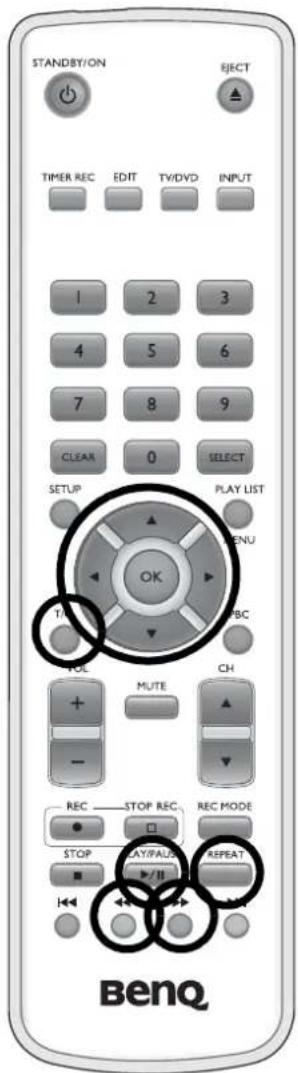
You can use the fast forward or fast reverse function to find a certain passage while playing a disc. The DVD Recorder offers fast forward and fast reverse functions at 4x, 8x, 16x or 32x. If you want to play a passage in slow motion, the DVD Recorder offers slow forward and reverse function at 1/8x, 1/4x or 1/2x. Besides, you can search the disc by entering the time when the desired scene is played.
Fast forward and reverse
-
While playing a disc, press the Forward button for fast forward, or Reverse button for fast reverse. Press the button again to select a speed.
-
Press the Play/pause button to resume normal speed.
Slow forward and reverse
Slow forward and reverse using the Forward/Reverse buttons
- While playing a disc, press the Play/pause button once to pause.

-
Press the Forward 🔊 button for slow forward or press the Reverse 🔊 button for slow reverse. Press the button again to select a speed.
-
Press the Play/pause button to resume normal speed.

Note:
Audio is disabled when a disc is playing either in fast or slow mode.
Slow forward and reverse using the T/C Tools menu
- While playing a disc, press the Title/chapter button. The T/C Tools menu displays on-screen.
-
Press the Up or Down button to highlight the 'Slow' item.
-
Press the Right button for slow forward or press the Left button for slow reverse. Press the button again to select a speed.
-
Press the Play/pause button to resume normal speed.
Step forward and reverse
-
While playing a disc, press the Title/chapter button. The T/C Tools menu displays on-screen.
-
Press the Up ▲ or Down ▼ button to highlight the 'Step' item.
-
Press the Right button for step forward or press the Left button for step reverse.
-
Press the Play/pause button to resume normal speed.
Searching the disc by time
-
While playing a disc, press the Title/chapter button. The T/C Tools menu displays on-screen.
-
Press the Up or Down button to highlight the 'Search' item, and then press the OK button.
-
Enter the time when the desired scene begins using the numbered buttons.
For example
If the desired scene begins approximately 1 hour, 20 minutes and 10 seconds after the disc starts playing, enter '0', '1', '2', '0', '1', '0'.
The disc will start playing from the time you entered.
Still picture
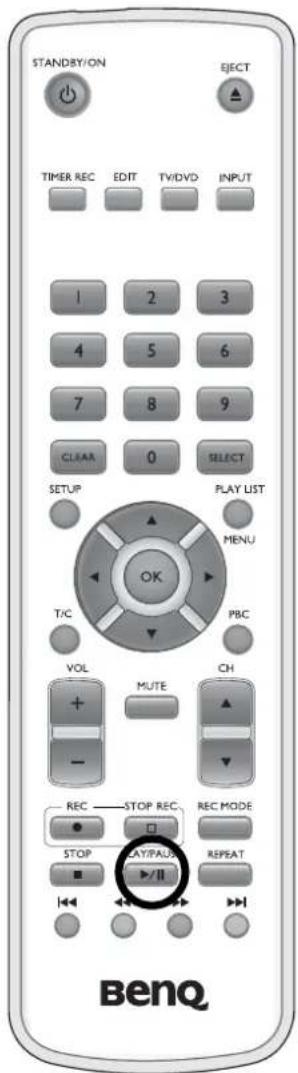
- To pause disc playing or recording, press the Play/pause button on the remote control.
- To resume playing or recording a paused disc, press the Play/pause PLAY/PULSE button on the remote control.
Repeat play
You can mark entire sections or the whole disc for repeated playback. Depending on the type of disc (DVD video, DVD+RW, video CD) you can select a chapter, title or the entire disc.
- Select the desired chapter, title or disc and start playing it.
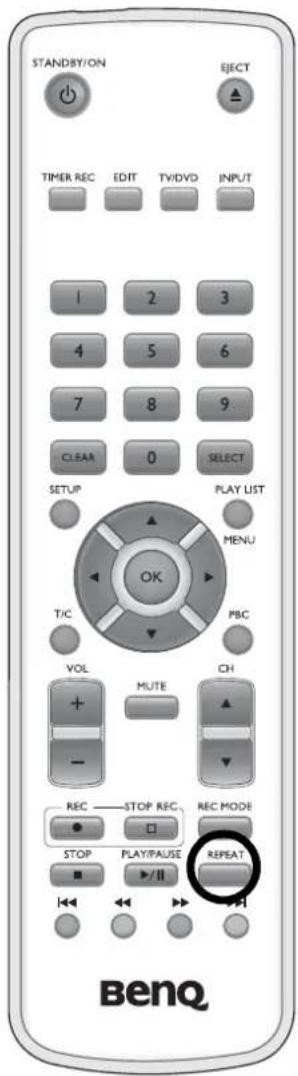
- While playing, press the Repeat mode button to select the following repeat modes (the corresponding icon and word will display on-screen):
'Repeat Chapter': Repeat a chapter (for DVD only)
'Repeat Title': Repeat a track or a title
'Repeat Disc': Repeat the whole disc
'Shuffle': Play tracks or a titles on the disc in a random order
'Scan': Play the starting 10 seconds of each track or title
'(No word)': no repeat
- To switch off the repeat and resume normal playback, press the Repeat mode button repeatedly until no repeat word is displayed.
Repeat a sequence (A-B)
You can repeat a certain sequence within a title or chapter.
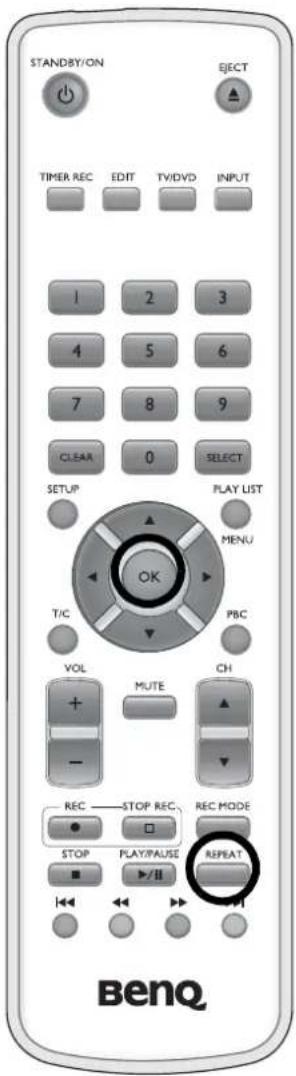
- While playing a disc, press the Repeat mode button on the remote control several times until 'Repeat A-' appears on-screen.
- At the position you wish to start the repeat sequence, press the OK button. The word 'Repeat -B' will display on-screen.
- When you reach the position you wish to stop the repeat sequence, press the OK button again. 'Repeat A-B' icon will display on-screen. The sequence will start playing repeatedly.
- To stop repeat play, press the Repeat mode button until no repeat mode is indicated.
Changing the camera angle
If a DVD contains video recorded from different angles, you can view the different angles during playback.
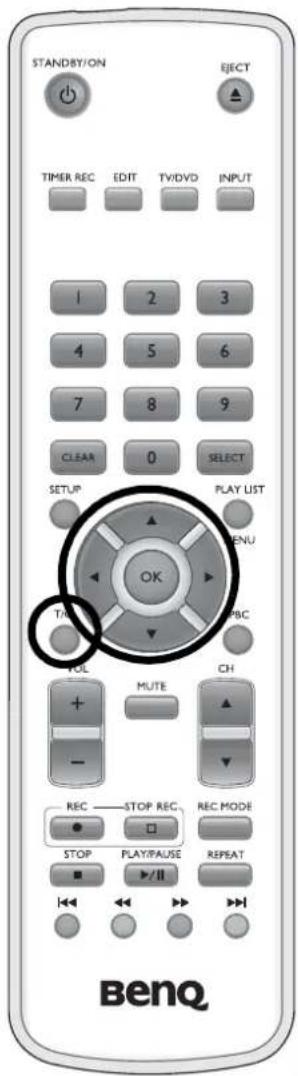
- While playing a disc, press the Title/chapter button. The T/C Tools menu displays on-screen.
- Press the Down button to select the 'Angle' item.

If you are unable to select the 'Angle' item:
The scene you selected was recorded with only one camera, and the camera angle function is unavailable. Refer to your DVD cover for availability and details of multiple camera angles.
- Press the Left or Right buttons to select the desired angle.
- After a short delay, the DVD Recorder will start playing the selected scene from the selected angle.

Tip:
If an Angle icon appears on the upper left corner of the screen when playing a DVD that contains different
angles, you can press the Up Down or button to select an angle directly.
Zoom
You can enlarge and pan a paused video image with the zoom function.
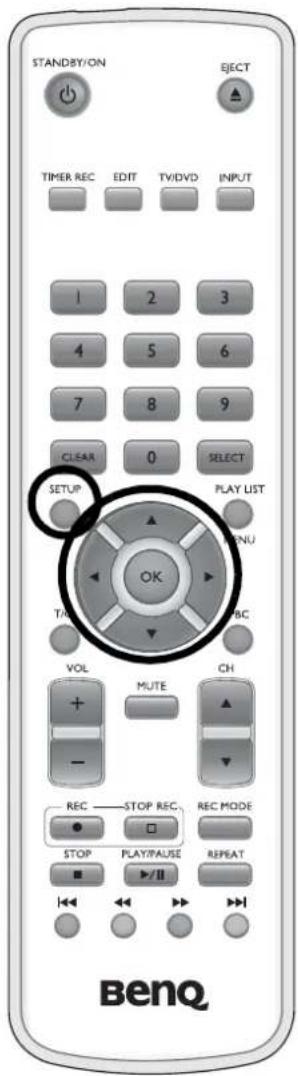
- While playing a disc, press the Title/chapter button. The T/C Tools menu displays on-screen.
- Press the Down button to select the 'Zoom' item and then press the OK button.
- Press the OK OK button to select a zoom-in rate (x1, x1.3, x2 or x4).
- Press the Up ▲, Down ▼, Left ▲ and
Right buttons to pan the enlarged image.
- Press the Setup button to switch off zoom.
Audio language
Pre-recorded DVD videos often come with multiple audio languages. The DVD Recorder will play the disc with the language you have selected in the 'SETUP' menu (refer to "User selectable DVD Recorder preferences" on page 85 for details). You can change the language at any time while playing a disc.
You can change the audio language from the DVD disc menu by pressing the Play list/menu button. The language options on the disc menu and the DVD Recorder 'SETUP' menu can be different. For some DVDs, you can only change the language from the disc menu.
Changing audio language in the 'SETUP' menu
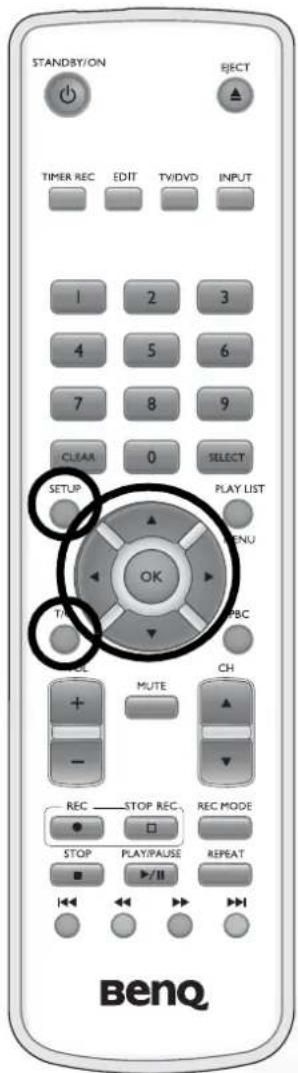
- While playing a disc, press the Setup button on the remote control, and the 'SETUP' menu will display on-screen.
- Press the Up or Down button to select the 'Language' item, and then press the Right button.
- With the 'Audio' item highlighted, press the OK button.
- Press the Up or Down button to select the desired audio language, and then press the OK OK button.
- Press the Setup button on the remote control to close the 'SETUP' menu.
Changing audio language in the 'T/C Tools' menu
- While playing a disc, press the Title/chapter button. The T/C Tools menu displays on-screen.
- Press the Up or Down button to highlight the 'Audio' item.
- Press the Left or Right button to select a desired language.
- Press the Title/chapter ☐ button to close the T/C Tools menu.
Subtitle language
Pre-recorded DVD videos often come with subtitles in several languages. The DVD Recorder will play the disc with the subtitle language you have selected in the 'SETUP' menu (refer to "User selectable DVD Recorder preferences" on page 85 for details) or the default subtitle language of the disc. You can also change the subtitle language at any time in the 'Display' menu while playing a disc.
Changing subtitle language in the 'SETUP' menu

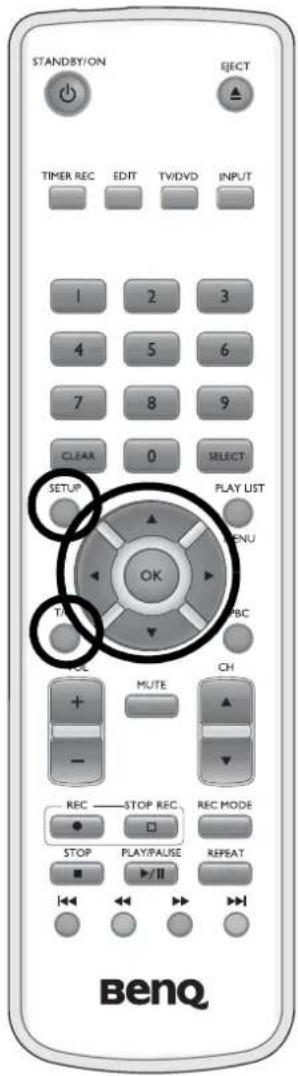
- While playing a disc, press the Setup button on the remote control, and the 'SETUP' menu will display on-screen.
- Press the Up or Down button to select the 'Language' item, and then press the Right
- Press the Up or Down button to select 'Subtitle', and then press the OK ok button.
- Press the Up or Down button to select the desired subtitle language, and then press the OK OK button.
- Press the Setup button on the remote control to close the 'SETUP' menu.
Changing subtitle language in the 'T/C Tools' menu
- While playing a disc, press the Title/chapter button. The T/C Tools menu displays on-screen.
- Press the Up or Down button to highlight the 'Subtitles' item.
- Press the Left or Right button to select a desired language.
- Press the Title/chapter ☐ button to close the T/C Tools menu.
Surround sound effect
Some DVD videos provide Surround sound effect. You can set the DVD Recorder to play the sound effect following the steps below.
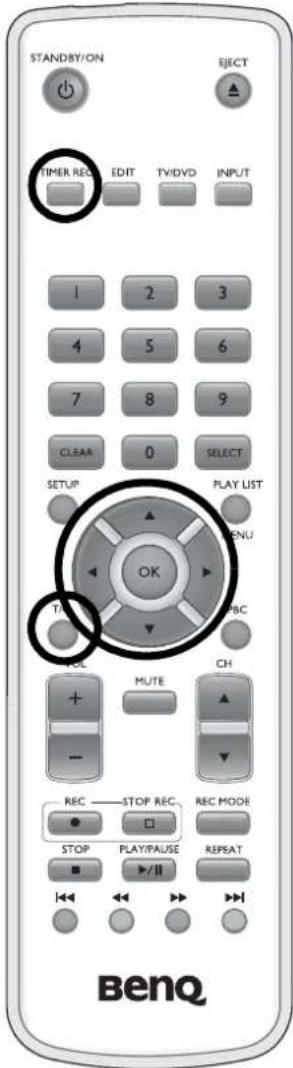
- While playing a disc that provides Surround sound effect, press the Title/chapter button on the remote control. The T/C Tools menu displays on-screen.
- Press the Up or Down button to highlight the 'Sound' item.
- Press the Left or Right button to select 'Stereo' or 'Surround'.
- Press the Title/chapter button to close the T/C Tools menu.
Playing a photo CD
You can use the DVD Recorder to play photo CDs. If you want to play a photo CD on the DVD Recorder, please note the following requirements when making a photo CD:
- Directory levels: no more than 8
- File format: JPEG File Interchange Format (JFIF) with baseline lossy JPEG (version 1.02)
- File system: ISO9660
• Maximum number of photos: 999 - Filename length: no more than 256 characters
Viewing a photo
- Load a photo CD into the DVD Recorder. If the DVD Recorder does not play the disc automatically, press the Play ▶ or ▶ button to start playing.
- The thumbnails of photos on the CD will display on-screen.
- Press the Right ▶, Left ▶, Up ▶ or Down
button to highlight the photo you wish to view. - Press the OK OK button. The full image will appear on-screen.
- To view the next photo, press the Next button. To view the previous photo, press the Previous button. To return to the thumbnail screen, press the Stop button.
Viewing thumbnails in different pages and folders
If the photo disc contains more than 9 photos or multiple folders, you can use this function to locate the photo you wish to view.

Note:
If the photos don't contain EXIF (thumbnails data), their thumbnails will become unavailable on the screen. However, the photos themselves can still be displayed normally when viewing.
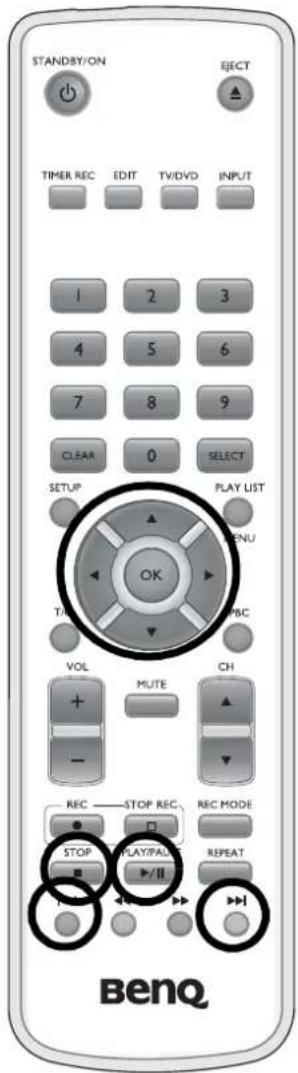
Viewing thumbnails on different pages
- With the thumbnails of photos on the CD displayed on-screen, press the Right ▶, Left
, Up or Down button to highlight 'Page' on the left of the screen.
- Press the OK OK button and the thumbnails on the next page will display on-screen.
- Press the OK OK button again to view thumbnails on different pages.
Viewing thumbnails in different folders
- With the thumbnails of photos on the CD displayed
on-screen, press the Right ▶, Left ▶, Up ▶ or Down ▶ button to highlight 'Roll' on the left of the screen.
- Press the OK OK button and the thumbnails in the next folder will display on-screen.
- Press the OK OK button again to view thumbnails in different folders.
Viewing photos as a slide show
- With the thumbnails of photos on the CD displayed
on-screen, press the Right ▶, Left ◀, Up ▲ or
Down button to highlight 'Play' on the left of the screen.
- Press the OK OK button and the photos in current folder will play as a slide show.
- To stop slide show playing and return to the thumbnail screen, press the Stop button.
Slide show options
- With the slide show playing, press the Setup button on the remote control.
- The Photo Slide Show menu containing the following options will appear on-screen:
Photo: Displays the number of current photo and all photos. Press the Next or Previous button to skip to the next or previous photo.
Play: Select this option and press the OK OK button to start playing the slide show.
Thumbnails: Select this option and press the OK button to return to the thumbnail screen.
Zoom: Select this option and press the OK button to zoom in on the photo at 1x, 2x, 4x or 8x.
Press the Stop STOP button to return to normal view.
Rotate: Select this option and press the OK OK button to rotate the picture at different angles.
Timer: Select this option and press the Left or Right button to adjust slide show speed. The larger the number, the slower the speed.
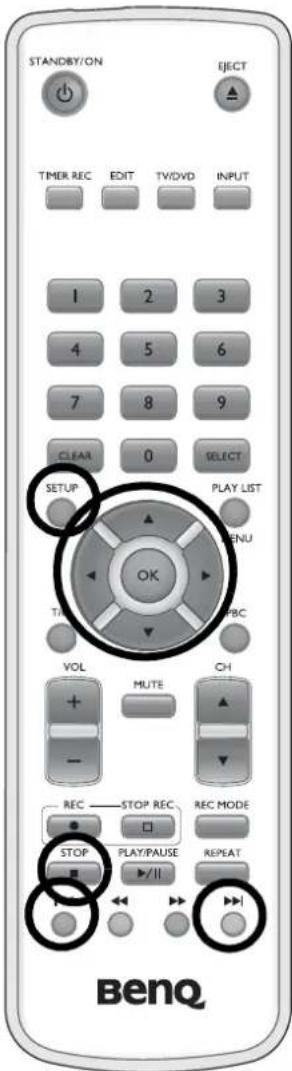
Repeat: Select this option and press the Left on or off the repeat play function of the slide s

orRight

button to select On' or 'Off' to turn
- To return to the thumbnail screen, press the Stop button.

Recording
Recordable media types
The BenQ DE320 DVD Recorder allows you to make recordings on two different types of media:
DVD+RW: ReWritable Digital Versatile Discs (DVD), which means you can record data on the disc at several different times until the disc is full, including over previous recordings.
DVD+R: Recordable Digital Versatile Discs (DVD), which means you can record data on the disc at several different times until the disc is full, but cannot record over previous recordings.
For DVD+R type discs, every new recording will be appended serially to the end of the exiting recordings on the disc (as previous recordings cannot be written over with this type of disc).
Likewise, DVD+RW type discs can be used to record video serially just like a DVD+R type disc, however, DVD+RW type discs also allow you to overwrite existing recordings on the disc.
With both types of discs, recording stops when the disc is full.

Note:
You can record up to 49 titles on a DVD+R or DVD+RW disc.
Record mode
Before recording, you should check and set the record mode of the DVD Recorder. The record mode determines the record/play length of the DVD. See "Record mode" on page 64 for details.
Manual recording
You can start recording video as soon as a video source has been selected and an appropriate recordable media has been set and loaded into the DVD Recorder. When you stop recording, the title is closed, and the file details are written to the disc. See "Manual recording" on page 65 for details.
Sleep mode recording
Sleep mode allows you to start recording manually and set a timer to stop recording and shutdown the DVD Recorder automatically. See "Sleep mode recording" on page 66 for details.
Adding bookmarks while recording
You can add bookmarks too if you want. See "Auto Chapters:" on page 88.
Pausing recording
You can pause and resume recording at any time, which will keep the segments together in the same title. See "Pausing recording" on page 68 for details.
Preventing unintended erasure of discs
When recording on a DVD+RW disc, you can set the DVD Recorder to protect an entire disc from further recording by using the 'Disc Lock' function. See "Preventing unintended erasure of a DVD+RW Disc" on page 84.
Timer recording
You can program the DVD Recorder to make a recording at some time in the future using the 'Timer recording' function. See "Timer recording" on page 69 for details.
Record mode
The Record mode setting determines the recording quality and the total disc playing time of your DVDs recorded using the DVD Recorder. You should set the record mode before starting a recording, as the mode cannot be changed during a recording session. The possible record modes are:
| Quality Level Recording time (hour) | |
| HQ High Quality mode for the best picture quality 1 | |
| SP Standard Play mode for excellent (DVD) quality 2 | |
| LP Long Play mode (S-VHS quality) 3 | |
| EP Extended Play mode (quality better than VHS) 4 | |
| SLP Super Long Play mode (VHS quality) 6 |

Note:
HQ is the default record mode when you use the record function.
Changing record mode
How to change the record mode using a single button:
Press the Record mode button on the remote control to select an appropriate record mode.
Each subsequent press of the button will cycle through the possible record modes.
The record mode and available time for record on the selected medium will display momentarily on screen.
How to change the record mode using the 'SETUP' menu:
-
Open the 'SETUP' menu by pressing the Setup button.
-
Press the Up or Down button to select the Recording item, and then press the Right

button.
-
With the 'Record mode' item highlighted, press the OK button, and then press the Up or Down button to select the desired record mode.
-
Press the OK OK button to confirm your selection.
-
Press the Setup button on the remote control to close the 'SETUP' menu.
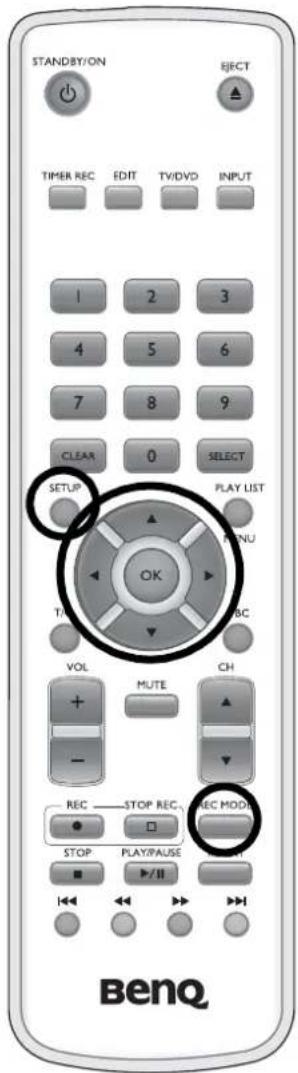
Manual recording
- Press the Power on/standby STANDBY/ON button to turn the DVD recorder on and place an unfinalized suitable DVD in the disc tray.
If a video source was being displayed, it will stop being displayed while the DVD Recorder checks the newly inserted disc. The message 'READING' will show on the front display panel. When read, the OSD (on screen display) will display, listing any previous recordings on the disc.
Should any other messages display on-screen, the disc is unreadable, unrecognized, unwritable, or is full. Refer to "Troubleshooting" on page 95 of the User's Manual for a possible solution.
- Press the Input INPUT button, and then press the Channel
button several times to select the video input source you wish to record. The information will appear in the Timer and Tuner Information Box.
3.
TUNER (channel is displayed as 'Pxx' where 'xx' stands for the channel number):
Selects the TV/CATV signal source connected to the ANTENNA terminal on the rear panel. You can press the
Numbered buttons 0 \~ 9 to select the channel you wish to record. You can also select a channel directly by using the numeric keys (two digits: 01–99) on the remote control.
EXT1:
Selects the signal source from the device connected to the SCART AUX I/O terminal on the rear panel.
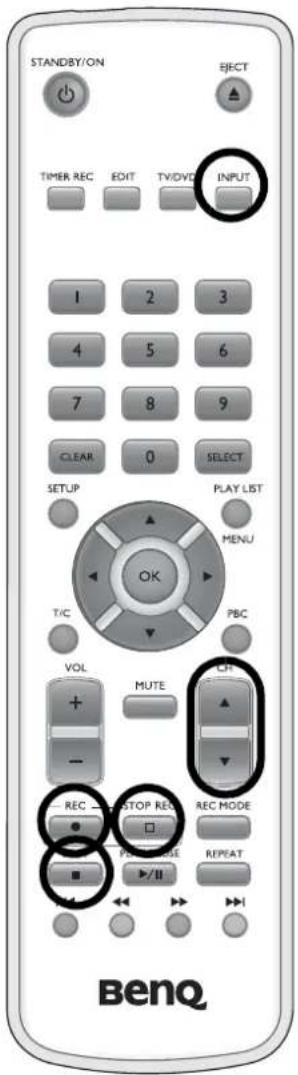
EXT2:
Selects the signal source from the device connected to the SCART TO TV I/O terminal or S-Video/Composite Video (AV) and Audio L/R input terminals on the rear panel.

Tips
Should you have multiple input devices connected using separate video inputs (Composite Video, S-Video or SCART) you should switch on and use only the video input source device you wish to have the DVD Recorder record onto DVD, and turn off all other video input source devices not in use. When both S-Video and Composite Video inputs are present, the DVD Recorder will automatically select the S-Video input.
CAM1:
Selects the signal source from the device connected to the Composite Video and Audio L/R input terminals on the front panel.
CAM2:
Selects the signal source from the device connected to the DV input port on the front panel.
- When you're ready to start recording, press either:
- the Record button on the remote control; or
- the ●Rton on the DVD Recorder.
The 'Record' icon will display on-screen.
- To stop recording press either the Stop STOP (or Record stop STOP REC) button on the remote control or the Stop Button on the DVD Recorder. When you stop recording, the title is closed, and the file details are written to the medium. The DVD Recorder creates the table of contents of the recording.
Sleep mode recording
While recording to DVD after a manual recording start (not timer recording start), the DVD Recorder allows you to set the remaining recording time, which will make the DVD Recorder automatically stop recording and turn itself off (go to standby mode) at the end of that time. This is known as Sleep mode recording.
You manually start recording (as explained in "Manual recording" on page 65) and then press the Record button again to activate Sleep mode recording.
How to activate the Sleep mode timer:
-
Place an unfinalized suitable DVD in the disc tray.
-
Press the Input INPUT button, and then the Channel

button several times to select the video input force you wish to record.
- When you're ready to start recording, press either:
- the Record button on the remote control; or
-
the button on the DVD Recorder. The 'Record' icon will display on-screen.
-
To activate sleep mode recording, press the Record button again. The total remaining recording time (until sleep) will display on-screen.
-
To increase the remaining recording time by 30 minutes increments, press the Record button again. You can set the recording time to up to 6 hours.
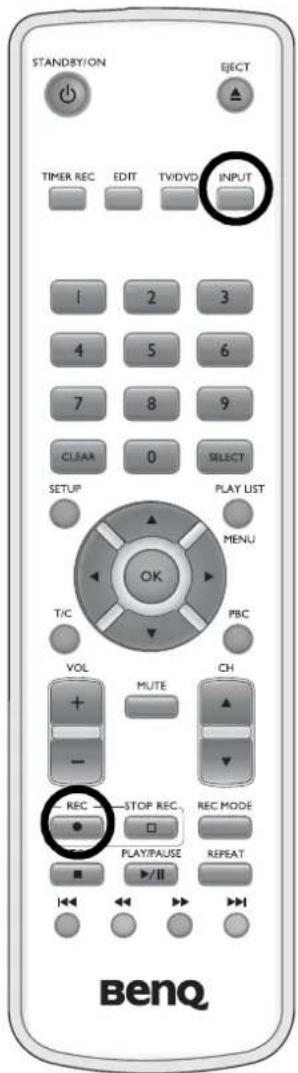
Satellite Recording
You can use Satellite Recording if you own a satellite receiver that can control other devices via the SCART cable and programming feature (Timer).
- Place an unfinalized suitable DVD in the disc tray.
- Press the Setup button on the remote control, and the 'SETUP' menu will display on-screen.
- Press the Up or Down button to select the 'Recording' item, and then press the
Right button.
- Press the Up or Down button to select the 'SAT Record' item, and then press the OK button.
- Press the Up or Down button to select 'EXT 2' and then press the OK OK button.
- Connect the SCART socket marked "AUX I/O" on DVD Recorder with a SCART cable to the corresponding SCART socket on the satellite receiver.
- Press the Setup button on the remote control to close the menu.
- Set up the satellite receiver with the required information (program number of the TV channel, start time, end time). If necessary, please see the operating instructions for your satellite receiver.
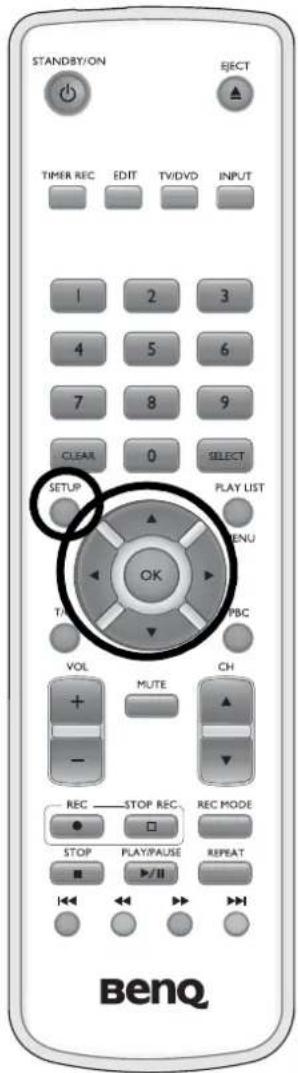
Pausing recording
- During recording, you can pause at any time by pressing the Play/pause button on the remote control.
The Pause Rec. icon will display on-screen.
- To resume recording, press the button on the remote control.
Play/pause
- To stop recording press either the Stop STOP (or Record stop STOP REC) button on the remote control or the Stop Button on the DVD Recorder.
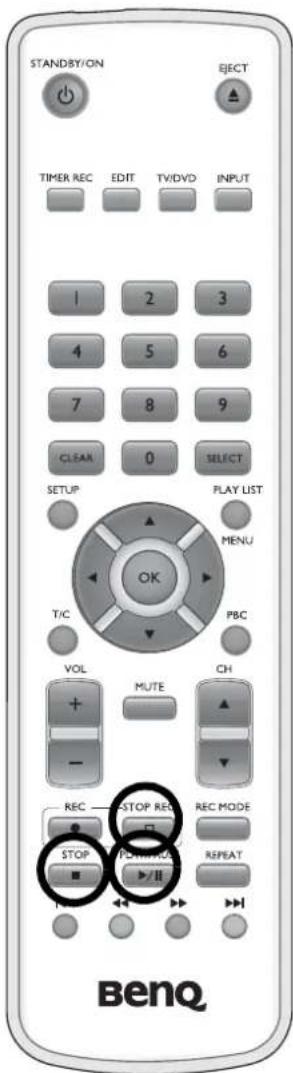

Timer recording
General Information
The timer recording function will start and stop recording the video you've selected at the time and date you set.
The DVD Recorder allows you to program it to record up to 8 recordings in the future. You can program for single event recordings at a specific date and time, or for repeated daily weekday recordings (Monday through Friday), or for weekly recordings to occur on the same day each week.
If not previously done, to program a recording, you must set:
• the date for the recording; and
• the video input you want to record; and
• the start time of recording; and
• the length of the recording; and
- the recording mode.

Note:
Before programming a recording, please make sure the system clock has been correctly set.

Tip:
If not previously done, to set the system clock on the DVD Recorder, see "Setting the 'Setup' clock" on page 39 for setting details.
Setting up timer recording
-
Press the Timer recording button. The Timer recording menu will appear on-screen.
-
Press the Up or Down button to select 'Timer Setup' and then press the OK button.
-
Press the Up or Down button, or the numbered buttons on the remote control to change settings ('Program' (channel), 'Date' and 'Time'). To move to the previous or next setting item, press the Left or Right button.
-
Press the Right button to select 'Record Mode' and then press the OK OK button. Use the Up or Down button to select a record mode and then press the OK OK button.
-
Press the Down button to select 'Repeat' and then press the OK button. Use the Up or Down button to select a repeat mode and then press the OK button.

Note:
When 'Repeat Mode' is set to 'Mo-Fr', make sure that the date in step 3 is set to a weekday.
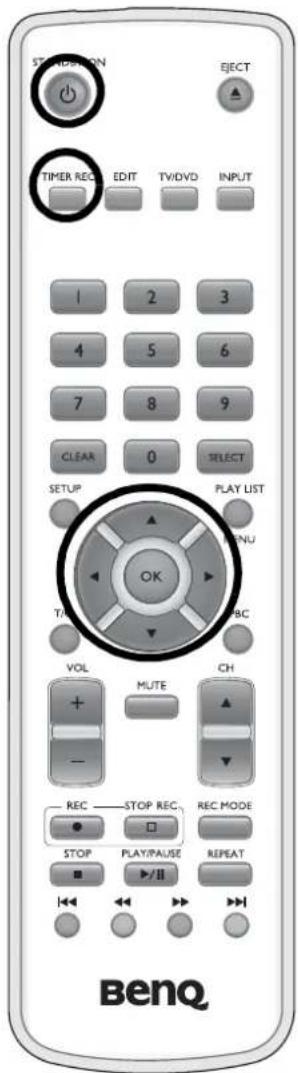
- Press the Down button to select 'VPS/PDC' and then press the OK button to enable or disable the VPS/PDC function.

Tip
VPS (video programming system) and PDC (program delivery control) are used to control the start and end time of a recording. Usually the start time is the same as that of the VPS or PDC time. But if the VPS or PDC time is different from the recording's start time, e.g. '20:15 (VPS/PDC 20:14)', you must enter the VPS/PDC time '20:14' exact to the minute as the start time.
If you wish to program a time that is different from the VPS or PDC time, you must disable the VPS/PDC function. Only one recording on a TV channel can be controlled using VPS/PDC' at a time. If you wish to record two or more TV programs on a TV channel using VPS/PDC, you will need o program these as two separate recordings.
-
Check all information. Press the Down button to select 'Confirm Programming' and press the OK button.
-
Press the Timer recording button to close the Timer recording menu.
-
Load an appropriate recordable (non write-protected) DVD into the DVD Recorder.

Note:
The timer function will only become active while the DVD Recorder is in standby mode.
- Press the Power/standby STANDBITION button to turn off the DVD Recorder (so that the timer programming can take effect).
When the timer recording function is triggered, the message 'TIMER' will show on the front display panel.
If timer recording is set while the antenna cable is disconnected from the DVD recorder, a warning message will display on-screen and remain there for 28 hours. To clear the warning message, re-connect the antenna cable.
Changing or erasing timer setting
How to change a timer setting:
- Press the Timer recording button. The Timer recording menu will appear on-screen.
-
Press the Up or Down button to select 'Timer List' and then press the OK button.
-
Press the Up or Down button to select a timer setting from the timer list.
-
Press the OK button to start editing the selected timer setting.
-
Check all information. Press the Down button to select 'Confirm Programming' and press the OK button.
-
Press the Timer recording button to close the timer list.
-
Press the Power/standby button to turn off the DVD Recorder (so that the timer programming can take effect).
How to delete a timer setting from the timer list:
- Open the timer list as described above, and select the timer setting you wish to delete.
- Press the Clear button.
- Press the OK button to confirm.
- Close the timer list as described above.
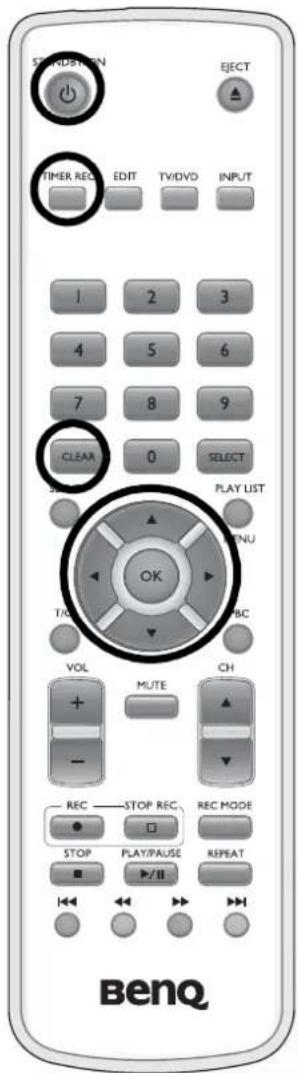

Managing recordings
General information
The following additional information is also stored at the beginning of the recording:
- Index picture of the recording
• Name of the recording - Input source of the recording
- Date of the recording
• Length of the recording
• Recording mode (Quality)
DVD recordings consist of titles (recorded video clips) and chapters (different scenes in a clip). A chapter bookmark will be inserted if the 'Auto chapters' function is activated in the 'Record Setup' menu (Refer to "Record Setup" on page 88 for details). These bookmarks can be changed when the recording has finished.
The scenes you do not want to see during playback (e.g. commercials), can be hidden or skipped. During playback you can watch your recording as a continuous sequence without the hidden chapters. See "How to insert chapter markers during playback:" on page 73 and "Hiding/showing chapters" on page 74 for details.
Managing recordings on DVD discs
Adding chapter markers during playback
Using this function, you can adjust a title to your personal preferences. You can insert/erase chapter markers, hide chapters or delete all markers from the title.

Tips
The chapter marker function is useful as it can be used to locate chapters for hiding later on if you wish. See "Hiding/showing chapters" on page 74.
You can mark chapters on DVD+RW type discs at any later time before the disc if finalized or full. However, you can not mark chapters on DVD+R type discs.
You can set the DVD Recorder to mark chapters automatically when recording. Refer to "Auto Chapters:" on page 88 for details.
While playing a suitable unprotected and unfinalized recordable DVD+RW type disc, you can set and erase chapter markers within a title as detailed by the following procedure.
Each disc can have a maximum of 124 chapters, and 99 per title. When one of these values is
reached, the message ' will display on-screen. If you wish to add more markers or to make new recordings (which add their own markers) to a disc which has reached its chapter limit, you will need to erase some existing chapter markers before you can continue.
How to insert chapter markers during playback:
- While playing a suitable unprotected and unfinalized recordable DVD+RW type disc, go to the scene where you wish to insert a chapter marker.
- Press the Edit button on the remote control to open the 'Edit Chapters' menu.
- With the highlight on the 'Insert Chapter' item, press the OK button to insert a chapter marker.
- Repeat step 2 and 3 to add another chapter marker.
- When you've finished inserting your chapter bookmarks, press the Edit button to close the menu.

Notes:
If a 'displays on-screen, the disc is write-protected or has been finalized. Further changes cannot be made. Once a disc has been edited, the disc edits must be finalized before they become available for play in a normal DVD player. See "Finalizing edits" on page 81.
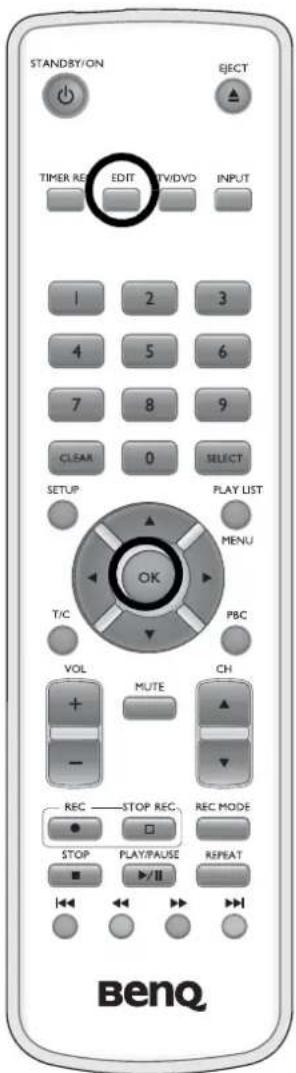
Hiding/showing chapters
By default all chapters on a disc are visible. You can hide chapters for playback (e.g. commercial skipping) or make them visible again. In editing mode, hidden chapters are displayed in grey.
- Press the Play/pause PLAY/PULSE button on the remote control while the corresponding chapter is being played.
- Press the Edit button on the remote control. The 'Edit Chapters' menu will appear on-screen.
- Press the Down button to select 'Hide Chapter', and then press the OK OK button.
- Press the Edit button, and then the Play/pause button to end. This chapter will be skipped while playing.
- To view the chapter again, select 'Unhide Chapter' in Step 3.
How do I select other chapters?
- Press the Title/chapter button on the remote control. The T/C Tools menu will display on-screen.
- Press the Up or Down button to select the 'Title' or 'Chapter' item.
- Press the numbered buttons or the Left or Right button to select the title or chapter you wish to edit.
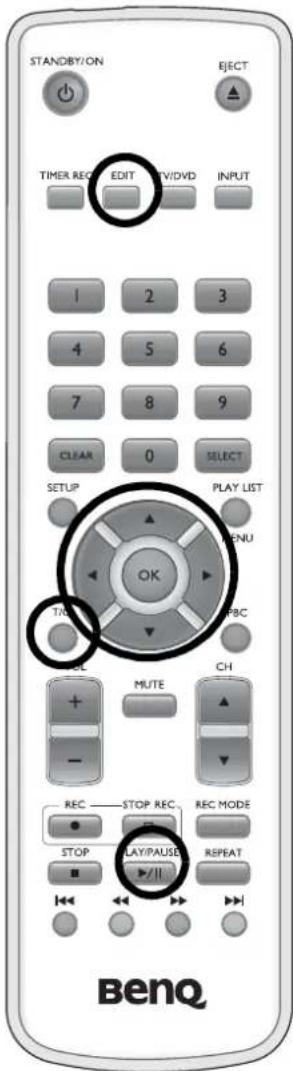
Deleting chapters
Within a title, you can either erase individual chapter markers or all markers.
- While playing a suitable unprotected and unfinalized recordable DVD+RW type disc, go to the chapter you wish to delete.
- Press the Edit button on the remote control to open the 'Edit Chapters' menu.
- Press the Up or Down button to highlight 'Delete Chapter', and then press the OK button to delete the chapter marker.
- Repeat step 2 and 3 to delete another chapter marker.
- When you've finished inserting your chapter bookmarks, press the Edit EDIT button to close the menu.

How do I select other chapters?
- Press the Title/chapter button on the remote control. The T/C Tools menu will display on-screen.
- Press the Up or Down button to select the 'Title' or 'Chapter' item.
Press the numbered buttons or the Left
button to select the title or chapter you wish to edit.
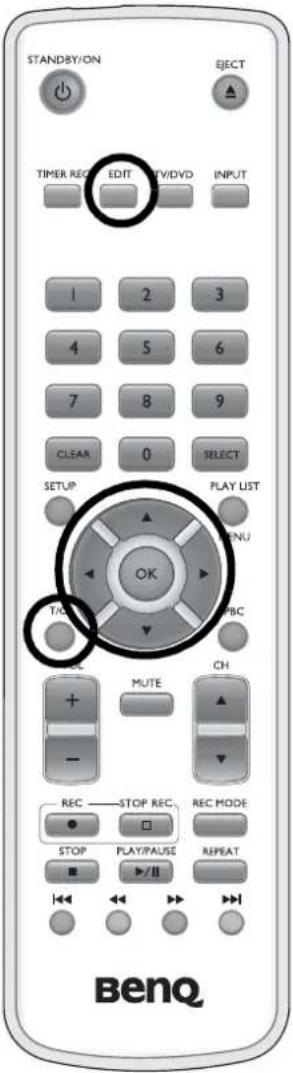
Editing title (name)
In general, the input source (or the TV channel number) used when recording will be stored as the name of title. This can only be changed after the recording has been completed.
-
While playing a suitable unprotected and unfinalized recordable DVD+RW type disc, press the Play list/menu button on the remote control to display the disc content menu.
-
Press the Up or Down button to select the title you wish to edit.
-
Press the Right button to open the Title Settings menu.
-
Press the Up or Down button to highlight 'Name', and the press the OK button to confirm.
-
To enter a character, press the Up or Down button until the desired character displays on-screen. To toggle between upper and lower case characters, press the Select button. To start entering the next character, press the Right button.
-
Repeat step 5 to enter more characters.

Note:
You can enter up to 15 characters.
-
Press the OK button when you are done entering the name.
-
Press the Left button to return to the disc content menu.
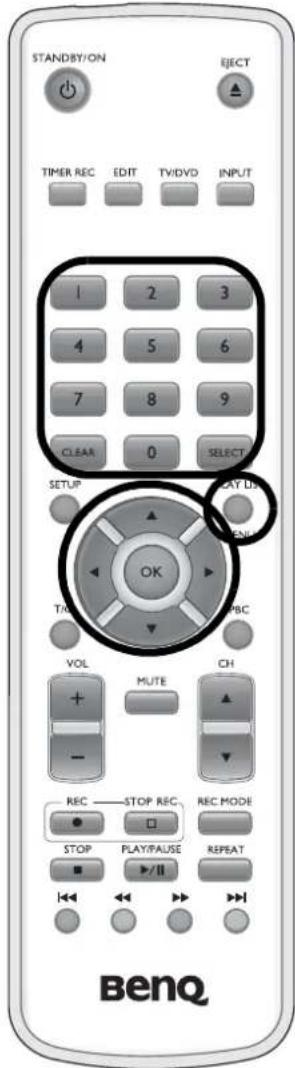
Playing all titles (including hidden chapters)
If you have hidden certain chapters of a title, you can view the entire title, including the hidden chapters, by following the steps below:
-
While playing a suitable disc, press the Play list/ menu button on the remote control to display the disc content menu.
-
Press the Up or Down button to select the title you wish to edit.
-
Press the Right button to open the Title Settings menu.
-
Press the Up or Down button to highlight 'Play Full Title', and the press the OK button to confirm.
-
The DVD Recorder will play the full title including the hidden chapters.
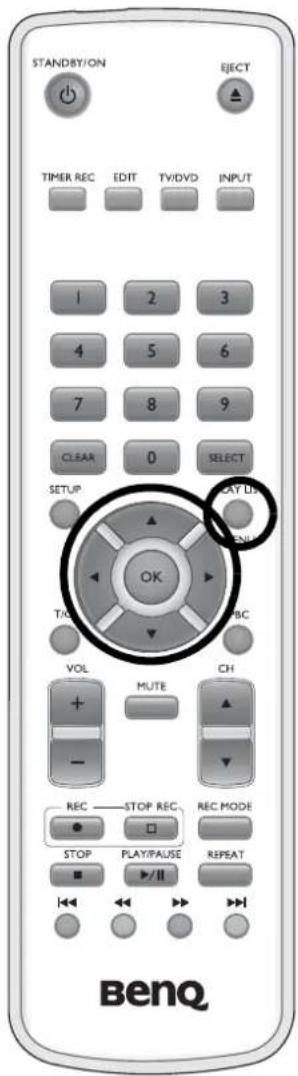
Dividing titles
With this function you can divide one existing title into two different titles. However, these titles cannot be combined once divided.
- While playing a suitable disc, press the Play list/ menu button on the remote control to display the disc content menu.
- Press the Up or Down button to select the title you wish to divide, and then press the Play/pause button to start playing the title.
- When the title content reaches the point where you wish to divide, press the Play/pause button to pause.
- Press the Edit button on the remote control. The 'Edit Chapters' menu will display on-screen.
- Press the Up or Down button to highlight 'Divide Title', and then press the OK button.
- A message will display on-screen. Press the button twice to confirm. OK OK
- The DVD recorder will start dividing the title. This will take a moment.
- When finished, the disc content menu will display on-screen showing the divided titles.
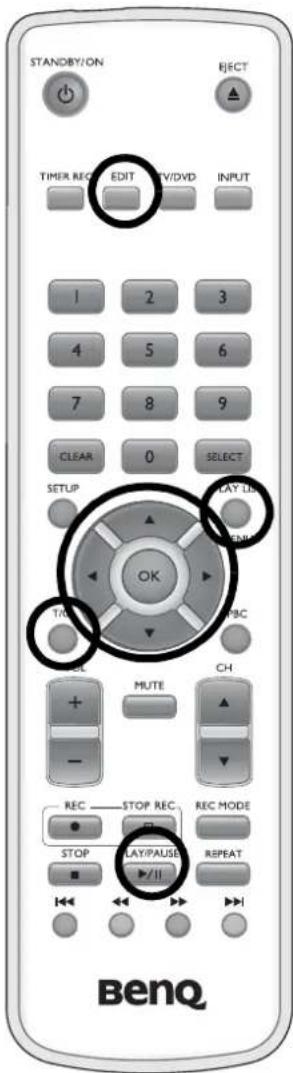
Erasing a recording/title
You can add to or erase contents from any unfinalized suitable recordable DVD. Once erased however, those programs cannot be recovered and reused again.
You can erase individual recordings from a disc as shown below:
- While playing a suitable unprotected and unfinalized recordable DVD+RW type disc, press the Play list/menu 🐘 button on the remote control to display the disc content menu.
- Press the Up or Down button to select the title you wish to erase.
- Press the Right button to open the Title Settings menu.
- Press the Up or Down button to highlight 'Erase Title', and the press the OK button to confirm.
- Press the OK button to confirm.
Can titles be erased from a DVD+R disc?
Titles on DVD+R discs are only marked as erased. While playing a disc, the 'erased' title will be skipped. The space used for a title cannot be used again as the disc format does not support files being re-written over. You must use DVD+RW type discs if you wish to rewrite over previously recorded files.
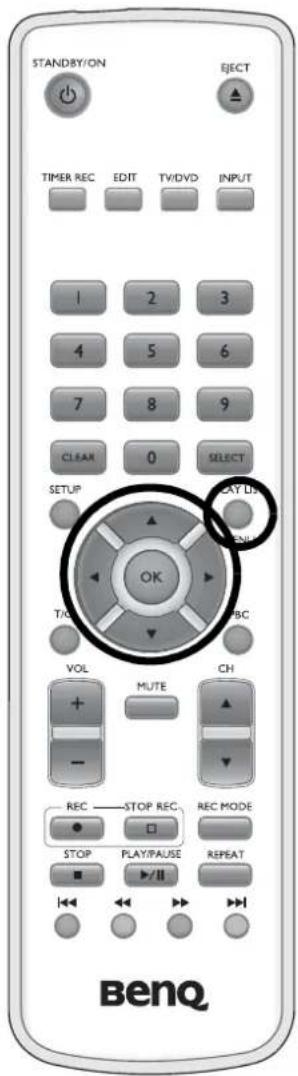
Disc Settings
The disc settings screen displays above the first title in the disc play list and contains general information about the current disc.
You can:
- give the disc a name
- finish editing (make edits DVD player compatible) for DVD+RW only;
- finalize a disc (for DVD+R disc only, so that you can play the disc on general DVD players);
- enable or disable write protection on the disc;
- erase all content on a DVD+RW.
Editing disc name
- While playing a suitable unprotected and unfinalized recordable DVD+RW type disc, press the Play list/menu button on the remote control to display the disc content menu.
- Press the Up button to highlight the first title in the disc content menu.
- Press the Up button again. The Disc information menu will display on-screen.
- Press the Right button to enter the Disc setting menu.
- With the 'Name' item highlighted, press the OK button.
- To enter a character, press the Up or Down button until the desired character displays on-screen. To toggle between upper and lower case characters, press the Select button. To start
entering the next character, press the Right button.

- Repeat step 6 to enter more characters.

Note:
You can enter up to 18 characters.
- Press the OK button to confirm.
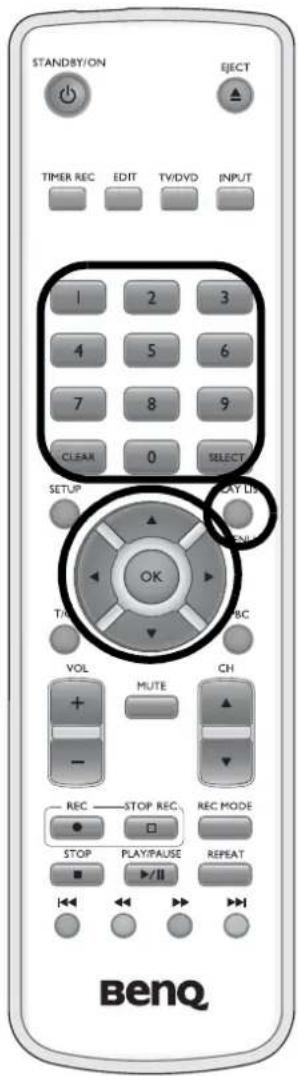
Finalizing edits
Even if one or more titles have been edited, a DVD player may still show the original title. You can prepare your disc so that a DVD player will read the edited title instead.
- While playing a suitable unprotected and unfinalized recordable DVD+RW type disc, press the Play list/menu button on the remote control to display the disc content menu.
- Press the Up button to highlight the first title in the disc content menu.
- Press the Up button again. The Disc information menu will display on-screen.
- Press the Right button to enter the Disc setting menu.
- Press the Up or Down button to select 'Make DVD Compatible', and the press the OK button to confirm.
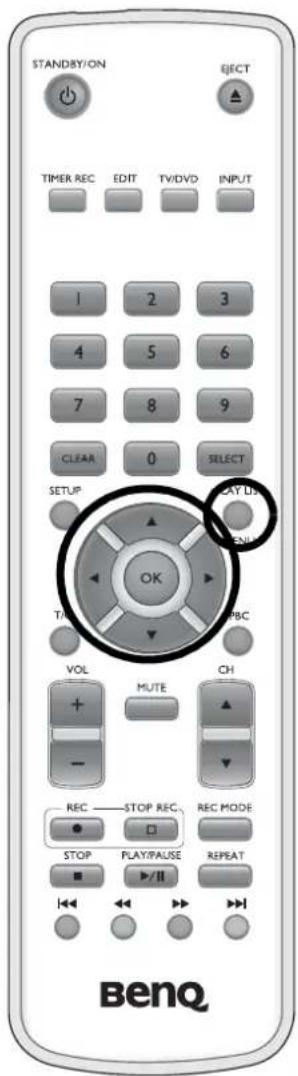
Finalizing a DVD+R Disc
You must finalize a DVD+R disc before playing it on general DVD players, however, you do not have to finalize a disc if you want to play it only the DVD Recorder.
Once the disc has been finalized no further recordings or changes can be made to that disc.
- While playing a DVD+R disc, press the Play list/ menu button on the remote control to display the disc content menu.
- Press the Up button to highlight the first title in the disc content menu.
- Press the Up button again. The Disc information menu will display on-screen.
- Press the Right button to enter the Disc setting menu.
- Press the Up or Down button to select 'Finalize Disc', and then press the OK button to start finalizing the DVD+R disc.

Tips:
If the 'Finalizing disc' message does not display on-screen, there is no disc inserted or your disc is already finalized.
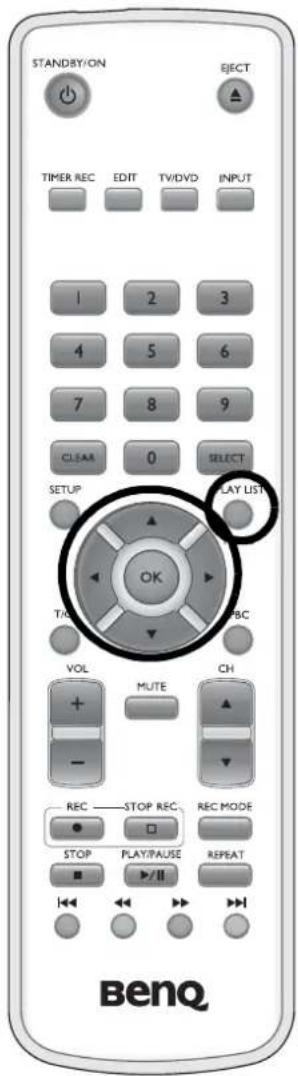
Erasing a DVD+RW Disc
Erasing a DVD+RW disc from the disc content menu
-
While playing a suitable unprotected and unfinalized recordable DVD+RW type disc, press the Play list/menu button on the remote control to display the disc content menu.
-
Press the Up button to highlight the first title in the disc content menu.
-
Press the Up button again. The Disc information menu will display on-screen.
-
Press the Right button to enter the Disc setting menu.
-
Press the Up or Down button to select 'Erase Disc', and the press the OK button.
-
Press the OK button again to confirm.
Tip:
You cannot erase an empty disc.
Erasing a DVD+RW disc recorded by other DVD recorders
-
Insert the DVD+RW disc and then press the Stop button on the remote control.
-
Press the button on the remote control.
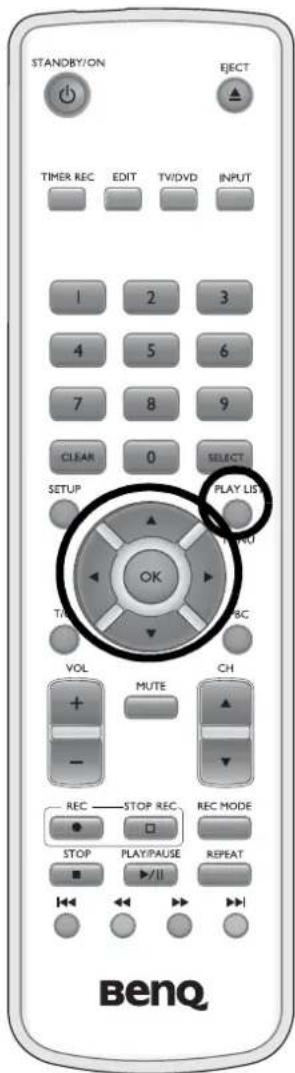
-
Press the Up or Down button to select 'Feature', and then press the Right button.
-
Press the Up or Down button to select 'Adapt Disc Format', and then press the OK ok button.
-
The 'Adapt Disc Menu' dialogue will display on-screen. Press the Up or Down button on the remote control to select 'OK to Replace Menu', and then press the OK button.
-
Press the button on the remote control, and then press the on the remote control to display the disc content menu. Play list/menu button
-
Press the Up button to highlight the first title in the disc content menu.
-
Press the Up button again. The Disc information menu will display on-screen.
-
Press the Right button to enter the Disc setting menu.
-
Press the Up or Down button to select 'OK to Erase Disc', and the press the OK button.
-
Press the OK button again to confirm.
Preventing unintended erasure of a DVD+RW Disc
To prevent a recording from being accidentally erased, you can set the DVD Recorder to protect the entire disc from further recording. This is useful as it can be undone at a later time for further recording, (which cannot be done if a disc has been finalized). See "Finalizing a DVD+R Disc" on page 82 for details of finalizing discs.
- Load the disc you want to protect into the DVD Recorder.
- Press the Play list/menu button on the remote control to display the disc content menu.
- Press the Up button to highlight the first title in the disc content menu.
- Press the Up button again. The Disc information menu will display on-screen.
- Press the Right button to enter the Disc setting menu.
- Press the Up or Down button to select 'Protected', and the press the OK button. The 'Protected' checkbox will be checked.
How to unprotect a disc:
When you wish to record onto the disc again, repeat the above steps and make sure that the 'Protected' checkbox becomes unchecked.
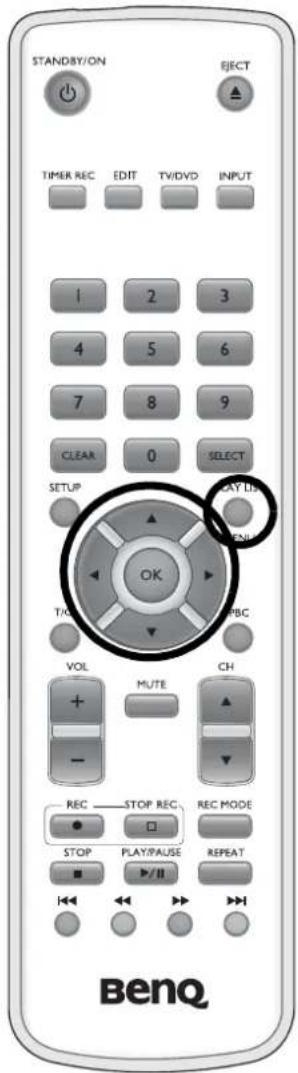
User selectable DVD Recorder preferences
In this section you will learn how to personalize (set your preferences) the DVD Recorder. Meanings of the symbols below are as follows:
Video Setup (See "Video Setup" on page 85)
Sound Setup (See "Sound Setup" on page 86)
Feature Setup (See "Feature Setup" on page 87)
Language Setup (See "Language Setup" on page 88)
Recording Setup (See "Record Setup" on page 88)
System Setup (See "System Setup" on page 89)
How to navigate through the 'SETUP' menu:
1 Press the Setup button on the remote control. The 'SETUP' menu will display on-screen.
2 Press the Up or Down button to select corresponding settings.
3 Press the Right button to enter the submenu or highlight corresponding features.
4 Press the OK OK button to confirm new settings.
5 Press the Left button to return to the previous menu layer.
6 Press the Setup button to close 'SETUP' menu.
Video Setup
TV Shape:
You can adjust the video output for the playback of pre-recorded wide-screen movies to suit your display screen shape.
Note:
This option will only have effect with pre-recorded movies which were recorded in a wide-screen mode.
1 Select the 'TV Shape' item from the 'SETUP' menu, and then press the OK button.
2 Press the Up or Down button to select a screen format:
4:3 Letterbox - full screen. for viewing 4:3 aspect ratio movies on a 4:3 aspect ratio screen
4:3 PanScan - full screen for viewing a 16:9 aspect ratio movie in full height on a 4:3 aspect ratio screen. This scales the whole picture to a larger size until the 4:3 screen height is reached, then crops the left and right edges to the width of the 4:3 screen.
16:09 - for viewing a 16:9 ratio movie on a 16:9 ratio screen. Has no effect on a 4:3 ratio screen.
Press the OK OK button to confirm.
Black Level
Adapts the color dynamics for playback when it is enabled (with a check mark). Press the OK button to enable or disable it.
Video Shift:
You can press the OK OK button and then press the Left or Right button to adjust the position of the picture on your TV left or right to suit your TV.
YUV Output:
You can set the format of video output from the component video terminal of the DVD Recorder according to the acceptable video format of your TV.
1 Select the 'YUV Output' item from the 'SETUP' menu, and then press the OK button.
2 Press the Up ▲ or Down ▼ button to select 'Interlaced' and 'Progressive'.
3 Press the OK OK button to confirm.
Video Output:
You can set the format of video output from the SCART TO TV I/O terminal of the DVD Recorder according to the acceptable video format of your TV.
1 Select the 'Video Output' item from the 'SETUP' menu, and then press the OK OK button.
2 Press the Up or Down button to select from the following options:
'CVBS+RGB': The SCART TO TV I/O terminal outputs video signal in Composite Video and RGB formats, and audio in left and right channels.
'YC+YUV': The SCART TO TV I/O terminal outputs video signal in S-Video and Component Video formats, and audio in left and right channels.
'CVBS+YUV': The SCART TO TV I/O terminal outputs video signal in Component Video and RGB formats, and audio in left and right channels.
Sound Setup
If digital audio equipment is connected to the digital output terminal on the rear panel of the DVD Recorder, you can select the appropriate setting in this menu:
Digital Output:
Set the DVD Record to enable or disable the digital output function.
1 Select the 'Digital Output' item from the 'SETUP' menu, and then press the OK button.
2 Press the Up or Down button to select from the following options:
'Off': Digital output switched off.
'PCM Only': For receivers/amplifiers without digital multi-channel sound decoders.
'All': For receivers/amplifiers with digital multi-channel sound decoders.
3 Press the OK OK button to confirm.
Analog Output:
Set the analog audio output type of the DVD Recorder.
1 Select the 'Analog Output' item from the 'SETUP' menu, and then press the OK OK button.
2 Press the Up or Down button to select from the following options:
'Stereo': Use this setting only when the DVD Recorder is connected to a stereo set.
3 Press the OK OK button to confirm.
Night Mode
Night mode optimizes the sound effect at low volume. You are therefore less likely to disturb your neighbors with this thoughtful feature without reducing the fun of entertainment due to low volume. Press the OK OK button to enable or disable night mode.
Feature Setup
You can select the following functions in this menu:
Access control
Refer to "Parental control" on page 90 for details.
Status Display
Along with the on-screen menu, the OSD (On Screen Display) displays information of the current operating status (counter, playback, recording, TV channel, etc.) on the TV screen. You can switch off the information about the operating status so that the on screen display (OSD) is not recorded during recording. If enabled, the OSD information appears in every selected mode for a few seconds and disappears again. Otherwise the OSD information is switched off. It is no longer displayed on the screen.
Press the OK OK button to enable or disable this function.
Resume
If this function is enabled, when you interrupt the playback of a DVD or VCD by pressing the Stop button, the DVD Recorder will start playing it at the precise location where it stopped when it is reloaded. This applies not only to the current disc but also to the last 20 discs played.
Press the OK OK button to enable or disable this function.
Auto Standby
To save power, you can enable this function to let the DVD Recorder switch off the clock display on the front display panel. The Timer recordings will still take place.
Press the OK OK button to enable or disable this function.
Low Power Standby
To save power, you can switch off the clock display on the DVD Recorder. Timer recordings will still take place. If the DVD Recorder is switched off, the clock display is also switched off when this function is enabled.
Press the OK button to enable or disable this function.
Language Setup
Audio
Select the audio language when playing a DVD.
Subtitle
Select the subtitle language when playing a DVD.
Menu
Select the language for the OSD menu.
Country
Select the country where the DVD Recorder is installed.
For more information, refer to "Language settings" on page 38.
Record Setup
You can select the following functions in this menu:
Record Mode:
Select a default record mode for recording. For more information about record modes, refer to "Record mode" on page 64.
To select a default record mode:
1 Select the 'Record Mode' item from the 'SETUP' menu, and then press the OK button.
2 Press the Up or Down button to select a record mode.
3 Press the OK button to confirm.
Filter Mode
Set the DVD Recorder to automatically adjust the best picture quality for recording.
To select a filter mode:
1 Select the 'Filter Mode' item from the 'SETUP' menu, and then press the OK button.
2 Press the Up or Down button to select a record mode:
'Standard': For recording standard scenes.
'Sport': For recording quick-moving scenes.
3 Press the OK button to confirm.
Auto Chapters:
A chapter marker will be inserted at the set frequency when recording on a DVD+R or DVD+RW type disc if this function is enabled.
To enable/disable the auto chapters function:
1 Select the 'Auto Chapters' item from the 'SETUP' menu, and then press the OK button.
2 Press the Up or Down button to select 'On' or 'Off'.
3 Press the OK button to confirm.
SAT Record
Refer to "Satellite Recording" on page 67 for details.
Dual Language
When recording bilingual TV programs, you can use this setting to select a language for recording (Language1 or Language 2).
To select a language:
1 Select the 'Dual Language' item from the 'SETUP' menu, and then press the OK OK button.
2 Press the Up ▲ or Down ▼ button to select 'Language 1' or 'Language 2'.
3 Press the OK button to confirm.
System Setup
Auto Install:
Refer to "Initial startup (virgin mode)" on page 30 for details.
Manual Search:
Refer to "Manually searching for TV channels" on page 34 for details.
Sort TV Channels:
Refer to "Re-positioning/adding/deleting TV channels" on page 35 for details.
Time & Date:
Refer to "Setting the 'Setup' clock" on page 39 for details.
Resetting the DVD Recorder to default factory settings
To reset the DVD Recorder to its default factory settings:
Note:
All the information stored in the memory (programs, time, timer settings) will be reset (deleted).
1 Disconnect the DVD Recorder from the power source.
2 Press and hold the Power on/standby button on the front panel while reconnecting the DVD Recorder to the power source.
3 Release the P Power on/standby STANDBY/ON button when "IS TV ON?" appears on the front display panel.
4 Refer to "Initializing the DVD Recorder" on page 27 to reinstall the DVD Recorder.

Parental control
Movies on pre-recorded DVDs may contain scenes that are unsuitable for children. Some discs may contain parental control level information that applies to the entire disc or to certain scenes on the disc.
The appropriate scenes have filter levels that range from 1 \~ 8. 8 is the most restrictive level (adults only) and 1 is the least restrictive (all ages). If such a scene is detected while a disc is being played, the filter value set on the DVD Recorder is compared to the scene. If the filter value is higher than the setting, an alternative scene will be played (if available), or the original scene will be skipped.
Most DVDs apply the same parental control level to the entire disc. Therefore, if the filter value of some scenes is higher than the setting, the entire disc will be locked.
In the United States the values usually map to the rating system of the MPAA (Motion Pictures Distributors Association of. America).
In Canada the values usually map to the rating system of the CMPDA (Canadian Motion Pictures Distributors Association).
Parental control levels
The table below shows the filter levels in different countries:
Activating/deactivating parental control (child-lock)
How to activate parental control
-
Press the Setup button on the remote control. The 'SETUP' menu will display on-screen.
-
Press the Up or Down button to select the 'Feature' item, and then press the Right

button.
- Press the OK button. You will be prompted to enter a 4-digit password. Use the numbered buttons on the remote control to enter the password.

Note:
The default password is '0', '0', '0', '0'.
-
Press the Down button to select the 'Level' item, and then press the OK button.
-
Press the Left or Right button to select a parental control level, and then press the OK button.

Tip:
If a DVD scene contains a higher level than the rating set, and the DVD Recorder does not find a suitable alternative, it will stop playing and you must enter the four-digit child-lock code to continue viewing.
- Press the Setup button to exit the 'SETUP' menu.
How to deactivate parental control
To unprotect the title, repeat the above steps, but set the parental control level to 'Off' in step 5.
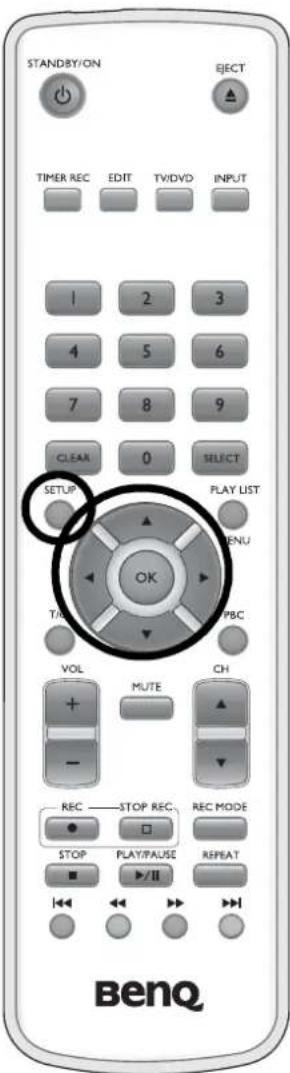
Changing the access control country setting
The set filter levels are different in different countries. Therefore, you must enter the country to which these filter levels apply.
- Press the Setup button on the remote control. The 'SETUP' menu will display on-screen.
- Press the Up or Down button to select the 'Feature' item, and then press the Right

button.
- Press the OK button. You will be prompted to enter a 4-digit password. Use the numbered buttons on the remote control to enter the password.

Note:
The default password is '0', '0', '0', '0'.
- Press the Down button to select the 'Set Country' item, and then press the OK ok button.
- Press the Up ▲ or Down ▼ button to select a country, and then press the OK □ button.
- Press the menu. Setup button to exit the 'SETUP'
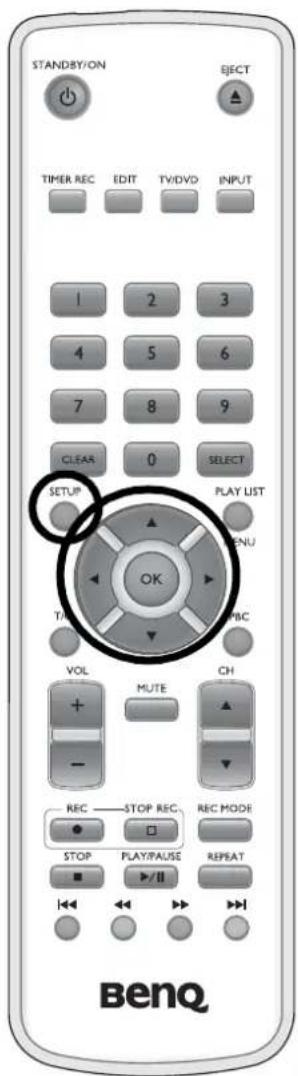
Changing/deleting the parent control password How to change parent control password
-
Press the Setup button on the remote control. The 'SETUP' menu will display on-screen.
-
Press the Up or Down button to select the 'Feature' item, and then press the Right

button.
- Press the OK button. You will be prompted to enter a 4-digit password. Use the numbered buttons on the remote control to enter the password.

Note:
The default password is '0', '0', '0', '0'.
-
Press the OK OK button.
-
Enter the new 4-digit password using the numbered buttons.
-
Verify the new password by entering it again using the numbered buttons.
-
Press the Setup button to exit the 'SETUP' menu.

Note:
If you forget your password, please perform system reset (Refer to "Resetting the DVD Recorder to default factory settings" on page 89 for details) and set the password again.
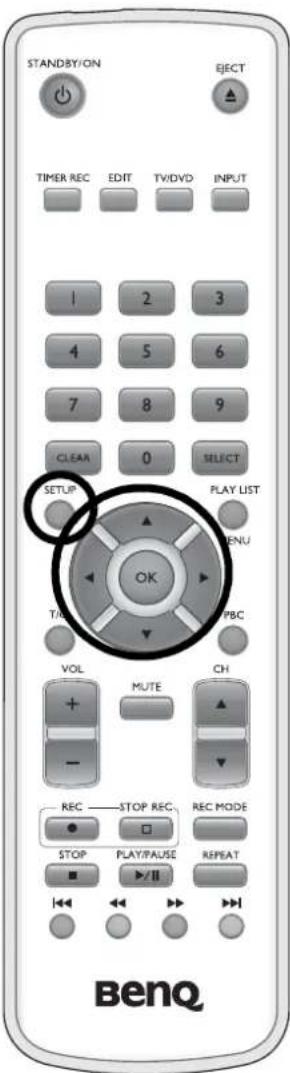

Troubleshooting
If you have any problems with the BenQ DE320 DVD Recorder, please check the following questions and solutions before calling your local BenQ customer service centre for assistance.
⑦ The DVD Recorder is not responding when you press a button, and the 'IS TV ON?' message is showing on the front display panel:
The DVD Recorder has not been properly initialized and is still in initial installation mode. Please refer to "Initializing the DVD Recorder" on page 27 to complete initialization.
⑦ The remote control does not work:
There are a number of possibilities. Check each of the following until a resolution is found:
- The DVD Recorder cannot see the remote control:
- Point the remote control at the DVD Recorder. See if the '('on)on shows on the front display panel briefly every time you press a remote control button. If it does, the DVD Recorder is receiving information from the remote control correctly. If not, move the remote control to a clear line of sight position in front of the DVD Recorder and try again. Refer to "Tips for using the remote control" on page 28 for details.
- The batteries are low or have been inserted incorrectly:
- Check or replace the batteries. Refer to "Remote control setup" on page 28 for details.
- Timer recording is active:
- Refer to "Changing or erasing timer setting" on page 71 for details.
• The DVD Recorder has become confused:
- Disconnect the DVD Recorder from the power supply for 30 seconds, then reconnect it to the power supply again.
If the problem persists, reset the DVD Recorder to the default factory settings.
⑦ The DVD Recorder cannot play a disc:
• The child lock my be enabled:
- Refer to "Parental control" on page 90 for details.
- You may have selected the wrong video input for the DVD Recorder on the display device:
- Select the correct video input for the DVD Recorder on the display device.
- A cable connecting the TV and the DVD Recorder may be loosened:
- Check that all cables remain undamaged and are fully inserted into their respective sockets.
- You may have inserted an empty disc. There is no recording on the disc:
- Change the disc to one known to contain a recording to check that the player works.
- You may have inserted the wrong type of disc:
- The DVD Recorder only supports the following disc types for playback: DVD, DVD-R, DVD-RW, DVD+R, DVD+RW, VCD, SVCD, Audio-CD, MP3-CD and Photo-CD.
- You may have inserted the disc in the wrong way:
- Insert the disc with the label facing up.
• The disc may be dirty:
- Check the disk and carefully wipe clean all dirt and fingerprints off the disc.
- The disc may be the wrong region code for your region:
- The region codes of the DVD and the DVD Recorder must match before the DVD can be decoded and played. The region code scheme was designed to prevent DVDs designated for
a particular region from being able to be played in any other regions. Under this scheme, the world has been divided into six regions (as shown in the figure below) with all compliant DVD players and DVD titles sold in those regions containing the appropriate region code for the region. Only when the region codes of the player and disc match can playback proceed.
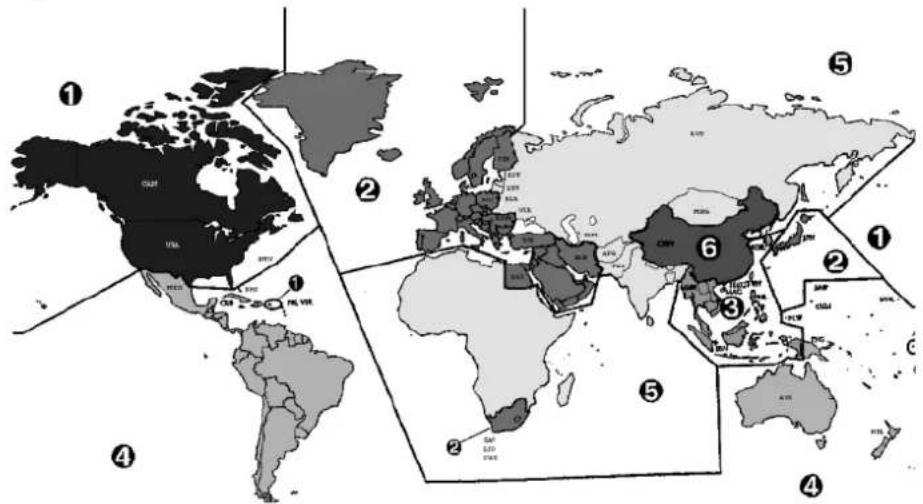
| Region Code Geographical Region | |
| 1 US, Canada | |
| 2 Europe, Middle East, Japan, South Africa | |
| 3 Southeast Asia, Taiwan, Hong Kong, South Korea | |
| 4 Australia, New Zealand, Latin America | |
| 5 Africa, Russia, India, Pakistan | |
| 6 China | |
⑦ No recording possible:
• The TV channel you want to record is not stored in the DVD Recorder:
- Check TV channels stored. Refer to "Manually searching for TV channels" on page 34.
• Disc is write-protected (cannot be recorded on):
- Remove write-protection or change the disc. For more information, refer to "Preventing unintended erasure of a DVD+RW Disc" on page 84.
• A finalized DVD+R has been inserted:
- Change disc.
• The DVD+RW disc has previously been used for recording on other DVD recorders
- Make the disc compatible to the DE320 DVD Recorder or erase the disc and try again. For more information, refer to "Erasing a DVD+RW Disc" on page 83.
• The DVD+RW disc has previously been used for recording on a PC
- Erase the disc and try again. For more information, refer to "How to start playing a DVD recorded on other DVD recorders:" on page 43 and "Erasing a DVD+RW Disc" on page 83.
⑦ Timer recording does not work:
- You have set the wrong time or date:
- Check the System clock. Refer to "Setting the 'Setup' clock" on page 39.
- You have not set the timer properly:
- Check the timer settings. Refer to "Setting up timer recording" on page 70.
• A locked disc was inserted:
- Remove disc lock. Refer to "Preventing unintended erasure of a DVD+RW Disc" on page 84.
• A finalized DVD+R has been inserted:
- Change disc.
⑦ No audio signal at the digital output:
• The correct audio input on the decoding device may not be selected:
- Check whether the appropriate audio input on the connected decoding device is selected.
- In accordance with SDMI (Secure Digital Music Initiative), the digital audio output is turned off during MP3 playback.
- Check whether you have inserted an MP3 CD.
A DVD+RW type disc cannot be played on other DVD players:
If a recording is too short, it is possible that a standard DVD player will not be able to detect it. Please observe the following 'Minimum recording times' when recording DVDs:
| Recording mode Minimum recording time (minute) | |
| HQ 5 min. | |
| SP 10 min. | |
| LP 15 min. | |
| EP 20 min. | |
| SLP 30 min. | |
Some DVD players cannot playback DVD+RW recordings.
⑦ How to reset DVD recorder settings to factory default?
To reset all DVD recorder settings to its original factory default, follow the steps below:
1 Unplug the power cord from the power outlet.
2 Press and hold the Power ⏻ button on DVD recorder front panel.
3 While holding the Power ⏻ button down, re-plug the power cord into the power outlet. The message "WAITING" will display on the front display panel.
4 Release the Power button.
Now you are ready to perform initial setup for the DVD recorder. For more information, refer to "Initial startup (virgin mode)" on page 30.
The default settings of the DVD Recorder is as follows:
| SETUP/menu option Default setting | ||
| Video TV Shape 4:3 PanScan | ||
| Black Level Off (unchecked) | ||
| Video Shift Left | ||
| YUV Output Interlaced | ||
| Video Output CVBS+RGB | ||
| Sound Digital Output Off | ||
| Analog Output Stereo | ||
| Night Mode Off (unchecked) | ||
| Feature Access Control Level: Off; Set Country: Austria | ||
| Language | Audio English | |
| Subtitle | OFF | |
| Menu | English | |
| Country | Austria | |
| Recording | Record Mode | HQ |
| Filter Mode | Standard | |
| Auto Chapters Off | ||
| SAT Record Off | ||
| Dual Language | Language 1 | |
| Volume | 25 | |

Product Specifications
| Item Description | ||
| Model name BenQ DE320 DVD Recorder | ||
| Supported playback disc types DVD | DVD-RDVD-RWDVD+RDVD+RWVCDSVCDCD (audio)CD-R (audio)CD-RW (audio)CD (photo) | |
| Supported recordable disc types DVD+R | DVD+RW | |
| Audio signal compression format MPEG2 | MPEG1MP3 | |
| Video signal recording format PAL 4:3 | ||
| Video signal playback format PAL | NTSC | |
| Record mode/Max playing/recording time HQ | 1 hour | |
| SP 2 hours | ||
| LP 3 hours | ||
| EP 4 hours | ||
| SLP 6 hours | ||
| Signal input terminals Analog audio input | TV antenna RF inputComposite analog video inputS-Video inputIEEE 1394 FireWire inputSCART input | |
| Signal output terminal | Analog audio outputDigital audio outputTV antenna RF outputComposite analog video outputS-Video outputComponent video outputSCART output | |
| Power source | AC 100-240V, 50~60 Hz, 27W | |
| Size | 430 mm x 330 mm x 59 mm | |
| Weight | 4.3 Kg | |
| Operating temperature | 5°C~C 3 5 | |
| Operating humidity 25% ~ 75% | ||
Specifications may be changed without notice due to constant product improvements.
- ji Disclaimer
- Precautions
- iv Safety Information
- Laser warning
- High Voltage warning
- Table of Contents
- Introduction ....1
- Connecting the DVD Recorder 12
- Initializing the DVD Recorder 27
- Playing a disc 40
- Recording 63
- Timer recording 69
- Managing recordings 72
- User selectable DVD Recorder preferences 85
- Video Setup 85
- Sound Setup 86
- Feature Setup 87
- Language Setup 88
- Record Setup 88
- System Setup 89
- Parental control 90
- Parental control levels 90
- Activating/deactivating parental control (child-lock) 92
- Changing the access control country setting 93
- Introduction
- Features
- Compatible media types
- Recording and Playback
- Playback
- Input/output interface
- SCART input/output
- Inputs for Recording
- Tips
- Outputs
- Getting to know the BenQ DE320 DVD Recorder
- The Remote Control
- Front display panel
- On-screen display (OSD) menus
- Playback Status box
- Operation mode icons in the Playback status Box
- Timer and Tuner Information Box
- 'SETUP' menu
- Navigating the 'SETUP' menu
- 'T/C Tools' menu
- Navigating the 'T/C Tools' menu
- 'Edit Chapters' menu
- Navigating the 'Edit Chapters' menu
- Connecting the DVD Recorder
- Connecting to a display device (TV or projector)
- Best video quality
- Better video quality
- Least video quality
- Recording TV channels
- Connecting to a sound system
- Connecting the DVD Recorder to a TV using a component video cable
- Connecting the DVD Recorder to a TV using an S-Video cable
- Connecting the DVD Recorder to a TV using an A/V cable
- Connecting the DVD Recorder to a TV using a SCART cable
- Connecting the DVD Recorder to the TV antenna cable
- How to connect the DVD Recorder to the TV antenna cable
- Connecting the DVD Recorder to your surround sound system
- Connecting the DVD Recorder to your stereo sound system
- Connecting an A/V device to the DVD Recorder
- Permanent connections
- Temporary connections
- Video quality
- Connecting a VCR to the DVD Recorder using an S-video cable
- How to connect a VCR using an S-Video cable:
- Connecting a VCR to the DVD Recorder using an A/V cable
- Connecting a satellite receiver or VCR to the DVD Recorder using a SCART cable
- Connecting a Camcorder to the DVD Recorder using a DV cable
- Connecting a Camcorder to the DVD Recorder using an A/V cable
- Initializing the DVD Recorder
- IMPORTANT
- Manually resetting options
- TV Channel Searching
- Adding/deleting TV channels
- Languages
- Remote control setup
- How to install the batteries in the remote control
- Tips for using the remote control
- Connecting power
- Initial startup (virgin mode)
- Note:
- Setting Time and Date
- How to set the Date
- Tip:
- For example:
- How to set the Month
- How to set the Year
- How to set the Time
- How to save the settings
- How to start using the DVD Recorder
- How to reset the settings to factory default
- Manually searching for TV channels
- CAUTION
- Re-positioning/adding/deleting TV channels
- How to view a listing of stored TV channels:
- How to re-position channels:
- How to delete channels:
- How to manually add channels:
- Language settings
- Setting the 'Setup' clock
- Playing a disc
- General information
- Once a disc has been loaded
- Loading a disc
- How to stop playing a disc:
- How to eject a disc:
- Playing a recordable DVD
- How to start playing a DVD:
- How to start playing a DVD recorded on other DVD recorders:
- How to stop playing a DVD:
- Playing a music CD
- Playing an MP3 CD
- ⚠️ Important note for playback:
- How to start playing an MP3 CD:
- How to play a specific track on the music CD:
- How to stop playing an MP3 CD:
- Playing a VCD/SVCD
- How to enable the PBC function of the DVD Recorder:
- How to use the PBC function:
- Operations while playing a disc
- How to select a title on a DVD:
- How to select a chapter on a DVD:
- How to move around within a playing disc:
- Searching a disc
- Fast forward and reverse
- Slow forward and reverse
- Step forward and reverse
- Searching the disc by time
- For example
- Still picture
- Repeat play
- Repeat a sequence (A-B)
- Changing the camera angle
- If you are unable to select the 'Angle' item:
- Zoom
- Audio language
- Changing audio language in the 'SETUP' menu
- Changing audio language in the 'T/C Tools' menu
- Subtitle language
- Changing subtitle language in the 'SETUP' menu
- Changing subtitle language in the 'T/C Tools' menu
- Surround sound effect
- Playing a photo CD
- Viewing a photo
- Viewing thumbnails in different pages and folders
- Viewing thumbnails on different pages
- Viewing thumbnails in different folders
- Viewing photos as a slide show
- Slide show options
- Recording
- Recordable media types
- Record mode
- Manual recording
- Sleep mode recording
- Adding bookmarks while recording
- Pausing recording
- Preventing unintended erasure of discs
- Timer recording
- EXT2:
- CAM1:
- CAM2:
- Satellite Recording
- Setting up timer recording
- Tip
- Changing or erasing timer setting
- How to change a timer setting:
- How to delete a timer setting from the timer list:
- Managing recordings
- Managing recordings on DVD discs
- Adding chapter markers during playback
- How to insert chapter markers during playback:
- Notes:
- Hiding/showing chapters
- How do I select other chapters?
- Deleting chapters
- Editing title (name)
- Dividing titles
- Erasing a recording/title
- Can titles be erased from a DVD+R disc?
- Disc Settings
- Editing disc name
- Finalizing edits
- Finalizing a DVD+R Disc
- Tips:
- Erasing a DVD+RW Disc
- Preventing unintended erasure of a DVD+RW Disc
- User selectable DVD Recorder preferences
- Video Setup
- Video Shift:
- YUV Output:
- Video Output:
- Sound Setup
- Digital Output:
- Analog Output:
- Night Mode
- Feature Setup
- Access control
- Status Display
- Resume
- Auto Standby
- Low Power Standby
- Language Setup
- Record Setup
- SAT Record
- Dual Language
- System Setup
- Auto Install:
- Manual Search:
- Sort TV Channels:
- Time & Date:
- Parental control
- Parental control levels
- Activating/deactivating parental control (child-lock)
- Changing the access control country setting
- Changing/deleting the parent control password How to change parent control password
- Troubleshooting
- ⑦ No recording possible:
- ⑦ Timer recording does not work:
- Product Specifications
Brand : BENQ
Model : DE320
Category : DVD Recorder