
DPF-741 - Digital photo frame DENVER - Free user manual and instructions
Find the device manual for free DPF-741 DENVER in PDF.


| Product Type | Digital Photo Frame |
| Brand | Denver |
| Model | DPF-741 |
| Display Resolution | 480 x 234 pixels (RGB) |
| Aspect Ratio | 16:10 |
| Supported Memory Cards | SD, MMC, MS |
| USB Port | USB 2.0 Host |
| File Format | JPEG |
| Power Adapter Input | 100-240V AC |
| Power Adapter Output | DC 5V 1A |
| Operating Temperature | -10°C to +50°C |
| Slideshow Transition Effects | Multiple effects (e.g., fade, wipe) |
| Slideshow Interval | Adjustable |
| Display Modes | Auto Fit, Optimal, Pane Scan |
| Split Slideshow | 1 or 4 pictures |
| Image Rotation | 90° counter-clockwise |
| Zoom | Yes |
| Calendar and Clock | Yes |
| Internal Memory | Built-in (for saving pictures) |
| Language Selection | Yes (multiple languages) |
| Image Adjustments | Brightness, Contrast, Color, Tint |
| Accessories Included | Power adapter, User manual, Bracket |
| Standalone Operation | No computer required |
| Safety and Maintenance | Indoor use only, avoid moisture and direct sunlight |
Frequently Asked Questions - DPF-741 DENVER
User questions about DPF-741 DENVER
0 question about this device. Answer the ones you know or ask your own.
Ask a new question about this device
Download the instructions for your Digital photo frame in PDF format for free! Find your manual DPF-741 - DENVER and take your electronic device back in hand. On this page are published all the documents necessary for the use of your device. DPF-741 by DENVER.
USER MANUAL DPF-741 DENVER
DENVER DPF-741 User Manual
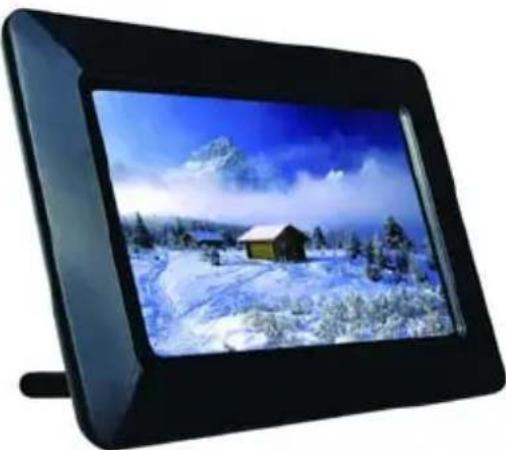
Digital Photo Frame
natural_image
Black rectangular electronic device displaying a snowy landscape with a small house and trees under a blue sky (no text or symbols visible)WARNING
The power adapter cable/disconnect device shall remain easy to operate/disconnect.
Introduction
Congratulations on your purchase of Digital Photo Frame.
Before operating the unit, please read this manual thoroughly and keep it for future reference. This manual will help you use many of the exciting features to make your Digital Photo Frame view more enjoyable.
The Digital Photo Frame enables you to view digital pictures directly from your camera's memory card. You can also create a slide show with multiple transition effects. No computer, digital camera, or internet connection is required.
- Play back of photo files stored in data stored devices through USB 2.0 port or various card-reader port, or internal memory.
●Supports SD,MMC, MS card. - Compatible with most digital cameras stored JPEG images files.
●Automatic slide show with multiple transition effects and adjustable display time.
- Insert the memory card with slots facing you. Do not force the memory card in the slot.
- If you are not able to easily insert the memory card completely, you may have inserted it in a wrong way.
Note: DPF = Digital Photo Frame.
Precautions and Maintenance
- For indoor use only
- To avoid risks of file or electric shock; do not expose this appliance to moisture.
- To avoid overheating; do not block the ventilation holes on the back of the DPF at any time.
- Keep your Digital Photo Frame out of sunlight. Direct sunlight may cause damage.
- Do not dismantle the DPF. There is a risk of electric shock, and there are no user serviceable parts inside. Dismantling your Digital Photo Frame will void your
warranty.
- Do not use the Digital Photo Frame if conditions could allow condensation to occur, or damage may result.
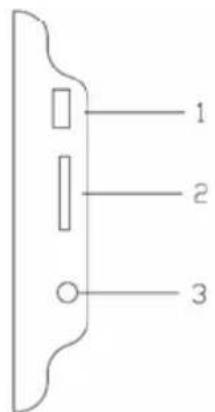
DPF Side view
- USB Host: The socket for DPF player to the USB memory.
- SD/MMC/ MS card: The socket for DPF player to connect the SD/MMC/MS card.
3.DC: Input the DC power adapter to the DPF player.
Player Overview
Key control and Key function:
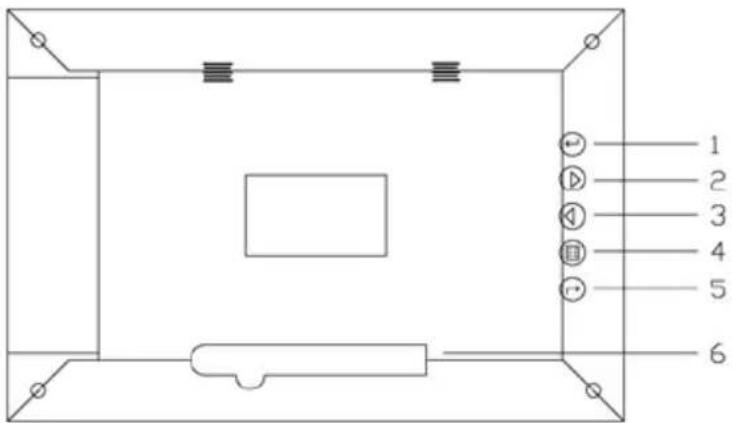
- ENTER Button: Confirms your selection, and pause or play.
- LEFT SHIFT Button: Left or Up cursor select function and to view the previous photo.
- RIGHT SHIFT Button: Right or Down cursor select function and to view the next photo.
-
MENU Button: Press and hold button for two seconds to Displays the photo frames menu options, Press once to go back to the previous menu.
-
STANDBY Button: Turned on or off the power of DPF.
- Bracket
Getting started
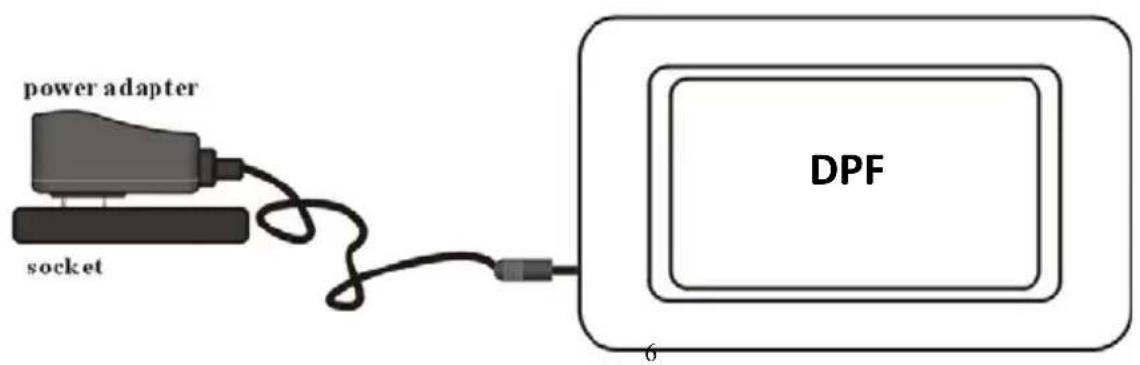
Assemble the Digital Photo Frame bracket to prop the unit up. Insert adapter DC plug into the DPF player first, then plug the power cord to a standard wall outlet. If you insert your memory card or USB flash drive into the frame, the images stored on the memory card or USB flash drive will begin to appear automatically on your screen.
Functions
DPF
ELECT CARD
In
Pre
co
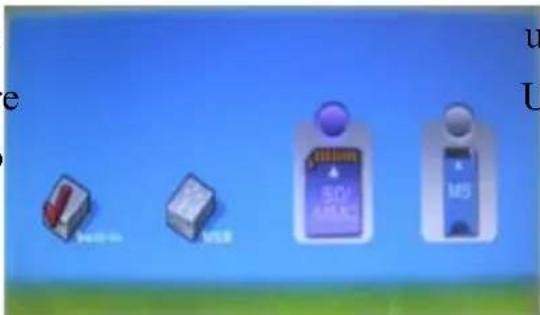
Fig1 Fig2
u button t
U Disc or
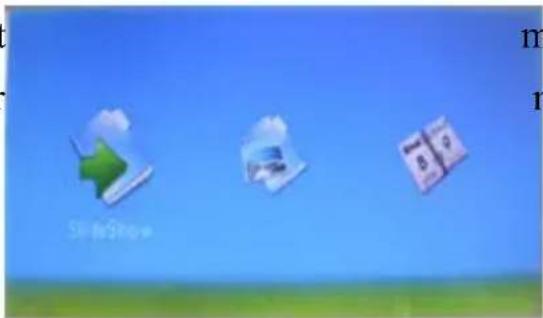
After selected device, you can press arrow buttons to select the main functions, such as Slide Show, Photo and Calendar (Fig2), Press Enter button into the selected function mode.
-
Slide Show: This function menu allows you press Enter button to enter slide show mode, the player will auto show photo.
-
Photo: This function allows you to preview photos in single window or six
windows.
- Calendar: This function shows calendar and clock to user.
●PHOTO FUNCTION
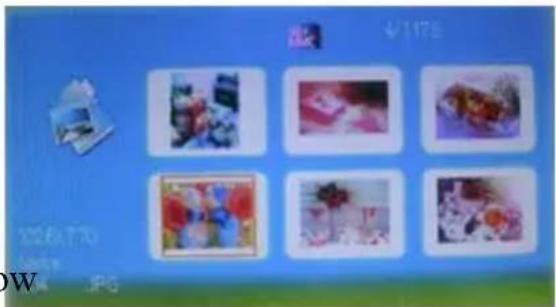
In this function mode (Fig 3).
- Press arrow buttons to select photos preview in six windows.
- Press Enter button to display pictures.
- Press Menu button two seconds to show Setup menu in the pause situation of slide show.
- Press Menu button to exit to the main function mode.
- CALENDAR FUNCTION
natural_image
Blue background with six small framed photos arranged in a 2x2 grid, no visible text or symbols.Fig3
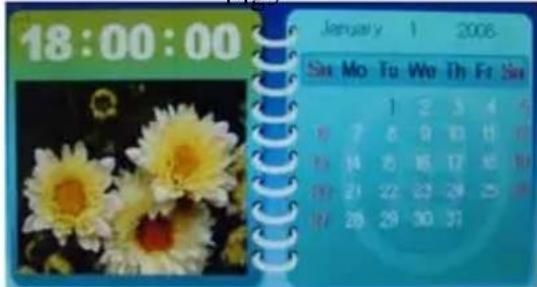
In this function mode, the player shows calendar and clock to user (Fig 4).
- Use the arrow buttons; you can look up the calendar show on the left of DPF.
- You can also slide show photo in a small window if the selected card has jpg files.
- Use Menu button to exit calendar show.
Fig4
Setup your DPF
Press Menu button two seconds to enter into setup menu. In the Setup menu, you can use the arrow buttons to select one item to setup or operate. When the item is show in gray color, you cannot deal with it at that moment (Fig 5).
- Image Size: Setup display mode for slide show. Include Auto Fit, Optimal and Pane Scan three modes.
- Slide Show Effect: Special effects shown to transition one photo to the next in a slide show.
- Slide Show Interval: The time amount the
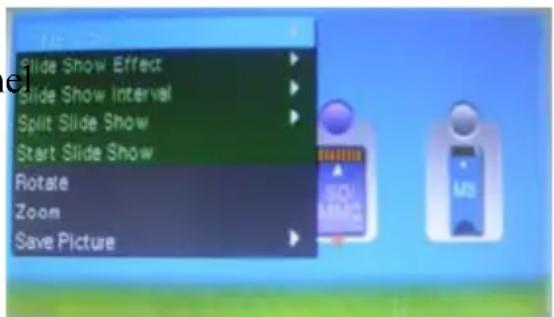
next photo is displayed.
- Split Slide Show: The picture number of the display model under the Split Slide Show is one or four.
- Start Slide Show: Starts the slide show.
- Rotate: Rotate the displayed photo 90 counter-clock-wise (In the pause situation of slide show).
- Zoom: Zoom in the displayed photo. When in zoom state, you can just do zoom or exit operation (In the pause situation of slide show).
- Save Picture: Copy selected files or current file from a memory card to built-in memory (In the pause situation of slide show).
- Delete File: Delete selected files or current file (In the situation of six windows).
10.Format memory: Formatted in memory all the files. - Reset Setting: Reset all settings to factory default values.
- Language: Change the language for the player.
- Brightness, Contrast, Color and Tint: Adjust the Brightness, Contrast, Color
and Tint value for screen.
- Time: Set the internal clock and date.
Specification
| Resolution 480*3(RGB)*234 (16:10) |
| Power adapter Input 100-240V AC, Output DC5V 1A |
| Working Temperature °C-10 to +50 |
| File Format JPEG |
| Cards supported SD/MMC/MS/USB |
| Accessories Power adapter, User's manual |
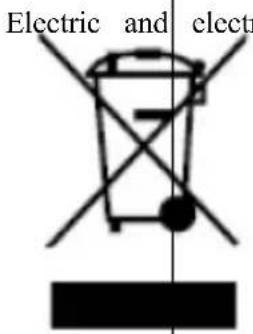
ronic equipment contains materials, components and be hazardous to your health and the environment, if discarded electric and electronic equipment) is not
ic equipment is marked with the crossed out trash ow. This symbol signifies that electric and electronic ot be disposed of with other household waste, but f separately.
All cities have established collection points, where electric and electronic equipment can either be submitted free of charge at recycling stations and other collection sites, or be collected from the households. Additional information is available at the technical department of your city.
ALL RIGHTS RESERVED
COPY RIGHT DENVER ELECTRONICS A/S

www.denver-electronics.com
- DENVER DPF-741 User Manual
- Digital Photo Frame
- WARNING
- Introduction
- Note: DPF = Digital Photo Frame.
- Precautions and Maintenance
- DPF Side view
- Player Overview
- Key control and Key function:
- Getting started
- Functions
- DPF
- ELECT CARD
- ●PHOTO FUNCTION
- - CALENDAR FUNCTION
- Setup your DPF
- ALL RIGHTS RESERVED
- COPY RIGHT DENVER ELECTRONICS A/S
Brand : DENVER
Model : DPF-741
Category : Digital photo frame