
Cybertruck (2025) - Automotive TESLA - Free user manual and instructions
Find the device manual for free Cybertruck (2025) TESLA in PDF.


| Product Type | Automotive - All-Electric Pickup Truck |
| Brand | Tesla |
| Model | Cybertruck (2025) |
| Year | 2025 |
| Overall Length | 223.7 in (5683 mm) |
| Overall Width (without mirrors) | 79.9 in (2029 mm) |
| Overall Height (at ride height) | 70.5 in (1790 mm) |
| Wheelbase | 149.9 in (3807 mm) |
| Ground Clearance (standard) | 16.5 in (419 mm) |
| Curb Weight (approx, dual motor) | 6000 lb (2722 kg) |
| Cargo Bed Volume | Approx 100 cu ft (2.83 m³) |
| Seating Capacity | 5 |
| Drive Type | All-Wheel Drive (Dual Motor) / Tri Motor available |
| Battery Type | High-Voltage Lithium-Ion |
| Battery Capacity (estimated) | ~200 kWh (usable) |
| Max Range (estimated) | 250+ miles (402+ km) depending on configuration |
| Charging | AC up to 11.5 kW (Level 2), DC up to 350 kW (Supercharger V4) |
| Max Towing Capacity | 11,000 lb (4,990 kg) for Tri Motor, 7,500 lb (3,402 kg) for Dual Motor |
| Suspension | Adaptive Air Suspension with self-leveling |
| Tire Size | Pirelli Scorpion ATR or Goodyear Wrangler Territory 35x12.5R20 |
| Power Outlets | Two 120V (20A) in cabin, two 120V (20A) and one 240V (40A) in cargo bed |
| USB Ports | Four USB-C (up to 65W), one USB-A in glovebox |
| Wireless Phone Charger | Qi-compatible, up to 15W (two pads) |
| Autopilot | Standard with Traffic-Aware Cruise Control and Autosteer |
| Full Self-Driving Capability | Available as optional upgrade (Supervised) |
Frequently Asked Questions - Cybertruck (2025) TESLA
User questions about Cybertruck (2025) TESLA
0 question about this device. Answer the ones you know or ask your own.
Ask a new question about this device
Download the instructions for your Automotive in PDF format for free! Find your manual Cybertruck (2025) - TESLA and take your electronic device back in hand. On this page are published all the documents necessary for the use of your device. Cybertruck (2025) by TESLA.
USER MANUAL Cybertruck (2025) TESLA
natural_image
Exterior view of a modern silver pickup truck (no visible text or symbols)Software version: 2025.2
North America
YOUR OWNER'S MANUAL
For the latest and greatest information that is customized to your vehicle, view the Owner's Manual on your vehicle's touchscreen by touching the app launcher and then selecting the Manual app. The information is specific to your vehicle depending on the features you purchased, vehicle configuration, market region, and software version. In contrast, owner information that is provided by Tesla elsewhere is updated as necessary and may not contain information unique to your vehicle.
RELEASE NOTES
Information about new features is displayed on the touchscreen after a software update, and can be viewed at any time by choosing the Release Notes tab in the Manual app, or by touching Controls > Software > Release Notes. If the content in the Owner's Manual on how to use your vehicle conflicts with information in the Release Notes, the Release Notes take precedence.
ILLUSTRATIONS AND PRODUCT SPECIFICATIONS
The illustrations provided in this document are for demonstration purposes only. Depending on vehicle options, software version and market region, the information displayed on the touchscreen in your vehicle may appear slightly different.
All specifications and descriptions contained in this document are verified to be accurate at the time of printing. However, because continuous improvement is a goal at Tesla, we reserve the right to make product modifications at any time. To communicate any inaccuracies or omissions in this document, please send an email to: ownersmanualfeedback@tesla.com.
SAFETY INFORMATION
You can find safety information in your Cybertruck Owner's Manual on the touchscreen.
For detailed information about your Cybertruck, go to the Tesla website for your region, log on to your Tesla account, or sign up to get an account.
If you have any questions or concerns about your Cybertruck, call 1-877-79TESLA (1-877-798-3752).
© 2012-2025 TESLA, INC.
All information in this document and all vehicle software is subject to copyright and other intellectual property rights of Tesla, Inc. and its licensors. This material may not be modified, reproduced or copied, in whole or in part, without the prior written permission of Tesla, Inc. and its licensors. Additional information is available upon request. Shown here are trademarks or registered trademarks of Tesla, Inc. in the United States and other countries:
MODEL 3
MODEL S
TESLA
TESLA ROADSTER


MODEL Y
MODEL X
TESLA MOTORS
TESLA

Overview....3
Exterior....3
Interior....5
Touchscreen....7
Vehicle Status....14
Interior Electronics.... 20
Cargo Bed Outlets.... 23
Voice Commands....25
Cameras....27
Opening and Closing.... 30
Keys....30
Doors....33
Windows....35
Seating and Safety Restraints.... 37
Front and Rear Seats....37
Seat Belts.... 40
Child Safety Seats.... 43
Airbags....50
Storage Areas.... 57
Interior Storage....57
Powered Frunk....59
Cargo Bed....62
Connectivity.... 66
Mobile App.... 66
Wi-Fi....69
Bluetooth....70
Phone, Calendar, and Web Conferencing.... 72
Smart Garage....74
Driving.... 75
Starting and Powering Off....75
Shifting....76
Steering Wheel....79
Mirrors....83
Lights....85
Windshield Wiper and Washers.... 88
Braking and Stopping....89
Park Assist....92
Traction Control....94
Suspension....95
On-Road Modes....98
Driver Profiles....99
Trip Information....101
Pedestrian Warning System....102
Off-Roading....103
Off-Road Driving....103
Off-Road Modes....105
Locking Differentials.... 108
Troubleshooting....111
Limitations and Warnings.... 112
Towing.... 113
Towing a Trailer.... 113
Carrying Accessories and Crossbars.... 119
Autopilot....122
About Autopilot....122
Autopilot Features.... 124
Traffic Light and Stop Sign Control....128
Autopark....135
Full Self-Driving (Supervised)....137
Limitations and Warnings.... 141
Active Safety Features....144
Lane Assist....144
Collision Avoidance Assist....146
Speed Assist.... 149
Cabin Radar....150
Dashcam, Sentry, and Security......151
Safety & Security Settings.... 151
Dashcam....153
Sentry Mode....155
USB Drive Requirements for Recording Videos.... 157
Climate....158
Operating Climate Controls....158
Adjusting the Front and Rear Vents.... 163
Cold Weather Best Practices.... 164
Hot Weather Best Practices....166
Navigation and Entertainment......167
Maps and Navigation.... 167
Media....172
Theater, Arcade, and Toybox.... 174
Charging and Energy Consumption...... 177
Electric Vehicle Components....177
High Voltage Battery Information....179
Charging Instructions....180
Scheduled Precondition and Charge.... 185
Getting Maximum Range.... 187
Powershare Home Backup....189
Maintenance....192
Software Updates.... 192
Maintenance Service Intervals....193
Cleaning....196
Tire Pressures....200
Inspecting and Maintaining Tires.... 202
Wheel and Tire Specifications....206
Windshield Wiper Blade, Jets and Fluid 213
Jacking and Lifting....215
Parts and Accessories.... 217
Do It Yourself Maintenance....221
Specifications.... 222
Identification Labels....222
Vehicle Loading.... 223
Dimensions, Weights, and Cargo Capacity...... 226
Subsystems....231
Instructions for Transporters.... 233
Instructions for Transporters.... 233
In Case of Emergency...... 237
Contacting Tesla Roadside Assistance....237
Running Out of Range....238
Installing a Spare Tire....239
Opening the Powered Frunk with No Power.... 242
Jump Starting....244
Opening Doors with No Power....246
Submerged Vehicle Guidance....247
Troubleshooting....248
Troubleshooting Alerts.... 248
Consumer Information...... 295
About this Owner Information....295
Feature Availability Statement.... 296
Disclaimers....297
Reporting Safety Defects.... 299
Certifications of Conformity.... 300
Index.... 303
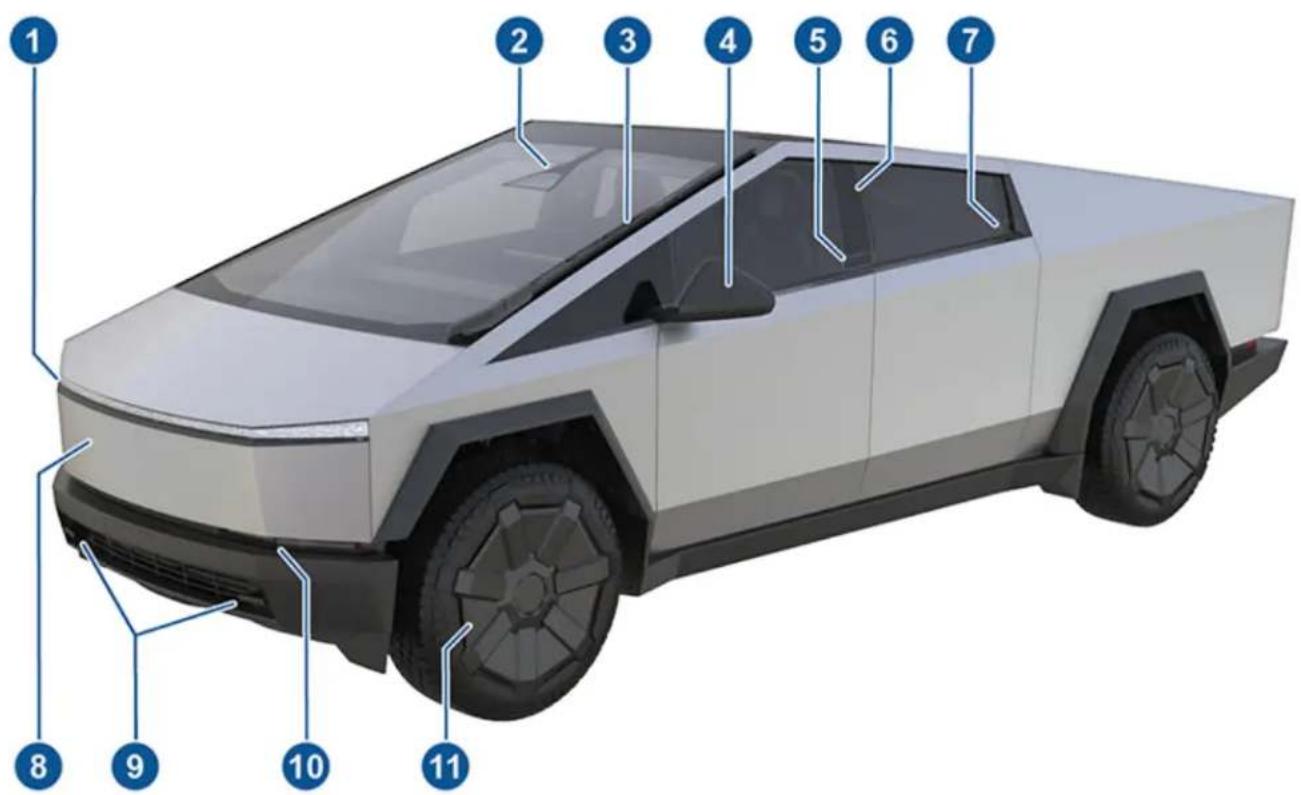
- Signature light bar (Lights on page 85)
- Autopilot cameras (Cameras on page 27)
- Wiper blade (Windshield Wiper and Washers on page 88)
- Exterior mirrors (Mirrors on page 83)
- Front exterior door release button (Doors on page 33)
- Key card reader (Keys on page 30)
- Rear exterior door release button (Doors on page 33)
- Powered frunk (Powered Frunk on page 59)
- Front tow hooks (Instructions for Transporters on page 233)
- Front exterior lights (Lights on page 85)
- Wheels and tires (Wheel and Tire Specifications on page 206)
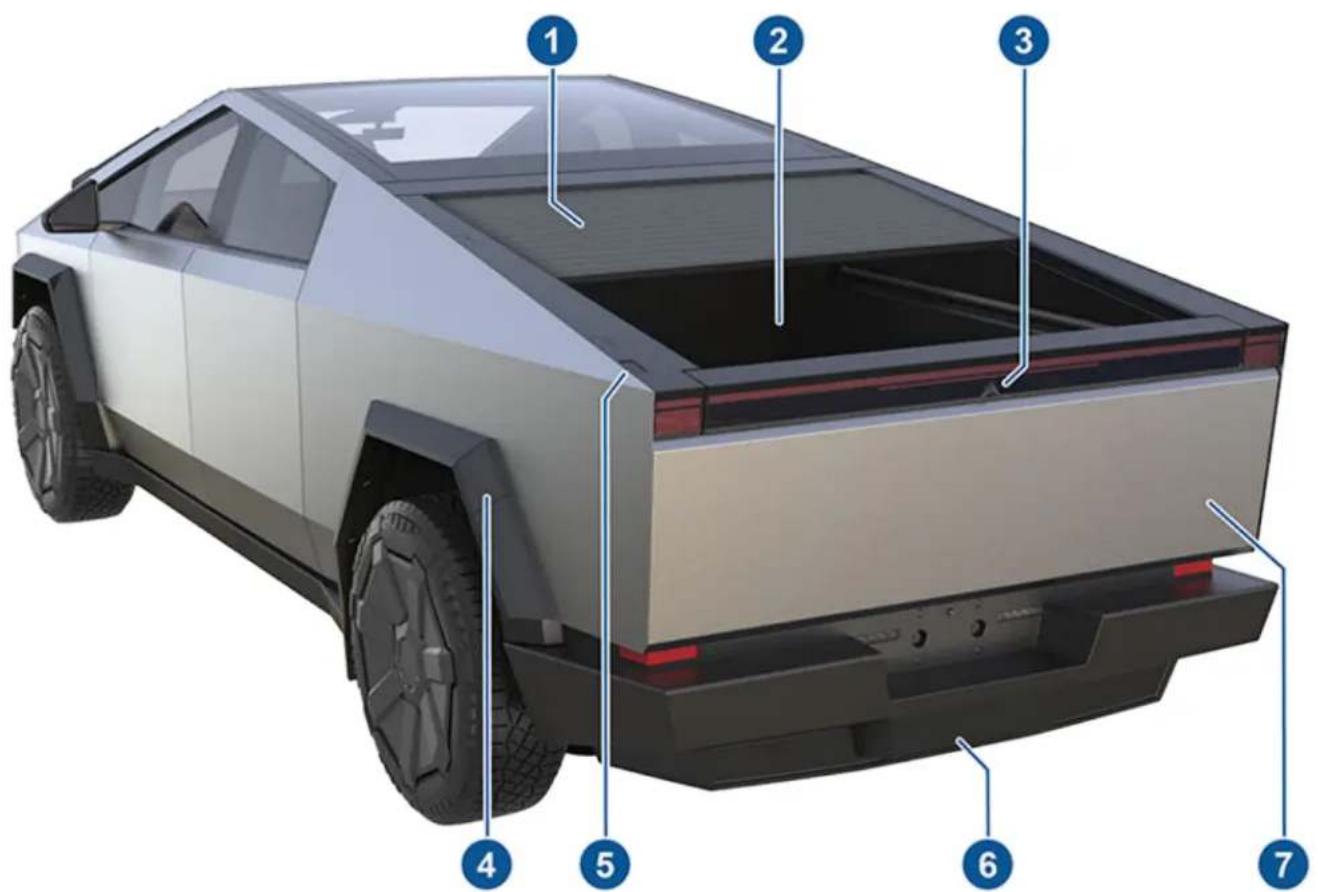
- Tonneau cover (Cargo Bed on page 62)
- Cargo bed (Cargo Bed on page 62)
- Rear-facing camera (Rear-Facing Camera on page 27)
- Charge port (Charging Instructions on page 180)
- Exterior cargo bed switch (Accessing the Cargo Bed on page 62)
- Tow hitch cover (Towing a Trailer on page 113)
- Tailgate (Cargo Bed on page 62)
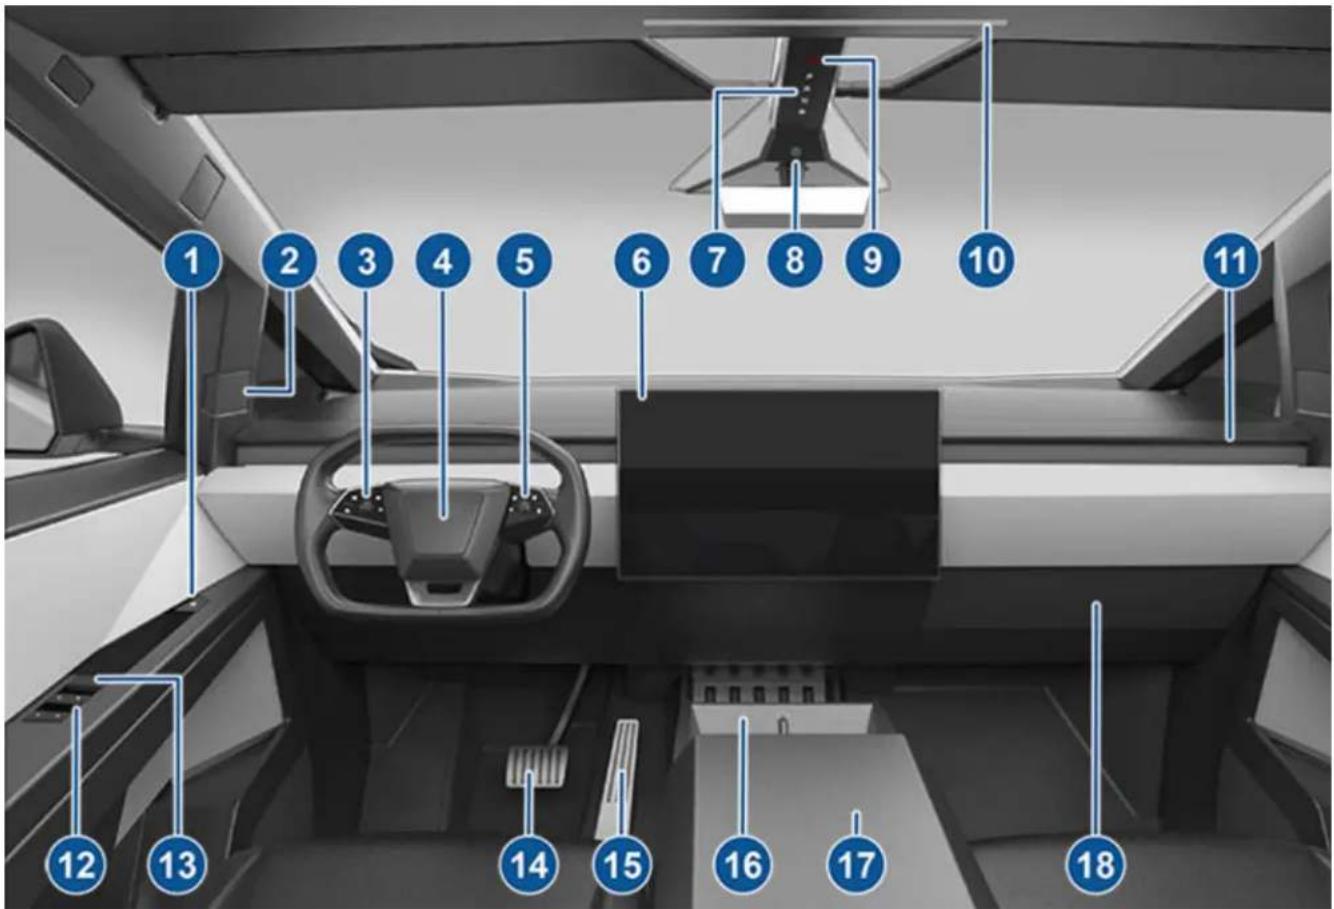
- Interior door open button (Doors on page 33)
- Blind spot indicator and speaker (Blind Spot Warning Light on page 144)
- Left scroll button (Left Scroll Button on page 80)
- Horn (Horn on page 81)
- Right scroll button (Right Scroll Button on page 81)
- Touchscreen (Touchscreen on page 7)
- Secondary drive mode selector on overhead console (Shifting on page 76)
- Cabin camera (Cabin Camera on page 28)
-
Hazard warning flashers (Hazard Warning Flashers on page 86)
-
Front passenger dome light (Lights on page 85)

CAUTION: Cybertruck is equipped with a cabin radar located above the front passenger dome light to ensure certain vehicle and safety components are working properly. Do not block or obstruct the sensor. Doing so may cause inaccurate readings, such as for occupant detection, parking brake engagement, vehicle display settings, etc.
- Climate control vent (Adjusting the Front and Rear Vents on page 163)
- Power window switches (Windows on page 35)
- Manual door release (Opening Doors with No Power on page 246)
- Brake pedal (Braking and Stopping on page 89)
1 Accelerator pedal (On-Road Modes on page 98) - Center console (Center Console on page 57)
-
Glovebox (Glovebox on page 58)
-
Wireless phone chargers and key card readers (Wireless Phone Chargers on page 20 and Key Card on page 30)
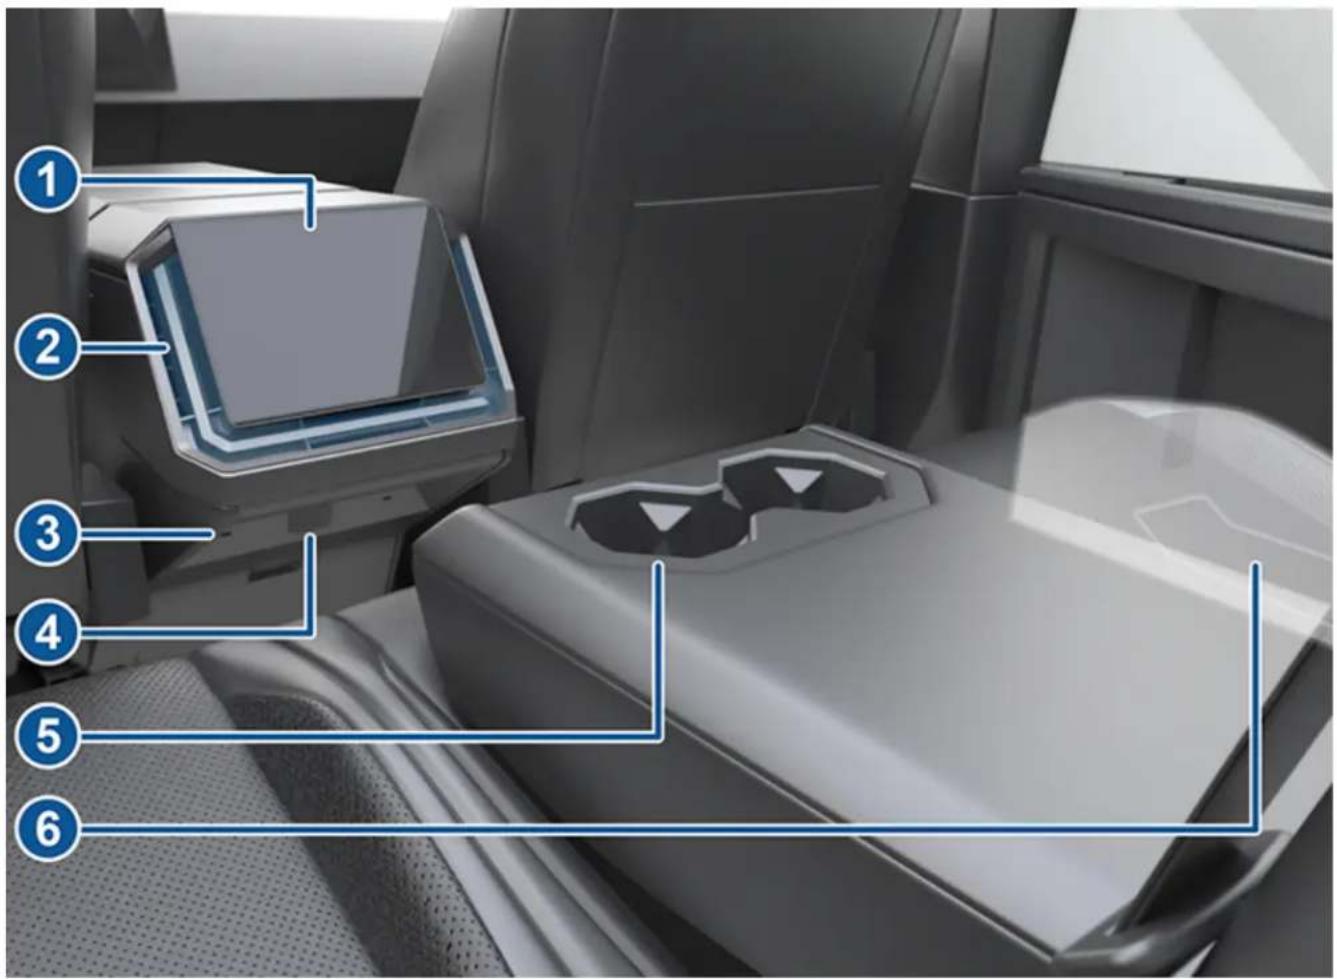
- Rear touchscreen (Rear Touchscreen on page 11)
- Rear climate control vents (Adjusting the Front and Rear Vents on page 163)
- USB ports (USB-C Ports on page 20)
- Rear outlet (120V) (Interior Electronics on page 20)
- Cup holders (Rear Console on page 57)
- Rear door mechanical release (Opening a Rear Door with No Power on page 246)
NOTE: The door mechanical release should only be used in emergency situations.
NOTE: Throughout this Owner's Manual, the front touchscreen is referred to as the "touchscreen" whereas the rear touchscreen is referred to as the "rear touchscreen".

WARNING: Always pay attention to road and traffic conditions when driving. To minimize driver distraction and ensure the safety of vehicle occupants as well as other road users, avoid using the touchscreen to adjust settings while the vehicle is in motion.
Use the touchscreen to control many features that, in traditional vehicles, are controlled using physical buttons (for example, adjusting the cabin heating and air conditioning, headlights, etc.). You also use the touchscreen to control media, navigate, use entertainment features, and customize Cybertruck to suit your preferences. For hands-free access to common touchscreen controls, use voice commands (see Voice Commands on page 25).
If the touchscreen is unresponsive or demonstrates unusual behavior, you can restart it (see Restarting the Touchscreen on page 10).

CAUTION: Do not apply a screen protector on the touchscreen. Doing so can result in unintended inputs to the touchscreen (phantom inputs), delayed response or unresponsiveness to touches, electrostatic discharge which can damage the touchscreen, etc. Any damage caused by installing a screen protector is not covered by the warranty.
The following shows the touchscreen while Cybertruck is parked.
NOTE: Illustrations are provided to improve conceptual understanding only. Depending on vehicle options, software version, market region and regional and language settings, the details displayed on the screen will differ.
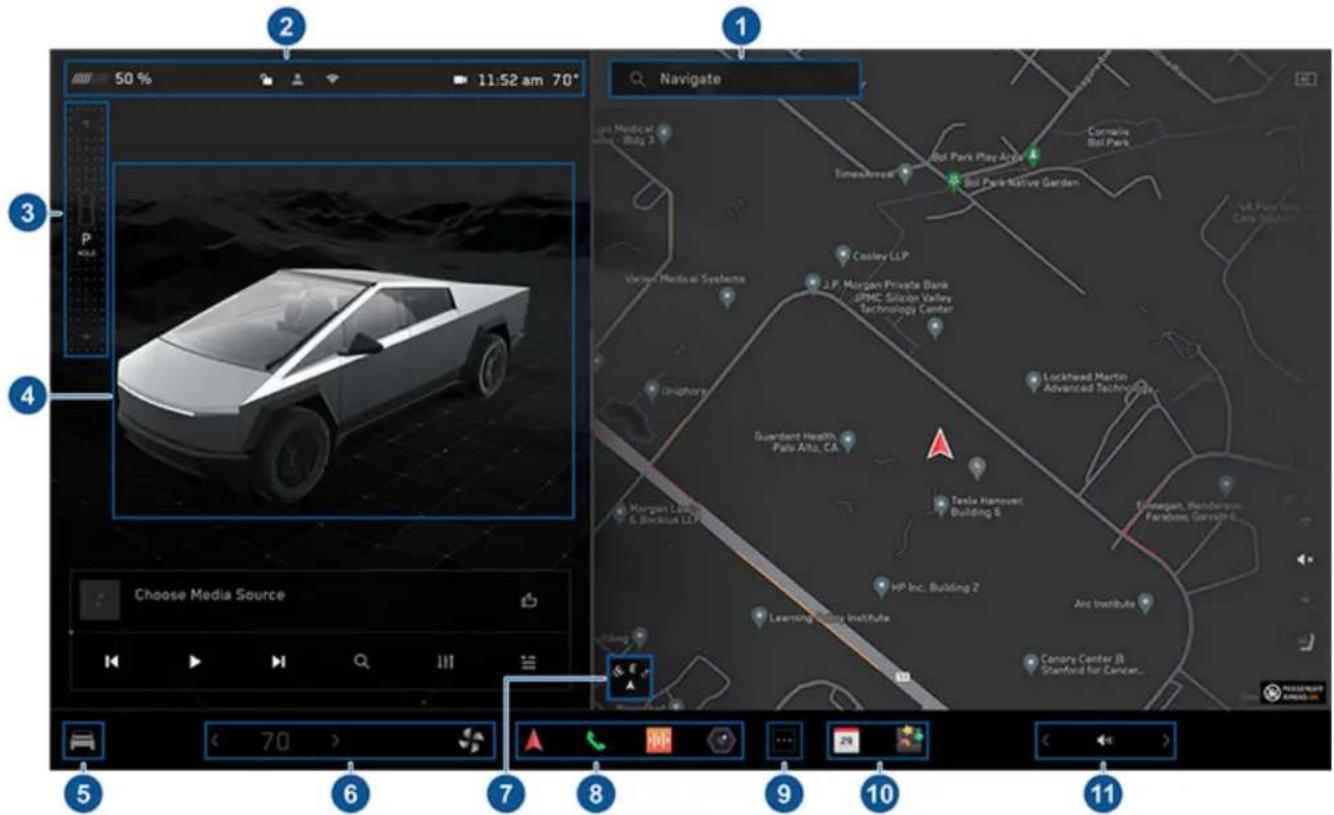
-
Navigation: Find or navigate to a destination (see Maps and Navigation on page 167).
-
Status bar: This area on the top of the touchscreen displays the time of day, the outside temperature, and more (see Top Status Bar Icons on page 8).
-
Drive mode strip: Use to shift into Park, Reverse, or Drive. Swipe right from the upper-left side of the screen to display the drive mode strip (see Shifting on page 76).
NOTE: To shift into Neutral, open Controls, then press and hold the Neutral icon.
- Vehicle status: This area dynamically displays the current status of Cybertruck as you drive, park, open doors, turn lights on, etc. Monitor this area when driving as it displays important information such as driving speed and warning messages (see Vehicle Status on page 14). When in Park, you can interact with the vehicle and open the powered frunk, tonneau, tailgate, and charge port door, and change the ride height setting. This area is also used for shortcut cards for media, tire pressures, and trip information.
- Controls: Control various features and customize Cybertruck to suit your preferences. The Controls screen appears over the map. Touch an option on the Controls screen to display the various settings and preferences associated with the chosen option.
To search for a specific setting, touch Search at the top of the Controls tab.

When an information icon displays beside a specific setting, touch to display a popup that provides helpful details about the associated setting.
NOTE: Many vehicle controls, settings, and preferences (such as climate, media, and navigation) can be adjusted hands-free using voice commands (see Voice Commands on page 25).
- Climate controls (driver): Use the left and right arrows to decrease/increase cabin temperature. Touch Split on the popup to display separate controls for the driver and passenger. Touch the temperature icon to customize climate control settings (see Operating Climate Controls on page 158). The passenger climate controls display when temperature controls have been Split to provide separate controls for the driver and passenger.
- Map Orientation: Touch to toggle the orientation of the map between North Up and Heading Up (see Maps and Navigation on page 167).
- My Apps: For one-touch access to frequently used apps and controls, you can choose what displays here (see Customizing My Apps on page 12).
- App Launcher: Touch the app launcher to open the app tray. Then touch any app to open it. The app you choose displays on top of the map. To close an app, drag it downward or press the X in the corner of the app.
- Recent App(s): Displays the most recently used app(s). The number of recent apps displayed here depends on how many apps have been added to My Apps. If you add the maximum number of apps to My Apps, only the most recent app displays.
- Volume Control: Controls the volume of media player and phone calls (see Volume Controls on page 172). The volume of navigation instructions is controlled separately (see Maps and Navigation on page 167).
Top Status Bar Icons

Touch to lock/unlock all doors and closures.

Displays the local or destination weather conditions. Touch to display more detailed information about the weather and air quality, including chance of rain, humidity, and UV index. Requires premium connectivity.
72^ F
Displays the current temperature. If your vehicle is equipped with premium connectivity, you can also touch to display more detailed information about the weather and air quality, including chance of rain, humidity, and UV index.

Displays on the touchscreen status bar only when Cybertruck detects that the local Air Quality Index (AQI) value is poor. A poor AQI will have yellow, orange, red, purple, or maroon numbers. Touch to display more detailed information about the weather and air quality, including chance of rain, humidity, and UV index. Requires premium connectivity.
4:20 pm
Your vehicle automatically updates the time. If the time is incorrect, confirm your vehicle has internet and GPS connectivity with the latest software. To switch between 12 and 24 hour format, touch Controls > Display.

Displays on the touchscreen status bar only when Cybertruck detects a programmed myQ Smart Garage within range (see Smart Garage on page 74).

Displays on the touchscreen status bar only when Cybertruck is parked. Add, configure (including Valet Mode and Use Easy Entry), or quickly switch driver profiles. Driver profiles can also be accessed from the top of any Controls screen (see Driver Profiles on page 99).

Available when Cybertruck is parked, touch to manually enable or disable Sentry Mode for the current drive cycle. To automatically turn Sentry Mode on (or off) every time you leave your vehicle, enable the setting from Controls > Safety > Sentry Mode (see Sentry Mode on page 155).
NOTE: If you turn Sentry Mode on or off from Controls > Sentry Mode, the shortcuts on the vehicle's touchscreen and mobile app will only work for the current drive cycle.

Displays when Cybertruck is connected to a Wi-Fi network.

Displays when Cybertruck cellular connectivity is available or being used.

Appears when your vehicle's GPS location is actively being accessed in the Tesla app by the owner, an added driver, or a third party app you're using. To disable, navigate to Controls > Safety > Allow Mobile Access on the touchscreen.
Popup Messages and Vehicle Alerts
Popup messages appear at the bottom of the touchscreen. For example, a seat belt reminder appears if a seat belt is unfastened in an occupied seat, an alert appears to notify you of an incoming phone call, and voice commands appear when in use. If applicable, touch options from these popup messages (for example, accept/decline a phone call, choose an option from the headlight menu, etc.). To dismiss a popup message, swipe it downward.

If an alert appears on your vehicle's touchscreen, touch Learn More for more details regarding the alert and how it can be resolved (see Troubleshooting Alerts on page 248). You can view a list of vehicle alerts and notifications by touching the bell icon at the top of Controls.
NOTE: Not all alerts provide additional information at this time.
Restarting the Touchscreen
You can restart your touchscreen if it is unresponsive or demonstrates unusual behavior.

WARNING: Only restart the touchscreen while the vehicle is stopped and in Park. The vehicle status display, safety warnings, backup camera, etc. will not be visible during the restart.
- Shift into Park.
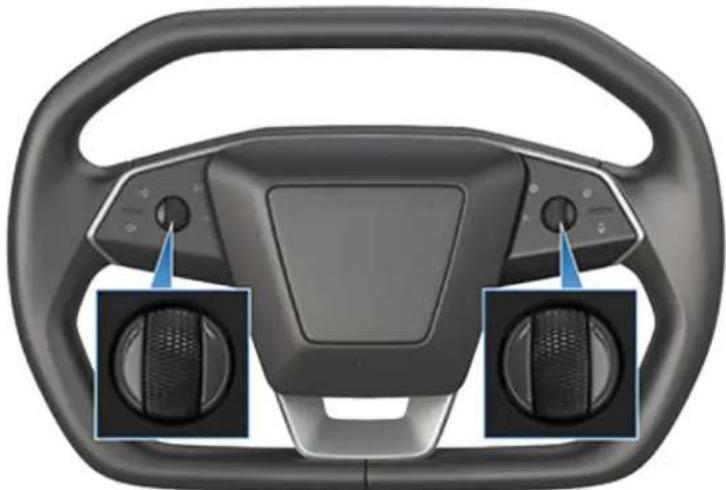
- Hold down both scroll buttons on the steering wheel until the touchscreen turns black.
natural_image
Interior view of a car steering wheel with two control buttons and a dashboard (no text or symbols visible)- Wait approximately 30 seconds for the touchscreen to restart. If the touchscreen is still unresponsive or demonstrating unusual behavior after a few minutes, try power cycling the vehicle, if possible (see Starting and Powering Off on page 75).
NOTE: Restarting the touchscreen also activates the drive mode selector on the overhead console.
NOTE: Pressing the scroll buttons only restarts the touchscreen. It does not restart any other vehicle component and does not power Cybertruck off and on.
Rear Touchscreen
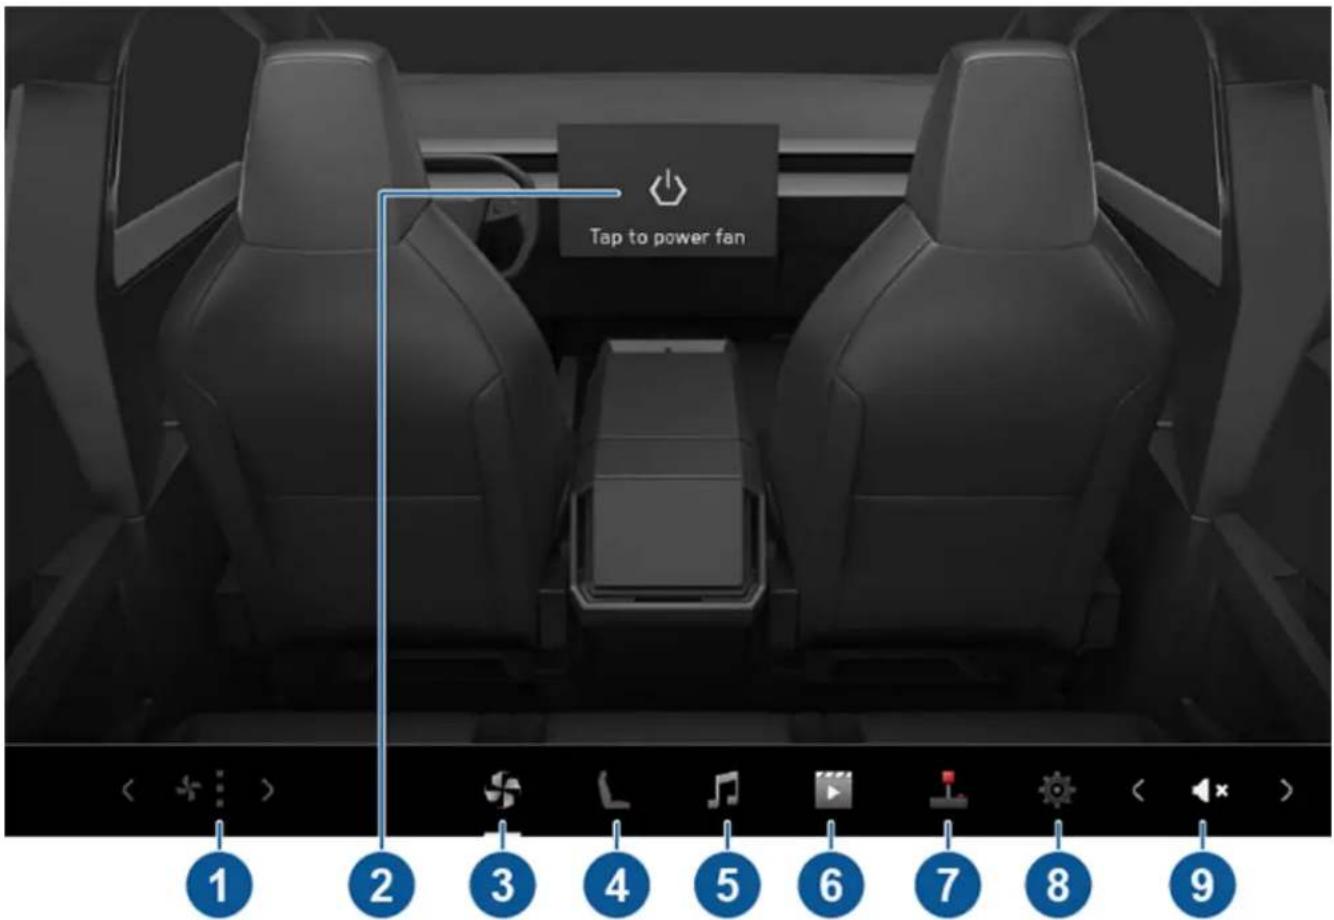
The rear touchscreen provides rear passengers with access to:
- Fan Speed: Touch the arrows to decrease/increase the fan speed.
NOTE: You can also use the front touchscreen to adjust climate settings in the rear cabin (see Operating Climate Controls on page 158).
-
Power: Touch to turn the rear climate control system on or off.
-
Climate: Touch to turn the rear fan on or off and control the direction of air flow from the rear vents (see Adjusting the Front and Rear Vents on page 163).
-
Seats: Control rear seat heaters and move the front passenger seat forward/rearward using the arrows.
-
Media: Play, pause, skip or rewind through the currently playing song (see Media on page 172).
-
Video: Access video streaming services.
-
Arcade: Play various video games on the rear touchscreen.
-
Settings: Touch to pair up to two sets of Bluetooth headphones, change the brightness or clean the display.
NOTE: Connect headphones to listen to audio from the rear touchscreen. The vehicle supports up to two Bluetooth devices at a time (such as one phone and one headset).
- Volume: Touch the arrows to adjust the volume.
NOTE: Adjusting the media and volume controls also adjusts the front cabin settings.
Rear Screen Remote Control

To control the rear screen from the front display, open the rear screen remote control app from the app launcher. Besides audio, video and climate controls, you can lock the rear display in the app or by touching Controls > Display > Lock Rear Display.
Customizing My Apps
For one-touch access to commonly used apps and controls, you can customize what displays in the My Apps area on the touchscreen's bottom bar:
- Enter customization mode by touching and holding any app or control in the My Apps area. If this area is empty, touch the app launcher (the ellipsis icon).
- Drag your desired app or control from the app tray onto the My Apps area in the bottom bar.
NOTE: Controls (for example, defrosters and seat heaters) appear in the app tray only when you enter customization mode by touching and holding an app. Seat heaters selected from the app tray appear next to the temperature, instead of in the My Apps area.
Remove an app or control from the My Apps area by touching and holding, then touching its associated "X".
When you've added the maximum number of apps or controls to My Apps, adding an additional app removes the rightmost app.
Customizing Display and Sound Settings
Touch Controls > Display to adjust display settings to suit your preferences:
- Appearance: Customize the display to be Dark or Light. When set to Auto, the brightness changes automatically based on ambient lighting conditions.
- Reduce Blue Light: When enabled, the display automatically adjusts to use warmer colors at night.
- Cybertruck Logo: When enabled, the display shows the Cybertruck logo when it is powered on. When disabled, the display shows the Tesla logo when it is powered on.
- Brightness: Drag the slider to manually control the brightness level. If Display Mode is set to Auto, the touchscreen further adjusts based on both the ambient lighting conditions and your brightness preference. Cybertruck remembers your chosen brightness preference and adjusts the touchscreen accordingly.
- Rear View Camera: Choose when to display the feed from the rear view camera. When set to Auto, the rear view camera feed displays automatically when the tonneau cover is closed.
- Screen Clean Mode: When enabled, your touchscreen darkens and temporarily disables to facilitate cleaning. Follow the onscreen instructions to exit Screen Clean Mode.
- Touchscreen Language: Select the language that the touchscreen displays.
NOTE: Cybertruck must be in Park to change the language. When you change the language, you experience a brief delay as the touchscreen restarts.
- Lock Rear Display: Lock access to the rear touchscreen.
• Time: Choose to display time in either 12 or 24 hour format.
- Energy Display: Choose to display remaining energy and charging units as either a percentage of battery energy remaining, or as an estimate of the distance you can drive.
NOTE: When anticipating when you need to charge, use energy estimate as a general guideline only. Many factors have an impact on energy consumption (see Getting Maximum Range on page 187).
• Distance: Choose to display range using miles or kilometers.
- Temperature: Choose to display temperature using Fahrenheit or Celsius.
- Tire Pressure: Choose to display tire pressures using BAR or PSI.
In addition to customizing the display, you can enable Joe Mode to reduce the volume of all chimes that are not related to critical safety issues. Touch Controls > Safety > Joe Mode to enable.
Naming your Vehicle
To further personalize your vehicle, you can name it. Touch Controls > Software > Name Your Vehicle located on the right side of the touchscreen below the image of your Cybertruck.
If your vehicle already has a name, touch the existing name to change it. Enter the new name in the popup and touch Save. The name of your Cybertruck appears in the Tesla mobile app, where you can also change it.
Erasing Personal Data
You can erase all personal data (saved addresses, music favorites, etc.) and restore all customized settings to their factory defaults. This is useful when transferring ownership of Cybertruck. Touch Controls > Service > Factory Reset. Before erasing, Cybertruck verifies your credentials by prompting you to enter the user name and password associated with your Tesla account.
Overview
The touchscreen displays the status of Cybertruck at all times. What you see depends on whether the vehicle is:
- Parked (see Touchscreen on page 7).
- Driving (see Driving Status on page 18).
- Charging (see Charging Status on page 181).
When Cybertruck is parked, the status area shows the drive mode, estimated range, suspension height and available adjustments, and an exterior view of the vehicle with buttons you can touch to open the tonneau cover, tailgate, powered frunk, and charge port door.
When you press the brake pedal, Cybertruck powers up and indicator lights flash briefly. Unless an indicator light applies to the current situation (for example, a seat belt is not fastened), it should turn off. If an indicator light fails to turn on or off, schedule a service appointment.
Cards
The bottom of the vehicle status display also shows shortcut "Cards" for quick access to Media, tire pressure data, trip information, and more. Swipe the cards to the left or right to customize your cards shortcuts.
Indicator Lights
The following indicator lights illuminate to advise or alert you of a specific status or condition.
USA and Mexico: If the touchscreen displays this red brake indicator at any time other than briefly when you first start Cybertruck, a brake system fault is detected, or the level of the brake fluid is low. Contact Tesla immediately. Apply steady pressure and keep the brake pedal firmly pressed to stop the vehicle when safe to do so.
BRAKE

If the touchscreen displays this red brake indicator at any time other than briefly when you first start Cybertruck, a brake system fault is detected, or the level of the brake fluid is low. Contact Tesla immediately. Apply steady pressure and keep the brake pedal firmly pressed to stop the vehicle when safe to do so.
Canada:
PARK
When you manually apply the parking brake using the touchscreen, the red parking brake indicator lights up on the touchscreen.
USA and Mexico:

When you manually apply the parking brake using the touchscreen, the red parking brake indicator lights up on the touchscreen.
Canada:

A seat belt for an occupied seat is not fastened. See Seat Belts on page 40.

Airbag safety. If this indicator does not flash on briefly when Cybertruck prepares to drive, or if it remains on, contact Tesla immediately. See Airbag Status Indicator on page 51.

A door or the powered frunk is open.

Cybertruck detects a faulty electrical connection for the trailer lights. Some, or all, trailer lights may not be functioning. Pull over as soon as safety permits and inspect the trailer lights for faulty cabling or connections. If the issue is resolved and the red icon persists, manually turn Trailer Mode off and on again. See Towing a Trailer on page 113.

Tire pressure warning. The pressure of a tire is out of specification. If a fault with the Tire Pressure Monitoring System (TPMS) is detected, the indicator flashes. For a TPMS fault, schedule a service appointment. See Tire Pressures on page 200.

The tailgate is open. See Cargo Bed on page 62.

The powered frunk is open. See Powered Frunk on page 59.

This indicator flashes when the electronic stability control systems are actively minimizing wheel spin by controlling brake pressure and motor power. See Traction Control on page 94. If this indicator remains on, a fault is detected and you should immediately contact Tesla.

Electronic stability control systems are no longer minimizing wheel spin. See Off-Road Driving on page 103.
USA and Mexico: The ABS indicator briefly flashes amber on the touchscreen when you first start Cybertruck. If this indicator lights up at any other time, an ABS fault has occurred and the ABS is not operating. Contact Tesla. The braking system remains fully operational and is not affected by an ABS failure. However, braking distances may increase. Drive cautiously and avoid heavy braking.


The ABS indicator briefly flashes amber on the touchscreen when you first start Cybertruck. If this indicator lights up at any other time, an ABS fault has occurred and the ABS is not operating. Contact Tesla. The braking system remains fully operational and is not affected by an ABS failure. However, braking distances may increase. Drive cautiously and avoid heavy braking.
Canada:
USA and Mexico: The touchscreen displays this amber brake indicator if a brake booster fault is detected. Apply
steady pressure and keep the brake pedal firmly pressed to stop the vehicle when safe to do so. Hydraulic Boost Compensation will be active (see Hydraulic Boost Compensation on page 90).
BRAKE

The touchscreen displays this amber brake indicator if a brake booster fault is detected. Apply steady pressure and keep the brake pedal firmly pressed to stop the vehicle when safe to do so. Hydraulic Boost Compensation will be active (see Hydraulic Boost Compensation on page 90).
Canada:
If the parking brake experiences an electrical issue, the amber parking brake indicator lights up and a fault message displays on the touchscreen.
PARK
USA and Mexico:

If the parking brake experiences an electrical issue, the amber parking brake indicator lights up and a fault message displays on the touchscreen.
Canada:

Vehicle power is currently being limited because the energy remaining in the Battery is low, the vehicle's systems are being heated or cooled, or an error is detected by a drive inverter.

Rear fog lights are enabled. See Lights on page 85.

Cybertruck detects a connection for trailer lights but Trailer Mode is disabled. It is likely that a carrying accessory has been connected. See See Towing a Trailer on page 113

Locking differential is engaged. This icon may blink orange while the locking differential is engaging or disengaging (see Locking Differentials on page 108 for more information).

Appears when regenerative braking is limited. See Regenerative Braking on page 90 for more information.

Fog lights are enabled. See Lights on page 85.
DO
Parking lights are on (side marker lights, tail lights, and license plate lights). See Lights on page 85.

Low beam headlights are on. See Lights on page 85.

High beam headlights are on and Auto High Beam is disabled or currently unavailable. See Headlights on page 85.

Auto High Beam is enabled and high beams are on. Cybertruck is ready to turn off the high beams if needed. See Headlights on page 85.

Trailer Mode is active. See Towing a Trailer on page 113.

Some of the energy stored in the Battery may not be available due to cold weather conditions. In cold weather, charging rates may also be limited. If Cybertruck is plugged in, you can heat your Battery by turning on climate control with the mobile app. This icon disappears when the Battery is sufficiently warm.

Vehicle Hold is actively applying the brakes. See Vehicle Hold on page 91.

Pedestrian Warning System is disabled. See Pedestrian Warning System on page 102.

Auto High Beam is enabled but high beams are not on because another vehicle is detected in front of Cybertruck. When there is no longer another vehicle detected, high beams automatically turn back on. See Headlights on page 85.

Locking differential is disengaged (see Locking Differentials on page 108 for more information).

The differential locker is in an unknown locker position (see Locking Differentials on page 108 for more information).

There is a system fault or the locking differential is unavailable (see Locking Differentials on page 108 for more information).
See Popup Messages and Vehicle Alerts on page 9 for more information about alert popups on your vehicle's touchscreen.
Driving Status
When Cybertruck is driving (or ready to drive), the touchscreen shows your current driving status and real-time visualization of the road as detected by the Autopilot components (see Cameras on page 27). The visualization automatically zooms in and out to better utilize touchscreen space and inform you when a vehicle is detected in your blind spot.
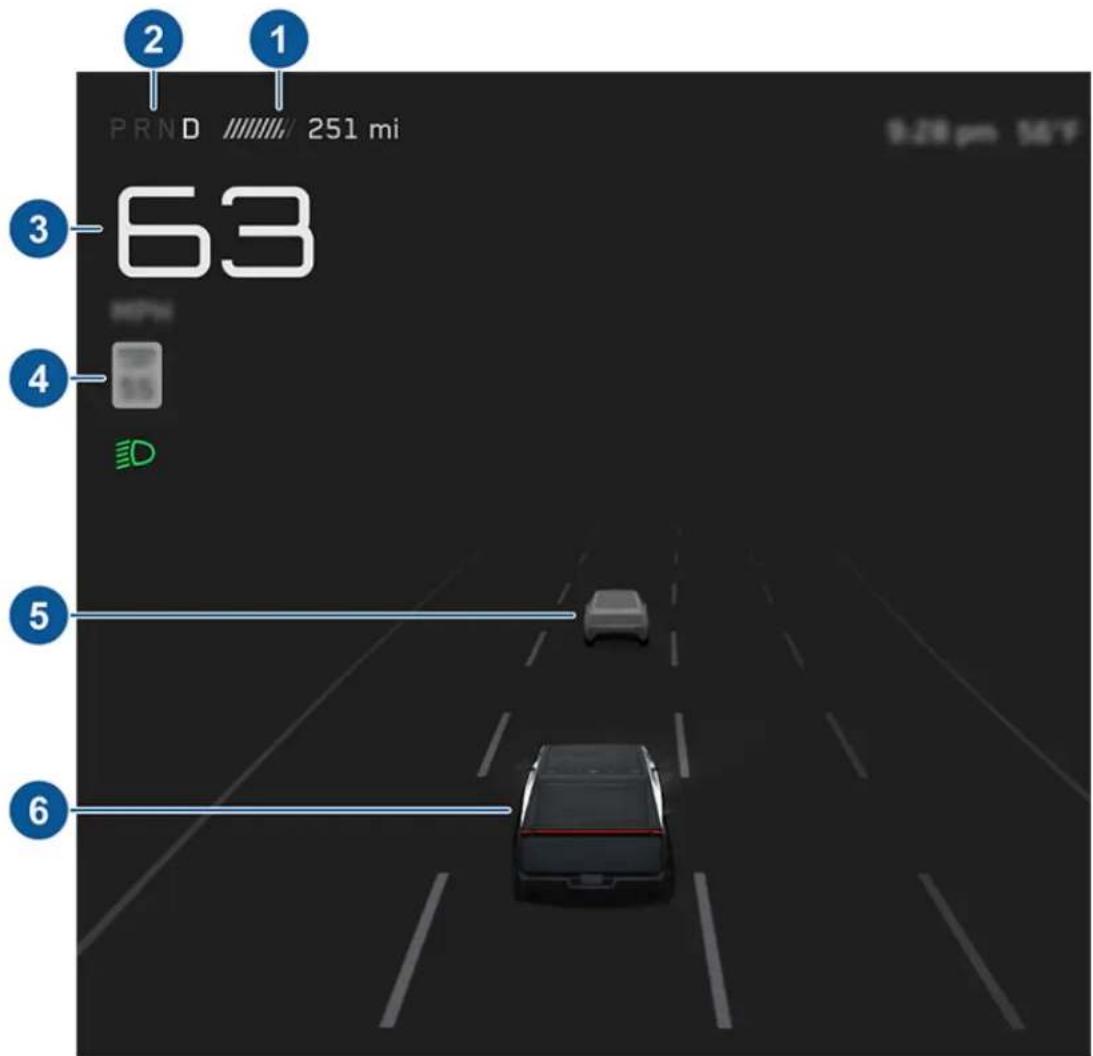
The touchscreen also shows the following:
- Total estimated driving distance (or energy) available. You can toggle between driving distance and percentage of Battery energy remaining by touching the displayed value. You can also change how energy is displayed by touching Controls > Display > Energy Display. When anticipating when you need to charge, use range estimates as a general guideline only.
- Currently selected drive mode: Park, Reverse, Neutral, or Drive (see Shifting on page 76).
-
Driving speed.
-
The speed limit that is currently being detected by Speed Assist (see Speed Assist on page 149). The icon associated with the detected speed limit reflects the style of speed limit signs used in your market region.
NOTE: A blue outline may appear around the speed limit icon to notify that you are above the speed limit.
-
Other cars detected on the road (as applicable).
-
Your Cybertruck. Colored lines radiate from the image of your Cybertruck as objects are detected (other motorists, guard rails, etc.). The location of the lines correspond to the location of the detected object. The color of the lines (white, yellow, orange, or red) represents the object's proximity to Cybertruck, with white being the farthest and red being very close and requiring your immediate attention. See Lane Assist on page 144.

WARNING: Pay attention to important alert messages that display at the bottom of the vehicle status area of the touchscreen. Ignoring these messages can result in serious injury or death.

WARNING: Although the touchscreen shows surrounding traffic, some vehicles may not be displayed. Never rely on the detected displayed vehicles to determine if a vehicle is present (for example, in your blind spot). Always use your mirrors and perform shoulder checks.
In addition to storage compartments and cup holders (see Interior Storage on page 57), the Cybertruck interior supports various electronics such as an RFID transmitter that reads key cards (see Keys on page 30), USB-C ports, wireless phone chargers, a power outlet in the center console, and a power outlet below the rear touchscreen.
USB-C Ports
Cybertruck has four USB ports.
There are three USB-C ports in the center console, each of which can provide up to 65W of power:
- One USB-C port is located in the front compartment of the center console. This port can be used to charge a USB-C device.
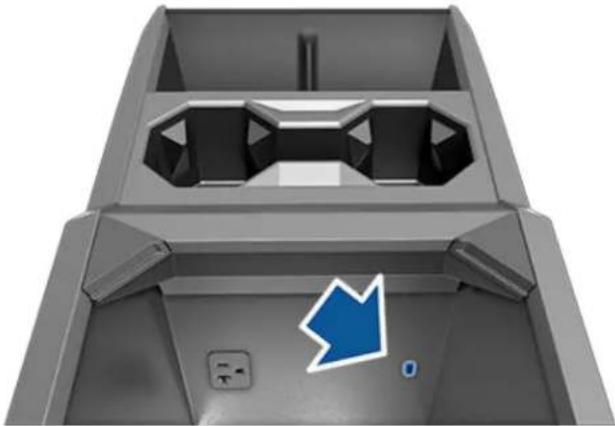
natural_image
3D rendering of a gray mechanical component with a blue arrow pointing to a small blue button (no text or symbols)- Two USB-C ports are located below the rear touchscreen and can be used to charge USB-C devices.
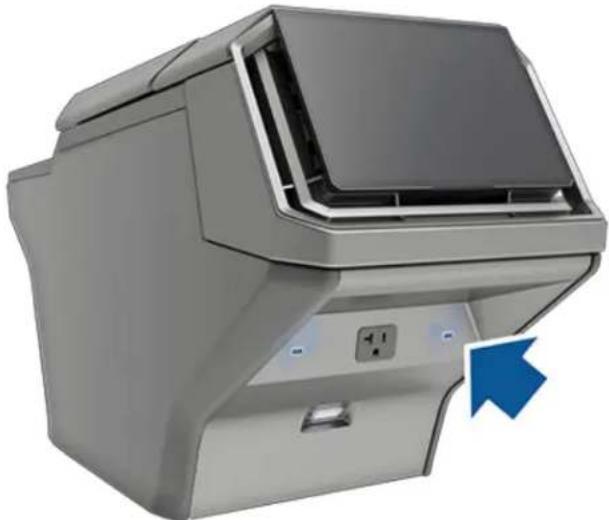
natural_image
Exterior view of a gray industrial machine with a blue arrow pointing to the right side (no visible text or symbols)NOTE: Use USB 3.0 compliant cables to connect a device to a USB-C port. Using non-compliant cables may result in slower charging, connection problems, or degraded performance.
NOTE: If all three USB-C ports are in use at the same time, power to each port will be reduced.

CAUTION: Do not use the USB-C ports to power a device with a power rating that exceeds the limits listed above.
There is also a USB-A port in the glovebox. This port is equipped with a USB-A flash drive. This port can be used to play media from a phone or USB-A drive (see Playing Media from Devices on page 173) or to save Sentry Mode and Dashcam video footage.
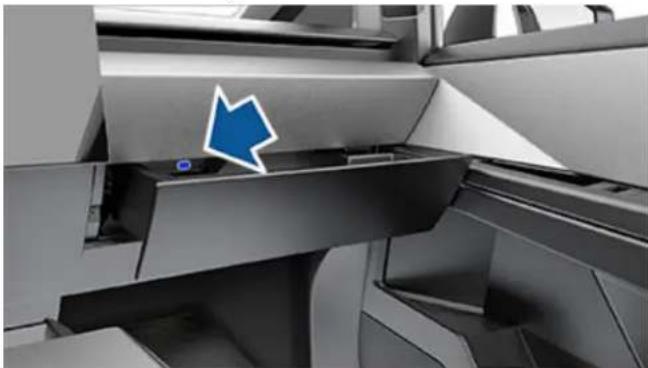
natural_image
Close-up of a modern industrial machine with a blue arrow pointing to a component (no visible text or symbols)NOTE: Do not connect multiple devices using a USB hub. This can prevent connected devices from charging or from being recognized by Media Player, Sentry Mode, Dashcam, etc.
Wireless Phone Chargers
Wireless phone chargers are integrated into the front console, providing up to 15W of power to charge Qi-enabled phones. To charge your phone, place it on one of the two charge pads. The phone must be in direct contact with the wireless charger. Your device may feel warm while charging, but this is a normal effect of inductive charging.

CAUTION: Before you charge, remove any objects (coins, keys, metal objects, etc.) between the phone and charger, as well as any NFC cards (for example, the vehicle key card, credit cards, or hotel key) placed on or behind the phone (like with integrated phone cases). Damage to NFC cards can occur when you charge the phone without first removing the card.
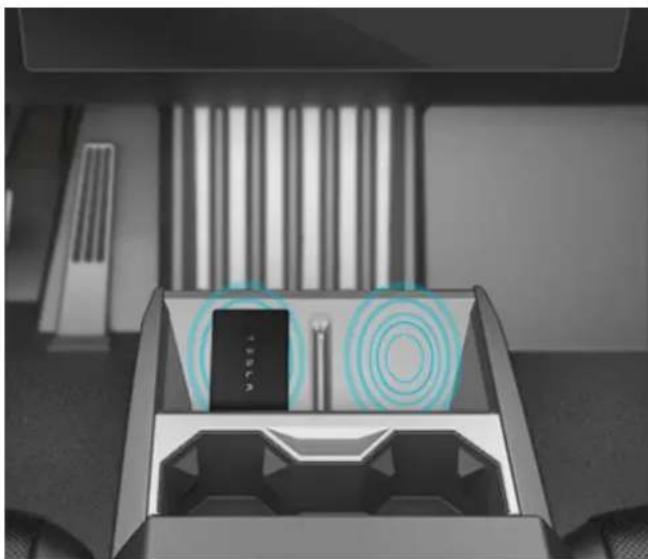
NOTE: The wireless phone chargers are in the same location as the key card readers (see Key Card on page 30).
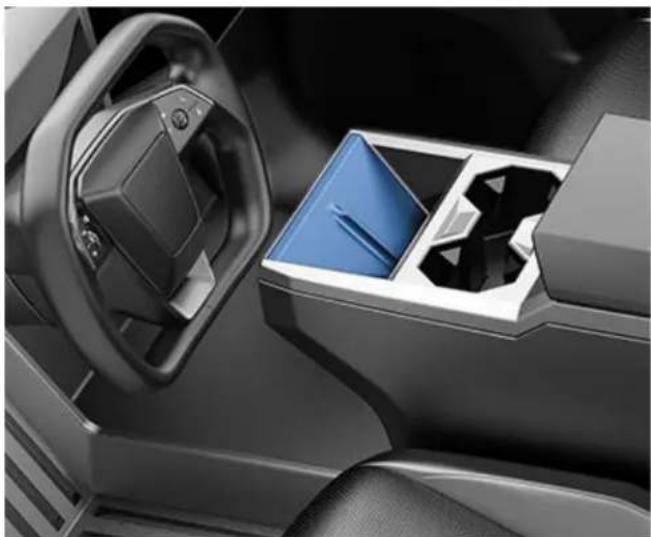
natural_image
Interior view of a car showing the dashboard, steering wheel, and internal compartments with a blue plastic tray (no text or symbols visible)When placed on the wireless charger, your phone charges whenever the vehicle is powered on (the touchscreen is on and you are in the vehicle). Your phone does not charge when you leave the vehicle unless a feature, such as Sentry Mode, is enabled.
NOTE: The phone must be in direct contact with the wireless charger. If you place objects between the phone and the charger (for example, credit cards, key cards, coins, keys, metal objects, etc.), or if your phone case is too large or is made of metal, the wireless charger may not work. Try removing the phone from its case before placing it on the charger.
NOTE: The wireless phone charger does not charge if the vehicle's high voltage Battery is discharged.
Interior Power Outlets
The Cybertruck center console is equipped with two NEMA 5-20 120V power outlets capable of providing up to 20A combined. To enable power to the outlets, touch Controls > Outlets & Mods. Touch Enable Cabin Outlets on Entry to enable them by default when you enter Cybertruck.
If an outlet is not providing power as expected, see Troubleshooting AC Outlets on page 23.
NOTE: The 120V power outlets provide 20A maximum draw between both outlets. If multiple devices are plugged in and drawing power at the same time, power to each device may be reduced or interrupted.
NOTE: Power to AC outlets may be disabled in very low ambient temperatures.
NOTE: Power to AC outlets is disabled when an AC charging cable is connected to Cybertruck even if the vehicle is not actively charging.
Power to AC outlets is still available when Cybertruck is DC charging (while Supercharging, for example). See Charging Instructions on page 180.
NOTE: Two 120V power outlets are also located in the cargo bed, in addition to a 240V power outlet (see Cargo Bed Outlets on page 23).
To access the front power outlet, open the front compartment of the center console (see Interior Storage on page 57). The power outlet is located on the front wall of the compartment:
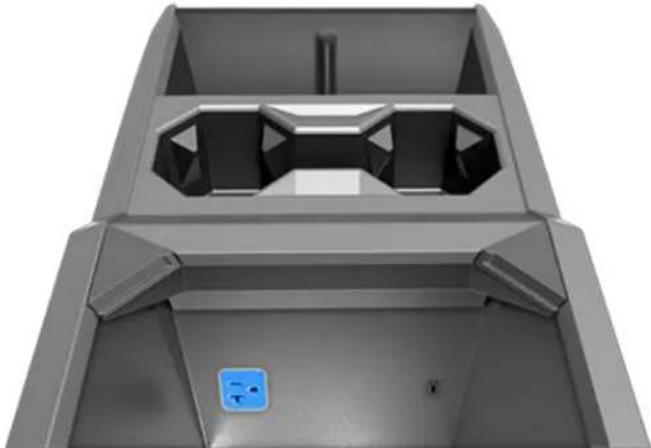
natural_image
3D rendered mechanical component with internal cavities and a blue square button (no text or symbols)The rear power outlet is located below the rear touchscreen:
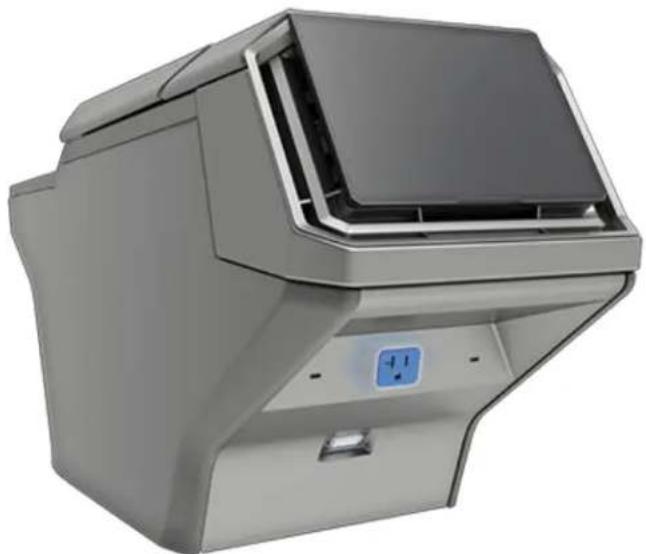
natural_image
Exterior view of a gray industrial machine with a digital display (no visible text or symbols)NOTE: To have the cabin outlets continue supplying power even when Cybertruck is not occupied, touch Controls > Outlets & Mods and enable Keep Outlets On (see Keep Outlets On on page 23). You can also enable CyberTent Mode and turn on outlets to keep them on when camping (see CyberTent Mode on page 23).

CAUTION: Leaving a device plugged in depletes the high voltage Battery. Power to the outlets shuts off when the capacity of the high voltage Battery is very low.

CAUTION: Damage to a device or data loss (such as from a laptop or external drive) due to a sudden loss of power is not covered by the warranty.
CAUTION: Always check each outlet for damage before use.
CAUTION: Damage to Cybertruck caused by an external device that is plugged in to an outlet is not covered by the warranty.
WARNING: The power outlets and a device's plug can become hot.
WARNING: As with any outlet, do not leave children unattended near the cabin outlets.
WARNING: Do not insert any objects into the outlets other than electrical plugs. Treat the outlets on Cybertruck the same as you would any other outlet, and take care to ensure proper handling. Misusing outlets can cause serious injury.
Your Cybertruck has three AC power outlets located in the cargo bed.
To access the outlets:
- Open the tailgate (see Cargo Bed on page 62).
- Locate the outlet cover on the left side of the bed.
- Pull the left side of the panel to open the cover.
The outlet cover must be open in order for the outlets to provide power.
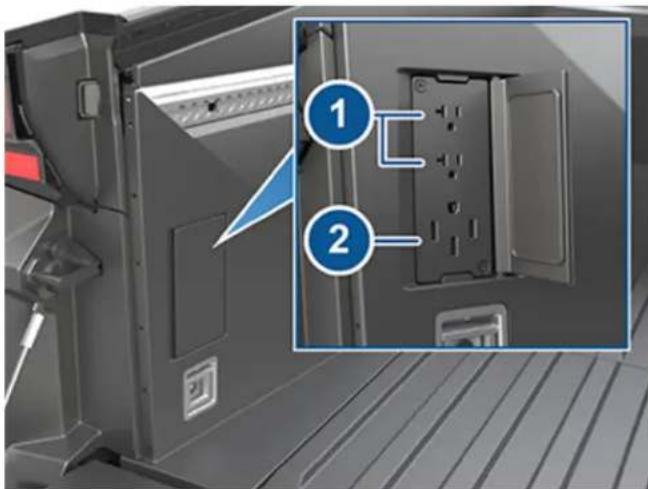
- 120V power outlets (20A maximum draw, combined)
- 240V power outlet (40A maximum draw, combined)
The 120V power outlets provide a maximum of 20A across both cargo bed outlets. This is independent from the 120V outlets in the cabin which also provide a maximum of 20A across both cabin outlets (see Interior Power Outlets on page 21). It is possible to pull 20A from the cabin and 20A from the cargo bed at the same time. All AC power outlets combined (120V cabin, 120V cargo bed, and the 240V cargo bed outlet) are limited to a combined maximum of 40A. If multiple devices are plugged in and drawing power at the same time, power to each device may be reduced or interrupted.
The outlets stop providing power when Cybertruck is no longer occupied (when you leave the vehicle and close the doors).
To enable power to the outlets, touch Controls > Outlets & Mods on the touchscreen. From here you can toggle power to all AC outlets and each power feed (see Connecting Accessories to the 48V Power Feeds on page 217). While the outlets are supplying power, the touchscreen shows the amount of power being used.
You can also enable power to the outlets and power feeds using the mobile app.
NOTE: Leaving a device plugged in depletes the high voltage Battery. Even if nothing is plugged in, the outlets draw small amounts of power from the Battery whenever they are enabled. When the charge level of the high voltage Battery is very low, power to the outlets shuts off and a message is displayed on the touchscreen. Leaving a device plugged in does not deplete the low voltage battery.
CAUTION: Do not use the AC outlets to power a device with a power rating that exceeds the limits listed above.
Keep Outlets On
If you want the outlets to continue supplying power even when the vehicle is not occupied, touch Controls > Outlets & Mods and enable Keep Outlets On. After 12 hours, or once the high voltage Battery has less than 5% remaining energy, the outlets shut off. Keep Outlets On is automatically enabled whenever you turn on the outlets using the mobile app.
CyberTent Mode
After installing the CyberTent, enable CyberTent Mode for optimal comfort. CyberTent Mode:
• Levels the suspension.
- Opens the tonneau cover and keeps it open by disabling the switches.
• Displays controls to adjust the front and rear lights.
- Allows outlets to be kept on indefinitely.
NOTE: Using CyberTent Mode and keeping the outlets or lights on may increase power usage.
• Disables walk-away lock.
NOTE: It is your responsibility to ensure the vehicle is appropriately locked or attended to at all times.
To enable, touch Controls > Outlets & Mods > CyberTent Mode. Cybertruck cannot be driven while CyberTent Mode is enabled.
Overload Capability
The AC outlets on Cybertruck are all capable of providing additional surge current to start almost all devices (such as power tools, motors, and compressors) up to 110LRA.
Troubleshooting AC Outlets
AC outlets may be disabled in the following scenarios:
- Very low ambient temperatures.
- When an AC charging cable is connected to Cybertruck even if the vehicle is not actively charging.
- The high voltage Battery does not have enough charge.
- GFCI or overcurrent detection has been tripped.
If one or more outlets unexpectedly stops providing power, first ensure that you have enabled power to the outlets (touch Controls > Outlets & Mods) and that the high voltage Battery has enough remaining charge.
Each power outlet in Cybertruck is equipped with overcurrent detection and a ground fault circuit interrupter (GFCI), which interrupts the power supply to an outlet if an issue is detected, such as a current leakage. In this case, the outlets will turn off. Overcurrent detection may happen if multiple devices plugged in at once draw too much power from the AC power outlets.

CAUTION: Use only "UL" Listed devices with the AC power outlets in Cybertruck.

CAUTION: Damage to a device or data loss (such as from a laptop or external drive) due to a sudden loss of power is not covered by the warranty.
If an outlet is still not providing power, the GFCI or overcurrent detection may have been tripped. When an outlet is faulted, an option to reset the outlets becomes available. To reset:
- Disconnect all devices from all AC outlets (three outlets in the cargo bed and two in the center console).
- Touch Controls > Outlets & Mods > Reset.
- Reconnect devices and re-enable power to the outlets by touching Controls > Outlets & Mods > AC Outlets.
NOTE: Power to AC outlets is still available when Cybertruck is DC charging (while Supercharging, for example). See Charging Instructions on page 180.
Warnings and Cautions

CAUTION: Always check each outlet for damage before use.

CAUTION: Keep the outlet cover closed when the cargo bed outlets are not in use.

CAUTION: Keep the outlet cover closed when Cybertruck is AC charging, especially in wet weather. AC charging may be disabled if moisture enters one of the outlets.

CAUTION: Damage to Cybertruck caused by an external device that is plugged in to an outlet is not covered by the warranty.

CAUTION: Use caution when driving Cybertruck while devices are plugged into the cargo bed outlets. Ensure that all objects in the cargo bed are properly secured (see Securing Cargo on page 64).

WARNING: A power outlet and a device's plug can become hot. Use caution when unplugging a device.

WARNING: Do not insert any objects into the outlets other than electrical plugs. Treat the outlets on Cybertruck the same as you would any other outlet, and take care to ensure proper handling. Misusing outlets can cause serious injury.

WARNING: Protect the cargo bed outlets from moisture, water, and foreign objects at all times. If you see a foreign object in an outlet, or if the outlets appear corroded or damaged, do not use them.

WARNING: Do not use the cargo bed outlets if they are wet or covered in snow.

WARNING: If rain falls while an accessory is plugged in and drawing power from the cargo bed outlets, do not allow rain water to run along the length of charge cable, causing the outlets to become wet.

WARNING: Do not connect a power source (such as a solar panel or external battery) to a cargo bed outlet.

WARNING: As with any power outlet, do not leave children unattended near the cargo bed outlets and ensure the outlet cover is closed when the outlets are not in use.
Use voice commands to easily control settings and preferences without using the touchscreen. Voice commands are designed to understand natural requests. The following is a non-exhaustive list of actions that you can perform with voice commands:
- Adjust climate preferences
- Tweak the windshield wiper speed and frequency
• Control various aspects of your vehicle - Navigate to a location
- Call a contact
- Interact with apps and settings
To initiate a voice command, fully press the microphone button on the right side of the steering wheel. When a chime sounds, make your request.
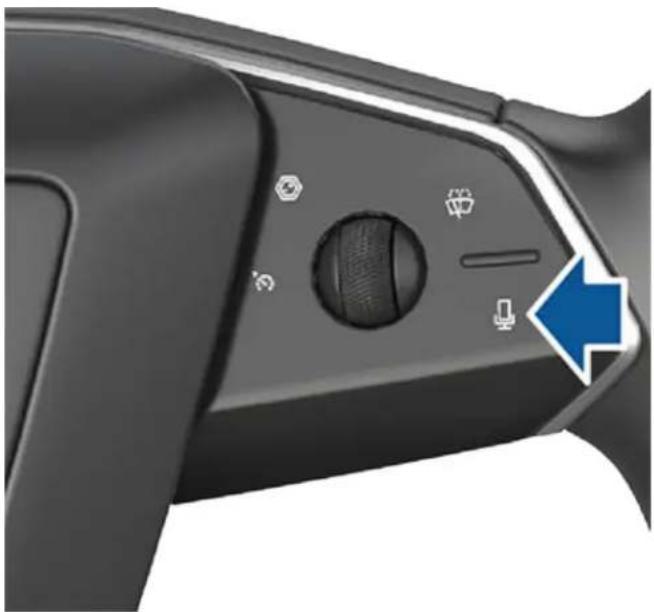
natural_image
Close-up of a black game controller handle with a scroll wheel and control buttons, showing no visible text or symbols.Examples of Voice Commands
Here is a list of example voice commands. This is not an exhaustive list. Tesla is constantly working to improve voice commands.
NOTE: Your vehicle must be in Park to enable some voice commands (such as Sentry Mode, Dog Mode, etc.).
Climate Controls
Adjust your climate preferences:
- "Make it cooler"
- "Make it warmer"
-
"Turn on/off the driver's seat heater"
• "Cool down the passenger"
• "Direct airflow to my face" -
"Sync climate"
- "Increase/decrease the fan speed"
• "Turn on/off rear defroster" - "Set the temperature/fan..."
- "Turn on recirculate"
Windshield Wiper
Update the windshield wiper speed and frequency based on changing road and weather conditions:
- "Speed up the wiper"
- "Turn on/off the wiper"
- "Increase/decrease windshield wiper speed by..."
Vehicle Controls
Modify various controls in your vehicle:
- "Sentry Mode on/off"
- "Keep my truck safe"
- "Lock/unlock the doors"
- "Turn on Dog Mode"
- "Fold/unfold the mirrors"
- "Open/close charge port"
- "Start/stop charging"
- "Open service settings"
- "Open the glovebox"
Navigation
Search for or navigate to a location:
- "Where is [location]?"
- "Drive to [location]"
- "Navigate to [location]"
• "Show nearby Superchargers" - "I'm feeling hungry/lucky" (see Maps and Navigation on page 167).
- "Stop navigation"
- "Mute voice guidance"
If you have defined a navigation address for your home or work locations, you can use a voice command to navigate there by saying "Navigate home" or "Take me to work".
Contacts
To call or text a contact on your Bluetooth-connected phone (see Phone, Calendar, and Web Conferencing on page 72), say:
- "Call [contact name/phone number]"
• "Text [contact name/phone number]"
Media
Listen to media and adjust your playback preferences:
- "Listen to [song name]"
• "Lower/raise the volume" - "Skip to next"
- "Pause/play song"
- "Change the source to [media source]"
To improve voice command recognition accuracy, provide multiple cues in your command, such as artist and song.
Apps and Settings
Easily navigate through your apps and settings:
- "Open [Toybox/browser/theater/phone]"
- "Search for..."
• "The screen is too bright"
• "Show me the Owner's Manual"
You can also file a bug report by saying "Report", "Feedback", or "Bug report".
For more information on voice commands, go to https://www.tesla.com/support/voice-commands.
NOTE: To support ongoing quality improvements, Tesla captures and processes voice command transcriptions (such as "set the temperature..."). Audio voice recordings are not collected, and transcriptions are not associated with your Tesla account or with your vehicle's identification number. To further protect your privacy, voice commands containing personal data are not captured (such as "Navigate to..." or "Make a call to...").
Your Cybertruck includes the following components that actively monitor the surrounding area:
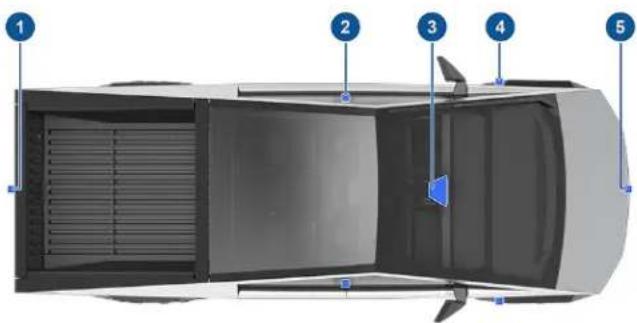
- A camera is mounted on the tailgate.
- A camera is mounted in each door pillar.
- Two cameras are mounted to the windshield above the rear view mirror.
- A camera is mounted above each front wheel.
- A camera is mounted above the grille on the front bumper.
Viewing Camera Feeds
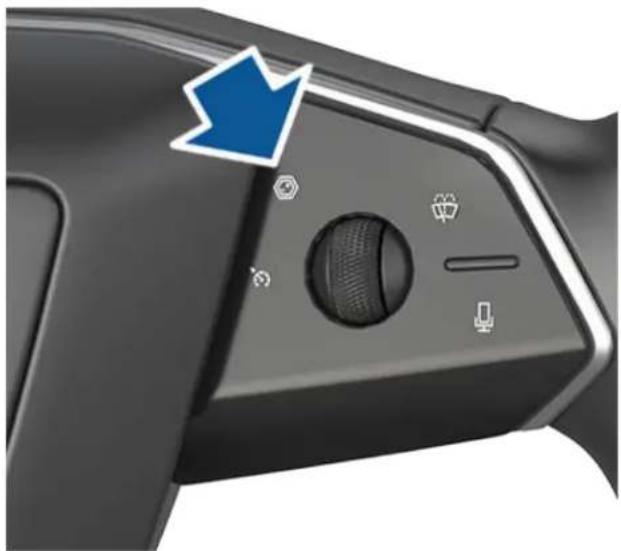
The Camera app shows the views from the side cameras, rear-facing camera, and front-facing camera. To open the Camera app, you can either:
- Open the app launcher and touch the Camera app.

- Touch the camera icon on the right side of the steering wheel.
natural_image
Close-up of a black game controller's grip panel with a blue arrow pointing to the button (no text or symbols visible)Swipe up or down to switch between the rear and front camera views. You can also zoom in on the rear view camera feed by pinching or tapping it.
The camera app opens automatically when you shift into Reverse.
Rear-Facing Camera
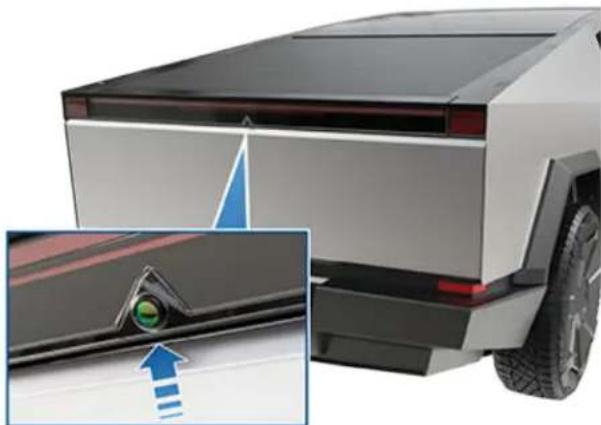
Cybertruck is equipped with a rear-facing camera mounted on the tailgate.
natural_image
Exterior view of a modern electric vehicle (no signage or text visible)Whenever you shift into Reverse, the touchscreen displays the view from the rear-facing camera. Lines show your driving path based on the position of the steering wheel. These lines adjust as you move the steering wheel. The tailgate must be fully closed in order to see the rear view and lines on the display.
A vertical red bar appears over the rear view camera feed if Cybertruck detects an object (such as another vehicle or a pedestrian) about to cross behind the vehicle. For more information, see Rear Cross-Traffic Alert on page 147.
You can choose to always show the rear view camera feed when the tonneau cover is closed by touching Controls > Display > Rear View Camera > Auto.
If a black screen appears on the touchscreen instead of the rear view camera feed when in Reverse, use the rear view mirrors and ensure your surroundings are safe before continuing to Reverse. If inoperability of the rear view camera persists, try restarting the touchscreen (see Restarting the Touchscreen on page 10). If the camera feed still shows as a black screen after that, use the mobile app to schedule a service appointment.

WARNING: Never depend on the cameras to inform you if the area around you is free of objects and/or people. The cameras may not detect objects or barriers that can potentially cause damage or injury. In addition, several external factors can reduce the performance of the cameras, including a dirty or obstructed lens. Therefore, depending on the cameras to determine if Cybertruck is approaching an obstruction can result in damage to the vehicle and/or objects and can potentially cause serious injury. Always inspect the area with your own eyes. When reversing, perform shoulder checks and use all mirrors. Use the cameras for guidance purposes only. It is not intended to replace your own direct visual checks and is not a substitute for careful driving.
Front-Facing Camera
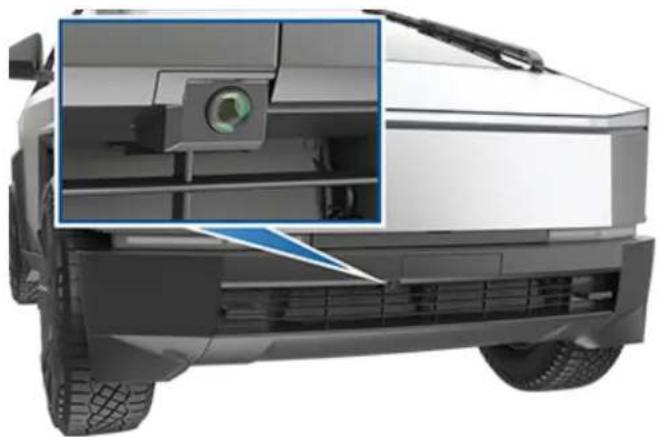
Your Cybertruck is equipped with a front-facing camera located above the grille on the front fascia.
natural_image
Front view of a modern electric vehicle (no visible text or symbols)To display the view from the front-facing camera at any time, open the app launcher and touch the Camera app or touch the camera icon on the right side of the steering wheel. Swipe up or down to switch between the rear, front, and side camera views.

WARNING: Never depend on the camera to inform you if the area around you is free of objects and/or people. The camera may not detect objects or barriers that can potentially cause damage or injury. In addition, several external factors can reduce the performance of the cameras, including a dirty or obstructed lens. Therefore, depending on the cameras to determine if Cybertruck is approaching an obstruction can result in damage to the vehicle and/or objects and can potentially cause serious injury. Always inspect the area with your own eyes. Use the camera for guidance purposes only. It is not intended to replace your own direct visual checks and is not a substitute for careful driving.
Cabin Camera
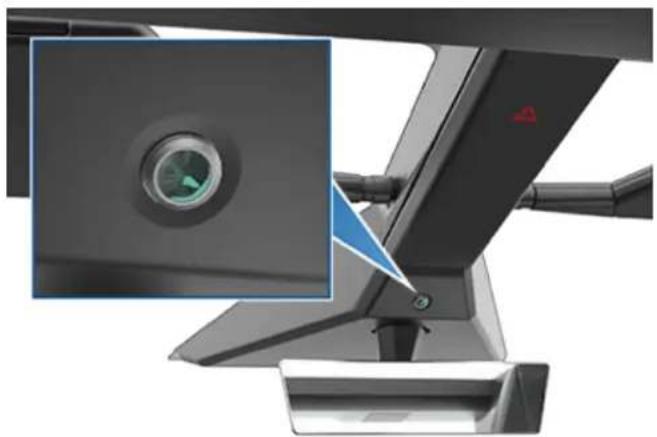
Your Cybertruck is equipped with a cabin camera located above the rear view mirror.
natural_image
Close-up of a computer monitor with a green circular dial and a blue triangular overlay (no text or symbols visible)The cabin camera can determine driver inattentiveness and enhances active safety features (such as Forward Collision Warning). You can also view the feed from this camera in the Tesla mobile app when Sentry Mode Live Camera is enabled (see Sentry Mode on page 155).
Data Sharing
By default, images and video from the camera do not leave the vehicle itself and are not transmitted to anyone, including Tesla, unless you enable data sharing. If you enable data sharing and a safety critical event occurs (such as a collision), Cybertruck shares short cabin camera video clips with Tesla to help us develop future safety enhancements and continuously improve the intelligence of features that rely on the cabin camera. Data may also be shared if diagnostics are required on cabin camera functionality. Cabin camera does not perform facial recognition or any other method of identity verification. To protect your privacy, cabin camera data is not associated with your vehicle identification number.
To adjust your data sharing preferences touch Controls > Software > Data Sharing > Allow Cabin Camera Analytics. You can change your data sharing settings at any time.
Cleaning a Camera
To ensure a clear picture, the camera lens must be clean and free of obstructions, condensation, or damage.
Condensation can form inside the camera enclosures, especially if you park outside in cold or wet conditions. The touchscreen may display an alert stating that a camera is blocked and that some (or all) Autopilot features may be temporarily restricted until the camera vision is clear. To proactively dry the condensation, precondition the cabin by setting it to a warm temperature, turning the windshield defroster on, and directing the front air vents toward the door pillars (see Mobile App on page 66).
Remove any build-up of dirt or debris by spraying water onto the camera lens and carefully drying it with a microfiber cloth. Clean the camera lens at least weekly during wet weather (snow, rain, sleet) and every month during dry weather.

The front-facing camera is equipped with a sprayer nozzle. To clean the front-facing camera, touch the app launcher, select the Camera app, and press the spray icon.

CAUTION: Do not use chemical-based or abrasive cleaners. Doing so can damage the surface of the lens.
Drive to Calibrate Cameras
Before some Autopilot features can be used for the first time or after some types of service repairs, cameras must complete a self-calibration process. When the cameras are calibrating, the touchscreen displays a progress indicator. When calibration is complete, Autopilot features are available for use.
Calibration typically completes after driving 20–25 miles (32–40 km), but the distance varies depending on the conditions. Calibration completes more quickly when driving on a straight road that has multiple lanes and highly visible lane markings in both the driving lane and adjacent lanes (at least two lanes over on each side of the vehicle). For best results, drive in the middle lane of a multi-lane highway (ideally with at least five lanes) that has clear lane markings and minimal traffic.
Schedule a service appointment only if your Cybertruck has not completed the calibration process after driving approximately 100 miles (160 km) in the described conditions.
If a camera has shifted from its previously calibrated position (for example, the camera or windshield was replaced), clear the calibration by touching Controls > Service > Camera Calibration > Clear Calibration. When the calibration is cleared, Cybertruck repeats the calibration process.
NOTE: Cybertruck must repeat the calibration process if the cameras are serviced by Tesla, and in some cases after a software update.
NOTE: If you attempt to use a feature that is not available until the calibration process is complete, the feature is not available and the touchscreen displays a message.
Types of Keys
NOTE: In the event you lose both key cards, schedule a service appointment through the mobile app to replace and pair them.
Cybertruck supports the following types of keys:
- Phone key - You can set up your personal phone as a "phone key" that communicates with Cybertruck using Bluetooth (BLE). A phone key supports automatic locking and unlocking.
- Key card - Tesla provides key cards that communicate with Cybertruck using short range radio-frequency identification (RFID) signals. Unlike the phone key, the key card does not support automatic locking and unlocking and must be touched against a card reader. In situations where your phone key has a dead battery, or is lost or stolen, use your key card to unlock, drive, and lock Cybertruck.
Cybertruck supports a total of 19 keys, which can include phone keys and key cards.

CAUTION: Remember to bring a key (and a backup key) with you when you drive. Although you can drive Cybertruck away from a detected key, you will be unable to power it back on after it powers off.
Phone Key

CAUTION: Do not leave your paired phone in your vehicle (for example, if you are hiking or at the beach). If you must leave your phone in the vehicle, disable Bluetooth and/or turn the phone off and ensure that you keep a key card with you.
Using your phone as a key is a convenient way to access your Cybertruck. As you approach your vehicle, the smartphone's Bluetooth signal is detected and the doors unlock when you press a door open button. Likewise, when you exit and walk away with the phone key, doors automatically lock (provided the Walk-Away Door Lock feature is turned on; see Walk-Away Door Lock on page 34).
Before you can use a phone to access Cybertruck, follow these steps to authenticate it (see Add a Phone Key on page 31)
Once a phone has been authenticated, it no longer requires an internet connection to be used as a phone key for Cybertruck. However, to use the phone hands-free, access your phone's contacts, play media from it, etc., you must also pair it and connect it as a Bluetooth device (see Bluetooth on page 70). Cybertruck detects your phone when within Bluetooth range but cannot tell whether your phone is inside or outside of the vehicle, , or if it is far away (such as in your front trunk or buried in a bag). Do not leave your smart phone in the front trunk.
NOTE: Some Android smartphones with NFC capability can be used to lock/unlock your vehicle, just like using a key card. Ensure the Tesla mobile app is correctly paired to your vehicle and enable the NFC function on your phone. Once enabled, simply hold the phone to the driver's side door pillar to lock or unlock the door. Refer to your smartphone's instructions for specific information on how to do this.
NOTE: You can also set up an Apple Watch to be used as a key.
Keep in mind that the phone key defaults as the "primary" key and the vehicle uses Bluetooth to detect your phone's proximity to the vehicle. The vehicle cannot detect whether the phone is inside or outside of Cybertruck. If you leave your paired phone inside the vehicle with Bluetooth enabled, it is essentially the same as leaving your keys in your vehicle with the doors unlocked – even if you press the lock icon on the mobile app. Therefore, your vehicle may not be secure if you lock a paired phone key inside because Cybertruck will unlock the door when the exterior door handle is pulled since the phone key is already detected.
If you want to lock the doors while inside Cybertruck so that they cannot be opened from the outside, close the doors and use the lock icon on the touchscreen. This temporarily overrides any phone lock settings, such as Walk-Away Door Lock. Otherwise, because your phone is enabled as a key, the doors will unlock when the exterior door handles are pulled even if you press the lock icon on your mobile app. If you open the door from the inside, that will once again allow the doors to be opened from the outside so long as the phone key is detected.
Key Card
Tesla provides you with two Cybertruck key cards, designed to fit in your wallet.
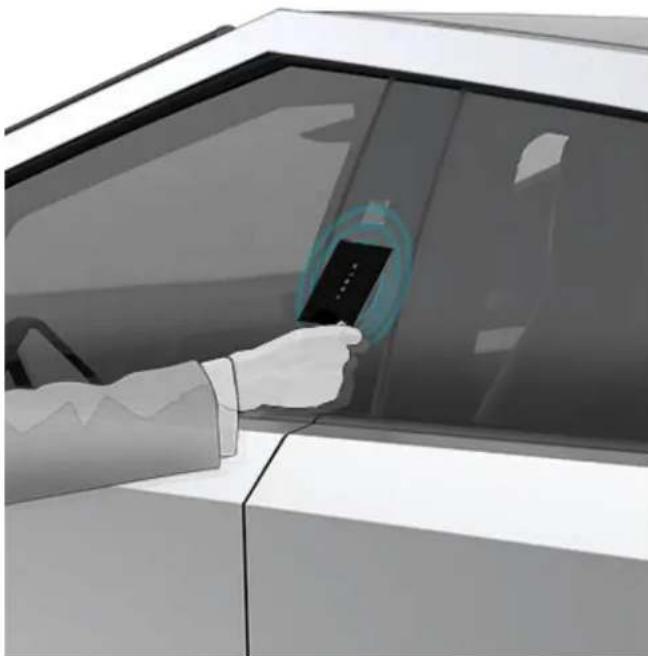
To use a key card to unlock or lock Cybertruck from outside, position the card as shown and tap it against the card reader located approximately one third the way up of the driver's side door pillar. When Cybertruck detects the key card, the exterior lights flash, the mirrors unfold or fold (if Fold Mirrors is on), the horn sounds (if Lock Confirmation Sound is on), and the doors unlock or lock.
NOTE: You may need to hold the key card against the transmitter for a few seconds.
natural_image
Illustration of a person using a smartphone to scan off a car window (no text or symbols visible)Once inside, power up Cybertruck by pressing the brake pedal within two minutes of scanning the key card (see Starting and Powering Off on page 75). If you wait longer than two minutes, you must re-authenticate by placing the key card near one of the card readers located on the wireless phone chargers on the center console. When your key card is detected, your two-minute authentication period restarts.
natural_image
Interior view of a smart home with a device and circular light indicators (no text or symbols visible)NOTE: If enabled, Walk-Away Door Lock (see Walk-Away Door Lock on page 34) operates only when you walk away using a phone key. When you walk away carrying your key card, Cybertruck does not automatically lock.
Managing Keys
To display a list of all keys that can access Cybertruck, touch Controls > Locks. An icon displays next to each key to indicate whether the key is a phone key or a key card. Use this list to manage keys that have access to Cybertruck. To add or delete keys, see Adding Keys from the Touchscreen on page 32.
Cybertruck supports up to 19 keys. When you reach this limit, you must delete a key before adding a new one.
You can pair a key card to multiple Tesla vehicles. This prevents you from having to deal with multiple keys when you switch vehicles. Key cards can be paired and used with many vehicles at a time. Pairing with a vehicle enables you to access the vehicle and enable driving.
NOTE: If you customize the name of a paired key card or key fob on one vehicle (by touching the pencil icon), any other vehicle to which the key card or key fob is authenticated also displays the changed name.
Add a Phone Key
You can use a phone to access Cybertruck after you add your phone as a phone key. Before you begin pairing your phone key, ensure:
- Your phone's Bluetooth setting is turned on.
- The Tesla mobile app can access your phone's Bluetooth. On your phone, navigate to Settings, choose the Tesla mobile app, and ensure the Bluetooth setting is turned on.
- Allow the Tesla mobile app to access your location. For the best experience, keep the mobile app running in the background.
- Mobile access is enabled for your vehicle. On the touchscreen, touch Controls > Safety > Allow Mobile Access.
NOTE: Cybertruck communicates with your phone using Bluetooth. Keep in mind that your phone must have enough battery power to support Bluetooth (some phones disable Bluetooth when the battery is low).
To add a phone key:
- Download the Tesla mobile app to your phone.
- Log in to the Tesla mobile app using your Tesla account username and password.
NOTE: You must remain logged in to your Tesla account to use your phone to access Cybertruck.
NOTE: Many convenience features for accessing Cybertruck, such as hands-free frunk, can only be used with the vehicle currently selected in the mobile app. If multiple vehicles are linked to your Tesla account, you must ensure that the vehicle you want to use such convenience features with is currently selected on the mobile app.
- While inside or near the vehicle, open the Tesla mobile app and touch Set Up Phone Key on the main screen, or navigate to Security > Set Up Phone Key.
You can also use an Apple Watch as a key. While inside or near the vehicle, open the Tesla mobile app on your Apple Watch and touch Set Up Watch Key (see Mobile App for Apple Watch on page 66).
- Follow the prompts on the mobile app and vehicle touchscreen to set up your phone key.
NOTE: You must have your key card available in order to set up a phone key.
Cybertruck can connect to three phone keys simultaneously. Therefore, if more than three phone keys are detected and you want to authenticate or pair a different phone, move the other connected phone key(s) out of range or turn off its Bluetooth setting.
Adding Keys from the Touchscreen
If you have a key card that is already paired with your vehicle, you can pair a new key using the touchscreen.
- On the touchscreen, touch Controls > Locks > Keys > Add Key.
- Scan your key card on one of the card readers located on the wireless phone chargers on the center console.
- Scan a key card that has already been paired to the vehicle to confirm new key pairing.
- When complete, the key list includes the new key. Touch the associated pencil icon to customize the name of the key.
Adding Keys from the Mobile App
If you are the owner of the vehicle, you can pair a new key using the Tesla mobile app. Adding keys from the Tesla mobile app can be helpful in the event that you don't have a working key card or key fob.
NOTE: Pairing a key with the mobile app is supported with version 4.29.0 of the Tesla mobile app on vehicles with software versions 2022.40 or higher.
- While inside or near the vehicle, open the Tesla mobile app on your smartphone.
- Touch Security & Drivers.
- Touch Add Key Card.
- Scan your key card on one of the card readers located on the wireless phone chargers on the center console.
- When the key is paired successfully, the mobile app shows a confirmation message. Touch Done in the mobile app and remove the key card from the card reader.
When complete, the key list on the touchscreen includes the new key. Touch the associated pencil icon to customize the name of the key.
Removing Keys
When you no longer want a key to access Cybertruck (for example, you lost your phone or key card, etc.), follow these steps to remove it.
- On the touchscreen, touch Controls > Locks.
- In the key list, find the key that you would like to delete and touch its associated trash icon.
- When prompted, scan an authenticated key on the card reader to confirm the deletion. When complete, the key list no longer includes the deleted key.
NOTE: Cybertruck requires at least one authenticated key card at all times. If only one key card remains on the key list, you cannot delete it.
Replacing Key cards
If you lose a key card, you can purchase replacement ones on the Tesla Shop. When ready to pair, simply follow the steps in Managing Keys on page 31. Remember to remove your old key cards from Controls > Locks > Keys for security purposes.
Opening and Closing Doors from Outside
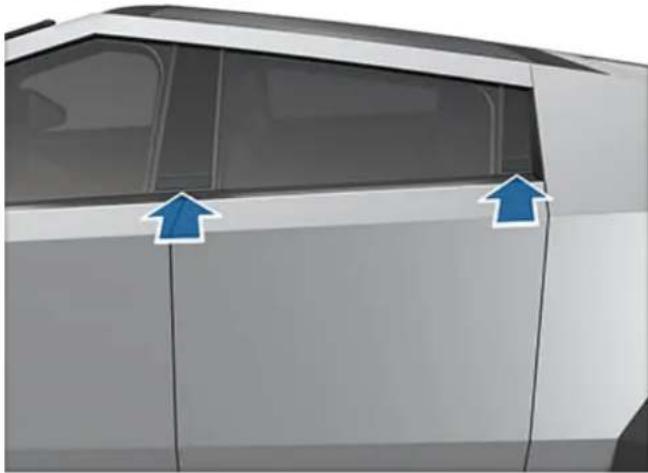
Doors are electrically powered. When you approach Cybertruck carrying a phone key, the doors and tailgate automatically unlock. To open a door, press the exterior door release button on the pillar to the right of each door. You can also open a door using the Tesla mobile app (see Mobile App on page 66).
natural_image
Side view of a car door with two blue arrows pointing to the front panel (no text or symbols visible)The doors do not automatically lock/unlock when you approach Cybertruck carrying only a key card. You must manually lock/unlock the vehicle. See Keys on page 30 for more information.

WARNING: Use caution around the panel edges on Cybertruck, including the doors, powered frunk, tailgate, and surrounding panels.

WARNING: When pulling the door open, always grasp the door at the top, as shown. Keep hands and fingers away from the opening edge and supervise children if they open and close the doors. This is especially important when handling a front door where the opening edge can cause injury when opening or closing the associated rear door. Neglecting to follow the correct opening procedure for front and rear doors can lead to injury.

CAUTION: Slamming or forcing closures (including the doors, tailgate, or powered frunk) can result in damage not covered under warranty.

natural_image
Illustration of a hand gripping a wall corner, no text or symbols present
Whenever a door is open, the Door Open indicator displays on the touchscreen. Also, the image of the Cybertruck on the touchscreen's Controls window provides a visual representation of the open door(s).
To close a door from the outside, manually push it shut. Make sure no objects are in the way before closing the door.
Opening Doors from the Interior
To open a door while sitting inside, press interior door open button, located at the top of the interior door handle, and push the door open.
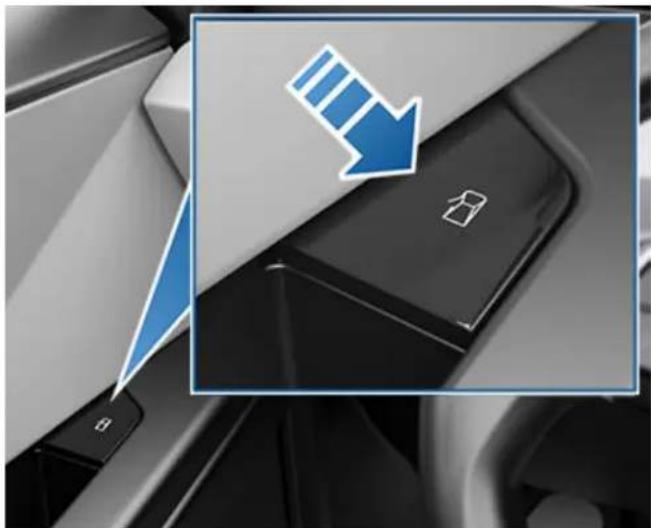
natural_image
Close-up of a black keyboard with a blue downward arrow icon, no visible text or symbolsNOTE: To prevent children from opening the rear doors, turn on child locks (see Child Locks on page 34).
NOTE: In the unlikely event that Cybertruck has no low voltage power, you will be unable to open the doors with the interior door open button. See Opening Doors with No Power on page 246 for more information.
Interior Locking and Unlocking
While sitting inside Cybertruck, you can lock or unlock all doors, the tailgate, and the powered frunk by touching the lock icon on the touchscreen.

The icon changes to indicate whether doors are locked or unlocked.
When you stop Cybertruck and engage Park, you can choose to unlock all doors. To turn this feature on or off, touch Controls > Locks > Unlock on Park.
Cybertruck automatically locks all doors (including the powered frunk and tailgate) when your driving speed exceeds 5 mph (8 km/h). The touchscreen displays a message if the tailgate remains open after the vehicle locks.
If you have enabled your phone as a key, your vehicle cannot tell whether your phone is inside or outside of the vehicle. If you want to lock the doors while inside Cybertruck so that they cannot be opened from the outside, close the doors and use the lock icon on the touchscreen. This temporarily overrides any phone lock settings, such as Walk-Away Door Lock. Otherwise, because your phone is enabled as a key, the doors will unlock when the exterior door handles are pulled even if you press the lock icon on your mobile app. If you open the door from the inside, that will once again allow the doors to be opened from the outside so long as the phone key is detected. (see Phone Key on page 30 for more information).
Walk-Away Door Lock
NOTE: Cybertruck will still lock, even if the tonneau cover is open. In other words, once the vehicle is locked, the tonneau cover is locked in its current position and cannot be open/closed using the tonneau cover switch on the vehicle. Always double check to make sure the tonneau cover is closed.
The doors, tailgate, and powered frunk can automatically lock when you walk away carrying your phone key. To turn this feature on or off, touch Controls > Locks > Walk-Away Door Lock.
NOTE: If you have authenticated an Apple Watch to be used as a key, it also works with Walk-Away Lock.
When the vehicle locks, the exterior lights flash once. To also sound a confirmation chime when Cybertruck locks, touch Controls > Locks > Lock Confirmation Sound.
Cybertruck does not automatically lock if:
- You choose Exclude Home and Cybertruck is parked at the location you have designated as Home. For details on how to designate a location as Home, see Home, Work, and Favorite Destinations on page 169.
- A key is detected inside Cybertruck (such as your phone or a key card resting on the card reader).
- A door or the powered frunk is not fully closed.
- The phone key's Bluetooth is not able to communicate with the vehicle or the phone's battery is dead.
- If Cybertruck detects an authenticated phone key for several minutes after you exit the vehicle and close all doors, Walk-Away Lock disables and doors do not lock when you walk away. In this case, you must manually lock your vehicle using a key card until after your next drive.
- The driver exits the vehicle without using the driver's door.
NOTE: It is your responsibility to ensure Cybertruck is locked, even when Walk-Away Door Lock is enabled. You can check if Cybertruck is locked from the Tesla mobile app (see Mobile App on page 66).
Driver Door Unlock Mode
Enabling Controls > Locks > Driver Door Unlock Mode only unlocks the driver's door when you first unlock Cybertruck. To unlock the remaining doors, long press the interior door open button, or use the touchscreen or mobile app.
Disabling Driver Door Unlock Mode unlocks all doors, the powered frunk, and the tailgate when you first unlock Cybertruck.
Car Left Open Notifications
Receive a mobile notification if a door, the powered frunk and/or windows are left open or if Cybertruck is left unlocked unexpectedly. Touch Controls > Locks > Car Left Open Notifications.
NOTE: Cybertruck will still lock, even if the tonneau cover is open. Always double check to make sure the tonneau cover is closed. Car Left Open Notifications may not notify you if the tonneau cover is left open.
Child Locks
Cybertruck has child locks on the rear doors to prevent them from being opened using the interior door open buttons. On the touchscreen, touch Controls > Locks > Child Lock. You can choose Both to engage the child lock on both rear doors, or you can choose Left or Right to engage it on just a specific door.

WARNING: Tesla recommends turning on child locks whenever a child is seated in a rear seat.
Opening and Closing

CAUTION: The windows automatically lower slightly when you open or close a door. This is normal and avoids damage to the window when the door opens. If you manually raise a window when the door is open, ensure it is slightly lowered before closing the door.
Press down on a switch to lower the associated window. Window switches operate at two levels:
- To lower a window fully, press the switch all the way down and immediately release.
- To lower a window partially, press the switch gently and release when the window is where you want it.
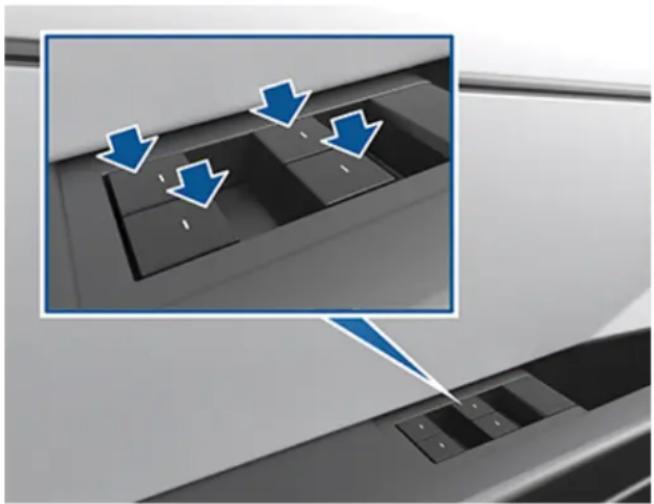
natural_image
Close-up of a computer keyboard with blue arrows pointing to specific keys (no text or symbols visible)Similarly, pull a switch to raise the associated window:
- To raise a window fully, pull the switch all the way up and immediately release.
- To raise a window partially, pull the switch gently and release when the window is where you want it.
NOTE: If a window is fully lowered and you open the associated door, the window rises slightly. Likewise, if you fully lower a window while the door is already open, it stops slightly above the edge of the door. To fully lower a window while the door is open, press the switch again.
If a window is left open unintentionally, Cybertruck can send a notification to the mobile app (touch Controls > Locks > Car Left Open Notification, then choose Doors & Windows). However, it is your responsibility to ensure windows are closed after leaving the vehicle; do not rely on notifications to inform you.
Enable Close Windows on Lock by touching Controls > Locks > Close Windows on Lock to automatically close the windows whenever the vehicle locks.
NOTE: See Cold Weather Best Practices on page 164 for information on preparing windows for cold weather.

WARNING: Before closing a window, it is the driver's responsibility to ensure that all occupants, especially children, do not have any body parts extended through the window's opening. Failure to do so can cause serious injury.

WARNING: Never leave children unattended in Cybertruck.
Locking Rear Windows
To disable the rear window switches, touch Controls > Locks > Window Lock. Once locked, the rear windows can only be controlled from the driver's window switch. Touch Window Lock again to re-enable the rear window switches.

WARNING: To ensure safety, it is recommended that you lock the rear window switches whenever children are seated in the rear seats.
Calibrating Windows
In the unlikely event that a window behaves unexpectedly (fails to open or close properly, goes down more than normal when the door opens, etc.), you can calibrate it to potentially fix the issue.
To calibrate a window:
- Close the door with the affected window.
- Sit in the driver's seat and close the driver door.
- Using the window's switch on the driver's door, fully raise the affected window until it stops.
- Using the window's switch on the driver's door, fully lower the affected window until it stops.
- Repeat step 3 and fully raise the affected window until it stops.
If this does not resolve the issue after performing a few times, use your mobile app to schedule a Service appointment.
UV Index Rating
The windshield, windows, and glass roof in Cybertruck are excellent at protecting you from UV (ultraviolet) rays. The glass components score less than two on the UV Index scale. Review your region's UV Index specifications for more information.

WARNING: It is the occupant's responsibility to take the necessary precautions to ensure adequate UV protection.
Sun Visors and Vanity Mirrors
To protect occupants from sunlight coming through the windshield and side windows, flip the sun visor downward.
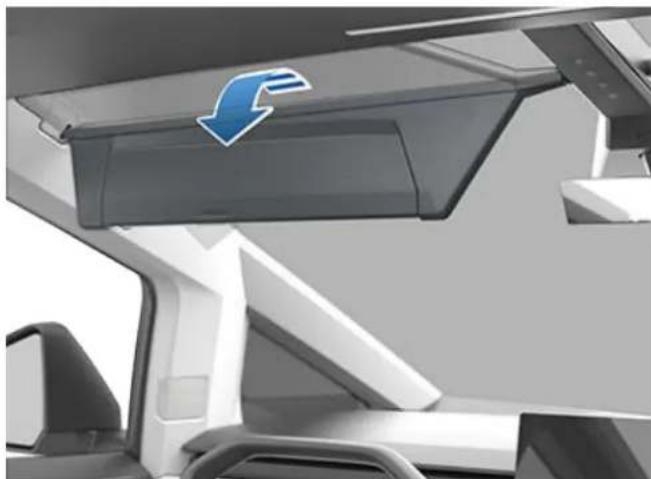
natural_image
Interior view of a modern vehicle showing a blue arrow pointing to a device component (no text or symbols visible)You can lower the extender or pivot the entire sun visor to the driver's window side provide maximum shade. Simply pull the inboard side of the sun visor out of the magnetic clip and pivot toward the window. Pivot the sun visor to return it back to its initial position and lock in place.
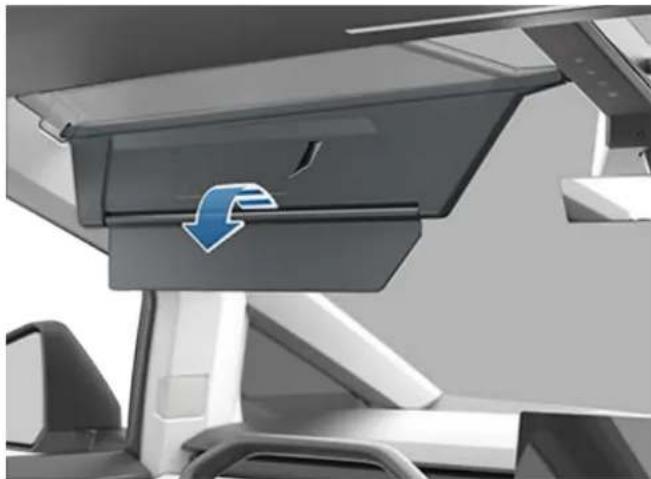
natural_image
Interior view of a vehicle showing a lift with a blue arrow indicating flow or direction (no text or symbols present)To expose the vanity mirror, lower the visor extender, then lower the mirror cover. While the cover is lowered, the mirror is exposed and lights are illuminated.
Correct Driving Position
The seat, head support, seat belt and airbags work together to maximize your safety. Using these correctly ensures greater protection.
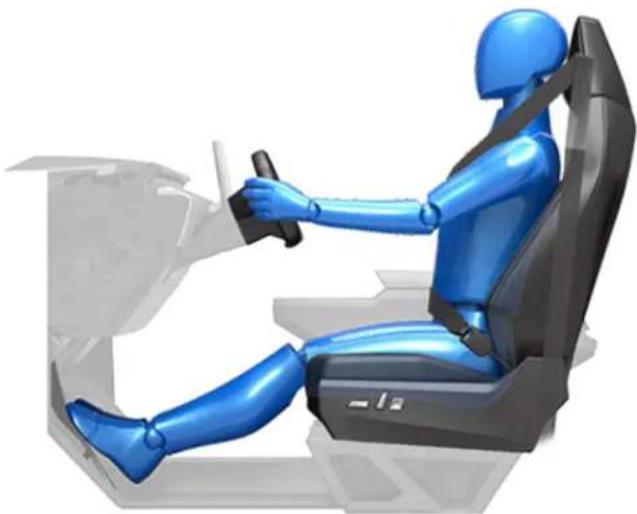
natural_image
3D rendering of a blue humanoid robot driving a car simulator (no text or symbols visible)Position the seat so you can wear the seat belt correctly, while being as far away from the front airbag as possible:
- Sit upright with both feet on the floor and the seat back in an upright position.
- Make sure you can easily reach the pedals and that your arms are slightly bent when holding the steering wheel. Your chest should be at least 10 inches (25 cm) from the center of the airbag cover.
- Place the shoulder section of the seat belt mid-way between your neck and your shoulder. Fit the lap section of the belt tightly across your hips, not across your stomach.
Adjusting Front Seats
NOTE: Only front seats in Cybertruck can be adjusted. The rear bench seat is stationary.
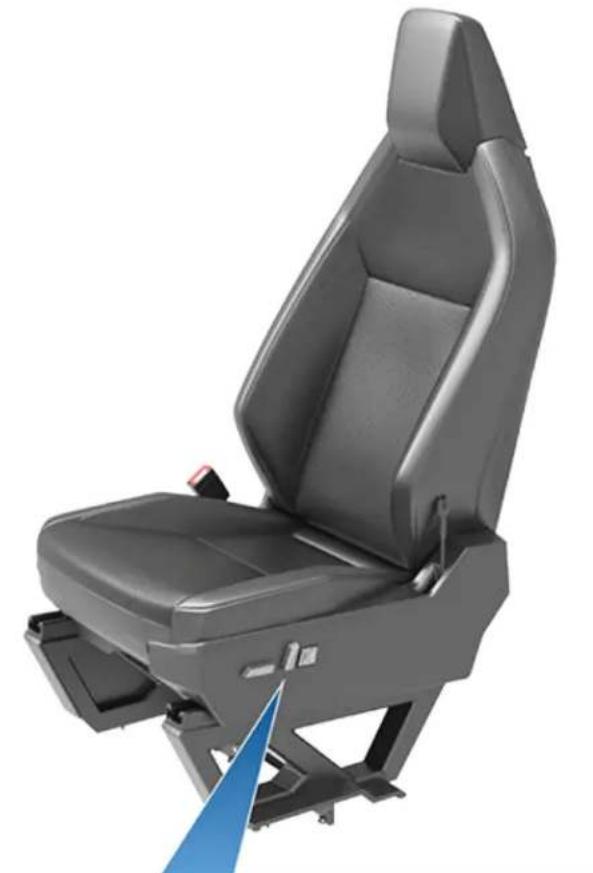
natural_image
Exterior view of a gray automotive seat with driver seat and seatbelt, no visible text or symbols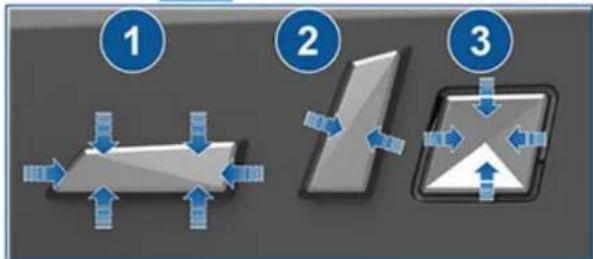
flowchart
graph TD
    A["Step 1: Satellite Communication"] --> B["Step 2: Data Transfer"]
    B --> C["Step 3: Display Interface"]
- Move seat forward/backward and adjust the seat's height and tilt angle up/down.
- Adjust backrest.
- Adjust lumbar support.
To adjust the front passenger seat using the touchscreen, touch Controls > Seats and use the arrows next to the front passenger seat visualization to move the seat forward or backward.
WARNING: Before adjusting a front seat, check that the area around the seat is free of obstacles (people and objects).
WARNING: Do not adjust seats while driving. Doing so increases the risk of a collision.

WARNING: Riding in a moving vehicle with the seat back reclined too much can result in serious injuries in a collision, as you could slide under the lap belt or be propelled into the seat belt. Ensure seat backs are reclined no more than 30 degrees when the vehicle is moving.
Head Supports
The front seats and the rear outboard seats are equipped with integrated head supports that you cannot adjust.
The rear center seat is equipped with an adjustable head support that you can raise and lower:
- When the seat is occupied by a passenger that is not in a child safety seat, align the center of the corresponding head support with the center of the occupant's head, and ensure the head support is locked into position.
- When the seat is occupied by a child safety seat equipped with an upper tether strap, leave the head support in the raised position after routing the upper tether straps under it.
To raise the head support, pull it upward to the desired position. To lower it, press and hold the button on the base of the post on the right side of the head support while pushing the head support downward.
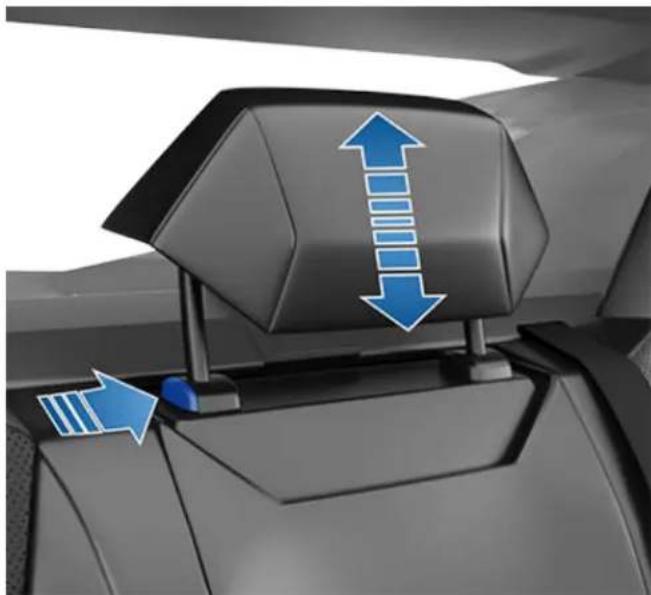
natural_image
Interior view of a car dashboard with blue directional arrows indicating flow or movement (no text or symbols)
WARNING: To minimize the risk of severe injury or death in the event of a collision, ensure that the rear center head support is positioned correctly before driving.
Removing/Installing the Rear Center Head Support
To remove the rear center head support:
- Fully raise the head support by pulling it upward.
- Press and hold the button located on the base at the right side of the head support.
- Insert a short, flat object (such as a small flat-head screwdriver) into the opening in the base of the opposite post and pull the head support upward.
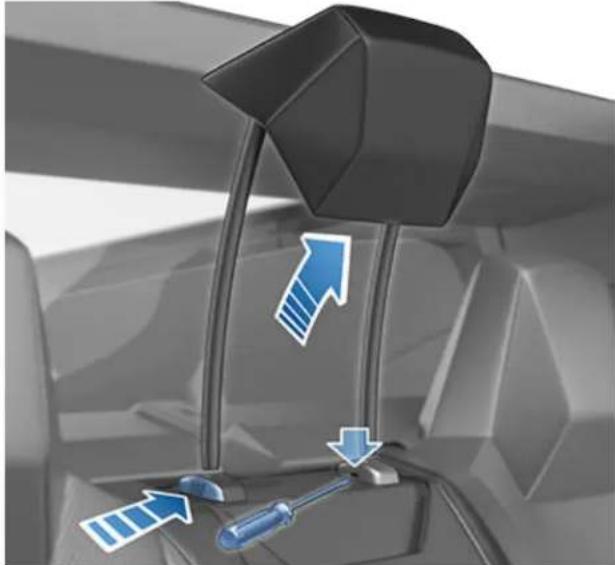
natural_image
Interior view of a car showing a steering wheel and blue directional arrows indicating flow or movement (no text or symbols)To re-install the rear center head support:
- With the front of the head support facing forward, align both posts into the corresponding holes on the seat back.
- While holding the button on the base of the post, press downward on the head support until it clicks into place.
- Pull upward on the head support to ensure that it is secure.

WARNING: Ensure that the head support is correctly installed before seating an occupant. Failure to do so increases the risk of injury or death if a collision occurs.
Seat Heaters
All seats (except the rear center seat) are equipped with seat heaters that operate at three levels from 3 (highest) to 1 (lowest). For details on how to operate the seat heaters, see Climate Controls on page 158.

WARNING: To avoid burns resulting from prolonged use, individuals who have peripheral neuropathy, or whose capacity to feel pain is limited because of diabetes, age, neurological injury, or some other condition, should exercise caution when using the climate control system and seat heaters.
Seat Covers

WARNING: Do not use seat covers on a seat equipped with a seat-mounted airbag (see Location of Airbags on page 50). Doing so could restrict deployment of the seat-mounted side airbags if a collision occurs. Also, if the vehicle is equipped with an occupant detection system that is used to determine the status of the passenger front airbag, seat covers may interfere with this system.
Wearing Seat Belts
Using seat belts and child safety seats is the most effective way to protect occupants if a collision occurs. Therefore, wearing a seat belt is required by law in most jurisdictions.
All seats are equipped with three-point inertia reel seat belts. Inertia reel belts are automatically tensioned to allow occupants to move comfortably during normal driving conditions.
Seat Belt Reminders

The seat belt reminder on the touchscreen alerts you if a seat belt for an occupied driver or passenger seat is unbuckled. If all occupants are buckled up and the reminder stays on, re-buckle seat belts to ensure they are correctly latched. Also remove any heavy objects (such as a briefcase) from an unoccupied seat. If the reminder light continues to stay on, schedule a service appointment.
You can temporarily disable a seat belt reminder associated with a rear seating position. This is useful when you are carrying an object in a rear seat that triggers the seat belt reminder alert. To disable the reminder, touch the associated seat on the seat belt reminder popup message that displays on the touchscreen when a seat belt reminder is active. When a reminder is disabled, the seat belt reminder icon is replaced by a seat icon, for the current drive only. Touch the seat again to re-enable the reminder.

WARNING: Seat belts must be worn by passengers in all seating positions. Do not disable a seat belt reminder when the seating position is occupied by a passenger.
To Fasten a Belt
- Ensure correct positioning of the seat (see Correct Driving Position on page 37).
- Draw the belt out smoothly, ensuring the belt lays flat across the pelvis, chest and mid-point of your collar bone, between the neck and shoulder. Ensure the belt is routed correctly and is not twisted. Never sit on the seat belt or any seat belt component.

WARNING: A twisted or incorrectly routed seat belt can cause damage and interfere with the functionality of the seat belt system.
- Insert the latch plate into the buckle and press together until you hear a click indicating it is locked in place.
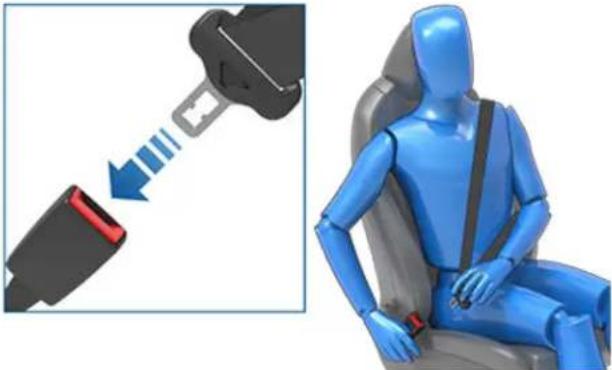
natural_image
Illustration showing a blue car seatbelt buckle being inserted into a blue passenger seatbelt, with no text or symbols present.-
Pull the belt to check that it is securely fastened.
-
Pull the diagonal part of the belt toward the reel to remove excess slack.
-
Pull the belt to check that it is securely fastened.
- Pull the diagonal part of the belt toward the reel to remove excess slack.
To Adjust the Shoulder Anchor Height
Cybertruck is equipped with an adjustable shoulder anchor for each front seat to ensure that the seat belt is positioned correctly. The seat belt should lay flat across the mid-point of your collar bone while in the correct driving position (see Correct Driving Position on page 37). Adjust the height of the shoulder anchor if the seat belt is not positioned correctly:
- To raise the shoulder anchor, slide it upwards.
- To lower the shoulder anchor, press and hold the arrow above the shoulder anchor while sliding the anchor downward. The arrow has a softer area underneath that engages a release button, allowing you to lower the anchor. Release the button when the shoulder anchor is in the desired position.
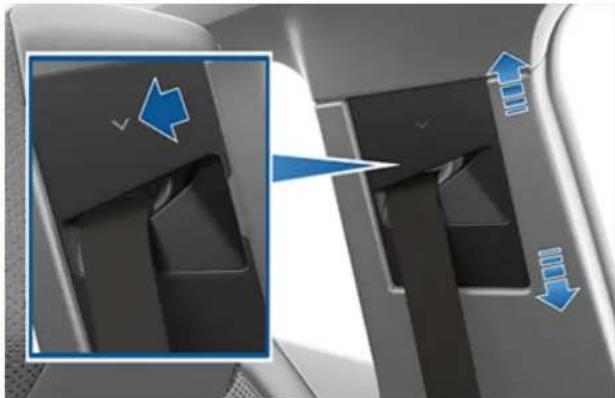
natural_image
Interior view of a vehicle airfoil with directional arrows indicating airflow or movement (no text or symbols)- Without pressing the button, pull firmly downward on the seat belt to check that it is locked into position.

WARNING: Ensure that the seat belt is positioned correctly and that the shoulder anchor is locked into position before driving. Riding in a moving vehicle with the seat belt positioned incorrectly or with the shoulder anchor not locked into position can reduce the effectiveness of the seat belt in a collision.
To Release a Belt
Hold the belt near the buckle to prevent the belt from retracting too quickly, then press the button on the buckle. The belt retracts automatically. Ensure there is no obstruction that prevents the belt from fully retracting. The belt should not hang loose. If a seat belt does not fully retract, schedule a service appointment.
Automatic Locking Retractor
All passenger seat belts include an automatic locking retractor (ALR) that you use to lock the seat belt in place. These self-locking retractors are typically used to securely hold a seat belt retained child safety seat (see Installing Seat Belt Retained Child Seats on page 45). To engage the locking retractor:
- Fully extract the seat belt webbing (beyond the length needed for a typical adult occupant).
- Fasten the seat belt as you normally would (see To Fasten a Belt on page 40).
- Allow the belt to retract. You will hear a clicking sound. The ALR mechanism operates as a ratchet, winding in slack and preventing the seat belt from extending.
The automatic locking retractor disengages by unbuckling and fully retracting the seat belt. The belt can then be worn as a normal belt, sliding freely in and out and locking tight only in an emergency.

WARNING: Do not use the automatic locking retractor (ALR) feature for booster seats in which a large child is restrained by the vehicle's seat belts directly, and therefore not using a child safety seat's integrated restraints.
Wearing Seat Belts When Pregnant
Do not put the lap or shoulder sections of the seat belt over the abdominal area. Wear the lap section of the belt as low as possible across the hips, not the waist. Position the shoulder portion of the belt between the breasts and to the side of the abdomen. Consult your doctor for specific guidance.
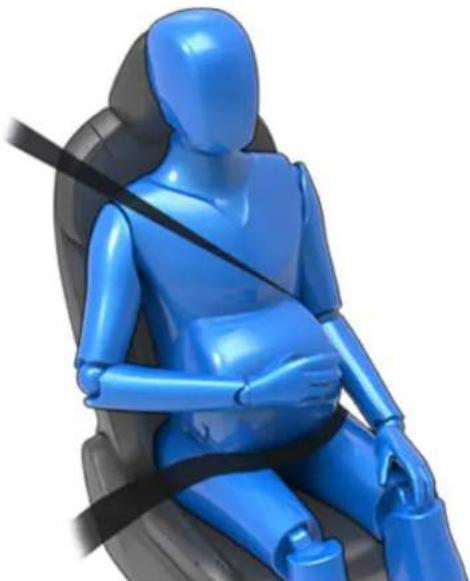
natural_image
Blue 3D model of a person sitting in a car seat with a black seatbelt (no text or symbols visible)WARNING: If the seat belt is uncomfortable, adjust the seating position instead of wearing the seat belt incorrectly.
WARNING: Never place anything between you and the seat belt to cushion the impact in the event of a collision.
Seat Belt Pre-tensioners
The front seat belts are equipped with pre-tensioners that work in conjunction with the airbags in a collision. The pre-tensioners automatically retract both the seat belt lower anchor and the upper shoulder webbing, reducing slack in both the lap and diagonal portions of the belts, resulting in reduced forward movement of the occupant.
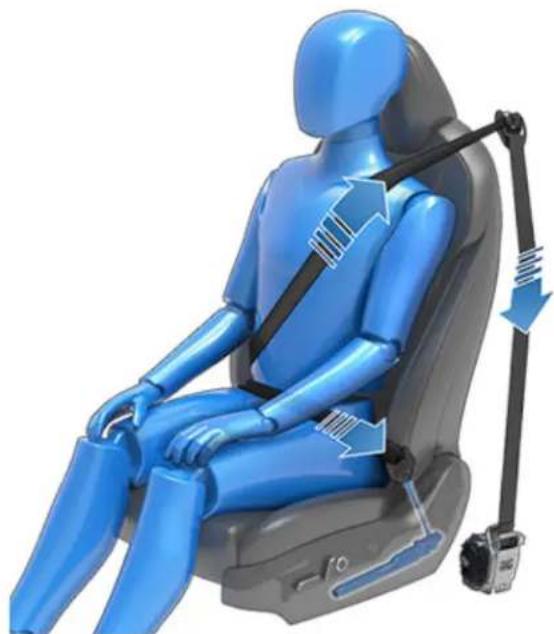
natural_image
3D illustration of a blue humanoid car seat with attached black cable, showing stress or pressure points (no text or symbols)The seat belts in all rear seating positions are equipped with shoulder pre-tensioners to retract the seat belt webbing to reduce forward movement of the occupant. If the pre-tensioners and airbags did not activate in an impact, this does not mean they malfunctioned. It usually means that the strength or type of force needed to activate them was not present.

WARNING: Do not bend, sit on, or interfere with the pre-tensioner assembly. Doing so can cause damage that interferes with the proper functionality of the seat belt system.

WARNING: Once the seat belt pre-tensioners have been activated, they must be replaced. After any collision, have the airbags, seat belt pre-tensioners and any associated components checked and, if necessary, replaced.
Testing Seat Belts
To confirm that seat belts are operating correctly, perform these simple checks on each seat belt:
- With the seat belt fastened, give the webbing nearest the buckle a quick and forceful pull. The buckle should remain securely locked.
- With the seat belt fastened, give the webbing closest to the door a quick and forceful pull. The permanent seat belt attachment should remain securely locked. Never attempt to remove this attachment.
- With the belt unfastened, unreel the webbing to its limit. Check that unreeling is free from snags, and visually check the webbing for wear. Allow the webbing to retract, checking that retraction is smooth and complete.
- With the webbing half unreeled, hold the tongue plate and pull forward quickly. The mechanism should lock automatically and prevent further unreeling.
If a seat belt fails any of these tests, have the vehicle serviced before driving with the seat occupied.
For information about cleaning seat belts, see Seat Belts on page 198.
Seat Belt Warnings

WARNING: Seat belts should be worn by all occupants at all times, even if driving for a very short distance. Failure to do so increases the risk of injury or death if a collision occurs.

WARNING: Secure small children in a suitable child safety seat as described in the Owner's Manual. Always follow the child safety seat manufacturer's instructions when installing.

WARNING: Ensure that all seat belts are worn correctly. An improperly worn seat belt increases the risk of injury or death if a collision occurs.

WARNING: Never sit on top of any seat belt component. Doing so can cause damage or interfere with the proper deployment of safety equipment.

WARNING: Do not wear seat belts over hard, fragile or sharp items in clothing, such as pens, keys, eyeglasses, etc. The pressure from the seat belt on such items can cause injury.

WARNING: Seat belts should not be worn with any part of the strap twisted.

WARNING: Each seat belt assembly must be used by one occupant only. It is dangerous to put a seat belt around a child being carried on an occupant's lap.

WARNING: Seat belts that have been worn in a collision must be inspected or replaced, if necessary, even if damage to the assembly is not obvious.

WARNING: Seat belts that show signs of wear (such as fraying), or have been cut or damaged in any way, must be replaced.

WARNING: Avoid contaminating a seat belt's components with any chemicals, liquids, grit, dirt or cleaning products. If a seat belt fails to retract or latch into the buckle, it must be replaced immediately.

WARNING: Do not make modifications or additions that can prevent a seat belt mechanism from taking up slack, or that can prevent a seat belt from being adjusted to remove slack. A seat belt with slack greatly reduces occupant protection.

WARNING: Do not make modifications that can interfere with the operation of a seat belt, or that can cause a seat belt to become inoperable.

WARNING: Do not use third party comfort and convenience products that attach to the seat belts.

WARNING: When seat belts are not in use, they should be fully retracted and not hanging loose. If a seat belt does not fully retract, schedule a service appointment.

WARNING: The seat belt system has no user serviceable parts and may contain pyrotechnics. Do not disassemble, remove, or replace components.
Passenger Front Airbag Must Be OFF
Your Cybertruck seat belts are designed for adults and larger children. You must restrain infants and small children in the rear seats only, and you must use a suitable child safety seat appropriate for the child's age, weight, and size.

WARNING: Never seat a child in the front passenger seat, even if using a child restraint system.

WARNING: Never seat a child on a seat with an ACTIVE AIRBAG in front of it. DEATH or SERIOUS INJURY to the child can occur.
Refer to the following label located on the sun visors.
NOTE: The image shown below is representative only and may not be identical to the label in your vehicle.
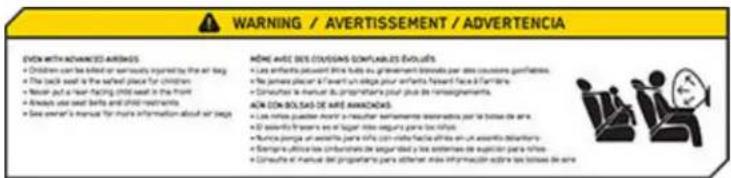
Cybertruck has an occupancy sensor in the front passenger seat that controls the status of the passenger front airbag (see Front Passenger Occupant Detection on page 52).

Before driving with a child seat on the front passenger seat (if permitted in your market region), always double-check the status of the passenger front airbag to confirm that it is OFF. The Passenger Airbag OFF indicator displays on the touchscreen when the airbag is off. When off, the passenger airbag does not inflate when a collision occurs.
When the vehicle detects a passenger in the front seat, the passenger airbag is on. When on, the Passenger Airbag OFF icon should NOT be visible on the touchscreen. In this case, the airbag will inflate when a collision occurs.

WARNING: It is the driver's responsibility to confirm that the passenger front airbag is OFF when a child is seated in the front passenger seat. If the passenger front airbag fails to disable with a child seat in position, place the child and child restraint system in the rear seat and schedule a service appointment.

WARNING: Always ensure that all Cybertruck seats are locked in position before traveling. Failure to do so increases the risk of injury. Pay attention to all warnings displayed on the touchscreen.

WARNING: Do not associate the Easy Entry setting with the driver's profile when a child is seated in a rear seat. Doing so can cause the driver's seat to push against the child, especially when a child is seated in a forward-facing child seat or booster seat. Do not rely on Cybertruck to recognize or accommodate a child seated in the rear seats while using this setting (see Driver Profiles on page 99).
Choosing a Child Safety Seat
All children age 12 and under should ride in the rear seats. Always use a child safety seat suitable for a young child's age and weight. The following table is based on child safety seat recommendations determined by the National Highway Traffic Safety Administration (NHTSA). For more information, go to www.nhtsa.gov/ChildSafety/Guidance.
| Category Infants Toddlers Young children | |||
| Age Birth to 1 year* Over 1 year* | 4 years and older, and less than | 57 in. (145 cm) tall | |
| Weight Up to at least 20 lbs (9 kg)* | Over 20 lbs (9 kg) (minimum) and up to 40 lbs (18 kg)* | Over 40 lbs (18 kg) | |
| Type of child safety seat Rear facing (or convertible) Forward facing (or convertible)* Forward facing or seat belt retained booster seat**** | |||
| Seat position Rear facing only* Rear facing as long as possible, then forward facing* | Forward facing | ||
| Recommended attachment method | If combined weight of child and safety seat is up to 65 lbs (29 kg), attach using either LATCH** (lower anchor only) or the seat belt only.*** If combined weight of child and safety seat is over 65 lbs (29 kg), attach using the seat belt only.*** | If combined weight of child and safety seat is up to 65 lbs (29 kg), attach using either LATCH** (both lower anchors and top tether anchor), or the seat belt and upper tether strap.*** If combined weight of child and safety seat is over 65 lbs (29 kg), attach using the seat belt and upper tether strap.*** | Secure the booster seat using lower LATCH anchors (if available) and then restrain the child with the seat belt. If the booster seat is not equipped with LATCH** anchors, then secure the booster seat with the child using the seat belt. However, if the combined weight of the child and booster seat exceeds 65 lbs (29 kg), secure the booster seat with the child using the seat belt only.**** |
*Many child safety seats currently available allow children to ride rear-facing using the child safety seat's integrated 5-point harness for a longer period of time BASED UPON SPECIFIC HEIGHT AND WEIGHT LIMITS. Keep your child in a rear facing seat for as long as possible. CHECK THE CHILD SAFETY SEAT MANUFACTURER'S INSTRUCTIONS AND CAREFULLY FOLLOW ALL INSTRUCTIONS.
**LATCH ("Lower Anchors and Tethers for Children") and ISOFIX are international standards for attachment points for child safety seats in passenger cars that enable compliant child safety seats to be quickly and safely secured. The system has other regional names including LUAS ("Lower Universal Anchorage System") or Canfix in Canada. It has also been called the "Universal Child Safety Seat System" or UCSSS.
***Subject to instructions provided by the child safety seat manufacturer.
****Keep your child in a forward facing child safety seat with a harness and tether until the child reaches the child safety seat's maximum allowable height or weight as specified by the manufacturer of the child safety seat.
*****In the center seating position, the vehicle's head support can be adjusted if the booster seat is not equipped with an integrated head support.

WARNING: Do not use LATCH anchors with child safety seats or booster seats that have an integral safety belt where the combined weight of the child plus the child safety seat exceeds 65 lbs (29 kg).

WARNING: Laws that govern how and where children should be carried when traveling in a vehicle are subject to change. It is the driver's responsibility to keep up to date on, and comply with, all current regulations in the region(s) where Cybertruck is driven. To check the child passenger safety laws for states in the U.S., go to: http://www.ghsa.org/html/stateinfo/laws/childsafety_laws.html.
Seating Larger Children
If a child is too large to fit into a child safety seat, but too small to safely fit into the standard seat belts, use a booster seat appropriate for the child's age and size. Carefully follow the manufacturer's instructions to secure the booster seat.
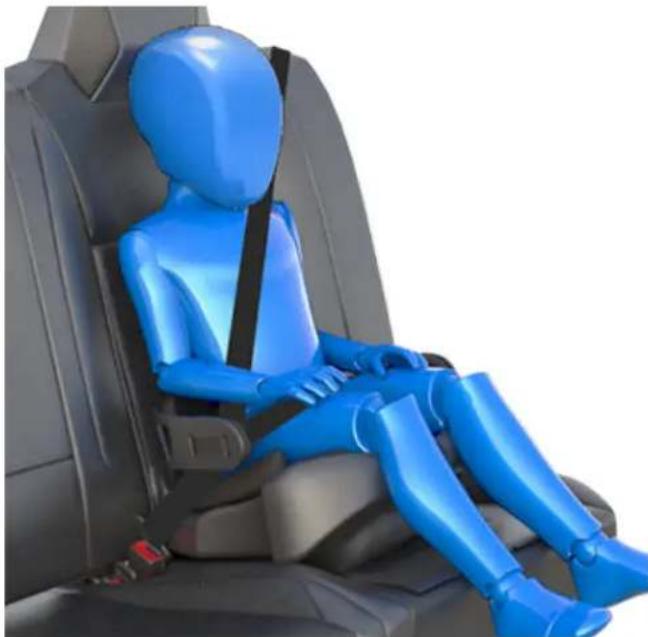
natural_image
Blue 3D humanoid robot sitting in a car seat, wearing a black seatbelt (no text or symbols visible)
WARNING: Larger children in booster seats should wear the seat belt like an adult. Do not fully extend the seat belt webbing to engage the automatic locking retracting (ALR).
Installing Child Safety Seats
There are two general methods used to install child safety seats:
- Seat belt retained – these seats are secured using the vehicle's seat belts. All passenger seating positions in Cybertruck support the use of seat belt retained child safety seats.
- LATCH retained – these seats attach to anchor bars built into the rear seats. All rear seating positions in Cybertruck support the use of LATCH retained child safety seats.
Check the child safety seat manufacturer's instructions and the table in this manual to determine which installation method to use. Some child safety seats can be installed using either method. Always follow the child safety seat manufacturer's instructions.
Installing Seat Belt Retained Child Seats
First, make sure that the child safety seat is appropriate for the weight, height, and age of the child.
Avoid dressing the child in bulky clothing and do not place any objects between the child and the restraint system.
Adjust harnesses for every child, every trip.
To securely hold child safety seats, all passenger seating positions are equipped with an automatic locking retractor (ALR) feature that, by fully extracting the seat belt (beyond the length needed for a typical adult occupant), locks the belt into place until the seat belt is unbuckled and the webbing is fully retracted. The ALR mechanism operates as a ratchet, winding in slack and preventing the seat belt from extending any further until it has been completely rewound. When installing a child safety seat with integrated restraints, engage the belt's automatic locking retractor by pulling the seat belt webbing until it is fully extended. The ALR system engages only when the seat belt is at its maximum extension point.
The automatic locking retractor (ALR) feature is not used for booster seats in which a large child is restrained by the vehicle's seat belts directly, and therefore not using a child safety seat's integrated restraints.
NOTE: An automatic locking retractor disengages only when the seat belt is unbuckled and fully retracted. The belt can then be worn as a normal belt, sliding freely in and out and locking tight only in an emergency. Once disengaged, the belt must be fully extended to re-engage the locking mechanism whenever you install a child safety seat.
Always follow the detailed instructions provided by the child safety seat manufacturer. General guidelines are provided below.
- Place the child safety seat in Cybertruck and fully extend the seat belt (doing so engages the automatic locking retractor (see Automatic Locking Retractor on page 41).
- Route the webbing and buckle the seat belt in accordance with the child safety seat manufacturer's instructions.
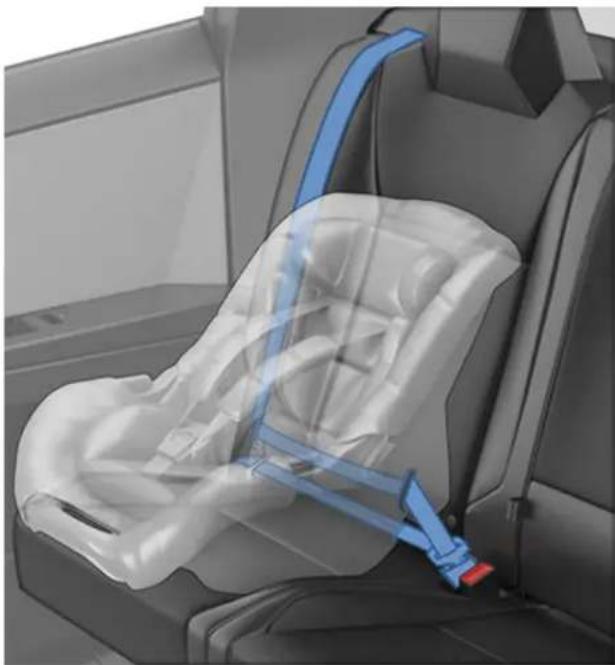
natural_image
Interior view of a car seat with blue safety belt and seatbelt, no visible text or symbols- Allow the seat belt webbing to retract, and remove all slack while firmly pushing the child safety seat into the seat.
- Once all slack has been removed, forcefully pull the seat belt webbing to confirm that the automatic locking retractor is engaged.
NOTE: The automatic locking retractor disengages only after unbuckling and fully retracting the seat belt webbing. Once disengaged, the belt must be fully extended to re-engage the locking mechanism.
- Attach the child safety seat's upper tether strap(s) (if equipped), as required by the manufacturer of the child safety seat (see Attaching Upper Tether Straps on page 47).
Installing LATCH (ISOFIX) Child Seats
Lower LATCH anchors are provided in all rear seating positions. The anchors are located between the seat's back rest and cushion. The exact location of each anchor is identified by a child safety seat identification label. The label is located on the seat back, directly above its associated anchor.
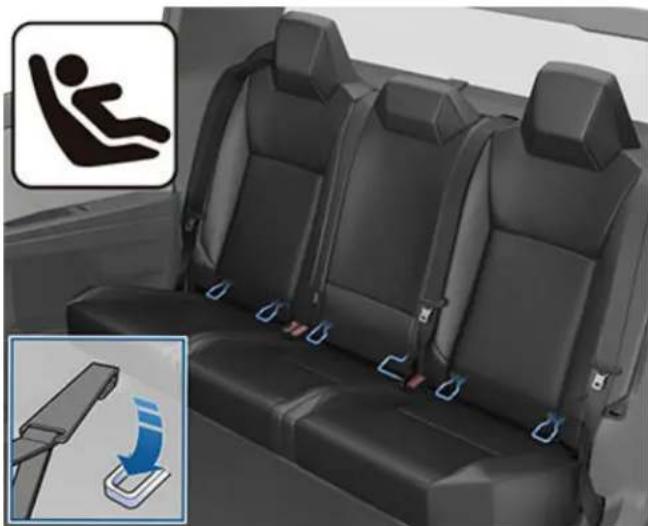
natural_image
Interior view of a car seatbelt seat with passenger seatbelt buckle, showing no text or symbols on the seats or background.Carefully read and follow the instructions provided by the manufacturer of the child restraint system. The instructions describe how to slide the child restraint system onto the seat's anchor bars until you hear it "click" into place. You may need to push the child restraint system firmly against the seat back to ensure it fits snugly.
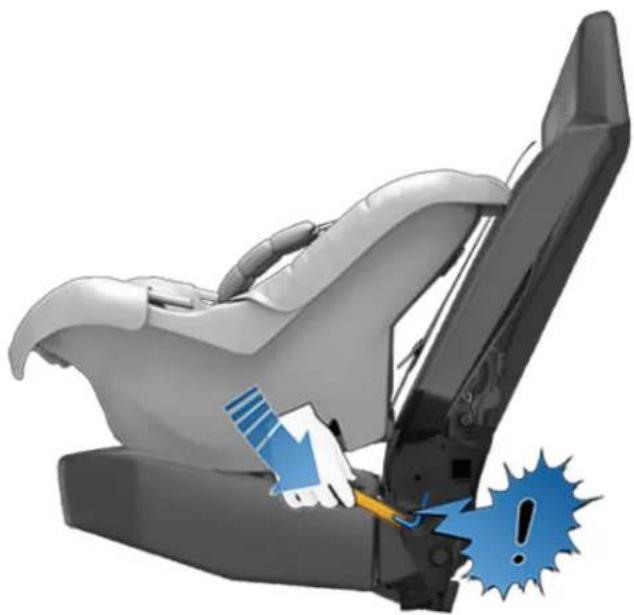
natural_image
Illustration of a car seatbelt with a blue warning symbol and an exclamation mark (no text or symbols present)Adjust until the child restraint system is fitted firmly against the seat back. Ensure the child restraint system fits snugly.
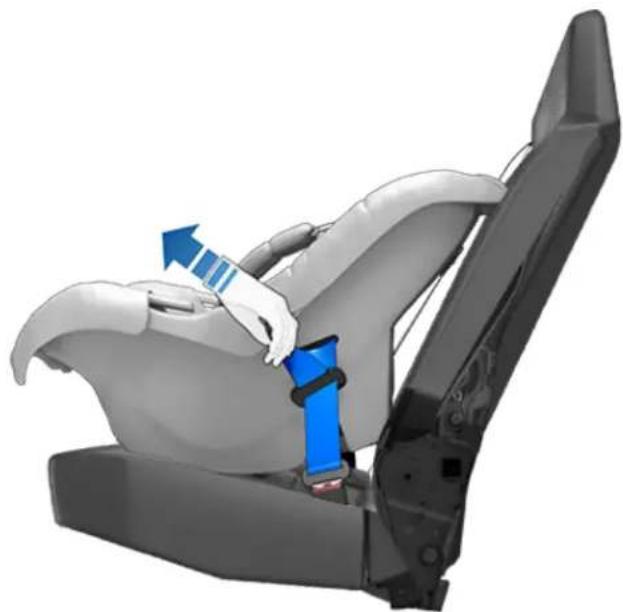
natural_image
3D rendering of a car seat assembly with blue belt and arrow indicating direction (no text or symbols)Before seating a child, ensure that the child restraint system is securely installed. Grasp the front of the child restraint system with one hand on each side, and attempt to:
- Twist the child restraint system from side to side.
- Pull the child restraint system away from the seat.
If the child restraint system moves away from the seat, both latches are not fully engaged onto the seat's anchor bars. You must reinstall it and try again. It is critical that both latches on the child restraint system are fully engaged.

WARNING: Do not use LATCH anchors with child seats or booster seats that have an integrated safety belt where the combined weight of the child plus the child restraint system exceeds 65 lbs (29 kg).
Attaching Upper Tether Straps
If the child safety seat is equipped with an upper tether strap, attach its hook(s) to the anchor point located behind the associated rear seat. To access the center anchor point, flip the cover upward. To access an outboard anchor point, slide the cover to one side.
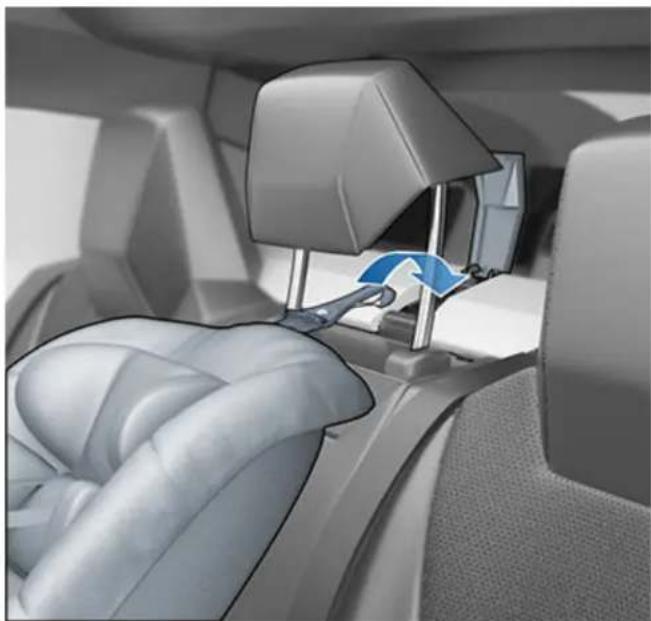
natural_image
Interior view of a car showing seatbelt and belt switch mechanism (no text or symbols visible)
WARNING: Tighten upper tether straps according to the instructions provided by the manufacturer of the child safety seat.
For the outboard seats, position dual-strap tethers on each side of the head support:
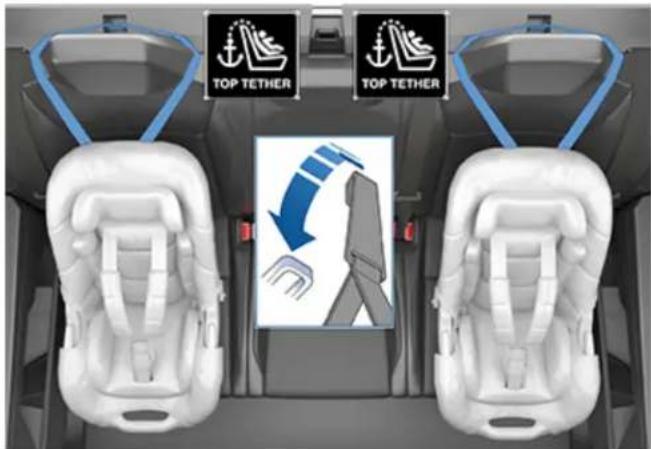
For the outboard seats, position single-strap tethers on the outside of the head support:
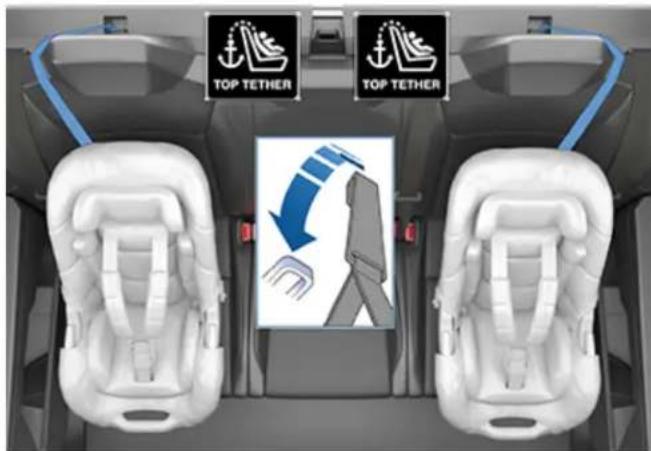
For the center seat, route dual-strap tethers between the posts under the head support. Lift the head support (see Head Supports on page 38), then route the straps. Keep the head support in the raised position.
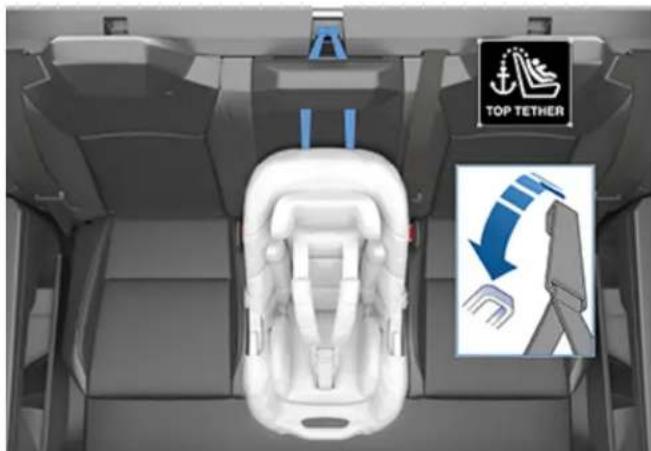

WARNING: In the center seat, do not run dual-strap tethers on each side of the head support.
For the center seat, route a single-strap tether between the posts under the head support. Lift the head support (see Head Supports on page 38), then route the strap. Keep the head support in the raised position.
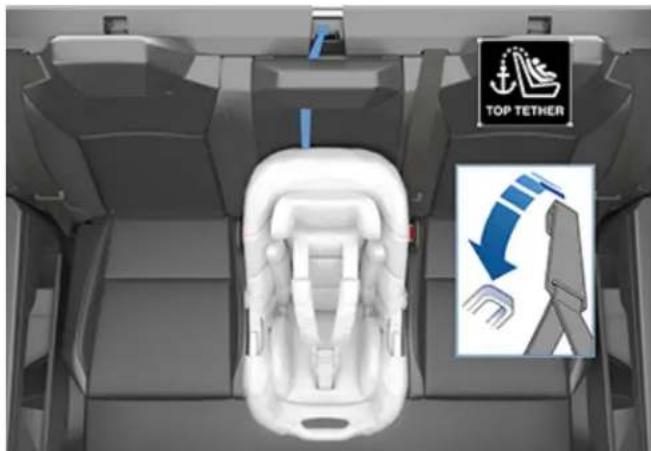
Testing a Child Safety Seat
Before seating a child, always make sure the child safety seat is not loose:
-
Hold the child safety seat by the belt path and try to slide the safety seat from side to side and front to back.
-
If the seat moves more than one inch (2.5 cm), it is too loose. Tighten the belt or reconnect the LATCH retained child safety seat.
-
If you are unable to reduce slack, try a different seat location or try another child safety seat.
Child Safety Seat Warnings
WARNING: Extreme hazard! Do not seat a child on the front passenger seat even if you are using a child safety seat. This seat has an airbag in front of it. Although this airbag is disabled when Cybertruck detects a lightweight passenger, do not rely on technology to protect your child.
WARNING: Child restraint systems are designed to be secured in vehicle seats by lap belts or the lap belt portion of a lap-shoulder belt. Children could be endangered in a crash if their child restraints are not properly secured in the vehicle.
WARNING: According to collision statistics, a child is safer when properly restrained in a rear seat instead of the front seat.
WARNING: Do not use a forward facing child safety seat until your child weighs over 20 lbs (9 kg) and can sit independently. Up to the age of two, a child's spine and neck are not sufficiently developed to avoid injury in a frontal impact.
WARNING: Do not allow a baby or infant to be held on an adult's lap. All children must be restrained in an appropriate child safety seat at all times.
WARNING: To ensure children are safely seated, follow all instructions provided in this document and by the manufacturer of the child safety seat.
WARNING: Children should ride in a rear facing child safety seat using the seat's integrated 5-point harness for as long as possible.
WARNING: Do not use seat belt extenders on a seat belt that is being used to install a child safety seat or booster seat.
WARNING: When seating larger children, make sure the child's head is supported and the child's seat belt is properly adjusted and fastened. The shoulder portion of the belt must be away from the face and neck, and the lap portion must not be over the stomach.
WARNING: Never attach two child safety seats to one anchor point. In a collision, one anchor point may be incapable of securing both seats.

WARNING: Child restraint anchors are designed to withstand only those loads imposed by correctly fitted child restraints. Under no circumstances are they to be used for adult seat belts, harnesses, or for attaching other items or equipment to the vehicle.

WARNING: Always check harnesses and tether straps for damage and wear.

WARNING: Never leave a child unattended, even if the child is secured in a child safety seat.

WARNING: Never use a child safety seat that has been involved in a collision. Have the seat inspected or replaced as described in the child safety seat manufacturer's instructions.
Location of Airbags
Airbags are located in the approximate areas shown below. Airbag warning information is printed on the sun visors.
Cybertruck is equipped with an airbag and lap/shoulder belt (also called seat belt assembly) at both designated front seating positions. The airbag is a supplemental restraint at those seating positions. All occupants, including the driver, should always wear their seat belts whether or not an airbag is also provided at their seating position to minimize the risk of severe injury or death in the event of a crash.
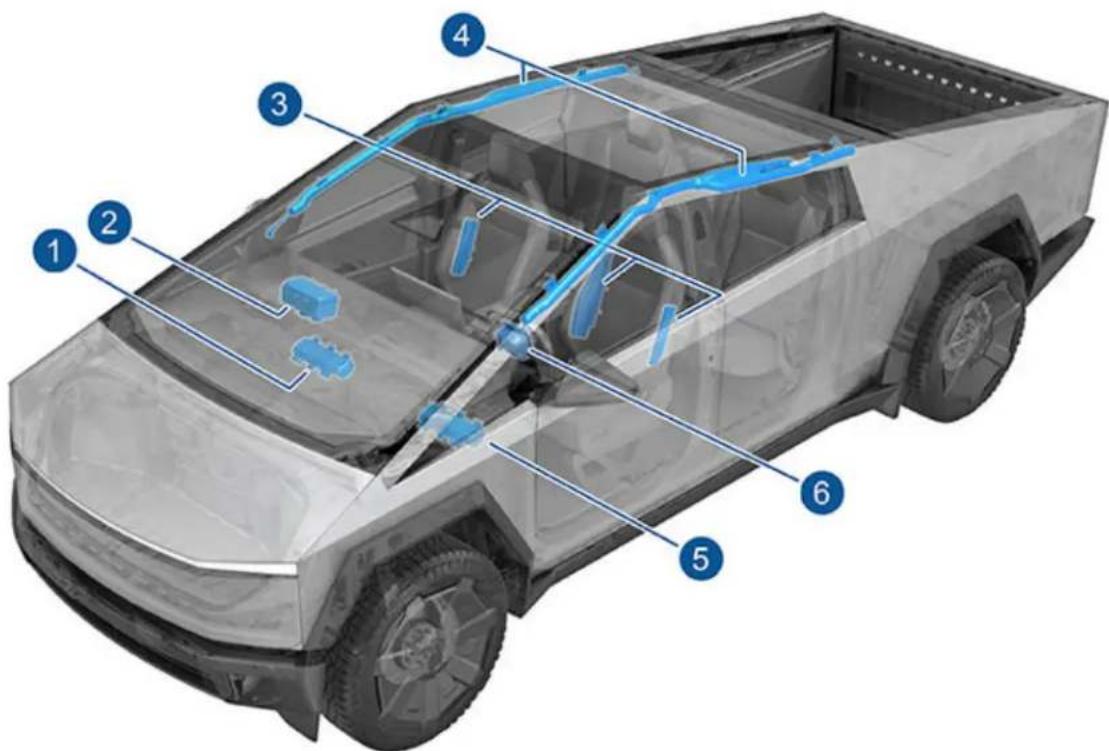
- Passenger knee airbag
- Passenger front airbag
- Seat-mounted airbags
- Curtain airbags
- Driver knee airbag
- Driver front airbag
How Airbags Work
Airbags inflate when sensors detect an impact that exceeds deployment thresholds. These thresholds are designed to predict the severity of a crash in time for the airbags to help protect the vehicle's occupants. Airbags inflate instantly with considerable force accompanied by a loud noise. The inflated bag, together with the seat belts, limits movement of occupants to reduce the risk of injury.
Front airbags are not ordinarily designed to inflate in rear collisions, rollovers, side collisions and when braking heavily or driving over bumps and potholes. Likewise, front airbags may not inflate in all frontal collisions, such as minor front collisions, underride collisions, or minor impacts with narrow objects (such as posts or poles). Significant superficial damage can occur to the vehicle without the airbags inflating and, conversely, a relatively small amount of structural damage can cause airbags to inflate. Therefore, the external appearance of the vehicle after a collision does not represent whether or not the front airbags should have inflated.

WARNING: Before modifying your vehicle to accommodate a person with disabilities in a way that may affect the airbag system, schedule a service appointment.
Types of Airbags
Cybertruck has the following types of airbags:
- Front airbags: The front airbags are designed to reduce injuries if larger children or adults are riding in the front seats. Follow all warnings and instructions related to seating a child on the front passenger seat (if permitted in your market region).
- Knee airbags: Knee airbags and the front airbags work together. The knee airbags limit the forward motion of the front seat occupants by restricting leg movement, thereby positioning the occupants so that the front airbags work more effectively.
- Seat-mounted airbags: A seat-mounted side airbag in the front seats helps protect the pelvis and the thorax region of the torso. The seat-mounted airbag on the inside portion of the driver's seat helps protect the head and torso. Seat-mounted airbags on both the impacted and non-impacted side of the vehicle inflate in the event of a severe side impact or a severe offset frontal impact.
- Curtain airbags: Curtain airbags help protect the head. Curtain airbags on both the impacted and non-impacted side of the vehicle inflate only if a severe side impact occurs, or if the vehicle rolls over.
Airbag Status Indicator
The status of the passenger front airbag displays on the touchscreen:

The Passenger Airbag Off indicator displays on the touchscreen when the passenger front airbag is OFF. When the passenger front airbag is OFF, it does not inflate when a collision occurs. When driving with a child seat on the front passenger seat (if permitted in your market region), always double-check the status of the passenger front airbag to confirm that it is OFF.
To protect an adult occupying the front passenger seat, ensure the passenger front airbag is ON – when ON, a Passenger Airbag OFF icon should not be visible on the touchscreen. When the passenger airbag is ON, it may inflate when a collision occurs.

The airbag indicator displays on the touchscreen for a few seconds at the start of every drive while checking the following functionality, as applicable:
- Airbags
- Seat belts with pre-tensioners and load limiters
- Impact sensors
- Occupant sensors
- Seat belt sensors
• Passive safety component wiring harnesses - Onboard restraint controlled components (ex: accelerometer and other passive safety components)
After this check, the airbag indicator turns off. If the airbag system detects a fault in any of the previously mentioned components, the airbag warning indicator stays on. In this case contact Tesla service immediately. Do not drive the vehicle until the airbag system is inspected by Tesla.
Front Passenger Occupant Detection
Cybertruck has an occupancy sensor in the front passenger seat that controls the status of the front airbag.
NOTE: The occupancy classification system (OCS) meets the regulatory requirement of FMVSS 208 and automatically detects when inflating the passenger front airbag would be unnecessary or potentially harmful.

WARNING: Seating an infant in a rear facing child restraint system on a seat equipped with an operational airbag can cause serious injury or death.
| Object Classification OCS Passenger Airbag Status* | Indicator status Notes | ||
| Empty OFF PASSENGER AIRBAG OFF | |||
| Object OFF or ON PASSENGER AIRBAG OFF or | PASSENGER AIRBAG ON | Depends on material/contents | |
| Rear-facing child restraint system designed for children up to One Year Old | OFF PASSENGER AIRBAG OFF Less than | 22 lbs (10 kg) | |
| Forward facing child restraint system | OFF PASSENGER AIRBAG OFF Less than | 35 lbs (16 kg) | |
| Child in a booster seat OFF PASSENGER AIRBAG OFF Less than | 51 lbs (23 kg) | ||
| Large child OFF or ON PASSENGER AIRBAG OFF or | PASSENGER AIRBAG ON | 51 lbs (23 kg) or more and less than 103 lbs (47 kg) | |
| 5th percentile female or larger (by weight) | ON PASSENGER AIRBAG ON Over approximately | 103 lbs (47 kg) | |
*If the passenger airbag status indicator does not match the situation, do not use the seat. The passenger must ride in a different seat. Schedule a service appointment.
NOTE: It takes approximately six seconds after you power on Cybertruck for the occupant classification system (OCS) to report accurate status of the front passenger airbag. As a result, when you first power on Cybertruck, even in situations when it should be OFF because the seat is occupied by a weight of 20 lbs (9 kg) or less, it will take the touchscreen approximately six seconds to display the status, PASSENGER AIRBAG OFF. If it fails to do so, schedule a service appointment and do not seat a child in the front passenger seating position.
To make sure the sensing system can correctly detect occupancy status, eliminate the following:
- Objects lodged under the seat.
- Heavy objects sitting on the seat (briefcase, large purse).
- Objects wedged between the seat back and seat cushion.
- Cargo interfering with the seat.
- Aftermarket items attached to, or sitting on or between, the seat and occupant including but not limited to covers, mats, blankets, etc.
These conditions can interfere with the occupancy sensor. If you have eliminated the above possibilities, and the airbag status is still incorrect, ask passengers to ride in the rear seats and schedule a service appointment to have the airbag system checked.
NOTE: The front passenger occupancy sensor affects the operation of the passenger front airbags only. The side airbags are not affected.

WARNING: If the front passenger airbag is not turning on or off as expected based on the weight thresholds previously described, schedule a service appointment immediately.

WARNING: If seating a child in the front passenger seat is legally permissible in your market region, it is the driver's responsibility to ensure that the passenger front airbag is OFF. Never seat a child in a rear facing safety seat in the front passenger seat with an active airbag. DEATH or SERIOUS INJURY to the child can occur. Per recommendations by the National Highway Traffic Safety Administration, all occupants age 12 and under must ride in the rear seats.

WARNING: Do not use seat covers on the front seats. Doing so could reduce the accuracy of the occupant detection system.
Ensuring Accurate Occupant Detection
To help ensure an occupant in the front passenger seat can be accurately detected, the passenger must:
- Wear a seat belt.
- Sit upright on the center of the seat cushion, with shoulders resting against the seat back and legs extended comfortably in front with feet on the floor. See Examples of Correct and Incorrect Seating Positions on page 55.
- Remain positioned on the seat cushion and not lift their weight off the seat (for example, by pushing their feet against the floor or pressing on the center console or armrest to lift up).
- Never wear thick, wet, or bulky clothing (such as ski wear or padded clothing).
In addition to the items listed above, the following situations can interfere with the accuracy of the occupant classification system:
- Incorrectly placing a child restraint system so that the entire lower section is not positioned against the seat cushion.
- Objects lodged under the seat or wedged between the seat back and cushion.
- Heavy objects sitting on the seat (briefcase, large purse).
- Cargo interfering with the seat.
These conditions can interfere with the occupancy sensor. If you have eliminated the above possibilities, and the airbag status is still incorrect, instruct passengers to ride in the rear seats and schedule a service appointment to have the airbag system checked.
NOTE: Tesla follows NHTSA (National Highway Traffic Safety Administration) recommendations that all occupants age 12 and under be seated in a rear seat.
NOTE: The front passenger occupancy sensor affects the operation of the passenger front and side airbags.

WARNING: Failure to follow the above instructions can adversely affect the Occupant Classification System (OCS) which can cause serious injury or death.

WARNING: If the front passenger airbag is not turning on or off as expected, do not seat a passenger in the front passenger seat. Schedule a service appointment.

WARNING: To ensure accuracy of the occupant detection system, do not make any modifications to the front passenger seat.
Examples of Correct and Incorrect Seating Positions
Correct seating position:
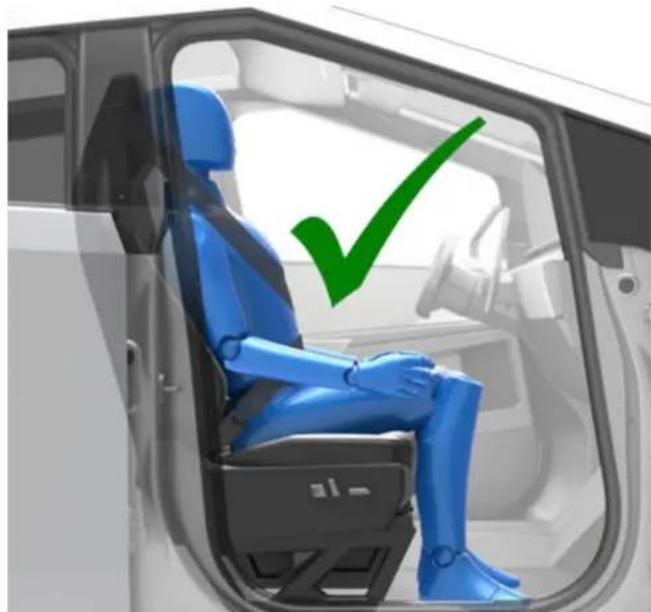
natural_image
Blue robotic car interior viewed through a vehicle, with a green checkmark indicating the correct seat (no text or symbols present)Incorrect seating position - the passenger's feet must be on the floor:
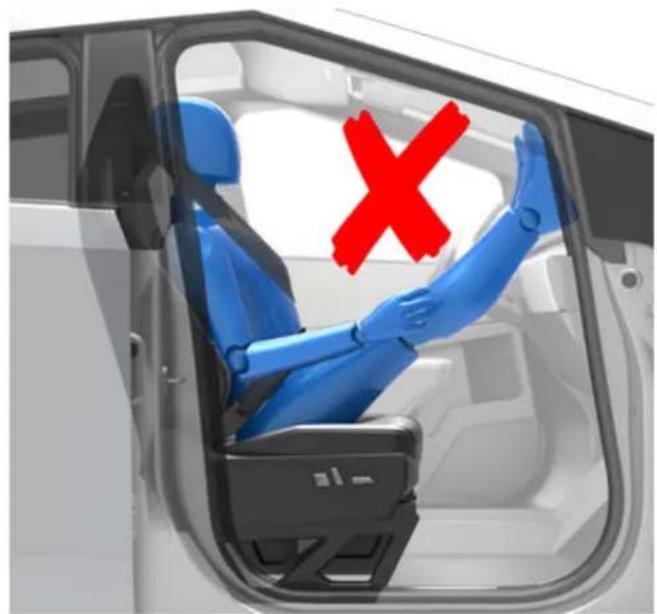
natural_image
Interior view of a car with a blue robotic arm and red X symbol (no text or symbols)Incorrect seating position - the passenger must not slide forward on the seat cushion:
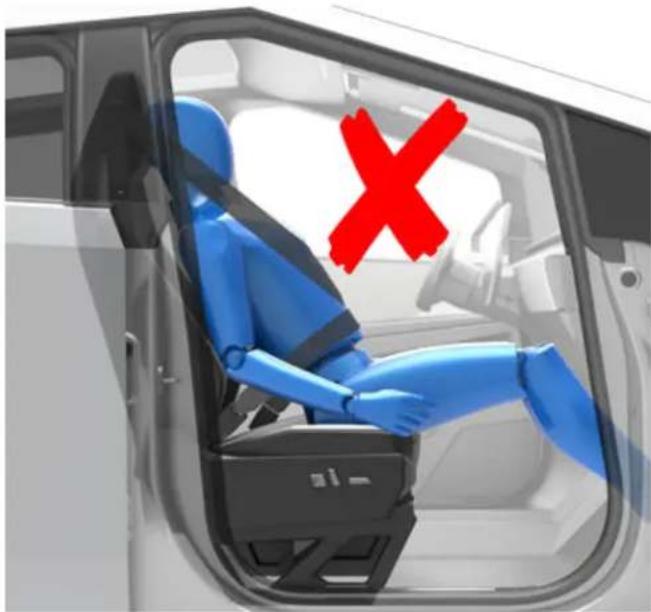
natural_image
Interior view of a car showing a blue robotic arm seated in the driver's seat, with a red 'X' symbol indicating no text or symbols on the vehicle.Incorrect seating position - the passenger must not recline the backrest to a laying down position when the vehicle is moving:
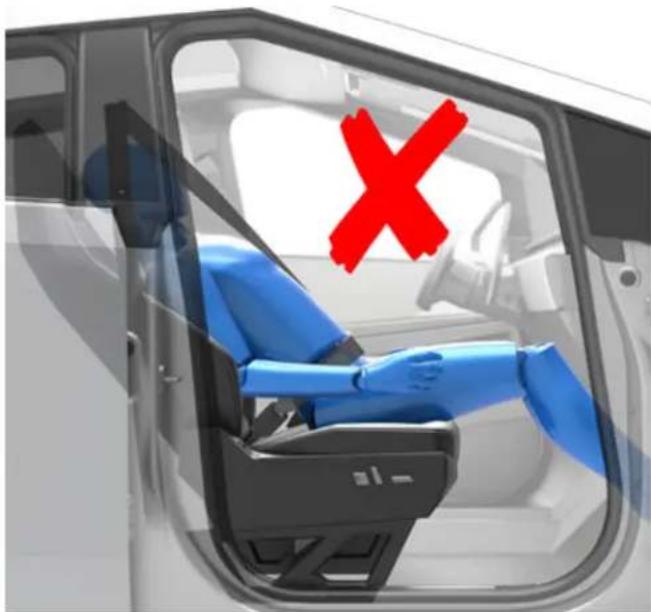
natural_image
Interior view of a car showing a blue and black seat with a red 'X' symbol in the window (no text or symbols on the main subject)Inflation Effects

WARNING: When airbags inflate, a fine powder is released. This powder can irritate the skin and should be thoroughly flushed from the eyes and from any cuts or abrasions.
After inflation, the airbags deflate to provide a gradual cushioning effect for the occupants and to ensure the driver's forward vision is not obscured.
If airbags have inflated, or if your vehicle has been in a collision, always have the airbags, seat belt pre-tensioners and any associated components checked and, if necessary, replaced.
In a collision, in addition to the airbags inflating:
- Doors unlock.
- Hazard warning lights turn on.
- Interior lights turn on.
- High voltage is disabled (you must contact Roadside Assistance to restore high voltage power).
- Seat belt pre-tensioners retract the seat belt anchor and seat belt webbing.
NOTE: Depending on the nature of the impact and the forces involved, doors may not unlock in a collision and/or damage may prevent them from opening. In such cases, the door may need to be opened using the interior manual release, or other means of extrication (for example, exiting through another door, breaking the window, etc.).
Airbag Warnings

WARNING: Do not place objects over or near airbags because any such objects could cause harm if the vehicle is in a crash severe enough to cause the airbag to inflate.

WARNING: All occupants, including the driver, should always wear their seat belts, whether or not an airbag is also provided at their seating position, to minimize the risk of severe injury or death in the event of a collision.

WARNING: Front seat occupants should not place their arms over the airbag module, as an inflating airbag can cause fractures or other injuries.

WARNING: Airbags inflate with considerable speed and force, which can cause injury. To limit injuries, ensure that occupants are wearing seat belts and are correctly seated, with the seat positioned as far back as possible. The National Highway Traffic Safety Administration (NHTSA) recommends a minimum distance of 10 inches (25 cm) between an occupant's chest and an airbag.

WARNING: Children should not be seated on the front passenger seat unless permitted by regulations in your market region. Follow all regulations in your region for the appropriate way to seat a child based on the child's weight, size, and age. The safest place to seat infants and young children is in a rear seating position. Seating an infant or child in a rear-facing child restraint system on a seat equipped with an operational airbag can cause serious injury or death.

WARNING: To ensure correct inflation of the side airbags, maintain an unobstructed gap between an occupant's torso and the side of Cybertruck.

WARNING: Passengers shouldn't lean their heads against doors. Doing so can cause injury if a curtain airbag inflates.

WARNING: Do not allow passengers to obstruct the operation of an airbag by placing feet, knees or any other part of the body on or near an airbag.

WARNING: Do not attach or place objects on or near the front airbags, the side of the front seats, the headliner at the side of the vehicle, or any other airbag cover that could interfere with inflation of an airbag. These include but are not limited to: steering wheel covers, decals, seat cushions or pillows, etc. Objects can cause serious injury if the vehicle is in a collision severe enough to cause the airbag to inflate.

WARNING: Do not use seat covers on the front seats. Doing so could restrict deployment of the seat-mounted airbags if a collision occurs.

WARNING: Following inflation, some airbag components are hot. Do not touch until they have cooled.
Center Console
In addition to housing wireless phone chargers, USB-C outlets, and a 120V power outlet (see Interior Electronics on page 20), the center console includes cup holders, a storage compartment, and a rear touchscreen.
To open the main storage compartment, squeeze the latch and pivot the cover upward. To close, lower the cover and make sure it latches shut.
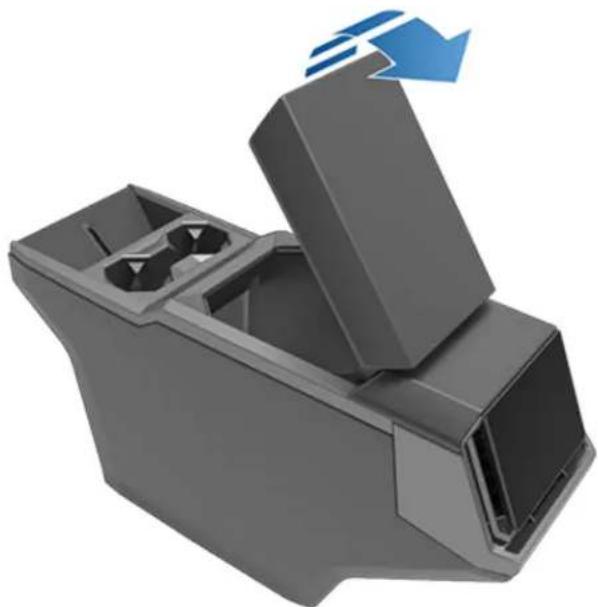
natural_image
3D rendering of a gray mechanical device with an open lid and internal compartments, showing a blue arrow indicating direction (no text or symbols present)
WARNING: When opening the center console, always keep your hands and fingers away from the opening edge and hinge. Placing your hands and fingers near the opening or hinge can lead to injury.
Rear Console
Cybertruck has a rear console integrated in the center of the second row. This console can serve as an arm rest for rear passengers and includes two cup holders.
To lower the console, pull the loop in the seat back and pull down the center seat head rest. The loop must be fully retracted back into place in order to lock the arm rest in the lowered or raised positions.
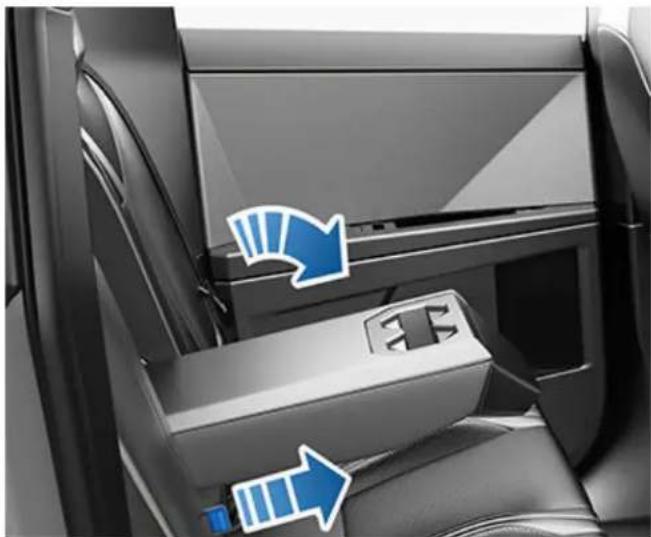
natural_image
Interior view of a car seatbelt with directional arrows indicating airflow or movement (no text or symbols)To raise the console, push the head rest all the way upward until the console securely latches into place.
Rear Seat Storage
To maximize cargo space in the second row, the seat cushions can be folded upwards. The rear seat is split into two sections. While pulling the tab on the inside of the rear door, pull the front of the seat upwards until you hear a click.
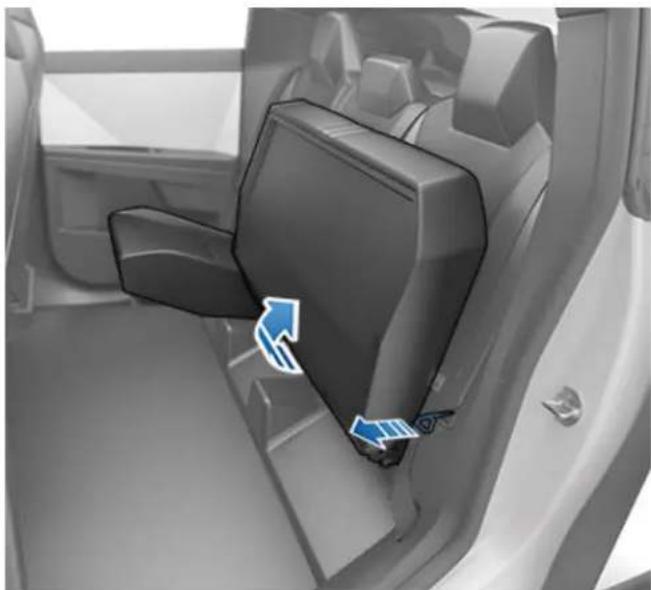
natural_image
Interior view of a car showing the backrest seat and side panel, with no visible text or symbols.To put the seats down again, pull the tab while pressing down on the corresponding seat cushion.

WARNING: When folding the rear seat cushion up, ensure that the area is clear of objects and hands and that they are fully locked into place before driving. When folding the rear seat cushions down, ensure that they are fully folded down and locked into place before a passenger sits down.
Glovebox
To open the glovebox, touch Controls > Glovebox. The glovebox opens and the light turns on. You can also open the glovebox with a voice command (see Voice Commands on page 25).
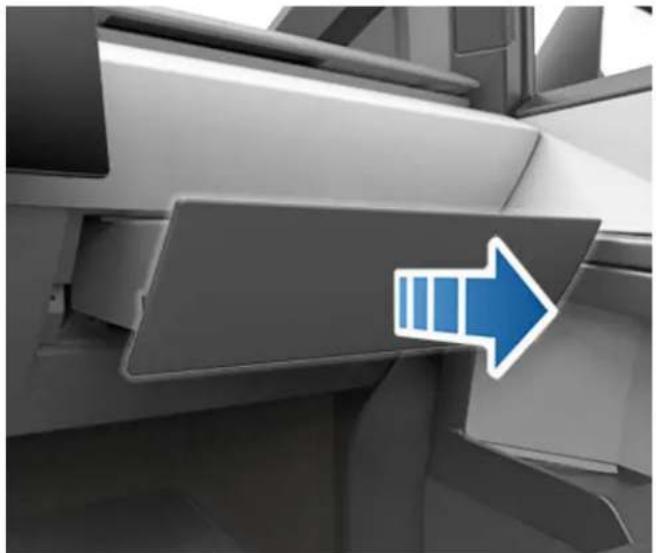
natural_image
Close-up of a vehicle's side panel with a blue arrow pointing right (no text or symbols visible)To close the glovebox, touch Glovebox again.
For additional glovebox security, touch Controls > Safety > Glovebox PIN to set a 4-digit PIN that must be re-entered to open the glovebox (see Glovebox PIN on page 152).
NOTE: If you leave the glovebox open, its light eventually turns off.
NOTE: The glovebox locks whenever closed and you lock Cybertruck using the mobile app, key card, you leave Cybertruck carrying your phone key (if Walk-Away Door Lock is turned on), or if Valet Mode is active (see Valet Mode on page 100). It does not lock when Cybertruck is locked by touching the lock icon on the touchscreen.

WARNING: When driving, keep the glovebox closed to prevent injury to a passenger if a collision or sudden stop occurs.
Seat Pockets
A pocket on the back side of each front seat provides convenient storage for small items. Avoid placing sharp objects in the seat pockets to prevent tears.
Door Panels
There is additional storage for small items on the inside of each front and rear door panel.
NOTE: In the unlikely event that Cybertruck has no low voltage power, a rear door manual release is located in each rear door pocket. For more information, see Opening Doors with No Power on page 246.
Coat Hangers
Your Cybertruck has a coat hanger on each side of the vehicle above the rear window in the second row, next to the reading light. Push the coat hanger to release it. Push it again to retract it.
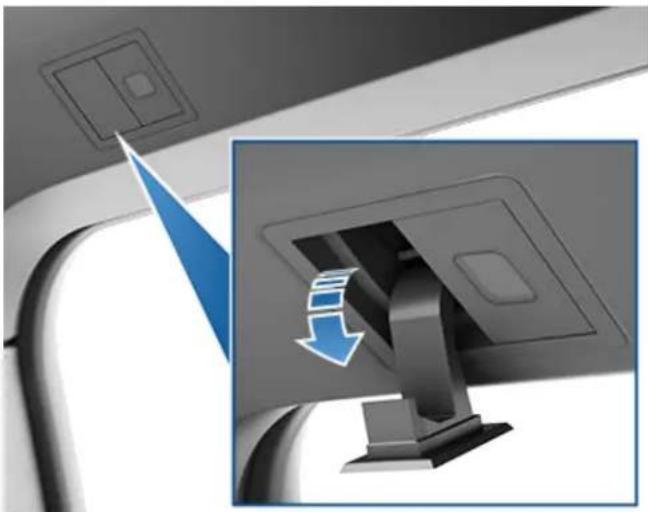
natural_image
Close-up of a computer monitor with a blue download arrow icon, showing the screen and keyboard (no text or symbols present)Opening

WARNING: Before opening or closing the powered frunk, it is important to check that the area around the hood is free of obstacles (people and objects). Failure to do so may result in damage or serious injury.

WARNING: Use caution around the panel edges on Cybertruck, including the doors, powered frunk, tailgate, and surrounding panels.
To open the powered frunk, ensure Cybertruck is in Park, and then do one of the following before opening the powered frunk:
- Approach the powered frunk with your phone key in your front pocket (see Hands-Free Frunk on page 59).
- Touch the associated Open icon on the touchscreen.
- Press the Frunk button in the mobile app.
- Press the center button under the hood closure.
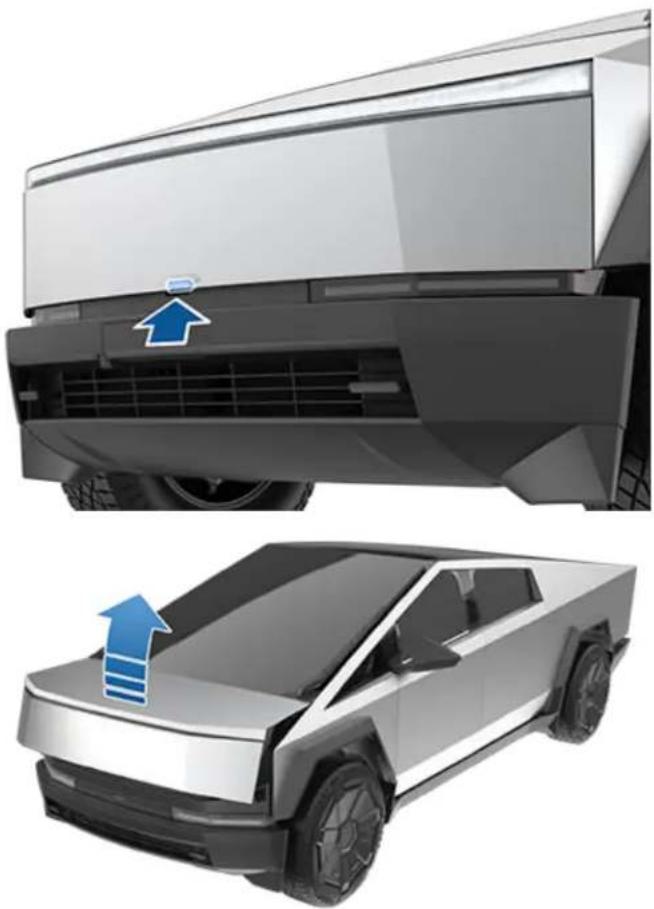
natural_image
Two views of a Tesla electric vehicle showing front and side profiles with blue arrows indicating airflow or change (no text or symbols)NOTE: In the unlikely event that Cybertruck has no low voltage power, you will be unable to open the powered frunk using the touchscreen or the button under the hood closure. Instead, see Opening the Powered Frunk with No Power on page 242.

When a door or the powered frunk is open, the touchscreen displays the Door Open indicator light. The vehicle avatar also shows the door, powered frunk, or tailgate status.

CAUTION: Slamming or forcing closures (including the doors, tailgate, or powered frunk) can result in damage not covered under warranty.
Hands-Free Frunk
You can open the powered frunk without pressing a button.
NOTE: Requires an iPhone 11 or newer and Tesla mobile app 4.31.0 or higher, or an Android phone and Tesla mobile app 4.41.0 or higher. Most higher-end Samsung Galaxy and Google Pixel phones are supported. Consult the specifications section of your phone manufacturer's website to check if the phone has background UWB support.
Ensure your phone settings allow "Nearby Interactions" for the Tesla mobile app. If your phone key is already paired, open the Tesla mobile app and go to Phone Key > Upgrade.
- To enable, touch Controls > Locks > Hands-Free Frunk.
- With your phone key in your front pocket, approach the powered frunk and stand still. When your phone key has been detected, Cybertruck chimes and the powered frunk opens. To cancel the request, step away from the vehicle.
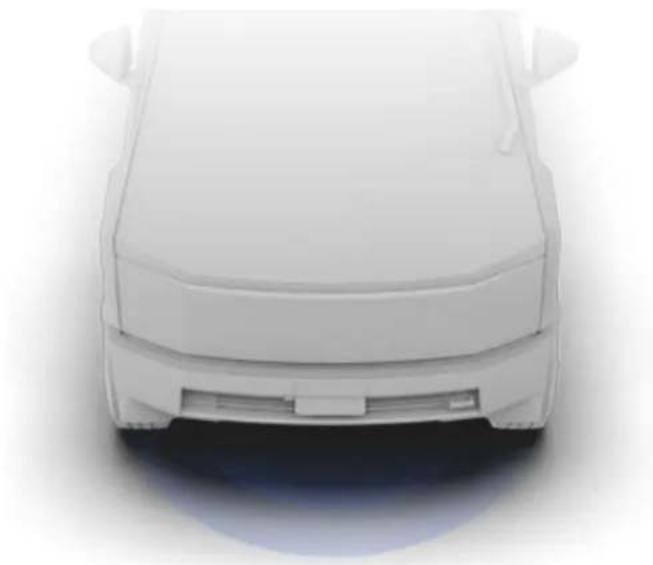
natural_image
Front view of a white car with blank roof and side panel (no text or symbols visible)
CAUTION: Do not leave your phone inside the powered frunk as it may open by itself. If you must leave your phone in the vehicle, disable Bluetooth and/or turn the phone off, and ensure you have alternate methods to lock/unlock your vehicle (see Keys on page 30).

WARNING: Before allowing an automated feature to open the powered frunk (rather than doing so manually), it is important to check that the area around the hood is free of obstacles (such as people and objects). Proactively monitor the hood's movement to ensure that it does not contact a person or object. Failure to do so can result in damage or serious injury.
Adjust the Opening Height of the Powered Frunk
You can adjust the opening height of the powered frunk to make it easier to reach or to avoid low-hanging ceilings or objects (for example, a garage door or light):
- Open the powered frunk, then manually lower or raise it to the desired opening height.
- Press and hold the powered frunk button on the front of the vehicle for three seconds until you hear a confirmation chime.
- Confirm that you have set it to the desired height by closing the powered frunk, then reopening it.
Closing

WARNING: Before driving, you must ensure that the hood is securely latched in the fully closed position by carefully trying to lift the front edge of the hood upward and confirming there is no movement. It is the driver's responsibility to ensure that the powered frunk is properly closed before driving.
Close the powered frunk in any of the following ways:
- Press the center button under the hood closure.
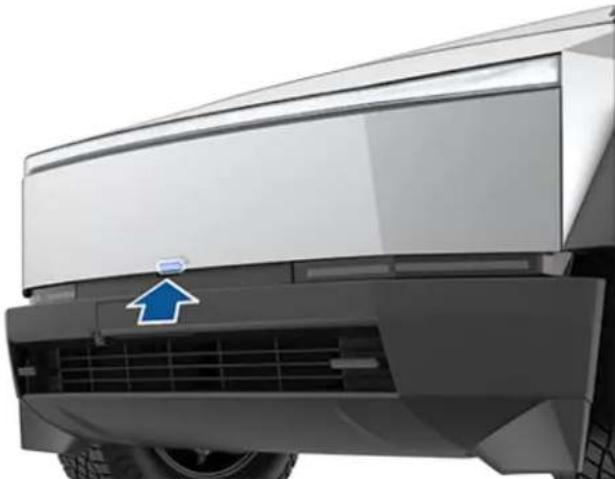
natural_image
Front view of a modern electric vehicle (no visible text or symbols)- Press the emergency release button in the powered frunk.
- Press the Frunk button in the mobile app.
- Touch the associated Close icon on the touchscreen.

WARNING: Ensure that all hands and other objects are free of the powered frunk before closing it.

CAUTION: Do not try to manually close the powered frunk. Doing so may cause damage.
If the powered frunk is left open when you attempt to shift out of Park, a notification requiring you to confirm your intent to drive appears on the touchscreen. If you choose to keep the powered frunk open while driving, your vehicle speed is limited.
The powered frunk locks when:
- You lock Cybertruck using the touchscreen, key or mobile app.
- You leave Cybertruck carrying your phone key (if Walk-Away Door Lock on page 34 is turned on).
• Valet mode is active (see Valet Mode on page 100).

CAUTION: Never leave your authenticated smartphone in the powered frunk.
Load Limits

CAUTION: Never load more than 440 lbs (200 kg) in the powered frunk. Doing so can cause damage.

WARNING: When loading cargo, always consider the vehicle's GVWR and GAWR ratings (see Vehicle Loading on page 223). The GVWR is the maximum allowable total mass of the vehicle including all passengers, fluids, and cargo, and the GAWR is the maximum allowable total mass permitted on an axle.
Interior Emergency Release
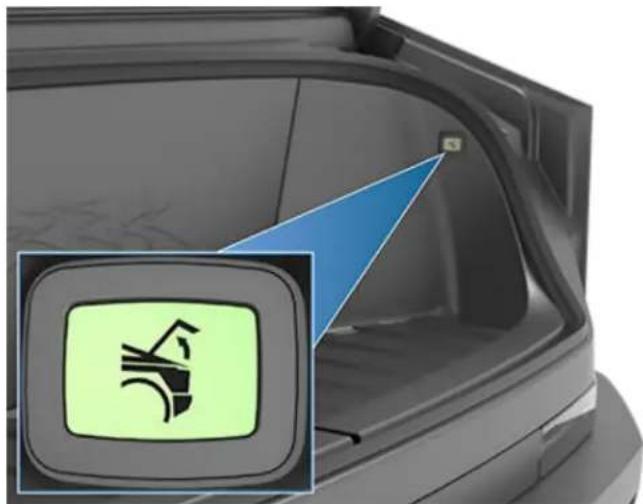
natural_image
Close-up of a car trunk showing a green safety symbol inside the opening, with a blue triangular overlay (no text or symbols)An illuminated interior release button inside the powered frunk allows a person locked inside to get out.
Press the interior release button to unlatch the powered frunk, then push up on the hood. If the powered frunk is already open, pressing the interior release button closes it.
NOTE: The interior release button glows following a brief exposure to ambient light.

WARNING: People should never climb inside the powered frunk. Never shut the powered frunk when a person is inside.

WARNING: Care should be taken to ensure that objects inside the powered frunk do not bump against the release button, causing the hood to accidentally open.
Overview

WARNING: Passengers must always be seated in seats with seat belts fastened at all times when the vehicle is in motion. Never allow passengers or pets to ride in the cargo bed, even with the tonneau cover closed. Doing so can result in serious injury or death.
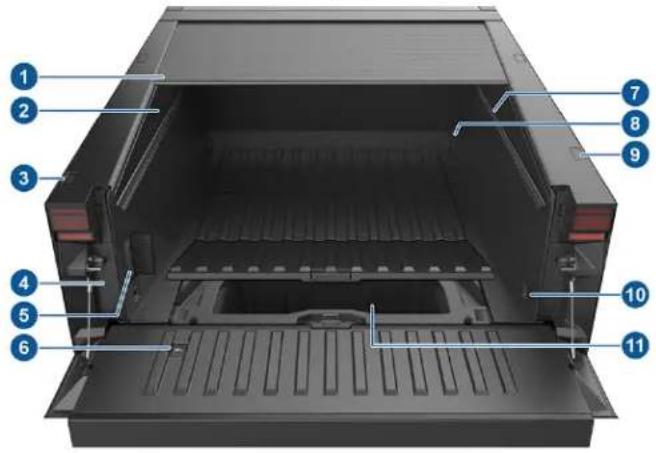
- Tonneau cover (Accessing the Cargo Bed on page 62)
- LED light bars (Lights on page 85)
- Tailgate and tonneau cover switches (Accessing the Cargo Bed on page 62)
- Charge port manual release (Manually Releasing Charge Cable on page 183)
- Power outlets (Cargo Bed Outlets on page 23)
- Tailgate emergency release (Tailgate Emergency Release on page 63)
- L-tracks (Securing Cargo on page 64)
- Front tie-downs (Securing Cargo on page 64)
- Attachment points (Securing Cargo on page 64)
- Rear tie-downs (Securing Cargo on page 64)
- Sealed storage (Under Bed Compartment on page 64)
For dimensions, weight capacities, and storage volumes of the cargo bed and its associated components, see Dimensions, Weights, and Cargo Capacity on page 226.

CAUTION: Although the tonneau cover protects contents from the majority of water during rain, snow, etc., it does not make the cargo bed waterproof. Water ingress and/or condensation can occur. Therefore, do not store items that can be damaged by water under the tonneau cover. Store water-sensitive items in the cab, the Under Bed Compartment on page 64, or the Powered Frunk on page 59.

WARNING: Never fill, store, or transport volatile solvents, chemicals, or liquids anywhere in the cargo bed or the under bed compartment. Doing so can cause spills, or allow fumes to accumulate, resulting in damage, serious injury, or death.
Accessing the Cargo Bed
When Cybertruck is parked, use these exterior switches to access the cargo bed:
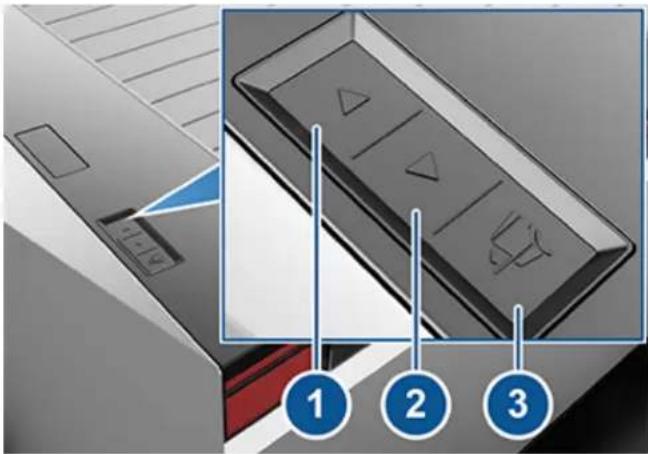
- Tonneau Open - Fully press and release to fully open the tonneau cover. Press a second time to pause the cover. To open the tonneau cover partially, press lightly and release the button when desired.
- Tonneau Close - Fully press and release to fully close the tonneau cover. Press a second time to pause the cover. To close the tonneau cover partially, press lightly and release when desired.
- Tailgate Open - Press to release the tailgate latch. The tailgate drops but integrated struts prevent it from falling forcefully.
NOTE: If the tonneau cover does not open or close when you fully press and release the tonneau open or tonneau close button, respectively, you may need to calibrate the tonneau cover. For more information, see Troubleshooting the Tonneau Cover on page 63. You can still press lightly to partially open or close the tonneau cover.
You can also use the mobile app and the touchscreen to open and close the tonneau cover. On the touchscreen, touch Controls > Tonneau.

CAUTION: Do not drop anything onto the tonneau cover or place objects on top that could fall off. Avoid allowing objects or debris to enter the tracks or interfere with the motors.
To close the tailgate, first remove all objects and ensure the hinge area is free of debris. Then lift the tailgate from the bottom with both hands and press it firmly against the cargo bed to ensure it latches into position. Pull the closed tailgate toward you to ensure it is fully latched into position. If the tailgate is open or unlatched, the touchscreen displays a message.
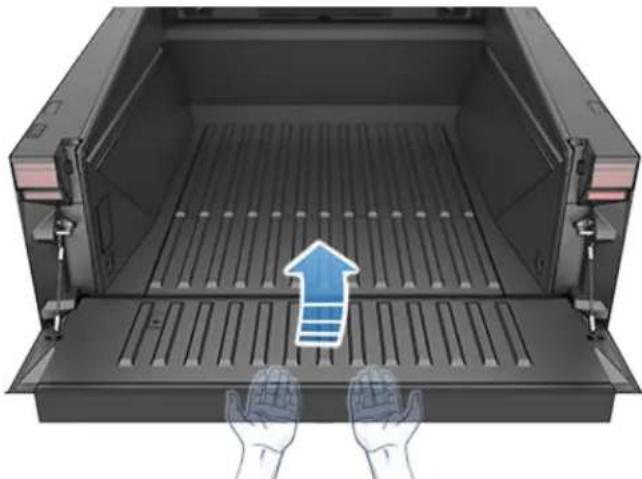
natural_image
Illustration of hands opening a storage tray with a blue upward arrow indicating flow or energy (no text or symbols)
WARNING: When closing the tonneau cover, keep hands and objects away from the tonneau cover tracks. Failure to do so can cause damage or injury.

WARNING: When closing the tailgate, keep hands and objects away from the perimeter, the hinges, etc. Failure to do so can cause damage or serious injury.
Troubleshooting the Tonneau Cover
The tonneau cover does not open or close when:
• Cybertruck is locked, or is not in Park.
- There is an obstacle blocking the tonneau cover from closing. In this case, remove the object and try again.

WARNING: Although the tonneau cover is designed to stop moving if it detects an obstacle when closing, do not rely on the tonneau cover to prevent damage or injury.
- Cybertruck has no low voltage power. In this case, it is necessary to open the powered frunk before attempting to jump start Cybertruck. For more information, see If Vehicle Has No Power on page 233.
NOTE: The tonneau cover locks into place (whether opened or closed) when Walk-Away Door Lock is enabled. Always double check that the tonneau cover is closed, or intentionally left open, before walking away from your vehicle (see Walk-Away Door Lock on page 34 for more information). Car Left Open Notifications may not notify you if the tonneau cover is left open.
If the tonneau cover does not open or close as expected:
- Make sure that Cybertruck is unlocked and in Park.
- Wait several minutes and then try again.
- Inspect the tracks to ensure there's no debris or object in the way of the tonneau cover.
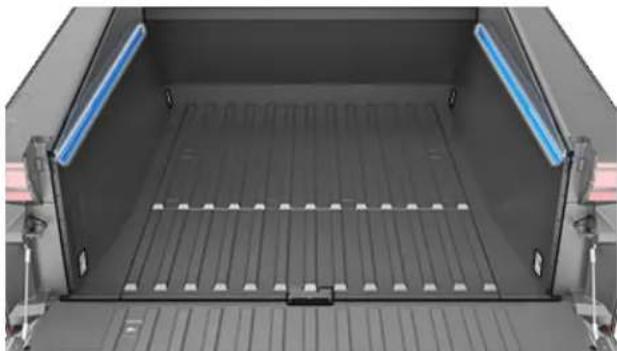
natural_image
Interior view of a vehicle storage bay with blue-lit channels and white grating (no text or symbols visible)4Calibrate the tonneau cover:
- Touch Calibrate on the touchscreen (on the exterior view of the vehicle, where you would normally touch to open or close the tonneau cover) and follow the onscreen instructions.
NOTE: The Calibrate option only appears on the touchscreen when the tonneau cover needs to be calibrated.
Or, to calibrate the tonneau cover manually: Press and hold the Open button (1) until the cover is fully open and wait for it to stall. Then, press and hold the Close button (2) until the cover is fully closed and stalled.
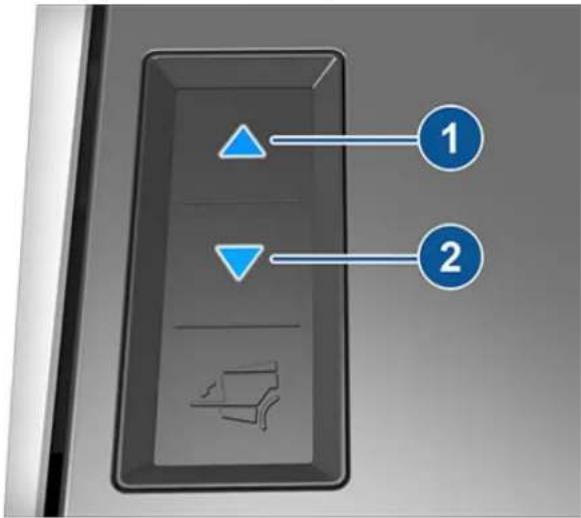
If the tonneau cover still does not function as expected, schedule a Service appointment.
Tailgate Emergency Release
An interior release, located on the inside of the tailgate, allows a person trapped in the cargo bed to open the tailgate when Cybertruck is parked.
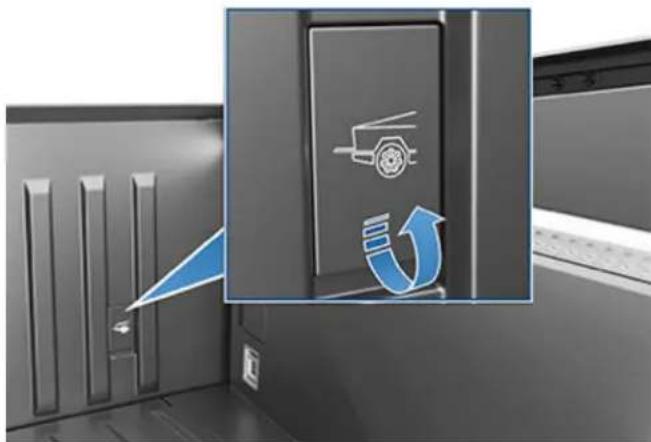
natural_image
Close-up of a computer tower with a blue arrow and mechanical component symbol (no readable text or labels)To use the emergency release, flip the cover upward to access the pull strap, then pull the strap firmly toward you.

WARNING: People should never be inside the cargo bed when the Cybertruck is moving. Never shut the tailgate when a person is inside.
Under Bed Compartment
The cargo bed features a sealed storage compartment. To open:
- Open the tailgate (see Accessing the Cargo Bed on page 62).
- Grasp the handle and flip the cover fully upward.
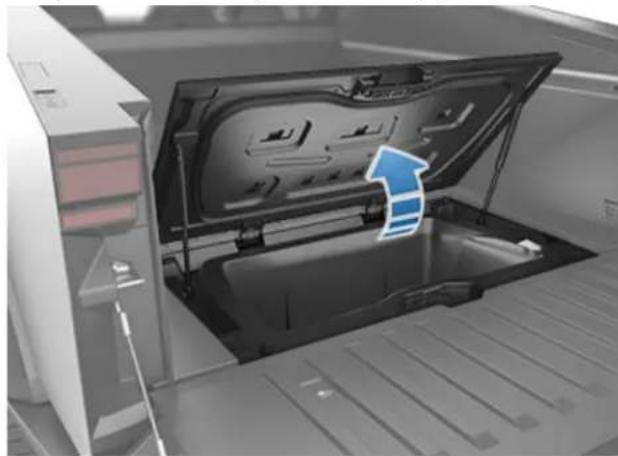
natural_image
Interior view of a vehicle storage bay with an open rear door, showing internal compartments and ventilation ducts (no text or symbols visible)Once open, integrated struts hold the cover in the raised position.
The under bed compartment features a drain plug that allows you to use it to store water and/or ice. To open the drain plug, simply turn it counter-clockwise and pull it up. Remember to re-install the drain plug once the compartment is fully drained.
To close the under bed compartment, push it fully downward until the latch engages.
CAUTION: Take care when closing the lid to the under bed storage compartment. Slamming the lid shut may cause damage or injury.
CAUTION: Do not load more than 220 lb (100 kg) in the under bed compartment. Doing so can cause damage.
Securing Cargo
Cybertruck features multiple options that make it easy to secure cargo:
- Two integrated L-track rails, running lengthwise along the top of each side of the cargo bed are compatible with standard fittings (not included) and provide multiple anchoring options.
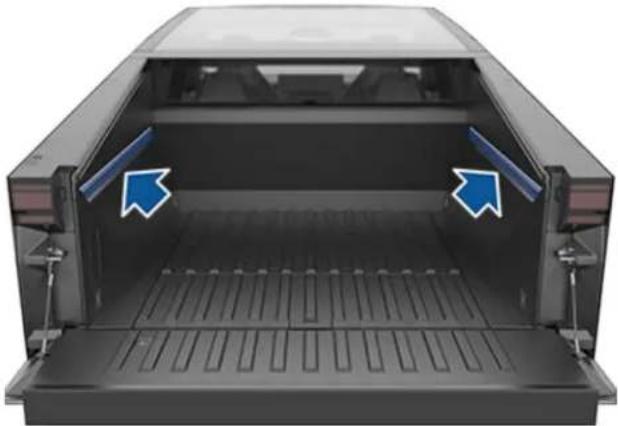
natural_image
Interior view of a black pickup truck cab with two blue arrows pointing to the side compartments (no text or symbols visible)- Four tie-down anchors - one at each bottom corner of the cargo bed.
CAUTION: Do not use the tie-down anchors or L-tracks for towing. They are intended to secure cargo such as a spare tire. See Towing a Trailer on page 113 for more information.
CAUTION: The maximum force between any two anchor points must not exceed 707 lb (320 kg). Doing so may cause damage.
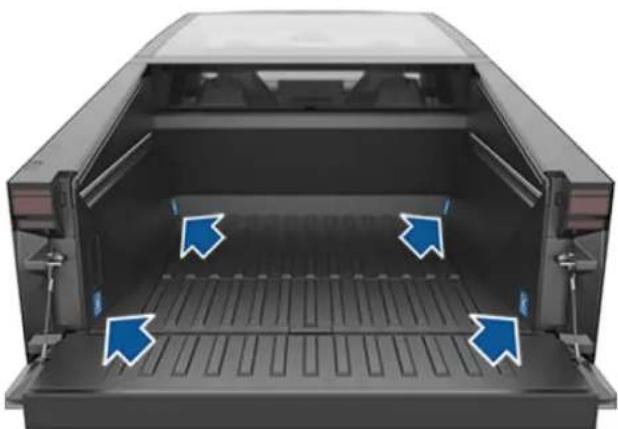
natural_image
Interior view of a black truck cab with blue directional arrows indicating flow or movement (no text or symbols)- Eight attachment anchor points, four distributed on each side above the cab and on the rails of the cargo bed. These anchor points are designed to accommodate accessory racks. To access the anchor points, press down on the inboard side of the appliques to pivot them to their open position. To close, carefully pull the applique down towards the outboard side of the vehicle until they are flush with the vehicle trim.
NOTE: If a roof applique is not secured correctly, the applique could fall off of the vehicle. Tesla is not responsible for broken or missing appliques.
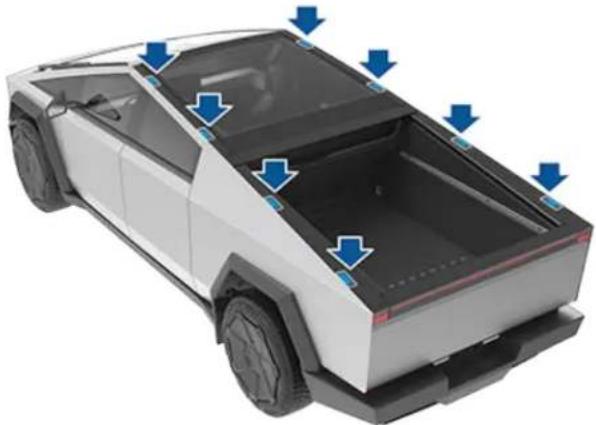
natural_image
3D rendering of a white pickup truck showing front compartment and side panels, with blue arrows indicating airflow or movement (no text or symbols)
WARNING: Before driving while carrying objects in the cargo bed, always ensure the cargo is evenly distributed and adequately secured to prevent it from shifting or falling onto a roadway. Failure to do so can compromise vehicle stability, damage the cargo bed, and cause serious personal injury or death to passengers and other road users.
The Tesla mobile app allows you to communicate with Cybertruck remotely using your iPhone® or Android™ phone.
NOTE: The information below may not represent an exhaustive list of the functions available on the Tesla mobile app. To ensure access to new and improved features, download updated versions of the mobile app as they become available.
To Use the Mobile App
To set up the Tesla mobile app to communicate with your Cybertruck:
- Download the Tesla mobile app to your phone.
- Log in to the Tesla mobile app by entering your Tesla account credentials.
Your phone and vehicle must both be actively connected to cellular service or Wi-Fi for the mobile app to communicate with your vehicle. Tesla recommends that you always have a functional physical key readily available if parking in an area with limited or absent cellular service, such as an indoor parking garage.
NOTE: In the event that you require lockout assistance from Tesla due to a non-warranty issue, such as having limited cellular connectivity and having no secondary key available, your expenses are not covered under the Roadside Assistance policy.
NOTE: Tesla does not support the use of third party applications to contact Cybertruck.
Mobile App for Apple Watch
You can also use the mobile app on your Apple Watch.
The Tesla mobile app for Apple Watch requires:
- An Apple Watch Series 6, Apple Watch SE 2, or Apple Watch Ultra 1 or newer with watchOS 11.0 or newer.
• Vehicle firmware version 2024.44.25 or newer.
• Tesla Mobile app version 4.39.5 or newer.
Before using the Tesla mobile app on your Apple Watch, ensure that your iPhone and Apple Watch are updated to the latest available software version. To add the Tesla mobile app to your Apple Watch, use the Watch app on your iPhone.
You can use the Tesla Apple Watch app to lock and unlock Cybertruck, open the trunk, and open the frunk.
In addition, you can use your Apple Watch as a key the same way you would use your phone as a key. For more information, see #unique_198 on page.
Overview
When both your phone and the vehicle have internet service, the Tesla mobile app's home screen allows you to:
- Lock or unlock your vehicle.
- Enable or disable the heating or air conditioning and monitor the cabin climate.
- Check your vehicle's charging information. Charging details also appear when a charging cable is plugged in.
- Open or close the charge port.
NOTE: Twisting red lines next to the Battery icon indicate that the Battery is actively heating up (including while charging or preparing to charge).
- Open the doors.
- Open the tailgate.
• See where your vehicle is located.
• View your vehicle's estimated range. - View your vehicle's odometer, VIN, and current software version.
You can configure the shortcut options on the home screen to include opening and closing the powered frunk and tonneau cover.
Media settings appear on the mobile app to pause, play, rewind, fast forward, and adjust the volume of the media currently playing in the vehicle. You may need to enable Media settings by touching Audio Settings > Options > Allow Mobile Control.
For supported video sources, send videos to Tesla Theater by sharing the link through the mobile app. Navigate to the movie, show, or video you want to play on your phone and touch the share button. Share the video with the Tesla app and it appears on the touchscreen if Cybertruck is in Park.

CAUTION: If you want to lock the doors while inside Cybertruck so that they cannot be opened from the outside, close the doors and use the lock icon on the touchscreen. This temporarily overrides any phone lock settings, such as Walk-Away Door Lock. Otherwise, because your phone is enabled as a key, the doors will unlock when the exterior door handles are pulled even if you press the lock icon on your mobile app. If you open the door from the inside, that will once again allow the doors to be opened from the outside so long as the phone key is detected. (see Phone Key on page 30 for more information).
Profile
In the Profile tab located at the top corner, you can:
- Switch to a different vehicle associated with your Tesla account, if you have access to more than one.
-
Navigate the Tesla Shop.
-
Manage your account information and view your order history.
- View and customize notifications you receive under the Settings tab, such as Calendar sync, when your security alarm has been triggered, charging updates, and new software updates. You can start updates from afar and check its progress.
Controls
The Controls tab allows you to do the following:
- Open or close the tonneau cover.
- Open the tailgate.
- Open or close the powered frunk.
- Turn on and check the status of the A/C power outlets.
• Control the bed lights. - Lock or unlock Cybertruck from afar.
NOTE: Your vehicle does not automatically re-lock if you unlock from the mobile app.
- Open or close the charge port.
- Flash the lights or honk the horn to find where Cybertruck is parked.
- Enable Keyless Driving.
NOTE: Keyless Driving can be used when you do not have your key or to bypass PIN to Drive in cases where you forgot your PIN or your touchscreen is unresponsive (see PIN to Drive on page 151).
- Vent the windows.
Climate
You can check the interior temperature and heat or cool the cabin before driving (even if it's in a garage), control the seat heaters, and defrost the windshield:
- Enable or disable Defrost Truck, which helps melt snow, ice, and frost on the windshield, windows, and mirrors, by swiping up from the bottom of the screen.
- Enable or disable Dog Mode or Camp Mode.
- Enable Cabin Overheat Protection, which prevents the cabin from getting too warm in hot ambient conditions. You can choose whether you want the A/C to run when the temperature in the cabin exceeds 105^ (40°C) or the selected temperature (if available). See Operating Climate Controls on page 158.
- Vent or close the windows.
- Precondition the cabin to your desired temperature and turn on or off the steering wheel and seat heaters.
Using the mobile app to precondition Cybertruck also warms the Battery as needed. The mobile app will notify you once your vehicle has reached the desired preconditioning temperature.
NOTE: In extremely cold weather or icy conditions, it is possible that your charge port latch may freeze in place. In cases where you cannot remove or insert the charge cable, or the vehicle is not Supercharging due to the latch being frozen in place, use your Tesla mobile app to enable Defrost Truck for approximately 30-45 minutes. This can help thaw ice on the charge port latch so the charge cable can be removed or inserted.
Location
Locate Cybertruck with directions, or track its movement across a map.
Schedule
Enable scheduled charging or departure, and precondition the vehicle. See Scheduled Precondition and Charge on page 185 for more information. Scheduled charging or departure can also be saved based on a preferred location.
You can also schedule a light show for a future time. For more information about light show, see Theater, Arcade, and Toybox on page 174.
Security
The Security tab allows you to do the following:
- Enable or disable Sentry Mode (see How to Use Sentry Mode (With a USB Flash Drive) on page 155).
- Enable or disable Valet Mode (see Valet Mode on page 100).
- Enable or disable Speed Limit Mode and receive notifications when the vehicle's driving speed is within approximately 3 mph (5 km/h) of your selected maximum speed (see Speed Limit Mode on page 152).
- Disable Phone Key, if needed (such as when you do not want the vehicle to automatically unlock whenever your phone is nearby).
- Watch and share Dashcam and Sentry Mode clips from the mobile app. See Dashcam on page 153 for more information.
NOTE: Requires Premium Connectivity and mobile app version 4.39.5 or newer. Only available on iOS.
Upgrades
View and purchase the latest upgrades available for your vehicle, such as full self-driving.
Service
See Schedule Service on page 193 for information on how to schedule service through the mobile app.
Roadside
View roadside resources and request roadside assistance (where applicable). For more information on Roadside Assistance, see Contacting Tesla Roadside Assistance on page 237.
Granting Access to a Second Driver
Add and remove access permission for an additional driver from the Tesla mobile app.
To add an additional driver, in the Tesla mobile app from the vehicle home screen, go to Security > Add Driver and follow the onscreen instructions.
NOTE: The additional driver has access to all app features except purchasing upgrades.
To remove access, use the mobile app and go to Security > Manage Drivers and follow the onscreen instructions.
Wi-Fi is available as a data connection method and is often faster than cellular data networks. Connecting to Wi-Fi is especially useful in areas with limited or no cellular connectivity. To ensure fast, reliable delivery of software and map updates, Tesla recommends leaving Cybertruck connected to a Wi-Fi network whenever possible (for example, when parked at home).
To connect to a Wi-Fi network:
- Touch Controls > Wi-Fi. Cybertruck begins to scan and display detected Wi-Fi networks that are within range.
NOTE: If a known Wi-Fi network does not appear in the list, move Cybertruck closer to the access point or consider using a range extender.
NOTE: When connecting to a 5GHz network (if available), check which channels are supported in your region.
5GHz Network Channels Supported
36-48 52-64 100-140 149-165
√ √ √ √
- Find and tap the Wi-Fi network you want to use in Searching for Wi-Fi Networks or add it manually in Add Wi-Fi Networks, enter the password (if necessary), then touch Confirm. When successfully connected, the Wi-Fi network shows in Known Wi-Fi Networks along with a green check. Whenever the network is within range, Cybertruck connects to it automatically.
NOTE: Cybertruck does not currently support connections to captive Wi-Fi networks (a captive Wi-Fi, commonly used by public hotspots, requires you to access a custom web portal and agree to terms of service prior to allowing you to log in).
NOTE: If more than one previously connected network is within range, Cybertruck connects to the one most recently used.
NOTE: At Tesla Service Centers, Cybertruck automatically connects to the Tesla Service Wi-Fi network.
Diagnostics
Diagnostics offers more information on your Wi-Fi connection, as well as connection improvement tips. To access, navigate to Wi-Fi > Diagnostics or find it below the progress bar while a software update downloads or installs.
Hotspots
Instead of a Wi-Fi network, you can also use a mobile hotspot (subject to fees and restrictions of your carrier). After connecting to your hotspot, select Remain Connected in Drive, if you want to keep the connection active while you are driving.
Troubleshooting Tips
If your vehicle's Wi-Fi connection is slow or it fails to connect, try these tips.
- On the touchscreen, check the number of Wi-Fi icon bars (signal strength). If the bars are low, consider adding a Wi-Fi access point closer to the vehicle to improve the signal.
- Restart the touchscreen (see Touchscreen on page 7).
- Remove the Wi-Fi connection and reconnect. Touch Controls > Wi-Fi, select your network and Forget Network then reconnect by touching your network in Known Networks.
- Try a different Wi-Fi network.
Bluetooth® Compatibility

You can use various Bluetooth devices in Cybertruck provided it is paired and within operating range. For example, you can pair your Bluetooth-capable phone so you can use it hands-free. In addition to phones, you can pair other Bluetooth-enabled devices with Cybertruck. For example, you can pair an iPod Touch, iPad, Android tablet, etc. from which you can play music.
Before using your phone or other Bluetooth device with Cybertruck, you must pair it. Pairing sets up Cybertruck to communicate with supported Bluetooth-capable devices. You can pair up to ten Bluetooth phones. Unless you've specified a specific phone as a Priority Device, or if the phone specified as Priority Device is not within range, Cybertruck always connects to the last phone that was used (provided it is within range). To connect to a different phone, see Switching Between Paired Devices on page 71.
NOTE: Authenticating your phone to use as a key (see Keys on page 30) does not allow you to use the phone hands-free, play media from it, etc. You must also pair it as described below.
NOTE: On many phones, Bluetooth turns off if the phone's battery is low.
NOTE: Although Bluetooth typically supports wireless communication over distances of up to approximately 30 feet (nine meters), performance can vary based on the phone, or other device, you are using.
NOTE: Cybertruck can pair up to twenty Bluetooth devices at a time but only allows two devices to connect simultaneously (such as one phone and one controller or two controllers) to each front and rear touchscreen (if equipped).

CAUTION: Do not leave your paired phone in your vehicle (for example, if you are hiking or at the beach). If you must leave your phone in the vehicle, disable Bluetooth and/or turn the phone off.
Pairing a Phone or Bluetooth Device
Pairing allows you to use your Bluetooth-capable phone hands-free to make and receive phone calls, access your contact list, recent calls, etc. It also allows you to play media files from your phone. Once a phone is paired, Cybertruck can connect to it whenever the phone is within range.
- To pair a phone or a Bluetooth device, sit inside Cybertruck and ensure the touchscreen is on.
- Unlock your phone and enable Bluetooth (typically in Settings on your phone).
NOTE: On some phones, this may require you to go to Bluetooth Settings for the remainder of the procedure.
-
On the touchscreen, touch Controls > Bluetooth to automatically start Bluetooth scanning for new devices.
-
Wait for your phone to be listed and touch Connect.
- Check that the number displayed on your phone matches the number on the touchscreen. Then, on your phone, confirm that you want to pair.
- If prompted on your phone, specify whether you want to allow Cybertruck to access your personal information, such as calendar, contacts and media files (see Importing Contacts and Recent Calls on page 70). When paired, Cybertruck lists your phone under Controls > Bluetooth > Paired Devices.
To change the settings of a paired device, go to Controls > Bluetooth > Paired Devices and expand the dropdown next to the device's name.
If you are experiencing issues importing or connecting to Bluetooth, see Troubleshooting Bluetooth on page 71 for more information.
You can toggle Reduce Fan Speed During Calls so the fan speed automatically lowers when you are on a call. Auto must be enabled in your climate controls (see Operating Climate Controls on page 158.
Importing Contacts and Recent Calls
Once a phone is paired, go to Controls > Bluetooth > Paired Devices and expand the dropdown next to the device's name to specify whether you want to allow access to your phone's contacts, recent calls and text messages. If you allow access, you can use the phone app to make calls and send messages to people in your list of contacts and on your recent calls list (see Phone, Calendar, and Web Conferencing on page 72). Before contacts can be imported, you may need to either set your phone to allow syncing, or respond to a popup on your phone to confirm that you want to sync contacts. This varies depending on the type of phone you are using. For details, refer to the documentation provided with your phone.
If you are having trouble importing contacts or pairing with Bluetooth, see Troubleshooting Bluetooth on page 71 for more information.
Disconnecting or Unpairing a Bluetooth Device
If you want to disconnect your phone or Bluetooth device, but keep it paired, touch Disconnect in your phone's Bluetooth settings dropdown on the touchscreen (Controls > Bluetooth > Paired Devices > Your phone). If you no longer want to use your device with Cybertruck, touch Forget Device and follow the instructions. Once you forget a device, you must pair it again if you want to use it with Cybertruck (see Pairing a Phone or Bluetooth Device on page 70).
NOTE: Your phone automatically disconnects when you leave Cybertruck.
NOTE: Unpairing the phone has no effect on using the phone as a key. To forget an authenticated phone, see Managing Keys on page 31.
Switching Between Paired Devices
Cybertruck automatically connects to a phone that you designated as Priority Device. If you have not set a phone as a priority, Cybertruck connects to the last phone to which is was connected, provided it is within operating range and has Bluetooth turned on. If the last phone is not within range, it attempts to connect with the next phone that it has been paired with.
To connect to a different phone, touch Controls > Bluetooth > Paired Devices. Select the phone you want to connect to, then touch Connect. If the phone you want to connect to is not listed, you must pair the phone. See Pairing a Phone or Bluetooth Device on page 70.
When connected, the Bluetooth settings screen displays the Bluetooth symbol next to the phone's name to show that Cybertruck is connected to the phone.
Troubleshooting Bluetooth
Your vehicle uses Bluetooth and BLE (Bluetooth Low Energy) to seamlessly connect your smartphone to Cybertruck. Due to several potential factors, Bluetooth or BLE may sometimes disconnect or experience issues in the pairing process. Connecting to Bluetooth allows your vehicle to use phone functions such as audio, phone calls, calendars, text messages, etc.
BLE is used for passive functions like phone key.
NOTE: Do not unpair your vehicle to your phone or remove it as phone key without a working key card nearby.
Try the following to troubleshoot Bluetooth, starting with your smartphone.
Smartphone Troubleshooting
Bluetooth may not connect due to settings and updates on your smartphone:
- Enable Bluetooth on your phone. If already enabled, disable and re-enable Bluetooth again.
- Ensure Airplane Mode is turned off.
- Charge your phone; if your phone battery is too low, it may not support Bluetooth functions.
- Pair your device properly. If already paired, try unpairing and re-pairing again.
- Update your phone to the latest software provided by the manufacturer.
- Check that your vehicle's sound system is selected as the audio output source.
- Ensure your phone's settings allow for Bluetooth (ex: data is turned on or you are connected to Wi-Fi).
- Turn your phone off and on again.
- Ensure location permissions set to "Always On" for the mobile app.
Tesla Mobile App Troubleshooting
Check the Tesla mobile app:
- Confirm the Tesla mobile app is up to date on software.
- Verify you're logged into the Tesla mobile app while using your phone key.
- Ensure the Tesla app is running in the background.
- Double check that you have completely set up your profile in the mobile app and properly configured your settings.
Vehicle Troubleshooting
Your vehicle's settings may affect its ability to pair with your smartphone:
- Charge Cybertruck: If the vehicle Battery is too low, you may lose Bluetooth function.
- Update vehicle software and make sure it is always up to date. Check for new software updates by navigating to Controls > Software.
- Restart the touchscreen. See #unique_233 on page.
- Reboot your vehicle.
If Bluetooth still does not work, unpair from your vehicle AND smartphone. Then try re-pairing both again.
For BLE phone key issues, when in the vehicle, navigate to Controls > Locks and remove your phone as "Phone as Key". Then set it back up again. But only do this while you are in the vehicle and have a reliable back up key available (such as a key card).
Using the Phone App

When your phone is connected to Cybertruck using Bluetooth (see Bluetooth on page 70), and you have allowed access to information on your phone (see Importing Contacts and Recent Calls on page 70), you can use the phone app to display and make a hands-free call to anyone listed on your phone.
- Calls: Displays recent calls in chronological order with the most recent call listed first.
- Messages: Displays message in chronological order with the most recent message listed first. You can view, send, and receive text messages. Instead of typing a text message, touch the microphone button on the right side of the steering wheel to enter text using your voice.

WARNING: To minimize distraction and ensure the safety of occupants as well as other road users, do not view or send text messages when the vehicle is in motion. Pay attention to road and traffic conditions at all times when driving.
- Contacts: Contacts are listed in alphabetical order and can be sorted by first name or last name. You can also choose a letter on the right side of the list to quickly scroll to the names that begin with the selected character. When you touch a name on your contacts list, the contact's available number(s) displays on the right pane, along with other available information (such as address). Touch the contact's number to make a call.
- Favorites: Displays the contacts from your phone that you have identified as Favorites.
- Calendar: Displays calendar entries from your phone (see Calendar on page 72). If an entry includes a phone number or an address, you can make a phone call, or navigate to a destination, by touching the corresponding information in the calendar entry.
Making a Phone Call
You can make a phone call by:
- Speaking a voice command (see Voice Commands on page 25). Voice commands are a convenient, hands-free way to call or text your contacts.
- Touching a phone number shown in a list in the phone app - Contacts, Calls, or Calendar.
• Using the Cybertruck on-screen dialer in the Phone app.
NOTE: If it is safe and legal to do so, you can also initiate a call by dialing the number or selecting the contact directly from your phone.
NOTE: You can also make a phone call by touching a pin on the map and choosing the phone number (if available) on the popup screen.
Receiving a Phone Call
When your phone receives an incoming call, the touchscreen displays the caller's number or name (if the caller is in your phone's contact list and Cybertruck has access to your contacts).
Touch one of the options on the touchscreen to Answer or Ignore the call. Depending on the phone you are using and what speakers you used for your most recent call, your phone may prompt you to choose which speakers you want to use for the incoming call.

WARNING: Stay focused on the road at all times while driving. Using or programming a phone while driving, even with Bluetooth enabled, can result in serious injury or death.

WARNING: Follow all applicable laws regarding the use of phones while driving, including, but not limited to, laws that prohibit texting and require hands-free operation at all times.
In Call Options
When a call is in progress, the call displays on the touchscreen. To adjust the call volume, roll the left scroll button during a call. Tilt the left scroll button left to mute/unmute and tilt right to end the call.
Calendar

The calendar displays scheduled events from your phone's (iPhone ^ or Android ^TM ) calendar for the current and next day. The calendar is conveniently integrated with the phone app so you can dial into your meeting from a Calendar entry. It is also integrated with the navigation system so you can navigate to the event's location.
- Ensure your phone is paired to Cybertruck.
- Ensure you are logged into the Tesla mobile app.
- In your Tesla mobile app, touch Profile > Settings > Calendar Sync.
NOTE: To ensure you have access to all of the calendar's features, it is recommended that you use the most recent version of the mobile app. - On your phone, go to Settings and allow access/give permission to share your calendar with the Tesla mobile app. The mobile app can then periodically (and automatically) send calendar data from your phone to Cybertruck.
If a calendar event includes an address, a navigation arrow displays to indicate that you can touch the address to navigate to the event's location.
If an event has a uniquely specified address and takes place within two hours of you entering your vehicle and preparing to drive, Cybertruck automatically routes you to the event's address (see Automatic Navigation on page 169).
Touch an event's information icon to display all notes associated with the event. If the notes include one or more phone numbers, the information icon shows a phone icon and the calendar displays the first phone number found. Touch to initiate a phone call. You can also initiate a phone call by touching any number in an event's notes popup screen (this is especially useful for conference calls). If notes include a web link, you can touch the link to open it in the Web browser.
Zoom

Seamlessly take meetings and calls through your vehicle's touchscreen. To set up, touch the Zoom app and sign in or enter the meeting ID. You can even access meetings shown on your calendar or in text messages by touching the Zoom link. Your vehicle's cabin camera can be used in calls over Zoom only when Cybertruck is Parked. When the vehicle is shifted out of Park in the middle of a Zoom call, the cabin camera turns off and you switch to audio only. Use the touchscreen to turn on/off the video, mute/unmute yourself, and customize various preferences for your meeting.

WARNING: Do not to use the video function when the vehicle is "temporarily parked" on a public road (such as when the vehicle is parked along the curb or in a spot that is not a designated parking spot)..

WARNING: Stay focused on your surroundings and follow all applicable laws while driving, including, but not limited to, laws that require hands-free operation at all times.
myQ

If equipped, Cybertruck can intelligently connect to your myQ® smart garage.
myQ is a smart garage control system that works seamlessly with Cybertruck, and allows you to remotely monitor and control your garage door from the vehicle's touchscreen or a paired phone. This is convenient if you forget to close your garage door, want to allow friends and family inside, or need to open and close it remotely (such as when receiving a package). By linking myQ with Cybertruck, the garage door can detect your vehicle nearby and automatically open or close to accommodate.

WARNING: Do not use myQ with a device that does not have safety stop and reverse features. Using a device without these safety features increases the risk of property damage, injury, or death.
Follow these steps to set up myQ on your vehicle:
- Your garage door must be myQ compatible. Navigate to Controls > Garage icon. Use the myQ Compatibility tool (https://www.myq.com/app/myq-compatibility) to determine this.
- Ensure your garage is Wi-Fi compatible. myQ uses Wi-Fi to communicate with your smart phone and vehicle. Some garages will have a Wi-Fi or myQ symbol on the hub. Your garage must have a strong Wi-Fi signal to control and monitor your garage through your vehicle.
NOTE: If your garage is not compatible, you may be able to purchase an external myQ hub to use this feature. - Download the myQ app from your smart phone's app store. Use the app to set up your account information and pair the garage to your phone. myQ requires a paid subscription, which you can purchase in the app.
- Check that your vehicle is running the latest available software version and has Wi-Fi or LTE connectivity.
- Navigate to Controls > Locks > myQ Connected Garage > Link Account and follow the instructions to pair the garage with Cybertruck. Once paired, monitoring and controlling the garage becomes available on the touchscreen, where you can further customize myQ.
For more information, questions, troubleshooting assistance, or damage claims, visit www.myQ.com/Tesla.
Starting
When you open a door to enter Cybertruck, the touchscreen powers on and you can operate all controls. To shift Cybertruck, press the brake pedal and swipe up for Drive or down for Reverse on the touchscreen's drive mode strip (see Shifting on page 76).
If Auto Shift out of Park is enabled, Cybertruck automatically selects Drive or Reverse based on the detected surroundings. Pressing the brake pedal shifts the vehicle into the selected drive mode displayed on the touchscreen's drive mode strip (provided the driver's door is closed and the driver's seat belt is buckled), and pressing the accelerator moves the vehicle in that direction.
NOTE: To turn Auto Shift out of Park on or off, touch Controls >Dynamics >Auto Shift out of Park.
Before accelerating when Auto Shift out of Park is enabled, check the touchscreen to make sure that Cybertruck has shifted into the drive mode you want (Drive or Reverse). If the selection is not correct, or if Auto Shift out of Park is not enabled, swipe up for Drive or down for Reverse on the touchscreen's drive mode strip to choose a new drive mode. See Shifting on page 76.
NOTE: If PIN to Drive is enabled (see PIN to Drive on page 151), you must enter a valid PIN on the touchscreen before you can drive Cybertruck.
Everything you need to know when driving Cybertruck displays on the touchscreen.
Drive Disabled - Requires Authentication
If Cybertruck does not detect a key when you press the brake (a phone key is not detected or two minutes have passed since you used the key card), the touchscreen displays a message telling you that driving requires authentication.
If you see this message, place the key card in either phone dock where the RFID transmitter can read it. The two-minute authentication period restarts and you can start Cybertruck by pressing the brake pedal.
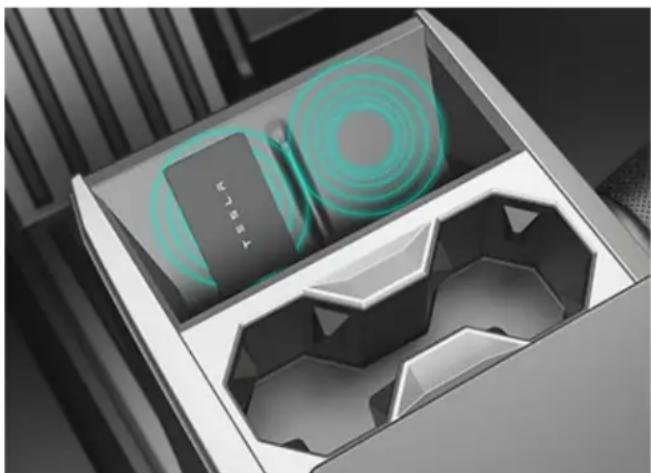
natural_image
Interior view of a device drawer with a branded electronic device and circular graphics (no visible text or symbols)A number of factors can affect whether Cybertruck can detect a phone key (for example, the device's battery is low or dead and is no longer able to communicate using Bluetooth).
Always keep your phone key or a key card with you. After driving, your key is needed to restart Cybertruck. And when you leave the vehicle, you must bring your key with you to lock Cybertruck, either manually or automatically.
Powering Off
When you finish driving and shift into Park, simply exit the vehicle. When you leave Cybertruck with your phone key, it powers off automatically, turning off the touchscreen.
Cybertruck also powers off automatically after being in Park for 30 minutes, even if you are sitting in the driver's seat.
Although usually not needed, you can power off Cybertruck while sitting in the driver's seat, provided the vehicle is not moving. Touch Controls > Safety > Power Off. Cybertruck automatically powers back on after a short period if you press the brake pedal or touch the touchscreen.
NOTE: Cybertruck automatically shifts into Park whenever it determines that you are exiting the vehicle (for example, the driver's seat belt is unbuckled and the vehicle is almost at a standstill). If you shift into Neutral, your vehicle shifts into Park when you open the door to exit. To keep your vehicle in Neutral, you will need to activate Tow Mode (see Instructions for Transporters on page 233).
Power Cycling the Vehicle
You can power cycle Cybertruck if it demonstrates unusual behavior or displays a nondescript alert.
NOTE: If the touchscreen is unresponsive or demonstrates unusual behavior, reboot it before you power cycle the vehicle (see Restarting the Touchscreen on page 10).
- Shift into Park.
- On the touchscreen, touch Controls > Safety > Power Off.
- Wait for at least two minutes without interacting with the vehicle. Do not open the doors, touch the brake pedal, touch the touchscreen, etc.
- After two minutes, open the door to wake the vehicle.
Shift Using the Touchscreen
When you press the brake pedal when Cybertruck is parked, the drive mode strip displays on the driver's side of the touchscreen. Use the drive mode strip to shift Cybertruck: Swipe up for Drive, swipe down for Reverse, or press the drive mode strip for Park.
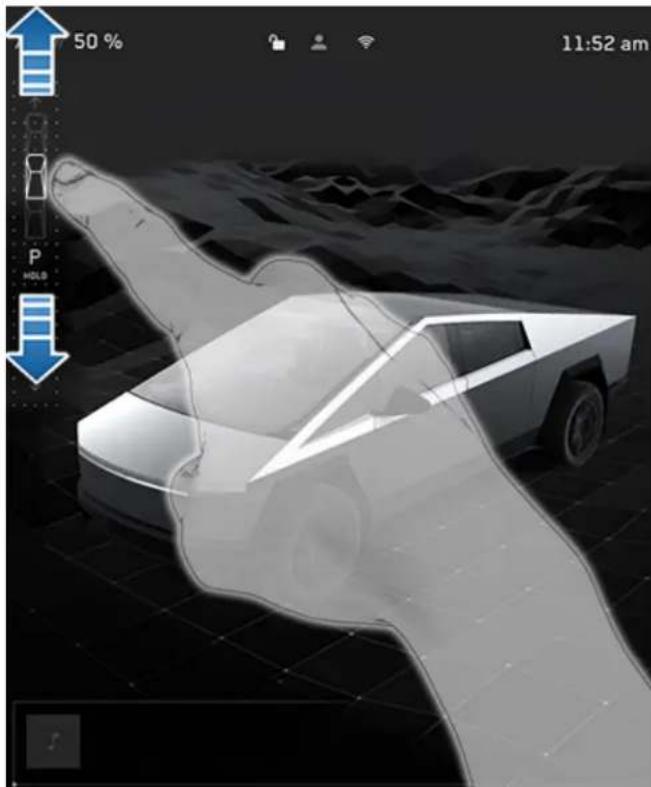
natural_image
3D rendering of a futuristic car with motion capture overlay, showing dynamic motion trajectory (no text or symbols)The touchscreen always shows which gear Cybertruck is in, but the drive mode strip is hidden when driving at highway speeds. To show the drive mode strip at any time, swipe right from the left edge of the touchscreen.
To shift into Park when driving below 5 mph (8 km/h), touch the drive mode strip while pressing the brake pedal. In emergency situations when driving above 5 mph (8 km/h), press and hold the gear strip to slowly bring the vehicle to a stop.
NOTE: To shift from Drive into Reverse or vice versa, the driving speed must be less than 5 mph (8 km/h).
The touchscreen is the preferred method to manually shift. However, in the unlikely situation in which the touchscreen is unavailable and therefore can't be used, the drive mode selector on the overhead console automatically activates and must be used to shift (see Shift Using the Overhead Console on page 76).
If you try to shift when it is prohibited by the current driving speed, the touchscreen displays an alert, a chime sounds, and the drive mode does not change.
Auto Shift from Park
Auto Shift from Park is a BETA feature and is disabled by default. When disabled, use the touchscreen or the overhead console to manually shift. To enable Auto Shift from Park, touch Controls > Dynamics > Auto Shift from Park.
When Auto Shift from Park is enabled, Cybertruck is designed to automatically select Drive or Reverse. The touchscreen displays the selected drive mode when the driver's door is closed and seat belt is buckled.
To override the selection, press the brake pedal and use the drive mode strip on touchscreen to shift into your desired drive mode (Drive, Reverse, Park; see Shift Using the Touchscreen on page 76).
Confirm the drive mode selection and follow the instructions on the touchscreen before you press the accelerator.

WARNING: As always, be aware of your vehicle and surroundings before driving. Never rely on Cybertruck to automatically select a suitable drive mode without confirming the selection before you start to drive.
If Auto Shift from Park is unavailable, the touchscreen displays a message.
Cybertruck automatically selects a drive mode when:
• Auto Shift from Park is enabled.
• Cybertruck is in Park.
- The driver's seat belt is fastened.
• The brake pedal is pressed.
- All doors and trunks are closed.
- The drive mode selector on the overhead console is not activated (see Shift Using the Overhead Console on page 76).
- The cameras are free of obstructions (see Cameras on page 27) and Cybertruck has enough input to make a selection.
NOTE: Cybertruck does not automatically select drive modes in Valet Mode.
Shift Using the Overhead Console
In addition to manually shifting on the touchscreen, you can shift by pressing P, R, N or D located on the overhead console. In most situations, these buttons are not available until you press one of the buttons to activate it. When active, the LEDs associated with each button illuminate and when you select P, R, N or D, the associated LED illuminates.
In situations where the touchscreen is unavailable (for example, experiencing a technical issue), or Cybertruck is in Valet or Tow Mode, the drive mode selector on the overhead console illuminates automatically and there is no need to touch it.
NOTE: You can also activate the drive mode selector on the overhead console by simultaneously and briefly pressing both scroll buttons on the steering wheel. However, if you press and hold both buttons simultaneously, the drive mode selector activates and the touchscreen restarts (see Restarting the Touchscreen on page 10).
NOTE: The front trunk must be closed to shift using the overhead console.
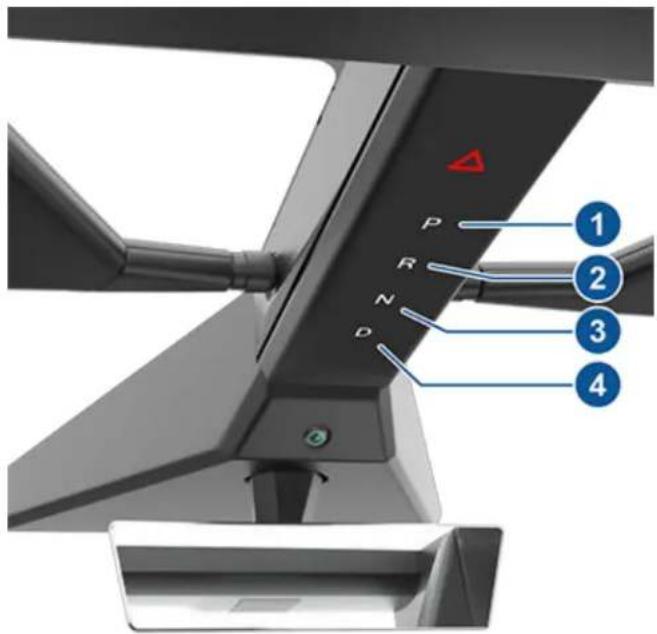
- Park
- Reverse
- Neutral
- Drive
NOTE: When the touchscreen is available for shifting and you have manually activated the drive mode selector on the overhead console, the overhead console automatically deactivates if you don't shift after a short amount of time.
Park
To manually shift into Park, press the brake pedal and touch the Park button on the touchscreen's drive mode strip. If the touchscreen is unavailable, press Park on the drive mode selector located on the overhead console.
Cybertruck automatically shifts into Park to prevent roll-away while driving in low speeds. This happens whenever you connect a charge cable, unbuckle your seat belt, or open the door while in Drive, Reverse, or Neutral. Ensure the charge cable is removed, buckle your seat belt, and close the door before shifting out of Park.
Attempting to engage the parking brake above 5 mph (8 km/h) will result in emergency braking (see Braking and Stopping on page 89).
NOTE: In emergency situations, if the brakes are not functioning properly, you can press and hold the Park button on the touchscreen's drive mode strip to apply the brakes and remove drive torque while the button is held. Do not use this method to stop the vehicle unless absolutely necessary.
NOTE: You must always press the brake pedal to shift from Park.

CAUTION: Cybertruck will not shift from Park if a charge cable is plugged in, or if the charge port is unable to determine whether a charging cable is plugged in. In situations when Cybertruck does not shift from Park, check the touchscreen for instructions on how to proceed.

WARNING: It is the driver's responsibility to always ensure the vehicle is in Park before exiting. Never rely on Cybertruck to automatically shift into Park for you.
Drive
To manually shift into Drive, swipe up on the drive mode strip located on the touchscreen or, if the touchscreen is unavailable, press D on the drive mode selector located on the overhead console. You can shift into Drive when Cybertruck is stopped or moving less than 5 mph (8 km/h) in Reverse.
Reverse
To manually shift into Reverse, swipe down on the drive mode strip located on the touchscreen or, if the touchscreen is unavailable, press R on the drive mode selector located on the overhead console. You can shift into Reverse when Cybertruck is stopped or moving less than 5 mph (8 km/h) in Drive.
Neutral
Neutral allows Cybertruck to roll freely when you are not pressing the brake pedal. To shift into Neutral, do any of the following:
- Open Controls, then press and hold the Neutral icon until Cybertruck engages Neutral.
- Choose Neutral from the drive mode selector on the overhead console.
NOTE: You must press the brake pedal to shift out of Neutral if Cybertruck is moving slower than approximately 5 mph (8 km/h).
Cybertruck automatically shifts into Park when you open the driver's door to exit the vehicle unless the vehicle is in certain modes such as Tow or Car Wash Mode which allows the vehicle to stay in Neutral even when you leave.
Keeping Your Vehicle in Neutral (Tow Mode)
To keep Cybertruck in Neutral when you exit, allowing it to roll freely (for example, pulling onto a flatbed truck), you must activate Tow Mode:
- Shift into Park.
- Press the brake pedal.
- Touch Controls > Service > Towing. The touchscreen displays a message reminding you how to properly transport Cybertruck.
- Touch Enter Tow Mode. The button turns blue to show that Cybertruck is now in Tow Mode. Cybertruck is now free-rolling and can be rolled slowly (no faster than walking speed) for short distances or winched (for example, onto a flatbed truck).
For more information on Tow Mode, see Activate Tow Mode on page 234.
NOTE: In Tow Mode, Cybertruck does not shift into a drive mode. You must first cancel Tow Mode by touching Exit Tow Mode. Tow Mode also cancels if you use the touchscreen to shift into Park.
Adjusting the Steering Wheel Position
To adjust the steering wheel, touch Controls and touch the Steering icon.
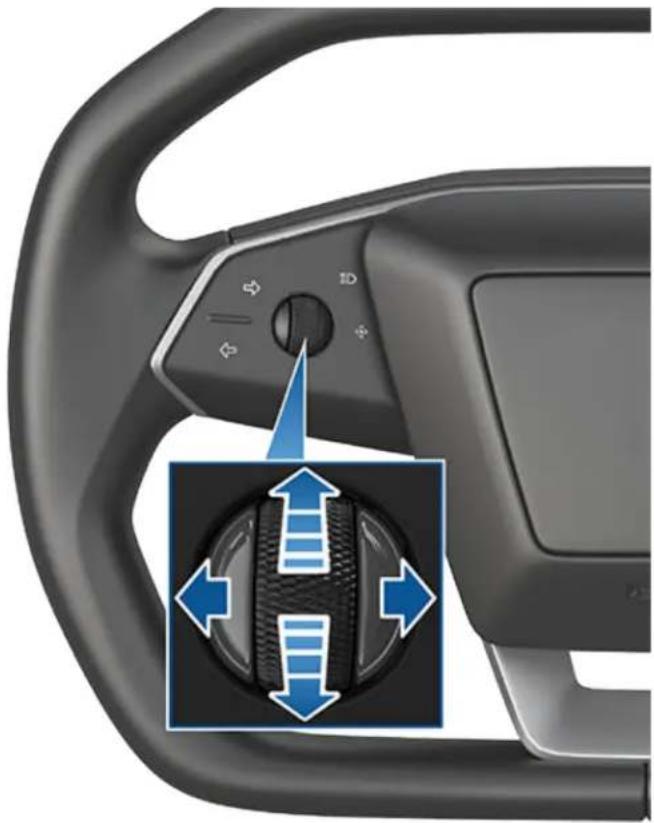
natural_image
Close-up of a car steering wheel with blue directional arrows indicating clockwise motion (no text or symbols)Use the left scroll button on the steering wheel to move the steering wheel to the desired position:
- To adjust the height/tilt angle of the steering wheel, roll the left scroll button up or down.
- To move the steering wheel closer to you, or further away from you, press the left scroll button to the left or right.
You can also customize what you want the left scroll wheel button to control, such as Climate or Dashcam status.

WARNING: Do not make steering wheel adjustments while driving.
Overview of Buttons
Cybertruck features stalkless driving in which all controls you need when driving are accessible on the steering wheel.
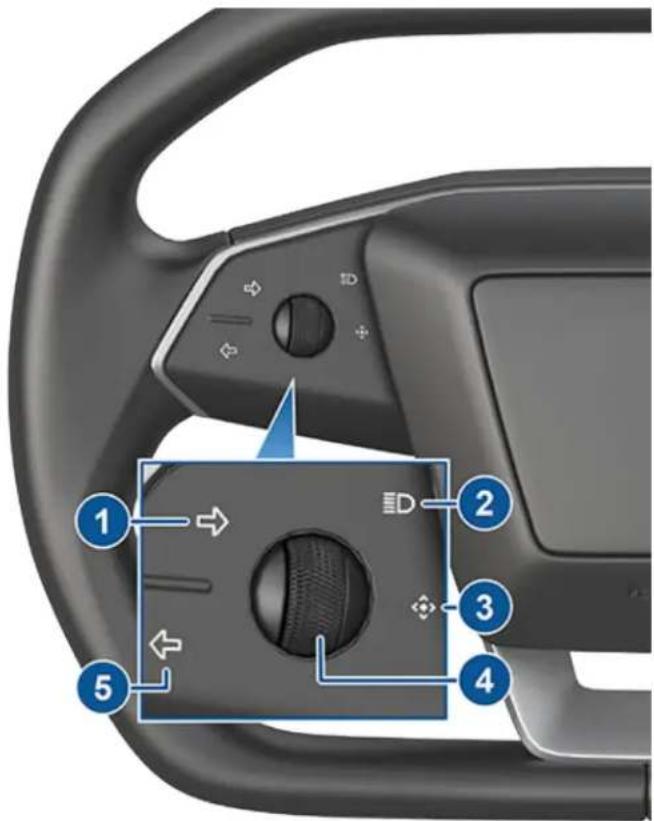
Left buttons:
- Right turn signal (see Turn Signals on page 86)
- High beam headlights* (see Headlights on page 85)
- Multi-functional button (non-functional)
- Left scroll button (see Left Scroll Button on page 80)
- Left turn signal (see Turn Signals on page 86)
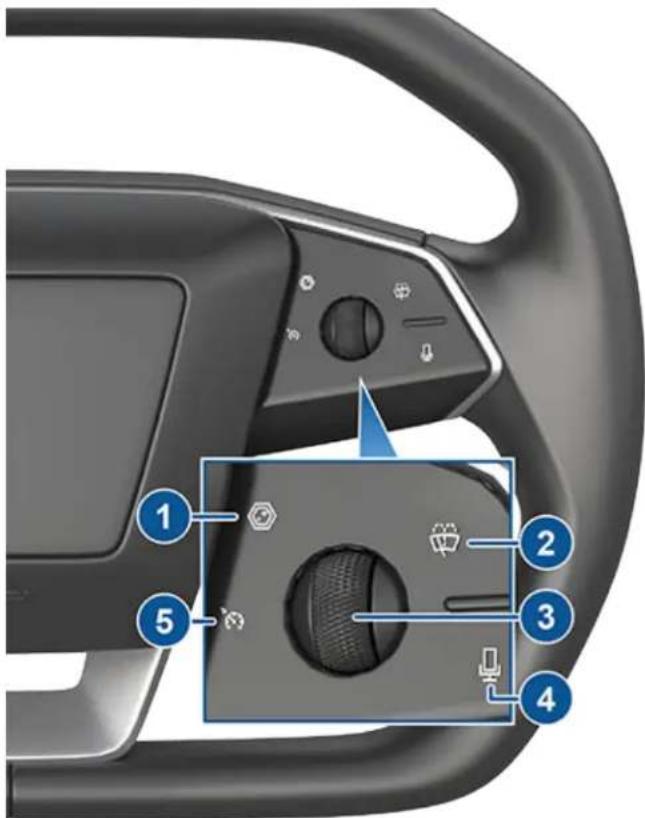
Right Buttons:
- Cameras (see Cameras on page 27)
- Wiper* (see Windshield Wiper and Washers on page 88)
- Right scroll button (see Right Scroll Button on page 81)
- Voice commands (see Voice Commands on page 25)
- Cruise control indicator (non-functional)
*The behaviors associated with the buttons for headlight high beams (Headlights on page 85) and wiper (Windshield Wiper and Washers on page 88) vary depending on whether you press or press and hold the button.
NOTE: If you are experiencing issues with the touchscreen (such as a missing feed from the front- or rear-facing camera), hold down both the left and right scroll buttons simultaneously while Cybertruck is parked to restart it (see Restarting the Touchscreen on page 10).
NOTE: Some controls on the steering wheel are capacitive buttons, meaning they do not have a physical switch, but respond to touch and provide haptic feedback (as a vibration). Do not rest your fingers on them unless intended. Unintentionally touching these buttons can enable or disable them. If a button is mistakenly enabled, remove your fingers from the switches for several seconds to resume normal operation.
Left Scroll Button
Use the left scroll button to adjust the position of the mirrors and steering wheel. The left scroll button also controls the wiper and media player.
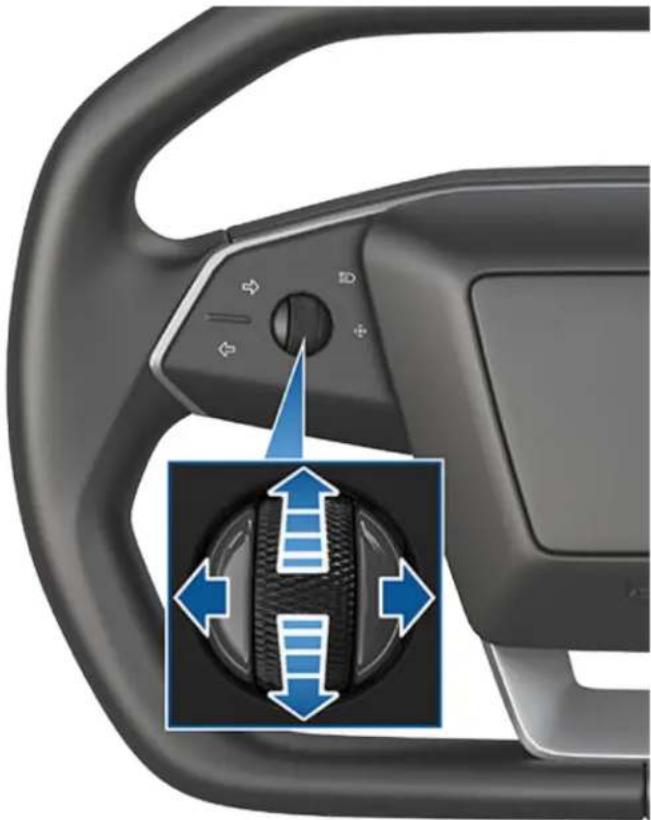
natural_image
Close-up of a car steering wheel with blue directional arrows indicating clockwise motion (no text or symbols)- When using media player, push the button to the left to go back to the previous song or station or push it to the right to skip to the next song or station.
- Roll the scroll button up to increase and down to decrease the volume.
NOTE: The scroll button adjusts the volume for media and phone calls based on what is currently in use. As you adjust the volume, the touchscreen displays the volume level and whether you are adjusting volume for media or phone.
- To mute the media volume, or to pause/play an audio file, push the scroll button.
- When adjusting mirrors, push the button to the left/right to move the associated mirror inward/outward and up/down to position the mirror upward or downward (see Mirrors on page 83).
- When adjusting the position of the steering wheel, roll the button up/down to adjust the tilt/angle and press the button to the left or right to move the steering wheel closer or further (see Adjusting the Steering Wheel Position on page 79).
- When a menu displays on the touchscreen from which you can choose options (for example, the wiper controls), use the scroll button to choose an option (up, down, left, or right) and push the button to confirm your choice.
- For incoming calls, press the scroll button to answer. During the call, press the scroll button again to hang up.
- Hold down the left scroll button to access the default action set or configure a new default action. Follow the directions on the touchscreen.
Left Scroll Button Customization
Choose from a list to create quick access to a function by touching Controls > Display > Scroll Wheel Function. Selecting a function sets the default action when you long press the left scroll button, unless you select Ask each time.
Right Scroll Button
Use the right scroll button to control Autopilot features such as Autosteer and Traffic-Aware Cruise Control:
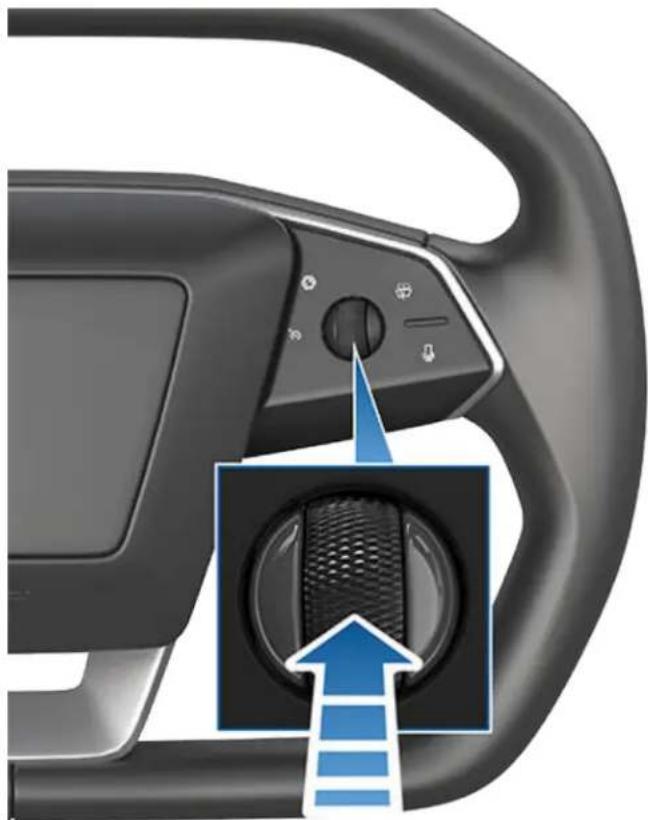
natural_image
Close-up of a car steering wheel with a blue arrow pointing to the interior panel (no text or symbols visible)- When driving, push and release the button to engage Traffic-Aware Cruise Control (see Autopilot Features on page 124).
NOTE: If you have enabled Full Self-Driving (Supervised), pressing the right scroll button activates Full Self-Driving (Supervised) and Traffic-Aware Cruise Control is unavailable.
- When Traffic-Aware Cruise Control is engaged, roll the scroll button up to increase or down to decrease the set speed, or push the button to the left or right to adjust the distance you want to maintain from a vehicle traveling ahead of you (see While Using Autopilot on page 125).
Heated Steering Wheel
To warm up the steering wheel, touch the temperature icon on the touchscreen to display climate controls (see Operating Climate Controls on page 158), then touch the steering wheel icon. When turned on, radiant heat keeps the steering wheel at a comfortable temperature.
To turn the heated steering wheel off, use the climate controls or the Tesla mobile app (see Mobile App on page 66).
Horn
To sound the horn, press and hold the center pad on the steering wheel.
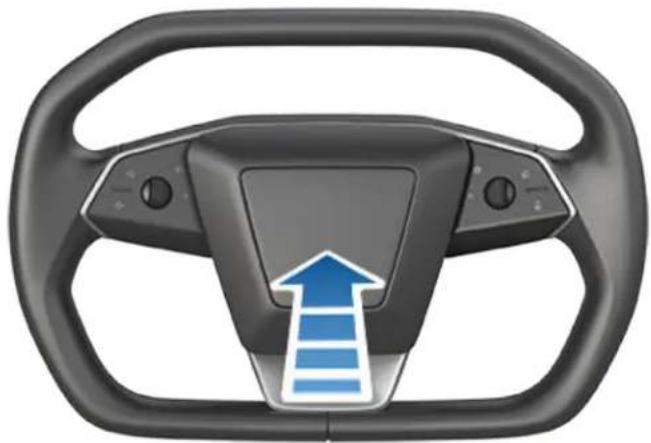
natural_image
Top-down view of a car steering wheel with a blue upward arrow indicating direction (no text or symbols)Steer-by-Wire
Cybertruck uses steer-by-wire technology, which means that there is no mechanical connection between the steering wheel and the wheels. Instead, sensors in the steering column communicate electronically with the steering racks. As a result, steering Cybertruck feels more responsive and requires less effort from the driver.
Cybertruck also has four-wheel steering. When the driver turns the steering wheel, all four wheels respond. This gives Cybertruck a tighter turning radius.
Emergency Operation
The steer-by-wire system is controlled by multiple redundant sensors and actuators. In the unlikely case that Cybertruck detects an issue, an alert displays on the touchscreen, a chime sounds, and Cybertruck gradually reduces drive torque while informing you to pull over.
NOTE: This alert does not mean that Cybertruck has lost steering, or that the steer-by-wire system has failed. This alert indicates a possible issue with one of the redundant systems.
Once pulled over, you can attempt to recover the system by performing a vehicle power cycle (see Power Cycling the Vehicle on page 75). If the power cycle attempt is unsuccessful, an override is available for low-speed maneuvering to position the vehicle for transporting on a flatbed truck (see Instructions for Transporters on page 233).
Adjusting Exterior Mirrors
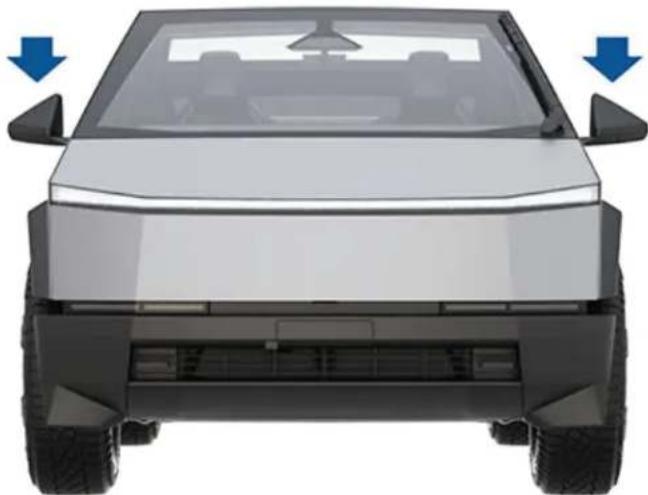
natural_image
Front view of a modern electric vehicle (no visible text or symbols)Adjust the exterior mirrors by touching Controls > Mirrors. Press the left scroll button on the steering wheel to choose whether you are adjusting the Left or Right mirror. Then, use the left scroll button as follows to adjust the selected mirror to its desired position:
- To angle the mirror up or down, roll the left scroll button up or down.
- To angle the mirror inward or outward, press the left scroll button to the left or right.
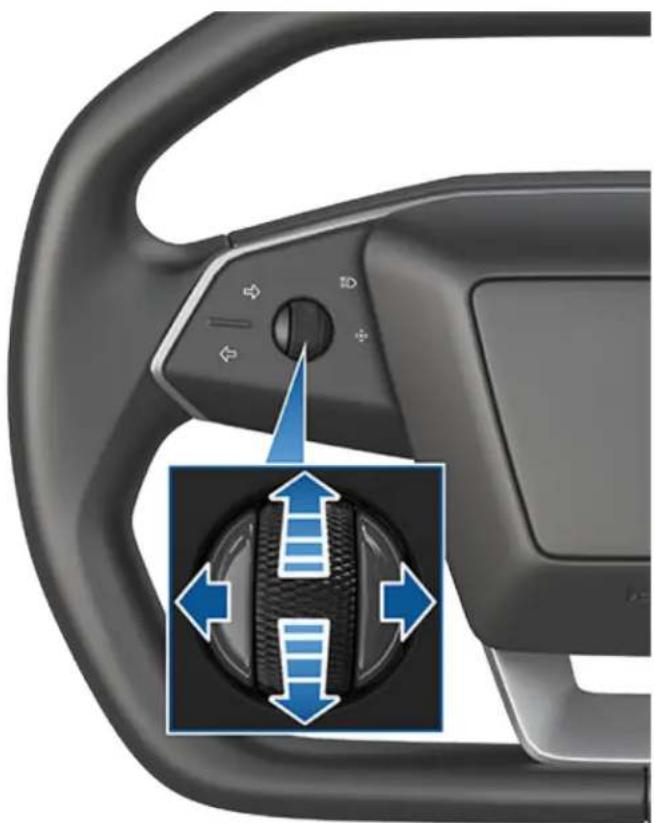
natural_image
Close-up of a car steering wheel with blue directional arrows indicating clockwise motion (no text or symbols)You can save your side mirror position in your driver profile for your convenience.
Mirror Auto Tilt automatically tilts mirrors downward when reversing. To turn this feature on or off, touch Controls > Mirrors > Mirror Auto Tilt. To adjust the auto-tilt position, touch Adjust Tilted Position and make mirror adjustments as needed. After adjusting the tilted position and touching Save, mirrors will automatically tilt to the configured position whenever you shift into Reverse. When you shift out of Reverse, mirrors tilt back to their normal (upward) position. Mirror Auto Tilt must be enabled to adjust tilted position.
When certain environmental conditions are met, the exterior side mirrors dim automatically (for example, in low light conditions or to reduce glare when driving at night). To enable or disable this feature, touch Controls > Mirrors > Mirror Auto Dim.
NOTE: Both exterior mirrors have heaters that can be controlled through Climate.
Folding Mirrors
To manually fold and unfold exterior mirrors (for example, if parking in a narrow garage, tight space, etc.), touch Controls > Fold/Unfold Mirrors. You can also fold and unfold mirrors using the multifunction capabilities on your left scroll button (see Left Scroll Button Customization on page 81.
Unfold the mirrors by touching Controls > Unfold Mirrors. If the mirrors are still folded when you begin driving, they will automatically unfold when your speed reaches 31 mph (50 km/h). You cannot fold a mirror when driving over 31 mph (50 km/h).
To set the mirrors to fold automatically whenever you exit and lock Cybertruck touch Controls > Mirrors > Mirror Auto Fold. The mirrors unfold automatically when you unlock Cybertruck.
You can also set mirrors to fold automatically whenever you arrive at a specific location, which saves you from having to manually fold them each time you arrive at a frequented place. To set up, stop at the location you want to save (or drive at less than 3 mph (6 km/h)), and fold the mirrors. Touch Save Location when it appears briefly on the Fold Mirrors control.
If you no longer want mirrors to fold automatically, touch Controls > Unfold Mirrors when they fold at the saved location, then touch Remove Location.
When you leave the saved location, the mirrors will unfold automatically when your speed reaches 3 mph (6 km/h) or if you touch Controls >Unfold Mirrors.

CAUTION: Mirrors may not automatically fold if you return to a saved location and are driving faster than 3 mph (6 km/h).
NOTE: You can override the automatic folding/unfolding of mirrors at any time (for example, Cybertruck has no power) by pushing the mirror assembly away from you to unfold, or pulling it toward you to fold.
NOTE: If you expect ice to accumulate when Cybertruck is parked, turn off Mirror Auto Fold. Accumulation of ice can prevent exterior side mirrors from folding or unfolding. See Cold Weather Best Practices on page 164 for information on how to ensure your mirrors function properly in cold weather.
You can integrate auto-folding mirrors with MyQ (see Smart Garage on page 74).
Interior Mirrors
Rear View Mirror
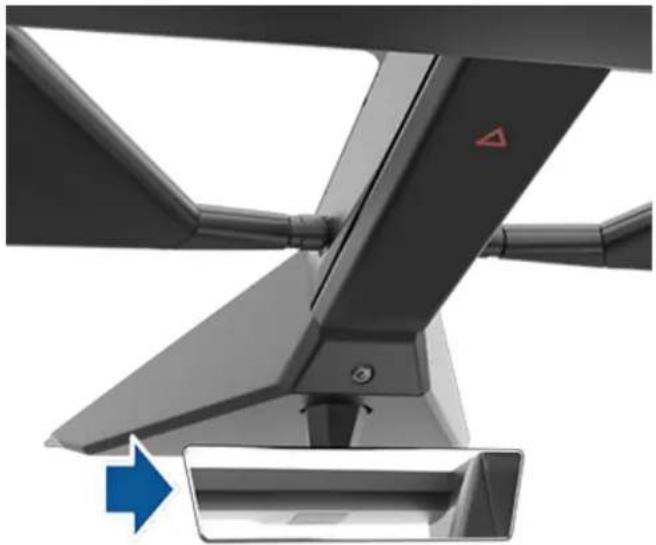
natural_image
Close-up of a mechanical device with a blue arrow pointing to a component (no visible text or symbols)Adjust the rear view mirror manually.
Vanity Mirrors
To expose and illuminate the vanity mirror, fold the sun visor downwards, then use the tab to lower the mirror cover. The tab can stick to the lower portion of the visor to keep it in place. After closing the mirror cover, the light turns off. See Sun Visors and Vanity Mirrors on page 35 for more information.
Overview
Cybertruck has convenience lights that automatically turn on and off based on what you are doing. For example, interior lights, marker lights, signature lights, door handle lights, and puddle lights turn on when you unlock Cybertruck, when you open a door, and when you shift into Park. They turn off automatically after a minute or two when you shift out of Park, or when you lock your vehicle.

TouchControls > Lights to control the lights.
NOTE: You can also access an abbreviated lights menu while driving by touching the headlights button on the steering wheel. A lights menu displays on the touchscreen, providing quick access to headlight controls.
- Headlights: Exterior lights (headlights, tail lights, signature lights, side marker lights, parking lights, and license plate lights) are set to Auto each time you start Cybertruck. When set to Auto, exterior lights automatically turn on when driving in low lighting conditions. If you change to a different setting, lights always revert to Auto on your next drive.
Touch one of these options to change the exterior light setting until adjusted again or the next time you drive:
- Off: Exterior lights turn off. When driving, daytime running lights may remain on based on regulations in various market regions.
- Parking: Parking lights, side marker lights, the tail light bar, and license plate lights turn on.
On: Low beam headlights, side marker lights, parking lights, signature lights, and license plate lights turn on.
- Dome Lights: Turn the interior dome (map) lights on or off. If set to Auto all interior dome lights turn on when you unlock your vehicle, open a door upon exiting, or shift into Park.
Cybertruck is also equipped with a rear dome light on each side of the rear seats, located next to the coat hangers (see Coat Hangers on page 58).
NOTE: To manually turn an individual dome light on or off, press the lens. If you leave a dome light on, it turns off when Cybertruck powers off. If the vehicle was already powered off when you manually turned the light on, it turns off after 60 minutes.
- Ambient Lights: When enabled, interior ambient lights turn on whenever the headlights are on.
- Accent Lights: Choose Off, On, or Night Only. When set to Night Only, interior accent lights will automatically illuminate when dim conditions are detected outside your vehicle, or when convenience lights are on. Customize the brightness and color of the lights to your preference.
- Footwell Lights: When headlights are enabled, footwell lights illuminate the front and rear footwells. Footwell lights will also enable when you unlock your vehicle, open a door upon entry/exit, or shift into Park.
- Bed Lights: The lights running on the sides of the truck cargo bed can be set to Off, On, or Auto. When set to Auto, the bed lights turn on when Cybertruck is parked and the tonneau cover or tailgate is open. You can also toggle the tailgate button to turn the bed lights on or off for your convenience. See Cargo Bed on page 62 for more information.

CAUTION: Ensure the headlights and tail lights are On during low visibility conditions (for example, when it is dark, foggy, snowy, or the road is wet, etc.). The tail lights are off while daytime running lights are on. Failure to do so can cause damage or serious injury.
Headlights
The following indicator lights are visible on the touchscreen to show the status of the headlights. If none of these indicator lights are on, the headlights are off.
Low beam headlights are on.


The headlights are on. Illuminates when headlights are on but the Auto High Beam setting is turned off or if the Auto High Beam setting is turned on but is temporarily unavailable.

High beams are currently turned on, and Auto High Beam is ready to turn off the high beams if light is detected in front of Cybertruck.

High beams are temporarily turned off because Auto High Beam is operating and light is detected in front of Cybertruck. When light is no longer detected, high beam headlights automatically turn back on.
Use the headlights button on the left side of the steering wheel to control the headlights:
- Press and quickly release to flash headlights.
- Press and hold to turn on headlights - the touchscreen displays a brief timer and you must hold for the duration of the timer to latch the headlights to the on position. When headlights are on, press the button a second time to turn them off.
When you touch or press the headlights button on the left side of the steering wheel, the touchscreen displays an abbreviated lights menu to provide quick access to control headlights, fog lights (if equipped), and the Auto High Beam setting. Use the touchscreen to choose options from this menu.
If Controls > Lights > Automatic Turn Signals is set to Auto Cancel, turn signals cancel automatically when Cybertruck detects completion of a maneuver such as a merge, lane change, or a fork in the roadway. You can override automatic cancellation at any time (for example, you want the turn signal to remain on because you are making more than one lane change). To override, engage the turn signal by pressing and momentarily holding the turn signal button (instead of just pressing). Then, when the first maneuver is complete, the turn signal remains on. If Automatic Turn Signals is set to Off, you must cancel the turn signal manually by pressing the turn signal button after maneuvers such as a merge, lane change, or fork in the roadway.
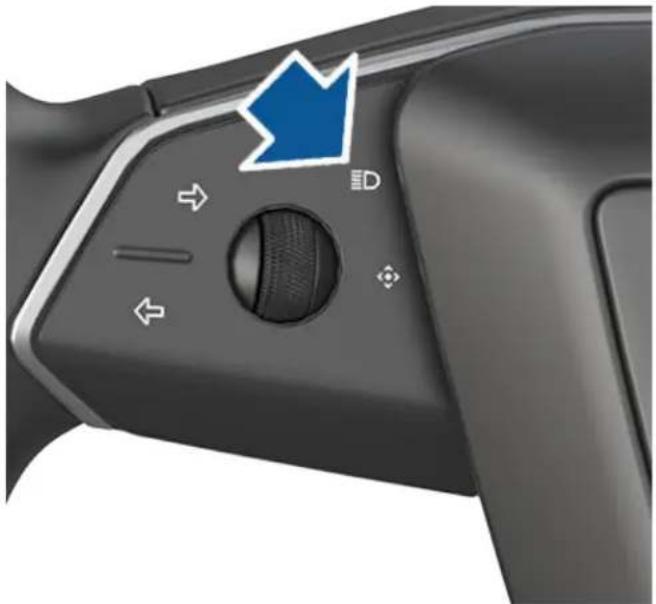
natural_image
Close-up of a black game controller handle with a blue arrow pointing to the left side (no text or symbols visible)Auto High Beam
The headlights can automatically switch to low beam when there is light detected in front of Cybertruck (for example, from an oncoming vehicle). To turn this feature on or off, touch Controls > Lights > Auto High Beam. Your chosen setting is retained until you manually change it.
NOTE: Auto High Beam is automatically enabled when Autosteer is engaged. To switch to low beamheadlights, press the headlights button on the steering wheel. Auto High Beam is re-enabled every time Autosteer is activated.

WARNING: Auto High Beam is a convenience only feature and is subject to limitations. It is the driver's responsibility to make sure that headlights are always appropriately adjusted for weather conditions and driving circumstances.
Turn Signals
To engage a turn signal, press the corresponding arrow button on the left side of the steering wheel. A turn signal cancels based on the angle of the steering wheel (for example, you finish making a turn). You can also cancel a turn signal by pressing the turn signal button a second time.
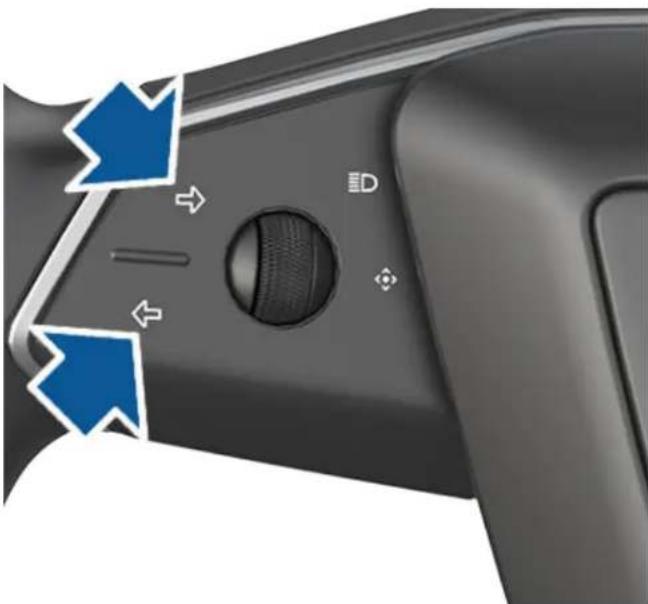
natural_image
Close-up of a game controller handle with blue arrows indicating left and right motion (no text or symbols)
When a turn signal is operating, the corresponding indicator lights up on the touchscreen and there is a clicking sound.
Hazard Warning Flashers
To turn on the hazard warning flashers, press the button on the drive mode selector on the overhead console. All turn signals flash. Press again to turn off.
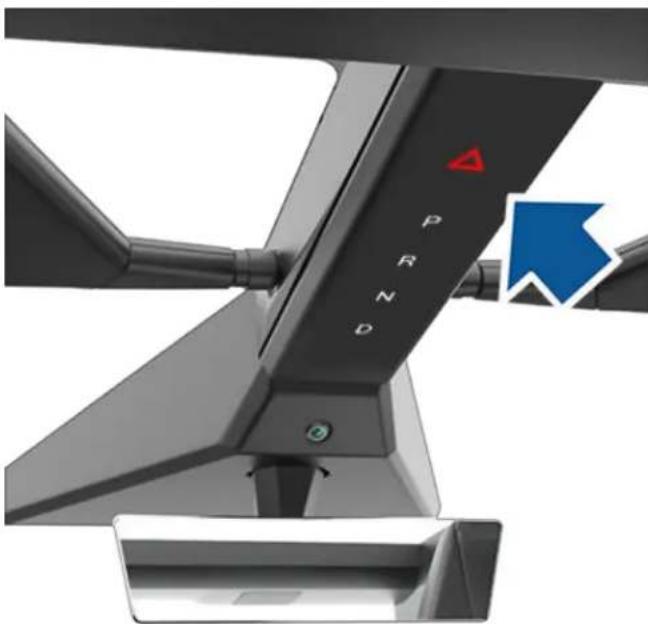
natural_image
Close-up of a mechanical device with labeled ports (PRND, N) and a blue arrow indicating direction (no readable text or symbols beyond labels)If a severe crash is detected by your vehicle, the hazard lights will automatically turn on and flash quickly to increase visibility. Pressing the hazard lights once will return the lights to its normal cadence. Pressing a second time turns all hazard lights off.
NOTE: Hazard warning flashers operate even without a key nearby.
Headlights After Exit
When you stop driving and park Cybertruck in low lighting conditions, exterior lights temporarily remain illuminated. They automatically turn off after one minute or when you lock Cybertruck, whichever comes first.
To turn this feature on and off, touch Controls > Lights > Headlights After Exit. When Headlights After Exit is off, the headlights turn off immediately when you engage Park and open a door.
Condensation in Headlights or Tail lights
Due to weather changes, humidity levels, or recent exposure to water (such as a car wash), condensation may occasionally accumulate in your vehicle's headlights or tail lights. This is normal—as the weather gets warmer and humidity decreases, condensation often disappears on its own. If you notice water buildup within the exterior lenses, or if the condensation affects the visibility of the exterior lights, use the mobile app to schedule a service appointment.
You can access wiper settings by touching the wiper button on the steering wheel or by accessing the app launcher and touching Wiper.
You can also drag the Wiper control to your My Apps area for easier access.
Press and quickly release the wiper button on the steering wheel to wipe the windshield. If the wiper is already operating at a wiper setting and is not set to Auto, pressing the wiper button cycles through speeds. Wiper speeds cycle as follows: I > II > III > IIII > IIII > II > I.
Press and hold the wiper button to spray washer fluid onto the windshield. After releasing the button, the wipers perform two additional wipes then, depending on vehicle and environmental conditions, a third wipe a few seconds later. You can also press and hold the wiper button for a continuous spray of washer fluid—the wipers perform the wipes after you release.
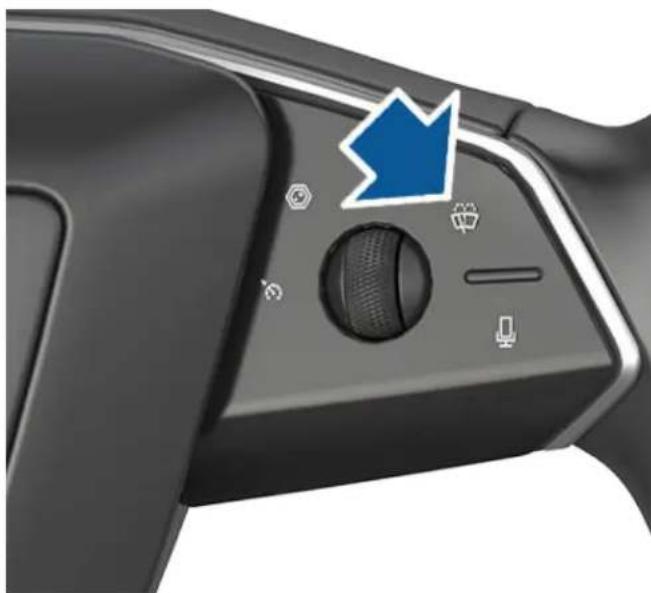
natural_image
Close-up of a black gaming controller handle with a blue arrow pointing to the button (no text or symbols visible)Whenever you press the wiper button on the steering wheel, the touchscreen displays the wiper menu, allowing you to adjust wiper settings. Roll the left scroll button on the steering wheel up or down to choose your desired setting.
- Turn the wiper off.
-
Choose how you want the wiper to operate:
-
I - Intermittent, slow.
- II - Intermittent, fast.
- III - Continuous, slow.
- III - Continuous, fast.
- Auto - Cybertruck detects precipitation and adjusts the wiping speed and intensity.
NOTE: Turning on Autopilot features automatically sets wipers to Auto.
NOTE: The Auto setting is currently in BETA. If uncertain about using the Auto setting while in the BETA phase, Tesla recommends operating the wipers manually, as necessary.

Choose to heat the wiper blade by touching the windshield icon on the touchscreen.
While driving in the rain, the wiper blade may pause in the horizontal position for approximately 30 seconds before continuing to wipe the windshield. The blade may also move slightly based on vehicle speed to make Cybertruck more aerodynamic.
Periodically check and clean the edge of the wiper blade. If a blade is damaged, replace it immediately. For details on checking and replacing the wiper blade, see Windshield Wiper Blade, Jets and Fluid on page 213.
NOTE: If you choose Auto and the ability to detect liquid on the windshield becomes unavailable, the wiper setting reverts to the most recently used manual setting. If a manual setting cannot be determined, the wiper turns off.
NOTE: You can also adjust the windshield wiper speed and frequency using voice commands (see Voice Commands on page 25).
CAUTION: To avoid the risk of damaging the wiper, do not leave the wiper set to Auto when washing Cybertruck.
CAUTION: Remove ice from the windshield before turning the wiper on. Ice has sharp edges that can damage the rubber on the wiper blade. In harsh climates, ensure that the wiper blade is not frozen or adhered to the windshield.
Braking Systems

WARNING: Properly functioning braking systems are critical to ensure safety. If you experience a problem with the brake pedal, brake calipers, or any component of a Cybertruck braking system, contact Tesla immediately.
Cybertruck has an anti-lock braking system (ABS) that prevents the wheels from locking when you apply brake pressure. This improves steering control during heavy braking in most road conditions because ABS constantly monitors the speed of each wheel and varies the brake pressure according to the grip available.
The alteration of brake pressure can be felt as a pulsing sensation through the brake pedal. This demonstrates that the ABS is operating and is not a cause for concern. Keep firm and steady pressure on the brake pedal while experiencing the pulsing.
USA and Mexico:

The ABS indicator briefly flashes amber on the touchscreen when you first start Cybertruck. If this indicator lights up at any other time, an ABS fault has occurred and the ABS is not operating. Contact Tesla. The braking system remains fully operational and is not affected by an ABS failure. However, braking distances may increase. Drive cautiously and avoid heavy braking.
Canada: The ABS indicator briefly flashes amber on

the touchscreen when you first start Cybertruck. If this indicator lights up at any other time, an ABS fault has occurred and the ABS is not operating. Contact Tesla. The braking system remains fully operational and is not affected by an ABS failure. However, braking distances may increase. Drive cautiously and avoid heavy braking.
USA and Mexico:

If the touchscreen displays this red brake indicator at any time other than briefly when you first start Cybertruck, a brake system fault is detected, or the level of the brake fluid is low. Contact Tesla immediately. Apply steady pressure and keep the brake pedal firmly pressed to stop the vehicle when safe to do so.
Canada: If the touchscreen displays this red brake

indicator at any time other than briefly when you first start Cybertruck, a brake system fault is detected, or the level of the brake fluid is low. Contact Tesla immediately. Apply steady pressure and keep the brake pedal firmly pressed to stop the vehicle when safe to do so.
USA and Mexico: The touchscreen displays this amber brake indicator if a brake booster fault is detected. Apply steady pressure and keep the brake pedal firmly pressed to stop the vehicle when safe to do so. Hydraulic Boost Compensation will be active (see Hydraulic Boost Compensation on page 90).
Canada: The touchscreen displays this amber brake

indicator if a brake booster fault is detected. Apply steady pressure and keep the brake pedal firmly pressed to stop the vehicle when safe to do so. Hydraulic Boost Compensation will be active (see Hydraulic Boost Compensation on page 90).
Emergency Braking
In an emergency, fully press the brake pedal and maintain firm pressure, even on low traction surfaces. The ABS varies the braking pressure to each wheel depending on the amount of traction available. This prevents wheels from locking and ensures that you stop as safely as possible.
If an alternative method is needed to bring the vehicle to a stop, press and hold the Park button on the touchscreen's drive mode strip to apply the brakes and remove drive torque while the button is held. Touch Controls or press the brake pedal to display the drive mode strip.

WARNING: Do not pump the brake pedal. Doing so interrupts operation of the ABS and can increase braking distance.

WARNING: Always maintain a safe distance from the vehicle in front of you and be aware of hazardous driving conditions. While the ABS can improve stopping distance, it cannot overcome the laws of physics. It also does not prevent the danger of hydroplaning (where a layer of water prevents direct contact between the tires and the road).

CAUTION: Automatic Emergency Braking (see Automatic Emergency Braking on page 146) may intervene to automatically brake in situations where a collision is considered imminent. Automatic Emergency Braking is not designed to prevent a collision. It is designed to minimize the impact of a frontal collision by attempting to reduce your driving speed. Depending on Automatic Emergency Braking to avoid a collision can result in serious injury or death.

CAUTION: In emergency situations, if the brakes are not functioning properly, press and hold the Park button on the overhead console or touchscreen to bring Cybertruck to a stop. Do not use this method to stop the vehicle unless absolutely necessary.
Brake Disc Wiping
When cold and wet weather is detected, brake disc wiping repeatedly applies an imperceptible amount of brake force to remove water from the surface of the brake discs.
Hydraulic Boost Compensation
Cybertruck is equipped with a brake booster that activates the brakes when the brake pedal is pressed. Hydraulic boost compensation provides mechanical assistance if the brake booster fails. If a brake booster failure is detected, the brake pedal feels stiffer to press and you may hear a sound when you press the brake pedal. To stop Cybertruck, apply steady force to the brake pedal without releasing or pumping. Drive cautiously and maintain a safe distance from other road users—brake pedal responsiveness and braking performance may be degraded.
Hydraulic Fade Compensation
Hydraulic fade compensation assists in monitoring brake system pressure and ABS activity for instances of reduced brake performance. If reduced brake performance is detected (for example, as a result of brake fade, or cold or wet conditions), you may hear a sound, feel the brake pedal pull away from your foot, and notice a strong increase in braking. Brake as you normally would and continue to press the brake pedal without releasing or pumping the brakes.

WARNING: Always maintain a safe driving distance from the vehicle in front of you and exercise caution when driving conditions are hazardous. Brake disc wiping and hydraulic fade compensation are NOT substitutes for adequately applying the brakes.
Regenerative Braking
Whenever Cybertruck is moving and your foot is off the accelerator, regenerative braking slows down the vehicle and feeds any surplus power back to the Battery. By anticipating your stops and reducing or relieving pressure from the accelerator pedal to slow down, you can take advantage of regenerative braking to increase driving range.
Vehicle deceleration due to regenerative braking may vary depending on the current state of the Battery. For example, regenerative braking may be limited if the Battery is cold or is already fully charged.
To experience the same amount of deceleration whenever you release the accelerator pedal, regardless of the state of the Battery, you can choose to have the regular braking system automatically engage whenever regenerative braking is limited. Touch Controls > Dynamics > Apply Brakes When Regenerative Braking is Limited. When enabled, the brake pedal may move or feel stiffer when pressed. This is expected and does not change your ability to slow down Cybertruck.
NOTE: Apply Brakes When Regenerative Braking is Limited may not operate if the brakes are extremely hot.
NOTE: Apply Brakes When Regenerative Braking is Limited is not available when Trailer Mode is engaged (see Towing a Trailer on page 113).
The power meter (a thin vertical line next to the drive mode strip) displays real-time power usage:
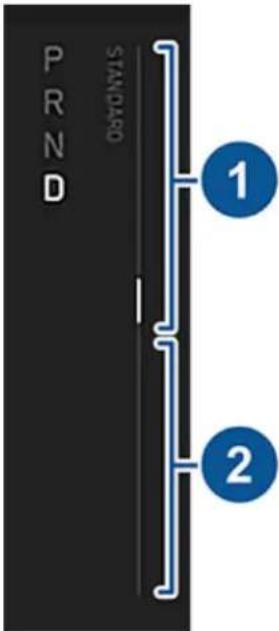
-
Shows power being output by the Battery, such as that used to accelerate the vehicle or to cool the cabin. When you press the accelerator pedal, the top half of the power meter fills with black (or white if the display is dark).
-
Represents power generated from regenerative braking, or power that captured from slowing down the vehicle. Power being fed back to the Battery displays in green whereas power used by the regular braking system displays in gray.
NOTE: Installing winter tires with aggressive compound and tread design may result in temporarily-reduced regenerative braking power. However, your vehicle is designed to continuously recalibrate itself, and after changing tires it will increasingly restore regenerative braking power after some straight-line accelerations. For most drivers this occurs after a short period of normal driving, but drivers who normally accelerate lightly may need to use slightly harder accelerations while the recalibration is in progress.
NOTE: If regenerative braking is aggressively slowing Cybertruck (such as when your foot is completely off the accelerator pedal at highway speeds), the exterior brake lights turn on to alert others that you are slowing down.

WARNING: In snowy or icy conditions, Cybertruck may experience loss of traction during regenerative braking.
Vehicle Hold
When Cybertruck is stopped, Vehicle Hold can continue to apply the brakes even after you remove your foot from the brake pedal and is automatically enabled any time the vehicle comes to a complete stop.

This indicator displays on the touchscreen whenever Vehicle Hold is actively holding Cybertruck while stopped.
To disengage Vehicle Hold, press the accelerator or brake pedal, or shift into Neutral.
NOTE: After actively braking Cybertruck for approximately ten minutes, Cybertruck shifts into Park and Vehicle Hold cancels. The parking brake is still applied. Cybertruck also shifts into Park if it detects that the driver has left the vehicle.
Parking Brake
The parking brake is automatically engaged when in Park, and automatically disengages when shifted out of Park.
To manually engage the parking brake, touch Controls > Safety > Park Brake. Follow the onscreen instructions. Manually disengage the parking brake by selecting Park Brake again.
USA and Mexico: When you manually apply the

parking brake using the touchscreen, the red parking brake indicator lights up on the touchscreen.
Canada: When you manually apply the parking

brake using the touchscreen, the red parking brake indicator lights up on the touchscreen.
USA and Mexico: If the parking brake experiences an

electrical issue, the amber parking brake indicator lights up and a fault message displays on the touchscreen.
Canada: If the parking brake experiences an

electrical issue, the amber parking brake indicator lights up and a fault message displays on the touchscreen.
NOTE: The parking brake operates on the rear wheels only, and is independent of the pedal-operated brake system.
CAUTION: In the unlikely event that Cybertruck loses electrical power, you cannot access the touchscreen and are therefore unable to release the parking brake without first jump starting (see Jump Starting on page 244).
WARNING: In snowy or icy conditions the rear wheels may not have sufficient traction to prevent Cybertruck from sliding down a slope, particularly if not using winter tires. Avoid parking on hills in snowy or icy conditions. You are always responsible for parking safely.
WARNING: Your Cybertruck may display an alert if the road is too steep to safely park, or if the parking brakes are not properly engaged. These alerts are for guidance purposes only and are not a substitute for the driver's judgment of safe parking conditions, including specific road or weather conditions. Do not depend on these alerts to determine whether or not it is safe to park at any location. You are always responsible for parking safely.
Brake Wear
Cybertruck brake pads are equipped with wear indicators. A wear indicator is a thin metal strip attached to the brake pad that squeals as it rubs against the rotor when the pad wears down. This squealing sound indicates that the brake pads have reached the end of their service life and require replacement.
Brakes must be periodically inspected visually by removing the tire and wheel. For detailed specifications and service limits for rotors and brake pads, see Subsystems on page 231. Additionally, Tesla recommends cleaning and lubricating the brake calipers every year or 12,500 miles (20,000 km) if in an area where roads are salted during winter months.
WARNING: Neglecting to replace worn brake pads damages the braking system and can result in a braking hazard.
Cybertruck is designed to detect the presence of objects. When driving slowly (for example, when parking), the vehicle alerts you if an object is detected in close proximity of your Cybertruck. The vehicle alerts you when objects are detected in front of Cybertruck when you are in Drive, and behind Cybertruck when you are in Reverse.

WARNING: You may not be alerted if Cybertruck rolls freely in the opposite direction (for example, Park Assist does not display an alert if Cybertruck rolls backwards down a hill while in Drive).
NOTE: Park Assist may be disabled when a bicycle is detected, when the tailgate is down, or when Cybertruck is in trailer mode.

WARNING: Never depend on Park Assist to inform you if an area you are approaching is free of objects and/or people. Several external factors can reduce the performance of Park Assist, causing either no readings or false readings (see Limitations and False Warnings on page 92). Therefore, depending on Park Assist to determine if Cybertruck is approaching an obstruction can result in damage to the vehicle and/or objects, and can potentially cause serious injury. Always inspect the area with your own eyes. When reversing, perform shoulder checks and use all mirrors. Park assist does not detect children, pedestrians, bicyclists, animals, or objects that are moving, protruding, located too far above or below the cameras, or too close or too far from the cameras. Park Assist is for guidance purposes only and is not intended to replace your own direct visual checks. It is not a substitute for careful driving.
Tesla Vision Park Assist
NOTE: Depending on market region, vehicle configuration, options purchased, and software version, your vehicle may not be equipped with Tesla Vision Park Assist.
Your vehicle uses the cameras mounted on the front, rear, and sides of Cybertruck to create a high-fidelity reproduction of surrounding objects on the touchscreen.
The colors on the visualization correspond to the distance between Cybertruck and the object shown. Red is closer to Cybertruck, and yellow is farther from Cybertruck.
Visual and Audio Feedback
When you shift to Reverse, the Park Assist view displays on the touchscreen, showing objects that are in close proximity to the front and rear of Cybertruck. This view closes when you shift into Drive unless an object is detected close to the front of Cybertruck, in which case the Park Assist view closes automatically when you start driving faster than the speed at which Park Assist operates. When reversing, visual feedback also displays on the touchscreen (see Rear-Facing Camera on page 27). You can manually close the park assist view on the touchscreen by touching the X.
When driving at low speeds with the Camera app displayed on the touchscreen, you can switch to the Park Assist view by touching the button located in the upper left corner of the Camera app screen. This is useful if you need assistance with parallel parking.
If chimes are turned on (see Controlling Audible Feedback on page 92), an audible beep sounds as you approach an object.
NOTE: If Park Assist is unable to provide feedback, the displays an alert message.

CAUTION: Keep cameras clean from dirt, debris, snow, and ice. Avoid using a high pressure power washer on the cameras, and do not clean a camera with a sharp or abrasive object that can scratch or damage its surface.

CAUTION: Do not install accessories or stickers on or near the cameras.
Controlling Audible Feedback
You can use Park Assist with or without audible feedback. To turn chimes on or off, touch Controls > Safety > Park Assist Chimes.
Limitations and False Warnings
Park Assist may not function correctly in these situations:
- One or more of the sensors (if equipped) or cameras is damaged, dirty, or obstructed (such as by mud, ice, or snow, or by a vehicle bra, excessive paint, or adhesive products such as wraps, stickers, rubber coating, etc.).
- The object is located below approximately 8 inches (20 cm) (such as a curb or low barrier).

CAUTION: Shorter objects that are detected (such as curbs or low barriers) can move into a blind spot. Cybertruck cannot alert you about an object while it is in a blind spot.
- Weather conditions (heavy rain, snow, or fog).
• The object is thin (such as a sign post). - Park Assist's operating range has been exceeded.
- The object is sound-absorbing or soft (such as powder snow).
- The object is sloped (such as a sloped embankment).
- Cybertruck has been parked in, or being driven in, extremely hot or cold temperatures.
- The object is located too close to the bumper.
- A bumper is misaligned or damaged.
- An object that is mounted to Cybertruck is interfering with and/or obstructing Park Assist (such as a bike rack or bumper sticker).
- Cybertruck rolls freely in the opposite direction you selected (for example, Park Assist does not display an alert if Cybertruck rolls backwards down a hill while in Drive).
Other Parking Aids
In addition to Park Assist, when shifted into Reverse, the backup camera displays a view of the area behind Cybertruck (see Rear-Facing Camera on page 27).
How It Works
The traction control system constantly monitors the speed of the front and rear wheels. If Cybertruck experiences a loss of traction, your vehicle minimizes wheel spin by controlling brake pressure and motor power. By default, the traction control system is on. Under normal conditions, it should remain on to ensure maximum safety.
NOTE: When Cybertruck is in an Off-Road Drive Mode, the traction control system may be disabled or operate differently. For more information about customizing the traction control system while driving off road, see Off-Road Driving on page 103.

This yellow indicator flashes on the touchscreen whenever the traction control system is actively controlling brake pressure and motor power to minimize wheel spin. If the indicator stays on, a fault is detected with the traction control system. Use the mobile app to schedule a service appointment.

WARNING: Traction control cannot prevent collisions caused by driving dangerously or turning too sharply at high speeds.
Slippery Surfaces
Your vehicle can distribute traction evenly across all tires to provide more traction and stability during slippery conditions, such as rain, snow, or ice. To enable, go to Controls > Dynamics > Slippery Surface.
NOTE: Even when this setting is Off, Cybertruck continuously detects characteristics of the current driving surface and automatically adapts Traction Control.
Cybertruck is equipped with adaptive air suspension that offers superior ride quality, balances comfort with range and performance, and maintains a level height between the front and rear axles.
You can manually adjust the ride height to suit your circumstances. For example, you can raise Cybertruck when you need extra ground clearance (such as when driving on a steep driveway or ramp, in deep snow, over large speed bumps, parking curbs, etc.) or temporarily lower Cybertruck when you need extra space above the vehicle (such as in a parking garage) or to increase handling and range.
NOTE: When Cybertruck starts, you may hear the sound of the compressor as the air suspension system's reservoir fills with air.

CAUTION: Before adjusting the ride height, ensure Cybertruck is clear of all obstacles, above and below.
You can adjust the ride height by touching Controls. The available ride height settings depend on your driving speed and other conditions, such as the current drive mode. You can also adjust the ride height by touching Ride Height on the exterior view of Cybertruck in the vehicle status area of the touchscreen when Cybertruck is parked.
NOTE: When you change the ride height from Controls, it will automatically lower or raise to the preferred ride height again once your driving speed exceeds 25 mph (40 km/h).

natural_image
Two stylized car icons in yellow and red, no text or symbols presentIf a fault is detected that reduces the performance of the adaptive air suspension system, a yellow indicator lights up on the touchscreen. If the problem persists, use the mobile app to schedule a service appointment.
If a fault is detected that disables the adaptive air suspension system, a red indicator lights up on the touchscreen. Use the mobile app to schedule a service appointment.
Ride Height Settings - On-Road
The following ride height settings are meant for day-to-day driving when Cybertruck is in an on-road drive mode. For more information on customizing the preferred ride height, see On-Road Modes on page 98.
NOTE: Each ride height is shown in relation to Medium, which is considered to be 0 in. (0 mm).
| Setting Change in Height Description | ||
| High 2.4 in. (6 cm) above Medium | When the ride height is set to High, it automatically returns to the preferred ride height* after driving approximately 100 ft. (30 meters) or when your driving speed reaches 25 mph (40 km/h). | |
| Low 1.6 in. (4 cm) below Medium | When the ride height is set to Low, it automatically returns to the preferred ride height* after driving approximately 100 ft. (30 meters) or when your driving speed reaches 25 mph (40 km/h). | |
| Entry 2.2 in. (5.5 cm) below Medium | When the ride height is set to Entry, it automatically returns to the preferred ride height* once your driving speed exceeds 10 mph (16 km/h).When Auto Lower is enabled, Cybertruck lowers to the Entry setting when in Park to make it easier to enter or exit the vehicle (see Auto Lower on page 96). | |
| * To change the preferred ride height, touch Controls > Dynamics > Preferred Ride Height. For more information, see On-Road Modes on page 98. | ||
Ride Height Settings - Off-Road
The following ride height settings are available when Cybertruck is in an off-road drive mode. For more information about driving off-road, see Off-Road Driving on page 103.
NOTE: Each ride height is shown in relation to Medium, which is considered to be 0 in. (0 mm).
| Setting Change in Height Description | ||
| Extract 5.9 in. (15 cm) above Medium | Extract is the maximum ride height, designed for use when Cybertruck is stuck on an underbody obstacle. This is only available in certain off-road modes.When the ride height is set to Extract, vehicle speed is limited to 10 mph (16 km/h), and torque may be limited. The ride height automatically resets to Very High once your driving speed exceeds 10 mph (16 km/h). | |
| Very High 3.9 in. (10 cm) above Medium | Very High increases ground clearance and improves approach, breakover, and departure angles while off-road driving. When the ride height is set to Very High, vehicle speed is limited to 25 mph (40 km/h). The ride height automatically resets to High when your driving speed exceeds 25 mph (40 km/h). | |
| High 2.4 in. (6 cm) above Medium | High increases ground clearance to suit general off-road driving at both low and high speeds. | |
Auto Lower
To make it easier to get into Cybertruck, enable Auto Lower (Controls > Dynamics > Auto Lower). Once enabled, your vehicle automatically adjusts to the Entry ride height whenever your vehicle shifts into Park.
The suspension automatically raises back to your preferred ride height when you resume driving.

CAUTION: When Auto Lower is enabled and you are parking Cybertruck, ensure that there are no obstacles underneath the vehicle that may contact the underbody when the suspension lowers.
NOTE: Auto Lower is not available while in Off-Road Mode.
NOTE: You can also make it easier to enter and exit Cybertruck by enabling Easy Entry. When Easy Entry is enabled, the steering wheel and driver's seat adjust automatically when the vehicle is in Park to allow more room for entering or exiting the vehicle (see Easy Entry on page 100).
Self-Leveling
To prevent damage when jacking or lifting the vehicle, you must activate Jack Mode to disable self-leveling. For more details, see Jack Mode on page 216.
Auto-Raising Locations
Whenever you raise the suspension, your vehicle saves the suspension setting based on the location. By saving the location, you do not need to manually raise the suspension every time you arrive at a frequently-used location where you have previously raised the suspension. When you return to the saved location, Cybertruck raises the suspension and the touchscreen displays a message indicating that the suspension is adjusting.
When returning to a saved location and driving faster than the suspension settings allow, the suspension does not adjust until the vehicle slows down. For example, if you set the suspension to always raise on a particular street to account for speed bumps, but you are traveling at more than 25 mph (40 km/h) when you reach that location, the ride height is not raised until your speed falls below 25 mph (40 km/h).
If Cybertruck reaches a saved location and the existing suspension setting is already higher than the level that has been saved for that location, the ride height is not adjusted. After leaving a saved location, the suspension automatically lowers to the preferred ride height. However, it may not lower until your vehicle meets the speed and distance threshold at which the suspension lowers.
NOTE: Cybertruck may not raise the suspension in a saved location where connectivity is poor (for example, in an underground parking garage).
To remove an auto-raising location
If no longer want the suspension to automatically raise at a location, touch to deselect Always raise at this location in the popup that appears when you arrive at a saved location.
To choose how Cybertruck accelerates and handles for day-to-day driving on public roads, touch Controls > Dynamics.
Choose between three Drive Modes. Comfort and Sport automatically set the Acceleration, Ride & Handling, and Preferred Ride Height to balance ride comfort, handling, and range. Custom allows you to customize these options as you see fit.
To access additional performance and acceleration, select Beast (if equipped) and follow the on-screen prompts.
In addition, you can choose to enable Auto Shift out of Park (see Shifting on page 76) or Auto Lower (see Suspension on page 95).
Customization Options
| Setting Options Description | ||
| Acceleration | Chill | Limits acceleration for a smooth and gentle ride. When Chill is selected, Chill displays on the touchscreen above the driving speed. |
| Standard | Provides the normal level of acceleration. | |
| Ride & Handling Relaxed | Prioritizes | comfort over dynamic handling response. Cybertruck will feel smoother and more comfortable, especially on rough or uneven roads. |
| Focused | Provides higher damping for more dynamic driving. Cybertruck will feel more responsive and connected to the road. | |
| Preferred Ride Height | Lower Sets | the Preferred Ride Height to Lower. The ride height remains at Low on and off the highway by default, optimizing handling and range (see Suspension on page 95). |
| Higher Sets | the Preferred Ride Height to Higher. When set to Higher, the ride height automatically adjusts between Medium and Low to balance ride comfort with handling and range. On highways or while driving at highway speeds, ride height adjusts to Low (see Suspension on page 95). | |

CAUTION: Do not use off-road locking differentials while driving on high-traction surfaces, such as asphalt. Using locking differentials in inappropriate situations can cause significant damage to the vehicle. Damage to the vehicle due to improper use of locking differentials is not covered by the warranty.
When you first adjust the driver's seat, steering wheel position, or exterior side mirrors, the touchscreen prompts you to create a driver profile to save these adjustments. Your profile also saves various preferences you make while customizing Cybertruck.
To save your profile settings to the cloud and access them across multiple Tesla vehicles, set up a Tesla Profile (see Using Tesla Profiles on page 99).

To add a new driver profile, touch the driver profile icon in Controls. Then touch Driver Profile Settings > Add New Driver, type the driver's name and touch Create Profile. Follow the onscreen instructions to save mirror and steering wheel position to the driver profile.
Check the Use Easy Entry checkbox if you want to save (or use existing) Easy Entry settings in which the driver's seat and the steering wheel are automatically adjusted to make it easy to enter and exit Cybertruck.
If you change the position of the driver's seat, steering wheel, or exterior side mirrors after you have saved or chosen a driver profile, the touchscreen prompts you to Save the new position or Restore the previously saved position (other settings are automatically saved). To change a setting without saving or restoring, just ignore the prompt.
To delete a driver profile, touch the driver profile icon in Controls, touch Driver Profile Settings and select the driver profile you want to remove. Once selected, Delete the driver profile.
NOTE: Valet mode is a built-in driver profile that limits speed and restricts access to some Cybertruck features (see Valet Mode on page 100).
NOTE: To stop automatic adjustments that are in process based on a driver's profile, touch Stop on the Driver Profile dropdown menu. Automatic adjustments also stop if you manually adjust a seat, mirror, or the steering wheel.
Selecting Between Driver Profiles

To adjust Cybertruck based on a driver's profile, touch the driver profile icon at the top of the Controls screen. Then choose the driver, and Cybertruck is adjusted based on the settings that have been saved to the chosen driver profile. See Using Tesla Profiles on page 99 to learn more about saving profile settings to the cloud for easy access across multiple Tesla vehicles.
Using Tesla Profiles
Driver profile settings, such as seat adjustments, temperature preferences, navigation Recents and Favorites, media settings, and data sharing preferences can be saved into a Tesla Profile that is synced to every supported vehicle under your Tesla Account. This provides convenient access to your profile settings and preferences across all your Tesla supported vehicles.
To set up your Tesla Profile, navigate to Driver Profile Settings and select your Tesla Account name. You can choose to set it up as a New Profile or copy the settings from an existing driver profile that you were previously using.
To set up a Tesla Profile for additional drivers, share your vehicle with them from the mobile app and navigate to Security & Drivers > Manage Drivers > Add Driver. Their Tesla Profile will appear in the Driver Profile settings after accepting the invitation from their Tesla Account. If you remove their access to the vehicle, it also removes their Tesla Profile. For more information on granting mobile app access, see Granting Access to a Second Driver on page 68. In addition, you can change your profile picture from your Tesla Mobile App.
NOTE: Some vehicle settings, such as seat, mirror, steering wheel, and air vent positions are only synced between the same vehicle models. If the seat or steering positions do not restore as expected, touch Controls > Service > Seat & Steering Calibration on the affected vehicles.
To remove your Tesla Profile from a vehicle, remove that vehicle from your Tesla account:
- In the Tesla mobile app, touch the profile icon in the top-right corner.
- Touch Add/Remove Products.
- Touch Remove.
- Select the vehicle you'd like to remove.
Saved Settings
A subset of the settings that you choose to customize your Cybertruck are automatically saved to your driver's profile. Once saved, a green check mark appears next to the driver profile icon on the touchscreen. Examples of automatically saved driver profile settings are:
- Navigation, temperature, lights and display settings.
- Autopilot and driving preferences.
Linking a Driver Profile to a Key
You can link a driver profile to a key (or keys) to allow Cybertruck to automatically select the correct driver profile when the linked key is detected as you approach the vehicle and open the driver's door. To link a driver profile to a key, first ensure you are using your desired driver profile, then touch Controls > Locks > Keys. You can toggle the driver icon
to link or delete a key to the desired driver profile. The name of the driver profile appears under the key to show that it is linked.
NOTE: Cybertruck supports up to 10 driver profiles. You can link multiple keys to a driver profile, but you cannot link multiple driver profiles to a single key.
Easy Entry
You can define an Easy Entry setting that moves the steering wheel and driver's seat to make it easy to enter and exit Cybertruck. Any driver can use the Easy Entry setting by associating it with their driver profile. When the Easy Entry setting is associated with a driver profile, the steering wheel and driver's seat automatically adjust when in Park and the driver's seat belt is unbuckled, allowing an easy exit from (and next entrance into) Cybertruck. When returning to the vehicle and stepping on the brake pedal, settings automatically adjust back to the settings used by the most recent driver profile (or based on the key if it's linked to a driver profile).
To use Easy Entry with a driver profile, ensure the Use Easy Entry box is checked.

WARNING: Never use Easy Entry to move the driver's seat to the full rearward position when a child safety seat is installed on a rear seat located behind the driver's seat. With reduced clearance, the movement of the seat may impact a child's legs, cause injury, or dislodge the seat.
NOTE: You can also make it easier to enter or exit Cybertruck by enabling Auto Lower. For more information, see Auto Lower on page 96.
Valet Mode
When Cybertruck is in Valet mode, the following restrictions apply:
• Key card must be used to access and drive Cybertruck.
• Speed is limited to 70 mph (113 km/h).
• Maximum acceleration and power are limited.
- Front trunk and glovebox are locked.
- Home and Work locations are not available in the navigation system.
• Voice commands are disabled.
- Text messages are not displayed.
- Autopilot convenience features are disabled.
- The Allow Mobile Access setting cannot be changed.
- Driver Profiles are not accessible.
- Some apps, such as Toybox and Theater, are not accessible.
- The touchscreen does not display the list of keys that can access Cybertruck (see Managing Keys on page 31).
- Wi-Fi and Bluetooth are disabled. When Cybertruck is in Valet mode, you cannot pair new Bluetooth devices or view or delete existing paired devices. However, if a Bluetooth-paired device or a known Wi-Fi network is within range, Cybertruck connects to it.
Starting Valet Mode
With Cybertruck in Park, touch Controls > Controls > Safety > Valet Mode, or touch the driver profile icon at the top of the Controls screen, then touch Valet Mode.
The first time you enter Valet mode, the touchscreen prompts you to create a 4-digit PIN you will use to cancel Valet mode.
When Valet mode is active, the touchscreen displays the word Valet while the driver profile changes to Valet Mode on the touchscreen.
You can also use the mobile app to start and cancel Valet mode (if Cybertruck is in Park). When using the mobile app, you do not need to enter a PIN because you are already required to log into the app using your Tesla Account credentials.
NOTE: If PIN to Drive is enabled (see PIN to Drive on page 151), you must enter the driving PIN before you can define or enter a Valet PIN. Once in Valet mode, Cybertruck can be driven without the valet needing to enter the driving PIN.
NOTE: The PIN to Drive setting is not available when Valet mode is active.
If you forget your valet PIN, reset it from inside Cybertruck by entering your Tesla Account credentials (which also cancels Valet mode). You can also reset your PIN using the mobile app.

WARNING: Do not use Valet mode when towing a trailer. The torque limitations of Valet mode can make it difficult for Cybertruck to pull a trailer up a hill.
Canceling Valet Mode
With Cybertruck in Park, touch the Valet Mode driver profile icon at the top of the Controls screen, and enter your 4-digit PIN.
When you cancel Valet mode, all settings associated with the most recently used driver profile and climate control settings are restored, and all features are available.
NOTE: You do not need to enter a PIN to cancel Valet mode from the mobile app.
Displaying Trip Information
Trip information displays on the touchscreen in the "Cards" area on the vehicle status display, or when you touch Controls > Trips. For the current trip, you can display distance, duration and average energy usage. You can also show distance and total and average energy used since your last charge and for additional trips.
To name or rename a trip, touch the trip's name, enter a new name for the trip, then press Save. To reset a particular trip meter, touch its associated Reset button.
Odometer
To display the odometer and view vehicle mileage, do either of the following:
- Touch Controls > Software.
- Touch Controls > Trips.
- Open the mobile app and scroll down to the bottom of the main screen.
The Pedestrian Warning System causes Cybertruck to emit sound when driving below approximately 25 mph (40 km/h) or while driving in reverse. Electric vehicles operate quietly and this sound helps to alert pedestrians of your oncoming vehicle. The sound, which activates whenever Cybertruck is shifted out of Park, gets louder as speed increases.

WARNING: If sound cannot be heard, pedestrians may not be aware of your oncoming vehicle, which may increase the likelihood of a collision resulting in serious injury or death. Never rely on the Pedestrian Warning System to make sure that pedestrians are aware of your vehicle. If the Pedestrian Warning System is not operating, schedule a service appointment.
Off-road driving is driving your vehicle on an unpaved surface such as sand, silt, dirt, or mud, or on rocky or snow-covered surfaces. When Cybertruck is in Off-Road Mode, you have access to settings and drive modes that allow you to manage steep ascents, descents, uneven terrain, shallow creeks, and other obstacles you may encounter.
The Off-Road app provides greater control over traction, stability, acceleration, and braking. Various modes and settings also allow you to quickly adjust the ride height of Cybertruck (see Suspension on page 95).

CAUTION: Carefully read all cautions and warnings before driving Cybertruck off road (see Limitations and Warnings on page 112). Always pay close attention and monitor the area to the front, rear, and sides of Cybertruck for obstacles while off-road driving.

CAUTION: Any damage caused by off-road driving is not covered by the warranty.
Off-Road Modes and settings include the following:
• Overland: Maximizes traction on various terrains at low speeds. See Overland on page 105.
- Baja: Optimizes the suspension and traction control of Cybertruck for high speed driving on dirt roads or desert environments. See Baja on page 105.
- Wade Mode: Raises the suspension and pressurizes the high voltage Battery to protect your vehicle from water and debris while navigating shallow bodies of water. See Wade Mode on page 106.
- Trail Assist: Allows you to maintain your speed while driving on a trail. See Trail Assist on page 107.
- Locking Differentials: Engage for more traction while off-roading. See Locking Differentials on page 108.
Using the Off-Road App

WARNING: Only use Off-Road mode in off-road driving scenarios. Off-Road modes change how Cybertruck handles, accelerates, and decelerates, and is not appropriate for public roads.

Use the Off-Road app, located in the app tray, to conveniently customize and monitor your off-road settings. After carefully reading the pop-up window, touch Confirm.
In the Off-Road app, customize options such as:
- Off-Road Mode: Choose between Overland and Baja and customize your preferences. See Overland on page 105 and Baja on page 105 for more information.
- Locking Differentials: Engage or disengage locking differentials. See Locking Differentials on page 108.
- Pitch, Roll: These angles determine how capable the vehicle is of climbing over an obstacle or up an incline.
NOTE: If you are approaching a large obstacle or change in incline, you can set the right ride height to Extract by touching Controls > Ride Height > Extract. When the ride height is set to Extract, Cybertruck has increased approach, breakover, and departure angles.
- Wade Mode: See Wade Mode on page 106 for more information.
- Rear Steer: You can set Rear Steer to Off or Auto. Auto allows for a tighter turn radius while driving.
- Light Bar: Enable or disable the light bar, if installed.
- Ride Height: Customize your vehicle's ride height based on terrain and other drive settings. See Suspension on page 95.
NOTE: Cybertruck must be in Park to change the off-road drive modes and settings.
NOTE: Your off-road settings remain for approximately 15 minutes after you exit the vehicle. Always double check to ensure your off-road settings are as intended prior to driving.

CAUTION: The TPMS warning thresholds may be lowered to accommodate different off-road needs. Do not rely solely on the TPMS warning indicator when in an Off-Road mode or setting, as these thresholds do not comply with Federal TPMS standards. It is your responsibility to ensure tires are adequately inflated at all times and are inflated back to normal levels before regular driving on roads.
Before Off-Road Driving
- Plan your route: Carefully consult maps and weather reports before beginning an off-road expedition and familiarize yourself with the different types of terrain you may encounter (gravel, sand, mud, snow, etc.). Research trails before setting out and be aware that weather and environmental conditions can change quickly and unexpectedly. Ensure your vehicle has ample range for your planned route.
- Secure passengers and cargo: Wearing a seat belt is required by law. Ensure that all passengers are wearing their seat belts properly (see Seat Belts on page 40). Make sure that loose items in the cabin are stowed or secured, and ensure that the cargo bed is free of cargo, or that cargo is tightly secured. The tonneau cover can be open or closed while driving off road.
- Evenly distribute vehicle load: While off-road driving, Cybertruck performs best when the weight of passengers and cargo is distributed evenly across the front and rear axles (see Vehicle Loading on page 223). Detach large or heavily loaded trailers before driving off road.
- Lower tire pressure: Lower tire pressure to increase traction on softer surfaces such as sand or gravel, and on rocky surfaces. Reducing tire pressure allows tires to make more contact with the terrain, increasing grip and decreasing the risk of punctures.

WARNING: Avoid making hard turns and other sudden maneuvers when tires are inflated under the recommended cold tire pressure. Before driving on public roads again, make sure to fill all tires to the recommended cold tire pressure (see Tire Pressures on page 200).
- Be prepared: Equip your Cybertruck with supplies in case of emergency, such as a spare tire, a jack, an air compressor, a portable jump starter, and a flashlight.
- Remove wheel fairings: Cybertruck has pieces of plastic trim that descend in front of the wheels from the rocker panels on either side of the vehicle. These are the wheel fairings. The wheel fairings increase aerodynamic performance and range, but may be damaged while driving off-road over rough, uneven surfaces, rocks, or obstacles. To prevent damage, remove the front wheel fairings before off-road driving. For more information and instructions for removing the wheel fairings, refer to the Do It Yourself Guide (see Do It Yourself Maintenance on page 221).
- Remove wheel covers: To prevent damage, remove the wheel covers before driving off-road. For more information, see Removing and Installing Wheel Covers on page 204.
While Off-Road Driving
Quickly access off-road settings and vitals from Cybertruck in the vehicle status area on the touchscreen. You can also keep the Off-Road app open while driving to quickly change settings and preferences based on your driving situation. See quick stats such as:
- Off-Road Status icons
- Tire Pressures
- Locking Differential status
- Battery and motor temperatures
- Ride Height
NOTE: When the ride height is set to Extract, vehicle speed is limited to 10 mph (16 km/h), and torque may be limited. The ride height automatically resets to Very High once your driving speed exceeds 10 mph (16 km/h).
If your vehicle is covered in mud after off-roading, rinse the entire exterior of the vehicle with water. It is important to regularly clean Cybertruck after off-roading because mud and debris can quickly build up and limit some vehicle functions. See Cleaning Mud on page 196 for more information.

CAUTION: Tesla recommends to fully open the tonneau to accommodate for increased body flex during dynamic off-road driving.
Overland
Overland maximizes traction on various terrains at low speeds. By selecting Overland, you can customize the following settings:
| Setting Options Description | ||
| Surface | All Purpose | Automatically adjusts tire slip based on the amount of available traction and sets the Preferred Ride Height to High. All Purpose is best suited for mixed terrain driving. |
| Sand Allows for high amounts of tire slip to provide optimal traction on soft, deformable surfaces like sand and sets the Preferred Ride Height to High. | ||
| Gravel/Deep Snow | Allows for medium amounts of tire slip to provide optimal traction on gravel or deep snow, and sets the Preferred Ride Height to High. | |
| Rock | Tightly manages tire slip to maximize grip in rock crawl conditions and sets the Preferred Ride Height to Very High. When the ride height is Very High, the suspension system pneumatically connects the springs on the front and rear axles, increasing suspension articulation for maximum traction. | |
| Stopping Mode | Hold Applies the brakes automatically when Cybertruck stops, without you having to put your foot on the brake pedal. Whether stopped on a flat surface or a hill, Vehicle Hold keeps the brake applied, provided your foot remains off the accelerator and brake pedals.[CYBR] WARNING: Never rely on Hold to adequately decelerate or fully stop your vehicle. Many factors can contribute to a longer stopping distance, including downward slopes, and reduced or limited regenerative braking (see Regenerative Braking on page 90). Always be prepared to use the brake pedal to adequately decelerate or stop. | |
| Roll Allows Cybertruck to roll freely when close to, or at, a complete stop, like a vehicle in Neutral. Therefore, if stopped on a slope, Cybertruck will roll downward. The brake does not engage, and the motors do not apply torque (until the accelerator pedal is pressed). | ||
Baja
When Cybertruck is in Baja, the ride height raises and adaptive damping dynamically adjusts based on your Terrain selection to optimize performance on various off-road scenarios. The electronic stability control system also allows more tire slip on low-traction surfaces. This is especially useful in high speed driving situations, such as desert or sand driving.
You can customize the following settings:
| Setting Options Description | ||
| Handling Balance Left Adjusts the vehicle balance such that Cybertruck behaves more like a front-wheel-drive vehicle. When you move the slider to the left, Cybertruck is more stable and is more susceptible to understeer (when you turn the wheel and Cybertruck turns less than normal). | ||
| Right Adjusts the vehicle balance such that Cybertruck behaves more like a rear-wheel-drive vehicle. When you move the slider to the right, Cybertruck moves with more agility but less stability, and is susceptible to oversteer (when you turn the wheel and Cybertruck turns more than normal). | ||
| Stability Assist Standard Provides the maximum amount of stability control intervention*. | ||
| Reduced Reduces the amount of stability control intervention. | ||
| Minimal | Provides a minimal amount of stability control intervention.[YKS7]WARNING:Drive with caution when customizing Stability Assist. If you lose control of Cybertruck, less stability control intervention will be applied and the vehicle may not stabilize itself. Use only if you have advanced experience driving beyond grip limits. | |
| Terrain | Smooth | Sets ride height to Medium and increases damping for greater body control and responsive handling. Best for drifting or high-speed driving on smooth or flat terrains (see Suspension on page 95). |
| Rugged | Sets ride height to High with damping optimized for rough terrain, medium-sized obstacles, and whoops. | |
| Clearance | Sets ride height to Very High for traversing large obstacles. | |
| Setting Options Description | ||
| Deceleration Mode | High | Increases the amount of regenerative braking so Cybertruck slows down more dramatically when you remove your foot from the accelerator pedal, allowing for more dynamic one-pedal driving. WARNING: Setting the Deceleration Mode to High (located in Dynamics) may cause some loss of traction on loose surfaces (such as snow). WARNING: Setting the Deceleration Mode to High (located in Dynamics) may cause some loss of traction on loose surfaces (such as snow). |
| Standard Provides the normal level of regenerative braking, allowing Cybertruck to maintain traction on loose, low-traction surfaces (such as sand, dirt, and gravel). | ||
| * Stability control intervention modifies motor torque and selectively applies the brakes to each wheel to make Cybertruck more stable and help the driver maintain control of the vehicle. In this setting, stability control is reduced compared to on-road driving. | ||
Wade Mode
Wade Mode allows Cybertruck to enter and drive through bodies of water, such as rivers or creeks.

CAUTION: It is your responsibility to gauge the depth of any body of water before entering. Damage or water ingress to Cybertruck as a result of driving in water is not covered by the warranty.

CAUTION: Always inspect underwater conditions (such as debris, etc.) before entering and use your best judgment. Take care to drive slowly and safely. If the water is too deep, return to more shallow water or dry land.
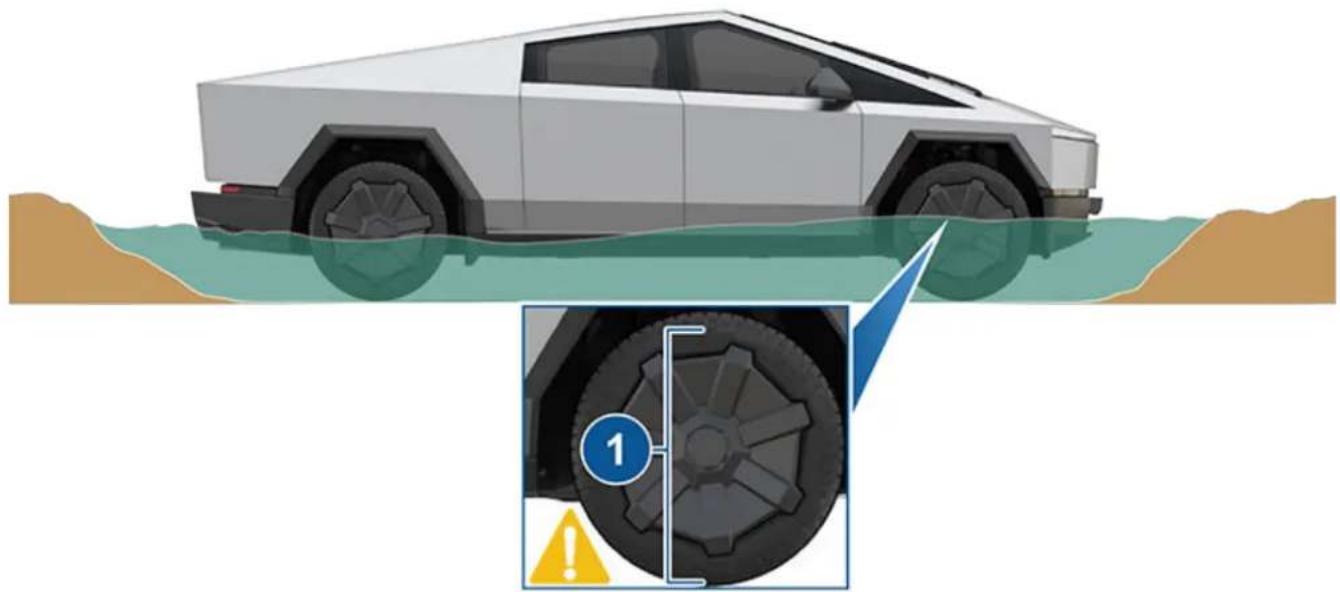
natural_image
Illustration of a futuristic white pickup truck navigating water with a close-up of its wheel and warning symbol (no text or labels)- The maximum wade depth is approximately 32 in. (815 mm) measuring from the bottom of the tire.
Wade Mode must be used any time you are driving Cybertruck through a shallow body of water, such as a river. To enable Wade Mode:
- Ensure all doors and windows are fully closed, and your vehicle speed is less than 20 mph (32 km/h).
- Access the Off-Road App.
- Select Wade.

When enabled, the Wade Mode icon appears on the touchscreen and starts a countdown for how long Wade Mode is active. Wade Mode duration is limited to 30 minutes.
Wade Mode defaults the vehicle's ride height to Very High and protects Cybertruck for up to approximately 32 in (815 mm) of water, driving at slow speeds (1-3 mph (2-5 km/h)). As water depth changes, reduce your vehicle speed accordingly. Do not disable Wade Mode until your vehicle is fully out of water.
In addition, the vehicle's high voltage Battery automatically pressurizes to protect the Battery from water and debris.
Muddy waters can reduce the cooling system effectiveness by adhering to the radiator. See Cleaning Mud on page 196 for information on how to clean your vehicle after a muddy excursion. Wash your vehicle immediately after wading to reduce chances of bacteria buildup and mud hardening after drying. Vehicles driving in waters should be regularly inspected for signs of water ingress or damage to components including (but not limited to) the brakes, horn, lights, etc.

CAUTION: On soft or muddy underwater surfaces, Cybertruck may sink in, effectively increasing the water level on the vehicle. Take this possibility into account and prepare accordingly.

WARNING: Never stop or place the vehicle in Park when crossing water. Do not drive in water next to, or immediately after, another vehicle. Currents created by other vehicles can lead to damage.

WARNING: Do not drive in deep, fast-flowing bodies of water (such as strong currents or rapids). Doing so can result in damage, serious injury, or death.
Trail Assist

Trail Assist is available when Cybertruck is in Overland. It maintains the speed of the vehicle to provide greater control during steep ascents and descents.
To enable, touch Controls > Dynamics > Off-Road > Trail Assist. Then you can quickly activate or deactivate Trail Assist when needed by single-clicking the right scroll wheel button. You can set the Trail Assist speed between 1 mph (2 km/h) and 25 mph (40 km/h). When active, you can change the set speed by swiping on the right scroll wheel. Small swipes increase the speed in smaller increments, whereas large swipes increase the speed in larger increments.
You can also press the accelerator or brake pedal to temporarily increase or decrease your speed. Once you remove your foot from the pedal, the vehicle returns to your set speed. If you simultaneously brake to a lower speed and swipe down on the right scroll wheel, or accelerate and swipe up, the set speed will automatically snap to the current speed.
NOTE: Unlike other features that allow you to set a cruising speed (such as Traffic-Aware Cruise Control), pressing the brake pedal does not disable Trail Assist. However, pressing and holding the brake pedal firmly while at a standstill disables Trail Assist.
NOTE: Trail Assist disengages and returns to your normal driving settings if you accelerate above 30 mph (48 km/h). It reactivates when you drive below 30 mph (48 km/h).

CAUTION: Trail Assist does not detect objects in front of the vehicle. It is your responsibility to always monitor your vehicle's surroundings and be prepared to brake or steer for unanticipated circumstances.

CAUTION: Do not use off-road locking differentials while driving on high-traction surfaces, such as asphalt. Using locking differentials in inappropriate situations can cause significant damage to the vehicle. Damage to the vehicle due to improper use of locking differentials is not covered by the warranty.
Open Differentials
Most passenger vehicles are equipped with open differentials on the drive axles. When a vehicle with open differentials turns on a corner or paved road, the wheels on the outside of the curve rotate more quickly than the wheels on the inside of the curve to prevent wheel hop and reduce vehicle instability. However, in low-traction scenarios (such as off-roading or driving in snow), additional torque can get directed towards the wheel(s) with less traction, which may lead to the vehicle getting stuck.
Locking Differentials
Cybertruck is equipped with locking differentials for increased traction during certain low traction and off-road conditions.
Locking differentials lock both wheels of an axle together, which forces the wheels to rotate at the same speed. This distributes the torque across the same axle based on the available traction in each wheel. When one of the locked wheels has significantly reduced traction (on sand, ice, etc.) more torque is applied to the wheel with greater traction. This distribution of torque helps the vehicle continue moving in low traction environments.
Dual Motor Variants: are equipped with mechanical front and rear locking differentials.
Tri-Motor (Cyberbeast) Variants: are equipped with a mechanical front locking differential, and a virtual rear locking differential to provide sufficient torque in each rear wheel. The rear locking differential automatically engages in certain drive modes and speeds, and cannot be manually engaged or disengaged.

CAUTION: Loading Cybertruck to the Gross Vehicle Weight Rating (GVWR) and engaging the locking differentials may result in damage to the drivetrain (see Vehicle Loading on page 223).

WARNING: Do not expect the locking differentials to provide sufficient traction if the vehicle does not have appropriate tires for the conditions, or Cybertruck is in a situation where all four wheels are spinning.
Engaging Locking Differentials On Road

WARNING: Your vehicle's turning radius increases when locking differentials are engaged. It is your responsibility to be aware of your surroundings and drive carefully.
Engaging locking differentials while driving on roads is intended for specific situations where you temporarily need extra grip on loose or uneven terrain, such as getting un-stuck from a snow bank. Do not engage locking differentials unless it is needed for the road conditions. Navigate to Controls > Dynamics > Engage Rear Locking Differential. When enabled, Slippery Surface also enables (see Slippery Surfaces on page 94). Engage Rear Locking Differential should not be used for regular driving on slick surfaces.
When you engage locking differentials while driving on roads, your speed is limited to 35 mph (56 km/h). The stability control icon may appear momentarily while the locking differentials disengage (see Vehicle Status on page 14).
NOTE: This option is not available on Tri-Motor (Cyberbeast) vehicles.
Engaging Locking Differentials Off Road
Before you engage locking differentials, consider your driving situation (such as the terrain, weather, etc.). The rear locking differentials are ideal for off-roading uphill or on level surfaces. Front locking differentials are typically used when you need more traction at the front of the vehicle, like rock crawling. To engage:
- Access the Off-Road app.
- Select the locking differentials you want to enable.
For dual motor variants:
。All On - Rear Only
。Off
For Tri-Motor (Cyberbeast) variants:
- Front Only
。Off
Or touch the associated locking differential icon in the vehicle status area and select which locking differential(s) you want to engage:

Gray: Locking differential is disengaged.

Orange: Locking differential is engaged. This icon may blink orange while the locking differential is engaging or disengaging.

Orange question mark (?): Unknown locker position.

Red exclamation point (!): System fault or locking differential unavailable (see Troubleshooting on page 109).
You may need to drive a short distance to engage or disengage once enabled.
Once the locking differentials are fully engaged, the vehicle may slightly rock side to side when turning at low speeds. This is normal behavior when the touchscreen indicates a fully engaged locker (solid orange icon).
The locking differentials may cancel or delay engaging in various cases. If the locking differentials are unable to engage, a chime sounds and a message displays on the touchscreen. See Troubleshooting on page 109 for more information.

WARNING: Driving with locked differentials may reduce vehicle responsiveness to steering. Always monitor your vehicle's behavior and the surroundings. Failure to do so may result in damage or serious injury.
Disengaging Locking Differentials
To disengage, touch the differential icon on the touchscreen and select Off. You may need to drive a short distance to disengage. The locking differentials also automatically attempt to disengage whenever the vehicle shifts out of Drive, or when a different drive mode is selected.
When you disengage the locking differentials, the icon may blink orange before disappearing from the touchscreen. Ensure the locking differentials are disengaged before you drive on paved roads or at speeds higher than 35 mph (56 km/h). Check the vehicle wheels are not skipping when turning.
Troubleshooting
Behavior Action(s)
Locking differential(s) are not engaging. Creep forward.
Wait for excessive wheel slip to reduce.
| Behavior Action(s) | |
| Turn the steering wheel to completely to the left and right, and back again, several times while stationary. | |
| Locking differential takes a long time to disengage. | Creep forward. |
| Turn the steering wheel to the left and right while creeping forward. | |
| Check tires on the axle for uneven wear. | |
| Locking differential cannot disengage after the first engagement. | This may occur if your vehicle has not been driven long enough with the locking differential engaged. After the first engagement, drive Cybertruck (at least 100 ft) while wriggling the steering wheel from left to right to calibrate. During this time, any attempt to disengage is ignored until calibration is complete or times out. |
| Popping sound while engaging/ disengaging. | This is normal. The noise while engaging/disengaging can occur while the mechanism is engaging or releasing. |
| Locking differential icon stays blinking. | Try performing a U-turn (where it is safe and legal to do so) when lockers are fully disengaged. |
| Solid orange with an exclamation point appears. | Try shifting into Park, then shift into Drive and try again. |
| Use the mobile app to schedule a service appointment. | |
| Locking differentials cancel or delay engagement. | The vehicle doesn't detect a difference in wheel spin between two wheels on the same axle. Continue driving and wait before trying to re-engage. |
| The vehicle detects a very high difference in wheel spin between two wheels on the same axle. Continue driving and wait before trying to re-engage. |
Off-Road Troubleshooting
You may need to increase traction while off-roading (such as for getting unstuck or overcoming an obstacle). Follow these general guidelines to provide more traction to Cybertruck:
- Engage Overland (see Overland on page 105 for more information).
- Adjust the suspension height. Raise the suspension until the vehicle is no longer obstructed. Avoid lowering the suspension to prevent damage (see Suspension on page 95).
- Customize Terrain based on the current surface conditions. For high traction terrains, select Rock. For looser terrains, select Sand.
- Engage the front and/or rear locking differentials (see Locking Differentials on page 108).
- For softer terrain or steep inclines, engage Trail Assist for a steady progression through complex terrain (see Trail Assist on page 107).
If you still need more traction, perform the following:
- Decrease tire pressure to 36 PSI. This increases tire contact with the surface, which can help provide more traction.

CAUTION: The TPMS warning thresholds may be lowered to accommodate different off-road needs. Do not rely solely on the TPMS warning indicator when in an Off-Road mode or setting, as these thresholds do not comply with Federal TPMS standards. It is your responsibility to ensure tires are adequately inflated at all times and are inflated back to normal levels before regular driving on roads.
- Use traction aids, such as traction boards.
- Tow your vehicle. See Instructions for Transporters on page 233 for more information on towing Cybertruck.
Off-road driving depends on the performance of the air suspension system, brakes, power steering, and other vehicle systems. If there is a condition affecting the performance of any dependent system, a message displays on the touchscreen and off-road driving modes are unavailable.

WARNING: Before driving off road, carefully survey the terrain and be aware of the weather forecast and other environmental conditions. Exercise extreme caution when approaching steep ascents and descents. While driving off road, always be aware of your surroundings and survey the terrain as necessary. Tesla is not liable for any damage to Cybertruck resulting from off-road driving.

WARNING: Never depend on the driving visualization to show you obstacles in front of, behind, or to the sides of Cybertruck. Always use caution while driving off road and perform visual checks when necessary. The visualization relies on the cameras mounted on Cybertruck (see Cameras on page 27). External factors (such as a dirty or obscured lens) may affect the performance of a camera, and the cameras may not detect objects or barriers that can potentially cause damage or injury.

WARNING: Visibility may be limited by sharp crests and uneven terrain. Always check what is at the top of a hill and over the crest before driving over it, and be aware of steep descents or other obstacles.

WARNING: Before approaching an obstacle, ensure that Cybertruck has enough ground clearance to clear it. If the bottom of Cybertruck is contacting the ground even with the ride height at the highest setting, reduce your speed or avoid the obstacle altogether.

WARNING: Exercise extra caution when the terrain surface is wet, sandy, or slippery. Loose gravel, sand, and other environmental conditions may affect the performance of Off-Road Modes.

WARNING: Before driving off road, make sure that loose items in the cabin are stowed or secured and ensure that the cargo bed is free of cargo, or that cargo is tightly secured.
NOTE: You cannot enable Off-Road Modes and Trailer Mode at the same time.
NOTE: If the towing capacity on the hitch label conflicts with the information provided in this owner's manual, this owner's manual takes precedence.
Towing Guidelines
Towing a trailer puts additional load on the motors, drive train, brakes, tires, and suspension and significantly decreases range. If you tow a trailer, follow these general guidelines:
- Reduce your driving speed and avoid sudden maneuvers. Keep in mind that when towing a trailer, steering, stability, turning radius, stopping distances, and braking performance are different when compared to driving without a trailer.
- Increase your following distance by maintaining at least twice the typical distance from the vehicle ahead. This helps avoid situations that require heavy braking. Sudden braking may result in skidding or jack-knifing, and loss of control.
- Avoid sharp turns. Sharp turns can cause the trailer to contact Cybertruck and cause damage. Make wider turns to prevent the trailer from hitting curbs, road signs, trees, or other objects.
- Periodically check the trailer lights and turn signals to confirm that bulbs are still working (see Trailer Light Test on page 116). When towing a trailer, the turn signal arrows on the touchscreen flash as normal, even if the bulbs on the trailer are burnt out.
• Periodically confirm the cargo is secure. - Periodically confirm the trailer brakes are working (see Trailer Brakes on page 115).
- Avoid parking on a grade (see Parking with a Trailer on page 116).
- Regularly confirm that all towing components are secured.
Before Towing a Trailer
Before towing a trailer, you must do the following:
- Review all regulations and legal requirements in your state/region that apply to towing a trailer. Failure to comply with regulations can compromise your safety.
- Inflate tires to the cold tire inflation pressure specified in Tire Pressures when Towing on page 114.
- Set the suspension height to match the trailer height. Tesla recommends Low (Controls > Suspension > Low). You must choose a ball mount suitable for your towing needs. See Ball Mount Specifications on page 117 for more information.
- Adjust all mirrors to provide a clear rearward view without a significant blind spot.
NOTE: Use towing mirrors for larger trailers.
- Confirm the trailer load is evenly distributed such that the trailer tongue weight is approximately 10% of the total trailer weight, without exceeding the maximum tongue weights provided in Towing Capacity on page 114.
- Engage Trailer Mode (see Trailer Mode on page 114).
- Calibrate the trailer brakes (see Trailer Brakes on page 115).
Then, confirm the following:
- Cybertruck rests horizontally with the trailer attached. If the vehicle is tipped up at the front, and down at the rear, check that you are not exceeding the maximum towing capacity and tongue weights provided in Towing Capacity on page 114.
- All trailer hitch parts and attachments, safety chains, and electrical connectors are in good condition and properly connected. If any problems are apparent, do not tow the trailer.
- Trailer lights (brake lights, turn signal lights, marker lights, etc.) are working properly.
- The trailer tongue is securely connected to the hitch ball.
- Safety chains are properly connected between the trailer and the vehicle. Cross the safety chains under the tongue of the trailer to help prevent the tongue from contacting the road if it separates from the hitch. Leave enough slack in the safety chains to allow for turns and ensure that the chains can never drag on the ground.
- Wheel chocks are available and easy to access.
- All cargo is secured.
- The correct Trailer Profile is selected (see Trailer Profiles on page 113).
NOTE: For general information about trailer safety provided by the National Highway Traffic Safety Administration, go to https://one.nhtsa.gov/cars/problems/equipment/towing/index.htm.
WARNING: The trailer tongue weight must be approximately 10% of the total trailer weight without exceeding the maximum tongue weights provided in Towing Capacity on page 114. Loads that are balanced over the wheels or heavier in the rear can cause trailer sway, resulting in loss of vehicle control.
WARNING: Always ensure that cargo is secured in the trailer and will not shift. Dynamic load shifts can cause loss of vehicle control, resulting in serious injury or death.
Trailer Profiles
Trailer Profiles allows you to save data and preferences associated with your trailer.
To create a profile, navigate to Controls > Towing > Trailer Profiles and enter your trailer's information. By accurately entering your trailer's mass, dimensions, auxiliary settings, etc., Cybertruck is better able to estimate energy consumption while driving to your destination. Before towing, remember to set the correct profile that matches your trailer.
Understand the impact of mass, drag, and powering accessories for your trailer by touching Energy Consumption >Drive while driving.
Towing Capacity
The total trailer weight (including all cargo and additional equipment), and the trailer tongue weight, must never exceed the following:
| Wheel Size | Maximum Towing Capacity | Maximum Tongue Weight* |
| 20" x 9J 11,000 lb (4,990 kg) | 1,100 lb (499 kg) |
*The tongue weight is the downward force that the weight of the trailer exerts on the hitch. It must not exceed 10% of the maximum towing capacity. Carrying a significant amount of equipment, passengers, or cargo in the tow vehicle can reduce the tongue weight it can handle, which also reduces the maximum towing capacity. Maximum towing capacity is calculated assuming the GVWR (Gross Vehicle Weight Rating) is not exceeded. For GVWR, see Vehicle Loading on page 223).
NOTE: When using a carrier mounted to the trailer hitch (for example, a hitch-mount bicycle rack or cargo carrier), the maximum acceptable weight may be less than the full tongue weight. For more information, see Carrying Accessories on page 119.

CAUTION: Tesla assumes no responsibility for damage or injuries resulting from towing a trailer, for any errors or omissions in the instructions accompanying towing equipment, or for your failure to follow the proper instructions. Damage caused by towing a trailer is not covered by the warranty.

WARNING: Do not overload the vehicle or trailer. Doing so can cause poor performance, vehicle damage and loss of vehicle control, resulting in serious injury.

WARNING: Do not use the trailer hitch to tow/transport Cybertruck.

WARNING: Never operate a trailer with a negative tongue weight, where the trailer tongue pulls upward on the trailer hitch. Negative tongue weights can significantly increase the risk of trailer sway or loss of stability.
Tire Pressures when Towing
When towing a trailer, tire pressures must be adjusted to accommodate the additional load. Keep tires inflated to the pressures shown below (these pressures override the pressures that are provided on the Tire and Loading information label – see Vehicle Loading on page 223):
Tires Cold Tire Inflation Pressure
20" All Season 50 psi
20" All Terrain 65 psi

WARNING: Check tire pressures using an accurate pressure gauge when tires are cold (see Tire Pressures on page 200). Driving one mile (1.6 km) warms the tires sufficiently to affect tire pressures. Parking the vehicle in direct sunlight or in hot weather can also affect tire pressures. If you must check warm tires, expect increased pressures. Do not let air out of warm tires in an attempt to match recommended cold tire pressures. A hot tire at or below the recommended cold tire inflation pressure is dangerously under-inflated.

WARNING: Never attempt to tow a trailer when a tire is faulty or has been inflated using a tire repair kit. A temporarily repaired tire is not designed to sustain the towing load. Towing using a faulty or temporarily repaired tire can result in tire failure and loss of vehicle stability.
Trailer Mode
Trailer Mode must always be active when towing a trailer. When you connect a trailer's electrical connection (see Electrical Connections on page 118), Cybertruck automatically engages Trailer Mode. Trailer Mode disengages when you disconnect the trailer's electrical connection. To engage or exit Trailer Mode manually, touch Controls > Towing & Hauling > Trailer Mode on the touchscreen. One of the following indicators displays on the touchscreen:
Trailer Mode is active.

Cybertruck detects a connection for trailer lights but Trailer Mode is disabled. It is likely that a carrying accessory has been connected.


Cybertruck detects a faulty electrical connection for the trailer lights. Some, or all, trailer lights may not be functioning. Pull over as soon as safety permits and inspect the trailer lights for faulty cabling or connections. If the issue is resolved and the red icon persists, manually turn Trailer Mode off and on again.
Some Autopilot features, and any feature that requires the use of the rear camera, may be unavailable when Trailer Mode is enabled. In addition, some features may operate differently. For example:
- Autosteer (if equipped) is unavailable. Therefore, for Traffic-Aware Cruise Control availability, touchControls > Autopilot > Autopilot Activation > Double Click. This allows you to engage Traffic-Aware Cruise Control with a single click of the right scroll button on the steering wheel.
- Traffic-Aware Cruise Control increases the following distance from the car in front of you.
- The air suspension system will not make speed-based adjustments from Medium to Low and does not automatically raise ride height based on saved locations.
- Side collision warnings are active but automatic steering interventions are disabled.
- The braking force provided by Automatic Emergency Braking (see Collision Avoidance Assist on page 146) is significantly limited.
NOTE: Trailer brakes are only available when Trailer Mode is engaged.

WARNING: Do not rely on Cybertruck to automatically detect a trailer in all cases. Always check that Trailer Mode is engaged before towing a trailer.

WARNING: Remaining in Trailer Mode will help ensure Cybertruck remains stable in adverse conditions while towing. Do not exit Trailer Mode while towing a trailer. Exiting Trailer Mode could result in loss of vehicle stability.
Trailer Alarm

When enabled, Cybertruck sounds an alarm if the vehicle detects the trailer is being unplugged while Trailer Mode is active and the vehicle is locked.
Trailer Brakes
Cybertruck is equipped with a trailer brake controller which automatically applies the trailer brakes when you decelerate. To update your trailer brake preferences, navigate to Controls > Towing & Hauling where you can:
- Enable/disable Trailer Mode on page 114.
- Customize Trailer Brake Gain on page 115.
NOTE: Tesla recommends always enabling the trailer brakes, otherwise stopping distance may be increased. To disable the trailer brakes, first disable Trailer Mode or set the Trailer Brake Gain to 0.
- Choose how to manually apply the trailer brakes (either with the touchscreen or right scroll button). The trailer brake activation button is unaffected.
- Adjust Trailer Brake Boost on page 115.
- Toggle Adaptive Regenerative Braking on page 115.
• Perform the Trailer Light Test on page 116.
You can also set up a shortcut for Towing & Hauling by adding it to your vehicle "Cards" area, near the bottom of the touchscreen.
Trailer Brake Gain
The Trailer Brake Gain slider is a scale between 0 and 10 that calibrates the degree of trailer braking applied when you press the brake pedal normally. 0 applies no trailer brakes, whereas 10 applies the full trailer brakes.
Set this up each time you connect a trailer to ensure your trailer brakes do not lock up:
- Ensure the trailer is securely attached to the Cybertruck hitch assembly.
- Drive Cybertruck in a safe, open area at low speeds (10-15mph or 15-25 km/h).
- Use the right scroll button on the steering wheel or Trailer Brake Activation (set your preference in Towing & Hauling) to apply the trailer brakes while moving. Adjust the Trailer Brake Gain as needed to ensure the trailer brakes do not lock up when they are applied. If the wheels do lock up, decrease the amount of gain slightly and repeat this process.
The ideal Trailer Brake Gain varies depending on your trailer load, number of axles, and surface conditions. You must adjust as needed if conditions change.
Trailer Brake Boost
Tesla recommends initially setting your Trailer Brake Boost to Low. Once Trailer Brake Gain is calibrated, adjust based on your preferences by driving around in a safe, open area and applying the brakes as you would in normal traffic. Increasing will make your brakes react more quickly, although the braking feels more harsh to passengers.
Adaptive Regenerative Braking
At the start of every drive, Cybertruck estimates the load to determine the proper level of regenerative braking. Regenerative braking will start at the standard level and increase as the vehicle learns your trailer/cargo weight. This weight estimation works best when driving in a straight line on a flat, smooth surface.
NOTE: Adaptive regenerative braking does not engage the trailer brakes. In order to engage the trailer brakes, you must press the brake pedal or enable trailer brakes on the touchscreen.

WARNING: It is your responsibility to determine when to enable Adaptive Regenerative Braking. Always drive safely and avoid situations that could require heavy braking.

WARNING: Towing increases your stopping distance. When towing, increase your following distance and avoid situations that could potentially cause heavy braking. Failure to do so can result in a collision.

WARNING: Observe all regulations and legal requirements in your regional and national jurisdictions that apply specifically to trailer towing and brake requirements. Many regions require a breakaway switch, located on the tongue of the trailer, to activate the trailer brakes if the trailer separates from the vehicle. Failure to comply with regulations can compromise your safety.
Trailer Light Test
Before towing, and periodically during towing, use Trailer Light Test to confirm the trailer lights are working as expected.

WARNING: Do not tow a trailer if the trailer lights or trailer brakes are not working properly.
Trailer Brake Controller Limitations

WARNING: It is your responsibility to understand your towing needs, proper towing procedures, trailer brakes (such as their use and limitations), and the risks and limitations of towing. Do not tow with Cybertruck if you do not have towing knowledge and experience; doing so may result in damage, injury or death. Damage as a result of improper towing is not covered by the warranty.
Keep in mind the following brake controller limitations:
- Properly maintain and use trailer brakes as intended to prevent damage.
- The trailer brake controller and auxiliary output is 12V.
- Abusive or extensively long manual activations of the trailer brake controller may cause overheating with some trailer brake loads.
- Maximum power draw - The onboard trailer controller is designed to support most trailer power applications. The power allocations are:
Standard trailer brakes (when braking power is derived from brake output, e.g. non-EOH Electric Drum brakes)
Lights: Max. 220 Watts total for all light outputs combined.
Auxiliary power (AUX 12V+ Charging): Max. 270 Watts (20 Amps).
| Trailer brakes: Max. 331 Watts | |
| Electric over Hydraulic trailer brakes (braking power is derived from auxiliary power output, e.g. EOH, Hydraulic disk brakes, see Electric Over Hydraulic (EOH) Brakes on page 116) | Lights: Max. 220 Watts total for all light outputs combined. |
| Auxiliary power (AUX 12V+ Charging): Max. 405 Watts (30 Amps). | |
| Trailer brakes: Max. 48 Watts (Current draw must be less than 3 Amps). | |
| Cybertruck switches to the standard brakes if a 3A or higher load on the trailer brake connections is detected. | |
Electric Over Hydraulic (EOH) Brakes
Cybertruck supports standard electric brakes and Electric over Hydraulic (EOH) brakes. If using EOH brakes, Tesla recommends connecting a battery in parallel with the auxiliary power output to the EOH unit.
The auxiliary output is capable of supplying up to 30 Amps when supporting an EOH trailer brake unit. You are responsible for understanding the power needs of your EOH trailer brake unit. Using an EOH trailer brake controller that draws more than 30 Amps may result in a loss of power to the trailer brakes while braking.
The usage of only an EOH unit with the auxiliary power port is supported for maximum braking availability. A battery in parallel is recommended. The battery must be in good health and is expected to already be present in most states per DOT regulations.

CAUTION: Tesla does not recommend using EOH trailer brakes simultaneously with other auxiliary power loads. Doing so could lead to complications or loss of power to the EOH trailer brakes unit.
Parking with a Trailer
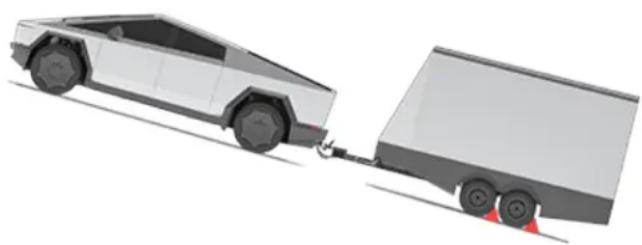
natural_image
Side view illustration of a white and gray autonomous delivery vehicle pulling a gray truck with wheels (no text or symbols)Whenever possible, avoid parking on a grade. However, if parking on a grade is absolutely necessary, place wheel chocks under the trailer wheels:
-
One person presses and holds the brake pedal.
-
A second person places the wheel chocks under the wheels on the downgrade side of the trailer's tires.
-
When the chocks are in place, slowly release the brake pedal and ensure the chocks hold the weight of the vehicle and trailer.
NOTE: When testing chocks, ensure that Vehicle Hold (see Vehicle Hold on page 91) is engaged. If Vehicle Hold is braking Cybertruck, the associated indicator light appears on the touchscreen. To disengage Vehicle Hold, press and release the brake pedal.
- Place the vehicle in Park.

WARNING: If parking on a grade is necessary, ensure that all trailer wheels have been securely chocked. Failure to do so can result in serious damage, injury, or death.
Trailer Sway Mitigation
When trailer sway is detected, your vehicle's electronic stability control system attempts to apply the appropriate amount of braking to minimize trailer sway. The touchscreen briefly displays the traction control system indicator. Manually applying the brakes (via right scroll button on the steering wheel or the Trailer Brake setting) when the system is actively braking to mitigate trailer sway does not cancel this automatic braking. However, it is still your responsibility to drive carefully and brake when needed, taking into consideration possible trailer sway.
Accessing the Trailer Hitch Assembly
The Cybertruck trailer hitch assembly is located behind the rear fascia of the vehicle, under the tailgate. Your vehicle is not equipped with a ball mount, which must be purchased separately based on your towing needs.
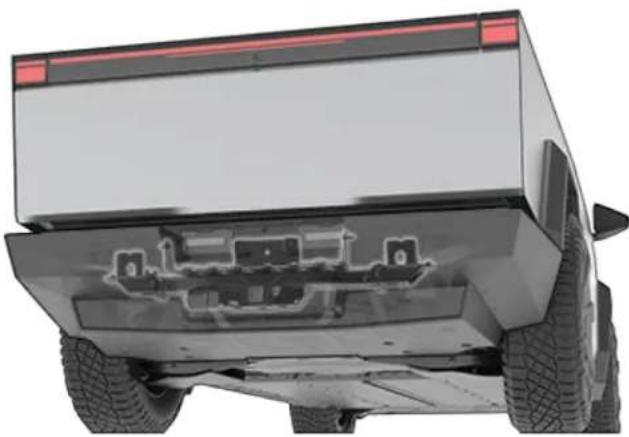
natural_image
Rear view of a white electric vehicle showing battery pack, rear wheel, and side-mounted sensors (no text or symbols visible)The trailer hitch cover is attached to the body of the vehicle with three turn clips. Use a flat trim tool or non-marring screwdriver to partially turn and unlock the clips, then remove the trailer hitch cover and place it in a secure, dry place. Once removed, you can see where the ball mount can be installed.
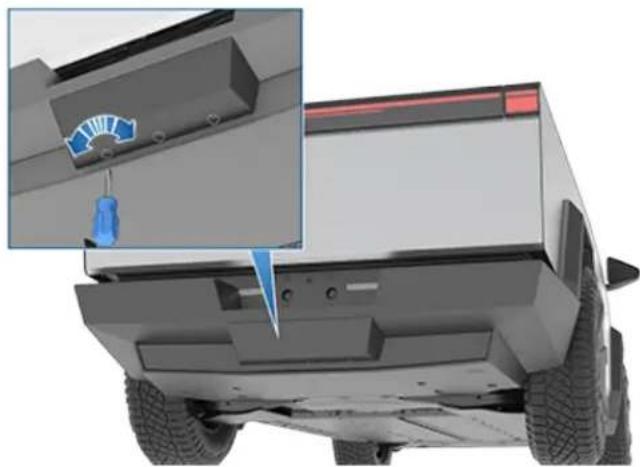
natural_image
3D rendering of a white electric vehicle front view with a close-up inset showing a blue tool interacting with the engine compartment (no text or symbols visible)When not actively towing, keep the cover installed to prevent dirt and debris from entering.
NOTE: The maximum permissible rear overhang for the coupling point is 49 in (1.25 m), measuring from the center of the rear tire toward the hitch receiver.
NOTE: Always attach safety chains when towing. See your trailer Owner's Manual for more information.
Ball Mount Specifications
A ball mount must be purchased separately based on your towing needs. The Cybertruck hitch receiver supports a 2 in (5 cm) ball mount. Follow the ball mount manufacturer's instructions for more information.
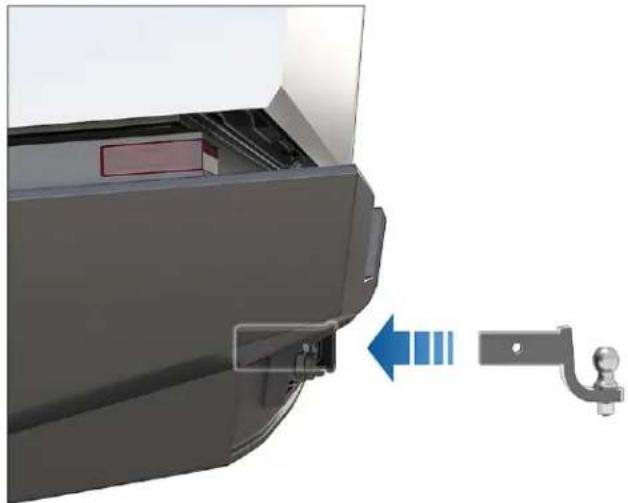
natural_image
3D rendering of a mechanical component with a blue arrow indicating direction, showing internal structure and a small attached bracket (no text or symbols)NOTE: Refer to the manufacturer's instructions to properly maintain the ball mount.
Electrical Connections
Cybertruck is equipped with a combination electrical outlet, located near the hitch assembly, that supports two types of commonly-used trailer plugs without needing an adapter:
- 7-PIN - SAE J2863 - for heavier trailer loads requiring their own braking system.
- 4-PIN - SAE J1239 - for light trailer loads requiring lights only.
Regulations require that all trailers, at a minimum, are equipped with taillights and turn signals. These are provided on the 4-pin connector, which is adequate when pulling a light load. For heavier loads, the trailer must also be equipped with brakes, available on the 7-pin connector.
Plugging a trailer's wiring into either electrical outlet automatically engages Trailer Mode (see Trailer Mode on page 114).
NOTE: Use one outlet only according to your trailering needs. The covers prevent you from opening both outlets simultaneously.
7-PIN Connector
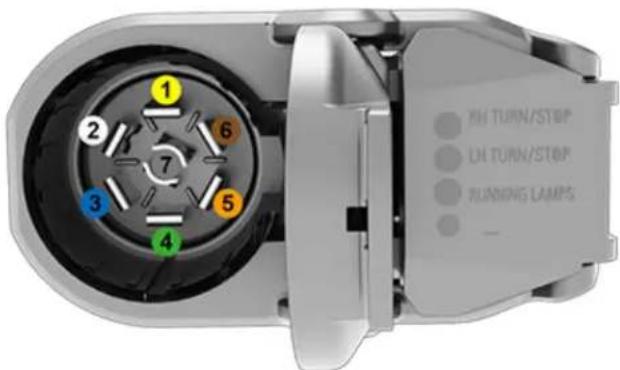
- Left Turn/Stop Light (Yellow)
- "-" Ground (White)
- Trailer Brake Output (Blue)
- Right Turn/Stop Light (Green)
- +12V Auxiliary Power (Orange)
- Running (or Side Marker) Lights (Brown)
- Reverse Lights (Gray)
4-PIN Connector
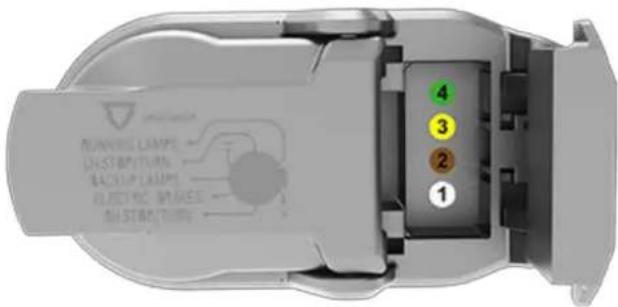
- Ground (White)
- Tail and License Plate lights (Brown)
- Left Turn/Stop Light (Yellow)
- Right Turn/Stop Light (Green)
Loss of trailer lights when towing may be the result of a fault in the trailer wiring or excessive power consumption by the lights connected to the trailer output(s). When this occurs, the touchscreen displays a red Trailer Mode icon. Fix any issues with the wiring and/or reduce the number of lights connected to the trailer output(s), then turn Trailer Mode off and on to try again.
CAUTION: Always ensure that the trailer's electrical cable does not contact or drag on the ground and there is enough slack in the cable to allow for turns.
WARNING: Before towing, it is the driver's responsibility to ensure that all electrical connections are working, all trailer lights are operating as expected, and the braking system is fully functioning. Cybertruck does not detect faulty electrical connections. You must perform manual checks. Failure to do so can result in property damage, personal injury, or death.
WARNING: Use only the electrical connection designed by Tesla. Do not attempt to directly splice or attempt to connect trailer electrical wiring using any other method. Doing so can damage the vehicle electrical system and cause malfunctions.
Impact on Range
Towing a trailer and carrying accessories increases vehicle weight and drag. As a result, driving range can decrease significantly. Although Trip Planner attempts to adjust estimates based on Trailer Mode, actual energy consumption may vary. Plan trip length and charging destinations accordingly.

WARNING: Tesla assumes no responsibility for damage or injuries resulting from installing and using a carrier or crossbars, for any omissions in the instructions accompanying a carrier or crossbar, or for your failure to follow the instructions. Damage caused by using a carrier or crossbars is not covered by the warranty.
Carrying Accessories
The load that the hitch receiver can support varies based on the configuration of the accessory carrier. The maximum tongue weight—the downward force on the trailer hitch—of Cybertruck is 1,100 lbs (500 kg). The maximum weight decreases when the center of gravity (the effective center point of the load) of the accessory carrier is farther from the trailer hitch. Refer to the table below for common examples.
| Accessory Center of Mass Distance from Hitch Pin | Maximum Load | ||
| Horizontal Distance | Vertical Distance | ||
| 4-Bicycle carrier | 32.2 in.817 mm | 29.9 in.760 mm | 220 lb100 kg |
| Motorcycle carrier | 17.8 in.453 mm | 25.8 in.655 mm | 375 lb170 kg |
| Trailer ball | 7.3 in.185 mm | 1.2 in.30 mm | 1,100 lb500 kg |
Heavier items should be mounted more closely to the hitch pin. When using a carrier mounted to the trailer hitch to carry bicycles, skis, or other items, always check to ensure that the maximum weight is not exceeded. The maximum weight includes the weight of the accessories plus the weight of the carrier itself.
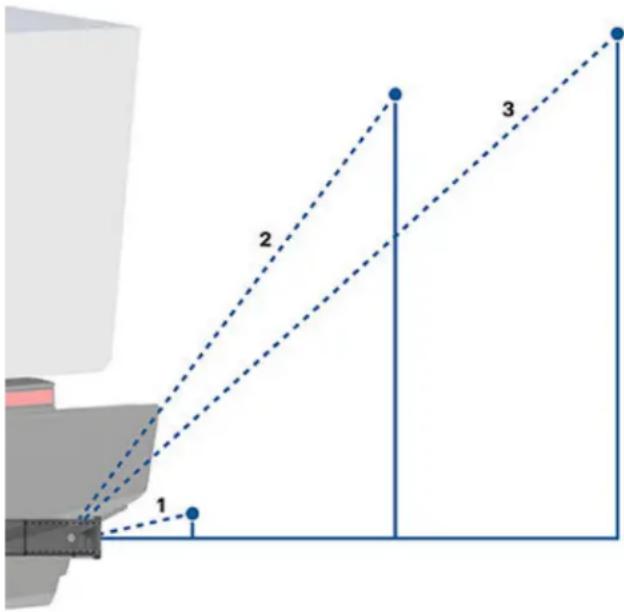
Examples of type of carrier and general distance from the hitch pin:
- Trailer (heaviest)
- Motorbike carrier (lighter)
- Four bike carrier (lightest)
Follow the instructions provided with your accessory carrier to install onto Cybertruck. Observe all regulations and legal requirements in your state/region that apply to carrying accessories.
Cybertruck includes the wiring necessary for using an accessory carrier equipped with lights (see Electrical Connections on page 118). Cybertruck also includes Trailer Mode software (see Trailer Mode on page 114).

CAUTION: An accessory carrier attached to the rear of Cybertruck may obscure your view from the rear view mirror and the rear camera.

When you connect an accessory carrier's wiring harness, Cybertruck detects a connection for trailer lights and displays this indicator on the touchscreen to indicate that Trailer Mode is disabled.
When carrying accessories, periodically confirm that the accessory carrier and its cargo remain secure at all times, and if applicable, that the lights on the accessory carrier are working.
Installing Brackets onto the Appliques
The cross bar kit comes with 8 appliques to mount onto the roof of Cybertruck.
- Open all 8 applique doors (you can also open the applique doors corresponding to the cross bar location if you know where you want to install the cross bars).
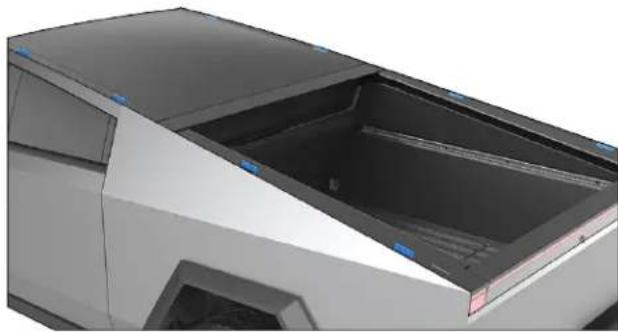
natural_image
3D rendering of a modern vehicle front compartment with no visible text or symbols- Use the torque wrench provided in the kit to loosen and remove the nuts that are fastened to the threaded studs located within the applique doors.
- Install a bracket by positioning the bracket so that the raised arrow on it is directed outward, away from the vehicle. Align it with the threaded studs and set it in place.
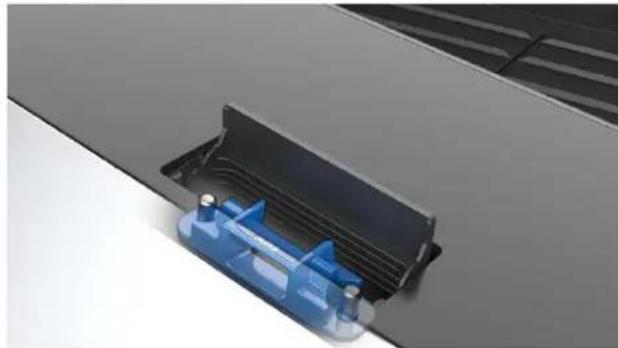
natural_image
Close-up of a blue plastic heat exchanger mounted on a white panel, with no visible text or symbols.- Use the nuts that were removed in step 2 and tighten them back onto the threaded studs with the provided torque wrench.
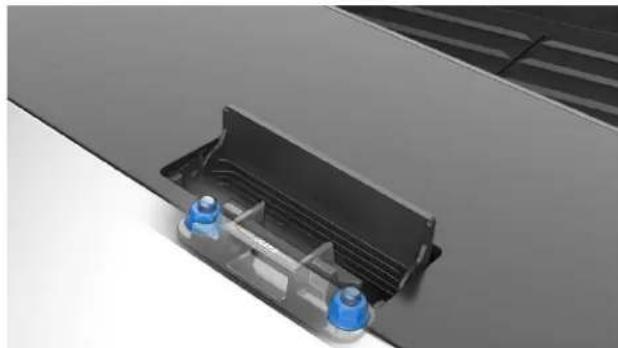
natural_image
3D rendering of a mechanical assembly with blue and black components, no visible text or symbols- Repeat steps 2-4 for the remaining applique doors.
NOTE: After installing the brackets once, you can leave them installed for future use, unless you want to move the crossbars to different locations on the vehicle.
NOTE: If a roof applique is not secured correctly, the applique could fall off of the vehicle. Tesla is not responsible for broken or missing appliques.
Installing Crossbars
NOTE: Installing the crossbars requires two people.
CAUTION: Crossbars must be installed in tandem. Failure to do so may cause damage.
CAUTION: It is your responsibility to ensure your accessories are secured to the crossbars. Periodically check to ensure your accessories have not moved or loosened throughout your driving. See the in-box instructions that come with the crossbars for more information.
CAUTION: If installing a crossbar on the front-most applique doors, make sure that the power feed harness on the passenger side applique is not pinched during installation. If necessary, use a trim tool to release the applique and maneuver the harness away from the studs.
To install the crossbars, once the brackets are installed onto the appliques (see Installing Brackets onto the Appliques on page 119):
- Locate the FRONT arrow embossed on the bottom of the crossbar. The arrow should point toward the front of the vehicle.
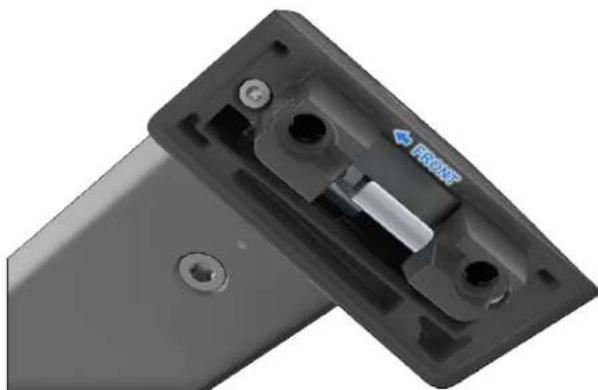
natural_image
Close-up of a black electronic device's front panel showing internal components and mounting holes (no text or symbols visible)- Lower one tower (edge of the crossbar) onto the bracket and extend the crossbar so that the other tower aligns with the bracket on the opposite side.
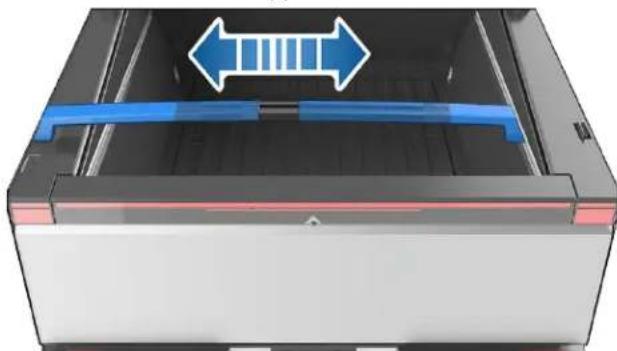
natural_image
3D rendering of a mechanical device with blue directional arrows indicating flow or movement (no text or symbols)- Use the key to open the tower doors. Push down to seat both towers.
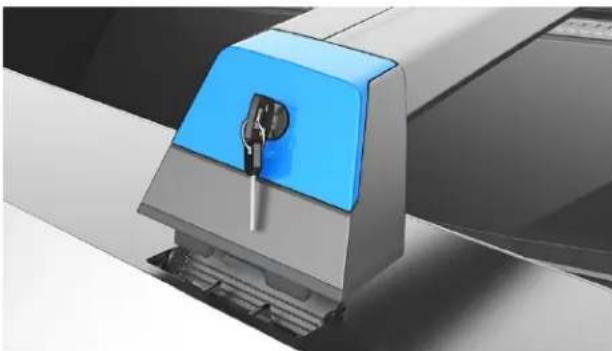
natural_image
Close-up of a blue and silver industrial machine component (no visible text or symbols)- Once the towers are completely seated, close the tower doors securely using the key. You will hear and feel a "click" when the tower door is closed completely. If there is resistance to closing or if the door physically cannot be closed, the tower door is not seated properly. Turn the key to open the door, re-position, and use the key to close to door again.
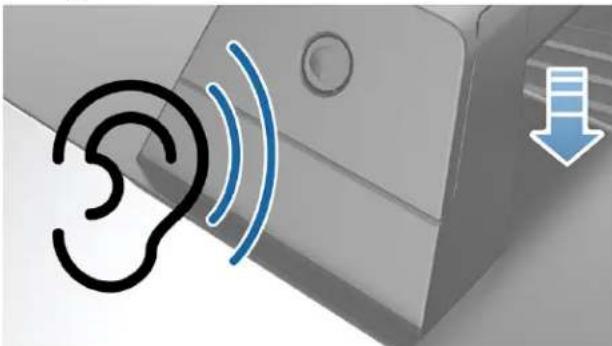
natural_image
Illustration of a human ear with sound waves and a download icon, no text or symbols present- Repeat this on the other side of the crossbar.
- Repeat steps 1-5 to install your second crossbar directly in front of or behind the first one.
- To test the secure installation of the crossbars, push and pull them in all directions. If any movement is observed at any of the four towers, re-seat the affected crossbars, then retest the installation.
NOTE: Keep the key in a dry, safe area for future use.
Weight limits
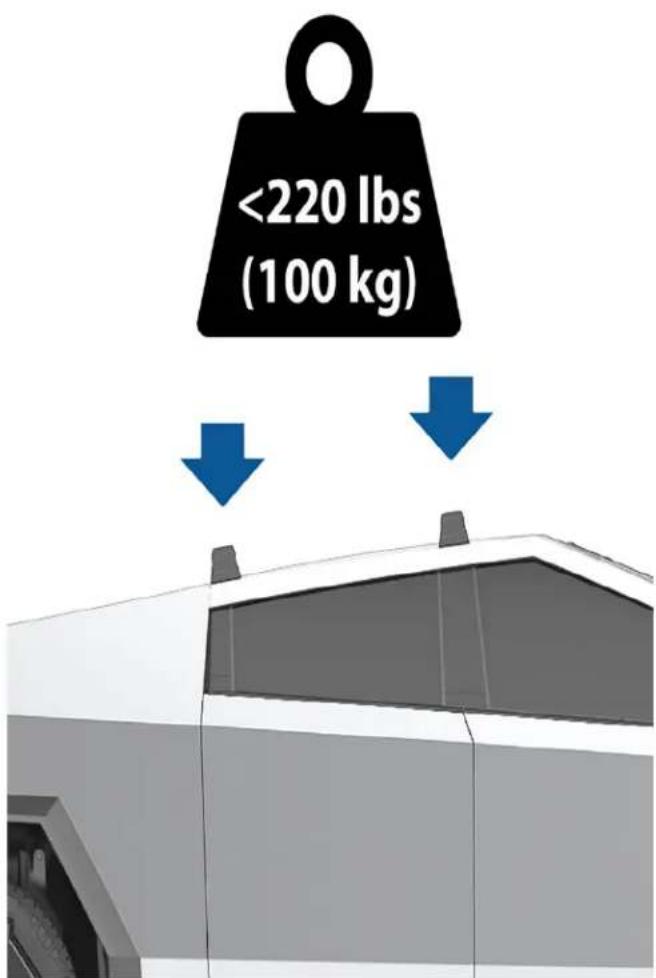
The crossbars are capable of supporting up to 220 lbs per crossbar set. See the in-box instructions that come with the crossbars for more information.
Autopilot refers to a suite of advanced driver assistance features that are intended to make driving safer and less stressful. None of these features make Cybertruck fully autonomous or replace you as the driver. Autopilot features come standard with all new Tesla vehicles.
NOTE: Depending on date of manufacture, software version, and vehicle configuration, your vehicle may not be equipped with the following features, or a feature may not operate exactly as described.
Autopilot includes Traffic-Aware Cruise Control.
- Traffic-Aware Cruise Control: Maintains your speed and an adjustable following distance from the vehicle in front of you, if there is one (see Traffic-Aware Cruise Control on page 124).

WARNING: Autopilot is a hands-on feature. Keep your hands on the steering wheel at all times and be mindful of road conditions, surrounding traffic, and other road users (such as pedestrians and cyclists). Always be prepared to take immediate action. Failure to follow these instructions could cause damage, serious injury, or death.
Full Self-Driving includes additional features that are designed to further reduce driver workload and make common actions, such as changing lanes or parking, easier.
- Traffic Light & Stop Sign Control: Maintains your speed, keeps a following distance, and keeps Cybertruck in its lane while also slowing down and stopping for traffic lights and stop signs (see Traffic Light and Stop Sign Control on page 128).
- Full Self-Driving (Supervised): Attempts to drive to your destination by following curves in the road; stopping at and negotiating intersections, stop signs, and roundabouts; making left and right turns; and entering/ exiting highways (seeFull Self-Driving (Supervised) on page 137).
- Autopark: Parks Cybertruck, either parallel or perpendicularly (see Autopark on page 135).
How It Works
Autopilot uses the cameras on Cybertruck, which monitor the surrounding area and detect other vehicles, pedestrians, road markings, and obstacles such as barriers and curbs. There are cameras mounted on the front, rear, left, and right sides of Cybertruck (see Cameras on page 27).
When Autopilot is engaged, Cybertruck shows a series of escalating warnings reminding you to keep your hands on the wheel and pay attention to the road. If there is no response, Autopilot disengages and is unavailable for the remainder of the drive.

WARNING: Autopilot is designed for your driving comfort and convenience and is not a collision warning or avoidance system. It is your responsibility to stay alert, drive safely, and be in control of the vehicle at all times. Never depend on Autopilot to adequately slow down Cybertruck. Always watch the road in front of you and be prepared to take corrective action at all times. Failure to do so can result in serious injury or death.
It is your responsibility to familiarize yourself with the limitations of Autopilot and be ready to take control at all times. For more limitations, cautions, and warnings, see Limitations and Warnings on page 141.
Autopilot Conditions
Ensure all cameras are clean and free of obstructions before each drive and before using Autopilot features (see Cleaning a Camera on page 28). Dirty cameras as well as environmental conditions such as rain and faded lane markings, can affect Autopilot performance. If a camera is obstructed or blinded, Cybertruck displays a message on the touchscreen and Autopilot features may not be available.
Before you can use Autopilot features, and after some Service visits, you must drive a short distance to calibrate cameras. For more information, see Drive to Calibrate Cameras on page 29.
In addition, these features may not work as intended when:
- The road has sharp curves or significant changes in elevation.
- Road signs and signals are unclear, ambiguous, or poorly maintained.
- Visibility is poor (due to heavy rain, snow, hail, etc. or poorly lit roadways at night)
- You are driving in a tunnel or next to a highway divider that interferes with the view of the camera(s)
- Bright light (such as from oncoming headlights or direct sunlight) interferes with the view of the camera(s).
The list above does not represent an exhaustive list of situations that may interfere with proper operation of Autopilot features. For more information, see Limitations and Warnings on page 141.
NOTE: Depending on date of manufacture, software version, and vehicle configuration, your vehicle may not be equipped with the following features, or a feature may not operate exactly as described.
| Autopilot Feature | Available When |
| Traffic-Aware Cruise Control | You are driving between 18 mph (30 km/h) and 85 mph (140 km/h)NOTE: You can activate Traffic-Aware Cruise Control at lower speeds if there is a vehicle detected at least 5 feet (1.5 meters) ahead of Cybertruck. |
| Full Self-Driving (Supervised) | You are driving less than 85 mph (150 km/h).NOTE: You can activate Full Self-Driving (Supervised) at lower speeds, including when Cybertruck is at a standstill, whether or not there is a vehicle detected in front of Cybertruck.Headlights are set toOn or Auto. Although Full Self-Driving (Supervised) is available both during the day and in low light conditions (dusk or dark), it aborts or is unavailable if headlights are set toOff. When Full Self-Driving (Supervised) is engaged,Auto High Beamis automatically enabled (see Headlights on page 85) and the wiper is set toAuto. |
This topic describes how to enable and use the following driver assistance features.
NOTE: Depending on date of manufacture, software version, and vehicle configuration, your vehicle may not be equipped with the following features, or a feature may not operate exactly as described.
- Traffic-Aware Cruise Control: Like traditional cruise control, Traffic-Aware Cruise Control maintains a set driving speed. However, Traffic-Aware Cruise Control also slows down or accelerates Cybertruck as needed to maintain the following distance from the vehicle in front of you. While Traffic-Aware Cruise Control is engaged, you are still responsible for steering Cybertruck (see Traffic-Aware Cruise Control on page 124).
These features use information from the cameras on Cybertruck to detect lane markings, road edges, and other vehicles and road users around Cybertruck.

CAUTION: Ensure all cameras are clean and free of obstructions before each drive and before using Autopilot features (see Cleaning a Camera on page 28). Dirty cameras as well as environmental conditions such as rain and faded lane markings, can affect Autopilot performance. If a camera is obstructed or blinded, Cybertruck displays a message on the touchscreen and Autopilot features may not be available.

CAUTION: It is your responsibility to familiarize yourself with the limitations of Autopilot and the situations in which driver intervention may be needed. For more information, see Limitations and Warnings on page 141.
Autopilot Settings
Before you use Autopilot features, customize how they work by touching Controls > Autopilot.
- Set Speed: Choose whether Autopilot engages at the currently detected speed limit or your current driving speed. Touch Controls > Autopilot > Set Speed and choose either Speed Limit or Current Speed.
- Offset: If you choose Speed Limit, you can specify an offset by touching Set Speed Offset. You can choose Fixed (the cruising speed adjusts by a specific amount on all roads) or Percentage (the cruising speed is adjusted as a percentage of the road's detected speed limit).
- Green Traffic Light Chime: In Canada and U.S.: If on, a chime will sound when you are waiting at a red traffic light and the light turns green. If you are not actively using Traffic-Aware Cruise Control and are waiting at a red light with a car in front of you, the chime sounds when the car ahead of you advances.
Traffic-Aware Cruise Control
Traffic-Aware Cruise Control is always enabled.
To use Traffic-Aware Cruise Control:
- Press the right scroll button, then release the accelerator pedal to allow Traffic-Aware Cruise Control to maintain the cruising speed. A chime sounds to indicate that Traffic-Aware Cruise Control is now active.
- To change the set speed, roll the right scroll wheel up to increase, or down to decrease. You can apply the accelerator at any time to temporarily override the set cruising speed. For more information, see While Using Autopilot on page 125.
- To cancel Traffic-Aware Cruise Control, press the right scroll button or press the brake pedal. For more information, see Canceling Autopilot on page 124.

When Traffic-Aware Cruise Control is available but not engaged, the touchscreen displays the cruising speed in gray. The number shown represents the speed that will be set when you engage Traffic-Aware Cruise Control.

When Traffic-Aware Cruise Control is actively cruising at a set speed, the speed is highlighted with blue text.

WARNING: Traffic-Aware Cruise Control is designed for your driving comfort and convenience and is not a collision warning or avoidance system. It is your responsibility to stay alert, drive safely, and be in control of the vehicle at all times. Never depend on Traffic-Aware Cruise Control to adequately slow down Cybertruck. Always watch the road in front of you and be prepared to take corrective action at all times. Failure to do so can result in serious injury or death. For more information, see Limitations and Warnings on page 141.
Canceling Autopilot
Traffic-Aware Cruise Control cancels when:
- You press the right scroll button on the steering wheel.
- You press the brake pedal.
- You exceed 85 mph (140 km/h).
- You shift into Reverse, Park, or Neutral.
- A door is opened.
- An Automatic Emergency Braking event occurs (see Collision Avoidance Assist on page 146).
- The driver's seatbelt is released, and/or the driver gets out of their seat.
When Traffic-Aware Cruise Control cancels, the cruising speed icon on the touchscreen turns gray to indicate that Traffic-Aware Cruise Control is no longer active.
When Traffic-Aware Cruise Control cancels, Cybertruck does not coast. Instead, regenerative braking slows down Cybertruck in the same way as when you move your foot off the accelerator when driving without Traffic-Aware Cruise Control (see Regenerative Braking on page).
While Using Autopilot
When Traffic-Aware Cruise Control is active and Autopilot is maintaining a set speed, the speed is highlighted with blue text on the touchscreen.
Maintaining the Set Speed
When Autopilot is active, Cybertruck maintains your set cruising speed whenever a vehicle is not detected in front of it. When cruising behind a vehicle, Cybertruck accelerates and decelerates as needed to maintain a chosen following distance (see Adjusting the Following Distance on page 125), up to the set speed.
You can manually accelerate at any time by pressing the accelerator pedal, but when you release the pedal Cybertruck resumes cruising at the set speed.
Cybertruck also adjusts the cruising speed when entering and exiting curves.
When Cybertruck is actively slowing down to maintain the selected distance from the vehicle ahead, brake lights turn on. You may notice slight movement of the brake pedal. However, when Cybertruck is accelerating, the accelerator pedal does not move.
Changing the Set Speed
Roll the right scroll wheel up to increase, or down to decrease, the set speed.
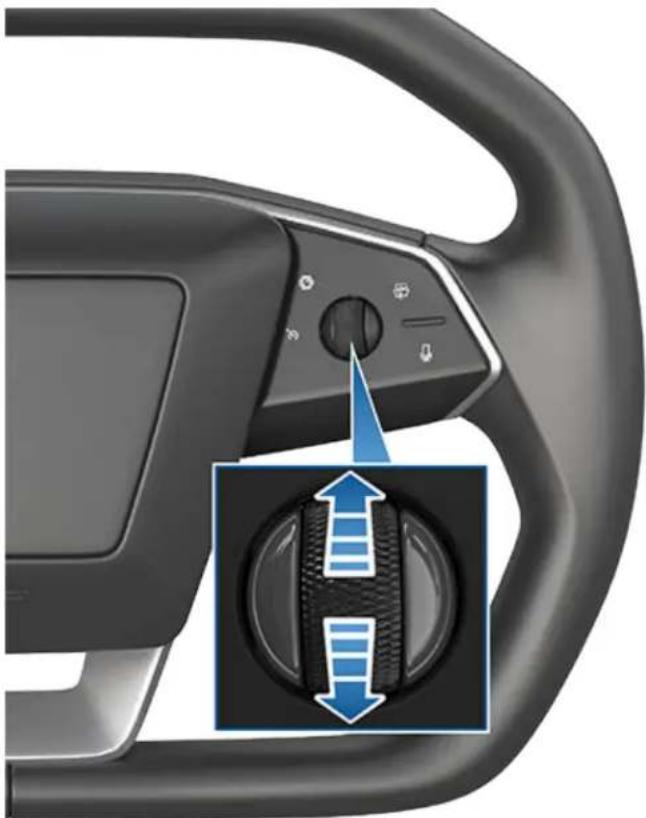
natural_image
Close-up of a car steering wheel with a blue directional arrow indicating clockwise motion (no text or symbols)It may take a few seconds for Cybertruck to reach the new cruising speed.
Adjusting the Following Distance
To adjust the following distance you want to maintain between Cybertruck and a vehicle traveling ahead of you, touch Controls > Autopilot > Cruise Follow Distance or press the right scroll button on the steering wheel to the left or right.
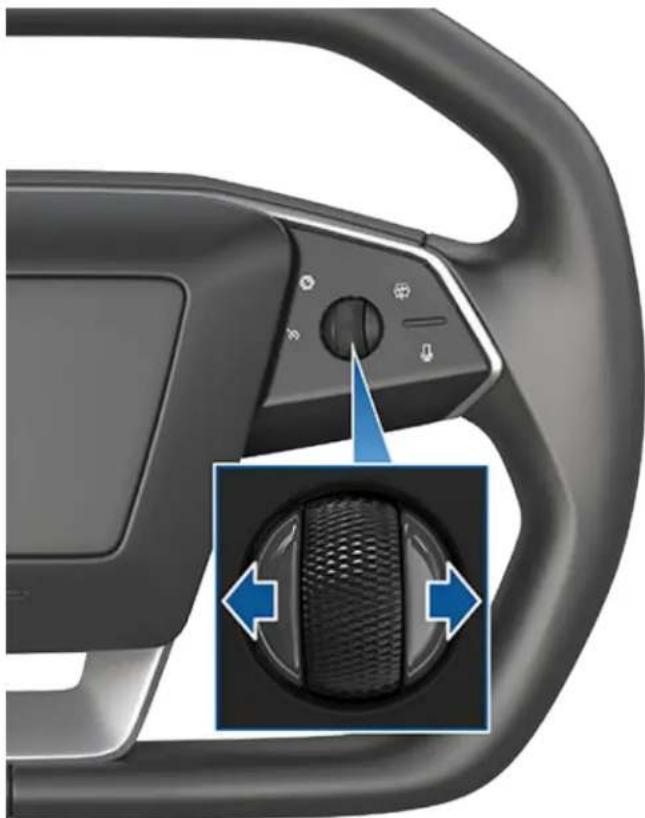
natural_image
Close-up of a car steering wheel with a black headrest and blue directional arrows indicating rotation (no text or symbols)The closest following distance is 2.
Each setting corresponds to a time-based distance that represents how long it takes for Cybertruck, from its current location, to reach the location of the rear bumper of the vehicle ahead of you. Autopilot retains your setting until you change it again.
As you adjust the following distance, the touchscreen displays the current setting.
Stopping and Slowdowns
When moving significantly faster than vehicles in adjacent lanes, Cybertruck automatically reduces the driving speed. This is especially helpful in heavy traffic situations or when vehicles are constantly merging into different lanes. When Cybertruck detects other vehicles driving significantly slower, the touchscreen highlights the adjacent lanes with arrows and detected vehicles in gray, and Cybertruck reduces the driving speed as appropriate. To temporarily override this feature, press the accelerator pedal.
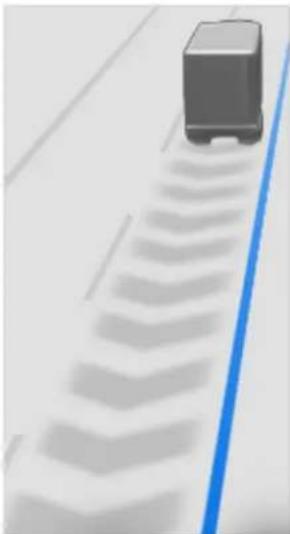
natural_image
Illustration of a moving vehicle on a curved road with a blue diagonal line (no text or symbols)When following a vehicle, Autopilot remains active at low speeds, even when Cybertruck comes to a full stop. For example, Autopilot remains active even if Cybertruck slows down to a complete or near-complete stop in heavy, stop-and-go traffic on a highway. When traffic starts moving more rapidly, Autopilot again accelerates up to the set speed.
Sometimes when Cybertruck is at a full stop, Autopilot goes into a HOLD state. If this happens, briefly press the accelerator pedal to resume cruising.

When the HOLD status is active, the touchscreen displays the HOLD icon and a message that indicates that you need to resume cruise control.
Cybertruck goes into HOLD state while Autopilot is active in the following circumstances:
• Cybertruck has been at a standstill for 5 minutes.
• Cybertruck detects a pedestrian (the HOLD state may clear when the pedestrian is no longer detected).
- Cybertruck suddenly loses visibility of the vehicle in front of you.
• An obstacle is detected in front of Cybertruck.
Cruising Near or On Exits
When you are cruising near an exit on a controlled-access highway and engage the turn signal toward the off-ramp, Autopilot assumes you are exiting and begins to slow down Cybertruck. If you do not drive onto the off-ramp, Autopilot resumes cruising at the set speed.
In a region with right hand traffic, this occurs only when you engage the right turn signal when driving in the right-most lane within 164 ft. (50 meters) of an exit. Likewise in regions with left hand traffic, this occurs when engaging the left turn signal when driving in the left-most lane within 164 ft. (50 meters) of an exit.
When enabled while on a highway interchange or off-ramp, Traffic-Aware Cruise Control may reduce your set speed in 5 mph (5 km/h) increments – to as slow as 25 mph (40 km/h) – to better match the reported speeds of other Tesla vehicles that have driven at that specific location. To override this and continue cruising at your set speed, tap the accelerator pedal. The new set speed is maintained for the duration of the interchange or off-ramp (unless you override it or cancel Autopilot). After the interchange or off-ramp, the set speed may revert or change as necessary based on the new location. For example, if you merged onto a different highway, the set cruising speed reverts to what it was before driving on the interchange.

WARNING: In some cases (such as having insufficient data), Traffic-Aware Cruise Control may not automatically reduce the set speed on the highway interchange or off-ramp. Do not rely on Traffic-Aware Cruise Control to determine an appropriate driving speed. Tesla recommends driving at a speed that is safe for road conditions and within posted speed limits.
When cruising onto an on-ramp to a controlled-access highway, Autopilot automatically adjusts the set cruising speed to the speed limit of the highway, plus any offset you have specified.
Overtake Acceleration
Engage the turn signal momentarily to accelerate Cybertruck towards the vehicle ahead of it. By momentarily holding the turn signal, you can quickly accelerate up to your set speed without having to press the accelerator pedal as long as:
- Traffic-Aware Cruise Control is operating and detects a vehicle in front of you.
- No obstacles or vehicles are detected in the target lane.
- Cybertruck is traveling below the set speed, but over 45 mph (72 km/h).
Cybertruck stops accelerating when you reach your set cruising speed, if changing lanes takes too long, or if Cybertruck gets too close the vehicle ahead. Cybertruck also stops accelerating if you disengage the turn signal.
Stop Light and Stop Sign Warning
While Autopilot is in use, Cybertruck displays a warning on the touchscreen and sounds a chime if it detects that you are likely to run through a red stop light or stop sign. If this happens, TAKE IMMEDIATE CORRECTIVE ACTION!
The visual and audible warnings cancel after a few seconds or when you press the brake pedal, whichever comes first.
Stop Light and Stop Sign Warning provides warnings only. It does not slow down or stop Cybertruck at red traffic lights, stop signs, road markings, etc. If equipped with Traffic Light and Stop Sign Control, you can enable this feature to automatically stop Cybertruck at traffic lights and stop signs (see Traffic Light and Stop Sign Control on page 128).
Emergency Vehicles
If available in your market region, Cybertruck automatically reduces driving speed when lights from an emergency vehicle are detected when using Autopilot at night on a high speed road. When this happens, the touchscreen displays a message informing you of the slowdown. You will also hear a chime, and see a reminder to keep your hands on the steering wheel. When the light detections pass by or cease to appear, Autopilot resumes your cruising speed. Alternatively, you may tap the accelerator to resume your cruising speed.
Never depend on Autopilot features to determine the presence of emergency vehicles. Cybertruck may not detect lights from emergency vehicles. Keep your eyes on your driving path and always be prepared to take immediate action.
Take Over Immediately
In situations where Autopilot is unable to steer Cybertruck, a warning chime sounds and the touchscreen displays the following message.

Take over immediately
When you see this message, take over steering immediately.
NOTE: Depending on market region, vehicle configuration, options purchased, and software version, your vehicle may not be equipped with Traffic Light and Stop Sign Control, or the feature may not operate exactly as described.
NOTE: Traffic Light and Stop Sign Control is a BETA feature and works best on roads that are frequently driven by Tesla vehicles. Traffic Light and Stop Sign Control attempts to stop at all traffic lights and may also stop at green lights.
Traffic Light and Stop Sign Control is designed to recognize and respond to traffic lights and stop signs, slowing Cybertruck to a stop when using Traffic-Aware cruise control or Autosteer. This feature uses the vehicle's forward-facing cameras, in addition to GPS data, and slows the car for all detected traffic lights, including green, blinking yellow, and off lights in addition to stop signs and some road markings. As Cybertruck approaches an intersection, the touchscreen displays a notification indicating the intention to slow down. You must confirm that you want to continue or Cybertruck stops at the red line displayed on the touchscreen's driving visualization.

WARNING: NEVER make assumptions and predict when and where Traffic Light and Stop Sign Control will stop or continue through an intersection or road marking. From a driver's perspective, the behavior of Traffic Light and Stop Sign Control may appear inconsistent. Always pay attention to the roadway and be prepared to take immediate action. It is the driver's responsibility to determine whether to stop or continue through an intersection. Never depend on Traffic Light and Stop Sign Control to determine when it is safe and/or appropriate to stop or continue through an intersection.
Before Using
Before using Traffic Light and Stop Sign Control, you must:
- Ensure that forward-facing cameras are unobstructed (see Cleaning a Camera on page 28) and calibrated (see Drive to Calibrate Cameras on page 29). Traffic Light and Stop Sign Control depends on the ability of the cameras to detect traffic lights, stop signs, and road markings.
- Ensure that the latest version of maps has been downloaded to Cybertruck. Although Traffic Light and Stop Sign Control primarily uses visual data received from the vehicle's cameras, greater accuracy is achieved when using the most recent map data. To check which version of maps is currently downloaded, touch Controls > Software. You must connect to a Wi-Fi network to receive updated maps (see Map Updates on page 171).
- Enable the feature. With the vehicle in Park, touch Controls > Autopilot > Traffic Light and Stop Sign Control. Once enabled, Traffic Light and Stop Sign Control operates whenever Traffic-Aware Cruise Control or Autosteer is active.
How it Works
When Traffic Light and Stop Sign Control is enabled and you are using Autosteer, Traffic-Aware Cruise Control, or Full Self-Driving (Supervised), the touchscreen displays a popup message to inform you that an upcoming traffic light, stop sign, or road marking has been detected. As it approaches the stop location, even at an intersection where the traffic light is green, Cybertruck slows down and displays a red line to indicate where Cybertruck will stop. To continue through the intersection—even if the traffic light is green—you must briefly press the accelerator pedal to give the vehicle permission to proceed. When you've confirmed that you want to proceed, the red stop line turns gray and Cybertruck continues through the intersection and resumes your set cruising speed.
NOTE: If Cybertruck is approaching a green light and detects that a vehicle in front of you is continuing through the intersection, Cybertruck continues through the intersection without requiring your confirmation, provided you are not in a turning lane and the vehicle can detect that your hands are on the steering wheel.
NOTE: If, after you briefly press the accelerator pedal to confirm that you want to continue through the intersection, the traffic signal changes before you enter the intersection (for example, the light changes from green to yellow or from yellow to red), Cybertruck may determine that it is not appropriate to proceed. Therefore, Cybertruck stops and you must press the accelerator to proceed. At all times, it is your responsibility to ensure the vehicle stops or accelerates appropriately and safely.

WARNING: Traffic Light and Stop Sign Control DOES NOT turn Cybertruck through an intersection unless Full Self-Driving (Supervised) is engaged. When in a turning lane, Cybertruck stops at the red stop line. To proceed, briefly press the accelerator pedal—Cybertruck continues straight through the intersection (even when in a turning lane), so you MUST manually steer Cybertruck through the intersection (which cancels Autosteer).
Traffic Light and Stop Sign Control is designed to operate as described only when the following conditions are met:
- Autosteer, Full Self-Driving (Supervised), or Traffic-Aware Cruise Control is engaged.
- The cameras can detect an upcoming traffic light, stop sign or road marking (for example, cameras are unobstructed and have a clear line-of-sight to the traffic light, stop sign, or road marking).
- The touchscreen on Cybertruck is displaying an upcoming traffic light in "bold" format. Cybertruck does not acknowledge traffic lights that the touchscreen shows as faded. If a traffic light is not directly ahead of the camera (for example, it is located at an angle of the camera's view, or located in an adjacent lane) the touchscreen displays it as faded and Cybertruck does not slow down and stop for it.
WARNING: If the touchscreen is not displaying a red stop line at an upcoming intersection, Cybertruck does not slow down or stop. It is the driver's responsibility to pay attention to upcoming intersections and monitor traffic conditions to determine when and if the vehicle should stop and then to take appropriate action as needed.
WARNING: Never depend on Traffic Light and Stop Sign Control to determine whether to stop at, or proceed through, an intersection. Drive attentively by watching the road and paying attention to the roadway, upcoming intersections, traffic conditions, crosswalks, and other road users. It is always the driver's responsibility to determine whether to stop or proceed. Be prepared to take immediate action. Failure to do so can result in injury or death.
WARNING: In some situations, Traffic Light and Stop Sign Control may inaccurately detect a traffic light or stop sign, causing Cybertruck to slow down unexpectedly. Be prepared to take immediate action at all times.
WARNING: You must briefly press the accelerator pedal to confirm that you want to proceed through an intersection, regardless of the status of the traffic light. If you do not confirm, Cybertruck stops at the red stop line displayed on the touchscreen, even if stopping may be inappropriate. Stopping at a green light may confuse other drivers and may result in a collision, injury or death. Therefore, always pay attention to upcoming intersections and be prepared to manually brake or accelerate in response to surroundings.
WARNING: Never assume that your ability to see a traffic light, stop sign, or road marking (especially at a complex intersection, or an intersection in which a traffic light or sign is partially obstructed, etc.) means that Cybertruck can also see it and respond appropriately.
WARNING: Even the most recent map data does not include all traffic lights and stop signs. Therefore, Traffic Light and Stop Sign Control relies heavily on the ability of the cameras to detect traffic lights, stop signs, road markings, etc. As a result, Cybertruck may ignore an intersection that is blocked from the camera's view (for example, obstructed by a tree or a large vehicle or object, or located near a steep hill or sharp curve).
WARNING: Traffic Light and Stop Sign Control is not a substitute for attentive driving and sound judgment.
Traffic Lights
When driving with Autosteer or Traffic-Aware Cruise Control engaged, and Traffic Light and Stop Sign Control enabled, Cybertruck is designed to respond as follows when approaching intersections controlled by a traffic light:
| Type of Traffic Light Vehicle Intended Response | ||
 | At a solid green traffic light, or at a traffic light that is currently off (not illuminated), Cybertruck slows down.If you are following a car in front of you that continues through the intersection, the touchscreen displays a green stop line and provided your hands are detected on the steering wheel, Cybertruck also continues.If a car is not in front of you, the touchscreen displays a red stop line. You must confirm that you want to continue through the intersection by briefly pressing the accelerator pedal. If you don't confirm, Cybertruck stops at the red stop line displayed on the touchscreen.NOTE: Cybertruck resumes the set cruising speed when it continues through the intersection, taking into consideration the speed of a vehicle in front of you. | |
 | ||
 | Cybertruck slows down and comes to a complete stop at the red stop line displayed on the touchscreen. When you want to continue through the intersection (for example, the light turns green again, or once Cybertruck has come to a complete stop), you must briefly press the accelerator pedal. | |
 | ||
 |  | Cybertruck slows down and comes to a complete stop at the red stop line displayed on the touchscreen. When you want to proceed through the intersection (for example, the light turns green again), you must briefly press the accelerator pedal.NOTE: If the traffic light changes after you've confirmed that you want to proceed (for example, a green traffic light turns yellow), Cybertruck may stop instead of continuing, especially if Cybertruck determines that it can safely stop before entering the intersection.NOTE: Cybertruck is not designed to proceed through an intersection when the traffic light is red or if the light turns yellow in situations when there is adequate distance to safely stop before entering the intersection.NOTE: You can take over driving at any time by manually braking to cancel Autosteer or Traffic-Aware Cruise Control. |
Type of Traffic Light Vehicle Intended Response
 | |
 | |
 | Cybertruck slows down. To proceed, you must briefly press the accelerator pedal. If you don't, Cybertruck stops at the red stop line displayed on the touchscreen.NOTE:To prevent Cybertruck from stopping, and to minimize how much it slows down as it approaches, you can confirm that you want to proceed by briefly pressing the accelerator pedal at any time after the touchscreen displays the red stop line. Cybertruck resumes your set cruising speed immediately after you confirm (taking into consideration the speed of a vehicle in front of you).WARNING:Approach attentively and be prepared to press the brake pedal to slow down or stop. |
 | |
 | Cybertruck slows down and comes to a complete stop at the red stop line displayed on the touchscreen. When you want to proceed through the intersection (for example, traffic laws and conditions indicate it is safe and legal to proceed), you must briefly press the accelerator pedal. |
Stop Signs and Road Markings
When driving with Autosteer or Traffic-Aware Cruise Control engaged, and Traffic Light and Stop Sign Control enabled, Cybertruck is designed to respond as follows when approaching intersections controlled by stop signs, stop lines, or road markings:
Type of Intersection Vehicle Intended Response
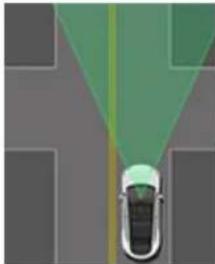
natural_image
Top-down view of a car driving on a road with green lane markings (no text or symbols)No Traffic Control
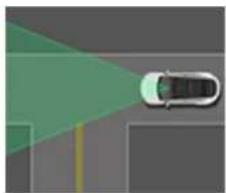
natural_image
Top-down view of a car on a road with a green light beam and lane markings (no text or symbols)Arm of T-junction
Cybertruck assumes the right of way and continues straight without slowing down or stopping.
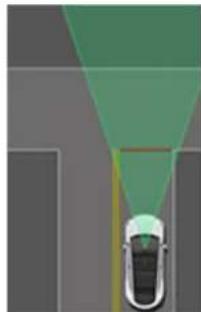
natural_image
Top-down view of a car driving on a road with green lane markings (no text or symbols)End of T-junction
If Cybertruck detects a T-junction based on the map data, Cybertruck slows down and comes to a complete stop at the red stop line displayed on the touchscreen. When you want to proceed, you must take over steering and acceleration.
WARNING: Cybertruck may not stop at a T-junction that does not have a stop sign or stop line, or if the T-junction is not included in the map data. Drive attentively and be prepared to stop (when necessary and/or appropriate).
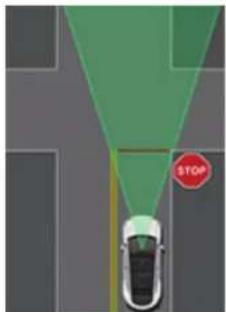
natural_image
Top-down view of a car on a road with a green traffic cone and a red STOP sign (no text or symbols on the car or road)Stop Sign
Cybertruck slows down and comes to a complete stop at the red stop line displayed on the touchscreen. When you want to proceed through the intersection, you must briefly press the accelerator pedal.
NOTE: If you confirm that you want to proceed through an intersection controlled by a stop sign by briefly pressing the accelerator pedal before Cybertruck has stopped, your confirmation is ignored. Cybertruck is not designed to proceed through a stop sign without stopping.
NOTE: Even when using Autosteer, and even if you have engaged a turn signal, you must turn the steering wheel yourself (which cancels Autosteer) to complete a turn at an intersection.
Type of Intersection Vehicle Intended Response
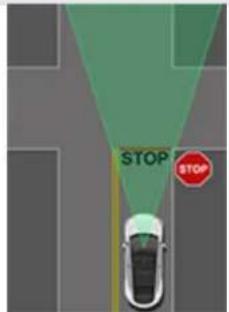
Stop Sign and Road Marking
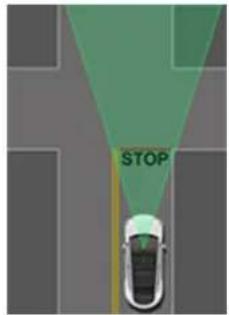
Road Marking

WARNING: Cybertruck also slows down and stops at a roundabout. You must take over steering (which cancels Autosteer) and briefly press the accelerator pedal to confirm that you want to continue through the roundabout.

WARNING: At crosswalks, Cybertruck may slow down and may stop, depending on whether the crosswalk is controlled by a traffic light and whether the cameras detect pedestrians, bicyclists, etc. in the crosswalk. Pay particular attention at crosswalks and be prepared to take over at any time. Failure to do so can result in injury or death.
Limitations
Depending on many different circumstances and environmental conditions, Traffic Light and Stop Sign Control may or may not stop at:
- Railroad crossings.
- Keep-out zones.
- Toll booths.
- Crosswalk systems.
- Yield signs or temporary traffic lights and stop signs (such as at construction areas).
- Miscellaneous traffic U-turn lights, bicycle and pedestrian crossing lights, lane availability lights, etc.
In addition, Traffic Light and Stop Sign Control is particularly unlikely to operate as intended, can disengage, or may not operate, when one or more of the following conditions are present:
- Driving through consecutive light-controlled intersections that are very close to each other.
- Visibility is poor (heavy rain, snow, fog, etc.) or weather conditions are interfering with camera operation.
- Bright light (such as direct sunlight) is interfering with the view of the camera(s).
-
A camera is obstructed, covered, damaged, or not properly calibrated.
-
Driving on a hill or on a road that has sharp curves on which the cameras are unable to see upcoming traffic lights or stop signs.
- A traffic light, stop sign, or road marking is obstructed (for example, a tree, a large vehicle, etc.).
• Cybertruck is being driven very close to a vehicle in front of it, which is blocking the view of a camera.

WARNING: The limitations listed above are not an exhaustive list of reasons why Cybertruck may not operate as expected. Many unforeseen circumstances can adversely impact the accurate operation of Traffic Light and Stop Sign Control. Using this feature does not reduce or eliminate the need to drive attentively and responsibly. You must be prepared to take appropriate and immediate action at all times.
NOTE: Depending on date of manufacture, software version, and vehicle configuration, your vehicle may not be equipped with the following features, or a feature may not operate exactly as described.
Autopark uses data to simplify parking on public roads by maneuvering Cybertruck into parallel and perpendicular parking spaces.

WARNING: It is your responsibility to familiarize yourself with the limitations of Autopark and the situations in which it may not work as expected. For more information, see Limitations and Warnings on page 141.

CAUTION: Do not use Autopark if anything, such as a ball hitch, bike rack, or trailer, is attached to the tow hitch. Do not use Autopark if there is cargo overhanging past the end of the cargo bed (such a long slats of wood, poles, pipes, etc.).
Autopark is disabled when:
• A bicycle is detected.
- The tailgate is down.
- Cybertruck is in Trailer Mode (see Trailer Mode on page 114).
- Cybertruck is in Off-Road Mode (see Off-Road Modes on page 105).

CAUTION: Autopark's performance depends on the ability of the cameras to determine the vehicle's proximity to curbs, objects, and other vehicles. Ensure all cameras are clean and free of obstructions before each drive and before using Autopilot features (see Cleaning a Camera on page 28). Dirty cameras as well as environmental conditions such as rain and faded lane markings, can affect Autopilot performance. If a camera is obstructed or blinded, Cybertruck displays a message on the touchscreen and Autopilot features may not be available.
Parameters
Autopark detects potential parking spaces based on the following parameters:
Perpendicular Parking
- Your driving speed must be below 8 mph (13 km/h). If driving too fast, Autopark may not be able to accurately detect your desired parking space.
- The parking space must be at least as wide as your vehicle.
- The parking space must have at least three visible lines for the vehicle to park into, such as parking lines, road markings, or distinct curbs. Autopark may not work in a garage, for example, without three visible parking lines.
- Autopark may not work with textured road surfaces such as cobblestone or brick.
Parallel Parking
- Your driving speed must be below 8 mph (13 km/h). If driving too fast, Autopark may not be able to accurately detect your desired parking space.
- There must be a vehicle in front of or behind the space you want to park in.
NOTE: Autopark does not operate on angled parking spaces.
To Use Autopark
When driving, follow these steps to allow Autopark to maneuver Cybertruck into a parking space:
- While driving slowly, monitor the touchscreen (after making sure that it is safe to do so) to see potential parking spaces detected by Autopilot.
NOTE: The detected parking spaces appear only if the vehicle's position and/or the circumstances of the surrounding area are such that Autopark can determine an appropriate driving path. If Autopark cannot determine an appropriate path (for example, when driving on a narrow street where moving into the parking space causes the front of the vehicle to extend into the adjacent lane), you can either reposition the vehicle, find a different parking space, or park manually. - Choose a spot, then release the steering wheel and touch Start on the touchscreen.
- Autopark displays a message when parking is complete.
If you press the brake pedal when Autopark is actively parking Cybertruck, the parking process cancels.

CAUTION: Cybertruck does not brake if you choose to override the current speed by pressing the accelerator pedal while Autopark is active. In this case, Autopark cancels if you exceed 6 mph (10 km/h).

WARNING: Never depend on Autopark to find a parking space that is legal, suitable, and safe. Autopark may not always detect objects in the parking space. Always perform visual checks to confirm that a parking space is appropriate and safe.

WARNING: When Autopark is actively steering Cybertruck:
- Do not interfere with the movement of the steering wheel. Doing so cancels Autopark.
- Continually check your surroundings. Be prepared to apply the brakes to avoid vehicles, pedestrians, or objects.
- Monitor the touchscreen to ensure that you are aware of the instructions that Autopark is providing.
To Cancel Parking
Autopark cancels the parking sequence when:
- You manually move the steering wheel.
- You shift.
- You press the brake pedal.
- You press the right scroll button on the steering wheel.
- The parking sequence exceeds seven moves.
Take Over Immediately
In situations where Autopark is unable to steer Cybertruck, Autopark sounds a warning chime and displays the message Take Over Immediately.
This happens when:
- Cybertruck detects that a door is opened or that the driver is exiting the vehicle.
- One or more of the cameras is damaged, dirty, obstructed (such as by mud, ice, or snow, or by adhesive products such as wraps, stickers, etc.), or has poor visibility (due to heavy rain, snow, hail, etc. or poor lighting).
- Your speed exceeds 6 mph (10 km/h).
- An Automatic Emergency Braking event occurs (see Collision Avoidance Assist on page 146).
When you see this message, take over immediately.
NOTE: Depending on market region, vehicle configuration, options purchased, and software version, your vehicle may not be equipped with Full Self-Driving (Supervised) (also referred to as Autosteer on City Streets), or the feature may not operate exactly as described.
When Full Self-Driving (Supervised) (also referred to as Autosteer on City Streets) is engaged, Cybertruck attempts to drive to your destination by following curves in the road, stopping at and negotiating intersections, making left and right turns, navigating roundabouts, and entering/exiting highways.
Full Self-Driving (Supervised) is meant to work in a variety of driving scenarios. You can use Full Self-Driving (Supervised) on any type of roadway, including residential and city streets.

WARNING: Driver intervention may be required in certain situations, such as on narrow roads with oncoming cars, in construction zones, or while going through complex intersections. For more examples of scenarios in which driver intervention might be required, see Limitations and Warnings on page 141.
Full Self-Driving (Supervised) uses inputs from cameras mounted at the front, rear, left, and right of Cybertruck to build a model of the area surrounding Cybertruck (see Cameras on page 27). The Full Self-Driving computer installed in Cybertruck is designed to use this input, rapidly process neural networks, and make decisions to safely guide you to your destination.
NOTE: As Tesla's Full Self-Driving (Supervised) capabilities evolve, Cybertruck is upgraded through over-the-air software updates. Download updates as soon as they become available.
Like other Autopilot features, Full Self-Driving (Supervised) requires a fully attentive driver and will display a series of escalating warnings requiring driver response. You must keep your hands on the steering wheel while Full Self-Driving (Supervised) is engaged.

WARNING: Full Self-Driving (Supervised) is a hands-on feature that requires you to pay attention to the road at all times. Keep your hands on the steering wheel at all times, be mindful of road conditions and surrounding traffic, pay attention to pedestrians and cyclists, and always be prepared to take immediate action (especially around blind corners, crossing intersections, and in narrow driving situations). Failure to follow these instructions could cause damage, serious injury or death. It is your responsibility to familiarize yourself with the limitations of Full Self-Driving (Supervised) and the situations in which it may not work as expected. For more information, see Limitations and Warnings on page 141.

CAUTION: Use of Full Self-Driving (Supervised) will be suspended if improper usage is detected. For more information, see Autopilot Suspension on page 139.

CAUTION: As Full Self-Driving (Supervised) deployment expands, Tesla will gradually make it available to eligible customers in select countries outside of the United States and Canada. Because every country contains unique infrastructure, driving behaviors, and traffic patterns that Full Self-Driving (Supervised) must adapt to over time, it is essential for drivers using Full Self-Driving (Supervised) in newly eligible countries to be extra attentive and overly cautious. You must be ready to take over safely at any time.
Before Using Full Self-Driving (Supervised)
- Enable Full Self-Driving (Supervised). Touch Controls > Autopilot > Full Self-Driving (Supervised) and then, after carefully reading and understanding the popup window, touch Yes.
- Ensure that the cameras on Cybertruck are unobstructed and calibrated (see Cameras on page 27). Full Self-Driving (Supervised) depends on the ability of the cameras to detect traffic lights, stop signs, and road markings.
- Ensure that the latest version of maps has been downloaded to Cybertruck (see Map Updates on page 171). Although Full Self-Driving (Supervised) primarily uses visual data received from the vehicle's cameras, greater accuracy is achieved when using the most recent map data.
To Use Full Self-Driving (Supervised)
As long as Full Self-Driving (Supervised) is enabled and available, you can activate it at any speed less than 85 mph (150 km/h) (including when Cybertruck is at a standstill) by pressing the right scroll button.
If you do not choose a destination, Cybertruck chooses the most probable driving path or suggests a destination based on your driving.

To indicate that Full Self-Driving (Supervised) is available but not engaged, the top corner of the touchscreen displays a gray steering wheel icon next to the driving gear.

When Full Self-Driving (Supervised) is engaged, the steering wheel icon is blue and a blue line represents your driving path.
The touchscreen displays the maximum speed in blue. When you engage Full Self-Driving (Supervised), the set cruising speed defaults to the speed limit, plus any offset you've specified. If Autopilot is unable to determine the speed limit, the cruising speed is your current speed, in addition to any specified offset.
When Full Self-Driving (Supervised) is engaged, the touchscreen displays a visualization of the environment surrounding Cybertruck, including the roadway and detected objects such as vehicles, pedestrians, curbs, bicyclists, and more. Objects that are highlighted on the visualization represent priorities that Full Self-Driving (Supervised) is actively controlling for at a given time.
NOTE: The Full Self-Driving (Supervised) visualization may not be a holistic representation of the objects, road markings, road signals, and other variables that Full Self-Driving (Supervised) takes into account as it attempts to drive to your destination. While Full Self-Driving (Supervised) is engaged, it uses data from the cameras on Cybertruck that may not be represented in the visualization (see Cameras on page 27).
You can widen the visualization area to fullscreen. Enable the setting by touching Controls > Autopilot > Full Self-Driving (Supervised) > Expanded Full Self-Driving Visualization. Then on the touchscreen, swipe the visualization window handle to fill the entire screen.
NOTE: You can override Full Self-Driving (Supervised) at any time if you are uncomfortable or uncertain about the system's intended course of action. You are driving Cybertruck at all times.
Canceling Full Self-Driving (Supervised)
To disengage Full Self-Driving (Supervised), do any of the following:
- Press the brake pedal.
- Press the right scroll wheel on the steering wheel
• Take over and steer manually.
When you disengage Full Self-Driving (Supervised) by steering manually, Traffic-Aware Cruise Control remains active.
In addition, Full Self-Driving (Supervised) will disengage if any of the following occurs:
- You shift out of Drive.
• A door or trunk is opened. - There is an Automatic Emergency Braking event (see Collision Avoidance Assist on page 146).
- The driver's seatbelt is released, and/or the driver gets out of their seat.
- You do not respond to repeated reminders to keep your hands on the wheel and subsequent messages on the touchscreen.
- Full Self-Driving (Supervised) becomes unavailable. This can happen for a number of reasons (for example, if a camera becomes obscured). If Full Self-Driving (Supervised) disengages, an alert will appear on the touchscreen to notify you and a chime will sound. If this happens, take control of steering immediately.
When driver intervention is required, it is best to safely disengage as soon as possible. It is recommended to practice disengaging from Full Self-Driving (Supervised) in safe environment without other road users so you may become familiar with the process.
While Using Full Self-Driving (Supervised)
Full Self-Driving (Supervised) changes lanes, makes left and right turns, follows on- and off-ramps, and takes forks in the road as necessary to reach the destination.

WARNING: NEVER make assumptions and predict when and where Full Self-Driving (Supervised) will stop or continue through an intersection or road marking. From a driver's perspective, the behavior of Full Self-Driving (Supervised) may appear inconsistent. Always pay attention to the roadway and be prepared to take immediate action. It is the driver's responsibility to determine whether to stop or continue through an intersection. Never depend on Full Self-Driving (Supervised) to determine when it is safe and/or appropriate to stop or continue through an intersection.
Full Self-Driving (Supervised) maintains your speed and following distance from the vehicle ahead of Cybertruck, if there is one. Full Self-Driving (Supervised) also slows down and stops at traffic lights and stop signs as necessary, and reacts to pedestrians, cyclists, and other vehicles on the road.
For example, if you are driving on a residential street and another vehicle backs out of a driveway ahead of Cybertruck, Full Self-Driving (Supervised) slows down or stops as appropriate. If the other vehicle stops backing out while partially blocking the driving lane, Full Self-Driving (Supervised) slows down and maneuvers around the other vehicle if the width of the lane allows it.
When the traffic in front of you is slowing down, Full Self-Driving (Supervised) shows blue arrows in the driving lane and slows down to maintain an appropriate following distance from the vehicle ahead of you. When you are driving on the highway, Full Self-Driving (Supervised) displays a message on the touchscreen to inform you when an action (such as a lane change) is being taken.

WARNING: In rare cases, Full Self-Driving (Supervised) may not appropriately slow down, come to a stop, or resume control for a stop sign or traffic light. You may assist the system by lightly applying the accelerator, or can override Full Self-Driving (Supervised) at any time.
Changing Lanes
To tell Full Self-Driving (Supervised) to change lanes while on a multi-lane roadway, engage the right or left turn signal. On city or residential streets, engaging the right or left turn signal tells Full Self-Driving (Supervised) to make a right or left turn, respectively.
Unlike Navigate on Autopilot, Full Self-Driving (Supervised) does not require confirmation before a lane change. To cancel a lane change or turn, cancel the turn signal or intervene with the steering wheel or other vehicle controls.
Changing the Set Speed
While Full Self-Driving (Supervised) is active, roll the right scroll wheel up to increase, or down to decrease, the set speed.
NOTE: In some cases, your speed is limited by the speed limit, the type of roadway, or the flow of traffic. If this is the case, Full Self-Driving (Supervised) displays a message at the top of the visualization.
Arriving at Your Destination
Once you reach your destination, Full Self-Driving (Supervised) stops Cybertruck and displays a message indicating that navigation is complete.
Driver Attentiveness
Like other Autopilot features, Full Self-Driving (Supervised) requires that the driver pay attention to the road, their surroundings, and other road users.
The cabin camera monitors continued driver attentiveness when Full Self-Driving (Supervised) is engaged. This system cannot be disabled. The cabin camera does not require full visibility of the driver's eyes in order to monitor attentiveness. The system is still active, for example, if the driver is wearing sunglasses.
If the cabin camera does not have clear visibility of the driver's hand and arm locations, Full Self-Driving (Supervised) periodically displays a message reminding the driver to apply slight force to the steering wheel.
Please pay attention to the road

When the cabin camera is actively monitoring driver attentiveness, a green dot appears next to the steering wheel icon on the touchscreen.
If the driver repeatedly looks away from the road, the touchscreen displays a warning. The warning is dismissed once the driver begins paying attention to the road again.
If the driver repeatedly ignore prompts to apply slight force to the steering wheel or to pay attention, Full Self-Driving (Supervised) displays a series of escalating warnings and, if those warnings are ignored, disables for the rest of the drive and displays the following message.

Autopilot unavailable for current drive. Autopilot Strikeout - Attention warnings ignored.
If the driver does not resume manual steering, Full Self-Driving (Supervised) sounds a continuous chime, turns on the warning flashers, and slows the vehicle to a complete stop.

WARNING: Do not use handheld devices while using Full Self-Driving (Supervised). If the cabin camera detects a handheld device while Full Self-Driving (Supervised) is engaged, the touchscreen displays a message reminding you to pay attention and keep your hands on the wheel.

WARNING: The use of devices designed to circumvent driver attentiveness is a violation of the terms of use for Full Self-Driving (Supervised) and may result in the feature being permanently disabled on your vehicle and a ban on future use of the feature.
Autopilot Suspension
Use of Autopilot features will be suspended if improper usage is detected.
Use of Full Self-Driving (Supervised) is suspended for a week when you or another driver of your vehicle receives five Autopilot "strikeouts." A strikeout is when the Autopilot system disengages for the remainder of a trip after the driver receives several audio and visual warnings for inattentiveness.
You can see how many strikeouts are remaining before Autopilot access is suspended by touching Controls > Autopilot.
A strikeout is forgiven after 7 days, as long as you don't receive another strikeout in that time.
NOTE: If your access to Full Self-Driving (Supervised) is suspended, you can still use Traffic-Aware Cruise Control and all active safety features are still enabled.
There may be occasions where driver intervention is required and you must take over immediately to maintain safe driving. Driver-initiated disengagements do not count as improper usage and are expected from the driver.
Take Over Immediately
In situations where Autopilot is unable to steer Cybertruck, a warning chime sounds and the touchscreen displays the following message.

Take over immediately
When you see this message, take over steering immediately.
This topic includes warnings, cautions, and limitations pertaining to the following Autopilot features.
• Traffic-Aware Cruise Control on page 141
- Full Self-Driving (Supervised) (Autosteer on City Streets) on page 142
• Autopark on page 142
NOTE: Depending on market region, vehicle configuration, options purchased, and software version, your vehicle may not be equipped with all features listed above, or a feature may not operate as described.

WARNING: Read the following warnings and limitations carefully before using Autopilot. Failure to follow all warnings and instructions can result in property damage, serious injury, or death.
NOTE: Ensure all cameras are clean and free of obstructions before each drive and before using Autopilot features (see Cleaning a Camera on page 28). Dirty cameras as well as environmental conditions such as rain and faded lane markings, can affect Autopilot performance. If a camera is obstructed or blinded, Cybertruck displays a message on the touchscreen and Autopilot features may not be available.
Traffic-Aware Cruise Control
While using Traffic-Aware Cruise Control, it is the driver's responsibility to stay alert, drive safely, and be in control of the vehicle at all times. Always keep your eyes on the road when driving and be prepared to take corrective action as needed.
In addition, it is the driver's responsibility to cruise at a safe speed and maintain a safe following distance based on road conditions and applicable speed limits. Be aware of the following limitations while Traffic-Aware Cruise Control is active.
- There may be situations where the cruising speed may not change when the speed limit changes.
- Traffic-Aware Cruise Control does not adapt driving speed based on road and driving conditions. Do not use Traffic-Aware Cruise Control on winding roads with sharp curves, on icy or slippery road surfaces, or when weather conditions (such as heavy rain, snow, fog, etc.) make it inappropriate to drive at a consistent speed.
- Do not rely on Traffic-Aware Cruise Control to maintain an accurate or appropriate following distance.
- Traffic-Aware Cruise Control may be unable to provide adequate speed control because of limited braking capability and hills. It can also misjudge the distance from a vehicle ahead. Driving downhill can increase driving speed, causing Cybertruck to exceed your set speed (and potentially the road's speed limit).
-
Traffic-Aware Cruise Control may occasionally cause Cybertruck to brake when not required or when you are not expecting it. This can be caused by closely following a vehicle ahead, detecting vehicles or objects in adjacent lanes (especially on curves), etc.
-
Due to limitations inherent in the onboard GPS (Global Positioning System), you may experience situations in which Cybertruck slows down, especially near exits or off-ramps where a curve is detected and/or you are navigating to a destination and not following the route.
- In some cases (such as having insufficient data), Traffic-Aware Cruise Control may not automatically reduce the set speed on the highway interchange or off-ramp.
- Traffic-Aware Cruise Control may not detect all objects and, especially when cruising over 50 mph (80 km/h), may not brake/decelerate when a vehicle or object is only partially in the driving lane or when a vehicle you are following moves out of your driving path and a stationary or slow-moving vehicle or object is in front of you.
- Traffic-Aware Cruise Control may react to vehicles or objects that either do not exist, or are not in your lane of travel, causing Cybertruck to slow down unnecessarily or inappropriately.

WARNING: Traffic-Aware Cruise Control is particularly unlikely to operate as intended in the following types of situations:
- The road has sharp curves or significant changes in elevation.
- Road signs and signals are unclear, ambiguous, or poorly maintained.
- Visibility is poor (due to heavy rain, snow, hail, etc. or poorly lit roadways at night)
- You are driving in a tunnel or next to a highway divider that interferes with the view of the camera(s)
- Bright light (such as from oncoming headlights or direct sunlight) interferes with the view of the camera(s).

WARNING: The list above does not represent an exhaustive list of situations that may interfere with proper operation of Traffic-Aware Cruise Control. Traffic-Aware Cruise Control can cancel unexpectedly at any time for unforeseen reasons. Always watch the road in front of you and stay prepared to take appropriate action. It is the driver's responsibility to be in control of Cybertruck at all times.

WARNING: Traffic-Aware Cruise Control is designed for your driving comfort and convenience and is not a collision warning or avoidance system. Never depend on Traffic-Aware Cruise Control to adequately slow down Cybertruck. Always watch the road in front of you and be prepared to take corrective action at all times. Failure to do so can result in serious injury or death.

WARNING: Although Traffic-Aware Cruise Control is capable of detecting pedestrians and cyclists, never depend on Traffic-Aware Cruise Control to adequately slow Cybertruck down for them. Failure to do so can result in serious injury or death.
Full Self-Driving (Supervised) (Autosteer on City Streets)

WARNING: Always remember that Full Self-Driving (Supervised) (also known as Autosteer on City Streets) does not make Cybertruck autonomous and requires a fully attentive driver who is ready to take immediate action at all times.

WARNING: Full Self-Driving (Supervised) is a hands-on feature. Keep your hands on the steering wheel at all times, be mindful of road conditions and surrounding traffic, and always be prepared to take immediate action. Failure to follow these instructions could cause damage, serious injury or death. It is your responsibility to familiarize yourself with the limitations of Full Self-Driving (Supervised) and the situations in which it may not work as expected.

WARNING: Failure to follow all warnings and instructions can result in property damage, serious injury or death.

CAUTION: Full Self-Driving (Supervised) and its associated functions may not operate as intended and there are numerous situations in which driver intervention may be needed. Examples include (but are not limited to):
- Interactions with pedestrians, bicyclists, and other road users.
- Unprotected turns with high-speed cross traffic.
- Multi-lane turns.
- Simultaneous lane changes.
- Narrow roads with oncoming cars or double-parked vehicles.
- Rare objects such as trailers, ramps, cargo, open doors, etc. protruding from vehicles.
- Merges onto high-traffic, high-speed roads.
- Debris in the road.
- Construction zones.
- High curvature roads, particularly at fast driving speeds.
Visibility is critical for Full Self-Driving (Supervised) to operate. Low visibility, such as low light or poor weather conditions (rain, snow, direct sun, fog, etc.) can significantly degrade performance.

WARNING: Cybertruck may quickly and suddenly make unexpected maneuvers or mistakes that require immediate driver intervention.
The list above represents only a fraction of the possible scenarios that can cause Full Self-Driving (Supervised) to make sudden maneuvers and behave unexpectedly. In fact, Cybertruck can suddenly swerve even when driving conditions appear normal and straight-forward. Stay alert and always pay attention to the roadway so you can anticipate the need to take corrective action as early as possible. Remember that this is an early access feature that must be used with extra caution.

CAUTION: As Full Self-Driving (Supervised) deployment expands, Tesla will gradually make it available to eligible customers in select countries outside the United States. Because every country contains unique infrastructure, driving behaviors, and traffic patterns that Full Self-Driving (Supervised) must adapt to over time, it is essential for drivers using Full Self-Driving (Supervised) in newly eligible countries to be extra attentive and overly cautious. You must be ready to take over safely at any time.
Autopark

CAUTION: Autopark's performance depends on the ability of the cameras to determine the vehicle's proximity to curbs, objects, and other vehicles. Be aware of the following warnings before and while using Autopark:
- Do not use Autopark if anything, such as a ball hitch, bike rack, or trailer, is attached to the tow hitch. Autopark may not stop for hitches when parking between or in front of other vehicles.
- Never depend on Autopark to find a parking space that is legal, suitable, and safe. Autopark may not always detect objects in the parking space. Always perform visual checks to confirm that a parking space is appropriate and safe.
- When Autopark is actively steering Cybertruck, the steering wheel moves in accordance with Autopark's adjustments. Do not interfere with the movement of the steering wheel. Doing so cancels Autopark.
- During the parking sequence, continually check your surroundings. Be prepared to apply the brakes to avoid vehicles, pedestrians, or objects.
- When Autopark is active, monitor the touchscreen to ensure that you are aware of the instructions that Autopark is providing.

CAUTION:
Autopark is particularly unlikely to operate as intended in these situations:
- The road is sloped. Autopark is designed to operate on flat roads only.
- Visibility is poor (due to heavy rain, snow, fog, etc.).
- The curb is constructed of material other than stone, or the curb cannot be detected.
- The target parking space is directly adjacent to a wall or pillar (for example, the last parking space of a row in an underground parking structure).
- One or more of the cameras is damaged, dirty, or obstructed (such as by mud, ice, or snow, or by a vehicle bra, excessive paint, or adhesive products such as wraps, stickers, rubber coating, etc.).
- Weather conditions (heavy rain, snow, fog, or extremely hot or cold temperatures) are interfering with sensor (if equipped) operation.

WARNING: Many unforeseen circumstances can impair Autopark's ability to park Cybertruck. Keep this in mind and remember that as a result, Autopark may not steer Cybertruck appropriately. Pay attention when parking Cybertruck and stay prepared to immediately take control.
Cybertruck monitors the markers on the lane you are driving in as well as the surrounding areas for the presence of vehicles or other objects.

WARNING: Ensure all cameras are clean and free of obstructions before each drive and before using Autopilot features (see Cleaning a Camera on page 28). Dirty cameras as well as environmental conditions such as rain and faded lane markings, can affect Autopilot performance. If a camera is obstructed or blinded, Cybertruck displays a message on the touchscreen and Autopilot features may not be available.

WARNING: Lane Assist features are for guidance purposes only and are not intended to replace your own direct visual checks. Before changing lanes, always use side mirrors and perform the appropriate shoulder checks to visually determine if it is safe and appropriate to change lanes.

WARNING: Never depend on Lane Assist to inform you if you unintentionally drive outside of the driving lane, or to inform you that there is a vehicle beside you or in your blind spot. Several external factors can reduce the performance of Lane Assist (see Limitations and Inaccuracies on page 145). It is the driver's responsibility to stay alert and pay attention to the driving lane and other road users. Failure to do so can result in serious injury or death.
Lane Departure Avoidance
NOTE: Depending on date of manufacture, software version, and vehicle configuration, your vehicle may not be equipped with Lane Departure Avoidance, or the feature may not operate exactly as described.
Lane Departure Avoidance is designed to warn you if Cybertruck is drifting out of, or nears the edge of, your driving lane.
Lane Departure Avoidance operates when driving between 40 and 90 mph (64 and 145 km/h) on roads with clearly visible lane markings. You can choose if and how you want Lane Departure Warning to operate by touching Controls > Autopilot > Lane Departure Avoidance and selecting between these options:
- Off: You are not warned of lane departures or potential collisions with a vehicle in an adjacent lane.
- Warning: If a front wheel passes over a lane marking, the touchscreen displays a warning. (For vehicles equipped with Full Self-Driving (Supervised): if a front wheel passes over a lane marking, the steering wheel vibrates.)
When Lane Departure Avoidance is enabled and Traffic-Aware Cruise Control is active, if Cybertruck drifts out of the driving lane when the associated turn signal is off, Lane Assist also checks to see whether your hands are on the steering wheel. If hands are not detected, the displays a series of alerts. If hands are repeatedly not detected
Cybertruck gradually slows down to 15 mph (25 km/h) below the detected speed limit, or below the set cruising speed, and the hazard lights start flashing.
NOTE: Lane Departure Avoidance does not warn you of lane departures, or provide steering interventions, if the associated turn signal is on, which indicates an intentional lane change.

WARNING: Lane Departure Avoidance is intended to help keep you safe, but it does not work in every situation and does not replace the need to remain attentive and in control.

WARNING: Keep your hands on the steering wheel and drive attentively at all times.
Blind Spot Assist
Automatic Blind Spot Camera
You can turn it on/off by touching Controls > Safety > Automatic Blind Spot Camera on the touchscreen.
Once enabled, when the turn signal is engaged, the touchscreen displays the image from the corresponding side repeater camera. You can move the image to a different location on the touchscreen. To do so, touch and drag the image to the new location (valid locations are indicated by shaded areas that display when you touch and hold the image).

WARNING: Automatic Blind Spot Camera does not eliminate the need to drive attentively and manually perform shoulder checks when changing lanes.
Blind Spot Collision Warning Chime
If you want a chime to sound when a vehicle is in your blind spot and a possible collision is detected, touch Controls > Safety > Blind Spot Collision Warning Chime.

WARNING: Blind Spot Camera does not eliminate the need to drive attentively and manually perform shoulder checks when changing lanes.

WARNING: Blind Spot Collision Warning Chime cannot detect every collision. It is the driver's responsibility to remain alert and perform the appropriate shoulder checks when changing lanes.
Blind Spot Warning Light
Both front door pillars are equipped with a blind spot warning light in the upper speaker grille. You can enable or disable the warning lights by touching Controls > Safety > Blind Spot Warning Light. When a vehicle is detected in your blind spot in an adjacent lane a red light appears in the upper speaker grille.
- A solid red light indicates a vehicle has been detected in your blind spot.
- A blinking red light indicates that a vehicle is in your blind spot while the turn signal is indicating your intent to turn that direction.
- A rapid blinking red light indicates that a vehicle is detected and immediate corrective action is required to avoid a collision.
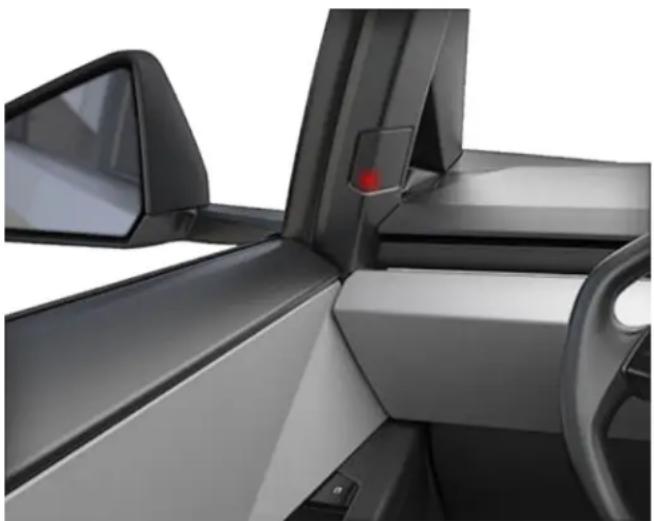
natural_image
Interior view of a modern car showing the steering wheel, dashboard, and side mirror (no text or symbols visible)
WARNING: Do not rely on Blind Spot Warning Light to detect a vehicle in your blind spot. Always visually confirm that a lane is free from obstacles and vehicles before exiting your lane.
Limitations and Inaccuracies
Lane Assist features cannot always detect lane markings and you may experience unnecessary or invalid warnings when:
- Visibility is poor and lane markings are not clearly visible (due to heavy rain, snow, fog, etc.).
- Bright light (such as from oncoming headlights or direct sunlight) is interfering with the view of the camera(s).
- A vehicle in front of Cybertruck is blocking the view of the camera(s).
- The windshield is obstructing the view of the camera(s) (fogged over, dirty, covered by a sticker, etc.).
- Lane markings are excessively worn, have visible previous markings, have been adjusted due to road construction, or are changing quickly (for example, lanes branching off, crossing over, or merging).
• The road is narrow or winding. - Objects or landscape features are casting strong shadows on lane markers.
Lane Assist may not provide warnings, or may apply inappropriate warnings, when:
- One or more of the cameras is damaged, dirty, or obstructed (by mud, ice, or snow, or by a vehicle bra, excessive paint, or adhesive products such as wraps, stickers, rubber coatings, etc.).
In addition, Lane Assist may not steer Cybertruck away from an adjacent vehicle, or may apply unnecessary or inappropriate steering, in these situations:
- You are driving Cybertruck on sharp corners or on a curve at a relatively high speed.
- Bright light (such as from oncoming headlights or direct sunlight) is interfering with the view of the camera(s).
- You are drifting into another lane but an object (such as a vehicle) is not present.
- A vehicle in another lane cuts in front of you or drifts into your driving lane.
- Cybertruck is not traveling within the speeds at which the Lane Assist feature is designed to operate.
- Weather conditions (heavy rain, snow, fog, or extremely hot or cold temperatures) are interfering with sensor operation.
- Visibility is poor and lane markings are not clearly visible (due to heavy rain, snow, fog, etc.).
- Lane markings are excessively worn, have visible previous markings, have been adjusted due to road construction or are changing quickly (for example, lanes branching off, crossing over, or merging).

CAUTION: Driver assistance features are automatically disabled when Track Mode is On. It is the driver's responsibility to drive safely and be in control of the vehicle at all times, including on track. Driver Assistance features automatically re-enable when Track Mode is turned Off.

WARNING: The lists above do not represent every possible situation that may interfere with Lane Assist features. There are many reasons why Lane Assist may not operate as intended. To avoid a collision, stay alert and always pay attention to the road so you can anticipate the need to take corrective action as early as possible.
The following collision avoidance features are designed to increase the safety of you and your passengers:
- Forward Collision Warning – provides visual and audible warnings in situations when Cybertruck detects that there is a high risk of a frontal collision (see Forward Collision Warning on page 146).
- Automatic Emergency Braking - automatically applies braking to reduce the impact of a collision (see Automatic Emergency Braking on page 146).
- Obstacle-Aware Acceleration – reduces acceleration if Cybertruck detects an object in its immediate driving path (see Obstacle-Aware Acceleration on page 147).

CAUTION: Ensure all cameras are clean and free of obstructions before each drive and before using Autopilot features (see Cleaning a Camera on page 28). Dirty cameras as well as environmental conditions such as rain and faded lane markings, can affect Autopilot performance. If a camera is obstructed or blinded, Cybertruck displays a message on the touchscreen and Autopilot features may not be available.

WARNING: Forward Collision Warning is for guidance purposes only and is not a substitute for attentive driving and sound judgment. Keep your eyes on the road when driving and never depend on Forward Collision Warning to warn you of a potential collision. Several factors can reduce or impair performance, causing either unnecessary, invalid, inaccurate, or missed warnings. Depending on Forward Collision Warning to warn you of a potential collision can result in serious injury or death.

WARNING: Automatic Emergency Braking is not designed to prevent all collisions. In certain situations, it can minimize the impact of a collision by attempting to reduce your driving speed. Depending on Automatic Emergency Braking to avoid a collision can result in serious injury or death.

WARNING: Obstacle-Aware Acceleration is not designed to prevent a collision. In certain situations, it can minimize the impact of a collision. Depending on Obstacle-Aware Acceleration to avoid a collision can result in serious injury or death.
Forward Collision Warning
Cybertruck monitors the area in front of it for the presence of an object such as a vehicle, motorcycle, bicycle, or pedestrian. If a collision is considered likely unless you take immediate corrective action, Forward Collision Warning is designed to sound a chime and highlight the vehicle in front of you in red on the touchscreen. If this happens, TAKE IMMEDIATE CORRECTIVE ACTION!
Visual and audible warnings cancel automatically when the risk of a collision has been reduced (for example, you have decelerated or stopped Cybertruck, or the object in front of your vehicle has moved out of your driving path).
If immediate action is not taken when Cybertruck issues a Forward Collision Warning, Automatic Emergency Braking (if enabled) may automatically apply the brakes if a collision is considered imminent (see).
By default, Forward Collision Warning is turned on. To turn off or adjust sensitivity, touch Controls > Autopilot > Forward Collision Warning. Instead of the default warning level of Medium, you can turn the warning Off, or you can choose to be warned Late or Early.
NOTE: Your chosen setting is retained until you manually change it.

WARNING: The camera(s) associated with Forward Collision Warning are designed to monitor an approximate area of up to 525 feet (160 meters) in your driving path. The area being monitored by Forward Collision Warning can be adversely affected by road and weather conditions. Use appropriate caution when driving.

WARNING: Forward Collision Warning is designed only to provide visual and audible alerts. It does not attempt to apply the brakes or decelerate Cybertruck. When seeing and/or hearing a warning, it is the driver's responsibility to take immediate corrective action.

WARNING: Forward Collision Warning may provide a warning in situations where the likelihood of collision may not exist. Stay alert and always pay attention to the area in front of Cybertruck so you can anticipate whether any action is required.
Forward Collision Warning operates only when driving between approximately 3 mph (5 km/h) and 124 mph (200 km/h).

WARNING: Forward Collision Warning does not provide a warning when the driver is already applying the brake.
Automatic Emergency Braking
Cybertruck is designed to determine the distance from detected objects. When a collision is considered unavoidable, Automatic Emergency Braking is designed to apply the brakes to reduce the vehicle's speed and therefore, the severity of the impact. The amount of speed that is reduced depends on many factors, including driving speed and environment.
When Automatic Emergency Braking applies the brakes, the touchscreen displays a visual warning and sounds a chime. You may also notice abrupt downward movement of the brake pedal. The brake lights turn on to alert other road users that you are slowing down.

Emergency braking in progress
Automatic Emergency Braking operates only when driving between approximately 3 mph (5 km/h) and 124 mph (200 km/h).
Automatic Emergency Braking does not apply the brakes, or stops applying the brakes, when:
- You turn the steering wheel sharply.
- You press and release the brake pedal while Automatic Emergency Braking is applying the brakes.
- You accelerate hard while Automatic Emergency Braking is applying the brakes.
- The vehicle, motorcycle, bicycle, or pedestrian is no longer detected in the front or rear of the vehicle.
Automatic Emergency Braking is always enabled when you start Cybertruck. To disable for your current drive, shift into Park and touch Controls > Autopilot > Automatic Emergency Braking. When disabled, the touchscreen displays a visual message.

Automatic Emergency Braking is disabled

WARNING: It is strongly recommended that you do not disable Automatic Emergency Braking. If you disable it, Cybertruck does not automatically apply the brakes in situations where a collision is considered likely.
NOTE: Automatic Emergency Braking is designed to reduce the impact of frontal collisions only.
NOTE: Automatic Emergency Braking is designed to reduce the impact of frontal and reverse collisions with limited functionality while in Reverse.
In the event Automatic Emergency Braking is unavailable, the touchscreen displays a visual warning.

Automatic Emergency Braking is not available

WARNING: Automatic Emergency Braking is designed to reduce the severity of an impact. It is not designed to avoid a collision.

WARNING: Several factors can affect the performance of Automatic Emergency Braking, causing either no braking or inappropriate or untimely braking, such as when a vehicle is partially in the path of travel or there is road debris. It is the driver's responsibility to drive safely and remain in control of the vehicle at all times. Never depend on Automatic Emergency Braking to avoid or reduce the impact of a collision.

WARNING: Automatic Emergency Braking is not a substitute for maintaining a safe traveling distance between you and the vehicle in front of you.

WARNING: The brake pedal moves downward abruptly during automatic braking events. Always ensure that the brake pedal can move freely. Do not place material under or on top of the driver's floor mat (including an additional mat) and always ensure that the driver's floor mat is properly secured. Failure to do so can impede the ability of the brake pedal to move freely.
Rear Cross-Traffic Alert
When Cybertruck is in Reverse and the touchscreen is displaying the rear view camera feed, a vertical red bar appears when Cybertruck detects that an object (such as another vehicle or a pedestrian) is about to cross behind Cybertruck.
For example, if you are backing out of a parking space and another vehicle is approaching from your left, a red bar appears on the left side of the camera view. If there are objects approaching from both sides of Cybertruck, red bars appear on both sides of the camera view.
If you would like a chime to sound when Rear Cross-Traffic Alert detects an object approaching, touch Controls > Safety > Rear Cross-Traffic Chime.
When Cybertruck is reversing and cross traffic is detected, Automatic Emergency Braking or Obstacle-Aware Acceleration may apply the brakes to attempt to avoid a collision. Do not rely on Automatic Emergency Braking or Obstacle-Aware Acceleration to prevent a collision. For more information, see Automatic Emergency Braking on page 146 and Obstacle-Aware Acceleration on page 147.

WARNING: Never depend on Rear Cross-Traffic Alert to inform you if the area surrounding your vehicle is free of objects and/or people. The cameras may not detect objects or barriers that can potentially cause damage or injury, especially objects very low to the ground. In addition, several external factors can reduce the performance of the cameras, including a dirty or obstructed lens. Always inspect the area with your own eyes. When reversing, perform shoulder checks and use all mirrors. Use the cameras for guidance purposes only. Rear Cross-Traffic Alert is not intended to replace your own direct visual checks and is not a substitute for careful driving.
Obstacle-Aware Acceleration
Obstacle-Aware Acceleration is designed to reduce the impact of a collision by reducing motor torque and in some cases applying the brakes, if Cybertruck detects an object in its driving path. The displays a visual warning and sounds a chime when the brakes are automatically applied. For example, Cybertruck, while parked in front of a closed garage door with Drive engaged, detects that you have pressed hard on the accelerator pedal. Although Cybertruck still accelerates and hits the garage door, the reduced torque may result in less damage.
Obstacle-Aware Acceleration is designed to operate only when all of these conditions are simultaneously met:
- Drive or Reverse is engaged.
- Cybertruck is stopped or traveling less than 10 mph (16 km/h).
- Cybertruck detects an object in its immediate driving path.
To disable Obstacle-Aware Acceleration, touch Controls > Autopilot > Obstacle-Aware Acceleration.

WARNING: Obstacle-Aware Acceleration is designed to reduce the severity of an impact. It is not designed to avoid a collision.

WARNING: Obstacle-Aware Acceleration may not limit torque in all situations, such as performing a sharp turn into a parking space. Several factors, including environmental conditions, distance from an obstacle, and a driver's actions, can limit, delay, or inhibit Obstacle-Aware Acceleration.

WARNING: Do not rely on Obstacle-Aware Acceleration to control acceleration or to avoid, or limit, the severity of a collision, and do not attempt to test Obstacle-Aware Acceleration. Doing so can result in serious property damage, injury, or death.

WARNING: Several factors can affect the performance of Obstacle-Aware Acceleration, causing an inappropriate or untimely reduction in motor torque. It is the driver's responsibility to drive safely and remain in control of Cybertruck at all times.
Limitations and Inaccuracies
Collision Avoidance features cannot always detect all objects, vehicles, bikes, or pedestrians, and you may experience unnecessary, inaccurate, invalid, or missed warnings for many reasons, particularly if:
• The road has sharp curves.
- Visibility is poor (due to heavy rain, snow, fog, etc.).
- Bright light (such as from oncoming headlights or direct sunlight) is interfering with the view of the camera(s).
- A camera is obstructed (dirty, covered, fogged over, covered by a sticker, etc.).

CAUTION: If a fault occurs with a Collision Avoidance Assist feature, Cybertruck displays an alert. Contact Tesla Service.

CAUTION: Driver assistance features are automatically disabled when Track Mode is On. It is the driver's responsibility to drive safely and be in control of the vehicle at all times, including on track. Driver Assistance features automatically re-enable when Track Mode is turned Off.

WARNING: The limitations previously described do not represent an exhaustive list of situations that may interfere with proper operation of Collision Avoidance Assist features. These features may fail to provide their intended function for many other reasons. It is the driver's responsibility to avoid collisions by staying alert, paying attention, and taking corrective action as early as possible.
How Speed Assist Works
Cybertruck displays a speed limit on the touchscreen and you can choose if and how you are warned when you exceed the speed limit. In addition, a blue outline may appear around the speed limit icon to notify that you are above the speed limit.
Instead of using the detected speed limit, you can base warnings on an arbitrary speed limit that you enter manually.
In situations where Cybertruck is unable to determine a speed limit, or if Speed Assist is uncertain that an acquired speed limit is accurate, the touchscreen may not display a speed limit sign and warnings do not take effect.
NOTE: Speed limit warnings go away after ten seconds, or when Cybertruck slows down below the specified limit.

WARNING: Do not rely on Speed Assist to determine the appropriate speed limit or driving speed. Always drive at a safe speed based on traffic and road conditions.
Controlling Speed Assist
To adjust the Speed Limit Warning setting, touch Controls > Autopilot > Speed Limit Warning, then choose one of these options:
- Off - Speed limit warnings do not display and chimes are not sounded.
- Display – Speed limit signs display on the and the sign increases in size when you exceed the determined limit.
- Chime - In addition to the visual display, a chime is sounded when you exceed the determined speed limit.
You can also specify how the speed limit is determined:
- Relative - You can set a speed limit offset (+ or -) if you want to be alerted only when you exceed the offset speed limit by a specified amount. For example, you can increase the offset to +10 mph (10 km/h) if you only want to be warned when you exceed the speed limit by 10 mph (10 km/h).
- Absolute - Manually specify any speed limit between 20 and 140mph (30 and 240km / h ).
NOTE: Speed Assist is not always accurate. In some situations, the location of a road can be miscalculated and Speed Assist can display a speed for a directly adjacent road that may have a different speed limit. For example, Speed Assist can assume Cybertruck is on a controlled-access highway when it is actually on a nearby surface street, and vice versa.
NOTE: Your chosen setting is retained until you manually change it.
Limitations and Inaccuracies
Speed Assist may not be fully functional or may provide inaccurate information in these situations:
- Visibility is poor and speed limit signs are not clearly visible (due to heavy rain, snow, fog, etc.).
- Bright light (such as from oncoming headlights or direct sunlight) is interfering with the view of the camera(s).
- Cybertruck is being driven very close to a vehicle in front of it which is blocking the view of the camera(s).
- The windshield is obstructing the view of the camera(s) (fogged over, dirty, covered by a sticker, etc.).
- Speed limit signs are concealed by objects.
- The speed limits stored in the map database are incorrect or outdated.
- Cybertruck is being driven in an area where GPS or map data is not available or where speed limit signs can not be detected.
- Traffic signs that do not conform to standard recognizable formats, such as digital or temporary speed signs.
- A road or a speed limit has recently changed.

WARNING: The list above does not represent an exhaustive list of situations that may interfere with proper operation of Speed Assist. Speed Assist may fail to provide warnings for many other reasons.
NOTE: Depending on market region, delivery year, and software version, your vehicle may not be equipped with cabin radar or the features may not operate exactly as described.
Your Cybertruck is equipped with a cabin radar located above the front row dome lights.
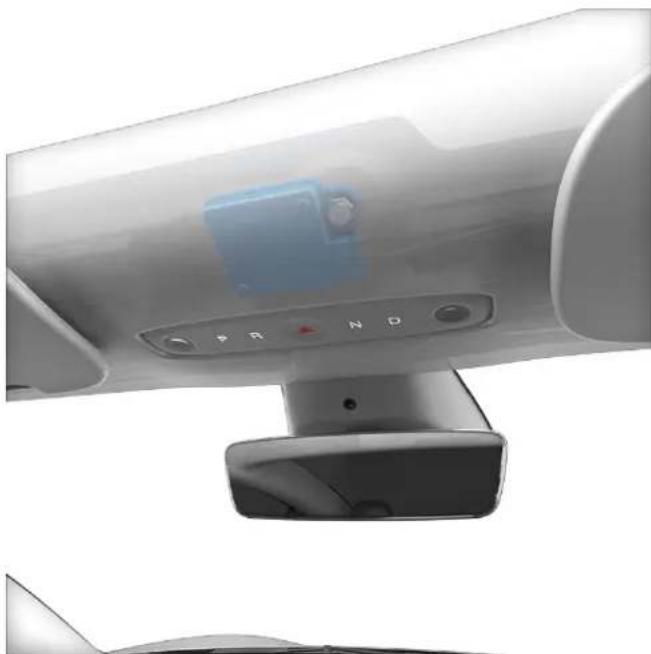
natural_image
Close-up of a modern office interior with a digital display and mirror (no visible text or symbols)Cabin radar can detect the presence of people inside the vehicle and use the measurements to determine occupancy. Cabin radar supports certain vehicle and safety features, including driver detection, seat occupancy, and parking brake engagement.

WARNING: DO NOT BLOCK OR OBSTRUCT THE DEVICE. Obstructions and after-market add-ons such as sunglass holders can cause inaccurate readings for critical safety features used for driver detection.
NOTE: Cabin radar cannot perform any identity verification and therefore does not transmit or retain any personally identifiable information.
About the Security System
The vehicle security system activates when Cybertruck does not detect an authenticated phone or key and:
- A locked door is opened
• The locked tailgate is opened
• The powered front trunk is opened
When your vehicle detects this, the siren sounds, headlights and turn signals flash, and you receive a notification on your mobile app that the security alarm is triggered. To deactivate the alarm, press any button on the mobile app or tap your key card against the card reader located on the driver's side door pillar.
To enable the alarm system, touch Controls > Safety > Security Alarm. When enabled, Cybertruck activates its alarm under these conditions:
• One minute after you exit.
• The doors are locked.
- A recognized key is no longer detected.
The tailgate does not need to be closed for Cybertruck to activate the alarm.
Sentry Mode and the vehicle alarm system are two separate things: the alarm system works similar to other vehicles (a siren sounds when a locked door is opened), whereas Sentry Mode uses cameras and audio to detect suspicious activity nearby (see Sentry Mode on page 155 for more information). If Cybertruck is in Sentry Mode, the Security Alarm setting is not available.
Parental Controls
Parental controls enable you to limit the capabilities of Cybertruck and ensure that safety settings are enabled and cannot be changed.
NOTE: You can also access parental controls from the Tesla mobile app (version 4.34.5 or higher required).
NOTE: You cannot enable parental controls if Speed Limit Mode is enabled.
When you enable Require Safety Features, Cybertruck enables or configures these vehicle settings:
NOTE: Depending on market region, vehicle configuration, options purchased, and software version, your vehicle may not be equipped with the listed features.
• Automatic Emergency Braking
- Obstacle-Aware Acceleration
• Automatic Blind Spot Camera
- Blind Spot Collision Warning Chime
• Automatic 911 Call
- Allow Mobile Access
• Lane Departure Avoidance: Set to Assist.
• Speed Limit Warning: Set to Chime. - Speed Limit: Set to Relative.
- Offset: Set to +5 mph (8 km/h).
- Forward Collision Warning: Set to Early.
If you want to enable parental controls:
- With your vehicle in Park, touch Controls > Safety > Parental Controls on the touchscreen.
- Enable or configure the parental controls you want to use:
- Limit Speed: Caps the speed at which Cybertruck can drive.
- Reduce Acceleration: Limits the vehicle Acceleration to Chill.
- Require Safety Features: Enables various safety features in the vehicle (if equipped). Drivers cannot change these settings while parental controls are active.
-
Send Curfew Notifications: Turns on curfew notifications from 11 PM to 4 AM. When someone shifts the vehicle to Drive after the start of curfew, a notification is sent through the Tesla mobile app to all phone keys paired with the vehicle, notifying users that Cybertruck is in use.
-
Touch Confirm.
-
Enter a PIN.
If you want to disable parental controls:
- While the vehicle is in park, touch Controls > Safety on the touchscreen.
- Navigate to Parental Controls.
- Touch Off.
- Re-enter the PIN you created when enabling parental controls.
NOTE: If you forget your Parental Controls PIN or wish to change it, touch the Enter your Tesla Account credentials link on your vehicle touchscreen and then follow the instructions. You cannot disable parental controls from your mobile device.
PIN to Drive
For an added layer of security, prevent Cybertruck from being driven until a 4-digit PIN (Personal Identification Number) is entered. To enable this setting, touch Controls > Safety > PIN to Drive and follow the on-screen prompts to create a driving PIN.
When enabled, in addition to entering the 4-digit driving PIN to drive, you must also use it to enter Valet mode for the first time and create the 4-digit valet PIN to enter and exit Valet mode. In Valet mode, Cybertruck can be driven without the need for the valet to enter a driving PIN. The PIN to Drive setting is disabled whenever Valet mode is active.
If you forget your driving PIN, touch the link to enter your Tesla login credentials on the PIN to Drive popup, then follow the instructions on the touchscreen.
NOTE: In the unlikely event that your touchscreen is unresponsive, you may be unable to enter the PIN. In this case, first try to restart the touchscreen (see Restarting the Touchscreen on page 10). If the touchscreen is still unresponsive, you can still bypass PIN to Drive by turning on Keyless Driving in the Tesla mobile app.
Glovebox PIN
Protect the contents in your glovebox with a 4-digit PIN (not related to PIN to Drive). To enable, touch Controls > Safety > Glovebox PIN and follow the directions on the touchscreen. When enabled, you are prompted to enter the PIN to open the glovebox. Select the toggle to disable and then enter the PIN to remove this added security protection.
If you forget your glovebox PIN, reset it by entering your Tesla login credentials, then follow the directions on the touchscreen.
NOTE: Using a Glovebox PIN allows the glovebox to be opened even when Cybertruck is in Valet mode.
Speed Limit Mode
Speed Limit Mode allows you to limit acceleration and maximum driving speed to a chosen value between 50 and 120 mph (80 and 193 km/h). The first time you use this feature, you must create a 4-digit PIN that you must use to enable and disable Speed Limit Mode. When enabled and the driving speed approaches within approximately 3 mph (5 km/h) of the maximum speed, a chime sounds, the touchscreen displays a message, and Cybertruck sends a notification to the mobile app. You can also touch Security > Speed Limit Mode to enable from the Tesla mobile app. To enable Speed Limit Mode:
- Ensure Cybertruck is in Park.
- Touch Controls > Safety > Speed Limit Mode on the touchscreen.
- Select the maximum driving speed.
- Drag the slider to the On position.
- Enter the 4-digit PIN that you want to use to enable and disable Speed Limit Mode.
NOTE: If you forget the PIN, you can disable Speed Limit Mode by entering login credentials for your Tesla account.
NOTE: While Speed Limit Mode is enabled, the acceleration setting automatically sets to Chill.
WARNING: Driving downhill can increase driving speed and cause Cybertruck to exceed your chosen maximum speed.
WARNING: Speed Limit Mode is not a replacement for good judgment, driver training, and the need to closely monitor speed limits and driving conditions. Accidents occur at any speed and it is your responsibility to drive safely.
Trailer Alarm

When enabled, Cybertruck sounds an alarm if the vehicle detects the trailer is being unplugged while Trailer Mode is active and the vehicle is locked.
Clear Browser Data
You can clear your vehicle's browser data (like you would on a computer or smartphone) by navigating to Controls > Service > Clear Browser Data. This is useful for many situations, such as erasing settings or searches from another driver.
Check the boxes on the touchscreen popup to exclude bookmarks and/or history for your convenience.
NOTE: Depending on market region, vehicle configuration, options purchased, and software version, your vehicle may not be equipped with Dashcam or the features may not operate exactly as described. It is your sole responsibility to consult and comply with all local regulations and property restrictions regarding the use of cameras.
Dashcam records video footage of your vehicle's surroundings while driving. Use Dashcam to record driving incidents or other notable events, like you would for an external dashcam on other vehicles.
The Dashcam icon is located in the app launcher. You can add the Dashcam app to the bottom bar for easy access (see Customizing My Apps on page 12). When Cybertruck is in Park, touching the Dashcam icon displays the Viewer (see Viewing Video Recordings on page 157).

To protect your privacy, video recordings are saved locally to a formatted USB flash drive's onboard memory. Recordings are not sent to Tesla. Cybertruck does not record videos when Dashcam is Off.
How to Use Dashcam
-
Format a USB flash drive. Dashcam requires a properly formatted USB drive inserted in your vehicle's USB port to store and retrieve footage. There are two ways to format the flash drive if needed:
-
Format the flash drive with Cybertruck. Insert the flash drive into the USB port and navigate to Controls > Safety > Format USB Drive.
Format the flash drive on a computer. See USB Drive Requirements for Recording Videos on page 157 for more information. -
Insert the USB flash drive into your vehicle's USB port, preferably the one in the glovebox.
-
Enable Dashcam by touching Controls > Safety > Dashcam. Dashcam allows you to choose how and when footage is saved. You can choose between:
Auto: Dashcam automatically saves a recording to the USB drive when Cybertruck detects a safety-critical event, such as a collision or airbag deployment. When Auto is selected, detection can vary and is subject to your vehicle's power, sleep, and Autopilot state.
NOTE: Several factors determine whether Dashcam automatically saves a recording of a safety-critical event (for example, amount of force, whether or not airbags deploy, etc.). Do not rely on Dashcam to automatically record all safety-critical events.
- Manual: You must manually touch the Dashcam icon to save a recording of the most recent ten minutes of footage.
On Honk: When you press the horn, Dashcam saves a recording of the most recent ten minutes of footage. You can enable this along with Auto or Manual simultaneously.
- Once enabled, the Dashcam icon indicates when footage is saved. You can also view the status of the Dashcam icon in Controls.

The icon changes to show the status of Dashcam:

RECORDING: Dashcam is recording. To save video footage, touch the icon. To pause recording, press and hold the icon.

AVAILABLE: Dashcam Is available but not actively recording. Touch the dashcam icon to start recording footage.

PAUSED: Dashcam is on, but not currently recording or saving anything. This may happen while the viewer is launched, for example.

BUSY: Dashcam is in the process of loading, saving, or overwriting footage. While dashcam is busy, footage is not being captured and recorded.

SAVED: Footage is saved. You can also save Dashcam clips by touching the Dashcam icon in the app launcher while Driving.
-
When your desired footage is saved, view the clips on the touchscreen or a computer:
-
Touchscreen: Ensure Cybertruck is in Park and touch the Dashcam icon in the app launcher. Videos are organized by timestamp. See Viewing Video Recordings on page 157 for more information.
Computer: Insert the USB flash drive into a computer and navigate to the TeslaCam folder. Videos are organized by timestamp. See Viewing Video Recordings on page 157 for more information. -
Alternatively, you can view and share footage from the mobile app by navigating to Security > Dashcam Viewer (View Live Camera from Mobile App must be enabled on the touchscreen).
NOTE: Requires Premium Connectivity and mobile app version 4.39.5 or newer. Only available on iOS.
- To turn Dashcam off, navigate to Controls > Safety > Dashcam > Off. If set to Auto, Manual, or On Honk, Dashcam automatically enables (but may not be actively saving footage, depending on your preferences) every time you drive.
NOTE: Depending on market region, vehicle configuration, options purchased, and software version, your vehicle may not be equipped with Sentry Mode or the features may not operate exactly as described. It is your sole responsibility to consult and comply with all local regulations and property restrictions regarding the use of cameras.
When enabled, your vehicle's cameras remain powered on and ready to record suspicious activity around your vehicle when Cybertruck is locked and in Park. Think of Sentry Mode as an intelligent vehicle security system that alerts you when it detects possible threats nearby.
If a threat is detected or the vehicle sensors determine there is a lot of jerky movement like when getting towed or shaken, Sentry Mode:
- Pulses the headlights.
- Sounds the alarm.
- Displays a message on the touchscreen that indicates cameras may be recording to inform individuals outside of the vehicles.
- Alerts you of the alarm on the mobile app.
- Saves footage of the event to a USB drive (if installed).
Sentry Mode is disabled by default. You can use voice commands or the Tesla mobile app to easily enable or disable Sentry Mode. To enable Sentry Mode using voice commands, say "Keep Tesla safe," "Keep my car safe," "Sentry on," or "Enable Sentry" (see Voice Commands on page 25).
Sentry Mode requires your Battery to be at least 20% charged. If the Battery falls below 20%, Sentry Mode turns off and the mobile app sends you a notification. Power consumption may increase when Sentry Mode is active.
NOTE: When Sentry Mode is enabled, the Security Alarm settings (Controls > Safety > Security Alarm) are not available.

CAUTION: Do not rely on Sentry Mode to protect Cybertruck from all possible security threats. Sentry Mode uses many factors to determine whether to activate the security alarm. All impacts may not be detected and the alarm may not activate in all situations. While it may help deter some threats, no security system can prevent all attacks.
NOTE: Sentry Mode only sends notifications to the mobile app when the alarm is triggered, when someone attempts to open a door or trunk, or sudden jerky motions are detected by the vehicle. If Sentry Mode doesn't consider an event a clear threat, the vehicle records footage but doesn't trigger the alarm.
How to Use Sentry Mode (With a USB Flash Drive)
- Sentry Mode requires a properly formatted USB drive inserted in your vehicle's USB port. There are two ways to format the USB drive:
Insert the USB drive into the USB port and navigate to Controls > Format USB Drive. Your vehicle automatically formats the USB drive for you.
- Format the USB drive on a computer. See USB Drive Requirements for Recording Videos on page 157 for more information.
- Insert the USB drive into the vehicle's USB port, preferable the one in the glove box.
- With your vehicle in Park, enable Dashcam by navigating to Controls > Safety > Dashcam (Dashcam must be enabled for Sentry Mode to work).
- Touch Controls > Sentry Mode > On. Once enabled, the Sentry Mode icon turns red.

When enabled, Sentry Mode is idle, ready to sound the alarm and save a recording of the security event if triggered. See Viewing Video Recordings on page 157 for information on viewing footage.
- To silence the security alarm and audio system when the alarm is triggered, navigate to Controls > Safety > Disable Sentry Sounds. When enabled, Sentry Mode still sends a notification through the mobile app and saves the last 10 minutes footage.
- To manually enable/disable Sentry Mode until the next drive, touch the Sentry Mode icon. Sentry Mode is Off when the icon is no longer red.

Turn Sentry Mode Off in Controls > Safety > Sentry Mode to disable for more than one drive cycle.
How to Use Sentry Mode (Without a USB Flash Drive)
When Sentry mode is enabled and a security event is detected but without a USB drive plugged into a USB port, your vehicle alerts you through the mobile app, without any camera recordings.
Sentry Mode Settings
- Exclude specific locations
In Controls > Safety > Sentry Mode, you can determine if you want Sentry Mode to not enable in certain locations (see Home, Work, and Favorite Destinations on page 169 for more information):
Exclude Home: Sentry Mode does not automatically enable at the location set as Home in your Favorites list.
Exclude Work: Sentry Mode does not automatically enable at the location set as Work in your Favorites list.
Exclude Favorites: Sentry Mode does not automatically enable at any location in your Favorites list.
NOTE: To recognize a location listed as Home, Work, or a Favorite, Cybertruck must be parked within approximately 1,640 feet (500 meters) of the saved location.
To set up your Home or Work location, touch Navigate > Set Home/Set Work. To set up a Favorite, touch the star when viewing an address on the map. Manually turning Sentry Mode on or off using the touchscreen or the mobile app overrides your Home, Work, or Favorite exclusion preferences until your next drive.
- Set Camera-Based Detection
When Camera-Based Detection is enabled, Sentry Mode uses the vehicle's external cameras in addition to vehicle sensors to detect a security event while parked. If disabled, your vehicle only saves clips to the USB drive if a physical threat is detected. To adjust, touch Controls > Safety > Sentry Mode > Camera-Based Detection.
• View Live Camera
NOTE: View Live Camera requires the Tesla mobile app installed on a phone that has been paired as a key to Cybertruck.
When Sentry Mode is enabled, use the mobile app to remotely view the area surrounding Cybertruck as seen through the exterior cameras. To enable, touch Controls > Safety > Sentry Mode > View Live Camera via Mobile App on the touchscreen to see what Sentry Mode records in real-time. Ensure there are no occupants in the vehicle and all doors are locked. Then, on the mobile app, navigate to Safety > Sentry Mode > View Live Camera.
When View Live Camera is actively in use, Cybertruck periodically flashes its exterior lights and displays a message on the touchscreen to notify others that the area surrounding the vehicle is being viewed through the cameras.
View Live Camera is limited to approximately one hour (or 15 minutes for some regions) of cumulative usage per day.
If Cybertruck is equipped with a pedestrian warning speaker (see Pedestrian Warning System on page 102), you can press and hold the microphone button on the mobile app to transmit your voice through this speaker.
You can also enable Dog Mode at the same time and switch the live camera view to see through the interior camera on the mobile app. See Keep Climate On, Dog, and Camp on page 161 for more information.
NOTE: If Dog and Sentry are enabled at the same time, Sentry defaults to Disable Sentry Sounds to protect your pet if the alarm sounds while they are in your vehicle.
NOTE: Video quality can vary depending on network connectivity. No audio is captured.
NOTE: The live camera feed is fully encrypted and cannot be accessed by Tesla.
See Viewing Video Recordings on page 157 for more information on viewing Sentry Mode footage.
NOTE: When the internal storage reaches full capacity, new recordings overwrite the older recordings.
Some features require you to use a USB drive (for example, Dashcam, Sentry Mode) that meet these requirements:
- Minimum storage capacity of 64 GB. Use a USB drive with as much available storage as possible. Video footage can occupy a large amount of space.
- A sustained write speed of at least 4 MB/s. Note that sustained write speed differs from peak write speed.
- USB 2.0 compatible. If using a USB 3.0 drive, it must also support USB 2.0.
- Properly formatted (either automatically or manually on page 157).
NOTE: In some market regions you can purchase recommended USB drives on http://www.tesla.com.
Automatically Formatting a USB Drive
Insert the USB drive into a front USB port that supports the ability to format, save, and view video footage (see Interior Electronics on page 20). Then, touch Controls > Safety >
Format USB Drive. This automatically formats the USB drive as exFAT and creates folders for TeslaCam. The USB drive is now ready to record and save video footage.
Format USB Drive is available only when a USB drive (with one or fewer partitions) is inserted into a front USB port.
Choosing Format USB Drive erases any existing content on the USB drive. Before using this feature, move any content you want to keep to a different device.
Manually Formatting a USB Drive
If Cybertruck is unable to format the USB drive, format it using a computer:
- Format the USB drive as exFAT, MS-DOS FAT (for Mac), ext3, or ext4 (NTFS is currently not supported).
- Create a base-level folder titled TeslaCam. You can use one USB drive for Dashcam, Sentry Mode, and audio files, but you must create separate partitions or folders on the exFAT USB drive.
- Once formatted, insert the USB drive into the glovebox USB port (if equipped), otherwise use a front USB port in the center console. Do not use a rear USB port because they can only charge devices. It may take a few seconds for Cybertruck to recognize the USB drive.
- Once recognized, ensure icons for Dashcam and Sentry Mode are available when you touch Controls. Cybertruck is now ready to record videos.
NOTE: You may need to first enable Sentry Mode (if equipped) by touching Controls > Sentry.
Viewing Video Recordings
If footage is saved, you can view the clips on the touchscreen or a computer.
When the USB drive runs out of storage space, video footage can no longer be saved. To prevent the USB drive from getting full, regularly move saved videos to another device and delete them from the USB drive.
When enabled, Dashcam and Sentry Mode records footage in cycles. Footage is continuously overwritten unless you save it. You must save your desired footage to view it, otherwise the footage is erased and overwritten. See Sentry Mode on page 155 and Dashcam on page 153 for information on saving footage. Four videos are recorded for each saved clip, one from each camera (front, rear, left, and right).
Viewing on the Touchscreen
You can view recorded footage on the touchscreen when Cybertruck is in Park. Touch the Dashcam icon located in the app launcher. The tabs display a list of all video clips, organized by location and timestamp. Pause, rewind, fast forward, and delete clips as needed. Swipe to the right or press and hold to quickly delete certain clips.
Navigate to Controls > Safety > Delete Dashcam Clips to delete all Dashcam and Sentry Mode footage.
NOTE: Dashcam recording pauses when you launch the Viewer.
Viewing on a Computer
Insert the USB drive into a computer and navigate to the TeslaCam folder.
The TeslaCam folder contains these sub-folders:
- RecentClips: Contains up to 60 minutes of recorded content.
- SavedClips: Contains all recordings that are saved and renamed from the RecentClips folder.
- SentryClips: Contains recordings from all Sentry Mode security events. If storage space on the USB drive becomes limited, the oldest Sentry Clips are deleted to provide space for new ones. Once deleted, you cannot retrieve them.
Overview of Climate Controls
Climate controls are available at the bottom of the touchscreen. By default, climate control is set to Auto, which maintains optimum comfort in all but the most severe weather conditions. When you adjust the cabin temperature while in Auto, the system automatically adjusts the heating, air conditioning, air distribution, and fan speed to maintain the cabin at your selected temperature.
Touch the displayed temperature at the bottom of the touchscreen to access the main climate controls screen, where you can adjust your climate preferences. You can return to Auto at any time by touchingAuto. Touch the power button on the main climate controls screen to toggle on or off. For quick access to common controls, touch the temperature at the bottom of the screen to display the climate popup.
The touchscreen may display Warming Up or Cooling Down while getting to your preferred temperature. You may hear the fan speed increase or decrease during this time.
NOTE: The climate control system is powered by the high voltage Battery. Therefore, prolonged use decreases driving range.

WARNING: To avoid burns resulting from prolonged use, individuals who have peripheral neuropathy, or whose capacity to feel pain is limited because of diabetes, age, neurological injury, or some other condition, should exercise caution when using the climate control system and seat heaters.
Adjusting Climate Control Settings
Easily adjust your climate preferences, such as turning on the seat heater or changing the cabin temperature, hands-free by using voice commands (see Voice Commands on page 25). You can use the climate controls to customize temperature and fan, defrost windows, heat seats, and more.
NOTE: For one-touch access to seat heaters and defrosters, you can add these controls to My Apps. See Customizing My Apps on page 12.
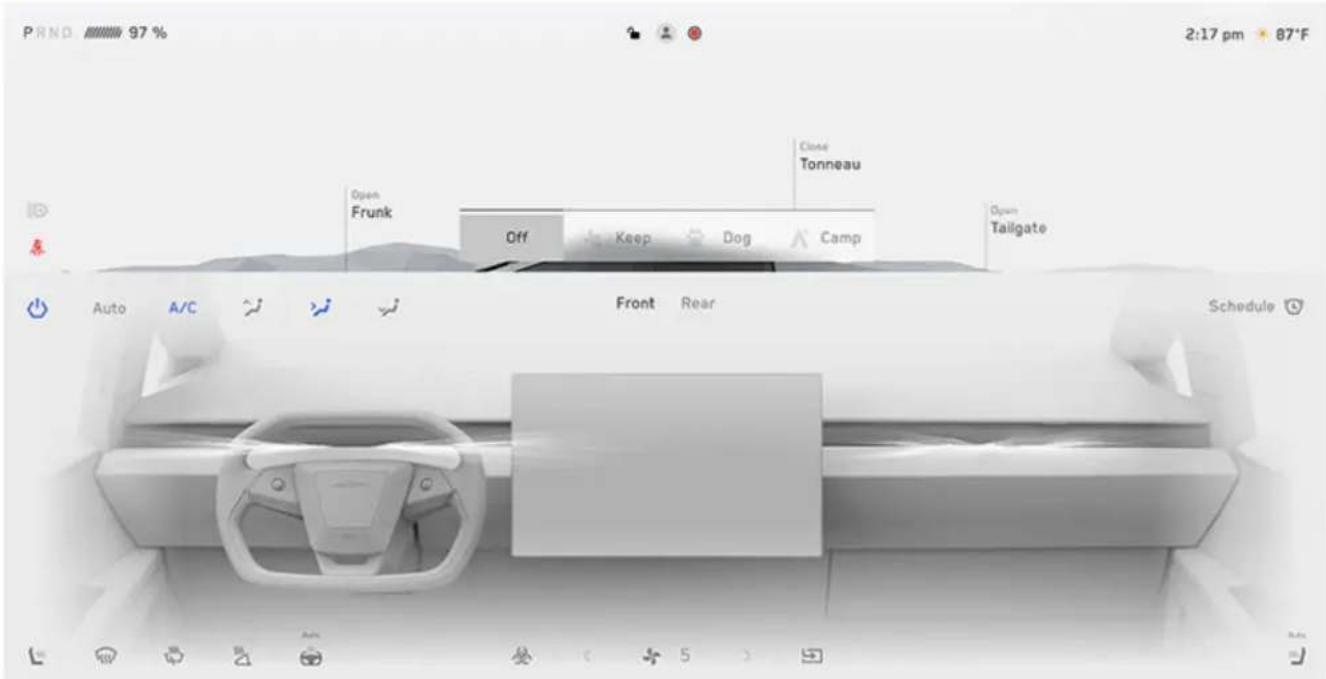

Turn the climate control system on or off. Turning it off reduces cooling, but saves energy. When the climate control system is operating, the front passenger vent can be turned off independently of the driver's vent. For more information, see Adjusting the Front and Rear Vents on page 163.
| NOTE: Because Cybertruck runs much quieter than a gasoline-powered vehicle, you may notice the sound of the air conditioning compressor as it is operating. To minimize noise, reduce the fan speed. | |||
 |  | Control the flow of air inside the cabin. Air can be drawn into Cybertruck from outside or air can be recirculated inside the cabin. | |
 | Adjust the fan speed using the slider. When inAuto, the fan speed levels change to Low/Medium/High.NOTE: Adjusting the fan speed may change the selected setting for how air is drawn into Cybertruck in order to increase or reduce air flow. | ||
| AUTO | Adjust climate settings for the front and rear cabin. IfAutois enabled and a passenger is detected, the set temperature is maintained for the rear cabin.NOTE: WhenReduce Fan Speed During Callsis enabled andAutois selected, the fan speed automatically lowers to reduce the sound of ambient noise while on a call. For more information, seeBluetooth on page 70. | ||
 | Choose where air flows into the front cabin (windshield, face-level, or foot-level vents). You can choose one or more vents. | ||
 | Touch the driver's, or passenger's, side seat icon to adjust seat heaters for the driver. The seat operates at three levels from 3 (highest) to 1 (lowest). The seat icon displays twisting lines that turn red (heating) or blue (cooling) corresponding with the set level.Auto, which displays when the climate control system is set toAuto, warms or cools the front seats based on cabin temperature. For one-touch access to seat heaters, you can add them to the touchscreen's bottom bar (seeCustomizing My Apps on page 12). | ||
 | Adjust the heated steering wheel. The icon displays red twisting lines that correspond to the set level. If set toAuto, the steering wheel is heated as needed, based on cabin temperature, whenever the climate control system is set toAuto. For one-touch access, you can add this control to the touchscreen's bottom bar (seeCustomizing My Apps on page 12). | ||
 | Turn on the wiper defroster. | ||
 |  |  | When in Park, Keep Climate On, Dog, and Camp allow you to keep the climate control system operating, even when you leave Cybertruck (seeKeep Climate On, Dog, and Camp on page 161). |
| FRONT REAR | Customize the front or rear climate settings | ||
 | When in Park, touchScheduleto set a recurring daily time when you want Cybertruck to be ready to drive by preconditioning the Battery and cabin climate and/or charging during off-peak hours (seeScheduled Precondition and Charge on page 185). | ||
 | The HEPA filter ensures the best quality air inside the cabin whenever the climate control system is on and outside air is entering the cabin (recirculate is off). The HEPA filter is extremely effective at removing particles, including pollution, allergens, bacteria, pollen, mold spores, and viruses. When you engage Bioweapon Defense Mode, the positive pressure inside the cabin minimizes the amount of outside air that can enter the vehicle.NOTE: Some gases, such as carbon monoxide, are not effectively removed by activated carbon. | ||
 | Warm up the side mirrors and the charge port. | ||
 | Defog or Defrost the windshield. Touch once to defog the windshield (the icon turns blue). Touch a second time to defrost the windshield. Touch a third time to turn off and restore the air distribution, heating, and fan to their previous settings. In low ambient temperatures, the exterior side mirrors are also heated whenever the windshield defroster is operating. See Cold Weather Best Practices on page 164 for more information on preparing for cold weather. | ||
Climate Popup
Touch the temperature arrows on the bottom of the touchscreen to display a popup for easy access to some of the most common climate controls:
NOTE: For one-touch access to seat heaters and defrosters, you can add these controls to My Apps. See Customizing My Apps on page 12.
- Touch to access the main climate controls screen.
- Enable or disable heated or cooled seats (if equipped).
- Enable or disable the front or rear windshield defrosters.
- Modify the cabin temperature by dragging the slider. You can also enable temperature splitting which allows the driver and front passenger to customize their own climate preferences. The front passenger can touch the temperature icon on the bottom of the touchscreen or the main climate controls screen to adjust. Touch Split again to disable climate splitting.
Keep Climate On, Dog, and Camp
These settings allow you to keep the climate control system running when in Park, whether you stay inside of, or leave, your vehicle. These settings are useful when it is important to maintain the cabin temperature in hot or cold weather conditions.
Keep Climate On: Maintains the climate control system on at a desire temperature. For example, when leaving groceries in Cybertruck on hot days, you may want to use Keep Climate On to pre-condition the cabin to maintain a particular temperature.
Dog: Keeps the cabin at a comfortable temperature for your pet while you actively and frequently monitor this temperature using the mobile app (which requires both your phone and the vehicle to have cellular connectivity plenty of battery). When in Dog, the touchscreen displays the current cabin temperature to inform people passing by that your pet is safe. This setting is not intended for people, and should only be used for short periods of time while you stay in close proximity should you need to return to the vehicle in situations where the temperature can no longer be maintained.
NOTE: To avoid accidentally pressing the window switch (such as your dog stepping on it), the windows cannot be rolled down while Dog is enabled.
NOTE: If Dog and Sentry are enabled at the same time, Sentry defaults to Disable Sentry Sounds to protect your pet. The cabin camera shows the inside of the vehicle so you can check on your pet at any time. See Sentry Mode on page 155 for more information.
Camp: Allows you to power electronics through the USB ports and low voltage outlets and maintain the cabin temperature. The touchscreen remains on so you can play music, browse the internet, play games, or watch shows in Tesla Theater. You can also control media and climate
settings from a paired phone. Camp is ideal for remaining inside your vehicle, such as camping or staying with a child. While active, Sentry Mode and the vehicle alarm system are disabled. Walk-Away Door Lock is inactive.
To operate Keep Climate On, Dog, or Camp:
- Make sure the Battery's charge level is at least 20%.
- Engage Park. These settings are available only when Cybertruck is in Park.
- Adjust the climate settings.
- On the climate controls screen, touch Keep Climate On, Dog, or Camp.
NOTE: You can also control Dog and Camp from the mobile app by swiping up from the gray bar on the Climate screen.
The climate control system attempts to maintain your climate settings until you shift out of Park or manually turn it off. Avoid using these features when the Battery's charge level is low or on extremely hot days.
Dog cannot be enabled if the cabin temperature is too hot, or if the vehicle detects an issue with the climate control system. Ensure that the cabin temperature is at a safe and comfortable level before enabling Dog.
If Keep Climate On, Dog, or Camp are on, the Tesla mobile app attempts to repeatedly send notifications reminding you to check on anything that you have left in Cybertruck if:
• The Battery's charge level drops below 20%.
- The vehicle detects an issue with the climate control system.
- The cabin temperature changes significantly from the level initially set for Dog.
NOTE: Software updates cannot be performed when Keep Climate On, Dog, or Camp is active.
WARNING: Never leave a child unattended in your vehicle.
WARNING: Check local laws for any restrictions on leaving pets unattended in your vehicle.
WARNING: You are responsible for the safety of your dog or pet. Never leave them in Cybertruck for long periods of time. Constantly monitor the vehicle temperature and their well-being. Make sure you have sufficient cellular coverage on your phone and time to return to the vehicle, if necessary.
WARNING: In the unlikely event that your climate control system needs service or is not working as expected, avoid using Keep Climate On, Dog, and Camp. Never rely on your vehicle to protect something irreplaceable.

WARNING: You can adjust and monitor the climate control system remotely using the mobile app. However, if you use the mobile app to turn off the climate control system, Keep Climate On, Dog, and Camp stop operating.
Cabin Overheat Protection
Cabin Overheat Protection prevents the cabin from getting too hot in scorching ambient conditions. While not necessary to activate whenever you leave Cybertruck, the climate control system can reduce and maintain the temperature of your vehicle's cabin. This can prevent the cabin from getting too hot after leaving it parked in the sun, making the vehicle more comfortable when you return. Cabin Overheat Protection may take up to 15 minutes to enable once you exit the vehicle. This feature is intended for passenger comfort and has no impact on the reliability of your vehicle's components.
To turn on, touch Controls > Safety > Cabin Overheat Protection and choose:
- On: The air conditioning operates when the cabin temperature exceeds 105^ (40°C), or the selected temperature on the touchscreen or mobile app. Customizing temperatures may require the most recent version of the mobile app.
- Off: Disables Cabin Overheat Protection.
You can also enable Cabin Overheat Protection remotely through the mobile app by touching Climate. Swipe up on the bottom menu and select a setting under Cabin Overheat Protection (see Mobile App on page 66).
Cabin Overheat Protection operates until 12 hours has elapsed once you exit Cybertruck, or until the Battery energy drops below 20%, whichever comes first. Using Cabin Overheat Protection requires energy from the Battery, which may decrease range.

WARNING: Due to automatic shut-off, extreme outside conditions, or other potential inability to maintain the selected temperature, the inside of the vehicle can become dangerously hot, even when Cabin Overheat Protection is enabled. If you experience temperatures exceeding the selected temperature repeatedly, contact Tesla service.

WARNING: Never leave children or pets in the vehicle unattended. Due to automatic shut-off or extreme outside conditions, the inside of the vehicle can become dangerously hot, even when Cabin Overheat Protection is enabled.
Climate Control Operating Tips
Normal behavior:
- When you use the mobile app to turn on the climate control system, it automatically turns off when the charge level drops to 20%, or if two hours has passed. To cool or heat the cabin for a longer period of time, charge the vehicle and re-enable your climate control preference through the mobile app.
- To reduce the temperature in the cabin in hot weather conditions, the fan may turn on to vent the cabin when the vehicle is parked. This occurs only if the Battery's charge level is above 20%.
- In addition to cooling the interior, the air conditioning compressor also cools the Battery. Therefore, in hot weather, the air conditioning compressor can turn on even if you turned it off. This is normal because the system's priority is to cool the Battery to ensure it stays within an optimum temperature range to support longevity and optimum performance.
- Even when not in use, you may hear Cybertruck emit a whining noise or the sound of water circulating. These sounds are normal and occur when the internal cooling systems turn on to support various vehicle functions, such as maintaining the low voltage battery and balancing the temperature of the high voltage Battery.
- In very humid conditions, it is normal for the windshield to fog slightly when you first turn on the air conditioning.
- It is normal for a small pool of water to form under Cybertruck when parked. Extra water produced by the dehumidifying process is drained underneath.
Tips:
- If the climate control system is louder than you prefer, manually reduce the fan speed.
- Improve the efficiency of the cabin heating or cooling by reducing your rate of acceleration. This allows the heat pump system to take more heat from the Battery to efficiently heat the cabin, instead of maintaining the Battery's ability to provide peak acceleration performance. Note that when subsequently increasing the acceleration mode, the Battery requires time to warm up before the increased level of acceleration is available.
- To ensure the climate control system operates efficiently, close all windows and ensure that the exterior grille in front of the windshield is free of ice, snow, leaves, and other debris.
- Your charge port latch may freeze in extremely cold weather or icy conditions. In cases where you cannot remove or insert the charge cable, or your vehicle is not Supercharging due to the latch being frozen in place, enable Defrost Truck in the mobile app. This helps thaw ice on the charge port latch so the charge cable can be removed or inserted. See Cold Weather Best Practices on page 164 for more information.
Cybertruck has a unique horizontal face-level vent that spans the width of the dashboard. It also has vents at the top and bottom of the rear console.
NOTE: Outside air is drawn into Cybertruck through the grill in front of the windshield. Keep the grill clear of obstructions, such as leaves and snow.
Using the front and rear touchscreens, you can pinpoint exactly where you want to direct the air flowing from this vent when heating or cooling the cabin. When the face-level vent is on you can adjust the direction of the air flow from each vent. To adjust the direction of the air flow, touch the radiating air waves from the corresponding vent on the touchscreen. The air flows in a single stream when centered or splits into mirrored air streams when air is directed outward or inward from the center of the vent.
NOTE: When you split a vent into two separate air flows, the air flow in each direction is not as strong as when all air is flowing in a single direction.
Front passengers can turn off the flow of air from the passenger vent. To turn off air flow, press and hold the front passenger air waves on the touchscreen. You can turn on the flow of air again by touching the front passenger vent.
Cabin Air Filter(s)
Cybertruck has a HEPA filter to prevent pollen, industrial fallout, road dust and other particles from entering through the vents.
NOTE: The HEPA filter requires periodic replacement. See Service Intervals on page 193.
To ensure that Cybertruck provides you with the best ownership experience possible in harsh cold weather conditions, follow these best practices.
Before Driving
When snow and ice accumulate on your vehicle, moving parts, such as the doors, windows, mirrors, and the wiper can freeze in place. To achieve maximum range and performance, it is helpful to warm the cabin and Battery before driving. There are several ways to do so:
- Touch Controls > Schedule (also available on both the charging and climate control screens) to set a time when you want your vehicle to be ready to drive (see Scheduled Precondition and Charge on page 185).
- In the mobile app, navigate to Climate to customize the temperature at which you want to heat the cabin. This also warms the high voltage Battery as needed.
- In the mobile app, navigate to Climate to melt snow, ice, and frost on the windshield, charge port, windows, and mirrors. This also warms the high voltage Battery as needed.
NOTE: Tesla recommends activating climate settings at least 30-45 minutes before departure (see Operating Climate Controls on page 158). Preconditioning times depend on outside temperature and other factors. The mobile app will notify you once your vehicle has reached the desired preconditioning temperature.
Charge Port
If your charge port latch freezes in place and a charging cable becomes stuck in the charge port, touch Controls > Service > Inlet Heater. If this does not work after several minutes, try manually releasing the charge cable. See Manually Releasing Charge Cable on page 183.
You can also prevent the occurrence of a charge port latch freezing in place by using the Schedule settings (see Scheduled Precondition and Charge on page 185).
NOTE: If your charge port latch is frozen in place, it may not lock the charging cable in place when inserted, but it can still charge at a slow AC rate even if the latch is not engaged.
Charging
By using Trip Planner to navigate to a Tesla charging location, Cybertruck pre-heats the high voltage Battery to ensure when you arrive at the charger, the temperature of the Battery is optimal and ready to charge. This reduces the amount of time it takes to charge. See (see Trip Planner on page 171).
NOTE: Tesla recommends using Trip Planner to navigate to a charging location for at least 30-45 minutes before arrival to ensure optimal Battery temperature and charging conditions. If the drive to the charging location is less than 30-45 minutes, consider preconditioning the Battery before driving (see Before Driving on page 164).
Windows
In the mobile app, go to Climate and select Defrost Truck, which helps melt snow, ice, and frost on the windshield, windows, and mirrors.
Use the mobile app to schedule a service appointment for Tesla to provide hydrophobic coating to the side and rear windows (not the front windshield) for a nominal fee.
Mirrors
If ice buildup is expected when parking, turn off Auto-Fold Mirrors. Touch Controls > Auto-Fold. Ice can prevent exterior side mirrors from folding or unfolding.
NOTE: Side mirrors automatically heat as needed during preconditioning, or when the rear defroster is turned on.
Tires and Tire Chains
Use winter tires to increase traction in snowy or icy conditions. You can purchase winter tires on the Tesla Shop (see Seasonal Tire Types on page 203).
Tire chains provide additional traction when driving in snowy or icy conditions. Check local regulations to determine if tire chains are recommended or required during winter months. See Tire Chains on page 203 for more information.
Your vehicle's tire pressures will drop in cold ambient temperatures. If the TPMS indicator light appears, inflate the tires before driving. The tires will lose one PSI for every 10^ F (6^) drop in outside temperature (see Inspecting and Maintaining Tires on page 202). Proper tire pressures help protect tires from potholes and improve range when properly inflated.
While Driving
Cold weather can increase energy consumption because more power is required for driving, cabin and Battery heating. Follow these suggestions to reduce energy consumption:
- Use seat heaters to keep warm. Seat heaters use less energy than the cabin heater. Lowering the cabin temperature and using seat heaters reduces energy consumption (see Operating Climate Controls on page 158).
- Slow down your driving and avoid frequent and rapid acceleration.
Regenerative Braking
Regenerative braking can be limited if the Battery is too cold. As you continue to drive, the Battery warms up and regenerative power increases (see Regenerative Braking on page 90).
NOTE: Limited regenerative braking can be avoided if you allow enough time to precondition your vehicle or if you use Schedule to precondition Cybertruck before your departure time (see Scheduled Precondition and Charge on page 185).
Cold Battery

A blue snowflake icon appears on your touchscreen when some of the stored energy in the Battery is unavailable because the Battery is cold. This portion of unavailable energy displays in blue on the Battery meter. Regenerative braking, acceleration, and charging rates may be limited. The snowflake icon no longer displays when the Battery is sufficiently warm.
After Driving
Leave Cybertruck plugged in when not in use. This uses the charging system, rather than the Battery itself, to keep the Battery warm (see High Voltage Battery Information on page 179).
Scheduled Precondition
When parked, use the Controls > Schedule settings, available on both the charging and climate control screens, to set a time when you want to precondition Cybertruck (see Scheduled Precondition and Charge on page 185). You can also use Schedule to prevent the charge port latch freezing in place. Your vehicle determines the appropriate time to begin preconditioning so that cabin and Battery are warm by your planned departure time.
Tesla recommends that you also schedule a charge with your precondition to ensure that your vehicle has sufficient energy for the trip. When Cybertruck is not plugged in, preconditioning operates but only when the Battery's charge level is above 20%.
Storage
If you leave Cybertruck parked for an extended period of time, plug the vehicle into a charger to prevent normal range loss and to keep the Battery at an optimal temperature. Your vehicle is safe to stay plugged in for any length of time.
When not in use, Cybertruck enters a sleep mode to conserve energy. Reduce the number of times you check your vehicle's status on the mobile app, as this automatically wakes up your vehicle and starts normal energy consumption.
To ensure that Cybertruck provides you with the best ownership experience possible in hot ambient conditions, follow these best practices.
Before Driving
There are several ways to prepare your vehicle for a drive, without having to get into an already hot vehicle:
- Precondition the cabin by moving the direction of air flow from the vents, and turn the seat heaters on or off. In the mobile app, navigate to Climate to customize the temperature at which you want to cool the cabin.
- Touch Schedule, available on both the Charging and Climate Control screens, to set a time when you want your vehicle to be ready to drive (see Scheduled Precondition and Charge on page 185).
- Enable Cabin Overheat Protection, which prevents the cabin from getting too warm in hot ambient conditions.
- In the mobile app, navigate to Controls to vent the windows.
NOTE: Tesla recommends activating climate settings at least 30-45 minutes before departure (see Operating Climate Controls on page 158). Preconditioning times depend on outside temperature and other factors. The mobile app will notify you once your vehicle has reached the desired preconditioning temperature.
After Driving
Leave Cybertruck plugged in when not in use, especially if using Preconditioning or Cabin Overheat Protection. This uses the charging system, rather than the battery itself, to maintain a comfortable temperature (see High Voltage Battery Information on page 179). In addition, there are several ways to minimize a hot cabin:
- Before leaving your vehicle (to run errands, for example), use Dog Mode to keep the cabin cool for pets or perishable goods. See Keep Climate On, Dog, and Camp on page 161 for more information.
- Tesla recommends turning the air conditioning off approximately 30 seconds before pressing Park to reduce puddling below the vehicle.
- Park in the shade to help reduce power consumption and maintain cooler cabin temperatures.
- Use a sun shade if you have to park outside in the sun.
- When parked, plug in Cybertruck and Schedule your charging. Your vehicle determines the appropriate time to begin charging so it is complete during off-peak hours. The cabin and Battery are also prepared by your set departure time. For more information, see Scheduled Precondition and Charge on page 185.
Charging
When using Trip Planner or navigating to a Supercharger station, your vehicle automatically prepares the Battery for most efficient charging. In extreme heat, you may not see the message that the vehicle is preconditioning the Battery while navigating to a Supercharger, but it is still preparing the Battery for charging.
NOTE: Tesla recommends using Trip Planner to navigate to a charging location for at least 30-45 minutes before arrival to ensure optimal Battery temperature and charging conditions. If the drive to the charging location is less than 30-45 minutes, consider preconditioning the Battery before driving (see Before Driving on page 164).
If possible, leave your vehicle plugged into a charger whenever not in use, even in warm weather, especially if using Preconditioning or Cabin Overheat Protection.
Storage
If you leave Cybertruck parked for an extended period of time, plug the vehicle into a charger to prevent normal range loss and to keep the Battery at an optimal temperature. Your vehicle is safe to stay plugged in for any length of time.
When not in use, Cybertruck enters a sleep mode to conserve energy. Reduce the number of times you check your vehicle's status on the mobile app, as this automatically wakes up your vehicle and starts normal energy consumption.
Map Overview
The touchscreen displays a map at all times (except when Cybertruck is shifted into Reverse).
Use your finger(s) to interact with the map:
- To move the map in any direction, hold and drag a finger.
- To rotate the map in any direction, hold and turn two fingers.
- To zoom the map in or out, expand or pinch two fingers, respectively.
NOTE: When you rotate or move the map, your current location is no longer tracked. The message "Tracking Disabled" displays briefly next to the map orientation icon and the icon turns gray. To re-enable tracking, touch the map's orientation icon and choose North Up or Heading Up.
NOTE: The map zooms in and out automatically when a navigation route is active.
To change the orientation of the map, toggle between these options:

North Up: North is always at the top of the screen.

Heading Up: The direction you are driving is always at the top of the screen. The map rotates as you change direction. This icon has an integrated compass that indicates the direction you are driving.
NOTE: Touching this icon while navigating to a destination displays the route overview.

Route overview is available when you are navigating to a destination and displays when you expand the turn-by-turn direction list (by swiping it downward). When you collapse the turn-by-turn direction list by swiping it upward, the map displays your previously chosen orientation.
Map Display
When Cybertruck is in Park, the following icons display on the map to allow you to customize the type of information the map displays. To access these icons when driving, touch anywhere on the map (they disappear after a few seconds).

Satellite imagery (if equipped with premium connectivity).

Traffic conditions (if equipped with premium connectivity).

Map details (such as points of interest).
Drop a pin anywhere on the map by pressing and holding your finger on a desired location. When you drop a pin, or touch an existing pin, the chosen location is centered on the map and a popup screen provides information about the location. From this popup, you can navigate to the location add or remove the location from your list of favorite destinations (see Home, Work, and Favorite Destinations on page 169).

Charging locations. Shows a popup list that includes the city and proximity of the corresponding stations on the map. Charging locations include Tesla Superchargers, destination charging sites, third-party fast chargers, and public chargers that you have used previously. See Charging Locations on page 170. Touch the lightning bolt icons in the popup list to filter by the types of chargers based on max power.
NOTE: In some market regions, third-party fast chargers are also included on the map as dark gray pins when you display chargers.

Weather overlay (if equipped with premium connectivity). Touch to overlay weather conditions on the map and show the movement of precipitation like rain and snow. Includes a timelapse that projects the changes in weather over the next 3 hours.
Navigation Settings
NOTE: The navigation settings available can vary depending on region and vehicle configuration.

The navigation settings icon displays when you touch ... once you start navigating to a destination.
NOTE: You can also access navigation settings by touching Controls > Navigation.
Touch the navigation settings icon to customize the navigation system to suit your preferences (the available settings vary depending on your market region and vehicle configuration):
- Navigation Guidance: Touch Voice to enable an audible reading for navigation instructions.
- Touch - or + to increase or decrease the volume of spoken navigation instructions. Decreasing all the way to the left or touching the speaker icon mutes the instructions. You can also mute/unmute navigation instructions by touching the speaker icon. This volume setting applies only to the navigation system's spoken instructions. Volume for Media Player and Phone does not change.
NOTE: Volume may automatically be adjusted based on driving speed and climate settings.
NOTE: Navigation instructions are muted when the paired phone has an ongoing phone call.
- Enable Automatic Navigation if you want Cybertruck to automatically initiate a navigation destination when you get in your vehicle. Destinations are predicted based on commonly driven routes, time of day, and calendar entries (see Automatic Navigation on page 169).
- Enable Trip Planner (if available in your market region) to add Supercharger stops as needed. Supercharging stops are added to navigation routes with the goal of minimizing the amount of time you spend driving and charging (see Trip Planner on page 171).
- Enable Online Routing to automatically route to avoid heavy traffic (see Online Routing on page 171).
- Touch Avoid Ferries to be automatically routed to avoid ferries.
- Touch Avoid Tolls to be automatically routed to avoid tolls, if possible.
- Touch Use HOV Lanes to include High Occupancy Vehicle (HOV) lanes on navigation routes.
Navigating to a Destination
To navigate to a location, touch the search bar in the corner of the map and enter a destination, send the destination from your phone, or use voice commands (see Voice Commands on page 25) for an address, landmark, business, etc. If the destination you choose has other destinations within it (such as terminals at an airport), you can also choose a sub-destination.
Touch the search bar for different options:
- Refresh a search when you zoom in or drag to a different area of the map by tapping Search this area when prompted (if available in your region).
- Choose a saved Home or Work location (see Home, Work, and Favorite Destinations on page 169).
- Select a Charging destination (see Charging Locations on page 170).
- Pick from Recent destination (the most recent destination is listed at the top).
- Choose a destination you have marked as a Favorite (see Home, Work, and Favorite Destinations on page 169).
- A popular restaurant when you're feeling Hungry or a popular destination (such as museums and amusement parks) when you're feeling Lucky (see Lucky and Hungry on page 169).
NOTE: You can start navigation remotely from your IOS® or Android™ device using the "share" functionality on your device after allowing access to the Tesla mobile app.
When you specify a location, the touchscreen zooms out to provide an overview of the route you need to travel and displays a turn-by-turn direction list. Estimated arrival time, driving time, mid-point stops and destination weather conditions, and mileage displays at the bottom of the direction list. Note the following about the turn-by-turn direction list:
- The Battery icon on the turn list provides a visual representation showing an estimate of how much energy will remain when you reach your destination, and how much will remain if you make a round trip back to your current location. See Predicting Energy Usage on page 171.
- Select Set Arrival % (if available) and use the slider to determine how much energy you want upon arrival.
- If charging is needed to reach your destination and Trip Planner is enabled (and available in your market region), the navigation route automatically includes Supercharger stops (see Trip Planner on page 171).
- If you won't have enough energy to reach your destination and there is no Supercharger on the route, an alert tells you that charging is needed to reach your destination.
• Each turn is preceded by the distance to the maneuver. - To see the bottom of the list, you may need to drag the list upward.
- Touch the top of the list to minimize it.
After setting a destination, the search bar gives you the option to Search Along Route to add stops (see Adding Stops to a Route on page 169).
While navigating, the map tracks your location and displays the current leg of your trip. You can display the entire route at any time by swiping down to expand the turn-by-turn direction list or touching the route overview icon.
Below the turn-by-turn list, a progress bar shows how close you are to your destination or next stop. If online routing is enabled, the progress bar also shows live traffic conditions on your route (see Online Routing on page 171).
To stop navigating, touch Cancel, located in the bottom corner of the turn-by-turn direction list. Swipe right on the suggested location or press and hold the location to quickly delete certain recent navigation searches.
NOTE: If a data connection is not available, onboard maps allow you to navigate to any destination, but you must enter the exact and complete address.
Selecting an Alternate Route
Depending on market region and vehicle configuration, this feature may not be available on your vehicle. Your vehicle must be equipped with Premium Connectivity.
After you have entered a destination with one stop, the map displays up to three alternate routes. This allows you to easily compare total travel time and traffic information for each route. If you do not select a preferred route within the timeout period, the fastest route is automatically selected.
Adding Stops to a Route
After entering a destination, edit your route by adding, deleting or reordering stops. Touch the three dots at the bottom of the turn-by-turn direction list to view options to edit your route.

Add Stop allows you to add a stop by searching for a location or adding a Home, Recent or Favorite destination. When you search, locations near your route are shown along with the detour time to reach them. You can also add a stop by touching any pin on the map and selecting Add from the popup.

Edit Stop allows you to set up a complex trip by adding or deleting stops on your route. Drag and drop stops by touching the equal sign to reorder your trip.
Automatic Navigation
NOTE: Automatic Navigation may not be available in all market regions and on all vehicle configurations.
Automatic Navigation can predict a destination when you get in your vehicle. When your phone's calendar is synced to Cybertruck, and the calendar includes an event that takes place within two hours of when you get in your vehicle to drive, Automatic Navigation suggests the location of the event (assuming a valid address is associated with the event).
In addition, if you are Home and drive on weekdays (Monday to Friday) from 5:00 AM to 11:00 AM, Automatic Navigation can automatically route you to your specified Work location (see Home, Work, and Favorite Destinations on page 169). Likewise, if you are at work on weekdays from 3:00 PM to 11:00 PM, Automatic Navigation can automatically route you to your specified Home location.
To enable Automatic Navigation, touch Controls > Navigation > Automatic Navigation. You must have your phone's calendar synced to Cybertruck and the event must include a uniquely specified and valid address (see Phone, Calendar, and Web Conferencing on page 72).
NOTE: Navigation instructions that you enter manually, or send to Cybertruck, override routes suggested by Automatic Navigation.
Lucky and Hungry
NOTE: Features may not be available in all market regions and on all vehicle configurations.
In addition to navigating to a destination of your choice, Cybertruck can also suggest nearby locations based on whether you are feeling Hungry or Lucky. In the navigation search bar, touch Hungry or Lucky. Hungry suggests a list of popular restaurants, whereas Lucky suggests a list of popular destinations (such as museums and amusement parks). Once you discover an interesting destination, touch Navigate to proceed to the destination.
This feature requires the latest version of Navigation maps. To download, connect Cybertruck to Wi-Fi and touch Controls > Software to check if an update is available (see Map Updates on page 171).
Home, Work, and Favorite Destinations
If you frequently drive to a destination, add it as a favorite to avoid entering the location's name or address each time. When you add a destination as a Favorite, you can easily navigate to it by touching the navigation search bar and then touching Favorites and choosing it from your list of favorite destinations.

To add a destination to your Favorites list, touch its pin on the map, then touch the star icon on the popup screen that appears. Enter a name (or leave as-is to accept the default name), then touch Add to Favorites. The star becomes solid and the destination is included on your Favorites list.
To delete a Recent or Favorite destination, touch it on the destination list and hold it down briefly until the X appears. Then touch the X to delete it from the list.
Home and Work locations also display under the navigation search bar. Touch to set an address to the corresponding location. After entering the address, touch Save as Home or Save as Work. Then simply touch these shortcuts whenever you want to navigate home or to work.
To change or delete the corresponding address, press and hold the Home or Work icon. A popup allows you to enter a new address and Save as Home or Save as Work. Once a Home or Work location is saved, Cybertruck may prompt you to navigate to your Work location in the mornings and to your Home location in the evenings and provide an estimated driving time based on current traffic conditions. See Automatic Navigation on page 169. Touch Clear Home or Clear Work to remove associated addresses entirely. Based on your usage patterns, Cybertruck may prompt you to save a location as Home or Work.
For security reasons, if you sell, transfer ownership, or allow others to drive Cybertruck, it is recommended that you delete your Home and Work locations. You can delete these individually or you can perform a factory reset to erase all personal data (touch Controls > Service > Factory Reset).
Charging Locations
To display charging locations on the map, touch the map's search bar, then touch Charging. Charging locations are shown in a list (with the closest charging location at the top of the list) and represented by corresponding pins on the map. Touch a pin to display more information, navigate to, or mark it as a favorite.
Touch the lightning bolt icons to specify the types of charging locations you want the map to include (by default, the map displays only Superchargers):

Touch to include low power stations up to 70 kW, such as destination charging locations.

Touch to include high power chargers above 70 kW.
NOTE: In some market regions, third-party fast chargers are also included as dark gray pins when you choose to display all charging stations.
The appearance of a charging location's pin reveals the predicted status about the location. Touch the pin to display details.

The Supercharger location is operational and the number displayed on the pin represents the predicted number of available Supercharger stalls upon arrival.
NOTE: A Supercharger located on your current navigation route is colored black (or white, if the touchscreen is in night mode).

The Supercharger location is predicting a high volume of users. You may need to wait before charging.

The Supercharger location may be operating at a reduced capacity.

The Supercharger location may be closed.

The Supercharger location has no data available but should be operational.

The location is either a destination charging location, a third-party fast charger, or a public charging station that you have previously used. Touch to display more information such as usage restrictions and available charge current.
NOTE: When the map is zoomed out and more than one destination charging location is available in an area, the pin is round and displays the number of stations. Touch the pin to zoom in. Then you can touch an individual pin for details about a specific location.
Touch a charging location's pin to display a popup from which you can:
- Determine its exact location and approximate distance from your current location.
- Determine if a Supercharger location is trailer friendly. A trailer-friendly Supercharger location includes Supercharger stalls that allow you to pull through and charge while a trailer is attached to your vehicle.
NOTE: If Cybertruck is in Trailer Mode (if equipped), the map displays trailer-friendly Supercharger locations at the top of the list.
- View amenities that are available at the charging location, including restrooms, restaurants, lodging, shopping, and Wi-Fi. On a Supercharger popup, touch an amenity icon to search the surrounding area for the associated amenity.
- Touch the arrow icon to navigate to the charging location.
NOTE: When navigating to a Supercharger (or third-party fast charger in some regions), Cybertruck preconditions the Battery to prepare for charging. This ensures you arrive with an optimal Battery temperature, reducing the amount of time it takes to charge. In some circumstances (such as cold weather), it is normal for the motor(s) and components to make noise as it generates heat to warm the Battery (see Charging on page 164).
- View how busy a Supercharger location typically is during different times of the day, along with corresponding charging fees and idle fees (see Supercharger Fees on page 183).
Predicting Energy Usage
When navigating to a destination, Cybertruck helps you anticipate your charging needs by calculating the amount of energy that remains when you reach your destination. When navigating, the map displays this calculation next to the Battery icon on the turn-by-turn direction list (see Navigating to a Destination on page 168). When the turn-by-turn direction list is compressed, touch the top of the list to expand it.
The calculation that predicts how much energy you will use is an estimate based on driving style (predicted speed, etc.) and environmental factors (wind speed and direction, ambient and forecasted temperatures, air density and humidity, etc.). As you drive, Cybertruck continuously learns how much energy it uses, improving accuracy over time. Cybertruck predicts energy usage based on the driving style of the individual vehicle. For example, if you drive aggressively for a period of time, future range predictions will assume higher consumption. Some factors that contribute to predicted energy (such as forecasted temperatures and wind speed) are available only when Cybertruck has internet connectivity.
NOTE: If you purchase a used Tesla vehicle, it is recommended that you perform a factory reset (Controls > Service > Factory Reset) to ensure the predicted energy is as accurate as possible.
Throughout your route, Cybertruck monitors energy usage and updates the estimate of energy remaining at the end of your trip. A popup warning displays on the turn-by-turn direction list in these situations:
- A yellow warning displays when you have very little energy remaining to reach your destination, requiring you to drive slowly to conserve energy. For tips on conserving energy, see Getting Maximum Range on page 187.
- A red warning displays when you must charge to reach your destination.
To determine if you have enough energy for a round trip, touch the Battery icon on the turn-by-turn direction list to display an estimated calculation of your round trip energy usage. Or, when navigating to a destination, use Set Arrival % (if available) to determine how much energy your vehicle has upon arrival.
Online Routing
Cybertruck detects real-time traffic conditions and automatically adjusts the estimated driving and arrival times. In situations where traffic conditions may delay your estimated time of arrival and an alternate route is available, the navigation system can reroute you to your destination. To decline the alternate route, tap the reroute notification on your touchscreen. You can also specify the minimum number of minutes that must be saved before you are rerouted. Turn this feature on or off by touching Controls > Navigation > Online Routing.
Trip Planner
Trip Planner (if available in your region) helps you take longer road trips with confidence. If reaching your destination requires charging, Trip Planner routes you through the appropriate Supercharger locations. Trip Planner selects a route and provides charging times to minimize the amount of time you spend driving and charging. To enable Trip Planner, touch the map's settings icon (see Navigation Settings on page 167), then touch Trip Planner.
When Trip Planner is enabled and charging is required to reach your destination, the turn-by-turn direction list includes Supercharger stops, recommended charging times at each Supercharger, and an estimate of how much energy will be available when you arrive at the Supercharger location.
To remove Supercharger stops and display directions only, touch Remove all charging stops at the bottom of the turn-by-turn direction list. If you remove charging stops, the turn-by-turn direction list may display an alert indicating that charging is needed to reach your destination. To add Supercharger stops back to the turn-by-turn direction list, touch Add charging stops.
While charging at a Supercharger, the charging screen displays the remaining charging time needed to drive to your next Supercharger stop or destination (if no further charging is needed). If you charge for a shorter or longer length of time, charging time at subsequent Supercharger stops is adjusted accordingly. You can also use the mobile app to monitor remaining charging time needed.
NOTE: When navigating to a Supercharger or, in some regions, a third-party fast charger using Trip Planner, Cybertruck may allocate some energy to pre-heat the Battery to arrive at the Supercharger or third-party fast charger with an optimal Battery temperature. This reduces charging time (see Charging on page 164).
If Trip Planner estimates that you won't have enough energy for your round trip, and there are no Superchargers available on your route, Trip Planner displays an alert at the top of the turn-by-turn direction list notifying you that charging is needed to reach your destination.
NOTE: If a Supercharger on your navigation route experiences an outage, Trip Planner displays a notification and attempts to reroute you to a different Supercharger location.
Map Updates
As updated maps become available, they are automatically sent to Cybertruck over Wi-Fi. To ensure you receive them, periodically connect Cybertruck to a Wi-Fi network (see Wi-Fi on page 69). The touchscreen displays a message informing you when new maps are installed.
Overview
NOTE: Media apps vary depending on market region, vehicle configuration, options purchased, and software version. Some apps described may not be available in your market region, or may be replaced by different ones.
The Media Player displays on the touchscreen and is used to play various types of media. You can drag Media Player upward to expand it (allowing you to browse), and downward to minimize it so that just the Miniplayer displays. The convenient Miniplayer, which occupies the least amount of space on the touchscreen, displays what's currently playing and provides only the basic functions associated with what's playing.
When you play audio through the web browser and then minimize the browser, Cybertruck continues the browser audio in the background. You can pause or play the browser audio through the media Miniplayer. If there was media playing before the browser audio began, the media resumes after you pause or end browser audio.
Streaming services are available only when a data connection is available (for example, Wi-Fi or Premium Connectivity). For some media services, you can use a default Tesla account. For others, you may need to enter account credentials the first time you use it.
NOTE: Instead of launching a different media app, you can change the source from within the Media Player screen by choosing a source from the dropdown list.

Radio: Choose from a list of available radio stations or touch the numeric keypad to directly tune the radio to a specific frequency. Touch the next or previous arrows to move from one frequency to the next (or previous).

Bluetooth: Play audio from a bluetooth-connected phone or USB device (see Playing Media from Devices on page 173).

Caraoke (if equipped): Sing along with various songs (see Caraoke on page 173).
NOTE: You can show or hide any media app/source. See Media Settings on page 172.
Cybertruck supports these media apps, if available in your region:
- Amazon Music
- Apple Music
- Apple Podcasts
- Audible
- LiveOne
-
Spotify
-
Tidal
- Tuneln
- YouTube Music
When listening to internet radio or a music streaming service, the options available on the Media Player screen vary depending on what you are listening to. Touch the next (or previous) arrows to play the next (and in some cases previous) available station, episode, or track. You can also play next/previous using the left scroll button on the steering wheel.
NOTE: You can use voice commands to adjust media settings and preferences, such as volume control, playing certain songs, or switching the media source (see Voice Commands on page 25).
Volume Controls
Volume can be controlled by:
- Roll the scroll button on the left side of the steering wheel up or down to increase or decrease volume respectively. This adjusts the volume for media, voice commands, and phone calls.
• Volume may be adjusted based on your driving speed and climate settings. - Touch the <> arrows associated with the speaker icon on the bottom corner of the touchscreen.
- To mute the volume, press the left scroll button. Press again to unmute.
- Pressing the left scroll button during a phone call mutes both the sound and your microphone.
Media Settings
NOTE: The settings available vary depending on market region. Also, a setting may not be applicable to all audio sources.

Press the settings icon located in the Media Player's search bar to access audio settings.
You can adjust these settings:
-
Tone: Drag the sliders to adjust the subwoofer and any of the five frequency bands (Bass, Bass/Mid, Mid, Mid/Treble, and Treble). If equipped with premium audio, you can adjust the level of sound immersion to make your music experience more engaging by dragging the immersive sound slider according to your preferences.
• Balance: Drag the center circle to the location in Cybertruck where you want to focus the sound. -
Options: Set preferences for optional features. For example, you can turn DJ Commentary, Explicit Content and Allow Mobile Control on or off.
- Sources: Displays all available media sources and allows you to choose whether you want to show or hide each source. You may want to hide media sources that you never use. Once hidden, the media source does not appear on the drop down list in Media Player, nor will it appear in the app tray when you touch the App Launcher. You can re-display a hidden media source at any time by returning to this settings screen.
Searching Audio Content

Touch Media Player's magnifying glass icon to search for a particular song, album, artist, podcast, or station. You can also use voice commands to search hands-free (see Voice Commands on page 25).
Caraoke
NOTE: Depending on vehicle configuration and market region, Caraoke may not be available on your vehicle. Caraoke requires premium connectivity.
Navigate to Media Player and select the drop down menu to change the media source to Caraoke. Or add Caraoke as an app in the app launcher. You can browse through various songs and select the song you want to sing. Touch the microphone icon to enable or disable the song's main vocals. Disabling the microphone leaves only the song's instruments and background vocals. Touch the lyrics icon (located next to the microphone icon) to enable or disable the song's lyrics.
United States only: For a complete karaoke studio, microphones are available for purchase online at http://www.tesla.com.

WARNING: Never read Caraoke lyrics while driving. You must always pay attention to the road and traffic conditions. When driving, the Caraoke lyrics are intended only for use by a passenger.
Recents and Favorites
For most source content, recents and favorites display at the top for easy access.

To add a currently playing station, podcast, or audio file to your Favorites list, touch the Favorites icon on Media Player.

To remove an item as a favorite, touch the highlighted Favorites icon. You can also remove multiple favorites by expanding Media Player to show all favorites for the applicable type of source content. Then press and hold any favorite. An X appears on all favorites and you can then touch the X to remove them from your Favorites list.

Your recently played selections are updated continuously so you don't need to remove them.
NOTE: Selections you play on FM (if equipped) radio are not included in the Recents list.
Playing Media from Devices
USB Flash Drives
Insert a flash drive into a front USB port (see USB-C Ports on page 20). Touch Media Player >USB, then touch the name of the desired folder. To play media from a USB connection, Cybertruck recognizes flash drives only. To play media from other types of devices (such as an iPod), you must connect the device using Bluetooth (see Bluetooth Connected Devices on page 173).
NOTE: Media Player supports USB flash drives with exFAT formatting (NTFS is not currently supported).
NOTE: Use a USB port located at the front of the center console. The USB connections at the rear of the console are for charging only.
Bluetooth Connected Devices
Pair your Bluetooth-capable device to Cybertruck (see Bluetooth on page 70) to play stored audio files. Choose Media Player's Phone source, touch the name of your Bluetooth-connected device, then touch CONNECT.
Overview
NOTE: Entertainment options may vary depending on market region, date of manufacture, and vehicle configuration.

Theater: Play various video streaming services (such as Netflix, YouTube, Hulu, etc.) while parked. Available only if Cybertruck is connected to WiFi, or is equipped with premium connectivity and a cellular signal is available.

Arcade: Want to game? You may need to use the steering wheel buttons or a Bluetooth or USB controller to play. See Gaming Controllers and Headphones on page 176.

Toybox: Play in the Toybox while parked.

WARNING: Use these features only when Cybertruck is parked. Always pay attention to road and traffic conditions when driving. Using these features while driving is illegal and very dangerous.
NOTE: You can also use voice commands to access these features (see Voice Commands on page 25).
Toybox
Your vehicle's toybox includes features that can be fun to use. Here's an example of the types of features you can find in Toybox:
| Select This... To Do This... | |
| Boombox If Cybertruck is equipped with a Pedestrian Warning System, delight pedestrians with a variety of sounds from your vehicle's external speaker while in Park. SeeBoombox on page 175for more details.NOTE:Check local laws before using Boombox in public areas. | |
| Emissions Fun can come in surprising ways. Select your preferred fart style and target seat. Use your turn signal or press the left scroll wheel when you're ready to "release" your prank. Better yet, turn the seats into whoopie cushions. For those lucky vehicles equipped with a Pedestrian Warning System, you can choose to broadcast externally when your vehicle is parked. But wait-- the fun doesn't stop there! Use the mobile app to conduct remote emissions testing by touching and holding any of the four quick control buttons and selecting the fart button. | |
| Light Show Park outside, turn the volume up, roll down your windows, then enjoy the show. You can customize the song to surprise your loved ones and, using the vehicle touchscreen or mobile app, schedule the light show for a future time. Light show should not be used when parked on or near public roads. Doing so can be distracting to other road users. Before activating, it is the driver's responsibility to ensure the use of light show complies with local laws and regulations.NOTE:Light Show enthusiasts can also play multiple custom Light Shows from the same USB flash drive. Save the files to a directory named "LightShow" on your flash drive, connect, and pick your favorite. | |
| Mars | The map shows your Cybertruck as a rover on the Martian landscape, and theAbout Your Tesla box displays SpaceX's interplanetary spaceship. |
| Rainbow Charge Port | When Cybertruck is locked and charging, press the button on the mobile connector ten times in quick succession. Neat, huh? |
| Romance You can't roast chestnuts by an open fire in your car, but you can still cozy up with your loved ones by this virtual fireplace. Cue the music and get your romance on! | |
| Sketchpad | Channel your inner Picasso. Show us what you got! Touch Publish to submit your artistic compositions to Tesla for critiquing. |
| TRAX It's never too late to follow your dream of becoming a world-famous DJ. With TRAX, you can turn your vehicle into your own personal music studio. While in Park, choose from an array of instruments and unique sounds to create the next hit song. Microphone and headset are not included. | |
| The Answer to the Ultimate Question of Life, The Universe, and Everything | Rename your vehicle to 42 (touch Controls > Software and touch the vehicle's name). Notice the new name. |
| Car Colorizer Change the color of your Cybertruck on the touchscreen. Touch the color swatch next to the vehicle name and customize the exterior color, tone, license plate name, custom wraps, and more.NOTE: You can also change the license plate name by touching Controls > Software. | |
Boombox
NOTE: Boombox is available only on vehicles equipped with the Pedestrian Warning System (PWS).
NOTE: Check local laws before using Boombox in public places.
Using Boombox, you can play sound externally through the Pedestrian Warning System (PWS) speaker when Cybertruck is in Park. For example:
- Play current media.
- Use Megaphone to project a modulated version of your voice.
- Press the horn to play the first five seconds of any sound from a compatible USB device.
NOTE: If Camp mode is enabled in Climate Controls, you can exit the vehicle and use the Tesla app to control the volume.
Prepare a USB drive for Boombox
Follow these steps to add up to five custom Boombox sounds:
- On a computer, format a USB drive to exFAT, MS-DOS FAT (for Mac), ext3, or ext4 (NTFS is currently not supported).
- Create a folder on the USB drive called Boombox.
NOTE: The USB drive can only contain one folder. For example, it cannot be shared with Dashcam. - Add .wav and .mp3 audio files to the folder. Although you can add as many files as the USB drive's capacity allows, you can only select from the first five, as listed alphabetically. File names, of any length, can contain upper or lower case alpha characters (a-z/A-Z), numbers from 0-9, periods (.), a dashes (-), and underscores (_).
- Plug the USB drive into a front USB port.
- Choose a sound from the USB drive by selecting from the Boombox dropdown menu.
Uninstall Games
Uninstalling games is useful if you want to free up your vehicle's onboard storage. To uninstall a game, navigate to Arcade, select the game you wish to uninstall, then touching Uninstall. Once you uninstall a game, you must download it before you can play the game again.
Gaming Controllers and Headphones
You can pair Bluetooth Classic gaming controllers to Cybertruck by following the same steps as pairing your phone (see Phone, Calendar, and Web Conferencing on page 72). After pairing, the controller automatically connects to the vehicle. Once connected, you can use the controller to play select games. Cybertruck supports up to two Bluetooth devices at a time (such as two controllers, or one phone and one controller).
You can pair Bluetooth Classic headphones by navigating to Settings > Bluetooth Devices and adding new headphones on the rear touchscreen. Once connected, you can use the headphones to listen to audio from the rear touchscreen.
High Voltage Components
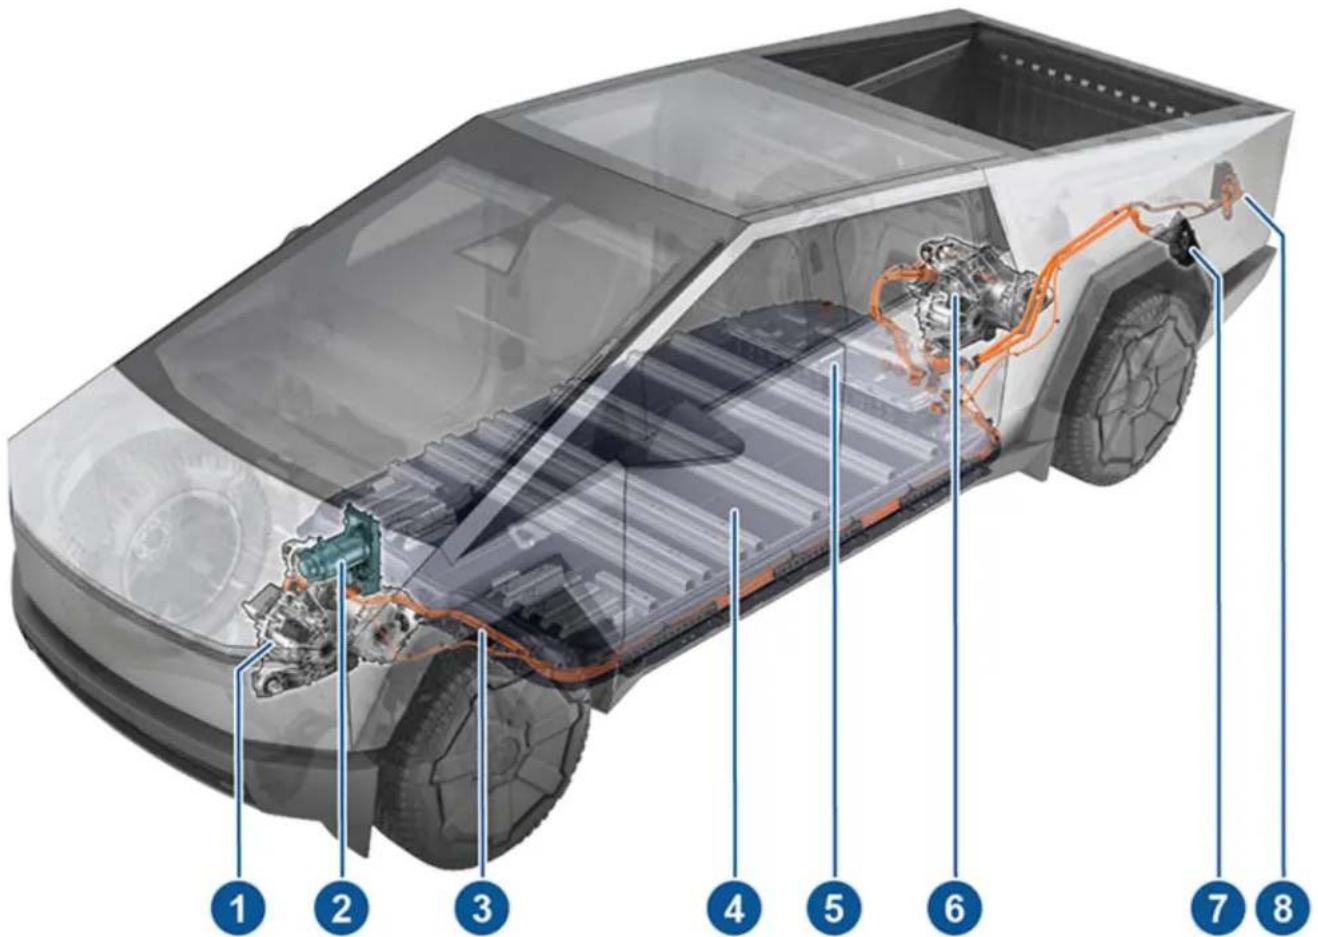
- Front drive unit
- Heat pump assembly
- High voltage cables
- High voltage Battery
- Service access panel for high voltage components (ancillary bay)
- Rear drive unit(s)
- Charge port
- Cargo bed outlets
WARNING: The high voltage system must be serviced only by a trained technician. Do not disassemble, remove or replace high voltage components, cables or connectors. High voltage cables are typically colored orange for easy identification.
WARNING: Read and follow all instructions provided on the labels that are attached to Cybertruck. These labels are there for your safety.
WARNING: In the unlikely event that a fire occurs, exit the vehicle, move to an area at least 100 ft. (30 meters) away from Cybertruck, and immediately contact your local fire emergency responders.
Charging Equipment
Charging equipment designed specifically to charge your Cybertruck is available from Tesla.
For information on the charging equipment available for your region, go to http://shop.tesla.com.
Tesla offers:
• Wall Connector: Installs in your parking space and is the fastest way to charge your vehicle for daily use.
- Mobile Connector: Allows you to plug into most commonly used power outlets. When using the Mobile Connector, attach the smart adapter (if required) to the Mobile Connector before plugging it in to the power outlet, and then plug in your vehicle.
- Adapters: Allows you to plug into the most commonly used public charging stations in your region. At a public charge station, first attach the adapter to the station's charging connector and then plug in your vehicle.
There is also a network of Superchargers, destination chargers, and other fast charging stations for when charging while traveling.
Low Voltage Battery
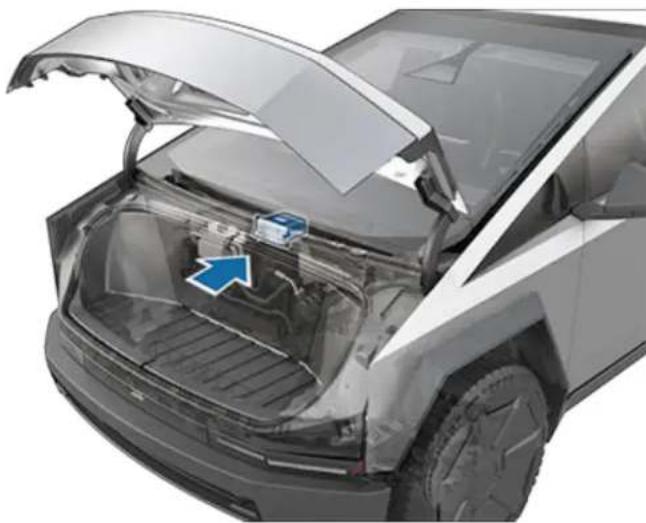
natural_image
Exterior view of a modern electric car trunk with open lid and internal compartment, showing no visible text or symbolsCybertruck uses a 48V lithium-ion low voltage battery. The 48V battery powers the windows, doors, touchscreen, and other low voltage vehicle systems when the high voltage Battery is unavailable. The 48V battery also provides a redundant source of power for critical systems (such as power steering).
NOTE: 48V low voltage connectors are colored blue for easy identification, and wires that operate at 48V are marked with blue tape.
By using a 48V low voltage battery instead of the 12V lead-acid battery found in many conventional vehicles, Cybertruck is able to operate more efficiently.

WARNING: Assume that the low voltage components of Cybertruck, including all cables and connectors, are always energized. Do not handle low voltage cables or connect/disconnect connectors when the low voltage system is powered. Because the 48V low voltage system operates at a higher voltage than a typical low voltage system, there is an increased risk of personal injury, arcing, or component damage if the low voltage components of Cybertruck are handled improperly.
Cybertruck has one of the most sophisticated battery systems in the world. The most important way to preserve the high voltage Battery is to LEAVE YOUR VEHICLE PLUGGED IN when you are not using it. This is particularly important if you are not planning to drive Cybertruck for several weeks.
NOTE: When left idle and unplugged, your vehicle periodically uses energy from the Battery for system tests and recharging the low voltage battery when necessary.
There is no advantage to waiting until the Battery's level is low before charging. In fact, the Battery performs best when charged regularly.
NOTE: If you allow the Battery to discharge to 0%, other components may become damaged or require replacement (for example, the low voltage battery). In these cases, you are responsible for repair and/or transporting expenses. Discharge-related expenses are not covered by the warranty or under the Roadside Assistance policy.
The peak charging rate of the Battery may decrease slightly after a large number of DC Fast Charging sessions, such as those at Superchargers. To ensure maximum driving range and Battery safety, the Battery charge rate is decreased when the Battery is too cold, the Battery's charge is nearly full, and when the Battery conditions change with usage and age. These changes in the condition of the Battery are driven by battery physics and may increase the total Supercharging duration by a few minutes over time. You can minimize the amount of charge time by using Trip Planner (if available in your market region) to warm the Battery while driving to a Supercharger. See Trip Planner on page 171 for more information.
Battery Care
Never allow the Battery to fully discharge.
Even when Cybertruck is not being driven, its Battery discharges very slowly to power the onboard electronics. The Battery can discharge at a rate of approximately 1% per day, though the discharge rate may vary depending on environmental factors (such as cold weather), vehicle configuration, and your selected settings on the touchscreen. Situations can arise in which you must leave Cybertruck unplugged for an extended period of time (for example, at an airport when traveling). In these situations, keep the 1% in mind to ensure that you leave the Battery with a sufficient charge level. For example, over a two week period (14 days), the Battery may discharge by approximately 14%.
Discharging the Battery to 0% may result in damage to vehicle components. To protect against a complete discharge, Cybertruck enters a low-power consumption mode when the displayed charge level drops to approximately 0%. In this mode, the Battery stops supporting the onboard electronics and auxiliary low voltage battery. Once this low-power consumption mode is active, immediately plug in Cybertruck to prevent a jump start and low voltage battery replacement.
NOTE: If Cybertruck is unresponsive and does not unlock, open, or charge, the low voltage battery may be discharged. In this situation, try jump starting the low voltage battery (see Jump Starting on page 244). If the vehicle is still unresponsive, use the mobile app to schedule a service appointment.
Temperature Limits
For better long-term performance, avoid exposing Cybertruck to ambient temperatures above 140^ F ( 60^ C) or below -22^ F ( -30^ C) for more than 24 hours at a time.
Submerged Vehicle
As with any vehicle, if your Tesla has been exposed to flooding, extreme weather events or has otherwise been submerged in water (especially in salt water), treat it as if it's been in an accident. See Submerged Vehicle Guidance on page 247 for more information.
An unintentionally submerged vehicle is different than a vehicle that intentionally enters water while off-roading. In these situations, use Wade Mode. See Off-Road Driving on page 103 for more information.
NOTE: Damage caused by water is not covered under warranty.
Battery Warnings and Cautions

WARNING: The high voltage system must be serviced only by a trained technician. Under no circumstances should you open or tamper with the Battery. Do not disassemble, remove or replace high voltage components, cables or connectors. High voltage cables are typically colored orange for easy identification.

CAUTION: If the Battery's charge level falls to 0%, you must plug it in. If you leave it unplugged for an extended period, it may not be possible to charge or use Cybertruck without jump starting or replacing the low voltage battery. Leaving Cybertruck unplugged for an extended period can also result in permanent Battery damage. If you are unable to charge Cybertruck after attempting to jump start the low voltage battery, schedule a service appointment.

CAUTION: The Battery requires no owner maintenance. Do not remove the coolant filler cap and do not add fluid. If the touchscreen warns you that the fluid level is low, use the mobile app to schedule a service appointment.
Opening the Charge Port
The charge port is located above the driver's side rear wheel of Cybertruck.
With Cybertruck in Park and a valid key is detected, press and release the button on the Tesla charge cable to open the charge port door.
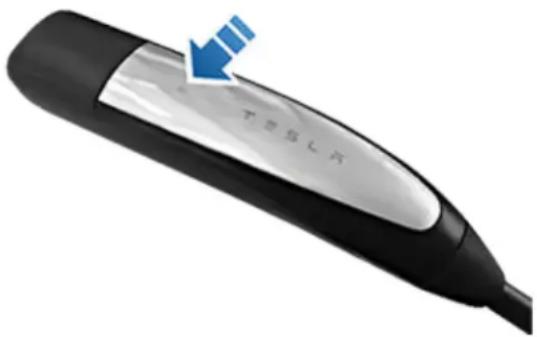
You can also open the charge port door using any of these methods:
- On the touchscreen, touch the charge port on the vehicle avatar and touch Open.
- On the touchscreen, touch Controls > Charging > Open Charge Port.
- Press the charge port door when Cybertruck is unlocked and an authenticated phone is nearby.
- Press the button on the charge cable to open the charge port door.
- Use voice commands. You can also use voice commands to close the charge port door, and begin or stop charging (see Voice Commands on page 25).
- Use the mobile app.
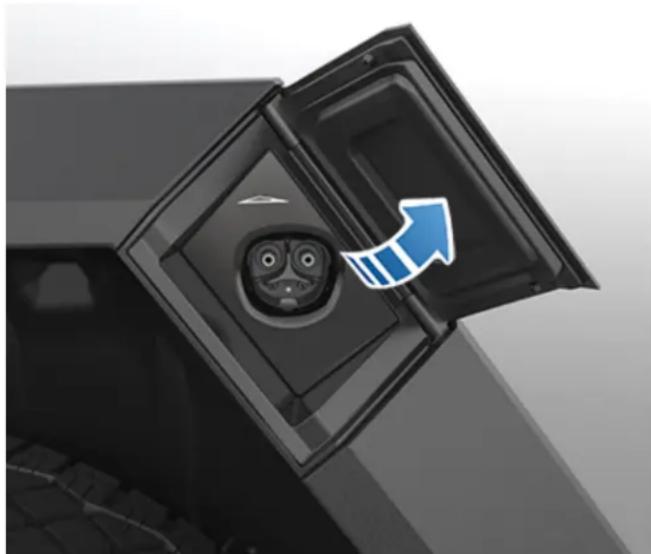
natural_image
Close-up of a car battery pack with an open door and a blue arrow indicating direction (no text or symbols)The Cybertruck icon lights up white when you open the charge port door (see Charge Port Light on page 181). If you do not insert a charge cable into the charge port within a few minutes after opening the charge port door, the charge port door closes. If this happens, open the charge port door again.
NOTE: In extremely cold weather or icy conditions, it is possible that your charge port latch may freeze in place. If this happens, you can thaw ice on the charge port latch by turning on the rear defrost or by enabling preconditioning using the mobile app. To prevent this from occurring, use the Schedule settings, which are also available on both the charging and climate control screens, to schedule a Precondition by (see Preconditioning on page 185).

CAUTION: Do not try to force the charge port door open.
During Charging
Tesla strongly recommends leaving Cybertruck plugged in when not in use. This maintains the Battery at the optimum level of charge.
During charging, the charge port light (the Cybertruck icon) pulses green, and the touchscreen displays real-time charging status. The frequency at which the green charge port light pulses slows down as the charge level approaches full. When charging is complete, the light stops pulsing and is solid green. If Cybertruck is locked, the charge port light does not light up. For more information, see Charge Port Light on page 181.
If the charge port light turns red while charging, there is an issue with charging. Check the touchscreen for an alert describing the issue. An issue can occur due to something as common as a power outage. If a power outage occurs, charging resumes automatically when power is restored.
NOTE: Cybertruck cannot charge from Gen 1 Wall Connectors if the charge current on the Wall Connector is greater than 48A (the front cover plate of Gen 1 Wall Connectors have a metal finish). When you attempt to charge a Cybertruck from a Gen 1 Wall Connector with a charge current that's configured incorrectly, the lights on the Wall Connector flash red eight times. For more information on changing the charge current, see https://www.tesla.com/support/charging/product-guides#gen-1-wall-connector.
NOTE: The thermal system may produce steam while Cybertruck charges. For example, odorless steam can come from the front of your vehicle while charging at a Supercharger in cold temperatures. This is normal and not a cause for concern. Likewise, it is normal to hear sounds during charging. Particularly at high currents, the refrigerant compressor and fan operate as needed to keep the Battery cool.
NOTE: Air conditioning performance is generally not affected by charging. However, in some circumstances (for example, charging at high currents during a particularly warm day), the air coming from the vents may not be as cool as expected and a message displays on the touchscreen. This is normal and ensures that the Battery stays within an optimal temperature range while charging to support longevity and optimum performance.

WARNING: Never spray liquid at a high velocity (for example, a pressure washer) towards the charge port while charging. Doing so can result in serious injury or damage to the vehicle, charging equipment, or property.

WARNING: Do not use third-party charging adapters with Cybertruck.

CAUTION: Keep the cargo bed outlet cover closed when Cybertruck is charging, especially in wet weather. Charging may be disabled if moisture enters one of the outlets.
Charging Status
On the touchscreen, the charging status displays at the top of the vehicle status area when the charge port door is open.
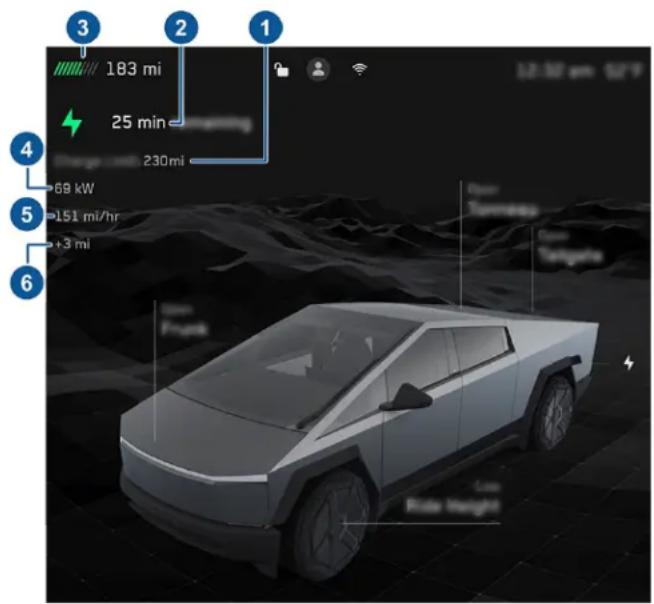
- Charge limit: The set charge limit. The charge limit is the capacity at which Cybertruck will stop charging. To change the charge limit, touch Controls > Charging.
- Time remaining: The estimated time remaining to charge to your set limit. Or, if you are navigating to a destination, the estimated time remaining until you can continue your trip.
NOTE: When charging to 100%, the Cybertruck may continue to charge with low power when charging is displayed as complete. This is expected. Because the added energy beyond this point is low, it is usually not beneficial to continue charging.
- Range: The total estimated driving distance or energy percentage (depending on your display setting) available.
NOTE: To change how energy units are displayed, touch Controls > Display > Energy Display. You can also touch the driving distance or energy percentage on the touchscreen to switch between them.
- Charging: The amount of power currently being provided by the charger.
- Charging rate: The speed at which the vehicle is charging, shown in range gained per hour.
- Range gained: The estimated increase in driving distance achieved in the charging session.
Charge Port Light
Above the charge port, the charge port light shows charging status. The charge port light turns off after a short period of time if the vehicle is locked (for example, if you walk up to the vehicle after it has been charging for a while).
After you insert a charge cable into Cybertruck, wait a few seconds and confirm that the charge port light begins blinking green and that your vehicle is charging. If the light is amber or red, troubleshoot the issue before you leave to ensure a successful charging session.

WHITE: The charge port door is open. Cybertruck is ready to charge and the connector is not inserted, or the charge port latch is unlocked and the connector is ready to be removed.

BLUE, BLINKING: Cybertruck is communicating with the charger but has not started charging or providing power yet (such as when your vehicle is preparing to charge, or when your vehicle is preparing to provide power from the high voltage Battery).

BLUE: The charger is connected, but Cybertruck is not charging (such as when scheduled charging is active).

PURPLE, BLINKING: Cybertruck is providing power from the high voltage Battery. The frequency of blinking corresponds to the amount of power that Cybertruck is providing (more frequent blinks correspond to more power being provided). For more information, see Powershare Home Backup on page 189.

natural_image
Five abstract geometric shapes in green, yellow, orange, and red with radiating lines (no text or symbols)GREEN, BLINKING: Charging is in progress. As Cybertruck approaches a full charge, the frequency of the blinking slows.
GREEN, SOLID: Charging is complete.
AMBER, BLINKING: Cybertruck is charging at a reduced current because the connector is not fully plugged in.
AMBER, SOLID: Cybertruck is not charging because the connector is not fully plugged in. Realign the connector to the charge port and insert fully.
RED: A fault is detected and charging has stopped. Check the touchscreen for an alert. In some cases, an alert can be easily cleared by unplugging the charge cable, returning it to the charger, then trying again. In other cases (such as a tripped fuse or a faulty charger), you may need to check the power source. If the red light persists, try using a different charger.
Stopping Charging
Stop charging at any time by pressing the button on the charge cable to disconnect, or touch Stop Charging on the touchscreen or mobile app. To disconnect the charge cable:
- Ensure your vehicle is unlocked. To prevent unauthorized unplugging of the charge cable, the charge cable latch remains locked and Cybertruck must be unlocked before you can disconnect the charge cable.
- Press and hold the button on the connector handle to release the latch.
- Pull the connector from the charge port. The charge port door automatically closes.
To disconnect the charge cable when using an adapter at a public charge station:
- Unlock Cybertruck.
- While holding the public charging handle in one hand and the adapter in the other hand, press and hold the button on the public charging handle and pull both outwards, removing the handle and adapter at the same time.
NOTE: If the charging station handle separates from the adapter, leaving the adapter in Cybertruck, use the touchscreen to unlock the charge port.
- Press and hold the button on the charging handle again to release the adapter from the public charging handle.
If the charge cable gets frozen stuck while plugged in due to freezing temperatures, touch Controls > > Service > Inlet Heater. This heats the charge port for up to two hours to unfreeze the charging cable.
The charge port door closes automatically shortly after you remove the charge cable.
You can also automatically stop charging from a specified time by creating a charge schedule. For more information, see Create a Schedule on page 185.
Charge Settings
Access charge settings by touching Controls > Charging when Cybertruck is in Park. You can also touch the Battery icon on the touchscreen to access charge settings.
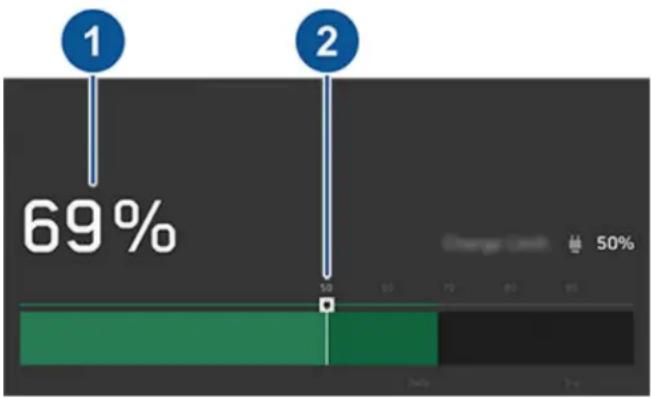
bar
| Category | Value (%) | |---|---| | 1 | 69 | | 2 | 50 |- Energy available: Displays the remaining energy available in the high voltage Battery. To show the remaining energy as estimated driving distance (miles or kilometers) rather than a percentage, touch Controls > Display > Energy Display.
- Set charge limit: Adjust the charge slider to the level of charging you want. The setting you choose applies to immediate and scheduled charging sessions.
NOTE: Refer to the information on the touchscreen (navigate to Controls > Charging) or mobile app (touch the Charging icon) for recommended daily and trip charging limits.
NOTE: A portion of the Battery image may appear blue. This indicates that a small portion of the energy stored in the Battery is not available because the Battery is cold. This is normal and no reason for concern. When the Battery warms up, the blue portion no longer displays.
Open/Unlock Charge Port
When not charging, touch Open Charge Port or Unlock Charge Port to open the charge port door or to unlock the charge cable from the charge port.
Stop Charging
Use Stop Charging when you are finished charging.
Charge Current at this Location
The current automatically sets to the maximum current available from the attached charge cable, unless it was previously reduced to a lower level. If needed, touch - or + to change the current (for example, you may want to reduce the current if you are concerned about overloading a domestic wiring circuit shared by other equipment). It is not possible to set the charging current to a level that exceeds the maximum available from the attached charge cable. When you change the current, Cybertruck remembers the location.
NOTE: When charging with the Mobile Connector, your vehicle may automatically select a default charge current. Override this default current to a higher setting by customizing Charge Current at this location or through the mobile app.
If Cybertruck is charging and detects unexpected fluctuations in input power, the charging current is automatically reduced by 25%. For example, a 40 amp current is reduced to 30 amps. This automatic current reduction increases robustness and safety in situations when an external problem exists (for example, a home wiring system, receptacle, adapter or cord is unable to meet its rated current capacity). As a precaution, when Cybertruck automatically reduces current, it saves the reduced current at the charging location. Although you can manually increase it, Tesla recommends charging at the lower current until the underlying problem is resolved and the charging location can provide consistent power.
Supercharging
Displays Supercharger usage fees, the location, the time that charging started, and a cost estimate for the session. To reduce congestion at high-usage Supercharger sites, you may be limited to a maximum charge of 80% when not using Trip Planner (if available in your market region). See Supercharger Fees on page 183.
NOTE: Tesla does not recommend using low-power charging equipment (such as a 120V NEMA 5-15 outlet and the Universal Mobile Connector) to charge Cybertruck, especially in low ambient temperatures. Due to the size of the high voltage Battery, charging with equipment that produces less than 2 kW of power will charge Cybertruck very slowly. If you are charging Cybertruck with such a method, turn off climate to reduce idle power consumption while charging.
Supercharger Fees
When charging at a Tesla Supercharger, information about the charging session displays at the bottom of the charging screen. This includes the location, the time that charging started, and a cost estimate for the session. When you stop Supercharging, the estimated cost of the session displays until a new Supercharging session begins.
NOTE: Estimated cost may not reflect the final cost of the Supercharging session. Final pricing for Supercharging sessions can be found in your Tesla account.
You are subject to additional fees after charging is complete or, at a busy Supercharger location, after your vehicle has reached the congestion limit. Superchargers are designed for fast charging, and these fees encourage drivers to move their vehicles when charging is complete.
Idle fees apply when half or more of the Superchargers at a site are occupied, and begin accruing when the vehicle reaches its charge limit. The Tesla mobile app notifies you when charging is almost complete, and again when charging is complete. Additional notifications are sent if idle fees are incurred. Idle fees are waived if you move your vehicle within five minutes of when charging completed.
The rate structure for each site, including whether idle fees apply, can be found on the site's popup on the touchscreen (see Charging Locations on page 170) or in the Tesla mobile app.
Log into your Tesla account to view fees and details about Supercharger sessions, set up a payment method, and make payments. Once a payment method is saved, fees are automatically paid from your account.
Manually Releasing Charge Cable

CAUTION: Use the release cable only in situations where you can not release the charge cable using the usual methods. Frequent use can damage the release cable or charging equipment.

WARNING: Do not perform this procedure when your vehicle is charging, or if any orange high voltage connectors are exposed. Failure to follow these instructions can result in electric shock and serious injury or damage to the vehicle. If you are uncertain as to how to safely perform this procedure, use the mobile app to schedule a service appointment.
If the usual methods for releasing a charge cable from the charge port (using the charge handle release button, touchscreen, or mobile app) do not work, carefully follow these steps:
- Ensure that Cybertruck is not actively charging by navigating to Controls > Charging on the touchscreen, or use the mobile app. If necessary, touch Stop Charging.
- Open the tailgate.
- Pull firmly on the edges of the panel on the left side of the bed to release the panel's clips and expose the release cable. The panel does not fully come off, but can be pulled just far enough to reach the cable.
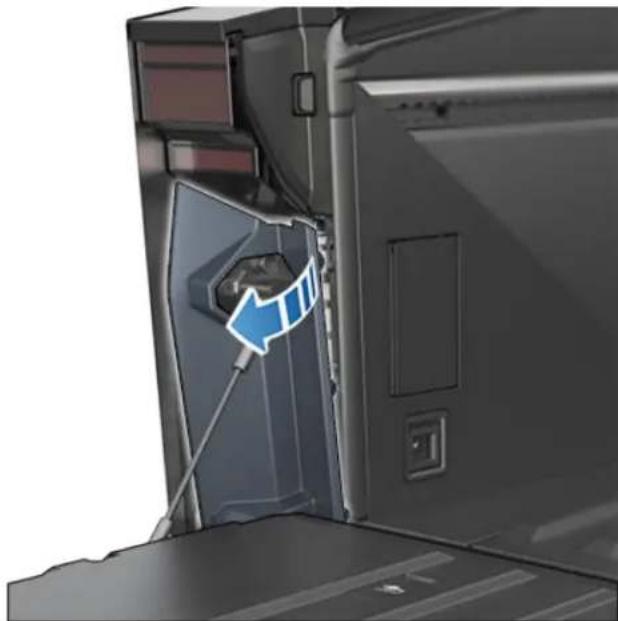
natural_image
Close-up of a car door with a blue arrow pointing to the side panel (no text or symbols visible)- Pull the release cable to unlatch the charge cable.

WARNING: Do not pull the release cable while simultaneously attempting to remove the charge cable from the charge port. Always pull the release cable before attempting to remove the charge cable. Failure to follow these instructions can result in electric shock and serious injury.
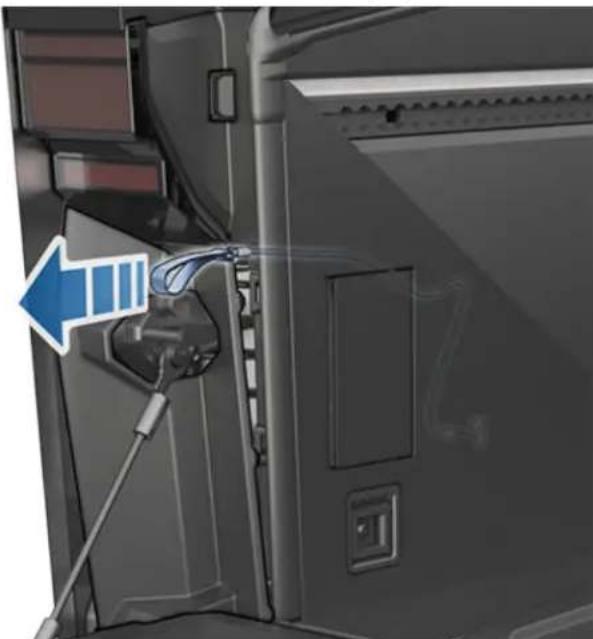
natural_image
Close-up of a car's front panel showing cable routing and a blue arrow pointing to the cable (no text or symbols visible)NOTE: The release cable may be recessed within the opening of the trim.
-
Pull and release the charge cable from the charge port.
-
Reinstall the panel, ensuring that the clips are fully engaged.
Charging Best Practices
- Avoid allowing the Battery to get too low (the Battery icon turns yellow when the capacity remaining in the Battery drops to 20% or below).
- Refer to the information on the vehicle touchscreen (navigate to Controls > Charging) or the mobile app (touch the Charging icon) for recommended daily and trip charging limits.
- Before you navigate to a destination charging location, such as a short-term rental or hotel, ensure that the available Wall Connectors are configured for a 48A charge current. Cybertruck cannot charge from Gen 1 Wall Connectors with a charge current greater than 48A.
- After you plug in your vehicle, confirm that the charge port light begins blinking green (indicating that Cybertruck is charging) before you walk away. If Cybertruck does not begin charging after a few seconds, the connector may not be fully inserted into the charge port, or there may be an issue preventing charging. Check the touchscreen for an alert with more information.
NOTE: If the charge port light begins blinking amber, Cybertruck is charging at a reduced current. If the charge port light is solid blue, the charger is connected but the vehicle is not charging (such as when a charge is scheduled). For more information, see Charge Port Light on page 181.
Fast charging tips:
- Find fast chargers by filtering for three lightning bolts in the navigation search bar.
- Navigate to fast chargers to allow for preconditioning of the high voltage Battery. An optimal Battery temperature can help speed up charging.
- Typically, a lower state of charge results in faster charging.
NOTE: It is your responsibility to monitor your vehicle's charge at all times. Do not wait until the vehicle is discharged to plug it in. Always ensure you have more than enough charge to safely get to a charger.
- At Superchargers, leave some space between other vehicles, as neighboring stalls may share power.
Schedule preconditioning and charging for Cybertruck. You can schedule preconditioning to help your vehicle charge more efficiently, or to prepare Cybertruck for departure.
NOTE: You can also access Schedule from the Climate Controls screen, the Charging window, and the Tesla mobile app (v4.34.5 or higher required).
Cybertruck automatically saves your schedule for each location you create a schedule at. When you select Current Location, the configured schedule can only be used when you return to the same approximate physical location.
NOTE: Scheduled charge cannot be used with fast chargers, including Tesla Superchargers. Charging schedules you create are ignored when you charge at a fast charger.
Create a Schedule
Create a Precondition and Charge schedule to specify the time and days you want Cybertruck to precondition or charge. To create a schedule:
- Touch Controls > Schedule.
-
Select the location for which you want to configure a schedule.
-
Current Location: The current location of your car, based on your GPS coordinates.
NOTE: You must be parked to create a schedule for your current location.
Home/Work: The saved location for your home and workplace. You can't choose these options if you don't have a saved home or work (see Home, Work, and Favorite Destinations on page 169). -
Touch Precondition to configure the time and the frequency you want the vehicle to precondition by.
- Touch Charge to configure the time you want to start and stop, and the frequency you want to charge.
- Select Create to create the schedule.
NOTE: If Repeat Weekly is not toggled, Cybertruck performs the schedule once. The vehicle then disables the schedule until you manually re-enable the schedule.
Using Scheduled Charging
When you create or enable a scheduled charge, you can plug in your vehicle for a charge. If you scheduled a precondition or charge for later in the day, Cybertruck waits until that time to precondition or charge.
When your schedules overlap, the vehicle uses the largest block of time for charging, if necessary. Example: You scheduled Cybertruck to start charging at 2 AM and at 3 AM, but to stop charging at 2:30 AM and 5 AM, the vehicle combines the two charge schedules into a single block from 2 AM to 5 AM.
When you specify an End by time, but not a Start at time, the vehicle briefly draws power when plugging in for scheduled charging (you may hear clicking) to calculate the necessary start time to meet your charge limit. Example: You configure an End by time of 2 AM and the vehicle needs 2 hours to charge to meet the charge limit. If you plug in your vehicle at 9 PM, Cybertruck briefly draws power to calculate the start time and begins charging at 12 AM.
If you specify a Start at time and no End by time, the vehicle begins charging at the specified time and continues until your charge limit is reached.
There are scenarios where Scheduled Charging starts immediately. These scenarios can occur when Cybertruck is plugged in:
- During a scheduled charge.
- Up to 6 hours after the start of a scheduled charge, if there is no specified End by time.
- When the next scheduled charge is more than 18 hours away and not the current day.
- When you haven't configured a Start at time and there is not enough time to reach the charge limit by the End by time.
NOTE: Cybertruck does NOT automatically start charging if you plug in your vehicle within 6 hours after the End by time of a scheduled charge, unless there is another scheduled charge.
You can schedule your charge to finish right at a planned departure time to reduce energy costs, even in market regions where off-peak utility rates are not applicable. Example, if charging starts as soon as you plug in, charging may complete much sooner. This causes the Battery to cool down to ambient temperatures and requires energy to warm it back up by your departure time. Therefore, even if off-peak utility rates are not applicable to you, Tesla recommends that you charge until your planned departure time in order to reduce energy consumption by specifying your departure time as the scheduled End by time.
Preconditioning
Use Precondition to schedule a time when you want Cybertruck to be ready to drive. Cybertruck automatically calculates when it needs to start preconditioning. This ensures that the cabin climate and Battery are preconditioned by your departure time.
Precondition warms the Battery for improved performance and ensures a comfortable cabin climate at your set departure time. If you don't schedule a Precondition, Cybertruck only warms the Battery before charging if the Battery is too cold to charge, and doesn't prepare the cabin climate.
NOTE: When Cybertruck is not plugged in, preconditioning operates but only when the Battery's charge level is above 20%.
Preconditioning can also help to increase range on your next trip because a preconditioned cabin and battery consumes less energy when you begin driving. Preconditioning can reduce energy consumption while driving in vehicles with heat pumps, because heat in the battery can be used to warm the cabin while driving.
Factors Affecting Energy Consumption
While driving:
• Elevated driving speed.
- Environmental conditions such as cold or hot weather and wind.
• Using climate controls to heat or cool the cabin.
- Uphill travel: Driving uphill requires more energy and depletes range at a faster rate. However, driving downhill allows your vehicle to regain a portion of its expended energy through regenerative braking (see Regenerative Braking on page 90).
- Short trips or stop-and-go traffic: It takes energy to bring the cabin and Battery to a specified temperature when starting the vehicle. You may see a higher average consumption when the vehicle is used for very short trips or in heavy traffic.
- Heavy cargo load.
- Windows rolled down.
• The tonneau cover staying open.
- Towing a trailer.
- Driving on soft or sandy terrain (see Off-Road Driving on page 103).
- Wheels and tires not maintained.
- Customized settings or third-party accessories (roof or trunk racks, third party wheels).
While parked and not plugged in to a charger:
- Preconditioning the cabin or using climate controls.
- Summon.
- Vehicle infotainment and climate controls system.
- Sentry mode.
- Tesla or third-party mobile app requests.
- The outlets in the cabin or the cargo bed are in use. For more information, see Interior Electronics on page 20 and Cargo Bed Outlets on page 23.
Tips to Maximize Range
You can maximize your driving range using the same driving habits you use to conserve fuel in a gasoline-powered vehicle. To achieve maximum range:
- Slow down your driving and avoid frequent and rapid acceleration. Consider using Chill Mode (touch Controls >Acceleration) and Speed Assist (see Speed Assist on page 149) to assist in controlling your acceleration and speed.
- If safe to do so, modulate the accelerator pedal instead of using the brake pedal when gradually slowing down. Whenever Cybertruck is moving and you are not pressing the accelerator pedal, regenerative braking slows down the vehicle and feeds surplus energy back to the Battery (see Regenerative Braking on page 90).
- Limit the use of resources such as heating and air conditioning. Using seat and steering wheel heaters (if equipped) to keep warm is more efficient than heating the cabin using climate controls.
- With your vehicle plugged in, use the mobile app to precondition your vehicle to ensure the cabin is at a comfortable temperature and windows are defrosted (if needed) before your drive by touching Climate > On and customizing your preferences (see Mobile App on page 66).
- Touch Schedule, (also available on both the charging and climate control screens) to set a time when you want your vehicle to be ready to drive (see Scheduled Precondition and Charge on page 185).
- Ensure the wheels are aligned to specification, the tires are kept at the recommended inflation pressures (see Tire Pressures on page 200), and are rotated when needed (see Maintenance Service Intervals on page 193).
- Install wheel covers (if equipped) to reduce wind resistance.
- Lighten your load by removing any unnecessary cargo.
- Fully raise all windows and close the tonneau cover.
- Features such as Sentry Mode and Cabin Overheat Protection can impact range. Disable features when not needed.
- To prevent an excessive amount of energy consumption while the vehicle is idle, keep the vehicle plugged in when not in use.
It is normal for estimated range to decrease slightly over the first few months before leveling off. Over time, you may see a gradual, but natural, decrease in range at full charge – this depends on factors such as the mileage and age of the Battery. Your Cybertruck will inform you in the unlikely event a hardware issue is causing excessive Battery or range degradation.
Range Assurance
The driving range displayed in Cybertruck is an estimate of the remaining battery energy based on EPA-rated consumption. It may not account for your personal driving patterns or external conditions. The displayed range on the may decrease faster than the actual distance driven.
Your vehicle continuously monitors its energy level and proximity to known charging locations.

Touch Chargers in the Navigation search bar to toggle between types of chargers, including Superchargers and destination charging sites.
When you are at risk of driving beyond the range of known charging locations, the touchscreen displays a message giving you the opportunity to display a list of charging locations that are within range. When you select a charging location from the list, Cybertruck provides navigation instructions and the turn-by-turn direction list displays the predicted amount of energy that will remain when you arrive at the charging destination.
Trip Planner routes you through Supercharger locations to minimize the amount of time you spend charging and driving. To enable, touch Controls > Navigation > Trip Planner.
Energy App
The Energy app provides a visual representation of your vehicle's real-time and projected energy usage.

- Locate the Energy app in the app launcher (the three dots) in the bottom bar.
- Touch to open the Energy app and choose from the different tabs. The energy chart's colored line represents your actual driving energy consumption whereas the gray line represents predicted usage.
NOTE: You can customize the chart values by touching Controls > Display > Energy Display.
- Drive: Monitor the amount of energy being used while driving. You can track the real-time energy consumption broken down by categories, compare against different baseline projections, and view range tips tailored to your drive to understand how to improve energy efficiency.
- Choose Trip while navigating to a destination to compare the actual usage against the estimated projection.
- Choose Rated to compare the actual energy or range usage against the estimated driving distance (or energy) available.
- Choose between Current Drive to view data from your current drive or Since Last Charged to include data since the vehicle was last charged.
- View Range Tips to understand impacts on battery consumption and suggestions to maximize range and efficiency.
- Park: Monitors the amount of energy lost while Cybertruck is parked.
-
Choose between Since Last Drive or Since Last Charge.
-
View how much idle energy has been consumed while your vehicle is parked and suggestions to decrease energy loss.
- Consumption: Compare your vehicle's actual energy consumption to Cybertruck's rated consumption over the last 200 miles (300 km). Consumption is measured in watt-hours per mile (Wh/mi). Lower values increase range, higher values decrease it.
- Your average consumption is an average of how much energy your vehicle uses per mile and varies based on your driving route, habits, and environment.
- Rated consumption is a constant value based on standardized driving conditions set by the EPA. This value is used to determine remaining battery energy on the touchscreen if the display is set to distance (Controls > Display > Energy Display).
Projected range is calculated using remaining battery energy and your average consumption. Use the Drive tab to learn more about how range can be increased.
Prerequisites
Before you can use Powershare Home Backup, make sure that the following requirements are met:
• Cybertruck is running vehicle firmware 2024.14 or later.
- You have the Tesla mobile app version 4.31 or later (see Mobile App on page 66).
- You have the Tesla Universal Wall Connector with Powershare Gateway installed in your home.
For more information about installation and to purchase a Tesla Universal Wall Connector, go to the Tesla shop: https://shop.tesla.com/.
To Use Powershare Home Backup
Before using Powershare Home Backup, enable it from your vehicle's touchscreen by touching Controls > Charging > Powershare Home Backup.
Once Powershare Home Backup is enabled, your Cybertruck automatically begins to provide power to your house when:
- The electric grid stops providing power to your home (there is a power outage).

CAUTION: When the grid first stops providing power to your home, your home may lose power briefly as Cybertruck prepares to begin Powershare Home Backup.
- The high voltage Battery has more energy remaining than the Powershare discharge limit (see Setting the Discharge Limit on page 189).
• Cybertruck is connected to the Universal Wall Connector.

When Powershare Home Backup is actively providing power to your home, the touchscreen displays the Tesla Powershare icon.
The charge port status light is also purple to indicate that Cybertruck is providing power from the high voltage Battery (see Charge Port Light on page 181).
You can also see the status of the high voltage Battery on the touchscreen, or in the mobile app.
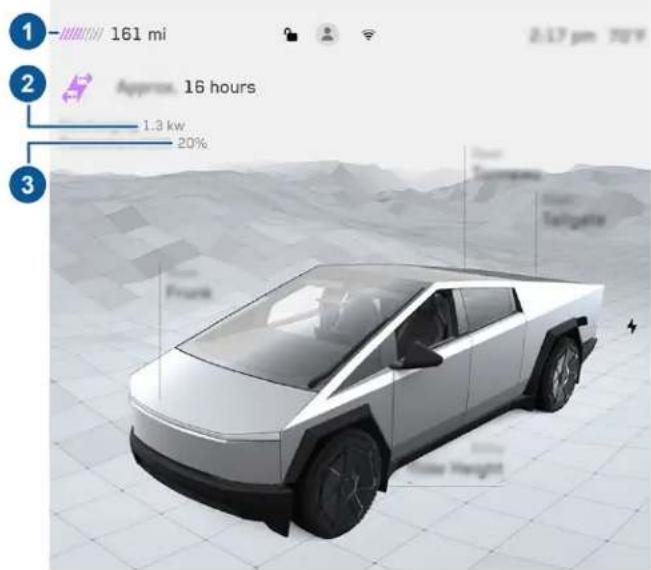
- Energy remaining: The total estimated driving distance or energy percentage (depending on your display setting) available. The amount of energy available to Powershare Home Backup (the amount remaining above the Powershare limit) is shown in purple.
- Powershare rate: The amount of power currently being provided by the high voltage Battery.
- Powershare discharge limit: The level of energy remaining at which at the high voltage Battery stops providing power.
Maximum Draw
Cybertruck provides a maximum draw of 11.5 kW.
NOTE: The maximum draw may be limited by the charger installed in your home. Tesla strongly recommends that the charger (such as a Tesla Wall Connector) that you use for Powershare Home Backup is connected to a 240V circuit.
Setting the Discharge Limit
You can set the discharge limit from the Tesla mobile app by adjusting the slider.
When Powershare Home Backup is active, you can see how much energy is remaining in the high voltage Battery above the discharge limit in the vehicle status area of the touchscreen, or by touching Controls > Charging.
To Stop Powershare Home Backup
To stop Cybertruck from providing power to your home, touch Controls > Charging > Stop Powershare
To restart Powershare, touch Controls > Charging > Start Powershare.
Powershare Home Backup also stops providing power when:
- The high voltage Battery discharges past the Powershare discharge limit.
- The electric grid starts supplying power (the power outage ends).
When the grid is about to start providing power again, you receive a notification from the Tesla mobile app and on the vehicle touchscreen.

CAUTION: When the grid begins providing power to your home again, your home may lose power for several seconds as Cybertruck stops providing power.
Limitations
Be aware of the following limitations when using Powershare Home Backup.
- While Cybertruck is actively providing power to your home, the AC outlets in the cabin and in the cargo bed are disabled (see Interior Electronics on page 20 and Cargo Bed Outlets on page 23).
If Powershare Home Backup stops providing power, you receive a notification on the vehicle touchscreen and through the Tesla mobile app. This may happen for one of the following reasons.
- Your home is drawing more power than Powershare Home Backup can provide. In this case, reduce the load as much as possible (for example, by turning off large appliances).
- The high voltage Battery is cold. This is more likely in low ambient temperatures (for example, if Cybertruck is parked in a cold garage) or if Cybertruck has not been driven recently.
- There is an issue with the Universal Wall Connector, with your vehicle's charge port, or with your vehicle's high voltage Battery. Check the touchscreen for an alert with more information.
Backup Troubleshooting
- If a brownout or blackout is experienced during backup operation, reduce the loads and check that the load breakers have not opened.
NOTE: See tesla.com/support/energy/powerwall/own/best-practices-during-power-outages for best practices to extend the backup duration of your system during an outage.
- If it is necessary to restart the Powershare Gateway, Tesla support may direct you to press the Reset button on the device.
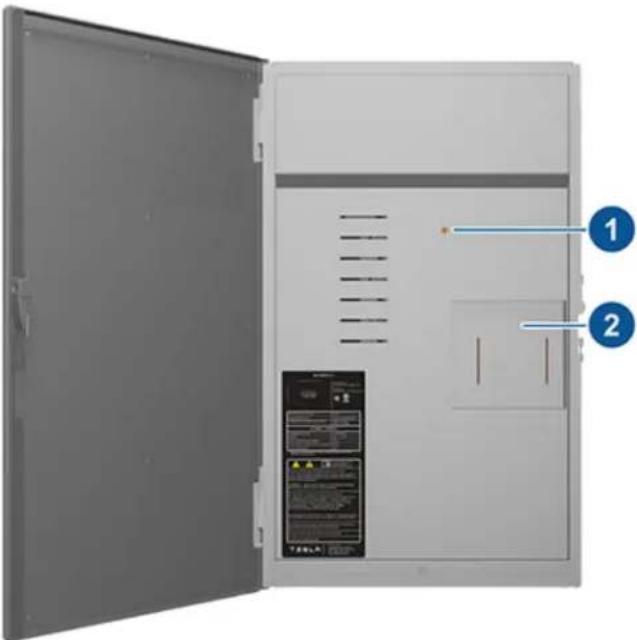
- Powershare Gateway RESET button
- Powershare Gateway circuit breaker (in most whole-home backup systems)
Technical Support
If you need further assistance, contact the Tesla Support team via the Contact Us page:
tesla.com/support/energy/more/additional-support/contact-us
Have the following information available when contacting Tesla:
- Owner name
- Best way for Tesla to contact you (name, phone number, email)
- Powershare Gateway serial number
- Brief description of the issue
Find the serial number on a sticker on the panel cover of Powershare Gateway.
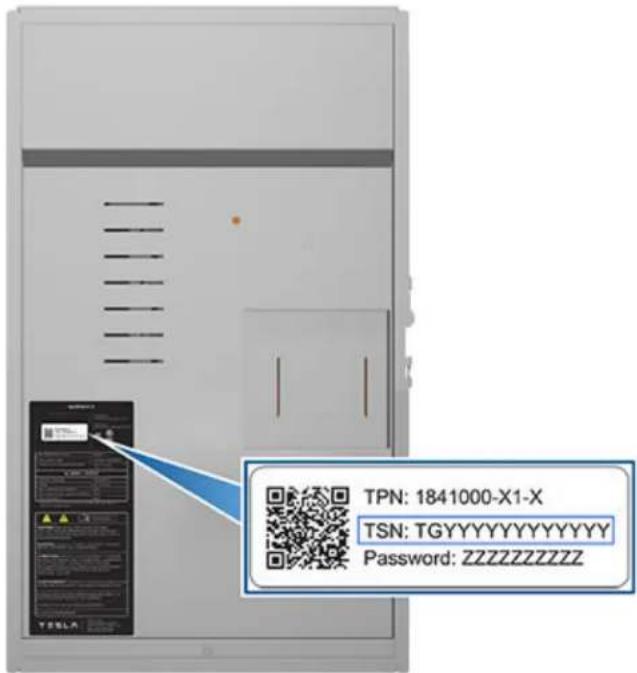
Loading New Software
Tesla updates your vehicle's software over the air, constantly providing new features. Tesla recommends you install software updates at the earliest opportunity on your vehicle. To ensure the fastest and most reliable delivery of software updates, leave Wi-Fi turned on and connected whenever possible. In most cases, your vehicle must be connected to Wi-Fi to download the software update (see Wi-Fi on page 69).
Downloading vs. Installing New Software
There are two steps to receiving a new update: downloading the software (which requires Wi-Fi), and installing it. For your convenience, you can start downloads and installations using the Tesla mobile app.
Download
When a software update is available for download, the download occurs automatically, showing a green arrow at the top of the touchscreen. If the vehicle is not connected to Wi-Fi, a yellow download icon appears. Although you can drive while the software update is being downloaded, doing so can interrupt the download if your vehicle loses the Wi-Fi connection. When the software update is fully downloaded and ready to install, a clock icon displays at the top of the touchscreen.
NOTE: To ensure the fastest and most reliable download of software updates, leave the Wi-Fi turned on and connected whenever possible (see Wi-Fi on page 69).
Install
You CANNOT drive while software is being installed. If plugged in, your vehicle will stop charging until the installation is complete. To start the installation, touch the yellow clock icon at the top of the touchscreen. Touch Install Now to begin the installation immediately or touch Set For This Time to choose a different start time. At any time before the update installs, you can touch this clock icon to reschedule. If you are driving Cybertruck at the scheduled update time, the update is canceled and must be rescheduled. You can also view, download, and install software updates by navigating to Controls > Software. If available, connect to Wi-Fi to download the update.
Software updates are not performed when certain features are active, such as Keep Climate On, Dog Mode, or Camp Mode.
NOTE: Software updates will not install if Keep, Dog, or Camp mode are enabled (see Keep Climate On, Dog, and Camp on page 161).
NOTE: On an as-needed basis, Tesla also sends software updates using a cellular connection.
NOTE: Some software updates take approximately 30 minutes to complete (some may take longer). Cybertruck must be in Park while the software is being updated.

WARNING: Do not attempt to use the vehicle while the software is being installed. Vehicle functions, including some safety systems and opening or closing the doors or windows, may be limited or disabled when installation is in progress and you could damage the vehicle.
Software Update Preferences
Tesla determines how, when, and where to send updates to vehicles based on various factors unique to each release. In Controls > Software, you can choose how quickly you want to receive updates that are ready for your vehicle. Be an early adopter by selecting Advanced (which will have additional releases), or wait until others have installed (which will result in fewer releases) by selecting Standard. Choosing Advanced does not enroll your vehicle in Tesla's early access program.
Tesla does not update your software upon request for those wanting to receive the latest features and improvements. Selecting Advanced and consistently connecting to Wi-Fi (see Wi-Fi on page 69) is the best way to quickly receive the latest software updates.
If the touchscreen displays a message indicating that a software update was not successfully completed, wait for the next software update to deploy to your vehicle.
NOTE: The software update screen persists until you install the update. Install a software update as soon as possible. Any harm resulting from failure to install a software update is not covered by the vehicle's warranty. Failure or refusal to install updates can cause some vehicle features to become inaccessible or digital media devices may become incompatible.
NOTE: Tesla may update or reinstall your vehicle's software as part of the normal diagnostic, repair, and maintenance process within Tesla Service.
NOTE: Reverting to a previous software version is not possible.
Charging
If Cybertruck is charging when the software update begins, charging stops. Charging resumes automatically when the software update is complete.
Viewing Release Notes
When a software update is complete, read the release notes displayed on the touchscreen to learn about changes or new features. To display release notes about the current version of your vehicle's software at any time, touchControls > Software > Release Notes.
Tesla strongly recommends reading all release notes. They may contain important safety information or operating instructions for your Cybertruck.
Service Intervals
Tesla recommends the following maintenance items and intervals, as applicable to your vehicle, to ensure continued reliability and efficiency of your Cybertruck.
For additional information on vehicle alerts, see Troubleshooting Alerts on page 248.
- Brake fluid health check every 4 years (replace if necessary)*.
• A/C desiccant bag replacement every 8 years. - HEPA filter replacement every 2 years, or every year in cases of off-road/dirt road driving.
- Clean and lubricate brake calipers every year or 12,500 miles (20,000 km) if in an area where roads are salted during winter.
- Rotate tires every 6,250 miles (10,000 km) or if tread depth difference is 2/32 in (1.5 mm) or greater, whichever comes first.
*Heavy brake usage due to towing, mountain descents, or performance driving -- especially for vehicles in hot and humid environments -- may necessitate more frequent brake fluid checks and replacements.
NOTE: Any damage caused by opening the Battery coolant reservoir is excluded from the warranty.
NOTE: The above intervals are based on typical driving behaviors and scenarios. Depending on various circumstances such as driving behavior, usage, environmental conditions, etc., the above maintenance items may need to be performed more or less frequently than specified. Additionally, the above list should not be considered comprehensive and does not include consumable parts such as the windshield wiper, brake pads, etc.
NOTE: Damages or failures caused by maintenance or repairs performed by non-Tesla certified technicians are not covered by the warranty.
For more do-it-yourself maintenance procedures and information, see https://www.tesla.com/support/do-it-yourself-guides.
Schedule Service
Scheduling a service visit through the mobile app is easy. After touching Service, select the type of service needed and follow the directions in the mobile app. Provide as much detail as possible to better help the Service team identify the cause of concern, such as:
- Photos, sound recordings, or videos.
- Date(s), time(s), and time zone when the issue occurred.
- Approximate speed the vehicle was traveling (if applicable).
-
Environmental conditions (rain, snow, cold, etc.).
-
Road name and type of road (if applicable).
• Quality of lane markings (if applicable).
• Applicable vehicle settings. - Identifiable symptoms.
Visit https://www.tesla.com/support/service-visits for more information on scheduling service.
Daily Checks
- Check the Battery's charge level, displayed on the touchscreen or mobile app.
- Check the condition and pressure of each tire (see Tire Pressures on page 200).
- Check that all exterior lights, horn, turn signals, and the wiper and washers are working.
- Check for any unexpected indicator lights or vehicle alerts on the touchscreen.
- Check the operation of the brakes, including the parking brake.
NOTE: Because Cybertruck uses regenerative braking (see Regenerative Braking on page 90), the brake pads are typically used less frequently than those in traditional braking systems. To avoid the accumulation of rust and corrosion, Tesla recommends frequently pressing the brake pedal to apply the mechanical brakes, which dries the brake pads and rotors.
- Check the operation of the seat belts (see Seat Belts on page 40).
- Look for abnormal fluid deposits underneath Cybertruck that might indicate a leak. It is normal for a small pool of water to form (caused by the air conditioning system's dehumidifying process).
- Look around the exterior of Cybertruck and immediately remove any corrosive substances (such as bird droppings, tree resin, tar spots, dead insects, industrial fallout, etc.) to prevent damage to the exterior (see Cleaning on page 196).
Weekly Checks
- During wet weather, clean Autopilot cameras weekly (see Cleaning a Camera on page 28). Otherwise, clean them monthly during dry weather.
Monthly Checks
- Check windshield washer fluid level and top up if necessary (see Topping Up Windshield Washer Fluid on page 213).
- Check that the air conditioning system is operating correctly (see Operating Climate Controls on page 158).
NOTE: In addition to cooling the interior, the air conditioning compressor also cools the Battery. Therefore, in hot weather, the air conditioning compressor can turn on even if you turned it off. This is normal because the system's priority is to cool the Battery to ensure it stays within an optimum temperature range to support longevity and optimum performance. Also, even when not in use, you may hear Cybertruck emit a whining noise or the sound of water circulating. These sounds are normal and occur when the internal cooling systems turn on to support various vehicle functions, such as maintaining the low voltage battery and balancing the temperature of the high voltage Battery.
Periodic Checks
Perform the following checks as needed:
• Over time, when driving in dusty or polluted conditions, your vehicle's radiator may become clogged. This can affect air flow and heating/AC performance. Use the mobile app to schedule a service appointment.
- The inside of the windshield within the camera enclosure (see Cameras on page 27) must be cleaned periodically to maintain clear visibility and optimal camera function. To check if such cleaning is needed, review your vehicle's maintenance summary by touching Controls > Service > Maintenance. When needed, use the mobile app to schedule a service appointment.
Maintenance Summary
You can view current status of maintenance items by navigating to Controls > Service > Maintenance on your vehicle's touchscreen.
Maintenance Summary keeps track of when regular maintenance items, such as windshield wiper blades and filters, were last performed and provides suggestions for when they should be performed again. You can perform them yourself or enlist the help of Tesla or an independent repairer. Once completed, you can reset the maintenance item on your vehicle's touchscreen. Cybertruck captures a time stamp and applicable information (such as your current mileage) and resets the maintenance item to remind you for next time. Vehicle service history records persist on the vehicle, providing you and future owners with a record of previously performed services. The service history record is not affected by a factory reset.
NOTE: Although Tesla updates the maintenance summary during a service visit as needed, it is the responsibility of the vehicle's owner to ensure the accuracy of the information, especially for service or maintenance performed by independent repairers or through do-it-yourself means.
Fluid Replacement Intervals
Battery coolant and brake fluid levels should only be checked by Tesla or a professional automotive repair shop. Specific service information is available in the Service Manual.
- Battery coolant: Your Battery coolant does not need to be replaced for the life of your vehicle under most circumstances.
NOTE: Any damage caused by opening the Battery coolant reservoir is excluded from the warranty. - Brake fluid: Do not top up your brake fluid.
Software
Updating software is important to ensure proper operation and longevity of your vehicle's components. You must install a software update at the earliest opportunity. See Software Updates on page 192.
Tesla may update or reinstall your vehicle's software as part of the normal diagnostic, repair, and maintenance process within Service.
High Voltage Safety
Your Cybertruck has been designed and built with safety as a priority. However, be aware of these precautions to protect yourself from the risk of injury inherent in all high-voltage systems:
- Read and follow all instructions provided on the labels that are attached to Cybertruck. These labels are there for your safety.
- The high voltage system has no user-serviceable parts. Do not disassemble, remove or replace high voltage components, cables or connectors. High voltage cables are colored orange for easy identification.
- If a collision occurs, do not touch any high voltage wiring, connectors, or components connected to the wiring.
- In the unlikely event that a fire occurs, immediately contact your local fire emergency responders.

WARNING: Assume that the low voltage components of Cybertruck, including all cables and connectors, are always energized. 48V low voltage connectors are colored blue for easy identification, and wires that operate at 48V are marked with blue tape.
Do not handle low voltage cables or connect/disconnect connectors when the low voltage system is powered. Because the 48V low voltage system operates at a higher voltage than a typical low voltage system, there is an increased risk of personal injury, arcing, or component damage if the low voltage components of Cybertruck are handled improperly.

WARNING: Always disconnect the charge cable before working underneath Cybertruck, even if charging is not in progress.

WARNING: Keep your hands and clothing away from cooling fans. Some fans operate even when Cybertruck is powered off.

WARNING: Some fluids (Battery acid, Battery coolant, brake fluid, windshield washer additives, etc.) used in vehicles are poisonous and should not be inhaled, swallowed, or brought into contact with open wounds. For your safety, always read and follow instructions printed on fluid containers.
Cleaning the Exterior
To prevent damage to the exterior, immediately remove corrosive substances (such as grease, oil, bird droppings, tree resin, dead insects, tar spots, road salt, industrial fallout, etc.). Do not wait until Cybertruck is due for a complete wash. If necessary, use denatured alcohol to remove tar spots and stubborn grease stains, then immediately wash the area with water and a mild, non-detergent soap to remove the alcohol.
NOTE: It is normal for the stainless steel exterior to mature over time, resulting in minor changes to the reflective properties and color of the metal.
Dents and Scratches
The stainless steel exterior of Cybertruck is more resistant to dents and dings than most other vehicles. However, Cybertruck does not have a clear coat on the surface of the exterior body panels, meaning any scratches that appear are in the stainless steel panels themselves. Anyone performing scratch repair should refer to the applicable "Exterior Stainless Steel Panel Refinishing" procedure within the Collision Repair Manual on service.tesla.com. In addition, do not use, and/or immediately remove, chemical, corrosive, or non-pH neutral substances (including but not limited to: acidic liquids or materials, grease, oil, tree resin, dead insects, tar spots, road salt, industrial fallout, etc.) as they can cause corrosion on the vehicle's exterior.

CAUTION: Tesla is not liable for any damage caused by failing to refer to official guidance.
Surface Contamination
Over time, you may notice contamination on the surface of the stainless steel body panels. These spots may appear as orange or brown rust. However, it is important to note that your Cybertruck is not rusting. Refer to the DIY Guide for more information.
Keep the exterior cameras free of dirt, condensation, or obstructions. These substances can cause unclear pictures or Autopilot and safety features to stop working (see Cleaning a Camera on page 28).
Follow these steps when washing the exterior of Cybertruck:
- Before washing, flush grime and grit from the vehicle using a hose. Flush away accumulations of mud in areas where debris easily collects (such as wheel wells and panel seams). If salt has been used on the highways (such as during winter months), thoroughly rinse all traces of road salt from the underside of the vehicle, wheel wells, and brakes.
- Mix a mild, pH-neutral soap (such as car shampoo) with water until it gets soapy.
- Soak a soft cleaning sponge in the soap mixture and hand wash Cybertruck.

CAUTION: Some cleaners and car shampoos contain chemicals that can cause damage or discoloration, especially for plastic trim pieces, exterior lights, or camera lenses. For example, some car cleaning formulas contain hydroxide or other highly alkaline or caustic ingredients that can damage exterior components. Do not use acidic products either. Damage or discoloration resulting from cleaning products is not covered by the warranty.
- After washing, rinse with clean water to prevent soap from drying on the surfaces.
- Dry thoroughly with microfiber cloths (ensure the cloths are clean of sand, dirt, rocks, etc.), one in each hand, rotating in circular motions until the surface is dry.
For a waterless wash:
- Hand wash using a non-ionic pH-neutral waterless wash with a high quality microfiber towel.
- Dry any streaks thoroughly with a chamois.
- Remove oil and grease with an organic solvent, such as alcohol or ethyl alcohol.
NOTE: Do not use alcohol or ethyl alcohol on the head or tail lights.
For spot cleaning: Use a glass cleaner and microfiber cloth. Spray glass cleaner and wipe in a zig-zag motion when cleaning large areas, such as entire panels.
Use isopropyl alcohol wipes (such as those used to clean glasses or screens) to clean away small stains.
NOTE: Tesla does not recommend taking Cybertruck through an automatic car wash.
Cleaning Mud
If your vehicle is covered in mud, such as after off-roading, rinse the entire exterior of the vehicle with water. It is important to regularly clean the exterior of Cybertruck after off-roading because mud and debris can quickly build up and limit some vehicle functions.
For certain components, such as the underside, wheel wells, panel seams, and radiator, use a power washer to remove stuck-on mud or debris. Then follow the rest of theregular cleaning on page 196 steps, as explained above. Wipe away mud from the headlights, tail lights, and cameras, as it may affect your vehicle's ability to drive safely.
Mud and rocks can get trapped between the wheel cover and wheel well. This may cause noise or vibration. Remember to clear mud, dirt, and rocks from the wheel wells after off-roading.

CAUTION: Damage to the vehicle as a result of debris or mud buildup is not covered by the warranty.
Window Cleaning and Treatments
Clean windows and mirrors using an automotive glass cleaner. Do not scrape or use any abrasive cleaning fluid on glass or mirrored surfaces. Follow the directions in Cleaning the Exterior on page 196 for best practices in cleaning the exterior glass.
To add a hydrophobic coating to your vehicle's windows, apply the coating only to the side and rear windows, not the front windshield—doing so may affect the visibility of the autopilot cameras. Follow the hydrophobic coating manufacturer's instructions for application details.
NOTE: Tesla is not responsible for any damage associated with applying window treatments on your vehicle.
Car Wash
If taking Cybertruck to an automatic car wash is necessary, Car Wash Mode closes all windows, locks the charge port, and disables windshield wipers, Sentry Mode, and walk-away door locking. To enable, touch Controls > Car Wash. Your vehicle must be stationary and not actively charging.
If using an automatic car wash, Enable Free Roll keeps your vehicle in Neutral and activates free roll for the duration of the wash, while preventing Cybertruck from applying the Parking brake if you leave the driver's seat. To enable, press on the brake pedal and touch Enable Free Roll; or shift into Neutral.
Car Wash Mode disables if the vehicle's speed exceeds 9 mph (15 km/h) or by touching Exit on the touchscreen.

CAUTION: Failure to put Cybertruck in Car Wash Mode may result in damage (for example, to the charge port or windshield wipers). Damage caused by car washes is not covered by the warranty.
Cautions for Exterior Cleaning

CAUTION: Do not wash in direct sunlight.

CAUTION: Do not use windshield treatment fluids. Doing so can interfere with wiper friction and cause a chattering sound.

CAUTION: Do not use hot water, detergents, highly alkaline or caustic cleaning ingredients or solvents, specifically those containing hydroxide. Avoid exposure to soaps and chemicals above pH 13. If unsure, check the product label or ask the staff at the car wash. Damage caused by improper washing is not covered by the warranty.

CAUTION: If using a pressure washer, maintain a distance of at least 12" (30 cm) between the nozzle and the surface of Cybertruck. Keep the nozzle moving and do not concentrate the water jet on any one area.

CAUTION: Do not aim water hoses directly at windows, door, or hood seals or at electronic modules or exposed cabling.
CAUTION: To avoid corrosive damage that may not be covered by the warranty, rinse away any road salt from the underside of the vehicle, wheel wells, and brakes. After cleaning the vehicle, dry the brakes by going on a short drive and applying the brakes multiple times.
CAUTION: Avoid using tight-napped or rough cloths, such as washing mitts. A high-quality microfiber cleaning cloth is recommended.
CAUTION: If washing in an automatic car wash, make sure the vehicle is locked. In addition, avoid using controls on the touchscreen that can result in accidentally opening doors or trunks while the vehicle is being washed. Any damage caused is not covered by the warranty.
CAUTION: Ensure the wipers are off before washing Cybertruck to avoid the risk of damaging the wipers.
CAUTION: Do not use chemical based wheel cleaners or pre-wash products. These can damage the finish on the wheels.
WARNING: Never spray liquid at a high velocity (for example, if using a pressure washer) towards the charge port while Cybertruck is charging. Failure to follow these instructions can result in serious injury or damage to the vehicle, charging equipment, or property.
Cleaning the Interior
Frequently inspect and clean the interior to maintain its appearance and to prevent premature wear. If possible, immediately wipe up spills and remove marks. For general cleaning, wipe interior surfaces using a soft cloth (such as microfiber) dampened with a mixture of warm water and mild non-detergent cleaner (test all cleaners on a concealed area before use). To avoid streaks, dry immediately with a soft lint-free cloth.
Interior Glass
Do not scrape, or use any abrasive cleaning fluid on glass or mirrored surfaces. This can damage the reflective surface of the mirror and the heating elements in the rear window.
Airbags
Do not allow any substance to enter an airbag cover. This could affect correct operation.
Dashboard and Plastic Surfaces
Do not polish the upper surfaces of the dashboard. Polished surfaces are reflective and could interfere with your driving view.
Interior Lighting
NOTE: The Tesla warranty does not cover damage caused by improper maintenance, including the use of cleaning solutions or tools that are not recommended in this Owner's Manual.
Do not use any soap or chemical cleaning solutions on interior lighting. Common cleaning solutions and substances can degrade the lenses or components of the lighting, causing cracks and damage over time. When you want to clean interior lighting, Tesla recommends that you use a soft cloth moistened with warm water to gently wipe away soiled areas or stains. Interior lighting includes, but is not limited to, these lights (if equipped):
- Footwell
- Puddle
- Projection
- Dome
- Accent
- Ambient
When you want to clean the interior with soap or a mild non-detergent cleaner, Tesla recommends that you first cover all lighting with some form of protection, such as:
- Fabric.
- Masking tape.
- Plastic film.
- Protective covers for car interiors.
Seats
NOTE: The Tesla warranty does not cover damage caused by improper maintenance, including the use of cleaning solutions or tools that are not recommended in this Owner's Manual.
Your vehicle's seats are made of a custom, sustainable, vegan leather which is softer than leather, yet far more durable and stain resistant. Tesla recommends that you regularly clean and vacuum the interior of your vehicle to maintain performance and an as-new appearance. You can purchase an all-purpose cleaning kit on the Tesla Shop.
Avoid contact with harsh chemicals, including certain cosmetics. Such substances can cause damage, degradation, or discoloration over time.
For general spills and stains, wipe spills and chemical residues from interior surfaces as soon as possible. Moisten a soft cloth (preferably microfiber) with warm water and mild soap and gently wipe the stain in a circular motion. Then, wipe dry using a soft, lint-free cloth. Do not blow dry. Anything more than soap can be too harsh. Using other cleaning agents, disinfectants, conditioners, or protectants is not recommended.
For white seats: As a last resort, moisten a soft cloth (such as microfiber) with warm water and isopropyl alcohol and gently wipe the stain in a circular motion (DO NOT use this method on black seats). Clean off any remaining isopropyl alcohol residue with a soft, damp cloth. Aggressive or extended use of isopropyl alcohol will damage the top coat of the material, allowing stains to occur more readily and violating the warranty.

CAUTION: Do not use products containing alcohol, bleach (sodium hypoclorite), citrus, naptha, or silicon-based additives. Do not spray the seat directly with any spray. Do not get water into the seat belt mechanism.
A variety of clothing, accessories, and cosmetics may contain dyes or oils which can transfer onto the seats over time. These stains are difficult to prevent and cannot always be safely cleaned off.

CAUTION: Do not use aftermarket, non-Tesla seat covers. Seat covers may cause staining or damage to the seats and may inhibit the sensitivity of a seat's occupancy sensors or restrict deployment of airbags.
Carpets
Avoid over-wetting carpets. For heavily soiled areas, use a diluted upholstery cleaner.
Seat Belts
Extend the belts to wipe. Do not use any type of detergent or chemical cleaning agent. Allow the belts to dry naturally while extended, preferably away from direct sunlight.
Door Seals
Wipe door seals with a damp cloth to remove any debris. Excessive debris on the door seals can cause damage when contacting surrounding surfaces. Avoid using alcohol wipes or any chemical products that can potentially deteriorate the coating on the door seals.
Front and Rear Touchscreens
Clean the touchscreen(s) using a soft lint-free cloth specifically designed to clean monitors and displays. Do not use cleaners (such as a glass cleaner) or alcohol-based gel products (such as hand sanitizer) and do not use a wet wipe or a dry statically-charged cloth (such as a recently washed microfiber). To wipe the front touchscreen without activating buttons and changing settings, you can enable Screen Clean Mode. Touch Controls > Display > Screen Clean Mode. The display darkens to make it easy to see dust and smudges. To exit Screen Clean Mode, press and hold HOLD TO EXIT.
Metal Surfaces
Polish, abrasive cleaners, alcohol-based gel products (such as hand sanitizer), and hard cloths can damage the finish on metal surfaces.
Cautions for Interior Cleaning

CAUTION: Using solvents (including alcohol), alcohol-based gel products (such as hand sanitizer), bleach, citrus, naphtha, or silicone-based products or additives on interior components can cause damage.

CAUTION: Statically-charged materials can cause damage to the touchscreen.

WARNING: If you notice any damage on an airbag or seat belt, contact Tesla immediately.

WARNING: Do not allow any water, cleaners, or fabric to enter a seat belt mechanism.

WARNING: Do not use solvents or soap on interior accent lights.

WARNING: Exposure to chemical cleaners can be hazardous and can irritate eyes and skin. Read and observe the instructions provided by the manufacturer of the chemical cleaner.
Using a Car Cover
To preserve the cosmetic appearance of the body when Cybertruck is not being used, use a genuine Tesla car cover. Car covers can be purchased online from the Tesla Shop.
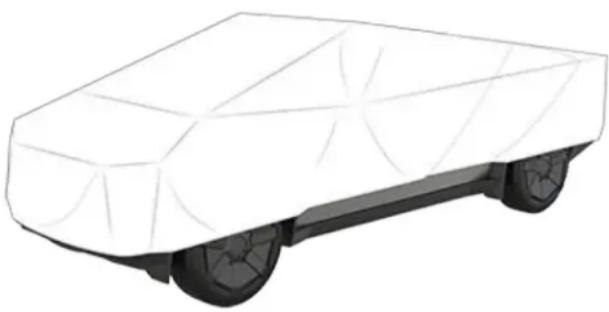
natural_image
3D wireframe illustration of a white rectangular object with black wheels, resembling a vehicle or container (no text or symbols)
CAUTION: Use only a Tesla-approved car cover when Cybertruck is plugged in. Using a non-Tesla car cover can prevent the Battery from being adequately cooled during charging.
Floor Mats
To extend the life of your carpet and make them easier to clean, use genuine Tesla floor mats available online at http://www.tesla.com. Maintain floor mats by regularly cleaning them and checking that they are properly attached. Replace floor mats if they become excessively worn.

WARNING: To avoid potential interference with a foot pedal, ensure that the driver's floor mat is securely fastened, and never place an additional floor mat on top of it. Floor mats should always rest on top of the vehicle carpeting surface and not on another floor mat or other covering.
Displaying Tire Pressures
Tire pressures display on the touchscreen by touching Controls > Service, or use the mobile app. The pressure of each tire displays in the visualization of Cybertruck, in addition to the time the tire pressures were last read by the system.
The touchscreen also displays your vehicle's recommended cold tire pressures so you can easily determine how much to inflate your tires.
To choose whether to display tire pressures using Bar or PSI, touch Controls > Display > Tire Pressure.
NOTE: You may need to drive briefly before the visualization displays the tire pressure values.
Maintaining Tire Pressures
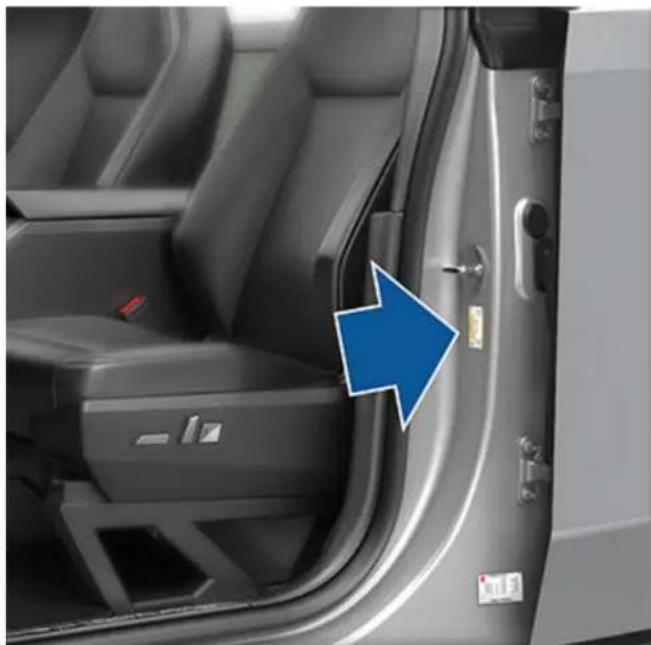
natural_image
Interior view of a car showing the door, seat, and passenger seat with a blue arrow pointing to the door (no text or symbols visible)Keep tires inflated to the recommended pressures, even if it differs from the pressure printed on the tire itself. The Tire and Loading Information label on the center door pillar is visible when the driver door is open and represents a nominal driving scenario in which the vehicle is carrying cargo in the front trunk and up to five passengers. When carrying heavy loads, up to the vehicle's GVWR, in a Cybertruck equipped with All Terrain tires, the tire pressures should be increased.
| Tires (Front and Rear) | Normal Load* GVWR** | |
| 20" All Season 50 psi 50 psi | ||
| 20" All Terrain | 50 psi 65 psi | |
Tires (Front and Rear) Normal Load\* GVWR\*\*
*Normal Load assumes a fully loaded front trunk and up to five occupants (see Steps for Determining the Correct Load Limit on page 224).
**GVWR load capacity not exceeding the vehicle's Gross Vehicle Weight Rating (see Weights - Vehicle on page 228).

CAUTION: If you are towing a trailer, do not use the tire pressures printed on the Tire and Loading Information Label. Instead, refer to the tire pressures published (see Tire Pressures when Towing on page 114).

The Low Tire Pressure indicator light on the touchscreen alerts you if a tire is under-inflated. This light does not immediately turn off when you adjust tire pressure. After inflating the tire to the recommended pressure, you must drive over 15 mph (25 km/h) for a short amount of time to activate the Tire Pressure Monitoring System (TPMS), which turns off the Low Tire Pressure indicator light.
If the indicator light flashes for one minute whenever you power on Cybertruck, a fault with the TPMS is detected.
Your vehicle's tire pressures will drop in cold ambient temperatures. If the TPMS indicator light appears, inflate the tires before driving. The tires will lose approximately one PSI for every 10^ F (6° C) drop in outside temperature. Proper tire pressures help protect tires from potholes and improve range and tire longevity when properly inflated.

WARNING: The Low Tire Pressure indicator light alerts you only in situations when a tire is below the recommended threshold (as indicated on the Tire and Loading Information label) under normal driving conditions. It does not alert you when a tire is under-inflated based on the load you are carrying.

WARNING: Under-inflation is the most common cause of tire failures and can cause a tire to overheat, resulting in severe tire cracking, tread separation, or blowout. This may lead to unexpected loss of vehicle control and increased risk of injury. Under-inflation also reduces the vehicle's range and tire tread life.
Checking and Adjusting Tire Pressures

WARNING: Check tire pressures using an accurate pressure gauge when tires are cold. It takes only about one mile (1.6 km) of driving to warm up the tires sufficiently to affect tire pressures. Parking the vehicle in direct sunlight or in hot weather can also affect tire pressures. If you must check warm tires, expect increased pressures. Do not let air out of warm tires in an attempt to match recommended cold tire pressures. A hot tire at or below the recommended cold tire inflation pressure is dangerously under-inflated.
Follow these steps when tires are cold and Cybertruck has been stationary for over three hours:
- Refer to the Tire and Loading Information label located on the driver's center door pillar for the target tire pressure.
- Remove the wheel cover (see Removing and Installing Wheel Covers on page 204).
- Remove the valve cap.
- Firmly press an accurate tire pressure gauge onto the valve to measure pressure.
NOTE: You can also view tire pressures on the touchscreen.
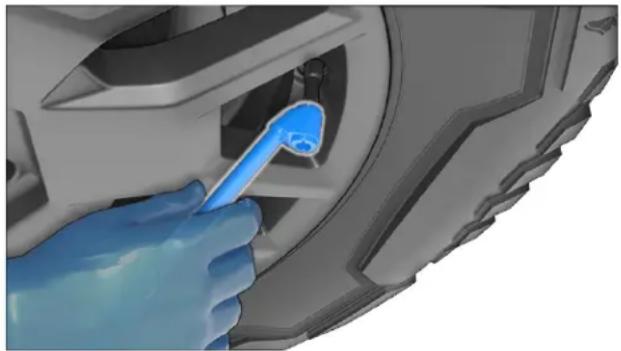
natural_image
Close-up of a blue-handled hand inserting a blue tool into a car interior (no text or symbols visible)- If required, add or remove air to reach the recommended pressure.
NOTE: You can release air by pressing the metal stem in the center of the valve.
- Re-check pressure using the accurate tire gauge.
- Repeat steps 5 and 6 as necessary until the tire pressure is correct.
- Reinstall the valve cap to prevent dirt from entering. Periodically check the valve for damage and leaks.
- Reinstall the wheel cover.
Tire Pressure Monitoring

The Cybertruck is equipped with a tire pressure monitoring system that warns the driver of significant under-inflation or over-inflation of the tires by displaying the Tire Pressure Indicator Light. Check the Tire Information label located on the driver's door pillar for more details, or see Maintaining Tire Pressures on page 200.
Each tire, including the spare (if provided), should be checked monthly when cold and inflated to the inflation pressure recommended by the vehicle manufacturer on the vehicle placard or tire inflation pressure label. (If your vehicle has tires of a different size than the size indicated on the vehicle placard or tire inflation pressure label, you should determine the proper tire inflation pressure for those tires.)
As an added safety feature, your vehicle has been equipped with a tire pressure monitoring system (TPMS) that illuminates a low tire pressure telltale when one or more of your tires is significantly under-inflated. Accordingly, when the low tire pressure telltale illuminates, you should stop and check your tires as soon as possible, and inflate them to the proper pressure. Driving on a significantly under-inflated tire causes the tire to overheat and can lead to tire failure. Under-inflation also reduces fuel efficiency and tire tread life, and may affect the vehicle's handling and stopping ability.
Please note that the TPMS is not a substitute for proper tire maintenance, and it is the driver's responsibility to maintain correct tire pressure, even if under-inflation has not reached the level to trigger illumination of the TPMS low tire pressure telltale.
TPMS Malfunction
Your vehicle has also been equipped with a TPMS malfunction indicator to indicate when the system is not operating properly. The TPMS malfunction indicator is combined with the low tire pressure telltale. When the system detects a malfunction, the telltale will flash for approximately one minute and then remain continuously illuminated. This sequence will continue upon subsequent vehicle start-ups as long as the malfunction exists.
When the malfunction indicator is illuminated, the system may not be able to detect or signal low tire pressure as intended. TPMS malfunctions may occur for a variety of reasons, including the installation of replacement or alternate tires or wheels on the vehicle that prevent the TPMS from functioning properly. Always check the TPMS malfunction telltale after replacing one or more tires or wheels on your vehicle to ensure that the replacement or alternate tires and wheels allow the TPMS to continue to function properly.

The TPMS malfunction indicator is combined with the tire pressure indicator light. If Cybertruck detects a fault with the TPMS, this indicator flashes for one minute whenever you power on Cybertruck.
NOTE: Installing accessories that are not approved by Tesla can interfere with the TPMS.
NOTE: If a tire has been replaced or repaired using a different tire sealant than the one available from Tesla, and a low tire pressure is detected, it is possible that the tire sensor has been damaged.
Replacing a Tire Sensor
If the Tire Pressure warning indicator displays frequently, schedule a service appointment to determine if a tire sensor needs to be replaced. Non-Tesla Service Center must replace using a Tesla OEM sensor.
Regularly inspect the tread and side walls for any sign of distortion (bulges), foreign objects, cuts or wear.

WARNING: Do not drive Cybertruck if a tire is damaged, excessively worn, or inflated to an incorrect pressure. Check tires regularly for wear, and ensure there are no cuts, bulges or exposure of the ply/cord structure.
To improve the mileage you get from your tires, maintain tires at the recommended tire pressures, observe speed limits and advisory speeds, and avoid:
- Pulling away quickly, or hard acceleration.
- Fast turns and heavy braking.
- Potholes and objects in the road.
- Hitting curbs when parking.
- Contaminating tires with fluids that can cause damage.
Tire Wear
Adequate tread depth is important for proper tire performance.
Cybertruck is originally fitted with tires that have wear indicators molded into the tread pattern. When the tread has been worn down to 2/32" (1.6 mm), the indicators start to appear at the surface of the tread pattern, producing the effect of a continuous band of rubber across the width of the tire. For optimal performance and safety, Tesla recommends replacing tires before the wear indicators are visible.
Tires with a tread depth less than 4/32" (3 mm) are more likely to hydroplane and should not be used when driving in wet conditions. Tires with a tread depth less than 5/32" (4 mm) do not perform well in snow and slush and should not be used when driving in winter conditions.
To improve vehicle handling characteristics and minimize hydroplaning in wet conditions, put tires with the most tread on the rear of the car.
Tire Rotation, Balance, and Wheel Alignment
Tesla recommends rotating the tires every 6,250 miles (10,000 km) or if tread depth difference is 2/32 in (1.6 mm) or greater, whichever comes first.
Tire rotation is an essential part of tire maintenance. It helps maintain an even tread wear pattern which enhances the tire's overall wear quality, decreases road noise and maximizes tire life.
Unbalanced wheels (sometimes noticeable as vibration through the steering wheel) affect vehicle handling and tire life. Even with regular use, wheels can get out of balance. Therefore, they should be balanced as required.
If tire wear is uneven (on one side of the tire only) or becomes abnormally excessive, check the wheel alignment.
Punctured Tires
A puncture eventually causes the tire to lose pressure, which is why it is important to check tire pressures frequently. Permanently repair (if safe to do so) or replace punctured or damaged tires as soon as possible.
Your tubeless tires may not leak when penetrated, provided the object remains in the tire. If, however, you feel a sudden vibration or ride disturbance while driving, or you suspect a tire is damaged, immediately reduce your speed. Drive slowly, while avoiding heavy braking or sharp steering and, when safe to do so, stop the vehicle and contact Roadside Assistance.
NOTE: In some cases, you can temporarily repair small tire punctures (under 1/4" (6 mm)) using an optional tire repair kit available from Tesla. This allows you to slowly drive Cybertruck to a nearby tire repair facility.

WARNING: Do not drive with a punctured tire that has not been repaired, even if the puncture has not caused the tire to deflate. A punctured tire can deflate suddenly at any time.
Flat Spots
If Cybertruck is stationary for a long period, tires can form flat spots. When Cybertruck is driven, these flat spots cause a vibration which gradually disappears as the tires warm up and regain their original shape.
To minimize flat spots during storage, inflate tires to the maximum pressure indicated on the tire's sidewall. Then, before driving, release air to adjust tire pressure to the recommended levels.
Tire Pressure Monitoring System (TPMS) Reset
After replacing one or more wheels (but not after just replacing a tire or rotating wheels), the TPMS sensors are reset to ensure tire pressure warnings are accurate. TPMS sensors reset automatically after driving over 15 mph (25 km/h) for longer than 10 minutes. For additional information on TPMS, see Tire Pressure Monitoring on page 201.
NOTE: After replacing a wheel, false tire pressure warnings may display before you've driven 15 mph (25 km/h) for longer than 10 minutes.

WARNING: If your Cybertruck is equipped with aftermarket tires that differ in size from those printed on the Tire and Loading Information Label (see Vehicle Loading on page 223), it is the driver's responsibility to determine the correct tire pressure. Do not drive on public roads when tires are not inflated to the correct pressure.

WARNING: Do not depend on TPMS sensors to accurately determine pressures and trigger alerts. It is the driver's responsibility to maintain correct tire pressures (see Maintaining Tire Pressures on page 200). Over or under-inflated tires can result in loss of control or tire damage, which can lead to serious injury.
Seasonal Tire Types
Understand Your Tire Type
The type of tires that your vehicle is originally equipped with depends on vehicle model and market region. It is important to understand the capabilities of your vehicle's tires and whether they are suited for summer, all-season, or winter driving. Check the information on the sidewall of a tire for information about a tire's performance characteristics (see Tire Pressures on page 200).
Summer and All-Season Tires
Summer tires and all season tires are designed for maximum dry and wet road performance but are not designed to perform well in winter conditions. All-season tires are designed to provide adequate traction in most conditions year-round, but may not provide the same level of traction as winter tires in snowy or icy conditions. All-season tires can be identified by "ALL SEASON" and/or "M+S" (mud and snow) on the tire sidewall.
If driving in cold temperatures or on roads where snow or ice may be present, Tesla recommends using winter tires.

WARNING: In cold temperatures or on snow or ice, summer and all-season tires do not provide adequate traction. Selecting and installing the appropriate tires for winter conditions is important to ensure the safety and optimum performance of your Cybertruck.
All-Terrain Tires
Use all-terrain tires if you regularly drive on gravel and dirt roads. All-terrain tires are suitable for driving on both paved roads (city streets, highways, etc.) as well as off-road (sand, dirt, mud, etc.). All-terrain tires must be the same diameter, brand, construction and tread pattern on all four wheels.
When driving with all-terrain tires, you may experience more road noise, shorter tread life, and less traction on dry roads.
Winter Tires
Use winter tires to increase traction in snowy or icy conditions. When installing winter tires, always install a complete set of four tires at the same time. Winter tires must be the same diameter, brand, construction and tread pattern on all four wheels.

Winter tires can be identified by a mountain/snowflake symbol on the tire's sidewall.
When driving with winter tires, you may experience more road noise and shorter tread life.

WARNING: Never exceed the speed rating of your vehicle's tires. The speed rating is shown on the sidewall of your tires (see Understanding Tire Markings on page 207).
Driving in Low Temperatures
Tire performance is reduced in low ambient temperatures, resulting in reduced grip and an increased susceptibility to damage from impacts. Performance tires (summer applications) have reduced traction in ambient temperatures below 5^ C40° F ( 5^ C), and are not recommended in snow/ice conditions. Performance tires can temporarily harden when cold, causing you to hear rotational noise for the first few miles (kilometers) until the tires warm up.
Tire Chains
Only use tire chains on the REAR tires.
Tesla has tested and approved the following tire chains to increase traction in snowy conditions. Install tire chains on rear tires only. You can purchase these tire chains from Tesla or other distributors.

CAUTION: You must remove wheel covers before installing tire chains. Failure to do so can cause damage not covered by the warranty.
Tire Size Recommended Chain
20" König XD-16 Pro size 285
Tesla recommends that you use the size 285 König XD-16 Pro tire chains, as they are sized to match the tires on Cybertruck.
When installing tire chains, follow the instructions and warnings provided by the tire chain manufacturer. Mount them evenly and as tight as possible.
When using tire chains:
- Inspect the tire chains for loose fittings and damaged links before each use.
- Set air suspension to Medium and turn off the Preferred Ride Height to Low setting (see Suspension on page 95).
- Avoid heavily loading Cybertruck (heavy loads can reduce the clearance between the tires and the body).
- Do not drive the vehicle without the chains properly installed.
- Drive slowly. Do not exceed 30 mph (48 km/h).
- Remove the tire chains as soon as conditions allow.
NOTE: Tire chains are prohibited in some jurisdictions. Check local laws before installing tire chains.

CAUTION: Using non-recommended tire chains, or using tire chains on other sized tires can damage the suspension, body, wheels, and/or brake lines. Damage caused by using non-recommended tire chains, or incorrectly installing tire chains, is not covered by the warranty.

CAUTION: Never deflate your tires to put on tire chains. When re-inflated, the chains might fit too tightly and cause tire damage.

CAUTION: Install tire chains on rear tires only. Installing chains on front tires can cause damage.

CAUTION: Ensure that the tire chains cannot touch suspension components or brake lines. If you hear the chains making unusual noises that would indicate contact with Cybertruck, stop and investigate immediately.
Removing and Installing Wheel Covers
If your Cybertruck is equipped with wheel covers, you must remove them to access the valve stem and the lug nuts.
To remove a wheel cover:
- Grasp the cover firmly with both hands.
- Pull the cover toward you to release the retaining clips.
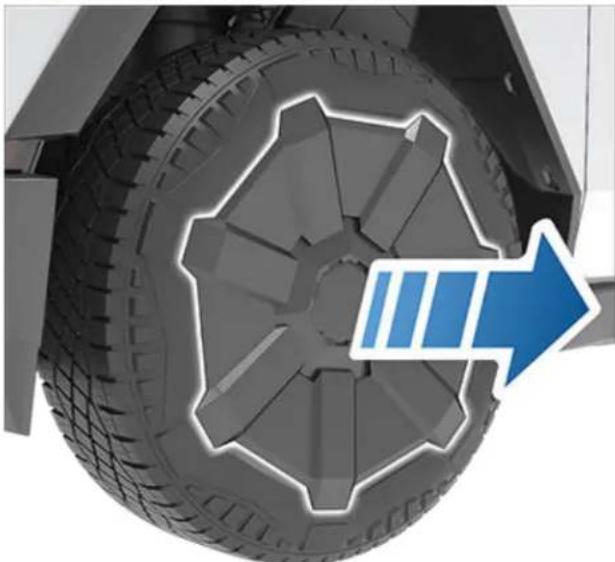
natural_image
Close-up of a car tire with a blue arrow pointing to it, no visible text or symbolsNOTE: Make sure the mounting ring is removed with the wheel cover.
To install a wheel cover:
- Separate the mounting ring from the wheel cover by pulling the platic ring from the inside of the wheel cover.
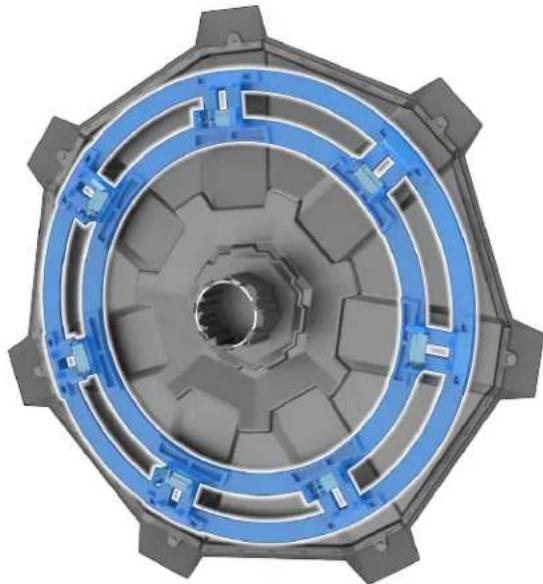
natural_image
3D rendering of a mechanical gear assembly with blue and gray components (no text or symbols visible)- Align the mounting ring with the spokes of the wheel. Firmly press the mounting ring into the wheel to secure it.
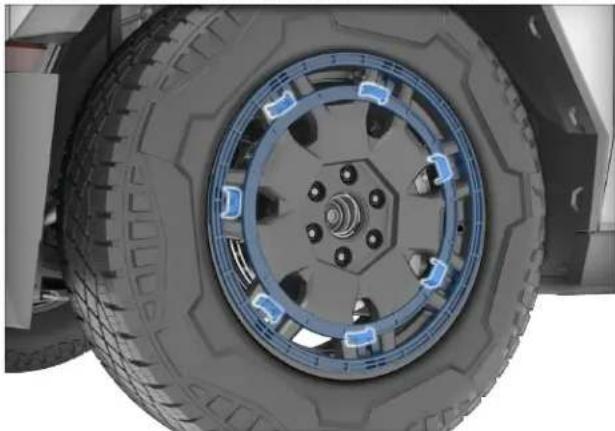
natural_image
Close-up of a vehicle tire and wheel assembly (no visible text or symbols)- Align the wheel cover with the design of the tire.
- Firmly press the center of the cover to secure it in place, then work your way out to firmly pressing the outer perimeter of each spoke. You may need to hold the opposite side of the cover until all spokes are secured.
- Firmly press the center of the cap with your hands (do not hit the cover with your hands) to ensure it is secured.
- As a final check, quickly pull each spoke to confirm it is secured in place.
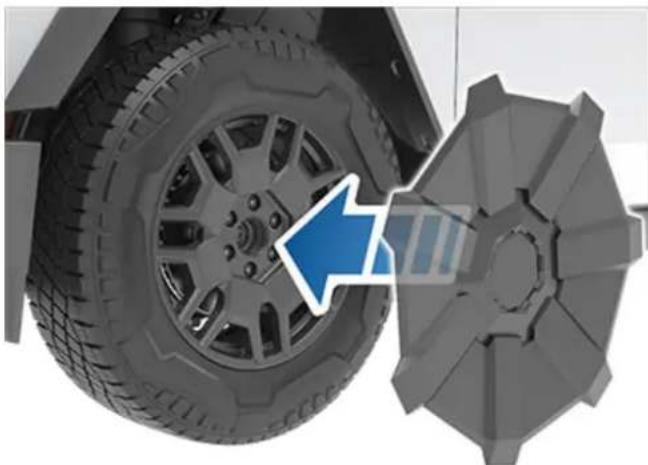
natural_image
Close-up of a car tire and mechanical component with a blue arrow indicating direction (no text or symbols)
CAUTION: To prevent the wheel cover from falling off, ensure that it is fully secured before driving.
Wheel Specifications (Factory)
| Configuration - Location Size (in) Offset (mm) | |||
| Dual Motor - Front and Rear 20 x 9.0J ET58.5 | |||
| Tri Motor - Front and Rear 20 x 9.0J ET58.5 | |||
| Lug Nut Torque 151 lb. ft (205 Nm) | |||
| Lug Nut Socket Size 21 mm | |||
NOTE: For instructions on how to jack/lift Cybertruck, see Jacking and Lifting on page 215.
Tire Specifications (Factory)
| Location Type/Purpose Name Design Size | ||||
| Front and Rear 20" All Season Pirelli Scorpion ATR Hard Metric | 285/65R20 | |||
| Front and Rear 20" All Terrain | Goodyear WranglerTerritory RT | Light Truck | LT285/65R20 | |
| Refer to the tire pressures printed on the Tire and Loading Information label. This label is located on the center door pillar and is visible when the driver's door is open (also see Checking and Adjusting Tire Pressures on page 200). | ||||
| Winter tires can be purchased from a Tesla service center or may be available for purchase on the Tesla web site. | ||||

WARNING: Tesla recommends replacement tires to be equivalent to or higher than the load rating compared the original tires. Using tires with a reduced load rating lowers Maximum GAWR (Gross Axle Weight Rating) below limits posted on the Tire and Loading Information Label on page 223. However, using tires with increased load rating does not increase the Maximum GAWR beyond the posted limits on the Tire and Loading Information Label on page 223.
Understanding Tire Markings
Laws require tire manufacturers to place standardized information on the sidewall of all tires. This information identifies and describes the fundamental characteristics of the tire. It also provides the tire identification number (TIN) for certification of safety standards, and in case of a recall.
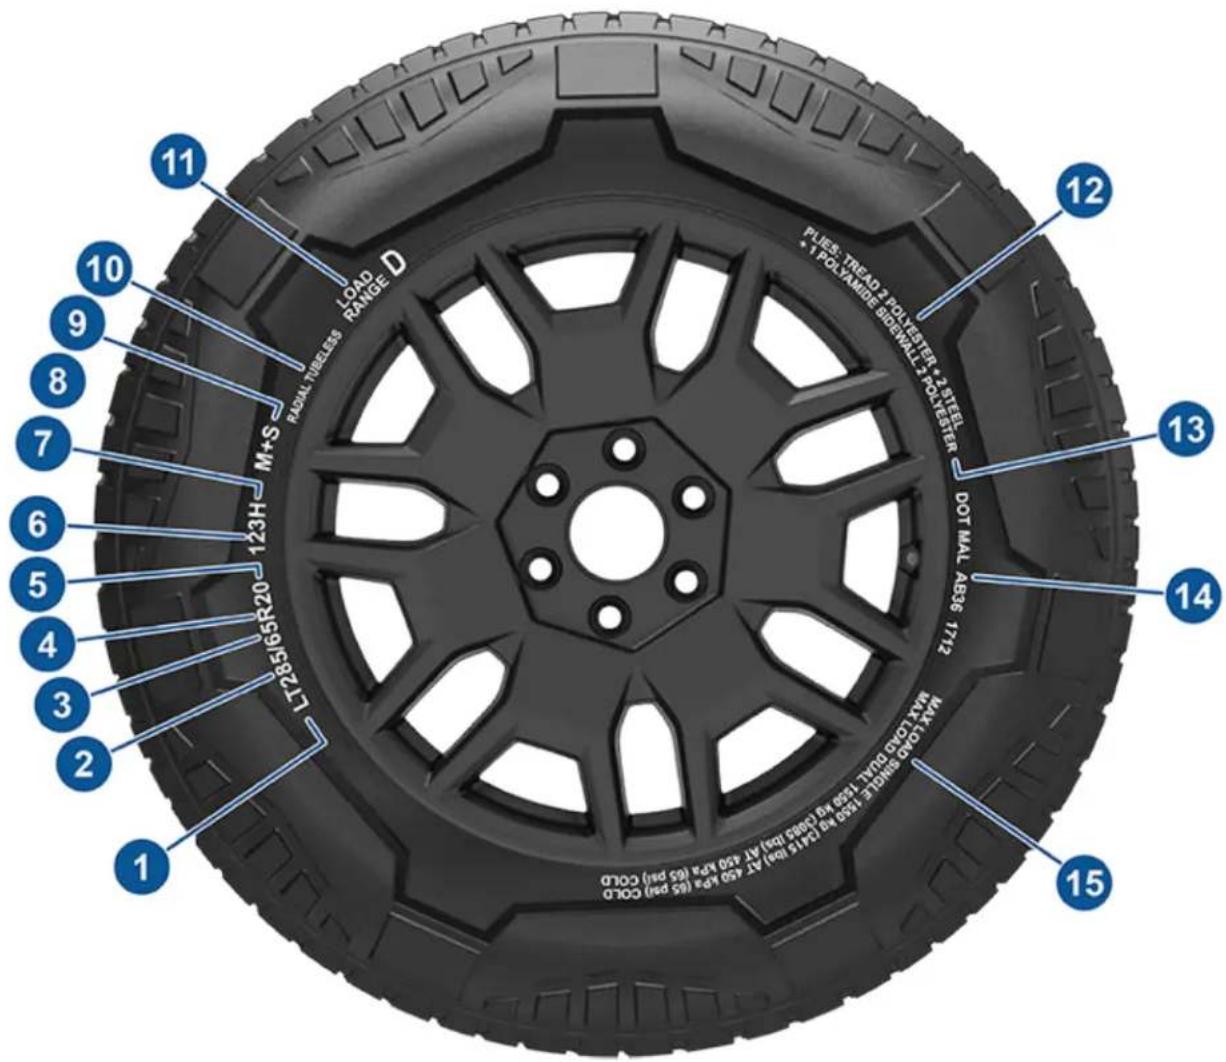
NOTE: You can identify a Tesla-approved tire by the "T-mark" specification on the tire's sidewall (for example, T0, T1, T2). Tesla-approved tires are designed to work with your vehicle and optimize performance, safety, reliability, and durability. For more information about Tesla-approved replacement tires, refer to the Service Manual.
- Tire category: P (passenger), LT (light truck), or None (hard metric) indicates the tire classification and corresponding load classification.
- Tire width: This 3-digit number is the width (in millimeters) of the tire from sidewall edge to sidewall edge.
- Aspect ratio: This 2-digit number is the sidewall height as a percentage of the tread width. So, if the tread width is 205 mm, and the aspect ratio is 50, the sidewall height is 102 mm.
- Tire construction: R indicates that the tire is of Radial ply construction.
- Wheel diameter: This 2-digit number is the diameter of the wheel rim in inches.
-
Load index: This 2 or 3-digit number is the weight each tire can support. This number is not always shown.
-
Speed rating: When stated, indicates the maximum speed (in mph) at which the tire can be used for extended periods. Q=99 mph (160 km/h), R=106 mph (170 km/h), S=112 mph (180 km/h), T=118 mph (190 km/h), U=124 mph (200 km/h), H=130 mph (210 km/h), V=149 mph (240 km/h), W=168 mph (270 km/h), Y=186 mph (300 km/h), (Y)=vehicle's top speed (exceeds the "Y" rating).
- Load range: Shown as Standard Load (SL) or Extra Load (XL), the load range determines how much weight your tires can support at a specified tire pressure. When replacing tires, only use tires of the same load range. If towing with snow tires, ensure they are the same load range of the tires your vehicle came equipped with.
- Tire composition and materials: The number of plies in both the tread area and the sidewall area indicates how many layers of rubber coated material make up the structure of the tire. Information is also provided on the type of materials used.
- Maximum tire load: The maximum load which can be carried by the tire.
- Maximum permissible inflation pressure: This pressure should not be used for normal driving.
- U.S. DOT Tire Identification Number (TIN): Begins with the letters DOT and indicates that the tire meets all federal standards. The next 2 digits/letters represent the plant code where it was manufactured, and the last 4 digits represent the week and year of manufacture. For example, the number 1712 is used to represent the 17th week of 2012. The other numbers are marketing codes used at the manufacturer's discretion. This information can be used to contact consumers if a tire defect requires a recall.
- Treadwear grade: This number indicates the tire's wear rate. The higher the treadwear number is, the longer it should take for the tread to wear down. A tire rated at 400, for example, lasts twice as long as a tire rated at 200.
- Traction grade: Indicates a tire's ability to stop on wet roads. A higher graded tire should allow you to stop your vehicle in a shorter distance than a tire with a lower grade. Traction is graded from highest to lowest as AA, A, B, and C.
- Temperature grade: The tire's resistance to heat is grade A, B, or C, with A indicating the greatest resistance. This grading is provided for a correctly inflated tire, which is being used within its speed and loading limits.
Uniform Tire Quality Grading
The following information relates to the tire grading system developed by the National Highway Traffic Safety Administration (NHTSA), which grades tires by tread wear, traction and temperature performance. Tires that have deep tread, and winter tires, are exempt from these marking requirements.
Where applicable, quality grades are found on the tire's sidewall between the tread shoulder and maximum section width. For example:
- TREADWEAR 180
- TRACTION AA
• TEMPERATURE A
The quality grades are described next.
NOTE: In addition to the marking requirements, passenger car tires must conform to Federal Safety Requirements.
Treadwear
The treadwear grade is a comparative rating based on the wear rate of the tire when tested under controlled conditions on a specified government test course.
For example, a tire graded 150 wears one and a half times better on a government test course than a tire graded 100. The relative performance of tires depends on the actual conditions of their use, however, and can depart significantly from the norm due to variations in driving habits, service practices, road characteristics, and climate.
Traction
The traction grades, from highest to lowest, are: AA, A, B, and C. These grades represent a tire's ability to stop on wet pavement as measured under controlled conditions on test surfaces of asphalt and concrete. A tire marked C might have poor traction performance.

WARNING: Defective tires are dangerous. Do not drive if a tire is damaged, excessively worn, or is inflated to an incorrect pressure. The safety of the vehicle and occupants can be adversely affected. Check tires regularly for wear and to ensure there are no cuts, bulges or exposure of the ply/cord structure.

WARNING: The traction grade assigned to the tire is based on straight-ahead braking tests, and does not include: acceleration, cornering, hydroplaning or peak traction characteristics.
Temperature
The temperature grades are A (the highest), B, and C, representing the tire's resistance to the generation of heat and its ability to dissipate heat when tested under controlled conditions on a specified indoor laboratory test wheel. Sustained high temperature can cause the tire to degenerate and reduce tire life, and excessive temperature can lead to sudden tire failure.
The grade C corresponds to the minimum level of performance that all passenger car tires must meet under the Federal Motor Safety Standard No. 109. Grades B and A represent levels of performance on the laboratory test wheel that exceed the minimum requirements.

WARNING: A tire's temperature grade is established for a tire that is properly inflated and not overloaded. Excessive speed, under-inflation, or excessive loading, either separately or in combination, can cause heat buildup and possible tire failure.
Tire and Loading Glossaries
General Wheel and Tire Terms
Accessory Weight The combined weight (in excess of those items replaced) of items available as factory installed equipment.
| Bead The inner edge of a | tire that is shaped to fit to the rim and form an air tight seal. The bead is constructed of steel wires which are wrapped, or reinforced, by the ply cords. |
| Cold Tire Pressure The air | pressure in a tire that has been standing in excess of three hours, or driven for less than one mile. |
| Curb Weight The weight of a standard vehicle, including any optional equipment fitted, and with the correct fluid levels. | |
| Gross Vehicle Weight The maximum permissible weight of a vehicle with driver, passengers, load, luggage, and equipment. | |
| kPa (kilo pascal) A metric | unit used to measure pressure. One kilo pascal equals approximately 0.145 psi. |
| Maximum Inflation Pressure | The maximum pressure to which the tire should be inflated. This pressure is given on the tire side wall in psi (lbf/in2).CAUTION:This pressure marked on the tire is the maximum allowed by the tire manufacturer. It is not the pressure Tesla recommends using for Cybertruck. |
| Maximum Loaded Vehicle Weight | The sum of curb weight, accessory weight, vehicle capacity weight, and production options weight. |
| Production Options Weight | The combined weight of options installed which weigh in excess of 3 lb (1.4 kg) more than the standard items that they replaced, and are not already considered in curb or accessory weights. |
| PSI (lbf/in2) | Pounds per square inch (the unit used to measure tire pressure). |
| Recommended Tire Inflation Pressure | Tire inflation pressure, established by Tesla, which is based on the type of tires that are mounted on the vehicle at the factory. This information can be found on the Tire and Loading Information label located on the door pillar. |
| Rim The metal support for a | tire, or tire and tube, upon which the tire beads are seated. |
| Vehicle Capacity Weight | The number of seats multiplied by 150 lbs (68 kg) plus the rated amount of load/luggage. |
Load Carrying Definitions
| Normal occupant weight 68 kg (150 lbs) times the number of occupants specified in the second column of the tables for calculating load limits (see the Vehicle Loading topic of this Owner's Manual). | |
| Occupant distribution Distribution of occupants in a vehicle. | |
| Passenger car tire (P or Hard Metric) A tire intended for use on passenger cars, multipurpose passenger vehicles, and trucks. | |
| Light truck tire (LT) A tire for use where additional load carrying capability is needed. | |
| Rim diameter Nominal diameter of the bead seat. | |
| Rim size designation | Rim diameter and width. |
| Rim type designation | The manufacturing industry's designation for a rim by style or code. |
| Rim width | Nominal distance between the rim's flanges. |
| Vehicle maximum load on the tire | Load on an individual tire that is determined by distributing to each axle its share of the maximum loaded vehicle weight and dividing by two. |
| Vehicle normal load on the tire | Load on an individual tire that is determined by distributing to each axle its share of the curb weight, accessory weight, and normal occupant weight and dividing by two. |
Pneumatic Radial Tire Definitions
| Bead separation | A breakdown of the bond between components in the bead. |
| Bias ply tire A pneumatic | tire in which the ply cords that extend to the beads are laid at alternate angles substantially less than 90 degrees to the center line of the tread. |
| Carcass The tire structure, except tread and sidewall rubber which, that when inflated, bears the load. | |
| Chunking The breaking away of pieces of the tread or sidewall. | |
| Cord The strands forming the plies in the tire. | |
| Cord separation The parting of cords from adjacent rubber compounds. | |
| Cracking Any parting within the tread, sidewall, or inner liner of the tire extending to cord material. | |
| Extra load tire A tire designed to operate at higher loads and higher inflation pressure than the corresponding standard tire. | |
| Groove The space between two adjacent tread ribs. | |
| Inner liner The layer(s) forming the inside surface of a tubeless tire that contains the inflating medium within the tire. | |
| Inner liner separation The parting of the inner liner from cord material in the carcass. | |
| Load rating The maximum load that a tire is rated to carry for a given inflation pressure. | |
| Maximum load rating The load rating for a tire at the maximum permissible inflation pressure for that tire. | |
| Measuring rim The rim on which a tire is fitted for physical dimension requirements. | |
| Open splice Any parting at any junction of tread, sidewall, or inner liner that extends to the cord material. | |
| Outer diameter The overall diameter of an inflated new tire. | |
| Overall width | The linear distance between the exteriors of the sidewalls of an inflated tire, including elevations due to labeling, decorations, or protective bands or ribs. |
| Ply | A layer of rubber-coated parallel cords. |
| Ply separation | A parting of rubber compound between adjacent plies. |
| Pneumatic tire | A mechanical device made of rubber, chemicals, fabric and steel or other materials, that, when mounted on an automotive wheel, provides the traction and contains the gas or fluid that sustains the load. |
| Radial ply tire | A pneumatic tire in which the ply cords that extend to the beads are laid at substantially 90 degrees to the center line of the tread. |
| Reinforced tire | A tire designed to operate at higher loads and at higher inflation pressures than the corresponding standard tire. |
| Section width | The linear distance between the exteriors of the sidewalls of an inflated tire, excluding elevations due to labeling, decoration, or protective bands. |
| Sidewall | The portion of a tire between the tread and bead. |
| Sidewall separation | The parting of the rubber compound from the cord material in the sidewall. |
| Snow tire | A tire that attains a traction index equal to or greater than 110, compared to the ASTM E1136-93 (re-approved 2003, incorporated by reference, see §571.5) Standard Reference Test Tire when using the snow traction test as described in ASTM F1805-00 (incorporated by reference, see §571.5), and that is marked with an Alpine Symbol specified in S5.5(i) on at least one sidewall. |
| Test rim | The rim on which a tire is fitted for testing, and may be any rim listed as appropriate for use with that tire. |
| Tread | The portion of a tire that comes into contact with the road. |
| Tread rib | A tread section running around the circumference of a tire. |
| Tread separation | The pulling away of the tread from the tire carcass. |
| Tread wear indicators (TWI) | The projections within the principal grooves designed to give a visual indication of the degrees of wear of the tread. |
| Wheel-holding fixture | The fixture used to hold the wheel and tire assembly securely during testing. |
Topping Up Windshield Washer Fluid
The only reservoir into which you can add fluid is the windshield washer fluid reservoir, which is located behind the powered frunk liner. When the level is low, a message displays on the touchscreen.
To top up the washer fluid:
- Open the powered frunk.
- Use a microfiber cloth to clean around the filler cap before opening it to prevent dirt from entering the reservoir.
- Open the filler cap.
- While avoiding spilling, fill the reservoir until the fluid level is visible just below the filler neck. The reservoir has a total capacity of 4.2 liters.
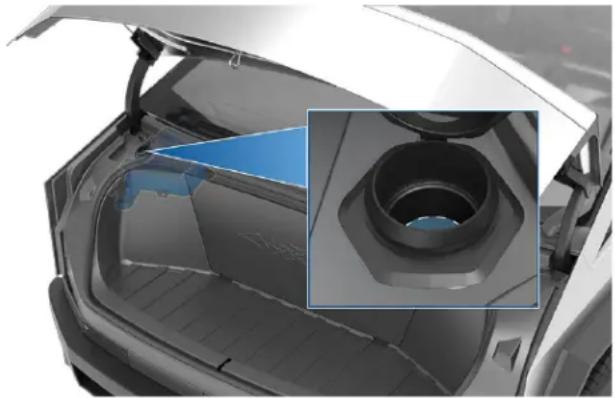
natural_image
Exterior view of a car trunk with a hexagonal vent and internal structure (no visible text or symbols)-
Wipe up any spills immediately and wash the affected area with water.
-
Close the filler cap.

CAUTION: Some national or local regulations restrict the use of Volatile Organic Compounds (VOCs). VOCs are commonly used as freeze protection in washer fluid. Use a washer fluid with limited VOC content only if it provides adequate freeze resistance for all climates in which you drive Cybertruck.

CAUTION: Use only ethanol-based windshield washer fluid meant for automotive vehicles. Using other substances, such as untreated water, can result in bacterial growth within the climate control system resulting in odor or potential damage that is not covered by warranty. Untreated pure water expands to ice when freezing, which may result in damage.

CAUTION: Do not add formulated washer fluids that contain water repellent or bug wash. These fluids can cause streaking, smearing, and squeaking or other noises.

WARNING: In temperatures below -32^ F ( 0^ C), use a washer fluid with antifreeze. In cold weather, using a washer fluid without antifreeze can impair visibility through the windshield.

WARNING: Windshield washer fluid can irritate eyes and skin. Read and observe the instructions provided by the washer fluid manufacturer.
Cleaning the Wiper Blade
Periodically clean the edge of the wiper blade and check the rubber for cracks, splits, and roughness. If damaged, replace the blade immediately to prevent damage to the glass and improve visibility.
Contaminants on the windshield or wiper blade can reduce the effectiveness of the wiper. Contaminants include ice, wax spray from car washes, washer fluid with bug and/or water repellent, bird droppings, tree sap, and other organic substances.
Follow these guidelines for cleaning:
- Lift the wiper arm a short distance away from the windshield, just far enough to access the wiper blade. Do not lift the wiper arm beyond its intended position.
- Place a towel between the wiper arm and windshield to avoid scratching or cracking the windshield.
- Clean the windshield and wiper blade using washer fluid or non-abrasive glass cleaner approved for use on automotive glass and rubber.

CAUTION: Inappropriate products can cause damage or smears and create glare on the windshield.
- Gently place the wiper blade back onto the windshield.
- Test the wiper blade again. If the wiper remains ineffective after cleaning, replace the wiper blade.
NOTE: An ineffective wiper can lead to reduced visibility for the front windshield cameras, which may lead to degraded performance or unavailability of Autopilot features. For more information, see Cameras on page 27 and refer to Autopilot Limitations and Warnings on page 141.
Replacing the Wiper Blade
For optimum performance, replace the wiper blade at least once a year. You can purchase a replacement wiper blade on the Tesla Shop.

CAUTION: Only install a replacement blade that is identical to the original blade. Using an inappropriate blade can damage the wiper system and windshield.
To replace the wiper blade:
- Shift into Park and turn off the wiper. Ensure the wiper setting is Off and not in Auto, because the wiper blade may still sweep if there is any liquid detected on the windshield.
- Place a towel between the wiper arm and windshield to avoid scratching or cracking the windshield.
- Lift the wiper arm a short distance away from the windshield, just far enough to access the wiper blade.

CAUTION: Wiper blade does not lock into a lifted position. Do not lift the wiper arm beyond its intended position or drop it onto the windshield.
- While holding the wiper arm, press the locking tab, then slide the blade away from the arm. Set the wiper blade next to the wiper arm.
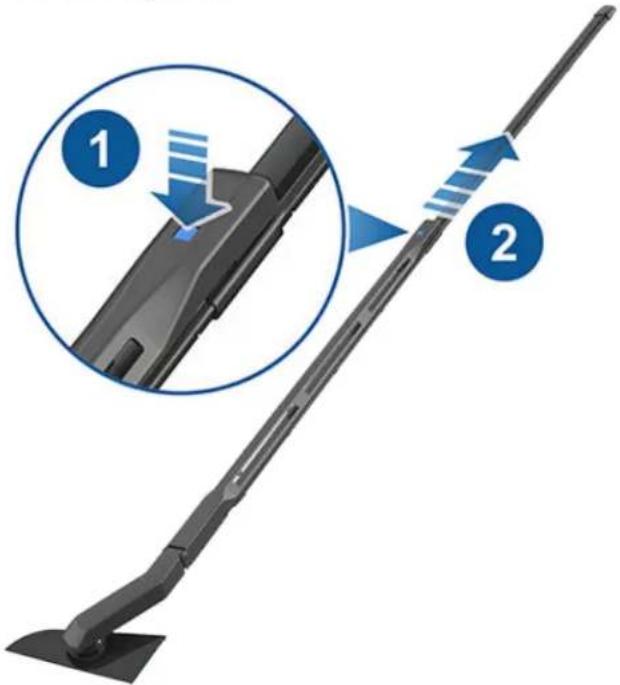
- Disconnect the washer hose from the wiper blade by pulling the hose from the barb fitting.
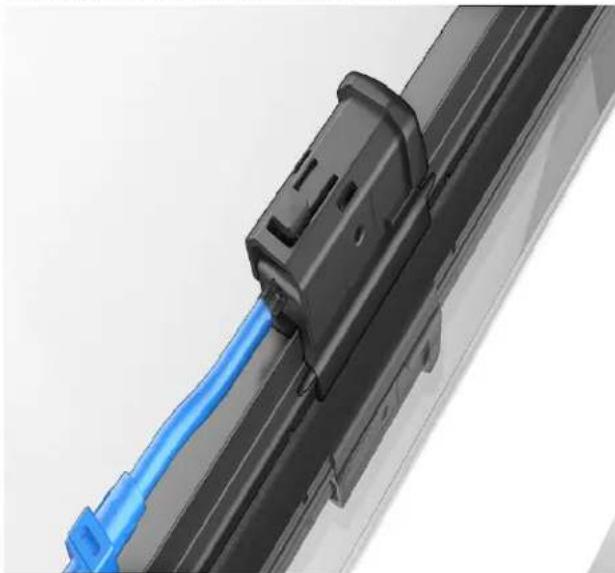
natural_image
Close-up of a black electrical connector with a blue cable inserted, mounted on a metal frame (no visible text or symbols)- Connect the new washer hose to the barb fitting on the new wiper blade.
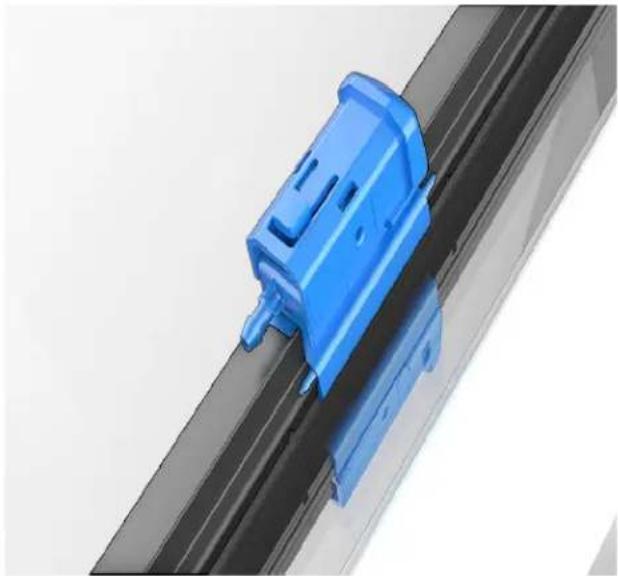
natural_image
3D rendering of a blue plastic component mounted on a black rail track (no text or symbols visible)-
Align the new wiper blade on the wiper arm and slide it toward the base of the wiper arm until it locks into place.
-
Ensure the wiper blade is fully secured by lightly pushing and pulling on the blade. The blade should not jostle or move around.

CAUTION: Ensure the new blade is locked in place and does not move. If not locked in place (you can hear and feel a "click"), the wiper blade may come off during use, resulting in serious damage.
- Remove the towel and gently place the wiper blade against the windshield.
Washer Jets
The windshield washer fluid sprays from nozzles along the length of the wiper blade. You cannot adjust them. If a windshield washer nozzle becomes blocked, use a thin strand of wire to clear any blockages.
If the blade is not dispensing washer fluid, make sure there is enough wiper fluid in the reservoir and refill if needed. If this issue still persists, check the hose connection between the arm and blade for any leaks, kinks, or disconnections.

WARNING: Do not operate the washers while cleaning Cybertruck. Windshield washer fluid can irritate eyes and skin. Read and observe the washer fluid manufacturer's instructions for safe handling.

WARNING: Ensure the equipment you are using is rated for the weight of Cybertruck, including any cargo, installed accessories, or upgrades before attempting to lift.
Follow the steps below to lift Cybertruck. Ensure that any non-Tesla repair facility is aware of these instructions, including lift points and warnings.
Using a Jack and Jack Stand
-
Ensure Cybertruck is located in a flat, stable, and secure area with enough space surrounding the vehicle to jack it.
-
Ensure the vehicle ride height is set to Medium and enable Jack Mode (Controls > Service > Jack Mode see Jack Mode on page 216) to disable self-leveling.

WARNING: You MUST enable Jack Mode, otherwise the vehicle may try to self-level while on the jack. Failing to engage Jack Mode may cause serious injury or death.
-
If available, chock the wheel diagonal to the corner you're working on (for example, if you are replacing the rear driver's side tire, chock the front passenger's side tire).
-
Remove the wheel cover from the wheel with the flat tire (see Removing and Installing Wheel Covers on page 204).
-
Use the lug nut wrench to break loose the lug nuts on the wheel.
-
Place the jack under the vehicle's lift point (shown in green) corresponding to the location you are working on.

WARNING: DO NOT position the jack under the Battery or side rails (shown in red).
Lift points:
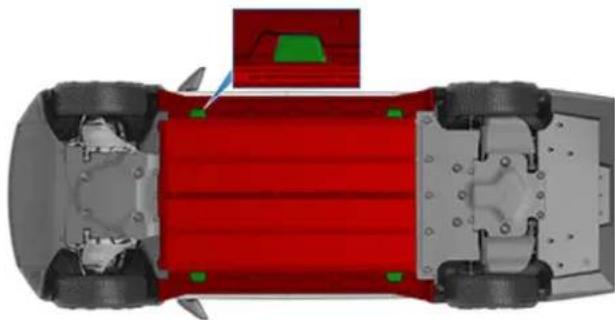
natural_image
Top-down view of a car chassis with red structural elements and green mounting brackets (no text or symbols)-
Following the jack manufacturer's instructions, begin to lift the vehicle, making sure to constantly monitor the contact with the lift point.
-
Place the jack stand under the appropriate jack stand location in the image corresponding to the area you're working on. Ensure the jack stand is appropriately oriented and does not touch any of the red areas in the image. Adjust to meet the jack's height. The vehicle should be able to be solely propped up with the jack stand.

WARNING: Do not get under the vehicle when it is propped up on the jack or jack stands. Doing so may cause serious injury or death.
Jack stand points:
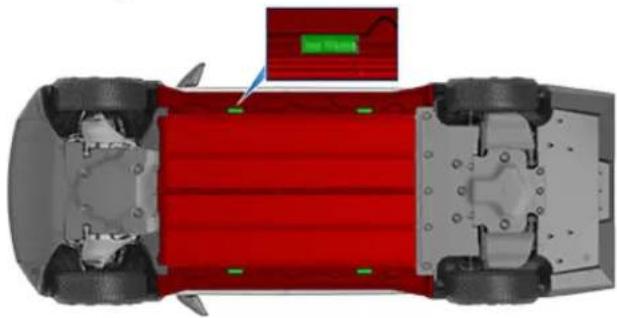
natural_image
Top-down view of a red electric vehicle chassis with visible battery pack and mounting brackets (no text or symbols)-
Slowly lower the jack following manufacturer instructions, constantly monitoring the contact between the vehicle and the jack stand. Then release the jack from the vehicle's lift point and check that it is secure.
-
To lower the vehicle off of the jack stand, use the jack to raise the vehicle until the jack stand is no longer supporting the vehicle, remove the jack stand, and slowly lower the vehicle down.
-
Disengage Jack Mode by touching Controls > Service > Jack Mode.
Using a 2-Post Lift:
- Ensure the vehicle ride height is set to Medium and enable Jack Mode (Controls > Service > Jack Mode see Jack Mode on page 216) to disable self-leveling.

WARNING: You MUST enable Jack Mode, otherwise the vehicle may try to self-level while on the jack. Failing to engage Jack Mode may cause serious injury or death.
- Position the lift arm pads under the lift points at the locations shown.

WARNING: DO NOT position the lift arm pads under the Battery or side rails.
Lift points:
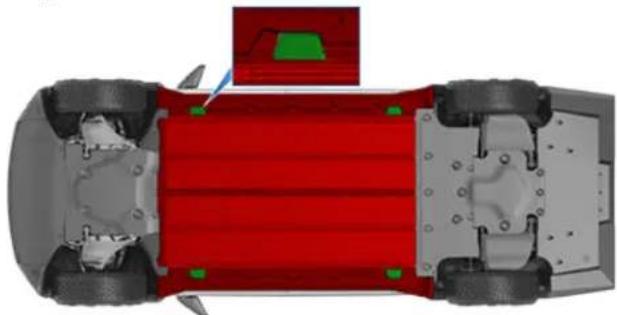
natural_image
Top-down view of a red automotive chassis with visible structural components and a small inset showing a green component (no text or symbols)-
Lift the vehicle to working height.
-
Engage any lift safety locks. Follow the lift manufacturer's instructions for details.

WARNING: Failure to correctly engage the safety locks can result in serious injury or death.
-
When done, lower the vehicle down slowly and safely.
-
Disengage Jack Mode by touching Controls > Service > Jack Mode.
WARNING: Never raise Cybertruck when the charge cable is connected, even if charging is not in progress.
WARNING: Do not work on an incorrectly supported vehicle. Doing so can cause serious damage, bodily injury, or death.
CAUTION: It is your responsibility to be observant of the vehicle and it's surroundings. Ensure the area is clear when lifting and lowering Cybertruck and that the doors, front trunk, and tailgate are closed as necessary to avoid damage.
CAUTION: DO NOT lift from under the Battery or side rails. Place the lift arm pads under the designated body lift points only. The locations shown are the only approved lifting points for Cybertruck. Lifting at any other points can cause damage. Damage caused by incorrectly lifting Cybertruck is not covered by the warranty.
Jack Mode
WARNING: Failure to enable Jack Mode can result in the vehicle self-leveling, resulting in damage, injury, or death.
Cybertruck automatically self-levels, even when the vehicle is "asleep" and the touchscreen is powered off. Before enabling Jack Mode:
- Set the ride height to Medium to allow for enough ground clearance for the jack.
NOTE: Due to the large wheels and height of Cybertruck, setting the ride height to High or Very High may not provide sufficient clearance for you to safely change the tire. - Enable Jack Mode (Controls > Service > Jack Mode).
- To deactivate Jack Mode, press the brake pedal and touch Controls > Service > Jack Mode again. Jack Mode automatically cancels when you start to drive.
NOTE: Jack mode may be unexpectedly enabled in situations where an object is supporting the vehicle's weight (for example the bumper of the vehicle is resting on a curb).
Parts, Accessories, and Modifications
Use only genuine Tesla parts and accessories. Tesla performs rigorous testing on parts to ensure their suitability, safety, and reliability. Purchase these parts from Tesla, where they can be professionally installed and you can receive expert advice about modifications to Cybertruck. Accessories are available for purchase online at the Tesla Shop. Some accessories may not be available in your market region or compatible with your exact vehicle.
NOTE: Adding accessories to your vehicle may impact expected range, vehicle dimensions, etc.
Tesla is unable to assess parts manufactured by other distributors and therefore accepts no responsibility if you use non-Tesla parts on Cybertruck.

WARNING: Installing non-approved parts and accessories, or performing non-approved modifications, can affect the performance of Cybertruck and the safety of its occupants. Any damage caused by using or installing non-approved parts, or by performing non-approved modifications, is not covered by the warranty.

WARNING: Tesla does not accept liability for death, personal injury or damage that occurs if you use or install non-approved accessories or make non-approved modifications.
Body Repairs
If your Cybertruck is in a collision, contact Tesla or a Tesla-approved Body Shop to ensure that it is repaired with genuine Tesla parts. Tesla has selected and approved body shops that meet strict requirements for training, equipment, quality, and customer satisfaction.
Some repair shops and insurance companies might suggest using non-original equipment or salvaged parts to save money. However, these parts may not meet Tesla's high standards for quality, fit, and corrosion resistance. In addition, non-original equipment and salvaged parts (and any damage or failures they might cause) are not covered by the warranty.
Connecting Accessories to the 48V Power Feeds
Cybertruck is equipped with two power feeds. The power feeds provide access to the 48V low voltage system, which can be used to power accessories.

CAUTION: Do not connect a power source (such as a solar panel or external battery) to a power feed. Doing so may damage Cybertruck.

WARNING: The two power feeds are the only points at which you can connect accessories directly to the low voltage system. Do not use any other low voltage wiring in Cybertruck to power accessories. Doing so can lead to unpredictable or unexpected results (such as a total loss of power steering) and can affect the performance of Cybertruck and the safety of its occupants. Any damage caused by using or installing non-approved parts, or by performing non-approved modifications, is not covered by the warranty. Tapping into the power feeds should only be done by knowledgeable and experienced individuals. Tesla does not accept liability for death, personal injury or damage that occurs if you install accessories using non-approved methods or circuits.
48V Power Feed Specifications
There are two power feeds:
- One power feed is located on the roof (400W maximum draw).
- One power feed is located in the powered frunk (400W maximum draw).
Each power feed operates in the following range:
- Minimum: 28V
- Nominal: 44–50V
• Maximum: 58V
Each power feed contains three wires:
| Wire Color Function | |
| Red with a blue stripe Positive | (+) terminal:Provides 48V power |
| Green Provides access to the | LocalInterconnect Network (LIN) |
| Roof power feed: Black with a blue stripe | Negative (-) terminal:Provides a grounding point |
| Powered frunk power feed: Brown with a blue stripe |
NOTE: The power feeds are designed to stop providing power when current that exceeds the listed specifications is detected. If a power feed unexpectedly stops providing power, reset them by touching Controls > Outlets & Mods > Reset.

CAUTION: If the wires in the vehicle do not match this information, use the mobile app to schedule a service appointment.
Accessing the Power Feed on the Roof
- Ensure that Cybertruck is powered off (see Powering Off on page 75).

WARNING: Failure to ensure the vehicle is powered off can result in serious injury. Tesla recommends wearing appropriate personal protective equipment to mitigate any potential for injury.
- Locate the strip of applique on the right side of the roof and use a flat, non-marring tool to gently lift under the edge and release the five clips that hold it in place. Lift upwards to remove the applique.
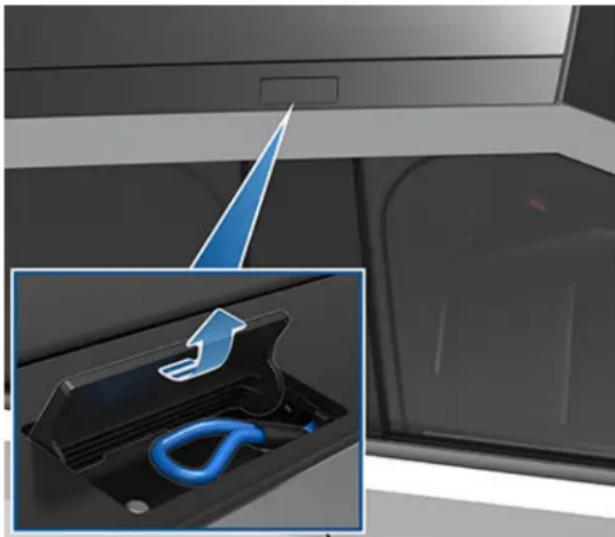
natural_image
Close-up of a car air conditioner unit with a blue-labeled component inserted into the lower panel (no visible text or symbols)- Locate the shrink-wrapped loop of wires. This is the power feed.
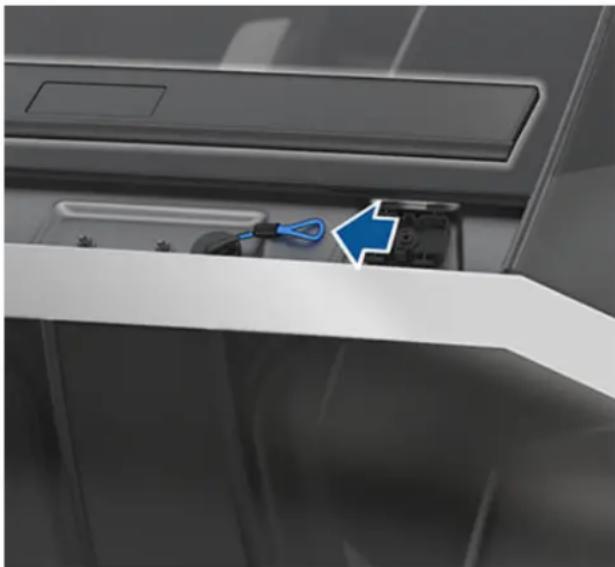
natural_image
Close-up of a device's front panel showing a cable inserted into a device (no visible text or symbols)- Remove the shrink wrap from the power feed, then splice or solder the accessory's wire harness to it.

WARNING: Use extreme care when accessing the power feed. Assume that the low voltage components of Cybertruck, including all wires and connectors, are always energized. Because the 48V low voltage system operates at a higher voltage than a typical low voltage system, there is an increased risk of personal injury, arcing, or component damage if the low voltage components of Cybertruck are handled improperly.

CAUTION: Carefully check the wiring of the accessory and ensure that you are connecting the positive (+) wire of the accessory to the positive wire (red with a blue stripe) of the power feed, and the negative (-) wire of the accessory to ground (black with a blue stripe). See 48V Power Feed Specifications on page 217. Accessories without proper power and grounding may not function as expected, and may be damaged as a result.

CAUTION: Ensure that the wires are properly insulated (taped or heatshrinked) after splicing or soldering an accessory's wiring to the power feed.
-
Ensure your accessory or attachment is properly secured to the vehicle.
-
Replace the roof applique by pressing it into place to ensure that the trim clips are secured.
NOTE: If a roof applique is not secured correctly, the applique could fall off of the vehicle. Tesla is not responsible for broken or missing appliques.
- Power on the vehicle (see Starting and Powering Off on page 75) and enable power to the power feed, if desired (see Enabling Power to the Power Feeds on page 220).
Accessing the Power Feed in the Powered Frunk
To access the power feed in the powered frunk, you must first remove the frunk lining.
-
Open the powered frunk (see Powered Frunk on page 59).
-
Ensure that Cybertruck is powered off (see Powering Off on page 75).

WARNING: Failure to ensure the vehicle is powered off can result in serious injury. Tesla recommends wearing appropriate personal protective equipment to mitigate any potential for injury.
- Remove the frunk maintenance panel by pulling it upwards to release the trim clips that hold it in place.
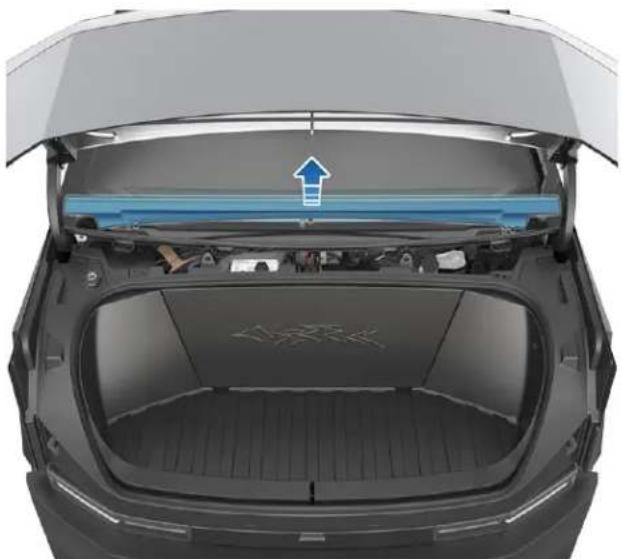
natural_image
Top-down view of a car trunk with visible engine compartment and blue airflow arrow (no text or symbols)- Remove the two bump stops (one on each side above the headlights) by turning them counterclockwise.
- Remove the windshield washer fluid cap.
- Using a trim tool or flat, plastic tool, remove the two pieces of trim on the bottom of the trunk lining to expose the four bolts that hold the lining in place.
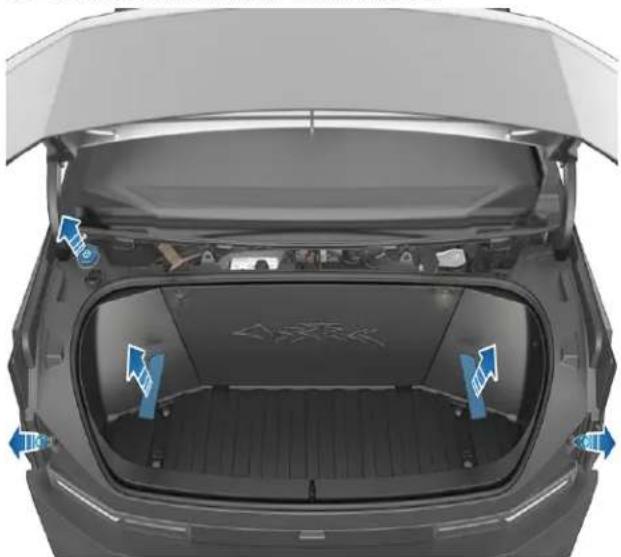
natural_image
Top-down view of a car trunk with visible engine compartment and blue directional arrows indicating movement or flow (no text or symbols)- Using a 10 mm socket, remove the four bolts on the bottom of the frunk and the two bolts beneath the maintenance panel.
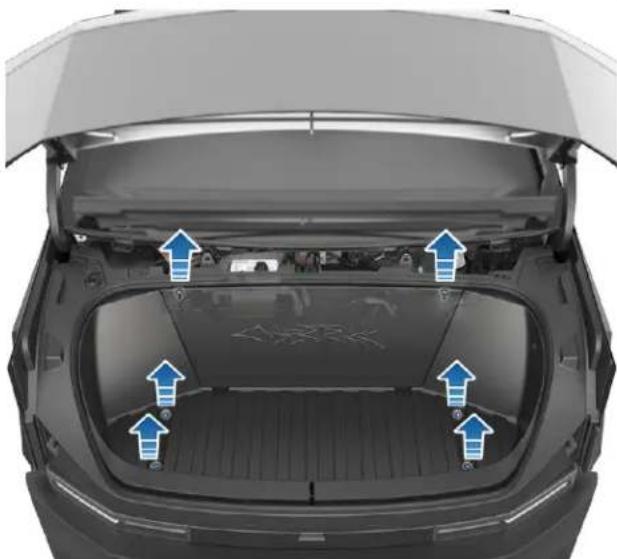
natural_image
Top-down view of a car trunk with blue directional arrows indicating engine or airflow direction (no text or symbols)- Carefully lift the frunk lining partially upward and unplug the emergency interior release connector. Once the connector is unplugged, the frunk lining can be removed.
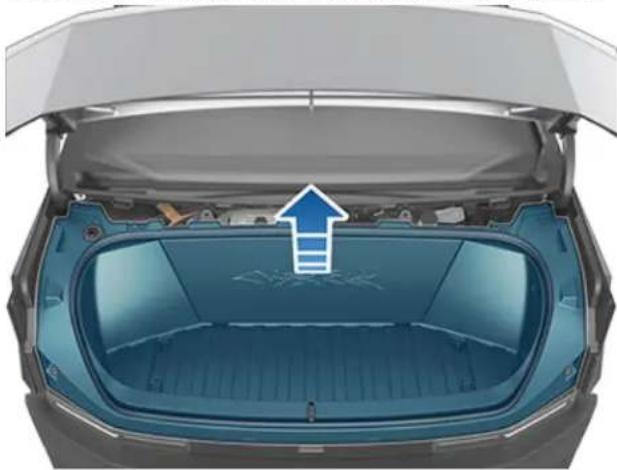
natural_image
Top-down view of a car trunk with an upward arrow indicating airflow or ventilation (no text or symbols)CAUTION: As you remove the frunk lining, be careful not to damage or jostle the connector for the powered frunk emergency interior release.
- Locate the shrink-wrapped wires. This is the power feed.
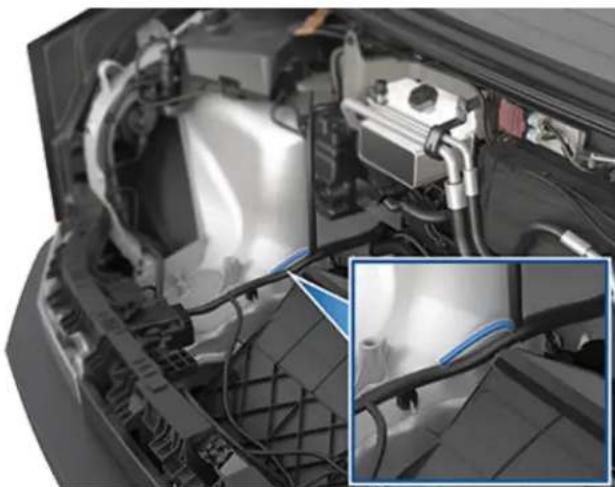
natural_image
Close-up of a car engine bay with visible wiring and components, no text or symbols present- Remove the shrink wrap from the power feed, then splice or solder the accessory's wire harness to it.

WARNING: Use extreme care when accessing the power feed. Assume that the low voltage components of Cybertruck, including all wires and connectors, are always energized. Because the 48V low voltage system operates at a higher voltage than a typical low voltage system, there is an increased risk of personal injury, arcing, or component damage if the low voltage components of Cybertruck are handled improperly.

CAUTION: Carefully check the wiring of the accessory and ensure that you are connecting the positive (+) wire of the accessory to the positive wire (red with a blue stripe) of the power feed, and the negative (-) wire of the accessory to ground (brown with a blue stripe). See 48V Power Feed Specifications on page 217. Accessories without proper power and grounding may not function as expected, and may be damaged as a result.

CAUTION: Ensure that the wires are properly insulated (taped or heatshrinked) after splicing or soldering an accessory's wiring to the power feed.
-
Ensure your accessory or attachment is secured to the vehicle.
-
Replace the powered frunk lining, connect the emergency interior release connector, and replace all fasteners and trim. Torque the bolts to 12 Nm (8.87 ft-lb).
-
Power on the vehicle (see Starting and Powering Off on page 75) and enable power to the power feed, if desired (see Enabling Power to the Power Feeds on page 220).
Enabling Power to the Power Feeds
Once you have connected an accessory to a power feed, enable power from the touchscreen. Touch Controls > Outlets & Mods and then touch a power feed on the touchscreen to enable it.

CAUTION: Leaving an accessory powered depletes the High Voltage Battery. Power to the power feed shuts off when the capacity of the High Voltage Battery is very low.
By default, the power feeds stop providing power when you exit Cybertruck and close the doors. To instead keep the power feeds on when you leave the vehicle, touch Keep Outlets On (see Keep Outlets On on page 23).
Using RFID Transponders
When attaching an RFID transponder (used by many automated toll systems) inside Cybertruck, place the transponder next to the rear view mirror. This ensures best results and minimizes any obstruction to your driving view. Refer to the RFID manufacturer's instructions for specific placement.
NOTE: You can also attach a weather-proof transponder to the front license plate.
Learn how to perform simple Do It Yourself procedures, such as replacing the wiper blade and HEPA filter. Go to https://www.tesla.com/support/do-it-yourself-guides for instructions, animations, and videos of these procedures.
NOTE: Due to market region or vehicle configuration specifics, some parts and procedures may not be available for your vehicle. When navigating to https://www.tesla.com/support/do-it-yourself-guides, select your vehicle, region, and/or language to see an updated list of parts and accessories available for your region.

CAUTION: Perform each procedure in a dry and well-lit area. For your safety, only perform a procedure if you feel comfortable doing so, and always follow provided instructions.
Vehicle Identification Number
You can find the VIN at the following locations:
• The Tesla mobile app.
- Touch Controls > Software.
- Stamped onto the driver's side A-pillar. Can be seen by looking through the windshield on the driver's side of the vehicle.
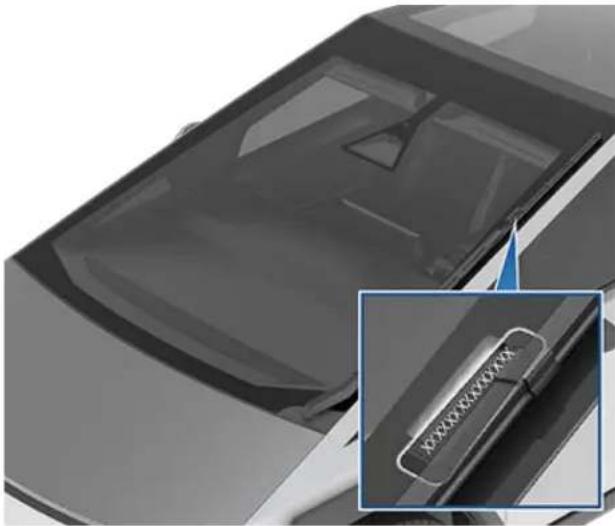
natural_image
Close-up of a car's front panel with a highlighted rectangular tag (no visible text or symbols)- Printed on the Vehicle Certification label, located on the door pillar. Can be seen when the driver's door is open.
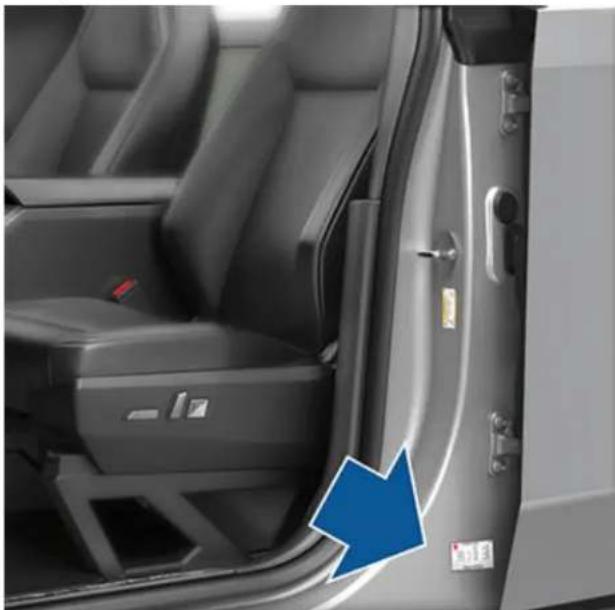
natural_image
Interior view of a car showing the door, seat, and side panel with a blue arrow pointing to the door (no text or symbols visible)Emission Control Label
The emission control label is located on the opening face of the powered frunk.
VEHICLE EMISSION CONTROL INFORMATION
THIS VEHICLE CONFORMS TO U.S. EPA REGULATIONS APPLICABLE TO 2024 MODEL YEAR NEW TIER 3 BIN O HEAVY-DUTY VEHICLES AND TO CALIFORNIA REGULATIONS APPLICABLE TO ZEV MEDIUM-DUTY VEHICLES AND IS CERTIFIED FOR SALE IN CALIFORNIA.
MODEL:
MOTOR:
TEST GROUP:
EVAPORATIVE FAMILY:
It is important to understand your vehicle's original tire sizes and pressures, and the GVWR (Gross Vehicle Weight Rating) and GAWR (Gross Axle Weight Rating). This information can be found on two labels attached to the front door pillar on the driver's side of the vehicle.
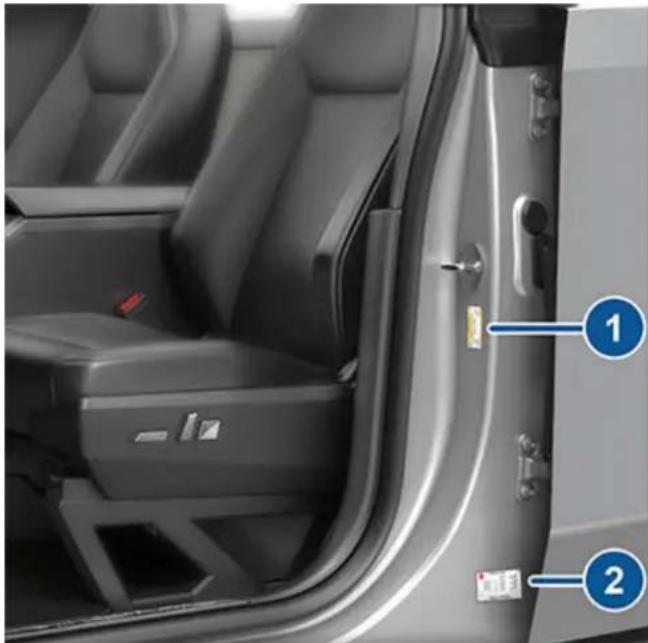
natural_image
Interior view of a car showing the door, seat, and dashboard (no text or symbols visible)- Tire and Loading Information Label
- Vehicle Certification Label

WARNING: Overloading Cybertruck has an adverse effect on braking and handling, which can compromise your safety or cause damage.

CAUTION: Never store large amounts of liquid in Cybertruck. A significant spill can cause electrical components to malfunction.
Tire and Loading Information Label
The Tire and Loading Information label provides:
• The maximum number of occupant seating positions.
• The maximum vehicle capacity weight.
• The size of the original tires.
- The cold inflation pressures for the original front and rear tires. These pressures are recommended to optimize ride and handling characteristics.
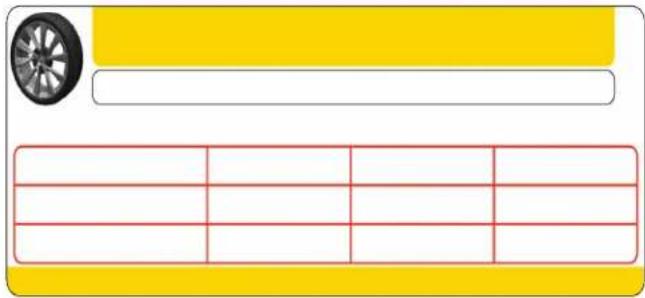
Never change this label, even if you use different tires in the future.
NOTE: If Cybertruck is loaded to its full capacity, double check all tires to ensure they are inflated to their recommended pressure levels (see Maintaining Tire Pressures on page 200).

WARNING: Tire pressures printed on the Tire and Loading Information label DO NOT APPLY to towing. When towing, tire pressures must be increased. For information about the tire pressures required when towing, refer to see Towing a Trailer on page 113.
Vehicle Certification Label

WARNING: The Vehicle Certification label specifies the weight ratings for Cybertruck based on the tires that were installed at time of manufacture and the tire pressures indicated on the Tire and Loading Information label. However, the weight ratings will change if you change the factory-installed tires or inflate tires to a pressure that differs from those shown on the Tire and Loading Information label.
The Vehicle Certification label provides:
- GVWR - Gross Vehicle Weight Rating. The maximum allowable total mass of Cybertruck. This is calculated as the weight of Cybertruck equipped with the heaviest factory selectable options, all passengers, fluids, and cargo.
- GAWR FRT and GAWR RR - Gross Axle Weight Rating for the front and rear axles. The GAWR is the maximum distributed weight that each axle can support.
| MFD BY TESLA, INC. | |||
| GVWR | WITH TIRES | ||
| GAWR FRT | WITH TIRES | RIM | COLD TIRE PRESSURE |
| GAWR RR | WITH TIRES | RIM | COLD TIRE PRESSURE |
| THIS VEHICLE CONFORMS TO ALL APPLICABLE U.S. FEDERAL MOTOR VEHICLE SAFETY STANDARDS IN EFFECT ON THE DATE OF MANUFACTURE SHOWN ABOVE. | |||

CAUTION: To prevent damage, never load Cybertruck so that it is heavier than GVWR or exceeds the individual GAWR weights.
Roof Racks
Cybertruck supports the use of Tesla-approved roof racks. Roof racks can be installed over the roof, over the bed, or both. To install roof racks, you must use only roof rack systems that have been approved by Tesla. You can find the roof rack instructions in the box or on the Tesla Shop.
Maximum Load on Roof Racks: 220 lb (100 kg) per 2-crossbar set. For example, a 2-crossbar set placed on the roof has a maximum load of 220 lb. An additional 2-crossbar set placed over the cargo bed also has a maximum load of 220 lb (100 kg).
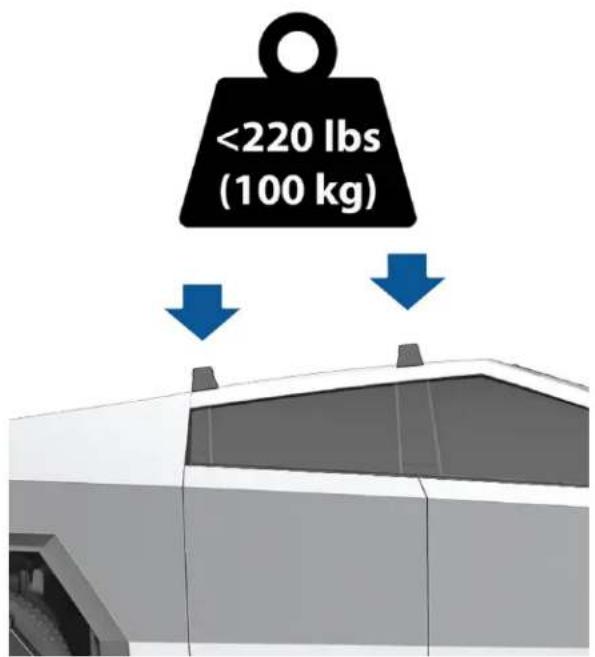
See Carrying Accessories and Crossbars on page 119 for more information.

CAUTION: Failure to use the correct roof racks and follow the instructions can cause significant damage.

WARNING: When loading the roof racks, distribute the load evenly and maintain a low center of gravity. Loaded vehicles, with higher centers of gravity, may handle differently than unloaded vehicles. Take extra precautions, such as slower speeds and increased stopping distance, when driving heavily loaded roof racks.
Steps for Determining the Correct Load Limit
-
Locate the statement "The combined weight of occupants and cargo should never exceed XXX kg or XXX lbs." on your vehicle's placard.
-
Determine the combined weight of the driver and passengers that will be riding in your vehicle.
-
Subtract the combined weight of the driver and passengers from XXX kg or XXX lbs.
- The resulting figure equals the available amount of cargo and luggage load capacity. For example, if the "XXX" amount equals 1400 lbs. and there will be five 150 lb passengers in your vehicle, the amount of available cargo and luggage load capacity is 650 lbs. (1400-750 (5 × 150) = 650 lbs.)
- Determine the combined weight of luggage and cargo being loaded on the vehicle. That weight may not safely exceed the available cargo and luggage load capacity calculated in Step 4.
- If your vehicle will be towing a trailer, load from your trailer will be transferred to your vehicle. Consult this manual to determine how this reduces the available cargo and luggage load capacity of your vehicle.

WARNING: The powered frunk and the cargo bed are the preferred places to carry objects. In a collision, or during hard braking and sharp turns, loose items in the cabin could injure occupants.
Example Load Limit Calculations
How much cargo Cybertruck can carry depends on the number and weight of passengers. The following calculated load limit examples assume passengers weigh 150 lbs (68 kg). If passengers weigh more or less, available cargo weight decreases or increases respectively.
Driver and one passenger
| Description Total | |
| Vehicle capacity weight 954 lbs (433 kg) | |
| Subtract occupant weight(2 x 150 lbs/68 kg) | 300 lbs (136 kg) |
| Available cargo weight 654 lbs (297 kg) |
Driver and four passengers
| Description Total | |
| Vehicle capacity weight 954 lbs (433 kg) | |
| Subtract occupant weight (5 x 150 lbs/68 kg) | 750 lbs (340 kg) |
| Available cargo weight 204 lbs (93 kg) |
Cautions and Warnings

WARNING: Drive cautiously when Cybertruck is carrying a large load. Increase braking distance, reduce speed when making sharp turns, and avoid abrupt steering. Failure to drive cautiously increases the risk of losing control which can result in property damage, personal injury, and death.

WARNING: The loading capacity of your vehicle is limited either by how much space is available (volume capacity) or by how much weight the vehicle can carry (payload capacity). When you have loaded Cybertruck to its maximum weight capacity, do not add more cargo, even if there is space available. Overloading, or improper loading, can contribute to properly damage, personal injury, or death.
NOTE: Dimensions for this vehicle are rounded to the nearest hundredth of an inch.
Dimensions - Exterior
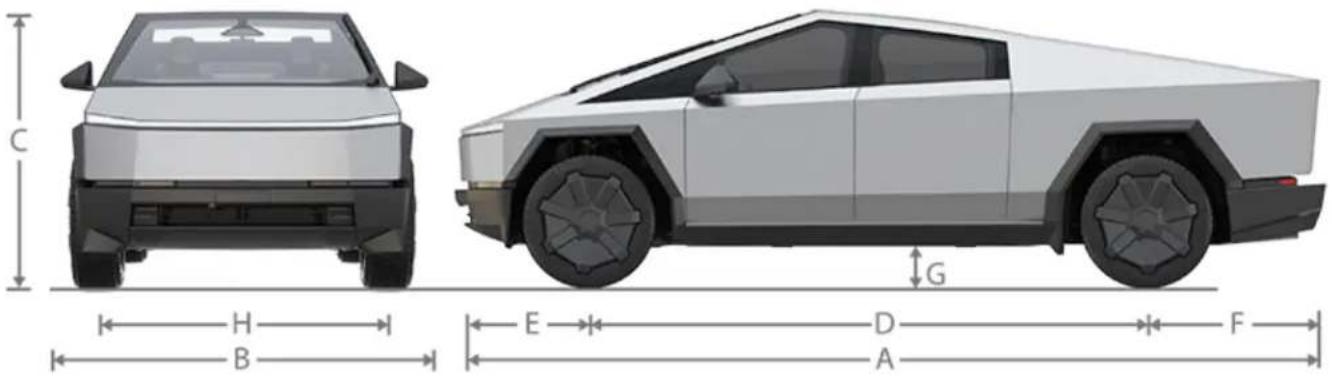
NOTE: Adding accessories can affect the dimensions listed.
| Callout Description Measurement (in) Measurement (mm) | |||
| A Overall Length | 223.74 5,682.9 | ||
| B - Overall Width | Including mirrors 95.01 2,413.3 | ||
| Folded mirrors 86.64 2,200.7 | |||
| Excluding mirrors 79.99 2,031.8 | |||
| C - Overall Height Entry/Exit air setting 68.54 1740.8 | |||
| Low air setting | 69.13 | ||
| Medium air setting | 70.70 | ||
| High air setting | 73.06 1855.8 | ||
| Very High air setting | 74.64 | ||
| Extract (highest) air setting | 76.61 | ||
| D Wheelbase | 143.11 | 3,635.0 | |
| E - Overhang | Front | 34.58 | 878.3 |
| F - Overhang | Rear | 46.05 1,169.6 | |
| G - Ground Clearance | Entry/Exit air setting | 7.93 | 201.3 |
| Low air setting | 8.52 | 216.3 | |
| Medium air setting | 10.09 | 256.3 | |
| High air setting | 12.45 | 316.3 | |
| Very High air setting | 14.03 | 356.3 | |
| Extract (highest) air setting | 16.00 | 406.3 | |
| H - Track | Front and Rear 69.76 | 1,772.0 | |
| *Values are approximate. Dimensions can vary depending on a vehicle's options and various other factors. **The Track of the vehicle is based on measurements at the wheel center. | |||
Dimensions - Cargo Bed
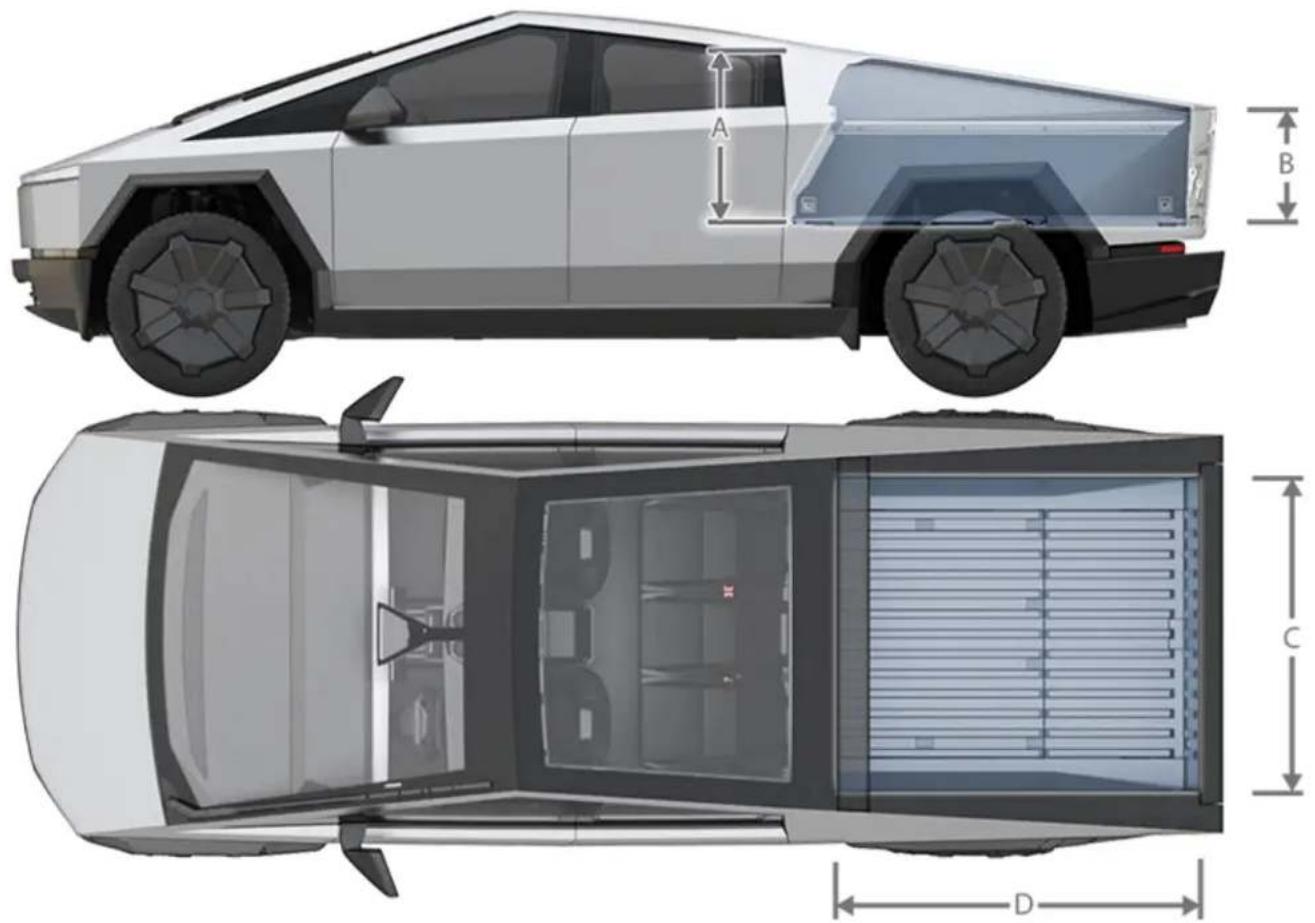
| Callout Description Measurement (in) Measurement (mm) | ||
| A Maximum Height - Front 28.66 727.9 | ||
| B Maximum Height - Rear 19.89 505.2 | ||
| C Width at Floor 51.00 1,295.4 | ||
| D Length at Floor 72.92 1,852.2 | ||
Dimensions - Interior Cabin
| Location Measurement (in) Measurement (mm) | ||
| Head Room - Front | 41.69 | 1,058.8 |
| Head Room - Rear | 39.05 | 991.9 |
| Leg Room - Front | 41.09 | 1,043.6 |
| Leg Room - Rear | 40.90 | 1,038.8 |
| Shoulder Room - Front | 63.31 | 1,608.0 |
| Shoulder Room - Rear | 62.06 | 1,576.4 |
| Hip Room - Front | 57.22 | 1,453.3 |
| Hip Room - Rear | 57.22 | 1,453.5 |
Weights - Vehicle
NOTE: Weight values are approximate and can vary slightly depending on a vehicle's options.
| Dual Motor All Season | Dual Motor All Terrain | Tri Motor All Season | Tri Motor All Terrain | |
| Curb Mass Total* 6,634 lb | (3,009 kg) | 6,669 lb (3,025 kg) | 6,863 lb (3,113 kg) | 6,898 lb (3,129 kg) |
| Curb Mass - Front Axle 3,287 lb | (1,491 kg) | 3,305 lb (1,499 kg) | 3,336 lb (1,513 kg) | 3,353 lb (1,521 kg) |
| Curb Mass - Rear Axle 3,347 lb | (1,518 kg) | 3,364 lb (1,526 kg) | 3,527 lb (1,600 kg) | 3,545 lb (1,608 kg) |
| Payload 2,200 lb | (998 kg) | 2,500 lb (1134 kg) | 2,000 lb (907 kg) | 2,270 lb (1,030 kg) |
| GVWR Total** 8,834 lb | (4,007 kg) | 9,169 lb (4,159 kg) | 8,863 lb (4,020 kg) | 9,169 lb (4,159 kg) |
| GVWR - Front Axle | 4,096 lb (1,858 kg) | 4,107 lb (1,863 kg) | 4,019 lb (1,823 kg) | 4,160 lb (1,887 kg) |
| GVWR - Rear Axle 4,738 lb | (2,149 kg) | 5,062 lb (2,296 kg) | 4,844 lb (2,197 kg) | 5,009 lb (2,272 kg) |
| GAWR - Front Axle*** 4,255 lb | (1,930 kg) | 4,255 lb (1,930 kg) | 4,255 lb (1,930 kg) | 4,255 lb (1,930 kg) |
| GAWR - Rear Axle 5,009 lb | (2,272 kg) | 5,247 lb (2,380 kg) | 5,009 lb (2,272 kg) | 5,247 lb (2,380 kg) |
| Maximum Towing Capacity 11,000 lb | (4,990 kg) | 11,000 lb(4,990 kg) | 11,000 lb(4,990 kg) | 11,000 lb(4,990 kg) |
| For more details on towing, seeTowing a Trailer on page 113. | ||||
| *Curb Mass = Weight of the vehicle with correct fluid levels, no occupants and no cargo.**GVWR = Gross Vehicle Weight Rating***GAWR = Gross Axle Weight Rating | ||||

WARNING: When loading cargo, always consider the vehicle's Gross Vehicle Weight Rating (GVWR). The GVWR is the maximum allowable total mass of the vehicle including all passengers, fluids, and cargo. In addition, never exceed the GAWR (Gross Axle Weight Rating) on a single axle. GVWR and GAWR are printed on the Vehicle Certification Label on page 223), located on the door pillar and are also detailed in Weights - Vehicle on page 228.

CAUTION: Follow all local regulations when driving with loaded cargo on public roads.
Weights - Nominal GVWR Reference
The following loading scenario assumes that cargo is uniformly distributed in their respective areas (cargo bed and front trunk), and the cabin is fully occupied by five people weighing 150 lb (68 kg) each. In this scenario, loads heavier than the combined weights as specified for passengers or cargo would exceed the vehicle's GVWR.
| Location Dual Motor | All Season | Dual Motor All Terrain | Tri Motor All Season | Tri Motor All Terrain |
| Cargo Bed 1,010 lb | (458 kg) | 1,310 lb (594 kg) | 919 lb (417 kg) | 1080 lb (490 kg) |
| Front Trunk 441 lb | (200 kg) | 441 lb (200 kg) | 331 lb (150 kg) | 441 lb (200 kg) |
Cargo - Weight Limits

CAUTION: Exceeding the weights specified can cause damage not covered by the warranty.
The front trunk and under bed compartments are designed to hold the following weights:
| Front Trunk Maximum 441 lb (200 kg) | |
| Under Bed Compartment Maximum 220 lb (100 kg) |
Cargo - Volumes

WARNING: The loading capacity of your vehicle is limited either by how much space is available (volume capacity) or by how much weight the vehicle can carry (payload capacity). When you have loaded Cybertruck to its maximum weight capacity, do not add more cargo, even if there is space available. Overloading, or improper loading, can contribute to property damage, personal injury, or death.
| Location Cubic Feet Liters | ||
| Front trunk 7.1 200 | ||
| Cargo Bed (enclosed) - Above load floor 56.2 1,591 | ||
| Cargo Bed - Lower storage compartment 3.4 97 | ||
| Cabin - Behind front seats with rear seat cushions folded up 54.2 1,533 | ||
| Total volume with five passengers 66.7 1,888 | ||
| Total volume with two passengers 120.9 3,421 |
Motor Type
| Motor Type | Dual Motor Tri-Motor | |
| Front One AC | induction motor, liquid-cooled, with variable frequency drive. | One AC permanent magnet synchronous motor, liquid-cooled, with variable frequency drive. |
| Rear One AC | permanent magnet synchronous motor, liquid-cooled, with variable frequency drive. | Two AC induction motors, liquid-cooled, with variable frequency drive. |
Transmission
| Type Dual Motor Tri-Motor | ||
| Type Single speed fixed gear | Single speed fixed gear | |
| Overall Final Drive Ratio | Front and Rear unit motors: 15.02:1 Front unit motor: 15.02:1Rear unit motor: 2Independent Gearsets: 15.02:1 | |
| Reverse Gear Reverse direction of motor, limited to 15 mph (24 km/h). | Reverse direction of motor, limited to 15 mph (24 km/h). | |
Steering
| Steering Specifications | |
| Type 4-wheel directional steer-by-wire | |
| Number of turns lock to lock 0.94 (340 degrees) | |
| Turning Circle (curb to curb) | Approximately 43.5 ft (13.25 meters) |
Brakes
| Brakes | Specifications |
| Type | 4-wheel anti-lock braking system (ABS) with Electronic Brake Force Distribution, Integrated Advanced Stability Control and Electronic Accelerator pedal actuated regenerative braking system. |
| Calipers | Front: Four piston, fixed |
| Rear: Single piston, floating | |
| Rotor Diameters (ventilated) | Front: 13.8 in (351 mm) |
| Rear: 14 in (356 mm) | |
| Front Rotor thickness | New: 1.26 in (32 mm) |
| Service limit: 1.18 in (30 mm) | |
| Rear Rotor thickness | New: 0.91 in (23 mm) |
| Service limit: 0.83 in (21 mm) | |
| Brakes Specifications | |
| Front Brake Pad Thickness (excluding back plate) | New: 0.39 in (10 mm) |
| Service limit: 0.12 in (3 mm) | |
| Rear Brake Pad Thickness (excluding back plate) | New: 0.43 in (11 mm) |
| Service limit: 0.08 in (2 mm) | |
| Parking brake Electrically actuated parking brake calipers | |
Suspension
| Suspension Specifications | |
| Front Independent, double wishbone, air spring with adaptive damper, stabilizer bar. | |
| Rear Independent, double wishbone, air spring with adaptive damper, stabilizer bar. |
Battery - Low Voltage
| Battery - Low Voltage Specifications | |
| Rating 4 amp hour | |
| Voltage 48V |
Battery - High Voltage
| Battery - High Voltage Specifications | |
| Type Liquid-cooled lithium ion (Li-ion) | |
| Nominal Voltage 700V DC | |
| Temperature Range Do not expose Cybertruck to ambient temperatures above 149^ F ( 65^ C) or below -22^ F ( -30^ C) for more than 24 hours at a time. |
DO NOT TRANSPORT WITH WHEELS ON THE GROUND
The front motor and rear motor(s) in Cybertruck may generate power when the wheels spin. Always transport Cybertruck with all four tires off the ground. Ensure that the tires are unable to spin at any time during transport.

WARNING: NEVER TRANSPORT YOUR VEHICLE WITH THE TIRES IN A POSITION WHERE THEY CAN SPIN. DOING SO CAN LEAD TO SIGNIFICANT DAMAGE AND OVERHEATING. IN RARE CASES EXTREME OVERHEATING MAY CAUSE THE SURROUNDING COMPONENTS TO IGNITE.
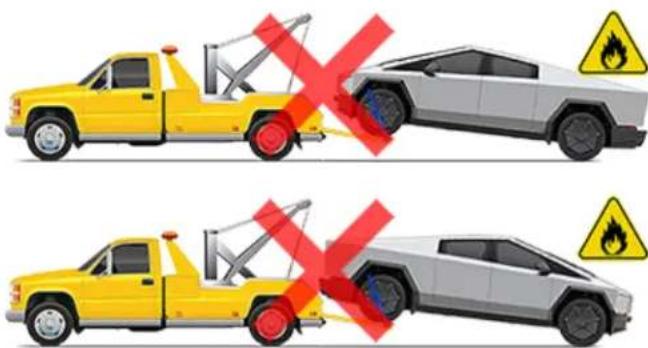
Do not transport Cybertruck using any method that is not specified by Tesla. Adhere to the instructions provided here and observe all warnings and cautions. Damage caused by improper transporting of your vehicle is not covered by the warranty.
NOTE: Tesla is not liable or responsible for reimbursing services not dispatched through Tesla Roadside Assistance.
Approved Methods for Transporting
A flatbed truck or comparable transport vehicle is the recommended method of transporting Cybertruck. Cybertruck can face either direction on the truck bed.
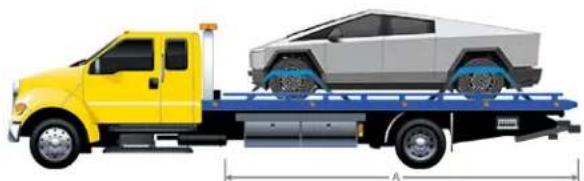
natural_image
Yellow and gray flatbed truck with a silver pickup truck on its side, shown with dimension lines (no text or symbols)
CAUTION: Use a flatbed truck with a bed that is at least 21 ft (6.5 meters) long (A). Before attempting to tow Cybertruck, always check the tow truck's recommended loading capacity against the gross vehicle weight rating (GVWR) of Cybertruck (see Dimensions, Weights, and Cargo Capacity on page 226) to ensure that the flatbed truck is capable.
Activate Tow Mode before repositioning Cybertruck (if necessary) and winching it onto a flatbed tow truck. For more information, see Activate Tow Mode on page 234.
If Cybertruck has no low voltage power, attempt to jump start the low voltage system first so that you can then activate Tow Mode. For more information about jump starting, see If Vehicle Has No Power on page 233.

CAUTION: Cybertruck uses steer-by-wire technology. As a result, you will be unable to use the steering wheel to turn the wheels if Cybertruck has no power.
NOTE: Do not transport Cybertruck with the front or rear wheels on dollies unless absolutely necessary for a short distance. If you are transporting Cybertruck on dollies, ensure that a steering wheel lock is applied and care is taken to prevent the front wheels from spinning.

CAUTION: Before using dollies, check the manufacturer's specifications and recommended loading capacity against the vehicle weight rating and axle weight rating of Cybertruck, as specified by the vehicle certification label (see Vehicle Loading on page 223).

CAUTION: DO NOT TRANSPORT YOUR VEHICLE IF THERE IS ANY CHANCE OF ANY OF THE WHEELS SPINNING.

CAUTION: Tesla is not responsible for any damage caused by or during the transport of Cybertruck, including personal property damage or damage caused by using self-loading dollies or tire skates.

WARNING: Cybertruck is equipped with high voltage and low voltage components that may be compromised as a result of a collision (see Electric Vehicle Components on page 177). Before transporting Cybertruck, it is important to assume these components are energized. Always follow high voltage safety precautions (wearing personal protection equipment, etc.) until emergency response professionals have evaluated the vehicle and can accurately confirm that all high voltage systems are no longer energized. Failure to do so may result in serious injury.
If Vehicle Has No Power
If Cybertruck has no low voltage power:
- Open the powered frunk. See Opening the Powered Frunk with No Power on page 242.
- Jump start the low voltage battery. See Jump Starting on page 244.
Cybertruck must have low voltage power to open the doors from the outside or use the touchscreen.

WARNING: It may be more difficult to steer Cybertruck when the vehicle is being supported by an external low voltage power supply. The wheels may not be as responsive to the steering wheel as expected, and extreme caution should be taken when repositioning Cybertruck.

CAUTION: Cybertruck uses a 48V low voltage architecture. As a result, some functions may be unavailable or degraded if you are supporting Cybertruck with less than 30V (for example, another vehicle or a 12V portable jump starter).

CAUTION: Avoid using low voltage components of Cybertruck (such as the climate control system, cabin USB-C ports, lights, etc.) when the vehicle is being supported by an external low voltage power supply. Doing so may disable low voltage systems and make it necessary to jump start Cybertruck again.
NOTE: Tow providers: If the vehicle ran out of range, see Running Out of Range on page 238 for more information on transporting the vehicle to a charging station and preparing the vehicle to charge.
If you are unable to jump start Cybertruck and the touchscreen is not accessible, use tire skates to re-position the rear tires, keeping front tires on the ground. When using tire skates, be sure to use skates of sufficient size to avoid contact between the tire and the bed/pavement. Before using tire skates, always check the manufacturer's specifications and recommended loading capacity.
Disable the Self-Leveling Air Suspension System
NOTE: If Cybertruck has no low voltage power (or is being supported by an external low voltage power supply) you will not be able to enter Jack Mode.
Your Cybertruck is equipped with an air suspension system that automatically self-levels, even when the vehicle is "asleep" and the touchscreen is powered off. To prevent damage, you must activate Jack Mode to disable self-leveling:
- Touch Controls > Ride and Handling on the touchscreen.
- Press the brake pedal, and then touch Medium to maximize ride height.
- Touch Controls > Service > Jack Mode.
NOTE: Jack Mode cancels if you touch the button again or when driving speed exceeds 4 mph (7 km/h).
Activate Tow Mode
Tow Mode keeps the parking brake disengaged while winching Cybertruck onto a flatbed truck. When active, Tow Mode displays a confirmation pop up indicating the requirements for the vehicle to enter Tow Mode. Once Tow Mode is enabled, Cybertruck remains free-rolling. The following are required to enable Tow Mode:
- Ensure the vehicle is not connected to a charger. Tow Mode is not available if Cybertruck is still plugged in.
-
Cybertruck must detect a key. Tow Mode is available only when a key is detected.
-
Confirm the Parking brake is engaged.
- Press and hold the brake pedal.
- Cybertruck needs Low voltage power. If the vehicle has no low voltage power, attempt to jump start the low voltage system so that you can use the touchscreen to activate Tow Mode (see If Vehicle Has No Power on page 233).
To activate Tow Mode:
- Ensure the vehicle is in Park and that it is not connected to a charge cable.
- Chock the tires and make sure Cybertruck is secure.

WARNING: Ensure that the wheels are secure and that Cybertruck has continuous low voltage support while it is in Tow Mode. If there is a loss of low voltage power (for example, if the low voltage battery does not self-recover before activating Tow Mode or if the external power supply becomes disconnected) there is a risk of rollaway.
-
Press and hold the brake pedal, and then on the touchscreen, touch Controls > Service > Towing. The touchscreen displays a message reminding you how to properly transport Cybertruck.
-
Touch Enter Tow Mode. The button turns blue to show that Cybertruck is now in Tow Mode. Cybertruck is now free-rolling and can be rolled slowly (no faster than walking speed) for short distances or winched (for example, onto a flatbed truck).

WARNING: Power steering may be disabled when Cybertruck is in Tow Mode. The steering system may be less responsive and the steering wheel may be more difficult to turn. Use extreme caution when repositioning the wheels of Cybertruck while in Tow Mode.
To cancel Tow Mode, touch Exit Tow Mode or shift Cybertruck into Park. If your phone key is not detected, canceling Tow Mode powers off Cybertruck. You may need your key card to restart the vehicle.
NOTE: Tow Mode is only intended to allow for winching Cybertruck onto a flatbed truck or repositioning the vehicle out of a parking space. While in Tow Mode, the tires are allowed to rotate slowly (under 3 mph or 5 km/h) and for a very short distance (less than 30 feet or 10 meters). Exceeding these boundaries can lead to significant damage and overheating that is not covered by the warranty.
NOTE: If you are unable to activate Tow Mode (because, for example, the electrical system is not working and you are unable to jump start the low voltage system), use tire skates to reposition Cybertruck. Before doing so, always check the manufacturer's specifications and recommended loading capacity.
Pull onto the Flatbed Truck From the Rear
To pull Cybertruck from the rear, use the tow hitch:
- Chock the tires.
- Remove the rear tow hitch cover. See Accessing the Trailer Hitch Assembly on page 117.
- Attach the winch cable to the cutouts on either side of the tow hitch.
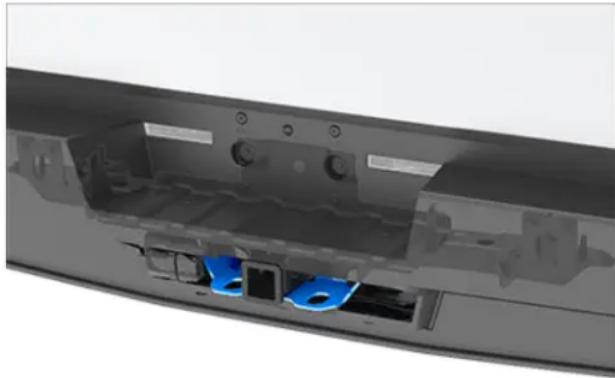
natural_image
3D cutaway view of a mechanical component showing internal parts and blue mounting holes (no text or symbols)- Activate Tow Mode. See Activate Tow Mode on page 234.
NOTE: If Cybertruck has no low voltage power, you will need to jump start it before activating Tow Mode. See If Vehicle Has No Power on page 233.
- Remove the tire chocks.
- Pull Cybertruck slowly onto the flatbed truck.
- If Cybertruck is in Tow Mode, deactivate it by touching Tow Mode again.
Pull onto the Flatbed Truck From the Front
To pull Cybertruck onto a flatbed truck from the front, use one or both of the square tow hooks beneath the front fascia:
- Chock the tires.
- Attach the winch cable to the tow hook(s). Either one or both tow hooks can be used.
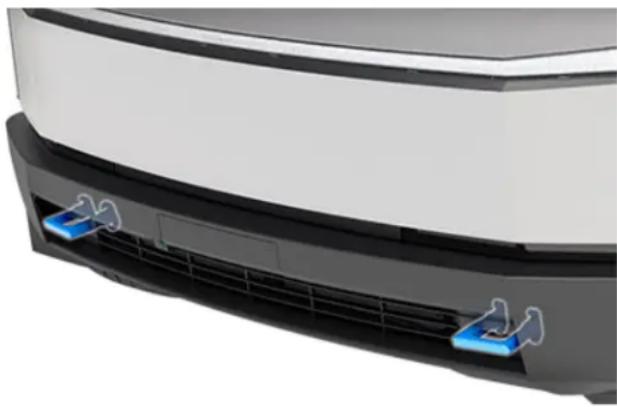
natural_image
Close-up of a white electric vehicle front grille with blue indicator lights on the back panel (no text or symbols visible)- Activate Tow Mode. See Activate Tow Mode on page 234.
NOTE: If Cybertruck has no low voltage power, you will need to jump start it before activating Tow Mode. See If Vehicle Has No Power on page 233.
- Remove the tire chocks.
- Pull Cybertruck slowly onto the flatbed truck.
- If Cybertruck is in Tow Mode, deactivate it by touching Tow Mode again.
Secure the Tires
The vehicle's tires must be secured onto the flatbed using the eight-point tie-down method.
- Remove any wheel covers before securing the tires.

CAUTION: Failure to remove wheel covers before attaching tie-down straps may result in damage to the wheel covers.
- Ensure any metal parts on the tie-down straps do not touch the face of the wheels.
- Do not place tie-down straps over body panels or through the wheels.

CAUTION: Attaching the tie-down straps to the chassis, suspension or other parts of the vehicle's body may cause damage.
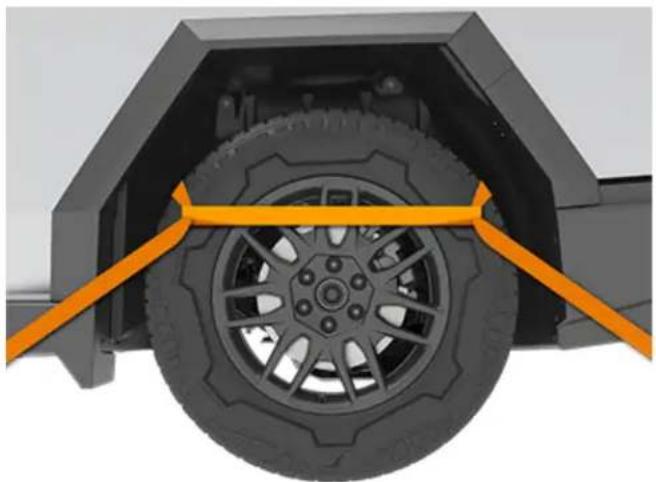
natural_image
Mechanical assembly diagram showing a tire mounted on a vehicle chassis with orange guide bars (no text or symbols)Tesla Roadside Assistance is available to you 24 hours a day, 365 days a year, for the duration of your warranty period. Tesla Roadside Assistance is also available to speak with roadside service professionals to answer any questions and explain the proper procedure for transporting your vehicle.
When contacting Tesla Roadside Assistance, please provide:
- The Vehicle Identification Number (VIN). The VIN is displayed when you touch Controls > Software. The VIN can also been seen by looking through the driver's side of the windshield.
- Your exact location.
• The nature of the problem.
If available in your region, you can also expedite your request, by choosing the Roadside Assistance option in the Tesla mobile app.
NOTE: For a detailed description of Tesla's Roadside Assistance policy, go to the support page on the Tesla web site for your region.
Regional Phone Number(s)
Canada: 1-877-79TESLA (1-877-798-3752)
Mexico: 800-228-8145
United States: 1-877-79TESLA (1-877-798-3752)
NOTE: The phone number is also available by touching Controls > Service.

CAUTION: It is your responsibility to monitor the state of the high voltage Battery and the remaining range of your vehicle. Do not assume that there is any range available when the range displayed on the touchscreen is at 0 miles (0 km) (or 0%). Damage to the low voltage battery due to running out of range is not covered by the warranty.
NOTE: In the unlikely event your vehicle runs out of range while driving, pull over when safe to do so and contact Tesla Roadside Assistance on page 237 or your preferred tow provider.
If Cybertruck runs out of range, the low voltage system is no longer supported – and when the low voltage battery runs out of power, the vehicle cannot charge. Therefore, the low voltage system must be supported by an external power supply to allow you to charge the High Voltage (HV) Battery. Once the vehicle begins charging, the external power supply is no longer required.
In the case of running out of range away from a charger, the tow provider should transport Cybertruck to the nearest charging station and unload the vehicle within the charging cable's reach. Once the vehicle is positioned next to a charger, follow these instructions:
NOTE: If the vehicle is being transported to a charger, make sure the tow provider does not leave until confirming that the vehicle's high voltage Battery is successfully charging.
- Jump start the low voltage system (see Jump Starting on page 244). The low voltage battery must be jump started to support the high voltage Battery.
- Wait a few minutes. Once the touchscreen powers on, plug the charge cable into Cybertruck to begin charging the high voltage Battery.
- When Cybertruck begins to charge, disconnect the external power supply from the low voltage jump posts.

WARNING: Shut off the external power supply before removing either cable. Removing the cables while the external power source is active may cause arcing.
NOTE: If Cybertruck is still not able to shift into Drive after charging the high voltage Battery, the low voltage battery may need additional time to recover. Reconnect the charge cable, wait several minutes, disconnect the charge cable, and then try again.
Before transporting to a non-Tesla charger, ensure your vehicle is equipped with an adapter that accommodates the specific type of charging station you will be using. Even at a non-Tesla charger, you will need to jump start the low voltage system before you can begin charging.

CAUTION: Always ensure Cybertruck has enough range for your drive, or for being stored for an extended period. Do not rely on the range estimates displayed on the touchscreen or mobile app as range can decrease faster than projected due to ambient temperature, driving habits, wind, vehicle settings (such as Sentry Mode), etc.
NOTE: Towing your vehicle as a result of running out of range is not covered by the warranty.
You can purchase a spare tire and tool kit for your Cybertruck on https://shop.tesla.com/. This is useful when you want a spare tire in your vehicle if you get a flat tire while driving.
Changing the Spare Tire

WARNING: NEVER get under the vehicle while Cybertruck is propped up with the jack. Doing so can cause serious injury or death.
Before using the spare tire, make sure it is adequately inflated according to the tire pressures on the driver's side door pillar.
To install the spare tire:
- Retrieve the spare tire from the cargo bed and set aside.
- Ensure Cybertruck is located in a flat, stable, and secure area with enough space surrounding the vehicle to jack it.
- Set the suspension setting to Medium and enable Jack Mode (Controls > Service > Jack Mode see Jack Mode on page 216) to disable self-leveling.

WARNING: You MUST enable Jack Mode, otherwise the vehicle may try to self-level while on the jack. Failing to engage Jack Mode may cause serious injury or death.
- If available, chock the tire diagonal to the one you're working on (for example, if you are replacing the rear driver's side tire, chock the front passenger's side tire).
NOTE: On a downhill, place the chock in front of the tire. On an uphill, place the chock behind the tire.
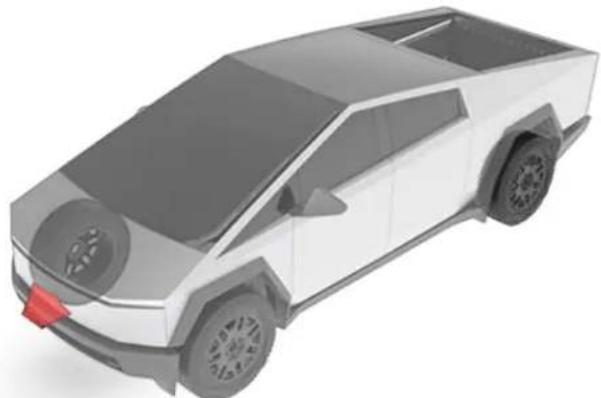
natural_image
3D rendering of a modern white pickup truck with gray roof and black wheels (no text or symbols visible)-
Remove the wheel cover from the wheel with the flat tire by grasping the cover firmly with both hands and pulling the cover toward you to release the clips. Then remove the mounting ring (see Removing and Installing Wheel Covers on page 204).
-
Add the socket to the lug nut wrench and extend it, then use the lug nut wrench to loosen the lug nuts on the wheel.
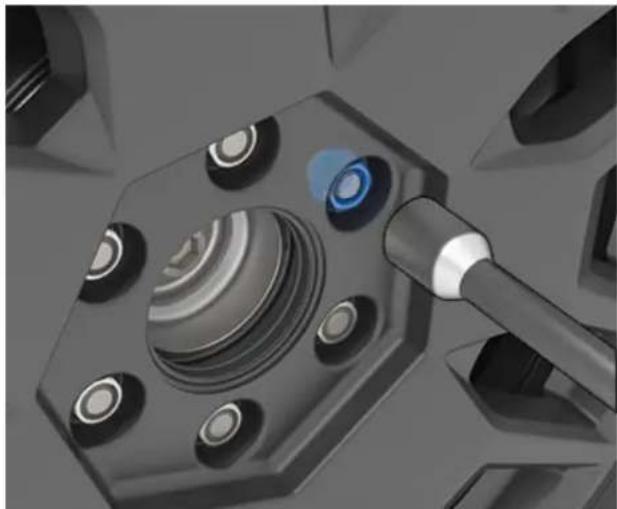
natural_image
Close-up of a mechanical component with a metallic tool inserted, showing no visible text or symbols.- Place the bottle jack under the vehicle's lift point (shown in green) corresponding to the location you are working on.

WARNING: Do not get under the vehicle when it is propped up on the jack. Doing so may cause serious injury or death.

WARNING: DO NOT position the jack under the Battery or side rails (shown in red).
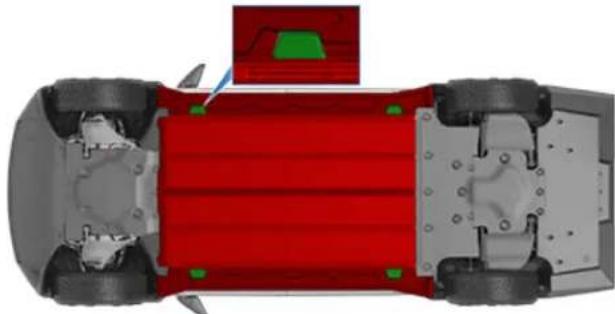
natural_image
Top-down view of a car chassis showing red structural components and surrounding vehicle chassis (no text or symbols)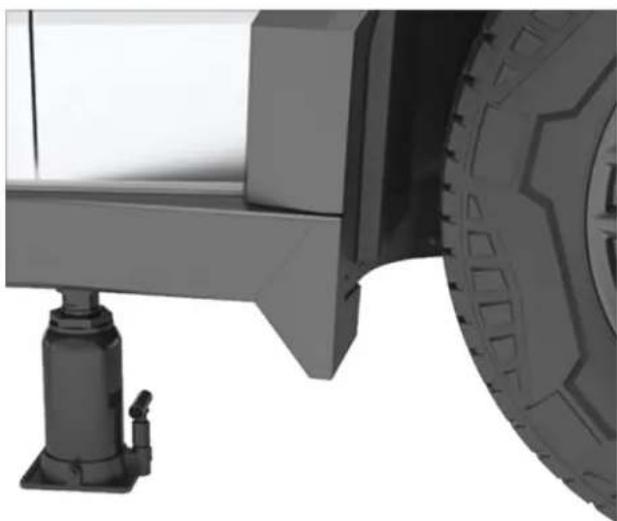
natural_image
Close-up of a vehicle's rear suspension system with a tire and mechanical component (no visible text or symbols)- Following the bottle jack manufacturer's instructions, begin to lift the vehicle, making sure to constantly monitor the contact with the lift point. Be sure to lift the vehicle enough for a fully inflated tire to fit, not just a flat tire.
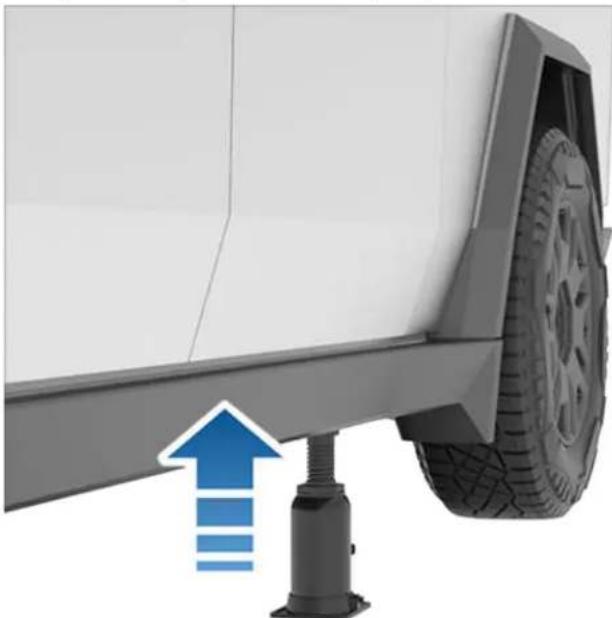
natural_image
Side view of a vehicle's rear suspension system with a blue upward arrow indicating acceleration (no text or symbols)- Once the tire is no longer contacting the ground, remove the lug nuts and the wheel.
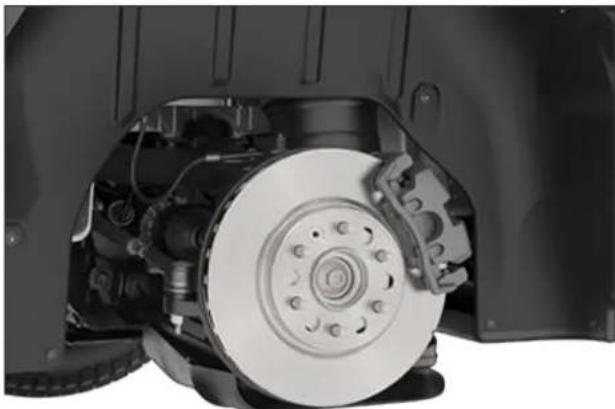
natural_image
Close-up of a car brake assembly showing internal components and housing (no visible text or symbols)-
Set the flat tire aside.
-
Place the spare tire onto the lug studs, then hand tighten the lug nuts.
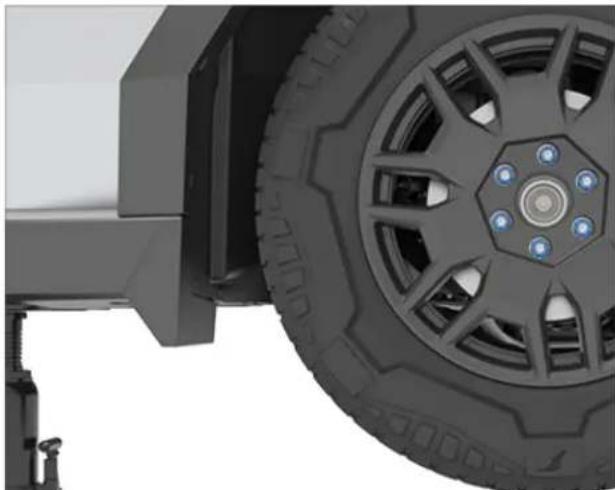
natural_image
Close-up of a car wheel assembly with mounting bracket and tire (no visible text or symbols)-
Carefully lower the vehicle using the bottle jack (following the manufacturer's instructions), then remove the bottle jack once the vehicle is on the ground.
-
Fully tighten the lug nuts with the lug nut wrench to a torque of 205 Nm (151 ft-lb).
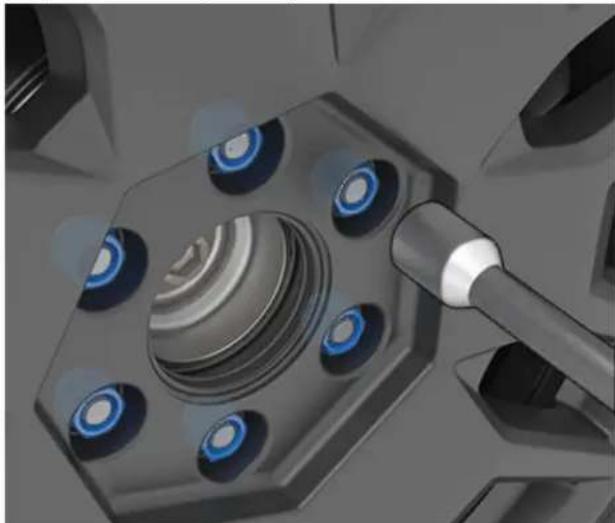
natural_image
Close-up of a mechanical component with blue circular holes and a metallic shaft (no visible text or symbols)-
Replace the mounting ring (if needed) and wheel cover by aligning with the wheel and securing the outer clips first, then securing the center clips.
-
Disengage Jack Mode by touching Controls > Service > Jack Mode.
-
Store the old tire in the spare tire kit and tether it to the cargo bed using the strap and D-rings.
Storage
To secure to the cargo bed:
-
Place the spare tire (in the vinyl cover) up against the front center of the truck bed.
-
Locate the 2 bolt covers in the center of the bed.
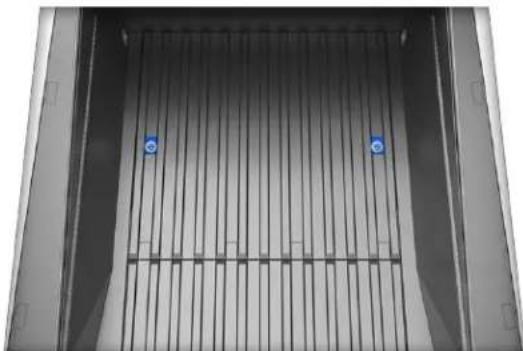
natural_image
Interior view of a vertical metal enclosure with two blue circular markers on the side (no text or symbols visible)- Latch the hooks onto the D-rings in the center of the bed.
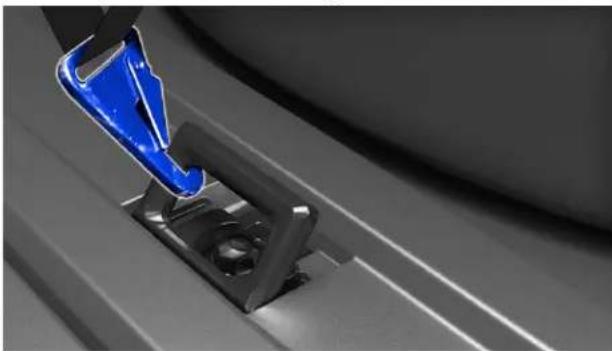
natural_image
Close-up of a blue mechanical clamp securing a black metal bracket (no text or symbols visible)- Connect the strap, then tighten starting from the right-hand side using the slack adjuster. Secure the excess strap to the top of the cover with the Velcro.
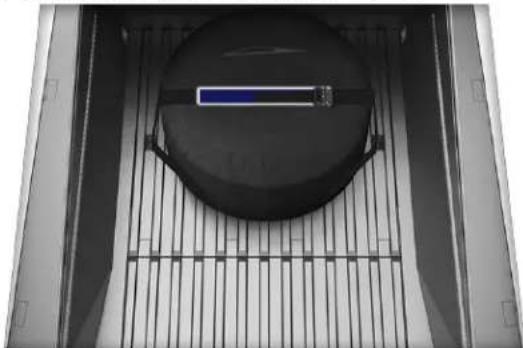
natural_image
Close-up of a black circular object with a blue horizontal bar, mounted on a grid-like structure (no text or symbols visible)- Jostle the tire to ensure it does not move around in the cargo bed.
In the unlikely event that Cybertruck has no low voltage power, you will be unable to open the powered frunk using the touchscreen, mobile app, or powered frunk button.
It is necessary to open the powered frunk before attempting to jump start Cybertruck. For more information, see Jump Starting on page 244.
To open the powered frunk when Cybertruck has no power, you need a power source that provides between 9V and 16.5V (such as a 12V portable jump starter or another vehicle), or a power source that provides between 30V and 50V. A standard 9V battery may not have enough power to open the powered frunk if Cybertruck has no power. Instead, use a portable jump starter or another vehicle.
The steps below assume you are using an external low voltage power supply (such as a portable jump starter).
NOTE: The following steps do not open the powered frunk if Cybertruck is locked and has low voltage power.
- Locate the front trunk access terminal beneath the front-left wheel well, behind the headlights.
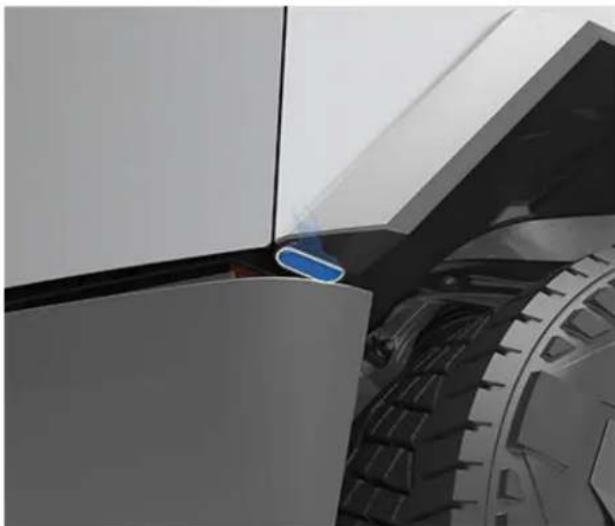
natural_image
Close-up of a mechanical component with a blue indicator light on the side (no visible text or symbols)- Use your finger to loosen the cover, then pull it down and toward you to remove it and expose the terminals. The cover is attached to a loop of cable containing both the red positive (+) and the black negative (-) terminals.
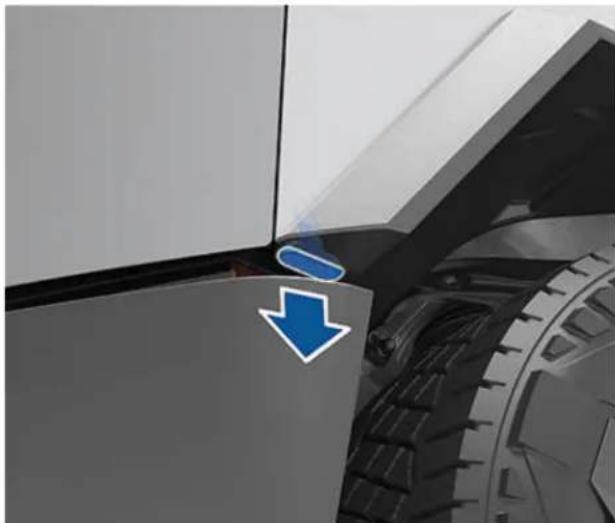
natural_image
Close-up of a mechanical component with a blue arrow pointing to a specific area (no text or symbols visible)- Carefully pull the terminals out from the cavity.
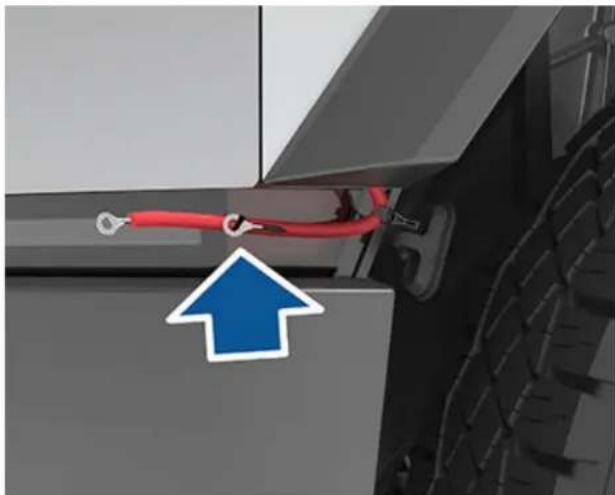
natural_image
Close-up of a red automotive tire with attached cable and a blue upward arrow indicator (no text or symbols)-
Connect the low voltage power supply's red positive (+) cable to the red positive (+) terminal.
-
Connect the low voltage power supply's black negative (-) cable to the black negative (-) terminal.
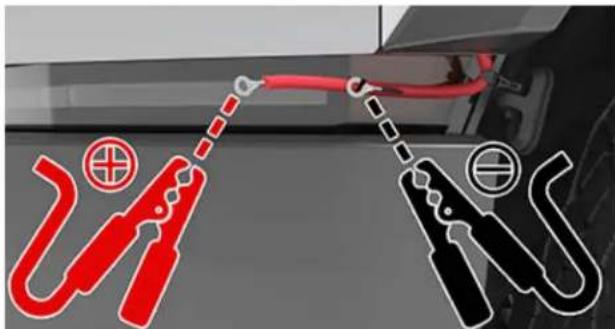
NOTE: Applying external low voltage power to these terminals only releases the hood latches. You cannot charge the low voltage battery using these terminals. Do not leave the low voltage power cables connected to the terminals for more than 30 seconds – remove from the vehicle's terminals as soon as the hood latches.
-
If you are using a variable power supply, set the supplied voltage to a value between 9V and 16.5V or between 30V and 50V.
-
Turn on the external power supply (refer to the manufacturer's instructions). The latches are immediately released and you can now open the powered trunk to access the front trunk area.

CAUTION: If you are using a variable power supply, do not change the supplied voltage while the cables are connected.
- Shut off the external power supply.

WARNING: Shut off the external power supply before removing either cable. Removing the cables while the external power source is active may cause arcing.
-
Disconnect both cables, beginning with the black negative (-) cable.
-
Feed the terminals back into the cavity and then press the cover gently but firmly back into place to ensure that it is secured.
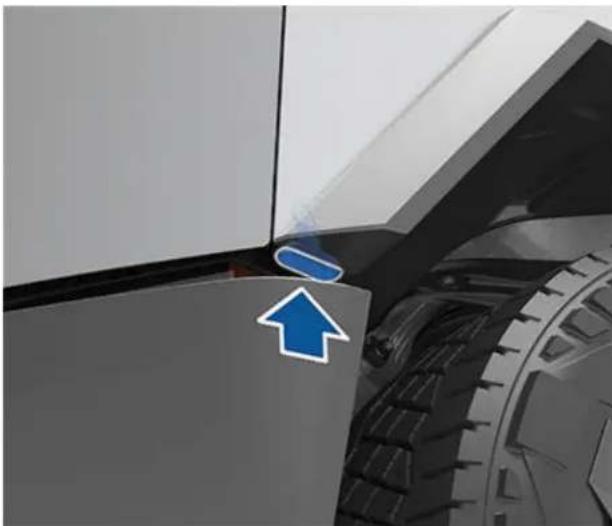
natural_image
Close-up of a mechanical component with a blue arrow pointing to a specific part (no text or symbols visible)To jump start Cybertruck, use an external power source that is capable of supplying at least 12V, such as a portable jump starter or another vehicle.

CAUTION: When jump starting Cybertruck, use jump cables that are 30 ft. (9 meters) or less in length. Using cables that are longer than 30 ft. (9 meters) may result in damage to Cybertruck or to the external power source.
The steps below assume you are using an external low voltage power supply (such as a portable jump starter). If you are using another vehicle to jump start Cybertruck, follow the manufacturer's instructions.

WARNING: It may be more difficult to steer Cybertruck when the vehicle is being supported by an external low voltage power supply. The wheels may not be as responsive to the steering wheel as expected, and extreme caution should be taken when repositioning Cybertruck.

CAUTION: Cybertruck uses a 48V low voltage architecture. As a result, some functions may be unavailable or degraded if you are supporting Cybertruck with less than 30V (for example, another vehicle or a 12V portable jump starter).

CAUTION: Avoid using low voltage components of Cybertruck (such as the climate control system, cabin USB-C ports, lights, etc.) when the vehicle is being supported by an external low voltage power supply. Doing so may disable low voltage systems and make it necessary to jump start Cybertruck again.

CAUTION: Cybertruck cannot be used to jump start another vehicle. Doing so can result in damage.

CAUTION: Avoid short circuits when jump starting Cybertruck. Connecting cables to the wrong jump post, touching leads together, etc., can damage Cybertruck.
-
Open the powered frunk (see Opening the Powered Frunk with No Power on page 242).
-
Remove the maintenance panel by pulling it upwards to release the trim clips that hold it in place.
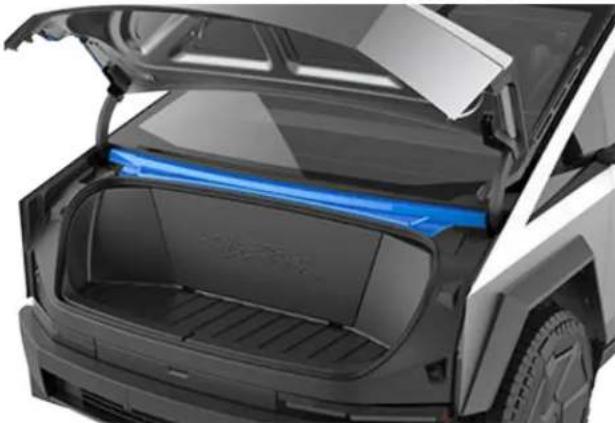
natural_image
Exterior view of a modern electric SUV trunk with open lid and blue-lit hood (no visible text or symbols)- Connect the external low voltage power supply's red positive (+) cable to the horizontal jump post mounted next to the brake fluid reservoir. The positive jump post is marked with a + sign.
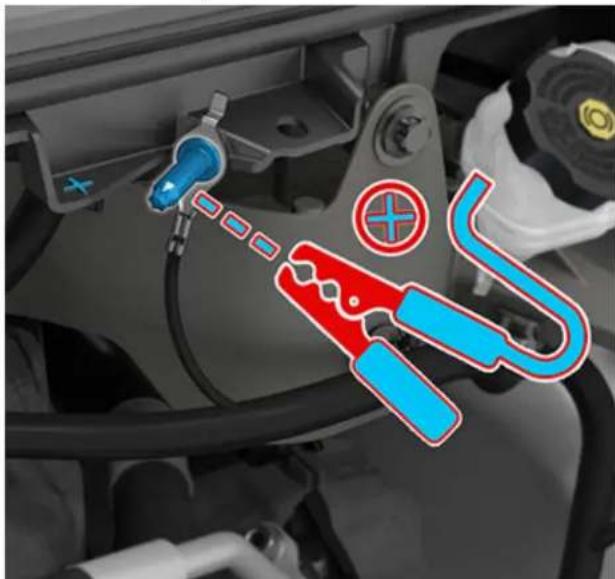
natural_image
Close-up of a car engine component with blue and red pliers and a plus symbol (no text or labels)
CAUTION: To avoid damaging Cybertruck, do not allow the positive cable to contact other metal components.
- Connect the external low voltage power supply's black negative (-) cable to the vertical jump post. The negative jump post is marked with a - sign. This jump post is used as a grounding location for the external support.
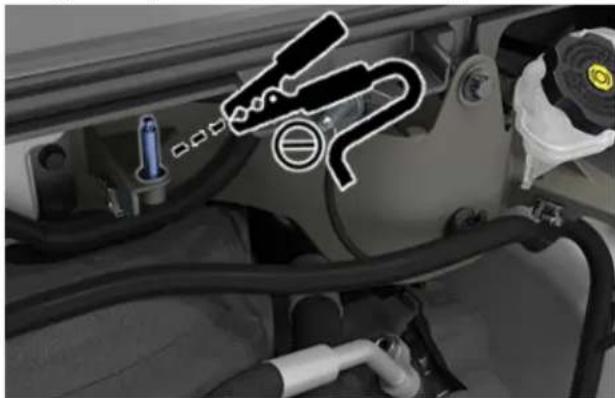
natural_image
Close-up of a car engine compartment with visible hoses and a valve icon (no text or symbols)-
If you are using a variable power supply, set the supplied voltage to a value between 12V and 16.5V or between 30V and 50V.
-
Turn on the external power supply.

CAUTION: If you are using a variable power supply, do not change the supplied voltage while the cables are connected. Doing so may cause damage to the vehicle.
-
Open the driver door and ensure that the touchscreen is on and the low voltage system is responsive. This may take up to two minutes.
-
Ensure the touchscreen is on and that the low voltage system is responsive.
NOTE: If attempting to activate Tow Mode (to winch the vehicle onto a flatbed truck), leave the power supply connected continuously until the vehicle has been secured. For more information, see Activate Tow Mode on page 234.
- Once external power is no longer required, shut off the external power supply.

WARNING: Shut off the external power supply before removing either cable. Removing the cables while the external power source is active may cause arcing.
- Disconnect both cables, beginning with the black negative (-) cable.
NOTE: Cybertruck may not be able to shift into Drive until after the high voltage Battery has been charged and the low voltage system is able to recover fully. See Running Out of Range on page 238.
-
Replace the maintenance panel by placing it back in its original location and pressing down until it is secure.
-
Close the powered frunk (see Closing on page 60).
In the unlikely event that Cybertruck has no low voltage power, you will not be able to open the doors from the interior by pressing the interior door open buttons. Instead, use the manual door releases.

CAUTION: Manual door releases are designed to be used only in situations when Cybertruck has no power. When Cybertruck has power, use the interior door open buttons.

WARNING: Do not use the manual door release while the vehicle is moving.
Opening a Front Door with No Power
To open a front door manually, pull up the manual door release located in front of the window switches and push the door open.
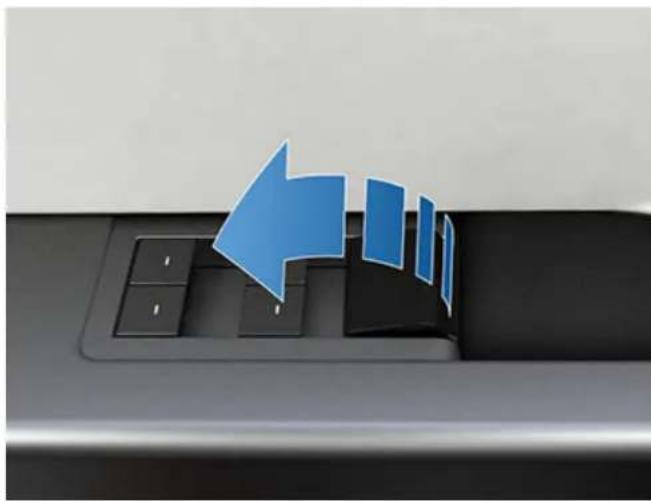
natural_image
Close-up of a computer keyboard with a blue arrow pointing to the left (no text or symbols visible)Opening a Rear Door with No Power
To open a rear door manually, perform the following steps:
- Remove the rubber mat on the bottom of the rear door's map pocket.
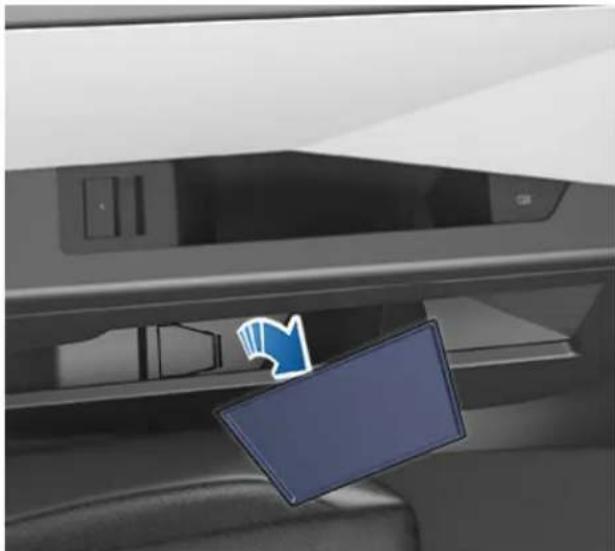
natural_image
Interior view of a car showing the front portion of the engine compartment with a blue folder icon on the side (no text or symbols visible)- Pull back the flap of plastic trim (if equipped), then pull the mechanical release cable forward and push the rear door open.
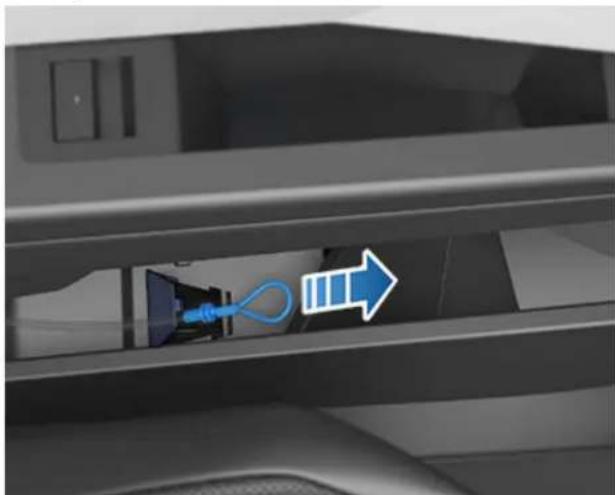
natural_image
Interior view of a car showing a blue cable inserted into a charging station, with an arrow pointing to the charger (no text or symbols visible)Vehicle submersion can be caused by a flood or other extreme weather conditions. Tesla wants to ensure you have the resources should there be a risk of vehicle submersion or if your vehicle experiences submersion in water.
Review these recommendations to help prepare for a potential vehicle submersion, know how to handle a submerged vehicle, and find available resources.
Best Practices to Prepare for Potential Flooding
If a submersion event is in the forecast and it is safe for you to preemptively move your vehicle, Tesla recommends you attempt to move Cybertruck to a location that is not at risk, or to higher ground. Keep in mind that charging infrastructure may be impacted, so Tesla recommends charging to 100% ahead of time.
However, if you are unable to move your vehicle to an area that is not at risk of flooding, consider the following best practices which may help prevent damage:
- Make sure to unplug the charger from your vehicle.
- Reduce the state of charge. This can be done by driving the vehicle ahead of time and leaving it unplugged, or by turning on climate controls or enabling Keep Climate On using your vehicle touchscreen or Tesla mobile app (see Operating Climate Controls on page 158). The intention is to have the charge level as low as possible if the vehicle becomes submerged.
- Change the air suspension (if equipped) and raise the vehicle height to High or Very High prior to leaving the vehicle.
- Lift the vehicle so that the high voltage Battery is above a potential flood line by raising it on jack stands, cylinder blocks, ramps, etc. Remember to enable Jack Mode with air suspension (if equipped) to avoid damage from self-leveling (see Jacking and Lifting on page 215).
- Leave Cybertruck in a water-tight car cover, or similar product, specifically designed to protect vehicles from flooding.
Handling a Submerged Vehicle
Know what to do if your vehicle, whether it's an electric vehicle or internal combustion engine vehicle, has been exposed to prolonged submersion.

WARNING: If you notice fire, smoke, audible popping/hissing or heating coming from your vehicle, step away and immediately contact your local first responders.
Follow these steps once the vehicle is no longer submerged and is safe to access:
-
Treat your vehicle as if it has been in an accident and contact your insurance company.
-
Do not attempt to operate the vehicle until an authorized shop has inspected it. If you are a Tesla vehicle owner, you can schedule your inspection with Tesla Service.
- Safely tow the vehicle at least 50 feet (15 meters) from structures or other combustible materials such as other cars and personal property.
- Tesla owners can request towing assistance from Tesla. See Contacting Tesla Roadside Assistance on page 237 for more information.
- Refer to Instructions for Transporters on page 233 for information on how to safely tow or move your vehicle.
APP\_w009
Automatic Emergency Braking is unavailable Feature may be restored on next drive
What this alert means:
The Automatic Emergency Braking feature is unavailable for the rest of your current drive. This alert does not specifically indicate any other braking functions or features are unavailable.
This alert may be present for several reasons. Other alerts may be present for conditions that also cause Automatic Emergency Braking to be unavailable.
What to do:
No action is typically required. Automatic Emergency Braking will usually be available again when you start your next drive.
If this alert persists across multiple drives, or occurs with increasing frequency over several drives, it is recommended that you schedule service at your earliest convenience.
For more information, see Collision Avoidance Assist on page 146.
APP\_w048
Autopilot features temporarily unavailable Features may be restored on next drive
What this alert means:
Autopilot features are currently unavailable on your vehicle. Depending on the configuration of your vehicle, Autopilot features that are disabled may include:
- Autosteer
• Traffic-Aware Cruise Control
• Automatic Emergency Braking
• Forward Collision Warning
• Lane Departure Warning
What to do:
This alert can be set for several reasons. Check for additional alerts that indicate the cause of this condition.
Typically, Autopilot features are restored on your next drive. If this alert persists across multiple drives, schedule service at your earliest convenience.
For more information and the full list of Autopilot features, see About Autopilot on page 122.
APP\_w207
Autosteer temporarily unavailable
What this alert means:
Autosteer is temporarily unavailable. This could be a temporary condition caused by an external factor, such as:
- Missing or faded lane markers.
- Narrow or winding roads.
-
Poor visibility due to rain, snow, fog, or other weather.
-
Extremely hot or cold temperatures.
- Bright light due to other vehicle headlights, direct sunlight, or other light sources.
This alert will also be present if you exceeded the maximum speed limit for Autosteer with Autosteer active. In this case, Autosteer will not be available for the rest of your current drive.
What to do:
Continue to your destination. If Autosteer is not available by the time you reach your destination, and remains unavailable during your next planned drive, check for the following:
- Damage or obstruction caused by mud, ice, snow, or other environmental factors
- Obstruction caused by an object mounted on the vehicle, like a bike rack
- Obstructions caused by adding paint or adhesive products like wraps, stickers, or rubber coatings to your vehicle
• A damaged or misaligned bumper
If there are no obvious obstructions, or if you find damage to the vehicle, schedule service at your convenience. Your vehicle is OK to drive in the meantime.
For more information, see Autopilot Features on page 124.
APP\_w218
Autosteer speed limit exceeded Take control of steering wheel
What this alert means:
Autosteer is unavailable because your vehicle has exceeded the maximum speed limit for this driver assistance feature.
What to do:
Take immediate control of the steering wheel and maintain control until you reach your destination.
In most cases, Autosteer will not be available for the rest of your current drive. To reset it, bring the vehicle to a complete stop and shift into Park. When you shift into Drive to travel to your next destination, Autosteer should be available again.
NOTE: If this alert becomes active while you are driving in Germany, Autosteer should be available again once your vehicle is traveling below the Autosteer speed limit.
If Autosteer is not available during your next drive, and remains unavailable throughout subsequent drives, schedule service at your convenience. Your vehicle is OK to drive in the meantime.
For more information, see Autopilot Features on page 124.
APP\_w222
Cruise control unavailable
Reduced front camera visibility
What this alert means:
Traffic-Aware Cruise Control and Autosteer are unavailable because one or more of the front cameras in your vehicle is blocked or blinded by external conditions.
Traffic-Aware Cruise Control and Autosteer will remain unavailable while a front camera lacks adequate visibility. Cameras may have limited or no visibility due to:
- Dirt or debris on the camera surface.
- Environmental conditions like rain, fog, snow, or dew.
• Bright sunlight or glare from another light source.
- Low or limited light conditions, including unlit or poorly lit roadways at night.
- Condensation (water droplets or mist) on the camera surface.
- Monotonous environmental features, including tunnel walls or highway dividers.
What to do:
Continue to your destination. Your vehicle is OK to drive.
This is often a temporary issue that clears up on its own. If the alert does not clear by the end of your drive:
- Inspect and clean the front camera area at the top center of the windshield before your next planned drive.
- Check the camera surface for condensation, dirt, or other debris and attempt to clear any obstruction.
See Cleaning a Camera on page 28 for more information on clearing dirt or debris from that area of the vehicle.
Although condensation on the inside of the front camera enclosure cannot be wiped clean, you can usually clear it quicker by following these steps:
- Pre-condition the cabin with the temperature set to High and A/C turned ON.
- Turn on the front windshield defroster.
If this alert persists throughout subsequent drives but no front camera obstruction is visible, schedule service at your earliest convenience. Your vehicle is OK to drive in the meantime.
APP\_w224
Cruise control unavailable
Continue driving to allow cameras to calibrate
What this alert means:
Traffic-Aware Cruise Control and Autosteer are unavailable because the cameras on your vehicle are not fully calibrated.
Your vehicle must maneuver with great precision when features like Traffic-Aware Cruise Control and Autosteer are active. Before these features can be used for the first time, the cameras must complete an initial self-calibration. Occasionally, one or more cameras can become uncalibrated.
What to do:
Continue to your destination. Your vehicle is OK to drive.
Traffic-Aware Cruise Control and Autosteer will remain unavailable until camera calibration is complete.
When calibration is complete, Traffic-Aware Cruise Control and Autosteer should be available.
For your convenience, a calibration progress indicator is displayed on the touchscreen. Calibration typically completes after your vehicle has driven 20-25 miles (32-40 km), but the distance varies depending on road and environmental conditions. For example, driving on a straight road with highly visible lane markings helps the cameras calibrate quicker.
If the alert persists and camera calibration has not completed after your vehicle has driven 100 miles (160 km) or more, or Traffic-Aware Cruise Control and Autosteer remain unavailable despite successful camera calibration, schedule service at your earliest convenience. Your vehicle is OK to drive in the meantime.
APP\_w304
Camera blocked or blinded
Clean camera or wait for it to regain visibility
What this alert means:
One or more of the vehicle cameras has limited visibility, or no visibility at all, due to external conditions. When the cameras on your vehicle cannot provide accurate visual information, some or all Autopilot features may be temporarily unavailable.
Cameras may have limited or no visibility due to:
- Dirt or debris on the camera surface.
- Environmental conditions like rain, fog, snow, or dew.
- Bright sunlight or glare from another light source.
- Low or limited light conditions, including unlit or poorly lit roadways at night.
- Condensation (water droplets or mist) on the camera surface.
- Monotonous environmental features, including tunnel walls or highway dividers.
What to do:
Continue to your destination. Your vehicle is OK to drive. This is often a temporary issue that will be resolved when condensation evaporates, or when a particular environmental condition or feature is no longer present.
If the alert does not clear by the time you reach your destination, check camera surfaces for condensation, dirt, or other debris. For camera locations, see Cameras on page 27.
Clean the cameras as necessary before your next planned drive. For recommended cleaning procedures, see Cleaning a Camera on page 28.
If you continue to see this alert after cleaning the cameras, check the inside surfaces of the door pillar camera enclosures for condensation. Although condensation inside the camera enclosures cannot be wiped clean, you can usually clear it faster by following these steps:
- Precondition the cabin by turning Climate ON, setting temperature to High, and making sure A/C is ON.
- Turn on the front windshield defroster.
- Direct the air vents toward the door pillar cameras.
For more information on clearing condensation from camera enclosures, see Cleaning a Camera on page 28.
If the alert does not clear by the end of your next planned drive, despite cleaning the indicated camera(s) and following recommended steps to clear condensation, schedule service at your next convenient opportunity. Your vehicle is OK to drive in the meantime.
APP\_w389
What this alert means:
A layer of hazy residue has been detected on the windshield, which is causing an obstruction for the camera view. As a result, one or more of the vehicle cameras might have limited visibility.
When the cameras on your vehicle cannot provide accurate visual information, some or all Autopilot features may be limited.
What to do:
Your vehicle is OK to drive. Continue to your destination.
If the alert has not cleared by the time you reach your destination, check the windshield for the following:
- Obstruction caused by dirt, mid, ice, snow, or other environmental factors.
- Obstruction caused by wiper streaks.
If there are no obvious obstructions and the alert appears during your next planned drive, schedule Service at your convenience to have the inside of the windshield camera area cleaned.
To check if your vehicle needs cleaning for the inside of the windshield camera area, review the Maintenance Summary by tapping Controls > Service > Maintenance on your vehicle touchscreen.
BMS\_a074
Maximum battery charge level reduced
OK to drive - Schedule service
What this alert means:
Your vehicle has detected a condition internal to the high voltage battery that is limiting the battery's performance. As a result, maximum charge level and range is reduced. Service is required to restore full performance.
What to do:
- Your vehicle is OK to drive. Your vehicle is able to charge when the state of charge is below 50%. Charging will not start if the State of Charge is already above 50%.
- If this alert persists, schedule service at your earliest convenience. Without service, you may notice further reductions in your vehicle's maximum charge level and range.
• For more information on the high voltage battery, see
BMS\_a079
Unable to charge - Maximum charge level reached Reduced maximum charge level - Schedule service
What this alert means:
Your vehicle has detected a condition internal to the high voltage battery that is limiting the battery's ability to charge 50% of State of Charge.
What to do:
- Your vehicle is OK to drive. Your vehicle is able to charge when the state of charge is below 50%. Charging will not start if the State of Charge is already above 50%.
- If this alert persists, schedule service at your earliest convenience. Without service, you may notice further reductions in your vehicle's maximum charge level and range.
• For more information on the high voltage battery, see
CC\_a001
Unable to charge - Insufficient grounding Proper wiring or outlet grounding must be verified
What this alert means:
No ground connection detected in the Wall Connector.
What to do:
Have the Wall Connector inspected by an electrician to make sure it is properly grounded. Your electrician should ensure there is proper grounding at your circuit breaker or power distribution box and also ensure that appropriate connections are made to the Wall Connector.
For more information, see the installation guide for your Wall Connector.
CC\_a002
Unable to charge - Insufficient grounding
Disconnect and retry or use different equipment
What this alert means:
Ground fault. Current is leaking through an unsafe path. Possible Line to ground or Neutral to ground fault.
What to do:
Try charging again by disconnecting the Wall Connector from the vehicle and reconnecting. If the issue persists, turn OFF the circuit breaker servicing the Wall Connector, wait 10 seconds, turn the circuit breaker ON again, then try reconnecting the Wall Connector to the vehicle. If the issue persists, consult your electrician or contact Tesla.
For more information, see the installation guide for your Wall Connector.
CC\_a003
Unable to charge - Wall Connector GFCI tripped
Disconnect and retry or use different equipment
What this alert means:
Ground fault. Current is leaking through an unsafe path. Possible Line to ground or Neutral to ground fault.
What to do:
Inspect the cargo bed outlets for signs of moisture. If any moisture is detected, this may be the issue. Allow any moisture in the outlets to dry completely before attempting to AC charge again.
Try charging again by disconnecting the Wall Connector from the vehicle and reconnecting. If the issue persists, turn OFF the circuit breaker servicing the Wall Connector, wait 10 seconds, turn the circuit breaker ON again, then try reconnecting the Wall Connector to the vehicle. If the issue persists, consult your electrician or contact Tesla.
For more information, see the installation guide for your Wall Connector.
CC\_a004
Unable to charge - Wall Connector issue
Wall Connector needs service
What this alert means:
Wall Connector hardware issue. Possible issues include:
- Contactor not working
- Self-test of internal ground fault monitoring circuit failed
- Thermal sensor disconnected
- Other hardware component issues
What to do:
An internal issue was detected by the Wall Connector.
- Try charging again by disconnecting the Wall Connector from the vehicle and reconnecting.
- If the issue persists, turn OFF the circuit breaker for the Wall Connector, wait 10 seconds, and turn the circuit breaker ON again. Then try reconnecting the Wall Connector to the vehicle.
-
If the issue persists, have an electrician make sure all wires are properly connected and torqued according to the instructions in the Wall Connector Installation Manual.
-
Once your electrician has completed all work and restored power to the Wall Connector, try charging again by reconnecting the Wall Connector to the vehicle.
- If the issue persists, the Wall Connector requires service.
For more information, see the installation guide for your Wall Connector.
CC_a005
Unable to charge - Wall Connector GFCI tripped Disconnect and retry or use different equipment
What this alert means:
Ground fault. Current is leaking through an unsafe path. Possible Line to ground or Neutral to ground fault.
What to do:
Inspect the cargo bed outlets for signs of moisture. If any moisture is detected, this may be the issue. Allow any moisture in the outlets to dry completely before attempting to AC charge again.
Try charging again by disconnecting the Wall Connector from the vehicle and reconnecting. If the issue persists, turn OFF the circuit breaker servicing the Wall Connector, wait 10 seconds, turn the circuit breaker ON again, then try reconnecting the Wall Connector to the vehicle. If the issue persists, consult your electrician or contact Tesla.
For more information, see the installation guide for your Wall Connector.
CC_a006
Unable to charge - Wall Connector overcurrent Disconnect and retry or use different equipment
What this alert means:
Over current protection.
What to do:
Reduce the vehicle's charge current setting. If the issue persists, service is required.
For more information, see the installation guide for your Wall Connector.
CC_a007
Unable to charge - Input voltage too high Voltage must be within Wall Connector rating
What this alert means:
Over or under voltage protection.
What to do:
Consult your electrician to ensure appropriate voltage on the circuit breaker that services the Wall Connector.
For more information, see the installation guide for your Wall Connector.
CC\_a008
Unable to charge - Input voltage too low Voltage must be within Wall Connector rating
What this alert means:
Over or under voltage protection.
What to do:
Consult your electrician to ensure appropriate voltage on the circuit breaker that services the Wall Connector.
For more information, see the installation guide for your Wall Connector.
CC\_a009
Unable to charge - Input wired incorrectly Input wiring to Wall Connector must be corrected
What this alert means:
Input miswired: possibly Line and Neutral are swapped.
What to do:
The wiring between the wall power and the Wall Connector has been incorrectly installed. Consult your electrician.
For more information, see the installation guide for your Wall Connector.
CC\_a010
Unable to charge - Wall Connector issue Wall Connector needs service
What this alert means:
Wall Connector hardware issue. Possible issues include:
- Contactor not working
- Self-test of internal ground fault monitoring circuit failed
- Thermal sensor disconnected
- Other hardware component issues
What to do:
An internal issue was detected by the Wall Connector.
- Try charging again by disconnecting the Wall Connector from the vehicle and reconnecting.
- If the issue persists, turn OFF the circuit breaker for the Wall Connector, wait 10 seconds, and turn the circuit breaker ON again. Then try reconnecting the Wall Connector to the vehicle.
- If the issue persists, have an electrician make sure all wires are properly connected and torqued according to the instructions in the Wall Connector Installation Manual.
- Once your electrician has completed all work and restored power to the Wall Connector, try charging again by reconnecting the Wall Connector to the vehicle.
- If the issue persists, the Wall Connector requires service.
For more information, see the installation guide for your Wall Connector.
CC\_a011
Unable to charge - Wall Connector too hot Let Wall Connector cool and try again
What this alert means:
Over temperature protection (latchoff).
What to do:
Make sure the Wall Connector is not covered by anything and that there is no heat source nearby. If the problem persists in normal ambient temperatures (under 100^ F or 38^ C), service is required.
For more information, see the installation guide for your Wall Connector.
CC\_a012
Unable to charge - Wall connection too hot Outlet or Wall Connector wiring must be checked
High temperature detected by Wall Connector alerts indicate the building connection to the Wall Connector is getting too warm, so charging has stopped to protect the wiring and Wall Connector.
This is not typically an issue with your vehicle or your Wall Connector, but rather an issue with the building wiring. This may be caused by a loose building wiring connection to the Wall Connector and can be fixed quickly by an electrician.
To regain normal charge operation, try the following steps.
If the Wall Connector is plugged into a wall outlet, make sure:
• The plug is fully inserted into the receptacle / outlet
• The plug / outlet area is not blocked or covered by anything
• There is no heat source nearby
If the issue persists or the Wall Connector is hard-wired, contact an electrician to inspect the building wiring connection to the Wall Connector. They should make sure that all wires are properly connected and torqued according to the installation guide for the Wall Connector.
For more information, see the installation guide for your Wall Connector.
CC\_a013
Unable to charge - Charge handle too hot Check charge handle or charge port for debris
What this alert means:
Over temperature protection (latchoff).
What to do:
Make sure the connector is fully inserted into the charge inlet in the vehicle's charging port, is not covered by anything, and there is no heat source nearby. If the issue persists in normal ambient temperatures (under 100^ F or 38^ C), service is required.
For more information, see the installation guide for your Wall Connector.
CC\_a014
Unable to charge - Wall Connector issue Wall Connector needs service
What this alert means:
Wall Connector hardware issue. Possible issues include:
- Contactor not working
- Self-test of internal ground fault monitoring circuit failed
- Thermal sensor disconnected
- Other hardware component issues
What to do:
An internal issue was detected by the Wall Connector.
- Try charging again by disconnecting the Wall Connector from the vehicle and reconnecting.
- If the issue persists, turn OFF the circuit breaker for the Wall Connector, wait 10 seconds, and turn the circuit breaker ON again. Then try reconnecting the Wall Connector to the vehicle.
- If the issue persists, have an electrician make sure all wires are properly connected and torqued according to the instructions in the Wall Connector Installation Manual.
- Once your electrician has completed all work and restored power to the Wall Connector, try charging again by reconnecting the Wall Connector to the vehicle.
- If the issue persists, the Wall Connector requires service.
For more information, see the installation guide for your Wall Connector.
CC\_a015
Unable to charge - Vehicle connection issue Insert charge handle fully into charge port
What this alert means:
A communication error occurred between the Wall Connector and the vehicle.
What to do:
Try charging again by disconnecting the Wall Connector from the vehicle and reconnecting.
- If the issue persists, turn OFF the circuit breaker servicing the Wall Connector, wait 10 seconds, turn the circuit breaker ON again, then try reconnecting the Wall Connector to the vehicle.
- If the issue persists and other charging equipment is available, plug the vehicle into another Wall Connector or a Mobile Connector to determine if the vehicle is able to communicate with other charging equipment.
- If the issue persists, service is required.
For more information, see the installation guide for your Wall Connector.
CC\_a016
Unable to charge - Vehicle connection issue Insert charge handle fully into charge port
What this alert means:
A communication error occurred between the Wall Connector and the vehicle.
What to do:
Try charging again by disconnecting the Wall Connector from the vehicle and reconnecting.
- If the issue persists, turn OFF the circuit breaker servicing the Wall Connector, wait 10 seconds, turn the circuit breaker ON again, then try reconnecting the Wall Connector to the vehicle.
- If the issue persists and other charging equipment is available, plug the vehicle into another Wall Connector or a Mobile Connector to determine if the vehicle is able to communicate with other charging equipment.
- If the issue persists, service is required.
For more information, see the installation guide for your Wall Connector.
CC\_a017
Unable to charge - Vehicle connection issue Insert charge handle fully into charge port
What this alert means:
A communication error occurred between the Wall Connector and the vehicle.
What to do:
Try charging again by disconnecting the Wall Connector from the vehicle and reconnecting.
- If the issue persists, turn OFF the circuit breaker servicing the Wall Connector, wait 10 seconds, turn the circuit breaker ON again, then try reconnecting the Wall Connector to the vehicle.
- If the issue persists and other charging equipment is available, plug the vehicle into another Wall Connector or a Mobile Connector to determine if the vehicle is able to communicate with other charging equipment.
- If the issue persists, service is required.
For more information, see the installation guide for your Wall Connector.
CC\_a018
Unable to charge - Vehicle connection issue Insert charge handle fully into charge port
What this alert means:
A communication error occurred between the Wall Connector and the vehicle.
What to do:
Try charging again by disconnecting the Wall Connector from the vehicle and reconnecting.
- If the issue persists, turn OFF the circuit breaker servicing the Wall Connector, wait 10 seconds, turn the circuit breaker ON again, then try reconnecting the Wall Connector to the vehicle.
- If the issue persists and other charging equipment is available, plug the vehicle into another Wall Connector or a Mobile Connector to determine if the vehicle is able to communicate with other charging equipment.
- If the issue persists, service is required.
For more information, see the installation guide for your Wall Connector.
CC\_a019
Unable to charge - Vehicle connection issue Insert charge handle fully into charge port
What this alert means:
A communication error occurred between the Wall Connector and the vehicle.
What to do:
Try charging again by disconnecting the Wall Connector from the vehicle and reconnecting.
- If the issue persists, turn OFF the circuit breaker servicing the Wall Connector, wait 10 seconds, turn the circuit breaker ON again, then try reconnecting the Wall Connector to the vehicle.
- If the issue persists and other charging equipment is available, plug the vehicle into another Wall Connector or a Mobile Connector to determine if the vehicle is able to communicate with other charging equipment.
- If the issue persists, service is required.
For more information, see the installation guide for your Wall Connector.
CC\_a020
Unable to charge - Wall Connector issue Wall Connector needs service
What this alert means:
Wall Connector hardware issue. Possible issues include:
- Contactor not working
- Self-test of internal ground fault monitoring circuit failed
- Thermal sensor disconnected
- Other hardware component issues
What to do:
An internal issue was detected by the Wall Connector.
- Try charging again by disconnecting the Wall Connector from the vehicle and reconnecting.
- If the issue persists, turn OFF the circuit breaker for the Wall Connector, wait 10 seconds, and turn the circuit breaker ON again. Then try reconnecting the Wall Connector to the vehicle.
- If the issue persists, have an electrician make sure all wires are properly connected and torqued according to the instructions in the Wall Connector Installation Manual.
- Once your electrician has completed all work and restored power to the Wall Connector, try charging again by reconnecting the Wall Connector to the vehicle.
- If the issue persists, the Wall Connector requires service.
For more information, see the installation guide for your Wall Connector.
CC\_a021
Unable to charge - No primary Wall Connector Check that primary unit is powered and available
What this alert means:
Load sharing (circuit breaker sharing) network: Need one (and only one) Wall Connector set as primary.
What to do:
Only one Wall Connector can be set to a primary configuration. Have your electrician confirm:
- Only one of the Wall Connectors is set as primary.
- All other Wall Connectors linked to the primary unit are set to paired position (position F).
For more information, see the installation guide for your Wall Connector.
CC\_a022
Unable to charge - More than 1 primary unit Ensure only 1 Wall Connector is set as primary
What this alert means:
Load sharing (circuit breaker sharing) network: Need one (and only one) Wall Connector set as primary.
What to do:
Only one Wall Connector can be set to a primary configuration. Have your electrician confirm:
- Only one of the Wall Connectors is set as primary.
- All other Wall Connectors linked to the primary unit are set to paired position (position F).
For more information, see the installation guide for your Wall Connector.
CC\_a023
Unable to charge - Too many Wall Connectors Ensure no more than 3 units paired with primary
What this alert means:
Load sharing (circuit breaker sharing) network: More than three Wall Connectors are paired with the same primary unit.
What to do:
Consult your electrician to have one or more paired Wall Connectors moved to a different circuit and disconnected (unpaired) from this load sharing (circuit breaker sharing) network.
For more information, see the installation guide for your Wall Connector.
CC\_a024
Unable to charge - Low Wall Connector current Primary unit current setting must be increased
What this alert means:
Incorrect rotary switch setting.
What to do:
Have your electrician adjust the Wall Connector's internal rotary switch to a valid operating current setting. They should first make sure there is no power to the Wall Connector. The correlation between switch setting and current should be printed on the inside of the Wall Connector. Your electrician should also refer to the Set the Operating Current section in the Wall Connector Installation Manual.
If the Wall Connector is set up for load sharing (circuit breaker sharing) and paired with other Wall Connectors, the rotary switch of the primary unit must be set to an operating current setting that allows each paired Wall Connector to receive at least 6A of charge current.
Example: Three Wall Connectors are paired for load sharing. The primary unit needs to be set to a current of at least 3 × 6A = 18A or greater.
For more information, see the installation guide for your Wall Connector.
CC\_a025
Unable to charge - Wall Connector issue Wall Connector needs service
What this alert means:
Wall Connector hardware issue. Possible issues include:
- Contactor not working
- Self-test of internal ground fault monitoring circuit failed
- Thermal sensor disconnected
- Other hardware component issues
What to do:
An internal issue was detected by the Wall Connector.
- Try charging again by disconnecting the Wall Connector from the vehicle and reconnecting.
- If the issue persists, turn OFF the circuit breaker for the Wall Connector, wait 10 seconds, and turn the circuit breaker ON again. Then try reconnecting the Wall Connector to the vehicle.
- If the issue persists, have an electrician make sure all wires are properly connected and torqued according to the instructions in the Wall Connector Installation Manual.
- Once your electrician has completed all work and restored power to the Wall Connector, try charging again by reconnecting the Wall Connector to the vehicle.
- If the issue persists, the Wall Connector requires service.
For more information, see the installation guide for your Wall Connector.
CC\_a026
Unable to charge - Wall Connector issue Wall Connector needs service
What this alert means:
Wall Connector hardware issue. Possible issues include:
- Contactor not working
- Self-test of internal ground fault monitoring circuit failed
- Thermal sensor disconnected
- Other hardware component issues
What to do:
An internal issue was detected by the Wall Connector.
-
Try charging again by disconnecting the Wall Connector from the vehicle and reconnecting.
-
If the issue persists, turn OFF the circuit breaker for the Wall Connector, wait 10 seconds, and turn the circuit breaker ON again. Then try reconnecting the Wall Connector to the vehicle.
- If the issue persists, have an electrician make sure all wires are properly connected and torqued according to the instructions in the Wall Connector Installation Manual.
- Once your electrician has completed all work and restored power to the Wall Connector, try charging again by reconnecting the Wall Connector to the vehicle.
- If the issue persists, the Wall Connector requires service.
For more information, see the installation guide for your Wall Connector.
CC\_a027
Unable to charge - Wall Connector issue Wall Connector needs service
What this alert means:
Wall Connector hardware issue. Possible issues include:
- Contactor not working
- Self-test of internal ground fault monitoring circuit failed
- Thermal sensor disconnected
- Other hardware component issues
What to do:
An internal issue was detected by the Wall Connector.
- Try charging again by disconnecting the Wall Connector from the vehicle and reconnecting.
- If the issue persists, turn OFF the circuit breaker for the Wall Connector, wait 10 seconds, and turn the circuit breaker ON again. Then try reconnecting the Wall Connector to the vehicle.
- If the issue persists, have an electrician make sure all wires are properly connected and torqued according to the instructions in the Wall Connector Installation Manual.
- Once your electrician has completed all work and restored power to the Wall Connector, try charging again by reconnecting the Wall Connector to the vehicle.
- If the issue persists, the Wall Connector requires service.
For more information, see the installation guide for your Wall Connector.
CC\_a028
Unable to charge - Incorrect switch setting Wall Connector rotary switch must be adjusted
What this alert means:
Incorrect rotary switch setting.
What to do:
Have your electrician adjust the Wall Connector's internal rotary switch to a valid operating current setting. They should first make sure there is no power to the Wall Connector. The correlation between switch setting and current should be printed on the inside of the Wall Connector. Your electrician should also refer to the Set the Operating Current section in the Wall Connector Installation Manual.
If the Wall Connector is set up for load sharing (circuit breaker sharing) and paired with other Wall Connectors, the rotary switch of the primary unit must be set to an operating current setting that allows each paired Wall Connector to receive at least 6A of charge current.
Example: Three Wall Connectors are paired for load sharing. The primary unit needs to be set to a current of at least 3 × 6A = 18A or greater.
For more information, see the installation guide for your Wall Connector.
CC\_a029
Unable to charge - Vehicle connection issue Insert charge handle fully into charge port
What this alert means:
A communication error occurred between the Wall Connector and the vehicle.
What to do:
Try charging again by disconnecting the Wall Connector from the vehicle and reconnecting.
-
If the issue persists, turn OFF the circuit breaker servicing the Wall Connector, wait 10 seconds, turn the circuit breaker ON again, then try reconnecting the Wall Connector to the vehicle.
-
If the issue persists and other charging equipment is available, plug the vehicle into another Wall Connector or a Mobile Connector to determine if the vehicle is able to communicate with other charging equipment.
-
If the issue persists, service is required.
For more information, see the installation guide for your Wall Connector.
CC\_a030
Unable to charge - Primary / paired unit mismatch Wall Connector current ratings must match
What this alert means:
Load sharing (circuit breaker sharing) network: The paired Wall Connectors have different maximum current capabilities.
What to do:
Only Wall Connectors with the same maximum current capabilities can be paired in a load sharing (circuit breaker sharing) network. Have your electrician inspect the type labels on the Wall Connectors and make sure the current capabilities match. It is further recommended that your electrician only pair Wall Connectors with the same part number, as an easy way to make sure paired units are compatible.
For more information, see the installation guide for your Wall Connector.
CC\_a041
Charge rate reduced - Wall connection hot Outlet or Wall Connector wiring must be checked
What this alert means:
High temperature detected by Wall Connector alerts indicate the building connection to the Wall Connector is getting too warm, so charging has been slowed to protect the wiring and Wall Connector.
This is not typically an issue with your vehicle or your Wall Connector, but rather an issue with the building wiring. This may be caused by a loose building wiring connection to the Wall Connector and can be fixed quickly by an electrician.
What to do:
Contact an electrician to inspect the building wiring connection to the Wall Connector. They should make sure that all wires are properly connected and torqued according to the installation guide for the Wall Connector.
For more information, see the installation guide for your Wall Connector.
CC\_a043
Wall Connector configuration must be completed Refer to Installation Guide to enable charging
What this alert means:
Wall Connector configuration is incomplete.
What to do:
The Wall Connector needs to be commissioned to appropriately configure the circuit breaker size and protective earth connection type.
For more information, refer to Commissioning Procedure in the Wall Connector Installation Manual. If the issue persists, contact an electrician to inspect the building wiring connection to the Wall Connector. They should make sure the power output and grounding connections are properly configured according to the installation guide for the Wall Connector.
For more information, see the installation guide for your Wall Connector.
CP\_a004
Charging equipment not recognized Try again or try different equipment
What this alert means:
The charge port is unable to detect whether a charge cable is inserted, or the type of charge cable connected.
This alert is usually specific to external charging equipment and power sources and does not typically indicate an issue with your vehicle that can be resolved by scheduling service.
What to do:
If this alert appears while a charge cable is connected, determine whether the issue is caused by the charging equipment or the vehicle. Try charging the vehicle using different external charging equipment (including charge cable, charging station, or charging stall).
- If the vehicle begins charging, the issue was likely with the equipment.
- If the vehicle still does not charge, the issue may be with the vehicle.
If this alert appears while a charge cable is not connected or if the issue is suspected to be with the vehicle, inspect the charge port inlet and the charge cable connector for any obstructions, such as debris, moisture, and/or foreign objects. Make sure any charge port inlet obstruction has been removed and any moisture has been allowed to dry, then try re-inserting the cable into the charge port.
You can also try charging your vehicle using a Tesla Supercharger or Destination Charging location, all of which can be located through the map on your vehicle's touchscreen display. See Maps and Navigation on page 167 for more details.
For more information on troubleshooting Mobile Connector or Wall Connector status lights, refer to the product's Owner's Manual at Charging & Adapter Product Guides.
For more information on charging, see Charging Instructions on page 180.
CP\_a010
Charging equipment communication error
Try again or try different equipment
What this alert means:
Your vehicle is unable to charge because it cannot communicate effectively with the external charging equipment. It cannot sense a valid control pilot signal coming from the charging equipment.
This alert is usually specific to external charging equipment and power sources and does not typically indicate an issue with your vehicle that can be resolved by scheduling service.
What to do:
First, confirm the lack of effective communication is caused by the external charging equipment rather than an issue with your vehicle. This is usually the case.
Try charging the vehicle using different external charging equipment (including charge cable, charging station, or charging stall).
- If the vehicle begins charging, the issue was likely with the equipment.
- If the vehicle still does not charge, the issue may be with the vehicle.
If the issue is suspected to be with the vehicle, inspect the charge port inlet and the charge cable connector for any obstructions, such as debris, moisture, and/or foreign objects. Make sure any charge port inlet obstruction has been removed and any moisture has been allowed to dry, then try re-inserting the cable into the charge port.
You can also try charging your vehicle using a Tesla Supercharger or Destination Charging location, all of which can be located through the map on your vehicle's touchscreen display. See Maps and Navigation on page 167 for more details.
For more information on troubleshooting Mobile Connector or Wall Connector status lights, refer to the product's Owner's Manual at Charging & Adapter Product Guides.
For more information on charging, see Charging Instructions on page 180.
CP\_a043
Charge port door sensor fault
Charge port may not operate as expected
What this alert means:
One of the charge port door sensors is not functioning normally. When this occurs, the charge port may be unable to accurately sense the charge port door position and the charge port may not operate as expected.
- The charge port latch may intermittently remain engaged when the charge port door is opened.
- The charge port light may illuminate only intermittently when the charge port door is opened.
What to do:
Try closing the charge port door and then opening it again.
For more information, see Opening the Charge Port on page 180.
For more information on charging, see Charging Instructions on page 180.
CP\_a046
Charging equipment communication lost Check power source and charging equipment
What this alert means:
Charging stopped because communication between the vehicle and the external charging equipment was interrupted.
This alert is usually specific to external charging equipment and power sources and does not typically indicate an issue with your vehicle that can be resolved by scheduling service.
What to do:
Confirm whether the external charging equipment is powered by looking for any status lights, displays, or other indicators on the equipment.
If the equipment is not powered, try to restore the external charging equipment's power source.
- If attempting to charge at a public station and power is unable to be restored, contact the station operator.
- If attempting to charge at a private station (for example: charging at home) and power is unable to be restored, contact an electrician.
If the equipment is powered, try charging the vehicle using different external charging equipment.
- If the vehicle begins charging, the issue was likely with the equipment.
- If the vehicle still does not charge, the issue may be with the vehicle.
You can also try charging your vehicle using a Tesla Supercharger or Destination Charging location, all of which can be located through the map on your vehicle's touchscreen display. See Maps and Navigation on page 167 for more details.
For more information on troubleshooting Mobile Connector or Wall Connector status lights, refer to the product's Owner's Manual at Charging & Adapter Product Guides.
CP\_a051
Charge port may not open when pressed Use another method to open the charge port
What this alert means:
One of the charge port door sensors is not communicating properly. The charge port may not recognize the request to open when the charge port door is pressed.
What to do:
You can still use all other usual methods to open the charge port door:
- Use the vehicle touchscreen.
• Use the Tesla Mobile App. - With your vehicle unlocked, press the charge handle button on any Tesla charge cable, including a Wall Connector, Mobile Connector, or Supercharger.
For more information, see Opening the Charge Port on page 180.
CP\_a053
Unable to charge - Charge station not powered
Check power source or try a different station
What this alert means:
Charging cannot begin because the charging equipment is not ready. A charge handle is detected, but the charging station is not communicating with the vehicle. This issue could occur because:
- The charging station is not powered.
- The control pilot signal between the charging station and the vehicle is interrupted.
This alert is usually specific to external charging equipment and power sources and does not typically indicate an issue with your vehicle that can be resolved by scheduling service.
What to do:
Try charging the vehicle with different charging equipment or at a different charging station.
- If the vehicle begins charging, the issue was likely with the equipment.
- If the vehicle still does not charge, the issue may be with the vehicle.
If using a Mobile Connector or Wall Connector, first check the status lights on the front. If no status lights are visible, check the power source and contact an electrician to inspect the building wiring connection to the wall outlet or the Wall Connector to confirm that all wires are properly connected and torqued.
If using other external charging equipment, consult the product's owner's manual to learn how to confirm that the station is powered. Contact an electrician to inspect the building wiring and charging equipment as necessary.
For more information on troubleshooting Mobile Connector or Wall Connector status lights, refer to the product's Owner's Manual at Charging & Adapter Product Guides.
You can also try charging your vehicle using a Tesla Supercharger or Destination Charging location, all of which can be located through the map on your vehicle's touchscreen display. See Maps and Navigation on page 167 for more details.
CP\_a054
Charge port latch not engaged
Fully insert charge cable or check for obstruction
What this alert means:
The charge port latch is unable to latch the charge cable in the charge port inlet. If the latch is not engaged, AC charging (for example, charging with a Mobile Connector or Wall Connector) will be limited to 16A and DC Fast Charging / Supercharging will be unavailable.
The charge port light will pulse amber if this alert appears during AC charging and will be solid amber if this alert appears when attempting to DC Fast Charge / Supercharge.
This alert is usually specific to external charging equipment and power sources and does not typically indicate an issue with your vehicle that can be resolved by scheduling service.
What to do:
Try re-inserting the charge cable fully into the charge port inlet.
If your vehicle begins charging and the charge port light pulses green, the charge cable may not have been fully inserted before. AC charging should no longer be limited, and DC Fast Charging / Supercharging should be available.
If charging is still limited or the vehicle will not charge at all, inspect the charge port inlet and the charge cable connector for any obstructions, such as debris, moisture, and/or foreign objects. Make sure any charge port inlet obstruction has been removed and any moisture has been allowed to dry, then try re-inserting the cable into the charge port.
If charging is still limited or the vehicle will not charge at all, make sure the charge port manual release has not been actuated. For more information on using the charge port manual release, see Manually Releasing Charge Cable on page 183.
You can also try charging your vehicle using a Tesla Supercharger or Destination Charging location, all of which can be located through the map on your vehicle's touchscreen display. See Maps and Navigation on page 167 for more details.
For more information on troubleshooting Mobile Connector or Wall Connector status lights, refer to the product's Owner's Manual at Charging & Adapter Product Guides.
For more information on charging, see Charging Instructions on page 180.
CP\_a055
Charging equipment communication lost Check power source and charging equipment
What this alert means:
Charging stopped because communication between the vehicle and the external charging equipment was interrupted.
This alert is usually specific to external charging equipment and power sources and does not typically indicate an issue with your vehicle that can be resolved by scheduling service.
What to do:
Confirm whether the external charging equipment is powered by looking for any status lights, displays, or other indicators on the equipment. For more information on troubleshooting Mobile Connector or Wall Connector status lights, refer to the product's Owner's Manual at Charging & Adapter Product Guides.
If the equipment is not powered, try to restore the external charging equipment's power source.
- If attempting to charge at a public station and power is unable to be restored, contact the station operator.
- If attempting to charge at a private station (for example: charging at home) and power is unable to be restored, contact an electrician.
If the equipment is powered, try charging the vehicle using different external charging equipment.
- If the vehicle begins charging, the issue was likely with the equipment.
- If the vehicle still does not charge, the issue may be with the vehicle.
You can also try charging your vehicle using a Tesla Supercharger or Destination Charging location, all of which can be located through the map on your vehicle's touchscreen display. See Maps and Navigation on page 167 for more details.
CP\_a056
Charging stopped - Charge cable disconnected Close charge port - Press brake pedal and retry
What this alert means:
Charging has stopped because your vehicle has detected that the connection between the charge port and charge cable has been unexpectedly interrupted.
What to do:
Before disconnecting a charge cable, make sure you first stop charging.
With some external charging equipment, charging may be stopped by pressing the button on the charge handle.
You can also stop charging from your vehicle touchscreen, your Tesla Mobile App, or the charging station.
For more information, see Stopping Charging on page 182.
CP\_a058
Unable to AC charge - System will retry shortly Disconnect and retry or use different equipment
What this alert means:
Your vehicle is unable to charge because it has detected one of the following conditions and has tried to charge too many times without success:
- The charge port is unable to detect whether a charge cable is inserted or detect the type of charge cable connected.
- Your vehicle is unable to sense a valid pilot control signal coming from the charging station, so it cannot communicate effectively with the external charging equipment.
- Communication between your vehicle and the external charging equipment has been interrupted.
- The external charging equipment has reported an error that prevents your vehicle from charging.
What to do:
When this alert is present, the vehicle will retry charging after some time. If the issues mentioned above are resolved, the vehicle will then resume charging. If you wish to retry charging sooner, disconnect the charge cable from the charge port and reconnect it.
For more information and troubleshooting suggestions, check in your vehicle touchscreen for other recent alerts that involve charging.
CP\_a066
Charging equipment not ready See equipment instructions to start charging
What this alert means:
Charging cannot begin because the charging station is communicating to your vehicle that either the external charging equipment is not ready or charging is not authorized. The control pilot signal that communicates between the charging station and your vehicle indicates that your vehicle is not allowed to start charging.
This could occur because:
- The charging station is actively delaying charging. For example, this can happen because the station has a scheduled charging feature activated.
- The charging station requires further activation before the charge session can begin. Some additional authentication may be needed before the station starts charging your vehicle, such as a charging card, a mobile app, or a credit card.
This alert is usually specific to external charging equipment and power sources and does not typically indicate an issue with your vehicle that can be resolved by scheduling service.
What to do:
Check the charging station for any instructions that explain the steps necessary to enable charging. For example, look for a touchscreen terminal, LED status indicators, printed instructions, or a payment interface that might provide guidance. If you cannot enable charging on the current charging station, try charging the vehicle with different charging equipment or at a different charging station.
- If the vehicle begins charging, the issue was likely with the equipment.
- If the vehicle still does not charge, the issue may be with the vehicle.
You can also try charging your vehicle using a Tesla Supercharger or Destination Charging location, all of which can be located through the map on your vehicle's touchscreen display. See Maps and Navigation on page 167 for more details.
For more information on troubleshooting Mobile Connector or Wall Connector status lights, refer to the product's Owner's Manual at Charging & Adapter Product Guides.
For more information on charging, see Charging Instructions on page 180.
CP\_a078
Cable blocked - Charge port latch may be frozen Try using Defrost Car button in Mobile App
What this alert means:
The charge port latch cannot unlatch the charge cable, and cold ambient temperature is detected.
What to do:
To remove any strain on the cable, re-insert the charge cable fully into the charge port inlet. Try again to unlatch the charge cable.
If the charge cable still cannot be removed, the charge port latch may be frozen.
To help thaw any ice on the charge port latch, press the Defrost Truck button in your Tesla Mobile App to defrost your vehicle for approximately 30 to 45 minutes.
NOTE: Be sure to use Defrost Truck in your Mobile App to defrost your vehicle. Adjusting the climate control settings in your vehicle's touchscreen is not as effective.
It may also be possible to thaw any ice affecting the charge port latch by warming up the side mirrors via your vehicle touchscreen, as your vehicle is equipped with a charge port inlet heater that turns on when you turn on side mirror heating in cold weather conditions.
For more information on charging in cold weather conditions, see Cold Weather Best Practices on page 164.
If the charge cable still cannot be removed, try the charge port manual release.
For more information on using the charge port manual release, see Manually Releasing Charge Cable on page 183.
For more information on charging, see Charging Instructions on page 180.
CP\_a079
Charge rate reduced - Charge port may be frozen Try using Defrost Car button in Mobile App
What this alert means:
The charge port latch is unable to secure the charge cable in the charge port inlet, and cold ambient temperature is detected. If the latch is not engaged, AC charging (for example, charging with a Mobile Connector or Wall Connector) will be limited to 16A and DC Fast Charging / Supercharging will be unavailable.
The charge port light will pulse amber if this alert appears during AC charging and will be solid amber if this alert appears when attempting to DC Fast Charge / Supercharge.
This alert is usually specific to external charging equipment and power sources and does not typically indicate an issue with your vehicle that can be resolved by scheduling service.
What to do:
Try re-inserting the charge cable fully into the charge port inlet. If your vehicle begins charging and the charge port light pulses green, the charge cable may not have been fully inserted before. AC charging should no longer be limited, and DC Fast Charging / Supercharging should be available.
If charging is still limited or the vehicle will not charge at all, make sure the charge port manual release has not been actuated. For more information on using the charge port manual release, see Manually Releasing Charge Cable on page 183.
If charging is still limited or the vehicle will not charge at all, inspect the charge port inlet and the charge cable connector for any obstructions, such as debris, moisture, and/or foreign objects. Make sure any charge port inlet obstruction has been removed and any moisture has been allowed to dry, then try re-inserting the cable into the charge port.
If you have checked for and cleared any debris or foreign objects, but charging is still limited or your vehicle will not charge at all, the charge port latch may be frozen. To help thaw any ice on the charge port latch, press the Defrost Truck button in your Tesla Mobile App to defrost your vehicle for approximately 30 to 45 minutes.
NOTE: Be sure to use Defrost Truck in your Mobile App to defrost your vehicle. Adjusting the climate control settings in your vehicle's touchscreen is not as effective.
It may also be possible to thaw any ice affecting the charge port latch by warming up the side mirrors via your vehicle touchscreen, as your vehicle is equipped with a charge port inlet heater that turns on when you turn on side mirror heating in cold weather conditions.
For more information on charging in cold weather conditions, see Cold Weather Best Practices on page 164.
If the alert remains present, limited AC charging should still be available.
For more information on charging, see Charging Instructions on page 180.
CP\_a101
Charge rate reduced - Wall connection hot Outlet or Wall Connector wiring must be checked
What this alert means:
High temperature detected by Wall Connector alerts indicate the building connection to the Wall Connector is getting too warm, so charging has been slowed to protect the wiring and Wall Connector.
This is not typically an issue with your vehicle or your Wall Connector, but rather an issue with the building wiring. This may be caused by a loose building wiring connection to the Wall Connector and can be fixed quickly by an electrician.
What to do:
Contact an electrician to inspect the building wiring connection to the Wall Connector. They should make sure that all wires are properly connected and torqued according to the installation guide for the Wall Connector.
Wall Connector installation guides can be found here.
CP\_a102
Unable to charge - Wall connection too hot Outlet or Wall Connector wiring must be checked
What this alert means:
High temperature detected by Wall Connector alerts indicate the building connection to the Wall Connector is getting too warm, so charging has been slowed to protect the wiring and Wall Connector.
This is not typically an issue with your vehicle or your Wall Connector, but rather an issue with the building wiring. This may be caused by a loose building wiring connection to the Wall Connector and can be fixed quickly by an electrician.
What to do:
Contact an electrician to inspect the building wiring connection to the Wall Connector. They should make sure that all wires are properly connected and torqued according to the installation guide for the Wall Connector.
For more information, see the installation guide for your Wall Connector.
CP\_a143
Charging adapter has electric arc flash hazard Use different charging equipment
What this alert means:
Charging is unavailable because your vehicle has detected an electric arc flash hazard in the third-party charging adapter used to connect a Combined Charging System (CCS) charge handle to your vehicle's charge port.
An electric arc flash can occur if you attempt to unplug while actively charging with the third-party charging adapter, and an electric arc flash can cause serious bodily injury and/or property damage.
What to do:
Follow the steps below to mitigate this risk:
• Make sure charging is completely stopped.
1. Use your vehicle touchscreen to confirm charging has stopped, or to stop charging if necessary.
2. Use the charging station display and controls to confirm charging has stopped, or to end any active charging session.
- Make sure no flashing green or blue light (LED) is visible on your vehicle's charge port.
- Unplug the charging adapter from your vehicle's charge port.
- Confirm again that the charging station indicates no active charging session.
- Unplug the charging adapter from the charge handle.
Use different charging equipment to charge your vehicle. For more information on charging, see Charging Instructions on page 180.
You can also try charging your vehicle using a Tesla Supercharger or Destination Charging location, all of which can be located through the map on your vehicle's touchscreen display. See Maps and Navigation on page 167 for more details.
CP\_a151
Charge port error detected - Service is required AC charging may not function / OK to Supercharge
What this alert means:
Your vehicle's charge port requires service. The charge port is unable to establish a valid control pilot signal and communicate effectively with some AC charging equipment and power sources.
While this alert remains present, AC charging and DC Fast Charging with non-Tesla charging stations may be limited or unavailable.
What to do:
It is recommended that you schedule service to have your vehicle's charge port inspected at your earliest convenient opportunity.
In the meantime, Supercharging should continue to be available. Supercharging locations can be displayed through the map on your vehicle's touchscreen. See Maps and Navigation on page 167 for more details.
AC charging may also be available using a Gen 2 Mobile Connector or Gen 3 Wall Connector. However, it is recommended that you make sure your vehicle's charge port can communicate with your Tesla charging product. Try charging with your Gen 2 Mobile Connector or Gen 3 Wall Connector, and confirm your vehicle is charging as expected, before relying on it.
For more information on troubleshooting Mobile Connector or Wall Connector status lights, refer to the product's Owner's Manual at Charging & Adapter Product Guides.
For more information on charging, see Charging Instructions on page 180.
CP\_a164
Charge handle still detected after unlatch request
Use charge port manual release cable if needed
What this alert means:
Your vehicle's charge port detects a charge cable / charge handle is still connected after receiving multiple requests to unlatch the charge cable so it can be disconnected.
This alert may indicate the charge port latch is not releasing the charge cable as expected.
What to do:
If the charge cable cannot be removed from the charge port after multiple attempts to unlatch it, try the manual release.
For more information on using the charge port manual release, see Manually Releasing Charge Cable on page 183.
If the charge cable still cannot be removed, the charge port latch may be frozen.
To help thaw any ice on the charge port latch, press the Defrost Truck button in your Tesla Mobile App to defrost your vehicle for approximately 30 to 45 minutes.
NOTE: Be sure to use Defrost Truck in your Mobile App to defrost your vehicle. Adjusting the climate control settings in your vehicle's touchscreen is not as effective.
It may also be possible to thaw any ice affecting the charge port latch by warming up the side mirrors via your vehicle touchscreen, as your vehicle is equipped with a charge port inlet heater that turns on when you turn on side mirror heating in cold weather conditions.
For more information on charging in cold weather conditions, see Cold Weather Best Practices on page 164.
If this alert occurs repeatedly over multiple drives and charging attempts, it is recommended that you schedule service to have your vehicle's charge port inspected at your earliest convenient opportunity.
For more information on troubleshooting Mobile Connector or Wall Connector status lights, refer to the product's Owner's Manual at Charging & Adapter Product Guides.
If using other external charging equipment, refer to the manufacturer's provided documentation for troubleshooting tips.
For more information on charging, see Charging Instructions on page 180.
DI\_a138
Front motor disabled - OK to drive
Vehicle power may be limited
What this alert means:
Your vehicle's front motor is unavailable. Power, speed, and acceleration may be reduced as your vehicle uses the rear motor(s) to continue driving.
What to do:
In some cases, your vehicle may be unable to continue driving. If this occurs, another vehicle alert should also be present to provide more information and recommended actions.
This alert may be caused by a temporary condition that will be resolved automatically. If this alert clears during your current drive, or is no longer present when you start your next drive, it was likely caused by a temporary condition. No action is required.
This alert may also indicate a condition requiring front motor inspection and service. If this alert persists throughout subsequent drives, it is recommended that you schedule service. Your vehicle is OK to drive in the meantime.
DI\_a166
Vehicle automatically parked to prevent rollaway
Fasten seatbelt and close door to stay in gear
What this alert means:
Your vehicle has automatically shifted into Park (P) because it determined the driver was leaving or no longer present. This is expected vehicle behavior under various circumstances.
Your vehicle will automatically shift into Park if all of these conditions are true:
• Autopark is not active
- Your vehicle is traveling slower than 1.4 mph (2.25 km/h) in Drive or Reverse
- The last driver activity was detected more than 2 seconds ago. Driver activity includes:
- Pressing the brake and/or accelerator pedal
- Manually steering the vehicle
And at least two of these conditions are true:
- Driver seatbelt is detected as unbuckled
- Driver is not detected as present
- Driver door is detected as open
- One or more of the sensors used to detect the three conditions above (seatbelt buckle, seat occupancy, door latch) is not working as expected
Your vehicle will also automatically shift into Park if any of these conditions is true:
- Door is detected as open
- Seatbelt is detected as unbuckled while speed is less than 0.1mph (0.15 km/h) in Drive or Reverse
- No driver activity is detected for 60 seconds
NOTE: Your vehicle will also automatically shift into Park when a charge cable is connected to the charge port.
What to do:
For more information on automatic shifting into Park, see Shifting on page 76.
DI\_a175
Cruise control unavailable
What this alert means:
Cruise Control, including Traffic-Aware Cruise Control, is currently unavailable.
Cruise Control might be unavailable because:
• The driver canceled the request.
• The driver unbuckled their seatbelt.
• The front trunk or a door is open.
- The vehicle is traveling below the Cruise Control minimum speed of 18 mph (30 km/h).
- There is an environmental condition, such as limited visibility.
• Valet mode is active.
What to do:
Take control and drive your vehicle manually.
When any condition preventing Cruise Control activation is no longer present, Cruise Control should be available. If this alert persists throughout subsequent drives, schedule service at your earliest convenience. Your vehicle is OK to drive in the meantime.
For more information, see Traffic-Aware Cruise Control on page 124.
DI\_a184
Autopark canceled
Take control
What this alert means:
Autopark has been canceled.
Autopark might have been canceled because:
- The driver pressed the Cancel button on the touchscreen.
- The driver moved the steering wheel.
- The driver pressed the accelerator pedal, pressed the brake pedal, or opened a door.
- There is a steep slope / grade.
- There is a weather condition affecting visibility.
- The curb cannot be detected.
• A trailer is attached to the vehicle.
What to do:
Park, or finish parking, your vehicle manually. Once you have finished parking, apply the brakes and shift into Park. Your vehicle will otherwise remain free-rolling.
Autopark should be available again during your next drive.
DI\_a185
Autopark Aborted
What this alert means:
Autopark has aborted and the Electronic Parking Brake has been applied.
Autopark might have been canceled because:
- The driver pressed the Cancel button on the touchscreen.
- The driver moved the steering wheel.
- The driver pressed the accelerator pedal, pressed the brake pedal, or opened a door.
- There is a steep slope / grade.
- There is a weather condition affecting visibility.
- The curb cannot be detected.
• A trailer is attached to the vehicle.
What to do:
Park, or finish parking, your vehicle manually.
Autopark should be available again during your next drive.
DI\_a190
Rear tire tread depth low - Schedule service Inspect tires for rotation/replacement
What this alert means:
NOTE: This alert does NOT indicate that there is a flat tire.
Your vehicle has detected that the rear tires have experienced more wear over time than the front tires, exceeding the recommended difference.
What to do:
It is recommended that the tread depth on all tires be inspected. As your tires wear during normal driving, the rear tires generally wear more quickly than the front tires.
Tire rotation is important to balance tire wear evenly across all tires.
Failure to rotate tires as recommended poses a risk of hydroplaning and losing control of the vehicle on wet roads. Failure to rotate tires also decreases the life of your tires, requiring premature replacement.
It is recommended that you schedule service via your Tesla Mobile App or with an independent service provider to have your tires rotated when:
- The difference in tire tread depth between any front and rear tire exceeds 1.5mm
- Your vehicle has been driven for more than 6,250 miles (10,000 km) since the last rotation
Upon completion of tire inspection and any necessary tire service, update your vehicle's tire configuration to optimize your vehicle settings to your tires and clear the alert for at least 6,250 miles. For more information, see Inspecting and Maintaining Tires on page 202.
It is not recommended that you rely on this alert instead of routine checks of tire tread depth. This alert should only be present when your vehicle estimates the tires are far beyond the recommended service interval.
This alert is calibrated for Tesla tires and is not expected to work with tires of different types or sizes, including combinations of different tire brands or models. It may not display, or may display prematurely, on vehicles using tires not recommended by Tesla. For more information on recommended tires, see Wheel and Tire Specifications on page 206.
DI\_a245
Vehicle Hold feature unavailable Keep brake pedal pressed while stopped
What this alert means:
Vehicle Hold is currently unavailable due to system constraints. When stopping, use the brake pedal to bring your vehicle to a complete stop and keep your vehicle stationary.
What to do:
Continue to your destination. Your vehicle is OK to drive.
If this alert persists throughout subsequent drives, schedule service at your earliest convenience. Your vehicle is OK to drive in the meantime.
For more information, see Stopping Mode in Braking and Stopping on page 89.
DI\_a250
Adaptive ride control disabled
Drive with caution
What this alert means:
The speed of your vehicle is limited to 90 mph (144 km/h) due to an issue with the Adaptive Suspension Damping system.
The system cannot provide real-time adjustments to the suspension system to optimize both ride and handling, and as a result your ride may be softer than usual.
What to do:
If this alert persists throughout subsequent drives, schedule service at your earliest convenience. Your vehicle is OK to drive in the meantime.
This alert is accompanied by a red indicator light on the touchscreen. For more information, see Suspension on page 95.
DIF\_a251 / DIR\_a251 / DIREL\_a251 / DIRER\_a251
Gearbox fluid service recommended
Schedule Service
What this alert means:
Your vehicle has detected a condition requiring gearbox fluid inspection.
What to do:
It is recommended that you schedule service.
Your vehicle is OK to drive with this alert present. However, continuing to drive over an extended period of time with this alert present may result in permanent gearbox / powertrain damage.
HVBATT\_a734
High voltage battery performance limited
OK to drive - Schedule service soon
What this alert means:
Your vehicle has detected a condition internal to the high voltage battery that is limiting the battery's performance. Service is required to restore full performance.
Your vehicle is OK to drive.
Your vehicle's maximum range may be reduced, and your vehicle may take longer to charge than before. Maximum charge rate varies, as always, based on location, power source, and charging equipment.
What to do:
While this alert remains present, keep your vehicle charged to 30% capacity or higher to avoid any discrepancy between the estimated range displayed on your vehicle's touchscreen and the actual high voltage battery charge level.
It is recommended that you schedule service at your earliest convenience. Without service, your vehicle may continue to show further reductions in maximum range and charging performance and may also begin to show reduced power and acceleration when driving.
For more information on the high voltage battery, see High Voltage Battery Information on page 179.
HVBATT\_a735
High voltage battery performance limited
OK to drive - Schedule service soon
What this alert means:
Your vehicle has detected a condition internal to the high voltage battery that is limiting the battery's performance. Service is required to restore full performance.
Your vehicle is OK to drive.
Your vehicle's maximum range may be reduced, and your vehicle may take longer to charge than before. Maximum charge rate varies, as always, based on location, power source, and charging equipment.
What to do:
While this alert remains present, keep your vehicle charged to 30% capacity or higher to avoid any discrepancy between the estimated range displayed on your vehicle's touchscreen and the actual high voltage battery charge level.
It is recommended that you schedule service at your earliest convenience. Without service, your vehicle may continue to show further reductions in maximum range and charging performance and may also begin to show reduced power and acceleration when driving.
For more information on the high voltage battery, see High Voltage Battery Information on page 179.
HVBATT\_a736
High voltage battery requires service
Acceleration and charging performance reduced
What this alert means:
Your vehicle has detected a condition internal to the high voltage battery that is limiting the battery's performance. Service is required to restore full performance.
Your vehicle is OK to drive.
You may notice that your vehicle's top speed is reduced and it responds slower than previously to acceleration requests.
Your vehicle's maximum range may be reduced, and your vehicle may take longer to charge than before. Maximum charge rate varies, as always, based on location, power source, and charging equipment.
What to do:
While this alert remains present, keep your vehicle charged to 30% capacity or higher to avoid any discrepancy between the estimated range displayed on your vehicle's touchscreen and the actual high voltage battery charge level.
It is recommended that you schedule service at your earliest opportunity. Without service, your vehicle may continue to show reduced power, acceleration, range, and charging performance.
For more information on the high voltage battery, see High Voltage Battery Information on page 179.
HVBATT\_a737
High voltage battery requires service
Acceleration and charging performance reduced
What this alert means:
Your vehicle has detected a condition internal to the high voltage battery that is limiting the battery's performance. Service is required to restore full performance.
Your vehicle is OK to drive.
You may notice that your vehicle's top speed is reduced and it responds slower than previously to acceleration requests.
Your vehicle's maximum range may be reduced, and your vehicle may take longer to charge than before. Maximum charge rate varies, as always, based on location, power source, and charging equipment.
What to do:
While this alert remains present, keep your vehicle charged to 30% capacity or higher to avoid any discrepancy between the estimated range displayed on your vehicle's touchscreen and the actual high voltage battery charge level.
It is recommended that you schedule service at your earliest opportunity. Without service, your vehicle may continue to show reduced power, acceleration, range, and charging performance.
For more information on the high voltage battery, see High Voltage Battery Information on page 179.
PM\_a092 / PMF\_a092 / PMR\_a092 / PMREL\_a092 / PMRER\_a092 Powertrain issue detected - Schedule service Issue may persist even if functionality is restored
What this alert means:
Your vehicle's powertrain requires service. Power, speed, and acceleration may be reduced, and your vehicle may need to shut down while driving.
This alert indicates a persistent condition requiring powertrain inspection and service.
Even if this alert clears after the current drive and does not return during subsequent drives, service is required to resolve the powertrain issue your vehicle has detected.
What to do:
It is recommended that you schedule service for your vehicle's powertrain at your earliest opportunity.
Without service, your vehicle may continue to have reduced power, speed, and acceleration, may experience conditions that require it to shut down while driving, or may become unable to drive.
TAS\_a313 Adaptive ride control degraded Ride comfort may be reduced
What this alert means:
There is an issue with your vehicle's Adaptive Suspension Damping system. As a result, the system cannot provide real-time adjustments to the suspension system to optimize both ride and handling.
Instead, all dampers are receiving fixed current. Your ride may be softer or firmer than usual.
What to do:
If this alert persists throughout subsequent drives, schedule service at your earliest convenience. Your vehicle is OK to drive in the meantime.
This alert is accompanied by a yellow indicator light on the touchscreen. For more information, see Suspension on page 95.
TAS\_a314
Adaptive ride control disabled
Drive with caution
What this alert means:
There is an issue with your vehicle's Adaptive Suspension Damping system. As a result, the system cannot provide real-time adjustments to the suspension system to optimize both ride and handling, and your ride may be softer than usual.
What to do:
If this alert persists throughout subsequent drives, schedule service at your earliest convenience. Your vehicle is OK to drive in the meantime.
This alert is accompanied by a red indicator light on the touchscreen. For more information, see Suspension on page 95.
UI\_a004
Front trunk open
Proceed with caution
What this alert means:
Your vehicle's front trunk (hood) is detected open while driving.
This alert indicates at least one of the two latches securing the hood, the front trunk primary and/or secondary latch, cannot be confirmed closed (confirmed as fully secured) when your vehicle is shifted into a gear other than Park.
What to do:
As this condition may lead to the front trunk opening while driving, it is recommended that you drive carefully until you can safely bring your vehicle to a stop and shift into Park.
Once your vehicle is parked, check the front trunk (hood) to make sure it is fully closed (both latches are fully engaged). For more information, see Closing instructions for the Powered Frunk on page 59.
The alert should clear once your vehicle is shifted into Park. However, it may return once you start driving if you do not first inspect and fully secure the hood.
If this alert persists across multiple drives, or occurs with increasing frequency over several drives, it is recommended that you schedule service at your earliest convenience.
For more information on the front trunk, see Powered Frunk on page 59.
UI\_a006
Service is required
Schedule service now
What this alert means:
This alert is set remotely by Tesla when a condition requiring service is detected on your vehicle.
This alert can be set due to various conditions. When you schedule service, more information should be available.
This alert can only be cleared by a service technician after your vehicle has been serviced.
What to do:
As this alert can be present due to various conditions, it is recommended that you schedule service at your earliest convenience.
UI\_a137
Active service connection to vehicle
Service performing remote diagnostics
What this alert means:
A service technician is remotely logged into your vehicle for diagnosis or repair. You may notice some loss of Infotainment functionality while the connection persists, but this alert does not indicate an issue with your vehicle.
Your vehicle is OK to drive.
What to do:
This alert should clear automatically after the technician completes vehicle diagnosis or repair. You may find it necessary to restart your touchscreen to restore full Infotainment functionality after the alert has cleared. For more information, see Restarting the Touchscreen in your vehicle's Do It Yourself Guide.
If this alert does not clear after 24 hours, it is recommended that you schedule service via your Tesla Mobile App or with an independent service provider. Please note that independent service provider options may vary, based on your vehicle configuration and your location.
UMC\_a001
Unable to charge with Mobile Connector Inadequate outlet grounding - Try another outlet
What this alert means:
The Mobile Connector has detected that the electrical outlet has insufficient grounding, likely caused by an inadequate or missing ground connection.
This does not indicate an issue with your Mobile Connector or vehicle, but instead points to an issue with the wall outlet / electrical installation the Mobile Connector is connected to.
What to do:
Have the electrical installation inspected by an electrician. Your electrician should make sure there is proper grounding at your circuit breaker or power distribution box, and also make sure that appropriate connections are made to the outlet, before you attempt to plug in the Mobile Connector again.
If you need to charge in the meantime, try charging using a different outlet, at another location, or with another type of charging station.
You can also try charging your vehicle using a Tesla Supercharger or Destination Charging location, all of which can be located through the map on your vehicle's touchscreen display. See Maps and Navigation on page 167 for more details.
For more information on troubleshooting Mobile Connector status lights and charging issues, refer to the product's owner's manual.
UMC\_a002
Unable to charge - Mobile Connector GFCI tripped Unplug charge handle from charge port and retry
What this alert means:
The vehicle cannot charge because the ground-fault circuit interrupter (GFCI) in the Mobile Connector has tripped.
Like the GFCI in a wall outlet, this feature is designed to stop the flow of electricity when there is a problem. It has interrupted charging to protect your vehicle and the charging equipment.
This could happen for many reasons. The problem could be in the charge cable, the charge handle, the charge port, or even an onboard vehicle component.
What to do:
Inspect the charge port and the charge handle for pooled water or unusual levels of moisture. If you find excessive moisture, wait and let both the inside area of the charge port and the exposed portion of the charge handle dry sufficiently before trying again.
Inspect the cargo bed outlets for signs of moisture. If any moisture is detected, this may be the issue. Allow any moisture in the outlets to dry completely before attempting to AC charge again.
Inspect the charge equipment for damage.
- If the cable is in any way damaged or deteriorated, do not use it. Try different charging equipment instead.
- If the cable is in good condition, try charging again with the same Mobile Connector.
If the issue persists and prevents charging, try charging with different charging equipment.
This alert is usually specific to external charging equipment and power sources and does not typically indicate an issue with your vehicle that can be resolved by scheduling service.
You can also try charging your vehicle using a Tesla Supercharger or Destination Charging location, all of which can be located through the map on your vehicle's touchscreen display. See Maps and Navigation on page 167 for more details.
For more information on troubleshooting Mobile Connector status lights and charging issues, refer to the product's owner's manual.
UMC\_a004
Unable to charge with Mobile Connector Voltage too high / Try a different wall outlet
What this alert means:
The vehicle cannot charge, or charging is interrupted, because either the Mobile Connector:
• Detects the wall outlet voltage is too high, or
- Detects an unexpected increase in supply voltage from the wall outlet.
What to do:
Try charging the vehicle with a different wall outlet. If the vehicle starts to charge, the issue was likely with the original wall outlet. Contact an electrician to inspect the building wiring connection to that outlet.
If the vehicle still does not charge when you try a different wall outlet, try charging at a different location.
You can also try charging your vehicle using a Tesla Supercharger or Destination Charging location, all of which can be located through the map on your vehicle's touchscreen display. See Maps and Navigation on page 167 for more details.
For more information on troubleshooting Mobile Connector status lights and charging issues, refer to the product's owner's manual.
UMC\_a005
Unable to charge with Mobile Connector Voltage too low / Try a different wall outlet
What this alert means:
The vehicle cannot charge, or charging is interrupted, because either the Mobile Connector:
- Does not detect enough supply voltage from the wall outlet, or
- Detects an unexpected drop in supply voltage from the wall outlet.
What to do:
Try charging the vehicle with a different wall outlet. If the vehicle starts to charge, the issue was likely with the original wall outlet. Contact an electrician to inspect the building wiring connection to that outlet.
If the vehicle still does not charge when you try a different wall outlet, try charging at a different location.
This alert is usually specific to external charging equipment and power sources and does not typically indicate an issue with your vehicle that can be resolved by scheduling service.
You can also try charging your vehicle using a Tesla Supercharger or Destination Charging location, all of which can be located through the map on your vehicle's touchscreen display. See Maps and Navigation on page 167 for more details.
For more information on troubleshooting Mobile Connector status lights and charging issues, refer to the product's owner's manual.
UMC\_a007
Mobile Connector control box temperature high Let Mobile Connector cool to resume charging
What this alert means:
Charging has been interrupted because the Mobile Connector has detected a high temperature inside its control box housing.
What to do:
Make sure the Mobile Connector is not covered by anything, and that there is no heat source nearby. If the problem persists in normal ambient temperatures (under 100^ F or 38^ C), service is required.
You can also try charging your vehicle using a Tesla Supercharger or Destination Charging location, all of which can be located through the map on your vehicle's touchscreen display. See Maps and Navigation on page 167 for more details.
For more information on troubleshooting Mobile Connector status lights and charging issues, refer to the product's owner's manual.
UMC\_a008
Unable to charge - Wall plug temperature high Wall outlet and wiring inspection recommended
What this alert means:
High temperature detected by Mobile Connector alerts indicate the outlet used to charge is becoming too warm, so charging has stopped to protect the outlet.
This does not indicate an issue with your Mobile Connector or vehicle, but instead points to an issue with the wall outlet / electrical installation the Mobile Connector is connected to.
A warm outlet may be caused by a plug that is not fully inserted, a loose building wiring connection to the outlet, or an outlet that is beginning to wear out.
What to do:
Make sure your adapter is fully plugged into the outlet. If charging speed does not return to normal, contact an electrician to inspect the outlet and building wiring connections to the outlet and complete any repairs needed.
If the outlet is worn, it should be replaced with a high-quality outlet. Consider upgrading to a Tesla Wall Connector for greater convenience and highest charging speed.
UMC\_a009
Cannot charge - Charge handle temperature high
Check charge handle or charge port for debris
What this alert means:
Charging has been interrupted because the Mobile Connector has detected a high temperature in the charge handle that connects to your vehicle's charge port.
What to do:
Make sure the Mobile Connector is fully inserted into your vehicle's charge port inlet.
Inspect the charge port inlet and the Mobile Connector handle for any obstructions or moisture. Make sure any obstruction in the charge port or Mobile Connector handle has been removed and any moisture has been allowed to dry, then try re-inserting the Mobile Connector handle into the charge port.
Also make sure the charge handle of the Mobile Connector is not covered by anything, and that there is no heat source nearby.
If the alert persists in normal ambient temperatures (under 100^ F or 38^ C), and occurs during multiple charging attempts, this may indicate a condition affecting the Mobile Connector or your vehicle. It is recommended that you schedule service at your convenience.
You can also try charging your vehicle using a Tesla Supercharger or Destination Charging location, all of which can be located through the map on your vehicle's touchscreen display. See Maps and Navigation on page 167 for more details.
For more information on troubleshooting Mobile Connector status lights and charging issues, refer to the product's owner's manual.
UMC\_a010
Mobile Connector to adapter connection hotLet cool - Plug adapter fully into Mobile Connector
What this alert means:
Charging has been interrupted because the Mobile Connector has detected a high temperature at the connection between the wall plug adapter and the control box.
What to do:
Make sure the wall plug adapter is fully connected to the Mobile Connector control box.
Also make sure the wall plug adapter is not covered by anything, and that there is no heat source nearby.
After unplugging from the power source (wall outlet), inspect the wall plug adapter connection and the Mobile Connector control box connection for any obstructions or moisture. Make sure any obstruction has been removed and any moisture has been allowed to dry, then try re-inserting the wall plug adapter into the Mobile Connector and then connecting to the power source (wall outlet).
Once the Mobile Connector control box temperature has decreased and any obstruction has been removed, the alert should clear and charging should possible.
You can also try charging your vehicle using a Tesla Supercharger or Destination Charging location, all of which can be located through the map on your vehicle's touchscreen display. See Maps and Navigation on page 167 for more details.
For more information on troubleshooting Mobile Connector status lights and charging issues, refer to the product's owner's manual.
UMC\_a011
Charging equipment communication error
Try again or try different equipment
What this alert means:
Your vehicle is unable to charge because it cannot communicate effectively with the Mobile Connector. The Mobile Connector cannot confirm via proximity detection that the charge handle is fully connected to your vehicle.
What to do:
First, confirm the lack of effective communication is caused by the Mobile Connector rather than an issue with your vehicle. This is usually the case.
To confirm this, try charging the vehicle using different external charging equipment.
- If the vehicle begins charging, the issue was likely with the Mobile Connector.
- If the vehicle still does not charge, the issue may be with the vehicle.
Inspect the charge port inlet and the Mobile Connector handle for any obstructions (use a flashlight as necessary). Make sure any obstruction has been removed and any moisture has been allowed to dry, then try re-inserting the Mobile Connector handle into the charge port.
This alert is usually specific to external charging equipment and power sources and does not typically indicate an issue with your vehicle that can be resolved by scheduling service.
You can also try charging your vehicle using a Tesla Supercharger or Destination Charging location, all of which can be located through the map on your vehicle's touchscreen display. See Maps and Navigation on page 167 for more details.
For more information on troubleshooting Mobile Connector status lights and charging issues, refer to the product's owner's manual.
For more information on charging, see Charging Instructions on page 180.
UMC\_a012
Charging equipment communication error
Try again or try different equipment
What this alert means:
Your vehicle is unable to charge because it cannot communicate effectively with the Mobile Connector. The Mobile Connector detects that it cannot generate or maintain a valid control pilot signal.
What to do:
First, confirm the lack of effective communication is caused by the Mobile Connector rather than an issue with your vehicle. This is usually the case.
To confirm this, try charging the vehicle using different external charging equipment.
- If the vehicle begins charging, the issue was likely with the Mobile Connector.
- If the vehicle still does not charge, the issue may be with the vehicle.
Inspect the charge port inlet and the Mobile Connector handle for any obstructions (use a flashlight as necessary). Make sure any obstruction has been removed and any moisture has been allowed to dry, then try re-inserting the Mobile Connector handle into the charge port.
This alert is usually specific to external charging equipment and power sources and does not typically indicate an issue with your vehicle that can be resolved by scheduling service.
You can also try charging your vehicle using a Tesla Supercharger or Destination Charging location, all of which can be located through the map on your vehicle's touchscreen display. See Maps and Navigation on page 167 for more details.
For more information on troubleshooting Mobile Connector status lights and charging issues, refer to the product's owner's manual.
For more information on charging, see Charging Instructions on page 180.
UMC\_a013
Wall plug adapter error - Charge rate reduced Plug adapter fully into Mobile Connector and retry
What this alert means:
Your Mobile Connector is unable to communicate with the wall plug adapter. Because your Mobile Connector cannot monitor the wall plug adapter temperature, charge current is automatically reduced to 8A.
What to do:
- Unplug your Mobile Connector, including the wall plug adapter, completely from the wall outlet.
- Make sure the connection between the wall plug adapter and the main body of your Mobile Connector is secure.
a. Disconnect the wall plug adapter completely from the main body of your Mobile Connector.
b. Fully reinsert the wall plug adapter into the main body of your Mobile Connector by pushing it into the socket until it snaps into place. - Try charging again by plugging the Mobile Connector, including wall plug adapter, fully into the wall outlet.
- If the alert persists, try using a different wall plug adapter (see steps above to make sure the adapter is fully connected to your Mobile Connector).
a. If the alert is no longer present, the issue is likely with the wall plug adapter you were using previously.
b. If the alert persists, the issue is likely with your Mobile Connector.
If needed, obtain another wall plug adapter or Mobile Connector.
In the meantime, you can continue to charge with the same equipment. The charge rate will be reduced, as charge current will be limited to 8A while this condition persists.
You can also try charging your vehicle using a Tesla Supercharger or Destination Charging location, all of which can be located through the map on your vehicle's touchscreen display. See Maps and Navigation on page 167 for more details.
For more information on troubleshooting Mobile Connector status lights and charging issues, refer to the product's owner's manual.
UMC\_a014
Wall plug adapter error - Charge rate reduced Plug adapter fully into Mobile Connector and retry
What this alert means:
Your Mobile Connector is unable to communicate with the wall plug adapter. Because your Mobile Connector cannot identify the type of wall outlet the wall plug adapter is connected to, charge current is automatically reduced to 8A.
What to do:
- Unplug your Mobile Connector, including the wall plug adapter, completely from the wall outlet.
- Make sure the connection between the wall plug adapter and the main body of your Mobile Connector is secure. a. Disconnect the wall plug adapter completely from the main body of your Mobile Connector.
b. Fully reinsert the wall plug adapter into the main body of your Mobile Connector by pushing it into the socket until it snaps into place.
- Try charging again by plugging the Mobile Connector, including wall plug adapter, fully into the wall outlet.
- If the alert persists, try using a different wall plug adapter (see steps above to make sure the adapter is fully connected to your Mobile Connector).
a. If the alert is no longer present, the issue is likely with the wall plug adapter you were using previously.
b. If the alert persists, the issue is likely with your Mobile Connector.
If needed, obtain another wall plug adapter or Mobile Connector. In the meantime, you can continue to charge with the same equipment. The charge rate will be reduced, as charge current will be limited to 8A while this condition persists.
You can also try charging your vehicle using a Tesla Supercharger or Destination Charging location, all of which can be located through the map on your vehicle's touchscreen display. See Maps and Navigation on page 167 for more details.
For more information on troubleshooting Mobile Connector status lights and charging issues, refer to the product's owner's manual.
UMC\_a015
Wall plug adapter error - Charge rate reduced Plug adapter fully into Mobile Connector and retry
What this alert means:
Your Mobile Connector is unable to communicate with the wall plug adapter. Because your Mobile Connector cannot identify the type of wall outlet the wall plug adapter is connected to, charge current is automatically reduced to 8A.
What to do:
- Unplug your Mobile Connector, including the wall plug adapter, completely from the wall outlet.
- Make sure the connection between the wall plug adapter and the main body of your Mobile Connector is secure.
a. Disconnect the wall plug adapter completely from the main body of your Mobile Connector.
b. Fully reinsert the wall plug adapter into the main body of your Mobile Connector by pushing it into the socket until it snaps into place.
- Try charging again by plugging the Mobile Connector, including wall plug adapter, fully into the wall outlet.
- If the alert persists, try using a different wall plug adapter (see steps above to make sure the adapter is fully connected to your Mobile Connector).
a. If the alert is no longer present, the issue is likely with the wall plug adapter you were using previously.
b. If the alert persists, the issue is likely with your Mobile Connector.
If needed, obtain another wall plug adapter or Mobile Connector. In the meantime, you can continue to charge with the same equipment. The charge rate will be reduced, as charge current will be limited to 8A while this condition persists.
You can also try charging your vehicle using a Tesla Supercharger or Destination Charging location, all of which can be located through the map on your vehicle's touchscreen display. See Maps and Navigation on page 167 for more details.
For more information on troubleshooting Mobile Connector status lights and charging issues, refer to the product's owner's manual.
UMC\_a016
Mobile Connector control box temperature high Maximum charge rate reduced
What this alert means:
Charge current has been temporarily reduced because the Mobile Connector has detected increased temperature inside its control box housing.
What to do:
Make sure the Mobile Connector is not covered by anything, and that there is no heat source nearby. If the problem persists in normal ambient temperatures (under 100^ F or 38^ C), service is required.
You can also try charging your vehicle using a Tesla Supercharger or Destination Charging location, all of which can be located through the map on your vehicle's touchscreen display. See Maps and Navigation on page 167 for more details.
For more information on troubleshooting Mobile Connector status lights and charging issues, refer to the product's owner's manual.
UMC\_a017
Charge rate reduced - Wall plug temperature high Wall outlet and wiring inspection recommended
What this alert means:
High temperature detected by Mobile Connector alerts indicate the outlet used to charge is becoming too warm, so charging has been slowed to protect the outlet.
This is not typically an issue with your vehicle or your Mobile Connector, but rather an issue with the outlet. A warm outlet may be caused by a plug that is not fully inserted, a loose building wiring connection to the outlet, or an outlet that is beginning to wear out.
What to do:
Make sure your adapter is fully plugged into the outlet. If charging speed does not return to normal, contact an electrician to inspect the outlet and building wiring connections to the outlet and complete any repairs needed.
If the outlet is worn, it should be replaced with a high-quality outlet. Consider upgrading to a Tesla Wall Connector for greater convenience and highest charging speed.
UMC\_a018
Charge rate reduced - Handle temperature high
Check charge handle or charge port for debris
What this alert means:
Charge current has been temporarily reduced because the Mobile Connector has detected increased temperature in the charge handle that connects to your vehicle's charge port.
What to do:
Make sure the Mobile Connector is fully inserted into your vehicle's charge port inlet.
Inspect the charge port inlet and the Mobile Connector handle for any obstructions or moisture. Make sure any obstruction in the charge port or Mobile Connector handle has been removed and any moisture has been allowed to dry, then try re-inserting the Mobile Connector handle into the charge port.
Also make sure the charge handle of the Mobile Connector is not covered by anything, and that there is no heat source nearby.
If the alert persists in normal ambient temperatures (under 100^ F or 38^ C), and occurs during multiple charging attempts, this may indicate a condition affecting the Mobile Connector or your vehicle. It is recommended that you schedule service at your convenience.
You can also try charging your vehicle using a Tesla Supercharger or Destination Charging location, all of which can be located through the map on your vehicle's touchscreen display. See Maps and Navigation on page 167 for more details.
For more information on troubleshooting Mobile Connector status lights and charging issues, refer to the product's owner's manual.
UMC\_a019
Mobile Connector to adapter connection hot Maximum charge rate reduced
What this alert means:
Charge current has been reduced because the Mobile Connector has detected a high temperature at the connection between the wall plug adapter and the control box.
What to do:
Make sure the wall plug adapter is fully connected to the Mobile Connector control box.
After unplugging from the power source (wall outlet), inspect the wall plug adapter connection and the Mobile Connector control box connection for any obstructions or moisture.
It is recommended that any debris / foreign objects be removed. Make sure any obstruction has been removed and any moisture has been allowed to dry, then try re-inserting the wall plug adapter into the Mobile Connector and then connecting to the power source (wall outlet).
Also make sure the wall plug adapter is not covered by anything, and that there is no heat source nearby. If the alert persists in normal ambient temperatures (under 100^ F or 38^ C), and occurs during multiple charging attempts, this may indicate a condition affecting the Mobile Connector or your vehicle. It is recommended that you schedule service at your convenience.
You can also try charging your vehicle using a Tesla Supercharger or Destination Charging location, all of which can be located through the map on your vehicle's touchscreen display. See Maps and Navigation on page 167 for more details.
For more information on troubleshooting Mobile Connector status lights and charging issues, refer to the product's owner's manual.
VCLEFT\_a130 / VCREAR\_a130
Critical issue detected
PULL OVER SAFELY
What this alert means:
Your vehicle has detected a potential issue with its electrical system and/or steering system, and has initiated a controlled shutdown process intended to provide you with an opportunity to pull over at a safe location.
This alert does not mean your vehicle has lost all electrical power or steering functionality, or that the steer-by-wire system is unavailable. This alert indicates a possible issue with one of the multiple redundant sensors and actuators designed to make sure the steer-by-wire system always remains available while driving, or with the electrical system's ability to provide power to the steer-by-wire system.
Your vehicle's speed and power will be limited. Your vehicle will gradually lose all drive torque, and you must pull over.
After you have pulled over and shifted into Park (P), you will have the option to drive again. Your vehicle will be limited to a very low speed for emergency operation, such as repositioning your vehicle before it is towed.
What to do:
Pull over at a safe location, and bring your vehicle to a complete stop, at your earliest reasonable opportunity.
Once your vehicle is in Park (P) with the parking brake applied, you may choose to accept the stated conditions in the message displayed on the touchscreen and shift out of Park (P). Your vehicle's speed and power will be very limited. This limited drive torque will allow you to reposition your vehicle slightly at the parked location or prepare your vehicle to be towed, but your vehicle should not be driven on public roads in this condition.
It is possible that exiting and re-entering your vehicle may clear the alert and restore functionality. If you attempt this successfully, and no further alert messages display in the touchscreen indicating potential electrical or steering system issues, or inability to drive, continue to your destination.
If this alert occurs again during your next drive, or occurs multiple times over subsequent drives, it is recommended that you schedule service.
VCLEFT\_a194
Electrical system power reduced
Vehicle may shut down unexpectedly
What this alert means:
The electrical system cannot maintain the voltage required to support all vehicle features.
If this alert is present while you are driving, it is possible your vehicle will shut down unexpectedly.
If this alert is present when your vehicle is in Park or when it first wakes, it is possible your vehicle may not have adequate electrical power to start driving. A separate vehicle alert may be present to indicate that condition.
What to do:
It is recommended that you eliminate or reduce your use of any non-essential features. This can help your vehicle maintain adequate electrical power for essential functions.
If this alert remains active, schedule service immediately. Without service, your vehicle may shut down unexpectedly or may not restart.
VCLEFT\_a208
Schedule service to replace low voltage battery Software will not update until battery is replaced
What this alert means:
The low voltage battery is showing degraded performance and needs to be replaced. Until the low voltage battery is replaced, vehicle software updates will not complete.
What to do:
It is recommended that you have the low voltage battery replaced at your earliest convenient opportunity.
You can schedule service via your Tesla Mobile App, or with an independent service provider that offers low voltage battery replacement for your vehicle. Please note that independent service provider options may vary, based on your vehicle configuration and your location.
If the low voltage battery does not have enough electrical power to turn on your vehicle or open the doors, follow the instructions in Jump Starting on page 244.
For more information on the battery system, see High Voltage Battery Information on page 179.
VCLEFT\_a207
Electrical system power reduced
Vehicle shutting down
What this alert means:
The low voltage battery cannot provide the electrical support necessary to drive or continue driving. Your vehicle is shutting down to preserve energy for essential functions other than driving.
Your vehicle cannot be driven or continue driving while this condition continues.
What to do:
If this alert is present while you are driving, your vehicle needs to come to a stop immediately. It is recommended that you:
• Pull over safely immediately
- Use your Mobile App to contact Tesla Roadside Assistance immediately, or seek other roadside assistance if preferred
If you do not pull over safely within a short time, your vehicle may shut down unexpectedly. It is also possible that your vehicle will not restart once parked.
When this alert is present, the electrical system cannot maintain the voltage required to support all vehicle features. Many vehicle functions may no longer work.
It is possible your vehicle may lose all electrical power. If this occurs, you can still use the manual door releases to exit the vehicle if necessary. For more information, see Opening Doors from the Interior on page 33.
This alert may be present due to various vehicle conditions. For more information and further recommended actions, check for other active vehicle alerts.
If this alert remains present, it is recommended that you schedule service immediately. Without service, your vehicle may not drive, may shut down unexpectedly, or may not restart.
VCLEFT\_a592
Electrical system is unable to support all features Switching off features to conserve energy
What this alert means:
The electrical system cannot support all vehicle features. Your vehicle is shutting down nonessential features to preserve energy for essential functions.
If you are driving when this alert is present, it is possible your vehicle may shut down unexpectedly. It is also possible that your vehicle will not restart once parked.
Nonessential features may be unavailable, including seat heaters, cabin climate control, and in-vehicle entertainment. This is expected behavior intended to help your vehicle maintain adequate electrical power for essential functions, including the ability to operate headlights, windows and doors, hazard lights, and the front trunk (frunk).
It is possible your vehicle may lose all electrical power. If this occurs, you can still use the manual door releases to exit the vehicle if necessary. For more information, see Opening Doors from the Interior on page 33.
What to do:
This alert may be present due to various vehicle conditions. For more information and further recommended actions, check for other active vehicle alerts.
VCLEFT\_a221
Electrical system is unable to support all features Schedule service
What this alert means:
The low voltage battery cannot provide the electrical support necessary to drive or continue driving.
It is possible your vehicle will shut down unexpectedly. It is also possible that your vehicle will not restart after the current drive.
You may notice that some nonessential features are not available. This is expected behavior due to your vehicle preserving energy for essential functions.
What to do:
If this alert is present while you are driving, your vehicle needs to come to a stop as soon as possible. Pull over safely at your earliest opportunity.
It is recommended that you eliminate or reduce your use of any nonessential features. This can help your vehicle maintain adequate electrical power for essential functions other than driving, until it can be serviced.
If this alert remains present, it is recommended that you schedule service immediately. Without service, your vehicle may not drive, may shut down unexpectedly, or may not restart.
VCLEFT\_a365 / VCREAR\_a365
Incline too steep to park vehicle and trailer
Parking brake may not hold - Move to flatter area
What this alert means:
Your vehicle has detected an attempt to park on a slope of 10% grade or greater while Trailer Mode is active. This alert displays whenever Trailer Mode is active and your vehicle is parked on a steep slope, even if no trailer is attached.
What to do:
- No trailer attached: Exit Trailer Mode manually via your vehicle touchscreen, so the alert no longer displays when parking on steep slopes without a trailer.
- For more information, see Trailer Mode in Towing a Trailer on page 113.
- Trailer attached: It is recommended that you park your vehicle and trailer in a more level area.
- The parking brake may not hold both vehicle and trailer on slopes of 10% grade or greater.
For more information, see Trailer Mode and Parking with a Trailer in Towing a Trailer on page 113.
VCLEFT\_a402
Electrical system backup power is unavailable Vehicle will consume more energy while idle
What this alert means:
The backup power source for the electrical system, the low voltage battery, is not available or cannot provide the voltage required to support all vehicle features.
The primary source of electrical power, the high voltage battery system, will continue to support vehicle functions, even when your vehicle is idle. For more information on the high voltage battery, see High Voltage Battery Information on page 179.
You may notice that some nonessential features are not available. This is expected behavior due to your vehicle preserving energy for essential functions.
You may also notice that your vehicle consumes more energy than usual when you are not driving it, or that your vehicle displays a lower projected range than you would normally expect after charging. This is normal vehicle behavior when this alert is present, and it will continue until the backup power source is restored.
There is a chance that an issue affecting the primary power source could cause your vehicle to shut down unexpectedly.
What to do:
It is recommended that you limit or avoid the use of any nonessential features. This can help your vehicle maintain adequate electrical power for essential functions.
It is recommended that you schedule service at your earliest opportunity, so the backup power source for the electrical system can be restored.
VCLEFT\_a496
Vehicle is preparing to shut down PULL OVER SAFELY
What this alert means:
The electrical system cannot provide adequate support to drive or continue driving. Your vehicle is preparing to shut down to preserve energy for essential functions other than driving.
Your vehicle cannot be driven or continue driving while this condition continues.
What to do:
If this alert is present while you are driving, your vehicle needs to come to a stop as soon as possible. It is recommended that you:
• Pull over safely at your earliest opportunity
- Use your Mobile App to contact Tesla Roadside Assistance immediately, or seek other roadside assistance if preferred
If you do not pull over safely within a short time, your vehicle may shut down unexpectedly. It is also possible that your vehicle will not restart once parked.
It is possible your vehicle may lose all electrical power. If this occurs, you can still use the manual door releases to exit the vehicle if necessary. For more information, see Opening Doors from the Interior on page 33.
This alert may be present due to various vehicle conditions. For more information and further recommended actions, check for other active vehicle alerts.
VCSEC\_a221
Air pressure below recommendation for tires Check pressure and refill air as needed
What this alert means:
This alert does NOT indicate that there is a flat tire.
The tire pressure monitoring system (TPMS) has detected that the air pressure in one or more of your tires is at least 20% lower than the recommended cold tire pressure.
See Tire Pressures on page 200 for detailed information on where to find the recommended cold pressure (RCP) for your vehicle's tires, how to check tire pressures, and how to keep your tires properly inflated.
This alert may appear in cold weather because the air in your tires naturally contracts when it becomes cold, decreasing tire pressures.
What to do:
Add air to maintain the recommended cold tire pressure. Although drops in tire pressure are expected in colder weather, the recommended cold tire pressure should be maintained at all times.
The alert may clear as the vehicle is driven. This is because the tires will warm up and the tire pressure will increase. Even if the alert clears, the tires should still be refilled with air once they have cooled.
The alert will clear once the Tire Pressure Monitoring System detects that each of your tires is inflated to the recommended cold pressure.
- The alert and Tire Pressure indicator light may still be present immediately after you have filled your tires to the recommended cold pressure, but both should clear once you have driven a short distance.
- You may need to drive over 15 mph (25 km/h) for at least 10 minutes for the Tire Pressure Monitoring System to measure and report your updated tire pressures.
If you repeatedly see this alert for the same tire, have the tire inspected for a slow leak. You can visit a local tire shop or schedule service using your Tesla Mobile App.
For more information on tire pressure and inflation, see Inspecting and Maintaining Tires on page 202.
VCSEC\_a228
Air pressure in tires very low PULL OVER SAFELY - Check for flat tire
What this alert means:
This alert indicates that one or more of the tires on your vehicle is extremely low or flat.
The tire pressure monitoring system (TPMS) has detected that the air pressure in one or more of your tires is significantly lower than the recommended cold tire pressure.
What to do:
You should pull over carefully as soon as possible. In a safe location, check for a flat tire.
You can request Tesla roadside assistance options (mobile tire, loaner wheel, tow) if required. See Contacting Tesla Roadside Assistance on page 237 for more information.
In a non-emergency situation, it is recommended that you visit a local tire shop for assistance or schedule service using your Tesla Mobile App.
See Tire Pressures on page 200 for detailed information on where to find the recommended cold pressure (RCP) for your vehicle's tires, how to check tire pressures, and how to keep your tires properly inflated.
The alert should clear once the Tire Pressure Monitoring System has a consistent tire pressure measurement for each of your tires that is no longer significantly below the recommended cold pressure (RCP).
- The alert and Tire Pressure indicator light may still be present immediately after you have filled your tires to the recommended cold pressure, but both should clear once you have driven a short distance.
- You may need to drive over 15 mph (25 km/h) for at least 10 minutes for the Tire Pressure Monitoring System to measure and report your updated tire pressures.
For more information on tire pressure and inflation, see Inspecting and Maintaining Tires on page 202.
Document Applicability
For the latest and greatest information that is customized to your vehicle, view the Owner's Manual on your vehicle's touchscreen by touching Controls > Service > Owner's
Manual. The information is specific to your vehicle depending on the features you purchased, vehicle configuration, market region and software version. In contrast, owner information that is provided by Tesla elsewhere is updated as necessary and may not contain information unique to your vehicle.
Information about new features is displayed on the touchscreen after a software update, and can be viewed at any time by touching Controls > Software > Release Notes. If the content in the Owner's Manual on how to use your vehicle conflicts with information in the Release Notes, the Release Notes take precedence.
Illustrations
The illustrations provided in this document are for demonstration purposes only. Depending on vehicle options, software version and market region, the information displayed on the touchscreen in your vehicle may appear slightly different.
Feature Availability
Some features are available only on some vehicle configurations and/or only in specific market regions.
Options or features mentioned in the Owner's Manual does not guarantee they are available on your specific vehicle. See Feature Availability Statement on page 296 for more information.
Errors or Inaccuracies
All specifications and descriptions are known to be accurate at time of publishing. However, because continuous improvement is a goal at Tesla, we reserve the right to make product modifications at any time. To communicate any inaccuracies or omissions, or to provide general feedback or suggestions regarding the quality of the Owner's Manual, send an email to ownersmanualfeedback@tesla.com.
Location of Components
Owner information may specify the location of a component as being on the left or right side of the vehicle. As shown, left (1) and right (2) represent the side of the vehicle when sitting inside.
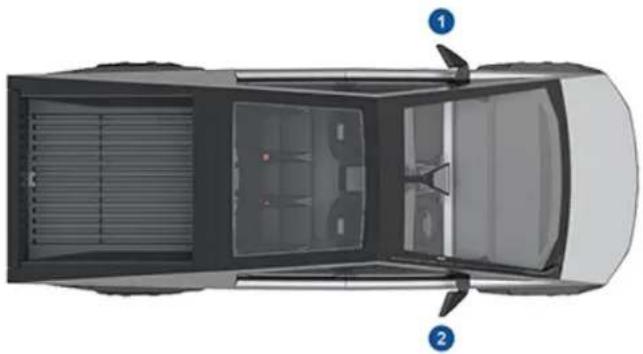
natural_image
Top-down view of a car showing the front and rear views with no visible text or symbolsCopyrights and Trademarks
© 2012-2025 Tesla, Inc. All information in this document and all vehicle software is subject to copyright and other intellectual property rights of Tesla, Inc. and its licensors.
This material may not be modified, reproduced or copied, in whole or in part, without the prior written permission of Tesla, Inc. and its licensors. Additional information is available upon request. Tesla uses software created by the Open Source community. HD Radio is a registered trademark of iBiquity Digital Corporation. The following are trademarks or registered trademarks of Tesla, Inc. in the United States and other countries:
TESLA
TESLA MOTORS
TESLA ROADSTER
MODEL S
MODEL X
MODEL 3
MODEL Y
CYBERTRUCK
TESLA



All other trademarks contained in this document are the property of their respective owners and their use herein does not imply sponsorship or endorsement of their products or services. The unauthorized use of any trademark displayed in this document or on the vehicle is strictly prohibited.
Your Tesla is constantly changing, with new features being added and improved upon with every software update. However, depending on the firmware release operating on your vehicle, your vehicle may not be equipped with all features or may not operate exactly as described in this Owner's Manual. The features on your vehicle vary depending on market region, vehicle configuration, options purchased, software updates, and more.
Referencing options or features mentioned in this Owner's Manual does not guarantee they are available on your specific vehicle. The best way to ensure you are getting the latest and greatest features is update your vehicle's software as soon as you receive the notification to do so. You can also set your preferences to Controls > Software > Software Preferences > Advanced. See Software Updates on page 192 for more information. For the features available on your vehicle, always comply with local laws and limits to ensure the safety of you, your passengers, and those around you.
Event Data Recorder (EDR)
Cybertruck is equipped with an event data recorder (EDR). The main purpose of an EDR is to record, in certain crash or near crash-like situations, data such as an airbag deployment or hitting a road obstacle, to better understand how the vehicle's systems performed. The EDR is designed to record data related to vehicle dynamics and safety systems for a short period of time, typically 30 seconds or less. The EDR in Cybertruck is designed to record data such as:
• How various systems in your vehicle were operating;
- Whether or not the driver and passenger safety belts were buckled/fastened;
- How far (if at all) the driver was pressing the accelerator and/or brake pedal; and,
• How fast the vehicle was traveling.
The data can help provide a better understanding of the circumstances in which crashes and injuries occur.
NOTE: EDR data is recorded by your vehicle only if a non-trivial crash situation occurs; no data is recorded by the EDR under normal driving conditions and no personal data (for example, name, gender, age, and crash location) is recorded. However, other parties, such as law enforcement, could combine the EDR data with person identifying data they routinely acquire during a crash investigation.
To read data recorded by an EDR, special equipment is required, and access to the vehicle or the EDR is needed. In addition to the vehicle manufacturer, other parties, such as law enforcement, that have this special equipment, can read the information if they have access to the vehicle or the EDR. Tesla may also access the EDR remotely in some crash circumstances.
Vehicle Telematics
Cybertruck is equipped with electronic modules that monitor and record data from various vehicle systems, including the motor, Autopilot components, Battery, braking and electrical systems. The electronic modules record information about various driving and vehicle conditions, including braking, acceleration, trip and other related information regarding your vehicle. These modules also record information about the vehicle's features such as charging events and status, the enabling/disabling of various systems, diagnostic trouble codes, VIN, speed, direction and location.
The data is stored by the vehicle and may be accessed, used and stored by Tesla service technicians during vehicle servicing or periodically transmitted to Tesla wirelessly through the vehicle's telematics system. This data may be used by Tesla for various purposes, including, but not limited to: providing you with Tesla telematics services; troubleshooting; evaluation of your vehicle's quality, functionality and performance; analysis and research by Tesla and its partners for the improvement and design of our vehicles and systems; to defend Tesla; and as otherwise may be required by law. In servicing your vehicle, Tesla can potentially resolve issues remotely simply by reviewing your vehicle's data log.
Tesla's telematics system wirelessly transmits vehicle information to Tesla on a periodic basis. The data is used as previously described and helps ensure the proper maintenance of your vehicle. Additional Cybertruck features may use your vehicle's telematics system and the information provided, including features such as charging reminders, software updates, and remote access to, and control of, various systems of your vehicle.
Tesla does not disclose the data recorded in your vehicle to any third party except when:
- An agreement or consent from the vehicle's owner (or the leasing company for a leased vehicle) is obtained.
• Officially requested by the police or other authorities.
• Used as a defense for Tesla. - Ordered by a court of law.
- Used for research purposes without disclosing details of the vehicle owner or identification information.
- Disclosed to a Tesla affiliated company, including their successors or assigns, or our information systems and data management providers.
For additional information regarding how Tesla processes data collected from your vehicle, please review Tesla's Privacy Notice at http://www.tesla.com/about/legal.
Data Sharing
For quality assurance and to support the continuous improvement of advanced features such as Autopilot, your Cybertruck may collect analytics, road segment, diagnostic, and vehicle usage data and send to Tesla for analysis. This analysis helps Tesla improve products and services by learning from the experience of billions of miles that Tesla vehicles have driven. Although Tesla shares this data with partners that contribute similar data, the collected information does not identify you personally and can be sent to Tesla only with your explicit consent. In order to protect your privacy, personal information is either not logged at all, is subject to privacy preserving techniques, or is removed from any reports before being sent to Tesla. You have control over what data you share by touching Controls > Software > Data Sharing.
For additional information regarding how Tesla processes data collected from your vehicle, please review Tesla's Privacy Notice at http://www.tesla.com/about/legal.
NOTE: Although Cybertruck uses GPS in connection with driving and operation, as discussed in this document, Tesla does not record or store vehicle-specific GPS information, except the location where a crash occurred. Consequently, Tesla is unable to provide historical information about a vehicle's location (for example, Tesla is unable to tell you where Cybertruck was parked/traveling at a particular date/time).
Quality Control
You might notice a few miles/km on the odometer when you take delivery of your Cybertruck. This is a result of a comprehensive testing process that ensures the quality of your Cybertruck.
The testing process includes extensive inspections during and after production. The final inspection takes place at Tesla and includes a road test conducted by a technician.
Sound Library
"Free Sounds Library" (if equipped).
Free Sound Effects Site.
License: Attribution 4.0 International (CC BY 4.0). You are allowed to use sound effects free of charge and royalty free in your multimedia projects for commercial or non-commercial purposes.
http://www.freesoundslibrary.com
California Proposition 65

WARNING: Operating, servicing and maintaining a passenger vehicle or off-highway motor vehicle can expose you to chemicals including phthalates and lead, which are known to the State of California to cause cancer and birth defects or other reproductive harm. To minimize exposure, wear gloves or wash your hands frequently when servicing your vehicle. For more information go to: www.P65Warnings.ca.gov/passenger-vehicle.

WARNING: Certain components of this vehicle such as airbag modules and seat belt pre-tensioners may contain Perchlorate Material. Special handling may be required for service or vehicle end of life disposal. See www.dtsc.ca.gov/hazardouswaste/perchlorate.

WARNING: Battery posts, terminals, and related accessories contain lead and lead compounds. Wash hands after handling.
Contacting Tesla
For detailed information about your Cybertruck, go to http://www.tesla.com and log on to your Tesla account or sign up to get an account.
If you have any questions or concerns about your Cybertruck, in the United States, Canada or Puerto Rico, call 1-877-79TESLA (1-877-798-3752) and in Mexico, call 1-800-228-8145.
NOTE: You can also use voice commands to provide feedback to Tesla. Say "Report", "Feedback", or "Bug report" followed by brief comments. Cybertruck takes a snapshot of its systems, including your current location, vehicle diagnostic data, and screen captures of the touchscreen. Tesla periodically reviews these notes and uses them to continue improving Cybertruck.
Reporting Safety Defects - US
If you believe that Cybertruck has a defect which could cause a crash or could cause injury or death, you should immediately inform the National Highway Traffic Safety Administration (NHTSA) in addition to notifying Tesla.
If NHTSA receives similar complaints, it may open an investigation. If it finds that a safety defect exists in a group of vehicles, it may order a recall and remedy campaign. However, NHTSA cannot become involved in individual problems between you, your dealer, or Tesla.
To contact NHTSA, you may call the Vehicle Safety Hotline toll-free at 1-888-327-4236 (TTY: 1-800-424-9153); go to; or write to: Administrator, National Highway Traffic Safety, 1200 New Jersey Avenue SE., Washington, DC 20590. You can also obtain other information about motor vehicle safety from www.safercar.gov.
Reporting Safety Defects - Canada
If you believe that your Cybertruck has a defect which could cause a crash or could cause injury or death, you should immediately inform Transport Canada, in addition to notifying Tesla. To contact Transport Canada, call their toll-free number: 1-800-333-0510.
FCC and ISED Certification
| Component Manufacturer Model | Operating Frequency (MHz) | FCC ID IC | |||
| B Pillar Endpoint Tesla 1948204 | 13.562400-2483.56000-8500 | 2AEIM-1948204 20098-1948204 | |||
| Interior Endpoint Tesla 1815669 2400-2483.5 | 6000-8500 | 2AEIM-1815669 20098-1815669 | |||
| Fascia Endpoint Tesla 1613851 2400-2483.5 | 6000-8500 | 2AEIM-1613851 20098-1613851 | |||
| Vivaldi Endpoint Tesla 1752108 2400-2483.5 | 6000-8500 | 2AEIM-1752108 20098-1752108 | |||
| Fascia Endpoint Tesla 1733130 | 2400-2483.56000-8500315 or 433.9 | 2AEIM-1733130 20098-1733130 | |||
| TPMS | Tesla | 1472547G | 2400-2483.5 | 2AEIM-1472547G | 20098-1472547G |
| TPMS | Tesla 1849171 2400-2483.5 | 2AEIM-1849171 20098-1849171 | |||
| Tire, Pirelli Scorpion ATR | Pirelli | 1250241-00-A | 2400-2483.5 | 2ANX7CPSN1 | 24121-CPSN1 |
| Tire, Goodyear Wrangler Territory | Goodyear | 1250242-00-A | 2402-2483.5 | YMY-030218 | 1M02FXD |
| TCU | Tesla 1727111 | -- | XMR2020AG525RGLXMR202303AF51Y | 10224A-2020AG525R10224A-202201AF51Y | |
| Wireless Phone Charger | Tesla WC6 | 127.72 KHz13.56 MHz | 2AEIM-WC6 | 20098-WC6 | |
| Glovebox BT USB Module | Tesla 1776863 | 2400-2483.5 | 2AEIM-1776863 | 20098-1776863 | |
| In-cabin radar* | Tesla | 1616631 | 60000-64000 | 2AEIM-1616631 | 20098-1616631 |
* The in-cabin radar is restricted to factory installation.
The devices listed above comply with Part 15 of the FCC rules and Industry Canada's license-exempt RSS Standard(s) and EU Directive 2014/53/EU.
Operation is subject to the following two conditions: (1) this device may not cause harmful interference, and (2) this device must accept any interference received, including interference that may cause undesired operation.
Changes or modifications not expressly approved by Tesla could void your authority to operate the equipment.
Radiation Exposure Statement
The products comply with the FCC/ISED RF Exposure for Low Power Consumer Wireless Power Transfer. RF exposure limits are set forth for an uncontrolled environment and are safe for intended operation as described in this manual. The farthest RF exposure demonstrated by compliance was at 20cm and farther from the user's body; set the device to low output power if such function is available.
TCU device has been tested and meets applicable limits for Radio Frequency(RF) exposure. TCU can be installed and is able to operate with a minimum distance of 1 inch (25mm) between the radiator and human body.
Radio Frequency Information
This equipment has been tested and found to comply with the limits for a Class B digital device, pursuant to Part 15 of the FCC Rules. These limits are designed to provide reasonable protection against harmful interference in a residential installation. This equipment generates, uses and can radiate radio frequency energy and, if not installed and used in accordance with the instructions, may cause harmful interference to radio communications. However, there is no guarantee that interference will not occur in a particular installation. If this equipment does cause harmful interference to radio or television reception, which can be determined by turning the equipment off and on, try to correct the interference by one or more of the following measures:
- Reorient or relocate the receiving antenna.
- Increase the separation between the equipment and receiver.
- Connect the equipment into an outlet on a circuit different from that to which the receiver is connected.
- Consult the dealer or an experienced radio/TV technician to help.

CAUTION: This equipment and its antennas must not be co-located or operated with another antenna or transmitter.
Canada
CAN ICES-003 (B)/NMB-003(B)
ABS (Anti-lock Braking System): 89
absolute speed limit: 149
accessory carrier: 119
adaptive regenerative braking: 115
adjacent lane speed: 124
air circulation: 158
air conditioning: 158
air distribution: 158
air filter: 164
air suspension, disabling: 234
airbags: 50
alarm: 151, 155
all-season tires: 203
ALR (automatic locking retractors): 41
Always Show Estimated Round Trip Energy: 171
anti-lock braking (ABS): 89
apps: 7
Arcade: 174
audio: 172, 174
playing files: 172, 174
settings: 172
volume control: 172
auto fold: 83
auto tilt: 83
automatic emergency braking: 146
automatic locking seat belts: 41
automatic navigation: 167
navigating: 167
Autopark: 135
autopilot: 144
side collision warning: 144
Autopilot: 122, 124, 135, 146, 149
automatic emergency braking: 146
Autopark: 135
collision avoidance assist: 146
forward collision warning: 146
overtake acceleration: 124
overview: 122
speed assist: 149
speed limit warning: 149
staying within speed limits: 149
Traffic-Aware Cruise Control: 124
Autopilot components: 122
average range: 188
B
baja: 99, 105
Battery (high voltage): 179, 232
specifications: 232
temperature limits: 179
battery (low voltage): 179, 232
complete discharge: 179
specifications: 232
bed (dimensions): 227
before off-roading: 103
before towing: 113
Blind Spot Camera: 144
Blind Spot Collision Warning: 144
Blind Spot Collision Warning Chime: 144
Bluetooth: 70, 72, 174
devices, playing audio files from: 174
general information: 70, 72
phone, pairing and using: 70
Boombox: 174, 175
brake controller: 115
brakes: 89, 146, 231
automatic in emergencies: 146
overview of: 89
specifications: 231
C
cabin air filter: 164
cabin radar: 150
cabin temperature control: 158
Calendar: 72
calibrating windows: 35
California Proposition 65: 298
Camp: 161
car cover: 199
car wash mode: 197
car washes: 197
Caraoke): 174
card: 30
cargo bed (dimensions): 227
cargo volume information: 229
carpets, cleaning: 198
CCS (Combo): 178
CE certifications: 300
certifications of devices: 300
CHAdeMO: 178
chains: 203
change of ownership: 13
charge port: 180
charge port light: 181
charge port manual release: 183
charge port release cable: 183
charging: 177, 178, 181
charge settings: 181
charging status: 181
components and equipment: 177
public charging stations: 178
scheduling: 181
charging locations, finding: 170
charging stations, displaying on map: 167
child protection: 35
disabling rear window switches: 35
child safety seats, installing and using: 43
cleaning: 196
climate controls: 158
coat hangers, rear: 58
cold weather: 164
cold weather best practices: 164
collision avoidance assist: 146
Colorizer: 174
conformity of device signals: 300
connecting to Wi-Fi: 69
console: 57
console, power outlets: 21
consumption chart: 188
contact information: 238, 300
roadside assistance: 238
Tesla: 300
copyrights: 295
crawl: 99
cruise control: 124
CyberTent Mode: 105
D
dashboard overview: 5
Dashcam: 153
data recording: 297
data sharing: 297
declarations of conformity: 300
defrost: 158
delivery mileage: 298
device signal conformity: 300
devices: 174
Bluetooth, playing audio files: 174
dimensions: 226
dimensions (cargo bed): 227
dimensions (exterior): 226
dimensions (vehicle interior): 227
display settings: 7
Dog: 161
door labels: 223
door seals: 198
cleaning: 198
doors: 33, 34, 246
Child Lock: 34
interior locking and unlocking: 34
locking: 33
opening from interior: 33, 246
opening with no power: 246
unlocking: 33
doors function: 34
Walk-Away Door Lock: 34
drive modes: 76
driver: 99
profiles: 99
driver assistance: 122
driving: 37, 75, 187
correct seating position: 37
starting: 75
tips to maximize range: 187
E
easy entry, driver profile: 99
EDR (event data recorder): 297
electric parking brake: 91
emergency braking: 146
Emergency Lane Departure Avoidance: 144
emergency lights: 86
emission control label: 222
energy: 90
gained from regenerative braking: 90
Energy app: 188
energy use predictions (navigating): 171
Entertainment: 174
Erase & Reset: 13
event data recording: 297
exterior: 3, 196, 199
car cover: 199
cleaning: 196
overview: 3
F
factory defaults, restoring: 13
factory reset: 13
favorites (Media Player): 174
Favorites (navigation): 167
FCC certifications: 300
feature availability: 296
features, downloading new: 192
firmware (software) updates: 192
flash drive: 153, 155
flashers, hazard warning: 86
floor mats: 199
fluids: 194
replacement intervals: 194
forward collision warning: 146
front airbag, passenger: 52
front and rear seats: 37
front trunk: 59, 242
frunk: 242
full self-driving: 137
G
gaming controllers: 174
garage doors, opening: 74
gates, opening: 74
GAWR: 223
Glovebox PIN: 152
glovebox, open: 58
Gross Axle Weight Rating: 223
Gross Vehicle Weight Rating: 223
ground clearance: 226
GVWR: 223
H
hazard lights: 86
hazards: 86
head supports: 38
headlights, after exit: 87
headlights, Auto High Beam: 85
headlights, high beam: 85
headlights, high beams: 85
heating: 158
height adjustments, air suspension: 95
high voltage: 177, 194, 232
Battery specifications: 232
components: 177
safety: 194
hills, stopping on: 91
Home: 7
button: 7
screen: 7
Home location: 169
hood: 59, 242
horn: 81
|
I'm Feeling Lucky, Hungry: 167
IC certifications: 300
in-cabin radar: 150
instant range: 188
interior: 5, 158, 197
cleaning: 197
overview: 5
temperature control: 158
intrusion detection: 151
ISED certifications: 300
ISOFIX child seats, installing: 46
J
J1772: 178
jacking: 215
jump start: 238, 244
jump starting: 233
K
kautosteer on city streets: 137
Keep Climate On: 161
key card: 30
keys: 30, 31
adding key cards and phone keys: 31
deleting key cards and phone keys: 31
displaying a list of: 31
overview: 30
L
label: 223
Tire and Loading Information: 223
vehicle certification: 223
lane assist: 144
Lane Departure Avoidance: 144
LATCH child seats, installing: 46
lifting: 215
lights, dome (map): 85
lights, exterior: 85
lights, fog: 85
lights, hazard warning: 86
lights, headlights after exit: 87
lights, interior: 85
load limits: 223
location tracking: 167
locking: 33
locking differential: 108
lug nuts, torque: 206
lumbar adjustment: 37
M
maintenance: 193, 194, 196, 200, 213, 214
cleaning: 196
daily checks: 193
fluid replacement intervals: 194
monthly checks: 193
periodic checks: 194
replacing wiper blade: 213
service intervals: 193
tires: 200
washer fluid, topping up: 213
washer jets, cleaning: 214
map orientation: 167
map updates: 171
mats: 199
media: 172, 174
settings: 172
sources, show and hide: 172
mileage upon delivery: 298
mirrors: 83
mirrors, heated: 158
mobile app: 66
mobile app access: 66
Mobile Connector: 178, 180
description: 178
using: 180
modifications: 217
motor specifications: 231
My Apps: 12
my car does what?: 174
myQ: 74
programming and using: 74
N
naming your vehicle: 13
NCC certifications: 300
NHTSA, contacting: 300
0
Obstacle-Aware Acceleration: 146
occupancy sensor, front passenger: 52
occupant classification: 54
odometer: 101
off road: 99, 103, 105, 112
off road troubleshooting: 111
Off-Peak Charging: 185
offset from speed limit: 149
Online Routing: 171
open differential: 108
opening hood without power: 233
opening without power: 233
overhang dimensions: 226
overland: 99, 105
overtake acceleration: 124
Owner Information, about: 295
P
Park Assist: 92
parking brake: 91
parking, using Autopark: 135
parts replacement: 217
passenger detection: 52
passenger detection, front: 52
pedestrian warning: 102
personal data, erasing: 13
phone: 30, 70, 72
app: 72
authenticating as a key: 30
connecting: 70
importing contacts: 70
in call options: 72
making a call: 72
pairing: 70
receiving a call: 72
recent calls: 70
phone app: 72
phone charger, inductive: 20
phone charger, wireless: 20
phone key: 30, 31
adding as a key: 31
removing as a key: 31
PIN: 100
PIN to Drive: 151
power: 90
gained from regenerative braking: 90
power cycling: 75
Power Feed: 217
power outlets, cargo bed: 23
power outlets, interior: 21
power outlets, troubleshooting: 23
power windows: 221
powered front trunk: 59
powering on and off: 75
Powershare: 189
Powershare Home Backup: 189
Preconditioning: 185
preparing to tow: 113
Proposition 65: 298
public charging stations: 178
R
racks: 119
radio: 172, 174
radio frequency information: 300
range: 90, 187
driving tips to maximize: 187
regenerative braking: 90
range assurance: 187
re-naming your vehicle: 13
Re-route: 171
reading light, rear: 58
rear window switches, disabling: 35
recent (Media Player): 174
Recents (navigation): 167
recording: 153, 155
regenerative braking: 90
regulatory certifications: 300
relative speed limit: 149
release notes: 192
restarting the touchscreen: 75
RF module compliance: 300
RFID transponders: 217
ride height, air suspension: 95
roadside assistance: 238
roof racks: 224
rotating tires: 202
Round Trip Energy (navigating): 171
run out of range: 238, 244
s
safety defects, reporting: 300
safety information: 42, 48, 56
airbags: 56
child seats: 48
seat belts: 42
Schedule: 185
schedule service: 66
scheduled charging: 185
scheduled departure: 185
using: 185
seat belts: 40, 41, 198
automatic locking retractors (ALR): 41
cleaning: 198
in a collision: 41
overview of: 40
pre-tensioners: 41
wearing when pregnant: 41
seat covers: 39
seat heaters: 38, 158
seating capacity: 223
seating position: 55
seats: 37, 158
adjusting: 37
heaters: 158
seats, heated: 158
security settings: 151
self-leveling: 95
self-leveling, disabling: 234
Sentry Mode: 155
service data recording: 297
service intervals: 193
Settings, erasing: 13
shifting: 76
shortcuts: 10, 12
adding to My Apps: 12
restarting the touchscreen: 10
Show Calendar Upon Entry: 72
side collision warning: 144
slippery conditions: 95
slippery surface: 95
smartphone: 30
authenticating as a key: 30
Software Reinstall: 192
software reset: 13
software update preferences: 192
software updates: 192
specifications: 206, 231, 232
brakes: 231
High Voltage Battery: 232
low voltage battery: 232
motor: 231
steering: 231
subsystems: 231
suspension: 232
tires: 206
transmission: 231
wheels: 206
specifications (vehicle interior): 227
specifications and dimensions: 226
specifications, exterior: 226
speed assist: 149
speed limit warning: 149
stability control: 95, 99, 103, 112
standby: 155
starting: 75
steering specifications: 231
steering wheel, heated: 158
storage volume information: 229
submerged vehicle: 247
summer tires: 203
sunvisors:35
Superchargers, displaying on map: 167
Supercharging: 183
described: 183
idle fees: 183
pay-per-use fees: 183
suspension: 95
suspension specifications: 232
suspension, air: 95
suspension, auto-raising: 95
suspension, damping: 95
T
telematics: 297
temperature: 158, 179, 209
Battery (high voltage), limits: 179
cabin, controls for: 158
tires: 209
tesla profiles: 99
Teslacam: 153, 155
tie-down straps: 235
Tire and Loading Information label: 223
tire noise: 203
Tire Pressure Monitoring System: 201
overview of: 201
tire pressures, checking: 200
tire pressures, displaying: 200
tire pressures, when towing: 114
tires: 200, 202, 203, 206, 207, 209
all-season: 203
balancing: 202
chains: 203
inspecting and maintaining: 202
pressures, displaying: 200
pressures, how to check: 200
pressures, recommended: 200
quality grading: 209
rotation: 202
specification: 206
summer: 203
temperature grades: 209
tire markings: 207
traction grade: 209
treadwear grade: 209
wheel configuration: 200
winter: 203
toll system transponders, attaching: 217
torque specifications: 231
touchscreen: 7, 10, 12, 192, 198
adding shortcuts: 12
cleaning: 198
customizing My Apps: 12
display settings: 7
frozen: 10
main: 7
overview: 7
rear: 7
reboot: 10
software updates: 192
unresponsive: 10
towing: 238, 244
towing a trailer: 113
towing capacity: 113
towing guidelines: 113
Toybox: 174
TPMS: 201
overview of: 201
Tracking Disabled: 167
traction control: 95
trademarks: 295
Traffic Light and Stop Sign Control: 128
Traffic-Aware Cruise Control: 124
trail assist: 105
trailer: 113
trailer alarm: 115, 152
trailer brake boost: 115
trailer brake gain: 115
trailer brakes: 115
trailer hitch: 117
trailer hitch assembly: 117
trailer light test: 115
Trailer Mode: 114
trailer profiles: 113
trailer sway: 117
trailer towing: 113
trailer, parking: 116
transmission specifications: 231
transponders, attaching: 217
Transport Canada, contacting: 300
trip chart: 188
trip meter: 101
Trip Planner: 171
trunk, front: 59
turn signals, lights: 86
U
uniform tire quality grading: 209
unlocking: 33
USB devices, connecting: 20
USB flash drive: 151, 153, 155
USB ports, console: 20
UV Index: 35
V
Valet mode: 100
vehicle certification label: 223
Vehicle Hold: 91
vehicle identification labels: 222
Vehicle Identification Number (VIN) labels: 222
vehicle lights: 85
vehicle loading: 223
ventilation: 164
vents, adjusting: 164
video call: 73
video clips: 153
View Live Camera: 155
voice commands: 25
volume control: 7
volume control (media): 172
volume information: 229
W
wade mode: 105
Walk-Away Door Lock: 34
Wall Connector: 178
warm weather best practices: 166
warning flashers: 86
washer fluid, topping up: 213
washer jets, cleaning: 214
washers, using: 88
web conferencing: 73
wheel chocks: 116, 235
wheels: 202, 206
alignment: 202
specifications: 206
while off-roading: 103
Wi-Fi, connecting to: 69
windows: 35
windows, calibrating: 35
windshield washer fluid, topping up: 213
winter tires: 203
wiper blade, replacing: 213
wiper, using: 88
Work location: 169
z
Zoom: 73


- YOUR OWNER'S MANUAL
- RELEASE NOTES
- ILLUSTRATIONS AND PRODUCT SPECIFICATIONS
- SAFETY INFORMATION
- © 2012-2025 TESLA, INC.
- Top Status Bar Icons
- 4:20 pm
- Popup Messages and Vehicle Alerts
- Restarting the Touchscreen
- Rear Touchscreen
- Rear Screen Remote Control
- Customizing My Apps
- Customizing Display and Sound Settings
- Naming your Vehicle
- Erasing Personal Data
- Overview
- Cards
- Indicator Lights
- BRAKE
- PARK
- Driving Status
- USB-C Ports
- Wireless Phone Chargers
- Interior Power Outlets
- Keep Outlets On
- CyberTent Mode
- Overload Capability
- Troubleshooting AC Outlets
- Warnings and Cautions
- Examples of Voice Commands
- Climate Controls
- Windshield Wiper
- Vehicle Controls
- Navigation
- Contacts
- Media
- Apps and Settings
- Viewing Camera Feeds
- Rear-Facing Camera
- Front-Facing Camera
- Cabin Camera
- Data Sharing
- Cleaning a Camera
- Drive to Calibrate Cameras
- Types of Keys
- Phone Key
- Key Card
- Managing Keys
- Add a Phone Key
- Adding Keys from the Touchscreen
- Adding Keys from the Mobile App
- Removing Keys
- Replacing Key cards
- Opening and Closing Doors from Outside
- Opening Doors from the Interior
- Interior Locking and Unlocking
- Walk-Away Door Lock
- Driver Door Unlock Mode
- Car Left Open Notifications
- Child Locks
- Opening and Closing
- Locking Rear Windows
- Calibrating Windows
- UV Index Rating
- Sun Visors and Vanity Mirrors
- Correct Driving Position
- Adjusting Front Seats
- Head Supports
- Removing/Installing the Rear Center Head Support
- Seat Heaters
- Seat Covers
- Wearing Seat Belts
- Seat Belt Reminders
- To Fasten a Belt
- To Adjust the Shoulder Anchor Height
- To Release a Belt
- Automatic Locking Retractor
- Wearing Seat Belts When Pregnant
- Seat Belt Pre-tensioners
- Testing Seat Belts
- Seat Belt Warnings
- Passenger Front Airbag Must Be OFF
- Choosing a Child Safety Seat
- Seating Larger Children
- Installing Child Safety Seats
- Installing Seat Belt Retained Child Seats
- Installing LATCH (ISOFIX) Child Seats
- Attaching Upper Tether Straps
- Testing a Child Safety Seat
- Child Safety Seat Warnings
- Location of Airbags
- How Airbags Work
- Types of Airbags
- Airbag Status Indicator
- Front Passenger Occupant Detection
- Ensuring Accurate Occupant Detection
- Examples of Correct and Incorrect Seating Positions
- Inflation Effects
- Airbag Warnings
- Center Console
- Rear Console
- Rear Seat Storage
- Glovebox
- Seat Pockets
- Door Panels
- Coat Hangers
- Opening
- Hands-Free Frunk
- Adjust the Opening Height of the Powered Frunk
- Closing
- Load Limits
- Interior Emergency Release
- Accessing the Cargo Bed
- Troubleshooting the Tonneau Cover
- Tailgate Emergency Release
- Under Bed Compartment
- Securing Cargo
- To Use the Mobile App
- Mobile App for Apple Watch
- Profile
- Controls
- Climate
- Location
- Schedule
- Security
- Upgrades
- Service
- Roadside
- Granting Access to a Second Driver
- Diagnostics
- Hotspots
- Troubleshooting Tips
- Bluetooth® Compatibility
- Pairing a Phone or Bluetooth Device
- Importing Contacts and Recent Calls
- Disconnecting or Unpairing a Bluetooth Device
- Switching Between Paired Devices
- Troubleshooting Bluetooth
- Smartphone Troubleshooting
- Tesla Mobile App Troubleshooting
- Vehicle Troubleshooting
- Using the Phone App
- Making a Phone Call
- Receiving a Phone Call
- In Call Options
- Calendar
- Zoom
- myQ
- Starting
- Drive Disabled - Requires Authentication
- Powering Off
- Power Cycling the Vehicle
- Shift Using the Touchscreen
- Auto Shift from Park
- Shift Using the Overhead Console
- Drive
- Reverse
- Neutral
- Keeping Your Vehicle in Neutral (Tow Mode)
- Adjusting the Steering Wheel Position
- Overview of Buttons
- Left buttons:
- Right Buttons:
- Left Scroll Button
- Left Scroll Button Customization
- Right Scroll Button
- Heated Steering Wheel
- Horn
- Steer-by-Wire
- Emergency Operation
- Adjusting Exterior Mirrors
- Folding Mirrors
- Interior Mirrors
- Rear View Mirror
- Vanity Mirrors
- Headlights
- Auto High Beam
- Turn Signals
- Hazard Warning Flashers
- Headlights After Exit
- Condensation in Headlights or Tail lights
- Braking Systems
- Emergency Braking
- Brake Disc Wiping
- Hydraulic Boost Compensation
- Hydraulic Fade Compensation
- Regenerative Braking
- Vehicle Hold
- Parking Brake
- Brake Wear
- Tesla Vision Park Assist
- Visual and Audio Feedback
- Controlling Audible Feedback
- Limitations and False Warnings
- Other Parking Aids
- How It Works
- Slippery Surfaces
- Ride Height Settings - On-Road
- Ride Height Settings - Off-Road
- Auto Lower
- Self-Leveling
- Auto-Raising Locations
- To remove an auto-raising location
- Selecting Between Driver Profiles
- Using Tesla Profiles
- Saved Settings
- Linking a Driver Profile to a Key
- Easy Entry
- Valet Mode
- Starting Valet Mode
- Canceling Valet Mode
- Displaying Trip Information
- Odometer
- Using the Off-Road App
- Before Off-Road Driving
- While Off-Road Driving
- Overland
- Baja
- Wade Mode
- Trail Assist
- Open Differentials
- Locking Differentials
- Engaging Locking Differentials On Road
- Engaging Locking Differentials Off Road
- Disengaging Locking Differentials
- Troubleshooting
- Off-Road Troubleshooting
- Towing Guidelines
- Before Towing a Trailer
- Trailer Profiles
- Towing Capacity
- Tire Pressures when Towing
- Tires Cold Tire Inflation Pressure
- Trailer Mode
- Trailer Alarm
- Trailer Brakes
- Trailer Brake Gain
- Trailer Brake Boost
- Adaptive Regenerative Braking
- Trailer Light Test
- Trailer Brake Controller Limitations
- Electric Over Hydraulic (EOH) Brakes
- Parking with a Trailer
- Trailer Sway Mitigation
- Accessing the Trailer Hitch Assembly
- Ball Mount Specifications
- Electrical Connections
- Impact on Range
- Carrying Accessories
- Installing Brackets onto the Appliques
- Installing Crossbars
- Autopilot Conditions
- Autopilot Settings
- Traffic-Aware Cruise Control
- Canceling Autopilot
- While Using Autopilot
- Maintaining the Set Speed
- Changing the Set Speed
- Adjusting the Following Distance
- Stopping and Slowdowns
- Cruising Near or On Exits
- Overtake Acceleration
- Stop Light and Stop Sign Warning
- Emergency Vehicles
- Take Over Immediately
- Before Using
- Traffic Lights
- Stop Signs and Road Markings
- Type of Intersection Vehicle Intended Response
- Limitations
- Parameters
- Perpendicular Parking
- Parallel Parking
- To Use Autopark
- To Cancel Parking
- Before Using Full Self-Driving (Supervised)
- To Use Full Self-Driving (Supervised)
- Canceling Full Self-Driving (Supervised)
- While Using Full Self-Driving (Supervised)
- Changing Lanes
- Arriving at Your Destination
- Driver Attentiveness
- Autopilot Suspension
- Full Self-Driving (Supervised) (Autosteer on City Streets)
- Autopark
- CAUTION:
- Lane Departure Avoidance
- Blind Spot Assist
- Automatic Blind Spot Camera
- Blind Spot Collision Warning Chime
- Blind Spot Warning Light
- Limitations and Inaccuracies
- Forward Collision Warning
- Automatic Emergency Braking
- Rear Cross-Traffic Alert
- Obstacle-Aware Acceleration
- How Speed Assist Works
- Controlling Speed Assist
- About the Security System
- Parental Controls
- PIN to Drive
- Glovebox PIN
- Speed Limit Mode
- Clear Browser Data
- How to Use Dashcam
- How to Use Sentry Mode (With a USB Flash Drive)
- How to Use Sentry Mode (Without a USB Flash Drive)
- Sentry Mode Settings
- - Set Camera-Based Detection
- • View Live Camera
- Automatically Formatting a USB Drive
- Manually Formatting a USB Drive
- Viewing Video Recordings
- Viewing on the Touchscreen
- Viewing on a Computer
- Overview of Climate Controls
- Adjusting Climate Control Settings
- Climate Popup
- Keep Climate On, Dog, and Camp
- Cabin Overheat Protection
- Climate Control Operating Tips
- Tips:
- Cabin Air Filter(s)
- Before Driving
- Charge Port
- Charging
- Windows
- Mirrors
- Tires and Tire Chains
- While Driving
- Cold Battery
- After Driving
- Scheduled Precondition
- Storage
- Map Overview
- Map Display
- Navigation Settings
- Navigating to a Destination
- Selecting an Alternate Route
- Adding Stops to a Route
- Automatic Navigation
- Lucky and Hungry
- Home, Work, and Favorite Destinations
- Charging Locations
- Predicting Energy Usage
- Online Routing
- Trip Planner
- Map Updates
- Volume Controls
- Media Settings
- Searching Audio Content
- Caraoke
- Recents and Favorites
- Playing Media from Devices
- USB Flash Drives
- Bluetooth Connected Devices
- Toybox
- Boombox
- Prepare a USB drive for Boombox
- Uninstall Games
- Gaming Controllers and Headphones
- High Voltage Components
- Charging Equipment
- Low Voltage Battery
- Battery Care
- Temperature Limits
- Submerged Vehicle
- Battery Warnings and Cautions
- Opening the Charge Port
- During Charging
- Charging Status
- Charge Port Light
- Stopping Charging
- Charge Settings
- Open/Unlock Charge Port
- Stop Charging
- Charge Current at this Location
- Supercharging
- Supercharger Fees
- Manually Releasing Charge Cable
- Charging Best Practices
- Fast charging tips:
- Create a Schedule
- Using Scheduled Charging
- Preconditioning
- Factors Affecting Energy Consumption
- While driving:
- While parked and not plugged in to a charger:
- Tips to Maximize Range
- Range Assurance
- Energy App
- Prerequisites
- To Use Powershare Home Backup
- Maximum Draw
- Setting the Discharge Limit
- To Stop Powershare Home Backup
- Backup Troubleshooting
- Technical Support
- Loading New Software
- Downloading vs. Installing New Software
- Download
- Install
- Software Update Preferences
- Viewing Release Notes
- Service Intervals
- Schedule Service
- Daily Checks
- Weekly Checks
- Monthly Checks
- Periodic Checks
- Maintenance Summary
- Fluid Replacement Intervals
- Software
- High Voltage Safety
- Cleaning the Exterior
- Dents and Scratches
- Surface Contamination
- For a waterless wash:
- Cleaning Mud
- Window Cleaning and Treatments
- Car Wash
- Cautions for Exterior Cleaning
- Cleaning the Interior
- Interior Glass
- Airbags
- Dashboard and Plastic Surfaces
- Interior Lighting
- Seats
- Carpets
- Seat Belts
- Door Seals
- Front and Rear Touchscreens
- Metal Surfaces
- Cautions for Interior Cleaning
- Using a Car Cover
- Floor Mats
- Displaying Tire Pressures
- Maintaining Tire Pressures
- Tires (Front and Rear) Normal Load\* GVWR\*\*
- Checking and Adjusting Tire Pressures
- Tire Pressure Monitoring
- TPMS Malfunction
- Replacing a Tire Sensor
- Tire Wear
- Tire Rotation, Balance, and Wheel Alignment
- Punctured Tires
- Flat Spots
- Tire Pressure Monitoring System (TPMS) Reset
- Seasonal Tire Types
- Understand Your Tire Type
- Summer and All-Season Tires
- All-Terrain Tires
- Winter Tires
- Driving in Low Temperatures
- Tire Chains
- Only use tire chains on the REAR tires.
- Tire Size Recommended Chain
- Removing and Installing Wheel Covers
- Wheel Specifications (Factory)
- Tire Specifications (Factory)
- Understanding Tire Markings
- Uniform Tire Quality Grading
- Treadwear
- Traction
- Temperature
- Tire and Loading Glossaries
- General Wheel and Tire Terms
- Load Carrying Definitions
- Pneumatic Radial Tire Definitions
- Topping Up Windshield Washer Fluid
- Cleaning the Wiper Blade
- Replacing the Wiper Blade
- Washer Jets
- Using a Jack and Jack Stand
- Using a 2-Post Lift:
- Jack Mode
- Parts, Accessories, and Modifications
- Body Repairs
- Connecting Accessories to the 48V Power Feeds
- 48V Power Feed Specifications
- Accessing the Power Feed on the Roof
- Accessing the Power Feed in the Powered Frunk
- Enabling Power to the Power Feeds
- Using RFID Transponders
- Vehicle Identification Number
- Emission Control Label
- VEHICLE EMISSION CONTROL INFORMATION
- Tire and Loading Information Label
- Vehicle Certification Label
- Roof Racks
- Steps for Determining the Correct Load Limit
- Example Load Limit Calculations
- Cautions and Warnings
- Weights - Vehicle
- Weights - Nominal GVWR Reference
- Cargo - Weight Limits
- Cargo - Volumes
- Motor Type
- Transmission
- Steering
- Brakes
- Suspension
- Battery - Low Voltage
- Battery - High Voltage
- DO NOT TRANSPORT WITH WHEELS ON THE GROUND
- Approved Methods for Transporting
- If Vehicle Has No Power
- Disable the Self-Leveling Air Suspension System
- Activate Tow Mode
- To activate Tow Mode:
- Pull onto the Flatbed Truck From the Rear
- Pull onto the Flatbed Truck From the Front
- Secure the Tires
- Regional Phone Number(s)
- Changing the Spare Tire
- Opening a Front Door with No Power
- Opening a Rear Door with No Power
- Best Practices to Prepare for Potential Flooding
- Handling a Submerged Vehicle
- APP\_w009
- Automatic Emergency Braking is unavailable Feature may be restored on next drive
- What to do:
- APP\_w048
- Autopilot features temporarily unavailable Features may be restored on next drive
- APP\_w207
- Autosteer temporarily unavailable
- APP\_w218
- Autosteer speed limit exceeded Take control of steering wheel
- What this alert means:
- APP\_w222
- Cruise control unavailable
- Reduced front camera visibility
- APP\_w224
- Continue driving to allow cameras to calibrate
- APP\_w304
- Camera blocked or blinded
- Clean camera or wait for it to regain visibility
- APP\_w389
- BMS\_a074
- Maximum battery charge level reduced
- OK to drive - Schedule service
- BMS\_a079
- Unable to charge - Maximum charge level reached Reduced maximum charge level - Schedule service
- CC\_a001
- Unable to charge - Insufficient grounding Proper wiring or outlet grounding must be verified
- CC\_a002
- Unable to charge - Insufficient grounding
- Disconnect and retry or use different equipment
- CC\_a003
- Unable to charge - Wall Connector GFCI tripped
- CC\_a004
- Unable to charge - Wall Connector issue
- Wall Connector needs service
- Unable to charge - Wall Connector GFCI tripped Disconnect and retry or use different equipment
- Unable to charge - Wall Connector overcurrent Disconnect and retry or use different equipment
- Unable to charge - Input voltage too high Voltage must be within Wall Connector rating
- CC\_a008
- Unable to charge - Input voltage too low Voltage must be within Wall Connector rating
- CC\_a009
- Unable to charge - Input wired incorrectly Input wiring to Wall Connector must be corrected
- CC\_a010
- Unable to charge - Wall Connector issue Wall Connector needs service
- CC\_a011
- Unable to charge - Wall Connector too hot Let Wall Connector cool and try again
- CC\_a012
- Unable to charge - Wall connection too hot Outlet or Wall Connector wiring must be checked
- CC\_a013
- Unable to charge - Charge handle too hot Check charge handle or charge port for debris
- CC\_a014
- CC\_a015
- Unable to charge - Vehicle connection issue Insert charge handle fully into charge port
- CC\_a016
- CC\_a017
- CC\_a018
- CC\_a019
- CC\_a020
- CC\_a021
- Unable to charge - No primary Wall Connector Check that primary unit is powered and available
- CC\_a022
- Unable to charge - More than 1 primary unit Ensure only 1 Wall Connector is set as primary
- CC\_a023
- Unable to charge - Too many Wall Connectors Ensure no more than 3 units paired with primary
- CC\_a024
- Unable to charge - Low Wall Connector current Primary unit current setting must be increased
- CC\_a025
- CC\_a026
- CC\_a027
- CC\_a028
- Unable to charge - Incorrect switch setting Wall Connector rotary switch must be adjusted
- CC\_a029
- CC\_a030
- Unable to charge - Primary / paired unit mismatch Wall Connector current ratings must match
- CC\_a041
- Charge rate reduced - Wall connection hot Outlet or Wall Connector wiring must be checked
- CC\_a043
- Wall Connector configuration must be completed Refer to Installation Guide to enable charging
- CP\_a004
- Charging equipment not recognized Try again or try different equipment
- CP\_a010
- Charging equipment communication error
- Try again or try different equipment
- CP\_a043
- Charge port door sensor fault
- Charge port may not operate as expected
- CP\_a046
- Charging equipment communication lost Check power source and charging equipment
- CP\_a051
- Charge port may not open when pressed Use another method to open the charge port
- CP\_a053
- Unable to charge - Charge station not powered
- Check power source or try a different station
- CP\_a054
- Charge port latch not engaged
- Fully insert charge cable or check for obstruction
- CP\_a055
- CP\_a056
- Charging stopped - Charge cable disconnected Close charge port - Press brake pedal and retry
- CP\_a058
- Unable to AC charge - System will retry shortly Disconnect and retry or use different equipment
- CP\_a066
- Charging equipment not ready See equipment instructions to start charging
- CP\_a078
- Cable blocked - Charge port latch may be frozen Try using Defrost Car button in Mobile App
- CP\_a079
- Charge rate reduced - Charge port may be frozen Try using Defrost Car button in Mobile App
- CP\_a101
- CP\_a102
- CP\_a143
- Charging adapter has electric arc flash hazard Use different charging equipment
- CP\_a151
- Charge port error detected - Service is required AC charging may not function / OK to Supercharge
- CP\_a164
- Charge handle still detected after unlatch request
- Use charge port manual release cable if needed
- DI\_a138
- Front motor disabled - OK to drive
- Vehicle power may be limited
- DI\_a166
- Vehicle automatically parked to prevent rollaway
- Fasten seatbelt and close door to stay in gear
- DI\_a175
- DI\_a184
- Autopark canceled
- Take control
- DI\_a185
- Autopark Aborted
- DI\_a190
- Rear tire tread depth low - Schedule service Inspect tires for rotation/replacement
- DI\_a245
- Vehicle Hold feature unavailable Keep brake pedal pressed while stopped
- DI\_a250
- Adaptive ride control disabled
- Drive with caution
- DIF\_a251 / DIR\_a251 / DIREL\_a251 / DIRER\_a251
- Gearbox fluid service recommended
- HVBATT\_a734
- High voltage battery performance limited
- OK to drive - Schedule service soon
- HVBATT\_a735
- HVBATT\_a736
- High voltage battery requires service
- Acceleration and charging performance reduced
- HVBATT\_a737
- PM\_a092 / PMF\_a092 / PMR\_a092 / PMREL\_a092 / PMRER\_a092 Powertrain issue detected - Schedule service Issue may persist even if functionality is restored
- TAS\_a313 Adaptive ride control degraded Ride comfort may be reduced
- TAS\_a314
- UI\_a004
- Front trunk open
- Proceed with caution
- UI\_a006
- Service is required
- Schedule service now
- UI\_a137
- Active service connection to vehicle
- Service performing remote diagnostics
- UMC\_a001
- Unable to charge with Mobile Connector Inadequate outlet grounding - Try another outlet
- UMC\_a002
- Unable to charge - Mobile Connector GFCI tripped Unplug charge handle from charge port and retry
- UMC\_a004
- Unable to charge with Mobile Connector Voltage too high / Try a different wall outlet
- UMC\_a005
- Unable to charge with Mobile Connector Voltage too low / Try a different wall outlet
- UMC\_a007
- Mobile Connector control box temperature high Let Mobile Connector cool to resume charging
- UMC\_a008
- Unable to charge - Wall plug temperature high Wall outlet and wiring inspection recommended
- UMC\_a009
- Cannot charge - Charge handle temperature high
- Check charge handle or charge port for debris
- UMC\_a010
- Mobile Connector to adapter connection hotLet cool - Plug adapter fully into Mobile Connector
- UMC\_a011
- UMC\_a012
- UMC\_a013
- Wall plug adapter error - Charge rate reduced Plug adapter fully into Mobile Connector and retry
- UMC\_a014
- UMC\_a015
- UMC\_a016
- Mobile Connector control box temperature high Maximum charge rate reduced
- UMC\_a017
- Charge rate reduced - Wall plug temperature high Wall outlet and wiring inspection recommended
- UMC\_a018
- Charge rate reduced - Handle temperature high
- UMC\_a019
- Mobile Connector to adapter connection hot Maximum charge rate reduced
- VCLEFT\_a130 / VCREAR\_a130
- Critical issue detected
- PULL OVER SAFELY
- VCLEFT\_a194
- Electrical system power reduced
- Vehicle may shut down unexpectedly
- VCLEFT\_a208
- Schedule service to replace low voltage battery Software will not update until battery is replaced
- VCLEFT\_a207
- Vehicle shutting down
- VCLEFT\_a592
- Electrical system is unable to support all features Switching off features to conserve energy
- VCLEFT\_a221
- Electrical system is unable to support all features Schedule service
- VCLEFT\_a365 / VCREAR\_a365
- Incline too steep to park vehicle and trailer
- Parking brake may not hold - Move to flatter area
- VCLEFT\_a402
- Electrical system backup power is unavailable Vehicle will consume more energy while idle
- VCLEFT\_a496
- Vehicle is preparing to shut down PULL OVER SAFELY
- VCSEC\_a221
- Air pressure below recommendation for tires Check pressure and refill air as needed
- VCSEC\_a228
- Air pressure in tires very low PULL OVER SAFELY - Check for flat tire
- Document Applicability
- Illustrations
- Feature Availability
- Errors or Inaccuracies
- Location of Components
- Copyrights and Trademarks
- Event Data Recorder (EDR)
- Vehicle Telematics
- Quality Control
- Sound Library
- California Proposition 65
- Contacting Tesla
- Reporting Safety Defects - US
- Reporting Safety Defects - Canada
- Radiation Exposure Statement
- Radio Frequency Information
- Canada
- B
- C
- D
- E
- F
- G
- H
- |
- J
- K
- L
- M
- N
- 0
- P
- R
- s
- T
- U
- V
- W
- z
Brand : TESLA
Model : Cybertruck (2025)
Category : Automotive