
Commercial X32i - Treadmills NordicTrack - Free user manual and instructions
Find the device manual for free Commercial X32i NordicTrack in PDF.


| Product Type | Treadmill |
| Brand | NordicTrack |
| Model | Commercial X32i |
| Motor | 4.0 CHP DurX™ Commercial Plus Motor |
| Speed Range | 0 – 12 mph (0 – 19.3 km/h) |
| Incline Range | -6% to 40% (decline and incline) |
| Display | 32-inch adjustable pivoting touchscreen |
| Running Surface | 22" x 65" (55.9 x 165.1 cm) |
| Max User Weight | 300 lbs (136 kg) |
| Dimensions (Assembled) | 80.75" L x 39.6" W x 73.5" H (205.1 x 100.6 x 186.7 cm) |
| Weight | 362 lbs (164 kg) |
| Power Requirements | 120V, 60Hz, 15A dedicated outlet |
| Foldable | Yes, with EasyLift™ Assist |
| Programs | iFit® subscription with thousands of interactive workouts |
| Heart Rate Monitoring | EKG grip pulse; wireless chest strap compatible |
| Cooling Fan | AutoBreeze™ workout fan |
| Safety Key | Yes, tethered |
| Warranty | Lifetime frame and motor; 3 years parts; 1 year labor |
| Maintenance | Regular lubrication of belt; clean deck and motor area |
| Spare Parts Availability | Through NordicTrack service center or authorized dealers |
| Documentation | User manual available for free download |
Frequently Asked Questions - Commercial X32i NordicTrack
User questions about Commercial X32i NordicTrack
0 question about this device. Answer the ones you know or ask your own.
Ask a new question about this device
Download the instructions for your Treadmills in PDF format for free! Find your manual Commercial X32i - NordicTrack and take your electronic device back in hand. On this page are published all the documents necessary for the use of your device. Commercial X32i by NordicTrack.
USER MANUAL Commercial X32i NordicTrack
Model No. NTL39221.0
Serial No.
Write the serial number in the space above for reference.

REGISTER YOUR PRODUCT
To register your product and activate your warranty today, go to my.nordictrack.com
CUSTOMER CARE
For service at any time, go to support.nordictrack.com.
Or call 1-800-TO-BE-FIT
(1-800-862-3348)
Mon.-Fri. 6 a.m.-6 p.m. MT
Sat. 8 a.m.-12 p.m. MT
Please do not contact the store.
CAUTION
Read all precautions and instructions in this manual before using this equipment. Save this manual for future reference.
USER'S MANUAL

natural_image
Line drawing of a treadmill with adjustable arms and a backrest, no text or symbols presentiFIT.
MAKE YOUR
FITNESS GOALS A
REALITY
IFIT.COM
TABLE OF CONTENTS
WARNING DECAL PLACEMENT....2
IMPORTANT PRECAUTIONS....3
BEFORE YOU BEGIN. 7
PART IDENTIFICATION CHART....8
ASSEMBLY....9
HOW TO USE THE INCLINE TRAINER....15
FCC INFORMATION....26
HOW TO MOVE THE INCLINE TRAINER ....27
MAINTENANCE AND TROUBLESHOOTING....28
EXERCISE GUIDELINES ....31
PART LIST....33
EXPLODED DRAWING....35
ORDERING REPLACEMENT PARTS. Back Cover
LIMITED WARRANTY. Back Cover
WARNING DECAL PLACEMENT
This drawing shows the locations of the warning decals. If a decal is missing or illegible, call the telephone number on the front cover of this manual and request a free replacement decal. Apply the decal in the location shown. Note: The decals may not be shown at actual size.

▲WARNING: Protect yourself and others from risk of serious injury. Read the user's manual or obtain proper instruction before use and:


- Stand only on side rails when starting or stopping treadmill.
• Change speed in small increments. - Hold handrails to prevent falling, and always wear the safety clip while operating treadmill.
- Stop if you feel faint, dizzy, or short of breath.

- Never allow children on or around treadmill.
- Remove key when not in use.

- Keep clothing, fingers, and hair away from moving belt.
- Never try to adjust or fix the belt while it is moving.
• Always wear athletic shoes while operating treadmill.
NORDICTRACK and IFIT are registered trademarks of ICON Health & Fitness, Inc. Google Maps is a trademark of Google LLC. The Bluetooth® word mark and logos are registered trademarks of Bluetooth SIG, Inc. and are used under license. Wi-Fi is a registered trademark of Wi-Fi Alliance. WPA and WPA2 are trademarks of Wi-Fi Alliance.
IMPORTANT PRECAUTIONS
⚠ WARNING: To reduce the risk of burns, fire, electric shock, or injury to persons, read all important precautions and instructions in this manual and all warnings on your incline trainer before using your incline trainer. ICON assumes no responsibility for personal injury or property damage sustained by or through the use of this product.
- It is the responsibility of the owner to ensure that all users of this incline trainer are adequately informed of all warnings and precautions.
- Before beginning any exercise program, consult your physician. This is especially important for persons over age 35 or persons with pre-existing health problems.
- The incline trainer is not intended for use by persons with reduced physical, sensory, or mental capabilities or lack of experience and knowledge, unless they have been given supervision or instruction concerning use of the incline trainer by someone responsible for their safety.
- Use the incline trainer only as described in this manual.
- The incline trainer is intended for home use only. Do not use the incline trainer in any commercial, rental, or institutional setting.
- Keep the incline trainer indoors, away from moisture and dust. Do not put the incline trainer in a garage or covered patio, or near water.
- Place the incline trainer on a level surface, with at least 8 ft. (2.4 m) of clearance behind it and 2 ft. (0.6 m) on each side. Do not place the incline trainer on any surface that blocks air openings. To protect the floor or carpet from damage, place a mat under the incline trainer.
- Do not operate the incline trainer where aerosol products are used or where oxygen is being administered.
- Keep children under age 16 and pets away from the incline trainer at all times.
-
The incline trainer should be used only by persons weighing 300 lbs. (136 kg) or less.
-
Never allow more than one person on the incline trainer at a time.
- Wear appropriate exercise clothes while using the incline trainer. Do not wear loose clothes that could become caught in the incline trainer. Athletic support clothes are recommended for both men and women. Always wear athletic shoes. Never use the incline trainer with bare feet, wearing only stockings, or in sandals.
- Plug the power cord into a surge suppressor (not included), and plug the surge suppressor into an appropriate outlet (see page 15). To avoid overloading the circuit, do not plug other electrical devices, except for low-power devices such as cell phone chargers, into the surge suppressor or into an outlet on the same circuit.
- Use only a surge suppressor that meets all of the specifications described on page 15. To purchase a surge suppressor, see your local NORDICTRACK dealer, call the telephone number on the front cover of this manual, or see your local electronics store.
- Failure to use a properly functioning surge suppressor could result in damage to the control system of the incline trainer. If the control system is damaged, the walking belt may slow, accelerate, or stop unexpectedly, which may result in a fall and serious injury.
- Keep the power cord and the surge suppressor away from heated surfaces.
-
Do not operate the incline trainer if the power cord or plug is damaged, or if the incline trainer is not working properly. (See MAINTENANCE AND TROUBLESHOOTING on page 28 if the incline trainer is not working properly.)
-
Read, understand, and test the emergency stop procedure before using the incline trainer. (See HOW TO TURN ON THE POWER on page 17.) Always wear the clip while using the incline trainer.
- Always stand on the foot rails when starting or stopping the walking belt. Always hold the handrails while using the incline trainer.
- When a person is walking on the incline trainer, the noise level of the incline trainer will increase.
- Keep fingers, hair, and clothing away from the moving walking belt.
- The incline trainer is capable of high speeds. Adjust the speed in small increments to avoid sudden jumps in speed.
-
Never leave the incline trainer unattended while it is running. Always remove the key, press the power switch into the off position (see the drawing on page 7 for the location of the power switch), and unplug the power cord when the incline trainer is not in use.
-
Do not attempt to move the incline trainer until it is properly assembled. (See ASSEMBLY on page 9, and HOW TO MOVE THE INCLINE TRAINER on page 27.) You must be able to safely lift 45 lbs. (20 kg) to raise, lower, or move the incline trainer.
- Never insert any object into any opening on the incline trainer.
- Inspect and properly tighten all parts each time the incline trainer is used.
- DANGER: Always unplug the power cord immediately after use, before cleaning the incline trainer, and before performing the maintenance and adjustment procedures described in this manual. Never remove the motor hood unless instructed to do so by an authorized service representative. Servicing other than the procedures in this manual should be performed by an authorized service representative only.
- Over exercising may result in serious injury or death. If you feel faint, if you become short of breath, or if you experience pain while exercising, stop immediately and cool down.
SAVE THESE INSTRUCTIONS
MAKE YOUR FITNESS GOALS A REALITY
iFIT®
Congratulations on the purchase of your new iFit® compatible fitness equipment. You're just one click away from making your fitness goals a reality.
GO TO IFIT.COM TO GET STARTED
DO MORE THAN JUST WORK OUT
iFit® is the most powerful training tool available to help you accomplish all of your fitness goals. From weight loss and performance to personalized training programs, iFit® is the key to getting more out of everything you do. Some features require paid subscription.

LOSE WEIGHT
Stay on track and motivated with progressive weight loss programs with our trainers, including Jillian Michaels.

COMPETE WITH OTHERS
Push yourself to new limits with real-time virtual races.

PERSONALIZED EVENT TRAINING
5k, 10k, half or full marathon training will help you prepare for your event.

GO MOBILE
Track your workout anywhere you go with iFit® mobile apps.

MAP YOUR ROUTE
With Google Maps ^™ , your fitness equipment will simulate the earth's terrain while displaying Street View during your workout.

SHARE YOUR PROGRESS
Inspire others, motivate yourself and share routes, workouts and more.
GO TO
IFIT.COM
OR CALL
877-236-1009
PROTECT
YOUR FITNESS EQUIPMENT
WITH AN EXTENDED SERVICE PLAN

natural_image
Abstract gear and shield icon with no text or symbolsYour new fitness equipment is not an ordinary purchase; it is an investment in your health and well being for years to come.
As the leading provider of manufacturer's extended service plans, ICON strives to protect your equipment and your future.
Please review the following service plans and find one that best fits your needs.
PREVENTIVE MAINTENANCE SERVICE PLANS
| Equipment Price | 3-Year Plan | 5-Year Plan |
| 0.00 to1000.00 | 199.99 | 289.99 |
| 1001.00 to1500.00 | 259.99 | 379.99 |
| 1501.00 to2500.00 | 339.99 | 489.99 |
| (Bikes/Systems Only)0.00 to2500.00 | $139.99 | NA |
Features:
• Includes an annual preventive maintenance and performance check at your convenience
- Unlimited in-home repairs; no shipping required
• Covers parts and labor on all manufacturer's defects, as well as wear and tear on parts
- Up to 5 years of coverage available
STANDARD SERVICE PLANS
| Equipment Price | 1-Year Plan | 2-Year Plan | 3-Year Plan |
| 0.00 to300.00 | 29.99 | 39.99 | 59.99 |
| 301.00 to 1000.00 | 89.99 | 119.99 | 149.99 |
| 1001.00 to2000.00 | 109.99 | 139.99 | 179.99 |
| 2001.00 to 3000.00 | 179.99 | 209.99 | 239.99 |
Features:
- Unlimited in-home repairs; no shipping required
• Covers parts and labor on all manufacturer's defects, as well as wear and tear on parts
• Up to 3 years of coverage available
To protect your fitness equipment today, please
call Customer Care at 1-800-677-3838.
Or, visit us online at www.utserv.com.
UTS

UNIVERSAL TECHNICAL SERVICES
BEFORE YOU BEGIN
Thank you for selecting the revolutionary NORDICTRACK® COMMERCIAL X32I. The COMMERCIAL X32I offers a selection of features designed to make your workouts at home more effective and enjoyable.
For your benefit, read this manual carefully before using the incline trainer. If you have questions after
reading this manual, please see the front cover of this manual. To help us assist you, note the product model number and serial number before contacting us. The model number and the location of the serial number decal are shown on the front cover of this manual.
Before reading further, please familiarize yourself with the parts that are labeled in the drawing below.

PART IDENTIFICATION CHART
Use the drawings below to identify small parts used for assembly. The number in parentheses below each drawing is the key number of the part, from the PART LIST near the end of this manual. The number following the key number is the quantity used for assembly. Note: If a part is not in the hardware kit, check to see whether it is preattached. Extra parts may be included.

3/8" Star Washer (3)-12
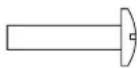
8 x 5/8" Machine Screw (106)-6

5/16" x 3/4" Patch Screw (108)-4

natural_image
Simple line drawing of a long rectangular object with a semicircular top edge (no text or symbols)3/8" x 5 1/2" Screw (1)-4
ASSEMBLY
Easy step-by-step interactive 3D assembly instructions for this product can be found on

Download the FREE App

Scan here and search by your model number


- To use the assembly steps in this manual, first see the helpful tips below.
• Assembly requires two persons.
- Place all parts in a cleared area and remove the packing materials. Do not remove the protective plastic sheet on the console until assembly is completed. Do not dispose of the packing materials until you finish all assembly steps.
- After shipping, there may be an oily substance on the exterior of the incline trainer. This is normal. If there is an oily substance on the incline trainer, wipe it off with a soft cloth and a mild, non-abrasive cleaner.
• To identify small parts, see page 8.
• Assembly requires the following tools:
the included hex keys
the included offset screwdriver
one Phillips screwdriver
To avoid damaging parts, do not use power tools.

2. Make sure that the power cord is unplugged.
Remove the four 3/8" x 3 1/4" Screws (18) from the Base (74) (only one side is shown). Save the Screws.

- Remove the four 3/8" x 2 3/4" Screws (22) from the Uprights (83). Save the Screws.

- Set the Uprights (83) on the Base (74). Make sure that the hole with the Upright Wire (75) is on the right side.
Attach the right Upright (83) with two of the 3/8" x 3 1/4" Screws (18) and two of the 3/8" x 2 3/4" Screws (22) that you just removed and four 3/8" Star Washers (3); do not fully tighten the Screws yet. Make sure that the Base Wire (52) is not pinched.
Attach the left Upright (not shown) as described above. Note: There are no wires on the left side.
Then, fully tighten the 3/8" x 3 1/4" Screws (18) and the 3/8" x 2 3/4" Screws (22).

- Connect the Base Wire (52) to the Upright Wire (75). The connectors should slide together easily and snap into place. If they do not, turn one connector and try again.
Then, remove the tie (A) from the Base Wire (52), and insert the connectors into the hole (B) in the right Upright (83).

6 Set the left handrail assembly (C) on the floor in the position shown.
Attach the Push Bar Bottom (109) to the left handrail assembly (C) with two 5/16" x 3/4" Patch Screws (108); do not fully tighten the Patch Screws yet.
Attach the Push Bar Bottom (109) to the right handrail assembly (D) in the same way.

- Set the handrail assembly (E) on the floor in the position shown. Attach the Push Bar Top (110) with six #8 x 5/8" Machine Screws (106); start all six Machine Screws, and then tighten them. Do not overtighten the Machine Screws.

- With the help of a second person, position the handrail assembly (E) below the Console (93) as shown. Then, move both sides of the handrail assembly upward at the same time, sliding the inner corner (F) of the handrail assembly between the Console (93) and the Console Base (92).
Next, attach the handrail assembly (E) with four 3/8" x 5 1/2" Screws (1) and four 3/8" Star Washers (3) (only one side is shown); start all four Screws, and then tighten them.
Then, tighten the four 5/16" x 3/4" Patch Screws (108) (only one side is shown).

- Slide the Right Inside Upright Cover (70) against the lower end of the right Upright (83). Then, press the Right Outside Upright Cover (71) against the Right Inside Upright Cover until it snaps into place. Make sure that the wires (G) are not pinched.
Attach the Left Inside Upright Cover (not shown) and the Left Outside Upright Cover (not shown) as described above. Note: There are no wires on the left side.

- If necessary, move the incline trainer to the desired location (see HOW TO MOVE THE INCLINE TRAINER on page 27).
After the incline trainer is placed in the location where it will be used, make sure that the incline trainer rests firmly on the floor. If the incline trainer rocks even slightly, turn a Leveling Foot (77) as needed until the rocking motion is eliminated.
To register your product and activate your warranty today, go to my.nordictrack.com.

natural_image
Technical line drawing of a treadmill with labeled parts (no text or symbols beyond labels)- Make sure that all parts are properly tightened before you use the incline trainer. Keep the included hex keys in a secure place. One of the hex keys is used to adjust the walking belt (see page 29). To protect the floor or carpet from damage, place a mat under the incline trainer. To avoid damage to the console, keep the incline trainer out of direct sunlight.
HOW TO USE THE INCLINE TRAINER
HOW TO CONNECT THE POWER CORD
Use a Surge Suppressor
Your incline trainer, like other electronic equipment, can be damaged by sudden voltage changes in your home's power. Voltage surges, spikes, and noise interference can result from weather conditions or from other appliances being turned on or off. To decrease the risk of damaging the incline trainer, always use a surge suppressor (A) with the incline trainer. To purchase a surge suppressor, see precaution 14 on page 3.
Use only a surge suppressor (A) that is UL 1449 listed as a transient voltage surge suppressor (TVSS). The surge suppressor must have a UL suppressed voltage rating of 400 volts or less and a minimum surge dissipation of 450 joules. The surge suppressor must also be electrically rated for 120 volts AC and 15 amps. There must be a monitoring light on the surge suppressor to indicate whether it is functioning properly. Failure to use a properly functioning surge suppressor could result in damage to the control system of the incline trainer and serious injury to users.
Plug in the Power Cord
The incline trainer must be grounded. If it should malfunction or break down, grounding provides a path of least resistance for electric current to reduce the risk of electric shock. The incline trainer power cord (B) has a plug with a grounding pin (C) (see drawing 1 on this page).

DANGER: Improper connection of
the power cord increases the risk of electric shock. Do not modify the plug—if it will not fit an outlet, have a proper outlet installed by a qualified electrician. If you are unsure whether the incline trainer is properly grounded, contact a qualified electrician.
Plug the power cord (B) into a surge suppressor (A), and plug the surge suppressor into an appropriate outlet (D) that is properly installed and grounded in accordance with all local codes and ordinances.
The outlet must be on a nominal 120-volt circuit capable of carrying 15 or more amps. To avoid overloading the circuit, do not plug other electrical devices, except for low-power devices such as cell phone chargers, into the surge suppressor or into an outlet on the same circuit. IMPORTANT: If the incline trainer is connected to an AFCI-equipped outlet and your circuit breaker trips repeatedly when the incline trainer is used, see the front cover of this manual to purchase an arc filter.

A temporary adapter (E) may be used to connect the surge suppressor (A) to a 2-pole receptacle (F) if a properly grounded outlet is not available.

The lug (G) or wire extending from the adapter must be connected with a metal screw (H) to a permanent ground such as a properly grounded outlet box cover. Some 2-pole receptacle outlet box covers are not grounded. Before using an adapter, contact a qualified electrician to determine whether the outlet box cover is grounded. The temporary adapter should be used only until a properly grounded outlet can be installed by a qualified electrician.

FEATURES OF THE CONSOLE
The advanced incline trainer console offers a selection of features designed to make your workouts more effective and enjoyable.
The console features wireless technology that enables the console to connect to iFit. With iFit, you can access a large and varied workout library. Each workout automatically controls the speed and incline of the incline trainer as it guides you through an effective exercise session. You can also create your own workouts, track your workout results, and access many other features.
When you use the manual mode, you can change the speed and incline of the incline trainer with the touch of a button. As you exercise, the console will display instant exercise feedback.
You can also measure your heart rate when you use a compatible wearable heart rate monitor. See page 25 to purchase a wearable heart rate monitor.
You can even listen to your favorite workout music or audio books with the console's sound system while you exercise.
To turn on the power, see page 17. To learn how to use the touch screen, see page 17. To set up the console, see page 18.
HOW TO TURN ON THE POWER
IMPORTANT: If the incline trainer has been exposed to cold temperatures, allow it to warm to room temperature before you turn on the power. If you do not do this, you may damage the console displays or other electrical components.
Plug in the power cord (see page 15). Next, locate the power switch on the incline trainer frame near the power cord. Press the power switch into the reset position (I).

IMPORTANT: Any time that the incline trainer is turned off, wait for a minimum of five minutes before turning it on again. This is necessary to allow any residual electrical charge to dissipate from the incline trainer's electronics.
Next, stand on the foot rails of the incline trainer. Locate the clip (J) attached to the key (K), and slide the clip securely onto the waistband of your clothes. Then, insert the key into the console. Note: It may take some time for the console to be ready for use. IMPORTANT: In an emergency, the key can be pulled from the console, causing the walking belt to slow to a stop. Test the clip by carefully taking a few steps backward; if the key is not pulled from the console, adjust the position of the clip.

Note: The console can display speed and distance in either miles or kilometers. To find which unit of measurement is selected, see HOW TO CHANGE CONSOLE SETTINGS on page 23. For simplicity, all instructions in this section refer to miles.
The console features a tablet with a full-color touch screen. The following information will help you become familiar with the tablet's advanced technology:
- The console functions similarly to other tablets. You can slide or flick your finger against the screen to move certain images on the screen, such as the displays in a workout (see step 5 on page 19). However, you cannot zoom in and out by sliding your fingers on the screen.
- The screen is not pressure sensitive. You do not need to press hard on the screen.
- To type information into a text box, touch the text box to view the keyboard. To use numbers or other characters on the keyboard, touch the ?123 button. To view more characters, touch the \~[< button. Touch the ?123 button again to return to the number keyboard. To return to the letter keyboard, touch the ABC button. To use a capital character, touch the button with an upward-facing arrow. To use multiple capital characters, touch and hold the arrow button. To return to the lowercase keyboard, touch the arrow button again. To clear the last character, touch the button with a backward-facing arrow and an X.
HOW TO SET UP THE CONSOLE
Before using the incline trainer for the first time, set up the console.
1. Connect to your wireless network.
To access the internet, download iFit workouts, and use several other features of the console, you must be connected to a wireless network. Follow the prompts on the screen to connect the console to your wireless network.
2. Customize settings.
Fill in the form on the screen to set the console to display the desired unit of measurement and your time zone. Note: If you need to change these settings later, see HOW TO CHANGE CONSOLE SETTINGS on page 23.
3. Log into or create an iFit account.
Provide your email address, and follow the prompts on the screen to sign up for or log into your iFit account.
4. Check for firmware updates.
First, touch your name or Hello on the screen, and then touch Settings. Next, select the maintenance section. Then, touch Update to check for firmware updates using your wireless network. See step 5 on page 23 for more information.
5. Calibrate the incline system.
First, touch your name or Hello on the screen. Next, select the settings main menu. Then, select the maintenance section, touch Calibrate Incline, and then touch Begin to calibrate the incline system. See step 6 on page 23 for more information.
The console is now ready for you to begin working out. The following pages explain the various workouts and other features that the console offers.
To use the manual mode, see page 19. To use a map workout, see page 20. To use a draw your own map workout, see page 21. To use a distance or time workout, see page 22. To use the sled push feature, see page 22.
To view or change console settings, see page 23. To connect to a wireless network, see page 24. To use the sound system, see page 25.
IMPORTANT: If there are sheets of plastic on the console, remove the plastic. To prevent damage to the walking platform, wear clean athletic shoes while using the incline trainer. The first time you use the incline trainer, observe the alignment of the walking belt, and center the walking belt if necessary (see page 29).
HOW TO USE THE MANUAL MODE
1. Insert the key into the console.
See HOW TO TURN ON THE POWER on page 17. Note: It may take some time for the console to be ready for use.
2. Select the main menu.
When you turn on the power, the main menu will appear after the console boots up. If you are in a workout or the settings menu, touch the back arrow or the x on the screen to return to the main menu.
Note: If you plan to use a wearable heart rate monitor with the console, you must put on the heart rate monitor before you start the walking belt. The console will automatically search for the heart rate monitor for 30 seconds when you start the walking belt at the beginning of each workout. See page 25 to purchase a wearable heart rate monitor.
3. Start the walking belt and adjust the speed.
Touch Manual Start on the screen or press the Start button on the console to start the walking belt. The walking belt will begin to move at a low speed. As you exercise, change the speed of the walking belt as desired by pressing the speed increase and decrease buttons. Each time you press one of the buttons, the speed setting will change by 0.1 mph; if you hold down the button, the speed setting will change in increments of 0.5 mph.
If you press one of the numbered speed buttons, the walking belt will gradually change speed until it reaches the selected speed setting.
To stop the walking belt, press the Stop button or tap the middle of the screen. To restart the walking belt, press the Start button.
4. Change the incline of the incline trainer as desired.
To change the incline of the incline trainer, press the incline increase and decrease buttons or one of the numbered incline buttons. Each time you press one of the buttons, the incline will gradually change until it reaches the selected incline setting.
Note: If the walking belt is moving at a high speed and you adjust the incline below 0% or above 15.5%, the speed of the walking belt may automatically decrease.
IMPORTANT: The first time you use the incline trainer, you must calibrate the incline system (see step 6 on page 23).
5. Monitor your progress with the display modes.
While you walk or run on the incline trainer, a selection of workout information will be displayed:
• The incline level of the incline trainer
- The elapsed time
• The approximate number of calories you have burned
• The distance that you have walked or run
• The speed of the walking belt
Additional information is also available. To view or browse additional statistics and charts, swipe down from the top of the screen. You can also touch the + button on the screen to view stats or charts.
Note: To record heart rate information, a compatible heart rate monitor must be in use (see page 25).
If desired, adjust the volume by pressing the volume buttons on the console.
To pause the workout, tap the screen or press the Stop button on the console. To continue the work-out, touch the play icon on the screen or press the Start button.
6. Turn on the fan if desired.
The fan features several speed settings. Press the fan buttons repeatedly to select a fan speed or to turn on or turn off the fan.

7. When you are finished exercising, remove the key from the console.
Step onto the foot rails and press the Stop button on the console or tap on the screen. Then, touch the stop icon on the screen or press the Stop button again. A workout summary will appear on the screen. If you wish to save your workout for future use, you can add it as a favorite by touching the heart icon on the screen. You may also be able to either save or publish your results using one of the options on the screen. Touch Finish to exit to the main menu. Then, remove the key from the console and put it in a secure place.
When you are finished using the incline trainer, press the power switch into the off position and unplug the power cord. IMPORTANT: If you do not do this, the incline trainer's electrical components may wear prematurely.
HOW TO USE A MAP WORKOUT
Note: To use a map workout, the console must be connected to a wireless network (see HOW TO CONNECT TO A WIRELESS NETWORK on page 24).
1. Insert the key into the console.
See HOW TO TURN ON THE POWER on page 17.
2. Select the main menu or the workout library.
Touch Home or Browse on the screen to select either the main menu or the workout library.
3. Select a map workout.
To select a map workout, touch the desired button on the screen. Note: The featured map workouts on your console will change periodically. If you wish to save one of the featured workouts for future use, you can add it as a favorite by touching the heart icon on the screen. To draw your own map work-out, see page 21.
The screen will show the duration and distance of the workout, and the approximate number of calories you will burn during the workout.
4. Start the workout.
Touch Start to start the workout. A moment after you touch the button, the walking belt will begin to move. Hold the handrails and begin walking.
During the workout, a map on the screen will show your progress.
When you reach the end of the workout, the walking belt will slow to a stop, and a workout summary will appear on the screen. After you view the workout summary, touch Finish to return to the main menu. You may also be able to either save or publish your results using one of the options on the screen.
5. Monitor your progress with the display modes.
See step 5 on page 19.
6. Turn on the fan if desired.
See step 6 on page 19.
7. When you are finished exercising, remove the key from the console.
See step 7 at the left.
HOW TO USE A DRAW YOUR OWN MAP WORKOUT
Note: To use a draw your own map workout, the console must be connected to a wireless network (see HOW TO CONNECT TO A WIRELESS NETWORK on page 24).
1. Insert the key into the console.
See HOW TO TURN ON THE POWER on page 17.
2. Select a draw your own map workout.
To select a draw your own map workout, touch Create on the screen.
3. Draw your map.
Navigate to the area on the map where you want to draw your workout by sliding your fingers on the screen. Tap the screen to add the start point for your workout. Then, tap the screen to add the end point for your workout. Note: If you want to start and end the workout at the same point, use the Loop or Out & Back options. You can also select whether you want your workout to snap to the road.
If you make a mistake, you can touch Undo.
The screen will display the elevation and distance stats for your workout. If desired, you can change the default speed.
4. Save your workout.
Touch Save New Workout on the screen. If desired, change the title of the workout or add a description, and then press the > symbol on the screen.
5. Start the workout.
Touch Start on the screen to start the workout. A moment after you touch the button, the walking belt will begin to move. Hold the handrails and begin walking. See step 4 on page 20 for more information.
6. Monitor your progress with the display modes.
See step 5 on page 19.
7. Turn on the fan if desired.
See step 6 on page 19.
8. When you are finished exercising, remove the key from the console.
See step 7 on page 20.
HOW TO USE A DISTANCE OR TIME WORKOUT
Note: To use a distance or time workout, the console must be connected to a wireless network (see HOW TO CONNECT TO A WIRELESS NETWORK on page 24). An iFit account is also required.
1. Add workouts to your schedule on iFit.com.
On your computer, smartphone, tablet, or other device, open an internet browser, go to iFit.com, and sign in to your iFit account.
Next, navigate to Menu > Library on the website. Browse the workout programs in the library and join the desired workouts.
Then, navigate to Menu > Schedule to view your schedule. All of the workouts that you have joined will appear on your schedule; you can arrange or delete the workouts on your schedule as desired.
Take time to explore the iFit.com website before you log out.
2. Insert the key into the console.
See HOW TO TURN ON THE POWER on page 17.
3. Select the main menu.
See step 2 on page 19.
4. Log in to your iFit account.
If you have not already done so, touch Login to log in to your iFit account. The screen will ask for your iFit.com username and password. Enter them and touch Submit. Touch the Cancel button to exit the login screen.
5. Select a distance or time workout that you have previously added to your schedule on iFit.com.
Touch the calendar icon to download a distance or time workout from your schedule.
Note: Before workouts will download, you must add them to your schedule on iFit.com.
When you select a distance or time workout, the screen will show the name, the estimated duration, and the distance of the workout.
6. Start the workout.
See step 4 on page 20. Note: During a distance or time workout, the display will not show a map.
7. Monitor your progress with the display modes.
See step 5 on page 19. The screen will show the elapsed distance or time, and the remaining distance or time.
8. Turn on the fan if desired.
See step 6 on page 19.
9. When you are finished exercising, remove the key from the console.
See step 7 on page 20.
For more information about iFit, go to iFit.com.
HOW TO USE THE SLED PUSH FEATURE
1. Insert the key into the console.
See HOW TO TURN ON THE POWER on page 17.
2. Select the main menu.
See step 2 on page 19.
3. Start the walking belt and adjust the speed to 1 mph. Then, adjust the incline to 0%.
See steps 3 and 4 on page 19. IMPORTANT: Do not use the sled push feature when the incline trainer is off or when the speed setting is higher than 1 mph. Do not use the sled push feature when the incline setting is higher or lower than 0%.
4. Grip the push bar or the sled grips with both hands (see page 7).
5. Use your body to manually move the walking belt at the desired speed.
HOW TO CHANGE CONSOLE SETTINGS
IMPORTANT: Some of the settings and features described may not be enabled. Occasionally, a firmware update may cause your console to function slightly differently.
1. Select the settings main menu.
First, turn on the power and insert the key into the console (see HOW TO TURN ON THE POWER on page 17). Note: It may take a few moments for the console to be ready for use.
Next, select the main menu. When you turn on the console, the main menu will appear on the screen after the console boots up. If you are in a workout, touch the screen, touch Pause, touch End, and then touch Finish to return to the main menu.
Next, touch your name or Hello on the screen, and then touch Settings. The settings menu will appear on the screen.
2. Navigate the settings menus and change settings as desired.
Slide or flick the screen to scroll upward or downward if necessary. To view a settings menu, simply touch the menu name. To exit a menu, touch the back button (arrow symbol). You may be able to view and change settings in the following settings menus:
A c c o u n t
• My Profi le
• In Workout
- Manage Accounts
Equipment
• Equipment Info
• Equipment Settings
- Maintenance
Wi-Fi
A b o u t
- Legal
3. Customize the unit of measurement and other settings.
To customize the unit of measurement, the time zone, or other settings, touch Equipment Settings, and then touch the desired settings.
The console can display speed and distance in standard or metric units of measurement.
4. View machine information.
Touch Equipment Info, and then touch Machine Info to view information about your incline trainer.
5. Update the console firmware.
For the best results, regularly check for firmware updates. Touch Maintenance, and then touch Update to check for firmware updates using your wireless network. The update will begin automatically. IMPORTANT: To avoid damaging the console, do not turn off or unplug the incline trainer while the firmware is being updated.
The screen will show the progress of the update. When the update is complete, the incline trainer will turn off and then turn back on. If it does not, use the power switch (see HOW TO TURN ON THE POWER on page 17) to turn the incline trainer off, wait for a few seconds, and then turn it back on again. Note: It may take a few minutes for the console to be ready for use.
Note: Occasionally, a firmware update may cause the console to function slightly differently. These updates are always designed to improve your exercise experience.
6. Calibrate the incline system of the incline trainer.
Touch Calibrate Incline, and then touch Begin to calibrate the incline system. The incline trainer will automatically rise to the maximum incline level, and then return to the starting position. This will calibrate the incline system. Touch Cancel to return to the Maintenance section. When the incline system is calibrated, touch Finish.
IMPORTANT: Keep pets, feet, and other objects away from the incline trainer while the incline system is calibrating. In an emergency, pull the key from the console to stop the incline calibration.
7. Exit the settings main menu.
If you are in a settings menu, touch the back arrow. Then, touch the close button (x symbol) to exit the settings main menu.
HOW TO CONNECT TO A WIRELESS NETWORK
The console is Wi-Fi enabled, allowing you to set up a wireless network connection.
1. Select the main menu.
See step 2 on page 19.
2. Select the wireless network mode.
Touch your name in the upper-left corner, then touch the Wi-Fi® symbol to enter the wireless network mode.
3. Enable Wi-Fi.
Make sure that Wi-Fi is enabled. If it is not, touch the Wi-Fi toggle to enable a wireless connection.
4. Set up and manage a wireless network connection.
When Wi-Fi is enabled, the screen will show a list of available networks. Note: It may take several seconds for the list of wireless networks to appear.
Note: You must have your own wireless network and an 802.11b/g/n router with SSID broadcast enabled (hidden networks are not supported).
When a list of networks appears, touch the desired network. Note: You will need to know your network name (SSID). If your network has a password, you will also need to know the password.
An information box will ask if you want to connect to the wireless network. Touch the Connect button to connect to the network or touch the Cancel button to return to the list of networks. If the network has a password, touch the password entry box. A keyboard will appear on the screen. To view the password as you type it, touch the Show Password checkbox.
To use the keyboard, see HOW TO USE THE TOUCH SCREEN on page 17.
When the console is connected to your wireless network, a checkmark will appear next to the wireless network name. Then, touch the back button on the screen to return to the wireless network mode.
To disconnect from a wireless network, touch and hold the name of the wireless network and then touch the Forget Network button.
If you are having problems connecting to an encrypted network, make sure that your password is correct. Note: Passwords are case-sensitive.
Note: The console supports unsecured and secured (WEP, WPA ^™ , and WPA2 ^™ ) encryption. A broadband connection is recommended; performance depends on connection speed.
Note: If you have questions after following these instructions, go to support.iFit.com for assistance.
5. Exit the wireless network menu.
To exit the wireless network menu, touch the back button on the screen.
HOW TO USE THE SOUND SYSTEM
To play music or audio books through the console sound system while you exercise, you can connect a personal audio device to the console with an audio cable, or you can connect wirelessly if your device is Bluetooth-enabled.
You can then adjust the volume level using the volume buttons on the console or the volume control on your personal audio device.

To use an audio cable
Plug a 3.5 mm male to 3.5 mm male audio cable (not included) into the jack on the console and into a jack on your personal audio device; make sure that the audio cable is fully plugged in. Note: To purchase an audio cable, see your local electronics store.
To use Bluetooth
-
Make sure that your device's Bluetooth setting is turned on, and place or hold your device near the console.
-
Press and hold the Bluetooth Audio button on the console's speaker grill for 3 seconds.
A tone will sound and the Bluetooth button will begin flashing to indicate that the console has entered pairing mode.
- Pair your device to the console.
Once your device and the console pair successfully, the audio from your device will play through the console's speakers.
Note: The console can save eight devices in its memory. If you have previously paired your device to the console, you can simply press the Bluetooth Audio button to connect your device to the console.
- Erase the console's device memory if necessary.
If you need to erase all the Bluetooth-enabled devices saved in the console's memory, press and hold the Bluetooth Audio button for 10 seconds.
THE OPTIONAL HEART RATE MONITOR
Whether your goal is to burn fat or to strengthen your cardiovascular system, the key to achieving the best results is to maintain the proper heart rate during your

natural_image
Line drawing of a person wearing a chest with a bandage (no text or symbols)workouts. A wearable rate monitor will enable you to continuously monitor your heart rate while you exercise, helping you to reach your personal fitness goals. To purchase a wearable heart rate monitor, please see the front cover of this manual.
Note: The console is compatible with all Bluetooth Smart heart rate monitors.
To connect a wearable heart rate monitor to the console, first put it on as directed in its included instructions. Then, when you begin a workout or start the walking belt in manual mode, the console will search for the wearable heart rate monitor for 30 seconds and connect automatically.
FCC INFORMATION
This equipment has been tested and found to comply with the limits for a Class B digital device, pursuant to Part 15 of the FCC Rules. These limits are designed to provide reasonable protection against harmful interference in a residential installation. This equipment generates, uses, and can radiate radio frequency energy and, if not installed and used in accordance with the instructions, may cause harmful interference to radio communications. However, there is no guarantee that interference will not occur in a particular installation. If this equipment does cause harmful interference to radio or television reception, which can be determined by turning the equipment off and on, try to correct the interference by one or more of the following measures:
- Reorient or relocate the receiving antenna.
- Increase the separation between the equipment and the receiver.
- Connect the equipment into an outlet on a circuit different from that to which the receiver is connected.
- Consult the dealer or an experienced radio/TV technician for help.
FCC CAUTION: To assure continued compliance, use only shielded interface cables when connecting to computer or peripheral devices. Changes or modifications not expressly approved by the party responsible for compliance could void the user's authority to operate this equipment.
IMPORTANT: To satisfy exposure compliance requirements, the antenna and transmitter in the console must be at least 8 in. (20 cm) from all persons and must not be near or connected to any other antenna or transmitter.
Note: The console contains FCC ID: OMC425341.
HOW TO MOVE THE INCLINE TRAINER
Before moving the incline trainer, insert the key into the console (A), raise the incline to the maximum incline level, remove the key, and unplug the power cord.
Due to the size and weight of the incline trainer, moving it requires two or three persons. Hold the uprights (B) firmly near the console (A). Tip the incline trainer back until it rolls freely on the wheels (C). CAUTION: To decrease the possibility of injury or of damage to the incline trainer, do not lift the incline trainer by the plastic belly pan (D). Do not pull on the console.

Carefully roll the incline trainer on the wheels to the desired location, and then lower it to the level position. CAUTION: To reduce the risk of injury, use extreme caution while moving the incline trainer. Do not attempt to move the incline trainer over uneven surfaces.
Make sure that the incline trainer rests firmly on the floor. If the incline trainer rocks even slightly, turn the Leveling Feet (77) as needed until the rocking motion is eliminated.

natural_image
Technical line drawing of a treadmill with handle and base plate (no text or symbols)MAINTENANCE AND TROUBLESHOOTING
MAINTENANCE
Regular maintenance is important for optimal performance and to reduce wear. Inspect and properly tighten all parts each time the incline trainer is used. Replace any worn parts immediately.
Regularly clean the incline trainer and keep the walking belt clean and dry. First, press the power switch into the off position and unplug the power cord. Wipe exterior parts of the incline trainer with a damp cloth and a small amount of mild soap. IMPORTANT: Do not spray liquids directly onto the incline trainer. To avoid damage to the console, keep liquids away from the console. Then, thoroughly dry the incline trainer with a soft towel.
TROUBLESHOOTING
Most incline trainer problems can be solved by following the simple steps below. Find the symptom that applies, and follow the steps listed. If further assistance is needed, see the front cover of this manual.
SYMPTOM: The power does not turn on
a. Make sure that the power cord is plugged into a surge suppressor, and that the surge suppressor is plugged into a properly grounded outlet (see page 15). Use only a surge suppressor that meets all of the specifications described on page 15.
IMPORTANT: If the incline trainer is connected to an AFCI-equipped outlet and your circuit breaker trips repeatedly when the incline trainer is used, see the front cover of this manual to purchase an arc filter.
b. After the power cord has been plugged in, make sure that the key is inserted into the console.
c. Check the power switch located on the incline trainer frame near the power cord. If the switch protrudes as shown (A), the switch has tripped. To reset the power switch, wait for five minutes and then press the switch back in (B).

SYMPTOM: The power turns off during use
a. Check the power switch (see drawing C at the left). If the switch has tripped, wait for five minutes and then press the switch back in.
b. Make sure that the power cord is plugged in. If the power cord is plugged in, unplug it, wait for five minutes, and then plug it back in.
c. Remove the key from the console, and then reinsert it.
d. If the incline trainer still will not run, please see the front cover of this manual.
SYMPTOM: The incline of the incline trainer does not change correctly
a. Calibrate the incline system (see step 6 on page 23).
SYMPTOM: The walking belt does not run
If the console does not function properly, see page 30. If the console displays time and distance while a work-out is running, but the walking belt does not run, do the following:
a. Turn off the power (see page 17) and unplug the power cord.
b. Wait a minimum of five minutes to ensure any residual charge has dissipated from the incline trainer's electronics.
c. Plug in the power cord (see page 15), turn on the power, and start the walking belt again.
d. If the walking belt still does not run, please see the front cover of this manual.
SYMPTOM: The walking belt slows when walked on
a. Use only a surge suppressor that meets all of the specifications described on page 15.
b. If the walking belt is overtightened, incline trainer performance may decrease and the walking belt may become damaged. First, adjust the incline to 40 percent. Then, remove the key and UNPLUG THE POWER CORD. Using the hex key, turn both idler roller screws (C) counterclockwise, 1/4 of a turn. When the walking belt is properly tightened, you should be able to lift each edge of the walking belt 3 to 4 in. (8 to 10 cm) off the walking platform. Be careful to keep the walking belt centered. Then, plug in the power cord, insert the key, and walk on the incline trainer for a few minutes. Repeat until the walking belt is properly tightened.

c. The incline trainer features a walking belt coated with high-performance lubricant. IMPORTANT: Never apply silicone spray or other substances to the walking belt or the walking platform unless instructed to do so by an authorized service representative. Such substances may deteriorate the walking belt and cause excessive wear. If you suspect that the walking belt needs more lubricant, see the front cover of this manual.
d. If the walking belt still slows when walked on, see the front cover of this manual.
SYMPTOM: The walking belt is off-center or slips when walked on
a. If the walking belt is off-center, first adjust the incline to 40 percent. Next, remove the key and UNPLUG THE POWER CORD. If the walking belt has shifted to the left, use the hex key to turn the left idler roller screw clockwise 1/2 of a turn; if the walking belt has shifted to the right, turn the left idler roller screw counterclockwise 1/2 of a turn. Be careful not to overtighten the walking belt. Then, plug in the power cord, insert the key, and walk on the incline trainer for a few minutes. Repeat until the walking belt is centered.

natural_image
Technical line drawing of a treadmill frame with no visible text or symbolsb. If the walking belt slips when walked on, first adjust the incline to 40 percent. Next, remove the key and UNPLUG THE POWER CORD. Using the hex key, turn both idler roller screws clockwise, 1/4 of a turn. When the walking belt is correctly tightened, you should be able to lift each edge of the walking belt 3 to 4 in. (8 to 10 cm) off the walking platform. Be careful to keep the walking belt centered. Then, plug in the power cord, insert the key, and walk on the incline trainer for a few minutes. Repeat until the walking belt is properly tightened.

natural_image
Technical line drawing of a mechanical assembly with curved components and directional arrows indicating motion (no text or symbols)SYMPTOM: The incline trainer will not connect to the wireless network
a. Make sure that the wireless settings on the console are correct (see page 24).
b. Make sure that the settings for your wireless network are correct.
c. If you still have questions, go to support.iFit.com.
SYMPTOM: The console does not stay in place
a. If the console will not stay in the desired position because it is too loose, turn a hex key in quarter turn increments in the two indicated locations (D) until the console is tightened.

SYMPTOM: The displays of the console do not function properly
a. If the console does not boot up properly, or if the console freezes and does not respond, reset the console to the factory default settings.
IMPORTANT: Doing this will erase all the custom settings you have made to the console.
Resetting the console requires two people. First, press the power switch into the off position. Next, locate the small reset opening (E) on the side of the console. Using a bent paper clip (F), press and hold the reset button inside the opening, and have a second person press the power switch into the on (reset) position. Continue holding the reset button (E) until the console turns on. When the reset operation is complete, the console will turn off and then turn back on. If it does not, use the power switch to turn the incline trainer off and then on again. Once the console turns on, check for firmware updates (see step 5 on page 23). Note: It may take a few minutes for the console to be ready for use.

EXERCISE GUIDELINES
WARNING: Before beginning this or any exercise program, consult your physician. This is especially important for persons over age 35 or persons with pre-existing health problems.
These guidelines will help you to plan your exercise program. For detailed exercise information, obtain a reputable book or consult your physician. Remember, proper nutrition and adequate rest are essential for successful results.
EXERCISE INTENSITY
Whether your goal is to burn fat or to strengthen your cardiovascular system, exercising at the proper intensity is the key to achieving results. You can use your heart rate as a guide to find the proper intensity level. The chart below shows recommended heart rates for fat burning and aerobic exercise.
| 165 | 155 | 145 | 140 | 130 | 125 | 115 | |
| 145 | 138 | 130 | 125 | 118 | 110 | 103 | |
| 125 | 120 | 115 | 110 | 105 | 95 | 90 | |
| 20 | 30 | 40 | 50 | 60 | 70 | 80 |
To find the proper intensity level, find your age at the bottom of the chart (ages are rounded off to the nearest ten years). The three numbers listed above your age define your “training zone.” The lowest number is the heart rate for fat burning, the middle number is the heart rate for maximum fat burning, and the highest number is the heart rate for aerobic exercise.
Burning Fat—To burn fat effectively, you must exercise at a low intensity level for a sustained period of time. During the first few minutes of exercise, your body uses carbohydrate calories for energy. Only after the first few minutes of exercise does your body begin to use stored fat calories for energy. If your goal is to burn fat, adjust the intensity of your exercise until your heart rate is near the lowest number in your training zone. For maximum fat burning, exercise with your heart rate near the middle number in your training zone.
Aerobic Exercise—If your goal is to strengthen your cardiovascular system, you must perform aerobic exercise, which is activity that requires large amounts of oxygen for prolonged periods of time. For aerobic exercise, adjust the intensity of your exercise until your heart rate is near the highest number in your training zone.
HOW TO MEASURE YOUR HEART RATE
To measure your heart rate, exercise for at least four minutes. Then, stop exercising and place two fingers on your wrist as shown. Take a six-second heartbeat count, and multiply the

natural_image
Line drawing of two fingers in a handshake gesture (no text or symbols)result by 10 to find your heart rate. For example, if your six-second heartbeat count is 14, your heart rate is 140 beats per minute.
WORKOUT GUIDELINES
Warming Up—Start with 5 to 10 minutes of stretching and light exercise. A warm-up increases your body temperature, heart rate, and circulation in preparation for exercise.
Training Zone Exercise—Exercise for 20 to 30 minutes with your heart rate in your training zone. (During the first few weeks of your exercise program, do not keep your heart rate in your training zone for longer than 20 minutes.) Breathe regularly and deeply as you exercise; never hold your breath.
Cooling Down—Finish with 5 to 10 minutes of stretching. Stretching increases the flexibility of your muscles and helps to prevent post-exercise problems.
EXERCISE FREQUENCY
To maintain or improve your condition, complete three workouts each week, with at least one day of rest between workouts. After a few months of regular exercise, you may complete up to five workouts each week, if desired. Remember, the key to success is to make exercise a regular and enjoyable part of your everyday life.
SUGGESTED STRETCHES
The correct form for several basic stretches is shown at the right. Move slowly as you stretch —never bounce.
1. Toe Touch Stretch
Stand with your knees bent slightly and slowly bend forward from your hips. Allow your back and shoulders to relax as you reach down toward your toes as far as possible. Hold for 15 counts, then relax. Repeat 3 times. Stretches: Hamstrings, back of knees and back.
2. Hamstring Stretch
Sit with one leg extended. Bring the sole of the opposite foot toward you and rest it against the inner thigh of your extended leg. Reach toward your toes as far as possible. Hold for 15 counts, then relax. Repeat 3 times for each leg. Stretches: Hamstrings, lower back and groin.
3. Calf/Achilles Stretch
With one leg in front of the other, reach forward and place your hands against a wall. Keep your back leg straight and your back foot flat on the floor. Bend your front leg, lean forward and move your hips toward the wall. Hold for 15 counts, then relax. Repeat 3 times for each leg. To cause further stretching of the achilles tendons, bend your back leg as well. Stretches: Calves, achilles tendons and ankles.
4. Quadriceps Stretch
With one hand against a wall for balance, reach back and grasp one foot with your other hand. Bring your heel as close to your buttocks as possible. Hold for 15 counts, then relax. Repeat 3 times for each leg. Stretches: Quadriceps and hip muscles.
5. Inner Thigh Stretch
Sit with the soles of your feet together and your knees outward. Pull your feet toward your groin area as far as possible. Hold for 15 counts, then relax. Repeat 3 times. Stretches: Quadriceps and hip muscles.

Key No. Qty. Description Key No. Qty. Description
1 4 3/8" x 5 1/2" Screw
2 2 #8 x 1/2" Pan Head Tek Screw
3 16 3/8" Star Washer
4 4 #8 x 3/4" Pan Head Tek Screw
5 69 #8 x 3/4" Screw
6 4 #8 Belt Guide Screw
7 10 #8 x 1/2" Screw
8 4 1/4" Star Washer
9 8 #8 x 3/4" Washer Head Screw
10 8 #8 x 5/8" Screw
11 4 5/16" x 1 1/2" Screw
12 2 1/4" x 1/2" Screw
13 4 1/4" x 2 1/2" Screw
14 1 M8 x 32mm Bolt
15 1 M8 x 51mm Bolt
16 12 Hood Clip
17 9 #8 x 1/2" Washer Head Screw
18 4 3/8" x 3 1/4" Screw
19 2 M8 Nut
20 2 5/16" Motor Bolt
21 2 3/8" x 2 3/8" Screw
22 4 3/8" x 2 3/4" Screw
23 3 #8 Star Washer
24 1 Console Back
25 4 5/16" Flat Washer
26 2 3/8" Nut
27 4 5/16" Nut
28 1 1/4" Nut
29 2 Belt Guide
30 1 Walking Platform
31 1 Walking Belt
32 1 Left Foot Rail
33 1 Right Foot Rail
34 1 Idler Roller
35 1 Belly Pan Cover
36 1 Belly Pan
37 1 Power Switch
38 2 Belly Pan Grommet
39 1 Power Cord Grommet
40 1 Power Cord
41 8 Tie
42 1 Drive Roller/Pulley
43 1 Right Foot Rail Cover
44 1 Left Foot Rail Cover
45 4 Small Pivot Bushing
46 1 Drive Belt
47 1 Front Hood
48 1 Front Belly Pan
49 8 Cushion Cap
50 4 Spring
51 4 Cushion
52 1 Base Wire
53 4 Rubber Cushion
54 2 Large Pivot Bushing
55 1 Electronics Cover
56 1 Incline Motor Top Cover
57 4 M3 x 12mm Screw
58 1 Incline Motor Bottom Cover
59 4 Incline Motor Bushing
60 1 Incline Motor
61 1 Electronics Bracket
62 1 Controller
63 1 Resistor
64 1 Drive Motor
65 4 Standoff
66 1 Frame
67 4 Fan Screw
68 1 Left Outside Upright Cover
69 1 Left Inside Upright Cover
70 1 Right Inside Upright Cover
71 1 Right Outside Upright Cover
72 2 Wheel
73 4 Base Pad
74 1 Base
75 1 Upright Wire
76 3 Round Grommet
77 2 Leveling Foot
78 2 Axle
79 2 Base Cap
80 1 Warning Decal
81 2 Caution Decal
82 1 Left Handrail
83 1 Upright
84 2 Console Ground Wire
85 1 Power Supply
86 2 Handrail Cap
87 1 Incline Motor Controller
88 1 Key
89 1 Right Handrail Top
90 1 Left Handrail Top
91 1 Left Tray
92 1 Console Base
93 1 Console
94 1 Right Tray
95 2 #8 x 1" Screw
96 2 #8 x 3/4" HiLo Screw
97 1 Right Handrail
98 1 Left Handrail Bottom
99 1 Right Handrail Bottom
100 2 3/8" x 2 1/4" Screw
Key No. Qty. Description Key No. Qty. Description
| 101 | 2 | Fan | 110 | 1 | Push | Bar | Top |
| 102 | 8 | 5/16" x 3/4" Screw | 111 | 1 | Left | Outside | Handrail Cover |
| 103 | 8 | 5/16" Star Washer | 112 | 1 | Left | Inside Handrail Cover | |
| 104 | 2 | #8 x 2" Screw | 113 | 1 | Right | Outside Handrail Cover | |
| 105 | 6 | #8 x 1 1/4" Screw | 114 | 1 | Right | Inside Handrail Cover | |
| 106 | 6 | #8 x 5/8" Machine Screw | 115 | 1 | #8 x 3/4" | Machine Screw | |
| 107 | 2 | 3/8" x 1/2" Screw | 116 | 1 | #8 | Nut | |
| 108 | 4 | 5/16" x 3/4" Patch Screw | * | - | User's Manual | ||
| 109 | 1 | Push Bar Bottom |
Note: Specifications are subject to change without notice. For information about ordering replacement parts, see the back cover of this manual. *These parts are not illustrated.


ORDERING REPLACEMENT PARTS
To order replacement parts, please see the front cover of this manual. To help us assist you, be prepared to provide the following information when contacting us:
- the model number and serial number of the product (see the front cover of this manual)
- the name of the product (see the front cover of this manual)
- the key number and description of the replacement part(s) (see the PART LIST and the EXPLODED DRAWING near the end of this manual)
LIMITED WARRANTY
IMPORTANT: To protect your fitness equipment with an extended service plan, see page 6.
ICON Health & Fitness, Inc. (ICON) warrants this product to be free from defects in workmanship and material, under normal use and service conditions. The frame is warranted for ten (10) years from the date of purchase. Parts are warranted for two (2) years from the date of purchase. Labor is warranted for one (1) year from the date of purchase.
This warranty extends only to the original purchaser (customer) and is not transferrable. ICON's obligation under this warranty is limited to repairing or replacing, at ICON's option, the product through one of its authorized service providers. All repairs for which warranty claims are made must be preauthorized by ICON. If replacement parts are shipped while the product is under warranty, the customer will be responsible for a minimal handling charge. For in-home service, the customer may be responsible for a minimal trip charge. This warranty does not extend to freight damage to the product. This warranty will automatically be voided by the following conditions: (1) if the product is used as a store display model, (2) if the product is purchased or transported outside the USA, (3) if all instructions and warnings in this manual are not followed, (4) if the product is abused or improperly or abnormally used, or (5) if the product is used for commercial or rental purposes. No other warranty beyond that specifically set forth above is authorized by ICON.
ICON is not responsible or liable for the following damages: (1) indirect, special, or consequential damages arising out of or in connection with the use or performance of the product; (2) damages with respect to any economic loss, loss of property, loss of revenues or profits, loss of enjoyment or use, or costs of removal or installation; or (3) other consequential damages of any kind. Some states do not allow the exclusion or limitation of incidental or consequential damages. Accordingly, the above limitation may not apply to the customer.
The warranty extended hereunder is in lieu of any and all other warranties, and any implied warranties of merchantability or fi tness for a particular purpose are limited in their scope and duration to the terms set forth herein. Some states do not allow limitations on how long an implied warranty lasts. Accordingly, the above limitation may not apply to the customer. This warranty provides specific legal rights; the customer may have other rights that vary from state to state.
For warranty service, please call the telephone number on the front cover of this manual. Please be prepared to provide the model number and serial number of the product (see the front cover of this manual).
ICON Health & Fitness, Inc., 1500 S. 1000 W., Logan, UT 84321-9813
- REGISTER YOUR PRODUCT
- CUSTOMER CARE
- CAUTION
- TABLE OF CONTENTS
- WARNING DECAL PLACEMENT
- ▲WARNING: Protect yourself and others from risk of serious injury. Read the user's manual or obtain proper instruction before use and:
- IMPORTANT PRECAUTIONS
- SAVE THESE INSTRUCTIONS
- MAKE YOUR FITNESS GOALS A REALITY
- DO MORE THAN JUST WORK OUT
- LOSE WEIGHT
- COMPETE WITH OTHERS
- PERSONALIZED EVENT TRAINING
- GO MOBILE
- MAP YOUR ROUTE
- SHARE YOUR PROGRESS
- PROTECT
- Features:
- BEFORE YOU BEGIN
- PART IDENTIFICATION CHART
- x 5/8" Machine Screw (106)-6
- ASSEMBLY
- Make sure that the power cord is unplugged.
- HOW TO USE THE INCLINE TRAINER
- HOW TO CONNECT THE POWER CORD
- Use a Surge Suppressor
- Plug in the Power Cord
- DANGER: Improper connection of
- FEATURES OF THE CONSOLE
- HOW TO TURN ON THE POWER
- HOW TO SET UP THE CONSOLE
- Connect to your wireless network.
- Customize settings.
- Log into or create an iFit account.
- Check for firmware updates.
- Calibrate the incline system.
- HOW TO USE THE MANUAL MODE
- Insert the key into the console.
- Select the main menu.
- Start the walking belt and adjust the speed.
- Change the incline of the incline trainer as desired.
- Monitor your progress with the display modes.
- Turn on the fan if desired.
- When you are finished exercising, remove the key from the console.
- HOW TO USE A MAP WORKOUT
- Select the main menu or the workout library.
- Select a map workout.
- Start the workout.
- HOW TO USE A DRAW YOUR OWN MAP WORKOUT
- Select a draw your own map workout.
- Draw your map.
- Save your workout.
- Start the workout.
- Monitor your progress with the display modes.
- Turn on the fan if desired.
- When you are finished exercising, remove the key from the console.
- HOW TO USE A DISTANCE OR TIME WORKOUT
- Add workouts to your schedule on iFit.com.
- Insert the key into the console.
- Select the main menu.
- Log in to your iFit account.
- Select a distance or time workout that you have previously added to your schedule on iFit.com.
- Start the workout.
- Monitor your progress with the display modes.
- Turn on the fan if desired.
- When you are finished exercising, remove the key from the console.
- HOW TO USE THE SLED PUSH FEATURE
- Start the walking belt and adjust the speed to 1 mph. Then, adjust the incline to 0%.
- Grip the push bar or the sled grips with both hands (see page 7).
- Use your body to manually move the walking belt at the desired speed.
- HOW TO CHANGE CONSOLE SETTINGS
- Select the settings main menu.
- Navigate the settings menus and change settings as desired.
- Equipment
- Customize the unit of measurement and other settings.
- View machine information.
- Update the console firmware.
- Calibrate the incline system of the incline trainer.
- Exit the settings main menu.
- HOW TO CONNECT TO A WIRELESS NETWORK
- Select the main menu.
- Select the wireless network mode.
- Enable Wi-Fi.
- Set up and manage a wireless network connection.
- Exit the wireless network menu.
- HOW TO USE THE SOUND SYSTEM
- To use an audio cable
- To use Bluetooth
- THE OPTIONAL HEART RATE MONITOR
- FCC INFORMATION
- HOW TO MOVE THE INCLINE TRAINER
- MAINTENANCE AND TROUBLESHOOTING
- MAINTENANCE
- TROUBLESHOOTING
- SYMPTOM: The power does not turn on
- SYMPTOM: The power turns off during use
- SYMPTOM: The incline of the incline trainer does not change correctly
- SYMPTOM: The walking belt does not run
- SYMPTOM: The walking belt slows when walked on
- SYMPTOM: The walking belt is off-center or slips when walked on
- SYMPTOM: The incline trainer will not connect to the wireless network
- SYMPTOM: The console does not stay in place
- SYMPTOM: The displays of the console do not function properly
- IMPORTANT: Doing this will erase all the custom settings you have made to the console.
- EXERCISE GUIDELINES
- EXERCISE INTENSITY
- HOW TO MEASURE YOUR HEART RATE
- WORKOUT GUIDELINES
- EXERCISE FREQUENCY
- SUGGESTED STRETCHES
- Toe Touch Stretch
- Hamstring Stretch
- Calf/Achilles Stretch
- Quadriceps Stretch
- Inner Thigh Stretch
- Key No. Qty. Description Key No. Qty. Description
- ORDERING REPLACEMENT PARTS
- LIMITED WARRANTY
Brand : NordicTrack
Model : Commercial X32i
Category : Treadmills