
SpectraLayers Elements 6 - Audio software STEINBERG - Free user manual and instructions
Find the device manual for free SpectraLayers Elements 6 STEINBERG in PDF.


| Product Type | Audio Spectral Editing Software |
| Version | SpectraLayers Elements 6 (6.0.30.201) |
| License Type | Proprietary, one-time purchase |
| Operating System (Windows) | Windows 7 SP1, 8.x, 10 (64-bit) |
| Operating System (macOS) | macOS 10.12 Sierra to 10.15 Catalina |
| Processor | Dual-core (quad-core recommended) |
| RAM | 4 GB minimum |
| Hard Disk Space | 4 GB free for temporary files |
| Graphics | OpenGL 3.3 capable (DirectX 11 recommended on Windows) |
| Display Resolution | 1280x720 minimum |
| Audio Hardware | Windows: WDM/ASIO compatible; macOS: CoreAudio compatible |
| File Formats (Import) | WAV, AIFF, FLAC, MP3, Ogg Vorbis, and more (via project open/import) |
| File Formats (Export) | WAV, AIFF, FLAC, MP3, Ogg Vorbis |
| Plugin Support | ARA2 (for compatible DAWs), VST3, AAX (Pro Tools) |
| Key Features | Spectral editing, layer system, advanced selection tools, noise reduction, frequency drawing, ARA2 integration, reworked interface (v6.0) |
| Language | English (interface, manual) |
| Updates | Free updates within major version; changelog provided |
| Manufacturer | Steinberg Media Technologies GmbH |
| Manual Pages | 75 pages (PDF) |
Frequently Asked Questions - SpectraLayers Elements 6 STEINBERG
User questions about SpectraLayers Elements 6 STEINBERG
0 question about this device. Answer the ones you know or ask your own.
Ask a new question about this device
Download the instructions for your Audio software in PDF format for free! Find your manual SpectraLayers Elements 6 - STEINBERG and take your electronic device back in hand. On this page are published all the documents necessary for the use of your device. SpectraLayers Elements 6 by STEINBERG.
USER MANUAL SpectraLayers Elements 6 STEINBERG
3.1 System requirements 6
4 Getting Started 7
5 The Interface 11
5.1 The Toolbars 12
5.1.1 The Tool Settings toolbar 12
5.1.2 The Tools toolbar 12
5.1.3 Transport 23
5.2 Waveform Display and overview bar 23
5.3 Spectral Display 24
5.4 Panels 25
5.4.1 The Display panel 25
5.4.2 The History panel 26
5.4.3 The Channels panel 26
5.4.4 The Layers panel 27
5.5 Preferences 30
5.5.1 Device 30
5.5.2 Interface 30
5.5.3 Display 31
5.5.4 System 32
5.5.5 Shortcuts 33
5.6 Saving and recalling layouts 33
6 Working with projects 35
6.1 Creating a new project 35
6.2 Opening a project or an audio file 35
6.3 Importing an audio file as a layer 36
6.4 Recording to a layer 36
6.5 Adding a new layer 36
6.6 Grouping layers 36
6.7 Inserting time 37
6.8 Deleting time 37
6.9 Merging layers 38
6.10 Resampling a project 38
6.11 Reinterpreting a project 38
6.12 Exporting your mix 39
6.13 Editing with ARA 39
6.14 Editing with Pro Tools 39
6.15 Saving a project 40
6.16 Saving and renaming a project 40
7 Viewing and selecting spectral data 41
7.1 Measuring spectral data 43
7.2 Positioning the cursor 45
7.3 Selecting spectral data 45
7.4 Adjusting a selection 50
8 Modifying spectral data 52
8.1 Erasing spectral data 52
8.2 Cloning spectral data 52
8.3 Drawing a frequency 53
8.4 Drawing noise 53
9 Processing spectral data 54
9.1 Generating silence 54
9.2 Generating a tone 54
9.3 Generating noise 55
9.4 Adjusting the volume of a selection 55
9.5 Mixing channels 55
9.6 Reducing noise 56
9.7 Reducing reverb (Pro only) 56
9.8 Spectral Imprinting : casting and molding (Pro only) 57
10 Working with metadata 60
10.1 Editing information 60
10.2 Editing markers and regions 60
11 Tips 62
11.1 Shortcuts 62
11.2 Integration with DAWs and Samplers 64
11.3 Editing in an external editor 68
11.4 Command line options 69
Index 70
Chapter 1
What's new

New features in version 6.0
- ARA2 Integration
- Reworked interface and look
- New Advanced Selection System
- New Move tool
- New Master Mute and Solo in the Layers and Channels panels
- New Target Active Layer Color switch and new Standard and Compact layout mode in the Layers panel
• Frequency and Harmonics selection tool tracking improved
See also Changelog
The information in this document is subject to change without notice and does not represent a commitment on the part of Steinberg Media Technologies GmbH. The software described by this document is subject to a License Agreement and may not be copied to other media except as specifically allowed in the License Agreement. No part of this publication may be copied, reproduced, or otherwise transmitted or recorded, for any purpose, without prior written permission by Steinberg Media Technologies GmbH. Registered licensees of the product described herein may print one copy of this document for their personal use.
All product and company names are ^TM or ^ trademarks of their respective owners. For more information, please visit www.steinberg.net/trademarks.
© Steinberg Media Technologies GmbH, 2019.
All rights reserved.
Chapter 2
Changelog
Release 6.0.30.201 (2020/01/10)
- New Elements edition
- Edition name (Pro/Elements) is now shown in ARA mode too
- Save As/Export use the project folder by default
- Playback is no longer stopped when the playhead is repositionned during playback
• Fix a rare crash when initializing ARA
• Fix undo not behaving properly after a group with layers is created - Fix undo not behaving properly when using paste to new layer
• Fix ARA playhead synchronization when multiple regions are edited
• Fix ARA layer activation when multiple regions are edited
• Fix the AAX plugin not properly transferring data - Fix brush settings
Release 6.0.20.195 (2019/11/01)
- New customization settings for the selection display: border style and blending mode
- Display settings, units and playhead position are now saved within project files
• Better shortcuts management - Mouse wheel navigation can be customized
- Shortcuts presets can be saved and loaded
• macOS Catalina compatibility improved - Better auto assignment of channels from devices with more than 2 channels
• Auto check graphic cards and graphic drivers capabilities - Handle more high-dpi screen ratios
- Smoother playhead synchronization in ARA mode
• Fix crash on older macs (2009 and 2010)
- Fix progress dialog not disappearing in ARA mode in some cases
• Fix brush settings saving
• Fix return to stop position in ARA
• Fix wav markers and metadata import and export and big wav export
- Minor graphic fixes
- Documentation update
Release 6.0.10.192 (2019/07/16)
- New Copy to New action in the Edit menu
- Up to 10 times faster selection engine
- Fix a crash with imprinting (casting/molding)
- Fix a crash occurring when processing very long selections (>30min)
- Activating Move tool with long selection (>3min) now show a dynamic progress bar during selection preparation
- Fix Move tool deleting repeatedly content if used during ARA playback or clicked outside its boundaries
• Fix undo after Cut to New and Paste to New - Fix tracking limit bug with frequency and harmonics selection tool
• Fix brief dialog flickering on startup and when creating a new project - When reformatting a project, properly default to current channel configuration
- Documentation update
Release 6.0.0.190 (2019/07/03)
- Initial release
Chapter 3
Introduction
Spectral...
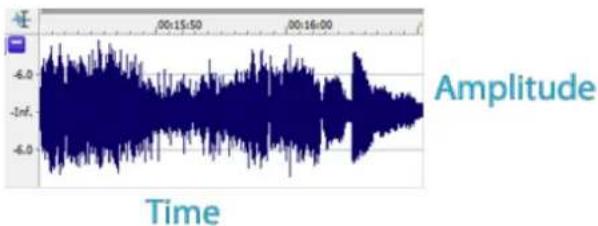
In most audio applications, audio is displayed as a waveform that represents audio in the time domain (amplitude vs. time):
line
| Time | Amplitude | | -------- | --------- | | 00:15:50 | -4.0 | | 00:16:00 | -4.0 |This representation shows the global power of sound; however it doesn't show what's inside the sound.
Spectral data represents sound in the frequency domain. You can think of it like a musical score: the higher the peaks, the higher the tones; the stronger the peaks, the stronger the tones. Everything can be analyzed with this representation: music, voice, even noise.
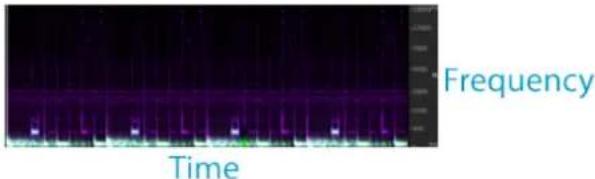
Spectral analysis uses discrete FFT sampling: you have to choose between time and frequency accuracy. A FFT Size of 2048 or 4096 is usually good for most situations (with a file sampled at 44,100 Hz or 48,000 Hz). Feel free to change the size on the fly as the accuracy of your work highly depends on it.
You should also play with the multiplier and gamma settings to see the small peak details in the spectral view.
...Layers
The layer system allows you to refine your work extensively in a nondestructive way, thanks to the additive and subtractive nature of layer mixing.
If you cut and paste data from one layer to a different layer, you add the layers nondestructively: the sum of the two layers is identical to the source data, but you have full control over the mute/volume state of the data you extracted to that new layer.
If you copy and paste data from one layer to a different layer, and then invert the phase of that new layer, you subtract the layers nondestructively: the first layer still contain all the original data, and the new, inverted layer acts to subtract the original data. When this negative layer is muted, you get your original data back. The volume of this inverted layer controls how much you want to mask from the original data.
Processes and Tools
Processes work the same way they do in usual audio applications: you select an area, and the process is applied to the whole area. For more information, see Processing spectral data
The difference with SpectraLayers is that you can select not only time but also frequency areas, so the process is only applied to a certain range of frequencies.
The processes are also different by nature, because they are designed to use spectral data instead of raw audio data, so the purpose and range is not the same as usual audio processes.
Tools work the same way they do in paint applications: they are local to the mouse position and allow you to work on specific frequencies. For more information, see The Tools toolbar
- Navigation tools allows the user to navigate the spectrogram.
- Transform tools allows the user to shift layers in time or to rescale them.
- Measure tools give the user specific information about spectral data. For more information, see Measuring spectral data
- Selection tools allow the user to select spectral data. For more information, see Selecting spectral data
- Modification tools allow the user to retouch spectral data. For more information, see Modifying spectral data
- Draw tools generate spectral data from scratch. For more information, see Drawing a frequency
See also System requirements
3.1 System requirements
Windows
- Windows 7 SP1, Windows 8.x or Windows 10 (64-bit)
- Dual-core processor (quad-core processor recommended)
• 4 GB RAM - 4 GB of free hard disk space (for temporary files)
- OpenGL 3.3 capable graphics adapter (DirectX11 recommended)
• 1280x720 display resolution - Windows-compatible audio hardware
macOS
- macOS 10.12 (Sierra), macOS 10.13 (High Sierra), macOS 10.14 (Mojave) or macOS 10.15 (Catalina)
- Dual-core processor (quad-core processor recommended)
• 4 GB RAM - 4 GB of free hard disk space (for temporary files)
- OpenGL 3.3 capable graphics adapter
• 1280x720 display resolution - CoreAudio-compatible audio hardware
Chapter 4
Getting Started
Beneath its streamlined interface, SpectraLayers provides you with powerful tools for spectral editing. This topic will help you find your way around SpectraLayers so you can unlock its full potential.
- When you first start SpectraLayers, the tools are unavailable until you open a file or create a project.
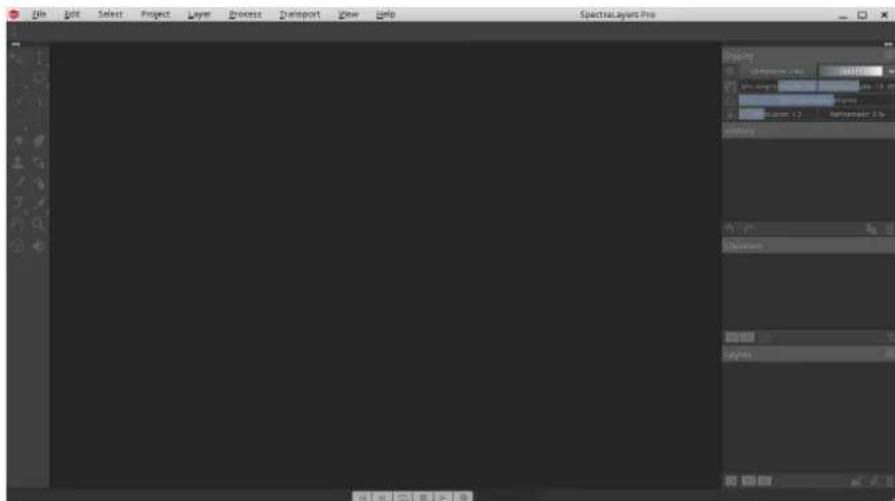
- We'll create a project by open an existing audio file.
Click the Open button (or choose File > Open) to create a project from an audio file. After you click Open, you'll browse to the file that you want to be the first layer of your SpectraLayers project.
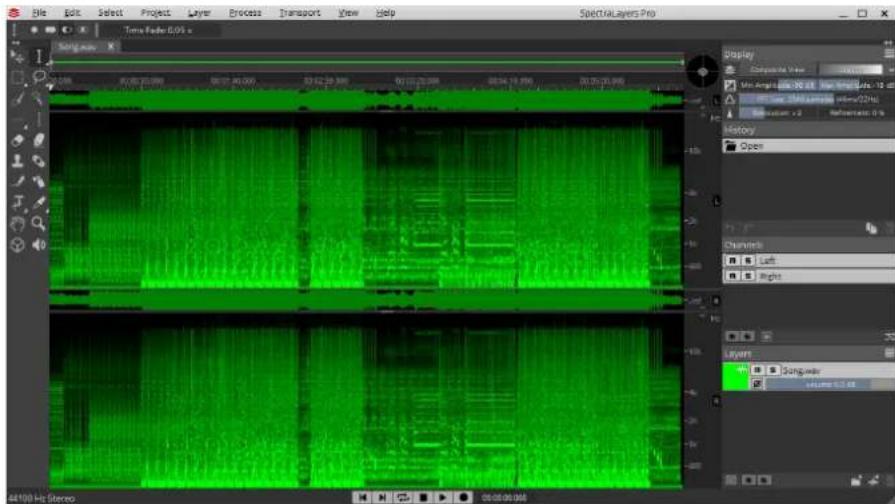
After you open the file, you'll see it displayed and highlighted in the Layers panel in the bottom-right corner of the SpectraLayers workspace.
The tools are now available on the left side of the SpectraLayers workspace. For more information, see The Tools toolbar
In the center of the screen is the spectral display. In the spectral display, the horizontal axis represents time, and the vertical axis represents frequency. The spots you can see correspond to a mix of the various frequencies and noise that compose your audio file. The higher the spots, the higher the pitch of sounds in your audio file. For more information, see Spectral Display
You can play your audio file by clicking the Play button ▶ or pressing the space bar.
- Before performing any edits, you need to select a layer.
Click the layer in the Layers panel to select it if it isn't already selected. A selected layer is highlighted in the Layers panel.
- Now let's modify the spectrogram.
After you select a layer, the tools in the Tools toolbar are available. The Retouch tools act directly on the layer you selected.
Select the Eraser tool and click and drag in the bottom of the spectral display to erase data in the lower frequencies of your audio file. For more information, see Erasing spectral data
Now play your audio file, and notice how the sound is different — you've done your first spectral editing.
- The first step in most editing is selecting data in the spectrogram. Let's create some selections.
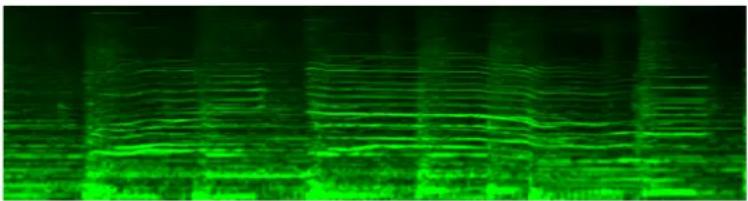
Let's take a closer look at some frequencies. If your file contains vocals or musical instruments, you'll see horizontal lines that represent syllables or musical notes. Several of these lines on top of each other represent harmonics, and they create the audio signature of each voice and instrument.
natural_image
Green glowing vertical lines against a dark background, no text or symbols visible- Zoom the spectral display to find the parts of a spectrogram that you want to edit.
Use the Zoom tool at the top of the tools bar on the left to change the magnification of the spectral display.
You can navigate the spectral display using the Hand tool next to the Zoom tool. Drag with the Hand tool to move the spectrogram within the spectral display.
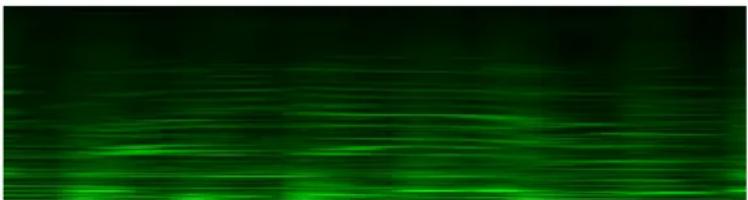
When you zoom in horizontally or vertically, you may notice that the frequencies will appear blurry:
natural_image
Abstract green glowing pattern with horizontal streaks on dark background (no text or symbols)The FFT Size control in the Spectral Settings toolbar allows you to refine the spectral display. You can choose a different resolution by dragging the slider or typing a value in the edit box.
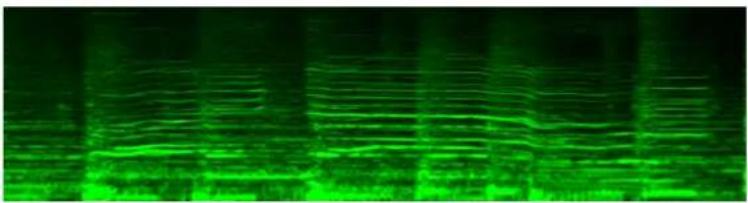
After increasing the frequency resolution, you can see that the frequency lines are thinner.
natural_image
Green glowing pattern with horizontal striations against a dark background (no text or symbols)Experiment with different FFT sizes to find the setting that allows you to see each line clearly.
- Let's select frequencies so we can cut them and paste them to a new layer.
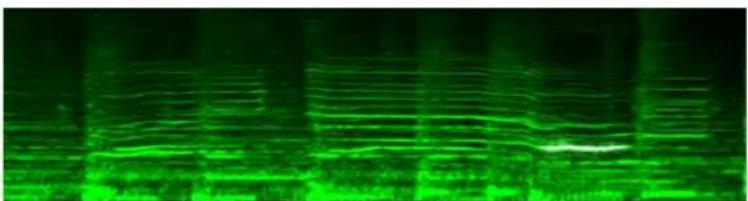
Click the Frequency Selection tool “” in the Tools toolbar. Move your mouse around the spectral display and see how the tool snaps to the different frequencies in the spectral display: the frequency under the tool is highlighted:
natural_image
Green glowing pattern with horizontal striations, no visible text or symbolsWith the Add to Selection button in the Tool Settings toolbar selected (or by holding the Shift key), click a few frequencies on top of each others, and see how they are also highlighted. It means they have been added to the selection. Notice the regular Play button ▶ (or space bar) now plays the current selection.
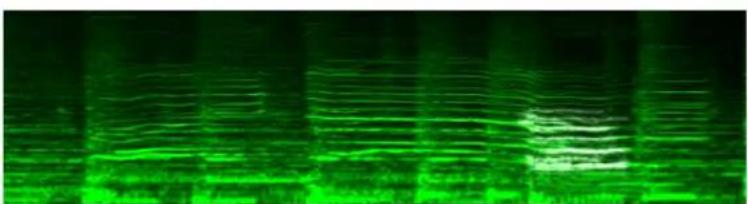
natural_image
Green glowing pattern with horizontal striations and a bright spot, no text or symbols visible- Let's cut the selected frequencies. Choose Edit > Cut or press the Ctrl+X (Windows) or Command_X (Mac). Notice that the frequencies you selected in the previous step are removed from the spectral display.
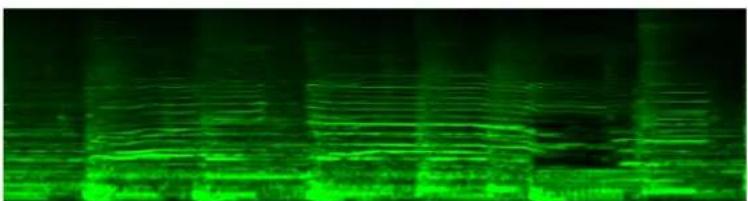
natural_image
Green glowing abstract pattern with horizontal striations and vertical bands (no text or symbols)Play your project again. If you extract enough data, you can completely remove voices, instruments, or any sound from your audio.
Don't hesitate to create several layers and experiment with the different tools. You can even adjust the FFT size setting in the middle of an extraction if needed!
- Finally, let's paste the contents of the clipboard to a new layer:
a. Click the New Layer button 🎨 (or choose Layer > New) to create a new layer.
b. Click the new layer in the Layers panel to select it.
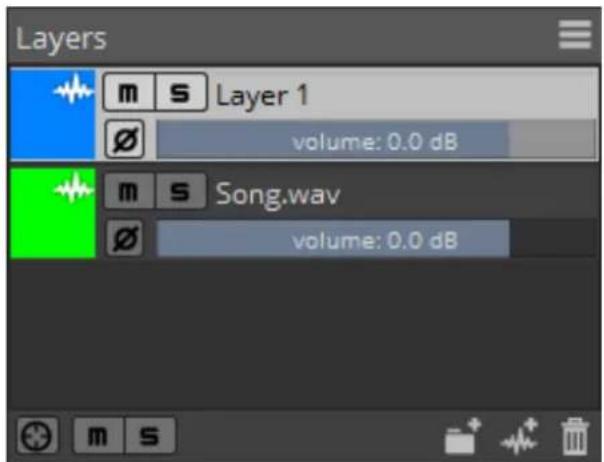
c. Choose Edit > Paste or press Ctrl+V (on Windows) or Cmd+V (on Mac). Notice the spectral color of that layer match its color setting in the Layers panel.
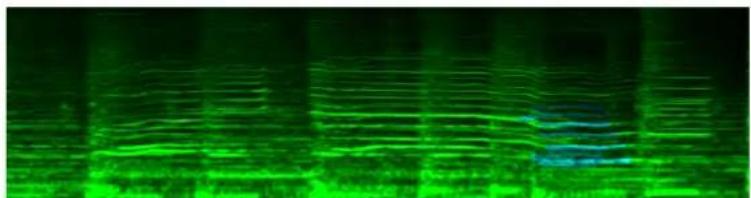
natural_image
Green-tinted abstract pattern with horizontal striations and a blue gradient overlay (no text or symbols)- Click the Mute button on the new layer or drag its volume fader to the left to reduce its volume. Notice the content fades away from the spectrogram as well. If you play your project, the frequencies you pasted to the new layer will be removed or attenuated.
Chapter 5
The Interface
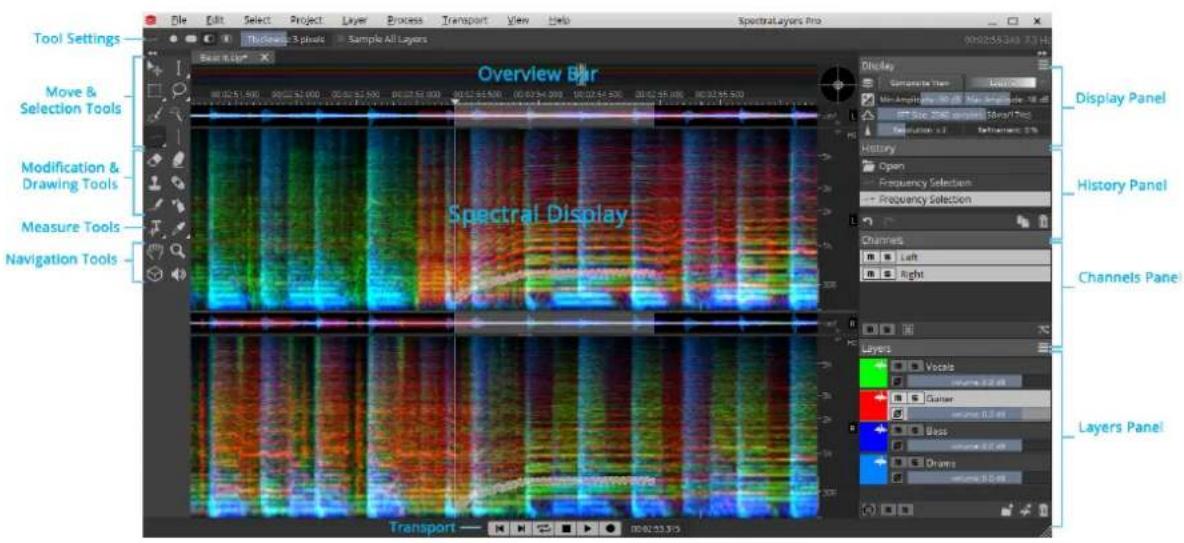
- The menu bar provides general project and options management, as well as specific editing and processing actions.
- The transport toolbar provides access to transport commands. For more information, see The Toolbars
- The tools to the left of the spectral display provide access to spectral selection, modification, drawing, measurements, and navigation. For more information, see The Tools toolbar
- The waveform display and overview bar help you navigate your project. For more information, see Waveform Display and overview bar
- The spectral display displays the spectrogram of the layers in your project. For more information, see Spectral Display
- The panels on the right side of the spectral display show display settings, editing history, audio channels, and your project's layers. For more information, see Panels
• See also Preferences and Saving and recalling layouts
5.1 The Toolbars
SpectraLayers includes several toolbars you can use.
Choose View > Toolbars, and then choose a toolbar to show or hide it.
5.1.1 The Tool Settings toolbar
Choose View > Toolbars > Tool Settings to show or hide the Tool Settings toolbar.
The Tool Settings toolbar displays controls for the active editing tool. For more information, see The Tools toolbar
5.1.2 The Tools toolbar
Choose View > Toolbars > Tools to show or hide the editing tools.
The editing tools on the left side of the spectral display provide access to spectral navigation, measures, selections, modifications and drawings.
Move Tool
Button Item Description

Move Click to move, stretch and pitch the current layer or the current selection in the spectral display by dragging it.

This tool can also auto-activate layers.
Selection Tools
Button Item Description
I
Cursor Selection

The Cursor Selection tool offers two modes you can use to select spectral data. Click the button to switch the Select tool, or click and hold to choose a selection mode.
- Time Selection : Click and drag to create a selection that includes the full frequency range within a time selection.
- Frequency Selection : Click and drag to create a selection that includes the full time range within a frequency selection.
Use the Tool Settings toolbar to control settings for the active tool.
- Replace Selection ● : in this mode, new selections clear existing selections.
- Add to Selection : in this mode, selections are persisted even when you switch selection tools. Add to Selection mode is the fastest way to build complex selections using multiple selection tools.
- Remove from Selection : in this mode, areas you click are removed from the current selection.
- Intersect with Selection Ⓞ : in this mode, areas you click are intersected with the current selection.
- Fade: sets the fade (either in time or frequency depending on the tool) of the selection edge.

Hold Shift to temporarily activate Add to Selection, Alt to temporarily activate Remove from Selection, and Shift+Alt to temporarily activate Intersect with Selection
Button Item Description

Marquee Selection

The Marquee Selection tool offers four modes you can use to select spectral data. Click the button to switch to the Select tool, or click and hold to choose a selection mode.
- Rectangular Selection : Click and drag to create a rectangular selection. All data in the rectangle is selected.
- Elliptical Selection : Click and drag to create an elliptical selection. All data in the ellipse is selected.
Use the Tool Settings toolbar to control settings for the active tool.
- Replace Selection : in this mode, new selections clear existing selections.
- Add to Selection: in this mode, selections are persisted even when you switch selection tools. Add to Selection mode is the fastest way to build complex selections using multiple selection tools.
- Remove from Selection : in this mode, areas you click are removed from the current selection.
- Intersect with Selection Ⓞ : in this mode, areas you click are intersected with the current selection.
- Fade: sets the fade (either in time or frequency) of the selection edge.

Hold Shift to temporarily activate Add to Selection, Alt to temporarily activate Remove from Selection, and Shift+Alt to temporarily activate Intersect with Selection
Button Item Description

Lasso Selection (Pro only)

The Lasso Selection tool allows you to draw shapes in the spectral display. When you close a shape, all data inside the same is selected. Click the button to switch to the Lasso tool, or click and hold to choose a selection mode.
- Lasso Selection Ⓟ : Click and drag to draw a free-form lasso around the data you want to select.
- Polygonal Lasso Selection : Click and drag to draw a straight-line-segment lasso around the data you want to select. Double-click to close the selection path.
When using the Polygonal Lasso Selection tool, the Options >Frequency Scale setting determines the shape of the polygon segments: Linear creates straight-line segments, and Mel, Bark, ERB, and MI←DI-Logarithmic create curved segments that match the scale.
Use the Tool Settings toolbar to control settings for the active tool.
- Replace Selection : in this mode, new selections clear existing selections.
- Add to Selection : in this mode, selections are persisted even when you switch selection tools. Add to Selection mode is the fastest way to build complex selections using multiple selection tools.
- Remove from Selection : in this mode, areas you click are removed from the current selection.
- Intersect with Selection Ⓞ : in this mode, areas you click are intersected with the current selection.
- Fade: sets the fade (either in time or frequency) of the selection edge.
Hold Shift to temporarily activate Add to Selection, Alt to temporarily activate Remove from Selection, and Shift+Alt to temporarily activate Intersect with Selection
Button Item Description

Selection Brush
The Selection Brush tool allows you to paint a selection in the spectral display. Click and drag to paint.
Use the Tool Settings toolbar to control settings for the active tool.
- Replace Selection : in this mode, new selections clear existing selections.
- Add to Selection : in this mode, selections are persisted even when you switch selection tools. Add to Selection mode is the fastest way to build complex selections using multiple selection tools.
- Remove from Selection : in this mode, areas you click are removed from the current selection.
- Intersect with Selection Ⓞ : in this mode, areas you click are intersected with the current selection.
- Size: sets the size of the brush (in pixels).
- Aspect Ratio: sets the aspect ratio of the brush.
- Hardness: sets the hardness of the selection edge. 0% creates a soft, feathered edge that helps you create blended sounds, and 100% creates a precise selection with sharp edges — perfect for creating precise selections of narrow frequency bands.
- Pen Pressure Ⓞ : select the Pen Pressure button to use pen pressure to multiply the Hardness value when drawing frequencies on a tablet.

Hold Shift to temporarily activate Add to Selection, Alt to temporarily activate Remove from Selection, and Shift+Alt to temporarily activate Intersect with Selection
Button Item Description

Magic Wand (Pro only)
The Magic Wand Selection tool allows you to paint a selection in the spectral display by intelligently selecting shapes. Click and drag to paint. Use the Tool Settings toolbar to control settings for the active tool.
- Replace Selection : in this mode, new selections clear existing selections.
- Add to Selection : in this mode, selections are persisted even when you switch selection tools. Add to Selection mode is the fastest way to build complex selections using multiple selection tools.
- Remove from Selection : in this mode, areas you click are removed from the current selection.
- Intersect with Selection Ⓞ : in this mode, areas you click are intersected with the current selection.
- Tolerance: sets the amplitude threshold (in dB) that is used to select frequencies. A higher threshold allows more content to be selected; a lower threshold creates a more focused selection.
- Maximum Width: sets the maximum width (in seconds) of the selection.

Hold Shift to temporarily activate Add to Selection, Alt to temporarily activate Remove from Selection, and Shift+Alt to temporarily activate Intersect with Selection
Button Item Description
......
Frequency Selection (Pro only)
Allows you to select a frequency band in the spectral display. Click and drag to create a selection.
Use the Tool Settings toolbar to control settings for the active tool.
- Replace Selection : in this mode, new selections clear existing selections.
- Add to Selection : in this mode, selections are persisted even when you switch selection tools. Add to Selection mode is the fastest way to build complex selections using multiple selection tools.
- Remove from Selection : in this mode, areas you click are removed from the current selection.
- Intersect with Selection Ⓞ : in this mode, areas you click are intersected with the current selection.
- Thickness: sets the number of bins (spectral samples) around the peak frequency that will be selected. Low settings work well for selecting clearly defined frequency bands such as hum. Higher settings expand the selection, incorporating more deviations from the baseline frequency.
- Tracking Limit: sets the maximum width (in seconds) of the selection.

Hold Shift to temporarily activate Add to Selection, Alt to temporarily activate Remove from Selection, and Shift+Alt to temporarily activate Intersect with Selection
Button Item Description

Harmonics Selection (Pro only)
Allows you to select harmonics (a full set of frequencies, with frequency tracking) in the spectral display. Click and drag over the fundamental tone to establish a selection that isolates the target and spans its entire harmonic spectrum. Use the Tool Settings toolbar to control settings for the active tool
- Replace Selection : in this mode, new selections clear existing selections.
- Add to Selection : in this mode, selections are persisted even when you switch selection tools. Add to Selection mode is the fastest way to build complex selections using multiple selection tools.
- Remove from Selection : in this mode, areas you click are removed from the current selection.
- Intersect with Selection Ⓞ : in this mode, areas you click are intersected with the current selection.
- Thickness: sets the number of bins (spectral samples) around the peak frequency that will be selected. Low settings work well for selecting clearly defined frequency bands such as hum. Higher settings expand the selection, incorporating more deviations from the baseline frequency.
- Tracking Limit: sets the maximum width (in seconds) of the selection.
- Master Rank: set this control to the order of the harmonic that you will hover over when making selections. The tool will seek up to the number of harmonic overtones shown in the Count value. Set the Master Rank to a higher number if you need to highlight a higher harmonic during the selection process. For example, imagine you're attempting to isolate a sound in which the fundamental and first three higher harmonics are obscured by other sounds in the program, but you have a clear view of the fourth harmonic. Set the Master Rank control to 4 and hover over the fourth harmonic. The Harmonic Selection Tool will seek down while simultaneously seeking upward to the limit defined by the Count setting.
- Count: sets the number of harmonics to be targeted for selection.

Hold Shift to temporarily activate Add to Selection, Alt to temporarily activate Remove from Selection, and Shift+Alt to temporarily activate Intersect with Selection
Button Item Description
• • • •
Transient Selection (Pro only)
The Transient Selection tool allows you to select transients (mainly clicks, certain consonants, note attacks and drum sounds). Click and drag to select. Use the Tool Settings toolbar to control settings for the active tool.
- Replace Selection : in this mode, new selections clear existing selections.
- Add to Selection : in this mode, selections are persisted even when you switch selection tools. Add to Selection mode is the fastest way to build complex selections using multiple selection tools.
- Remove from Selection : In this mode, areas you click are removed from the current selection.
- Intersect with Selection Ⓞ : in this mode, areas you click are intersected with the current selection.
- Tolerance: sets the amplitude threshold (in dB) that is used to select frequencies. A higher threshold allows more content to be selected; a lower threshold creates a more focused selection.
- Maximum Height: sets the maximum height (in Hz) of the selection.

Hold Shift to temporarily activate Add to Selection, Alt to temporarily activate Remove from Selection, and Shift+Alt to temporarily activate Intersect with Selection
Modification Tools
Button Item
Description

Eraser
Allows you to erase an area in the selected layer. Use the Tool Settings toolbar to control settings for the active tool.
- Size: sets the size of the brush (in pixels).
- Aspect Ratio: sets the aspect ratio of the brush.
- Opacity: sets the strength of the eraser. 100% completely erases the spectral data under the eraser, and lower settings allow you to erase gradually.
- Pen Pressure Ⓞ : select the Pen Pressure button to use pen pressure to multiply the Opacity value when using a tablet.
| Button Item Description | |
| AmplifierAllows you to brighten the spectral data in the selected layer.Use the Tool Settings toolbar to control settings for the active tool.Size: sets the size of the brush (in pixels).Aspect Ratio: sets the aspect ratio of the brush.Hardness: sets the hardness of the tool's edge. 0% creates a soft,feathered edge, and 100% creates a sharp edge.Gain: sets the intensity of the amplifier effect.Pen Pressure: select the Pen Pressure button to use pen pressure to multiply the Opacity value when using a tablet. | |
| Clone Stamp (Pro only)Allows you to clone an area from and to the current layer. You have to pick a source location first.Use the Tool Settings toolbar to control settings for the active tool.Pick Source: click Pick Source and click an area of the spectrogram to choose the part of the spectrogram you want to clone.Size: sets the size of the brush (in pixels).Aspect Ratio: sets the aspect ratio of the brush.Hardness: sets the hardness of the tool's edge. 0% creates a soft,feathered edge, and 100% creates a sharp edge.Exposure: sets the intensity of the dodge effect.Pen Pressure: select the Pen Pressure button to use pen pressure to multiply the Opacity value when using a tablet.Use tablet pressure: when activated, pen pressure will multiply the strength value.Aligned: select this check box if you want the source to move when you move the cursor. When the check box is cleared, the tool will begin from the original source each time you click.Sample All Layers: select this check box if you want to sample from all layers when using Pick Source. When the check box is cleared,you sample from the selected layer. | |
| Repair FrequencyAllows you to repair a frequency in the selected layer.Drag the mouse cursor from one damaged end to another damaged end of a frequency, and the tool will reconstruct the missing part. | |
Drawing Tools
| Button Item Description | ||
| Frequency Pencil | Allows you to draw a frequency in the selected layer.Use the Tool Settings toolbar to control settings for the active tool.Power: sets the strength (in dB) of the data you draw.Pen Pressure: select the Pen Pressure button to use pen pressure to multiply the Exposure value when using a tablet. | |
| Noise Spray | Allows you to paint an area of noise in selected layer.Use the Tool Settings toolbar to control settings for the active tool.Size: sets the size of the brush (in pixels).Aspect Ratio: sets the aspect ratio of the brush.Hardness: sets the hardness of the tool's edge. 0% creates a soft, feathered edge, and 100% creates a sharp edge.Power: sets the strength (in dB) of the data you paint.Use tablet pressure: when selected, pen pressure will multiply the opacity of the data you paint. | |
Measure Tools
| Button Item Description | ||
| Spectral Marker | Click to add a spectral marker in the spectrogram. | |
| · Spectral MarkerT: Add and modify spectral markers. | ||
| · Spectral RegionT: Add and modify spectral regions. | ||
| Sampler (Pro only) | Click to get information about the spectrogram. | |
| · Sampler: Get information about spectral pixels. | ||
| · Plot: Drag across the spectrogram to plot a slice of spectral data. | ||
| · Statistics: Get statistics about a spectral area. | ||
Navigation Tools
| Button Item | Description |
| Hand | Select to pan within the spectral display by dragging. |
| Hold Shift to constrain movement to the time or frequency axis.Hold Ctrl (Windows) or Cmd (macOS) and drag the spectral display with any tool to pan. |
| Button Item Description | ||
| Zoom | Select to magnify the spectral display by dragging. | |
| If you want to lock the spectral display so the bottom of the graph remains anchored at 0 Hz when you zoom, choose View > Frequency Unit > Lock to 0Hz. | ||
| 3D | Select to display the spectrogram in 3D space. You can drag in the spectral display with the tool to adjust the amount of 3D. | |
| Hold Shift to constrain movement to the time or frequency axis.Double-click the spectral display to restore the 2D view.You can also drag the control in the Displacement Pad upper-right corner of the spectral display to adjust 3D: | ||
 | Playback | When this button is selected, you can click in the spectral display to play a specific part. |
5.1.3 Transport
Choose View > Toolbars > Transport to show or hide the Transport toolbar.
| Button Item | Description | |
| ◀ | Previous | Click to move the time cursor to previous time event. |
| ▶ | Next | Click to move the time cursor to the next time event. |
| ■ | Stop | Click to stop playback.If you want to use theStopbutton to pause playback, selectTransport>Return to Start on Stop. |
| ▶ | Play | Click to start playback from the time cursor. |
| ● | Record | Click to record to the selected layer. For more information, seeRecording to a layer |
 | Loop Selection | Click to toggle looped playback. When the button is selected, the selection in the spectral display plays in a continuous mode. For more information, seeSelecting spectral data |
| Time Cursor Position | Type a timecode value in the edit box to set the time cursor at a specific position. | |
5.2 Waveform Display and overview bar
The waveform display and overview bar help you navigate your project.
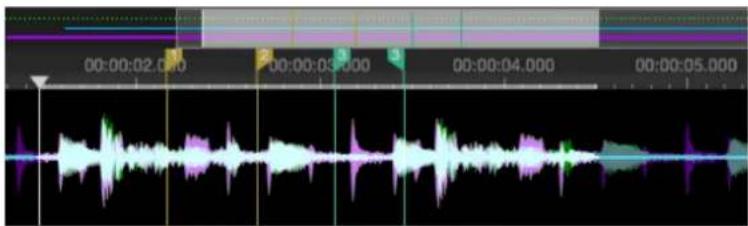
The overview bar is displayed above the waveform and displays a line for each layer's program length.
• Each layer's line color matches the layer's color.
• A solid line represents a layer.
- A bold line represents the selected layer.
- A dimmed line represents a muted layer.
- Markers, regions, and the cursor position are displayed below the overview bar and through the waveform.
- In the sample screen above, the bright rectangle represents a time selection.
The waveform displays a traditional waveform view of each layer.
• Each layer's waveform color matches the layer's color.
- In the sample screen above, the bright waveform represents a time selection.

Scroll with your mouse to zoom horizontally, or hold Shift while scrolling to zoom the waveform vertically.
5.3 Spectral Display
The spectral display represents the spectrogram. The horizontal axis represents time, and the vertical axis represents frequency.
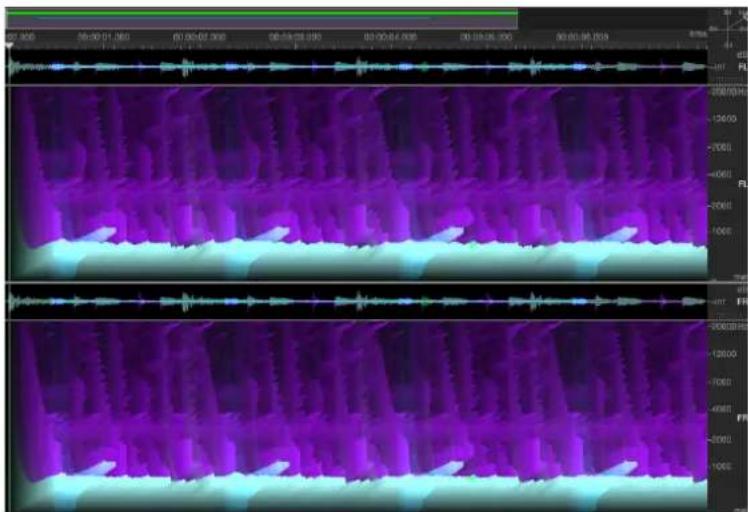

If you want to change the scale of the spectral display, choose View > Frequency Scale and choose a scale from the submenu. The logarithmic scales — Mel, Bark, ERB, or MIDI-Logarithmic — provide better visibility of the lower frequencies, compressing higher, less-significant frequencies at the top of the display. For more information, see The Display panel
If you want to lock the spectral display so the bottom of the graph remains anchored at 0 Hz when you zoom, choose View > Frequency Unit > Lock Bottom to 0Hz.
If you want the spectral display to show regularly spaced octaves, choose View > Frequency Scale > MI← DI-logarithmic, and then choose View > Frequency Unit > Octaves or View > Frequency Unit > Notes.
If you want to change the units used in the spectral display, choose View > Time Unit, Power Unit, or Frequency Unit, and choose a unit from the submenu. When choosing BPM, you can adjust the tempo by clicking Tempo.... When choosing FPS, you can adjust the frame rate by clicking Frame Rate....
If you to display a grid in the spectral display, select View > Unit Grid. Select View > Snap to Grid and Markers if you want to enable snapping the cursor to the grid in the spectral display.
To show or hide markers and regions in the spectral display, choose View > Markers and Regions.
5.4 Panels
5.4.1 The Display panel
The Display panel controls the waveform and spectrogram settings. You can show or hide additional settings using the dropdown menu at the top right of the panel.
Choose View > Panels > Display to show or hide the Display panel.
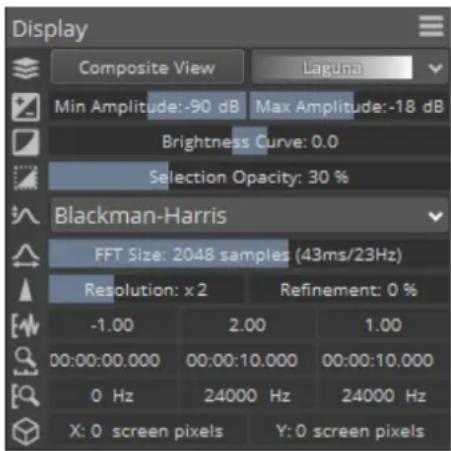
| Icon | Item | Description |
| . | ||
| Color Mapping | When the composite view is enabled (previewing all layers mixed), you can choose between several color maps. | |
| Amplitude | Drag the Min and Max sliders to define the amplitude range displayed. | |
| Brightness Curve (Pro only) | Drag the slider to adjust the brightness curve of the spectral display.Brightness curve is defined as 2(gamma)+1 . | |
| Selection Opacity | Drag the slider to adjust the opacity of the selection. | |
| Icon Item Description | ||
| FFT Window (Pro only) | Choose the window type used for analysis. The window type is related to the dynamic range of the analysis. We recommend using Blackman-Harris for most applications. | |
| FFT Size Define the size (in samples) of the spectral analysis. Higher numbers produce increased frequency resolution at the expense of lower time resolution and longer computational time. | ||
| Resolution (Pro only) | Resolution increases the time and frequency overlapping of the spectro-gram. Sharpness increase the sharpness based on the resolution defined by the first parameter. | |
| Wave Range | Define the displayed wave range (lowest, range, highest). | |
| Time Range | Define the displayed time range (start, length, end). | |
| Frequency Range | Define the displayed frequency range (bottom, range, top). | |
| 3D Range | Define the displayed 3D range (horizontal (X) and vertical (Y)). | |
5.4.2 The History panel
The History panel allows you to see a list of the actions you've performed.
Choose View > Panels > History to show or hide the History panel.
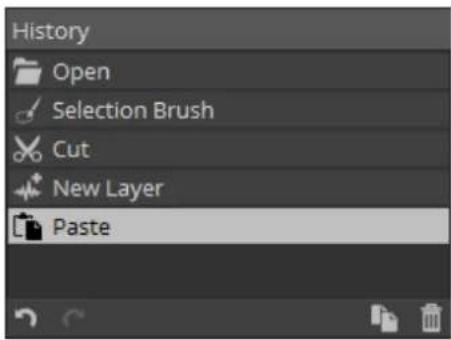
The last action is always displayed at the bottom of the list.
Click an action to step through your edit history and undo/redo actions.
The icons at the bottom of the panel allows you to undo, redo, duplicate the current state into a new project, and delete the selected action (and the followings).
5.4.3 The Channels panel
The Channels Panel allows you to enable channels in multichannel audio files.
Choose View > Panels > Channels to show or hide the History Panel.
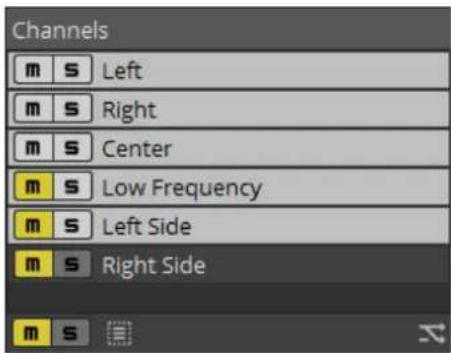
When you select a specific channel, only this channel can be modified.

Click a blank area of the Channels panel to select all channels again, or click and drag the mouse over all channels, or click the Select All Channels button at the bottom of the panel.
If you want to exclude channels from playback, select the Mute button. To unmute a channel, click the Mute button again to deselect it.

Muted channels are not displayed in the spectral display and are excluded when selecting data. For more information, see Selecting spectral data
Click the Solo button 5 to mute all unsoloed channels. Click the Solo button on additional channels to add them to the solo group.
To remove a channel from the solo group, click its Solo button again.

If the Mute and Solo buttons are selected for a channel, the channel will be played during playback.
The icons at the bottom of the panel allows you to select all channels, resample the project, and reinterpret the project.
5.4.4 The Layers panel
The Layers panel allows you to manage the layers and layer groups in your project. You can mute/unmute or solo/unsolo layers, change phase, adjust volume, duplicate, delete, move, group and merge layers.
Choose View > Panels > Layers to show or hide the Layers panel
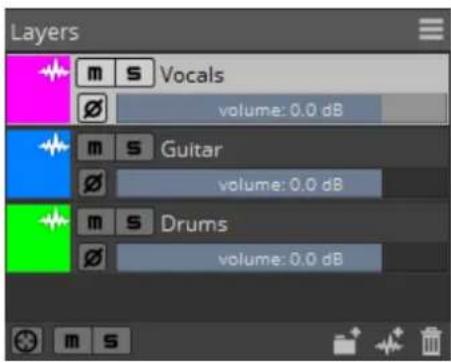
Selecting a layer or group
Click a layer or group to select it. To deselect a layer hold Ctrl (Windows) or Command (Mac) while clicking it.
A bold line in the overview bar represents the selected layer. For more information, see Waveform Display and overview bar
Changing the color of a layer or group
Click the color indicator to set the color that will be used to display a layer in the spectral display, waveform display and overview bar.
When working with layer groups, the group color is used for all the group's layers.
Muting and soloing a layer or group
Muting layers or groups
Click the Mute button m to prevent a layer or group from being played in the mix. Click the Mute button on additional layers or groups to add them to the mute group.
To unmute a layer or a group, click the Mute button again.
A dimmed line in the overview bar represents a muted layer or group. For more information, see Waveform Display and overview bar
Soloing layers or groups
Click the Solo button S to mute all unsoloed layers or groups. Click the Solo button on additional layers or groups to add them to the solo group.
To remove a layer or group from the solo group, click its Solo button again.

If the Mute and Solo buttons are selected for a layer or a group, the layer or group will be played during playback.
Changing a layer's phase
When you add a new layer, it's mixed with the other layers in your project.
Click the Phase button ∅ to switch between additive and subtractive mode.
A dotted line in the overview bar represents a phase-inverted layer. For more information, see Waveform Display and overview bar
Renaming a layer or group
The file name is used for the layer name by default. Perform either of the following actions to edit a layer's name:
- Double-click the layer name in the Layers panel and type a new name.
- Right-click (Windows) or Control-click (Mac) a layer and choose Rename from the shortcut menu. The Properties dialog displays information about the layer and allows you to specify a new name.
Adjusting layer volume
Drag a fader in the Layers panel to adjust a layer's volume in the global mix.

Double-click the fader handle to reset the volume to 0 dB.
Adding a layer group
Layer groups help you to manage complex projects by grouping related layers. You can name, mute and solo, and expand/collapse layer groups. See also Grouping layers
Click the New Group button ☐ at the bottom of the Layers panel to create a new group. You can then drag layers within the layers panel to add then to groups or move them among groups.

If you want to remove all layers from a group, select the group and choose Layer > Ungroup.
Adding a new layer
Click the New Layer button ✦ at the bottom of the Layers panel to add a new, blank layer to your SpectraLayers project.
If no layers have been created in the current project, you'll be prompted to set the sample rate, channels, and length in the Create New Layer dialog.
Duplicating a layer
Right-click (Windows) or Control-click (Mac) a layer and choose Duplicate from the shortcut menu. The new layer is added above the original layer in the Layers panel.

You can duplicate a layer to another SpectraLayers project by choosing Layer > Duplicate To and then choosing a project.
Deleting a layer or a group
Right-click (Windows) or Control-click (Mac) a layer and choose Delete from the shortcut menu.
Rearranging layers
Drag layers in the Layers panel to rearrange them.
Merging layers
Right-click (Windows) or Control-click (Mac) a layer and choose Merge Down from the shortcut menu to merge the layer with the next layer in the list.
When a layer group is selected, choose Merge Group from the shortcut menu to merge the layers in the selected group to a single layer.
For more information, see Merging layers
5.5 Preferences
Choose Edit > Preferences (Windows) or SpectraLayers > Preferences (Mac) to open the Preferences dialog.
5.5.1 Device
| Item Description | |
| Type | Choose an audio device type from drop-down list to indicate the audio device type that will be available for recording and playback. |
| Input Choose a device from the drop-down list to choose the audio input device that will be used for recording. | |
| Output Choose a device from the drop-down list to choose the audio output device that will be used for playback. | |
| Buffer Size | Specifies the amount of buffering (in milliseconds) that occurs before starting playback.The larger the number, the more buffering occurs during playback. This value must be as low as possible without gapping. To set it, start at 25 and play back a typical song. If the playback gaps at all, try increasing this value in small increments until the gapping goes away. |
| Use Preferred Buffer Size (ASIO Only) | Use the buffer size set by the ASIO driver instead of the one set by the application. |
| Force Sample Rate (ASIO Only) | If set to 0, the application will try match the device sample rate to the project sample rate. Otherwise it will force the device sample rate to the user defined sample rate. |
| Show ASIO Panel (ASIO Only) | Shows the ASIO Panel (provided by the ASIO driver) |
| Channel Mapping | Use drop-down lists to map multichannel audio to the ports on your selected audio device. |
5.5.2 Interface
Colors
Allows you to change the color that will be used to display the elements in the spectral display. Click a color swatch to display a color picker that you can use to select a new color for each element.
- Selection Color
-
Selection Pattern
-
Grid Color
- Drawing Color
- Transport Color
- Controls Color
- Markers Color
- Regions Color
- Spectral Markers Color
• Spectral Regions Color - Waveform Luminosity
Default Transport Options
Select check boxes to specify the default transport behaviors. You can still change the settings via the Options menu or shortcut menus.
| Item Description | |
| Return to Start on Stop | When checked, the cursor will to start position when the playback is stopped. |
| Scroll | Choose how the display will follow the time cursor during playback. |
Default View Layout
Allows you to choose the default window layout that will be used when SpectraLayers starts, as well as the interface language. For more information, see Saving and recalling layouts
| Item Description | |
| Layout File | Displays the path to the layout file that is loaded when during startup. Click Browse to choose a different layout file. |
| Layout Mode (Windows Only) | Choose a setting from the drop-down list to choose whether you want to optimize the interface for a desktop or tablet computer during startup. When you choose Tablet, the interface elements are optimized for touchscreen editing. To change the layout during editing, choose View > Interface Layout > Desktop or View > Interface Layout > Tablet. |
| DPI Scaling (Windows Only) | Choose a setting from the drop-down list to choose whether you want to optimize the interface for a normal or high-resolution display during startup. |
| Waveform Display | Percentage of the waveform that will cover the display when opening a project. |
| Language | Select the interface language. You will need to restart to apply. |
5.5.3 Display
Default Units and Scales
Choose a setting from the drop-down list to specify the default units and scales that are used in the SpectraLayers interface. You can still change the values via the Options menu or shortcut menus.
| Item Description | |
| Time Unit | Choose a setting from the drop-down list to specify the default units that are used to display the time ruler. |
| Frequency Unit | Choose a setting from the drop-down list to specify the default units that are used in the spectral display. |
| Lock Spectrogram to 0Hz | Select this check box if you want to lock the spectral display so the bottom of the graph remains anchored at 0 Hz when you zoom. |
| Power Unit | Choose a setting from the drop-down list to specify the default units that are used in the spectral display. |
| Always Center Waveform | Select this check box if you want to lock the waveform display to prevent vertical scrolling when zooming the waveform. |
| Frequency Scale | Choose a setting from the drop-down list to specify the default scale of the spectral display. The logarithmic scales — Mel, Bark, ERB, or MIDI-Logarithmic — provide better visibility of the lower frequencies, compressing higher, less-significant frequencies at the top of the display. |
| Filtering | Choose a setting from the drop-down list to specify the default filtering of the spectral display. The Cubic filtering is the most smooth and accurate. Nearest shows the raw source samples only. |
Default Display Options
Select check boxes to specify the default settings for the spectral display. You can still change the settings via the Options menu or shortcut menus.
| Item | Description |
| Markers and Regions | Shows markers and regions by default in the spectral display. |
| Grid | Displays a grid in the spectral display by default. |
| Spectral Markers and Regions | Shows spectral markers and regions by default in the spectral display. |
| Snap to Grid and Markers | Enables snapping the cursor to the grid by default in the spectral display. |
Default Display Settings
Thoses settings will be set each time you open or create a project. See The Display panel for more information on each setting.
- Color Mapping
- Amplitude
- Brightness Curve
- Window
- Sampling
- Resolution
Invert Mouse Wheel Axes
Select this check box if the mouse wheel axes are inverted when zooming in the waveform and spectral display.
5.5.4 System
| Item Description | |
| Session Path Displays the path to the folder where SpectraLayers will save temporary data. Click the path to browse to a new folder. | |
| Maximum Session Recovery Days | Indicates the number of days that temporary data will be maintained in the temporary folder. |
| Logs Path Displays the path to the folder where SpectraLayers will save log files. Click the path to browse to a new folder. | |
| Maximum Logs | Indicates the number of logs that will be maintained in the folder. |
| Maximum Recent Projects | Indicates the number of projects that should be available in the File menu. |
| Maximum History Actions | Indicate the number of actions that will be displayed in the History panel. For more information, seeThe History panel |
| WYSIWYG Samples Limit | Define the maximum number of samples a tool can preview in realtime. This doesn't affect how the tool operate, only its preview capabilities. |
| Path to External Editor (Pro only) | Define the external editor application that will be used when clickingProcess > Edit in External Editor.... |
| Check Notifications... | Check and display web notifications (such as new update available). |
If Pro Tools is available on your system, you should also see the Install Pro Tools Plugin and Uninstall Pro Tools Plugin buttons that will automatically install and uninstall SpectraLayers Pro Tools Plugin. The Check at startup checkbox tell SpectraLayers to automatically check for Pro Tools at startup and automatically check if the plugin needs to be installed.
5.5.5 Shortcuts
The Shortcuts page displays all available keyboard shortcuts. You can use this page to add, customize, delete, or restore keyboard shortcuts.
Select a row. The Action column displays a description of each available shortcut.

Use the Filter box to filter the list of keyboard shortcuts. For example, if you type Play in the Filter box, only keyboard shortcuts that contain the word "Play" in their description will be displayed.
Click the value in the Shortcut column and press a key to change the current keyboard shortcut.

Click Clear to remove the main and alternate shortcut for the selected row.
Click the value in the Alternate column and press a key to assign an alternate keyboard shortcut.
Click the Reset button to restore all keyboard shortcuts to the default state.
5.6 Saving and recalling layouts
A window layout stores the positions of all toolbars and panels in the SpectraLayers workspace. You can store any number of window layouts on your computer. You can transfer layouts between computers by copying the .layout files.

You can use the Layout File box on the Display tab of the Preferences dialog to choose the default window layout that will be used when SpectraLayers starts.
Saving a window layout
Use the Views > Toolbars and View > Panels submenus to configure the SpectraLayers workspace as needed.
Choose View > Interface Layout > Save Layout.
Use the Save Layout dialog to browse to the folder where you want to save your layout (.layout) file.
Click Save.
Recalling a window layout
Choose View > Interface Layout > Load Layout.
Use the Load Layout dialog to browse to the layout (.layout) file you want to load.
Click Open.
Chapter 6
Working with projects
A SpectraLayers project file (.slp) saves all the project data: format, layers data and settings, time and spectral markers and regions, and information.
A project file contains copy of the original source files, so you can edit your project nondestructively — you can be creative without worrying about corrupting your source files.
If SpectraLayers terminates unexpectedly, you can recover your editing sessions by restarting SpectraLayers. You can change the folder where SpectraLayers saves these files using the Session Path box in the System tab of the Preferences dialog.
6.1 Creating a new project
From the File menu, choose New Project to create a new empty SpectraLayers project.
- From the File menu, choose New Project. The New Project dialog is displayed.
-
Use the New Project dialog to set your project properties.
-
Length: Allows you to specify the duration (in seconds) of the project.
- Sample rate: Allows you to specify the number of samples used to store each second of audio.
-
Channels: Type a number in the Channels box or select the check boxes for each audio channel you want to include in your new project.
-
Click Create to start a new project. The new project is added as a new tab in the SpectraLayers workspace.

Choose Layer > Duplicate Project to copy the current project's layers to a new project.
6.2 Opening a project or an audio file
From the File menu, choose Open to open a SpectraLayers project.
- From the File menu, choose Open. The Open dialog box is displayed.
- Select a file in the browse window or type a name in the File name box.
- Click Open. The project is opened in a new tab in the SpectraLayers workspace.
6.3 Importing an audio file as a layer
From the File menu, choose Import to add an audio file as a new layer in your SpectraLayers project.
- From the File menu, choose Import. The Import File dialog box is displayed.
- Select a file in the browse window or type a name in the File name box.
- Click Open. The new file is added to the current project and is selected in the Layers panel.
6.4 Recording to a layer
You can use the Record button ● on the toolbar to record audio to a selected layer.
- Create a new SpectraLayers project or open an existing project file. For more information, see Creating a new project or Opening a project or an audio file
- In the Preferences dialog, select the Device tab and use the Input drop-down list to choose the input you want to record.
- In the Layers Panel, click the layer where you want to record data (or create a new layer and select it). This is your target layer.
- Position the cursor in the spectral display at the position where you want recording to begin. If you create a selection, audio will only be recorded to the selected time/frequency range. For more information, see Selecting spectral data
- Click the Record button ●
6.5 Adding a new layer
From the Layer menu, choose New Layer to add a new, blank layer to your SpectraLayers project.
If no layers have been created in the current project, you'll be prompted to set the sample rate, channels, and length in the Create New Layer dialog.
For more information, see The Layers panel
6.6 Grouping layers
Layer groups help you to manage complex projects by grouping related layers.
A group is a virtual layer that collects the layers you add to it, mixing the group's layers:
- A group's layers are drawn using the group's color.
- You can name, mute and solo, and expand/collapse layer groups.
-
When you move or scale a group, all layers in the group are modified.
-
Groups can help you organize layers and visualize and process grouped layers together while allowing you to continue to edit the layers individually.
- Duplicating a layer within a group and inverting its phase will result in cancelling this layer.
- Duplicating data from a layer to an empty layer with inverted phase within the same group will result in having a non-destructive eraser layer.
From the Layer menu, choose New Group to create a new group. You can then drag layers within the layers panel to add then to groups or move them among groups.

If you want to remove all layers from a group, select the group and choose Layer > Ungroup.
For more information, see The Layers panel
6.7 Inserting time
Choose Project > Insert Time to insert a specified amount of blank space into your project.
- Create a new SpectraLayers project or open an existing project file. For more information, see Creating a new project or Opening a project or an audio file
- In the Layers Panel, click the layer where you want to add time.
- Choose Project > Insert Time. The Insert Time dialog is displayed.
- Select the Active Layer radio button if you want to insert time in only the layer you selected in step 2, or select the Project radio button to insert time in all layers.
- In the Start box, type the cursor position from which you want to insert time.
- In the Length box, specify the amount of time you want to insert.
- Click OK.
6.8 Deleting time
Choose Project > Delete Time to delete a specified amount of blank space into your project.
- Create a new SpectraLayers project or open an existing project file. For more information, see Creating a new project or Opening a project or an audio file
- In the Layers Panel, click the layer from which you want to delete time.
- Create a time selection containing the section of time you want to delete. For more information, see Selecting spectral data
- Choose Project > Delete Time. The Delete Time dialog is displayed.
- Select the Active Layer radio button if you want to delete time from only the layer you selected in step 2, or select the Project radio button to delete time from all layers.
- In the Start box, edit the cursor position from which you want to delete time if needed.
- In the Length box, edit the amount of time you want to delete if needed.
- Click OK.
6.9 Merging layers
Merging layers allows you to combine layers to simplify your project.
Merge down
- In the Layers panel, click a layer to select it.
- Choose Layer > Merge Down. The selected layer is merged with the next layer in the list.
Merge visible
- In the Layers panel, scroll or adjust the height of the panel so only the layers you want to merge are visible.
- Choose Layer > Merge Visible. The visible layers are merged.
Merge all
Choose Layer > Merge All. All layers are merged.
6.10 Resampling a project
Choose Project > Format to change the audio sample rate or number of channels in your project.
- Choose Project > Format. The Format dialog is displayed.
- Choose Resample.
- Use the Sample Rate control to choose the desired sample rate for your project. The sample rate (also referred to as the sampling rate or sampling frequency) is the number of samples per second used to store a sound.
- Use the Channels control to choose the desired number of audio channels.
- Click Change Format.
- If you change the number of channels, the Channel Remixer dialog is displayed. Use the Channel Remixer to adjust the amount of the original channels that will be mixed to the new channels.
6.11 Reinterpreting a project
Choose Project > Format to change the audio sample rate or number of channels in your project without resampling or remixing the audio.
- Choose Project > Format. The Format dialog is displayed.
- Choose Reinterpret.
- Use the Sample Rate control to choose the desired sample rate for your project. The sample rate (also referred to as the sampling rate or sampling frequency) is the number of samples per second used to store a sound.
- Use the Channels control to change the channel mapping.
- Click Change Format.
- If you change the number of channels, the Channel Remixer dialog is displayed. Use the Channel Remixer to adjust the amount of the original channels that will be mixed to the new channels.
6.12 Exporting your mix
From the File menu, choose Export to mix your project's layers to a new audio file.
- From the File menu, choose Export. The Export File dialog box is displayed.
- Use the Export File dialog to choose the folder, file name, and file format you want to use to save your rendered mix.
- Click Save.
6.13 Editing with ARA
If your DAW is ARA2-capable, you can use SpectraLayers as an ARA plugin. This allows a very tight integration between the host and the plugin: every region you send to SpectraLayers appears as a layer and remains synchronized with the host. If you move it or resize it in the host, the corresponding layer in SpectraLayers will be moved and resized as well. Every audio modification you do in SpectraLayers is automatically transferred to the host during playback or rendering, and saved with your host project.

The ARA protocol requires a 1:1 synchronization between the regions in the plugins and the regions in the host. For this reason, you cannot create or destroy layers within SpectraLayers in ARA mode. If you need more layers in SpectraLayers, your need to send more regions from your host to the plugin.
6.14 Editing with Pro Tools
You can use the AudioSuite > Other > SpectraLayers Edit and SpectraLayers Send commands to integrate SpectraLayers editing with your Pro Tools workflow.
Editing Pro Tools audio in SpectraLayers
In Pro Tools, choose AudioSuite > Other > SpectraLayers Edit to send audio to SpectraLayers for spectral editing and then export the audio back to your Pro Tools project.
- In Pro Tools, select the audio you want to edit.
- Choose AudioSuite > Other > SpectraLayers Edit. The AudioSuite dialog is displayed.
- Click the Edit button at the bottom of the AudioSuite dialog to send the selected audio to a new tab in SpectraLayers.

In some cases, Pro Tools takes control of the system's audio hardware and prevents SpectraLayers
from playing audio while Pro Tools is running. In these cases, Click the Preview button in the SpectraLayers Tools dialog to activate the SpectraLayers Bridge in Pro Tools and SpectraLayers. The SpectraLayers Bridge will allow SpectraLayers to play audio through Pro Tools.
- Edit your audio as needed. For more information, see Modifying spectral data
- When you're done editing, choose File > Update Host File in SpectraLayers to send the edited audio back to Pro Tools.
- In Pro Tools, click the Import Back button at the bottom of the AudioSuite dialog. The edited audio is imported to your Pro Tools project.

The audio you selected in Step 1 used by default. You can change the selection in Pro Tools before clicking Import Back to choose a different destination. If you want to use your SpectraLayers edits in multiple places in your Pro Tools project, select the audio you want to replace and repeat Step 6.
Sending audio from Pro Tools to SpectraLayers
In Pro Tools, choose AudioSuite > Other > SpectraLayers Send to send audio to SpectraLayers for spectral editing. When you're finished editing, you can save the edited audio as a new file from SpectraLayers.
- In Pro Tools, select the audio you want to edit.
- Choose AudioSuite > Other > SpectraLayers Send. The AudioSuite dialog is displayed.
- Click the Send button at the bottom of the AudioSuite dialog to send the selected audio to a new tab in SpectraLayers.

In some cases, Pro Tools takes control of the system's audio hardware and prevents SpectraLayers
from playing audio while Pro Tools is running. In these cases, Click the Preview button in the SpectraLayers Tools dialog to activate the SpectraLayers Bridge in Pro Tools and SpectraLayers. The SpectraLayers Bridge will allow SpectraLayers to play audio through Pro Tools.
- Edit your audio as needed. For more information, see Modifying spectral data
- When you're done editing, you can save the edited audio as a new SpectraLayers project or export the project to a new audio file. For more information, see Saving a project or Exporting your mix
6.15 Saving a project
From the File menu, choose Save to save changes to the current SpectraLayers project (.slp). When a Spectra← Layers project is saved, all of the layers and adjustments are saved in this project file.

If you want to keep the previous version of your project before you made changes, use the Save As command to save the new version of the project with a new name. For more information, see Saving and renaming a project
6.16 Saving and renaming a project
From the File menu, choose Save As to save the current project to a different location or with a new name.
- From the File menu, choose Save As.
- Use the Save Project dialog to choose the folder, file name, and file format you want to use to save your project.
- Click the Save button.
Chapter 7
Viewing and selecting spectral data
Frequency, harmonics, and noise
In a spectral view, all sound is represented as a sum of frequencies with different amplitudes and phase. So if you record a pure tone (such as A4, 440Hz), you will see a straight horizontal line in the spectrogram at frequency 440 Hz. However, pure tones are typically generated by electronic devices or very specific instruments.
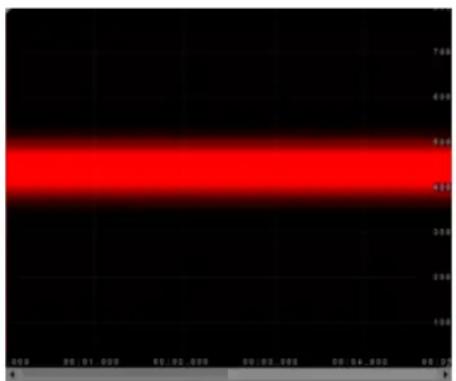
natural_image
A red horizontal bar centered on a black background, with no visible text or symbols.Figure 7.1 440 Hz sine wave
Voice and musical instruments are (mostly) composed of harmonics: several pure tones with different amplitudes and different frequencies. These frequencies follow physical rules: they are a multiple of the base frequency. If a piano plays A4, you will have a tone at 440 Hz plus a tone at 440x2=880 Hz with a different amplitude, plus a tone at 440x3=1320 Hz, etc.
Finally, noise is everything that cannot be described as pure tones. In the spectrogram, noise appears as clouds of random dots across time and frequencies.
Voice data
Voice is mostly harmonics because all vowels sounds use pure tones ("a", "e", etc). However, most consonants ("t", "k", etc) are noise. So when you select a full word you have to deal both with harmonic and noise sounds.
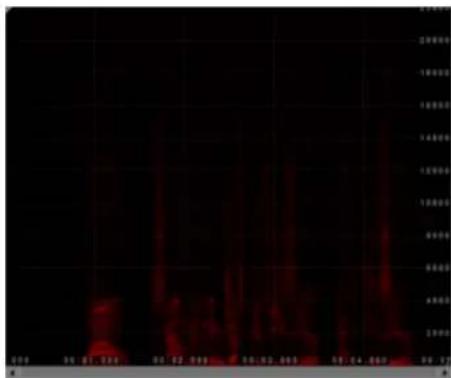
bar
| 时间 | 数值 | |---|---| | 09:30 | 1.0 | | 12:30 | 1.5 | | 05:02 | 1.8 | | 09:00 | 1.6 | | 05:12 | 1.4 | | 10:05 | 1.7 | | 15:00 | 1.9 | | 20:00 | 2.0 | | 05:17 | 1.7 |Figure 7.2 A voiceover recording
Instruments
- Classic instruments such as the piano, violin, trumpet, etc produce harmonic sounds.
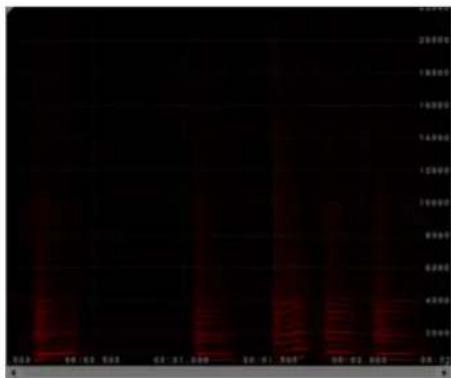
Figure 7.3 A recorded saxophone
- Some synthetic instruments may produce unharmonic sounds (harmonic-like, but with float frequency multiplier).
- Percussive instruments such as drums produce noise.
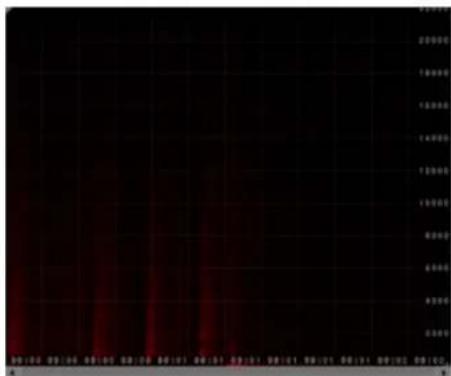
Figure 7.4 A drum fill
Sounds from nature and engine sounds
• The sea and the wind are noise.
- Something that breaks or crashes is noise.
• Engine sounds can be noise or harmonics.
Moving and scaling harmonics vertically
While moving or scaling noise or pure tones does not change their nature, moving harmonics breaks the harmonic rules.
Moving harmonics adds a constant frequency: if a piano plays A4 (see above) and we move this sound by 100 Hz, the 3 first frequencies will be 440+100=540 Hz, 880+100=980 Hz and 1320+100=1420 Hz.
1420 Hz and 980 Hz are not multiples of 540 Hz, which means the sound will be unharmonic (it will not sound like a piano note anymore).
To preserve the harmonics, we need to scale (multiply) the frequencies. Scaling A4 by 1.2 produces 440 × 1.2 = 528 Hz, 880 Hz × 1.2 = 1056 Hz , 1320 × 1.2 = 1584 Hz .
1584 Hz=528 Hz x 3 and 1056 Hz=528 Hz x 2, so we preserved harmonics and the recording will still sound like a piano.
Formant and time envelope
The formant is the frequency signature of a sound, and it applies both to harmonic and noise sounds. It is the envelope of amplitudes across frequencies.
A person's voice sounds different from another person's voice and sounds different from a piano because the harmonics are different. If they all sing and play A4, they will all have the first 3 frequencies 440 Hz, 880 Hz and 1320 Hz (see above), but with different amplitudes each. This rule also applies to noise, where the random dots are shaped by different amplitudes.
Finally the time envelope also act a signature across time. Let's take a violin: it will sound very different drawing a bow across a string or plucking it, although the frequency envelope will be the same. The way amplitudes change over time is fully part of the signature of a sound whether the sound is harmonic or noise.
If you scale a sound too much (by a factor of 2 and above, or 1/2 and below), it will not sound exactly as played by the same source, because the formant and time envelope were scaled too.
See Measuring spectral data, Positioning the cursor, Selecting spectral data and Adjusting a selection
7.1 Measuring spectral data
The Info tools on the left side of the SpectraLayers window allow you to analyze the content of the spectrogram.

Choose View > Fullscreen to maximize the spectral display. Repeat to exit fullscreen mode.
Using the graph
-
Use the Channels Panel and Layers Panel to select the portion of your project that you want to analyze. For more information, see The Channels panel and The Layers panel
-
Click the Graph button ✗.
The Graph window is displayed, and the mouse pointer changes to a crosshair + .
- As you drag the cursor over the spectrogram to draw a slice, the Graph window displays information about the slice.
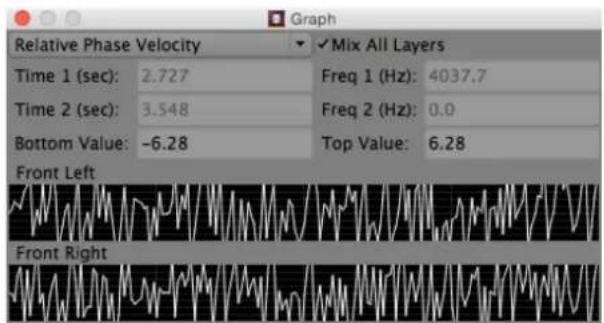
line
| Time | Relative Phase Velocity | Frequency | |------|--------------------------|---------| | 1 | 2.727 | 4037.7 | | 2 | 3.548 | 0.0 | | Bottom Value | -6.28 | 6.28 |You can use the drop-down lists at the top of the graph to choose the information you want to display in the graph.
You can display Power dB, Power Value, Phase Radian, Phase Degree, or Relative Phase Velocity on the Y axis.
Press + or - to change the vertical scale of the graph.
Using the sampler
-
Use the Channels Panel and Layers Panel to select the portion of your project that you want to analyze. For more information, see The Channels panel and The Layers panel
-
Click the Sampler button
The Sampler toolbar is displayed above the spectral display, and the mouse pointer changes to a sampler
As you move the sampler over the spectrogram, the Sample window displays information about the cursor position.
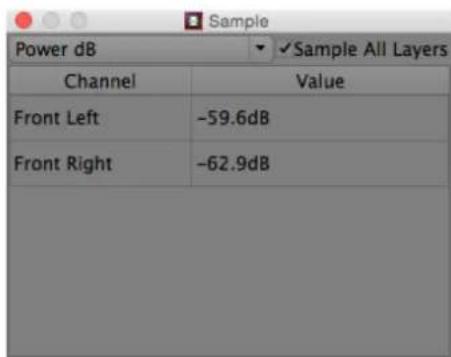
You can use the drop-down list in the Sampler toolbar to choose the information you want to display in the graph:
- Power dB
- Power Value
- Power Percent
- Phase Radian
- Phase Degree
• Phase Velocity Radian/Window
• Phase Velocity Degree/Window
• Phase Velocity Hertz - Peak Power dB
- Peak Power Value
- Peak Bin
- Peak Hertz
- Complex Value
7.2 Positioning the cursor
The cursor position determines the starting point for playback and for inserting generated tones, noise, and silence.
Select the Time Cursor tool I and click in the spectral display to position the cursor. The cursor is displayed as a vertical line through the display.

The Transport Time box in the Transport Controls toolbar displays the current cursor position. You can also type a value in this box to edit the cursor position.
You can drag the cursor to adjust its position:
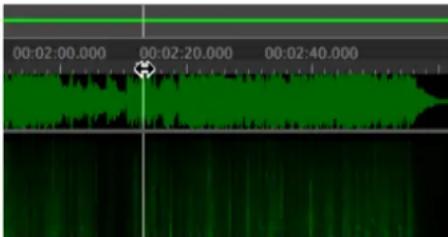
If Scrubbing is selected, playback will scrub when you drag the cursor.
7.3 Selecting spectral data
You can use the tools in the Tools toolbar to select data in the spectral display. For more information, see Selection Tools

Muted channels are also excluded when selecting data. For more information, see The Channels panel
Creating a selection with the Select tool
-
Click the Select tool ☐, to switch to the Select tool, or click and hold to choose a selection mode.
-
Rectangular Selection : Click and drag to create a rectangular selection. All data in the rectangle is selected.
- Elliptical Selection : Click and drag to create an elliptical selection. All data in the ellipse is selected.
- Time Range Selection : Click and drag to create a selection that includes the full frequency range within a time selection.
-
Frequency Range Selection : Click and drag to create a selection that includes the full time range within a frequency selection.
Hold Shift to temporarily activate Add to Selection, Alt to temporarily activate Remove from Selection, and Shift+Alt to temporarily activate Intersect with Selection -
Use the Tool Settings toolbar to control settings for the active tool.
-
Replace Selection ● : in this mode, new selections clear existing selections.
- Add to Selection : in this mode, selections are persisted even when you switch selection tools.
Add to Selection mode is the fastest way to build complex selections using multiple selection tools. - Remove from Selection ☐ : in this mode, areas you click are removed from the current selection.
- Intersect with Selection Ⓞ : in this mode, areas you click are intersected with the current selection.
-
Hardness: sets the hardness of the selection edge. 0% creates a soft, feathered edge that helps you create blended sounds, and 100% creates a precise selection with sharp edges — perfect for creating precise selections of narrow frequency bands.
Hold Shift to temporarily activate Add to Selection, Alt to temporarily activate Remove from Selection, and Shift+Alt to temporarily activate Intersect with Selection -
Click and drag in the spectral display to create a selection.
Hold Shift while dragging with the Time Cursor to create a time selection. Please note that selecting with the Time Cursor selects from the global mix rather than only the selected layer.
Creating a selection with the Lasso tools
-
Click the Lasso tool 📋 to switch to the Lasso tool, or click and hold to choose Lasso Selection 🔒 or Polygonal Lasso mode.
-
Lasso Selection Ⓠ: Click and drag to draw a free-form lasso around the data you want to select.
-
Polygonal Lasso Selection ▷ : Click and drag to draw a straight-line-segment lasso around the data you want to select. Double-click to close the selection path.
When using the Polygonal Lasso Selection tool, the Options > Frequency Scale setting determines the shape of the polygon segments: Linear creates straight-line segments, and Mel, Bark, ERB, and MIDI-Logarithmic create curved segments that match the scale. -
Use the Tool Settings toolbar to control settings for the active tool.
- Replace Selection ● : in this mode, new selections clear existing selections.
- Add to Selection : in this mode, selections are persisted even when you switch selection tools.
Add to Selection mode is the fastest way to build complex selections using multiple selection tools.
- Remove from Selection Ⓞ : in this mode, areas you click are removed from the current selection.
- Intersect with Selection Ⓞ: in this mode, areas you click are intersected with the current selection.
- Fade: sets the fade (either in time or frequency) of the selection edge.
Hold Shift to temporarily activate Add to Selection, Alt to temporarily activate Remove from Selection, and Shift+Alt to temporarily activate Intersect with Selection
- Click and drag in the spectral display to create a path around the data you want to select.
Creating a selection with the Selection Brush tool
- Click the Selection Brush tool ⚙️ to paint a selection in the spectral display.
- Use the Tool Settings toolbar to control settings for the active tool.
- Replace Selection : in this mode, new selections clear existing selections.
- Add to Selection : in this mode, selections are persisted even when you switch selection tools.
Add to Selection mode is the fastest way to build complex selections using multiple selection tools.
- Remove from Selection Ⓞ : in this mode, areas you click are removed from the current selection.
- Intersect with Selection Ⓞ : in this mode, areas you click are intersected with the current selection.
- Width: sets the width (in seconds) of the brush tip.
• Height: sets the height (in Hz) of the brush tip.
- Hardness: sets the hardness of the selection edge. 0% creates a soft, feathered edge that helps you create blended sounds, and 100% creates a precise selection with sharp edges — perfect for creating precise selections of narrow frequency bands.
- Pen Pressure: select the Pen Pressure button ⏻ to use pen pressure to multiply the Hardness value when drawing frequencies on a tablet.
Hold Shift to temporarily activate Add to Selection, Alt to temporarily activate Remove from Selection, and Shift+Alt to temporarily activate Intersect with Selection
- Click and drag in the spectral display to paint a selection.
Creating a selection with the Magic Wand Selection tool
- Click the Magic Wand Selection tool to paint a selection in the spectral display by intelligently selecting shapes.
- Use the Tool Settings toolbar to control settings for the active tool.
- Replace Selection ● : in this mode, new selections clear existing selections.
- Add to Selection : in this mode, selections are persisted even when you switch selection tools.
Add to Selection mode is the fastest way to build complex selections using multiple selection tools.
- Remove from Selection : in this mode, areas you click are removed from the current selection.
- Intersect with Selection Ⓞ : in this mode, areas you click are intersected with the current selection.
- Tolerance: sets the amplitude threshold (in dB) that is used to select frequencies. A higher threshold allows more content to be selected; a lower threshold creates a more focused selection.
• Maximum Width: sets the maximum width (in seconds) of the selection.

Hold Shift to temporarily activate Add to Selection, Alt to temporarily activate Remove from Selection, and Shift+Alt to temporarily activate Intersect with Selection
- Click and drag in the spectral display to paint a selection.
Selecting a frequency
- Click the Frequency Selection tool ⋯ to select a frequency band in the spectral display.
-
Use the Tool Settings toolbar to control settings for the active tool.
-
Replace Selection ● : in this mode, new selections clear existing selections.
- Add to Selection : in this mode, selections are persisted even when you switch selection tools.
Add to Selection mode is the fastest way to build complex selections using multiple selection tools. - Remove from Selection : in this mode, areas you click are removed from the current selection.
- Intersect with Selection Ⓞ: in this mode, areas you click are intersected with the current selection.
- Tracking Limit: sets the maximum width (in seconds) of the selection. SpectraLayers seeks on each side of the cursor when selecting data: a four-second width means that SpectraLayers will scan two seconds before and after the cursor.
- Thickness: sets the number of bins (spectral samples) around the peak frequency that will be selected. Low settings work well for selecting clearly defined frequency bands such as hum. Higher settings expand the selection, incorporating more deviations from the baseline frequency.
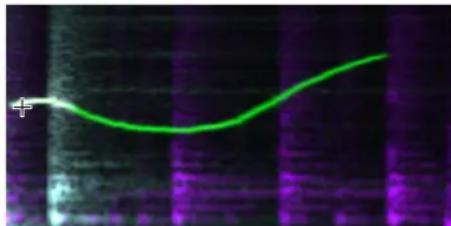
natural_image
Green curved line against a dark background with purple vertical striations (no text or symbols)
Hold Shift to temporarily activate Add to Selection, Alt to temporarily activate Remove from Selection, and Shift+Alt to temporarily activate Intersect with Selection
- Click and drag in the spectral display to select a frequency band.
Selecting harmonics
- Click the Harmonics Selection tool to select harmonics (a full set of frequencies, with frequency tracking) in the spectral display.
- Use the Tool Settings toolbar to control settings for the active tool.
- Replace Selection ● : in this mode, new selections clear existing selections.
- Add to Selection : in this mode, selections are persisted even when you switch selection tools.
Add to Selection mode is the fastest way to build complex selections using multiple selection tools.
- Remove from Selection Ⓞ : in this mode, areas you click are removed from the current selection.
- Intersect with Selection Ⓞ: in this mode, areas you click are intersected with the current selection.
- Tracking Limit: sets the maximum width (in seconds) of the selection. SpectraLayers seeks on each side of the cursor when selecting data: a four-second width means that SpectraLayers will scan two seconds before and after the cursor.
- Thickness: sets the number of bins (spectral samples) around the peak frequency that will be selected. Low settings work well for selecting clearly defined frequency bands such as hum. Higher settings expand the selection, incorporating more deviations from the baseline frequency.
- Master Rank: set this control to the order of the harmonic that you will hover over when making selections.
The tool will seek up to the number of harmonic overtones shown in the Count value. Set the Master Rank to a higher number if you need to highlight a higher harmonic during the selection process.
For example, imagine you're attempting to isolate a sound in which the fundamental and first three higher harmonics are obscured by other sounds in the program, but you have a clear view of the fourth harmonic. Set the Master Rank control to 4 and hover over the fourth harmonic. The Harmonic Selection Tool will seek down while simultaneously seeking upward to the limit defined by the Count setting.
- Count: sets the number of harmonics to be targeted for selection.
Hold Shift to temporarily activate Add to Selection, Alt to temporarily activate Remove from Selection, and Shift+Alt to temporarily activate Intersect with Selection
- Click and drag in the spectral display to select harmonics.
Selecting all data
Choose Select > Select All to clear the current selection.
Selecting a region
Double-click a region marker to select the time between the region markers.
For more information, see Editing markers and regions
Clearing a selection
Choose Select > Deselect to clear the current selection.
Inverting a selection
Choose Select > Invert Selection to deselect all selected data and select unselected data.
Moving a selection
After creating a selection, you can use the Move tool

to move your selection.

You can click the down arrow (or hold Shift) to choose whether you want to constrain movement to the time or frequency axis.
When you move or scale a selection with a group selected, all layers in the group are modified. For more information, see Grouping layers
For more information, see Standard
Scaling a selection
After creating a selection, you can use the Scale tool

to scale your selection.

You can click the down arrow (or hold Shift) to choose whether you want to scale by time, frequency, or proportionally.
When you move or scale a selection with a group selected, all layers in the group are modified. For more information, see Grouping layers
7.4 Adjusting a selection
After you've created a selection, you can use the commands in the Process > Selection submenu to refine the selection.
For more information, see Selecting spectral data
Expanding a selection
- Create a new SpectraLayers project or open an existing project file.
For more information, see Creating a new project or Opening a project or an audio file - In the Layers Panel, click the layer that you want to edit.
- Create a selection. For more information, see Selecting spectral data
- Choose Edit > Modify Selection > Expand to display the Expand dialog.
- Type a value in the Expand Horizontally by box to increase the selection horizontally by the current FFT Size and Time Overlap values.
For example, if the FFT Size control in the Spectral Settings toolbar is set to 512 samples and the Time Overlap is set to x4, typing 2 in the Expand Horizontally by box would increase the selection by 640 samples (512+512/4). - Type a value in the Expand Vertically by box to expand the selection vertically around the peak frequency by the specified number of bins (spectral samples).
- Click OK.
Contracting a selection
- Create a new SpectraLayers project or open an existing project file. For more information, see Creating a new project or Opening a project or an audio file
- In the Layers Panel, click the layer that you want to edit.
- Create a selection. For more information, see Selecting spectral data
- Choose Edit > Modify Selection > Contract to display the Contract dialog.
- Type a value in the Contract Horizontally by box to reduce the selection horizontally by the current FFT Size and Time Overlap values.
For example, if the FFT Size control in the Spectral Settings toolbar is set to 512 samples and the Time Overlap is set to x4, typing 2 in the Contract Horizontally by box would reduce the selection by 640 samples (512+512/4).
-
Type a value in the Contract Vertically by box to reduce the selection vertically around the peak frequency by the specified number of bins (spectral samples).
-
Click OK.
Smoothing a selection
Smoothing a selection allows you to soften the hardness of the selection edge. Smoothing a selection helps you create blended sounds.
- Create a new SpectraLayers project or open an existing project file. For more information, see Creating a new project or Opening a project or an audio file
- In the Layers Panel, click the layer that you want to edit.
- Create a selection. For more information, see Selecting spectral data
- Choose Edit > Modify Selection > Smooth to display the Smooth dialog.
- Type values in the Smooth Horizontally by and Smooth Vertically by boxes to set the radius of the blur filter.
- Click OK.
Sharpening a selection
Sharpening a selection allows you to increase the hardness of the selection edge. Sharpening a selection helps you create a precise selection with sharp edges — perfect for creating precise selections of narrow frequency bands.
- Create a new SpectraLayers project or open an existing project file. For more information, see Creating a new project or Opening a project or an audio file
- In the Layers Panel, click the layer that you want to edit.
- Create a selection. For more information, see Selecting spectral data
- Choose Edit > Modify Selection > Sharpen to display the Sharpen dialog.
- Type values in the Sharpen Horizontally by and Sharpen Vertically by boxes to set the radius of the sharpen filter.
- Click OK.
Chapter 8
Modifying spectral data
You can use the modify tools to manipulate spectral data in a layer.
8.1 Erasing spectral data
Erasing an area allows you to simply remove data from a layer.
- Create a new SpectraLayers project or open an existing project file.
For more information, see Creating a new project or Opening a project or an audio file - In the Layers Panel, click the layer that contains the data you want to erase.
- Click the Eraser button . The cursor is displayed as a crosshair.
- Click (or drag) in the spectral display to erase data.
You can use the controls above the spectral display to adjust the erased area.
- Width: sets the time range (in seconds) of the tool.
• Height: sets the frequency range (in hertz) of the tool. - Hardness: sets the hardness of the eraser's edge. 0% creates a soft, feathered edge, and 100% creates a precise eraser with sharp edges.
- Opacity: sets the strength of the eraser. 100% completely erases the spectral data under the eraser, and lower settings allow you to erase gradually.
- Pen Pressure: select the Pen Pressure button ⏻ to use pen pressure to multiply the Opacity value when using a tablet.
8.2 Cloning spectral data
Cloning an area allows you to duplicate data within a layer.
- Create a new SpectraLayers project or open an existing project file.
For more information, see Creating a new project or Opening a project or an audio file
-
In the Layers Panel, click the layer that contains the data you want to clone.
-
Click the Clone button ⏻ . The cursor is displayed as a target.
-
Click the pick button above the spectral display — or hold Alt (Windows) or Option (Mac) — and click the spectral display to pick the source data that you want to clone.
The selection is bound to the area you click in the spectral display. You can use the controls above the spectral display to adjust the selection area.
- freq range (Hz): sets the range of the selection area.
- time range (sec): sets the time range of the selection.
- hardness (%): sets the shape of the selection area — 100% selects a raw block of data; 0% selects a block with feathered edges.
- use tablet pressure: select the button ⏻ to use pen pressure to multiply the power value when creating a selection.
- transpose: select this check box to transpose frequencies. You can clear this check box when working with harmonic data to keep the structure of sound.
-
source: choose the source layer that you want to clone.
-
Click (or drag) in the spectral display to draw the cloned data.
8.3 Drawing a frequency
- Create a new SpectraLayers project or open an existing project file.
For more information, see Creating a new project or Opening a project or an audio file
-
In the Layers Panel, click the layer where you want to draw data.
-
Click the Frequency Pencil button . The cursor is displayed as a crosshair.
-
Click (or drag) in the spectral display to draw frequencies.
You can use the power (dB) and use tablet pressure controls above the spectral display to adjust the drawn frequency.
• power: sets the level of drawn frequencies.
- use tablet pressure: select the button ⏻ to use pen pressure to multiply the power value when drawing frequencies.
8.4 Drawing noise
- Create a new SpectraLayers project or open an existing project file.
For more information, see Creating a new project or Opening a project or an audio file
-
In the Layers Panel, click the layer where you want to draw noise.
-
Click the Noise Spray button 📋. The cursor is displayed as a crosshair.
-
Click (or drag) in the spectral display to draw noise in the spectral display.
You can use the controls above the spectral display to adjust the erased area.
- Width: sets the time range (in seconds) of the tool.
• Height: sets the frequency range (in hertz) of the tool. - Hardness: sets the hardness of the tool's edge. 0% creates a soft, feathered edge, and 100% creates a sharp edge.
• Power: sets the strength (in dB) of the data you paint. - Use tablet pressure: when selected, pen pressure will multiply the opacity of the data you paint.
Chapter 9
Processing spectral data
You can use the commands on the Process menu to manipulate spectral data.
9.1 Generating silence
- Create a new SpectraLayers project or open an existing project file.
For more information, see Creating a new project or Opening a project or an audio file - In the Layers Panel, click the layer where you want to amplify data.
- Select the data you want to replace with silence or position the cursor where you want the silence to begin. For more information, see Selecting spectral data
- Choose Process > Generate > Silence. The Silence dialog is displayed.
- In the Length box, specify the amount of silence you want to insert.
- Click OK.
9.2 Generating a tone
- Create a new SpectraLayers project or open an existing project file.
For more information, see Creating a new project or Opening a project or an audio file - In the Layers Panel, click the layer where you want generate data.
- Select the data you want to replace with a tone or position the cursor where you want the tone to begin. For more information, see Selecting spectral data
- Choose Process > Generate > Tone. The Tone dialog is displayed.
- Choose a setting from the Type drop-down list to indicate the waveform shape you want to generate.
- Use the Power (dB) control to set the level of the generated signal.
- Use the Offset (%) control to apply a DC offset to the generated signal.
- Use the Length (s) control to set the duration of the generated signal.
- Use the Start Frequency (Hz) control to set the frequency of the generated signal.
If you want to sweep a frequency range, select the End Frequency check box and use the End Frequency box to set the end frequency of the sweep. - Click the Preview button to preview your generated signal. During preview, only the generated signal is played, and the generated signal is drawn over the spectral display.
- Click the OK button to mix the generated frequency with the selected layer.
9.3 Generating noise
- Create a new SpectraLayers project or open an existing project file.
For more information, see Creating a new project or Opening a project or an audio file - In the Layers Panel, click the layer where you want generate noise.
- Select the data you want to replace with noise or position the cursor where you want the noise to begin. For more information, see Selecting spectral data
- Choose Process > Generate > Noise. The Noise dialog is displayed.
- Choose a setting from the Type drop-down list to indicate the type of noise (white, pink, brown) you want to generate.
- Use the Power (dB) control to set the level of the generated signal.
- Use the Offset (%) control to apply a DC offset to the generated signal.
- Use the Length (s) control to set the duration of the generated signal.
- Click the OK button to mix the generated noise with the selected layer.
9.4 Adjusting the volume of a selection
Choose Process > Amplitude > Gain to increase the volume of a selection.
- Create a new SpectraLayers project or open an existing project file.
For more information, see Creating a new project or Opening a project or an audio file - In the Layers Panel, click the layer where you want to amplify data.
- Select the data you want to amplify. For more information, see Selecting spectral data
- Choose Process > Amplitude > Gain to display the Gain dialog.
- Type a value in the Gain box to set the amount of gain you want to apply to the selection. Positive values increase volume, and negative values decrease volume.
- Click OK.
9.5 Mixing channels
- Create a new SpectraLayers project or open an existing project file.
For more information, see Creating a new project or Opening a project or an audio file - In the Layers Panel, click the layer that contains the channels you want to mix.
- Choose Process > Amplitude > Channels Mixer. The Channels Mixer dialog is displayed.
- Adjust the faders in the Mix Channels dialog to mix the layer's channels as desired.
The Channels Mixer dialog displays a tab for each channel. Select a tab and use the channel faders to adjust the mix for that channel.
Click the Preview button to preview your mix. During preview, the new mix is played, and the spectral display is updated to reflect the new mix. - Click the OK button to update the layer's channel mix.
9.6 Reducing noise
- Create a new SpectraLayers project or open an existing project file. For more information, see Creating a new project or Opening a project or an audio file
- In the Layers Panel, click the layer that contains the noise you want to remove.
- Create a selection containing only the noise you want to remove. For more information, see Selecting spectral data
- Choose Process > Restoration > Register Noise to register the selection as noise.
- Choose Select > Deselect to clear your selection.
- Create a selection containing the portion of the spectrogram from which you want to remove the registered noise. If you don't create a selection, noise will be reduced in the entire layer. For more information, see Selecting spectral data
- Choose Process > Restoration > Noise Reduction. The Noise Reduction dialog is displayed.
- Use the settings in the Noise Reduction Noise dialog to adjust how the noise you registered in step 4 will be removed from the selection.
a. Use the Tolerance (dB) control to set the level of the noise. Samples below this level will be removed.
b. Use the Reduction Ratio (%) control to set the amount of the noise signal you want to remove. A setting of 100% removes all noise; settings below 100% allow you to make the noise less prominent.
c. Choose Reduce Noise from the drop-down list if you want to reduce noise in the audio signal, or choose Reduce Signal to reduce the dry signal, leaving the noise signal intact.
d. Click the Preview button to preview your settings and adjust as needed.
e. Click the OK button when you're satisfied with your settings.
9.7 Reducing reverb (Pro only)
- Create a new SpectraLayers project or open an existing project file. For more information, see Creating a new project or Opening a project or an audio file
- In the Layers Panel, click the layer that contains the reverb you want to reduce.
- Choose Process > Restoration > Reverb Reduction. The Reverb Reduction dialog is displayed.
- Click the Analyze button to analyze the audio signal.
- Use the Reverb Threshold (dB) control to set the level of the reverb signal. Samples below this level will be reduced.
- Use the Reverb Length (s) control to set the length of the reverb you want to reduce. The length represents the time you can hear the reverb signal after an audio sample.
- Use the Reduction Ratio (%) control to set the amount of the reverb signal you want to reduce. A setting of 100% removes all reverb; settings below 100% allow you to make the reverb less prominent.
- Choose Reduce Reverb from the drop-down list if you want to reduce the effect of reverb in the audio signal, or choose Reduce Signal to reduce the dry signal, leaving the reverb signal intact.
- Click the Preview button to preview your settings and adjust as needed.
- Click the OK button when you're satisfied with your settings.
9.8 Spectral Imprinting : casting and molding (Pro only)
Spectral imprinting (casting or molding) allow you to apply the frequency content across layers.
Imagine you're working on a mix in which the bass guitar is causing the kick drum to become lost in the mix. You could use spectral molding to remove the shared frequencies from the bass guitar, creating space for the kick drum to stand out.
Casting a layer
In spectral casting, the frequency content of the mold leaves an impression in the selected layer in the same way your foot leaves an impression in the sand when you walk on the beach.
- Load the layers you want to process. For more information, see Importing an audio file as a layer
- Adjust the spectral display until the harmonics are clearly visible. For more information, see The Display panel
- In the Layers panel, select the layer to which you want to cast peaks.
- Choose Process > Imprint... to Layer. The Imprint dialog is displayed.
- Select the Cast Operation. and the layer you want to use as the source for casting.
- Type values in the Horizontal Margin and Vertical Margin boxes (or use the spin controls) to control the time and frequency range that is used when casting peaks. Increasing the margin settings produces softer (feathered) peaks.
- Type a value in the Strength box (or use the spin control) to set the gain that will be applied to the cast peaks.
- Click OK to cast peaks with the current dialog settings.
To demonstrate the effect of casting with our bass guitar/kick drum example, let's start with a simple two-layer project. The following image shows the spectrogram of the bass guitar layer. This layer is displayed in red:
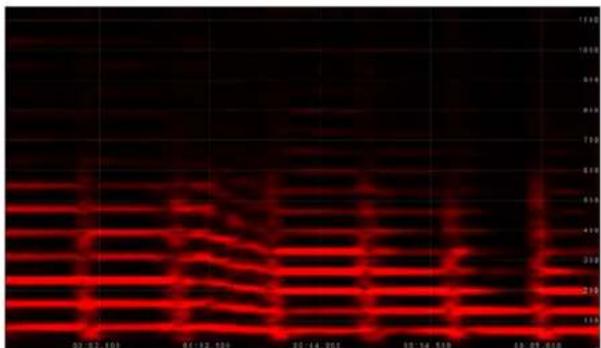
The following image shows the spectrogram of the kick drum:
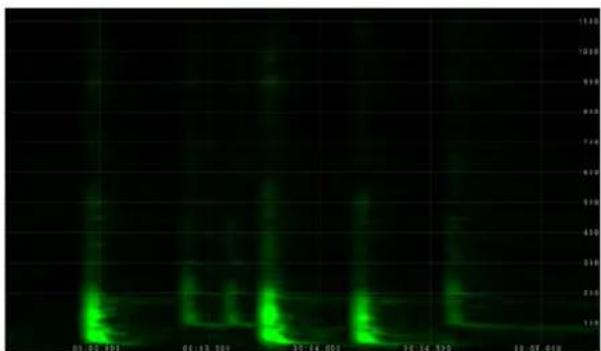
The following image shows the mix of the kick drum and bass guitar. The bass guitar layer is displayed in red. The kick drum appears in the global mix and is displayed in green, You can see where the layers conflict:
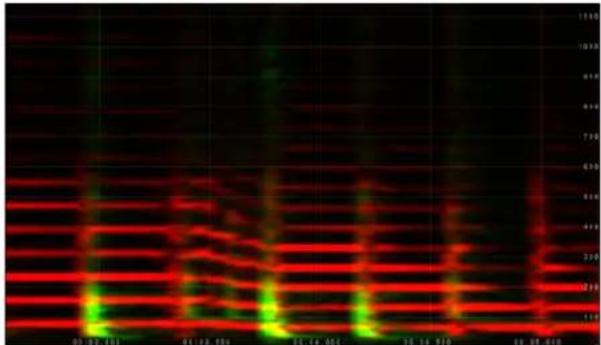
After selecting the content of the bass guitar layer and casting peaks, you can see that the areas that conflicted with the kick drum have been removed:
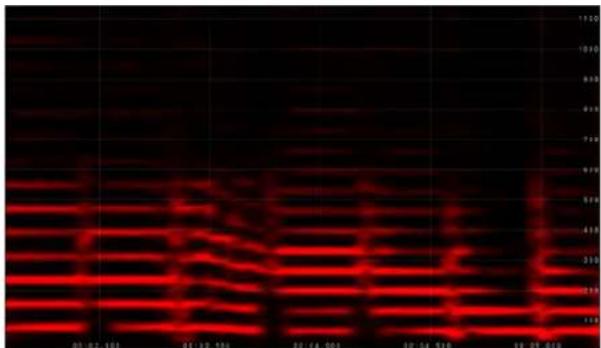
Molding a layer
In spectral molding, the frequency content of the mold that shapes the selected layer, removing spectral data that exists outside the area of the mold in the same way a cookie cutter allows you to cut shapes from dough.
- Load the layers you want to process. For more information, see Importing an audio file as a layer
- Adjust the spectral display until the harmonics are clearly visible. For more information, see The Display panel
- In the Layers panel, select the layer to which you want to cast peaks.
- Choose Process > Imprint... to Layer. The Imprint dialog is displayed.
- Select the Mold Operation. and the layer you want to use as the source for molding.
- Type values in the Horizontal Margin and Vertical Margin boxes (or use the spin controls) to control the time and frequency range that is used when molding peaks. Increasing the margin settings produces softer (feathered) peaks.
- Type a value in the Strength box (or use the spin control) to set the gain that will be applied to the cast peaks.
- Click OK to mold peaks with the current dialog settings.
To demonstrate the effect of molding, let's start with a simple two-layer project with a music bed and a voiceover. The following image shows the global mix of the voiceover and a music bed. The music bed layer is displayed in red. The voiceover layer is displayed in green. You can see where the layers intersect:
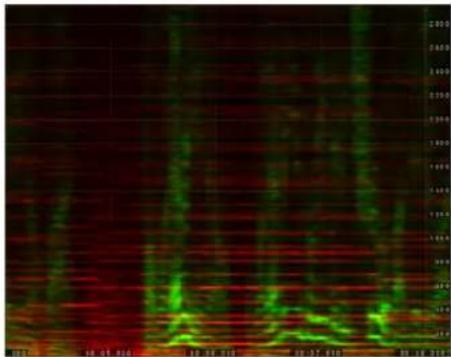
line
| Date | Value | | ---------- | ----- | | 10.05.06 | 250 | | 10.07.01 | 240 | | 10.07.319 | 230 | | 10.18.319 | 220 |After selecting the content of the music bed layer and molding peaks, the voiceover layer is used to mold the frequency content of the music bed. In the following image, you can see that mold of the voiceover layer has cut away portions of the music bed layer that do not intersect with the voiceover:
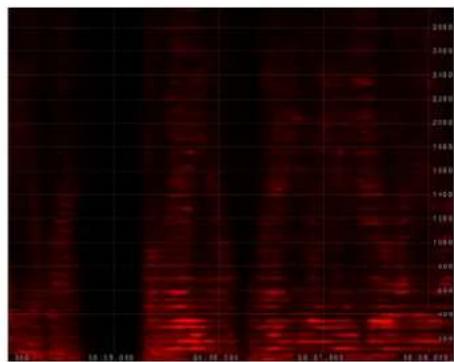
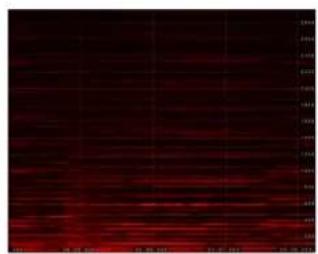
natural_image
Dark abstract image with horizontal red lines and faint grid patterns (no text or symbols)Selected Layer
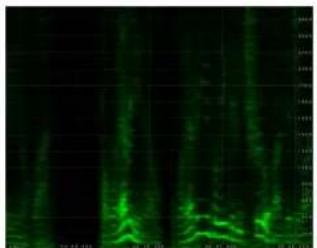
natural_image
Green glowing vertical streaks against a black background, no text or symbols visibleUnselected Layer
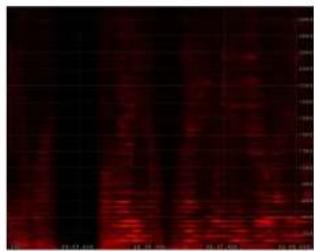
natural_image
Dark red abstract image with faint vertical streaks and grid lines (no text or symbols)Result After Molding
Chapter 10
Working with metadata
SpectraLayers can read and edit metadata, markers, and regions.
10.1 Editing information
Choose Project > Information to display the Information dialog, where you can view and edit metadata information saved in the current sound file.
- Choose Project > Information. The Metadata dialog is displayed.
- Double-click a metadata value and type a new value in the box.
- Press Tab to commit your change and select the next metadata value.
10.2 Editing markers and regions
If you're editing a sound file that contains markers and regions, they will be shown in the spectral display.
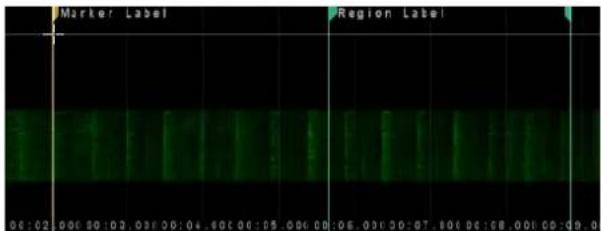
Choose Project > Markers to display the Markers and Regions dialog, where you can change marker and region positions, edit labels, delete markers, and add new markers and regions.

Choose View > Markers and Regions to show or hide markers and regions in the spectral display.
Editing a marker or region
If you want to adjust markers and regions individually, you can drag the marker and region tags in the spectral display. For more detailed editing, choose Project > Markers and Regions to display the Markers and Regions dialog.
- Choose Project > Markers and Regions. The Markers and Regions dialog is displayed.
- Edit the Position value to change a marker or region's start time.
- Edit the Length value to change a region's length.
- Edit the text in the Description column to edit a marker or region's label.

To rename a marker or region quickly, right-click (Windows) or control-click (Mac) the marker or region tag in the spectral display, and then choose Rename Marker/Region from the shortcut menu.
- Close the Markers and Regions dialog to update the spectral display with your changes.
Adding a marker or region
If you want to add a marker quickly, right-click the top of the spectral display and choose Add Marker from the shortcut menu.
If you want to add a region quickly, create a time selection, right-click (Windows) or control-click (Mac) the top of the spectral display and choose Add Region from the shortcut menu.
If you want to add multiple markers and regions with precise control over their position, choose Project > Markers and Regions to display the Markers and Regions dialog.
- Choose Project > Markers and Regions. The Markers and Regions dialog is displayed.
- Click the Add Marker button. A row is added to the marker list in the Markers and Regions dialog.
- Type a value in the Position value to set a marker or region's start time.
- Type a value in the Length value to set a region's length.
- Type a value in the Description column to set a marker or region's label.
- Close the Markers and Regions dialog to update the spectral display with your changes.
Deleting a marker or region
If you want to delete a marker or region quickly, right-click (Windows) or control-click (Mac) the marker tag at the top of the spectral display and choose Delete Marker/Region from the shortcut menu.
If you want to delete multiple markers and regions, choose Project > Markers and Regions to display the Markers and Regions dialog.
- Choose Project > Markers and Regions. The Markers and Regions dialog is displayed.
- Select a marker or region in the Markers and Regions dialog.
- Click the Delete Markers button.
- Close the Markers and Regions dialog to update the spectral display with your changes.
Chapter 11
Tips
This section contains tips and shortcuts to help you work efficiently with SpectraLayers.
Shortcuts
Integration with DAWs and Samplers
Editing in an external editor
Command line options
11.1 Shortcuts
Shortcuts are provided to help you edit quickly and easily in SpectraLayers:

You can list all the keyboard shortcuts from Help > Keyboard Shortcut
If you want to customize keyboard shortcuts, you can use the Shortcut tab in the Preferences dialog. For more information, see Preferences
Navigation and Display shortcuts
| Command Windows Shortcut macOS Shortcut | ||
| Time Cursor Tool | T or click the timeline | T or click the timeline |
| 3D Tool | D or click the 3d pad | D or click the 3d pad |
| Hand Tool H or hold Ctrl and drag the spectral display. | H or hold Cmd and drag the spectral display. | |
| Zoom Tool | Z or Mouse Wheel to zoom horizontally.Shift+Mouse Weel to zoom vertically.Ctrl+Mouse Wheel to zoom horizontally and vertically. | Z or Mouse Wheel to zoom horizontally.Shift+Mouse Weel to zoom vertically.Cmd+Mouse Wheel to zoom horizontally and vertically. |
| Zoom In | = to zoom horizontally.Shift+= to zoom vertically.Ctrl+= to zoom horizontally and vertically. | = to zoom horizontally.Shift+= to zoom vertically.Cmd+= to zoom horizontally and vertically. |
| Zoom Out | - to dezoom horizontally. Shift+- to dezoom vertically. Ctrl+- to dezoom horizontally and vertically. | - to dezoom horizontally. Shift+- to dezoom vertically. Cmd+- to dezoom horizontally and vertically. |
| Toggle Composite View C C | ||
| Adjust Min Amplitude | Alt+Mouse Wheel | Option+scroll up/down |
| Adjust Max Amplitude | Alt+Shift+Mouse Wheel | Option+Shift+scroll up/down |
| Increase Sampling | Page Up | Page Up |
| Decrease Sampling | Page Down | Page Down |
Edit shortcuts
| Command | Windows Shortcut | macOS Shortcut |
| Snap to Unit Grid | Ctrl+G | Cmd+G |
| Undo | Ctrl+Z | Cmd+Z |
| Redo | Ctrl+Y | Shift+Cmd+Z |
| Cut | Ctrl+X | Cmd+X |
| Copy | Ctrl+C | Cmd+C |
| Copy from all layers | Ctrl+Shift+C | Cmd+Shift+C |
| Paste | Ctrl+V | Cmd+V |
| Paste to new layer | Ctrl+Shift+V | Cmd+Shift+V |
| Delete | Del | Delete |
| Heal (Pro only) | Ctrl+Del | Cmd+Delete |
| Select All | Ctrl+A | Cmd+A |
| Deselect | Ctrl+D | Cmd+D |
| Reselect | Ctrl+Shift+D | Cmd+Shift+D |
| Invert Selection | Ctrl+I | Cmd+I |
Layers shortcuts
| Command | Windows Shortcut | macOS Shortcut |
| Select layer | Up/Down Arrow | Up/Down Arrow |
| Duplicate layer | Ctrl+J | Cmd+J |
| Merge down | Ctrl+E | Cmd+E |
| Merge visible layers | Ctrl+Shift+E | Cmd+Shift+E |
| New Layer | Ctrl+Shift+N | Cmd+Shift+N |
| Mute | Shift+M | Shift+M |
| Solo | Shift+S | Shift+S |
| Activate Above | Up Arrow | Up Arrow |
| Activate Below | Down Arrow | Down Arrow |
Transport shortcuts
| Command | Windows Shortcut | macOS Shortcut |
| Stop | Esc | Esc |
| Command Windows Shortcut macOS Shortcut | ||
| Toggle Play Space Space | ||
| Play Shift+Space Shift+Space | ||
| Toggle Preview Ctrl+Space Cmd+Space | ||
| Preview Ctrl+Shift+Space Cmd+Shift+Space | ||
| Record Ctrl+R Cmd+R | ||
| Loop Selection Ctrl+L Cmd+L | ||
| Move cursor left | Left Arrow | Left Arrow |
| Move cursor right | Right Arrow | Right Arrow |
| Move cursor to previous time event | Ctrl+Left Arrow | Option+Left Arrow |
| Move cursor to next time event | Ctrl+Right Arrow | Option+Right Arrow |
| Add Marker | M | M |
| Add Region | R | R |
View shortcuts
| Command | Windows Shortcut macOS Shortcut | |
| Show/Hide Unit Grid | G | G |
| Lock/Unlock spectral display to 0 Hz | Ctrl+Shift+L | Cmd+Shift+L |
| Fullscreen | F11 | Control+Cmd+F |
| Compact/Expand Panels | Shift+Tab | Shift+Tab |
| Compact/Expand Panels and Tools | Tab | Tab |
11.2 Integration with DAWs and Samplers
This section contains information to help you use SpectraLayers with other DAW and sampler applications. For more information about using these applications, please refer to the manufacturer's documentation.
When you set up SpectraLayers as an editor, you can work in another DAW or sampler, move to SpectraLayers for fine edits, and then send the edited file back to your DAW or sampler.
Ableton Live
- In Ableton Live, choose Options > Preferences, and then go to File Folder > Sample Editor.
- Enable SpectraLayers as a sample editor:
- On Windows, browse to C:\Program Files\Steinberg\SpectraLayers 6.0\Win64\SpectraLayers.exe.
- On macOS, browse to /Applications/SpectraLayers.app.
- Enable View > Detail > Clip.
- Right-click the sample and choose Manage Sample File > Edit.

You may want to consolidate your sample before editing.
Avid Pro Tools
See Editing with Pro Tools
Bandlab Cakewalk
Starting with version 2019.05:
- Right-click an audio region, Region FX > SpectraLayers > Create Region FX
For more information, see Editing with ARA
Cockos Reaper
- In REAPER, choose Options > Preferences > External Editors > Add.
-
Enable SpectraLayers as a wave editor:
-
On Windows, browse to C:\Program Files\Steinberg\SpectraLayers 6.0\Win64\SpectraLayers.exe.
-
On macOS, browse to /Applications/SpectraLayers.app.
-
Right-click a sample and choose Open Items in editor (or press Ctrl+Alt+E).
Or ARA mode starting with version 5.978:
- Right-click an audio region, Item Properties...
- Click Take FX...
- Select VST3: SpectraLayers
Alternatively, you can assign ARA to a track:
- Click the FX button of a track
- Select VST3: SpectraLayers
For more information, see Editing with ARA
E-MU Emulator X3
- In Emulator X3, choose Preferences > Other Settings > Paths > External audio editor.
- Browse to C:\Program Files\Steinberg\SpectraLayers 6.0\Win64\SpectraLayers.exe.
- Choose Sample Edit > External Audio Editor.
Final Cut Pro
- In Final Cut Pro, choose System Settings > External Editors > Audio Files.
- Browse to /Applications/SpectraLayers.app.
- Right-click a sample and choose Open in Editor.
FL Studio
- In FL Studio, choose Tools > External tools > File location.
- Browse to C:\Program Files\Steinberg\SpectraLayers 6.0\Win64\SpectraLayers.exe.
- Select Launch with sample.
- Right-click a sample and choose Tools > SpectralLayers.
Logic Pro
- In Logic Pro, choose Preferences > Audio > Sample Editor > External Sample Editor.
- Browse to /Applications/SpectraLayers.exe.
- Select a sample and choose Options > Audio > Open in SpectraLayers (or press Shift+W shortcut).
MAGIX Sequoia
Right-click a media and choose Edit in SpectraLayers.

If Edit in SpectraLayers is not visible, go to Options > External Tools and click Add > SpectraLayers.
MAGIX Sound Forge Pro
Starting with version 13, see Editing with ARA
MAGIX ACID Pro
- In ACID Pro, choose Options > Preferences.
- In the Preferences dialog, click the Editing tab.
- Click the Browse button next to an Editing application box and browse to C:\Program Files\Steinberg\SpectraLayers 6.0\Win64\SpectraLayers.exe.
- Click OK to close the Preferences dialog.
- Right-click an event on the ACID timeline and choose Event Clip > Edit in SpectraLayers.exe. SpectraLayers will start.
- Edit as needed in SpectraLayers.
- When you're done editing, close SpectraLayers. You'll be prompted to export your changes back to ACID Pro. Click Yes, and the edited file replaces the event's clip on the ACID timeline.
MAGIX Vegas Pro
- In Vegas Pro, choose Options > Preferences.
- In the Preferences dialog, click the Audio tab.
- Click the Browse button next to the Preferred audio editor box and browse to C:\Program Files\Steinberg\SpectraLayers 6.0\Win64\SpectraLayers.exe.
- Click OK to close the Preferences dialog.
- Right-click an event on the Vegas timeline and choose Open in Audio Editor (or Open Copy in Audio Editor). SpectraLayers will start.
- Edit as needed in SpectraLayers.
- When you're done editing, close SpectraLayers. You'll be prompted to export your changes back to Vegas Pro. Click Yes, and the edited file is set as the active take on the Vegas timeline.
Native Instruments KONTAKT
- In Kontakt, choose Options > Handling > External wave editor.
- Browse to C:\Program Files\Steinberg\SpectraLayers 6.0\Win64\SpectraLayers.exe.
- Click Ext. Editor in the Wave Editor toolbar
Native Instruments REAKTOR
- In REAKTOR, choose Preferences > Directories > External Sample Editor.
- Browse to C:\Program Files\Steinberg\SpectraLayers 6.0\Win64\SpectraLayers.exe.
- In the Sample Map Editor, click Edit Sample List/Edit.
Presonus Studio One
Starting with Studio One 4.1, you can assign SpectraLayers as an ARA plugin to your regions.
- Go to the Effects tab on the right side of the screen.
- Hold the ALT key, and drag SpectraLayers onto an audio region.
For more information, see Editing with ARA
Steinberg Cubase
Starting with Cubase 10.0.30, you can assign SpectraLayers as an ARA plugin to your regions.
- Select an audio region.
- Click Extensions > SpectraLayers, or go to Audio > Extensions > SpectraLayers
Alternatively, CTRL+right-click a region, Extensions > SpectraLayers
For more information, see Editing with ARA
Steinberg Nuendo
Starting with Nuendo 10.1, you can assign SpectraLayers as an ARA plugin to your regions.
- Select an audio region.
- Click Extensions > SpectraLayers, or go to Audio > Extensions > SpectraLayers
Alternatively, CTRL+right-click a region, Extensions > SpectraLayers
For more information, see Editing with ARA
Steinberg HALion
- In HALion, choose Options > Edit > External Wave Editor.
- Enable SpectraLayers as a wave editor:
- On Windows, browse to C:\Program Files\Steinberg\SpectraLayers 6.0\Win64\SpectraLayers.exe.
- On macOS, browse to /Applications/SpectraLayers.app.
- Right-click the sample editor and choose Sample > Load into External Editor.
Tracktion
- In Tracktion, select a sample and choose Edit audio file > Set the audio editor to use.
- Enable SpectraLayers as a sample editor:
- On Windows, browse to C:\Program Files\Steinberg\SpectraLayers 6.0\Win64\SpectraLayers.exe.
- On macOS, browse to /Applications/SpectraLayers.app.
- Select a sample and choose Edit audio file > Edit using SpectraLayers.
11.3 Editing in an external editor
Combining SpectraLayers with an external wave editor allows you to seamlessly blend the best elements of spectral editing and waveform editing into your workflow.
- Select the layer you want to edit, and create a selection if you want to open only a time- or frequency-limited portion of the layer in your editor.
For more information, see Selecting spectral data
- Choose Edit > Edit in...

You will have to first define the external editor in the Preferences dialog.
- Click the Edit button.
- Edit as needed in your wave editor, and then save the file and close the wave editor.
- After you close your wave editor, the edited layer is updated in SpectraLayers.
11.4 Command line options
SpectraLayers can be called with various command line options. [ ] means optionnal arguments.
Launch options
Theses options only work when SpectraLayers is launched for the first time.
| Command Description | |
| -reset Reset every settings. | |
| -dpiscaling SCALE | Windows only. Forces the dpi scaling of the application. SCALE for a non high-dpi screen would be 1, otherwise it would typically be 2. |
| -cpu INSTRUCTIONSET | Limits optimizations to the specific INSTRUCTIONSET. Possible values are sse4.2, avx, avx2, avx512. |
| -threads X | Forces multi-threading to X threads. |
| -directx | Windows only. Forces the use of DirectX instead of OpenGL. |
| -opengl | Windows only. Forces the use of OpenGL instead of DirectX. |
| -language X | Forces language to X, where X can be an ISO 639-1 code or a path to a .qm file. |
| -debug | Write more detailed log files. |
Session options
Theses options can be called at launch or when a SpectraLayers session is already active.
Calling SpectraLayers with options when a session is active will result in theses options being transferred to the active session.
| Command | Description |
| -deviceapi [API] | Changes the active device to API. API must be an existing Type in Device Preferences. If API is not defined, it will switch back to the previously active API. |
| -edit FILE [START] | Open FILE as a new project with START as the first sample position. If START is not defined, it will start at 0. |
| -merge FILE [START] | Import FILE as a new layer into the active projec, with START as the first sample position. If START is not defined, it will start at 0. |
| -replace FILE [START] | Replace any project created from the same FILE, with START as the first sample position. If START is not defined, it will start at 0. |
| -parent APPLICATION | When opening a file with the above commands, define an application name that will be used for the Export Back text strings |
| -server SERVERNAME | Gets socket notification sent to SERVERNAME for specific events (0: importing file, 1: file imported, 2: exporting file, 3: file exported, 4: file closed) |
| -timerange START LENGTH | Zoom the current project to the specified time range (in samples) |
| -freqrange BOTTOM HEIGHT | Zoom the current project to the specified frequency range (in hertz) |
Index
3d, 23
ACID Pro, 66
ARA, 39
Ableton Live, 64
adding a group, 29
adding a layer, 29, 36
amplifier, 21
amplitude, 25
Bandlab Cakewalk, 65
bark scaling, 24
buffer size, 30
cast, 57
changelog, 2
channel mapping, 30
channels panel, 26
channels remixing, 55
clone stamp, 21, 52
Cockos Reaper, 65
command line options, 69
composite view color mapping, 25
contracting a selection, 51
Cubase, 67
DAWs, 64
deleting a layer, 29
deleting time, 37
device preferences, 30
display panel, 25
display preferences, 31
dpi, 31
drawing tools, 21
duplicate, 29
elliptical selection, 14, 46
eraser, 20, 52
erb scaling, 24
expanding a selection, 50
export, 39
external wave editor, 68
Final Cut Pro, 66
frequency, 41
frequency pencil, 22, 53
frequency range, 26
frequency range selection, 46
frequency selection, 13, 18, 48
gamma, 25
generating a tone, 54
generating noise, 55
generating silence, 54
graph, 44
grid, 24
grouping layers, 36
groups, 36
hand, 22
harmonics, 41
harmonics selection, 19, 48
history panel, 26
imprint, 57
information, 60
input, 30
inserting time, 37
interface preferences, 30
keyboard preferences, 33
keyboard shortcuts, 62
language, 31
lasso selection, 15, 46
layers panel, 27
layout, 31, 33
lock bottom to 0hz, 24
Logic Pro, 66
loop, 23
magic wand, 17, 47
markers, 60
measure tools, 22
mel scaling, 24
merging, 30, 38
metadata, 60
midi-logarithmic scaling, 24
mixing channels, 55
modification tools, 20
mold, 57
move, 12
move tool, 12
mute, 27, 28
navigation tools, 22
new project, 35
noise, 41, 55
noise reduction, 56
noise spray, 22, 53
Nuendo, 68
open, 35
output, 30
overview bar, 23
panels, 25
phase, 28
play, 23
playback tool, 23
polygonal lasso selection, 15, 46
preferences, 30
Pro Tools, 33, 39
rearranging, 29
record, 23, 36
recording, 36
rectangular selection, 14, 46
reducing noise, 56
reducing reverb, 56
regions, 60
reinterpreting, 38
remixing channels, 55
renaming, 28
repair frequency, 21
resampling, 38
resolution sharpness, 26
reverb reduction, 56
sampler, 22, 44
save, 40
selecting, 45
selection brush, 16, 47
selection opacity, 25
selection tools, 12, 45
Sequoia, 66
sharpening a selection, 51
shortcuts, 33, 62
silence, 54
smoothing a selection, 51
snap to grid, 24
solo, 27, 28
spectral casting, 57
spectral display, 24
spectral imprinting, 57
spectral marker spectral region, 22
spectral molding, 57
stop, 23
system preferences, 32
time cursor, 45
time range, 26
time range selection, 46
time selection, 13
time window, 26
tone, 54
tools, 12
transient selection, 20
transport, 23
type, 30
Vegas Pro, 67
volume, 29, 55
wave range, 26
waveform display, 23
zoom, 23
- Getting Started 7
- The Interface 11
- Working with projects 35
- Viewing and selecting spectral data 41
- Modifying spectral data 52
- Processing spectral data 54
- Working with metadata 60
- Tips 62
- Chapter 1
- What's new
- New features in version 6.0
- See also Changelog
- Chapter 2
- Changelog
- Release 6.0.30.201 (2020/01/10)
- Release 6.0.20.195 (2019/11/01)
- Release 6.0.10.192 (2019/07/16)
- Release 6.0.0.190 (2019/07/03)
- Chapter 3
- Introduction
- Spectral...
- ...Layers
- Processes and Tools
- System requirements
- Windows
- macOS
- Chapter 4
- Getting Started
- Chapter 5
- The Interface
- The Toolbars
- The Tool Settings toolbar
- The Tools toolbar
- Move Tool
- Button Item Description
- Selection Tools
- Modification Tools
- Button Item
- Description
- Measure Tools
- Navigation Tools
- Transport
- Waveform Display and overview bar
- Spectral Display
- Panels
- The Display panel
- The History panel
- The Channels panel
- The Layers panel
- Selecting a layer or group
- Changing the color of a layer or group
- Muting and soloing a layer or group
- Muting layers or groups
- Soloing layers or groups
- Changing a layer's phase
- Renaming a layer or group
- Adjusting layer volume
- Adding a layer group
- Adding a new layer
- Duplicating a layer
- Deleting a layer or a group
- Rearranging layers
- Merging layers
- Preferences
- Device
- Interface
- Colors
- Default Transport Options
- Default View Layout
- Display
- Default Units and Scales
- Default Display Options
- Default Display Settings
- Invert Mouse Wheel Axes
- System
- Shortcuts
- Saving and recalling layouts
- Saving a window layout
- Recalling a window layout
- Chapter 6
- Working with projects
- Creating a new project
- Opening a project or an audio file
- Importing an audio file as a layer
- Recording to a layer
- Adding a new layer
- Grouping layers
- Inserting time
- Deleting time
- Merging layers
- Merge down
- Merge visible
- Merge all
- Resampling a project
- Reinterpreting a project
- Exporting your mix
- Editing with ARA
- Editing with Pro Tools
- Editing Pro Tools audio in SpectraLayers
- Sending audio from Pro Tools to SpectraLayers
- Saving a project
- Saving and renaming a project
- Chapter 7
- Viewing and selecting spectral data
- Frequency, harmonics, and noise
- Voice data
- Instruments
- Sounds from nature and engine sounds
- Moving and scaling harmonics vertically
- Formant and time envelope
- Measuring spectral data
- Using the graph
- Using the sampler
- Positioning the cursor
- Selecting spectral data
- Creating a selection with the Select tool
- Creating a selection with the Lasso tools
- Creating a selection with the Selection Brush tool
- Creating a selection with the Magic Wand Selection tool
- Selecting a frequency
- Selecting harmonics
- Selecting all data
- Selecting a region
- Clearing a selection
- Inverting a selection
- Moving a selection
- Scaling a selection
- Adjusting a selection
- Expanding a selection
- Contracting a selection
- Smoothing a selection
- Sharpening a selection
- Chapter 8
- Modifying spectral data
- Erasing spectral data
- Cloning spectral data
- Drawing a frequency
- Drawing noise
- Chapter 9
- Processing spectral data
- Generating silence
- Generating a tone
- Generating noise
- Adjusting the volume of a selection
- Mixing channels
- Reducing noise
- Reducing reverb (Pro only)
- Spectral Imprinting : casting and molding (Pro only)
- Casting a layer
- Molding a layer
- Chapter 10
- Working with metadata
- Editing information
- Editing markers and regions
- Editing a marker or region
- Adding a marker or region
- Deleting a marker or region
- Chapter 11
- Tips
- Shortcuts
- View shortcuts
- Integration with DAWs and Samplers
- Ableton Live
- Avid Pro Tools
- Bandlab Cakewalk
- Cockos Reaper
- E-MU Emulator X3
- Final Cut Pro
- FL Studio
- Logic Pro
- MAGIX Sequoia
- MAGIX Sound Forge Pro
- MAGIX ACID Pro
- MAGIX Vegas Pro
- Native Instruments KONTAKT
- Native Instruments REAKTOR
- Presonus Studio One
- Steinberg Cubase
- Steinberg Nuendo
- Steinberg HALion
- Tracktion
- Editing in an external editor
- Command line options
- Launch options
- Session options
- Index
Brand : STEINBERG
Model : SpectraLayers Elements 6
Category : Audio software