
DVB-30 - Receiver Orava - Free user manual and instructions
Find the device manual for free DVB-30 Orava in PDF.


| Product Type | HD Digital Terrestrial Receiver (DVB-T2) |
| Dimensions (W x D x H) | 14.7 x 7 x 2.8 cm |
| Weight | 0.13 kg |
| Power Supply | AC adapter: Input 100-240V~ 50/60Hz, 0.5A; Output 12V, 1A |
| Power Consumption | Max 8 W (operating), standby < 0.5 W |
| Input Frequency | 175.5 - 866 MHz |
| Bandwidth | 8 MHz |
| Modulation | QPSK / 8 PSK |
| Video Output Resolution | 720P, 1080i, 1080P, 576i, 576P |
| Connectors | SCART, USB 2.0 (host), RF IN, RF OUT, LAN (RJ45), HDMI out |
| Playable Video Formats | AVI, MKV, Xvid, MPEG-2, MP4, VOB, H264 |
| Playable Audio Formats | mp3, E-AC-3 (DD+), wav, MPEG-1 |
| Playable Image Formats | bmp, jpg, gif, tif, png |
| Recording | PVR to USB (FAT32), Timeshift |
| Features | EPG, teletext, subtitles, parental lock, network connectivity, online apps |
| Protection Rating | IP20 |
| Cleaning | Soft cloth slightly dampened with mild detergent; do not use solvents |
| Safety | Double insulation; use only supplied AC adapter; read safety instructions |
| Spare Parts / Repairs | Use only identical spare parts; contact authorized service center |
| Operating Temperature | +5 °C to +40 °C |
| Operating Humidity | 5% to 85% |
Frequently Asked Questions - DVB-30 Orava
User questions about DVB-30 Orava
0 question about this device. Answer the ones you know or ask your own.
Ask a new question about this device
Download the instructions for your Receiver in PDF format for free! Find your manual DVB-30 - Orava and take your electronic device back in hand. On this page are published all the documents necessary for the use of your device. DVB-30 by Orava.
USER MANUAL DVB-30 Orava
Please read this manual carefully before using the device and keep it for future reference.
HD digital terrestrial receiver
Intended use of the device
The device is intended exclusively for receiving digital terrestrial television and radio broadcasts, for playing back the contents of audio/video/image files from external storage data units and for storing audio/video/image files on external storage data units, to the extent specified by technical and operating parameters and functions, safety and user instructions, and external influences of the operating environment.
ORAVA electrical appliances are manufactured according to state-of-the-art knowledge and recognized safety regulations. Nevertheless, improper or improper use or improper use may result in injury or endangerment to the life of the user or a third party or to a third party. damage to equipment and other property.
1. GENERAL SAFETY INSTRUCTIONS AND WARNINGS
This document contains important safety instructions and warnings for the safe, correct and economical operation of electrical equipment. Its compliance helps the user avoid risks, increase product reliability and durability.
1.1 General safety instructions
- We recommend that you carefully read the operating instructions before operating the device and operate the device in accordance with the instructions!
- The safety instructions and cautions in this manual do not cover all possible conditions and situations that may occur when using the device. The user must understand that a factor that cannot be built into any of the products is responsibility and caution. Therefore, these factors must be ensured by the user (s) using and operating this device.
- The manufacturer is not responsible for any damage to health or property if the safety instructions and warnings are not followed!
-
Before using the device for the first time, make sure that the device is complete and shows no visible signs of damage. Do not use the product if it is defective or has any visible damage.
-
If possible, keep the operating instructions close to the device for the entire life of the device. Always keep the operating instructions together with the device for future use and use by new users.
- Use the device only for its intended purpose and in the manner specified by the manufacturer.
- The device is intended for domestic use and similar indoor use without any special focus.
- This device is intended not only for domestic use but also for the following applications:
- in shops, offices and other similar working environments;
- farm buildings;
- in hotels, motels and other residential environments;
- in bed and breakfast establishments.
It is not a professional device for commercial use.
- Do not alter the specifications and characteristics of the device by unauthorized modification or modification of any part of the device.
- The manufacturer is not liable for damage caused during transport, misuse, damage or destruction of the device due to adverse weather conditions.
1.2 Safety of the operating environment
- Do not use the device in an industrial or outdoor environment.
• Always keep the operating environment of the device clean and well lit. - Do not place the device on an unstable surface. Turning over or dropping the device may result in personal injury or damage to the device.
- Do not expose the device to direct sunlight or excessive heat.
- Do not use the device in areas with flammable liquids, gases or dust. The device may be a source of spark, which may result in the ignition of dust or fumes.
Operating environment characteristics
- Ambient temperature: +5 ÷ +40 °C
- Humidity: 5 ÷ 85%
- Altitude: ≤ 2 000 m
- Occurrence of water: occasional water condensation or water vapor
- Occurrence of foreign bodies: the amount and type of dust are not significant
- Degree of protection: min. IP20 (the device is protected from the touch of dangerous parts by the finger of the hand and not protected against the effects of water)
- This degree of protection is not marked on the product and in the technical data given in the operating instructions.
-
If the degree of protection of the enclosure of the product differs from IP X0, this information can be found on the device label or in the technical data of the operating instructions.
-
Other characteristics of the operating environment (mechanical stress
- shocks and vibrations, occurrence of plants, animals, weather conditions) are negligible in terms of their effect on the correct and safe use of electrical device.
1.3 Electrical safety
- Before connecting the device to the mains for the first time, make sure that the mains voltage indicated on the device label corresponds to the mains voltage of the household.
- The electrical device is determined Power supply: 1/N/PE 230V \~ 50Hz.
The electrical safety of the device is guaranteed only if it is correctly connected to the mains.
- Use only the power cord with the plug (power cord) supplied with the device and compatible with the wall socket. Using a different cable may result in fire or electric shock.
- Always connect the device to an easily accessible power socket. In the event of an operating fault, the device must be switched off and disconnected from the mains as soon as possible.
- Do not unplug the power cable / cord by pulling on the cable / cord. Disconnect the power cord by pulling the plug on the power cable / power cord.
- If you use an extension cord, make sure that the total rating (ampere) of all devices connected to the extension cord does not exceed the maximum current rating of the extension cord.
- If you must use an extension power cord or power block, ensure that the extension power cord or power block is plugged into an electrical socket, and not to another extension power cord or power block. The extension cord or power block must be for grounded plugs and plugged into a grounded socket.
- The mains plug of the device must be compatible with the mains socket. Never use any adapters or modify the socket in any other way. Do not use improper and damaged sockets.
- To avoid electrical shock, plug the equipment power cables into properly grounded electrical sockets. If your device is equipped with a 3-pin power cord, do not use adapters that do not have a grounding element, or remove the grounding element from the plug or adapter.
- Do not bend, crush, or otherwise expose the appliance's power cord / power cord to mechanical stress or external heat sources. Damage to the power cord can result in electric shock.
-
If the power cord is damaged, unplug the device and do not use it again. If the power cable / power cord is damaged, it must be replaced by the manufacturer, its service center, or a qualified person to avoid the risk of electric shock.
-
Regularly check and keep the device and the power cord clean. Unplug the power cord regularly and clean it if necessary. Contamination by dust or other substances can cause insulation damage and consequently fire.
- Do not expose the device to water or moisture. Water entering the device increases the risk of electric shock. If the power cord is wet or water has entered the device, unplug it immediately. If the device is connected to the mains socket and if possible, switch off the power to the circuit breaker before attempting to disconnect the power supply. Exercise extreme caution when removing wet cables from a live power source.
- If the protective covers are removed when installing (connecting) the electrical device, the electrical parts must not be accessible to the user after the installation has been completed.
1.4 Safety of persons
- This device is intended for use by non-electrically qualified persons (laymen) in accordance with the manufacturer's instructions.
- Operations of the equipment include operations such as turning the device on and off, user handling and operating parameter settings, visual or auditory inspection of the device, and user cleaning and maintenance.
- This device may be used by children 8 years of age and older, and persons with reduced physical, sensory or mental abilities or lack of experience and knowledge only under the supervision or guidance of the responsible person have been instructed in the safe use of the device and understand.
- Cleaning and user maintenance may only be carried out by children aged 8 years and over only under the supervision of a responsible person.
• Children must not play with the device. - Always keep the device out of the reach of children during use and operation. Remember that the device can also be downloaded with a freely accessible power cord.
- Always exercise caution when operating the electrical device. Do not use the device if you are excessively tired, under the influence of drugs or narcotics that reduce attention and concentration. Failure to observe the operator may result in serious injury.
1.5 Cleaning, maintenance and repair
- Perform routine user cleaning and maintenance of the appliance only as recommended. Do not use solvents or abrasive cleaners for cleaning. Contamination and visible stains from the touch of fingers or hands can be cleaned using cleaning detergents, specially designed for cleaning household appliances.
-
Always disconnect the device from the mains supply when not in use, cleaning, or when the device is faulty.
-
Do not disassemble the device. The device operates with dangerous voltage. For this reason, always switch off the device and disconnect it from the mains during user maintenance. In the event of a fault, have it repaired by an authorized service center.
- Only provide warranty and post-warranty repairs of the electrical device to a competent qualified expert.
2. Special safety instructions. Read carefully!
- The electrical device is designed and manufactured in such a way as to allow safe operation and use by unauthorized persons. Despite all precautions taken by the manufacturer for safe use, operation and use entails certain residual risks and the associated potential hazards.
- The following symbols and their meanings have been used on the device and in the accompanying documentation to indicate potential hazards:

This symbol alerts users that the device is operating with hazardous electrical voltages.
Do not remove protective covers on the device.
Failure to follow the safety instructions while using and operating the equipment may result in:
Risk of electric shock! Risk of serious injury or death!

This symbol alerts users that when
Failure to follow the safety instructions when using and operating the device may result in:
Risk of serious injury or death! Risk of device damage or other property damage!

This symbol indicates that the product is made with double insulation between hazardous live parts (parts with dangerous voltage from the mains) and parts that are accessible in normal use.
Use only identical spare parts for repairs.
Transportation/Transfer
- When using e.g. Take care when moving the truck to prevent the device from toppling over.
- Only transport / carry the device after thoroughly inspecting the area and routes, which must be clear of obstructions.
- Never carry the device while it is in operation. Do not carry the device while it is connected to the power.
- Do not carry the device until all cable connections have been disconnected.
- Carry the device by firmly gripping the base of the device or by firm covers. When moving the device, make sure that your hands and the device are not damp or slippery.
Risk of serious injury or death!
Risk of device damage!
Unpacking/Packaging
- Unpack the device and accessories before putting it into operation and dispose of all parts of the packaging materials, etiquettes and labels, and keep them in a safe place or keep them out of reach of children and incapacitated persons.
- Clean the unit according to the instructions in the „Commissioning“ section or before using the unit. „Cleaning“.
- Never clean the device, the remote control, the power cord with plugs, and signal cables with connectors under running water or immerse in any liquid.
- Clean these parts only with a slightly damp cloth and wipe them dry or allow to dry.
- Clean the unit only when the unit is turned off and unplugged.
Risk of electric shock!
Risk of electric short circuit!
Inspection/Commissioning
- We recommend performing initial and subsequent regular inspections of the device.
- Never use the device if it is incomplete, damaged or any part of it has been damaged during use.
- Do not use non-original and incomplete parts and accessories.
- Use only the recommended parts and accessories to install and use the device.
- If the device has been transported and stored at low temperatures or excessive humidity (e.g. in winter), first let it acclimatize for about 1-2 hours at room temperature to remove any moisture in the electrical / electronic parts, that occurs when the ambient temperature changes.
Risk of serious injury!
There is a risk of damage to the equipment or other property damage!
Location/Installation
- Only place the device on:
- flat, solid and stable mats - for tables and stools, furniture parts suitable for placing audio / video equipment.
- Always make sure that the area where you want to place the device has sufficient mechanical strength and load capacity.
- Do not place the device and the remote control:
• for unstable carts, stools or tables,
- on uneven, unstable and contaminated surfaces,
- on the tight edge of tables, tables or furniture parts,
- near heat sources,
- near containers with water or other liquids,
- in close proximity to sources of strong magnetic or electromagnetic fields.
Warning!
- Do not place containers of water or other liquids on the device or on the shelves that are placed above the device.
- Do not place open flame objects on the device or on shelves that are placed above the device.
- Warning!
- Place the device in a place where children cannot reach freely.
- Keep children away from the device. The device may fall over children and cause serious injury.
- Mechanical damage (e.g. rupture of plastic covers) of the device can cause serious injury.
Risk of serious injury!
There is a risk of damage to the equipment or other property damage!
Warning!
- To reduce the risk of electric shock or fire, do not expose this apparatus to rain or moisture.
- Do not place or use the device in areas where water is present and near containers containing water. Do not place any containers with water or other liquid (e.g. vases, etc.) on the device. Do not remove the device if it falls into water. Unplug the power cord from the wall socket before removing the device from the water. In such cases, take the device to a specialist workshop to check that it is safe and working correctly.
Risk of electric shock!
Risk of electric short circuit!
- Do not install the device in rooms (e.g. closed bookcase cabinets, built-in cabinets and cabinets, etc.) where there is insufficient surrounding space and ventilation.
- Leave sufficient clearance around the unit to ensure the required air circulation. It is recommended to keep min. 10 cm from all sides.
- Do not partially cover the device. Do not place any objects and / or decorative and other fabrics on the device, and do not allow foreign bodies to enter the ventilation openings or openings of the device.
- Do not block the air vents of the covers. Air ventilation ensures safe and reliable operation of the system. Covering the device may result in overheating and damage.
There is a risk of damage to the device or other property damage!
Risk of fire!
Warning!
- Do not expose the unit and the remote control to:
- heat and direct sunlight equipment,
• vibration and mechanical stress,
• excessive dustiness,
• water and excessive moisture,
- insects,
• aggressive external environment.
- Do not subject the device or its accessories to strong vibrations and / or shocks. Do not drop or hit objects on the device.
Risk of serious injury!
There is a risk of damage to the equipment or other property damage!
- Do not use the device near an open flame (such as lighted candles). Do not use the device in potentially explosive atmospheres in the presence of flammable substances and their vapors, mist or dust, and in atmospheric conditions where they easily spread in the air after combustion of the flue gas.
There is a risk of damage to the equipment or other property damage! Risk of explosion and / or fire!
Operation/Supervision
- Keep the device under supervision during use and operation!
- Never leave the device freely accessible and do not store it freely accessible by a power cord and signaling cables. Children, incapacitated persons, or animals could pull the device away from the power cord or signal cables.
- Operation, and especially long-term operation, can cause the unit to become very hot.
- The device contains parts of the covers (ventilation grilles) that may become hot during operation. Do not touch these parts of the device.
Risk of serious injury!
There is a risk of damage to the device or other property damage!
Risk of fire!
- Do not turn the device on or off by plugging in or unplugging the power cord.
- In normal use, always connect the device to the mains socket first and then switch it on with the main switch.
- After use, turn off the device with the main power switch, and then unplug the power cord.
- Do not use the unit if the main switch does not work.
- The device is under dangerous voltage when the AC power is connected.
Risk of electric shock!
- Ensure that all electrical cable connections are securely and correctly connected. If the power cord is not firmly connected to the device, be careful not to disconnect it from the device while the plug is connected to the power socket. The free end of the power cord is under dangerous voltage. Do not insert any conductive objects into the terminal.
- Do not touch the mains plug during a thunderstorm device or antenna signal system cords. You could be hit by an electric shock from an atmospheric discharge. Unplug the power cord during lightning storms or when unused for long periods of time.
- Unplug the unit from the power source if you leave children or incapacitated persons near the unit unattended.
- Do not bundle the power cord and signal cables together. Do not wrap the cables together. Do not expose the power cord and signal cables to mechanical stress and damage. The power cord must remain accessible for safe use disconnect the device from the power supply.
- Unplug the power cord from the wall socket if you do not intend to use it for an extended period of time. Dust deposits and environmental humidity can cause electrical insulation to be impaired.
Risk of serious injury!
Risk of electric shock! Risk of fire!
- Do not store the device with the wrapping a power cord around his body. Mains cord loose “Fold” in the way it was folded in the original packaging from the manufacturer.
- Never overload the device beyond the limits specified in the technical data!
Warning!
- Avoid overheating and overloading when using the device.
- If you notice any abnormal effects (sounds, odors, smoke, ...) while using the unit, turn off the unit immediately and unplug it. Have the device checked by a specialist garage.
- If any safety part (mechanical, electrical / electronic) is part of the device, never put it out of operation! Do not use the device if the safety part / component is damaged or malfunctioning!
- Never underestimate possible dangers and be careful!!!
Power Supplies/Batteries
- Safety instructions for replacing and disposing of the remote-control power supply - to batteries.
Warning!
- The device is equipped with a power source that can be replaced by the user - batteries for the remote control.
- If the safety instructions are incorrectly replaced and not observed, there is a danger of accumulators - electric short circuit, explosion, electrolyte leakage, burns.
- When replacing batteries, replace only with the same or equivalent type specified by the manufacturer and always in the recommended manner.
- Dispose of batteries according to the applicable regulations and regulations for electronic disposal devices.
Warning!
• Always store batteries out of reach of children, incapacitated persons and pets.
- Store used batteries carefully to prevent children from swallowing them. If batteries are swallowed, seek medical advice immediately.
- Use only the same or equivalent type of batteries specified by the manufacturer.
Do not use new batteries with old ones. This may lead to remote-control damage.
- Wipe the batteries with a dry cloth before inserting them into the remote. This ensures better electrical contact.
- Insert the batteries with the “+” and “-” symbols on the batteries and on the inside of the remote-control cover matching.
- Do not handle batteries with metal tools (e.g. tweezers, etc.). The conductive contact of both battery terminals can cause a short circuit.
- It is recommended that you remove the batteries from the unit when not in use for a long time. This protects the device from damage from leaking batteries. Should the batteries leak,
Have the remote control cleaned by an authorized service center
Caution!
- Do not charge, heat, disassemble, or dispose of in fire.
- Batteries may explode if mistreated.
- In case of contact, seek medical advice.
Risk of serious injury or death! Risk of explosion!
Risk of burns from leaking electrolyte!
What is DVB-T2?
The function is the same as a conventional TV, but since the signal is digital, you need a digital terrestrial receiver (set-top box) to convert it. This means that more channels and additional services can be transmitted such as interactivity or widescreen broadcasts.
DVB-T2 is the new standard of digital terrestrial TV broadcasting. As a result, multiple TV programs can be embedded in a single broadcast multiplex. This standard is based on the DVB-T standard. Published
DVB consortium. Current devices capable of receiving DVB-T are not compatible (unable) to receive DVB-T2. Even if you have a newer device that supports MPEG4, Full HD and similar technologies, unless DVB-T2 support is explicitly mentioned in the manual, the device is not able to receive this broadcast.
DVB-T broadcasts used MPEG-2 or MPEG-4 compression format.
In the case of DVB-T2, compression formats older than H.264 and later are suitable H.265 (HEVC).
Features and functions
- Reception of digital terrestrial TV and radio broadcasts
- Audio file playback (mp3, E-AC-3 (DD +), wav, MPEG-1 (LAYER 1 & 2))
- Playback of image files (bmp, jpg, gif, tif, png)
• Video (movie) playback (AVI, MKV, Xvid, MPEG-2, MP4, VOB, H264) - Recording TV broadcasts to storage media
- USB connector supporting USB device connection
- HDMI output connector, SCART connector and RF OUT connector
Power supply
Power supply
1 Connect the DC plug of the supplied AC adapter to the DC IN jack on the back of the device, and then connect the AC adapter to a 230V \~ 50Hz electrical cosket.
2 The device will turn on automatically, and this is the very first power on, the initial installation will start
Warning!
Use only the supplied AC adapter designed exclusively for this unit. Do not use any other AC adapters.
The device is at a constant voltage while the AC adapter is plugged into an electrical outlet, even if the device itself is off-standby.
Description of parts and controls
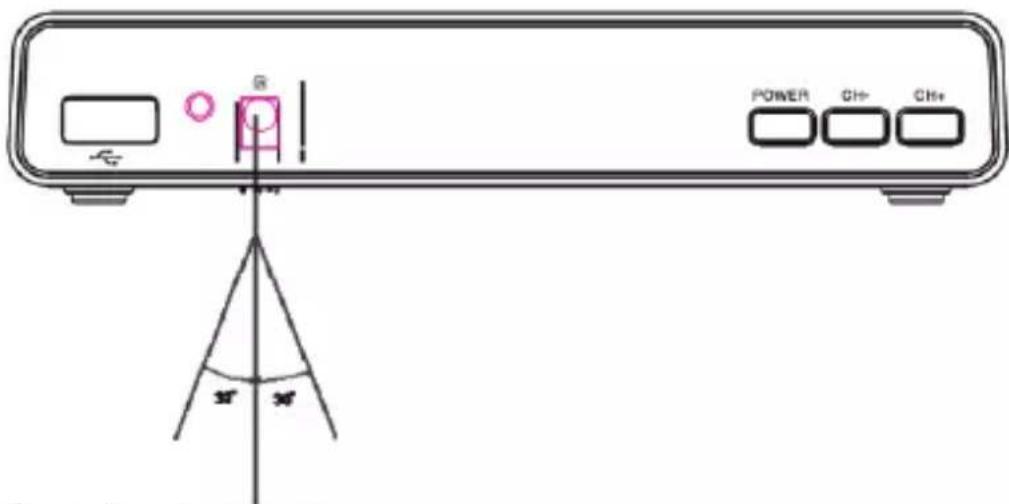
Device Features Front
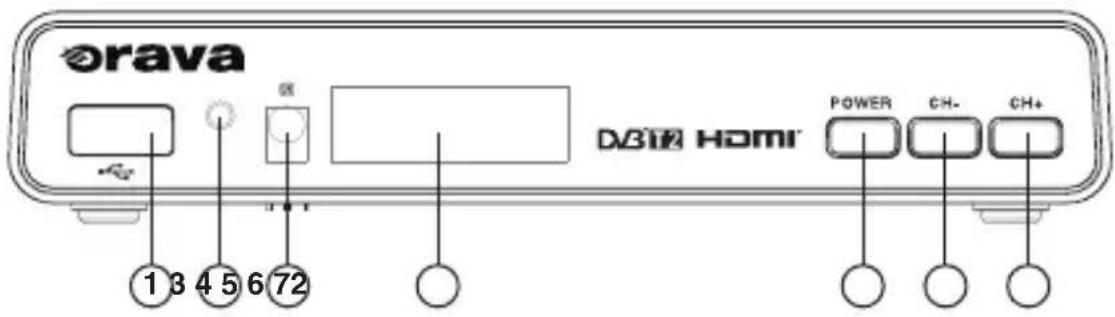
1 USB connector
2 Standby indicator (lights red in standby mode)
3 Remote control sensor
4 Display
5 POWER button (On / Off from standby)
6 CH- (Toggle preset down) button
7 CH+ (Toggle preset up) button
Back side
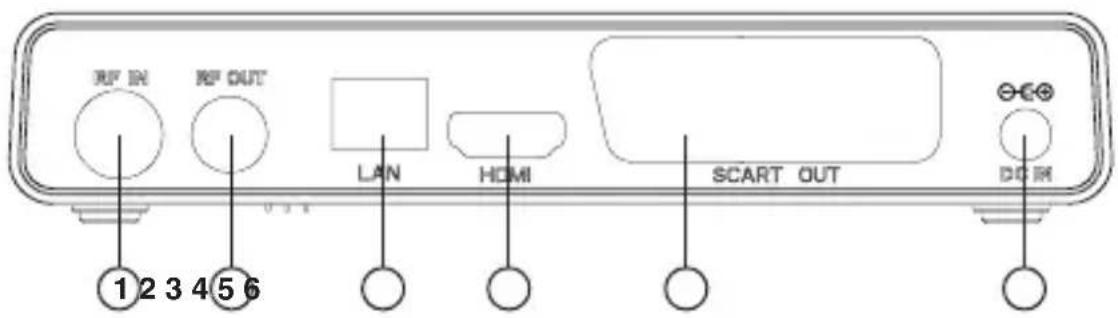
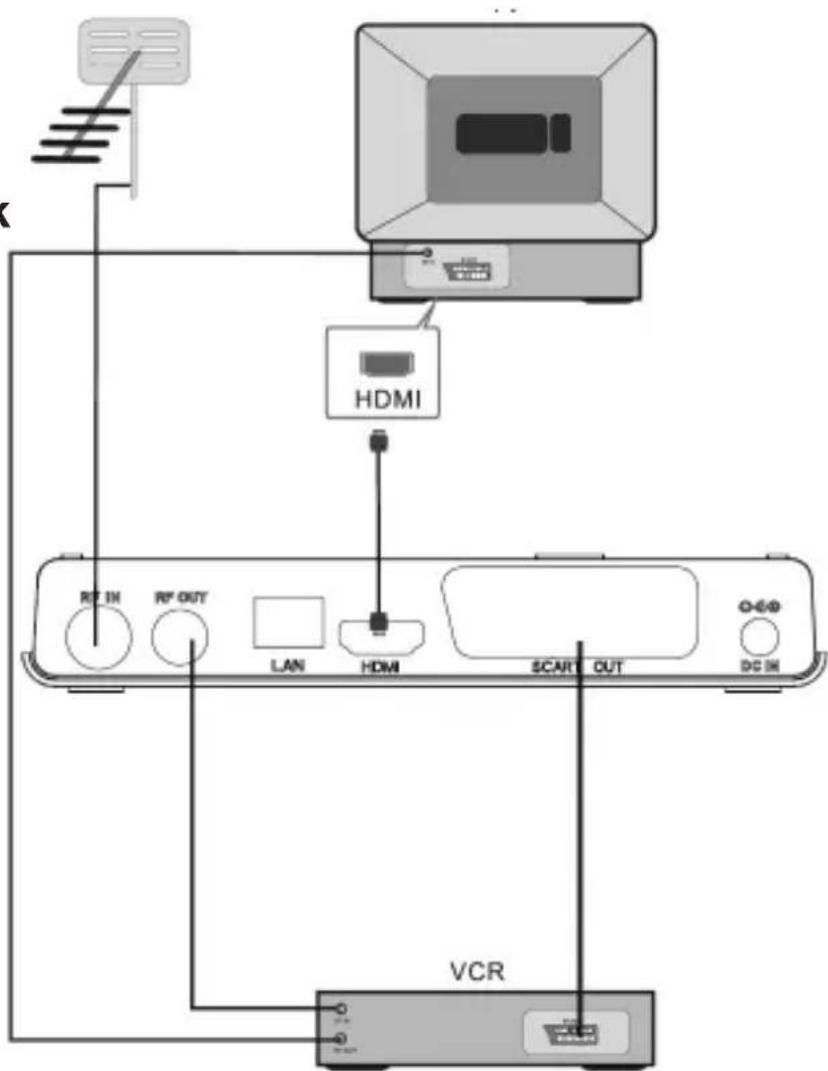
1 RF IN - Connects to the antenna
2 RF OUT - Connects to the antenna jack of another device (STB, TV, etc.).
3 LAN (Input Network Connector) - Connects to the Internet or the network via a router
4 HDMI (HDMI out jack) - Connects to a TV
5 SCART OUT - Connects to a TV
6 DC IN (Connecting the supplied AC Adapter)
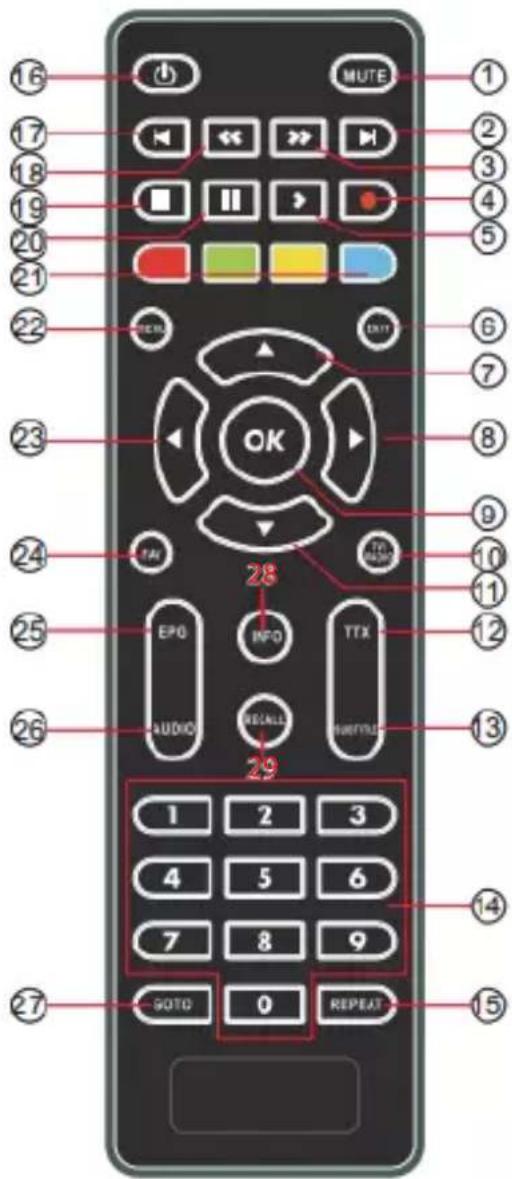
Remote Control (RC)
21 Red button (Selecting the red option in teletext/Switching a file (YouTube search))
1 MUTE button
2 ▶▶▶I (NEXT) button (Forward)
3 ▶▶ (FWD) button (Fast forward)
4 ● (REC) (PVR) button (Start recording)
5 ▶ (PLAY) button
6 EXIT button
7 ▲ (CH +) button
(Scroll Up/Toggle Presets Up)
8 ▶ (VOL +) button
(Scroll right/Volume up)
9 OK button
(Confirm / View Channel List) 28
10 TV/RADIO button
(Switch between TV and radio stations)
11 ▼ (CH-) button
(Scroll Down/Toggle Presets Down) 29
12 TTX (Teletext On Off) button
13 SUBTITLE button
(Show captions if available)
14 0 - 9 buttons (Numeric buttons for direct selection)
15 REPEAT button
16 ⏻ (STANDBY) button
17 ◀◀(PREV) (Reverse)
18 ◀◀ (REV) button (Fast reverse)
19 ■ (STOP) button
20 II (PAUSE) button
Green button (Select teletext green/Resolution switch)
Yellow button (Select teletext yellow/Aspect ratio)
Blue button (Select teletext blue/Timer setting)
22 MENU button (Main Menu Display)
23 ◀ (VOL-) button (Scroll left/Volume down)
24 FAV button
25 EPG (Electronic Program View) button
26 AUDIO button
27 GOTO button (Display navigation bar and play time selection)
28 INFO (Program information display) button
29 RECALL button
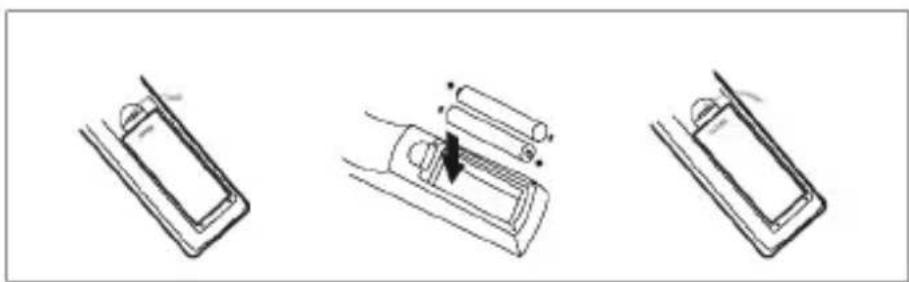
Inserting/replacing the batteries in the remote control
The unit can be operated with the supplied remote control.
Insert two AAA size batteries into the remote control according to the correct polarity + and - .
natural_image
Three-step diagram showing a battery holder, its internal mechanism, and its side view (no text or symbols)When using the remote control, point it at the sensor to receive signals from the remote control on the device within an angle of up to 60^ . Otherwise, the DO may not work.
Replacing the battery
If the remote control no longer controls the device, the batteries may be weak. In this case, replace the batteries as follows.
Open the battery compartment cover at the back of the remote.
Remove the batteries and insert new batteries of the same type according to the correct polarity + and -. Always replace both batteries.
Notes
- Do not leave the remote control in very hot or humid places.
- Do not use an old battery.
- Make sure that no object gets into the remote control, especially during battery replacement.
- Do not place the device so that the remote sensor is exposed to direct sunlight or light from lamps. Otherwise, malfunctions may occur when operating with the remote control.
- If you will not be using the remote control for an extended period of time, remove the batteries to prevent battery leakage and corrosion.
Connecting the device
Connection to TV
SCART OUT connector
Connect the SCART cable (not supplied). The connection provides higher picture quality.
HDMI connector
Connect the HDMI cable (not supplied). The connection provides the highest image quality
and the ability to reproduce high definition images on a TV capable of displaying the image in progressive format. The audio signal is also transmitted via the HDMI connection.
RF OUT connector
Connect the aerial cable (not supplied) from this unit to the RF IN jack, for example. on TVP. Connections are used to transmit both video and audio signals from this unit.
Antenna connection
RF IN connector
Connect the aerial cable (not supplied)
from the cable box or the indoor or outdoor DVB-T antenna.
The connection is for receiving a digital signal.
Connect to a data network LAN input connector
Connect the machine to a router or data network using a
LAN cable with a LAN connector.
Anténa TVP
Turn on the device
Basic operations
Turn on
After connecting the unit to the TV (or other devices) and to the power source, press ⏻ (on/off) on the remote or POWER on the unit to turn on the receiver.
The unit turns on automatically when the power is plugged into an electrical socket. If the device is already set up, you can use it or press MENU to display the main menu.
Notes
- To ensure easy access, the electrical socket should be as close to the device as possible.
- Do not place the device on an unstable or inclined surface.
Switch
When the unit is turned on, pressing ⏻ (on/off) on the remote or POWER on the unit will turn off the unit.
Note
Do not disconnect the AC Adapter from the wall socket (wall socket) before the device turns off. Doing so may damage the device.
Initial setup
First start and tune in stations
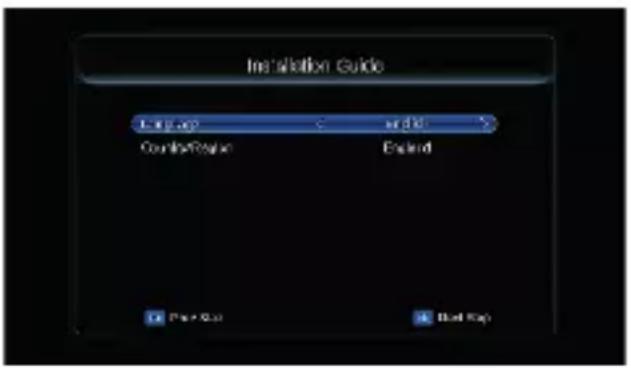
When you connect and turn on the device for the first time, the initial installation menu of the Installation Guide is displayed.
Press ◀/▶ to select the desired display language in “Language”.
Depending on which language you select in this menu item, the OSD Menu will be displayed as follows.
Press ▲/▼ to select "Country / Region" and press ◀/▶
select the desired country (Slovakia) and press OK.
The next Menu appears, press ▲/▼ and ◀/▶ to select TV System, Video Resolution and Aspect Ratio as desired, then press OK again.
The next Menu appears, press ▲/▼ and ◀/▶ to set FTA, Antenna Power and Summer Time as desired, then press OK again.
When you press OK, the "Auto Search" window appears and all available TV and radio stations are tuned in automatically.
The tuning progress bar appears and tuned stations are added to the list in the TV and Radio window.
Note:
Auto-tuning may take a few minutes.
During tuning, press EXIT to cancel auto tuning at any time. During tuning, information about the tuned TV and radio stations and the progress bar appears.
When tuning is complete, the first tuned preset is displayed and Menu is turned off.
The device is ready for operation.
Operations in the Main Menu
When the device is turned on, press MENU to display the main menu. In the illustrations in this manual, the Menu is shown in English.
The menu contains the following items:
Channel List
Channel Search
Language
AV Setting
Local Time
Setting System
Media Center
Network
Channel List Menu
When the device is turned on, press MENU to display the main menu.
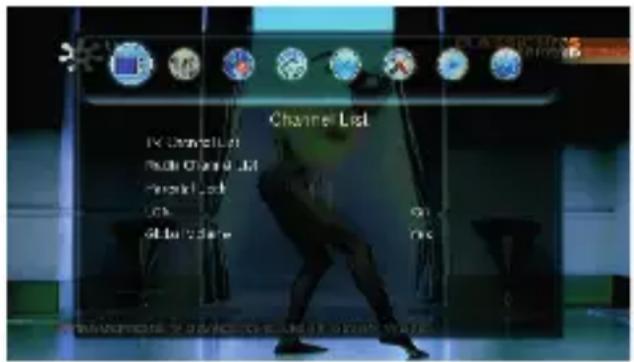
Press ◀/▶ to display "Channel List". Then use ▲/▼ to highlight the desired submenu option.
TV Channel List
The "TV Channel List" item allows you to select and edit TV channels in the list. Press
▲/▼ to highlight "TV Channel List" and press OK.
A list of tuned TV channels appears in the table.
You can select the desired channel from the list by pressing ▲/▼ and use the buttons to edit the channel, move it, skip it, lock it, delete it, favorite it (FAV), sort it (SORT).
The functions of the color buttons and other available buttons are described in the bottom bar. If you use the green button to lock the selected channel, you will be prompted for your password. The password is set to 0000 at the factory. You can change it later
in the settings in this menu under Parental Lock - New Password.
After entering the password, you can perform the selected operation.
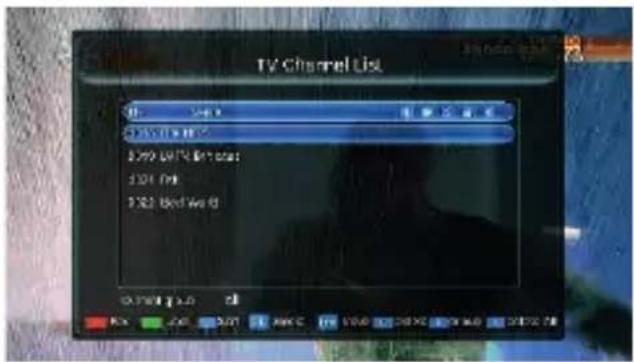
An example of moving a TV channel:
- In the table, select the row with the desired TV channel you want to move and press OK to confirm, then press INFO (corresponds to the Move function). A relocation icon appears next to the program name.
- Use ▲/▼ to select a new position for the program and press INFO again. The program will move to a new position.
Press OK to confirm the position.
You can also intuitively follow other functions, such as lock, add to favorites, delete a program, delete all programs, etc.
To exit the table, press EXIT. You will be prompted to save your changes. To save the changes, select Yes and press OK.
If you do not want to save the changes, select No and press OK.
Radio Channel List
The “Radio Channel List” item allows you to select and edit radio channels in the list. Press ▲/▼ to highlight “Radio Channel List” and press OK. The list of tuned radio channels in the table appears.
The procedure and operations are the same as for the TV channel list.
Parental Lock
The “Parental Lock” item allows you to make settings for the parental control of minors’ custody.
Press ▲/▼ to highlight "Parental Lock" and press OK.
You will be prompted for a password. The password is set to 0000 at the factory. You can change it later in this entry.
When you enter the password, the Age Limit, Menu Lock, Channel Lock, New Password, Confirm Password options are displayed.
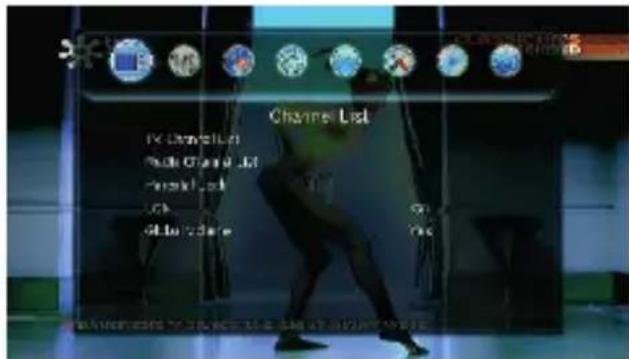
The age limit is used to set the age limit.
Press ◀/▶ to select the Show All (Cancel Parental Control), Lock All, or Individual Age Level settings.
After setting, press EXIT to turn off the item (display previous menu) and save the selected settings.
Menu Lock allows you to turn the Menu lock on or off. When you lock the Menu, viewers without a password will not be able to make changes to the Menu. Channel Lock enables or disables channel lock. When you turn on channel lock, viewers without a password will not be able to edit channels. New Password allows you to set the new password required for the locked settings. The factory default password is "0000". Press ▲/▼ to highlight "New password" and enter the desired new 4-digit password using the number buttons. It will automatically switch to the next item, Confi rm Password. Enter the new 4-digit password you entered using the number keys. The "Password changed" window appears. Press OK. Press EXIT to turn off the item (display previous menu) and save the selected settings.
LCN The “LCN” item enables/disables the display of the logical channel number (for better identification of the program being watched). Press ▲/▼ to highlight “LCN”. Press ◀/► to select On or Off. Press EXIT to turn off the item (display previous menu) and save the selected settings.
LCN The “LCN” item enables/disables the display of the logical channel number (for better identification of the program being watched). Press ▲/▼ to highlight “LCN”. Press ◀/► to select On or Off. Press EXIT to turn off the item (display previous menu) and save the selected settings.
Global Volume If this item is set to Yes, all channels will have the same default volume. If set to No, each channel will have its own independent volume setting. Press EXIT to turn off the item (display previous menu) and save the selected settings.
Global Volume If this item is set to Yes, all channels will have the same default volume. If set to No, each channel will have its own independent volume setting. Press EXIT to turn off the item (display previous menu) and save the selected settings.
Channel Search
When the device is turned on, press MENU to display the main menu.
Press ◀/▶ to display "Channel Search". Then use ▲/▼ to highlight the desired submenu option.
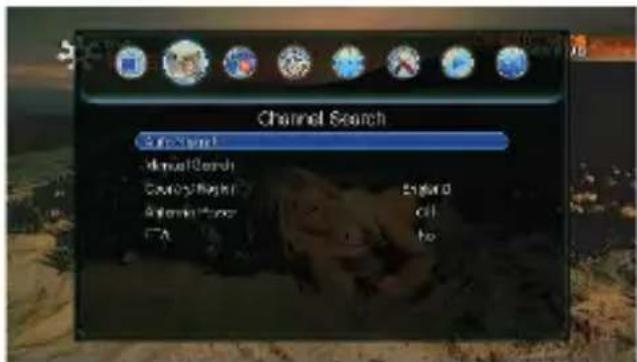
Auto Search
Press ▲/▼ to select "Auto Search" and press OK.
A confirmation window will appear to remove all channels already tuned. If you do not want to retune, select No and press OK.
If you select Yes and press OK, the "Auto Search" window will be displayed and all available TV and radio stations will be tuned in automatically.
The tuning progress bar appears and tuned stations are added to the list in the TV and Radio window.
Note:
Auto-tuning may take a few minutes.
During tuning, press EXIT to cancel auto tuning at any time. During tuning, information about the tuned TV and radio stations and the progress bar appears.
When tuning is complete, the first tuned preset is displayed and Menu is turned off.
Auto-tuning deletes a previously stored program database.
Manual Search
Manual tuning allows you to add only newly found programs to the program database without deleting the previously stored database. You need to know the tuning frequency and bandwidth.
Press ▲/▼ to select “Manual Search” and press OK. The Manual Search window appears with the Channel, Frequency, Bandwidth, NIT Search, and Start Search options.
Press ◀/▶ to select the desired channel number. If there is sufficient TV signal, it will be displayed (level, quality) in the form of signal bars next to Signal strength and Signal quality (also in%).
Depending on the channel selected, 2 items are also displayed, namely “Frequency” and “Bandwidth”.
Under NIT Search, choose whether to use this format (Yes setting) or No when tuning.
After entering the channel number and choosing whether or not to use NIT search, scroll to Start Search and press OK to activate manual tuning.
note:
During tuning, press EXIT to cancel manual tuning at any time. During tuning,
information about the tuned TV and radio stations and the progress bar appears.
When tuning is complete, the first preset manual is displayed and Menu is turned off.
Country/Region
Press ▲/▼ to highlight “Country/Region”.
Press ◀/▶ repeatedly to select the desired country.
If the country is not in the options, select the nearest country using the same broadcast standard.
Antenna Power
Press ▲/▼ to highlight "Antenna Power".
Press ◀/▶ to select Off or On to set the 5V antenna power if you have an active antenna connected.
FTA
Press ▲/▼ to highlight "FTA".
Press ◀/▶ to select No or Yes to include FTA (free) channels in the channel tuning result.
Note:
After changing the “Country/Region” setting, the time zone is set to the selected country. At the same time, a new time may appear on the display.
Language Menu
"Language" allows you to make language settings.
When the device is turned on, press MENU to display the main menu.
Press b◀/▶ to display "Language".
Then use ▲/▼ to highlight the desired submenu option.
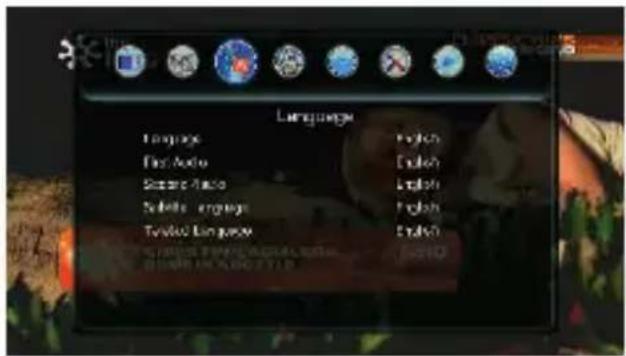
Language
"Language" allows you to select the language for the on-screen displays.
Press ▲/▼ to highlight "Language".
Press ◀/▶ to select the desired language.
Press EXIT to turn off the item and save the selected settings.
First Audio
"First Sound" allows you to select the language for the primary (main) sound.
Press ▲/▼ to highlight "First Audio".
Press ◀/▶ to select the desired language.
Press EXIT to turn off the item and save the selected settings.
Second Audio
"Second Sound" allows you to select the language for the secondary (sub) sound.
Press ▲/▼ to highlight "Second Audio".
Press ◀/▶ to select the desired language.
Press EXIT to turn off the item and save the selected settings.
Subtitle Language
The "Subtitle Language" option allows you to select the language for the subtitle display. Press ▲/▼ to highlight "Subtitle Language".
Press ◀/▶ to select the desired language.
Press EXIT to turn off the item and save the selected settings.
Teletext Language
The "Teletext Language" item allows you to select the language for displaying subtitles.
Press ▲/▼ to highlight "Teletext Language".
Press ◀/▶ to select the desired language.
Press EXIT to turn off the item and save the selected settings.
AV Setting Menu
"AV Settings" allows you to make audio and video signal settings. When the device is turned on, press MENU to display the main menu.
Press◀/▶ to display "AV Setting".
Then use ▲/▼ to highlight the desired submenu option.
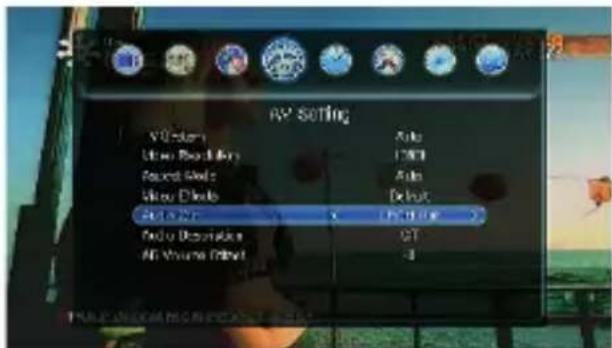
TV systém (TV System)
"TV System" allows you to switch the standard to PAL, NTSC or Auto.
Press ▲/▼ to highlight "TV System".
Press ◀/▶ to select the desired standard.
Press EXIT to turn off the item and save the selected settings.
Video Resolution
The “Video Resolution” option allows you to set the resolution of the video output signal. Press ▲/▼ to highlight “Video Resolution”.
Press ◀/▶ to select the output image resolution to match the connected TV. Press EXIT to turn off the item and save the selected settings.
Aspect Mode
"Aspect Mode" allows you to switch the video output format: "16: 9 Letter Box", "Auto", "16: 9 PanScan", "4: 3 Letter Box", "4: 3 PanScan".
Press ▲/▼ to highlight "Aspect Mode".
Press ◀/▶ to select the desired aspect ratio (so that the picture best suits the connected TV).
Press EXIT to turn off the item and save the selected settings.
Video Effects)
"Video Effects" allows you to set the video output signal.
Press ▲/▼ to highlight "Video Effects".
Press ◀/▶ to select the desired picture appearance adjustment. You can select Default, Live (for live) or Standard.
Press EXIT to turn off the item and save the selected settings.
Audio Out
"Audio Output" allows you to select the digital audio output signal.
Press ▲/▼ to highlight "Audio Out".
Press ◀/▶ to select the desired output signal - LPCM Out, BS Out, Force SPDIF Out.
Press EXIT to turn off the item and save the selected settings.
Audio Description (AD)
“AD Volume Shift” allows you to adjust the volume (shift) of the audio description for blind people relative to the normal TV broadcast sound if such description is broadcast with the program and Audio Description (AD) is on.
Press ▲/▼ to highlight "AD Volume Offset".
Press ◀/▶ to adjust the volume shift from -3 to +3.
Press EXIT to turn off the item and save the selected settings.
AD Volume Offset
“AD Volume Shift” allows you to adjust the volume (shift) of the audio description for blind people relative to the normal TV broadcast sound if such description is broadcast with the program and Audio Description (AD) is on.
Press ▲/▼ to highlight "AD Volume Offset".
Press ◀/▶ to adjust the volume shift from -3 to +3.
Press EXIT to turn off the item and save the selected settings.
Local Time Setting Menu
When the device is turned on, press MENU to display the main menu.
Press ◀/▶ to display "Local Time Setting".
Then use ▲/▼ to highlight the desired submenu option.
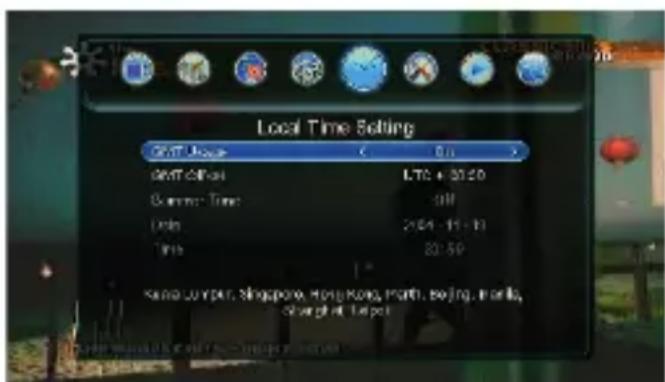
GMT Usage
The “Use GMT” item allows you to set whether or not to use Greenwich Mean Time.
Press ▲/▼ to highlight "GMT Usage".
Press ◀/▶ to select On to use Greenwich Mean Time. The GMT Offset is then set automatically according to the set country and the time and date are set automatically according to the signal from the channel that sends the exact time and date signal. In this case, Date and Time cannot be set manually and will not be available for setting. If you set the item to Off, both Time and Date will be available for setting and you can set them manually.
Press EXIT to turn off the item and save the selected settings.
GMT Offset
The “GMT Offset” item allows you to manually adjust the time offset to Greenwich Mean Time. To use this item for manual setup, GMT Usage must be set to On.
Press ▲/▼ to highlight "GMT Offset".
Press ◀/▶ to select the desired time offset to Greenwich Mean Time. At the bottom of the window, you can also see the cities where the time offset is set.
Press EXIT to turn off the item and save the selected settings.
Summer Time
The “Daylight Saving Time” option allows you to set whether Daylight Saving Time is used.
Press ▲/▼ to highlight "Summer Time".
Press ◀/▶ to select On to use daylight saving time or Off to not use daylight saving time.
Press EXIT to turn off the item and save the selected settings.
Date
The “Date” item allows you to manually set the current date.
This option will not be available if you set GMT Usage to On.
Press ▲/▼ to highlight "Date" and press OK.
The cursor appears below the digit being set.
Press ◀/▶ and ▲/▼ to set the desired date.
After setting, press OK to confirm the date.
Press EXIT to turn off the item and save the selected settings.
Time
The “Time” item allows you to manually set the current time.
This option will not be available if you set GMT Usage to On.
Press ▲/▼ to highlight "Time" and press OK.
The cursor appears below the digit being set.
Press ◀/▶ and ▲/▼ to select the desired time.
After setting, press OK to confirm the date.
Press EXIT to turn off the item and save the selected settings.
System Menu
“System” allows you to make additional settings for the machine and access some functions.
When the device is turned on, press MENU to display the main menu.
Press ◀/▶ to display "System".
Then use ▲/▼ to highlight the desired submenu option.
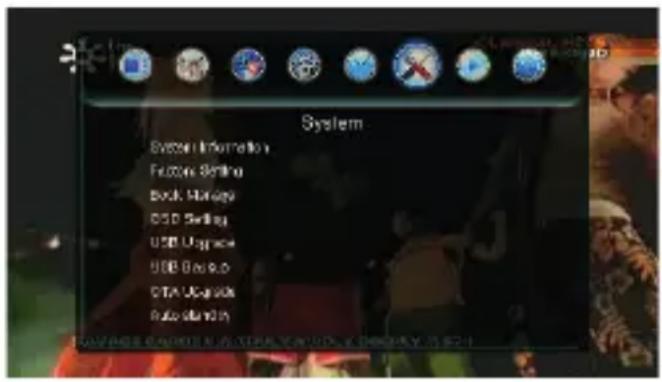
System Information
The “System Information” item allows you to view the device information (Serial Number, Software Version, Hardware Version, Date Time (Last Updated), Loader Version and STB Name).
Press ▲/▼ to highlight “System Information” and press OK. The device information is displayed.
Press EXIT to turn off the item and display the previous menu.
Factory Setting
"Factory settings" allows you to restore the factory settings.
Press ▲/▼ to select “Factory Setting” and press OK. You will be prompted for a password. The password is set to 0000 at the factory.
You can change it later in New password.
After entering the password, press OK. A confirmation window will appear, whether you want to load the default settings.
To reset all the device to factory settings, select Yes and press OK. If you do not want to restore the factory settings, select No and press OK.
Resetting to factory settings will also erase all saved presets and require an initial installation.
Book Manage
The “Manage Files” item allows you to view an overview of the timer recording settings, make timer recording settings, and make adjustments in scheduled uploads.
Press ▲/▼ to highlight "File Management" and press OK.
You will see an overview of the scheduled recordings you have set. If no events are scheduled (timer recording / arming), the list is empty. If any events are already scheduled, a list of scheduled events is displayed in the list.
Use the colored buttons to perform the appropriate functions in the list. The functions of the colored buttons are described in the bottom bar.
Set to the desired event in the list.
The red (Recording) button for the event changes whether recording will be performed (Yes) or only the set program will be displayed (No).
Press the green button (Setup) to activate or deactivate the event (the alarm icon is displayed or turned off).
Use the yellow (Edit) button to edit the selected event. You'll see a table for the event where you can make edits.
The blue button (Settings) allows you to set a new timed event. In the Timer Setup window that appears, you set Repeat (Off / Once), Channel, Wake Date (Event Execution Date), Start Time (Event Execution Start Time), End Time, and Mode (View - View Selected Program Only or Record - Record Selected Program).
To record, a USB storage device with sufficient free space must be connected to the USB connector.
After entering all parameters, select Save and press OK to save the event, or select Cancel and press OK if you do not want to save the event.
The event is added to the Timer Settings table and performed at the set time.
You can select an event in the table at any time and edit any parameter by pressing the yellow (Edit) button in the Timer Setting window that appears.
OSD Setting
“OSD Settings” allows you to change various OSD settings.
Press ▲/▼ to select "OSD Setting" and press OK.
The following submenu appears.
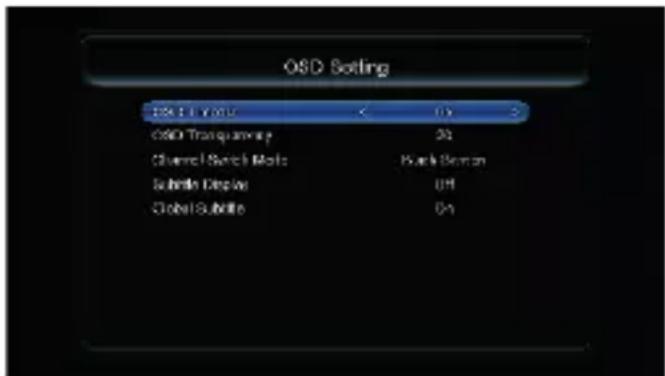
The “OSD Timeout” item allows you to set the amount of time the OSD will be displayed.
Press ◀/▶ to set. The setting is saved automatically until you change it.
"OSD Transparency" allows you to adjust the degree of transparency of the OSD.
Press◀/▶ to set. The setting is saved automatically until you change it.
The “Channel Switch Mode” allows you to set what is displayed during channel switching. You can select Back Screen or Video Freeze.
Press ◀/▶ to set. The setting is saved automatically until you change it.
The “Subtitle Display” item allows you to set whether or not (Subtitle Display) will be displayed if available.
Press ◀/▶ to set. The setting is saved automatically until you change it.
The “Global Subtitle” item allows you to set whether (On) or not (Off) global subtitles will be displayed, if available.
Press ◀/▶ to set. The setting is saved automatically until you change it.
USB Upgrade
“USB Update” allows you to update the software. We recommend that you entrust the update to an expert or authorized service center.
When updating from a USB device, press ▲/▼ to highlight "USB Update"
(USB Upgrade) and press OK. A USB storage device containing the update file must be connected.
Then set the desired Update Mode, locate the update file and select Start to update the software of your choice.
Press EXIT before selecting Start to turn off the item and return to the previous Menu.
USB Backup
"USB Backup" allows you to back up the user database and save preferences.
We recommend that you entrust the backup to an expert or an authorized service center.
To back up to a USB device, press ▲/▼ to highlight “USB Backup” and press OK.
Then set the desired Backup Mode (User Database or Default) and select Start to start the backup. A USB storage device with sufficient free space for backup must be connected.
Press EXIT before selecting Start to turn off the item and return to the previous Menu.
OTA Upgrade
"OTA Update" allows you to update the software over the network.
If you turn on OTA, set the time to check for updates. However, the device must be connected to the Internet.
We recommend that you entrust the update to an expert or authorized service center. To update the OTA, press ▲/▼ to highlight “OTA Upgrade” and press OK.
Then set the desired Frequency. Bandwidth and PID are also set accordingly. Select Start to update the software.
Press EXIT before selecting Start to turn off the item and return to the previous Menu.
Auto standby
The "Auto Standby" item allows you to set the auto-off time.
Press ▲/▼ to highlight "Auto standby".
First, press ◀/▶ to turn On (On) or Off (Off) Timer Mode.
If you set the item to On, then select Off time and press OK.
Use ◀/▶, ▲/▼ and the number buttons to set the time after which the auto power off function is to be set to standby.
Press EXIT to turn off the item and save the selected settings.
Menu Media Center
"Media Center" allows you to make settings for multimedia, recording, etc.
When the device is turned on, press MENU to display the main menu.
Press ◀/▶ to display "Media Center".
Then use ▲/▼ to highlight the desired submenu option.
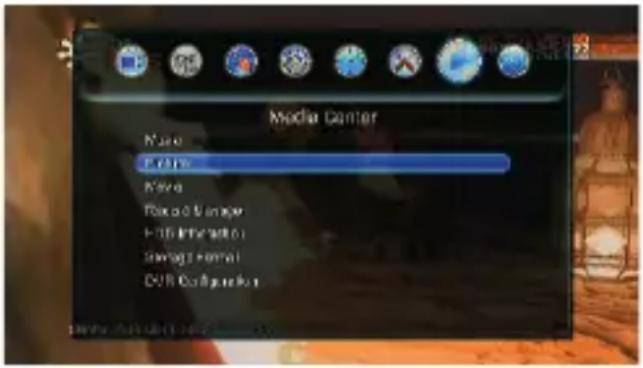
To use this menu, fi rst connect a USB memory device with video, audio or image fi les to the USB connector.
Music
Press ▲/▼ to select "Music", then press OK to confirm. The display for playing audio fi les (tracks) appears.
The structure of the drive and folders is shown in the right half. In it, press ▲/▼ to select the desired folder with audio fi les (tracks) and press OK to display the contents of the folder.
When the tracks in the folder are displayed, press ▲/▼ to select the desired audio file and press OK to play it.
The fi le will start playing and the fi le information and time will be displayed on the left half of the screen.
At the bottom of the view is a navigation bar that describes the button functions.
When a file is playing, the blue (Repeat) button can be used to switch the repeat play mode for 1 track repeat, all track repeat, random play, or standard play (indicated by the icon next to the progress bar).
Note:
Use the playback control buttons when playing an audio file.
▶: Start playback
■: Stop playback
II: Pause playback
▶▶: Fast forward in file.
Press this button repeatedly to fast forward the file.
◀◀: Accelerates the file in reverse.
Pressing this button repeatedly scrolls backward through the file.
▶▶▶: Switch to the next file.
◀◀: Switch to the previous file.
◀/▶: Decreases or increases the volume.
When playback is stopped, press EXIT to return to the Media Center menu.
Picture
Press ▲/▼ to select "Picture", then press OK to confirm.
The image/photo playback screen appears.
When the files in the folder are displayed, press ▲/▼ to select the desired image file (a preview of the selected image will be displayed in the left half of the screen) and press OK to view it in full screen.
When the file list is displayed, a navigation bar with button functions is displayed at the bottom of the view.
Press ▶ or OK to start the slide show playback from the selected image from the list.
The blue button allows you to set the slide show parameters (image display time and repeat).
Note:
Use the playback control buttons when playing an image file.
▶: Start slideshow
■: Stop the presentation
II: Pause the presentation
▶▶I: Switch to the next file.
◀◀: Switch to the previous file.
Movie
Press ▲/▼ to select “Movie”, then press OK to confirm. The playback screen for movies (video files) appears.
The folder structure is shown in the right half. In it, press ▲/▼ to select the desired folder with video files and press OK to display the contents of the folder.
Select the desired video file by pressing ▲/▼, then press OK to play it. File information will be displayed on the left side of the screen.
At the bottom of the view is a navigation bar that describes the button functions. If you press OK again during playback, the OSD will turn off and only the progress bar will remain on the screen and disappear after a short time.
When a file is played in full screen, the progress bar can be displayed with the INFO button during playback.
When the file is playing, you can use the GOTO button to display the window for entering the desired time to find the exact location in the video file.
Enter the time and press OK. Playback starts from the specified time.
With the AUDIO button on the remote control, you can display the audio track selection window and select the audio of the video file if multiple audio tracks are available.
Press ▲/▼ repeatedly to select the desired audio channel and press OK.
Press EXIT to turn off the item and save the selected settings.
You can use the SUBTITLE button on the remote control to display the subtitle selection window and select the subtitle language if the playback file has multiple language subtitles or turn off subtitles.
Press ▲/▼ to select the desired subtitle language or Off to not display the subtitle and press OK to confirm.
Press EXIT to turn off the item and save the selected settings.
Note:
Use the playback control buttons when playing a video file.
▶: Start playback
■: Stop playback
II: Pause playback
▶▶: Fast forward in file.
Pressing this button repeatedly increases the forward speed by 2X, 4X, 8X, 16X, 32X, and then restores the standard speed of 1X.
◀◀: Accelerates the file in reverse.
Pressing this button repeatedly increases the playback speed backward 2X, 4X, 8X, 16X, 32X, and then returns to the default speed of 1X.
▶▶▶I: Switch to the next file. You can also use button ▶.
◀◀: Switch to the previous file. You can also use the ◀ button.
◀/▶: Decreases or increases the volume.
Record Manager
Press ▲/▼ to display “Record Manager”, then press OK to confirm. The display for playing recorded video files from the TV broadcast is displayed.
The right half shows a list of video files recorded on the connected USB memory stick with this unit. This device records records to the PVRS folder that it automatically creates on the connected USB storage device as soon as it is connected. The USB drive must not have write protection set.
When you select this item, playback of the first recording starts automatically. All video files uploaded by your device will be stored in the PVRS folder.
Press ▲/▼ to select the desired recorded file and press OK to start playback. File information will be displayed on the left side of the screen.
At the bottom of the screen is a navigation bar that describes the functions of the buttons that allow you to rename the file (red button), lock the file (green button), or delete the file (blue) button.
The blue button has the "Clear" function.
Use ▲/▼ to select the file (line) you want to delete. Press the blue button. A confirmation window will appear to confirm that you want to delete the file. Select Yes and press OK to confirm the deletion. The selected file is deleted from memory. If you do not want to delete the file, select No and press OK.
The red button has the "Rename" function.
This item allows you to edit the name of the recorded record.
Use ▲/▼ to select the file (line) you want to rename.
Press the red button and use the onscreen keyboard and buttons to edit the name
▲/▼/◄/► and OK.
Press EXIT to exit editing and save the new name.
The green button has the "Lock" function.
Use ▲/▼ to select the file (line) you want to lock. Press the green button. The password entry window (factory setting 0000) appears. When you enter the password, a lock icon appears next to the file, and the file is locked for playback and will only play after you enter the password. To unlock the file, set it again and press the green button again. The password entry window (factory setting 0000) appears. After entering the password, the lock icon next to the file disappears and the file is unlocked for playback again.
With the AUDIO button on the remote control, you can display the audio track selection window and select the audio of the video file if multiple audio tracks are available.
Press ▲/▼ repeatedly to select the desired audio channel and press OK.
Press EXIT to turn off the item and save the selected settings.
You can use the SUBTITLE button on the remote control to display the subtitle selection window and select the subtitle language if the playback file has multiple language subtitles or turn off subtitles.
Press ▲/▼ to select the desired subtitle language or Off to not display the subtitle and press OK to confirm.
Press EXIT to turn off the item and save the selected settings.
Note:
Use the playback control buttons when playing a video file.
▶: Start playback
■: Stop playback
II: Pause playback
▶▶: Fast forward in file.
Pressing this button repeatedly increases the forward speed by 2X, 4X, 8X, 16X, 32X, and then restores the standard speed of 1X.
◀◀: Accelerates the file in reverse.
Pressing this button repeatedly increases the playback speed backward 2X, 4X, 8X, 16X, 32X, and then returns to the default speed of 1X.
▶▶▶I: Switch to the next file. You can also use button ▶.
◀◀: Switch to the previous file. You can also use the ◀ button.
◀/▶: Decreases or increases the volume.
HDD Information
"HDD Information" allows you to view information about the connected storage unit.
Press to ▲/▼ highlight “HDD Information” and press OK. Information about the connected unit, such as total capacity, free space, is displayed. busy space, space for TimeShift, free space available for recording, and drive file system (FAT32 or NTFS).
Press EXIT to return to the Media Center menu.
Storage Format
The “Storage Format” item allows you to view information about the connected storage unit, switch its storage partitions and file system if the drive contains multiple partitions and file systems, and also format the selected partition or drive.
Press ▲/▼ to highlight "Storage Format" and press OK. Information about the
connected drive, such as total capacity, free space, is displayed. occupied space and items File system in which the file system can be selected if the drive is formatted in multiple file systems and Storage where the partition can be selected if the drive has multiple partitions.
After selecting the file system and partition, you can format the selected partition into the selected file system.
Select the bottom HDD Format and press OK.
To format the drive, select FAT and press OK.
The drive is formatted to the FAT32 file system.
If you do not want to format the drive, select Cancel and press OK. Press EXIT to return to the Media Center menu.
DVR Configuration
“DVR Conf i guration” allows you to enable or disable the TimeShift function and set the partition of the connected USB memory stick if it contains multiple partitions where the recordings recorded by this unit will be stored.
Press ▲/▼ to highlight “DVR Configuration” and press OK. A menu with options for confi guring broadcast recording appears.
Press ▲/▼ to select “Time shift” and press ◀/▶ to set the function to On or Off. Press ▲/▼ to select “DVR Partition” and press ◀/▶ to set the desired partition of the unit where the recording will be stored if the unit contains multiple partitions. Press EXIT to turn off the item, save the settings and return to the previous menu.
Network Menu
"Network" allows you to make network settings.
When the device is turned on, press MENU to display the main menu.
Press b/B ◀/▶ to display "Network".
Then use ▲/▼ to highlight the desired submenu option.
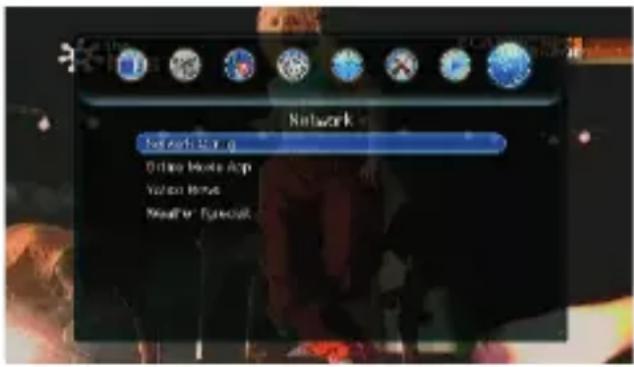
Network Confi ng
"Network Conf i guration" allows you to make network settings when the device is connected to the Internet.
Press ▲/▼ to highlight "Network Confing" and press OK. The submenu appears.
When you first connect to the network, select Active, then scroll to Set up and press OK.
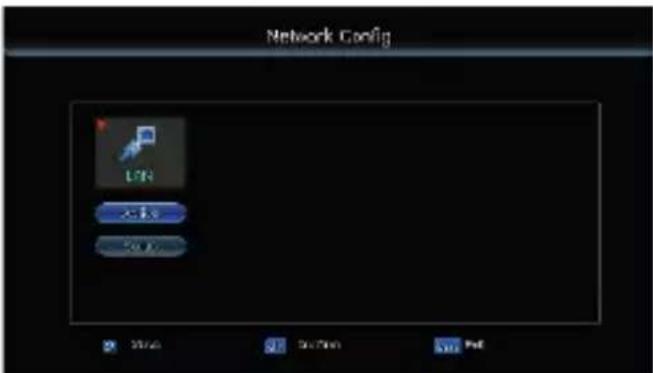
The network configuration menu appears.
In Confi guration mode, select DHCP if you want the network to set up automatically. In this case, the network settings are made automatically (all settings are automatically assigned to the device by the router) and cannot be changed.
If you set Static IP, network setup items such as IP Address, Network Mask, Gateway, DNS Server, which you can set manually, become available.
The Mac address is fixed and only displayed. You can check the connection status by performing a Ping test.
Select Ping test. Here you can change the IP address used for the test (www.baidu.com by default) and the Times (20 by default).
Then select Start and press OK. A Ping test is performed and a result table is displayed. Press EXIT to display the previous menu.
If, in the first option in this window, you leave the DHCP setting On, if you change the setting to Off, you can enter the network parameters manually.
Online Movie App
"Online Movie" allows you to view applications for playing online videos on the factory device. The available applications may vary (from YouTube).
Press ▲/▼ to highlight “Online Movie App” and press OK. You’ll see a menu of available apps to play videos from the Internet.
For applications to work, the device must be connected to the Internet via a LAN cable. After selecting the desired app, you can play available videos from it. Proceed intuitively, just like on a PC.
Press EXIT to turn off the item and display the previous menu.
Warning
Depending on the software version on your device, various Internet applications are available for watching videos, playing home multimedia on the network, Internet IPTV TV, and so on.
Use applications similar to your home PC, and check the Internet for details on the application.
Other operations
USB memory device connection
The unit can play video / audio / video files from USB memory drives and record favorite programs to such USB drives.
USB device connection
You can connect a USB drive, photo storage device, or other external storage device to the device to play or view the desired files directly from the device.
Remark
- Proper operation and connection of all types of external devices is not guaranteed.
Playing
This device can play video, audio and image files from a connected USB memory device.
1 Connect this product to an electrical socket.
2 Set the external USB device to Mass Storage mode. The necessary settings and operations before connecting vary depending on the external device. For details, refer to the instruction manual of the external device.
3 Turn on this receiver.
4 Connect an external device to the USB jack on this receiver.
If a USB cable is required, use the USB cable supplied with the external device to connect to this receiver.
5 Press MENU on the remote, press ◀/▶ to select "USB" and press ▼ to highlight "Media Center" in yellow. Then press OK.
The multimedia submenu appears.
Press ◀/▶ to display "Music", "Picture", "Movie" or "Record Manager", and then press OK to confirm.
The content from that device is displayed on the screen.
To play, follow the section on Media Center Menu.
Notes
- When using a commercially available USB interface cable, use a Type A USB cable that is less than 3 meters long.
- Do not disconnect the USB cable while the operation indicator on the external device is flashing and do not turn off this or any external device. Data in the external device may be damaged. We are not responsible for any damage or loss of data.
- A USB hub or USB device with a built-in USB hub may not work properly.
- Encoded or compressed data based on fingerprint identification or password input cannot be used with this unit.
- Use a USB cable with the USB logo.
Recording (PVR)
The device allows you to record a watched or other favorite program to a connected USB memory device. Make sure there is enough free space on the USB device.
Connect the USB device before the scheduled recording when the device is turned off or on.
Instant Upload
The ● button (red dot) allows immediate recording of the currently viewed program. Recording is only possible when a USB memory device with sufficient free space for recording is connected.
Start recording
Press● to start instant recording.
A red recording indicator ● and a progress bar appear in the upper right corner of the screen.
During recording, press INFO to display the recording information.
Stop recording
You can stop recording at any time during recording.
Press ■ to display a confirmation message if you really want to stop recording. Select Yes and press OK to stop recording or No and press OK to continue.
PVR files
When recording using the PVR function, the device automatically creates a PVRS folder on the connected USB device, in which it stores all recorded PVR files.
The playlist is then displayed from this folder and can be played / renamed / deleted.
Use the "Record Manager" item in the Media Center menu to work with PVR files.
To do this, follow the procedure described in o Media Center Menu - Record Manager.
Configure the USB drive for PVR recording as described in o Media Center Menu - DVR Configuration.
Recording for some time
You can set the recording to start for a certain amount of time after starting, and then turn off automatically.
Press ● to start recording immediately and press ● the second time. Basically, press ● twice in quick succession.
A red recording indicator ●, a recording progress bar, and a small window in the center of the Duration and Time 00:00 screen are displayed.
Press OK and use the numbered buttons or ▲/▼ and ◀/► to enter the desired time for how long to record. Then press EXIT to confirm. Recording will continue for the set time and then stop automatically.
Automatic (timed) recording
Timer recording can be set via System Menu - Manage (Book Manage).
Press MENU to display the Main Menu, press ◀/▶ to select System, and press ▲/▼ to highlight “Message” and press OK.
You will see an overview of the scheduled recordings you have set. If no events are scheduled (timer recording / arming), the list is empty. If any events are already scheduled, a list of scheduled events is displayed in the list.
Use the colored buttons to perform the appropriate functions in the list. The functions of the colored buttons are described in the bottom bar.
Set to the desired event in the list.
The red (Recording) button for the event changes whether recording will be performed (Yes) or only the set program will be displayed (No).
Press the green button (Setup) to activate or deactivate the event (the alarm icon is displayed or turned off).
Use the yellow (Edit) button to edit the selected event. You'll see a table for the event where you can make edits.
The blue button (Settings) allows you to set a new timed event. In the Timer Setup window that appears, you set Repeat (Off/Once), Channel, Wake Date (Event
Execution Date), Start Time (Event Execution Start Time), End Time, and Mode (View - View Selected Program Only or Record - Record Selected Program).
To record, a USB storage device with sufficient free space must be connected to the USB connector.
After entering all parameters, select Save and press OK to save the event, or select Cancel and press OK if you do not want to save the event.
The event is added to the Timer Settings table and performed at the set time.
You can select an event in the table at any time and edit any parameter by pressing the yellow (Edit) button in the Timer Setting window that appears.
EPG
The Timer Setting tab can also be accessed by pressing the EPG button.
When you press EPG, a table is displayed with an overview of the programs and shows broadcasted by date and time.
You can also use this spreadsheet to set up auto upload.
Press ◀/▶ to select the desired day of the week, press ▲/▼ to select the desired channel, then press ▲/▼ to select the desired program broadcast by that channel on the selected day. Then press the OK button to display the “Timer Setting” table for scheduling the event (timer recording / on). By default, the table sets items according to the selected session. However, you can adjust their settings.
After checking or editing all parameters, select Save and press OK confirm the setting.
The event is added to the Book Manage table and executed at the set time.
You can select an event in the table at any time and then edit any parameter for that event, or remove the event from the list so that it does not execute. Follow the previously described procedures.
Warning:
If you plan to record, a storage medium with sufficient free capacity must be connected to the USB connector.
Watch a broadcast with a time delay (Timeshift)
The device allows you to watch TV broadcasts with a time delay, pause the program you are watching and take a break, etc.
With this function, the connected USB memory device is continuously recorded according to the settings made in the Media Center menu in the “DVR Configuration” submenu.
Make sure there is enough free space on the USB device.
Approach
While watching your favorite program, simply press Ⅱ.
The image pauses and you can leave. When you return, just press the button ▶ to continue watching the program right from where you left off.
Timeshift is active and a bar appears at the bottom of the screen, which turns off for 5 seconds.
You will now be able to pause the program you are watching, rewind with the ◀ button and then go back forward with the ▶ button, just as if you were watching a video.
The Timeshift icon appears when Timeshift is active in the upper left corner of the screen.
To turn off Timeshift, press ■. The function turns off and the recording mode also turns off.
Teletext
While watching TV, you can display teletext if the station you are watching broadcasts a teletext signal.
Press TTX to display teletext.
Press ◀/▶ or color buttons to select Teletext subpages, press ▲/▼ select basic teletext pages. To turn off teletext, press TTX again.
Subtitle
While watching TV, you can view the subtitles if the station you are watching broadcasts subtitles for that program.
Press SUBTITLE to display the subtitle selection screen. Press ▲/▼ to make subtitle settings.
Press OK to confirm the selection and close the subtitle selection screen.
If the broadcast program contains subtitle data, it will be displayed on the screen.
Sound
While watching TV, you can switch the sound if the station you are watching broadcasts multiple audio tracks for that program.
Press AUDIO to display the audio selection screen. Press ▲/▼ repeatedly to select the desired sound.
Press OK to confirm the setting and close the sound selection screen.
Troubleshooting
Before you can fix your device for repair, try the following troubleshooting guide. If the problem persists, contact your dealer or an authorized service center.
Power supply
Cannot turn on the power.
Is the AC adapter connected correctly? Connect the power supply correctly.
Play pictures/tracks/video files
If the power is turned on but the files are not playing or the settings in the settings window cannot be made, check the following.
No files are played on the screen.
Is the external device connected correctly?
Connect the external device correctly.
Does the USB device contain any files?
Are the files stored on an external device?
Connect an external device containing compatible files.
Check the playable file formats.
Is the file format compatible with this device?
A file that is not compatible with this unit may not be playable on this unit even though it is displayed on a PC.
The file name is not displayed correctly.
Have you renamed the file on a PC or other device?
If you rename a file on your PC and its file name contains non-alphanumeric characters, the file name may not be displayed correctly on this unit.
The video file is not playing.
The video file may not be supported by this device. Video files that cannot be played will not play.
Fast forward/reverse playback is not possible.
Depending on the video file, fast forward/reverse playback may not be available on this unit.
USB external device connection
The device is connected, but nothing is displayed.
Is the USB device/USB extension cable connected correctly?
Connect the cable correctly.
Is this device turned on?
If not, turn it on.
Nothing happens even if you disconnect and reconnect the USB device/cable.
There is probably a problem with overloading this device. Turn the device off and on again.
The USB device may not be compatible with this device.
No picture appears on the TV screen or LCD monitor.
Is the input source on the TV set to external input?
Even if the TV's input source is set to this unit, sometimes the picture may not be displayed on the TV screen or LCD monitor if a damaged cable is connected.
Set the TV's input source to this unit, or check the cable.
This device
Nothing happens even when you operate this unit.
Turn the power off and on again.
There is no picture and nothing can be tuned.
Connect the correct antenna capable of detecting the DVBt2 broadcast signal.
Correctly connect the connecting cable between this unit and the TV or monitor (HDMI, SCART).
The image not clear or freezes.
The signal is of poor quality. Connect the correct antenna capable of picking up the DVBt2 broadcast signal well.
Correctly connect the connecting cable between this unit and a TV or monitor (HDMI, SCART, or RF).
Internet applications do not appear in the menu.
Connect the device to the Internet correctly via the LAN connector and make the IP address settings correctly.
Remote control (RC)
Nothing happens even when using the remote control.
Have you inserted the batteries into the remote control correctly? Replace the batteries.
Insert the batteries.
Insert the batteries with the correct polarity.
Point the top of the remote control directly at the remote sensor of this unit.
Remove obstacles between the remote control and the remote sensor.
Maintenance
Cleaning the device surface
To clean the surface, panel and controls, use a soft cloth slightly moistened with a mild detergent solution. Do not use abrasive cloths, cleaning powders, or solvents such as thinner, petrol, or alcohol.
Technical specifications
Receiver
Input frequency 175,5-866 MHz
RF input level -65 to -25 dBm
Bandwidth 8 MHz
Symbol speed 2-45 Mb/s
Power supply LNB 5 V, max 50 mA
Modulation QPSK/8 PSK
Input/Output Connectors
SCART connector
USB connector (PC type, USB 2.0)
Connector RF IN (antenna connector)
Connector RF OUT (antenna connector)
LAN input connector
HDMI output connector
Resolution: 720P, 1080i, 1080P, 576i, 576P
Coding
Video: MPEG2, MP@ML.HL, MPEG4, AVC/H.264 HP@L4
Audio: MPEG2, Audio Layer I a II
Compliance: ETSI/STN 300421, DVB-t2-compatible
Compatible file formats
Image files (photos)
Format: bmp, jpg, gif, tif, png
Video files
Format: AVI, MKV, Xvid, MPEG-2, MP4, VOB, H264
Audio format: MPEG-1 Audio Layer 2
Audio files:
Compression format (audio codec): mp3, E-AC-3 (DD+), wav, MPEG-1
(LAYER 1 a 2)
File system
FAT 32
General
Power
AC adapter: Input - AC 100 - 240 V\~, 50/60 Hz, 0,5 A
Output - 12 V, 1 A
Input
At maximum load: max 8 W, standard mode
Standby mode: less than 0.5 W
Dimensions (W x D x H): 14,7 x 7 x 2,8 cm
Weight: 0,13 kg
Supplied accessories
Remote control
AC adapter
Manual
Subject to change!
Producer:
ORAVA retail 1, a.s.
Seberíniho 2
821 03 Bratislava
Slovenská republika
Importer:
ORAVA retail 1, a.s.
Seberíniho 2
821 03 Bratislava
Slovenská republika
ORAVA distribution CZ, s.r.o.
Ostravská 494
739 25 Sviadnov
Česká republika

DISPOSAL OF USED ELECTRICAL AND ELECTRONIC EQUIPMENT
The symbol on the product or on its packaging indicates that this product does not belong to household waste. It is necessary to take it to a collection point for electrical recycling and electronic equipment.
By ensuring proper disposal of this product, you will help prevent negative consequences to the environment and human health that would otherwise be caused by inappropriate disposal of this product. For more detailed information about recycling of this product, please contact your local authority, your household waste disposal service or the shop where you purchased the product.

This product meets all the essential requirements of the EU directives that apply to it.
DECLARATION OF CONFORMITY
Short text Declaration of Conformity:
ORAVA retail 1, a.s. hereby declares that the DVB-30 complies with the essential requirements and other relevant conditions of Directive 2014/53/ EU of the European Parliament and of the Council.
The full text of the Declaration of Conformity is available at: www.orava.eu
- HD digital terrestrial receiver
- Intended use of the device
- GENERAL SAFETY INSTRUCTIONS AND WARNINGS
- General safety instructions
- Safety of the operating environment
- Electrical safety
- Safety of persons
- Cleaning, maintenance and repair
- Special safety instructions. Read carefully!
- Transportation/Transfer
- Unpacking/Packaging
- Inspection/Commissioning
- Location/Installation
- Warning!
- Operation/Supervision
- Power Supplies/Batteries
- Caution!
- What is DVB-T2?
- Features and functions
- Power supply
- Description of parts and controls
- Device Features Front
- Back side
- Remote Control (RC)
- Inserting/replacing the batteries in the remote control
- Replacing the battery
- Notes
- Connecting the device
- Connection to TV
- SCART OUT connector
- HDMI connector
- RF OUT connector
- Antenna connection
- RF IN connector
- Connect to a data network LAN input connector
- Turn on the device
- Basic operations
- Turn on
- Switch
- Note
- Initial setup
- First start and tune in stations
- Note:
- Operations in the Main Menu
- Channel List Menu
- TV Channel List
- An example of moving a TV channel:
- Radio Channel List
- Parental Lock
- Channel Search
- Auto Search
- Manual Search
- Country/Region
- Antenna Power
- FTA
- Language Menu
- Language
- First Audio
- Second Audio
- Subtitle Language
- Teletext Language
- AV Setting Menu
- TV systém (TV System)
- Video Resolution
- Aspect Mode
- Video Effects)
- Audio Out
- Audio Description (AD)
- AD Volume Offset
- Local Time Setting Menu
- GMT Usage
- GMT Offset
- Summer Time
- Date
- Time
- System Menu
- System Information
- Factory Setting
- Book Manage
- OSD Setting
- USB Upgrade
- USB Backup
- OTA Upgrade
- Auto standby
- Menu Media Center
- Music
- Picture
- Movie
- Record Manager
- HDD Information
- Storage Format
- DVR Configuration
- Network Menu
- Network Confi ng
- Online Movie App
- Warning
- Other operations
- USB memory device connection
- USB device connection
- Remark
- Playing
- Recording (PVR)
- Instant Upload
- Start recording
- Stop recording
- PVR files
- Recording for some time
- Automatic (timed) recording
- EPG
- Warning:
- Watch a broadcast with a time delay (Timeshift)
- Approach
- Teletext
- Subtitle
- Sound
- Troubleshooting
- Play pictures/tracks/video files
- USB external device connection
- This device
- Maintenance
- Cleaning the device surface
- Technical specifications
- Receiver
- Input/Output Connectors
- Coding
- Compatible file formats
- File system
- General
- Power
- Input
- Supplied accessories
- Subject to change!
- Producer:
- Importer:
- DISPOSAL OF USED ELECTRICAL AND ELECTRONIC EQUIPMENT
- DECLARATION OF CONFORMITY
Brand : Orava
Model : DVB-30
Category : Receiver