
ES-300 - Coffee maker Orava - Free user manual and instructions
Find the device manual for free ES-300 Orava in PDF.


| Product Type | Espresso coffee maker with steam wand |
| Model | Orava ES-300 |
| Power Supply | 220-240 V~ 50/60 Hz |
| Power Consumption | 850 W |
| Water Tank Capacity | 1.6 L |
| Dimensions (W x H x D) | 23.4 x 29.2 x 28 cm |
| Weight | 3.5 kg |
| Pump Pressure | 15 bar |
| Noise Level | 60 dB (A) |
| Heating System | Aluminum heating vessel |
| Functions | Espresso, cappuccino, steam, hot water |
| Frothing System | Steam pipe with removable frothing attachment |
| Safety Features | Thermal fuse, overheat protection, class I earthing |
| Drip Tray | Removable for easy cleaning |
| Water Tank | Removable, transparent with hinged lid |
| Accessories Included | Coffee spoon/measuring cup, stainless steel strainer, metal funnel with handle |
| Protection Class | IP20 |
| Descaling Interval | Every 2–3 months |
| Cleaning | Hand wash accessories; wipe body with damp cloth |
| Intended Use | Household and similar indoor use (not professional) |
Frequently Asked Questions - ES-300 Orava
User questions about ES-300 Orava
0 question about this device. Answer the ones you know or ask your own.
Ask a new question about this device
Download the instructions for your Coffee maker in PDF format for free! Find your manual ES-300 - Orava and take your electronic device back in hand. On this page are published all the documents necessary for the use of your device. ES-300 by Orava.
USER MANUAL ES-300 Orava
ES-300 Instruction manual
EN
natural_image
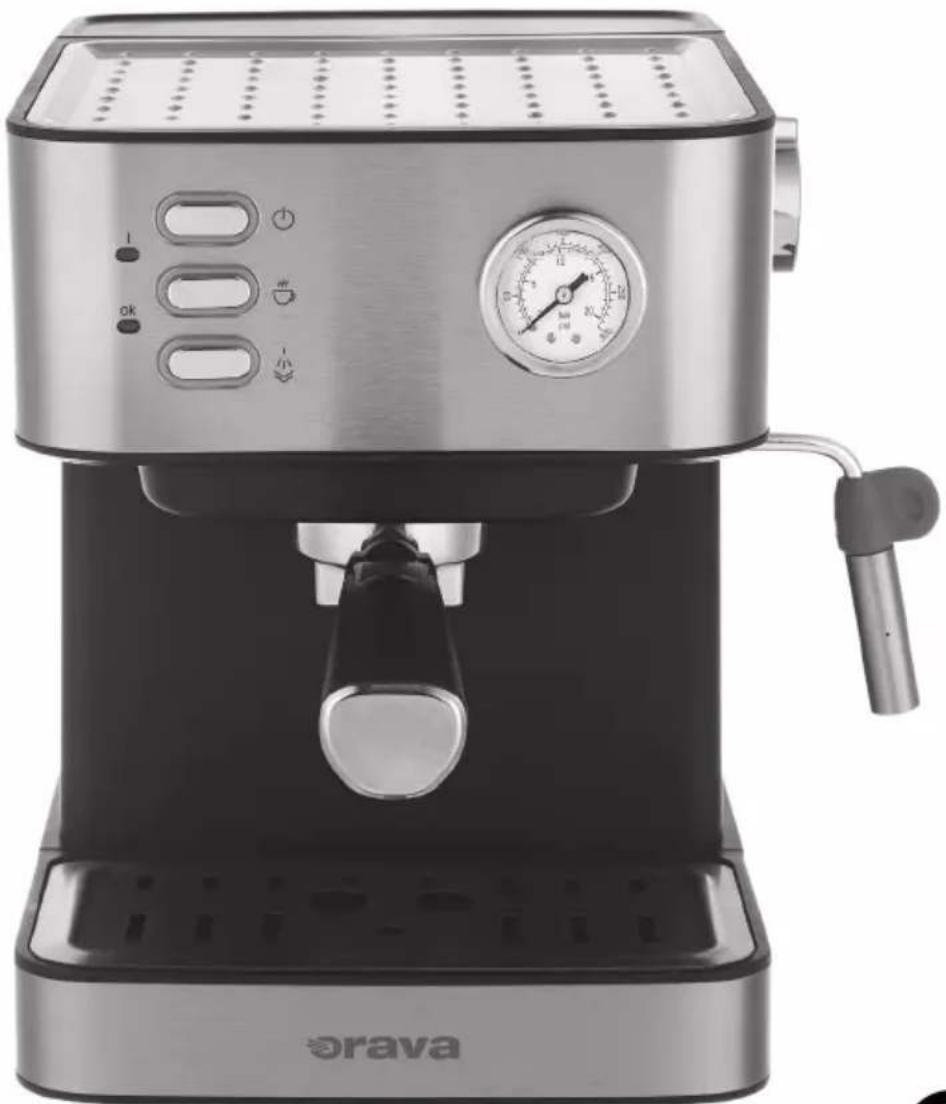
Exterior view of a modern espresso maker with control panel and pressure gauge (no text or symbols on main body)CE
Keep these instructions for future use
Intended use of the device
The device is designed exclusively for heating water intended for the preparation of espresso coffee and for the preparation of steam for hot beverages, to the extent specified by technical and operational parameters and functions, safety and user instructions and external influences of the operating environment.
ORAVA electrical appliances are manufactured according to the knowledge of the current state of technology and recognized safety and technical rules. Nevertheless, incorrect and unprofessional use or use contrary to the intended purpose may create a risk of injury or endanger the life of the user or a third party, resp. damage to equipment and other property.
1. GENERAL SAFETY INSTRUCTIONS AND WARNINGS
- This document contains important safety instructions and warnings for safe, correct and economical operation of the electrical equipment. Its compliance helps the user avoid risks, increase reliability and product life.
- In this document, the general term product is used in text parts such as: electrical equipment - any device used for the production, conversion, transmission, distribution or use of electricity.
- From the point of view of the purpose of using electricity, the concept of electrical equipment in the strict sense of the word will include the following categories:
- household electric appliances,
- information and communication equipment,
- consumer electronics,
- lighting equipment,
- electrical and electronic tools,
- toys and equipment for sporting and recreational purposes,
- medical devices (aids),
- monitoring and control devices,
- vending machines.
1.1 General safety instructions
- Before operating the unit, we recommend that you carefully read the instruction manual and operate the equipment in accordance with the instructions!
- The safety instructions and warnings in this manual do not cover all the possible conditions and situations that may arise when using the device. The user must understand that a factor that cannot be incorporated into any of the products is personal responsibility and caution. These factors must therefore be ensured by users serving this device.
- Failure to follow the safety instructions and warnings is forbidden by the manufacturer for any damage to health or property!
- Keep the instruction manual as close to the device as possible
throughout its service life. Always keep the instruction manual together with the appliance for future use and use by new users.
- Use the appliance only for the intended purpose and in the manner specified by the manufacturer.
- The appliance is intended for home and similar indoor use without special focus.
- This appliance is intended, in addition to domestic use, for the following uses:
- in shops, offices and other similar work environments;
- in economic buildings;
- in hotels, motels and other residential environments;
- in bed and breakfast establishments.
- It is not a professional device for commercial use.
- Do not change the technical parameters and features of the device by unauthorized modification or modification of any part of the device.
- The manufacturer is not responsible for damages caused during transportation, misuse, damage or destruction of the equipment due to adverse weather conditions.
1.2 Safety of the operating environment
- Do not use the device in an industrial environment or outside environment!
- Do not expose the appliance to:
- Do not use the device in an industrial environment or outside environment! - Do not expose the appliance to:
- sources of excessive heat or open flame,
- dripping or splashing water,
- vibration and excessive mechanical stress,
- insects, animals and plants,
- aggressive and chemical substances.
- The operating environment of the device must always be in accordance with the basic characteristics set out.
- Features of the operating environment:
- The operating environment of the device must always be in accordance with the basic characteristics set out. - Features of the operating environment:
-
Ambient temperature: +5 ÷ +40 °C
-
Humidity: 5 ÷ 85%
-
Altitude: ≤ 2 000 m
-
Occurrence of water: intermittent condensation of water or occurrence of water vapor
-
Occurrence of foreign bodies: quantity and type of dust are insignificant
-
Protection degree: min. IP20 (device protected from touching dangerous parts by hand and non-waterproof)
-
Ambient temperature: +5 ÷ +40 °C
- Humidity: 5 ÷ 85%
- Altitude: ≤ 2 000 m
- Occurrence of water: intermittent condensation of water or occurrence of water vapor
- Occurrence of foreign bodies: quantity and type of dust are insignificant
- Protection degree: min. IP20 (device protected from touching dangerous parts by hand and non-waterproof)
- This degree of protection is not indicated on the product and on the technical parameters in the operating instructions.
- If the protection class of the product is different from IPX0, this information is then displayed on the label of the appliance or in the technical data of the operating instructions.
- Other characteristics of the domestic operating environment (mechanical stress - vibrations and vibrations, occurrence of plant, animals, weather effects ...) are negligible in terms of effect on the correct and safe use of electrical equipment.
1.3 Electrical safety
- Before connecting the appliance to the power supply for the first time, make sure that the voltage on the appliance label corresponds to that of the household electrical outlet.
- The electric appliance is designed to power from 1/N/PE \~ 230 V 50 Hz.
- The electrical safety of the appliance is guaranteed only if it is properly connected to the mains.
- Electrical protection class I equipment is equipped with a protection against electric shock by means of protective earthing of inanimate parts, which can become dangerous when the device is malfunctioning. Always connect such devices to properly installed mains sockets that are equipped with earthing conductors and have a properly grounded earthing conductor.
All electrical equipment is equipped with a three-wire power supply.
- Class II electrical equipment is protected against electric shock by double insulation or by enhanced insulation of hazardous live electrical parts. Device of protection class II it must not be equipped with means to connect protective earthing.
All electrical equipment is equipped with two-wire power supply.
- Class III electrical equipment is a device that is powered by a small safe voltage source (battery or accumulator) and does not present any danger to the user from electrical shock.
- In order to provide increased safety against the risk of electric shock due to the use of electrical appliances by laypersons, it is recommended to install the power supply circuit for sockets with a rated current not exceeding 20 A RCD with a rated operating current not exceeding 30 mA.
To ensure the safety and correctness of the electrical installation, consult a qualified electrician.
- Only use a power cord with a plug (mains lead) supplied with the device and compatible with a wall socket. Using another cable may result in fire or electric shock.
- Always connect an electrical appliance to an easily accessible mains socket. In the event of an operating fault, the appliance must be switched off as soon as possible and disconnected from mains supply.
- The power cord and mains plug must always be easily accessible for safe disconnection of the electrical appliance from the power supply.
- Do not pull off the power cord by pulling the cable. Disconnect the power cord by pulling the plug behind the power cord plug.
-
If you use an extension cord, make sure that the total rated power of all devices connected to the extension cord does not exceed the max. current load on the extension cable.
-
If you need to use an extension cord or power supply block, make sure that the extension cord or power pack is plugged into a power socket, and not to another extension cord or power supply. The extension power cord or power supply block must be designed for grounded electrical plugs and connected to a properly grounded electrical socket.
- The power plug of the appliance must be compatible with the mains socket. Never use any adapters or modify the socket in any other way. Do not use inappropriate or damaged drawers!
- To avoid electrical shock, plug the power cables into properly grounded electrical sockets. If the device is equipped with a 3-pole plug, do not use adapters that do not have a grounding element or remove the grounding element from the plug or adapter.
- Do not bend, crush or otherwise expose the power cord of the appliance to mechanical stress or external heat sources. Damage to the power cord may result in electric shock.
- When the power cord is damaged, disconnect the appliance from the mains and do not use it again.
- If the power cord is damaged, it must be replaced by the manufacturer, its service department or a similarly qualified person to avoid the risk of electric shock.
- Regularly check and maintain the electrical appliance as well as the power cord and power socket. Disconnect the power plug regularly and clean it if necessary. Pollution by dust or other substances may cause disruption of the insulating state and consequently fire.
- Do not expose the appliance to water or moisture. The ingress of water into the appliance increases the risk of electric shock.
If the power cord is wet or the water has penetrated the water, disconnect it immediately from the mains. If the appliance is plugged into a mains socket and if possible, turn off the power circuit before attempting
unplug the power. If you are pulling wet wires from a live power source, be very careful.
- If the electrical equipment is installed (connecting) the protective covers are dismantled, the electrical parts must not be accessible to the user when the installation is finished.
1.4 Safety of persons
- This appliance is intended for use and operation by persons without electrotechnical qualification - lay people, according to the instructions specified by the manufacturer.
- Device operation includes activities such as switching on and off, user manipulation and setting of operating parameters, visual or auditory inspection of the equipment, and user cleaning and maintenance.
- This appliance can be used by children under the age of 8 and persons with reduced physical, sensory or mental capabilities or lack of experience or knowledge when supervised or instructed to use the appliance safely and understand the dangers involved.
• Children may not play with the appliance. - Cleaning and maintenance for users may not be performed by children unattended.
- Always keep the appliance out of reach of children during use and operation. Be sure to download the appliance even for a freely accessible power cord.
- Always be careful when operating the electric appliance! Do not use an electric appliance if you are overly tired, under the influence of medication or narcotic drugs that reduce attention and focus.
- Inattention during operation may result in serious injury.
1.5 Cleaning, maintenance and repairs
- Observe the normal user cleaning and maintenance of the appliance in the recommended way. Do not use solvents or harsh cleaners for cleaning. Pollution and visible stains from finger contact, respectively. The hands can be cleaned using detergent detergents specially designed to clean household appliances.
- If you do not use the appliance, clean it or disconnect the appliance from the power supply when the appliance is faulty.
- Electrical appliances that are cleaned after use and are not intended to be completely or partly immersed in water or other liquid, protect against the effects of dripping and / or splashing water and before immersion.
- Electric household appliances, like all other technical devices, are subject to the surrounding environment and natural wear. Since the legal framework of regular maintenance is not laid down for lay-in electrical household appliances, the manufacturer recommends that the user have the appliance checked and cleaned at least once a year by a specialist workshop.
- By doing so, it is possible to achieve safety, operational reliability and increased service life.
-
Do not disassemble the electric appliance! The appliance works with a dangerous voltage. For this reason, always switch off the appliance and disconnect it from the mains supply during user maintenance. In the event of a fault, please have the repair serviced by an authorized service center.
• Before calling a service: -
Verify that you are unable to remedy the malfunction yourself according to the procedure described in the chapter „Remedy of operating faults“.
- Turn the appliance off and on to make sure the fault reappears.
-
If the malfunction of the appliance still persists after these operations, call the nearest specialist service center.
-
Never repair the electric appliance yourself!
- Unauthorized, unqualified and improper use of an electric appliance may result in electric shock or other serious injury.
- Only carry out the warranty or post-warranty repair of an electrical appliance to an authorized qualified person (*).
2. Special safety instructions. Read carefully!
- The electrical equipment is designed and manufactured in such a way as to allow safe operation and use by unqualified persons. Despite all the measures taken by the manufacturer for safe use, operation and use entails certain residual risks and the associated dengers.
- The following symbols and their meanings have been used on the device and in the accompanying documentation to warn of possible dangers:
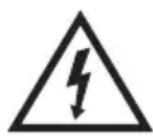
This symbol alerts users that the device operates on dangerous electrical voltage. Do not remove the protective covers on the device.
Failure to observe the safety instructions for the use and operation of the device may result in:
Danger of electric shock!
Danger of serious injury or death!

This symbol warns users that if they failure to follow the safety instructions for the use and operation of the device it may result in:
Danger of serious injury or death!
Danger of equipment damage or other property damage!
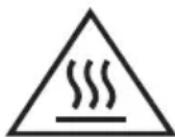
The symbol warns users about the risk if they failure to observe the safety instructions when using and operating the equipment: Danger of burns from hot surfaces!
Danger of burns/scalding from hot water and hot steam!
Transport/Carrying
- When transporting and using e.g. care must be taken when moving the truck to avoid tipping the machine over.
- Only transport / transport the device after a thorough inspection of the area and the route, which must be unobstructed.
- Never carry the device while it is in operation. Do not carry the device while it is plugged in.
Warning!
- Some surfaces may become hot during operation. Do not touch heated surfaces. never carry the device unless it has cooled down.
- Carry the device by firmly grasping the lower edge of the base or solid parts of the body with both hands.
- When carrying, make sure that your hands and the device are not wet or slippery.
- To maintain safety (with regard to the dimensions and weight of the device), the device may only be carried by qualified and sufficiently physically fit persons.
Danger of serious injury or death!
Danger of damaging the device!
Unpacking/Packaging
- Unpack the device and accessories before putting them into operation and dispose of all parts of the packaging materials, labels and tags. Keep packaging materials in a safe place, especially out of the reach of children and incompetent persons, or dispose of them safely.
Danger of serious injuries!
Danger of suffocation!
Inspection/Commissioning
- The appliance is intended for food preparation. Therefore, before putting it into operation, thoroughly clean all its parts, according to the instructions given in the section „Commissioning“, resp. „Before first use“.
- Never clean the device (its drive unit with electrical parts and controls) and the mains cord with plug under running water, as this could lead to liquid entering the device.
- Clean these parts only with a damp cloth and dry wipe or leave the product to dry.
Only clean the appliance when it is switched off and unplugged.
- We recommend performing initial and subsequent regular inspections of the device.
- Never use the device if it is incomplete, damaged or any part of it has been damaged during transport or use.
- Do not use non-original and incomplete parts of the device and its accessories.
Danger of serious injuries!
There is a risk of electric shock!
Location/Installation
- Only place the appliance on flat, firm and stable surfaces - on kitchen worktops and on pieces of furniture suitable for placing kitchen appliances.
- Always make sure that the place where you want to place the device has sufficient space, mechanical strength and suitable lighting.
- Never place the appliance on the edge of a worktop or kitchen table. Make sure that the power cord does not hang loosely over the edge of the worktop or kitchen table. Children could pull the device by the power cord.
Warning!
- Do not use or place the device:
- on unstable tables or parts of furniture,
- on uneven and dirty surfaces,
- on the tight edge of tables or pieces of furniture,
- near containers with water or other liquids.
Warning!
- Place the appliance in a place where children cannot reach freely. Work tables and furniture for placement should not be less than 85 cm.
- Do not allow children to reach the device. The appliance can tip over children and cause serious injuries.
- Mechanical damage (cracking or breaking of parts and covers) of the device can cause serious injury.
Danger of serious injuries!
There is a risk of damage to the device or other property damage!
- Do not place or use the device near containers containing water. Do not remove the device if it falls into the water. First pull the mains plug out of the mains socket and only then remove the appliance from the water. In such cases, take the device to a specialist garage for inspection to ensure that it is safe and working properly.
There is a risk of electric shock! Danger of electrical short circuit!
- Do not place or use the appliance on or near an electric or gas stove, or in places and near places with excessive heat or open flames. Danger of serious injuries!
There is a risk of damage to the device or other property damage!
Operation/Supervision Warning!
- This device must only be used with original parts and accessories.
- Always switch off and unplug the power cord before replacing accessories or accessible parts of the device, before assembly and disassembly, and before cleaning and maintenance.
- Before using the appliance, always make sure that the appliance is correctly assembled and that none of its parts are damaged. Do not use incorrectly assembled and damaged equipment.
Danger of serious injuries!
• Always keep the device under supervision during use and operation!
- This unit is not intended to be operated by a programmer, external timer or remote control, as there is a risk of fire if the unit is covered or incorrectly positioned.
- When leaving the device unattended, always disconnect it from the mains.
- Before each connection of the device to the electricity, make sure that the main switch (control knob) is in the „0“ (off) position.
- Do not turn the machine on or off by plugging or unplugging the power cord.
- For normal use, always connect the device to the electricity first and then switch it on with the main switch.
- After use, turn off the machine with the main power switch, and then unplug the power cord from the AC outlet.
- Do not use the device if the main power switch does not work on the device.
- The device is under dangerous voltage when the mains supply is connected.
Danger of serious injuries!
- Do not partially cover the device. Do not place any objects on the device. Do not put or allow foreign items to enter the openings of the device covers.
- Do not cover the air vents of the covers. Air ventilation ensures reliable and safe operation of the device.
There is a risk of electric shock!
There is a risk of fire!
Warning!
- The device contains parts that become very hot during operation.
- Do not touch the hot surface of the device. Only touch the handles and grips.
- Parts of the appliance that become hot during operation remain hot for some time even after the appliance has been switched off and disconnected from the mains.
Warning!
- After turning off the unit, heated surfaces remain hot for some time. Always wait until the hot surfaces have completely cooled down before carrying out any further handling of the device - storage and storage.
There is a risk of burns from a hot surface!
- Before making espresso, make sure that the filter holder is properly and firmly seated in the brew head.
- Never loosen, open or remove any parts of the appliance while preparing a drink. The hot water in the appliance is under high pressure and can cause serious injuries. Be extremely careful when moving in close proximity to the device.
- Be extremely careful when preparing food. Cooked dishes are also very hot/hot.
There is a risk of burns from a hot surface!
There is a risk of burns / scalding from hot water or steam!
- When operating the appliance, do not touch the hot parts of the appliance, especially the cup holder, the strainer holder, the steam nozzle, the cappuccino nozzle attachment, the heating plate to keep warm.
- Never overload the device beyond the limits set by the technical parameters!
- Do not switch on the appliance if there is no water in the water tank.
-
Only add drinking, clean (still) and cold water to the water tank. Do not use any other liquids.
-
Do not add water to the container during operation
- the work cycle or even immediately after its end. Allow the appliance to cool before refilling the water tank.
- Do not exceed the maximum content / volume of processed foods indicated on the containers or recommended in the information for the food processing method in this manual.
- Always divide the operating mode (continuous operation / activity time and break time) of the device into the recommended operating intervals and follow these instructions.
- If you notice any abnormalities (vibrations, sounds, odors, smoke ...) while using the device, turn off the device immediately and disconnect it from the mains. Have the device checked by a specialist garage.
- Only fold and unfold the individual parts of the device if the device is switched off, sufficiently cold and disconnected from the mains.
- Do not store the device in temperatures below 5 °C. Residual water in the heating system could freeze and damage the device.
- Store the device in an upright position - especially the body of the device.
- If any safety part / component (mechanical, electrical / electronic) is part of the device, never deactivate this part / component! Do not use the device if the safety part / component is damaged or non-functional!
- Do not use safety parts / components for switching on or off. switching off the device.
- Children under the age of 3 must be denied access to the appliance unless they are constantly supervised.
- Children from the age of 3 and under the age of 8 must not plug, regulate or clean the appliance or perform maintenance by the user.
WARNING!
- Some parts of this product may become very hot and may cause burns. Pay special attention if vulnerable people or children are present.
- Never underestimate the possible dangers and take extra care !!!
Espresso coffee
For optimal results, use a special ground coffee designed for making espresso, which must be properly compressed in a sieve. Thanks to the pressure created by the pump of your device with a capacity of 15 bar, the hot water passes through this finely ground coffee for a short time. The result is a thick, black liquid that is extremely tasty and rich in aroma: the concentrated essence of coffee. Espresso is not served in a traditional coffee cup, but rather in small cups with a volume of 70 ml.
The perfect espresso has a wonderful thick gold-colored foam called „cream“, which is made from natural oil derived from coffee beans and gives the espresso its rich taste and aroma. It is important that the espresso coffee is well roasted and ground accordingly. If you cannot buy already ground espresso coffee, use a coffee grinder (eg Orava brand) to grind the grains. The coffee must not be ground too finely. It must be slightly grainy and its coarseness must be somewhere between flour and sugar. Too fine ground coffee can clog the grille and strainer and you will not be able to prepare quality foam; from too coarsely ground coffee the espresso will be weak.
Three other factors that will determine the quality of an espresso, in addition to the coffee they use, are: water, temperature and pressure. Your espresso machine requires control of these three factors through technology that has been developed for this purpose. It must be made sure that the water is freshly drained from the tap (so that it does not have time to become in contact) with air), that it is odorless and that it is relatively cold. We recommend that you use a quality water filter available in stores.
There are several misconceptions about espresso. One claims that espresso should be hot. The truth is that the ideal espresso is aromatic, hot-sweet (not hot) and pronounced in the mouth, where its taste persists.
The second myth is that espresso will keep you up all night. Despite its more pronounced taste, espresso actually contains less caffeine than regular coffee, more precisely, the caffeine content is in the range of 60 to 80 mg per cup compared to 80 to 100 mg of regular coffee; this is due to the brewing time, which is shorter in espresso. Also, some people think that making espresso is too long and complicated. In fact, the espresso was invented, as the name suggests, for fast serving, without complicated preparations.
As you will find, your espresso machine has been made with a sense of ease of use and to serve it for a long time.
Characteristic properties
- Small device - powerful pump
The device is equipped with a powerful pump (15 bar) capable of producing excellent espresso and cappuccino.
• Aluminum heating vessel
The appliance is equipped with an aluminum heating vessel, which heats the water very quickly and produces steam and hot water.
- Quality foam
The device is equipped with a foam device on the steam pipe. In an instant, you get a great milk froth for cappuccino without learning the „techniques“ of making the perfect froth.
- Removable drip tray
The drip tray can be removed for convenient cleaning.
- Removable water tank
The 1.6 I transparent plastic container with hinged cover is removable for easy cleaning.
- Security system
The heating element of the heating vessel has a thermal fuse that prevents overheating if the heating vessel is empty during operation.
Description of parts
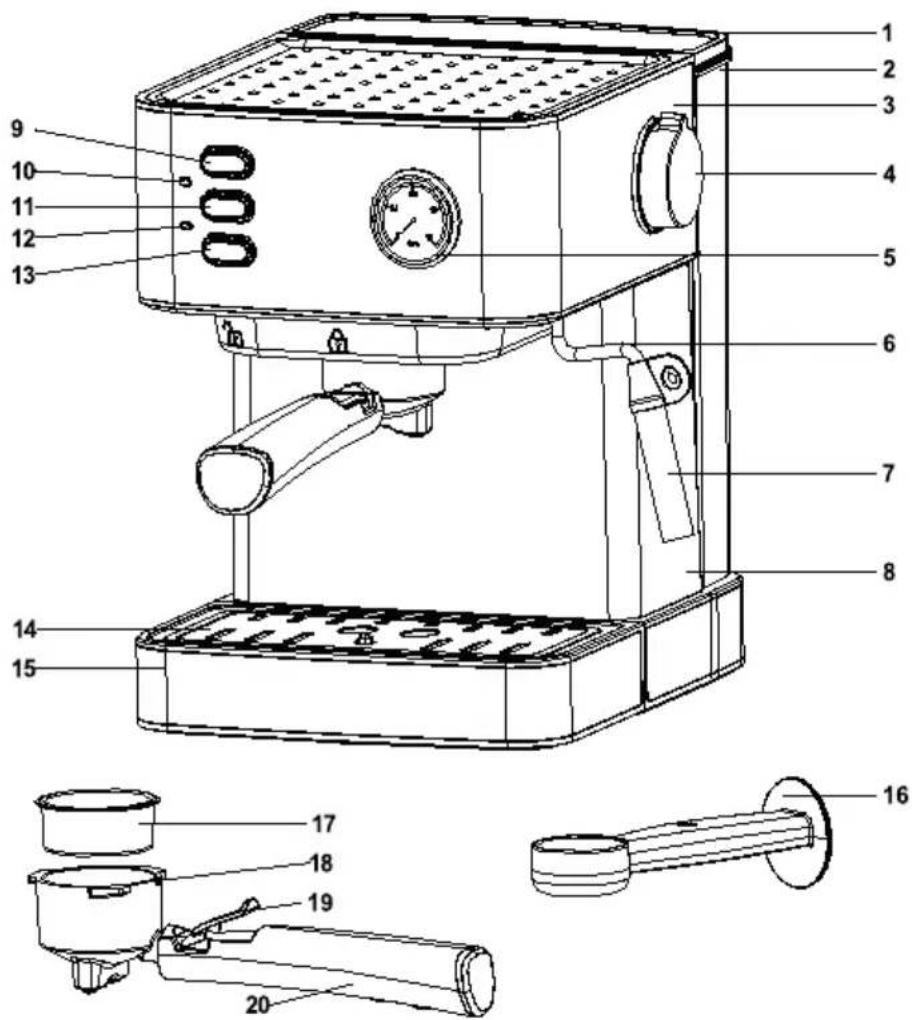
- water tank cover
- water container
- device body (upper part)
- steam control
- pressure gauge
- steam pipe
- foaming attachment
-
device body (lower part)
-
power switch
- power indicator (red)
- coffee / hot water switch
- ready indicator (green)
- steam switch
- removable grille
- drip tray
Accessories
- coffee spoon - measuring cup for compressing coffee
- stainless steel strainer
- metal funnel
- tilting locking arm (when pouring coffee residues, press it together with the strainer to prevent it from falling out)
- funnel handle
Before first use
Before making coffee for the first time, the appliance must be cleaned as follows:
- Fill the container with water (do not exceed the „MAX“ mark) and close the lid.
The steam control must be switched off. - Insert the filter (strainer) on the cup into the funnel (do not place ground coffee in the filter).
- Place a cup (not supplied) on the removable grid.
- Plug in the device and press the power button. The red power indicator lights up.
- Set the steam control to the „OFF“ position. The pump starts running. Wait for a while for the device to warm up.
After warming up, the green indicator lights up to indicate that the device is ready. Noise may be emitted from the pump during first use. After about 20 seconds, the noise stops. This is a normal phenomenon and is not a malfunction.
- Turn on the coffee / hot water switch and water will start to flow from the coffee tube into the cup.
- Switch off the coffee / hot water switch.
- Wash the filters and water container. The device is ready for normal use.
Expresso preparation
- Fill the container with cold and clean water.
- The container can be removed upwards so that you can fill it selected and then reinsert it correctly.
- Close the lid on the top of the container.
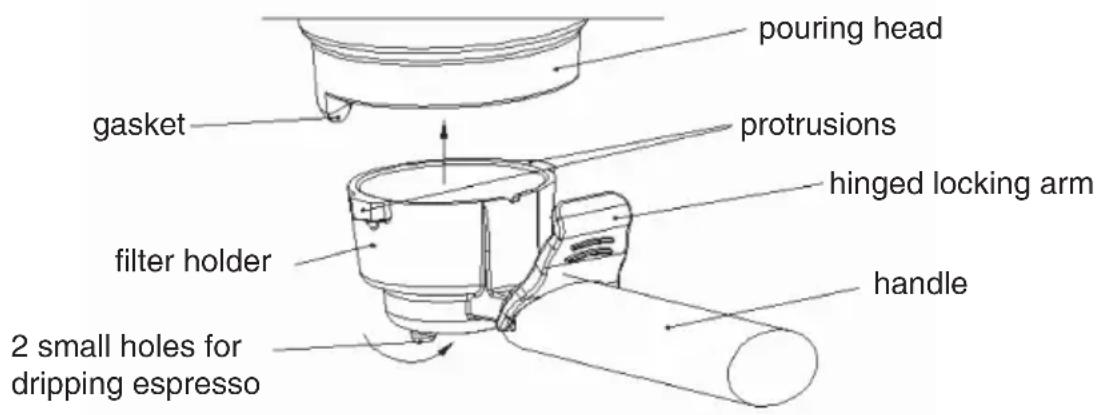
- Insert the stainless steel strainer into the funnel (do not put ground coffee in the funnel), lower the locking arm on the handle, and slide the assembly onto the pouring head on the device in the insertion position so that it fits properly into the groove, and turn the handle counterclockwise to the assembly is locked to the stop in the locking position (lock mark pouring head gasket filter holder 2 small holes for dripping espresso protrusions hinged locking arm handle).
-
Place a cup (not supplied) on the removable grid.
-
Connect the appliance to the mains (230 V), check that the steam control is in the „0“ or „OFF“ position. Then turn on the power switch.
As soon as the power is turned on, the power indicator (red) lights up.
-
Set the steam switch to the „0“ position and switch on the coffee / hot water switch. The pump starts running. After the water has flowed, turn off the coffee / hot water switch and wait a while for the appliance to warm up. After warming up, the green indicator lights up to indicate that the device is ready.
-
The device reaches the optimum temperature when the green ready indicator lights up. Then you can turn on the coffee / hot water switch. Hot water starts to flow out of the coffee tube, preheating the necessary parts (including the pouring head, cup filter, funnel, etc.).
Hot water must fill one cup.
Warning: Do not prepare espresso or cappuccino froth until the green indicator light is on.
- The coffee brewing assembly consists of a stainless steel strainer, a funnel, a handle and a hinged locking arm on the handle. You can pour ground coffee into the filter (sieve).
When filling the cup filter with ground coffee, pour coffee into it and gradually push it with the round element on the opposite side of the supplied coffee spoon.
Note: Do not fill the strainer with coffee up to the edges.
Insert the funnel into the pouring head by sliding and turning it until it clicks into place (as described in step 4).
- Place the cup under the two coffee spouts on the drip tray and turn on the coffee / hot water switch. In a few seconds, fresh espresso will drip into the cup. Turn off the coffee / hot water switch when the cup is filled to your liking. We recommend doing this shortly in advance, as the coffee flow will not stop immediately after switching off.
Notifications!
- Do not leave the coffee machine, as it is sometimes necessary to operate it manually.
- If you use a large filter, you get 1 dcl of coffee, if you use a small filter, you get 1/2 dcl of coffee.
- It is a good idea to shut down and clean the cooking system after each use.
The squeezing bar on the handle helps to firmly remove the remnants of filtered coffee. - You can remove the drip tray and the removable grille and clean them of coffee residues.
Note:
If you prefer a stronger rich coffee, use a large filter and use one refill for one coffee. If you prefer a weaker coffee, slightly increase the brewing time.
Be careful when handling hot water, there is a risk of scalding.
Warning!
The container must always be filled with water. Before switching on.
Preparation of steam for cappuccino / frothing milk
You can use the steam function to prepare foam for cappuccino. First, prepare an espresso according to the previous procedure. Then follow these steps:
- Fill the container with cold and clean water to approx. 3/4 of its volume.
- The container can be removed upwards so that you can fill it selected and then reinsert it correctly.
- Close the lid on the top of the container.
- Connect the appliance to the mains (230 V \~), check that the steam control is in the „OFF“ position. Then turn on the power switch.
As soon as the power is turned on, the power indicator (red) lights up.
- Turn on the steam switch and also turn on the coffee / hot switch.
The device reaches the optimum temperature when the green ready indicator lights up. You can then turn the steam control to the left so that steam starts to flow from the steam pipe.
Warning: Turn the steam control slowly to the left, there is a risk of rapid steam release and scalding when turning quickly.
- Fill a suitable cup to approx. 1/3 with low-fat milk and place it under the steam pipe of the appliance.
Notes:
The milk must be well chilled and the cup must also be cold, so do not immerse it in warm water.
Cappuccino consists of 1/3 espresso, 1/3 milk and 1/3 milk foam. Fill the cup to 1/3 with espresso. The rest will be milk and milk foam for cappuccino.
The steam pipe consists of a metal pipe and a removable foaming attachment.
When preparing cappuccino froth, immerse the steam tube with the setting just below the level of cold milk. Do not touch the bottom of the cup with it. In this way, the steam mixes with the air to form a rich and creamy foam.
If you want more foam, tilt the cup.
Notes: Before preparing cappuccino foam leave escape a small amount of steam from the steam pipe before immersing it into milk.
- Turn the steam control back to the „OFF“ position when you get the foam you need.
Warning: The metal pipe is hot when generating steam, do not touch it. - After foaming, wipe the tube with a soft, dry cloth.
- Finish the cappuccino by adding the foam created to the top of the prepared warm cup of espresso.
Preparation of hot water
You can use the hot water function, e.g. to heat the cup before making coffee so that the coffee does not lose its taste, to make tea or to wash the cups more easily after drinking coffee.
Follow these steps:
- Fill the container with cold and clean water to approx. 3/4 of its volume.
- The container can be removed upwards so that you can fill it selected and then reinsert it correctly.
- Close the lid on the top of the container.
- Connect the appliance to the mains (230 V \~), check that the steam control is in the „OFF“ position.
- Turn on the power switch. As soon as the power is turned on, the power indicator lights up (red).
The device reaches the optimum temperature when the green ready indicator lights up.
- First turn the steam control to the left from the „OFF“ position by at least 135°.
Then turn on the coffee/hot water switch.
Hot water will flow into the prepared cup.
Notes: Steam may be released for a while before hot water escapes.
Do not place the tube too close to the wall of the cup. There is a risk of rapid release of steam and scalding.
- After filling the cup with hot water, switch off the coffee/hot water switch and turn the steam control to the „OFF“ position.
Turn off the device.
Steam preparation for hot drinks
You can use the steam preparation function for hot drinks, e.g. for the preparation of hot chocolate, etc.
Follow these steps:
- Fill the container with cold and clean water up to the „MAX“ limit.
- The container can be removed upwards so that you can fill it selected and then reinsert it correctly.
- Close the lid on the top of the container.
- Connect the appliance to the mains (230 V), check that the steam control is in the „OFF“ position.
- Turn on the power switch.
As soon as the power is turned on, the power indicator lights up (red). - Turn on the coffee / hot water switch.
The pump starts running. When the water starts to flow, immediately turn the coffee / hot water switch off and on the steam switch.
Wait for the device to reach the optimum temperature when the green ready light is on. - Remove the frother from the steam tube, immerse the tube below the level of the beverage in the cup you want to heat with steam, and slowly turn the steam control to the left to start releasing the steam.
Warning: Beware of released steam.
Do not place the tube too close to the wall of the cup. There is a risk of rapid release of steam and scalding. - After heating the beverage with steam, turn the steam control to the "OFF" position and switch off the appliance.
Cleaning
Unplug the appliance before cleaning and let it cool down. Only clean the device with a wet wipe. Do not use any strong cleaning agents or solvents. Wash the container and filters in the usual way.
Never put the accessories of your espresso machine in the dishwasher. After use, the water tank must be emptied to prevent limescale deposits.
Drip tray
If you are preparing several espresses in a row, you should empty the drip tray from time to time (about every 7 to 8 espressos).
It is normal to have water in it, this does not mean that the appliance is flowing, but the heating block of your appliance is draining. If necessary, clean the drip tray with water and a little liquid soap without an abrasive component, rinse it and dry it. Put it back in place.
Filling head, filters and funnel
These accessories must be cleaned after each use. Simply clean the pouring head with a damp cloth and wash the other parts with water and a little dishwashing detergent, rinse and dry.
When using the espresso machine, do not leave the funnel mounted to avoid unnecessary wear of the sealing insert.
Removable grille
To clean, remove and wash with water and a little non-abrasive dishwashing detergent, rinse and dry.
Steam pipe and frother
The openings must not be blocked by milk residues. If necessary, pull them through the needle.
Removal of lime deposits
To ensure efficient coffee machine operation, clean inner tubes and the best taste of coffee, you should clean the residue at least once every 2-3 months.
- Fill the water tank with descaling solution to the „MAX“ level/create the solution in the ratio of water to the agent to remove scale 4: 1, see the instructions for the product used, you can also use citric acid (available in pharmacies or drugstores, use a dilution ratio per 100 parts of water 3 parts of citric acid.
- To preheat, fit a funnel (without coffee) and place a suitable container under the spout.
- Turn on the on/off switch. The red indicator lights up. Set the steam switch to the „OFF“ position. When the water starts to flow, turn off the coffee/hot water switch to turn off the pump and wait for preheating until the green indicator light comes on.
- Turn on the coffee/hot water switch and allow about 2 cups of water to drain. Then switch off the coffee/hot water switch to switch off the pump and wait approx. 5 seconds.
- Set the steam switch to the first position (steam symbol) and wait until the green indicator lights up. For about 2 minutes, turn the steam control to produce steam and then turn the steam control back to the „OFF“ position to stop steam production. Turn off the steam switch and allow the sediment remover solution to act on the appliance for at least 15 minutes.
- Continue removing deposits and repeat steps 3 to 5 at least three times.
- Then set the on/off switch to position „1“ again until the green indicator light comes on, then set the coffee/hot water switch to position „1“ and allow all the remover solution to drain.
- After these steps, use the appliance as for making coffee (without coffee) only with clean water filled in the container up to the „MAX“ level, repeat steps 3 to 5 with clean water three times (in step 5 it is not necessary to wait up to 15 minutes), until the water in the container has passed.
- Repeat step 9 at least three times to ensure that the tubes are completely cleaned of remover solution.
Problems solving
| Symptom Caue Solution | ||
| Water leaking from the container or water seeps out through the container cover. | The container is not fitted correctly. | Place the container straight and correctly. |
| The water level in the container exceeds the "MAX" level. | Fill with water within the "MIN" and "MAX" markings. | |
| Water leak at the bottom of the coffee machine. | There is too much water in the drip tray. | Clean the drip tray. |
| The coffee machine has a fault. | Contact an authorized service center for repair. | |
| Water leakage from the outside of the filter (strainer). | Remains of ground coffee are at the edge of the filtration. | Clean and remove coffee from the edge filter. |
| In the coffee you can smell the acid (vinegar). | After cleaning the deposits, you have insufficiently cleaned the coffee machine. | Clean the coffee machine several times as described in the section on cleaning equipment before first use. |
| Ground coffee was stored for a long time in a warm and humid place and lost quality. | Use fresh ground coffee or coffee stored in a cool and cool place. After opening the ground coffee package, close it tightly and store it in the refrigerator to keep the coffee fresh. | |
| The coffee machine does not work. | The device is not properly plugged into an electrical outlet. | Plug the power cord into an electrical outlet correctly. If the coffee machine still does not work, contact an authorized service center to have it repaired. |
| Steam is not generated or foamed. | The green steam indicator does not light up. | Steam can only be used to create foam when the green steam indicator lights up. |
| The used container is too large or not properly shaped. | Use a tall and narrow cup. | |
| You used skim milk. Use whole | milk. |
If the problem persists even after following the recommendations listed here, request an authorized service center to repair it. Do not attempt to disassemble or repair the device yourself.
Recipes
Enjoy your espresso the way you like it: when you want to relax or finish a good meal.
Here are some recipes you can make with your espresso machine.
Original espresso
- To prepare, use a scoop of high-quality well-roasted ground espresso coffee and filter it directly into a preheated cup. If you use good and well-ground coffee, a beautiful foam crown will form above the cup.
- Add sugar to taste and enjoy the taste and aroma. The original espresso is drunk without milk.
Cappuccino
The following quantities are ideal for cappuccino prepared according to all the rules of this art: 1/3 of coffee, 1/3 of warm milk, 1/3 of frothed milk. The amount of warm milk + foam obtained should therefore be about twice the amount of coffee prepared.
- Use large cups that you have preheated.
- Fill them with coffee in an amount equivalent to a cup of espresso and add milk frothed using cappuccino accessories.
• Finally, sprinkle with chocolate powder
Coffee cream
- Prepare a classic espresso in a large cup.
- Add a portion of cream to get a café crème. You can also replace cream with warm milk.
Café corretto
- Prepare a cup of espresso in the usual way.
- Flavor easily by adding 1/4 or 1/2 a glass of cognac. Aniseed, grape spirit, sambuca, cherry and cointreau are equally suitable for this purpose.
There are a number of other opportunities for „refining“ espresso. There are no limits to imagination.
Coffee liqueur
- Mix 3 cups of espresso, 250 g of brown candied sugar, 1/2 liter of cognac or cherry in an empty 0.75 liter bottle.
- Let the mixture settle for at least 2 weeks. You will get a fine liqueur suitable especially for coffee lovers.
Italian ice coffee
4 scoops vanilla ice cream, 2 cups of cold sweetened espresso, 1/8 l of milk, whipped cream, grated chocolate.
- Mix chilled espresso with milk.
- Divide scoops of ice cream into cups, pour coffee over them and decorate with whipped cream and grated chocolate.
Frisian coffee\*
- Add a glass of rum to a cup of sweetened espresso.
• Garnish with an honest layer of whipped cream and serve.
Flambéed espresso
2 cups of espresso, 2 glasses of cognac, 2 teaspoons of brown sugar, whipped cream.
- Pour cognac into thick-walled cups, heat them and flambe.
- Add sugar, mix, pour coffee and garnish with whipped cream. Depending on your taste, the espresso can also be diluted with a little hot water.
Perfect espresso
2 cups of espresso, 6 egg yolks, 200 g of sugar, 1/8 liter of sweetened whipped cream, 1 cup of orange liqueur.
- Beat the egg yolks with the sugar until a thick foam is formed.
- Add cold espresso and orange liqueur.
- Then mix the whipped cream.
- Pour everything into cups.
- Put the cups in the refrigerator.
Mocca pudding
2 cups of espresso, 1/2 liter of milk, 1 bag of powder for vanilla pudding, 3 egg yolks, 1/8 liter of sweetened whipped cream, 150 g of sugar.
• Prepare vanilla pudding from milk, vanilla powder and sugar.
- Add egg yolks to the still warm pudding.
- Allow to cool and add espresso and whipped cream.
Warning!
(*: Excessive alcohol consumption is dangerous to health)
Technical specifications
Power supply: 220 - 240V\~ 50/60 Hz
Power consumption: 850 W
Water tank capacity: 1,6 l
Dimensions (W x H x D): 23,4 x 29,2 x 28 cm
Weight: 3,5 kg
Vapor pressure: 15 bar
Noise: 60 dB (A)
The declared noise emission value of this appliance is 60 dB (A), which represents the sound power level A with respect to the reference sound power of 1 pW.
All the rights to make changes are reserved!
Producer:
ORAVA retail 1, a.s.
Seberíniho 2
821 03 Bratislava
Slovenská republika
Importer:
ORAVA retail 1. a.s.
Seberíniho 2
821 03 Bratislava
Slovenská republika
ORAVA distribution CZ, s.r.o.
Ostravská 494
739 25 Sviadnov
Česká republika
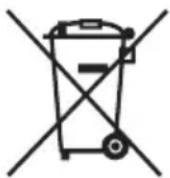

DISPOSAL OF USED ELECTRICAL AND ELECTRONIC EQUIPMENT
The symbol on the product or on its packaging indicates that this product does not belong to household waste. It is necessary to take it to a collection point for electrical recycling and electronic equipment.
By ensuring proper disposal of this product, you will help prevent negative consequences to the environment and human health that would otherwise be caused by inappropriate disposal of this product. For more detailed information about recycling of this product, please contact your local authority, your household waste disposal service or the shop where you purchased the product.

This product meets all the essential requirements of the EU directives that apply to it.
- ES-300 Instruction manual
- Intended use of the device
- GENERAL SAFETY INSTRUCTIONS AND WARNINGS
- General safety instructions
- Safety of the operating environment
- Electrical safety
- Safety of persons
- Cleaning, maintenance and repairs
- Special safety instructions. Read carefully!
- Transport/Carrying
- Warning!
- Unpacking/Packaging
- Inspection/Commissioning
- Location/Installation
- Operation/Supervision Warning!
- Espresso coffee
- Characteristic properties
- - Small device - powerful pump
- • Aluminum heating vessel
- - Quality foam
- - Removable drip tray
- - Removable water tank
- - Security system
- Accessories
- Before first use
- Expresso preparation
- Notifications!
- Note:
- Preparation of steam for cappuccino / frothing milk
- Notes:
- Preparation of hot water
- Steam preparation for hot drinks
- Cleaning
- Drip tray
- Filling head, filters and funnel
- Removable grille
- Steam pipe and frother
- Removal of lime deposits
- Problems solving
- Recipes
- Original espresso
- Cappuccino
- Coffee cream
- Café corretto
- Coffee liqueur
- Italian ice coffee
- Frisian coffee\*
- Flambéed espresso
- Perfect espresso
- Mocca pudding
- Technical specifications
- Producer:
- Importer:
- DISPOSAL OF USED ELECTRICAL AND ELECTRONIC EQUIPMENT
Brand : Orava
Model : ES-300
Category : Coffee maker