
E450AD86G - Television Element - Free user manual and instructions
Find the device manual for free E450AD86G Element in PDF.


| Product Type | LED Television |
| Model | E450AD86G |
| Screen Size | 43 inches (109 cm diagonal) |
| Resolution | 3840 x 2160 (4K UHD) |
| Display Technology | LED backlit LCD |
| Refresh Rate | 60 Hz |
| HDR Support | HDR10, HLG |
| Smart TV Platform | Built-in (proprietary or Android TV based) |
| Wi-Fi | 802.11 b/g/n (2.4 GHz) |
| Ethernet | RJ45 (10/100 Mbps) |
| HDMI Ports | 3 x HDMI 2.0 |
| USB Ports | 2 x USB 2.0 |
| Other Ports | 1 x AV input, 1 x Optical audio out, 1 x Headphone jack |
| Tuner | DVB-T2/C/S2 (triple tuner) |
| Power Consumption (Max) | 75 W |
| Power Supply | AC 100-240 V, 50/60 Hz |
| Dimensions (without stand) | 957 x 559 x 74 mm (width x height x depth) |
| Dimensions (with stand) | 957 x 612 x 200 mm |
| Weight (without stand) | 6.8 kg |
| Weight (with stand) | 7.2 kg |
| VESA Mount Pattern | 200 x 200 mm |
| Remote Control | Infrared (IR) with dedicated streaming buttons |
| Energy Efficiency Class | F (EU scale) |
| Audio Output | 2 x 8 W stereo speakers |
Frequently Asked Questions - E450AD86G Element
User questions about E450AD86G Element
0 question about this device. Answer the ones you know or ask your own.
Ask a new question about this device
Download the instructions for your Television in PDF format for free! Find your manual E450AD86G - Element and take your electronic device back in hand. On this page are published all the documents necessary for the use of your device. E450AD86G by Element.
USER MANUAL E450AD86G Element

2 AAA Remote Batteries
WHAT YOU'LL NEED (NOT INCLUDED)

Screwdriver
Phillips head

natural_image
Line drawing of a wireless router with a tall antenna and three ports (no text or symbols)Wireless Router
Needed for streaming
natural_image
Simple line drawing of a Wi-Fi symbol with three curved arcs above and one arc below, no text or labels present.Internet connection
Needed for streaming
natural_image
Line drawing of a smartphone and a laptop computer (no text or symbols)Smartphone, computer or tablet
Needed for setup
CONNECT DEVICES TO YOUR TV
Check to ensure that you have selected the right cables for the ports and that they are connected securely (cables and external devices not included). Loose connections can affect your picture and audio quality.
ANT HDMI OPTICAL

natural_image
Diagram of a laboratory pipette with a cap and a circular inset showing a droplet (no text or labels)Connect an outdoor or indoor antenna.

Connect a Blu-ray or DVD player, gaming console, or other external devices to your TV. Highest quality audio/visual connection.

Connect an optical cable from an external digital audio system.

Connect an Ethernet cable to access a network or the Internet. The TV also has a wireless connectivity feature.
CONNECT DEVICES TO YOUR TV
(continued)

natural_image
Simple line drawing of a USB flash drive with an external port (no text or symbols)Connect a USB device for browsing photos, music, or videos.
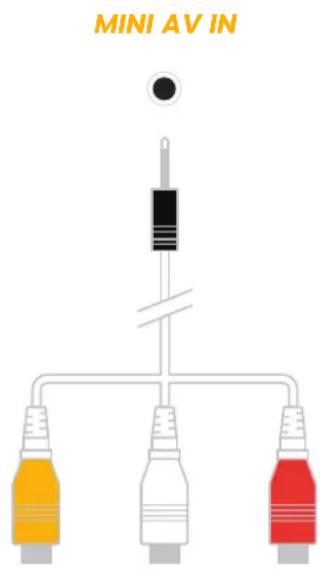
Connect a composite video cable and left-right audio cables from an external AV device.
SETTING UP YOUR TV

natural_image
Line drawing of a table with legs and supports, showing structural details and a numbered label (1) at the top center.Installing the stands
WARNING: Your TV is heavy (>82 lbs)! A minimum of two people are required for installation. Do not install the stands if you want to wall mount your TV.
You will need: Phillips screwdriver (not included)
- Place the TV screen-down on a clean, flat, soft surface (e.g.: blanket) to prevent scratches or damage to the screen.
- Use a Phillips screwdriver to attach each stand with the provided screws.
- Use the handles on the back of the TV to help lift and place it upright on a stable, level surface.
To avoid damages, never carry your TV by holding or putting pressure onto the glass.
Use the attached handles when lifting and take extra care when handling.
SETTING UP YOUR TV
(continued)

Mounting your TV
If you choose to wall mount your TV, please ensure your wall mount (not included) and supporting structure can hold >82 lbs and is properly anchored.
Your TV has four mounting holes for a 500 x 300 mm VESA approved mounting bracket.
- Place the TV screen-down on a clean, flat, soft surface (e.g.: blanket) to prevent scratches or damage to the screen.
- Mount the VESA bracket using four M8 x 25 mm (max depth) screws (not included) and follow the mounting instructions provided with your wall mount.
If you have any doubts about your ability to safely install your TV, please consult a professional installer.
SETTING UP YOUR TV
(continued)

natural_image
Simple line drawing of a vertical device with two battery cells and a labeled pin (no text or symbols beyond the number 2)Setting up your remote
Power your TV remote by inserting the included batteries carefully matching (+) and (-) indicated inside the battery compartment.
Pairing your remote
When the TV prompts you to start pairing the remote, press and hold the ⏻ and ⏻ buttons on the remote until the light on the remote starts to pulse. Once complete, follow the on-screen instructions.
Note: Internet connection is required in order to use Google Assistant.
TIP: Always replace dead batteries with two brand new batteries from the same manufacturer. Never use damaged batteries.
If your remote gets warm/hot during use, discontinue use and contact customer support immediately.

natural_image
Simple line drawing of an electrical outlet with a plug and socket, no text or symbols presentPlug in and turn on TV
Plug your TV into the wall outlet and press the power button on your remote control. Your TV will display a launch screen followed by the first setup screen.
Power button

SETTING UP YOUR TV
(continued)

Follow the on-screen instructions
When your TV powers on, follow the easy on-screen instructions for setup.
Connecting your TV to the Internet gives you access to all the things that make your TV smart, including apps, Google Assistant, and more. Your TV will automatically detect wireless networks in your area, so have your network name and password handy. If you aren't ready to connect to a wireless network you can still use it as a basic TV and can connect it later within settings.
SETTING UP YOUR TV
(continued)

natural_image
Line drawing of a laptop and smartphone with no text or symbolsActivate your TV
To activate your TV you'll need a computer, smartphone or tablet. When setup is complete you'll be directed to the home screen.
Set up Google TV™ for full access to all of your TVs features like installing apps, personalized entertainment, and Google Assistant. For this selection, a Google Account is required for activation. You can login to an existing Google Account, or create a new one by following the prompts.
TIP: Download the Google Home app for faster set up, or continue set up on the TV using the remote.
Set up Basic TV if you prefer to use your TV without an Internet connection or without a Google Account. Some features aren't available in basic TV (ie: features that require a Google Account, installing apps, Google Assistant, or casting content). You can always setup Google TV later within the TV settings.
A paid subscription or other payments may be required for some streaming channels. Channel availability subject to change and varies by country or region.
USING YOUR REMOTE

A Power Turn your TV on and off
B Microphone Speak into the microphone after pressing the Google Assistant button
c Mute Turn your TV sound on and off
D Profile Select your Google profile
E Google Assistant Ask Google to find movies, stream apps, play music, control the TV, and more – all with your voice. Press the Google Assistant button on the remote to get started.
F Dashboard Display the dashboard menu to access quick TV settings, inputs, and more
G Navigation Pad Select up, down, left and right
H Select Confirm your selection
1 Back Return to the previous screen
Home Return to the home screen
K Guide Display over-the-air live TV channels when the TV is connected to an antenna; or when pressed in DTV mode, the electronic program guide (EPG) will display
Volume Make your TV louder or softer
M Channel Select the channel
N Virtual Keyboard Display the on-screen virtual keyboard
Menu Display the Menu settings
P App shortcuts Launch the labeled app when your TV is connected to the Internet
CONNECTING AN ANTENNA
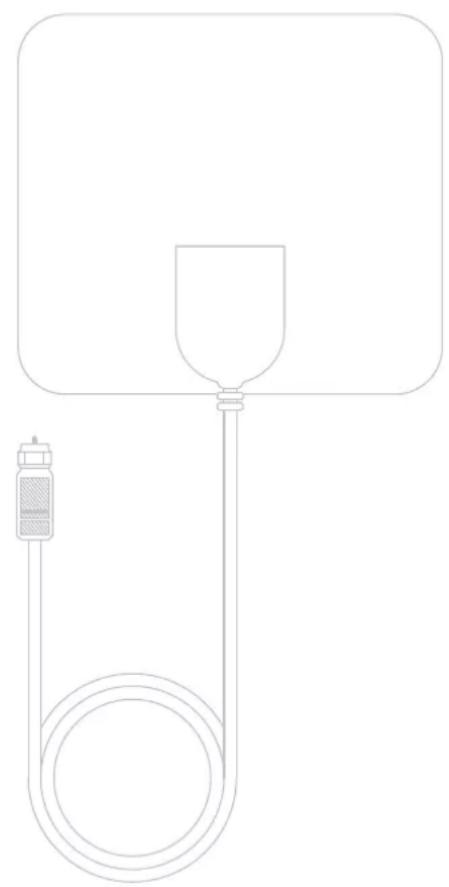
With the built-in tuner you can connect your TV to an antenna and enjoy over-the-air entertainment.
- To connect your TV to an antenna, connect a coax cable (not included) into your TV's ANT/CABLE port and the other end into your device.
- Turn your TV on and press the button on your remote and then press Select.
- Navigate channels & inputs > channels > channel scan
- Follow the on-screen instructions.
natural_image
Line drawing of a medical device with a funnel and tubing (no text or symbols)UNIVERSAL REMOTE SETUP
If you prefer to use your cable set-top box or satellite receiver remote as a universal remote, please refer to the manual your cable or satellite service provided. It includes instructions on how to program your remote to your TV.
LET'S REGISTER YOUR PRODUCT

natural_image
Icon showing a globe with 'WWW' text and a cursor arrow, no readable text or symbols beyond the graphic elements.It's super easy, just head on over to elementelectronics.com/register
BENEFITS OF REGISTERING YOUR PRODUCT:

Support
Get assistance quickly by pre-registering your product.

News & Off ers
Take advantage of the latest news and special offers from Element.

Updates
Stay current with important product updates and notifications.

Warranty
Receive a 2-year limited warranty with product registration.*
WE'RE HERE TO HELP
Find resources and get help with product setup, connecting devices, technical issues, downloading manuals and more!
We're available 24 hours a day, 7 days a week

elementelectronics.com
1.888.842.3577

customerservice@elementelectronics.com
To learn more about your Google TV, or to review common issues and solutions, visit support.google.com/googletv
We recommend keeping your TV box for the duration of your warranty. See your product warranty for details.

element®
Bring it home.
Element, the Element Logo, and Bring it home are trademarks of Element Brand Holding, LLC. ©2023 Element Brand Holding, LLC. All Rights Reserved.
Google TV is the name of this device's soft ware experience and a trademark of Google LLC.
Google and Google Home are trademarks of Google LLC.
- WHAT YOU'LL NEED (NOT INCLUDED)
- CONNECT DEVICES TO YOUR TV
- SETTING UP YOUR TV
- Installing the stands
- Mounting your TV
- Setting up your remote
- Pairing your remote
- Plug in and turn on TV
- Follow the on-screen instructions
- Activate your TV
- USING YOUR REMOTE
- CONNECTING AN ANTENNA
- UNIVERSAL REMOTE SETUP
- LET'S REGISTER YOUR PRODUCT
- BENEFITS OF REGISTERING YOUR PRODUCT:
- Support
- News & Off ers
- Updates
- Warranty
- WE'RE HERE TO HELP
- We're available 24 hours a day, 7 days a week
- element®
Brand : Element
Model : E450AD86G
Category : Television