
BreadChef - Bread maker Orava - Free user manual and instructions
Find the device manual for free BreadChef Orava in PDF.


| Product Type | Bread Maker |
| Brand | Orava |
| Model | BreadChef |
| Dimensions (W x H x D) | 24 x 30 x 35.5 cm |
| Weight | 4.05 kg |
| Power Supply | 220-240 V~, 50/60 Hz |
| Power Consumption | 550 W |
| Noise Level | 60 dB (A) |
| Number of Programs | 19 (Basic, Quick, Sweet, French, Whole Wheat, Rice Bread, Gluten Free, Dessert, Mix, Dough, Knead, Cake, Jam, Yogurt, Bake, Sticky Rice, Rice Wine, Defrost, Stir-Fry) |
| Loaf Sizes | 500 g, 750 g, 1000 g |
| Crust Color Settings | Light, Medium, Dark, Fruit |
| Delay Timer | Up to 15 hours |
| Keep Warm Function | Yes, up to 1 hour after baking |
| Memory Function | Resumes program if power failure < 10 minutes |
| Baking Pan | Non-stick coating, removable |
| Kneading Hook | Removable, with removal tool |
| Accessories Included | Measuring cup (cup and spoon), kneading hook removal tool, instruction manual |
| Viewing Window | Yes, in top cover |
| Safety Features | Overheat protection (displays H:HH), automatic shutdown, child safety (aged 8+ with supervision) |
| Cleaning and Maintenance | Baking pan and kneading hook dishwasher safe; wipe exterior with damp cloth; do not immerse in water |
| Spare Parts Availability | Contact authorized service center; kneading hook and baking pan replaceable |
| Repairability | Repairs by authorized service center only; do not disassemble yourself |
| Intended Use | Household and similar indoor use (not commercial) |
| Certification | CE marking; complies with EU directives |
Frequently Asked Questions - BreadChef Orava
User questions about BreadChef Orava
0 question about this device. Answer the ones you know or ask your own.
Ask a new question about this device
Download the instructions for your Bread maker in PDF format for free! Find your manual BreadChef - Orava and take your electronic device back in hand. On this page are published all the documents necessary for the use of your device. BreadChef by Orava.
USER MANUAL BreadChef Orava
Homemade bread bakery
Orava
Breadchef
Instruction manual
EN
natural_image
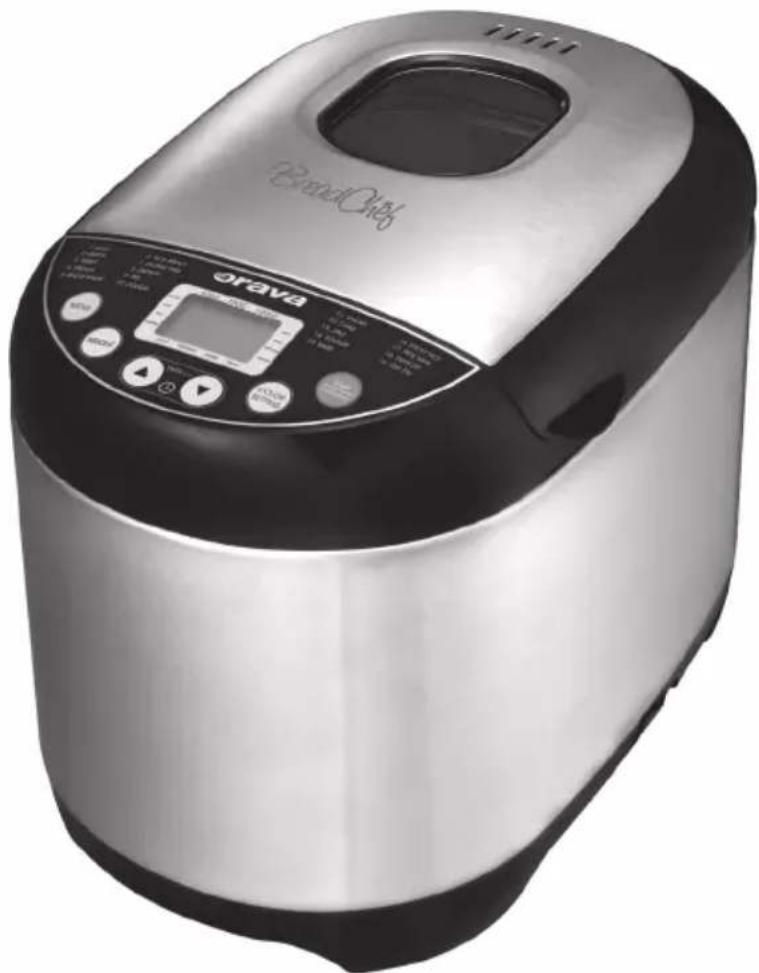
Exterior view of a modern oar with brand chef branding and control panel (no visible text beyond branding)Keep these instructions for future reference.
CE
Breadchef
Intended use of the device
The device is intended exclusively for use to the extent specified in the technical and operating parameters and functions, safety and user instructions and external influences of the operating environment.
ORAVA electrical appliances are manufactured according to the knowledge of the current state of technology and recognized safety and technical rules. Nevertheless, incorrect and unprofessional use or use contrary to the intended purpose may create a risk of injury or endanger the life of the user or a third party, resp. damage to equipment and other property.
1. GENERAL SAFETY INSTRUCTIONS AND WARNINGS

Read all instructions before using the device!
- This document contains important safety instructions and warnings for safe, correct and economical operation of the electrical equipment. Its compliance helps the user avoid risks, increase reliability and product life.
- In this document, the general term product is used in text parts such as: electrical equipment - any device used for the production, conversion, transmission, distribution or use of electricity.
-
From the point of view of the purpose of using electricity, the concept of electrical equipment in the strict sense of the word will include the following categories:
-
household electric appliances,
- information and communication equipment,
- consumer electronics,
- lighting equipment,
- electrical and electronic tools,
- toys and equipment for sporting and recreational purposes,
- medical devices (aids),
- monitoring and control devices,
- vending machines.
1.1 General safety instructions
- Before operating the unit, we recommend that you carefully read the instruction manual and operate the equipment in accordance with the instructions!
- The safety instructions and warnings in this manual do not cover all the possible conditions and situations that may arise when using the device. The user must understand that a factor that cannot be incorporated into any of the products is personal responsibility and caution. These factors must therefore be ensured by users serving this device.
- Failure to follow the safety instructions and warnings is forbidden by the manufacturer for any damage to health or property!
- Keep the instruction manual as close to the device as possible throughout its service life. Always keep the instruction manual together with the appliance for future use and use by new users.
-
Use the appliance only for the intended purpose and in the manner specified by the manufacturer.
-
The appliance is intended for home and similar indoor use without special focus.
- This appliance is intended, in addition to domestic use, for the following uses:
- in shops, offices and other similar work environments;
- in economic buildings;
- in hotels, motels and other residential environments;
- in bed and breakfast establishments.
- It is not a professional device for commercial use.
- Do not change the technical parameters and features of the device by unauthorized modification or modification of any part of the device.
- The manufacturer is not responsible for damages caused during transportation, misuse, damage or destruction of the equipment due to adverse weather conditions.
1.2 Safety of the operating environment
- Do not use the device in an industrial environment or outside environment!
- Do not expose the appliance to:
- Do not use the device in an industrial environment or outside environment! - Do not expose the appliance to:
- sources of excessive heat or open flame,
- dripping or splashing water,
- vibration and excessive mechanical stress,
- insects, animals and plants,
- aggressive and chemical substances.
- The operating environment of the device must always be in accordance with the basic characteristics set out.
- Features of the operating environment:
- The operating environment of the device must always be in accordance with the basic characteristics set out. - Features of the operating environment:
-
Ambient temperature: +5 ÷ +40 °C
-
Humidity: 5 ÷ 85%
-
Altitude: ≤ 2 000 m
-
Occurrence of water: intermittent condensation of water or occurrence of water vapor
-
Occurrence of foreign bodies: quantity and type of dust are insignificant
-
Protection degree: min. IP20 (device protected from touching dangerous parts by hand and non-waterproof)
-
Ambient temperature: +5 ÷ +40 °C
- Humidity: 5 ÷ 85%
- Altitude: ≤ 2 000 m
- Occurrence of water: intermittent condensation of water or occurrence of water vapor
- Occurrence of foreign bodies: quantity and type of dust are insignificant
- Protection degree: min. IP20 (device protected from touching dangerous parts by hand and non-waterproof)
- This degree of protection is not indicated on the product and on the technical parameters in the operating instructions.
- If the protection class of the product is different from IPX0, this information is then displayed on the label of the appliance or in the technical data of the operating instructions.
- Other characteristics of the domestic operating environment (mechanical stress - vibrations and vibrations, occurrence of plant, animals, weather effects ...) are negligible in terms of effect on the correct and safe use of electrical equipment.
1.3 Electrical safety
- Before connecting the appliance to the power supply for the first time, make sure that the voltage on the appliance label corresponds to that of the household electrical outlet.
- The electric appliance is designed to power from 1 / N / PE \~ 230 V 50 Hz.
- The electrical safety of the appliance is guaranteed only if it is properly connected to the mains.
- Electrical protection class I equipment is equipped with a protection against electric shock by means of protective earthing of inanimate parts, which can become dangerous when the device is malfunctioning. Always connect such devices to properly installed mains sockets that are equipped with earthing conductors and have a properly grounded earthing conductor.
All electrical equipment is equipped with a three-wire power supply.
- Class II electrical equipment is protected against electric shock by double insulation or by enhanced insulation of hazardous live electrical parts. Device of protection class II it must not be equipped with means to connect protective earthing.
All electrical equipment is equipped with two-wire power supply.
- Class III electrical equipment is a device that is powered by a small safe voltage source (battery or accumulator) and does not present any danger to the user from electrical shock.
- In order to provide increased safety against the risk of electric shock due to the use of electrical appliances by laypersons, it is recommended to install the power supply circuit for sockets with a rated current not exceeding 20 A RCD with a rated operating current not exceeding 30 mA.
To ensure the safety and correctness of the electrical installation, consult a qualified electrician.
- Only use a power cord with a plug (mains lead) supplied with the device and compatible with a wall socket. Using another cable may result in fire or electric shock.
- Always connect an electrical appliance to an easily accessible mains socket. In the event of an operating fault, the appliance must be switched off as soon as possible and disconnected from mains supply.
- The power cord and mains plug must always be easily accessible for safe disconnection of the electrical appliance from the power supply.
- Do not pull off the power cord by pulling the cable. Disconnect the power cord by pulling the plug behind the power cord plug.
- If you use an extension cord, make sure that the total rated power of all devices connected to the extension cord does not exceed the max. current load on the extension cable.
- If you need to use an extension cord or power supply block, make sure that the extension cord or power pack is plugged into a power socket, and not to another extension cord or power supply. The extension power cord or power supply block must be designed for grounded electrical plugs and connected to a properly grounded electrical socket.
- The power plug of the appliance must be compatible with the mains socket. Never use any adapters or modify the socket in any other way. Do not use inappropriate or damaged drawers!
-
To avoid electrical shock, plug the power cables into properly grounded electrical sockets. If the device is equipped with a 3-pole plug, do not use adapters that do not have a grounding element or remove the grounding element from the plug or adapter.
-
Do not bend, crush or otherwise expose the power cord of the appliance to mechanical stress or external heat sources. Damage to the power cord may result in electric shock.
- When the power cord is damaged, disconnect the appliance from the mains and do not use it again.
- If the power cord is damaged, it must be replaced by the manufacturer, its service department or a similarly qualified person to avoid the risk of electric shock.
- Regularly check and maintain the electrical appliance as well as the power cord and power socket. Disconnect the power plug regularly and clean it if necessary. Pollution by dust or other substances may cause disruption of the insulating state and consequently fire.
- Do not expose the appliance to water or moisture. The ingress of water into the appliance increases the risk of electric shock.
If the power cord is wet or the water has penetrated the water, disconnect it immediately from the mains. If the appliance is plugged into a mains socket and if possible, turn off the power circuit before attempting unplug the power. If you are pulling wet wires from a live power source, be very careful.
- If the electrical equipment is installed (connecting) the protective covers are dismantled, the electrical parts must not be accessible to the user when the installation is finished.
1.4 Safety of persons
- This appliance is intended for use and operation by persons without electrotechnical qualification - lay people, according to the instructions specified by the manufacturer.
- Device operation includes activities such as switching on and off, user manipulation and setting of operating parameters, visual or auditory inspection of the equipment, and user cleaning and maintenance.
- This appliance can be used by children under the age of 8 and persons with reduced physical, sensory or mental capabilities or lack of experience or knowledge when supervised or instructed to use the appliance safely and understand the dangers involved.
• Children may not play with the appliance. - Cleaning and maintenance for users may not be performed by children unattended.
- Always keep the appliance out of reach of children during use and operation. Be sure to download the appliance even for a freely accessible power cord.
- Always be careful when operating the electric appliance! Do not use an electric appliance if you are overly tired, under the influence of medication or narcotic drugs that reduce attention and focus.
- Inattention during operation may result in serious injury.
1.5 Cleaning, maintenance and repairs
- Observe the normal user cleaning and maintenance of the appliance in the recommended way. Do not use solvents or harsh cleaners for cleaning. Pollution and visible stains from finger contact, respectively. The hands can be cleaned using detergent detergents specially designed to clean household appliances.
- If you do not use the appliance, clean it or disconnect the appliance from the power supply when the appliance is faulty.
- Electrical appliances that are cleaned after use and are not intended to be completely or partly immersed in water or other liquid, protect against the effects of dripping and / or splashing water and before immersion.
- Electric household appliances, like all other technical devices, are subject to the surrounding environment and natural wear. Since the legal framework of regular maintenance is not laid down for lay-in electrical household appliances, the manufacturer recommends that the user have the appliance checked and cleaned at least once a year by a specialist workshop.
- By doing so, it is possible to achieve safety, operational reliability and increased service life.
-
Do not disassemble the electric appliance! The appliance works with a dangerous voltage. For this reason, always switch off the appliance and disconnect it from the mains supply during user maintenance. In the event of a fault, please have the repair serviced by an authorized service center.
• Before calling a service: -
Verify that you are unable to remedy the malfunction yourself according to the procedure described in the chapter „Remedy of operating faults“.
- Turn the appliance off and on to make sure the fault reappears.
- If the malfunction of the appliance still persists after these operations, call the nearest specialist service center.
- Never repair the electric appliance yourself!
- Unauthorized, unqualified and improper use of an electric appliance may result in electric shock or other serious injury.
- Only carry out the warranty or post-warranty repair of an electrical appliance to an authorized qualified person ^(*) .
2. Special safety instructions. Read carefully!
- The electrical equipment is designed and manufactured in such a way as to allow safe operation and use by persons without professional qualifications. Despite all the measures taken by the manufacturer for safe use, operation and use carry certain residual risks and the possible dangers associated with them.
- The following symbols and their meanings have been used on the device and in the accompanying documentation to warn of possible dangers:
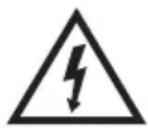
This symbol alerts users to the fact that the device operates on hazardous electrical voltage. Do not remove the protective covers on the device.
Failure to observe the safety instructions for the use and operation of the device may result in:
Danger of electric shock! Danger of serious injury or death!

This symbol alerts users to the risk of failure to observe the safety instructions when using and operating the equipment:
Danger of serious injury or death! Danger of equipment damage or other property damage!
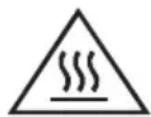
This symbol alerts users to the fact that there is a risk of non-observance of the safety instructions when using and operating the device: Danger of burns from hot surfaces!
Transport/Carrying
- Only transport/transport the device after a thorough inspection of the area and the route, which must be unobstructed.
Never carry the device while it is in operation. Do not carry the device while it is plugged in.
When carrying, make sure that your hands and the device are not wet or slippery.
Danger of serious injury or death!
Danger of damaging the device!
Unpacking/Packaging
- Before putting the device into operation, unpack the device and dispose of all its parts and accessories of packaging materials, labels and tags. Keep all packaging materials in a safe place or keep them out of the reach of children and incompetent persons.
Danger of serious injuries!
Danger of suffocation!
Inspection/Commissioning
- Never use the device if it is incomplete, damaged or any part of it has been damaged during use. Have the device repaired by a specialist garage. Danger of serious injuries!
- Children under the age of 3 must be denied access to the facility unless they are permanently supervised.
- Children aged 3 years and under must not plug in, regulate or clean or maintain the appliance by the user.
Warning!
- Some parts of this product may become very hot and may cause burns. Pay special attention if vulnerable people or children are present.
- The appliance may be used by children from 8 years of age and older with reduced physical, sensory or mental abilities or lack of experience and knowledge, provided they are supervised or instructed in the safe use of the appliance and understand the dangers involved. Children must not play with the appliance. Cleaning and maintenance that can be performed by the user must not be performed by children without supervision. Keep the appliance and its mains cord out of the reach of less than 8 years of age when it is plugged in or cold.
- The device is intended for household use and similar purposes. Not for commercial use!
- Do not use the device in an industrial environment or outdoors.
- Before connecting the appliance to the mains, make sure that the rated voltage indicated on the type plate of the appliance corresponds to the voltage in your socket.
- Only connect the device to a properly grounded socket.
- If your hands are wet or damp, do not touch the device that is connected to an electrical socket.
There is a risk of damage to the device or other property damage! There is a risk of electric shock!
Danger of serious injuries!
- The device must not be used if it has been dropped or if it shows visible signs of damage.
- Make sure that the power cord does not come into contact with water or a warm surface.
- Do not unplug the appliance by pulling on the power cord. This may damage the power cord or power socket. Unplug the power cord by pulling on the plug of the power cord.
- If the power cord is damaged, have it replaced by a qualified service center. It is forbidden to use the device with a damaged mains cable or mains plug.
- To avoid the risk of electric shock, do not repair or modify the device yourself. Have all repairs carried out by an authorized service center. By interfering with the product, you run the risk of losing the legal right from incorrect performance, or quality guarantees. There is a risk of damage to the device or other property damage! There is a risk of electric shock!
Danger of electrical short circuit!
Location/Installation
- The device must be used and stored on a stable surface.
- Always make sure that the place where you want to place the device has sufficient space, stability, mechanical strength.
Warning!
Do not place the device:
- on unstable stands,
- on uneven and unstable surfaces.
- Do not partially cover the device. (Steam must be freely removed.) Do not place any objects on the appliance.
There is a risk of fire!
Warning!
- Place the appliance in a place where children cannot reach freely. Do not allow children to manipulate (play with) the device. The device can tip over and cause very serious injuries. Mechanical damage (cracking or breaking of parts and covers) of the device can cause serious injuries.
Danger of very serious injuries!
There is a risk of damage to the device or other property damage!
Operation/Supervision
- Never switch on the appliance without the container inserted.
- Never switch on the device empty. (It may be damaged.)
- Do not touch any moving or rotating parts of the device during use.
- Do not use the appliance for other purposes (e.g. drying, etc.).
- Do not load metal foils or other materials into the appliance.
There is a risk of damage to the device or other property damage!
There is a risk of fire!
Danger of short circuit!
- Do not hold hot parts. Use a glove to remove the baking tin. Danger of burns!
- Never knock the bread pan as it could be damaged. There is a risk of damage to the device or other property damage!
- This unit is not intended to be controlled by a programmer, external timer or remote control.
- Unplug the appliance after use. There is a risk of fire!
Warning!
- Never leave the device with the power cord loose. Children, incompetent persons or animals could pull the device by the power cord.
- Do not store the device with the power cord wrapped around its body. „Fold the power cord“ loosely in the way it was folded in the original packaging from the manufacturer.
Danger of serious injuries!
- The appliance is intended for household use only!
- Do not use the device outdoors!
- Do not use the device for purposes other than those intended.
There is a risk of damage to the device or other property damage!
- Children under the age of 3 must be denied access to the appliance unless they are constantly supervised.
- Children from the age of 3 and under the age of 8 must not plug, regulate or clean the appliance or perform maintenance by the user.
WARNING!
- Some parts of this product may become very hot and may cause burns. Pay special attention if vulnerable people or children are present.
- Never underestimate the possible dangers and take extra care!!!
Cleaning/Maintenance
Cleaning the outside of the appliance:
- To prevent damage to the surface, do not use metal objects, petrol, thinners or abrasive cleaners, etc. for cleaning.
- To prevent possible electric shock, do not wash the device under running water, spray water on it, or immerse it in water or any other liquid.
Danger of damaging the device! There is a risk of electric shock!
Introduction
Your bread bakery is the result of your experience with bread appliances. If you have never baked bread yourself before, but even if you have experience with baking homemade bread, the information in this manual is important to make the bread from this bakery as good as possible.
There are many differences between manual bread making and bread making in the device. This guide will give you the information to achieve excellent results when baking the first loaf in a home bakery. There are also recipes in the manual that use the various programs and functions of this home bakery. The recipes were designed to make working with the device as easy as possible. Over time, you will surely gain confidence and start making bread according to your own recipes.
PLEASE DO NOT DISPOSE OF THE PACKAGING.
THE PACKAGING WAS SPECIALLY DESIGNED FOR THE SAFE TRANSPORTATION OF THE EQUIPMENT. TRANSPORTING THE EQUIPMENT IN AN NON-ORIGINAL PACKAGING COULD DAMAGE THE EQUIPMENT.
Location
- Leave enough space around the device to ensure proper ventilation.
- For your home bakery to work properly, it is essential that the surrounding environment is at a constant temperature. Do not place the device in humid rooms.
- Do not place any objects on the device.
- Place the device near an easily accessible electrical socket. Do not use extension cords or splitters. If problems are observed, disconnect the device from the mains immediately.
BREAD
Bread is one of the oldest foods we know. Soon after people learned to cultivate the fields, bread became the staple food of many cultures around the world. Since then, each culture has developed its own method of making bread based on local ingredients and processing them. This trend continues to this day. Even bread sold in a supermarket differs depending on the country in which it is sold. No matter how wide the range of breads sold in bakeries and supermarkets is, it is not beyond the smell and taste of home-made bread.
BREAD BAKING EQUIPMENT
It's nice to know that today's technology helps preserve the tradition of baking homemade bread. Like most home appliances, your home bakery is a device that makes your job easier. The basic advantage is that all the work (mixing, fermenting and baking) is done for you by the device without you having to put in the slightest effort.
Your home bakery will bake delicious loaves over and over again provided you follow the instructions and advice. The appliance cannot think for you, so always make sure that the ingredients and the set baking program correspond to the instructions in the manual.
INGREDIENTS
The most important part of baking bread is the wise selection of ingredients. Only with suitable ingredients will you achieve excellent results. To save you time in determining which ingredients are most suitable, we have dedicated one of the following paragraphs to each of the basic ingredients.
FLOUR
For baking, the most important ingredient in flour is a protein called gluten, which holds the dough together. The term „thick flour“ means that the flour has a high gluten content. It was probably ground from durum wheat and is especially suitable for baking.
WHOLEWHEAT WHEAT FLOUR
This type of flour contains wheat grains, including bran - the outer husk of wheat grains, which is an excellent source of fiber. Bran in wholemeal flour prevents the release of gluten, so wholemeal bread tends to be smaller and denser than white bread. Your home bakery has a special program for wholemeal bread, which devotes more time to kneading and leavening.
Note: We recommend sifting each type of flour before use. This does not apply to finished flours with bread ingredients.
YEAST
Yeast is an essential ingredient for dough fermentation. The most suitable for baking in a home bakery is dried yeast, which is sold in bags containing 7 g, which is enough to bake bread weighing 0.7 kg. A large amount of sugar is not required to ferment this yeast, so it is possible to reduce the sugar content of the loaf. Dried yeast is sensitive to moisture, so do not store the rest of the yeast for more than one day.
SALT
Salt not only gives the bread a taste, but can also slow down the particularly fast fermentation.
BUTTER (or fat)
It improves and softens the taste of bread. Margarine or olive or vegetable oil can be a substitute for butter. Do not use low fat products, they will not have the same effect.
SUGAR
The sugar adds flavor to the bread and partially helps to brown the crust. Note: Most dried yeast does not need more sugar for fermentation.
WATER
If you can, use soft water to make bread. However, your home bakery will also make good bread from hard water. It is not necessary to heat the water before adding. The water should be at room temperature, unless otherwise stated in the recipe.
OTHER ADDITIVES
Other ingredients can mean anything from dried fruit, cheese, eggs, nuts or yoghurt to other types of cereals, such as e.g. rye or various spices. It's up to you. However, it is necessary to keep a few basic tips in mind. Always be aware of the moisture content of other ingredients and decide accordingly. Foods such as cheese, milk and fresh fruit contain a high amount of water, which will affect the final appearance of your loaf. One option is to use dried ingredients such as parmesan, powdered milk or fruit. When you improve
when using a home bakery, you will know for yourself whether the dough is too dry or watery. Also keep in mind the salt content of the individual ingredients. Salt slows the fermentation. If you are adding liquid ingredients such as yogurt, or powdered ingredients such as dried herbs, we recommend putting them in the mold first. Ingredients such as nuts or dried fruit are only added during mixing after an acoustic signal (see program and time table).
BREAD STORAGE
Home-made bread does not contain artificial preservatives. If stored in an airtight container in the refrigerator, it will last for 5 to 7 days. You can also store this bread in the freezer; Before freezing, make sure you no longer have bread cooled.
Description of parts
Carefully unpack the bakery from the packaging material. Remove any remaining packaging material on the device.
Check that the following accessories are included in the package:
Measuring cup - spoon (1pc)
The amount of sugar, oil and some other ingredients is stated in recipes in tablespoons (15 ml) and coffee spoons (5 ml).
- A large part of the measuring cup is identical to a soup spoon.
- A small part of the measuring cup is identical to a coffee spoon.
Measuring cup - cup (1pc)
You can use this cup to dispense liquid ingredients or flour.
Kneading hook removal tool (1pc)
Kneading hook (1pc)
Instructions for use (1pc)
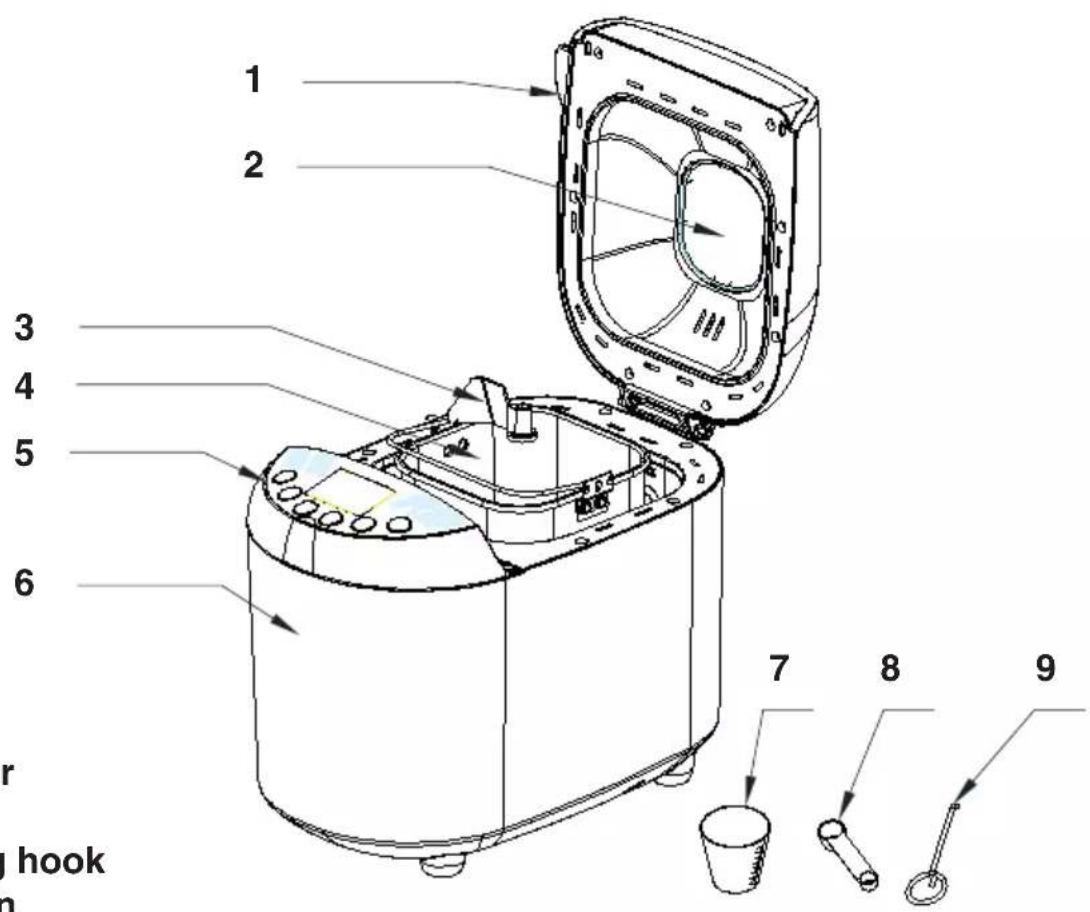
1 Top cover
2 Window
3 Kneading hook
4 Baking tin
5 Control panel
6 Device body
7 Measuring cup - cup
8 Measuring cup - spoon
9 Kneading hook removal tool
Control panel
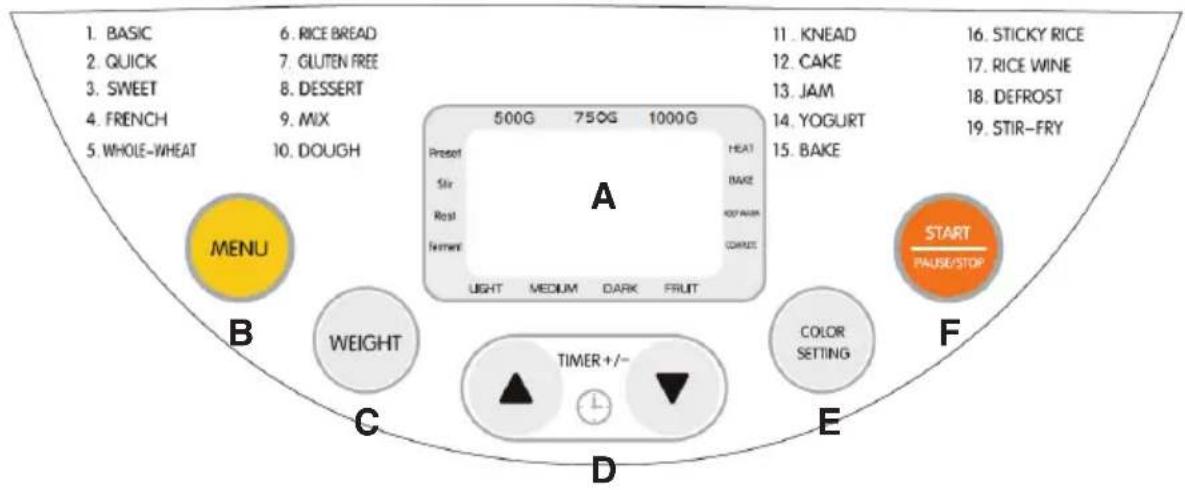
A DISPLAY
After starting the bakery, the display shows the following information:
- Selected loaf weight (500 g, 750 g, 1,000 g)
- Remaining baking time
- Selected level of browning (baking) of bread
/ Light - Medium - Dark - Fruit / - Number of the selected program
- Sequence of the program process
The individual stages of bread production shown on the sides of the display:
PRESET STIR REST
FERMENT / fermentation / HEAT (heating)
BAKE (baking)
KEEP WARM COMPLETE
B MENU
You can select the desired program by pressing MENU. The number of the relevant program appears on the display. Baking time depends on the selected program combination. The bakery has 19 programs, which are as follows:
Program 1: BASIC (basic)
For the preparation of white, wheat and rye bread. This is the most commonly used program. You can adjust the browning level with the COLOR SETTING button.
Program 2: QUICK (fast)
For quick preparation of white, wheat and rye bread. Mixing, fermenting and baking are very fast. Baked bread is more wrinkled and thicker than with other programs.
Program 3: SWEET (sweet pastries)
For the preparation of sweet yeast pastries with ingredients of fruit juices, coconut flour, dried fruit, chocolate or sugar. Due to the longer fermentation, the pastry will be light and airy.
Program 4: FRENCH
This program is slightly longer than the BASIC program due to the longer kneading and fermentation that is necessary for the bread to be as „airy“ as the French baguettes and had a crunchy crust. The program is not suitable for baking pastries requiring butter, margarine or milk.
Program 5: WHOLE WHEAT
This program is suitable for baking whole meal bread with a low gluten content, requiring long mixing and fermentation. Bread will be smaller and heavier.
Program 6: RICE BREAD
Mix, ferment and bake a loaf with a 1:1 mixture of cooked rice and flour.
Program 7: GLUTEN FREE
Preparation of bread from gluten - free flour or mixture. Gluten-free flour requires a longer absorption of liquids and the fermentation properties differ from other flour mixtures.
Program 8: DESERT
Mixing and baking foods with a higher fat and protein content.
Program 9: MIX
For quality and thorough mixing of flour and water or some other ingredients.
Program 10: DOUGH
In this program, mixing and fermentation take place without the final baking phase. Only the raw dough for pastries (for pizza, etc.) is prepared.
Program 11: KNEAD (mixing)
Set the mixing time for users with different amounts of dough.
Program 12: CAKE (desserts)
Mixing, fermentation and baking - preparation of pastries (e.g. cream puff).
Program 13: JAM
This program is suitable for cooking jams and marmalades.
Program 14: YOGHURT
Preparation of bread from dough containing sour milk or yogurt.
Program 15: BAKE (baking)
This program is suitable for baking hand-made dough or baking unfinished dough. The program does not contain a mixing or fermentation phase.
Program 16: STICKY RICE
Mixing and baking a flour mixture of polished sticky rice and plain rice.
Program 17: RICE WINE
Mixing and baking bread from polished sticky rice flour.
Program 18: DEFROST
Thawing frozen food.
Program 19: STIR-FRY (frying)
Mixing and baking bread from flour from dried crops, such as peanuts, soybeans, etc.
C WEIGHT
Choice of gross loaf weight (500 g, 750 g, 1,000 g). Press the button to set the arrow on the display to point to the desired weight.
Note: The factory setting after switching on the device is 750 g. The weight of the loaf can only be set for programs 1 to 7.
D △/▽ (Time setting +/-)
The bakery has a function of extending the time - delaying the start of the program. Use the and buttons to set the desired start time for cooking at 10-minute intervals. The maximum delay for the start of baking is 15 hours.
Follow these steps:
1) Select the program including menu, color (overcooking), loaf weight.
2) Set the delay. Each time you press△ the end time increases
in 10 minutes. If you keep the f button pressed, the delay will increase continuously and quickly. If you have extended the time more than you wanted, you can shorten the extension by pressing .
E.g. if it's just 20:30 and you want fresh bread tomorrow morning at 7:00, i. in 10 hours and 30 minutes, first select the desired program, the weight of the loaf, and then use the △ and ∇ buttons to set a delay of 10:30 on the display.
3) Press START/STOP to start the program with a delay. The colon on the display flashes and the program starts with a delay.
If you do not want to remove the bread immediately after baking, if you do not open the bakery when finished, the function for keeping the bread warm will start and it will take 1 hour.
Note: Do not use the delay if you are using perishable ingredients (eggs, milk, cream or cheese).
E COLOR SETTING
Setting the brown color (baking) of the bread / Light - Medium - Dark - Fruit /. Press COLOR SETTING to set the desired overflow (browning). Baking time depends on the brown color setting. For programs 9, 10, 11, 13, 14, 16, 17, 18 and 19, the brown color setting cannot be selected.
F START/STOP
This button starts and stops the program. As soon as you press the START/STOP button once briefly, the colon in the time display flashes and the selected cooking program starts. Other buttons will not be active. You can interrupt the program at any time with the START/STOP button. Press the START/STOP button, a beep will sound and the time display will flash. To resume the program, briefly press START/STOP again. If you forget to press the button again, baking will resume automatically after 3 minutes.
To end the program, press and hold the button for approx. 3 seconds until a beep sounds. The program shuts down.
Note: To check the condition of the baked bread, do not interrupt the program by pressing the START/STOP button, only check the bread through the sight glass during baking.
Temperature maintenance
Bread can be automatically kept warm 1 hour after baking. To select bread in this mode, press START/STOP to turn off the program.
Memory
If the power goes out during operation, the bread making process will resume automatically (unless the power failure is longer than 10 minutes), even if you do not press START/STOP. If the power failure is longer than 10 minutes, it is necessary to remove the dough from the mold and, after the power supply is restored, re-insert the dough and start the bread preparation process again. However, if the dough has not yet started to ferment, you can continue the selected program directly by pressing START/STOP after the power is restored.
Environment
The operating temperature of the device is optimal in the range of 15 °C to 34 °C .
Warning messages
- If H: HH appears on the display after pressing the START/STOP button, the mold temperature is too high. Cancel the program and turn off the power immediately. Open the appliance and let it cool down for about 10 to 20 minutes.
- If E: E0 appears on the display after pressing START/STOP, a fault has occurred on the temperature sensor. Have the device checked by an authorized service center.
Using a bread bakery
First use
- Unpack the appliance and check that the home bakery contains complete accessories and is not damaged.
- Clean all parts according to the Cleaning and Maintenance section.
- Open the bakery cover, remove and re-insert the baking tin. The mold must be properly inserted to allow the kneading hook to operate properly. Check the operation of the kneading hook.
- Switch on the empty cooking mode for approx. 10 minutes.
When first switched on, a slight smoke and a characteristic odor may be emitted from the device. This is normal and will soon disappear. Ensure that the device has adequate ventilation.
Then let the bakery cool down and clean it again.
- After the accessories and all parts have dried, reassemble everything. The bakery is ready for first use.
Commissioning of the device
Connect the device to the power socket. After commissioning the bakery, the display shows the following data for the BASIC program, which is set at the factory. Example: 1 3:00 (colon does not flash).
The number 1 indicates the selected program, the numbers 3:00 indicate the cooking time according to the selected program. The positions of the two arrows provide information on the selected color (brownness) of the baked bread and weight. The basic setting after connecting the home bakery to the mains is the weight of the loaf 750 g and the medium browning MEDIUM. During operation, you can monitor the progress of the program steps on the display. As the program progresses, the numerical value of the selected time decreases. If you press the MENU button again, program 2 - QUICK will be selected on the display. You can select the desired program by pressing MENU.
To adjust the weight of the loaf, press the WEIGHT button. The arrow moves cyclically to 500 g, 750 g, 1000 g. When you press COLOR SETTING, the arrow on the display moves cyclically to Light - Medium - Dark - Fruit.
Don't be afraid to press other buttons to get to know the new device better.
The first loaf
For the easiest acquaintance with the operation of a home bakery, we recommend starting with baking of basic white bread. Follow the instructions in the exact order.
You need the following ingredients to prepare:
250 ml of water
460 g of flour
2 tablespoons butter
2 tablespoons sugar
2 teaspoons salt
1 pack of dried yeast (7 g)
Follow these instructions to prepare bread weighing 0.75 kg.
Use an accurate kitchen scale to measure the flour. Use the supplied measuring cups (cup, spoon) or any other measuring cup with a value in milliliters to measure liquid ingredients.
- Use both hands to remove the baking tray from the appliance.
-
Check that the kneading hook is firmly seated (otherwise the dough will not move).
-
Pour in water first.
-
Sprinkle the flour to cover the water surface.
-
Add the sugar using the spoon provided. Pour the sugar into one corner of the mold.
-
Add butter or margarine.
-
Add salt, preferably to the next corner of the mold.
-
Next to the salt, create a small hole in the flour with your finger and pour the yeast into it. The well must not be too deep so that the yeast does not mix with the water.
-
Insert the mold back into the appliance. Make sure the mold is firmly held.
-
Close the device cover and select the program on the panel with the MENU button 1 - BASIC. If you have just plugged in the power cord, a beep will sound and program 1 will appear on the display automatically.
-
Use the WEIGHT button to select 750 g.
The weight can only be set for programs 1 to 7.
-
You can adjust the browning (overcooking) level with the COLOR SETTING button. For programs 9, 10, 11, 13, 14, 16, 17, 18 and 19, the brown color setting cannot be selected.
-
If you bake bread other than the one listed here, you can delay baking with the and buttons.
-
Press the START/STOP button. For programs 1 to 7, 10 beeps will sound during operation, indicating the addition of any ingredients. Open the cover and add the ingredients. This prevents the chopping of ingredients such as fruit or nuts with a kneading hook.
-
The kneading and fermentation programs are started one after the other. The progress of these operations is shown by the character displayed on the sides of the display.
We recommend checking the dough several times through the sight glass of the top cover.
-
After the bread is finished, the display changes. Press START/STOP and unplug the power cord and open the cover. Choose a baking tin. Use gloves or a cloth to remove, the mold will be very hot.
-
Remove the bread from the mold as soon as possible. Just turn the mold and shake it gently several times.
-
Do not cut bread immediately - let it cool for at least 20 minutes.
If you have trouble tipping the bread, try turning the pins on the bottom of the mold. This will release the kneading hook and make it easier to tip the bread. It is normal for the kneading hook to bake into the bread and remain in it. Then remove it from the bread.
If the hook is not stuck in the bread and you have a problem picking it from the mold, pour enough water into the mold to cover the hook and let the mold soak for an hour.
If you do not press START/STOP after baking, the appliance will automatically set to the Heating function, which you can use if you do not want to remove the loaf from the appliance immediately after baking. This function prevents the formation of water clots on the bread and keeps the bread warm for another hour. If you do not want to use the function, press the START/STOP button.
Warning!
Before slicing the bread, remove the kneading hook from it using the supplied hook removal tool (9). The bread is hot, never remove the hook with your hands. There is a risk of burns!
Alert for program 2: QUICK
Quick pastry is prepared from baking powder and baking soda, which are activated by moisture and heat. For a perfect quick bake of bread, it is recommended that you all the liquids were dosed to the bottom of the baking tin, pour dry ingredients on the surface of the liquids. During the initial mixing of the dough in the QUICK program, dry ingredients may settle in the corners of the mold. It may therefore be necessary to assist the mixing device in order to prevent flour deposits. In this case, use a rubber spatula to mix and scrape.
HOW WAS THE FIRST BAKING?
If you followed the above procedure, your bread should look and taste great. If this is not the case, the information in the Troubleshooting section should help you determine where the error occurred.
Equipment cleaning and maintenance
Unplug the power cord and allow the appliance to cool completely.
Baking tin and kneading hook
In order for the device to work long and well, it is forbidden to follow a few tips:
- The surface of the mold and the kneading hook is covered with a non-stick layer. Never use metal objects to remove bread or jam from the mold, as this could damage it.
- Use a solution of weak detergents to wash the mold and the kneading hook. Both the mold and the hook are dishwasher safe.
- If it is possible to remove the baked dough from the mold, pour water into the mold and prepare to soak it for a maximum of one hour. Do not soak the mold completely, as this could damage the seal under the kneading hook pins.
Cleaning the inside of the device
Due to the fact that all the ingredients are put into the mold, the device should not be cleaned very often. If the mixture overflows, wait for the appliance to cool down, then use a damp cloth to clean it.
Cleaning the surface of the device
Never immerse the device in water or any other liquid!
Use only a slightly damp cloth to clean the surface of the device in a weak detergent solution. Never use any solvents or harsh cleaners. They can damage the surface finish.
Cleaning the control panel and cover
Clean the cover and control panel with a dry cloth. If necessary, use a cloth slightly dampened in clean water. Never use any solvents or harsh cleaners. They can damage the control panel and the cover seal.
Troubleshooting
The dough is too watery.
You may have added too much water or too little flour to the mixture. The dough should be soft but firm.
The bread did not rise.
- It is possible that the flour you have used is not suitable for baking bread because it does not contain enough gluten. If you used flour other than white (e.g. wheat), the processing of the dough was not sufficient.
- Another reason could be bad yeast, whether after warranty or badly processed. Make sure the yeast is not over the expiration date. It is also necessary to follow the instructions when adding yeast to the mixture. It should not come into contact with water or salt before mixing the mixture.
The loaf soured too much and stuck to the cover of the appliance.
You may have added too much yeast to the mixture or forgot to add salt.
The motor did not start immediately after pressing the START/STOP button.
It's OK. The first phase of preparation is preheating the device. In this way, all ingredients reach room temperature.
An acoustic signal sounded during path processing.
This signal alerts you to the addition of other ingredients, such as nuts or dried fruit. Some recipes require the addition of additional ingredients (see recipes).
The appliance did not start when I wanted to start preparing another loaf immediately after baking.
The appliance must cool down before more bread can be prepared. The display will show H: HH until it is ready for further processing.
What if there is a power failure during processing?
If this outage is not longer than 10 minutes, the device will automatically continue processing. If the outage is longer, we recommend discarding the ingredients and starting with new ingredients after the start of the electric current.
Smoke rises from the baking space or from the ventilation openings.
Dirt is baked in the baking space or on the outside of the mold. Disconnect the power and remove dirt.
The center of the bread drops and the underside is damp.
The bread remained in shape for a long time after baking.
Remove the bread from the baking tin before the end of the heating cycle.
Bread is difficult to remove from the mold.
The underside of the loaf is glued to the kneading hooks.
Move the shafts up and down repeatedly until the bread falls out. After baking, clean the kneading hooks and shafts. If necessary, fill the baking tin with warm water and let it soak for 30 minutes. Then it is easier to remove the hooks and clean them.
The ingredients are not mixed well and the bread does not bake properly.
Incorrect program setting.
Check the selected program and other settings.
The START/STOP button was pressed during operation.
The cover was opened many times during the operation of the bakery.
Do not open the cover after the last sour.
Long-term power failure during equipment operation. Rotation of the kneading hook is blocked.
Check that the kneading hook is not blocked by grains and the like. Select the baking tin and check that the shaft rotates freely. If not, contact an authorized service center.
The baking tin rises during mixing.
The dough is very thick.
Open the lid and add a little liquid to the dough. Then close the lid again.
Useful information and tips for baking
In this section you will find some useful tips and information for preparing bread and other pastries, as well as some recipes for their preparation.
After baking, the bread stuck to the container.
After baking, let the bread cool for about 10 minutes and then turn the mold upside down. If you cannot tip the bread, move the shafts of the kneading hooks from left to right until the bread is released. Grease the entire mold and kneading hooks before baking again.
How to avoid holes in the bread after kneading hooks?
You can remove the kneading hooks before the last cycle of leavening with floured fingers.
The dough leaks over the edge of the container.
This only happens if you use wheat flour with a higher gluten content.
- Reduce the amount of flour and, accordingly, the amount of other ingredients. The finished bread will have sufficient volume.
- Before fermenting, spread a tablespoon of hot melted margarine on the dough.
The bread did not rise enough.
a) If a V-shaped groove is formed in the middle of the dough, the flour does not contain enough gluten. This means that the flour contains very little protein (as a result of a rainy summer) or is too moist.
Measure: Add a tablespoon of wheat gluten to every 500 g of wheat flour.
b) If the bread is tapered in the middle, there may be several reasons:
- The water temperature was too high.
- You added a lot of water to the path.
- The flour had a low gluten content.
When is it possible to open the cover of the home bakery during operation?
The cover can be opened at any time during mixing. You can add more liquid or flour to the dough during this cycle. If the bread is to have satisfactory properties after baking, proceed as follows:
Before the last fermentation cycle, open the cover and carefully cut the looming crust of bread with a sharp preheated knife, sprinkle it with cereal or spread it with a solution of water and potato flour to make it shine nicely. However, this is the last time you can open the cover, because the next time you open it, the center of the bread would drop. Under no circumstances open the bakery cover during baking!
What is whole wheat flour?
Wholemeal flour is made from all types of cereals, including wheat. Wholemeal means that the flour has been ground from whole grains and has a higher content of indigestible particles and is darker in color. However, it does not make the bread darker than is generally believed.
How to proceed when working with wholemeal rye flour?
Rye flour does not contain gluten, and therefore the bread is almost non-sour. To make it easier to digest, whole meal rye bread must be prepared with yeast from yeast.
How many types of flour are and how are they used?
a) Maize, rice and potato flour are suitable for people allergic to gluten or for those suffering from malabsorption syndrome or intestinal problems.
b) Spelled wheat flour is expensive but does not contain chemical additives, because wheat also grows on soil poor in nutrients and does not need any fertilizer. Spelled flour is very suitable for allergy sufferers.
c) Millet flour is suitable for people suffering from many allergies.
d) Due to its consistency, durum wheat flour is suitable for baguettes and you can replace it with durum wheat semolina.
How to bake fresh bread that is easier to digest?
If you add mashed boiled potatoes to the flour before kneading, fresh bread will be easier to digest.
What to do when you smell yeast in bread?
a) This taste can be removed by adding sugar. Sugar brightens bread.
b) Add 1 tablespoon of vinegar to the path of two small loaves of bread, 2 tablespoons of two large loaves.
c) Use sour milk instead of water. Recommended to improve the taste of bread.
Why does bread baked in a classic oven taste differently than bread baked in an electric home bakery?
It depends on the different degree of humidity. Bread baked in a conventional oven is the larger the baking space. Bread baked in an electric home bakery is damp.
Ingredients and measurement
1. Raw materials
Because all ingredients have a role to play in the successful baking of bread, measuring and weighing them is as important as the order in which they are added.
- Basic ingredients - liquids, flour, sugar, salt, sugar and yeast (you can use both dry and fresh yeast) - affect the successful outcome of dough and bread preparation. Always use the right amount in the right proportions.
- If you want to prepare the dough right away, use heated ingredients. If you want to set the timing function of the program cycles, we recommend using cold ingredients to prevent the yeast from fermenting too soon.
- Margarine, butter and milk affect the taste and smell of bread.
- To make the crust lighter and thinner, you can reduce the amount of sugar by up to 20% and the result will still be good. If you prefer a softer and lighter crust, replace the sugar with honey.
- To add cereals, let them swell overnight. Remove from the amount of flour and liquid (up to a fifth). If you bake from rye flour, yeast is essential.
- If you want bread that is very light, rich in nutrients and stimulates bowel function, add wheat bran to the dough. Dispense 1 tablespoon per 500 g of flour. Add 1 tablespoon of liquid to the indicated amount of flour.
Description of raw materials
Bread flour
Bread flour is high in gluten (it can also be called high gluten flour, which is high in protein), is flexible and can prevent the bread from shrinking after cooling.
Because the gluten content is higher than
in ordinary flour, it can be used to make bread of large size and with better internal fiber. Bread flour is the most important ingredient in bread making.
Flour
Flour that does not contain any baking powder can be used to make quick bread.
Whole-wheat flour
Whole-wheat flour is ground from grain. Contains wheat skin and gluten.
Wholemeal flour is heavier and more nutritious than regular flour. Bread made from wholemeal flour is usually small in size. Many recipes usually combine wholemeal flour and bread flour to achieve the best result.
Black wheat flour
Black wheat flour, also called coarse flour. It's a kind of flour
with a high fiber content and it is similar to whole wheat flour. To obtain a large size after fermentation, it must be used in combination with a high proportion of bread flour.
Self-leavening flour
The flour, which contains baking powder, is used for the special preparation of cakes.
Corn flour and oatmeal
Maize (corn) flour and oatmeal shall be ground separately from maize and oat flakes. These are ingredients in the preparation of coarse-grained bread that are used to improve the taste and texture.
Sugar
Sugar is a very important ingredient to increase the sweet taste and color of bread. And it is also considered a nutrition in sourdough bread. White sugar is widely used. Brown sugar, powdered sugar is used in exceptional cases as well.
Yeast
After the fermentation process, the yeast will produce carbon dioxide. Carbon dioxide enlarges the bread and softens the inner fibers.
1 tablespoon dry yeast = 3 teaspoons dry yeast 1 tablespoon dry yeast = 15 ml 1 teaspoon dry yeast = 5 ml
Yeast must be stored in the refrigerator because the fermenting bacteria will not survive at high temperatures.
Before use, check the date of manufacture and the shelf life of the yeast. Store it back in the refrigerator as soon as possible after each use. Unsuccessful bread is usually caused by bad yeast.
Salt
Salt is necessary to improve the taste and color of the crust. But salt can also prevent yeast from fermenting. Never use too much salt in the recipe. The bread reaches a larger size without salt.
Eggs
Eggs can improve the texture of the bread, make the bread more nutritious and bigger. However, it is necessary to mix them into the path evenly.
Fats, butter and vegetable oil
Fats can soften bread and extend its shelf life. Butter should be melted or cut into small pieces before use.
Baking-powder
Baking powder is used to leaven fast bread and cake. Because it does not need time to leaven and can produce oxygen, it creates air bubbles that soften the texture of the bread through a chemical reaction.
Sodium bicarbonate
It works similar to baking powder. It can also be used in combination with baking powder.
Water and other liquids
Water is an essential ingredient in bread making. In general, a water temperature between 200 °C and 250 °C is best. You can replace the water with fresh milk or water mixed with 2% milk powder, which improves the taste of the bread and improves the color of the crust. Some recipes require the use of fruit juice to improve the taste of the bread, e.g. apple, orange, lemon juice, etc.
2. Adjustment of benefits
If you want to increase or decrease the dose of individual ingredients, make sure that you follow the ratio of ingredients according to the original recipe. To achieve a perfect result, follow the basic rules of dose adjustment of individual ingredients:
- Liquids / flour: The dough should be light (but not very) and easy to mix, but must not remain fibrous. With light kneading you should get a nice, round loaf. This does not apply to cereal or whole grain roads, which are heavier. Check the dough after the first mixing after about 5 minutes. If it is very moist, add a little flour to get the right consistency. If it is too dry, add water over spoons.
- Substitution of liquids: If the recipe prescribes the use of moist ingredients (e.g. cottage cheese, yoghurt), reduce the amount of liquids to the expected total volume. If you are adding eggs, beat them in a measuring cup and then add to the expected amount of liquid.
If you live at an altitude of more than 750 m above sea level, the dough will rise faster.
In this case, take a quarter to a half of a teaspoon of the prescribed amount of yeast. Follow these instructions even if the water used is very soft.
3. Weighing and measuring of ingredients, procedure of their addition
- Always measure and add liquids first, then bulk ingredients and finally yeast. In direct contact with the liquid, the yeast reacts too quickly (it is this is an error when using the delay function), therefore direct contact must be avoided.
- Always use the same units of measurement when measuring. This means that if the recipe prescribes the use of 1 tablespoon of ingredients (coffee or soup), use for dosing either the measuring cup for loose ingredients supplied with the appliance or the spoons you have at home.
- Weights in grams must be weighed accurately.
- Fruits, nuts or cereals: If you want to add more ingredients during mixing, you can do so using special programs after the sound signal. If you add the ingredients early, they will crush when mixed.
4. Weight and volume of bread loaves
- You will find exact information on bread in the recipes listed. You will see that the weight of white bread is less than whole grain. This is due to the fact that the white flour dough sours more easily and more, and therefore may not ferment as long as the wholemeal flour dough.
• Even though you weigh and measure all the ingredients accurately, the weight
the baked loaf will be different. Its actual weight is also affected by the humidity in the room during preparation.
- In the case of the highest permissible dose, the dough with the predominant proportion of wheat flour grows to a considerable volume and the edge of the container grows after the last fermentation. However, the dough will not spill. The part of the dough that grew out of the mold when fermented only browns more when baked than if it were protected by the mold.
- If you want to bake sweet bread with QUICK or SWEET (making lighter bread), you can use ingredients (such as nuts, raisins) in smaller portions.
5. Baking results
- The baking result depends on local conditions (soft water, high relative humidity, high altitude, consistency of ingredients, etc.). Therefore, you can recipe the data yourself after gaining experience
adjust accordingly. If you do not manage to prepare the product perfectly for the first time according to the recipe, do not be discouraged, find a reason for failure, change the ratio of raw materials, for example, and try again. - If the bread is too light, knead it with a baking program.
- Before using the program at night for the first time, we recommend that you test the procedure during the day so that you are familiar with the progress of the function and can make any changes. You can then use the verified procedure at night.
RECIPES
Most of the recipes in this manual have been created for the preparation of bread weighing 750 g.
Bread with this weight is prepared from 3 cups (mugs) of flour.
WHITE BREAD
1 and 1/8 cups of water
2 and 1/2 tablespoons of skim milk 2 tablespoons of sugar
1 and 1/4 tablespoons salt 2 and 1/2 tablespoons oil 3 cups flour
1 and 1/4 teaspoons of dried caraway seeds yeast
Program number: 1
Short program: 2
DARK BREAD
1 and 1/8 cups of water
2 tablespoons milk powder
2 and 1/2 tablespoons brown sugar 1 and 1/4 teaspoon salt
2 tablespoons oil
3 cups flour
1 and 1/4 teaspoons of dried caraway seeds yeast
Program number: 1
Italian FOCACCIA
1 cup water
1 to 1 and 1/2 teaspoons of salt
1 and 1/3 tablespoons olive oil 1 and 1/3 tablespoons sugar
1 and 1/2 tablespoons of milk powder
1 teaspoon Italian pepper (basil, oregano, etc.) 3 cups plain flour
1 and 1/2 teaspoons of dried yeast
Program number: 1, browning COLOR - Low (light color)
GARLIC BREAD WITH BLANKET
1 and 1/8 cups of water
3 cups plain flour
1 and 1/2 tablespoons of milk powder 3 tablespoons of sugar
1 and 1/2 teaspoons of salt
1 and 1/2 teaspoons of vegetable oil
1 and 1/2 tablespoons of garlic paste or chopped garlic 1 cup crushed blue cheese
1 and 1/4 teaspoon dried yeast
Program number: 1
FRENCH BREAD
1 cup water
2 tablespoons skim milk 2 tablespoons sugar
1 teaspoon salt
1 tablespoon oil
3 cups flour
1 teaspoon dried yeast 2 tablespoons chopped chives
Program number: 4
CEREAL BREAD
1 and 1/8 cups of water
2 and 1/2 tablespoons of skim milk 2 tablespoons of cane sugar
1 and 1/4 teaspoon salt 2 tablespoons oil
3 cups flour
1 and 1/4 teaspoons of dried caraway seeds yeast
Program number: 5
BREAD WITH BASIL AND PARMESAN
1 and 1/8 cups of water
1 and 1/2 cups whole wheat flour 1 and 1/2 cups plain flour
1 and 1/2 tablespoons olive oil 1 tablespoon sugar
1/3 teaspoon salt 1 tablespoon basil
1 and 1/2 teaspoons of dried yeast 1/3 cup grated Swiss cheese
1/3 cup grated parmesan
Program number: 5
WHOLEWHEAT DARK BREAD
1 and 1/8 cups of water
1 cup wholemeal wheat flour 1 cup wholemeal rye flour
1 cup plain flour 2 tablespoons butter
2 tablespoons sugar
2 teaspoons salt
1 packet of dried yeast (7 g) 3 tablespoons sunflower seeds 3 tablespoons caraway seeds flax seeds
Program number: 5
Note: You can insert the seeds at the beginning of the processing or after the acoustic signal.
LIGHT WHOLEWHEAT BREAD
1 and 1/4 cup water
1 and 1/2 cups whole wheat flour 1 and 2/3 cups plain flour
1 and 1/2 teaspoons of salt
1 and 1/2 tablespoons vegetable oil 2 teaspoons dried yeast
3 tablespoons of caraway seeds honey
Program number: 5
OLIVE BREAD
320 ml of water
200 g whole wheat flour 200 g plain flour
15 g butter
1 and 1/2 tablespoons of milk powder 1 teaspoon of salt
1 tablespoon dried oregano 3 teaspoons dried yeast
50 g whole black olives without cubes
Program number: 5
BUNDT CAKE
BANANA BUNDT CAKE WITH CHOCOLATE PIECES
1/2 cup milk
1/2 cup roasted, very ripe bananas 1 large egg
1 tablespoon butter or margarine 1 teaspoon salt
3 cups plain flour
1/3 cup chopped chocolate pieces 2 teaspoons dried yeast
Program number: 3
ORANGE BUNDT CAKE
2/3 cup milk
4 tablespoons butter or margarine 1 egg
1/3 teaspoon salt 1/4 cup sugar
1 and 1/4 teaspoon orange peel
1/4 teaspoon ground nutmeg 3 cups plain flour
1 teaspoon dried yeast
Program number: 3
BUNDT CAKE WITH WALNUTS
150 ml of water
1 small egg
2 cups plain flour
2 tablespoons skim milk powder 2 tablespoons sugar
1 teaspoon salt
3 tablespoons butter
1 and 1/2 teaspoons of dried yeast
1/4 cup chopped walnuts
Program number: 3
Note: You can insert nuts at the beginning of processing or after an acoustic signal.
We wish you much success in baking!
Producer:
ORAVA retail 1, a.s.
Seberíniho 2
821 03 Bratislava
Slovenská republika
Importer:
ORAVA retail 1, a.s.
Seberíniho 2
821 03 Bratislava
Slovenská republika
ORAVA distribution CZ, s.r.o.
Ostravská 494
739 25 Sviadnov
Česká republika
natural_image
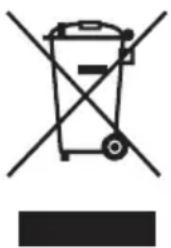
Symbol of a trash bin crossed out by two crossed lines, with a solid black rectangle below (no text or labels)DISPOSAL OF USED ELECTRICAL AND ELECTRONIC EQUIPMENT
The symbol on the product or on its packaging indicates that this product does not belong to household waste. It is necessary to take it to a collection point for electrical recycling and electronic equipment.
By ensuring proper disposal of this product, you will help prevent negative consequences to the environment and human health that would otherwise be caused by inappropriate disposal of this product. For more detailed information about recycling of this product, please contact your local authority, your household waste disposal service or the shop where you purchased the product.

This product meets all the essential requirements of the EU directives that apply to it.
Technical specifications
Model: Breadchef
Power supply: 220 - 240 V\~, 50/60 Hz
Power consumption: 550 W
Weight: 4,05 kg
Dimensions (W x H x D): 24 x 30 x 35,5 cm
Noise: 60 dB (A)
The declared noise emission value of this appliance is 60 dB (A), which represents the sound power level A with respect to the reference sound power of 1 pW.
We reserve the right to make changes!
- Homemade bread bakery
- Orava
- Breadchef
- Intended use of the device
- GENERAL SAFETY INSTRUCTIONS AND WARNINGS
- Read all instructions before using the device!
- General safety instructions
- Safety of the operating environment
- Electrical safety
- Safety of persons
- Cleaning, maintenance and repairs
- Special safety instructions. Read carefully!
- Transport/Carrying
- Unpacking/Packaging
- Inspection/Commissioning
- Warning!
- Location/Installation
- Operation/Supervision
- Cleaning/Maintenance
- Introduction
- PLEASE DO NOT DISPOSE OF THE PACKAGING.
- Location
- BREAD
- BREAD BAKING EQUIPMENT
- INGREDIENTS
- FLOUR
- WHOLEWHEAT WHEAT FLOUR
- YEAST
- SALT
- BUTTER (or fat)
- SUGAR
- WATER
- OTHER ADDITIVES
- BREAD STORAGE
- Description of parts
- Measuring cup - spoon (1pc)
- Measuring cup - cup (1pc)
- Kneading hook removal tool (1pc)
- Kneading hook (1pc)
- Instructions for use (1pc)
- Control panel
- A DISPLAY
- The individual stages of bread production shown on the sides of the display:
- B MENU
- Program 1: BASIC (basic)
- Program 2: QUICK (fast)
- Program 3: SWEET (sweet pastries)
- Program 4: FRENCH
- Program 5: WHOLE WHEAT
- Program 6: RICE BREAD
- Program 7: GLUTEN FREE
- Program 8: DESERT
- Program 9: MIX
- Program 10: DOUGH
- Program 11: KNEAD (mixing)
- Program 12: CAKE (desserts)
- Program 13: JAM
- Program 14: YOGHURT
- Program 15: BAKE (baking)
- Program 16: STICKY RICE
- Program 17: RICE WINE
- Program 18: DEFROST
- Program 19: STIR-FRY (frying)
- C WEIGHT
- D △/▽ (Time setting +/-)
- E COLOR SETTING
- F START/STOP
- Temperature maintenance
- Memory
- Environment
- Warning messages
- Using a bread bakery
- First use
- Commissioning of the device
- The first loaf
- Alert for program 2: QUICK
- HOW WAS THE FIRST BAKING?
- Equipment cleaning and maintenance
- Baking tin and kneading hook
- Cleaning the inside of the device
- Cleaning the surface of the device
- Cleaning the control panel and cover
- Troubleshooting
- The dough is too watery.
- Bread is difficult to remove from the mold.
- The ingredients are not mixed well and the bread does not bake properly.
- The baking tin rises during mixing.
- Useful information and tips for baking
- After baking, the bread stuck to the container.
- How to avoid holes in the bread after kneading hooks?
- The bread did not rise enough.
- What is whole wheat flour?
- How to proceed when working with wholemeal rye flour?
- How many types of flour are and how are they used?
- How to bake fresh bread that is easier to digest?
- What to do when you smell yeast in bread?
- Why does bread baked in a classic oven taste differently than bread baked in an electric home bakery?
- Ingredients and measurement
- Raw materials
- Description of raw materials
- Bread flour
- Whole-wheat flour
- Black wheat flour
- Corn flour and oatmeal
- Eggs
- Baking-powder
- Sodium bicarbonate
- Water and other liquids
- Adjustment of benefits
- Weighing and measuring of ingredients, procedure of their addition
- Weight and volume of bread loaves
- Baking results
- RECIPES
- WHITE BREAD
- DARK BREAD
- Italian FOCACCIA
- GARLIC BREAD WITH BLANKET
- FRENCH BREAD
- CEREAL BREAD
- BREAD WITH BASIL AND PARMESAN
- WHOLEWHEAT DARK BREAD
- LIGHT WHOLEWHEAT BREAD
- OLIVE BREAD
- BUNDT CAKE
- BANANA BUNDT CAKE WITH CHOCOLATE PIECES
- ORANGE BUNDT CAKE
- BUNDT CAKE WITH WALNUTS
- Producer:
- Importer:
- DISPOSAL OF USED ELECTRICAL AND ELECTRONIC EQUIPMENT
- Technical specifications
Brand : Orava
Model : BreadChef
Category : Bread maker