Yukona - Rowing Machine inSPORTline - Free user manual and instructions
Find the device manual for free Yukona inSPORTline in PDF.


| Product Type | Rowing Machine |
| Brand | inSPORTline |
| Model | Yukona |
| Max User Weight | 110 kg |
| Resistance System | Magnetic with motor control |
| Display | LCD showing time, distance, calories, strokes, watt, strokes/min, pulse |
| Programs | 21 programs (P01-P16, U1-U4) including competition (P15) and pulse (P16) |
| Heart Rate Monitoring | Compatible with chest belt (optional, not included) |
| Power Supply | DC adaptor (included), cable connection required |
| Assembly | Required, step-by-step instructions provided |
| Frame Material | Steel |
| Seat | Sliding on rail |
| Pedals | With adjustable straps |
| Handlebar | With foam grips |
| Transport Wheels | Yes, on front stabilizer |
| Storage | Can be stored upright; use transport wheels |
| Maintenance | Clean with soft cloth; check all bolts weekly |
| Safety Class | EN957 Class HC (home use) |
| Warranty | 24 months |
Frequently Asked Questions - Yukona inSPORTline
Key steps: secure bolts with washers, tighten pedals with two wrenches, and lubricate the handlebar foam grip with soap or water for easier installation.
User questions about Yukona inSPORTline
0 question about this device. Answer the ones you know or ask your own.
Ask a new question about this device
Download the instructions for your Rowing Machine in PDF format for free! Find your manual Yukona - inSPORTline and take your electronic device back in hand. On this page are published all the documents necessary for the use of your device. Yukona by inSPORTline.
USER MANUAL Yukona inSPORTline
natural_image
Technical line drawing of a mechanical device with articulated arms and mounting feet (no text or symbols)CONTENTS
SAFETY PRECAUTIONS....3
PRODUCT DESCRIPTION 4
ASSEMBLY PARTS 5
ASSEMBLY STEPS 6
STORAGE 9
MOVING INSTRUCTIONS....9
EXPLODED DRAWING....10
PARTS LIST 11
METER INSTRUCTIONS 14
POWER UP....14
KEY FUNCTION 14
FUNCTIONS....15
OPERATIONS 16
MANUAL PROGRAM 16
COMPETITION PROGRAM (PROGRAM 15) 16
PROGRAM P16 17
USER PROGRAM (U1-U4)....17
CHEST BELT USE 17
HOW TO EXERCISE....18
MAINTENANCE 18
ENVIRONMENT PROTECTION 18
TERMS AND CONDITIONS OF WARRANTY, WARRANTY CLAIMS.... 19
SAFETY PRECAUTIONS
- Read this manual carefully before first using and retain it for future reference.
- Observe all warnings and precautions including assembly steps. Use it only for intended purpose.
- Assemble and use it only according to this manual to assure your safety. Inform all other users about safe usage.
- Keep it away from children and pets. Don't let children unattended near this device. Only an adult person may assemble and use it.
- Ask your physician for advice before starting any exercise program. It is especially necessary if you suffer from some health problems or if you take some medication that could affect your heart rate, blood pressure or cholesterol level.
- Observe body signals. If you feel some problems (pain, tightness in chest, irregular heartbeat, breathing shortness, dizziness or nausea), stop immediately. Improper exercising can result in serious health problems or in an injury.
- Put it only on a flat, dry and clean surface and keep a safety clearance of at least 0.6 m from other objects for higher safety. Use a protective cover to protect carpet or floor.
- Wear adequate sports clothes and sports shoes. Avoid too loose clothes.
- Don't use it outdoors.
- Check this device for damage or wearing before each using. Regularly check all bolts and nuts. They should be well tightened. Re-tighten, if necessary. Never use damaged or worn device to assure your safety.
- If some sharp edges occur, stop using.
- If you hear some unusual noises coming from this device, stop using.
- No adjustable part should protrude and obstruct user movements. Only one person may use it at time.
- It is not intended for therapeutic purpose.
- Pay attention while lifting or transporting it to avoid back injury. Use only proper lifting techniques or ask some other person for help.
- Don't do any improper modification of this product. If necessary, contact authorized service.
• Weight limit: 110 kg
- Category: HC (according to EN957 norm) suitable for home use
- WARNING! The heart rate frequency monitoring may not be completely accurate. Overexertion during training can lead to a serious injury or even death. If you start to feel faint, stop the exercise immediately.
PRODUCT DESCRIPTION

| No. | Picture | Description | Qty. |
| 84 |  | Button head bolt M8x40 mm | 2 |
| 60 |  | Button head bolt M8x15 mm | 6 |
| 85 |  | Button head bolt M8x20 mm | 2 |
| 62 |  | Flat washer M8 | 8 |
| 83 |  | Large washer M8 | 2 |
| 64 |  | Flat washer M6 | 5 |
| 61 |  | Lock washer M8 | 4 |
| 81 |  | Cross self-tapping bolt ST4.2x45 | 1 |
| 63 |  | Cross flat head bolt M6x15 | 5 |
| 59 | 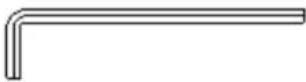 | Allen wrench 5 mm | 1 |
| 69 |  | Screwdriver and wrench | 1 |
ASSEMBLY STEPS
STEP 1
- Position the rowing machine as shown in picture A.
- Insert the rear support (5) into the base frame (3) and lock with button head bolts M6x15 mm (63) and washers M6 (64).
- Attach the base frame (3) to the connection bracket (11) with button head bolts M8x40 mm (84) and washers M8 (62).
STEP 2
- Follow the illustration B. Turn the rowing machine upside down. Attach rear stand (2) to the rail (48) using button head bolts M8x15 mm (60), lock washers M8 (61) and washers M8 (62).

STEP 3
- Unfold the rail (48) and thereafter attach the connection bracket (11) to the base frame (3) using button head bolts M8x20 mm (85) and washers M8 (62).
STEP 4
- Attach the seat (21) to the seat carriage (10) with round head bolts M6x15 mm (63) and washers M6 (64).

STEP 5
- Insert the handlebar (15) through the handlebar sleeve (103) Slide the foam grip (22) onto the protruding end of the handlebar (15).
NOTE: Lubricate the handlebar (15) with a small amount of liquid soap or water for easier installation of the foam grip (22).
STEP 6
- Put the end cap (30) into the rear stand (2).
STEP 7
- Lock the front cover (28) onto the base frame (3) with round head screw ST4.2x45 (81).
STEP 8
- Install the bottle holder (27). To do it, loosen screw M4.2x16 mm (67) on the right cover (18). Push the bottle holder (27) into the gap of the left and right covers (17 and 18) and tighten the screw M4.2x16 mm (67) again.

STEP 9
- Insert pedal shaft (6) through the tube that is located on the base frame (3). Slide pedal cap (19) onto each end of the pedal shaft (6). Secure the pedal caps (19) using button head bolts M8x15 mm (60) and large washers M8 (83) at both ends of the pedal shaft (6). You need to use two Allen wrenches to tighten the button head bolts M8x15 mm (60) at both ends of the pedal shaft (6) at the same time.
STEP 10
- Insert the adaptor (94) into the hole of the DC power cable (96).

STORAGE
• Store it only in a clean and dry place.
- Move this device using moving wheels on the front stabilizer of the base frame (3). Lift the rear stand (2) to move it. Never use seat (21) to push or pull it. The seat could move, the seat carriage (10) could hurt or crush your fingers.
• See pictures below how to stand the machine before storing.

natural_image
Technical line drawing of a mechanical device with two views showing assembly and assembly (no text or symbols)MOVING INSTRUCTIONS
- Rise up the rear stabilizer and push the rower machine to move it.

natural_image
Line drawing of a person using a long-handled mechanical device (no text or symbols present)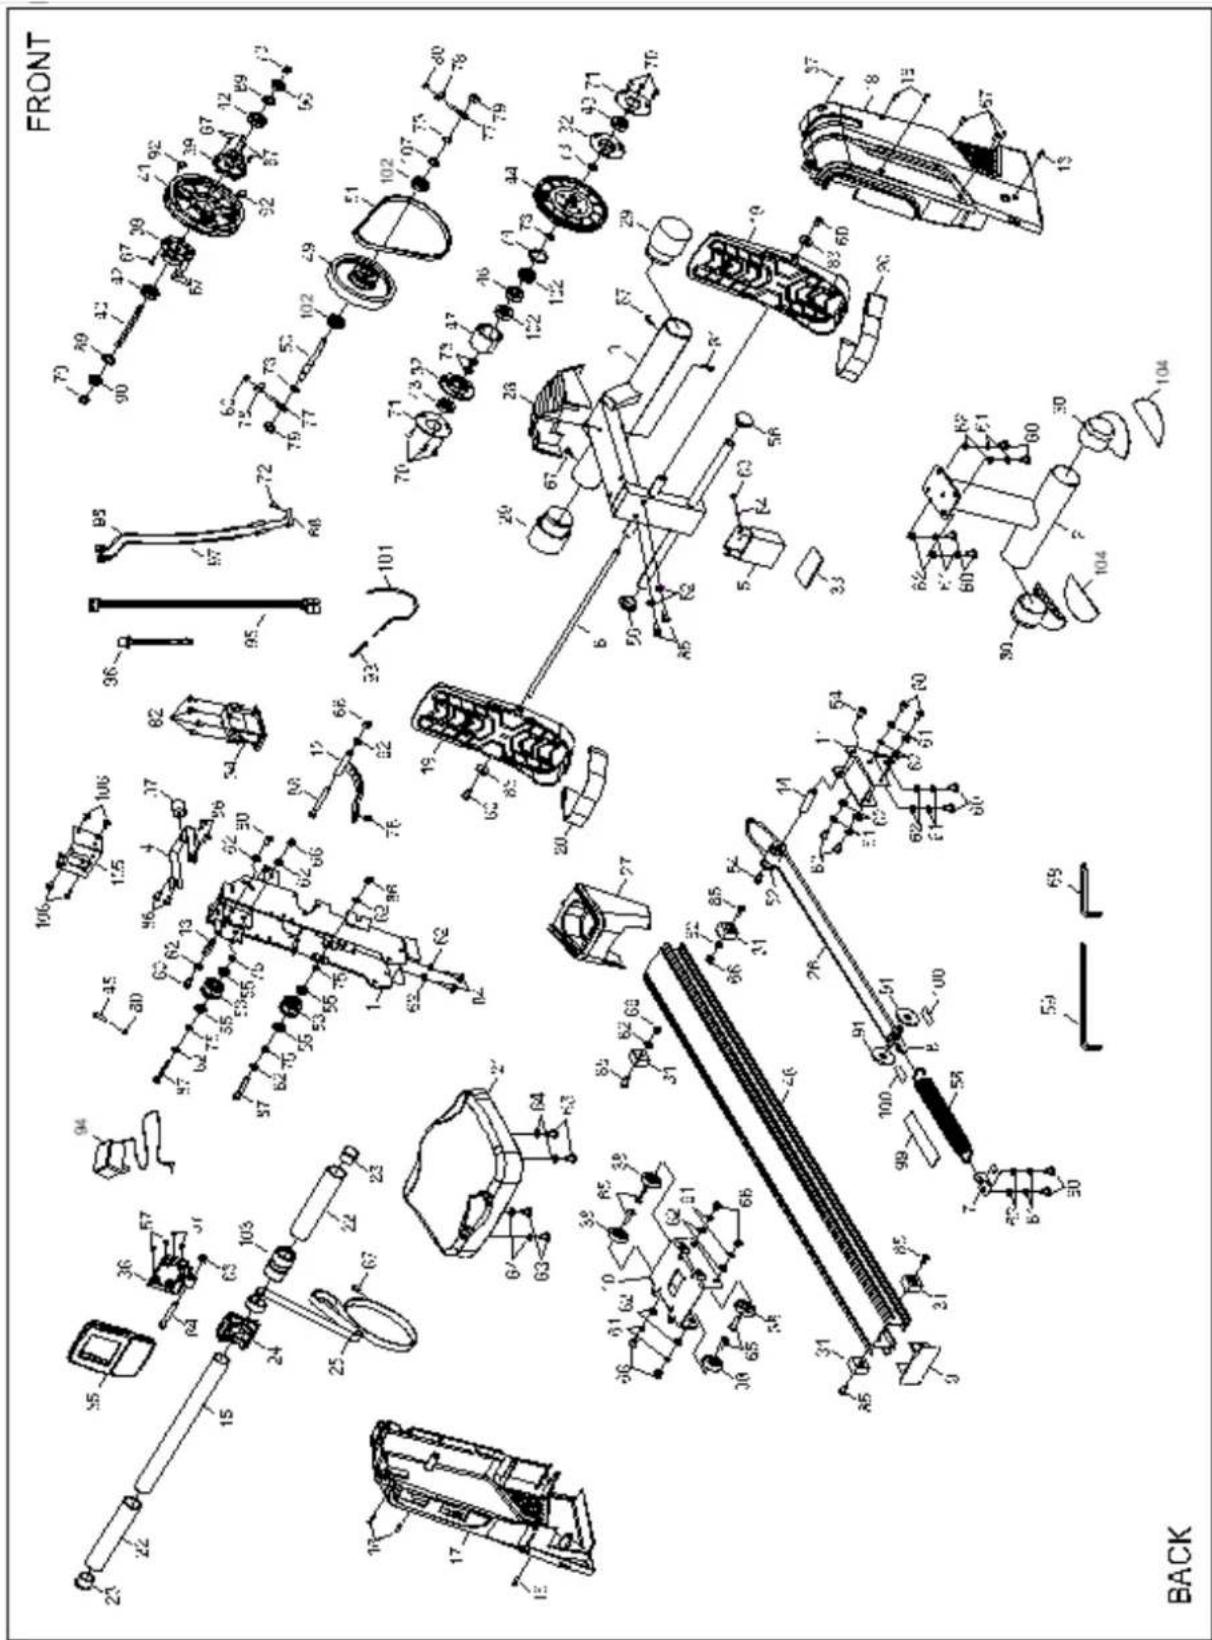
PARTS LIST
| No. | Item | Qty. |
| 1 | Main frame | 1 |
| 2 | Rear stand | 1 |
| 3 | Base frame | 1 |
| 4 | Foot bracket | 1 |
| 5 | Rear support | 1 |
| 6 | Pedal shaft | 1 |
| 7 | Rear spring hook | 1 |
| 8 | Spring hook | 1 |
| 9 | Rail cap | 1 |
| 10 | Seat carriage | 1 |
| 11 | Connection bracket | 1 |
| 12 | Magnetic bracket | 1 |
| 13 | Spacer (ø12.8.x38.5 mm) | 1 |
| 14 | Shaft rod (ø12.8.x58.5 mm) | 1 |
| 15 | Handlebar | 1 |
| 16 | Round head self-drill (ST4.2x20 mm) | 6 |
| 17 | Left cover | 1 |
| 18 | Right cover | 1 |
| 19 | Pedal cap | 2 |
| 20 | Pedal strap | 2 |
| 21 | Seat | 1 |
| 22 | Foam grip | 2 |
| 23 | Round plug (ø32 mm) | 2 |
| 24 | Handlebar holder | 1 |
| 25 | Strap (13x1.5x1950 mm) | 1 |
| 26 | Return strap (9x2x1700 mm) | 1 |
| 27 | Bottle holder | 1 |
| 28 | Front cover | 1 |
| 29 | Transporting wheel | 2 |
| 30 | End cap | 2 |
| 31 | Seat stopper | 4 |
| 32 | Bearing housing | 2 |
| 33 | Rubber foot pad | 1 |
| 34 | Motor | 1 |
| 35 | Meter | 1 |
| 36 | Meter plate | 1 |
| 37 | Foot stand | 1 |
| 38 | PU roller | 4 |
| 39 | Return bearing housing | 2 |
| 40 | Strap pulley shaft ø10*100 | 1 |
| 41 | Strap pulley | 1 |
| 42 | Bearing (6000RS) | 2 |
| 43 | Bearing (6003zz) | 2 |
| 44 | Pulley ø155*J3 | 1 |
| 45 | Round-head bolt (M6x25 mm) | 1 |
| 46 | One-way bearing (16003) | 1 |
| 47 | Collar | 1 |
| 48 | Rail | 1 |
| 49 | Magnetic flywheel | 1 |
| 50 | Flywheel shaft | 1 |
| 51 | V-ribbed belt (220 PJ3) | 1 |
| 52 | Idler roller | 1 |
| 53 | Idler wheel | 2 |
| 54 | Button head bolt M8x20 | 2 |
| 55 | Bearing (608zz) | 4 |
| 56 | Round plug (ø19 mm) | 2 |
| 57 | Round-head screw M5x20 | 4 |
| 58 | Return spring | 1 |
| 59 | Allen wrench (5 mm) | 1 |
| 60 | Button head bolt M8x15 | 16 |
| 61 | Lock washer (M8) | 16 |
| 62 | Washer (M8) | 29 |
| 63 | Round-head bolt M6x15 | 5 |
| 64 | Flat washer M6 | 5 |
| 65 | Hex head bolt M8x32 | 4 |
| 66 | Nylon nut M8 | 10 |
| 67 | Cross head bolt ST4.2x16 | 14 |
| 68 | Sensor clip | 1 |
| 69 | Allen wrench (5 mm) with screwdriver | 1 |
| 70 | Round-head bolt M6x12 | 6 |
| 71 | Bearing housing cover ø75*ø31.5*2.0T | 2 |
| 72 | Round washer head M4x10 | 1 |
| 73 | C ring M17 | 6 |
| 74 | Inner C ring M35 | 1 |
| 75 | Spacer | 4 |
| 76 | Retaining plug | 1 |
| 77 | Eye bolt M6 | 2 |
| 78 | Tension bracket | 2 |
| 79 | Nut M10 | 4 |
| 80 | Nut M6 | 3 |
| 81 | Round-head screw ST4.2x45 | 1 |
| 82 | Cross head screw M5x12 | 4 |
| 83 | Large washer M8 | 2 |
| 84 | Button head bolt M8x40 | 3 |
| 85 | Button head bolt M8x20 | 6 |
| 86 | Round-head screw M6x12 | 4 |
| 87 | Button head bolt M8x60 | 2 |
| 88 | Button head bolt M8x80 | 1 |
| 89 | Spacer S10 | 2 |
| 90 | Thin nut M10 | 2 |
| 91 | Guide wheel | 2 |
| 92 | Magnetic sensor | 2 |
| 93 | Spring | 1 |
| 94 | Adaptor | 1 |
| 95 | Cable | 1 |
| 96 | DC power cable | 1 |
| 97 | Female sensor wire | 1 |
| 98 | Male sensor wire | 1 |
| 99 | EVA pad 180x30x1.0T | 1 |
| 100 | EVA pad 65x12x1.0T | 2 |
| 101 | Tension cable | 1 |
| 102 | Bearing (6003RS) | 4 |
| 103 | Handlebar sleeve | 1 |
| 104 | Rubber pad | 2 |
| 105 | Tension bracket | 1 |
| 106 | Cross-head bolt M5x8 | 4 |
| 107 | Washer S17 | 1 |
METER INSTRUCTIONS
POWER UP
- Connect all the cables to the monitor.
- After powering up, all LCD segments will light up for 2 seconds and CPU will be reset the resistance to level 1. The monitor will enter the initial mode.
- If the connection cables are installed incorrectly, the motor will not work. Before contacting service: Check the cable connection and then reset the power to release a beep sound or press START/STOP key. Hold it to reset the device and to restart the system. If the motor still doesn't work, contact authorized service.
KEY FUNCTION
| START/STOP | To start or pause the workout. |
| FUN/SCAN | Under stop condition, push it to enter parameter setting.Confirm set values of the parameters and go into next setting.In the start state, push it to display fixed current parameter values.Push it to switch into automatic scanning function and parameter displaying. |
 | In parameter setting, push it to increase the value.In start state, push it to increase the resistance. |
 | In parameter setting, push it to decrease the value.In start state, push it to decrease the resistance. |
| PROG/RESET | In stop state, push it to select required movement patterns.In any state push it long (for 5 seconds) and the electronic watch resets. All the data, except ODO will be reset. |
- Key combination: FUN/SCAN and simultaneously UP (+) button for 3 seconds – motor introspection.
- Key combination: at the same time PROGRAM and DOWN (-) button for 3 seconds – ODO values examination.
FUNCTIONS
PROGRAM
Selection of the workout mode. There are total 21 manual programs (P01-P16 and U1-U4).
TIME
Exercise time will be shown on display during training. If there is no signal detected within 256 seconds, it enters the sleep mode. To wake up the computer, push any key, give some input or start workout. All the values will be reset to zero.
Count up: without value setting, the monitor will count up the time in range 0:00 – 99:59.
Count down: if the workout time has been set in, the system will count down from the pre-set value. Once the setting value is reached, the monitor gives a sound signals and stops. Push START/STOP key to count up from 0:00.
DISTANCE
The distance will be displayed on the window. The monitor starts calculating in range 1 – 999 m (measure unit: 1 m). After reaching 1 km, the measure unit becomes 0.1 km (100 m). The monitor can display from 1.000 km to 9.999 km.
Count up: without distance value setting, the monitor will count up from 1 m to 9.999 km.
Count down: if the distance has been set in, the system will count down from the pre-set value. Once the setting value is reached, the monitor gives a sound signals and stops. Push START/STOP key to count up from 1 m.
CALORIE
The number of burned calories will be displayed on the window. The range is: 0.0-999 kcal.
Count up: without calorie value setting, the monitor will count up from 0.0 to 999.
Count down: if the calorie value has been set in, the system will count down from the pre-set value. Ones the setting value is reached, the monitor gives a sound signals and stops. Push START/STOP key to count up from 0.0.
COUNT OF STROKES
The number of strokes will be displayed during exercising. If there is no signal within 256 seconds, it will be reset to zero.
Count up: without strokes value setting, the monitor will count up from 0 to 9999.
Count down: if the stroke value has been set in, the system will count down from the pre-set value. Once the setting value is reached, the monitor gives a sound signals and stops. Push START/STOP key to count up from 0.
WATT
The value of current watts during a workout. It will be changed with resistance or speed.
STROKES/MIN.
In means the movements (strokes) per minute.
OPERATIONS
There are 21 manual programs in all. The user can set the workout time and then the program divides this workout period (time) into 10 parts.
If the user will not set the workout time, the program will count up per second and each part lasts for 1 minute.
MANUAL PROGRAM
Preset programs: Programs 01-14
- Push the PROGRAM key to select required program.
- Press FUN/SCAN key to enter the program.
- The time display will flash. Then press UP or DOWN key to set up desired time of the exercise. Push FUN/SCAN again to confirm the set value.
- The count display will flash. Then press UP or DOWN key to set up desired value. Push FUN/SCAN again to confirm the set value.
- The distance display will flash. Then press UP or DOWN key to set up desired value. Push FUN/SCAN again to confirm the set value.
- The calorie display will flash. Then press UP or DOWN key to set up desired value. Push FUN/SCAN again to confirm the set value.
- Press START/STOP key to start your workout.
NOTE:
- Push FUN/SCAN key to go to next setting function.
- If the desired value has been reached the system gives a sound signal. If there are more preset (required) values, push START/STOP to continue your workout after the sound signal and you can reach the next one.
COMPETITION PROGRAM (PROGRAM 15)
- Push the PROGRAM button and select P15.
- Press FUN/SCAN key to enter the competition program.
- The time display will flash. Then press UP or DOWN key to set up desired time of the exercise. Push FUN/SCAN again to confirm the set value.
- The distance display will flash. Then press UP or DOWN key to set up desired value. Push FUN/SCAN again to confirm the set value.
- Press START/STOP key to start your workout.
NOTE:
- Press FUN/SCAN key to go to next setting function.
- There are two parts of the display (upper and lower part).
Upper part: workout distance, each bar means 1/10 of desired distance
Lower part: workout time, each bar means 1/10 of desired time
- If the user reaches the workout time unit and the distance is less than the workout distance, the distance bars will flash and mean that the user doesn't reach the required workout distance. Otherwise the bars will increase. That means the workout is right.
PROGRAM P16
The computer will adjust the resistance level according to the pulse value. If the current value is lower than desired value, the resistance will be increased. Otherwise, it will be decreased.
- Press the PROGRAM button to P16.
- Press FUN/SCAN key to enter the pulse program.
- Pulse display will flash. Then press the UP or DOWN key to set up the desired pulse value that you would like to reach. Press FUN/SCAN button to confirm your setting value.
- The time display will flash. Push UP or DOWN key to set in desired time of workout. Press FUN/SCAN button to confirm your setting value.
- The count display will flash. Press UP or DOWN key to set up desired value. Press FUN/SCAN button to confirm your setting value.
- The distance will flash. Press UP or DOWN key to set up desired distance that you want to reach. Press FUN/SCAN key to confirm the setting value.
USER PROGRAM (U1-U4)
- Push the PROGRAM key to select U1-U4.
- Press FUN/SCAN key to enter the user program.
- The time display will flash. Then press UP or DOWN key to set up desired time of the exercise. Push FUN/SCAN again to confirm the set value.
- The count display will flash. Then press UP or DOWN key to set up desired value. Push FUN/SCAN again to confirm the set value.
- The distance display will flash. Then press UP or DOWN key to set up desired value. Push FUN/SCAN again to confirm the set value.
- The calorie display will flash. Then press UP or DOWN key to set up desired value. Push FUN/SCAN again to confirm the set value.
- The profile will flash. Then press UP or DOWN key to set up desired profile value that you want to reach. Push FUN/SCAN key to confirm your setting value. Set in the same way until all profiles will be finished.
- Strat your workout using START/STOP key.
NOTE:
- The user can hear a sound signal when required value has been reached.
- If there are more pre-set values, press any key to continue your workout after the signal to reach the next one.
CHEST BELT USE
Setup the length of the chest belt so it holds tightly but comfortably on your chest. Moisten the contact surface with water or gel and attach the chest belt. Make sure the chest belt is located in the middle of the chest and the logo is facing away and up.
Persons with a pacemaker, defibrillator, or other implanted electronic device use the chest band at their own risk. Before using the chest belt for the first time, we recommend performing the tests under the doctor's supervision. This will ensure safety and reliability while using a pacemaker and a chest belt. Exercise can pose a certain risk, especially for those who do not practice any sport. We strongly recommend that you consult with your doctor before starting a regular exercise program.
HOW TO EXERCISE
Phase of right rowing to strengthen specific muscles:
- Stroke (Lower Muscle Exercise): Bend your knees and stretch your arms. Grasp the handle and keep your back straight (Pic 01).
- Movement (center muscles): Reflect the legs and bend the arms (Pic 02).
- End (upper body muscles): Take your back and legs tight. Hold your wrists straight and pull the handle (Pic 03).
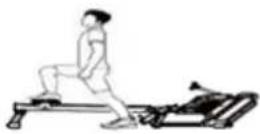
- Training the four-headed femoral muscle (Pic 04).
- Muscle training on arms (Pic 05).
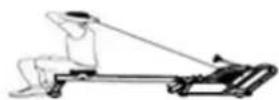
- Practice of back and abdominal muscles (Pic 06)

natural_image
Illustration of a person using an olive oil r machine (no text or symbols)Picture 01

Picture 02

Picture 03
Picture 04

natural_image
Illustration of a person using a machine tool (no text or symbols visible)Picture 05
Picture 06
MAINTENANCE
- Cleaning: Use a soft cloth and gentle cleaner to clean the product.
- Do not use abrasives or solvents on plastic parts.
- Wipe the sweat after each use.
- Protect your computer from moisture to avoid damaging the electronics.
- Protect machine and computer from direct sunlight.
- Check all screws and correct tightening of the pedals at least once a week. Tighten if necessary.
- Store in a dry and clean place. Keep away from children.
ENVIRONMENT PROTECTION
After the product lifespan expired or if the possible repairing is uneconomic, dispose it according to the local laws and environmentally friendly in the nearest scrapyard.
By proper disposal you will protect the environment and natural sources. Moreover, you can help protect human health. If you are not sure in correct disposing, ask local authorities to avoid law violation or sanctions.
Don't put the batteries among house waste but hand them in to the recycling place.
TERMS AND CONDITIONS OF WARRANTY, WARRANTY CLAIMS
General Conditions of Warranty and Definition of Terms
All Warranty Conditions stated hereunder determine Warranty Coverage and Warranty Claim Procedure. Conditions of Warranty and Warranty Claims are governed by Act No. 89/2012 Coll. Civil Code, and Act No. 634/1992 Coll., Consumer Protection, as amended, also in cases that are not specified by these Warranty rules.
The seller is SEVEN SPORT s.r.o. with its registered office in Borivojova Street 35/878, Prague 13000, Company Registration Number: 26847264, registered in the Trade Register at Regional Court in Prague, Section C, Insert No. 116888.
According to valid legal regulations it depends whether the Buyer is the End Customer or not.
"The Buyer who is the End Customer" or simply the "End Customer" is the legal entity that does not conclude and execute the Contract in order to run or promote his own trade or business activities.
"The Buyer who is not the End Customer" is a Businessman that buys Goods or uses services for the purpose of using the Goods or services for his own business activities. The Buyer conforms to the General Purchase Agreement and business conditions.
These Conditions of Warranty and Warranty Claims are an integral part of every Purchase Agreement made between the Seller and the Buyer. All Warranty Conditions are valid and binding, unless otherwise specified in the Purchase Agreement, in the Amendment to this Contract or in another written agreement.
Warranty Conditions
Warranty Period
The Seller provides the Buyer a 24 months Warranty for Goods Quality, unless otherwise specified in the Certificate of Warranty, Invoice, Bill of Delivery or other documents related to the Goods. The legal warranty period provided to the Consumer is not affected.
By the Warranty for Goods Quality, the Seller guarantees that the delivered Goods shall be, for a certain period of time, suitable for regular or contracted use, and that the Goods shall maintain its regular or contracted features.
The Warranty does not cover defects resulting from (if applicable):
- User's fault, i.e. product damage caused by unqualified repair work, improper assembly, insufficient insertion of seat post into frame, insufficient tightening of pedals and cranks
- Improper maintenance
- Mechanical damages
- Regular use (e.g. wearing out of rubber and plastic parts, moving mechanisms, joints etc.)
- Unavoidable event, natural disaster
- Adjustments made by unqualified person
- Improper maintenance, improper placement, damages caused by low or high temperature, water, inappropriate pressure, shocks, intentional changes in design or construction etc.
Warranty Claim Procedure
The Buyer is obliged to check the Goods delivered by the Seller immediately after taking the responsibility for the Goods and its damages, i.e. immediately after its delivery. The Buyer must check the Goods so that he discovers all the defects that can be discovered by such check.
When making a Warranty Claim the Buyer is obliged, on request of the Seller, to prove the purchase and validity of the claim by the Invoice or Bill of Delivery that includes the product's serial number, or eventually by the documents without the serial number. If the Buyer does not prove the validity of the Warranty Claim by these documents, the Seller has the right to reject the Warranty Claim.
If the Buyer gives notice of a defect that is not covered by the Warranty (e.g. in the case that the Warranty Conditions were not fulfilled or in the case of reporting the defect by mistake etc.), the Seller
is eligible to require a compensation for all the costs arising from the repair. The cost shall be calculated according to the valid price list of services and transport costs.
If the Seller finds out (by testing) that the product is not damaged, the Warranty Claim is not accepted. The Seller reserves the right to claim a compensation for costs arising from the false Warranty Claim.
In case the Buyer makes a claim about the Goods that is legally covered by the Warranty provided by the Seller, the Seller shall fix the reported defects by means of repair or by the exchange of the damaged part or product for a new one. Based on the agreement of the Buyer, the Seller has the right to exchange the defected Goods for a fully compatible Goods of the same or better technical characteristics. The Seller is entitled to choose the form of the Warranty Claim Procedures described in this paragraph.
The Seller shall settle the Warranty Claim within 30 days after the delivery of the defective Goods, unless a longer period has been agreed upon. The day when the repaired or exchanged Goods is handed over to the Buyer is considered to be the day of the Warranty Claim settlement. When the Seller is not able to settle the Warranty Claim within the agreed period due to the specific nature of the Goods defect, he and the Buyer shall make an agreement about an alternative solution. In case such agreement is not made, the Seller is obliged to provide the Buyer with a financial compensation in the form of a refund.

insportline
SEVEN SPORT s.r.o.
Registered Office: Borivojova 35/878, 130 00 Praha 3, Czech Republic
Headquarters: Delnicka 957, 749 01 Vitkov, Czech Republic
Warranty & Service Centre: Cermenska 486, 749 01 Vitkov, Czech Republic
CRN: 26847264
VAT ID: CZ26847264
Phone: +420 556 300 970
E-mail: eshop@insportline.cz
Headquarters, Warranty & Service centre: Elektricna 6471, 911 01 Trencin, Slovakia
CRN: 36311723
VAT ID: SK2020177082
Phone: +421(0)326 526 701
E-mail: objednavky@insportline.sk
reklamacie@insportline.sk
servis@insportline.sk
Web: www.insportline.sk
Date of Sale: Stamp and Signature of Seller:

- CONTENTS
- SAFETY PRECAUTIONS
- PRODUCT DESCRIPTION
- ASSEMBLY STEPS
- STEP 1
- STEP 2
- STEP 3
- STEP 4
- STEP 5
- STEP 6
- STEP 7
- STEP 8
- STEP 9
- STEP 10
- STORAGE
- MOVING INSTRUCTIONS
- METER INSTRUCTIONS
- POWER UP
- FUNCTIONS
- PROGRAM
- TIME
- DISTANCE
- CALORIE
- COUNT OF STROKES
- WATT
- STROKES/MIN.
- OPERATIONS
- MANUAL PROGRAM
- NOTE:
- COMPETITION PROGRAM (PROGRAM 15)
- PROGRAM P16
- USER PROGRAM (U1-U4)
- CHEST BELT USE
- HOW TO EXERCISE
- MAINTENANCE
- ENVIRONMENT PROTECTION
- TERMS AND CONDITIONS OF WARRANTY, WARRANTY CLAIMS
- General Conditions of Warranty and Definition of Terms
- Warranty Conditions
- Warranty Period
- The Warranty does not cover defects resulting from (if applicable):
- Warranty Claim Procedure
- insportline
- SEVEN SPORT s.r.o.
Brand : inSPORTline
Model : Yukona
Category : Rowing Machine