
Ocean Scout TK - Camera FLIR - Free user manual and instructions
Find the device manual for free Ocean Scout TK FLIR in PDF.


| Product Type | Handheld Thermal Monocular |
| Brand | FLIR |
| Model | Ocean Scout TK |
| Sensor Resolution | 160 × 120 (19,200 pixels) |
| Display | 640 × 480 LCOS |
| Magnification | 2× Digital Zoom |
| Detection Range | Up to 100 yards (91 m) for human-sized objects |
| Field of View | 20° × 16° |
| Frame Rate | <9 Hz |
| Battery Type | Internal Li-ion (rechargeable via micro USB) |
| Battery Life | Approx. 5 hours continuous use |
| Operating Temperature | -20°C to 50°C |
| Storage Temperature | -30°C to 60°C |
| Dimensions | 4.4 × 1.6 × 2.2 inches (112 × 41 × 56 mm) |
| Weight | 6.7 oz (190 g) |
| Video Output | None (viewfinder only) |
| Image Capture | Yes (saves to internal memory) |
| Internal Memory | 8 GB |
| Waterproof Rating | IP-67 (submersible to 1 m for 30 min) |
| Warranty | 2 years (limited) |
| Cleaning | Use a soft, dry cloth; avoid solvents |
| Accessories Included | Neck lanyard, micro USB cable, carrying case |
| Safety | Do not disassemble; avoid direct eye exposure to laser (none) |
| Maintenance | Keep lens clean; store in dry place; charge battery periodically |
| Repairability | Non-user-serviceable; contact FLIR support |
Frequently Asked Questions - Ocean Scout TK FLIR
User questions about Ocean Scout TK FLIR
0 question about this device. Answer the ones you know or ask your own.
Ask a new question about this device
Download the instructions for your Camera in PDF format for free! Find your manual Ocean Scout TK - FLIR and take your electronic device back in hand. On this page are published all the documents necessary for the use of your device. Ocean Scout TK by FLIR.
USER MANUAL Ocean Scout TK FLIR
Charging the OCEAN SCOUT-TK – Use the included USB Cable and connect to a power source. The Indicator LED flashes while charging and blinks green when fully charged.
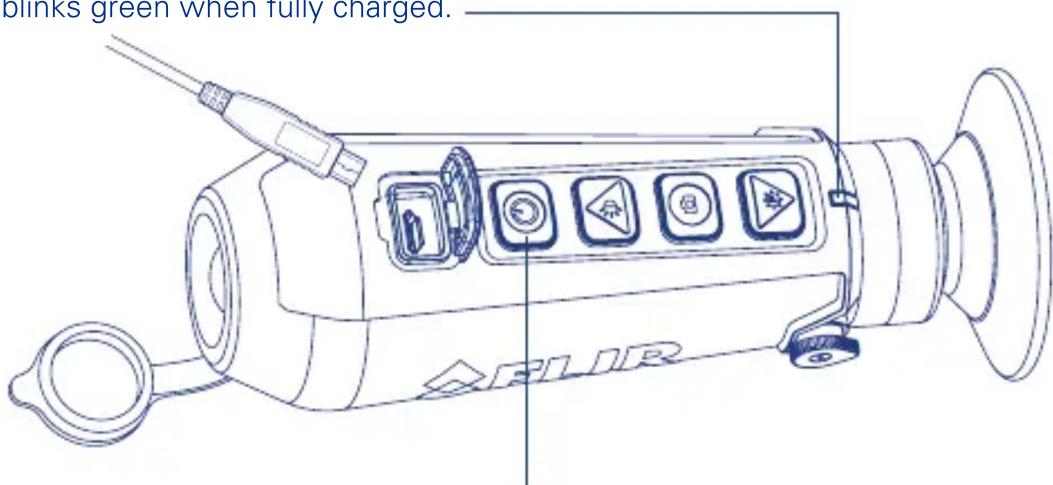
Turning On/Off – Press the power button to turn on your OCEAN SCOUT -TK. The Indicator LED is illuminated when power is applied. The FLIR logo is displayed in the eyepiece followed by the live image. To turn OFF press and HOLD the power button. The camera shuts off after one second.

CHANGE THE IMAGE DISPLAY
Once an image is displayed, press the Color Palette Button to select the colors that are applied to the image. Use arrow keys to cycle through options.
natural_image
Illustration of a hand holding a small object with a funnel-like shape attached (no text or symbols)ADJUST DISPLAY SHARPNESS
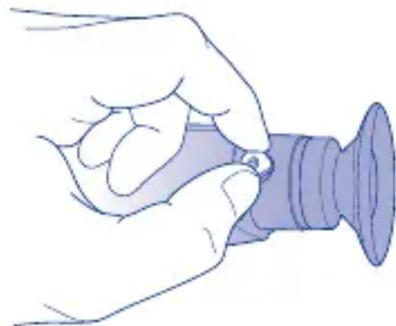
The diopter adjustment lever allows you to adjust for optimum image sharpness in the eyepiece. Turn the diopter lever to set the sharpest image in the viewfinder.

USER MENU
While the camera is on press the power button to access the user menu. Additional display settings, the ability to configure the date and time, system information, and the photo browser are accessible via the menu.

Press the Snapshot Button to take a picture of the current image. The picture is saved to the camera.
To Record video – Press and HOLD the Snapshot Button for one second to start a video recording. The Recording ICON is shown at the bottom of the display. Press the Snapshot Button again to stop a recording.

natural_image
Blue icon of a USB flash inside a battery outline (no text or symbols)DOWNLOAD PICTURES & VIDEO
With camera on, connect to a computer using USB cable provided. Device will appear as drive labeled "FLIR".
For more details on how to operate your OCEAN SCOUT TK please refer to the user manual. Register your camera now at: www.flir.com/oceanscouttk/registration
P/N: 4206720 Rev 1www.flir.com

Brand : FLIR
Model : Ocean Scout TK
Category : Camera