GREE HLR-12-M - Uncategorized

HLR-12-M - Uncategorized GREE - Free user manual and instructions

Find the device manual for free HLR-12-M GREE in PDF.

📄 50 pages English EN Download 💬 AI Question 10 questions ⚙️ Specs
Notice GREE HLR-12-M - page 1
Pick your language and provide your email: we'll send you a specifically translated version.
Product Type Dehumidifier
Model HLR-12-M
Brand Gree
Capacity (pints/day) 12 pints (at 80°F, 60% RH)
Coverage Area Up to 200 sq. ft.
Dimensions (W x H x D) 13.5 x 19.3 x 10.2 inches
Weight 28 lbs
Power Supply 115V, 60Hz, 1.8A
Water Tank Capacity 2.4 gallons
Refrigerant Type R-410A
Operating Temperature Range 41°F to 95°F
Noise Level 48 dB
Humidity Control Adjustable humidistat with continuous and auto modes
Filter Type Washable, reusable mesh filter
Defrost Function Automatic defrost for low temperature operation
Auto-Restart Yes, after power outage
Bucket Full Indicator Yes, with auto-shutoff
Drain Options Continuous drain with hose (included) or bucket
Energy Efficiency Energy Star certified
Maintenance Clean filter every 2 weeks; empty bucket or ensure continuous drain
Safety Features Overheat protection, frost protection, tip-over switch
Warranty 1 year limited warranty

Frequently Asked Questions - HLR-12-M GREE

How do I set the humidity level on my Gree HLR-12-M dehumidifier?
Press the Humidity Set button repeatedly to cycle through humidity levels from 35% to 85% or choose Continuous mode for constant operation.
What should I do if the dehumidifier shows a full bucket indicator but the bucket is empty?
Check if the bucket is properly seated. Remove the bucket, empty it, rinse if needed, and reinstall firmly. If the issue persists, inspect the float switch for obstruction.
Can I use a hose for continuous drainage?
Yes, the unit includes a drain hose. Attach it to the continuous drain port on the back, ensure the hose is not kinked, and direct it to a floor drain or sink. The bucket must be removed or placed with the hose connected.
How often should I clean the filter?
Clean the washable mesh filter every 2 weeks or more frequently in dusty environments. Use warm water and mild detergent, rinse thoroughly, and let it dry completely before reinstalling.
Why is my dehumidifier not collecting water?
Ensure the humidity setpoint is below the current room humidity. Check that the filter is clean and the air intake is unobstructed. The unit may also be in defrost mode; wait for it to finish. If ambient temperature is below 41°F, the dehumidifier may not operate effectively.
What does the defrost light mean?
The Defrost indicator turns on when the unit is automatically removing frost from the coils. This is normal at low temperatures. The fan will continue running but dehumidification pauses until defrost is complete.
How do I reset the dehumidifier after a power outage?
The unit has auto-restart feature. It will resume operation with the previous settings when power is restored. If not, unplug for 30 seconds and plug back in.
What is the recommended room size for the HLR-12-M?
This dehumidifier is suitable for rooms up to 200 square feet with moderate humidity. For larger spaces or very damp conditions, consider a higher capacity model.
Where can I find the user manual for the HLR-12-M?
You can download the manual for free from notice-facile.com. Simply search for your model and click the download button.
What should I do if the dehumidifier makes unusual noises?
Common sounds include compressor hum, fan whir, and water dripping. If you hear rattling or grinding, check for loose parts, debris in the motor, or ensure the unit is level on a flat surface. Remove any packaging materials inside.

User questions about HLR-12-M GREE

0 question about this device. Answer the ones you know or ask your own.

Ask a new question about this device

The email remains private: it is only used to notify you if someone responds to your question.

No questions yet. Be the first to ask one.

Download the instructions for your Uncategorized in PDF format for free! Find your manual HLR-12-M - GREE and take your electronic device back in hand. On this page are published all the documents necessary for the use of your device. HLR-12-M by GREE.

USER MANUAL HLR-12-M GREE

natural_image Exterior view of a large industrial air conditioning unit with two circular fans (no visible text or symbols)
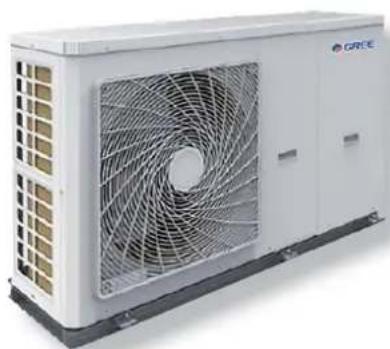
GREE HLR-12-M - 1

natural_image Exterior view of a white industrial air conditioning unit with a spiral fan grille (no visible text or symbols)

◆ HLR8Pd/Na-K, HLR10Pd/Na-K
GREE HLR-12-M - 2

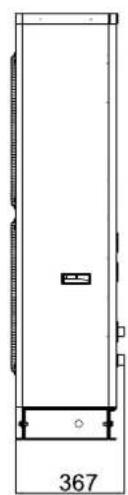
natural_image Technical drawing of a rectangular enclosure with internal grid pattern and dimension label (no text or symbols)
GREE HLR-12-M - 3

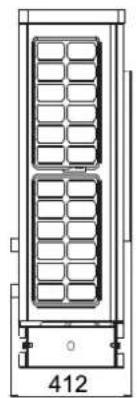
natural_image Technical line drawing of a vertical panel or enclosure with internal compartments, labeled '412' at the base (no text or symbols on the diagram itself)
GREE HLR-12-M - 4

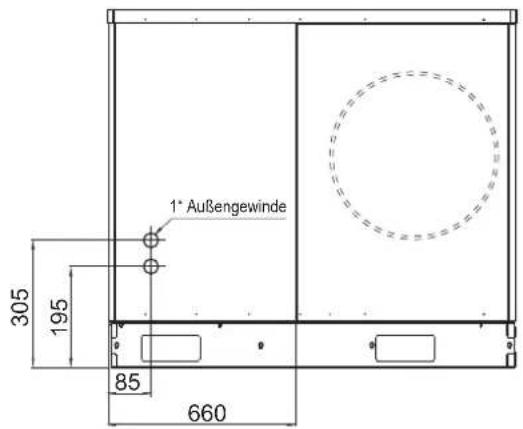
natural_image Technical diagram of a cabinet or enclosure with internal grid patterns and dimension label (1430), no readable text or symbols beyond the dimension line.
GREE HLR-12-M - 5

natural_image Pure technical line drawing of a rectangular cabinet or enclosure with no text, numbers, or symbols

16:15 2016-01-04 Friday Mode Auxiliary func. Error state Off No Yes T-water out T-outdoor Key lock 0°C 25°C No

16:15 2016-01-04 Friday Mode Auxiliary func. Error state Off No Yes T-water out T-outdoor Key lock 0°C 25°C No FUNC PARA VIEW GEN.

FUNKTIONEN Seite 1

Funktionen

■ Control State (Ctrl. state)

16:15 2016-01-04 Friday MONDAY Period 2 Start time End time ✓ 08:30 17:30 Period 3 Start time End time ✓ 08:30 17:30 Last Next

16:15 2016-01-04 Friday MONDAY Period 4 Start time End time ✓ 08:30 17:30 Period 5 Start time End time ✓ 08:30 17:30 Last Text

natural_image Close-up of a small electronic device with a blue body and black ventilation grille (no visible text or symbols)
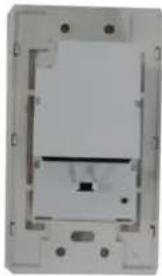
GREE HLR-12-M - ■ Control State (Ctrl. state) - 3

natural_image Pure electrical circuit lines without any symbols
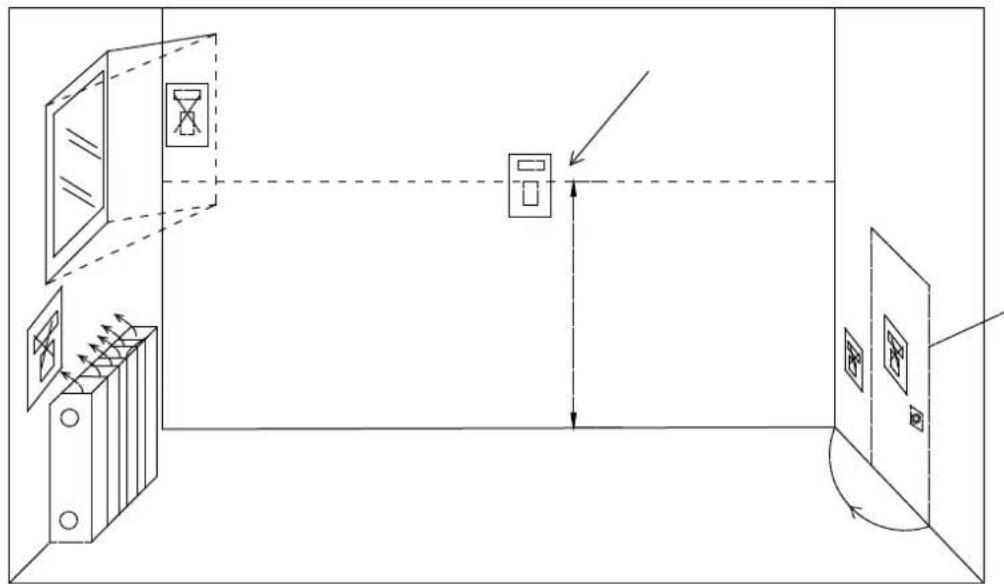
GREE HLR-12-M - ■ Control State (Ctrl. state) - 4

flowchart
graph TD
    A[" Furniture "]
    B[" Storage Unit "]
    C[" Window "]
    D[" Window "]
    E[" Window "]
    F[" Window "]
    G[" Window "]
    H[" Window "]
    I[" Window "]
    J[" Window "]
    K[" Window "]
    L[" Window "]
    M[" Window "]
    N[" Window "]
    O[" Window "]
    P[" Window "]
    Q[" Window "]
    R[" Window "]
    S[" Window "]
    T[" Window "]
    U[" Window "]
    V[" Window "]
    W[" Window "]
    X[" Window "]
    Y[" Window "]
    Z[" Window "]
    AA[" Window "]
    AB[" Window "]
    AC[" Window "]
    AD[" Window "]
    AE[" Window "]
    AF[" Window "]
    AG[" Window "]
    AH[" Window "]
    AI[" Window "]
    AJ[" Window "]
    AK[" Window "]
    AL[" Window "]
    AM[" Window "]
    AN[" Window "]
    AO[" Window "]
    AP[" Window "]
    AQ[" Window "]
    AR[" Window "]
    AS[" Window "]
    AT[" Window "]
    AU[" Window "]
    AV[" Window "]
    AW[" Window "]
    AX[" Window "]
    AY[" Window "]
    AZ[" Window "]
    BA[" Window "]
    BB[" Window "]
    BC[" Window "]
    BD[" Window "]
    BE[" Window "]
    BF[" Window "]
    BG[" Window "]
    BH[" Window "]
    BI[" Window "]
    BJ[" Window "]
    BK[" Window "]
    BL[" Window "]
    BM[" Window "]
    BN[" Window "]
    BO[" Window "]
    BP[" Window "]
    BQ[" Window "]
    BR[" Window "]
    BS[" Window "]
    BT[" Window "]
    BU[" Window "]
    BV[" Window "]
    BW[" Window "]
    BX[" Window "]
    BY[" Window "]
    BZ[" Window "]
    CA[" Window "]
    CB[" Window "]
    CC[" Window "]
    CD[" Window "]
    CE[" Window "]
    CF[" Window "]
    CG[" Window "]
    CH[" Window "]
    CI[" Window "]
    CJ[" Window "]
    CK[" Window "]
    CL[" Window "]
    CM[" Window "]
    CN[" Window "]
    CO[" Window "]
    CP[" Window "]
    CS[" Window "]
    CT[" Window "]
    CU[" Window "]
    CV[" Window "]
    CW[" Window "]
    CX[" Window "]
    CY[" Window "]
    CZ[" Window "]
    DA[" Window "]

CN14 CN1 15K RT6

Hinweise!

HLR-10a-K, HLR-12-M, HLR-14-M
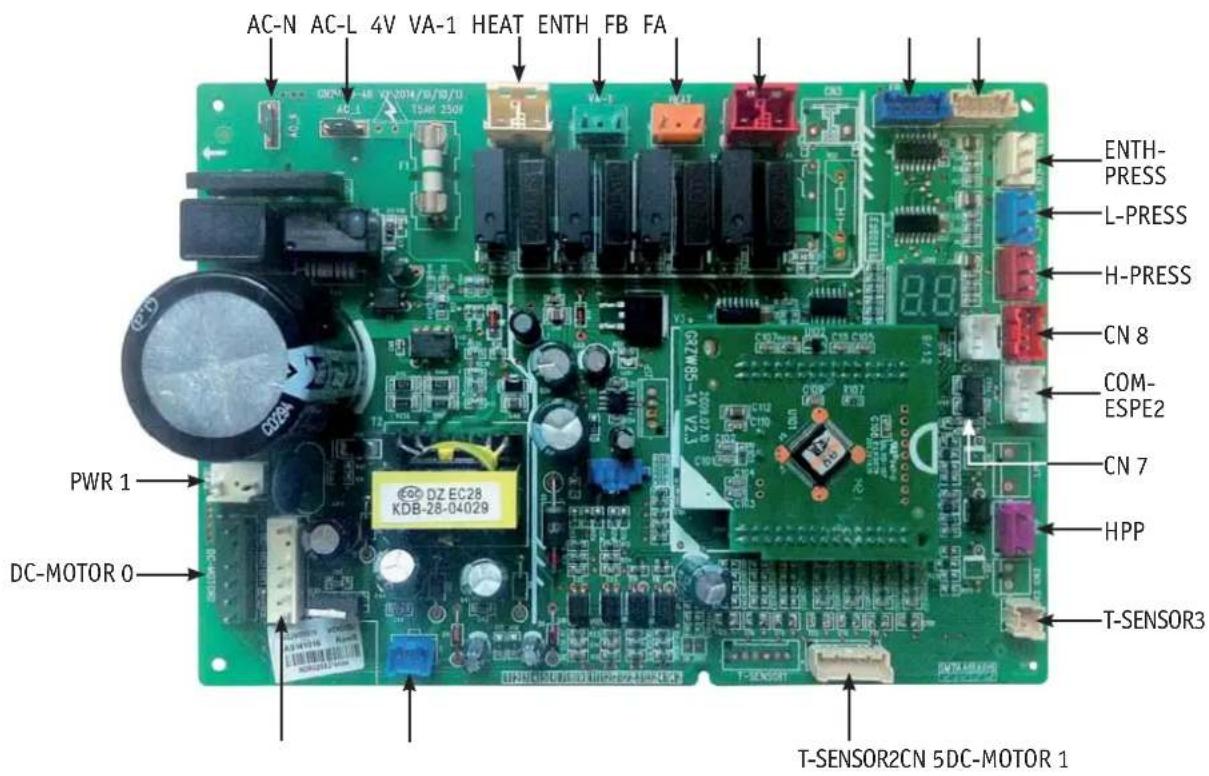
AC-N AC-L 4V VA-1 HEAT ENTH FB FA DCN-48 CN-2014/6/19/10 TSENOR3 PWR 1 DC-MOTOR 0 T-SENSOR2CN 5DC-MOTOR 1 ENTH-PRESS L-PRESS H-PRESS CN 8 COM-ESPE2 CN 7 HPP T-SENSOR3

■ Regelplatine AP1
HLR-10a-K, HLR-12-M, HLR-14-M
AC-L NE RR EAT RUNH HEAT2 HEAT1 BAN-HEAT X5 X9 2V1_ON 2V2_ON 3V1_ON 3V2_ON OTHER-HEAT 220 V X10 2V1_OFF 2V2_OFF 3V1_OFF 3V2_OFF OTHER-HEAT DCOUT CN33 TR-IN CN31 CN18 TR-OUT2 TR-OUT1 T-SEN13 T-SEN12 T-SEN10 T-SEN8 T-SEN5 T-SEN1 T-SEN3 OVC HEAT1 OVC HEAT2 OVC-WT HEAT DOOR IN DK00314622 OTHER-HEAT DCIN CN6 CN4 COM OUT INDOOR PUMP POOL PUMP SOLAR PUMP SW-INDOOR SW-SOLAR SW-POOL

L2-1 zu PFC-Drossel (weiß

Schaltplan

HLR-12-M, HLR-14-M
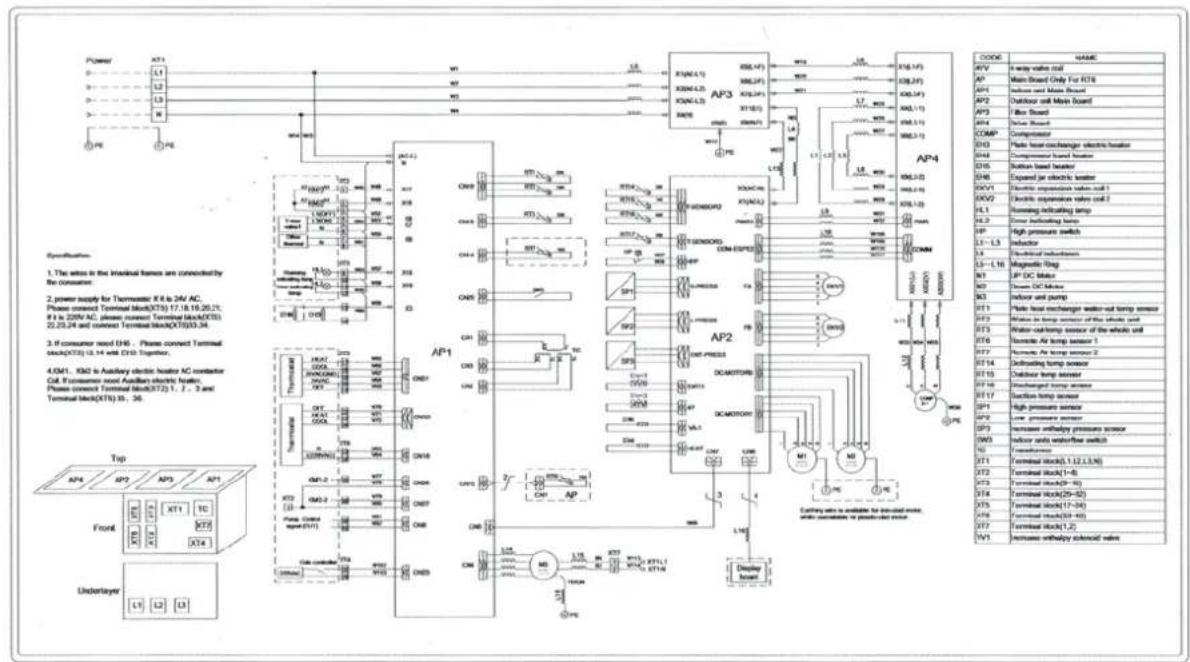
Specification: 1. The wire is the internal frame are connected by the consumer. 2. power supply for Thermostat R 6 to 24V AC. Please connect Terminal Block(XT3) 17.18.19.20.21. R 6 to 250V AC, please connect Terminal Block(XT3) 22.23.24 and connect Terminal Block(XT3)33.34. 3. if consumer need EHI . Please connect Terminal Block(XT3) 13.14 with EHI Together. 4. GM1, KM2 is Auxiliary electric heater AC contactor Cell. If consumer need Auxiliary electric heater. Please connect Terminal Block(XT3) 1, 2, 3 and Terminal Block(XT3) 10, 26. Top Front Underlayer AP4 AP7 AP3 AP1 XT3 X1X X1T X14 L1 L2 L3 XT1 X1X X1T X14 XT1 X1X X1T X14 XT1 X1X X1T X14 XT1 X1X X1T X14 XT1 X1X X1T X14 XT1 X1X X1T X14 XT1 X1X X1T X14 XT1 X1X X1T X14 XT1 X1X X1T X14 XT1X X1X X1T X14 XT1X X1X X1T X14 XT1X X1X X1T X14 XT1X X1X X1T X14 XT1X X1X X1T X14 XT1X X1X X1T X14 XT1X X1X X1T X14 XT1X X1X X1T X15 XT1X X1X X1T X14 XT1X X1X X1T X14 XT1X X1X X1T X14 XT1X X1X X1T X14 XT1X X1X X1T X14 XT1X X1X X1T X14 XT1X X1X X1T X14 XT1X X1X X20 XT20 XT20 XT20 XT20 XT20 XT20 XT20 XT20 XT20 XT20 XT20 XT20 XT20 XT20 XT20 XT20 XT20 XT20 XT20 XT20 XT20 XT20 XT20 XT20 XT20 ATC ATC ATC ATC ATC ATC ATC ATC ATC ATC ATC ATC ATC ATC ATC ATC ATC ATC ATC ATC ATC ATC ATC ATC ATC ATC ATC ATC ATC ATC ATC ATC ATC ATC

■ HLR-12-M, HLR-14-M
GREE HLR-12-M - Schaltplan - 2

Table of contents Click a title to access it
Manual assistant
Powered by Anthropic
Waiting for your message
Product information

Brand : GREE

Model : HLR-12-M

Category : Uncategorized