
Aquos Crystal - Mobile Phone SHARP - Free user manual and instructions
Find the device manual for free Aquos Crystal SHARP in PDF.


| Product Type | Smartphone |
| Brand | Sharp |
| Model | Aquos Crystal (306SH) |
| Dimensions (W x H x D) | Approx. 67 x 131 x 10 mm |
| Weight | Approx. 141 g (with battery) |
| Battery Capacity | 2040 mAh (built-in) |
| Talk Time | 3G: Approx. 780 minutes |
| Charging Time | Approx. 180 minutes (with included AC adapter) |
| Display | 5.0-inch S-CG Silicon LCD (720 x 1280 pixels) |
| Operating System | Android 4.4.2 KitKat |
| Processor | Qualcomm Snapdragon 400 (MSM8926) quad-core 1.2 GHz |
| RAM | 1.5 GB |
| Internal Storage | 8 GB (expandable via microSD up to 128 GB) |
| Rear Camera | 8 MP with autofocus and LED flash |
| Front Camera | 2.1 MP |
| Connectivity | Wi-Fi 802.11 b/g/n/ac, Bluetooth 4.0, GPS, NFC, microUSB 2.0, 3.5mm headset jack |
| Audio | Harman/Kardon sound enhancement, Direct Wave Receiver (screen vibration) |
| SIM Card | Nano-SIM (pre-installed) |
| Network | Sprint Spark LTE (bands 25/26/41), CDMA, GSM (international roaming) |
| Sensors | Accelerometer, proximity, light, compass |
| Special Features | Clip Now, Smart Contacts, Wi-Fi Calling, Mobile Hotspot |
Frequently Asked Questions - Aquos Crystal SHARP
User questions about Aquos Crystal SHARP
0 question about this device. Answer the ones you know or ask your own.
Ask a new question about this device
Download the instructions for your Mobile Phone in PDF format for free! Find your manual Aquos Crystal - SHARP and take your electronic device back in hand. On this page are published all the documents necessary for the use of your device. Aquos Crystal by SHARP.
USER MANUAL Aquos Crystal SHARP
Sprint Printable User Guide
A downloadable, printable guide to your phone's features.
SHARP
AQUOS CRYSTAL
Table of Contents
Introduction 1
Get Started 2
Parts and Functions 2
Phone Layout 2
Keys 3
Direct Wave Receiver 4
SIM Card 5
Handling SIM Card 5
Insert SIM Card 5
Phone Memory/SD Card 7
Insert SD Card 8
Unmount SD Card 9
Remove SD Card 11
Format SD Card 12
Charge the Battery 15
Turn Your Phone On and Off 18
Use the Touchscreen 19
Activate Your Phone 23
Complete the Setup Screens 24
Set Up Smart Contacts 27
Basic Operations 30
Basics 30
Home Screen and Applications (Apps) List 30
Select Options and Navigate Screens 30
Menu Operations 31
Phone Settings Menu 32
Portrait and Landscape Screen Orientation 33
Capture Screenshots 34
Applications 35
Launch Applications 35
Apps List 36
Phone Number 40
Silent Mode/Airplane Mode 42
Silent Mode .42
Airplane Mode 44
Enter Text . 46
Touchscreen Keyboards 46
Google Keyboard .46
Swype 49
Google Voice Typing...52
Tips for Editing Text 53
Google Account..55
Create a Google Account 55
Sign In to Your Google Account 61
Google Play Store 64
Find and Install an App...65....
Request a Refund for a Paid App 67
Update an App 67
Uninstall an App....71
Get Help with Google Play....73
Lock and Unlock Your Screen 75
Update Your Phone 76
Update Your Phone Software 77
Your Phone Interface 84
Home Screen 84
Status Bar 85
Notifications Window 89
Customize the Home Screen....90
Change the Wallpaper 91
Add Shortcuts to the Home Screen 92
Add Widgets to the Home Screen 93
Add Folders to the Home Screen 95
Phone App 97
Place and Answer Calls 97
Call Using the Phone Dialer....97
Answer Phone Calls 100
In-Call Screen Layout and Operations 103
Place Calls from Contacts/Call History 105
Place a Call from Contacts.... 105
Call from Call History.... 107
Optional Services...109
Voicemail Setup 109
Visual Voicemail 111
Set Up Visual Voicemail 111
Review Visual Voicemail...112
Listen to Multiple Voicemail Messages 113
Visual Voicemail Options 114
Configure Visual Voicemail Settings 115
Caller ID Blocking...118
Call Waiting 118
Conference Calling 120
Call Forwarding...121
Access Call Settings...122
TTY Mode 123
Contacts 125
Add a Contact 125
Check Contacts ...129....
Contacts Screen Layout 130
Edit a Contact 131
Delete a Contact 133
Share a Contact ...135....
Import Contacts 137
Back Up Contacts 139
Smart Phone and Smart Contacts Apps 143
Place and Answer Calls with Smart Phone 143
Call Using the Smart Phone Dialer 143
Answer Phone Calls with Smart Phone 146
Place Calls from Contacts/Call History with Smart Phone 149
Place a Call from Contacts.... 149
Call from Smart Phone Call History 151
Optional Smart Phone Services 153
Voicemail Setup with Smart Phone 153
Caller ID Blocking with Smart Phone 155
Call Waiting with Smart Phone 155
Conference Calling with Smart Phone 157
Call Forwarding with Smart Phone 158
Access Smart Contacts Settings.... 159
Add a Contact with Smart Contacts...161....
Save a Phone Number 164
Check Smart Contacts 165
Smart Contacts Screen Layout 166
Edit a Contact with Smart Contacts...167....
Delete a Contact with Smart Contacts 169
Messaging and Internet 172
Text and Multimedia Messaging 172
Send a Text Message 172
Send a Multimedia Message (MMS) 175
Save and Resume a Draft Message 180
New Messages Notification 182
Manage Message Conversations 182
Text and MMS Options 194
Create and Send Gmail 195
Check Received Gmail Messages 198
Open New Gmail Messages 198
Open Gmail Messages 199
Manage Gmail Messages 200
Use Gmail Labels 201
Archive Gmail Threads 202
Mute Gmail Threads 203
Delete Gmail Threads 204
Search Gmail Messages 205
Report Spam or Phishing Gmail 206
Add Another Google (Gmail) Account 207
Switching between Gmail Accounts 210
Email 211
Set Up an Email Account 212
Add an Email Account 212
Add an Exchange ActiveSync Account 216
Compose and Send Email 218
Open New Email Messages 220
Open Email Messages 221
Delete an Email Account 223
Manage Your Email Inbox 225
Data Services General Information (Sprint Spark LTE and 3G Networks) 226
Sprint Spark LTE 226
Your User Name 228
Data Connection Status and Indicators 229
Browser 229
Take Pictures and Record Videos 243
Take a Picture 243
Camera Viewfinder Screen 245
Record Videos 246
Video Shooting Screen 248
View Pictures and Videos Using Gallery 249
Edit Pictures 251
Share Pictures and Videos 254
Send Pictures or Videos by Email or Gmail 254
Send a Picture or Video by Multimedia Message 256
Send Pictures or Videos Using Bluetooth® 257
Share Pictures and Videos on Facebook 259
Share Pictures on Picasa 260
Share Videos on YouTube 262
Camera Settings 263
Switch Camera Mode 263
Set Camera Functions 265
Useful Features 268
NASCAR MOBILE 268
Navigation 268
Google Maps 268
Scout 270
Hangouts 272
Google Search 274
Use Google Search 275
Use Google Voice Search 276
Calculator 277
Calendar .278....
Add an Event to the Calendar 279
View Calendar Events 281
Sync Calendars 283
Synchronize an Exchange ActiveSync Calendar...284
Clock 285
Set Alarms 286
Additional Clock Features 288
Twitter .290
Install the Twitter App on Your Phone 290
Tweet on Twitter . 290
Facebook 291
Install the Facebook App on Your Phone...291......
Use Facebook 293
YouTube 294
View YouTube Videos 294
Post a Video to YouTube 295
Google Play Music App 297
Play Music with Google Play 297
Google Play Music Screen Layout 298
Create Playlists in Google Play Music 299
Sprint Music Plus 302
Google Wallet 305
OfficeSuite 305
Clip Now 307
Connectivity 311
Connections Optimizer 311
Connect to a Computer via USB 313
Wi-Fi 318
Turn Wi-Fi On and Connect to a Wireless Network 318
Wi-Fi Settings 320
Disconnect Wi-Fi 323
Wi-Fi Direct 325
Mobile Hotspot 328
Tethering 330
Bluetooth® 332
Bluetooth® Information 332
Enable the Bluetooth® Feature...332
Pair Bluetooth® Devices 334
Connect to a Paired Bluetooth® Device 336
Send Information Using Bluetooth® 338
Receive Data via Bluetooth® 340
View Your Phone's Screen on Other Devices 341
Settings 344
Basic Settings .344
Wi-Fi Calling Settings 345
Wi-Fi Settings Menu 349
Bluetooth® Settings 353
Call Settings 355
Data Usage Settings 356
More Settings 359
Airplane Mode Setting 360
Default SMS App Settings 362
Tethering & Portable Hotspot Settings 363
Virtual Private Networks (VPN) 364
Prepare Your Phone for VPN Connection 365
Set Up Secure Credential Storage 365
Add a VPN Connection 367
Connect to or Disconnect from a VPN 369
Mobile Networks Settings 373
Cell Broadcasts Settings 375
Harman/Kardon Audio Settings.... 376
Sound Settings 377
Display Settings 379
Clip Now Settings 380
Storage Settings 382
USB Connection Settings 383
Battery Settings 383
Apps Settings 384
Location Services Settings.... 386
Security Settings 388
Lock Screen Settings 398
Language & Input Settings 408
Backup & Reset 410
Accounts 414.
Date & Time Settings 416
Accessibility Settings 418
Printing 420
Activate This Device 421
System Updates 422
About Phone 424
Copyright Information 425
For Assistance 429
Troubleshooting 429
Specifications 431
Sprint Account Information and Help 432
Sprint Account Passwords 432
Manage Your Account 432
Sprint Support Services 433
Index 434
Introduction
The following topics describe the basics of using this guide and your new phone.
About the User Guide
Thank you for purchasing your new AQUOS Crystal. The following topics explain how best to use this guide to get the most out of your phone.
Before Using Your Phone
Read "Get Started" and "Important Information Booklet" thoroughly for proper usage.
Accessible services may be limited by subscription contract conditions.
Descriptions in the User Guide
Note that most descriptions in this guide are based on your phone's setup at the time of purchase. Unless otherwise noted, instructions begin from the phone's home screen, which is displayed by touching. Some operation descriptions may be simplified.
Screenshots and Key Labels
Screenshots in the user guide may appear differently on your phone. The status bar and keys displayed at the bottom of the display are omitted from screenshots where unrequired in explanations. Key labels in the user guide are simplified for description purposes and differ from your phone's display.
Other Notations
In the user guide, the phone may be referred to either as "phone," "device," or "handset." microSD™, microSDHC™ or microSDXC™ card is referred to as an "SD Card," "memory card," or "storage card."
Get Started
The following topics give you all the information you need to set up your phone and wireless service the first time.
! Cautions Handling Your Phone
Touchscreen: Your phone uses liquid crystal in its display. When wearing polarized sunglasses and depending on the angle, the screen may appear dark or distorted.
Do not put a sticker or shield (commercially-available protective film, privacy protector shield, etc.) on the display.
Charger/Accessory Jack: Inserting an accessory into the incorrect jack may damage the phone.
Parts and Functions
These topics illustrate your phone's primary parts and key functions.
Phone Layout
The following illustration outlines your phone's primary external features.
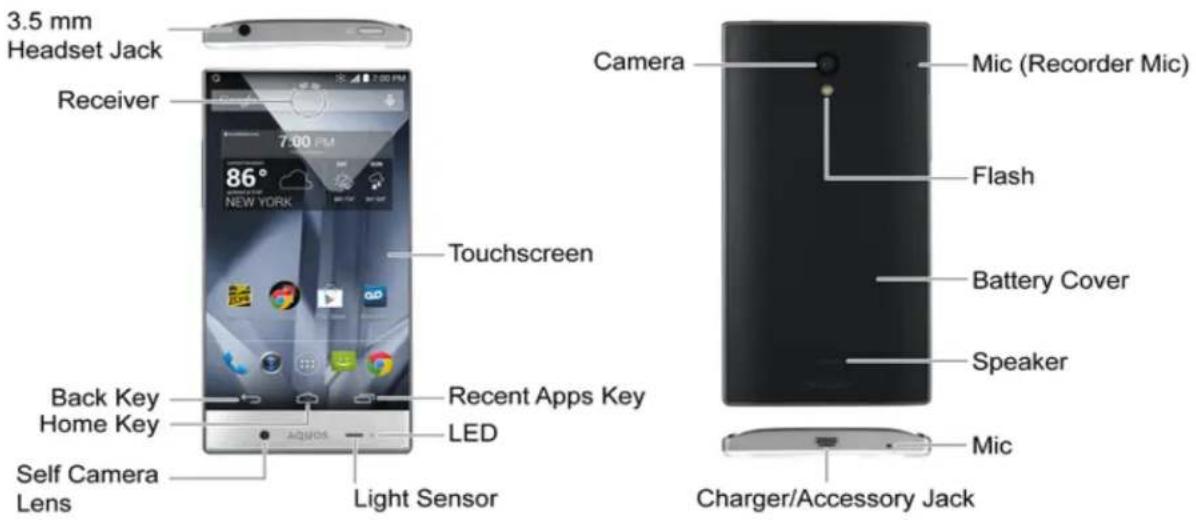
| Part Description | |
| 3.5 mm Headset Jack Allows | you to plug in either a stereo headset or an optional headset for convenient, hands-free conversations. |
| Receiver Lets you hear the other party’s voice during a call. For details on the receiver, see Direct Wave Receiver. | |
| Part Description | |
| Back Key← | Lets you return to the previous screen, or close a dialog box, options menu, the notifications window, or onscreen keyboard (for keyboard, changes to ↓, Drag or swipe ← up to open Assistant/Google. |
| Home Key Returns you to the home screen. Drag or swipe up to open Assistant/Google. | |
| Self Camera Lens Takes pictures and records videos while facing the screen, and allows you to video conference. | |
| Touchscreen Displays all the information needed to operate your phone, such as the call status, the Contacts list, and the date and time. Also provides one-touch access to all of your features and applications | |
| Recent Apps Key Displays recently-used applications. Drag or swipe up to open Assistant/Google. | |
| LED Displays a phone notification, charging status, or alert. | |
| Light Sensor Detects ambient light level. | |
| Camera Lets you take pictures and videos. | |
| Charger/Accessory Jack Allows you to connect the AC adapter or the USB cable (included). | |
| Mic (Recorder Mic) | Captures ambient sounds while recording videos. |
| Flash | Helps illuminate subjects in low-light environments when the camera is focusing and capturing a picture or video. |
| Battery Cover | Accesses SIM card and SD card. |
| Speaker | Lets you hear the different ringtones and sounds. The speaker also lets you hear the caller's voice in speakerphone mode. |
| Mic | Talk to other party through this. |
Keys
The following illustration outlines your phone's keys.

| Part Description | |
| Power Key | Lets you turn the phone on or off or turn the screen on or off, or switch your phone to silent mode, vibration mode, or airplane mode. |
| Volume Up/Down Keys Allow | s you to adjust the ringtone or media volume or adjust the voice volume during a call. |
Direct Wave Receiver
The phone is equipped with a "Direct Wave Receiver" which transmits sound by vibrating the display area. You can call without needing to worry about where to place your phone although there is no hole in the receiver. We recommend the following usage for better hearing.
Hold the Phone to Your Ear
Hold the receiver so that it covers your ear as much as possible and blocks out surrounding noise for clearer sound. Adjust the position of the phone up, down, left or right to suit your hearing and the surrounding environment.
Direct Wave Receiver Cautions
Do not put a sticker, sheet, etc. on the display. The other party's voice may become hard to hear.
■ Make sure not to cover the mic with your finger etc. when you talk on the phone. - When an earphone (commercially available) is connected to the phone, sound is from the earphone instead of the Direct Wave Receiver.
■ How well sound can be heard differs with each individual. ■ How well sound can be heard depends on the surrounding environment.
SIM Card
The SIM card is an IC card containing phone number and other customer information.
Handling SIM Card
Keep the following in mind when handling a SIM card.
- Customer is responsible for any damage caused by inserting SIM card in another-brand IC card reader, etc. The company is not responsible in such case. ■ Always keep the IC chip clean. ■ Wipe clean with a dry, soft cloth. ■ Avoid applying labels. May damage SIM card. ■ See instructions included with SIM card for handling. ■ SIM card is the property of the company. ■ SIM card is replaceable (at cost) in case of loss/damage. ■ Return SIM card to the company when cancelling subscription. ■ Returned SIM cards are recycled for environmental purposes. ■ Note that SIM card specifications and performance may change without notice.
- It is recommended that you keep a separate copy of information that is stored on SIM card. The company is not responsible for damages from stored information that is lost. ■ Always follow emergency procedures to suspend service if your SIM card or phone (SIM card inserted) is lost/stolen. For details, contact Customer Service. ■ Always power off phone before inserting/removing SIM card.
Insert SIM Card
Follow these instructions to insert a SIM card. Remember to power off your phone before inserting a SIM card.
If your phone has become warm, insert after it has cooled. May cause burns.
Note: Your phone's SIM card should be preinstalled.
- Remove the battery cover.

- Lift where marked ○ (indent) and create a gap between the battery cover and the phone. Continue by sliding your finger completely around the phone under the battery cover to remove.
- Insert SIM card in SIM card slot.

- Insert gently being careful of SIM card orientation (notch/(gold) IC chip facing downward).
Note: To remove the SIM card, lightly press in and release. After the SIM card pops out, pull it out gently without bending.
- Attach the battery cover.

- Press firmly where marked o so there are no gaps. Be careful not to press excessively and damage the battery cover.
Phone Memory/SD Card
Your phone supports the use of an optional SD card (not included) to expand its storage capacity. It supports cards up to 128 GB. Some cards may not operate properly with your phone.
The phone's memory is also available for storing data such as system data, apps, and captured pictures/videos.
! SD Card Cautions
Content saved in phone memory/SD card: Content stored in the phone's memory/SD card may be altered/lost due to accidents, malfunctions, repairs, phone replacement, or other handling. Back up important information regularly. The company is not responsible for damages from stored information that is altered/lost.
Reading/Writing Data: Never power off while reading or writing data.
SD cards used on other mobile phones: A message indicating there is app data on the SD card may appear if the SD card was used on another mobile phone (a device prior to model upgrade, etc.). First transfer the data on the SD card to your phone with the following steps to use the data.
- Drag the status bar down and open the notifications window > Follow the instructions in the message.
- If there are folders and files with the same names in phone memory as on the SD card, a prompt appears for whether to overwrite folders/files. Use adequate caution, as overwritten data in phone memory cannot be restored.
Battery Level: A low battery charge may prevent reading/writing to the SD card.
Phone memory: By default, pictures, videos, and other media files captured on your phone are saved in phone memory. Applications (third-party) you download may indicate that files are saved to an SD card, however, they are saved to your phone's memory.
Handling SD Card: Use/store SD cards away from the reach of infants. May cause choking if swallowed.
Insert SD Card
Follow these steps to insert an optional SD card (not included). Make sure to power your phone off before inserting or removing an SD card.
If your phone has become warm, insert after it has cooled. May cause burns.
- Remove the battery cover.

- Lift where marked ○ (indent) and create a gap between the battery cover and the phone. Continue by sliding your finger completely around the phone under the battery cover to remove.
- Insert SD card.

- Insert SD card gently all the way in without bending and with terminals facing downward.
- Attach the battery cover.

- Press firmly where marked o so there are no gaps. Be careful not to press excessively and damage the battery cover.
Unmount SD Card
Always unmount the SD card before removing it from your phone.
- From home, touch Ⓗ > Settings Ⓗ.

2. Touch Storage.
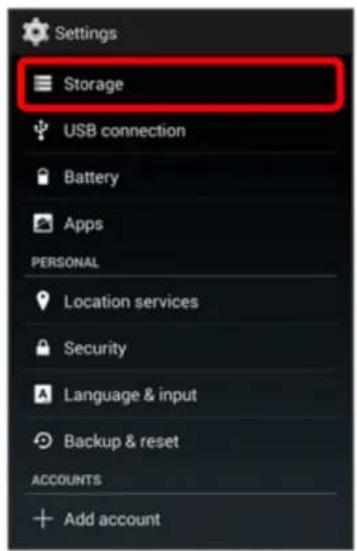
3. Touch Unmount SD card.

4. Touch OK.

The menu option name changes from Unmount SD card to Mount SD card. The card is now unmounted.
Remove SD Card
Follow these instructions to remove an SD card. Always power the phone off before inserting or removing an SD card.
If your phone has become warm, remove after it has cooled. May cause burns.
1. Remove the battery cover.

- Lift where marked o (indent) and create a gap between the battery cover and the phone. Continue by sliding your finger completely around the phone under the battery cover to remove.
- Remove SD card.

• Pull SD card by tab gently without bending.
- Attach the battery cover.

- Press firmly where marked ○ so there are no gaps. Be careful not to press excessively and damage the battery cover.
Format SD Card
When you insert an optional SD card for the first time, it is recommended that you format it on your phone.
■ Formatting deletes all SD card files. - Charge handset while formatting or charge it adequately beforehand.
- From home, touch ⚙ > Settings ⚙️.

- Touch Storage.

- Touch Erase SD card.

- Touch Erase SD card.
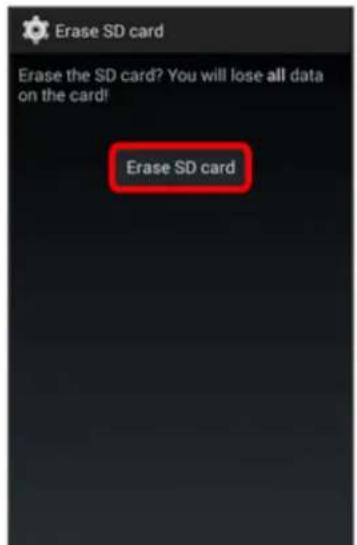
5. Touch Erase everything.
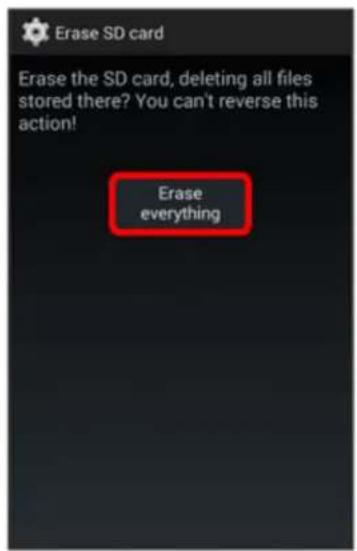
All data on the SD card is erased, and the card is formatted and mounted for use on your phone.
Charge the Battery
Follow these instructions to charge your phone's battery using either the included AC adapter or via a USB connection on your computer.
The battery is built into the phone.
If your phone or the AC adapter is wet, never connect the micro USB plug. May cause fire, malfunction, or burns due to electric shock or short-circuiting. Always dry before use.
Troubleshooting
Question: LED blinks during charging.
Answer: Battery is not being charged. Charge with specified AC adapter.
Question: Cannot charge while abroad.
Answer: The company is not responsible for any trouble with charging while abroad.
! Battery Cautions
Handling cables: Do not pull or twist cables forcefully. Doing so may break wires.
When charging by USB: When your phone and a computer are connected by the micro USB cable for computer, your phone may turn on automatically. Do not connect your phone and a computer where use is prohibited, such as on airplanes and in hospitals.
Storage: To help maintain performance and life of internal battery, do not store in the following conditions.
• Full (immediately after charging is complete) • Exhausted (too low for phone to turn on)
Battery level should be at approximately 40% for optimal storage.
Bulges on internal battery: Depending on usage, bulges may appear near end of battery life; this does not affect safety.
When using flash: Your phone does not charge while flash is shining. Turning on flash with a low battery level may cause your phone to close the camera even while charging.
Charge Using the AC Adapter
Charge using the included AC adapter (XN-2QC25).
If your phone or the AC adapter are wet, never connect the micro USB plug.
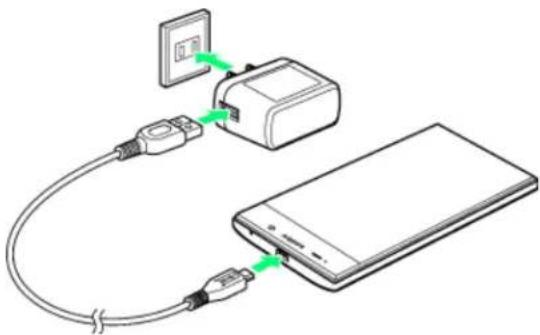
- Insert the USB plug on the micro USB cable into the USB port on the AC adapter.

- Insert the micro USB plug on the AC adapter into the charger/accessory jack on the bottom of your phone.
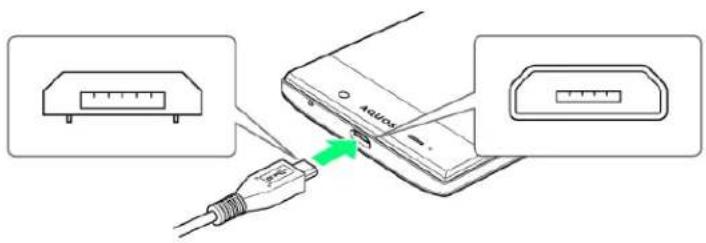
- Inserting the micro USB plug in the wrong orientation may damage the charger/accessory jack on the bottom of your phone. Insert after checking the contours and orientation of the micro USB plug.
- Plug the AC adapter into a standard electrical outlet.
After charging is complete, the LED goes out.
• Make sure that the LED glows red (when the battery is almost fully charged, it glows green).
- After charging, remove the micro USB plug on the AC adapter from the charger/accessory jack on the bottom of your phone, and unplug from the electrical outlet.
Charge Using a Computer Connection
Charge with the micro USB cable for computer.
Before using a computer connection to charge your phone, ensure that the computer is turned on. Depending on the type of connection, your phone's battery may not charge. If your phone or the micro USB cable for computer are wet, never connect the micro USB plug.
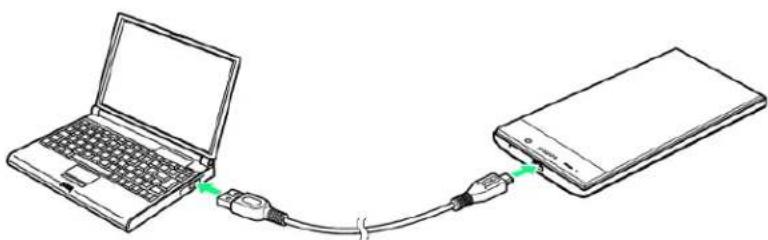
- Insert the micro USB plug on the micro USB cable for PC into the charger/accessory jack on the bottom of your phone.

- Inserting the micro USB plug in the wrong orientation may damage the charger/accessory jack on the bottom of your phone. Insert after checking the contours and orientation of the micro USB plug.
- Insert the USB plug on the micro USB cable for PC into the USB port on your computer.

After charging is complete, the LED goes out.
• Make sure that the LED glows red (when the battery is almost fully charged, it glows green).
- After charging, remove the micro USB cable from both the phone and the computer.
Turn Your Phone On and Off
The instructions below explain how to turn your phone on and off.
Turn Your Phone On
- Press and hold the Power key until the screen displays "SHARP".

Your phone will power on. Depending on the settings, you may see the lock screen.
- When using the phone for the first time, be sure to charge it first before turning it on. If the battery level is low, the phone may not turn on.
- See Lock and Unlock Your Screen and Screen Lock for information about using the screen lock.
- The first time you turn the phone on, you will see the startup screens. See Complete the Setup Screens for details.
- If your phone is not yet activated, see Activate Your Phone for more information.
Turn Your Phone Off
- Press and hold the Power key to open the phone options menu.

- Touch Power off to turn the phone off.

Your phone will power off.
Your screen remains blank while your phone is off (unless the battery is charging).
■ Touch Restart and then OK to restart your phone.
Use the Touchscreen
Your phone's touchscreen lets you control actions through a variety of touch gestures.
Touch
When you want to type using the onscreen keyboard, select items onscreen such as application and settings icons, or press onscreen buttons, simply touch them with your finger.

Touch and Hold
To open the available options for an item (for example, a contact or link in a Web page), touch and hold the item.

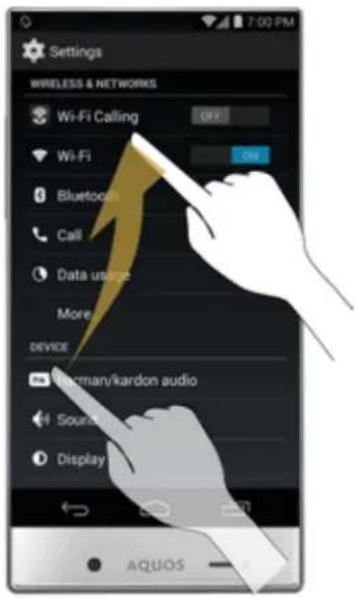
Swipe or Slide
To swipe or slide means to quickly drag your finger vertically or horizontally across the screen.

Drag
To drag, press and hold your finger with some pressure before you start to move your finger. While dragging, do not release your finger until you have reached the target position.

Flick
Flicking the screen is similar to swiping, except that you need to swipe your finger in light, quick strokes. This finger gesture is always in a vertical direction, such as when flicking the contacts or
message list.
Rotate
For most screens, you can automatically change the screen orientation from portrait to landscape by turning the phone sideways. When entering text, you can turn the phone sideways to bring up a bigger keyboard. See Touchscreen Keyboards for more details.

Note: The Auto-rotate check box needs to be selected for the screen orientation to automatically change. From home, touch ⏻ > Settings ⏱ > Display > Auto-rotate screen.
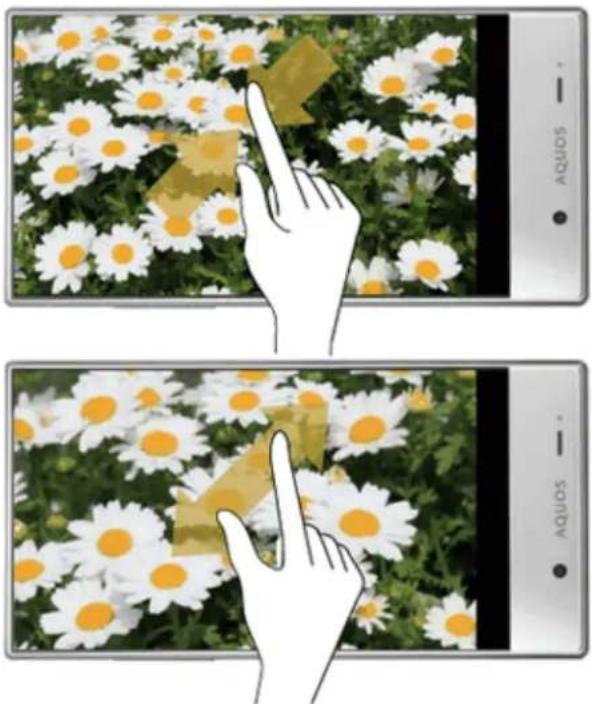
Pinch and Spread
"Pinch" the screen using your thumb and forefinger to zoom out or "spread" the screen to zoom in when viewing a picture or a Web page. (Move fingers inward to zoom out and outward to zoom in.)
Activate Your Phone
Follow the instructions below to activate your phone if it has not already been activated. Depending on your account or how and where you purchased your phone, it may be ready to use or you may need to activate it on your Sprint account.
- If you purchased your phone at a Sprint Store, it is probably activated and ready to use.
- If you received your phone in the mail and it is for a new Sprint account or a new line of service, it is designed to activate automatically.
- When you turn the phone on for the first time, you should see a Hands Free Activation screen, which may be followed by a PRL Update screen and a Firmware Update screen. Follow the onscreen instructions to continue.
If you received your phone in the mail and you are activating a new phone for an existing number on your account (you're swapping phones), you can activate on your computer online or directly on your phone.
• Activate on your computer:
- Go to sprint.com/activate and complete the online instructions to activate your phone.
• Activate on your phone:
Turn on your new phone. (Make sure the old one is turned off.) Your phone will automatically attempt Hands-Free Activation. - Touch Activate to override auto-activation and start the manual activation wizard. - Follow the on-screen prompts to complete the activation process.
To confirm activation, make a phone call. If your phone is still not activated, visit sprint.com/support for assistance. If you do not have access to the Internet, call Sprint Customer Service at 1-888-211-4727 from another phone.
Tip: Do not press the Power key while the phone is being activated. Pressing the Power key cancels the activation process.
Note: If you are having any difficulty with activation, visit sprint.com/support.
Complete the Setup Screens
The setup screens help you set up certain features and preferences on your phone. Once your phone has been turned on, you will see a Welcome message. You can then complete the setup process.
Note: You may be able to complete the setup screens before your phone has been activated on your Sprint account.
Note: During or after setup, you may see a Connections Optimizer notice. Read the notice and touch I agree to allow your phone to connect automatically to the best available data network, including Wi-Fi. To turn Connections Optimizer off at any time, from home, touch ⚙ > Settings > More... > Mobile networks > Automatic Connections > Connections Optimizer and uncheck the box. See Connections Optimizer for details.
including Wi-Fi. To turn Connections Optimizer off at any time, from home, touch ⚙ > Settings > More... > Mobile networks > Automatic Connections > Connections Optimizer and uncheck the box. See Connections Optimizer for details.

- From the Welcome screen, select a language (if prompted) and touch to get started.

Note: On the Welcome screen, there may also be an Accessibility button. If you are visually impaired or hard of hearing, touch Accessibility to change the accessibility settings.
- Follow the onscreen instructions to complete each section. For each topic, you will have the option to skip it and continue to the next screen.
- Select Wi-Fi – If prompted, follow the prompts to sign in to an available Wi-Fi network. For secured Wi-Fi networks, you will need to enter a password. See Wi-Fi for more details.

- Got Google? – Touch Yes and complete the steps to sign in to your current Google account, or touch No to sign up for a new Google account. You can also skip signing in to your Google account, or sign in later.
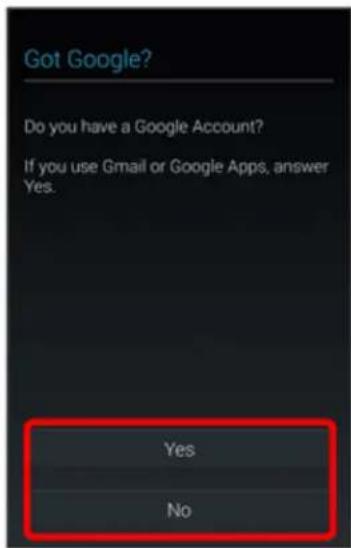
Google services – Select your Google services options, such as Backup & Restore, Location and Communication.
- Set up payment info – Select a payment option when purchasing on Google Play. Touch Continue and follow the onscreen instructions. To set up later, touch NOT NOW.
- This phone belongs to... – If applicable, enter your first and last name and touch . This information is used by the phone to personalize certain apps.

Your phone is now set up for use. If you skipped any part of the setup, you can access additional options through the Apps screen or through Settings.
Note: You do not need to sign up for a Google account to use your phone. However, to download apps from the Google Play Store app, you must link your phone to a Google account.
Set Up Smart Contacts
After completing setup, if the Smart Contacts application launches, follow the steps below. The Smart Contacts application may also launch after updating your phone's software.
Smart Contacts is powered by Yahoo!. Use a current Yahoo account, create a new account, or use your phone number to register.
- Swipe the screen left and read the information.

- Select the I accept the Terms of Service and Privacy Policy check box and then touch Let's get started.

- If you do not want to use Smart Contacts, touch I don't want to use this and the setup will end. The Smart Phone and Smart Contacts apps are displayed on the apps list screen. Touch either app icon to start the setup process again.
- Touch Sign in with Yahoo or I do not have a Yahoo account.
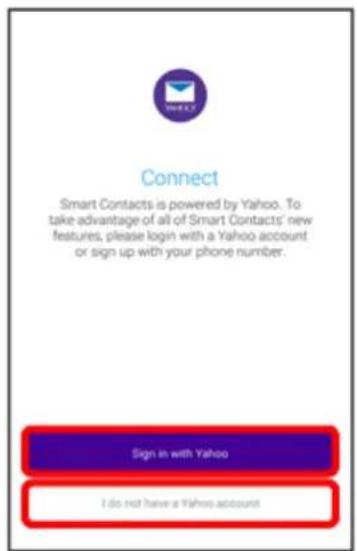
- If you select Sign in with Yahoo, follow the onscreen instructions to sign in with an existing ID or create a new one.
- If you select I do not have a Yahoo account, follow the onscreen instructions to create your Yahoo account.
- Touch Sign in with Facebook or Skip.

- If you select Sign in with Facebook, follow the onscreen instructions to sign in to your Facebook account.
Smart Contacts is set up. The Smart Phone and Smart Contacts apps are displayed on the apps list screen.
Basic Operations
The following topics outline basic features and operations of your phone.
Basics
The following topics offer an overview of your phone's basic operations.
Home Screen and Applications (Apps) List
Most of your phone's operations originate from the home screen or the apps list.
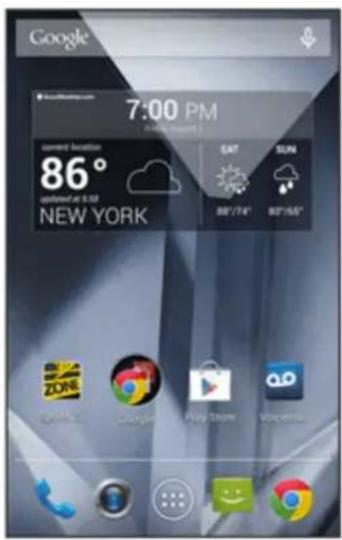

- Touch 📄 to return to the home screen from any other screen.
- From home, touch 📋 to display the apps list (Applications).
For information about using the home screen, see Home Screen.
Select Options and Navigate Screens
Touch icons, onscreen keys, and other items to open or activate the assigned function.
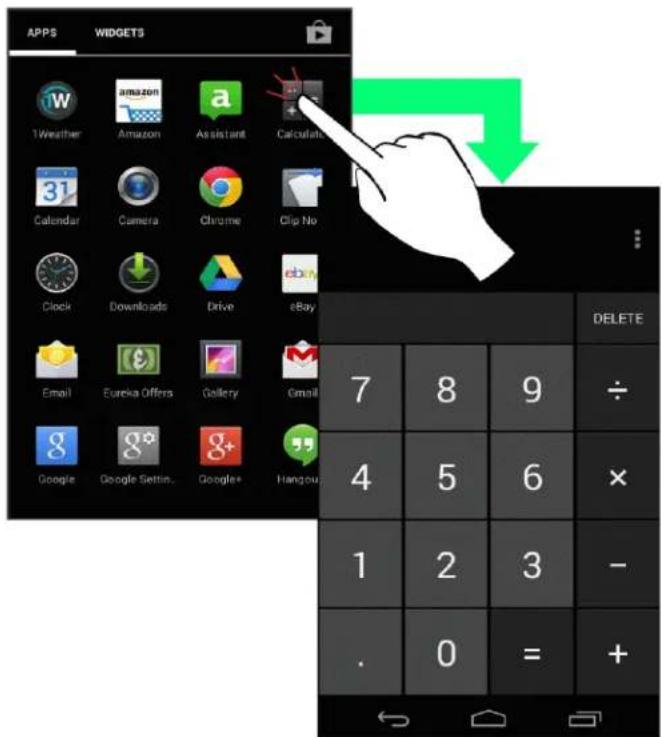
■ Touch ← to return to the previous screen.
Menu Operations
You can display options menus using the app-specific menu icon, or by touching and holding a screen area, depending on your current app.
- Touch to view available settings and options.

Phone Settings Menu
You can customize your phone's settings and options through the Settings menu.
- From home, touch ⚙ > Settings ⚙️.

- or -
- Drag the status bar down and touch > SETTINGS

For more information, see Settings.
Portrait and Landscape Screen Orientation
The default orientation for your phone's screen is portrait (vertical), but many apps will change to landscape orientation (widescreen) when you rotate the phone sideways.
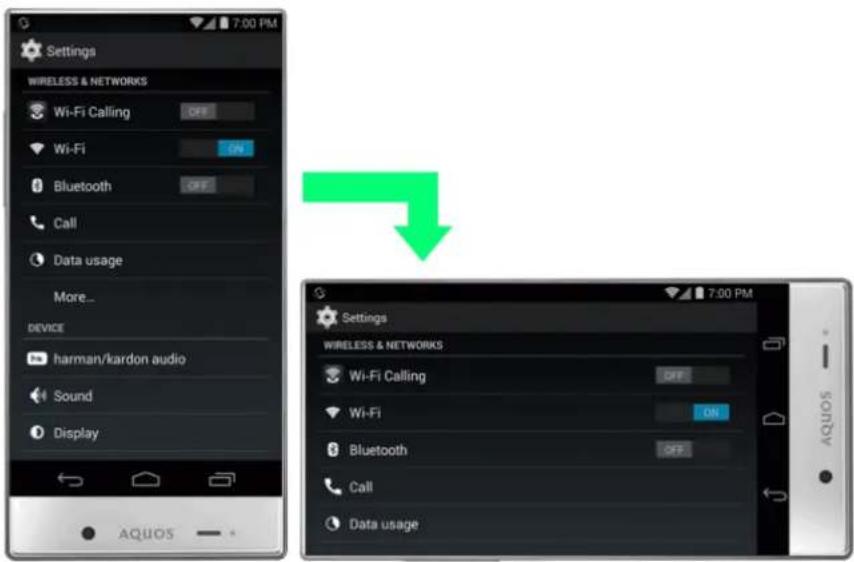
Note: Not all screens will adjust for landscape orientation.
Note: The Auto-rotate check box needs to be selected for the screen orientation to automatically change. From home, touch ⏻ > Settings ⚙️ > Display > Auto-rotate screen.
Capture Screenshots
You can use your phone's Power key and Volume Down key to capture screenshots.
- Press and hold the Power key and Volume Down key at the same time to capture a screenshot of the current screen.

The current screenshot will be captured and stored in the Screenshot album in the phone's Gallery. From home, touch > Gallery.
Note: You can capture and manage screenshots more easily by using Clip Now. For more information on Clip Now, see Clip Now.
Applications
The following topics describe how to access the applications (apps) list and launch apps on your phone.
Launch Applications
All installed apps can be accessed and launched from the apps list.
- From home, touch


The apps list opens.
- Touch an app icon to launch the corresponding application. You may need to scroll left or right to find a specific app.


The application opens.
Apps List
The apps list expands to include any apps you download and install on your phone. The following table outlines the primary apps that have been preinstalled on your phone.
| App Function/Service | |
| [0367] 1Weather | Get real-time local weather and worldwide forecasts on the free 1Weather app. |
 Amazon Amazon | Shop for items from a broad range of products available on Amazon. Search by keyword or by scanning a barcode. |
 Assistant Assistant | Assistant is a talking personal assistant. By speaking to your phone, your assistant finds information, launches applications, etc. Also, it can connect you to Web services such as Google, Twitter, Facebook, and more. |
 Calculator Calculator | Use basic math, percent, and root operations. Includes memory function for a variety of operations. |
| [X03H] Calendar | Check a calendar and manage a scheduled events. Toggle between day, week, and month calendar views. You can also sync online with Google Calendar. |
 Camera Camera | Take pictures or videos with the autofocus-capable camera. You can change picture size, white balance, and other settings to take pictures/videos. Continuous shooting is also possible. You can also display setting icons to make setting changes easily. |
| [72CK] Chrome | Access the Internet for Web searches and surfing. Supports syncing with your computer's Chrome app to link with bookmarks and other data. Also supports privacy features such as an incognito tab. |
 Clip Now Clip Now | You can view and manage screenshots captured using Clip Now. |
 Clock Clock | Use the alarm, world clock, stopwatch, and timer. Check times in different regions around the world with the world clock. You can also add regions and check times for several regions simultaneously. |
| [X7Y4] Downloads | Use the browser to check a list of all downloaded files. Files that are sorted by time can be re-sorted by size, and you can select and delete several downloaded files together. |
 Drive Drive | Google Drive is Google's online storage service. You can save and share files with Google Drive. |
| [93W4] eBay | Browse, bid, buy, sell, and manage your eBay listings on the go. |
 Email Email | Registering an email account allows you to send and receive home and office Internet mail on the go. You can register several Internet mail accounts on your phone. |
 Eureka Offers Eureka Offers | The Eureka Offers app lets you find local and major brand deals and special offers, scan and load store cards, share good finds, and more. |
| [4TH0] Gallery | You can view and edit pictures or videos taken with your phone or downloaded, as well as share them with friends. |
 Gmail Gmail | Allows you to use Gmail, Google's email service, anywhere and at any time. Enter keywords to search mail and add labels to sort your mail. |
| [XX68] Google | Use Google Search to look for Internet information and apps for your phone. View Web pages around the world as well as different information such as maps, videos, business locations, and train routes. |
| [2TBT] Google Settings | Google settings app allows you to access Google+ and apps linked to Google+, as well as complete settings all together for Google Maps, Google Search, and other Google services. |
| [0301] Google+ | Google's social networking service. You can group and register your friends, family, friends with the same interest, etc., in circles and share information with users in those circles. |
| [4WZ6] Hangouts | Use pictures, emoji, video hangout, etc., to enjoy free-of-charge conversations one-on-one or in a group. You can also elect to use Hangouts as your phone's default messaging app for text and multimedia messages. |
| [S2CA] Lookout Security | The Lookout Security and Antivirus app offers protection against mobile threats, phone loss, and theft. |
| [WXKT] Lumen Toolbar | Install the Lumen Toolbar in your browser for more enjoyable and convenient browsing, including Web page sharing (Facebook, Twitter, etc.), app searches/downloads, etc. You can also customize the Lumen Toolbar. |
| [0364] Maps | Google's location app lets you display a map of your current location or search for a route to a destination. You can view traffic information and aerial views. Street view, 3D view, as well as a compass mode are available. |
| [CCKK] Messaging | Use SMS (Short Message Service) and MMS (Multimedia Message Service). SMS allows short messaging between mobile phones. MMS allows you to send/receive pictures, audio, videos, etc., together with your message. |
| [1590] Messaging+ | Text, chat, video call, share files and more with Messaging Plus, the app that brings your conversations to life. |
| [8761] NASCAR | NASCAR Mobile is the official app of NASCAR. This app provides easy enjoyment of the latest news, videos, LIVE NASCAR events, Live Leaderboard, etc. |
| [TWGC] NBA Game Time | NBA Game Time gives you unlimited live coverage of every NBA game. Get stats, scores, rosters, updates, and more. |
| [2T47] NextRadio | Enjoy FM radio. Check album covers and music information, purchase new favorites, share music on Facebook or Twitter, etc. |
[2X08] OfficeSuite | This application allows you to view or create Microsoft Word®/Excel®/PowerPoint® files, PDFs, etc.People Add phone numbers and email addresses. In addition to an email address, you can add a birthday, nickname, etc. You can also set a ringtone for each added contact. |
 | Phone Place and receive phone calls. Also allows you to call abroad. You can view incoming and outgoing call logs to check calls, or place a call from the logs. |
 | Photos You can view and edit pictures or videos taken with your phone, as well as back up them on Google+. |
| [2ATK] | Play Books Read your favorite books and authors from anywhere. Select from among millions of books, including new titles, New York Times best sellers, up-and-coming authors, and free books. |
| [26KG] | Play Games Enjoy Google Play games in one place. You can discover new games, manage your game playing and scores, and enjoy multiplay with friends around the world easily. |
 | Play Movies & TV You can use the Google Play Movies & TV app to watch movies and TV shows you have rented or purchased from the Google Play Store app as well as personal videos you have stored on your phone. |
 | Play Music The Play Music application works with Google Play Music, Google's online music store and streaming service. You can stream via mobile data or Wi-Fi and listen to favorite songs that you've added to your online Google Play Music library. You can also play audio files you've copied directly to your device from a computer. |
 | Play Newsstand Check a variety of news information (free/paid) at one location. Also enjoy audio and video. |
 | Play Store Download a variety of apps (free/paid) from Google Play. Change your phone setting for manual/automatic updating of downloaded apps. |
 | Scout ScoutTM is a daily personal navigator designed to save you time and money with hassle-free GPS navigation, local search and live traffic. |
 | Settings You can change and check all phone settings, including sound/vibration, wallpaper/display, basic settings, as well as app settings for calls, email, and browser. |
 | Smart Contacts Launches the Smart Contacts application. This app from Yahoo! can serve in place of the pre-installed Phone and People apps, and it also lets you check SMS messages and link with Facebook. |
 | Smart Phone Launches the Smart Phone application. This app from Yahoo! can serve in place of the pre-installed Phone and People apps, and it also lets you check SMS messages and link with Facebook. |
 | Spotify Spotify is a worldwide music streaming service. You can access and choose from millions of tracks, listen to artists and albums, or create your own playlist of your favorite songs. |
| [BYWH] Sprint ID | Sprint ID is a single pack containing apps, ringtones, wallpapers, widgets, etc. You can easily install several ID packs, and switch between ID packs in a few simple touches. |
| [2YBD] Sprint Money Express | Make payments, purchases, and manage your cash from your Android phone or linked Visa Prepaid card. The Sprint Money ExpressTM app offers a wide array of financial features. |
 Sprint Music Plus Sprint Music Plus | With Sprint Music Plus and the Music Store, Ringtone Store, and Ringback Tone Store, you can purchase, download, and play music, ringtones, and ringback tones for your phone. |
 Sprint TV & Movies Sprint TV & Movies | Sprint TV & Movies lets you watch live TV and access movies and other on demand entertainment on the go. |
| [4C0W] Sprint Zone | Sprint Zone provides convenient access to your Sprint account, featured apps for your device, Sprint news, support, and more. |
| [6STW] Voice Dialer | Use Voice Dialer to make calls and launch apps using just your voice. |
 Voice Search Voice Search | Speak search keywords into your phone instead of typing to search for a variety of information. Displays a range of information including websites maps, videos, locations/train routes to businesses, etc. |
 Voicemail Voicemail | You can quickly access messages from the message list without dialing voicemail. Easily select, play back, and erase messages as well as call back, etc. |
| [96K4] YouTube | Enjoy the many different video contents uploaded to YouTube. You can play back videos on your phone in high-quality mode. |
Applications other than the above may appear.
Phone Number
Follow the instructions below to display your phone's wireless phone number.
- From home, touch ⚙ > Settings ⚙️.

- Touch About phone.

3. Touch Status.

You will see the number listed under "My phone number".
Silent Mode/Airplane Mode
The following topics explain how to use your phone's Silent Mode and Airplane Mode settings.
Silent Mode
Silent mode sets your phone's ringtone, operation sounds, notifications, etc., not to sound to avoid disturbing others around you.
Note: Camera shutter, video start/stop tones, and certain other sounds may still be active during silent mode.
To set silent mode:
- Press and hold the Power key to display the device options menu.
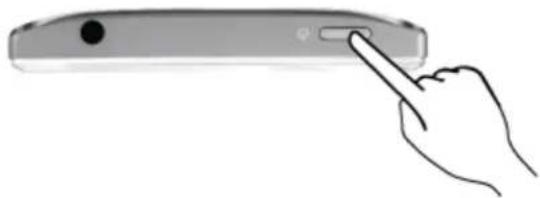
2. Touch


Your phone is now in silent mode.
To restore sound settings:
- Press and hold the Power key to display the device options menu.

2. Touch


Your phone's sound settings are now restored.
Airplane Mode
Airplane mode turns off all functions that emit or receive signals, while leaving your phone on so you can use apps that don't require a signal or data.

Airplane Mode Cautions
If you turn on airplane mode while Wi-Fi and Bluetooth are enabled, connectivity with either is then disabled. Any data communication occurring when airplane mode is turned on is discontinued.
If Wi-Fi or Bluetooth® are turned on after turning on airplane mode, you can connect with Wi-Fi or Bluetooth® even while in airplane mode. Use these functions after confirming that communication is permitted in your location.
To turn on airplane mode:
- Press and hold the Power key to display the device options menu.

- Touch Airplane mode.

Your phone is now in airplane mode. You will see the airplane mode icon in the status bar.
To turn off airplane mode:
- Press and hold the Power key to display the device options menu.

2. Touch Airplane mode.


Your phone's wireless connection features are now restored.
Enter Text
You can type on your phone using one of the available touchscreen keyboards or Google voice typing.
Touchscreen Keyboards
Your phone offers you a choice of two touchscreen keyboards for entering text. The keyboard appears automatically onscreen when you touch a text entry field, and they can be used in either portrait or landscape mode. You can also use the Google voice typing option to enter text using your voice (see Google Voice Typing for details).
The methods available include:
- Google keyboard lets you use a traditional QWERTY setup to enter text. Additional options expand your ability to enter text faster and more accurately. See Google Keyboard for details.
- Swype lets you enter letters and words in one continuous motion by swiping your finger across the letters. See Swype for details.
Google Keyboard
The Google keyboard offers a traditional QWERTY keyboard setup for entering text by touching keys (like on a computer), along with enhancements and options that allow you to enter text faster and more accurately, such as continuous key input, personalized usage dictionaries, and more.
For Google Keyboard settings, see Language & Input Settings.
Assigning Google Keyboard for Text Entry
- From home, touch ⚙ > Settings ⚙ > Language & input.

- Touch Default.

When the Google Keyboard check box is not selected, enter the check mark in the box.
- Select Google Keyboard.

Using Google Keyboard
- Touch to change the case of the text. Touch twice quickly to switch to all capitals.
- Touch ?123 to switch to a keyboard for entering symbols.
- Touch to enter a period. Touch and hold to enter a symbol. ■ Touch 🙏 to enter emoji. ■ Touch to delete text.
- Touch the icon to switch to Google voice typing. Touch and hold to configure input settings.
- If Swype is enabled in addition to Google Keyboard, touch and hold the Space bar and then you can choose the input method.
Swype
The Swype™ keyboard lets you enter words by drawing a path from letter to letter in one continuous motion. When you enter the first letter of a next word, a space is automatically added.
For Swype settings, see Language & Input Settings.
Assigning Swype for Text Entry
- From home, touch Settings > Language & input.

2. Touch Default.
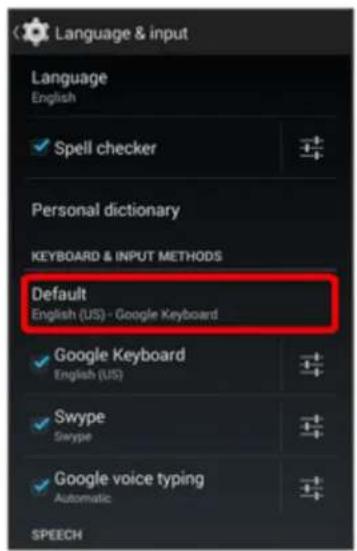
- When the Swype check box is not selected, enter the check mark in the box.
3. Select Swype.

Using Swype
- Touch the text entry field to display the onscreen keyboard.
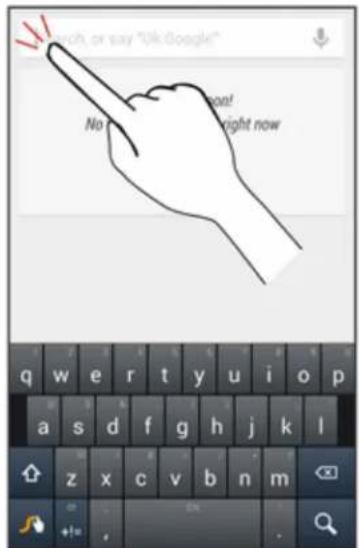
- Slide your finger slowly across each letter of the word you want to input.

- Release your finger when the word you want is displayed in the middle of the suggestion strip. Touch a word to select it.

For more information about using Swype and its additional capabilities, including using voice entry and personalizing your Swype dictionary, touch and hold the Swype keyboard display and then touch Help > How to Swype. You can also visit swype.com for more information.
Google Voice Typing
Google voice typing uses Google voice recognition to convert speech to text.
For Google voice typing settings, see Language & Input Settings.
- Touch the microphone icon or the keyboard icon from a screen where you can enter text.


- Speak into the phone.

• If the text is incorrect, touch DELETE.
- Touch English (US) (depends on selected language) to switch to the language that Google voice typing is to recognize. Select the language you want to use beforehand by touching Add more languages and clearing the check box.
- Touch to return to the onscreen keyboard.
Tips for Editing Text
These tips allow you to cut or copy selected text and paste it into a separate selected area. For more information on entering text, see Language & Input Settings.
- In a text entry field, touch and hold or touch the text twice quickly.

- Drag the handles to the left or right to select the desired text.
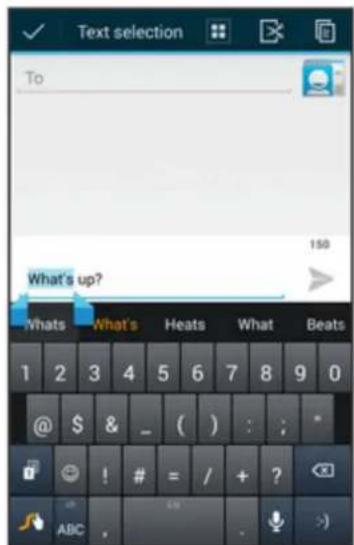
- Touch Select all to select all text.
- Touch an option at the top of the screen.

• Cut: Removes the selected text and saves it to the clipboard.
• Copy: Copies the selected text to the clipboard.
- Paste: Overwrites the selected text with the last copied or cut text. To insert it, touch the position where you want to insert, then touch > PASTE. This icon appears when you have cut or copied text.
Google Account
You will need a Google account to access several phone features such as Gmail, Google Maps, Hangouts, and Google Play applications. Before you can access Google applications, you must enter your account information. These applications sync between your phone and your online Google account.
Google Account Cautions
Google account email address and password: Be careful not to forget your Google account email address and password.
Phone operation and display when using your Google account: Operation and display may change due to automatic app updates, etc.
Create a Google Account
If you do not already have a Google account, you can create one online or using your phone.
Note: You can also create and sign into your Google/Gmail account through your phone's Setup application.
Note: Although you need a Gmail account to use certain features of your phone, such as Google Play, you do not need to use Gmail as the default account for your phone.
Create a Google Account Online
- From a computer, launch a web browser and navigate to google.com.
- On the main page, click Sign in > Create an account.
- Follow the onscreen prompts to create your free account.
- Look for an email from Google in the email box you provided, and respond to the email to confirm and activate your new account.
Create a Google Account Using Your Phone
- From home, touch ⚙ > Settings ⚙ > Add account.

- Touch Google and then touch New.
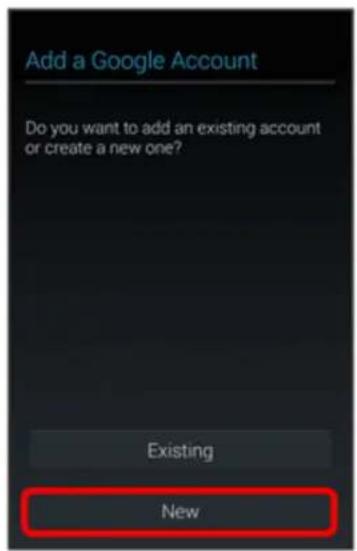
- Enter your First name and Last name, and then touch ▶.

- Enter a desired Username, and then touch

- When prompted, enter and re-enter a password and then touch

- Touch Set up recovery options, and then enter a phone number and secondary email address. Specify your region and then touch .

• If you touched Not now, proceed to step 7.
Note: When setting up a new Google account, either on your phone or online, you will be prompted to add a secondary email address. Enter a second Gmail address or any other email address from which you currently send and receive email. This address is used to authenticate your account should you ever encounter problems or forget your password. It is strongly encouraged for Android users so you can regain access to Google services and purchases on your phone.
- Select whether to back up your system settings, etc., to your Google account, specify whether to receive news and other information from Google Play, and then touch .

- Touch I accept, enter the displayed text, and then touch

- Touch Not now.

- To use Google+, touch Get started and follow the onscreen instructions.
- Touch NOT NOW.

- To specify a payment method, touch an option > Continue, and then follow the onscreen instructions.
You are signed in to your Google account, and your phone will be synchronized with it.
Sign In to Your Google Account
If you have a Google account but have not yet signed in with your phone, follow these instructions to sign in to your Google account.
- From home, touch ⏻ > Settings ⏱ > Add account.

- Touch Google, and then touch Existing.

- Enter your Gmail username and password, and then touch

- After touching OK in the confirmation screen, touch Not now.

• To use Google+, touch Get started and follow the onscreen instructions.
- Select whether to back up your system settings, etc., to your Google account, specify whether to receive news and other information from Google Play, and then touch .

6. Touch NOT NOW.

- To specify a payment method, touch an option > Continue, and then follow the onscreen instructions.
You are signed in to your Google account, and your phone will be synchronized with it.
Google Play Store
Google Play™ is the place to go to find new Android apps, books, movies, and music for your phone. Choose from a wide variety of free and paid content ranging from productivity apps and games to bestselling books and blockbuster movies and music. When you find what you want, you can easily download and install it on your phone.
To access the Google Play store app, you must first connect to the Internet using your phone's Wi-Fi or mobile data connection and sign in to your Google account. See Browser and Sign In to Your Google Account for details.
! Google Play Cautions
Installing Applications: Many different kinds of applications can be installed on your phone from Google Play (provided by Google Inc.). The company is not responsible in any way for user-installed applications (quality, reliability, legality, fitness for a purpose, credibility, accuracy, etc.) or resulting malfunctions (viruses, etc.).
Purchasing Applications: Purchase apps at your own risk. The company is not responsible for any disadvantage resulting for user or third parties.
Phone operation and display when using Google Play: Operation and display may be changed due to automatic app updates, etc.
Important: Our policies often do not apply to third-party applications. Third-party applications may access your personal information or require us to disclose your customer information to the third-party application provider. To find out how a third-party application will collect, access, use, or disclose your personal information, check the application provider's policies, which can usually be found on their website. If you aren't comfortable with the third-party application's policies, don't use the application.
Find and Install an App
When you install apps from Google Play app and use them on your phone, they may require access to your personal information (such as your location, contact data, and more) or access to certain functions or settings of your phone. Download and install only apps that you trust.
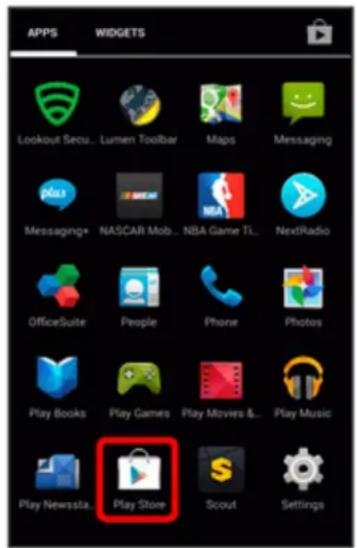
1. From home, touch 🎨 > Play Store

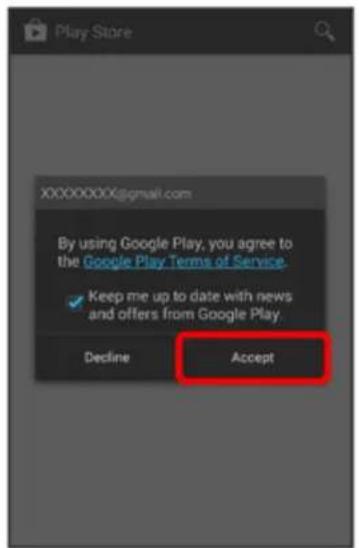
- When you open the Google Play store app for the first time, the Terms of Service window will appear. Touch Accept to continue.
- Browse through the categories (Apps, Games, Movies & TV, Music, Books, or Newsstand), find an item you're interested in, and touch the name.
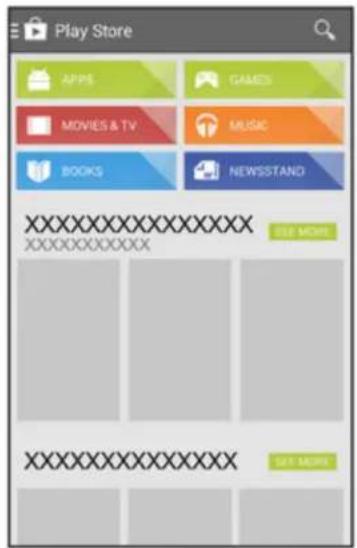
- Browse through featured apps. Scroll through the list of featured apps when you open Google Play.
- Browse apps recommended by Sprint. Touch Apps > SPRINT, and then scroll through the list.
- Search for an app. Touch Search Google Play 📋 on the Google Play home screen, enter the name or type of app you're looking for, and then touch 📋 on the keyboard.
- Touch an app to read a description about the app and user reviews.
- Touch INSTALL (for free applications) or the price (for paid applications).
Note: You can use a Google Wallet account to purchase items on Google Play. See Google Wallet to set up a Google Wallet account if you do not have one.
- The subsequent screen notifies you whether the app will require access to your personal information or access to certain functions or settings of your phone. If you agree to the conditions, touch ACCEPT to begin downloading and installing the app.
If you selected a paid application, after touching ACCEPT, a screen for selecting a payment method appears before the application is downloaded to your phone.
The selected app is downloaded and installed on your phone.
Warning: Read the notification carefully! Be especially cautious with applications that have access to many functions or a significant amount of your data. Once you touch OK on this screen, you are responsible for the results of using this item on your phone.
Purchasing Applications
Purchase apps at your own risk. The company is not responsible for any disadvantage resulting for user or third parties.
Request a Refund for a Paid App
If you are not satisfied with an app, you can ask for a refund within 15 minutes of the purchase. Your credit card is not charged and the app is uninstalled from your phone.
If you change your mind, you can install the app again, but you can't request a refund a second time.
- From home, touch Play Store.
- Touch My apps.
- Touch the app to uninstall for a refund. The details screen for the app opens.
- Touch REFUND, and then touch Yes to confirm. Your app is uninstalled and the charge is cancelled.
Update an App
Depending on your settings, many apps will update automatically, or you can update apps directly from the Play Store app.
Update an App Directly
- From home, touch 📋 > Play Store 🎨
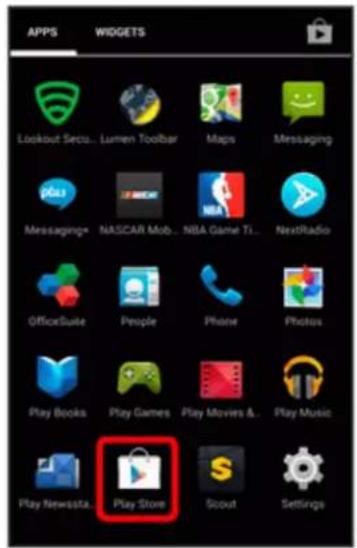
- Touch

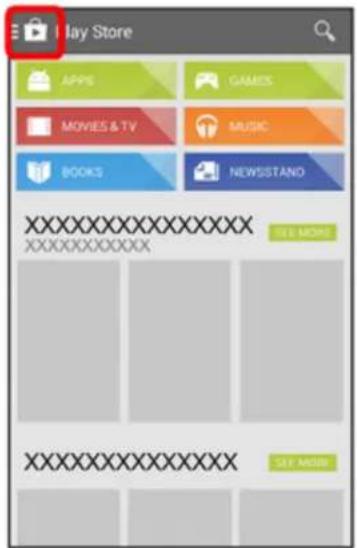
- Touch My apps.

- Touch the app you want to update, and then touch UPDATE > ACCEPT/CONTINUE.
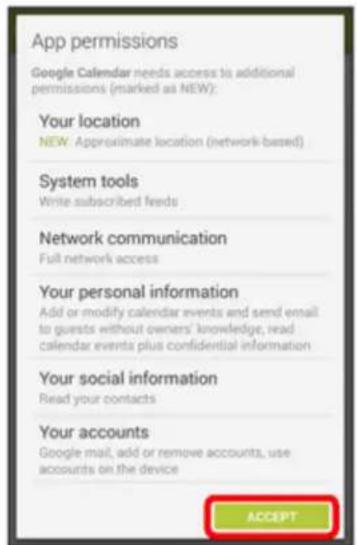

The app update is downloaded and installed.
Set Automatic App Updates
- From home, touch 🎯 > Play Store 🎯.

- Touch


3. Touch My apps.

- Touch the app you want to set for auto-update, and then touch > Auto-update. (Enabled when the check mark is entered.)

The app is set to update automatically whenever an update becomes available.
Note: Automatic updates are unavailable for some apps.
Uninstall an App
You can uninstall any app that you have downloaded and installed from Google Play.
1. From home, touch > Play Store


2. Touch


3. Touch My apps.

4. On the Installed screen, touch the app you want to uninstall, and then touch UNINSTALL > OK.


The app is uninstalled and removed from your phone.
Get Help with Google Play
The Google Play store app offers an online help option if you have questions or want to know more about the app.
1. From home, touch 🎨 > Play Store 🎩.

- Touch


3. Touch HELP.

The Web browser will take you to the Google Play Help Web page, where you will find comprehensive, categorized information about Google Play.
Lock and Unlock Your Screen
Your phone allows you to quickly turn the screen off when not in use and to turn it back on and unlock it when you need it.
Turn the Screen Off When Not in Use
- To quickly turn the screen off, press the Power key. Pressing the Power key again or receiving an incoming call will turn on your phone screen and show the lock screen.
To save battery power, the phone automatically turns off the screen after a certain period of time when you leave it idle. You will still be able to receive messages and calls while the phone's screen is off.
Note: For information on how to adjust the time before the screen turns off, see Display Settings.
Turn the Screen On and Unlock It
- To turn the screen on, press the Power key.

The lock screen appears.
- Slide the lock icon in any direction to unlock the screen.

The screen is unlocked.
- If you have set up a screen lock, you will be prompted to draw the pattern or enter the password or PIN. See Screen Lock.
Update Your Phone
From time to time, updates may become available for your phone. You can download and apply updates through the Settings > System updates menu.
! Software Update Cautions
During update: The phone cannot be used until the software update is complete. It may take time to update your phone's software.
Signal during update: Update your phone where signal reception is good, and do not change location during the update process. Make sure the battery is adequately charged before
beginning an update. A weak signal or low battery during an update may cause the update to fail. An update failure may disable the phone.
Other functions during update: Other phone functions cannot be used during a software update.
Update Your Phone Software
You can update your phone's software using the System updates option.
Before Updating Your Phone
Updating your phone may result in a loss of saved data depending on the condition of your phone (malfunctioning, damaged, water seepage, etc.). You must back up all critical information before updating your phone firmware. The company is not responsible for damages from stored information or settings that are altered/lost due to malfunction, repairs, or other handling.
Back Up All Data Prior to Update
To back up your Gmail information:
- From home, touch ⚙ > Settings ⚗ > Google.
If Google is not displayed on the screen, add a Google account. See Google Account for details.
- Touch the account, and then touch to checkmark the sync item and enable the feature.
Checked items automatically synchronize whenever a change is made.
- Touch ➤ Sync now to sync your Google account information.
To back up your Exchange Mail information:
- From home, touch ⚙ > Settings ⏰ > Corporate.
If Corporate is not displayed on the screen, add an email account. See Set Up an Email Account for details.
- Touch the account, and then touch to checkmark the sync item and enable the feature.
Checked items automatically synchronize whenever a change is made.
- Touch Sync now to sync your Exchange Mail Account information.
To back up stored text messages:
- From home, touch 📋 > Messaging
- Select the text message from the list to view the message thread.
- Touch and hold on a portion of the text message from the string. The Message options context menu appears.
Note: You can back up stored text messages by forwarding them to your own phone number. Open the messages after you have updated your firmware.
- Touch Forward.
- Enter your phone number and touch
To back up your Google apps:
Your Google app purchases are reloaded remotely and can be re-installed after the update is applied.
- From home, touch 📋 > Play Store 🎨.
- Touch 📄 > My apps > ALL tab.
- Scroll through the list of previously downloaded Google apps and choose those you wish to reinstall.
- Follow the onscreen instructions.
As an added precaution, to preserve any data on your SD card, please unmount it from your phone prior to starting the update process. From home, touch ⚙️ > Settings 📋 > Storage > Unmount SD card.
Update Your Phone's Software
Once you have backed up all your data, use System updates options to update your phone's internal software.
- From home, touch ⚙ > Settings ⚙️.
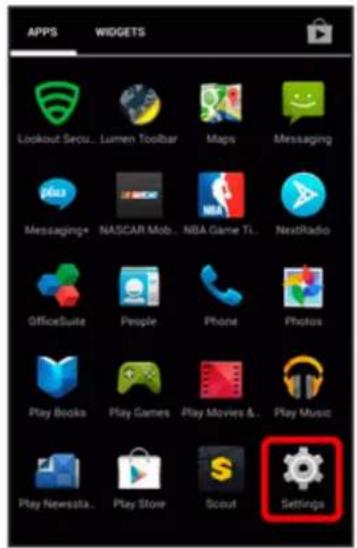
- Touch System updates to use the following options:

- Update PRL: Download the latest Preferred Roaming List (PRL), used by your phone to access the network.
- Update Profile: Update the user profile related to your wireless service account. If you choose to change your user name online, use this option to update the user name on your phone.
Note: If your data services or account syncing ever seems to go out unexpectedly, use this feature to reconnect with the network.
- Update Sharp software: Upgrade to the latest software available for your phone.
If the System Update Available icon ( ) appears in the status bar, do the following:
- Locate the System Update Available icon( ) in notifications.

- Drag the status bar down.
![7:00 PM [Important Notice] Software A new software is available for download Stay ON Keep screen on while holding in your hand?](/content/2026/05/846850/images/5f73990f03e140f5f990cc80f36a65d7fe81d59831856d7cce527bb808100236.jpg)
- Touch Software update to open the Sharp software update.
![7:00 PM FRI AUGUST 1 [Important Notice] Software L 7:00 PM A new software is available for download Stay ON Keep screen on while holding in your hand.](/content/2026/05/846850/images/fc1d7b987b22c4e53194822e30c27aa58ecd2c2ef61ee94d373735999174b4de.jpg)
- Touch Yes.
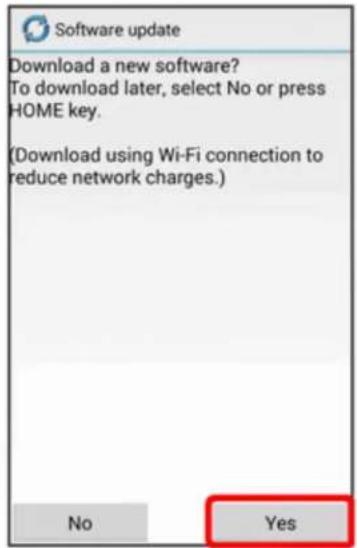
- Touch Yes and install to complete the process.

- Touch Update now.

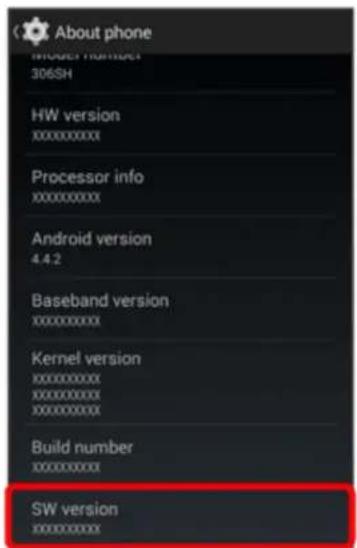
Confirm Your Current Phone Software
- From home, touch ⚙ > Settings ⚗ > About phone.

- Locate the software version read-only field.
Your Phone Interface
The following topics describe how to use and customize your phone's home screen, understand the status bar, and use the notifications window.
Home Screen
The home screen is the starting point for your phone's applications, functions, and menus. You can customize your home screen by adding application icons, shortcuts, folders, widgets, and more.
To display the home screen, touch

| Item Description | |
| Notification Area The notification area of the status bar (on the left) displays notifications for incoming messages, missed calls, application updates, and more. | |
| Status Bar The status bar displays icons to notify you of your phone's status (on the right side) and notifications (on the left side). | |
| Back Key which to return to the previous screen. Drag or swipe up to open Assistant/Google. | |
| Home Key which to display the main home screen. Drag or swipe up to open Assistant/Google. | |
| Item Description | |
| Status Area The status | area of the status bar (on the right) displays phone and service status information such as signal strength, battery status, Wi-Fi and data connectivity, ringer status, and time. |
| Widget Widgets are | self-contained onscreen apps that reside on your phone's home screen. |
| Application Icons | Application icons are shortcuts to favorite applications. You can add and remove these shortcuts as you wish. |
| Primary Shortcuts | Primary shortcuts are application shortcuts that appear in the same location on all of your phone's home screens. These are customizable except for the Applications (Apps) shortcut, which remains static. |
| Applications (Apps) List Key [HT02] | Touch to open the applications (Apps) list. The apps list key is a primary shortcut available from all home screens. |
| Recent AppsKey [4880] | ch to display recently-used applications. Drag or swipe open Assistant/Google. |
Tip: Touch 📁 to return to the main home screen from any other screen.
Extended Home Screens
In addition to the main home screen, your phone has four extended home screens to provide more space for adding icons, widgets, and more. Touch and hold the icon or widget and then drag across the screen to move from the main screen to an extended screen.
Status Bar
The status bar at the top of the home screen provides phone and service status information on the right side and notification alerts on the left. To view the notifications window or access the quick settings menu, touch the status bar and drag it down.
Status Bar Layout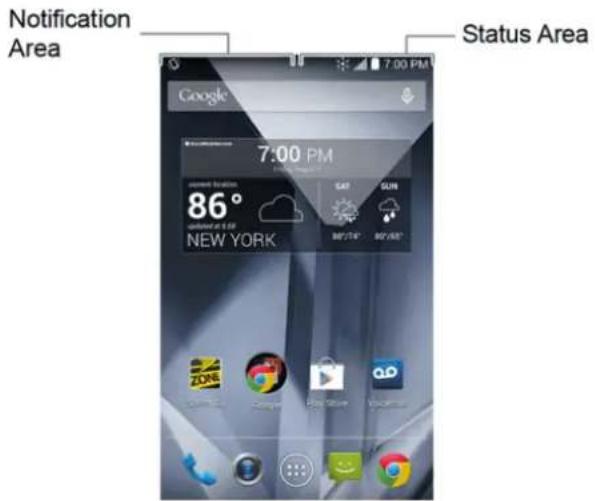
Main Notification Icons
| Icon | Notification |
 | Stay On active |
 | new emergency notification |
 | arriving call |
 | arriving HD Voice call |
 | missed call |
 | new voicemail |
 | new email |
 | new Gmail |
 | new text or MMS message |
 | new Hangout message |
 | new Sprint Zone message |
 | event |
 | USB connection |
 | alarm |
 | warning |
 | update available |
 | update downloading |
 | update successful |
 | keyboard active |
 | obtaining location information |
 | Bluetooth® data receive request |
 | SD card unmounted |
 | reading SD card |
 | screenshot captured |
 | screenshot captured using Clip Now |
 | LiveStage active |
 | Clari-Fi active |
 | more notifications available (drag down to view) |
Main Status Icons
| Icon | Status |
 | Bluetooth®active |
 | Bluetooth®connection |
 | GPS active |
 | Wi-Fi®active |
 | downloading |
 | vibrate |
 | silent |
 | speakerphone active |
 | network (full signal) |
 | network (roaming) |
 | Out of service area |
 | Sprint Spark enhanced 4G LTE data service |
 | 3G (data service) |
 | airplane mode |
 | alarm set |
 | battery (charging) |
 | battery (full charge) |
Notifications Window
Drag the status bar down to open the notifications window. From there, you can check notifications, download updates, open messaging apps, use the quick settings menu, and more.
Open the Notifications Window
- Drag the status bar down. (Slide your finger down from the top of the screen.)

The notifications window opens. To check notifications, touch an item in the list.
Close the Notifications Window
- Drag the notifications window up. (Slide your finger up from the bottom of the screen.)
-or-
- Touch ← to close the notifications window.
Notifications Window Layout
The notifications window gives you access to both notifications and the quick settings menu.

Quick Settings Menu Layout
The quick settings menu lets you check the status of the phone and services and change settings by directly accessing the various settings menus.

Customize the Home Screen
Learn how to set the wallpaper and add, move, or remove shortcuts, widgets, and folders from the home screen.
Operations for Rearranging the Home Screen
- Moving Widgets and Icons: From home, touch and hold an item and then drag it to the desired location.
- Deleting Widgets and Icons: From home, touch and hold an item and then drag it to Remove.
Changing Folder Names: From home, touch the folder to open it, and then touch the folder name. Type a new name and then touch Done.
Displaying the Choose wallpaper from menu: From home, touch and hold an empty space to display the Choose wallpaper from menu.
Change the Wallpaper
Select and assign your phone's background wallpaper.
- From home, touch and hold an empty space.

The Choose wallpaper from menu appears.
You can also access the wallpaper menu through settings. Touch ⚙️ > Settings 🌐 > Display > Wallpaper.
- Select your desired wallpaper from Gallery, Live Wallpapers, Photos, or Wallpapers.

- Touch Set wallpaper/SET WALLPAPER.

The wallpaper is set.
Note: If you select Gallery, you will need to select an album and a picture. Drag the wallpaper or pinch/spread the screen to reduce/enlarge the wallpaper so it is centered on the screen.
Note: If you select Live Wallpapers, depending on the live wallpaper, you can touch Settings... to select custom animation settings, etc. before touching Set wallpaper.
Add Shortcuts to the Home Screen
You can add shortcuts for quick access to favorite apps from the home screen.
- From home, touch

The Apps list opens.
- Touch and hold an app icon.
The icon will disengage and you will see thumbnails of your home screens.
- Drag the icon to an empty location on one of the home screens.
The shortcut is added to the home screen.
Add Widgets to the Home Screen
You can add widgets to your phone's home screen. Widgets are self-contained apps that display on a home screen. Unlike a shortcut, the Widget works like an onscreen application. There are all kinds of widgets, including links to a specific contact, Internet bookmarks, Facebook status windows, Gmail and email accounts, and many others.
- From home, touch


The Apps list opens.
- Touch the WIDGETS tab at the top of the Apps list.

- Touch and hold a widget icon.

The icon will disengage and you will see thumbnails of your home screens.
- Drag the icon to an empty location on one of the home screens.

The widget is added to the home screen.
• If prompted, follow the onscreen instructions.
Add Folders to the Home Screen
You can group home screen shortcuts into folders for convenient access.
- Touch and hold a shortcut you want to place in a folder, and then drag it to above another shortcut.
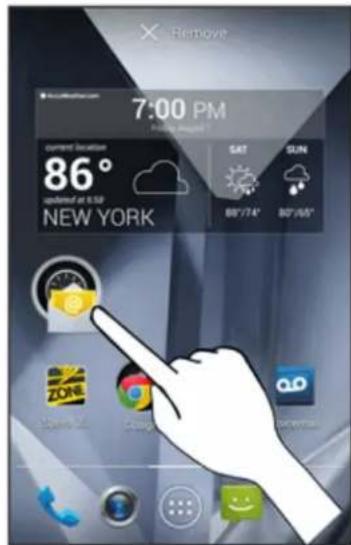
A new folder is created.
- To create a name, touch the folder, then Unnamed Folder, and enter a name.

- To add more app shortcuts to the folder, touch and hold a shortcut and drag it on top of the new folder.

The new shortcut is added to the folder.
Phone App
The following topics outline the use of your device's phone app to place and receive calls, use voicemail, set up and manage contacts, and more. To call and manage contacts using Smart Contacts, see Smart Phone and Smart Contacts apps.
Place and Answer Calls
The following topics describe how to directly dial calls, how to answer incoming calls, and how to use the in-call screen options.
Troubleshooting
Question: Call does not connect.
Answer 1: Was the number dialed using the area code? Try dialing the number starting with "0".
Answer 2: Are you in an area with poor wireless coverage? Try calling again from another area.
Emergency Call Cautions
Emergency calls are restricted in Airplane mode.
Call Using the Phone Dialer
The most "traditional" way to place a call is by using the phone's dialer screen.
- From home, touch Phone > Dialer to display the dialer screen.

- Touch the number keys on the dialpad to enter the phone number.

- As you enter digits, Smart Dial searches for contacts that match. If you see the number you want to dial, touch it to place the call immediately without entering the rest of the number.
- Touch Add to contacts to add the entered number into your contacts list.
- Touch to call the number.

The phone dials the number. The call begins when the other party answers.
- Your phone's screen automatically locks during a call. See Screen Auto-Locking During a Call for details.
- To end the call, touch


The call ends.
Call Emergency Numbers
You can place calls to 9-1-1 even if the phone's screen is locked or your account is restricted.
To call the 9-1-1 emergency number when the phone's screen is locked with a screen lock:
- From the lock screen, touch EMERGENCY CALL.
- Touch

As long as you are in an area covered by wireless service, the emergency call is placed.
To call the 9-1-1 emergency number normally or when your account is restricted:
- Unlock the screen. For more information, see Lock and Unlock Your Screen.
- From home, touch 📋 > Phone >
- Touch 9
As long as you are in an area covered by wireless service, the emergency call is placed.
Enhanced 9-1-1 (E 9-1-1) Information
This phone features an embedded Global Positioning System (GPS) chip necessary for utilizing E 9-1-1 emergency location services where available.
When you place an emergency 9-1-1 call, the GPS feature of your phone seeks information to calculate your approximate location. Depending on several variables, including availability and access to satellite signals, it may take up to 30 seconds or more to determine and report your approximate location.
Important: Always report your location to the 9-1-1 operator when placing an emergency call. Some designated emergency call takers, known as Public Safety Answering Points (PSAPs), may not be equipped to receive GPS location information from your phone.
Answer Phone Calls
The following information lets you know how to answer incoming calls, mute the ringer on incoming calls, reject incoming calls, and more.
When you receive a phone call from a contact, the Incoming call screen appears and displays the caller ID icon, name, and phone number of the calling party. When you receive a phone call from someone who is not stored in People, only the default caller ID icon and phone number appear on the Incoming call screen.
If you have the Smart Phone/Smart Contacts app installed, you will receive calls with the Smart Phone app. For more information on answering calls with the Smart Phone app, see Answer Phone Calls with Smart Phone.
Note: If your phone is turned off, all calls automatically go to voicemail.
Answer an Incoming Call
- When a call arrives, drag to to answer it.

The call begins.
- To end the call, touch


The call ends.
Mute the Ringing Sound
■ To mute the ringer without rejecting the call, press the Volume Up/Down key.
Reject an Incoming Call
- When a call arrives, drag to to reject it.


The ringtone or vibration will stop and call will be sent directly to voicemail.
Reject a Call and Send a Text Message
You can reject an incoming call and automatically send a text message to the caller.
1. When a call arrives, drag to


- Touch one of the messages to send it to the caller.

The selected message will be delivered to the caller.
You can edit the quick response messages through the Call settings menu. From the phone app, touch > Settings > Quick responses and edit the quick response messages.
In-Call Screen Layout and Operations
While you're on a call, you will see a number of onscreen options.
Screen Auto-Locking During a Call
Your phone's screen automatically locks during a call to prevent unexpected touch screen operation. To operate the screen, unlock the screen as follows.
- Drag the Unlock slider down in the locked screen.
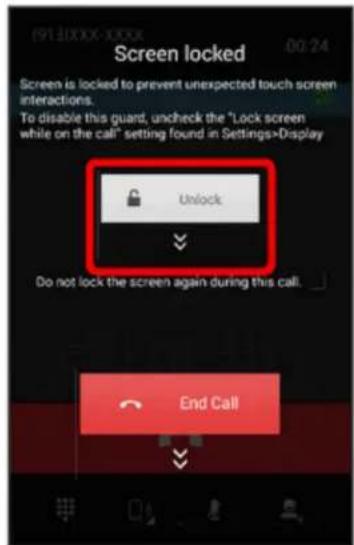
The in-call screen appears.
In-Call Screen Layout
Touch options to activate them during a call.

End call: End the current call.
Dialpad/Hide: Toggle the appearance of the onscreen dialpad.
Receiver: Route the phone's audio through the receiver or through the speaker.
Touch 📄 to route the phone's audio through the speaker. (You can adjust the speaker volume using the Volume Up/Down keys.) Touch 📄 again to use the phone's receiver.
Warning: Because of higher volume levels, do not place the phone near your ear during speakerphone use.
Bluetooth: Route the phone's audio through a connected Bluetooth headset, through the speaker or through the receiver. Appears instead of the Speaker icon when your phone is connected to a Bluetooth headset.
- Touch the Bluetooth icon for a menu to switch between Speaker, Handset earpiece (receiver), and Bluetooth.
Note: The Headset button is activated to show the current call is routed to a connected Bluetooth® headset.
- When Bluetooth® or the Bluetooth® headset is turned off, the call is routed through either the receiver or speaker
■ Mute: Mute the microphone during an active call. Touch again to unmute the microphone.
Note: If Mute is activated, the speaker mode is deactivated.
- Add call: Touch to initiate a conference call (3-way call).
- Merge: Join two currently active calls (conference). Appears instead of the Add call icon after touching to add another number.
Additional In-Call Options
■ Adjusting Call Volume: Press the volume keys, up or down, during the call.
Troubleshooting
Question: Difficulty during call.
Answer 1: It may not be possible to make a call properly in a noisy location.
Answer 2: When calling using Speaker, check the call volume. Raising the call volume may make calling difficult.
Question: Sound pops momentarily during a call.
Answer: Are you changing location while calling? Sound pops when signal is weak and the phone switches to a different area.
Place Calls from Contacts/Call History
Make calls quickly using Contacts and Call History.
Place a Call from Contacts
You can place phone calls directly from entries in your Contacts list.
- From home, touch 📋 > People to display the People app.
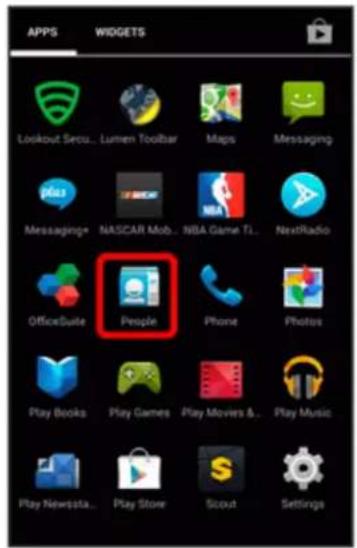
- Touch a contact and then touch the number you want to call.
The phone dials the number. The call begins when the other party answers.
- To end the call, touch


The call ends.
For additional information on Contacts, see Contacts.
Call from Call History
The history list lets you quickly place calls to recent incoming, outgoing, or missed numbers.
- From home, touch 📋 > Phone to display the phone app.

Phone App 107
- Touch Ⓤ to display the history list.

The history list appears.
- Touch next to the entry you want to call.

The phone dials the number. The call begins when the other party answers.
- Touch an entry to display the call details.
- To end the call, touch


The call ends.
Optional Services
The following topics outline additional voice-related services available with your phone, including call services, voicemail, and more.
Voicemail Setup
You should set up your voicemail and personal greeting as soon as your phone is activated. Always use a password to protect against unauthorized access. Your phone automatically transfers all unanswered calls to your voicemail, even if your phone is in use or turned off.
- From home, touch 📋 > Phone >
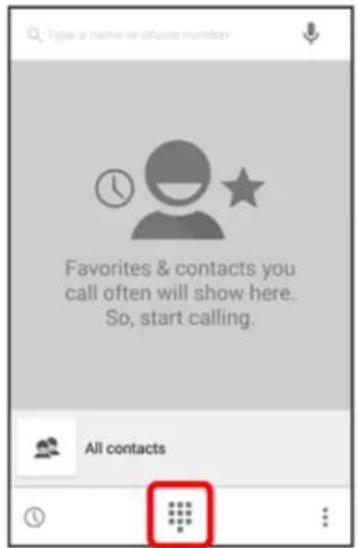
- Touch and hold to dial your voicemail number.

Your phone dials the voicemail access number.
- Follow the system prompts to:
• Create your password. • Record your name announcement. • Record your greeting.
Important: Voicemail Password – It is strongly recommended that you create a password when setting up your voicemail to protect against unauthorized access. Without a password, anyone who has access to your phone is able to access your voicemail messages.
Visual Voicemail
Visual Voicemail gives you a quick and easy way to access your voicemail. Now you can find exactly the message you are looking for without having to listen to every voicemail message first. This feature periodically goes out to your voicemail, and gathers the caller information from all of the current voicemails. It then populates a list with the caller name and number, along with the length of time and priority level of the voicemail message.
Set Up Visual Voicemail
Setting up Visual Voicemail follows many of the same procedures as setting up traditional voicemail. You should set up your voicemail and personal greeting as soon as your phone is activated. Your phone automatically transfers all unanswered calls to your voicemail, even if your phone is in use or turned off.
Note: To set up your traditional voicemail box, see Voicemail Setup.
- From home, touch 📋 > Voicemail

You'll see a Personalize your voicemail prompt.
- If a pop-up for Welcome to Voicemail appears, follow the onscreen instructions.
- A screen presenting new Visual Voicemail functions may also appear. Follow the onscreen instructions.
- Touch Personalize now and follow the system prompts to:
• Create a password (part of standard voicemail). • Record your name announcement. • Record your greeting.
Important: Voicemail Password – It is strongly recommended that you create a password when setting up your voicemail to protect against unauthorized access. Without a password, anyone who has access to your phone is able to access your voicemail messages.
Note: If the above settings are already completed with traditional voicemail, you are not prompted for these settings.
- Touch the Welcome to Voicemail message on the screen to play a brief explanation of the voicemail services.

Review Visual Voicemail
Visual Voicemail lets you easily access and select which messages you want to review.
- From home, touch 📋 > Voicemail

You will see the voicemail inbox.
- Touch a message to review it.
Tip: There are several icons at the bottom of the review screen for maintenance, storage, messaging, and other options. For an explanation of all your options, touch 📄 > Help > Visual Voicemail Menu > Visual Voicemail Menu.
Listen to Multiple Voicemail Messages
When you are done listening to a voicemail message, you can easily access other voicemail messages without returning to the main voicemail screen.
- Listen to the current voicemail message.
- Swipe your finger left or right to display the next or previous message.
You can navigate through voicemail messages as frequently as you'd like. You can even move to the next or previous message before you're finished listening to the current one.
Visual Voicemail Options
Your visual voicemail options appear as icons at the bottom of the voicemail review screen.
- From home, touch 📋 > Voicemail

- Touch a message to review it. The following options are available while reviewing a voicemail message:
Phone App 114
• Call to call the number the message came from. • Share to send the message via Bluetooth®, Gmail, etc. • Delete to delete selected messages from your current list of available voicemail messages. • Reply to reply to the message via text or voice message.
Note: Not all options are available for all messages.
Configure Visual Voicemail Settings
The Visual Voicemail settings menu lets you access settings for notifications, pictures, greetings, and more.
- From home, touch > Voicemail.
2. Touch : > Settings.
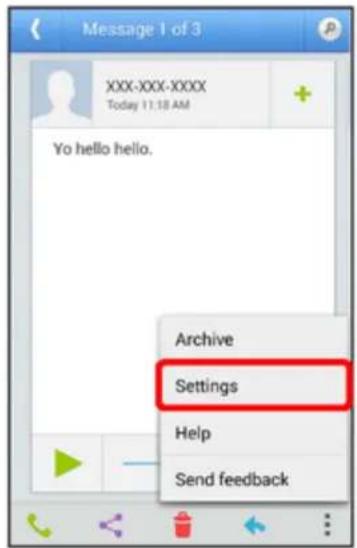
You will see the voicemail settings menu.
- Select an option to change its settings.
- Manage subscription • Auto forward to email
- Personalize voicemail
- Notifications • Transcription language
- Delete messages
- Display name • Mobile advertising preferences
- Display ads
- Speakerphone • Transcriptions displayed
- Themes • View quick tips tutorial
- Help
- Send feedback
- Updates
- About Voicemail
Change Your Main Greeting via the Voicemail Menu
Your main greeting can be changed directly via the Visual Voicemail system. This direct access saves you from having to navigate within the voicemail menu.
- From home, touch 📋 > Voicemail

- Touch > Settings > Personalize voicemail.
- Touch OK to connect to the voicemail system. Follow the prompts to change your current greeting.
Edit the Display Name via the Voicemail Menu
From your Visual Voicemail menu, you can quickly change the name or number attached to your voice messages.
- From home, touch 📋 > Voicemail

- Touch : > Settings > Display name.
- Touch the existing identification field and enter a new identifying name or number (used to identify you to recipients of your voice messages).
- Touch OK to save your information.
Caller ID Blocking
Caller ID identifies a caller before you answer the phone by displaying the number of the incoming call. If you do not want your number displayed when you make a call, follow these steps.
- From home, touch 📋 > Phone >
- Touch * 6 MRD 7 PDRS
- Enter a phone number.
- Touch
Your caller information will not appear on the recipient's phone.
To permanently block your number, call Sprint Customer Service.
Call Waiting
When you're on a call, Call Waiting alerts you to incoming calls by sounding two beeps. Your phone's screen informs you that another call is coming in and displays the caller's phone number (if it is available).
To respond to an incoming call while you're on a call:
- Unlock the screen (if necessary) and slide to the right. (This puts the first caller on hold and answers the second call.)

To switch back to the first caller:
■ Touch

- Touch to switch between callers.
Note: For those calls where you don't want to be interrupted, you can temporarily disable Call
Waiting by pressing 7 0 before placing your call. Call Waiting is automatically reactivated once you end the call.
Conference Calling
With conference calling, also known as 3-way calling, you can talk to two people at the same time. When using this feature, the normal airtime rates will be charged for each of the two calls.
- On the Phone screen, enter a number and touch (or place a call from History or Contacts).
- Once you have established the connection, touch, and dial the second number (or place the call from History or Contacts).

This puts the first caller on hold and dials the second number.
- When you're connected to the second party, touch . Your conference call is now in session.

- To end the three-way call, touch

Note: If one of the people you called hangs up during your call, you and the remaining caller stay connected. If you initiated the call and are the first to hang up, all callers are disconnected.
Call Forwarding
Call Forwarding lets you forward all your incoming calls to another phone number – even when your phone is turned off. You can continue to make calls from your phone when you have activated Call Forwarding.
Note: You are charged a higher rate for calls you have forwarded.
To activate Call Forwarding:
Phone App 121
- From home, touch 🎯 > Phone

- Touch

- Enter the area code and phone number to which you want your calls forwarded.
- Touch

You will hear a tone to confirm the activation of Call Forwarding. All calls to your wireless number will be forwarded to the designated phone number.
To deactivate Call Forwarding:
- From home, touch 📋 > Phone

- Touch

- Touch

You will hear a tone to confirm the deactivation.
Access Call Settings
Your phone's Call Settings menu lets you configure your voicemail options and a number of other settings for the phone application. For details on the call settings menu, see Call Settings.
Use the Call Settings Menu
- From home, touch 📋 > Phone

Phone App 122
The phone app opens.
- Touch ⋮ > Settings.

The call settings menu appears.
- Configure your options.
- Touch a menu item to display its options.
- Select your options and follow the prompts to set them.
Your call settings options are set.
TTY Mode
A TTY (teletypewriter, also known as a TDD or Text Telephone) is a telecommunications device that allows people who are deaf, hard of hearing, or who have speech or language disabilities, to communicate by telephone.
Your phone is compatible with select TTY devices. Please check with the manufacturer of your TTY device to ensure that it supports digital wireless transmission. Your phone and TTY device will connect using a special cable that plugs into your phone's headset jack. If this cable was not provided with your TTY device, contact your TTY device manufacturer to purchase the connector cable.
To turn TTY Mode on or off:
- From home, touch ⚙ > Settings
Phone App 123
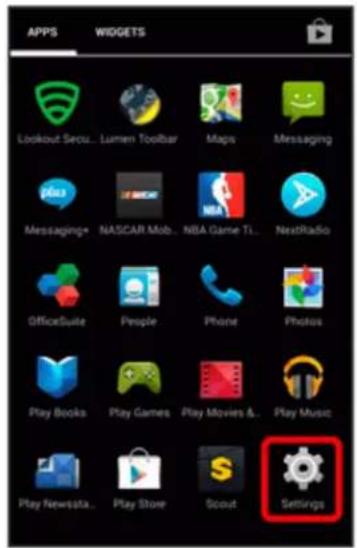
- Touch Call > TTY mode.

- Touch TTY Full, TTY HCO, or TTY VCO to turn TTY mode on.
- or -
Touch TTY Off to turn TTY mode off.

Your phone's TTY mode is set.
Note: When enabled, TTY mode may impair the audio quality of non-TTY devices connected to the headset jack.
Warning: 9-1-1 Emergency Calling
It is recommended that TTY users make emergency calls by other means, including Telecommunications Relay Services (TRS), analog cellular, and landline communications. Wireless TTY calls to 9-1-1 may be corrupted when received by public safety answering points (PSAPs), rendering some communications unintelligible. The problem encountered appears related to TTY equipment or software used by PSAPs. This matter has been brought to the attention of the FCC, and the wireless industry and the PSAP community are currently working to resolve this.
Contacts
The People application lets you store and manage contacts from a variety of sources, including contacts you enter and save directly in your phone as well as contacts synchronized with your Google account, your computer, compatible email programs (including Exchange Server), and your Facebook friends.
! Contacts Cautions
An accident or malfunction may cause loss or change to information. It is recommended that you keep a separate copy of contacts and other important information. The company is not responsible for any damages from lost or changed contacts.
Add a Contact
You can add contacts from your phone's People application. Enter details such as name, phone numbers, email addresses, mailing addresses, and more.
1. From home, touch ⚙ > People

You will see the Contacts list.
- Touch Add Contact to add a contact.

The Add Contact screen appears.
- When a screen for selecting where to add the contact appears, follow the onscreen instructions to continue.
- Use the keyboard to enter as much information as you want.
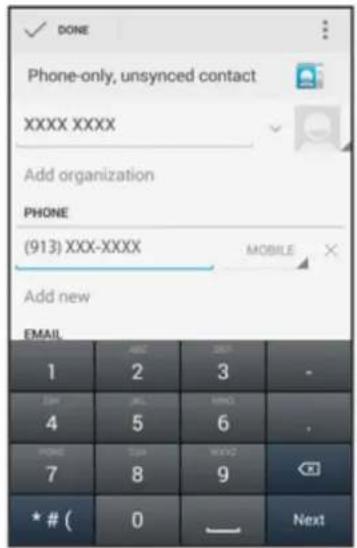
• : Touch the picture icon to assign a picture to the contact. - Name • : Display detailed name fields such as first name, middle name, or last name. - Phone - Email - Address - Date - Group name - Add another field: Touch Add another field to include additional information such as IM address, Notes, Nickname, Website, etc.
Note: Group name and Date are displayed for a Google contact type.
Note: To select a type (label) for a phone number, email address, or postal address (such as Mobile, Home, Work, etc.), touch the type to the right of the field and select the appropriate type.
Note: To add more phone numbers, email addresses, etc., touch Add new displayed under the entered number, etc.
- When you have finished adding information, touch DONE.


The contact is added.
Save a Phone Number
You can save a phone number to People directly from the phone dialpad.
- From home, touch 🎯 > Phone


- Enter a phone number and touch Add to contacts.
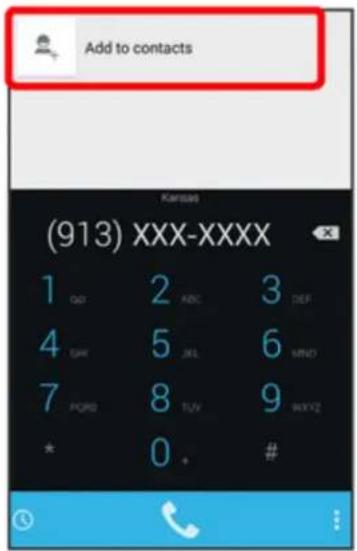
- To add the number to an existing contact, touch the contact you want to add to. To add a new contact, touch CREATE NEW CONTACT.
- For an existing contact, touch the contact name, select a number type for the new number, and then touch OK.
- For a new contact, enter the name and any additional information, and then touch DONE.
Check Contacts
View a contact's details by displaying a contact entry.
- From home, touch ⚙ > People

You will see the Contacts list.
- Touch a contact to view its details.

The contact's detailed listing appears.
- If you have Smart Contacts installed in your phone, the contact details screen is displayed from the Smart Contacts app. See Check Smart Contacts for details.
Contacts Screen Layout
The following illustration shows your People app layout and describes the various features.
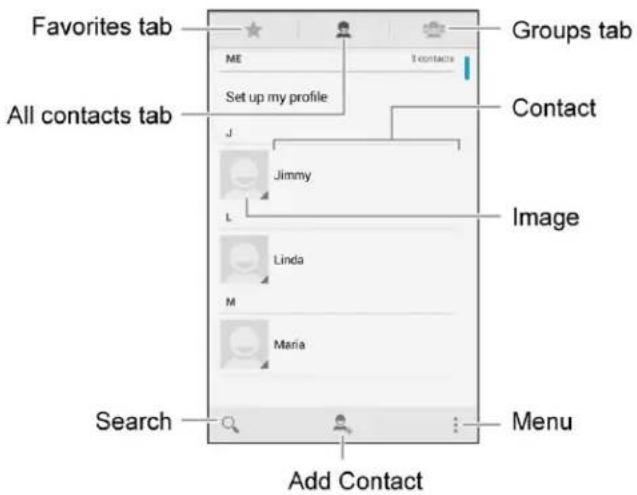
| Item Description | |
Favori  | Show favorite contacts. |
All contacts tab  | Show all contacts. |
Search  | Search contacts. |
Groups tab  | Show contact groups. |
| Contact Touch to show contact's details. | |
Image  | Touch to show simplified information. Touch an icon to place a call, send a message, etc. |
Menu  | Show the following options: Contacts to display, Import/export, Clear frequents*, Accounts, and Settings. |
| Add C [H7DS] | Add a new contact. |
* Clear frequents is displayed when calls are made to numbers registered as contacts.
Edit a Contact
Once you've added a contact, you can add or edit any of the information in the entry, assign a caller ID picture, customize with a unique ringtone, and more.
- From home, touch 📋 > People

You will see the Contacts list.
- Touch a contact to view its details.

The contact's detailed listing appears.
- If you have Smart Contacts installed in your phone, the contact details screen is displayed from the Smart Contacts app. See Edit a Contact with Smart Contacts for details.
- Touch : > Edit.
- Touch any field you want to change or add. See Add a Contact.
- Add or edit the information, and then touch DONE.


Your changes are saved to the contact entry.
Note: To select a type (label) for a phone number, email address, or postal address (such as Mobile, Home, Work, etc.), touch the type to the right of the field and select the appropriate type.
Note: To add more phone numbers, email addresses, etc., touch Add new displayed under the entered number, etc.
Delete a Contact
You can delete a contact from the contacts details page.
- From home, touch ⚙ > People

You will see the Contacts list.
- Touch a contact to view its details.
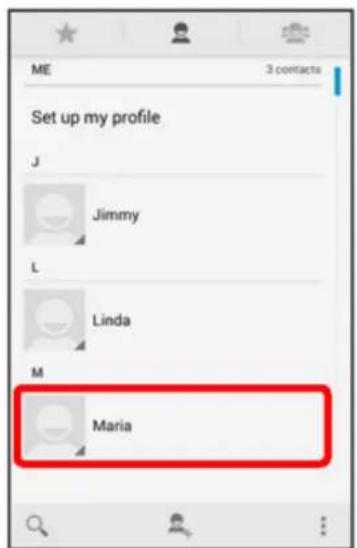
The contact's detailed listing appears.
- If you have Smart Contacts installed in your phone, the contact details screen is displayed from the Smart Contacts app. See Delete a Contact with Smart Contacts for details.
- Touch : > Delete.

- Touch OK.

The contact is deleted.
Share a Contact
You can quickly share contacts using Bluetooth email, Gmail, or text messaging.
- From home, touch ⚙ > People

You will see the Contacts list.
- Touch a contact to display it, and then touch > Share.
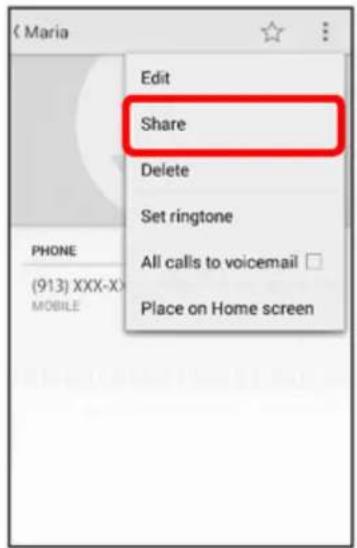
You will see the Share contact via menu.
- If you have Smart Contacts installed in your phone, the contact details screen is displayed from the Smart Contacts app. See Check Smart Contacts for details.
- In the Share contact via menu, select a method:

- Bluetooth to send the information via Bluetooth®. See Bluetooth® for information on pairing and sending via Bluetooth®.
- Drive to upload the information to your server. Enter a document title, select an account, then a folder, and then touch OK.
- Email to send the information as an email attachment. If prompted, select an email account. Address the message, add a subject and a message, and then touch Send ▶. See Compose and Send Email for details on sending email.
- Gmail to send the information as a Gmail attachment. Address the message, add a subject and a message, and then touch Send ▶. See Create and Send Gmail for details.
- OfficeSuite Wi-Fi Direct to send the information using Wi-Fi Direct. Touch the device to which you want to send from the device list.
- Complete the required steps as prompted for the selected method.
The selected contact will be shared.
Import Contacts
Import (load) contacts that have been backed up on an SD card.
Before Importing Contacts from SD Card
You will need to have installed an SD card with previously backed up contacts information into your phone before you can import contacts. See Phone Memory/SD Card for SD card information.
Import Contacts from SD Card
- From home, touch ⚙ > People.

You will see the Contacts list.
- Touch : > Import/export.

You will see the Import/export contacts menu.
- Touch Import from storage.

- Follow the onscreen instructions to complete the import.

The contacts are imported and stored in your phone.
- If several accounts with contacts to import are displayed, select the desired account.
Back Up Contacts
If you are saving contacts to an account that does not automatically back them up via the Cloud, you can manually back them up to an installed SD card for re-import if needed.
Before Backing Up Contacts to SD Card
Insert an SD card before backing up your contacts. See Phone Memory/SD Card for SD card information.
Back Up Contacts to SD Card
- From home, touch 📋 > People.

You will see the Contacts list.
- Touch : > Import/export.


You will see the Import/export contacts menu.
3. Touch Export to storage.

- Touch External Card > OK.
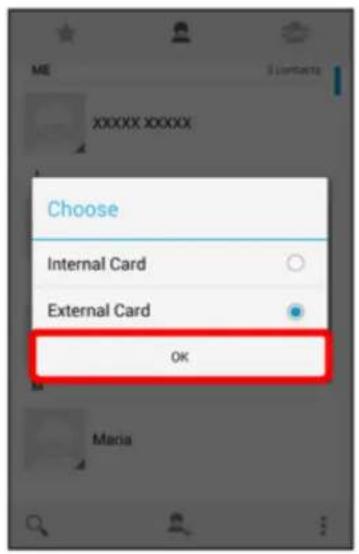
- Touch OK to confirm the export.

The contacts are exported and saved to the installed SD card.
Smart Phone and Smart Contacts Apps
The Smart Phone and Smart Contacts apps from Yahoo! can serve in place of the pre-installed Phone and Contacts apps, and they also let you check SMS messages and link with Facebook. The following topics outline the use of the Smart Phone and Smart Contacts apps.
To set up and activate Smart Contacts, you need a Yahoo account. You can create a new Yahoo account or use an existing account during setup. For information on setting up the Smart Phone and Smart Contacts apps, see Set Up Smart Contacts.
About Smart Phone and Smart Contacts
Smart Contacts can combine and manage your contacts from multiple sources including phone contacts, Yahoo contacts, Google Contacts, and Facebook. Communication histories including calls and SMS are also shown in your contact entries, providing quick access for calling or sending messages. You can also link Facebook to Smart Contacts, so your Facebook friends appear on your contact list, allowing you to check their information, posts, etc. Link to Facebook during setup of Smart Contacts, or from Account Settings in the Smart Contacts settings. See Access Smart Contacts Settings for more information.
Although the Smart Phone and Smart Contacts apps appear with their own separate app icons, they integrate into one feature. Access the same feature from either preferred app.
Place and Answer Calls with Smart Phone
The following topics describe how to directly dial calls and how to answer incoming calls in the Smart Phone app. For details on how to use the in-call screen options, see In-Call Screen Layout and Operations.

Emergency Call Cautions
Emergency calls are restricted in Airplane mode.
Call Using the Smart Phone Dialer
You can use the dialer screen in the Smart Phone app to dial calls directly.
- From home, touch the Apps icon > Smart Phone > Dialer to display the dialer screen.

You can also touch Contacts > Smart Contacts > Dialer to display the dialer screen.
- Touch the number keys on the dialpad to enter the phone number.

As you enter digits, Smart Dial searches for contacts that match. If you see the number you want to dial, touch it to select the number to call.
Touch + to add an entered number into your contacts list.
- Touch the call button to call the number.

The phone dials the number. The call begins when the other party answers.
Your phone's screen automatically locks during a call. See Screen Auto-Locking During a Call for details.
- To end the call, touch the end call button.

The call ends.
- If the screen is locked, drag down to end the call.
Call Emergency Numbers
You can place calls to 9-1-1 even if the phone's screen is locked or your account is restricted.
To call the 9-1-1 emergency number when the phone's screen is locked with a screen lock:
- From the lock screen, touch EMERGENCY CALL.
- Touch

As long as you are in an area covered by wireless service, the emergency call is placed.
To call the 9-1-1 emergency number normally or when your account is restricted:
- Unlock the screen. For more information, see Lock and Unlock Your Screen.
- From home, touch 📋 > Smart Phone 📞 > 🌐
- Touch 9 1 1.
As long as you are in an area covered by wireless service, the emergency call is placed.
Enhanced 9-1-1 (E 9-1-1) Information
This phone features an embedded Global Positioning System (GPS) chip necessary for utilizing E 9-1-1 emergency location services where available.
When you place an emergency 9-1-1 call, the GPS feature of your phone seeks information to calculate your approximate location. Depending on several variables, including availability and access to satellite signals, it may take up to 30 seconds or more to determine and report your approximate location.
Important: Always report your location to the 9-1-1 operator when placing an emergency call. Some designated emergency call takers, known as Public Safety Answering Points (PSAPs), may not be equipped to receive GPS location information from your phone.
Answer Phone Calls with Smart Phone
Once the Smart Phone app is set up, your phone will use it to allow you to answer incoming calls, mute the ringer on incoming calls, reject incoming calls, and more.
When you receive a phone call from a contact, the Incoming call screen appears and displays the caller ID icon, name, and phone number of the calling party. When you receive a phone call from someone who is not stored in People/Contacts, only the default caller ID icon and phone number appear on the Incoming call screen.
Note: If your phone is turned off, all calls automatically go to voicemail.
Answer an Incoming Call
- When a call arrives, drag to to answer it.

The call begins.
- To end the call, touch
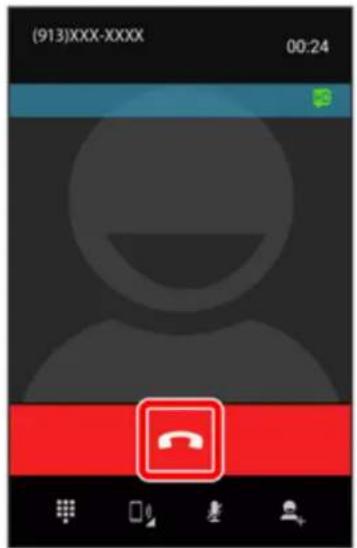
The call ends.
- If the screen is locked, drag down to end the call.
Mute the Ringing Sound
■ To mute the ringer without rejecting the call, press the Volume Up/Down key.
Reject an Incoming Call
- When a call arrives, drag to reject it.

The ringtone or vibration will stop and the call will be sent directly to voicemail.
Reject a Call and Send a Text Message
You can reject an incoming call and automatically send a text message to the caller.
- When a call arrives, drag to

- Touch one of the messages to send it to the caller.

The selected message will be delivered to the caller.
- You can edit the quick response messages through the Call settings menu. From the phone app, touch : > Settings > Call Settings > Quick responses and edit the quick response messages.
Place Calls from Contacts/Call History with Smart Phone
The Smart Phone app lets you quickly make calls using Smart Contacts and Call History.
Place a Call from Contacts
You can place phone calls directly from entries in your Contacts list.
- From home, touch 📋 > Smart Contacts 🙏.

The Smart Contacts app opens.
- You can also touch 📋 > Smart Phone 📊 to access the same application.
- Touch a contact and then touch the number you want to call.
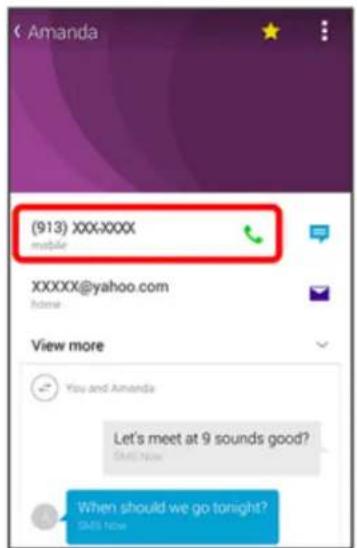
The phone dials the number. The call begins when the other party answers.
• If prompted, follow the onscreen instructions.
- To end the call, touch


The call ends.
- If the screen is locked, drag down to end the call.
For additional information on Contacts, see Check Smart Contacts.
Call from Smart Phone Call History
The history list in the Smart Phone app lets you quickly place calls to recent incoming, outgoing, or missed numbers.
- From home, touch 📋 > Smart Phone

Smart Phone and Smart Contacts Apps 151
The Smart Phone app opens.
- You can also touch 📋 > Smart Contacts 🔒 to access the same application.
- Touch ⏻ to display the history list.

The history list appears.
- Touch the entry you want to call.
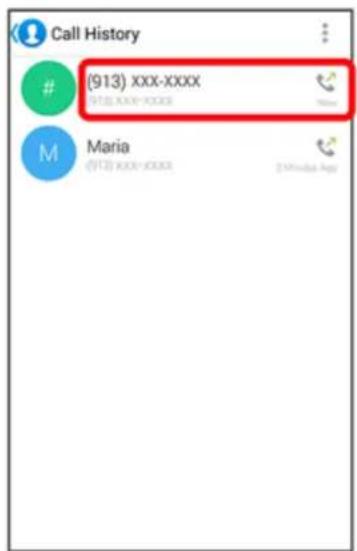
The phone dials the number. The call begins when the other party answers.
- Touch and hold an entry to use the following options: Call, Send SMS, Copy Number, Delete Call, and Contact Details.
- To end the call, touch

The call ends.
- If the screen is locked, drag down to end the call.
Optional Smart Phone Services
The following topics outline additional voice-related services available with your Smart Phone app, including call services, voicemail, and more.
Voicemail Setup with Smart Phone
You should set up your voicemail and personal greeting as soon as your phone is activated. Always use a password to protect against unauthorized access. Your phone automatically transfers all unanswered calls to your voicemail, even if your phone is in use or turned off.
- From home, touch 📋 > Smart Phone 📞 >

- You can also touch 📋 > Smart Contacts 🙏 > ▼ to display the dialer screen.
- Touch and hold 1 to dial your voicemail number.

Your phone dials the voicemail access number.
- Follow the system prompts to:
• Create your password. • Record your name announcement. • Record your greeting.
Important: Voicemail Password – It is strongly recommended that you create a password when setting up your voicemail to protect against unauthorized access. Without a password, anyone who has access to your phone is able to access your voicemail messages.
Note: Your phone also offers a visual voicemail app for accessing your voicemail messages. See Visual Voicemail for details.
Caller ID Blocking with Smart Phone
Caller ID identifies a caller before you answer the phone by displaying the number of the incoming call. If you do not want your number displayed when you make a call, follow these steps.
- From home, touch 📷 > Smart Phone 📞 > 🌐 .
- Touch * 6 7
- Enter a phone number.
- Touch
Your caller information will not appear on the recipient's phone.
To permanently block your number, call Sprint Customer Service.
Call Waiting with Smart Phone
When you're on a call, Call Waiting alerts you to incoming calls by sounding two beeps. Your phone's screen informs you that another call is coming in and displays the caller's phone number (if it is available).
To respond to an incoming call while you're on a call:
- Unlock the screen (if necessary) and slide to the right. (This puts the first caller on hold and answers the second call.)

To switch back to the first caller:
■ Touch
- Touch to switch between callers.
Note: For those calls where you don't want to be interrupted, you can temporarily disable Call Waiting by pressing 7 before placing your call. Call Waiting is automatically reactivated once you end the call.
Conference Calling with Smart Phone
With conference calling, also known as three-way calling, you can talk to two people at the same time. When using this feature, the normal airtime rates will be charged for each of the two calls.
- On the Smart Phone screen, enter a number and touch (or place a call from History or Contacts).
- Once you have established the connection, touch > , and dial the second number (or place the call from History or Contacts).

This puts the first caller on hold and dials the second number.
- If you're prompted to select a phone app, select Smart Phone.
- When you're connected to the second party, touch a button. Your conference call is now in session.

- To end the three-way call, touch
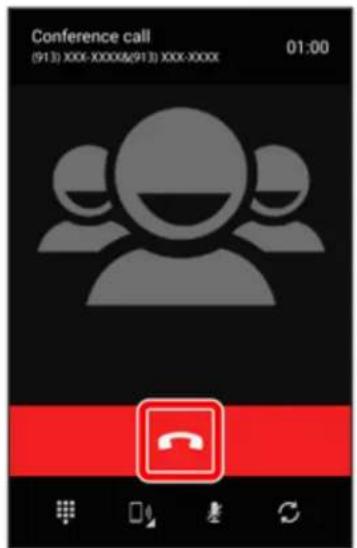
- If the screen is locked, drag down to end the call.
Note: If one of the people you called hangs up during your call, you and the remaining caller stay connected. If you initiated the call and are the first to hang up, all callers are disconnected.
Call Forwarding with Smart Phone
Call Forwarding lets you forward all your incoming calls to another phone number – even when your phone is turned off. You can continue to make calls from your phone when you have activated Call Forwarding.
Note: You are charged a higher rate for calls you have forwarded.
To activate Call Forwarding:
- From home, touch 📋 > Smart Phone 📞 >
- Touch * 7 2
- Enter the area code and phone number to which you want your calls forwarded.
- Touch
You will hear a tone to confirm the activation of Call Forwarding. All calls to your wireless number will be forwarded to the designated phone number.
To deactivate Call Forwarding:
- From home, touch 📋 > Smart Phone 📞 >
- Touch * 7 pms 2. see 0
- Touch
You will hear a tone to confirm the deactivation.
Access Smart Contacts Settings
The Smart Contacts Settings menu lets you configure a number of settings for the Smart Contacts app.
- From home, touch 📋 > Smart Contacts
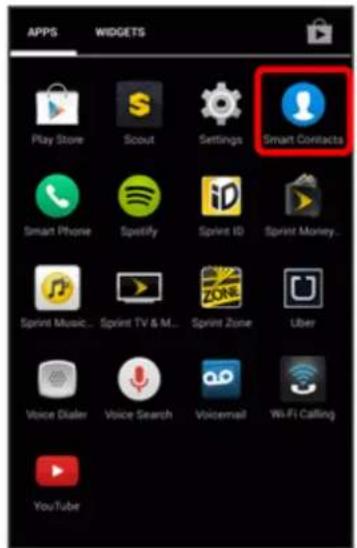
The Smart Contacts app opens.
- You can also touch 📋 > Smart Phone 📊 to access the same application.
- Touch > Settings.

The Smart Contacts settings menu appears.
- Configure your options from the following:
| Smart Contacts Setting | Description |
| Call Settings | Configure your call settings. See Call Settings for details. |
| Account Settings | Configure your Facebook account linked to Smart Contacts, and deactivate Smart Contacts. |
| Check for updates | Check whether updates are available. |
| Subscribe to Sprint Caller ID | Subscribe to Sprint Caller ID. |
| Show People I Contact | Set whether people you contact most frequently are shown on the Smart Contacts screen. |
| Show Recent Communications | Set whether recent communications including SMS or calls are displayed a contact details screen. |
| Show Relative Time | Set whether to switch to relative timestamps on recent communications. |
| Show Incoming Call Screen | Set whether to use Smart Phone for incoming calls. |
| FAQ Show help for the | Smart Contacts app. |
| Version Shows the current version. | |
Add a Contact with Smart Contacts
Use Smart Contacts to add new contacts to your phone. Enter details such as name, phone numbers, email addresses, mailing addresses, and more.
! Contacts Cautions
An accident or malfunction may cause loss or change to information. It is recommended that you keep a separate copy of contacts and other important information. The company is not responsible for any damages from lost or changed contacts.
- From home, touch 📋 > Smart Contacts 🔥.
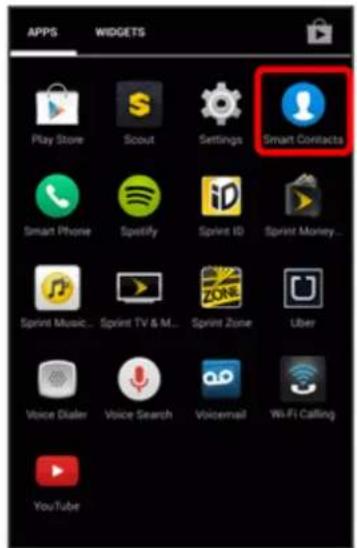
The Smart Contacts app opens and you will see the Contacts list.
- You can also touch 📋 > Smart Phone 📊 to access the same application.
- Touch : and then Add Contact to add a contact.
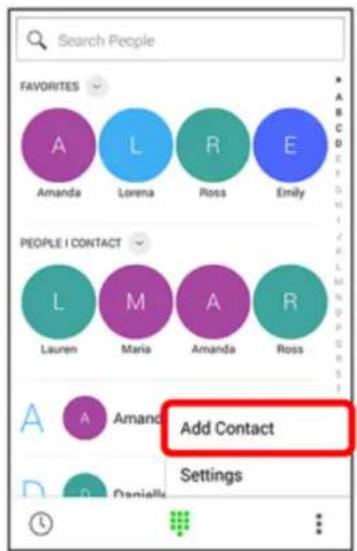
The Add Contact screen appears.
- When a screen for selecting where to add the contact appears, follow the onscreen instructions to continue.
- Use the keyboard to enter as much information as you want.
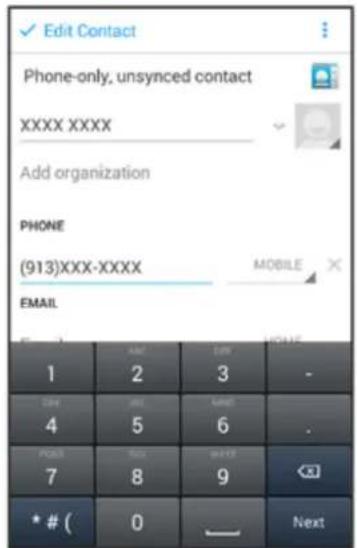
• : Touch the picture icon to assign a picture to the contact. - Name • : Display detailed name fields such as first name, middle name, or last name. - Phone - Email - Address - Date - Group name - Add new: Touch Add new to include additional information such as phone numbers, email addresses, IM address, Notes, Nickname, Website, etc.
Note: Group name and Date are displayed for a Google contact type.
Note: To select a type (label) for a phone number, email address, or postal address (such as Mobile, Home, Work, etc.), touch the type to the right of the field and select the appropriate type.
- When you have finished adding information, touch Edit Contact.


The contact is added.
Save a Phone Number
You can save a phone number to Contacts directly from the phone dialpad.
- From home, touch 📋 > Smart Phone 📞 >
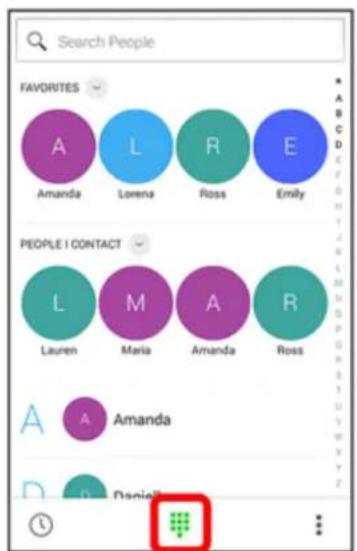
- You can also touch 📷 > Smart Contacts 🔔 > to display the dialer screen.
- Enter a phone number and touch
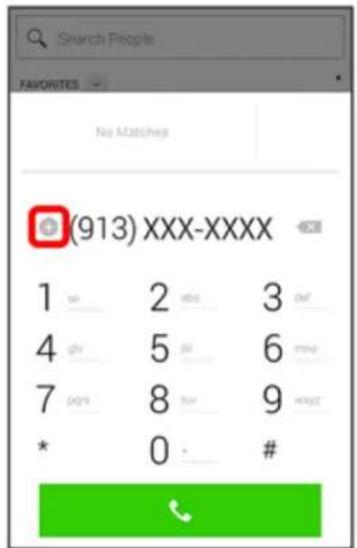
- Enter the name and any additional information, and then touch Edit Contact.
Check Smart Contacts
View a contact's details by displaying a contact entry.
- From home, touch 📋 > Smart Contacts 🔥.

The Smart Contacts app opens and you will see the Contacts list.
- You can also touch 📋 > Smart Phone 📊 to access the same application.
- Touch a contact to view its details.

The contact's detailed listing appears.
- In addition to basic contact information such as names, phone numbers, and addresses, you can see communication histories including calls and SMS in the contact details screen. Touching these histories launches the Phone app or opens the Messaging app. If you have logged in to Facebook on Smart Contacts, exchanges with Facebook friends appearing in your Contact list are also displayed.
Smart Contacts Screen Layout
The following illustration shows your Smart Contacts screen layout and describes the various features.
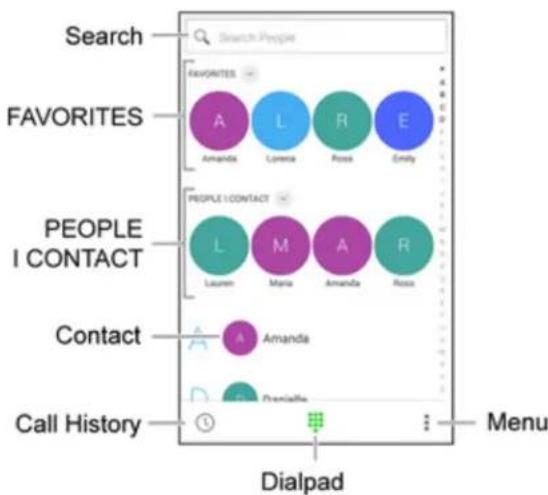
| Item Description | |
| Search Search contacts. | |
| FAVORITES Show favorite contacts. | |
| PEOPLE I CONTACT | Show a selection of contacts that you contact most frequently. The contact shown here will change every once in a while. |
| Contact Touch to show contact's details. | |
| Call History | Show your call history. |
| Dialpad | Show the onscreen dialpad. |
| Menu | Show the following options: Add Contact and Settings. |
Edit a Contact with Smart Contacts
Once you've added a contact, you can add or edit any of the information in the entry, assign a caller ID picture, customize with a unique ringtone, and more.
- From home, touch 📋 > Smart Contacts 🙏.

The Smart Contacts app opens and you will see the Contacts list.
- You can also touch 📋 > Smart Phone 📊 to access the same application.
- Touch a contact to view its details.


The contact's detailed listing appears.
- Touch ➕ Edit Contact.
• If prompted, follow the onscreen instructions.
- Touch any field you want to change or add. See Add a Contact with Smart Contacts.
- Add or edit the information, and then touch Edit Contact.


Your changes are saved to the contact entry.
Note: To select a type (label) for a phone number, email address, or postal address (such as Mobile, Home, Work, etc.), touch the type to the right of the field and select the appropriate type.
Note: To add more phone numbers, email addresses, etc., touch Add new displayed under the entered number, etc.
Delete a Contact with Smart Contacts
You can delete a contact from the contacts details page.
- From home, touch ⚙ > Smart Contacts


The Smart Contacts app opens and you will see the Contacts list.
- You can also touch 📋 > Smart Phone 📊 to access the same application.
- Touch a contact to view its details.
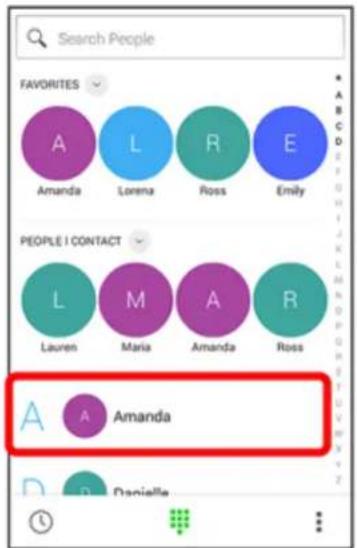
The contact's detailed listing appears.
- Touch Delete Contact.

- Touch OK.


The contact is deleted.
Messaging and Internet
With wireless service and your phone's messaging and data capabilities, you have the opportunity to share information through many different channels and accounts, including Gmail (Google), personal and corporate email, text and multimedia messaging, social networking accounts, and Hangouts.
Text and Multimedia Messaging
With Text Messaging (SMS), you can send and receive instant text messages between your wireless phone and another messaging-ready phone.
Multimedia messages, or MMS, can contain text and pictures, recorded voice, audio or video files, picture slideshows, or contact cards (vCard).
See your service plan for applicable charges for messaging.
Send a Text Message
Quickly compose and send text messages on your phone.
- From home, touch 📋 > Messaging

- On the Messaging screen, touch New message

The New message screen opens.
- Fill in one or more recipients. You can:
- Enter phone numbers directly in the To field. If you're sending the message to several phone numbers, separate the phone numbers with a comma or by touching Return. As you enter information, any matching phone numbers from your contacts list are displayed. Touch a match to enter that number or address directly.
- Touch the icon, and then select the contacts to whom you want to send the message.

- Touch the Type message field, and then start composing your message.

Note: A counter appears above the ( ) to tell you how many characters are left. Once you go over the 160-character limit, a new message is created but automatically joined into one when received.
- When done, touch to send the text message.

The text message is sent.
Send a Multimedia Message (MMS)
When you need to add a little more to a text message, you can send a multimedia message (MMS) with pictures, voice recordings, audio or video files, contact cards (vCard), or slideshows.
- From home, touch ⚙ > Messaging


- On the Messaging screen, touch New message

The New message screen opens.
- Fill in one or more recipients. You can:
- Enter phone numbers directly in the To field. If you're sending the message to several phone numbers, separate the phone numbers with a comma or by touching Return. As you enter information, any matching phone numbers from your contacts list are displayed. Touch a match to enter that number or address directly.
- Touch the icon, and then select the contacts to whom you want to send the message.

Note: You can add a subject line by touching ⚠ > Add subject.
- Touch the Type message field, and then start composing your message.
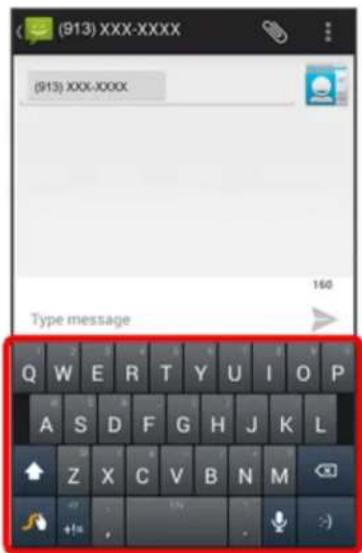
5. Touch Attach

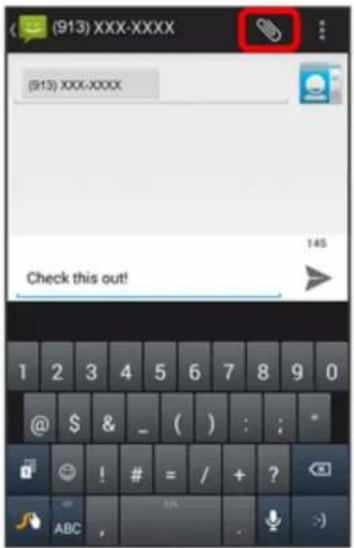
- In the Attach window, select from the following file attachments:
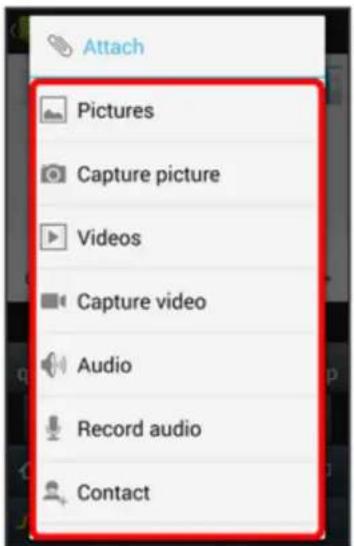
• Pictures: Attach a stored picture. • Capture picture: Take a picture and attach it. • Videos: Attach a stored video. • Capture video: Capture a video and attach it.
- Audio: Select System audio to attach a ringtone, or External audio to attach an audio file or a recorded voice. • Record audio: Make a voice recording and attach it.
- Contact: Select a contact from your phone.
- Slideshow: Create a slideshow and attach it. See the instructions below to create a slideshow.
- To make changes to your attachment, touch Replace. You can also touch Remove to start over.
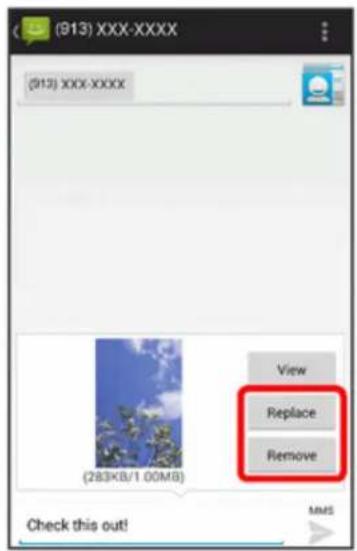
- Touch to send the MMS message.

The MMS message is sent.
Create a Slideshow
In a multimedia message, you can add slides, each containing a picture, video, or audio.
- In the multimedia message you're composing, touch Attach > Slideshow.

- To compose your slideshow, do any of the following:
- Add a new slide: Touch Add slide.
- Select a slide: Touch a slide name such as Slide 1.
- Add a picture: Touch Add picture or 📄 > Add picture and select a picture. You can also touch 📄 > Capture picture to take a picture and add it.
- Add music or a voice recording: Touch > Add music > Audio or Record audio and select a file or record audio.
- Add a video: Touch > Add video and select a video. (You cannot add both a picture and a video, or music and a video on the same slide.) You can also touch > Capture video to capture a video and add it.
- Add a caption to a picture or video: Touch the text entry field.
- Preview your slideshow: Touch Preview.
- Replace an added picture: Touch Replace picture.
- Remove a picture: Touch > Remove picture.
- Remove a slide: Touch Remove slide.
- Add a slide: Touch > Add slide.
- Choose the duration for each slide: Touch > Duration (XX sec).
- Choose the layout of the slideshow: Touch > Layout (top/bottom).
- When finished, touch Return to attach the slideshow to your message.
- When you have finished composing the multimedia message, touch Send.
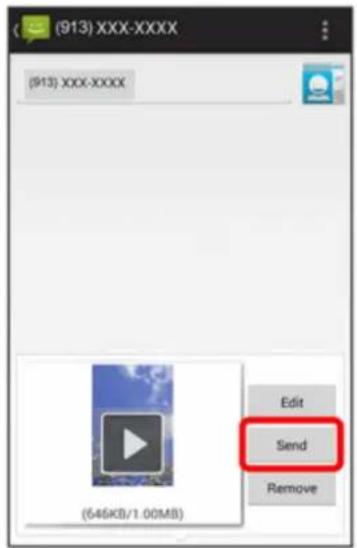

The MMS message with your slideshow is sent.
Save and Resume a Draft Message
While composing a text or multimedia message, touch to automatically save your message as a draft.
To resume composing the message:
- From home, touch ⚙ > Messaging

- On the Messaging screen, touch the message to resume editing it.

- A draft will show "Draft" in red on the messaging screen.
- When you finish editing the message, touch
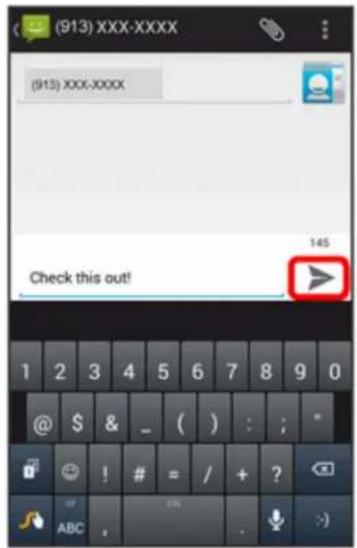
New Messages Notification
Depending on your notification settings, the phone will play a ringtone, vibrate, or display the message briefly in the status bar when you receive a new text or multimedia message. To change the notification for new text and multimedia messages, see Text and MMS Options for details.
A new message icon 🙏️ also appears in the notifications area of the status bar to notify you of a new text or multimedia message. The Messages application icon (if shown on the home screen) also displays the number of new messages .
- To open the message, drag the status bar down to open the notifications window. Touch the new message to open and read it. For information on reading and replying to messages see Manage Message Conversations.
Manage Message Conversations
Text and multimedia messages that are sent to and received from a contact (or a number) are grouped into conversations or message threads in the Messaging screen. Text or MMS conversations let you see exchanged messages (similar to a chat program) with a contact on the screen.
Read a Text Message
■ Do one of the following:
- On the Messaging screen, touch the text message or conversation to open and read it.
- If you have a new message notification, drag the status bar down to open the notifications window. Touch the new message to open and read it.
To return to the Messaging screen from a conversation, touch.
Note: To view the details of a particular message, in the conversation, touch and hold the message to open the options menu, and then touch View details.
Note: If a message contains a link to a Web page, touch the message and then touch the link to open it in the Web browser.
Note: If a message contains a phone number, touch the message and then touch the phone number to dial the number or send a message.
View a Multimedia Message (MMS)
- From home, touch ⚙ > Messaging

- On the Messaging screen, touch a multimedia message or conversation to open it.

- Touch the attachment to open it.

- If the attachment is a vCard contact, it is imported to your phone's contacts list. For more information, see Contacts.
- To save the attachment to device memory or a memory card, touch and hold the attachment, then touch Save attachment.

Note: When Auto-retrieve in MMS settings is disabled, only the message header is downloaded. To download the entire message, touch Download at the right side of the message. For details, see Text and MMS Options.
Note: If you are concerned about the size of your data downloads, check the multimedia message size before you download it.
Reply to a Message
- From home, touch Messaging.

- On the Messaging screen, touch a conversation to open it.

- Touch the Type message field at the bottom of the screen, enter your reply message, and then touch Send.

The MMS message is sent.
Note: To reply to a text message with a multimedia message, open the text message, touch and then touch Add subject, or Attach. The text message is automatically converted into a multimedia message.
Protect (Lock) a Message
You can lock a message so that it will not be deleted even if you delete the other messages in the conversation.
- From home, touch Messaging.

- On the Messaging screen, touch a conversation.
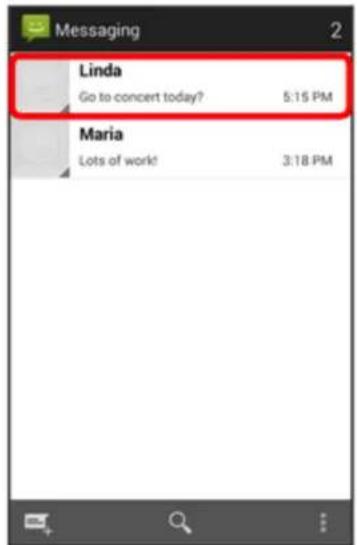
- Touch and hold the message that you want to lock.

- Touch Lock on the options menu. A lock icon is displayed at the right hand side of the message.


The message is locked.
Delete a Conversation
- From home, touch ⚙ > Messaging
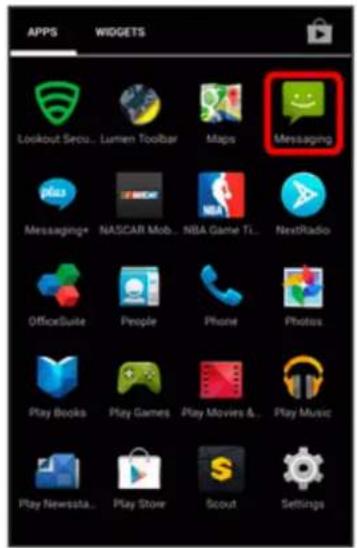
- On the Messaging screen, touch the conversation that you want to delete.

- Touch ▶ Delete thread.

- When prompted to confirm, touch Delete. Any locked messages in the thread will not be deleted unless you select the Delete locked messages check box.
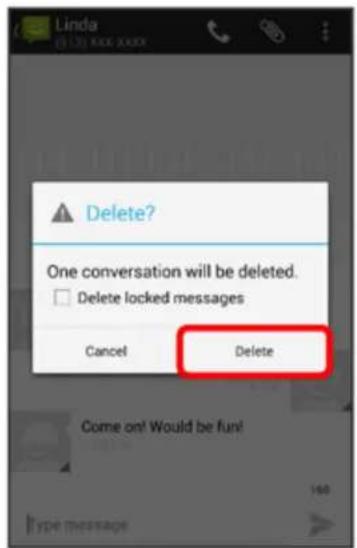

The conversation is deleted.
Delete Multiple Conversations
- From home, touch 🎨 > Messaging

- On the Messaging screen, touch and hold the thread you want to delete and then touch another thread you want to delete.

- Touch Delete and then touch Delete to confirm. Any locked messages will not be deleted unless you select the Delete locked messages check box.


The selected conversations are deleted.
Delete a Single Message
- While viewing a conversation, touch and hold the message that you want to delete.

- If the message is locked, touch Unlock on the options menu and hold the message to display the options menu again.
- Touch Delete on the options menu.
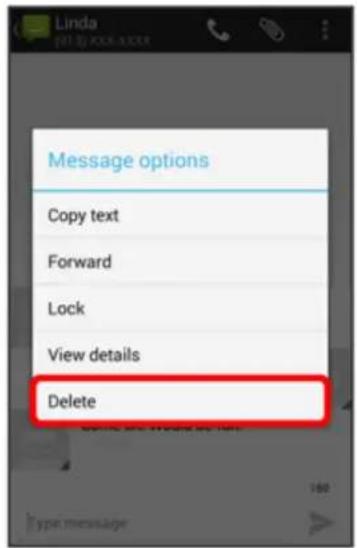
- When prompted to confirm, touch Delete.

The message is deleted.
View Contact Information from a Message
When you have received a message from someone in your stored contacts, you can touch the contact's picture or icon in the conversation to open a menu of options. Depending on the stored contact information, you can view the contact details, place a phone call or send an email message to the contact, and more.
Text and MMS Options
The messages settings menu lets you control options for your text and MMS messages including message limits, size settings, and notifications.
- From home, touch ⚙ > Messaging

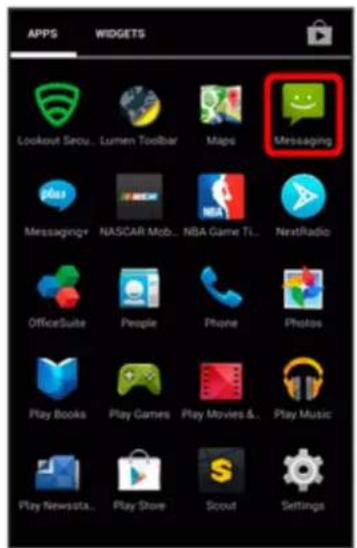
- On the Messaging screen, touch > Settings. You can set the following:

■ SMS Enabled: Set up an application used for sending and receiving SMS.
STORAGE
- Delete old messages: Automatically delete older messages, except for locked messages, when the set limits are reached.
- Text message limit: Choose the maximum number of text messages to store in each conversation thread. (This does not include locked messages.)
- Multimedia message limit: Choose the maximum number of MMS messages to store in each conversation thread. (This does not include locked messages.)
TEXT (SMS) MESSAGES
■ Delivery reports: Receive a report on the delivery status of your message. - Manage SIM card messages: Manage messages stored on your phone's SIM card.
MULTIMEDIA (MMS) MESSAGES
■ MMS Send Priority: Set the priority of outgoing MMS messages. - Group messaging: Control how messages to multiple recipients are handled. When enabled, a single message is sent to multiple recipients as an MMS message. When disabled, a separate message is sent to each recipient. ■ Auto-retrieve: Select this option to automatically retrieve all your multimedia messages completely. When selected, the multimedia message header plus the message body and attachments will automatically be downloaded on your phone. If you clear this check box, only the multimedia message header will be retrieved and shown in your Messaging screen. ■ Roaming auto-retrieve: Automatically retrieve all your messages completely when roaming. This may incur significant phone charges.
CELL BROADCAST SETTINGS
■ Emergency alerts: Set emergency alert notifications.
NOTIFICATIONS
■ Notifications: Set whether to receive notification for received SMS/MMS. ■ Sound: Set a ringtone for received SMS/MMS. ■ Vibrate: Set whether the phone vibrates for received SMS/MMS.
Create and Send Gmail
Use Google's Gmail service and your Google account to send, receive, and manage your Gmail messages. Before using Gmail, you must register a Google (Gmail) account on your phone. See Google Account for details.
! Gmail Cautions
Gmail is handled as email from a computer. Restricting email from computers on your phone prevents your phone from receiving Gmail.
Compose and Send a Gmail Message
- From home, touch 📋 > Gmail 📂.

The Gmail inbox opens.
- In the inbox, touch Compose


The Gmail composition window opens.
- Enter the message recipient(s), subject, and message, and then touch Send ▶.

The Gmail message is sent.
Gmail Composition Options
- Attaching Pictures or Videos: In the mail composition window, touch > Attach file. Locate and then touch the picture or video you want to attach.
- Adding Cc/Bcc: In the mail composition window, touch ≡ > Add Cc/Bcc, and then add recipients.
- Save as a Draft (Send Later): While composing your message, touch > Save draft. The message is saved as a draft for later.
- Delete Mail Being Composed: In the mail composition window, touch > Discard > Discard.
- Configure Gmail Settings: In the mail composition window or the inbox, touch > Settings. Select an option to configure your settings.
- Send Feedback: In the mail composition window or the inbox, touch > Send feedback. Write your feedback comment and send it.
- See How to Use Gmail: In the mail composition window or the inbox, touch > Help.
Note: To view your draft email messages, touch 📂 > Drafts.
Note: To view your sent messages, touch 📂 > Sent.
Check Received Gmail Messages
Your phone allows you to access, read, and reply to all your Gmail messages.
Open New Gmail Messages
When new Gmail arrives, you will see it in the status bar.
- Drag the status bar down to display the notifications window.

- Touch the new message from the notifications window.

The new Gmail message opens.
- If you have two or more new Gmail messages, touching the notification opens the Gmail inbox. Touch a message to open it.
Open Gmail Messages
You can also read and reply to all your Gmail messages from the Gmail inbox.
- From home, touch ⚙ > Gmail

The Gmail inbox opens.
- Touch the message thread you want to view.

The message thread opens, with the newest message displayed.
Options when Reviewing Gmail Messages
- Replying to Gmail Messages: With the Gmail message open, touch 📄, compose your reply message, and touch Send 📄.
• To reply to all, touch next to , and then touch Reply all, or, from the reply message, touch Reply and select Reply all.
- Forwarding Gmail Messages: With the Gmail message open, touch next to , and then touch Forward, enter a recipient and an additional message, and touch Send ▶.
- You can also touch Reply and select Forward from a reply message to forward a Gmail message.
- Printing Gmail Messages: With the Gmail message open, touch next to , and then touch Print.
Manage Gmail Messages
Your phone gives you control over how you manage your Gmail messages, with labels, thread management, search capabilities, adding multiple Google accounts, and more.
Use Gmail Labels
Gmail saves all mail in one box, but you can add labels that allow you to sort your Gmail conversation threads. For example, when a new thread starts with a received mail, the label "Primary" is automatically added to the thread. By then adding the label "travel," all threads with "travel" are shown in a list.
1. From home, touch ⚙ > Gmail 📂

The inbox opens.
- Touch the icon on the left side of the message, and then touch : > Change labels.

- Touch a label for the thread.
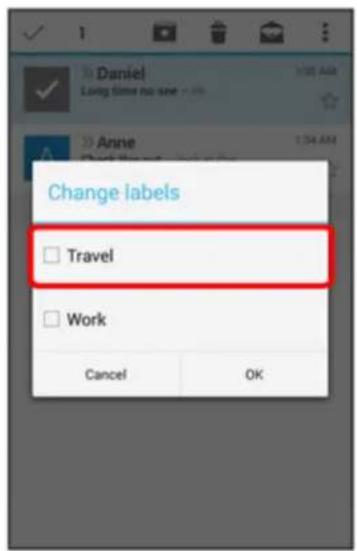
- Touch OK.
The thread is added to the selected label.
Archive Gmail Threads
Remove sent and received Gmail threads so they do not appear in the inbox. When replies arrive for archived threads, they appear in the inbox again.
- From home, touch ⚙ > Gmail 📂

The inbox opens.
Messaging and Internet 202
- Touch the icon on the left side of the message, and then touch Archive.


The thread is now archived.
Mute Gmail Threads
If you are registered on a mailing list, there will be threads with always-continuing conversations. For long threads that are not important, mute the threads and they will no longer appear in the inbox. When mail arrives that includes your address as a recipient or in Cc, mail will again appear in the inbox.
- From home, touch ⚙ > Gmail 📂
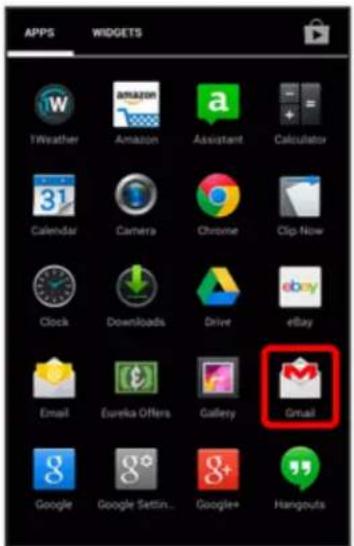

The inbox opens.
- Touch the icon on the left side of the message, and then touch : > Mute.

The thread is now hidden.
Delete Gmail Threads
If you no longer wish to keep a Gmail conversation thread, you can simply delete it from the inbox.
- From home, touch 📋 > Gmail 📂

The inbox opens.
- Touch the icon on the left side of the message, and then touch Delete.

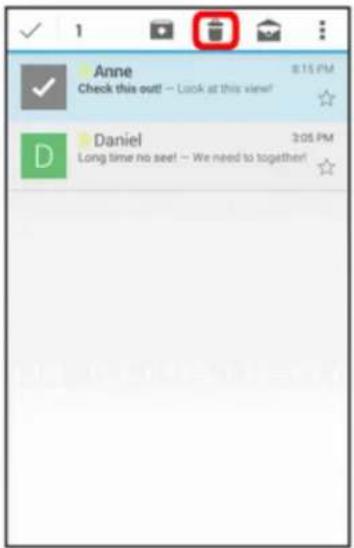

Search Gmail Messages
If you need to find a specific message or message thread, you can search Gmail from the inbox.
- From home, touch > Gmail


The inbox opens.
2. Touch Search


3. Enter your search text and touch
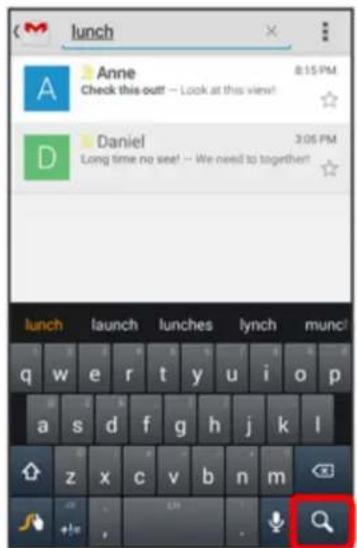
The search results appear. Touch a message or thread from the list to display it.
Report Spam or Phishing Gmail
You can report spam or phishing Gmail messages from your phone's Gmail inbox.
1. From home, touch 📋 > Gmail 📂
Messaging and Internet 206

The inbox opens.
- Touch the icon on the left side of the message, and then touch > Report spam or Report phishing.

The selected message is reported as spam or phishing Gmail.
Add Another Google (Gmail) Account
If you have multiple Gmail accounts you wish to view on your phone, you can add them from the Settings > ACCOUNTS menu.
- From home, touch Menu > Settings > Add account.

- Touch Google, and then touch Existing.

- Enter your Gmail username and password, and then touch OK.

- Touch Not now.

- Specify whether to receive news and other information from Google Play, and then touch Next.

- After your phone connects with the Google servers, select the items you would like to sync with your phone and then touch Done.
You are signed in to your Google account, and you can access both of your Gmail accounts from the Gmail app.
Switching between Gmail Accounts
If you have more than one Gmail account set up, you can switch between them in the Gmail app.
- From home, touch Menu > Gmail.


The inbox opens.
2. Touch the Menu icon.


- Touch the account you want to view from the list at the top of the menu.

The selected account inbox is displayed.
Use the Mail application to send and receive email from your webmail or other accounts, using POP3 or IMAP, or access your Exchange ActiveSync account for your corporate email needs.
Set Up an Email Account
Your phone supports several types of email accounts and allows you to have multiple email accounts set up at one time.
Before setting up an email account, make sure you have the username (user ID), password, server name, etc., so you can set up successfully.
- From home, touch Email.

A window for adding an account appears if no email account has been previously set up.
- Follow the onscreen instructions to set up your email account.
The email account is set up and you will begin receiving email.
Add an Email Account
You can add several types of personal email accounts, such as POP3 and IMAP accounts, on your phone.
Add an Email Account from the Email App
You can add email accounts directly from the email app, even if you have another email account set up.
- From home, touch Email.


The email inbox opens.
- Touch > Settings.

3. Touch ADD ACCOUNT.
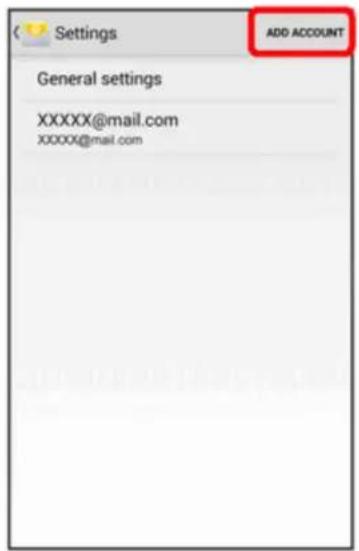
- Follow the onscreen instructions to complete the account setup.
The email account is added and you will begin receiving email for the account.
Add an Email Account from the Settings Menu
You can also set up email accounts from the Settings > ACCOUNTS menu.
- From home, touch ⚙ > Settings ⚗ > Add account > Corporate, IMAP, or POP3.

- Enter the Email address and Password for the email account and then touch Next.
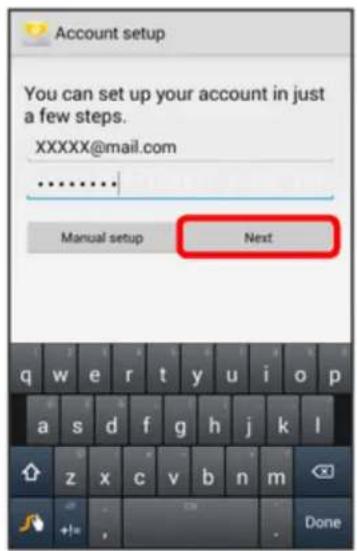
Touching Next prompts your phone to attempt a "regular" email setup and test the incoming and outgoing servers.
- If you have custom settings you need to configure, touch Manual setup and enter your settings. These may include mail type, user name, password, server, security type, etc.
- Select your sync settings and then touch Next.

- Enter an account name and a display name and touch Next to complete setup.


The email account is set up and you will begin receiving email for the account.
Important: If the account type you want to set up is not in the phone database, you will be asked to enter more details. You should get all pertinent information for the email account, such as incoming and outgoing server settings, before you proceed.
Add an Exchange ActiveSync Account
If you synchronize your phone with your Exchange ActiveSync account, you can read, manage, and send email in the same easy way as with a POP3/IMAP account. However, you can also access some powerful Exchange features.
Important: Before setting up a Microsoft Exchange ActiveSync Account, contact your company's Exchange Server administrator for required account settings information.
- From home, touch ⚙ > Settings ⚗ > Add account > Corporate.

- Enter the Email address and Password for the email account and then touch Manual setup.

- Touch Exchange.
- Configure the settings such as a server address and port number, and touch Next.

- Username: Enter your network username.
- Password: Enter your network access password (case-sensitive).
- Server: Enter your system's Exchange server remote email address. Obtain this information from your company network administrator. • Port: Enter your port number. • Security type: Select a security type.
- Client certificate: Touch Select to enter the password for credential storage.
- Select your sync settings and then touch Next.
- Enter an account name and touch Next to complete setup.
Compose and Send Email
Compose and send email using any account you have set up on your phone. Increase your productivity by attaching files such as pictures, videos, or documents to your email messages.
- From home, touch ⚙ > Email

The email inbox opens.
- If you want to switch to a different email account, touch the account name at the top of the screen and select another account.
2. Touch Compose


The email composition window opens.
- Enter the message recipient(s), subject, and message.

- Touch Send

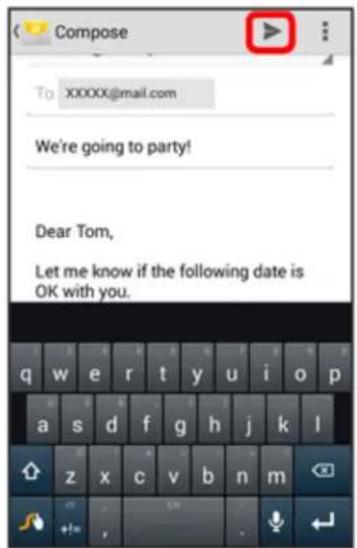

The email message is sent.
Open New Email Messages
When new email arrives, you will see in the status bar.
- Drag the status bar down to display the notifications window.

- Touch the new message from the notifications window.

The new email message opens.
- If you have two or more new email messages, touching the notification opens the email inbox. Touch a message to open it.
Open Email Messages
You can also open and read email messages directly from the email inbox. Reading and replying to email on your phone is as simple as on your computer.
- From home, touch ⚙ > Email


The email inbox opens.
- Touch the message you want to view.
The email message opens.
Tip: Touch the account name at the top of the screen to switch to a different email account.
- Touch or :> Reply all to reply to the message.
Options when Reviewing Email Messages
- Resetting Mail as Unread: Touch the icon on the left side of the read message you want to unread, and then touch Mark unread.
- Deleting Email: Touch the icon on the left side of the message you want to delete, and then touch Delete 📄.
- Syncing Accounts Manually: Sync sent and received email messages manually at any time regardless of the automatic sync settings. Switch to the account you want to sync and then touch > Refresh or drag the inbox screen down.
- Replying to Email Messages: With an email message open, touch , compose your reply message, and touch Send .
- To reply to all, touch next to , and then touch Reply all, or, from the reply message, touch Reply and select Reply all.
- Forwarding Email Messages: With the email message open, touch next to , and then touch Forward, enter a recipient and an additional message, and touch Send ▶.
- You can also touch Reply and select Forward from a reply message to forward a Gmail message.
- Printing Gmail Messages: With the Gmail message open, touch next to , and then touch Print.
Delete an Email Account
You can delete an email account from your phone if you no longer wish to receive messages for the account on your phone.
- From home, touch ⚙ > Settings ⚙ > Corporate, IMAP, or POP3.

- Touch an account you want to delete.

- Touch Remove account again to confirm the deletion.


The account is deleted from your phone.
Manage Your Email Inbox
Your email inbox provides management options for viewing, sorting, and deleting your email messages.
View Your Email Inbox
- From home, touch ⚪ > Email


The email inbox opens.
- Touch the email account at the top of the screen to select a different inbox, or touch Combined view to see all your email inboxes at once.
Refresh an Email Account
Whatever your automatic synchronization settings are, you can also synchronize your sent and received email messages manually at any time.
While viewing the account you want to synchronize, touch > Refresh or drag the inbox screen down.
Delete an Email Message
On the email account inbox, swipe the message you want to delete to the right or left.
Touch UNDO to cancel deletion.
Delete Multiple Email Messages
- On the email account inbox, touch the icon on the left side of the message you want to delete.
- Touch Delete
Touch UNDO to cancel deletion.
Data Services General Information (Sprint Spark LTE and 3G Networks)
The following topics will help you learn the basics of using your data services, including managing your user name, launching a data connection, and navigating the Web with your phone.
Important: Certain data services requests may require additional time to process. While your phone is loading the requested service, the touchscreen or QWERTY keyboard may appear unresponsive when in fact they are functioning properly. Allow the phone some time to process your data usage request.
Sprint Spark LTE
The Sprint Spark enhanced LTE network provides your phone with wireless Internet access over greater distances than Wi-Fi and delivers data transfer rates of up to 60 Mbps. To connect your phone to Sprint Spark, you need to be in an area covered by the Sprint Spark enhanced LTE network.
For more information about the availability of Sprint Spark in your location, visit sprint.com/coverage.
Note: The availability and range of the network depends on a number of factors including your distance to the base station, and infrastructure and other objects through which the signal passes.
Set Your Network Options
- From home, touch ⚙ > Settings ⚙ > More... > Mobile networks > Preferred network type.

- Select LTE/CDMA or CDMA.

The phone will scan for the best available Sprint network and will automatically connect to it.
When your phone is connected via Sprint Spark, the Sprint Spark icon appears in the status bar.
Note: The Sprint Spark network is self-discoverable, which means no additional steps are required for your phone to connect to it.
Your User Name
When you buy your phone and sign up for service, you're automatically assigned a user name, which is typically based on your name and a number, followed by "@sprintpcs.com." (For example, the third John Smith to sign up for Sprint data services might have jsmith003@sprintpcs.com as his user name.)
When you use data services, your user name is submitted to identify you to the network. Your user name is automatically programmed into your phone. You don't have to enter it.
Update Your User Name
If you choose to change your user name and select a new one online, or make any changes to your services, you must then update the profile on your phone.
- From home, touch ⚙ > Settings ⚗ > System updates.

2. Touch Update Profile.

Your phone will download and install the profile update.
Data Connection Status and Indicators
Your phone displays the current status of your data connection through indicators at the top of the screen. The following symbols are used:
| Icon Status | |
 | Network (full signal): The number of bars indicate the strength of the signal. More bars mean a better signal. |
 | Sprint Spark Enhanced LTE data service: Your phone is connected to the Sprint Spark enhanced LTE network. The rays spin when data is being transferred. |
 | 3G (data service): Your phone is connected to the 3G network. When the icon is animated, your phone is transferring or receiving data. |
Browser
Your phone's Web browser gives you full access to both mobile and traditional websites on the go, using 3G, 4G, or Wi-Fi data connections.
Your phone supports the Chrome mobile Web browser. If you are signed in with a Google account, the Chrome browser will import all your bookmarks and other Web preferences for use on your phone.
Use the Browser
Launching the browser is as easy as touching an icon.
■ From home, touch ⚙ > Chrome

The browser opens.
- You can also launch the browser by touching a URL in a text message, email message, or Gmail message.
Tip: To change the phone's default launch page to your current page, touch > Settings > Home page, clear the Default check box, and then enter the current page's URL in the Enter URL... field. Touch ON to complete.
Add a Bookmark
Bookmark favorite sites using the browser menu options.
- From home, touch 📋 > Chrome


The browser opens.
- Navigate to the Web page you want to bookmark, and touch >


The add bookmark window opens.
- Check or change the bookmark title, URL, etc., and then touch Save.
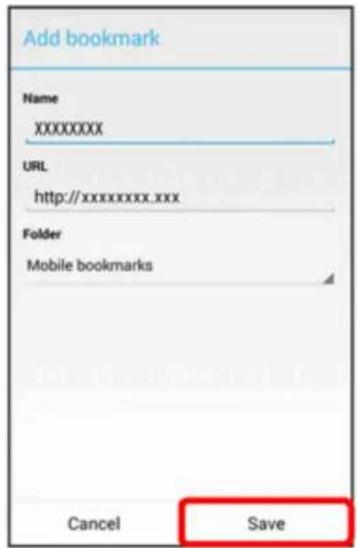

The Web page is added to bookmarks.
View Browser History
Use the browser menu options to view your browsing history.
- From home, touch ⚙ > Chrome 📋.


The browser opens.
- Touch : > History.
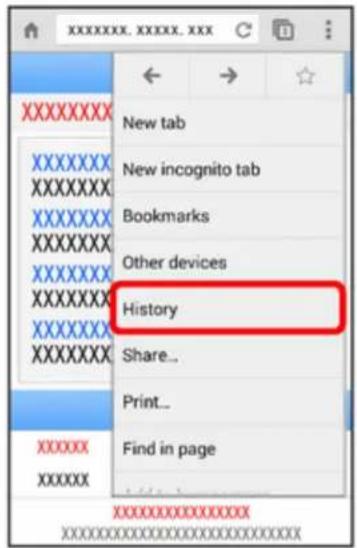
The history window opens.
- If you don't see ☐, drag the Web page down to display the address bar.
- Touch an entry.

The Web page opens.
Use Tabs
You can use multiple tabs to switch between Web sites quickly and easily.
Open New Browser Tabs
Use tabbed browsing to switch between Web sites quickly and easily.
- From home, touch ⚙ > Chrome 📷.
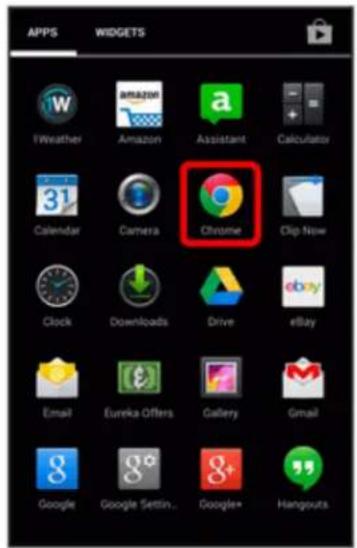
The browser opens.
- Touch
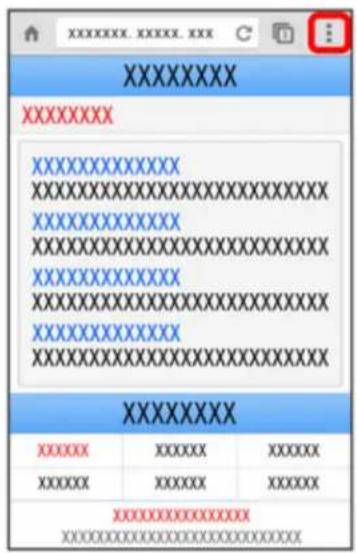
The option menu opens.
- If you don't see ☐, drag the Web page down to display the address bar.
3. Touch New tab.

A new tab opens.
Note: You can also open a new tab by touching Open tabs > New tab.
Open Incognito Tabs
Use incognito tabs to browse Web pages without leaving identifying information such as browsing history, cookies, etc.
- From home, touch 📋 > Chrome 🅿


The browser opens.
- Touch


The option menu opens.
- If you don't see , drag the Web page down to display the address bar.
- Touch New incognito tab.


A new incognito tab opens.
Switch Tabs
- Touch Open tabs

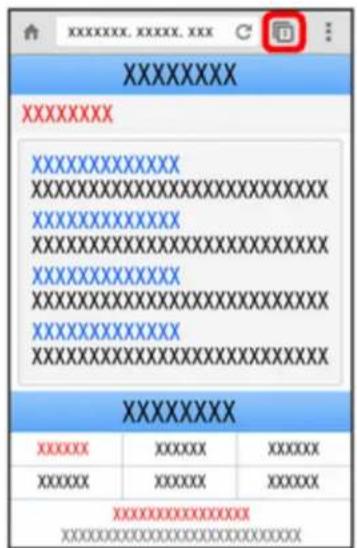

You can see all the open tabs.
Note: You can also drag the address bar down to see the open tabs.
- Touch a desired tab.
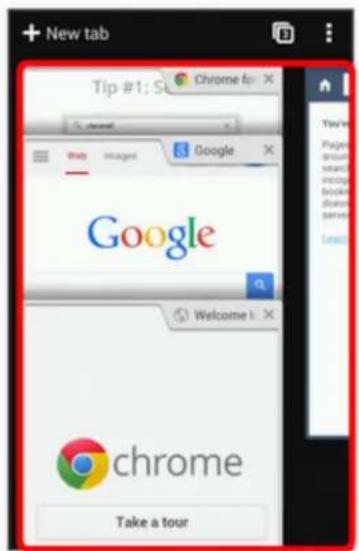
Note: You can change to another tab by swiping the address bar right or left.
Close Tabs
- Touch Open tabs


You can see all the open tabs.
Note: You can also drag the address bar down to see the open tabs.
- Swipe the tab you want to close right or left.

Note: You can also close tabs by touching the top right corner of the page.
Tab Menu
You can open a new tab or close Chrome from the tab menu.
- Touch Open tabs
You can see all the open tabs.
Note: You can also drag the address bar down to see the open tabs.
- Touch


You will see the tab menu.
Options available within the tab menu may include:
■ New tab: displays a new tab so you can browse multiple Web pages. ■ New incognito tab: allows you to browse the Web without leaving identifying information. ■ Close all tabs: closes all open tabs and exits Chrome. ■ Close incognito tabs: closes all incognito tabs. ■ Settings: allows you to modify your Web settings. For more information, see Browser Settings.
Browser Settings
Customize your experience with the Internet through the browser settings menu.
- From home, touch 📋 > Chrome 🎨.

The browser opens.
- Touch > Settings, and customize your browser settings.

Your browser settings are saved.
Options for Browser Operations
- Editing Bookmarks: From the browser, touch >Bookmarks, touch and hold a bookmark, and then touch Edit bookmark, edit the bookmark, and then touch Save.
- Deleting Bookmarks: From the browser, touch ≡ >Bookmarks, touch and hold a bookmark, and then touch Delete bookmark.
- Searching within a Web Page: With a Web page displayed, touch > Find in page, and enter your search text. The search results are highlighted on the page.
- Deleting Cache and Cookies: From the browser, touch > Settings > Privacy > CLEAR BROWSING DATA. Select the types of data you want to remove, and then touch Clear.
SSL/TLS
SSL (Secure Sockets Layer) and TLS (Transport Layer Security) are protocols for encrypting sent/received data. While in a screen connected by SSL/TLS, data is encrypted to safely send/receive private information, credit card numbers, corporate secrets, etc., and provide protection against online threats (eavesdropping, falsification, impersonation, etc.).
! SSL/TLS Cautions
When a security notice appears upon opening a webpage, users must decide for themselves whether or not to open the page. No guarantees are made whatsoever to users with their own use of SSL/TLS regarding security of SSL/TLS.
Chrome Support
- To find on-phone help with Chrome, from Chrome, touch 📄 > Help & feedback. A Web page will open displaying Google help for Chrome.
Tip: For more information, from your computer, visit: google.com/intl/en/chrome/browser/mobile/.
Camera and Video
You can use the camera or video camera to take and share pictures and videos. Your phone comes with an 8 megapixel camera with an autofocus feature that lets you capture sharp pictures and videos.
Take Pictures and Record Videos
The following topics teach you how to take pictures and record videos with your phone's camera.
The file formats for pictures and videos are as follows:
Pictures: JPEG. Videos: MPEG4.
! Camera Cautions
If Lens Becomes Dirty: Fingerprints/smudges on lens prevent capturing of clear still images/videos. Wipe lens with a soft cloth beforehand.
Avoid Exposure to Direct Sunlight: Be careful not to expose lens to direct sunlight for long periods. May discolor color filter and affect color of images.
! Flash Warning
Do not shine flash close to eyes. Do not look directly at flash when shining/flashing. Do not shine flash at other people's eyes. May affect eyesight, etc.
Take a Picture
You can take high-resolution pictures using your phone's camera.
Note: You can share or delete multiple pictures or videos together by touching and holding thumbnails in an album.
- From home, touch 📋 > Camera

The camera viewfinder appears.
- Aim the camera at your subject.

- When you take a picture of people, the camera automatically recognizes the face of your subject and focuses on it (face detection function). • To zoom in, swipe the screen right. • To zoom out, swipe the screen left.
Auto focus activates.
- Touch


The shutter clicks and the picture is captured and saved to your phone or SD card.
- You can also take a picture by pressing the Volume Up/Down key.
Camera Viewfinder Screen
The Viewfinder screen lets you view your subject and access camera controls and options.

- Switch operation mode: Switch between a simple mode (easy to operate) and a detail mode (various settings available). ■ Settings: Open the camera settings menu and lets you change additional camera settings. See Camera Settings.
- Switch view mode: Switch between the back camera lens and the front-facing camera lens (for self-portraits, video chatting, etc.). ■ AUTO Flash: Select a flash mode for the camera.
■ STD AUTO Shooting mode: Change to settings matched to the subject and shooting conditions. ■ GPS: Set whether to append location information. ■ 6M Size: Change the shooting size. NightCatch: Capture dark portions brightly. ■ HDR: In backlit and other strong contrast scenes, enable shooting with reduced flaring or blackening out. ■ Framing Adviser: According to the shooting scene, display dividing lines or guide for composing a shot. ■ SELECT Change Framing Adviser: Change Framing Adviser settings. - Minipreview: Display the picture that was just taken. Shutter: Touch to shoot. - Camera/Video Switch: Switch between picture and video shooting.
Record Videos
Record high-quality videos using your phone's video camera.
Note: By default, pictures and videos captured on your phone are saved in phone memory even if you have an SD card installed.
- From home, touch 📋 > Camera 🎨.

The camera viewfinder appears.
- Move the selection slider to video camera.

The video shooting screen is displayed.
- When prompted to confirm, follow the onscreen instructions to continue.
- Aim the camera at your subject and then touch


Video recording begins.
- Touch to stop recording.


The camera stops recording and the video is captured and saved to your phone or SD card.
Video Shooting Screen
The video shooting screen lets you view your subject and access video controls and options.

- Switch operation mode: Switch between a simple mode (easy to operate) and a detail mode (various settings available).
- Settings: Open the video settings menu and lets you change additional video settings. See Camera Settings.
- Switch view mode: Switch between the back camera lens and the self camera lens (for self-portraits, video chatting, etc.). ■ Flash: Select a flash mode for the camera. ■ STD AUTO Shooting mode: Change to settings matched to the subject and shooting conditions. GPS: Set whether to append location information. ■ HD Size: Change the shooting size.
- NightCatch: Capture dark portions brightly.
- 44m Remaining Time: Show the remaining time for recording by the current settings.
- Minipreview: Display the video that was just recorded.
- Record: Start recording.
- Camera/Video Switch: Switch between picture and video shooting.
View Pictures and Videos Using Gallery
Using the Gallery application, you can view pictures and watch videos that you've taken with your phone's camera, downloaded, or copied onto your storage card or phone memory.
For pictures that are on your storage card or phone memory, you can do basic editing such as rotating and cropping. You can also easily assign a picture as your contact picture or wallpaper and share pictures with your friends.
- From home, touch 📋 > Gallery

The album list opens.
- Touch an album (such as Camera).

The list of pictures and videos for the album opens.
- To select another album, touch ⇔ to return to the album list.
- Touch an image to view the picture or video.
The picture or video opens.
- Touch a picture to view it full screen.
- Touch ▶ to start the video and then follow the onscreen instructions.
- You can share or delete multiple pictures or videos together by touching and holding thumbnails in an album.
Pictures and Videos: Review Screen
After capturing a picture or video, from the camera screen, touch the thumbnail image (Minipreview) to see the item in the review screen. From there, you can access options such as edit, view, send, or delete the picture or video.
Pictures and Videos: Options while Viewing
- Zoom In or Out on a Picture or Video: Touch the screen twice or pinch the screen to zoom in or out on a picture or video. ■ Viewing Videos: Use the onscreen controls to play, pause, or stop the video playback.
After selecting an album from the Albums tab, you can browse through the pictures and videos of that album. Touch a picture or video to view it in full screen. By default, the pictures and videos in an album are displayed in grid view.
Edit Pictures
You can choose to delete the picture, rotate or crop it, and more.
Rotate and Save a Picture
- From home, touch 📋 > Gallery

The album list opens.
- Touch an album (such as Camera).
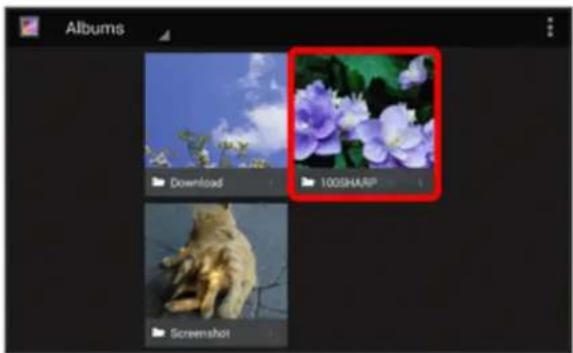
The list of pictures and videos for the album opens.
- Touch the picture you want to rotate.
- Touch 📄 and then select either Rotate left or Rotate right.

The picture is rotated and saved to the phone or SD card, depending on your settings.
Crop a Picture
- From home, touch 📋 > Gallery

The album list opens.
- Touch an album (such as Camera).

The list of pictures and videos for the album opens.
- Touch the picture you want to crop.
4. Touch Crop.

A crop box appears on the picture.
- To adjust the crop box size, touch the edge or corner of the box and then drag your finger inward or outward to resize the crop box.

- To move the crop box to the part of the picture that you want to crop, drag the crop box to the desired position.
- Touch SAVE to apply the changes to the picture.
The cropped picture is saved in the album as a copy. The original picture remains unedited.
Share Pictures and Videos
The Gallery application lets you send pictures and videos using email or multimedia messages. You can share pictures on your social networks (such as Facebook, Picasa, and Twitter) and share videos on YouTube. You can also send them to another phone or your computer using Bluetooth®
Send Pictures or Videos by Email or Gmail
You can send several pictures, videos, or both in an email or Gmail message. They are added as file attachments in your email or Gmail.
1. From home, touch 🎯 > Gallery

The album list opens.
- Touch an album (such as Camera).
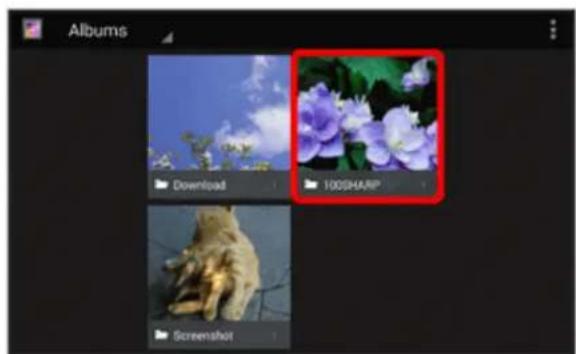
The list of pictures and videos for the album opens.
- Touch the pictures or videos you want to share.
- To select multiple items, touch and hold an image to turn on multiple select. Touch all the items you want to include.
- Touch, and then touch See all > Email or Gmail.

Follow the onscreen prompts to complete and send the message.
Note: If you selected Email and you have multiple email accounts, the default email account will be used.
For more information about using email and Gmail, see Compose and Send Email or Create and Send Gmail.
Send a Picture or Video by Multimedia Message
Multimedia Messaging (MMS) lets you send pictures and videos using your phone's messaging app. Although you can send several pictures or videos in a multimedia message, it may be better to just send one at a time, especially if the files are large in size.
- From home, touch 📋 > Gallery

The album list opens.
- Touch an album (such as Camera).

The list of pictures and videos for the album opens.
- Touch the pictures or videos you want to share.
- To select multiple items, touch and hold an image to turn on multiple select. Touch all the items you want to include.
- Touch and then touch Messaging.

Follow the onscreen prompts to complete and send the message.
For more information about sending multimedia messages, see Send a Multimedia Message (MMS).
Send Pictures or Videos Using Bluetooth®
You can select several pictures, videos, or both and send them to someone's phone or your computer using Bluetooth®.
- From home, touch 🎯 > Gallery


The album list opens.
- Touch an album (such as Camera).


The list of pictures and videos for the album opens.
- Touch the pictures or videos you want to share.
- To select multiple items, touch and hold an image to turn on multiple select. Touch all the items you want to include.

Touch and then touch Bluetooth.


Follow the onscreen prompts to complete and send the files.
For more information, see Bluetooth®.
Share Pictures and Videos on Facebook
You can share pictures and videos from your phone directly to your Facebook account. You need to be logged in to your Facebook account to upload pictures and videos.
- From home, touch 🎯 > Gallery
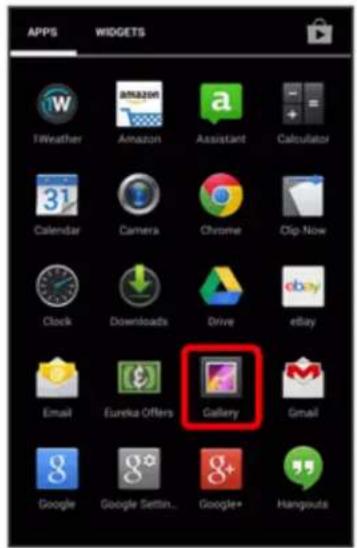

The album list opens.
- Touch an album (such as Camera).

The list of pictures and videos for the album opens.
- Touch the pictures or videos you want to share.
- To select multiple items, touch and hold an image to turn on multiple select. Touch all the items you want to include.
- Touch, and then touch See all > Facebook.
- Add a caption and then touch Post.
The upload is completed.
- For confirmation, check the status bar for the upload information.
Share Pictures on Picasa
You need to be signed in to a Google account to upload pictures to the Picasa™ picture organizing service.
- From home, touch 📋 > Gallery
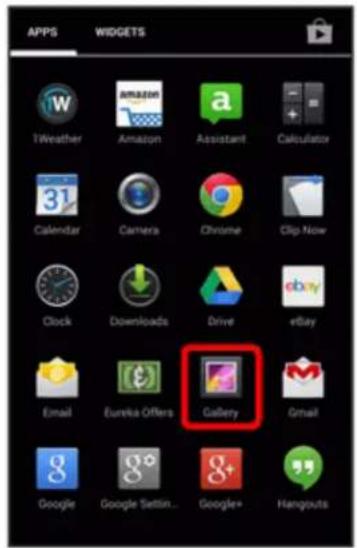

The album list opens.
- Touch an album (such as Camera).


The list of pictures and videos for the album opens.
- Touch the pictures or videos you want to share.
- To select multiple items, touch and hold an image to turn on multiple select. Touch all the items you want to include.

Touch and then touch Picasa.

- Select the online album where you want to upload the pictures, or touch to create a new album.
- Touch Upload.
The upload is completed.
• You can view the pictures online at picasaweb.google.com.
Share Videos on YouTube
You can share your videos by uploading them to YouTube™. Before you do this, you must create a YouTube account and sign in to that account on your phone.
- From home, touch 📋 > Gallery

The album list opens.
- Touch an album (such as Camera).

The list of pictures and videos for the album opens.
- Touch the videos you want to share.
- To select multiple videos, touch and hold an image to turn on multiple select. Touch all the videos you want to include.
- Touch 📁, and then touch See all > YouTube.

• If prompted, select an account and then touch OK.
- Enter the prompted information, such as description and tags, and select a privacy option.
- Touch
The upload is completed.
Camera Settings
You can adjust your camera's settings using the icons on the main camera screen and the full camera settings menu.
Switch Camera Mode
Your phone lets you use different camera modes for your pictures.
- From home, touch 🎨 > Camera 🎩.

The camera viewfinder appears.
- Touch AUTO.

The shooting mode list appears.
- Touch a shooting mode.


The camera switches modes.
The shooting modes are the following:
| Type Description | |
| Auto Automatically adjust the focus on the subject. | |
| Standard Suitable for mixed subjects. | |
| Portrait Suitable for portraits, sets a soft background. | |
| Night Portrait Suitable for low-light or nighttime portraits. | |
| Scenery Suitable for landscapes, the whole shot is in focus. | |
| Night Scenery Suitable for low-light or nighttime landscapes. | |
| Food Capture close-up details of food. | |
| Text Suitable for print and text. | |
| Sepia Add a warm, nostalgic feel. | |
| Monochrome | Emphasize highlights and shadows. |
| Bleach Bypass | Add a faded, high-contrast look to the shot. |
| Fisheye | Capture the subject with an ultra-wide-angle lens. |
| Miniature | Give life-size subjects a miniature look. |
| Panorama | Combine shots to create a single panoramic image. |
| Mirror | Use the in-camera to view yourself like a mirror (cannot take picture). |
Set Camera Functions
You can configure your camera's settings to fit any situation and event.
- From home, touch 🎨 > Camera 🎩.

The camera viewfinder appears.
• To configure settings for video, touch
2. Touch


The camera settings menu opens.
- Select your desired settings from the options:
The main options you can choose are the following:
| Item Description | |
| ISO*1 | Set the ISO speed. |
| White Balance Set | Set the white balance according to the shooting environment. |
| Mic\ settings*2 | Set to record sound. |
| Shutter mode*1 | Set whether to use Smile detect or Turn around detect. |
| Self-timer Set the self-timer. | |
| Touchscreen shutter*1 | Enable the touchscreen to be touched to take a picture instead of touch  |
| Auto focus*1 | Set auto focus. |
| Focus settings*2 | Set a focus setting. |
| Anti shake*1 | Enable use of shake correction. |
| Anti Flicker Set the anti-flicker feature. | |
| Save to*3 | Select your phone memory or an installed SD card to save pictures to. |
| Time lapse*2 | Set to shoot a time-lapse video. |
| Help Display camera/video instructions. | |
| Framing Advisor Guide*1 | Display Framing Adviser instructions. |
*1 This option is available for the camera viewfinder screen. *2 This option is available for the video shooting screen. *3 Displayed only when an SD card is installed.
Note: Options differ depending on the camera type in use.
Useful Features
The following topics detail many of your phone's tools and features such as news services, maps and navigation, calendar, clock, social networking apps, music, memos, and more.
NASCAR MOBILE
Now you have the ability to get every bit of NASCAR coverage, news, and stats right on your phone.
Use the NASCAR MOBILE App
- From home, touch 📷 > NASCAR

The NASCAR Mobile app opens.
- Follow the prompts to customize your app and begin following your favorite racers.
Navigation
Your phone offers a number of location-based navigation programs to help you figure out where you are and get you where you're going.
Google Maps
Use the Google Maps app to determine your location, find directions, browse local businesses and attractions, rate and review places, and more.
Note: Before using any location-based services, you must enable your phone's location feature. For information about setting your phone's location options, see Location Services Settings.
View Maps of Specified Places
Use Google Maps to locate and map a specific address or destination.
- From home, touch ⚙ > Maps


Google Maps opens.
- If prompted, follow the onscreen instructions to accept terms of use.
- Touch Search

- Enter an address, city, facility name, etc., and then touch a candidate in the results list.

A map of the specified location opens.
Google Maps Operations
- Viewing Current Location: From the Maps app, touch
- View Traffic Information, Aerial Photos, Etc., in Maps: From the Maps app, touch and then touch Traffic, Satellite, Google Earth, etc.
- Check Route to Destination: From the Maps app, touch y , enter your current location and your destination, touch a method of transport (car, public transit, or on foot). • Route candidates appear in a list.
- Check Detailed Operation for Maps: From the Maps app, touch > Help.
Scout
Scout™ by Telenav is a daily personal navigator that helps you get where you're going. It lets you see and hear turn-by-turn directions and it can provide important, personalized information about traffic and alternate routes.
Note: Before using any location-based services, you must enable your phone's location feature. For information about setting your phone's location options, see Location Services Settings.
Use Scout as Your Personal Navigator
- From home, touch ⚙ > Scout

The Scout app will open.
• If prompted, accept the terms of use before continuing.
- Use the search bar to enter a place or an address for directions, or explore other options to find places to go or things to do.

Hangouts
Hangouts is Google's instant messaging service. Use to communicate with other Hangout users, and also use video calling. Log in to a Google account beforehand (see Google Account).
Using Hangouts
- From home, touch 📋 > Hangouts.

The Hangouts app will open.
- When prompted, follow the onscreen instructions to continue.
- Touch New Hangout + to start a new Hangout.

- Type a name, email, number, or circle, or select a contact from the list.

- Type a message or touch Video call to start a video chat.

A chat window or a video chat window opens.
• Each time text is entered, the corresponding friend appears.
- If a friend is not in a Hangout, you will see a message. Touch Send invite to invite them to join the Hangout.
Hangouts Operations
■ Ending a Chat: In the Hangouts window, flick the chat from left to right.
■ Ending a Video Chat: In the video chat window, touch
- Disabling Chat History: If you don't want to keep chat history, in the chat window, touch Turn history off.
- Delete Chat History: To delete all your chat history, in the chat window, touch > Delete > Delete.
Note: You can use Hangouts as your phone's default messaging app, or as a standalone IM app. If you set Hangouts as the default messaging app, the Messaging app will be disabled. For more information, see Default SMS App Settings.
Google Search
Search information saved on the phone and in phone applications as well as on the Internet.
Use Google Search
Type search terms in the Google Search bar to find information on your phone and around the globe.
- From home, touch the Google search bar or touch > Google

The Search window opens.
• If confirmation appears, follow the onscreen instructions.
- If a description for Google Now appears, touch NEXT and read the information. Touch YES, I'M IN. on the last page if you want to use Google Now, or touch No, maybe later to continue with your Google search.
- Type your search keywords and touch

Search results appear.
• To search by voice, touch in the search bar and speak your search terms.
Google Search Operations
- Changing Search Information: In the search window, touch > Settings > Phone search and select where to search.
- Using Google Now: Google Now automatically searches for information based on search keywords used, your current location, etc., and presents search results in the search screen. Google Now also informs users of scheduled events.
- To enable Google Now, in the search window, touch : > Settings > Google Now > ON > YES, I'M IN..
- To use all of Google Now's functions, ensure that Google Location Reporting and Location History are turned on in your location settings. Touch > Settings > Accounts & privacy > Google location settings > Google Location Reporting and select your options.
- Canceling Google Now: In the search window, touch > Settings > Google Now > OFF, select whether to disable location history, and then touch Turn off.
Use Google Voice Search
Use your voice to search instead of typing, with Google Voice Search.
- From home, touch 📋 > Voice Search 🏠.

The Voice Search window opens.
- Speak your search terms.


Search results appear.
Calculator
Your phone's convenient built-in calculator lets you perform basic mathematical equations.
- From home, touch ⚙ > Calculator


The calculator app launches.
- Touch onscreen keys for calculations.


Calculation results appear.
- For advanced calculations, touch > Advanced panel.
Calendar
Use Calendar to create and manage events, meetings, and appointments. Your Calendar helps organize your time and reminds you of important events. Depending on your synchronization settings, your phone's Calendar stays in sync with your Calendar on the Web, Exchange ActiveSync calendar, Google Calendar, and Outlook calendar.
In order to sync with your Google calendar, you must sign in to a Google account on your phone. See Google Account.
Access the Calendar
■ From home, touch 📋 > Calendar 31


The Calendar app opens.
Calendar Operations
- View Today's Calendar: From the Calendar, touch Today
- Change Calendar View: From the Calendar, touch the month at the top left corner and then touch Day, Week, Month, or Agenda to change the current view.
- View Next/Previous Month (Month View): From the Calendar, flick the screen up or down. ■ View Next/Previous Week (Week View): From the Calendar, flick the screen left or right.
- View Next/Previous Day (Day View): From the Calendar, flick the screen left or right.
- View the Next/Previous Time Period (Day/Week View): From the Calendar, flick the screen up or down.
Add an Event to the Calendar
Add events to your calendar directly from the Calendar application.
- From home, touch ⚙ > Calendar 31

The Calendar app opens.
- Touch : > New event.

The add event window opens.
- Enter an event title, start date/time, end date/time, etc., and then touch DONE.
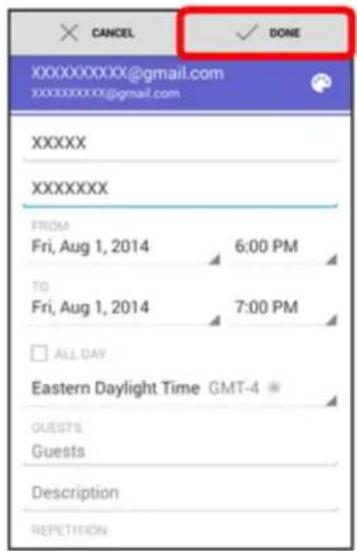

The event is added to your calendar.
Selecting a Calendar
- If you have more than one calendar, select a calendar in which to add events:
- Select your Google account to create a Google Calendar event. If you have several Google Calendars on the Web, select one in which to add your event.
- You can create multiple Google Calendars only in Google Calendar on the Web. After creating them in Google Calendar on the Web, you'll be able to see them in the Calendar application on your phone. For more information about creating and managing multiple Google Calendars, visit the Google website: calendar.google.com.
- If you have synchronized your phone with an Exchange ActiveSync account or Outlook on your computer, you can also select these calendars.
View Calendar Events
You can display the Calendar in daily, weekly, monthly, or agenda view. To change the Calendar view, touch the top left of the screen displaying year/month or year/month/day to choose Day, Week, Month, or Agenda.
- From home, touch ⚙ > Calendar 31.

The Calendar app opens.
- Touch a date and then touch an event.

The event details appear.
- In event details, touch Edit to edit the event.
- In event details, touch Delete 📋 and follow the prompts to delete the event.
Sync Calendars
You can select which calendars you'd like to sync on your phone, along with what types of information you want to sync.
- From home, touch ⚙ > Calendar 31

The Calendar app opens.
- Touch : > Calendars to display.
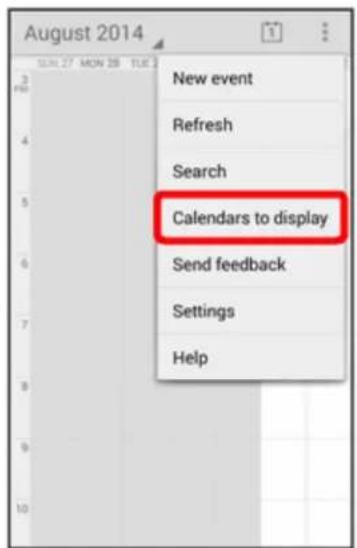
- Select sync options by adding or removing check marks from the items.
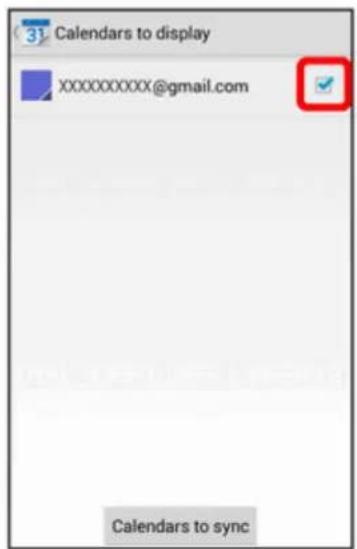
The sync settings have been updated.
- Touch Calendars to sync, and then touch OK.

The selected calendars sync.
Synchronize an Exchange ActiveSync Calendar
If you have set up a Microsoft Exchange ActiveSync account on your phone, you can also synchronize Exchange ActiveSync calendar events on your phone. Calendar events on your
Exchange ActiveSync will also show in Calendar if you chose to synchronize with the Exchange ActiveSync Server.
- To check if Exchange ActiveSync items are set to be synchronized, from home, touch > Settings > Corporate.

- If Corporate doesn't appear under the Accounts heading in the Settings menu, you do not have an Exchange ActiveSync account configured on the phone. For information about adding an account, see Add an Exchange ActiveSync Account.
- If your Exchange ActiveSync account is set for synchronization, you will see a Sync icon.
Clock
Your phone has a Clock app that lets you set alarms, view time in time zones around the world, use a stopwatch, set a timer, and use your phone as a desk clock.
Checking the Time
You can check the time any time on your phone. The current time is displayed in the upper right corner of the status bar. Many widgets and lock screens also display the time and provide options for how time is displayed.
Setting Date and Time
Your phone automatically receives the current date and time from the wireless network. You can set the date by hand by overriding the default setting.
- From home, touch ⚙ > Settings ⚙

- Touch Date & time.

The Date & time settings menu appears.
- Clear the check marks next to Automatic date & time and Automatic time zone, and then set the date and time as desired.
The date and time will reflect your new settings.
Set Alarms
Set multiple alarms using your phone's Clock app.
- From home, touch > Clock

The Clock app opens.
- Touch the Alarm tab and then touch + . You can also touch an alarm from the list and customize it.

- Set the alarm options, including time, name, repeat pattern, alarm sound, vibration, snooze, and then touch Save.


The alarm is set.
Phone at Alarm Time
At the set alarm time, the phone sounds the alarm and/or vibrates. To stop an alarm, drag Stop down to dismiss it.
Additional Clock Features
Your phone's Clock app provides additional useful features including world clock, stopwatch, and timer functions. All features are available from the Clock app display.
From home, touch Apps > Clock.

The Clock app opens.
World Clock
The world clock lets you keep track of the current time in multiple cities around the globe.
- From the Clock app, touch the World Clock tab.
- Touch + and select a city.
- Repeat to add multiple cities.
Stopwatch
The stopwatch lets you time events down to the hundredth of a second.
- From the Clock app, touch the StopWatch tab.
- Touch Start to begin timing.
- Touch Stop to stop timing.
- Additional options include Lap to keep track of laps, Split to track split times, Restart to continue timing, and Reset to reset the stopwatch to zero.
Timer
The timer provides a countdown timer for up to 59 minutes and 59 seconds.
- From the Clock app, touch the Timer tab.
- Use the keypad to set the length of the timer.
- Touch Start to begin the timer.
Tweet (post messages) and view other people's tweets on Twitter. Login may be required to use Twitter. For details on Twitter, visit twitter.com.
Install the Twitter App on Your Phone
Before you can use Twitter on your phone, you have to download and install the app from Google Play.
- From home, touch ⚙ > Play Store 📋.

- Touch the Search icon and search for "twitter".
- Touch Twitter from the results list.
- Touch INSTALL, and then touch ACCEPT.
The app will be downloaded and installed on your phone.
- When the download has completed, touch Open.
• To open the app from the home screen, touch > Twitter
Tweet on Twitter
Read Twitter feeds, follow your friends, and tweet your own updates right from your phone.
- From home, touch 📋 > Twitter
Useful Features 290

The Twitter app launches.
- If this is the first time you've used Twitter on your phone, touch Sign in to sign in to an existing account, or touch Create my account or Sign up a different account to set up a new Twitter account.
- Touch the "What's happening?" text box, type a tweet, and touch Tweet.
The tweet is sent and appears on your Twitter feed.
Post updates, read what your friends are up to, upload pictures and check-ins, and more with on-the-go Facebook access.
Install the Facebook App on Your Phone
Before you use Facebook on your phone, you must download and install the app from the Google Play Store app.
- From home, touch 📋 > Play Store
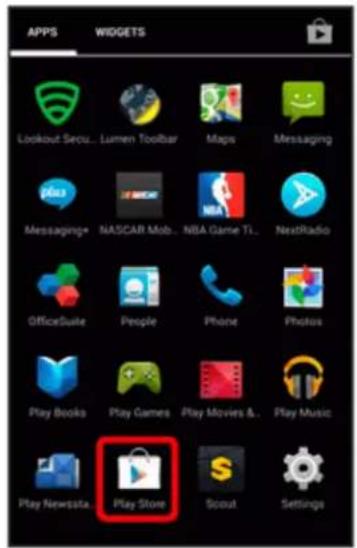
- Touch the Search icon and search for "facebook".
- Touch Facebook from the results list.
- Touch INSTALL, and then touch ACCEPT.
The app will be downloaded and installed on your phone.
- When the download has completed, touch Open.
- To open the app from the home screen, touch > Facebook
Sign in to Your Facebook Account from Account Settings
- From home, touch ⚙ > Settings ⚙ > Add account.

- Touch Facebook.
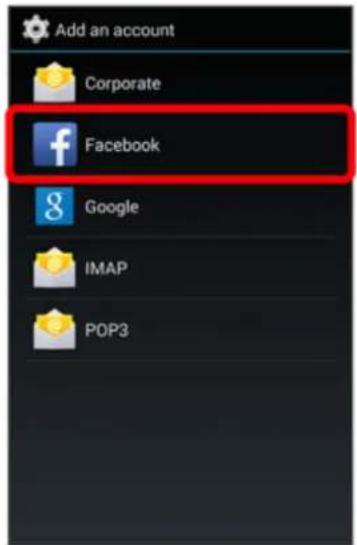
- Enter your Facebook username and password and touch Log in.
Your Facebook account is added to your phone.
Use Facebook
Once you've downloaded the app and signed in, you can post and read updates, upload pictures, tag locations, and more, all from your phone.
- From home, touch 🎯 > Facebook

The Facebook app launches.
- If this is the first time you've used Facebook on your phone, enter your Facebook ID and password and touch Log in to sign in to an existing account, or touch Sign Up for Facebook to set up a new Facebook account.
- Touch Status and type an update, touch Photo and upload a picture from the gallery, touch Check In to share your location, "Like" and comment on friends' posts, and more.
YouTube
View videos uploaded to YouTube and upload your own videos to your YouTube account.
View YouTube Videos
You can use the YouTube app to view videos on YouTube even if you aren't signed in to a YouTube account.
- From home, touch 📋 > YouTube

The YouTube app launches.
- If you're prompted to add or create an account, follow the onscreen instructions to continue.
- Search through the YouTube channels and touch a video you want to see.
The video plays on your phone screen.
- Touch the screen to pause or resume play while watching.
Post a Video to YouTube
You can post videos to your YouTube account from your phone. Before posting, you must set up a YouTube account and sign in to it on your phone.
- From home, touch 📋 > YouTube


The YouTube app launches.
- Touch Uploads.

- If you're prompted to create a channel, follow the onscreen instructions to continue.
- Touch ↑ at the top of the screen and then select a video to upload.
- Enter a title, description, and tags, and select a privacy setting.
- Touch ↑

The video is uploaded to your YouTube channel.
Google Play Music App
The Google Play Music app lets you browse, shop, and play back songs purchased from Google Play as well as songs you have loaded from your own music library. The music you choose is automatically stored in your Google Play Music library and instantly ready to play via streaming or download.
For more information about Google Play Music, visit play.google.com/about/music.
Note: For information about loading music onto your phone, see Connect to a Computer via USB.
Play Music with Google Play
Use the Google Play Music app to listen to all your music on your phone. Compatible music file formats include: MP3, AAC, and FLAC.
- From home, touch 🎨 > Play Music 🎩.

The Play Music app opens to the Listen Now view.
- If you're prompted to select an account, follow the onscreen instructions to continue. • If the menu list appears, touch Listen Now.
- Touch an item from the category window and then touch a song.


The song begins playing.
• You can select a song from a library category such as Artists or Albums in My Library.
Touch > My Library.
- You can select a song from a playlist in Playlists. Touch 📤 > Playlists.
- Touch a song/artist name at the bottom of the screen to display the Google Play Music player screen.
Google Play Music Screen Layout
The following diagram outlines the main features of the Play Music app player screen.
When the Google Play Music player screen is not displayed, touch a song/artist name at the bottom of the screen.

| Feature Description | |
| Return to previous screen Touch | to return to the previous screen. |
| Show music image Display music | image. |
| Music title/artist Display a music title and artist name. | |
| Progress bar Drag the bar forward | back to move to any point in a song. |
| Repeat Repeat a song. | |
| Previous song Touch twice to go back to the previous song. Touch once to restart the current song. | |
| Play/Pause Touch to switch play and pause. | |
| Options menu Set the following options: Start instant mix, Add to playlist, Go to artist, Go to album, Clear queue, Save queue. | |
| Queue list Display a queue list. | |
| Rate (thumbs up/thumbs down) | Touch to rate songs. |
| Shuffle | Play songs in random order. |
| Next song | Go to the next song. |
Create Playlists in Google Play Music
Organize music into playlists to fit every occasion.
- From home, touch 🎨 > Play Music 🏠️.

The Play Music app opens to the Listen Now view.
- Display a song or album you want to add and then touch next to it.

- Touch Add to playlist > New playlist.

- Enter a name and touch OK.

The playlist is created.
- Return to the Listen Now view, display a song or album you want to add, and then touch next to it. Touch Add to playlist > .

The song or album is added to the playlist. Repeat to add more items to the playlist.
- You can also create a playlist from a category window such as Albums or Songs in My Library.
Adding Currently Playing Music to a Playlist
- From the player view, touch: > Add to playlist > .
The music is added to the playlist.
Sprint Music Plus
With Sprint Music Plus and the Music Store, Ringtone Store, and Ringback Tone Store, you can purchase, download, and play music, ringtones, and ringback tones for your phone.
Access Sprint Music Plus
- From home, touch 🎯 > Sprint Music Plus
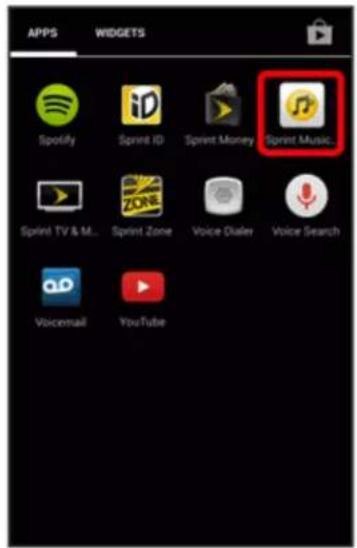

The app opens.
- The first time you use the app, touch Accept to agree to the Premium Services Terms of Use.
- Touch a store option from the main page (Ringbacks Store, Music Store, or Ringtones Store), or touch > Music (under Library) to access your music.

- Touch the onscreen navigation tools to skip ahead or rewind. Touch at any time to see additional options.
- For more information, touch > Settings > About or Help.
Purchase and Download Music from the Sprint Music Plus Store
From the Sprint Music Plus Store, you can shop for songs to purchase and download to your phone.
- From home, touch 🎯 > Sprint Music Plus 🎽 > Music Store.
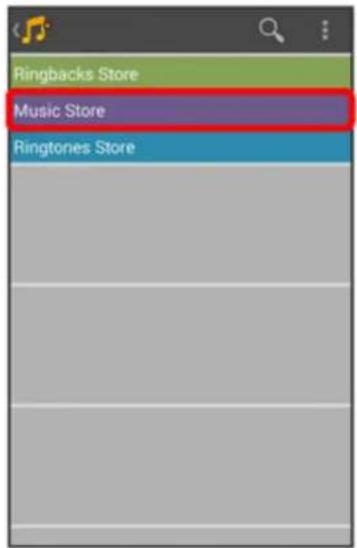
The app will open and display the Music Store.
- Enter a song or artist in the search field or browse through options in the tabs in the center of the screen.

- Touch a song to select it.


The song information screen is displayed.
- Follow the onscreen instructions to preview or purchase the song. Touch Tutorial at any time to display the Sprint Music Plus menu.
Tip: For ringtones or ringback tones, touch Ringtone Store or Ringback Tone Store from the Sprint Music Plus main menu.
Google Wallet
You can have a Google Wallet account associated with your Google account to purchase items from the Google Play Store app.
To create a Google Wallet account, do one of the following:
- On your computer, go to google.com/wallet to create a Google Wallet account.
- or -
- The first time you use your phone to buy an item from Google Play, you're prompted to enter your billing information to set up a Google Wallet account.
OfficeSuite
View files created in Microsoft® Office (Word®, Excel®, PowerPoint®), PDFs, and more on your phone.
- From home, touch 📋 > OfficeSuite

OfficeSuite launches.
- If you're prompted to upgrade to OfficeSuite Premium, follow the onscreen instructions to continue.
- You may also be prompted to install the OfficeSuite Font Package. Touch Install if you want to install the package.
- Swipe the screen right and then touch an item (such as My documents) that contains a file you want to open.

The app displays the file.
Clip Now
Swipe on top of the screen to capture screenshots. URL on the websites will be captured along with the screenshots. View the captured screenshots with the Clip Now app.
Note: You may not be able to capture screenshots depending on the type of screen.
Enable Clip Now
- From home, touch > Settings


- Touch Clip Now.
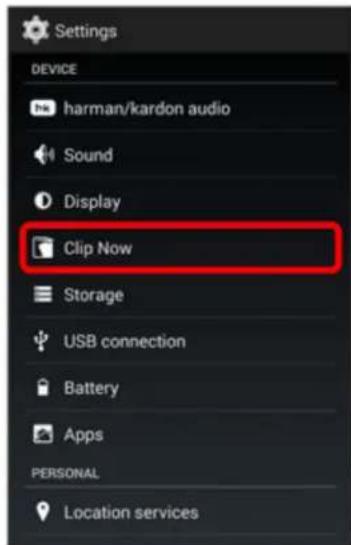
- Touch Clip Now. (Enabled when the check mark is entered.)


Clip Now is ready to use.
Capture Screenshots Using Clip Now
- Slide your finger along the top edge of the screen.


A screenshot of the current screen is captured.
- You can slide from either direction to capture a screenshot.
- When you capture a screenshot of a Web page, the URL of the Web page will also be saved.
Manage Screenshots Captured Using Clip Now
- From home, touch ⚙ > Clip Now

The screenshot list is displayed.
- If instructions for using Clip Now appear, follow the onscreen instructions to continue.
- Touch a screenshot you want to view.
The screenshot details screen is displayed.
3. Touch


• Share: Share the image via email, etc. - Delete: Delete the image. • If you touch a URL, you can open its saved Web page.
Connectivity
The following topics address your phone's connectivity options, including USB file transfer and tethering, Wi-Fi, Bluetooth®, and more.
Connections Optimizer
The Connections Optimizer is a tool that automatically selects the best mobile network for your phone, including “remembered” Wi-Fi networks.
About Connections Optimizer
The Connections Optimizer helps you manage and enhance your data experience by finding and connecting to “remembered” Wi-Fi networks on your phone. Remembered Wi-Fi networks are networks with which you have previously chosen to connect. Active Wi-Fi connections may offer improved performance and generally improve battery life while allowing you to talk on the phone and use data at the same time.
The Connections Optimizer works by searching for available “remembered” Wi-Fi networks. If you do not leave your Wi-Fi antenna on all the time, you will only notice the Connections Optimizer operating at certain times of the day in a small number of locations on the network. Your Wi-Fi antenna will conserve battery by scanning for connections periodically (not continuously), and if no connection is achieved, the antennas will be turned off. You may also manually turn the antennas off during the scan period.
To facilitate quality assurance and enable feature enhancements, information is collected about your battery levels, Wi-Fi and network connections and usage. No personal information is collected.
Enable Connections Optimizer
- From home, touch ⚙ > Settings ⚙ > More... > Mobile networks > Automatic Connections.
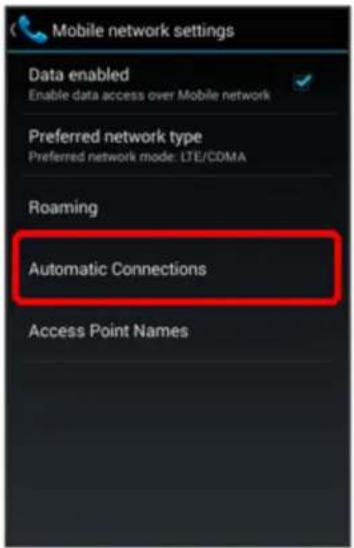
- Touch Connections Optimizer to enter the check mark in the box. (Enabled when the check mark is entered.)
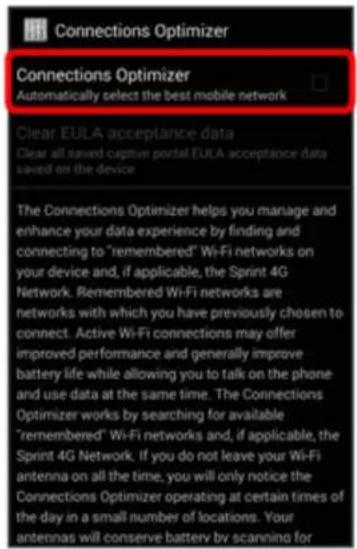
Connections Optimizer will turn on and automatically analyze your phone's connection options.
Disable Connections Optimizer
- From home, touch ⚙ > Settings ⏻ > More... > Mobile networks > Automatic Connections.

- Uncheck the box on the Connections Optimizer page.

◆ Connection Optimizer will turn off.
Connect to a Computer via USB
One way to back up or sync files between your phone and a computer is by using a direct USB connection.
You can use the supplied micro USB cable to connect your phone directly to your computer and transfer music, pictures, and other content files.
For example, if you have a music album stored on your computer that you want to listen to on your phone with any of the music apps, just attach your phone to the computer and copy the files to the music folder.
Cable Cautions
Do not pull or twist cables forcefully. May break wires.
File Transfer Tips
- If you want to save data to an SD card on your phone, make sure the SD card is installed and active. See Phone Memory/SD Card.
- Avoid removing the SD card while transferring data. Data exchange may use the methods outlined in the following table:
| Method Description | |
| Media device (MTP) Transfer | Transfer files between your phone and computer such as pictures, videos, and music. |
| Camera (PTP) Transfer | picture and video files between your phone and computer. |
| USB mass storage (UMS) | Exchange data with a computer using an optional installed SD card as external storage device. |
Transfer Files Between the Phone and a Computer
- Connect your phone to your computer using the supplied micro USB cable.

- Insert the smaller end of the cable into the charger/accessory jack at the bottom of the phone.
- Insert the USB end of the cable into an available USB port on your computer. You may need to remove the USB cable from the charger body to access it.
- When the USB connection icon appears in the notifications area, drag the status bar down to display the notifications window.

- You will see either Connected as a media device or Connected as a camera.

The files on your phone can now be accessed via your computer.
- For most transfers, you'll want to use Connected as a media device.
- To change the option, touch it in the notifications window to open the Settings > USB connection window, and then touch the desired option.
- If you see Connected as an installer in the notifications window, touch Connected as an installer, and then Connected as a media device or Connected as a camera.
- On your computer, navigate to the detected device (such as through the My Computer menu) and open it.
- If available, select a drive (card for SD card, phone for internal phone storage).
- Select a folder (for example, Music for songs and albums) and copy files to it from your computer.
- When you are done, disconnect your phone from your computer.

The transferred files are now saved to your phone or SD card.
Use the Phone's SD Card as a USB Drive
To transfer music, pictures, and other files from your computer to your phone's SD card, you need to set the phone's SD card as a USB drive.
- Connect your phone to your computer using the supplied micro USB cable.
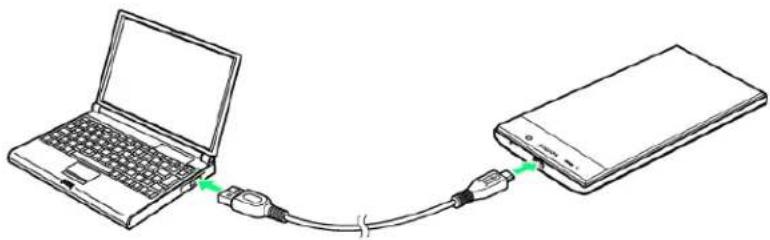
- Insert the smaller end of the cable to the charger/accessory jack at the bottom of the phone.
- Insert the USB end of the cable into an available USB port on your computer. You may need to remove the USB cable from the charger body to access it.
- When the USB icon appears in the notifications area, drag the status bar down to display the notifications window. You will see USB connected and Connected as an installer.

- If an option other than above is selected, touch Connected as a media device or Connected as a camera and then USB mass storage (UMS).
- After closing the notifications window, touch Turn on USB storage, and then touch OK.
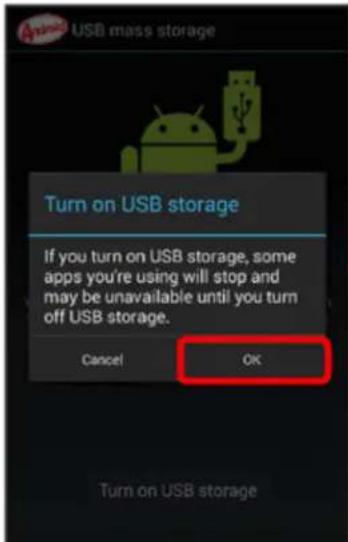
- Do one of the following:
- Copy files from the computer to the root folder on the phone's storage card.
- Copy files from the phone's storage card to a folder on your computer or computer desktop.
- After copying the files, unmount the removable disk (that is, the connected phone) as required by your computer's operating system to safely remove your phone, and touch Turn off USB storage.
- Disconnect the phone from the computer.
Wi-Fi
Wi-Fi provides wireless Internet access over distances of approximately 130 feet. To use your phone's Wi-Fi, you need access to a wireless access point or "hotspot."
The availability and range of the Wi-Fi signal depends on a number of factors, including infrastructure and other objects through which the signal passes.
Turn Wi-Fi On and Connect to a Wireless Network
Use the Wireless & networks settings menu to enable your phone's Wi-Fi radio and connect to an available Wi-Fi network.
- From home, touch ⚙ > Settings

The settings menu opens.
- Touch Wi-Fi.

The Wi-Fi settings menu appears.
- Touch the Wi-Fi slider to turn Wi-Fi on ON

- Wi-Fi is enabled. You will see the names and security settings of in-range Wi-Fi networks.
- To disable Wi-Fi, touch the slider again OFF
- Touch a Wi-Fi network to connect, enter the password (if it's not an open network), and then touch Connect.

Your phone is connected to the Wi-Fi network. You will see this in the status bar.
- The password for a household wireless LAN router is sometimes found on a sticker on the router (WEP, WPA, KEY, etc.). Contact the router manufacturer for information. For a password for a public wireless LAN, check with the user's service provider.
- Entering a password is not required if an access point is not security protected. • WPS Push Button: Use the WPS function to connect to WPS-capable devices. • Add network: Set network information manually to connect to a network.
Note: The next time your phone connects to a previously accessed secured wireless network, you will not be prompted to enter the password again, unless you reset your phone to its factory default settings or you instruct the phone to forget the network.
Note: Wi-Fi networks are self-discoverable, which means no additional steps are required for your phone to connect to a Wi-Fi network. It may be necessary to provide a user name and password for certain closed wireless networks.
Wi-Fi Settings
Use the Wi-Fi settings menu to manually set your Wi-Fi connection options.
- From home, touch ⚙ > Settings ⚙️.

- Touch Wi-Fi.

The Wi-Fi settings menu appears.
- Touch the Wi-Fi slider to turn Wi-Fi on ON

- Wi-Fi is enabled. You will see the names and security settings of in-range Wi-Fi networks.
• To disable Wi-Fi, touch the slider again OFF
- Touch □ Advanced.

The advanced Wi-Fi settings menu appears.
- Select an option from the following to change its settings.
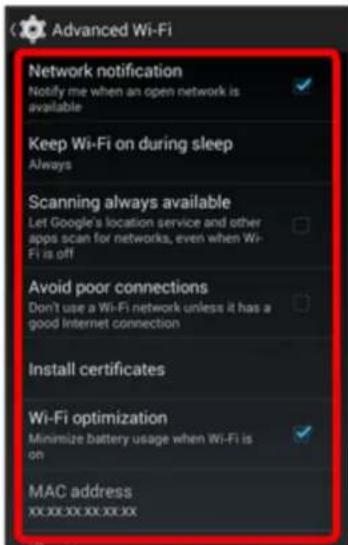
- Network notification: When enabled, your phone alerts you when a new Wi-Fi network is available.
- Keep Wi-Fi on during sleep: Specify when to switch from Wi-Fi to mobile data for data communications, when the device goes to sleep (when the backlight goes out). This setting can affect data usage, since the data connection will remain active even when the phone screen is off.
- Scanning always available: When enabled, your phone will allow Google location service and other apps to scan for networks, even when Wi-Fi is turned off.
- Avoid poor connections: When enabled, your phone does not use a Wi-Fi network when there is a poor connection.
- Install certificates: If you have certificates stored on an installed optional memory card (not included), you can use this option to install the certificates.
- Wi-Fi optimization: Enable your phone to use as little battery as possible when using Wi-Fi.
- MAC address: View your device's MAC address, needed for connecting to some secured networks.
- IP address: View your device's IP address.
Your Wi-Fi settings changes are saved.
Disconnect Wi-Fi
You may wish to disconnect from a connected Wi-Fi network without turning Wi-Fi off.
- From home, touch ⚙ > Settings


- Touch Wi-Fi.

The Wi-Fi settings menu appears.
- Touch the name of the connected access point and then touch Forget.

Wi-Fi is disconnected.
- After disconnecting from an access point, you may need to re-enter the password to reconnect.
Wi-Fi Direct
Use Wi-Fi Direct to connect directly to other Wi-Fi Direct devices simply via Wi-Fi, without an access point or via the Internet.
- From home, touch ⚙ > Settings
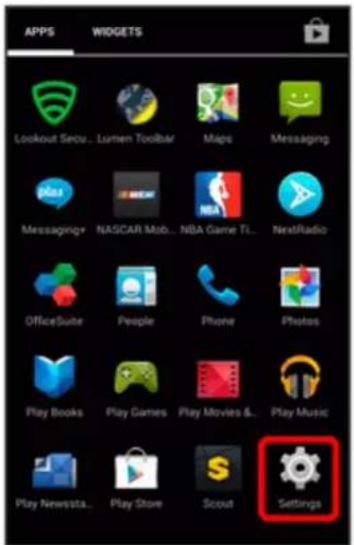
- Touch Wi-Fi.

The Wi-Fi settings menu appears.
- Touch the Wi-Fi slider to turn Wi-Fi on ON

- Wi-Fi is enabled. You will see the names and security settings of in-range Wi-Fi networks.
- Touch Wi-Fi Direct.
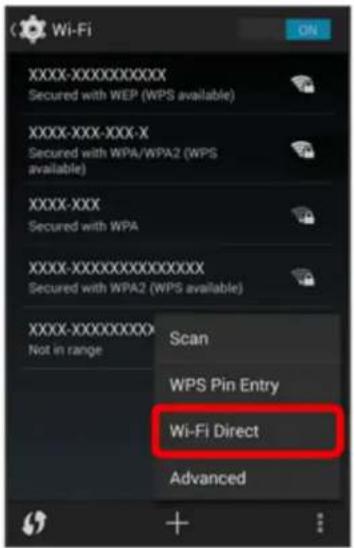
The Wi-Fi Direct settings menu appears.
• Wi-Fi Direct and Wi-Fi are unavailable at the same time.
- Touch a device with which to connect.

- If you cannot find the device you want to connect to, touch SEARCH FOR DEVICE.
- If connected via Wi-Fi, you will see a confirmation. Follow the onscreen instructions.
- Touch RENAME DEVICE to rename your phone name as it appears on the other device.
- Accept the connection on the other device.
The phone is connected via Wi-Fi Direct.
- If a connection is not accepted after a certain period, the connection request is cancelled. • To stop a connection, touch the connected device name > OK.
Mobile Hotspot
Mobile Hotspot allows you to turn your phone into a Wi-Fi hotspot. When this feature is turned on, you can share your phone's mobile data services via Wi-Fi with other Wi-Fi enabled devices. The feature works best when used in conjunction with 4G data services (although 3G service can also be used).
Important: Use of the Hotspot feature requires an additional subscription. Sign on to your account at sprint.com/mysprint or access your account via Sprint Zone (touch 🎨 > Sprint Zone 🎨) to learn more.
Note: Turning on Hotspot will disable your phone's connection to other Wi-Fi networks.
Set Up Mobile Hotspot
- From home, touch ⚙ > Settings

- Touch More... > Tethering & portable hotspot.

The Tethering & portable hotspot window opens.
- Touch Wi-Fi hotspot to enable it. (Enabled when the check mark is entered.)

Important: Write down the passkey (password) for this communication (shown onscreen).
Note: The best way to keep using the phone as a hotspot is to have it connected to a power supply.
Connect to Mobile Hotspot
- Enable Wi-Fi (wireless) functionality on your target device (laptop, media device, etc.).
- Scan for Wi-Fi networks from the device and select your phone hotspot from the network list.
- The default name for your phone hotspot is [306SH]XXX. You can change the name by touching Wi-Fi hotspot settings > the Network SSID field from the Wi-Fi hotspot settings screen.
- Select this phone and follow your onscreen instructions to enter the passkey (provided on the Mobile Hotspot page).
The device is connected via your phone's Mobile Hotspot.
- Launch your Web browser to confirm you have an Internet connection.
- To change the Wi-Fi hotspot settings, touch Wi-Fi hotspot settings to change the necessary settings.
Tips: You can change the maximum number of devices allowed to be connected to your Wi-Fi hotspot. Touch Wi-Fi hotspot maximum connections, select the number, and touch OK.
Tethering
Use Tethering to share your device's Internet connection with a computer that connects to your device via USB cable, or by Bluetooth.
Important: Use of the Hotspot feature requires an additional subscription. Sign on to your account at sprint.com/mysprint or access your account via Sprint Zone (touch 🎨 > Sprint Zone 🎨) to learn more.
- From home, touch ⚙ > Settings
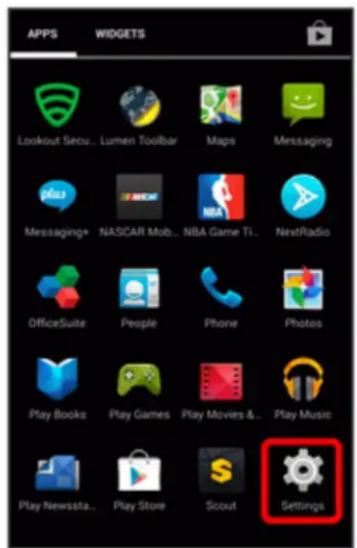
- Touch More... > Tethering & portable hotspot.

- Select a tethering option: USB tethering or Bluetooth tethering.
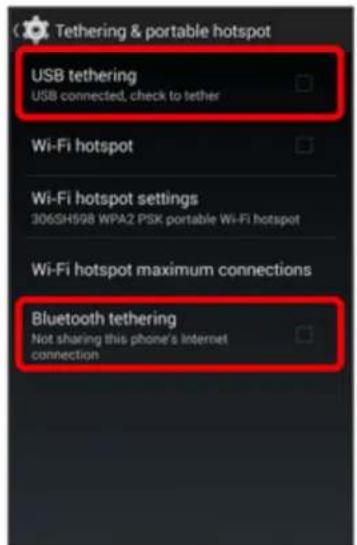
Tethering is turned on, and your phone's Internet connection can be shared with a connected device.
- For USB tethering, connect your phone to the target device with the supplied USB cable.
- For Bluetooth tethering, pair your phone with the other device via Bluetooth.
Bluetooth®
Bluetooth® is a short-range communications technology that allows you to connect wirelessly to a number of Bluetooth® devices, such as headsets and hands-free car kits, and Bluetooth® enabled handhelds, computers, printers, and wireless phones. FH1 indicates FH-SS modulation with maximum transmission radius of approximately 30 feet. XX4 indicates a different modulation scheme with maximum transmission radius of approximately 130 feet.
Bluetooth® Hints
Question: Can't use Bluetooth®?
Answer: Is your phone in airplane mode? Bluetooth® is unavailable in airplane mode.
Bluetooth® Function Cautions
Wireless connectivity with all Bluetooth® devices is not guaranteed for the phone. During wireless and hands-free conversations, noise may be audible depending on conditions.
Information may not appear correctly on connected devices depending on the transferred data.
Bluetooth® Information
Bluetooth® is a technology that enables wireless connection with computers, Bluetooth® devices with hands-free features, etc.
| Function Description | |
| Audio output Listen | to music, etc., wirelessly. |
| Hands-free calls Cal | I hands-free, using Bluetooth -capable hands-free devices and headsets. |
| Data exchange Exch | ange data with Bluetooth devices. |
Enable the Bluetooth® Feature
Use the settings menu to enable or disable your phone's Bluetooth capabilities.
- Wireless connection to all Bluetooth® functions is not guaranteed for the phone. ■ The phone may not connect properly depending on the other device. ■ Noise may be experienced with wireless calls and hands-free calls depending on the conditions.
To enable Bluetooth®:
- From home, touch ⚙ > Settings ⚙️.

- Touch Bluetooth.

The Bluetooth® settings open.
- Touch the Bluetooth® slider to turn Bluetooth® on ON

Bluetooth® is enabled.
- To disable Bluetooth®, touch the slider again OFF
Tip: You can also turn Bluetooth® on or off with the toggle menu in the notifications window. Drag the status bar down to display the notifications window, then touch quick settings menu and then BLUETOOTH (###/###)/BLUETOOTH OFF to turn Bluetooth® on or off.
Note: Turn off Bluetooth® when not in use to conserve battery power, or in places where using a wireless phone is prohibited, such as aboard an aircraft and in hospitals.
Pair Bluetooth® Devices
Search for and pair nearby Bluetooth® devices. Registered Bluetooth® devices can be connected simply.
Enable the Bluetooth® function on the Bluetooth® devices being paired beforehand.
To pair Bluetooth® devices:
- From home, touch ⚙ > Settings.

2. Touch Bluetooth.

The Bluetooth® settings open.
- Nearby devices appear in the "AVAILABLE DEVICES" list.
- If a target device is not detected, touch SEARCH FOR DEVICES to search again.
- Touch a device from the "AVAILABLE DEVICES" list, and follow the onscreen instructions to pair with the device.
The Bluetooth® device is paired to your phone.
• Methods to accept a Bluetooth® connection differ depending on the devices used.
Unpairing from a Paired Device
- From the Bluetooth® settings menu, touch next to the paired device you wish to unpair.

- Touch Unpair.
The device is unpaired from your phone. To make another connection with the device, you will need to pair again.
Connect to a Paired Bluetooth® Device
You can listen to music over a Bluetooth® stereo headset, or have hands-free conversations using a compatible Bluetooth® headset or car kit. It's the same procedure to set up stereo audio and hands-free devices.
- From home, touch ⚙ > Settings

2. Touch Bluetooth.

The Bluetooth® settings open.
- Paired Bluetooth devices appear in the "PAIRED DEVICES" list.
- Touch a device from the "PAIRED DEVICES" list.
Your phone connects to the paired device.
The pairing and connection status is displayed below the device's name in the Bluetooth devices section. When the device is connected to your phone, the Bluetooth paired icon is displayed in
the status bar. Depending on the type of device you have connected, you can then start using the headset or car kit to listen to music or make and receive phone calls.
Note: Due to different specifications and features of other Bluetooth®-compatible devices, display and operations may be different, and functions such as transfer or exchange may not be possible with all Bluetooth®-compatible devices.
Send Information Using Bluetooth®
You can use Bluetooth® to transfer information between your phone and another Bluetooth enabled device such as a phone or notebook computer.
Types of Data You Can Send via Bluetooth®
You can send various types of information including the following, depending on the device you are sending to:
■ Images and videos - Contacts ■ Audio files
In the instructions below, Contacts data is being used as an example.
Sending Contacts Data via Bluetooth®
- From home, touch ⚙ > People


You will see the Contacts list.
- Touch a contact to send.

- Touch : > Share > Bluetooth.

- Touch a paired device to receive the data.

The contact information is sent.
- If you see a message to confirm, follow the onscreen instructions.
Receive Data via Bluetooth®
Your phone is capable of receiving a wide variety of file types with Bluetooth, including pictures, music tracks, and documents such as PDFs.
- When another device attempts to send a file to your phone via Bluetooth you will see a request to accept the file in the notifications window.

- Touch Bluetooth share: Incoming file, and then touch Accept.
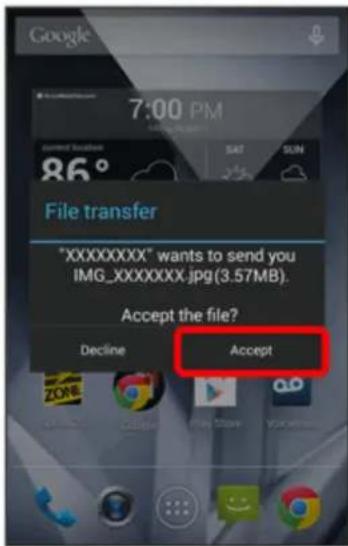
The file is sent to your phone.
- When your phone receives a file, you will see a notification. To open the file immediately, drag the status bar down to display the notifications window, and then touch the notification.
- When you open a received file, what happens next depends on the file type:
Media files and documents are usually opened directly in a compatible application. For example, if you open a music track, it starts playing in the Music application.
View Your Phone's Screen on Other Devices
You can display your phone's screen content on the screen of another device (mirroring function). This allows you to enjoy pictures and videos on your phone on the larger screen of a TV or similar device. Your phone connects to nearby Wi-Fi Direct-capable devices via Wi-Fi without needing to route through an access point.
Depending on the app, you may not be able to display its screen on a connected device.
Enable the Wireless display
- From home, touch ⚙ > Settings ⚗ > Display > Cast screen.
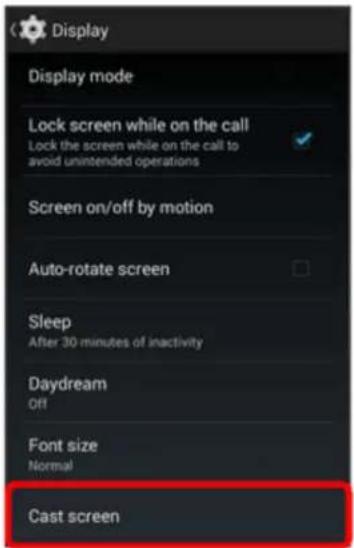
The Nearby devices menu opens.
- Touch □> Enable wireless display. (Enabled when the check mark is entered.)

- Select and touch the name of the device you want to connect to.
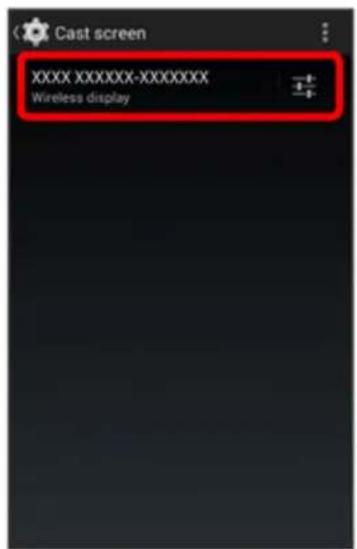
Your phone connects to the selected device.
The following topics provide an overview of items you can change using your phone's Settings menus.
Basic Settings
From the home screen, touch ⚙ > Settings 🌐 to access your phone’s settings menu.
The table below outlines the top-level settings categories.
| Category Description | |
| Wi-Fi Calling Set options for voice services via Wi-Fi network. | |
| Wi-Fi Enable and set Wi-Fi options. | |
| Bluetooth Enable and set Bluetooth® options. | |
| Call Configure options for calling with your phone. | |
| Data usage Check your phone's data usage. | |
| More... Set additional wireless and networks options. | |
| harman/kardon audio Configure settings for the Harman sound effect. | |
| Sound Set ringtone, operation tones, etc. | |
| Display | Set brightness, wallpaper, etc. |
| Clip now | Enable Clip Now and check usage instructions. |
| Storage | Check memory usage and manage usage of an optional SD card. |
| USB connection | Select the data exchange method for USB connection. |
| Battery | Check your phone's battery usage. |
| Apps | Check installed and running applications. |
| Location services | Select your phone's location access options. |
| Security | Lock the screen, set encryption options, etc. |
| Language & input | Select your phone's language, select and setup input method, etc. |
| Backup & reset | Back up your phone's data and settings. |
| Add account Add or manage accounts. | |
| Date & time | Configure date and time settings. |
| Accessibility | Set accessibility options such as screen magnification, hearing aid compatibility, etc. |
| Printing | Configure settings for cloud printing, etc. |
| Activate this Device | Activate a new phone. |
| System updates | Update your phone's profile, software, etc. |
| About phone | Check your phone's important information. |
Access Settings
- From home, touch ⚙ > Settings


The settings menu opens.
- Select settings.
◆ Settings are made and applied.
Wi-Fi Calling Settings
By enabling Wi-Fi Calling, you can make or receive calls using Wi-Fi network even where there is no cellular signal.
Enable Wi-Fi Calling
- From home, touch ⚙ > Settings


- Touch Wi-Fi Calling.

The Wi-Fi settings menu appears.
- Touch the Wi-Fi Calling slider to turn Wi-Fi Calling on ON

- Wi-Fi Calling is enabled. Available Wi-Fi networks are displayed.
To disable Wi-Fi Calling, touch the slider again. When prompted to accept a Wi-Fi Calling service agreement, follow the onscreen instructions.
- Touch the Wi-Fi network you want to use with Wi-Fi Calling.

The touched Wi-Fi network is displayed under WI-FI CALLING ENABLED WI-FI NETWORKS.
- Touch the Wi-Fi network displayed under WI-FI CALLING ENABLED WI-FI NETWORKS.

- Touch Wi-Fi Calling to select the check box, then touch Save.
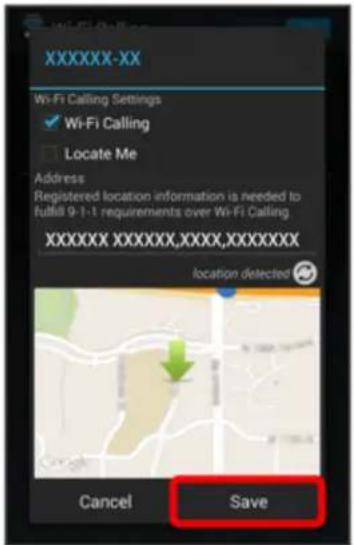
Wi-Fi Calling is enabled.
- Once your current location is obtained, you can touch Save. You can also set your current location by entering it in the entry field.
- You can select the Locate Me check box to relay your location when making an emergency call with Wi-Fi Calling.
Make a Call with Wi-Fi Calling
When you make a call and Wi-Fi Calling is enabled, Wi-Fi Calling is automatically used for the call. For details on making a call, see Call Using the Phone Dialer or Place Calls from Contacts/Call
History.
Wi-Fi Settings Menu
The Wi-Fi settings menu lets you turn Wi-Fi on or off, set up and connect to available Wi-Fi networks, and configure advanced Wi-Fi options.
For more information about Wi-Fi settings, see Wi-Fi.
1. From home, touch ⚙ > Settings

2. Touch Wi-Fi.
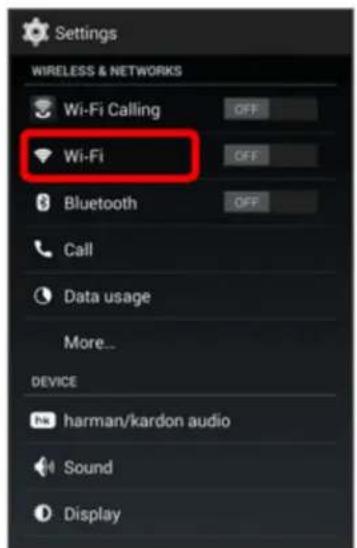
Settings 349
The Wi-Fi settings menu appears.
- Touch the Wi-Fi slider to turn Wi-Fi on. ON

- Wi-Fi is enabled. You will see the names and security settings of in-range Wi-Fi networks.
• To disable Wi-Fi, touch the slider again. OFF
- Touch a Wi-Fi network to connect, enter the password (if it's not an open network), and then touch Connect.

Your phone is connected to the Wi-Fi network. You will see ( ) in the status bar.
- The password, for a household wireless LAN router, is sometimes found on a sticker on the router (WEP, WPA, KEY, etc.). Contact the router manufacturer for information. For password for a public wireless LAN, check with user's service provider.
- Entering a password is not required if an access point is not security protected.
- WPS Push Button: Use the WPS function to connect to WPS-capable devices.
• Add network: Set network information manually to connect to a network.
Wi-Fi Settings Options
Wi-Fi setting options let you set up and manage wireless access points.
- From home, touch ⚙ > Settings ⚙️.

2. Touch Wi-Fi.

• If Wi-Fi is turned off, turn it on.
3. Touch


The Wi-Fi setting options appear.
4. Select an option to change its settings.
- Scan: Search for available Wi-Fi networks.
- WPS Pin Entry: View the PIN used by your device to set up a PIN-secured connection to a Wi-Fi router or other equipment.
• Wi-Fi Direct: Connect to other Wi-Fi Direct devices. See Wi-Fi Direct for details.
- Advanced: Configure detailed Wi-Fi settings. See Wi-Fi Settings for details.
Bluetooth® Settings
Your phone's Bluetooth® capabilities let you use wireless headsets, send and receive pictures and files, and more. For details on your phone's Bluetooth usage, see Bluetooth®.
1. From home, touch ⚙ > Settings

2. Touch Bluetooth.

The Bluetooth® settings open.
Bluetooth® Settings Operations

Enable Your Phone to be Discoverable to Other Devices: From Bluetooth® settings, touch your phone name.
- Touch the phone name to toggle discoverable/hidden setting.
- The indication below the phone name shows the discoverability status.
- After the predetermined time, the phone returns to hidden mode and is no longer discoverable by nearby devices.
- This setting is available when Bluetooth® is enabled.
Pairing Bluetooth Devices: Make sure the other devices are set to be discovered. From Bluetooth® settings, touch the device name in the “AVAILABLE DEVICES” list and follow the onscreen instructions.
- Depending on the device, you may be required to enter or accept a passkey.
- If the target device does not appear, touch SEARCH FOR DEVICES to search again.
- This setting is available when Bluetooth® is enabled.
Change the Name of a Paired Device: From Bluetooth® settings, touch 📋 next to a paired device name, touch Rename, enter a new name, and touch OK.
This setting is available when Bluetooth® is enabled.
Cancelling Pairing: From Bluetooth® settings, touch next to a paired device name, and then touch Unpair.
This setting is available when Bluetooth® is enabled.
Enable Service from Paired Device: From Bluetooth® settings, touch next to a paired device name, and then touch the listing under PROFILES.
- If a confirmation prompt appears, follow the onscreen instructions. This setting is available when Bluetooth® is enabled.
- This setting is available when the paired device is providing a service.
Touch the setting to toggle it ON or OFF.
Search for Other Devices: From Bluetooth® settings, touch SEARCH FOR DEVICES.
This setting is available when Bluetooth® is enabled.
Change your phone name as it appears on other devices: From Bluetooth® settings, touch 📄 > Rename phone, enter a name and touch Rename.
Set Visibility Timeout: From Bluetooth® settings, touch > Visibility timeout and select an option.
- Touch Never time out to allow your phone always to be discoverable unless you turn off discoverability. This setting is available when Bluetooth® is enabled.
Check Files Received via Bluetooth® Transfer: From Bluetooth® settings, touch > Show received files, and follow the onscreen instructions.
Call Settings
Your phone's Call Settings menu lets you configure your voicemail options and a number of other settings for the phone application.
Call Settings Overview
The call settings menu allows you to configure the following options:
| Call Setting Description | |
| Voicemail Configure your voicemail settings. | |
| Dial pad touch tones Enable dialpad tones. | |
| Quick responses Edit a message that is played when you cannot answer a call. | |
| North American dialing Enable North American dialing (international calls in North America). | |
| International dialing | Set an international dialing code. |
| TTY mode | Toggle TTY modes. See TTY Mode for details. |
| Hearing aids | Enable hearing aid compatibility. |
| Noise Canceller | Enable the noise canceller function. |
| DTMF tones | Set the length of Dual-tone Multi-frequency (DTMF) tones. |
| CDMA call settings | Make settings for CDMA. |
Access Call Settings Options
- From home, touch ⚙ > Settings


- Touch Call.

The Call settings menu opens.
- Set your Call options.
Your Call settings are saved and applied.
Data Usage Settings
The Data usage menu lets you view your phone's mobile and Wi-Fi data usage, set data limits, restrict hotspot usage, and more.
1. From home, touch ⚙ > Settings


2. Touch Data usage.

The data usage window opens.
Data Usage Settings Operations
- Enable Mobile Data: In the Data usage window, touch the slider OFF for Mobile data to enable the service.
- Enable Restrictions on Mobile Data Usage: From the Data usage window, touch Set mobile data limit > OK to enable restriction.
• A check mark will appear. - With restriction turned on, drag the horizontal limit slider up or down to set the data usage limit. • This setting is available when Mobile data is enabled.
- Set Amount for Alert when Data Usage Increases: From the Data usage window, insert a check mark next to Set mobile data warning, and then drag the horizontal warning slider up and down to set an amount.
• Data usage amounts are approximate. Actual amounts may differ. • This setting is available when Mobile data is enabled.
- Set Date for Resetting Data Usage: To set the data usage measuring cycle, from the Data usage window, touch the date field next to Data usage cycle, touch Change cycle..., set a reset date, and touch Set.
• This setting is available when Mobile data is enabled.
- Check Data Usage for Each Application: To see how your data is being used, slide the vertical white bars in the graph to set a usage period, and then touch an app name to see its usage for the period.
- Enable Data Roaming: From the Data usage window, touch > Data roaming.
- Enter the check mark to enable, clear the check mark to disable.
- If a confirmation appears, follow the onscreen instructions.
- Enable Restrictions on Mobile Data Usage in the Background: From the Data usage window, touch > Background restrictions.
- Enter the check mark to enable, clear the check mark to disable.
- If a confirmation appears, follow the onscreen instructions.
- Enable permission for automatic app syncing: From the Data usage window, touch > Auto-sync data.
- Enter the check mark to enable, clear the check mark to disable.
- Enable Display of Mobile Data Usage by Wi-Fi: From the Data usage window, touch Wi-Fi usage status.
- Enter the check mark to enable, clear the check mark to disable.
- A WI-FI tab appears when Wi-Fi usage status is enabled. Touch this tab to view mobile data usage for Wi-Fi.
- Enable Restriction on usage of mobile data with Wi-Fi: From the Data usage window, touch > Mobile hotspots.
- When entering a check mark next to the available Wi-Fi networks to enable, you can restrict apps from using these networks when in the background, and you can configure apps to warn you before using these networks for large downloads.
More Settings
The More settings menu provides access to additional wireless and network options, such as default messaging app, VPN, Mobile networks, and more.
More Settings Options
| Setting Description | |
| Airplane mode Disable all | settings that emit or receive signals. Phone stays powered on. |
| Default SMS app Set a default SMS app. | |
| Tethering & portable hotspot | Configure settings for tethering and Wi-Fi hotspots. For more information, see Mobile Hotspot and Tethering. |
| VPN Add a Virtual Private | Network (VPN). |
| Mobile networks Set a network mode, etc. | |
| Cell broadcasts | Set emergency alert notifications. |
Access More Settings Options
- From home, touch ⚙ > Settings

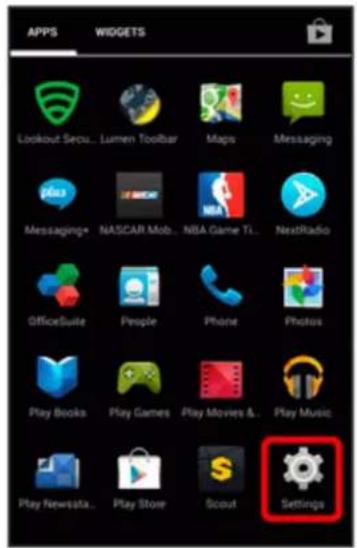
- Touch More....

The More... settings menu opens.
- Set items.
Your settings are saved and implemented.
Airplane Mode Setting
Airplane Mode setting allows you to use many of your phone's features, such as Gallery, Camera, and Music, when you are on an airplane or in any other area where making or receiving calls or data
is prohibited. When you set your phone to Airplane Mode, it cannot send or receive any calls or access online information.
1. From home, touch ⚙ > Settings

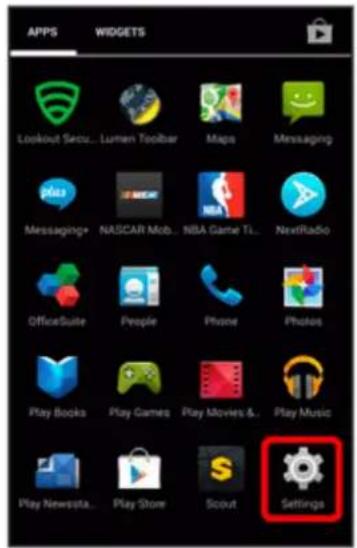
2. Touch More... > Airplane mode.

3. Touch the Airplane mode check box. While in Airplane Mode, the status bar will display .
Default SMS App Settings
If you have multiple messaging apps installed on your phone, you can choose the app your phone uses for SMS messaging.
1. From home, touch ⚙ > Settings

2. Touch More... > Default SMS app.

- Choose a messaging app.

The default messaging app is set.
Note: If you choose a default messaging app other than Messaging (for example, Google Hangouts or Messaging+), you will not be able to use the standard Messaging app unless you restore it as the default messaging app.
Tethering & Portable Hotspot Settings
Tethering & portable hotspot settings let you complete settings for the tethering and hotspot features. Tethering settings enable your phone to connect to another device for Internet access via USB or Bluetooth. Hotspot settings allow your phone to serve as a Wi-Fi hotspot. See Mobile Hotspot and Tethering for more information about Tethering & portable hotspot.
Important: Use of the Tethering and Hotspot features requires an additional subscription. Sign on to your account at sprint.com/mysprint or access your account via Sprint Zone (touch 📷 > Sprint Zone 📞) to learn more.
- From home, touch ⚙ > Settings

- Touch More... > Tethering & portable hotspot.
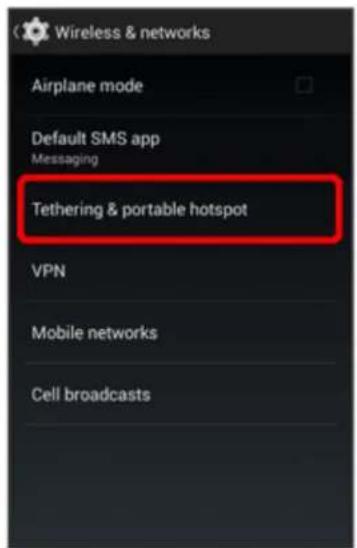
- Set the tethering or portable hotspot options.
Tethering & portable hotspot settings are applied and saved.
Virtual Private Networks (VPN)
From your phone, you can add, set up, and manage virtual private networks (VPNs) that allow you to connect and access resources inside a secured local network, such as your corporate network.
Prepare Your Phone for VPN Connection
Depending on the type of VPN you are using at work, you may be required to enter your login credentials or install security certificates before you can connect to your company's local network. You can get this information from your network administrator.
Before you can initiate a VPN connection, your phone must first establish a Wi-Fi or data connection. For information about setting up and using these connections on your phone, see Browser and Turn Wi-Fi On and Connect to a Wireless Network.
Set Up Secure Credential Storage
If your network administrator instructs you to download and install security certificates, you must first set up the phone's secure credential storage.
1. From home, touch ⚙ > Settings


- Touch Security, and then touch Screen lock > Password.

- Enter a new password (at least four characters including letters) for the credential storage, and then touch Continue.
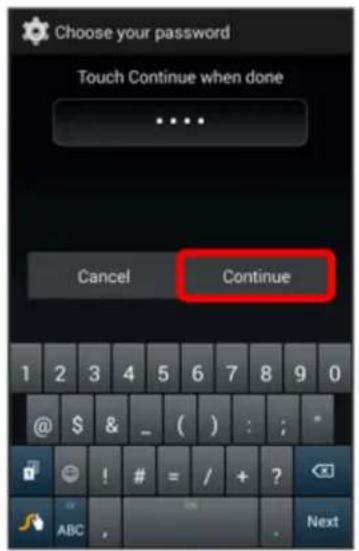
- Re-enter the password and then touch OK.
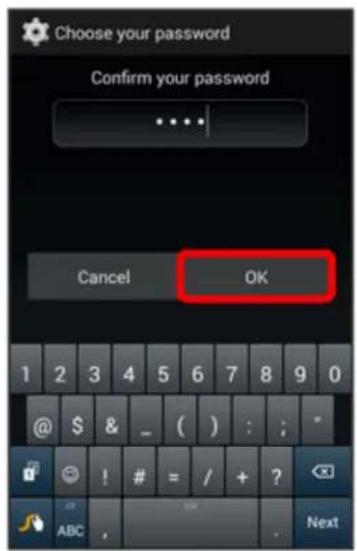
The password is set, allowing secure credential storage.
- Touch Trusted credentials in the Security settings menu and then touch your preferred system and user credentials.
Your secure credentials storage is set.
You can then download and install the certificates needed to access your local network. Your network administrator can tell you how to do this.
Add a VPN Connection
Use the Wireless & networks settings menu to add a VPN connection to your phone.
- From home, touch ⚙ > Settings

- Touch More... > VPN.

The VPN settings window appears.
- Touch Add VPN profile +, and then enter the information for the VPN you want to add.

- Information may include Name, Type, Server address, PPP encryption (MPPE), and advanced options.
- Set up all options according to the security details you have obtained from your network administrator.
4. Touch Save.

Your VPN is added to the VPNs section of the VPN settings window.
Connect to or Disconnect from a VPN
Once you have set up a VPN connection, connecting and disconnecting from the VPN is easy.
Access the VPN Settings Window
- From home, touch ⚙ > Settings


- Touch More... > VPN.
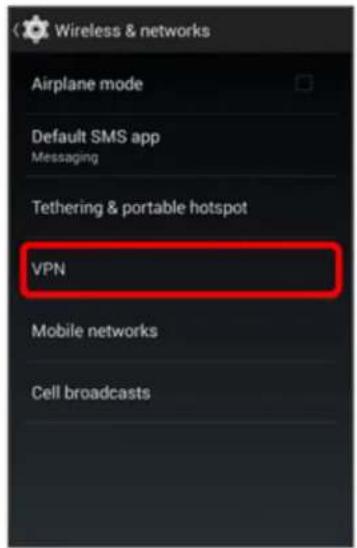
The VPN settings window appears.
Connect to a VPN
- From the VPNs section of the VPN setting window, touch the VPN that you want to connect to.

- When prompted, enter your login credentials, and then touch Connect.

You will connect to the selected VPN.
When you are connected, a VPN connected icon appears in the notification area.
- Open the Web browser to access resources such as intranet sites on your corporate network.
Disconnect from a VPN
- Drag the status bar down to open the notifications window.
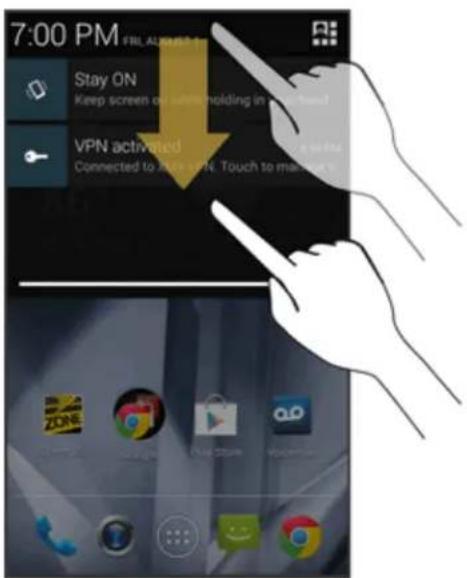
- Touch VPN activated.

3. Touch Disconnect.


Your phone disconnects from the VPN.
Mobile Networks Settings
The Mobile networks options menu lets you enable your phone's mobile data access, set your preferred network mode, configure Connections Optimizer, and more.
Mobile Networks Settings Overview
The Mobile networks settings menu allows you to configure the following options:
| Mobile Networks Setting | Description |
| Data enabled When enabled | d, data communication can be used via a mobile network. |
| Preferred network type Select your network type: LTE/CDMA or CDMA. | |
| Roaming Set your roaming options. | |
| Automatic Connections Touch | Connections Optimizer to help you manage and enhance your data experience by finding and connecting to remembered Wi-Fi networks on your device. For more information, seeConnections Optimizer. |
| Access Point Names Touch | to create a new access point. |
Access Mobile Networks Settings
- From home, touch ⚙ > Settings

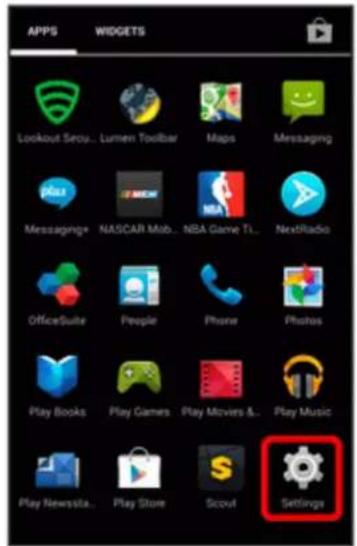
- Touch More... > Mobile networks.

The Mobile networks settings menu opens.
Cell Broadcasts Settings
Cell broadcasts settings allow you to configure emergency alert settings. You can enable or disable alerts such as Extreme threats, Severe threats, Amber alerts, and Test alert. You cannot disable Presidential alerts.
1. From home, touch ⚙ > Settings


2. Touch More... > Cell broadcasts.

3. Touch the check box next to each alert to enable or disable alerts.
Your alert settings are saved and applied.
Harman/Kardon Audio Settings
You can enable improved sound quality with the sound effect features of harman/kardon audio.
Harman/Kardon Audio Settings Overview
The harman/kardon audio settings menu allows you to configure the following options:
| Harman/Kardon Audio Setting | Description |
| Clari-Fi Set to ON to recover | sound information lost during compression for improved sound quality. Enabled when an earphone, Bluetooth device, etc., is connected. |
| Clari-Fi Visualizer Set to ON | for a visual display of the sound effect. |
| LiveStage Set to ON for more impressive sound rendering. | |
| Display icon on status bar when it is enabled. | Set whether the icon is displayed in the status bar when Clari-Fi or LiveStage is enabled. |
| Help View a description of the Harman sound effect. | |
Access Harman/Kardon Audio Settings
- From home, touch ⚙ > Settings ⚗.

2. Touch harman/kardon audio.

- If a description of the Harman sound effect appears, follow the onscreen instructions to continue.
3. Set your Harman/Kardon Audio options.
Your Harman/Kardon Audio settings are saved and applied.
Sound Settings
The Sound settings menu lets you control your phone's audio, from ringtones and alerts to touch tones and notifications.
Sound Settings Overview
The sound settings menu allows you to configure the following options:
| Sound Setting Description | |
| Volumes Set volume for music, ringtones, alarms, system features, etc. | |
| Silent mode Enable silent mode. | |
| Incoming call Set incoming call options. | |
| Notification Set notification options. | |
| Dial pad touch tones Enable dialpad tones. | |
| Touch sounds Enable a tone for screen touches. | |
| Screen lock sound Enable a tone when locking/unlocking the screen. | |
| Vibrate on touch | Enable vibration for screen touches. |
Access Sound Settings
- From home, touch ⚙ > Settings


- Touch Sound.

- Set your sound options.
Your sound settings are saved and applied.
Display Settings
Adjusting your phone's display settings not only helps you see what you want, it can also help increase battery life.
Display Settings Overview
The display settings menu allows you to configure the following options:
| Display Setting Description | |
| Brightness Set the display | brightness. |
| Wallpaper Set a wallpaper. | |
| Frameless effect Set effect | that appears on the display edges when the display turns on. |
| Display mode Set the screen colors. | |
| Lock screen while on the call | Keep screen locked during calls. |
| Screen on/off by motion Set | set the display to turn on/off according to phone movement or operation. |
| Auto-rotate screen Enable | automatic rotation of the screen. |
| Sleep Set a screen timeout | duration.Note: Longer durations discharge the battery more quickly. |
| Daydream Set content to be displayed on the screen while charging. | |
| Font size Set the font size for the screen. | |
| Cast screen | Set wireless output. |
Access Display Settings
- From home, touch ⚙ > Settings ⚙️.

- Touch Display.
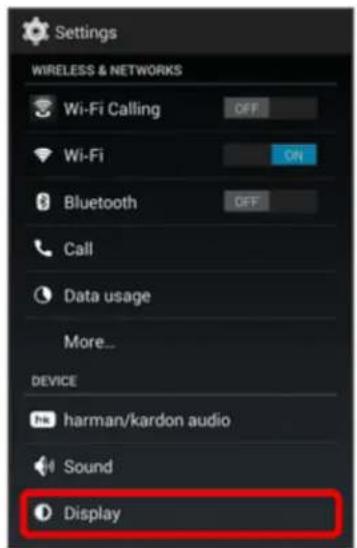
- Set your display options.
Your display settings are saved and applied.
Clip Now Settings
You can enable Clip Now and check usage instructions. See Clip Now for more information about Clip Now.
Clip Now Settings Overview
The Clip Now settings menu allows you to configure the following options:
Settings 380
| Clip Now Setting Description | |
| Clip Now Enable/disable the Clip Now feature. | |
| Help Check how to use Clip Now. |
Access Clip Now Settings
- From home, touch > Settings


- Touch Clip now.

- Set your Clip Now options.

Your Clip Now settings are saved and applied.
Storage Settings
The Storage settings menu lets you manage internal storage on your phone and provides options for your SD card.
Storage Settings Overview
The storage settings menu allows you to configure the following options:
| Storage Setting Description | |
| Total space View the total space/free space in your phone memory and in an optional installed SD card. | |
| Unmount SD card If an optional SD card is installed, touch to unmount the card to allow for safe removal. | |
| Mount SD card If an optional SD card is installed, touch to mount the card and make it available for use. | |
| Erase SD card If an optional SD card is installed, touch to erase all data stored on the card and prepare it for use by your phone. |
Access Storage Settings
- From home, touch ⚙ > Settings


2. Touch Storage.
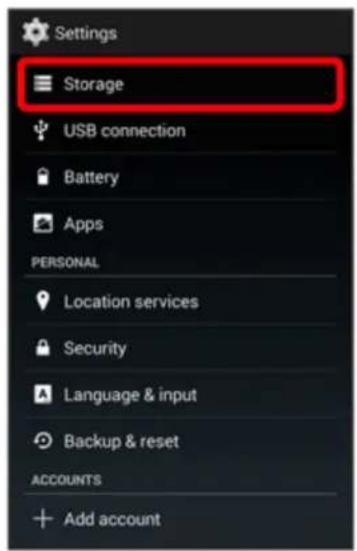
3. Check or touch items.
Review your storage settings.
USB Connection Settings
The USB Connection Settings menu lets you select with which method your phone exchanges data when you connect your phone to your computer.
Select a data exchange method from the following table.
| USB Connection Setting | Description |
| Charge Only Only recharge | after connecting. |
| Media device (MTP) Transfer | files between your phone and computer such as pictures, videos, and music. |
| Camera (PTP) Transfer picture and video files between your phone and computer. | |
| USB mass storage (UMS) | Exchange data with a computer using your phone as an external storage device. |
Battery Settings
You can monitor your phone's battery usage through this settings menu. You can also view which functions are consuming your battery's charge and at what percentage.
- From home, touch ⚙ > Settings Ⓗ.
Settings 383
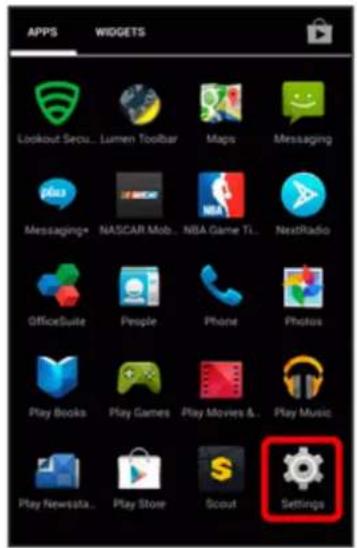
- Touch Battery.

- Touch items to view details.
Check your battery condition and access additional options.
Apps Settings
You can check installed applications and running applications.
Apps Settings Overview
Items that can be checked in the Apps settings menu are the following.
| Apps Setting Description | |
| DOWNLOADED Check downloaded apps. | |
| RUNNING Check running apps. | |
| ALL Check all apps. | |
Access Apps Settings
- From home, touch ⚙ > Settings


- Touch Apps.

- Touch items to view details.
Settings 385
Check your application settings condition and access additional options.
- Depending on the app and its location, you may be able to force the app closed, uninstall or disable the app, clear cache and data, and more.
- You can change how apps are sorted by touching 📄 > Sort by size/Sort by name.
- You can clear any disabling of apps, permission restrictions, etc. all at once for all apps by touching ⚠ > Reset app preferences > Reset apps.
Location Services Settings
Your Location Services settings menu lets you select how your phone determines its location (using the wireless networks, GPS satellites, both, or neither).
Location Services Settings Overview
Your Location settings menu allows you to configure the following options.
| Location Services Setting | Description |
| Mode Select a locating method: High accuracy, Battery saving, or Device only. Turn Accelerated location ON to use the Qualcomm IZat location acceleration hardware. | |
| RECENT LOCATION REQUESTS | Display apps that have recently requested your phone’s location. |
| LOCATION SERVICES Permit Google to use your phone’s location information and location history. | |
Enable Location Services
Before using any features that require location assistance, you must enable your phone's location services.
- From home, touch ⚙ > Settings

- Touch Location services.

- Touch the Location services slider to turn Location services on or off.

Your phone's location services are enabled.
If you see a confirmation, follow the onscreen instructions to connect.
Access Location Settings
- From home, touch ⚙ > Settings.

Settings 387

- Touch Location services.
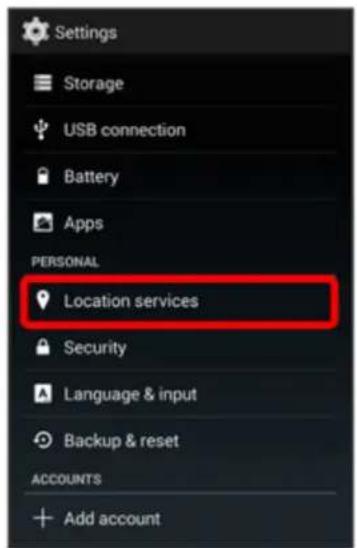
- Configure the desired settings.
Your location settings are applied and saved.
Security Settings
The Security settings menus let you set screen security options, encryption options, password visibility, administrator settings, and credential storage options.
Security Settings Overview
Many security settings are dependent on Screen lock settings, SIM lock settings, etc. The following table outlines the settings available through the Security settings menu:
| Security Setting Description | |
| Screen lock | Set your screen lock. See Lock Screen Settings for details. |
| Improve face matching*4 | When you have a face unlock set, you can capture your face in different conditions to improve the face matching ability. |
| Liveness check*4 | You need to blink when unlocking the screen with the face Unlock s |
| Make pattern visible*2 | When you have a Pattern screen lock set, you can choose whether the pattern is visible briefly as you draw it on the lock screen. |
| Automatically lock*2*3*4 | When you have a screen lock set, you can choose a time period for automatically locking the screen after the screen turns off, or choose to have the screen lock immediately when the screen turns off. |
| Power key to lock instantly*2*3*4 | Pressing the Power key locks the screen immediately. |
| Enable widgets*1*2*3*4 | Enable multiple widgets on your lock screen. |
| Owner info Show your information on the lock screen. | |
| Encrypt phone Encrypt all data on your phone. | |
| Encrypt microSD Encrypt the data on an optional installed SD card. | |
| Make passwords visible Toggle to show or hide passwords when entering form data. | |
| Device administrator View or turn off device administrators. | |
| Unknown sources Allow or deny installation of apps from sources other than the Google Play Store app. | |
| Verify apps Disallow or warn before installation of apps that may cause harm. | |
| Storage type Check the storage type. | |
| Trusted credentials | Display trusted CA certificates. |
| Install from microSD | Install encrypted credentials. |
| Clear credentials | Delete all credentials and reset the credential storage password. |
*1 This option is available when the Slide screen lock is set. *2 This option is available when the Pattern screen lock is set. *3 This option is available when the PIN/Password screen lock is set. *4 This option is available when the face unlock screen lock is set.
Access Security Settings
- From home, touch ⚙ > Settings


- Touch Security.

The Security settings menu opens.
- Set your security options.
Your security settings are applied and saved.
Encrypt phone
- From home, touch ⚙ > Settings ⚙️.

- Touch Security.
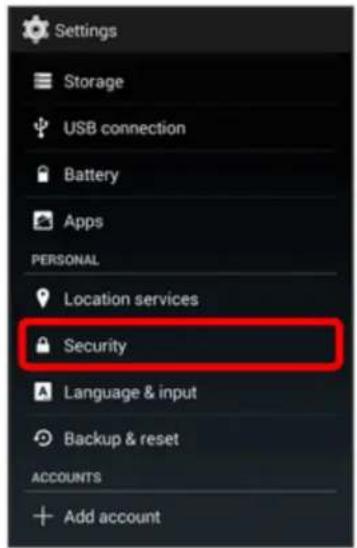
The Security settings menu opens.
- Touch Encrypt phone.

- Encrypt phone is dimmed if your phone is not plugged into the charger.
- Enter a PIN or password you have set and then touch Next.

5. Touch Encrypt phone.

• Encrypting starts and then the phone restarts.
! Phone Encryption Cautions
Files on your phone can be encrypted with Encrypt phone.
■ After performing Encrypt phone, a storage decryption password entry window appears each time your phone is powered on. Enter the PIN or password set in Screen lock. ■ To disable encryption of your phone, perform Reset all. - Charge your phone adequately beforehand, and charge your phone during the encryption process. ■ If Encrypt phone is interrupted, all files on your phone will be deleted. Emergency calls cannot be placed in the storage decryption password entry window. - If an incorrect PIN or password is entered 10 times and 20 times consecutively in the storage decryption password entry window, input will be disabled for 30 seconds. Note that your phone will be initialized after 30 consecutive failures.
Encrypt microSD
- From home, touch ⚙ > Settings

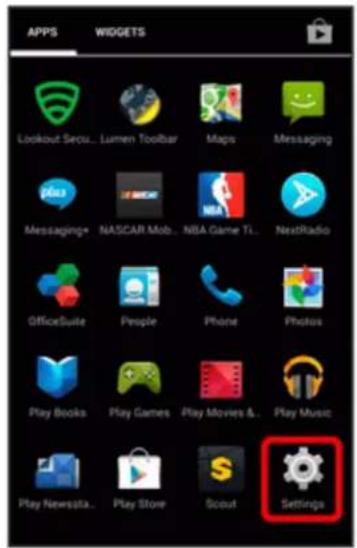
- Touch Security.

The Security settings menu opens.
- Touch Encrypt microSD.

- After an alert that all data will be erased appears, touch OK.
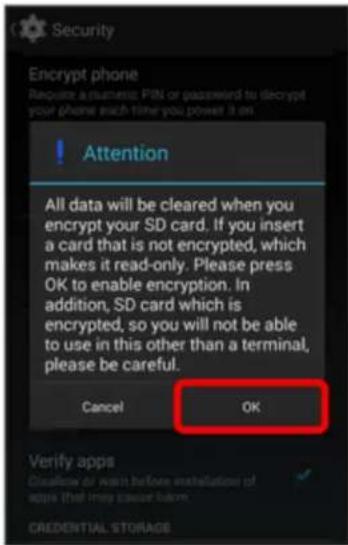
- Touch Erase SD card.

- Enter a PIN or password you have set and then touch Next.

7. Touch Erase everything.
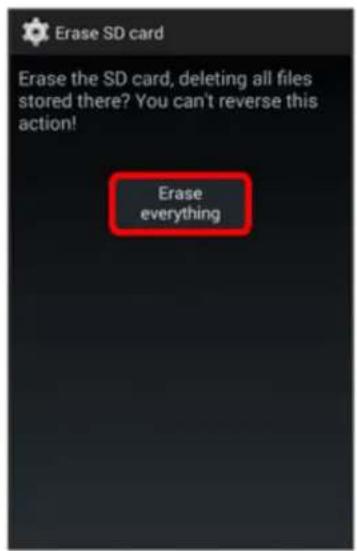

Data saved on microSD card is encrypted.

SD Card Encryption Cautions
Files on SD Card can be encrypted with Encrypt microSD.
■ An encrypted SD Card cannot be recognized by any device other than your phone used for encrypting the SD Card. ■ Encrypting SD Card prevents files on that SD Card from being accessed by other people (e.g., when your handset is lost). ■ Even when an encrypted SD Card is removed from your phone then inserted into another phone or connected to a PC via an SD Card reader/writer, files on the encrypted SD Card cannot be accessed from the device. ■ Performing Encrypt microSD deletes all SD Card files. - To disable encryption of SD Card and use it normally, perform Erase SDcard and then Reset all. Note that files on the SD Card will be deleted. ■ Once used for encrypting SD Card, your phone cannot be connected to a PC in MTP mode or PTP mode. ■ SD Card becomes read-only when inserted into your phone that has been used for encrypting another SD Card. - To write to read-only SD Card, perform steps in Format SD Card. Note that files on the SD Card will be deleted.
Lock Screen Settings
The lock screen settings let you set your method for unlocking your phone, customize lock screen options, determine whether to show pop-up tips for unlocking the phone, and enter your owner information to be displayed on the lock screen.
! Lock Screen Cautions
Please note that if you forget the pattern/PIN/password for unlocking the screen, you will not be able to unlock the screen.
Screen Lock
You can increase the security of your phone by creating a screen lock. When enabled, you have to draw the correct unlock pattern on the screen, enter the correct PIN, or enter the correct password to unlock the phone's control keys, and touchscreen.
In order from least secure to most secure, the available screen lock options are:
None ■ Slide Face Unlock Pattern PIN - Password
Important: To protect your phone and data from unauthorized access, it is recommended that you use the highest security level available (Password protection). It is also recommended you frequently change your password to ensure the safety of your phone and personal data.
Access Screen Lock Settings
- From home, touch ⏻ > Settings


- Touch Security.

The Security settings menu opens.
- Touch Screen lock.

The Screen lock settings menu opens.
Use Slide to Unlock the Screen
From the Screen lock settings menu, touch Slide to save the setting.

The screen lock is set.
Use Face Unlock
- From the Screen lock settings menu, touch Face Unlock.

- Touch Set it up after checking the precautions displayed on the screen.
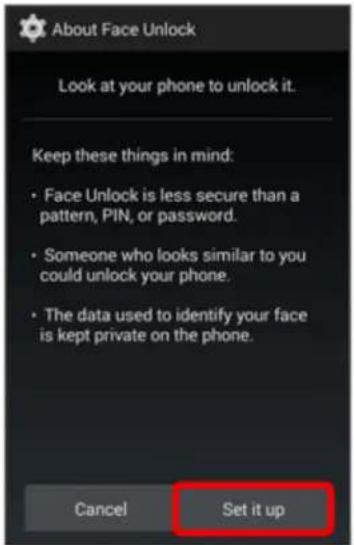
- Touch Continue.
- Fit your face in the frame.
- After "Face captured." is displayed, touch Continue.

- Touch a backup unlock method in the case your phone cannot recognize your face.
- For Pattern, follow the instructions described in "Use a Screen Unlock Pattern" below.
- For PIN, follow the instructions described in "Use a Screen Unlock PIN" below.
- Touch OK.

The screen lock is set.
Use a Screen Unlock Pattern
- From the Screen lock settings menu, touch Pattern.

- Draw the screen unlock pattern by connecting at least four dots in a vertical, horizontal, or diagonal direction. Lift your finger from the screen when finished.

The phone records the pattern.
- Touch Continue.
- When prompted, draw the screen unlock pattern again, and then touch Confirm.

The screen unlock pattern is saved.
Note: Clear the Make pattern visible check box if you do not want the unlock pattern to display on the screen when you unlock it.
Note: To change your unlock screen pattern, from home, touch ⚙️ > Settings ⚙️ > Security > Screen lock.
Note: If you draw a mistaken pattern five times in a row to unlock the screen while a Google account is activated, your phone determines that the pattern was forgotten and a prompt appears. Touch the prompt and log in to the Google account to unlock the screen.
Use a Screen Unlock PIN
- From the Screen lock settings menu, touch PIN.

- Enter a PIN, touch Continue, re-enter your PIN, and then touch OK to save the setting.
The screen lock is set.
- If you fail to enter the correct PIN after five attempts, you will be prompted to wait for 30 seconds before you can try again.
Use a Screen Unlock Password
- From the Screen lock settings menu, touch Password.

- Enter a password, touch Continue, re-enter your password, and then touch OK to save the setting.
The screen lock is set.
- If you fail to enter the correct password after five attempts, you will be prompted to wait for 30 seconds before you can try again.
Important: To protect your phone and data from unauthorized access, it is recommended that you use the screen unlock password (highest security). It is also recommended that you frequently change your password to ensure the safety of your phone and personal data.
Disable the Screen Lock
Follow the instructions below to turn off your current screen lock.
- From home, touch ⚙ > Settings


- Touch Security.

The Security screen settings menu opens.
- Touch Screen lock.

- Draw your unlock screen pattern, enter your PIN, or enter your password.
- Touch None.
The screen lock is disabled.
Language & Input Settings
Your phone's language and input settings let you select a language for the phone's menus and keyboards, select and configure keyboard settings, configure speech input settings, and set your phone's mouse/trackpad options.
Language & Input Settings Overview
You can set the following options in the Language and input settings menu:
| Language & Input Setting | Description |
| Language Set the language for your display and menus. | |
| Spell checker Choose whether to perform the spell check when typing words.Touch on the right side to set the spell checker options. | |
| Personal dictionary Add words in Personal dictionary. | |
| Default Set the default method for entering text. | |
| Google Keyboard | Enable or disable Google keyboard. Touch on the right side to set Google keyboard options. |
| Swype | Enable or disable Swype keyboard. Touch on the right side to set Swype keyboard options. |
| Google voice typing | Enable or disable Google voice typing. Touch on the right side to set Google voice typing options. |
| Voice Search Set your voice search options. | |
| Text-to-speech output Set text-to-speech output. | |
| Pointer speed Set the speed of the pointer for a mouse/trackpad. | |
Access Language & Input Setting Options
- From home, touch ⚙ > Settings


- Touch Language & input.

The Language & input settings menu opens.
- Set options.
The Language & input settings are applied and saved.
Language & Input Options
Some of the language and input options are detailed below.
- Set the Display Language: From the Language & input settings menu, touch Language and then touch a language to assign it.
- Enable Spell Checker: From the Language & input settings menu, touch Spell checker to toggle the option on or off. (A check mark indicates the option is enabled.)
- Set Spell Checker Options: From the Language & input settings menu, touch next to Spell checker and configure your Spell checker options.
- Edit Personal Dictionary: From the Language & input settings menu, touch Personal dictionary, and edit Personal dictionary.
- Set Input Method: From the Language & input settings menu, touch Default and then touch an input method.
- Set Google Keyboard Options: From the Language & input settings menu, touch next to Google Keyboard and configure your keyboard options.
- Set Swype keyboard Options: From the Language & input settings menu, touch next to Swype and configure your keyboard options.
- Enable Voice Input: From the Language & input settings menu, touch Google voice typing to toggle the option on or off. (A check mark indicates the option is enabled.)
- Set Voice Output when Using Voice Search: From the Language & input settings menu, touch Voice Search, touch a settings option, and follow the onscreen instructions.
- Set options for Text-to-Speech Output: From the Language & input settings menu, touch Text-to-speech output, touch a settings option, and follow the onscreen instructions.
- Set Speed of Pointer for Mouse/Trackpad: From the Language & input settings menu, touch Pointer speed, drag the bar to adjust the speed, and touch OK.
Backup & Reset
Your phone's Backup & reset menu lets you back up your phone's data and settings to Google servers before resetting your phone to the original factory settings. The Factory data reset erases all data from the phone's application storage, including:
■ Your Google account ■ All other email and social networking accounts ■ System and application data and settings ■ Downloaded applications ■ Some preInstall applications ■ Music ■ Photos ■ Other user data
Backup & Reset Overview
The following options are available in the Back up and reset menu:
| Backup & Reset Option | Description |
| Back up my data Enable b | backup for application data, Wi-Fi passwords, and other settings to Google servers. |
| Backup account Select the | account used to back up data. |
| Automatic restore When re | installing an application, backed up settings and data will be restored. |
| Reset all Reset all settings | and delete all data on your phone. |
- Performing a factory data reset erases all data on the phone. It is recommended that you back up important data before performing a factory data reset.
- Erased information cannot be restored. Only erase data after you are sure you have saved everything you need.
Access Backup & Reset Options
- From home, touch ⚙ > Settings


2. Touch Backup & reset.
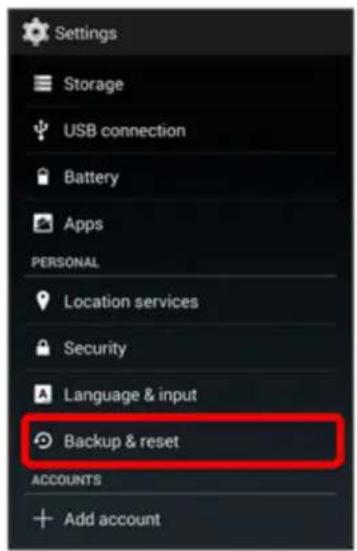
The Backup & reset menu opens.
3. Set options.
The Backup & reset settings are applied and saved.
- If you're performing Reset all, follow the prompts to confirm the data removal. The phone will erase all data and reboot.
Reset all
Tip: Before performing a factory data reset on your phone, you may want to unmount the microSD card to avoid losing any data you may have stored on it. From home, touch ⚙ > Settings 🌐 > Storage > Unmount SD card > OK to unmount the storage card.
- From the Backup & reset menu, touch Reset all.

- Read the reset all information page and touch Reset phone.

3. Touch Erase everything.

Your phone will power down and reset itself, which may take up to 10 minutes.
- Once the phone has reset, it will run through the Hands Free Activation and update processes again. When finished, you will see the Welcome screen and Setup screens. See Complete the Setup Screens to start over.
Accounts
The Accounts settings menu lets you add and manage all your email, social networking, and picture and video sharing accounts.
Set Up a New Account
- From home, touch ⚙ > Settings ⚙️.

- Touch Add account.

An Add account window appears.
- Touch an account type and then follow the onscreen instructions to add the required account information.
The account is added to the accounts list.
Manage Existing Accounts
- From home, touch ⚙ > Settings

Settings 415
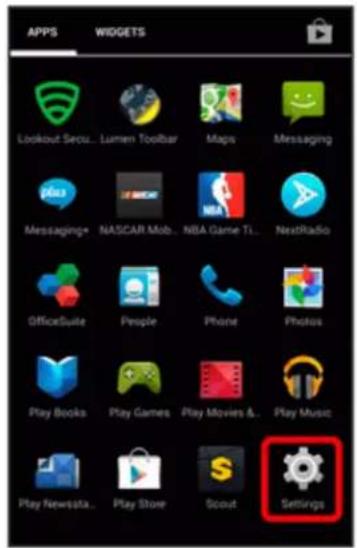
- Touch an account > .

The account settings menu appears.
- Select your account settings, and then update the settings you want to change.
The account options are updated.
Date & Time Settings
Use the Date & Time settings menu either to automatically use the network-provided date and time or manually set these values, as well as select time and date format options.
Date & Time Overview
The following Date & Time options may be configured:
| Date and Time Option | Description |
| Automatic date & time Set | the date and time automatically via the connected wireless network. |
| Automatic time zone Set the | the time zone automatically via the connected wireless network. |
| Set date | Set the date manually (only available when the Automatic date & time option is disabled). |
| Set time | Set the time manually (only available when the Automatic date & time option is disabled). |
| Select time zone | Set the time zone manually (only available when the Automatic time zone option is disabled). |
| Use 24-hour format Enable or disable 24-hour format. | |
| Choose date format Set the | the date display format. |
Access Date & Time Options
- From home, touch ⚙ > Settings ⚙️.

2. Touch Date & time.

3. Set available date & time options.
Your date & time settings are applied and saved.
Accessibility Settings
The Accessibility settings menu lets you enable and manage accessibility-related applications.
Accessibility Settings Overview
The following Accessibility options may be configured:
| Accessibility Option Description | |
| TalkBack Activate the Talkback feature and configure options. | |
| Captions Turn captions on/off, and set language, size, and style. | |
| Magnification gestures Control whether your phone recognizes gestures to pan, and zoom in or out by triple-tapping the screen. | |
| Large text Set the text to large size. | |
| Power button ends call | Enable the Power key to end calls. |
| Auto-rotate screen Set the | screen to rotate automatically when the phone is rotated. |
| Speak passwords | Set the phone to read passwords aloud as they are entered. |
| Accessibility shortcut | Control whether your device recognizes a gesture to quickly enable accessibility features. To use the gesture, press and hold the Powe key until you hear a sound or feel a vibration, then touch and hold tv fingers on the screen until you hear an audio confirmation. |
| Hearing aids Enable hearing aid compatibility. | |
| Text-to-speech output Configure options for converting text to speech. | |
| Touch & hold delay Choose how long your phone waits when you hold your finger on the screen, before continuing with the touch and hold action. | |
| Persistent Alerts Set alerts to repeat. Configurable per application. | |
Access Accessibility Options
- From home, touch ⚙ > Settings

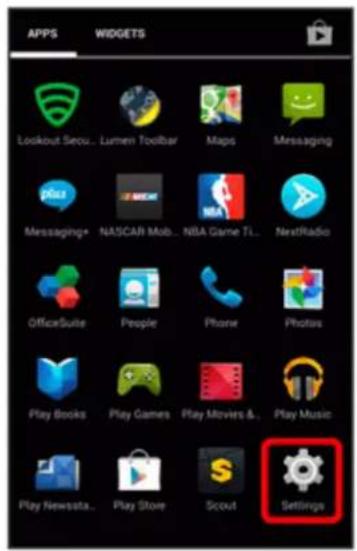
2. Touch Accessibility.
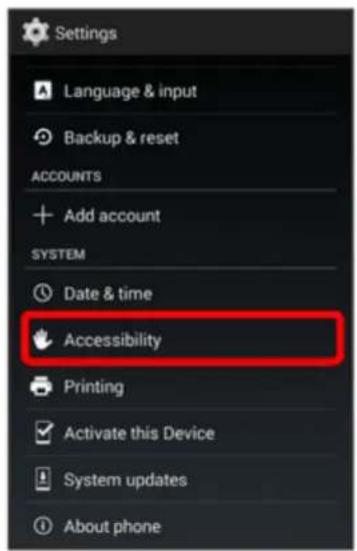
3. Set available accessibility options.
Your accessibility settings are applied and saved.
Printing
The Printing window configures settings for cloud printing, etc.
1. From home, touch ⚙ > Settings ⚙️.

2. Touch Printing.
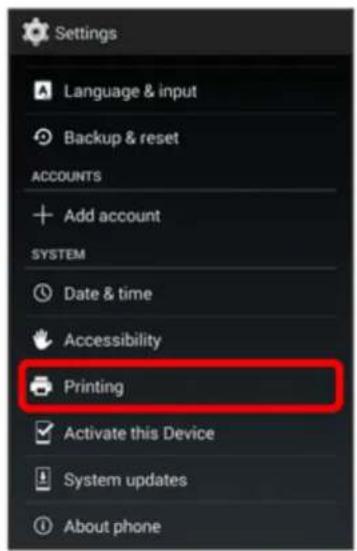
The Printing window appears.
3. Follow the onscreen instructions.
Activate This Device
The Activate this device menu lets you activate a new phone or use additional self-service options such as checking the status of an in-service phone.
1. From home, touch ⚙ > Settings

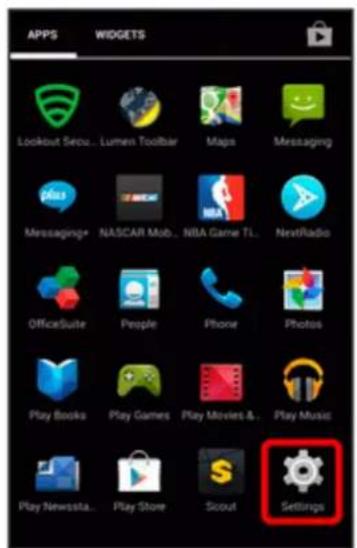
- Touch Activate this Device.

The Device Self Service menu appears.
- Follow the onscreen prompts to activate your phone or review your summary.
Your phone activates. If already activated on an account, you will see a usage and plan summary.
System Updates
System updates options let you update your phone's software.
- From home, touch ⚙ > Settings ⚙️.

- Touch System updates to use the following options:

- Update PRL: Download the latest Preferred Roaming List (PRL), used by your phone to access the network.
- Update Profile: Update the user profile related to your wireless service account. If you choose to change your user name online, use this option to update the user name on your phone.
- Update Sharp software: Upgrade to the latest software available for your phone.
About Phone
The About Phone menu lets you access important phone information, search for and apply updates, and view legal and safety information.
About Phone Overview
The following About Phone items may be reviewed or set:
| About Phone Item Description | |
| Status Check your phone's status. | |
| 4G Settings Check the Network provider and IP address. | |
| Adjust touch screen Adjust the accuracy of the touch screen. | |
| Sensor calibration Adjust motion sensor and electromagnetic sensor. | |
| Legal information Check copyright information, terms of use, etc. | |
| Regulatory information Check the regulatory information. | |
| Model number Check the phone's model number. | |
| HW version Check the phone's hardware version. | |
| Processor info Check the phone's processor information. | |
| Android version | Check the Android version number. |
| Baseband version | Check the phone's baseband version. |
| Kernel version | Check the phone's kernel version. |
| Build number | Check the current phone build number. |
| SW version | Check the phone's software version. |
Access About Phone Options
- From home, touch 📄> Settings


- Touch About phone.

- Select or view available options.
Your phone information is displayed.
Copyright Information
Licensed by InterDigital Technology Corporation under certain patents relating to TDMA or CDMA-based digital wireless telephony.
THIS PRODUCT IS LICENSED UNDER THE AVC PATENT PORTFOLIO LICENSE FOR THE PERSONAL AND NONCOMMERCIAL USE OF A CONSUMER TO (i) ENCODE VIDEO IN
COMPLIANCE WITH THE AVC STANDARD ("AVC VIDEO") AND/OR (ii) DECODE AVC VIDEO THAT WAS ENCODED BY A CONSUMER ENGAGED IN A PERSONAL AND NONCOMMERCIAL ACTIVITY AND/OR WAS OBTAINED FROM A VIDEO PROVIDER LICENSED TO PROVIDE AVC VIDEO. NO LICENSE IS GRANTED OR SHALL BE IMPLIED FOR ANY OTHER USE. ADDITIONAL INFORMATION MAY BE OBTAINED FROM MPEG LA, L.L.C. SEE HTTP://WWW.MPEGLA.COM.
This product is licensed under the MPEG-4 Visual Patent Portfolio License for the personal and non-commercial use of a consumer to (i) encode video in compliance with the MPEG-4 Video Standard ("MPEG-4 Video") and/or (ii) decode MPEG-4 Video that was encoded by a consumer engaged in a personal and non-commercial activity and/or was obtained from a licensed video provider. No license is granted or implied for any other use. Additional information may be obtained from MPEG LA. See http://www.mpegla.com.
This product is licensed under the MPEG-4 Systems Patent Portfolio License for encoding in compliance with the MPEG-4 Systems Standard, except that an additional license and payment of royalties are necessary for encoding in connection with (i) data stored or replicated in physical media which is paid for on a title by title basis and/or (ii) data which is paid for on a title by title basis and is transmitted to an end user for permanent storage and/or use. Such additional license may be obtained from MPEG LA, LLC. See http://www.mpegla.com for additional details.
THIS PRODUCT IS LICENSED UNDER THE VC-1 PATENT PORTFOLIO LICENSE FOR THE PERSONAL AND NON-COMMERCIAL USE OF A CONSUMER TO (i) ENCODE VIDEO IN COMPLIANCE WITH THE VC-1 STANDARD ("VC-1 VIDEO").
AND/OR (ii) DECODE VC-1 VIDEO THAT WAS ENCODED BY A CONSUMER ENGAGED IN A PERSONAL AND NON-COMMERCIAL ACTIVITY AND/OR WAS OBTAINED FROM A VIDEO PROVIDER LICENSED TO PROVIDE VC-1 VIDEO. NO LICENSE IS GRANTED OR SHALL BE IMPLIED FOR ANY OTHER USE. ADDITIONAL INFORMATION MAY BE OBTAINED FROM MPEG LA, L.L.C. SEE HTTP://WWW.MPEGLA.COM.
©2014 Sprint. Sprint and the logo are trademarks of Sprint.
Microsoft®, Excel®, PowerPoint® and Exchange® are trademarks or registered trademarks of Microsoft Corporation in the U.S.A. and other countries.
Microsoft® Excel® and Microsoft® Word® are product names of Microsoft Corporation in the U.S.A.
Bluetooth® is a trademark of the Bluetooth SIG, Inc.

Bluetooth®
SMART READY
The Bluetooth word mark and logos are owned by the Bluetooth SIG, Inc. and any use of such marks by Sharp is under license. Other trademarks and trade names are those of their respective owners.
Oracle and Java are registered trademarks of Oracle and/or its affiliates. Other names may be trademarks of their respective owners.
micro SD™ micro SD HC micro SD XC
microSD Logo, microSDHC Logo and microSDXC Logo are trademarks of SD-3C, LLC.
This product has passed certification testing as stipulated by Wi-Fi Alliance® in order to guarantee interconnectivity of wireless LAN devices based on wireless LAN specification IEEE 802.11, and has been certified as "Wi-Fi CERTIFIED™".
Supports* IEEE 802.11a/b/g/n (2.4 GHz/5 GHz)/ac.
* See each manufacturer's website for information on supporting products.

Functionality provided for completing wireless LAN connection settings (SSID, authentication method, encryption key, etc.) by push button method or PIN entry method using Wi-Fi Protected Setup™ (WPS).

Wi-Fi®, Wi-Fi Alliance®, Wi-Fi Protected Access® (WPA), the Wi-Fi CERTIFIED logo, and the Wi-Fi Protected Setup logo are registered trademarks of Wi-Fi Alliance®.
Wi-Fi CERTIFIED™, Wi-Fi Direct™, Wi-Fi Protected Setup™, WPA2™, and Miracast™ are trademarks of Wi-Fi Alliance®.
Sharp and AQUOS are registered trademarks of Sharp Corporation. SHARP is a trademark of Sharp Corporation.
Google™, Google logo, Android™, Android logo, Google Play™, Google Play logo, Google+™, Google+ logo, Google Settings™, Google Settings logo, Gmail™, Gmail logo, Google Calendar™, Google Calendar logo, Google Maps™, Google Maps logo, Google Chrome™, Google Chrome logo, Google Voice Search™, Google Voice Search logo, Picasa™, YouTube™, YouTube logo, Google Drive™, Google Drive logo, Google Search™, Google Search logo and Google Now™ are trademarks of Google Inc.
QUALCOMM® 3G/4G
Facebook® is a registered trademark of Facebook, Inc.
Twitter is a trademark of Twitter, Inc., and is used under license.
Livestage™ is a trademark of Harman International Industries, Incorporated.
Clari-Fi™ is a trademark of Harman International Industries, Incorporated.
©2014 Harman International Industries, Incorporated
Harman Kardon® is a registered trademark and trademark of Harman International Industries, Incorporated.
Other marks are trademarks of their respective owners.
■ OpenSSL License
OpenSSL License
Copyright © 1998-2009 The OpenSSL Project. All rights reserved.
This product includes software developed by the OpenSSL Project for use in the OpenSSL Toolkit. (http://www.openssl.org/)
THIS SOFTWARE IS PROVIDED BY THE OpenSSL PROJECT "AS IS" AND ANY EXPRESSED OR IMPLIED WARRANTIES, INCLUDING, BUT NOT LIMITED TO, THE IMPLIED WARRANTIES OF MERCHANTABILITY AND FITNESS FOR A PARTICULAR PURPOSE ARE DISCLAIMED. IN NO EVENT SHALL THE OpenSSL PROJECT OR ITS CONTRIBUTORS BE LIABLE FOR ANY DIRECT, INDIRECT, INCIDENTAL, SPECIAL, EXEMPLARY, OR CONSEQUENTIAL DAMAGES (INCLUDING, BUT NOT LIMITED TO, PROCUREMENT OF SUBSTITUTE GOODS OR SERVICES; LOSS OF USE, DATA, OR PROFITS; OR BUSINESS INTERRUPTION) HOWEVER CAUSED AND ON ANY THEORY OF LIABILITY, WHETHER IN CONTRACT, STRICT LIABILITY, OR TORT (INCLUDING NEGLIGENCE OR OTHERWISE) ARISING IN ANY WAY OUT OF THE USE OF THIS SOFTWARE, EVEN IF ADVISED OF THE POSSIBILITY OF SUCH DAMAGE.
Original SSLeay License
Copyright © 1995-1998 Eric Young (eay@cryptsoft.com) All rights reserved.
This product includes cryptographic software written by Eric Young (eay@cryptsoft.com).
THIS SOFTWARE IS PROVIDED BY ERIC YOUNG "AS IS" AND ANY EXPRESS OR IMPLIED WARRANTIES, INCLUDING, BUT NOT LIMITED TO, THE IMPLIED WARRANTIES OF MERCHANTABILITY AND FITNESS FOR A PARTICULAR PURPOSE ARE DISCLAIMED. IN NO EVENT SHALL THE AUTHOR OR CONTRIBUTORS BE LIABLE FOR ANY DIRECT, INDIRECT, INCIDENTAL, SPECIAL, EXEMPLARY, OR CONSEQUENTIAL DAMAGES (INCLUDING, BUT NOT LIMITED TO, PROCUREMENT OF SUBSTITUTE GOODS OR SERVICES; LOSS OF USE, DATA, OR PROFITS; OR BUSINESS INTERRUPTION) HOWEVER CAUSED AND ON ANY THEORY OF LIABILITY, WHETHER IN CONTRACT, STRICT LIABILITY, OR TORT (INCLUDING NEGLIGENCE OR OTHERWISE) ARISING IN ANY WAY OUT OF THE USE OF THIS SOFTWARE, EVEN IF ADVISED OF THE POSSIBILITY OF SUCH DAMAGE.
Portions Copyright © 2004 Intel Corporation
For Assistance
The following topics address areas of support for your phone, including troubleshooting, specifications, account information, warranty information, and customer service contact information.
Troubleshooting
Check the questions and answers below for troubleshooting solutions for common phone issues.
Check Here First
Question: Phone does not turn on.
Answer: Are you holding the Power key down? Continue pressing the Power key until the logo is displayed.
Answer: Is the phone charged? Recharge the phone if not charged.
Question: Phone turns off/does not turn on.
Answer: If you continue using your phone while it is warm, a caution is displayed and your phone turns off in 3 minutes. Exit any apps and turn off the screen to let the phone cool down.
Question: Phone freezes/operation is unstable.
Answer: If your phone freezes or you cannot operate it, you can force your phone to turn off. Press and hold the Power key for 8 seconds or more.
- Release the Power key once your phone vibrates. Your phone turns off.
Question: Operation is unstable after a new application was installed.
Answer: The newly installed application may be the cause. Uninstall the application. See Uninstall an App.
Question: Phone starts operating on its own without touching the screen/phone does not respond to screen touch.
Answer: Press the Power key to turn off the screen, and then press again to turn the screen on before using the phone.
Question: Cannot use phone, mail, or Internet.
Answer 1: Check whether you are where signal is weak or out of service area.
Answer 2: Power the phone on again.
Answer 3: Is the phone in Airplane mode? To check that Airplane mode is cancelled:
- From home, touch ⚙ > Settings ⚙ > More... > Airplane mode.
Answer 4: Is data communication disabled? To check that data communication is enabled:
- From home, touch ⚙ > Settings ⚙ > More... > Mobile networks > Data enabled.
Answer 5: Is a disabled access point set? To reset to initial settings:
- From home, touch ⚙ > Settings ⚙ > More... > Mobile networks > Access Point Names > 📄 > Reset to default.
Question: Battery level goes down quickly.
Answer: Are you where signal is weak or have been out of service area for a long period? Calling where signal is weak or being out of service area uses a lot of battery.
Answer: Your phone's usable time is decreased by frequently using flash or functions/operations that emit sound, frequently using data communication, etc. with external devices, increasing the screen brightness, or setting long times for the screen, etc. to remain lit.
Question: Cannot install applications.
Answer: Applications cannot be installed with only a little free space on the phone or SD card. To check free space, see Storage Settings.
Answer: Applications not supported by your phone cannot be installed.
Question: Screen dims quickly.
Answer: The screen automatically dims when the phone becomes warm. The screen returns to its original brightness once the phone cools down.
Question: Cannot unlock screen.
Answer: If your phone freezes or you cannot operate it, you can force your phone to turn off. Touch and hold the Power key for 8 seconds or more.
- Release the Power key once your phone vibrates. Your phone turns off.
Question: Cannot charge/charging takes time.
Answer: Is the micro USB plug on the AC adapter connected firmly to the phone? Remove the micro USB plug and connect it again.
Answer: Is the AC adapter plugged in firmly to a standard electrical outlet? Unplug the AC adapter and plug it in again firmly.
Answer: Are you using a non-specified AC adapter? Always use a specified AC adapter. Using a non-specified AC adapter not only prevents charging, but may also affect the internal battery.
Answer: Is the LED blinking? The internal battery is not being charged. Use a specified AC adapter to recharge.
Answer: Is the micro USB plug on the AC adapter soiled? Clean the terminals with a clean, dry swab and recharge again.
Answer: Are you recharging by USB? Recharging by USB takes longer than with the AC adapter. You may also not be able to recharge depending on the connection environment.
Question: Recharging stops/recharging does not start.
Answer: Recharging stops automatically if the phone becomes warm. Recharging starts again once the phone cools down.
Question: SIM card is not recognized.
Answer: Is the SIM card installed properly? Is it installed in the right location and orientation? Turn off your phone, check whether the SIM card is installed properly, and then turn your phone on again. If this does not remedy the problem, the SIM card may be damaged.
Answer: Are there any fingerprints, etc. or other soiling on the (gold) IC chip on the SIM card? Remove the SIM card, wipe with a clean, dry cloth, and install it again properly.
Answer: Is the wrong SIM card installed? An unusable SIM card may be installed. Make sure that the right SIM card is installed.
Question: Cannot recharge by USB.
Answer: Is the computer turned on? You cannot recharge if the computer is not turned on.
Answer: Are you using a USB hub? You may not be able to recharge if using a USB hub. Connect the optional micro USB cable for PC directly to the computer.
Question: Cannot make a call/calls do not connect.
Answer: Is the phone in Airplane mode? To check that Airplane mode is cancelled:
From home, touch ⚙ > Settings ⚙ > More... > Airplane mode.
Answer: Are you where signals can be received? Check the signal indicator while changing locations and call again.
Question: Cannot hear the other party.
Answer: Is the call volume low? Touch the Volume Up key during a call to turn the call volume up.
Specifications
The following tables list your phone's and battery's specifications.
Phone Specifications
| Item Description | |
| Weight Approx. 141 g (with Internal Battery) | |
| Internal Battery Capacity 2,0 | 40 mAh |
| Continuous Talk Time 3G: Approx. 780 minutes | |
| Charging Time Approx. 180 minutes | |
| Dimensions (W x H x D) Approx. 67 × 131 × 10 mm (without protruding parts) | |
| Maximum Output 3G: 0.25 W | 4G: 0.2 W |
Sprint Account Information and Help
Find out about account passwords and information about managing your account and finding help.
Sprint Account Passwords
You will need to create passwords to protect access to your personal account information, your voicemail account, and your data services account. As a Sprint customer, you enjoy unlimited access to all your information.
Account User Name and Password
If you are the account owner, you will create an account user name and password when you sign on to sprint.com/mysprint. (Click Sign in/Register and then click Sign up now! to get started.) If you are not the account owner (if someone else receives the bill for your Sprint service), you can get a sub-account password at sprint.com/mysprint.
Voicemail Password
You'll create your voicemail password when you set up your voicemail. See Voicemail Setup for more information on your voicemail password.
Data Services Password
With your Sprint phone, you may elect to set up an optional data services password to control access and authorize purchases.
For more information, or to change your passwords, sign on to sprint.com/mysprint.
Manage Your Account
Manage your Sprint account from your computer, your Sprint phone, or any other phone.
Online: sprint.com/mysprint
■ Access your account information. - Check your minutes used (depending on your Sprint service plan). ■ View and pay your bill.
■ Enroll in Sprint online billing and automatic payment. ■ Purchase accessories. ■ Shop for the latest Sprint phones. ■ View available Sprint service plans and options. - Learn more about data services and other products like games, ringtones, screen savers, and more.
From Your Sprint Phone
- From home, touch 📋 > Phone > 🌐.
- Do any of the following:
- Touch 2 to access a summary of your Sprint service plan or get answers to other questions.
- Touch 3 to make a payment.
- Touch 4 to check minute usage and account balance.
Sprint Support Services
Sprint 411 and Sprint Operator Services let you easily access information and calling assistance from your Sprint phone.
Sprint 411
Sprint 411 gives you access to a variety of services and information, including residential, business, and government listings; movie listings or showtimes; driving directions, restaurant reservations, and major local event information. You can get up to three pieces of information per call, and the operator can automatically connect your call at no additional charge.
There is a per-call charge to use Sprint 411, and you will be billed for airtime.
- From home, 📋 > Phone > , and then touch

Sprint Operator Services
Sprint Operator Services provides assistance when you place collect calls or when you place calls billed to a local telephone calling card or third party.
■ From home, 📋 > Phone , and then touch
For more information or to see the latest in products and services, visit us online at sprint.com/mysprint.
Index
3
3-way Calling 120
4
4G 226
A
About phone 424
About Smart Phone and Smart Contacts 143
Access Call Settings 122
Access Smart Contacts Settings 159
Accessibility 418
Accessory Jack 3
Account Passwords 432
Accounts
Add new 414
Manage 415
Settings 414
Activate This Device 421
Activation 23, 421
Airplane Mode 44
Settings 360
Alarm 286
Answer a Call 100, 146
Application
Launch 35
Applications 35
Applications List 30, 36
Apps
Find and install 65
Request refunds 67
Uninstall 71
Update 67
Apps List 30, 36
Apps Settings 384
B
Back Key 3
Back up Contacts 139
Back Up Phone 410
Backup & Reset 410
Battery
Charge 15
Settings 383
Bluetooth 332
About 332
Connect 336
Pair devices 334
Receive information 340
Send information 338
Settings 353
Share pictures and videos 257
Turn on or off 332
Bookmark 230
Browser
Bookmark 230
History 232
Launch connection 229
Settings 240
Tabs 233
C
Calculator 277
Calendar 278
Add event 279
Sync Exchange ActiveSync calendar 284
View events 281
Call Contacts from Smart Phone 149
Call Forwarding 121
Call Logs
Make call from 107, 151
Call settings 355
Call Settings menu 122
Call Waiting 118
Call with Smart Phone 143
Caller ID 118, 155
Caller ID Blocking 118
Camera 243
Camera functions 265
Settings 263
Switch cameras 263
Take a picture 243
Viewfinder 245, 248
Car Kit
Connect 336
Cast screen 341
Cell broadcasts Settings 375
Charger Jack 3
Charger/Accessory Jack 3
Clip Now 307
Settings 380
Clock 285
Additional features 288
Alarm 286
Stopwatch 289
Timer 289
World Clock 289
Computer
Connect to via USB 313
Conference Calling 120
Connections Optimizer 311
Contacts 125
Add contact 125
Back up 139
Check Contact 129
Delete 133
Edit 131
Import 137
Make call from 105, 149
Save a phone number 128
Share 135
Contacts Screen Layout 130
Copyrights 425
Credentials 389
D
Data Services 226
Password 432
Status indicators 229
User name 228
Data Usage Settings 356
Date & Time 416
Default SMS App
Settings 362
Device Administrator 389
Direct Wave Receiver 4
Display settings 379
Drag 21
E
Editing Text 53
Add account 212
Add Exchange ActiveSync account 216
Compose and send 218
Delete account 223
Manage inbox 225
Open new message 220
Setup 212
Share pictures 254
View and reply 221
Emergency Numbers 99, 145
Encrypt Device 389
Encrypt SD Card 389
Enhanced 9-1-1 (E 9-1-1) 99, 146
Enter Text 46
Exchange ActiveSync
Add account 216
Extended Home Screen 85
F
Facebook 291
Install 291
Share pictures and videos 259
Use 293
Factory Data Reset 412
Flash 3
Flick 21
Folders 95
G
Gallery 249
Share pictures and videos 254
Gmail
Add another account 207
Archive threads 202
Create account 55
Delete threads 204
Labels 201
Manage Messages 200
Mute threads 203
New messages 198
Read and reply 198
Read messages 199
Report phishing 206
Report spam 206
Search 205
Share pictures 254
Switch accounts 210
Gmail Account 55
Create account 55
Hangouts 272
Sign in 61
Voice search 276
Google Account 55
Google Keyboard 46
Google Maps 268
Google Play
Find and install apps 65
Help 73
Store 64
Google Play Music 297
Google Play Music Screen Layout 298
Playlists 299
Google Search 275
Google Voice Typing 52
Google Wallet 305
GPS Satellites 386
H
Hangouts 272
Harman/Kardon Audio
Settings 376
Headset
Connect 336
Headset Jack 2
Home Screen 30, 84
Add Folders 95
Add Shortcuts 92
Add Widgets 93
Customize 90
Extended 85
|
Import Contacts 137
In-call
Screen lock 103
In-Call Options 103
In-Call Screen 103
In-Call Screen Layout 103
Incoming Call
Answer 100, 146
Mute 101, 147
Reject 101, 148
Reject and send message 102, 148
Input Settings 408
Internet 172
K
Key Layout 3
Keyboard
Google 46
Swype 49
Touchscreen 46
L
Language Settings 408
Location
GPS satellites 386
Wireless networks 386
Location Services 386
Lock screen settings 398
M
Maps 268
Menu
Open 31
Messaging 172
microSD Card
Encrypt 389
Mirroring 341
MMS
Create slideshow 179
Options 194
Send messages 175
Mobile Hotspot 328
Mobile Networks Settings 373
More settings 359
Multimedia Messaging
Share pictures and videos 256
Music
Google Play Music 297
Sprint Music Plus 302
Mute Incoming Call 101, 147
N
NASCAR MOBILE 268
Navigation 268
Google Maps 268
Scout 270
Notification Icons 86
Notifications 86
Notifications Window 89
Notifications Windows Layout 89
0
OfficeSuite 305
Option
Select 30
Optional Services 109
P
Phone
Dialer 97
Parts and Functions 2
Turn On/Off 18
Phone Calls 97
Answer 100
Emergency numbers 99, 145
Using Call Logs 107
Using contacts 105, 149
Using Phone Dialpad 97
Using Smart Phone Dialpad 143
Phone Layout (illustration) 2
Phone Memory 7
Phone Number 40
Save to contacts 128, 164
Phone Status 424
Phone Update
Software 77
Picasa
Share pictures 260
Pictures
Crop 252
Edit 251
Rotate 251
Share via Bluetooth 257
Share via email 254
Share via Facebook 259
Share via messaging 256
Share via Picasa 260
Take with camera 243
Pinch 22
Place Calls 97
Play Music 297
Google Play Music Screen Layout 298
Play Store 64
Find and install apps 65
Power Key 4
Power Off 19
Power On 18
Printing 420
Q
Quick Settings Menu Layout 90
R
Reject call and send message 102, 148
Reject Incoming Call 101, 148
Rotate 22
S
Save a Phone Number 128, 164
Scout 270
Screen
Landscape 33
Portrait 33
Screen lock 103
Screen Lock 75, 398
Disable 406
Screen Orientation 33
Screen Unlock 75
Screen Unlock Face Unlock 400
Screen Unlock Password 405
Screen Unlock Pattern 403
Screen Unlock PIN 404
Screen Unlock Slide 400
Settings Menu
Open 32
Setup Screens 24
Share
Contacts 135
Silent Mode 42
SIM Card 5
Handle 5
Insert 5
Slide 20
Smart Contacts 143
Add contact 161
Check Contact 165
Delete 169
Edit 167
Save a Phone Number 164
Smart Contacts Screen Layout 166
Smart Contacts Setup 27
Smart Phone 143
Call Forwarding 158
Call Waiting 155
Caller ID Blocking 155
Conference Calling 157
Dialer 143
Smart Phone and Smart Contacts apps 143
Smart Phone Calls
Answer 146
Using Call Logs 151
Sound Settings 377
Speaker 3
Specifications 431
Spread 22
Sprint Account
Management 432
Sprint Music Plus 302
Sprint Spark LTE 226
Status Bar 85
Status Bar Layout 86
Status Icons 88
Stopwatch 289
Storage
Settings 382
Swipe 20
Swype 49
Sync
calendars 283
System updates 422
T
Tethering 330, 363
Tethering & Portable Hotspot Settings 363
Text Editing 53
Text Entry 46
Text Messaging
Conversations 182
Draft messages 180
Notifications 182
Options 194
Send messages 172
Three-way Calling 157
Timer 289
Touch 19
Touch and Hold 20
Touchscreen 19
Keyboard 46
Turn off 75
Turn on 75
Troubleshooting 429
TTY Mode 123
Turn Device Off 19
Turn Device On 18
Tweet 290
Twitter 290
Install 290
Typing 46
U
USB Connection
Settings 383
V
Video Camera
Record video 246
Videos
Record 246
Share via Bluetooth 257
Share via Facebook 259
Share via messaging 256
Share via YouTube 262
Visual Voicemail 111
Listen to multiple messages 113
Options 114
Review 112
Set up 111
Settings 115
Voice Search 276
Voice Typing 52
Voicemail
Display name 117
Greeting 117
Password 432
Setup 109, 153
Volume
Key 4
VPN 364
Add connection 367
Connect or disconnect 369
Prepare for connection 365
Secure credential storage 365
W
Wallpaper 91
Web
Launch connection 229
Wi-Fi 318
Disconnect 323
Settings 320, 349
Turn on and connect 318
Wi-Fi Calling
Settings 345
Wi-Fi Direct 325
Wi-Fi Hotspot 328, 363
Wi-Fi Settings 320
Widgets 93
World Clock 289
Y
YouTube 294
Post 295
Share videos 262
Watch Videos 294
Z
Zoom 22




- SPRINT PRINTABLE USER GUIDE
- TABLE OF CONTENTS
- OPTIONAL SERVICES
- ACCESS CALL SETTINGS
- CONTACTS
- IMPORT CONTACTS
- BACK UP CONTACTS
- SMART PHONE AND SMART CONTACTS APPS
- PLACE AND ANSWER CALLS WITH SMART PHONE
- PLACE CALLS FROM CONTACTS/CALL HISTORY WITH SMART PHONE
- OPTIONAL SMART PHONE SERVICES
- ACCESS SMART CONTACTS SETTINGS
- INTRODUCTION
- ABOUT THE USER GUIDE
- BEFORE USING YOUR PHONE
- DESCRIPTIONS IN THE USER GUIDE
- SCREENSHOTS AND KEY LABELS
- OTHER NOTATIONS
- GET STARTED
- CAUTIONS HANDLING YOUR PHONE
- PARTS AND FUNCTIONS
- PHONE LAYOUT
- KEYS
- DIRECT WAVE RECEIVER
- HOLD THE PHONE TO YOUR EAR
- DIRECT WAVE RECEIVER CAUTIONS
- SIM CARD
- HANDLING SIM CARD
- INSERT SIM CARD
- PHONE MEMORY/SD CARD
- SD CARD CAUTIONS
- INSERT SD CARD
- UNMOUNT SD CARD
- TOUCH STORAGE
- TOUCH UNMOUNT SD CARD
- TOUCH OK
- REMOVE SD CARD
- REMOVE THE BATTERY COVER
- FORMAT SD CARD
- TOUCH ERASE EVERYTHING
- CHARGE THE BATTERY
- TROUBLESHOOTING
- BATTERY CAUTIONS
- CHARGE USING THE AC ADAPTER
- CHARGE USING A COMPUTER CONNECTION
- TURN YOUR PHONE ON AND OFF
- TURN YOUR PHONE ON
- TURN YOUR PHONE OFF
- USE THE TOUCHSCREEN
- TOUCH
- TOUCH AND HOLD
- SWIPE OR SLIDE
- DRAG
- FLICK
- ROTATE
- PINCH AND SPREAD
- ACTIVATE YOUR PHONE
- COMPLETE THE SETUP SCREENS
- SET UP SMART CONTACTS
- BASIC OPERATIONS
- BASICS
- HOME SCREEN AND APPLICATIONS (APPS) LIST
- SELECT OPTIONS AND NAVIGATE SCREENS
- MENU OPERATIONS
- PHONE SETTINGS MENU
- PORTRAIT AND LANDSCAPE SCREEN ORIENTATION
- CAPTURE SCREENSHOTS
- APPLICATIONS
- LAUNCH APPLICATIONS
- APPS LIST
- PHONE NUMBER
- TOUCH STATUS
- SILENT MODE/AIRPLANE MODE
- SILENT MODE
- AIRPLANE MODE
- AIRPLANE MODE CAUTIONS
- TOUCH AIRPLANE MODE
- ENTER TEXT
- TOUCHSCREEN KEYBOARDS
- GOOGLE KEYBOARD
- ASSIGNING GOOGLE KEYBOARD FOR TEXT ENTRY
- SWYPE
- ASSIGNING SWYPE FOR TEXT ENTRY
- TOUCH DEFAULT
- SELECT SWYPE
- USING SWYPE
- GOOGLE VOICE TYPING
- TIPS FOR EDITING TEXT
- GOOGLE ACCOUNT
- GOOGLE ACCOUNT CAUTIONS
- CREATE A GOOGLE ACCOUNT
- CREATE A GOOGLE ACCOUNT ONLINE
- CREATE A GOOGLE ACCOUNT USING YOUR PHONE
- SIGN IN TO YOUR GOOGLE ACCOUNT
- TOUCH NOT NOW
- GOOGLE PLAY STORE
- GOOGLE PLAY CAUTIONS
- FIND AND INSTALL AN APP
- FROM HOME, TOUCH 🎨 > PLAY STORE
- PURCHASING APPLICATIONS
- REQUEST A REFUND FOR A PAID APP
- UPDATE AN APP
- UPDATE AN APP DIRECTLY
- SET AUTOMATIC APP UPDATES
- TOUCH MY APPS
- UNINSTALL AN APP
- FROM HOME, TOUCH > PLAY STORE
- ON THE INSTALLED SCREEN, TOUCH THE APP YOU WANT TO UNINSTALL, AND THEN TOUCH UNINSTALL > OK
- GET HELP WITH GOOGLE PLAY
- FROM HOME, TOUCH 🎨 > PLAY STORE 🎩
- TOUCH HELP
- LOCK AND UNLOCK YOUR SCREEN
- TURN THE SCREEN OFF WHEN NOT IN USE
- TURN THE SCREEN ON AND UNLOCK IT
- UPDATE YOUR PHONE
- SOFTWARE UPDATE CAUTIONS
- UPDATE YOUR PHONE SOFTWARE
- BEFORE UPDATING YOUR PHONE
- BACK UP ALL DATA PRIOR TO UPDATE
- UPDATE YOUR PHONE'S SOFTWARE
- CONFIRM YOUR CURRENT PHONE SOFTWARE
- YOUR PHONE INTERFACE
- HOME SCREEN
- EXTENDED HOME SCREENS
- STATUS BAR
- NOTIFICATIONS WINDOW
- OPEN THE NOTIFICATIONS WINDOW
- CLOSE THE NOTIFICATIONS WINDOW
- NOTIFICATIONS WINDOW LAYOUT
- QUICK SETTINGS MENU LAYOUT
- CUSTOMIZE THE HOME SCREEN
- OPERATIONS FOR REARRANGING THE HOME SCREEN
- CHANGE THE WALLPAPER
- ADD SHORTCUTS TO THE HOME SCREEN
- ADD WIDGETS TO THE HOME SCREEN
- ADD FOLDERS TO THE HOME SCREEN
- PHONE APP
- PLACE AND ANSWER CALLS
- CALL USING THE PHONE DIALER
- CALL EMERGENCY NUMBERS
- ENHANCED 9-1-1 (E 9-1-1) INFORMATION
- ANSWER PHONE CALLS
- ANSWER AN INCOMING CALL
- MUTE THE RINGING SOUND
- REJECT AN INCOMING CALL
- REJECT A CALL AND SEND A TEXT MESSAGE
- WHEN A CALL ARRIVES, DRAG TO
- IN-CALL SCREEN LAYOUT AND OPERATIONS
- SCREEN AUTO-LOCKING DURING A CALL
- IN-CALL SCREEN LAYOUT
- ADDITIONAL IN-CALL OPTIONS
- PLACE CALLS FROM CONTACTS/CALL HISTORY
- PLACE A CALL FROM CONTACTS
- CALL FROM CALL HISTORY
- VOICEMAIL SETUP
- VISUAL VOICEMAIL
- SET UP VISUAL VOICEMAIL
- REVIEW VISUAL VOICEMAIL
- LISTEN TO MULTIPLE VOICEMAIL MESSAGES
- VISUAL VOICEMAIL OPTIONS
- CONFIGURE VISUAL VOICEMAIL SETTINGS
- TOUCH : > SETTINGS
- CHANGE YOUR MAIN GREETING VIA THE VOICEMAIL MENU
- EDIT THE DISPLAY NAME VIA THE VOICEMAIL MENU
- CALLER ID BLOCKING
- CALL WAITING
- CONFERENCE CALLING
- CALL FORWARDING
- USE THE CALL SETTINGS MENU
- TTY MODE
- WARNING: 9-1-1 EMERGENCY CALLING
- CONTACTS CAUTIONS
- ADD A CONTACT
- FROM HOME, TOUCH ⚙ > PEOPLE
- SAVE A PHONE NUMBER
- CHECK CONTACTS
- CONTACTS SCREEN LAYOUT
- EDIT A CONTACT
- DELETE A CONTACT
- SHARE A CONTACT
- BEFORE IMPORTING CONTACTS FROM SD CARD
- IMPORT CONTACTS FROM SD CARD
- BEFORE BACKING UP CONTACTS TO SD CARD
- BACK UP CONTACTS TO SD CARD
- TOUCH EXPORT TO STORAGE
- ABOUT SMART PHONE AND SMART CONTACTS
- CALL USING THE SMART PHONE DIALER
- ANSWER PHONE CALLS WITH SMART PHONE
- CALL FROM SMART PHONE CALL HISTORY
- VOICEMAIL SETUP WITH SMART PHONE
- CALLER ID BLOCKING WITH SMART PHONE
- CALL WAITING WITH SMART PHONE
- CONFERENCE CALLING WITH SMART PHONE
- CALL FORWARDING WITH SMART PHONE
- ADD A CONTACT WITH SMART CONTACTS
- CHECK SMART CONTACTS
- SMART CONTACTS SCREEN LAYOUT
- EDIT A CONTACT WITH SMART CONTACTS
- DELETE A CONTACT WITH SMART CONTACTS
- MESSAGING AND INTERNET
- TEXT AND MULTIMEDIA MESSAGING
- SEND A TEXT MESSAGE
- SEND A MULTIMEDIA MESSAGE (MMS)
- TOUCH ATTACH
- CREATE A SLIDESHOW
- SAVE AND RESUME A DRAFT MESSAGE
- NEW MESSAGES NOTIFICATION
- MANAGE MESSAGE CONVERSATIONS
- READ A TEXT MESSAGE
- VIEW A MULTIMEDIA MESSAGE (MMS)
- REPLY TO A MESSAGE
- PROTECT (LOCK) A MESSAGE
- DELETE A CONVERSATION
- DELETE MULTIPLE CONVERSATIONS
- DELETE A SINGLE MESSAGE
- VIEW CONTACT INFORMATION FROM A MESSAGE
- TEXT AND MMS OPTIONS
- STORAGE
- TEXT (SMS) MESSAGES
- MULTIMEDIA (MMS) MESSAGES
- CELL BROADCAST SETTINGS
- NOTIFICATIONS
- CREATE AND SEND GMAIL
- GMAIL CAUTIONS
- COMPOSE AND SEND A GMAIL MESSAGE
- GMAIL COMPOSITION OPTIONS
- CHECK RECEIVED GMAIL MESSAGES
- OPEN NEW GMAIL MESSAGES
- OPEN GMAIL MESSAGES
- OPTIONS WHEN REVIEWING GMAIL MESSAGES
- MANAGE GMAIL MESSAGES
- USE GMAIL LABELS
- FROM HOME, TOUCH ⚙ > GMAIL 📂
- ARCHIVE GMAIL THREADS
- MUTE GMAIL THREADS
- DELETE GMAIL THREADS
- SEARCH GMAIL MESSAGES
- TOUCH SEARCH
- ENTER YOUR SEARCH TEXT AND TOUCH
- REPORT SPAM OR PHISHING GMAIL
- FROM HOME, TOUCH 📋 > GMAIL 📂
- ADD ANOTHER GOOGLE (GMAIL) ACCOUNT
- SWITCHING BETWEEN GMAIL ACCOUNTS
- TOUCH THE MENU ICON
- SET UP AN EMAIL ACCOUNT
- ADD AN EMAIL ACCOUNT
- ADD AN EMAIL ACCOUNT FROM THE EMAIL APP
- TOUCH ADD ACCOUNT
- ADD AN EMAIL ACCOUNT FROM THE SETTINGS MENU
- ADD AN EXCHANGE ACTIVESYNC ACCOUNT
- COMPOSE AND SEND EMAIL
- TOUCH COMPOSE
- OPEN NEW EMAIL MESSAGES
- OPEN EMAIL MESSAGES
- OPTIONS WHEN REVIEWING EMAIL MESSAGES
- DELETE AN EMAIL ACCOUNT
- MANAGE YOUR EMAIL INBOX
- VIEW YOUR EMAIL INBOX
- REFRESH AN EMAIL ACCOUNT
- DELETE AN EMAIL MESSAGE
- DELETE MULTIPLE EMAIL MESSAGES
- DATA SERVICES GENERAL INFORMATION (SPRINT SPARK LTE AND 3G NETWORKS)
- SPRINT SPARK LTE
- SET YOUR NETWORK OPTIONS
- YOUR USER NAME
- UPDATE YOUR USER NAME
- TOUCH UPDATE PROFILE
- DATA CONNECTION STATUS AND INDICATORS
- BROWSER
- USE THE BROWSER
- ADD A BOOKMARK
- VIEW BROWSER HISTORY
- USE TABS
- OPEN NEW BROWSER TABS
- TOUCH NEW TAB
- OPEN INCOGNITO TABS
- SWITCH TABS
- CLOSE TABS
- TAB MENU
- BROWSER SETTINGS
- OPTIONS FOR BROWSER OPERATIONS
- SSL/TLS
- SSL/TLS CAUTIONS
- CHROME SUPPORT
- CAMERA AND VIDEO
- TAKE PICTURES AND RECORD VIDEOS
- CAMERA CAUTIONS
- FLASH WARNING
- TAKE A PICTURE
- CAMERA VIEWFINDER SCREEN
- RECORD VIDEOS
- VIDEO SHOOTING SCREEN
- VIEW PICTURES AND VIDEOS USING GALLERY
- PICTURES AND VIDEOS: REVIEW SCREEN
- PICTURES AND VIDEOS: OPTIONS WHILE VIEWING
- EDIT PICTURES
- ROTATE AND SAVE A PICTURE
- CROP A PICTURE
- TOUCH CROP
- SHARE PICTURES AND VIDEOS
- SEND PICTURES OR VIDEOS BY EMAIL OR GMAIL
- FROM HOME, TOUCH 🎯 > GALLERY
- SEND A PICTURE OR VIDEO BY MULTIMEDIA MESSAGE
- SEND PICTURES OR VIDEOS USING BLUETOOTH®
- SHARE PICTURES AND VIDEOS ON FACEBOOK
- SHARE PICTURES ON PICASA
- SHARE VIDEOS ON YOUTUBE
- CAMERA SETTINGS
- SWITCH CAMERA MODE
- SET CAMERA FUNCTIONS
- USEFUL FEATURES
- NASCAR MOBILE
- USE THE NASCAR MOBILE APP
- NAVIGATION
- GOOGLE MAPS
- VIEW MAPS OF SPECIFIED PLACES
- GOOGLE MAPS OPERATIONS
- SCOUT
- USE SCOUT AS YOUR PERSONAL NAVIGATOR
- HANGOUTS
- USING HANGOUTS
- HANGOUTS OPERATIONS
- GOOGLE SEARCH
- USE GOOGLE SEARCH
- GOOGLE SEARCH OPERATIONS
- USE GOOGLE VOICE SEARCH
- CALCULATOR
- CALENDAR
- ACCESS THE CALENDAR
- CALENDAR OPERATIONS
- ADD AN EVENT TO THE CALENDAR
- SELECTING A CALENDAR
- VIEW CALENDAR EVENTS
- SYNC CALENDARS
- SYNCHRONIZE AN EXCHANGE ACTIVESYNC CALENDAR
- CLOCK
- CHECKING THE TIME
- SETTING DATE AND TIME
- SET ALARMS
- PHONE AT ALARM TIME
- ADDITIONAL CLOCK FEATURES
- WORLD CLOCK
- STOPWATCH
- TIMER
- INSTALL THE TWITTER APP ON YOUR PHONE
- TWEET ON TWITTER
- INSTALL THE FACEBOOK APP ON YOUR PHONE
- SIGN IN TO YOUR FACEBOOK ACCOUNT FROM ACCOUNT SETTINGS
- USE FACEBOOK
- YOUTUBE
- VIEW YOUTUBE VIDEOS
- POST A VIDEO TO YOUTUBE
- GOOGLE PLAY MUSIC APP
- PLAY MUSIC WITH GOOGLE PLAY
- GOOGLE PLAY MUSIC SCREEN LAYOUT
- CREATE PLAYLISTS IN GOOGLE PLAY MUSIC
- ADDING CURRENTLY PLAYING MUSIC TO A PLAYLIST
- SPRINT MUSIC PLUS
- ACCESS SPRINT MUSIC PLUS
- PURCHASE AND DOWNLOAD MUSIC FROM THE SPRINT MUSIC PLUS STORE
- GOOGLE WALLET
- OFFICESUITE
- CLIP NOW
- ENABLE CLIP NOW
- CAPTURE SCREENSHOTS USING CLIP NOW
- MANAGE SCREENSHOTS CAPTURED USING CLIP NOW
- CONNECTIVITY
- CONNECTIONS OPTIMIZER
- ABOUT CONNECTIONS OPTIMIZER
- ENABLE CONNECTIONS OPTIMIZER
- DISABLE CONNECTIONS OPTIMIZER
- CONNECT TO A COMPUTER VIA USB
- CABLE CAUTIONS
- FILE TRANSFER TIPS
- TRANSFER FILES BETWEEN THE PHONE AND A COMPUTER
- USE THE PHONE'S SD CARD AS A USB DRIVE
- WI-FI
- TURN WI-FI ON AND CONNECT TO A WIRELESS NETWORK
- WI-FI SETTINGS
- DISCONNECT WI-FI
- WI-FI DIRECT
- MOBILE HOTSPOT
- SET UP MOBILE HOTSPOT
- CONNECT TO MOBILE HOTSPOT
- TETHERING
- BLUETOOTH®
- BLUETOOTH® HINTS
- BLUETOOTH® FUNCTION CAUTIONS
- BLUETOOTH® INFORMATION
- ENABLE THE BLUETOOTH® FEATURE
- PAIR BLUETOOTH® DEVICES
- TOUCH BLUETOOTH
- UNPAIRING FROM A PAIRED DEVICE
- CONNECT TO A PAIRED BLUETOOTH® DEVICE
- SEND INFORMATION USING BLUETOOTH®
- TYPES OF DATA YOU CAN SEND VIA BLUETOOTH®
- SENDING CONTACTS DATA VIA BLUETOOTH®
- RECEIVE DATA VIA BLUETOOTH®
- VIEW YOUR PHONE'S SCREEN ON OTHER DEVICES
- ENABLE THE WIRELESS DISPLAY
- BASIC SETTINGS
- ACCESS SETTINGS
- WI-FI CALLING SETTINGS
- ENABLE WI-FI CALLING
- MAKE A CALL WITH WI-FI CALLING
- WI-FI SETTINGS MENU
- FROM HOME, TOUCH ⚙ > SETTINGS
- TOUCH WI-FI
- WI-FI SETTINGS OPTIONS
- SELECT AN OPTION TO CHANGE ITS SETTINGS
- BLUETOOTH® SETTINGS
- BLUETOOTH® SETTINGS OPERATIONS
- CALL SETTINGS
- CALL SETTINGS OVERVIEW
- ACCESS CALL SETTINGS OPTIONS
- DATA USAGE SETTINGS
- TOUCH DATA USAGE
- DATA USAGE SETTINGS OPERATIONS
- MORE SETTINGS
- ACCESS MORE SETTINGS OPTIONS
- AIRPLANE MODE SETTING
- TOUCH MORE... > AIRPLANE MODE
- TOUCH THE AIRPLANE MODE CHECK BOX. WHILE IN AIRPLANE MODE, THE STATUS BAR WILL DISPLAY
- DEFAULT SMS APP SETTINGS
- TOUCH MORE... > DEFAULT SMS APP
- TETHERING & PORTABLE HOTSPOT SETTINGS
- VIRTUAL PRIVATE NETWORKS (VPN)
- PREPARE YOUR PHONE FOR VPN CONNECTION
- SET UP SECURE CREDENTIAL STORAGE
- ADD A VPN CONNECTION
- TOUCH SAVE
- CONNECT TO OR DISCONNECT FROM A VPN
- ACCESS THE VPN SETTINGS WINDOW
- CONNECT TO A VPN
- DISCONNECT FROM A VPN
- TOUCH DISCONNECT
- MOBILE NETWORKS SETTINGS
- MOBILE NETWORKS SETTINGS OVERVIEW
- ACCESS MOBILE NETWORKS SETTINGS
- CELL BROADCASTS SETTINGS
- TOUCH MORE... > CELL BROADCASTS
- TOUCH THE CHECK BOX NEXT TO EACH ALERT TO ENABLE OR DISABLE ALERTS
- HARMAN/KARDON AUDIO SETTINGS
- HARMAN/KARDON AUDIO SETTINGS OVERVIEW
- ACCESS HARMAN/KARDON AUDIO SETTINGS
- TOUCH HARMAN/KARDON AUDIO
- SET YOUR HARMAN/KARDON AUDIO OPTIONS
- SOUND SETTINGS
- SOUND SETTINGS OVERVIEW
- ACCESS SOUND SETTINGS
- DISPLAY SETTINGS
- DISPLAY SETTINGS OVERVIEW
- ACCESS DISPLAY SETTINGS
- CLIP NOW SETTINGS
- CLIP NOW SETTINGS OVERVIEW
- ACCESS CLIP NOW SETTINGS
- STORAGE SETTINGS
- STORAGE SETTINGS OVERVIEW
- ACCESS STORAGE SETTINGS
- CHECK OR TOUCH ITEMS
- USB CONNECTION SETTINGS
- BATTERY SETTINGS
- APPS SETTINGS
- APPS SETTINGS OVERVIEW
- ACCESS APPS SETTINGS
- LOCATION SERVICES SETTINGS
- LOCATION SERVICES SETTINGS OVERVIEW
- ENABLE LOCATION SERVICES
- ACCESS LOCATION SETTINGS
- SECURITY SETTINGS
- SECURITY SETTINGS OVERVIEW
- ACCESS SECURITY SETTINGS
- ENCRYPT PHONE
- TOUCH ENCRYPT PHONE
- PHONE ENCRYPTION CAUTIONS
- ENCRYPT MICROSD
- SD CARD ENCRYPTION CAUTIONS
- LOCK SCREEN SETTINGS
- LOCK SCREEN CAUTIONS
- SCREEN LOCK
- ACCESS SCREEN LOCK SETTINGS
- USE SLIDE TO UNLOCK THE SCREEN
- USE FACE UNLOCK
- USE A SCREEN UNLOCK PATTERN
- USE A SCREEN UNLOCK PIN
- USE A SCREEN UNLOCK PASSWORD
- DISABLE THE SCREEN LOCK
- LANGUAGE & INPUT SETTINGS
- LANGUAGE & INPUT SETTINGS OVERVIEW
- ACCESS LANGUAGE & INPUT SETTING OPTIONS
- LANGUAGE & INPUT OPTIONS
- BACKUP & RESET
- BACKUP & RESET OVERVIEW
- ACCESS BACKUP & RESET OPTIONS
- TOUCH BACKUP & RESET
- SET OPTIONS
- RESET ALL
- ACCOUNTS
- SET UP A NEW ACCOUNT
- MANAGE EXISTING ACCOUNTS
- DATE & TIME SETTINGS
- DATE & TIME OVERVIEW
- ACCESS DATE & TIME OPTIONS
- TOUCH DATE & TIME
- SET AVAILABLE DATE & TIME OPTIONS
- ACCESSIBILITY SETTINGS
- ACCESSIBILITY SETTINGS OVERVIEW
- ACCESS ACCESSIBILITY OPTIONS
- TOUCH ACCESSIBILITY
- SET AVAILABLE ACCESSIBILITY OPTIONS
- PRINTING
- FROM HOME, TOUCH ⚙ > SETTINGS ⚙️
- TOUCH PRINTING
- FOLLOW THE ONSCREEN INSTRUCTIONS
- ACTIVATE THIS DEVICE
- SYSTEM UPDATES
- ABOUT PHONE
- ABOUT PHONE OVERVIEW
- ACCESS ABOUT PHONE OPTIONS
- COPYRIGHT INFORMATION
- SMART READY
- MICRO SD™ MICRO SD HC MICRO SD XC
- OPENSSL LICENSE
- ORIGINAL SSLEAY LICENSE
- FOR ASSISTANCE
- CHECK HERE FIRST
- SPECIFICATIONS
- SPRINT ACCOUNT INFORMATION AND HELP
- SPRINT ACCOUNT PASSWORDS
- ACCOUNT USER NAME AND PASSWORD
- VOICEMAIL PASSWORD
- DATA SERVICES PASSWORD
- MANAGE YOUR ACCOUNT
- ONLINE: SPRINT.COM/MYSPRINT
- FROM YOUR SPRINT PHONE
- SPRINT SUPPORT SERVICES
- SPRINT
- SPRINT OPERATOR SERVICES
- INDEX
- A
- B
- C
- D
- E
- F
- G
- H
- K
- L
- M
- N
- P
- Q
- R
- S
- T
- U
- V
- W
- Y
- Z
Brand : SHARP
Model : Aquos Crystal
Category : Mobile Phone