
SRC 140 B - Radio SENCOR - Free user manual and instructions
Find the device manual for free SRC 140 B SENCOR in PDF.


| Product Type | Portable Radio |
| Brand | Sencor |
| Model | SRC 140 B |
| Power Supply | 3V DC (2x AA batteries or AC adapter) |
| Battery Type | 2x AA (not included) |
| Frequency Bands | FM 87.5–108 MHz, AM 520–1710 kHz |
| Speaker | Built-in dynamic speaker, 2.5W output |
| Headphone Jack | 3.5mm stereo output |
| Antenna | Telescopic rod antenna for FM, built-in ferrite for AM |
| Controls | Volume knob, tuning knob, band switch, power on/off |
| Display | Analogue dial with frequency markings |
| Dimensions (W x H x D) | 160 x 80 x 40 mm |
| Weight | 0.45 kg (with batteries) |
| Housing Material | ABS plastic |
| Cleaning Instructions | Wipe with a soft, dry cloth. Do not use liquid cleaners. |
| Safety Precautions | Keep away from water, do not expose to extreme temperatures, remove batteries if not used for long periods. |
| Spare Parts / Repairability | Not user serviceable. Contact authorized service center for repairs. |
| Package Contents | Radio, user manual |
Frequently Asked Questions - SRC 140 B SENCOR
User questions about SRC 140 B SENCOR
0 question about this device. Answer the ones you know or ask your own.
Ask a new question about this device
Download the instructions for your Radio in PDF format for free! Find your manual SRC 140 B - SENCOR and take your electronic device back in hand. On this page are published all the documents necessary for the use of your device. SRC 140 B by SENCOR.
USER MANUAL SRC 140 B SENCOR
natural_image
Line drawing of a SENCOR air conditioner unit with ventilation grilles and control buttons (no text or symbols beyond branding)USER'S MANUAL
NÁVOD K OBSLUZE
NÁVOD NA OBSLUHU
FELHASZNÁLÓI KÉZIKÖNYV
INSTRUKCJA OBSŁUGI
Clock Radio
Radiobudík
Rádiobudík
Rádiós ébresztő
Radiobudzik
EN CZ SK HU PL
Thank you for buying Brandname's product. Read this manual carefully to get the best performance form this unit.
LOCATION OF CONTROL
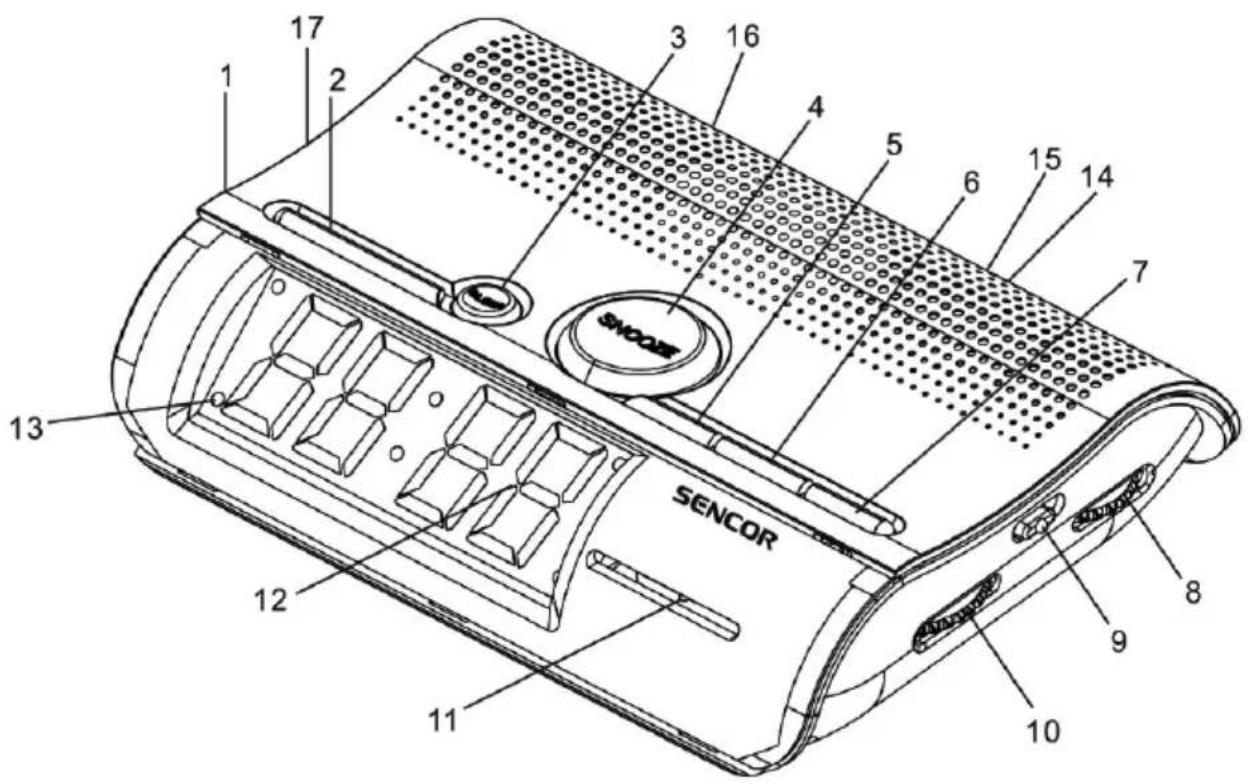
- On/Off/Auto
- Alarm Set/Off
- Sleep Button
- Snooze Button
- Time Set Button
- Hour Button
- Minute Button
- Volume Control / Buzzer
- Band Switch
- Tuning Control
- Dial Indicator
- LED Display
- Alarm Indication
- FM Antenna
- AC Power
- 9V Back Up Battery
- HI-LO Dimmer Selector
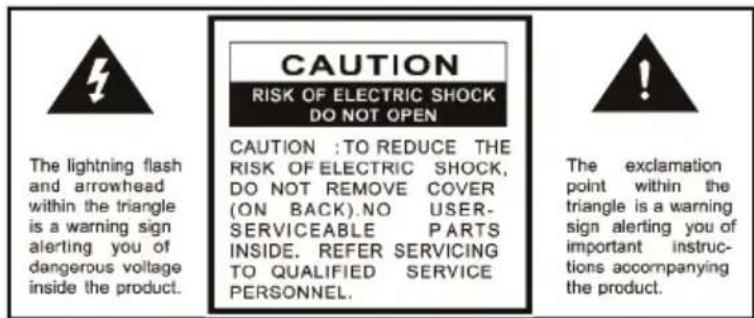
WARNING : TO REDUCE THE RISK OF FIRE OR ELECTRIC SHOCK, DO NOT EXPOSE THIS APPLIANCE TO RAIN OR MOISTURE.
CAUTION : THE CLOCK RADIO MUST NOT BE USED IN ANY ENVIRONMENT WHERE IT MAY BE SUBJECT TO THE DRIPPING OR SPLASHING OR WATER OR OTHER LIQUIDS.
DO NOT CONNECT THE ANTENNA WIRE ON THE BACK OF THIS SET TO ANY OUTDOOR ANTENNA
Mains plug is used as the disconnect device. It shall remain readily operable and should not be obstructed during intended used. To be completely disconnected the apparatus from supply mains, the mains plug of the apparatus shall be disconnected from the mains socket outlet completely.
BOTTOM OF SET : Battery compartment for 9 volt (6F22 or 6LR61) battery (not included) for temporary time storage.
- Plug the AC line cord into 230V AC home outlet
- The set is now working as an electronic clock and it will flash the clock figures to show you it is not set correctly.
- To set the correct time, depress the Time Set Button (5) and Hour Button (6) simultaneously, release the buttons approximately before the correct time is reached. Now depress the Minute Button (7) and the Time Set Button (5) simultaneously, to set the readout to the correct time precisely.
RADIO OPERATION
- Slide the ON/OFF/AUTO Switch (1) to "ON" position.
- Slide Band Switch (9) to FM or AM position.
- Turn the Volume Control (8) to desired volume.
- Turn the Tuning Control (10) to select your favorite station.
- Antenna
For AM reception, this radio incorporates a highly sensitive ferrite core bar antenna.
For FM reception, this set is specially equipped with an external wire as FM antenna. Be sure to untwist it to its fullest length for peak performance.
WAKE TO RADIO
Having selected your station and set the volume at the desired level, proceed as follows :
Slide the ON/OFF/AUTO Switch (1) to "AUTO" position.
Press the Alarm Set Button (2) and whilst this button is depressed, press the Hour Button (6) and then the Minute Button (7) until the time is reached at which you wish to wake. The wake up time is now entered into the timer memory. To check the wake up time, simply press the Alarm Set Button (2) and the clock will show the present time. The preset wake up time will continue to be registered in the time memory and the radio will switch on by itself at the same time the next day. To switch the radio off, simply press the Alarm Off Button (2).
WAKE TO BUZZER
Set the controls as for "Wake to Radio" but volume control (8) to BUZZER position. The buzzer can then be switched off by pressing the Alarm Off Button (2) or it can be converted to the radio by selecting switch (1) to "ON" position.
SLEEP TO RADIO
The radio can be set to play and to switch off automatically for a length of time from 1 minute to 1 hour 59 minutes by following this procedure – With all the controls preset in the “Wake to Radio” positions, depress the Sleep Button (3) and press the Minute Button (7) to count down to the desired sleep time. To switch off the radio before the end of the registered sleep time period, simply press the Snooze Button (4).
SNOOZE CONTROL
The Snooze Button (4) allows the user an extra sleep time of about 9 minutes after radio alarm is switched on at the preset wake up time.
HI-LO DIMMER
Slide HI-LO Dimmer (17) knob to HI position to get brighter clock display and slide it to LO position to get dimmer clock display.
BATTERY BACK-UP
(For Temporary Time Storage Only)
Connect a 9 volt (6F22 or 6LR61) battery (not included) to the terminals inside the battery compartment. It is recommended that the set is disconnected from the mains supply while the battery is fitted. Your set will not work normally from the mains supply but there is now the advantage that if there is a mains current failure you clock will continue to work. The clock display will not light up, as the clock time will be held in the clock memory by the battery back-up system. This enables you to move the set from place to place without re-setting the clock every time. The battery back-up system is only meant to be used from short temporary power failures. For longer durations the battery may become exhausted or there may be some deviation in accuracy. When the battery is exhausted, it should be removed from the set to prevent leakage. If you do not wish to take advantage of the battery back-up system, your set will work normally without a battery. However, if disconnected from the mains, the clock figures will flash when the mains are re-connected and you must re-set the clock as described in the Electronic Clock Operation paragraph.
GENERAL CARE
The cabinet can be cleaned with a slightly damp cloth (make sure mains lead is disconnected from mains supply)
Avoid leaving the clock radio in direct sunlight or in hot, humid, dusty places.
Keep the set away from heating appliances and appliances that generate noise, such as fluorescent lamps, or motors.
SPECIFICATION
Power Source: 230V \~ 50Hz
DC battery: 9V (1 x 9V 6F22 Not included)
Radio Frequency: AM 530-1600kHz
FM 88-108MHz
Power Consumption: 4W
Weight: 500 g
Dimension: 195 x 145 x 53 mm
INSTRUCTIONS AND INFORMATION REGARDING THE DISPOSAL OF USED PACKAGING MATERIALS
Dispose of packaging material at a public waste disposal site.
DISPOSAL OF USED ELECTRICAL AND ELECTRONIC APPLIANCES
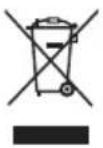
The meaning of the symbol on the product, its accessory or packaging indicates that this product shall not be treated as household waste. Please, dispose of this product at your applicable collection point for the recycling of electrical & electronic equipment waste. Alternatively in some states of the European Union or other European states you may return your products to your local retailer when buying an equivalent new product. The correct disposal of this product will help save valuable natural resources and help in preventing the potential negative impact on the environment and human health, which could be caused as a result of improper liquidation of waste. Please ask your local authorities or the nearest waste collection centre for further details. The improper disposal of this type of waste may fall subject to national regulations for fines.
For business entities in the European Union
If you wish to dispose of an electrical or electronic device, request the necessary information from your seller or supplier.
Disposal in other countries outside the European Union
If you wish to dispose of this product, request the necessary information about the correct disposal method from local government departments or from your seller.

This product meets all the basic EU regulation requirements that relate to it.
Changes to the text, design and technical specifications may occur without prior notice and we reserve the right to make these changes.

- LOCATION OF CONTROL
- WARNING : TO REDUCE THE RISK OF FIRE OR ELECTRIC SHOCK, DO NOT EXPOSE THIS APPLIANCE TO RAIN OR MOISTURE.
- RADIO OPERATION
- WAKE TO RADIO
- WAKE TO BUZZER
- SLEEP TO RADIO
- SNOOZE CONTROL
- HI-LO DIMMER
- BATTERY BACK-UP
- GENERAL CARE
- SPECIFICATION
- INSTRUCTIONS AND INFORMATION REGARDING THE DISPOSAL OF USED PACKAGING MATERIALS
- DISPOSAL OF USED ELECTRICAL AND ELECTRONIC APPLIANCES
- For business entities in the European Union
- Disposal in other countries outside the European Union
Brand : SENCOR
Model : SRC 140 B
Category : Radio