
SBC 2318 - Beer dispenser SENCOR - Free user manual and instructions
Find the device manual for free SBC 2318 SENCOR in PDF.


| Product Type | Beer dispenser with integrated chilling compartment |
| Brand | Sencor |
| Model | SBC 2318 |
| Dimensions (W x D x H) | 300 x 410 x 560 mm |
| Weight (without keg) | 14 kg |
| Power Input | 88 W, 0.8 A |
| Voltage | 220 – 240 V ~ 50 Hz |
| Coolant | R134a (50 g) |
| Chilling Temperature Range | 3 – 9 °C (regulated) |
| Climate Class | SN/N |
| Pump Capacity | 3 litres/minute |
| Pump Pressure | 1.38 bar |
| Suitable Kegs | 4-litre, 5-litre, 6-litre beer kegs |
| Hose Material | Silicone |
| Keg Adapter Material | ABS (Acrylonitrile butadiene styrene) |
| Cooling System | Compressor with cyclopentane foam insulation |
| Chilling Time (5L keg from 25°C to 5°C) | Approximately 5 hours |
| Chilling Time (5L keg from 10°C to 5°C) | Approximately 1 hour |
| Maintenance | Hand wash all parts; do not use dishwasher; wipe exterior with damp cloth |
| Safety Features | Automatic pump shut-off; lid switch for pressurization; over-pressure protection |
| Warranty | Refer to warranty card (not specified) |
Frequently Asked Questions - SBC 2318 SENCOR
User questions about SBC 2318 SENCOR
0 question about this device. Answer the ones you know or ask your own.
Ask a new question about this device
Download the instructions for your Beer dispenser in PDF format for free! Find your manual SBC 2318 - SENCOR and take your electronic device back in hand. On this page are published all the documents necessary for the use of your device. SBC 2318 by SENCOR.
USER MANUAL SBC 2318 SENCOR
natural_image
Black and silver stainless steel water dispenser with a handle, no visible text or symbolsSENCOR®
SBC 2318
Prior to using this appliance, please read the user manual thoroughly, even if you are already familiar with similar types of appliances. Use the appliance only as described in this user manual. Keep the manual for future use.
Save the original shipping transport box, packaging material, receipt and warranty card for the duration of the warranty. When transporting, pack the appliance in the original packaging materials only.
EN-1
CONTENTS
SAFETY PRECAUTIONS 3
DESCRIPTION OF THE APPLIANCE 5
FUNCTIONS OF THE BEER DISPENSER SYSTEM 7
SETTING UP AND CONNECTING KEGS....7
INSTALLING A KEG 8
TURNING ON AND COOLING....17
POURING BEVERAGES....18
REMOVING THE KEG....19
STORING KEGS....19
CARE AND MAINTENANCE 20
TROUBLESHOOTING....21
TECHNICAL INFORMATION 23
INSTRUCTIONS AND INFORMATION REGARDING THE DISPOSAL OF USED PACKAGING MATERIALS 24
DISPOSAL OF USED ELECTRICAL AND ELECTRONIC EQUIPMENT 24
SAFETY PRECAUTIONS
For your safety and the safety of your appliance, please adhere to the following instructions:
- Do not leave the appliance without supervision. This appliance may not be used by any persons (including children) with mental disabilities, weak strength, by inexperienced persons, unless they have been properly trained or schooled in the safe use of the product, or unless they are properly supervised by a qualified person who is responsible for their safety. This appliance must not be use by persons under the effect of narcotics.
• Children must be supervised to ensure that they do not play with the product.
• Alcoholic beverages are harmful to children's health. - Under no circumstances should children come into contact with the packaging materials. There is a risk of suffocation.
- Any other use is considered to be incorrect and is forbidden. Using the beer dispenser system for pouring non-foodgrade liquids is strictly forbidden. Likewise the beer dispenser system should not be used to pour beverages containing milk, sticky beverages and beverages with a thick consistency or beverages containing fruit pulp.
The appliance is connected to the mains under electrical current. Pay increased attention as contact with live parts (e.g. in the event of damaged insulation) is lethally dangerous. Therefore adhere to the following instructions:
• Never touch the power plug with wet hands.
- If you wish to disconnect the appliance from the power socket, always only pull on the power plug. Never disconnect the appliance from the power supply by pulling on the power cord, there is a risk that it may tear.
- Check that the power cord is not tangled, pinched or otherwise deformed, or is located near a source of heat as this could lead to its damage.
- Never place the appliance on the power cord. The sharp edges of the appliance's feet may damage the power cord.
- Only use power cords that conform with the rated power of the appliance.
- Do no submerge the appliance in water or any other liquid.
- Protect the appliance from rain or other moisture. Only the chilling compartment of the appliance may come into contact with liquids and only in exceptional circumstances.
- Operate the appliance if the electrical voltage on the label is the same as the electrical voltage in your power socket. Incorrect electrical voltage may damage the appliance.
- Disconnect the appliance from the power socket if you are not using it.
- Check that there is no danger of tripping over the power cord.
If the appliance is damaged:
- If the power cord of the appliance is damaged, it must be replaced by the manufacturer or at an authorised service centre to prevent a risk of injury.
- If a liquid has entered into the appliance, the appliance has fallen or has been damage in any other way, it must be inspected at an authorised service centre. Disconnect the appliance from the main source of electricity and contact an authorised service centre.
- Never repair a damaged part of the appliance or the appliance with a damaged power cord yourself. There is a high risk of injury.
Safe operation of the appliance requires that it is appropriately located. Adhere to the following instructions:
- Protect the appliance against the effects of weather.
-
Protect the appliance against moisture which could enter from the external environment.
-
Never place the appliance on a heat source or in the direct vicinity of a heat source, e.g. hotplate, oven, etc. Avoid direct sunlight. Temperatures above 35°C may damage the appliance.
- The appliance should be located at least 10 cm from a wall or other items so that proper ventilation of the coolant is ensured. Check that the ventilation openings (Pic. 1/7) and the fan (Pic. 1/8) are not covered.
- During connection or pouring, the liquid may spray out on to furniture, wallpaper, etc. Therefore, we recommend that an easy to maintain room is chosen, e.g. kitchen.
- Locate the appliance on an even and stable surface so that it cannot fall.
- The feet of the appliance (Pic. 3/1) have sharp edges, which may scratch fine surfaces. Therefore, we recommend that an underlay (e.g. a rubber mat) is placed under the appliance to avoid scratching (Pic. 3/2).
Handling beverages requires special care in the area of hygiene. Bacteria dangerous to health may accumulate in the parts of the appliance (e.g. in the hoses, if not properly cleaned) where excess liquid remains. The bacterial cultures may cause serious illnesses and health complications. Therefore adhere to the following principles:
- Thoroughly wash out with lukewarm water all the parts of the dispensing system, which may come into contact with the beverage immediately after every use - see chapter "Care and maintenance".
• If you are not sure, wash out the given parts also before using the appliance. - Wash out all parts of the dispensing system when replacing kegs.
- Like a refrigerator, this appliance also has a cooling circuit with coolant. In this respect adhere to the following safety measures:
- The coolant should not leak out into the environment. This means that the cooling circuit inside the appliance should not be damaged.
- Leaking coolant is highly flammable. If coolant is leaking from the appliance, avoid any contact with a cigarette lighter or an open flame. After discovering a coolant leak, immediately ventilate the room.
• Leaking coolant may affect the eyes. In the event that they are affected seek medical help.
Transport
• For standard transport always hold the appliance by the bottom part and never by the lid.
- The appliance is equipped with an oil-filled compressor. This means that it must always be transported in the vertical position and operated seated on a horizontal surface on all 4 feet. In the event that the appliance is transported on its side, then we recommend that the appliance is left to stabilise for at least 3 hours before being turned on again. Otherwise the compressor could be damaged.
- Do not carry or handle the appliance in any other way while it is running or if a keg is installed in the chilling compartment.
Storage
If you will not be using the appliance for an extended period of time, then:
- Remove the keg.
• Thoroughly clean out the appliance. - Check that liquid remains are not left inside the appliance.
• Cover the appliance so that it is protected against dust and store it in its original packaging.
• Store the appliance in a dry place.
DESCRIPTION OF THE APPLIANCE
1
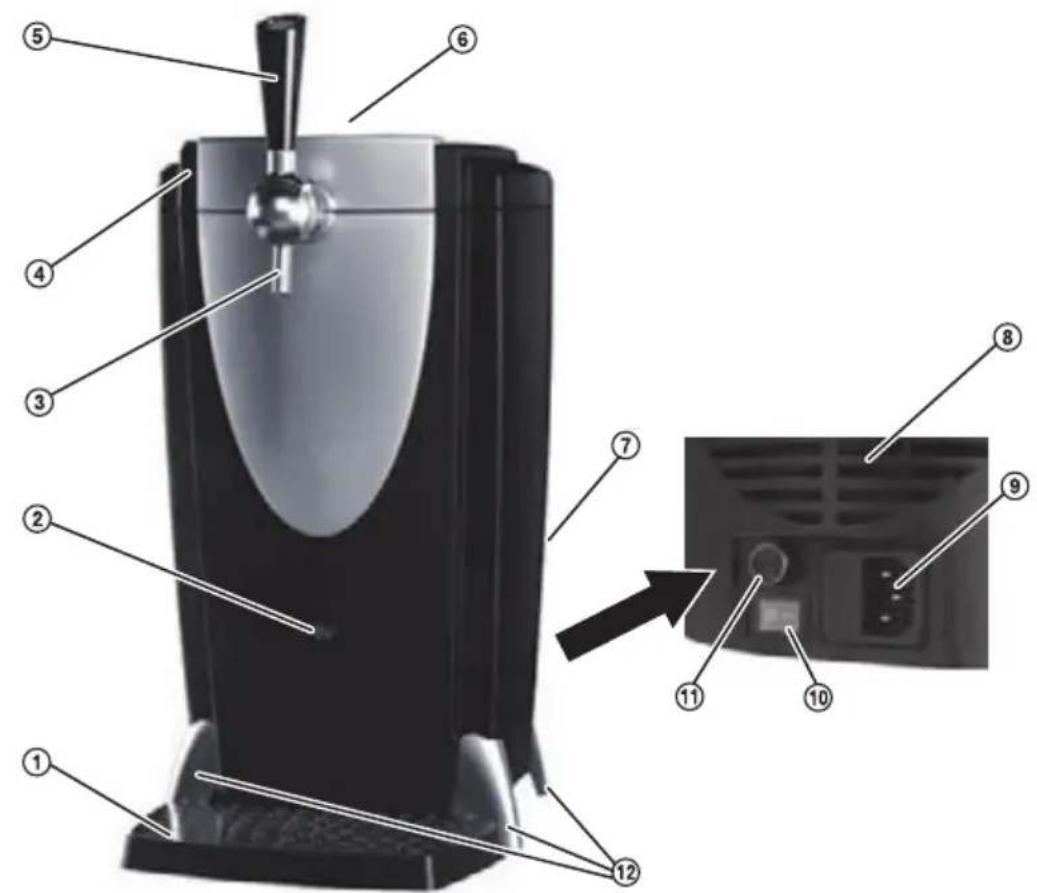
① Drip tray
② Temperature display
③ Tap
④ Lid
⑤ Tap handle
⑥ Lid opening mechanism
⑦ Ventilation openings
⑧ Fan
⑨ Input power socket
⑩ On/Off switch
⑪ Temperature control dial
⑫ Feet of the appliance
Accessories (not compulsory)
2
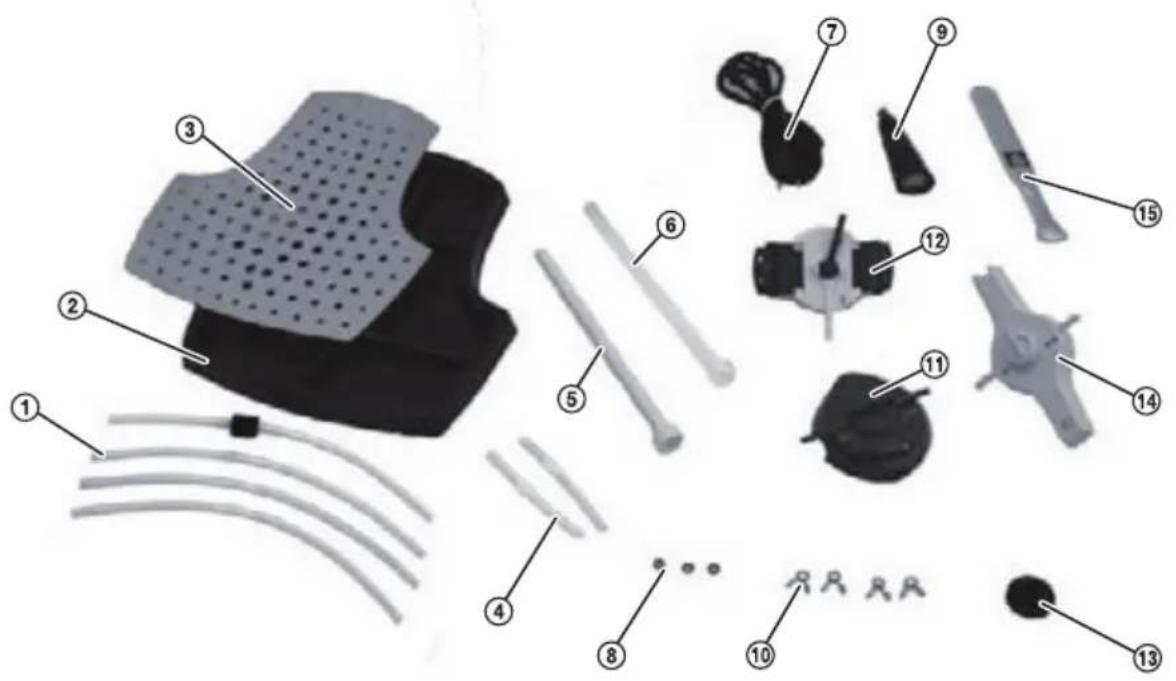
① Connecting beer hose (4 hoses, one already has the retainer block attached)
② Drip tray
③ Drip tray underlay
④ Connecting air hoses (2 hoses, one is already attached)
⑤ Tubing to the keg (yellow)
⑥ Tubing to the keg (white)
⑦ Power cord
⑧ Tap seal rings
⑨ Tap handle
⑩ Hose clips – for fastening hoses to the keg adapter
⑪ Keg adapter (blue)
⑫ Keg adapter (blue-green)
⑬ Plug for the blue-green adapter, if necessary
⑭ Keg adapter (yellow)
⑮ Spatula for removing froth
It may also contain (not shown) also other accessories and a user's manual
3
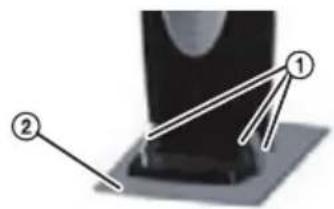
natural_image
Diagram of a mechanical component with labeled parts (1 and 2), no readable text or symbols present.EN-6
FUNCTIONS OF THE BEER DISPENSER SYSTEM
In the chilling compartment of the beer dispensing system there is a keg chilled to a set temperature. Various keg adapters ensure the connection of various kegs to the dispensing system. Compressed air is generated by means of a pump, which is located inside the dispensing system. This compressed air is delivered to the keg, creating excess pressure inside the keg and enabling the beverage to be drawn from the keg. The beverage is easily poured through a tap.
SETTING UP AND CONNECTING KEGS
Unpack the appliance and all accessories and check that the appliance including accessories is complete – see chapter "Description of the appliance".

Attention:
Always transport the appliance in the original packaging to avoid damaging the appliance. Store the packaging in a safe location for the purpose of further transport. Dispose of packaging that is no longer used in accordance with other legal regulations in the given country.
Assembling
- Select an appropriate location.
- Place the anti-scratch underlay (e.g. a rubber mat) (Pic. 4/2) on which the appliance will stand. This will prevent scratching the surface.
- Insert the tap handle (Pic. 1/5) with the mark facing forward. The tap handle needs to be pushed into the holder with appropriate force.
- Remove the protective film from the drip tray (Pic. 2/3).
- Place the drip underlay (Pic. 2/3) into the drip tray (Pic. 2/3) and insert it under the beer dispensing system (Pic. 1/1). Check that the drip tray is not protruding to avoid tipping it over accidentally.

Attention:
The feet of the appliance (Pic. 4/1) have sharp edges, which may scratch a fine surface.
4
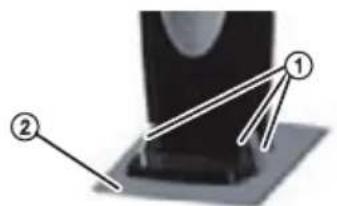

Warning:
Do not connect the power cord to a power source or turn the appliance on yet. To prevent any possible accidents caused by the entry of liquids into the appliance, connect it and turn it on only after installing a keg. Instructions for connecting the power cord and turning on the appliance are found in chapter "Turning on and cooling".
After connecting the appliance it is necessary to wash it out thoroughly.
EN-7
Washing out for the first time
Before first use, all parts must be thoroughly cleaned to remove any health damaging liquid remains, which could cause serious illnesses or potential health complications.

Warning:
Use the appliance only after all its parts are clean. Using the appliance when it is dirty may cause serious illnesses or potential health complications.
- Remove the hoses which have already been set up at the appliance:
- connecting hoses
- air hoses
- A more detailed description of the cleaning process can be found in chapter "Care and maintenance".
- After cleaning the appliance for the first time you may connect kegs – see chapter "Installing a keg".
INSTALLING A KEG
When connecting kegs it may happen that liquid will flow out of the appliance due to an operating mistake or due to the kegs being pressurised more than usual. For this situation prepare the following:
- Bucket to catch excess liquids.
- Sufficient number of towels for wiping the excess fluids.
Wear suitable clothing on which potential spraying or staining will not matter.

Warning:
Liquid remains may contain bacteria and pathogenic substances, which may cause serious illnesses or potential health complications. Check that the appliance and all accessories have been thoroughly washed out before every use. Wash out the parts where you are not sure whether they have been washed out or not – see chapter "Care and maintenance". Wash out all parts every time a keg is replaced.

Attention:
Before use, store kegs in a location where they will not be handled. A keg that has been shaken is highly pressurised. This causes the formation of a large amount of head and may cause the connecting hoses to come loose. Keep these over-pres-surised kegs for at least 1 day in a location where it is certain that they will not be handled.

Note:
We recommend the kegs be chilled in advance to prevent excessive head (froth) formation and subsequent problems with the connecting hoses. You may chill the kegs by placing them inside the appliance without connecting them.

Attention:
Do not place kegs in a freezer. The contents of the keg may freeze and the keg may be damaged. Never use kegs that are damaged or dinted in any way.
EN-8
The procedure for connecting individual keg types is described below:
- 5-litre beer keg
• 4-litre beer keg - 6-litre beer keg
5-litre beer keg
natural_image
Metallic cylindrical beer can with visible barrel and cap (no text or symbols)Pic. 12
To connect the keg you will need the following accessories:
• Keg adapter (yellow) (Pic. 2/15)
• Tubing to the keg (yellow) (Pic. 2/6)
• 1 air hose (Pic. 2/5)
• 1 beer hose (Pic. 2/14)
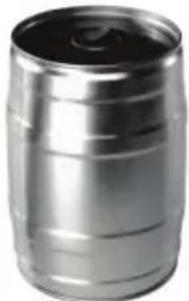
The 5-litre beer keg (Pic. 12), also called "party keg", is offered by many European beer distributors. Is poured by means of the dispensing unit through ventilation openings on the top side of the keg.
natural_image
Close-up of a hand holding a small mechanical component (no visible text or symbols)Pic. 13
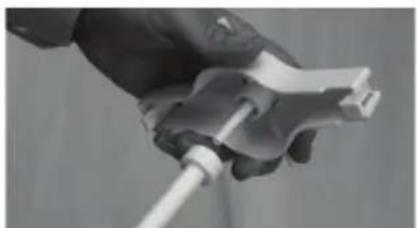
- Insert the yellow tubing into the yellow keg adapter (Pic. 13) and screw in firmly.
natural_image
Close-up of a hand holding a small object with a numbered line marker (no text or symbols on the object itself)Pic. 14
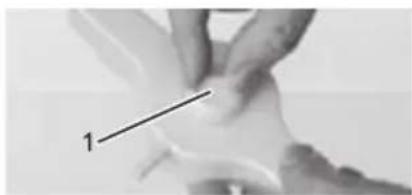
- Move the lock (Pic. 14/1) to the "Close" position.
natural_image
Close-up of hands pouring liquid from a metal container into a glass with a white liquid (no text or symbols visible)Pic. 15
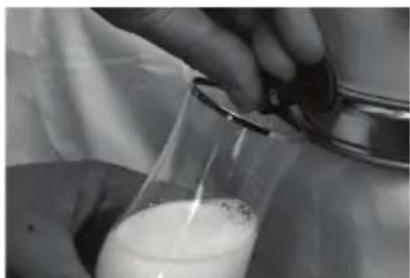
- First the pressure in the keg must be reduced. Perform this by using the draught seal on the keg. Follow the instructions on the keg.
- Pour 2-3 glasses of head (froth) until you register that the pressure in the keg has fallen significantly.
- Press the draught seal on the keg once more.
natural_image
Two-panel black-and-white photo showing a hand holding a tool over a circular object, labeled A and B (no text or symbols on the objects)Pic. 16
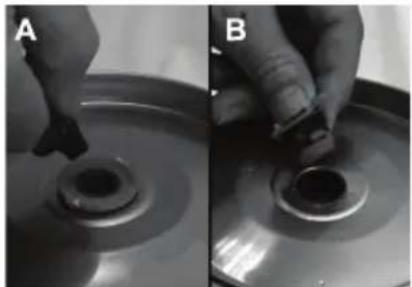
- Remove the plug to open the keg opening (Pic. 16/A) located at its top end.
- The keg opening has various designs depending on the type of keg, therefore it is necessary to check whether the opening is suitable for inserting the keg tubing.
If any part is blocked, you must remove the plastic trimming on the keg opening (Pic. 16/B). You will probably need tools such as for example a screwdriver or pliers.

Warning:
Only use clean tools as the use of dirty tools could contaminate the beer.
Pic. 17
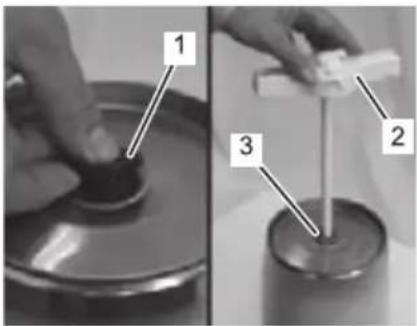
- After removing the plastic trimming insert the plug (Pic. 17/1).
- Insert the adapter with the installed keg tubing (Pic. 17/2) into the keg opening or into the plug.
- Have a towel on hand for the case that beer may leak in one of the following steps.
- Slowly push the keg adapter down so that the side brackets fit in.
- Now check that the keg adapter is firmly seated.
- Open the lid of the appliance (Pic. 1/4).
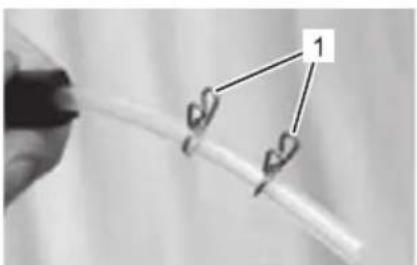
- Place two hose clamps on the bottom part of the beer hose (Pic. 18/1). These clamps will later be used to secure the beer hoses to the keg adapter.
natural_image
Close-up of a hand holding a thin wire with two clips labeled '1' (no text or symbols on the object itself)Pic. 18
Pic. 19
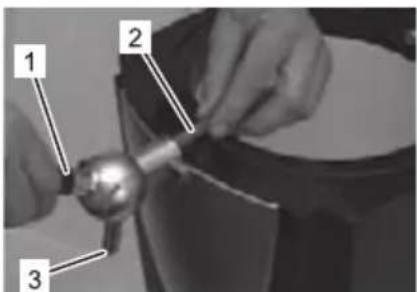
- Slowly press down on the tap handle (Pic. 19/1).
- Insert the beer tube (Pic. 19/2) into the tap until its other end extends past the edge of the tap (Pic. 19/3). While inserting it, turn it to make the insertion easier.
- Lift the tap handle (Pic. 19/1) and release it.
Beer Dispenser
SBC 2318
Z
Pic. 20
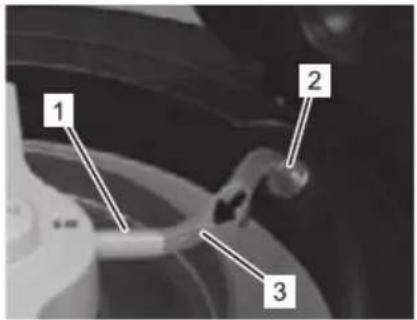
- Place the universal keg into the chilling compartment so that the air fitting "Air In" (Pic. 20/1) of the keg adapter faces to the rear.
- Connect the air fitting "Air In" (Pic. 20/1) to the air fitting (Pic. 20/2) using the air hose (Pic. 20/3). In this step the arrow on the air hose must face in the direction of the air fitting "Air In" on the keg adapter.

Attention:
Check that the air hose is pushed far enough on to the fitting. An air hose that is not pushed on far enough may come loose. And this may result in the release of the pressurised liquid.
Pic. 21
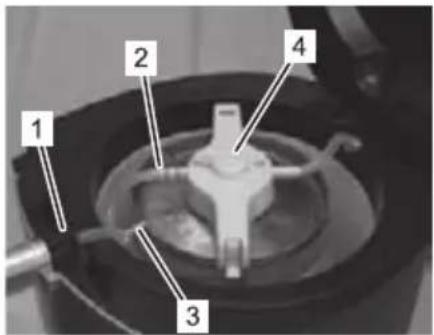
- Insert the retainer block (Pic. 21/1) into the cavity of the appliance. Do not forget to also take the retainer block when changing the hose.
- Press the free end of the hose into the beer fitting "Beer Out" (Pic. 21/2).

Attention:
Check that the hose is pushed far enough on to the fitting. A beer hose that is not pushed on far enough may come loose. And this may result in the release of the pressurised liquid.

Note:
Do not tangle the hoses. Otherwise the it may be impossible for the liquid to flow through the hoses. If necessary turn the keg so that the hoses are not tangled.
- Push the hose clamp over the hose and the beer fitting "Beer Out" (Pic. 21/2).
- Secure the beer hose using the clamp (Pic. 21/3).
- Move the lock (Pic. 21/4) to the "Open" position.
- Close the lid of the appliance (Pic. 1/4).
The appliance is now ready to be turned on – see chapter "Turning on and cooling".
4-litre beer keg
natural_image
Metal barrel with cylindrical top and side slot (no text or symbols visible)To connect the keg you will need the following accessories:
• Keg adapter (blue-green) (Pic. 2/13)
• 1 air hose (Pic. 2/5)
• 1 beer hose (Pic. 2/1)
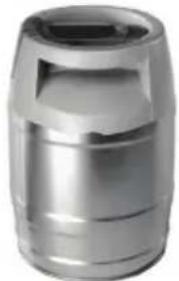
The 4-litre beer keg (Pic. 22) is offered by many European beer distributors. Its fitting is compatible with the keg adapter of the dispenser unit.
Pic. 22
natural_image
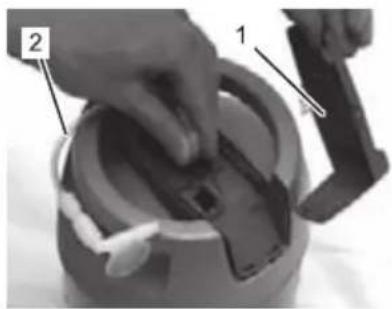
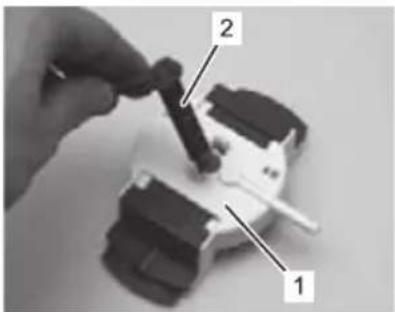
Close-up of hands operating a mechanical device with labeled parts (1 and 2), no visible text or symbols beyond labels.- Pull the overseal (Pic. 23/1) out of the keg and pull out the hose with plug (Pic. 23/2). You may throw these parts away.
Pic. 23
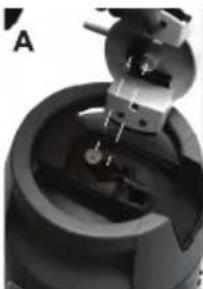
- Take out the beer hose (Pic. 24/1) from the keg adapter (Pic. 24/2).
Pic. 24
natural_image
Close-up of a mechanical device with a cylindrical component and a metallic tool inserted (no visible text or symbols)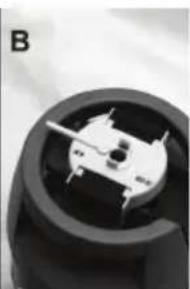
natural_image
Close-up of a mechanical component with a central cylindrical part and internal features (no visible text or symbols)- Place the adapter on to the keg. Check that the fittings fit into each other - one into the other (Pic. 25/A).
- Check that keg adapter is firmly seated on the keg.
- Open the lid of the appliance (Pic. 1/4).
Pic. 25
Beer Dispenser
SBC 2318
Z
natural_image
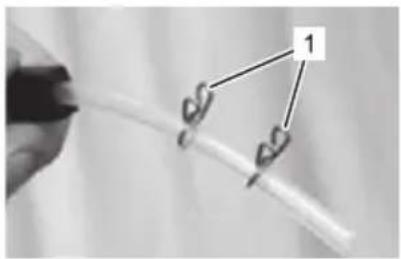
Close-up of a hand holding a thin wire with three metal clips (labeled 1) attached to it, no text or symbols visible.Pic. 26
- Place two hose clamps on the bottom part of the beer tube (Pic. 26/1). These two clamps will later be used to secure the beer hoses on to the tap adapter.
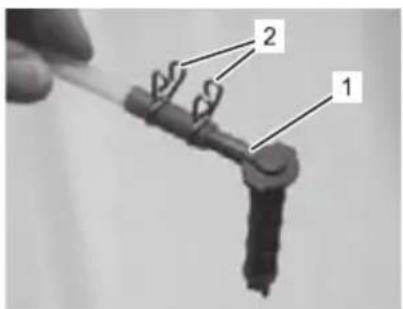
Pic. 27
- Place the shorter end of the beer hose on to the beer tube (Pic. 27/1).
- Allow the hose clamps (Pic. 27/2) to gently slide on to the beer hose and the beer tube.

Attention:
Check that the beer hose is pushed far enough past the fitting. A beer hose that is not pushed on far enough may come loose. And this may result in the release of the pressurised liquid.
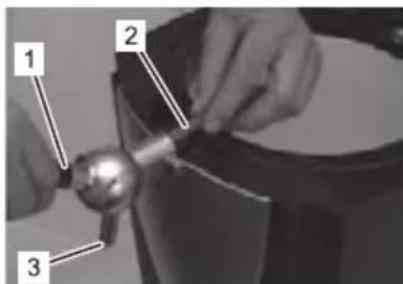
Pic. 28
-
Gently push the tap handle (Pic. 28/1) downwards.
-
Insert the beer tube (Pic. 28/2) into the tap until its other end extends past the edge of the tap (Pic. 28/3). While inserting it, turn it to make the screwing on easier.
- Lift the tap handle (Pic. 28/1) and release it.
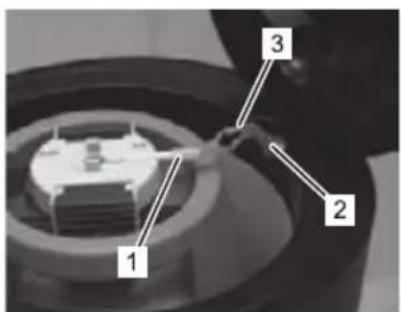
Pic. 29
- Place the keg into the chilling compartment so that the air fitting "Air In" (Pic. 29/1) faces backwards.
- Connect the air fitting "Air In" (Pic. 29/1) to the air fitting (Pic. 29/2) using the air hose (Pic. 29/3). In this step the arrow on the air hose must face in the direction of the air fitting "Air In" on the keg adapter.
Attention:
Check that the air hose is pushed far enough on to the fitting. An air hose that is not pushed on far enough may come loose. And this may result in the release of the pressurised liquid.
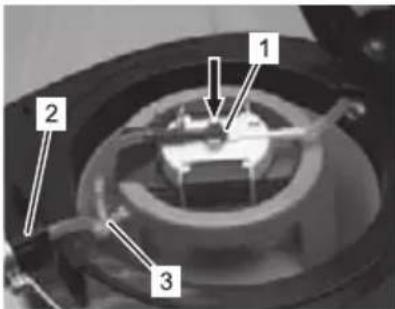
Pic. 30
- For pouring it is necessary to slowly insert the beer hose (Pic. 30/1) into the pouring adapter. It is necessary to push hard enough so that it penetrates the protective plug on the keg.
- If you have pushed the entire beer tube downwards, turn it to lock it in place.
- Insert the retainer block (Pic. 30/2) into the cavity of the appliance. Do not forget to also take the retainer block when changing the hose.
- Secure the beer hoses in their place using clips (Pic. 30/3).

Note:
Do not tangle the hoses. Otherwise the it may be impossible for the liquid to flow through the hoses. If necessary turn the keg so that the hoses are not tangled.
- Close the lid of the appliance (Pic. 1/4).
The appliance is now ready to be turned on – see chapter "Turning on and cooling".
6-litre beer keg
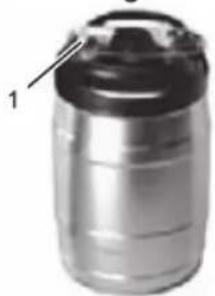
natural_image
Close-up of a metallic cylindrical container with a lid and label '1' pointing to the side (no text or symbols on the container itself)To connect the keg you will need the following accessories:
• Keg adapter (blue) (Pic. 2/12)
• 1 air hose (Pic. 2/5)
• 1 beer hose (Pic. 2/1)
The 6-litre beer keg (Pic. 31) is offered by many European beer distributors. Its fitting is compatible with the keg adapter of the dispenser unit.
Pic. 31
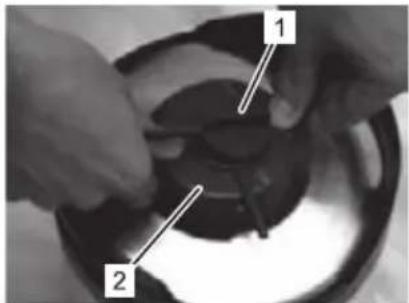
Pic. 32
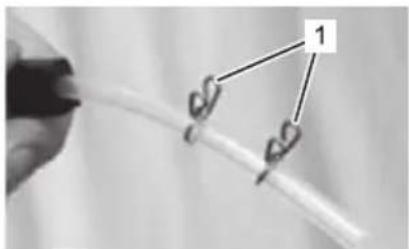
natural_image
Close-up of a hand holding a thin wire with a triangular hook and label '1' (no text or symbols on the hook itself)Pic. 33
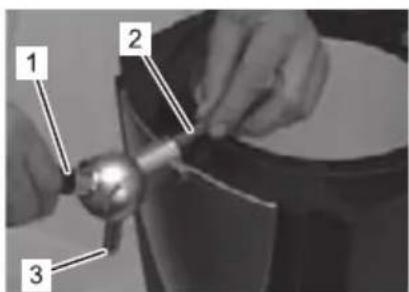
Pic. 34
- Remove the protective film and packaging material with the hose on the keg. You may throw these parts away.
- Release the seal (Pic. 32/1) from the keg adapter (Pic. 32/2) so that the adapter is free.
- Place the adapter on to the lock of the keg.
- Check that the adapter is firmly seated on the keg.
-
Open the lid of the appliance (Pic. 1/4).
-
Place two hose clamps on the bottom part of the beer tube (Pic. 33/1). These two clamps will later be used to secure the beer hoses on to the tap adapter.
-
Slowly press down on the tap handle (Pic. 34/1) downwards.
-
Insert the beer tube (Pic. 34/2) into the tap until its other end extends past the edge of the tap (Pic. 34/3). While inserting it, turn it to make the screwing on easier.
-
Lift the tap handle (Pic. 34/1) and release it.
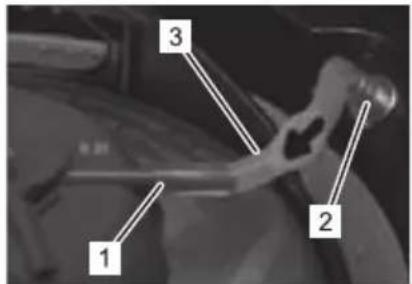
Pic. 35
- Place the keg into the chilling compartment so that the air fitting "Air In" (Pic. 35/1) of the keg adapter faces to the rear.
- Connect the air fitting "Air In" (Pic. 35/1) to the air fitting (Pic. 35/2) using the air hose (Pic. 35/3). In this step the arrow on the air hose must face in the direction of the air fitting "Air In" on the keg adapter.

Attention:
Check that the air hose is pushed far enough on to the fitting. An air hose that is not pushed on far enough may come loose. And this may result in the release of the pressurised liquid.
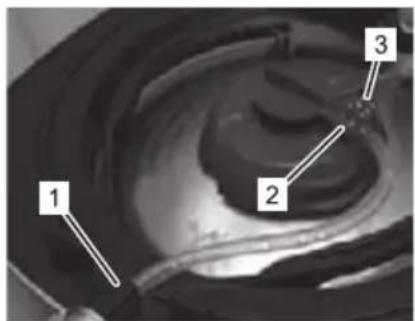
Pic. 36
- Insert the retainer block (Pic. 36/1) into the cavity of the appliance. Do not forget to also take the retainer block when changing the hose.
- Press the free end of the beer hose into the beer fitting "Beer Out" (Pic. 36/2).
- Allow the hose clamps (Pic. 36/3) to gently slide on to the beer hose and the beer tube.

Note:
Check that the beer hose is pushed far enough on to the fitting. A beer hose that is not pushed on far enough may come loose. And this may result in the release of the pressurised liquid.

Note:
Do not tangle the hoses. Otherwise the it may be impossible for the liquid to flow through the hoses. If necessary turn the keg so that the hoses are not tangled.
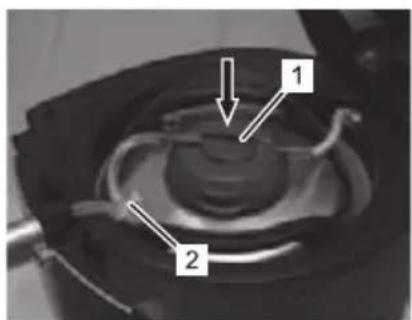
Pic. 37
- Secure the beer hoses in their place using clamps (Pic. 37/1).
- Press the keg lock (Pic. 37/2) by a quick downward motion and turn it to position "Open".
- Close the lid of the appliance (Pic. 1/4). The appliance is now ready to be turned on – see chapter "Turning on and cooling".
TURNING ON AND COOLING

Warning:
Turn on the appliance only once the kegs are properly connected – see chapter "Installing a keg".
Check that no liquid has entered inside the appliance (excluding the chilling compartment). If you find any liquid then under no circumstances should you turn the appliance on. Contact your vendor or an authorised service centre for repairs.
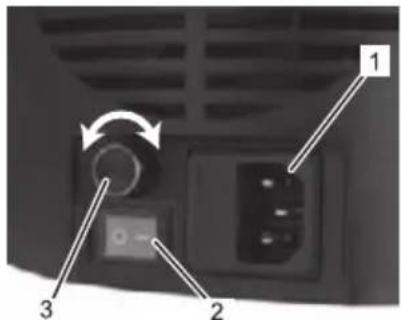
Pic. 38
Turning on
- Check that the keg is correctly connected.
- Close the lid of the appliance (Pic. 1/4).
- First connect the power cord to the power socket on the appliance (Pic. 38/1), then connect it to the wall socket.
- Turn on the appliance using the On (I) / Off (O) indicator light switch. 38/2).
Cooling
- Use the temperature control dial (Pic. 38/3) to achieve the correct temperature.
- Anticlockwise "H" (Turn right) Increase the temperature
- Clockwise "L" (Turn left) Decrease the temperature

Note:
Setting the temperature using the temperature control dial has a fundamental effect on the temperature of the beverage. It is necessary understand that cooling or heating the entire contents of the keg may take some time. The temperature in the chilling compartment is shown on the temperature display. 1/2).

Note:
The temperature is measured outside of the keg and so it is possible that sometimes the shown temperature may vary from the current temperature in the keg, it depends on pre-chilling.
- Wait until the keg is chilled to the required temperature. The chilling time may vary depending on the initial temperature and the size of the keg.
- It takes approximately 5 hours to cool down a 5-litre keg from 25°C to 5°C.
- It takes approximately 1 hour to cool down a 5-litre keg from 10°C to 5°C.

Attention:
Never leave kegs in a freezer. The contents of the keg may freeze and the keg may be damaged.
Important notice:
On the underside of the lid there is a switch used to activate and deactivate the pressurisation of the keg.
If the switch is in the top position, the pressurisation function is activated. If the appliance is connected to a power source and the main switch is in the ON position (on), the pressurisation function will be activated when the lid is closed.
If the switch is in the lower position, the pressurisation function is deactivated. Pressure deactivation can be used in the event that you first want to only chill the keg and then later connect it to the draught system.
POURING BEVERAGES
- Take a clean rinsed glass and place it under the tap.

Warning:
For hygiene reasons make sure that the tap is not submerged in the beverage. Beer that has dried on to the tap may spoil head formation.
- Pull the tap handle towards you and pour yourself a glass. Pouring with the tap handle half open may result in a large amount of head being created.
- Release the tap handle at the right time to stop the pouring process.
- Pour another beer if necessary.

Note:
Regularly inspect the drip tray when pouring. Pour out the contents of the drip tray if necessary and rinse it.
You may begin pouring beverages as soon as the keg is connected and the appliance is turned on. Nonetheless, we recommend that you wait until the liquid has reached the desired temperature. Beer froths a lot when its temperature is too high.

Attention:
Do not store kegs with the bottom facing upwards, they could tip over.

Note:
The appliance is loud. While the appliance is turned on the pump automatically starts when air pressure falls below the required level. As soon as the correct pressure is achieved the pump turns itself off automatically.
Ask your supplier about the optimum temperature for your beverage, the correct type of glass and the typical pouring method for achieving optimal results.
TAKING THE KEG OUT OF THE APPLIANCE
If you are only pouring froth then the beer keg is empty and it is necessary to replace it. If necessary you can also remove partially empty kegs.
- Turn off the appliance and disconnect it from the power socket.
- Hold a glass under the tap and press on the tap handle to release excess pressure in the keg. A small amount of beer will flow out of the tap in this step.
- Once beer stops flowing out of the appliance, release the tap handle.
- Open the lid of the appliance.
- Pull out the air hose.

Note:
It may be difficult to pull the air hose out. It is necessary pull firmly.
- Pull out the beer hose from the adapter and lift it up.
- Again press the tap handle so that the hose is completely empty and leave the tap open.
- Pull the beer hose out of the tap.
- Release the tap handle.
- Take out the keg.
- If you wish to store the keg, place the keg with the adapter attached into a refrigerator. If the keg is empty, remove the keg adapter.
- Thoroughly wash out the appliance and all accessories.
STORING KEGS
You can store kegs in a turned on appliance for various lengths of time. Always leave the appliance turned on when maintaining the required temperature in a keg.
4-litre and 6-litre kegs have a system installed, which separates the injected air from the beer. For this reason beer may be stored in the keg for longer.
You may store the kegs in the appliance for several days (see printed material that come with the keg for more information), if you pour at least once per day. Otherwise remove the keg from the appliance and store it in a refrigerator. Connect again if necessary.
The 5-litre beer keg does not have system that separates the air from the beer. Therefore the beer should not be stored for longer than 24 hours in a turned on appliance. The beer will spoil within 24 hours.

Warning:
Check the brewer's information on the beer keg labels.
CARE AND MAINTENANCE
- Take off all hoses and take the keg out of the appliance.
- Wash the appliance with only a lightly dampened cloth. Do not use any cleaning agents, cleaning sands or alcohol, as these substances may scratch the appliance.

Attention:
Do not tilt or turn over the appliance to fully empty the remaining liquid remaining in the chilling compartment. The liquid could enter inside the appliance. Rather, use a wiping cloth to suck up any liquids.
- Use a wiping cloth to suck up the remaining liquid, that may have remained in the chilling compartment.
- Wash out the chilling compartment using a dishwashing detergent and wipe dry with a soft wiping cloth.
- Wash the inside of the tap using a dishwashing detergent, rinse it out and wipe dry with a corner of a wiping cloth.
- Wash out all hoses which can be removed or which come into contact with the liquid, accessories and the drip tray in hot water with dishwashing detergent. Turn the keg adapters around several times so that you clean out also from the hard-to-reach angles. Rinse all parts under running water to remove excess cleaning agents.
- Dry all part thoroughly.
- Allow the accessories and the appliance to dry in an open location for at least 24 hours before storing.

Warning:
For hygiene reasons do not install accessories in advance. Store them separately inside the appliance.

Warning:
Handling beverages requires special care in the area of hygiene. Bacteria dangerous to health may accumulate if excess liquid remains are left in some part (e.g. in the hoses, if not properly cleaned) of the appliance. We therefore recommend that the appliance is thoroughly cleaned after every use.

Warning:
Risk of injury by electrical shock: Before cleaning the appliance turn off and disconnect it from the power source (disconnect it from the power socket). Do not allow any liquid to enter inside! Never place the appliance into water or other liquids!

Warning:
Risk of scalding by hot water: Check that the water used for washing is not too hot.

Attention:
Neither the appliance nor the accessories may be washed inside a dishwasher.
TROUBLESHOOTING
Before you send the appliance to an authorised service centre, check whether you can remedy the defect using the table below.

Warning:
Before troubleshooting, always turn off the appliance and disconnect it from the power socket. Never use a damaged appliance.
| Defect | Possible cause | Solution |
| Temperature display does not display information | The appliance is not turned on | Properly connect the appliance to a power socket – see chapter "Connecting and chilling". Check that there is a voltage in the power socket with the help of another working electrical appliance. |
| The appliance is not powered / main circuit is turned off | Turn on the draught system – chapter "Connecting and chilling". | |
| The beer does not flow | The appliance is not turned on | Turn on the draught system – chapter "Connecting and chilling" |
| The keg is empty | Take out the keg | |
| The adapter on the keg is closed | Open the keg adapter | |
| The hose is pinched | Move the keg so that the hose is set free – see chapter "Installing a keg" | |
| Creation of a large amount of head (froth) | First glass | The first glass always contains a large amount of head (froth). This is normal. It is necessary to pour several glasses before the froth becomes thinner |
| The keg is not cold enough | Continue chilling | |
| The keg was shaken up | Place the keg in a location where it will not be handled for at least 4 hours – see chapter "Installing a keg" | |
| The tap is not open enough | Always open the whole tap – see chapter "Pouring beverages" | |
| The pump is activated frequently | Air is leaking out of the air hose | Attach the air hose properly. If necessary use a new air hose – see chapter "Installing a keg" |
| The keg adapter is not in the proper position | Place the keg adapter in the proper position – see chapter "Installing a keg" | |
| Beer is leaking when the keg adapter is inserted | The keg adapter is not closed | Close the keg adapter |
| The pressure inside the keg is too high | Continue chilling | |
| Place the keg in a location where it will not be handled for at least 4 hours – see chapter "Installing a keg" | ||
| The displayed temperature is increasing on its own | The keg is not entirely chilled | Continue chilling – see chapter "Connecting and chilling" |
| The beer is not cold enough | The lid is open | Close the lid |
| The ventilation openings are clogged | Keep the ventilation openings and fan free from obstructions | |
| The ambient temperature is too high | Move the appliance away from sources of heat and direct light | |
| The appliance is too loud | The pump or the compressor are running | When connected the pump and compressor turn on and off automatically. This is normal. |
TECHNICAL SPECIFICATIONS
| Type of appliance | Beer dispensing system with an integrated chilling compartment |
| Voltage | 220 – 240 V ~ 50 Hz |
| Power input | 88 W, 0.8 A |
| Insulation | Cyclopentane foam |
| Dimensions | 300 x 410 x 560 mm |
| Weight | 14 kg without a keg |
| Cooling | R134a (environmentally friendly), amount: 50g |
| Chilling temperature | 3 - 9 °C (regulated) |
| Climatic class | SN/N |
| Capacity of the pump | 3 litres/minute |
| Pressure in the pump | 1.38 bar |
| Suitable kegs | 4-litre beer keg5-litre beer keg6-litre beer keg |
| Material | Hoses: siliconeKeg adapter: ABS (Acrylonitrile butadiene styrene) |
Due to constant product development we reserves the right to make technical and design changes.
Mistakes and errors in the text reserved.
INSTRUCTIONS AND INFORMATION REGARDING THE DISPOSAL OF USED PACKAGING MATERIALS
Dispose of packaging material at a public waste disposal site.
DISPOSAL OF USED ELECTRICAL AND ELECTRONIC APPLIANCES
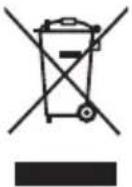
The meaning of the symbol on the product, its accessory or packaging indicates that this product shall not be treated as household waste. Please, dispose of this product at your applicable collection point for the recycling of electrical & electronic equipment waste. Alternatively in some states of the European Union or other European states you may return your products to your local retailer when buying an equivalent new product. The correct disposal of this product will help save valuable natural resources and help in preventing the potential negative impact on the environment and human health, which could be caused as a result of improper liquidation of waste. Please ask your local authorities or the nearest waste collection centre for further details. The improper disposal of this type of waste may fall subject to national regulations for fines.
For business entities in the European Union
If you wish to dispose of an electrical or electronic device, request the necessary information from your seller or supplier.
Disposal in other countries outside the European Union
If you wish to dispose of this product, request the necessary information about the correct disposal method from local government departments or from your seller.

This product meets all the basic EU regulation requirements that relate to it.
- SENCOR®
- CONTENTS
- SAFETY PRECAUTIONS
- If the appliance is damaged:
- Transport
- Storage
- DESCRIPTION OF THE APPLIANCE
- FUNCTIONS OF THE BEER DISPENSER SYSTEM
- SETTING UP AND CONNECTING KEGS
- Attention:
- Assembling
- Warning:
- Washing out for the first time
- INSTALLING A KEG
- Note:
- EN-8
- Beer Dispenser
- SBC 2318
- 4-litre beer keg
- TURNING ON AND COOLING
- Turning on
- Cooling
- Important notice:
- POURING BEVERAGES
- TAKING THE KEG OUT OF THE APPLIANCE
- STORING KEGS
- CARE AND MAINTENANCE
- TROUBLESHOOTING
- INSTRUCTIONS AND INFORMATION REGARDING THE DISPOSAL OF USED PACKAGING MATERIALS
- DISPOSAL OF USED ELECTRICAL AND ELECTRONIC APPLIANCES
- For business entities in the European Union
- Disposal in other countries outside the European Union
Brand : SENCOR
Model : SBC 2318
Category : Beer dispenser