
V-Fold - Treadmills LifeSpan - Free user manual and instructions
Find the device manual for free V-Fold LifeSpan in PDF.


| Product Type | Folding Treadmill |
| Model | V-Fold |
| Brand | LifeSpan |
| Recommended Use | Home use |
| Max User Weight | 300 lbs (136 kg) |
| Motor Power | 2.5 HP DC motor |
| Speed Range | 0.5 – 10 mph (0.8 – 16 km/h) |
| Incline | 0 – 12% power incline |
| Running Surface | 20" x 56" (51 x 142 cm) |
| Display | LCD with time, distance, calories, pulse, speed, incline |
| Heart Rate Monitoring | Hand pulse sensors and chest strap compatible |
| Programs | 12 preset programs plus manual mode |
| Folding Mechanism | Hydraulic assisted folding with soft drop |
| Dimensions (Unfolded) | 74" L x 30" W x 52" H (188 x 76 x 132 cm) |
| Dimensions (Folded) | 40" L x 30" W x 62" H (102 x 76 x 157 cm) |
| Product Weight | 185 lbs (84 kg) |
| Power Requirements | 120 V / 15 A |
| Warranty | Frame: lifetime, motor: 5 years, parts: 3 years, labor: 1 year |
| Safety Features | Safety key, emergency stop, child lock |
| Transport Wheels | Yes, built-in |
| Accessories Included | Lubricant, manual, safety key |
| Assembly Required | Minimal, basic assembly of handlebars |
Frequently Asked Questions - V-Fold LifeSpan
User questions about V-Fold LifeSpan
0 question about this device. Answer the ones you know or ask your own.
Ask a new question about this device
Download the instructions for your Treadmills in PDF format for free! Find your manual V-Fold - LifeSpan and take your electronic device back in hand. On this page are published all the documents necessary for the use of your device. V-Fold by LifeSpan.
USER MANUAL V-Fold LifeSpan
V-Fold Treadmill with Smart Stride
USER MANUAL
natural_image
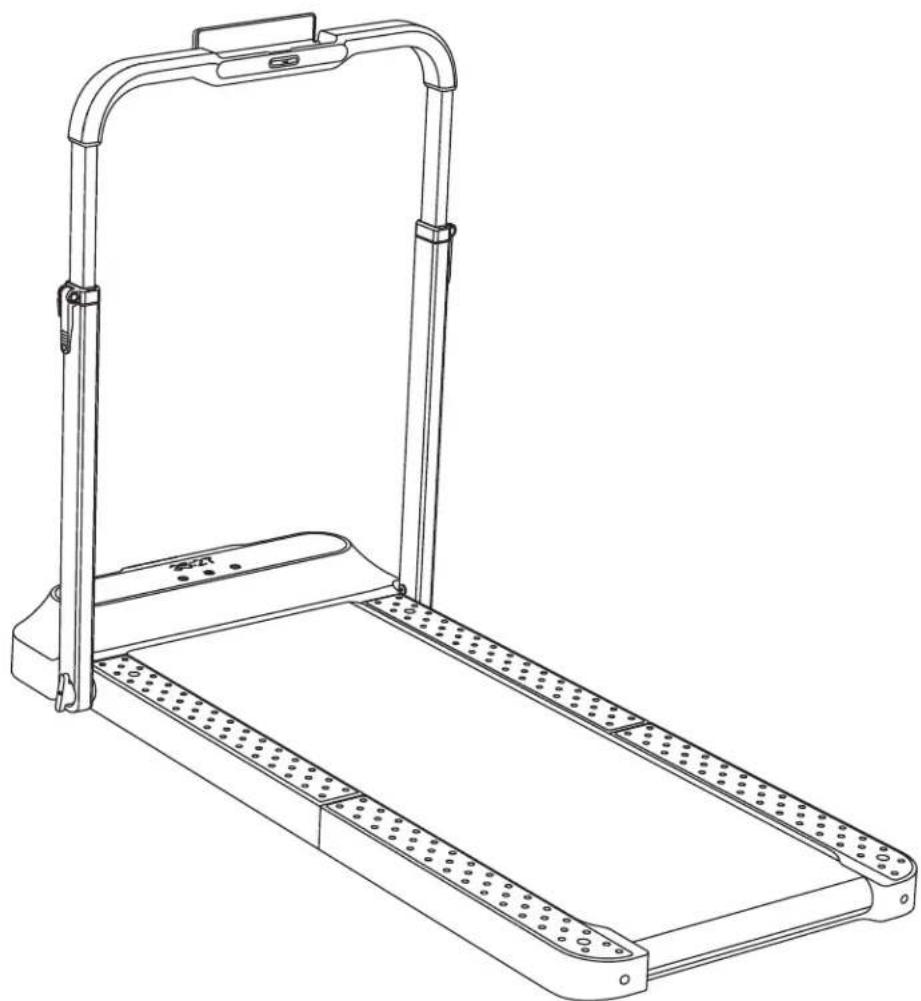
Line drawing of a treadmill with adjustable arms and perforated base (no text or symbols)Product may vary slightly from the item pictured due to model upgrades.

Read all instructions carefully before using this product. Retain this owner's manual for future reference.
NOTE: This manual should not be used to guide your purchasing decision. Your product, and the contents inside its carton, may vary from what is listed in this manual. This manual may also be subject to updates or changes. Updated manuals are available through our website at www.lifespanfitness.com.au
TABLE OF CONTENTS
I. Important Safety Instructions 03
II. Welcome 05
III. Product and Accessories 06
IV. Function Diagram 07
V. Set-Up Guide 10
VI. KS Fit App Instructions 12
VII. Learn to Use the Treadmill 16
VIII. Safety Instruction 19
IX. Maintenance and Adjustments 23
X. Replacement and Disposal 25
XI. FAQ ...... v.... 26
XII. Exercise Guide 28
XIII. Warranty 30
I. IMPORTANT SAFETY INSTRUCTIONS
The appliance is intended for residential use.

DANGER
To reduce the risk of electric shock: Always unplug this appliance from the electrical outlet immediately after using and before cleaning.

WARNING
To reduce the risk of burns, fire, electric shock, or injury to persons:
- An appliance should never be left unattended when plugged in. Unplug from outlet when not in use, and before putting on or taking off parts.
- Close supervision is necessary when this appliance is used by, or near children, invalids, or disabled persons.
- Use this appliance only for its intended use as described in this manual. Do not use attachments not recommended by the manufacturer.
- Never operate this appliance if it has a damaged cord or plug, if it is not working properly, if it has been dropped or damaged, or dropped into water. Return the appliance to a service center for examination and repair.
- Do not carry this appliance by the supply cord or use the cord as a handle.
- Keep the cord away from heated surfaces.
- Never drop or insert any object into any opening.
- Do not use outdoors.
- Do not operate where aerosol (spray) products are being used or where oxygen is being administered.
- To disconnect, turn all controls to the off position, then remove the plug from the outlet.
- To prevent the motor from overheating, we recommend up to 2 hours of use and 1 hour of rest before restarting your workout.

WARNING
- This appliance can be used by children aged from 8 years and above and persons with reduced physical, sensory or mental capabilities or lack of experience and knowledge if they have been given supervision or instruction concerning use of the appliance in a safe way and understand the hazards involved. Children shall not play with the appliance. Cleaning and user maintenance shall not be made by children without supervision.
- Correct Disposal of this product. This marking indicated that this products shall not be disposed with other household wastes throughout the EU. To prevent possible harm to the environment or human health from uncontrolled waste disposal, recycle it responsibly to promote the sustainable reuse of material resources. To return your device, please use the return collection systems or contact the retailer where the product was purchased. They can take this product for environmental safe recycling.
This appliance is not intended for use by persons (including children) with reduced physical, sensory or mental capabilities, or lack of experience and knowledge, unless they have been given supervision or instruction concerning use of the appliance by a person responsible for their safety.
Children should be supervised to ensure they do not play with the appliance.
WARNING: Keep young children away from this machine at all times. Contact with the moving surface may result in severe friction burns.
II. WELCOME
Thank you for choosing Lifespan Fitness V-Fold Treadmill with Smart Stride, and hereinafter referred to as "Treadmill". The exquisite, simple, and innovative design afford quality and enjoyable workouts at home. This Treadmill is designed for residential use only. Please do not use it for any commercial, leasing, or public group purpose.

natural_image
Line drawing of a smartphone front panel with visible internal structure and buttons (no text or symbols)Reference
Index
Parameter
Applicable Age 14-60 years old
Speed Range Walking Mode: 0.5km - 6km/h (0.5 - 3.7mi/h)
Running Mode: 0.5 - 12km/h (0.5 - 7.5mi/h)
Running Area 440 x 1200mm (17" x 47")
Max Load 110kg (240lbs)
Frequency 50/60 Hz
Voltage 220 - 240 V\~
Power Input 918 W
Net Weight 36kg (81lbs)
Unfold Size 1452 x 720 x 1032mm (57" x 28" x 40.5")
Folded Size 1000 x 720 x 162mm (39" x 28" x 6")
Working Mode Running Mode/Walking Mode
III. PRODUCT AND ACCESSORIES
Please check if the items inside the packaging are complete and intact. In case of any item missing or broken, please contact the seller.

natural_image
Technical line drawing of a mechanical component with dotted fill and mounting bracket (no text or symbols)Treadmill
ACCESSORIES

Power Cord Remote Control

ote
Control
Remote Control
Lanyard

Hex L
Shaped Wrench

Safe Lock Silicon Oil User Manual
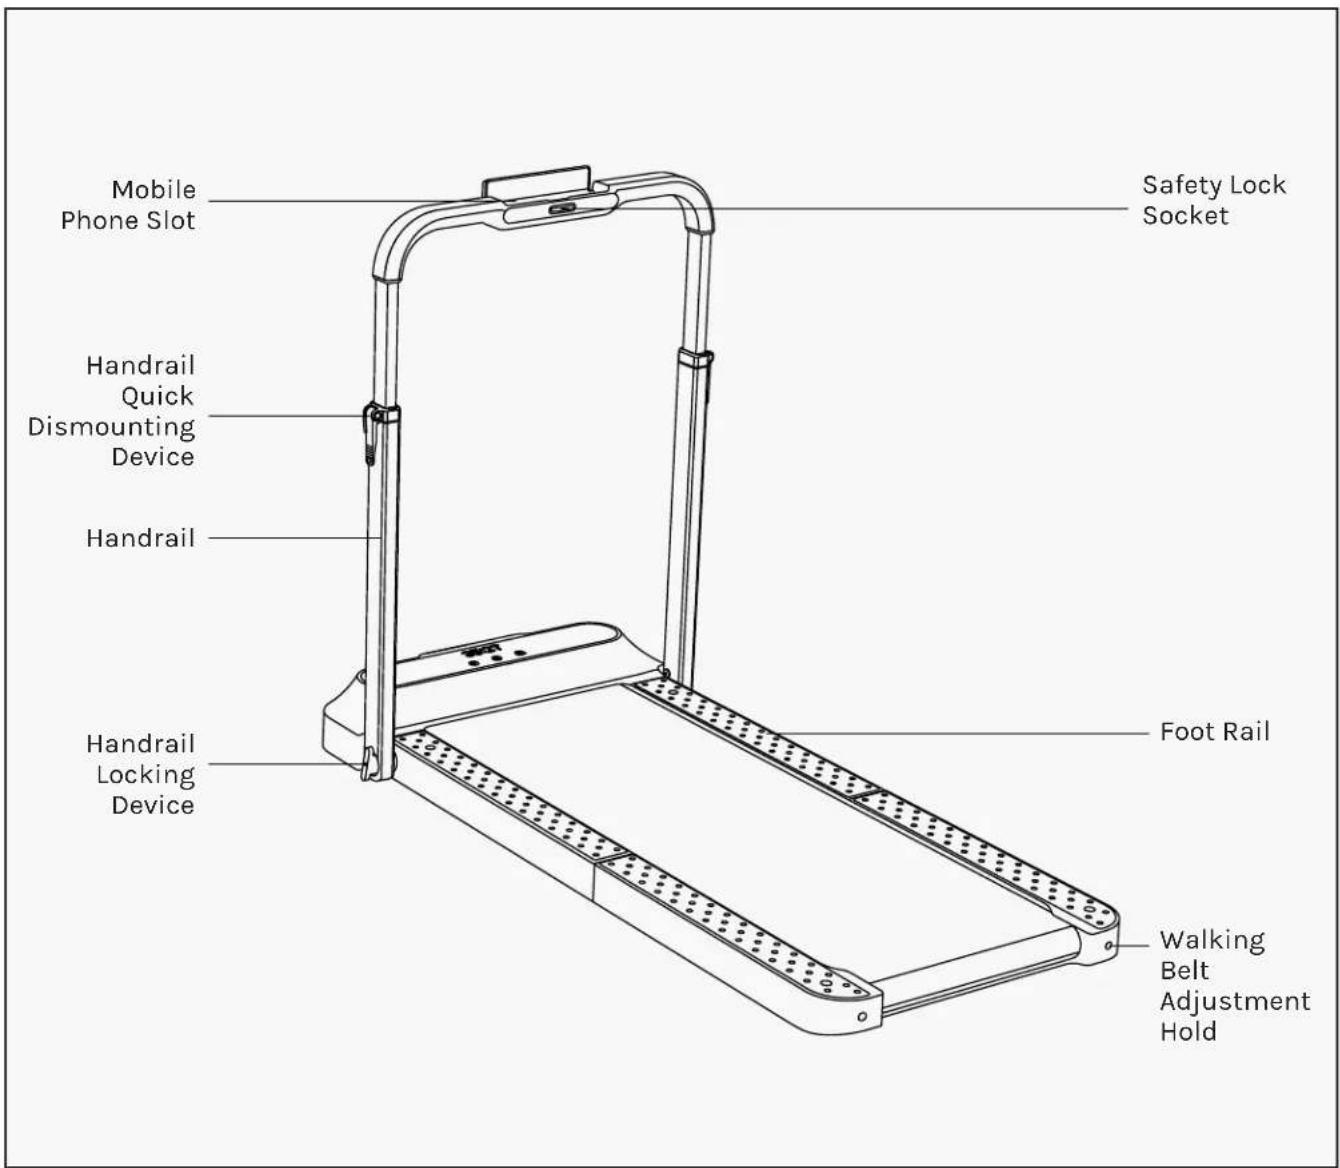
IV. FUNCTION DIAGRAM
1. WALKING MODE
When handles are horizontal, the treadmill will be on Walking Mode. The maximum speed in this mode is 6km/h. In this mode, manual (M) and automatic (A) modes can be used. It has a speed limit of 3km/h when the treadmill is used for the first time. Unlocking the speed limit of 6km/h can be done in three ways: Finishing beginner guidance on the KS Fit App, walking on the treadmill for 1km, setting the speed limit on the "KS Fit" APP.
Ensure the handlebars are tightened on the side when placed horizontally.

2. RUNNING MODE
When handrail is vertical, the treadmill will be on Running Mode. The maximum speed in this mode is 12km/h. In this mode, manual (M) mode can be used. For safety reasons, running mode does not support automatic (A) mode.
Ensure the handlebars are tightened on the side when placed vertically
3. DISPLAY PANEL FUNCTION
TIME KM SPO STEP CAL
Time
Distance Speed Steps Calories
*Step and Calorie data can be displayed on the panel after being set in the APP.
Touch Key-press
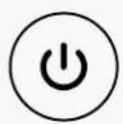
Standby Mode

Manual Mode

Automatic Mode
Indicator Light
4. Remote Control


V. SET-UP GUIDE
natural_image
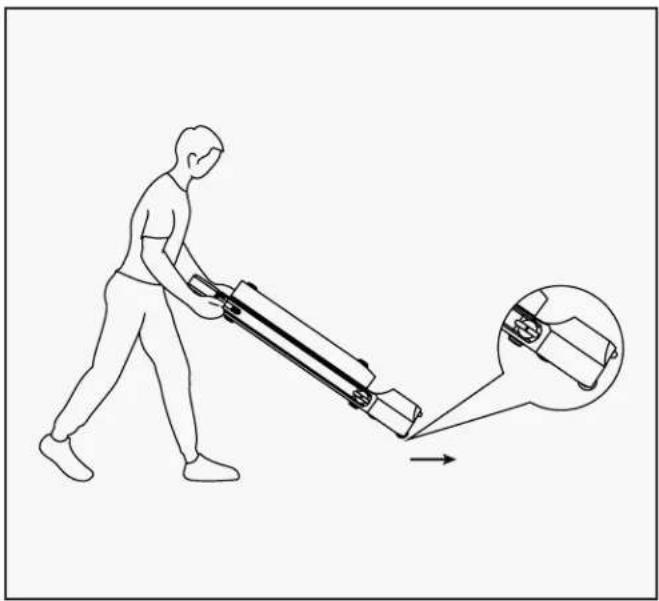
Illustration of a person pushing a lever with an arrow indicating motion, showing a close-up inset of the lever (no text or symbols present)- When moving treadmill, make sure that all the locking devices on the handrail are locked and fixed. Put the treadmill on a flat and firm surface. Avoid soft or thick carpets.

natural_image
Mechanical device diagram showing a lever mechanism with a rotating arrow and a magnified inset view (no text or symbols)- Loosen the handrail locking device, lift the handrail to a vertical position, tighten the locking devices on both sides of the handrail.

natural_image
Diagram of a mechanical lever system with a rotating arm and lever (no text or symbols)- Unfold the treadmill, adjust the walking belt to the center position, slowly unfold it and press it down to make it completely flat, or rotate the bottom foot cushion for leveling.

natural_image
Technical line drawing of a mechanical lever system with a magnified inset showing a component detail (no text or symbols)- Loosen the handrail quick mounting device, adjust it to the handrail scale mark, and then lock the handrail quick mounting device.

natural_image
Technical line drawing of a device with labeled components and a magnified inset showing internal structure (no text or symbols)- Install the emergency stop switch. Connect the power supply and turn on the power switch.
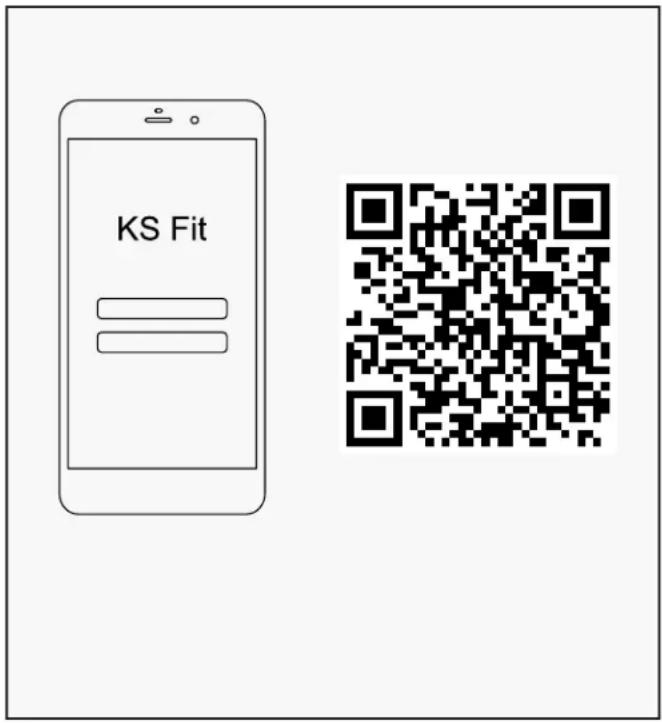
- Download "KS Fit" APP from the Apple Store or Google Play Store and complete installation.
natural_image
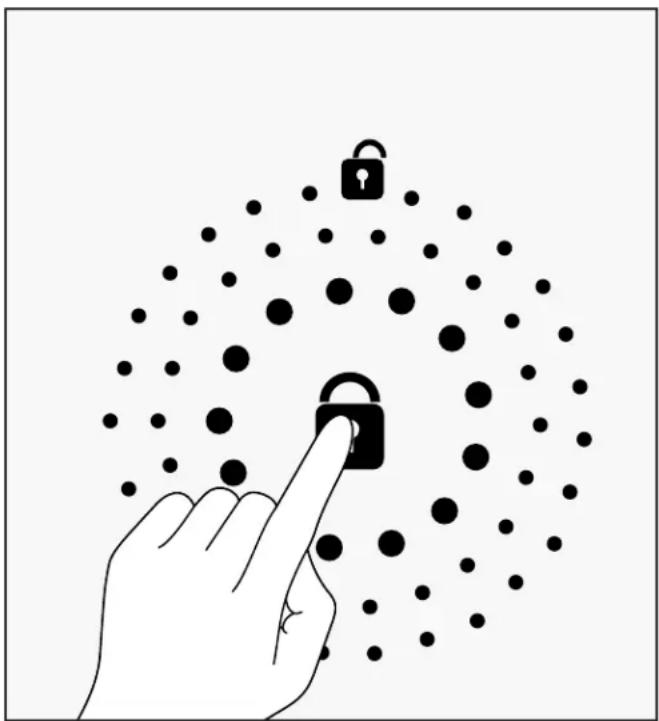
Illustration of a hand interacting with a large padlock icon surrounded by dots (no text or symbols)7a. When Treadmill is turned on, you should see a small red light flashing, this means your treadmill is ready for connection.
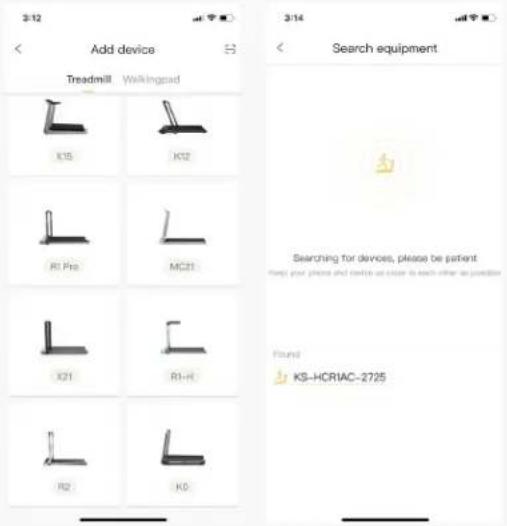
7b. Open the Ks Fit app and select the "Add Manually" option, which will open the screen with all different options of treadmills.
7c. Select the R2 treadmill option, it should be at the bottom left corner, then the treadmill should show up on the lower portion of the screen.
VI. KS FIT APP INSTRUCTIONS
NOTE: App views may differ for Android or iOS users and may change in layout from App updates.
Screen View
Screen View Motion
Main screen to choose your device to connect to.

Mine
Shows your previous workout data and user settings.

Adding Device
Add Manually Choose the model (R2) that matches your treadmill.
You should see a device model to choose from.
NOTE: the last four digits are always going to be different.

Novice Guide
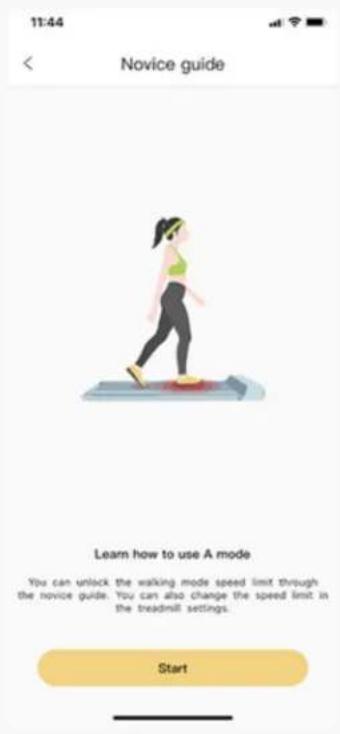
Use the Novice Guide to instruct you on how to use the app and the machine.
Manual Mode
Click Go for Manual Mode. Click
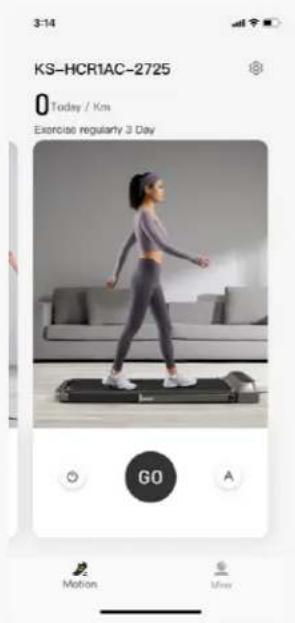
to stop o start workout.

Click Speed adjustment to change speed. You can select the digit, swipe to the speed press the - or + buttons.

Quick Speed Buttons
You can edit the quick speed buttons by clicking on the setting sign.


Automatic Mode
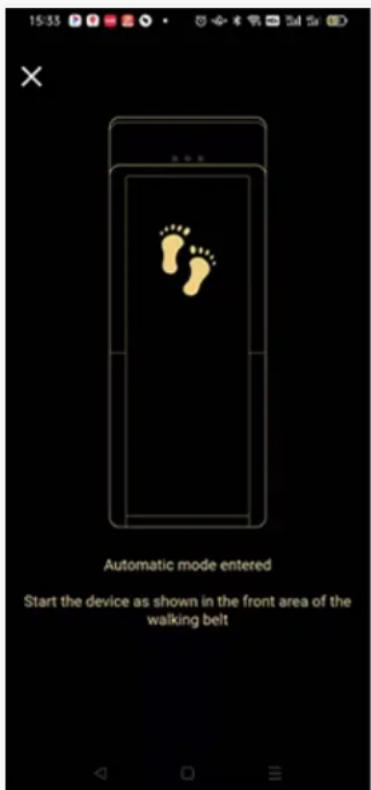
Press the Ⓐ to start Automatic mode. The belt will sense your walking pace and increase or decrease.
Device Settings
Click on the Settings symbol on the top right corner for more settings.
You can change the default speeds for running and walking, start up speed and sensitivity setting for Automatic Mode. There is also a Child Lock to prevent unauthorised use.

Belt Calibration
If belt is shifted it will need to be recentred. Click on Belt Calibration and follow steps to adjust it to centre.

VII. LEARN TO USE THE TREADMILL
1. MODE DESCRIPTION

Standby Mode
The standby mode indicator lights up, the motor and sensor are stopped.

Manual Mode
The manual mode indicator lights up, the speed can be controlled with the remote control or the APP.

Automatic Mode
The automatic mode indicator lights up, the speed is controlled automatically via an intelligent algorithm.
2. STANDBY MODE CONTROL DESCRIPTION

Standby Mode
Under standby mode, users can press the mode button on the remote control briefly to wake up the treadmill and switch to the default manual mode.
Users can also touch the icon on the display panel to wake up the treadmill.
When the treadmill is not in use, press the mode button on the remote control or touch the standby icon on the display panel to switch to the standby mode.

Remote Control Diagram
Short press: Mode switch Long press: Switch to standby mode (non-operational state)
3. MANUAL MODE CONTROL DESCRIPTION (PRIMARY MODE)

Manual Mode
In this mode, users can use the remote control to control the treadmill. Beginners are advised to use the manual mode first, and then use the automatic mode once skills have increased.

Speed Increase Button
Short press: Speed increase by 0.5km/h (0.5mi/h)
Function Button
Short press: Starts or stops the treadmill
Speed Decrease Button
Short press: Speed decrease by 0.5km/h (0.5mi/h)
Mode Button
Short press: Switches mode
Long press: Switch to standby mode
(not in use)
5. AUTOMATIC CONTROL MODE DESCRIPTION
Automatic
This mode is difficult to control and can be used completely without the remote control. It is advised to use this mode only after having gain experience.
Use the remote control to start and stop the treadmill, and the switch mode button is effective under this mode.
NOTE: The automatic control mode is only available under walking mode.

6. REMOTE CONTROL PAIRING INSTRUCTIONS
If the remote control does not respond or you have replaced the remote control, you need to pair it again.
Pairing method: Restart the treadmill and press and hold the Mode button on the remote control AT THE SAME TIME for 5 seconds.
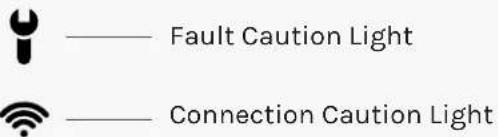
7. CONNECTION CAUTION LIGHT

Not connected to APP: Will flicker
Connected to APP: Off
8. FAULT CAUTION LIGHT

E01: Software overcurrent
E02: Hardware overcurrent
E03: IPM Module Overheating
E04: Low-voltage Protection
E05: High-voltage Protection
E06: Motor phase loss protection
E07: Motor block rotation protection
E08: Sensor fault
E09: Motor unable to start
E12: Motor overcurrent protection
E13: Overloading protection
E14: Hall signal loss
E15: Communication fault
VIII. SAFETY INSTRUCTION

natural_image
Line drawing of a person walking on a treadmill next to a vertical exercise machine (no text or symbols)The distance between the treadmill should be superior to 2000mm. You can hold the handrail tightly to support your body and jump away from the treadmill.

natural_image
Line drawing of a person standing on a treadmill with vertical supports, no text or symbols presentThe distance in each side of the treadmill should be superior to 500mm.

natural_image
Line drawing of a person standing on a fitness scale device, enclosed by vertical supports (no text or symbols)Please wear sports shoes and clothes and exercise moderately when using the treadmill. If you feel uncomfortable during running, please stop immediately and consult a doctor. Otherwise, you may risk injuries.

Test the safe lock before using the treadmill. Please clip the end of the safe lock on your clothes when running on the treadmill. If there is an unexpected situation, pull off the safe lock to stop the treadmill immediately.
natural_image
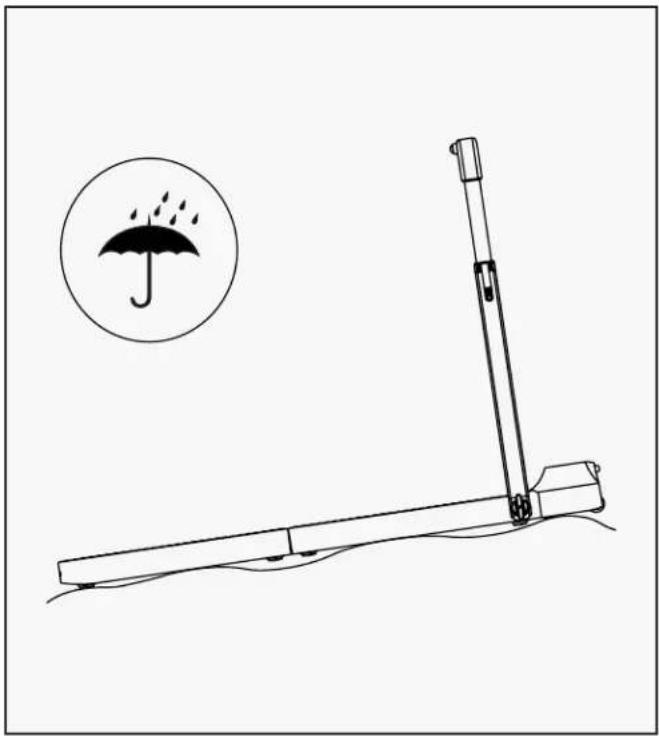
Simple line drawing of a lever mechanism with an umbrella icon and raindrops, no text or symbols present.DO NOT operate the treadmill in damp or wet locations. DO NOT use on uneven floor.

natural_image
Line drawing of a device rear panel connected to a cable with two plug connectors (no text or symbols)Please unplug the power cord when not in use.
natural_image
Line drawing of a person using a mobility device to lift a seat (no text or symbols)DO NOT step on the head of the treadmill.

natural_image
Line drawing of a person standing on a treadmill with a dog nearby (no text or symbols)DO NOT bring pets when using the treadmill.

natural_image
Line drawing of a person standing on a treadmill with no text or symbolsDO NOT use the treadmill backwards or sideways.
natural_image
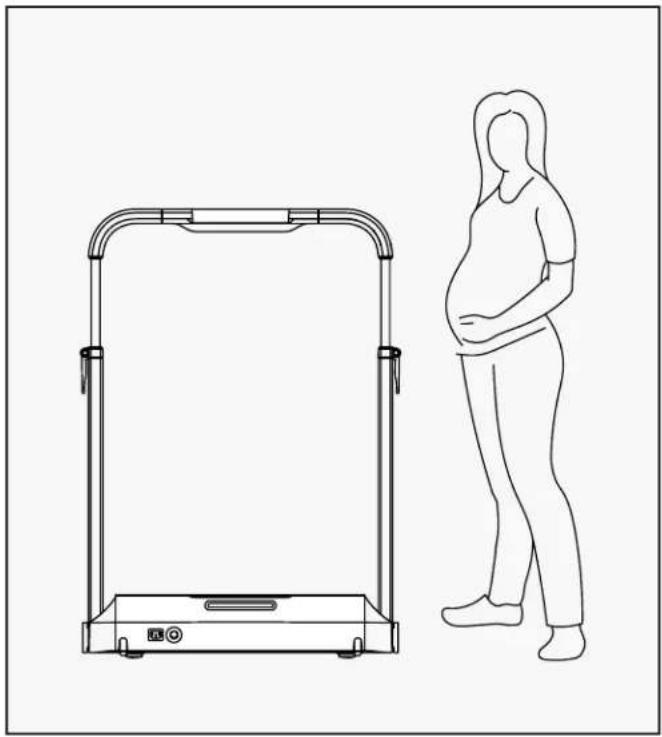
Line drawing of a pregnant woman standing beside a portable electronic device (no text or symbols)Elderly people, children, and pregnant women should use caution when using the treadmill.
natural_image
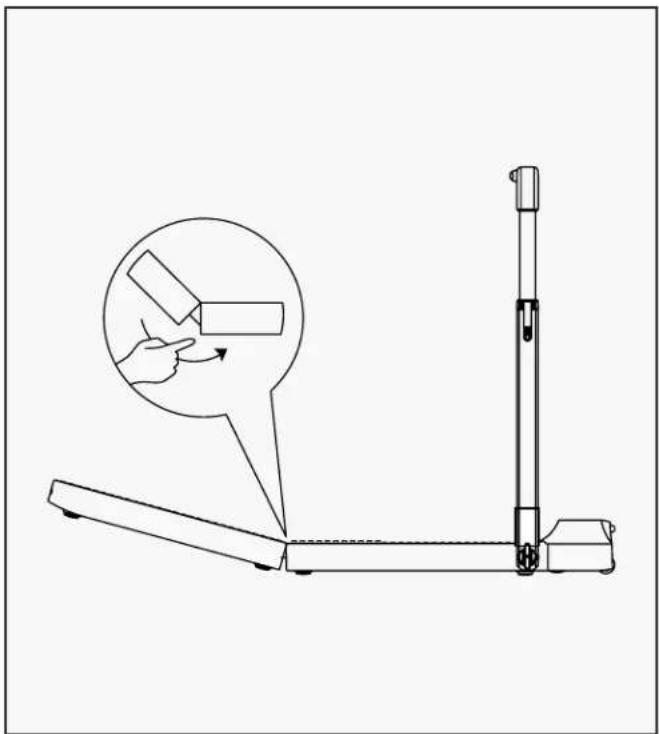
Line drawing of a mechanical lever mechanism with a magnified inset showing a hand pressing a block (no text or symbols)Watch your hands. Take care of your belongings.

natural_image
Technical line drawing of a mechanical device with two gears and a vertical support structure (no text or symbols)
natural_image
Line drawing of a mechanical device with a rotating wheel and base, no text or symbols present
natural_image
Technical line drawing of a mechanical device casing with mounting brackets and control panel (no text or symbols)DO NOT fold before power off. Keep treadmill upright and put it in a space with
supporting points on both sides. Please keep away from children.

natural_image
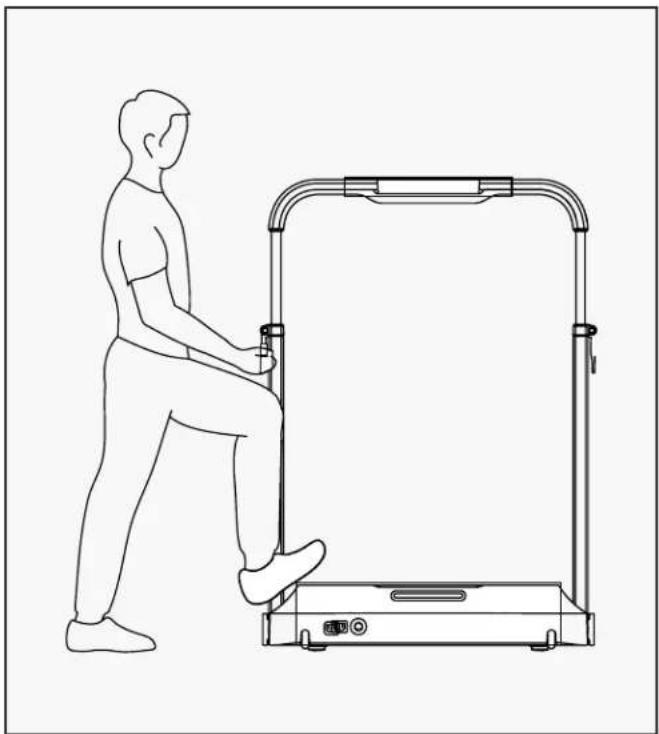
Line drawing of a person performing a leg exercise with a vertical post and explosion effect (no text or symbols)DO NOT get on and off when the treadmill operating.
PLEASE NOTE:
The treadmill will automatically stop operating when there is no one walking on it.
IX. MAINTENANCE AND ADJUSTMENTS

natural_image
Line drawing of a hand cleaning a small object on a device (no text or symbols)1. Clean the treadmill
- Disconnect all sources of power before cleaning the treadmill.
- Add a small quantity of mild cleaner to a 100% cotton cloth. Do not spray the cleaner directly on the walking belt or use acidic and corrosive cleaner.
- Do not wipe under the walking belt.
- After a period of exercise, dust and stains may appear on the rear floor. This is normal and can be simply wiped.

natural_image
Technical line drawing of a mechanical component with two flanged ends and a curved arrow indicating motion (no text or symbols)2. Walking Belt Slipping and Correction
- Simultaneously press and hold both Mode Button and Speed Increase Button on the remote control for over 3 seconds until device start.
- Front panel will show "CALI" and keep running with speed 3km/h (2mi/h).
- Walking belt goes to the left: Turn the left adjusting hole screw clockwise by 1/4 turn.
- Walking belt goes to the right: Turn the right adjusting hole screw clockwise by 1/4 turn.
- Walking belt is slipping: Turn the left and right adjusting screws clockwise for 1/2 turn at the
same time.
• After each adjustment, the treadmill needs to run for 1-2 minutes to verify the adjustments.
Please adjust again if necessary.
- Press the function key to stop treadmill.
CAUTION: DO NOT OVERTIGHTEN THE BELT. PLEASE MAINTAIN ORIGINAL FACTORY BELT TENSION. EXCESSIVE BELT TENSION WILL CAUSE DAMAGE TO MOTOR.

natural_image
Line drawing of a hand using a tool to interact with a device (no text or symbols present)3. Walking Belt Lubrication
• Power off the treadmill and unplug the power cord.
- Lift the edge of the walking belt and smear the inner surface with silicone oil.
- Start the treadmill to run at a speed of 3km / h (2mi/h) for 10-20 seconds.
- 5-10ml of silicone oil is required for each lubrication. Excessive silicone oil may cause slipping and affect normal use.
• Lubricate the walking belt every three months.
X. REPLACEMENT AND DISPOSAL

The battery contained in this appliance must be removed for disposal.
When replacing the battery, use only original battery, available from our online parts shop.
The battery compartment is located on the back of the appliance. Open the compartment by removing the screw in the cover using a suitable screwdriver, and the press the lower end of the locking catch on the connectors. In that way, both sides of the connection can be separated by pulling them apart.
When inserting a new battery, push together the two connectors and ensure that the catch looks over the stop.
Never dispose of old battery in domestic garbage, but only through the proper public collection points. This also applies to the battery of defective appliances.
natural_image
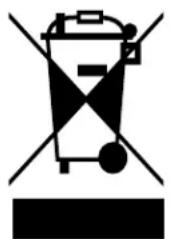
Symbolic illustration of a trash bin with crossed lines and a horizontal bar (no text or labels)Devices marked with this symbol must be disposed of separately from your household waste, as they contain valuable materials that can be recycled. Proper disposal protects the environment and human health. Your local authority or retailer can provide information on the matter.
XI. FAQ
Q1: Why is it showing SAFE?
A: The emergency stop switch is not connected.
Q2: Why the running mode will not start?
A: Check that the power supply of the treadmill is connected, the switch is turned on, and the emergency stop siwtch is plugged in. Also, check that the locking devices on both sides of the handrail have been tightened and the treadmill is showing RUN. Otherwise, the running mode will not work due to the safety setting.
Q3: Why can't I use the Automatic mode?
A: Automatic mode can be used for Walking mode only. Please try to put the handrail down and then enable automatic mode.
Q4: Why is the maximum speed is only 3km/h?
A: The maximum speed is 3km/h when you are using the walking mode for the first time. The maximum speed will increase to 6km/h (3,7mi/h) after you accessed the novice guide on the App. You may also unlock the speed limit by walking or running on the treadmill for 1km.
Q5: Why the remote is not working?
A: Check that the remote control has a battery and try to pair it again. Restart the treadmill and press and hold the Mode button in the remote control AT THE SAME TIME for 5 seconds. A beep will indicate a successful pairing. NOTE: During the pairing, the remote control should be close to the LED display on the treadmill. (See 04. Learn to Use the Treadmill).
Q6: How to adjust belt to center before use?
A: Simultaneously press and hold both Mode Button and Speed Increase Button on the remote control for over 3 seconds until device start.
Front panel will show "CALI" and keep running with speed 3km/h (2mi/h).
Walking belt goes to the left: Turn the left adjusting hole screw clockwise by 1/4 turn.
Walking belt goes to the right: turn the right adjusting hole screw clockwise by 1/4 turn.
Walking belt is slipping: Turn the left and right adjusting screws clockwise for 1/2 turn at the same time.
After each adjustment, the treadmill needs to run for 1-2 minutes to verify the adjustments.
Please adjust again if necessary.
Press the function key to stop treadmill.
CAUTION: DO NOT OVERTIGHTEN THE BELT. PLEASE MAINTAIN ORIGINAL FACTORY BELT TENSION. EXCESSIVE BELT TENSION WILL CAUSE DAMAGE TO MOTOR.

XII. EXERCISE GUIDE
! PLEASE NOTE:
Before beginning any exercise program, consult your physician. This is important especially if you are over the age of 45 or individuals with pre-existing health problems.
The pulse sensors are not medical devices. Various factors, including the user's movement, may affect the accuracy of heart rate readings. The pulse sensors are intended only as an exercise aid in determining heart rate trends in general.
Exercising is great way to control your weight, improving your fitness and reduce the effect of aging and stress. The key to success is to make exercise a regular and enjoyable part of your everyday life.
The condition of your heart and lungs and how efficient they are in delivering oxygen via your blood to your muscles is an important factor to your fitness. Your muscles use this oxygen to provide enough energy for daily activity. This is called aerobic activity. When you are fit, your heart will not have to work so hard. It will pump a lot fewer times per minute, reducing the wear and tear of your heart.
So as you can see, the fitter you are, the healthier and greater you will feel.
natural_image
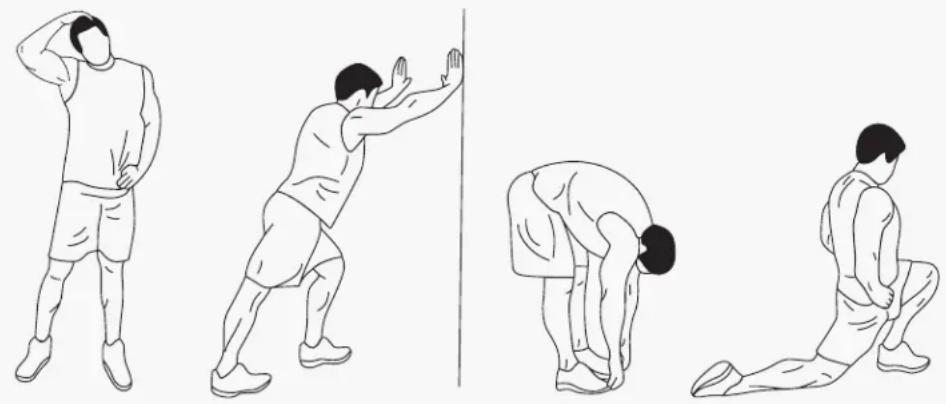
Four sequential line drawings of a person performing a stretching or martial arts pose, no text or symbols present.WARM UP
Start each workout with 5 to 10 minutes of stretching and some light exercises. A proper warm-up increases your body temperature, heart rate and circulation in preparation for exercise. Ease into your exercise.
After warming up, increase the intensity to your desired exercise program. Be sure to maintain your intensity for maximum performance. Breathe regularly and deeply as you exercise.
COOL DOWN
Finish each workout with a light jog or walk for at least 1 minute. Then complete 5 to 10 minutes of stretching to cool down. This will increase the flexibility of your muscles and will help prevent post-exercise problems.
WORKOUT GUIDELINES

line
| AGE | HEART RATE | | --- | --- | | 40 | 160 | | 75 | 100 |This is how your pulse should behave during general fitness exercise. Remember to warm up and cool down for a few minutes.
The most important factor here is the amount of effort you put in. The harder and longer you work, the more calories you will burn.
XIII. WARRANTY
AUSTRALIAN CONSUMER LAW
Many of our products come with a guarantee or warranty from the manufacturer. In addition, they come with guarantees that cannot be excluded under the Australian Consumer Law. You are entitled to a replacement or refund for a major failure and compensation for any other reasonably foreseeable loss or damage.
You are entitled to have the goods repaired or replaced if the goods fail to be of acceptable quality and the failure does not amount to a major failure. Full details of your consumer rights may be found at www.consumerlaw.gov.au.
Please visit our website to view our full warranty terms and conditions: http://www.lifespanfitness.com.au/warranty-repairs
WARRANTY AND SUPPORT
Any claim against this warranty must be made through your original place of purchase. Proof of purchase is required before a warranty claim may be processed.
If you have purchased this product from the Official Lifespan Fitness website, please visit https://lifespanfitness.com.au/warranty-form
For support outside of warranty, if you wish to purchase replacement parts or request a repair or service, please visit https://lifespanfitness.com.au/warranty-form and fill in our Repair/Service Request Form or Parts Purchase Form.
Scan this QR code with your device to go to lifespanfitness.com.au/warranty-form

- V-Fold Treadmill with Smart Stride
- TABLE OF CONTENTS
- IMPORTANT SAFETY INSTRUCTIONS
- DANGER
- WARNING
- WELCOME
- PRODUCT AND ACCESSORIES
- FUNCTION DIAGRAM
- WALKING MODE
- RUNNING MODE
- DISPLAY PANEL FUNCTION
- Touch Key-press
- Indicator Light
- Remote Control
- SET-UP GUIDE
- KS FIT APP INSTRUCTIONS
- Screen View
- Screen View Motion
- Mine
- Adding Device
- Novice Guide
- Manual Mode
- Quick Speed Buttons
- Automatic Mode
- Device Settings
- Belt Calibration
- LEARN TO USE THE TREADMILL
- MODE DESCRIPTION
- Standby Mode
- STANDBY MODE CONTROL DESCRIPTION
- Remote Control Diagram
- MANUAL MODE CONTROL DESCRIPTION (PRIMARY MODE)
- Mode Button
- AUTOMATIC CONTROL MODE DESCRIPTION
- Automatic
- REMOTE CONTROL PAIRING INSTRUCTIONS
- CONNECTION CAUTION LIGHT
- FAULT CAUTION LIGHT
- SAFETY INSTRUCTION
- PLEASE NOTE:
- MAINTENANCE AND ADJUSTMENTS
- Clean the treadmill
- Walking Belt Slipping and Correction
- Walking Belt Lubrication
- REPLACEMENT AND DISPOSAL
- FAQ
- EXERCISE GUIDE
- ! PLEASE NOTE:
- WARM UP
- COOL DOWN
- WORKOUT GUIDELINES
- WARRANTY
- AUSTRALIAN CONSUMER LAW
- WARRANTY AND SUPPORT
Brand : LifeSpan
Model : V-Fold
Category : Treadmills