
X3-17-SW-P - Loudspeaker MTX Audio - Free user manual and instructions
Find the device manual for free X3-17-SW-P MTX Audio in PDF.


| Product Type | Subwoofer |
| Brand | MTX Audio |
| Model | X3-17-SW-P |
| Speaker Size | 17 inches |
| Peak Power Handling | 2000 watts |
| RMS Power Handling | 1000 watts |
| Impedance | 4 ohms |
| Sensitivity | 85 dB @ 1W/1m |
| Frequency Response | 20 Hz - 200 Hz |
| Mounting Depth | 8 inches |
| Mounting Cutout Diameter | 15.5 inches |
| Recommended Enclosure Type | Sealed or Ported |
| Weight | 35 lbs (15.9 kg) |
| Cone Material | Polypropylene |
| Surround Material | Rubber |
| Voice Coil | 4-layer aluminum |
| Magnet Material | Ferrite |
| Terminals | Spring-loaded |
| Basket Material | Stamped steel |
| Sold As | Single unit |
| Warranty | 1 year (limited) |
Frequently Asked Questions - X3-17-SW-P MTX Audio
User questions about X3-17-SW-P MTX Audio
0 question about this device. Answer the ones you know or ask your own.
Ask a new question about this device
Download the instructions for your Loudspeaker in PDF format for free! Find your manual X3-17-SW-P - MTX Audio and take your electronic device back in hand. On this page are published all the documents necessary for the use of your device. X3-17-SW-P by MTX Audio.
USER MANUAL X3-17-SW-P MTX Audio
X3-17-SW-D / X3-17-SW-P CAN-AM® MAVERICK X3 SUBWOOFER ENCLOSURE OWNER'S MANUAL ADDENDUM
NOTICE
When installing your new X3 subwoofer enclosure, you may notice that the front mounting hole locations may not perfectly align with your seat bracket hole locations. During vehicle manufacturing, some variance can occur in the alignment of the seat brackets. This may require the X3 seat bracket hole on the vehicle to be enlarged before installation to ensure proper fitment and mounting.


© 2021 MiTek Corporation. All rights reserved. MTX is a trademark of MiTek Corporation. All other trademarks are property of their respective owners. Designed and Engineered in the U.S.A.
Due to continual product development, all specifications are subject to change without notice.
MTX Audio, 4545 East Baseline Rd. Phoenix, AZ 85042 U.S.A. 1-800-225-5689
MTX006458 RevA 4/21 • AW0015962 • 1-12404

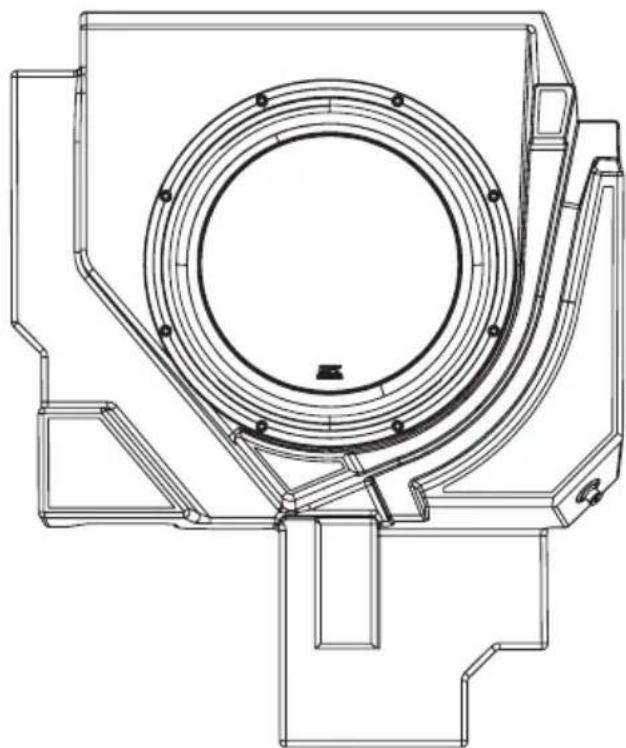
X3-17-SW-P
CAN-AM® MAVERICK X3 PASSENGER SUBWOOFER ENCLOSURE
OWNER'S MANUAL

THANK YOU
Thank you for making the AWESOME decision to purchase our MTX Audio direct-fit subwoofer enclosure designed for the Can-Am® Maverick X3. Our sub enclosure, with its 3512-04S 12" shallow subwoofer, will belt out the bass and deliver ground pounding audio making you the party vehicle in any ride! With a few basic hand tools in your trusty toolbox, you can have this installed in no time. So, what are you waiting for? It's time to get the rumble in your ride and go hit the trails! Oh, and congratulations on your purchase, thanks for your support and most importantly, enjoy the ultimate audio experience with MTX!
WE'RE HERE TO HELP
We're here to help with any installation or technical support. Visit mtx.com to chat, call 1-800-225-5689 to speak with an MTX Technical Support representative, or visit youtube.com/user/MTXAudioUSA to view product videos.
DON'T FORGET TO REGISTER YOUR PRODUCT
Don't forget to register your new MTX Audio product. Visit mtx.com/productregistration or scan the QR code to the right.
Model # ____
Serial #
Dealer's Name
Date of Purchase

IMPORTANT NOTICE
Whenever working on the vehicle, it is recommended to disconnect the battery prior to starting work. Failure to do so may lead to a risk of electric shock or equipment damage.
When connecting power and ground wires ensure that the red power wire is fused at the point where it is connected to the vehicle's battery. Failure to do so can result in damage to the vehicle if a short circuit develops between the vehicle connection point and the product.

FEATURES
- Includes an MTX 3512-04S 12" Shallow Subwoofer
• Mounts Under Passenger Seat
• Factory Matched Texture
• Installer Friendly Design - Direct Fit, No Cutting or Drilling Required
SPECIFICATIONS
• 12" Loaded Subwoofer Enclosure
• RMS Power Handling: 300-Watts
• Peak Power Handling: 600-Watts
• Sensitivity (2.83V/1m): 88.5dB
• Sensitivity (1W/1m): 84.4dB
• Frequency Response: 23Hz - 130Hz
- Impedance: 4Ω
FIT GUIDE
Turbo / Max Turbo....2018 - 2019
Turbo R / Max Turbo R....2017 - 2019
X-DS Turbo 2017
X-RS Turbo R / Max X-RS Turbo R....2017 - 2019
X-DS Turbo R / Max X-DS Turbo R 2018 - 2019
X-MR Turbo 2019 - 2021
X-MR Turbo R....2019
X-RC Turbo 2019 - 2021
X-MC Turbo R....2019
DS Turbo / Max DS Turbo 2020 - 2021
RS Turbo 2020
DS Turbo R / Max DS Turbo R 2020 - 2021
Max DS Turbo RR....2020
RS Turbo R / Max RS Turbo R....2020 - 2021
X-RC Turbo RR 2020 - 2021
X-RS Turbo RR / Max X-RS Turbo RR....2020 - 2021
X-MR Turbo RR / Max X-MR Turbo RR 2020 - 2021
X-MS Turbo RR 2020
X-DS Turbo RR / Max X-DS Turbo RR 2020 - 2021
FIT GUIDE NOTES
Only the X3-17-SW-D driver side enclosure includes the signal harness from the amp.
IN THE BOX
• X3-17-SW-P Loaded Subwoofer Enclosure
- Adhesive Foam Tape
- Mounting Hardware
(1) Mounting Bracket
(5) T40 Torx Bolts
INSTALLATION
Step 1 - Release the lower seat belt strap from the harness by feeding it back through the tension assembly. This will allow you to feed the shoulder straps through the holes at the top of the seat.


Step 2 - Remove two (2) 13mm bolts and nuts at the front of the seat frame.
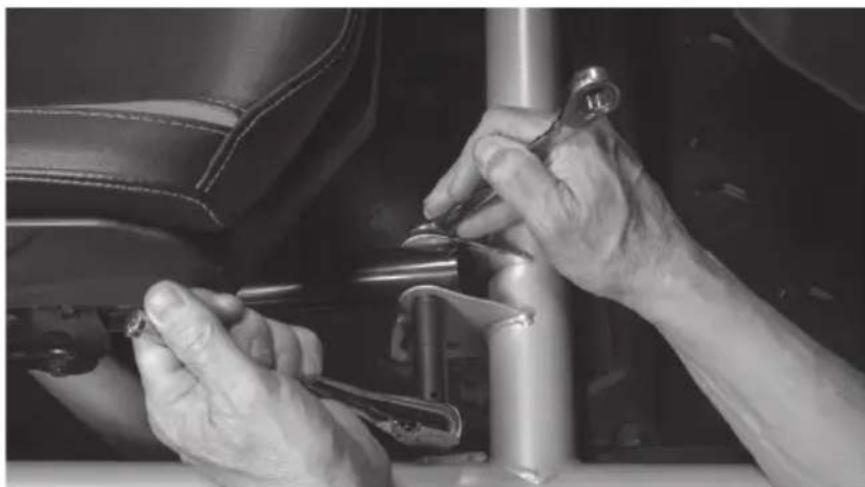
Step 3 - Access the rear 18mm nuts using a socket with extension either by aligning the holes in the seat base over the nuts or by sliding the seat fully forward and reaching behind.
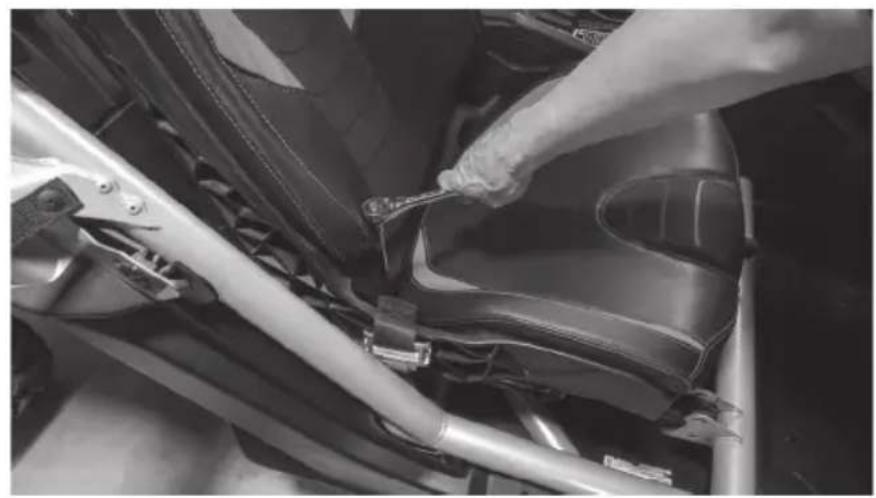

Step 4 - With the seat free, lift the seat out of the vehicle and set aside.
Step 5 - Remove the 10mm M6 bolt holding the brake line clamp in place on the seat frame.


Step 6 - Remove the cable clamp from the brake line.

Step 7 - Wrap the brake line with the strip of adhesive backed foam tape included in the box. Note: This step is to prevent the brake line from rattling against the enclosure under high bass output and any chaffing due to movement of the brake line while the vehicle is in motion.
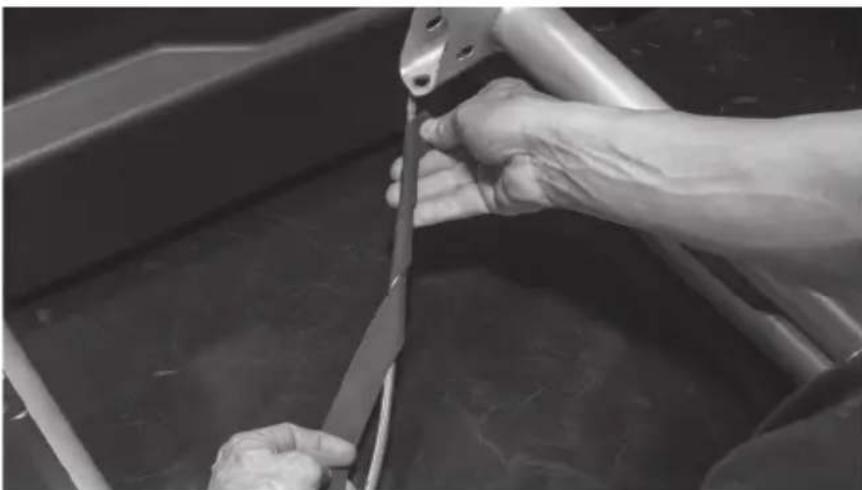
Step 8 - Tilt the front of the enclosure down and slide it under the forward crossbar as you set it in place onto the floor of the vehicle tucking the brake line into the pre-molded slot in the bottom of the enclosure.

Step 9 - Taking the long bar bracket included, align the slotted holes with the threaded insets on the top rear of the enclosure. The two large holes at either end should slide over the threaded seat mounting posts.

Step 10 - Loosely install three (3) T-40 Torx screws into the bracket.
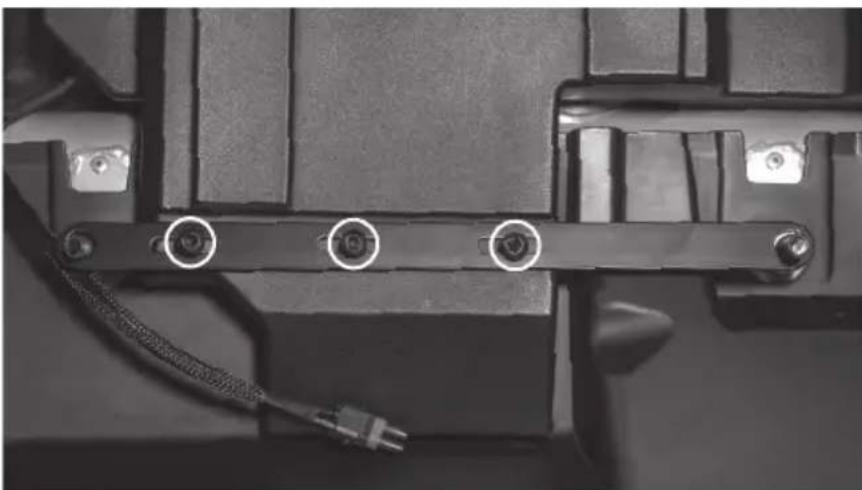
Step 11 - Align the threaded inserts at the front corners of the enclosure with the holes in the bottom of the seat brackets and insert two (2) T-40 Torx screws.


Step 12 - Once all fasteners are in place, tighten to secure the enclosure.
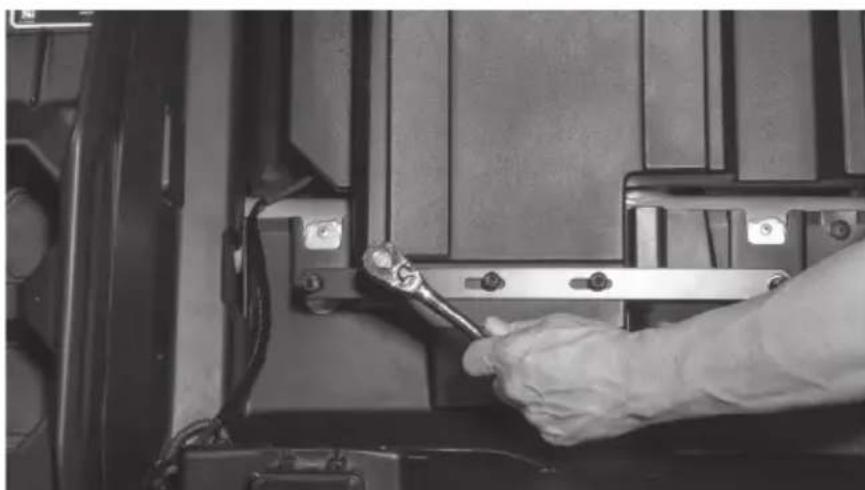
Step 13 - Route the subwoofer cable to the desired connection point. Note: If installing as part of a kit, the subwoofer plug will connect to the main harness supplied. If not installing as part of a kit, the plug will need to be removed and additional speaker wire added.
Step 14 - With your wire routed and system tested, reinstall the seat in the reverse order as removed. Note: In the event of floor pan rattle, included in the subwoofer kit are a self-tapping drill bit and bolts to allow you to bolt the floor pan directly to the frame of the vehicle. Please refer to the installation videos for more information on their use at www.youtube.com/user/MTXAudioUSA
Step 15 - Reassemble and go ride.
NOTES
WARRANTY PERIOD
At MTX Audio we engineer products that will stand up to the test of time. We also realize that from time to time a problem may occur. That's why our products carry a 2-year limited warranty that begins at the time of sale to the end user.
Of course, we're here to help. If you experience an issue with any of our products within the warranty period, please contact our customer service technical line at 1-800-CALL-MTX to help troubleshoot your issue. If, after speaking with our technical experts it is determined that a problem lies with the product, the technician will provide you with a Return Authorization number and all relevant details you'll need to get the product taken care of.
MITEK WARRANTY
MiTek Mobile products (including, but not limited to: MTX, Coustic, Streetwires, Xtant, BassSlammer, and Thunder Marine) purchased in the USA from an AUTHORIZED MITEK DEALER are guaranteed against defects in material and workmanship for the period of time speci ed. The warranty period begins the day the product is purchased by the end user, and this warranty is limited to the original retail purchaser of product. Products found to be defective during the warranty period will be repaired or replaced with equivalent product by MiTek at no charge. This warranty is void if it is determined that unauthorized parties have attempted repairs or alterations of any nature, and the warranty does not extend to cosmetics or nish. MiTek disclaims any liability for other incurred or consequential damages resulting from product defects. MiTek's total liability will not exceed the purchase price of the product.

Let's Get Social
mtx.com

Like, Follow, & Subscribe
© 2021 MiTek Corporation. All rights reserved. MTX is a trademark of MiTek Corporation. All other trademarks are property of their respective owners. Designed and Engineered in the U.S.A.
Due to continual product development, all specifications are subject to change without notice.
MTX Audio, 4545 East Baseline Rd. Phoenix, AZ 85042 U.S.A. 1-800-225-5689
MTX006228 RevA 1/21 • 21A10813 • AW0015868
- X3-17-SW-D / X3-17-SW-P CAN-AM® MAVERICK X3 SUBWOOFER ENCLOSURE OWNER'S MANUAL ADDENDUM
- NOTICE
- THANK YOU
- WE'RE HERE TO HELP
- DON'T FORGET TO REGISTER YOUR PRODUCT
- IMPORTANT NOTICE
- FEATURES
- SPECIFICATIONS
- FIT GUIDE
- FIT GUIDE NOTES
- IN THE BOX
- INSTALLATION
- NOTES
- WARRANTY PERIOD
- MITEK WARRANTY
- LET'S GET SOCIAL
- MTX.COM
Brand : MTX Audio
Model : X3-17-SW-P
Category : Loudspeaker