
500-TH-II - Oven Alto-Shaam - Free user manual and instructions
Find the device manual for free 500-TH-II Alto-Shaam in PDF.


| Product Type | Cook and Hold Oven |
| Brand | Alto-Shaam |
| Model | 500-TH-II |
| Dimensions (W x D x H) | 38 x 34 x 62 inches |
| Weight | 240 lbs |
| Power Supply | 208-240V, 1-phase, 15A |
| Temperature Range | 60°F to 450°F |
| Capacity | 5 full-size sheet pans |
| Construction Material | Stainless steel interior and exterior |
| Controls | Digital touchpad with programmable settings |
| Timer | Programmable 24-hour timer |
| HACCP Monitoring | Yes, integrated food safety monitoring |
| Humidity Control | Automatic humidity management system |
| Venting Requirement | Ventless operation with catalytic converter |
| Certifications | NSF, UL, CSA |
| Warranty | 2 years parts and labor |
| Cleaning | Easy-clean stainless steel; removable drip tray |
| Safety Features | Over-temperature protection, cool-touch handles, auto shut-off |
| Spare Parts Availability | Genuine Alto-Shaam parts available through authorized dealers |
| Reparability | Service by certified technicians; DIY-friendly for minor parts |
Frequently Asked Questions - 500-TH-II Alto-Shaam
User questions about 500-TH-II Alto-Shaam
0 question about this device. Answer the ones you know or ask your own.
Ask a new question about this device
Download the instructions for your Oven in PDF format for free! Find your manual 500-TH-II - Alto-Shaam and take your electronic device back in hand. On this page are published all the documents necessary for the use of your device. 500-TH-II by Alto-Shaam.
USER MANUAL 500-TH-II Alto-Shaam
COOKING, HOLDING, SMOKING GUIDELINES
Low-Temperature Cooking, Holding, Smoking Guidelines
Contents
Low-Temperature Cooking
Welcome to Low-temperature Cooking ..... 1
Meat and Nutrition 2
Shrinkage Control and Cooking Time.....3
Labor and Equipment Cost Reduction ..... 4
Oven Characteristics....4
Start-up 4
Cooking, Holding, Smoking
Manual Control 5-6
Deluxe Control 7-10
Operating Tips 11
Food Safety
Determine if a Product is Sufficiently Cooked....12
Reheating 12
General Holding Guidelines ..... 13
Food Safety 14-15
Cleaning and Preventative Maintenance
Protect Stainless Steel Surfaces ..... 16
Cleaning Agents 16
Cleaning Materials 16
Daily Probe/Prong Cleaning (Deluxe Control) 16
Equipment Care & Cleaning....17
Preventative Maintenance Checklist ..... 18
Cooking Guidelines
Product Index 19
Beef 20-23
Veal 23
Lamb 24
Pork 25-27
Processed Meats 27
Poultry 28-31
Fish 32
Miscellaneous.... 33-39
Smoking Guidelines
Smoked Beef 40
Smoked Pork 41-42
Smoked Poultry 42
Smoked Fish, Shrimp 43
Cold Smoked Canned Tomatoes ..... 44
Cold Smoked Salmon 44-45

W164 N9221 Water Street • P.O. Box 450 • Menomonee Falls, Wisconsin 53052-0450 • U.S.A. PHONE: (262) 251-3800 • (800) 558-8744 u.s.a./CANADA • FAX: (262) 251-7067 • (800) 329-8744 u.s.a. • www.alto-shaam.com
MN-29492 (11/16) • Cooking, Holding, Smoking Guidelines • Table of Contents
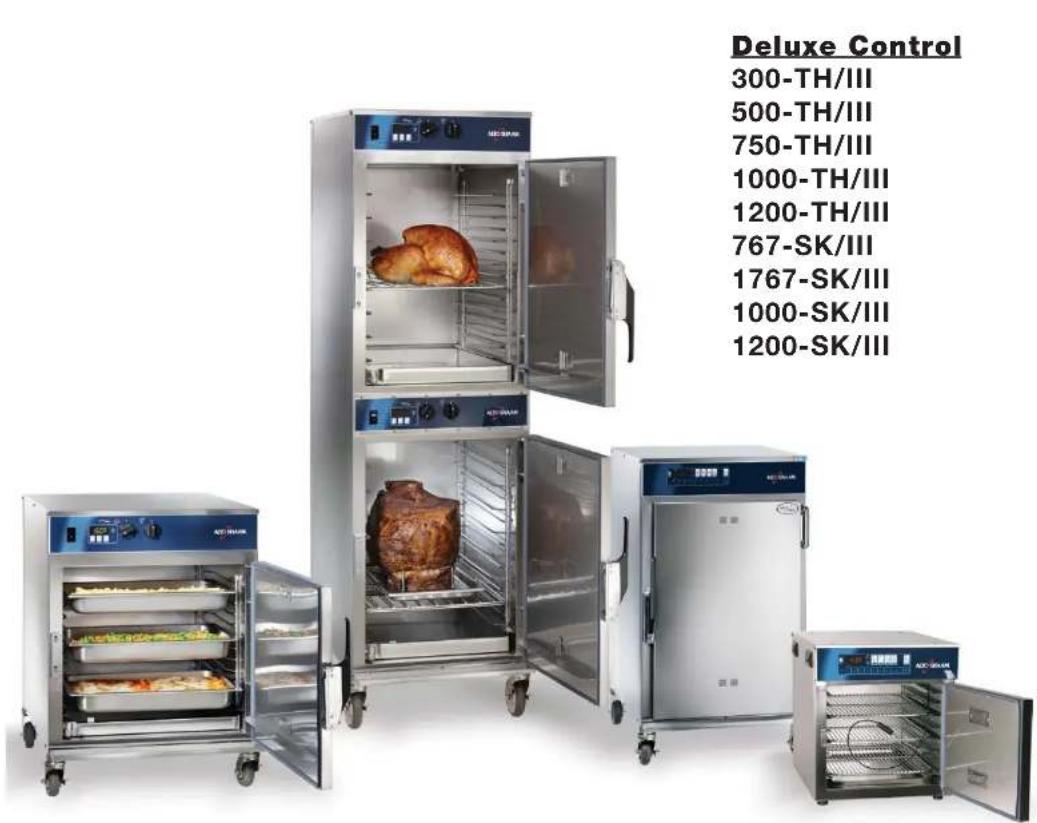
Manual Control
500-TH-II
750-TH-II
1000-TH-I
1000-TH-II
767-SK
1767-SK
1000-SK-I
1000-SK/II

Low-temperature Cooking
Welcome to the cost saving convenience of low-temperature cooking.
In 1968, Alto-Shaam invented the first automatic, commercial cook and hold oven featuring the principle of Halo Heat. The heating method provided by Halo Heat low-temperature cooking and holding ovens consist of an electric thermal cable that encircles the entire cooking and holding chamber. This creates a gentle blanket or HALO of radiant heat — surrounding food with a consistent and uniform temperature with no air movement inside the oven compartment. This gentle heating concept cooks at low temperatures and at a high level of humidity to preserve product moisture, flavor, and nutrition. Halo Heat ovens are designed to convert automatically from a cooking temperature to a holding temperature where the product can remain until it is ready to be served.
Halo Heat is an entirely different system of cooking. Utilizing this uniform heat source, Halo Heat reduces meat shrinkage; provides natural enzyme (aging) action for more tender, flavorful meat; and preserves natural juices along with nutritional values in all foods. Halo Heat cooking reduces energy cost, cuts back on labor and handling, and solves kitchen space problems. There is no mechanical ventilation or oven hood necessary in most areas so the ovens can be moved wherever they are needed.
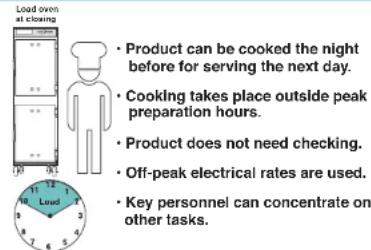
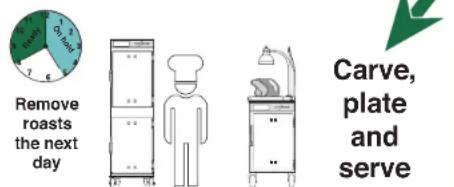
Read this booklet carefully. Halo Heat is a cooking system that requires minimal care once you have learned the basic principles. For best results with many products, we recommend you start your cooking cycle the evening before — for serving the next day. In many areas, off-peak power rates are also lower at night.
If anything you cook in a Halo Heat low-temperature cooking and holding oven doesn't meet your highest standards of quality, please contact one of our food service professionals for help. Usually, only a minor change in procedure is required.



Low-temperature Cooking
Meat and Nutrition
Meat plays a significant role in the diet; therefore, one of the primary goals in food preparation is proper nutrition. Meat is one of the best sources of protein; is a rich source of B vitamins such as thiamine, riboflavin, and niacin; and includes fats, carbohydrates, minerals, pigments, enzymes and water.
All of these elements are affected by cooking, but over-heating destroys many of them. Low-temperature Halo Heat cooking helps preserve unstable, heat-sensitive vitamins and nutrients.
A report on the Nutrient Analysis of Roast Beef, conducted by the University of Wisconsin-Stout in July 1971, concluded, “...it is apparent that the Alto-Shaam cooking method results in lower moisture losses. Even after a 24-hour holding period, the Alto-Shaam product is nutritionally equal to, and possibly better than beef roast cooked in a conventional oven and removed immediately after cooking.”
Fat contributes greatly to the flavor of meat. During the cooking process, fat not only melts, but also changes chemically. With low-temperature cooking there is less chemical change and less fat melt resulting in a more flavorful finished product.
The enzymes found in meat break down the tissues and act as natural tenderizing agents. A premium price is paid for aged meats where this enzyme action has already started, however, enzymes are destroyed by high temperatures.
Low-temperature cooking does not destroy these enzymes and, particularly in the hold cycle, creates this natural chemical action to tenderize or age the meat right in the oven. For this reason, it is important to use fresh beef and it is essential to allow the product to remain in the hold cycle for at least the minimum amount of time suggested in the individual procedure. The longer meat is left in the hold cycle the more tender it becomes, making the purchase of more expensive, aged meat unnecessary.
Meat is 70% to 75% water. High temperatures cause this water to evaporate during cooking resulting in the loss of product moisture. Cooking at low temperatures in a Halo Heat oven retains the maximum amount of water content resulting in a juicier finished product and an extended holding life.
Along with better nutrition, a more tender finished product, less shrinkage and higher moisture content, meat will not require the addition of as much salt as needed with conventional cooking methods. Natural flavors are preserved. This is a significant factor in today's health conscious diets.
Low-temperature Cooking
Shrinkage Control and Cooking Time
There are two major factors controlling meat shrinkage or cooking losses.
1. The temperature at which meat is cooked:
The higher the temperature at which meat is cooked the more shrinkage will result. Over-cooked meat also results in higher losses. Higher temperatures and over-cooking draws moisture to the surface and this moisture evaporates or drips out of the meat.
2. The internal temperature of the meat:
Like over-cooking, as meat is brought to a higher internal temperature shrinkage is increased. For these two reasons, it is suggested most cuts of red meat be cooked at 250^ F ( 121^ C) and that all cooking be based on internal product temperature. The use of a thermometer is encouraged.
There are four major factors involved in determining cooking times for meat:
1. The degree of aging of the meat:
Aged meat will cook faster, shrink more, and has a much shorter holding life than fresh meat.
2. The internal temperature before cooking:
Meat should be placed in a preheated oven directly from a refrigerated temperature of 38^ F to 40^ F ( 3^ C to 4^ C). Meat cooked from a frozen state will require approximately one and one-half to two times the normal cooking time. In addition, freezing ruptures the tissue cells and creates additional moisture loss during the cooking process. This results in more shrinkage.
3. The desired degree of doneness:
The higher the degree of internal temperature required, the longer the necessary cooking time. Cooking times in this guideline are based on the most popular internal product temperatures.
4. The quantity and quality of product.
To Calculate Meat Shrinkage
Starting weight (weight of raw product)
-Minus: Ending weight (weight of cooked product)
Equals: Amount of shrinkage
Amount of shrinkage (total weight lost in cooking)
÷ Divided by: Starting weight (weight of raw product)
Equals: Percent of shrinkage
Example: Raw Beef Roast: 100 lb (45 kg)
Cooked Beef Roast: -95 lb (-43 kg)
= Amount of shrinkage: 5.0 lb (2 kg)

Equals: Percent of shrinkage
Prevent Bacteria Growth
The surface of raw meat may become contaminated in processing, handling by the butcher or chef, or by other means. Food contamination can also be caused by unsanitary personal hygiene and work habits, unclean slicers, knives, and probes, or by faulty operational procedures. It is important, therefore, that sanitary procedures be followed at all times during food preparation and handling. This is your main protection in guarding against food contamination. For additional information see the Cleaning and Preventative Maintenance section of this manual.
Low-temperature Cooking
Labor and Equipment Cost Reduction
Halo Heat ^® ovens are easy to operate and maintain. After the raw product is placed in the oven and the controls are set, there is no need to check, stir, or adjust the time or temperature. Minimal time is spent attending the product during cooking. This advantage, combined with the automatic conversion to the hold cycle, frees key personnel to concentrate on other tasks including final product and presentation.
When cooking in a Halo Heat oven at a temperature of 250^ F ( 121^ C), outside venting and expensive exhaust hoods are not necessary in most areas. Kitchens remain cooler, lowering energy costs by reducing the exchange of heated air. Because the ovens do not need outside venting, they can be put almost anywhere — in the corner of the kitchen, on a buffet line, or in a banquet room. The ovens can also be built into a counter or to save space, can be stacked in combination with another Halo Heat oven or holding cabinet of the same or similar dimension.
Cooking at low temperatures also reduces the cleaning time. Most food does not normally carbonize or burn onto the interior of the oven.
Halo Heat reduces labor
Distributes work loads
Oven Characteristics
The oven is equipped with a special, low-heat-density, heating cable. Through the Halo Heat concept, the heating cable is mounted against the walls of the cooking and holding compartment to provide an evenly applied heat source, controlled by an oven sensor. The design and operational characteristics of the unit eliminate the need for a moisture pan or a heat circulating fan. Through even heat application, the food product is cooked uniformly and provides the ability to hold foods for longer periods of time.
Notice: The 300-TH/III is a countertop oven. When cooking a full load in the 300-TH/III, insert the food probe into the food on the lowest shelf.
Start-Up
Before initial use or after removing the appliance from storage:
- Remove all packing material from the appliance.
- Remove and wash any detachable items such as wire shelves, side racks, pans, and drip pans with hot, soapy water. Dry with a clean damp lint-free cloth.
- Remove all visible grease or oil from the appliance.
-
Clean the interior and exterior of the appliance with a mild soap and water solution. Apply the solution with a clean damp cloth. Do not use commercial or household cleaners that contain ammonia. Wipe with a clean, damp cloth to remove all detergent residue. Dry with a clean, lint-free cloth.
-
Clean the appliance glass with glass cleaner or distilled vinegar.
-
Install the side racks and wire shelves - position shelves with the curved end up and toward the rear of the appliance. Re-install drip pan.
-
Operate the oven without food for a period of two (2) hours at a temperature of 300^ F ( 149^ C) to remove surface oils and any accompanying odor.
The appliance is now ready for operation.
Manual Control Cooking, Holding, Smoking
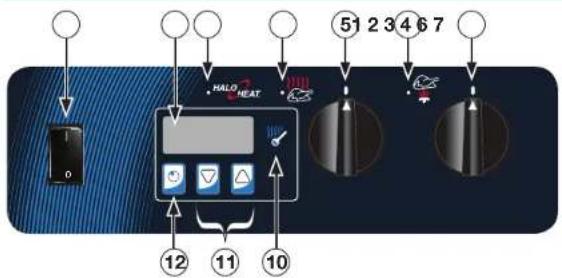
1 On/Off Switch
2 Digital Display
3 Heat Indicator Light
4 Holding Indicator Light
5 Hold Knob — Temperature range 60 °F to 205 °F (16°C to 96°C)
6 Cooking Indicator Light
- Press the On/Off switch to the On (I) position.
Control will display 0°F or 0°C. - Set the holding temperature.
Rotate the Hold Knob to the desired temperature. The set temperature will appear in the Digital Display and the Holding Indicator Light will illuminate. - Set the cooking temperature.
Rotate the Cook Knob to the desired temperature. The set temperature will appear in the Digital Display and the Cooking Indicator Light will illuminate.
Notice: The cooking mode is not active unless the timer is operating. - Set the timer.
Press the Up or Down Arrows to set desired cooking time, or to adjust the time while the appliance is cooking.
To cancel the timer, press and hold the Time Cancel button. - Preheat the oven for 30 minutes before loading food.
- If smoking, load the wood chip container.
Take one container load of dry wood chips, no smaller than 1/2" (13mm), and soak the chips in water for 5-15 minutes. Shake excess water off the wood chips. Remove the wood chip container from the interior rear panel of the appliance. Place the moistened chips in the wood chip container and replace the container in the oven. - Load the oven with food and adjust the cooking time as needed.
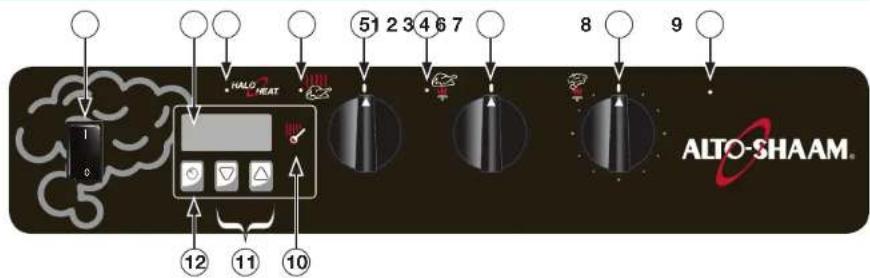
7 Cook Knob — Temperature range 200 °F to 325°F (93°C to 162°C)
8 Smoke Timer Knob (60 minutes maximum)
9 Smoke Indicator Light
10 Temperature Display button
11 Up and Down Arrows (to set and adjust cook time)
12 Time Cancel
- Set the smoke timer
The smoke timer activates the heating element located inside the wood chip container. When the wood chip container is full and the smoke timer is turned clockwise as far as it will turn, the wood chips will smoke for approximately forty-five minutes to one hour.
To set the smoke timer, rotate the Smoke Timer Knob beyond the required length of time, then immediately rotate it back to the correct setting.
The Smoke Indicator Light will illuminate.
Keep the oven door and door vents completely closed during the smoking cycle.
Notice: When cold smoking, the cook temperature must be set to 0^ F ( 0^ C) before setting the smoke time in order for the smoke process to work.
Notice:
- The Heat Indicator Light illuminates when the timer is set and will remain illuminated until the oven reaches the set temperature.
- Press the Temperature Display button to toggle between the Set temperature and the set time. Press and hold the Temperature Display button to display the Actual oven temperature.
Manual Control Cooking, Holding, Smoking
To toggle between Fahrenheit (°F) and Celsius (°C)
The factory default is Fahrenheit. To change to Celsius:
- Press and hold the Temperature Display button and the Down Arrow for 5 seconds.
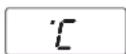
- The control will display ^ C for 3 seconds and then show the temperature in ^ C.
- Repeat to toggle to Fahrenheit.
Notice: In the event of a power failure, the control will retain the °C or °F setting selected by the user.


Deluxe Control Cooking, Holding, Smoking
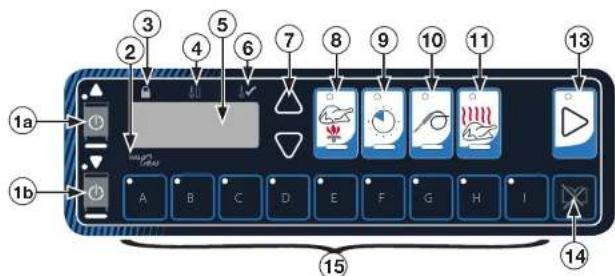
1a On/Off Button - Upper Cavity
1b On/Off Button - Lower Cavity
2 Heat Indicator Light
3 Lock Indicator Light
4 Preheat Indicator Light
5 LED Display
6 Ready Indicator Light
7 Up and Down Arrow Buttons
- Press the On/Off button.
- To cook with a preset program
Press the desired Preset Program button (A-II) and then press the Start button to begin the cooking cycle.
- To cook without a preset program
A. Set the cooking temperature.
Press the Cook button. The Preheat Indicator Light will illuminate and the last set cooking temperature will displayed. Press the Up or Down Arrow button to change the cook temperature.
- To cook by time — Press the Time button. The time indicator will illuminate and the last set cooking time will be displayed. Press the Up or Down Arrow button to change the set time. The display will alternate between the set cooking temperature and the elapsed time.
- To cook by probe — Press the Probe button. The probe indicator will illuminate and the last set internal product temperature will be displayed. Press the Up or Down Arrow button to change the set temperature. The display will alternate between the set cooking temperature, the elapsed time, and the probe temperature.
B. Set the holding temperature.
Press the Hold button. The cook indicator light will remain illuminated. Press the Up or Down Arrow button to change set hold temperature. The display will alternate between the set hold temperature and the amount of time the product has been in the hold mode. The oven will remain in the hold mode until the On/Off button is pressed.
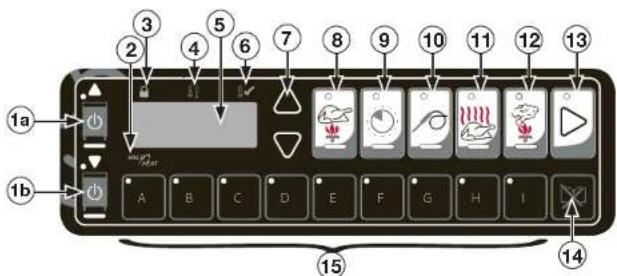
8 Cook Button — Temperature range 200 °F to 325°F (93°C to 162°C)
9 Time Button
10 Probe Button
11 Hold Button — Temperature range 60 °F to 205 °F (16°C to 96°C)
12 Smoke Button
13 Start Button
14 Cancel Program Button
15 Preset Program Buttons A-H
To enable Probe Hold mode (optional when cooking by probe) — Press the Probe button. The probe cooking temperature will be displayed. Press the Probe button again to toggle to the Probe Hold temperature. The LEDs below the Probe and Hold buttons will alternate, signaling the Probe Hold mode. Press the Up or Down Arrow buttons to set the probe holding temperature.
C. Preheat the oven for 30 minutes before loading food.
D. If smoking, load the wood chip container.
Take one container load of dry wood chips, no smaller than 1/2" (13mm), and soak the chips in water for 5-15 minutes. Shake excess water off the wood chips. Remove the wood chip container from the interior rear panel of the appliance. Place the moistened chips in the wood chip container and replace the container in the oven.
E. Load the oven with food and adjust the cooking time as needed.
F. Set the smoke timer.
Press the Smoke button. Press the Up or Down Arrow button to set the smoke time desired.
G. Start cooking cycle.
Press the Start button.
Note: When setting time or temperature, press the Up or Down Arrow button to change by increments of one. Press and hold the button to increase by increments of ten.
To stop an operation:
Press and hold the Start button until the control beeps for two seconds, indicating the operation has been canceled. The oven will remain in a power-on state.
Deluxe Control Cooking, Holding, Smoking
To create a preset program
A. Set desired cook and hold time and temperature, and smoke time.
B. Press and hold desired Preset Program button (A-H). When the preset program has been saved, an alarm sounds for two (2) seconds and the indicator light illuminates.
Note: Only one preset program may be entered at a time. When entering multiple Preset Programs, turn the oven off and then back on between each Preset Program to be entered. The values of subsequent programs default to the values of the last program entered. Change the values by entering desired cook and hold time and temperature, and smoke time.
To erase a preset program
The oven must be in either the power-up hold mode or in the preheat mode. The oven can not be running a preset program.
Press and hold the Cancel button and the appropriate Preset Program button (A-H) to be erased. When the preset program has been erased, an alarm sounds for one (1) second.
To turn oven control panel off:
Press and hold the On/Off button until the oven beeps. The On/Off Indicator Light will go out.
Door open indicator:
The display will flash "door" and a triple beep will alert the user. Press the On/Off button to acknowledge error and disable the triple beep.
Indicator lights:
Each Preset Program button includes a green light which indicates a requirement for additional programming by the operator or the current operational state of the oven.
The Cook, Time, Probe, and Hold buttons include an amber indicator light to identify the information being displayed.
Green
Amber

Power fail detect:
If the power fails while the oven is heating, the control will retain, in memory, the programmed operating conditions. When power is restored, the control will resume operating from the point where it was interrupted and the On/Off Indicator Light will flash, indicating that a power failure occurred. Acknowledge the power failure by pressing the On/Off button. Pressing the On/Off button will display the amount of time that the power was off. The control will stop counting the amount of time the power has been off when it has been off for more than 24 hours.
Notice: If a power failure has occurred, it is strongly recommended that you ensure the food is safe for consumption according to local health regulations.
To set the date and time:
All oven cavities must be Off.
To set the time of day (HH:mm) Hours/minutes - press and hold the "A" Preset Program button for three seconds, then press the Up or Down Arrow button.
To set the year - press and hold the "B" Preset Program button for three seconds, then press the Up or Down Arrow button.
To set the month and day (MM.dd) - press the "C" Preset Program button for three (3) seconds, then press the Up or Down Arrow button.
Deluxe Control Cooking, Holding, Smoking
Probe usage:
When the oven probe remains inserted in the probe bracket, the LED temperature display will indicate the ambient air temperature inside the oven. To use the probe for cooking remove it from the bracket and wipe the full length of the metal probe with a disposable alcohol pad to clean and sanitize before using.
Only the tip of the probe senses the internal product temperature; therefore, it is important the tip be placed correctly in the product for internal temperature accuracy. Push the probe tip halfway into the product, positioning the tip at the center of the food mass, avoiding the bone. When inserting the probe into solid foods such as meat roast or poultry breasts, push the probe in from a straight downward position or in from the side to the center position. If placing into a semi-liquid or liquid product, the probe cable must be secured to keep the probe positioned properly. Do not let the probe tip touch the edges, bottom or side of a container. Tape the probe cable to the lip or edge of the container.
To display high/low probe temperatures:
To display the recorded maximum or minimum probe temperature when cooking by probe, press the following buttons while the probe remains in the product:
Highest Temperature: Press the Probe button and the Up Arrow button at same time.
Lowest Temperature: Press the Probe button and the Down Arrow button at same time.
To enable Probe Hold (optional when cooking by probe):
- Press the Probe button to see the probe cooking temperature.
- Press the Probe button again to toggle to the probe hold temperature.
Note: The indicator lights below the Probe and Hold buttons will alternate while the Probe Hold mode is active. - Press the Up or Down Arrow button to set the desired probe hold temperature.
- Press the Start button to begin the cooking cycle.


Probe calibration:
- To verify the product probe calibration, place the probe in a glass of ice water.
- After allowing the temperature to stabilize, press the Probe button for five (5) seconds. Compare the reading against 32^ F ( 0^ C).
- If calibration is required, the unit must be in the power-up hold mode. From the off state press the On/Off button. The appliance will begin to operate in the power-up hold mode, press the Probe button for eight (8) seconds until the appliance beeps twice and a temperature is displayed. Adjust the probe offset temperature by pressing the Up or Down Arrow button to increase or decrease the temperature. Repeat step 2 to verify.
- Repeat steps 1 and 2 to verify the probe calibration accuracy.
Sous Vide cooking:
With the oven in a preheat mode, press and hold the Probe button. After five (5) seconds, it will display "SouS" if in sous vide mode, or "rE9" if in a regular probe mode. If changes are desired, continue holding the Probe button for an additional three (3) seconds which will toggle the option.
CAUTION
To maintain safe temperature levels, cold food for rethermalization or reheating must never be added to the oven while hot foods are being held.
When cooking by probe, insert the probe into the raw product after the oven has been preheated.
Wait one (1) full minute to allow the probe temperature to decrease to the internal temperature of the product. Press the Start button to begin the cooking process after this probe temperature adjustment period. A false probe reading of the internal product temperature will cause the oven to default to a holding temperature.
Deluxe Control Cooking, Holding, Smoking
Lock and Unlock Presets

Preset Program buttons A through H can be locked in order to prevent storing, altering or crasing a program.
To lock the Preset Program buttons, press and hold the "1" Preset Program button until the oven beeps. Release the "1" Preset Program button. The indicator light on the "1" Preset Program button will illuminate. Oven preset A through H are now locked.
Notice: Only the Preset Program buttons A through II are affected by this lock-out. The oven can be used with the unprogrammed Cook, Probe, or Hold functions.
To unlock the Preset Program buttons, press and hold the Cancel Program button along with the "I" Preset Program button until the "I" Preset Program button light no longer illuminates. Release all buttons. The Preset Program buttons are now unlocked.
Fahrenheit or Celsius selection
With the control in the off mode, press and hold the Up Arrow button until the current selection is displayed. Press Up or Down Arrow button to toggle between the two (2) options. After each change the button must be released. The display must clear before the procedure can be repeated.
Control panel Lock and Unlock

The control panel can be locked at any time in order to prevent inadvertent or accidental setting changes.
To lock the control panel, press and hold the Up Arrow button and then press the On/Off button. You will hear a brief beep and the panel Lock Indicator Light will illuminate. Release all buttons. The control panel is now locked.
Note: The control panel is locked with the exception of the On/Off button and Up or Down Arrow buttons. You are unable to turn the oven control off at this point.
To unlock the control panel, press and hold the Down Arrow button and then press the On/Off button. You will hear three (3) beeps and the panel lock indicator light will extinguish. Release all buttons. The panel is now unlocked and ready for normal use.
Beeper volume selection

With the control in the off mode, press and hold the Down Arrow button until the current control volume is displayed. Press the Up or Down Arrow button to toggle through the four (4) options (0 = Off, 1 = Low, 2 = Medium, 3 = High).
HACCP Documentation, Data Logger - Optional
This oven meets the requirements of established HACCP criteria by providing automated sampling, record keeping, set-point validation, recipe used, dates and time. This data is retained for the last 30 days. This information can be displayed on screen or downloaded to a USB flash drive and then copied to your computer. The file format is a comma-separated variable (*.csv) that is opened using a spreadsheet software.
To download the data collected:
-
All oven cavities must be Off.
-
It is recommended that an empty USB flash drive is used. Remove the cap of the USB port located on the right side of the control panel and insert the USB flash drive. Display will show "Usb". If display does not show "Usb", try again with another flash drive or call Alto-Shaam Service.
-
Press and hold the Start button until display shows "≡ XYZ". The number at the far right is the percentage of the download completed. The Start button indicator light will blink while the download is in process. When display shows "≡ 100", the download is complete.
-
Remove the USB flash drive and replace the cap on the USB port. When the USB is removed, the oven will beep for one (1) second, acknowledging the removal.
hACCP Data Sample
| A26 | ||||||
| 1 | 2 | 3 | 4 | 5 | 6 | |
| 1 | Unit Serial Number 01:10:04 | |||||
| 2 | Software Version: 0.12 | |||||
| 3 | Control Personality: 0 | |||||
| 4 | Start Time: 7/26/2022 20:33 | |||||
| 5 | Cavity Upper | |||||
| 6 | Program Name Preset A | |||||
| 7 | Cook Set Temperature (°F) 250 | |||||
| 8 | Cooking by Time | |||||
| 9 | Cook Time 2.24 | |||||
| 10 | Hold Set Temperature (°F) 150 | |||||
| 11 | ||||||
| 12 | ||||||
| 13 | ||||||
| 14 | Date Time Mode Cavity Set-Temperature (°F) Cavity (°F) Probe (°F) Additional Information | |||||
| 15 | 7/26/2012 10:33:57 Preheat 250 150 146 | |||||
| 16 | 7/26/2012 10:37:29 Cook 250 146 | |||||
| 17 | 7/26/2012 10:38:57 Cook 250 146 | |||||
| 18 | 7/26/2012 10:43:57 Cook 250 146 | |||||
| 19 | 7/26/2012 10:47:29 Hold 150 150 146 | |||||
| 20 | 7/26/2012 10:48:57 Hold 150 151 146 | |||||
| 21 | ||||||
Operating Tips
Chef Operating Tips
- Refer to individual cook and hold instructions for cooking specific products.
- When cooking at 250^ (121°C), it takes approximately one (1) hour for the cooking temperature to decrease to the selected holding temperature. During this one-hour time period, the product will continue to cook.
- The cooking times in this guide are based on product taken directly from a refrigerated temperature of 38^ to 40^ (3.3°C to 4.4°C), and placed in a preheated oven. Adjustments must be made for cooking products at other than refrigerated temperatures.
- Place the curved edge of the shelf toward the back of the oven.
- Adjust the inside door vents as indicated in the individual cooking procedure selected.
- It is recommended the oven door remain closed during the cooking cycle. Opening the door allows heat to escape and increase the length of time necessary to cook the product.
- Puncturing an item with any sharp instrument may introduce bacteria inside the product. Avoid using a fork to handle products, and always use standard sanitary methods when handling any food item.
- Check the internal temperature of a product with a thermometer. Sanitize the thermometer before each use.
- Aged meat will cook faster, shrink more, and cannot be held as long as fresh meat. Because of the tenderizing capabilities of the oven, aged meat or tenderizing agents such as M.S.G. are not necessary, and are not recommended.
- When cooking full loads, never cook below the second shelf spacing from the bottom of the oven compartment.
- Clean the oven interior, drip pan, shelves, and side racks on a daily basis.
-
Since there is no air movement inside the Halo Heat ^® low-temperature cooking and holding oven, condensation will form on the inside of the door during operation and may leak out of the oven door vents. This is a normal operating condition; however, any condensation spilling on the floor should be periodically wiped as a safety precaution. There is an external drip tray included with the oven.
-
Place the drip pan directly on the bottom of the oven compartment.
- Drip pan overflow is a condition caused by cooking some cuts of beef to an internal temperature in excess of 130^ (54^) . The external drip tray will help alleviate some of this overflow problem. There is also an extra deep drip pan available as an option for select ovens.
- Overflow may also be caused by overloading the oven compartment. Do not overload the oven. Follow the recommended load capacities listed in each individual procedure.
- For maximum product tenderizing and to reduce labor during peak preparation hours, overnight cook and hold is highly recommended for many products. Refer to individual cooking instructions.

Need some help?
The Alto-Shaam staff includes corporate executive chefs who welcome questions. You are invited to contact anyone on our staff by phone or e-mail through the Contact Us section of our web site for help with any cook and hold procedure.
800-558-8744 • 262-251-3800
www.alto-shaam.com
Food Safety
Is the product sufficiently cooked?
- Insert a thermometer into the center of the product to determine if the correct internal temperature has been reached.
Red Meat:
Rare: 130^ F to 135^ F ( 54^ C to 57^ C)
Medium: 140^ F to 145^ F ( 60^ C to 63^ C)
Well: 155^ F to 160^ F ( 66^ C to 71^ C)
- When following the procedures in the individual product cooking instructions, additional cooking time should not be necessary. If, however, the required internal product temperature has not been reached after the product has remained in the hold cycle for a minimum time period of one (1) hour, additional cooking time may be added. Use the same cook temperature set for the original cooking cycle until the correct internal temperature has been reached.
Reheating
- Food must be removed from the oven, wrapped, rapidly chilled, and refrigerated.
- Product can be removed from the refrigerator, returned to the oven, and reheated the next day.
- Products must be reheated at a temperature range of 250^ F to 275^ F ( 121^ C to 135^ C). Refer to individual cooking instructions for the correct thermostat setting for the product being reheated.
- The length of time necessary to reheat a product depends on the type of product and the quantity to be reheated. The time should be based on the internal product temperature. Use a pocket thermometer to determine the internal product temperature of the reheated product.
The United States food code requirements indicate cooked foods that have been cooled, followed by reheating for hot food holding, must be reheated to 165^ F ( 74^ C). The temperature of 165^ F ( 74^ C) must be maintained for a period 15 seconds.
Always follow federal and local health (hygiene) codes for the time and internal temperature required for reheating products.
In the United States, FDA food code requires products such as red meat to remain in Hold for a specified time period. This holding time requirement is based on the internal product temperature desired for the finished product and includes the one hour time period while the oven decreases from the cooking temperature to the holding temperature and the product continues to cook.
| Internal Product Temperature | Time* in Hold cycle required by food code |
| 130°F (54°C) 1 hour, 52 minutes | |
| 131°F (55°C) 1 hour, 29 minutes | |
| 133°F (56°C) 56 minutes | |
| 135°F (57°C) 36 minutes | |
| 136°F (58°C) 28 minutes | |
| 138°F (59°C) 18 minutes | |
| 140°F (60°C) 12 minutes | |
| 142°F (61°C) 8 minutes | |
| 144°F (62°C) 5 minutes | |
| 145°F (63°C) 4 minutes | |
| 147°F (64°C) 2 minutes, 14 seconds | |
| 149°F (65°C) 1 minutes, 25 seconds | |
| 151°F (66°C) | 54 seconds |
| 153°F (67°C) | 34 seconds |
| 155°F (68°C) | 22 seconds |
| 157°F (69°C) | 14 seconds |
| 158°F (70°C) | 0 seconds |
| *Holding time may include post-oven heat rise | |
Food Safety
General Holding Guidelines
Proper holding temperatures vary for food products.
Halo Heat ^® maintains the maximum amount of product moisture content without the addition of water, water vapor, or steam.
Maintaining maximum natural product moisture preserves the natural flavor of the product and provides a more genuine taste. In addition to product moisture retention, the gentle properties of Halo Heat maintain a consistent temperature throughout the cabinet without the necessity of a heat distribution fan, thereby preventing further moisture loss due to evaporation or dehydration.
In an enclosed holding environment, too much moisture content is a condition which can be relieved. A product achieving extremely high temperatures in preparation must be allowed to decrease in temperature before being placed in a controlled holding atmosphere. If the product is not allowed to decrease in temperature, excessive condensation will form increasing the moisture content on the outside of the product. To preserve the safety and quality of freshly cooked foods however, a maximum of one (1) to two (2) minutes must be the only time period allowed for the initial heat to be released from the product.
Most Halo Heat holding equipment is provided with a thermostat control between 60^ F and 200^ F ( 16^ C to 93^ C). If the unit is equipped with vents, close the vents for moist holding and open the vents for crisp holding.
| Holding Temperature Range | ||
| Meat Fahrenheit Celsius | ||
| Beef Roast — Rare 130°F 54°C | ||
| Beef Roast — Med/Well Done 155°F 68°C | ||
| Beef Brisket 160°F–175°F 71°C–79°C | ||
| Corn Beef 160°F–175°F 71°C–79°C | ||
| Pastrami 160°F–175°F 71°C–79°C | ||
| Prime Rib — Rare 130°F 54°C | ||
| Steaks — Broiled/Fried 140°F–160°F 60°C–71°C | ||
| Ribs — Beef Or Pork 160°F 71°C | ||
| Veal 160°F–175°F 71°C–79°C | ||
| Ham 160°F–175°F 71°C–79°C | ||
| Pork | 160°F–175°F | 1°C–79°C |
| Lamb | 160°F–175°F | 1°C–79°C |
| Poultry | ||
| Chicken — Fried/Baked | 160°F–175°F | 1°C–79°C |
| Duck | 160°F–175°F | 1°C–79°C |
| Turkey | 160°F–175°F | 1°C–79°C |
| General | 160°F–175°F | 1°C–79°C |
| Fish/Seafood | ||
| Fish — Baked/Fried | 160°F–175°F | 1°C–79°C |
| Lobster | 160°F–175°F | 1°C–79°C |
| Shrimp — Fried | 160°F–175°F | 1°C–79°C |
| Baked Goods | ||
| Breads/Rolls | 120°F–140°F | 49°C–60°C |
| Miscellaneous | ||
| Casseroles | 160°F–175°F | 1°C–79°C |
| Dough — Proofing | 80°F–100°F | 27°C–38°C |
| Eggs — Fried | 150°F–160°F | 66°C–71°C |
| Frozen Entrees | 160°F–175°F | 1°C–79°C |
| Hors d'oeuvres | 160°F–180°F | 1°C–82°C |
| Pasta | 160°F–180°F | 1°C–82°C |
| Pizza | 160°F–180°F | 1°C–82°C |
| Potatoes | 180°F 82°C | |
| Plated Meals | 140°F–165°F | 60°C–74°C |
| Sauces | 140°F–200°F | 60°C–93°C |
| Soup | 140°F–200°F | 60°C–93°C |
| Vegetables | 160°F–175°F | 1°C–79°C |
| The holding temperatures listed are suggested guidelines only. All food holding should be based on internal product temperatures. Always follow local health (hygiene) regulations for all internal temperature requirements. | ||
Food Safety
Food flavor and aroma are usually so closely related that it is difficult, if not impossible, to separate them. There is also an important, inseparable relationship between cleanliness and food flavor. Cleanliness, operating efficiency, and appearance of equipment contribute considerably to savory, appetizing foods.
Most food imparts its own particular aroma and many foods also absorb existing odors. Unfortunately, during this absorption there is not a distinction between good and bad odors. The majority of objectionable flavors and odors troubling food service operations are caused by bacteria growth. Sourness, rancidity, mustiness, stale or other undesirable flavors are usually the result of germ activity.
The easiest way to ensure full, natural food flavor is through comprehensive cleanliness. This means good control of both visible soil (dirt) and invisible soil (germs). A thorough approach to sanitation will provide essential cleanliness. It will ensure an attractive appearance of equipment, along with maximum efficiency and utility. More importantly, a good sanitation program provides one of the key elements in the prevention of food-borne illnesses.
A comprehensive sanitation program should focus on the training of staff in basic sanitation procedures. This includes personal hygiene, proper handling of raw foods, cooking to a safe internal product temperature, and the routine monitoring of internal food temperatures from the time the food is received through the time the food is served.
A controlled holding environment for prepared foods is just one of the important factors involved in the prevention of food-borne illnesses. Temperature monitoring and control during receiving, storage, preparation, and the service of foods are of equal importance.
The most accurate method of measuring safe temperatures of both hot and cold foods is by internal product temperature. A thermometer is an effective tool for this purpose, and should be routinely used on all products that require holding at a specific temperature.
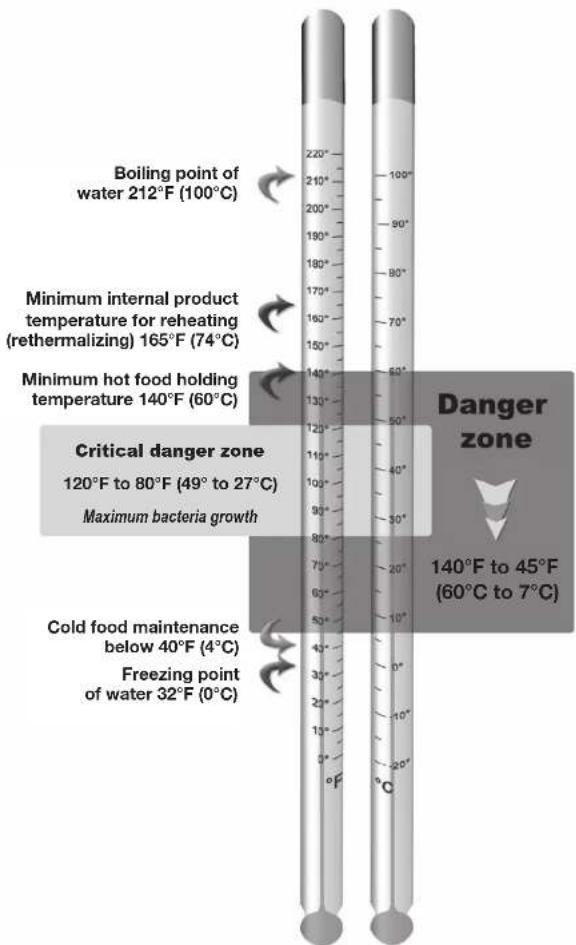
| Internal Food Product Temperatures | ||
| Hot Foods | ||
| Danger Zone 40° | F to 140°F 4°C to 6 | 0°C |
| Critical Zone 70° | F to 120°F 21°C to 49°C | |
| Safe Zone 140° | F to 165°F 60°C to 74°C | |
| Cold Foods | ||
| Danger Zone Above 40°F Above 4°C | ||
| Safe Zone 36°F to 40°F 2°C to 4°C | ||
| Frozen Foods | ||
| Danger Zone Above 32°F Above 0°C | ||
| Critical Zone 0°F to 32°F -18°C to 0°C | ||
| Safe Zone 0°F or Below -18°C or Below | ||
Hazard Analysis (at) Critical Control Points (HACCP), is a quality control program of operating procedures to assure food integrity, quality, and safety. Taking steps necessary to augment food safety practices is both cost effective and relatively simple. Additional HACCP information is available by contacting:
Center for Food Safety and Applied Nutrition
Food and Drug Administration
Phone: 1-888-SAFEFOOD
www.foodsafety.gov
Food Holding and Sanitation
Food Safety Guidelines
All heated food must be maintained at 140^ F to 150^ F ( 60^ C to 65^ C) after being heated. Foods that have been heated followed by refrigerated storage must be reheated to a minimum of 165^ F ( 74^ C) to prevent bacteria growth.
- All stored food items must be covered and placed in a cooler or freezer at a minimum height of 6" (152mm) above the floor.
• Employees serving food, preparing food, or washing utensils must wear effective hair covering.
• Employees must wash their hands before serving or preparing food. - Soap and towels must be provided at the hand-sink and only be used for washing hands.
- No smoking or use of tobacco products is allowed in the food preparation or service area.
- All serving containers must be stored with food contact surfaces covered or in the down position.
- All utensils must be washed in a three-compartment sink and dipped in a final sanitation rinse. A pH test kit must be used to check the rinse water.
- Food preparation surfaces must not be used for the storage of non-food items.
- All cold food must be stored at or below 40^ (4°C).
- Frozen foods must not be thawed at room temperature or in water. Use the cooler for thawing and thaw foods slowly.
Cleaning and Preventative Maintenance
Protecting Stainless Steel Surfaces

ant to guard against corrosion the care of stainless steel surfaces. Harsh, corrosive, or inappropriate chemicals can completely destroy the protective surface layer of stainless steel. Abrasive pads steel wool, or metal impleme
will abrade surfaces causing damage to this protective coating and will eventually result in areas of corrosion. Even water, particularly hard water that contains high to moderate concentrations of chloride, will cause oxidation and pitting that result in rust and corrosion. In addition, many acidic foods spilled and left to remain on metal surfaces are contributing factors that will corrode surfaces.
Proper cleaning agents, materials, and methods are vital to maintaining the appearance and life of this appliance. Spilled foods should be removed and the area wiped as soon as possible but at the very least, a minimum of once per day. Always thoroughly rinse surfaces aft er using a cleaning agent and wipe standing water as quickly as possible aft er rinsing.
Cleaning Agents
Use non-abrasive cleaning products designed for use on stainless steel surfaces. Cleaning agents must be chloride-free compounds and must not contain quaternary salts. Never use hydrochloric acid (muriatic acid) on stainless steel surfaces. Failure to observe this precaution will void the warranty. Always use the proper cleaning agent at the manufacturer's recommended strength. Contact your local cleaning supplier for product recommendations.
Cleaning Materials
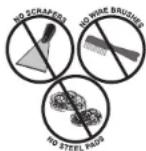
Cleaning can usually be accomplished with the proper cleaning agent and a soft, clean cloth. When more aggressive methods are needed, use a non-abrasive scouring pad on difficult areas and make certain to scrub with the visible grain of surface metal to avoid surface scratches. Never use wire brushes, metal scouring pads, or scrapers to remove food residue. Failure to observe this precaution will void the warranty.
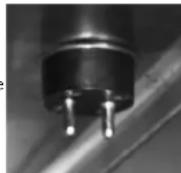
Clean the temperature probe prongs daily (Deluxe Control)
Clean the prongs on the removable probe daily to ensure accurate internal product temperature readings.
- Remove all food debris from prongs at the end of each production shift.
- Wipe the entire prong casing, and between each prong with a clean cloth and warm detergent solution.
- Remove the detergent by wiping with a cloth and clean rinse water.
- Allow the prongs to air dry before replacing detachable probe.
WARNING

To prevent serious injury, death, or property damage, always disconnect the appliance from the power source before cleaning or servicing.
NOTICE

To protect stainless steel surfaces, completely avoid the use of abrasive cleaning compounds, chloride based cleaners, or cleaners containing quaternary salts. Never use hydrochloric acid (muriatic acid) on stainless steel. Never use wire brushes, metal scouring pads or scrapers.


WARNING
To prevent serious personal injury, death, or property damage:
The appliance must be cleaned thoroughly to avoid deposits of grease and or food residues inside the appliance that may catch fire. If fat deposits and/or food waste inside the appliance ignite, shut down the appliance immediately and keep the appliance door closed to extinguish the fire. If further extinguishing is required, disconnect the appliance from the main power and use a fire extinguisher (do not use water to extinguish a grease fire!). Failure to clean the appliance properly invalidates the warranty and relieves Alto-Shaam of all liability.
Cleaning and Preventative Maintenance
WARNING

To prevent serious personal injury, death, or property damage:
Do not steam clean, hose down or flood the interior or exterior with water or liquid solution of any kind. Do not use water jet to clean. Failure to observe this precaution will void the warranty.
Clean daily
- Disconnect the oven from the power source and let it cool.
- Remove all detachable items such as wire shelves, side racks, drip trays, and drip pans. Clean these items separately.
- Wipe the interior metal surfaces of the oven with a paper towel to remove loose food debris.
- Clean the interior metal surfaces of the cabinet with a damp clean cloth or sponge and any good commercial detergent.
Notice: Never use abrasive cleaning compounds, chloride-based cleaners, or cleaners containing quaternary salts. Never use hydrochloric acid (muriatic acid) on stainless steel.
- Spray heavily soiled areas with a water soluble degreaser and let stand for 10 minutes, then remove soil with a plastic scouring pad.
- Wipe control panel, door vents, door handles, and door gaskets thoroughly since these areas harbor food debris.
- Rinse surfaces by wiping with a sponge and clean warm water.
- Remove excess water with sponge and wipe dry with a clean cloth or air dry. Leave doors open until interior is completely dry. Replace side racks, drip trays, and shelves.
- Wipe door gaskets and control panel dry with a clean, soft cloth.
- Interior can be wiped with a sanitizing solution after cleaning and rinsing. This solution must be approved for use on stainless steel food contact surfaces.

WARNING
To prevent serious injury, death, or property damage, always disconnect the appliance from the power source before cleaning or servicing.
- To help maintain the protective film coating on polished stainless steel, clean the exterior of the cabinet with a cleaner recommended for stainless steel surfaces. Spray the cleaning agent on a clean cloth and wipe with the grain of the stainless steel.
- Clean any glass with a window cleaner.
Always follow appropriate state or local health (hygiene) regulations regarding all applicable cleaning and sanitation requirements for equipment.
Clean the door vents
Door vents need to be inspected and cleaned as required.
Clean the probes daily (deluxe control)
Remove all food soil from probes. Wipe entire probe and cable assembly with warm detergent solution and a clean cloth. Remove detergent by wiping each probe and cable with clean rinse water and a cloth. Wipe probes and probe brackets with disposable alcohol pad or sanitizing solution recommended for food contact surfaces. Allow probe and cable to air dry in probe holding bracket.
Check the cooling fan in the oven control area
While the oven is warm, check that the cooling fan in the oven control area is functioning. The fan is located at the back of the unit, toward the top.
Check overall condition of the oven once a month
Check the oven once a month for physical damage and loose screws. Correct any problems before they begin to interfere with the operation of the oven.
Do not use oven if controls are not functioning properly
Refer to the Troubleshooting Guide in the Operation and Care manual or call an authorized service technician.
Preventative Maintenance Checklist
Daily
□ Perform daily oven cleaning as stated in this guide.
□ Clean front drip tray as recommended in this guide.
Monthly
☐ Inspect the door gasket for signs of cracking, deformation, or damage and replace as needed.
□ Inspect the door window gasket for proper seal.
□ Inspect the cavity door vent slides for proper operation.
□ Inspect the side racks, shelves and shelf supports for damage and replace as needed.
□ Calibrate removable product probe (if applicable).
□ Clean the cooling fan intake area and exhaust vents.
□ Visually inspect the smoke element (if applicable). If any visual signs of deformation, cracks or breaks are seen, remove the oven from service and contact a factory authorized service technician for service.
Every 12 months (Inspection by a factory authorized technician)
□ Open the control area and inspect and tighten all electrical connections.
□ Inspect all electrical components.
□ Inspect the smoke element and smoke element wiring (if applicable).
□ Visually inspect the smoke element (if applicable). If any visual signs of deformation, cracks or breaks are seen, remove the oven from service and contact a factory authorized service technician for service.
□ Confirm proper current draw of heating elements.
□ Test heating elements for electrical short to ground. Replace/repair as needed.
□ Inspect the condition of the plug and cord and replace if damaged.
□ Tighten the cord connection inside the appliance control area.
□ Test/replace independent indicator lights (where applicable).
□ Replace the control cooling fans (if applicable).
□ Check the site voltage.
□ Set the voltage switch (where applicable).
□ Inspect and test the product probe and product probe receptacle.
□ Inspect and test the control and control functions.
□ Replace the control knobs.
□ Visually inspect the cavity for structural integrity.
□ Visually inspect any door handles and hinges. Replace/repair as needed.
- Remove any loose handle and hinge screws. Apply Locft and then properly secure the screws.
□ Inspect the perimeter bumper. Repair / replace as needed.
□ Inspect the casters. Repair/replace as needed.
- Perform cavity temperature calibration per manufacturer's recommended calibration procedures.
WARNING

To prevent serious injury, death, or property damage, always disconnect the appliance from the power source before cleaning or servicing.
Cooking, Holding, Smoking Guidelines
Beef
Beef brisket 20
Beef short ribs 20
Beef short ribs, braised 20
Beef striploin 21
Prime rib (#109) 21
Prime rib, Special....21
Corned beef 22
Ribeye roll 22
Beef round....22
Beef round, cafeteria/steamship ..... 23
Tenderloin 23
Veal loin. 23
Lamb
Lamb, leg. 24
Lamb racks (frenched) 24
Lamb shanks 24
Pork
Pork leg, fresh 25
Ham, cured & smoked 25
Pork chops. 25
Pork loin 26
Pork shoulder....26
Pork ribs 26
Pig, whole 27
Processed meats 27
Poultry
Chicken, pieces & halves 28
Chicken, whole. 28
Chicken, fried two-step method 29
Cornish hens 29
Duck, whole 30
Duck confit 30
Turkey 30
Turkey breast....31
Turkey roll 31
Quantities listed in this section are per oven compartment.
Fish
Fish, baked 32
Salmon steaks 32
Trout 32
Miscellaneous
Quiche 33
Rice 33
Baked egg custard....33
Au gratin potatoes 34
Canning 34
Crème Brûlée....34
Tempering chocolate 35
Sheet cake 35
Cheese cake 35
Frozen convenience 36-37
Precooked frozen finger foods 38
Breakfast sandwiches....38
Cookies 39
Proofing dough 39
Smoking
Beef brisket 40
Pastrami 40
Beef tongue 40
Ham....41
Ribs 41
Pork butt 41
Pork belly. 42
Duck 42
Turkey 42
Fish fillets 43
Whole salmon. 43
Shrimp 43
Cold smoked canned tomatoes....44
Cold smoked salmon 44-45
The times and temperatures are suggested guidelines only. All cooking should be based on internal product temperatures. Due to variations in product quality, weight and desired degree of doneness, the cooking time may need to be adjusted accordingly. Always follow local health (hygiene) regulations for all internal temperature requirements.
Beef
| Product > | Beef brisket Beef short ribs | Ibs Beef short ribs, braised | |
| Size of meat | Beef brisket, fresh, 9-13 lbs (4 to 6 kg) | Short ribs, 10 to 12 oz. (.28 to .34 kg) pieces | Short ribs, 10 to 12 oz. (.28 to .34 kg) pieces |
| Instructions | Season brisket and wrap individually in clear plastic wrap for cooking. Place wrapped brisket directly on wire shelves. | Season as desired. Place ribs side-by-side in pans. For an overnight cook and hold, cover pans loosely with clear plastic wrap to retain additional product moisture. | Add ribs to hot liquid for braising. |
| Suggested pan | None 300, 1000, 1200 - Full-size hotel pan500, 750 - Sheet pan | Full-size hotel pan | |
| Number of shelves | |||
| 300 | 1 | 2 | 2 |
| 500 | 3 | 3 | 3 |
| 750 | 2 | 3 | 3 |
| 1000, 1200 | 3 | 4 | 5 |
| Items per shelf | |||
| 300 | 1 roast | 1 full-size pan | 1 full-size pan |
| 500 | 1 roast | 1 half-size sheet pan | 1 full-size pan |
| 750 | 3-4 roasts | 1 full-size sheet pan | 2 full-size pan |
| 1000, 1200 | 2-3 roasts | 1 full-size pan | 1 full-size pan |
| Maximum capacity | |||
| 300 | 1 roast | 2 full-size hotel pans | 2 full-size pans |
| 500 | 3 roasts up to 40 lbs (18 kg) | 3 half-size sheet pans | 4 full-size pans |
| 750 | 6-8 roasts up to 100 lbs (45 kg) | 3 full-size sheet pans | 8 full-size pans |
| 1000, 1200 | 6-9 roasts up to 100 lbs (45 kg) | 4 full-size hotel pans | 4 full-size pans |
| Vent position | One-half open One-half open One-half open | ||
| Cook temperature | 300: 225°F (107°C)500, 750, 1000, 1200: 250°F (121°C) | 300: 225°F (107°C)500, 750, 1000, 1200: 250°F (121°C) | 300: 225°F (107°C)500, 750, 1000, 1200: 250°F (121°C) |
| Probe temperature | 300: 160°F (71°C)500, 750, 1000, 1200: 170°F (77°C) | 300: 160°F (71°C)500, 750, 1000, 1200: 170°F (77°C) | 300: 170°F (77°C)500, 750, 1000, 1200: 170°F (77°C) |
| Hold temperature | 160°F (71°C) 160°F (71°C) 160°F (71°C) | ||
| Cook time | 20 min/lb for first roast (44 min/kg) plus 30 minutes each additional roast. | 3 hours for the first pan plus 30 minutes for each additional pan. | 3 hours for the first pan plus 30 minutes for each additional pan. |
| Minimum hold time | 6 hours 6 hours 6 hours | ||
| Maximum hold time | 24 hours 18 hours 12 hours | ||
| Overnight cook / hold | Highly recommended | Required | Highly recommended |
| Final Internal temperature | 180°F (82°C) | 170° to 190°F (77° to 88°C) | 170° to 190°F (77° to 88°C) |
| Override allowance | 300: 20°F (11°C)500, 750, 1000, 1200: 10°F (6°C) | — | 15°F (8°C) |
Beef
| Product > | Beef strip loin Prime rib P | Prime rib special | |
| Size of meat | Short-cut, boneless: 8-12 lb (4 to 5 kg) Beef rib, | roast ready, with fat cap, #109:20 lb (9 kg) average weight | Beef rib, roast ready special, tied:14 to 18 lb (6 to 8 kg) average weight |
| Instructions | Season as desired. Place roasts directly on the wire shelves with fat side down. Place larger roasts toward the top of the oven compartment. | Season as desired. Place roasts directly on wire shelves with the larger roasts toward the top of the oven compartment. | Season as desired. Place roasts directly on wire shelves with the larger roasts toward the top of the oven compartment. |
| Suggested pan | None None None | ||
| Number of shelves | |||
| 300 | 2 | 1 | 1 |
| 500 | 2 | 2 | 2 |
| 750 | 2 | 2 | 2 |
| 1000, 1200 | 3 | 3 | 3 |
| Items per shelf | |||
| 300 | 1 roast | 1 roast | 1 roast |
| 500 | 2 roasts | 1 roast | 1 roast |
| 750 | 4 roasts | 3 roasts | 3 roasts |
| 1000, 1200 | 3 roasts | 2 roasts | 2 roasts |
| Maximum capacity | |||
| 300 | 2 roasts up to 24 lb (11 kg) | 1 roast 20 lb (9 kg) | 1 roast 18 lb (8 kg) |
| 500 | 4 roasts up to 40 lb (18 kg) | 2 roasts - 40 lb (18 kg) | 2 roasts 36 lb (16 kg) |
| 750 | 8 roasts up to 100 lb (45 kg) | 6 roasts - 120 lb (54 kg) | 6 roasts 100 lb (45 kg) |
| 1000, 1200 | 9 roasts up to 100 lb (45 kg) | 6 roasts - 120 lb (54 kg) | 6 roasts 100 lb (45 kg) |
| Vent position | One-half open One-half open One-half open | ||
| Cook temperature | 300: 225°F (107°C)500, 750, 1000, 1200: 250°F (121°C) | 300: 225°F (107°C)500, 750, 1000, 1200: 250°F (121°C) | 300: 225°F (107°C)500, 750, 1000, 1200: 250°F (121°C) |
| Probe temperature | 300: 90°F (32°C)500, 750, 1000, 1200: 100°F (38°C) | 300: 90°F (32°C)500, 750, 1000, 1200: 100°F (38°C) | 300: 90°F (32°C)500, 750, 1000, 1200: 100°F (38°C) |
| Hold temperature | 140°F (60°C) 140°F (60°C) 140°F (60°C) | ||
| Cook time | 8 to 10 lb roasts (4 to 4,5 kg):8 minutes per pound for the first roast (18 minutes per kilogram) plus add 8 minutes for each additional roast.12 lb roasts (5 kg):10 minutes per pound for the first roast (22 minutes per kilogram) plus add 8 minutes for each additional roast. | 10 minutes per pound for the first roast (22 minutes per kilogram) plus add 30 minutes for each additional roast. | 10 minutes per pound for the first roast (22 minutes per kilogram) plus add 15 minutes for each additional roast. |
| Minimum hold time | 4 hours 4 to 6 hours 4 or more hours | ||
| Maximum hold time | 12 hours 24 hours 24 hours | ||
| Overnight cook / hold | Optional | Highly recommended | An overnight cook and hold can be done with this cut. |
| Final internal temperature | 130°F (54°C) Rare | 130°F (54°C) Rare | 130°F (54°C) Rare |
| Override allowance | 300: 40°F (22°C)500, 750, 1000, 1200: 30°F to 40°F (17°C to 22°C)depending on size | 300: 40°F (22°C)500, 750, 1000, 1200: 30°F (17°C) | 300: 40°F (22°C)500, 750, 1000, 1200: 30°F (17°C) |
MN-29492 (11/16) • Cooking, Holding, Smoking Guidelines • 21
Beef
| Product > | Corned beef Ribeye roll Beef round | ||
| Size of meat | 9 to 12 lb (4 to 5 kg) | Beef ribeye roll, lip on, #112A: 8 to 12 lb (3 to 5 kg) | Beef round, top (inside), or bottom (gooseneck), Untrimmed: 14 to 23 lb (6 to 10 kg) |
| Instructions | Leave the corned beef in the original plastic bag and place the corned beef bag directly on the wire shelf. | Season as desired. Place roasts directly on the wire shelves, fat side down. Place larger roasts toward the top of the oven compartment. | Season as desired. Place roasts directly on wire shelves with fat side down. Place larger roasts toward the top of the oven compartment. |
| Suggested pan | None None None | ||
| Number of shelves | |||
| 300 | 2 | 1 | 1 |
| 500 | 2 | 2 | 1 or 2 |
| 750 | 2 | 2 | 2 |
| 1000, 1200 | 3 | 3 | 3 |
| Items per shelf | |||
| 300 | 1 roast | 1 roast | 1 roast |
| 500 | 2 roasts | 2 roasts | 1: 23 lb (10 kg) or 2: 14 lb (6 kg) roasts |
| 750 | 3 to 4 roasts | 3 roasts | 3: 23 lb (10 kg) or 4: 14 lb (6 kg) roasts |
| 1000, 1200 | 2 to 3 roasts | 3 roasts | 2: 23 lb (10 kg) or 3: 14 lb (6 kg) roasts |
| Maximum capacity | |||
| 300 | 2 roasts up to 24 lb (11 kg) | 1 roast 12 lb (5 kg) | 1 roast up to 23 lb (10 kg) |
| 500 | 4 roasts up to 40 lb (18 kg) | 4 roasts up to 40 lb (18 kg) | 2 lg. or 4 sm. roasts up to 40 lb (18 kg) |
| 750 | 6 to 8 roasts up to 100 lb (45 kg) | 6 roasts up to 100 lb (45 kg) | 6 roasts up to 100 lb (45 kg) |
| 1000, 1200 | 6 to 9 roasts up to 100 lb (45 kg) | 9 roasts up to 100 lb (45 kg) | 6 lg. or 9 sm. roasts up to 100 lb (45 kg) |
| Vent position | One-half open One-half open One-half open | ||
| Cook temperature | 300: 225°F (107°C) | 300: 225°F (107°C) | 300: 225°F (107°C) |
| 500, 750, 1000, 1200: 250°F (121°C) | 500, 750, 1000, 1200: 250°F (121°C) | 500, 750, 1000, 1200: 250°F (121°C) | |
| Probe temperature | 300: 160°F (71°C) | 300: 90°F (32°C) | 300: 90°F (32°C) |
| 500, 750, 1000, 1200: 165°F (74°C) | 500, 750, 1000, 1200: 100°F (38°C) | 500, 750, 1000, 1200: 100°F (38°C) | |
| Hold temperature | 160°F (71°C) 140°F (60°C) 140°F (60°C) | ||
| Cook time | 20 minutes per pound for the first corned beef (44 minutes per kilogram) plus add 30 minutes for each additional corned beef. | 8 to 11 lb (4 to 5 kg) roasts: 8 minutes per pound for the first roast (18 minutes per kilogram) plus add 10 minutes for each additional roast. | 14 lb (6 kg) roasts: 10 minutes per pound for the first roast (22 minutes per kilogram) plus add 15 minutes for each additional roast. |
| 12 lb (5 kg) roasts: 10 minutes per pound for the first roast (22 minutes per kilogram) plus add 10 minutes for each additional roast. | 15 to 23 lb (7 to 10 kg) roasts: 10 minutes per pound for the first roast (22 minutes per kilogram) plus add 30 minutes for each additional roast. | ||
| Minimum hold time | 6 or more hours 4 hours | 14 lb (6 kg) roasts: 4 to 6 hours | |
| 15 to 23 lb (7 to 10 kg) roasts: 8-10 hrs. | |||
| Maximum hold time | 24 hours 12 hours | 14 lb (6 kg) roasts: 12 hours | |
| 15 to 23 lb (7 to 10 kg) roasts: 24 hours | |||
| Overnight cook / hold | Required | Optional | Optional for smaller roasts. Highly recommended for larger cuts. |
| Final Internal temperature | 175°F (79°C) | 130°F (54°C) Rare | 130°F (54°C) Rare |
| Override allowance | — | 30°F to 40°F (17°C to 22°C) depending on size | 300: 40°F (22°C) |
| 500, 750, 1000, 1200: 30°F (17°C) | |||
| Additional information | If desired corn beef can be removed from the bag and wrapped in clear plastic wrap for cooking. | — | Do not overload the oven. |
MN-29492 (11/16) • Cooking, Holding, Smoking Guidelines • 22
Beef, Veal
| Product > | Steamship round Beef tenderloin Veal loin | ||
| Size of meat | Any one of a variety of beef rounds used for carving on a buffet line. May be bone-in or boneless and may have a handle on or off as required.Weight range: 40 to 50 lb (18 to 23 kg)50 to 80 lb (23 to 36 kg) | Beef loin, full tenderloin, side muscle off, skinned:4 to 6 lb (2 to 3 kg) | Veal loin, trimmed:8 to 10 lb (4 to 5 kg) |
| Instructions | Meat should be at a refrigerated internal temperature of 38^ to 40^ ( 3^ to 4^ ) when placed in a preheated oven. | Season as desired and place directly on wire shelves. | Season as desired and place directly on wire shelves. |
| Suggested pan | None None None | ||
| Number of shelves3005007501000, 1200 | —111 | 2233 | 1223 |
| Items per shelf3005007501000, 1200 | —1 roast1-2 roasts1-2 roasts | 2 tenderloins3 tenderloins5 tenderloins5 tenderloins | 1 roast2 roasts4 roasts3 roasts |
| Maximum capacity3005007501000, 1200 | —40 lb (18 kg)up to 80 lb (36 kg)up to 80 lb (36 kg) | 4 tenderloins6 tenderloins15 tenderloins15 tenderloins | 1 roast4 roasts8 roasts9 roasts |
| Vent position | One-half open One-half open One-half open | ||
| Cook temperature | 250^ (121°C) | 300: 225^ (107°C)500, 750, 1000, 1200: 250^ to 275^ (121°C to 135°C) | 300: 225^ (107°C)500, 750, 1000, 1200: 250^ (121°C) |
| Probe temperature | 100^ (38°C) | 300: 85^ (29°C)500, 750, 1000, 1200: 95^ (35°C) | 300: 90^ (32°C)500, 750, 1000, 1200: 100^ (38°C) |
| Hold temperature | 150^ (66°C) 140^ (60°C) 140^ (60°C) | ||
| Cook time | 40 to 49 lb (18 to 22 kg) roasts:10 minutes per pound for the first roast (22 minutes per kilogram) plus add 15 minutes for a second roast.50 to 80 lb (23 to 36 kg) roasts: one roast only —7 minutes per pound (15 minutes per kilogram) | Full load to Rare: 1 hour | 12 minutes per pound for the first roast (26 minutes per kilogram) plus add 20 minutes for each additional roast. |
| Minimum hold time | 40 to 49 lb (18 to 22 kg) roasts: 6 to 8 hrs.50 to 80 lb (23 to 36 kg) roasts: 8 to 12 hrs. | 1 hour | 1 hour |
| Maximum hold time | 24 hours | 6 hours | 10 hours |
| Overnight cook / hold | Required | Not recommended | Not recommended |
| Final internal temperature | 138^ (59°C) Rare | 130^ (54°C) Rare | 140^ (60°C) Medium rare |
| Override allowance | — | 300: 45^ (25°C)500, 750, 1000, 1200: 35^ (14°C) | 300: 50^ (28°C)500, 750, 1000, 1200: 40^ (22°C) |
| Additional Information | When cooking these large roasts, reinforce the shelf support by using two wire shelves in one shelf bracket. | — | — |
MN-29492 (11/16) • Cooking, Holding, Smoking Guidelines • 23
Lamb
| Product > | Lamb, leg Lamb racks (frenched) Lamb shanks | ||
| Size of meat | Lamb leg, boneless, tied: 8 to 11 lb (4 to 5 kg) Lamb rack, roast ready, single, frenched: 7-bone Lamb shanks | ||
| Instructions | Season as desired and place directly on wire shelves. Season as desired. Place racks on sheet pans with icing racks inserted in pans. | Add shanks to hot braising liquid. | |
| Suggested pan | None Sheet pan Full-size hotel pan | ||
| Number of shelves | |||
| 300 | 2 | 2 | None |
| 500 | 2 | 4 | None |
| 750 | 2 | 4 | None |
| 1000, 1200 | 3 | None | 4 |
| Items per shelf | |||
| 300 | 1 roast | 1 half-size sheet pan | 1 |
| 500 | 2 roasts | 1 half-size sheet pan | 1 |
| 750 | 6 roasts | 1 full-size sheet pan | 2 |
| 1000, 1200 | 4 roasts | 1 full-size sheet pan | 1 |
| Maximum capacity | |||
| 300 | 2 roast | 2 half-size sheet pans | 1 full-size pans |
| 500 | 4 roasts up to 40 lb (18 kg) | 4 half-size sheet pans | 4 full-size pans |
| 750 | 12 roasts up to 100 lb (45 kg) | 4 full-size sheet pans | 8 full-size pans |
| 1000, 1200 | 12 roasts up to 100 lb (45 kg) | 4 full-size sheet pans | 4 full-size pans |
| Vent position | One-half open One-half open One-half open | ||
| Cook temperature | 300: 225°F (107°C)500, 750, 1000, 1200: 250°F (121°C) | 300: 225°F (107°C)500, 750, 1000, 1200: 250°F (121°C) | 300: 225°F (107°C)500, 750, 1000, 1200: 250°F (121°C) |
| Probe temperature | 300: 95°F (35°C)500, 750, 1000, 1200: 105°F (41°C) | 300: 85°F (29°C)500, 750, 1000, 1200: 90°F (32°C) | 160°F (71°C)* |
| Hold temperature | Rare: 140°F (60°C)Medium rare: 140°F (60°C)Medium: 150°F (66°C)Medium well: 160°F (71°C)Well: 160°F (71°C) | 140°F (60°C) | 160°F (71°C) |
| Cook time | 10 minutes per pound for the first roast (22 minutes per kilogram) plus add 15 minutes for each additional roast | 1-1/2 hoursFull Load | 3 hours plus 30 minutes per pan |
| Minimum hold time | 2 hours | 1 hour | 4 hours |
| Maximum hold time | 10 hours | 4 hours | 12 hours |
| Overnight cook / hold | Optional | Not recommended | Yes |
| Final internal temperature | Rare: 130°F (54°C)Medium rare: 135°F (57°C)Medium: 145°F (63°C)Medium well: 150°F (66°C)Well: 160°F (71°C) | 135°F to 140°F (57°C to 60°C) | 160°F (71°C) |
| Override allowance | 300: 35°F (19°C)500, 750, 1000, 1200: 25°F (14°C) | 300: 55°F-60°F (31°C-33°C)500, 750, 1000, 1200: 45°F-50°F (25°C-28°C) | 20°F (11°C) |
MN-29492 (11/16) • Cooking, Holding, Smoking Guidelines • 24
Pork
| Product > | Pork leg, fresh Ham - cured | and smoked Pork chops | |
| Size of meat | Pork leg, fresh: 14 to 17 lb (6 to 8 kg) Ham, boneless, skinless, cured and smoked:10 to 14 lb (4,5 to 6 kg) | Pork loin chops: 3 to 8 oz (85 to 227 grams)approximate weight range.Pork loin rib chops with pocket (stuffed): 5 to 8 oz(142 to 227 grams) approximate weight range.Thickness: 1" to 1-1/2" (25 to 38 mm) | |
| Instructions | Season as desired and place directly on wire shelves. | Place ham directly on wire shelves for cooking. | Season as desired.Place chops side-by-side on sheet pans. |
| Suggested pan | None None Sheet pan | ||
| Number of shelves3005007501000, 1200 | 12223 | 22223 | 344None |
| Items per shelf3005007501000, 1200 | 1 pork leg2 pork legs2-4 pork legs2-3 pork legs | 1 ham2 hams4 hams3 hams | 1 half-size sheet pan1 half-size sheet pan1 full-size sheet pan1 full-size sheet pan |
| Maximum capacity3005007501000, 1200 | 1 pork leg4 pork legs up to 40 lb (18 kg)4 to 8 pork legs up to 100 lb (45 kg)6 to 9 pork legs up to 100 lb (45 kg) | 2 hams4 hams up to 40 lb (18 kg)8 hams up to 100 lb (45 kg)9 hams up to 100 lb (45 kg) | 3 half-size sheet pans4 half-size sheet pans4 full-size sheet pans5 full-size sheet pans |
| Vent position | One-half open One-half open One-half open | ||
| Cook temperature | 250°F to 275°F (121°C to 135°C) 250°F to 275°F (121°C to 135°C) 250°F (121°C) | ||
| Probe temperature | 300: 120°F (49°C)500, 750, 1000, 1200: 130°F to 135°F (54°C to 57°C) | 300: 138°F (59°C)500, 750, 1000, 1200: 148°F (64°C) | 300: 120°F (50°C)500, 750, 1000, 1200: 130°F (54°C) |
| Hold temperature | 160°F (71°C) | 160°F (71°C) | 160°F (71°C) |
| Cook time | 12 minutes per pound for the first pork leg (26 minutesper kilogram) plus add 30 minutes for each additionalpork leg | 12 minutes per pound for the first ham (26 minutes perkilogram) plus add 30 minutes for each additional ham | 3-1/2 hoursFull Load |
| Minimum hold time | 2 hours | 1 to 2 hours | 1-1/2 hours |
| Maximum hold time | 10 hours | 10 hours | 6 to 8 hours |
| Overnight cook / hold | Optional | Optional | Not recommended |
| Final Internaltemperature | 160°F (71°C) | 160°F (71°C) | 160°F to 170°F (71°C to 77°C) |
| Override allowance | 300: 40°F (22°C)500, 750, 1000, 1200: 30°F (17°C) | 300: 22°F (12°C)500, 750, 1000, 1200: 12°F (7°C) | 300: 40°F (22°C)500, 750, 1000, 1200: 30°F (17°C) |
MN-29492 (11/16) • Cooking, Holding, Smoking Guidelines • 25
Pork
| Product > | Pork loin Pork shoulder | Pork ribs | |
| Size of meat | Pork loin, boneless, tied:8 to 10 lb (4 to 5 kg) | Pork shoulder, Boston butt, boneless:8 to 10 lb (4 to 5 kg) | Spareribs: 1-1/2 down (38 kg or less)Pork loin, back ribs (baby back ribs):1-1/2 down (38 kg or less) |
| Instructions | Season as desired and place roasts directly on wire shelves for cooking. | Season as desired and place in pans. Ribs can be cooked | from frozen or thawed. Season as desired. Place ribs on sheet pans, slightly overlapping and cover with clear plastic wrap only if cooking overnight. If desired, barbecue sauce can be included with initial seasoning to allow it to cook into the ribs. |
| Suggested pan | None Full-size hotel pan Sheet pan | ||
| Number of shelves3005007501000, 1200 | 2233 | 12None3 | 234None |
| Items per shelf3005007501000, 1200 | 2 roasts2 roasts3 roasts3 roasts | 2 roasts per pan / 1 pan2 roasts per pan / 2 pans2 roasts per pan / 2 pans2 roasts per pan / 2 pans | 1 half-size sheet pan1 half-size sheet pan1 full-size sheet pan1 full-size sheet pan |
| Maximum capacity3005007501000, 1200 | 4 roasts4 roasts up to 40 lb (18 kg)9 roasts up to 100 lb (45 kg)9 roasts up to 100 lb (45 kg) | 2 roasts4 roasts up to 40 lb (18 kg)10 roasts up to 100 lb (45 kg)12 roasts up to 100 lb (45 kg) | 3 half-size sheet pans approx. 20 lb (9 kg)3 half-size sheet pans approx. 20 lb (9 kg)4 full-size sheet pans5 full-size sheet pans |
| Vent position | One-half open One-half open One-half open | ||
| Cook temperature | 250°F to 275°F (121°C to 135°C) 250°F (121°C) 250°F (121°C) | ||
| Probe temperature | 300: 110°F (43°C)500, 750, 1000, 1200: 120°F (49°C) | 300: 165°F (74°C)500, 750, 1000, 1200: 175°F (80°C) | Not recommended |
| Hold temperature | 160°F (71°C) 160°F (71°C) 160°F (71°C) | ||
| Cook time | 15 minutes per pound for the first roast (33 minutes per kilogram) plus add 30 minutes for each additional roast. | 20 minutes per pound for the first roast (33 minutes per kilogram) plus add 30 minutes for each additional roast. | Thawed ribs: 2-1/2 to 3-1/2 hoursFrozen ribs: 3-1/2 to 4-1/2 hoursFull Load |
| Minimum hold time | 2 hours 2 hours 1-1/2 hours | ||
| Maximum hold time | 12 hours | 12 hours | 12 hours |
| Overnight cook / hold | Highly recommended | Highly recommended | Optional |
| Final internal temperature | 155°F to 165°F (68°C to 74°C) | 180°F (82°C) | 160°F to 170°F (71°C to 77°C)Well Done |
| Override allowance | 300: 55°F (31°C)500, 750, 1000, 1200: 45°F (25°C) | — | — |
| Additional information | — | — | Additional barbecue sauce can be added after completing the hold cycle. Heat sauce to 150°F (66°C) and coat ribs just before serving. |
MN-29492 (11/16) • Cooking, Holding, Smoking Guidelines • 26
Pork, Processed Meats
| Product > | Pig, whole Processed meats | |
| Size of meat | 33 lb (15 kg) whole pig Sausage, fresh: Any of a variety | of processed meat product including bratwurst, Polish sausage, breakfast links, smoked sausage, hot dogs, etc. |
| Instructions | Bend hind legs under the pig so that it sits on the shelf. Season as desired. | Place sausage side-by-side on sheet pans. Add a sufficient amount of hot water so that it just covers the bottom of each pan. Cover each pan with clear plastic wrap. |
| Suggested pan | None Sheet pan | |
| Number of shelves | ||
| 300 | — | 2 |
| 500 | — | 4 |
| 750 | 1 | 5 |
| 1000, 1200 | 2 | None |
| Items per shelf | ||
| 300 | — | 1 half-size sheet pan |
| 500 | — | 1 half-size sheet pan |
| 750 | 1 | 1 full-size sheet pan |
| 1000, 1200 | 1 | 1 full-size sheet pan |
| Maximum capacity | ||
| 300 | — | 2 half-size sheet pans |
| 500 | — | 4 half-size sheet pans |
| 750 | 1 | 5 full-size sheet pans |
| 1000, 1200 | 1 | 8 full-size sheet pans |
| Vent position | Open full Open full | |
| Cook temperature | 250°F (121°C) 250°F (121°C) | |
| Probe temperature | 175°F (80°C) Not recommended | |
| Hold temperature | 160°F (71°C) 300: 150°F (66°C) | 500, 750, 1000, 1200: 160°F (71°C) |
| Cook time | 5 hours 1-1/2 to 2 hours | Full load |
| Minimum hold time | — | — |
| Maximum hold time | 12 hours 6 hours | |
| Overnight cook / hold | Required | Not recommended |
| Final Internal temperature | 167°F (75°C) | 170°F (77°C) |
| Override allowance | — | — |
| Additional Information | Reheating time: 250°F (121°C) 5 hours | For precooked sausage, follow the same time and temperature settings as fresh sausage. Cooking time for a precooked sausage will vary, particularly for less than full loads. When heating a full load of precooked sausage, check the internal product temperature after approximately one (1) hour of cooking time. |
MN-29492 (11/16) • Cooking, Holding, Smoking Guidelines • 27
Poultry
| Product > | Chicken, pieces and halves Chicken, whole | |
| Size of meat | 2-1/2 to 2-3/4 lb (1,1 to 1,2 kg) average weight 2-1/4 to 2-3/4 lb (1 to 1,2 kg) | |
| Instructions | Clean chicken and remove excess fat. Brush chicken with oil, butter or margarine (optional). Season as desired and sprinkle with paprika. | Clean chicken and remove excess fat. Brush chicken with oil, butter or margarine (optional). Season as desired and sprinkle with paprika. For better whole bird appearance, fold chicken wings and tuck under the back of the bird. Make a slit in the skin of the chicken (lower end of the bird), cross chicken legs and insert both legs through the slit. |
| Suggested pan | Sheet pan Sheet pan | |
| Number of shelves | ||
| 300 | 2 | 2 |
| 500 | 3 | 2 |
| 750 | 3 | 2 |
| 1000, 1200 | None | None |
| Items per shelf | ||
| 300 | 1 half-size sheet pan | 3 chickens |
| 500 | 1 half-size sheet pan | 4 chickens |
| 750 | 1 full-size sheet pan | 9 chickens |
| 1000, 1200 | 1 full-size sheet pan | 9 chickens |
| Maximum capacity | ||
| 300 | 12 halves, 2 half-size sheet pans | 6 chickens - 6 full size pans |
| 500 | 18 halves or 60 pieces, 3 half-size sheet pans | 8 chickens - 2 half-size sheet pans |
| 750 | 36 halves or 120 pieces, 3 full-size sheet pans | 18 chickens - 2 full-size sheet pans |
| 1000, 1200 | 48 halves or 160 pieces, 4 full-size sheet pans | 27 chickens - 3 full-size sheet pans |
| Vent position | Open full Open full | |
| Cook temperature | 275°F to 300°F (135°C to 149°C) 275°F to 300°F (135°C to 149°C) | |
| Probe temperature | 300: 145°F (63°C)500, 750, 1000, 1200: 155°F (68°C) | 300: 145°F (63°C)500, 750, 1000, 1200: 155°F (68°C) |
| Hold temperature | 160°F (71°C) 160°F (71°C) | |
| Cook time | 2-1/2 to 3 hours, full load 3 to 3-1/2 hours, full load | |
| Minimum hold time | 30 minutes 1 hour | |
| Maximum hold time | 8 hoursNote: When holding longer than 30 minutes, cover chickens with clear plastic wrap. | 8 to 10 hoursNote: When cooking and holding overnight, cover the pans of raw chicken with clear plastic wrap for cooking. Set cooking thermostat to 250°F (121°C) for 4 hours. |
| Overnight cook / hold | Not recommended Optional | See maximum hold time note above |
| Final Internal temperature | 170°F (77°C) 185°F (85°C) | |
| Override allowance | 300: 25°F (14°C)500, 750, 1000, 1200: 15°F (8°C) | 300: 25°F (14°C)500, 750, 1000, 1200: 15°F (8°C) |
| Additional information | — If barbecue sauce is desired, heat sauce to 150°F (66°C) and coat chicken approximately 1 hour before serving. | |
MN-29492 (11/16) • Cooking, Holding, Smoking Guidelines • 28
Poultry
| Product > | Chicken, fried (two-step method**) | Cornish hens |
| Size of meat | 2-1/2 to 2-3/4 lb (1,1 to 1,2 kg) fryer, 8 piece cut 12 oz (340 grams) | each |
| Instructions | Clean chicken and remove all excess fat. Soak chicken in cold, salted water for 15 minutes, drain, and dredge in dry breading. Coat pans with vegetable release spray. Place chicken side-by-side on pans — separating breasts and wings from legs and thighs. Cover chicken loosely with clear plastic wrap. | Clean hens and remove excess fat. Fold wings and tuck under the back of the bird. Make a slit in the skin of the hen (lower end of bird), cross hen legs and insert both legs through the slit. Brush hens with oil, butter, or margarine (OPTIONAL). Season as desired and sprinkle with paprika. Space evenly on sheet pans. |
| Suggested pan | Sheet pan Sheet pan | |
| Number of shelves | ||
| 300 | 2 | 1 |
| 500 | 3 | 2 |
| 750 | 3 | 3 |
| 1000, 1200 | None | None |
| Items per shelf | ||
| 300 | 1 half-size sheet pan | 1 half-size sheet pan, 9 hens per pan |
| 500 | 1 half-size sheet pan | 1 half-size sheet pan, 9 hens per pan |
| 750 | 1 full-size sheet pan | 1 full-size sheet pan, 18 hens per pan |
| 1000, 1200 | 1 full-size sheet pan | 1 full-size sheet pan, 18 hens per pan |
| Maximum capacity | ||
| 300 | 12 halves, 2 half-size sheet pans | 1 half-size sheet pan, 9 hens per pan |
| 500 | 18 halves or 60 pieces, 3 half-size pans | 2 half-size sheet pans, 18 Cornish hens |
| 750 | 36 halves or 120 pieces, 3 full-size pans | 3 full-size sheet pans, 54 Cornish hens |
| 1000, 1200 | 48 halves or 160 pieces, 4 full-size pans | 4 full-size sheet pans, 72 Cornish hens |
| Vent position | One-half open Open full | |
| Cook temperature | 275°F (135°C) 275°F (135°C) | |
| Probe temperature | 300: 145°F (63°C)500, 750, 1000, 1200: 155°F (68°C) | 300: 145°F (63°C)500, 750, 1000, 1200: 155°F (68°C) |
| Hold temperature | 160°F (71°C) 160°F (71°C) | |
| Cook time | 2-1/2 to 3 hours - Full load 3 to 3-1/2 hours - Full load | |
| Minimum hold time | — 1 hour | |
| Maximum hold time | 4 hours 4 to 6 hours | |
| Overnight cook/hold | Not recommended Not recommended | |
| Final internal temperature | 170°F (77°C) 175°F (79°C) | |
| Override allowance | 300: 25°F (14°C)500, 750, 1000, 1200: 15°F (8°C) | 300: 30°F (17°C)500, 750, 1000, 1200: 20°F (11°C) |
\*\*Two-step fried chicken
The two-step method consists of precooking the chicken in a low-temperature oven to retain the product moisture, then adding the crisp, fried appearance by inserting the product in a fryer for a very short period of time. This method can be used with product directly from the oven or the product can be precooked and fried directly from refrigerated storage. With the two-step method the chicken will be moist, flavorful, plump and golden brown. Shrinkage will be low and shortening in the fryer will last much longer.
Frying directly from the oven
- Preheat the fryer to 335°F (168°C).
- If heavier or crisper breading is desired, remove the required portion of chicken from the oven and dredge in fresh breading.
- Drop the chicken in the fryer for 3 minutes or until the chicken is golden brown.
- The chicken can be fried per customer order or in larger quantities. When frying larger quantities, place the fried pieces on a sheet pan with a wire grid insert and place the pans in a preheated Alto-Shaam display case or in a preheated holding cabinet with the door vents fully open.
Frying from refrigerated storage
- Remove the chicken from the Alto-Shaam Halo Heat oven, wrap, chill rapidly and store under refrigeration at 38^ F to 40^ F ( 3^ C to 4^ C).
- Preheat the fryer to 335°F (168°C).
- Remove the required portion of precooked chicken from refrigerated storage.
- Drop the chicken in the fryer for 6 to 7 minutes or until chicken is golden brown.
Poultry
| Product > | Duck, whole Duck confit | Turkey | |
| Size of meat | Duck, whole: 4 to 5 lb (2 kg) Duck, pieces | Turkey, whole: 25 lb (11 kg) | |
| Instructions | Season as desired. Rub duck with oil and paprika and place directly on wire shelves. | Prepare according to recipe. Turkey must be fully thawed. | Season as desired. Rub with oil, butter or margarine (OPTIONAL), and sprinkle with paprika. Place directly on wire shelves. |
| Suggested pan | None Full-size hotel pan None | ||
| Number of shelves | |||
| 300 | 1 | 2 | 1 |
| 500 | 2 | 2 | 1 |
| 750 | 2 | 4 | 1 |
| 1000, 1200 | 3 | 4 | 2 |
| Items per shelf | |||
| 300 | 3 ducks | 1 full-size pan | 1 turkey |
| 500 | 3 ducks | 1 full-size pan | 1 turkey |
| 750 | 6 ducks | 2 full-size pans | 2 turkeys |
| 1000, 1200 | 4 ducks | 1 full-size pan | 2 turkeys |
| Maximum capacity | |||
| 300 | 3 ducks | 2 full-size pans | 1 turkey |
| 500 | 6 ducks | 4 full-size pans | 1 turkey |
| 750 | 12 ducks | 8 full-size pans | 2 turkeys |
| 1000, 1200 | 12 ducks | 4 full-size pans | 4 turkeys |
| Vent position | Open full Open full Open full | ||
| Cook temperature | 300°F (149°C) 250°F (121°C) 250°F (121°C) | ||
| Probe temperature | 300: 145°F (63°C)500, 750, 1000, 1200: 155°F (68°C) | Not recommended | 300: 135°F (57°C) in thigh500, 750, 1000, 1200: 145°F (63°C) in thigh |
| Hold temperature | 160°F (71°C) | 160°F (71°C) | 160°F (71°C) |
| Cook time | 2-1/2 to 3 hours - Full Load | 3 hours | 10 minutes per pound for the first turkey (22 minutes per kg) plus add 30 minutes for each additional turkey. |
| Minimum hold time | 1 hour | 4 hours | 1 to 2 hours |
| Maximum hold time | 8 hours | 12 hours | 10 hours |
| Overnight cook / hold | Not recommended | Yes | Highly recommended |
| Final internal temperature | 170°F (77°C) | 175°F (79°C) | 170°F (77°C) |
| Override allowance | 300: 25°F (14°C)500, 750, 1000, 1200: 15°F (8°C) | — | 300: 35°F (19°C)500, 750, 1000, 1200: 25°F (14°C) |
Poultry
| Product > | Turkey breast Turkey roll | Recipe | |
| Size of meat | 10 to 15 lb (5 to 7 kg) Precooked, frozen: 8-12 lb (4-5 kg) | ||
| Instructions | Turkey breast should be at a refrigerated temperature of 38°F to 40°F (3°C to 4°C) when placed in a preheated oven. Season as desired. Brush with oil, butter or margarine (optional), and sprinkle with paprika. Place turkey breasts directly on wire shelves. | Place fully frozen turkey rolls directly on wire shelves to reheat. | |
| Suggested pan | None None | ||
| Number of shelves | |||
| 300 | 2 | 1 | |
| 500 | 2 | 2 | |
| 750 | 2 | 2 | |
| 1000, 1200 | 3 | 3 | |
| Items per shelf | |||
| 300 | 1 turkey breast | 1 turkey roll | |
| 500 | 2 turkey breasts | 2 turkey rolls | |
| 750 | 4 turkey breasts | 4 turkey rolls | |
| 1000, 1200 | 3 turkey breasts | 3 turkey rolls | |
| Maximum capacity | |||
| 300 | 2 turkey breasts | 1 turkey roll | |
| 500 | 4 turkey breasts | 4 turkey rolls | |
| 750 | 8 turkey breasts | 8 turkey rolls | |
| 1000, 1200 | 9 turkey breasts | 9 turkey rolls | |
| Vent position | Open full Open full | ||
| Cook temperature | 275°F (135°C) 250°F (121°C) | ||
| Probe temperature | 140°F (60°C) — | ||
| Hold temperature | 300: 165°F (74°C)500, 750, 1000, 1200: 160°F (71°C) | 160°F (71°C) | |
| Cook time | 3-1/2 to 4-1/2 hoursFull load | 3 to 4 hoursFull load | |
| Minimum hold time | 1 hour 1 hour | ||
| Maximum hold time | 10 hours 6 to 8 hours | ||
| Overnight cook / hold | OptionalNotice: When cooking and holding overnight, set the cook thermostat at 250°F (121°C) | Not recommended | |
| Final internal temperature | 170°F (77°C) | 165°F (74°C) | |
| Override allowance | 30°F (17°C) | 10°F (6°C) | |
Fish
| Product > | Fish, baked Salmon steaks Trout | ||
| Size of meat | Fish fillets, fresh or frozen:6 to 8 oz (170 to 227 grams) | 6 to 8 oz (170 to 227 grams), 1" (25mm) thick Whole: | 1 lb (454 grams) dressed |
| Instructions | Do not thaw frozen fillets. Spray or coat sheet pans with oil. Place fillets side-by-side on sheet pans. Brush the fish with oil, butter or margarine. Season as desired and sprinkle lightly with paprika. Loosely cover pans with clear plastic wrap. | Spray or coat sheet pans with oil, butter or margarine. Place the steaks side-by-side on sheet pans. Season as desired. | Spray or coat sheet pans with oil. Wipe the trout with a damp towel and place side-by-side on sheet pans.Season as desired. |
| Suggested pan | Sheet pan Sheet pan Sheet pan | ||
| Number of shelves3005007501000, 1200 | 246None | 244None | 266None |
| Items per shelf3005007501000, 1200 | 1 half-size sheet pan1 half-size sheet pan1 full-size sheet pan1 full-size sheet pan | 7-8 steaks per pan, 1 half-size sheet pan7-8 steaks per pan, 1 half-size sheet pan15 steaks per pan, 1 full-size sheet pan15 steaks, 1 full-size sheet pan | 6 trout, 1 half-size sheet pan6 trout, 1 half-size sheet pan12 trout, 1 full-size sheet pan12 trout, 1 full-size sheet pan |
| Maximum capacity3005007501000, 1200 | 2 half-size sheet pans4 half-size sheet pans6 full-size sheet pans8 full-size sheet pans | 14-16 steaks, 2 half-size sheet pans28-32 steaks, 4 half-size sheet pans60 steaks, 4 full-size sheet pans75 steaks, 5 full-size sheet pans | 12 trout, 2 half-size sheet pans36 trout, 6 half-size sheet pans72 trout, 6 full-size sheet pans96 trout, 8 full-size sheet pans |
| Vent position | One-half open One-half open One-half open | ||
| Cook temperature | 275°F (135°C) 275°F (135°C) 275°F (135°C) | ||
| Probe temperature | Not recommended Not recommended Not recommended | ||
| Hold temperature | 160°F (71°C) 160°F (71°C) 160°F (71°C) | ||
| Cook time | 1-1/2 to 2-1/2 hoursFull load | 1-1/2 hoursFull load | 1 to 1-1/2 hoursFull load |
| Minimum hold time | — 1 hour — | ||
| Maximum hold time | 3 to 4 hoursHolding time will vary greatly depending on the type of fish and the initial product moisture content. | 3 to 4 hours 4 to 6 hours | |
| Overnight cook / hold | Not recommended Not recommended Not recommended | ||
| Final internal temperature | 150°F (71°C) 150°F (66°C) 150°F (66°C) | ||
| Override allowance | — — — | ||
MN-29492 (11/16) • Cooking, Holding, Smoking Guidelines • 32
Miscellaneous
| Product > | Quiche Rice Baked egg | custard | |
| Item/Quantity | As needed As needed As needed | ||
| Instructions | Pre-bake the shells in pie plates at 275°F (135°C) for approximately 40 minutes.Pour the quiche mixture into the pre-baked shells and bake in a preheated oven. Quiche is done when product sets-up. | Use 1 x 1 or 1 x 1-1/2 ratio of rice to water. Rice that is high in starch needs to be rinsed. Fill pans to half the pan depth and cover pans with foil. | Use a favorite custard recipe. Pour custard mixture into cups to a depth of 2/3 the container height and place cups on a sheet pan. No water bath is required.Bake in a preheated oven. Custard is done when knife inserted in center of cup is clean when removed. |
| Suggested Pan | Pie plate Hotel pan Sheet pan | ||
| Number of shelves | |||
| 300 | 2 | None | 2 |
| 500 | 2 | None | 4 |
| 750 | 4 | None | 4 |
| 1000, 1200 | 8 | 3 | None |
| Items per shelf | |||
| 300 | 2 quiches | 1 full-size pan | 1 half-size sheet pan |
| 500 | 2 quiches | 1 full-size pan | 1 half-size sheet pan |
| 750 | 5 quiches | 2 full-size pans | 1 full-size sheet pan |
| 1000, 1200 | 3 quiches | 1 full-size pan | 1 full-size sheet pan |
| Maximum capacity | |||
| 300 | 4 quiches | 2 full-size pans | 2 half-size sheet pans |
| 500 | 4 quiches | 2 full-size pans | 4 half-size sheet pans |
| 750 | 20 quiches | 4 full-size pans | 4 full-size sheet pans |
| 1000, 1200 | 24 quiches | 3 full-size pans | 5 full-size sheet pans |
| Vent position | Open full Closed Closed | ||
| Cook temperature | 275°F (135°C) 275°F (135°C) 250°F (121°C) | ||
| Probe temperature | Not recommended Not recommended | Not recommended | |
| Hold temperature | 160°F (71°C) 160°F (71°C) — | ||
| Cook time | Bake approximately 2 hours or until product sets-up.Full load | 60 minutes - 3 hours depending on load and pan size 60 to 90 minutes, 4 oz. ramekinsUp to 3 hours for 4" (100mm) hotel pans | |
| Minimum hold time | — — — | ||
| Maximum hold time | 5 hours 8 hours | — | |
| Overnight cook / hold | No | Optional | No |
| Final internal temperature | — | 160°F to 170°F (71°C to 77°C) | — |
| Override allowance | — | — | |
Miscellaneous
| Product > | Au gratin potatoes Canning | Crème brûlée | |
| Item/Quantity | As needed As needed As needed | ||
| Instructions | Follow recipe as desired. Follow recipe as desired. Follow recipe as desired. Pour into individual ramekins | and place on sheet pan. | |
| Suggested Pan | Hotel pan Hotel or sheet pan Hotel or sheet pan | ||
| Number of shelves | |||
| 300 | 2 | As needed 2 | |
| 500 | 3 | 4 | |
| 750 | 3 | 4 | |
| 1000, 1200 | 5 | None | |
| Items per shelf | |||
| 300 | 2 half-size pans | As needed 1 half-size pan | |
| 500 | 2 half-size pans | 1 full-size pan | |
| 750 | 4 half-size pans | 1 full-size pan | |
| 1000, 1200 | 2 half-size pans | 1 full-size pan | |
| Maximum capacity | |||
| 300 | 2 full-size pans | 2 hotel or full-size pans | 2 hotel or full-size pans |
| 500 | 4 full-size pans | 4 hotel or full-size pans | 4 hotel or full-size pans |
| 750 | 8 full-size pans | 8 full-size pans/ 4 sheet pans | 8 full-size pans/ 4 sheet pans |
| 1000, 1200 | 4 full-size pans | 4 hotel or full-size pans | 4 hotel or full-size pans |
| Vent position | Closed Closed Closed | ||
| Cook temperature | 300°F (149°C) 225°F (107°C) 275°F (135°C) | ||
| Probe temperature | Not recommended Not recommended Not recommended | ||
| Hold temperature | 160°F (71°C) — — | ||
| Cook time | 90 minutes, plus 20 minutes per additional pan | 20 minutes | 60 minutes, plus 20 minutes per additional pan |
| Minimum hold time | — — — | ||
| Maximum hold time | 8 hours | — — | |
| Overnight cook / hold | No | No | No |
| Final Internal temperature | — — — | ||
| Override allowance | — — — | ||
Miscellaneous
| Product > | Tempering chocolate Sheet cake Cheese cake | |
| Item/Quantity | As needed As needed As needed | |
| Instructions | Place chocolate in a pan Use a favorite cake recipe or mix. Pour the batter in pans to one-half the pan depth. Keep the oven door closed during the cooking cycle. The cake is done when a toothpick inserted in the center of the cake is clean when removed. | Use a favorite cheese cake recipe or mix. Pour the batter into spring-form pans and bake in a preheated oven. The cheese cake is done when a toothpick inserted in the center is clean when removed. To prevent cracking, allow the cheese cake to remain in the oven until it reaches room temperature. |
| Suggested Pan | As desired Sheet pan Spring-form pan | |
| Number of shelves | ||
| 300 | As needed 2 | 2 |
| 500 | 2 | |
| 750 | 4 | |
| 1000, 1200 | 4 | |
| None | ||
| Items per shelf | ||
| 300 | As needed 1 half-size sheet pan | 2 cakes |
| 500 | 2 cakes | |
| 750 | 5 cakes | |
| 1000, 1200 | 3 cakes | |
| Maximum capacity | ||
| 300 | — 2 half-size sheet pans | 4 cakes |
| 500 | 4 cakes | |
| 750 | 20 cakes | |
| 1000, 1200 | 12 cakes | |
| Vent position | Closed Open full Open full | |
| Cook temperature | 115°F (46°C) 325°F (163°C) 250°F (121°C) | |
| Probe temperature | Not recommended | Not recommended |
| Hold temperature | — | — |
| Cook time | Until 115°F (46°C) | 1-1/2 hoursFull load |
| Minimum hold time | — | — |
| Maximum hold time | — | — |
| Overnight cook / hold | No | No |
| Final internal temperature | 115°F (46°C) | — |
| Override allowance | — | — |
Miscellaneous
| Product > | Frozen, convenience entrées Frozen portioned convenience entrées | |
| Item/Quantity | As needed As needed | |
| Instructions | Product must be fully frozen when placed in a preheated oven.Leave the product in the original container with a foil cover in place. Pour 1/2 gallon (1 liter) of hot water into the drip pan located on the bottom surface of the oven compartment. Place the containers directly on wire shelves. | |
| Suggested Pan | Half-size pan None | |
| Number of shelves3005007501000, 1200 | 2335 | 2333 |
| Items per shelf3005007501000, 1200 | 444 foil half-size pans2 foil half-size pans | 6699 |
| Maximum capacity3005007501000, 1200 | 81212 foil half-size pans10 foil half-size pans | 12182727 |
| Vent position | Closed Closed | |
| Cook temperature | 275°F (135°C) 275°F (135°C) | |
| Probe temperature | Not recommended Not recommended | |
| Hold temperature | 160°F (71°C) 160°F (71°C) | |
| Cook time | See pan placement diagrams and time settings on the following page. Approximately 2 hours.See pan placement diagrams on the following page.Do not over-cook — check internal product temperature. | |
| Minimum hold time | — | — |
| Maximum hold time | 16 to 18 hours 4 hours | |
| Overnight cook / hold | Optional Not recommended | |
| Final Internal temperature | 140°F (60°C)* 140°F (60°C)* | |
| Override allowance | — | — |
| Additional information | ^ Frozen convenience entrées that are removed from the original food processor's intact packaging must be treated as a product for reheating. Products that are reheated must reach an internal product temperature of 165°F (74°C) for the amount of time specified by local health (hygiene) regulations. | |
Frozen Convenience Entrées, Pan Placement
300 Series 500 Series 750 Series 1000 & 1200 Series
natural_image
Simple line drawing of a container with three horizontal plates, no text or symbols present
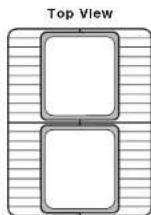
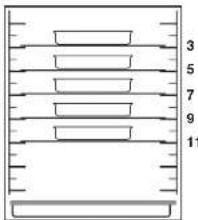
| Half-Size Pans | Timer Setting Total Hours |
| 1 2 hours, 30 minutes | |
| 2 2 hours, 45 minutes | |
| 3 3 hours, 30 minutes | |
| 4 3 hours, 30 minutes | |
| 5 4 hours, 00 minutes | |
| 6 4 hours, 30 minutes | |
| 7 5 hours, 00 minutes | |
| 8 5 hours, 00 minutes | |
| Half-Size Pans | Timer Setting Total Hours |
| 1 2 hours, 30 minutes | |
| 2 2 hours, 45 minutes | |
| 3 3 hours, 30 minutes | |
| 4 3 hours, 30 minutes | |
| 5 4 hours, 00 minutes | |
| 6 4 hours, 30 minutes | |
| 7 5 hours, 00 minutes | |
| 8 5 hours, 00 minutes | |
| 9 6 hours, 40 minutes | |
| 10 7 hours, 25 minutes | |
| 11 7 hours, 25 minutes | |
| 12 7 hours, 25 minutes | |
| Half-Size Pans | Timer Setting Total Hours |
| 1 2 hours, 30 minutes | |
| 2 2 hours, 45 minutes | |
| 3 3 hours, 30 minutes | |
| 4 3 hours, 30 minutes | |
| 5 4 hours, 00 minutes | |
| 6 4 hours, 30 minutes | |
| 7 5 hours, 00 minutes | |
| 8 5 hours, 00 minutes | |
| 9 6 hours, 40 minutes | |
| 10 7 hours, 25 minutes | |
| 11 7 hours, 25 minutes | |
| 12 7 hours, 25 minutes | |
| Half-Size Pans | Timer Setting Total Hours |
| 1 2 hours, 45 minutes | |
| 2 3 hours, 00 minutes | |
| 3 3 hours, 00 minutes | |
| 4 3 hours, 45 minutes | |
| 5 4 hours, 00 minutes | |
| 6 4 hours, 40 minutes | |
| 7 5 hours, 00 minutes | |
| 8 5 hours, 00 minutes | |
| 9 6 hours, 00 minutes | |
| 10 6 hours, 00 minutes | |
Portioned Entrée Pan Placement
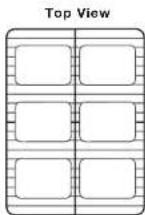
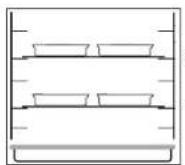
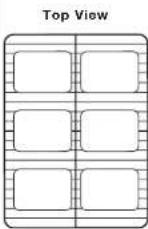
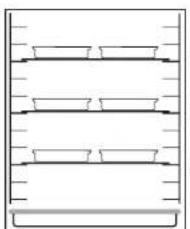
natural_image
Simple line drawing of three horizontal rectangular panels with rounded corners, no text or symbols present.3
6
9
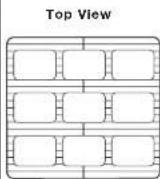
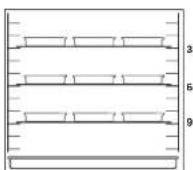
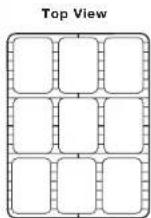
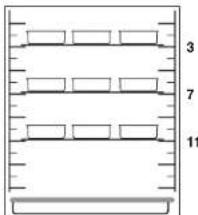
Miscellaneous
| Product > | Precooked frozen finger food Breakfast sandwiches | |
| Item/Quantity | Chicken nuggets: 40 per full-size sheet panCorn dogs: 30 per full-size sheet panEgg rolls: 40 per full-size sheet panMini pizza: 12 to 15 per full-size sheet pan | Approximately 36 wrapped sandwiches per full-size sheet pan. |
| Instructions | Line the sheet pans with baking pan liners (optional) and insert a wire pan grid.Place items side-by-side on the wire pan grids. | Place sandwiches on pans. |
| Suggested Pan | Sheet pan Sheet pan | |
| Number of shelves3005007501000, 1200 | 235None | 233None |
| Items per shelf3005007501000, 1200 | 1 half-size sheet pan1 half-size sheet pan1 full-size sheet pan1 full-size sheet pan | 1 half-size sheet pan1 half-size sheet pan1 full-size sheet pan1 full-size sheet pan |
| Maximum capacity3005007501000, 1200 | 2 half-size sheet pans3 half-size sheet pans5 full-size sheet pans5 full-size sheet pans | 2 half-size sheet pans3 half-size sheet pans3 full-size sheet pans5 full-size sheet pans |
| Vent position | Open full Open full | |
| Cook temperature | 275°F (135°C) 275°F (135°C) | |
| Probe temperature | Not recommended Not recommended | |
| Hold temperature | 160°F (71°C) 160°F (71°C) | |
| Cook time | Com dogs: 30 to 45 minutesEgg Roll/Chicken Nuggets: 45 to 60 minutesMini Pizza: 60 minutes | 90 minutesProbe to 160°F (71°C) |
| Minimum hold time | — | — |
| Maximum hold time | Maximum holding time varies from product to product. Generally expect a 1 to 3 hour maximum holding time for product acceptability. | 5 hours |
| Overnight cook / hold | Not recommended Not recommended | |
| Final internal temperature | 150°F (66°C) 160°F (66°C) | |
| Override allowance | — | — |
| Additional information | Make certain the product reaches the fully heated temperature. Check the internal product temperature before removing the product from the oven and adjust the heating time as required. | Make certain the product reaches the fully heated temperature. Check the internal product temperature before removing the product from the oven and adjust the heating time as required. |
Miscellaneous
| Product > | Cookies Proofing dough | |
| Item/Quantity | Premixed frozen commercial cookie dough at room temperature.Premixed frozen commercial cookie dough pieces. | As needed |
| Instructions | Preheat the oven at 325°F (163°C) for a minimum of one (1) hour. Line full-size sheet pans with baking pan liners. Use a number 30 scoop to produce a 1 oz (28 gm) cookie. Evenly space portioned cookie dough on the sheet pans and load all pans in the oven at one time. Oven doors must remain closed during baking. Do not over-bake.Approximate pan capacity: 24 cookies per full-size sheet pan | Remove dough from the retarder or refrigerator, and allow covered product to set up at room temperature.Preheat oven for 45-60 minutes.Pour approximately 2 quarts (c. 2 liters) of hot water, 140°F-180°F (60°C-82°C) into a pan on the bottom surface of the oven compartment. |
| Suggested Pan | Sheet pan Sheet pan | |
| Number of shelves3005007501000, 1200 | 266None | 266None |
| Items per shelf3005007501000, 1200 | 1 half-size sheet pan1 half-size sheet pan1 full-size sheet pan1 full-size sheet pan | 1 half-size sheet pan1 half-size sheet pan1 full-size sheet pan1 full-size sheet pan |
| Maximum capacity3005007501000, 1200 | 2 half-size sheet pans6 half-size sheet pans6 full-size sheet pans8 full-size sheet pans | 2 half-size sheet pans6 half-size sheet pans6 full-size sheet pans8 full-size sheet pans |
| Vent position | Open full One-Half Open | |
| Cook temperature | 325°F (163°C) — | |
| Probe temperature | Not recommended Not recommended | |
| Hold temperature | — 90°F to 110°F (32°C to 43°C) | |
| Cook time | Fresh: 1 full-size sheet pan: 20 minutes2 to 3 full-size sheet pans: 45 minutesFrozen: 1 full-size sheet pan: 30 minutes2 to 3 full-size sheet pans: 45 to 60 minutes | — |
| Minimum hold time | — 20 minutes | |
| Maximum hold time | — 45 minutes | |
| Overnight cook / hold | No No | |
| Final Internal temperature | — | — |
| Override allowance | — | — |
| Additional information | Cookies will continue to bake for approximately 3 minutes after being removed from the oven. Take this factor into consideration to prevent over-baking. Place cookies on bakery rack for cooling. | The above proofing procedure is suggested as a general guideline only. Due to variations in product, product quality, and weight, adherence to the product manufacturer's instructions are recommended. |
Smoked Items
| Product > | Beef brisket, smoked Pastrami, smoked Beef tongue, smoked | |
| Item/Amount | Beef brisket, fresh: 9 to 13 lb (4 to 6 kg) | Corned beef: As needed |
| Instructions | Season brisket as desired. Place the brisket directly on wire shelves fat side down. The briskets can also be wrapped in clear plastic wrap for the cooking, smoking, and holding function (optional). | Season as desired. Place directly on wire shelves. |
| Suggested Pan | None None Full-size Hotel Pan w/ 18" x 26" wire rack | |
| No. of Shelves767, 17671000, 1200 | 33 | 33 |
| Items per Shelf767, 17671000, 1200 | 3 to 4 roasts2 to 3 roasts | 3 to 4 roasts2 to 3 roasts |
| Maximum Capacity767, 17671000, 1200 | 12 roasts - up to 100 lb (45 kg)6-9 roasts - up to 100 lb (45 kg) | 8 roasts9 roasts |
| WOOD CHIPCONTAINER | Full Full Full | |
| Vent position | Closed Closed Closed | |
| Cook temperature | 250°F (121°C) 250°F (121°C) 250°F (121°C) | 21°C) |
| Probe temperature | 160°F (71°C) 160°F (71°C) 180°F (82°C) | |
| Hold temperature | 160°F (71°C) 160°F (71°C) 150°F (66°C) | |
| Cook time | 20 minutes per pound for the first roast (44 minutes per kilogram) plus add 30 minutes for each additional roast | 20 minutes per pound for the first roast (44 minutes per kilogram) plus add 30 minutes for each additional roast |
| Smoke time | Due to the density of the meat, set smoke timer for 1 hour to achieve a medium smoke flavor. | Due to the density of the meat, set the smoke timer for 1 hour to achieve a medium smoke flavor. |
| Minimum hold time | 6 hours 6 hours 4 hours | |
| Maximum hold time | 24 hours 24 hours 8 hours | |
| Overnight cook / hold | Highly recommended | Recommended |
| Final internal temperature | 165°F (73°C) 160°F (71°C) | Before activating the Smoking Timer: 188°F (87°C) |
| Override allowance | 6°F (3°C) | 20°F (11°C) |
Smoked Items
| Product > | Ham, smoked Ribs, smoked | Pork butt, smoked | |
| Item/Amount | Pork fresh ham:14 to 17 lb (6 to 8 kg) | Spareribs or pork loin, back ribs (baby back ribs):1-1/2 down (38 mm or less) | Pork butt: 8 to 10 lbs (4 to 5kg) |
| Instructions | Season as desired and place ham directly on wire shelves. | Ribs can be cooked frozen or thawed. Season as desired. Place ribs on sheet pans, slightly overlapping or use rib rack shelves for more even smoke penetration. If desired, barbecue sauce can be included with the initial seasoning to allow it to cook into the ribs. | Season as desired. |
| Suggested Pan | None Sheet pan Full-size hotel pan | ||
| No. of Shelves767, 17671000, 1200 | 23 | 2 rib racks or 3 flat wire shelves,13 slabs per rib rack shelf3 rib racks or 5 flat wire shelves,13 slabs per rib rack shelf | 23 |
| Items per Shelf767, 17671000, 1200 | 3 to 4 hams3 hams | 14 to 18 slabs per flat wire shelf14 to 18 slabs per flat wire shelf | 22 |
| Maximum Capacity767, 17671000, 1200 | 6 to 8 hams - up to 100 lbs (45 kg)9 hams - up to 100 lbs (45 kg) | 60 lb (27 kg)60 lb (27 kg) | 8 full-size pans4 full-size pans |
| WOOD CHIPCONTAINER | Full Full Full | ||
| Vent position | Closed Closed Closed | ||
| Cook temperature | 250°F to 275°F (121°C to 135°C) 250°F (121°C) | 250°F (121°C) | |
| Probe temperature | 148°F (64°C) Not recommended 160°F to 170°F (71°C to 77°C) | ||
| Hold temperature | 160°F (71°C) 160°F (71°C) 160°F (71°C) | ||
| Cook time | 12 minutes per pound for the first ham (26 minutes per kilogram) plus add 30 minutes for each additional ham. | Thawed ribs: 2-1/2 to 3-1/2 hoursFrozen ribs: 3-1/2 to 4-1/2 hours | 20 minutes per pound for the first roast (33 minutes per kilogram) plus add 15 minutes for each additional roast. |
| Smoke time | 3 to 4 smoking cycles1 hour for each smoking cycleFill wood chip container for each cycle | 1 hour for medium smoked flavor 1 hour for medium smoked flavor | |
| Minimum hold time | 2 hours 1-1/2 hours 2 | ||
| Maximum hold time | 10 hours 12 hours: At the end of the hold cycle, heated barbecuesauce can be added to the ribs immediately before serving. | 12 | |
| Overnight cook / hold | Optional | Optional | Highly recommended |
| Final Internaltemperature | 100°F (71°C) | 160°F to 170°F (71°C to 77°C)Well done | 160°F (71°C) |
| Override allowance | 12°F (7°C) | — | 20°F (11°C) |
MN-29492 (11/16) • Cooking, Holding, Smoking Guidelines • 41
Smoked Items
| Product > | Pork belly, smoked Duck, smoked Turkey, smoked | ||
| Item/Amount | Pork belly: As needed Duck, whole: 4 to 5 lb (2 kg) Turkey, whole: 25 lb (11 kg) | ||
| Instructions | Season or cure as desired. Season as desired. Rub the duck with oil and paprika.Place ducks directly on wire shelves. | The turkey must be fully thawed. Season as desired.Rub with oil, butter, or margarine (optional). Placeturkeys directly on wire shelves. | |
| Suggested pan | Full-size hotel pan None None | ||
| Number of shelves767, 17671000, 1200 | 63 | 2 per compartment3 per compartment | 1 per compartment2 per compartment |
| Items per shelf767, 17671000, 1200 | 11 | 6 ducks per shelf4 ducks per shelf | 2 turkeys2 turkeys |
| Maximum capacity767, 17671000, 1200 | 6 pork bellies3 pork bellies | 12 ducks - 60 lb (27 kg)12 ducks - 60 lb (27 kg) | 2 turkeys4 turkeys |
| Wood chip container | Full Full Full | ||
| Vent position | Closed Closed Closed | ||
| Cook temperature | 250°F (121°C) 300°F (149°C) 275°F (135°F) | ||
| Probe temperature | 165°F to 170°F (74°C to 77°C) 165°F to 170°F (74°C to 77°C) 165°F to 170°F (74°C to 77°C) | ||
| Hold temperature | 160°F (71°C) 160°F (71°C) 160°F (71°C) | ||
| Cook time | 15 minutes per pound for the first pork belly(33 minutes per kg) plus add 10 minutes for each additional pork belly.Probe to 135°F (57°C) | 3-1/2 to 4 hoursProbe to 155°F (68°C) | 10 minutes per pound for the first turkey (22 minutes per kilogram) plus add 30 minutes for the second turkey.Probe to 155°F (68°C) |
| Smoke time | 1 hour for medium smoked flavor | 1 hour | 1 hour |
| Minimum hold time | — | 1 hour | 1 to 2 hours |
| Maximum hold time | — | 8 hours | 10 hours |
| Overnight cook / hold | Optional Not recommended | Highly recommended. When cooking and holdingovernight, set the cook thermostat to 250°F (121°C). | |
| Final Internal temperature | 155°F (68°C) | 185°F to 190°F (85°C to 88°C) | 185°F (85°C) |
| Override allowance | 25°F (14°C) | 12°F (7°C) | 20°F (11°C) |
Smoked Items
| Product > | Fish fillets, smoked Whole smoked salmon Shrimp, smoked | ||
| Item/Amount | Fish fillets: As neededHaddock may be substituted. | Salmon, whole: 8 to 10 lb (4 to 5 kg) Shrimp: 15 to 20 count | |
| Instructions | Portion cut fish. Place fillets side-by-side. Scale and wash fish thoroughly. If desired, fish can be placed in a salt brine and refrigerated for 2 to 3 hours. Place fish upright on sheet pans. Do not lay the fish on its side. | Shrimp may remain in the shell or may be peeled and develined. Season as desired. Place side-by-side on pans. | |
| Suggested Pan | Full-size hotel panPan placement: Position 1, 4, & 7 from the top of the oven | Sheet pan Sheet pan | |
| No. of Shelves767, 17671000, 1200 | NoneNone | 24 | 1 full-size sheet pan5 full-size sheet pans |
| Items per Shelf767, 17671000, 1200 | 2 pans per shelf position1 sheet pan per shelf position | 1 full-size sheet pan4 full-size sheet pans | 1 full-size sheet pan1 full-size sheet pan |
| Maximum Capacity767, 17671000, 1200 | 6 pans7 sheet pans | 3 full-size sheet pans - 6 whole salmon4 full-size sheet pans - 8 whole salmon | 4 full-size sheet pans5 full-size sheet pans |
| WOOD CHIPCONTAINER | Full Full Full | ||
| Vent position | Closed Closed Closed | ||
| Cook temperature | 250°F (121°C) 275°F (135°C) 250°F (121°C) | Not recommended | |
| Probe temperature | Not recommended Not recommended | Not recommended | |
| Hold temperature | 160°F (71°C) 160°F (71°C) 160°F (71°C) | ||
| Cook time | 1-1/2 to 2 hours 2 to 2-1/2 hours 45 minutes to 1 hour | ||
| Smoke time | 1 hour 1 to 2 smoking cycles | 1 hour for each smoking cycleFill wood chip container for each cycle | 45 minutes |
| Minimum hold time | — 1 to 2 hours — | ||
| Maximum hold time | 3 to 4 hours 10 hours | 1 hour | |
| Overnight cook / hold | Not recommended Not recommended | Not recommended | |
| Final Internaltemperature | 150°F (66°C) 150°F (66°C) | 150°F to 160°F (66°C to 71°C) | |
| Override allowance | — | 35°F (19°C) | — |
Cold Smoking
| Product > | Cold smoked canned tomatoes Cold smoked salmon | |
| Item/Amount | As needed Saumon fumé: Fresh salmon fillets 2-1/2 to 4 lb (1 to 2 kg) each | |
| Instructions | Add the tomatoes to the pan. | Ingredients required:Fresh salmon fillets or sidesSea salt: Large crystalsGranulated or raw sugarSupplies required:Clear plastic wrapPaper towelWire mesh gridsDigital thermocouple thermometer (to monitor internal product temperature)TweezersIce: 3 to 4 lbs (1 to 2 kg)Preparation:Remove bones from fillets with a tweezers to avoid rupturing tissue.Salting:50% sea salt or kosher salt50% granulated or brown sugar (for richer color)To remove moisture from the raw salmon, blend the salt and sugar mixture thoroughly and pack firmly around each fillet. Cover salt-filled pans with clear plastic wrap and refrigerate for 24 hours. Following the 24 hour refrigeration period, remove fillets from salt/sugar mixture and rinse thoroughly under cold, running water. Pat the salmon dry with paper toweling. Place fillets side-by-side on a sheet pan and return, uncovered, to the refrigerator for a period of 1 to 6 hours for the final drying period. |
| Suggested Pan | Full-size hotel pan Wire grid | |
| No. of Shelves767, 17671000, 1200 | 44 | 34 |
| Items per Shelf767, 17671000, 1200 | 2 full-size pans1 full-size pan | 3 fillets/sides per shelf3 fillets/sides per shelf |
| Maximum Capacity767, 17671000, 1200 | 8 full-size pans4 full-size pans | 9 fillets12 fillets |
| Wood chip container | Full Full | |
| Vent Position | Closed Closed | |
| Smoke time | 15 minutesLeave in oven for 1 hour | 10 to 20 minutes |
| Oven time required | 1 to 2 hours | |
| Final internal Temperature | Not to exceed 77°F (25°C) | |
Cold Smoking
Cold Smoked Salmon
The oven must be at room temperature before the cold smoke procedure is begun.
Soak wood chips in water according to directions (5 to 15 minutes), fill wood chip container full and insert in chip holder located at the back of the oven.
Fill pan with ice and locate pan in shelf position number 7 (just above wood chip container).
Place prepared salmon fillets on a wire grid as indicated on the diagram and place wire grid on oven shelf beginning with the top shelf position.
Insert probe of thermocouple thermometer into the center of the middle salmon fillet located in the top shelf position or central shelf position when smoking a full load. To maintain proper color, the internal temperature of the salmon must not exceed 77^ F ( 25^ C). For this reason, it is important to begin the smoking process with the oven at room temperature.
Ensure oven vents are closed. Close oven door and set the smoke time from 10 to 20 minutes depending on taste preference.
Note: If using a manual control oven, cook temperature must be set to 0^ F ( 0^ C) before setting smoke time in order for the smoke process to work.
When the smoke time has elapsed, the fillets must remain in the oven for 1 to 2 hours. Do not open the oven door during this time.
Following the required oven time, remove the fillets, cover with clear plastic wrap and refrigerate until fully chilled.

WARNING

Fire Hazard
The use of improper materials for the smoke function could result in a fire which may lead to personal injury or property damage.
Do not use sawdust for smoking. Do not use wood chips smaller than 1/2" (13mm) diameter.
Use Alto-Shaam approved wood chips for the smoke function in this appliance.
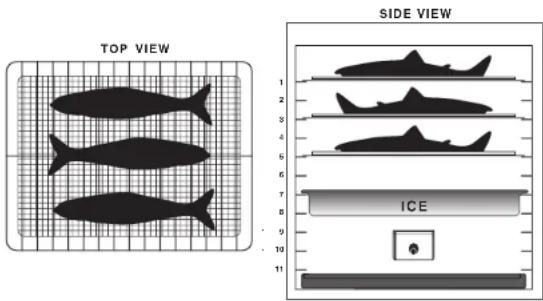
| Smoking Times | |
| It is recommended the operator be familiar with the taste preferences of the area. Initially experimenting with a minimal amount of smoking time is suggested. | |
| Light Smoke Flavor | 10 minutes |
| Medium Smoke Flavor | 30 minutes |
| Heavy Smoke Flavor | 40 minutes |
| Very Heavy Smoke Flavor | 60 minutes* |
| Extra Heavy Smoke Flavor | 80 minutes* |
| *For 60 minutes or more: Load wood chip container twice and activate smoke timer twice. | |
Alto-Shaam World Headquarters
W164 N9221 Water Street, P.O. Box 450
Menomonee Falls, WI 53052-0450, U.S.A.
Phone 800-558-8744: +1-262-251-3800
Alto-Shaam Asia
Shanghai, China Phone +86-21-6173 0336
Alto-Shaam Canada
Concord, Ontario Canada Tull Free Phone 866-577-4484 Phone +1-905-660-6781
Alto-Shaam Central & South America
Miami, FL USA Phone +1-954-655-5727
Alto-Shaam Middle East & Africa
Dubai, UAE Phone +971 4 321 9712
Alto-Shaam France, L.L.C.
Aix en Provence, France Phone +33(0)4-88-78-21-73
Alto-Shaam GmbH
Bochum, Germany Phone +49(0)234-298798-0
Alto-Shaam Mexico
Leon, Mexico Phone +52 1 477-754-1305
Alto-Shaam Russia Moscow, Russia Phone +7-903-793-2331
- COOKING, HOLDING, SMOKING GUIDELINES
- Low-Temperature Cooking, Holding, Smoking Guidelines
- Contents
- Low-Temperature Cooking
- Cooking, Holding, Smoking
- Food Safety
- Cleaning and Preventative Maintenance
- Cooking Guidelines
- Smoking Guidelines
- Manual Control
- Welcome to the cost saving convenience of low-temperature cooking.
- Meat and Nutrition
- Shrinkage Control and Cooking Time
- The temperature at which meat is cooked:
- The internal temperature of the meat:
- The degree of aging of the meat:
- The internal temperature before cooking:
- The desired degree of doneness:
- The quantity and quality of product.
- To Calculate Meat Shrinkage
- Prevent Bacteria Growth
- Labor and Equipment Cost Reduction
- Oven Characteristics
- Start-Up
- Manual Control Cooking, Holding, Smoking
- Notice:
- To toggle between Fahrenheit (°F) and Celsius (°C)
- Deluxe Control Cooking, Holding, Smoking
- To create a preset program
- To erase a preset program
- To turn oven control panel off:
- Door open indicator:
- Indicator lights:
- Power fail detect:
- To set the date and time:
- Probe usage:
- To display high/low probe temperatures:
- To enable Probe Hold (optional when cooking by probe):
- Probe calibration:
- Sous Vide cooking:
- CAUTION
- Lock and Unlock Presets
- Fahrenheit or Celsius selection
- Control panel Lock and Unlock
- Beeper volume selection
- HACCP Documentation, Data Logger - Optional
- To download the data collected:
- Operating Tips
- Chef Operating Tips
- Need some help?
- Is the product sufficiently cooked?
- Red Meat:
- Reheating
- General Holding Guidelines
- Food Holding and Sanitation
- Food Safety Guidelines
- Protecting Stainless Steel Surfaces
- Cleaning Agents
- Cleaning Materials
- Clean the temperature probe prongs daily (Deluxe Control)
- WARNING
- NOTICE
- Clean daily
- Clean the door vents
- Clean the probes daily (deluxe control)
- Check the cooling fan in the oven control area
- Check overall condition of the oven once a month
- Do not use oven if controls are not functioning properly
- Preventative Maintenance Checklist
- Daily
- Monthly
- Every 12 months (Inspection by a factory authorized technician)
- Beef
- Lamb
- Pork
- Poultry
- Fish
- Miscellaneous
- Smoking
- \*\*Two-step fried chicken
- Frying directly from the oven
- Frying from refrigerated storage
- Frozen Convenience Entrées, Pan Placement
- Series 500 Series 750 Series 1000 & 1200 Series
- Cold Smoking
- Cold Smoked Salmon
- Fire Hazard
Brand : Alto-Shaam
Model : 500-TH-II
Category : Oven