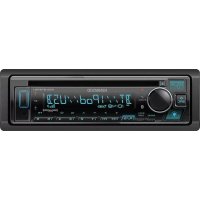
DDX8017 - Car stereo KENWOOD - Free user manual and instructions
Find the device manual for free DDX8017 KENWOOD in PDF.
Download the instructions for your Car stereo in PDF format for free! Find your manual DDX8017 - KENWOOD and take your electronic device back in hand. On this page are published all the documents necessary for the use of your device. DDX8017 by KENWOOD.
USER MANUAL DDX8017 KENWOOD
DDX8017 INSTRUCTION MANUAL Kenwood Corporation DOG sn DAT VIDEO SURROUND Take the time to read through this instruction manu: Familiarity with installation and operation procedures will help you obtain the best performance from your new DVD Receiver. For your records Record the serial number, four warranty card, and in the sp: whenever you call upon your Ke Model DDX8017 Serial number spaces designated on the del and serial numbers service on the product US Residence Only Register Online Register your Kenwood product at www.kenwoodusa.com © B64-3185-00/00 (KV)
Character Entry. How To Use the Character Entry screen
Source Select... Displaying the Control screen Displaying the Source Select screen Adjusting the Monitor Display Position and Quality. Displaying the Screen Control screen Displaying the Tilt Adjust screen Setup Menu... Setup Menu. Displaying the Control screen Displaying the Setup Menu screen Audio Set Up . Displaying the Car Type Set Up screen Displaying the Speaker Set Up screen Displaying the Channel Level screen Speaker Set Up Channel Level DTA Setup Crossover Network Setup DVD Setup . Displaying the DVD SETUP 1 screen Displaying the DVD SETUP 2 screen Displaying the DVD SETUP 3 screen Language Setup Parental Level Setup System Setup Displaying the System 1 screen Displaying the System 2 screen AV Interface Displaying the AV /F 1 screen Displaying the AV 1/F 2 screen Displaying the AV //F 3 screen User Interface Displaying the User l/F 1 screen Displaying the User 1/F 2 screen Displaying the User l/F 3 screen Touch Panel Adjustment Clock Security Code Setup Set Up Memory SIRIUS Setup … Displaying the SIRIUS Set Up screen DAB Set Up Displaying the DAB Set Up screen Announcement Selection AMP Control Displaying the AMP Control screen Sound Effects Menu Sound Effects Menu Displaying the Control screen Displaying the Sound Effects Menu screen Audio Control Displaying the Audio Control screen Equalizer . Displaying the Equalizer screen Parametric Equalizer Surround Control Displaying the Surround Control screen Surround Control Adjustment SRS WOW Control Displaying the SRS WOW Control screen SRS WOW Uesr Setup Position Displaying the Position screen Position Fine Control Storing the Preset adjustment setup Recalling the Preset adjustment setup Zone Control . Displaying the Zone Control screen Glossary. Troubleshooting Guide … Specifications … English | 3
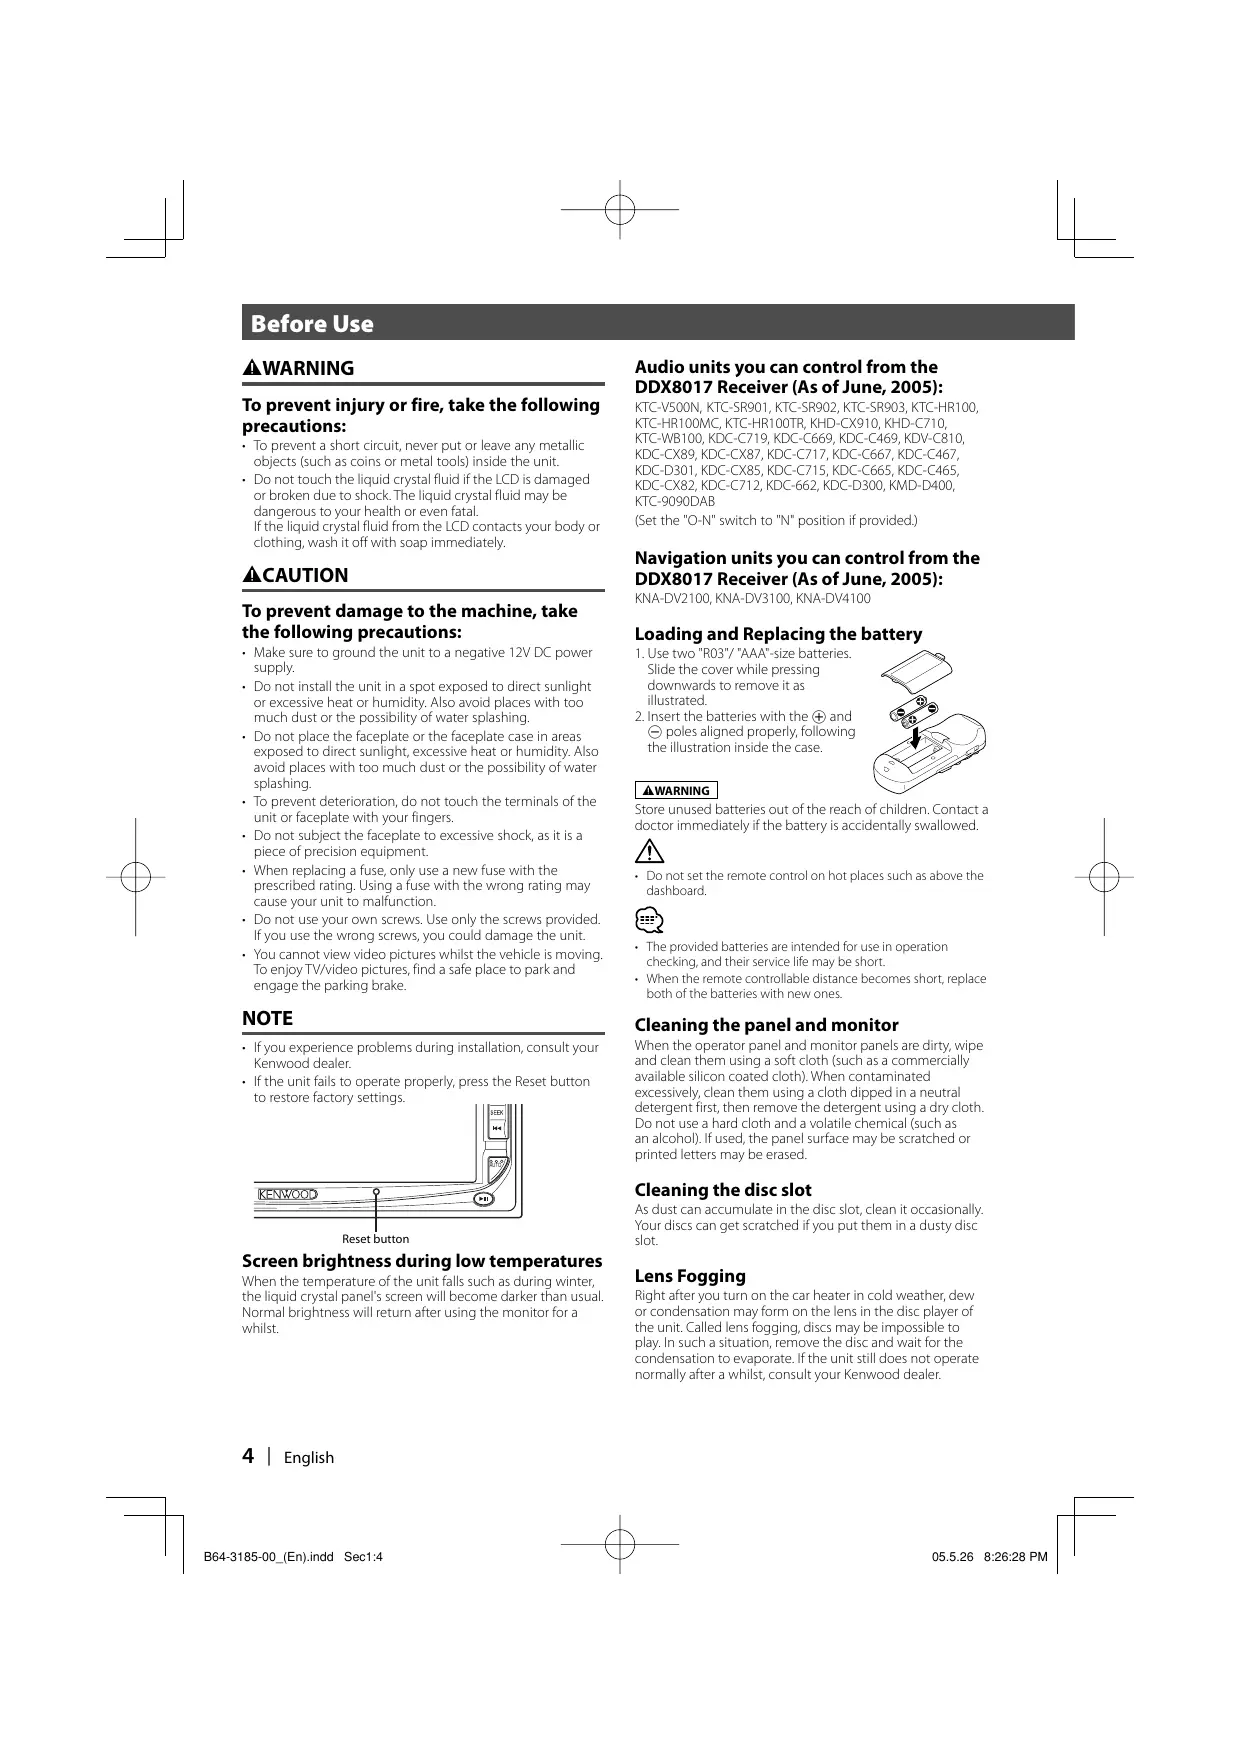
Before Use A WARNING To prevent injury or fire, take the follo: precautions: + To prevent a short circuit, never put or leave any metallic objects (such as coins or metal tools) inside the unit. Do not touch the liquid crystal fluid ifthe LCD is damaged or broken due to shock. The liquid crystal fluid may be dangerous to your health or even fatal Ifthe liquid crystal fluid from the LCD contacts your body or clothing, wash it off with soap immediately. ACAUTION To prevent damage to the machine, take the following precautions: + Make sure ta ground the unit to a negative 12V DC power supply. Do not install the unit in a spot exposed ta direct sunlight or excessive heat or humidity. Also avoid places with too much dust or the possibility of water splashing + Do not place the faceplate or the faceplate case in areas exposed to direct sunlight, excessive heat or humidity. Also avoid places with too much dust or the possibility of water splashing, To prevent deterioration, do not touch the terminals of the unit or faceplate with your fingers. Do not subject the faceplate to excessive shock, as it is a piece of precision equipment. When replacing a fuse, only use a new fuse with the prescribed rating. Using a fuse with the wrong rating may cause your unit to malfunction. Do not use your own screws. Use only the screws provided. I you use the wrang screws, you could damage the unit You cannot view video pictures whilst the vehicle is moving, To enjoy TVivideo pictures, find a safe place to park and engage the parking brake. NOTE + lfyou experience problems during installation, consult your Kenwood dealer + IFthe unit fails to operate properl, press the Reset button to restore factory settings. Reset button Screen brightness during low temperatures When the temperature of the unit flls such as during winter, the liquid crystal panel's screen will become darker than usual. Normal brightness wil return after using the monitor for à whilst. 4 | English I 864-3185-00_(En)indd Sect4 Audio units you can control from the DDX8017 Receiver (As of June, 2005): KTC-V500N, KTC-SR901, KTC-SR902, KTC-SR903, KTC-HR100, KTC-HR100MC, KTC-HR100TR, KHD-CX910, KHD-C710, KTC-WB100, KDC-C719, KDC-C669, KDC-C469, KDV-C810, KDC-CX89, KDC-CX87, KDC-C717, KDC-C667, KDC-C467, KDC-D301, KDC-CX85, KDC-C715, KDC-C665, KDC-C465, KDC-CX82, KDC-C712, KDC-662, KDC-D300, KMD-D400, KTC-9090DAB {Set the "O-N" switch to "N" position if provided) Navigation units you can control from the DDX8017 Receiver (As of June, 2005):
KNA-DV2100, KNA-DV3100, KNA-DV4100
Loading and Replacing the battery 1.Use two "RO3"/"AAA'-ize batteries. & Slide the cover while pressing downwards to remove it as = illustrated
2. Insert the batteries with the ® and
© poles aligned proper following the illustration inside the case. Store unused batteries out of the reach of children. Contact a doctor immediately f the battery is accidentally swallowed.
+ Do not setthe remote contral on hot places such as above the dashboard. + The provided batteries are intended for use in operation checking, and their service life may be short. + When the remote controllable distance becomes short, replace both ofthe batteries with neurones. Cleaning the panel and monitor When the operator panel and monitor panels are dirty, wipe and clean them using a soft cloth (such as à commercially available silicon coated cloth). When contaminated excessively clean them using a cloth dipped in a neutral detergent first then remove the detergent using a dry cloth Do not use a hard cloth and a volatile chemical (such as an alcohol used, the panel surface may be scratched or printed letters may be erased Cleaning the disc slot As dust can accumulate in the disc slot, clean it occasional}. Your discs can get scratched if you put them in a dusty disc slot. Lens Fogging Right after you turn on the car heater in cold weather, dew or condensation may form on the lens in the disc player of the unit. Called lens fogging, discs may be impossible ta play. In such a situation, remove the disc and wait for the condensation to evaporate.IFthe unit stil does not operate normally after a whilst, consult your Kenwood dealer.
Region codes in the world The DVD players are given a region code according to the country ar area it is marketed, as shown in the following map. Icons on the DVD discs Icon Descri Indicates the region code where the disc can be played. &) Number of voice languages recorded with the audio function. The number in the icon indicates the number of voice languages. (Max. 8 languages) (62) Number of subtile languages recorded with the subtile function. The number in the icon indicates the number of subtitle languages. (Max. 32 languages) Number of angles provided by the angle function. The number in the icon indicates the number of angles. Max. 9 angles) Aspect ratios that can be selected. "LB" stands for Letter Box and PS" for Pan/Scan. In the example an the left, the 169 videa can be canverted into letter box video. Unplayable dises This player cannot play back any of the following discs. + DVD-ROM/DVD-RAM discs -HQVCD/SVCD discs + CDV discs (Only the audio part can be reproduced): CD-G/CD-EG/CD-EXTRA discs (Only the audio can be reproduced) - Photo CD discs + DVD-Audio Also, you cannot play back the DVD-R/RW and DVD+R/RW dises if not recorded in the DVD-Videa format Restrictions due to difference between discs Explanation of icons used on this manual Some DVD and VCD di be played trhibition | in certain playback modes according ŒD _ indicates the key operation on the receiver. to the intentions of the software producers As this player plays discs according to their é Indicates the button you must touch. intentions, some functions may not work as 1 intended by you. Please be sure to read the instructions provided with each disc. When an inhibition icon is displayed on the monitor, it indicates that the disc being played is under the restriction as described above. Indicates the key or joystick operation on the remote controller. The initial value of each setup is shown. Gives an additional information or an operation advice. The illustrations ofthe display and the panel appearing in this manual are examples used to explain more clearly how the controls are used. Therefore, what appears on the display in the illustrations may differ from what appears on the display on the actual equipment, and some of the illustrations on the display may represent something impossible in actual operation. English | 5 I 864-3185-00 (En)indd Sect:5 S 7 05.526 8:26:30 PM
Notes on playing MP3/WMA/JPEG/MPEG This unit can play MP3 (MPEG1 Audio Layer 3)/ WMA/JPEG/MPEG (MPEG 1/MPEG 2). Note, however, that the MP3/WMA/JPEG/MPEG recording media and formats acceptable are limited. When writing MP3/WMA/JPEG/MPEG, pay attention to the following restrictions. Acceptable media The MP3/WMA/JPEG/MPEG recording media acceptable to this unit are CD-ROM, CD-R, CD-RW,DVD-R/RW and DVD+R/ RW. When using CD-RW, do full format not quick format to prevent malfunction. Acceptable medium formats The following formats are available for the media used in this unit. The maximum number of characters used for file name including the delimiter (") and three-character extension are indicated in parentheses. 150 9660 Level 1 (12 characters) 150 9660 Level 2 (31 characters) - Joliet (64 characters) + Romeo (128 characters) Up to 200 characters can be displayed in the long file name format. For a list of available characters, see the instruction manual of the writing software and the section Entering file and folder names below. The media reproducible on this unit has the following limitations: + Maximum number of directory levels: 8 + Maximum number of files per folder. 255 + Maximum number of characters for folder name: 200 < Maximum number of folclers: 254 MP3/WMA/IPEG/MPEG written in the formats other than the above may not be successfully played and their ile names or folder names are not properly displayed. Settings for your MP3/WMA/JPEG/MPEG encoder and CD/DVD writer Do the following setting when compressing audio data in MP3/WMA data with the MP3/WMA encoder. MP3/WMA - Transfer bit rate: MP3: 32 —320 kbps WMA: 48 —192 kbps + Sampling frequency: MP3: 32, 44.1, 48 kHz WMA: 32, 44.1, 48 kHz Do the following setting when compressing video/audio data in JPEG/MPEG data with the JPEG/MPEG encoder. JPEG + Picture size: Baseline format 5,120 (W) x 3,840 (H) pixels (Maximum size)*! Progressive format: 2,048 (W] x 1,536 (H) pixels {Maximum size)*? MPEG + Video format: MPEG1, MPEG2 - Picture size: MPEG1: 320x240, 352x240 (NTSC), 352x288 (PAL) MPEG2: 640x480, 704x480 (NTSC), 704x576 (PAL) + Audio format: MPEG1 Audio Layer? + Transfer bit rate: 32—384 kbps CBR + Sampling frequency: 32, 44.1,48 kHz When you use your CD/DVD writer to record MP3/WMA/JPEG/ MPEG up to the maximum disc capacity, disable additional writing. For recording on an empty disc up ta the maximum capacity at once, check Disc at Once. 6 | English I 864-3185-00_(En)indd Sect:8 + Play mode may not be possible when portions of the functions ofWindows Media Player 9 or higher are used 'A part of picture well not be displayed ifthe size of picture exceeds maximum. + A picture wall not be displayed ifthe size of a picture exceeds maximum. + When you write for MPEG 2 data, please be sure to use DVD media When you write data in DVD media, please be sure to set à setup ofa DVD writer to "Disc at once”. Entering ID3 tag The Displayable ID3 tag is ID3 version 1x For the character code, refer ta the List of Codes.
Es EEE UE El RENTE Elu Le ol fe TEE TUT Le Ra ER TE En AU HE “triste Entering file and folder names You can use only characters shown on the code table for file name and folder name. I you use any other character for entry, the file and folder names are not displayed correctiy. They may neither be displayed correctly depending on the CD/DVD writer used. The MP3/WMA/IPEG/MPEG file must have the MP3/WMA/ JPEG/MPEG extension (mp3/wma/jpg/.mpG) + Afile with a name entered with characters not on the code list may not play correct. Writing files into a medium When a medium containing MP3/WMA/IPEG/MPEG data is loaded, the unit checks all the data on the medium. the medium contains à lot of folders or non-MP3/WMAYIPEG/ MPEG files, therefore, it takes à long time until the unit starts playing MP3/WMAYIPEG/MPEG. In addition, it may take time for the unit to move to the next MP3/NMAYIPEG/MPEG file or File Search or Folder Search may not be performed smooth. Loading such à medium may produce loud noise to damage the speakers. + Dono attempt to play à medium containing a non-MP3ANMA/ JPEG/MPEG ile wth the MP3/WMA/IPEG/MPEG extension The unit mistakes non-MP3/ANMA/IPEG/MPEG files for MP3/ WMA/IPEG/MPEG data as long as they have the MP3/WMA/ JPEG/MPEG extension + Donot attempt to play à medium containing non MP3/WMA/ JPEG/MPEG,
MP3/WMA/JPEG/MPEG playing order When selected for play, Folder Search, File Search, or for Folder Select, files and folders are accessed in the order in which they were written by the CD/DVD writer Because of this, the order in which they are expected to be played may not match the order in which they are actually played. You may be able to set the order in which MP3/WMA/ JPÉG/MPEG are to be played by writing them onto a medium such as a CD-R with their file names beginning with play sequence numbers such as "O1" to "99° depending on your CD/DVD writer. JPEG JPEG is a standardized image compression mecha- nism. JPEG stands for Joint Photographic Experts Group, the original name of the committee that wrote the standard. JPEG is designed for compress- ing either full color or gray scale images. MPEG _ The most common implementations of the MPEG 1 standard provide a video resolution of 352-by- 240 at 30 frames per second (fps). This produces video quality slightiy below the quality of conven- tional VCR videos, MPEG2 __. MPEG 2 offers resolutions of 720x480 and 1280x720 at 60 fps (NTSC), with full CD-quality audio. This is sufficient for all the major TV stan- dards, including NTSC, and even PAL. MPEG 2 is used by DVD-ROMs. MPEG-2 can compress a 2- hour video into à few gigabytes. English | 7 I 864-3185-00_(En)indd Sec1:7 05.526 8:26:35 PM
DDX8017 Basic operations ABl El WE tE] Play Disc [1 Eject Disc IDise insertion slot] IEJECT] key A disc is played when you insert it The disc is ejected Play/Pause D] key Pauses and replays à disc. 8 | English I 864-3185-00_(En)indd Sect:8 D 05.526 8:26:35 PM L
[4] Video Source Selection [VSEL] key Video source selection changes in the following order each time you press the key VX/Video RCAMe Navigation = 5] fo
- Oprional accessory You can also turn off the video display by pressing the key longer than 1 second When you press the key again, the previous video display comes back on. [5] Audio Source Selection/Power Supply ISRC] key Audio source selection changes in the following order each time you press the key SIRIUS * DAB* TUNER or HD Radio * Buït-in Disc player External Disc player * TV Video External Disc Changer Lil
You can also turn off the power by pressing the key longer than 1 second. When you press the Key againthe power turns on. [6] Volume Controls IVOLIkey Adjusts the volume. I 864-3185-00_(En)indd Sec1:9 [71 Track/Station Selectors ISEEK] key Selects à music or chapter track, or frequency. [8] Attenuator IATTI key Atrenuates the volume. Press it again to cancel muting [8] Select Seek Mode IAUTO] key Selects the Seek mode. (see pages 32/39/48/52 for the <Seek Mode>) Hü Screen Setup/Dimmer ISCRNI key Displays the Screen Control or Tilt Control screen. {page 59) The Dimmer Mode Setup is set to “Manual in the Screen Control screen, the Dimmer function turns On or Off when the key is pressed more than 1 second (page 59) IT Function IFNCI key The video source function changes in the following order each time you press the key.
Picture Switches the source that is output at the AV OUTPUT terminal when itis pressed more than 1 second HZ Switch Screen Mode IMODE] key Switches the screen mode. (page 14) The DVD Disc Menu screen appears when you hold down the key more than 1 second. (page 20) DVD Disc Menu is not available when the top menu of the DVD is shown. Aside from the navigation system, the display turns on when you apply the parking brake. It is necessary to set "Navigation Source” of <AV Interface> to “On to add Navigation as an audio source that can be selected the with [SRC] key. (page 74) It is necessary to engage the shift knob of car to "Reverse" to switch to rear view camera (R-CAM) video display. English | 9
VOL KENWOOD [1] Remote Control Mode selector switch Selects one of the following remote control modes when switched to AV control mode with [NAV] switch. TV. TVsource DVD: Buït-in DVDA/CD/CD/MP3/AWMA/JPEG/MPEG player source AUD: Tuner source or attached disc changer source INAV] switch Pressing the switch until it locks enters into the navigation system control mode. Pressing the switch again returns to the AV control mode. ISRC] key Audio source changes each time you press the key. [] (VOLI key Coisc L Tv, [runer]
Enlarged and reduced map indication. IVSEL] key Video source selection changes in the following order each time you press the key. DVD/VCD
- Oprional accessony Adjusts the volume. When you press the key, the volume attenuates. When you press the key again, the volume returns to the - previous level 10 | English B64-3185-00_(En).indd Sec1:10 is necessary to engage the shift knob of caro "Reverse" to switch to rearview camera (R-CAM) video display.
[5] [BAND] key EE (When [is set to "DVD" or"AUD") +:Selects next disc. Selects previous disc. is set to "AUD") FMI, FM2, or FM3 band. Switches to the AM band. Selects the icon. 1H4-<)/ Dev key Loisc Wie Selects a track is set to "DVD" or AUD") is set to "TV" or"AUD") is set to "AUD"} Selects a station. Icon selection, Horizontal scrolling of characters. Du] key is set to "DVD" or "AUD") is set to "TV" or "AUD') [TUNER [| is set to "AUD'") Selects the Seek mode. {see page 32/39/48/52, for the <Seek Mode>) Displays the current position: [5] (TOP MENU] key {When [lis set to "DVD") Calls the Top menu of DVD Disc Menu ES UM EU (When [Ulis set to "TV" or "AUD') Switches the Screen mode. (page 14) Displays Route Option menu. [AV OUT] key Coisc L rv, Lruner] Selects an AV source to be output at the AV OUTPUT Switches between the heading up navigation and north up navigation map displays. [1 OPEN] key Doisc L Tv [runer] Each time the key is pressed, the panel slides, Next the full-opened, the panel closes
Jumps to the function registered in Shortcut 2 [2-ZONE] key Turns Zone function on or off each time you press the key. (see page 98 for the <Zone Control>) Plays Voice guidance. [REAR VOL] key DISC UNER You can adjust the rear channel volume when Zone function is on. [MENU] key {When [is set to "DVD") Stops to play the built-in disc play. Displays Main menu ICANCELI key TRES (ren [is set to" DVD") Returns to the previous screen when the DVDACD Disc Menu is displayed. Displays previous screen (same as the [Return] button on the navigation screen) [ZOOMI key {When [is set to "DVD") Each time you press the button, the zoom ratio switches. Jumps to the function registered in Shortcut 1 [MENU] key {When [is set to "DVD") Calls the DVD Disc Menu {When [is set to "DVD") Turns the PBC (Playback Control function On or Off. Switches between 2D and 3D map displays. Joystick Enters your selection from the DVD Disc Menu Scrolls the map, or moves the cursor. Also performs the selected function when you press the button down An operation during DVD playback An operation during VCD playback An operation during TV source rune] An operation during DVD, VCD, CD, MP3/WMA/JPEG/MPEG or MD playback DUT: An operation during FM/AM broadcasting source An operation during Navigation (KNA-DV2100,KNA-DV3100,KNA-DV4100) control mode I B64-3185-00 (En)indd Sect:11 English | 11
Basic Operations of Remote Controller 101-191 key Lan/»] key {une Msetto mA ; (When [lis set to "DVD') [TUNER et is set to Slow Backward. @ — @ : Recall the stations on memory. 1: Slow Forward Cnav ] You can enter a character/number. LANGLE] key (When [1] is set to"DVD') Éite key rom) @: Switches the view angle IA (When [is setto @: Switches a subtitle language. 20 [DIRECT] key Selects the Direct Search mode. TAUDIO] key {see pages 21/29/34/41 for <Direct Search>) IA (Wen [is set to "DVD') Switches an audio language. B1) (CLEAR] key (When [1] is set to"DVD') Led» key Le Clears a numeric value you have entered in the built-in EZHETSE (When [is setto"DVD") disc player during direct search. << Fast Backward (Rewind). The speed changes each time itis pressed »»-: Fast Forward. The speed changes each time it is pressed 12 | English I 864-3185-0_(En)indd Sec1:12 05.526 8:2644 PM
Handling dises + Do not touch the recording surface of the disc. + CD-R/RW, DVD-R/RW, and DVD+R/RW discs are easier to be damaged than a ordinary music CD. Use a CD-R/RW, DVD: R/RW, or DVD+R/RW disc after reading the cautions on the package. + Do not stick a tape, sticker, ete, on the disc. Also, do not use a disc with those materials pasted on it. When using a new disc Ithe disc center hole or outside rim has bus, use it after removing them with a ballpoint pen etc. Disc shaped accessory Do not insert a disc shape accessory into the unit. Disc cleaning Wipe from the center of the disc to outward
I 864-3185-0_(En)indd Sec1:13 Removing dises When removing discs from this unit pull them out horizontally. Discs that can not be used + Dises that are not round can not be used. + Discs with coloring on the recording surface or that are dirty cannot be used 2 This unit can only play the CDs with one of labels Discs without the label may not be played on the unit + ACD-R or CD-RW that hasn' been finalized can not be played. (For the finalization process refer to your CD-R/CD: RW writing software, and your CD-R/CD-RW recorder instruction manual.) Disc storage + Do not leave discs place them in direct sunlight (On the seat or dashboard etc.) and where the temperature is high. + Put discs in their cases and store them in such a storage as dise cabinet. English | 13
Switching Screen Mode The Screen mode ofthe monitor changes each time the [MODE] key is pressed. [MODE] key Full picture mode (FULL) Justify picture mode (JUST) Cinema picture mode (CINEMA) Zoom picture mode (ZOOM) Normal picture mode (NORMAL) + When you select the Menu, Easy Control screen, or Navigation, the display is shown in the full-size display mode automatically. The screen mode of these displays cannot be changed. +_ You can set the screen mode for each ofthe DVD/VCD, TV, and video images. 14 | English B64-3185-00_(En)indd Sec1:14
I 864-3185-0_(En)indd Sect:15 Muting Au Muting Audio Volume upon Reception of Phone call When the telephone is called, the system is paused automatically. When the telephone is called... The Phone Call ('CALL') screen appears, and system is paused Phone Call ("CALL") screen If you want to continue to listen to the audio source during phone call. Ez © The system resumes audio play during the phone call When the call ends. Hang up the phone. The system resumes playing automatically. Volume upon Reception of Phone cal
Controlling during JPEG or MPEG Playback Various control screens appear when you play back a DVD Video (DVD), a Video CD (VCD) disc or a JPEG, a MPEG files. Displaying the DVD/VCD/JPEG/MPEG Playback screen [1] Title Number Display You can use the following operations when [2] Chapter Number Display displaying DVD/VCD/IPEG/MPEG images. (3) Play Time Display Plays back the [4] Forward Chapter Search Area DVD/VCD or Ex SN EURE » Selects the next chapter. files. [5 Backward Chapter Search Area Selects the previous chapter. [6] DVD Disc Menu Control Button Area (page 20) Ne + When you touched during DVD menu played it will change r ta Highlight screen. (page 20) È [7 Information Display Button Area (page 21)
VCD playback screen [2 Scene/Track Number Display DVDVCD (HfSne 27) > [8] Forward Scene/Track Search Area Mode: FULL __AVOUT: TV Selects the next scene (when PBC is On) or track nm {when PEC is Off e | F0 Backward Scene/Track Search Area Selects the previous scene (when PBC is On) or track (when PBC is Off) = | I Zoom Control Button Area { { Displays the Zoom Control buttons (page 20) ne > 112] Information Display Button Area (page 20) + For DVDA/CD playback, DVD/VCD picture selection, or controller key operations, see <DDX8017 Basic Operations> (page 8). + The information display is cleared automatically after approximately 5 seconds. Also, the information can be displayed automatically when it is updated (page 76) 16 | English I B64-3185-00_(En).indd Sec1:16 a 05.526 8:26:52 PM
JPEG/MPEG playback screen DVD MEDIA (f Mode: FULL AVOUT: TV CHE Displaying the Easy Control Panel The Control Panel is displayed in a floating position: ofthe DVD/VCD screen. Displaying the Easy Control Panel DVDVIDEO Title 1 Chap 2,» TO:10:25
E5 Stops to play. When pressed twice, the disc is played from its beginning when you play it in the next time LT Fast Forwards or Fast Backwards. E2 Chapter Search Searches for a chapter. Scene/Track Search KM Selects a scene (when PBC is On) or a track (when PBC is Off) B3 Plays or pauses. + The Easy Control Panelis hidden when you touch a central part ofthe monitor. English | 17
Displaying the DVD/VCD Control screen Plays a DVD/CD using various functions DVD/VCD Control screen 18 | English I 864-3185-00_(En)indd Sec1:18 B4 Ejects the disc from the built-in disc player. B5 Calls the Sound Effects Menu. (page 88) B6 Displays the Source Select screen. (page 58) B7 Calls the Setup Menu. (page 60) LS Fast Forwards or Fast Backwards. BJ Stops to play. When pressed twice, the disc is played from its beginning when you play it in the next time. B0 Selects a chapter, a scene or a track. When the DVD/VCD is paused, touch this button to start single-frame stepping. BI Plays or pauses. E2 Slow Forwards or Backwards. F3 Turns the PBC function of VCD On or Off (only. when VDC Ver 2.0 is in use) B4 Switches the Repeat Play operations in the following sequence DVD: Title Repeat, Chapter Repeat, Repeat Off VCD: Track Repeat, Repeat Off (Available when the PBC is off) B5 Scrolls the display text. ES Switches the play time display in the following sequence. DVD: | Title, capter, remaining titles VCD: Track, disc, remaining discs (Available when the PBC is off) B7 Title Number Display B8 Chapter/Scene/Track Number Display ES Play Time Display HO Appears when a disc is inserted Hi) Function Indicator 42 Clock Display When touched, the display of Clock 1, Clock 2, and Clock 3 are switched one after the other. 3] Volume Label Display
(D Calls the Menu @ Returns to the Disc Menu Control screen. @ Selects a menu option. @ Enters your menu selection. ® Returns to the previous menu screen, @ Displays the Top Menu. Highlight Control. ® Clears the Disc Menu Control. Highlight Control You can select a chapter and title for the DVD Menu screen. When you touch a chapter and title, itis played back. Éé = DVD MEñy,
Calls the Menu Control @ Switches the picture angle. (during program playback only) © Switches the subtitle language. (during program playback only) @ Switches the voice language (during program playback only) @ Displays the Zoom Control screen. © Clears the Disc Menu Control. Zoom Control É = a © D Changes the zoom ratio at 4 levels (2 times, 3 times, 4 times, or off) each time you touch. ® Scrolls the screen in the direction you touch. @ Returns to the Disc Menu Control screen. @ Clears the Zoom Menu Control.
Controlling during VCD Zoom Control D Video, PEG or MPEG Playback Information Display Displays an enlarged VCD screen. 1 Display the Zoom Control screen Zoom Control Button Area (page 16) ® Changes the zoom ratio at 4 levels (2 times, 3 times, 4 times, or off) each time you touch. @ Scrolls the screen in the direction you touch @ Clears the Zoom Control button: Picture Control Rotates picture for JPEG files. 1 Displays the Picture Control screen Picture Control Button Area (page 17) CE picure Contro | Picture Control @ Switches the picture flip horizontal. @ Switches the picture flip vertical @ Rotates the picture counter clockwise. @ Rotates the picture clockwise. @Hides the Picture Control button. 864-3185-00_(En)indd Sect:21 Displays the DVD and AV information. é Te The information is displayed for 5 seconds. Information Display Button Area (age 16,17) Direct Search You can search for a DVD/VCD chapter, scene or track by entering its number. T Select the Direct Search mode ê & The following items can be searched directly each time it is pressed. DVD: Title, Chapter, Time, Direct number VCD (when PBC is On): Scene, Direct number VCD (when PBC is Off): Track, Time However, the direct search may not be supported for some discs. 2 Enter a number ortime ÿ O — Em When playing back a VCD, enter a PBC screen number (ff PBC is On) or a track number (if PBC is Off) + To clear your incorrect entry, press ŒD (CLEAR). 3 Search ê =. + The operation ends automatically if you do not operate within 10 seconds. English | 21
c Changer Play Control You can recall various control screens during CD/MP3/WMA/JPEG/MPEG/Disc Changer playback. Displaying the Easy Control Panel The CD/MP3AWMA/JPEG/MPEG/Disc Changer Play Control Panel is displayed in a floating position of the selected picture. Displaying the Easy Control Panel During CD playback
Be Ben 0eE | 22 | English [D Switches the source. [2] Stops to play the built-in disc player. [2 Fast Forwards or Fast Backwards. (only when à CD is played back on the built-in disc player) [4] Selects a track or data When you continue to touch button: Fast Forwards or Fast Reverse. {Disabled when a JPEG is being played) [5] Plays or pauses. [6] Selects an MP3/WMA/JPEG/MPEG file. (only when an MP3/WMA/JPEG/MPEG is played back on the built-in disc player) F7] Selects a disc. (only when a disc is played back on the disc changer) + For CD/MP3AWMA/JPEG/MPEG/Disc Changer playback and receiver key operations, see <DDX8017 Basic Operations> (ee page 8) + The Easy Control Panel is hidden when you touch a central part of the monitor
12) Ejects the disc from the built-in disc player.
F3 Fast Forwards or Fast Backwards. FA Selects a track. Î5) Plays or pauses.
6) Starts or stops Scan Play (that plays the beginning
of each song one after the other). fl) Repeats to play (the present track).
8) Starts or stops Random Play (to play track in
25 Stops to play the built-in disc player. When pressed twice, the disc is played from its beginning when you play it in the next time. 26 Clock Display When touched, the display of Clock 1, Clock 2, and Clock 3 are switched one after the other. L7 Function Indicator English | 23
MP3/WMA/JPEG/MPEG Control screen During MP3/AWMA/JPEG/MPEG play BB Ejects a disc. RS Fast Forward or Fast Backwardis. {Disabled when a JPEG is being played) ED Stops to play. When pressed twice, the disc is played back from its beginning in the next time. 1] Selects à song or data
B2 Plays or pauses. E3 Selects a folder.
Starts or stops Scan Play (that plays the beginning of each song or data one after the other) B5 Repeats to play (the present song or data). ES] Starts or stops Random Play (to play songs of the present folder in random order) F7 Selects the Folder name, File name, Title (ID3/WMA tag), Artist name (ID3/WMA tag), or Album name {1D3 tag) for text display. BB Scrolls the display text. E3 Switches the button display. ro) Repeats to play the song or data of the present folder. Hi) Folder and File Number Display H2 Play Time Display F3) Appears when a disc is inserted
Clock Display When touched, the display of Clock 1, Clock 2, and Clock 3 are switched one after the other. 15 Function Indicator 24 | English I 864-3185-00_(En)indd Sec1:24 D 05.526 8:27:19PM L
IMP3/WMA/JPEG/MPEG/! Disc Changer Control screen Er) During play by the disc changer A, x. © Selects a track. D \s “2 5 ser Fast Forward or Fast Backward when it is held
Selects a disc. ©) 525 CH Plays or pauses. Starts or stops Scan Play (that plays the beginning of each song one after the other). 10] Repeats to play (the present track) Starts or stops Random Play (to play songs in random order) Repeats to play disc (the present disc) Starts or stops Magazine Random Play (to play songs ofthe disc changer in random order) Switches the button display. Selects the Disc Name (see <Set Disc Name>, page 27), Disc Text, or Track Text mode for text display. F3 Scrolls the display text. Switches the play time display between Track, Disc, and Disc Remaining Time. 18 Disc Number Display
159) Track Number Display
El Play Time Display Clock Display When touched, the display of Clock 1, Clock 2, and Clock 3 are switched one after the other. Function Indicator English | 25 I 864-3185-00_(En)indd Sec1:25 D 05526 82722PM L
+ The CSS position varies depending on the disc you are playing. 4 Enter a name For character entry details, see <Character Entry> (page 57) 5 Exitthe Set Name mode É = + You cannot name an MD or MP3/WMA/IPEG/MPEG disc. + You can store up to 100 disc names in memory, The receivers Set Disc Name function uses the Memory Function of the receiver itself rather than the memory function of disc changer or others. Therefore, you can store up to 100 disc names independent from the memary function of the attached device. +_ You can set a disc name only after you have applied the parking brake. I 864-3185-00_(En)indd Sec1:27 IMP3/WMA/JPEG/MPEG/! < Changer Play Control Select Folder (during MP3/WMA/JPEG/ MPEG play) The folders of an MP3/WMA/JPEG/MPEG disc are listed for quick search. T Callthe MP3/WMA/JPEG/MPEG Menu É = 2 Start the Select Folder per Folder Name TER Le GE Fo: CG} Or SON Fie Name F " e MO File Name © D Returns to the root directory. @ Displays the next higher level of hierarchy. @® Displays a folder if the subdirectory has a folder without files. When you touch the folder, it opens. @ Displays a folder if the subdirectory has files without a folder. When you touch the folder, it opens. @ Displays a folder if the subdirectory has both files and folders. When you touch the folder, it opens. © Displays the MP3/WMA/JPEG/MPEG files. When you touch a file, its data is played back. ) Plays the selected folder. © Scrolls the list. 3 Select a song Display the desired song and touch the file display. English | 27
1D3/WMA TAG Display (during MP3/ Disc Select (during play by disc WMA play) changer) The ID3/WMA TAG information of MP3/WMA file is The discs loaded on the disc changer are listed for listed. quick disc selection. 1 Callthe MP3/WMA/JPEG/MPEG Menu 1 Callthe Disc Changer Menu 2 Display the ID3/WMA TAG 2 Callthe Disc Select Menu
© Scrolls the list. (D Plays the displayed disc. @ Selects the Disc Name or Disc Text mode for text display. ® Scrolls the list. {lis not displayed when a disc changer having 6 or less discs is used.) 3 Select the desired disc É ‘me Touch the desired disc display. 28 | English
—6— IMP3/WMA/JPEG/MPEG/Disc Changer Play Control Direct Search Searches for a disc or a track when its number is entered. During play on the built-in disc player T Select the Direct Search mode Ÿ = The following items can be searched directly each time it is pressed. CD: Track number, Total play time MP3/WMA/JPEG/MPEG: Folder, File 2 Enter a disc or track number
3 Search When searching for a track: a = During play on an external in disc player or changer T Enter a disc or track number ÿ à. 2 Search When searching for a track: ÿ M4 en When searching for a disc: ÿ = BAND+ + The operation ends automatically if you do not operate within 10 seconds. English | 29
I 864-3185-00_(En)indd Sec1:30 Tuner Control Various control screens appear in the Tuner Source mode. Displaying the Easy Control Panel The Tuner Control Panel is displayed in a floating position ofthe selected picture. Es | Displaying the Easy Control Panel TUNER FM1 98.1 MHz Displaying the Tuner Control screen You can tune in a station using various functions Tuner Control screen 30 | English [D Switches the source. [21 Switches the band (to AM or FM1/2/3) [3 Tunes in a station [1 Switches the Seek mode. (see page 32 for the <Seek Mode>) + For receiver key operations, see <DDXB017 Basic Operations> (page 8) + The Easy Control Panel is hidden when you touch a central part of the monitor [5] Calls the Tuner Menu. [6] Calls the Sound Effects Menu. (page 88) [7] Displays the Source Select screen. (page 58) [8] Calls the Setup Menu. (page 60) [8] Turns the Traffic Information function On or Off. (see <Traffic Information>, page 34) F0 Switches to the FM1/2/3 band Fi Switches to the AM band F2 Tunes in a station. Use the <Seek Mode> (page 32) to change the frequency switching. F3 Switches between @B to @Bbuttons and Function buttons to use. Î4] Turns the CRSC function On or Off (Only when receiving the FM broadcast. The CRSC indicator displayed when the CRSC function is Off) F5 Selects the Auto Memory mode. {See page 32 for the <Auto Memory>) F8 Switches the Seek mode. (see page 32 for the <Seek Mode>)
[7 Selects the Program Service Name, Station Name, or Radio Text mode for text display. FE] Scrolls the display text. fs] When @B to @B buttons appear, you can recall the stations on memory. For memory of broadcasting stations, see <Auto Memory> (page 32) or <Manual Memory> (page 32). 10 Indicates current Seek mode. B1) Clock Display When touched, the display of Clock 1, Clock 2 and Clock 3 are switched one after the other. 22 Memory Number Display
Displaying the Tuner Menu screen = 3 Selects option from various function menus. You can select menu options using various functions. L4 Returns to the Tuner Control screen G ere } + The available functions vary depending on the model used {the tuner specifications and the broadeasting system that can be received) Tuner Menu screen Gen) English | 31 I 864-3185-00_(En)indd Sect:31 05.526 8:2750PM
I 864-3185-00_(En)indd Sec1:32 —6— Seek Mode Manual Memory Sets a station selection. É = 1F@D is not shown, touch @ The mode is switched in following order each time you touch the button. FUTO1 lunesina station with good . reception automaticalh AUTOZ _] lunesin stations in memory one after another.
FANUAL Switches to the next frequency CU manual. Auto Memory Stores stations with good reception in memory automatically. À Select a band you wish to store in memory é ss 3 2 Select the Auto Memory mode É = IF Bis not shown, touch 3 Start Auto Memory é CG Je à Touch SR 0 ER Auto Memory terminates when 6 stations are stored or when all stations are tuned in + The operation ends automatically f you do not operate within 10 seconds. 32 | English S 7 05.526 8:27:52 PM Stores the current receiving station in memory. 1 Select a station you wish to store in memory 2 Storein memory é=sz Fe to @ ire not shown, touch D Continue to touch until the memory number appears
—6— Preset Select Set Station Name Lists and tunes in stations in memory one after the Names a station. other. T Callthe Tuner Menu É = 2 Callthe Preset Select Menu @ Tunes in the displayed station. [an À Select a station you wish to name 2 Callthe Tuner Menu
4 Enter aname For character entry details, see <Character Entry> (page 57) 5 Exitthe Set Name mode @ Switches the band of the displayed station list. @ Band Display. @ Returns to the Tuner Menu. © Switches the Station List display between the + You can store up to 30 stations in memory. Program Service Name and SNPS (Frequency) + You can set a station name only after you have applied I 864-3185-00_(En)indd Sec1:33 the parking brake. English | 33 a 05.526 8:28:04 PM
Direct Search Traffic Information Tunes in a station when its frequency is entered. 1 Select a band ÿ = uv 2 Select the Direct Search mode ÿ & 3 Enter frequency ê à. When you enter frequency, signal reception starts. Example: When you receive FM 92.1 MHz Example: When you receive AM 810 kHz + The operation ends automatically f you do not operate within 10 seconds. 34 | English I 864-3185-00_(En)indd Sec1:34 When a traffic bulletin starts, any source is switched to the traffic information and it is displayed automatically. When the traffic bulletin stats. The Traffic Information screen appears automatically. Traffic Information screen 4 Trafic Information D Calls the Sound Effects Menu. (page 88) @ Calls the Setup Menu. (page 60) @ Tums the Traffic Information function on or off. If you continue to listen to the audio source during traffic bulletin. EE © +_Itis necessary to have Traffic Information function set to On in order to have the Traffic Information screen appear automatically. + During reception of traffic information the adjusted volume is automatically remembered, and the next time it switches to traffic information its automatically the remembered volume.
Tuner Conti Search for Program Type Radio Text A program is tuned when you set its program type. You can display the radio text. (Only when receiving {Only when receiving the FM broad cast.) the FM broad cast.) 1 Callthe Tuner Menu 1 Callthe Tuner Menu É É = 2 Callthe PTY Search Menu 2 Display the Radio Text D Displays the Radio Text. @ Returns to the Tuner Menu. D Selects a program type. @ Scrolls the program type list ® Searches for the program type Itis displayed when the Program Type is selected @ Continue to touch more than 2 seconds, the currently receiving station is registered to have the selected program type @ Returns to the Tuner Menu. 3 Select a program type 4 Search for the program type
I 864-3185-00_(En)indd Sec1:36 TV/Video Control Various control screens appear in the TV/ Video Source mode. (You can only operate TV with the optional accessory TV Tuner connected) Displaying the TV Picture screen Various control screens appear in the TV Source mode. TV Picture screen Displaying the Easy Control Panel The Control Panel is displayed in a floating position: ofthe TV picture. Displaying the Easy Control Panel 36 | English [1] TV Band Number Display [2} Memory Number Display [3] Channel Number Display [4 Channel Up Area Increase the channel [5] Channel Down Area Decrease the channel. [6] Band/Video Switch Area Switches to TV1, TV2, VIDEO or VIDEOZ. [71 Information Display Button Area + ForTV picture selection and receiver key operations, see <DDX8017 Basic Operations> (page 8). + The information display is cleared automatically after approximately 5 seconds. Also, the information can be displayed automatically when it is updated (page 78) [8] Switches the source. [8] Switches to Video (VIDEON or VIDEO2) H9) Switches the TV band (to TV1 or TV2) Î) Calis up a channel F2 Switches the Seek mode. {see page 39 for the <Seek Mode>) + The Easy Control Panel display is hidden when you touch a central area ofthe monitor a 05.526 8:28:30 PM
Displaying the TV Control screen F3 Calls the TV Menu You can tune in a TV station using various functions. fa) Calls the Sound Effects Menu. (page 88) 15 Displays the Source Select screen. (page 58) f6) Calls the Setup Menu. (page 60) FA Switches to VIDEO or VIDEOZ. TV Control screen F8] Switches to TV1 or TV2. HS Select a channel Use the <Seek Mode> (page 39) to change the channel tuning sequence. E9 Switches between @B to @Bbuttons and Function buttons to use. B1 Selects the Auto Memory mode. (see page 39 for the <Auto Memory>) R2 Switches the Seek mode. (see page 39 for the <Seek Mode>) 23 When @B to @B buttons appear, you can recall channels on memory. For memory of broadcasting stations, see <Auto Memory> (page 39) or <Manual Memory> (page 40). LE Indicates current Seek mode 25 Clock Display When touched, the display of Clock 1, Clock 2, and Clock 3 are switched one after the other. English | 37 I 864-3185-00_(En)indd Sec1:37 D 05.526 8:28:34PM L
Displaying the TV Menu screen You can select menu options using various functions. É = RS Selects options from various function menus. B7 Returns to the TV Control screen. TV Menu screen 38 | English I 864-3185-00_(En)indd Sec1:38 D 05.526 8:28:36 PM L
Seek Mode TV/Video Control Auto Memory Sets a TV station selection. É = 1F@D is not shown, touch @ The mode is switched in following order each time you touch the button. Tunes in a station with good its AUTO] eception automatically, Tunes in stations in memory one after AUTOZ ] another z Switches to the next channel MANUAL ] manual I 864-3185-00_(En)indd Sec1:39 Stores stations with good reception in memory automatically. À Select a band you wish to store in memory É = 2 Select the Auto Memory mode É = 1m is not shown, touch 3 Start Auto Memory É «ee Touch SRB 0: ER Auto Memory terminates when 6 stations are stored or when all stations are tuned in. + The operation ends automatically if you do not operate within 10 seconds. English | 39
Manual Memory Preset Select Stores the current receiving channel in memory. Lists and tunes in stations in memory one after the other. 1 Select a channel you wish to store in memory À Callthe TV Menu é ER LE LE . np °° 75) 2 Store in memory = = 2 Callthe Preset Select Menu 2e 2e
Qu to @ re not shown, touch D Continue to touch until the memory number appears. TE) 69 ch Tunes in the displayed station. The station name is displayed if previously set. @ Returns to the TV Menu. 40 | English I 864-3185-00_(En)indd Sec1:40 D 05.526 82846 PM L
Set Station Name Direct Search Names a station. Tunes in a station when its channel number is entered. À Select a station you wish to name T Select the Direct Search mode É ee ee ÿ 2 Callthe TV Menu 2 Enter a channel number é æ 5
3 Select the Set Name mode When you enter a channel number, signal reception starts. Example: When you receive Channel 06 4 Enter a name For character entry details, see <Character Entry> (page 57). + Direct Search ends automatically if you do not operate within 10 seconds. 5 Exitthe Set Name mode É = + You can store up to 20 stations in memory. +_ You can set a station name only after you have applied the parking brake English | 41 I 864-3185-00_(En)indd Sect41 S 7 05.526 8:28:57PM
—6— SIRIUS Tuner Control Various control screens appear in the SIRIUS Tuner source mode. (with the optional accessory SIRIUS Tuner connected only) Displaying the Easy Control Panel The SIRIUS Tuner Control Panel is displayed in à loating position of the selected picture. Displaying the Easy Control Panel Displaying the SIRIUS Tuner Control screen SIRIUS Tuner Control screen 42 | English I 864-3185-00_(En)indd Sec142 [D Switches the source. [21 Switches the band [1 Tunes in a channel [1 Switches the Seek mode. SEEK 1: Tunes channels one after the other. SEEK 2: Selects channels in memory one after the other. + For system key operations, see <DDXB8017 Basic Operations> (page 8). + The Easy Control Panel display is hidden when you touch à central area ofthe monitor. [5] Calls the SIRIUS Tuner Menu. [6] Calls the Sound Effects Menu. (page 88) [7] Displays the Source Select screen. (page 58) [8] Calls the Setup Menu. (page 60) [8] Tunes in a channel F0 Switches the band I Switches between @Bto @Bbuttons and Function button to use. 12 Starts or stops Channel Scan (that tunes channels one after the other) F3 Switches the Seek mode. SEEK 1 Tunes channels one after the other. SEEK 2: Selects channels in memory one after the other. F4] Changes the display from Song Title & Artist Name, Composer Name, Channel Name, to Category Name.
16 When @B to @B buttons appear, you can recall the channel on memory. For memory of channel stations, see <Channel Memory> (page 44) FA Indicates current Seek mode.
Channel Search 3 Select a category The categories and channels are listed for your channel selection. ac. T Call the SIRIUS Tuner Menu The channel list ofthe selected category appears 6 er.) Channel Selection screen 2 Start Channel Searching
The category list appears. Category Selection screen Tunes in a channel @ Scrolls the list. ® Returns to the Category Selection screen. @ Returns to the SIRIUS Tuner Menu. 4 Select a channel (D Selects a category. @ Scrolls the list @® Returns to the SIRIUS Tuner Menu. The selected channel is tuned Channel Memory Stores the current receiving channel in memory. 1 Select a channel you wish to store in memory É Es Le ] 2 Store in memory é æ = IF to are not shown, continue to touch @ button until the memory number appears. 44 | English I 864-3185-00_(En)indd Sec1:44 05.526 8:20:15 PM
S Tuner Conti Information Display A channel is tuned when you enter its number. T Call the SIRIUS Tuner Menu 2 Display the Direct Search screen
Enters a channel number. @ Returns to the SIRIUS Tuner Menu. © Tunes in a channel when you enter is number. 3 Enter a channel number
(D Displays the information (such as Category Name, Channel Name, Artist Name, Song Title, and Composer) @ Scrolls the information display. @ Returns to the SIRIUS Tuner Menu. English | 45
—6— HD Radio Contro Various control screens appear in the HD Radio Source mode. (with the optional accessory HD Radio Tuner connected only) Displaying the Easy Control Panel The HD Radio Control Panel is displayed in a loating position of the selected picture. Displaying the Easy Control Panel a Displaying the HD Radio Control screen
You can tune in a station using various functions HD Radio Control screen 46 | English I 864-3185-00_(En)indd Sec1:46 [D Switches the source. [2] Switches the band (HD FM1/2/3, HD AM) [1 Tunes in a station. [1 Switches the Seek mode. (see page 48 for the <Seek Mode>) + For receiver key operations, see <DDXB017 Basic Operations> (page 8) + The Easy Control Panel display is hidden when you touch à central area ofthe monitor. [5] Calls the HD Radio Menu [6] Calls the Sound Effects Menu. (page 88) [7] Displays the Source Select screen. (page 58) [8] Calls the Setup Menu. (page 60) [8] Switches to the HD FM1/2/3 band. F0 Switches to the HD AM band. FN Tunes in a station or channel Use the <Seek Mode> (page 48) to change the frequency switching. F2 Switches between @B to @Bbuttons and Function buttons to use. H3 Selects the Auto Memory mode. (see page 48 for the <Auto Memory>) F4 Switches the Seek mode. (see page 48 for the <$eek Mode>) F5) Switches between Station Name and Song Title display modes. F6) Scrolls the display text. . button is not displayed when there is no text information.
17 When @B to @B buttons appear, you can recall the stations on memory. For memory of broadcasting stations, see <Auto Memory> (page 48) or <Manual Memory> (page 48). 8] Indicates current Seek mode. H9 M/S Indicator 20 Clock Display When touched, the display of Clock 1, Clock 2, and Clock 3 are switched one after the other.
—6— Seek Mode Manual Memory Sets a station selection. Stores the current receiving station in memory. 1 Select a station you wish to store in memory
1 SD is not shown, touch @B. The mode is switched in following order each time . you touch the button. 2 Store in memory A. Tunes in a station or channel with É Æ Ææ= AUTO 1 good reception automatically.
AUTO 2 Junes in stations in memory one afer 1° to @B are not shown, touch D Y : Continue to touch until the memory number TAN Siitches to the next frequency or CC MANUAL ] * Chännel manual appears Auto Memory Stores stations with good reception in memory automatically. 1 Select a band you wish to store in memory lan 2 Select the Auto Memory mode É = IF Bis not shown, touch 3 Start Auto Memory é CG 7e à Touch SR or ER Auto Memory terminates when 6 stations are stored or when all stations are tuned in 48 | English I 864-3185-00_(En)indd Sec1:48 S 7 05.526 82049 PM
HD Radio Conti Receive Mode Title Display The digital or analog program is selected and An information about the received song is received. displayed. T Callthe HD Radio Menu T Callthe HD Radio Menu 2 Callthe Receive mode Menu 2 Display the Title screen Title screen € Cenize 7 _ÆAP#ADIO
(D Receive mode Display. @ Switches the Receive mode. @® Returns to the HD Radio Menu. (D Displays the information. @ Scrolls the information display. 3 Select the Receive mode ® Returns to the HD Radio Menu: É = AUTO: Automaticall switches between the Digital and Analog Receive modes depending on the broadcasting type. Ifprograms are broadcasted in both modes, the digital program is received Also, fa program is received in the Ball Game mode (the non-displayed broadcast program), the analog program is automatically received. DIGITAL: _ Receives the digital program only. ANALOG: Receives the analog program only. English | 49 I B64-3185-00_(En)indd Sec149 D 05.526 8:20:56 PM L
—6— B Tuner control Various control screens appear in the DAB Tuner source mode. (with the optional accessory DAB Tuner connected only) Displaying the Easy Control Panel The DAB Tuner Control Panel is displayed in à loating position of the selected picture. Displaying the Easy Control Panel 220.094MHz a Displaying the DAB Tuner Control screen
You can select the Ensemble and services using various functions. 50 | English I 864-3185-00_(En)indd Sec1:50 [D Switches the source. [21 Switches the band (to DAB1/2/3) [1 Selects a service. [4 Selects the Ensemble. [5] Switches the Seek mode. (see page 52 for the <Seek Mode>) + For system key operations, see <DDX8017 Basic Operations> (page 8) + The Easy Control Panel display is hidden when you touch à central area ofthe monitor. [6] Calls the DAB Tuner Menu [7] Calls the Sound Effects Menu. (page 88) [8] Displays the Source Select screen. (page 58) [8] Calls the Setup Menu. (page 60) EH Switches the band (to DAB1/2/3). HT Selects a service. F2 Select the Ensemble. H3 Switches between to @Bbuttons and Function button to use.
4) Selects the primary or secondary operation.
f5 Selects the Auto Memory Mode. H& Switches the Seek mode. (see page 52 for the <Seek Mode>) 7 Changes the display between Ensemble label, PTY label, Component label, Region label, and Audio quality.
EE When @Bto @Bbuttons appear. you can recall a service on memory. HS Indicates current Seek mode. 20 Clock Display When touched, the display of Clock 1, Clock 2, and Clock 3 are switched one after the other.
—6— Seek Mode Service Preset Memory A service selection method can be set. The current receiving service is stored in memory. É = e you wish to store inmemory
IF @D is not shown, touch @ <> The mode is switched in following order each time . you touch the button. 2 Store in memory QT Tunesina ensemble with g00d É reception automatically.
AUTOZ —) lunes in service in memory one after © 10 @æ 2 rot chou touch s Continue to touch until the memory number TANOAL À Switches to the next channel manual. appears Auto Ensemble Memory An ensemble with good reception is stored in memory automatically. T Select a band you wish to store in memory lan! 2 Select the Auto Memory mode É = IF Bis not shown, touch 3 Start Auto Memory é CG 7e à Touch SR or ER Auto Memory terminates when 6 stations are stored or when all stations are tuned in 52 | English I 864-3185-00_(En)indd Sec1:52 S 7 05.526 8:30:13PM
AB Tuner control Service Select Language Filter The service list of the currently receiving ensemble The languages are list for your selection. displayed lection. 1S SSP'aYeE lor Your Se ectIon. 1 Callthe DAB Tuner Menu L'ET é = 2 Callthe Language Filter Menu 2 Callthe Service Select Menu Langua CE re LANG Fier | ONE Name D (D Selects a language D Selects a service. À Searches for the selected language. @ Scrolls the service list ® Returns to the DAB Tuner Menu @® Returns to the DAB Tuner Menu. 3 Select a language you wish to use 3 Select a service é É ee 4 Search for the language
Search for Program Type 3 Select a program type The services are received when you set its program type. LL" 2 Î Callthe DAB Tuner Menu Select a Language 6 er.) 1. Display the Language select screen 2 Callthe PTY Search Menu D Selects a Language. @ Searches for the program type. @ Returns to the PTY Search Menu (D Selects a program type. @ Searches forthe program type. 2. Select a Language © Displays the Language select screen. @ Returns to the DAB Tuner Menu. é ee 4 Search for the program type É = 54 | English I 864-3185-00_(En)indd Sec1:54 D 05.526 8:30:33 PM L
B Tuner conti DAB Information DAB Announcement The DAB information is displayed. When the Announcement you have turned on starts, any source is switched to the Announcement automatically. 6 When the announcement starts.. The Announcement screen appears automatically. Î Callthe DAB Tuner Menu 2 Display the DAB Information screen Announcement screen D Calls the Sound Effects Menu. (page 88) @ Calls the Setup Menu. (page 60) (D Displays the DAB information (such as Service label, Ensemble label, Component label, Audio quality, Region label, and Dynamic label) @ Scrolls the information display. @® Returns to the DAB Tuner Menu. English | 55 I 864-3185-00_(En)indd Sec1:55 05.526 8:3041 PM
—6— Weather Band Tuner Control Various control screens appear in the Weather Band Tuner source mode. (with the optional accessory Weather Band Tuner connected only) Displaying the Easy Control Panel © Switches th The Weather Band Tuner Control Panel is displayed I Switches the source in a floating position of the selected picture. [2] Tunes in a station. + For system key operations, see <DDXB8017 Basic Operations> (page 8). + The Easy Control Panel display is hidden when you touch à central area ofthe monitor. Displaying the Easy Control Panel
[3] Calls the Sound Effects Menu. (page 88) [4] Displays the Source Select screen. (page 58) [5] Calls the Setup Menu. (page 60) [6] Tunes in a station. [7 Clock Display When touched, the display of Clock 1, Clock 2, and Clock 3 are switched one after the other. 56 | English
Character Entry How To Use the Character Entry screen When you select the Set Disc Name mode or others, the following screen appears for character entry. Character Entry screen
[D Shifts the cursor. [2] Enters a space. If you erase a character, locate the cursor on it and touch this button. [1 Enters characters. F9 Scrolls up or down the character button display. [8 Exits the Character Entry mode and returns to the previous screen. + You can enter characters only after you have applied the parking brake. English | 57 I B64-3185-00_(En).indd Sec1:57 a 05.526 8:30:50 PM
Source Select The source you wish to listen to can be selected quickly. Displaying the Control screen
Press this key several times unit the Control screen appears. + The Source Select screen can be displayed from the control screen of any source Control screen Displaying the Source Select screen [ Select the source. G @ [2] Returns to the Control screen previously displayed [3] Calls the Sound Effects Menu. (page 88) [4] Calls the Setup Menu. (page 60) Source Select screen Œne” Y 58 | English I 864-3185-00_(En)indd Sec1:58 D 05.526 8:30:51 PM L
I 864-3185-00_(En)indd Sec1:59 Adjusting the Monitor You can adjust the position and picture quality of the monitor. Displaying the Screen Control screen You can adjust the picture quality using the following keys
Displaying the Tilt Adjust screen You can set the monitor til, É == Tilt Adjust screen [1 Brightness Control [21 Tint Control Displayed for an NTSC system image on TV or Video. [31 Color Control Displayed on the TV and Video screen only. [4] Contrast Control [5] Black Level Adjustment [6] Displays the Adjust Monitor Position screen. {see <Displaying the Tilt Adjust screen>, page 59) [7] Dimmer Mode Setup "SYNC" Turning the Dimmer function On or Off when the vehicle light control switch is tumed On or Off. Manual” Turning the Dimmer function On or Off when [SCRN] key is pressed more than 1 second [8] Returns to the previous screen. + The Screen Control screen is displayed only when you have applied the parking brake. + The picture quality can be set for each source [8 Monitor Tilt Adjustment F0] The monitor fully closes. ET Returns to the Screen Control screen. 12 Returns to the previous screen. + fyoutum the power off, the panel will close. However, if you tum the power back on, it wi return to the adjusted ti. English | 59 a 05.526 8:30:57 PM
Setup Menu You can set up various receiver parameters. + You can call the same Setup Menu for the Control screen of each source. Press this key several times until the Control screen appears. Control screen
the <Audio Set Up> first, then set up the <Sound Effects menu>. Setup Menu screen + The available functions vary depending on the model used {the tuner specifications and the broadcasting system that can be received) 60 | English I 864-3185-00_(En)indd Sec1:60 05.526 8:31:01 PM
Audio Set Up (Other than STANDBY mode) You can set up the car type and speaker system you use together with this unit. Displaying the Car Type Set Up screen IF your car type is selected, the Digital Time Alignment and Equalizer is set automatically (for timing adjustment of sound output for each channel) to have the highest surround effects. Compact Car Type Displaying the Speaker Set Up screen When the speaker type and size are set, the speaker crossover network and equalizer curve are set automatically. É = Speaker Set Up screen 62 | English 864-3185-00_(En)indd Sec1:62 [2 Returns to the Control screen of the previous source. [2] Calls the Sound Effects Menu. (page 88) [31 Calls the Setup Menu. [4] Sets up the car type you use together with this unit. You can choose according to type of your car. Compact’ "Full Size Car "Wagon" "Wagon? “Minivan1” "Minivan2’ "SUV" "Minivan(Long)". "Off" [5] Displays the DTA (Digital Time Alignment) Setup screen. (page 66) You can adjust the digital time alignment that was set automatically when you selected the car type [6] Displays the Speaker Set Up screen. not shown, touch em :° dipl) [71 Selects a speaker to be set. (see <Speaker Set Up>, page 64) [8] Selects a speaker type. (see <Speaker Set Up>, page 64) [8] Displays the Speaker Crossover Setup screen. {See <Crossover Network Setup>, page 67) You can adjust the crossover setup that was set automatically when you selected the speaker type. FO Sets the use or no use of tweeter. (see <Speaker Set Up>, page 64) M] Displays the Channel Level Setup screen 12] Displays the Car Type Set Up screen. + Your setup on the <Sound Effects Menu> is adjusted automatically to get the best sound effects according ta the car type and speaker you have set on the <Audio Set Up> (page 62). We recommend you to complete the <Audio Set Up> first, then set up the <Sound Effects Menu> You can fine-adjust the automatic set value by <DTA Setup> (page 66) or <Parametric Equalizer> (page 91)
Displaying the Channel Level screen 113 Selects a speaker to be set. You can set the volume at each setup position (see <Channel Level, page 65) [4 Sets the speaker volume. C- 2 {see <Channel Level>, page 65)
Speaker Set Up 2 Select a speaker type You can select a speaker type and its size to getthe best sound effects. ee 1 Select a speaker you wish to adjust 6 You can select any of the following speaker types. Page 62 7) Q Page 2 Center speaker NONE, 2 3/4x1 9/16 inch, 2 inch, 4 inch, 5 inch, Speaker Set Up screen 6 1/2 inch over Front speakers: OEM, 4 inch, 5 inch, 6 1/2 inch, 6 3/4 inch, 7 inch, 4x6 inches, 5x7 inches, 6x8 inches, 6x9 inches, 7xl0 inches Rear speakers NONE, OEM, inch, Sinch, 6 1/2inch, 6 3/4inch, inch, 4xéinches, Sx7inches, 6x8 inches, 6x9 inches, 7x10 inches (D Center speaker Subwoofer: @ Front speaker NONE, 6 1/2 inch, 8 inch, 10 inch, 12 inch, 15 inch over @ Rear speaker @ Subwoofer ® Tweeter setup You can set the tweeter when you are selecting + Select"NONE" if you have no speakers front speakers. + _Ifyou set the center speaker ta "NON" even in a short If you are using a tweeter together with the front speakers, set the tweeter to "Use". In the "Use" position, the Equalizer is adjusted to its best position. 64 | English I B64-3185-00_(En)indd Sec1:64 time when you are setting the Surround Control (page
92) to "Bypass+Center the Surround Control is set to
"Bypass” automatically. +_Ifyou set the center and rear speakers to "NONE" when you are setting the Surround Control (page 92) to"Dolby PL, the Surround Contrel is set to "Bypass" automatically -_Ifyou set the rear speakers to "NONE" when you are setting the Surround Control (page 92) to "CS ll the Surround Control is set to "Bypass' automatically.
Channel Level You can set the volume at each setup position. 1 Select a speaker you wish to adjust 6 @ (Page 63 13) Channel Level setup screen (D Center speaker @ Left front speaker ® Right front speaker @ Left rear speaker ® Right rear speaker © Subwoofer 2 Adjust the volume 6 = English | 65 I 864-3185-00_(En)indd Sec1:65 D 05526 8:31:17PM L
DTA Setup 3 Set a delay time You can manually set the sound output timing of each channel. |: 17 1 1 play the DTA Setup screen The speakers are virtually moved to the desired 6 distance. (age 52/5) When the values of center speaker and front speakers increase, they are virtually moved DTA Setup screen forward. When the values of rear speakers and subwoofer increase, they are virtually moved backward. (D Selects a speaker to be adjusted. @ Sets a delay time of the selected speaker. © Returns to the Car Type Set Up screen. 2 Select a speaker you wish to adjust é o (D Center speaker @ Front speaker ® Rear speaker @ Subwoofer 66 | English I 864-3185-00 _(En)indd Sec1:66 D 05526 8:3120PM L
Crossover Network Setup You can manually set a crossover frequency of speakers. Frequen O—— oe= 80Hz VO ©) Praso Woma 12dB/Oct Peu (D Sets a crossover frequency. @ Sets a crossover slope. © Returns to the Speaker Set Up screen. @ Sets the phase of subwoofer output (it is displayed when the subwoofer crossover frequency is set) The phase is reversed 180 degrees when set to "Reverse” + When you select a speaker type on the Speaker Set Up screen, the crossover frequency setup is cleared. + During crossover setup, the speaker type is set to "User" on the Speaker Set Up screen. English | 67 I 864-3185-00_(En)indd Sec1:87 05526 8:3126PM
DVD Setup You can set up the DVD play. Displaying the DVD SETUP 1 screen
68 | English I 864-3185-00_(En)indd Sec1:68 [2 Returns to the Control screen of the previous source. [2] Calls the Sound Effects Menu. (page 88) [31 Calls the Setup Menu. [42 Selects a disc menu language *' (See <Language Setup>, page 70) [8] Selects a subtitle language *' (See <Language Setup>, page 70) [6] Selects an audio language *! (See <Language Setup>, page 70) [71 Sets the dynamic range. (4 Wide) The dynamic range is reduced by changing from “Wide” to "Normal" and from "Normal" to “Midnight” You can easy to listen a small sound when the dynamic range is narrowc This is effective only when you are using a Dolby Digital software. [8] Displays the DVD SETUP 2 screen. is not shown, touch © 01 em :° dipl) it. + * Disabled when a DVD is being played.
Displaying the DVD SETUP 2 screen É = DVD SETUP 2 screen
"169": Displays wide pictures "43 (LB)': Displays wide pictures in the Letter Box format (having black stripes at the top and bottom of screen). "43 (PS): Displays wide pictures in the Pan & Scan format (showing pictures cut at the right and left ends) Î2 Displays the DVD SETUP 1 screen. 13 Displays the DVD SETUP 3 screen. + * Disabled when a DVD is being played. 16:9) Î4 Selects the picture display time* Middle) The Display of a JPEG picture is changed "Short "Middle’ "Long" H5 Selects the Picture Effect.*' (4 Random) Î16 Displays the DVD SETUP 2 screen. + * Disabled when a DVD is being played. English | 69
I 864-3185-00_(En)indd Sec1:70 Language Setup Selects a language you use for the speech and menus. 1 Display the Language Setup screen See <Displaying the DVD SETUP 1 screen> (page
(D Enters a language code. @ Cancels the language setup and returns to the DVD SETUP 1 screen © Clears the language code. @ Sets the original audio language. {lt appears during audio language setup.) ® Sets the language and returns to the DVD SETUP 1 screen. {lt appears after you have entered a language code) 2 Enter a language code See the Language Code Table shown at right to select the desired language. 3 Setthe language you use
ET Ci (D Enters a code number. @ Cancels the current setup and returns to the DVD SETUP 2 screen. © Clears the code number. @ Indicates the present parental lock level. ® Determines the code number and displays the Parental Level Setup screen
+ The number you enter frs is set as your code number. +_ You can clear the code number by pressing the Reset button. I 864-3185-00_(En)indd Sect:71 3 Display the Parental Level Setup screen e—0 Fun © Sets a parental level. @ Returns to the DVD SETUP 2 screen. 4 Select a parental level 6 = 5 Complete the parental level setup É «æ + fa disc has a higher parental lock level, the audience needs ta enter the code number. + The parental lock level varies depending on a loaded disc. + fa disc has no parental lock any audience can play it back even when you have set the parental lock English | 71
System Setup You can set up the system parameters. Displaying the System 1 screen (61 System 1 screen Manual Remote Sensor 72 | English I 864-3185-00_(En)indd Sec1:72 [2 Returns to the Control screen of the previous source. [2] Calls the Sound Effects Menu. (page 88) [31 Calls the Setup Menu. [4] Turns the key touch tone On or Off ({£ On) [8 Allows scrolling of text display on the Source Control screen. Auto) "Auto": Scrolls the screen automatically. “Manual”: Allows you to scroll the screen manually. [6 Selects a remote control signal. ((£ On) When turned "Off the remote control ofTV reception is rejected. [7] Displays the System Set Up 2 screen, - FE is not shown, touch ee 0: to display it.
Displaying the System 2 screen [8] Sets a music CD playback. (8 1) "1": Automatically recognizes and plays back an MP3/WMA disc, a DVD or a music CD. "2": Forcibly plays back a disc as a music CD. Select "2" ifyou wish to play a music CD having a special format or if you cannot play à disc in the *1" position System 2 screen + You cannot play an MP3/AWMA//CD disc in the "2" position. Also, you may not play some music CDs in the "2" position. + Your setup is disabled when the disc is being played [) Selects an illumination color of receiver keys. (Æ Red) “Green” Green 'Red' Red fo] Displays the System Set Up 1 screen.
AV [/F 1 screen 74 | English I 864-3185-00_(En)indd Sec1:74 [2 Returns to the Control screen of the previous source. [2] Calls the Sound Effects Menu. (page 88) [31 Calls the Setup Menu. [4] Selects a navigation system connection. (2) RGB) "RGB": Allows the Kenwood's Navigation System to connect via its interface cable. "AVANT": Allows a third-party navigation system to connect via the AV INPUT1 port. "Off: Must be used ifno navigation system is connected. (The navigation display is cancelled when the AV source is switched) [5] Sets a name to be displayed when you select a system that is connected via the AV INPUT1 port. (@ vipeot) + Ifyou have set the navigation system connection to "AVINT', the display is fixed to "NAV" [6] Sets an image display of the system that is connected via the AV INPUT2 port. ([A Off) "Off": When the image source is switched, an image entered via the AV INPUT2 port is displayed. "On": When an image signal is entered via the AV INPUT2 port, this image is displayed. [7] Sets a name to be displayed when you select an image of the system that is connected via the AV INPUT2 port. (4 VIDEO2) [8] Displays the AV1/F 2 screen. a 05.526 8:31:53 PM
Displaying the AV 1/F 2 screen [8] Sets a method to switch to the rear view camera video display. (1 off “On”: Switches to the the rear view camera video display when engaging the shift knob of car to "Reverse" AV U/F 2 screen "Off": Switches to the the rear view camera video ED)" ; ca orne display when engaging the shift knob of car to ‘Reverse" and then pressing the [SEL] switch several times. Normal 10) You can flip the left and right ofthe rear view camera video display. Set to "Reverse” and the the rear view will be displayed left and right in mirror image on the screen. ((Æ Normal) Î Selects an AV source to be output at the AV OUTPUT port. (44) AV-IN1)
4) Selects speakers used for voice quidance of the
navigation system. ((Æ Left) FC y "Left: Uses the front left side speaker for voice guidance AVI/E 3 screen: Right: Uses the front right side speaker for voice guidance "Front-All-Uses both front speakers for voice guidance F3) Adjusts the volume for voice guidance of the navigation system. (2 19) Î6] Mutes the volume during voice guidance of the navigation system. (Æ On) When turned ‘On’, the volume level drops for voice guidance Ei] Sets a selecting method of audio source from the Navigation system. (4 Off) "On": Allows you to select the audio source input from the Navigation system interface by pressing [SRC] or selecting it on Source Select screen. "Off": | The audio source cannot be selected using ISRC] or on Source Select screen.
User Interface You can set up user interface (IF) parameters. Displaying the User 1/F 1 screen
Userl/F 1 screen in |
Displaying the User 1/F 2 screen É = Userl/F 2 screen Manual On Screen 76 | English I 864-3185-00_(En)indd Sec1:76 [2 Returns to the Control screen of the previous source. [2] Calls the Sound Effects Menu. (page 88) [31 Calls the Setup Menu. [4] Switches the wall paper. (A Light) [5] Turns the background motion picture of the Source Control screen On or Off (LA On) [6] Selects a frame pattern. (4) Pattern1) You can select ‘Pattemi" or "Pattern?" [1 Turns the screen saver On or Off on the Source Control screen. On) If you turn it On and if you do not operate within one minute on the Control screen of the selected source, the screen saver starts, ‘The screen saver is canceled when the screen is touched [8] Displays the User 1/F 2 screen. is not shown, touch © 0 em :° cpl) [8] Sets an on-screen display of the navigation screen (£ Auto) "Auto": Information is displayed for 5 seconds when updated "Off: Information is not displayed!
0) Sets an on-screen display of the video playback
screen. ((£ Auto) "Auto": Information is displayed for 5 seconds when updated Manual“ Information is displayed when you touch on the screen
I) Sets an on-screen display of the DVD playback
I B64-3185-00_(En).indd Sec1:78 a 05.526 8:32:11 PM —6— Touch Panel Adjustment 3 Adjust the positions You can adjust the touch panel operations. é 1 Display the Touch Panel Adjust screen é Touch the center of left lower and right upper when requested 1 mm is not shown, touch ae 07 es 0 display it Panel Adjust D Returns to the Control screen of the previous source. @ Calls the Sound Effects Menu. (page 88) @ Calls the Setup Menu \ @ Allows you to start touch panel adjustment. Ne 2 Start to adjust the touch panel (D Cancels the adjustment and returns to the Touch Panel Adjust screen. @ Resets to the initial status. 78 | English
Clock You can adjust the clock time. 1 Display the Clock screen
F mm is not shown, touch ee or es 0 display it Returns to the Control screen of the previous source. @ Calls the Sound Effects Menu. (page 88) @ Calls the Setup Menu @ Clock time display. ® Adjusts hours. @ Adjusts minutes. @ Sets "00" minute. Setup examples: 3:00-3:29 3:00 3:30-3:59 > 4:00 ® Sets the clock time in synchronization with the time data sent from the RDS station. (14 Off When turned "On', the synchronized mode starts and the clock cannot be adjusted manually. 2 Adjust the clock time É > English | 79 I 864-3185-00_(En)indd Sec1:79 05.526 8:32:18PM
Security Code Setup You can set a security code to protect your receiver system against theft. + When the Security Code function is activated, the code cannot be changed and the function cannot be released! Note, the Security Code can be set as the 4 digit number of your choice: 1 Display the Security Code Setup screen G = Fe ;s not shown, touch ce 01 em : display it Returns to the Control screen of the previous source. @ Calls the Sound Effects Menu. (page 88) @ Calls the Setup Menu @ Allows you to start security code registration. @ Turns the SI function On or Off. Iftumed *On', the burglar alarm lamp flashes when the vehicle ignition is off. ((4 On) + Hfyou have already completed the code registration, cannot touch @ 80 | English 864-3185-00_(En)indd Sec1:80 2 Startthe security code registration
ET o Enters the numbers to make your security code. @ Clears your entry. ® Cancels the registration and returns to the Security Code Setup screen @ Registers your security code. 3 Enter a security code
Input a four-digit number. 4 Register your security code G «= 5 Reenter the security code Reenter the same security code as that you have entered in Step 3 for confirmation. -_Ifyou enter a different security code, the screen returns to Step 3 (for the first code entry) 6 Register the security code again G «= Now, your security code is registered If you press the Reset button or if you disconnect your receiver from the battery after the code registration, you need to enter the registered security code. See below for details
If you have pressed the Reset button or if you have disconnected the Receiver from battery... 1 Enter the correct security code
You must enter the same security code as that you have entered in Step 3 above. 2 Enter the security code
Now, you can use your Receiver.
Set Up Memory Audio Set Up and AV Interface settings can be memorized. The memorized settings can be recalled at any time. For example, even when the settings are cleared due to replacement of the battery, the settings can be restored. 1 Display the Set Up Memory screen is not shown, touch cs ox em 0 display it @ Returns to the Control screen of the previous source. @ Calls the Sound Effects Menu. (page 88) @ Calls the Setup Menu. Locks the Audio Set Up and AV Interface settings. When BB is selected, you cannot set the Audio Set Up and AV Interface settings © Memorizes or recalls the settings. To cancel the function, touch em To cancel memorization, touch The Setup Menu screen appears again 2 Display the Memory screen 82 | English I 864-3185-00_(En)indd Sec1:82
® Recalls the memorized settings. @ Memorizes the current Audio Set Up and AV Interface settings. @ Clears the currently memorized settings. @ Returns to Set Up Memory screen. Memorize or recall the settings When memorizing the Audio Set Up and AV Interface settings:
Ifsettings have already been memorized, à confirmation message appears. Touch sum .To cancel memorization, touch sum When recalling the memorized settings:
Touching the screen displays a confirmation message. Touch 82 . To cancel recalling, touch mm When clearing the currently memorized settings: É = Touching the screen displays a confirmation message. Touch © . To cancel clearing, touch Ce 2 Quit memorization/recalling of settings É «=
SIRIUS Setup You can display the SIRIUS ID. (with the optional accessory SIRIUS Tuner connected only) Displaying the SIRIUS Set Up screen [2 Returns to the Control screen of the previous source. [2] Calls the Sound Effects Menu. (page 88) [31 Calls the Setup Menu. [4] Displays the SIRIUS ID - FEES is not shown, touch ES 0 to display it. SIRIUS Set Up screen
DAB Set Up You can set the DAB reception. (only with the optional accessory DAB Tuner connected) Displaying the DAB Set Up screen
84 | English I 864-3185-00_(En)indd Sec1:84 [1] Calls the Sound Effects Menu. (page 88) [21 Returns to the Control screen of the previous source. [31 Calls the Setup Menu. [4] Turns the DAB Priority On or Off. [5] Turns the Dynamic Range Control function On or Of. [6] Turns the Regional Announcement function On or Of. [7] Sets a program type to be selected automatically when the receiving ensemble starts. [8] Displays the Announcement Selection screen. is not shown, touch @RER 01 a :° spi it. a 05.526 8:33:05 PM
Announcement Selection 2 Set the announcement parameters You can set various announcement reception 1 Display the Announcement Selection screen COEUR RE Ton Lér y OSanponners Tor RE To |
® Lower priority items than alarms (power failure, (D Turns the Announcement Reception function cutoff of water supply and others) On or Of. @ News flash © Enters the setup and returns to the DAB Set Up ® Weather forecasting screen © Events information (D Undetermined event information © Program information, advance notice @ Sports news 4 Financial news 3 Terminate the setup ê = English | 85 I 864-3185-00_(En)indd Sec1:85 05.526 8:33:07PM
AMP Control Sets the power amp connected via the LX bus. (with the optional accessory LX Power Amp connected only) pla g the AMP Control screen
AMP Control screen 86 | English I 864-3185-00_(En)indd Sec1:86 [1 Calls the Setup Menu. [2] Calls the Sound Effects Menu. (page 88) [31 Returns to the Control screen of the previous source. [4] Setup option and value display [5] Select a setup option. [6] Selects a set value. [1 Enters the set value. is not shown, touch ES 01 to display it. For the model name of amp you can control from the system, see the amps catalog, For the options and values you can change and forthe amps operation when changed, see the amps instruction manual.
Sound Effects Menu Sound Effects Menu You can set up the receiver sound effects. + You can display the same Sound Effects Menu on the Control screen of any source. Displaying the Sound Effects Menu screen [D Calls the Sound Effects Menu. G Oo) [2] Calls the Setup Menu. (page 60) [31 Returns to the Control screen of the previous source. Sound Effects screen + Your setup on the <Sound Effects Menu> is adjusted automatically according to your <Audia Set Up> (page
Audio Control You can adjust the front/rear and right/left audio balance. Displaying the Audio Control screen [2 Returns to the Control screen of the previous source. G [2] Calls the Setup Menu. (page 60) [1 Calls the Sound Effects Menu. Audio Control screen [] Adjusts the right and left volume balance: [8] Adjusts the front and rear volume balance. [6] Adjusts the volume of the present source based on the difference level of original volume. [71 Adjusts the subwoofer volume.
+ Ifyou have increased the volume fist, then reduced the volume using the "Vol. Offset’ the sound generated if you suddenty switch to another source may be extremely loud. English | 89 I 864-3185-00_(En)indd Sec1:89 05.526 8:33:21 PM
Equalizer You can set up the equalizer. playing the Equalizer screen É —= Equalizer screen 90 | English I 864-3185-00_(En)indd Sec1:90 [2 Returns to the Control screen of the previous source. [2] Calls the Setup Menu. (page 60) [1 Calls the Sound Effects Menu. [41 Adjusts the bass boost of the BMS power amplifier optional accessory) + You may not set some models of power amp boost to "+18" See the catalog or instruction manual of power amplifier. [5] Sets the center frequency of bass boost you have set for AMP Bass’ If you set the center frequency to "Low it will be dropped approximately 20% to 30%. [6] Displays the Parametric Equalizer screen. (see page 91) You can adjust the value set for the Equalizer Curve Type [7] Selects an equalizer curve type. You can select any ofthe following equalizer curves. “Natural” 2'Rock' “Pops" 2'Easy" “Top40" “az + Equalizer curve can be set for each source.
Parametric Equalizer 5 Setagain You can Manually set the equalizer curve by adjusting the center frequency, gain and Q value. JS Je 1 Display the Parametric Equalizer screen 6 SetaQ value
7 Close the Parametric Equalizer screen É «æ COL La CUT ® D@®® Select à band to be adjusted O Sets a frequency. ® Sets a gain level. D Sets a Q value. ® Tone curve becomes flat. de. @ Select a channel to be adjusted 4 Exits the Parametric Equalizer setup and returns to the Equalizer screen
2 Select a channel you wish to adjust
3 Select a frequency band you wish to adjust É = You can adjust the following frequency bands Band1: 60, 80, 100, 120, 160, 200 Hz Band2: 250, 315, 400, 500, 630, 800, 1k Hz Band3: 1.25k, 1.6k, 2k, 2.5k, 3.15k, 4k Hz Band4: 5k, 6.3k, 8k, 10k, 12.5k, 16k Hz 4 Set a center frequency
I 864-3185-00_(En)indd Sec1:92 Surround Control You can set up the sound field. Displaying the Surround Control screen
Surround Control screen
[5] Displays the present source information. The stream (Dolby Digital, dts, Linear PCM, MPEG or MP3/WMA), input channels (front or rear channels), and sampling frequency are displayed [6] Displays the Surround Control Adjustment screen. {See <Surround Control Adjustment>, page 93) + When you have selected the TV or TUNER source and when you set the Dolby PL, we recommend you to select the “Dolby PLI Matrik' mode. I you select another Dolby PLII mode, the sound is NOT output from rear speakers when you receive monaural broadcasting sounds. Surround control can be set for each source.
I 864-3185-0_(En)indd Sec1:93 Surround Control Adjustment You can adjust the sound field. 1 Display the Surround Control screen É «æ Surround Control Adjust screen the sound field of "Dolby PLII Music" has been set: PLI Adjust
@ Sets the surround position by adjusting the front and rear volume balance. @ Sets the vocal image position by adjusting the right and left vocal volume level. © Turns the Panorama mode On or Off. @ Enters your setup and returns to the Surround Control screen Ifthe sound field of "SRS CS 11" has been set: CS I Adjust
® Sets the surround position by adjusting the front and rear volume balance. ® Adjusts the center audio mix to rear volume. + You cannot use the <Suround Control Adjustment> during playback of a Multi-channel source. + You cannot use the <Suround Control Adjustment> when the sound field of" Dolby PLII Movie”, or "Dalby PLII Matrix” has been set. 2 Adjust the sound field
SRS WOW Control You can set up the SRS WOW effect. Displaying the SRS WOW Control screen [2 Returns to the Control screen of the previous source. G [21 Calls the Setup Menu. (page 60) [1 Calls the Sound Effects Menu. SRSWOW Control screen [4] Sets a SRS WOW. You can select any ofthe following sound fields Of" Low" +'Middle" c'High" 2'User Hide 7 [5] Displays the SRS WOW User Setup screen. (page95) + No sound effectors of SRS WOW when you have been set to Dolby PLIL If you want set SRS WOW effect when <Surround Contral> set to "BYPASS' or "SRS CS IF.
Table of Sound Effect Menu You can set to sound effect menu to mark" Input Surround 5530 FOCUS Tubsss Channels | Function | Front | Rear | Front | Rear [Center | Front | Rear | Center Wu = = — En Bypass EE = = BypassiCenter DE - - 2h Dolby PLI - - - - - EX - - + * The SRS 3D effect cannot be set when you selected tuner source + The SRS WOW effect cannot be set when you have been set to Dolby PLIL 94 | English I 864-3185-00_(En)indd Sec1:94
Four D Selects a speaker to be set (Front, Rear or Center speaker) @ Sets the TruBass effect level. @ Sets the FOCUS effect level. (@ Sets the SRS 3D effect level, @ Returns to SRS WOW Control screen. + FOCUS: Adjusts the vertical position of the speaker and sound image by virtual adjustment. + TruBass: Assists the playback for the super bass sound. + SRS 3D: Makes a natural 3D sound field + You cannot set SRS 3D in tuner source. 2 Select a speaker you wish to adjust
3 Adjust the sound effect level
Position You can adjust the sound effects according to your listening position. [2 Returns to the Control screen of the previous source. [2] Calls the Setup Menu. (page 60) [1 Calls the Sound Effects Menu. [4] Sets a listening position. You can select any of "Front R' (Right front), "Front L' (Left front), "Front AI! (All front) and 'AIF (AI) positions. Position screen [5] Displays the Position Fine Control screen. (page 97) [6] Stores the present adjustment setup in memory, or callsit from memory. (page 97) + The final distance is adjusted to the total of Car Type Set Up value (page 62) and Position Setup (both Position and Position Fine Controi) value. I you change the Car Type Set Up value (page 62), the position is set to "AI" Only the adjusted distance of position setup (Position and Position Fine Control values) is stared in memory. Therefore, the final adjustment distance changes if you change the Car Type Set Up value (page 62). 96 | English I 864-3185-00_(En)indd Sec1:86 S 7 05.526 8:33:56 PM
Position Fine Control Center speaker @ Left front speaker ® Right front speaker 1 Display the Position Fine Control screen @ Left rear speaker ® Right rear speaker é © Subwoofer 3 Set a delay time
You can fine-adjust your listening position. Position Fine Control screen Total DTA 4 Close the Position Fine Control Screen É «æ
ET] Storing the Preset adjustment setup (D Selects a speaker to be adjusted To store your adjustment in memory: @ Indicates setup distance. The adjusted distance (Position and Position ECS Fine Control values), and the total of the ee» - Van distance adjusted by Car Type Set Up (page 62) ? and the adjustment distance for position setup are indicated Continue to touch to more than 2 © Adjust the distance to each speaker. seconds. @ Exits the Position Fine Control setup and returns to the Position screen Recalling the Preset adjustment setup 2 Select a speaker you wish to adjust To call your adjustment from memory: É o É æ Touch BB to @B of your adjustment you wish to call from memory. English | 97
I 864-3185-00_(En)indd Sec1:98 —6— Zone Control You can set the front and rear audio source. Displaying the Zone Control screen (61 Zone Control screen 98 | English [2 Returns to the Control screen of the previous source. [2] Calls the Setup Menu. (page 60) [1 Calls the Sound Effects Menu. [41 Turns the Zone Function (that sets different source sounds for front and rear speakers) On or Off. When tumed On, S, &B and rear volume are shown. 5] Adjusts the volume of the rear channel {This button appears when the Zone function is On) [6] Sets the front and rear audio source separately. {This button appears when the Zone function is On) + When the rear speaker sound is switched, the audio source that is output at the AV OUTPUT terminal is also switched to the same source. However, if you have set the "Area" to "Reverse’, the audio source that is output at the AV OUTPUT terminal is switched depending on the front sound source. [1 Switches the front and rear audio sources. {This button appears when the Zone function is On) Use "Reverse" to change over the front and rear audio sources. + There are following limitations when zone function is set to “on” There is no output from the subwoofer or center. <Audio Setup> (page 62), <Equalizer> (page 90), <Surround Contral>(page92), <SRS WOW: (page 94) <Position>{page 96) are not available.
A type of disc which contains recording of audio/ video packaged media with high video and audio quality, such as a movie, featuring large recording capacity and digital signal processing capability.
A type of CD which contains the recording of mov- ing images. lt compresses image information by. about 1/120 and audio information by about 1/6 and accommodates up to 74 minutes of recording in a disc with the same diameter as ordinary music CD of 12 cm. Some VCDs do not have the PBC. compatibility and are capable of playback only, while some are PBC.-compatible and are capable of various spe- cial playback control operations. This player can play both ofthese VCDs MPEG: Moving Picture Experts Group This is an international standard for digital video and audio compression and decompression in media Dolby Di This is à digital audio compression technology developed by Dolby Laboratories. It is compatible with 5.1-channel surround audio as well as normal stereo (2-channel) audio and can accommodate à large amount of audio data efficientiy in à disc. Name of a digital surround system developed by Digital Theater Systems, Inc. Top menu/menu (DVD) Some DVDs display more than one title in a screen: This screen is referred to as the top menu The menu is the item display (menu screen) for use in setting operations. The menu can be recalled any time during playback to perform settings according to the current software, including the audio switching between Dolby Digital and PCM, switching of language used in the subtitles and spoken voice. Title number (DVD) The ütle is the largest unit of video and audio recorded in à DVD. It usually corresponds to à single movie of video software or an album (some- times a piece of music) of music software. The numbers assigned to individual titles are referred to as the title numbers. I 864-3185-00_(En)indd Sec1:89 The chapter is a section of video and audio record- ed in a DVD. A title is composed of several chap- ters. The numbers assigned to individual chapters are referred to as the chapter numbers. Some DVD discs contains the recording of more than one subtile language. This player allow you to select one of the recorded subtitle languages during playback Track number (CD, VCD) A track is also a section of video and audio record- ed in a disc. The numbers assigned to individual tracks are referred to as the track numbers. With most of music CDs, a track is assigned to à piece of music. However, with a VCD, the sections ofthe contents do not always correspond to the assigned tracks. A5 (special) playback functions such as skipping and programming of ordinary CDs are based on track number date, such playback functions are sometimes impossible with some VCDs When a VIDEO CD carries "Play Back Control capable" or similar message on the disc or jacket, desired scenes and information can be played back in an interactive manner using a hierarchical struc- ture while viewing the menu screens displayed on the TV screen. Circle Surround I improves on its predecessor Circle Surround (CS5.1) by enabling you to experi- ence powerful mult-channel surround sound playback from mono, stereo or Dolby Surround encoded audio and video sources. With SRS CS Il you can also listen to audio CDS, television and radio broadcasts in full surround sound You wil discover a new type of sound experience through SRS CS 11 English | 99
Some system functions are limited to control depending on your setup. : Zone cannot be set. The "Rear Bass Boost" of Surround Control Adjust cannot be set. - The rear speakers of DTA cannot be set. The “Position Fine Control" of rear speakers cannot be set. + The "Channel Level" of rear speakers cannot be set. The SRS CS I cannot be set.
The rear speakers have been set to *NONE on the Speaker Set Up screen (page 64) No Surround Control (Sound Field) can be set. - No signals can be set. - The “Parametric Equalizer” cannot be set. - The "Position (Position Fine Control)" cannot be set. - The "Car Type Setup" value cannot be set. - The "Speaker Setup' value cannot be set. + No crossover frequency can be set. The "Channel Level" (test signal output) cannot be set. ‘The Zone Control has been tumed On (page 98).
The Surround Control (Sound Fi "Bypass+Center". The "Center Level" of Surround Control Adjust cannot be set. - The "Center Width Control" of Surround Control Adjust cannot be set. - The center speaker for DTA cannot be set. - The "Position Fine Control" of the center speaker cannot be set. The "Channel Level” of the center speaker cannot be set. Id) cannot be setto The center speaker has been set to *NONE" on the Speaker Set Up screen (page 64) The Surround Control Adjust cannot be set. The Surround Control (Sound Fielch) {page 94) has been set to "Bypas: "Bypass Center” + The Surround Control (Sound Field) cannot be set to "Dolby PL me. The center and rear speakers have been set to"NONE" on the Speaker Set Up screen (page 64) + The subwoofer of DTA cannot be set. + The "Position Fine Control" of the subwoofer cannot be set. + The "Channel Level" ofthe subwoofer cannot be set. The subwoofer has been set to "NONE" on the Speaker Set Up screen (page 64). + No sound effectors ofSRS WOW. VNVNV Y The Surround Control (Sound Field) {page 92) has been set to "Dolby PL Il" I 864-3185-00_(En)indd Sec1:100 100 | English
What might appear to be a malfunction in your unit may just be the result of slight misopera- tion or miswiring. Before calling service, first check the following table for possible problems. General HE The power does not turn on. #_The fuse has blown. æ After checking for short circuits in the wires, replace the fuse with one having the same rating, V7 The speaker wire has a short-circuit or touches the chassis of the vehicle, and then the protection function is activated æ Wire or insulate the speaker cable properly and press the reset button. The desired source is NOT selected although you pressed the SRC button. w_ Anon-connected source cannot be selected! #æ A non-connected source cannot be selected! See <INSTALLATION MANUALS> and connect the unit correctly. The RESET button is not pressed yet although the optional unit has been connected to the system. Press the reset button (page 4).
The "O-N" switch of the optional unit is at the "O" position. Set the "O-N° switch to the "N” position. V_Adisc changer not supported by the system is used Use a disc changer supported by the system (page 4) The message "Disconnected cable found. Please confirm a connection line! is displayed and the unit cannot be used. #_Receiver unit is disconnected. #æ Connect the wire correctly, referring to the section on <INSTALLATION MANUAL>. Nothing happens when the buttons are pressed. #_The computer chip in the unit is not functioning normal. ææ Press the reset button on the unit (page 4) No television/video image appears. #_ The unit is not connected to the parking brake detection switch. Make proper connections according to <INSTALLATION MANUALS. I 864-3185-00_(En)indd Sect:101 v_ The parking brake is not engaged. #æ For safety reasons no television/ideo images are displayed while the vehicle is moving Engaging the parking brake will cause images to be displayed EH The screen is dark. #_ The unit is in a location where temperature is low. #æ ifthe temperature of the monitor unit drops, the screen may appear darker when power is first turned on due to the characteristics of a liquid crystal panel. Wait a while after turning power on for the temperature to rise. Normal brightness will return. H The screen does not darken when the vehicles lights are turned on. # The unitis set to auto dimmer. When the unit is set to auto dimmer, it is not linked to the vehicle's light switch. V_ The illumination wire has not been connected {If manual dimmer is set) æ Make proper connections according to <INSTALLATION MANUAL. EH AM/FM radio reception is poor and/or there is noise. v_ The TV antenna and vehicle radio antenna are too close. æ Separate the two antennas as far as possible. æ Turn offthe main unit. H The remote controller does not operate. W_ The remote control mode selector is not set correctly. æ Switch the remote control mode selector according to the source you select (page 10). EH No sound can be heard, or the volume is low. #_Attenuator is turned on. æ Turn off Attenuator. V The fader or balance settings are set all the way to one side. wæ_ Reset the fader and/or balance settings. The input/output wires or wiring harness are connected incorrectiy. Reconnect the input/output wires or the wiring harness correctly. See the section on <INSTALLATION MANUAL>. English | 101
—6— H The sound quality is poor or distorted. #_ One of the speaker wires is being pinched by a screw in the car. æ Checkthe speaker wiring V7 The speakers are not wired correctiy. #æ Reconnect the speaker wires so that each output terminal is connected to a different speaker. HE Radio reception is poor. # The car antenna is not extended. wæ Pull the antenna out all the way. # The antenna control wire is not connected. = Connect the wire correctly, referring to the section on INSTALLATION MANUALS. HI The memory is erased when the ignition is turned off. W_ The battery wire has not been connected to the proper terminal. æ Connect the wire correctly, referring to the section on <INSTALLATION MANUAL>. V_ The ignition and battery wire are incorrectly connected, #æ Connect the wire correctly, referring to the section on <INSTALLATION MANUAL> HE Does not switch to the rear view camera video display when pressing the [V.SEL] button. #_ The reverse sensor wire is disconnected. æ Connect the wire correctly, referring to the section on INSTALLATION MANUAL> H The sound/picture skips on a DVD/VCD/CD. The disc is scratched or dirty. æ Clean the disc, referring to the section on <Disc cleaning> (page 13). H A track will not play. W_ Random play has been selected æ Turn off random play. HI A VCD cannot be played using menus. v_ The VCD disc being played is not compatible with PB.C. æ Menu playback is available only with VCD discs recorded with PB.C. H The subtitle is not displayed. The DVD disc being played does not contain the recording of subtitles æ The subtitle cannot be displayed when the DVD disc being played does not contain the recording of subtitles. 102 | English I 864-3185-00_(En)indd Sec1:102 EH The voice (or subtitle) language cannot be changed. v_ The DVD disc being played does not contain the recording of more than one audio (or subtitle) language = The voice (or subtitle) language cannot be changed when the DVD disc being played does not contain the recording of more than one voice (or subtitle) language. H The viewing angle cannot be changed. v_ The DVD disc being played does not contain the recording of more than one angle æ The viewing angle cannot be changed when the DVD disc being played does not contain the recording of more than one angle #_ You are attempting to switch the angle in a DVD section where more than one angle is not recorded # More than one viewing angle may be recorded only in limited sections in a disc. H Playback will not start even after a title is selected. A viewing restriction (RATING) has been set for the disc. æ Check the viewing restriction level (RATING) à\ setting. N H The voice or subtitle language selected in the setting is not played. W_ The DVD disc being played does not contain the recording of the selected voice or subtile language æ Use a DVD disc containing the recording ofthe selected voice or subtitle language Disc source H The disc control mode cannot be selected. #_ No wire has been connected to the disc changer input terminal on the unit. æ Connect the wire to the disc changer input terminal on the unit.
EH The specified disc does not play, but another one plays instead. w_ The specified CD is quite dirty. #æ Clean the CD. The CDis upside-down #æ_Load the CD with the labeled side up. V7 The discis loaded in a different slot from that specified æ Eject the disc magazine and check the number for the specified disc. W The discis severely scratched æ Try another disc instead! The sound skips. Something is touching the disc changer. æ Remove whatever is touching it The CDis scratched or dirty. wæ lfskipping happens at the same place when the car is stopped, something with the CD is wrong. Clean the CD. The display shows that the changer is being played, but no sound can be heard. #_The computer chip in the unit is not functioning normal. ææ Press the reset button on the unit (page 4) The specified track will not play. V_ Random play or magazine random play has been selected #æ Turn off random play or magazine random play. Track repeat, disc repeat, track scan, disc scan, random play, and magazine random play start by themselves. #_ The setting is not cancelled The settings for these functions remain on until the setting to off or the disc ejected, even if the power is tumed off or the source changed! Cannot remove disc. The cause is that more than 10 minutes has elapsed since the vehicle ACC switch was turned OFF. æ The disc can only be removed within 10 minutes of the ACC switch being turned OFF. more than 10 minutes has elapsed, turn the ACC switch ON again and press the Eject button. I 864-3185-00_(En)indd Sec1:103 Troubleshoo! MP3/WMA source EH Cannot play an MP3/WMA. v_ The media is scratched or dirty. æ Clean the media, referring to the Disc cleaning ofthe section on <About discs> (page 13). EH The sound skips when an MP3/WMA is being played. v_ The media is scratched or dirty. #æ Clean the media, referring to the Disc cleaning of the section on <About discs> (page 13). V_ The recording condition is bad! Record the media again or use another media HE The MP3/WMA track time is not displayed correctly. v — There are times when it isn't displayed correctly according to the MP3/AWMA recording conditions. H Cannot display the 1D3 tag information correctly. W_ Record is not made in conformity with the ID3 tag version 1x Record in conformity with the ID3 tag version Also, the display may be incorrect if an MP3/WMA file uses the ID3 tag v1x standard and if this standard has been expanded after production of the machine software. English | 103
Troubleshooting Guide The following messages are displayed when certain problems are occurring in your sys- tem. Take the recommended actions. Hot Error The protection circuit in the unit activates when the temperature inside the unit exceeds 60°C (140°F), stopping all operation. Cool down the unit by opening the windows or turing on the air conditioner. As the temperature falls below 60°C (140°F), the disc will start playing again. Hold Error The protection circuit in the unit activates when the temperature inside the automatic disc changer exceeds 60°C (140°F), stopping all operation. Cool down the unit by opening the windows or turning on the air conditioner. As the temperature falls below 60°C (140°F), the disc will start playing again Mecha Error The disc player is malfunctioning Eject the disc and try inserting it again. Contact the Kenwood dealer if this indicator continues blinking or the disc cannot be ejected Disc Error The unplayable discs is inserted Read Error The disc is upside-down. Load the disc with the labeled side up. The disc is quite dirty. Clean the disc, referring to the section on <Disc cleaning> (page 13) Region code Error The DVD software encoded for other region code. Parental level Error The parental level is set to high levels. Error 07 — 67 The unit is malfunctioning for some reason: © Press the reset button on the unit. Ifthe "Error ##" code does not disappear, consult your nearest service center. 104 | English I 864-3185-00_(En)indd Sec1:104 05.526 8:34:21 PM
Audio section Maximum Power (Front&Rear) SOWxA Full Bandwidth Power (Front&Rear)(at Less than 1%THD) 22Wx4 Preout level (V) SV/10kQ Preout impedance
General Operating voltage 144V (TIV-T6V) Current consumption ISA Dimensions (WxHxD) 182 x 112 x 163mm 73764-7/6%6-7/16 inch Operational temperature range -10-60°C Storage temperature range -20-85 °C Weight
Although the effective pixels for the liquid crystal panel is given as 99.99% or more, 0.01% of pixels may not light or may light incorrectiy. 106 | English I 864-3185-00_(En)indd Sec1:106 05.526 8:3422PM
Use of controls or adjustments or performance of procedures other than those specified herein may result in hazardous radiation exposure In compliance with Federal Regulations, following are reproductions of labels on, or inside the product relating to laser product safety. KENWOOD CORPORATION 2967-3, ISHIKAWA-MACHI, HACHIO)I-SHI TOKYO, JAPAN
KENWOOD CORP CERTIFIES THIS EQUIPMENT
1040. 10, CHAPTER 1, SUBCHAPTER J. Location : Bottom Panel FCC WARNING This equipment may generate or use radio frequency energy. Changes or modifications ta this equipment may cause harmful interference unless the modifications are expressly approved in the instruction manual. The user could lose the authority to operate this equipment if an unauthorized change or modification is made. This equipment has been tested and found to comply with the limits for a Class 8 digital device, pursuant to Part 15 ofthe FCC Rules These limits are designed to provide reasonable protection against harmful interference in a residential installation. This equipment may cause harmful interference to radio communications, fi is not installed and used in accordance with the instructions. However, there is no guarantee that interference will not occur in a particular installation. Ifthis equipment does cause harmful interference to radio or television reception, which can be determined by tuming the equipment off and on, the user is encouraged ta try to correct the interference by one or more of the following measures: - Reorient or relocate the receiving antenna. + Increase the separation between the equipment and receiver. - Connect the equipment into an autlet on a circuit different from that to which the receiver is connected - Consult the dealer or an experienced radio/TV technician for help NOTE This Class B digital apparatus complies with Canadian ICES-003 [ DVP is à trademark of DVD Format/Logo Licensing Corporation registered in the US, Japan and other countries. | [ ESS is a trademark of SRS Labs, Inc. | This product incorporates copyright protection technology that is protected by US. patents and other intellectual property rights. Use of this copyright protection technology must be authorized by Mactovision, and is intended for home and other limited viewing uses only unless otherwise authorized by Macrovision. Reverse engineering or disassembly is prohibited Manufactured under license from Dolby Laboratories. "Dolby! "ProLogic' and the double-D symbol are trademarks of Dolby Laboratories DTS' and "DTS Digital Surround" are registered trademarks of Digital Theater Systems, Inc. | English | 107 I 864-3185-00_(En)indd Sec1:107 05.526 8:3422PM