X6 - Mobile Phone Doogee - Free user manual and instructions
Find the device manual for free X6 Doogee in PDF.


| Brand | Doogee |
| Model | X6 |
| Product Type | Smartphone |
| Dimensions | 152 x 76 x 9 mm (approx.) |
| Weight | 180 g (approx.) |
| Display | 5.5 inch (approx.) |
| Battery | Rechargeable Li-Ion, removable |
| Charger Input | 100-240V, 50/60Hz, 0.2A |
| Charger Output | 5V, 700mA |
| SIM Card | Dual SIM (micro SIM) |
| Main Functions | Call, Messaging, Internet, Camera, Music, FM Radio, Bluetooth, Wi-Fi |
| Camera | Rear camera with flash, front camera |
| Storage | Internal memory expandable via microSD |
| Connectivity | Bluetooth 4.0, Wi-Fi 802.11 b/g/n, GPS |
| Operating System | Android (version not specified) |
| Water Resistance | Not waterproof |
| Safety Certifications | CE, FCC (FCC ID: 2AFPY-X6) |
| SAR Value (Head) | 0.300 W/kg |
| SAR Value (Body) | 0.862 W/kg (1.0 cm distance) |
| Spare Parts & Accessories | Use only authorized Doogee batteries and accessories |
| Maintenance | Keep away from water and liquids; avoid high volume for long periods |
| Operating Temperature | -20°C to 40°C |
Frequently Asked Questions - X6 Doogee
User questions about X6 Doogee
0 question about this device. Answer the ones you know or ask your own.
Ask a new question about this device
Download the instructions for your Mobile Phone in PDF format for free! Find your manual X6 - Doogee and take your electronic device back in hand. On this page are published all the documents necessary for the use of your device. X6 by Doogee.
USER MANUAL X6 Doogee
Call Functions ....7
Contacts....9
Messaging 13
Internet Browser 15
Bluetooth & Wi-Fi 17
Camera 20
Gallery 21
Music....24
Sound Recorder 25
Alarm Clock....27
FM Radio....28
Settings 30
Storage 36
Safety Information
Please carefully read the terms below:
Use Safely
Do not use the phone in situations where it might cause danger.
Transportation Safety
Please observe all transportation laws and regulations.
Please drive with both hands on the wheel.
DO NOT TEXT AND DRIVE
Hospitals
Please follow limitations.
Please turn off your mobile phone when near medical instruments.
Airports
Remember to follow all airport and flight safety regulations.
Please do not use your phone during flight.
Toxic Chemicals
Do not use your mobile phone around fuels or chemicals.
Hazard
Do not use in hazardous areas where explosions may occur.
Accessories and Batteries
Use only X6 authorized batteries and accessories.
Backup
Remember to keep a written record of all important information.
Water
Your phone is not waterproof. Keep it away from water and liquids.
SOS Emergency Calls
Make sure your mobile phone is switched on and in a service area. In home screen, tap the phone key and dial 911 and send.
Introduction
Installation of the SIM Cards
Note: Please keep the SIM card out of the reach of children. The SIM card and its contacts are easily damaged due to scratching or bending. Please be cautious when carrying, installing or taking out the SIM cards. SIM: Contact your cellular phone service provider directly to obtain the SIM card.
To insert SIM cards:
- Pull out the SIM slot. Insert the SIM card(s) and SD card.
- Then insert the SIM slot.
Power On and Off
On - Please ensure the SIM card has been properly inserted into the phone. Long press the Power key to switch on the phone.
Off - In standby mode, long press on Power key until an options menu appears. Select Power Off in the menu and confirm.
Security
You may set a security lock feature as a security measure for the phone. For further information regarding password locks, password revision and other functions please enter into the security option in system settings.
Call Functions
At the dial keyboard, enter the phone number and then click the dial key. If dialing an extension, you may click the dial pad icon in the bottom of the screen to open the interface and enter the number of the extension. You may also press and hold the 0 key to add a (+) sign when adding an international dialing prefix.

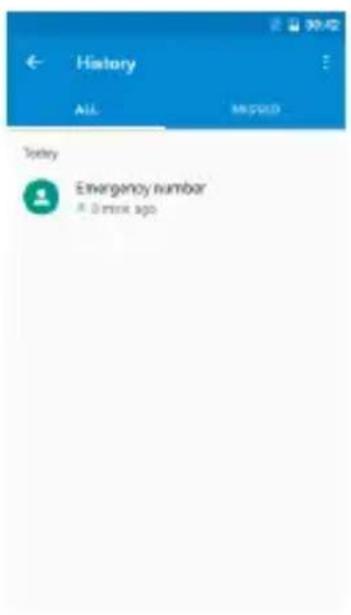
Call history
Every telephone number called and received will be saved in the history. All numbers in the history can be dialed directly by clicking the Redial on the screen. When the number appears on the list, click it to view details.
Call Options
There are different options that can be used in the history and dialing interface. You may press the MORE while in the dial interface and adjust speed dial and call settings. In the dialing interface, you may press the search button to browse through contacts list or set default contact resources.
Contacts
Enter: Click on the applications menu and select contacts.
- The default display is the phone contacts and SIM card contacts.
- The contacts are organized alphabetically by default.

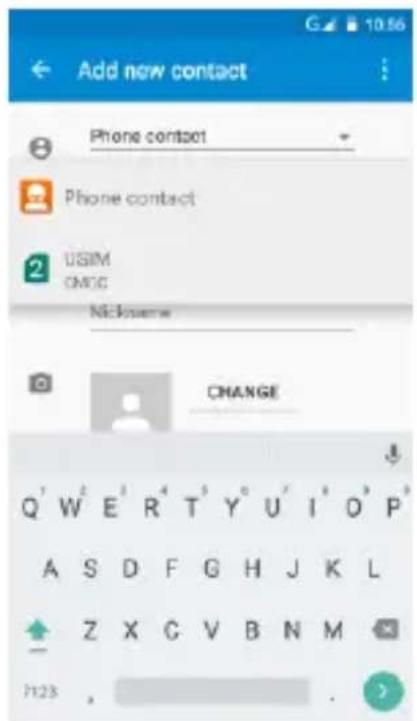
Add New Contact
- Click the add contact icon to add contact.
- Select to save your contacts to the Google account, the phone or the SIM card.
- You may enter different contact details which include adding a picture, name, telephone number, group, address, and email among other options.
- Click to finish and save contact.

Messaging
You may use this function to exchange text messages and multimedia messages with your family and friends. The messages to and from the same contact or phone number will be saved into a single conversation so you may see the entire message history conveniently.
Send an SMS
Application Menu » Messages » New message (or shortcut icon)
- Click to enter recipient from contact book or enter a new number)
- Compose Message
- Send
(You may enter contacts
Send an MMS
When creating message, the default message style is SMS. The message will automatically convert to MMS when adding an attachment.
- Click the attachment icon in the messaging interface.
- Click to add attachments and create an MMS message.
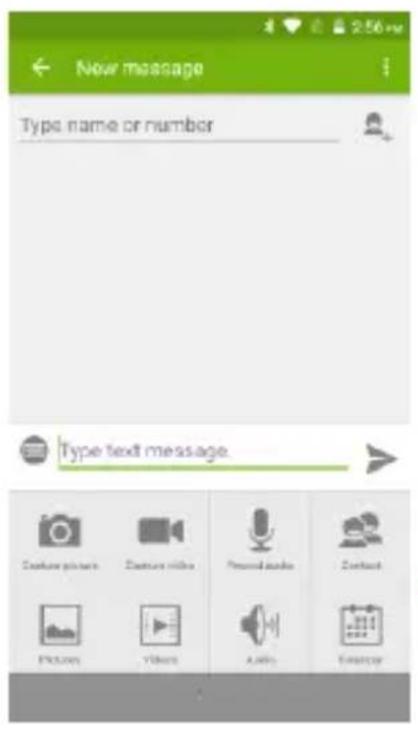

Attachment Type for MMS Message
Internet Browser
Menu Functions
Backward
• After browsing through multiple pages, this option will return the user to the previous page.
Forward
• After browsing through multiple pages, this option will move to a web page after the current page.
Windows
- You may view all windows open by clicking the windows icon in the upper right part of the browser.
Bookmarks
- Click the save to Bookmarks option to make the current URL as a saved Bookmark.
- Click Bookmarks/History to opened saved bookmarks.
More
Find on page: Search current page.
Share page: Select to share the current page.
Save for offline reading: Saves page for offline reading.
Bookmarks/History: Show your browsing history and view the most visited pages.
Settings: Contains a variety of browser settings.
Bluetooth & Wi-Fi
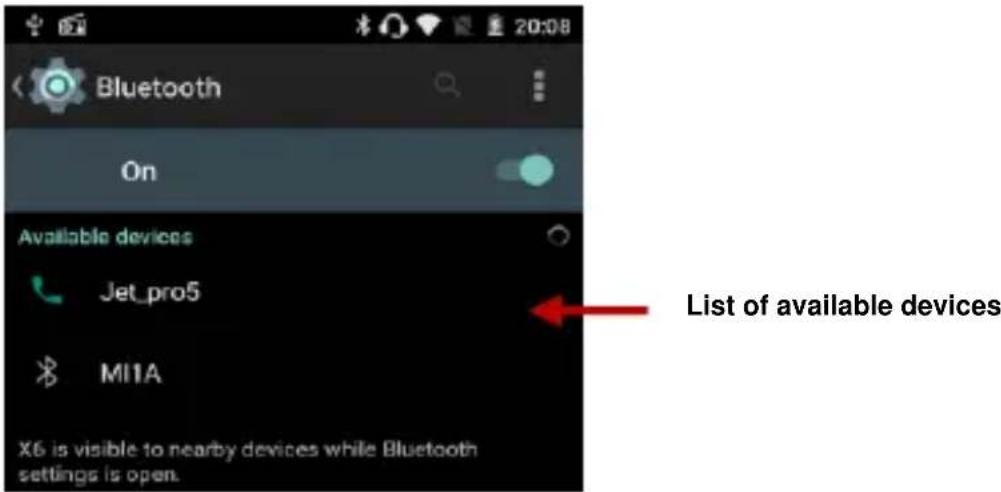
Bluetooth is a short-range wireless communications technology that devices can use to exchange information and connect to different types of devices which include headsets and other devices.
Power on Bluetooth
1) Settings » Bluetooth and select to power on bluetooth.
2) The bluetooth icon will appear in the notification bar. Click “scan for devices” and the phone will start to scan for all devices within range.
3) In bluetooth settings all the devices found will displayed in the list under the icon.
Note: The maximum detecting time of the phone is 2 minutes.
Power on Wi-Fi
1) Settings » Wi-Fi and select ON to power on Wi-Fi
2) Click on the desired Wi-Fi network to be connected. Unsecured networks can be connected to directly - secured networks require a password or credentials prior to connection.
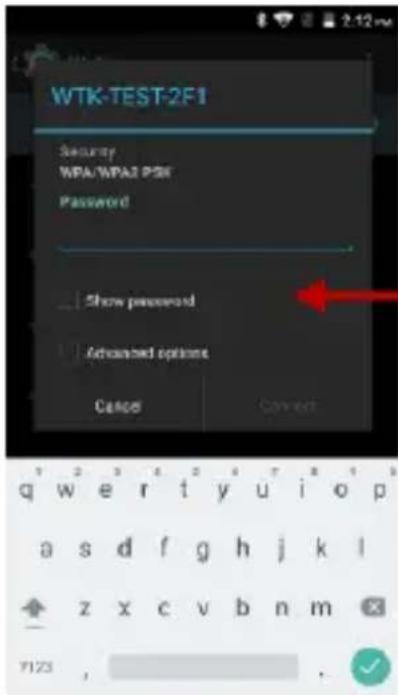
List of available networks and the network connection screen
Camera
Camera
Prior to use: Insert SD card before using the camera or video camera. All photos or videos taken by the phone are typically stored in the memory card for large storage capacity of images.
Open Camera
- Applications Menu » Camera
- Switch to video mode if you want to record videos.
Note: You may place a camera shortcut icon on any of the screens
Take Pictures
- Aim the object that the picture will be taken.
- Press the "Shutter" button on the screen.
- After taking the picture, the file will be saved in the camera's gallery folder.
- You can view the photos by clicking the preview box button.
You may adjust various settings for the camera by pressing Menu while in the camera interface. When in the camera viewfinder mode, you can switch to video or photos' gallery.

Gallery
Open Images
Applications Menu » Gallery

Share Pictures
You may share pictures by sending them through different types of installed applications. You may also send pictures through the MMS message function by composing a message and attaching the picture. Any image can also be sent via the Bluetooth function by
selecting Bluetooth equipment that has been paired.
Adjust Image
Press Menu and Edit to adjust images
You may select from different effects that may include: Vintage, Black and White, Instant, Latte, Litho, X-Process, Crop, Rotate, Mirror, Straighten, Vignette, Contrast, Exposure, Auto color, Shadows, Vibrancy, among other settings that can be used to adjust picture images.
View Images
In the picture interface, click on an album to view images
In the photo album, scroll the picture towards left to view the next picture or towards right to view the previous one.
Crop Pictures
If you want to adjust the size of the picture, use the crop tools. Once the arrow appears, pinch your fingers in or out to adjust the size. If you want to adjust the image and keep its proportion, please hold down any of the four corners of the image and adjust accordingly.
Music
Open Music
Search Music
You may choose to search for music from media folder through artist name, song name,
album name. The following formats are available: AMR, MIDI, MP3, WAV, and OGG.
Sound Recorder
The Sound Recorder can record voice or any audio.
You may send any recorded audio via Bluetooth or MMS and also have the option to make any recorded audio the phones default ring tone.
The recorder uses 3GPP format.
Record
-Keep the phone's microphone near the voice source.
-Click the record button to record the audio.
-Click the stop button to stop recording the audio.
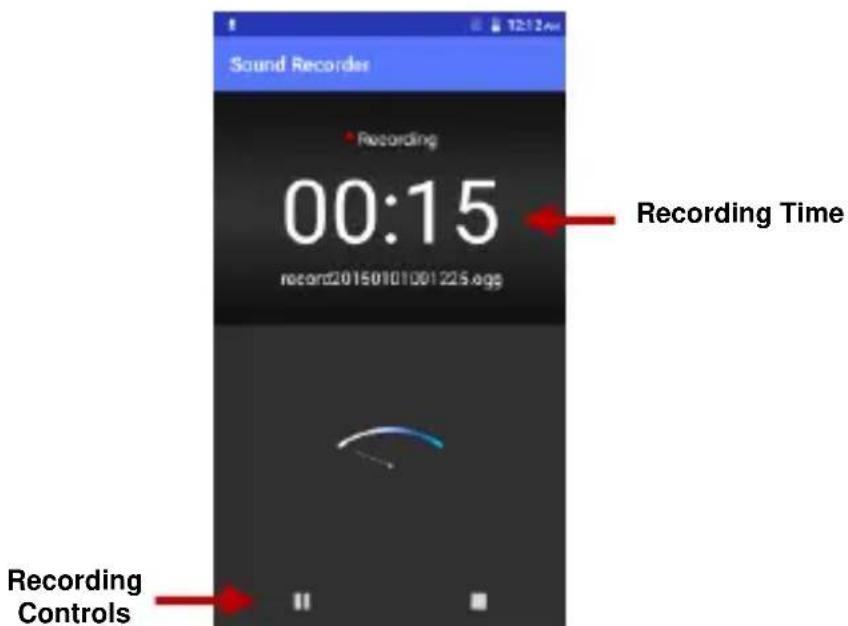
All recordings will be saved in the recording folder in the default music program and can be accessed from the sound recorder application.
Alarm Clock
- Click on the Clock icon in the application menu
- Click set alarm button and enter the alarm clock set interface where you may delete and edit alarms

FM Radio
FM Radio
Through this function, you may listen to FM radio on the device. The FM radio uses the wired headphones as an antenna in order to receive signal. Before using this function, connect the original equipment headphones that came with the phone.
Open FM radio
Press the FM Radio icon to open the application.
- Click "Search" automatic scans of FM channels.
- Click to add favorite radio stations.
FM Radio as Background
Click on the Home key to move the FM Radio to the background.

Settings

Wi-Fi
- Settings » Wi-Fi to power on. When on, the Wi-Fi will automatically search for available networks. Any unsecured network can be used directly and any secured network requires a password or credentials prior to connection.

Bluetooth
- Press the switch to power on Bluetooth. Once on, the Bluetooth will automatically scan for any nearby open equipment.

SIM cards
- Press the switch to power on SIM cards. When insert two cards, click to set cellular data、Calls、SMS messages.

Data Usage
- Mobile and Wi-Fi Data Usage

More
- Airplane Mode
- Default SMS app
• Tethering, Portable Hotspot - VPN
- Cellular networks
Note: When in flight mode, all network connections will turn off automatically.

Display
- Brightness, Auto rotating screen, Wallpaper, Screen Timeout.

Gesture Settings
- Smart motion for voice call and have some fun.

Breathing light
- To close or open breathing light.

Sound¬ification
This option sets the phone tone settings for receiving calls and notifications. Some of the settings include:
- Vibrate, volume, ring tones, ring tones notification, dial touchpad, and haptic feedback and tones

Storage
• View the phone memory usage.

Battery
- Click to switch to power saving mode.

Apps
- Manage applications - Manage and delete installed applications.
- Running services - Press the ‘Force Stop’ button to stop any of the services listed and removes from the running services list.

Location
- Mobile Network Location - Use wireless services to find locations in applications.
- When using the GPS, power on to set satellite positioning for accuracy.

Security
Set up screen locks: Use slide, face/voice unlock, pattern, PIN or password to lock the screen.
- Pattern: The first time there will be simple unlock instructions and examples. Click “next step” to continue the security pattern step.
• PIN: Enter PIN number to unlock the screen. - Password: Use password to unlock the screen
You may stop the security feature at any time.
Set up SIM card PIN lock
- SIM card PIN (Personal Identification Number) is used to prevent unauthorized use of SIM card.
To change a blocked PIN code, you will need to unlock the SIM lock then go to the Change Password screen. The phone will automatically prompt you enter the old PIN code and ask to enter a new PIN code twice. The phone will then prompt you that the change was successful. If you enter the PIN incorrectly three times, the SIM and PIN codes will be automatically locked. You will need the PUK code to unlock the phone which is available
through your service provider. If you enter the PUK code incorrectly 10 times, the SIM card will be permanently locked. Please see your service provider for a new SIM card.
- Password visible – Make the password visible when it's typed.
- Use security credentials - Allow applications to visit security credentials or other credentials.

Privacy protection
- Hide call log, message and so on to protect privacy.

Emergency rescue
- When you are in an emergency, emergency rescue helps you by sending your emergency contacts a message along with your location.

Accounts
- Add accounts, include Facebook, Google, IMAP, POP3, Twitter.

Language & Input
- Language – Change the language of the phone.
- Custom Dictionary - Add or delete words to the custom dictionary.
- Keyboard Settings – Haptic vibration, Haptic tones, Capitalizing, Speech Input, Inputting words, Predictive text function, Auto-Text, Input keyboard method

Backup & reset
- Backup Data – Will back up all application data, WLAN passwords, and other settings to Google's servers
- Restore to Factory Settings - Clear all data stored on the phone.

Date & time
- Date and Time adjustment.
- Time Zone - Select Time Zone according to where your location.
- Select Date Format - There are 3 kinds of formats you can choose from: Month-Day-Year, Day-Month-Year and Year-Month-Day, and Year-Month-Day which is the default setting

Scheduled power on & off
- Schedule power on and off

Accessibility
- Power button ends call and auto rotate screen
- Speak Passwords and large text

Printing
Need to download the "CloudPrint.apk" from the Internet and install.

Developer options
- Open to use the phone as a developer.

About phone
- Phone information status and firmware updates
Storage
Connect the phone with the USB cable provided. Once connected, a connection interface will appear. In the connection mode interface, select MTP and turn on from the connection screen to be able to transfer files. Other storage options are also available.
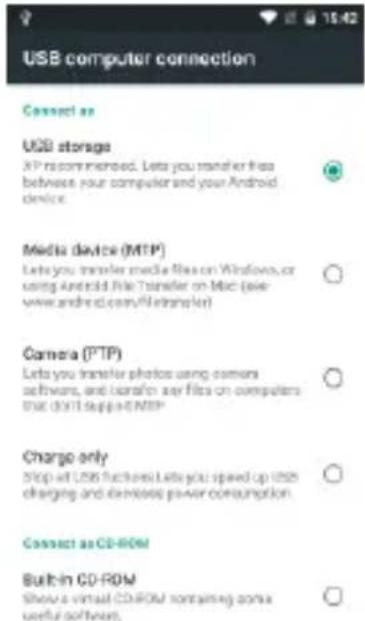
Some system settings, hardware, and UI options may vary depending on final version.
Additional Information
The information provided in this user manual is subject to change without notice and X6 Products reserves the right to modify the manual at any given time. X6 Products has made every effort to ensure that this user manual is accurate and disclaims responsibility and liability for any inaccuracies or omissions. X6 Products makes no commitment to keep current the user manuals, however, does reserve the right to make improvements to the user manual at any given time without notice.
Maintenance
- Use careful with the earphone maybe excessive sound pressure from earphones and headphones can cause hearing loss.

- Risk of explosion if battery is replaced by an incorrect Type. Dispose of used batteries according to the instructions.
-
The product shall only be connected to a USB interface of version USB2.0.
-
Adapter shall be installed near the equipment and shall be easily accessible.
- EUT working temperature: -20^ C to 40^ C
- Adapter
Model: DG30
Input: 100-240V, 50/60Hz, 0.2A
Output: 5V 700mA
- The device complies with RF specifications when the device used at 1.5cm from your body.
- To prevent possible hearing damage. Do not listen at high volume levels for long periods.
Declaration of Conformity
Shenzhen KVD Communications Equipment Limited hereby declares that this GSM/WCDMA Smartphone is in compliance with the essential requirements and other relevant provisions of Directive 1999/5/EC. a copy of the original declaration of conformity may be found or obtained at http://www.doogee.com
CE0700
FCC Caution:
Any changes or modifications not expressly approved by
the party responsible for compliance could void the user's authority to operate this equipment.
This device complies with part 15 of the FCC Rules. Operation is subject to the condition that this device does not cause harmful interference
NOTE: The manufacturer is not responsible for any radio or TV
interference caused by unauthorized modifications to this equipment.
Such modifications could void the user's authority to operate the equipment.
NOTE: This equipment has been tested and found to comply with the
limits for a Class B digital device, pursuant to part 15 of the FCC Rules.
These limits are designed to provide reasonable protection against harmful interference in a residential installation. This equipment generates uses and can radiate radio frequency energy and, if not installed and used in accordance with the instructions, may cause harmful interference to radio communications. However, there is no guarantee that interference will not occur in a particular installation. If this equipment does cause harmful interference to radio or television reception, which can be determined by turning the equipment off and on, the user is encouraged to try to correct the interference by one or more of the following measures:
- Reorient or relocate the receiving antenna.
- Increase the separation between the equipment and receiver.
- Connect the equipment into an outlet on a circuit different from that to which the receiver is connected.
- Consult the dealer or an experienced radio/TV technician for help.
FCC RF Exposure Information and Statement□
This smart phone meets the government's requirements for exposure to radio waves. The
guidelines are based on standards that were developed by independent scientific organizations through periodic and thorough evaluation of scientific studies. The standards include a substantial safety margin designed to assure the safety of all persons regardless of age or health.
FCC RF Exposure Information and Statement The SAR limit of USA (FCC) is 1.6 W/kg averaged over one gram of tissue. Device types: X6 (FCC ID: 2AFPY-X6) has also been tested against this SAR limit. The highest SAR value reported under this standard during product certification for use at the ear is 0.300W/kg and when properly worn on the body is 0.862W/kg. This device was tested for typical body-worn operations with the back of the handset kept 1.0cm from the body. To maintain compliance with FCC RF exposure requirements, use accessories that maintain a 1.0cm separation distance between the user's body and the back of the handset. The use of belt clips, holsters and similar accessories should not contain metallic components in its assembly. The use of accessories that do not satisfy these requirements may not comply with FCC RF exposure requirements, and should be avoided.
Body-worn Operation
This device was tested for typical body-worn operations. To comply with RF exposure requirements, a minimum separation distance of 1.0 cm must be maintained between the user's body and the handset, including the antenna. Third-party belt-clips, holsters, and similar accessories used by this device should not contain any metallic components.
Body-worn accessories that do not meet these requirements may not comply with RF exposure requirements and should be avoided. Use only the supplied or an approved antenna.
- Safety Information
- DO NOT TEXT AND DRIVE
- Hazard
- Accessories and Batteries
- Backup
- Water
- SOS Emergency Calls
- Introduction
- To insert SIM cards:
- Power On and Off
- Security
- Call Functions
- Call history
- Call Options
- Contacts
- Messaging
- Send an SMS
- Send an MMS
- Internet Browser
- Menu Functions
- Backward
- Forward
- Windows
- Bookmarks
- More
- Bluetooth & Wi-Fi
- Power on Bluetooth
- Power on Wi-Fi
- Camera
- Open Camera
- Take Pictures
- Open Images
- Share Pictures
- Adjust Image
- View Images
- Crop Pictures
- Music
- Open Music
- Search Music
- Sound Recorder
- Record
- Alarm Clock
- FM Radio
- Open FM radio
- FM Radio as Background
- Settings
- Wi-Fi
- Bluetooth
- SIM cards
- Data Usage
- Display
- Gesture Settings
- Breathing light
- Sound¬ification
- Storage
- Battery
- Apps
- Location
- Set up SIM card PIN lock
- Privacy protection
- Emergency rescue
- Accounts
- Language & Input
- Backup & reset
- Date & time
- Scheduled power on & off
- Accessibility
- Printing
- Developer options
- About phone
- Additional Information
- Maintenance
- FCC Caution:
- Body-worn Operation
Brand : Doogee
Model : X6
Category : Mobile Phone