
Ronin - Uncategorized Atomos - Free user manual and instructions
Find the device manual for free Ronin Atomos in PDF.


| Product Type | Portable HD-SDI Recorder/Monitor/Deck |
| Model | Atomos Ronin |
| Weight | 1.9 kg (1890 g) / 4 lb 3 oz |
| Dimensions (without batteries) | 102 mm (H) x 202 mm (W) x 140 mm (D) |
| Construction | Steel, fanless for silent operation |
| Display | 5" touchscreen, 800x480 pixels, 16:9 native |
| Video Input | Uncompressed 10/8-bit 4:2:2 via HD-SDI (BNC), optional HDMI via Connect H2S |
| Video Output | HD-SDI (BNC) x1, optional HDMI via Connect S2H |
| Supported Formats (In/Out) | 1080i60/59.94/50, 1080p30/25/24/23.98, 720p60/59.94/50, SD 486i/576i |
| Recording Codecs | Apple ProRes HQ (220 Mbps), 422 (150 Mbps), LT (100 Mbps); Avid DNxHD (optional) |
| Storage Media | 2.5" HDD or SSD (5400-10000 rpm), hot-swappable via Master Caddy |
| File System | exFAT (native on Mac/PC) |
| Audio Input | 12 channels SDI embedded (48kHz 16-bit); 2 channels balanced XLR analog (48kHz 16-bit) |
| Audio Output | 12 channels SDI embedded; 2 channels XLR analog (adjustable level); 3.5mm headphone |
| Power Supply | Internal AC 100-240V 50/60Hz; battery 7.2-14.4V (NP series); D-Tap adaptor; Battery looping for continuous power |
| Power Consumption | 3.3 W (monitor only), 6.8 W (record/monitor/play) |
| Battery Life | Up to 4 hrs with 2600mAh, 8 hrs with 5200mAh, 12 hrs with 7800mAh |
| Remote Control | Via SDI trigger, SDI timecode, LANC, or serial protocol |
| Monitoring Tools | Focus peaking, zebra (75%/95%), false color, blue only, waveform (via SmartMonitor) |
| Additional Features | SmartLog (Favourite/Reject tags), anti-shock recovery, pulldown removal, loop playback, timecode support |
| Mounting | 1/4"-20 threads (7 top, 2 sides), rack-mount adapter optional (ATOMRCK001) |
| Accessories Included | 5x Master Caddies, docking station (USB 2/3, FireWire 800), 2x batteries 2600mAh, D-Tap adaptor, quick start guide |
| Warranty | 1 year standard, upgrade to 3 years with registration (excluding TFT/LCD) |
Frequently Asked Questions - Ronin Atomos
User questions about Ronin Atomos
0 question about this device. Answer the ones you know or ask your own.
Ask a new question about this device
Download the instructions for your Uncategorized in PDF format for free! Find your manual Ronin - Atomos and take your electronic device back in hand. On this page are published all the documents necessary for the use of your device. Ronin by Atomos.
USER MANUAL Ronin Atomos
EDITION 1: JUNE 2013
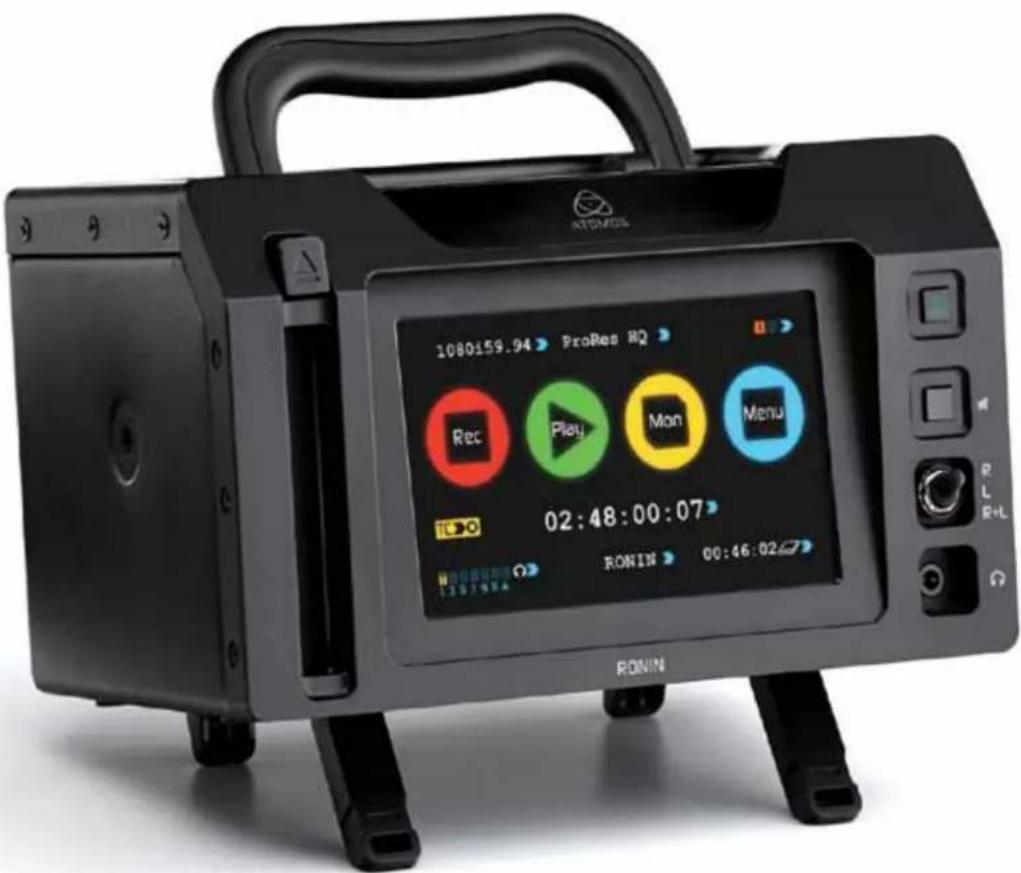
Have you registered your Ronin yet? Upgrade to 3 year warranty now.
Contents Safety Instructions
Warranty & Conditions....1
Introduction 2
-
What's included....3
-
What you also need....4
Spinning Disk Drives (HDD) 4
Solid State Drives (SSDs) 4
Mechanical Vibration 4
Backing up and archiving 4
HD-SDI Cables 5
Standard 1/4" Camcorder Mount 5
-
Mounting disks in the Master Caddy 6
-
Connecting and powering up....7
Batteries 7
Power ON/Power OFF 8
-
Ronin connections....8
-
Other physical features....9
Master Caddy / Screw Mounts / Modularity 9
- Using the Ronin....10
The User Interface in detail 10
The Ronin Touchscreen 10
The Home Screen 10
Home Screen / Menu functions 11
Screen Lock 12
Batteries Screen / Auto Switching/Manual Switching 13
Storage Capacity Indicator 13
Formatting HDD/SSD 13
Unit Name 13
Audio In 14
Audio during playback 14
- Monitoring and Recording....15
Connect to Input....15
Before recording / Choosing your recording format 15
SmartControl 16
6 ways to start recording 16
Using the Ronin as a field monitor/electronic viewfinder ..... 17
SmartMonitor 17
Zebra / Focus Peaking / False Colour / Blue only 17
SmartLog 18
Exporting .xml 19
Organising material on disk....20
Anti-shock technology 21
File Recovery 21
-
Timecode 22
-
Pulldown 23
-
Playback & Playout....24
exFAT / FAT 32 disks 24
Play mode / Pause mode 25
Loop mode 26
- Connecting and Editing ...... 27
Connect to Input 27
NLE Support 27
exFAT compatibility....27
Transferring files....27
Importing / Import into Final Cut Pro....28
SmartLog with FCPX 29
-
External Power Supply....30
-
Using Connect Converters....30
-
Software Upgrades....31
Updating ATOMOS (Firmware) 31
- Technical Specifications....32
The Ronin is designed to a high standard but there are some things you should be aware of to prolong the life of the unit and for your own safety.
Batteries and power supplies
The batteries supplied with the Ronin are designed to retain enough energy to supply the Ronin for hours. You should avoid short-circuiting the battery connections because this can cause a high current to flow which can damage the cells and even pose a fire hazard. For example, you should not carry batteries in a bag or pocket where they may contact other metal objects such as coins.
Disconnect the power before cleaning the Ronin or its components.
Using the Ronin safely
Although the Ronin is very lightweight compared to all the devices it replaces, it is still a solid object that could cause injury if misused.
- Always make sure that the Ronin is mounted securely and is unable to fall onto anyone nearby.
- Always ensure that cable runs to the Ronin are clearly visible and do not present a trip hazard.
- Do not place on uneven or unstable surfaces.
- Do not insert anything but Ronin Master Disk caddies in the Master Disk slot on the front of the Ronin.
- Do not touch the Ronin's screen with sharp, metallic or abrasive objects.
- The Ronin can become warm or hot with prolonged use. Do not place it in contact with your lap or any part of your body where such warming could cause discomfort or injury.
- Do not expose to strong electrical or magnetic fields.
- Do not expose to or use near liquids, rain or moisture.
- Do not dispose of the Ronin or its batteries in municipal waste and do not incinerate it or its batteries, but follow local regulations for safe disposal
Care of disk drives
Spinning disks and SSDs are very sensitive to damage from static electricity. Please observe all the usual precautions when handling them.
Please see the section Mechanical shock and vibration later in this manual for information about how to handle and care for your disk drives.
SDI Cables
Please remember that SDI cables use locking connectors and will not simply pull out if they are jerked or tripped over. They are therefore a significant trip hazard, and also a hazard to your equipment, which may be damaged if the cables are misused.
User Manual Conventions
To keep things simple but clear, we've only adopted two conventions in this manual:

A helpful tip, suggestion or something to note because it's not obvious at first
Menu Monospaced text indicates a menu or touch action
Notice
Copyright © 2013 ATOMOS Global Pty Ltd ('referred to as ATOMOS'). All rights reserved. All information in this document is subject to change without notice. No part of the document may be reproduced or transmitted in any form, or by any means, electronic or mechanical, including photocopying or recording, without the express written permission of ATOMOS. A reference to ATOMOS includes its related entities, subsidiaries and parent company.
Trademarks
Ronin and ATOMOS are registered trademarks of ATOMOS, Apple, the Apple logo, AppleShare, AppleTalk, FireWire, iPod, iPod Touch, Mac, and Macintosh are registered trademarks of Apple Inc. Final Cut Pro, QuickTime and the QuickTime Logo are trademarks of Apple Inc. All other trademarks are the property of their respective holders.
International Hardware Limited Warranty
ATOMOS warrants that:
- the main product, not including TFT/LCD, or any external accessories, will be free from defects in materials and workmanship for a period of 1 years from the date of purchase, the user may upgrade to a 3 year warranty upon registering their product at www.atomos.com
- the TFT/LCD, batteries, battery charger, HDD/SSD docking station, Master Caddy and Carry Case will be free from defects in materials and workmanship for a period of 1 year from the date of purchase.
This warranty is exclusively for the benefit of the original purchaser and is not assignable or transferable.
If during the warranty period the product is shown to be defective ATOMOS may at its option:
a) replace the goods or supply equivalent ones, b) repair the goods, c) pay the cost of replacing the goods or of acquiring equivalent ones and d) paying the cost of having the goods repaired;
The customer must notify ATOMOS of any defect in the goods in writing prior to the expiry of the warranty periods set out above. The customer will be solely responsible for returning the goods to ATOMOS or its authorized distributor. Upon acceptance of a warranty claim by ATOMOS, where ATOMOS repairs or replaces the goods, it will be responsible for reasonable shipping costs incurred in sending the goods to the Customer, provided that customer is located in a country in which ATOMOS has an authorized distributor or repair centre or agent.
Warranty Exclusions
This warranty applies only to defects in workmanship and does not cover defects caused by:
- Neglect;
- Improper or negligent acts or omissions;
- Unauthorised repairs or attempted repairs;
- Tampering with or modification of the goods;
- Connection to incompatible equipment or power sources;
- Exposure to water or weather;
- Exposure to magnetic fields or corrosive liquids or substances;
- Physical damage
EXCEPT AS STATED IN THIS WARRANTY, ATOMOS, IT'S VENDORS, AGENTS, RESELLERS AND DISTRIBUTORS DISCLAIM IN THEIR ENTIRETY ALL OTHER WARRANTIES, EXPRESS OR IMPLIED, INCLUDING WITHOUT LIMITATION ALL WARRANTIES OF MERCHANTABILITY OR FITNESS FOR A PARTICULAR PURPOSE. THE REMEDIES OUTLINED IN THIS WARRANTY ARE THE EXCLUSIVE REMEDY A CUSTOMER HAS ARISING FROM DEFECTIVE GOODS WHICH ARE SUBJECT TO THE WARRANTY.
ATOMOS DOES NOT WARRANT THAT THE GOODS WILL OPERATE IN A MANNER WHICH IS ERROR FREE, OR UNINTERRUPTED. THE GOODS ARE NOT INTENDED TO BE THE PRIMARY OR ONLY DATA STORAGE DEVICE FOR DATA – CUSTOMERS ARE SOLELY RESPONSIBLE FOR BACK UP AND PROTECTION OF DATA.
Software License Agreement
IMPORTANT, PLEASE READ CAREFULLY. THIS IS A LICENSE AGREEMENT.
This ATOMOS software, related documentation, any included sample images and other files (the "Software"), is protected by copyright laws and international copyright treaties, as well as other intellectual property laws and treaties. The Software is licensed, not sold.
This End User License Agreement ("EULA") is a legal agreement between you (either an individual or a single entity) and ATOMOS with regard to the copyrighted Software provided with this EULA. Use of the Software provided to you by ATOMOS in whatever form or media, will constitute your acceptance of these terms, unless separate terms are provided by the software supplier, in which case certain additional or different terms may apply. If you do not agree with the terms of this EULA, do not download, install copy or use the Software. By installing, copying or otherwise using the Software, you agree to be bound to the terms of this EULA. If you do not agree to the terms of this EULA, ATOMOS is unwilling to license the Software to you.
-
Eligible licensees. This Software is available for license solely to purchasers of the ATOMOS Ronin, who have purchased a unit manufactured by ATOMOS Ronin and purchased through an ATOMOS authorized reseller, with no right of duplication or further distribution, licensing or sub-licensing.
-
License Grant. ATOMOS grants you a personal, non-transferable and non-exclusive right to use the copy of the Software provided with this EULA. You agree you will not copy the Software except as necessary to use it with the ATOMOS Ronin. You agree that you may not copy the written materials accompanying the Software. Modifying, reverse engineering, translating, renting, copying, transferring or assigning all or part of the Software or any rights granted hereunder, to any other persons or reverse engineering the hardware on which the Software runs, is strictly prohibited. The software is license, not sold. You acknowledge that no title to intellectual property in the Software is transferable to you. You further acknowledge that title and full ownership rights to the Software will remain the exclusive property of ATOMOS and/or its suppliers, and you will not acquire any rights to the Software, except as expressly set forth above. All copies of the software will contain the same proprietary notices as contained in or on the Software. All title and copyrights in and to the Software (including but not limited to any images, animations, video, audio, text incorporated), the accompanying printed materials, and any copies of the Software are owned by ATOMOS or its suppliers.
-
Reverse engineering. You agree that you will not attempt, and if you are a corporation, you will use your best efforts to prevent your employees and contractors from attempting to reverse compile, derive circuits, modify, translate or disassemble the Software and/or the Atomos Ronin in whole or in part. Any failure to comply with the above or any other terms and conditions contained herein will result in the automatic termination of this license and the reversion of the rights granted hereunder by ATOMOS.
ATOMOS reserves the right to terminate this license without prejudice to any additional recourse ATOMOS may have against you if you violate any of its terms and conditions.
Registration + Warranty Upgrade
Register to upgrade your warranty FREE 1yr →3yr www.atomos.com/support
Introduction
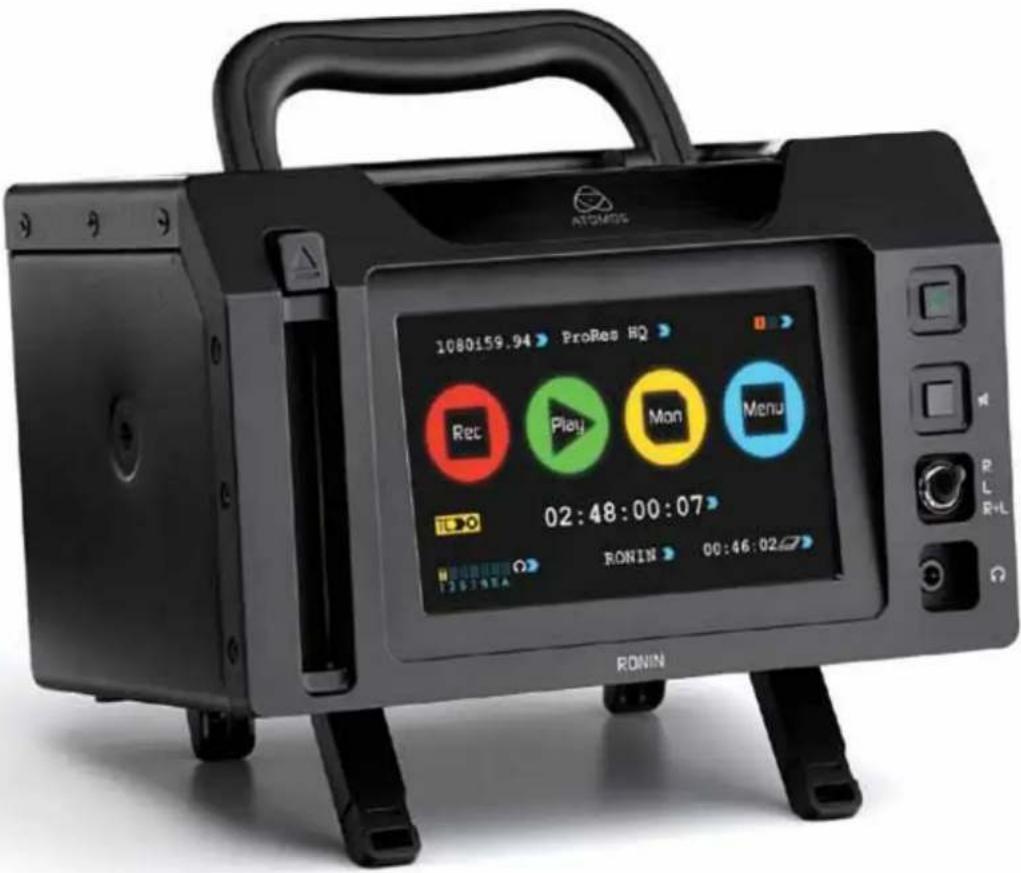
Thank you for choosing the Atomos Ronin, your 10-bit HD-SDI Recorder/Monitor/Deck. It is the perfect product for Recording, Monitoring, Playing back and logging or pre-editing content on the set or in the field. It's the new portable media deck.
The Ronin portable Recorder/Player/Monitor is a smart solution for both fixed-facility and live video production. Based on the award-winning Samurai field recorder, the Ronin features touchscreen ease of use, capture to Apple ProRes® or Avid DNxHD® ^1 , professional monitoring and edit review. Like the Samurai, it can operate on location with battery or DC power, but it can also be used in a fixed facility, rack-mounted environment using AC power.
In addition, the Ronin has balanced XLR input and output, along with a front panel headphone jack able to monitor individual channels. It also has an internal battery charging system for attached Atomos batteries when connected to AC power.
For HDMI connectivity, simply attach an Atomos Connect H2S and/or S2H converter. The Ronin's compact half-rack size makes it suitable for any video production environment.
Software updates for your Ronin will be issued regularly. Registering your Ronin now will ensure you are kept abreast of any updates. Software updates and information will also be available at: www.atomos.com/Ronin
We hope you enjoy your Ronin!
Your Ronin comes with a standard 1 year warranty on all parts and accessories. You can upgrade to a 3 year warranty on the main Ronin unit alone (excluding TFT/LCD) by registering your Ronin online at http://www.atomos.com/registration.xml. This will enable us to let you know about updates to the product and other important information surrounding your purchase.
AtomOS
HD·SDI
HDD
SSD
ProRes
Avid DNxHD®
1. What's included
We try to provide you with as complete a package as possible, you don't have to add anything except 2.5" storage media (you can buy additional packs of empty Master Disk Caddies from your Atomos Reseller) and some cables to suit your set-up, like SDI BNC cables.

Atomos does not sell storage and your package will not contain any spinning disks or SSDs. You can buy these locally to keep running costs as low as possible.
Here's the complete list
- Ronin body (the Ronin itself, with touchscreen, inputs and slot for Ronin disk caddies)
- 5 x empty Master Disk Caddies + screws for fixing disks
• Master Caddy Docking Station with
a. USB 2 & 3 Cable (Under Ronin body)
b. Firewire ^® Cable (Under dock)
c. USB 2.0 power cable for extra USB power when required (Under dock)
• 2 x Atomos 7.4 V 2600mAh Batteries
• D-Tap Adaptor (cable sold separately)
• Ronin Quick Start Guide (not pictured)
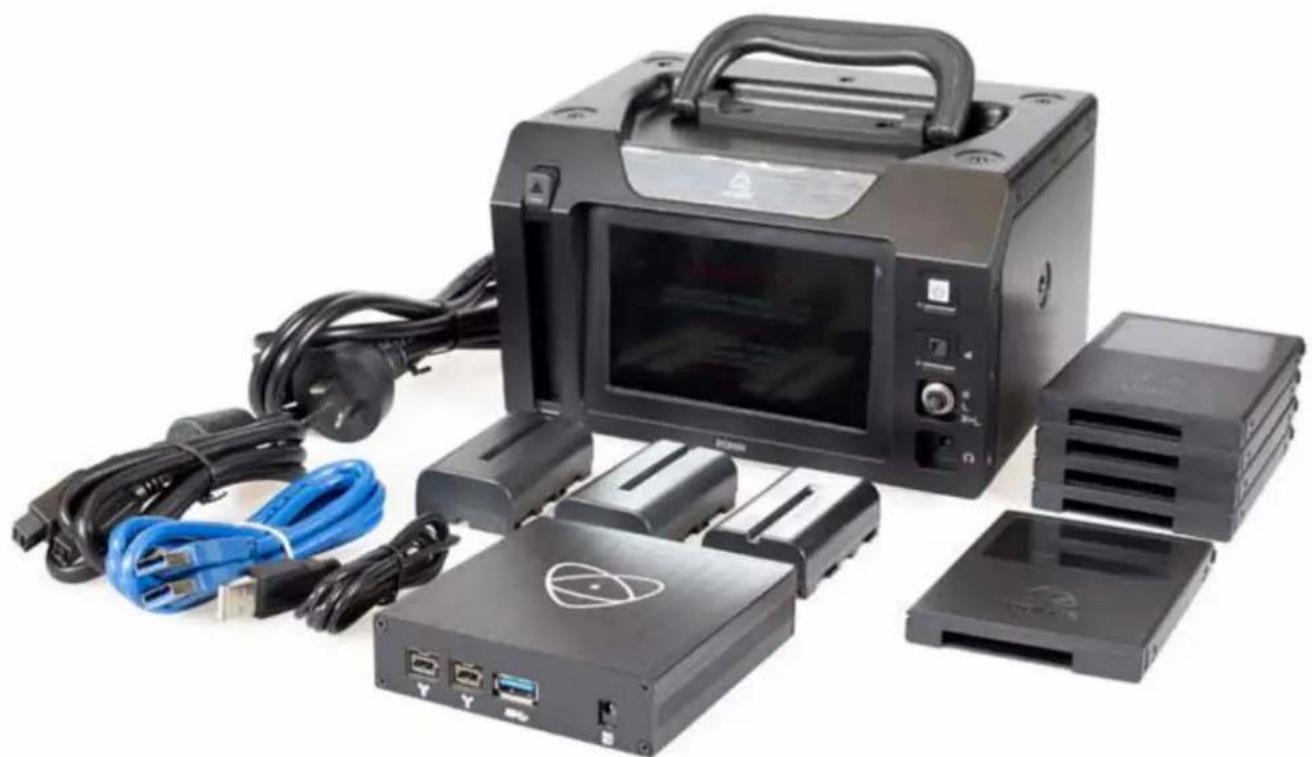
natural_image
Black digital camera module with attached hardware components including cables, USB ports, and a battery pack (no visible text or symbols)Contents may differ from those shown here.
Spinning Disk Drives (HDD)
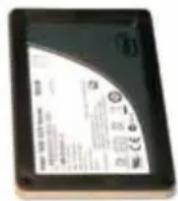
These are the raw storage medium for Ronin. You can use either traditional "spinning" disks, or the new solid state ones. Choose 2 12 spinning drives if your Ronin is going to be attached to a tripod or if it is not going to be subject to excessive vibration. For harsher conditions, choose a solid state drive.
HDD
SSD
Which drives should you use?
There are so many drives available, and new models appear all the time. We are not able to test all drives but here are some guidelines.
Speed and reliability are the main factors. Here are a few things to bear in mind:
- Disk drive data rates tend to be given in megaBYTES per second, and codec data rates are normally given in megaBITS per second. It's very easy to get confused. But there's no need to be, because all you have to do to convert megabits to megabytes is divide by 8. So if you're recording at 220 megaBITS per second, that's going to result in 220/8 megaBYTES per second, which is 27.5 megaBYTES per second.
- To see what works for you, you may want to start working with relatively fast drives 7200 RPM, and then try slower ones 5400 RPM. This gives you a frame of reference for comparison. Just remember that the higher the bitrate of the Apple ProRes® you're using, the faster the drive needs to be.
Atomos regularly test hard drives – please check this link before purchasing drives: http://atomos.activehosted.com/kb/article/what-drives-do-we-recommend
Solid State Drives (SSDs)
These are Flash memory devices that come in the same form-factor as 2 12 " disk drives, and they are fully supported by the Ronin. See the section below about when you should consider using SSDs. For a list of approved drives, please refer to our website.
Mechanical Shock and Vibration
Hard disks are precision mechanical devices that need to be handled carefully. You will be using the same type of drives that are normally used in notebook computers, and you can use this as a guide to whether you need to use mechanical drives or Solid State ones for any proposed projects. If you think a particular usage scenario would be suitable for a notebook computer, then it will probably be OK for a mechanical drive inside a Ronin. If you think the drive inside your notebook might suffer damage, then don't use a mechanical drive.
We can't give rigid guidelines because there are so many different kinds of drives, each with different mechanical properties. You may even find variations between drives of the same type.
What we have found is that mechanical drives are suitable for most purposes that don't involve harsh vibration or mechanical shocks. They will be perfect for tripod-mounting, and also for the majority of hand-held work. We would advise against hard-mounting them on moving vehicles
(but they would probably be OK if cushioned against the body of the camera operator) and we would not advise using mechanical disks if there is a likelihood that they might be dropped onto a hard surface.
Here are some things that you should bear in mind when using spinning disks:
- Even though spinning drives can withstand substantial shocks when they are not in use, they are more vulnerable when running. Harsh treatment that may not actually damage the drive may interrupt recordings at a much lower level of severity. We recommend that you experiment with your drives by testing them in the conditions that you normally work in.
- Spinning drives have a gyroscopic effect that you will feel faintly if you rotate the Ronin up or down or from side to side. They are particularly sensitive to this type of motion. If you do this too quickly while the drive is spinning, you may get a small gap in your recording.
- Be very gentle when changing batteries if you are recording. Practise this manoeuvre so that you are able to do it smoothly. It is always better to do this in-between takes.
- Do not bang or jolt the Ronin while recording. Gentle and cushioned movement may be OK.
- You will find noticeable differences in the ability of drives to withstand shock and to continue recording during vibration and movement. As we receive reports of drive durability and reliability, we will post them on www.atomos.com
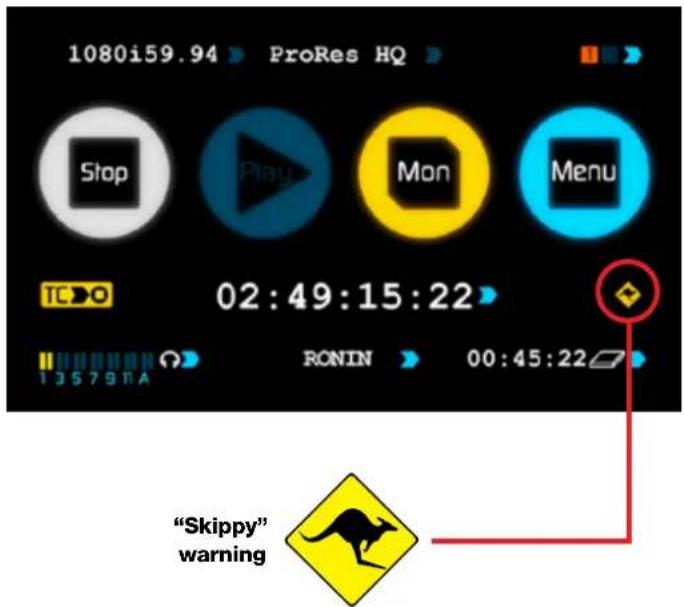
- Your Ronin is able to detect when the drive is under stress and it will recover from any break in a recording by waiting until the drive is ready to continue, and then resuming from that point. If frames have been dropped because of shock or vibration, a “Skippy” Kangaroo symbol will appear on the home screen on the Ronin, just above the disk capacity indicator. This means that you will not normally have to restart the Ronin, even if a recording has been interrupted by mechanical disruption to the disk drive. (see Recording and Monitoring: Atomos Anti-shock Technology for more information)
Taking into account most usage scenarios, we think that mechanical disks will be suitable in the majority of cases. Spinning disks are most sensitive when they are rotating. It is obviously best to avoid dropping them but many disks now have a “drop detector” that will lock the most fragile mechanical parts in place and protect them from surprisingly hard knocks. We recommend that if you want to experiment with this, you do so with a drive that doesn’t contain the day’s shoot!
Backing up and archiving
Remember that no storage medium, including tape, optical disks, spinning disks and flash memory, is completely immune from failure. You should bear this in mind when deciding how to manage your recorded content. At the very least, you should consider the consequences for you and your business if your storage medium were to suffer from a sudden failure, and you should back up your content accordingly. Hard drives that you can use for archiving are becoming increasingly affordable. You may find that it is completely feasible for your to keep your master Ronin disks on a shelf (just like tapes!), and, as a backup, store copies on large hard drives, RAID arrays or Network Attached Storage (NAS).
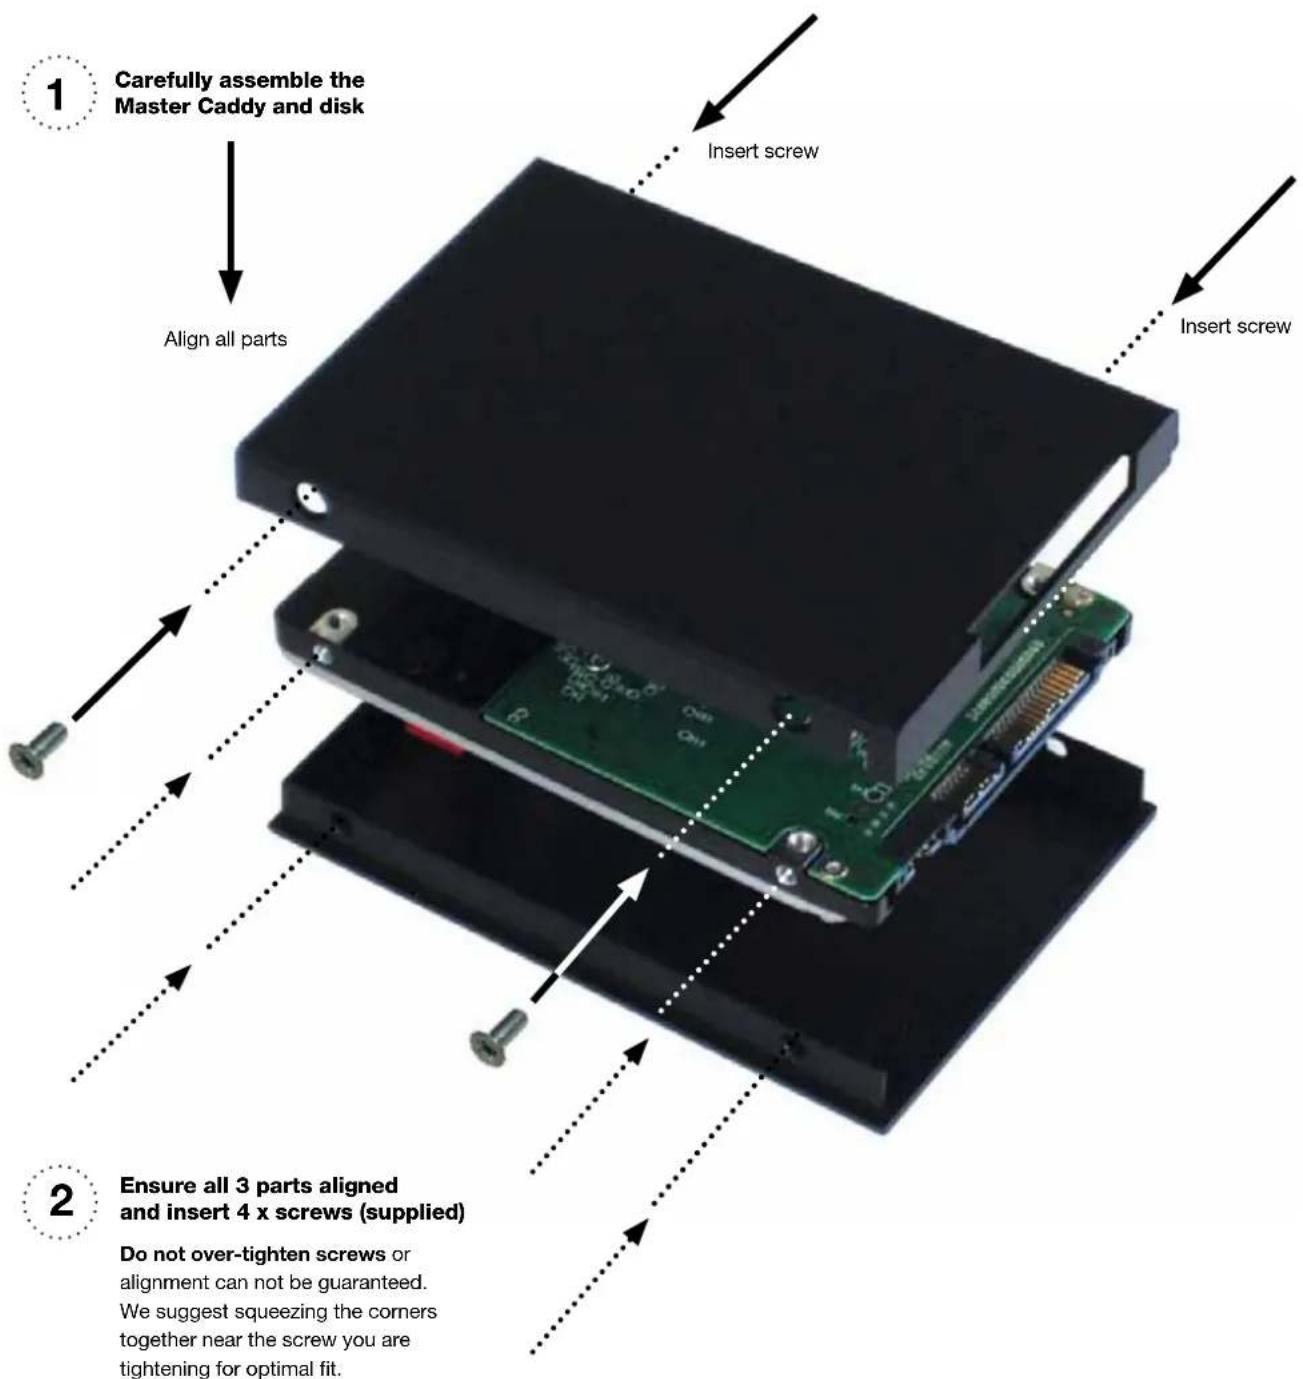
3. Mounting disks in the Master Caddy
Mounting drives in the Master Caddy
This is simplicity itself. Just insert the disk into the caddy, and secure with four screws. The caddy is light and the disk just needs to be held securely. Don't over-tighten the screws. There are no connections to make because pushing the caddy into the Ronin or the Docking station makes all the connections for you.
The Master Caddy can't be inserted the wrong way round. Always make sure that the disk connector faces the slot in the Ronin. You have to be quite firm to push the Master Caddy into place, but don't push too hard, just in case something isn't set up or aligned properly. There is very little that can cause problems and the most likely thing is that the Master Caddy isn't properly flush with the drive inside. A quick visual check will confirm this.
Spinning disks and SSDs are very sensitive to damage from static electricity. Please observe all the usual precautions when handling them, especially DO NOT EVER touch the exposed SATA connector as static electricity may be harmful to your disk.
4. Connecting the Ronin and powering up
Batteries
natural_image
Black rectangular electronic device with a flat top and small base (no visible text or symbols)
natural_image
Black cylindrical battery with visible internal structure and terminal markings (no readable text or symbols)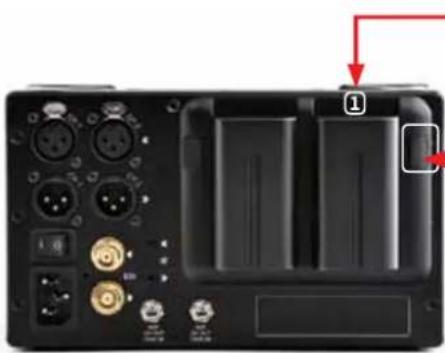
natural_image
Close-up of a black electronic device rear panel with ports and connectors, no visible text or symbolsBattery number 1
Slide down into battery slot/s and lock into position.
Push latch to
release battery
The Ronin is a battery powered device, and has a special feature to ensure that you never have to interrupt a recording to change a battery.
Like all batteries, you will need to take care of them. Make sure that you don't short circuit the connections because this can result in very high currents that can damage the cells and could pose a fire hazard.
Charge new batteries before using them. The Ronin internal charger can charge two batteries simultaneously.

Before any type of disposal the battery should be discharged completely. Tape the contacts with electrical tape and package so as to prevent contacts accidentally coming together at any time. Incineration must be performed by an approved and permitted waste treatment facility that handles lithium ion batteries. If you are not sure if your waste facility can handle lithium ion batteries, contact them and verify if they are permitted or not.
Always use battery slot 1 for the first battery. This is effectively your primary battery and the Ronin will, if using batteries alone.
Battery slot No.2 is the secondary or back-up battery and is not marked. Once the Ronin has been started from battery slot No. 1, it will operate on battery slot No. 2 alone. No. 1 is only required for start up.
To insert the batteries, gently slide them down into the slot and lock them into position. To remove a battery, push the latch to release it. Each battery has its own latch, which is located to the right of batter No. 1 and to the left of batter No. 2 as you look at the back of the Ronin. Pull the latches towards the batteries to release them.

Ronin batteries and modular accessories (Connect Converters, etc) are held in place very tightly because they are on the outside of the device and there has to be no possibility whatsoever that they could work loose, so you will have to be quite firm with the battery latches. We suggest that you familiarise yourself with the force required to remove the batteries and accessories so that you can do this quickly in the field. Make sure that you hold the top and the bottom of the battery or accessory module when sliding it off to avoid dropping it when it is released from the main unit.
The Ronin introduces an Atomos technology called Battery Looping for Continuous Power. When power is running low on one battery, the Ronin will automatically switch to the second battery, you can remove one of the batteries and replace it with a fully charged one. Ronin will continue to operate as you do this. You can continue this process indefinitely.

The Ronin may be powered from NiMH & Li Ion 14.4V battery systems. Battery adaptor required. If a 14.4V battery is connected the unit will assume it is on AC power and the battery status page will show the AC power plug icons.
4. Connecting the Ronin and powering up
Turning ON power to the Ronin
The Atomos Ronin half-rack HD/SD-SDI deck can be powered in multiple ways:
- AC mains connection on rear panel
-
Battery operation on the rear panel
-
External DC voltage operation via an Atomos D-Tap Adaptor
The Ronin has an internal power supply that is powered by the AC connection on the rear panel. This internal power supply is turned on by toggling the switch next to the AC mains input on the rear panel to the '1' position. Turning on this internal power supply puts the unit into standby mode and activates the battery charger. In this state any batteries on the rear panel will begin charging. To activate the Ronin, momentarily press the power button on the front panel. The power indicator on the front panel button will turn green and the Ronin home screen will display within a few seconds.
This switch and button arrangement allows for the internal power supply to charge the batteries even when the Ronin is not in active use. Battery level condition can only be checked when the Ronin is running. To do this, go to the battery menu page and toggle the rear power switch to the '0' position. The front Power switch indicator will turn red to show that the Ronin is operating off battery power. The battery page will now show the voltage level of the attached batteries. To return to AC mains power just flick the rear toggle switch back to the '1' position and the front power indicator will change back to green.
This unique operation, for a deck, is very useful in live event situations if, for example, there is a mains failure, as the Ronin will automatically switch over to battery operation. Ronin uses the same unique Continuous Power technology as all Atomos recorder units.
Furthermore, the Ronin can operate from an external DC power supply source with the use of the D-Tap Adapter. Just make sure the D-Tap Adapter is in slot one of the battery plate.

The DC output connections on the rear panel of the Ronin are reserved for use with future Atomos accessories.
5. Ronin connections
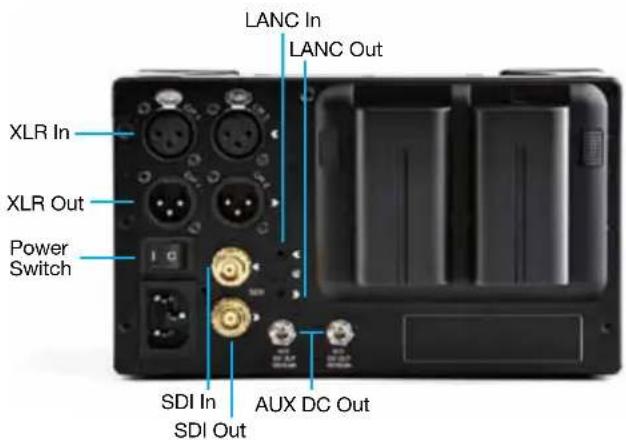
HD SDI in: Your source video input to the Ronin is via HD-SDI.
HD SDI out: This is for connection to an external monitor or other device with an HD SDI input. It carries a delay-free loop-through of the incoming signal in record and standby mode, and the playout signal when the Ronin is in playout mode.
LANC Remote: In addition to direct control through HD SDI, you have the option of controlling the Ronin remotely using the LANC remote control protocol. The Ronin has a LANC input and a LANC loop-through connector to allow you to chain LANC-controllable devices together. This feature is compatible with certain Sony/Canon cameras only. This connection is also used for Serial commands control, which is still under development.
Audio: The Ronin can record 12 channels of digital audio embedded in the HD SDI signal. There is also a pair of XLR Balanced Line-in sockets for recording audio in sync with incoming video. Depending on your setup, you may find that this gives you better results than the microphone on the camera.
You can switch between Analogue Audio Line In and HD SDI as your audio sources in the user interface, where you can also adjust the analogue audio input level.
There is also a pair of XLR Balanced Line-out sockets with adjustable level control. On the front of the Ronin is a 3.5mm Headphone Out Socket, which has its own independent level control and mute switch.
6. Other physical features
Master Caddy Slot
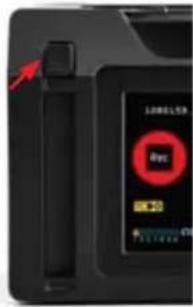
On the left hand side of the unit (as you face the screen) is a slot for Ronin Master Disk Caddies. To insert a caddy, gently push until it clicks into position.
Formatting disks - see page 13
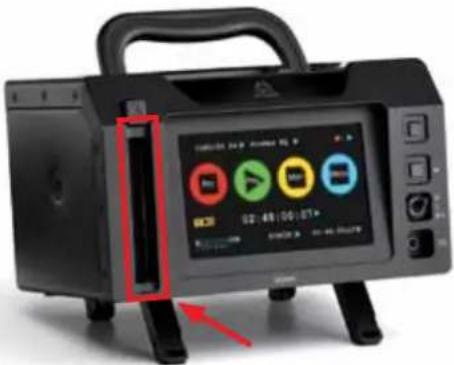
Release and remove Master Caddy
To eject it, use the latch on the right hand side of the Ronin (as pictured)
The Master Caddy is hot-swappable, so you can do this at any time - even while the unit is turned on. But don't do it while recording or you will get a corrupted file that may be unplayable.

Ronin Master Disk Caddies are held in place firmly. Push the eject button and the drive comes out, no need to pull on the caddy.
Screw Mounts
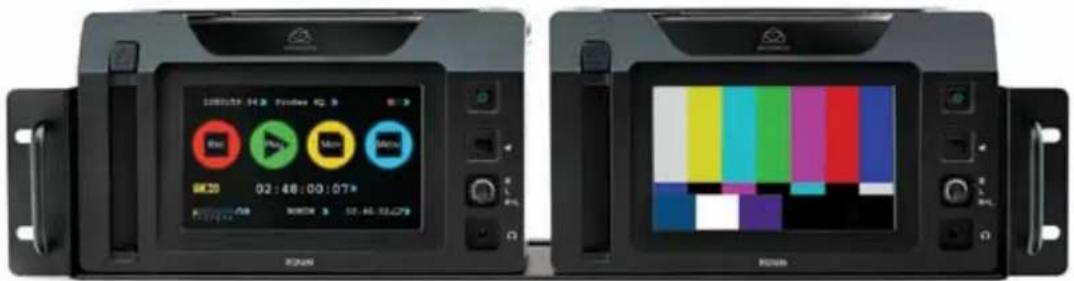
The Ronin is highly portable, but also has mounting fixtures as well as rack-mounting capabilities.
The top of the Ronin unit incorporates a convenient handle for hand carrying. There are fold-down feet on the bottom of the unit that provide various tilting combinations for use on a desk or as part of mobile production.
Further mounting versatility is provided by seven embedded 1/4inch/20 threads – five on the top panel and two on each side. This provides for custom mounting situations as well as the ability to mount various accessories and fixtures to the Ronin.
Ronin can be easily rack-mounted into a standard 19-inch wide equipment rack using the ATOMRCK001 rack-mount adapter. The rack-mount adapter provides a way to mount two Ronin units side by side in a standard equipment rack and only utilizes three RU of vertical rack-mount space. Please refer to the installation guide provided with the rack-mount adapter.
Ronin Modularity
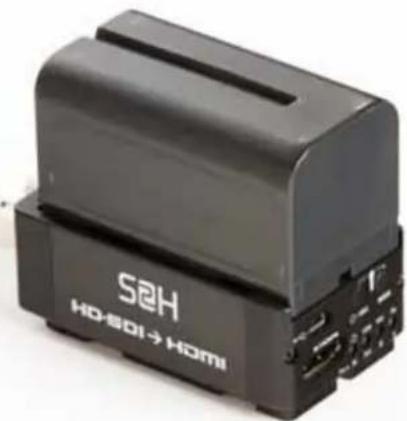
The Ronin was designed to be a flexible and modular system. It doesn't need any drivers to connect to a computer, you have a choice of spinning hard disk storage or solid state, and it will work with any battery system as long as it connects to the Ronin's NP-type slots, or via a DTap connector.
The Ronin's battery slots are the key to its modularity. They provide secure attachment and continuous power, through Atomos' feed-through power system.
The first of the modular add-ons to be announced by Atomos are the Connect converters (pictured). More on this in Part 14.
natural_image
Black rectangular electronic device labeled 'S2H HD-SDI→HOMI' with ports and connectors (no readable text beyond branding)Using the Ronin
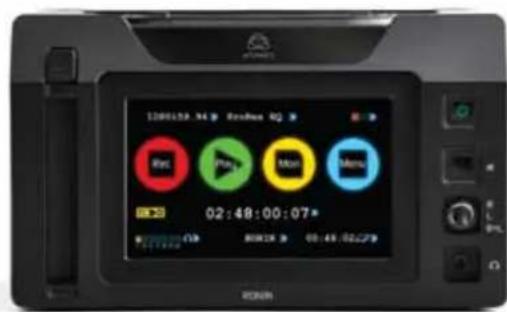
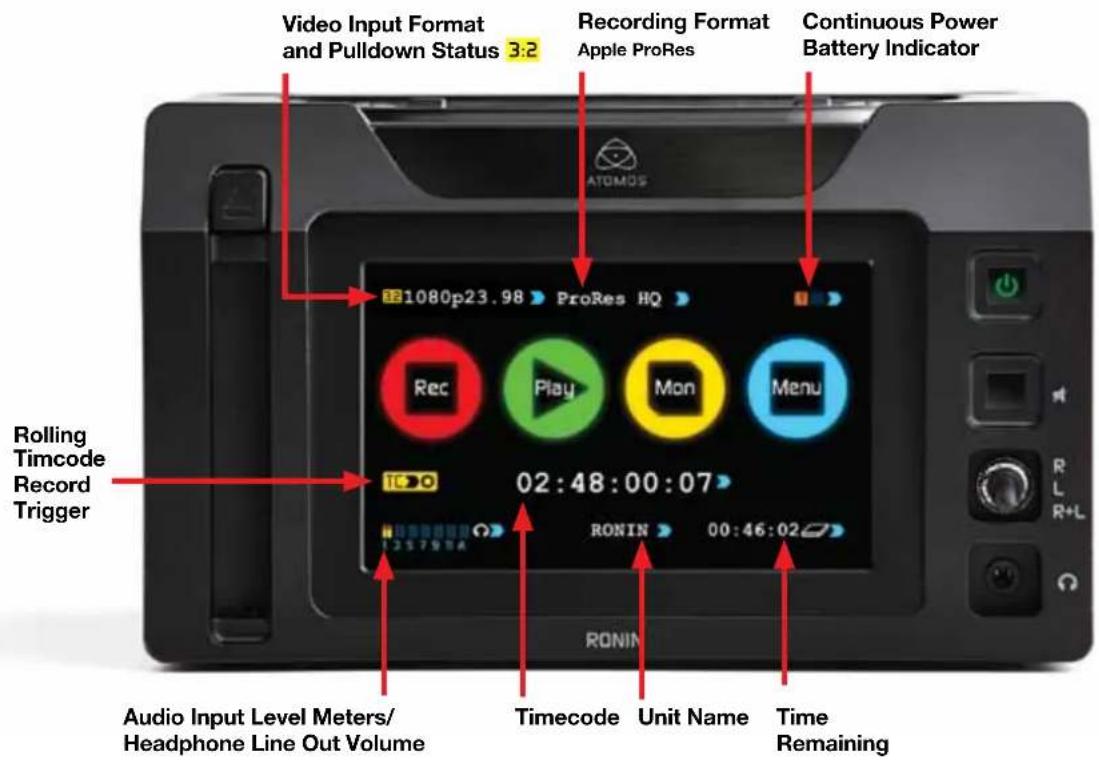
The Ronin is controlled via an intuitive touchscreen interface. There are large, obvious controls for Record, Play, Monitor, and Menu, as well as the following information:
• Current input format and status
- Codec currently in use
- Remaining battery power
• Which of the two batteries is currently active
• Headphone/Line Out volume
• Audio Input Level meters
• Remaining Recording time on disk
- Timecode
- Record Trigger
- Unit name


Watch out for any items on the screen that are marked by a small blue arrow. If you touch these items you will be taken to other options depending on context. If you touch them repeatedly, you will cycle through related options


A large blue arrow in the top right of the screen will take you out of lower-level menus back to the main control screen
The User Interface in detail
Even though the Ronin is an extremely sophisticated and technically advanced device, we have taken a minimalist approach to the interface. We've only included controls that you really need. This is important in a device that has to be ready for use at all times and must therefore be simple to operate while in use.
The Ronin Touchscreen
Ronin features a very high quality 800x480 pixel video touch screen. Most of us are now familiar with the idea of touchscreens, but there is an important difference between Ronin's screen and those you might find on a smartphone.
Ronin's screen is pressure and touch sensitive. It takes more than a glancing brush of a finger to trigger the screen. For some applications, (like dragging and dropping) this would be a disadvantage, but for the Ronin it is an important feature, because if the screen was too sensitive, it would be easy to accidentally trigger Ronin operations, potentially interrupting a recording, for example.
With the Ronin screen, you have to firmly push the screen for an instruction to register. This gives a very positive feel to the device and confidence that commands won't be given in error.
Be definite and deliberate in your pressing on icons on the screen and the Ronin will be very responsive. Remember this is not a capacitive touch device like many Smart Phones; holding contact with the icon for a millisecond will ensure accurate and rapid response.
The Home Screen
This is the screen you see whenever you are not in a function or sub-menu, and it is the first screen that the Ronin boots into when you turn it on. All functions are one touch away: simply touch the screen on any function to be taken to that function's screen.
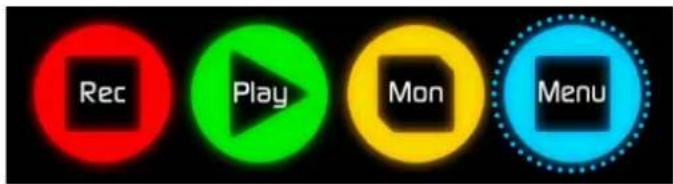
There are four brightly coloured icons labelled Rec, Play, Mon and Menu. In the lower centre of the screen is a timecode display with Hours:Minutes:Seconds:Frames. Below this, on the lower edge is the Unit Name: a customisable label that identifies media from your when it is connected to a computer.
7. Using the Ronin
Home Screen and Menu Functions
Rec (Record)
This is the icon you touch to begin a recording. Touch it again to stop a recording. While recording the Rec icon changes to a Stop icon. Once your recording has started you have the option to touch the Mon icon to view the signal you are recording.
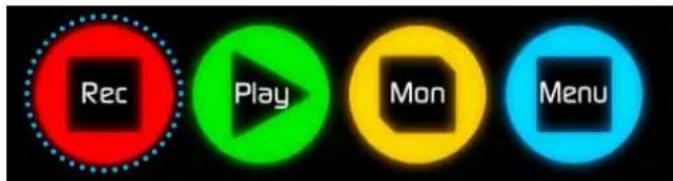
STANDBY

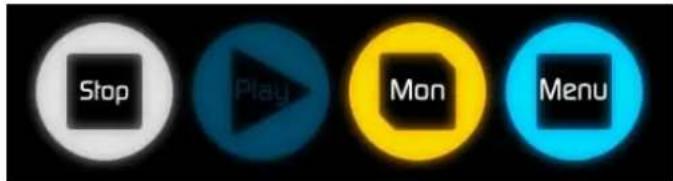
RECORDING
The Rec icon is dimmed and disabled if there is no valid video input OR if the disk is full. The buttons is dimmed because you cannot record.
NO INPUT
Play
Touch this icon to play previously recorded clips. When you press the green Play button you will be taken to the navigation screen.
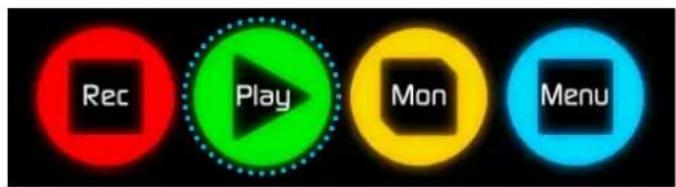
STANDBY

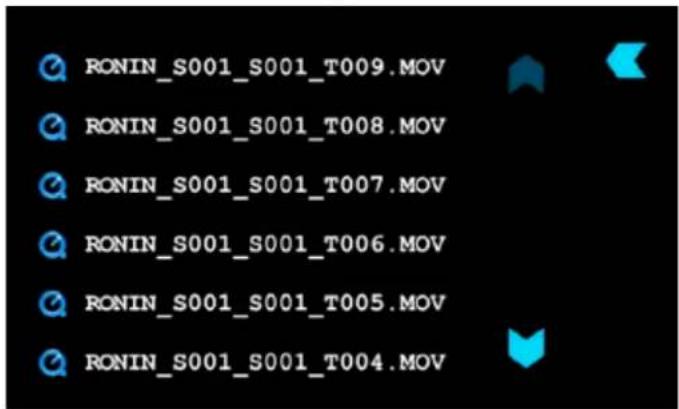
NAVIGATION
Ronin uses a unit name, scene, shot and take convention to name the clips. Select the clip you want to play by touching the file name and this will start to playback.
The Play button will be dimmed and disabled if there is no disk or the disk is not formatted. See page 14 - Formatting disks
NO DISK
Mon (Monitor)
Pressing this icon connects the incoming video signal to the screen, so that you can use the Ronin as a field monitor. More about monitoring in the next section, Monitoring and Recording.
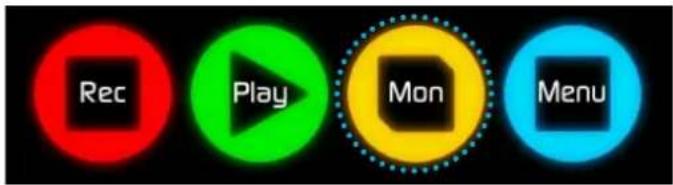
STANDBY
The Mon icon is dimmed and unselectable if there is no valid video input.
NO INPUT
Menu
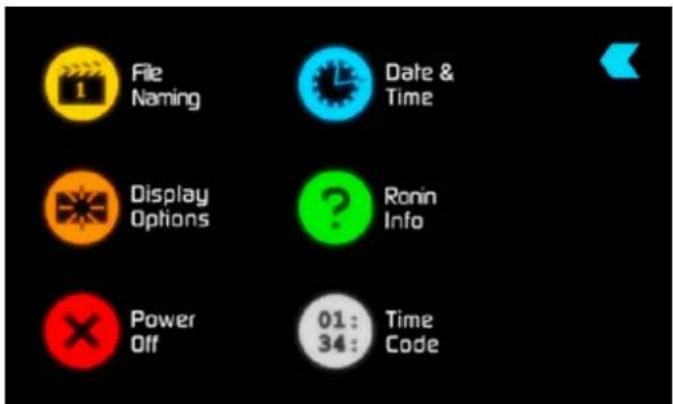
Pressing this takes you into a number of options which will explained next.
STANDBY

MENU
7. Using the Ronin

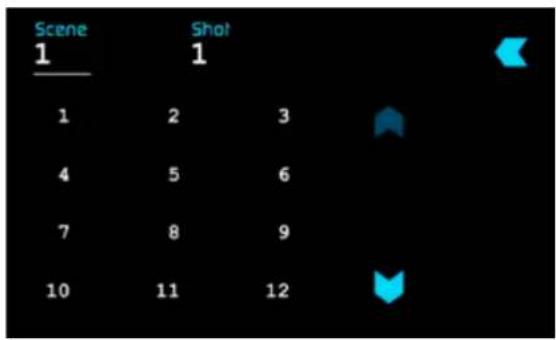
File Naming
Allows you to select the scene and shot number that will be recorded next. To select press scene or shot at the top and the number you wish to use from the list below (up to 999). The number you choose will then be shown underneath the word Scene or Shot in a larger font and will be underlined. The take number is automatically increased with each take.
Date & Time
Allows you to adjust the date and time shown by the clock and calendar in the Ronin. Touching the Date & Time takes you into the Date and Time Screen. At the top of the screen is the date and the time of day. The month, day and year are selectable by touching them, at which point a scrollable list of dates, months or years will show below, depending on which option has been selected.
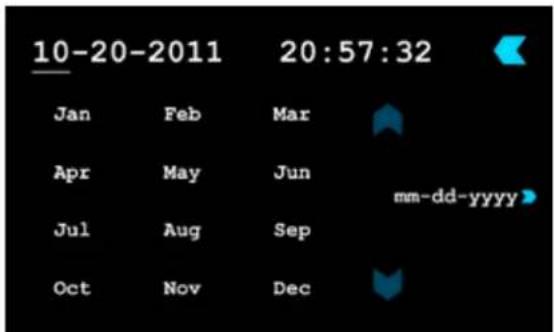
To enter a date, for example, begin by touching the month at the top of the screen, and then select the required month from the list below. Then touch the day, and then the year, selecting the required value from the list below.
Setting the time is done in exactly the same way.
Date formats (i.e. dd-mm-yyyy or mm-dd-yyyy) are selectable on the right of the screen. Just keep touching the date format icon until it shows the format you want to use.
Display Options / Screen Lock
Allows you to modify the brightness of the screen. You are presented with a horizontal slider. Touch it anywhere on it's length to increase or decrease the brightness of the display or you can tap the + and - buttons at each end.
SCREEN LOCK
A new feature for the Ronin is the ability to Lock the screen so no changes can be made by mistakenly touching the screen. To Lock the screen press the power button located on the side of the Ronin once quickly.
You will see Locked will flash on the screen. Press again to Unlock.
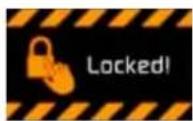
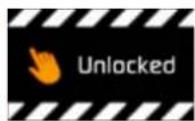
When you access the Display Icons you can choose to disable your screen but only when the screen is locked. While Locked, Display is > On/off

Ronin Info
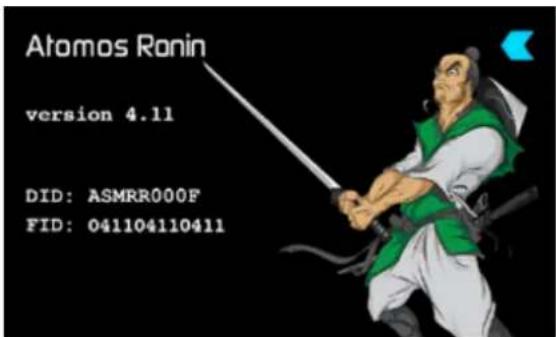
Shows the software (firmware) version and unique device ID (DID) of your Ronin device. This will be useful if you ever have to speak to Atomos technical support or a support agent from your reseller. You can also check on the Atomos website to ensure you are running the latest firmware: http://www.atomos.com/Ronin/firmware/
Power Off
Turns the Ronin off. You need to press Power Off for four seconds. Alternatively, you can press the physical On/Off button on the right side of the Ronin for four seconds to force shutdown. Atomos recommends using the touchscreen Power Off function.
Timecode
Takes you to the dedicated timecode configuration page. Refer to Part 7 of this manual for more information.
Remember that pressing a large blue arrowhead will always take you back to the previous menu you were in.
Smaller controls and indicators around the Home Screen
There are a number of smaller controls that double-up as indicators around the Home Screen.
Input
321080p23.98
At the top left of the screen is not actually a control but will change to display information about the signal being input to the Ronin at the time. If there is no input, it will say No Input. When a valid signal source is connected, the display will change to (for example) 1080i50.
Video Compression Format
ProRes HQ
ProRes
At the top middle of the screen shows which version of ProRes ^® you are using. You can change between versions (LT, HQ and 422) by repeatedly touching the indicator.'
7. Using the Ronin
Battery Indicator
Shows whether you've got one or two batteries connected. If there is no battery connected a number will not be displayed in the appropriate slot. Touching the Battery Indicator takes you to the Batteries screen where you can closely monitor the status of the Batteries.

When a battery is running low its icon will flash.
BATTERIES SCREEN
The Battery screen indicator is made up of two Battery icons, the active battery is shown in orange and the level of each battery is shaded in 1/4 increments with a voltage level shown on top.
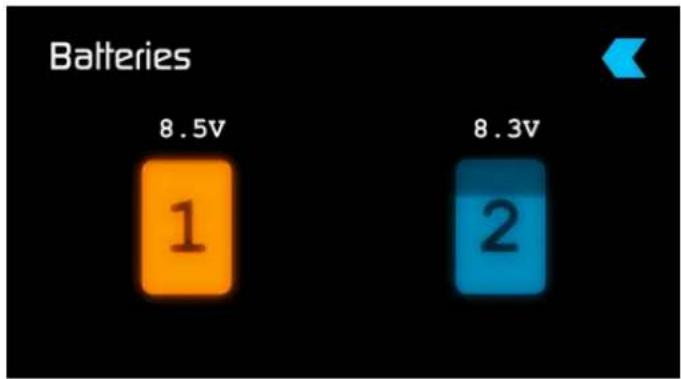
In the picture above we see Battery 1 is full and active and Battery 2 is currently inactive and 1/4 depleted. If no battery is present it will show an X in the picture and will be Black in colour as pictured right.
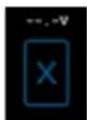

Warning: If both of the batteries are fully depleted, the unit will turn itself off. The Ronin will switch to the battery screen for the last 5 seconds of available power before shutting down, alerting you that shutdown is about to occur.

If the Ronin is running off its AC connected supply, the battery status will change to the icon shown in the right.
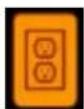
AUTO SWITCHING/MANUAL SWITCHING
The Ronin will automatically switch to a new battery when the current battery is depleted or the AC supply fails (ie blackout). You may also switch between batteries at any time by pressing on that battery icon. The new active battery will then turn orange. You may need to use this if you have for example 3 hours recording but only 2.5 hours of battery in one battery, in which case you would change to a freshly charged one.

If the AC supply is connected the unit will automatically switch to this er source allowing the batteries to recharge.
Storage Capacity Indicator
Located in the bottom right of the screen. When a disk is inserted, the Storage Capacity Indicator will show the recording capacity of the drive in hours minutes and seconds, based on the currently selected video compression, which of course, will determine the recording bitrate.
FORMATTING HDD/SSD
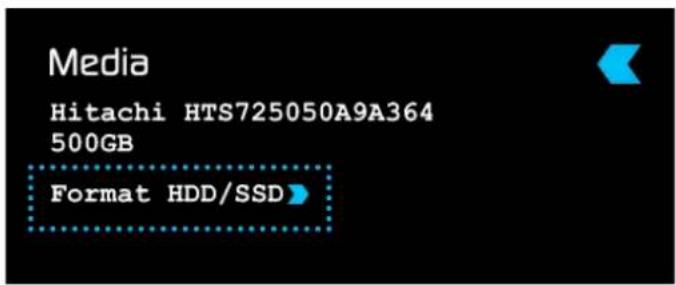
Touching the Storage Capacity Indicator on the home screen will take you to the Media Information and Format screen. Media Information indicates the drive you have present, in this case a Hitachi 500GB spinning disk.
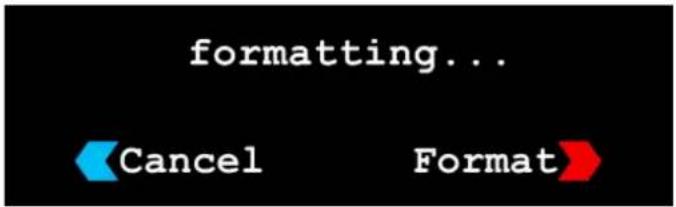
Touching Format HDD/SSD will format the drive inside the Ronin. A confirmation screen will give you the choice to continue or cancel the process.
If you do not see your hard drive information, there may be a problem with your connection. Try ejecting the drive and trying again.
Also check the drive compatibility list: http://atomos.activehosted.com/kb/article/what-drives-do-we-recommend

The Ronin file system is exFAT. We recommend that you format each disk with the Ronin and not your computer.
Unit Name
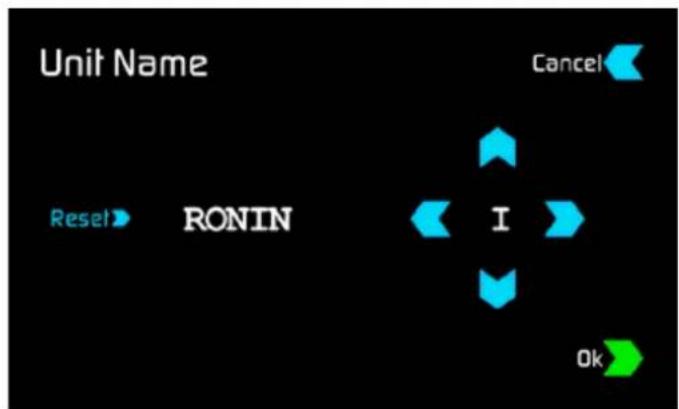
RONIN
The unit name serves two main purposes:
- HDD Naming: Naming the unit names the drive if the drive is formatted after the unit name has been set
- File Naming: File name is the current unit name as the start of the recorded clip name; Ronin_S001_S002_T003
To access the unit name screen simply touch the blue arrow to the right of the unit name. Creating your own unit name is simple. Pressing OK will allocate the new unit name and return you to the menu screen.
7. Using the Ronin
Audio
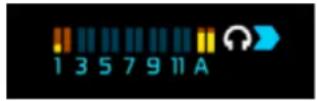
Located in the bottom left corner of the main screen you can see the area for monitoring the audio levels, pressing here will allow you to access the audio settings.
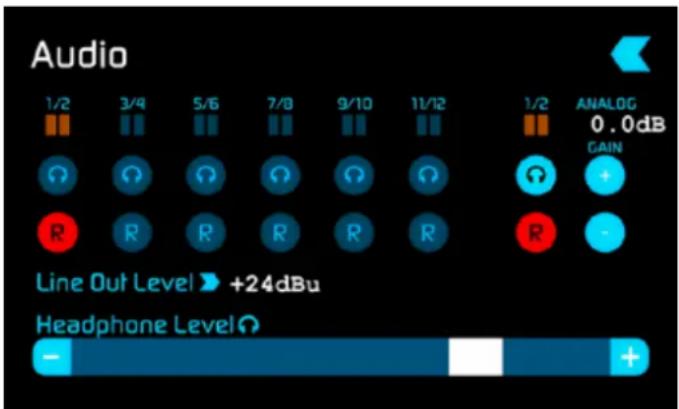
You can see 12 digital channels (via SDI input) and 2 analog audio channels (via the XLR inputs). Each channel has a level meter assigned to it. When there is active sound coming in you will see the level indicator moving.
If the 'R' icon is highlighted red below the level meter these channels will be recorded to disk (this is also indicated by the level meters background changing to orange). If the headphone icon is highlighted this channel pair will be output to both the headphones and the XLR outputs.
If recording analog audio via the XLR inputs the input gain can be adjusted by pressing the + and - buttons to set a suitable level to match the source. Since the analog input connections are line level, they cannot be used with microphone level sources. Ronin does not supply +48 volts phantom power for microphones. An adaptor is necessary to operate with microphone level equipment.
Similarly, The analog output is also balanced line level XLR type. If you wish to adjust the clipping point of the analog XLR outputs this can be set by pressing on the Line Out Level indicator. The clipping level settings are +15 dBu, +18 dBu, +22 dBu, and +24 dBu.
There is also a slider to control the headphone level. Press any point along the line or slide your finger to the left or right to adjust. On the front panel, there is also a mute button for the headphones along with a toggle switch that allows you to select between maintaining the left/right or both channels of each audio pair.
It is not possible to vary the gain if the signal input is from the SDI connection because this is digital and is embedded in the signal. You can usually adjust this from the camera, please see your camera manual for operational details.
Audio During Playback Mode
When you enter into Playback mode on the Ronin it will only output channels 1/2 on the headphones and XLR outputs, please bear this in mind when you select the audio channels for recording. Also note, all recorded audio channels will be present on the SDI output.
8. Monitoring and Recording
Connect to input
As soon as you connect a supported input to the Ronin's SDI input:
• Rec and Mon icons will go solid and colourful
- The input format will be shown in the top left corner
• Audio inputs will show levels in bottom left corner
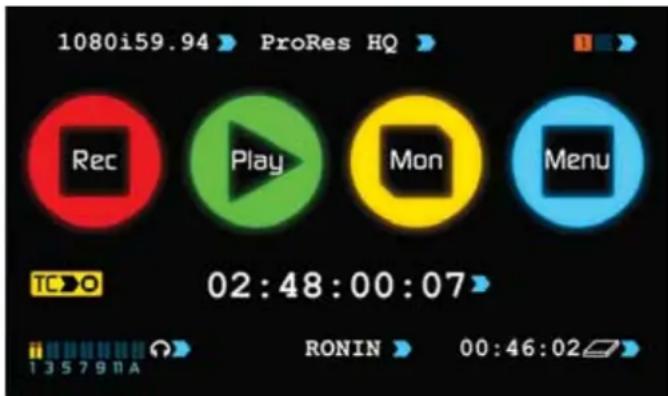
READY-TO-RECORD
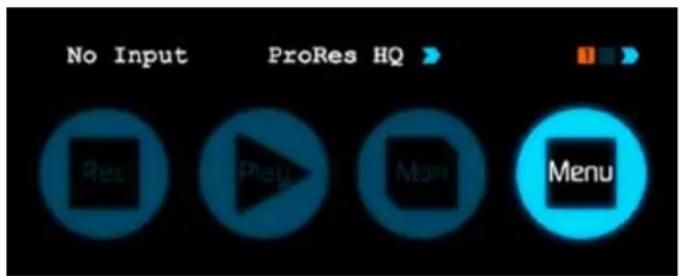
NO INPUT / NO DISK
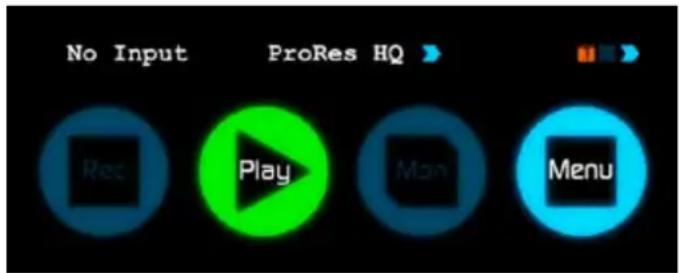
NO INPUT / DISK PRESENT
INPUT PRESENT / NO DISK

The Ronin has a high-quality screen that adjusts to the scan frequency of the incoming signal, for a smooth, accurate display.
Before recording
- Check there is a valid signal by looking at the main screen, ensuring it looks like the 'ready-to-record' screen
- Check the input signal is set to what you would like:
- Progressive with 2:2 or 3:2 pulldown or
- Interlaced
- If you see No Input for any reason please check your camera settings match a supported format for Ronin. See technical specifications on page 33.
- Connect headphones and monitor the Audio channels to make sure the sound levels are correct.
- Select the correct audio recording set from the audio menu.
- Connect any additional Analogue audio inputs and adjust gain accordingly.
- Enter monitor mode to ensure the video is coming in as expected.
- Check you have the correct Scene & Shot number selected. (see page 21 – Organising Material on disk)
- Check your drive is inserted and has been formatted
- Check your timecode settings are as you need
- Choose how you will start/stop your recording
- Check for clean input:
By touching the screen in Monitor mode, you can remove the Atomos overlays to give you a clean screen. If any overlay graphics remain, these will be coming from your camera. Please check the settings on your camera to switch these off.
Activate pulldown removal if required
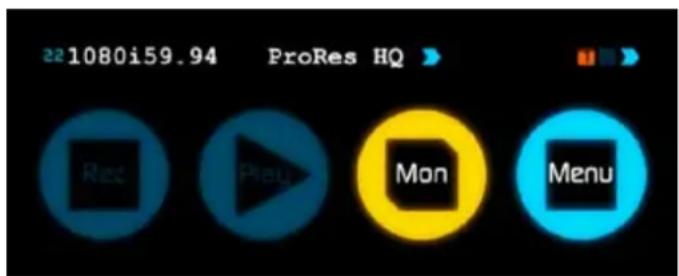
You can select the recording format by touching the top middle of the touch screen where the format is indicated.
1080i59.94

IMPORTANT: You need to match the format you are recording internally on the camera with the format recorded on the Ronin. If you are recording 24p internally on the camera you need to record 24p on the Ronin so the recordings match. To adjust the recording format simply touch the format icon repeatedly and the Ronin will cycle through the options available. The basic rule is match the format of the internal recording on the camera (not the external output of the camera). For more explanation on choosing the correct format on the Ronin and the relationship to camera internal format and output format refer to Section 10 – Pulldown.
8. Monitoring and Recording
SmartControl
SmartControl is a versatile set of functions used to control the starting and stopping of recording by automatic or external means. This section outlines the different methods to start and stop recording. More advanced external control using the Ronin serial port (marked LANC) allows control from other devices such as serial control ports, using computer applications, or API code-generating products. Atomos has a document guide in its KnowledgeBase on how to use industry-adopted protocols and the serial port for external control.
Ronin Start and Stop record control can be triggered by the following methods:
- Home Page Touch Screen
- Monitor Page
- HD-SDI Rolling Timecode trigger
- HD-SDI Camera trigger
- Via LANC for Sony and Canon Cameras
-
Via LANC serial port
-
Home page Touch Screen
By pressing Rec (Record)

- From the Monitor Page
By pressing Rec (Record)

- HD-SDI Rolling Time Code Trigger record
OFF
DISABLED

ENABLED
If HD-SDI timecode is selected and the camera is in Record run mode, the user has the choice to start and stop recording remotely from the moving HD-SDI timecode. To enable this simply arm the TC icon (see above). When enabled the camera and the Ronin will start and stop record simultaneously.

NOTE: Rolling timecode trigger is for use when the camera is in REC RUN timecode mode only. Auto SDI flag triggers should be used for Free Run timecode. Please be that aware not all cameras have Start/Stop flags for triggering record, especially older cameras. In such cases rolling trigger in REC RUN will need to be used to trigger recording automatically at the same time as the camera starts recording.
4. HD-SDI Camera trigger record
The HD-SDI Camera trigger is manufacturer-specific, you will need to select the appropriate manufacturer for your camera. There is a flag within the SDI signal that lets the Ronin know the start/stop record has been pressed on the camera; in turn this will trigger the Ronin to start/stop recording at the same time as the camera.
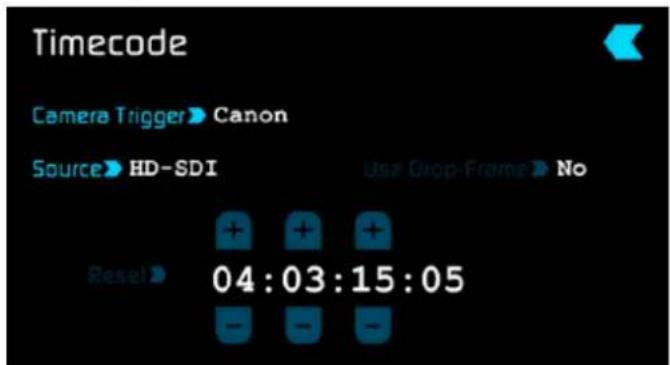
You can use this mode with either Free-Run or Record-Run timecode
To enable this set Timecode to HD-SDI then set the camera manufacture in the timecode menu

If both the Camera Trigger and Rolling Timecode Trigger are enabled this can create multiple files, please ensure only one HD-SDI trigger is used.
5. via LANC for Sony and Canon Cameras
6. via the LANC serial port
Controlled by a third party computer or controller. For system and OEM integration, contact support@atomos.com
Once you are recording you will see:
- The Rec button has now changed to Stop on the main screen
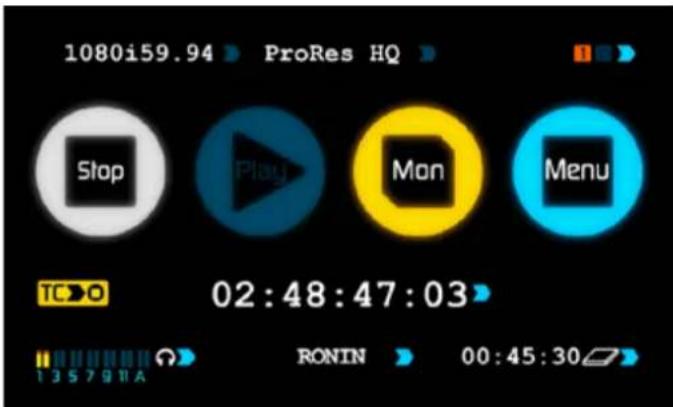
- Play button has been disabled
- The Record icon has changed to a stop icon on the monitor screen
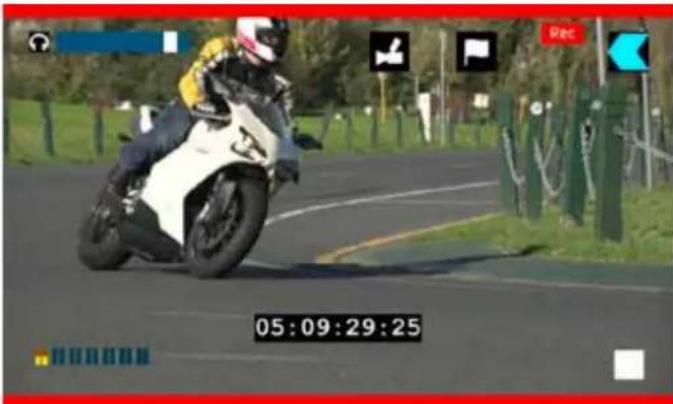
• REC is in the top right corner of the monitor screen
Your files will be recorded to your drive with theunitname, scene

and shot you have setup.
To stop, press the stop button on the Ronin monitor or Trigger.
8. Monitoring and Recording
Using the Ronin as a field monitor and viewfinder
With its 5" high-resolution color TFT 800x480pixel screen, the Ronin makes a great field monitor. So good, in fact, that you don't need any separate monitoring equipment. You could even say that the Ronin is a "Recording Monitor".
SmartMonitor
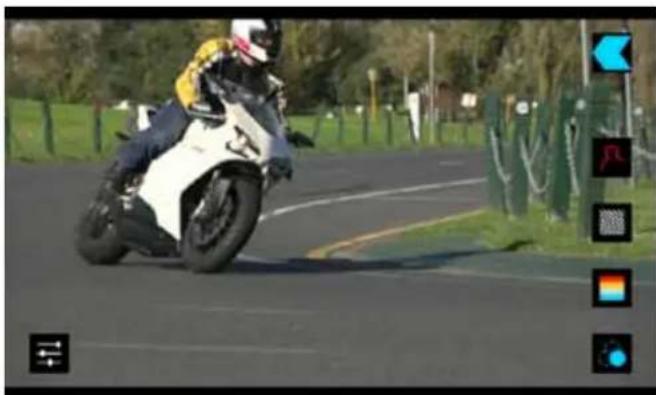
SmartMonitor features Focus Peaking, Zebra Patterns, False Colour and Blue Only Exposure that will help assist when setting up a shot.

To access these tools, go into Monitor and select the Camcorder icon. A new set of icons will appear
On the right hand side are the icons for each SmartMonitor tool.
natural_image
Motorcyclist riding on a paved road with green fencing and trees in the background (no visible text or symbols)To enable the tools you simply press the icon for the tool you would like, the border will change to white.

You can apply all filters to your monitor at the same time but set up individually for your needs

Settings
On the bottom left side is the icon to amend the settings of the tools. Current settings are for Focus Paking, Zebra and False Colour.

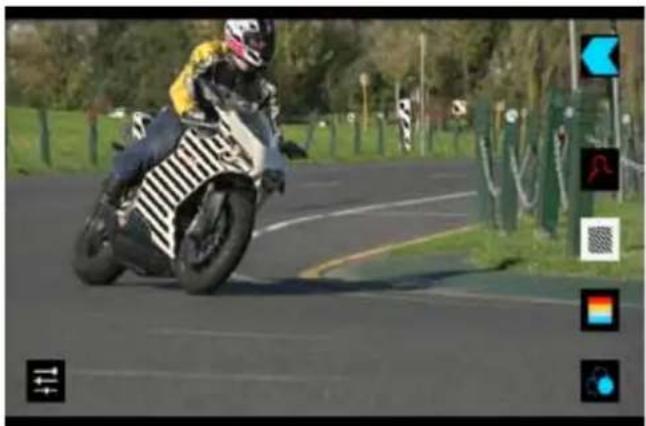
Zebra
Zebra lines show the parts of the image that are over exposed relevant to the % level set. 95% is usually used for objects, windows and surfaces. 75% is used for checking over exposure of human faces this will indicate reflective or shiny areas on the face.
natural_image
Motorcyclist riding on a paved road with lane markings and trees in the background (no visible text or symbols)
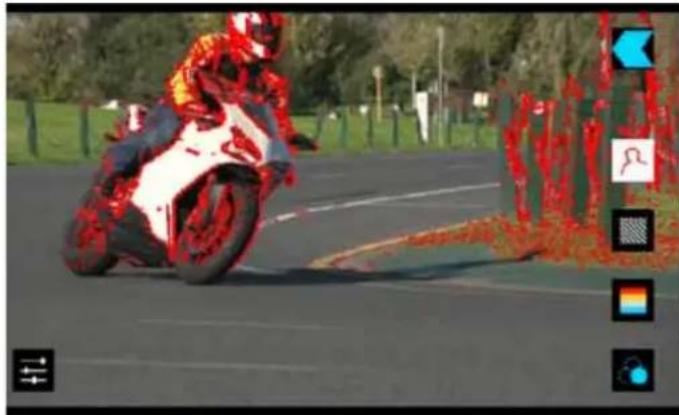
Focus Peaking
Focus peaking allows the user to ensure their recordings are always in focus. The parts of the image in focus are indicated by the selected colour.
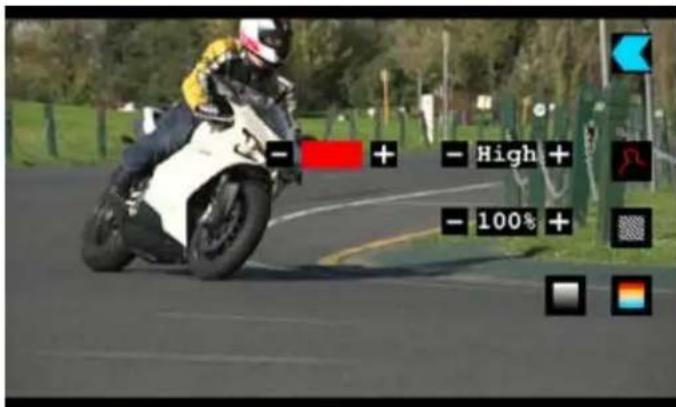
The colour indicating the section of the image in focus can be adjusted by pressing the +/- keys next to the coloured square representing the current colour. The default colour is Red. The following additional colours are available (White Square, Red Square, Green, Blue, Yellow, Light Blue and Purple).
natural_image
Motorcyclist in red and white gear riding a white motorcycle on a paved road, with no visible text or symbols.By default the Ronin uses red, but you can change the colour in the settings and the threshold can be set to high, med or low.
8. Monitoring and Recording

False Colour
natural_image
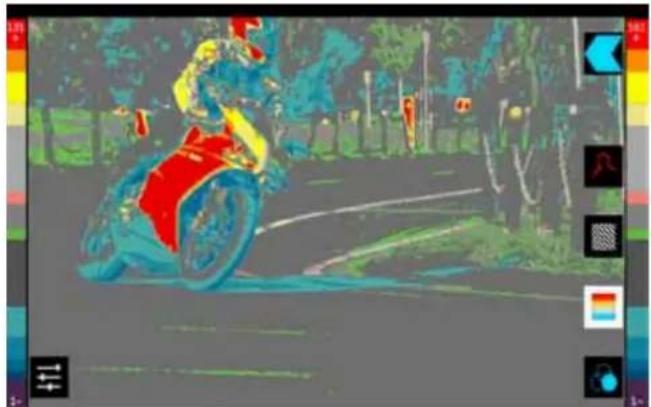
Person riding a motorcycle on a forest road, wearing red and yellow suit (no visible text or symbols)False Colour assigns different colors to areas of different exposure in the image. Instead of just showing what parts of the image are overexposed, it gives a more complete picture of what is going on in the image by using a range of exposure values. Generally speaking, overexposed elements will display as red, and underexposed elements will display as blue.
The gradient between colour levels can be adjusted to have a gradient or not. If gradient is not selected, the colour levels will change instantly to the next colour level.
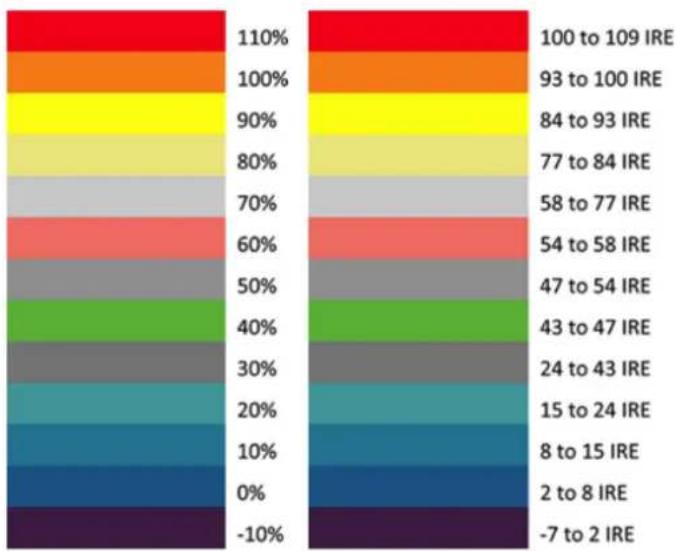
False Colour Scale:
To help you determine the exposure range with more accuracy, please use the scale above:

You can apply all filters to your monitor at the same time but set up individually for your needs

Blue for Exposure
Displays a black-and-white image that is based on the blue channel of the input signal. Used to observe the noise content of a video image and the judge the overall exposure quality.
SmartLog
SmartLog gives you the ability to tag your clips during recording (or playback, more on this later).
By the pressing the Favourite and Reject icons you can assign a "good clip" or "bad clip". This information can then be exported to non-linear editing system to speed up the edit process, as you can easily see which parts of your recording you have marked to keep or reject.

SmartLog currently only works with Apple FCP X.
How to use
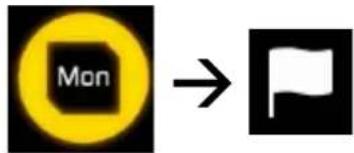
To access the tags, enter the Monitor screen, then press the Flag
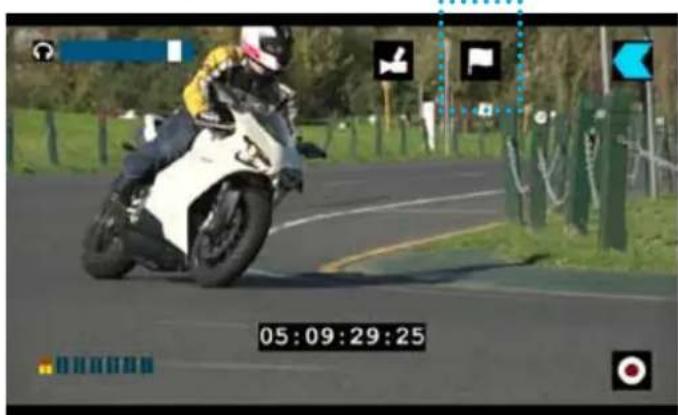
SmartLog: MONITOR MODE
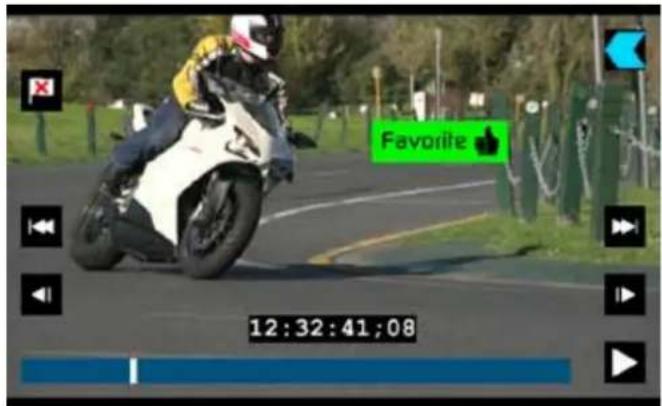
You can now see your monitor in the background and the Favourite and Reject icons
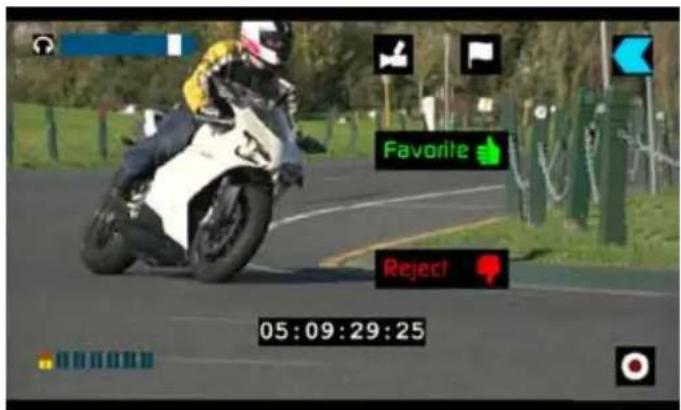
8. Monitoring and Recording
You will use these icons as an in and out point on the file, pressing once to set the in point then again to set the output.
When you have selected Favourite, the icon colours will invert (Green background with black text) and the Reject Icon will disappear. When Reject is selected the icon colours will invert (red background with black text) and favourite will disappear.
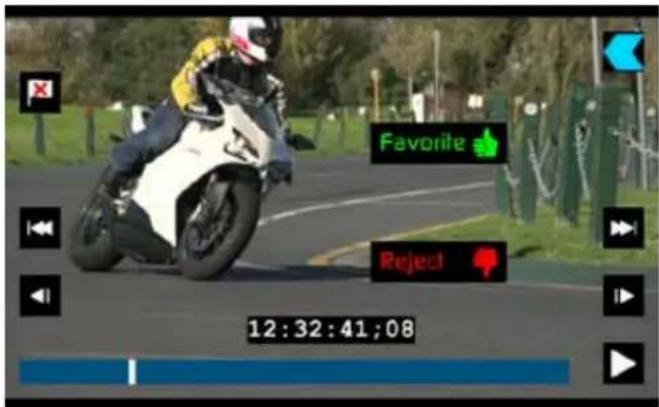
SmarLog: PLAYBACK MODE
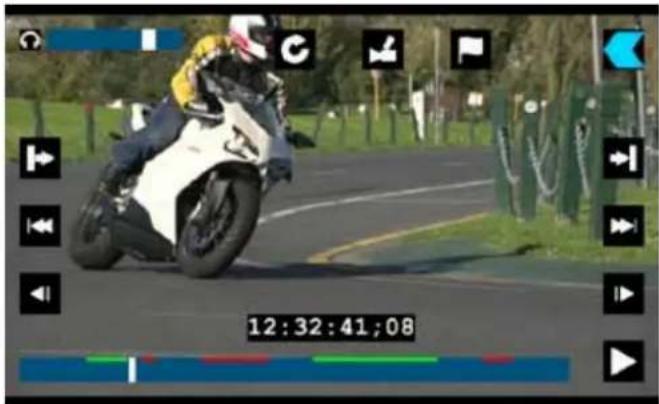
Once recording has finished you will see the green or red in/out points shown on the timeline of the clip once selected.
natural_image
Motorcyclist riding on a racetrack at night, captured in video frame with UI icons (no readable text or symbols)Your final stage is to Export the XML flag:
• Enter Play or Media Information
- On the bottom right hand side there is an icon Export XML
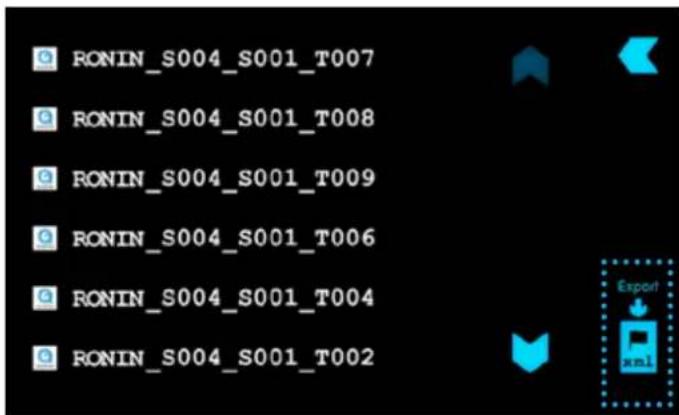
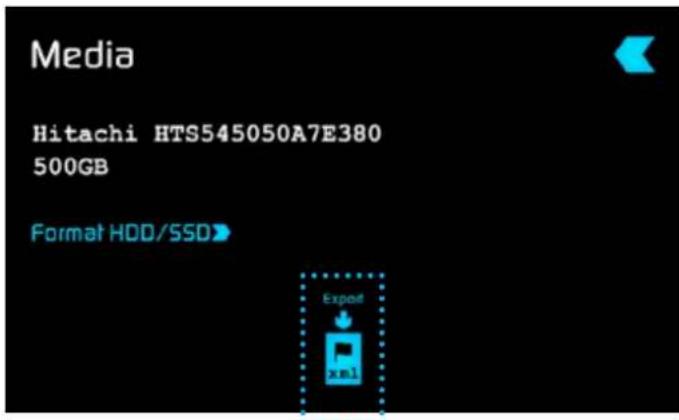
- Press this once
- You will be shown a please wait screen (the length of time will vary depending on your recording time and amount of flags applied)
- Then it will return you to the previous screen
You can carry on recording but please remember before you eject the drive to export your XML files.
8. Monitoring and Recording
Organising material on the disk
Ronin uses a unitname, scene, shot and take naming convention:
RONIN_S001_S001_T001
This was recorded on a Ronin unit called RONIN, the scene selected was 1, the shot selected was 1 and it was take 1.
Below is an example of your playback browser window showing file names.
You can see along the top you have scene and Shot with a large underlined number, this is the current selection.
To change them pressscene or shot (depending on the one you wish to change) then the number you wish it to set as. In each selection this goes up to 999.
Once selected you will see the underlined number at the top will have changed. You can now go back to the Main screen and start your record.
To organise your clips you need to access the Scene & Shot. To navigate press Menu on the main screen and then press Scene & Shot on the menu screen.
If you do not set this up Ronin will start recording from Scene 1 and Shot 1 automatically.
The Ronin uses the exFAT file system. This is recognised natively by both PCs and Macs, without any need to install driver software. It is a 64-bit file system that will let you record to the full capacity of your storage medium without any need to "segment" the files. The maximum file size is so large that you never need to worry about exceeding it.
For Windows XP, service pack 3 and a special exFAT patch are required. Both are available on the Microsoft® website.
8. Monitoring and Recording
Atomos Anti-Shock Technology
Spinning disks are very reliable in a controlled environment where movement and vibration are minimal and within the capabilities of the devices. They are ideal for low-cost recording, but will suffer reduced performance if they are jolted or receive a sudden impact.
Should one of these events occur, the Ronin will sense the hard disk slowdown. If there is a break in the recording it will detect the number of frames involved and will then continue to record when it is safe to do so.
This means that even if you suffer a momentary break in your recording, the video capture will continue without any intervention from you, the user.
It is obviously important for you to know that you have suffered from an interrupted recording and the user interface will display a warning (in the form of a Kangaroo sign) clearly above the disk-capacity display on the main screen.
If you find you are working on a very active project where you are seeing a lot of "Skippys" then you probably need to switch to SSDs, and only use spinning disks for gentler environments. This can also caused by fragmented drives, drives with not much space.

Format drives at start of each shoot.

To remove "Skippy" warning, simply touch the icon and it will disappear.
File Recovery
The Ronin is continuously writing to disk when recording. However if the recording is stopped suddenly due to sudden power failure or disk removal the file will be broken. A file recovery feature has been included in the device that can recover almost all of the footage and rebuild the video file.
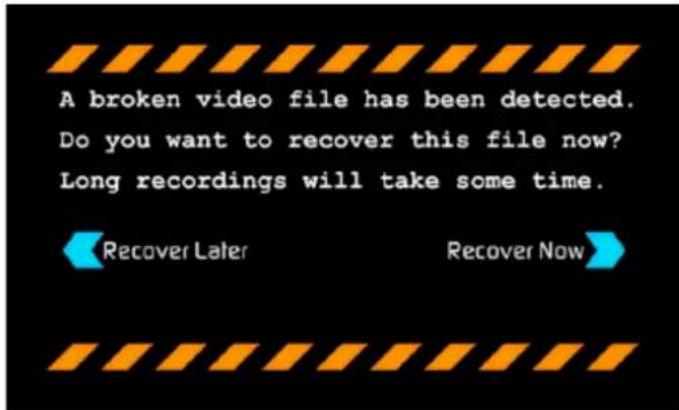

If the drive is broken, or has become corrupted, then we will not be able to recover the file and we recommend that you try third-party hard disk recovery software.
9. Timecode
Using Timecode
Touching the timecode display on the Ronin's home screen, just below the four main coloured controls, will take you to the Timecode setup screen (this is also accessible by touching Menu and then Timecode)
OR

Occupying the lower-centre part of the screen is the timecode display with controls to set the start-time of the timecode.
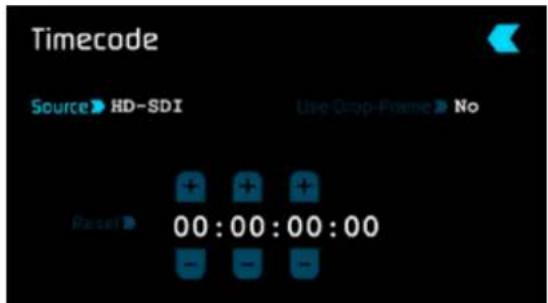
The four timecode modes supported are:
• HD-SDI
• Time of Day
- Record Run
- Auto Restart
Cycle through these modes by touching the timecode Source Selector.
HD-SDI embedded timecode
With this setting, the SDI input will set the timecode (as long as the source SDI device supports this). The controls to adjust the timecode value are disabled in this setting because the embedded timecode in the SDI signal sets the Timecode value of the recording. If you want to adjust this please, refer to the manual of your SDI input device.
Trigger from HD-SDI time code
If HD-SDI timecode is selected and the camera is in Record Run mode, the user has the choice to start and stop recording remotely from the Source Camera HD-SDI timecode.
To enable rolling Timecode Start/Stop functions, simply press the TC Icon shown here. When enabled, pressing the camera Record Stop/Start button will make the Ronin start and stop record simultaneously as the timecode starts and stops.
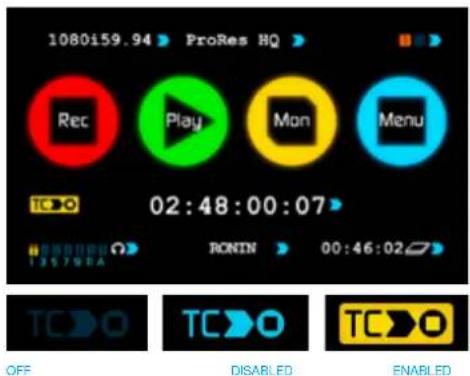

When using the camera in Free Run timecode, the rolling timecode trigger might not work as expected. However, depending on the camera, you can trigger record function by the embedded flag/trigger in the HD-SDI signal. Most higher end cameras have this functionality; if unsure contact us at support@atomos.com
Time of Day
With this selected, each new clip that is created will contain embedded timecode accurately showing the time of day that it was recorded, based on the internal Ronin Time of Day clock. This can be set in Menu > Date & Time
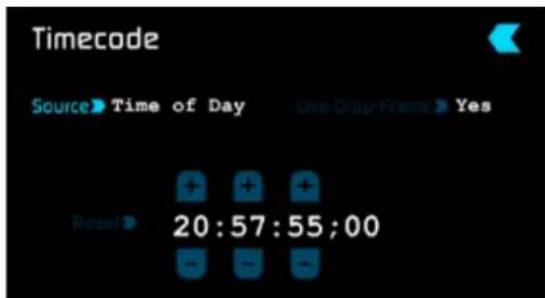
If recording is stopped and then restarted while in this mode, there will be a time gap between the last clip and the next one, equal to the length of time the Ronin has been out of record. The start timecode of each clip will be the exact time of day when recording started.
Time of Day timecode is useful as a reminder of the time that clips were recorded. It can also help with syncing-up of multiple cameras, but remember that the accuracy of the correlation of Time of Day timecode between Ronins will depend on how closely their internal clocks are synchronised.

In Time Of Day mode, the controls on the Timecode Setup Scre en for adjusting the start-point of the Ronin timecode are not available, as the timecode is set by the Ronin's internal clock.
Record Run
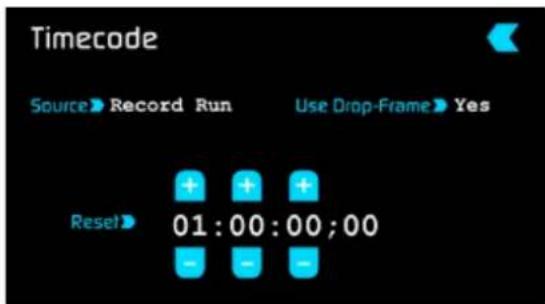
With this setting you set the start timecode of the first clip and the following clip will start at the frame immediately after the out point of the preceding clip. This will continue for all clips that follow. This is often referred to as continuous timecode.
Auto Restart
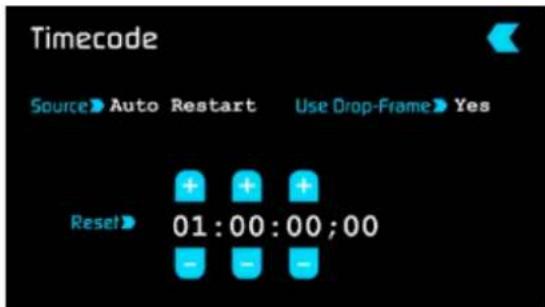
With this setting, the timecode will be reset to the timecode you define here whenever you press record. All your clips will start at this timecode.

To adjust the timecode use the "+" and "-" above and below the hour:minute:seconds sections
10. Pulldown
What is Pulldown?
Many professional and consumer cameras available today do not send true 1080p24, 1080p23.98, 1080p25, 1080p29.97 or 1080p30 signals down their SDI or HDMI outputs.
Instead they send 1080i59.94 in NTSC regions (eg USA, Japan), and 1080i50 in PAL regions (eg Europe)
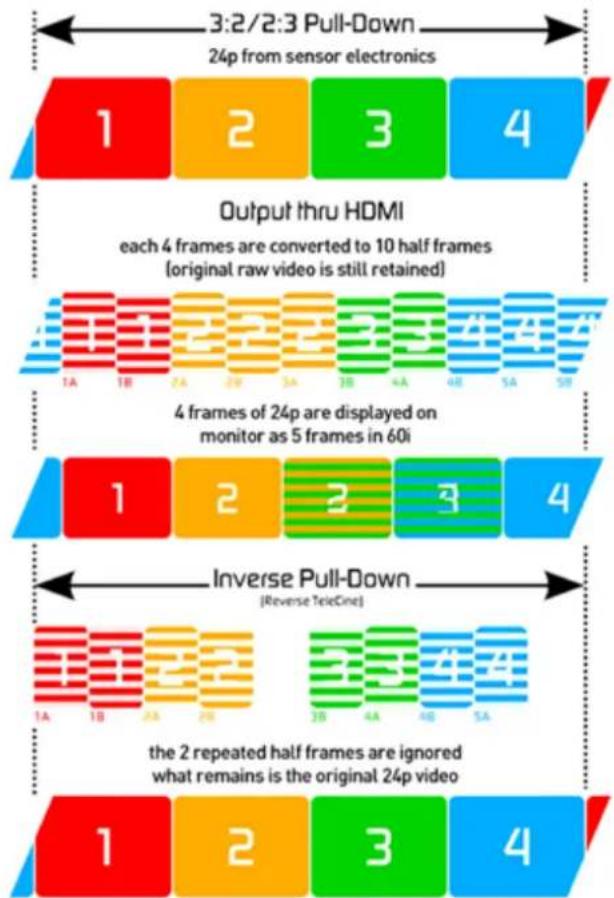
In order to convert the signal from the internal recording format to 1080i5994 or 1080i50, they use a process called 3:2 or 2:2 pulldown.
| Camera Setting Pulldown Ronin Receives | ||
| 1080p23.98 3:2 1080i59.94 | ||
| 1080p24 3:2 1080i60 | ||
| 1080p25 2:2 1080i50 | ||
| 1080p29.97 2:2 1080i59.94 | ||
| 1080p30 2:2 1080i60 | ||
You will, of course, want the Ronin to record eg 1080p24, not 1080i60 to the disk. In many cases, it is not easy for the Ronin to detect the pulldown operation in the video, so you will have to set the correct mode in the Ronin as well as setting it on your camera.
With some cameras, the Ronin can detect and remove the pulldown, in which case the mode you expect (eg 1080p23.98) will display on the Ronin and you will not have to do anything further.

Atomos is adding auto-detection support for more cameras, please check for firmware updates regularly at www.atomos.com
1080p23.98 or 1080p24

1080p23.98
1080p24


If you have set 1080p23.98 or 1080p24 in your camera and your Ronin displays 1080i59.94 or 1080i60, then you can easily remove the pulldown by following these steps:
- Press the blue arrow next to the video format repeatedly until you see 1080p23.98 (or 1080p24) displayed. You will see that the Mon button is dimmed. Your Ronin needs to analyse the video for about 1 second, in order to detect the pulldown sequence and remove it.
- If it is not automatically detected after 1 second, wave your hand from side to side in front of the lens, or wave the camera from side to side for a few seconds. The Ronin will detect the pulldown in the movement, the input video format will show 1080p24 and the Mon/Rec button will highlight.
3:2 pulldown detection is difficult, if not impossible to detect on completely still video. This is why you should wave your hand in front of the lens.
If you lose the input detection – for example you unplug the SDI cable or go to Playback mode, you will need to wave your hand or the camera again, when the signal is restored to the Ronin.
Some cameras use a variant of pulldown removal, for example Panasonic Advanced pulldown. The Ronin does NOT support this format, and it will not be detected.
Standard Panasonic pulldown is supported, ensure in the Panasonic camera settings that pulldown is not set to Advanced.
1080p25, 1080p29.97 or 1080p30
For these modes, simply press the blue arrow repeatedly until your 1080p desired format is displayed. There is no need to wave your hand or the camera, as 2:2 pulldown removal does not require moving video.

1080p25

1080p29.97

1080p30


Your Ronin always remembers whether you wanted 3:2 or 2:2 pulldown removal. If you change the format on your camera eg from 1080p24 to 1080i60, you will need set to the Ronin input to match your camera setting again.
11. Playback & Playout
Using the Playback and Playout features
The Ronin has a powerful playback function that allows you to playback pristine Apple ProRes or (optionally) DNxHD recordings in real-time with controls to navigate quickly to any part of a clip, the ability to play recorded content faster than normal playback speed or step through the clip frame-by-frame to check your footage very accurately.
Playback makes the Ronin a fully-functional portable HD Deck with quality visually identical to uncompressed!
Whenever a clip plays on the Ronin's screen, it will also be presented as an HD-SDI signal through the Ronin's HD-SDI output. You can view this on an HD-SDI monitor, or, using an optional Atomos S2H Connect Converter, on an HDMI monitor.
To play back a clip, first touch the green Play control on the home
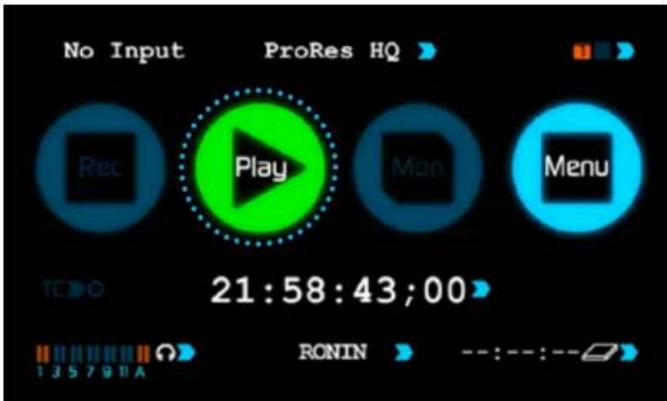
screen. There will be a short pause while clips are made available for playback. You will then be taken to the Play Navigation screen.
exFAT Disks
If the disk has been formatted on Ronin it will use the ExFat file system. The Play navigation screen will display a list of files that have been recorded. The naming convention used includes the unit's name, Scene number, shot number and take number, e.g.
Ronin_S001_S001_T001.mov
This list is ordered in the same order it was recorded in. To navigate the list use the up and down arrows to scroll through.
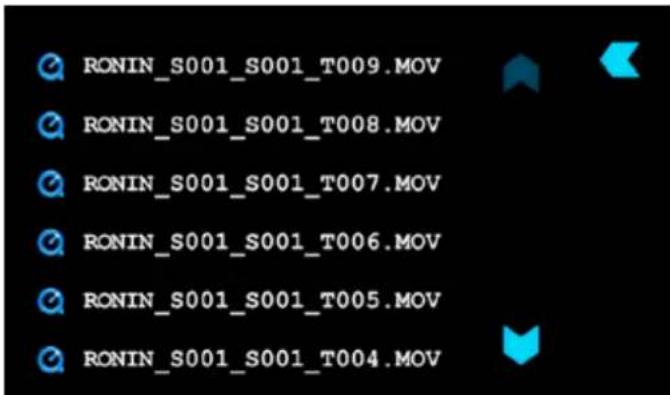
To play the item touch the file you want to play and this will start the playback.
FAT32 Disks
If the disk has been formatted on Ninja it will use the FAT32 file system.
The Play navigation screen will display the Scene and Shot folder structure.
The first screen will show you all the Scene folders. In the picture below we can see Scene001) within the Scene Folder are any Shot folders. In the picture below you will see the 5 different shot folders. Within each Shot folder will be the list of takes.
Fat 32 has a file size limitation of approx 4GB, when you recorded on the Ninja it would generate a new take each time the recording exceeded this limit.
You will notice the take has a different icon, this indicates the file can be played back.
You can navigate the files and folders using the blue up and down arrows. Once you see the take you would like to playback, touch the take icon you want to play and this will start the playback.
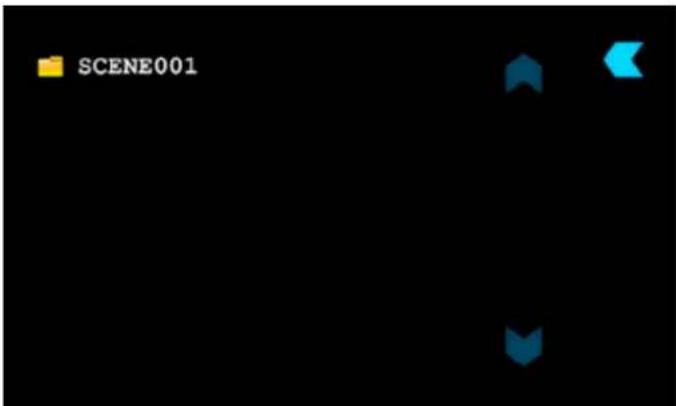
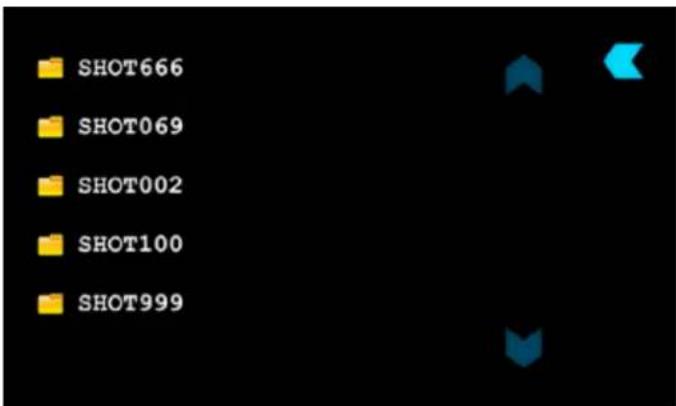
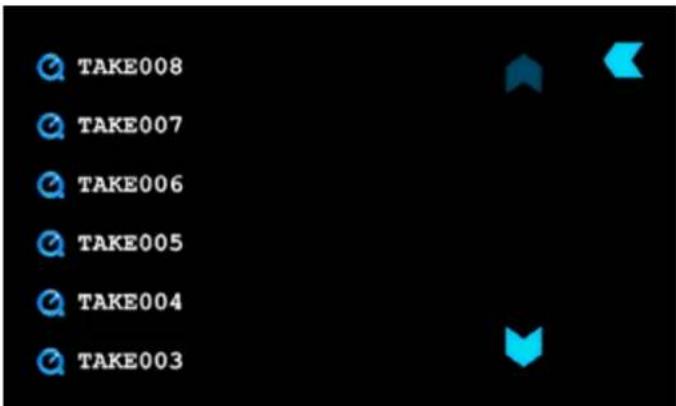
11. Playback & Playout
Scrub Bar
This is the thick blue line along the bottom of the playback screen. A vertical white "now" line shows the current playback position. You can think of the scrub bar as representing the length of the clip. If you touch the scrub bar, playback will start from that position.
Simply by running your finger along the scrub bar, you can move forwards or backwards through any clip - even if it is eight hours long - at any speed.
Play/Pause

This is the master playback start/stop control and is found to the right of the scrub bar. It toggles between play and stop.
The remaining play controls have two modes depending on whether the Ronin is in Play or Pause.
Play mode
Fast Reverse/Fast Forward

Plays the clip at 8x normal speed
Fast Fast Reverse/Fast Fast Forward
Plays the clip at 64x normal speed
Pause mode
Frame Reverse/Frame Forward
Moves the clip forward/backward by a single frame

Go to end/Go to start
Goes directly to the beginning/end of the current clip
Note that you can jump between any of the controls while in playback: you do not have to press Stop first.
11. Playback & Playout
Loop Mode
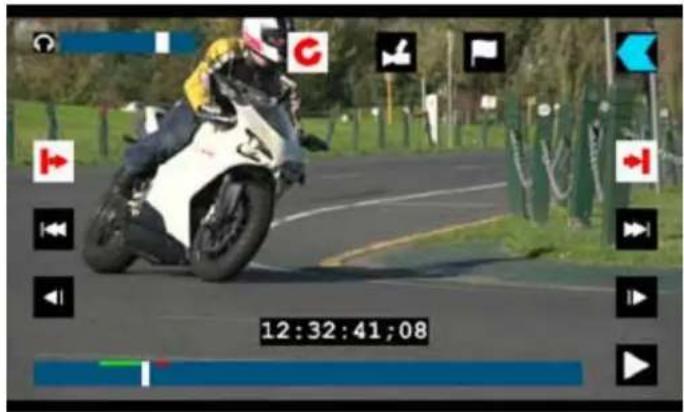
LOOP MODE
The Ronin has the ability to play back a single clip in loop mode via the SDI output. This can perform with captured clips at full broadcast quality or the final edited clips from your hard drive.
To do this:
- Go into Playback mode
- Pick the clip you want to loop
Note that when you first select a clip for playback, longer clips will take slightly more time before they start playing. All subsequent navigation within clips of any size will be instantaneous.
- Use the scrub bar to locate the point you wish to start from (In point) and select the In point icon on the top left hand side of the playback screen. This will turn red to confirm that it is active.

- Repeat this for the desired Out point by selecting the Out point icon on the top right hand side. Again this will change to red.

- Now select the Loop icon in the top middle of the screen - that will also turn red to indicate that it is active.

- Press the Play button. The segment of the clip you have selected will now loop until you press the Stop button.
To change the In and Out points, just stop playback and adjust the start and stop points. Press Loop/Play again.

You can only play any one clip at any given time, and only one area from that clip.

natural_image
Person riding a white motorcycle on a paved road, with green trees and a green bench in the background (no visible text or symbols)REMOVE OVERLAY
At any time, you can hide all the visible controls by simply touching the screen (away from any controls) once. Touch it again to bring back the controls.
Headphone volume
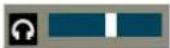
Allows you to adjust the headphone volume while in the playback page
Timecode
12:16:34;19
This shows the timecode of the 'Now' line
Interlaced playback
Ronin playback shows a frame at a time. If the video footage is interlaced (ie with two fields, each separated by 1/50th or 1/60th of a second) it will play back perfectly well, but when playback is stopped, the frame showing on the screen will flicker between the two fields.
This is a useful and accurate method to determine whether your originally captured footage is progressive (even if it is delivered via an interlaced signal) or genuinely interlaced.
12. Connecting and Editing
Connect
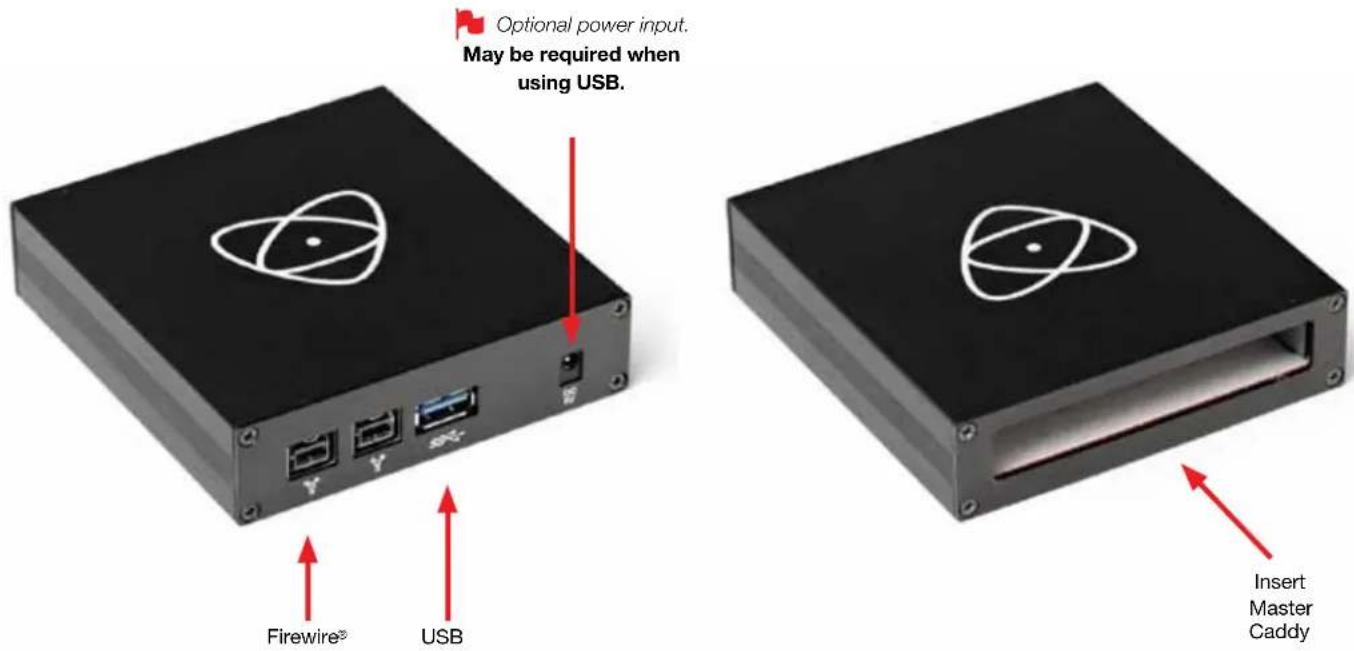
To access and edit your recorded material, connect the Master Caddy Docking Station to a Mac® or Windows® editing workstation via USB 2.0, USB 3.0 or FireWire® 800 port.
Eject the Master Caddy from your Ronin and insert it into the Docking Station. After a short wait, the recorded video will be accessible to the target computer via a standard disk (exFAT) file system.
NLE supported
We have chosen the Apple Pro-Res codec as it is not only visually lossless but is an edit-ready format. All major NLE support Apple ProRes ^® .
• Final Cut Pro (version 7)
- Final Cut X
• Adobe CS5 (with 5.51 update)
• EDIUS 6
- Sony Vegas 10
- Lightworks
• AVID Media Composer 6
Avid DNxHD ^® support is available as an optional download.
ExFAT compatibility
The Ronin formats your disk as exFAT. We have chosen this file system to overcome the 4GB file limitation of FAT32 and keep compatibility on both Windows and MAC OS.
The Operating Systems that support exFAT are:
- Windows XP - install the following update :
http://www.microsoft.com/download/en/details.aspx?id=19364 - Windows Vista - install SP1 or higher
- Windows 7 (32/64bit)
• Snow Leopard 10.6.5 or higher - Lion 10.7
The Master Caddy Docking Station is a sophisticated device supporting three different data interfaces: Firewire 800, USB 2 and USB 3. Note that when using the Master Caddy Docking Station you may need to connect an additional USB cable to the 5v power input. This is because when it has to power a disk drive and its interface electronics, the Docking Station may consume more power than is available from a single USB port. We supply you with a USB to 5v Power Supply socket for this purpose.
Do not connect the USB power cable if you are using Firewire® 800. You may find that your docking station does not work with the Apple Lion operating system if you use Firewire® 800. If you experience this issue, please contact Atomos Support for a firmware upgrade.
Transferring Files
Now your docking station is connected and your disk is recognised by your operating system, you can edit directly from the drive or copy the files to your own storage.
Windows
Open the disk in My Computer > Select all the files or just the ones you wish to transfer, copy and paste them to your desired location. (command+c copy, command+v paste).
Mac OS
Your Ronin disk will show in Finder. Select the files you wish to transfer, drag the files to your desired location or use the copy and paste commands.(⌘+c copy, ⌘+v paste).
If you have used a FAT32 formatted disk in the Ronin this will have a folder structure Scene, Shot, Take. This will mean you either transfer all the folders or utilise the Windows Search or MACs automate program to transfer just the .mov files. There are instructions on this in our knowledge base; visit www.atomos.com/support for more info.
12. Connecting and Editing
Importing
Final Cut Pro (version 7), Final Cut X, Adobe CS5 (with 5.51 update), EDIUS 6, Sony Vegas 10, Lightworks and AVID Media Composer 6 support imported files from your Ronin disk.
Importing Ronin footage into Final Cut Pro
You can import Ronin footage into Final Cut Pro (FCP) in just a few simple steps.
First, connect the Ronin Docking Station to your Apple Mac using the Firewire 800 port (USB 2.0 will also work). Insert the Ronin Master Caddy containing the disk with your footage into the Docking Station and you will see the drive appear in your Finder window.
Start FCP and open your project (or start a new one).
The screen will look like this:
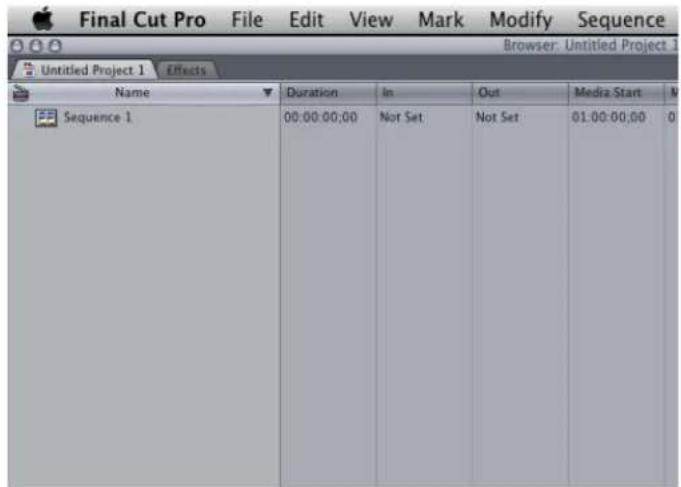
Go to the File menu and select Import > folder:
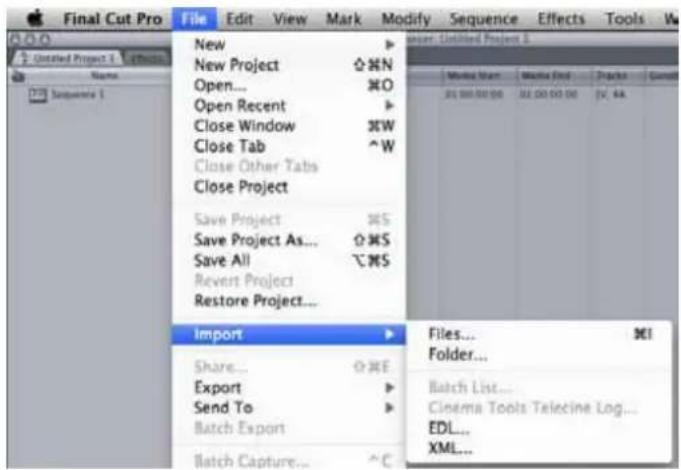
FCP will show you a "browse" window. Look for the Ronin drive, and click on it.
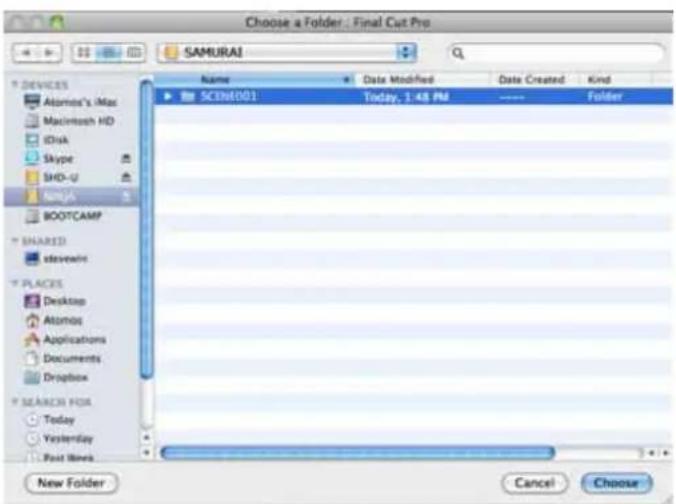
You'll see the folders in the Ronin drive. Select the folder containing the footage you want to import:
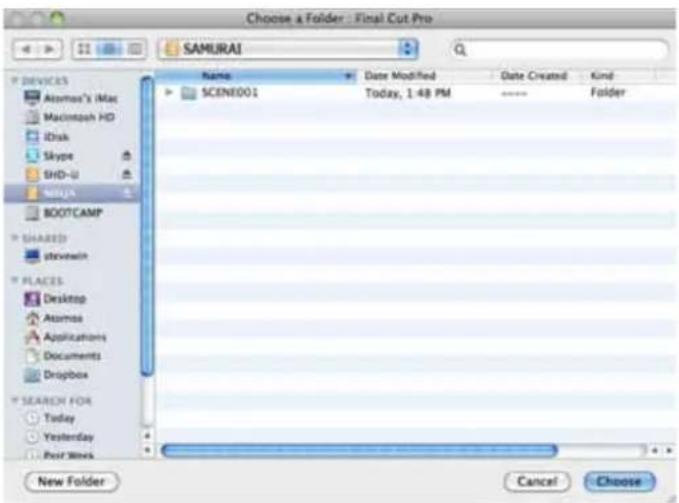
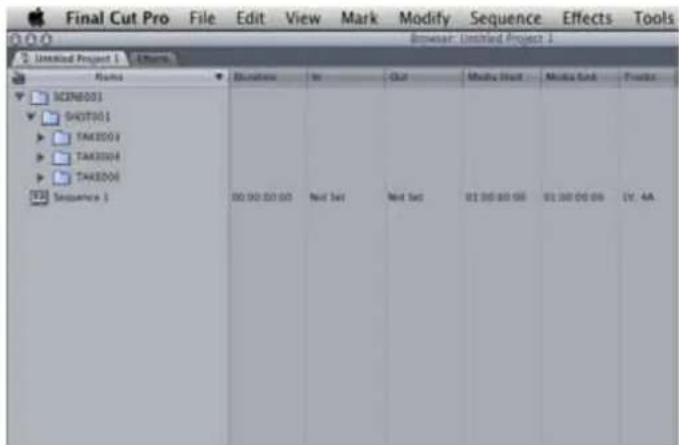
Click on Choose and go back to your FCP project window:
Your Scene, Shot and Take folders now appear in the project window, ready for use in your FCP project.
12. Connecting and Editing
SmartLog with FCP X
Prior to importing the XML files into FCP X, ensure that:
- You have exported XML whilst the drive is in your Ronin
- You have connected your Master Caddy Docking Station and inserted your Master Caddy into the Dock
- You are using an operating system that supports ExFAT
- Your QuickTime version is up to date
• FCP X is the latest version
There are 2 ways to import the XML file:
- Directly from the docked hard drive
-
Manually into FCP X
-
Automatic Import
-
Open Finder
- Select the drive (in this example it is EXCVIDEO)
- Double-click the unitname.FCPXML file
• This will open FCP X and import the .xml file
FCP X will make a event of the disk name and reference all the footage in that event.
You will notice that on the clips you have added Smart Tags too, with Green and Red indicating Favorite and Reject.
You can sort these by using the pull-down menu to show favorites. This will show all the individual favorites as separate clips in the Event Viewer.
-
Manual
-
Open FCP X
- Create a New Project (or you can use an existing project); in this example it is called XML Import
- Select File, Import, XML
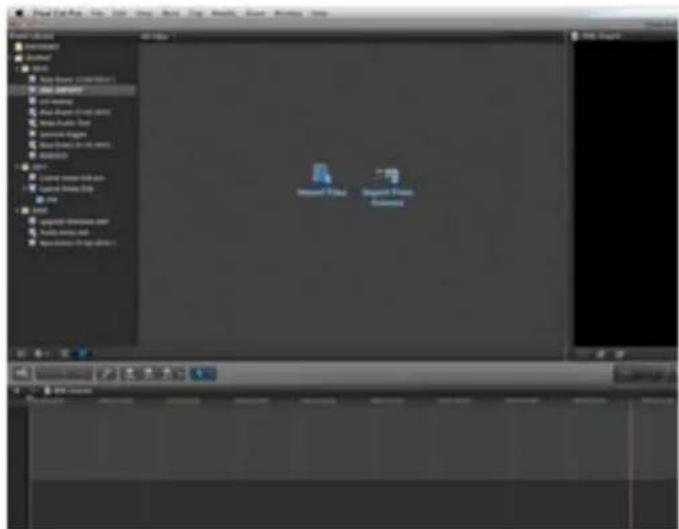
- Select the Ronin drive under Devices (in this example it is called EXCVIDEO)
- Choose the unitname.FCPXML, select Import
The XML will import

Once imported you can expand the clip and you will see the Favourite and Reject tags. You can also filter the view to only see Favourite, etc.
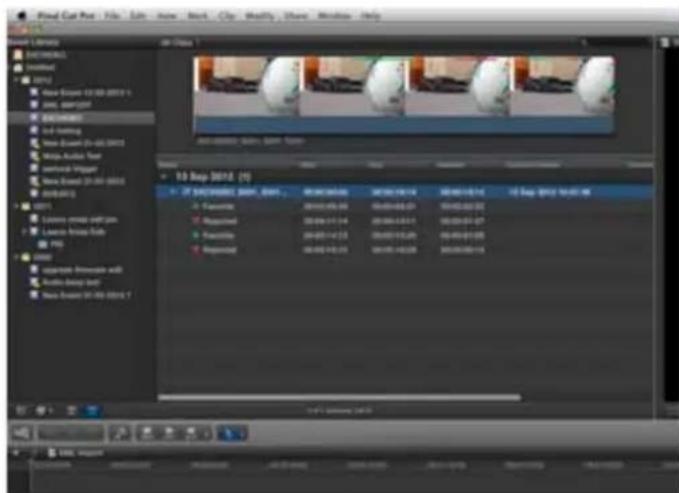
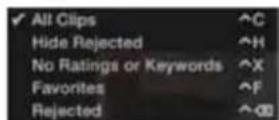
13. Using Ronin with external power supplies
D-Tap Connector
This adaptor allows you to take the power supply from any source that has a D-Tap connection such as V-Lock
The D-Tap also connects to the battery slot of the Ronin, please ensure it is in slot 1. You will need a D-Tap to D-Tap cable (sold separately). Voltages 7.2 to 16.8 volts. Please refer to Atomos D-Tap document on the Atomos Knowledge Base.
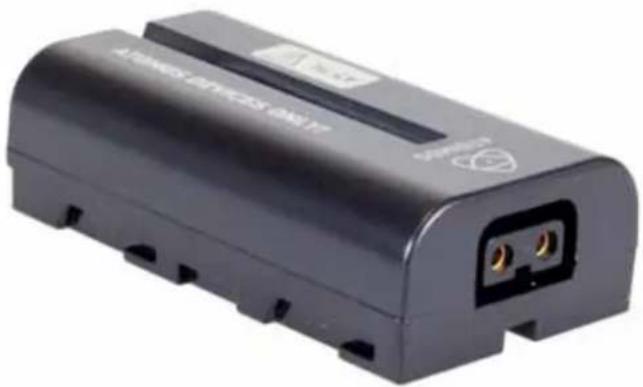
natural_image
Exterior view of a black cylindrical electronic device with two ports and a label (no readable text or symbols beyond branding)14. Using Ronin with Atomos Connect Converters
You can think of Atomos Connect Converters as stand-alone devices or as specially designed modules to give the Ronin additional capabilities. With them you can:
- Add an HDMI input to the Ronin for connection to non-HD SDI devices
- Add an HDMI output to the Ronin for playout to HDMI monitors
There is nothing to set up when you use a Connect Converter. Just secure the device in a battery slot (in Slot 1 if you only have a single battery) and place the battery that previously occupied that slot in the battery slot on the converter.
If you are using a Connect H2S to bring an HDMI input to the Ronin, connect the HDMI cable to the HDMI input of the Converter, and take a short HD-SDI cable from the Converter to the Ronin.
As far as the Ronin is concerned, it is receiving a conventional HD SDI signal, even though your source is HDMI.
To use a S2H converter to connect the Ronin to an HDMI monitor, secure the device in a battery slot (in Slot 1 if you only have a single battery) and place the battery that previously occupied that slot in the battery slot on the converter. Connect the Ronin's HD SDI Output to the HD SDI input on the S2H converter.
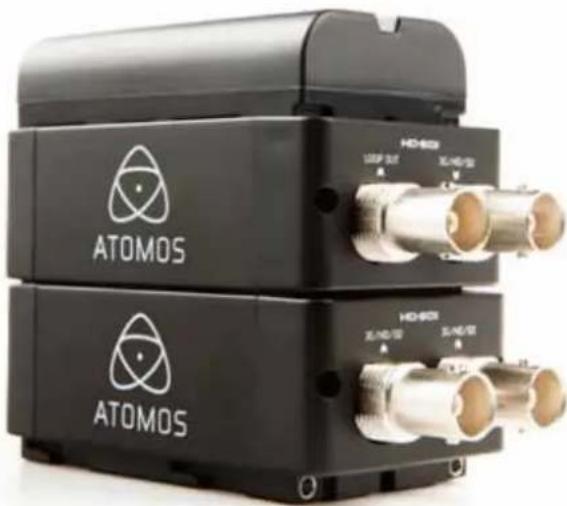
natural_image
Exterior view of a black ATOMOS device with two coaxial connectors (no visible text or symbols on the device body)CONNECT
15. Software updates
Updating AtomOS (Firmware)
From time to time we will issue software updates for your Ronin. To update the firmware (that's the software that runs inside your Ronin), there is a simple procedure you have to follow.
- Go to www.atomos.com/Ronin/firmware
- Locate and download the firmware upgrade
- Extract the file ATOMRON.FW from the firmware zip file.
- Copy ATOMRON.FW onto a drive in a Master Caddy.
a. Atomos recommends you use a freshly formatted known good disk. b. Always format your drives in the Ronin. The Ronin formats the drive for optimal performance for Video.
- Put 2 freshly charged batteries on your Ronin.
a. It is very important that your Ronin does not lose power during a firmware upgrade.
b. This is a necessary precaution to make doubly sure that power is not lost.
- Power down your Ronin.
- Insert the Master Caddy with the ATOMRON.FW file.
- Power up your Ronin with a short press of the Power Button.
- Watch the screen. Do not remove the Master Caddy until after the upgrade is complete.
- The Atomos Logo will appear, and after a few seconds the firmware upgrade will start.
- While the firmware upgrade is happening, there will be flashing coloured lines above and below the Atomos Logo.
- The firmware upgrade will take up to a few minutes.
- When the firmware upgrade is finished, the Ronin will: a. delete ATOMRON.FW from the drive. This is a necessary precaution for the upgrade procedure.
b. Power itself down. - Wait until the Ronin has powered itself down.
- Turn on your Ronin again with a short press of the Power Button.
- When the Ronin has booted, Press "MENU" and then "Ronin Info" and check that the version number is the version expected.

Please ensure your batteries have plenty of charge and that you do not interrupt your Ronin while its firmware is upgrading. You will see a randomised colour-bar display on the screen top and bottom of the screen while updating is taking place. When it is finished, the Ronin will restart and you will be able to use the device as normal.
Problems when installing AtomOS
Very occasionally, the firmware update process can go wrong. This might be because of an incomplete or corrupted download.
In the unlikely event of your Ronin becoming unresponsive, there is a built-in recovery mechanism.
All you have to do is press and hold the on/off button for 10 seconds. The Ronin will enter emergency firmware update mode, not to its factory condition.
16. Ronin Technical Specifications
| Weight 1.9kg (1890 grams) / 4lb 3nz | ||||
| Dimensions (without batteries) 102mm (H) x 202mm (W) x 140mm (D) | ||||
| Construction | Steel construction for durability + portability. Fanless for silent operation. | |||
| Operating Power 3.3W (Monitoring Only) / 6.8W (Rec, Mon & Play) | ||||
| Power and battery options- Internal AC power supply 100-240V 50/60Hz- 7.2V-14.4V Battery SystemCompatible NP Series- 2 x DC output- D-Tap | All 7.4v1. 2600mAh - Up to 4hrs2. 5200mAh - Up to 8hrs3. 7800mAh - Up to 12hrs4. D-Tap Adaptor (cables sold separately)AC power charges batteries. In the event of loss of AC,power seamlessly transfers to attached batteries. | DC output12V @ 0.5s , forpowering optionalaccessories | ||
| Continuous Power*Patent Pending | Primary-Secondary battery system. Change batteries without losing power.Loop batteries continuously.Built in charger, charges attached Atomos batteries for portable use or ACpower loss back-up. | |||
| Touchscreen Size: 5" diagonal. Resolution: 800x480Aspect Ratio: 16:9 native /4:3 Lelterbox. SMPTE Colour SpecificationNative Frame Rate Playback (48-60Hz) | ||||
| Video InputUncompressed 10/8-bit 4:2:2Simultaneously displayedon internal 5" screenStandard size BNC | HD/SD-SDI x 1Optional HDMI(HDMI output possible with Connect S2H) | SMPTE259/292/296M | ||
| Video OutputUncompressed 10-bit 4:2:2Simultaneously displayed on Internal 5"Ronin screenStandard size BNC | HD/SD-SDI x 1HDMI x 1(with optional S2H Connect SDI -> HDMI converter) | SMPTE259/292/296M | ||
| Supported Formats(InOut) | HD 1080i60, 1080i59.94, 1080i50, 1080p30, 1080p25, 1080p24,1080p23.98, 1080pSF23.98, 1080pSF24, 1080pSF25, 1080pSF30,720p60, 720p59.94, 720p50, SD 486i59.94, 576i50aSF - Progressive Segmented Frame modes are recorded to Progressive rates | |||
| Realtime Hardware Encoding1920x1080 8/10-bit 4:2:2 to: | → Apple ProRes* | HQ - 220Mbps422 - 150MbpsLT - 100Mbps | ||
| → Avid DNxHD | Avid DNxHD-220/220x - 220Mbps (8/10-bit)Avid DNxHD-185/185x - 185Mps (8/10-bit)Avid DNxHD-145 - 145 Mbps (8-bit) | |||
| Onboard ProcessingAuto detect and remove or insertpulldown | 25pSF (50i) → 25p30pSF (60i) → 30p24p (3:2-60i) → 24p23.98p (3:2-59.94i) → 23.98p | |||
| Audio Input 48kHz PCM audio SDI embedded: 12 channels 48 kHz 16 bitXLR: 2 channels balanced analog audio 48 kHz 16 bit. +24dBu clipping level,96 dB SNR, adjustable input gain (analog gain -12dB to +12dB) | ||||
| Audio output 48kHz PCM audio SDI embedded: 12 channels 48 kHz 16 bitXLR: 2 channels balanced analog audio 48 kHz 16 bit. +24dBu clipping level,96 dB SNR. Level soltable +18oBu/+24dBuHeadphone (> =16 Ohm) for onboard review (select any pair of channels) | ||||
| Remote Start and Stop | Via SDI trigger / Via SDI timecode / Via Lanc controller.Full unit control via Atomos Serial Control Protocol. | |||
| Recording Time | Edit Formats(I-Frame Only, 4:2:2, 8/10-bit) | HDD or SSD | ||
| HDD & SSDs are hot-swappableon the fly in the field | 250GB 500GB 1 TB | |||
| ProRes °HQ (10-bit, 220Mbps)Avid DNxHD 220x (10-bit, 220Mbps)ProRes °422 (10-bit, 150Mbps)Avid DNxHD 145 (8-bit, 145Mbps)ProRes °LT (10-bit, 100Mbps)Avid DNxHD-36 (36 Mbps)SD not supported by Avid DNxHD | 2.5 hrs2.5 hrs4hrs4hrs5.5 hrs15hrs | 5hrs5hrs8hrs8hrs11hrs30hrs | 10hrs10hrs16hrs16hrs22hrs61hrs | |
| Master Caddy Casefor HDD or SSD2.5" SSD or HDD minimum 5400rpmto 10,000rpm standard 9.5mm height | 75mm x 105mm x 12mmFor recommended drives visit: www.alomos.com |
| Master Caddy Dock 2.5" internal drive | SATA to FireWire * 800, USB 2.0 / 3.0 |
| Supported Applications FCPX/FCP7+ | / Media Composer 5.0+ / Premiere 5.5+EDIUS 6.0+ / Vegas Pro 10+ / Lightworks |
| Accessories Included • Docking station and cables • 5 x Master Caddy Cases• 2 x Alomos 2600mAh batteries • D-Tap Adaptor | |
| Optional Extras · Rack Mount Adapter | 3RU high. Holds 2ea. Ronin unitsConnect H2S converter · Connect S2H converter |
SSD/HDD usage:
With spinning drives, you need to be careful in handling when recording. The drives will generally stand light/medium occasional bumps without problems, and the Ronin has an anti-shock buffer. However, spinning drives are not suitable for use in high vibration or movement environments, for example if the Ronin is strapped to the side of a motor bike.
With spinning hard drives, use a new drive, or one that has very little usage. Do not use old drives. Do not use drives that have been dropped.
On all drives, when handling, keep fingers away from the SATA connector at all times, as static electricity can damage the electronics inside.
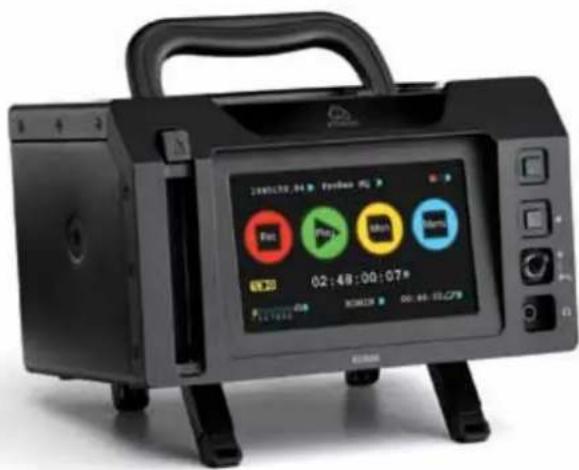
- Contents Safety Instructions
- Warranty & Conditions....1
- Introduction 2
- Batteries and power supplies
- Using the Ronin safely
- Care of disk drives
- SDI Cables
- User Manual Conventions
- Notice
- Trademarks
- International Hardware Limited Warranty
- Warranty Exclusions
- Software License Agreement
- Introduction
- What's included
- Here's the complete list
- Spinning Disk Drives (HDD)
- Which drives should you use?
- Speed and reliability are the main factors. Here are a few things to bear in mind:
- Solid State Drives (SSDs)
- Mechanical Shock and Vibration
- Here are some things that you should bear in mind when using spinning disks:
- Backing up and archiving
- Mounting disks in the Master Caddy
- Mounting drives in the Master Caddy
- Connecting the Ronin and powering up
- Batteries
- Turning ON power to the Ronin
- Ronin connections
- Other physical features
- Master Caddy Slot
- Release and remove Master Caddy
- Screw Mounts
- Ronin Modularity
- Using the Ronin
- The User Interface in detail
- The Ronin Touchscreen
- The Home Screen
- Using the Ronin
- Home Screen and Menu Functions
- Rec (Record)
- Play
- Mon (Monitor)
- Menu
- File Naming
- Date & Time
- Display Options / Screen Lock
- SCREEN LOCK
- Ronin Info
- Power Off
- Timecode
- Smaller controls and indicators around the Home Screen
- Input
- 321080p23.98
- Video Compression Format
- ProRes HQ
- ProRes
- Battery Indicator
- BATTERIES SCREEN
- AUTO SWITCHING/MANUAL SWITCHING
- Storage Capacity Indicator
- FORMATTING HDD/SSD
- Unit Name
- RONIN
- Audio During Playback Mode
- Monitoring and Recording
- Connect to input
- Before recording
- Activate pulldown removal if required
- 1080i59.94
- SmartControl
- HD-SDI Camera trigger record
- via LANC for Sony and Canon Cameras
- via the LANC serial port
- Once you are recording you will see:
- Using the Ronin as a field monitor and viewfinder
- SmartMonitor
- Settings
- Zebra
- Focus Peaking
- False Colour Scale:
- Blue for Exposure
- SmartLog
- Organising material on the disk
- Atomos Anti-Shock Technology
- File Recovery
- Timecode
- Using Timecode
- HD-SDI embedded timecode
- Trigger from HD-SDI time code
- Time of Day
- Pulldown
- What is Pulldown?
- 1080p23.98 or 1080p24
- 1080p25, 1080p29.97 or 1080p30
- Playback & Playout
- Using the Playback and Playout features
- exFAT Disks
- FAT32 Disks
- Scrub Bar
- Play/Pause
- Fast Fast Reverse/Fast Fast Forward
- Frame Reverse/Frame Forward
- Go to end/Go to start
- To do this:
- Headphone volume
- 12:16:34;19
- Interlaced playback
- Connecting and Editing
- Connect
- NLE supported
- ExFAT compatibility
- Transferring Files
- Windows
- Mac OS
- Importing
- Importing Ronin footage into Final Cut Pro
- SmartLog with FCP X
- The XML will import
- Using Ronin with external power supplies
- D-Tap Connector
- Using Ronin with Atomos Connect Converters
- Software updates
- Updating AtomOS (Firmware)
- Problems when installing AtomOS
- Ronin Technical Specifications
- SSD/HDD usage:
Brand : Atomos
Model : Ronin
Category : Uncategorized