
Food Processor 7 - Blender NUTRIBULLET - Free user manual and instructions
Find the device manual for free Food Processor 7 NUTRIBULLET in PDF.


| Product Type | Food Processor |
| Model | NutriBullet Food Processor 7 |
| Capacity | 7 cups (1.65 L) |
| Motor Power | 400 W (estimated) |
| Voltage | 120 V (US standard) |
| Speed Settings | Off, Low, High, Pulse |
| Continuous Run Time | Up to 10 minutes (with cool-down period) |
| Blade Attachments | Chopping blade, Dough blade, Reversible thin slice/shred disc, Reversible thick slice/shred disc, Spiralizer disc |
| Additional Accessories | Blade adaptor, Dual-size food pusher, Work bowl lid with feed chute |
| Materials | BPA-free plastic work bowl and lid, stainless steel blades |
| Dishwasher Safe | All detachable parts (top rack only) |
| Motor Base Cleaning | Wipe with damp cloth; never submerge |
| Safety Features | Lid interlock mechanism, overload protection (auto shut-off after 10 minutes) |
| Power Cord | Polarized plug, fixed cord |
| Warranty | 1-year limited warranty |
| Storage | Blades and discs store inside work bowl |
| Replacement Parts | Available at nutribullet.com or by calling 1-800-523-5993 |
Frequently Asked Questions - Food Processor 7 NUTRIBULLET
User questions about Food Processor 7 NUTRIBULLET
0 question about this device. Answer the ones you know or ask your own.
Ask a new question about this device
Download the instructions for your Blender in PDF format for free! Find your manual Food Processor 7 - NUTRIBULLET and take your electronic device back in hand. On this page are published all the documents necessary for the use of your device. Food Processor 7 by NUTRIBULLET.
USER MANUAL Food Processor 7 NUTRIBULLET
natural_image
Nutribullet blender with clear glass and black casing, no visible text or symbols on the device itselfUser guide.
Important safeguards.
Warning! To avoid the risk of serious injury, carefully read all instructions before operating your nutritive Food Processor. When using any electrical appliance, basic safety precautions should always be observed, including the following important information.
! Save these instructions! • FOR HOUSEHOLD USE ONLY
GENERAL SAFETY INFORMATION
WARNING! AVOID CONTACT WITH MOVING PARTS.
Blades and discs are sharp. Handle carefully.
Do not leave the appliance unattended when in use.
- Do not overfill the bowl. Make sure to stay at or below the LIQUID MAX line when using liquid ingredients to reduce the risk of injury or damage to the machine. Overfilling the bowl can cause damage to the bowl or cover and cause the ingredients to leak.
• Always make sure the unit is properly and completely assembled before connecting to power outlet and operating. Always make sure the bowl is securely locked in place (with lid on and locked) before the motor is turned on. Do not attempt
to remove the bowl or lid while the unit is in operation.
- Do not attempt to defeat the lid interlock mechanism.
- This appliance is not intended for use by persons (including children) with reduced physical, sensory, or mental capabilities, or lack of experience and knowledge, unless they are closely supervised and instructed concerning use of the appliance by a person responsible for their safety.
- Close supervision is necessary when any appliance is used by or near children. Children should be supervised to ensure that they do not play with the appliance.
- Do not immerse the appliance, motor base, cord, or plug in water or any other liquid.
- Turn motor off and ensure that all moving parts have
stopped before disassembling the appliance to remove food. Always make sure the blades have come to a stop before removing the lid.
- Never store the blade attachments in the bowl without the lid in place. Exposed blades can present a dangerous hazard.
- Do not use this appliance if any parts appear to be damaged. If you have any questions or concerns, please contact customer service.
- Do not use outdoors.
- Never continuously operate for longer than one minute intervals. Allow at least a minute before starting another processing cycle.
FEED CHUTE
- Never push food into the feed chute with your fingers or utensils. Only use the food pusher provided. If food becomes lodged in the feed chute, ONLY use the food pusher provided to push it down. Do not place hand or fingers into the feed chute.
- Keep hands and utensils out of the feed chute and bowl and away from moving blades or discs while processing food, to reduce the risk of severe injury to persons or property damage.
A scraper may be used BUT ONLY WHEN THE APPLIANCE IS OFF.
- Do not overload the feed chute with ingredients.
- When using the food pusher, never use excessive force to push food down the feed chute. Wait until food naturally moves down the feed chute and into the bowl before adding more food.
ELECTRICAL SAFETY
WARNING! Do not use this product in locations with different electrical specifications or plug types. Do not operate with any type of plug adapter or voltage converter device, as these may cause electrical shorting, fire, electric shock, personal injury or product damage. This appliance has important markings on the plug blade. The cord is not suitable for replacement. If damaged, the appliance must be replaced.
- Do not modify the plug in any way.
- Always turn the appliance OFF and UNPLUG from the outlet when not in use, BEFORE assembling or disassembling parts and before cleaning.
-
To unplug, grasp the plug and pull from the outlet. Never pull from the power cord.
-
Do not let the power supply cord hang over the edge of a table or countertop.
- Do not let the power supply cord touch hot surfaces, including stove, or become knotted or tangled.
- This unit has a polarized plug. To reduce the risk of electric shock, this plug will fit into a polarized outlet only one way. If the plug does not fit fully inside the outlet, reverse the plug. If it still does not fit, contact a qualified electrician.
- Regularly inspect the power cord, plug, and appliance for any damage. Do not operate any appliance with a damaged cord or plug or if the appliance malfunctions, or is dropped or damaged in any manner. Contact Customer Service for assistance at 1 (800) 523-5993.
ADDITIONAL SAFEGUARDS
- Remove and safely discard any packaging material or promotional labels before using the appliance for the first time.
- Do not put any non-food items in any of the appliance pieces, as doing so may damage the unit and or cause severe personal injury or property damage.
- This appliance is not intended to be an ice crusher. Attempting to crush ice may cause permanent damage to the blades or cause the unit to malfunction, resulting in personal injury or property damage.
- Make sure you have removed any rind from fruit prior to adding to the bowl. Do not use fruits that contain seeds or pits unless they have been completely removed.
- Do NOT attempt to use blade, cup or bowl attachments from another nutribullet® or a magic bullet® product with the nutribullet® Food Processor. Only use the bowl and blade attachments that come with your unit.
-
The use of attachments not recommended or sold by Capital Brands Distribution, LLC may cause personal injury or property damage.
-
Ensure that the surface where the appliance operates is stable, level, clean, and dry.
• Vibration may occur during normal operation. - Any significant spillage onto the surface under or around the appliance, or onto the appliance itself, should be cleaned and dried before continuing to use the appliance.
- When using this appliance, provide adequate air space above, below, and on all sides for circulation.
-
Periodically inspect all nutribullet® components for damage or wear that may impair proper function or present an electrical hazard. Make sure that the power cord and plug are undamaged. Discontinue use and replace if you detect damage to the motor body, work bowl, or any attachments. Ensure that the blades rotate freely and that the structure is undamaged. Follow the recommended procedures in the Care and Maintenance section of this guide, and never operate your nutribullet® with damaged components.
-
If your nutribullet ^ malfunctions in any way, immediately discontinue use and contact Customer Service at 1 (800) 523-5993. You may purchase new nutribullet, ^ attachments, or other parts at nutribullet.com or by contacting Customer Service.
- If you have any questions or comments, or if some aspect of this user guide is not clear, please contact Customer Service for assistance at 1 (800) 523-5993.
! Save these • instructions!
natural_image
Product photo of a nutrient-branded blender with kitchen utensils and a cutlery (no visible text or symbols)Contents.
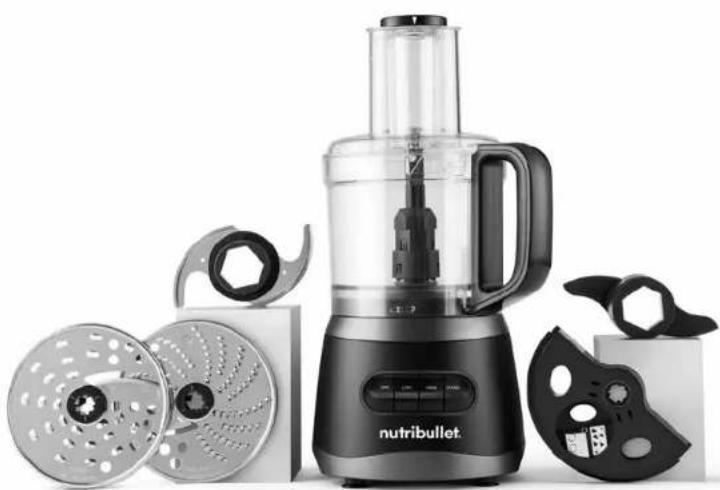
08 What's included
09 Assembly guide
10 Control panel
11 Assembly & use
11 Before first use
11 Assembly
13 Using the chopping blade
16 Using the dough blade
18 Using a disc attachment
20 Using the dual-size food pusher
21 Troubleshooting
22 Care & maintenance
23 How to store
23 Replacement parts
24 nutribullet® Food Processor one-year limited warranty
27 Warranty registration
Thank you for purchasing the nutribullet® Food Processor.
What's included.
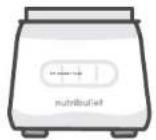
motor base
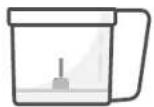
7-cup
work bowl

work bowl lid
with feed chute
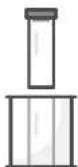
dual-size
food pusher
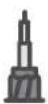
blade adaptor

chopping blade
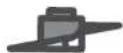
dough blade
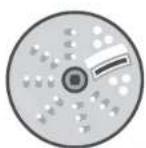
reversible thin slice/shred disc
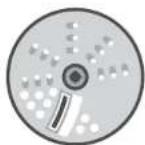
reversible thick slice/shred disc

spiralizer disc
Assembly guide.
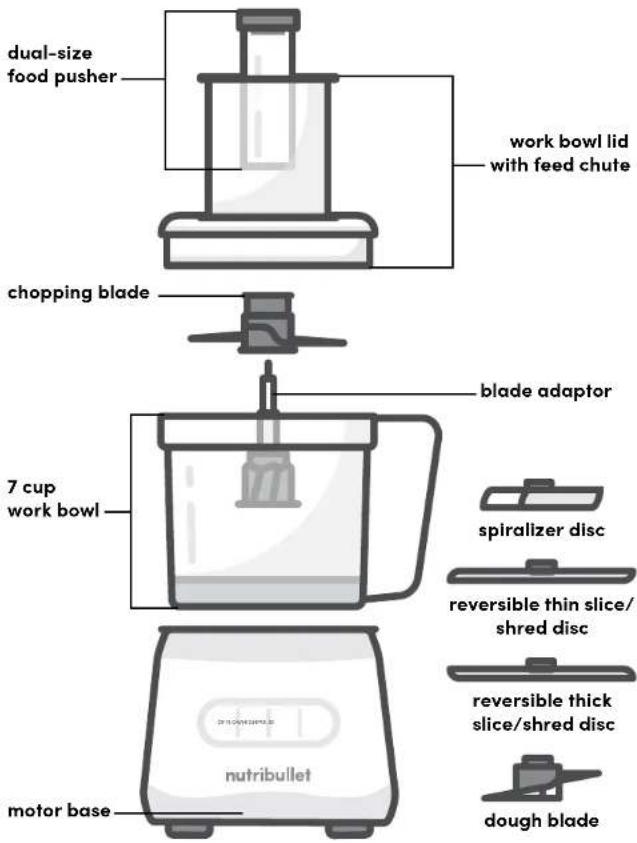

CAUTION: Blades are sharp. Handle carefully.
Control panel.
The nutribullet® Food Processor features a multi-speed control panel for all types of food prep.
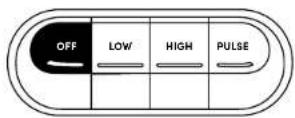
OFF:
Stops the Food Processor when operating on continuous LOW or HIGH speeds.
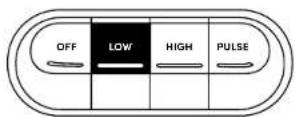
LOW:
Continuous LOW-speed chopping or mixing.
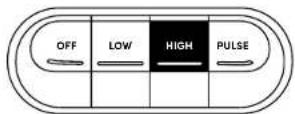
HIGH:
Continuous HIGH-speed chopping or mixing.
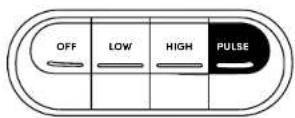
PULSE:
A burst of chopping or mixing that runs at HIGH speed. PULSE must be held to activate; motion will stop when the button is released.
Assembly & use.
Before first use.
Before using your nutribullet® Food Processor for the first time, please take a moment to perform the steps below.
1. UNPACK
Open box. Remove the Motor Base and all attachments. Place all parts on a flat, dry surface.
2. CLEAN
Rinse all detachable parts and accessories. All parts except the Motor Base are dishwasher safe, or can be cleaned by rinsing with warm, soapy water. Clean the Motor Base with a clean, damp cloth.
WARNING: Never submerge the Motor Base in water or any other liquid. See Care & Maintenance instructions on page 22 for more detailed cleaning instructions.
Assembly.
Review all warning and caution statements in the Important Safeguards section (pages 2-5) and above before proceeding to Step 1.
natural_image
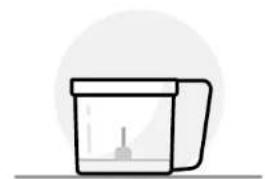
Simple line drawing of a container with liquid inside, no text or symbols present1 Place the Work Bowl on a clean, dry, flat surface, like a countertop or table.
natural_image
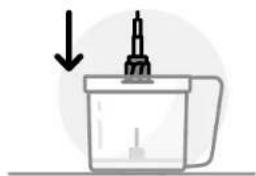
Simple line drawing of a dropper inside a glass container with an arrow indicating downward motion (no text or symbols)2 Place the Blade Adaptor in the Work Bowl. Lower the Blade Adaptor onto the top of the shaft located in the center of the Work Bowl. Push down so the adaptor is firmly and securely in place.
natural_image
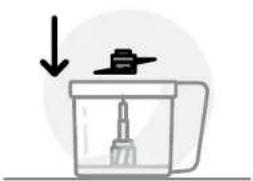
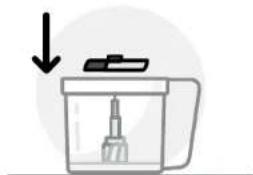
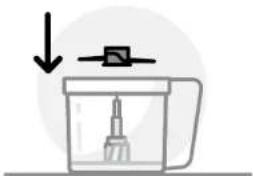
Simple line drawing of a container with a tool and arrow pointing downward (no text or symbols)3a If using the Chopping Blade or Dough Blade: Hold the plastic center of the blade, and carefully place it on top of the Blade Adaptor. Slide the blade down until it reaches the bottom of the Work Bowl. Press it down firmly to set it in place.
CAUTION: Blades are sharp! Handle carefully. Keep fingers away from the blade's sharp edges. Always hold blades by grasping the plastic areas.
natural_image
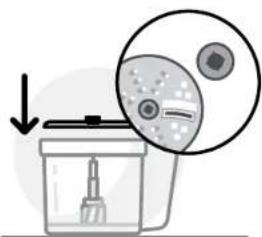
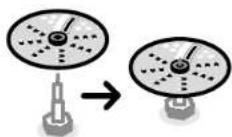
Diagram showing a container with a tool and a magnified view of a biological cell or particle (no text or symbols present)3b If using a Slice/Shred disc attachment: The disc attachments can be placed in 2 different positions on the Blade Adaptor. The lower position is for storage, and the higher position is for use. Hold the center knob of the disc, and carefully place it on the Blade Adaptor. Align the markings on the disc with the markings on the Blade Adaptor, so that the lines connect. If the disc appears to be in the lower position, remove the disc and rotate until the markings line up and the disc sits in the higher position.
CAUTION: Blades are sharp! Handle carefully. Keep fingers away from the blade's sharp edges. Always hold blades by grasping the plastic areas.
natural_image
Simple line drawing of a trash bin with a downward arrow indicating quantity (no text or symbols)4 If using the Spiralizer disc attachment: Align the notches on the Spiralizer Disc with the tabs that are located inside the Work Bowl towards the top. Once the disc is properly seated on the Blade Adaptor and inside of the Work Bowl,
turn the Spiralizer Disc so that the 'FRONT' is aligned with the front of the Motor Base. The spiralizer part of the disc will sit directly under the Feed Chute.
CAUTION: Never run the motor with more than 1 blade attached.
Using the chopping blade.
The Chopping Blade is a versatile blade that can be used to chop, mix, mince, or purée foods.
natural_image
Simple line drawing of a container with a tool inside, no text or symbols present1 Place the Work Bowl, with the Chopping Blade attached, on a clean, dry, flat surface like a countertop. Refer to the assembly instructions on page 12 for how to properly attach the Chopping Blade.
natural_image
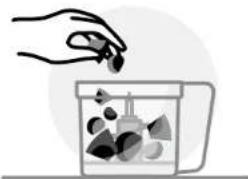
Illustration of a hand pouring liquid into a glass with various geometric shapes (no text or symbols)2 Prepare food (cut into smaller pieces, remove seeds, etc.) and place into the Work Bowl. Do not overload bowl with food. If you are using liquid ingredients do not fill past the LIQUID MAX line.
NOTE: Make sure the Chopping Blade has been attached to the Work Bowl BEFORE adding food to the bowl.
natural_image
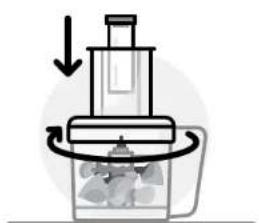
Diagram of a blender with a downward arrow indicating compression or cooling process (no text or symbols)3 Place the Work Bowl Lid on top of the Work Bowl. Turn the lid clockwise, lining up the arrows on the lid and handle, to lock into place. Place the Dual-Size Food Pusher into the Feed Chute.
NOTE: The motor will not run unless the lid is locked into place.
natural_image
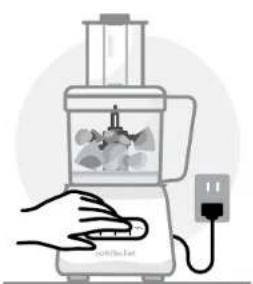
Illustration of a hand using a blender with a power plug (no text or symbols)5a Plug in the unit, then press your desired speed to start processing food. The blue light will illuminate over the speed that is currently running.
natural_image
Illustration of a hand holding a magnifying glass with an arrow indicating rotation (no text or symbols)4 Place the Work Bowl, with lid attached, onto the Motor Base. Turn the bowl clockwise to lock into place. You should hear a click when the bowl is properly locked into place.
natural_image
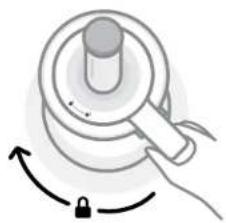
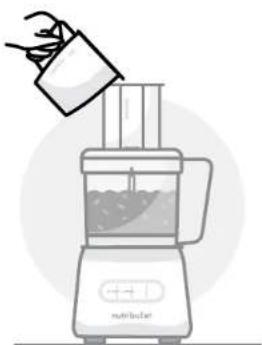
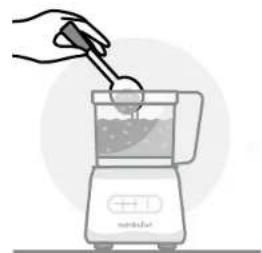
Illustration of a blender with liquid being poured from a cup (no text or symbols)5b If you need to add liquid while processing, unlock the Inner Pusher by turning the Pusher Cap clockwise. Once unlocked, lift the Inner Pusher and drizzle liquid through the narrow chute.
NOTE: Do not fill liquid ingredients past the LIQUID MAX line.
natural_image
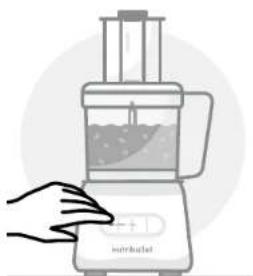
Illustration of a hand pressing a button on a blender with liquid (no text or symbols)6 When you're done, press the OFF button. Wait until the Chopping Blade has come to a complete stop. Remove the Work Bowl by turning the handle counterclockwise to unlock it from the Motor Base. Lift the bowl up off the base and set it on a flat surface.

natural_image
Simple line drawing of a mechanical device with a rotating base and internal components (no text or symbols)7 Remove the Work Bowl Lid from the Work Bowl by turning the lid counterclockwise to unlock. Carefully remove the lid and set it aside.
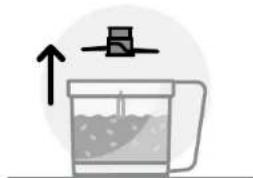
8 Carefully remove the Chopping Blade and the Blade Adaptor from the Work Bowl and set them aside.
CAUTION: Blades are sharp! Handle carefully. Keep fingers away from the blade's sharp edges. Always hold blades by grasping the plastic areas.
natural_image
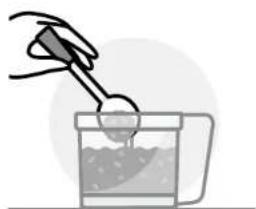
Illustration of a hand pouring liquid into a glass mug (no text or symbols)9 Remove your food from the Work Bowl using a spatula or spoon. Dispose of any leftover food in the bowl, then clean the bowl, blades, and other parts to avoid food residue buildup.
Using the dough blade.
The Dough Blade can be used for combining ingredients to make dough for pie crusts, pizza, bread, and more!
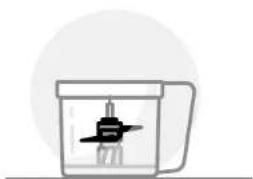
natural_image
Simple line drawing of a mug with a small object inside, resembling a cooking pot or container (no text or symbols)1 Place Work Bowl, with Dough Blade attached, on a clean, dry, flat surface like a countertop. Refer to the assembly instructions on page 12 for how to properly attach the Dough Blade.
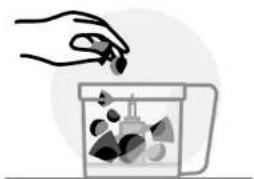
natural_image
Illustration of a hand pouring liquid into a container filled with various small objects (no text or symbols)2 Prepare food, ensuring to chop ingredients like butter into small chunks, and place into the Work Bowl. Do not overload the bowl with food. If you are using liquid ingredients do not fill past the LIQUID MAX line.
NOTE: Make sure the Dough Blade has been attached to the Work Bowl BEFORE adding food to the bowl.
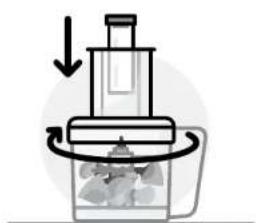
natural_image
Simple line drawing of a blender with a lid and base, showing liquid level and rotation arrow (no text or symbols)3 Refer to the instructions on page 14 for attaching the Work Bowl Lid and the Work Bowl to the Motor Base.
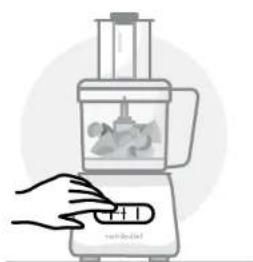
natural_image
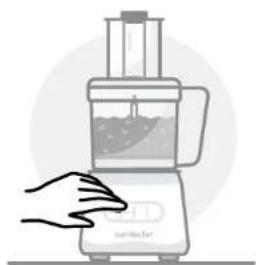
Illustration of a hand using a blender to press food into a tray (no text or symbols visible)4a After plugging in the unit, press your desired speed to start processing food. The blue light will illuminate over the speed that is currently running.
natural_image
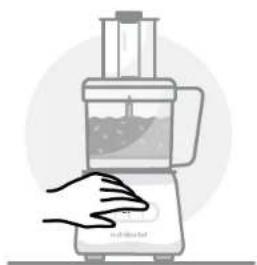
Illustration of a hand pressing down on a blender with a handle (no text or symbols)4b LOW: Use LOW speed for all dough making. Using a lower speed will help to avoid overworking the dough which can lead to a tough dough. If dough is cold and not overly blended, it will remain flaky.
natural_image
Illustration of a hand pressing down on a blender (no text or symbols)4c PULSE: Use PULSE to cut butter into flour before switching to LOW speed for mixing and kneading the dough. NOTE: We do not recommend using HIGH speed as it will over work the dough, and the dough will become tough.
natural_image
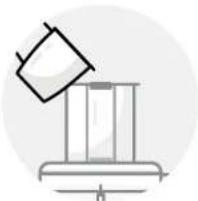
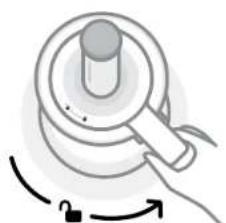
Simple line drawing of a container with a handle, no text or symbols present5 If you need to add liquid while processing, unlock the Inner Pusher by turning the Pusher Cap clockwise. Once unlocked, lift the Inner Pusher and drizzle liquid (like ice water) through the narrow chute. Process just long enough to bring dough together in a loose ball.
natural_image
Simple line drawing of a mechanical device with a knob and handle, no text or symbols present6 Refer to the instructions on page 15 for removing the Work Bowl from the Motor Base once dough has reached your desired consistency and you are done mixing.
NOTE: Do not fill liquid ingredients past the LIQUID MAX line.
Using a disc attachment.
The disc attachments are for slicing, shredding, or spiralizing your ingredients. The Slice/Shred Discs are reversible and labeled on either side. Place the side you want to use with its name facing up.
natural_image
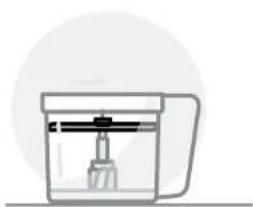
Simple line drawing of a glass mug with a handle and internal structure (no text or symbols)1 Place the Work Bowl, with disc attached, on a clean, dry, flat surface like a countertop. Refer to the assembly instructions on page 12 for how to properly attach a disc for use.
natural_image
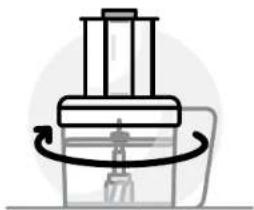
Pure mechanical diagram showing a piston and crank mechanism without any text or symbols2 Place the Work Bowl Lid on top of the Work Bowl. Turn the lid clockwise, lining up the arrows on the lid and handle, to lock into place.
NOTE: The motor will not run unless the lid is locked in place.
natural_image
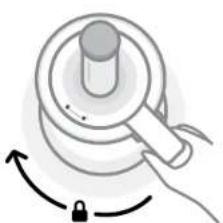
Illustration of a hand holding a magnifying glass over a circular object with a lock, showing rotational motion (no text or symbols)3 Place the Work Bowl, with lid attached, onto the Motor Base. Turn the Work Bowl clockwise to lock in place. You should hear a click when the bowl is properly locked in place.

4 Prepare food (cut into smaller pieces, remove seeds, etc.) and set aside.
NOTE: When using the Spiralizer Disc, cut the produce into pieces that will easily fit in the chute. We recommend to cut foods vertically along the sides creating a 'square' shape for best spiralizing results.
natural_image
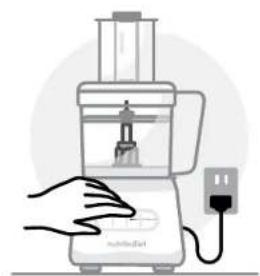
Illustration of a hand using a blender with a power plug (no text or symbols)5 Plug in the unit and press the HIGH speed button.
natural_image
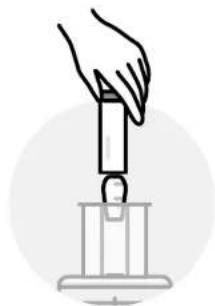
Illustration of a hand using a tool to lift a cylindrical object into a container (no text or symbols)6 With the motor running, place food into the Feed Chute, carefully guiding it down using the Food Pusher.
natural_image
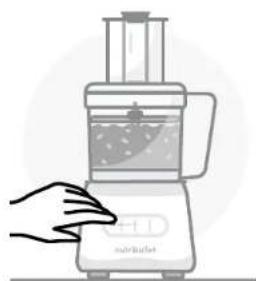
Illustration of a hand using a blender with a handle, no text or symbols present7 When you're done, or when your processed ingredients have filled the work bowl, press the OFF button. Wait until the blade has come to a complete stop.
WARNING: always use the Food Pusher, not fingers or utensils, to push food down chute. Do not insert too much food at one time. Never force stuck food down chute.
natural_image
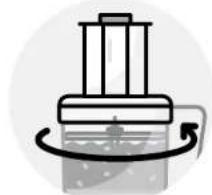
Simple line drawing of a mechanical device with no text or symbols8 Remove the Work Bowl Lid from the Work Bowl by turning the lid counterclockwise to unlock. Carefully remove the lid and set it aside.
natural_image
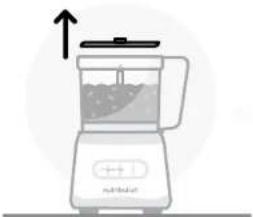
Illustration of a blender with a handle and lid, showing liquid level and control buttons (no text or symbols)9 Carefully remove the Disc Blade and Blade Adaptor from the bowl and set them aside.
CAUTION: Blades are sharp! Handle carefully. Keep fingers away from the blades sharp edges. Always hold blades by grasping the plastic areas.
natural_image
Illustration of a hand pouring liquid into a blender with a spoon (no text or symbols)10 Remove your food from the Work Bowl using a spatula or spoon. Dispose of any leftover food in the bowl, then clean the bowl, blades, and other parts to avoid food residue buildup.
Using the dual-size food pusher.
The Dual-Size Food Pusher features a smaller pusher inside a larger one. Use the Full-Sized Pusher for guiding bigger pieces of food down the Feed Chute – like when shredding lettuce or a big block of cheese.
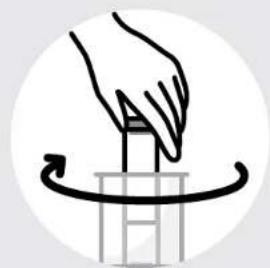
Unlock the Inner Pusher to create a more narrow Feed Chute, and use the Inner Pusher for better control with thinner ingredients, such as zucchini or carrots. The narrow Feed Chute is also ideal for drizzling in liquids during processing.
natural_image
Illustration of a hand pressing down on a test tube with a curved arrow indicating motion (no text or symbols)Separate the Inner Pusher from the outer pusher piece by gripping the circular Pusher Cap. Twist the top of the pusher clockwise and lift the Inner Pusher from the outer piece.
Troubleshooting.
PROBLEM
Unit does not power on.
SOLUTIONS
Make sure the Power Cord is plugged into an electrical outlet, and that outlet has power.
Make sure the Work Bowl Lid is locked into place on top of the Work Bowl. The arrow on the lid and handle should line up when properly locked in place. If the lid becomes unlocked at any time while the motor is running, the unit will stop running and the blue lights around the buttons will flash.
Make sure the Work Bowl is locked into place on the Motor Base. When placing the Work Bowl on the Motor Base, turn the handle clockwise until you hear a click – indicating that the bowl is properly locked in place.
PROBLEM
The Food Processor stopped in the middle of processing, and the control panel lights flashed three times.
SOLUTIONS
You have exceed 10 minutes of continuous running time. Unplug the Food Processor and keep the unit off for 15 minutes before continuing use.
PROBLEM
Feed Chute is blocked.
SOLUTIONS
If you notice that a piece or cluster of food appears to be stuck in the Feed Chute, blocking food flow, turn the motor OFF. Unlock the Work Bowl Lid from the Work Bowl, and use the Food Pusher, a spatula, or spoon to remove the stuck food before reassembling.
If the Work Bowl is nearly full of food, that may stop the flow of food down the Feed Chute. If the food has reached to just below the disc attachment, you'll need to empty the bowl before processing more food. Turn the motor OFF, wait until the blades have come to a complete stop and disassemble the unit to empty the Work Bowl.
Care & maintenance.
Cleaning the nutribullet® Food Processor is quick and easy. All detachable parts (Blade Adaptor, Chopping Blade, Dough Blade, Slice/Shred Discs, Spiralizer Disc, Work Bowl, Work Bowl Lid, and Dual-Size Food Pusher) are TOP RACK dishwasher-safe. The Motor Base can be quickly hand-washed with a damp cloth. Read on for best practices.
STEP 1:
The most important thing — ALWAYS POWER OFF THE UNIT and UNPLUG the Motor Base from the power outlet when it is not in use.
NOTE: Do not attempt to handle the appliance until all parts have stopped moving! This includes during assembly and disassembly, while changing accessories, during cleaning, and any time you leave the machine unattended
STEP 2:
Detach the blades and other attachments from the Motor Base.
STEP 3:
Clean the individual components as recommended in the following sections.
MOTOR BASE:
- To avoid risk of injury, NEVER attempt to clean the actuator system on the Motor Base while the unit is plugged in.
- Do not attempt to remove any pieces from the Motor Base.
- Use a sponge or dish cloth dampened with warm soapy water to wipe down the Motor Base until clean.
- If necessary, you may use a small brush to scrub the actuator system area to ensure it's clean.
• To clean leakage residue from the Motor Base, wipe with a damp sponge and warm water.

WARNING: Never submerge the motor Base in water.
ALL DETACHABLE PARTS:

WARNING: Blades are sharp!
ndle all blade attachments with re when cleaning!
- The Blade Adaptor, Blade Attachments, Work Bowl, Work Bowl Lid, and Dual-Size Food Pusher are all TOP RACK dishwasher-safe. These parts may also be cleaned by hand with warm soapy water.
• We recommend cleaning all removable parts after each use to reduce the buildup of residue.

WARNING: NEVER use the sanitize uncle — heat this high can warp the plastic.

WARNING: Do not clean the work Bowl, Work Bowl Lid, or other parts of the appliance with steel rod pads/balls or other hard material that might scratch your food Processor.
How to store.
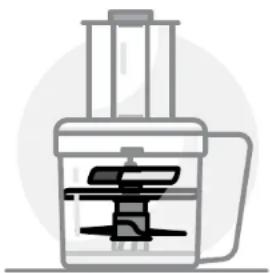
The blade attachments conveniently store within the Work Bowl when not in use. Make sure the unit is powered off and unplugged before placing attachments in the Work Bowl for storage. Read on for details:
NOTE: All included blades and discs will not store in the work bowl together, you will have two storage options:
OPTION 1: Chopping Blade, Dough Blade, 2 Slice/Shred Discs
OPTION 2: Chopping Blade, Dough Blade, 1 Slice/Shred Disc, Spiralizer Disc
STEP 1:
Place the Blade Adaptor on the center shaft.
STEP 2:
Lower the Chopping Blade onto the Lower the Chopping Blade onto the blade shaft, and then lower the Dough Blade onto the blade shaft so that it sits above the Chopping Blade on the shaft.
STEP 3:
Lower the disc attachments onto the adaptor, on top of the Chopping Blade. In storage mode, the discs should sit in the lower position on the adaptor than when used in normal operation. In storage mode, the lines on the disc will NOT be aligned with the lines on the adaptor.
STEP 4:
The Spiralizer Disc should be the last disc stored, if storing with one of
natural_image
Illustration of a mechanical device with internal components (no text or symbols)the Slice/Shred Discs. When storing the Spiralizer Disc, align the notches on the Spiralizer Disc with the tabs that are located inside of the Motor Base towards the top. Ensure the disc is properly seated on the blade and adapter, inside of the Motor Base, and turn the Spiralizer Disc so that the 'FRONT' is aligned with the front of the Motor Base.
STEP 5:
Place the Work Bowl Lid onto the Work Bowl and lock into place, with the Dual-Size Pusher nestled in the Feed Chute.
NOTE: The power cord wraps under the bottom of the Motor Base – keeping it neatly tucked away when stored.
Replacement parts.
To order additional parts and accessories, please visit our website at nutribullet.com/shop/accessories or feel free to contact Customer Service: 1 (800) 523-5993.
nutribullet® Food Processor one-year limited warranty.
LIMITED WARRANTY FOR NUTRIBULLET®
nutribullet's limited warranty obligations are confined to the terms set forth below:
nutribullet, LLC ("nutribullet") warrants this nutribullet^6 against defects in materials and workmanship for a period of one year from the date of original retail purchase. This limited warranty is valid only in the country in which the product is purchased and comes with the product at no extra charge, however, shipping and processing fees will be incurred for returns, replacements and or refunds.
If a defect exists and nutribullet ^® is obligated under this limited warranty, at its option nutribullet ^® will (1) repair the product at no charge, using new or refurbished replacement parts, (2) exchange the product with a product that is new or that has been manufactured from new or serviceable used parts and is at least functionally equivalent to the original product, or (3) refund the purchase price of the product. A replacement product assumes the remaining warranty of the
original product. A repaired product has a one-year warranty from the date of repair. When a product or part is exchanged, any replacement item becomes your property and the replaced item becomes nutribullet's property. When a refund is given, your product becomes nutribullet's property.
OBTAINING WARRANTY SERVICE
For limited warranty service, simply call our customer service department at 1 (800) 523-5993 or contact us via email from our website at nutribullet.com; click the Contact Us link, fill out and submit the customer contact form, and we will be glad to help you. When you contact our customer service department, you will be asked to provide your name, address, telephone number, and proof of the original purchase (receipt) containing a description of the product(s), purchase date, and the appropriate nutribullet® serial number(s). Before sending your product for limited warranty service, please make sure to keep a copy of all relevant documents for your files (receipt, etc.). It is always recommended to purchase product insurance
and tracking services when sending your product for service. Remember, shipping and processing fees will be incurred and are not covered by the one-year limited warranty.
EXCLUSIONS & LIMITATIONS
This nutribullet® one-year limited warranty applies only to nutribullet® products distributed by or for nutribullet that can be identified by the "nutribullet" trademark, trade name, logo, and bar code. This nutribullet® Food Processor, one-year limited warranty does not apply to any other products that may appear to be authentic, but were not distributed/sold by nutribullet.
Normal wear and tear is not covered by this limited warranty.
This limited warranty applies to consumer use only, and is void when the product is used in a commercial or institutional setting. This limited warranty extends only to the original consumer purchaser and is not transferable. In addition, proof of purchase must be demonstrated.
Repair or replacement of the product (or, if repair or replacement is not feasible, a refund of the purchase price) is the exclusive remedy of the consumer under this limited warranty. Nutribullet shall not be liable for any incidental or consequential damages for breach of this limited warranty or any implied warranty on this product.
This limited warranty gives you specific legal rights, and you may also have other rights which vary from state to state. Nutribullet is not liable for any damage to products not covered by this warranty (e.g., cups, book, User Guide).
This limited warranty does not apply: (a) to damage caused by accident, abuse, misuse, or misapplication; (b) to damage caused by improper maintenance (including unauthorized parts service); (c) to a product or a part that has been modified in any way; (d) if any nutribullet ^® serial number or trademark has been removed or defaced; and/or (e) if the product has been used with an adapter/converter.
Warranty registration.
THIS LIMITED WARRANTY AND THE REMEDIES SET FORTH ABOVE ARE EXCLUSIVE AND IN LIEU OF ALL OTHER WARRANTIES, REMEDIES AND CONDITIONS, WHETHER ORAL OR WRITTEN, EXPRESS OR IMPLIED. NUTRIBULLET SPECIFICALLY DISCLAIMS ANY AND ALL IMPLIED WARRANTIES, INCLUDING, WITHOUT LIMITATION, WARRANTIES OF MERCHANTABILITY AND FITNESS FOR A PARTICULAR PURPOSE. IF NUTRIBULLET CANNOT LAWFULLY DISCLAIM IMPLIED WARRANTIES UNDER THIS LIMITED WARRANTY, ALL SUCH WARRANTIES, INCLUDING WARRANTIES OF MERCHANTABILITY AND FITNESS FOR A PARTICULAR PURPOSE ARE LIMITED IN DURATION TO THE DURATION OF THIS LIMITED WARRANTY.
No nutribullet® reseller, agent, or employee is authorized to make any modification to this warranty. NUTRIBULLET IS NOT RESPONSIBLE FOR DIRECT, SPECIAL, INCIDENTAL OR CONSEQUENTIAL DAMAGES RESULTING FROM ANY BREACH OF WARRANTY OR CONDITION, OR UNDER ANY OTHER LEGAL THEORY,
INCLUDING BUT NOT LIMITED TO LOST PROFITS, DOWNTIME, GOODWILL, DAMAGE TO OR REPLACEMENT OF EQUIPMENT AND PROPERTY. NUTRIBULLET SPECIFICALLY DOES NOT REPRESENT THAT IT WILL BE ABLE TO REPAIR ANY PRODUCT UNDER THIS LIMITED WARRANTY.
Some states and provinces do not allow the exclusion or limitation of incidental or consequential damages or exclusions or limitations on the duration of implied warranties or conditions, so the above limitations or exclusions may not apply to you. This warranty gives you specific legal rights, and you may also have other rights that vary by state or province.
Please visit nutribullet.com/shop/accessories or call 1 (800) 523-5993 to register your new nutribullet® Food Processor. You will be asked to enter the Serial Number* of your product, along with the purchase date and place of purchase.
The registration will enable us to contact you in the unlikely event of a product safety notification. By registering your product, you acknowledge you have read the instructions and understood the warnings as set forth in the accompanying instructions.
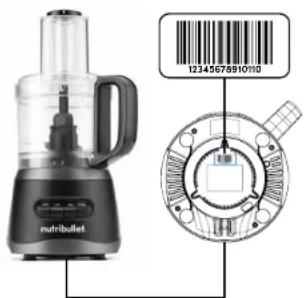
How to find serial number under the Motor Base.
Capital Brands Distribution, LLC | nutribullet.com | All rights reserved.
nutribullet® and the nutribullet logo are trademarks of CapBran Holdings, LLC registered in the U.S.A. and worldwide.
Illustrations may differ from the actual product. We are constantly striving to improve our products, therefore the specifications contained herein are subject to change without notice.

- User guide.
- Important safeguards.
- ! Save these instructions! • FOR HOUSEHOLD USE ONLY
- GENERAL SAFETY INFORMATION
- FEED CHUTE
- A scraper may be used BUT ONLY WHEN THE APPLIANCE IS OFF.
- ELECTRICAL SAFETY
- ADDITIONAL SAFEGUARDS
- ! Save these • instructions!
- Contents.
- What's included.
- Assembly guide.
- Control panel.
- OFF:
- LOW:
- HIGH:
- PULSE:
- Assembly & use.
- Before first use.
- UNPACK
- CLEAN
- Assembly.
- Using the chopping blade.
- Using the dough blade.
- Using a disc attachment.
- Using the dual-size food pusher.
- Troubleshooting.
- PROBLEM
- SOLUTIONS
- Care & maintenance.
- STEP 1:
- STEP 2:
- STEP 3:
- MOTOR BASE:
- ALL DETACHABLE PARTS:
- How to store.
- STEP 4:
- STEP 5:
- Replacement parts.
- nutribullet® Food Processor one-year limited warranty.
- OBTAINING WARRANTY SERVICE
- EXCLUSIONS & LIMITATIONS
- Warranty registration.
Brand : NUTRIBULLET
Model : Food Processor 7
Category : Blender