
TKM 9961 S - Coffee maker Arçelik - Free user manual and instructions
Find the device manual for free TKM 9961 S Arçelik in PDF.


| Brand | Arçelik |
| Model | TKM 9961 S |
| Product Type | Turkish Coffee Machine |
| Total Rated Input Power | 1100 W |
| Induction Heating Input Power | 2 x 525 W (1050 W) |
| Voltage | 220-240 V AC, 50-60 Hz |
| Electrical Insulation Class | II |
| Water Tank Capacity | 1.5 L |
| Cup Size Adjustment | Small (60 ml), Medium (70 ml), Large (80 ml) |
| Number of Coffee Compartments | 2 (Left and Right) |
| Servings per Compartment | 1, 2, or 3 servings |
| Heating Surface | Induction heating, 2 compartments |
| Control Panel | Touch buttons with LED indicators |
| Automatic Stirring System | Yes |
| Safety Features | Auto shut-off, overheat protection, water depletion warning, error codes |
| Materials | Food contact safe materials |
| Accessories Included | 2 coffee pots, measuring spoon |
| Cleaning | Hand wash coffee pots; descaling with citric acid |
| Operating Temperature | 4-37°C, 80% relative humidity |
| Warranty | Refer to manufacturer |
Frequently Asked Questions - TKM 9961 S Arçelik
User questions about TKM 9961 S Arçelik
0 question about this device. Answer the ones you know or ask your own.
Ask a new question about this device
Download the instructions for your Coffee maker in PDF format for free! Find your manual TKM 9961 S - Arçelik and take your electronic device back in hand. On this page are published all the documents necessary for the use of your device. TKM 9961 S by Arçelik.
USER MANUAL TKM 9961 S Arçelik
Turkish Coffee Machine
User Manual

TKM 9961 L
TKM 9961 S
TKM 9961 B
TKM 9961 Bio
EN

Please read this user manual first!
Dear Customers,
Thank you for selecting an Arçelik product. We hope that you get the best results from your product which has been manufactured with high quality and state-of-the-art technology. Therefore, please read this entire user manual and all other accompanying documents carefully before using the product and keep it as a reference for future use. If you handover the product to someone else, give the user manual as well. Follow all warnings and information in the user manual.
Meanings of the symbols
Following symbols are used in the various section of this manual:

Important information and useful hints about usage.

WARNING: Warnings for dangerous situations concerning the safety of life and property.

Materials are intended to be in contact with food.

Warning for electric shock.

Functional grounding

Protection class for electric shock.
- Control panel
- Left compartment, button to start making 3 servings of coffee
- Left compartment, button to start making 2 servings of coffee
- Left compartment, button to start making 1 serving of coffee
- Water indicator LED
- Right compartment, button to start making 1 serving of coffee
- Right compartment, button to start making 2 servings of coffee
- Right compartment, button to start making 3 servings of coffee
- Small-Medium-Large - cup size adjustment buttons
- Water tank (1.5 l)
- Mains cable
- On/off button
- Right compartment heating surface
- Left compartment heating surface
- Coffee-making pots - 2x
- Right compartment coffee-making detection sensor
- Left compartment coffee-making detection sensor
- Coffee measuring spoons
Technical data
Power: Total Rated Input Power: 1100 W Induction Heating Input Power: 2 X 525 W = 1050 W Voltage: 220-240 V AC \~, 50-60 Hz Electrical insulation class: II

Technical and design modifications are reserved.
The values which are declared in the markings affixed on your appliance or the other printed documents supplied with it represent the values which were obtained in the laboratories pursuant to the pertinent standards. These values may vary according to the usage of the appliance and ambient conditions.
1
Important instructions for safety and environment
This section contains safety instructions that will help protect from risk of personal injury or property damage.
Failure to follow these instructions will void all types of warranty.
1.1 General safety
- This appliance complies with the international safety standards.
- Do not use the appliance outdoors and in the bathroom.
- No responsibility or warranty claim shall be assumed for damages arising from misuse or improper handling of the appliance.
- Never attempt to dismantle or separate the mounted parts of the appliance.
-
Only use the original parts or parts recommended by the manufacturer.
• Always use the appliance on a stable, flat, clean, dry and non-slip surface. -
Do not put any substances apart from coffee and sugar into the coffee-making pot.
- Do not drink the cooked Turkish coffee using the coffee-making pot.
• Turkish Coffee Machine is designed to operate at 4-37°C 80% relative humidity. - Due to the manufacturing technology, steam and odour may arise in the heating element of the appliance during the initial use. This is normal. They will disappear after a few cycles.
- WARNING: When making coffee, do not move the appliance and do not remove the coffee-making pot.
- Do not move the appliance when it is still hot or when there is liquid inside the coffee-making pot.
- The coffee-making pot and the heating surfaces get hot during use. For this reason, do not contact the heating surface or the pot during and after use (until it cools down).
1
Important instructions for safety and environment
- WARNING: When making coffee, there might be some hot steam over the pot. Avoid contacting these areas to prevent the effects of the hot steam.
- Avoid contacting hot surfaces and hold the pot only by handle.
- Ensure that the appliance is switched off before moving it.
- The base (black glass surface) on which the coffee-making pot is placed gets hot during operation. Therefore, do not touch this area while using and until the appliance gets cold.
- This appliance should be connected to a maximum 30 mA domestic fault current protection fuse for additional protection.
- Use the appliance with a grounded plug.
-
If the supply cable is damaged, immediately stop using it to prevent any danger and have it replaced by the manufacturer, service agent or similarly qualified personnel.
-
Do not use the appliance if the appliance itself or any part of it is damaged. Contact the authorised service.
- Do not use the appliance with an extension cord.
- Do not immerse the appliance, power cord, or power plug in water or any other liquids.
- Do not touch the appliance or its plug with damp or wet hands.
- Position the appliance in such a way that the plug is always accessible.
- Prevent damage to the power cable by not squeezing, bending, or rubbing it on sharp edges. Keep the power cable away from hot surfaces and naked flame.
- Make sure that there is no danger that the power cable could be accidentally pulled or that someone could trip over it when the appliance is in use.
- Unplug the appliance before cleaning it and never clean it when it is in use.
1 Important instructions for safety and environment
- Do not pull the power cable of the appliance to unplug the appliance from the outlet and do not wrap its power cable around the appliance.
- Your mains power supply should comply with the information supplied on the rating plate of the appliance.
- Do not use the appliance in or near places where combustible or inflammable places or materials are present.
- Do not use the appliance next or close to heat resources (hob, grill, heater core, stove etc.).
- Keep the appliance away from steam resources and avoid using it in environments containing excessive steam.
- Do not use the coffee-making pot with any other heater (hob and etc.) apart from the appliance.
-
Do not place anything (cups, coffee-making pots etc.) on the appliance.
-
This appliance is not suitable for commercial use. It is intended to be used for household purposes in places such as:
-Shops, offices and personnel kitchens in other working environments,
-Farmhouses,
-By customers in hotels, motels and other residential places,
-Places for sleep and breakfast. - This appliance can only be used to cook coffee.
- Extreme caution is advised when being used near children and persons who are restricted in their physical, sensory or mental abilities.
1
Important instructions for safety and environment
- This appliance may be used by children who are at the age of 8 or over and the people whose physical, perceptive or mental skills are impaired or who are inexperienced or not knowledgeable about the appliance as long as they are supervised or informed and made understood the safe use of the appliance and the encountered dangers. Children should not play with the appliance.
- Cleaning and user maintenance procedures should not be performed by children over 8 unless they are supervised by an older person.
- If you keep the package material keep it away from children.
- Keep the appliance out of the reach of children under age 8.
- Supervise children to ensure that they do not play with the appliance.
-
This product only contains functional grounding connection.
-
If you are using a pace maker, consult the manufacturer before using the appliance.
- Perform cleaning and care procedures in compliance with the "Cleaning and Care" section in this manual.
- WARNING: If there is damage (crack, breakage etc.) on the coffee-making surface, immediately disconnect the product from the mains and do not use it to prevent electric shock, and contact the authorised service.
- Do not fill the water tank with any other substance (milk, powdered milk) than water.
- Do not exceed the max. level mark of the water tank.
- When making coffee, do not stir the coffee with spoon or any other object and do not intervene in the process.
- Do not leave metal objects (such as cutlery) on hot surfaces in the coffee-making areas since these objects get hot.
1
Important instructions for safety and environment
- Do not use the devices with an external timer or a remote control system.
- This appliance cannot be used for built-in applications and it is not intended to be used inside cabinets. Do not put the coffee machine in a cabinet while it is running.
1.2 Compliance with the WEEE Directive and disposal of the waste product

This product does not contain harmful or prohibited materials specified in the "Regulation for Supervision of the Waste Electric and Electronic Appliances" issued by the Ministry of Environment and Urbanisation. Conforms to the WEEE Regulation. This product has been made from high-quality parts and materials which can be recycled and reused. Therefore, do not throw the product away with household and other waste at the end of its life. Take it to a collection point for recycling electrical and electronic devices. Contact local authorities for the collection points in your region. Help protect the environment and natural resources by recycling used products.
1.3 Package information

Package of the product is made of recyclable materials in accordance with our national legislation. Do not dispose of the packaging materials together with the domestic or other wastes. Take them to the packaging material collection points designated by the local authorities.
2 Use
2.1 Initial use

Read the whole user manual before using the product.
Make sure that the device is straight and balanced on a flat, clean, dry and non-slip surface.
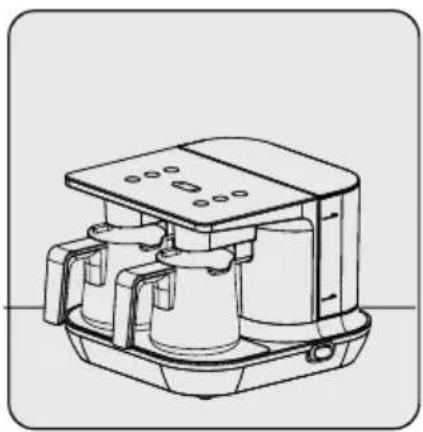
Place the product vertically on a flat, clean and dry surface.

Slightly pull the coffee-making pot (15) out of its slot.

Wash the water tank (10) and the coffee making pot (15) by hand and dry them.

To obtain a tasty coffee, make sure that the inside of the coffee-making pot (15) is dry and clean.

Make sure that there are no water drops underneath the coffee-making pot (15) when preparing coffee. Otherwise, an annoying noise will be heard when the water drops get into contact with the hot base.

Insert the plug (11) in the wall-socket. Switch the On/Off button (12) to On (1) position
- All buttons on the control panel (1) will turn white.

Open the cover of the water tank. Holding the handle, slightly pull it up to remove.

Fill the water tank (10) up to a level between min. and max. levels. Close the cover again and re-install it.
2 Use

If you want, you can also fill the water tank (10) without completely removing it. Repeat the same process after the appliance gives a water depleted warning (5).
To fill the pump and water system with water and bleed the air out of the system:
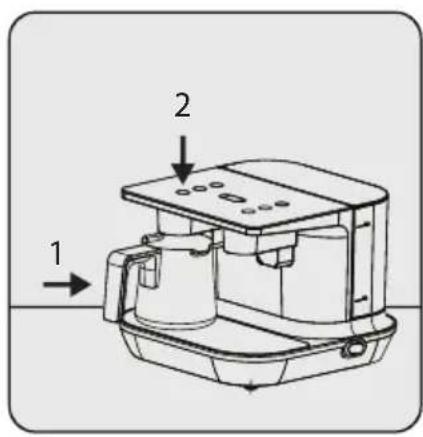
Place the coffee-making pot into the left compartment heating surface (14). Press the left compartment coffee-making button for 3 servings (2).


Once the water pumping process is over, press and hold the same button for 3 seconds to end the coffee-making process.


Take the coffee-making pot (15) and drain the water in it down the sink.

This way, proper operation of the pump in the appliance is ensured.

WARNING: Repeat this process also after you remove/place the water tank from/into its place and before brewing coffee.
To adjust the water amount according to the size cup:
| Small cup for one serving 60 ml on average. | |
| Medium cup for one serving 70 ml on average. | |
| Large cup for one serving 80 ml on average. |
2 Use

Place the coffee-making pot (15) into the left compartment heating surface (14). Press the left compartment coffee-making button for 1 serving (4).
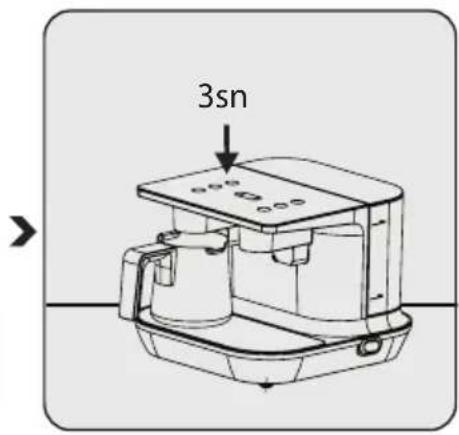
Once the water pumping process is over, press and hold the same button for 3 seconds to end the coffee-making process and drain the water inside the coffee-making pot (15) into your cup.

If the water you have poured into your cup is too little or too much, press the cup size adjustment button to set it to small, medium or large (9). You can press the cup size adjustment button (9) to switch between level. Once the LED of the desired cup size turns on, end the process.

The cup size LED will show the level to which the product is set.
Repeat the water amount adjusting process when you change the cup size. Repeat the water amount adjusting process when you change the cup size.
2.2 Coffee making

Put the desired amount of coffee and sugar (up to 3 servings) into the coffee-making pot (15).

Place the coffee-making pot (15) in its slot. Slightly press the button that is found on the compartment where you have placed the coffee-making pot (15) and that shows the number of servings based on the amount of coffee you have added.
- The light of the selected button will light in white.
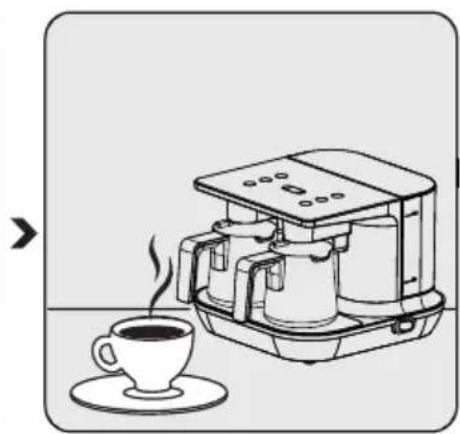
Once the coffee-making process is complete, an audio warning will be heard and the LED of the relevant coffee-making button will flash in white. Once the LED turns dull white, slightly pull back the coffee-making pot (15) to remove it and pour the coffee into your cup.

WARNING:
- Pay attention not to stain the heating surface (13-14). If you drip coffee onto the heating surface, wipe it with a slightly damp cloth before it gets dry.
- Do not use the coffee-making pot on any cooking appliance other than the Coffee Machine! (Hob etc.)
- The appliance will not start unless you place the coffee-making pot (15) properly into its seat.
- Fully insert the pot back into its seat in upright position. Otherwise your product will not run.

- Coffee-making time is 1-1.5 min. for 1 person., 1.5-2.5 min. for 2 persons and 2-3.5 min. for 3 persons.
- For a tasty coffee, take the coffee-making pot (15) from the seat without waiting!
- Pour coffee swiftly in order to prevent the foam and grounds from remaining in the coffee-making pot (15).
- If you want to cancel the coffee-making process for any reason, press and hold the selected coffee-making starting button for 3 seconds.
2.3 Amounts
This is an easy-to-use appliance designed to make Turkish coffee. You can prepare foamy Turkish coffee that suits your tastes by using the quantities in the table. Following quantities are provided only for information purposes. You can adjust them according to your personal tastes.
- Add sufficient coffee for one, two or three persons by using the measuring spoon, desired amount of sugar and required amount of water for your cup size (recommended cup size is 65 ml) into the coffee-making pot.
- These amounts are for a one-serving medium cup. You can use the measuring spoon provided with the product for measuring the amount of coffee. For a foamy, delicious coffee, use fine grind fresh coffee suitable for making Turkish coffee.
| Recommended quantities of ingredients to prepare coffee | ||||
| Sugar-free | With little sugar | With medium amount of sugar | Sweet | |
| Coffee 1 measure | 1 measure 1 measure | 1 measure | ||
| Sugar - | 1/2 cube of sugar / 1/2 tea spoon of granulated sugar | 1 cube of sugar / 1 tea spoon of granulated sugar | 2 cubes of sugar / 2 tea spoons of granulated sugar | |
*These quantities are for single serving.
*You can prepare 3 servings of coffee maximum in a single pot.
* We recommend you to use sugar cubes to easily adjust the amount of sugar.
2 Use
2.4 Sleep mode
If you do not do anything on the appliance for 3 minutes, it will give an audio warning (beep) and switch to stand-by mode. If you press the coffee-making start button or the cup size adjustment button, an audio warning will be heard and the appliance will leave sleep mode.
2.5 Notifications
Product is ready to make coffee
LED of the selected cup size is constantly on in white. LEDs of the coffee-making starting button are in dull white.
Making coffee
LED of the selected coffee-making starting button is constantly on in white.
Coffee-making process is complete
LED of the selected coffee-making starting button is flashing in white.
Level exceeded error
The selected button's LED for coffee-making start is flashing in red

Please wait
Do not remove the coffee-making pot.
Remove the coffee-making pot, and pour the coffee into the cup before serving.
Switch off the product. Take out the coffee-making pot from its seat. Use a damp cloth to clean the base of the coffee-making pot, heating surface (make sure that the heating surface is cold) and the sensor glass. You can switch on the product again to start another coffee-making process. Contact authorised service agent if the error occurs again.
2 Use
Time out error
The selected button's LED for coffee-making start is continuously on in red
Coffee-making error 1
The button LEDs for coffee-making start for the relevant compartment are flashing in red
Coffee-making error 2
LEDs of all coffee-making starting buttons are constantly on in red
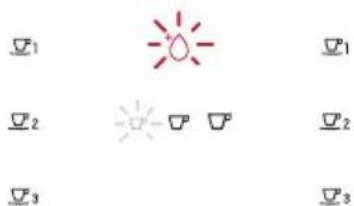
No water
Water indicator LED is constantly on in red
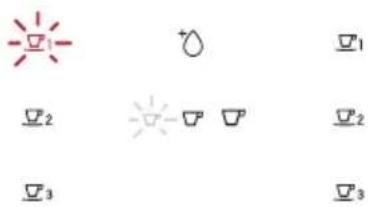
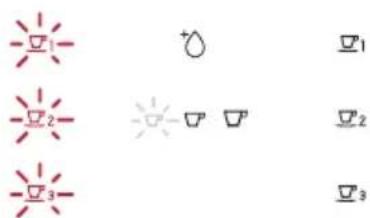

Switch off the product. Take out the coffee-making pot from its seat. Use a damp cloth to clean the base of the coffee-making pot, heating surface (make sure that the heating surface is cold) and the sensor glass. You can switch on the product again to start another coffee-making process. Contact authorised service agent if the error occurs again.
Switch off the product. Take out the coffee-making pot from its seat. Use a damp cloth to clean the base of the coffee-making pot, heating surface (make sure that the heating surface is cold) and the sensor glass. You can switch on the product again to start another coffee-making process. Contact authorised service agent if the error occurs again.
Switch off the product. Take out the coffee-making pot from its seat. Use a damp cloth to clean the base of the coffee-making pot, heating surface (make sure that the heating surface is cold) and the sensor glass. You can switch on the product again to start another coffee-making process. Contact authorised service agent if the error occurs again.
Fill the water tank with water up to the max level. (When there is no water left, the coffee-making start buttons will go off and the user cannot make any selection).
3 Cleaning and care
3.1 Cleaning

- Since the appliance will be hot during coffee-making, please wait until it is cold if you would like to clean it afterwards.
- Never use gasoline, solvent, abrasive cleaning agents, metal objects or hard brushes to clean the appliance.
- Never immerse the appliance or its power cable in water or any other liquid.
- Use a dry cloth to wipe the water droplets that appear on the sensor glass (16-17) after consecutive coffee-making cycles.
- Do not wash the coffee-making pot (15) in dishwasher.

Switch the On/Off button (12) of the appliance to Off (0) position. Unplug the appliance. Allow it to cool down.

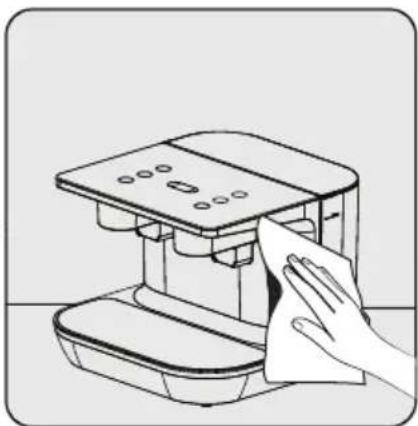
Use a damp cloth and a small amount of washing liquid to clean the outer surface of the appliance.


Remove the water tank (10) of the appliance. Wash it under running water with little washing liquid. Then dry and re-install it.

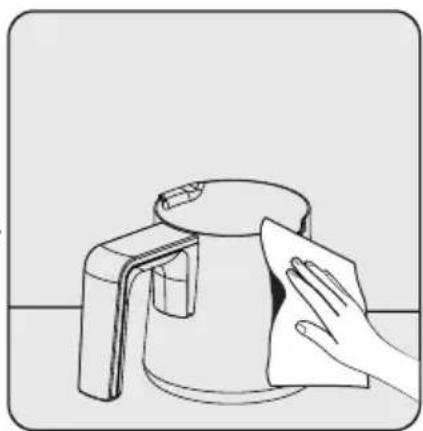
Wash the coffee-making pot by hand.

Then, dry it.


After drying the coffee-making pot, re-install it.
3.1.2 Descaling
To clean the stains (deposits) that might appear in the coffee-making pot in time without harming the inner base surface, pour one dessert spoon of citric acid crystals to the coffee-making pot and pour boiling water on it, so that water fills 1/3 of the pot. Wait for 10 minutes. At the end of the waiting process, you can rinse the coffee-making pot (15) and use it again.
3 Cleaning and care

WARNING: If you do not perform the descaling process for a long time, the base of the water reservoir of the appliance will get covered with lime and become inoperable.
3.2 Storage
- If you do not intend to use the appliance for a long time, store it carefully.
- Please make sure that the appliance is unplugged, cooled down and totally dry.
- Store the appliance in a cool and dry place.
- Keep the appliance and its power cable out of the reach of children.
3.3 Handling and transportation
- During handling and transportation, carry the appliance in its original packaging. The packaging of the appliance protects it against physical damages.
- Do not place heavy loads on the appliance or on the packaging. The appliance may be damaged.
- Dropping the appliance may render it non-operational or cause permanent damage.
4 Technological features of the appliance

Automatic stirring system that ensures that the coffee is foamy and ideally consistent

The technology that allows making coffee at the best consistency.

Additional safety system eliminating the necessity of watching the coffee while it is being prepared
5 Before calling the authorised service agent

First, check it the appliance is plugged in or not.

Check whether there is any break or damage on the cable.

Check if there is enough water in the water tank and if it is fitted in its place or not.

Clean the level detection glass.


- TURKISH COFFEE MACHINE
- EN
- PLEASE READ THIS USER MANUAL FIRST
- MEANINGS OF THE SYMBOLS
- TECHNICAL DATA
- 1
- IMPORTANT INSTRUCTIONS FOR SAFETY AND ENVIRONMENT
- 1.1 GENERAL SAFETY
- 1 IMPORTANT INSTRUCTIONS FOR SAFETY AND ENVIRONMENT
- 1.2 COMPLIANCE WITH THE WEEE DIRECTIVE AND DISPOSAL OF THE WASTE PRODUCT
- 1.3 PACKAGE INFORMATION
- 2 USE
- 2.1 INITIAL USE
- TO FILL THE PUMP AND WATER SYSTEM WITH WATER AND BLEED THE AIR OUT OF THE SYSTEM
- TO ADJUST THE WATER AMOUNT ACCORDING TO THE SIZE CUP
- 2.2 COFFEE MAKING
- WARNING
- 2.3 AMOUNTS
- 2.4 SLEEP MODE
- 2.5 NOTIFICATIONS
- PRODUCT IS READY TO MAKE COFFEE
- MAKING COFFEE
- COFFEE-MAKING PROCESS IS COMPLETE
- LEVEL EXCEEDED ERROR
- PLEASE WAIT
- TIME OUT ERROR
- COFFEE-MAKING ERROR 1
- COFFEE-MAKING ERROR 2
- NO WATER
- 3 CLEANING AND CARE
- 3.1 CLEANING
- 3.1.2 DESCALING
- 3.2 STORAGE
- 3.3 HANDLING AND TRANSPORTATION
- 4 TECHNOLOGICAL FEATURES OF THE APPLIANCE
- 5 BEFORE CALLING THE AUTHORISED SERVICE AGENT
Brand : Arçelik
Model : TKM 9961 S
Category : Coffee maker