
G3 HD - Coffee grinder Bunn - Free user manual and instructions
Find the device manual for free G3 HD Bunn in PDF.


| Product Type | Commercial Coffee Grinder |
| Model | G3 HD |
| Brand | Bunn |
| Grinding Mechanism | Flat Steel Burrs |
| Burr Diameter | 3 inches (76 mm) |
| Hopper Capacity | 5 lbs (2.27 kg) |
| Grind Settings | 40+ Adjustable Settings |
| Grinding Speed | Up to 5 lbs/min (2.27 kg/min) |
| Power Supply | 120V / 60 Hz / 6 Amps |
| Dimensions (W x D x H) | 8.5 x 15.5 x 21 inches (21.6 x 39.4 x 53.3 cm) |
| Weight | 31 lbs (14 kg) |
| Construction Material | Stainless Steel and High-Impact Plastic |
| Operation Type | Timer or Manual Start |
| Safety Features | Safety Interlock Switch, Overload Protection |
| Cleaning | Removable Burrs and Hopper for Easy Cleaning |
| Maintenance | Regular Burr Calibration and Cleaning Recommended |
| Noise Level | Approximately 85 dB |
| Spare Parts Availability | Burrs, Hopper, Switches, Motors Available |
| Warranty | 1 Year Parts and Labor |
| Certifications | NSF, UL, CSA |
Frequently Asked Questions - G3 HD Bunn
User questions about G3 HD Bunn
0 question about this device. Answer the ones you know or ask your own.
Ask a new question about this device
Download the instructions for your Coffee grinder in PDF format for free! Find your manual G3 HD - Bunn and take your electronic device back in hand. On this page are published all the documents necessary for the use of your device. G3 HD by Bunn.
USER MANUAL G3 HD Bunn
INSTALLATION & OPERATING GUIDE
BUNN-O-MATIC CORPORATION
To ensure you have the latest revision of the Operating Manual, or to view the Illustrated Parts Catalog, Programming Manual, or Service Manual, please visit the Bunn-O-Matic website, at www.bunn.com. This is absolutely FREE, and the quickest way to obtain the latest catalog and manual updates. For Technical Service, contact Bunn-O-Matic Corporation at 1-800-286-6070.

BUNN-O-MATIC COMMERCIAL PRODUCT WARRANTY
Bunn-O-Matic Corp. ("BUNN") warrants equipment manufactured by it as follows:
1) All equipment other than as specified below: 2 years parts and 1 year labor.
2) Electronic circuit and/or control boards: parts and labor for 3 years.
3) Compressors on refrigeration equipment: 5 years parts and 1 year labor.
4) Grinding burrs on coffee grinding equipment to grind coffee to meet original factory screen sieve analysis: parts and labor for 3 years or 30,000 pounds of coffee, whichever comes first.
These warranty periods run from the date of installation BUNN warrants that the equipment manufactured by it will be commercially free of defects in material and workmanship existing at the time of manufacture and appearing within the applicable warranty period. This warranty does not apply to any equipment, component or part that was not manufactured by BUNN or that, in BUNN's judgment, has been affected by misuse, neglect, alteration, improper installation or operation, improper maintenance or repair, damage or casualty. This warranty is conditioned on the Buyer 1) giving BUNN prompt notice of any claim to be made under this warranty by telephone at (217) 529-6601 or by writing to Post Office Box 3227, Springfield, Illinois 62708-3227; 2) if requested by BUNN, shipping the defective equipment prepaid to an authorized BUNN service location; and 3) receiving prior authorization from BUNN that the defective equipment is under warranty.
THE FOREGOING WARRANTY IS EXCLUSIVE AND IS IN LIEU OF ANY OTHER WARRANTY, WRITTEN OR ORAL, EXPRESS OR IMPLIED, INCLUDING, BUT NOT LIMITED TO, ANY IMPLIED WARRANTY OF EITHER MERCHANTABILITY OR FITNESS FOR A PARTICULAR PURPOSE. The agents, dealers or employees of BUNN are not authorized to make modifications to this warranty or to make additional warranties that are binding on BUNN. Accordingly, statements by such individuals, whether oral or written, do not constitute warranties and should not be relied upon.
If BUNN determines in its sole discretion that the equipment does not conform to the warranty, BUNN, at its exclusive option while the equipment is under warranty, shall either 1) provide at no charge replacement parts and/or labor (during the applicable parts and labor warranty periods specified above) to repair the defective components, provided that this repair is done by a BUNN Authorized Service Representative; or 2) shall replace the equipment or refund the purchase price for the equipment.
THE BUYER'S REMEDY AGAINST BUNN FOR THE BREACH OF ANY OBLIGATION ARISING OUT OF THE SALE OF THIS EQUIPMENT, WHETHER DERIVED FROM WARRANTY OR OTHERWISE, SHALL BE LIMITED, AT BUNN'S SOLE OPTION AS SPECIFIED HEREIN, TO REPAIR, REPLACEMENT OR REFUND.
In no event shall BUNN be liable for any other damage or loss, including, but not limited to, lost profits, lost sales, loss of use of equipment, claims of Buyer's customers, cost of capital, cost of down time, cost of substitute equipment, facilities or services, or any other special, incidental or consequential damages.
BrewWISE, BrewLOGIC, BrewMETER, BrewWIZARD, Bunn Gourmet, BUNN Gourmet Ice, BUNN Pour-O-Matic, BUNN, Bunn-OMatic, Bunn-O-Matic, BUNNlink, BUNNserve, BUNNSERVE, BUNN Espress, Cool Froth, DBC, Dr. Brew, Dual, Easy-Clear, EasyGard, Easy Pour, FlavorGard, Gourmet Ice, Gourmet Juice, High Intensity, IMIX, Infusion Series, Intellisteam, Quality Beverage Equipment Worldwide, The Mark of Quality in Beverage Equipment Worldwide, My Café, PowerLogic, Safety-Fresh, Scale-Pro, Silver Series, Single, Smart Funnel, Smart Hopper, SmartWAVE, Soft Heat, SplashGard, System III, ThermoFresh, 392, AutoPOD, AXIOM, Beverage Profit Calculator, Beverage Bar Creator, BUNNsource, Coffee At Its Best, Digital Brewer Control, Nothing Brews Like a BUNN, Pouring Profits, Pulse Wave, Signature Series, Smart Heat, Tea At Its Best, The Horizontal Red Line, Titan, Ultra, are either trademarks or registered trademarks of Bunn-O-Matic Corporation.
USER NOTICES
Carefully read and follow all notices on the grinder and in this manual. They were written for your protection. All notices on the grinder are to be kept in good condition. Replace any unreadable or damaged labels.

11075.0000

11075.0004 (SPECIAL)
WARNING
To reduce the risk of electric shock, do not remove or open cover. No user-serviceable parts inside. Authorized service personnel only. Disconnect power before servicing.
37881.0000

00824.0000
PLEASE CLOSE LID BEFORE GRINDING

PERSONAL INJURY HAZARD Keep Fingers & Foreign Objects out of Hopper or Chute Opening
PLEASE DO NOT POUR GROUND COFFEE BACK INTO GRINDER
11076.0000

39956.0000 - G1
▲WARNING
◆ Use only on a properly protected circuit capable of the rated load.
◆ Electrically ground the chassis.
◆ Follow national/local electrical codes.
◆ Do not use near combustibles.
An extension cord, when used, must be shorter than 20 feet if 16-gage 3-conductor wire, or shorter than 10 feet if 18-gage 3-conductor wire.
FAILURE TO COMPLY RISKS EQUIPMENT DAMAGE, FIRE, OR SHOCK HAZARD
READ THE ENTIRE OPERATING MANUAL INCLUDING THE LIMIT OF WARRANTY AND LIABILITY BEFORE BUYING OR USING THIS PRODUCT
20545-0000D 01/04 © 1990 Bunn-O-Matic Corporation
20545.0000

39957.0000 - G2 & G3
ELECTRICAL REQUIREMENTS
The 120 volt and 240 volt grinders have an attached cordset and requires 2-wire, grounded service rated 120 volts ac and 240 volts ac, 15 amp, single phase, 60 Hz. The 230 volt grinders have a power connector and requires 2-wire, grounded service rated 230 volts ac, 15 amp, single phase, 50 Hz.
CE REQUIREMENTS
- This appliance must be installed in locations where it can be overseen by trained personnel.
- For proper operation, this appliance must be installed where the temperature is between 5°C to 35°C .
- Appliance shall not be tilted more than 10° for safe operation.
- An electrician must provide electrical service as specified in conformance with all local and national codes.
- This appliance must not be cleaned by water jet.
- This appliance is not intended for use by persons (including children) with reduced physical, sensory or mental capabilities, or lack of experience and knowledge, unless they have been given instructions concerning use of this appliance by a person responsible for its safety.
- Children should be supervised to ensure they do not play with the appliance.
- If the power cord is ever damaged, it must be replaced by the manufacturer or authorized service personnel with a special cord available from the manufacturer or its authorized service personnel in order to avoid a hazard.
INITIAL SET-UP
CAUTION - Unplug the grinder throughout the initial set-up.
- Open the top lid. Clear all foreign objects and shipping materials from the hopper compartment and the entrance to the grind chamber.
- Tip the machine gently, on its back, so it rests with approximately one inch of the bottom overhanging the work surface.
- Remove the drawer from the base assembly.
- Place the base against the grinder bottom and align the four sets of holes.
- Securely fasten the base to the grinder bottom using the four screws and washers provided.
- Raise the grinder to the upright position.
- Insert the drawer into the base assembly.
- The grinder can now be plugged-in and put into service.
OPERATING CONTROLS
Off/On/Start Switch
OFF - (upper position)
Switching to this position stops the operation of the grinder.
ON - (center, resting position)
The switch will return to this position after a grind cycle has begun and will remain in this position after grinding has ceased.
START - (lower, momentary position)
Pressing the switch initiates grinding only when a bag is in place behind the chute.
Grind Selector
Allows the user to vary the grind for each bag of coffee. Each setting will provide precisely the same grind every time it is selected.
Bag Sensor
Prevents the grinder from operating unless the back of a bag is in place behind the dispense chute.
Do not attempt to bypass this safety device.
CLEANING
WARNING - Unplug the grinder before the removal of any panel or grind chamber-housing parts.
- Clean all exterior surfaces using a damp cloth rinsed in any mild, nonabrasive, liquid detergent. Care should be taken not to scratch the grinder with any abrasive material.
- Empty all beans from hopper(s). Plug in the grinder, place an empty bag behind the dispense chute. Press and release the "START" switch. Run a few cycles until all coffee in the grind chamber is dispensed and disconnect the grinder from the power source. Remove the bag.
WARNING - Prior to cleaning the grind chamber, unplug the grinder.
-
Remove the two screws and remove the dial plate and selector knob assembly.
-
Slide the burr auger rotor/spring assembly off the motor shaft and disassemble for cleaning.
-
Remove the two screws securing the stationary burr to the grind chamber.
-
Remove the four screws at the top of the chute and remove the chute. Using a pair of pliers, remove the C-clips securing the flapper arm to the chute. Remove the flapper securing pins carefully (noting the location of each flapper spring).
-
Wash all parts in a mild solution of detergent with hot water and a stiff non-metallic bristle brush. Rinse all parts thoroughly and allow them to air dry before reinstalling.
-
Carefully clean the grind chamber, dial plate assembly, chute opening and dial plate opening with a dry stiff non-metallic bristle brush. Wipe with a clean cloth that has been soaking in a mild solution of detergent and hot water. Reinstall the spring and rotor with burr onto the motor shaft.
-
Align the slot in the motor shaft with the rotor and reinstall shear plate. Reinstall rotor cup and grind selector dial plate to the burr housing. Refer to the “Adjustment” section of the Operating and Service manual for burr adjustments.
COFFEE GRINDING
- Turn the selector knob to align the red arrow with the desired grind.
- Raise the top lid and add the whole bean coffee. Close the top lid.
- Locate the back of a bag behind the dispense chute. (The grinder will not operate unless the bag is behind the chute.)
- Allow the bag to rest on the screen beneath the chute.
- Press the start switch.
- Flip the cleaning lever a few times as dispensing slows.
- Remove the bag when ground coffee is no longer dispensed from the chute. The grinder will stop automatically as the bag is removed.
NOTE - The start switch will have to be pressed again to continue the cycle if the bag is removed while grinding.
ADJUSTMENT
- Place an empty bag on the screen, with the back of the bag behind the dispense chute.
- Start the grinder to clear the grind chamber. Leave grinder "ON".
- Turn the Grind Selector knob to the "TURKISH" (fully clockwise) position.
- Using a small flat blade screwdriver, loosen the two set screws on the left side of the grind selector knob.
- Hold the knob in the "TURKISH" (fully clockwise) position with one hand.
- Using a large flat blade screwdriver, slowly turn the adjusting screw in the center of the grind selector knob to the right (clockwise) until a metallic whine can be heard due to the rubbing of the grinding burrs.
- While holding the knob in the "TURKISH" (fully clockwise) position, back off the screw to the left (counterclockwise) just until the metallic whine ceases.
- Turn-off the grinder.
- Push the knob against the dial plate and tighten both set screws on the left side of the grind selector knob.
- Turn the grinder on and listen again for the metallic whine with the grind selector knob in the turkish (fully clockwise) position. If the metallic whine is heard, repeat steps 7 through 10 until the sound ceases.
- If no metallic whine is heard, the grinding burrs are adjusted properly.
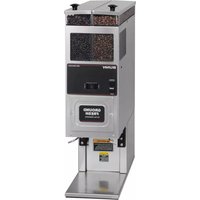


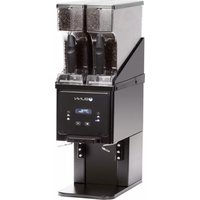

Brand : Bunn
Model : G3 HD
Category : Coffee grinder