
VSJ843Q - Juicer OMEGA - Free user manual and instructions
Find the device manual for free VSJ843Q OMEGA in PDF.


| Product Type | Vertical Juicer |
| Model | VSJ843Q / VSJ843R |
| Rated Voltage | 120 V |
| Rated Frequency | 60 Hz |
| Rated Power Consumption | 150 W |
| Rotation Speed | 43 rpm |
| Motor | Single-phase induction motor |
| Fuse | 250 V 8 A |
| Weight | 11.5 lb (5.2 kg) |
| Dimensions (VSJ843Q) | 9" W x 6" D x 16" H (229 x 153 x 407 mm) |
| Cord Length | 55" (1.4 m) |
| Maximum Continuous Operation | 30 minutes |
| Construction Material | Ultem (screen & auger), stainless steel, silicone |
| Juice Extraction Method | Low-speed masticating (vertical) |
| Safety Features | Safety locking system, grounding plug, auto shut-off (if overloaded) |
| Cleaning | Dishwasher safe (top rack) or hand wash; includes cleaning brush |
| Accessories Included | Pusher, hopper, auger, screen, spinning brush, silicone brush, juice bowl, pulp container, juice cup, cleaning brush |
| Warranty Registration | Available at www.omegajuicers.com/omega-warranty-registration |
| Recipes | Available at www.omegajuicers.com/recipes |
Frequently Asked Questions - VSJ843Q OMEGA
User questions about VSJ843Q OMEGA
0 question about this device. Answer the ones you know or ask your own.
Ask a new question about this device
Download the instructions for your Juicer in PDF format for free! Find your manual VSJ843Q - OMEGA and take your electronic device back in hand. On this page are published all the documents necessary for the use of your device. VSJ843Q by OMEGA.
USER MANUAL VSJ843Q OMEGA
natural_image
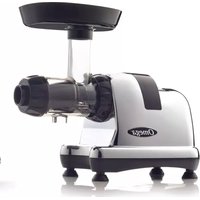
Exterior view of a modern Omega juice maker with black and silver casing (no visible text or symbols)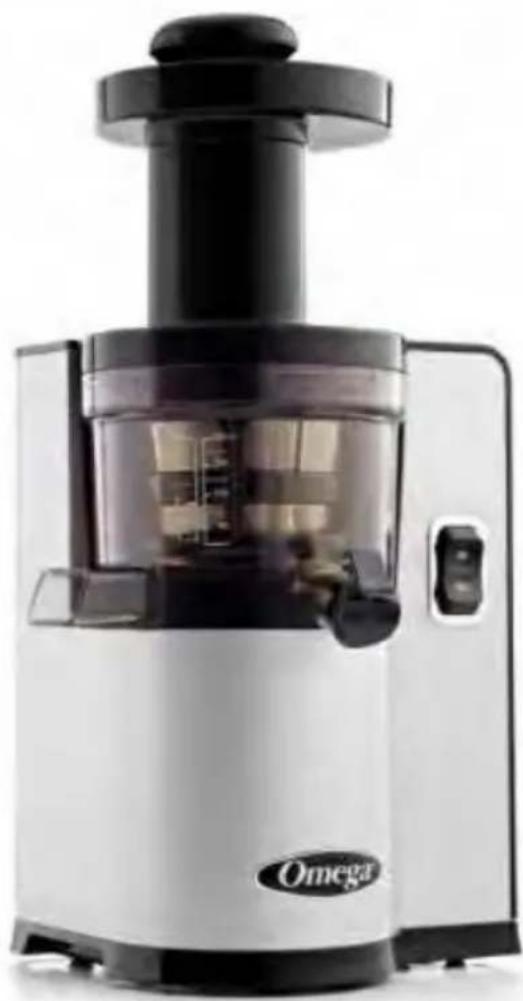
natural_image
White and black Omega juice maker with clear glass control panel (no visible text or symbols on device body)VSJ843R - VSJ843Q
USER MANUAL
Vertical Juicer
LOW SPEED MASTICATING JUICER
MODE D'EMPLOI
CONGRATULATIONS on the purchase of your new Omega product.
At Omega, we strive to develop technologically advanced machines that help deliver nutrition and flavor of the highest kind and closest to nature's purest form.
We are driven by you, our brand supporters. Your enthusiasm helps us continue to reinventandrenewourlineofjuicers,highspeedblendersandbeverageequipment.
Our team at Omega thanks you for supporting us for over 50 years!
www.omegajuicers.com/omega-warranty-registration
RECIPES, VISIT:
www.omegajuicers.com/recipes
CUSTOMER SERVICE:
Visit: www.omegajuicers.com
After using your Omega, we kindly ask you to rate the machine on
www.OmegaJuicers.com
TABLEÁOFÁCONTENTS
02 - 03 Safety First, Important Safeguards
04 - 05 Know Your Omega
06 - 07 Quick Start Assembly
08 - 09 How to Assemble
10 - 11 Operating Instructions
12 - 13 Spinning Brush Assembly, Disassembly and Washing
14 - 15 Bowl Packaging Assembly
16 - 17 Juice Flap Assembly
18 - 19 Sterilization & Easy Cleaning
20 - 23 Precautions for Safe Use
24 - 25 If the Auger Stops Working
26 - 27 Hints & Tips
28 - 29 Troubleshooting
30 - 31 Product Specifications
32 - 37 Recipes & Notes
38 - 75 French Manual
76 - 114 Spanish Manual

IMPORTANTÁSAFEGUARDS
WARNING: GROUNDING INSTRUCTIONS
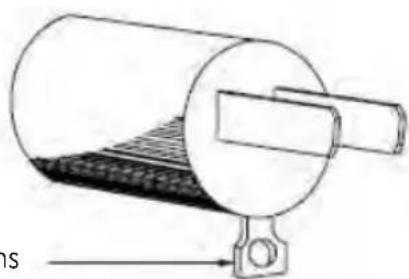
This appliance must be grounded while in use to protect the operator from electrical shock. The appliance is equipped with a 3-conductor cord and a 3-prong grounding-type plug to fit the proper grounding-type receptacle. The appliance has a plug that looks like sketch A in Figure 73.1. An adaptor, sketch B, should be used for connecting sketch A plugs to two-prong receptacles. The grounding tab which extends from the adaptor must be connected to a permanent ground such as a properly grounded outlet box as shown in sketch C using a metal screw.
FIGURE 73.1
Grounding Methods

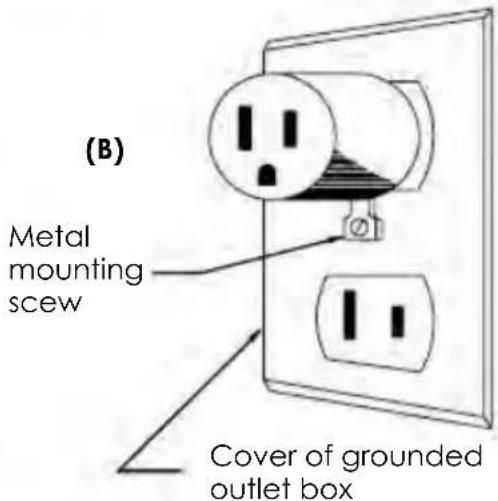
(C)
ADAPTER
natural_image
Technical line drawing of a cylindrical mechanical device with a meshed base and mounting bracket (no text or symbols)Grounding means
AA220
IMPORTANTÁSAFEGUARDS
When using electrical appliances, basic safety precautions should always be followed including the following.
- READ ALL INSTRUCTIONS BEFORE USING.
- To protect against electrical shock, do not immerse cord, plug, or main body (motor) in water or other liquid.
- Close supervision is necessary when any appliance is used by or near children.
- Unplug from outlet when not in use, before putting on or taking off parts, and before cleaning.
- Avoid contact with moving parts. Unplug from outlet when not in use, before putting on or taking off parts, and before cleaning.
- Do not operate any appliance with a damaged cord or plug or after the appliance malfunctions or has been damaged in any manner. Return appliance to the manufacturer (see warranty) for examination, repair, or electrical or mechanical adjustment.
- The use of attachments not recommended or sold by manufacturer may cause fire, electric shock or injury.
- Do not let cord hang over edge of table or counter or touch heated surfaces.
- Always make sure juicer cover is clamped securely in place before motor is turned on. Do not unfasten clamps while juicer is in operation.
- Be sure to turn switch to OFF position after each use of your juicer. Make sure the motor stops completely before disassembling.
- Do not put your fingers or other objects into the juicer while it is in operation. If food becomes lodged in opening, use food pusher or another piece of fruit or vegetable to push down the lodged food. When this method is not possible, turn off the machine, remove the plug from wall outlet and disassemble juicer to remove the remaining food.
- Do not use outdoors.
- Do not place on or near a hot gas or electric burner or in a heated oven.
- Do not use appliance for anything other than its intended use.
- Keep hands and utensils away from moving blades or discs while processing food to reduce the risk of severe injury to persons or damage to the food processor. A scraper may be used but must be used only when the food processor is not running.
- Blades are sharp. Handle carefully.
- Keep the appliance clean. Refer to the Care & Cleaning instructions in this manual.
- DO NOT plug in until familiar with all the instructions and operating procedures.
- DO NOT unplug from electrical outlet by pulling on the cord. To unplug, grasp the plug, not the cord, and pull.
- Turn off all controls before unplugging from or plugging into an electrical outlet.
- This appliance can not grind meat.
- Check hopper for presence of foreign objects before using.
- Moving parts – Keep fingers out of discharge openings.
- Sharp blade – Always use food pusher.
SAVE THESE INSTRUCTIONS

KNOWÁYOURÁOMEGA
KNOWÁYOURÍOMEGA

A Pusher
B Hopper
C Wide Feed Chute
D Safety Locking System
E Auto Cleaning System
F Pulp Outlet
G High Performance Motor
H Sturdy Nonslip Feet
I Ultem Juice Screen
J On/Off
K Juice Flap
L Heavy Duty Ultem Auger

natural_image
Close-up of a mechanical component with green spiral grooves and a labeled arrow 'L' pointing to a feature (no text or symbols on the object itself)NOT SHOWN
Juice Container
Pulp Container

QUICKÁSTARTÁASSEMBLY
QUICKÁSTARTÁASSEMBLY

1 Pusher
2 Hopper
3 Auger
4 Screen
5 Spinning Brush
6 Silicon Brush
7 Juice Bowl
8 Base
9 Pulp Container
10 Juice Cup

11 Cleaning Brush
12 Operating Switch
13 Power Cord

HOWÁTOÁASSEMBLE
HOWÁTOÁASSEMBLE


natural_image
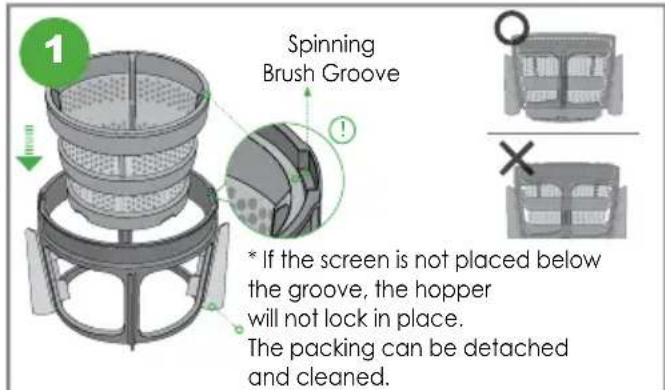
3D rendering of a blender with a green arrow indicating motion (no text or symbols)Assemble the screen. The top of the screen must sit below the grooves on the spinning brush, as shown in the picture. Otherwise, the chamber set will not close properly.
Place the assembled silicone brush and screen into the juice bowl. Move it left to right until it clicks into place.
Next place the auger inside the screen. Align the augers wings with the grooves on the spinning brush.
Place the hopper onto the juice bowl. Turn the hopper clockwise until it is locked completely.
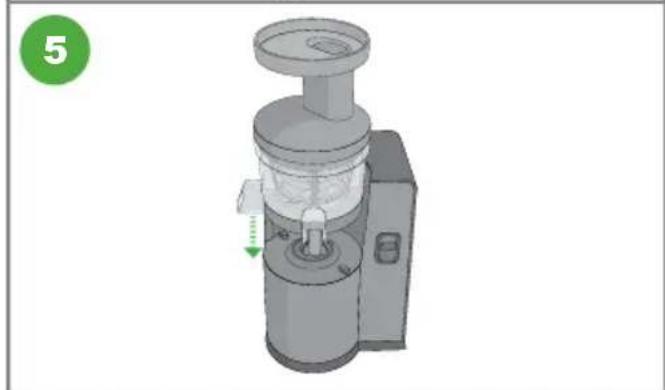
Mount the assembled juice bowl chamber onto the motor base.

OPERATINGÍNSTRUCTIONS
OPERATINGÍNSTRUCTIONS
ON/REVÁBUTTON

Press [ON] button to start.
Gradually put the ingredients into the hopper chute and press down with the pusher.
After the extraction is complete, place the switch in stop position to stop.
WARNING Whenusing[ON]uor[Rev]u button, u make sure that the auger stops completely.
JUICEÁFLAP

Close the juice flap to mix juice inside the bowl while juicing.
Open the juice flap to release mixed juice into a glass. Close the flap to save juice for another serving.
EXTRACTIONÁSEAL

The silicone pulp stopper is located at the bottom of the Juice Bowl. Before use, make sure the seal is closed. For cleaning, open the extraction seal and wash out trapped food.

SPINNINGÁBRUSHÁASSEMBLY,Á DISASSEMBLYÁANDÁWASHING
SPINNINGÁBRUSHÁSSEMBLY,ÁDISASSEMBLYÁANDÁWASHING
Check the groove of the spinning brush and the direction of silicone brush.
- As shown to the left, let groove inserts face the spinning brush.
Insert the silicone brush into the spinning brush. The longer part should face upward. Hold the outer wing of silicone brush with your thumb and index finger and insert silicone brush into the groove of spinning brush.
Pull tight.
- Push silicone brush from the outer side of spinning brush and pull 'inner wing' in the direction of inside of the spinning brush with the other hand as shown to the left.
- Pull it until you cannot pull it any longer. If unit is not fully assembled, there is a risk of breakage.
SPINNINGÁBRUSHÁDISASSEMBLYÁANDÁWASHING
natural_image
Diagram of a mechanical component with a red arrow indicating upward motion, no text or symbols present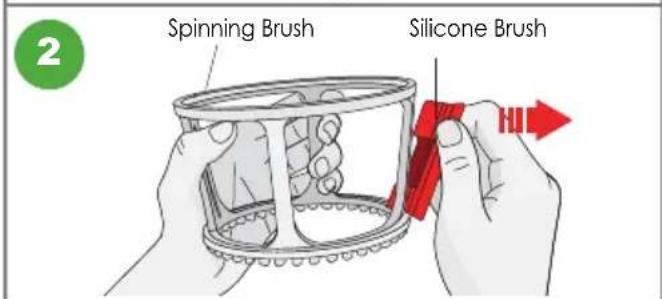

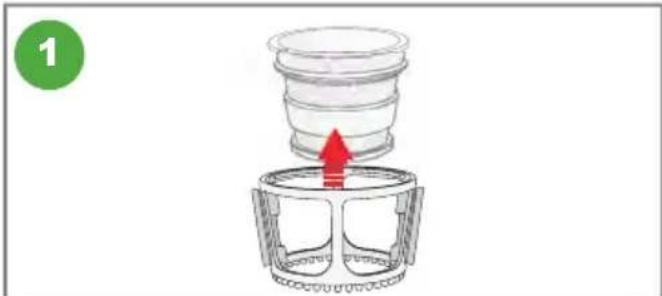
Remove the spinning brush from juicing screen.
Detach the silicone brush from spinning brush. As shown to the left, hold the outer part of silicone brush with your fingers and pull it out to the arrow direction. If pulling it by force, silicone brush may be torn or spinning brush may be damaged.
With cleaning brush, wash inside and outside of spinning brush under running water. Wash silicone brush in the same way under running water.

BOWLÁPACKINGÁASSEMBLY
BOWLÁPACKINGÁASSEMBLY


natural_image
Illustration of a hand holding a lid with a red object inside, no text or symbols present
natural_image
Illustration of a hand using a tool to adjust a mechanical component with a red arrow indicating the process (no text or symbols present)As shown to the left in the dotted circle, let the protrusion part on the bowl packing face upward and hold it, like pinching, with your thumb and index finger.
- Insert the bottom of the bowl packing into the bowl hole and fully press it down.
- Do not insert whole part of bowl packing.
- The upper part of the bowl packing must be shown.
If the bowl packing at the bottom of the bowl is not fully inserted and is bent, set it into place with the rotating attractor of the cleaning brush.

JUICEÁFLAPÁASSEMBLY
JUICEÁFLAPÁASSEMBLY
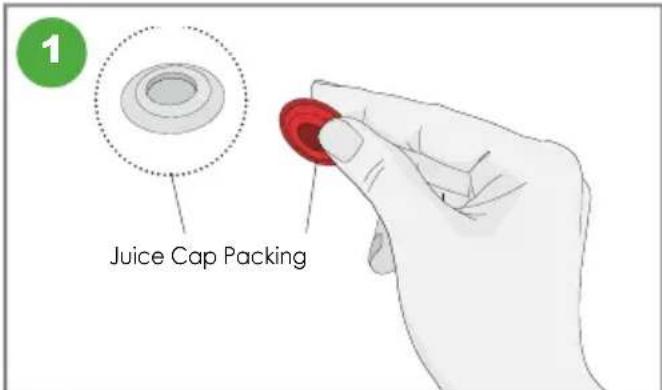
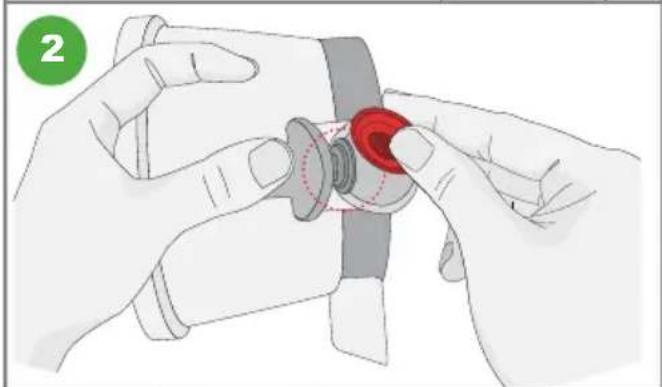
Hold juice cap packing as shown to the left. The hole must be visible.
natural_image
Illustration of hands adjusting a mechanical component with a red circular knob (no text or symbols)Open the juice cap and insert the juice cap packing to the top. Be careful not to drop the bowl.

natural_image
Illustration of hands using a tool to adjust or install a small object, with a red arrow highlighting the point (no text or symbols present)Set the packing to seal off completely. If not completely sealed, juice may leak.

STERILIZATIONÁ &Á EASYÁCLEANINGÁÁ
STERILIZATION&ÆASYÁCLEANING
HANDWASHÁOPTION

natural_image
Illustration of a bucket pouring liquid into a container, with an inset showing a close-up of the container (no text or symbols)You can thoroughly wash parts by immersing in warm water diluted with one or two drops of baking soda or dishwashing soap for about 30 minutes.

natural_image
Illustration of a kitchen appliance with coins and a hammer inside, no text or symbols presentWhen finished using the Omega® Nutrition System, simply put parts into dishwasher, on top rack.
CLEANINGÁBETWEENÁRECIPIES

natural_image
Illustration of a hand mixer with a green circular badge labeled '3' and an inset showing the handle (no text or symbols on the main diagram)When juicing multiple recipes successively, it is not necessary to disassemble and wash parts. Simply close the juice cap, pour water into hopper and operate the appliance.
Open the juice cap and discharge the water. After you are done juicing for the day, disassemble and fully wash the bowl set.

PRECAUTIONSÁ FORÁSAFEÁUSEÁA
PRECAUTIONSÁFORÁSAFEÁUSE
All users of this appliance must read and understand these safety precautions before operating.
SIGNÁSAMPLES

This sign indicates contents that may cause risk of a fire or an electrical shock.
Specific warnings are written in the sign.

This sign indicates prohibited acts.
Specific prohibitions are written around or in the sign.

This sign indicates contents of regulating or directing actions.
Specific prohibitions are written around or in the sign.
PRECAUTIONS

CAUTION
Hazards or unsafe practices could result in minor personal injury or appliance damage.

DO NOT PLUG IN OR UNPLUG WITH WET HANDS.
It may cause an electric shock or an injury.
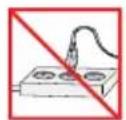
DO NOT USE WITH OTHER THAN RATED VOLTAGE.
It may cause an electric shock, a fire or abnormal performance. If the voltage is different, it may shorten the life of the motor or cause a failure.

PLUG THE POWER CORD CORRECTLY AND PUSH IT TIGHT IN A WALL SOCKET.
It may cause electric shock or a fire.
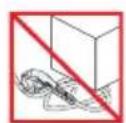
IF THE SUPPLY CORD IS DAMAGED, IT MUST BE REPLACED BY THE MANUFACTURER, ITS SERVICE OR SIMILARLY QUALIFIED PERSONS IN ORDER TO AVOID A HAZARD.
If the power cord is damaged, it may cause electric shock or a fire.
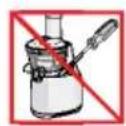
NEVER ALTER THE APPLIANCE. ALSO, DO NOT DISASSEMBLE OR REPAIR BY YOURSELF. DO NOT INSERT FINGERS, FOREIGN SUBSTANCES OR OBJECTS SUCH AS PINS INTO GAPS OR HOLES IN THE BASE.
It may cause a fire, an electric shock or a failure. For any technical support, contact the authorized local Customer Care Center.
PRECAUTIONSÁFORÁSAFEÁUSE

DO NOT MOISTEN THE BASE OR SPLASH WATER ON THE BASE.
Be careful not to let any liquids or other substances get into the switch on the appliance. DO NOT OPERATE THE SWITCH WITH WET HANDS. It may cause electric shock or a fire.
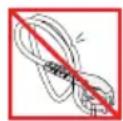
WHEN THE POWER CORD, WIRE IS BROKEN OR DAMAGED OR THE PLUG-IN PART BECOMES LOOSE, DO NOT OPERATE IT.
It may cause an electric shock, a fire or an injury.

FOR SAFETY, MUST DO GROUND CONNECTION DO NOT DO THE GROUNDING ON GAS PIPE, PLASTIC WATER PIPE, TELEPHONE WIRE, ETC.
It could cause an electric shock, a fire, or a malfunction and an explosion. Be sure to use the socket with ground connection.
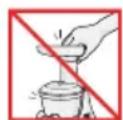
NEVER DISASSEMBLE BOWL SET DURING OPERATION OR INSERT FINGERS, FOREIGN OBJECTS SUCH AS FORKS, SPOONS ETC. INTO FEEDING CHUTE OR JUICE SPOUT.
It may cause an injury, an accident or a failure.

THIS APPLIANCE IS NOT INTENDED FOR USE BY PERSONS (INCLUDING CHILDREN) WITH REDUCED PHYSICAL, SENSORY OR MENTAL CAPABILITIES, OR LACK OF EXPERIENCE AND KNOWLEDGE, UNLESS THEY HAVE BEEN GIVEN SUPERVISION OR INSTRUCTION CONCERNING USE OF THE APPLIANCE BY A PERSON RESPONSIBLE FOR THEIR SAFETY.
Children should be supervised to ensure that they do not play with the appliance.

DO NOT OPERATE WITHOUT LOCKING THE HOPPER PROPERLY.
It may cause an injury or a failure.
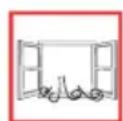
WHEN DETECTING A GAS LEAK, DO NOT INSERT THE POWER CORD INTO ITS SLOT. OPEN THE WINDOW TO VENTILATE FULLY AND IMMEDIATELY.
It may cause an injury or a failure.

IF SCREW ROTATION IS STOPPED IN NORMAL OPERATION, PRESS [REVERSE/REV] BUTTON AND HOLD FOR 2\~3 SECONDS AND THEN AFTER REVERSE OPERATION IS COMPLETELY STOPPED, PRESS [ON] BUTTON AGAIN. If such a
stop event continues during the operation, the parts may be damaged and performance may be deteriorated due to overheating in a motor. When the problem continues, immediately stop the appliance and contact the local Customer Care Center.
![OMEGA VSJ843Q - IF SCREW ROTATION IS STOPPED IN NORMAL OPERATION, PRESS [REVERSE/REV] BUTTON AND HOLD FOR 2\~3 SECONDS AND THEN AFTER REVERSE OPERATION IS COMPLETELY STOPPED, PRESS [ON] BUTTON AGAIN. If such a - 1](/content/2026/05/831658/images/44b72a197644b3c41b45a1871da6c8033c0ba2962a364772690f079afc88ea56.jpg)
NEVER PUT A FINGER, A FORK OR A SPOON ETC. INTO JUICE SPOUT.
It may cause an injury or a failure.
PRECAUTIONSÁFORÁSAFEÁUSE

DURING THE OPERATION, DO NOT ATTEMPT TO MOVE THE BASE, DISASSEMBLE THE BOWL SET OR PARTS AND TRY TO LOCK THEM.
It may cause an injury or a failure. Any act of event needed, switch off first and unplug the power cord.
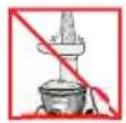
WHEN USING THE APPLIANCE, BE CAREFUL OF A NECKTIE, LONG NECKLACE, SCARF ETC. BECOMING ENTANGLED INTO FEEDING CHUTE.
It may cause an injury, a failure or a breakage.
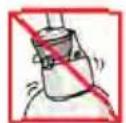
PLACE THE APPLIANCE ON A FLAT AND STABLE SURFACE.
It may cause an injury or a failure.
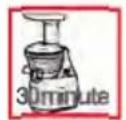
DO NOT OPERATE THE APPLIANCE FOR MORE THAN 30 MINUTES AT A TIME.
It may cause a motor failure due to overheating. Cool it down sufficiently for 5 minutes and operate it again.

WHEN PLACING INGREDIENTS INTO THE FEEDING CHUTE, ONLY USE THE PUSHER PROVIDED.
It may cause an injury or a failure.

DO NOT ALLOW A SEVERE SHOCK TO THE APPLIANCE OR DROP IT.
It may cause an electric shock, a fire or damage
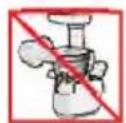
IF THE APPLIANCE GIVES OFF AN UNPLEASANT SMELL, EXCESSIVE HEATING, OR SMOKE, STOP USING IMMEDIATELY AND CONTACT THE LOCAL CUSTOMER CARE CENTER.
When using a new appliance, it will give off a smell and the smell disappears naturally over time.

ALWAYS UNPLUG THE APPLIANCE AFTER USE.
WHEN UNPLUGGING THE POWER CORD, MAKE SURE TO HOLD THE POWER CORD.
If holding the wire to unplug, it may cause an electric shock or a fire.

THE APPLIANCE WEIGHS ABOUT 11.51 LB (5.2 KG). WHEN MOVING THE APPLIANCE, ENSURE TO MOVE IT HOLDING GRIPS TIGHTLY AT THE BASE IF THE BOTTOM WITH BOTH HANDS.
If attempting to hold bowl or the edge of the base, the base may fall causing an injury or a failure.

IFÁTHEÁAUGERÁ STOPSÁWORKING
IFÁTHEÁAUGERÁSTOPSÁWORKING
![1 [Rev]](/content/2026/05/831658/images/56a314dc29bc6b83c7040f695f3068b6eb657b26f821113362124bef008ef42c.jpg)
![2 [On]](/content/2026/05/831658/images/ef83c5e3e47971df1003351da57c7b986e6b506c96b2f9672a8a88573b0d0984.jpg)
Press [Rev] button for 3 to 5 seconds, then release. When the [Rev] button is released, the auger will stop rotating. Repeat this 2 to 3 times.
The [Rev] button pushes the ingredients upward releasing the food clog.
Press [ON] button to start. When using [ON] auger should rotate. Wait 2 to 3 seconds. Then presss [REV] button. Repeat this 2 to 3 times. Make sure the auger stops completely after releasing the button.
Note:
Even after following the directions above, if the juicer still doesn't work, please unplug the power cord, disassemble the chamber set and clean it. Then try again.

To STOP the operation, press the [Rev] button quickly. The auger will rotate slowly then stop. After the auger rotation stops completely, you can press [ON] to continue operation as normal or hold down the [Rev] button to push ingredients upward.
![[Stop]](/content/2026/05/831658/images/82f26ac19a66634e4284a2270a65a1d926ec6acdf744ea209c9c863ed4792bd5.jpg)
![[Rev]](/content/2026/05/831658/images/4d8ed8977894f490d0d2af4f9464f1e73d2291356f6b8f18b49b6e6d1d86c4b1.jpg)
![[On] [Stop] [Rev]](/content/2026/05/831658/images/4a8c828548347188cbfaf585c5491c7e4ed5c92942e615fdc0596febd119a2b7.jpg)

HINTSÁ&ÁTIPSÁ
HINTSÁ&ÁTIPS
- Use caution when juicing the following ingredients:
- Fruits with seeds that are hard to chew should be pitted before extraction. Fruits such as plums, peaches, and apricots.
- Stalk vegetables with strong fiber should be cut into smaller sizes of 1 to 2 inches before placing in the hopper. Vegetables such as water parsley, celery, fennel, etc.
- Do not use sesame, coffee beans, bark of a tree, Chinese pepper, etc. which cannot be extracted.
- Do not use fruits preserved in alcohol, sugar, honey, etc. It may cause damage or failure.
- Frozen fruit or withered ingredients stored in the refrigerator for a long time, may extract less amount of juice or may even be impossible to juice.
- Do not re-squeeze residue expelled through pulp outlet, except for soft fruits. Soft fruits can be re-squeezed.
- You can use the appliance to crush spices (garlic and red pepper).
- Do not use appliance to grind grains. It may cause damage or failure.
• We recommend you drink juice immediately after extraction.
- Do not use the appliance for more than 30 minutes continuously. It may cause failure due to overheating of the motor.

TROUBLESHOOTING
TROUBLESHOOTING
Please troubleshoot using the details below before contacting Omega Customer Service for repair or service. When contacting Omega for after-sales service, please have the manufacturer's serial number or bar code available.
The Appliance Does Not Work
- Make sure the power cord is plugged in correctly.
- Make sure the hopper is assembled correctly. If the hopper is not locked into place, the appliance will not operate.
- Make sure the appliance is assembled according to the instructions in this manual. Refer to the instructions.
- If the appliance still does not work, please contact Omega Customer Service for additional support.
The Hopper Does Not Open
- If there is a lot of pulp inside the chamber, press [On] to release the excess pulp.
- Check the appliance for any foreign substance or solid objects including seeds.
- Press [Rev] button to push up stuck ingredients.
- Do not attempt to open by force. If the hopper still does not open, please contact Omega Customer Service for additional support.
The Appliance Stops During Normal Operation
- Check for large pieces of food stuck in the appliance.
- Refer to the manual "If the Auger Stops Working" and follow the guideline for the [Rev] button.
- If the appliance still does not work, please contact Omega Customer Service for additional support.
Fine Lines or Scratch Marks around the Auger
- This is normal. Do not be concerned. These are molding marks resulting from the normal manufacturing process.
Juice Leaks Over the Base
- Check for an excessive amount of ingredients in the hopper chute.
- If you try to juice a large amount of food compared to the pulp outlet, the packing will be slightly pushed away. Juice may leak out of the gap.
- Do not force too much food into the juicer. Push food gradually for extraction.
- Check to make sure the juice flap is closed.
Juicer Shakes when In-Use
- This is normal as the auger rotates. It is not a malfunction. Hard ingredients such as carrots, potatoes, radishes, beets, etc. may cause shaking more so than soft ingredients.
- Depending on the firmness of the ingredient, there may be a more pronounced shaking of the motor.
- Slight shaking may be caused by the motor.

PRODUCTÁSPECIFICATIONS
PRODUCTÁSPECIFICATIONS
Product Name Vertical Juicer
Model Name VSJ843Q & VSJ843R
Rated Voltage 120 V
Rated Frequency 60 Hz
Rated Power Consumption 150 W
RPM 43 rpm
Cord Length 55" (1.4 m)
Motor Single-phase induction motor
Fuse 250 V 8 A
Weight 11.5 lb (5.2 kg)
Outward Dimension VSJ843Q : 9" Width (229 mm)
6" Depth (153 mm)
16" Height (407 mm)
VSJ843R : 7" Depth (178 mm)
8.5" Depth (216 mm)
16" Height (407 mm)
Rated Operating Time Less than 30 minutes

natural_image
Black and white photo of a Omega juice maker with clear glass and black handle (no visible text or symbols)
natural_image
Black and white photo of a Omega juice maker with smooth glass and black handle (no visible text or symbols)
NOTESÁ&ÁRECIPIES
NOTES
For Recipes, visit www.OmegaJuicers.com/recipes
Clean Boost
What You'll Need:
12 a beetroot 5 spinach leaves 14 cabbage 1 broccoli stick 12 a grapefruit 12 a lemon 1 orange 1 kiwi fruit 1 pieces of ginger
How To Prepare:
1 Cut product to fit into hopper.
2 Juice in an Omega Juicer.
3 Pour over ice.
4 Enjoy!
PREP
2 minutes
JUICE
4 minutes
Australian Dream
What You'll Need:
2 beets (australian beetroot) 2 organic carrots 1 cup organic strawberries 2 cups kale leaves (6-8 leaves) (australia tuscan cabbage)
How To Prepare:
1 Wash all produce well.
2 Cut as needed to fit into hopper.
3 Juice in an Omega Juicer.
4 Pour over ice and enjoy!
PREP
3 minutes
JUICE
6 minutes
Morning Glory Citrus
What You'll Need:
2 grapefruits (peeled)
1 red bell pepper
2 pears
6 carrots
How To Prepare:
1 Wash all produce well.
2 Juice all produce in an Omega Juicer and enjoy!
Serving Size: 16 - 18 oz.
Bursting with vitamin C and beta-carotene, as well as vitamins A & K and even copper.
PREP 5 minutes JUICE 5 minutes
Salsa in a Glass
What You'll Need:
2 Tomatoes
1/4 Onion
1/2 Lime
1 Jalapeno Pepper
5 Sprigs of Fresh Cilantro
How To Prepare:
1 Wash all produce well.
2 Peel lime (optional).
3 Add all ingredients into your Omega Juicer and juice.
4 Serve and enjoy!
PREP 5 minutes JUICE 5 minutes
Total Health Booster
What You'll Need:
1 medium apple, cored and cubed 2 medium soft pears, cored and cubed ½ cup fresh cherries (pits removed or frozen and thawed)
How To Prepare:
In your Omega Juicer, juice apple, pears, and cherries.
Before serving, garnish with fresh cherries, if desired.
PREP 5 minutes JUICE 5 minutes
Cukelear Power
What You'll Need:
1 cucumber 2 collard green leaves 1 handful of cauliflower florets ½ lemon (yellow rind removed)
How To Prepare:
1 Wash all produce.
2 Add all ingredients into your Omega Juicer and juice.
3 Pour into your glass and enjoy!
PREP 5 minutes JUICE 5 minutes
Tropical Morning
What You'll Need:
1 peach (remove pit) 1 mango (peeled and seed removed) 1 orange (skin removed) ½ cup coconut water 1 teaspoon agave nectar
How To Prepare:
1 Cut produce to fit hopper.
2 In your Omega Juicer, juice peach, mango and orange.
3 Add remaining ingredients and stir.
4 Serve chilled and garnish with a peach slice.
PREP 5 minutes JUICE 5 minutes
Apple & Kiwi Juice
What You'll Need:
2 apples 3 kiwis
How To Prepare:
1 Wash the apples, then remove the core and cut into quarters.
2 Peel the kiwis and chop into small pieces.
3 Juice ingredients in your Omega Juicer.
4 Stir before drinking.
PREP 5 minutes JUICE 5 minutes

natural_image
Abstract wavy gradient background with green-to-white transition, no text or symbols presentOmega®
Nourish Your Body
Enrich Your Soul
NourisSEZ VOTRE CORPS
Enrichissez/Votreâme
NUTRA SU CUERPO
Enriquezca suialma
Discover the complete line of Omega brand professional products at:
www.OmegaJuicers.com
The Legacy Companies Weston FLaaaa@U'S'A

- TABLEÁOFÁCONTENTS
- IMPORTANTÁSAFEGUARDS
- WARNING: GROUNDING INSTRUCTIONS
- SAVE THESE INSTRUCTIONS
- KNOWÁYOURÁOMEGA
- KNOWÁYOURÍOMEGA
- NOT SHOWN
- QUICKÁSTARTÁASSEMBLY
- HOWÁTOÁASSEMBLE
- OPERATINGÍNSTRUCTIONS
- ON/REVÁBUTTON
- JUICEÁFLAP
- EXTRACTIONÁSEAL
- SPINNINGÁBRUSHÁASSEMBLY,Á DISASSEMBLYÁANDÁWASHING
- SPINNINGÁBRUSHÁSSEMBLY,ÁDISASSEMBLYÁANDÁWASHING
- Pull tight.
- SPINNINGÁBRUSHÁDISASSEMBLYÁANDÁWASHING
- BOWLÁPACKINGÁASSEMBLY
- JUICEÁFLAPÁASSEMBLY
- STERILIZATIONÁ &Á EASYÁCLEANINGÁÁ
- STERILIZATION&ÆASYÁCLEANING
- HANDWASHÁOPTION
- CLEANINGÁBETWEENÁRECIPIES
- PRECAUTIONSÁ FORÁSAFEÁUSEÁA
- PRECAUTIONSÁFORÁSAFEÁUSE
- SIGNÁSAMPLES
- PRECAUTIONS
- CAUTION
- DO NOT MOISTEN THE BASE OR SPLASH WATER ON THE BASE.
- WHEN THE POWER CORD, WIRE IS BROKEN OR DAMAGED OR THE PLUG-IN PART BECOMES LOOSE, DO NOT OPERATE IT.
- FOR SAFETY, MUST DO GROUND CONNECTION DO NOT DO THE GROUNDING ON GAS PIPE, PLASTIC WATER PIPE, TELEPHONE WIRE, ETC.
- NEVER DISASSEMBLE BOWL SET DURING OPERATION OR INSERT FINGERS, FOREIGN OBJECTS SUCH AS FORKS, SPOONS ETC. INTO FEEDING CHUTE OR JUICE SPOUT.
- THIS APPLIANCE IS NOT INTENDED FOR USE BY PERSONS (INCLUDING CHILDREN) WITH REDUCED PHYSICAL, SENSORY OR MENTAL CAPABILITIES, OR LACK OF EXPERIENCE AND KNOWLEDGE, UNLESS THEY HAVE BEEN GIVEN SUPERVISION OR INSTRUCTION CONCERNING USE OF THE APPLIANCE BY A PERSON RESPONSIBLE FOR THEIR SAFETY.
- DO NOT OPERATE WITHOUT LOCKING THE HOPPER PROPERLY.
- WHEN DETECTING A GAS LEAK, DO NOT INSERT THE POWER CORD INTO ITS SLOT. OPEN THE WINDOW TO VENTILATE FULLY AND IMMEDIATELY.
- IF SCREW ROTATION IS STOPPED IN NORMAL OPERATION, PRESS [REVERSE/REV] BUTTON AND HOLD FOR 2\~3 SECONDS AND THEN AFTER REVERSE OPERATION IS COMPLETELY STOPPED, PRESS [ON] BUTTON AGAIN. If such a
- NEVER PUT A FINGER, A FORK OR A SPOON ETC. INTO JUICE SPOUT.
- DURING THE OPERATION, DO NOT ATTEMPT TO MOVE THE BASE, DISASSEMBLE THE BOWL SET OR PARTS AND TRY TO LOCK THEM.
- WHEN USING THE APPLIANCE, BE CAREFUL OF A NECKTIE, LONG NECKLACE, SCARF ETC. BECOMING ENTANGLED INTO FEEDING CHUTE.
- PLACE THE APPLIANCE ON A FLAT AND STABLE SURFACE.
- DO NOT OPERATE THE APPLIANCE FOR MORE THAN 30 MINUTES AT A TIME.
- WHEN PLACING INGREDIENTS INTO THE FEEDING CHUTE, ONLY USE THE PUSHER PROVIDED.
- DO NOT ALLOW A SEVERE SHOCK TO THE APPLIANCE OR DROP IT.
- IF THE APPLIANCE GIVES OFF AN UNPLEASANT SMELL, EXCESSIVE HEATING, OR SMOKE, STOP USING IMMEDIATELY AND CONTACT THE LOCAL CUSTOMER CARE CENTER.
- ALWAYS UNPLUG THE APPLIANCE AFTER USE.
- WHEN UNPLUGGING THE POWER CORD, MAKE SURE TO HOLD THE POWER CORD.
- THE APPLIANCE WEIGHS ABOUT 11.51 LB (5.2 KG). WHEN MOVING THE APPLIANCE, ENSURE TO MOVE IT HOLDING GRIPS TIGHTLY AT THE BASE IF THE BOTTOM WITH BOTH HANDS.
- IFÁTHEÁAUGERÁ STOPSÁWORKING
- IFÁTHEÁAUGERÁSTOPSÁWORKING
- Note:
- HINTSÁ&ÁTIPSÁ
- HINTSÁ&ÁTIPS
- TROUBLESHOOTING
- The Appliance Does Not Work
- The Hopper Does Not Open
- The Appliance Stops During Normal Operation
- Fine Lines or Scratch Marks around the Auger
- Juice Leaks Over the Base
- Juicer Shakes when In-Use
- PRODUCTÁSPECIFICATIONS
- NOTESÁ&ÁRECIPIES
- NOTES
- Clean Boost
- What You'll Need:
- How To Prepare:
- Australian Dream
- Morning Glory Citrus
- Salsa in a Glass
- Total Health Booster
- Cukelear Power
- Tropical Morning
- Apple & Kiwi Juice
- Omega®
Brand : OMEGA
Model : VSJ843Q
Category : Juicer