
SW6000 - Software SHURE - Free user manual and instructions
Find the device manual for free SW6000 SHURE in PDF.


| Product Type | Conference Management Software |
| Brand | Shure |
| Model | SW6000 |
| Version | 6.8 |
| Included Applications | CAA (Conference Admin Application), CUA (Conference User Application), ECA (External Control Application) |
| Optional Modules | SW6000-VOTE (Parliamentary Voting), SW6000-ESI (External System Interface), SW6000-ADV (Advanced Meeting Management), additional CAA/CUA/CDA licenses |
| Maximum CAA Instances | Up to 16 (1 basic + 15 additional) |
| Maximum CUA Instances | Up to 200 (1 basic + 199 additional) |
| Maximum CDA Instances | Up to 16 |
| Language Support | Full multi-language support with customizable labels |
| Database | SQL database format (Microsoft SQL Server or SQL Express) |
| System Architecture | Client/server for multiple PCs |
| Microphone Control | Manual, Automatic, FIFO, VOX, and Reply modes |
| Agenda Control | Create, edit, import from Word, multi-level subjects, speaker assignments |
| Voting | Parliamentary voting with configurable buttons, results display, and reports (requires SW6000-VOTE) |
| Meeting Roles | Chairman, Delegate, VIP, Deputy, with customizable user rights and speak priorities |
| Reporting | Meeting logs, participant reports, agenda reports, voting results, statistical reports (PDF) |
| Integration | ID card registration, external validation, web service interface, streaming control |
| Licensing | License file controls feature availability; per-instance licensing for applications |
| Backup Utility | Built-in SW6000 Database Backup Utility for backup and restore |
| Operating System Compatibility | Windows (specific versions not listed, but typical for enterprise software) |
| Minimum Screen Resolution | 1024x768 (1600x900 recommended) |
Frequently Asked Questions - SW6000 SHURE
User questions about SW6000 SHURE
0 question about this device. Answer the ones you know or ask your own.
Ask a new question about this device
Download the instructions for your Software in PDF format for free! Find your manual SW6000 - SHURE and take your electronic device back in hand. On this page are published all the documents necessary for the use of your device. SW6000 by SHURE.
USER MANUAL SW6000 SHURE
SW6000 Conference Management Software, Version 6.8
SW6000-CAA
Conference Admin Application
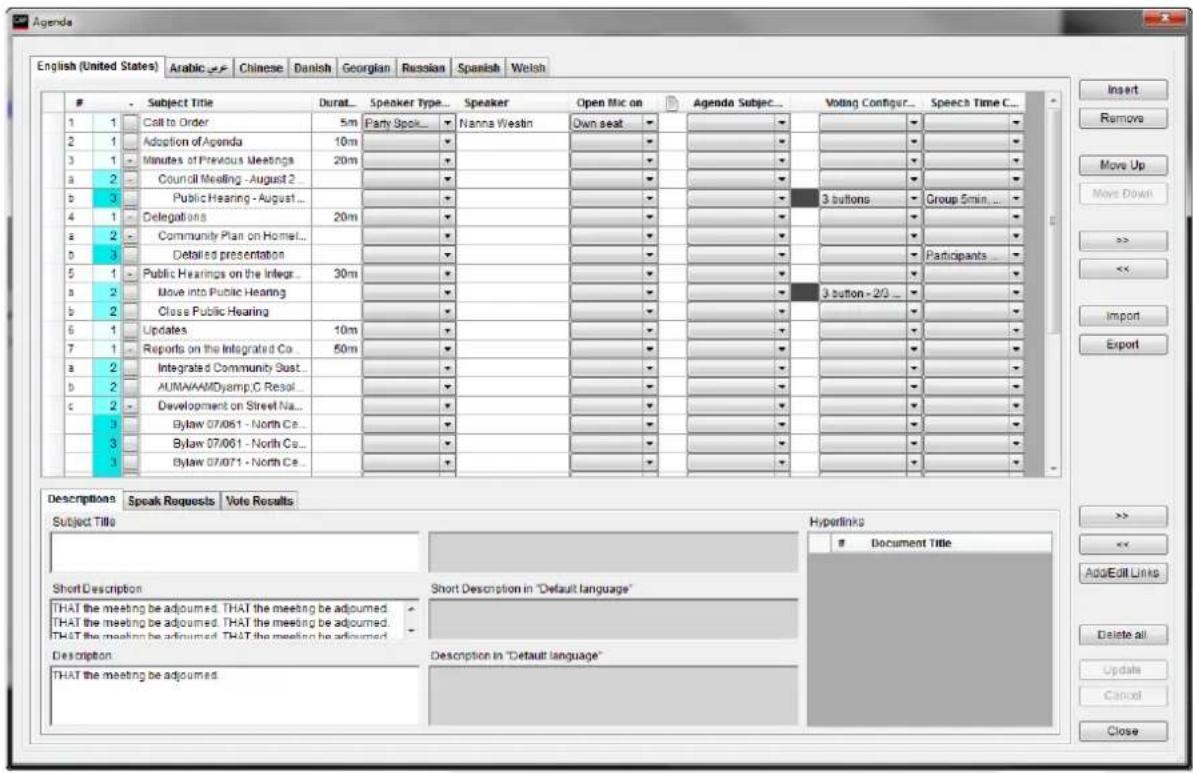
Table of Contents
Table of Contents 2
1 Introduction....4
1.1 Licensing 4
2 Features ....5
2.1 SW6000 General Description....5
2.2 SW6000 Conference Management Software (basic)....5
2.3 SW6000 Expanding Options ....5
2.3.1 SW6000-VOTE 5
2.3.2 SW6000-ESI 5
2.3.3 SW6000-ADV 5
2.3.4 SW6000-CAA 5
2.3.5 SW6000-CUA 5
2.3.6 SW6000-CDA 6
3 Operating instructions....7
3.1 General 7
3.1.1 Starting the CAA....7
3.1.2 Closing the CAA 7
3.1.3 Screen sizes 7
3.1.4 General screen functionality 8
3.1.5 Search List 8
3.1.6 Language Tabs....8
3.1.7 Buttons....9
3.2 Language Selection....10
3.3 Meetings....11
3.3.1 Meeting Mode....15
3.3.2 Speak Mode....18
3.3.3 Participant Seat Table 19
3.3.4 Agenda 22
3.3.4.1 Agenda Table View....22
3.3.4.2 Subject Control Buttons....24
3.3.4.3 Subject Tabs 24
3.3.5 Options....27
3.3.6 Import Agenda from Word....30
3.3.6.1 Template....30
3.3.6.2 Field Properties 30
3.3.6.3 Examples of valid tables....31
3.4 Tables 33
3.4.1 Participants....33
3.4.2 Groups Table 35
3.4.3 Default Participant Seat Table......35
3.5 Messages 37
3.6 Reports 38
3.6.1 Meeting Log Reports....38
3.6.1.1 Meeting Log 39
3.6.1.2 Login and logout activity....40
3.6.2 Participant Meeting Report......41
3.6.3 Participant Table Report 42
3.6.4 Agenda Report....43
3.6.4.1 Agenda Report without voting results43
3.6.4.2 Agenda Report with voting results ....44
3.6.5 Participant Statistical Report......44
3.6.5.1 All Participants 45
3.6.5.2 Detailed Participant 46
3.6.5.3 Participant....46
3.6.6 Search in Voting Results....46
3.7 Setup/Equipment 47
3.7.1 Conference Units....47
3.7.2 Interpreter Consoles 51
3.7.3 Audio Output Units (AO) 53
3.7.4 Ambient Microphones (AM) 54
3.7.5 Meeting Displays (CDA)......55
3.7.6 ID Card....56
3.7.7 Web Service....57
3.7.8 Meeting Import/Export Mode......57
3.7.9 Name Signs....58
3.8 Setup/Configurations....60
3.8.1 Agenda Subject Configuration....60
3.8.2 Reply Configuration....60
3.8.3 Voting Configuration....61
3.8.3.1 Voting Buttons 61
3.8.3.2 CDA Voting Indications....62
3.8.3.3 Mimic Image....63
3.8.3.4 Parameters....64
3.8.3.5 Attendance check....65
3.8.3.6 Vote Results 65
3.8.3.7 Passed Criteria's 66
3.8.3.8 Vote Display Column Formula......67
3.8.3.9 Formula Fields....68
3.8.4 Mimic Configuration....70
3.8.4.1 Edit Image 71
3.8.4.2 Not Removable Button 71
3.8.4.3 Dot Sizes....71
3.8.5 CDA Screen Configuration....72
3.8.6 Participant List Configuration....72
3.8.7 Print Server Configuration....73
3.8.8 Speech Time Configuration....73
3.8.9 Speaker Type Configuration....73
3.8.10 Web Service Configuration....73
3.8.11 Meeting Type Configuration .....74
3.8.12 Name Sign Templates....74
3.9 Setup/Meeting Role....75
3.9.1 Main Menu....76
3.9.1.1 Agenda options....77
3.9.2 Control menu 80
3.9.3 Panel Buttons....81
3.9.3.1 Functionality....82
3.9.4 Speak operation settings....82
3.9.4.1 Default Speak operation settings.....83
3.9.4.2 Individual Speak Operation Modes....83
3.9.5 User Rights 83
3.10 Setup/Language 85
3.10.1 Languages....85
3.10.2 Labels....86
3.10.4 Conference Units with Graphical Interface 87
3.11 Setup/Rooms....88
3.11.1 Create Rooms....88
3.11.2 Room Configuration....89
3.12 Setup/Database....90
3.12.1 Create Database Connections....90
3.13 Connect to Database....90
3.14 Tools 91
3.14.1 Tools/System Messages....91
3.14.2 Tools/License Information .....91
4 SW6000 Backup Utility 92
4.1 Backing Up Data....92
4.2 Restoring data to same database....93
4.3 Restoring data to other database .....94
1 Introduction
The SW6000 Meeting Management Software is designed to operate with hardware units in the MXC Microflex Conference System and the DCS 6000 Digital Conference System.
1.1 Licensing
The SW6000 software facilities are controlled by licensing. The next chapter describes the basic facilities and the expanding options.
One instance of the CAA application is included in basic SW6000 Software.
Please note that this manual may include description of features, which are not included in basic SW6000 Software like Software Controlled Voting, which is licensed separately.
2 Features
2.1 SW6000 General Description
The use of the SW6000 applications and modules is controlled by a 'SW6000 License' file. Refer to the 'Installation Manual SW6000' for details on the License File.
The SW6000 software package has the following system features:
- Client/server system for multiple PCs
- Multiple user profiles with different functionality
• Full language support - Very user friendly graphical design of high quality
• Data stored in SQL database format
2.2 SW6000 Conference
Management Software (basic)
The basic software includes the following applications:
- CAA Conference Admin Application (one instance)
- CUA Conference User Application (one instance) incl. CUA voting client
• ECA External Control Application
With the following functionality:
- Microphone Control
- Agenda Control
- Messaging
- Mimic/synoptic layout
- Participant Table
- Interpretation Control
- Multiple Languages
• ID Card Registration
• ID Card Programming - Multiple Room Control
2.3 SW6000 Expanding Options
The functionality in the basic software can be expanded with the following modules and applications:
2.3.1 SW6000-VOTE
• Parliamentary Voting
This module enables start/stop of voting from the CUA application and is needed if voting in the system is required
2.3.2 SW6000-ESI
The External System Interface module includes the following functionality:
• Streaming Application Control
- Web Service Interface (Streaming of Dynamic data)
- Import/Export of meetings
2.3.3 SW6000-ADV
This module expands the functionality in the basic software with the following advanced controls:
• Advanced Microphone Control
• Advanced Agenda Control
• Advanced Speech Time Control
2.3.4 SW6000-CAA
The ‘CAA Conference Admin Application’ is used by technicians to configure components and setup the system.
The CAA is also used before the event by secretaries or chair persons for setting up meetings, enter participants and agenda information.
During the event the CAA is used for making changes to the meeting agenda.
SW6000 basic includes the use of one CAA instance. Up to 15 additional CAA applications can be used simultaneously in SW6000.
2.3.5 SW6000-CUA
The ‘CUA Conference User Application’ is used by chairman or delegates to control microphones, view agenda, vote, etc. on a PC instead of using the conference unit.
SW6000 basic includes the use of one CUA instance. Up to 199 additional CUA applications can be used simultaneously in SW6000.
This application includes the facility to vote from the CUA application if the system is
expanded with the 'SW6000-VOTE Parliamentary Voting' module.
2.3.6 SW6000-CDA
The ‘CDA Conference Display Application’ is used for displaying content for the audience or participants in the meeting. Up to 16 CDA applications (instances) can be used simultaneously in SW6000.
Important: Refer to the section 'Module Licenses' in the 'Installation Manual SW6000' for information on the module licenses needed for the required functionality.
This manual may include functionality which is licensed separately.
3 Operating instructions
3.1 General
3.1.1 Starting the CAA
After the CAA has been installed, the CAA shortcut is placed on the Desktop and in the start folder.
Clicking the CAA shortcut will start the application
A small window will appear while the application is starting up.

Figure 3.1-A
3.1.2 Closing the CAA
The CAA can be closed in three different ways:
• Using the 'Exit' option in the menu list
- Using the standard windows option 'x' in the upper right corner
• Using the key combination 'Alt+F4'
3.1.3 Screen sizes
The CAA user interface (UI) is designed to run in a window or as a full screen application.
The CAA application accepts screen resolution from 1024x768 and higher, however a minimum resolution of 1600x900 is highly recommended.
3.1.4 General screen functionality
The following describes the general functionality that applies to all screens in the Conference Admin Application (CAA).
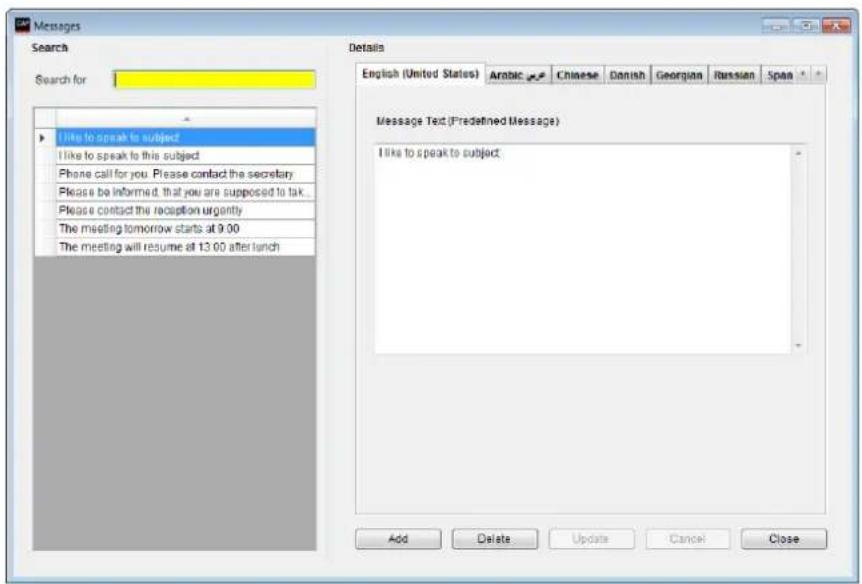
Figure 3.1-B
The above example shows the screen for creating and editing messages.
3.1.5 Search List
The left side of the screen will display a list of messages that allow the user to search for and select a specific message to edit. The 'Search for...' field provides free text search on the texts displayed in the list. Entering the text 'Plea' in the shown example would place focus on the first message where the
3.1.6 Language Tabs
The right side is for the actual functionality related to the menu selection. A tab for each language will be available. The user can flip through the language tabs when creating or editing data thereby entering a translation for the different languages. The system will require the user to enter data for the default
text is found. In this case 'Please approach the Chairman...' would be found.
A vertical scroll bar will appear to enable scrolling down the message list if additional ones exist off the screen.
language, which is the language on the first tab from the left (e.g. English).
Entering data for the rest of the languages is optional.
Selected fields will be highlighted in yellow.
3.1.7 Buttons
Throughout this manual buttons will be referred to by putting the button text in brackets like [Add]. The following buttons are generally implemented on all screens:
| [Add] | Press the button to add a new record. That can be a meeting, a Participant, a message or similar record. When the screen is in edit mode then all fields will be sand colored. When the adding of information is complete (possibly for several languages) then press the [Update] button to save the information. |
| [Delete] | Press the button to delete selected record information. That can be a Participant, a meeting or similar. Information for the record in all languages will be deleted. |
| [Update] | When the user is adding or editing information the changes are saved by pressing this button. Editing existing information is done simply by selecting the information and changing it. The fields will be sand colored to show that the screen is in edit mode. |
| [Copy] | Select one configuration and press this button. A copy of the configuration selected will be created. |
| [Cancel] | Press the button to avoid saving changes just made or saving a newly added record. If an existing record was being edited then the old data will reappear. |
| [Close] | Press the button to close the window. All windows must be closed before exiting the CAA |
3.2 Language Selection
When the application is started the a UI language must be selected if more languages are in use.
If only one language is in use, then the language selection screen is not presented.
A user ID or password is not required. If restricted access to the CAA application is needed, use the standard Windows logon when starting up Windows or apply 'Single Sign On'.
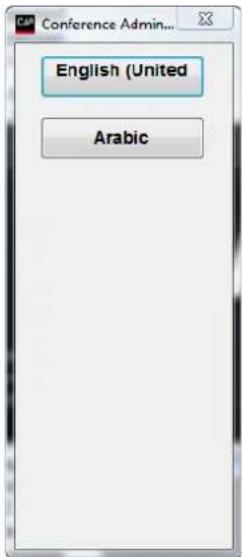
Figure 3.2-A
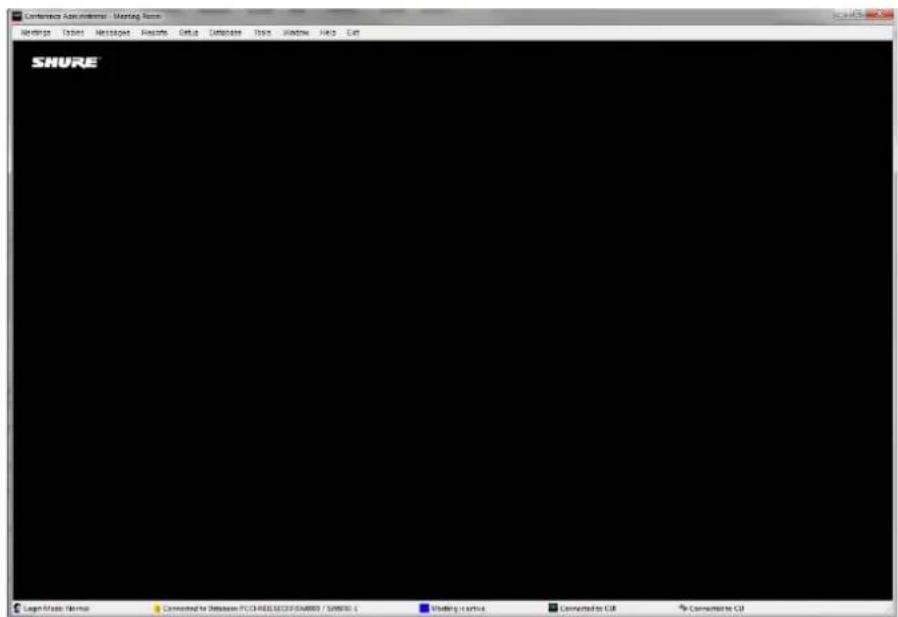
After selecting the language the application will present the following screen.
At the top of the screen dropdown menu provides access to all the different CAA screens.
Figure 3.2-B
3.3 Meetings
Clicking the 'Meetings' brings up the 'Meetings' page.
This screen is used to create meetings with Participant lists assigned to a specific meeting, and to specify operation parameters to be set when the meeting is activated.
Any number of meetings can be created.
The names of the meetings will normally be a specific meeting name like ‘Sales Meeting’ or ‘Annual Meeting’ running a limited period of time.
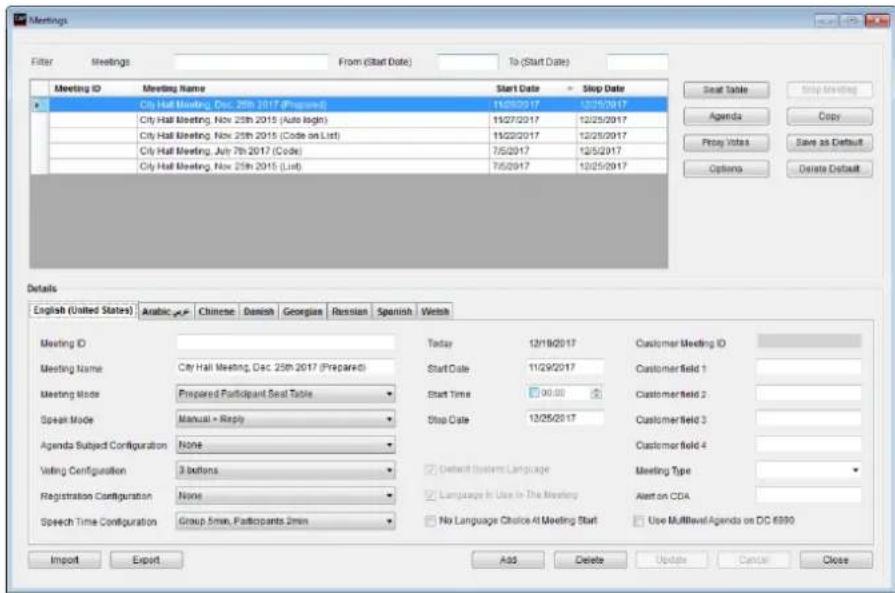
Figure 3.3-A
| Meeting ID | An alpha-numerical value use to identify the meeting. |
| Meeting Name | Title of the meeting. Max. 50 characters. |
| Meeting Mode | The meeting mode determines how Participants are known to the system.Refer to the section‘3.9 Meeting Mode’. |
| Speak Mode | Select the microphone mode to be used when the meeting is started. Options are ‘Automatic’, ‘Manuel’, ‘FIFO’ and ‘VOX (Voice active)’. VOX option only if the CU 6105/6110 features this mode.Refer to the section ‘3.3.2 Speak Mode’. |
| Agenda Subject Configuration | Note: This facility is subject to availability of ‘SW6000-ADV’ module.Refer to the ‘User Manual SW6000 Advanced Meeting Management’ for user information. |
| Voting Configuration | Note: This facility is subject to availability of ‘SW6000-VOTE’ module.The default voting configuration for the meeting can be set using a dropdown box.A set of voting configurations is created in ‘Setup/Configurations/Voting Configuration’. The default voting configuration for the meeting can always be changed in the CUA before a voting session is started. |
| Registration Configuration | Note: This facility is subject to availability of ‘SW6000-VOTE’ module.The dropdown selection ‘Registration Configuration’ in is used to select the registration configuration for the meeting.If no registration configuration is selected, registration is not available for the meeting. |
| Note: Refer to the ‘User Manual SW6000 Registration Facility’ for detailed use of the Registration facility. | |
| Speech Time Configuration | The default speech time configuration for the meeting can be set using a dropdown box.A set of speech time configurations is created in ‘Setup/Configurations/Speech Time Configuration’. The speech time configurations for the meeting can always be changed in the CUA. |
| Start / Stop Dates | The date fields are used to specify when the meeting is to be held. Meetings are only visible in the CUA Application if today’s date falls on or between these two dates. |
| Start Time | The start time of the meeting can be specified in this field.The following setting in ‘prjCUA.exa.config’ file in the folder ‘Program Files (x86)->DIS->Conference User Application’ if time is shown in the agenda:<setting name="ShowAgendaTimesAndDuration" serializeAs="String"><value>FalseIf set to ‘True’ the time entered will be the time shown for the first agenda subject.If no time is specified, the time the meeting is started will be shown for the first agenda subject |
| Default System Language | The ‘Default System Language’ displays the default language selected during the installation. It is set per default and cannot be disabled. Missing labels or text entries in other languages will show the system language label/text entry instead. |
| Language In Use In The Meeting | The ‘Language In Use In The Meeting’ option enables the use of languages during a meeting. Only those languages that have been selected before a meeting is started will be available to the users. The default system language selected during the installation will always be enabled and cannot be disabled. |
| No Language Selection At Meeting Start | The ‘No Language Selection At Meeting Start’ option disables the language selection when used with meeting modes ‘No login’, ‘Prepared Participant Seat Table’ or ‘Automatic Login on Preferred Seat’. The user will be presented for the CUA Main screen in the default language, when the meeting is started. When using the meeting modes ‘Login Using Code...’ the user will be presented for the CUA Login screen, when the meeting is started. |
| Customer Meeting ID | Field, which is filled in during an import from another system. The field cannot be edited. |
| Customer field 1-4 | Four user defined fields for entering data about the meeting. |
| Meeting Type | Type of the meeting. This information is used when streaming content to third party applications.The ‘Meeting Type’ is setup in the Meeting Type Configuration. |
| Alert on CDA | Note: This facility is subject to availability of ‘SW6000-ADV’ module.Refer to the ‘User Manual SW6000 Advanced Meeting Management’ for user information. |
| Use Multilevel Agenda on DC 6990 | Field for enabling the display of multilevel agenda on the DC 6990P. If not ticked only the active subject (or sub-subject) is shown during a voting session. |
| [Seat Table] | This button open the screen for creating a ‘Participant Seat Table’ for the meeting.The button is not available for the meeting modes ‘No Login’ and ‘Login Using Code’.Refer to the section ‘3.3.3 Participant Seat Table’. |
| [Agenda] | Clicking this button bring the ‘Agenda’ popup used for creating an Agenda to a meeting.Refer to the section ‘3.3.4 Agenda’. |
| [Proxy Votes] | On conference units which feature 5 voting buttons ‘Proxy’ voting is possible. Proxy votes cannot be casted from the CUA.Proxy voting enables aParticipant to cast a vote on behalf of another Participant.The “Proxy Votes” button opens the list for assigning Participants permission to vote for another Participant.If time and/or date entries are made the Proxy votes are only valid within these dates.If only date entries are made the Proxy votes are valid from 00.00-23.59 within these. If no time or date entries are made the Proxy votes are valid throughout the entire meeting. |
| [Options] | The ‘Option’ button brings the ‘Option’ popup, which is used to set operation settings of the system used when starting the Meeting.Refer to the section ‘3.3.5 Options’. |
| [Stop Meeting] | Use this button to stop a meetingNote. A meeting is normally stopped from the CUA application. |
| [Copy] | The ‘Copy’ button makes a copy of the selected meeting. Both ‘Participant seat table’, ‘Agenda’, ‘Proxy votes’ and ‘Option’ settings are copied. |
| [Save as default] | The ‘Save as default’ button saves the meeting data from the currently marked meeting and inserts this data per default when creating new meetings. |
| [Delete default] | The ‘Delete default’ button deletes default meeting data. |
3.3.1 Meeting Mode
Select one of the seven available modes for the meeting:
| PreparedParticipant Seat Table | This mode is used to create a list of Participants with names of all the Participants attending the meeting. Each Participant is assigned a seat with a microphone. This assignment cannot be changed during the meeting. The assignment of seats is done by clicking the 'Seat Table' button.See later section: 'Creating a Participant Seat Table'.A seat, having a PC running the CUA Application, will show the name and other information of the Participant on the Language Selection Screen and other screens and on various lists. | 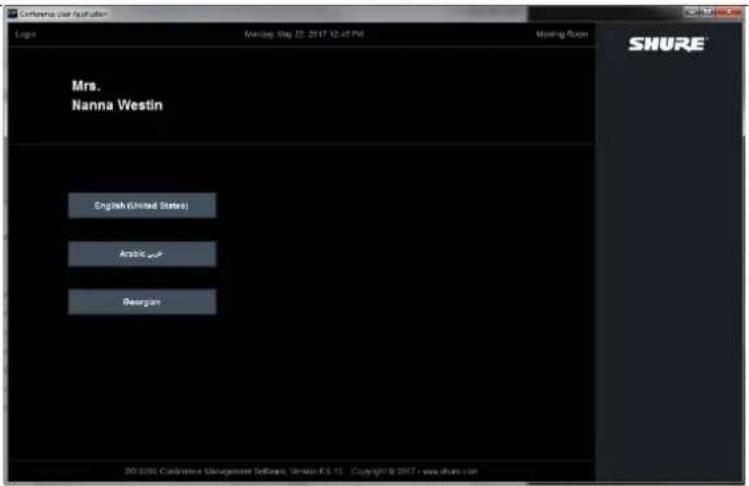 Figure 3.3-C Figure 3.3-C |
| Login Using Code | Selecting this option will allow permanent Participants to login at the CUA Application using their individual 'login code'.If the functionality "Setup/Equipment/ID Card/ID Card Setup: Using ID Cards in Conference Units" is selected, the login code is taken from a ID Card inserted in the conference unit. In this case the user will not be presented for a login screen when starting the CUA.Participants using conference units without ID Card reader will be shown on various Participant screens/lists with the seat number instead of their name. | |
| Login Using Code on Seat | Selecting this option will allow permanent Participants to be assigned a specific seat with a microphone. The Participants has to login at the CUA Application using their individual login codes, but the Participant can only login to the seat assigned to him.If the functionality "Setup/Equipment/ID Card/ID Card Setup: Using ID Cards in Conference Units" is selected, the login code is taken from a ID Card inserted in the conference unit. Then the user will not be presented for a login screen when starting the CUA.Participants using conference units without ID Card reader will be shown on various Participant screens/lists with the seat number instead of their name.The participant assigned to a seat with a conference units with/without a ID Card reader can be logged into the seat using the Mimic screen. | |
| Login Using Code on List | Selecting this option will allow Participants present on a Participant Seat table to login at the CUA Application using their individual login codes at any seat.If the functionality “Setup/Equipment/ID Card/ID Card Setup: Using ID Cards in Conference Units” is selected, the login code is taken from a ID Card inserted in the conference unit. Then the user will not be presented for a login screen when starting the CUA.Participants using conference units without ID Card reader will be shown on various Participant screens/lists with the seat number instead of their name.All participant on the list with a conference units with/without a ID Card reader can be logged into the seat using the Mimic screen. | |
| Login Using Code on Preferred Seat | Selecting this option will allow the Participants to have pre-assigned seats. The Participants can either login at the designated seat by using the Login button or login with ID Card/code at other seats.In systems without ID Card login, the CUA always allows for login at the designated seat using the Login button and alternative login of other Participants with code login.In systems with ID Card login, the CUA prompts for code login at the designated seat if there is no ID Card reader available and allows for alternative login with another code login. If there is a ID Card reader available, the CUA prompts for ID Card login.The ‘Login Using Code on Preferred Seat’ mode differs from the ‘Prepared Participant Seat Table’ mode in the sense that the Participants are not registered as logged in before they login using the Login button or login with ID Card/code.Also, it is possible to move the Participants and assign other Meeting Roles during the meeting (except for seats where a ID Card has been inserted) from the CUA mimic.Furthermore, it is possible to mix units with and without ID Card reader and assign names to all units. Participants using conference units without ID Card reader will be shown on various Participant screens/lists with the seat number instead of their name. | |
| Automatic Login on Preferred Seat | Selecting this option will allow the Participants to have pre-assigned seats. The Participants can either login automatically at the designated seat or login with ID Card/code at other seats.In systems without ID Card login, the CUA always allows for automatic login at the designated seat and alternative login of other Participants with code login.In systems with ID Card login, the CUA prompts for code login at the designated seat if there is no ID Card reader available and allows for alternative login with another code login. If there is a ID Card reader available, the CUA prompts for ID Card login.The ‘Automatic Login on Preferred Seat’ mode differs from the ‘Login Using Code on Preferred Seat’ mode in the sense that the Participants are automatically logged in when the system operates without ID Card login.Similar to the ‘Login Using Code on Preferred Seat’ mode it is possible to move the Participants and assign other Meeting Roles during the meeting (except for seats where a ID Card has been inserted) from the CUA mimic.Furthermore, it is possible to mix units with and without ID Card reader and assign names to all units. Participants using conference units without ID Card reader will be shown on various Participant screens/lists with the seat number instead of their name. | |
| Important: This mode is not supported in DC 6990 Conference Units. | ||
| No login | This option will not use names of Participants. All Participant seat tables will show the seat number.In this mode, the ‘Participants’ screen will not be available at the CUA application | |
3.3.2 Speak Mode
The Speak Mode can always be changed during a meeting using the Meetings page in the CUA. Individual microphone settings which might be assigned to any conference unit are not overridden. See section Setup/Meeting Role for further details about Individual microphone settings.
The following modes can be pre-selected for the meeting:
| Manual | All participants speak requests are inserted into the speak-request queue. Their microphones are turned on when Chairman grants the individual participant the right to speak. Microphones with Chairman priority will not be placed in the speak-request queue but can always be turned on. |
| Automatic | All Participants speak requests causes their microphone to turn on if the maximum number of speakers is not reached. Otherwise the speak request will be rejected. Microphones with Chairman priority can always be turned on. |
| FIFO | All Participants speak requests causes their microphone to turn on if the maximum number of speakers is not reached. Otherwise the speak request will be inserted into a speak-request queue. When one of the active microphones is turned off, the first in the speak-request queue will automatically be turned onMicrophones with Chairman priority can always be turned on directly. |
| VOX | Speaking into a Participant microphone will turn on the microphone if the maximum number of Participants is not reached. Otherwise the speak request will be rejected.Speaking into a Chairman microphone will turn on the microphone if the maximum number of Open Mics is not reached. Otherwise the speak request will be rejected. Chairman units will interrupt a Delegate Unit if the maximum number of Open Mics is reached.Settings for the VOX mode can be set in the CU 6105/6110/DIS-CCU browser application. |
| Manual + Reply | Same a ‘Manual’ mode however the Reply option is enabled |
| Automatic + Reply | Same a ‘Automatic’ mode however the Reply option is enabled |
| VOX + Reply | Same a ‘VOX’ mode however the Reply option is enabled |
Participant Seat Table
Press the [Seat table] button to call the function for creating a Participant Seat table for the meeting.
The button is only enabled if the meeting mode is set to
• ‘Prepared Participant Seat Table’
- 'Login Using Code on Seat'
- 'Login Using Code on List'
- 'Login Using Code on Preferred Seat'
• 'Automatic Login on Preferred Seat'.
Figure 3.3-D
| [>>] | Participants in the Participants table will be shown in the left window. Selecting a Participant and clicking ‘>>’ will place the Participant in seat number 1 in the Participant seat table. The seat will automatically be generated, when clicking ‘>>’.Selecting an empty seat before clicking ‘>>’ will place the Participant in that seat.Selecting a seat occupied by a Participant, before clicking ‘>>’ will place the Participant in a new seat. |
| [<<] | Selecting a seat and clicking ‘<<’ will remove a Participant from a seat.Clicking ‘Clear seat’ will also remove a Participant from a seat. |
| Participants table | Clicking this button will show the Participant table. This is the default view when opening the Participant Seat Table. The following setting can be changed:Meeting Role – assigning the Meeting Role for the participant for the meeting. The default is the meeting role assigned to the Participant in the Participant tableUse Second. Meeting Role – enabling the use of a Secondary Meeting Role on seat types ‘Secondary seat’Secondary Meeting Role – assigning a Secondary Meeting Role used on seats with the Seat type configured as ‘Secondary seat’ in Setup/Equipment/Conference units |
Note: Secondary Meeting Role facility is subject to availability of 'SW6000-ADV' module.
Refer to the 'User Manual SW6000 Advanced Meeting Management' for user information.
Seat table details
Clicking the 'Seat table details' button bring a window showing all the Participant Seat table details.
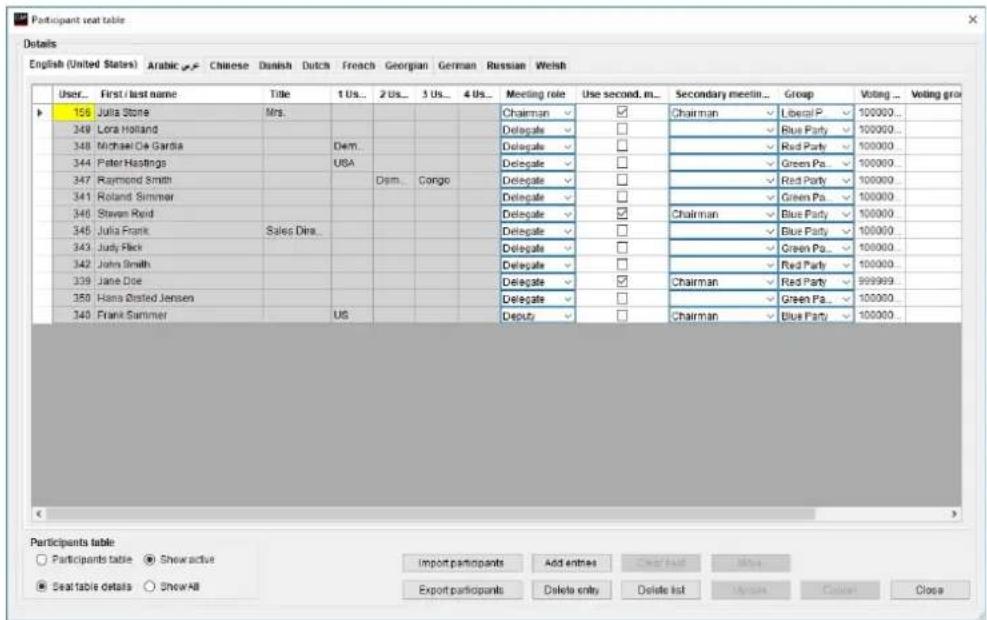
Figure 3.3-E
This option is useful if specific values different from the entries made for the Participant in the Participant Table has to be changed for the meeting. The following additional values can be changed:
Group – assigning a group e.g. for group speech time
Voting Weight – assigning a numerical value giving the number of votes the user has
Voting Group – assigning a character used for a voting calculation for groups with different voting rights
Mic Attenuation – assigning an individual microphone level
| [Show active] | Clicking ‘Show active’ will show all Participants in the Participants Table marked as ‘Active’. |
| [Show all] | Clicking ‘Show all’ will show all Participants in the Participants table. |
| [Import participants] | Use this button to import a list of names from an XML file or to use the default Participant Seat table created in the CAA/Tables/Default Participant seat table. |
| [Export participants] | Use this button to export a list of names to an XML file. |
| [Add entries] | Press this button to create the number of seats, which will be used for the meeting. | 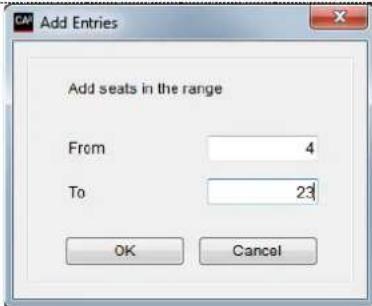 Figure 3.3-F Figure 3.3-F |
| [Delete entry] | Press this button to delete a selected seat. | |
| [Clear seat] | Press the button to remove a Participant from a selected seat. | |
| [Delete list] | Press this button to delete all seats. | |
| [Move] | Press this button to move a Participant from one seat to another. | 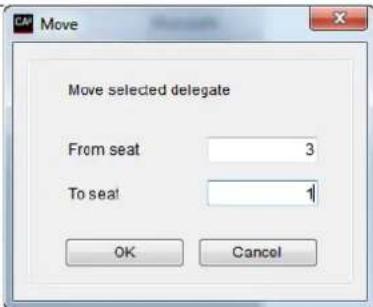 Figure 3.3-G Figure 3.3-G |
3.3.4 Agenda
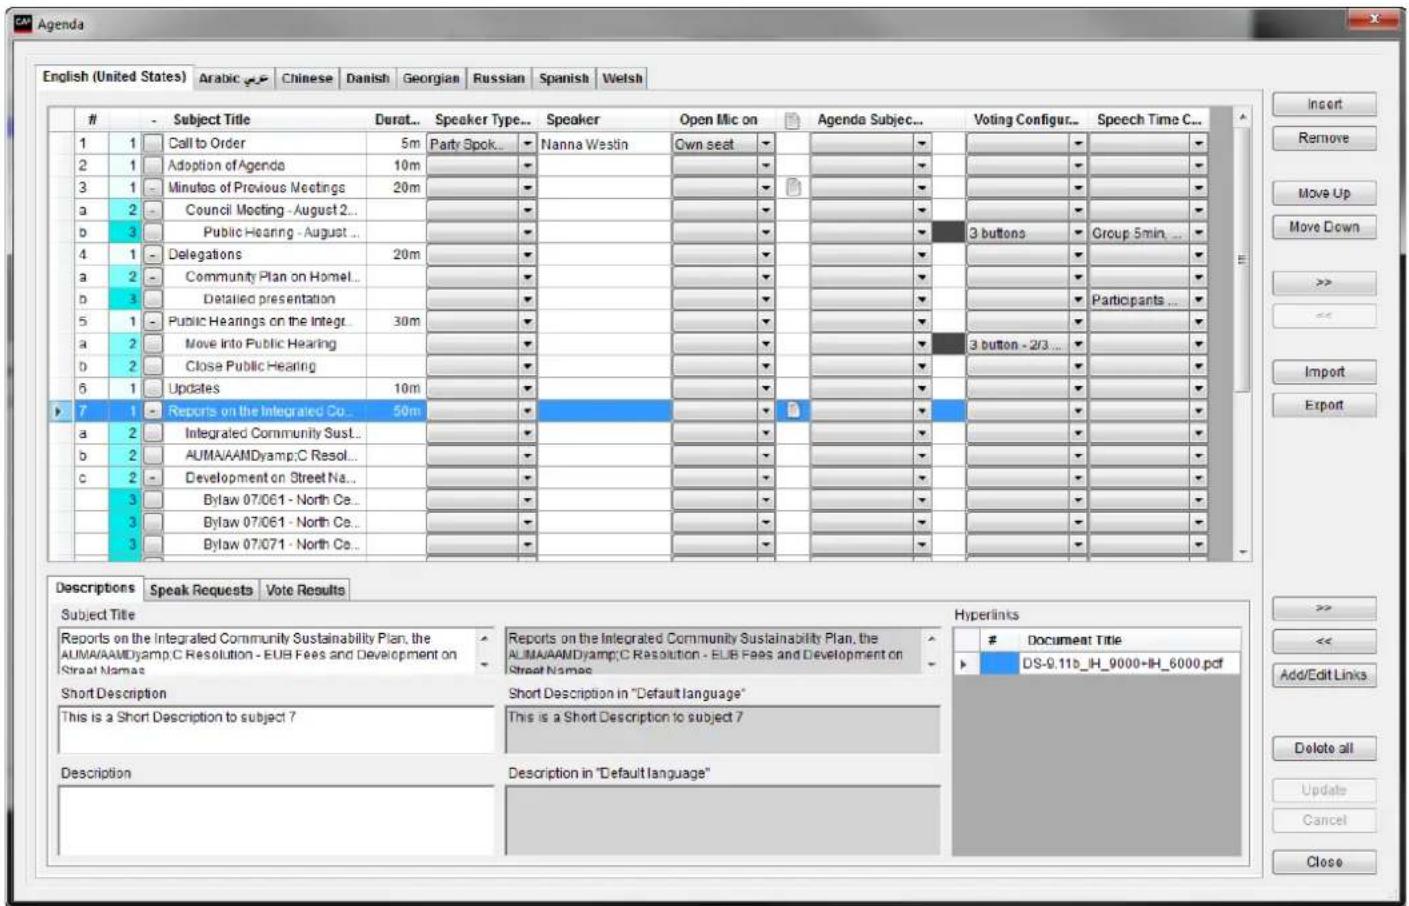
Figure 3.3-H
The agenda is a list of subjects with a Title and optional information like Description. Adding subjects build the Agenda one by one in a table view.
The Agenda screen consist of an ‘Agenda Table View’ and for a selected subject the ‘Subject Tabs’ are available for adding additional information like Description, Hyperlinks, Speak Requests or view information like Voting Results.
A number of Subject Control Buttons are available on the screen for editing/structuring the agenda subjects.
3.3.4.1 Agenda Table View
The agenda table view consist of columns with fields for entering data and shows all subjects including indentation.
New subjects are added automatically when entering text on a blank line below the last subject.
Subject can be moved, inserted and indented using the Subject Control Buttons to the right.
Note: The Subject Title in a row must not be left blank in the default meeting language.
The columns in the Table View are:
| # | Field for numbering the subjects. The field can be empty. |
| (no header) | This field indicates the indentation level of the subject. Each level is marked with the level number and a different color. |
| -/+Subject Title | Expand and collapses the sub-subjects.Field for entering the main subject and sub-subjects. For each main subject it is possible to type in a number of sub-subject activates with ‘>>’. There can be a maximum of 5 levels of sub-subjects (6 levels including the main subject). The level is marked in the second column with a color and a level number. Each sub-subject is shown with indentation as well. The subject title can be edited in the grid or in the editing field in the ‘Descriptions’ tab. When editing in the editing field line change is possible. Max. number of characters in a subject: 1000 Max. number of subjects (all levels): 1000 |
| Important: The MXC640 / DC 6990 Conference Unit support up to 100 characters. Characters exceeding 100 will not be shown. | |
| Duration | Field to enter the duration of the agenda item. Max. duration is 23 hour 59 minutes. The duration together with the actual time is shown in the CUA->Agenda, if enabled in the CUA configuration file “prjCUA.exe.config”. The actual time is calculated based on the start time of the meeting. Refer to ‘3.3 Meetings’ in the section ‘Start Time’ for more details. |
| Speaker Type Configuration | Note: This facility is subject to availability of ‘SW6000-ADV’ module. Refer to the ‘User Manual SW6000 Advanced Meeting Management’ for user information. |
| Speaker | It is possible to insert an unlimited number of speakers as sub-subject to a main subject or a sub-subject. Each speaker is normally assigned each a sub-subject i.e. at level 3 below a level 2 subject like “Reply”. The speaker is selected by clicking the speaker field at the subject. A popup will open, listing the Participants assigned to the meeting in the Participant Seat Table. Alternatively, the speaker name can be typed in the speaker field at the subject. If a subject with a speaker is set current in the CUA/Agenda screen the microphone for the speaker will be set active on the seat, selected in the field ‘Open Mic On’. If the subject title is empty the speaker name is shown in the CUA/Agenda and CDA/Agenda. If the subject title is not empty the speaker name is not shown in the CUA/Agenda and CDA/Agenda. The subject title is shown instead. |
| Open Mic On | Note: This facility is subject to availability of ‘SW6000-ADV’ module. Refer to the ‘User Manual SW6000 Advanced Meeting Management’ for user information |
| “Document” icon | This field indicates is one or more documents are linked to the subject |
| Agenda Subject Configuration | Note: This facility is subject to availability of ‘SW6000-ADV’ module. Refer to the ‘User Manual SW6000 Advanced Meeting Management’ for user information |
| (No header) | Indication column. The field is black if a voting configuration is selected for the subject. |
| Voting Configuration | Note: This facility is subject to availability of ‘SW6000-VOTE’ module. Field for assigning voting configurations for the individual agenda subjects. |
| Speech Time Configuration | Note: This facility is subject to availability of ‘SW6000-ADV’ module. Refer to the ‘User Manual SW6000 Advanced Meeting Management’ for user information |
3.3.4.2 Subject Control Buttons
The subject control buttons are:
| [Insert] | This button inserts a blank row above the selected row allowing the user to add a new subject. | |
| [Remove] | This button deletes the selected subject unless a vote result exists for the subject. | |
| [Move up] | This button moves the selected subject one row up allowing the user to reorder the agenda. | |
| [Move down] | This button moves the selected subject one row down allowing the user to reorder the agenda. | |
| [>>] | This button increases indentation one level. A limit of 6 indentation levels must apply. | |
| [<<] | This button decreases indentation one level. | |
| [Import] | Import an agenda from an XML file or Word file. Refer to the section 'Import Agenda from Word' for detail about importing from word.A dialog box will be presented for the option of deleting an existing agenda or add the import to the existing agenda. | 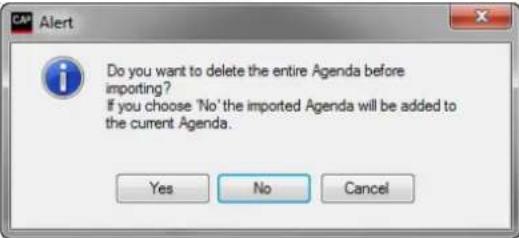 Figure 3.3-1 Figure 3.3-1 |
| [Export] | Export the agenda to an XML file. | |
| [Delete all] | This button deletes all subjects. You have to confirm your choice. | |
3.3.4.3 Subject Tabs
3.3.4.3.1 Descriptions
| Description | A long description of a subject (main subject or sub-subject) can be inserted. This description is shown in the CUA/Agenda in the description window when a subject is selected.Max. number of characters: 10.000 |
| Important: The MXC640 / DC 6990 Conference Unit does not show Description. | |
| Short Description | A short description, typical one line can be typed for a subject (main subject or sub-subject). This short description is shown in the CUA/Agenda and CDA/Agenda but only for the main subject.Max. number of characters: 500 |
| Important: The MXC640 / DC 6990 Conference Unit supports up to 250 characters. Characters exceeding 250 will not be shown. | |
| Description in “Default language” | When adding the description of an agenda subject to other languages the description for the default language can be seen in the ‘Default language description’ window. This will ease the translation to the other languages |
| Short Description in “Default language | This window shows the short description in the default language easing the task of making a translation to another language. |
| Hyperlinks | Note: This facility is subject to availability of ‘SW6000-ADV’ module.Refer to the ‘User Manual SW6000 Advanced Meeting Management’ for user information |
3.3.4.3.2 Vote Results
Note: This facility is subject to availability of 'SW6000-VOTE' module
The Vote Result tab on the agenda screen features the following:
- Viewing of Total Vote Result
- Viewing of the Group Voting Conclusion
- Adding Comments to the Voting Results
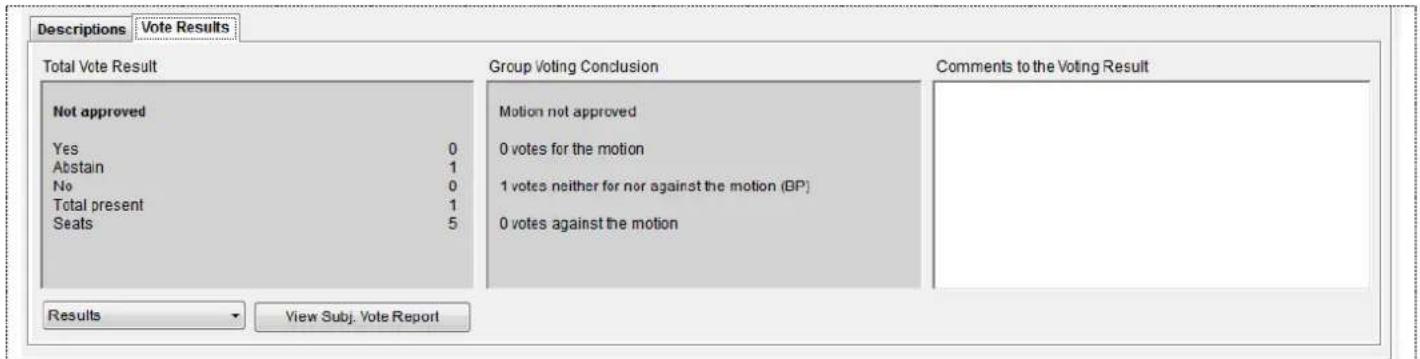
Figure 3.3-J
| Total Vote Result | Shows the voting result as configured in the Vote Result table in the CAA/ Setup/Configurations/Voting Configuration in the following format:Approved/not approvedVoting configuration result text 1-9: Result 1-9 |
| Group Voting Conclusion | Field used to display the voting conclusion in a format specified by customer |
| Comments to the Voting Results | Field for inserting comments to the voting results |
| Results | Dropdown list to select a Voting Report to print:ResultResult with GroupsSimple |
| [View Subject Vote Report] | Prints the Subject Vote report in PDF format. |
3.3.4.3.3 Speak Requests
Note: This facility is subject to the availability of the 'SW6000-ESI' module.
Refer to the 'User Manual SW6000 External System Interface' section 'Web Publish Mode' for information in how to make 'Speak Requests' available.
The speak request tab gives the option to add pre-requests before the meeting is started for participants who are assigned to participate and speak to a subject in the meeting.
The Pre-request to speak list can be shown in the agenda informing the chairman who want to speak for the subject.
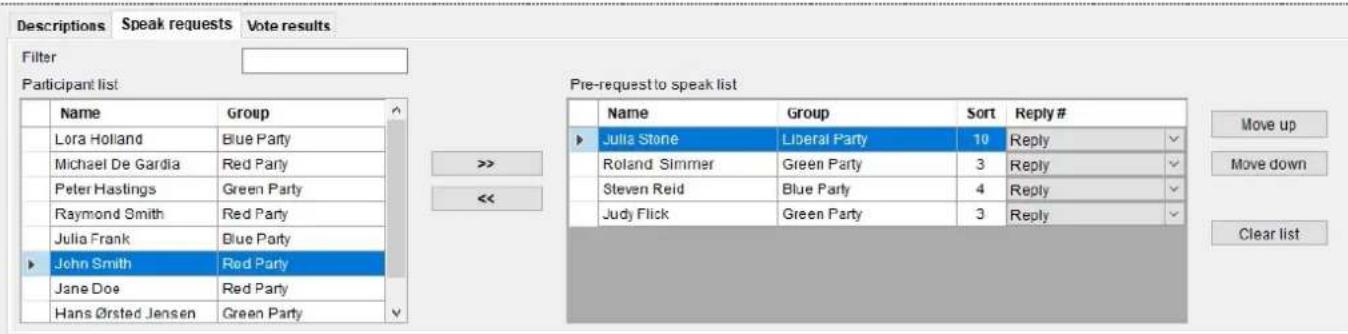
Figure 3.3-K
| Participant list | Shows the participants added to the Seat table for the meeting.The list is only available for the Meeting mode which include a Seat Table. | |
| Filter | Filters the Participant list based on the entry in the filter field | |
| [ >> ] | Selecting a participant entry in the ‘Participant List’ and clicking ‘>>’ will add the participant’ to the ‘Pre-request to speak list’ and remove the participant from ‘Participant List’. | |
| [ << ] | Selecting a participant entry in the ‘Pre-request to speak list’ and clicking ‘<<’ will remove the participant from ‘Pre-request to speak list’ and add the participant’ to the ‘Participant List’. | |
| Pre-request to speak list | When a subject is set active in the CUA, the participants on the pre-request list will be populated in the CUA->Microphones->Speak Requests list.The pre-request facility uses the ‘Reply’ facility and if the ‘Speak List Setting’ does not include ‘Reply’, the list will not be populated in the CUA.If the Reply configuration used for the meeting or agenda subject does not include the Reply# selected, the CUA list is not populated with the replies.The list is populated each time the subject is set active. | |
| Sort | Show the entry made in the ‘Group table’ in the field ‘Sort order’ | |
| Reply# | The Reply number show is the one selected in CAA -> Setup -> Equipment -> Meeting Import/Export -> Web Publish Mode -> Web Application -> Reply Configuration -> Reply # .The Reply# cannot be changed.The Reply# is used by the system if the pre-request list to speak is transferred automatically to the Speak list in the CUA. This is the case if:The speak mode includes replyThe participant(s) in the list is logged in | |
| Move Up | Moves the selected entry up in the list | |
| Move Down | Moves the selected entry down in the list | |
| Clear List | Removes all entries in the ‘Pre-request to speak list’. | |
3.3.5 Options
The 'Options' popup is used to set the system settings, used when starting the Meeting.
Figure 3.3-L
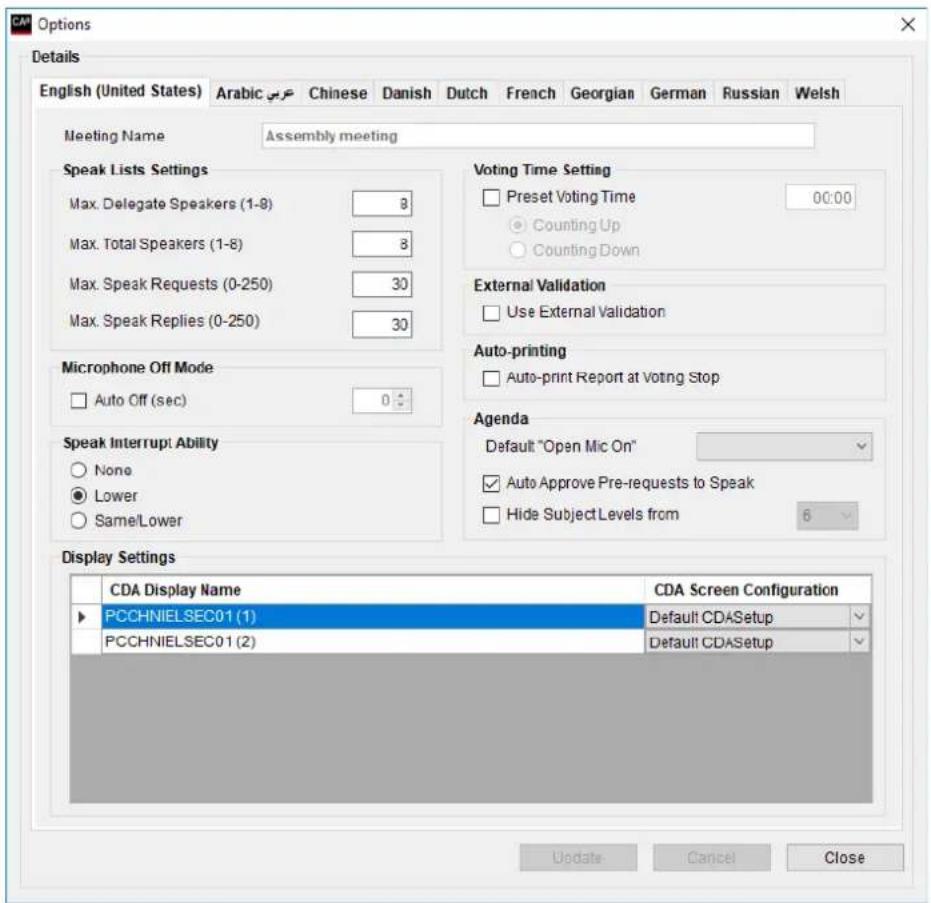
| Speak List Settings | Max. Del. Speakers | Set the maximum delegate speakers allowed. The value can be set from 1 to 8. |
| Max. Total Speakers | Set the maximum open microphones allowed. This included both Delegates and Chairmen. The value can be set from 1 to 8. | |
| Max. Speak Requests | Set the maximum number of entries in “Request to speak” queue. The value can be set from 0 to 255. | |
| Max. Speak Replies | Set the maximum no of entries in “Reply” queue. The value can be set from 0 to 255. | |
| Microphone Off Mode | Auto Off (sec) | When ticked the microphone in a Conference Unit will switch off after the time set, if nobody is talking in the microphone. |
| Speak Interrupt Ability | None | Cannot interrupt another speaker. |
| Lower | Can interrupt a speaker with a speak priority less than own speak priority. | |
| Same/ Lower | Can interrupt a speaker with the same speak priority or a speak priority which is less than own speak priority. | |
| Voting Configuration | Preset Voting Time | When ticked the voting time is enabled. After the time set, the voting session will stop automatically. |
| Note: This facility is subject to availability of ‘SW6000-VOTE’ module. | Counting up | Select this option to make voting time counters display elapsed time starting from zero and counting up. |
| Counting down | Select this option to make voting time counters display elapsed time starting at the time limit and counting down to zero. | |
| External Validation | Use External Validation | When ticked External Validation e.g. external biometric validation using finger print recognition or iris scanners is enabled. External validation is only available if the current meeting is of type ‘Login using code’, ‘Login using code and list’ or ‘Login using code on list’. It is also a prerequisite that ID Card is used.The option shall also be ticked if a Registration popup is required, when using Registration at the meeting. |
| Auto Printing | Auto-print Report after Voting Stop | When selected a configured printer will print the selected ‘Vote Report’ after a voting session is stopped.The report to print is selected in ‘Print Server Configuration’. |
| Default ‘Open Mic On’ in Agenda | This selection determines the default (Podium or Own place) when a Speakers is selected to a subject.Note: ‘Open Mic On’ facility is subject to availability of ‘SW6000-ADV’ module.Refer to the ‘User Manual SW6000 Advanced Meeting Management’ for user information. | |
| Agenda | Hide Subject Levels From | This option is used to hide sub-level subjects for certain users.The setting ‘Hide Subject Levels from’ includes setting from 2 to 6. Agenda subject levels from the number set and higher levels are excluded in UI’s as default for all Meeting Roles and in the Web Service.The setting does not limits the visibility of agenda subject levels in the CDA as this visibility can be controlled in custom displays.A setting in Meeting Role allows a user (like Chairman) to have access to hidden subjects levels. Refer to the section Meeting Role for details. |
| Display Settings | It is possible to have up to 16 CDA applications running.Various CDA Screen Configurations can be created in the CAA application. For each meeting it is possible to assign any created configuration to any of the CDA Displays available.For more information about CDA Screen Configurations Refer to the ‘User Manual SW 6090 CDA’. | |
3.3.6 Import Agenda from Word
3.3.6.1 Template
When importing from word the import facility will import the first table only in a document. Previous/later text and later tables will be ignored.
The word file must be of the format docx.
The import to SW6000 will be to the default language only.
The table may have a header line. The header line if present will not be imported if the character in the first column/line is # .
| # | Subject Title | Level | Description | Short description |
• Empty lines will be omitted in the import.
- The Level, Description and Short Description columns might be omitted leaving only the # and Subject Title in the table. All Subjects will then be imported at level 1.
- If a Level field is empty the subjects will be imported at level 1
- If a Level field contains other characters than stated in the "Field Properties" table, the line will imported to level 1
3.3.6.2 Field Properties
| Field | Type | Length |
| # | Alpha-numerical | 3 |
| Level | Numerical (1-6 only) | 1 |
| Subject Title | Alpha-numerical | 1.000 |
| Description | Alpha-numerical | 10.000 |
| Short description | Alpha-numerical | 500 |
Characters exceeding the specified length will be omitted in the import
3.3.6.3 Examples of valid tables
The following examples are all valid tables.
Example 1
| # | Subject Title | Level | Description | Short description |
| 1.0 | This is subject number one on level 1 | 1 | This is the long description at subject 1.0. This description is shown in the CUA in a separate field | This is the short description at subject 1.0. This description is shown in the CUA just below the Subject line |
| 1.1 | This is subject number two on level 2 | 2 | This is the long description at subject 1.1. This description is shown in the CUA in a separate field | |
| 2.0 | This is subject number three on level 1 | 1 | This is the long description at subject 2.0. This description is shown in the CUA in a separate field | This is the short description at subject 2.0. This description is shown in the CUA just below the Subject line. |
| 2.1 | This is subject number four on level 2 | 2 | This is the long description at subject 2.1. This description is shown in the CUA in a separate field | |
| 2.2 | This is subject number five on level 3 | 3 | This is the long description at subject 2.2. This description is shown in the CUA in a separate field |
The Short Description is only shown in the CUA for subjects at level 1.
Example 2
| # | Subject Title | Level |
| 1.0 | This is subject number one on level 1 | 1 |
| 1.1 | This is subject number two on level 2 | 2 |
| 2.0 | This is subject number three on level 1 | 1 |
| 2.1 | This is subject number four on level 2 | 2 |
| 2.2 | This is subject number five on level 3 | 3 |
Example 3
| # | Subject Title |
| 1.0 | This is subject number one |
| 1.1 | This is subject number two |
| 2.0 | This is subject number three |
| 2.1 | This is subject number four |
| 2.2 | This is subject number five |
Example 4
| # | Subject Title |
| This is subject number one | |
| This is subject number two | |
| This is subject number three | |
| This is subject number four | |
| This is subject number five |
Example 5
| # | Subject Title |
| A | This is subject number one |
| B | This is subject number two |
| C | This is subject number three |
| D | This is subject number four |
| E | This is subject number five |
Example 6
| A | This is subject number one |
| B | This is subject number two |
| C | This is subject number three |
| D | This is subject number four |
| E | This is subject number five |
3.4 Tables
3.4.1 Participants
Participants who attend meetings can be created using this screen.
User Id, Login Code, Name, and Meeting Role fields are all mandatory and must be filled in.
Figure 3.4-A
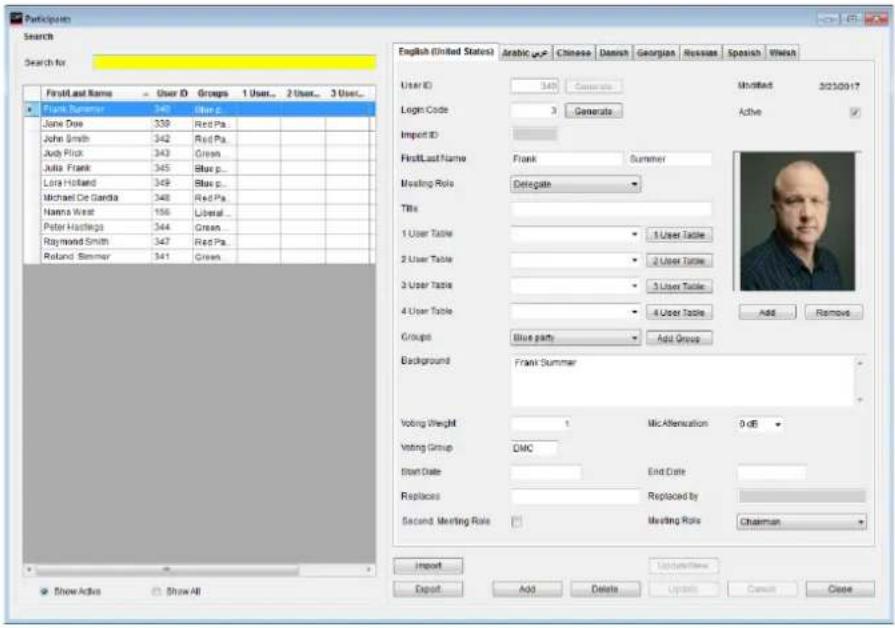
| User ID | A numeric value up to 5 digits, unique for each Participant, which is identifying the User. When a Participant is added to the list of Participants, the ID cannot be changed. If ID Cards are in use, this ID has to match the ‘Participant Id’ programmed on the card. |
| Login Code | Enter a unique login code to be used by the Participant for logging in to the CUA Application. |
| [Generate] | Press the button to generate a random number for the User id/Login Code. When adding new Participants, unique User id/Login Codes will automatically be assigned. |
| First/ Last Name | First and last name of the Participant. |
| Meeting Role | Select one of the existing Meeting Roles from the drop down list. The Meeting Role will determine what screens, buttons, individual microphone settings and functionality will apply to the Participant’s CUA Application and microphone operation when the Participant is logged in. |
| Title | Title or position of the Participant. |
| 1-4 User Table | Four user-defined fields are available for entering various text information. Write any text or select predefined text from the drop down list.The description of the fields can be changed in ‘CAA/ Setup/Language/Labels’ to describe the content of the fields. The label numbers are 1204 to 1207. |
| [1-4 User table] | Pressing the buttons will call popup screens that allow the user to create and maintain predefined selections for each of these four fields.The label numbers are 1204 to 1207. |
| Groups | A Participant can be assigned a group of Participant. This is useful if ‘Group Speech Time’ is used.Note: This facility is subject to availability of ‘SW6000-ADV’ module. |
| [Add Group] | This button will bring a popup for adding Participant groups.Note: This facility is subject to availability of ‘SW6000-ADV’ module. |
| Background | The user can enter any free text information here to be displayed on the Participant information screen in the CUA Application. |
| Voting Weight | This field is used to insert a numerical value given the number of votes the user has. Default value is ‘1’ (one).Voting weight must be between 0,01 and 100.000.000 |
| Mic Attenuation | Use this setting to assign individual microphone level to a Participant. The setting can be from 0 to -6. |
| Voting Group | This field is used to insert a character to be using in the voting calculations i.e. ‘F’ for French and ‘N’ for Nederland if the two groups have different voting rights |
| Start Date | Date field for entering from which date the Participant is active. The start date cannot be after the stop date. It is possible to enter a start date but no stop date. |
| Stop Date | Date field for entering the stop date where the Participant is not active anymore. The stop date cannot be before the start date. It is possible to enter a start date but no stop date. |
| Replaces | If the Participant is replacing another Participant, a Participant to replace can be found by clicking the field. A popup will show the list of active Participants. Participants selected cannot be replaced by other Participants nor be replacing other Participants. |
| Replaced by | If a Participant is replaced by another Participant this field show the ‘First/Last Name’ of the Participant who has replaced. |
| Second. Meeting Role | Note: This facility is subject to availability of ‘SW6000-ADV’ module.Refer to the ‘User Manual SW6000 Advanced Meeting Management’ for user information. |
| Meeting Role | Note: This facility is subject to availability of ‘SW6000-ADV’ module.Refer to the ‘User Manual SW6000 Advanced Meeting Management’ for user information. |
| Active | A Participant is by default marked as ‘Active’. If marked as active, he will be shown in lists where ‘Show Active’ is selected.Non-active participants are only shown if ‘Show All’ is selected. This setting is only a filtering facility and has no other functional behavior. |
| Picture | A picture of the Participant can be inserted using the [Add] button and removed using the [Remove] buttons.A picture added will be displayed on the Participant information screen in the CUA Application. |
| [Add] (picture) | Press the button to call a standard Windows interface to select picture files (maximum size 30 Kb – picture format WxH = 115x120).Pictures are replaced by adding a new one. |
| [Remove](picture) | Press the button to remove a picture from the Participant record. |
3.4.2 Groups Table
Note: The Groups Table is subject to the availability of the 'SW6000-ADV' module.
Refer to the 'User Manual SW6000 Advanced Meeting Management' for user information.
3.4.3 Default Participant Seat Table
The default Seat table is used to create a standard seating which can be used, when creating meetings.
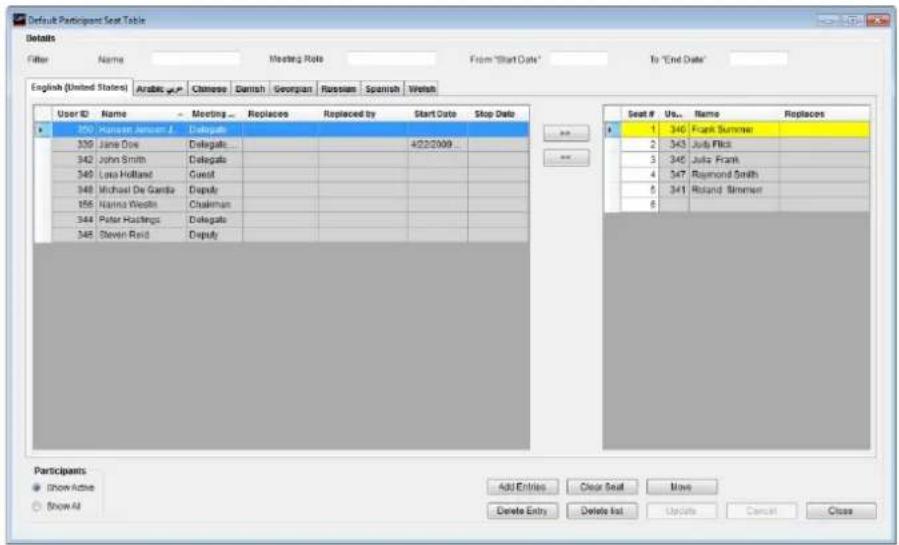
Figure 3.4-B
| [>>] | Existing Participants from the Participants Table will be shown in the left window. Selecting a Participant and clicking ‘>>’ will place the Participant in seat number 1 in the Default Participant Seat Table. The seat will automatically be generated, when clicking ‘>>’.Selecting an empty seat before clicking ‘>>’ will place the Participant in that seat.Selecting a seat occupied by a Participant, before clicking ‘>>’ will place the Participant in a new seat. |
| [<<] | Selecting a seat and clicking ‘<<’ will remove a Participant from a seat.Clicking ‘Clear Seat will also remove a Participant from a seat. |
| [Show Active] | Clicking ‘Show Active’ will show all Participants in the Participants Table marked as ‘Active’. |
| [Show All] | Clicking ‘Show All’ will show all Participants in the Participants Table. |
| [Add Entries] | Press this button to create the number of seats, which will be used for the meeting. | 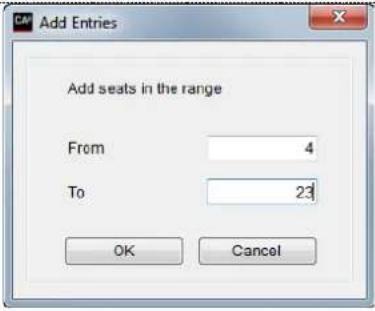 Figure 3.4-C Figure 3.4-C |
| [Delete Entry] | Press this button to delete a selected seat. | |
| [Clear Seat] | Press the button to remove a Participant from a selected seat. | |
| [Delete list] | Press this button to delete all seats. | |
| [Move] | Press this button to move a Participant from one seat to another. | 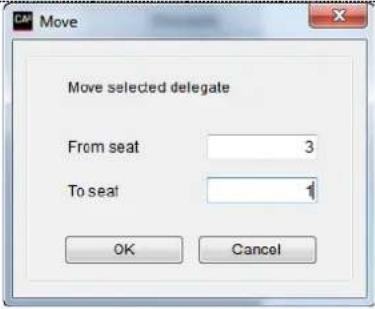 Figure 3.4-D Figure 3.4-D |
3.5 Messages
This screen is used to create pre-defined messages that can be used by Participants who have access to the message screen in the CUA Application.
A maximum of 4000 characters can be used for each message.
If a message is created in several language versions then a Participant logged in using English can read and send the message in English and a Participant logged in using Danish will read the Danish version of the received message etc.
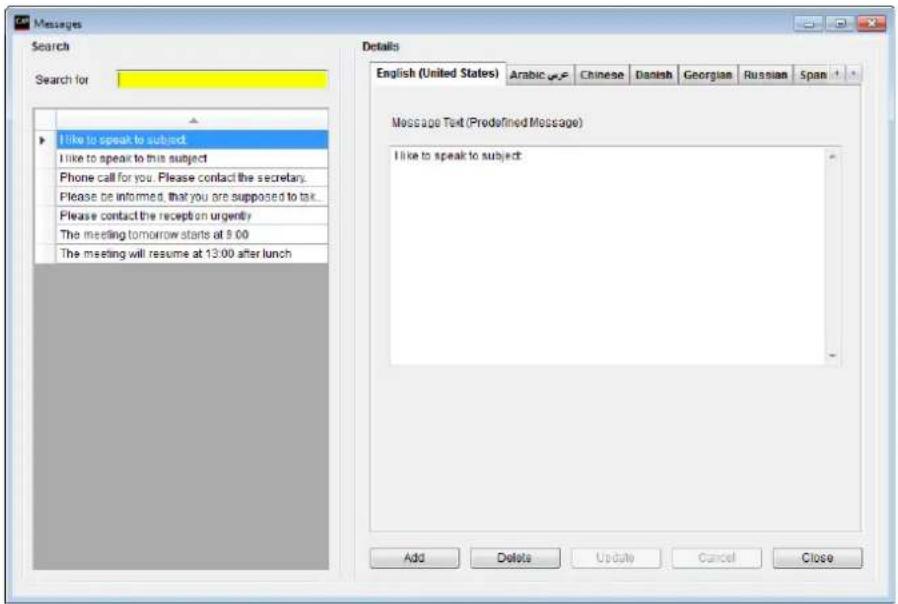
Figure 3.5-A
3.6 Reports
The following groups of reports are available:
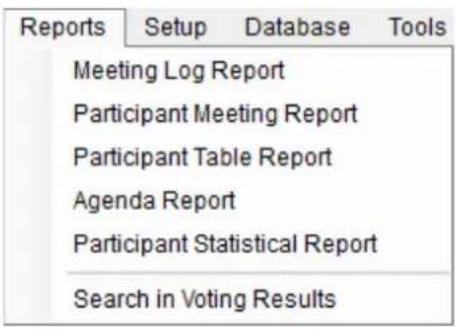
Figure 3.6-A
All reports are created as PDF files.
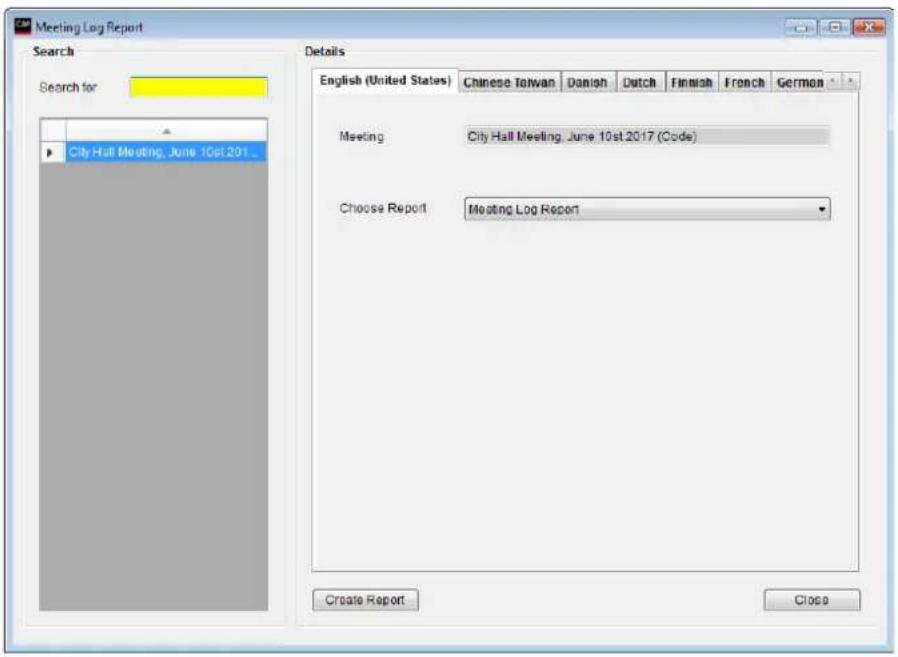
3.6.1 Meeting Log Reports
The Meeting Log Reports lists events taking place during a meeting in chronological order.
The reports are available in the drop-down list 'Choose Report':
• Meeting log report
• Meeting log report with individual votes
- Login and logout activity report
- Registration reports (various)
Figure 3.6-B
3.6.1.1 Meeting Log
The Meeting Log Report lists all events that take place during a meeting in chronological order.
Select a meeting from the list on the left side of the screen.
Select the 'Meeting Log' report in the dropdown list and press [Create Report]
When the report is created it is displayed for viewing in a PDF viewer.
Figure 3.6-C
| Conference Log Report | ||||||
| Conference name: | World Sales Meeting | Start | Stop | Duration | ||
| Start Conference: | World Sales Meeting | 2013-06-25 | 2013-06-25 | 36:04 | ||
| 2:23:34 PM | 2:29:38 PM | |||||
| Login: | Canten Haack Nielsen | Managing Director | Chairman | 2:23:34 PM | 2:59:38 PM | 30:04 |
| Login: | Benny Krudsen | Service | Delegates | 2:23:34 PM | 2:59:38 PM | 36:04 |
| Login: | Jesper Rosgård | Sales | Delegates | 2:23:34 PM | 2:59:38 PM | 36:04 |
| Login: | Håkan Hansson | Managing Director | Delegates | 2:23:34 PM | 2:59:38 PM | 36:04 |
| Login: | Bjame Rasmusen | Technician | Delegates | 2:23:34 PM | 2:59:38 PM | 36:04 |
| Speak: | Benny Krudsen | Service | Delegates | 2:24:34 PM | 2:25:34 PM | 01:00 |
| Speak: | Håkan Hansson | Managing Director | Delegates | 2:27:34 PM | 2:59:38 PM | 32:04 |
| Speech time subject | Benny Krudsen | Service | Delegates | 01:00 | ||
| Speech time subject | Håkan Hansson | Managing Director | Delegates | 32:04 | ||
| Speech time group | Group A | 01:00 | ||||
| Speech time group | Group B | 32:04 | ||||
| Subject: | Approval of next years budget | 2:30:34 PM | 2:33:40 PM | 03:06 | ||
| Speak: | Canten Haack Nielsen | Managing Director | Chairman | 2:30:40 PM | 2:35:40 PM | 05:00 |
| Request: | Bjame Rasmusen | Technician | Delegates | 2:30:40 PM | 2:35:40 PM | 08:00 |
| Voting: | Approval of next years budget | 2:30:40 PM | 2:33:34 PM | 02:54 | ||
| Proxy: | Håkan Hansson | can vote for Standard Voting | Bjarne Rasmussen | |||
| Status: | Voting configuration | |||||
| Voting result: | Yes | 2 | ||||
| Voting result: | Absent | 1 | ||||
| Voting result: | No | 2 | ||||
| Voting result: | Not Voted | 1 | ||||
| Voting result: | ||||||
| Voting result: | Present | 6 | ||||
| Voting result: | Total seats | 10 | ||||
| Voting result: | Passed/Not passed | Passed | ||||
| Status: | Final Result | |||||
| Speak: | Canten Haack Nielsen | Managing Director | Chairman | 2:35:40 PM | 2:30:40 PM | 01:00 |
| Speech time subject | Canten Haack Nielsen | Managing Director | Chairman | 06:00 | ||
| Speech time group | Group A | 08:00 | ||||
| Subject: | New products | 2:33:46 PM | 2:59:34 PM | 25:54 | ||
| Stop Conference: | World Sales Meeting | 2:23:34 PM | 2:59:38 PM | 36:04 | ||
| Conference name: | World Sales Meeting | |||||
| Conference summary: | Conference duration | 36:04 | ||||
| Conference summary: | Participating delegates | 3 | ||||
| Conference summary: | Speakers | 4 | ||||
| Conference summary: | Voting sessions | 1 | ||||
| Speech time total | Benny Krudsen | 01:00 | ||||
| Speech time total | Canten Haack Nielsen | 00:00 | ||||
| Speech time total | Håkan Hansson | 33:03 | ||||
| Speech time group | Group A | 07:00 | ||||
| Speech time group | Group B | 32:04 | ||||
3.6.1.2 Login and logout activity
This report shows all login/logout activity during the meeting.
Select a meeting from the list on the left side of the screen.
Select the 'Login and logout activity' report in the dropdown list and press [Create Report]
When the report is created it is displayed for viewing in a PDF viewer.
Participants, with a Meeting Role in the Participant Table different from Participant or Chairman Meeting Role, who is logging into a seat after a Participant or Chairman has logged in will be listed in the report as Deputy.
| Login and logout activity report | |||||
| Conference Name | Login Using code 2 | ||||
| Start conference | 9/11/2013 2:13:38 PM | ||||
| Stop conference | 9/11/2013 2:14:51 PM | ||||
| Seat Number | Name | Group | Login time | Logout time Subject at login time | |
| 1 | Thomas Jones | S | 2:13:42 PM | 2:14:51 PM | |
| 2 | Anita Knakkergaard | DF | 2:14:09 PM | 2:14:17 PM | |
| 2 | Anne Beastrup | SF | 2:14:24 PM | 2:14:51 PM | |
| Start conference | 9/11/2013 2:20:05 PM | ||||
| Stop conference | 9/11/2013 2:21:29 PM | ||||
| Seat Number | Name | Deputy name | Group | Login time | Logout time Subject at login time |
| 1 | Thomas Jones | S | 2:20:10 PM | 2:21:29 PM | |
| 2 | Anita Knakkergaard | DF | 2:20:24 PM | 2:20:29 PM | |
| 2 | Anita Knakkergaard | Anita Christensen | DF | 2:20:33 PM | 2:21:29 PM |
| Start conference | 9/11/2013 2:22:39 PM | ||||
| Stop conference | 9/11/2013 2:24:08 PM | ||||
Figure 3.6-D
3.6.2 Participant Meeting Report
The Participant Meeting Report lists all Participants that have been part of a meeting either sorted by 'Participant Name' or by 'Seat #.
The drop-down list 'Choose Report' is only used if customized reports are available.
Figure 3.6-E
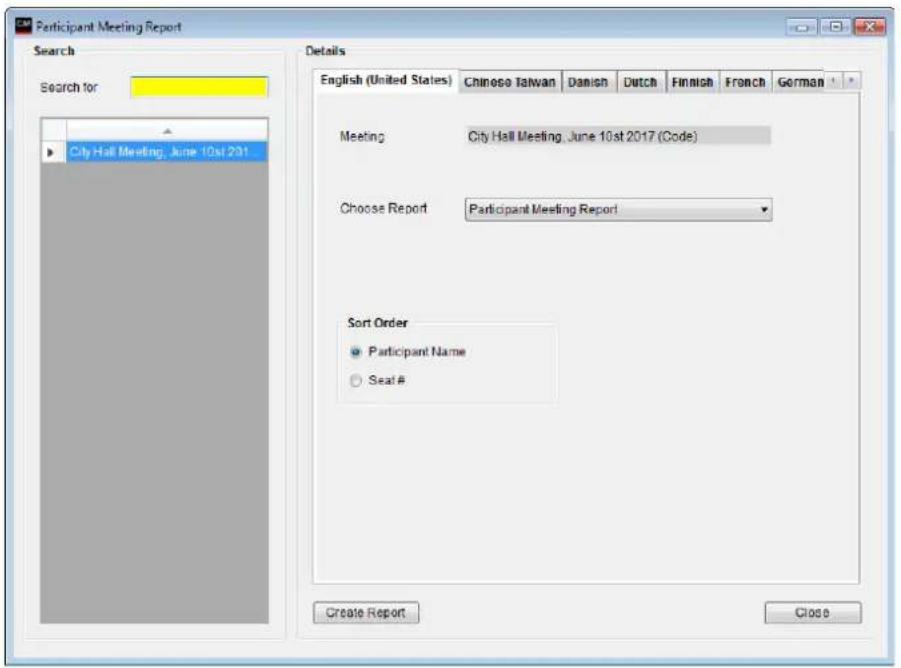
Select a meeting from the list on the left side of the screen.
Select whether the Participants shall be sorted by Participant names or seat numbers using the Sort order radio buttons.
Press [Create Report]
When the report is created it is displayed for viewing in a PDF viewer.
Figure 3.6-F
| Delegate Conference Report | |||
| City Hall Meeting #165 | |||
| Seat # | 15 Name | Frank Summer | |
| Title | |||
| User Type | Delegate | ||
| 1 User Table | |||
| 2 User Table | |||
| 3 User Table | |||
| 4 User Table | |||
| Group name | Blue party | ||
| Group Abbreviation | BP | ||
| Background | |||
| Voting Group | |||
| Voting Weight | 1 | ||
| Mic Attenuation | 0 | ||
| Seat # | 10 Name | Jane Doe | |
| Title | |||
| User Type | Delegate | ||
| 1 User Table | |||
| 2 User Table | |||
| 3 User Table | |||
| 4 User Table | |||
| Group name | Liberal Party | ||
| Group Abbreviation | LP | ||
| Background | |||
| Voting Group | |||
| Voting Weight | 1 | ||
| Mic Attenuation | 0 | ||
3.6.3 Participant Table Report
The Participant Table Report lists all Participants in the Participant Table for a Meeting with an option for showing all Participants or only the Participants marked active in the 'Participant Table.
The drop-down list 'Choose Report' is only used if customized reports are available.
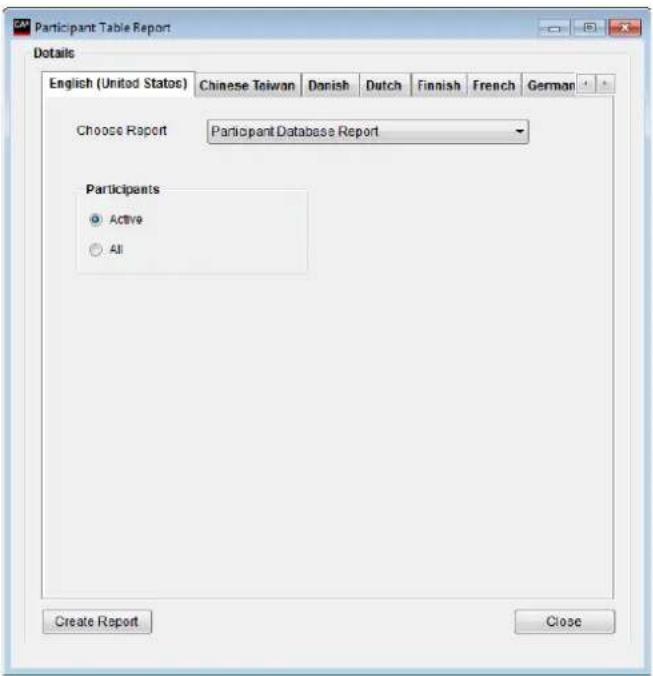
Figure 3.6-G
Select a meeting from the list on the left side of the screen.
Select whether the report shall contain only active Participants or all Participants in the database using the 'Participants Active/All buttons.
Press [Create Report]
When the report is created it is displayed for viewing in a PDF viewer.
Figure 3.6-H
| Delegate Database Report | |||
| Id | 156 | Name | Nanna West |
| Title | Mrs. | ||
| User Type | Chairman | ||
| 1 User Table | |||
| 2 User Table | |||
| 3 User Table | |||
| 4 User Table | |||
| Group name | Blue party | ||
| Group Abbreviation | BP | ||
| Background | |||
| Voting Group | |||
| Voting Weight | 1 | ||
| Mic Attenuation | 0 | ||
| Id | 339 | Name | Jane Doe |
| Title | |||
| User Type | Delegate | ||
| 1 User Table | |||
| 2 User Table | |||
| 3 User Table | |||
| 4 User Table | |||
| Group name | Liberal Party | ||
| Group Abbreviation | LP | ||
| Background | |||
| Voting Group | |||
| Voting Weight | 1 | ||
| Mic Attenuation | 0 | ||
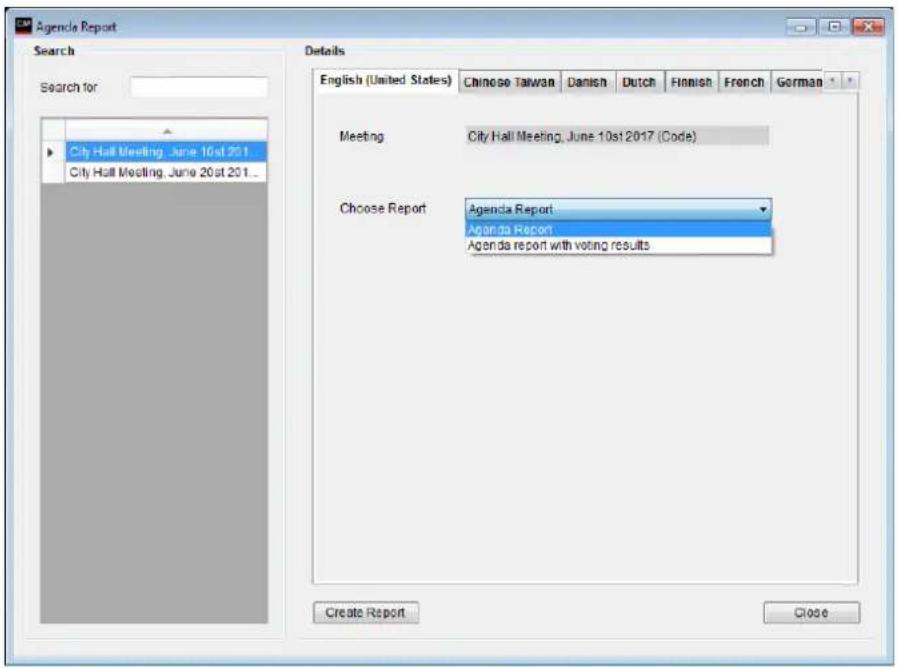
3.6.4 Agenda Report
The Agenda Reports displays the agenda of a selected meeting.
Two reports are available in the drop-down list 'Choose Report':
- Agenda report
- Agenda report with voting results
Figure 3.6-1
3.6.4.1 Agenda Report without voting results
Select a meeting from the list on the left side of the screen.
Select the 'without voting result' report in the 'Chose Report' dropdown list
Press [Create Report]
When the report is created it is displayed for viewing in a PDF viewer.
Figure 3.6-J
| Agenda Report | |
| City Hall Meeting #161 8/23/2013 12:00:00 AM | |
| 1 | Call to Order |
| 2 | Adoption of Agenda |
| 3 | Minutes of Previous Meetings |
| a | Council Meeting - August 28, 2007 |
| b | Public Hearing - August 28, 2007 |
| 4 | Delegations |
| a | Community Plan on Homelessness |
| 5 | Public Hearings |
| a | Move into Public Hearing |
| b | Close Public Hearing |
| 6 | Updates |
| 7 | Reports |
| a | Integrated Community Sustainability Plan |
| b | AUMA/AAMD&C Resolution - EUB Fees |
| c | Development & Street Names |
| d | Bylaw 07/061 - North Central ASP - 2nd Reading |
| e | Bylaw 07/061 - North Central ASP Amendment |
| f | Bylaw 07/061 - North Central ASP - 3rd Reading |
| g | Bylaw 07/062 - North Central LUB - 2nd Reading |
| h | Bylaw 07/062 - North Central LUB - 3rd Reading |
| i | Bylaw 07/063 - Red Creek Area LUB - 2nd Reading |
| j | Bylaw 07/063 - Red Creek Area LUB - 3rd Reading |
| k | Bylaw 07/064 - LUB General Amendments - 3rd Reading |
| l | Bylaw 07/060 - Assessment & Taxation Fees - 3rd Reading Postponed for next meeting |
| 8 | Adjournment |
| a | Motion to adjourn |
| x | New item |
3.6.4.2 Agenda Report with voting results
Select a meeting from the list on the left side of the screen.
Select the 'with voting result' report in the 'Chose Report' dropdown list
Press [Create Report]
When the report is created it is displayed for viewing in a PDF viewer.
Figure 3.6-K
| Agenda Report | |
| City Hall Meeting #161 8/23/2013 12:00:00 AM | |
| 1 Call to Order | |
| Voting: | |
| Voting Configuration 3 buttons | |
| Yes 0 | |
| Abstain 0 | |
| No 1 | |
| Total present 1 | |
| Seats 13 | |
| Passed/Not passed Not passed | |
| 2 Adoption of Agenda | |
| 3 Minutes of Previous Meetings | |
| a Council Meeting - August 28, 2007 | |
| b Public Hearing - August 28, 2007 | |
| 4 Delegations | |
| a Community Plan on Homelessness | |
| 5 Public Hearings | |
| a Move into Public Hearing | |
| b Close Public Hearing | |
| 6 Updates | |
| 7 Reports | |
| a Integrated Community Sustainability Plan | |
| b AUMA/AAMD&C Resolution - EUB Fees | |
| c Development & Street Names | |
| d Bylaw 07/061 - North Central ASP - 2nd Reading | |
| e Bylaw 07/061 - North Central ASP Amendment | |
| f Bylaw 07/061 - North Central ASP - 3rd Reading | |
| g Bylaw 07/062 - North Central LUB - 2nd Reading | |
| h Bylaw 07/062 - North Central LUB - 3rd Reading | |
| i Bylaw 07/063 - Red Creek Area LUB - 2nd Reading | |
| j Bylaw 07/063 - Red Creek Area LUB - 3rd Reading | |
| k Bylaw 07/064 - LUB General Amendments - 3rd Reading | |
| l Bylaw 07/060 - Assessment & Taxation Fees - 3rd Reading Postponed for next meeting | |
| 8 Adjournment | |
| a Motion to adjourn | |
| x New item |
3.6.5 Participant Statistical Report
The Participant Statistical Reports lists Participants speaking information and the number of meetings Participants has participated in.
The statistical reports are available in three versions:
• All Participants
• Detailed Participant
- Participant
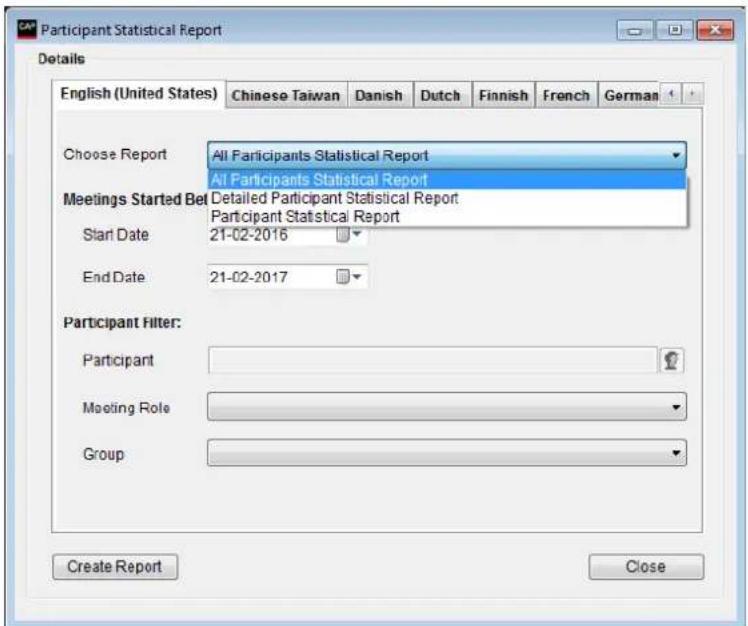
Figure 3.6-L
3.6.5.1 All Participants
This reports list total speech time and number of meeting participated for all active Participants in the ‘Participant Table’ within a specified period of time.
Select the 'All Participants' report in the dropdown list
Enter the 'Start Date' and 'End Date'.
Optional select a 'Meeting Role'.
Optional select a 'Group'.
Press [Create Report]
When the report is created it is displayed for viewing in a PDF viewer
| All Delegates Statistical Report | |||
| Start time | Stop time | Conferences Total | |
| Period | 8/22/2013 12:00:00 AM | 8/23/2013 11:59:59 PM | 3 |
| Delegate | Delegate Speeches | Conferences Participated | |
| Delegate Name | Frank Summer | 00:00 | |
| User Type | Delegate | ||
| Group | Blue party | ||
| Delegate Name | Jane Doe | 00:04 | |
| User Type | Delegate | ||
| Group | Liberal Party | ||
| Delegate Name | John Smith | ||
| User Type | Delegate | ||
| Group | Red Party | ||
| Delegate Name | Judy Flick | 00:14 | |
| User Type | Delegate | ||
| Group | Green Party | ||
| Delegate Name | Julia Frank | 00:08 | |
| User Type | Delegate | ||
| Group | Liberal Party | ||
Figure 3.6-M
3.6.5.2 Detailed Participant
This reports list a summary of total speech time and number of meeting participated for a selected Participants in the 'Participant Table' within a specified period of time.
The report does also list all agenda subject, where the selected Participant has participated with login/logout time and speech time for each subject
Select the 'Detailed
Participant' report in the dropdown list
Enter the 'Start Date' and 'End Date'.
Select the 'Participant' in the 'Participant Filter dropdown list
Press [Create Report]
When the report is created it is displayed for viewing in a PDF viewer
| Detailed Delegate Statistical Report | ||||
| Start time | Stop time | Conferences Total | ||
| Period | 8/22/2013 12:00:00 AM | 8/23/2013 11:59:59 PM | 3 | |
| Delegate | Delegate Speeches | Conferences Participated | ||
| Delegate Name | Nanna West | 57:04 | 3 | |
| User Type | Chairman | |||
| Group | Blue party | |||
| Conferences | Start time | Stop time | Duration | |
| Conference Name | City Hall Meeting #151 | 8/22/2013 | 8/23/2013 | 17:55:11 |
| 4:21:43 PM | 10:16:54 AM | |||
| Subject: | No Subject | 4:21:43 PM | 10:16:54 AM | 17:55:11 |
| Login: | 4:21:49 PM | 10:33:55 AM | 18:12:06 | |
| Login: | 10:12:28 AM | 10:33:55 AM | 21:27 | |
| Speak: | 10:13:19 AM | 10:30:52 AM | 17:33 | |
| Speech time subject | 17:33 | |||
| Conference Name | City Hall Meeting #160 | 8/23/2013 | 8/23/2013 | 04:22 |
| 10:29:33 AM | 10:33:55 AM | |||
| Subject: | No Subject | 10:29:33 AM | 10:33:55 AM | 04:22 |
| Login: | 10:29:38 AM | 10:33:55 AM | 04:16 | |
| Speech time subject | 00:00 | |||
| Subject: | Call to Order | 10:30:31 AM | 10:30:49 AM | 00:18 |
| Speak: | 10:30:35 AM | 10:30:52 AM | 00:17 | |
| Speech time subject | 00:17 | |||
| Subject: | Adoption of Agenda | 10:30:49 AM | 10:33:20 AM | 02:30 |
| Speak: | 10:31:13 AM | 10:31:27 AM | 00:13 | |
| Speech time subject | 00:13 | |||
Figure 3.6-N
3.6.5.3 Participant
This reports list a summary of total speech time and number of meeting participated for a selected Participants in the 'Participant Table' within a specified period of time.
Select the 'Participant' report in the dropdown list
Enter the 'Start Date' and 'End Date'.
Select the 'Participant' in the 'Participant Filter dropdown list
Press [Create Report]
When the report is created it is displayed for viewing in a PDF viewer
| Delegate Statistical Report | |||
| Start time | Stop time | Conferences Total | |
| Period | 8/22/2013 12:00:00 AM | 8/23/2013 11:59:59 PM | 3 |
| Delegate | Delegate Speeches | Conferences Participated | |
| Delegate Name | Nanna West | 57:04 | 3 |
| User Type | Chairman | ||
| Group | Blue party | ||
Figure 3.6-O
3.6.6 Search in Voting Results
Note: This facility is subject to the availability of the 'SW6000-ADV' module.
Refer to the 'User Manual SW6000 Advanced Meeting Management' for user information.
3.7 Setup/Equipment
3.7.1 Conference Units
This screen is used to configure the seat assignment by setting up relations between microphones, seat numbers and computers running the CUA Application.
Seats are automatically created by the CUI application when information about new units is received from the CU/CCU Central Unit.
The table can be sorted in accordance to the various columns by clicking the header.
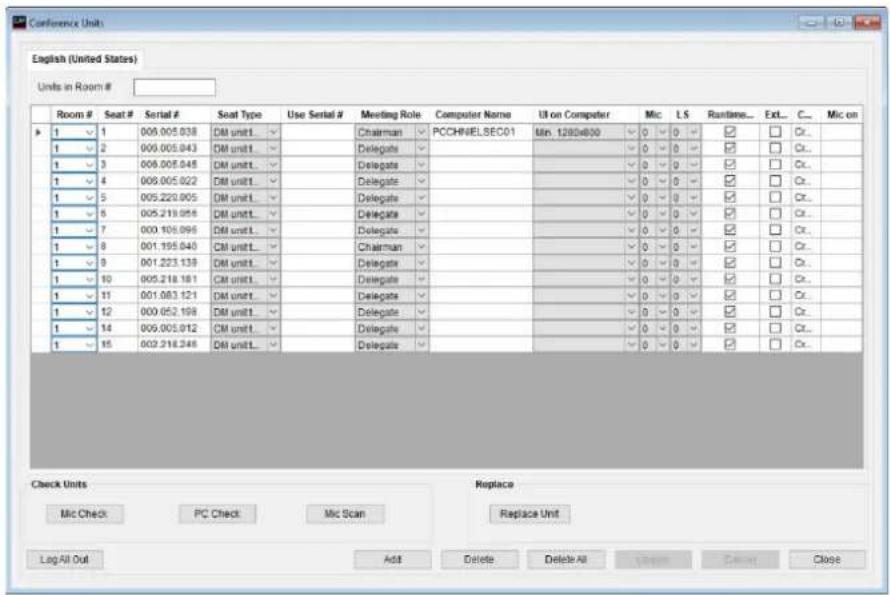
Figure 3.7-A
Note: If a seat has been created, it will not be deleted automatically if the unit is disconnected from the CU/CCU.
Un-used 'Seats' can be deleted manually.
| Units in room | Type in the Room # to filter the list to shown only units placed in the room selected. | ||||
| Room # | If rooms are linked together for combining system in more room, this field is used for identifying which room, the unit is located in. The room number is selected by use of a drop down box, with a list of configured rooms. The available rooms are set in Setup/Rooms/Room Configuration. | ||||
| Seat # | The seat number must be unique and is used to identify the seat on lists, reports and on the mimic diagram. It can have a maximum of five numeric characters. | ||||
| Serial # | Each microphone has a unique serial number encoded into the unit from the factory. The number 000.000.000 must be used to create a seat with a computer but no conference unit. | ||||
| Seat Type | This field is identifying the use of the seat, where the conference unit has been placed. Some entries are just identifying (labeling) the unit and other entries are changing the functionality of the unit. The entries are: | ||||
| DM unit type | The connected unit is a Delegate Unit. This is identifying the unit, but does not give any functionality. | ||||
| CM unit type | The connected unit is a Chairman Unit. This is identifying the unit, but does not give any functionality. | ||||
| DV unit type | The connected unit is a Voting Unit. This is identifying the unit, but does not give any functionality. | ||||
| Podium x | Note: This facility is subject to the availability of the 'SW6000-ADV' module.Refer to the 'User Manual SW6000 Advanced Meeting Management' for user information. | ||||
| Secondary seat | Note: This facility is subject to the availability of the 'SW6000-ADV' module.Refer to the 'User Manual SW6000 Advanced Meeting Management' for user information. | ||||
| Technician | If a seat has been marked as a 'Technician', a CUA application running on a PC assigned to this seat will not be logged out, when starting a meeting. | ||||
| PC | The seat is attached to a PC. This is identifying the unit, but does not give any functionality. | ||||
| Use Serial # | If Delegate Units connected are sharing a microphone, this field is used to identify the units sharing a microphone.In the example unit 000.167.059 is using the microphone connected in unit 000.167.109 and unit 000.167.010 is using the microphone connected in unit 000.166.209. | Serial # | Seat Type | Use Serial # | |
| 000.096.130 | CM unit type | Chairm | |||
| 000.167.059 | DM unit type | Delega | |||
| 000.167.109 | DM unit type | Delega | |||
| 000.167.010 | DM unit type | Delega | |||
| 000.166.209 | DM unit type | Delega | |||
| 000.167.026 | DM unit type | Delega | |||
| 000.000.000 | Technician | Technici | |||
| Figure 3.7-B | |||||
| Note: Chairman units as well as portable units does not support sharing microphone. | |||||
| Note: Units sharing a microphone has to be connected to the same chain on the CU | |||||
| Meeting Role | Specifies the default Meeting Role that applies to the CUA Application and the Conference Units when a meeting is not started. | ||||
| Computer Name | The computers running the CUA application are identified by their Windows computer name. A computer name must be specified if a PC with CUA application is assigned to the seat. It allows the PCs to send messages to each other via the network using MSMQ and allows the CUA to control the conference unit assigned to this seat. The field must be left blank if no PC is attached to the conference unit. Must be unique.The ‘Serial No’ can be inserted as ‘000.000.000’ if a seat with a PC running the CUA application does not have a conference unit assigned i.e. for a technician.For a Technician, the fields ‘Seat type’ must be selected as ‘Technician’.For applications running as a session on a terminal server the computer name should be set so that terminal server and client console is identified e.g. “ServerName~3” is used to identify a CUA running on terminal server “ServerName” and using client assigned to console number 3.Client must identify console number in call as well for the link to be established between client on server and CUI. | ||||
| UI on Computer | Dropdown list to select the CUA Layout type for the Computer selected | ||||
| Mic | This field is used to apply individual microphone level to a seat. The selectable values are from 0 to -6. | ||||
| LS | This field is used to apply individual speaker level to a seat. The selectable values are from 0 to -6 and OFF. | ||||
| Runtime Seat Assignment | This field enables/disables automatic CUA seat assignment. | ||||
| Ext. Val. | This field indicates whether external validation equipment is available for the seat. | ||||
| Comments | The text ‘Inserted by CU’ with a time stamp is displayed when the seat was created automatically by the system. The field can be used to store comments of any kind. | ||||
| Mic on | Red color indicates that the microphone is ON. Green color indicates that the microphone is in request.The number in the green indication indicates the number in the request queue. | ||||
| [Mic check] | Will check a selected seat’s microphone by turning on the microphone (for two seconds). | ||||
| [PC check] | Will check the connection to the computer whose name is specified for the selected seat. | ||||
| [Mic scan] | This button starts a scanning of all microphone units, by switching them On and OFF one by one.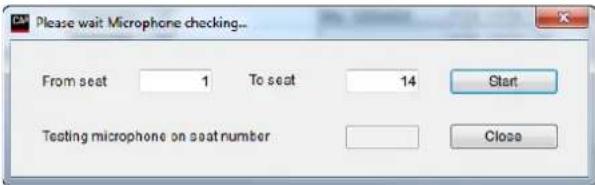 Figure 3.7-C Figure 3.7-C | ||||
| [Replace Unit] | This functionality is used for replacing a defective conference unit or switch units between the seat: | ||||
| 1 | Identify the seat number for the defective unit and remove it. | ||||
| 2 | Connect the new unit to the CU. The new unit will after a short time show up as the last unit on the list. | ||||
| 3 | Select the line in the ‘Seat’ window with the new microphone. | ||||
| 4 | Click ‘Replace microphone’ and the following dialog window will appear: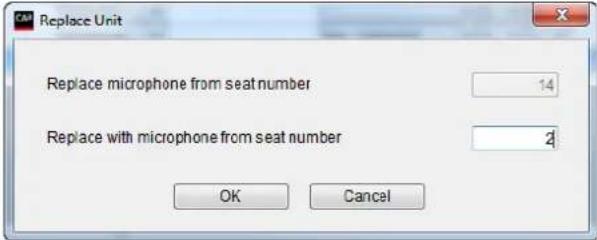 Figure 3.7-D Figure 3.7-D | ||||
| 5 | Type in the seat number for the defective unit. | ||||
| 6 | Click OK. The new microphone has now replaced the defective one and has got the functionality and Seat number of the defective microphone. Click OK. | ||||
| Note: If the microphone unit was assigned a PC running the CUA application the participant has to logout and login again for getting control of the new microphone unit. | |||||
3.7.2 Interpreter Consoles
This screen is used to configure the use of Interpreter Consoles and Interpretation Channels.
Entries are automatically inserted by the CUI Interface application when information about new units is received from the Central Unit.
The table can be sorted in accordance to the various columns by clicking the header on top.
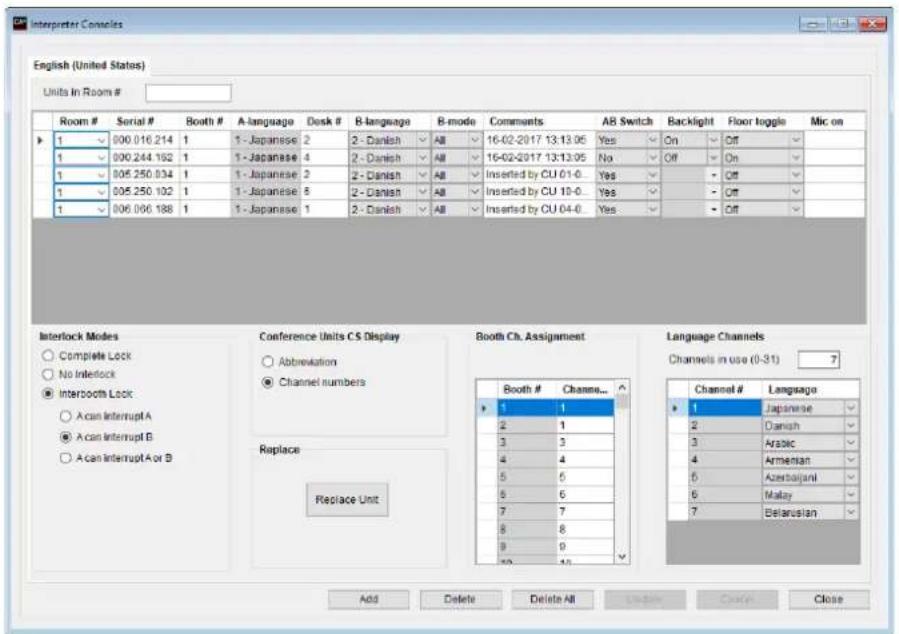
Figure 3.7-E
Note: If an entry has been created, it will not be deleted automatically, if the unit is not connected to the CU Central Unit anymore.
Un-used units can be deleted manually.
| Units in room | Type in the Room # to filter the list to shown only units placed in the room selected. | ||
| Room # | If rooms are linked together for combining system in more room, this field is used for identifying which room, the unit is located in. The room number is selected by use of a drop down box, with a list of configured rooms. The available rooms are set in Setup/Rooms/Room Configuration. | ||
| Serial # | Each unit has a unique serial number encoded into the unit from the factory. | ||
| Booth # | This field is used to enter the booth number, where the Interpreter Console is placed. Each booth can be assigned to maximum 32 Interpreter Consoles.The Language Channel assigned to the booth is assigned at the ‘Booth Ch. Assignment’. | ||
| A-language | This information field is for informing the channel number (and language assigned to this channel) which is assigned as the A-channel. This is set automatically. | ||
| Desk # | Each interpreter booth can use multiple desks. This field is used to identify the desk no. | ||
| B-language | This field is used for assigning a language channel to the B-language of the Interpreter Console. | ||
| B-mode | This field is used to set the mode for the B-channel: | ||
| All | All channels at the Interpreter Console can be set to a B-channel. | ||
| One | One channel set as ‘B-language’ can be used at the B-language. | ||
| None | The B-language is not in use. | ||
| Comments | The text ‘Inserted by CU’ with a time stamp is displayed when the unit was created automatically by the system. The field can be used to store comments of any kind. | ||
| AB Switch | Set to ‘On’ the interpreter can switch between the A and B-language with the microphone ‘On’. | ||
| Backlight | Set to ‘On’ switches on the backlight in the LCD display in the Interpreter Console. | ||
| Floor toggle | Set to ‘On’ enable the toggle of the Floor button. | ||
| Mic on | Red color indicates that the microphone is ‘On’. | ||
| Interlock Modes | Complete lock | When ticked, no interpreter can switch ‘On’ his microphone to an occupied channel. | |
| No interlock | When ticked any interpreter can switch ‘On’ his microphone to an occupied channel. The interpreter who was occupying the channels will be switched ‘Off’. | ||
| Inter booth lock | A can interrupt A | When ticked, an interpreter can switch ‘On’ his microphone on his A-channel to a channel occupied by an interpreter using his A-channel.The interpreter who was occupying the channels will be switched ‘Off’. | |
| A can interrupt B | When ticked, an interpreter can switch ‘On’ his microphone on his A-channel to a channel occupied by an interpreter using his B-channel.The interpreter who was occupying the channels will be switched ‘Off’. | ||
| A can interrupt A+B | When ticked, an interpreter can switch ‘On’ his microphone on his A-channel to an occupied channel.The interpreter who was occupying the channels will be switched ‘Off’. | ||
| Conference Units CS Display | Abbreviation | When ticked the abbreviation of the language will be shown in the channel selector display in conference units. | |
| Channel numbers | When ticked the channel number will be shown in the channel selector display in conference units.Please note that Channel Selector Units will always show channel numbers. | ||
| [Replace Unit] | Replaces a unit. See procedures in previous section Setup/Equipment/Conference Units. | ||
| Booth Ch. Assignment | Use this table to set the language to be used in each interpreter booth. Several booth can have the same language channels. | ||
| Language Channels | Channel in use (0-31) | Type in the number of channels to be used. Pressing [Update] will update the Channel/Language window to show the number of channels in use. |
| Language | A language can then be assigned to the channels in use. |
3.7.3 Audio Output Units (AO)
This screen is used to configure the AO Units connected.
Entries are automatically inserted by the CUI application when information about new units is received from the CU Central Unit.
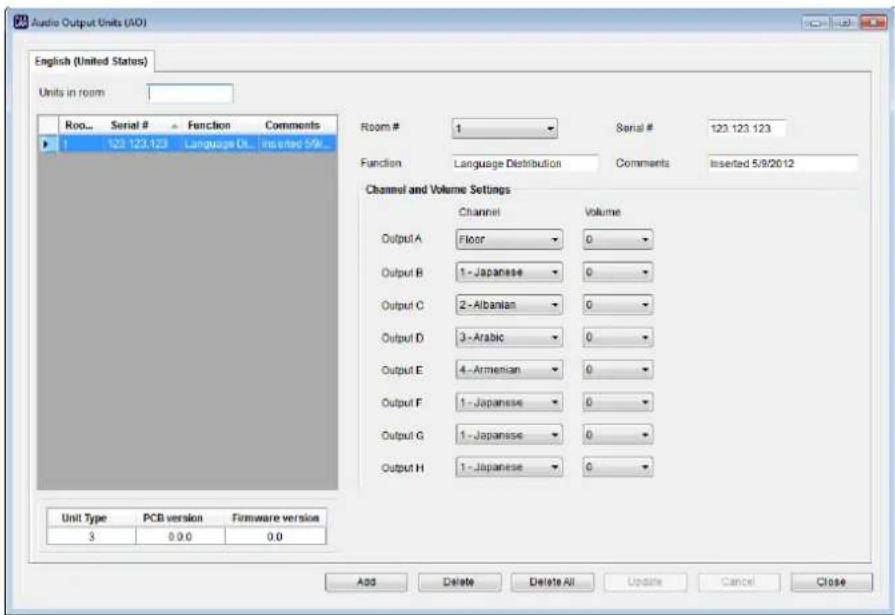
Figure 3.7-F
Note: If an entry has been created, it will not be deleted automatically, if the unit is not connected to the CU Central Unit anymore.
Un-used units can be deleted manually.
| Units in room | Type in the Room # to filter the list to shown only units placed in the room selected. |
| Room # | If rooms are linked together for combining system in more room, this field is used for identifying which room, the unit is located in. The room number is selected by use of a drop down box, with a list of configured rooms. The available rooms are set in Setup/Rooms/Room Configuration. |
| Serial # | Each unit has a unique serial number encoded into the unit from the factory. |
| Function | Field, which can be used to identify the function of the unit. This description is used to identify the units in the CUA application. |
| Comments | The text ‘Inserted by CU’ with a time stamp is displayed when the unit was created automatically by the system. The field can be used to store comments of any kind. |
| Channel and Volume Settings | The Channel and Volume can be set for each of the outputs at the AO unit. |
3.7.4 Ambient Microphones (AM)
This screen is used to configure the Ambient Microphone connected.
Entries are automatically inserted by the CUI application when information about new units is received from the CU Central Unit.
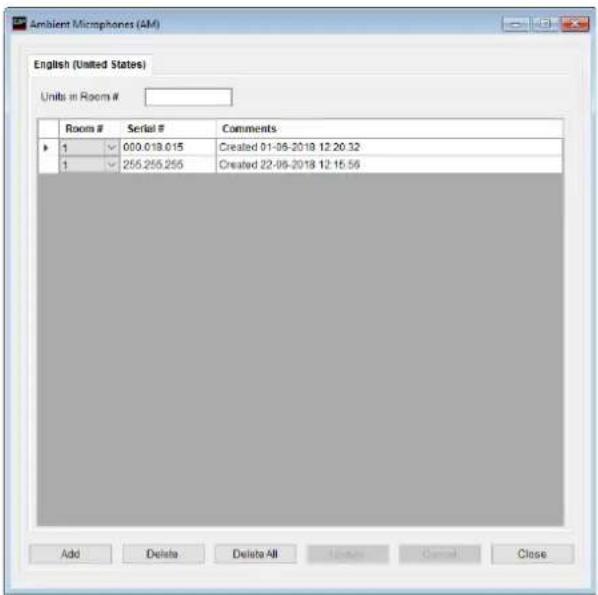
Figure 3.7-G
Note: If an entry has been created, it will not be deleted automatically, if the unit is not connected to the CU Central Unit anymore.
Un-used units can be deleted manually.
| Units in room | Type in the Room # to filter the list to shown only units placed in the room selected. |
| Room # | If rooms are linked together for combining system in more room, this field is used for identifying which room, the unit is located in. The room number is selected by use of a drop down box, with a list of configured rooms. The available rooms are set in Setup/Rooms/Room Configuration. |
| Serial # | Each unit has a unique serial number encoded into the unit from the factory. |
| Comments | The text ‘Inserted by CU’ with a time stamp is displayed when the unit was created automatically by the system. The field can be used to store comments of any kind. |
3.7.5 Meeting Displays (CDA)
This screen is used to configure the Meeting Displays (CDA).
Up to 16 CDA displays can be configured.
For more information about setting up the CDA displays Refer to the 'User Manual SW6000 CDA'.
Figure 3.7-H
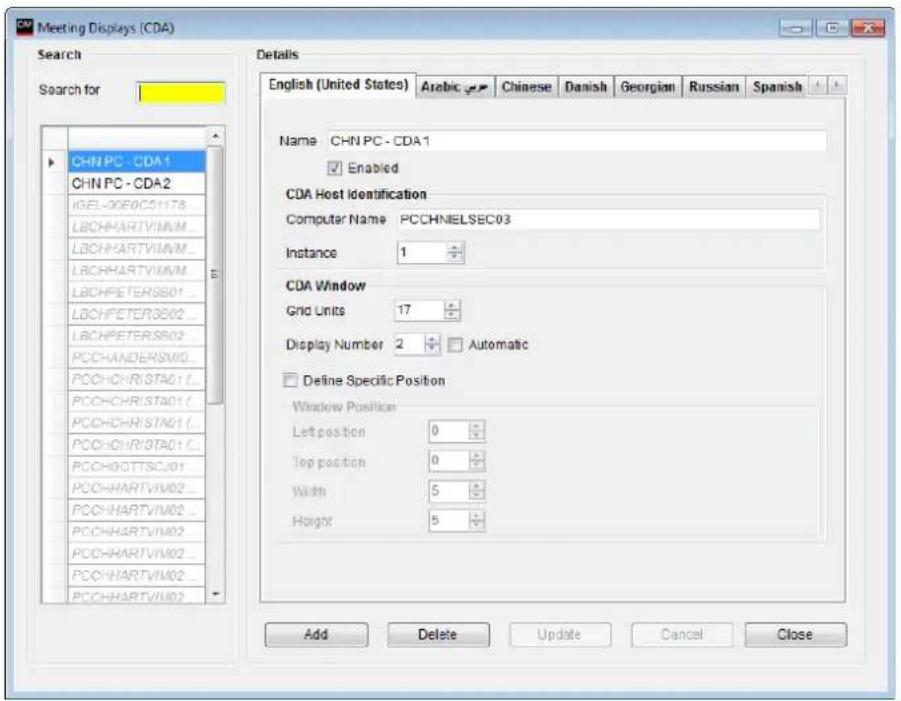
3.7.6 ID Card
ID Card functionality is a feature where Participants uses a Shure Chip Card to login to a meeting.
The ID Card contains the information: User ID, Login Code and Location ID, which the system uses to identify the user of the Conference Unit by getting the personal details from the Participant Table.
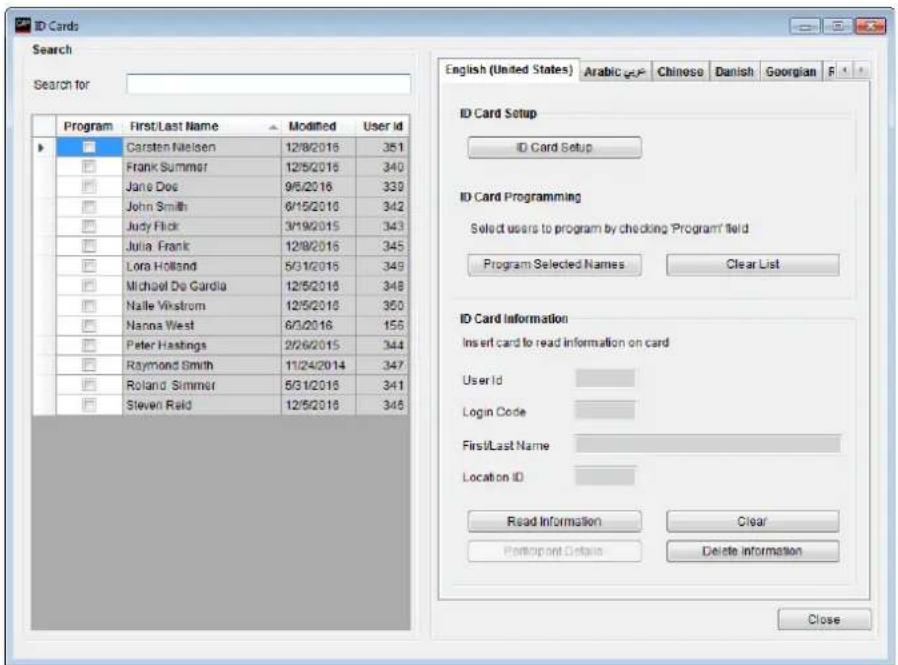
Figure 3.7-1
When a meeting is started with meeting mode: 'Login Using Code', 'Login Using Code on Seat', Login Using Code on List', 'Login Using Code on Preferred Seat', or 'Automatic Login on Preferred Seat' units are checked for a valid ID Card.
When a card is inserted in a conference unit, the software will identify the user by matching the 'User ID' in the Participant Table with the 'User ID' on the card. After this match the 'Login Code' will be checked and first then the cards will be accepted.
The microphone button will then work, however depending on the 'Meeting Role' of the logged in person, the person may be allowed to vote.
If the card is not inserted or is invalid, the microphone and voting buttons are not usable, however the loudspeaker and channel selector will still work.
| [ID Card Setup] | If ID Cards have to be used in the system click this button | 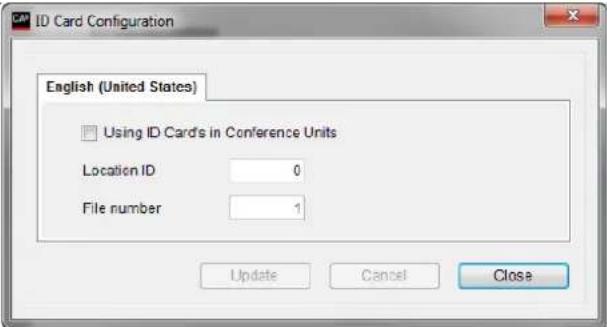 Figure 3.7-J Figure 3.7-J |
| Using ID Cards in Conference Units | Tick this option, if ID Cards are to be used in the system | |
| Location IDFile number | This ID is used to make cards usable only in the installation, they are intended for. Insert a four or five digit number identifying your installation. If cards are delivered pre-programmed from DIS, the ‘Location id’ is marked on the package containing the ID Cards.The entry determines where the information is place on the card.This field has to be set to '1' (one) if the cards in use are delivered from DIS. | |
| After clicking [Close], you will be prompted to restart all SW6000 applications including the CUI. | ||
| [Program Selected Names] | The list to the left shows all names in the Participant Table.Select the Participant for which a ID Card has to be programmed.After selecting the Participants, click the button. | 8YKXFigure 3.7-K |
| Note: Programming is only possible if the CP 6001 ID Card reader is installed. | ||
| [Program ID Card] | Click this button to program ID Cards for the selected Participants. You will be prompted to insert the cards to be programmed. | |
| [Abort Programming] | Click this button to abort the programming. | |
| [Clear List] | Click this button to un-select all selected Participants. | |
| [Read Information] | Click this button to read the information on the inserted ID Card. | |
| [Clear] | Click this button to clear the ID Card information fields. | |
| [Participant Details] | If a card is inserted in the ID Card reader, the information (User Id, Login Code, Name, Location Id) will be shown in the fields above the button. Clicking [Participant Details] will bring a popup showing all details about the Participant. | |
| [Delete Information] | Clicking this card will erase the programmed information on the card. Participant information in the Participants Table will not be deleted. | |
3.7.7 Web Service
Note: This facility is subject to the availability of the 'SW6000-ESI' module.
Refer to the 'User Manual SW6000 External System Interface' for user information.
3.7.8 Meeting Import/Export Mode
Note: This facility is subject to the availability of the 'SW6000-ESI' module.
Refer to the 'User Manual SW6000 External System Interface' for user information.
3.7.9 Name Signs
This screen is used to configure the name signs by assigning seat numbers to the name signs.
Seats are automatically created by when information about new units is received from the CU/CCU Central Unit.
The table can be sorted in accordance to the various columns by clicking the header.
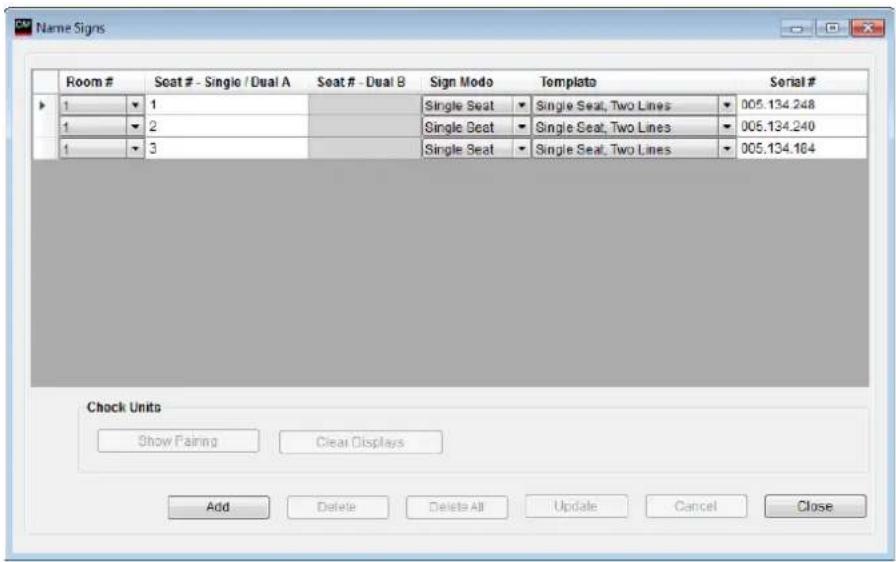
Figure 3.7-L
Note: If an name sign entry has been created, it will not be deleted automatically if the sign is disconnected from the CU/CCU.
Unused 'Name Signs' can be deleted manually.
| Room # | If rooms are linked together for combining system in more room, this field is used for identifying which room, the unit is located in. The room number is selected by use of a drop down box, with a list of configured rooms. The available rooms are set in Setup/Rooms/Room Configuration. |
| Seat # - Single / Dual A | Upon first registration with a CU/CCU, the name sign will be assigned the next available seat number in the Name Signs table. This is identical to the behavior when meeting units are registered the first time with a CU/CCU.Assigning seat numbers in the Name Signs table is independent from the assigned seat numbers in the Conference Units table. Seat numbers can exist in either table without existing in the other.The automatically assigned seat number can be manually changed to any seat number, however a name sign with the same assigned seat number as a conference unit will show details for the participant logging into that conference unit using the selected name sign template.The same seat number can be assigned to multiple name signs.Content will be stored when [Update] is pressed - but it requires a press of [Show Pairing] to write content to the Name Signs.On the name sign itself, nothing is written to the sign upon registration with a CU/CCU. |
| Seat # - Dual B | If the “Sign Mode” for the sign is selected as “Dual Seat”, this field defines the seat number for the second seat, which can be shown on the sign.Content will be stored when [Update] is pressed - but it requires a press of [Show Pairing] to write content to the Name Signs. |
| Sign Mode | This field defines the sign mode.The name sign can be paired to one seat or two seats. A name sign with sign mode 'Single Seat' can be paired to one seat and a name sign with sign mode 'Dual-Seat' can be paired to shown participant information from two seats.The options are:Single SeatDual SeatA name sign will at the first registration in SW6000 as default be configured as 'Single Seat' and use the Name Sign template marked as default in the 'Name Sign Template' table. |
| Template | The content in the name sign is defined using templates. The drop down will show the available templates.Refer to the section '3.8.12 Name Sign Template' for defining and adding new templates. The template marked as default will be the one used, when a name sign is registered the first time. |
| Serial # | Each Name Sign has a unique serial number encoded into the unit from the factory. The serial number format is xxx.xxx.xxx, which format must be used if entries are created manually. |
| [Show Pairing] | The [Show Pairing] button will when activated get all connected name signs to display the assigned seat number(s) and the name sign's individual unique serial number on the front and back displays.Name signs with no assigned seat number will show "Seat --".The [Show Pairing] button is disable if a Meeting is started, |
| [Clear Sign] | Activation the [Clear Sign] button will clear the content in all signs |
3.8 Setup/Configurations
3.8.1 Agenda Subject Configuration
Note: This facility is subject to the availability of the 'SW6000-ADV' module.
Refer to the 'User Manual SW6000 Advanced Meeting Management' for user information.
3.8.2 Reply Configuration
Note: This facility is subject to the availability of the 'SW6000-VOTE' module.
This screen is used to specify a number of reply configurations.
The configurations can be applied to a subject on an Agenda.
The 'Default' configuration will be used when
• No Meeting is started
• No Subject is set active
- A Subject is set active, where no Reply Configuration is applied
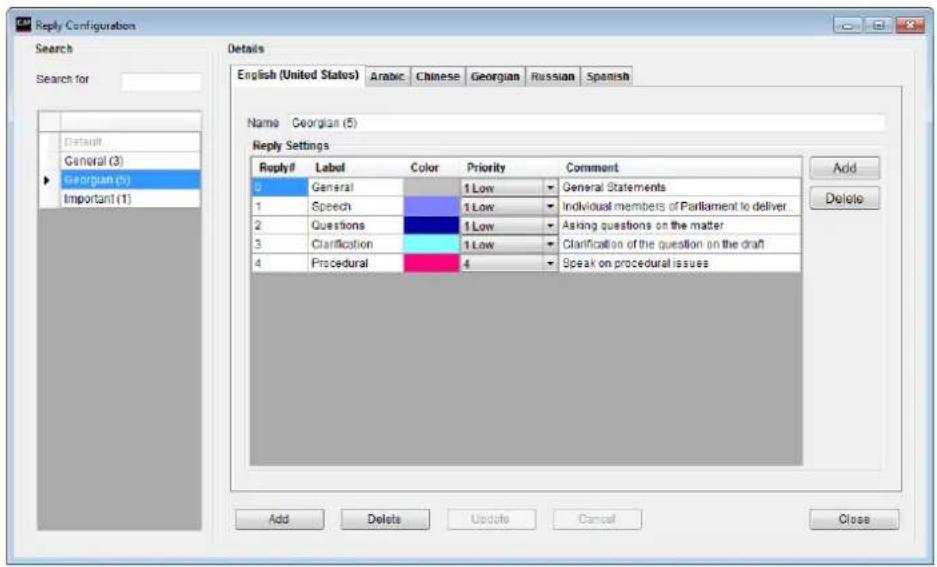
Figure 3.8-A
| Name | Name of the agenda subject configuration |
| Reply# | Each reply configuration can contain up to 10 reply options numbered from 0 to 9. The ‘default’ configuration cannot be deleted but changed. The default configuration is used always except when an agenda subject has been applied another configuration (see the chapter ‘Agenda Configuration’. |
| Label | The Label name specifies the label in the reply button. |
| Color | Specifics the color indication of the reply option.Hint: Do not specify Red or Green color as those colors are used for Speak and Request indication. |
| Priority | Priority 1 to 10 can be specified. Replies with higher priority will be shown first in the reply list. |
| Comment | Described the reply option. This description is used in the CUA Layout 2 to 4 to guide the chairman. |
3.8.3 Voting Configuration
Note: This facility is subject to the availability of the 'SW6000-VOTE' module.
This screen is used to define voting configurations.
Voting configurations are specified as different named configurations, which can be applied when starting a voting session or be applied as default to a Meeting or default to an agenda subject.
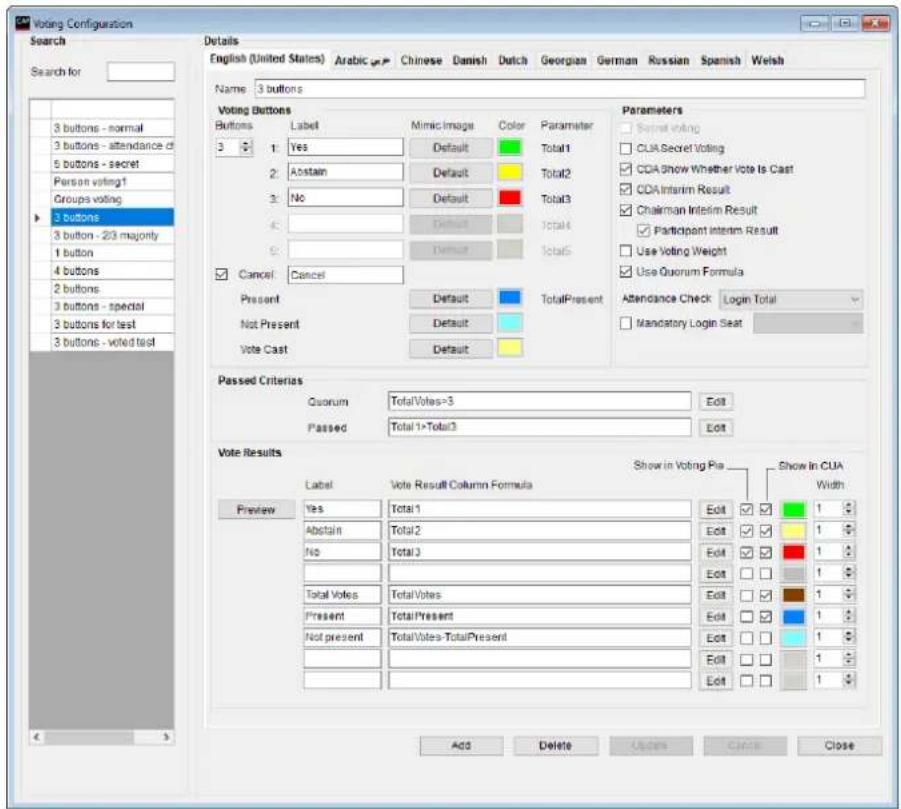
Figure 3.8-B
3.8.3.1 Voting Buttons
Voting configurations can be created with 1 to 5 buttons.
A conference unit with 3 voting buttons cannot vote if a voting session is started with 4 or 5 button voting configuration.
A label and a color is to be specified for each of the voting buttons. The label is used in the voting buttons in the CUA Application and in the Conference Units with Graphical User Interface like 'Yes', 'No' and 'Abstain'. The color is used in the voting buttons and casted vote indications in the CUA, in the CDA Voting Mimic and Voting Individual screens when the voting configuration allow the use of those colors.
A mimic image can be specified if the default round mimic indication need to be replaced. Refer to the section '03.8.3.3 Mimic Image' for details.
When a voting session is closed the total of the different buttons presses are counted and stored in five totals, which can be referred to from the Quorum, Passed and the 9 vote display column formulas.
Please note that the units with voting capability are supplied either with 3 or 5 voting buttons. The 5 voting button option is standard.
In addition to the voting buttons, one optional button is available.
| Cancel | If ticked, a Cancel button will be shown on the CUA and can be used to cancel a casted vote |
3.8.3.2 CDA Voting Indications
In addition to the colors used to indicate the casted vote in an Open voting session, the following colors can be specified:
| Present | The color specified here will be used to indicate ‘Present’ in CDA Voting Mimic screen |
| Not Present | The color specified here will be used to indicate ‘Not Present’ in CDA Voting Mimic screen |
| Vote Cast | The color specified here will be used to indicate the a vote has been cast in CDA Voting Mimic and Voting Individual screen.The use of the indication depends on the setting ‘CDA Show Whether Vote is cast’. |
3.8.3.2.1 Conference Units with 3/5 voting buttons
The voting buttons are numbered as shown in the next table. The table shows which of the buttons in the conference unit that are active depending on the Voting Configuration in SW6000:
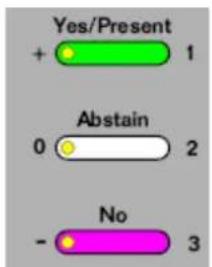
| 3 voting buttons in Conference Unit | Voting Configuration Number of buttons | ||
| 3 2 1 | |||
| Button 1 (+) | 1 (Total1) | 1 (Total1) | 1 (Total1) |
| Button 2 (0) 2 (Total2) | |||
| Button 3 (-) | 3 (Total3) | 2 (Total2) | |
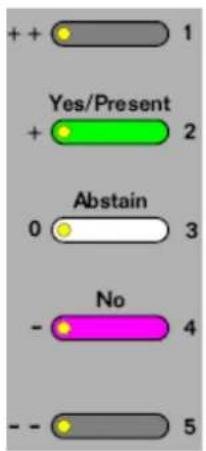
| 5 voting buttons in Conference Unit | Voting Configuration Number of buttons | ||||
| 5 4 3 2 1 | |||||
| Button 1 (++) | 1 (Total1) | ||||
| Button 2 (+) | 2 (Total2) | 1 (Total1) | 1 (Total1) | 1 (Total1) | 1 (Total1) |
| Button 3 (0) | 3 (Total3) | 2 (Total2) | 2 (Total2) | ||
| Button 4 (-) | 4 (Total4) | 3 (Total3) | 3 (Total3) | 2 (Total2) | |
| Button 5 (--) | 5 (Total5) | 4 (Total4) | |||
3.8.3.2.2 Proxy voting
On conference units featuring 5 voting buttons as well as the MXC640 / DC 6990, 'Proxy' voting is possible for voting configuration using 1-4 buttons.
Proxy voting enables a Participant to cast a vote on behalf of another Participant. On the conference units with 5 voting buttons, button 1 is used to select between own vote and the proxy (Proxy vote).
3.8.3.3 Mimic Image
The default round voting image used on the CDA can be changed using the 'Mimic Image' button.
When clicked the CDA 'Voting Mimic Image: xxx' window opens.
This screen is used to upload images to be used when showing voting result in the CDA Mimic screens.
[Add], [Delete], [Select Image] and [Update is used for uploading images etc.
For using an image in the voting configuration activate the [Select] button after selecting an image in the list.
Figure 3.8-C
The name of the selected image is shown in the 'Mimic Image' button next to the Voting Buttons.
Hint: Use the CDA skin editor in the section 'Mimic Items' to change the size of the images on the CDA (Dot Size)
Hint: Samples of Voting images are included in the SW6000 Installations Package
Figure 3.8-D
When the voting configuration is used the new images are shown in the CDA mimic.
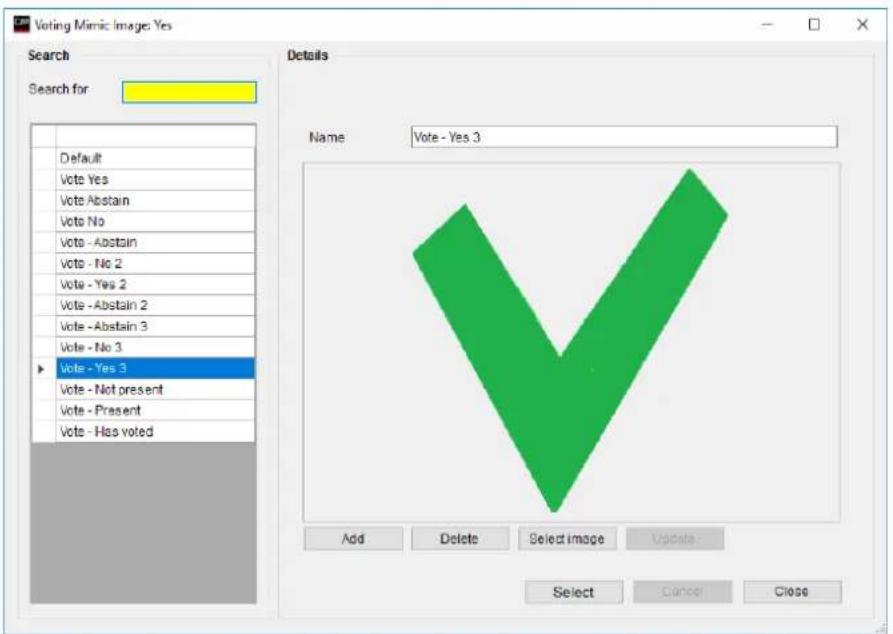
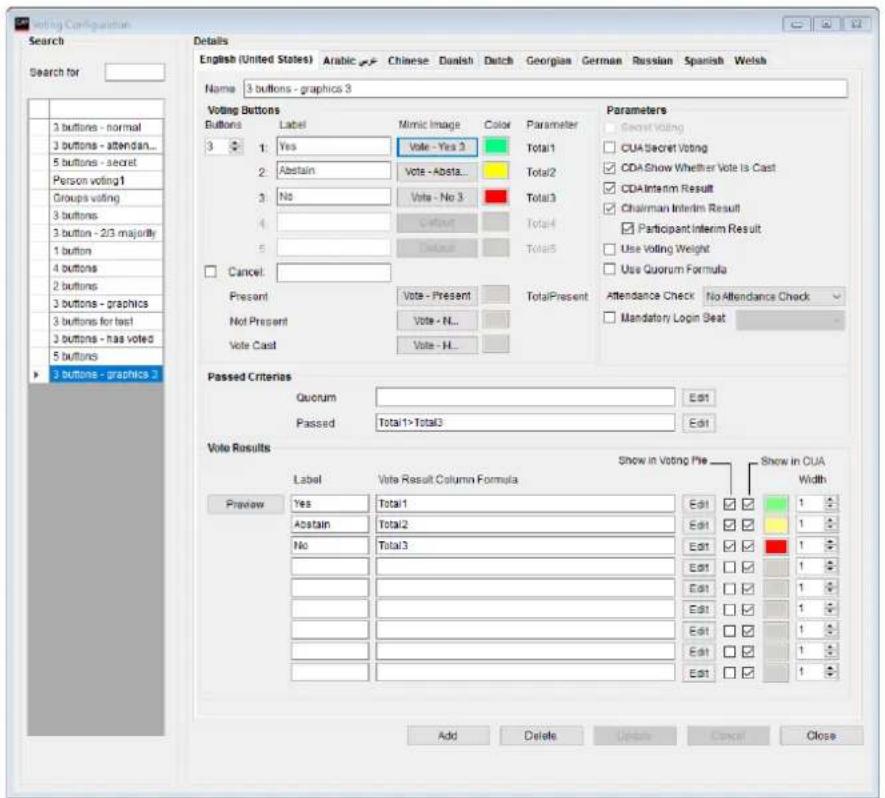
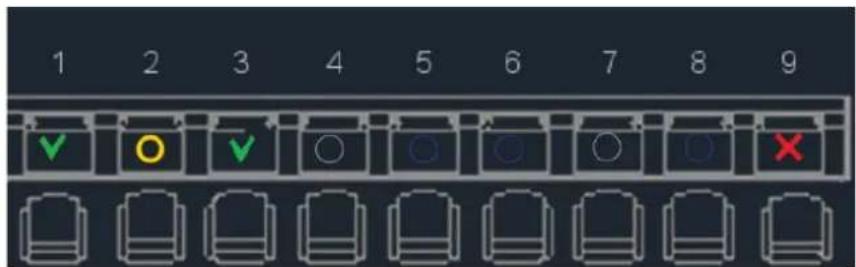
| Secret Voting | Individual result will not be shown on the mimic displays |
| CUA Secret Voting | When ticked the indication in the CUA Voting buttons will not visually reveal the casted vote |
| Show whether Vote is cast | When ticked the indication specified in ‘Vote Cast’ is used in ‘CDA Mimic’ screen and ‘CDA Individual Voting Result’ screen to show that a Participant has voted.In Open Mode (not Secret Mode) the color indication in the two screens changes at ‘Voting Stop’ to the colors specified for the voting buttons, to show which vote, each participant did cast. |
| CDA Interim Result | Results on the CDA voting displays will be updated during the voting session as the Participants enter the votes |
| Participant Interim Result | Results on the CUA voting screen will be updated during the voting session as the Participants enter the votes |
| Chairman Interim Result | Results on the CUA voting screen on a user with ‘Chairman’ rights will be updated during the voting session |
| Use Voting Weight | A weight value for each Participant permanently created in the Participant Table can be specified. The Participant’s vote will be multiplied with this value if the parameter is checked. If the login mode is ‘Prepared Participant seat table’ then the weight value will be taken from the Participant Seat table instead of the Participant TableAn example of the purpose could be a shareholder meeting where each shareholder has as many votes as he has shares. In this case you must enter the amount of shares in his weight field in the Participant table before a voting session. When a session using this parameter is performed his vote will automatically be multiplied with his amount of shares when the result is calculatedThe five totals for the buttons store the result after the multiplication with the weight values |
| Use Quorum Formula | The Quorum formula is only used if this parameter is checked. Otherwise the Quorum formula field must be blank |
| Mandatory Login Seat | If a seat is selected for this parameter, a voting session cannot be started unless a user is logged into this seat. |
3.8.3.5 Attendance check
An attendance check can be performed in all configurations. The variables used in the different voting result calculation depends on the attendance check option selected.
The attendance check options are:
| Attendance check options | Description | Variables(refer to section ‘3.8.3.9.1 Variables’) | ||
| TotalPresent | TotalVotes | TotalAttendance | ||
| No attendance check | No attendance check is performed before a voting session | The sum of Participants who pressed a [Voting] button during the voting session | Same as ‘TotalPresent’ | |
| Automatic Calculated | No attendance check is performed before a voting session | |||
| Manual | An attendance check session must be performed before a voting session can be started | The sum of Participants with voting right who are logged in.If a Participant logs out during the voting session he is not counted. | Counted as the sum of Participants with voting right who are logged in at the time the voting session is started.The value is not updated during the voting session | |
| Manual (for session) | An attendance check session must be performed before a voting session can be started.Following voting sessions can be started without starting an attendance check session. | |||
| Login Total | No attendance check is performed before a voting | Same as ‘TotalPresent’ | ||
3.8.3.6 Vote Results
The vote results can be shown with up to nine voting calculations. When adding Voting Configurations the voting calculations can be filled in a previewed using the [Preview] button.
For each of the nine rows the following fields are available:
| Label | Specifies the text for each column |
| Vote Result Column Formula | Field for inserting a formula for showing the voting result. Refer to ‘3.8.3.8 Vote Display Column Formula’ for details. |
| [Edit] | The button [Edit] is showing a window for creating the formulas. |
| Show in Voting Pie | Tick to get the result to be shown in the CDA – Voting Pie |
| Show in CUA | Tick to get the result to be shown in the CUA – Result |
| ‘Color’ | Select the color for showing the result |
| Width | Defined the relative width in the voting columns. Value 1-5. |
3.8.3.7 Passed Criteria's
3.8.3.7.1 Quorum
The user can define a formula in this field that will determine if a voting session is legal or not. A Quorum is normally based on a calculation of present Participants being equal to or more than a required number.
The Quorum formula is calculated after stopping the vote session but before displaying the result. If the result of the Quorum formula is 1 it is interpreted as 'Quorum obtained'. Anything else is interpreted as 'Quorum not obtained'.
Note: Refer to the paragraph '3.8.3.9 Formula Fields' for details about the syntaxes and variables to use.
Examples of calculating Quorum:
| Example 1 | At least 2/3 of the number of appointed members (120) must be present.80 and above is OK | sum(Present) >= 120*(2/3)orTotalPresent >= 120*(2/3) |
| Example 2 | More than 2/3 of the number of appointed members (120) must be present.81 and above is ok but 80 and below is not ok | sum(Present) > 120*(2/3)orTotalPresent > 120*(2/3) |
| Example 3 | Quorum is obtained if the given votes are more than 60. | Total1+ Total2+ Total3>60 |
| Example 4 | Quorum is obtained if the given ‘Yes’ votes are more than 2/3 of the ‘Present’. | Total1> Sum(Present)*(2/3)OrTotal1> TotalPresent*(2/3) |
3.8.3.7.2 Passed
A vote session can result in either ‘Passed’ or ‘Not passed’. If the Quorum formula is used and the result is “true” being ‘Quorum obtained’ the result is calculated based on the formula specified in the Passed field.
If the result of the formula is 'true' the result is 'Passed'
If the result of the formula is anything else than ‘true’ the result is ‘Not passed’.
If Quorum was not obtained the result is always 'Not passed – Quorum not met' regardless of the result of the 'Passed' calculation.
The result of the Passed formula is displayed on the various vote result screens right after finishing the vote session. 'Passed' is in clear green color and 'Not passed' in clear red color.
Note: Refer to the paragraph '3.8.3.9 Formula Fields' for details about the syntaxes and variables to use.
Examples of calculating Passed condition:
| Example 5 | Passed if Yes votes are more than No votes | Total1> Total3 |
| Example 6 | Passed if Yes votes are more than No+ Abstain votes | Total1> Total2+ Total3 |
| Example 7 | We have exactly 120 appointed Members and more than half of them must vote Yes regardless of how many of them are present during the voting: | sum(Vote1) > 60 |
| Example 8 | Exactly half or more of the present Participants must vote Yes: | sum(Vote1) >= (Sum(Present)/2) |
3.8.3.8 Vote Display Column Formula
The result of the voting sessions can be displayed on the CUA screens or CDA screens in different ways. Either as plain numbers due to the limited space on the screen or as column charts with numbers.
Up to nine different voting results can be shown each based on the formulas inserted in the 'Vote Display Column Formula'.
Note: Refer to the paragraph '3.8.3.9 Formula Fields' for details about the syntaxes and variables to use.
Examples of calculating voting results:
| Example 9 | Total number of YES votes | Total1 |
| Example 10 | Total number of ABSTAIN votes | Total2 |
| Example 11 | Total number of NO votes | Total3 |
| Example 12 | To calculate the sum of those who did not vote at all | TotalPresent-Total1-Total2-Total3 |
| Example 13 | To display the total count of available votes in the hall | TotalVotes+ TotalDelegatedVotes |
3.8.3.9 Formula Fields
3.8.3.9.1 Variables
A number of predefined variables are available for use in the formula fields. The variables combined with the syntaxes forms the calculations, which are used in the formula fields.
Each of the variables can be used when specifying a passed or a voting result formula.
| Variable | Variable type | Description | Include Voting Weight |
| Vote1 | Real | The value for Participants who pressed button 1. | x |
| Vote2 | Real | The value for Participants who pressed button 2. | x |
| Vote3 | Real | The value for Participants who pressed button 3. | x |
| Vote4 | Real | The value for Participants who pressed button 4. | x |
| Vote5 | Real | The value for Participants who pressed button 5. | x |
| Present | Real | The value for Participants present. This variable correspond to the variable ‘TotalPresent’. Refer to the section ‘3.8.3.5 Attendance check’ | x |
| Total1 | Real | Sum of Participants who pressed button 1. | x |
| Total2 | Real | Sum of Participants who pressed button 2. | x |
| Total3 | Real | Sum of Participants who pressed button 3. | x |
| Total4 | Real | Sum of Participants who pressed button 4. | x |
| Total5 | Real | Sum of Participants who pressed button 5. | x |
| TotalSeats | Integer | Sum of Seats configured in CAA/ Setup/ Equipment/ Conference Units | |
| TotalPresent | Real | Refer to the section ‘3.8.3.5 Attendance check’ | x |
| TotalAttendance | Real | Refer to the section ‘3.8.3.5 Attendance check’ | x |
| TotalVotes | Real | Refer to the section ‘3.8.3.5 Attendance check’. This value is also used in the CUA, ‘Participant Votes’ subpanel. | x |
| TotalLoggedIn | Real | Same as ‘TotalVotes’ | x |
| TotalDelegatedVotes | Real | Sum of the ‘proxy votes’, which has been delegated to others. This value is also used in the CUA, ‘Participant Votes’ subpanel. | x |
| DelOnList | Integer | Sum of the users with voting right on the ‘Participant Seat Table’ | |
| Registered | Integer | Sum of the users who indicated presence during a registration session | |
| LateRegistered | Integer | Sum of the users who indicated presence after a registration session is stopped. The value is reset when a registration session is started |
3.8.3.9.2 Syntaxes
The following syntaxes are valid when specifying formulas:
| + | Add |
| - | Minus |
| / | Divide |
| * | Multiply |
| and | Two statements combined with ‘and’ shall fulfil condition |
| or | One of two statements combined with ‘or’ shall fulfil condition |
| sum('voting_group') | Sum (incl. voting weight) of the given votes for a Voting Group. |
| sum('voting_group',condition) | Sum (incl. voting weight) of the given votes for the Group ‘ABC’ fulfilling the ‘condition’. The condition could be “Vote1” |
| iif (condition,truepart,falsepart) | If the ‘condition’ is true then the ‘truepart’ is shown, if not the ‘falsepart’ is shown |
| convert(number,'System.Int32') | Converts a decimal number to the lower integer part.Example 1:convert(3,'System.Int32') = 3convert(2.5,'System.Int32') = 2Example 2 (25% of Total present is always rounded up to the nearest integer):iif(convert(TotalPresent/4,'System.Int32')< TotalPresent/4,convert(TotalPresent/4,'System.Int32')+ 1,convert(TotalPresent/4,'System.Int32')) |
3.8.3.9.3 Use of Voting Group parameter
Use of Participant ‘Voting Group’ parameter in the formulas is a way of counting votes from group of Participants separately and use this count in calculating Quorum or Passed/Not passed results or in the Voting Result columns. The ‘voting group’ is specified for each Participant in the Participant Table.
The Voting Group parameter type is 3 digits alphanumerical.
In the following the 'Voting Group' parameter ABC has been used for some Participants and DEF for others.
| Example 15 | To get all Participants with ‘Voting Group’ = 'ABC' who has cast a vote.Enclose the ‘Voting Group’ in quotes and use the SUM-function (you are in fact creating a sum of the individual results...) | SUM('ABC') |
| Example 16 | To get all Participants with ‘Voting Group’ = 'ABC' who has pressed button 1 use the expression | SUM('ABC',VOTE1) |
| Example 17 | The statement is true if yes-votes for ABC-Participants are greater than no-votes for DEF-Participants. | SUM('ABC',VOTE1) > SUM('DEF',VOTE3) |
| Example 18 | To get all Participants with ‘Voting Group’ = 'ABC' who are present | SUM('ABC',PRESENT) |
3.8.4 Mimic Configuration
The Mimic is a graphical overview of the meeting room or hall.
Each seat has a colored dot showing microphone and login status.
It is possible to make several mimic diagrams that can be selected for specific meetings.
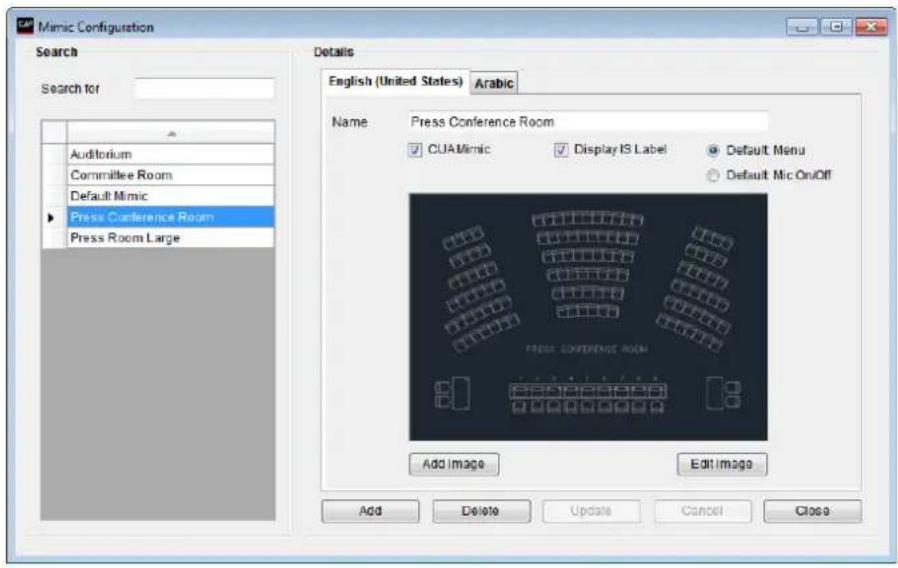
Figure 3.8-F
| Name | Name of the mimic diagram. |
| CUA Mimic | One of the mimic diagrams must be marked as default to be used by the system when no meeting is started. |
| Display IS Label | To display the Interpreter Console labels on the mimic diagram the ‘Display Label’ must be checked. The CDA application has to be restarted in order for the changes to be applied. |
| Default: Menu | Tick this option to enable the Menu button in the mimic diagram per default. When touching the dot representation of a microphone in the mimic diagram a menu is presented directly. |
| Default: Mic On/ Off | Tick this option to enable microphone handling. When touching the dot representation of a microphone in the mimic diagram the microphone is directly turned on/off. |
| [Add Image] | Press the button to select a graphic file (bitmap file) through a standard Windows file selection window. The bitmap must be greater than 150x100 pixels. File formats ‘bmp’, ‘tiff’, ‘png’, ‘jpg’ are valid graphical file formats. The aspect ratio of the image shown in the Preview window might not be correct.The bitmaps can be created using various standard tools like Microsoft Paint. The full size of the bitmap is shown in full resolution in the ‘Edit window’ and in the CUA. |
| [Edit Image] | Press the button to call a window allowing the user to edit the mimic diagram as described in the section below. The bitmap will be shown in a scalable window in correct aspect ratio. |
3.8.4.1 Edit Image
The screen presents a full screen view of the imported bitmap allowing the user to add and edit seats, and to add buttons for special functionality.
Right clicking on the image calls a popup menu presenting the different options.
The dots and buttons inserted by use of the popup menu can be arranged by a standard Windows drag and drop function.
Seat numbers are displayed when the mouse is positioned over a dot.
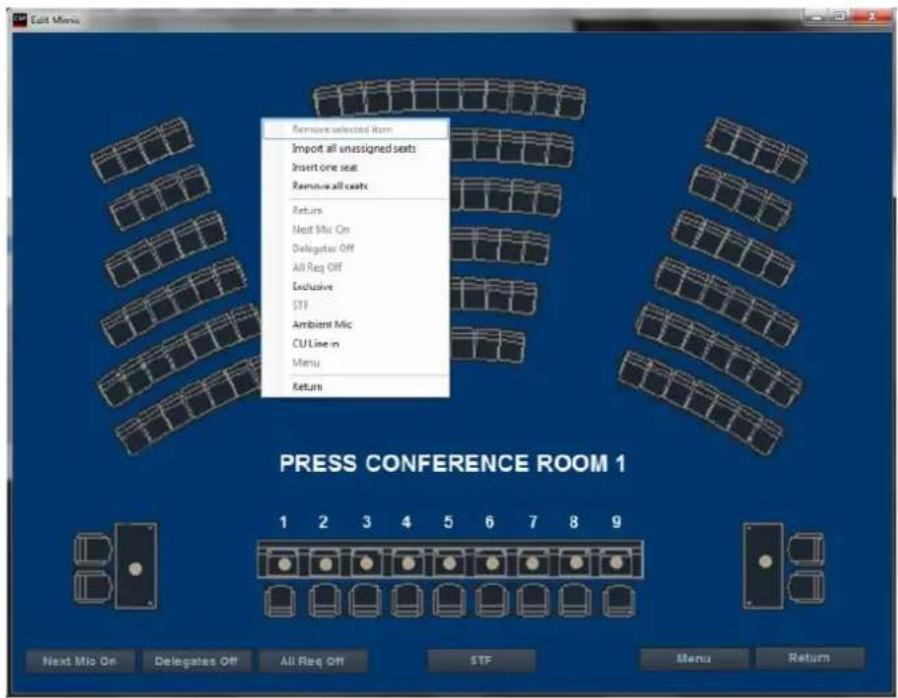
Figure 3.8-G
| Remove selected item | Right click on a button or a dot and select this option to remove it from the mimic diagram |
| Import all unassigned seats | Will create a dot on the screen for each entry in the Seat table that has not been put on the mimic yet.Dot size can be adjusted in the file |
| Insert one seat | Displays a list of all seats not already on the mimic allowing the user to select a single seat. The dot is created where the mouse is pointing. |
| Remove all seats | Will delete all dots on the screen. |
| Return, Next Mic On etc. | Will insert the buttons [Return], [Next Mic On], [Participants Off], [All Req Off], [Exclusive], [STF], [Ambient], [CU Line in] and [Menu]. |
| [Menu] | The button [Menu] switches the functionality of the mimic diagram (in the CUA) between presenting a menu or switching On/Off the microphone directly when touching the dot representing of a microphone |
| Return | Will return to the previous screen presenting the user with a popup ‘Save changes yes/no?’. If ‘No’ is selected all the changes are lost. |
3.8.4.2 Not Removable Button
| [Return] | The button [Return] closes the mimic diagram (in the CUA) and returns to previous screen |
3.8.4.3 Dot Sizes
The dot sizes are configured in the file 'prjCAA.exe.config' in the folder '..\Program Files (x86)\DIS\Conference Administrator Application'. The setting 'MimicRelativeSeatSize' defines the size. Default value is 0.02.
3.8.5 CDA Screen Configuration
This screen is used to make screen configurations for the use of the CDA application.
Multiple configurations can be created to assign the CDA applications individual configurations.
For more information about CDA Screen Configurations Refer to the 'User Manual CDA'.
Figure 3.8-H
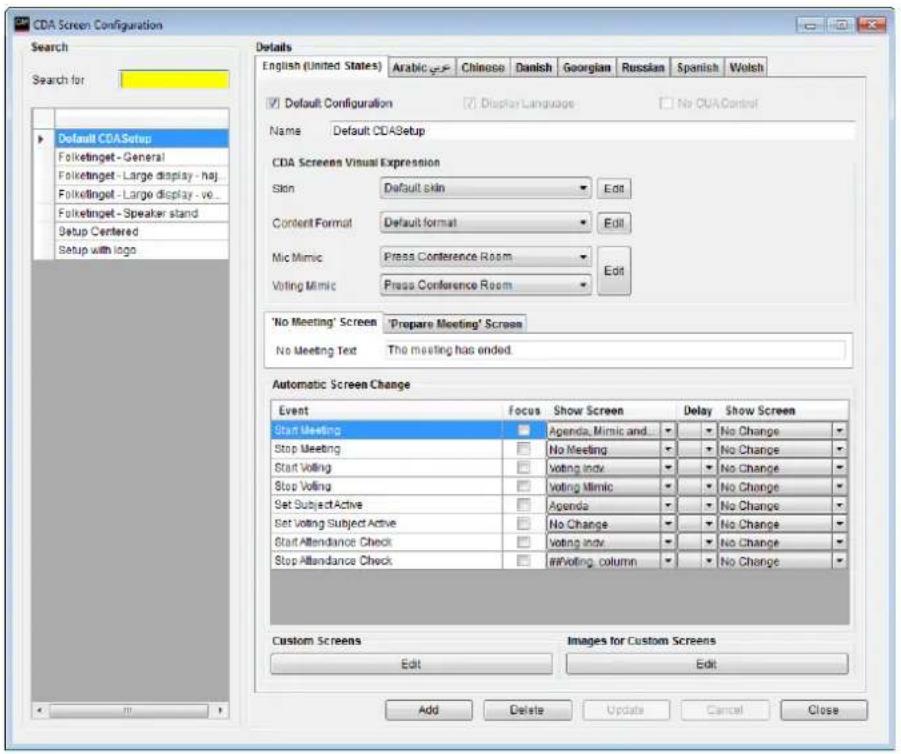
3.8.6 Participant List Configuration
This screen allows the user to set the column widths in the CUA Application lists which are showing Participants in the Speak Lists.
The total width is a fixed determined by the maximum available space on the screens. The individual columns can be omitted from the lists by entering zero in the width field. Only the 'Show Name' column is mandatory.
The 'Show Name' content is defined in the 'Meeting Role' setting.
The fields ‘Meeting Role, Group and Group Abbreviation’ can also be selected as part of the ‘Show Name’ content.
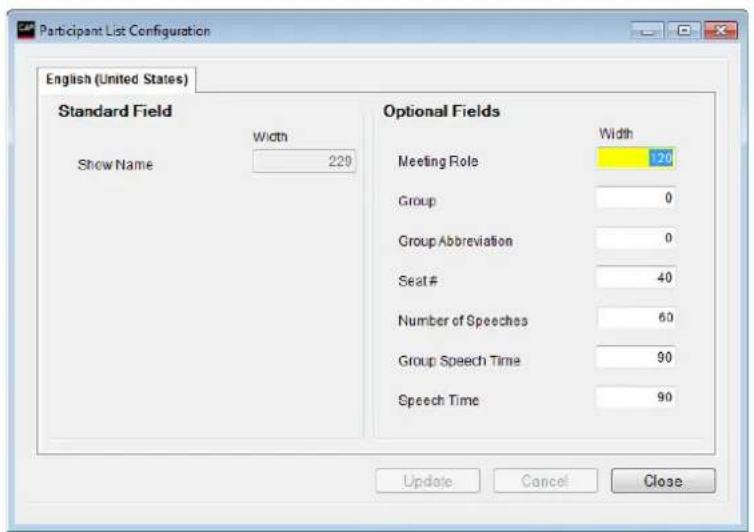
Figure 3.8-1
The ‘Number of Speeches’ field indicated the number a participant has spoken to the active subject.
Note: The fields selected in the 'Participant List Configuration' are shown in columns in the lists. If the fields 'Meeting Role, Group and Group Abbreviation' are selected as part of the 'Show Name' content, the fields are not shown in columns but appended in the 'Show Name' content.
3.8.7 Print Server Configuration
This screen allows the user to configure a print server for the print button in the CUA.
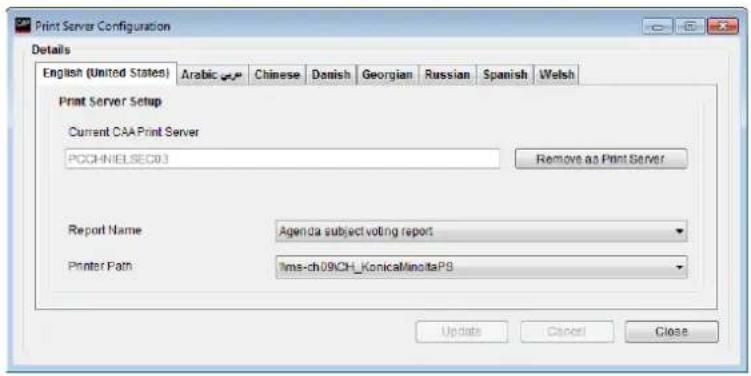
Figure 3.8-J
3.8.8 Speech Time Configuration
This screen allows the user to configure different speech time configurations.
For more information on the speech time configuration Refer to the 'User Manual SW6000 Advanced Meeting Management'.
Figure 3.8-K
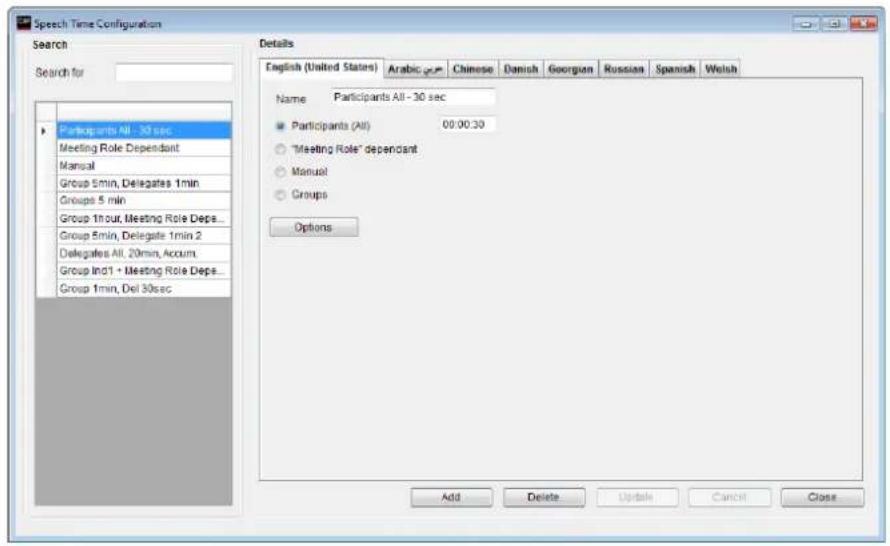
3.8.9 Speaker Type Configuration
Note: This facility is subject to the availability of the 'SW6000-ADV' module.
Refer to the 'User Manual SW6000 Advanced Meeting Management' for user information.
3.8.10 Web Service Configuration
Note: This facility is subject to availability of 'SW6000-ESI External System Interface' module.
Refer to the 'User Manual SW6000 External System Interface' for user information.
3.8.11 Meeting Type Configuration
This screen allows the user to configure different Meeting Types used when different type of meetings are streaming to the same web application.
Figure 3.8-L
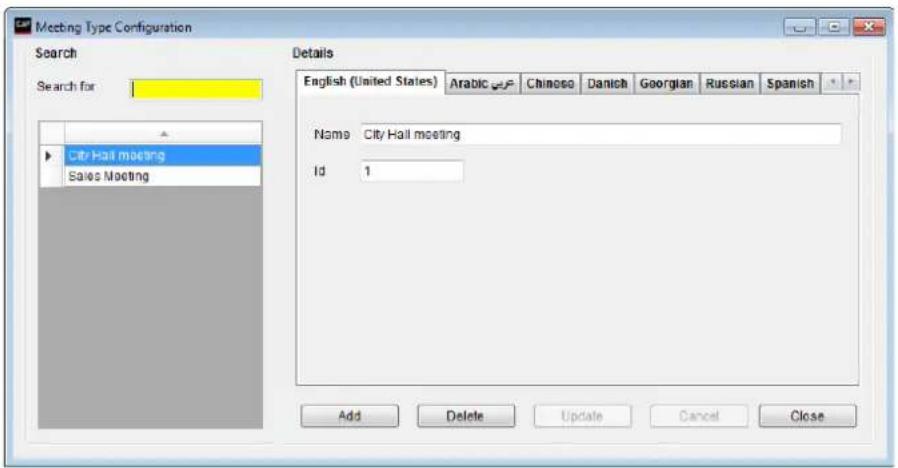
3.8.12 Name Sign Templates
This screen is used to define the content on the Name Signs.
Each template is split into a "Front" and "Rear" definition for easier handling, and then merged into one before sending to a Name Sign. When content in the name sign is updated the rear side will be updated first.
The template defines font size and type, position of the text and the content.
Refer to the "User Manual SW6000 Name Sign Markup Language" for details about the template format.
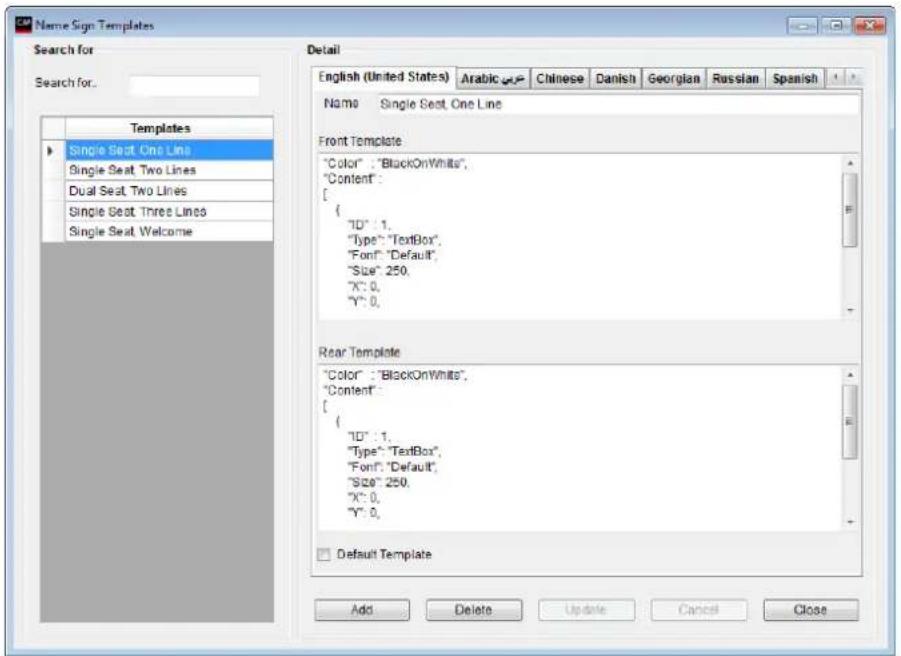
Figure 3.8-M
| Templates | The list of defined templates |
| Template Name | The name of the template |
| Front Template | The definition of the content to be shown on the name sign facing the audience |
| Rear Template | The definition of the content to be shown on the name sign facing the participant |
| Default | The template marked as default will be the one used, when a name sign is registered the first time. |
3.9 Setup/Meeting Role
Note: The available settings in the Meeting role screen depends on the licensed modules.
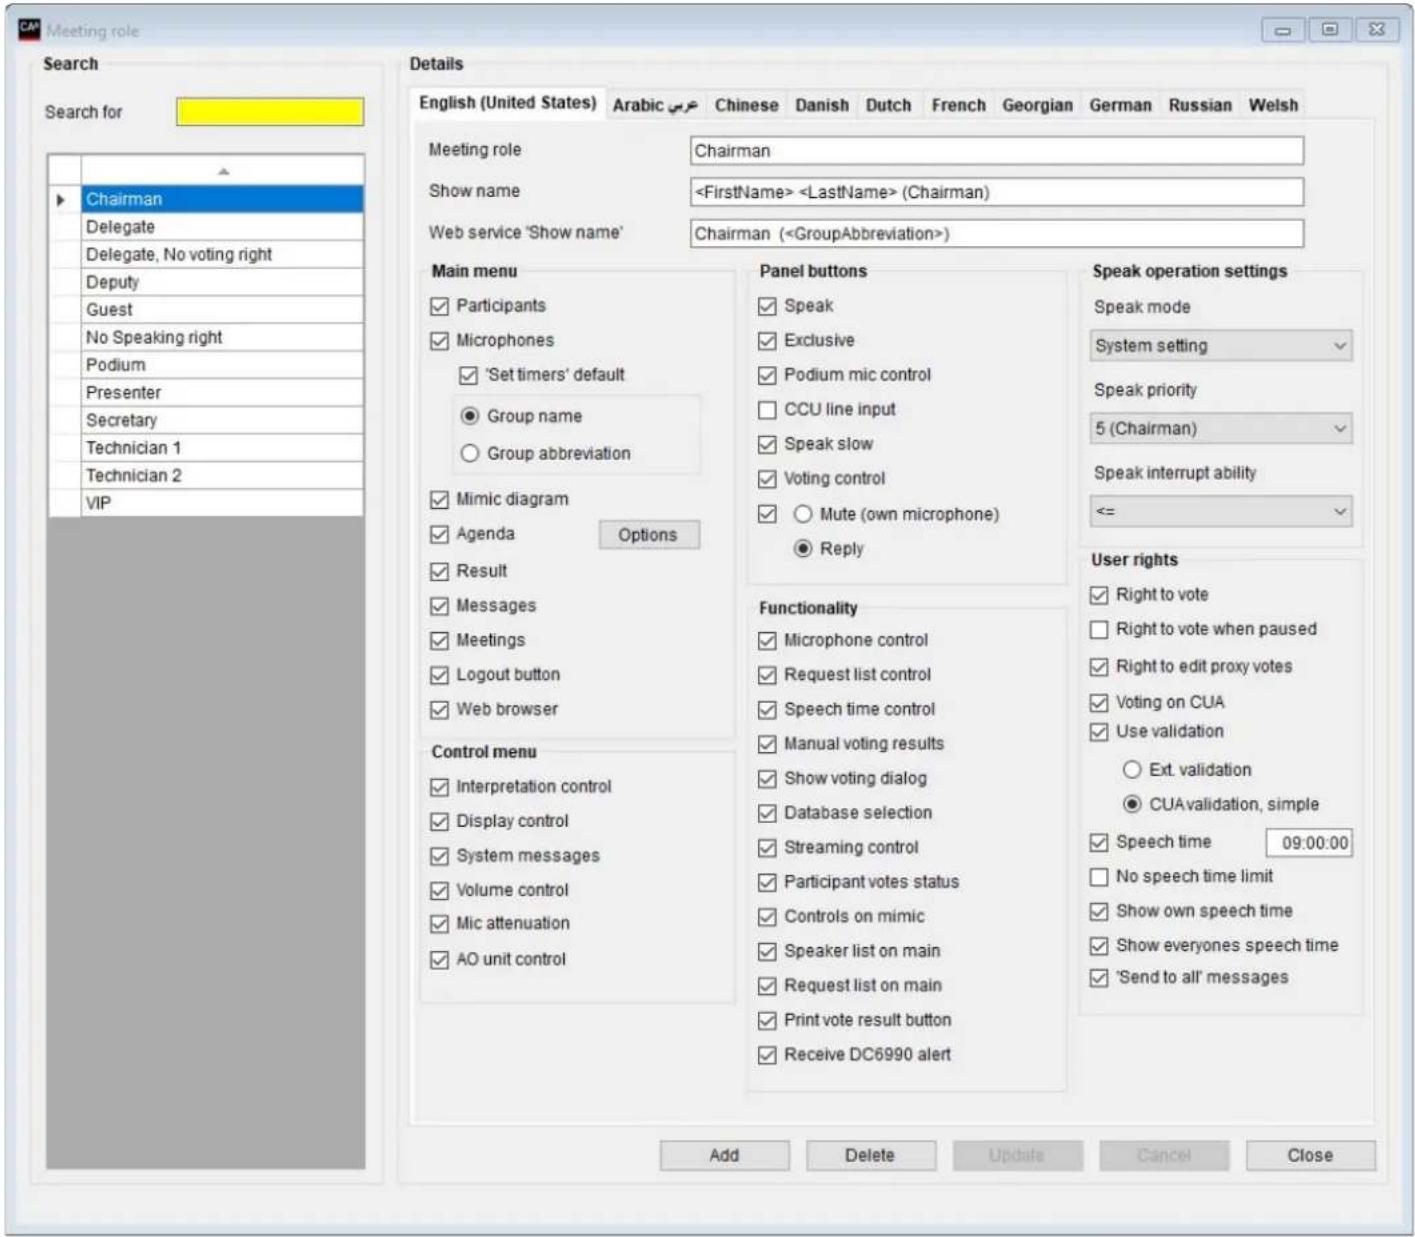
Figure 3.9-A
This screen is used to create and maintain the various ‘Meeting Roles’ that can be assigned to Participants and Seats.
It is used to specify the screens, buttons or special functionalities that apply to a Participant or a seat's profile.
A number of standard Meeting Roles are created automatically during installation.
They standard Meeting Roles can be modified or deleted except the Chairman and Participant which can be modified but not deleted.
| Meeting Role Name | Label with an intuitive description of the Meeting Role |
| Show Name & Web Service Show Name | Note: This facility is subject to the availability of the ‘SW6000-ADV’ module.Refer to the ‘User Manual SW6000 Advanced Meeting Management’ for user information. |
3.9.1 Main Menu
The options specify which screens will available to the user of the CUA Application:
| Participants | Shows names, titles, pictures and other information for the Participants attending the meeting. |
| Microphones | Microphone management, speakers list, speak request list and last five speakers. Allows the user to open and close microphones. |
| ‘Set Timers’ default opens the speech time ‘Timer’ sub-panel in the CUA/Microphones as default.Group Name Group name is shown in the ‘Group Speech Time’ window in the CUAGroup Abbreviation The group abbreviation is shown in the ‘Group Speech Time’ window in the CUA | |
| Mimic Diagram | Graphical overview of the room or hall showing login and microphone status and allowing the user to turn microphones on and off, log Participants in and out and set individual volume level of microphones. |
| Agenda | Shows the agenda. See section ‘3.9.1.1 Agenda options’ for information about content, user rights etc. |
| Result | Show the voting result. |
| Messages | Allows Participants to exchange written or pre-recorded messages between each other. |
| Meetings | Allows a user to start and stop a meeting and setting ‘Speak operation settings’. This does also give the permission to access the sub-panel ‘Not Voted’ during a voting session. |
| Logout Button | Show the logout button on the CUA |
| Web Browser | Note: This facility is subject to the availability of the ‘SW6000-ADV’ module.Refer to the ‘User Manual SW6000 Advanced Meeting Management’ for user information. |
3.9.1.1 Agenda options
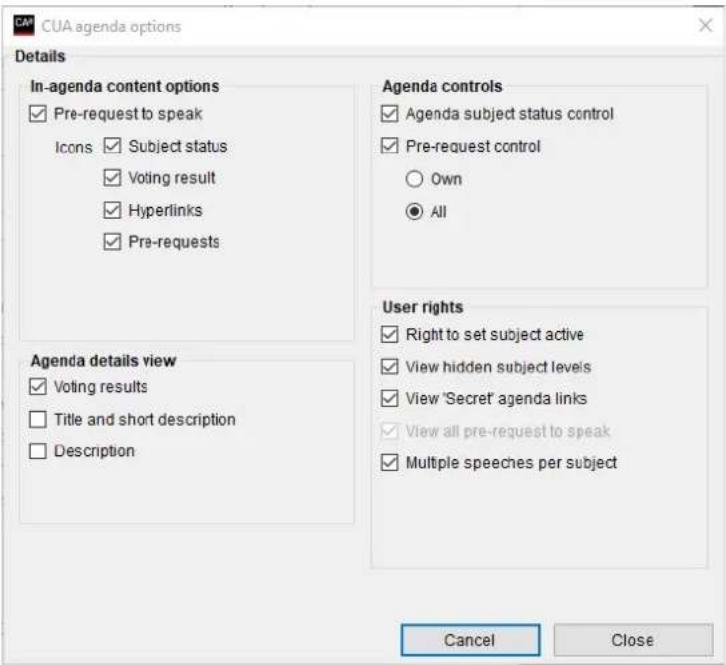
Figure 3.9-B
The following settings are available in the Agenda option window:
3.9.1.1.1 In-agenda content options
| Pre-request to speak | Selects if a Pre-request to speak list is available within the agenda |
| Icons | Selects which icon shall be visible in the agenda |
3.9.1.1.2 Agenda detailed view
| Pre-request to speak | Selects if a voting result (if exists) shall be shown at the bottom of the agenda window | |||||||
| Title and short description & Description | Selects if a short description and/or description (if exists) shall be shown at the bottom of the agenda window.The button ‘Description’ will be available and when activated the agenda window will be replaced with a subject item window with the following content | |||||||
| Selected in Meeting Role | Description button activated | |||||||
| Title and short description | Description | |||||||
| x | 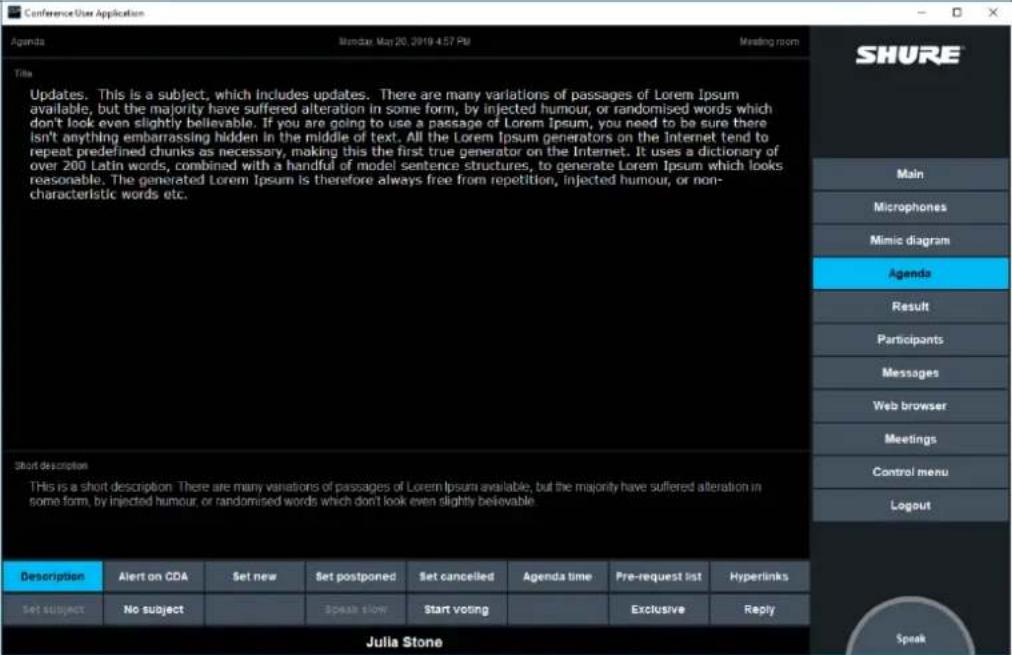 | |||||||
| x | 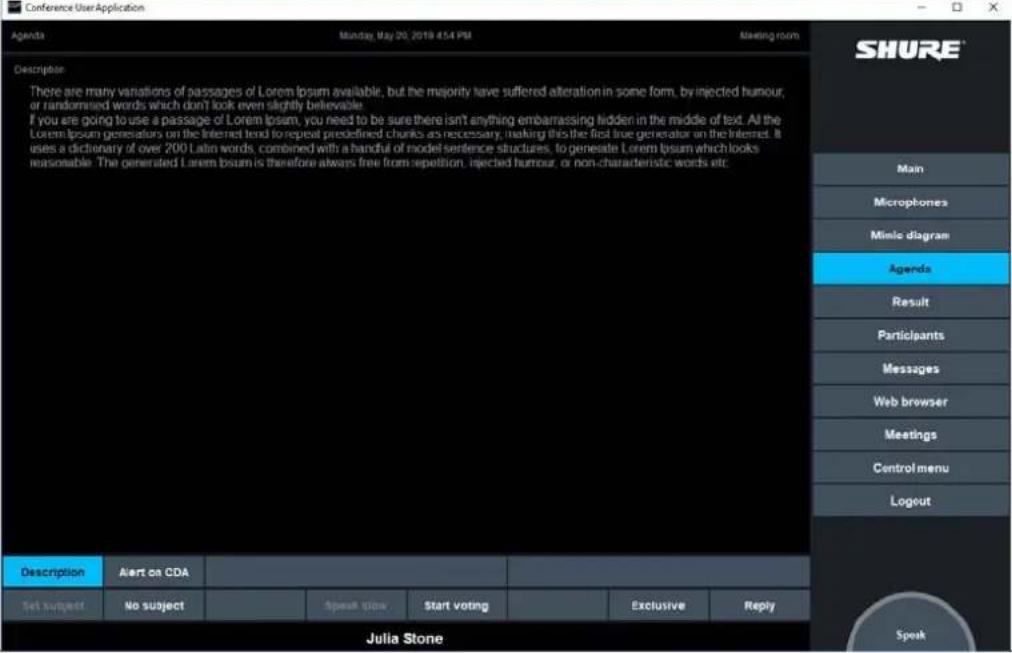 | |||||||
| X X | Conference User ApplicationAgenda Monday, May 20, 2019 4:55 PM Meeting roomTitleUpdates. This is a subject, which includes updates. There are many variations of passages of Lorem Ipsum available, but the majority have suffered alteration in some form, by injected humour, or randomised words which don't look even slightly believable. If you are going to use a passage of Lorem Ipsum, you need to be sure there isn't anything embarrassing hidden in the middle of text. All the Lorem Ipsum generators on the Internet tend to repeat predefined chunks as necessary, making this the first true generator on the Internet. It uses a dictionary of over 200 Latin words, combined with a handful of model sentence structures, to generate Lorem Ipsum which looks reasonable. The generated Lorem Ipsum is therefore always free from repetition, injected humour, or non-characteristic words etc.Short descriptionThis is a short description. There are many variations of passages of Lorem Ipsum available, but the majority have suffered alteration in some form, by injected humour, or randomised words which don't look even slightly believable.DescriptionThere are many variations of passages of Lorem Ipsum available, but the majority have suffered alteration in some form, by injected humour, or randomised words which don't look even slightly believable. If you are going to use a passage of Lorem Ipsum, you need to be sure there isn't anything embarrassing hidden in the middle of text. All the Lorem Ipsum generators on the Internet tend to repeat predefined chunks as necessary, making this the first true generator on the Internet. It views a dictionary of over 200 Latin words, combined with a handful of model sentence structures, to generate Lorem Ipsum which looks reasonable. The generated Lorem Ipsum is therefore always free from repetition, injected humour, or non-characteristic words etc. | |||||||
| Description Alert on CDA Set new Set postponed Set cancelled Agenda time Pre-request list HyperlinksSet subject No subject Speak slow Start voting Exclusive ReplyJulia Stone | ||||||||
Figure 3.9-C
3.9.1.1.3 Agenda controls
| Agenda status subject control | When enabled three buttons for setting agenda subject status in the CUA are available. The default subject status are: Cancelled, Postponed or New.The ‘status’ labels can be changes in Languages/labels. |
| Pre-request control | When selected the participant will have the option to pre-request to speak on the selected subject.Own: The participant can only request on behalf of himselfAll: The participant can request on behalf of all participants and approve/deny/remove all pre-requests |
3.9.1.1.4 User rights
| Right to set subject active | With this option the user has the right to set a subject active. |
| View hidden subject levels | When active the User can see all agenda subject levels in his UI (CUA). The number of hidden subjects is set in Meeting Options. |
| View ‘Secret’ agenda links | When enabled the user can view open links to documents, which has the attribute ‘Secret’ |
| View all pre-requests to speak | When enabled, the user can view pre-request to speak from all participants |
| Multiple speeches per subject | If the option ‘One speech pr. subject’ is active (configured in ‘Agenda subject configuration’) only users with ‘Multiple speeches per subject’ are allowed to speak multiple times. |
3.9.2 Control menu
The ‘Control menu’ is a sub-menu in the CUA giving access to screens for setting like adjusting CU volume controls and adjusting individual conference unit volume controls
| Interpretation Control | Allow the user to control and monitor the status of the Interpreter Consoles. |
| Display Control | This page is used to select the screen to be shown on the CDA displays. |
| Note: This facility is subject to the availability of the ‘SW6000-CDA’ application.Refer to the ‘User Manual SW6000 CDA’ for user information. | |
| System Messages | Displays important system messages generated by the DCS6000 system |
| Volume Control | Adjusting the DIS-CCU/CU 6105/6110 volume controls and adjusting individual conference unit volume controls. |
| Mic Attenuation | Adjusting individual conference unit volume controls. |
| AO Unit Control | Control the channel setting and output volume of connected AO units. |
3.9.3 Panel Buttons
These options specify the panel buttons which will be available to the user of the CUA Application:
| Speak | Button for requesting to speak with the same functionality as the button on the conference unit. |
| Exclusive (Speak) | Button for requesting the exclusive right to speak. Will turn off all Participant microphones.This button will only work, if the user has ‘Speak Priority’ = 5 (Chairman) |
| Podium | Buttons for turning On/Off the Podium microphone(s). |
| CU Line input | Button for switching On/Off the Line input at the CU |
| STF (Speaking Too Fast) | Indication button. Turns red if an interpreter presses his STF button. |
| Voting Control | Right to start a Voting session |
| Mute (Own Microphone) | Button for temporary muting an open microphone. Either the [Mute] or the [Reply] button can be selected |
| Reply | Button for requesting to give a reply. Either the [Mute] or the [Reply] button can be selected |
3.9.3.1 Functionality
These parameters specify special functionality that applies to seats or Participants of this Meeting Role:
| Microphone control | With this option the user has control of microphones in the CUA Microphone screen and Interpreter Screen. |
| Request list control | With this option the user has the right to close and hide the request list for all as well as to close the request queue for all except a ‘Technician’ user (Seat type: Technician). |
| Speech time control | With this option the user has the right to set speaking time in a CUA. |
| Manual voting results | With this option the user has the right to type in a voting result using a dialog box. |
| Show voting dialog | This option enables the display of the voting pop-up when the Start Voting button has been activated. |
| Database selection | A user with Technician Role can switch his CUA application between two or more databases. |
| Streaming control | With this option the user has the right to control streaming and archiving. |
| Participant votes status | With this option the user has the right to display the ‘Participant Votes Status’ information on the CUA Result screen and ‘Proxy Votes’ on the CUA Participants screen. |
| Controls on mimic | With this option the user has access to the control buttons on the mimic diagram in the CUA. |
| Speaker list on main | With this option the user has access to the Speakers list on the CUA and on the MXC640 / DC 6990 (not the Request list). |
| Request list on main | With this option the user has access to the Speakers and Request list on the CUA and on the MXC640 / DC 6990. |
| Print vote result button | With this option the user has access to a button on the voting results screen enabling the user to print the voting result. |
| Receive DC69 alert | With this option the user will receive alerts send from DC 6990 unit using the ‘Send Alert’ button in the Messages menu |
3.9.4 Speak operation settings
Those settings are used to assign individual settings to Users or Seats. The default setting for Speak Mode is 'System Setting'.
System Setting means that the Speak Mode for the users is following the setting made for the system, e. g. if the system is running in Manual Mode the Participants Speak Mode will be Manual mode.
The settings at the time of installation for the default Meeting Roles are found in the following table:
3.9.4.1 Default Speak operation settings
| Meeting Role | Speak Mode | Speak Priority | Speak Interrupt ability |
| Chairman | Auto or VOX | 5 | <= |
| Participant | System Setting | 1 | System Setting |
| VIP | System Setting | 2 | System Setting |
| Guest | System Setting | 1 | Not allowed |
| Secretary | System Setting | 2 | <= |
| Technician | System Setting | 1 | System Setting |
Figure 3.9-D
3.9.4.2 Individual Speak Operation Modes
For certain applications, it is desirable to assign individual Speak operation settings, where the participant will always use the selected mode independently of the default 'Speak operation settings' or the settings made for or during a meeting.
| Speak mode | System Setting, FIFO, Manual, Automatic, VOX, Manual+ Reply, Automatic+ Reply or VOX+ Reply.See explanation of the modes in the Meeting chapter | Speak ModeSystem SettingSystem SettingFIFOManualAutomaticVOXManual + ReplyAutomatic + ReplyVOX + Reply | |
| Speak priority | 1 (Participant), 5 (Chairman), 4, 3, 2 (VIP) or No Speaking RightsChairman (5) is the highest priority and the microphone will always be turned on regardless of operation mode.In the Request list in the CUA, a user with higher speak priority will be placed before a user with lower speak priority. | Speak Priority5 (Chairman)1 (Delegate)5 (Chairman)432 (VIP)No Speaking Rights | |
| Speak interrupt ability | Determines the microphone's ability to interrupt another speaker if the maximum number of speakers is reached. | Speak Interrupt Ability<=System SettingNot allowed<= | |
| System Setting | The interrupt ability will follow the setting for the system | ||
| Not allowed | Cannot interrupt another speaker | ||
| <= | Can interrupt a speaker with the same speak priority or a speak priority which is less than own speak priority. | ||
| < | Can interrupt a speaker with a speak priority less than own speak priority | ||
3.9.5 User Rights
These settings specify special functionality that applies to Seats or Participants of this Meeting Role:
| Right to vote | With this option the user has the right to vote. |
| Right to vote when paused | With this option the user has the right to vote after the voting session has been paused. |
| Right to edit proxy votes | With this option the user has the right to edit proxy votes in the CUA |
| Voting on CUA | A user with this right can vote on the CUA display. When this option is set, then voting buttons on a connected conference unit will be disabled. |
| Use validation | Ext. validation With this option the user can use external validation on a Participant Meeting Role.CUA validation, simple This option is only available for the user if Registration is in use at the Meeting and ‘External Validation’ is ticked in CAA/Equipment/Conference Units. The option is used to enable/disable a popup on the CUA when a ID Card is inserted in the attached conference unit. When enabled, the user is not registered/logged in before he has pressed a ‘Registration’ button on the popup: |
| Speech time | This option applies individual speech time limit (0:00:00-9:59.59) to the Meeting Role. If the option is not enabled, the Meeting Role will not have any speech time applied even though a speech time configuration based on Meeting Roles is active. |
| No speech time limit | This option applies a no speech time configuration to the Meeting Role. |
| Show own speech time | This option enables the Meeting Role only to see own speech time in the CUA. |
| Show everyone’s speech time | This option enables the Meeting Role to see the speech time of all Participants in the CUA. |
| ‘Send To All’ messages | When enabled the user can send messages to all Participants |
3.10 Setup/Language
3.10.1 Languages
The CUA and CAA Application offer full support for multiple languages.
Figure 3.10-A
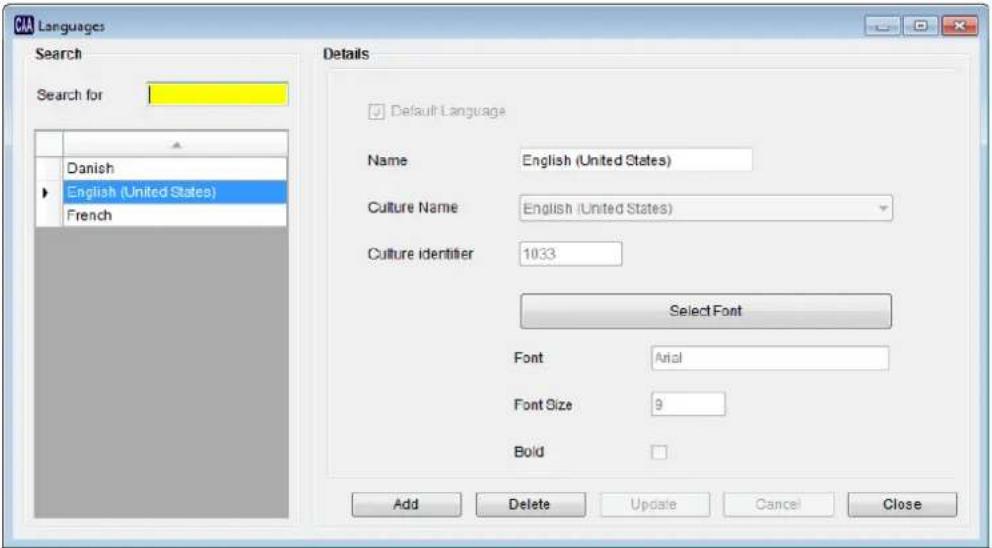
| Default Language | The default language, which is created during the installation, is marked as the default language. |
| Name | Name of the language (this will be displayed on the language selection buttons on the CUA Application and on the language tabs of the different screens in this application). |
| Culture Name | Selects the standard Windows culture that applies to the language. These languages must also be installed manually on Windows on all PCs that will use the language. |
| Culture identifier | Field for showing the associated culture identifier for the selected culture name. |
| [Select Font] | Use this button to change of the font and font size in the CAA for this language (Arial is currently the default for the SW6000 applications). |
| Font | Field for showing the selected font. |
| Font size | Field for showing the selected font size. (Font size 10 is the default size for labels and data fields). |
| Bold | All text and labels will be in Arial Bold if this option is selected. |
3.10.2 Labels
This screen allows the user to enter a complete translation of all labels and system text used in the CUA and CAA Application. Maximum amount of characters per label is 100 however the maximum useable number of characters might be limited in the application, where the label is used.
A drop down box 'Label Group' allows the user to select the labels grouped by application and screen.
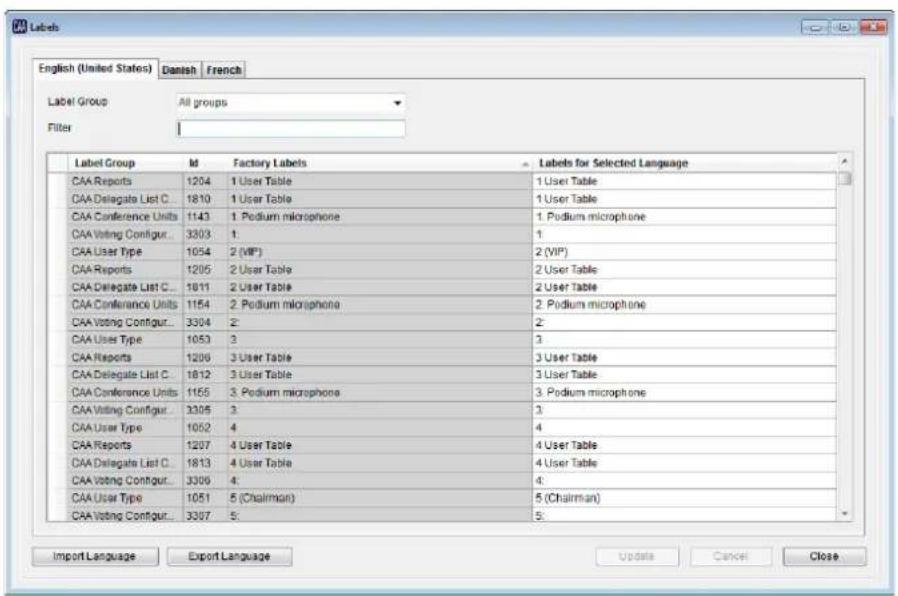
Figure 3.10-B
Labels for the 'Default language' that is selected during installation must be created or imported if the default language is changed from English.
In the SW6000 installation package are labels for some languages, which can be imported.
| [Import Language] | Use this button to import a set of labels for one language in XML format. Only one language at a time can be imported. Before importing select the language, where you want to import the labels. Only languages with the same culture code can be imported. |
| [Export Language] | Use this button to export a set of labels for one language in XML format. Only one language at a time can be exported. The exported language file can be edited using the ‘Label editor’ program. |
3.10.2.2 Shortcut to Commands
Placing an &-sign before the label text will invoke the function, that the button can be activated with Alt+ "the letter after the & sign"
If the underline has to be present before the Alt-key is pressed, the following has to be done:
- Right click on the desktop and select 'Properties'
- Select 'Appearance'
- Activate the button 'Effects...'
- Remove the tick mark in 'Hide underlined letters for keyboard navigation until I press the Alt key'
In Windows 7 the setting is in "Ease of use" in desktop properties.
3.10.3 Label Groups
This screen allows the user to change the labelling of a label group.
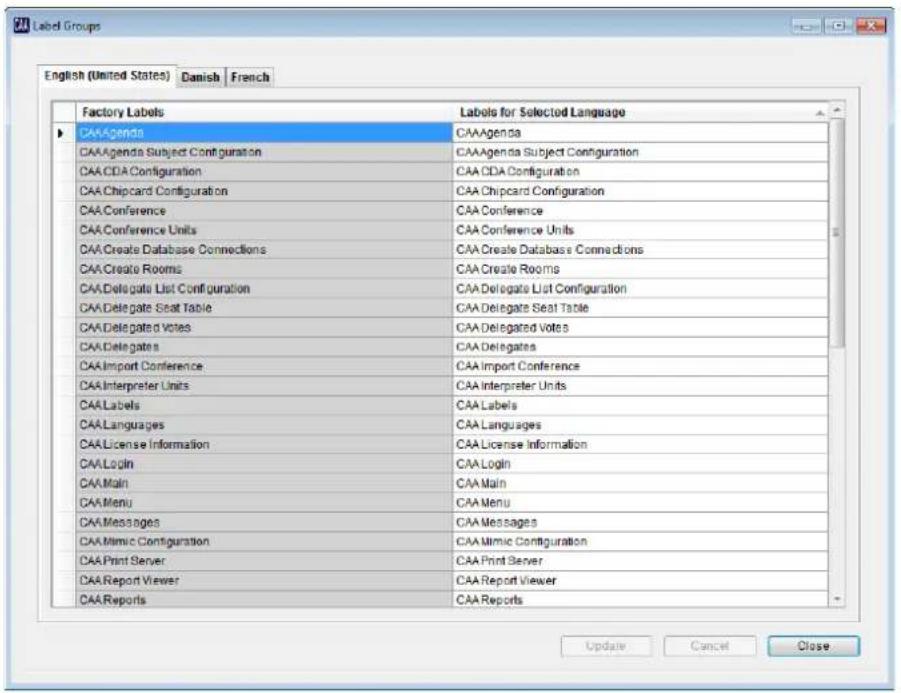
Figure 3.10-C
3.10.4 Conference Units with Graphical Interface
This screen allows the user to select the language of the dynamic text and the default UI label language used in the conference units with graphical user interface. The dynamic text refers to the text strings that come from the SW6000 such as Participant Names, Agenda Items and Meeting Names.
If the selected Language is not available in the conference unit the English UI language will be used as the static labels.
After selecting the language the CUI application must be restarted for the selection to become active. A CAA alert will pop up when updating the language prompting to restart the CUI.
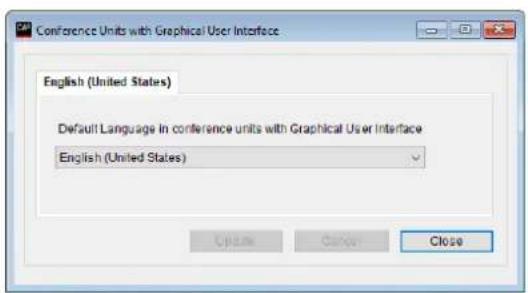
Figure 3.10-D
Figure 3.10-E
3.11 Setup/Rooms
3.11.1 Create Rooms
This screen is used listing the rooms, which can be connected together.
Configurations for the rooms are created in 'Setup/Rooms/Room Configuration'.
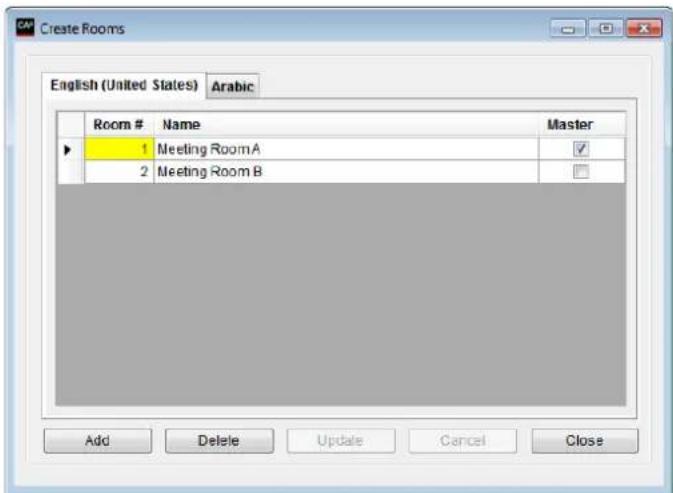
Figure 3.11-A
| Room # | An integer value, numbering the rooms |
| Name | Description of the room |
| Master | Indicating that this room is the default room, where the CU is located. |
3.11.2 Room Configuration
This screen is used to create configurations for the unit in each room listed in 'Setup/Rooms/Create Rooms'. Multiple configurations can be made for each room.
If multiple configurations are to be used for one room only, then create one room in 'Setup/Rooms/Create Rooms' and create the needed configurations in 'Setup/Rooms/Room Configuration'.
Left window is showing the list of rooms.
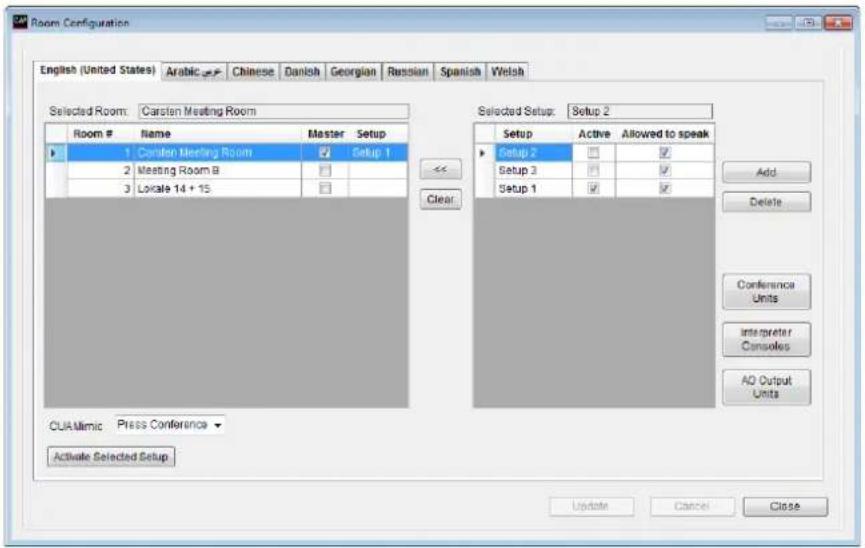
Figure 3.11-B
For each of the rooms in the left panel, a list of created setups is shown in the right panel. One of those Setups can then be selected for the room.
This is done for each room.
| [Add] [Delete] | The buttons are used when creating the setups. |
| [Conference Units] | When a new setup is created, this button is used to show the Seat table for the units in this room. The functionality of the units can then be changed as described in Setup/Equipment/Conference Units. |
| [Interpreter Consoles] | When a new setup is created, this button is used to show the table for the Interpreter Consoles in this room. The functionality of the units can then be changed as described in Setup/Equipment/Interpreter Consoles. |
| [AO Output Units] | When a new setup is created, this button is used to show the table for the AO output units in this room. The functionality of the units can then be changed as described in Setup/Equipment/Audio Output Units (AO). |
| [Activate selected setups] | When each room has been assigned the Setup to be used, this button activates the setup. |
3.12 Setup/Database
3.12.1 Create Database Connections
This screen is used to create connections to other databases definitions for the CAA and CUA applications.
Each row represent a connection to a database.
The columns 'Location', 'CUI Computer Name' and 'Database Name' are labels used to identify and group the database connections.
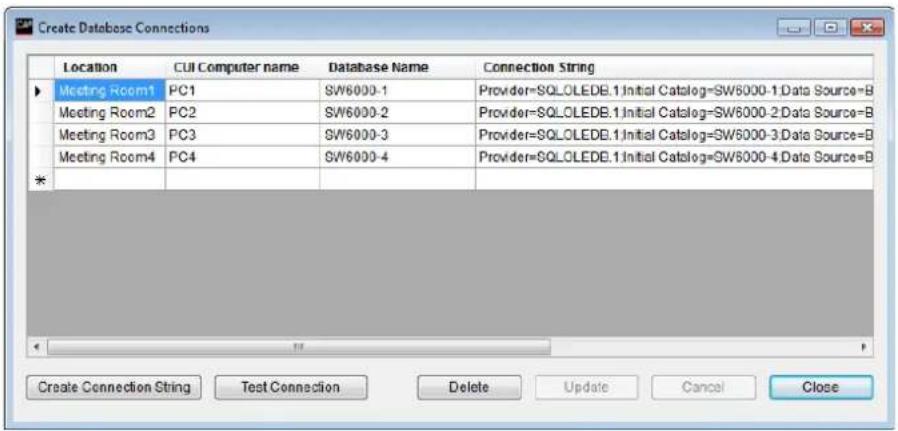
Figure 3.12-A
The button [Create Connection String] will bring the 'Generate Connection String' window.
Refer to the 'Installation Manual SW6000' page 23 row 30 for details.
Note: The connections strings applied has to be unique.
Figure 3.12-B
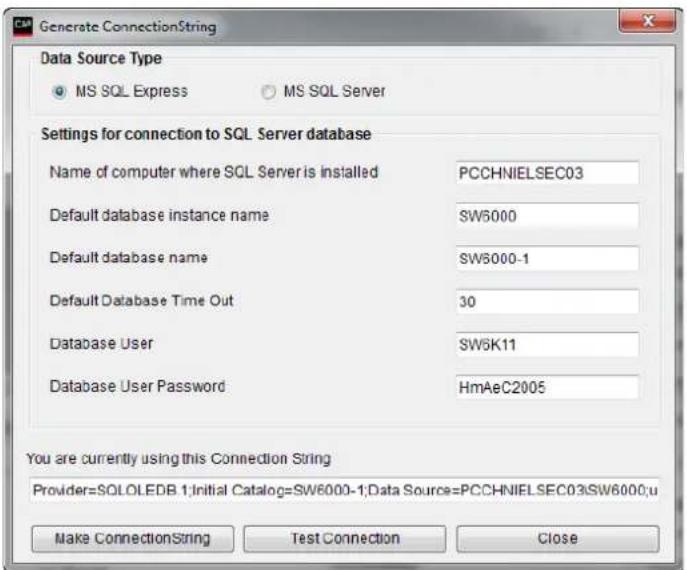
3.13 Connect to Database
This screen is used to switch between the database connections made in the 'Create Database Connections' screen.
Activating the [Connect to] button will change the connection for the CAA application to the database selected.
Figure 3.13-A
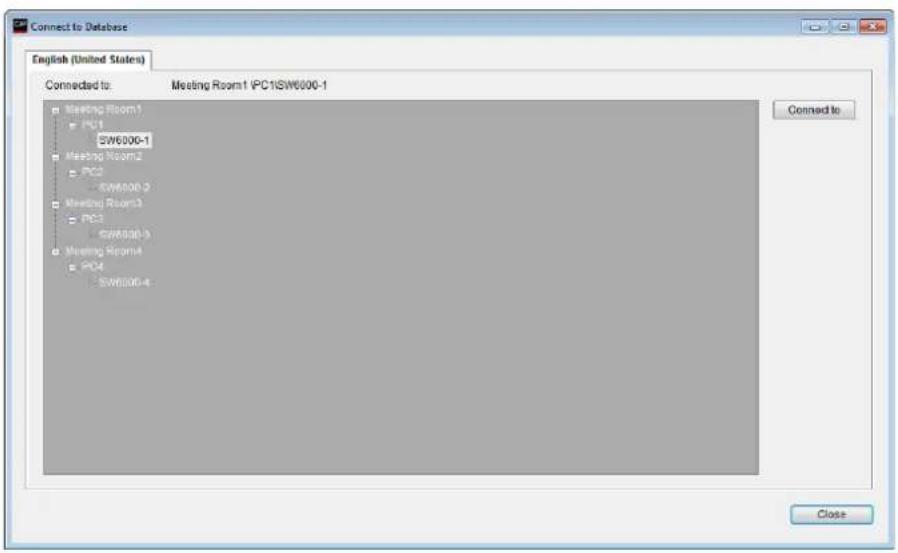
3.14 Tools
3.14.1 Tools/System Messages
This screen is used to view system messages generated by the SW6000 Conference Management Software. The system messages can be saved to a file using the 'Save to file' button.
Figure 3.14-A
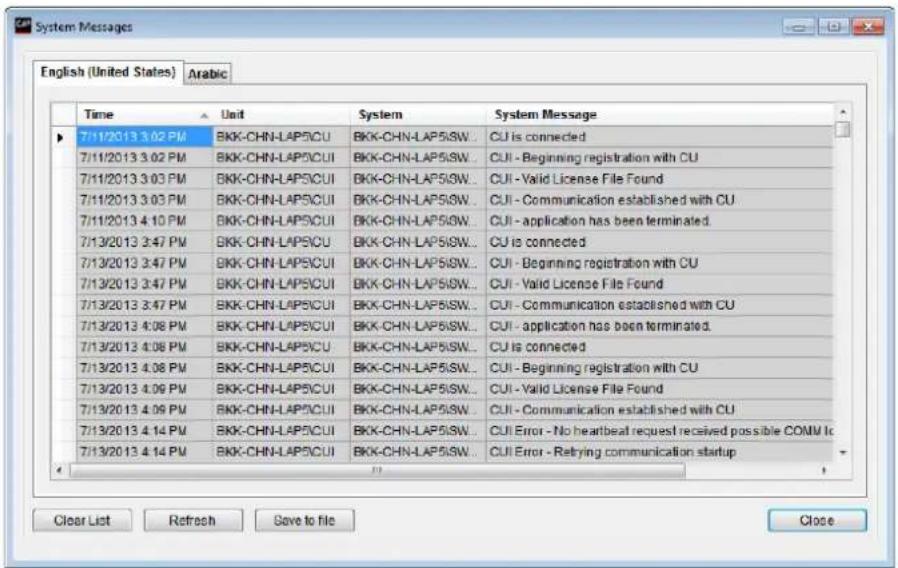
3.14.2 Tools/License Information
This screen is used to view license information for the SW6000 Conference Management Software.
The License Information window displays a list of how many licenses are available per software applications and modules based on the loaded software license.
The ‘Licenses In Use’ provides information on how many licenses are currently in use for the different software applications.
Figure 3.14-B
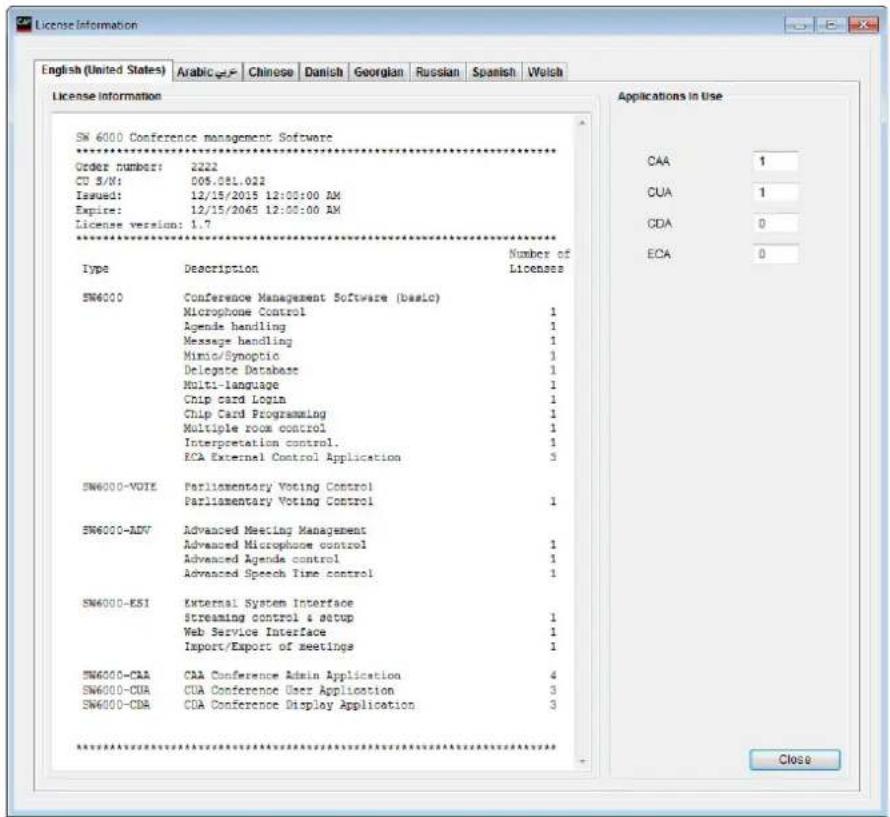
4 SW6000 Backup Utility
This application is used to backup and restore the SW6000 database. You need to have 'Local Administrator Rights' to perform a Backup and Restore procedure.
4.1 Backing Up Data
The procedure for backing up data is a follows:
| 1 | Close all SW6000 applications. | ||
| 2 | Start the application by clicking the SW6000 DataBase Backup Utility shortcut in the Start menu. |  SW6000 DataBase Backup Utility SW6000 DataBase Backup Utility | |
| 3 | The utility will start.Select ‘Backup”.Fill in the fields:Server Name This is the name of the PC, where the database is installed.Database Name: This is the name of the database. Normally this will be ‘SW6000-1’.Select ‘Use Windows Authentication’.Fill in the Backup file path and name or use the suggested name.Click the [Backup] button. | 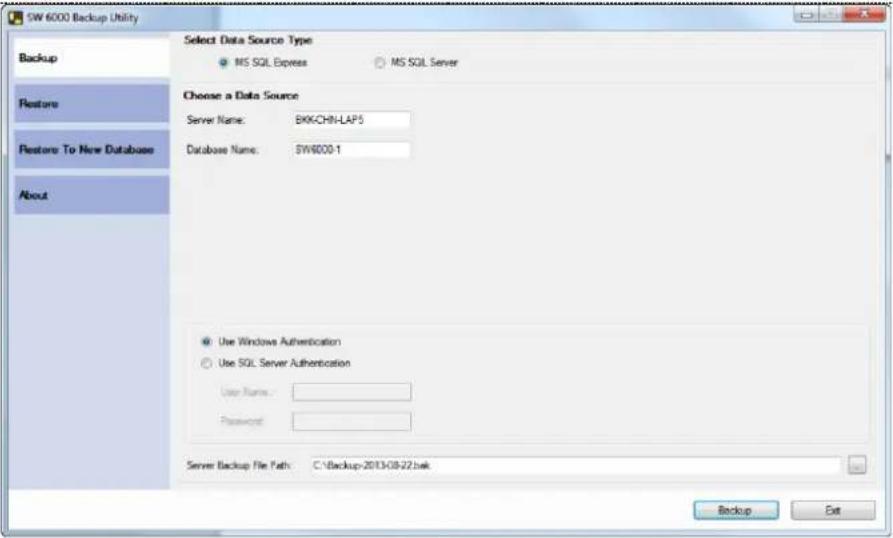 Figure 4.1-A Figure 4.1-A | |
| 4 | Click [Yes] to start backing up the database. | 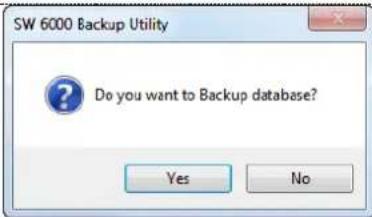 Figure 4.1-B Figure 4.1-B | |
| 5 | The data will be backed up and when finished the message box ‘Backup Database is complete’ will show.Click [OK] and click [Exit] to close the application. | 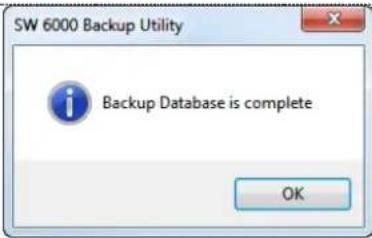 Figure 4.1-C Figure 4.1-C | |
4.2 Restoring data to same database
The procedure for restoring data to the same database as the backup is as follows:
| 1 | Close all SW6000 applications. | ||
| 2 | Start the application by clicking the SW6000 DataBase Backup Utility shortcut in the Start menu. |  SW6000 DataBase Backup Utility SW6000 DataBase Backup Utility | |
| 3 | The utility will start.Select ‘Restore”Fill in the fields:Server Name This is the name of the PC, where the database is installed.Database Name This is the name of the database. Normally this will be ‘SW6000-1’, but it has to be the same as when the data was backed up.Select ‘Use Windows Authentication’.Select the backup file using the [...] button.Click the [Restore] button. | 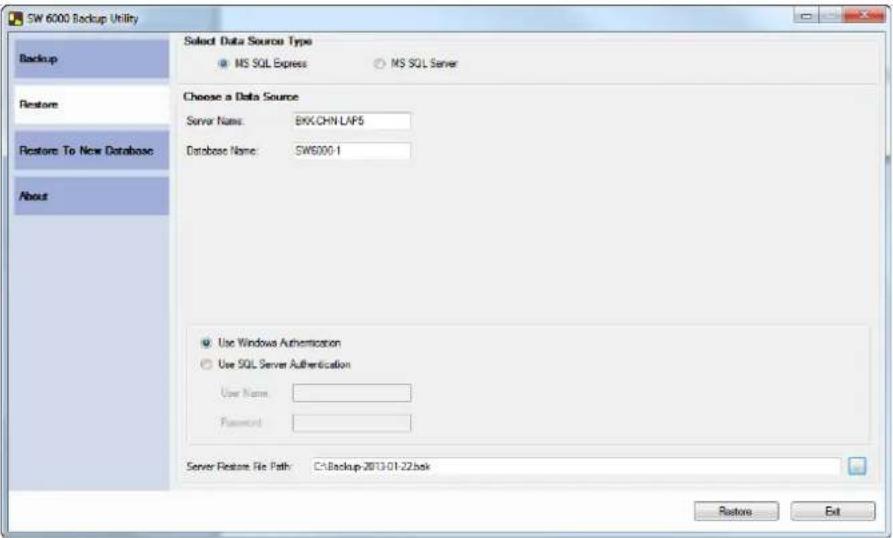 Figure 4.2-A Figure 4.2-A | |
| 4 | Click [Yes] to start restoring the database. | 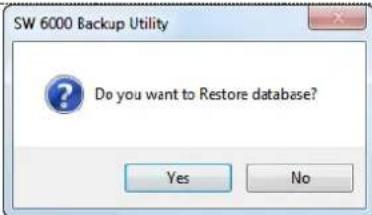 Figure 4.2-B Figure 4.2-B | |
| 5 | The data will be restored and when finished the message box ‘Restore Database is complete’Click [OK] and click [Exit] to close the application. | 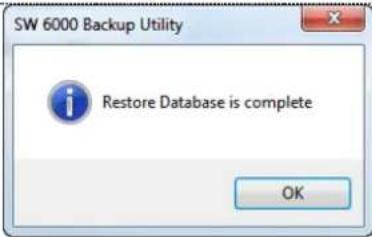 Figure 4.2-C Figure 4.2-C | |
4.3 Restoring data to other database
The procedure for restoring data to another database than the backup is as follows:
| 1 | Close all SW6000 applications. | |
| 2 | Start the application by clicking the SW6000 DataBase Backup Utility shortcut in the Start menu. |  SW6000 DataBase Backup Utility SW6000 DataBase Backup Utility |
| 3 | The utility will start.Select ‘Restore”Fill in the fields:Server Name This is the name of the PC, where the database is installed.Old Database This is the name of the database, which was backed up (ex. SW6000-1).New Database This is the name of the database, which has to be restored (ex. SW6000-3).Select ‘Use Windows Authentication’Select the back using the [...] buttonClick the [Restore] button. | 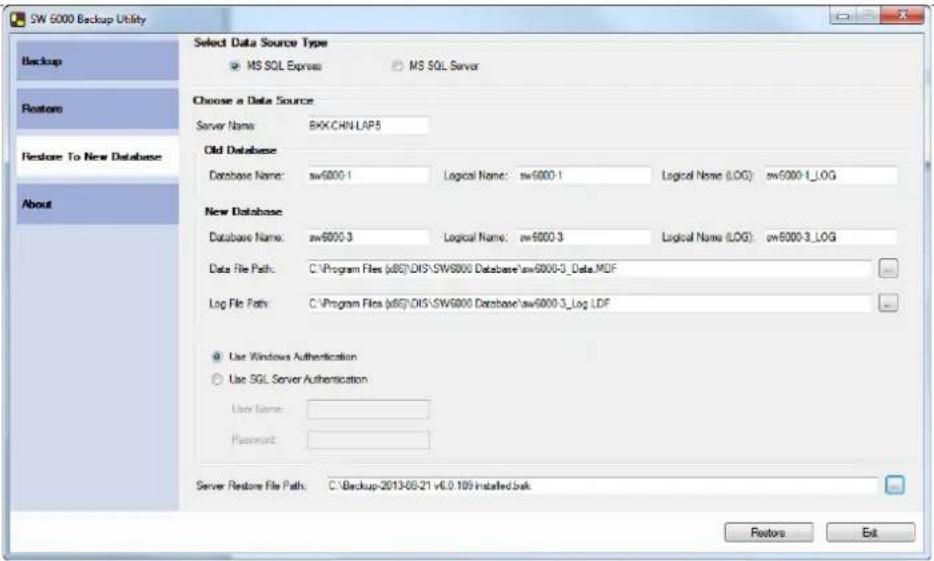 Figure 4.3-A Figure 4.3-A |
| 4 | Click [Yes] to start restoring the database. |  Figure 4.3-B Figure 4.3-B |
| 5 | The data will be restored and when finished the message box ‘Restore Database is complete’Click [OK] and click [Exit] to close the application. |  Figure 4.3-C Figure 4.3-C |
- SW6000-CAA
- Conference Admin Application
- Subject Title Durat... Speaker Type... Speaker Open Mic on Agenda Subject... Voting Configur... Speech Time C...
- Table of Contents
- Table of Contents 2
- Introduction....4
- Features ....5
- SW6000 Conference Management Software (basic)....5
- SW6000 Expanding Options ....5
- Operating instructions....7
- General 7
- Language Selection....10
- Meetings....11
- Tables 33
- Messages 37
- Reports 38
- Setup/Equipment 47
- Setup/Configurations....60
- Setup/Meeting Role....75
- Setup/Language 85
- Setup/Rooms....88
- Setup/Database....90
- Connect to Database....90
- SW6000 Backup Utility 92
- Introduction
- Licensing
- Features
- SW6000 General Description
- SW6000 Conference
- Management Software (basic)
- SW6000 Expanding Options
- SW6000-VOTE
- SW6000-ESI
- SW6000-ADV
- SW6000-CAA
- SW6000-CUA
- SW6000-CDA
- Operating instructions
- General
- Starting the CAA
- Closing the CAA
- Screen sizes
- General screen functionality
- Search List
- Language Tabs
- Buttons
- Language Selection
- Meetings
- Meeting Mode
- Speak Mode
- Participant Seat Table
- Seat table details
- Agenda
- Document Title
- Agenda Table View
- Subject Control Buttons
- Subject Tabs
- Vote Results
- Speak Requests
- Options
- Import Agenda from Word
- Template
- Field Properties
- Examples of valid tables
- Tables
- Participants
- Groups Table
- Default Participant Seat Table
- Messages
- Reports
- Meeting Log Reports
- Meeting Log
- Login and logout activity
- Participant Meeting Report
- Participant Table Report
- Agenda Report
- Agenda Report without voting results
- Agenda Report with voting results
- Participant Statistical Report
- All Participants
- Detailed Participant
- Participant
- Search in Voting Results
- Setup/Equipment
- Conference Units
- Interpreter Consoles
- Audio Output Units (AO)
- Ambient Microphones (AM)
- Meeting Displays (CDA)
- ID Card
- Web Service
- Meeting Import/Export Mode
- Name Signs
- Setup/Configurations
- Agenda Subject Configuration
- Reply Configuration
- Voting Configuration
- Voting Buttons
- CDA Voting Indications
- Conference Units with 3/5 voting buttons
- Proxy voting
- Mimic Image
- Attendance check
- Vote Results
- Passed Criteria's
- Quorum
- Passed
- Vote Display Column Formula
- Formula Fields
- Variables
- Syntaxes
- Use of Voting Group parameter
- Mimic Configuration
- Edit Image
- Not Removable Button
- Dot Sizes
- CDA Screen Configuration
- Participant List Configuration
- Print Server Configuration
- Speech Time Configuration
- Speaker Type Configuration
- Web Service Configuration
- Meeting Type Configuration
- Name Sign Templates
- Setup/Meeting Role
- Main Menu
- Agenda options
- In-agenda content options
- Agenda detailed view
- Agenda controls
- User rights
- Control menu
- Panel Buttons
- Functionality
- Speak operation settings
- Default Speak operation settings
- Individual Speak Operation Modes
- User Rights
- Setup/Language
- Languages
- Labels
- Shortcut to Commands
- Label Groups
- Conference Units with Graphical Interface
- Setup/Rooms
- Create Rooms
- Room Configuration
- Setup/Database
- Create Database Connections
- Connect to Database
- Tools
- Tools/System Messages
- Tools/License Information
- SW6000 Backup Utility
- Backing Up Data
- Restoring data to same database
- Restoring data to other database
Brand : SHURE
Model : SW6000
Category : Software