
SRA43010 - Radio SWAN - Free user manual and instructions
Find the device manual for free SRA43010 SWAN in PDF.


| Product Type | Portable AM/FM Radio |
| Brand | Swan |
| Model | SRA43010 |
| Dimensions (approx.) | 200 × 120 × 80 mm |
| Weight (approx.) | 0.5 kg |
| Power Supply | 3 × AA batteries (not included) or AC adapter (DC 4.5V) |
| Frequency Bands | AM (520-1710 kHz) and FM (87.5-108 MHz) |
| Built-in Speaker | Yes, dynamic speaker |
| Headphone Jack | Yes, 3.5mm stereo |
| Volume Control | Rotary knob |
| Tuning Control | Rotary knob with analog dial |
| Antenna | Telescopic rod antenna for FM; built-in ferrite bar for AM |
| Power Indicator | Red LED on/off |
| Material | Plastic casing |
| Color Options | Black (as shown) |
| Operating Temperature | 0°C to 40°C |
| Battery Life (approx.) | Up to 30 hours with alkaline batteries |
| Maintenance | Wipe with dry cloth; avoid moisture |
| Safety Warning | Do not disassemble; keep away from water |
| Spare Parts Availability | Contact Swan support for replacement parts |
Frequently Asked Questions - SRA43010 SWAN
User questions about SRA43010 SWAN
0 question about this device. Answer the ones you know or ask your own.
Ask a new question about this device
Download the instructions for your Radio in PDF format for free! Find your manual SRA43010 - SWAN and take your electronic device back in hand. On this page are published all the documents necessary for the use of your device. SRA43010 by SWAN.
USER MANUAL SRA43010 SWAN

GET TO KNOW YOUR RADIO!


GET TO KNOW YOUR RADIO!
Control Method
On/Off/Standby
Press the ⏻ button to turn the radio on. Once on press it again to enter standby mode or hold it to turn the radio off.
Using The Buttons
All the button actions are just a quick press unless otherwise stated in the required action. This includes the button function of the dial.
Using The Dial
The dial on this radio is dual action. This means it will perform one action by turning the dial and another action by pressing it.
First Time Use
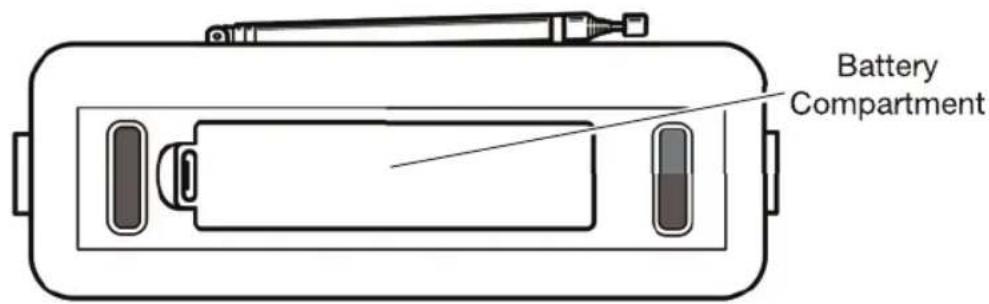
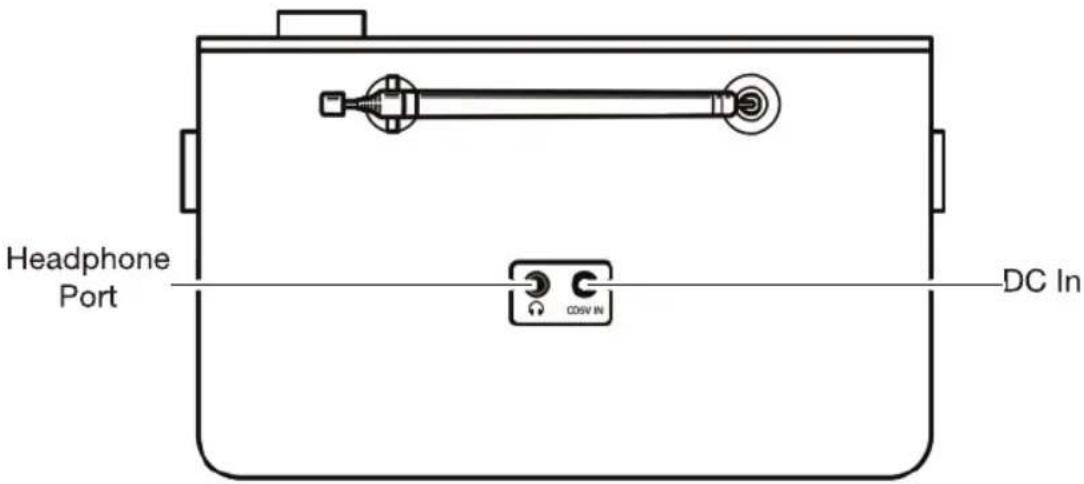
After removing the radio from the packaging, connect the radio to the mains using the adaptor supplied or insert 4 x 'AA' batteries into the battery compartment in the base. Fully extend the aerial and press the ⏻ button to turn the radio on.
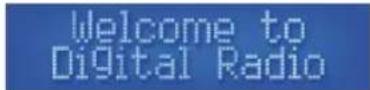
The date and time will automatically be set from the DAB signal received. The radio will then proceed to scan for the first time.
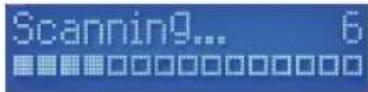
The number to the right of the display indicates the amount of channels found in your region during this scan. After the scan is complete the radio will tune itself to the first alphabetically listed station available in DAB mode.
DAB Mode
Selecting A Station
Use the tune +/- buttons to cycle through the available DAB stations on the display. Press the dial to tune the radio into the station that is shown on the display.
Scan
You can retune or refresh the amount of DAB stations available by pressing the 'Scan' button. It is recommended you do this when the radio has been moved or if you are getting a poor DAB signal.

GET TO KNOW YOUR RADIO
DAB Options
DAB Menu Options
Press and hold the 'Info/Menu' button until you see 'Full Scan'.
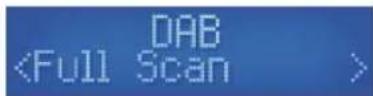
Press the tune +/- buttons to cycle the options and press the dial to select. The options here are:
Full Scan > Manual Tune > DRC > Prune > System.
Full Scan
To fully erase and retune all of the available DAB stations select 'Full Scan' in the menu options.
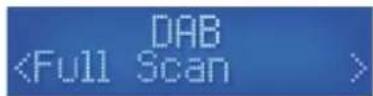

The radio will now scan through all the available channels. All the channels found will be shown in alphabetical order.
Manually Tune DAB
To manually tune the radio select 'Manual Tune, in the menu options.
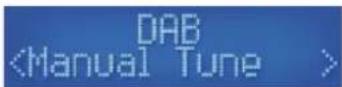
Use the tune +/- buttons to tune the radio in then press the dial to keep the current tuning. Save as a preset if required (see page 10). This helps in poor signal areas to get a clearer signal.
DRC
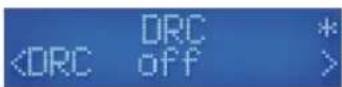
DRC or Dynamic Range Compression is a feature that some DAB stations use. This enables the audio to be evened out by raising the volume of the quieter audio levels and lowering the volume of the louder audio levels. To change this select 'DRC' in the menu option.


GET TO KNOW YOUR RADIO!
The 'Low' option will give you a small amount of DRC, where as 'High' with give you strong amount of DRC. Use the tune +/- buttons to go through the options and press the dial to select the required preference.
The asterisk in the top right corner indicates the current selection.
Prune
You can remove DAB stations from the radio that are listed with a in front of their name by using the prune function.


Once you've selected a station you wish to remove, select "Prune", from the menu options. You will be presented with the choice 'Yes' or 'No'. Select 'Yes' to remove the station. Use the tune +/- buttons to go through the options and press the dial to confirm.
FM Mode
Select FM Mode
Press 'Mode' to change from DAB to the FM function.
Auto Tune FM
To auto tune to the next available radio station press and hold either "Tune +/-" buttons for 3 seconds. This will start the FM auto scan. '+' will scan up the channel and '-' will scan down the channel.
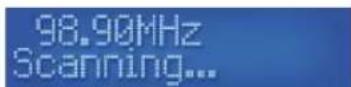
The scan will always stop at the next signal received. Save as a preset if required (see page 10).
Manually Tune FM
Press either 'Tune +/-' buttons to manually tune the radio in FM mode. This helps in poor signal areas to get a clear signal. Save as a preset if required (see page 10).

GET TO KNOW YOUR RADIO!
FM Options
FM Menu Options
Press and hold the "Info/Menu" button until you see 'Scan Setting'.
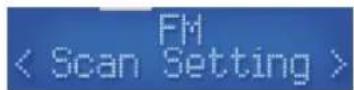
Press the tune +/- buttons to cycle the options and press the dial to select. The options here are:
Scan Setting > Audio Set > System.
Scan Settings
You can change the Auto Tune search ability between "all stations" and "strong stations". Select "Scan Settings" from the menu options.
Press the tune +/- buttons to cycle between either "Strong Stations" or "All Stations". Press the dial to select the required option.
The asterisk in the top right corner indicates current selection.


You will be sent to the previous menu once a selection has been made. Press the Info/Menu" button to return to the main screen.
Audio Settings
You can change the sound output from stereo to mono with this option. Select "Audio Set" from the menu option.
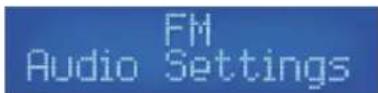
Then Press the tune +/- buttons to chose from "Stereo Allowed" and "Forced Mono" options and press the dial to confirm. The asterisk in the top right corner indicates which option is currently in use.

GET TO KNOW YOUR RADIO!
Bluetooth Mode
Select Bluetooth Mode
To select Bluetooth press "Mode" until "Bluetooth" shows on the display.
The radio is automatically in pairing mode and shows "Disconnected" on the display.
Bluetooth Disconnected
Activate the Bluetooth on your device and search for available devices. Look for and add [SWAN RADIO] The radio will automatically pair with the device and no code is required. The display will show 'Connected' if the pairing is successful.
Bluetooth Connected
Using Bluetooth
Make sure the source device has the maximum volume set. You can use the following functions on the radio.
- Play/Pause - 'Select' button
- Skip Back - 'Tune -' button
- Skip Forward- 'Tune+' button
The volume is controlled in the normal way by turning the dial.
System Options
System Menu Options
Press and hold the Info/Menu" button until you see either
'Scan Setting' in FM mode or 'Full Scan', in DAB mode. Press the tune +/- button to cycle through the options until you get to 'System' then press the dial to select it.
The options here are:
Sleep > Alarm > EQ > Time > Backlight > Inactive Standby > Lang. > Reset > SW Ver.
Sleep
You can set the length of time the radio is on for with this feature.
Once selected from the system options you with have access to:
Sleep off > 15 > 30 > 45 > 60 > 90 (Minutes)
Swan 7

GET TO KNOW YOUR RADIO!
Alarm
See Page 12.
EQ
You can change the sound output preference with this feature. Once selected from the system options you with have access to:
Normal > Classic > Jazz > Pop > Rock > Speech > My EQ
You can customise the EQ by using the sub menu under "My EQ" Here you can change the following:
- Treble +/-
- Bass +/-
- Loudness Y/N
Use the dial to cycle through the options and press it to select.
Time
All the time and date functions and preferences can be altered here. Press the tune +/- buttons to cycle through the options and press the dial to select.

The options here are: Time/Date > Auto Update > Set 12/24 > Date Format.
Time/Date
With this option you can manually set the time and date. Once selected from the 'Time' sub menu you will see the hours flashing. Press the tune +/- buttons to cycle through the hours and press it to select the required hour value.

Once the hour has been set you will have the minutes flashing. Repeat the process for choosing the hour for the minutes. Once selected you will move on to the next screen for setting the date.

Swan
8


GET TO KNOW YOUR RADIO!
Similar to setting the hour and minute, you cycle through the numbers with the tune +/- buttons and press the dial to select your chosen value, and then move to the next value to set. When the last value is set the display will confirm that the new time and date has been saved.
Time Saved
All the preferences can be altered by pressing the tune +/- buttons to cycle through the options and press the dial to select.
Backlight
You can change the brightness and light duration of the display.
System Backlight
The options here are: Time Out > On Level > Dim
Time Out
This is to set the duration of time before the display dims. Choose from the options by turning the dial and pressing it to select:
On gt; 1 0 gt; 2 0 gt; 3 0 gt; 4 5 gt; 6 0 gt; 9 0 gt; 1 2 0 gt; 1 8 0 (Seconds)
The asterisk in the top right corner indicates current selection.
On Level
This option lets you set the active display light level.
Choose from the options by turning the dial and pressing it to select:
High gt; Med gt; Low
The asterisk in the top right corner indicates current selection.
Dim
This option lets you set the inactive display light level.
Choose from the options by turning the dial and pressing it to select:
High gt; Med gt; Low
The asterisk in the top right corner indicates current selection.

GET TO KNOW YOUR RADIO!
Inactive Standby
You can set the radio to change to standby mode after a preselected period of time with this feature. Once selected from the system options you will have the following options:
Cycle through the options with the tune +/- buttons and press the dial to select an option. Each number value is a period in hours. The radio will continue to play for the selected duration until you select 'OFF'. An asterisk in the top right corner will indicate which is the currently selected option.
Language
With this option you can choose what language the radio uses to display the menu options in. Choose from the following options:
English>Français>Deutsch>Italiano> Español
Cycle through the options using the +/- buttons and press the dial to select an option. The asterisk in the top right corner indicates current selection.
Reset
Selecting this option from the 'System' menu will reset the radio and clear any presets saved. Use this option if the DAB signal is still poor after re-scanning for stations or any possible faults.
SWVer.
This will display the current software version in use.
DAB/FM Preset
Storing A Preset
Once a station has been tuned in, if you want to save it in the quick preset bank (Button 1,2,3,4 or 5 which can be found on the top of the device), press and hold the preferred button for 3 seconds until the 'stored message' is displayed on the LCD
Preset 1 stored
If you need to save more than 5 presets, press and hold the 'Preset* button for 3 seconds, then use the ,Tune+/-, buttons to cycle through the available preset slots. Once you have found the desired slot, press the 'Select/Snooze' button to save the station to that preset number.
The radio has a total of 20 preset slots (10 for DAB and 10 for FM). This includes the 5 'Quick Access' buttons.

GET TO KNOW YOUR RADIO!
Recall A Preset
To recall saved presets 1, 2, 3,4 or 5 simply press the required 'Quick Access' button on the top of the device. To recall presets 6 to 10, simply press the 'Preset' button and then use the 'Tune+/-' buttons to scroll through the desired preset station, Press the 'Select/ Snooze* button to select that station
If you select a slot that has nothing stored in it, it will display as 'Preset Empty'.
89.00MHz P1 [No RadioText]
Preset Empty
DAB/FM Information
When listening in DAB or FM mode you can cycle through the available information from the broadcasting service and the radio by pressing the 'Info' button.
The information cycle:
DAB
- Now Playing
- Signal Strength
- Music genre
• National/Local designation - MHz Frequency
- Signal Errors
• Kbps data transfer rate - Power Type
- Time
- Date
FM
- Now Playing
- Station Name
- Music genre
- Mono/Stereo
- Power Type
- Time
- Date
Bluetooth/AUX
- Power
- Type
- Time
- Date


GET TO KNOW YOUR RADIO!
Alarm
Setting the Alarm
There are 2 alarms you are able to set on this radio when the radio is on and not in standby press 'Alarm' once to set alarm 1 or press 'Alarm' twice to set alarm 2 and press the dial to select.
Alarm 1 Setup
Alarm 2 Setup
The process is controlled by using tune +/- buttons to cycle through the available options and pressing the dial to select it. Once an option has been selected it will move on to the next option to set.
Process flow:
| Time Hour > Minutes | |
| Duration 15>30>45>60>90>120 (Minutes) | |
| Alert Buzz > *DAB > *FM | |
| *If 'DAB' or 'FM' selected Last Listened > Preset [1-10] | |
| Repeat Daily > *Once > Weekend > Weekday | |
| *If 'Once' selected: Day > Month > Year | |
| Volume Select Volume Level | |
| Alarm On > Off |
Alarm Saved
Once the alarm is successfully set 'Alarm Saved' will be seen on the display to confirm. You can set or disable the alarm from the last action in the flow process.
Turning The Alarm On/Off
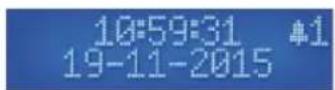
When the radio is in standby mode press the 'Alarm' button and use the tune +/- buttons to cycle through the options on the display and press the dial to select. The combination options with icons are:
Alarm 1: Off > On > Off > On
Alarm 2: Off > Off > On > On


Swan 12


SPECIFICATIONS
• DAB receiver (174MHz - 240MHz)
• FM receiver (87.5M Hz - 108.00MHz)
• Stores 10 FM presets
• Stores 10 DAB presets
- Bluetooth
• Powered by 4 x AA alkaline batteries
• 5v mains adapter (included)
• Auto adjusting clock
- Dual Alarms
• Blue LCD backlight display
- Dimmable Display
- Mono 3W speaker
• 3.5mm headphone port
- Sleep function
- Inactive Standby
- Telescopic aerial
- Carry Handle
• Approximately 8 hours constant play using batteries



SPARES
Spares for this item:
SRA43010N01: AC mains adaptor
To order, visit:
www.swan-brand.co.uk


WARRANTY
This product is guaranteed for 2 years from the date of original purchase. If any defect arises due to faulty materials of workmanship the faulty products must be returned to the place of purchase. Refunds or replacement is at the discretion of the store.
The following conditions apply:
- The product must be returned to the retailer with proof of purchase.
- The product must be installed and used in accordance with the instructions contained in this instruction guide.
- It must be used only for domestic purposes.
- It does not cover wear and tear, damage, misuse or consumable parts.
- Swan Products Ltd has limited liability for incidental or consequential loss or damage.
- This guarantee is valid in the UK and Eire Only.

DISPOSAL OF UNIT
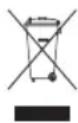
Appliances bearing the symbol shown here may not be disposed of in domestic rubbish. You are required to dispose of old electrical and electronic appliances like this separately. Please visit www.recycle-more.co.uk or www.recyclenow.co.uk for access to information about the recycling of electrical items. Please visit www.weeeireland.ie for access to information about the recycling of electrical items purchased in Ireland. The WEEE directive, introduced in August 2006, states that all electrical items must be recycled, rather than taken to landfill. Please arrange to take this appliance to your local Civic Amenity site for recycling, once it has reached the end of its life.

BATTERY INFO
- Never throw batteries into a fire or expose to excessive heat sources.
- If batteries are swallowed, please seek immediate medical attention.
- Always ensure correct +/- battery polarity when installing batteries.
- Do not recharge non-rechargeable batteries.
- Batteries, should not be thrown away with your household waste. Contact your local authority waste disposal department, as they will be able to provide \ details of the recycling options available in your area.




NOTES

natural_image
Stylized white and gray swan logo design on black background (no text or symbols)www.swan-brand.co.uk

Scan this QR code to hear about our story

We love what we do

we're proud of our quality

Find us on Facebook
* on selected products
Copyright © Swan Products Ltd. PO Box 3117, Stoke-on-Trent ST4 9GD
- GET TO KNOW YOUR RADIO!
- Control Method
- On/Off/Standby
- Using The Buttons
- Using The Dial
- First Time Use
- DAB Mode
- Selecting A Station
- Scan
- GET TO KNOW YOUR RADIO
- DAB Options
- Full Scan
- Manually Tune DAB
- DRC
- Prune
- FM Mode
- Select FM Mode
- Auto Tune FM
- Manually Tune FM
- FM Options
- FM Menu Options
- Scan Settings
- Audio Settings
- Bluetooth Mode
- Bluetooth Disconnected
- Bluetooth Connected
- Using Bluetooth
- System Options
- Sleep
- Swan 7
- Alarm
- EQ
- Time
- Time/Date
- Time Saved
- Backlight
- System Backlight
- Time Out
- On Level
- Dim
- Inactive Standby
- Language
- Reset
- SWVer.
- DAB/FM Preset
- Preset 1 stored
- Recall A Preset
- DAB/FM Information
- DAB
- FM
- Bluetooth/AUX
- Setting the Alarm
- Alarm 1 Setup
- Alarm 2 Setup
- Alarm Saved
- Turning The Alarm On/Off
- Swan 12
- SPECIFICATIONS
- SPARES
- WARRANTY
- The following conditions apply:
- DISPOSAL OF UNIT
- BATTERY INFO
Brand : SWAN
Model : SRA43010
Category : Radio