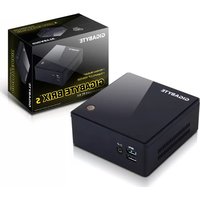
GB-BXCEH-3205 - Desktop computer GIGABYTE - Free user manual and instructions
Find the device manual for free GB-BXCEH-3205 GIGABYTE in PDF.


| Product Type | Desktop computer (compact BRIX series) |
| Brand | Gigabyte |
| Model | GB-BXCEH-3205 |
| Processor | Intel Celeron 3205U (estimation) |
| Memory | 8GB DDR3L (estimation) |
| Storage | 240GB Intel SSD (as shown in BIOS SATA configuration) |
| BIOS | UEFI AMI BIOS (Aptio Setup Utility) |
| Dimensions | 139.5 x 115.4 x 41.5 mm (estimation) |
| Weight | 0.6 kg (estimation) |
| Power Input | 19V DC (estimation) |
| LAN | Gigabit Ethernet (MAC address shown) |
| Audio | Onboard audio controller (configurable in BIOS) |
| USB Ports | Multiple (USB 3.0 supported via XHCI) |
| SATA Ports | 2 SATA ports (one with SSD, one empty) |
| M.2 Slot | 1 M.2 SATA device slot |
| BIOS Features | Overclocking, Hardware Monitor, Secure Boot, Power management |
| Operating System Support | Windows 7, Windows 8.x/10 (selectable in BIOS) |
| Security | Administrator and User passwords, Secure Boot |
Frequently Asked Questions - GB-BXCEH-3205 GIGABYTE
User questions about GB-BXCEH-3205 GIGABYTE
0 question about this device. Answer the ones you know or ask your own.
Ask a new question about this device
Download the instructions for your Desktop computer in PDF format for free! Find your manual GB-BXCEH-3205 - GIGABYTE and take your electronic device back in hand. On this page are published all the documents necessary for the use of your device. GB-BXCEH-3205 by GIGABYTE.
USER MANUAL GB-BXCEH-3205 GIGABYTE
BIOS (Basic Input and Output System) is a UEFI interface that allows you to setup and configure your system for optimum use. Using your mouse and keyboard, users can change BIOS settings, monitor CPU temperature, select the boot device priority and view system information such as the CPU name, DRAM capacity, and the BIOS version.
To access the BIOS setup program, press the
BIOS Setup Program Function Keys
| <↑><↓> | Move the selection bar to select an item |
| <←→<→> | Move the selection bar to select the screen |
| (orExecute command or enter the submenu | |
| (orMain Menu: Exit the BIOS Setup programSubmenus: Exit current submenu | |
| <+> Increase the numeric value or make changes | |
| <-> Decrease the numeric value or make changes | |
| <F1> General Help | |
| < F2>Restore the previous BIOS settings for the current submenus | |
| < F3>Load the Optimized BIOS default settings for the current submenu | |
Main
This setup page includes all the items in standard compatible BIOS
Advanced
This setup page includes all the items of BRIX enhanced features.
Chipset
Platform Controller Hub additional features configuration.
Security
Change, set or disable supervisor and user password. Configuration supervisor password allows you to restrict access to the system and BIOS Setup.
A supervisor password allows you to make changes in BIOS Setup.
A user password only allows you to view the BIOS settings but not to make changes.
Boot
This setup page provides items for configuration of boot sequence.
Save & Exit
Save all the changes made in the BIOS Setup program to and exit. (Pressing
Abandon all changes and the previous settings remain in effect. Pressing
(Pressing

- BIOS flashing is potentially risky, if you do not encounter problems of using the current BIOS version, it is recommended that you don't flash the BIOS. To flash the BIOS, do it with caution. Inadequate BIOS flashing may result in system malfunction.
- It is recommended that you not alter the default settings (unless you need to) to prevent system instability or other unexpected results. Inadequately altering the settings may result in system's failure to boot. If this occurs, try to clear the CMOS values and reset the board to default values.
b
The Main Menu
Once you enter the #IOS Setup program< the Main Menu (as shown below) appears on the screen. Use arrow keys to move among the items and press
Main Menu Help
The on>screen description of a highlighted setup option is displayed on the bottom line of the Main Menu.
Submenu Help
While in a submenu<press
![Aptio Setup Utility - Copyright (C) 2016 American Megatrends, Inc. Main Advanced Chipset Security Best Save & Exit BIOS Information Project Name HLSFF C BIOS Version DCS Build Date and Time 05/30/2016 11:05:48 LAN MAC Address 40-8D-SC-BA-CS-38 Total Memory B192 MB ME FW Version 11.0.0.1197 System Date [Red 10/05/2016] System Time [08:08:34] Set the Date. Use Tab to switch between Date elements. +/- Select Screen I: Select Item Enter: Select +/-: Change Opt. F1: General Help F2: Previous Values ES: Optimized Defaults F4: Save & EXIT ESC: Exit Version 2.17.1254, Copyright (C) 2016 American Megatrends, Inc.](/content/2026/05/825322/images/f6ab17f82901b82da0aa9998f4ef263ab33aa6efe67cf3eb26a9ec1e5428eb79.jpg)
BIOS Information
Project Name
Displays Project name.
BIOS Version
Displays version of the #IOS.
Build Data and Time
Displays the date and time when the #IOS setup utility was created.
LAN MAC Address
Displays the MA& address information.
Total Memory
Determines how much total memory is present during the POST.
ME FW Version
Displays the ME firmware version.
System Date
Set the date following the weekly>month>day>year format.
System Time
Set the system time following the hour>minute> second format.

- If you do not find the settings you want in the Main Menu or a submenu, press
+ to access more advanced options. - When the system is not stable as usual, select the Restore Defaults item to set your system to its defaults.
- The BIOS Setup menus described in this chapter are for reference only and may differ by BIOS version.
Advanced Menu
The Advanced menu display submenu options for configuring the function of various hardware components.
Select a submenu item<then press
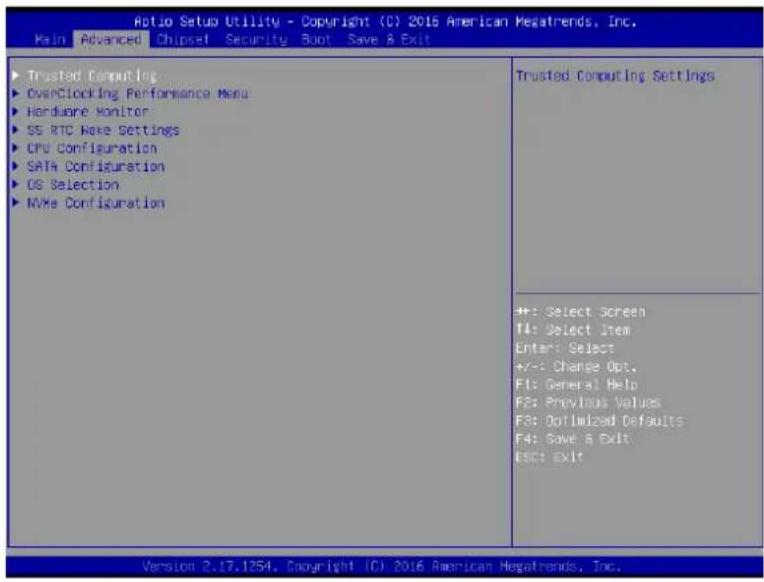
Trusted Computing
Configures trusted computing setting.
OverClocking Performance Menu
Configures OverClocking setting
*This item depends on purchasing product.
H/W Monitor
Displays a real>time record of the CPU / system temperature and fan speed.
S5 RTC Wake Setting
Enable system to wake up from S5 mode using RTC alarm
CPU Configuration
Configures the CPU features in this entry.
SATA Configuration
Configures the SATA settings in this entry.
OS selection
Selecting allow you to select the OS system in this entry.
NVMe Configuration
Optional item by models.
H/W1Monitor1
Enter to view the Hardware Monitor screen which displays a real>time record of the &PU / system temperature and fan speed.
![Rotio Setup Utility - Copyright (C) 2016 American Megatrends, Inc. Advanced System Fan Fail Warning [Enabled] System Fan Speed Control [Normal] CPU Temperature : +70 ° GPU Temperature : +35 ° System Fan Speed : 1991 RPM Enable to set a warning message when the fan fail or disconnected. +: Select Screen #: Select Item Enter: Select +:- Change Opt. F1: General Help F2: Previous Values F3: Optimized Defaults F4: Save & Exit ESC: Exit Version 2.17.1254, Copyright (C) 2016 American Megatrends, Inc.](/content/2026/05/825322/images/6aa67a63c4eb843be3733b77350343b558ff4e5cd7dafb082fa39e6d53f93b8f.jpg)
System1Fan1Fail1Warning1(Default:1Enabled)1
Enable system fan stop warming function.
Set waring message when system fan failed.
System1Fan1Speed1Control (Default:1Normal)
Set Normal by default.
Option available: Full Speed / Normal.
CPU1Temperature1
Displays current system temperature.
GPU1Temperature1
Displays current GPU temperature.
System1Fan1Speed1
Displays current &PU fan speed.
CPU Configuration
Your CPU features / instructions are displayed and can be individually enabled / disabled in the CPU features list showed below.
![CPU Configuration Intel(R) Core(TM): 2016.0.0.0.7E CPU Signature: 506E3 Microcode Patch: 74 Processor Cores: 4 Hyper Threading Technology: Supported Intel VT-x Technology: Supported Intel SMX Technology: Not Supported 64-bit: Supported L1 Data Cache: 32 KB x 4 L1 Code Cache: 32 KB x 4 L2 Cache: 256 KB x 4 L3 Cache: 6 MB Intel Virtualization Technology [Enabled] CPU P States [Enabled] EIST [Enabled] Turbo Mode [Enabled] CPU C states [Enabled] CFG lock [Disabled] When enabled, a VM can utilize the additional hardware capabilities provided by Vanderpool Technology +: Select Screen T1: Select Item Enter: Select +/-: Change Out. F1: General Help F2: Previous Values F3: Optimized Defaults F4: Save & Exit ESC: Exit Version 2.17.1254. Copyright (C) 2016. Superlinear Performance, Inc.](/content/2026/05/825322/images/4e615c01deeb4a69deb633e921a490b27871e061d9403f94f35764961fc8363b.jpg)
CPU Model Name
Displays the processor type information.
CPU processor type depends on actual model.
CPU Signature
Displays the processor ID information.
Microcode Patch
Displays the information of the processor microcode patch.
Processor Cores
Displays the information of the processor core.
64-bit
Displays the supported information of installed CPU.
L1 Data Cache
Displays the information of L1 Data Cache.
L1 Code Cache
Displays the information of L1 Code Cache.
L2 Cache
Displays the information of L2 Cache per Core.
L3 Cache
Displays the information of total L3 Cache per socket.
SATA Configuration
Let you select the on chip SATA type.
![Aotio Setup Utility - Copyright (C) 2016 American Megatrends, Inc. Advanced SATA Mode Selection [AMCI] Serial ATA Port 1 Empty Serial ATA Port 2 INTEL SSDSC2BN (240.0GB) M.2 SATA device Empty Determines how SATA controller(s) operate. +#: Select Screen T1: Select Item Enter: Select +/-: Change Opt. F1: General Help F2: Previous Values F3: Optimalead Defaults F4: Save & Exit ESC: Exit Version 2.17.1254. Copyright (C) 2016 American Megatrends, Inc.](/content/2026/05/825322/images/ac81ae46b5e178f417a84421d510b308d409c0a70072cec12cf5140930b62f04.jpg)
SATA Mode Selection (Default: AHCI)
SATA controller enable its AHCI functionality.
The RAID function is disabled and cannot be access the RAID setup utility at boot
time.
![Aptlo Setup Utility - Copyright (C) 2016 American Megatrends, Inc. Advanced SATA Mode Selection [ACCI] Serial ATA Port 1 Empty Serial ATA Port 2 INTEL SSDSC2BX (240.0GB) M.2 SATA device Empty Determines how SATA controller(s) operate. SATA Mode Selection AHCI RAID +: Select Screen F1: Select Item Enter: Select +/-: Charge Opt. F1: General Help F2: Previous Values F3: Optimized Defaults F4: Save & Exit ESC: Exit Version 2.17.1254, Copyright (C) 2016 American Megatrends, Inc.](/content/2026/05/825322/images/119a83176529d9aca7138da53fd891dad9c9a9f64a6322472fa3e2e099b2507d.jpg)
SATA Port
Displays the hard drive information connected to your SATA port.
M.2 SATA device
Displays the hard drive information connected to your M.2 SATA device.
OS1Selection1
Selecting allow you to select the OS system in this entry
![Optio Setup Utility - Copyright (C) 2016 American Megatrends, Inc. Advanced OS Selection [Windows 7] LAN PXE OPGM [Disabled] Storage [Do not launch] OS Selection Windows 8.x/10 Windows 7 Select OS type. Windows 6.x/10: Support EFI mode OS(CSM Disabled) Windows 7: Support Legacy mode OS(CSM Enabled) +/-: Select Screen F1: Select Item Enter: Select +/-: Change Opt. F1: General Help F2: Previous Values F3: Optimized Defaults F4: Save & Exit ESC: Exit Version 2.17.1254. Copyright (C) 2016 American Megatrends, Inc.](/content/2026/05/825322/images/0bc8c5df5ac61ba27bc9bae594909ae3ee062f73d297d16744b251e80d2b7936.jpg)
OS1Selection1 1
Selecting OS before installation..
L#N1PXE1OpROM (Default:1Disabled)
Allows you to select whether to enable the legacy option ROM for the LAN controller t.
Default: Disabled.
Storage1(Default:1Do1not1launch)1
&ontrols the execution of UEFI and Legacy storage OpROM.
When setting RAID function and select UEFI or Legacy mode to control.
![Aptio Setup Utility - Copyright (C) 2016 American Megatrends, Inc. advanced OS Selection [Windows 7] LAN PXE OpROM [Disabled] Storage [Do not launch] Storage Do not launch DEFI Legacy Controls the execution of UEFI and Legacy Storage OpROM +: Select Screen TI: Select Item Enter: Select +/-: Change Opt. F1: General Help F2: Previous Values F3: Optimized Defaults F4: Save & Exit ESC: Exit Version 2.17.1254. Copyright (C) 2016 American Megatrends, Inc.](/content/2026/05/825322/images/156ff195fa84ff4221740f0777bca8e19992a2a7886502e97e94dcf5058df9e0.jpg)
Chipset1
Allows users to view and configure the system chipset features.
![Aptio Setup Utility - Copyright (C) 2016 American Megatrends, Inc. Main Advanced Chipset Security Boot Save & Exit VT-d [Enabled] Onboard Audio [Enabled] Onboard LAN [Enabled] ERP Lowest Power State Mode [Disabled] USB SS Makeup Support [Disabled] XHCI Hand-off [Disabled] Restore AG Power Loss [Power Off] Power LED Support [Enabled] VT-d capability +/-: Select Screen T1: Select Tion Enter: Select +/-: Change Opt. F1: General Help F2: Previous Values F3: Optimized Defaults F4: Save & Exit ESG: Exit Version 2.17.1254. Copyright (C) 2016 American Megatrends, Inc.](/content/2026/05/825322/images/45f7da9830b81b28922f92a486e3b503561a680e4213d206327849e28f3a17e0.jpg)
VT-d1(Default:1Enabled)1
Enables guest virtual machines to directly use peripheral devices through DMA and interrupt remapping.
Option available: Enabled / Disabled.
Onboard1#udio1(Default:1Enabled)1
Enabled / Disabled onboard audio controller.
Option available: Enabled / Disabled.
Onboard1L#N1(Default:1Enabled)1
Enabled / Disabled onboard LAN controller.
Option available: Enabled / Disabled.
ERP1Lowest1Power1State1Mode1(Default:1Disabled)1
Enabled / Disabled ERP support function.
Option available: Enabled / Disabled.
XHCI1Hand-off1(Default:1Disabled)1
Set US# port behavior.
Option available: Enabled / Disabled.1
Restore1#C1Power1Loss1(Default:1Power1off)1
This option provides user to set the mode if an A& power loss occurs.
Power1LED1Support1(Default:1Enabled)1
11This option provides user to set the mode for Power LED behavior.
Security
Allows you to safeguard a protect the system from unauthorized use by setting up access passwords.
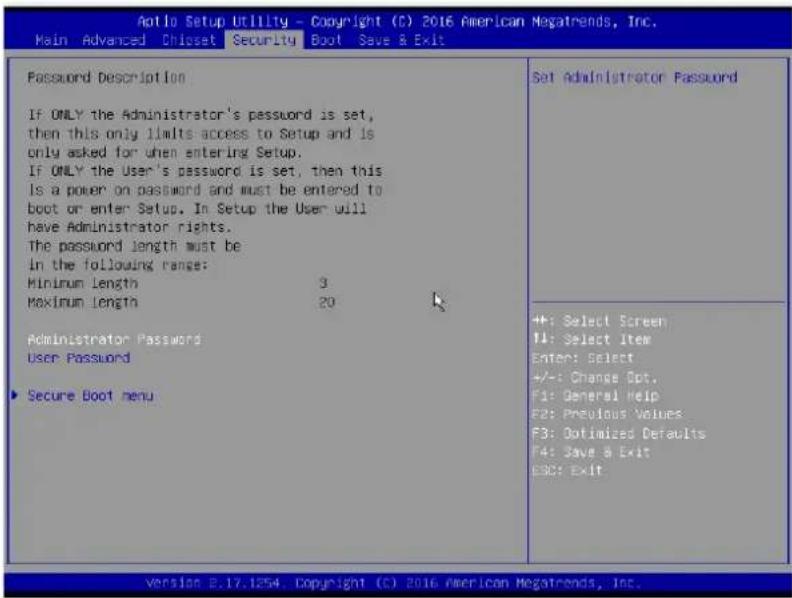
Administrator Password
Press
User Password
Press
Secure Boot menu
![Aptio Setup Utility - Copyright (C) 2016 American Megatrends, Inc. Security System Mode Secure Boot Vendor Keys Secure Boot Secure Boot Mode Key Management Setup Not Active Not Active [Disabled] [Standard] Secure Boot can be enabled if 1.System running in User mode with enrolled Platform Key(FK) 2.CSM function is disabled +: Select Screen T4: Select Item Enter: Select +/-: Change Out. F1: General Help F2: Previous Values FS: Optimized Defaults F4: Save & Exit ESC: Exit1 Version 2.17.1254. Copyright (C) 2016 American Megatrends, Inc.](/content/2026/05/825322/images/240d792eed0f2c18c3f827a0a3ed18a35b5e038eeb1a634921df32906b8bc683.jpg)
Secure Boot Support (Default: Disabled)
Secure #oot requires all the applications that are running during the booting process to be pre>signed with valid digital certificates. This way< the system knows all the files being loaded before UEFI OS loads and gets to the login screen have not been tampered with.
Option available: Enabled / Disabled.
Allows you to safeguard an protect the system from unauthorized use by setting up access passwords.
Secure Boot Mode (Default: Standard)
Define the Secure #oot Mode.
Option available: Standard / &ustom.
The Key Management below can be selected if Secure #oot Mode is &ustom.
Key1Management1
11 For an experienced user to modify Secure #oot variables.
1
1
Boot
Allows you to set the logo post on screen and the device priority during system boot>up.
![Aptio Setup Utility - Copyright (C) 2016 American Megatrends, Inc. Main Advanced Chipset Security Boot Save & Exit Full Screen LOGO Show [Enabled] Boot Option Priorities Boot Option #1 [P1: INTEL SSDSC28W240HS ] Boot Option #2 [Kindous Boot Manager (P1: INTEL SSDSC28W240HS)] Boot Option #3 [UEFI: SanDisk Druzer 7.01, Partition 1] Boot Option #4 [UEFI: Built-in EFI Shell] Hard Drive BES Priorities Allow you to determine whether to display the Logo at system startup. Disabled skips the Logo when the system starts up. +: Select Screen T1: Select Item Enter: Select +/-: Change Opt. F1: General Help F2: Previous Values F3: Optimized Defaults F4: Save & Exit ESC: Exit Version 2.17.1254. Copyright (C) 2016 American Megatrends, Inc.](/content/2026/05/825322/images/28c5ef444bd75071031dea48c72c49384f6495e810cf4a19d130307023404023.jpg)
Boot Option Priorities
Full Screen LOGO Show (Default: Enabled)
Allow user to determine whether to display the logo at system startup.
Boot Option (Default: #1)
Press
Option may vary depends on your connected HDD numbers: #1 / (#2) / (#3) / (#4).
Save & Exit
The Save & Exit menu displays the various options to quit from the #IOS setup. Highlight any of the exit options then press
![Aptio Setup Utility - Copyright (C) 2016 American Megatrends, Inc. Main Advanced Chipset Security Boot Save & Exit Save Options Save Changes and Reset Discord Changes and Reset Restore Defaults Boot Override UEFI: Built-in EFI Shell Windows Boot Manager (P1: INTEL SSDSC2BW240H6) P1: INTEL SSDSC2BW240H5 SanDisk Cruzer 7.01 UEFI: SanDisk Cruzer 7.01, Partition 1 Me FX Image Re-Flash [Disabled] Reset the system after saving the charges. #: Select Screen II: Select Item Enter: Select +/-: Change Opt. F1: General Help F2: Previous Values F3: Optimized Defaults F4: Save & Exit ESC: Exit Version 2.17.1254. Copyright (C) 2016 American Megatrends, Inc.](/content/2026/05/825322/images/885c5e50136d378d4dad40b27e98157ebd89d2f3a55cce0f2c830978668cbf56.jpg)
Save Changes and Reset
Active this option to reset system after saving the changes.
Option available: Yes / No.
Discard Changes and Reset
Discards changes made and close the #IOS setup and exit.
Option available: Yes / No.
Restore Defaults
Press
Option available: Yes / No.
ME FW Image Re-Flash
Press
Option available: Disabled / Enabled

- Main
- Advanced
- Chipset
- Security
- Boot
- Save & Exit
- The Main Menu
- Main Menu Help
- Submenu Help
- BIOS Information
- Advanced Menu
- Trusted Computing
- OverClocking Performance Menu
- H/W Monitor
- S5 RTC Wake Setting
- CPU Configuration
- SATA Configuration
- OS selection
- NVMe Configuration
- H/W1Monitor1
- CPU Model Name
- CPU Signature
- Microcode Patch
- Processor Cores
- 64-bit
- L1 Data Cache
- L1 Code Cache
- L2 Cache
- L3 Cache
- SATA Mode Selection (Default: AHCI)
- SATA Port
- M.2 SATA device
- OS1Selection1
- OS1Selection1 1
- L#N1PXE1OpROM (Default:1Disabled)
- Storage1(Default:1Do1not1launch)1
- Chipset1
- VT-d1(Default:1Enabled)1
- Onboard1#udio1(Default:1Enabled)1
- Onboard1L#N1(Default:1Enabled)1
- ERP1Lowest1Power1State1Mode1(Default:1Disabled)1
- XHCI1Hand-off1(Default:1Disabled)1
- Restore1#C1Power1Loss1(Default:1Power1off)1
- Power1LED1Support1(Default:1Enabled)1
- Key1Management1
- Save Changes and Reset
- Discard Changes and Reset
- Restore Defaults
- ME FW Image Re-Flash
Brand : GIGABYTE
Model : GB-BXCEH-3205
Category : Desktop computer