
WDP01 - Uncategorized BENQ - Free user manual and instructions
Find the device manual for free WDP01 BENQ in PDF.


| Product Type | Wireless FHD Kit (HDMI Transmitter & Receiver) |
| Brand | BenQ |
| Model | WDP01 |
| Transmitter Dimensions (W x L x H) | 182 x 96.5 x 31.5 mm |
| Receiver Dimensions (W x L x H) | 95 x 95 x 31.5 mm |
| Power Supply (Transmitter) | 100-240V AC, 5V 2A DC adapter |
| Power Supply (Receiver) | 5V mini USB (from projector USB or adapter) |
| HDMI Inputs (Transmitter) | 2 x HDMI Type A |
| HDMI Output (Transmitter) | 1 x HDMI Type A (loop-through) |
| HDMI Output (Receiver) | 1 x HDMI Type A |
| Supported Video Resolutions | 1080p, 1080i, 720p, 576p, 480p (including 3D formats) |
| Supported Audio Formats | Up to 6 Mbps, AC-3, DTS, 2-channel PCM up to 96 kHz |
| Maximum Transmission Distance (Line of Sight) | 30 m (100 ft) |
| Minimum Transmission Distance | 1.98 m (6.5 ft) |
| Operating Frequency | 4.9 – 5.9 GHz (including DFS bands) |
| Antenna | 4 built-in omni-directional internal antennas |
| System Latency | < 1 ms (no latency) |
| Remote Control | Yes, with Power, Source, Info, IR frequency buttons |
| IR Blaster Cable | Included, frequency adjustable 36-56 kHz |
| Mounting Options | Mounting holders A & B, Velcro, screws |
| Operating Temperature | 0 – 40 °C |
Frequently Asked Questions - WDP01 BENQ
User questions about WDP01 BENQ
0 question about this device. Answer the ones you know or ask your own.
Ask a new question about this device
Download the instructions for your Uncategorized in PDF format for free! Find your manual WDP01 - BENQ and take your electronic device back in hand. On this page are published all the documents necessary for the use of your device. WDP01 by BENQ.
USER MANUAL WDP01 BENQ
Wireless FHD Kit User Manual

natural_image
Abstract halftone dot pattern with gradient shading, no text or symbols presentCopyright
Copyright © 2014 by BenQ Corporation. All rights reserved. No part of this publication may be reproduced, transmitted, transcribed, stored in a retrieval system or translated into any language or computer language, in any form or by any means, electronic, mechanical, magnetic, optical, chemical, manual or otherwise, without the prior written permission of BenQ Corporation.
Disclaimer
BenQ Corporation makes no representations or warranties, either expressed or implied, with respect to the contents hereof and specifically disclaims any warranties, merchantability or fitness for any particular purpose. Further, BenQ Corporation reserves the right to revise this publication and to make changes from time to time in the contents hereof without obligation of BenQ Corporation to notify any person of such revision or changes.
This user manual aims to provide the most updated and accurate information to customers, and thus all contents may be modified from time to time without prior notice. Please visit www.benq.com for the latest version of this manual.
Table of contents
Introduction 4
Package content 4
Overview 5
Transmitter (Tx) 5
Receiver (Rx) 6
Remote controller 7
Installation 8
Setting up the transmitter (Tx) 8
Setting up the IR blaster cable 8
Setting up the receiver (Rx) 9
Attaching receiver (Rx) to your BenQ projector with mounting holder-A 9
Attaching Receiver (Rx) to your BenQ projector with mounting holder-B 10
Booting up the transmitter and the receiver .... I
Troubleshooting 14
Supported resolution ....16
Audio bit rate support 17
Product specification ....18
Introduction
This device is a Full HD wireless transmission device.
- Uncompressed Full HD Image Quality with 3D Support
This solution delivers uncompressed 1080p full HD video with all types of 3D content from a Blu-ray/DVD player, set-top box, game console, or even a computer to BenQ 1080P 3D video projectors wirelessly as well as 5.1 channel digital audio.
- Stream up to 30m (100 feet) with no Latency, Great for Gaming
With four built-in omni-directional antennas, this solution transmits uncompressed video content up to 30 meters (100 feet, Line of sight)* with no latency ideal for video gaming.
• Ultra Stable and Fluent Streaming Quality
This solution operates at 4.9 GHz\~ 5.9 GHz frequencies and features “Dynamic Frequency Selection” technology that adjusts the communication frequency automatically in case of interference from another RF system and provides stable and fluent transmission quality for your full HD content.
• Enhanced IR Functionality
IR Blaster Cable is included in the package so users can point their original remote control of the AV source at the receiver directly to control source devices like switching channels.

Transmission distance depends on actual environment. Stated distance is based on line-of-sight measurement. Structures constructed of steel, wood, concrete, or brick may decrease transmission distance.
Package content
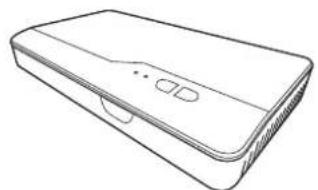
natural_image
Line drawing of a rectangular electronic device with a lid and buttons (no text or symbols)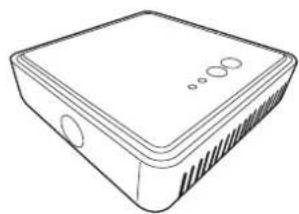
natural_image
Line drawing of a rectangular electronic device with ventilation slots and three circular ports (no text or symbols)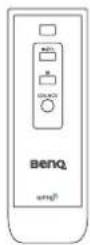
Transmitter (Tx) Receiver (Rx) Remote Control
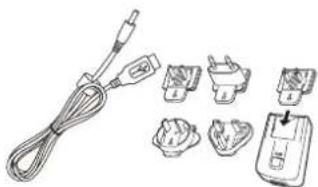
natural_image
Illustration of a cable with plug and multiple small accessories (no text or symbols)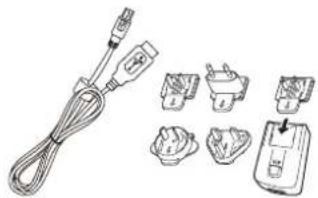
natural_image
Illustration of a cord with plug connectors and multiple small accessories (no text or symbols)
Tx_Adapter Rx_Adapter User Manual
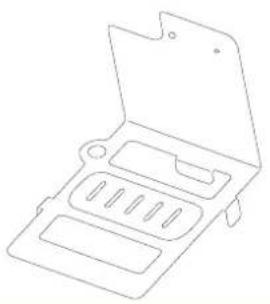
natural_image
Line drawing of an open hard drive or clamp device with multiple slots and a handle (no text or symbols)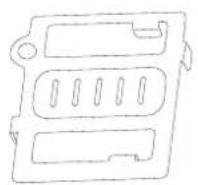

Mounting Holder-A Mounting Holder-B Quick Start Guide
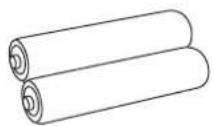
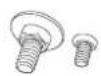
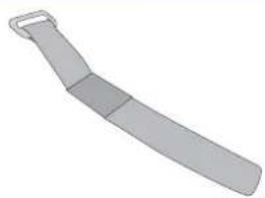
natural_image
Illustration of a gray tool or blade with a loop handle, no text or symbols presentBatteries Screws Velcro
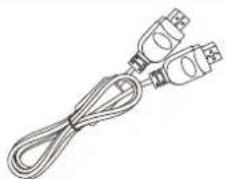
natural_image
Line drawing of a cable with two connectors (no text or symbols)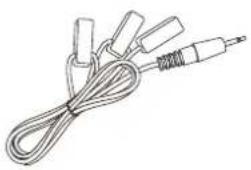
natural_image
Line drawing of a coiled cable with multiple connectors (no text or symbols)HDMI Cable IR Blast Cable
Overview
Transmitter (Tx)
Front panel buttons and indicators
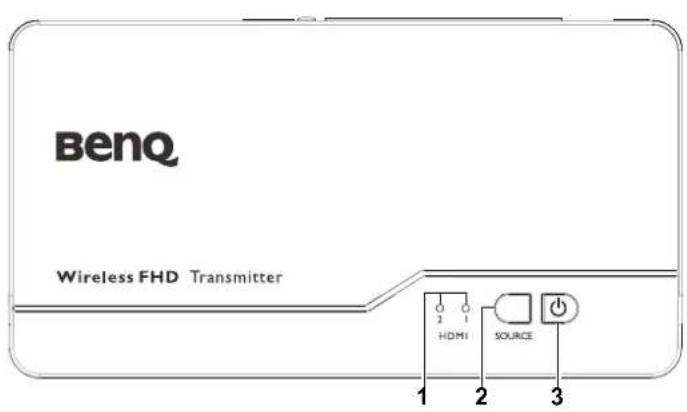
I. Source indicators
These two LED indicators are lit in solid blue to show current input you switch.
- Source selection button
Press to switch source inputs of the transmitter.
- Power button with LED Indicator
Press to turn the transmitter on and off. The indicator in the power button is lit in solid blue when the power is on, and turns red in standby mode.
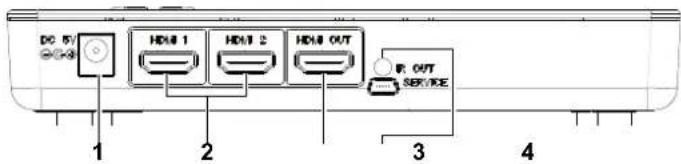
Main unit back panel
Receiver (Rx)
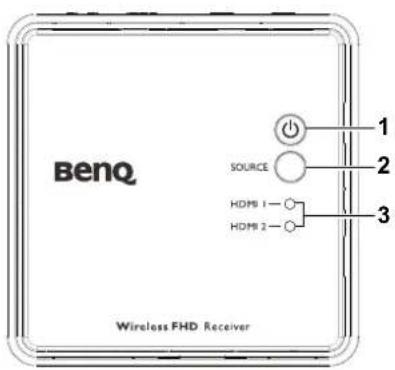
Front panel buttons and indicators
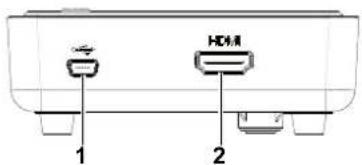
Main unit back panel
I. DC in
For connecting the Tx adapter.
2. HDMI 1/HDMI 2
Connect up to two high-definition audio/video source inputs via HDMI cables.
3. HDMI OUT
Connect transmitter to second display equipped with an HDMI port via an HDMI cable.
4. IR OUT blaster extender jack
Plug the IR blaster extender cable into the IR OUT jack of the transmitter.
1. Power button with LED indicator
Press to turn the receiver on and off. The indicator in the power button lights up in blue when the power is on and turns red in standby mode.
2. Source button
Press this button for input source
3. Source indicators
For HDMI 1 and HDMI 2 selected indication.
I. DC in
Connect to USB type A (1.5V power supply) on BenQ video projector or the receiver's power adapter.
2. HDMI out
Connect to BenQ video projector via the provided HDMI cable.
Remote controller
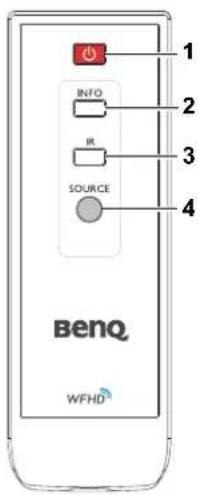
1. Power button
Press to turn the transmitter & receiver on/off. When both power indicators of Tx & Rx are in red, press the power button on either Tx or Rx to wake up the other automatically.
2. INFO button
Press this button to display OSD of system related information on the display terminal connected the receiver.
3. IR button
Press to switch the IR blaster frequency between 36KHz to 56KHz to meet source device's requirement.
4. SOURCE button
Press to switch the input sources connected to the transmitter directly.
Installation
This section will guide you on how to prepare the unit before its initial use.
Setting up the transmitter (Tx)
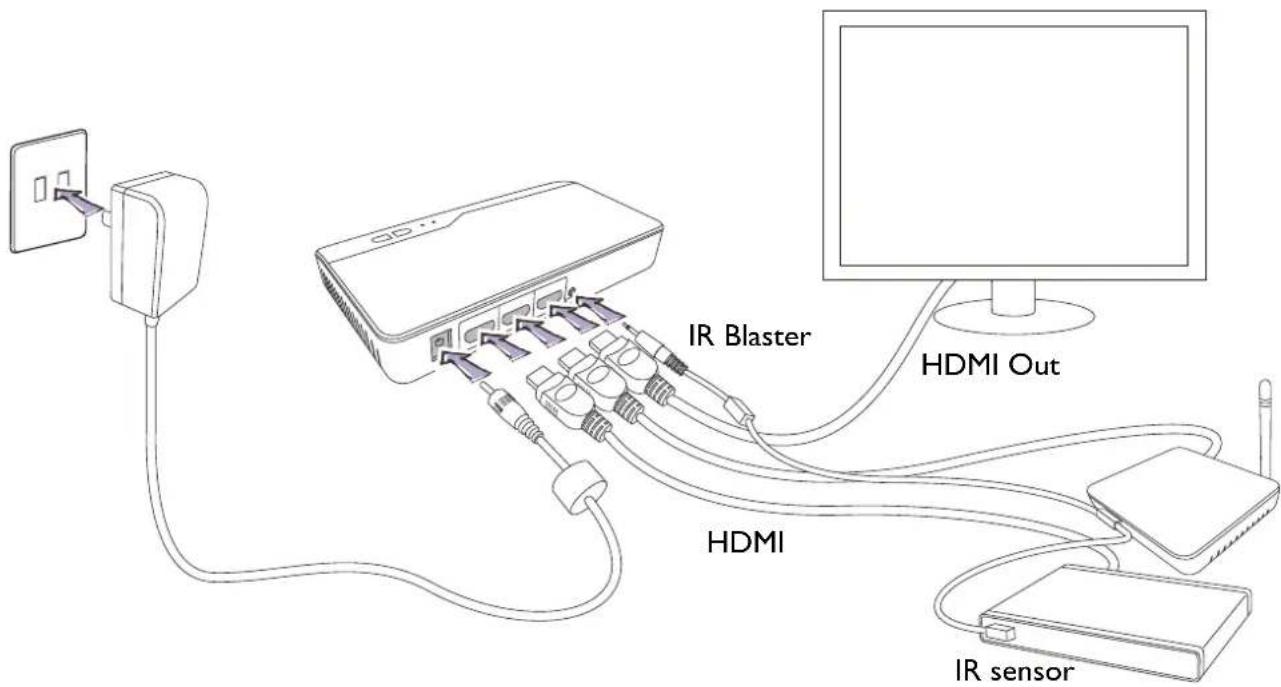
Connect up to two high-definition audio/video sources to the transmitter.
I. Connect the transmitter's HDMI 1/HDMI 2 jacks to the high-definition AV equipment's HDMI out jacks via HDMI cables. The transmitter is equipped with two HDMI jacks for the high-definition equipment such as Blu-ray Players or video game consoles.
2. Connect the transmitter's HDMI OUT to HDMI input of a second display via an HDMI cable for the loop-through connection.
3. Connect the supplied power adapter to the DC in jack of the transmitter and a wall socket. The indicator on the power button lights up in blue when the transmitter is connected to the power socket.
Setting up the IR blaster cable
If necessary, connect the IR Blaster Cable to the IR sensor of you high-definition AV equipment. You will be able to use the remote control of the source device at the receiver side to directly and operate the source device like switching channels.
I. Plug one end of IR blaster cable into the IR OUT jack of the transmitter.
2. Stick the other end of the IR blaster cable near the IR sensor of your high-definition audio/video devices and then press IR button of remote control to search a good position of IR response.
- When the IR blaster cable is connected, it relays infrared commands from your remote control to the device. You can now control your source devices by pointing their remote control to the receiver instead.

The IR sensor supports remote's signal protocol of NEC, RC5, and RC6 between 36 KHz \~ 56 KHz. Therefore, it is possible that some devices may not be supported.
Setting up the receiver (Rx)
Attaching receiver (Rx) to your BenQ projector with mounting holder-A
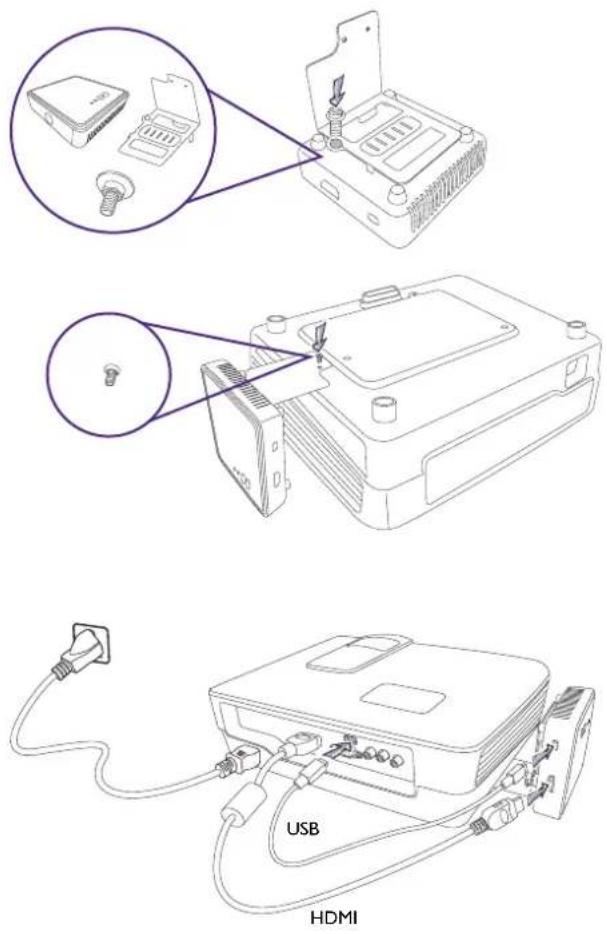
- If your BenQ projector is one of following models: WI070+, WI080ST+, WI350, HT1075, or 1085ST, please mount the receiver to the right hand side of the projector with the mounting holder-A (L type). Fix one side of the mounting holder to the tripod hole on the bottom of receiver and then fix the other side of the mounting holder to the bottom of projector by using the supplied anchor.
-
All of these models mentioned above are equipped with a USB type A jack (1.5V) to provide power supply for the receiver. Just connect one end of supplied USB cable to the mini USB jack of the receiver and the other end to the USB type A jack of the projector.
-
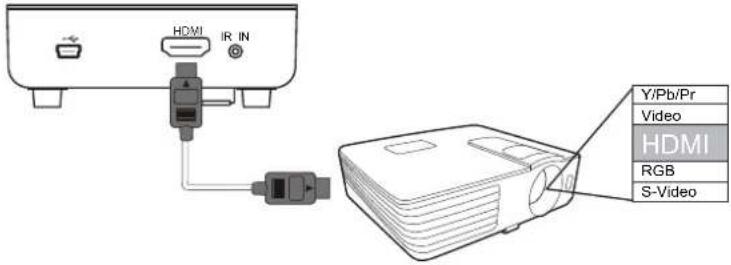
Connect the HDMI cable to the HDMI out jack of the receiver and the HDMI input jack of the projector. Turn on the projector and the receiver will be automatically turned on accordingly. The indicator on the power button of the receiver will light up in blue.
-
Press the source button of the projector to select the appropriate HDMI video input.
Attaching Receiver (Rx) to your BenQ projector with mounting holder-B
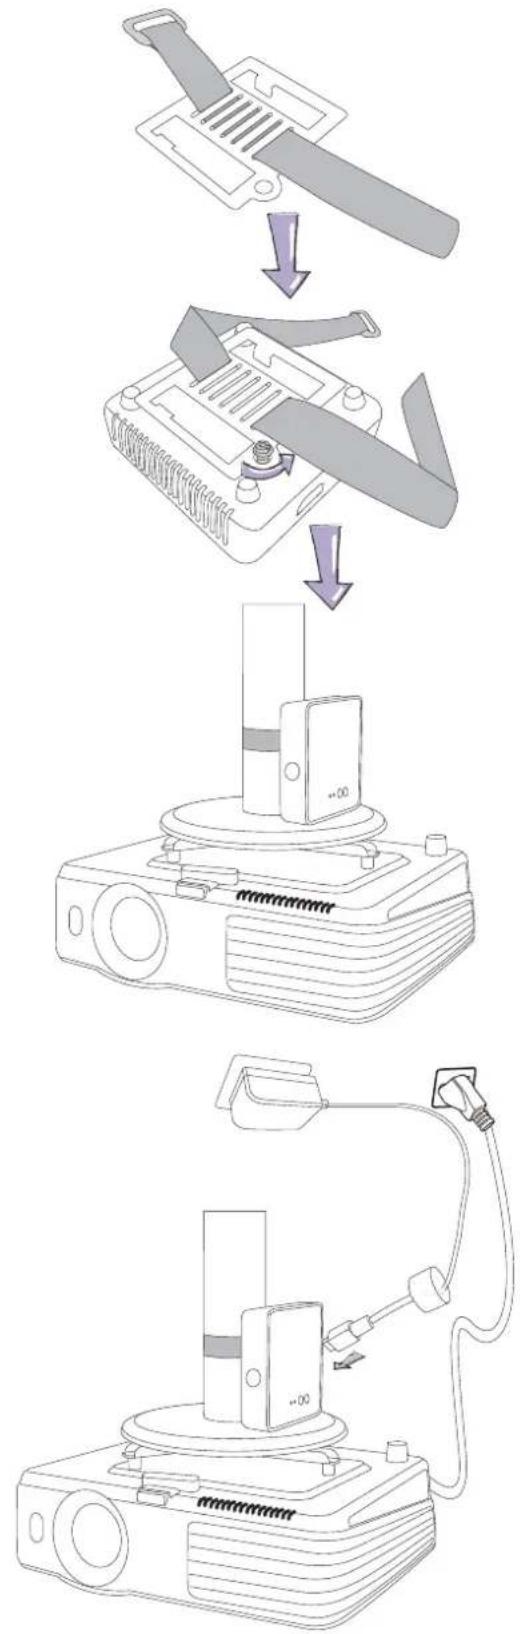
- If your BenQ video projector is not in the list as mentioned above, you can use mounting holder-B to fix the receiver to ceiling mount when the projector is installed on the ceiling. Fix the mounting holder to the tripod hole on the bottom of the receiver by using the supplied anchor first and then use supplied Velcro to fix the mounting holder and the receiver to the ceiling mount as shown in the picture.
flowchart
graph TD
    A["Cut Blade"] --> B["Melt"]
    B --> C["Clamping"]
    C --> D["Mounting Plate with 00% clamp"]
-
Connect the supplied USB power adapter to the mini USB jack of the receiver and a wall socket. The indicator on the power button of the receiver lights up in blue when the receiver is connected to the power mains.
-
Connect the HDMI cable to the HDMI out jack of the receiver and the HDMI input jack of the projector. Turn on the projector and the receiver will be automatically turned on accordingly. The indicator on the power button of the receiver will light up in blue.
-
Press the source button of the projector to select the appropriate HDMI video input.
Booting up the transmitter and the receiver
I. Place two AAA batteries into the remote control.
- Once the projector is turned on or the power adaptor is connected to wall socket, the receiver and transmitter will be turned on automatically.
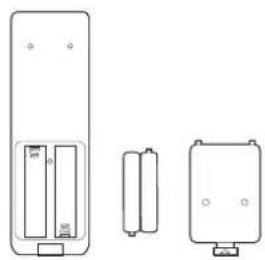
natural_image
Three technical line drawings of electronic components or devices, showing front, side, and top views with no visible text or symbols.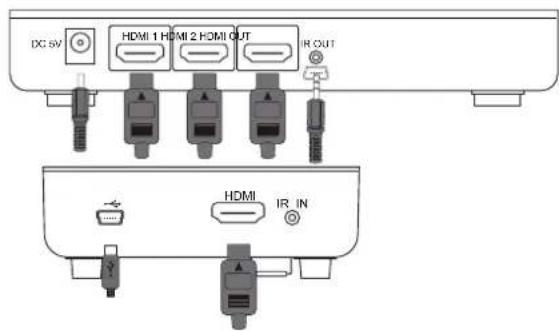
- If in standby mode (both power indicators of the transmitter and the receiver are lit in red), press the power button of either the transmitter or the receiver to turn on both the transmitter and the receiver. The same condition applies to remote control operation.
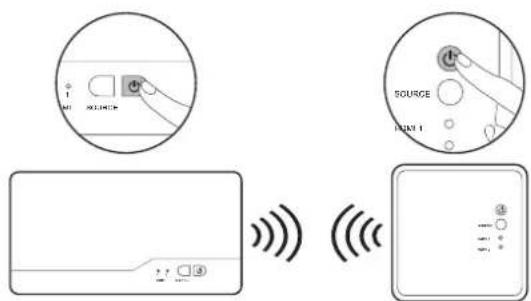
-
If the transmitter's HDMI out display is on (transmitter's power indicator is lit in purple) and the receiver stays in standby mode (receiver's power indicator is lit in red), press the power button of either the receiver or the transmitter to wake up the other and make wireless connection automatically between each other.
-
During the warm-up, the power indicator will blink in blue until the signal link between the transmitter and the receiver is established. It takes about 15 \~ 20 seconds to boot up successfully.
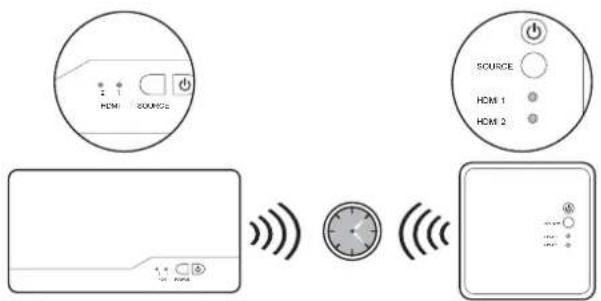
- Ensure your projector is already turned on and being switched to the correct HDMI source.
- Press SOURCE button on the remote control or on the top of the receiver/the transmitter for source input switching until you see the video being transmitted.
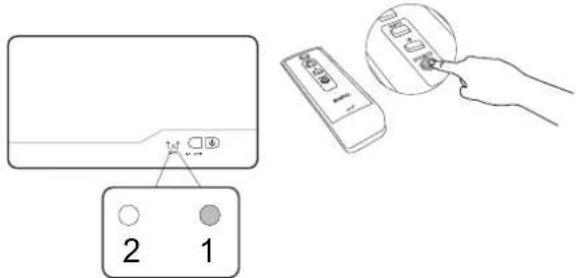
- If all operation is normal, the power indicator and source indicator will both glow in solid blue. Please refer below for detailed indicator and OSD description of the transmitter and the receiver.
| Item/Mode Status Description | Power indicator (on Rx) | Source indicator (on Rx) | OSD Display (on Rx) | |
| Standby Power saving Static red off |  | |||
| Initial boot up/warm up | It takes about 15~20 seconds for booting up. | Blinking blue Blinking |  —4 levels looping —4 levels looping | |
| Searching available channels | Continuing search available channels if system can't establish the blink for over 80 seconds after initialization. (Note 1 & 4) | Blinking blue Blinking | 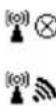 —looping display —looping display | |
| Wireless linked mode | No input from selected source. (Note 2) | Static blue | Blinking(Quickly) |   |
| Unrecognizable video format. (Note 3) | Static blue | Blinking(Quickly) |   | |
| Video format is recognized. | Static blue Static blue | |||

-
If the RF connection is not established after over 80 seconds, the link might be lost or the transmitter is most likely out of range. You may have to verify the range and adjust or shorten the distance between the transmitter and the receiver. The maximum video transmission range for 1080p content is up to 30 m (100 feet) in line of sight (LOS), and the minimum range is 1.98m (6.5 feet). Transmission distance varies from environments. Stated distance is based on line-of-sight measurement. Structures constructed of steel, wood, concrete, or brick may decrease transmission distance.
-
Please make sure the source devices have been turned on and switched the signal output to HDMI out; also try to re-plug the HDMI cable to make sure the HDMI connector had settled well.
-
If there is no video displayed and OSD displayed 'Not Supported Format', this is an indication that the video frame rate from the computer is not supported. Please refer to Supported resolution to switch a supported video timing.
-
If you have more than one set of the unit, each transmitter and receiver should be at least 1.98 m (6.5 feet) away from one another.
9. On Screen Display (OSD) and the remote control instruction:
- In active mode, press the power button on the top of the receiver or press remote control's power button pointing to the receiver, the receiver enters standby mode and transmitter's HDMI out is still on.
- In active mode, press the power button on the top of the transmitter or press remote control's power button pointing to the transmitter, both the transmitter and the receiver will enter standby mode.
- Press INFO button on the remote control, and information such as signal quality, source, channel, and resolution will be displayed for reference.
- Press SOURCE button on the remote control or on the top of the transmitter (or the receiver) for audio/video source input selection.
- Press IR button of the remote control to change IR blaster frequency between 36KHz and 56KHz. IR blaster frequency default setting is 47KHz.
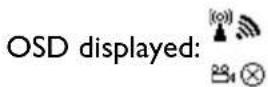
OSD displayed: (display for 3 seconds and then enter Standby mode.)


OSD displayed: (display for 3 seconds and then enter Standby mode.)


OSD displayed: (press again to exit.)


OSD displayed:

HDMI1 CH10 1280x1024
or

HDMI2 CH10 1280x1024
Press once for current IR frequency status display. The OSD shows:

HDMI1 CH10 1280x1024

Press IR button again to switch IR blaster frequency. The OSD shows:

HDMI1 CH10 1280x1024


Only the status of the receiver connected to the HDTV can be displayed on the OSD. The status of the transmitter HDMI out cannot be displayed.
Troubleshooting

The power indicator doesn't light up.

Check if the power plug of the receiver or the transmitter is properly inserted into a functional power outlet.

Poor picture quality or intermittent video.

- Check if your video resolution with HDMI input from your device is set to 1080p, 1080i, 720p, 576p, or 480p. Please refer to “Supported Resolution” for the supported video frame rate.
- Ensure the transmission distance is less than 100 feet in line of sight.

No audio.

- Check your display's volume is properly set and not set in mute mode.
- Check if your source player's audio volume has been turned up.
- Ensure the bit rate of audio from the source device can be supported. Please refer to the details in “Audio bit rate support.”

IR blaster can't control source device.

- Check the IR sensor location of source device. Make sure IR blaster sensor is close and straight to source device's IR sensor. Please refer to step 3 in chapter 3 for setup.
- Change IR blaster frequency to meet source device's requirement. See the page 13 for the IR blaster frequency switching.

No 3D video output

- OSD displayed: TX 3D or/and RX 3D
- Check both display terminals (include Tx and Rx side) support 3D video format. If one of display terminals supports 2D format only, then 3D output might not supported.
- For displaying 3D video on the supported display terminal, please turn off the 2D supported display terminal and re-power on the 3D supported display terminal. Then set the source player to 3D video format output for the 3D display.
- Check the video output setting of source player such as Blu-ray players or video game consoles. If the video output setting of Source player is in 3D video format, It might be abnormal to display on the incompatible display terminal.

No video is displayed on the screen.

- Verify that that the proper cables have been selected and installed between the transmitter input jack and your high-definition equipment jack.
- At your projector side (connected to the receiver), select HDMI as the input source.
- Verify the power indicator and SOURCE indicators of the receiver and the transmitter.
• Power indicator is flashing in blue.
OSD displayed: (levels looping)
I. Ensure the transmission range between the transmitter and the receiver is NOT beyond 30 meters (100 feet) transmission distance in line of sight.
- Try to move the transmitter closer to the receiver.
• Power indicator is in solid blue and source indicator is slow flashing
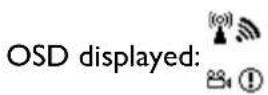
I. Ensure your video resolution and frame rate is recognized and supported.
2. Connect the source device to your display to check and modify the video format compatibility.
3. Check if your video resolution with HDMI input from your device is set among 1080p, 1080i, 720p, 576p, or 480p. Please refer Chapter 5 for the detail supported Resolution.
• Power indicator is in solid blue and source indicator is fast flashing.
I. Ensure the proper cables are connected between the transmitter and your source devices.
2. Ensure your source devices connected to the transmitter are turned on.
3. Ensure the proper cables are connected between the receiver and the projector.
Supported resolution
If the SOURCE indicator continues to blink in blue (slower than “no signal” mode); OSD display: 📄, and there is no video displayed or the video quality suffers, it indicates that the video frame rate from your A/V source device is not supported. Ensure that the consumer timing of your HD device is compliant with the standard listed below:
| 2D Video Format Timings Resolution Support | ||
| Primary CEA Video Timing | ||
| 640x480p @ 59.94 / 60Hz | 480p | YES |
| 720x480p @ 59.94Hz YES | ||
| 720x480p @ 60Hz YES | ||
| 720x576p @ 50Hz 576p YES | ||
| 1280x720p @ 50Hz | 720p | YES |
| 1280x720p @ 59.94 / 60Hz YES | ||
| 1920x1080i @ 50Hz | 1080i | YES |
| 1920x1080i @ 59.94 / 60Hz YES | ||
| 1920x1080p @ 50Hz | 1080p / 60 | YES |
| 1920x1080p @ 59.94 / 60Hz YES | ||
| Secondary CEA Video Timing | ||
| 1920x1080p @ 23.98 / 24Hz | 1080p /24 | YES |
| 1920x1080p @ 25Hz YES | ||
| 1920x1080p @ 29.97 / 30Hz YES | ||
| VESA Timing (DVI only) | ||
| 640x480 @ 59.94 / 72.809 Hz VGA YES | ||
| 800x600 @ 60.317 / 72.188 Hz SVGA | YES | |
| 1024x768 @ 60 / 70.069 Hz | XGA | YES |
| 1280x768 @ 60 Hz | WXGA | YES |
| 1280x1024 @ 60 Hz | SXGA | YES |
| Mandatory CEA 32D Video Format Timings | Support |
| 1280x720p @ 50Hz Top-and-Bottom | YES |
| 1280x720p @ 50Hz Frame packing | YES |
| 1280x720p @ 59.94 / 60Hz Top-and-Bottom | YES |
| 1280x720p @ 59.94 / 60Hz Frame packing | YES |
| 1920x1080i @ 50Hz Side-by-Side (Half) | YES |
| 1920x1080i @ 59.94 / 60Hz Side-by-Side (Half) | YES |
| 1920x1080p @ 23.98 / 24Hz Top-and-Bottom | YES |
Audio bit rate support
- Digital Audio from HDMI inputs: Up to 6Mbit/s bit-rate support.
• Audio formats supported: AC-3 and DTS. - 2-channel PCM: 16\~24 bits audio sample with 32\~96KHz sampling rate as listed below.
| 2channel PCM 32KHz 44.1KHz 48KHz | 96KHz | |||
| 16 bits YES YES | YES YES | |||
| 24 bits YES YES | YES YES | |||
Product specification
| General specifications | |||
| Supported video resolutions | HDMI input 1080p, 1080i, 720p, 576p, 480p | ||
| Supported audio formats | Digital audio Up to 6 Mbps AC-3 and DTS | ||
| Transmission distance | The maximum video transmission range is 30 meters (100 feet) in line of sight (LOS). The minimum range is 1.98 meters (6.5 feet). | ||
| System Latency No latency (<1ms) | |||
| Antenna High performance internal antennas | |||
| Operating frequencies 4.9~ 5.9 GHz (including non-DFS and DFS frequency bands) | |||
| Power supply 100~ 240V AC in, 5V 2A DC out power adapter | |||
| Operating temperature 0~40°C | |||
| Interfaces Transmitter (Tx) Receiver (Rx) | |||
| AV interfaces | HDMI input 2 (type A) | ||
| HDMI output | I (type A) | I (type A) | |
| Control signal interface | IR sensor | Yes | Yes |
| IR blaster extender | 2.5 mm jack | N/A | |
| IR sensor extender | N/A | N/A | |
| Power interface | Power input | 5V DC jack | 5V mini USB |
| Switches | Front power switch | Yes (one tack switch) | Yes (one tack switch) |
| Front source switch | Yes (one tack switch) | Yes (one tack switch) | |
| Indicators | Power indicator | I x LED (two tone: blue/red) | I x LED (two tone: blue/red) |
| Source indicator | 2 x blue LED | 2 x blue LED | |
| Signal quality status | N/A | OSD displayed | |
| Dimensions (mm) | 182(W) x 96.5 (L) x 31.5 (H) | 95(W) x 95 (L) x 31.5 (H) | |
- Wireless FHD Kit User Manual
- Copyright
- Disclaimer
- Table of contents
- Introduction 4
- Installation 8
- Troubleshooting 14
- Introduction
- Package content
- Overview
- Main unit back panel
- Receiver (Rx)
- Front panel buttons and indicators
- DC in
- HDMI 1/HDMI 2
- HDMI OUT
- IR OUT blaster extender jack
- Power button with LED indicator
- Source button
- Source indicators
- HDMI out
- Remote controller
- Power button
- INFO button
- IR button
- SOURCE button
- Installation
- Setting up the transmitter (Tx)
- Setting up the IR blaster cable
- Setting up the receiver (Rx)
- Attaching receiver (Rx) to your BenQ projector with mounting holder-A
- Attaching Receiver (Rx) to your BenQ projector with mounting holder-B
- Booting up the transmitter and the receiver
- On Screen Display (OSD) and the remote control instruction:
- Troubleshooting
- Supported resolution
- Audio bit rate support
Brand : BENQ
Model : WDP01
Category : Uncategorized