
Concert C-550 - Keyboard KORG - Free user manual and instructions
Find the device manual for free Concert C-550 KORG in PDF.


| Product Type | Digital Piano |
| Brand | Korg |
| Model | Concert C-550 |
| Number of Keys | 88 weighted keys |
| Touch Sensitivity | Adjustable (Light, Normal, Heavy) |
| Sound Engine | PCM with 64-note polyphony |
| Built-in Sounds | 30+ voices including grand piano, electric piano, organ |
| Speaker System | 2 x 15W amplifiers with woofers and tweeters |
| Pedals | 3 pedals (soft, sostenuto, sustain) included |
| Connectivity | USB to Host, MIDI In/Out, Audio In/Out, Headphones |
| Dimensions (W x D x H) | 1320 x 295 x 780 mm |
| Weight | 40 kg |
| Power Supply | AC adapter (included) |
| Power Consumption | 20W |
| Metronome | Built-in with adjustable tempo |
| Recording | 2-track MIDI recorder |
| Lesson Functions | Built-in songs and part mute for practice |
| Display | Large LCD with backlight |
| Accessories Included | AC adapter, music stand, pedal unit |
| Cleaning | Wipe with soft dry cloth; avoid solvents |
| Safety Precautions | Do not expose to moisture, extreme temperatures, or direct sunlight |
| Spare Parts & Repairability | Contact authorized Korg service centers for parts and repairs |
| General Information | Designed for home use, suitable for beginners to advanced players |
Frequently Asked Questions - Concert C-550 KORG
User questions about Concert C-550 KORG
0 question about this device. Answer the ones you know or ask your own.
Ask a new question about this device
Download the instructions for your Keyboard in PDF format for free! Find your manual Concert C-550 - KORG and take your electronic device back in hand. On this page are published all the documents necessary for the use of your device. Concert C-550 by KORG.
USER MANUAL Concert C-550 KORG
Thank you purchasing the Korg C-550 Concert digital piano. In order to enjoy long and trouble-free use, please read this manual carefully and use the instrument correctly.
Owner's Manual
C-550
PC I/F
Contents
Introduction 2
IMPORTANT SAFETY
INSTRUCTIONS 2
Back-up Battery 3
Data handling ----3
1.Contorols and their function ---- 4
2.Preparing to play 6
- Listening to the demo songs ---- 7
Playing 8
-
Selecting a sound 8
-
Adding reverberation or spaciousness to the sound---- 9
3.Using the pedals 9
4.Playing with the metronome 10
- Adjusting the keyboard touch ---- 11
6.Transposing the pitch. 12
7.Making fine adjustments to the pitch - 12
8.Selecting a temperament 13
Record and playback your
performance 15
1.Recording your performance ---- 15
2.Playing back your performance ---- 16
3.Creating an ensemble 18
-
Correcting the timing of musical data you record 19
-
Combining the data of two Parts into one Part 20
-
Erasing a song/part---- 20
-
Various recording methods ---- 21
Connections with other devices---- 24
-
Connecting a synthesizer or audio device 24
-
Connecting MIDI devices ---- 24
3.Connections with a computer ---- 28
Data 29
- Assembling the ST-550 Stand ---- 29
2.Korg MIDI Driver installation and setup 31
3.[DRUM KIT] MAP 36
- List of switch functions ---- 36
5.LED display messages 38
- Initializing settings ---- 38
7.Troubleshooting---- 38
8.Index 40
9.Specifications 41
MIDI Implementation Chart---- 41
IMPORTANT SAFETY INSTRUCTIONS
WARNING — When using electric products, basic precautions should always be followed, including the following.
- Read all the instructions before using the product.
- Do not use this product near water — for example, near a bathtub, washbowl, kitchen sink, in a wet basement, or near a swimming pool, or the like.
- This product should be used only with a cart or stand that is recommended by the manufacturer.
- This product, either alone or in combination with an amplifier and headphones or speakers, may be capable of producing sound levels that could cause permanent hearing loss. Do not operate for a long period of time at high volume level or at a level that is uncomfortable. If you experience any hearing loss or ringing in the ears, you should consult an audiologist.
- The product should be located so that its location or position does not interfere with its proper ventilation.
- The product should be located away from heat sources such as radiators, heat registers, or other products that produce heat.
-
The product should be connected to a power supply only of the type described in the operating instructions or as marked on the product.
-
This product may be equipped with a polarized line plug (one blade wider than the other). This is a safety feature. If you are unable to insert the plug into the outlet, contact an electrician to replace your obsolete outlet. Do not defeat the safety purpose of the plug.
- The power-supply cord of the product should be unplugged from the outlet when left unused for a long period of time.
- Care should be taken so that objects do not fall and liquids are not spilled onto the enclosure through openings.
- The product should be serviced by qualified service personnel when:
A. The power-supply cord or the plug has been damaged; or
B. Objects have fallen, or liquid has been spilled into the product; or
C. The product has been exposed to rain; or
D. The product does not appear to operate normally or exhibits a marked change in performance; or
E. The product has been dropped, or the enclosure damaged. - Do not attempt to service the product beyond that described in the user-maintenance instructions. All other servicing should be referred to qualified service personnel.
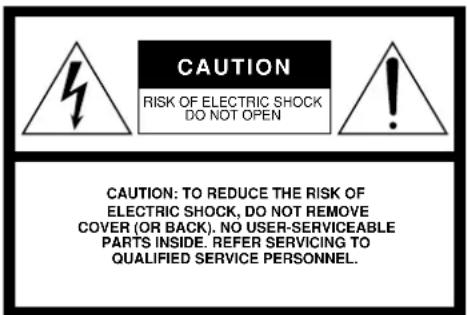


The lightning flash with arrowhead symbol, within an equilateral triangle, is intended to alert the user to the presence of uninsulated “dangerous voltage” within the product’s enclosure that may be of sufficient magnitude to constitute a risk of electric shock.
The exclamation point within an equilateral triangle is intended to alert the user to the presence of important operating and maintenance (servicing) instructions in the literature accompanying the product.
CAUTION
To prevent electric shock, match wide blade of plug to wide slot, fully insert.
CE mark for European Harmonized Standards
CE mark which is attached to our company's products of AC mains operated apparatus until December 31, 1996 means it conforms to EMC Directive (89/336/EEC) and CE mark Directive (93/68/EEC). And, CE mark which is attached after January 1, 1997 means it conforms to EMC Directive (89/336/EEC), CE mark Directive (93/68/EEC) and Low Voltage Directive (73/23/EEC).
Also, CE mark which is attached to our company's products of Battery operated apparatus means it conforms to EMC Directive (89/336/EEC) and CE mark Directive (93/68/EEC).
IMPORTANT NOTICE FOR THE UNITED KINGDOM
As the colours of the wores in the mains lead of this apparatus may not correspond with the coloured markings identifying the terminals in your plug, proceed as follows:
- the wire which is coloured blue must be connected to the terminal which is marked with the letter N or coloured black.
- the wire which is coloured brown must be connected to the terminal which is marked with the letter L or coloured red.
- Do not connect the wire to earth terminal of a three-pin plug.
THE FCC REGULATION WARNING
This equipment has been tested and found to comply with the limits for a Class B digital device, pursuant to Part 15 of the FCC Rules. These limits are designed to provide reasonable protection against harmful interference in a residential installation. This equipment generates, uses, and can radiate radio frequency energy and, if not installed and used in accordance with the instructions, may cause harmful interference to radio communications. However, there is no guarantee that interference will not occur in a particular installation. If this equipment does cause harmful interference to radio or television reception, which can be determined by turning the equipment off and on, the user is encouraged to try to correct the interference by one or more of the following measures:
- Reorient or relocate the receiving antenna.
- Increase the separation between the equipment and receiver.
- Connect the equipment into an outlet on a circuit different from that to which the receiver is connected.
- Consult the dealer or an experienced radio/TV technician for help.
Unauthorized changes or modification to this system can void the user's authority to operate this equipment.
Back-up Battery
The C-550 uses a back-up battery to prevent memory loss when the power is turned off. If the display shows "Lo", the battery should be replaced. Consult the nearest Korg Service Center or dealer.
Data handling
Unforeseen malfunctions can result in the loss of memory contents. Please be sure to save important data on an external data filer (storage device). Korg can accept no responsibility for any loss or damage which you may incur as a result of data loss.
1. Contorols and their function
Printing conventions for switches
Panel switches are enclosed in square brackets [ ]. The lit/blinking/off status of the switch indicator will be shown as follows.

A switch/selector which lights

A switch which does not light

Lit

Blinking

Off
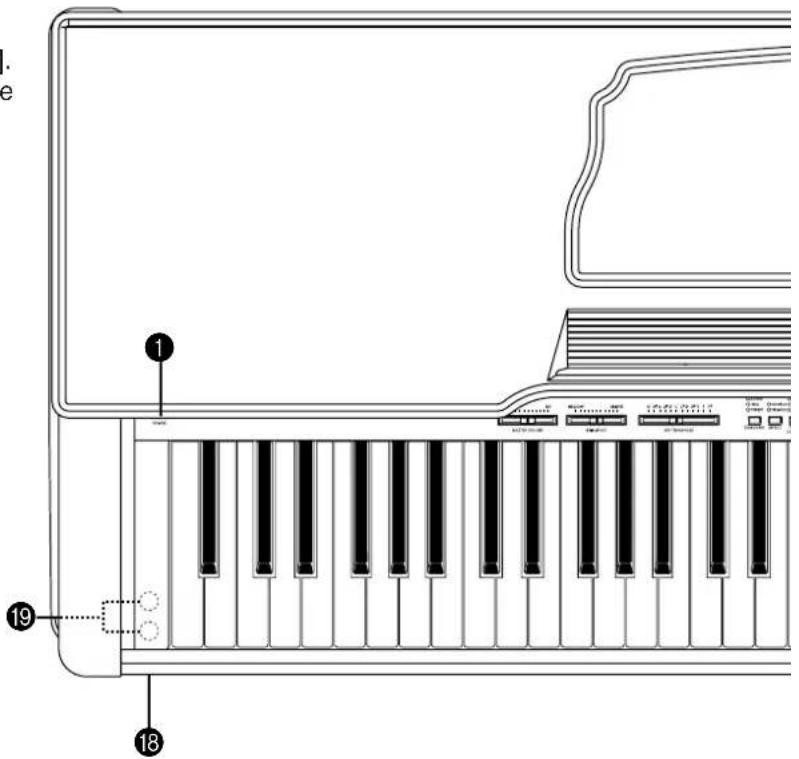
①[POWER] switch
[POWER] switch (p.6)
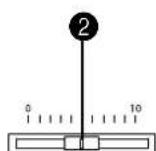
②Master volume
This slider controls the volume output from the speakers or headphones. [MASTER VOLUME] slider (P.6)
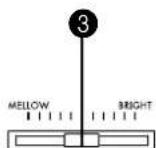
③Brilliance
This slider controls the brightness of the tone. [BRILLIANCE] slider (p.9)
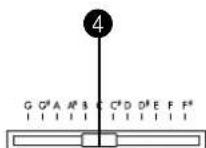
④Key transpose
This slider transposes the key. [KEY TRANSPOSE] slider (p.12)
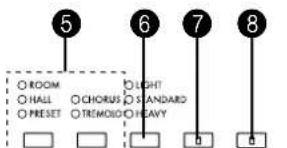
⑤Surround, Effect
These switches add various effects to the sound [SURROUND] [EFFECT] switch (p.9)
6 Touch control
This switch adjusts the way in which the volume will change in response to your keyboard playing dynamics. [TOUCH CONTROL] switch (p.11)
⑦Tune
This switch adjusts the pitch. [TUNE] switch (p.12)
⑧Temperament
This switch selects baroque tunings and other temperaments. [TEMPERAMENT] switch (p.13)
⑨Sound selector switches
These switches select sounds. [PIANO1] [PIANO2] [E.PIANO] [HARPSI] [VIBES] [ORGAN] [STRINGS] [DRUM KIT] [BASS] switch (p.8)
10MIDI
This switch is used to make settings for various MIDI-related functions, and in conjunction with other switches to set additional functions. [MIDI] switch (p.36)
MASTER VOLUME
BRILLIANCE
KEY TRANSPOSE
⑪ LED display
This indicates the tempo or the sound number etc.
⑫Select / Value
These switches set the value shown in the LED display. [+/UP] [-/DOWN] switch
13Metronome
This switch starts/stops the metronome. [METRONOME] switch (p.10)
14 Tempo, Beat, Metro volume
These switches make metronome settings. [TEMPO] [BEAT] [METRO VOLUME] switch (p.10)
⑮Song, Part
These switches are used to select the Song or Part number when using the recorder or when playing a song. [SONG] [PART] switch (p.15)
16Recorder
These switches are used to record/playback your performance. [RESET] [START/STOP] [RECORD] [REW] [FF] [REPEAT] switch (p.15)
17Demo
This switch plays the built-in demo songs. [DEMO] switch (p.7)
18[POWER] indicator
[POWER] indicator (p.6)
19 PHONES jacks
On the underside of the piano [PHONES] jack (p.6)
20Music stand (p.6)

2.Preparing to play
1. Plug in the power cable
Plug the power cable into an AC outlet.
Be sure to use an AC outlet of the correct voltage for your instrument.
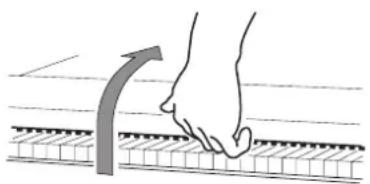
2. Open the key cover
Gently lift and support the center of the edge, and slide the cover carefully toward the back. To close the key cover, gently lift the center of the edge, and slide it toward yourself.
natural_image
Illustration of a hand pressing down on a curved surface with a tool, no text or symbols present
When opening or closing the key cover, be careful not to pinch your fingers.

Applying excessive force, or opening and closing the cover roughly may cause malfunction.
3. Turn on the power
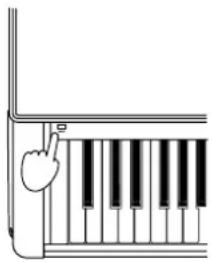
1. Press the POWER switch to turn on the power.
When the power is turned on, the POWER indicator located on the left front will light.
natural_image
Illustration of a hand pressing down on a piano keyboard (no text or symbols)
At this time, the pedals will be initialized so do not press a pedal until numerals appear in the LED display
2. To turn the power off, press the POWER switch once again.
When the power is off, the POWER indicator located on the left front will be off.
4. Adjust the volume
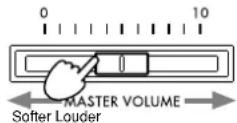
Raise the [MASTER VOLUME] slider to approximately the middle position.
Moving the slider toward the right will increase the volume. Moving it toward the left will decrease the volume. With a setting of "0" there will be no sound. Adjust an appropriate volume while actually playing the instrument.
The [MASTER VOLUME] slider controls the volume that is output from the built-in speakers, the headphone jack, and the rear panel OUTPUT jacks.
■ When using headphones
When headphones are plugged in, no sound will be heard from the built-in speakers.
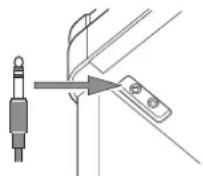
Use headphones when you do not wish to disturb those around you, such as at night. Since there are two headphone jacks, you can enjoy playing duets.
Connect the plug (phone plug) of your stereo headphones to the headphone jack located at the left on the bottom of the instrument.
If you are using headphones that have a mini→phone converter plug, grasp the base of the converter plug when connecting or disconnecting the headphones.

When using headphones, do not listen to high volumes for extended periods of time, since this may damage your hearing.
■ When using the Music Stand
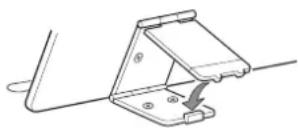
To prop up the music stand, pull out the flaps and fit them into the base, forming a triangle.
3. Listening to the demo songs
Eleven demo songs are built-in. Listen to the demo songs to hear the rich sounds and expressive possibilities of the C-550
1. Press the [DEMO] switch.
The indicator at the [DEMO] switch and the indicator located at the upper left of the [SONG] switch will light, and the LCD display will show the demo song number (d01).
2. Press the [+/UP] or [−/DOWN] switch to select the number of the song that you wish to hear.
Number Song name
| d01 F.ChopinScherzo No.2 Bb-minor Op.31 |
| d02 L.v.BeethovenFor Elise |
| d03 F.MendelssohnSprings Song Op.62-6 |
| d04 F.ChopinValse No.6 Db-major Op.64-1 |
| d05 W.A.MozartSonate K.331 |
| d06 F.Burgmuller"La chevaleresque" Op.100-25 |
| d07 A.EllmenreichSpinng Song |
| d08 J.S.BachItalian Concert BWV971 |
| d09 N.RIMSKY-KorsakovThe Flight of The Bumble Bee |
| d10 F.MendelssohnWedding March |
| d11 KORG OriginalSplendid View |
3. Press the [START/STOP] switch, and the demo will begin playing.
The indicator located at the upper of the [START/STOP] switch will blink in time with the tempo.
All of the demo songs will play back, beginning with the selected song.
![KORG Concert C-550 - Press the [START/STOP] switch, and the demo will begin playing. - 1](/content/2026/05/820856/images/5342128314305c091adbdb5f4d8aec726b6aa6fdebe7c00635ae2c41ae054fdb.jpg)
![KORG Concert C-550 - Press the [START/STOP] switch, and the demo will begin playing. - 2](/content/2026/05/820856/images/5d22c4e3467e7f9b1af8cbfb44a25498deb2c54b8aee25352c4906e471447a92.jpg)
![KORG Concert C-550 - Press the [START/STOP] switch, and the demo will begin playing. - 3](/content/2026/05/820856/images/0d422d82b800f9ac6ec62a638c8b7028d6ac3e86d7ff96e610f9cef48854bda4.jpg)
![KORG Concert C-550 - Press the [START/STOP] switch, and the demo will begin playing. - 4](/content/2026/05/820856/images/25ade0125bfd353022b796ce83981101c2eed6f02fbb3edcfebfa09aed848111.jpg)
4. To stop playback, press the [START/STOP] switch.
The indicator at the upper of the [START/STOP] switch will go off.
5. When you finish listening to the demo songs, press the [DEMO] switch while a song is not playing.
The indicator at the [DEMO] switch will go off.
![KORG Concert C-550 - When you finish listening to the demo songs, press the [DEMO] switch while a song is not playing. - 1](/content/2026/05/820856/images/d6cc3274fde95b0128dd7407377b5aa1b27c8c002eb9104976e801c6c7ff5ff3.jpg)
1.Selecting a sound
The C-550 has 16 sounds.
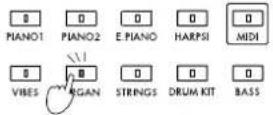
●Press one of the Sound selector switches to select the sound you wish to play.
The indicator at the selected switch will light, and you can play that sound.
Selecting a sound from a sound group
Groups of several sounds are contained within the [BASS] switch of the C-550. You can select and play a desired sound from these groups.
1. Press a Sound selector switch which contains a group of sounds.
The indicator at the selected Sound selector will light, and the LED display will indicate the number of the currently selected sound.
2. Press the [+ / UP] or [− / DOWN] switch to select a sound.
Each time you press the [+/UP] or [-/DOWN] switch, the sound number will increase or decrease by 1. If you hold down the currently selected Sound selector switch (i.e., the switch whose indicator is lit) and press the [+/UP] or [-/DOWN] switch, the sound number will increase or decrease in steps of 10. If there is no sound number 10 higher than the current one, the last number will be selected.
![KORG Concert C-550 - Press the [+ / UP] or [− / DOWN] switch to select a sound. - 1](/content/2026/05/820856/images/4a65d3fea0a4fa9322f61d1699de851c6bea70b8e0b97caeff188b24908a49a5.jpg)
![KORG Concert C-550 - Press the [+ / UP] or [− / DOWN] switch to select a sound. - 2](/content/2026/05/820856/images/26e3d9323dc88e8fd6e598a64b09f39191c361346fe409e2f781c6cf35577839.jpg)
Sound Comment
| PIANO 1 A rich and spacious acoustic piano | |
| PIANO 2 A subdued acoustic piano | |
| E.PIANO A light and clear electric piano (electric piano) | |
| HARPSI A delicately refined classical (harpsichord) harpsichord | |
| VIBES A smooth vibraphone (vibraphone) | |
| ORGAN | A majestic pipe organ |
| STRINGS | A string ensemble with violin etc. |
| DRUM KIT | drum kits |
| BASS | Eight types of bass sounds,such as acoustic bass and synth bass |
PIANO1, PIANO2 sounds processed by Infinity™.
![KORG Concert C-550 - Press the [+ / UP] or [− / DOWN] switch to select a sound. - 3](/content/2026/05/820856/images/cd8a83db45d4df240a43fff05a26f4da5c7e7671331b4b9a62f95c5e6060229f.jpg)
![KORG Concert C-550 - Press the [+ / UP] or [− / DOWN] switch to select a sound. - 4](/content/2026/05/820856/images/75f5ec2d42435ec6debc64ec7843f2547845016f8a06375d5b6e5747c81476a3.jpg)
The maximum number of simultaneous notes is 16 for [PIANO1], and for some of the [BASS] sounds. For all other sounds, the maximum number of simultaneous notes is 32.
BASS sound list
01 Jazz Bass 05 SlapBass 1 02 Deep Bass 06 SlapBass 2 03 Pick Bass *07 SynthBass1 04 Fretless 08 SynthBass2
When a sound marked by * is selected, the maximum number of simultaneous notes will be 16
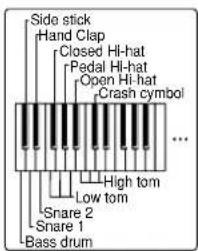
What is a Drum Kit?
A drum kit is a set of assignments placing a different drum sound (such as snare or hi-hat) on each note of the keyboard, as shown in the diagram at right. (Refer to p.36)
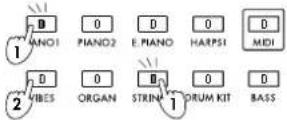
Simultaneously playing two sounds.
You can simultaneously play two Sound selector sounds (such as [PIANO2] and [STRINGS]) from each note of the keyboard. This is called the Layer function.
1.Hold down one of the two desired Sound selector switches, and then press the other one.
The indicators at the two selected Sound selector switches will light, and both sounds will be heard for each note you play.

It is not possible to select [DRUM KIT] The [SURROUND] and [EFFECT] effects (see p.9) will be applied to the Sound selector switch that you press first.
When Layering is used, the number of maximum simultaneous notes will decrease, since two sounds are being played from each note.
When the built-in recorder is used, there are several restrictions if Layering is selected. Refer to p.16.
2. Press just one Sound selector switch, and layering will be canceled.
Adjusting the volume balance of the two sounds
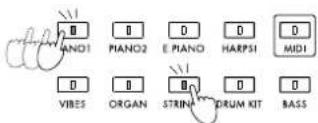
●Hold down the Sound selector switch whose volume you wish to decrease, and repeatedly press the Sound selector switch whose volume you wish to increase.
Each time you repeatedly press the Sound selector switch, its volume will increase.
The volume balance will be remembered even after the layer is canceled.
2. Adding reverberation or spaciousness to the sound
Adding re verberation to the sound. Here's how to add re verberation to the sound selected by the Sound selector switch. (the
Surround effect)
●Press the [SURROUND] switch to select the desired effect.
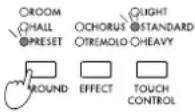
Each time you press the switch, the indicator at its upper left will cycle through the choices of effect.
Surround Comment
| ROOM The reverberance of a small room |
| HALL The reverberance of a concert hall |
| PRESET The effect most suitable for each sound will be applied. When [PIANO1] or [PIANO2] are selected, pressing the damper pedal will produce a simulation of the resonance of an acoustic piano. |
OFF(indicator off) There will be no surround effect.
Adding spaciousness to the sound
Here's how to add modulation to the sound selected by the Sound selector switch, making the sound more spacious. (the Modulation effect)
●Press the [EFFECT] switch to select the desired effect. Each time you press the
switch, the indicator at its upper left will cycle through the choices of effect.
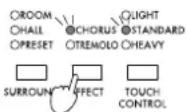
Effect Comment
CHORUS The sound will become more spacious
TREMOLO The sound will modulate between left and right
OFF(indicator off) There will be no modulation effect.

If you select “PRESET” for [SURROUND], the [EFFECT] indicator will go off, and the most suitable effect will be selected for each sound, just as with [SURROUND].
[SURROUND] and [EFFECT] can be set for each of the Sound selector switches. Each time you subsequently select that Sound selector switch, the same effect will automatically be selected.
On the C-550, the effects specified for Part 1 of Song 1 immediately before the power was turned off will be selected.
Adjusting the brightness of the sound
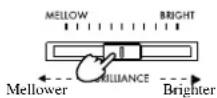
Moving the [BRILLIANCE] slider toward the right ("BRIGHT") will make the sound brighter, and moving it toward the left ("MELLOW") will make the sound more mellow.
3. Using the pedals
The C-550 have three types of pedals: damper, sostenuto, and soft.
Here's how to use these pedals as you play.
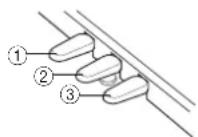
① Soft pedal
While the pedal is pressed, the sound will be softer and more gentle. The depth to which you press the pedal will affect the softness of the sound (half-pedal effect).
② Sostenuto pedal
The damper effect will be applied only to the sound of notes which are already pressed when this pedal is pressed, and these notes will be sustained while the pedal remains pressed. The effect will not apply to notes which are newly played after pressing this pedal.
③ Damper pedal
Notes will be sustained while the pedal is pressed, producing a rich resonance. The depth to which you press the pedal will affect the degree of the effect (half-pedal effect). When [PIANO1] or [PIANO2] are selected, setting [SURROUND] to "PRESET" will produce an effect that simulates the resonance of an acoustic piano's strings.
Pedal setting for Layering
When the Layer function is used, you can specify which of the two layered sounds the damper pedal will affect. For example you can change the settings so that the damper pedal applies to the piano sound but not to the string sound as you play.
1. Hold down the [MIDI] switch, and press the damper pedal.
The indicator at the [MIDI] switch will light, and the following LED display will appear.
![KORG Concert C-550 - Hold down the [MIDI] switch, and press the damper pedal. - 1](/content/2026/05/820856/images/2b8849891f1669c79c1d8eaf7ffbec978af8b901a25d6f18b55857765e16e439.jpg)
![KORG Concert C-550 - Hold down the [MIDI] switch, and press the damper pedal. - 2](/content/2026/05/820856/images/673db821f45f23fa77d993d74b2f7f3ccc7b3ace67026efdebeac24d206b2687.jpg)
flowchart
graph TD
    A["Damper affects"] --> B["Damper dose not affect"]
    B --> C["Damper affects"]
    C --> D["Damper affects"]
    D --> E["Damper does not affect"]
    E --> F["Damper affects"]
    F --> G["Damper does not affect"]
    G --> H["Damper affects"]
    H --> I["Damper does not affect"]
    I --> J["Damper affects"]
    J --> K["Damper does not affect"]
    K --> L["Damper affects"]
    L --> M["Damper does not affect"]
    M --> N["Damper affects"]
    N --> O["Damper does not affect"]
    O --> P["Damper affects"]
    P --> Q["Damper does not affect"]
    Q --> R["Damper affects"]
    R --> S["Damper does not affect"]
    S --> T["Damper affects"]
    T --> U["Damper does not affect"]
    U --> V["Damper affects"]
    V --> W["Damper does not affect"]
    W --> X["Damper affects"]
    X --> Y["Damper does not affect"]
    Y --> Z["Damper affects"]
    Z --> AA["Damper does not affect"]
    AA --> AB["Damper affects"]
    AB --> AC["Damper does not affect"]
    AC --> AD["Damper affects"]
    AD --> AE["Damper does not affect"]
The left side of the LED display shows the setting for the left of the two selected Sound selector switches, and the right side shows the setting for the right Sound selector switch. With a setting of "0" the damper will function, and with a setting of “_” will not function.
2. Press the [+/UP] or [−/DOWN] switch to change the setting.
![KORG Concert C-550 - Press the [+/UP] or [−/DOWN] switch to change the setting. - 1](/content/2026/05/820856/images/141727b79c7d07716168f7757f0a1ce15a09e4bade78433669a62bcc84d14c26.jpg)
flowchart
graph LR
    A["Left side"] --> B["PIANO1"]
    A --> C["PIANO2"]
    A --> D["E.PIANO"]
    A --> E["HARPSI"]
    A --> F["MIDI"]
    G["VIBES"] --> H["ORGAN"]
    G --> I["STRINGS"]
    G --> J["DRUM KIT"]
    G --> K["BASS"]
    L["Righth Side"] --> M["DWORD"]
When the power is turned on again, the damper effect will apply to both of the Sound selector switches.
4. Playing with the metronome
When you wish to play accurately in tempo, use the metronome.
This metronome provides the basis for the time signature and tempo of the recorder discussed in the following chapter.
Starting the metronome
- Press the [METRONOME] switch, and the metronome will start.
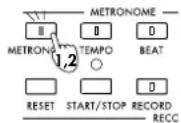
The indicator at the [METRONOME] switch will light.
2. Press the [METRONOME] switch once again, and the metronome will stop.
The indicator at the [METRONOME] switch will go off.
![KORG Concert C-550 - Press the [METRONOME] switch once again, and the metronome will stop. - 1](/content/2026/05/820856/images/5e8a8efda4445286ca40c11769f5699aa52a67e6b0f4dccc2ee6667a77199965.jpg)
Since one voice is used to sound the metronome, the maximum number of simultaneous notes will be 1 less.
Adjusting the tempo
1. Press the [TEMPO] switch.
The indicator will light, and the current tempo of the metronome will appear in the LED display.
The range of settings is ♪=30250 .
2. Press the [+UP] or [-/DOWN] switch to adjust the tempo.
Each time you press the [+UP] or [-DOWN] switch, the value will increase or decrease by one. If you continue holding the switch, the value will increase/decrease continuously.
If you hold down the [TEMPO] switch and press the [+/UP] or [-/DOWN] switch, the value will increase/decrease in steps of ten.
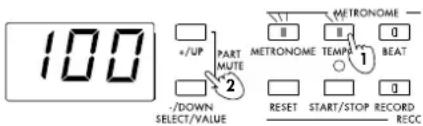
Changing the time signature
1. Press the [BEAT] switch.
The indicator at the [BEAT] switch will light, and the LED display will indicate the current time signature of the metronome. The range of settings is 1/4—5/4, 1/8—10/8, 1/16—16/16. The display will be as follows.
![KORG Concert C-550 - Press the [BEAT] switch. - 1](/content/2026/05/820856/images/0d76cff807519b2a224359d78c09fd4849dd38995cbabe0acc0df60b0fd388fc.jpg)
Each time you press the [+/UP] or [-/DOWN] switch, the value will increase or decrease by one. If you continue holding the switch, the value will increase/decrease continuously.
![KORG Concert C-550 - Press the [BEAT] switch. - 2](/content/2026/05/820856/images/e2c80de3dae9863caf1337b5c6f29c55f99908a90fe7e8377ba54188ee0b7cfb.jpg)
The tempo and time signature are set independently for each song.
Adjusting the volume
1. Press the [METRO VOLUME] switch.
The indicator at the [METRO VOLUME] switch will light, and the LED display will show the current metronome volume. The range of settings is 0 (minimum) \~ 127 (maximum).
2. Press the [+UP] or [-/DOWN] switch to adjust the volume.
Each time you press the [+/UP] or [-/DOWN] switch, the value will increase or decrease by one. If you continue holding the switch, the value will increase/decrease continuously. If you hold down the [METRO VOLUME] switch and press the [+/UP] or [-/DOWN] switch, the value will increase/decrease in steps of ten.
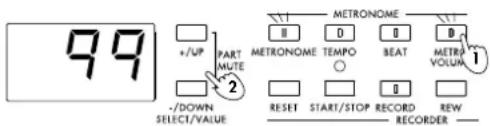
Selecting the accented note of the time signature
You can specify whether the accented notes (strong beats) of the time signature will be sounded by a bell or by the normal metronome sound, or whether there will be no accent (all weak beats).
●Hold down the [MIDI] switch and press the [METRONOME] switch repeatedly to cycle through the following settings.
While you are holding down the [MIDI] switch, the indicator at the [MIDI] switch will light, and the indicator at the [METRONOME] switch will be lit, off, or blinking to indicate the setting.
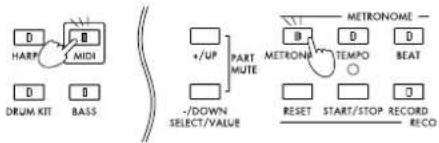
Accent note Indicator
| bell sound lit |
| normal |
| metronome sound off |
| no accen blinking |
![KORG Concert C-550 - ●Hold down the [MIDI] switch and press the [METRONOME] switch repeatedly to cycle through the following settings. - 2](/content/2026/05/820856/images/1eb2121ef0aed9f9652b139cde8769cf6ed7157fa20834a03287f62909c309b7.jpg)
If you select the bell as the accent note, Part 16 will be muted.
On the C-550, the tempo will be "120," and the time signature, volume and accent note will remember the setting that was selected when the power was turned off. When song 1 is recorded or played back, the tempo will be set to the current value.
If the sound is not what you expect
As you begin using the many functions of the C-550, you may not know how to adjust the sound to your liking. In such cases, you can use the following procedure (reset), and then re-select the sound. Page 38 explains the contents of the data that will be reset by this operation.
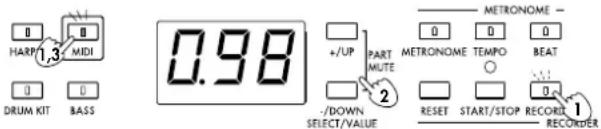
●Hold down the [MIDI] switch, and press the [RESET] switch.
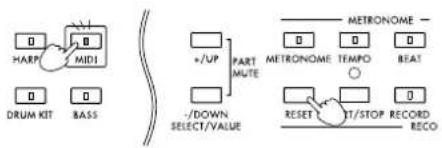
flowchart
graph TD
    A["HARP"] --> B["MIDI"]
    C["DRUM KIT"] --> D["BASS"]
    B --> E["+ / UP"]
    D --> F["- / DOWN SELECT/VALUE"]
    E --> G["METRONOME"]
    F --> H["PART MUTE"]
    G --> I["METRONOME TEMPO"]
    H --> J["BEAT"]
    I --> K["RESET"]
    J --> L["T/STOP RECORD RECO"]

When you perform this procedure, the pedal settings will also be reset, so be careful not to press the pedals at this time.
5. Adjusting the keyboard touch
The Touch Control function lets you adjust the way in which the volume will be affected by your playing dynamics.
●Each time you press the [TOUCH CONTROL] switch, the setting will cycle through the three choices.
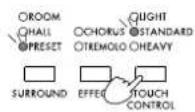
Touch control Remarks
LIGHT Even a light touch will produce fortissimo (ff).
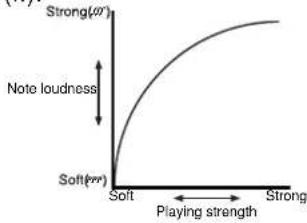
line
| Playing strength | Note loudness | | ---------------- | ------------- | | Soft | 100 | | Strong | 200 |STANDARD This is the normal piano touch.
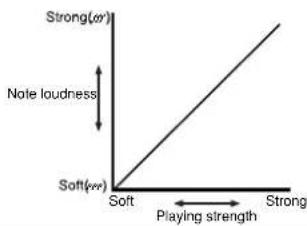
line
| Point | Strong(ω) | |-------|-----------| | Soft | Soft | | Strong| Strong |HEAVY With this setting, you will have to play strongly to produce fortissimo. This setting gives you expressive dynamics from pianissimo (pp) to fortissimo.
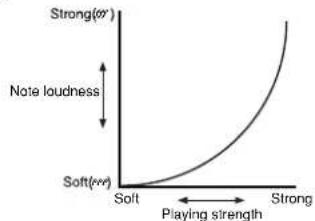
line
| Playing strength | Note loudness | | ---------------- | ------------- | | Soft | 0 | | Strong | High |When the power is turned on, keyboard touch will automatically be set to "STANDARD."
6. Transposing the pitch.
When the song you are playing contains man y sharps or flats, or when the k ey is too high or too lo w to match other instruments or to sing along with, you can change the pitch of the k keyboard so that the song can be played in an easier k ey or at a more singable pitch. This is referred to as the Transpose function.
- Move the [KEY TRANSPOSE] slider to the desired key.
The "C" note will be given the pitch that you specify on the [KEY
TRANSPOSE] slider. The range of settings is 11 semitones in semitone steps (C(-5) \~ F#(+6)).
![KORG Concert C-550 - - Move the [KEY TRANSPOSE] slider to the desired key. - 1](/content/2026/05/820856/images/0063247a6c38cd9861b46ba3c0b46a013f972c659eee91be475818db84417763.jpg)
Example 1. If the [KEY TRANSPOSE] slider is set to "F," pressing the "C" note will produce a pitch of
![KORG Concert C-550 - - Move the [KEY TRANSPOSE] slider to the desired key. - 2](/content/2026/05/820856/images/99af600e189f663e9e5ca3b526c602ce7bb5d08b2e154eb35f0d7047aaa74414.jpg)
Example 2. Using the Transpose function, a song written in a difficult key (with many black keys) can be played in an easier key.
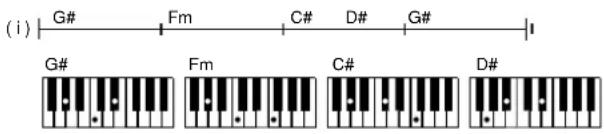
If the entire song is four semitones higher, the chords will be as follows.
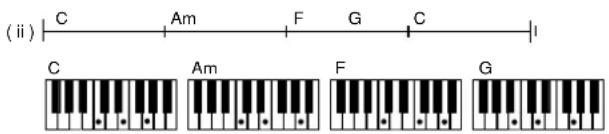
This is much easier to play. However if you play the song this way, the pitch will be higher than it should be. So, simply lower the pitch that is produced by the C-550 by four semitones (i.e., move the [KEY TRANSPOSE] slider to "G#").
Example 3. To raise the key of the song by 1 semitone, move the
[KEY TRANSPOSE] slider to "C#". TO lower it by 1 semitone, move the slider to "B".
7. Making fine adjustments to the pitch
This function lets you make fine adjustments to the pitch so that you can match the pitch of the C-550 to the other instruments you are playing. The pitch can be adjusted in the range of 427 \~ 453 Hz (Hertz). F or an even finer adjustment, you can adjust the pitch in the range of +/-50
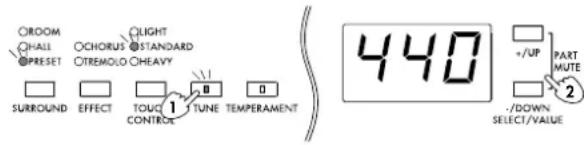
cents.
1. Press the [TUNE] switch.
The indicator at the [TUNE] switch will light, and the LED display will show the current tuning value.
2. Press the [+/UP] or [-/DOWN] switch to adjust the pitch.
Each time you press the [+/UP] or [-/DOWN] switch, the value will increase or decrease by one. If you continue pressing the switch the value will continue to change.
Hz (Hertz): This is a unit of absolute value used to indicate pitch. When tuning instruments to each other, the middle A note (A4) is used. Usually A4=440Hz, but the standard pitch has differed by area and by historical period, and recently there is a tendency to tune to a slightly sharper pitch (A4=441 \~ 444 Hz).
cent :Cents are the smallest unit used to indicate relative pitch. A semitone is 100 cents, and an octave is 1200 cents. 1 cent is a very small amount, and a difference of +/-3 cents should not normally cause any problem.
Switching between units of "Hertz" and "Cents"
- Hold down the [MIDI] switch, and press the [TUNE] switch.
The [MIDI] switch indicator will light, and the [TUNE] switch indicator will blink. The LED display will indicate the current tuning unit ("cents" or "Hertz").
- Press the [-/DOWN] switch to select units of "cents," and press the [+/UP] switch to select units of "Hertz."

When the display is switched from “cents” to “Hertz,” the “Hertz” setting closest to the current “cents” setting will appear, and the tuning value will be set to that setting.
- After you have selected the unit of tuning, press the [MIDI] switch (or the [RESET] switch).
The [MIDI] and [TUNE] indicators will go off, and you will return to the display that you were in before performing step 1. This means that if the [TUNE] switch had been pressed before performing step 1,
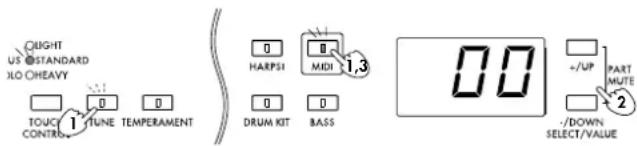
the [TUNE] switch indicator will be lit, and the LED display will show the currently selected unit.
- After pressing the [TUNE] switch, press the [+/UP] or [-/DOWN] switch to adjust the tuning value. (Refer to the above procedure.)

The tuning setting is remembered even when the power is turned off.
8.Selecting a temperament
Many compositions of classical music were composed using temperaments (tunings) which are different than the “Equal Temperament” that is usually used today. The C-550 provide classical temperaments such as Kirnberger and Werckmeister so that these compositions can be played with their original temperament, allowing the notes and chords to resonate as they originally did. Special temperaments such as Arabic and Indonesian scales are also provided.
- Press the [TEMPERAMENT] key.
The [TEMPERAMENT] indicator will light, and the number of the currently selected temperament will appear in the LED display. In the case of a temperament for which a key setting is required, the key setting will appear at the right of the temperament number.
LED Temperament Key
0. Equal temperament
This is the most widely used scale, and consists of equally-spaced semitone steps, meaning that the scale will be the same for all keys.
1. Equal temperament (random)
This introduces a slight degree of irregularity to the equal temperament pitches. It is suitable for simulating acoustic instruments whose pitch is naturally unstable.
2. Pure major O
The major chords of the selected key will be perfectly in tune.
3. Pure minor O
The minor chords of the selected key will be perfectly in tune.
4. Arabic (1/4) O
This is a quarter-tone scale of Arabic music. Set the Key parameter to C for "rast C/bayati D", D for "rast D/bayati E", F for "rast F/bayati G", G for "rast G/bayati A", or A# for "rast Bb/bayati C".
5. Pythagorean O
This scale is based on ancient Greek musical theory, and is suitable for playing melodies.
6. Werckmeister O
An equal-tempered scale used in the latter baroque period.
7. Kirnberger O
A scale created in the 18th century and used mainly for harpsichord.
8. Slendro
0
An Indonesian gamelan scale in which the octave consists respectively of 5 notes. When the key is C, the keys C, D, F, G, and A are used.
9. Pelog
0
An Indonesian gamelan scale in which the octave consists of 7 notes. When the key is C, the keys C, D, E, F, G, A, and B are used.
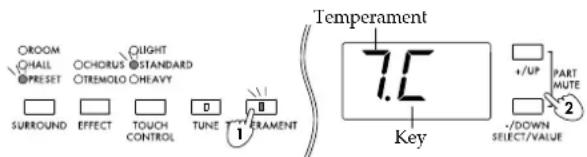
2. Press the [+/UP] or [−/DOWN] switch to select the temperament.
Each time you press the [+/UP] or [-/DOWN] switch, the value will increase or decrease by one. If you continue holding the switch, the value will change continuously.
Setting the key (tonic)
For temperaments whose “Key” column contains a “O”, you will need to set the key to match the key of the song you are playing.
1. Hold down the [MIDI] switch, and press the [TEMPERAMENT] switch.
The [MIDI] switch indicator will light, and the [TEMPERAMENT] switch indicator will blink. The LED display will show the number of the currently selected temperament and the selected key.
| LED Key | |
| C | |
| d- | D b(C \#) |
| d | D |
| E- | E b(D \#) |
| E | E |
| F | F |
| G- | G b(F \#) |
| G | G |
| R- | A b(G \#) |
| R | A |
| b- | B b(A \#) |
| b | B |
2. Press the [+UP] or [-/DOWN] switch to set the key.
Each time you press the [+UP] or [-/DOWN] switch, the value will increase or decrease by one. If you continue pressing the switch, the value will change continuously.
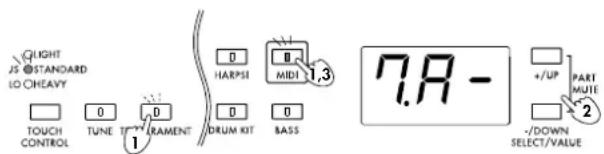
3. When you finish changing the settings, press the [MIDI] switch (or the [RESET] switch).
The [MIDI] switch indicator will go off, and you will return to the display you were in before performing step 1.
When the power is turned on, this will automatically be set to "Equal temperament".
About stretched tuning
When [PIANO1] or [PIANO2] are selected, a "stretched" tuning will be applied so that the low range is tuned slightly lower, and the high range slightly higher, than equal temperament. This is the tuning used on acoustic pianos, and produces a more natural resonance.
1. Recording your performance
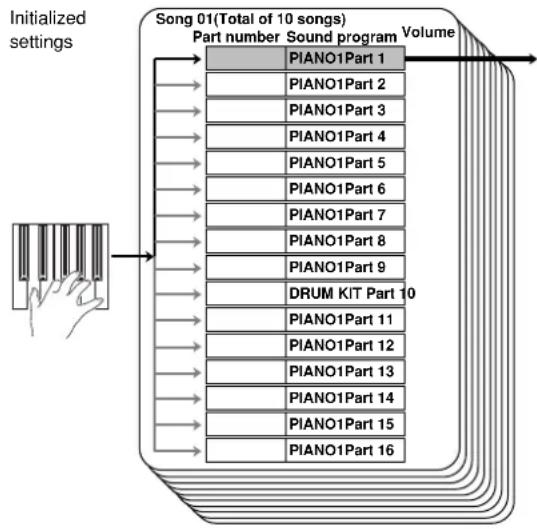
The C-550 allow you to record and playback your keyboard playing just as easily as when using a tape recorder. Up to 10 songs can be recorded, and each song contains 16 Parts. Each of these Parts can be recorded independently, and played back simultaneously.
flowchart
graph TD
    A["Initialized settings"] --> B["Song 01(Total of 10 songs)"]
    B --> C["Part number"]
    C --> D["Sound program"]
    D --> E["Volume"]
    E --> F["PIANO1Part 1"]
    E --> G["PIANO1Part 2"]
    E --> H["PIANO1Part 3"]
    E --> I["PIANO1Part 4"]
    E --> J["PIANO1Part 5"]
    E --> K["PIANO1Part 6"]
    E --> L["PIANO1Part 7"]
    E --> M["PIANO1Part 8"]
    E --> N["PIANO1Part 9"]
    E --> O["DRUM KIT Part 10"]
    E --> P["PIANO1Part 11"]
    E --> Q["PIANO1Part 12"]
    E --> R["PIANO1Part 13"]
    E --> S["PIANO1Part 14"]
    E --> T["PIANO1Part 15"]
    E --> U["PIANO1Part 16"]

With the factory settings, Part 16 cannot be used since the bell sound is selected for the metronome. If you turn off the bell setting, Part 16 will be displayed, and you can use it for recording and playback (see p.11).
1. Press the [SONG] switch.
The indicator at the [SONG] switch will light, and the LED display will show the current song number (01 \~ 10).
2. Press the [+/UP] or [−/DOWN] switch to select the song that you wish to record.
Each time you press the [+/UP] or [-/DOWN] switch, the song number will increase or decrease by one. If you continue holding the switch, the number will change continuously.
3. Press the [PART] switch.
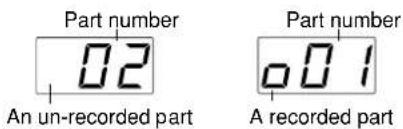
The indicator at the [PART] switch will light, and the LED display will show the current Part number (01 \~ 16). The status of the selected Part is shown at the left of the Part number.
Example: When part 1 is selected

4. Press the [+/UP] or [−/DOWN] switch to select the Part you wish to record.
Normally you will select an un-recorded Part. If you wish to re-record, select a previously recorded Part. If you continue holding the switch, the number will change continuously.
5. Press the [RESET] switch.
When you press the [RESET] switch, you will move to the beginning of the song.
6. Use the Sound selector switches to select a sound.
During playback, the sound you choose here will be selected. To record with a layer, see p.16.
You can also press the Sound selector to switch sounds after recording has begun. However it will not be possible to select a layer. During playback, the sounds will be switched at the point where you pressed the Sound selector switch.
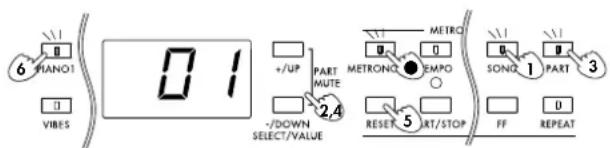
- If you wish to record in time with the metronome, press the [METRONOME] switch to hear the metronome sound.
If necessary, adjust the time signature, tempo, and volume (see p.10).
●You can correct (quantize) the timing at which notes are recorded. For details refer to p.19.
7. Press the [RECORD] switch.
The indicator at the [RECORD] switch will light. At this time it is not possible to change the Part number. If you need to change the Part number, press the [RECORD] switch once again to cancel record-ready mode.
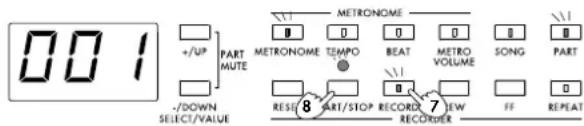
8. Recording will begin when you either play a note or press the [START/STOP] switch.
If you play a note, recording will begin immediately. If you press the [START/STOP] switch, there will be a two-measure count (the LED display will show "-02" → "-01") and then recording will begin.
During recording, the indicator above the [START/STOP] switch will blink in time with the tempo, red on the first beat of the measure, and green on other beats.
9. Press the [START/STOP] switch to stop recording.
The indicator above the [START/STOP] switch and the [RECORD] switch indicator will go off, and you will automatically return to the measure where you started recording. If the metronome is playing, press the [METRONOME] switch to stop the metronome.
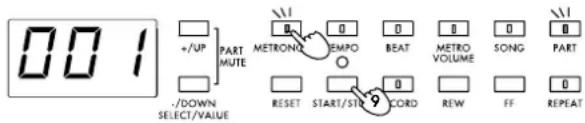
On the C-550, the recorded data is remembered even when the power is turned off.
2. Playing back your performance
1. Press the [SONG] switch.
The indicator at the [SONG] switch will light, and the current song number (01 \~ 10) will appear in the LED display.
2. Press the [+/UP] or [−/DOWN] switch to select the song you wish to hear.
3. Press the [RESET] switch.
When you press the [RESET] switch, you will return to the first measure.
4. Press the [START/STOP] switch, and playback will begin.
During playback, the indicator above the [START/STOP] switch will blink in time with the tempo.
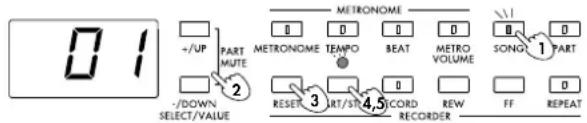
5. To stop playback, press the [START/STOP] switch.
The indicator above the [START/STOP] switch will go off. Likewise, if the entire performance finishes playing back, playback will stop and the indicator above the [START/STOP] switch will go off.
Adjusting the speed (tempo) of playback
Press the [TEMPO] switch, and then press the [+/UP] or [-/DOWN] switch to adjust the tempo which is displayed in the LED display (see page 10). Adjusting the tempo of the song will not affect the pitch.
Changing the sound
You can playback with a different sound than when you recorded. Press the Sound selector to select the sound with which you want that part to play. However if you have pressed the Sound selector during recording to switch sounds, the sound selected during recording will be selected automatically at that point during playback.

Notes when a layer is selected
- If you select a layer, the musical data of the next-numbered part (i.e., part 2 if part 1 was layered) will no longer be played back, and it will not be possible to select that part. When you cancel the layer, it will be possible to playback and select that part.
- Layering is not possible when part 16 (or part 15, if the bell is selected for the metronome) is selected.
- The two layered parameters will use the same MIDI channel. This means that if a MIDI program change message is received, both parts will switch to the same sound.
Moving to the measure you wish to playback from
Press the [FF] switch and the current measure will appear in the LED display. After the measure has appeared, you can press the [FF] switch to advance in one-measure steps. If you continue holding the switch, the measure will advance continuously.
If you press this switch during playback, there will be no sound.
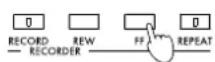
Press the [REW] switch and the current measure will appear in the LED display. After the measure has appeared, you can press the [REW] switch to go backward in one-measure steps. If you continue holding the switch, the measure will go backward continuously.
If you press this switch during playback, there will be no sound.
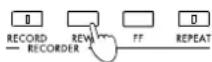
Listening repeatedly to the playback
You can listen repeatedly to an entire recorded song or to a portion of it. This is convenient when you wish to repeat a song, or to practice a difficult section.
Repeating an entire song
1. Press the [SONG] switch.
The indicator at the [SONG] switch will light, and the current song number will appear in the LED display.
2. Press the [+/UP] or [−/DOWN] switch to select the song number that you wish to playback repeatedly.
3. Press the [REPEAT] switch.
The indicator at the [REPEAT] switch will light.
4. Press the [START/STOP] switch and the entire song will be played back repeatedly.
The indicator above the [START/STOP] switch will blink in time with the tempo.
5. Press the [START/STOP] switch to stop playback.
The indicator above the [START/STOP] switch will go off.
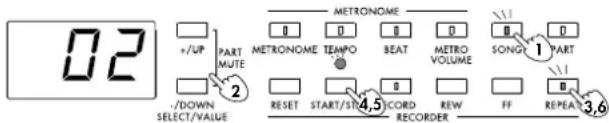
6. To cancel repeat playback, press the [REPEAT] switch while playback is stopped.
The indicator at the [REPEAT] switch will go off.
![KORG Concert C-550 - To cancel repeat playback, press the [REPEAT] switch while playback is stopped. - 1](/content/2026/05/820856/images/dca89e2e5d487e922bf51935b247966c2c30f0679cc8c3bbd01d1555dd3ee1f9.jpg)
It is not possible to turn off the [REPEAT] switch during playback.
Repeating a section A-B
1. Press the [SONG] switch.
The indicator at the [SONG] switch will light, and the current song number will appear in the LED display.
2. Press the [+/UP] or [−/DOWN] switch to select the song number that you wish to playback repeatedly.
3. Press the [START/STOP] switch to begin playback.
The indicator above the [START/STOP] switch will blink in time with the tempo.
4. At the location where you wish to begin repeating, press the [REPEAT] switch.
The indicator at the [REPEAT] switch will blink. This sets the starting measure of the section to be repeated.
5.Playback will continue. At the location where you wish to stop repeating, press the [REPEAT] switch once again.
The indicator at the [REPEAT] switch will light. This sets the ending measure of the section to be repeated. The specified section will now be played back repeatedly.
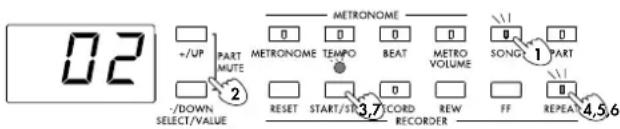
6. To cancel the specified repeat section, press the [REPEAT] switch again.
Each time you press the [REPEAT] switch during playback, the action of the switch will cycle between "starting measure" → "ending measure" → "cancel settings" → "starting measure."
7. Press the [START/STOP] switch to stop playback.
The indicator above the [START/STOP] switch will go off.
![KORG Concert C-550 - Press the [START/STOP] switch to stop playback. - 1](/content/2026/05/820856/images/5141f57ffed31d2aa7a51c918b51c84931e0a99c0ea9a13dc2a10cadaa13f325.jpg)
The beginning and end of the repeated area are set in terms of the measures marked by the metronome. This means that the actual beginning of the repetition may be earlier than the point at which you pressed the switch, and the end may be later.
While using this A-B repeat function, it is not possible to use the [REW] or [FF] switches to move between measures.
3.Creating an ensemble
While playing back previously-recorded Parts, you can record additional Parts. For example you might record the right-hand and left-hand separately on different Parts, or record bass and drums on their own Parts to create a colorful ensemble.
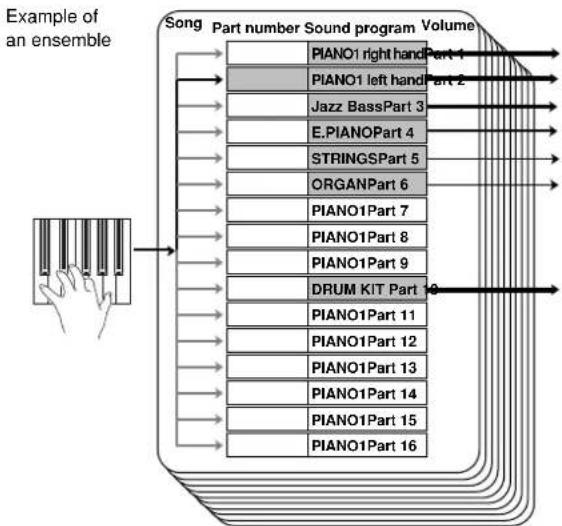
flowchart
graph TD
    A["Example of an ensemble"] --> B["Song"]
    B --> C["Part number"]
    C --> D["Sound program Volume"]
    D --> E["PIANO1 right hand"]
    D --> F["PIANO1 left hand"]
    D --> G["Jazz BassPart 3"]
    D --> H["E.PIANOPart 4"]
    D --> I["STRINGSPart 5"]
    D --> J["ORGANPart 6"]
    D --> K["PIANO1Part 7"]
    D --> L["PIANO1Part 8"]
    D --> M["PIANO1Part 9"]
    D --> N["DRUM KIT Part"]
    D --> O["PIANO1Part 11"]
    D --> P["PIANO1Part 12"]
    D --> Q["PIANO1Part 13"]
    D --> R["PIANO1Part 14"]
    D --> S["PIANO1Part 15"]
    D --> T["PIANO1Part 16"]
1. Press the [SONG] switch.
The indicator at the [SONG] switch will light, and the current song number (01 \~ 10) will appear in the LED display.
2. Press the [+/UP] or [−/DOWN] switch to select the song in which you wish to create an ensemble recording.
3. Press the [PART] switch.
The indicator at the [PART] switch will light, and the LED display will show the current Part number (01 \~ 16). The status of the currently selected Part will be shown at the left of the number.
4. Press the [+/UP] or [−/DOWN] switch to select an un-recorded Part.
5. Refer to step 5 of the procedure "1. Recording your performance" (page 15), and record the Part you wish to add while you listen to the previously-recorded performances.

The [SURROUND] and [EFFECT] effects of the currently selected Part will apply to all Parts.
Adjusting the volume of each Part
Here's how to adjust the volume of each Part in the ensemble to regulate the balance between Parts.
1. Press the [PART] switch.
The indicator at the [PART] switch will light.
2. Press the [+/UP] or [−/DOWN] switch to select the Part whose volume you wish to adjust.
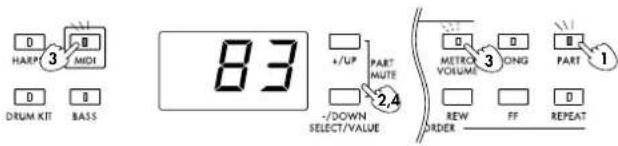
3. Hold down the [MIDI] switch, and press the [METRO VOLUME] switch.
The indicator at the [MIDI] switch will light, and the indicator at the [METRO VOLUME] switch will blink. The volume of the currently selected Part will appear in the LED display as a value of 0 (minimum) to 127 (maximum).
4. Press the [+UP] or [−/DOWN] switch to adjust the volume.
Muting parts
By muting (temporarily silencing) one Part of a previously-recorded performance, you can then play or sing along to add the missing part. This procedure mutes the sound only temporarily, and does not cause data to be permanently erased (as is done by “Erasing a Part,” discussed on page 20). It is also possible to use the procedure “Adjusting the volume of each Part” to set the volume to 0, but in this case playing the keyboard will produce no sound since the volume has been set to 0.
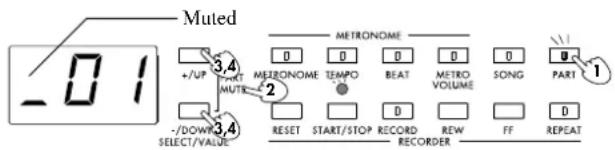
1. Press the [PART] switch.
The indicator at the [PART] switch will light, and the LED display will show the current Part number (01 \~ 16). The status (see p.17) of the selected Part will be shown at the left of the number.
2. Press the [+/UP] or [−/DOWN] switch to select the Part that you wish to mute.
3. Simultaneously press the [+UP] and [-DOWN] switches to mute the Part.
The LED display will change as shown below, and when the musical data is played back, this Part will not play.
4. Simultaneously press the [+UP] and [-/DOWN] switches once again, and muting will be canceled.
The LED display and the volume will return to the un-muted status.
4. Correcting the timing of musical data you record
You can automatically correct the timing of your playing as you record. This is called the (realtime) Quantize function. Suppose that you are playing along with the metronome and attempting to record the notes just as they are printed in the musical score. If your timing is slightly off, this function can automatically correct your timing. The notes will be moved to the nearest location of the timing interval you specify. In the example below, all the notes are eighth notes, so you would use the following procedure to set Quantize to “2”= ♪.

- Follow the procedure "1. Recording your performance" (p.15) through step "4".
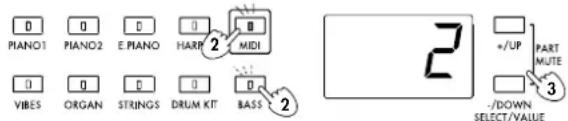
2. On the C-550 hold down the [MIDI] switch and press the [BASS] switch.
The indicator at the [MIDI] switch will light, and the indicator at the [BASS] switch will blink. The LED display will show the quantize resolution.
3. Press the [+UP] or [-/DOWN] switch to select the timing resolution to which the notes will be corrected.
With a setting of "96" the timing will not be corrected, and your performance will be recorded just as you play it. With a setting of "12" \~ "1" the timing of your playing will be corrected to the nearest specified interval. "12" = ♩₃, "8" = ♩, "6" = ♩₃, "4" = ♩, "3" = ♩₃, "2" = ♩, and "1" = ♩.
Example : With a setting of "12" the timing will be adjusted to the nearest thirtysecond note triplet. With a setting of "1" the timing will be adjusted to the nearest quarter note.
![KORG Concert C-550 - Press the [+UP] or [-/DOWN] switch to select the timing resolution to which the notes will be corrected. - 1](/content/2026/05/820856/images/6a7598e4d523f38bb021c823a85325284545f90be13c2b9ba8b82f5b62060864.jpg)
Depending on the selected Quantize resolution, your performance may change dramatically. Select an appropriate Quantize setting.
4. Use steps "5" and following of "1. Recording your performance" to begin recording.

The timing is quantized according to the time signature and tempo of the metronome. Press the [METRONOME] switch to turn on the metronome before you start recording.
5. Combining the data of two Parts into one Part
Musical data that has been recorded separately on two Parts can be combined into one Part.
This is called the Bounce function. When data is combined into one Part, the other track will automatically become empty, allowing you to record an additional performance into that Part.
- Press the [PART] switch.
The indicator at the upper left of the [PART] switch will light, and the LED display will show the current Part number (01 \~ 16). The status (see p.15) of the selected Part will be displayed at the left of the number.
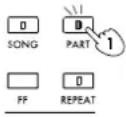
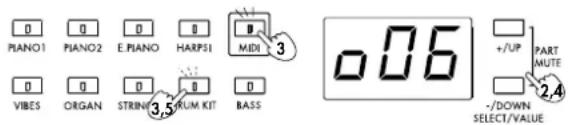
- Press the [+UP] or [-/DOWN] switch to select the Part into which the data will be combined (the Bounce destination).
- Hold down the [MIDI] switch, and press the [DRUM KIT] switch.
The indicator at the upper left of the [MIDI] switch will light, and the indicator at the upper left of the [DRUM KIT] switch will blink.
- Press the [+/UP] or [-/DOWN] switch to select the other Part whose data will be combined (the Bounce source).
- Press the [DRUM KIT] switch, and the data of the "bounce source" Part will be combined with the Part selected in step 2, and the Part selected in step 4 will become empty.
The sound of the bounce destination will be used. For example if you bounce data being played by a piano sound (the bounce destination) with data being played by a strings sound (the bounce source), the data will be combined into the piano Part, and all data will be played by a piano sound.
6. Erasing a song/part
Erasing a song
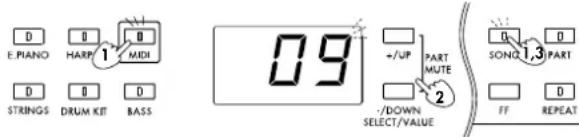
- Hold down the [MIDI] switch, and press the [SONG] switch.
The indicator at the [MIDI] switch will light, and the indicator at the [SONG] switch and the song number in the LED display will blink.
- Press the [+/UP] or [−/DOWN] switch to select the song number that you wish to erase.
- Press the [SONG] switch, and the selected song data will be erased.
The indicator at the [MIDI] switch will go off, and the song number in the LED display will light.
If you decide not to erase the song data, press the [MIDI] switch (or the [RESET] switch).
Erasing a part
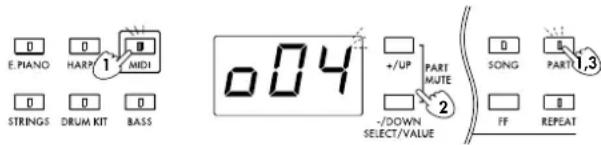
- Hold down the [MIDI] switch, and press the [PART] switch.
The indicator at the [MIDI] switch will light, and the indicator at the [PART] switch and the Part number in the LED display will blink.
- Press the [+/UP] or [−/DOWN] switch to select the Part number that you wish to erase.
- Press the [PART] switch, and the Part data will be erased.
The indicator at the [MIDI] switch will go off, and the Part number in the LED display will light.
If you decide not to erase the Part data, press the [MIDI] switch (or the [RESET] switch).
7. Various recording methods
Setting the recording mode
On the C-550 you can select the following methods of recording.
LED Recording mode Explanation
| 0 Overwrite Data that was previously recorded will be erased, and only the newly recorded data will remain. | |
| 1 Overdub Data that was previously recorded will be combined with the newly recorded data. | |
| 2 Automatic punch-in/out you can specify the measures to be recorded, so that only those measures are re-recorded. | |
| 3 Manual During recording, you can punch-in/out press the sostenuto pedal to specify the area which will be re-recorded. |
1.Hold down the [MIDI] switch, and press the [RECORD] switch.
The indicator at the [MIDI] switch will light, and the indicator at the [RECORD] switch will blink. The LED display will show the recording mode and the remaining amount of memory. For the remaining amount of memory refer to page 23.
2. Press the [+/UP] or [−/DOWN] switch to select the recording mode (0 \~ 3).
3. Press the [MIDI] switch (or the [RESET] switch) to exit the setting mode.
When the power is turned on, the “overwrite” recording method is selected.
Overwrite
With this method of recording, the new data will be written over any previously recorded data. All data existing at and following the measure where recording began will be rewritten. If any data existed after the location where recording ended, it too will be erased.
Normally you will use this method of recording.
- Set the recording mode to "0" before recording (refer to the above procedure).
Overdub
With this method of recording, the new data will be added to the previously recorded data. Data existing at or following the measure where recording began will not be erased, but will be combined with the newly recorded data.
- Set the recording mode to “1” before recording (refer to the above procedure). When you press the [RECORD] switch to enter record-ready mode (refer to step 7 on page 18), the “recording mode and remaining memory” will blink in the LED display, allowing you to check the current recording mode. (At this time it is not possible to change the recording mode.) When you press the [START/STOP] switch or play a note, overdub recording will begin.
Automatic punch-in/out
With this method of recording, only the specified range of measures will be recorded. This is con venient when you wish to correct just a certain portion of a performance. First, specify the measures at which you want recording to be gin and end. Then start recording just as usual. Recording will take place only in the specified area.
- Set the recording mode to "2" (refer to the previous page).
- Hold down the [MIDI] switch, and press the [REW] switch.
The indicator at the [MIDI] switch will light, and the measure number will blink in the LED display.
- Press the [+/UP] or [−/DOWN] switch to specify the measure at which recording will begin (punch-in).
Recording will start from this measure.
- Hold down the [MIDI] switch, and press the [FF] switch.
The indicator at the [MIDI] switch will light, and the measure number will blink in the LED display.
- Press the [+/UP] or [−/DOWN] switch to specify the measure at which recording will end (punch-out).
Recording will occur to the end of this measure.
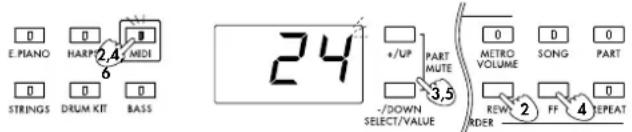
6. Press the [MIDI] switch (or the [RESET] switch) to exit the setting display.
- Begin recording as usual.
When you press the [RECORD] switch to enter record-ready mode, the recording mode and the remaining amount of memory will blink in the LED display, allowing you to check the current recording mode. (It is not possible to change the recording mode at this time.) Press the [START/STOP] switch or a note on the keyboard, and automatic punch-in/out recording will begin.
Be sure to start recording at a location earlier than the punch-in point (the location where recording will actually begin). When you begin recording, the data will playback until the punch-in point is reached. Then (overwrite) recording will begin. When the punch-out point is reached, recording will end, and playback will resume from the following measure.
![KORG Concert C-550 - Press the [MIDI] switch (or the [RESET] switch) to exit the setting display. - 1](/content/2026/05/820856/images/41889d4a9ccbcd1171fd248eb5fe847ff11cf6de98d48230897481faab4c19b0.jpg)
The “measures” used by this function will follow the time signature and tempo of the metronome. This means that if you have been recording without regard to the metronome time signature or tempo, the punch-in/out points will not match the actual time signature or tempo.
Manual punch-in/out
With this method of recording, you manually specify the area in which recording will take place. This is convenient when you wish to correct just a certain portion of a performance. During recording, press the sostenuto pedal to specify the measures to be recorded.
- Set the recording mode to "3" (refer to the previous page).
- Press the [PART] switch.
The indicator at the [PART] switch will light.
- Press the [+/UP] or [−/DOWN] switch to select the Part that you wish to record.
- Press the [RECORD] switch.
The indicator at the [RECORD] switch will blink, and the recorder will enter record-ready mode.
- Press the [START/STOP] switch to begin playback.
The indicator at the upper of the [START/STOP] switch will blink in time with the tempo, and playback will begin. At this time, the indicator at the [RECORD] switch will be blinking, and your playing is not yet being recorded.
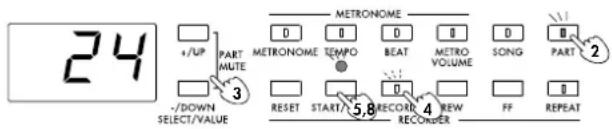
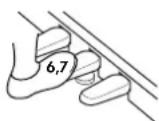
- When you reach the location where you want recording to begin, press the [Sostenuto pedal].
The indicator at the [RECORD] switch will change to steadily lit, and (overwrite) recording will begin.
- When you reach the location where you want recording to end, press the [Sostenuto pedal] once again.
The indicator at the [RECORD] switch will change to blinking. Recording will end, and playback will resume.
- Press the [START/STOP] switch to stop playback.
The indicator at the upper left of the [START/STOP] switch and the indicator at the upper left of the [RECORD] switch will go off.

Since the [Sostenuto pedal] is used in this recording mode to specify the punch-in/out timing, it will not be possible to use the Sostenuto pedal function.
Remaining recording memory display
This displays the percentage of internal memory that remains available for recording.
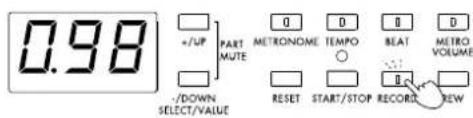
●Hold down the [MIDI] switch, and press the [RECORD] switch.
The indicator at the [MIDI] switch will light, and the indicator at the [RECORD] switch will blink. The LED display will show the remaining amount of recorder memory in the range of 0 \~ 99 (%).
![KORG Concert C-550 - ●Hold down the [MIDI] switch, and press the [RECORD] switch. - 1](/content/2026/05/820856/images/5aae8c2a9a0d5746315e83f51610c5fe2b603d3851d58d0b2c8229224bd63851.jpg)
![KORG Concert C-550 - ●Hold down the [MIDI] switch, and press the [RECORD] switch. - 3](/content/2026/05/820856/images/f8af1765539c6dea1e40f9c6cb4f0816268be24cf14e2ddcec057376a85a5330.jpg)
If not enough free memory is remaining, recording will not be possible. When you begin to run out of memory, save the data on an external
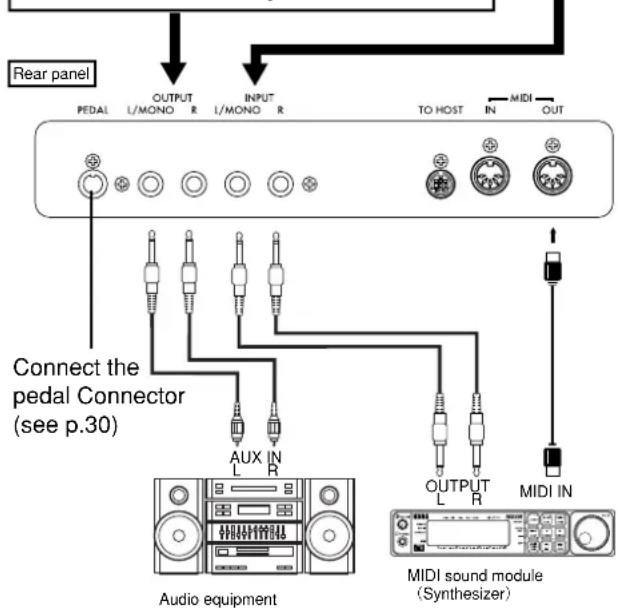
1. Connecting a synthesizer or audio device
You can connect a synthesizer or audio de vice to the C-550 so that its sound can be heard through the built-in speakers, or record your playing on a tape recorder etc.
[INPUT] jacks (L/MONO, R)
These are input jacks to which the output jacks of a synthesizer or audio device can be connected so that the sound can be heard through the built-in speakers. If connecting in mono, use the L/MONO jack. To adjust the volume, use the volume control of the connected device.
[OUTPUT] jacks (L/MONO, R)
These are output jacks which can be connected to the input jacks of an audio system to achieve a greater volume of sound, or to record your playing on a tape recorder etc. If connecting in mono, use the L/MONO jack. Use the [MASTER VOLUME] slider of the C-550 to adjust the volume.
2. Connecting MIDI devices
What is MIDI?
MIDI (Musical Instrument Digital Interface) is a world-wide standard which allows electronic musical instruments and computers to exchange musical data (keyboard playing, sound selections etc.) in the form of digital data.
You can play other MIDI instruments from the keyboard of the C-550. Operations such as selecting sounds, using the damper pedal, and many other functions are also transmitted along with the notes. In the same way, another MIDI k keyboard or sequencer (an automatic playback device) can be used to control the C-550.
This section explains ways of using MIDI related to the C-550. If you are further interested in MIDI, you may wish to read one of the many excellent introductory books which are widely available.
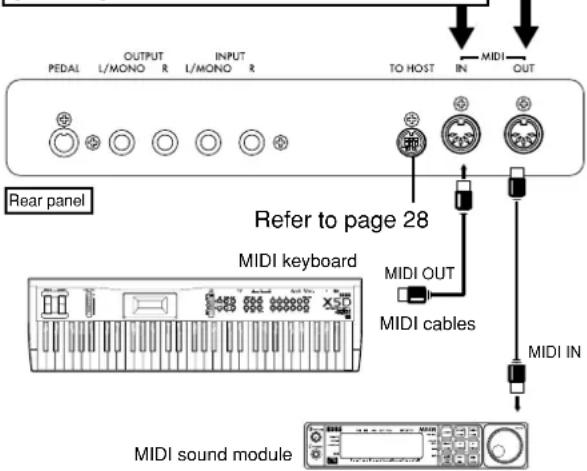
MIDI connections
MIDI cables are used to transfer messages. These cables are connected from the MIDI connectors of the C-550 to the MIDI connectors of another MIDI device so that commands can be exchanged.
[MIDI OUT] connector
This connector transmits MIDI messages. By using this connector, the MIDI messages which are transmitted when you play the keyboard of the C-550 or when you playback the recorder can cause external MIDI instruments to produce sound. Use a MIDI cable to connect the [MIDI OUT] connector of the FC-500 to the [MIDI IN] connector of the external MIDI device.
[MIDI IN] connector
This connector receives MIDI messages. By using this connector, MIDI messages transmitted from an external MIDI device (MIDI keyboard or sequencer etc.) can cause the C-550 to produce sound. Use a MIDI cable to connect the [MIDI OUT] connector of the external MIDI device to the [MIDI IN] connector of the C-550.
MIDI channel settings
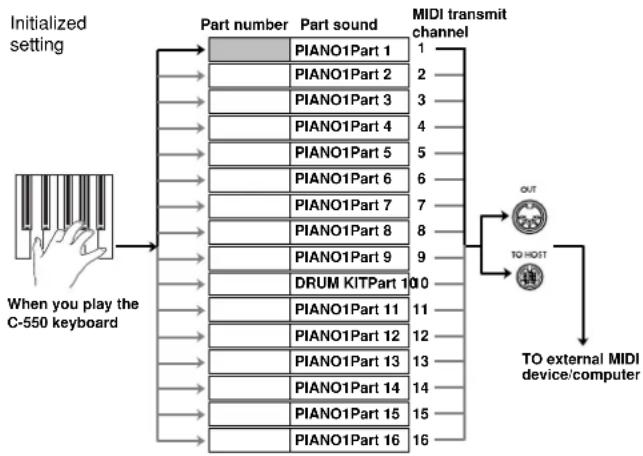
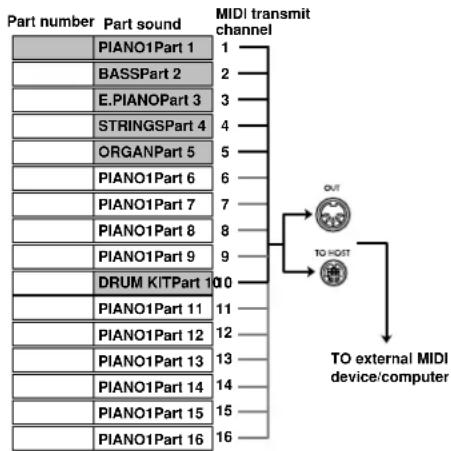
After you have finished making MIDI connections, set the MIDI channels of the C-550 and the external MIDI device. MIDI uses sixteen channels: 1 \~ 16. When you play the keyboard of the C-550, the keyboard will transmit messages on the MIDI channel which is specified for the currently selected Part of the song. Musical data from the recorder is transmitted on the MIDI channels which are specified for each Part of the recorded song.
flowchart
graph LR
    A["Initialized setting"] --> B["When you play the C-550 keyboard"]
    B --> C["Part number"]
    C --> D["PIANO1Part 1"]
    C --> E["PIANO1Part 2"]
    C --> F["PIANO1Part 3"]
    C --> G["PIANO1Part 4"]
    C --> H["PIANO1Part 5"]
    C --> I["PIANO1Part 6"]
    C --> J["PIANO1Part 7"]
    C --> K["PIANO1Part 8"]
    C --> L["PIANO1Part 9"]
    C --> M["DRUM KITPart 10"]
    C --> N["PIANO1Part 11"]
    C --> O["PIANO1Part 12"]
    C --> P["PIANO1Part 13"]
    C --> Q["PIANO1Part 14"]
    C --> R["PIANO1Part 15"]
    C --> S["PIANO1Part 16"]
    D --> T["MIDI transmit channel"]
    E --> T
    F --> T
    G --> T
    H --> T
    I --> T
    J --> T
    K --> T
    L --> T
    M --> T
    N --> T
    O --> T
    P --> T
    Q --> T
    R --> T
    S --> T
    T --> U["OUT"]
    T --> V["TO HOST"]
    T --> W["TO external MIDI device/computer"]
Example of recording a performance on the internal recorder and playing it back
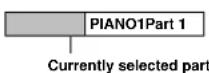
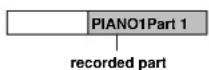
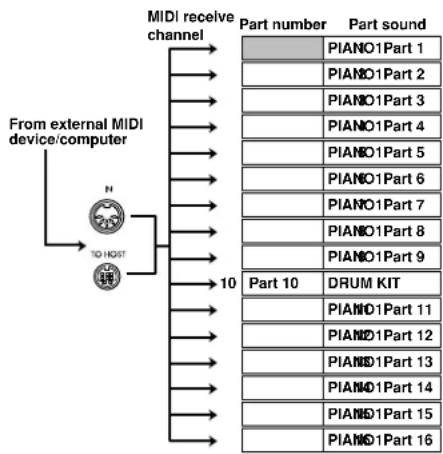
MIDI messages from the external MIDI device will be received on the MIDI channels which are specified for each Part of the currently selected song. By assigning a different MIDI channel to each Part, messages can be received from an external sequencer to play up to 16 different sounds simultaneously on the C-550. This is referred to as “multi-timbral” capability.

The C-550 can produce up to 32 notes simultaneously. However this number may decrease depending on the selected sounds or layering.
flowchart
graph TD
    A["From external MIDI device/computer"] --> B["MIDI receive channel"]
    B --> C["10"]
    C --> D["PIANO1Part 1"]
    C --> E["PIANO1Part 2"]
    C --> F["PIANO1Part 3"]
    C --> G["PIANO1Part 4"]
    C --> H["PIANO1Part 5"]
    C --> I["PIANO1Part 6"]
    C --> J["PIANO1Part 7"]
    C --> K["PIANO1Part 8"]
    C --> L["PIANO1Part 9"]
    C --> M["DRUM KIT"]
    C --> N["PIANO1Part 11"]
    C --> O["PIANO1Part 12"]
    C --> P["PIANO1Part 13"]
    C --> Q["PIANO1Part 14"]
    C --> R["PIANO1Part 15"]
    C --> S["PIANO1Part 16"]
Changing MIDI channels
The easiest way to change the MIDI transmit channel is to select a different Part number. However there may be cases in which you wish to change the MIDI channel transmitted by a Part. Use the following procedure.
- Select the Part of the song whose MIDI channel you wish to change.
- Hold down the [MIDI] switch, and press the [BEAT] switch.
The indicator at the [MIDI] switch will light, and the indicator at the [BEAT] switch will blink. The LED display will show the MIDI channel of the currently selected Part.
- Press the [+/UP] or [−/DOWN] switch to change the MIDI channel.

With the initial settings, changing the MIDI channel of a Part will mean that two Parts will have the same channel. In this situation, when data of that channel is received, the sounds selected for each of these two Parts will play simultaneously. If this sounds wrong, set the MIDI channel of the other Part to the MIDI channel previously used by the first Part.
- When you finish making settings, press the [MIDI] switch (or the [RESET] switch).
The indicators at the [MIDI] switch and the [BEAT] switch will go off.
The settings of the C-550 are remembered even when the power is turned off.
Changing the global MIDI channel
System Exclusive messages are transmitted and received on the Global channel. When the Data Dump operation (p.34) is performed on the C-550, the data is transmitted and received on the Global MIDI channel. Here's how to set the Global MIDI channel.
1. Hold down the [MIDI] switch, and press the [VIBES] switch.
The indicator at the [MIDI] switch will light, and the indicator at the [VIBES] switch will blink. The LED display will show the Global MIDI channel setting.
2. Press the [+UP] or [-/DOWN] switch to set the Global MIDI channel.
3. When you have finished making the setting, press the [MIDI] switch (or the [RESET] switch).
The indicators at the [MIDI] switch and the [VIBES] switch will go off.
Local on/off setting
With a setting of Local Of f, playing the k keyboard of the C-550 will cause only an external sound source connected to MIDI OUT (or TO HOST) to sound, and the internal sound source of the C-550 will not sound. You can also use a setting of Local Of f to prevent notes from being sounded in duplicate by the C-550 when an external sequencer is connected with its "echo back" function turned on. Normally, you will leave this setting at Local On so that playing the keyboard will produce sound.
●Hold down the [MIDI] switch, and press the [PIANO1] switch. Each time you do so, the setting will alternate.
While you hold down the [MIDI] switch, the indicator at the [MIDI] switch will light, and the indicator at the [PIANO1] switch will be either lit or off.
| Setting [PIANO1] | Comment | |
| Local On | off | Playing the keyboard will produce sound |
| Local Off | lit | Playing the keyboard will not produce sound; only MIDI messages will be output |
When the power is turned on, this will be set to Local On.
Program filter settings
When MIDI messages are received from an external MIDI device (sequencer or computer) to play the tone generator of the C-550, incorrect bank numbers may cause the wrong sounds to be used. Similarly, the same problem may occur when the recorder of the C-550 is used to transmit MIDI messages to an external MIDI device to play the external device. By changing the Program Filter settings you can avoid such problems.
●Hold down the [MIDI] switch, and press the [EFFECT] switch. Each time you do so, the setting will alternate.
While you hold down the [MIDI] switch, the indicator at the [MIDI] switch will light, and the two indicators at the upper left of the [EFFECT] switch will be either lit or off, depending on the setting.
| CHORUS | TREMOLO | No. | Comment |
| off | off | 1 | ignore Program Change and Bank Select |
| lit | off | 2 | ignore Bank Select |
| lit | lit | 3 | both valid |
| lit | blinking | 4 | both valid |
Normally this should be set at "3". If the sounds are not being selected correctly, try a setting of "2" or "4."
Program Change and Control Change numbers
When the above-mentioned Program Filter is set to "3" or "4," the following Program Change and Control Change messages will be transmitted and received. The numbers in parentheses () are for a setting of "4."
Bank Select
| MSB LSB | Program Change # | Sound selector |
| 0 (0) 4 (4) 0 | PIANO1 | |
| 0 (0) 4 (4) 1 | PIANO2 | |
| 0 (0) 4 (4) 2 | E.PIANO | |
| 0 (0) 4 (4) 3 | HARPSI | |
| 0 (0) 4 (4) 4 | VIBES | |
| 0 (0) 4 (4) 5 | ORGAN | |
| 0 (0) 4 (4) 6 | STRINGS | |
| 62 (0) 0 (0) 0 | DRUMKIT | |
| 56 (0) 0 (0) 32~39 | BASS |
When selecting C-550 sounds from an external MIDI sequencer etc., first transmit the MSB (see table) as Control Change #0, then the LSB (see table) as Control Change #32, and finally transmit the Program Change. The operation will depend on the setting of the Program Filter.
Control Change settings
The messages produced by the damper pedals etc. connected to the C-550 can be transmitted to external MIDI de vices to control them. In the same way, messages such as Volume, P an (stereo position), and Damper Pedal which are received from an external MIDI device can control the C-550. For a list of the Control Change messages which are transmitted and received, see page 49.
●Hold down the [MIDI] switch, and press [PIANO2]. Each time you press [PIANO2], the setting will alternate between these messages being transmitted and not transmitted.
As long as you continue holding the [MIDI] switch, the indicator at the [MIDI] switch will be lit, and the indicator at the [PIANO2] switch will be either lit or off depending on the setting.
Setting [PIANO2] Meaning
| Enabled off Control Changes will be transmitted and received |
| Disabled lit Control Changes will not be transmitted or received |

Bank Select messages will be transmitted and received even if this setting is disabled.
Be sure not to press the pedals while making this setting.
Saving musical data from the internal recorder to a data filer
Musical data recorded on the internal recorder can be saved on an external MIDI data filer (storage device). Later, this data can be transmitted back to the internal recorder and played back. This is referred to as the Data Dump procedure.

Be sure to carefully read the owner's manual for your data filer before performing this operation.
To save internal recorder data to the data filer
-
Use a MIDI cable to connect the [MIDI OUT] of the C-550 to the [MIDI IN] of an external MIDI device (data filer etc.). Alternatively, use a special cable to connect the serial port of your computer to the [TO HOST] connector of the C-550.
-
Operate the data filer so that it is waiting to receive MIDI data from the C-550.
3.Hold down the [MIDI] switch, and press the [STRINGS] switch.
The data dump will begin, and the MIDI data will be transmitted from [MIDI OUT] to the data filer.

While a data dump is in progress, do not touch the keyboard or switches of the C-550.
The time required for a data dump will depend on the contents of the musical data.
To load data from the data filer back into the internal recorder
-
Use a MIDI cable to connect the [MIDI IN] of the C-550 to the [MIDI OUT] of the external MIDI device (data filter etc.) which will be transmitting the data dump. Alternatively, use a special cable to connect the serial port of your computer to the [TO HOST] connector of the C-550.
-
Set the Global MIDI channel of the receiving device to match the MIDI channel of the transmitting device (the Global MIDI channel that was selected when the data was transmitted to the data filter).
-
Operate the data filer so that it transmits the C-550 musical data.

While a data dump is in progress, do not touch the keyboard or switches of the C-550.
Pedal settings (see “Pedal settings for a layer”) cannot be stored on a data filer.
Synchronizing the internal recorder with an external MIDI device
The recorder of the C-550 can playback in synchronization with a MIDI rhythm machine or sequencer which is connected via MIDI. Connect the [MIDI OUT] of the master device (the MIDI device which will be controlling the other device) to the [MIDI IN] of the slave device (the device being controlled). Alternatively, use a special cable to connect the serial port of your computer to the [TO HOST] connector of the C-550.
- Hold down the [MIDI] switch, and press the [TEMPO] switch.

The [TEMPO] switch indicator will blink. The LED display will show the current setting.
-
Press the [+UP] or [−/DOWN] switch to select "In" if the C-550 is to be the master device, or "E" if it is to be the slave device.
-
If the C-550 is the master, press the [START/STOP] switch. For operation of the external MIDI device, refer to its owner's manual.
-
When you finish making settings, press the [MIDI] switch.
The indicators at the [MIDI] switch and the [TEMPO] switch will go off.

The MIDI Clock messages (signals for synchronizing the tempo) transmitted from the C-550 follow the metronome tempo. (For Clock and other settings of the connected MIDI device, refer to its owner's manual.) With a setting of "E" (external), the recorder will not playback or record unless MIDI Clock messages are being received. When you press the [START/STOP] switch the LED display will show "E". This display will also appear when you press the [TEMPO] switch.
3.Connections with a computer
A special PC I/F connection cable can be used to connect the C-550 to a computer. This allows the computer to play the C-550, or keyboard playing on the C-550 to be recorded on the computer — the same operations can be done using MIDI as discussed on the previous pages.
The C-550 can be connected to the following computers using a special PC I/F connection cable.
IBM PC (compatibles):
Connection kit AG-001B (connection cable, "Korg MIDI Driver" software) *sold separately However, applications which are not Windows-compatible cannot be used with this method of connection unless they specifically support the C-550.
Apple Macintosh series:
Connection kit AG-002B (connection cable, "Korg MIDI Driver" software) *sold separately
[TO HOST] connector
This connector allows the C-550 to be controlled from the computer, and MIDI messages to be transmitted to the computer. Use a PC I/F cable appropriate for your computer to connect the [TO HOST] of the C-550 to your computer.
![KORG Concert C-550 - [TO HOST] connector - 1](/content/2026/05/820856/images/f77302434e898dda290b803f049083cdd104e569a1fae0810f265119ed76108e.jpg)
flowchart
graph TD
    A["Apple Macintosh"] -->|PC I/F connection cables| B["Com"]
    C["IBM PC(compatible)"] -->|PC I/F connection cables| B
    D["Rear panel"] --> E["PC I/F connection cables"]
    E --> F["TO DIST IN MIDI OUT"]
Connections with an IBM PC (compatible)
- Use a special PC I/F cable (AG-001B) *sold separately to connect the serial port (COM port) of the IBM PC (compatible) to the [TO HOST] connector of the C-550.
If the serial port of your computer uses a 25 pin connector, you will need a 9 pin — 25 pin conversion adapter. *sold separately
-
Hold down the [MIDI] switch, and press the [ORGAN] switch.
-
Press the [-/DOWN] switch to set the baud rate to "38.4" (38.4 kPBS).
-
If you are using Windows, install the KORG MIDI Driver. For installation, refer to page 31.
Connections with an Apple Macintosh
-
Use a special PC I/F cable (AG-002B *sold separately) to connect the modem port or the printer port of the Apple Macintosh to the [TO HOST] connector of the C-550.
-
Hold down the [MIDI] switch, and press the [ORGAN] switch.
-
Press the [-/DOWN] switch to set the baud rate to "31.2" (31.25 kPBS).
If you will be using the Korg MIDI Driver, refer to page 34.
(1) AG-001B (for IBM PC or Compatible)
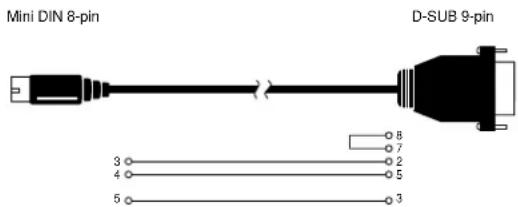
(2) AG-002B (for Macintosh)
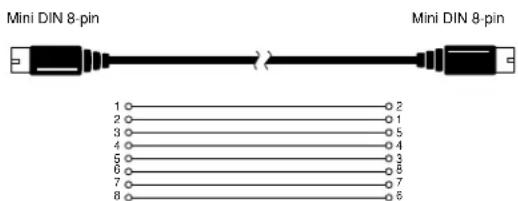
1. Assembling the ST-550 Stand

Caution
Two or more people are required to assemble the piano unit. When attaching the piano to the stand, be careful not to or let go of it. Make sure you do not mistaken the type or direction of each part. Follow the assembly procedures carefully during assembly. If too much force is applied to the front of the piano before fastening it with the mounting screws, the piano unit could fall off the stand.

- You will need a Phillips head screw driver to tighten the screws.

2.Open the case and take out the parts. Remove two pieces of styrofoam packing material from the box, and place the instrument on them. Place the styrofoam so as to protect the power cable located on the underside of the instrument.
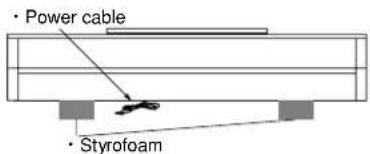
- Make sure all the parts shown below are included in the case.
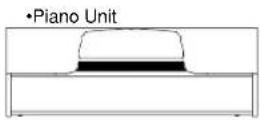
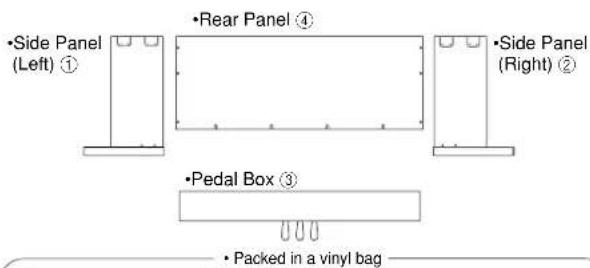
• Assembly Screws x 4 (M6 x 75)
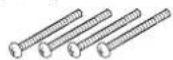
- Adjuster ⑥

- Screws x 10 (3.5 x 20)
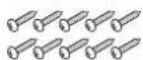
- Piano Mounting Screws x 4 Ⓗ
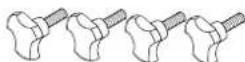
- Cord Holder x 2
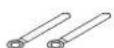
- For assembly, you must place the back of the stand on a smooth surface such as the floor, as shown in the diagram below. Assemble the Side Panel (Left) ① and the Side Panel (Right) ② to the Pedal Box ③ using the 4 assembly screws ⑤.
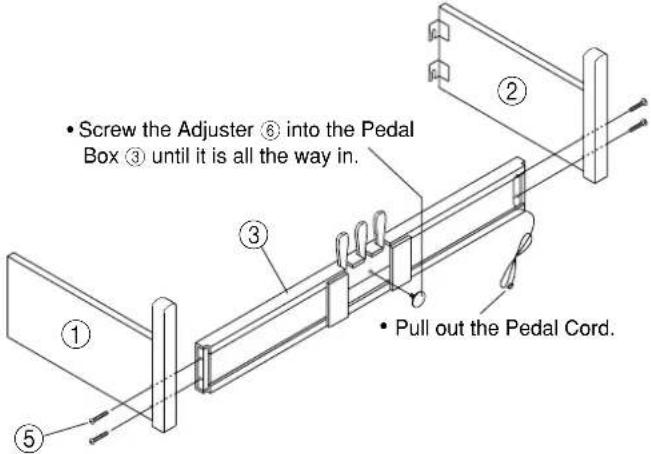
- Attach 4 Screws ⑦ in the Pedal Bo⑧ as shown, tightening them only partially.
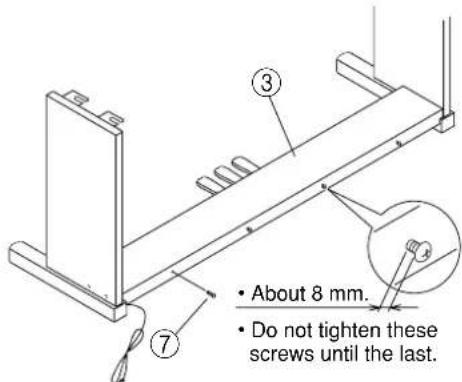
- Assemble the Rear Panel ④. Tighten the Screws ⑦ from the previous step into the bottom of the Rear Panel ④. Fasten the Side Panels to the Rear Panel ④ using the 6 remaining Screws ⑦.
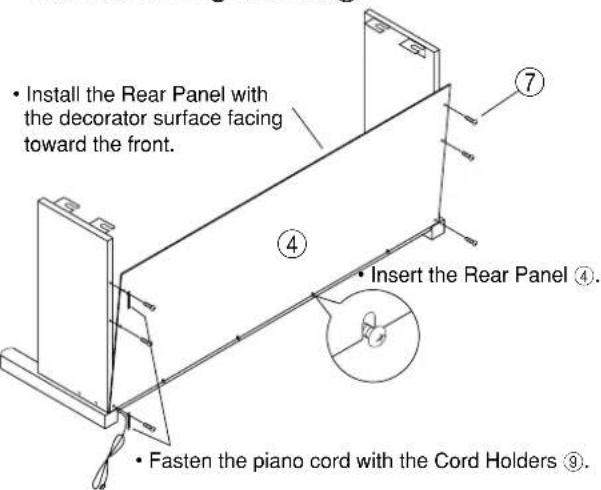
- Attach the Piano. Rest the piano unit on the rear of the side panel tops, lift it up slightly and slide it toward the front of the side panels. Fasten the four piano unit mounting screws ⑧ to the bottom of the piano.
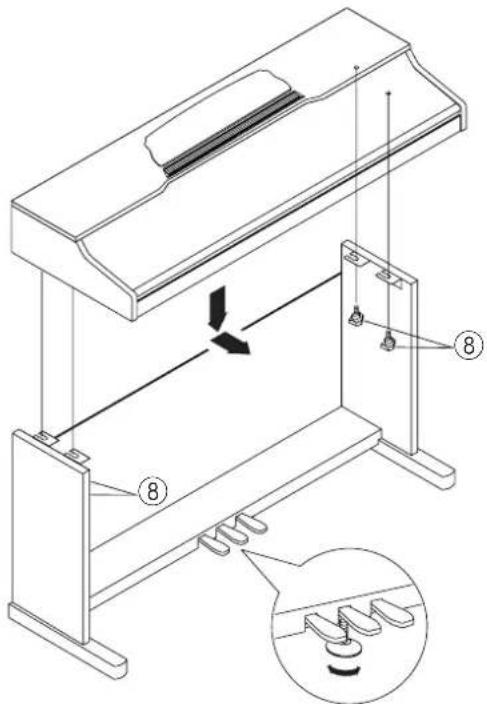
- Turn the adjuster, so that the bottom makes complete contact with the floor. If the adjuster doesn't make contact with the floor, the Pedals will be unstable and the sound may be affected.
- Connect the pedal cord and fasten it in place.
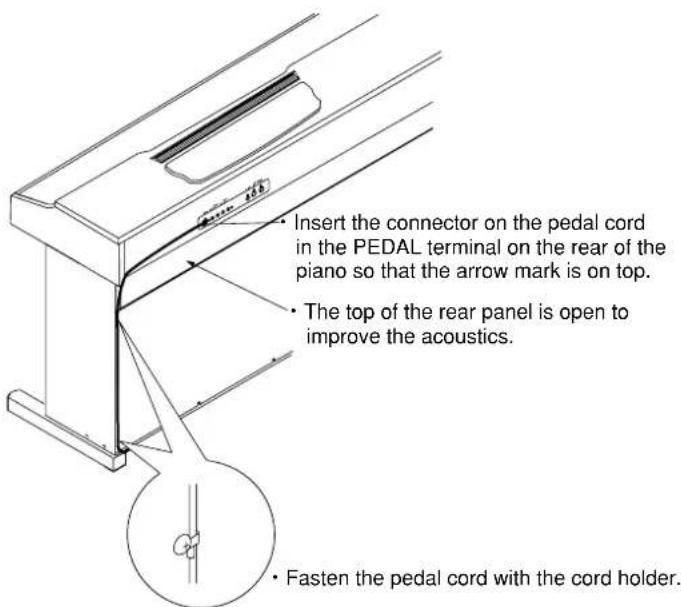
Post-assembly Check
o Are there any parts left over?
If there are any parts remaining, check each of the part positions shown in the illustration to find where they are missing.
o Check the mounting screws for any looseness.

Caution
Cautions when Moving
Please disconnect the piano from the stand and move them separately. After moving, reconnect according to these instructions. Also, be careful of the following points when moving the piano.
- Wind up the power cord in a small bundle. If it is left to dangle, the cord could catch on some other object and be cut, and could cause short circuits or other damage.
- Be careful that the pedal cord doesn't catch on a door knob or other object during moving.
Loose Screws
If a long period of time passes after assembly, the screws holding the parts of the stand together may become loose, causing the stand to wobble. In this case, re-tighten each screw.
Disassembly
To disassemble the piano and the stand assembly, follow the assembly procedure in reverse order. After disassembly, keep the screws and other parts so that they do not get lost.
2.Korg MIDI Driver installation and setup
The "K org MIDI Dri ver" softw are is included with the optional AG-001B and AG-002B. If the application (sequencer) you are using on your IBM PC (compatible) is compatible with Windows, using the K org MIDI Dri ver will allow the C-550 connected to the serial port to be handled as a MIDI device. If the application (sequencer) you are using on your Apple Macintosh is compatible with the Apple MIDI Manager, using the K org MIDI dri ver will allow the C-550 connected to the serial port to exchange data with the Macintosh.
Installing the Korg MIDI Driver into Windows 3.1

If the processing speed of your computer is not fast enough, data from MIDI IN may not be received correctly.
- In the control panel, double-click the Drivers icon.
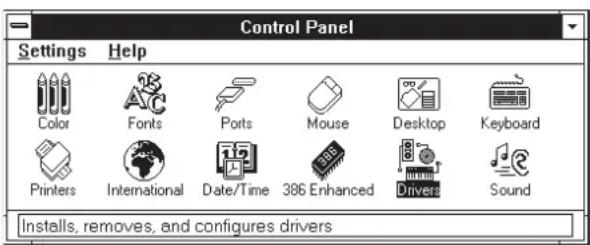
- Click the [Add] button.
![Drivers Installed Drivers MIDI Mapper Timer [MCI] MIDI Sequencer [MCI] Sound Cancel Add... Remove Setup... Help](/content/2026/05/820856/images/a1b6bee5b16c1af6990eb501d0868d4956846bfe0582ea2ba0f19559b3f2e383.jpg)
- From the list of drivers, select [Unlisted or Updated Driver] and click the [OK] button.
![Add List of Drivers Unlisted or Updated Driver MIDI Mapper Timer [MCI] CD Audio [MCI] MIDI Sequencer [MCI] Sound OK Cancel Help](/content/2026/05/820856/images/6e9a0e4744b350e6af3d7669f762804f16dbfe10f893311b56a6141447594000.jpg)
- Insert the disk included with the AG-001B into the floppy disk drive of your computer. If you insert it into drive A, type in "A:\" (or "B:\" if using drive B), and click the [OK] button.
(The directory "A:\PC98", on the disk included with AG-001B, is for a type of computer sold only in Japan, and cannot be used with your computer.)
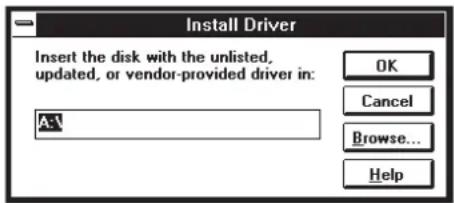
- Select Korg PC/IF Driver, and click [OK]. The setup window will appear. Now perform the setup as explained in the following section "Setting up the Korg MIDI Driver (Windows)".
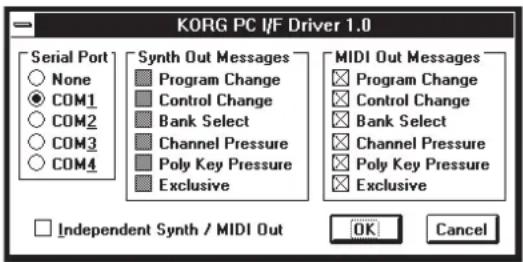
- After setup, remove the disk and select [Restart Now] to make the driver take effect.
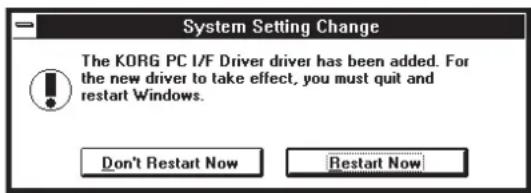
Setting up the Korg MIDI Driver (Windows)
- Double-click the driver icon located in the control panel, select [Korg PC/IF Driver], and click the set button to access the setup window.
- Set the Serial Port setting to the serial port that is connected to the C-550 [COM1]\~[COM4].
If you wish to use the serial port for another purpose after installing the Korg MIDI Driver, either delete the driver or select [None] to defeat the driver.
- When the C-550 is connected, [Independent Synth/MIDI Out] is not used, so do not check this item.
If you check it, operation will be incorrect.
4.[MIDI Out Messages] allows you to select the messages that will be transmitted to the C-550. - When you have finished making your selections, click the [OK] button. If you wish to cancel, click [Cancel].
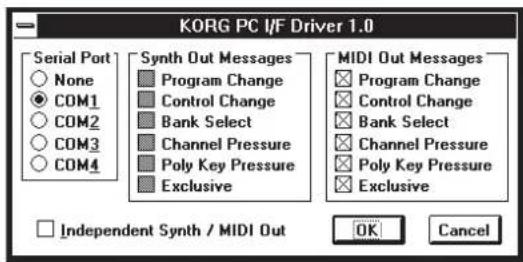
Installing the Korg MIDI Driver into Windows 95

If the processing speed of your computer is not fast enough, data from MIDI IN may not be received correctly.
- In the task bar, click the [Start] button. Click the [Control Panel] item located in [Settings].
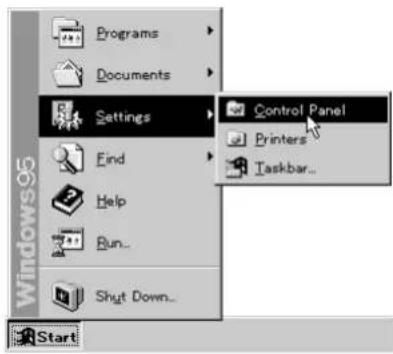
- In the control panel, double-click the [Hardware] icon, and the hardware wizard will start up. Click the [Next >] button.
- In reply to the question "Automatically detect new hardware?" be sure to select
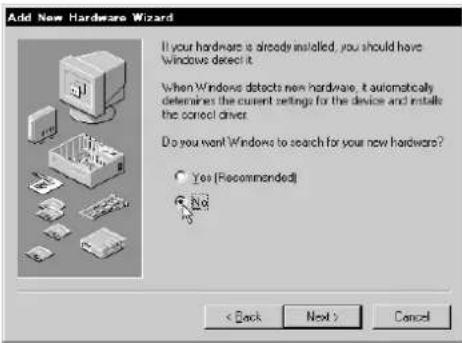
[No], and click the [Next >] button.
- Select [Sound, video, and game controllers] and click the [Next >] button.
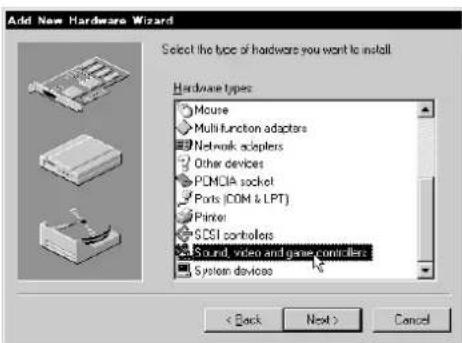
5.Click [Have Disk].
A dialog box will appear, allowing you to specify the drive and directory.
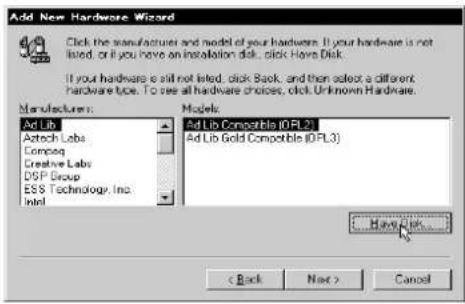
- Insert the floppy disk included with the AG-001B into the floppy disk drive of your computer. If you have inserted it into drive A, type "A:\" (or "B:\" if using drive B), and click the [OK] button.
(The directory "A:\PC98", on the disk included with AG-001B, is for a type of computer sold only in Japan, and cannot be used with your commuter.)
- Click the [OK] button and then click [Finish].
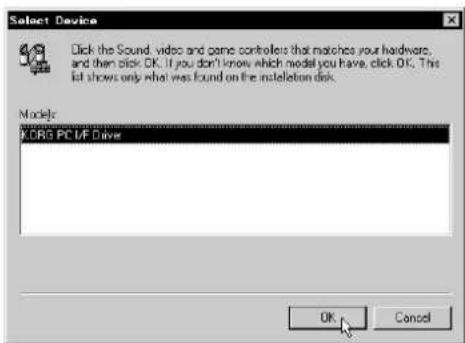
- Perform the setup following the procedure of "Setting up the Korg MIDI Driver (Windows)", and click the [OK] button.
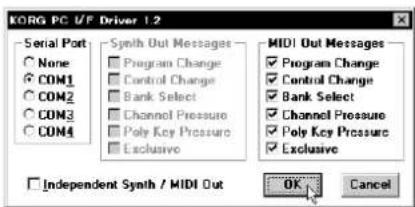
- Be sure to restart so that the driver will take effect.
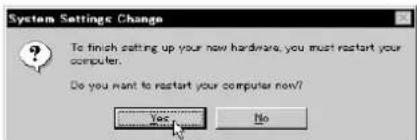
Modifying the Korg MIDI Driver setup for Windows 95
- In the control panel, double-click the [Multimedia] icon, and the Multimedia Properties dialog box will appear.
- Click the [Advanced] tab located in the upper right.
- Click [+] for [MIDI Device and Instruments] (the display will change to [-]), and click [Korg PC I/F MIDI Port].
- Click the [Properties] button.
The properties of the Korg PC I/F MIDI Port will appear.
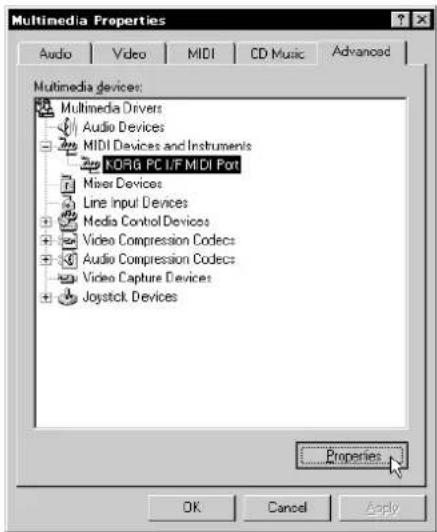
5.Click the [Settings] button.
Follow the procedure of "Setting up the Korg MIDI Driver (Windows)" (p. 32), and click the [OK] button.
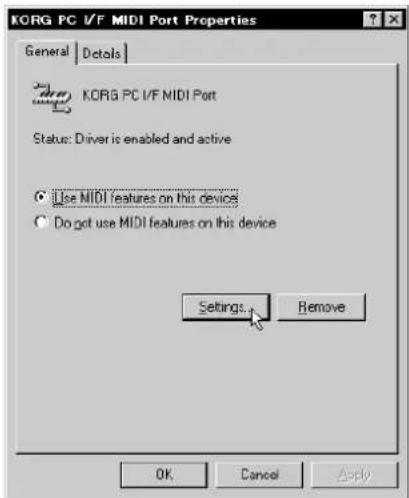
If you have modified the settings, restart Windows.
Installing the Korg MIDI Driver into the Macintosh

In order to use the Korg MIDI Driver, Apple MIDI Manager and PatchBay must already be installed. Use the Apple MIDI Manager and PatchBay that are included with the MIDI application that you are using. They are not included with the AG-002B.
When the K org MIDI Dri ver is used, the “Modem MIDI Out/Port settings” dialog box allows you to specify the MIDI channels and types of messages that will be sent to the C-550. If you do not require this function, you can simply use the Apple MIDI Dri ver without using the K org MIDI Dri ver. When using the Apple MIDI Driver or when using a MIDI application (sequencer) which does not use the Apple MIDI Dri ver.
-
Copy the Korg MIDI Driver from the disk included with the AG-002B into the system folder of the start-up drive.
-
If the system folder contains the Apple MIDI Driver, either delete it or move it to another folder. Be careful not to delete or move the Apple MIDI Manager.
* The Korg MIDI Driver includes the functions of the Apple MIDI Driver.
- From the Special menu, choose "Restart."
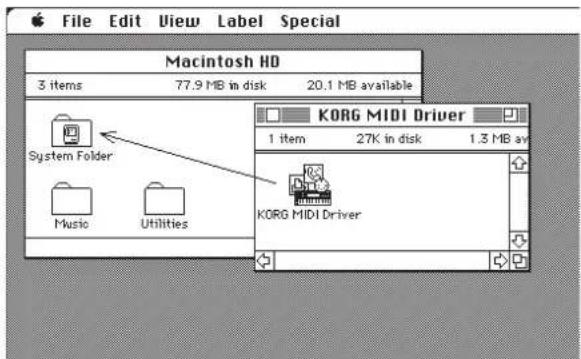
Setting up the Korg MIDI Driver (Macintosh)
- Start up PatchBay.
If installation has been performed correctly, the Korg MIDI Driver icon will appear in the PatchBay window when PatchBay is started up, as shown below. (The Modem/Printer port displays may be different, depending on your setup.)
- In PatchBay, double-click the Korg MIDI Driver icon.
A setup dialog box will appear.
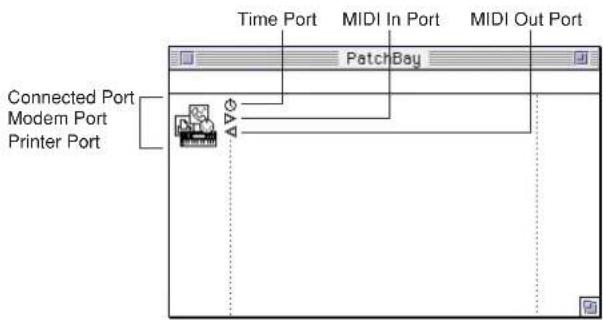
- Check Port Enabled for the port to which the C-550 if is connected, and select [1 MHz] as the Interface Type.
(Since the C-550 if does not contain a Korg PC IF, do not select [Korg PC IF].)
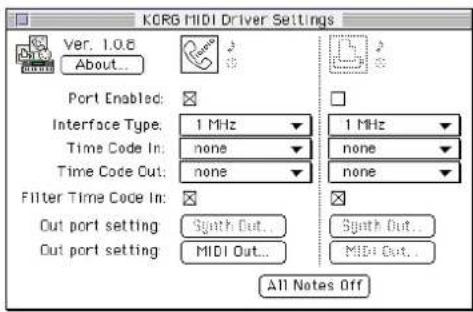
- Click the [Out Port Setting] button.
The following dialog box will appear. Here you can select the MIDI channels/messages that will be output to each port. Only the channels/messages which are checked will be output.
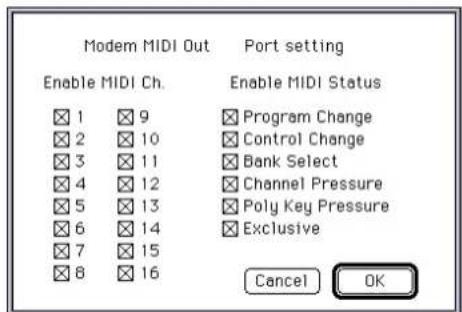
-
After making settings, click the [OK] button.
-
Start up your MIDI application (sequencer), and drag with the mouse from the Out Port \$ symbol of the MIDI application to connect it to the MIDI Out of the MIDI Driver.
- For details on using PatchBay, refer to the explanation contained in "About PatchBay..." in the " " menu.
If you wish to use the Apple MIDI Dri ver, start up PatchBay (after first deleting or moving the K org MIDI Driver if it is in the system folder), double-click the Apple MIDI Dri ver icon, check Enabled for the port to which the C-550 if is connected, set the Interf ace Type to [1 MHz], and close the dialog box. In the PatchBay, drag with the mouse from the Out Port symbol of the MIDI application (sequencer) to connect it to MIDI Out.
If you are using a MIDI application (sequencer) which does not use the Apple MIDI Manager, select the Port to which the C-550 if is connected, and set the Clock setting to [1 MHz].
About the MIDI File Translator included with the AG-002B
Most commercially available Standard MIDI File (SMF) song files are saved in MS-DOS format. The MIDI File Translator included with the AG-002B is a translator program for Apple File Exchange that converts MS-DOS SMF song files into a form that Macintosh MIDI applications can recognize as SMF files.
-
Put the MIDI File Translator into the Apple File Exchange folder.
-
Double-click Apple File Exchange to start it up.
-
Insert the MS-DOS disk that you wish to convert into the floppy disk drive.
A window such as the following will appear. Be sure to start up Apple File Exchange before inserting the MS-DOS format disk into the disk drive.
-
Select the song that you wish to convert.
-
Click the “<<Convert<<” (or “>>Convert>>”) button.
The conversion will begin. When the bar graph reaches 100% the conversion is complete. The converted file will appear in the box at the left.
6.Exit Apple File Exchange.
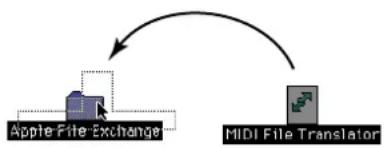
flowchart
graph TD
    A["Apple File Exchange"] --> B["MIDI File Translator"]
    B --> A
Using PC Exchange to convert SMF data
If Apple File Exchange is not included with your Macintosh system, you can use PC Exchange to convert MS-DOS format SMF song files so that they can be recognized by the Macintosh.
For example, we will explain the procedure using the MIDI Player included with K org Audio Gallery (sold separately) to open an MS-DOS SMF song file.
-
In the control panel, open PC Exchange. The PC Exchange control panel will appear.
-
Click the [Add...] button. The [Specify application for DOS extension] window will appear.
3.Input "MID" for the DOS extension item. MS-DOS uses a filename extension consisting of a period and three characters to distinguish different types of files. It is typical to assign an extension of ".MID" to SMF files.
- From the list that appears in the lower part of the dialog box, select [MIDI Player v1.0.1] The icon selected for the application item will appear.
Now select a MIDI application (sequencer) that can use SMF data, and that software will be able to open SMF song files.
- From the [Document type] popup menu choose [MIDI] and click the [OK] button.
The item added to the PC Exchange window will be displayed, and has been registered.
Now you can insert an MS-DOS SMF disk into the disk drive and use it as is.
* For details refer to the explanation of "Macintosh PC Exchange."
3.[DRUM KIT] MAP
![KORG Concert C-550 - 3.[DRUM KIT] MAP - 1](/content/2026/05/820856/images/a4a5cfe0f77c9c00e5423f9ba5e021921c34384d7f0570dffb6e3c63717a518d.jpg)
bar
| Key | DURM Kit Ex.asn | |---|---| | 21 | ↓ ↓ ↓ ↓ ↓ ↓ ↓ ↓ ↓ ↓ ↓ ↓ ↓ ↓ ↓ ↓ ↓ ↓ ↓ ↓ ↓ ↓ ↓ ↓ ↓ ↓ ↓ ↓ ↓ ↓ ↓ ↓ ↓ ↓ ↓ ↓ ↓ ↓ ↓ ↓ ↓ ↓ ↓ ↓ ↓ ↓ ↓ ↓ ↓ ↓ ↓ ↓ ↓ ↓ ↓ ↓ ↓ ↓ ↓ ↓ ↓ ↓ ↓ ↓ ↓ ↓ ↓ ↓ ↓ ↓ ↓ ↓ ↓ ↓ ↓ ↓ ↓ ↓ ↓ ↓ ↓ ↓ ↓ ↓ ↓ ↓ ↓ ↓ ↓ ↓ ↓ ↓ ↓ ↓ ↓ ↓ ↓ ↓ ↓ ↓ ↑↓↓↓↓↓↓↓↓↓↓↓↓↓↓↓↓↓↓↓↓↓↓↓↓↓↓↓↓↓↓↓↓↓↓↓↓↓↓↓↓↓↓↓↓↓↓↓↓↓↓↓↓↓↓↓↓↓↓↓↓↓↓↓↓↓↓↓↓↓↓↓↓↓↓↓↓↓↓↓↓↓↓↓↓↓↓↓↓↓↓↓↓↓↓↓↓↓↓↓↓↑ ↑ ↑ ↑ ↑ ↑ ↑ ↑ ↑ ↑ ↑ ↑ ↑ ↑ ↑ ↑ ↑ ↑ ↑ ↑ ↑ ↑ ↑ ↑ ↑ ↑ ↑ ↑ ↑ ↑ ↑ ↑ ↑ ↑ ↑ ↑ ↑ ↑ ↑ ↑ ↑ ↑ ↑ ↑ ↑ ↑ ↑ ↑ ↑ ↑ ↑ ↑ ↑ ↑ ↑ ↑ ↑ ↑ ↑ ↑ ↑ ↑ ↑ ↑ ↑ ↑ ↑ ↑ ↑ ↑ ↑ ↑ ↑ ↑ ↑ ↑ ↑ ↑ ↑ ↑ ↑ ↑ ↑ ↑ ↑ ↑ ↑ ↑ ↑ ↑ ↑ ↑ ↑ ↑ ↑ ↑ ↑ ↑ ↑ ↑ ↑ → Down Arrow Down Arrow Down Arrow Down Arrow Down Arrow Down Arrow Down Arrow Down Arrow Down Arrow Down Arrow Down Arrow Down Arrow Down Arrow Down Arrow Down Arrow Down Arrow Down Arrow Down Arrow Down Arrow Down Arrow Down Arrow Down Arrow Down Arrow Down Arrow Down Arrow Down Arrow Down Arrow Down Arrow Down Arrow Down Arrow Down Arrow Down Arrow Down Arrow Down Arrow Down Arrow Down Arrow Down Arrow Down Arrow Down Arrow Down Arrow Down Arrow Down Arrow Down Arrow Down Arrow Down Arrow Down Arrow Down Arrow Down Arrow Down Arrow Down Arrow Down Arrows Down Arrows Down Arrows Down Arrows Down Arrows Down Arrows Down Arrows Down Arrows Down Arrows Down Arrows Down Arrows Down Arrows Down Arrows Down Arrows Down Arrows Down Arrows Down Arrows Down Arrows Down Arrows Down Arrows Down Arrows Down Arrows Down Arrows Down Arrows Down Arrows Down Arrows Down Arrows Down Arrows Down Arrows Down Arrows Down Arrows Down Arrows Down Arrows Down Arrows Up | - 21 | 22 | | 23 | 25 | | 26 | 27 | | 28 | 30 | | 29 | 32 | | 31 | 34 | | 33 | 37 | | 35 | 39 | | 36 | 40 | | 38 | 41 | | 40 | 42 | | 41 | 43 | | 43 | 44 | | 45 | 46 | | 47 | 48 | | 48 | 49 | | 50 | 51 | | 52 | 53 | | 53 | 54 | | 55 | 56 | | 57 | 58 | | 59 | 59 | The values represent the number of DURM Kit Ex.asn at each key position in a game. The numbers are explicitly labeled on the right side of each bar. The arrows indicate direction or direction of movement along the x-axis. The numbers are shown as vertical bars aligned with the x-axis positions.[DRUM KIT] is “GM Kit.” Keys 35\~81 of GM Kit are the sounds specified by GM.
Key: MIDI note number.
Ex.asn: Sounded as mono within the same group (example: Tight Hi-Hat and Open Hi-Hat).
→: same content as sound indicated by the arrow
- : not sounded.
4. List of switch functions
Here is a summary of the functions performed by each of the switches of the C-550.
Symbols:
: the function when this switch is pressed by itself
: the function when this switch is pressed while holding down the [MIDI] switch
![press two [Sound selector] switches simultaneously: Layer (p.8) ○ ROOM ○ HALL ○ PRESET ○ LIGHT ○ CHORUS ○ STANDARD ○ TREMOLO ○ HEAVY Tuning (p.12) select switch Hz/cent (p.12) Temperament (p.13) scale key (tonic) (p.14) SURROUND EFFECT TOUCH CONTROL TUNE TEMPERAMENT select Sounds (p.8) select sounds (p.8) Local On/Off (p.26) Control Change (p.26) select sounds (p.8) select sounds (p.8) PIANO1 PIANO2 E.PIANO HARPSI VIBES ORGAN STRINGS DRUM KIT BASS select Sounds (p.8) select sounds (p.8) select sounds (p.8) select sounds (p.8) Global MIDI ch. (p.26) PC I/F baud rate (p.28) Data Dump (p.27) Bounce (p.20) Quantize (p.19)](/content/2026/05/820856/images/d1a7589d745c668148350d1d7f58fa83e08850c6365639b5837e9bcc926e7871.jpg)
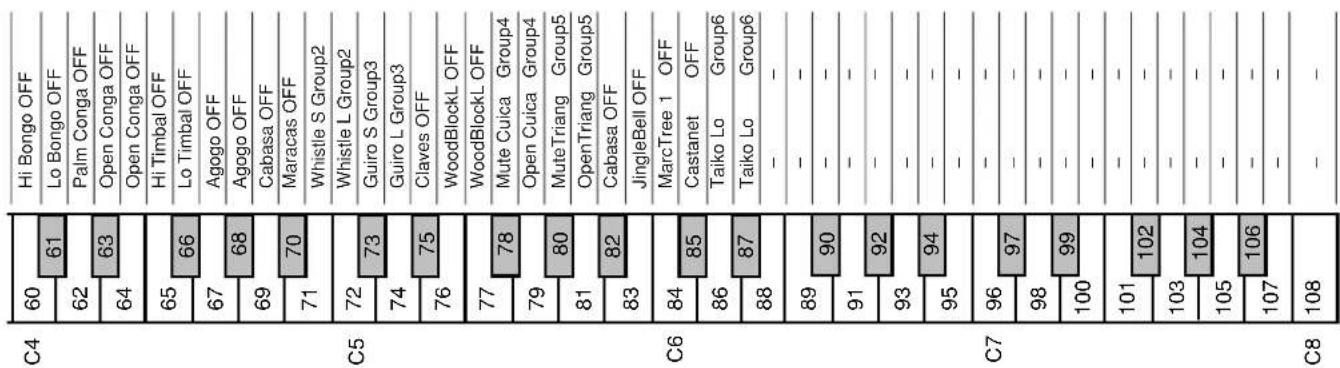
bar
| Category | Value | |---|---| | Hi Bongo OFF | 60 | | Lo Bongo OFF | 61 | | Palm Conga OFF | 62 | | Open Conga OFF | 63 | | Open Conga OFF | 64 | | Hi Timbal OFF | 65 | | Lo Timbal OFF | 66 | | Agogo OFF | 67 | | Agogo OFF | 68 | | Cabasa OFF | 69 | | Maracas OFF | 70 | | Whistle S Group2 | 71 | | Whistle L Group2 | 72 | | Guiro S Group3 | 73 | | Guiro L Group3 | 74 | | Claves OFF | 75 | | WoodBlockL OFF | 76 | | WoodBlockL OFF | 77 | | Mute Cuica Group4 | 78 | | Open Cuica Group4 | 79 | | Mute Triang Group5 | 80 | | OpenTriang Group5 | 81 | | Cabasa OFF | 82 | | JingleBell OFF | 83 | | MarcTree 1 OFF | 84 | | Castanet OFF | 85 | | Taiko Lo Group6 | 86 | | Taiko Lo Group6 | 87 | | - - | 88 | | - - | 89 | | - - | 90 | | - - | 91 | | - - | 92 | | - - | 93 | | - - | 94 | | - - | 95 | | - - | 96 | | - - | 97 | | - - | 98 | | - - | 99 | | - - | 100 | | - - | 101 | | - - | 102 | | - - | 103 | | - - | 104 | | - - | 105 | | - - | 106 | | - - | 107 | | - - | 108 | C4 Hi Bongo OFF Lo Bongo OFF Palm Conga OFF Open Conga OFF Open Conga OFF Hi Timbal OFF Lo Timbal OFF Agogo OFF Agogo OFF Cabasa OFF Maracas OFF Whistle S Group2 Whistle L Group2 Guiro S Group3 Guiro L Group3 Claves OFF WoodBlockL OFF WoodBlockL OFF Mute Cuica Group4 Open Cuica Group4 Mute Triang Group5 OpenTriang Group5 Cabasa OFF JingleBell OFF MarcTree 1 OFF Castanet OFF Taiko Lo Group6 Taiko Lo Group6 - -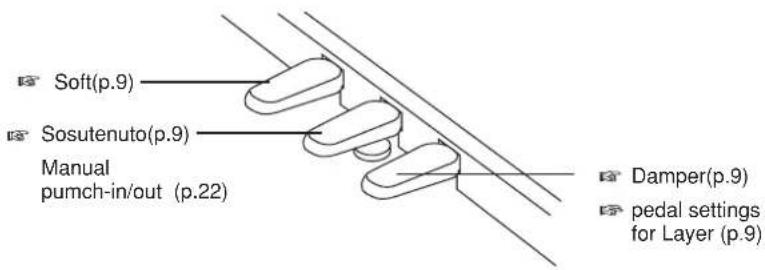
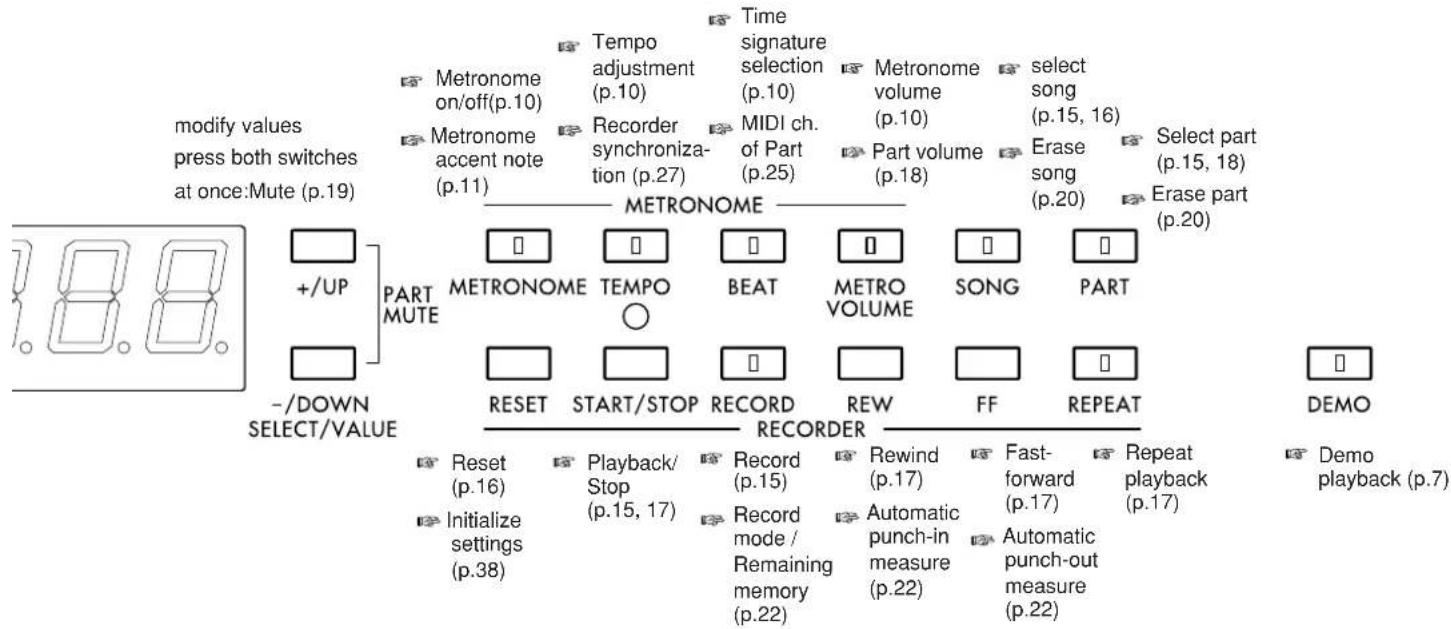
flowchart
graph TD
    A["modify values press both switches at once:Mute (p.19)"] --> B["+ / UP"]
    B --> C["PART MUTE"]
    C --> D["METRONOME"]
    D --> E["RESET"]
    E --> F["START/STOP"]
    F --> G["RECORD"]
    G --> H["REW"]
    H --> I["FF"]
    I --> J["REPEAT"]
    J --> K["DEMO"]

    subgraph Control Signals
        L["Reset (p.16)"]
        M["Initialize settings (p.38)"]
        N["Playback/Stop (p.15, 17)"]
        O["Record (p.15)"]
        P["Record mode / Remaining memory (p.22)"]
        Q["Rewind (p.17)"]
        R["Automatic punch-in measure (p.22)"]
        S["Fast-forward (p.17)"]
        T["Repeat playback (p.17)"]
        U["Automatic punch-out measure (p.22)"]
    end

    style A fill:#f9f,stroke:#333
    style K fill:#f9f,stroke:#333
5.LED display messages
Messages
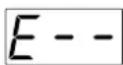
This will be displayed if you press the [TEMPO] switch when External Clock is selected for the recorder.
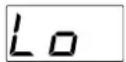
The internal backup battery is running down. Contact a nearby service center or your dealer.
6. Initializing settings
You can initialize the follo wing settings for a specified song: sound selections for each Part, surround, effect, volume, and MIDI channel settings. And you can initialize pedal settings in common to all songs. If you have modified the MIDI channel of the Parts, or loaded musical data from an external sequencer, the piano may not operate in the way that you expect. In such situations, you can perform this Initialization operation to bring back the “basic” settings. This operation should also be performed if the pedals are not responding correctly.
Part Part sound MIDI channel
| 1~9, 11~16 PIANO1 1~9, 11~16 |
| 10 DRUM Kit 10 |
- Press the [SONG] switch, and then press the [+UP] or [-/DOWN] switch to select the song that you wish to initialize.
Pedal settings are initialized in common to all songs. When you initialize pedal settings, sound selections for each Part, surround, effect, volume, MIDI channel settings are initialized at same time. So if you wish to initialize the pedal settings, select a song in which sounds are not already selected for the Parts.
- Simultaneously press the [MIDI] switch and the [RESET] switch, and the data will be initialized.

Do not press the pedals during this operation.
7. Troubleshooting
Power dose not turn on
- Is the power cable connected to an AC outlet?(p.6)
- Is the power switch on?(p.6) If the problem is still not resolved, contact a Korg dealer.
No sound
- Is the [MASTER VOLUME] slider of the C-550 raised?(p.6)
· Is the headphone jack in use? (p.6)
· Is the Part volume at "0"? (p.18)
· Is the Part muted?(p.19)
· Is the [DEMO] switch indicator lit? Turn off the [DEMO] switch. (p.7)
· Make sure that the Local setting is ON.(p.26)
Sound does not change
· T urn off the [DEMO] switch.(p.7)
Sound is interrupted
The sounds of the C-550 are produced by samples (recordings) of original instrumental sounds. For some sounds, pressing a note will play one sample, and for other sounds, two samples. The [PIANO1] sound and [BASS] sounds use two samples. When these sounds are selected, the maximum number of notes which can be played simultaneously will be 16, including notes held by the damper pedal. For other sounds, the maximum number of simultaneous notes will be 32. If you are using a Layer to play two sounds simultaneously, the maximum number of simultaneous notes will depend on whether the sounds use one or two samples. For example if you have layered a sound that uses one sample with a sound that uses two samples, the maximum number of simultaneous notes will be 10. As you use layers or record multiple parts on the recorder, be aware of these limits so that you can make the best use of the available note capacity.
The pitch or tone of a piano sound appears incorrect in a particular range.
- The piano sounds on this instrument have been created with the intent of reproducing the actual sounds of a piano as faithfully as possible. This means that in some pitch ranges, it may sound as though overtones are emphasized differently, or that a certain pitch or range sounds incorrect, but this is not a malfunction.
Pedal does not work correctly
· W as a pedal pressed when the power was turned on or when settings were initialized? (p.6, 38)
- Has the pedal connector been disconnected? (p.30)
Sostenuto pedal effect does not work
- Is manual punch-in selected as the recording mode?(p.22)
- Has the pedal connector been disconnected? (p.30)
Cannot playback
Make sure that the C-550 is set to "In" (internal). If you wish to use it as the slave device (the device which will synchronize to the master device), set it to "E" (external), and set the external device to transmit MIDI Clock data.(p.27)
Cannot record
- Is there sufficient free space in the recorder?(p.23)
- Is the recording mode setting appropriate?(p.21)
- Make sure that the C-550 is set to "In" (internal). If you wish to use it as the slave device (the device which will synchronize to the master device), set it to "E" (external), and set the external device to transmit MIDI Clock data.(p.27)
Does not respond to transmitted MIDI data
- Make sure that all MIDI cables are connected correctly.(p.24)
- Make sure that the C-550 is receiving data on the same channel as the transmitting device is using.(p.25)
· Do the MIDI channels (Part, Global) match? (p.25, 26)
Specified drum sound is not heard when key board is played
- Make sure that the [KEY TRANSPOSE] slider is set to "C."(p.12)
8.Index
A
Apple Macintosh 28
B
Backup battery 3
[BASS] sound list ---- 8
Bounce 20
Brilliance 9
C
Cent (unit of tuning) ---- 12
Connections 24
MIDI devices ---- 24
audio devices ---- 24
computers---- 28
synthesizers 24
Control change 26
D
Damper pedal 9
Data dump 27
Data filer 27
Demo playback 7
Drum kit 8
[DRUM KIT] map ---- 36
E
Erase 20
part 20
song 20
G
Global MIDI channel ---- 26
H
Half pedal 9
Hertz (Hz) 12
|
IBM PC (compatibles) ---- 28
Initializing settings --- 11, 38
K
Korg MIDI driver---- 31
L
LED display messages -- 38
Layer 8
cautions 16
pedal settings 9
volume 6
Load 27
data filer 27
Local on/off 26
M
MIDI 24
MIDI channel 25
Metronome 10
accent note 11
tempo 10
time signature 10
volume 10
Modulation 9
Multi-timbral capability -- 25
Mute 19
O
Overdub 21
Overwrite 21
P
change sounds for ---- 16
change tempo for ---- 16
Program filter 26
Punch-in/out 22
automatic---- 22
manual 22
Q
Quantize 19
R
Recording 15
Recording mode 21
Recording multiple parts 18
volume 18
Remaining memory display 23
Repeat 17
A-B section ---- 17
entire song 17
Resonance effect 9
S
Soft pedal 9
Sostenuto pedal 9
Sound groups 8
Sound selector 8
Surround 9
Synchronization ---- 27
T
TO HOST connector ---- 28
Temperament 13
key 14
Tempo 10
Time signature 10
Touch control 11
Transpose 12
V
Volume 6
9.Specifications
| C-550 | |
| Keyboard 88 note (velocity sensitive) | |
| Touch control Light, Standard, Heavy | |
| Tone generator ai-squared Synthesis System | |
| Polyphony 32/16*1 | |
| Sound programs ROM: 7 + Bass 8 + Dr1 | |
| Sound program(groups) Piano 1, Piano 2, Electric piano, Harpsichord, Vibraphone, Organ, Strings, Drum kit, Bass (8) | |
| Effects Surround (Room/Hall/Preset), Effect (Chorus/Tremolo) | |
| Recorder 16 tracks, 10 songs (maximum 31,000 step capacity) | |
| Metronome Metronome, Tempo, Beat, Volume | |
| Display 8 segment LED X 3 | |
| Pedal controls | Damper *2, Soft *2, Sostenuto |
| Connectors | Output (L/MONO, R), Input (L/MONO, R), Headphones X 2, MIDI (IN, OUT), PC I/F (TO HOST) |
| Controls | Master volume, Power switch, Brilliance, Key transpose, Tuning, Temperament |
| Main amplifier | 30W X 2 |
| Speakers | 16cm X 2 |
| Power supply | AC Local Voltage |
| Power consumption | 90W(117V)/60W(220-240V) |
| Dimensions | 1404 (W) X 483 (D) X 874 (H) mm |
| Weight (with stand) | 53.7kg |
| Options | AG-001B, AG-002B |
*1: May decrease depending on sounds or layers
*2: Responds to half-pedaling
Appearance and specifications are subject to change without notice for product improvement.
- Apple Macintosh, MIDI Manager, MIDI Driver, and PatchBay are registered trademarks and trademarks of Apple Computer Corporation, USA.
- IBM is a registered trademark of IBM Corporation, USA.
- MIDI Player is a registered trademark of Passport Designs Corporation.
• MS-DOS and Windows are registered trademarks and trademarks of Microsoft Corporation, USA.
[Digital piano]
C-550 MIDI Implementation Chart
| Function ... | Transmitted Recognized Remarks | |||
| Basic Default 1 1 channel Changed 1~16 1~16 | ||||
| Mode Messages | Default 3 Altered | x | x | |
| Note number : | True voice | 16~114 | 0~127 | 0~127 when transmitting recorder data 0~127 received for some sounds |
| ...... | 0~108 | |||
| Velocity | Note ON Note OFF x | 8~127 | 1~127 | 2~126 when transmitting recorder data |
| After Touch | Polyphonic Channel | x | O | Polyphonic for recorder data only |
| x | O | |||
| Pitch Bender | x | O | *C | |
| Control Change | 0,32 | O | O | Bank Select *P |
| 1,2 | x | O | Modulation *C | |
| 6,38 | x | O | Data Entry | |
| 7 | O | O | Volume *C | |
| 10 | x | O | Panpot *C,*3 | |
| 11 | x | O | Expression *C | |
| 64 | O 0~127 | O 0~127 | Damper Pedal *C | |
| 66 | O | O | Sostenuto Pedal *C | |
| 67 | O 0~127 | O 0~127 | Soft Pedal *C | |
| 72,73 | x | O | EG Time *C | |
| 92,94 | x | O | Effect 1,2 ON/OFF *C | |
| 100,101 | x | O | RPN *2 | |
| 120,121 | x | O | All Sound Off, Reset All Controller | |
| 0~101 O | O (sequence data) | |||
| Program Change : | True# | O 0~127 | O 0~127 | *P |
| ********** | ||||
| System Exclusive | O | O | Device Inquiry Sequence Data Dump | |
| : Song Pos System Common : Song Sel : Tune | O | O | *1 | |
| O 0~9 | O 0~9 | *1 | ||
| x | x | |||
| System Realtime : Clock : Commands | O | O | *1 | |
| O | O | *1 | ||
| Aux Messages : Local ON/OFF : All Notes OFF : Active Sense : Reset | x | O | ||
| x | O 123~127 | |||
| O | O | |||
| x | x | |||
| Notes | *C:Received (transmitted) when Control Changes are enabled.*P: Received (transmitted) when Program Changes are enabled.*1: Transmitted and not received when Clock is Internal. The opposite when Clock is External.*2: LSB,MSB=00,00: Pitch Bend Range, =01,00: Fine Tune, =02,00: Coarse Tune*3: Except for [PIANO1], and [PIANO2] | |||
Mode 1: OMNI ON, POLY Mode 2: OMNI ON, MONO O : Yes
Mode 3: OMNI OFF, POLY Mode 4: OMNI OFF, MONO × : No
NOTICE
KORG products are manuf actured under strict specifications and v oltages required by each country. These products are w arranted by the K ORG distrib utor only in each country. Any KORG product not sold with a w arranty card or carrying a serial number disqualifi es the product sold from the manuf acturer's/distrib utor's warranty and liability. This requirement is for your own protection and safety.
KORG
KORG INC.
15 - 12, Shimotakaido 1 - chome, Suginami-ku, Tokyo, Japan.
- Owner's Manual
- C-550
- Contents
- Introduction 2
- IMPORTANT SAFETY
- Playing 8
- Record and playback your
- performance 15
- Connections with other devices---- 24
- Data 29
- IMPORTANT SAFETY INSTRUCTIONS
- CAUTION
- CE mark for European Harmonized Standards
- IMPORTANT NOTICE FOR THE UNITED KINGDOM
- THE FCC REGULATION WARNING
- Back-up Battery
- Data handling
- Contorols and their function
- Printing conventions for switches
- ⑪ LED display
- ⑫Select / Value
- 13Metronome
- Tempo, Beat, Metro volume
- ⑮Song, Part
- 16Recorder
- 17Demo
- 18[POWER] indicator
- PHONES jacks
- 20Music stand (p.6)
- 2.Preparing to play
- Plug in the power cable
- Open the key cover
- Turn on the power
- Press the POWER switch to turn on the power.
- To turn the power off, press the POWER switch once again.
- Adjust the volume
- ■ When using headphones
- ■ When using the Music Stand
- Listening to the demo songs
- Press the [DEMO] switch.
- Press the [+/UP] or [−/DOWN] switch to select the number of the song that you wish to hear.
- Press the [START/STOP] switch, and the demo will begin playing.
- To stop playback, press the [START/STOP] switch.
- When you finish listening to the demo songs, press the [DEMO] switch while a song is not playing.
- 1.Selecting a sound
- Selecting a sound from a sound group
- Press a Sound selector switch which contains a group of sounds.
- Press the [+ / UP] or [− / DOWN] switch to select a sound.
- BASS sound list
- What is a Drum Kit?
- Simultaneously playing two sounds.
- 1.Hold down one of the two desired Sound selector switches, and then press the other one.
- Press just one Sound selector switch, and layering will be canceled.
- Adjusting the volume balance of the two sounds
- Adding reverberation or spaciousness to the sound
- Adding spaciousness to the sound
- Adjusting the brightness of the sound
- Using the pedals
- ① Soft pedal
- ② Sostenuto pedal
- ③ Damper pedal
- Pedal setting for Layering
- Hold down the [MIDI] switch, and press the damper pedal.
- Press the [+/UP] or [−/DOWN] switch to change the setting.
- Playing with the metronome
- Starting the metronome
- Press the [METRONOME] switch once again, and the metronome will stop.
- Adjusting the tempo
- Press the [TEMPO] switch.
- Press the [+UP] or [-/DOWN] switch to adjust the tempo.
- Changing the time signature
- Press the [BEAT] switch.
- Adjusting the volume
- Press the [METRO VOLUME] switch.
- Press the [+UP] or [-/DOWN] switch to adjust the volume.
- Selecting the accented note of the time signature
- ●Hold down the [MIDI] switch and press the [METRONOME] switch repeatedly to cycle through the following settings.
- If the sound is not what you expect
- Adjusting the keyboard touch
- Touch control Remarks
- Transposing the pitch.
- - Move the [KEY TRANSPOSE] slider to the desired key.
- Making fine adjustments to the pitch
- cents.
- Press the [TUNE] switch.
- Press the [+/UP] or [-/DOWN] switch to adjust the pitch.
- Switching between units of "Hertz" and "Cents"
- 8.Selecting a temperament
- LED Temperament Key
- Equal temperament
- Equal temperament (random)
- Pure major O
- Pure minor O
- Arabic (1/4) O
- Pythagorean O
- Werckmeister O
- Kirnberger O
- Slendro
- 0
- Pelog
- Press the [+/UP] or [−/DOWN] switch to select the temperament.
- Setting the key (tonic)
- Hold down the [MIDI] switch, and press the [TEMPERAMENT] switch.
- Press the [+UP] or [-/DOWN] switch to set the key.
- When you finish changing the settings, press the [MIDI] switch (or the [RESET] switch).
- About stretched tuning
- Recording your performance
- Press the [SONG] switch.
- Press the [+/UP] or [−/DOWN] switch to select the song that you wish to record.
- Press the [PART] switch.
- Press the [+/UP] or [−/DOWN] switch to select the Part you wish to record.
- Press the [RESET] switch.
- Use the Sound selector switches to select a sound.
- - If you wish to record in time with the metronome, press the [METRONOME] switch to hear the metronome sound.
- ●You can correct (quantize) the timing at which notes are recorded. For details refer to p.19.
- Press the [RECORD] switch.
- Recording will begin when you either play a note or press the [START/STOP] switch.
- Press the [START/STOP] switch to stop recording.
- Playing back your performance
- Press the [+/UP] or [−/DOWN] switch to select the song you wish to hear.
- Press the [RESET] switch.
- Press the [START/STOP] switch, and playback will begin.
- To stop playback, press the [START/STOP] switch.
- Adjusting the speed (tempo) of playback
- Changing the sound
- Notes when a layer is selected
- Moving to the measure you wish to playback from
- Listening repeatedly to the playback
- Repeating an entire song
- Press the [+/UP] or [−/DOWN] switch to select the song number that you wish to playback repeatedly.
- Press the [REPEAT] switch.
- Press the [START/STOP] switch and the entire song will be played back repeatedly.
- Press the [START/STOP] switch to stop playback.
- To cancel repeat playback, press the [REPEAT] switch while playback is stopped.
- Repeating a section A-B
- Press the [START/STOP] switch to begin playback.
- At the location where you wish to begin repeating, press the [REPEAT] switch.
- 5.Playback will continue. At the location where you wish to stop repeating, press the [REPEAT] switch once again.
- To cancel the specified repeat section, press the [REPEAT] switch again.
- Press the [START/STOP] switch to stop playback.
- 3.Creating an ensemble
- Press the [+/UP] or [−/DOWN] switch to select the song in which you wish to create an ensemble recording.
- Press the [+/UP] or [−/DOWN] switch to select an un-recorded Part.
- Refer to step 5 of the procedure "1. Recording your performance" (page 15), and record the Part you wish to add while you listen to the previously-recorded performances.
- Adjusting the volume of each Part
- Press the [PART] switch.
- Press the [+/UP] or [−/DOWN] switch to select the Part whose volume you wish to adjust.
- Hold down the [MIDI] switch, and press the [METRO VOLUME] switch.
- Press the [+UP] or [−/DOWN] switch to adjust the volume.
- Muting parts
- Press the [+/UP] or [−/DOWN] switch to select the Part that you wish to mute.
- Simultaneously press the [+UP] and [-DOWN] switches to mute the Part.
- Simultaneously press the [+UP] and [-/DOWN] switches once again, and muting will be canceled.
- Correcting the timing of musical data you record
- On the C-550 hold down the [MIDI] switch and press the [BASS] switch.
- Press the [+UP] or [-/DOWN] switch to select the timing resolution to which the notes will be corrected.
- Use steps "5" and following of "1. Recording your performance" to begin recording.
- Combining the data of two Parts into one Part
- Erasing a song/part
- Erasing a song
- Erasing a part
- Various recording methods
- Setting the recording mode
- 1.Hold down the [MIDI] switch, and press the [RECORD] switch.
- Press the [+/UP] or [−/DOWN] switch to select the recording mode (0 \~ 3).
- Press the [MIDI] switch (or the [RESET] switch) to exit the setting mode.
- Overwrite
- - Set the recording mode to "0" before recording (refer to the above procedure).
- Overdub
- Automatic punch-in/out
- Press the [MIDI] switch (or the [RESET] switch) to exit the setting display.
- Manual punch-in/out
- Remaining recording memory display
- ●Hold down the [MIDI] switch, and press the [RECORD] switch.
- Connecting a synthesizer or audio device
- [INPUT] jacks (L/MONO, R)
- [OUTPUT] jacks (L/MONO, R)
- Connecting MIDI devices
- What is MIDI?
- MIDI connections
- [MIDI OUT] connector
- [MIDI IN] connector
- MIDI channel settings
- Changing MIDI channels
- Changing the global MIDI channel
- Hold down the [MIDI] switch, and press the [VIBES] switch.
- Press the [+UP] or [-/DOWN] switch to set the Global MIDI channel.
- When you have finished making the setting, press the [MIDI] switch (or the [RESET] switch).
- Local on/off setting
- ●Hold down the [MIDI] switch, and press the [PIANO1] switch. Each time you do so, the setting will alternate.
- Program filter settings
- ●Hold down the [MIDI] switch, and press the [EFFECT] switch. Each time you do so, the setting will alternate.
- Program Change and Control Change numbers
- Control Change settings
- Saving musical data from the internal recorder to a data filer
- To save internal recorder data to the data filer
- Synchronizing the internal recorder with an external MIDI device
- 3.Connections with a computer
- IBM PC (compatibles):
- Apple Macintosh series:
- [TO HOST] connector
- Connections with an IBM PC (compatible)
- Connections with an Apple Macintosh
- Assembling the ST-550 Stand
- Post-assembly Check
- Cautions when Moving
- Loose Screws
- Disassembly
- 2.Korg MIDI Driver installation and setup
- Installing the Korg MIDI Driver into Windows 3.1
- Setting up the Korg MIDI Driver (Windows)
- Installing the Korg MIDI Driver into Windows 95
- 5.Click [Have Disk].
- Modifying the Korg MIDI Driver setup for Windows 95
- 5.Click the [Settings] button.
- Installing the Korg MIDI Driver into the Macintosh
- Setting up the Korg MIDI Driver (Macintosh)
- About the MIDI File Translator included with the AG-002B
- Using PC Exchange to convert SMF data
- 3.[DRUM KIT] MAP
- List of switch functions
- Symbols:
- 5.LED display messages
- Messages
- Initializing settings
- Troubleshooting
- Power dose not turn on
- No sound
- Sound does not change
- Sound is interrupted
- The pitch or tone of a piano sound appears incorrect in a particular range.
- Pedal does not work correctly
- Sostenuto pedal effect does not work
- Cannot playback
- Cannot record
- Does not respond to transmitted MIDI data
- Specified drum sound is not heard when key board is played
- 8.Index
- A
- B
- C
- D
- E
- G
- H
- |
- K
- L
- M
- O
- P
- Q
- R
- S
- T
- V
- 9.Specifications
- NOTICE
- KORG
- KORG INC.
Brand : KORG
Model : Concert C-550
Category : Keyboard