
Sonar 8.5 - Photo/Video Software CAKEWALK - Free user manual and instructions
Find the device manual for free Sonar 8.5 CAKEWALK in PDF.


| Product Type | Digital Audio Workstation (DAW) Software |
| Brand | Cakewalk |
| Model | SONAR 8.5 (Studio/Producer) |
| Category | Music Production Software |
| Platform | Microsoft Windows XP, Windows Vista (32-bit and x64) |
| Audio Resolution | Up to 24-bit/192 kHz (supports 44.1 kHz, 96 kHz) |
| MIDI Support | 16 channels per port, multiple ports, MIDI Machine Control |
| File Formats | Import/export: WAV, MP3, WMA, MIDI, ACID, REX, OMF, AIFF, etc. |
| Max Tracks | Unlimited (limited by system resources; supports hundreds of audio + MIDI tracks) |
| Key Features | Multitrack recording, MIDI sequencing, audio editing, mixing, real-time effects, software instruments (DXi, VSTi), notation, video scoring, AudioSnap, Matrix view, Step Sequencer 2.0 |
| Included Plug-Ins | 30+ audio effects (e.g., reverb, delay, compressor), MIDI effects, soft synths (Session Drummer 3, Dimension Pro, TruePianos, etc.) |
| Surround Mixing | Up to 7.1 (Producer version) |
| Automation | Track and clip automation (volume, pan, effects parameters, etc.) |
| Metering | Peak, RMS, Peak+RMS with hold options |
| User Manual | 999-page PDF included |
| Power Source | Computer power supply (not applicable as software) |
| Maintenance | Regular software updates via Cakewalk; backup projects and audio files |
| Safety | Standard computer safety practices; no special hazards |
| Spare Parts & Repairability | Not applicable (software); updates available for download |
| General Information | Version 8.5 released 2009; product of Cakewalk, Inc. |
Frequently Asked Questions - Sonar 8.5 CAKEWALK
User questions about Sonar 8.5 CAKEWALK
0 question about this device. Answer the ones you know or ask your own.
Ask a new question about this device
Download the instructions for your Photo/Video Software in PDF format for free! Find your manual Sonar 8.5 - CAKEWALK and take your electronic device back in hand. On this page are published all the documents necessary for the use of your device. Sonar 8.5 by CAKEWALK.
USER MANUAL Sonar 8.5 CAKEWALK
Information in this document is subject to change without notice and does not represent a commitment on the part of Cakewalk, Inc. The software described in this document is furnished under a license agreement or nondisclosure agreement. The software may be used or copied only in accordance of the terms of the agreement. It is against the law to copy this software on any medium except as specifically allowed in the agreement. No part of this document may be reproduced or transmitted in any form or by any means, electronic or mechanical, including photocopying and recording, for any purpose without the express written permission of Cakewalk, Inc.
Copyright © 2009 Cakewalk, Inc. All rights reserved.
Program Copyright © 2009 Cakewalk, Inc. All rights reserved.
ACID is a trademark of Sony Creative Software, Inc.
Cakewalk is a registered trademark of Cakewalk, Inc. and the Cakewalk logo are trademarks of Cakewalk, Inc. Other company and product names are trademarks of their respective owners.
Visit Cakewalk on the World Wide Web at www.cakewalk.com.
Getting started
If you want to get up and running quickly, please use the following tutorials, which are tailored to learning specific tasks in SONAR. If you are new to Cakewalk products, you may want to start at Tutorial 1. If you have used previous versions of Cakewalk, or you want to do a specific task, choose from the following tutorials:
Tutorial 1 – Creating, playing, and saving projects
Tutorial 2 – Using the Media Browser
Tutorial 3 – Recording vocals and musical instruments
Tutorial 4 – Playing and recording software instruments
Tutorial 5 – Working with music notation
Tutorial 6 – Editing your music
Tutorial 7 – Mixing and adding effects
Tutorial 8 – Working with video
Tutorial 9 – Exporting, CD burning and sharing
Glossary. A list of defined terms.
Introduction. An overview of SONAR's features and functionality.
Troubleshooting. Answers to some frequently asked questions.
New features in SONAR 8.5. Descriptions of new features in SONAR 8.5.
Table of Contents
Getting started 3
1 Introduction 51
About SONAR....51
Publish 51
Music Composition and Exploration 52
Remixing....52
Game Sound Development 52
Sound Production and Engineering 52
Web Authoring 53
Film and Video Scoring and Production 53
Publishing Music on the Internet 53
Burning Audio CDs 53
Flexibility....54
Computers, Sound, and Music 54
MIDI 54
Digital audio 55
Setup....56
Audio connections 57
MIDI Connections 59
Changing I/O devices 60
Starting SONAR 62
SONAR basics 66
SONAR file types 67
Opening a file 67
Views 68
Working on a project. 85
Windows taskbar indicators 86
Screen colors and wallpaper.... 86
Color presets 88
Installing SONAR....90
Starting to use SONAR 91
2 Tutorial 1 – Creating, playing, and saving projects ..... 93
Creating a new project....94
Opening project files 96
Playing project files 98
Configuring your sound device 98
Setting the tracks outputs 99
Playing the project 100
Looping project files....102
Saving project files....103
3 Tutorial 2 – Using the Media Browser ..... 107
Finding and previewing audio loops....111
Previewing MIDI groove clips 112
Adding loops to your project 113
4 Tutorial 3 – Recording vocals and musical instruments.... 115
Troubleshooting....117
5 Tutorial 4 – Playing and recording software instruments ..... 121
Adding an instrument track to your project 122
Recording MIDI 124
Manually entering MIDI notes 124
6 Tutorial 5 – Working with music notation.... 129
Printing your notation....135
7 Tutorial 6 – Editing your music .... 137
Selection 137
Moving clips....140
Splitting Clips. 140
Cropping Clips 142
Undo and Redo 143
8 Tutorial 7 – Mixing and adding effects.... 145
Volume and pan 146
Adding effects (FX) 147
Using Automation 151
9 Tutorial 8 – Working with video ...... 153
Importing video 153
What if I don't see the Video Thumbnail pane or Video view? 156
Changing the video properties 156
Working with markers 158
Exporting your video 160
10 Tutorial 9 – Exporting, CD burning and sharing 163
Burning an audio CD 166
Cakewalk Publisher 168
11 Controlling Playback 171
The Now time and how to use it 172
The Now time marker 174
The Track view Now time display 175
Displaying the Now time in large print 176
Other ways to set the Now time 176
The Time ruler 177
Controlling playback 179
Handling stuck notes 181
Looping....181
Using the Large Transport 184
Track-by-track playback 187
The Playback state toolbar 188
Silencing tracks 188
Soloing tracks 189
Dim Solo mode 190
Inverting the phase of a track 191
Changing tracks' mono/stereo status 191
Changing track settings. 193
Setting up output devices 203
Assigning Inputs & Outputs 205
Choosing the instrument sound (bank and patch) 207
Adding effects. 209
Adjusting volume and pan 209
Configuring panning laws 210
Adjusting volume trim 211
Assigning a MIDI channel (Chn) 211
Adjusting the Key/transposing a track (Key+) 212
Adjusting the note velocity (Vel+) 212
Adjusting the time alignment of a MIDI track (Time+) .....213
Other MIDI playback settings 213
Controlling live MIDI playback—MIDI echo 214
Local control....217
Playing files in Batch mode 217
The Play List view 217
Video playback, import, and export 219
Importing and playing back videos 220
Exporting video 224
Optimizing video performance....224
Using the Video thumbnails pane 225
Video playback on a FireWire DV device 228
Exporting a project to a FireWire DV device 229
Synchronizing external video playback to audio 230
Locating missing audio 230
The Find missing audio file dialog 230
Restoring missing audio files....231
Managing shared and external files....231
12 Recording.... 233
Creating a new project 234
Using per-project audio folders 234
Creating a new project File 234
Setting the Meter and Key signatures 235
Setting the Metronome and Tempo settings .....237
Setting the audio sampling rate and bit depth 239
Sony Wave-64 support 240
Setting the MIDI timing resolution 241
Preparing to record 242
Recording modes 242
Choosing an input 243
Arming tracks for recording 245
Auto arming 246
Recording music from a MIDI instrument 246
Input quantizing.... 247
Arpeggiator 249
Using the arpeggiator 252
Recording audio 255
Tuning an Instrument 256
Confidence Recording and Waveform Preview 257
Input Monitoring 258
The Audio Engine Button 262
Loop Recording....262
Punch Recording....264
Step Recording 266
Step Record Keyboard Shortcuts 271
Step Pattern Recording 273
Recording Specific Ports and Channels 274
Input Filtering 275
Importing Music and Sound 276
Importing Audio Files 276
Importing Audio CD Tracks 278
Importing Material from Another SONAR Project.... 278
Importing OMF Projects 279
Importing MIDI Files 281
Importing audio / MIDI files from the Clips pane.... 281
Saving Your Work 282
Using File Versioning 283
Labeling Your Projects 284
File Statistics 285
13 Arranging and editing 287
Arranging Tracks.... 288
Changing the Order of Tracks 289
Inserting Tracks 290
Configuring the Display of Tracks in the Track View 291
Copying Tracks. 293
Erasing Tracks 293
Working with Track Templates 294
Track Icons 295
Configuring Track View Controls 297
Arranging Clips 299
Displaying Clips 299
Using the Navigator View 303
Opening Views by Double-clicking Clips 303
Selecting Clips....304
Moving and Copying Clips. 304
Reverting clip(s) to original time stamp 309
Locking Clips 310
Auto Scroll Lock in Clips pane. 311
Nudge 312
Nudge Settings 312
Working with Partial Clips 314
Markers and the snap grid 315
Showing gridlines 315
Defining and Using the Snap Grid 316
Snap Offsets 318
Creating and Using Markers 318
TAB to transients 322
Working with Linked Clips 323
Splitting and Combining Clips 325
Take Management and Comping Takes 326
Clip Muting and Isolating (Clip Soloing) 329
Clip Muting with the Default Style 330
Clip Muting with the Alternate Style....332
Toggling a Clip's Mute Status 332
Audition (Selection Playback) 333
Isolating (Clip Soloing). 333
Track Folders....334
Adding Effects in the Track View 336
Changing Tempos 337
Using the Tempo Toolbar 338
Using the Tempo Commands 339
Using the Tempo View 341
Undo, Redo, and the Undo History 345
Slip-editing (Non-destructive Editing)....346
Using Slip-editing....347
Slip-editing Multiple Clips 349
Fades and Crossfades....349
Using Fades and Crossfades in Real Time 349
14 AudioSnap 355
Using the Transient tool 357
Editing transient markers 360
Enabling/disabling AudioSnap 368
Using the AudioSnap palette.... 369
Synchronizing audio and the project tempo 373
Editing a clip's tempo map 375
Changing a project's tempo 378
Fixing timing problems in audio clips 379
Adjusting the timing of a solo performance 380
Adjusting the timing of a multi-track performance while maintaining phase relationships 381
Synchronizing the rhythms of out-of-sync tracks 385
Making multiple clips/tracks groove together 386
Quantizing audio.... 386
Extracting MIDI timing information from audio 394
General editing 395
Snapping edits to audio beats 396
Splitting beats into clips 397
Slip-stretching audio 402
Adding automation 403
Using the Pool.... 404
Groove Quantize and Quantize to Pool 405
Algorithms and rendering 406
Keyboard shortcuts 409
15 Working with Loops and Groove Clips 411
The Loop Construction View 411
Loop Construction Controls 412
The Media Browser View 416
Folders Pane 417
Contents List Pane 418
Working with Loops. 418
Working Groove Clip audio 419
How Groove Clips Work in SONAR 419
Using Groove Clips. 420
Creating and Editing Groove Clips 421
Editing Slices 423
Saving Groove Clips as Wave Files/ACIDized Wave Files 424
Using Pitch Markers in the Track View. 425
Working with REX files 426
MIDI Groove Clips....427
Exporting, and Importing MIDI Groove Clips 429
Importing Project5 Patterns 430
16 Editing MIDI Events and Continuous Controllers (CC) 433
Event Inspector Toolbar 433
The Piano Roll View....434
Note Map Pane 436
Drum Grid Pane. 436
Notes Pane 436
Controller Pane 436
Track List Pane 437
Opening the View 437
Working with Multiple Tracks in the Piano Roll View. 437
Note Names. 439
Displaying Notes and Controllers (Piano Roll View Only) 440
Adding and Editing Notes in the Piano Roll 441
Selecting Notes 441
Editing Notes with the Draw Tool and the Select Tool 443
Show velocity on selected notes (optional) 447
Selection sensitive velocity drawing 448
Note/controller painting (freehand) 449
Note/controller painting (linear) 449
Controller/velocity painting (freehand)....450
Controller/velocity painting (linear) 450
Note split 450
Note glue 451
Drag-quantize 452
MIDI event mute 452
Erase tool behavior 454
Note hit testing improvements 454
Velocity Audition options 455
Hiding events in muted clips 455
Adjust velocity without changing the Display Type 455
Flexible Piano Roll tools. 457
The PRV Tool Configuration dialog 457
Default PRV tool assignments....463
Adding and Editing Controllers in the Piano Roll 466
Multiple automation controller lanes 466
Adding Controllers 470
Selecting Controllers 472
Select controllers within note duration....472
Editing Controllers 473
Piano Roll Microscope mode 474
The Inline Piano Roll View 477
Displaying the Inline Piano Roll View 478
The MIDI Scale.... 479
Displaying Notes and Controllers in the Inline Piano Roll View 480
Selecting and Editing Events 482
Copying and Pasting MIDI Data 482
Transposing 482
Inserting Time or Measures into a Project 484
Stretching and Shrinking Events 486
Reversing Notes in a Clip 489
Adding Crescendos and Decrescendos 489
Changing the Timing of a Recording. 490
Quantizing 491
Fit Improvisation 498
Snap to Scale 501
Searching for Events. 505
Event Filters 505
Controllers, RPNs, NRPNs, and
Automation Data 510
The Event List View 512
Event List Buttons and Overview 514
Selecting Events in the Event List View 516
Event List Display Filter 516
Editing Events and Event Parameters 517
Additional Event Information. 518
MIDI Effects (MIDI Plug-ins) 519
MIDI Effects Presets 520
Quantizing 520
Adding Echo/Delay 521
Filtering Events. 523
Adding Arpeggio 523
Analyzing Chords 525
Changing Velocities with the Velocity Effect. 526
Transposing MIDI Notes with the Transpose MIDI Effect. 527
17 Drum Maps and the Drum Grid Pane 529
The Basics 529
Creating and Editing a Drum Map....530
The Drum Map Manager ....530
Working in the Drum Map Manager. 532
The Map Properties Dialog 532
Saving a Drum Map. 533
Using Drum Maps 533
Assigning a MIDI Track to a Drum Map. 534
Opening a Drum Map 534
Displaying Tracks in the Drum Grid Pane ....535
Velocity Tails 535
Editing Note Velocities....536
Changing Mapped-note Settings 537
The Drum Grid Pane 539
Grid Lines 539
The Pattern Brush Tool 540
How the Pattern Brush Tool Works 540
Creating Custom Patterns....542
18 Editing Audio....545
Digital Audio Fundamentals....545
Basic Acoustics 546
Example—A Guitar String ....546
Waveforms 548
Recording a Sound 550
The Decibel Scale 551
Audio Clips 552
Managing Audio Data 552
Basic Audio Editing 553
Editing Clip Properties 553
Moving, Copying, Pasting and Deleting Audio Clips .....554
Audio Scaling....555
Splitting Audio Clips. 558
Bouncing to Clips. 559
Scrubbing 560
Basic Audio Processing 560
Using the Normalize and Gain Commands ....561
Reversing Audio Data 562
Advanced Audio Processing 563
Removing Silence 563
Removing DC Offset 565
Applying Fades and Crossfades Offline 565
Audio Effects (Audio Plug-ins) 567
Real-Time Audio Effects Processing 568
Destructive Audio Effects Processing. 568
19 Software Instruments.... 569
Synth Rack View 570
Synth Tracks 571
Inserting Soft Synths....571
Opening a Soft Synth's Property Page 574
Synth Rack Icons 575
Playing a Soft Synth 575
Muting and Soloing Soft Synth Tracks 577
Rename synths in the Synth Rack view 578
Multi-port Soft Synths 578
Converting Your Soft Synth Tracks to Audio. 579
Using the Assignable Controls Feature. 580
Automating Controls from the Synth Rack 582
Displaying Synth Rack Automation 582
Remote Control of the Synth Rack 582
Drawing Soft Synth Automation in the Clips Pane 583
Soft Synth MIDI Output Support 583
Recording a Soft Synth's MIDI Output 583
ReWire 585
ReWire Instruments 585
Inserting a ReWire Instrument 586
Routing MIDI Data to ReWire Instruments 588
Mixing Down ReWire Instruments 588
Automating ReWire Instruments.... 588
ReWire Troubleshooting Guide 588
Stand-alone Synths. 589
Playing a Stand-alone Synth 589
Recording a Stand-alone Synth 590
20 Mixing 593
Preparing to Mix 594
Configuring the Console and Track Views 596
Mixing MIDI 599
Mixing a MIDI Track. 599
Converting MIDI to Audio 600
Signal Flow 602
Sidechaining Signal Flow 604
Routing and Mixing Digital Audio. 605
Stereo Buses 607
Surround Buses (SONAR Producer Only)....608
Main Outs 609
Metering....609
What the Meters Measure 610
Hiding and Showing Meters....610
Changing the Meters' Display 611
Segmented and Non-segmented Meters. 613
Changing the Meters' Performance....614
MIDI Activity indicators 615
Peak Markers 615
Waveform Preview for Buses and Synth Tracks 616
Freeze Tracks and Synths 617
Using Real-Time Effects 621
Effects Parameters 622
How to Use Real-Time Effects 622
Presets and Property Pages 625
Effects on Clips 626
Sidechaining 629
Sidechainable Vintage Channel VC-64 plug-in 631
External Insert plug-in 632
Organizing Plug-ins 638
VST Configuration 638
V-Vocal Clips 641
Using V-Vocal 642
Playing Back V-Vocal Clips 644
Pitch Editing. 645
Editing Time....648
Editing Formants 649
Editing Dynamics....650
Context Menu 650
V-Vocal pitch-to-MIDI 651
Keyboard Shortcuts 651
Using the Per-track EQ 653
Applying Audio Effects 656
Applying MIDI Effects 657
Using Control Groups 657
Quick Groups 660
Using Remote Control.... 662
Using the Learn Option.... 664
Bouncing Tracks 664
Real-time bounce 666
Preparing to Create an Audio CD. 668
Preparing Audio for Distribution 669
Exporting OMF Files.... 678
Dithering 679
Burning audio CDs 680
Cakewalk Publisher. 680
21 Surround Mixing.... 683
Surround Basics 683
Configuring SONAR for Surround Mixing 684
Using Surround Format Templates 684
Choosing a Surround Format 687
Surround Buses 688
Routing in Surround 688
Downmixing 689
Panning in Surround 691
Controlling Surround Panning 692
Automating Surround Panning 696
Joystick Support 697
Surround Metering 698
Bass Management 698
Surround Effects 699
The SurroundBridge 699
Effect Property Pages. 700
Effect Presets 700
How to Patch and Configure Surround Effects. 701
Importing Surround Mixes 703
Exporting Surround Mixes....704
22 Automation....705
Quick Automation Guide 706
The Automation Toolbar 707
Automation Methods 707
Automation Read and Automation Write Buttons 708
Recording Individual Fader or Knob Movements 709
Creating and Editing Audio Envelopes 710
Creating and Editing MIDI Envelopes 712
Dotted Lines 715
Using the Envelope Draw Tool 715
Drawing Envelopes on Clips 716
Showing or Hiding Envelopes 717
Deleting Envelopes 718
Copying and Pasting Envelopes 719
Resetting Envelopes and Nodes to Current or Neutral Values 720
Envelope Mode and Offset Mode 721
Converting MIDI Envelopes to Shapes 722
Snapshots 723
Adding Nodes at a Selection....724
Automating Effects....725
Automating Individual Effects Parameters. 725
Recording Automation Data from an External Controller .....726
Reassigning envelopes 727
The Envelope Editing and Node Editing menus 728
Automated Muting 729
23 Layouts, Templates and Key Bindings 731
Layouts 732
Floating Views and Dual Monitor Support....734
Templates 735
Template Example: Three MIDI instruments....737
Key Bindings 738
Importing Key Bindings 740
Exporting Key Bindings 740
24 Notation and Lyrics....743
The Staff View 743
Opening the Staff View 744
Staff Pane Layout 745
The Staff pane right-click menu....746
The Fretboard 747
Fretboard pop-up menu. 748
Basic Musical Editing 749
Inserting Notes on the Staff 750
Inserting Notes with the Fretboard 751
Selecting Notes 751
Moving, Copying, and Deleting Notes on the Staff. 752
Moving Notes from within the Fretboard. 753
Auditioning 753
Changing Note Properties 754
Deglitch Dialog 755
Working with Triplets 756
Beaming of Rests 756
Changing the Way Notes Are Displayed 757
Using Enharmonic Spellings.... 757
MIDI Channels and the Fretboard 759
Chords and Marks. 760
Adding Chord Symbols. 760
Adding Expression Marks. 764
Adding Hairpin Symbols 765
Adding Pedal Marks 766
Tablature....767
Tablature Settings 767
Changing Fretboard Texture and Orientation. 768
Quick TAB 769
Regenerate TAB. 769
Entering Notes from the TAB Staff 770
Single Note Editing from the TAB Staff 770
Editing Chords or Groups of Notes from the TAB Staff 771
Editing Notes and Chords from the Fretboard 771
Working with Percussion. 772
Setting Up a Percussion Track 773
Setting Up a Percussion Staff or Line. 773
Ghost Strokes. 775
Printing 776
The Meter/Key View 777
What Is Meter? 777
What Is Key? 778
Opening the Meter/Key View 778
Adding and Editing Meter/Key Changes. 779
Music Notation for Non-concert-key Instruments 780
Working with Lyrics 781
Adding and Editing Lyrics in the Staff View 782
Opening the Lyrics View 783
Adding and Editing Lyrics in the Lyrics View 783
25 Instrument Definitions 785
Assigning Instruments 786
Importing Instrument Definitions 788
Creating Instrument Definitions 789
Creating and Editing Patch Name and Other Lists 792
Copying Name Lists 793
Assigning the Bank Select Method 794
Assigning Patch Names 795
Assigning Note Names 796
Assigning Controller, RPN, and NRPN Names 798
SONAR Flags in Instrument Definitions 799
Instrument Definition Tutorial....800
Why Use Instrument Definitions? 800
What Can They Do and Not Do? 801
Where Do Instrument Definitions Come From?......801
Start of Tutorial 801
26 System Exclusive Data....805
What Is System Exclusive? 806
Sysx Events. 806
Using the System Exclusive View 807
Sending Sysx Banks at Startup 807
Importing, Creating, and Dumping Sysx Banks 808
More about Dump Request Macros....810
Editing Sysx Banks 811
Sysx View Buttons 811
Send 812
Send All 812
Receive 812
Clear Bank 812
Name 812
Auto 812
Output 812
Edit Bytes 813
Load Bank and Save Bank 813
Transmitting Banks During Playback 814
Real-time Recording of System Exclusive Messages....814
Sysx Echo 815
Sysx .ini File Settings 815
Troubleshooting 816
27 Synchronizing Your Gear 819
Synchronization Overview.... 819
Choosing Clock Sources: SONAR as Master 820
MIDI Synchronization 821
SONAR as the Slave 822
SONAR as the Master 823
Using MIDI Sync with Drum Machines 824
Troubleshooting MIDI Sync 824
SMPTE/MIDI Time Code Synchronization 824
Playing Digital Audio under SMPTE/MTC Sync 828
SMPTE/MTC Sync and Full Chase Lock 828
Troubleshooting SMPTE/MTC Sync. 829
MIDI Machine Control (MMC) 830
28 Audio File Management.... 833
The Project Files Dialog 834
Project Files and Bundle Files.... 835
Audio Folders 836
Global Audio Folders 836
Per-project Audio Folders.... 837
Imported Audio Files. 838
Backing Up Projects with Digital Audio 839
Deleting Unused Audio Files.... 841
29 Improving Audio Performance 843
System Configuration 843
The Wave Profiler.... 843
Enabling and Disabling Audio Devices....844
Sampling Rates 845
Bit Depths, and Float Resolution 846
Bit Depths for Playback 847
Bit Depths for Recording 848
Bit Depths for Importing Audio 848
Bit Depths for Exporting Audio 849
Bit Depths for Rendering Audio 849
Preparing Higher-quality Audio for CD Burning. 849
SONAR Project File Compatibility Notes. 850
Improving Performance with Digital Audio 851
Getting the Most Out of Your PC. 851
Mixing Latency....853
ASIO Drivers 854
Queue Buffers 854
Status Bar/CPU Meter/Disk Meter 855
Reduce GUI updates to improve playback performance. 856
24-bit Tips 857
Dropouts and Other Audio Problems. 858
Optimized Picture Cache Redrawing. 865
Improving recording performance 867
MIDI Prepare Buffer Size and automation. 867
30 External Devices 869
Edirol PCR Controllers 870
Setting up Control Surfaces 872
ACT MIDI Controller Plug-in 874
Using the ACT MIDI Controller Property Page 874
ACT presets....875
Assigning Controls on Your Controller/Surface to Cells in the ACT MIDI Property Page 875
Cakewalk Generic Surface Plug-in 876
Loading Cakewalk Generic Surface Presets....877
Assigning Faders and Knobs to Control SONAR Parameters. 877
Controlling Different Tracks or Groups of Tracks 880
The Cakewalk Generic Surface Property Page....881
Euphonix EuCon control surface support 886
The WAI Display 886
ACT 888
OPT Panels 890
Working with StudioWare....890
StudioWare Panels 891
Using StudioWare Panels 892
Grouping Controls 895
Recording Control Movements 897
Control Settings 899
StudioWare Panel Drawing Speed 900
31 Using CAL.... 901
Running CAL Programs 901
Sample CAL Files 901
SPLIT NOTE TO TRACKS.cal 902
SPLIT CHANNEL TO TRACKS.cal 902
RANDOM TIME.cal 902
THIN CONTROLLER DATA.cal 902
THIN CHANNEL AFTERTOUCH.cal 903
THIN PITCH WHEEL.cal 903
MAJOR CHORD.cal, MINOR CHORD.cal 903
32 Troubleshooting.... 905
Audio dropouts or crash when playing back large files at maximum latency ..... 906
When I Play a File, I Don't Hear Anything....906
I Can't Record from My MIDI Instrument. 908
When I Play a File Containing Audio, the Audio Portion Doesn't Play ..... 908
I Can't Record Any Audio 909
The Music Is Playing Back with the Wrong Instrument Sounds . . . . . . . . . . . . . . 910
My Keyboard Doubles Every Note I Play 910
I Don't See the Clips Pane in the Track View 911
Why Can't SONAR Find My Audio Files? 911
Why Do I Get Errors from the Wave Profiler?....911
My Track or Bus Fader is Maximized, But There's No Sound or Level. 912
How Do I Use SONAR to Access All the Sounds on My MIDI Instrument? ..... 912
I Hear an Echo When I Record 913
Dropouts Happen in High Bit-depth or High Sample Rate Audio 913
Patching an Effect into SONAR Causes a Dropout 914
I Can't Open My Project 914
Audio Distorts at Greater than 16 Bits. 914
No Sound from My Soft Synth. 915
My Pro Audio 9 Files Sound Louder/Softer When I Open Them in SONAR. . . . . . 915
SONAR Can't Find the Wavetable Synth or MPU401....916
I Get an Error Message When I Change a Project to 24-bit Audio . . . . . . . . . . . . . . . . . 916
Bouncing Tracks Takes a Long Time 916
The GUI is not Smooth During Playback 917
Plug-in windows flicker or don't display properly 917
File Recovery mode 918
33 Hardware Setup....921
Connect Your MIDI Equipment 921
Set Up to Record Digital Audio 923
34 Initialization Files 929
Initialization Files 929
Initialization File Format....930
Cakewalk.ini 931
TTSSEQ.INI. 939
AUD.INI 942
35 MIDI Files 949
Timebases 950
Supported MIDI File Meta-Events 950
Features Not Supported by MIDI Files 951
Other MIDI File Handling Notes. 951
Special Handling of GM, GS, and XG MIDI Files 951
If You Have Problems Playing MIDI Files 952
If You Plan to Publish Your Songs 952
36 New features in SONAR 8.5 955
PX-64 Percussion Strip 959
VX-64 Vocal Strip. 959
Session Drummer 3 961
Alias Factor 962
Classic Phaser....962
HF Exciter 963
Mod Filter 963
Multivoice Chorus/Flanger 964
Para-Q 964
Stereo Compressor/Gate 965
Stereo Delay 965
Studioverb2 966
New Impulse Responses for Perfect Space 966
Step Sequencer 2.0 966
Integrated arpeggiator.... 967
Support for more MIDI ports 968
Matrix view 968
REX file import 969
Freeze and Archive buttons in Track view 970
New Freeze option 970
Solo track/bus from plug-in window 970
Insert Send Assistant enhancements 971
DC offset meter in Analyst 973
AudioSnap 2.0....973
TAB to transients. 974
Auto Scroll Lock in Clips pane 975
Clips pane vertical grid lines 975
Draggable Now Time marker 975
Change I/O devices without restarting SONAR 976
VST plug-in compatibility options 976
Media Browser enhancements 977
TS-64 Transient Shaper plug-in 978
TL-64 Tube Leveler plug-in 979
Beatscape 980
Dimension Pro. 981
Channel Tools plug-in 982
Native Instruments GUITAR RIG 3 LE 983
TruePianos Amber Module VSTi plug-in. 983
Digital Sound Factory Volume 2 Classic Keys for Dimension Pro 984
Hollywood Edge FX for Dimension Pro. 984
Dimension Pro expansion packs. 985
Assign tracks to mono hardware outputs 986
Enhanced CPU performance 987
Audio driver changes without restart. 987
Minimize driver state changes. 988
Vista audio enhancements 989
WASAPI support. 989
MMCSS task profile support. 990
WaveRT updates 991
Instrument track 992
Media Browser enhancements ..... 995
Auditioning audio files 997
Auditioning MIDI files....998
Using Content Location presets 1000
Arm tracks during playback/recording 1001
Insert Send Assistant 1001
Exclusive Solo mode 1005
Solo Override....1006
Live input bounce....1006
Clip selection groups 1007
Editing clips in a group 1009
Enhanced editing with keyboard 1012
Navigating with a keyboard 1014
Selecting with a keyboard 1015
Editing with a keyboard 1016
Aim Assist line 1019
Free Edit tool 1020
Quick Group enhancement 1021
Edit tools enhancements 1021
Transport enhancements 1021
Pause button 1021
True Rewind and Fast Forward buttons 1022
Audition button....1022
Control surface enhancements 1023
Synchronizing channel strips between SONAR and control surfaces ..... 1023
Control surfaces keep MIDI port assignments....1023
Display logical VST parameter values....1024
MIDI out port assignments are retained when adding/removing MIDI devices . . . 1024
Audio Option configuration settings....1025
Limit number of plug-in sidechain inputs 1026
Select all AudioSnap/SlipStretched clips....1027
SurCode Dolby Surround encoders 1027
QuickTime 7 import/export....1027
Updated ACT mappings and presets....1027
Live Input PDC override 1028
Multiprocessor load balancing 1029
AIM Assist enhancements 1029
Snap to Grid enhancements ..... 1030
Dynamic Arm enhancement 1031
External insert enhancements.... 1032
Global effects bypass 1032
Split clip group enhancement 1033
Create new group when pasting grouped clips.... 1033
New split clip options. 1034
Notification when track/bus outputs are assigned to silent output 1034
GUITAR RIG 3.2.1 LE enhancements 1035
TruePianos Vista 64 support. 1035
37 Included plug-ins 1037
Audio effects 1041
MIDI effects....1074
Instruments 1077
38 Cyclone 1087
Cyclone Toolbar 1088
Pad Groups 1088
Pad Inspector 1089
Loop Bin 1091
Loop View and Key Map View 1091
Pad Editor.... 1092
Slice Inspector 1092
Using Cyclone....1093
Controlling Individual Pads—Volume, Pan, Mute, Solo, Sync, Looping, and Content 1096
Mixing Down Cyclone 1096
Loop Editing 1097
Keyboard Shortcuts in Cyclone 1098
Undo and Redo 1098
39 Menu Reference 1099
File > New 1099
File > Open 1099
File > Revert 1099
File > Close 1099
File > Save 1100
File > Save As. 1100
File > Info....1100
File > Project Audio Files 1100
File > Import > Audio .... 1101
File > Import > Audio CD 1101
File > Import > Video File....1101
File > Import > MIDI 1102
File > Export > Audio 1102
File > Export > Video 1102
File > Export > MIDI Groove Clip....1102
File > Export > OMF....1103
File > Export > Track Template ..... 1103
File > Print 1103
File > Print Preview 1103
File > Print Setup 1103
File > Send....1103
File > Recent File....1104
File > Exit....1104
Edit > Undo 1104
Edit > Redo 1104
Edit > History 1104
Edit > Select > All. 1104
Edit > Select > None 1105
Edit > Select > By Filter 1105
Edit > Select > By Time ..... 1105
Edit > Select > From = Now....1105
Edit > Select > Thru = Now ..... 1106
Edit > Select > From = Start. 1106
Edit > Select > Thru = End....1106
Edit > Select > Select Track Envelopes with Selected Clips ..... 1106
Edit > Cut....1106
Edit > Copy 1107
Edit > Paste .... 1107
Edit > Delete 1107
Edit > Bounce to Clip(s)....1108
Edit > Bounce to Track(s) 1108
Edit > Groove Clip Looping ..... 1108
Edit > Create V-Vocal Clip 1108
Edit > Clip Mute/Unmute.... 1109
Edit > Isolate Clip(s) in Layer 1109
Edit > Split. 1109
Edit > Apply Trimming.... 1109
Edit > Revert Clip(s) to Original Time Stamp 1109
Edit > Clip Lock > Lock Position 1109
Edit > Clip Lock > Lock Data.... 1110
Edit > Convert MIDI to Shapes 1110
Process > Audio > Remove Silence 1110
Process > Audio > Gain 1110
Process > Audio > Normalize 1111
Process > Audio > Remove DC Offset 1111
Process > Audio > Fade/Envelope 1111
Process > Audio > Crossfade 1111
Process > Audio > Reverse 1112
Process > Apply Audio Effects 1112
Process > Apply MIDI Effects 1112
Process > Audio Fx. 1113
Process > Audio Fx > Plug-in Layouts > Manage Layouts ..... 1113
Process > MIDI Fx 1113
Process > Deglitch 1114
Process > Slide 1114
Process > Nudge > Left 1 ..... 1114
Process > Nudge > Right 1.... 1114
Process > Nudge > Left 2 ..... 1115
Process > Nudge > Right 2....1115
Process > Nudge > Left 3 ..... 1115
Process > Nudge > Right 3....1115
Process > Nudge > Up 1115
Process > Nudge > Down 1116
Process > Nudge > Settings 1116
Process > Quantize.... 1116
Process > Groove Quantize 1116
Process >AudioSnap Pallette 1117
Process > Interpolate 1117
Process > Length....1117
Process > Run CAL 1118
Process > Retrograde ..... 1118
Process > Transpose....1118
Process > Scale Velocity ..... 1119
Process > Fade Selected Clips ..... 1119
Process > Fit to Time....1119
Process > Fit Improvisation ..... 1120
Views > Piano Roll....1120
Views > Step Sequencer ..... 1120
Views > Event List .... 1121
Views > Staff 1121
Views > Loop Construction ..... 1121
Views >Lyrics 1121
Views > Media Browser 1122
Views > Matrix View....1122
Views > V-Vocal Editor 1122
Views > Track View ..... 1122
Views > Console 1123
Views > Synth Rack....1123
Views > Video 1123
Views > Big Time....1123
Views > Markers 1123
Views >Tempo 1124
Views > Meter/Key....1124
Views > Sysx 1124
Views > Navigator 1124
Views > Surround Panner ..... 1125
Views > Layouts....1125
Views > Toolbars ..... 1125
Views > Show Toolbars ..... 1125
Views > Enable Tabbing in Open Views ..... 1126
Insert > Bank/Patch Change ..... 1126
Insert > Meter/Key Change 1126
Insert > Tempo Change....1126
Insert > Time/Measures....1126
Insert > Marker 1127
Insert >Controllers 1127
Insert > Audio Track 1127
Insert > MIDI Track 1127
Insert > Multiple Tracks.... 1127
Insert > Track Folder.... 1127
Insert > Insert from Track Template > More Track Templates ..... 1128
Insert > Insert from Track Template > Import Filter. 1128
Insert > Stereo Bus 1128
Insert > Surround Bus.... 1128
Insert > Series of Tempos.... 1128
Insert > Soft Synths. 1128
Insert > ReWire Device.... 1129
Transport > Play 1129
Transport > Audition 1129
Transport > Record 1129
Transport > Rewind. 1130
Transport > Stop 1130
Transport > Stop Audio / Transport > Run Audio 1130
Transport > Reset 1130
Transport > Step Record.... 1131
Transport > Toggle Step Record Activate.... 1131
Transport > Loop and Auto Shuttle.... 1131
Transport > Record Options 1131
Transport > Reject Loop Take 1132
Transport > Update Patch Cache 1132
Transport > Tempo Ratio 1 1132
Transport > Tempo Ratio 2....1132
Transport > Tempo Ratio 3....1133
Transport > Set Timecode at Now 1133
Transport > Set Measure/Beat at Now 1133
Go > Time 1133
Go > From.... 1133
Go > Thru 1134
Go > Beginning 1134
Go > End.... 1134
Go > Previous Measure....1134
Go > Next Measure 1135
Go > Previous Marker 1135
Go > Next Marker....1135
Go > Search....1135
Go > Search Next 1135
Go > Go to Track Peak 1136
Tracks > Property > Name 1136
Tracks > Property > Outputs 1136
Tracks > Property > Inputs....1136
Tracks > Property > Channel ..... 1136
Tracks > Property > Key+ 1137
Tracks > Property > Vel+....1137
Tracks > Property > Time+ 1137
Tracks > Property > Bank 1137
Tracks > Property > Patch 1137
Tracks > Property > Volume 1138
Tracks > Property > Pan 1138
Tracks > Property > Icon > Load Icon 1138
Tracks > Property > Icon > Reset Icon 1139
Tracks > Mute 1139
Tracks > Archive 1139
Tracks > Show Automated Mute ..... 1139
Tracks > Solo....1139
Tracks > Automation Read Enable 1140
Tracks > Automation Write Enable 1140
Tracks > Arm for Recording....1140
Tracks > Input Monitor/Echo 1140
Tracks > Freeze > Freeze Track ..... 1140
Tracks > Freeze > Quick Freeze Track ..... 1140
Tracks > Freeze > Unfreeze Track 1141
Tracks > Freeze > Quick Unfreeze Track ..... 1141
Tracks > Freeze > Freeze Synth ..... 1141
Tracks > Freeze > Quick Freeze Synth ..... 1141
Tracks > Freeze > Unfreeze Synth 1141
Tracks > Freeze > Quick Unfreeze Synth ..... 1141
Tracks > Freeze > Freeze Options 1142
Tracks > Clone 1142
Tracks > Delete.... 1142
Tracks > Wipe 1142
Tracks > Hide 1142
Tracks > Show Record Meter 1142
Tracks > Show Playback Meter 1143
Tracks > Layers > Show Layers 1143
Tracks > Layers > Remove Empty Layers 1143
Tracks > Layers > Rebuild Layers 1143
Tracks > Sort. 1143
Tracks > Inline PRV > PRV Mode 1143
Tracks > Inline PRV > PRV Tool > Select/Draw/Erase.... 1144
Tracks > Inline PRV > Fit Content. 1144
Tracks > Inline PRV > Show Velocity Tails 1144
Tracks > Inline PRV > Show/Hide Continuous Events 1144
Tracks > Inline PRV > Show/Hide Notes 1144
Tracks > Inline PRV > Display All Continuous Events 1145
Tracks > Snap to Scale > Enable/Disable Snap to Scale 1145
Tracks > Snap to Scale > Root Note > [name of root note] 1145
Tracks > Snap to Scale > Scales > [name of scale] 1145
Tracks > Snap to Scale > Scales > Scale Manager ..... 1145
Tracks > Snap to Scale > Scales > Snap Settings ..... 1146
Tracks > Input Quantize > Enable/Disable Input Quantize ..... 1146
Tracks > Input Quantize > Quantize Settings ..... 1146
Tools > Burn Audio CD 1146
Tools > Cakewalk Publisher 1146
Tools > Consolidate Project Audio 1147
Tools > Clean Audio Folder 1148
Tools > Change Audio Format 1148
Options > MIDI Devices 1148
Options > Instruments.... 1148
Options >Audio 1149
Options > Audio Meter Settings 1150
Options > Project 1150
Options > Global Options 1150
Options > Colors 1150
Options > Icons > Show Icons 1150
Options > Icons > Track View > Show Icons ..... 1151
Options > Icons > Track View > Large Icons....1151
Options > Icons > Track View > Small Icons ..... 1151
Options > Icons > Track View > Show in Header 1151
Options > Icons > Track View > Show Custom in Header....1151
Options > Icons > Track View > Show in Strip....1151
Options > Icons > Track Inspector > Show Icons 1151
Options > Icons > Track Inspector > Show Large Icons .....1151
Options > Icons > Track Inspector > Show Small Icons 1152
Options > Icons > Console > Show Icons 1152
Options > Icons > Console > Show Large Icons ..... 1152
Options > Icons > Console > Show Small Icons .....1152
Options > Icons > Synth Rack > Show Large Icons. 1152
Options > SoundFonts....1152
Options > Key Bindings ..... 1153
Options > Initialization File....1153
Options > Non-Destructive MIDI Editing 1153
Options > Time Ruler Format > M:B:T 1153
Options > Time Ruler Format > H:M:S:F 1154
Options > Time Ruler Format > Samples 1154
Options > Menu Editor....1154
Options > Menu Layouts > [name of layout] 1154
Options > Drum Map Manager....1154
Options >Controllers/Surfaces 1154
Options > ACT Learn 1155
Options > PRV Tool Configuration....1155
Window > Cascade 1155
Window > Tile in Rows. 1155
Window > Tile in Columns ..... 1155
Window > Arrange Icons 1155
Help > Help Topics. 1156
Help > View README.RTF 1156
Help > Quick Start 1156
Help > Tip of the Day 1156
Help > Keyboard Shortcuts.... 1156
Help > SONAR on the Web 1171
Help > Register Online 1171
Help > Time Trial Activator 1171
Help > Cakewalk Problem Reporter 1172
Help > About SONAR 1172
Delete Track 1172
Group 1172
Remove From Group 1172
Set Start = Current 1172
Set End = Current 1173
Insert Audio Track.... 1173
Insert MIDI Track. 1173
Hide Module 1173
Set Snap-to = Current 1174
90 dB Range 1174
78 dB Range 1174
60 dB Range 1174
42 dB Range 1174
24 dB Range 1175
12 dB Range 1175
Set As Current Track. 1175
Delete 1175
View Options....1175
Set Loop Points.... 1176
Select Loop Region.... 1176
Set Punch Points. 1176
Loop On/Off. 1176
Set Punch Points....1176
Select All Siblings 1176
Unlink 1176
Select Punch Region. 1177
Snap Properties 1177
Set Snap Offset to Now Time 1177
Envelope > Create Track Envelope > Volume 1177
Envelope > Create Track Envelope > Pan 1177
Jump 1177
Linear....1178
Fast Curve 1178
Slow Curve....1178
Drag and Drop Options 1178
Clip Properties 1178
Track Properties....1179
Layout 1179
Regenerate Tablature 1179
Export to ASCII TAB 1179
Note Length > Whole 1179
Note Length > Half....1179
Note Length > Quarter 1179
Note Length > Eighth 1180
Note Length > Sixteenth 1180
Note Length > Thirty second 1180
Note Length > Dotted....1180
Note Length > Triplet 1180
Mirror Fretboard....1180
Rosewood Hi 1180
Rosewood Lo....1181
Ebony Hi 1181
Ebony Lo 1181
Maple Hi....1181
Maple Lo 1181
Show Previous Track(s) 1181
Show Next Track(s)....1181
Animate 1181
Insert 1182
Delete....1182
Original Size....1182
Stretch to Window 1182
Preserve Aspect Ratio 1182
Integral Stretch....1183
Full Screen....1183
Time Display Format > M:B:T 1183
Time Display Format > SMPTE 1183
Time Display Format > Frames. 1183
Time Display Format > None 1183
Time Display Format > Font 1184
Background Color > Black 1184
Background Color > White 1184
Video Properties 1184
Add Node 1184
Reset Node....1184
Delete Node 1185
Note. 1185
Key Aftertouch.... 1185
Controller....1185
Patch Change 1185
Channel Aftertouch 1185
Pitch Wheel 1185
RPN....1186
NRPN 1186
Sysx Bank....1186
Sysx Data 1186
Text 1186
Lyric....1186
MCI Command 1187
Audio....1187
Expression 1187
Hairpin....1187
Chord 1187
Event Manager 1187
Lock Contents.... 1188
Enable Floating 1188
Show Entire Project. 1188
Zoom tool 1188
Fast Zoom Options 1188
Previous Zoom 1189
Show All Tracks 1189
Track Manager 1189
Record Meters 1189
Playback Meters 1189
Output Bus Meters 1189
Record Meter Options > Peak 1190
Record Meter Options > RMS 1190
Record Meter Options > Peak + RMS 1190
Record Meter Options > Show Labels 1190
Record Meter Options > Hold Peaks 1190
Record Meter Options > Lock Peaks 1190
Playback Meter Options > Peak. 1191
Playback Meter Options > RMS....1191
Playback Meter Options > Peak + RMS 1191
Playback Meter Options > Show Labels 1191
Playback Meter Options > Hold Peaks 1191
Playback Meter Options > Lock Peaks 1191
Output Bus Meter Options > Peak 1192
Output Bus Meter Options > RMS 1192
Output Bus Meter Options > Peak + RMS 1192
Output Bus Meter Options > Show Labels....1192
Output Bus Meter Options > Hold Peaks....1192
Output Bus Meter Options > Lock Peaks....1192
Playback Meter Options > Pre Fader....1193
Output Bus Meter Options > Pre Fader 1193
Playback Meter Options > Post Fader 1193
Output Bus Meter Options > Post Fader 1193
Output Bus Meter Options > Pre Fader Post FX 1193
Default Fade-In Curve > Linear ..... 1193
Default Fade-In Curve > Fast Curve ..... 1193
Default Fade-In Curve > Slow Curve ..... 1194
Default Fade-Out Curve > Linear....1194
Default Fade-Out Curve > Fast Curve ..... 1194
Default Fade-Out Curve > Slow Curve ..... 1194
Default Crossfade Curves > Linear Out - Linear In ..... 1194
Default Crossfade Curves > Fast Out - Fast In .....1194
Default Crossfade Curves > Slow Out - Slow In .....1195
Default Crossfade Curves > Fast Out - Slow In 1195
Default Crossfade Curves > Slow Out - Fast In 1195
Default Crossfade Curves > Linear Out - Fast In 1195
Default Crossfade Curves > Linear Out - Slow In 1195
Default Crossfade Curves > Fast Out - Linear In 1195
Default Crossfade Curves > Slow Out - Linear In.... 1196
Percentage 1196
dB 1196
Zoom Factor 1196
Show and Fit Selection 1196
Fit Tracks to Window.... 1196
Fit Tracks and Buses to Window.... 1196
Show only Selected Tracks.... 1197
Hide Selected Tracks 1197
Show All Tracks and Buses 1197
Undo View Change 1197
Redo View Change 1197
Show All Envelopes 1197
Hide All Envelopes 1197
Show Volume Envelopes 1198
Show Pan Envelopes 1198
Show Bus Send Envelopes.... 1198
Show Plug-in Envelopes.... 1198
Show Automated Mute Envelopes 1198
Show MIDI Envelopes.... 1198
Create Track Envelopes Using Linear Shapes.... 1198
Velocity 1199
Use Pattern Velocities.... 1199
Use Pattern Polyphony 1199
Use Note Duration.... 1199
Auto Erase 1199
Quarter Note 1199
Quarter Note Triplet 1200
Eighth Note 1200
Eighth Note Triplet 1200
Sixteenth Note.... 1200
Sixteenth Note Triplet 1200
32nd Note 1200
32nd Note Triplet 1200
64th Note 1201
Follow Snap Resolution 1201
Show/Hide Inspector 1201
Vertical FX Bins 1201
Envelope Draw Tool > Freehand Mode ..... 1201
Envelope Draw Tool > Sine Mode ..... 1201
Envelope Draw Tool > Triangle Mode ..... 1201
Envelope Draw Tool > Square Mode....1201
Envelope Draw Tool > Saw Mode ..... 1202
Envelope Draw Tool > Random Mode....1202
Save As Track Template 1202
V-Vocal > Create V-Vocal Clip....1202
V-Vocal > Remove V-Vocal ..... 1202
V-Vocal > Bypass All V-Vocal Clips 1202
V-Vocal > Bypass/Unbypass ..... 1202
V-Vocal > V-Vocal Editor 1203
Pick Tracks Menu 1203
Snap to Grid....1203
Select Tool....1203
Erase Tool 1203
Draw Tool....1203
Scrub tool....1203
Unlink Step Sequencer Clips 1204
Convert MIDI Clip(s) To Step Sequencer ..... 1204
Convert to Mono 1204
Open Clip Effects Bin 1204
Insert New Track(s) or Bus(es) 1204
Free Edit Tool 1205
Envelope Tool 1205
Envelope Draw Tool....1205
Enable/Disable Automatic Crossfades....1205
Show/Hide Meters 1206
Split Tool 1206
Mute Tool....1206
Show/Hide Navigator 1206
Show/Hide Video.... 1207
PRV Select Tool 1207
PRV Draw Tool 1207
PRV Erase Tool 1207
Microscope Mode 1208
Select Controllers Along with Notes 1208
Restores View to Previous State. 1208
Restore state of the view prior to undoing. 1208
Aim Assist 1208
Exclusive Solo....1209
Edit > Select > All AudioSnap/Stretched Clips 1209
Create selection group from selected clips 1209
Remove selected clips from selection groups.... 1209
Process > Global Bypass Effects Bins 1210
Transport > Live Input PDC Override 1210
Transient Tool 1210
Set project tempo from clip 1211
Clip follows project tempo 1211
Edit clip tempo map.... 1211
Save as groove....1211
Copy as MIDI 1212
Add Clip to Pool 1212
Show Pool Lines 1212
Add MBT to Pool.... 1212
Quantize to Pool 1213
40 Beginner's Guide to Cakewalk Software 1215
MIDI....1216
MIDI Channels, Interfaces, Inputs, and Outputs.... 1218
MIDI Drivers 1220
MIDI Files, Projects, Tracks, and Clips. 1220
Controlling Which Sounds You Hear 1222
Audio....1224
Audio Playback in Cakewalk 1225
Tracks....1227
Clips 1228
Track-by-Track Playback....1230
Audio Recording 1231
Connecting an Instrument, Home Stereo, or Microphone to your Sound Card1231
Choosing Inputs. 1237
Audio Hardware (Sound Cards) and Drivers 1239
Consumer and Professional 1239
How do I know if I have a hardware conflict? 1240
Installation and Drivers 1240
41 Dialog Reference.... 1245
About SONAR dialog 1245
Apply Audio Effects dialog 1245
Apply MIDI Effects dialog 1246
Assign Instruments dialog 1246
Assign Series of Inputs dialog 1247
Audio CD Burner dialog 1248
Audio Meter Settings dialog 1249
Audio Mixdown Options dialog.... 1250
Audio Options dialog—General 1251
Audio Options dialog—Advanced 1253
Audio Options dialog—Drivers 1256
Audio Options dialog—Driver Profiles 1257
AudioSnap Options 1257
Automation Read/Write Parameters 1258
Auto-Send Sysx dialog. 1259
AVI Encoder Options dialog....1259
Bank Name dialog 1261
Bank Output dialog 1261
Bank/Patch Change dialog 1261
Bounce to Track(s) dialog 1262
Change Audio Format dialog 1265
Chord Fret Number dialog 1265
Chord Properties dialog 1265
Choose Track Type dialog 1266
Chromatic Tuner 1266
Clean Audio Folder dialog 1266
Clip Properties dialog—General 1267
Clip Properties dialog—Audio Stretching 1269
Clip Properties dialog—Audio Files. 1272
Clone Track(s) dialog 1272
Clip View Options dialog 1273
Complete Registration dialog 1274
Configure Colors dialog.... 1276
Controller/Surface Settings dialog 1289
Controllers/Surfaces dialog.... 1290
Convert MIDI To Shapes dialog 1291
Convert MIDI Clip(s) To Step Sequencer dialog.... 1291
Copy dialog 1292
Create Fx Envelopes dialog 1293
Crossfade dialog 1293
Controller/Surface Settings dialog. 1294
Customize Toolbars dialog 1294
Cut dialog 1295
Define Groove dialog 1296
Define Instruments and Names dialog 1297
Deglitch dialog.... 1297
Delay dialog 1298
Delete dialog 1298
Delete dialog (with multiple selection).... 1299
Drag and Drop Options dialog.... 1299
Drum Map Manager dialog 1300
Dump Request Macro needs your input—Channel/Unit Number 1301
Dump Request Macro needs your input--Patch/Voice/Config Number..... 1301
Duration dialog 1301
Edit Node dialog 1302
Edit System Exclusive Bytes dialog 1302
Event Filter dialog 1302
Event Filter Select Some/Search/Replace dialog 1303
Event Manager dialog 1305
Export Audio dialog.... 1306
Export Color Set dialog 1309
Export MIDI Groove Clip dialog. 1310
Export OMF dialog 1310
Expression Text Properties dialog 1311
Export Track Template....1312
Fade/Envelope dialog 1312
Fade Selected Clips dialog 1313
File Info dialog 1314
File Statistics dialog 1315
File Options dialog 1315
Find Missing Audio File dialog 1315
Fit to Time dialog 1316
Folder Properties dialog 1317
Freeze Options dialog 1317
Gain dialog....1318
Global Options dialog—General 1319
Global Options dialog—Autosave and Versioning ..... 1322
Global Options dialog—Timecode 1322
Global Options dialog—MIDI 1323
Global Options dialog—Folders 1324
Global Options dialog—Editing 1328
Global Options dialog—Nudge 1330
Global Options dialog—Audio Data 1330
Global Options dialog—VST Plug-ins 1332
Go dialog 1333
Groove Quantize dialog 1335
Group Attributes dialog 1337
Group Manager dialog 1337
Hairpin Properties dialog 1339
Import Audio dialog 1339
Import Audio CD Tracks dialog 1340
Import Color Set dialog 1341
Import Instrument Definitions dialog 1342
Import MIDI dialog 1342
Import Video File dialog 1343
Initialization File Settings dialog....1344
Input Quantize dialog....1346
Insert Pitch Change dialog.... 1347
Insert Series of Controllers dialog 1347
Insert Series of Tempos dialog 1348
Insert Soft Synth Options dialog 1348
Insert Time/Measures dialog.... 1350
Insert Tracks dialog.... 1350
Interpolate and Event Filter dialog 1351
Key Bindings dialog.... 1351
Kind of Event dialog 1353
Length dialog.... 1353
Load Pattern dialog.... 1354
Loop/Auto Shuttle dialog 1355
Lyric Properties dialog.... 1355
Map Properties dialog 1355
Marker dialog 1356
Markers dialog.... 1357
Measure Beat/Meter 1357
Menu Editor dialog 1358
Meter/Key Signature dialog.... 1358
Microsoft Media Format Encode Options dialog 1359
MIDI Devices dialog 1360
MIDI Envelope dialog 1361
MIDI Event Type dialog.... 1361
MIDI Input Presets dialog 1361
Migrate Cakewalk Preferences dialog. 1362
Missing Plug-ins dialog 1362
MP3 Export Options dialog 1363
New Global Layout dialog 1364
New Project File dialog 1365
No MIDI Inputs—SONAR dialog 1365
No MIDI Outputs—SONAR dialog 1365
Normalize dialog 1366
Note Names dialog dialog.... 1366
Note Properties dialog.... 1366
Online Registration dialog.... 1367
Open dialog.... 1367
Open Groove File dialog.... 1368
Paste dialog 1368
Patch Browser dialog 1370
Pattern Velocity dialog 1371
Pedal Properties dialog 1371
Percent Done dialog 1371
Percussion Notation Key dialog 1371
Pick Track(s) dialog 1373
Print dialog....1373
Print Preview dialog....1373
Print Setup dialog....1374
Project Files dialog....1375
Project Options dialog—Clock tab 1376
Project Options dialog—Metronome tab 1377
Project Options dialog—MIDI Out tab 1378
Project Options dialog—Sync tab 1379
Project Options dialog—Surround tab 1380
PRV Tool Configuration dialog.... 1382
Quantize dialog 1388
Fast Zoom Options 1389
Reassign Envelopes dialog 1390
Receive System Exclusive dialog 1390
Record Options dialog 1391
Regenerate Tablature dialog ..... 1392
Remote Control dialog 1393
Remove DC Offset dialog 1395
Remove Silence dialog 1395
Rename Existing Layout dialog 1396
Rename Toolbar dialog 1396
Retain Cakewalk Preferences dialog 1397
Revert dialog 1397
Safe Mode dialog....1398
Save As dialog....1398
Save Pattern dialog 1400
Scale Defaults dialog 1400
Scale Manager dialog 1400
Scale Velocity dialog 1401
Search for Missing Audio dialog 1402
Select By Time dialog 1402
Set Default Velocities for Steps dialog 1403
Select Fretboard Track dialog 1403
Set Timecode at Now Time.... 1403
Slide dialog 1403
Snap Scale Settings dialog 1404
Snap to Grid dialog 1404
SONAR Quick Start dialog 1406
Sort Tracks dialog.... 1407
SoundFont Banks dialog.... 1408
SoundFont Locations 1409
Split Clips dialog 1409
Staff View Layout dialog 1410
Staff View Print Configure dialog 1411
Step Record dialog 1412
Step Size dialog 1413
SurroundBridge Plug-in Linker 1413
Sysx Bank Name. 1414
Tablature Settings dialog 1414
Tempo dialog 1416
Tip of the Day dialog 1416
Toolbars dialog 1417
Track Bank dialog 1417
Track Channel dialog 1417
Track Inputs dialog 1418
Track Key+ dialog 1418
Track Manager dialog 1419
Track Name dialog 1419
Track Outputs dialog 1419
Track Pan dialog 1420
Track Patch dialog 1420
Track Properties dialog 1421
Track Template Import Options dialog 1422
Track Time+ dialog 1423
Track Vel+ dialog 1423
Track Volume dialog 1423
Transpose dialog 1424
Undo History dialog 1425
Unlink Clips dialog 1426
Unpack Bundle dialog 1426
Unpack OMF dialog 1427
Unreadable Files dialog 1428
Video Export dialog 1428
Video Properties dialog 1428
Widget Tab Manager....1429
Window Layouts dialog 1430
Windows Media Format Encode Options dialog 1431
WMV Encoder Options dialog 1432
Insert Send Assistant dialog 1433
Missing MIDI Ports dialog 1434
Silent Buses Detected dialog 1434
Rename Cell dialog 1435
Adjust Velocity Multiplier dialog ..... 1435
Matrix Options dialog 1435
Quantize to AudioSnap Pool dialog 1436
42 View Reference 1437
Track View 1437
SONAR Empty View 1445
Piano Roll View 1445
Piano Roll View Toolbar 1446
Note Map Pane 1448
Drum Grid Pane....1448
Notes Pane 1448
Controller pane 1449
Track List pane 1449
Step Sequencer View 1450
Step sequencer interface....1450
Toolbar 1451
Rows 1453
Notes pane 1456
Controllers pane....1457
Keyboard shortcuts 1458
Using the Step Sequencer.... 1459
Working with rows 1460
Working with steps 1462
Working with Controller events 1469
Working with patterns.... 1471
Using the Step sequencer with drum maps.... 1473
Working with Step Sequencer clips 1475
Event List View 1477
Staff View 1477
The Staff View Toolbar 1479
Synth Rack View....1480
Lyrics view. 1483
Console View 1483
Video View 1488
Tempo View 1490
Meter/Key View.... 1491
Markers View 1492
SYSX View 1492
Big Time View 1492
Loop Construction view.... 1492
Media Browser View 1496
Tree View Pane 1497
Contents List Pane 1497
Matrix view 1498
Matrix view user interface.... 1499
Using the Matrix view 1508
Navigator View 1519
Play List View 1519
Surround Panner.... 1520
43 Glossary 1521
Introduction
SONAR is a professional tool for authoring sound and music on your personal computer. It's designed for musicians, composers, arrangers, audio and production engineers, multimedia and game developers, and recording engineers. SONAR supports Wave, MP3, ACIDized waves, WMA, AIFF and other popular formats, providing all the tools you need to do professional-quality work rapidly and efficiently.
SONAR is more than an integrated MIDI and digital audio authoring software package—it's an expandable platform that can function as the central nervous system of your recording studio. With drivers for common high-end audio hardware, full support for audio plug-ins, software synthesizers, StudioWare, MFX MIDI plug-ins, and MIDI Machine Control (MMC) of external MIDI gear, SONAR can handle your most demanding projects.
About SONAR
SONAR lets you work with music on your own level. Here are some of the ways you can make music with SONAR:
Publish
Publish
Publishing usually means printing your music; it's one way to share your finished product with other performers. After you've recorded and arranged a song in SONAR, you can produce printed lead sheets and small scores with lyrics for sharing. You can also share the music files themselves. SONAR will save your music in a format that you can put on a web site or email to other people.
SONAR is the flagship product of the Cakewalk line of integrated MIDI and digital audio sequencers for the Windows platform. SONAR has a comprehensive feature set that makes it the single most productive tool for sound and music authoring. Here are some of the ways you can use SONAR.
Next topic: Music Composition and Exploration.
Music Composition and Exploration
SONAR is a powerful music-composition application, providing tools to record your own musical performances; enhance or improve the quality of those performances; and edit, arrange, and experiment with the music. With a few simple clicks of the mouse, you can arrange, orchestrate, and audition your composition. Fully integrated sequencing allows you to combine the convenience and flexibility of MIDI composition with the high-quality sound and subtlety of digital audio sound recording and reproduction. Change the feel of a piece by locking it to a musical groove, or add delicate delays, anticipations, or echoes that add richness to the music.
SONAR displays and lets you edit your music using standard musical notation and guitar tablature, so you can adjust individual notes, add performance markings, and print individual parts or full scores. You can graphically draw tempo and volume changes, or add lyrics to display on-screen or to include with printed scores.
Next topic: Remixing.
Remixing
SONAR's Groove clips allow you to import, create, export and edit loops, making it possible to quickly change tempos and keys for an entire project. The Media Browser view lets you preview loops in the project's tempo and key before dragging and dropping them onto a track.
Next topic: Game Sound Development.
Game Sound Development
There's no better tool than SONAR for composing music for electronic games. Clip-based sequencing lets you create and reuse musical themes freely, so you can associate musical sections with game characters, locations, objects, and actions. Your creations can be saved and replayed using the compact MIDI file format, which adapts its sound automatically to the target hardware for the best possible sound reproduction.
Next topic: Sound Production and Engineering.
Sound Production and Engineering
If you want to produce music CDs or master tapes, SONAR has virtually everything you need from recording to mixing and mastering. Multichannel recording lets you capture studio or live performances track by track. Reconfigurable buses provide full control over your mix. Real-time stereo effects like chorus, flange, reverb, and delay/echo can be applied as track inserts, in effects loops, or to the master mix. SONAR supports 44.1 KHz sampling for CD-quality sound, 24-bit/96 kHz sound for DVD-quality sound, and lets you choose from lower or higher sample rates as well. All
audio effects are 32-bit floating point for faster processing and high-quality sound reproduction. Many effects now support 64-bit processing for pristine quality.
Next topic: Web Authoring.
Web Authoring
SONAR is the ideal tool for developing and producing music and sound for the World Wide Web, because it lets you save your work in the formats that are most commonly used on web sites: MIDI, MP3, and Windows Media Advanced Streaming Format. Any SONAR project—musical composition, audio clip, commercial spot, jingle with voice-over—can be stored in a web-compatible format with a few simple mouse clicks.
Next topic: Film and Video Scoring and Production.
Film and Video Scoring and Production
SONAR has many of the tools you need to execute audio post-production projects quickly and efficiently. SONAR provides chase lock sync to time code for frame-by-frame accuracy when synchronizing audio or MIDI to film or video. Or, you can turn chase lock off to conserve CPU power. SONAR provides high-quality time stretching and sample-accurate editing with zero-crossing detection so you can make the fine adjustments you need very quickly and easily. In addition, SONAR's support for video files gives you convenient synchronized access to digitized video, making film and video scoring easier than ever.
Next topic: Publishing Music on the Internet.
Publishing Music on the Internet
Cakewalk Publisher allows you to easily present and share your music online. With Cakewalk Publisher, you can create a customized streaming music player with a playlist of your music, upload it to your personal or band's website, and embed it in any other website. You can also update your playlist with album art, links (URLs), and artist, track, & album information.
Next topic: Burning Audio CDs.
Burning Audio CDs
SONAR has integrated Audio CD burning, which allows you to write your audio tracks to an audio CD that can be played in any standard CD player.
Next topic: Flexibility.
Flexibility
SONAR works the way you want to work—you can customize screen layouts, toolbars, and audio and MIDI system configurations to make your work more efficient. SONAR integrates with other sound editing tools so you can access them in an instant without leaving SONAR. There are custom software modules to support specialized audio devices from Roland and Yamaha. SONAR's unique StudioWare technology provides software interfaces for common studio hardware.
Next topic: SONAR basics.
Computers, Sound, and Music
This section provides some background on the different ways that computers store and play sound and music. Computers work with sound and music in two different forms: MIDI and digital audio.
Next topic: MIDI.
MIDI
MIDI (short for Musical Instrument Digital Interface) is the way computers communicate with most sound cards, keyboards, and other electronic instruments. MIDI refers to both the type of cables and plugs used to connect the computers and instruments, and to the language those computers and instruments use to talk to each other. The MIDI standard is accepted and used worldwide. Almost any electronic instrument you buy today will have MIDI connectors and can be used with other MIDI instruments and with your computer's MIDI interface. To record MIDI in SONAR, you have to have a MIDI cable connecting the MIDI OUT port on your MIDI instrument to a MIDI IN port on either your sound card or your MIDI interface. You must also make sure that you have installed the software MIDI driver that came with your sound card or MIDI interface.
The MIDI language conveys information and instructions, both from the computer to the instrument and from the instrument to the computer. For example, if your computer wants your keyboard to play a note, it sends a MIDI “Note On” message and tells the keyboard which note to play. When your computer wants the keyboard to stop playing that note, it sends another message that stops the note from playing.
The MIDI language has many other instructions, such as messages to change the sound that is used to play the notes (the bank and patch), messages that enable working with the sustain pedal and the pitch-bend wheel, and others. By sending the right messages at the right times, your computer can control your electronic instrument and make it play music.
MIDI information can be sent on 16 different channels. You can set up your MIDI equipment to listen for messages on all channels or on only a few.
MIDI files contain all the MIDI messages and timing information that are needed to play a song. MIDI files can be read and played by many different programs, including SONAR, and can even be played by programs on other types of computers. MIDI files have the extension .mid.
There are several important advantages of the MIDI format:
• Large amounts of music can be stored in a very compact form
- Different parts of a piece can easily be assigned to any instrument you can imagine
- The music contains information on notes, tempos, and key signatures that makes it possible to display and edit the piece using standard musical notation
The primary disadvantage of MIDI is that the quality of the sound a listener hears will vary depending on the MIDI equipment the listener is using. For example, MIDI usually sounds much better on an expensive synthesizer than it does on an inexpensive sound card.
Next topic: Digital audio.
Digital audio
Digital audio (frequently referred to here as just "audio") is a simple way to record and play sounds of any type. It works like a tape recorder—you record something, then later play it back. Digital audio stores the sound as a long series of numbers. To record audio in SONAR, you have to have an audio cable connecting the audio output of your electronic instrument to the audio input on your sound card or audio hardware. If you're recording vocals or an acoustic instrument, you need to connect a microphone to the audio input on your sound card or audio hardware.
Sound Waves
Sound waves are vibrations in the air. Sound waves are generated by anything that vibrates; a vibrating object causes the air next to it to vibrate, and the vibration is passed through the air in all directions. When the vibrating air enters your ear, it makes your eardrum vibrate, and you hear a sound. Likewise, if the vibrating air hits a microphone, it causes the microphone to vibrate and send electrical signals to whatever it's connected to.
These vibrations are very fast. The slowest vibration frequency you can hear is about 20 vibrations per second, and the fastest is around 16,000 to 20,000 vibrations per second.
Recording digital audio
To record digital audio, your computer monitors the electrical signal generated by a microphone, an electric guitar, or another source. At equal intervals of time (for CD-quality sound, this means 44,100 times a second), the computer measures and saves the strength of the electrical signal from the microphone, on a scale from 0 to 65,535.
That's it. Digital audio data is just a long series of numbers. The computer sends these numbers, in the form of electrical signals, to a speaker. The speaker then vibrates and generates the same sound that was recorded.
The primary advantage of digital audio is the quality of the sound. Unlike MIDI, a digital audio recording is very rich, capturing all the nuances, overtones, and other characteristics of the sound exactly as performed. The main drawback of digital audio is that it takes up a lot of disk space. To
record a 1-minute segment of stereo, CD-quality digital audio, you need about 10 megabytes of disk space.
On the PC, digital audio is usually stored in Wave files (extension .wav). There are many programs available that let you create, play, and edit these files. SONAR reads, writes, and lets you edit Wave files.
Next topic: Setup
Setup
You can install SONAR on any computer that runs Windows XP or x64 and has a sound card or built-in sound module. If you want to hook up other devices, like a MIDI keyboard, an electric guitar, or a microphone, you need the right cables, and you need to find the right connectors on your computer.
Before you install SONAR, take a minute to register the software so we can let you know when updates become available and provide you with technical support. To register anytime log onto www.cakewalk.com/register, or call 888-CAKEWALK (U.S.) or +(617)-423-9004 (outside the U.S.) between 9 AM and 8 PM Eastern Standard Time. If you live outside of North America, please visit our distributor's page at www.cakewalk.com/Dealers/International.asp to get the telephone number of your local distributor. You'll need to supply your serial number, your name, and a valid email address.
To connect a MIDI keyboard to your computer, you need standard MIDI cables or a MIDI adapter cable (joystick connector), such as the one available in Cakewalk's PC Music Pack. One end of the adapter cable should have two 5-pin DIN connectors that connect to your keyboard or other MIDI device. At the other end, you need a 15-pin connector to connect to a sound card through its MIDI/joystick port.

natural_image
Diagram of two connected audio/video connectors with a labeled terminal (A), no text or symbols present.
A. MIDI to 15 Pin Connector B. 15-pin connector (DB15)
If you have a dedicated MIDI interface, lots of electronic music gear, or work with many different music software packages, see the online help topic “Hardware Setup.”
Before you attach or detach any cables from your computer, you should shut down your computer and turn off the power to all your equipment. This greatly reduces the chance of electrical damage to your equipment while plugging and unplugging cables.
User accounts
Previous versions of SONAR required a user to have Windows Administrator status. This is no longer the case. Any level of user can now install and run SONAR. Only one copy of SONAR per machine is necessary for multiple users to run SONAR with each user's personal settings.
When you first install SONAR, all application data files and .ini files are installed to the system-specified "all users" application data folders:
Windows XP:
C:\Documents and Settings\All Users\Application Data\Cakewalk
Windows Vista:
C:\ProgramData\Cakewalk
When you launch SONAR for the first time, all content files (such as track templates and project templates) will be copied from the global application data folder (All Users) to the user application data folder (User Account), before the program launches.
If you install a SONAR patch on top of the original installation, any updated content files in the patch will not overwrite existing content files in your personal user application data folder. However, you can force SONAR to update the default content files in your personal user data folder.

Warning: The following action will overwrite any SONAR data files such as track templates and project templates that you may have customized. A message box will prompt you if you wish to continue or cancel. Only proceed if you are certain that you will not overwrite any important customized files.
To force SONAR to update and overwrite any default content files, hold down the CTRL key while starting SONAR.
Data in the Program Files folder will be common to all users.
Next topic: Audio connections
Audio connections
There are several types of audio interfaces (soundcards). CardBus (PCI), USB/USB2 and FireWire are the most common. Laptops can use an audio PCMCIA card. Many audio interfaces also have MIDI inputs and some have built in MIDI synthesizers as well. This section covers the various audio connection options.
Analog and digital Inputs
There are two basic types of audio inputs, analog and digital. Analog inputs allow you to connect a guitar, mic or other instrument to your computer directly. The audio interface converts the analog input to digital. Digital inputs allow other digital devices to connect directly to your computer. Common digital inputs include external analog to digital converters, popular guitar processors like the Line 6 POD, and other digital recording systems like the ADAT decks. Analog inputs are very common, and are standard in virtually all consumer sound cards (the ones that come with your PC). Digital inputs are becoming more popular and are very common on professional and mid-level, "prosumer" interfaces. Analog inputs allow you to record a mono or stereo signal (assuming you have a stereo input) while digital inputs allow you to record 1 to 8 signals depending on the type of digital connection.
The following table describes the various analog inputs and outputs:
Type of analog input/output Description
Balanced (XLR, phono or RCA) A mono input/output
Unbalanced (TRS) A stereo or mono input/output
Table 1.
The following table describes the various digital inputs and outputs:
Type of digital input/output Description
S/PDIF Sony/Philips Digital Interface capable of carrying a stereo signal, S/PDIF is transmitted via RCA, Toslink or more rarely BNC jacks (single-pin cable-TV connections).
ADAT Lightpipe Up to 8 channels of simultaneous transfer. If you want to import your old ADAT material without any signal degradation, this is the connection you should use.
TDIF Tascam Digital Interface up to 8 channels of simultaneous transfer.
AES/EBU Often referred to as simply AES, this type of digital connection uses a modified XLR cable to transfer a stereo signal.
Table 2.
Read your hardware documentation carefully to determine what kind of digital connections, if any, you have on your audio interface.
To connect an electric guitar or keyboard to your computer
- If your sound card has a 1/8 inch input jack (built-in sound cards that come with your PC usually do), plug your 1/4 inch mono guitar or audio cable into a 1/8 inch stereo adapter, and then plug the 1/8 inch adapter into the microphone input or line input jack on your computer sound card. If you are connecting a keyboard, the audio cable must go from the keyboard's audio out or line out
jack to the sound card input jack. 1/8 inch stereo adapters are available at consumer electronic supply stores.
Or
- If you use a professional or "prosumer" sound card, there is probably a 1/4 inch input jack on your sound card or audio hardware interface that you can plug your guitar cable or audio cable into.
To connect a microphone to your computer
- If your sound card has a 1/8 inch input jack (built-in sound cards that come with your PC usually do), and your microphone cable has a 1/4 inch plug on the end, plug the mic cable into a 1/8 inch stereo adapter, and then plug the 1/8 inch adapter into the microphone input jack on your computer sound card. 1/8 inch stereo adapters are available at consumer electronic supply stores.
- If you use a professional or "prosumer" sound card, there is probably a 1/4 inch input jack on your sound card or audio hardware interface that you can plug your mic cable into.
- If your mic has a cable with an XLR plug on the end, and your sound card or audio hardware interface has a 1/4 inch input jack, plug the mic cable into an XLR-to-quarter inch adapter, and then plug your mic cable into your audio hardware. If your audio hardware has an XLR input, of course it's better to use that.
- You can also plug your mic into a mixer or pre-amp, and connect the mixer or pre-amp to an input jack on your audio hardware. This is usually the best method.
That's it! Now that your instruments are all set to go, you can restart your computer and turn on your keyboard, guitar, and microphone.
For a complete description of audio input options, see the online help topic "Hardware Setup."
Next topic: MIDI Connections
See:
"Changing I/O devices" on page 60
MIDI Connections
There are three types of MIDI cables in common use. Here's how to connect each of the three types:
- USB cable. This is extremely common. Many electronic keyboards and stand-alone MIDI interfaces use this type of connection. To use this type of connection, simply plug one end of the USB cable into the USB jack on your MDI keyboard or stand-alone MIDI interface, and plug the other end into your computer. If you are using a stand-alone USB MIDI interface, you then need to connect standard MIDI cables between your MIDI keyboard and your stand-alone MIDI interface (see the next procedure, below). If you haven't already installed the software MIDI driver that came with your keyboard or interface, make sure you do so.
- Standard MIDI cable. This is also very common. MIDI keyboards usually have jacks for these cables even if they have a USB connection. You need two of these cables. To use this type of cable, use one cable to connect the MIDI OUT jack on your MIDI instrument to the MIDI IN jack
Introduction
Setup
on your stand-alone MIDI interface or sound card, and one to connect the MIDI IN jack on your MIDI instrument to the MIDI OUT jack on your stand-alone MIDI interface or sound card. Many stand-alone MIDI interfaces and audio interfaces use this type of connector.
Figure 1. Standard MIDI cable—use this if your MIDI interface has standard 5-pin input and output ports

natural_image
Close-up of two black cable connectors with 5-pin pins, no visible text or symbols- Joystick connector. This is becoming less common. This is the type of connection seen on older SoundBlaster type sound cards. To use this type of connection, find the end of one of the MIDI cables that is labeled OUT. Plug this connector into the MIDI IN jack on your electronic keyboard. The other 5-pin connector on the MIDI cable is labeled IN. Plug this connector into the MIDI OUT jack on your electronic keyboard. Plug the 15-pin connector on the MIDI cable into the MIDI/joystick port on your sound card. If you have a joystick, unplug it, plug in the MIDI cable, and plug the joystick into the pass-through connector on the MIDI cable.
Figure 2. Joystick connector—use this if your MIDI interface is the joystick port on your sound card.
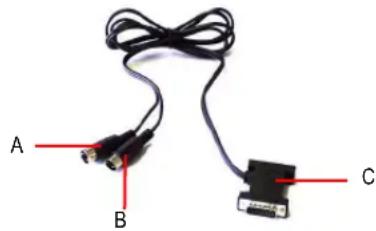
A. Insert this MIDI IN plug into the MIDI OUT port on your MIDI instrument B. Insert this MIDI OUT plug into the MIDI IN port on your MIDI instrument C. Insert this plug into the joystick port on your sound card
See:
"Changing I/O devices" on page 60
Changing I/O devices
You can add or remove USB/FireWire audio and MIDI devices while SONAR is running, and the audio and MIDI engines will dynamically respond to any changes.
When a device is added or removed, SONAR prompts you to confirm or cancel the change. If you click Yes, playback stops and the audio and MIDI engines reload.
Preserve selected audio devices on device changes
Enabled inputs and outputs are persisted per device and per driver mode. This prevents audio ports from shifting around and causing unwanted devices to become selected as active audio inputs and outputs. You can add a device back at any time and SONAR will remember the last set of enabled inputs and outputs for that device.
You can freely add or remove devices without impacting the current working set of enabled devices. Adding a device back will remember its last selected inputs and outputs. You can also switch driver modes and the existing enabled devices will be remembered for the next time when you switch back to that mode.
Loading a project after changing audio devices
When loading a project after changing audio devices, SONAR will attempt to automatically remap any missing device to an equivalent new device. If an equivalent match is not found, the Missing Audio Outputs dialog appears, allowing you to manually reassign any unresolved output ports.
The Missing Audio Outputs dialog will suggest default assignments for any missing devices. You can click OK to accept the assignments, or click Cancel to preserve the original missing device assignments. You can also preserve the original missing device by selecting [Unassigned] from the Available Devices list. If you choose not to reassign a missing device, the Output port selection in SONAR will show the missing device name prefixed by MISSING.
![Missing Audio Outputs The following audio output devices used by this project are not available. You may reassign them to any other available device, or click OK to accept the default assignments below . Click CANCEL to retain the original output assignments. (These outputs will remain silent until reassigned to an available output) Reassign missing Audio Output Devices Missing Devices Available Devices EDIROL PCR-1 [Unassigned] --- None --- Speaker [WaveRT] 1/2 Speaker [WaveRT] 3/4 OK Cancel](/content/2026/05/819773/images/9466eae6c7d42eb8f761c686012edd26a09bf651714c8b52196de23eb492d320.jpg)
![A M S RD W 0 0% C 0 0% C 0 0% C O MISSING: EDIROL PCR-1 [...]](/content/2026/05/819773/images/a4d5bedea94dd1f9d1d9da4901b7de04d1b520ad3a6c3331de82788358a67b57.jpg)

Note: The Missing Audio Outputs dialog is not shown if there is only a single missing output port and only one available output port. In this case, SONAR will automatically assign the missing output port to the available output port.
Remapping using friendly driver names
When Use friendly names to represent audio drivers is selected in Options > Audio > Drivers, SONAR can intelligently remap devices across different hardware configurations or driver models by using your assigned friendly driver names, even if the hardware names do not match.
This can be very useful if you switch driver modes and load projects you worked on earlier in another driver mode, or if you collaborate with other people who have different hardware configurations. As long as you set up friendly names that match, all outputs will be automatically remapped.

Note: Remapping with friendly names takes precedence over the actual hardware device names.
Automatic MIDI port remapping for control surfaces
SONAR persists the names of MIDI ports that are assigned to control surfaces. This ensures that the correct MIDI ports are assigned to control surfaces, even if you add or remove other MIDI devices.
Starting SONAR
There are many different ways to start SONAR. Here are a few:
- Double-click the SONAR icon on your desktop.
- Click the Start button, and choose Programs > Cakewalk > SONAR 8.5 (Studio or Producer > SONAR 8.5 (Studio or Producer).
- Click the Start button, point to Documents, and choose a SONAR project from the menu.
- Double-click the SONAR program or any SONAR document from the Windows Explorer or the Find menu.
When starting SONAR, you will see the Quick Start dialog box.
Figure 3. The Quick Start dialog

The Quick Start dialog box has several options:
| Option How to use it | |
| Open a Project | Choose a project from the Open File dialog box to open it |
| Open a Recent Project Select a project from the list, and click this button to open it | |
| Create a New Project Click here to create a new project. | |
| Online Videos and more Click this link to view our tutorial videos online. An active Internet connection is needed in order to access this content. | |
| Getting Started | Click here to view the Getting started topic in the Help file. This topic has links to a glossary of terms, as well as some basic procedures. |
Table 3.
If you don't want to see the Quick Start dialog box in the future, uncheck the box at the bottom of the dialog box, and click Close. You can see the Quick Start dialog box later by choosing Help > Quick Start.
RIFF/MID will not launch SONAR when double-clicked

Note: Double-clicking RIFF MIDI files and Standard MIDI files will fail to launch SONAR even if these file types are associated with SONAR.
Migrating preferences
If you have a previous version of Cakewalk installed, SONAR will detect it and give you the option of migrating certain preferences from a single earlier version.
When you choose to migrate preferences, SONAR migrates the following settings from an earlier Cakewalk version:
Setting Description
| Global Options | Settings in the Global Options dialog. Open by selecting Options > Global. |
| Key Bindings Your customized key bindings for controlling SONAR using your MIDI keyboard or computer keyboard. | |
| Instrument Definitions Files used to control specific MIDI instruments. | |
| Audio data directory (WaveData folder) and Picture Cache directory locations | SONAR uses the Data directory and Picture Cache directories from the previous Cakewalk version for storing project wave files and their waveform image files. |
Table 4.
Running Wave Profiler
The first time you start SONAR, it automatically runs the Wave Profiler utility. Wave Profiler determines the proper MIDI and Audio timings for your sound card and writes them to a file that SONAR refers to when using the card. Wave Profiler does not change the sound card's DMA, IRQ, or port address settings.
Wave Profiler detects the make and model of your sound card, which determine the card's audio characteristics. If Wave Profiler finds a card that has a WDM driver, it only profiles that card. If you want to use more than one sound card at a time, and they don't both have WDM drivers, you must force the one with the WDM driver to use that driver as an older, MME driver. It is not necessary to run the Wave Profiler for a sound card using an ASIO driver. For more information about Wave Profiler, WDM, and MME, see The Wave Profiler.
When Wave Profiler determines the kind of card you have, always accept the default settings.

Note: You can run the Wave Profiler again at a later time (for example, if you install a new sound card or driver) by choosing the Options >Audio General tab command and clicking Wave Profiler.
Setting up the MIDI In and MIDI Out devices
When you start SONAR for the first time, it checks your computer to find all the MIDI input and output devices you have installed (such as sound cards and MIDI interfaces). However, sometimes you need to tell SONAR exactly which devices you want it to use. If you're not getting sound from
your sound card or MIDI keyboard, or if you just want to change the MIDI outputs and devices that you are using, follow the steps in this section.
Choose Options > MIDI Devices to open a dialog box in which you select the MIDI In and MIDI Out devices that SONAR will use. Each item in the list is a MIDI Input or MIDI Output from drivers installed using the Windows Control Panel.
- Select Options > MIDI Devices. You will see the MIDI Devices dialog box, which lets you choose instruments on MIDI inputs and outputs.
Figure 4. The MIDI Devices dialog
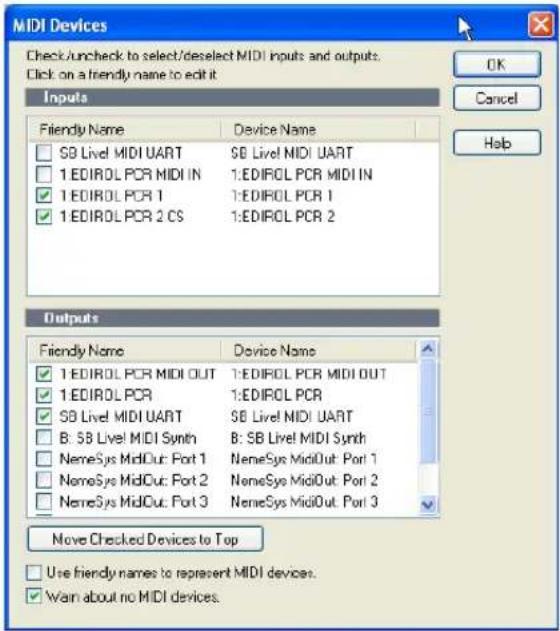
- Look at the top window. Notice that it shows devices on MIDI Inputs; make sure that all devices in this window are checked. If a device isn't checked, click on it once to select it for MIDI Input.
- Look at the window on the bottom. Notice that it shows devices on MIDI Outputs. SONAR numbers its MIDI Outputs by the order of the devices in this window. The device on top is on Output 1, the one below it is on Output 2, and so on.
- Check one device at a time in the Outputs window and click Move Selected Devices to Top to change its order. Then check all the devices that appear in the window to select them for output.

Tip: Be sure to enable (check) MIDI output devices in the MIDI Devices dialog (use the Options > MIDI Devices command). If you don't do this, you won't hear any of your MIDI instruments when you play songs in SONAR.
See MIDI Devices dialog.
Using MIDI devices after making driver changes
If you later add or remove drivers using the Drivers icon of the Windows Control Panel, SONAR reacts in the following way:
- If you remove a Control Panel driver, SONAR will not use the device it belongs to the next time you run the program. Any other devices you had selected using the Options > MIDI Devices command will remain selected.
- If you add a driver through the Control Panel, SONAR does not automatically use it. You must use the Options > MIDI Devices command to enable the new driver in SONAR's list.

Note: After you add or remove a driver with the Drivers icon in the Windows Control Panel, you must restart Windows for the change to take effect.
Defining your MIDI instrument or sound card
Once you have selected your MIDI Input and Output devices, SONAR, by default, plays back MIDI sequences using a General MIDI instrument definition. If you are using a synthesizer or sound card that does not adhere to the General MIDI standard, you may want to define that instrument. See the online help topic: Instrument Definitions for more information.
SONAR basics
SONAR's menus and toolbars give you quick access to all the features of SONAR. Some menu choices and tools display dialog boxes that let you choose among various options, or type in the values you want. If you click in most views, in time rulers, or on certain other items with the right mouse button, you see a pop-up menu that provides quick access to many common operations.
The project is the center of your work in SONAR. If you're a musician, a project might contain a song, a jingle, or a movement of a symphony. If you're a post-production engineer, a project might contain a 30-second radio commercial or a lengthy soundtrack for a film or videotape production. By default, every project is stored in a file (known as a project file). The normal file extension for a SONAR work file is .cwp.
SONAR organizes the sound and music in your project into tracks, clips, and events.
Tracks are used to store the sound or music made by each instrument or voice in a project. For example, a song that is arranged for four instruments and one vocalist may have 5 tracks—one for each instrument and one for the vocals. Each project can have an unlimited number of tracks. Some of these tracks may be used in your finished project, while others can hold alternate takes, backup tracks, and variations that you might want to keep for future use. Each track can be made up of one or many clips.
Clips are the pieces of sound and music that make up your tracks. A clip might contain a horn solo, a drum break, a bass or guitar riff, a voice-over, a sound effect like the hoot of an owl, or an entire keyboard performance. A track can contain a single clip or dozens of different clips, and you can easily move clips from one track to another.
Groove clips are audio clips which have tempo and pitch information embedded within them, allowing them to follow changes to the project tempo or project pitch. You can click on either edge of a Groove clip and drag out repetitions in the track.
Events are MIDI data (in MIDI tracks) or automation data.
See:
SONAR file types
Opening a file
Views
Working on a project
SONAR file types
Projects in SONAR can be saved as a project file with the extension .cwp or as a Bundle file with the extension .cwb.
For a complete description of the differences between project files and bundle files, see the online help topic Project Files and Bundle Files.
Other types of files
SONAR lets you create and work with several other types of files, in addition to project (.cwp) and bundle (.cwb) files that store your projects:
File type Description
MIDI files (extension .mid) Standard MIDI files.
Template files (extension .tpl) Templates for new files you create
StudioWare (extension .CakewalkStudioware) To control external MIDI devices from SONAR
OMF (extension .omf) Open Media Framework format files.
Table 5.
Opening a file
Use the following procedure to open a file.
To open a file in SONAR
- If you haven't already done so, start SONAR.
- Choose File > Open.
- In the Open dialog box, navigate to the directory where the project you want to open is located and select it.
Introduction
SONAR basics
-
Click the Open button.
-
If you are opening an OMF file, the Unpack OMF dialog appears. Set the initial tempo and specify the directory where you want to save the file and its audio. For more information about opening OMF files, see Unpack OMF dialog in the online help.
SONAR loads the project.
See:
Working on a project
File Recovery mode
Views
SONAR displays your project in windows on the screen that are known as views. You can have many views open at once, all showing the same project. When you edit a project in one view, the other related views are updated automatically.
The Track View
Track view is the main window that you use to create, display, and work with a project. When you open a project file, SONAR displays the Track view for the project. When you close the Track view for a project, SONAR closes the file.
The Track view is divided into several sections: toolbars (at the top), the Navigator pane, the Video Thumbnails pane, the Track pane, the Track/Bus Inspector, the Clips pane, and the Bus pane. You can change the size of the panes by dragging the vertical or horizontal splitter bars that separate them.
Figure 5. The Track view
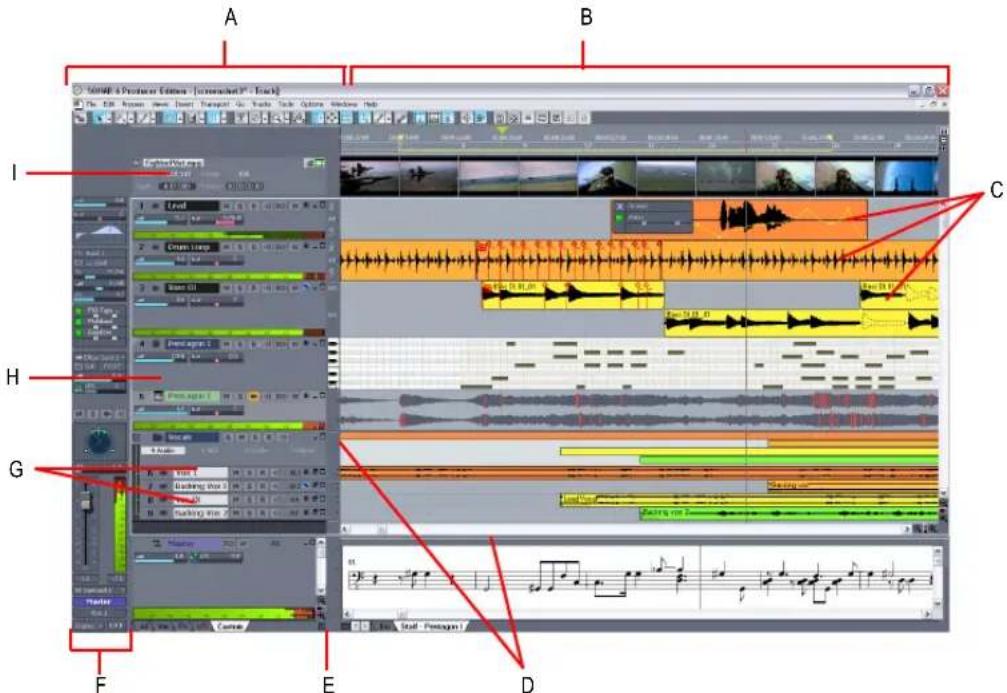
A. The Track Pane B. The Clips Pane C. Clips D. Splitter bars E. Show/hide bus pane F. Track/Bus Inspector G. Minimized tracks H. Expanded track I. The Video Thumbnails Pane
All of the current track's controls, plus a few that are only available in the Console view, are contained in the Track/Bus Inspector which is an expanded version of the current track's controls located on the far left side of the Track view. You can hide or show the Track/Bus Inspector by pressing I on your keyboard (see "Track/Bus Inspector" on page 70, for more information).
The Track pane lets you see and change the initial settings for each track. By default, the current track is displayed in gold. To change the current track, move the highlight using the mouse or the keyboard as follows:
What it does Key
Moves the highlight to the next or previous control. LEFT/RIGHT ARROW
Moves to the same control in the adjacent track, or the next track of the same type UP/DOWN ARROW if the control only applies to a specific track type (for example, the Patch control only applies to MIDI tracks).
Displays the next page of tracks. PAGE DOWN
Displays the previous page of tracks. PAGE UP
Table 6.
Introduction
SONAR basics
What it does Key
Moves the focus to the first track. HOME
Moves the focus to the last track. END
Table 6.
The current track's controls are contained in the Track/Bus Inspector.
The Clips pane shows the clips in your project on a horizontal timeline called the Time Ruler that helps you visualize how your project is organized. Clips contain markings that indicate their contents. The Clips pane lets you select, move, cut and copy clips from place to place to change the arrangement of music and sound in your project.
The Bus pane shows the buses in the project, and also shows any editing views that are in tabbed (docked) format. The Show/Hide Bus pane button ☑ allows you to show or hide the Bus pane at the bottom of the Track view.
The Navigator pane displays a large part of your project so you can see an overview of your song. The Navigator pane displays all of your project's tracks.
The Track view makes it easy to select tracks, clips, and ranges of time in a project. These are the most common selection methods:
To Do this
Select tracks Click on the track number, or drag over several track numbers
Select clips Click on the clip, or drag a rectangle around several clips
Select time ranges Drag in the Time Ruler, or click between two markers
Select partial clips Hold down the ALT key while dragging over a clip
Table 7.
As with most other Windows programs, you can also use the SHIFT-click and CTRL-click combinations when selecting tracks and clips. Holding the SHIFT key while you click adds tracks or clips to the current selection. Holding the CTRL key while you click lets you toggle the selection status of tracks or clips. For more information, see Track View and Configuring the Display of Tracks in the Track View.
Track/Bus Inspector
The Track/Bus Inspector makes it easy to adjust the current track's (or bus's) controls, because it's a greatly expanded version of the current track's controls that is located on the left side of the Track pane.
In addition to the controls that a track or bus displays in the Track view, the Track/Bus Inspector also contains a built-in 4-band EQ. See the online help topic "Using the Per-track EQ" for more information.
The following graphic shows most of the Track/Bus Inspector's controls (there may not be room to display all of a track's controls on the Track/Bus Inspector, depending on the resolution of your monitor):
Figure 6. The Track/Bus Inspector
Track/Bus Inspector for an audio track Track/Bus Inspector for a MIDI track
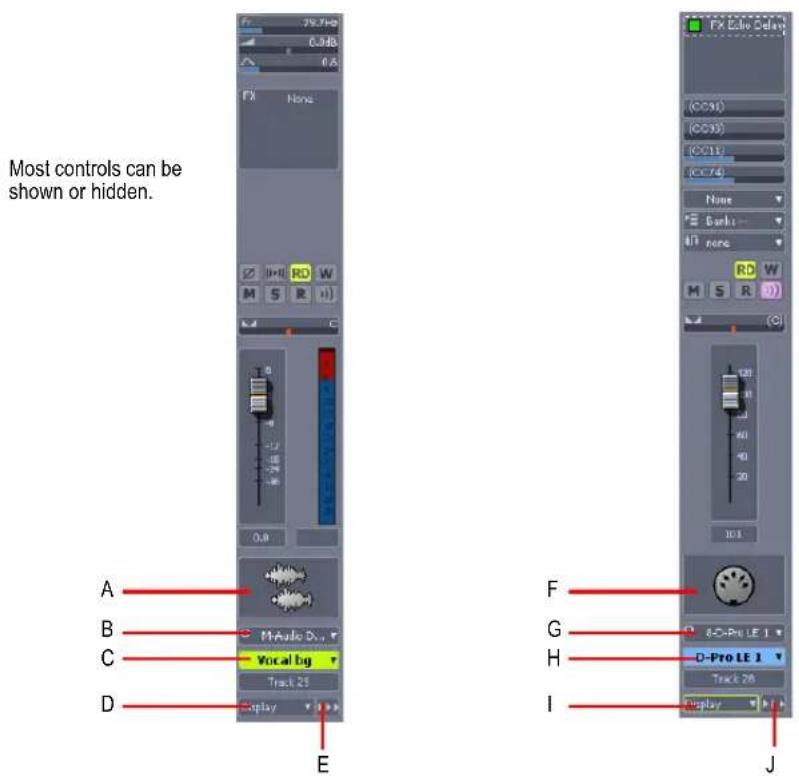
A. Audio icon B. Output routing C. Track name D. Display menu E. Module menu F. MIDI icon G. Output routing H. Track name I. Display menu J. Module menu
You can hide or show any of the Track/Bus Inspector's controls, and use it to display the controls from any track or bus. The following table shows you how.
To do this Do this
Hide or show the Track/Bus Inspector Press I on your keyboard.
Display a certain track's or bus's controls in the Track/Bus Inspector
Click the track or bus to make it current, or choose the track or bus in the track/bus drop-down menu that's at the bottom of the Track/Bus Inspector.
Table 8.
Introduction
SONAR basics
| To do this Do this | |
| Hide or show any of the Track/Bus Inspector's controls | Click the Display menu or Module menu, and choose Options.Note: you can not display a MIDI track's Time + or Key + controls in the Track/Bus Inspector. |
| Reassign MIDI controller sliders in a MIDI Track's Fx bin | Right-click the slider you want to reassign and choose Reassign Control from the pop-up menu, choose the new parameter, and click OK. |
| Display the parameters of a different automatable effect | Click the name of the effect you want to select. |
| Assign a control to a group, arm it for automation, take an automation snapshot, or set up remote control | Right-click the control and choose options from the pop-up menu. |
| Bypass the FX bin | Right-click the FX bin and choose Bypass Bin from the pop-up menu. |
Table 8.
The Console View
The Console view is where you can mix the sounds on all the different tracks to create the final mix of your project. While the Track view provides most of the same controls, you may want to use the more familiar interface of the Console view for mixing.
You use the Console view to adjust the levels of sound for the different tracks in your project, to change the stereo panning, and to apply real-time effects to an individual track, combinations of tracks, or the final mix.
The Console view contains several groups of controls. There is one module for each track in your project, and one module for each bus. You can use bus sends to direct certain tracks to special modules that are known as buses.
Figure 7. The Console view

A. Audio module B. MIDI module C. MIDI velocity D. Bus out E. Main out F. Show/hide strip controls buttons G. Widen all strips H. Show/hide for tracks, buses, mains
As in the Track view, you can change track settings or record new music or sound in the Console view. You may choose to use one view or the other, or the choice you make may depend on which project you are working on.
Other views
SONAR has a number of other views you can use to display and work on your project. To display these views, select one or more tracks, by CTRL-clicking their track numbers and:
- Click the icon for the view in the Views toolbar
Or
- Choose the view you want from the View menu
The Piano Roll view 📁: shows the notes from a MIDI track or tracks as they would appear on a player-piano roll. You can move the notes around, make them longer or shorter, and change their pitches by just dragging them with the mouse. You can also use the Piano Roll view to display and edit MIDI velocity, controllers, and other types of information. The Piano Roll view also contains the Drum Editor, which allows you to “paint” drum patterns using the Pattern Brush tool and play different drum modules from a single track. For more information, see Piano Roll View.
Figure 8. The Piano Roll view
Introduction
SONAR basics
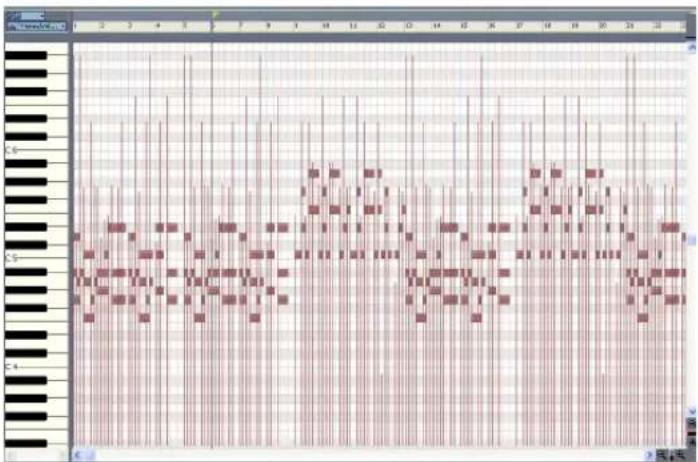
The Staff view 📄: displays the notes from one or more MIDI tracks using standard music notation, similar to the way the notation would appear on a printed page. You can add, edit, or delete notes; create percussion parts; add guitar chords and other notation markings; display guitar tablature; display the Fretboard pane; and print whole scores or individual parts to share with other musicians.
Figure 9. The Staff view
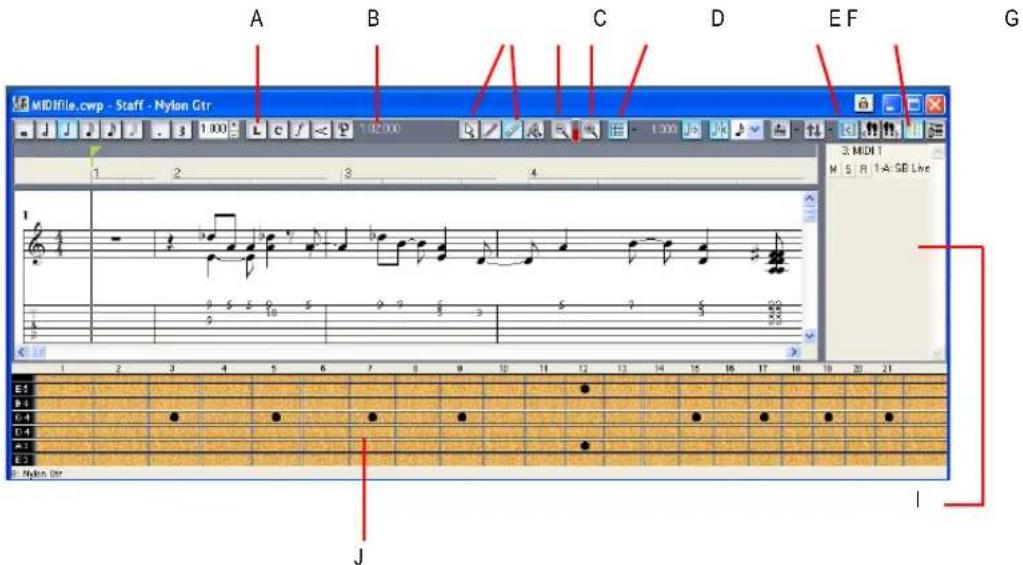
A. Dynamics and markings B. Time and pitch locator C. Editing tools D. Zoom out E. Zoom in F. Snap to Grid G. Show/hide track pane H. Fretboard display I. Track list pane J. Fretboard pane
The Loop Construction view 📄 allows you to create and edit Groove clips (SONAR loops that "know" the tempo and key in which they were recorded), and export these clips as ACIDized files. For more information, see Loop Construction view.
Figure 10. The Loop Construction view
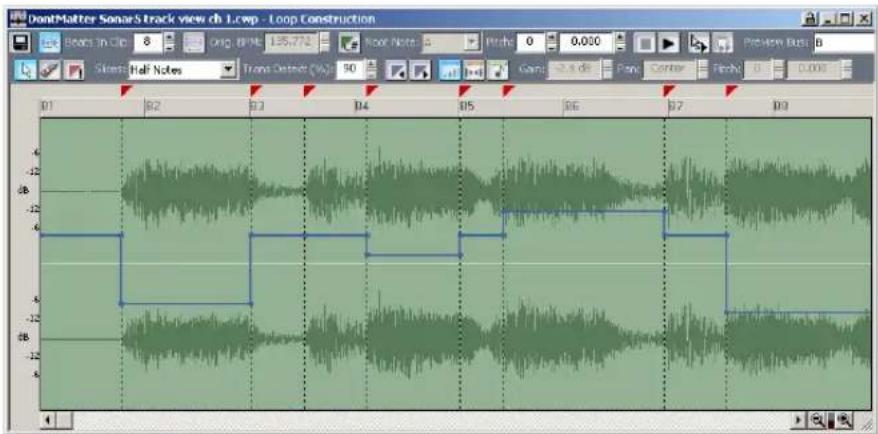
The Media Browser view 📄: allows you to preview ACIDized files and other Wave files; and drag and drop them into your project. For more information, see Media Browser View.
Figure 11. The Media Browser view

The Event List view 📄 displays the events in a project individually, so that you can make changes at a very detailed level. For more information, see Event List View.
Figure 12. The Event List view

Introduction
SONAR basics
SONAR has several other views that are used for very specific purposes:
| View How you use it | |
Meter:  | To change the meter (time signature) or key signature, or to insert changes in the meter or key signature at specific times in a project. For more information, see Meter/Key View. |
| Big Time 2:2 | To display the Now time in a large, resizable font that you can read more easily. For more information, see Big Time View. |
| Markers 7 | To add, move, rename, or delete labels for parts of your project that make it easier to move from one point to another. For more information, see Markers View. |
| Lyrics [CKS8] | To add and display lyrics for a track. For more information, see Lyrics view. |
| Video 1 | To display a loaded video file. For more information, see Video View. |
Synth  :k 1 :k 1 | Manage your soft synths |
Navig  2 2 | Manage the Now Time in a project |
| Surround Panner Producer version only) | Pan a surround track |
| Sysx [CWXA] | To create, display, store, and edit System Exclusive MIDI messages used to control instruments and other gear that are MIDI capable. For more information, see SYSX View. |
Temp  | To view and edit the project's tempo changes. For more information, see Tempo View. |
| Step Sequencer | Lets you compose patterns by clicking cells in a grid to turn notes on or off. For more information, see Step Sequencer View. |
Matrix  | Lets you trigger multiple audio and MIDI patterns, either with a mouse or via MIDI remote control. For more information, see Matrix view. |
Table 9.
Zoom controls
Many of the views contain Zoom tools that let you change the horizontal and vertical scale of the view.
Figure 13. Zoom controls
A. Zoom Clips pane out vertically B. Vertical Zoom fader for Clips pane C. Zoom Clips pane in vertically D. Zoom Bus pane out vertically E. Vertical Zoom fader for Bus pane F. Zoom in horizontally G. Horizontal zoom fader H. Zoom out horizontally
The Track view toolbar contains the Zoom tool:
The Zoom tools are used as described in the following table:
| Tool How you use it | |
| Zoom out (Clips pane or Bus pane) | Click to zoom out incrementally, or press SHIFT and click to zoom all the way out |
| Zoom in (Clips pane or Bus pane) | Click to zoom in incrementally, or press SHIFT and click to zoom all the way in |
| Zoom fader | Click and drag to zoom continuously |
| Zoom tool | Click to arm, then click and drag in the view to select the zoom area.Click the drop-down arrow to display a menu of zoom and view options. |
Table 10.
You can also zoom with the keyboard:
| Key What it does |
| CTRL+UP ARROW Zoom out vertically |
| CTRL+DOWN ARROW Zoom in vertically |
| CTRL+RIGHT ARROW Zoom in horizontally |
| CTRL+LEFT ARROW Zoom out horizontally |
| G Go to (center) the Now time, without zooming |
Table 11.
Introduction
SONAR basics
Key What it does
Hold down Z Arm the Zoom tool
U Undo the current zoom
F Fit tracks to window
A Show all tracks
SHIFT+F Fit project to window
SHIFT+double-click a clip Maximize track height
Table 11.
Docking views
You can dock any view other than the Console view in the lower-right corner of the Track view by enabling a view's Enable Tabbed option. You can have as many views open in tabbed format as you want. You can toggle through the different views by clicking the tab of the view you want to see (or use the CTRL+SHIFT+LEFT/RIGHT ARROW shortcut). You can also maximize the pane to do detailed work in a view, or drag the splitter bar at the top of the view to enlarge the tabbed view area. For step-by-step instructions, see the procedures below.

A. Maximize pane B. Scroll left or right to view tabs C. Active view D. Tabs
To do this Do this
| Display a view in tabbed format | Click the upper left corner of a view, and choose Enable Tabbed from the pop-up menu |
| Disable tabbed format for a view | Right-click the view's tab, and choose Disable Tabbed from the pop-up menu. |
| Enable or disable tabbed format for all open views | Use the View > Enable Tabbing for Open Views command. |
| To do this Do this | |
| Maximize a tabbed view | Click the Maximize/Restore button ☐ that's just to the left of the tabs. |
| Restore tabbed view | Click the Restore button ☑ that's in the lower left corner of the view that you're restoring. |
| Close a view that is in tabbed format | Right-click the view's tab, and choose Close from the pop-up menu |
Table 12.
Table 12.
Locking views
By default SONAR allows only one instance of each view, but you can lock the contents of most views, preserving the current view by forcing a new instance of the view to appear if necessary. Locking views is the only way you can have multiple instances of the same view open. Only the Track and Console views cannot be locked.
To lock a view, just click the Lock button at the top right of the view. An unlocked view looks like this and a locked view looks like this. View can be locked automatically by pressing the CTRL key when opening the view.
Floating views
When a view is float enabled, you can move it outside of the confines of SONAR. This is particularly useful if you take advantage of SONAR's dual monitor support. Using dual monitor support, you can keep the Track or Console view on one monitor and "float" other views to the other monitor by dragging them to the second screen.
For more information, see the online help topic “Floating Views and Dual Monitor Support.”
X-Ray windows
The X-Ray Windows feature eliminates the need to constantly minimize, move, or close windows in order to work in other windows. It works by decreasing the opacity of the current window enough so that you can see and work with the window that's behind the current window. You activate the feature by pressing a keyboard shortcut (default shortcut is SHIFT+X) when the mouse cursor is over a window you want to x-ray. You can choose to X-Ray whichever window is underneath the mouse cursor, or automatically X-Ray all FX/synth property pages in one step (Note: the mouse cursor does not need to be over any plug-in property pages).
The X-Ray Windows feature works on the following windows:
- AudioSnap palette
- Synth Rack
- Piano Roll view (when float-enabled)
- Snap To Grid dialog
- Plug-in effects and synths
- Controller/Surface plug-ins
To select key bindings for X-Ray windows
- Use the Options > Key Bindings command to open the Key Bindings dialog.
- If you want to use currently unassigned keys or key combinations, scroll through the options in the Key window until the Global Key Assignment field that is just under the window reads Unassigned. It's a good idea to find two unassigned options that are next to each other or easy to remember.

Note: For best results with X-Ray Windows, avoid using ALT key combinations.
- Once you've decided on two keys or key combinations that you want to use, select Global Bindings in the Bind Context field, and scroll to the bottom of the list of commands that are in the window below that field.
- In the Key window, highlight the key or key combination that you want to use for the X-Ray command, then highlight X-Ray in the function column of the list of commands, then click the Bind button to bind them together.
- Now highlight the key or key combination that you want to use for the X-Ray All FX/Synths command, then highlight X-Ray All FX/Synths in the function column of the list of commands, then click the Bind button to bind them together.
- Click OK to close the dialog.
To use X-Ray windows
- Use the Options > Global command to open the Global Options dialog, and on the General tab, make sure that the Enable X-Ray check box is enabled.
- Make sure that the view windows you want to X-Ray are in the Floating-enabled state: to check this, click the view or fx icon that's in the upper left corner of a window, and select Enable Floating from the drop-down menu. If Disable Floating is in the menu, then the Floating option is already enabled.

Note: All FX/Synth/Control surface property pages are float-enabled by default.
- To X-Ray or un-X-Ray a single window, move the mouse cursor over the window, and press the keyboard shortcut (default is SHIFT+X) for the X-Ray command. The window does not need to have focus (does not need to be the highlighted window).
- To X-Ray or un-X-Ray all plug-in windows at once, press the key binding for the X-Ray All FX/Synths command.

Note: If a window has focus, and the window's Give All Keystrokes To Plug-in button is enabled, X-Ray keyboard commands won't work.
To Adjust X-Ray Windows Options
-
Use the Options > Global command to open the Global Options dialog.
-
On the General tab, you can adjust these options:
-
Enable X-Ray. Enable or disable this check box to turn the X-Ray Windows feature on or off.
- Opacity. Adjust this value by typing in a value, or by clicking and holding the + or - button to adjust the final opacity percentage value that an X-Rayed window reaches.
- Fade Out Time. Adjust this value by typing in a value, or by clicking and holding the + or - button to adjust the amount of time that an X-Rayed window takes to reach its final opacity percentage value.
-
Fade In Time. Adjust this value by clicking and holding the + or - button to adjust the amount of time that an X-Rayed window takes to restore its original opacity.
-
Click OK to close the dialog and accept your changes.
To exclude a plug-in from X-Ray capability
Some plug-ins (very few) use DirectDraw to create their windows. These windows appear jittery when x-rayed.
To exclude a plug-in from X-Ray capability, follow these steps:
- Open the Cakewalk Plug-in Manager: use the Tools >Cakewalk Plug-in Manager command.
- In the Plug-in Categories window, select the category that the plug-in you want to exclude is in.
- In the Registered Plug-ins window, select the plug-in that you want to exclude.
- If the plug-in is a DirectX effect or an MFX, write down (or select and copy) the CLSID value that's in the CLSID field at the bottom of the dialog.
-
If the plug-in is a VST or VSTi, write down the VST ID value that's in the VST ID field at the bottom of the dialog.
-
Close the Plug-in Manager dialog.
-
Open the Xrayexclude.ini file that's in your SONAR program folder (use Notepad).
-
At the end of the file, find the [EffectProps View] section.
You will see entries such as the following:
; Waves SSL EQ Stereo
XRayExclude11=1397510483
XRayExclude12={E451379E-F7E1-4E82-98D9-BEB87AC45E90}
- Exclude your plug-in by creating a blank line below the last entry in the [EffectProps View] section, and then typing:
; [name of your plug-in, but without brackets]
XRayExclude[type the next available number in XRayExclude list, but without brackets]=[VST ID number, with no brackets, or CLSID number, with curly braces at start and finish]
For example, if the last entry in the [EffectProps View] section was:
; Waves SSL EQ Stereo
XRayExclude11=1397510483
XRayExclude12={E451379E-F7E1-4E82-98D9-BEB87AC45E90}
And you wanted to exclude the Cakewalk FxDelay from the X-Ray Windows feature, after creating a blank line you would type:
; Cakewalk FxDelay
XRayExclude13={985DAF67-589F-4B8D-8BBC-D7AD651B9022}
If there was also a VST version of the Cakewalk FxDelay, you would add another line:
XRayExclude14=[some VST ID number, with no brackets]
- Save and close the Xrayexclude.ini file, and restart SONAR to implement your changes.
Customizable menus
All main menus and context menus are customizable. You can fine-tune your workflow by hiding menu items that are rarely used and reordering commands that you use frequently. You can even design and save menu layouts specific to different tasks.

Caution: You can move commands completely out of their default menus. For example, you can move commands out of the Edit menu into the Process menu. Keep in mind that this manual describes commands by their original menu locations, so if you're looking for help about the Process > Nudge command, and you've moved the Nudge command to the Edit menu, the documentation for this command will still refer to the command as Process > Nudge. You can always load the default menu layout to restore the original command structure.
- To open the Menu Editor dialog, choose Options > Menu Editor.
- In the Menu Editor dialog, to choose a menu to edit, select one from the Menu drop-down list.
To do this Do this
| Hide items in a menu | Click a menu Item (CTRL-click to select multiple items) and press the Hide button.The hidden command(s) will only be visible in the submenu that is automatically created at the bottom of the menu. You can display the submenu by clicking one of the arrows at the bottom of the menu. |
| Show items in a menu | Click a menu Item (CTRL-click to select multiple items) and press the Show button.The command(s) will reappear in its original location. |
| Reorder items in a menu Click and drag menu Items up or down to change their position in the menu order.Note: You can also click and drag Menu Items in and out of submenus. | |
| Create a new submenu | Right-click an item in the Menu Items list and select Create Submenu. That item will now appear in its own new submenu.OrSelect one or more items from the list and press the Create New button in the Submenus section of the dialog. |
| To do this Do this | |
| Rename a menu item or submenu | Right-click a menu Item or submenu and selectRename, then enter a new name.OrSelect a menu Item and press F2, then enter a new name. |
| Create a new separator bar | Right-click a menu item and selectInsert Separator.The separator bar will appear above the menu item you right-clicked. |
| Remove a submenu or separator bar | Right-click the submenu or separator and selectRemove Submenu or Remove Separator. |
| Save a new menu layout | Enter a new name into theMenu Layoutfield and press theSavebutton. |
| Delete an existing menu layout | Select the menu layout you wish to delete and press theDeletebutton |
| Edit a menu layout Launch the | Menu Editor and choose the menu layout you wish to edit from the drop-down menu, then make your changes. |
| Load a different menu layout | Launch the Menu Editor and choose a differentMenu Layoutfrom the drop-down menu, then close the dialog.ORUse theOptions >Menu Layoutscommand, and select a layout from the available options. |
Table 13.
Table 13.
Note 1: Keep in mind that the factory default menu layout cannot be overwritten. If you want to change this layout, save your changes under a new layout name.
Note 2: If you change your menu layout so much that you can't find some commands, you can always load the factory default menu layout.
Altering your menus may affect your menus' hotkeys, which allow you to navigate through the application's menus without using a mouse. You can view the hotkeys in your menus by pressing ALT and observing the underlined letters. Pressing the underlined letter on your keyboard will launch that menu command. In order to ensure you have no duplicates hotkeys in your customized menu, do the following.
- Launch the Menu Editor and select the menu or submenu you wish to check for duplicate hotkeys. Right-click the menu item and select Check Hotkeys. The Menu Editor will then report back if duplicate hotkeys are found, or if a command has no hotkey at all.
Note: The Check Hotkeys command examines only commands on the menu that you right-clicked, at the menu level that you right-clicked. It does not examine submenus of that menu.
- If missing or duplicate hotkeys are found, right-click again and select Generate Hotkeys. New non-duplicate hotkeys will be assigned for each item in that menu or submenu (but only on the menu level where you right-clicked, not on any submenus of the menu or submenu that you right-clicked).

Note: Hotkeys are indicated within the Menu Editor by ampersands ("&") in each menu item's name. The ampersand is placed directly before the letter that represents the menu item's hotkey. If you wish to assign hotkeys manually, you can do so by when you rename a hotkey by placing the ampersand before your preferred hotkey letter for that command or submenu.
- If necessary, re-save your layout to preserve these changes.
You can customize each toolbar in SONAR. You can hide or reorder each component of a toolbar, or add buttons to a toolbar from other toolbars. You can create up to three new toolbars from components of other toolbars. You can also hide or show all toolbars with a single command, and dock toolbars vertically if you want.
- To choose what toolbars you want to see, use the View >Toolbars command, and check the toolbars that you want to see in the dialog box.
- To hide or show all toolbars, use the View > Show Toolbars command. This command is available in the Key Bindings dialog (Options > Key Bindings command).
To customize a toolbar:
- Right-click the toolbar that you want to customize, and choose Customize from the pop-up menu to open the Customize Toolbar dialog.
- In the Available Toolbar Buttons field, select a component that you want to see in the toolbar, and click the Add button to move the component to the Current Toolbar Buttons field.
- Repeat step 2 for any additional components you would like to display.
- In the Current Toolbar Buttons field, select a component that you do not want to see in the toolbar, and click the Remove button to move the component to the Available Toolbar Buttons field.
- Repeat step 4 for any additional components you would like to remove.
- If you would like to move a toolbar component to a different location in the toolbar, select the component in the Current Toolbar Buttons field, and click the Move Up button or the Move Down button to change the button's location in the toolbar.
- Repeat step 7 for any additional components.
- If you want to restore the toolbar to its default appearance, click the Reset button.
- Click Close when you want to close the dialog.
To create a toolbar:
- Use the View > Toolbars command, and check one of the User "n" options.
A toolbar appears, with a default set of controls. - Right-click the toolbar, and choose Customize from the pop-up menu to open the Customize Toolbar dialog.
- Customize the toolbar the in the same way as the previous procedure.
To rename a toolbar:
- Right-click the toolbar, and choose Rename from the pop-up menu to open the Rename Toolbar dialog
- Fill in the New Name field, and click OK.
Now when you open the Toolbars dialog, the name you chose is listed in the dialog.
To dock or undock a toolbar:
- To dock a toolbar horizontally, drag it to the top or bottom of the interface.
- To dock a toolbar vertically, drag it to the left or right side of the interface.
- To undock a toolbar, drag it to the part of the interface where you want it, or entirely away from the interface.
Layouts
You may spend a lot of time making sure that all the views are laid out on the screen just the way you want. When you save your work, you can save the screen layout along with it. You can also save the layout by itself and then use the layout with other projects. For more information, see the online help topic "Layouts."
Next topic: Working on a project.
Working on a project
Much of your time in SONAR is spent recording and listening to your project as it develops. The Transport toolbar, shown below, contains the most important tools and other pieces of information you'll need to record and play back your project.
Every project has a current time, known as the Now time (see: The Now time and how to use it). As you record or play back a project, the Now time shows your current location in the project. When you create a project, the Now time is set to the beginning of the project. The current Now time is saved with your project.
You control recording and playback using tools on the Large Transport toolbar (press F4 to show or hide), which work a lot like the ones on your tape deck or CD player:
Figure 14. The Large Transport toolbar

A. Play B. Record C. Click to move ahead one measure D. Auto-punch toggle E. Drag Now Time to any desired position F. Click to jump to the end G. Click to back up one measure H. Click to jump to the beginning
As you work with a project, you can use SONAR's mute and solo features to choose which tracks are played, or you can create loops to play a particular section over and over again. You can also create markers, which are named time points you add to your project to make it easy to jump to a particular location.
Next topic: SONAR file types.
Windows taskbar indicators
When SONAR is running, you'll normally see two indicators in your Windows taskbar, right next to the clock.
The MIDI activity monitor 📄 contains two lights that indicate MIDI input and output. When you play your MIDI keyboard, the first light flashes when each note is pressed, and it flashes again when each note is released. When you play back a project that contains MIDI, the second indicator lights up.
The volume control is used to control the playback and record volumes on your sound card. Double-click on this indicator to open a dialog box that lets you control the levels for audio, MIDI, CD playback, and record.
The volume control is available only if your sound card is using a native Windows driver. If your sound card does not use a native Windows driver, no volume control will be displayed in the taskbar. In this case, your sound card probably came with a separate program to control input and output levels. See your sound card documentation for more information.
Screen colors and wallpaper
SONAR lets you customize the colors that are used for virtually all parts of the program using the Options > Colors command. This command also lets you change the background bitmap that is displayed in the SONAR window.
For any SONAR screen element, you can assign a color in two ways:
- Choose one of the colors that is part of your Windows color scheme.
- Assign a custom color.
To Assign Custom Colors
- Choose Options > Colors to display the Configure Colors dialog box.
- Choose the screen element whose color you want to change from the Screen Element list.
-
Assign a color to the screen element in one of two ways:
-
To use a color from the Windows color scheme, choose one of the options in the Follow System Color list
-
To use a custom color, check Use Specific Color, click the Choose Color button, and select the color you want
-
To save these changes from session to session, check the Save Changes for Next Session box.
- Click OK when you are done.
SONAR uses the colors you have chosen.
To restore the default colors
- Choose Options > Colors to display the Configure Colors dialog box.
- In the Screen Elements window, select the elements that you want to restore; you can CTRL-click or SHIFT-click to select multiple elements.
- Click the Defaults button.
- Click OK.
SONAR uses the default colors for all selected screen elements.
To change the wallpaper
- Choose Options > Colors to display the Configure Colors dialog box.
- Choose the desired wallpaper according to the table:
To do this Do this
| Use the default wallpaper | Check Default in the Wallpaper list |
| Not use any wallpaper Check None in the Wallpaper list | |
| Use a custom bitmap | Check Custom, choose a bitmap, and click Open |
Table 14.
- Click OK when you are done.
See also:
Configure Colors dialog
Color presets
Color presets
Once you create a color arrangement that you like, you can save it as a preset, and then load it whenever you want to use that arrangement. You can also load any of the many factory presets, some of which duplicate the colors of earlier versions of SONAR. You can also import and export color arrangements in the form of .clr files so that SONAR users can share color layouts. And you can back up or export all of your presets with a single command, and import a group of presets that you or another SONAR user created.

Note: Both single color presets, and collections of presets use the file extension .clr, so when you export either the current color arrangement, or all of your presets at once, give the exported file a name that clearly labels it as either a single preset, or as a collection of presets.
Figure 15. The Configure Colors dialog

A. Presets menu B. Import and Export buttons
To load a color preset
- Open the Configure Colors dialog by using the Options > Colors command.
- Click the drop-down arrow on the Presets menu to display the list of presets, then click the name of the preset you want to load.
To save a color preset
- Open the Configure Colors dialog by using the Options > Colors command.
- Adjust the color settings you want to save.
- Type a name for your preset in the Presets menu.
- Click the floppy disk icon that's next to the Presets menu to save your preset.
To export the current color arrangement
- Open the Configure Colors dialog by using the Options > Colors command.
- Arrange or load the color arrangement you want to export.
- Click the Export Colors button Export Colors... in the Configure Colors dialog.
The Export Color Set dialog appears.
- Navigate to the folder where you want to store your new color set file.
- Type a name for your color set file in the File Name field.
- Make sure that the Export Current Color Set check box is enabled.
- Click the Save button.
To import one or more color presets
- Open the Configure Colors dialog by using the Options > Colors command.
- Click the Import Colors button Import Colors... in the Configure Colors dialog.
The Import Color Set dialog appears.
- Navigate to the folder where the color set file you want to import is. Both single presets and groups of presets are stored in color set files, which use the .clr file extension.
- Click the file that you want to import.
- Click the Open button.
- If your Preset menu in SONAR already contains a preset that is included in the preset collection file you are importing, SONAR asks you if you want to overwrite the file. This happens for each file that has the same name as a preset in the preset collection you are importing. Click Yes or No for each file in question, or Yes All or No All to either overwrite or protect all of your current preset files.
To export all your color presets
-
Open the Configure Colors dialog by using the Options > Colors command.
-
Click the Export Colors button Export Colors... in the Configure Colors dialog.
The Export Color Set dialog appears.
- Navigate to the folder where you want to store your the exported file. This file will contain all or your color presets.
- Type a name for your file in the File Name field. Use a file name that you will recognize as a collection of presets, rather than as a single color arrangement.
- Make sure that the Export Color Presets check box is enabled.
- Click the Save button.

Note: A file of color presets can be large, and might take a minute or so to export.
Installing SONAR
SONAR is easy to install. All you need to do is choose the folder where the program and sample project files should be stored. Before you start, make sure you have your serial number handy. Your serial number is located on the back of your DVD case.

Note: If you choose to not install the Sample files, you will not have the necessary content to use the tutorials in Chapter 2.
To install SONAR
- Start your computer.
- Close any open programs you have running.
- Place the SONAR installation disc in your disc drive.
If you have autorun enabled, the SONAR AutoRun menu opens automatically, showing you a dialog box with several buttons. If autorun is not enabled, you can open the SONAR AutoRun menu by selecting Start > Run and entering d:\AutoRun.exe (where d:\ is your disc drive).
- Click the Install SONAR button.

Note: If you exit Setup without completing the installation, choose Start > Run, type D:\AutoRun.exe (where D:\ is your DVD drive), and click OK. This will reopen the AutoRun window, and you can click Install to start installation again.
- Follow the installation instructions on the screen.
You can also install SONAR by choosing Start > Run and running the application named SETUP.EXE from the DVD.
Uninstalling SONAR
When you installed SONAR, the setup program placed an Uninstall icon in the Start menu. To uninstall SONAR, click the Start button and choose Programs > Cakewalk > SONAR 8.5 (Studio or Producer) > Uninstall SONAR 8.5 (Studio or Producer).
Starting to use SONAR
This chapter has provided you with an overview of SONAR and basic information on how to install the software and configure your system.
The following tutorials will give you some hands-on practice in playing, recording, and mixing your projects. If you have not already done so, you may want to refer to SONAR basics to get the most out of these tutorials.

Note: If, during installation, you chose in the Select Components dialog not to install the Tutorials folder (part of the Sample files), you will not have access to the sample tutorial files needed to follow the tutorials in this chapter. If you didn't install these files, insert your product disc and copy the files to your hard drive.
Tutorial 1 – Creating, playing, and saving projects
Tutorial 2 – Using the Media Browser
Tutorial 3 – Recording vocals and musical instruments
Tutorial 4 – Playing and recording software instruments
Tutorial 5 – Working with music notation
Tutorial 6 – Editing your music
Tutorial 7 – Mixing and adding effects
Tutorial 8 – Working with video
Tutorial 9 – Exporting, CD burning and sharing
Tutorial 1 – Creating, playing, and saving projects
Understanding and managing project files is central to your work flow in SONAR. In this tutorial, we are going to cover the basics of getting started with project files and some of the operations that can be performed with them. Whenever you write or record music in SONAR, you are writing it to be saved into a project. A project can contain a variety of elements, including:
- Audio tracks
- MIDI tracks
- Instrument tracks
- DirectX and VST audio effects
- Project settings such as Tempo, Key and Meter changes
• L y r i c s
See:
Creating a new project
Opening project files
Playing project files
Looping project files
Saving project files
Creating a new project
There are several ways to get started with a project in SONAR. When SONAR is opened, you will be greeted with the Quick Start dialog. Let's take a look at the options available in this dialog.
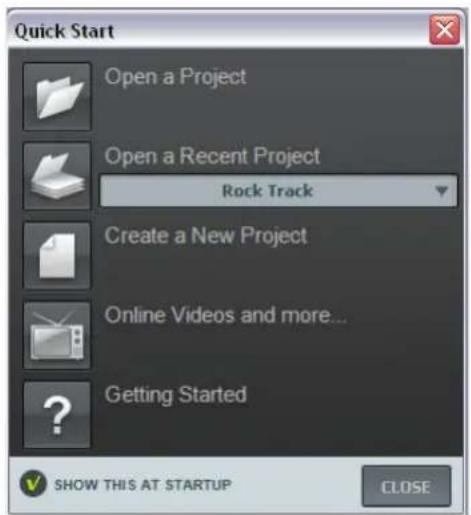
Open a Project. Opens a standard File Open dialog, which lets you select the project that you want to open.
Open a Recent Project. The drop-down list shows the most recent projects that have been opened in SONAR. Select the desired project from the list and click the button to the left of the list to open the project.
Create a New Project. Click this button to open the New Project File dialog, which lets you create a new project based on any available template.
Online Videos and more. Click this link to view our tutorial videos online. An active Internet connection is needed in order to access this content.
Getting Started. Click this button to open the SONAR online Help.
Show this at Startup. Clear this check box if you don't want the Quick Start dialog to launch the next time you start SONAR.
Close. Use this button to close the Quick Start dialog.
For this tutorial, we want to create a new project.
- Click the Create a New Project button


Tip: You can also perform this same operation by clicking File > New from the main menu across the top of SONAR's screen.
The New Project File dialog appears. Whenever you create a new project, you will be presented with this dialog.
Let's explore some of the things you can do in this window.

Name. Type the name of your project in the Name box. For this exercise, let's name your project Tutorial 1.
Location. Use the Location box to specify where the project should be saved. Click ☐ to browse to a specific location. For this tutorial, use the default, as shown in the preceding figure.
Audio Path. Use the Audio Path box to specify where to save audio recordings for your project. Click to browse to a specific location.
Store Project Audio in its own Folder. Select this check box if you want to store the project's audio files in a separate folder. It is recommended that you select this option.
Template. This list shows all available pre-made templates that are included with SONAR. This list will also include any custom templates that you create. Your Template list may vary from the preceding figure. For this tutorial, select the template named Normal.
OK. Click OK to create a new project based on the specified settings.
Cancel. Click Cancel to close the New Project File dialog.
Help. Click Help to open the online Help topic for the New Project File dialog.
Click OK now to move forward with this tutorial.
Congratulations, you have just created a new project in SONAR!
See:
Opening project files
Tutorial 1 – Creating, playing, and saving projects
Creating a new project
Playing project files
Looping project files
Saving project files
Opening project files
Next we are going to talk about opening existing project files. There are two ways this can be done in SONAR:
- Click the Open a Project button in the Quick Start dialog that is first presented when SONAR starts.
- Select File > Open from the menu bar across the top of SONAR's screen.
Let's go ahead and try one of the above methods. Either of them will bring you to the Open dialog as shown in the following figure. The Open dialog functions like any other file browsing dialog in Microsoft Windows.
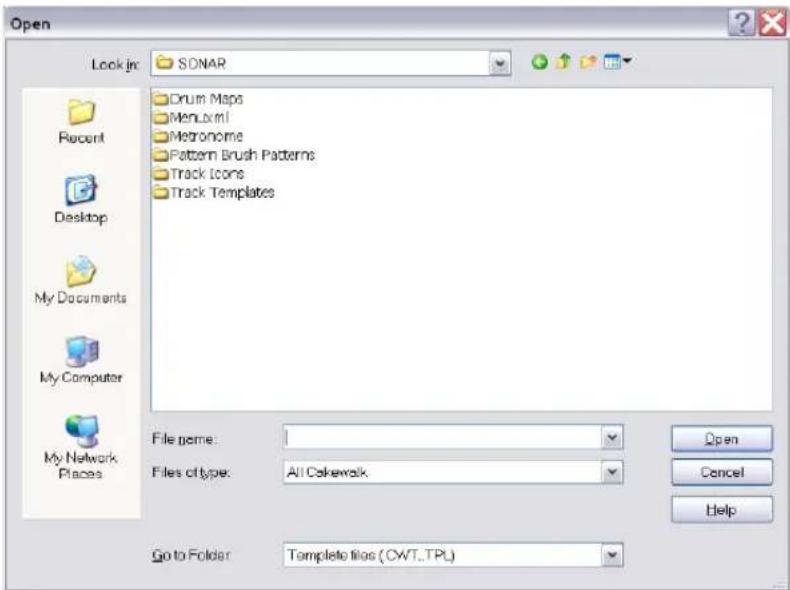
- The vertical navigation buttons let you jump to popular locations on your computer's hard disk.
- The browsing pane lists all the project files and folders that are available in the selected folder.
- The Go to Folder dropdown list allows you to quickly move to commonly used folders for project files in SONAR. Typically, you can get to your projects by selecting Project Files.
- For more detailed information about all of the options and functions in this dialog, click Help.
For this tutorial we want to open one of the sample project files that are included with SONAR. To do so, select Template Files in the Go to Folder list. This option appears when clicking on the little arrow to the right of the dropdown list.

This will refresh the browsing pane to display all the files and folders in the Template Files directory. Double-click on the Tutorials folder to open it and then Locate the project named SONAR AudioDemol.cwp.
You can load project files into SONAR in one of two ways:
- Select a file by clicking on it so that it is selected, then click Open.
- Double-click the file from the browsing pane.
Let's now use one of these methods to open the project file SONAR_AudioDemol.cwp. When the project opens, the File Information window appears. This window can be used for storing notes, comments, credits and other helpful information about a project. For now, close File Information window by clicking the Close button ✗ in the upper right corner of the window.
See:
Creating a new project
Playing project files
Looping project files
Saving project files
Playing project files
For this next section we are going to configure the project named SONAR_AudioDemol.cwp for playback in SONAR. If you have not opened the project yet using the steps from the previous section Opening project files, do so before continuing.
Configuring your sound device
Before we can get any sound, we need to ensure that SONAR is communicating with your computer's sound card or audio interface. To do so, click on the Options menu across the top of SONAR's screen and choose Audio. For this tutorial, there are two pages of this window we are concerned with. The first is the Drivers tab shown in the following image. To get to this page, click the Drivers tab. Before you can hear any sound play in SONAR, you have to ensure that the devices you want to use are selected. An Edirol audio interface is used in the following example, so all the Input Drivers and Output Drivers check boxes for the Edirol device are selected. Your device list will most likely be different from the following image.

After you have selected the desired Input and Output devices that you plan to use with SONAR, click the General tab. In the Playback Timing Master list, select the audio output device that you want SONAR to treat as the default or main output device. This should be the output on your sound card that has either speakers or headphones connected to it. In the Record Timing Master list, select the input on your sound card that you plan to plug devices into, such as a microphone, keyboard or other instrument.
If you are having trouble with any of the steps in the last section thus far, we have created a helpful set-up guide on our web site that provides step-by-step instructions for configuring your audio hardware. You can find it here: www.cakewalk.com/Support/hardwaresetup/
Setting the tracks outputs
The next important step is telling SONAR which output on your sound device you would like audio tracks to play on. In some cases, it is desirable to have tracks playing different outputs (such as if you are using external hardware processing for effects). In this scenario, you'll want to set all of the audio tracks to the same output.
Let's start with the Bass track. Locate the track named Upright Bass in the project. Let's take a closer look at a few of the track's controls. If the track controls are not all visible, you may need to expand the track to see them all.
To expand a track to make all of its controls visible
- Point the cursor to the bottom edge of the track.
- Click and drag down to reveal all track controls.


Tip: If you find the number of track controls overwhelming, you can show/hide specific types of track controls by using the tabs located at the bottom of the Track view.

| Control Description | |
| M | This is the Mute button. It is used to silence a track during playback. Any tracks that are muted will not be heard. |
| S | This is the Solo button. It is used to silence every track except the one that is soloed. This can be handy for isolating a particular performance or recording for monitoring or mixing purposes. SONAR allows you to solo multiple tracks simultaneously. |
Tutorial 1 – Creating, playing, and saving projects
Playing project files
| Control Description | |
| R | This is the Arm or Record Enable button, which must be enabled on any track that you want to record onto. For more details, see Tutorial 3 – Recording vocals and musical instruments. |
| ) | This is the Input Echo or Input Monitor button. When clicked, this enables the track's input to be heard directly through its output. For more details, see Tutorial 3 – Recording vocals and musical instruments. |
| W | This is the Write Automation button. When enabled, changes to adjustable track parameters during playback are recorded. For more details, see Tutorial 7 – Mixing and adding effects. |
| * | This is the Freeze button. It is used to temporarily convert a synth or instrument track into an audio track to conserve CPU power. |
Locate the dropdown list for Output and click the small arrow to show all available outputs. Select the output that your speakers or headphones are connected to. If you can't find the Output dropdown list, make sure you have expanded the track fully by dragging it down.
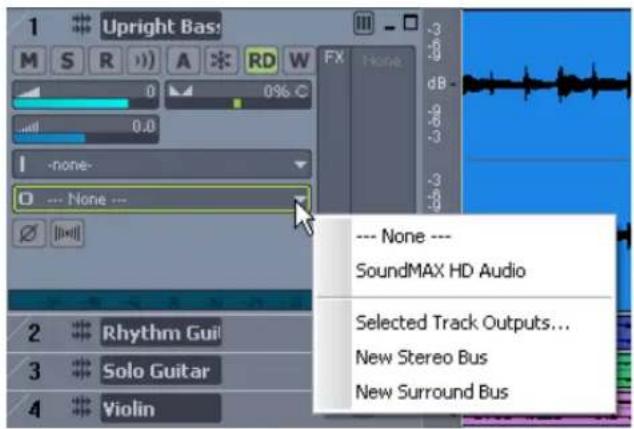

Note: Your options will be different from the preceding image. Select the output that corresponds to your sound card or audio device.
Next, you will want to repeat the above process for all of the tracks in your project.

Tip: If you need to change multiple outputs simultaneously, you can also do it by clicking Edit > Select > All and then Tracks > Property > Outputs. This will bring up a dialog that will allow you to change the Audio and MIDI outputs of all selected tracks.
Playing the project
Now that all of the track's outputs are set to the appropriate device, the next step is to play the project to make sure it can be heard and sounds right.
Locate the Transport tool bar at the top of SONAR's screen. If you can't find this toolbar, press F4 to show the Large Transport toolbar.

The transport contains many useful functions related to projects in SONAR. For now, simply click the Play button to hear the project.
Experiment with the Mute M and Solo S buttons on each track. If you solo multiple tracks you will hear all of the soloed tracks. If you mute any tracks, they will not be heard.

Tip: You can also use your keyboard's SPACEBAR key to start and stop playback in SONAR.
Once you are done listening, click the Stop button
See:
Creating a new project
Opening project files
Looping project files
Saving project files
Looping project files
SONAR features a really handy tool that allows you to repeat specified sections of a project file. You may want to do this for many reasons, such as to rehearse a part or phase or to listen closely to a specific section. Perhaps you might set up a loop just because it's your favorite part of the song and you want to hear it over and over again. For all of the above, you will need to loop a section of the song.
You may have noticed this demo file is an example of swing or jazz music. Let's pretend for a second that you are the guitar player and you wanted to practice your solo section right before the Violin soloist begins. This requires you do two things:
- Create a looped section of the Bass and Rhythm Guitar for you to practice with.
- Mute the existing Solo Guitar track.
To enable looping in SONAR is easy. Simply click the Loop button in the Loop/Auto Shuttle toolbar. You can also find this button in the Large Transport toolbar by pressing F4. When enabled, the Loop button is lit
Take note of the measure numbers displayed in the preceding image. The first number (2:01:000) indicates the start of the loop region and second number (38:01:000) indicates the end of the loop region.
When looping is enabled, the time ruler across the top of SONAR's track view displays yellow flag markers that indicate where the loop region starts and ends. If you want to change the loop region, you can drag the loop markers to a new location. Drag the loop start marker to measure 25 and the loop end marker to measure 37. This will create a 12 bar loop.

Finally, mute both the Solo Guitar and Violin tracks and click Play to audition the loop region. You will now hear only the Upright Bass and Rhythm Guitar tracks so that you, the guitarist in our scenario, can practice your solo section.
See:
Creating a new project
Opening project files
Playing project files
Saving project files
Saving project files
SONAR offers you many options for saving your work. To investigate these options, click on the File menu and choose Save As. This opens the Save As dialog. Before doing anything in this window, the first thing you should do is select Project Files in the Go to Folder list. Even if it already says Project Files, click it anyway.
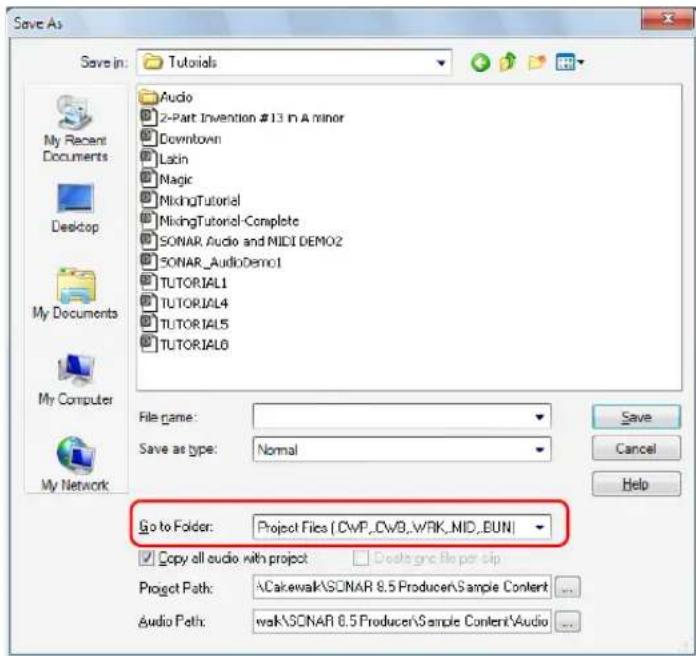
You will notice this window looks very familiar to the Open dialog we looked at earlier in this tutorial. The Save As dialog navigates files much in the same way as Windows does. If you would like to read the finer points and in-depth information about using this window, click the Help button
Help. For this exercise, we are going to look at the different types of project files you can save with SONAR.
Take a look at the dropdown list labeled Save as type. Click the Save as type arrow to see a list of supported file formats. Let's look at these different files formats now:
- Normal. This is the first option listed and the most common format used for saving project files. Choosing this will create a Cakewalk Project file with the .cwp file extension. It is important to remember that Cakewalk Project files do not actually store any audio data, but rather reference audio files from where they are saved on your computer's hard drive.
- Template. Template files are used as a starting point for new projects. Templates can store layout information about your project, such as how many audio and MIDI tracks there are and which Output ports they are assigned to. Detailed information about using templates can be found in SONAR's help topic Templates
- Cakewalk Bundle. This format is typically only used when transferring projects to other people or other computers. Cakewalk Bundle files use the .cwb file extension and are similar to Cakewalk Project files. The main difference is that Cakewalk Bundle files actually contain all of a project's audio data. Cakewalk Bundle files are much larger in size than regular Cakewalk Project files because they contain all of the audio data for a project, so try to avoid using this format unless you need to move a project between computers. When opening a Cakewalk Bundle file, SONAR will “unpack” the embedded audio data and save it to a new audio folder on your computer.
- MIDI. This option lets you save a standard MIDI file of your project. MIDI files do not contain any embedded audio or references to external audio files, so any audio data in a project will be discarded when you save a MIDI file. MIDI files can be either Format 0 or Format 1. Format 0 combines all the MIDI events into a single track. This is compatible with many older sequencers and keyboards. MIDI Format 1 files can store up to 7256 tracks and are a better choice if you plan on using your MIDI file with another computer-based sequencing application. Although not as common, SONAR also allows you to save in the RIFF MIDI format. Unless you are positive that the playback system requires a RIFF MIDI file, you will want to use the MIDI format.
In most cases, the best choice for saving your files is Normal. To save this project, do the following:
- In the Save as type list, select Normal.
- Type a name in the File Name box.
-
Click Save to save the project.
This completes the tutorial. -
In the Go to Folder list, select Project Files. Even if Project Files is already selected, select it again for good practice.
See:
Creating a new project
Opening project files
Playing project files
Looping project files
Tutorial 2 - Using the Media Browser
New to SONAR is the enhanced Media Browser view; designed to improve workflow and make working with audio loops and MIDI groove clips simple. When you open a project in SONAR, the Media Browser will open underneath the track view. It is outlined in the image below.
![SONAR_AudioDemo1 - SONAR 8.5 Producer File Edit Process View Insert Transport Go Trade Tools Options Windows Help SONAR_AudioDemo1* - Track 15:01:000 Upright Bass 1 2 3 4 Upright Bass* Track 1 Accent Location SONAR 8.5 Producer Audio Preview Run SoundMAX HD Audio Preview Synth Folders SONAR 8.5 Producer Sample Content Tutorials Centersia Studio My Sanda Packets Name Size Scope Modified Sample Content File Folder 67/12/2009... Tutorials File Folder 67/12/2009... For Help, press F1 16:02:148 N 44.3MHz, 36 bit Disk space [C]: 16.7038 (18%)](/content/2026/05/819773/images/0b55c3fbd068cee2b0a14ec38161ffc02b001bcdf977538f21e2838b0a0188be.jpg)
To show or hide the Media Browser, click the the Media Browser View button [icon] located to the left of the Transport controls in the top of SONAR's screen, or press ALT+1.
Now that we know how to show and hide the Media Browser view, let's take a closer look at some of its features, starting with the toolbar that spans across the top of the Media Browser view. Locate the section on your computer screen that looks like the following image.

First, let's review the controls on the left side of the toolbar.
| Control Description | |
 | This is theMove upbutton. It is used to open the folder one level above the active folder. |
 | The Refreshbutton is used to refresh the active folder. This is helpful if you move new loops into the folder and want SONAR to be able use/see them. |
 | This is theWindows Explorerbutton. Click to open Windows Explorer at the same directory being viewed in the Media Browser view. |
 | Stopis used to stop play back of the selected loop. |
 | Playis used to listen to the currently selected loop. |
 | When enabled, theAuto Previewbutton automatically previews loops and files when you click on them in the Media Browser view. |
 | Clicking theViewsbutton allows you to choose how files are displayed in the list view. For more details on this check out the online help topic “The Media Browser View” |
The Content Location drop down box shown below allows you to quickly jump to popular locations on your hard drive.

The Audio Preview Bus drop down box shown below allows you to select the output device used to listen to loops and files from the Media Browser view.

The next three controls are used for software synths.
| Control Description | |
| The Insert Soft Synth button allows you to add an instrument track to your project so you can preview MIDI groove clips directly from the Media Browser. | |
| This is the Delete Soft Synth button, which is used to remove the selected synth from the Preview Synth list from your project. | |
| Click the Properties button to open up the property page for the selected synth. | |
Table 15.
Below the toolbar, the Media Browser is split into two or three panes. From left to right they are the Preview Synth list, the Folders pane and the Explorer pane.

Note: The folders list can be hidden using the Views button.

See:
Finding and previewing audio loops
Tutorial 2 – Using the Media Browser
Previewing MIDI groove clips
Adding loops to your project
Finding and previewing audio loops
Now that we have a general idea of how the Media Browser is laid out, let's find some of the content that is included with SONAR and give it a listen.
- Make sure the Media Browser view is open and visible. If it is not, click the Media Browser view button or press ALT+1.
- Click on the Views button and make sure that the option for Folders is selected and that the bullet point is set to Details.
- In the Folders list, locate the My Documents directory. Click the little triangle to the left of my documents to expose all of the folders inside of it.
- Using the same process, navigate to the following directory: My Documents\Cakewalk\SONAR\Sample Content\PowerFX\DowntempoDub. You can open folders by double-clicking on them.

Tip: You can quickly jump to the Sample Content folder by selecting Sample Content from the Content Location drop-down list.
Your folders list should look something like the image below.

Notice that when you click on the Funky folder all of the contents of that folder are displayed in the Explorer pane to the right.
- Click on the file named DrumLoop1.wav.

- Click the Play button ▶ in the Media Browser toolbar.
The selected file is previewed.
If you don't hear anything, revisit the settings of your Audio Preview Bus, as discussed above, and ensure that it is set to the audio device that your headphones or speakers are connected to.
If you need to preview a lot of loops quickly, enable the Auto-Preview function 📄. When enabled, an audio loop will start playing as soon as you select it.
See:
Previewing MIDI groove clips
Adding loops to your project
Previewing MIDI groove clips
In addition to audio loops, the Media Browser view also allows you to preview MIDI groove clips. Let's try this now with one of the clips included with SONAR. Unlike audio loops, MIDI groove clips require a soft synth or instrument track to play through.
- Click the Insert Soft Synth button +, point to Soft Synths and select Cakewalk TTS-1.
The Insert Soft Synth Options dialog appears.

-
Clear all of the check boxes except for Single Track Instrument, Recall Assignable Controls, and Ask This Every Time.
-
Click OK.
Cakewalk TTS-1 is added to your project.
Now that we have a synth in our project that we can preview MIDI groove clips with, let's find some and give them a listen.
-
Using the same process we did to find audio loops, use the Folders and Explorer panes to browse to My Documents\Cakewalk\SONAR\Sample Content\Smart Loops.
-
Locate the MIDI groove clip named Bangin 10.mid.
Before we can preview a MIDI groove clip, we need to tell SONAR what instrument or synth we would like to preview it with.
- In the Preview Synth pane, select Cakewalk TTS-1 1.

-
Now that SONAR knows what synth to play MIDI groove clips through, select the groove clip named Bangin 10.mid just as you did with the audio loop previously.
-
Click the Play ▶ button in the Media Browser toolbar.
Just like with audio loops, you can set MIDI groove clips to auto-preview by clicking the Auto-
Preview button.
In addition to using soft synths to preview MIDI groove clips, soft synths also have many other useful and powerful features. For more details and instructions on using them, see Tutorial 4 – Playing and recording software instruments.
See:
Adding loops to your project
Adding loops to your project
Once you have found an audio loop or MIDI groove clip that you would like to use in your project, the next important step is to add it to your project. Adding loops is easy with SONAR's intuitive drag and drop interface.
To add a loop to your project, do the following:
-
Locate the loop you would like to use in the Browser pane of the Media Browser view.
-
Drag the loop to a track. If you are selecting an audio loop, you must drag it to an audio track. If you would like to use a MIDI groove clip, be sure you drag it to a MIDI track.
You should also notice that, as you drag the file, your mouse pointer changes to an arrow with a
plus sign

- When you drag a loop or groove clip into a project, it will only show one repetition. You can extend how long a loop is by pointing the mouse pointer to the clip's right edge, then drag the clip edge to the desired duration. When you point the mouse pointer to the right clip edge, a blue vertical line appears and the mouse pointer looks like this

This completes the tutorial. You should now be able to drag loops into your projects and loop them.
Tutorial 3 – Recording vocals and musical instruments
One of the most important aspects of creating music in SONAR is digital audio recording. This is the process of taking the sound from a microphone or an instrument and recording it to an audio track. Once this step is completed you can edit and mix the song to prepare it to share with the world.
This tutorial will walk you through the steps involved and provide you with some insight on how to get the best possible audio recordings.
Adding an audio track
In Tutorial 1, you learned about opening project templates. Let's open a blank project for this tutorial:
- On the File menu, click New.
- Select the Blank (no tracks or buses) template and click OK.
A new blank project is created.
With the blank project open, you can insert new tracks as you need them. For the task of recording digital audio you'll need a new audio track. Follow these steps to insert one:
-
Do one of the following:
-
Click Insert and then click Audio Track.
- Right-click on the Tracks pane and select Insert Audio Track on the pop-up menu.
A new audio track is added to your project.
- In the new audio track, expand the track to expose all of its controls (for details, see "To expand a track to make all of its controls visible" on page 99).
The track's controls are exposed.
- Click the Input drop-down menu to select the track's input.
The available inputs for the track are displayed.
- Select the physical jack that you're instrument is plugged in to. If you know, for instance, that your guitar is plugged into input 1, click the Input control and select the first option. Some audio interfaces refer to their stereo inputs as pairs, like 1/2, 3/4 or 5/6. Most often left channels are represented by odd numbers and right channels are represented by even numbers.

Note: Most microphones and guitars are mono, so you'll want to select either the left or right channel accordingly.
- Click the Output drop-down menu to select the track's output.
The available outputs for the track are displayed.
-
Select the output port that you want the audio track to play through during playback. This is how you ultimately route the audio to your speakers. You will usually choose 1 and 2, because these are most commonly the outputs that speakers or audio monitors are connected to.
-
Click the track's Record Enable button R.

Note: SONAR only allows recording to tracks that have been record enabled. This is necessary since SONAR allows for multi-track recording. This tells SONAR what track you want your new material recorded to. Otherwise, every track would be recorded to during every take.
- Click the Input Echo button 📄 if you want to hear the input during recording. Many sound cards and audio interfaces have an option to do this automatically on the hardware level. If you can already hear the input signal, simply move on to the next section.
Getting ready to record
At this point, we need to check the input levels to make sure they are sufficient and not distorting.
Perform as you would if you were recording and watch the meter on the track respond to the sounds you produce.
If the meter never even comes close to the maximum, increase the input level. If the meter even occasionally reaches the maximum, decrease the input level.
Input levels are usually adjusted via a knob next to the input jack on the sound card, but features like this may vary slightly between devices. So, if you have never recorded an instrument or microphone with your sound card, you may want to read about doing so in the device's manual.
Figure 16. The record meter shows the input level

Recording your performance
Now that everything is set up, let's record something!
- On the Options menu, select Project and then click the Metronome tab.
- Set the metronome for a 2 measure count-in.
- Click Use Audio Metronome, select the Recording check box and set Record Count-in to 2 Measures. For details about each metronome option, click Help.
-
Make sure the track has been record enabled by clicking the track's Record Enable button. The Record Enable button on the track should be lit in red like this: ☐. Again, if you don't arm a track, SONAR will not know where to put the audio and the transport Record button will be disabled ☐.
-
On the Transport, click Record, or press R on your computer keyboard.
- You'll hear two measures counted in by the metronome and then recording will begin. Start performing at the beginning of the third count.
- When you finish recording, click the Stop button or press the SPACEBAR.
A new audio clip appears.
Press Play to play back the project. If you would like to redo the take, go to Edit > Undo to undo the previous recording, then repeat steps 3, 4 and 5 above until you get a perfect take.
Now that your first track has been recorded, you can “over-dub” another part. To do so, disable recording on track 1 and repeat the steps in this tutorial. After repeating the steps, you will have recorded to track 2. Both recorded tracks will play during playback. Each will also have its own exclusive volume and pan control, FX chain and can be muted or soloed. You'll learn more about this in future tutorials.
See:
Troubleshooting
Troubleshooting
If you weren't able to record successfully by following this tutorial, please check the following:
I only get one side of my guitar/microphone recorded
You may be recording a mono signal through a stereo input. Guitars and microphones produce mono signals. Right-click the track and select Track Properties from the popup menu. This opens the Track Properties dialog, where you can specify the desired input port. Select the appropriate side of your stereo pair, either left or right as opposed to stereo.
Also make sure you don't have a mono adapter going into the Line-in and that you have the Left side of your sound card (mono) chosen for input in SONAR.
Previously recorded tracks are mixed into my new recordings
This can happen when your soundcard is set to record everything that comes out of your computer speakers.
- Click on the Windows Start button and go to All Programs > Accessories > Entertainment > Volume Control.
The Volume Control window appears.
- On the Options menu, click Properties.
The Properties dialog appears.
-
In the Adjust Volume For section, click Recording.
-
Click OK to close the Properties dialog.
The Record Mixer appears.
- Make sure What You Hear or Stereo Mix (exact name various depending on the sound card manufacturer) is not selected. If this option is enabled, click the Select check box below the desired input (normally Line In or Mic).
This problem can also occur when you are using an analog mixer in your setup. Carefully follow all of your signal paths to ensure that your sound cards audio output is not being looped back into itself.
You should also consider the possibility of your microphone picking up the signal from your speakers or headphones.
Only a flat line/silence is recorded
In Windows XP, click the Start button and go to Programs > Accessories > Entertainment > Volume Control to open the Windows Mixer.
The Windows Mixer controls the volume levels of your sound card inputs and can also mute any input or output device.
The Windows Mixer looks like this:

When you open the Windows Mixer it may be labeled Play Control or Recording Control. We want to see the recording controls.
To view the recording controls in Windows XP:
- On the Options menu, click Properties.
The Properties dialog appears.
-
In the Adjust Volume For section, click Recording.
-
In the Show the Following Volume Controls section, click Line-in and Microphone.
-
Click OK to close the Properties dialog.
The recording controls appear in the Windows Mixer.
- Click the Select check box under the input you wish to use (normally Line In or Mic).
To view the recording controls in Windows Vista:
-
Go to the Windows Start Menu and type the word SOUND in the Start Search box.
-
The search results appear.
- Click Sound to open the Windows Sound Control Panel.
- Click the Recording tab.
All available input devices are listed along with a meter for each device.
- Play your instrument or speak into the microphone.
Meter activity is visible on one of the input devices.
- Right-click the input device that has meter activity and select Set As Default from the popup menu.
Tutorial 4 – Playing and recording software instruments
Software instruments, which are also referred to as soft synths, are a major part of computer music. Our goal in this tutorial is to add a software instrument to a project. We'll explore a few different ways they can be used with SONAR and look at some options to really make the most of them.
A brief history

Note: Feel free to skip to the next section if you want to start using synths right away.
For our purposes, a synth has two basic functions:
- Receive a digital message
- Make a sound based on the information contained in that message
In the early 1980's, all of the major manufacturers of keyboards and drum machines got together to decide on a way for their products to work well with each other. Since they all operated under some version of the two functions listed above, it was a simple goal.
They needed to standardize what messages were used to represent particular expressions. For example: if it was a drum machine, everyone would need to use the C note for the bass drum, the D note for the snare drum and so on. That way, messages sent from one drum machine can be fed to another made by a different company. It will play the same beat, but using the drum sounds from the different module.
The standard they established is known as MIDI (usually pronounced [mid-ee]). As soon as computers entered the scene, it was clear that there could (and should) be a way to connect a synth and send MIDI messages to it from a software sequencer. That's how Cakewalk was born. Our first application was a DOS program that would allow a user to edit the MIDI data in detail, and play it out to a connected synth. You could also record the events from a performance into the computer.
Things have evolved a lot since then. As computers have grown more powerful, the capabilities of Cakewalk software have expanded. Computers are now so fast that software companies are able to make synths and drum machines that are completely software-based. They are essentially the guts of a keyboard in a computer program.
See:
Adding an instrument track to your project
Recording MIDI
Manually entering MIDI notes
Adding an instrument track to your project
Adding instrument tracks to your project is easy and something you'll find yourself doing often, so let's explore some of the basics. For this exercise, we'll start with a blank project:
- On the File menu, click New.
- Select the Blank (no tracks or buses) template and click OK.
A new project opens.
A menu lists all available software synths that are installed on your computer.
- Click DropZone.
The Insert Soft Synth Options dialog appears.
-
Select the following options:
-
Simple Instrument Track
- Synth Property Page
- Recall Assignable Controls
- Ask This Every Time
A new track is inserted in your project. This track is a combination of the two types of tracks you have learned about in the previous tutorials. It holds MIDI data and accepts a MIDI input, but it outputs the sound of the synth, like an audio track would. The DropZone window may also open. If not, you can open it manually by double-clicking on the track icon.


Note: You can always launch a given software instrument's window by double-clicking its track icon.
Let's take a quick look at DropZone.
![cakewalk default [1.6 MB] BLADEMY 3 FLOWOUT 2 drop zone dragon breath.wav [1.6 MB] Lo.Pt key 0 127 Lo.Pt vol 0 122 Wnt 0 Tung 0 Mid Track 100 Proprietary 0 86 Start 0 End 430080 Loop Start 32400 Loop End 43543 Krustade 0 FILTER W/FF OPTION CUTOFF LFD OUT FIDP FIDP FIDP FIDP FIDP FIDP FIDP FIDP FIDP FIDP FIDP FIDP FIDP FIDP FIDP FIDP FIDP FIDP FIDP FIDP FIDP FIDP FIDP FIDP FIDP FIDP FIDP FIDP FIDP FIDP FIDP FIDP FIDP FIDP FIO +](/content/2026/05/819773/images/73860c4bfae2c81ae2bc84ea8fca1bd0434a31ca5f05791f7a94e2a5365efa63.jpg)
One of the first things you'll typically need to do is choose a sound. In DropZone and most other Cakewalk synths, a sound preset is referred to as a program.
- In DropZone's Program window, click Empty Program.
The Program Browser appears.
Note: It may take a minute the first time the Program Browser opens. This is because DropZone is building a list of all available sounds. Once the list has been built, the Program Browser will open faster the next time.
- Select a program by double-clicking its name. For this tutorial we'll use Acid Quinda from the Basses section.
DropZone loads the program and displays the program name.
- Click the keyboard image to hear what the program sounds like.
Note: Each soft synth uses a different method of choosing and auditioning sounds. This is often outlined in the synth's documentation. You can press the F1 key to open the online help for a synth.
Now that we have inserted an instrument and selected one of its sounds we can make use of these sounds in our project. This is where you can get creative. You have the option of recording a performance that you play on a MIDI keyboard (also referred to as a controller) or manually entering notes and events to play out to the software synth. We'll explore each method in the following sections.
See:
Recording MIDI
Manually entering MIDI notes
Recording MIDI
First, we'll try recording. This only works if you have a MIDI controller. If you do not have a MIDI controller, skip ahead to the next section of this tutorial.
For recording, you don't need the DropZone window open. You can close an instrument by clicking in the upper right corner. This doesn't cause the synth to stop functioning—it will continue to work in the background.

Note: If you need to see the DropZone window again, just double-click the track icon.
In the Track view, we can assign the input port. If you only have one MIDI keyboard this should be set up already. Try playing some notes to see if it works. If not, go to Options > MIDI Devices and make sure your keyboard is enabled in the Input Port list.
The next step is arming the track for recording. Click the track's Record Enable button R. This enables recording on the track.
Now, click the Record button in the Transport toolbar. The Now Time cursor starts to roll. Play some notes and click the Stop button when you're done.
You have just recorded your first MIDI performance through a software instrument. Press the Play button to hear it play back.
See:
Adding an instrument track to your project
Manually entering MIDI notes
Manually entering MIDI notes
Using this method, you can manually draw notes on a grid called the Piano Roll View (often referred to as the PRV). This is the preferred method if you're not much of a keyboard player or don't have access to a MIDI controller. It allows you to edit every detail of a performance.
To get to the PRV, you first need to select the track you would like to see in it. Simply click the track icon once so that it changes color. Next, go to Views > Piano Roll to open the PRV.
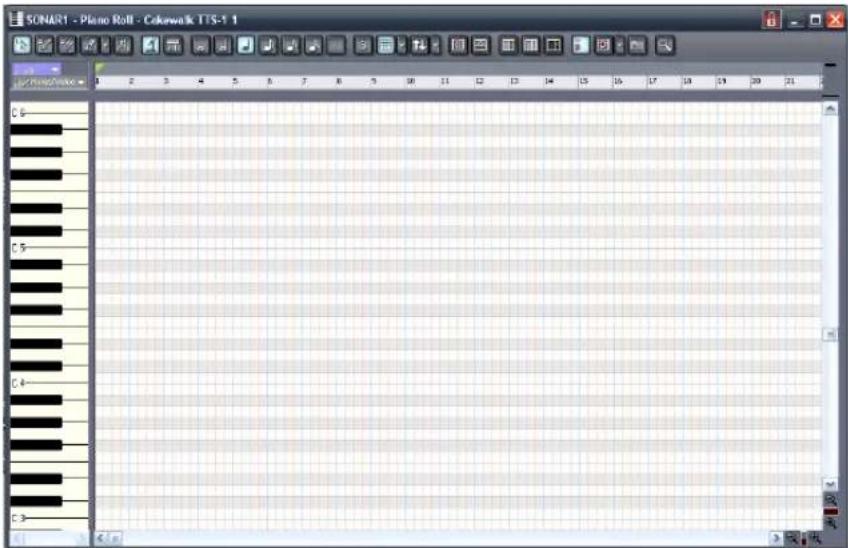
The ruler at the top of this view represents musical measures and beats. The keyboard image on the left represents what notes are being played.
Click on the Draw tool 📋. You can also enable this tool by pressing the D key on your computer keyboard. The Draw tool allows you to click on the grid to create a note.
To create a note, click on the grid at measure 1.
![E 5 Time:1:02:720 (+1200) [1 Notes]](/content/2026/05/819773/images/df9796c41dd2460d7cf62dc90c0b641cb0375e638e0165ec01c7a9accf23a211.jpg)
If you click on various sections of a note, the Draw tool performs a different function:
- Left edge. Adjusts the start time.
• Right edge. Adjusts the end time or the duration. - Top. Adjusts the velocity of the note, which indicates how hard the note is played.
- Bottom. Allows you to move the note to another location on the PRV grid.
Try to create a melody using this technique. You might find that you can only create 16th notes or
longer. If you want 32nd notes or triplets, click the Snap To Grid options button
This will open the Snap To Grid dialog box where you can set the resolution to 32nd notes.
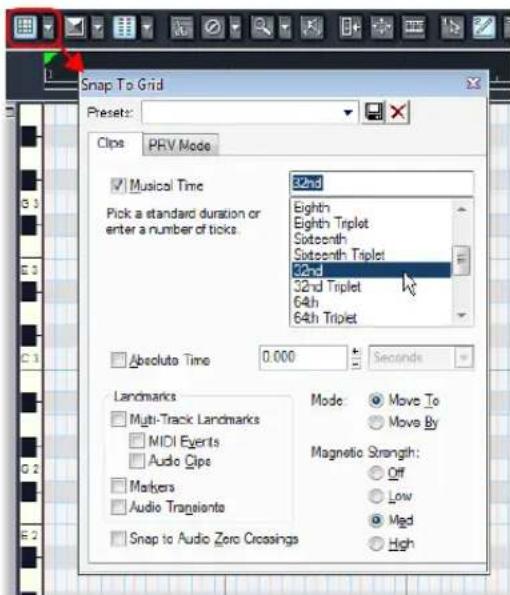
Click OK. You can now draw notes at shorter distances from each other.
What if I already have a project that contains MIDI tracks?
If you already have a MIDI track that you would like to play through a software instrument, the steps are a bit different.
Let's start by opening a sample project.
- On the File menu, click Open.
- Naviagate to My Documents/Cakewalk/SONAR/Sample Content/Tutorials.
- Click on the file named Latin.cwp and click OK.
If you press Play, you are not likely to hear anything. That's because this project does not contain a software synth for the MIDI tracks to play through. Since there are 11 tracks in this project, it would be best to use one synth track and route them all to the same instrument. Some instruments, such as the Cakewalk TTS-1 can output more than one type of sound. These instruments are known as multi-timbral synths. They know what notes are played through each sound based on the MIDI channel they are sent over. If you examine the Track Properties dialog of each track in this project, you'll notice that each one is set to its own channel. No two tracks share the same channel.
Let's insert the Cakewalk TTS-1:
- Go to Insert > Soft Synths > Cakewalk TTS-1.
The Insert Synth Options dialog appears. - In the Create These Tracks area, click First Synth Audio Output.
- In the Open These Windows area, click Synth Property Page.

Note: If you would like a detailed explanation of each option, click Help.
- Click OK.
A new synth track is inserted in your project.
On some computers, the tracks may play back through the TTS-1 at this point. However, on computers that have hardware MIDI outputs available, you may need to specify the TTS-1 as each track's output. Here's a fast way to do that:
- Hold down the CTRL key and click each track to select them.
The tracks are highlighted to indicate they are selected.
- Go to Tracks > Property > Output.
The Track Outputs dialog appears.
- In the MIDI Outputs list, select Cakewalk TTS-1.
Press Play to play back the project. If you'd like to add your own track to play through the TTS-1, you can click on the New Track button again. This time select MIDI Track. On your new MIDI track, set the output to TTS-1. Remember, it needs to be on its own discreet MIDI channel. In this project, MIDI channels 1-11 are already used, so let's assign this track to channel 12. You can also select the sound via the track's Patch control. Then use one of the methods described above to create MIDI data. You can also add MIDI data to your new track from the Media Browser. See Tutorial 2 for details about the Media Browser. Another option is using the Staff view as an alternative to the Piano Roll view. That will be covered in the next tutorial: Tutorial 5 - Working with music notation.
Tutorial 5 - Working with music notation
A great way to compose in SONAR is by using the Staff view. The Staff pane displays MIDI note events as musical notation. For some musicians, this may be the most familiar and comfortable view in which to work. The Staff pane provides many features that make it easy for you to compose, edit, and print music. You can add notes to your composition with simple point-and-click techniques.
This tutorial will introduce you to the tools and features that SONAR provides for working with notation.
Let's start by opening the Staff view in a new project:
- On the File menu, click New.
The New Project File dialog appears.
- Select the Normal template, specify a project name and save location, then click OK.
SONAR loads the new project, which contains two audio tracks and two MIDI tracks.
-
Click on track 3 labeled "MIDI 1".
-
On the Views menu, click Staff.
The Staff view opens.

Next we need to configure the Staff View tools for the purpose of this tutorial:
-
Change the Display Resolution ♪ to the smallest note value.
-
Disable Fill Durations and Trim Durations
-
Select the Draw tool

For this tutorial we will also change the time signature to 34 , the key to G and the staff layout to display a treble and bass clef.
-
On the Insert menu, click Meter/Key Change. The Meter/Key Signature dialog appears.
-
Change Beats per Measure to 3 and Key Signature to 1 Sharp (G), then click OK to close the Meter/Key Signature dialog.
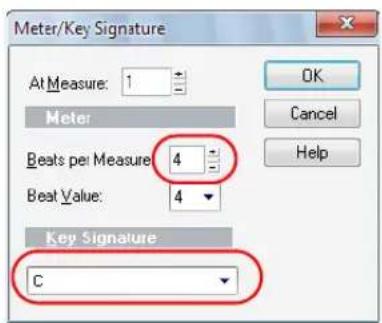
- In the Staff view, click the Layout button. The Staff View Layout dialog appears.
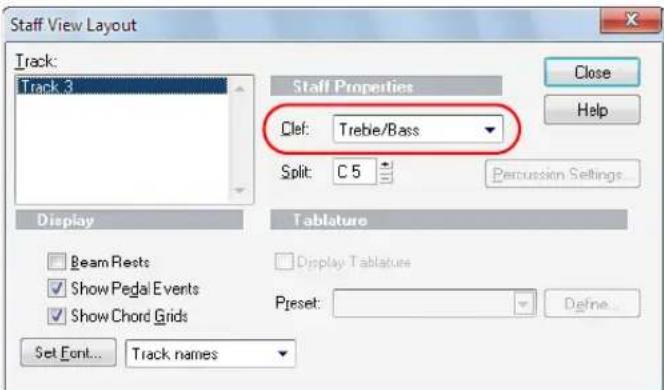
- In the Clef list, select Treble/Bass, then click OK to close the Staff View Layout dialog. The Staff View now looks like this:

Now that you know how to set up the Staff View, it's time to play! You can either record a MIDI track in this project or manually add notes. The rest of this tutorial will provide you with a basic overview of the notation tools. For more in depth information about all the features and functionality of the Staff View, including using the Fretboard and the Lyrics View, see Notation and Lyrics.
Selecting the note value
Simply select any of the note value buttons found in the center of the Staff view. You can also create a dotted note or triplet by clicking the appropriate buttons found just to the right.

Adding a note
To add a note:
- Click the Draw tool

- Click at the point where you want to add a note.
A note event is inserted.
Selecting notes
To select notes:
- Click the Select too

- Do one of the following:
• To select a single note, click the note head.
- To select multiple adjacent notes, click outside the first note you want to select and drag the mouse to draw a rectangle around the desired notes.
- To select discontinuous notes, hold down the CTRL key and click the desired notes.
Moving Notes - Change timing or pitch
To move notes:

- Click the Select tool
- Select the note or notes that you want to move.
- Click on any selected note and drag the mouse left or right to change timing or up and down to change pitch.
Copying notes
To copy notes:
- Press and hold the CTRL key down while you click the desired note(s).
- While still holding the CTRL key and the left mouse button, drag the note(s) to the desired location, then release the mouse button.
The note(s) is copied.
Changing the duration of a note
You can change the duration of a note while using either the Draw tool or the Select tool.
- Right click the note head to open the Note Properties dialog.
- In the Duration field, enter in the number of ticks you want for the note, then click OK to close the Note Properties dialog.

The following table shows the relationship between note durations and ticks (with the default timebase of 960 ticks per quarter note).
Note Duration in ticks
Whole 4:000
Half 2:000
Note Duration in ticks
Quarter 1:000
Eighth 480
Sixteenth 240
Thirty-second 120
Deleting a note
Select the Erase tool 📋 and click the note you want to delete.
Adding lyrics
To add a lyric event below a note:
- Click the Draw tool
- Enable the Lyric button
- Position the pointer just below the note and click.
A box appears where lyrics can be typed.

- Press the space bar to quickly jump to the next note.
Adding chord symbols
To add a chord symbol above a note:
- Click the Draw tool
- Enable the Chord button
- Position the pointer above the note you want to add the chord to and click.
A chord symbol is added above the note.
- To change the chord properties or show a guitar chord grid, right-click the chord name. The Chord Properties dialog appears.
Adding expressions
- Click the Draw tool

- Enable the Expression button

- Position the pointer just below a note and click.
A box appears where expressions can be entered.

Adding a crescendo or decrescendo/diminuendo
- Click the Draw tool

- Enable the Hairpin button

- Position the pointer just below a note and click.
A hairpin event (crescendo or decrescendo) is inserted.
- To change the hairpin type and duration, right-click the hairpin event.
The Hairpin Properties dialog appears.

Note: Hairpin events are ornamental only and do not affect playback.
Adding pedal marks (sustain)
- Click the Draw tool

- Enablen the Pedal button

- Position the pointer below the staff and click.
Pedal down P and Pedal up * marks are inserted.
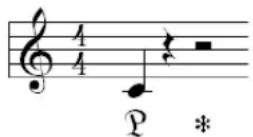
- Click and drag to move the marks to a new time if needed.
See:
Printing your notation
Printing your notation
Once you are finished entering and editing notes you can print out the score or individual parts.
- Select the MIDI track or tracks you want to print the notation for.
- On the Views menu, click Staff.
The Staff view opens.
- On the File menu, click Print Preview.
The Print Preview window opens, allowing you to see how the printed score will look.
- To change the astral size of the score, click Configure.
The Staff View Print Configure dialog appears. For more information about the different rastral sizes, see Printing.
- To print the score, click Print.

Tip: To change the title, composer and copyright information, select File > Info to open the File Info window.
See:
Notation and Lyrics
Tutorial 6 – Editing your music
While working on your music, you are likely to find that editing is a major part of the song creation process. Before people started making music on computers, all of the editing was done by cutting tape with a razor blade and piecing it together. You can imagine how difficult it could become. In SONAR, you can actually select a part of your music with the mouse and delete/copy/paste/move it all very easily. This Tutorial will introduce SONAR's tools for making some common edits and offer a few tips to make it faster and more fun.
See:
Selection
Moving clips
Splitting Clips
Cropping Clips
Undo and Redo
Selection
One of the most important things to understand in order to edit your music successfully is selection. Once you become familiar with selecting, the rest is easy. You typically need to have the appropriate parts selected in order to make edits on them.
There are two aspects of selection:
- Time Range
- Tracks
Let's say you'd like to delete the second measure of a certain track. The time range specifies that the edit will need to occur between measures 2 and 3. The track selection specifies what track's clips will be deleted, while leaving its surrounding tracks unchanged.
Let's explore some different ways to do this in a sample project. All of the tools described are available in the Track View toolbar, which is located directly above the tracks in the Track View. For a complete description of all of the tools in the Track view toolbar, see "Track View Toolbar" on page 1439.

Note: If you would like to try both of the following methods, select Edit > Undo after completing the first method. Doing so will revert the project to its previous state.
Method 1:
- Select the track that you want to delete measure two from.

Tip: Click in the Tracks pane on the left, not the Clips pane on the right.
- Drag in the time ruler from measure 2 through measure 3.
The selected time range is highlighted.
- Press DELETE or select Edit > Delete.
Measure two is deleted from the selected track.
Method 2:
- Select the Free Edit tool

- Click in the center of the clip and drag to select the section you want to delete.
The selected section is highlighted.

natural_image
Simple diagram with a white starburst shape centered on a green rectangle, surrounded by purple borders (no text or symbols)- Press DELETE or select Edit > Delete.
You might have noticed that you're only able to select full measures. What if you need to edit a smaller amount of time? You'll need to turn off Snap To Grid. To do so, click the Snap to Grid
button
With this button disabled, you will be able to make finer selections. You can also choose different Snap To Grid options. Press SHIFT+N to open the Snap To Grid window and try different options. For information about each option, click Help.
See:
Moving clips
Splitting Clips
Cropping Clips
Undo and Redo
Moving clips
From time to time, you may need to move clips around. If you understand selection, you're half way there already.
- Select the section you want to move.
- With the Free Edit tool, click the top or bottom of the selection and drag the clip to the desired location.
natural_image
Abstract graphic with a black arrow pointing to a white dot on a purple background, no text or symbols present.The Drag and Drop Options dialog appears, which lets you specify what to do with any existing data in the target location. You can either replace the existing data or blend the old and new data.
See:
Selection
Splitting Clips
Cropping Clips
Undo and Redo
Splitting Clips
In some cases, you might want to split a clip. As described later in this tutorial, it can be beneficial to have clip borders at different points on a track. You can split a clip with the Split tool
To split a clip, do one of the following:
- To split a clip in two, click the desired position on the clip.
- To split a clip at two separate points, click the first split position and drag to the second split position.

Note: The Split tool obeys the Snap to Grid settings. If a split does not occur exactly where you click, disable Snap to Grid and try again.

Tip: You can also use the Free Edit tool to click the desired position on the clip, then press the S key to split.
See:
Selection
Moving clips
Cropping Clips
Undo and Redo
Cropping Clips
You can crop a clip by using a gesture called slip editing. Slip editing lets you “roll out” the beginning or the end of a clip to different places without changing the position of the music. Imagine that the clips are “windows” that allow you to see and hear pieces of audio or MIDI. You can change the size of that window so that less of the data is visible. If it's not visible, it won't be heard during playback. The data still exists, so you can enlarge the “window” by slip editing the clip. The visible data will then be audible.
Click the Select tool to enable slip editing.
Now, if you point to the left or right clip edge, the cursor changes and you can drag the clip edge to a new location.

natural_image
Pure electrical circuit lines without any symbolsFading Clips
You can also fade individual clips by using the Select tool. Drag the upper left corner of a clip to create a fade-in. Drag the upper right corner of a clip to create a fade-out.

natural_image
Pure diagram of a waveform or signal flow with no text, numbers, or symbolsTo change the fade characteristics, right-click an existing fade and select the desired fade type from the popup menu.

See:
Selection
Moving clips
Splitting Clips
Undo and Redo
Undo and Redo
While editing a project, you might make mistakes or experiment with an idea that doesn't produce the desired results. SONAR has unlimited Undo for such occasions. You can undo one step at a time by selecting Edit > Undo or by pressing CTRL+Z. You can also look at your edit history and select a time to go back to. To do so, go to Edit > History, choose the edit you'd like to return to and click OK.

Note: When you close a project, the undo history is erased.
If you change your mind and want to revert to the previous undo state, select Edit > Redo or press CTRL+SHIFT+Z.
This tutorial has shown you how to use different tools to shape your recordings into well-organized and great sounding projects. The next step is mixing, which is covered in Tutorial 7 – Mixing and adding effects.
Tutorial 7 - Mixing and adding effects
Mixing is an important part of recording that can really help the music you create in SONAR sound its best. Mixing involves placing different instruments and sounds in layers of the frequency spectrum, adjusting levels so that tracks blend nicely, spreading them across the stereo field and adding effects where appropriate.
There are many important decisions to make when mixing; things that are sometimes not considered while writing a song. The choices you make can have a major effect on how pleasurable the listening experience is for your audience.
In this tutorial, we'll discuss some general guidelines. But, it's important to remember that there are no rules. This is another artistic stage of song creation.
We'll start by opening the MixingTutorial project:
- Go to File > Open and select the file named MixingTutorial.cwp.

Note: Tutorial files are located in the My Documents/Cakewalk/SONAR/Sample Content/Tutorials folder. You can jump to this folder by selecting Template Files from the Go to folder drop-down list in the Open dialog.
- Go to File > Save As and save it under a new name. This way, you can save your work without overwriting the original, in case you'd like to start over.
In the same folder is a file named MixingTutorial-Complete.cwp, which is a copy of the same project, but after the tutorial has been completed. You can use this project as a reference to which you can compare settings and levels.
See:
Volume and pan
Adding effects (FX)
Using Automation
Volume and pan
Adjusting volume and pan is always a good place to start when mixing. One of the biggest benefits of SONAR's Console view is that you can easily see the volume and pan controls for many tracks simultaneously, in addition to large meters. Some people also enjoy working in the Console view because it doesn't offer a graphical representation of what the music "looks like". Since the final outcome will be an audio file, the listener will not be distracted by the visual cues that are shown in the project's Track view. You may find that you are better able to focus on the actual sound when not seeing the clips.
To open the Console view
• D o one of the following:
- Click the Console view button in the Views toolbar.
- Click Views > Console.
- Press ALT+3.
Here, we'll be shaping the song's foundation. If you listen to the project as it is, you'll probably notice that it sounds pretty "muddy" and bland. This usually happens because all of the instruments are fighting each other for space in the frequency spectrum and stereo field. They're all trying to be heard at the same level in the same location.
Normally, when recording a track, it is common to try to get a relatively loud signal. This is done to achieve the best signal-to-noise ratio and knowing that you will eventually adjust levels during the mixing stage.
Some people like to begin this process by turning down every track and then gradually turning up one track at a time, starting with the rhythm section. Begin by increasing the volume of the bass drum to the desired level. Continue with the snare, the rest of the drums and finally the bass guitar--moving on in order of importance. If there is a lead vocal in the song, that would come last, so that it sits on top of the instrumental foundation you've established.
Other people approach mixing the opposite way, turning things down a bit one at a time. If one method doesn't seem more appealing than the other, try both to see which one is more comfortable for you.

Important: Pay close attention to the main meter while mixing. You never want the main meter to reach the very top, which will result in undesirable audible noise. This is called clipping.


Note: You can find the Mains meters on the far right side in the Console view. If you don't see the Mains meters it, click the Mains button -MAINS
The next thing we'll try is panning. As with mixing in general, there are no rules when it comes to panning. Be creative, trying different ideas to see how they sound. One important thing to consider is
that when you pan two tracks that share the same frequency range away from each other they will become clearer. This especially applies to instruments that have been double-tracked. Try it with the two tracks labeled Cymbals Left and Cymbals Right. Notice how you can hear more definition and detail in the two tracks as you pan them away from each other. When panning double-tracked instruments, try to avoid panning them all the way to the left or right. Doing so may cause the tracks to sound too “separated”, which can take away from the fullness of the sound.
See:
Adding effects (FX)
Using Automation
Adding effects (FX)
At this point, you should have a basic mix. Everything is generally where you want it to be and it's time to use some audio effects to tweak it all to perfection. Effects placed directly on an audio track are called inserts.
Choose an audio track you would like to start with:
- In the Console view, locate the FX bin for the track you'd like to work with. If you don't see the FX bin, click the FX button to ensure FX bins are not hidden.
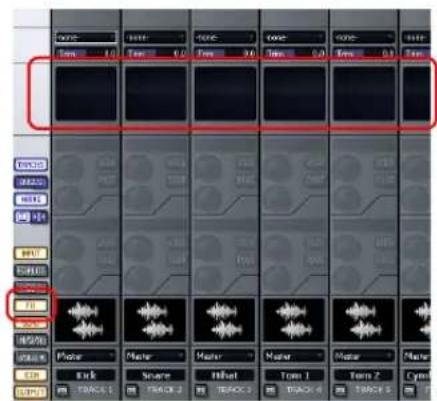
-
Right-click the FX bin to open the pop-up menu.
-
Point to Audio FX, then point to Sonitus:fx and choose any one of the available effects. The selected effect is inserted into the track's FX bin.
-
Experiment with the controls on the plug-in while the music is playing back. You will hear noticeable changes to the sound.
-
Right-click on the effect and choose Delete to remove the effect.
Each of the effect plug-ins listed is designed to change the sound in some specific way. Here's a quick list of some of the included plug-ins and what they're typically used for:
Compressor/Gate. This plug-in affects the loudness of the sound. It can limit how loud a sound can get. It can also limit how soft a sound can get before it's completely turned off.
EQ. EQ can accentuate or turn down a certain frequency range in a sound. For example, if you have an unwanted high-pitched buzz on one of your tracks, an EQ may be able to turn that high frequency down without affecting the sound of the instrument.
Reverb. Reverb creates an artificial space. It produces echoes that are similar to the natural echoes that happen when a sound bounces off the walls in a room.
Delay. Delay plug-ins have the ability to create an echo. However, it's typically more distinct than that of a reverb. It makes a sound repeat, often in a rhythmic, musical manner.
These are the effects we'll be focusing on in this tutorial. However, other effects are available and you should experiment with each one to discover how they can be used in your mixes. To get online Help for a particular plug-in, simply click one of its controls and press the F1 key on your computer keyboard.
Compression and EQ
While adjusting track levels in a song, you might notice that some tracks are too dynamic.
Sometimes they're too loud, other times too soft. In most modern music, the important elements in a mix are focused in a specific volume range. This is done with a compressor.
The purpose of a compressor is to limit the dynamic range of music or sound. Compression will make the loud parts of the signal quieter, resulting in a more or less even level. That even level can then be increased to fit more specifically in the mix.
Many compressors have an option to allow that loud peak to remain untouched for a certain time, which can add some “punch”.
Let's try it on the bass drum:
- Add the Compressor plug-in to the track labeled Kick.
- Adjust the Threshold. The threshold value represents the dB level at which compression starts to take place.
- Adjust Attack. The attack value represents the time the compressor takes to respond to an increase in the input audio's level once the threshold level has been reached.
- Adjust the Level to the desired output volume.
This approach can be applied to any track you like. It's especially useful when trying to get vocals to stand out in a mix.
Now, we can apply some EQ. One of the primary uses for EQ is to prevent different instruments from stepping on each other in the frequency spectrum. One instrument might be intended for a certain frequency range, but extends into another instrument's frequency range. If you turn down the overlapping frequency range for one of the instruments, it will allow the other instrument to stand out better in the mix.
Let's give it a try:
- Solo the tracks named Tension Climbing and Chirppy Synth.
- Add the Sonitus:fx Equalizer plug-in to the Tension Climbing track.
The Sonitus:fx Equalizer interface appears.
- Grab one of the numbered nodes and drag it around. Boost the selected band until you find the frequency range that interferes with Chirppy Synth. When you find it, turn down the selected band by dragging the node downward.

Tip: Try to cut the band around 1kHz.
Experiment with the other controls on the EQ to get the best possible results. As with the compressor plug-in, this approach can be applied to any track you like.
Reverb and Delay
Next, we'll add some space to the song. This is done by using time-based effects.
The first thing we'll do is add a delay effect. A delay effect can really enhance an instrument. In our tutorial project, we will add the Delay effect to the track name Chirppy Synth, which sounds very dry and lifeless. Applying a delay might give it more depth.
- Add the Delay plug-in to Chirppy Synth.
-
Configure the controls as follows:
-
Tempo Sync = Host
- Factor = 1/2 (set for both Left & Right channels)
This is a good starting point. Sometimes the best way to familiarize yourself with a new effect plug-in is to dig in and start tweaking.
Next, we'll apply some reverb to the project. Think of a reverb effect as an artificial room. We could add a separate reverb to each track, but when multiple reverbs are running at the same time it can sound "cloudy". This might be because our ears are used to hearing sounds bounce of walls naturally. A reverb on each track would sound like you have one instrument in one room, another instrument in another room, and so on.
Instead, we will add a single reverb effect to a bus, then send each track to that bus, at varying levels. This is where SONAR's advanced mixing environment offers a lot of flexibility. We will add a control to each track, which adjusts how loud a copy of the track's sound is sent to the bus. This will sound more natural since it's similar to the behavior of an actual acoustic space. All of the different sounds can interact with each other in the "virtual room" we're creating with the reverb.
Follow these steps to create your reverb send from the Console View:
- We want to add this send to all tracks, so go to Edit > Select > All to select all tracks.
- Right-click on one of your tracks in the Sends section of the strip and choose Insert Send Assistant. If you don't see this section in your Console View click the SEND button to ensure it is not hidden.
The Insert Send Assistant appears.
- Configure the Send Assistant as follows:
- Click New Bus. This will create a new reverb bus instead of routing the tracks to an existing
bus.
- Select Stereo
• In the Name box, type Reverb. - Click Choose Effect and select Audio Effects > Sonitus:fx > Reverb.
• Make sure Pre Fader is not selected. - Select the Show Effects Property Page check box.
• In the Bus Output list, select Master.

4. Click OK.
The Reverb property page appears.
5. Set the Reverb control to 0.0 dB and the Dry control to -Inf..
Notice that a send control named Reverb has been added to each track. To enable or disable a send, click the On/Off button located on each track's Send control.
![Sanitusfx Revverb [Reverb] - MixingTutorial Project: No Preset Excess Unic Setup A Reset Presets Input Multi 0.0 dB Low-Cut 75 Hz High Cur 4.0 MHz Predelay 0 ms Room Size 5.0 Diffusion 100 % Base Multiplier 1.0 s Crossover 560 Hz Decay Time 1.5 s High Damping 4.0 MHz Dry Multi 0.0 dB E.R. Multi 3.5 dB Reverse Multi 12.9 dB Width 100 % Output Stress Total Sonitus-reverb Calk-walk](/content/2026/05/819773/images/496ecb2b711fd93bd785bd4148937d8eb5fece324c345ec65f04c9e40ee35dec.jpg)
When a send is enabled, you will hear the reverb effect during playback. To adjust how much reverb is applied to each track, use the send's LEVEL control.

Enable the send control for each track that you want reverb on. You'll probably want at least a little reverb on every track except for the kick drum and the bass guitar.
See:
Volume and pan
Using Automation
Using Automation
Another feature that is important to mixing is automation. Automation lets you record changes to almost any parameter in SONAR, including track parameters, effects, synths and buses. SONAR makes this very easy.
-
Click a track's Write Automation button w to enable automation recording for that track.
-
Press Play ▶ to start playback.
-
During playback, simply make the changes to the parameters in realtime, using either your mouse or a control surface.
- To disable automation recording, stop playback and click the track's Write Automation button w again.
When you play back, the parameters will update automatically.
Automation allows you to make gradual or sudden changes to make your song more dynamic. For example, in the tutorial project, you might find that Whiney Synth should become lower in volume at measure 25, when the drums and bass change. Try it:
-
Click the Write Automation button w on the Whiney Synth track.
-
Click Play ▶ or press SPACEBAR to start playback.
-
At measure 25, turn the track volume down to the desired level.
-
At measure 33, turn the track volume back up.
-
Press Stop to stop playback.
-
Disable Write Automation by clicking the w button again.
-
Press Play ▶ and notice how the track volume changes automatically.
Repeat this process with any other automation you feel the project needs.
That concludes this tutorial. But don't stop here. Continue to experiment by adding different effects, adding loops through the Media Browser view, etc.
Be creative and listen closely to the mix details in your favorite songs and albums. It's sure to provide you with inspiration for your own projects. There are also many books available on the topic, as well as thousands of add-on plug-ins that can expand your arsenal of FX. For more information, visit www.cakewalk.com.
FX: www.cakewalk.com/Products/instruments.asp
Books/Videos: www.cakewalk.com/Products/Books/Mixing.asp
Tutorial 8 - Working with video
SONAR allows you to add music and sound to your videos. This tutorial will guide you through the basics of working with video inside SONAR. If you are new to SONAR, it is highly recommended you review Tutorial 1 – Creating, playing, and saving projects before going any further.
See:
Importing video
Working with markers
Exporting your video
Importing video
Before you can start working with video, you first need to import a video file. Let's try this out with a new project.
- On the File menu, click New to open the New Project File dialog.
- Select the Normal template, give your project a name and then click OK.
If you are having trouble with this, please refer to Tutorial 1 – Creating, playing, and saving projects.
- On the File menu, point to Import and select Video.
The Import Video dialog appears.

Let's explore some of the options in the Import Video dialog.
The first thing you will notice is that this dialog is very similar to the Open dialog that was discussed in Tutorial 1. The Import Video dialog functions in very much the same way with the exception of two sections.
First, outlined in the image above is the drop down box Files of type. Making a selection here will determine which video formats are displayed in the dialog. SONAR supports the following digital video formats:
• Windows Media (.wmv and .asf)
• Video For Windows (.avi)
- MPEG Video (.mpg)
- QuickTime Video (.mov)
The file we are interested in for this tutorial is a Windows Media file, so let's select Windows Media (*.wmv, *.asf) in the Files of type list.
Next, outlined in the above image you will see the File info area on the left and three options on the right. Let's review what each of these options do.
Option What it does
Show file info When selected, this tells SONAR to display video information about the selected file in the File info area of the dialog.
Import Audio Stream Select this option if you want to import the video file's embedded audio into a new audio track in SONAR.
Import as mono tracks Select this option if you want to import the video file's embedded audio data as one or more mono tracks.
Table 16.
For now, let's leave the Import Audio Stream and Show file info check boxes selected.
Just as you would with the Open dialog, navigate to the following location:
My Documents/Cakewalk/SONAR/Sample Content/Tutorials
Locate and import the file named Boarding.wmv. You can open it by either double-clicking on it or highlighting it and then clicking the Open button.

Tip: You can quickly get to the My Documents folder by clicking on its button along the left side of the Import Video dialog.
Notice that SONAR imported any audio that is a part of the video as well. If the video does not have any audio already associated with it, then SONAR will create a silent audio track like in our example.
You should now see the Boarding video in the Video view as well as the Video Thumbnail pane in the Track view.

What if I don't see the Video Thumbnail pane or Video view?
To show or hide the Video Thumbnail pane, drag the splitter bar that separates the Video Thumbnail pane from the Clips pane.

To restore the Video Thumbnail pane, point the mouse pointer over the splitter bar (the mouse pointer will look like 🤊 then drag the splitter bar down to restore and resize the Video Thumbnail pane to your liking.
If you closed the Video view, or if it did not open automatically when you imported the video, you can open it by selecting Views > Video or pressing ALT+6.
Changing the video properties
SONAR allows you to make some useful changes to a video's settings for film scoring purposes. To access these settings, simply right-click in the Video view and choose Video Properties from the popup menu to open the Video Properties dialog.
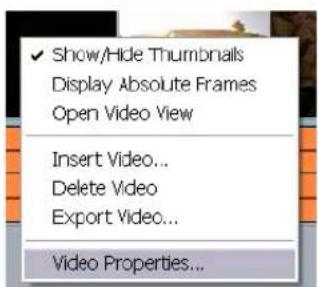
The Video Properties dialog has three tabs: the Video Settings tab, the Info tab and the Render Quality tab. For detailed information about all of these options and settings, see Video Properties dialog. For this tutorial, we are only going to look at the tools on the Video Settings tab.
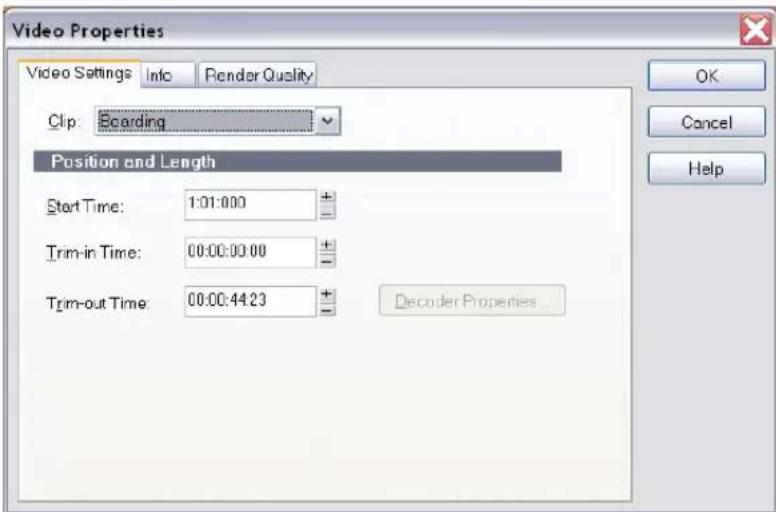
There are three options on this tab that are very important to understand and extremely helpful when working with video. Let's take a closer look at them
| Option What it does | |
| Start Time | The time in your SONAR project at which you want the video file to start playing. |
| Trim-in Time | The time in the video file at which you want video playback to start, this is useful if you don’t want to see the opening credits or the first few scenes. This is expressed in SMPTE time code. |
| Trim-out Time | The time in the video file at which you want video playback to stop, this is also expressed in SMPTE time code. |
Table 17.
Let's change the Start Time value to measure 2. To do this, enter the number 2 in the Start Time box.
Now, click the RTZ button in the transport and then click Play. Notice how the video doesn't start playing until measure 2 in your project.
See:
Working with markers
Exporting your video
Working with markers
When syncing up audio events to film cues or video, it is common to use markers. Markers are a powerful feature in SONAR that helps to simplify the task of identifying major events in a song or video. They can be used to clarify where a verse or chorus begins in a rock tune or, in the case of film scoring, they can be used to identify hit points (points in the film where you want a musical event to synchronize with a visual event). Before we get started on this next exercise, return to the Video Properties dialog and click the Video Settings tab. Set Start Time to 1:01:000, Trim-in Time to 00:00:00:00 and Trim-out Time to 00:00:44:23.
Let's say we want our music to start at the beginning of the video right when the sun comes out. This occurs about 4 seconds into the movie. Taking a closer look, this happens at 4 seconds and 10 frames into the clip, which, expressed in SMPTE time code, is 00:00:04:10.
There are two ways to add markers in SONAR:
- Place the Now Time at the location where you would like a marker, then select Insert > Marker or press F11.
- Click the Add Marker button in the Markers view.
Let's open the Markers view by selecting Views > Markers.

The Markers view is very handy when working with events in a film. The first thing we want to do is add a new marker to the project, indicating the start of the project. To do this, click the Insert
Markers button to open the Marker dialog.

From this dialog you can do a lot of very important things. First let's name this marker by typing Intro in the Name field.
Next, select the Lock to SMPTE (Real World) Time check box. This option is very important when working with video. If a marker is not locked to SMPTE time, its position in relation to events on the video will change with tempo and meter changes in the project.
You might also notice that the Time value changes to the SMPTE format after you selected the check box. This determines where the location of the marker will be. We know in the video that the sun comes out at about four seconds and ten frames into the video. Let's set the Time value to 00:00:04:10.
Click OK to insert the marker and close the Marker dialog. You can place as many markers as you need for a project to sync up all of your events.
The Markers view will now display the marker you just created, with the name Intro assigned to it. The Marker view toolbar contains the following commands that apply to selected markers.
Control Description

Click the Delete Marker button to delete the currently selected marker.

Click the Change Marker Properties button to open the Marker dialog for the selected marker. This is useful if you want to change the location of a marker.

Click the Lock/Unlock Marker button to lock or unlock the marker to SMTPE time.
Table 18.
Close the Markers view now and take a look at the time ruler in SONAR, which spans the top of the Clips pane in the Track view. You will notice there is now an orange flag named Intro indicating where your new marker is in the project.
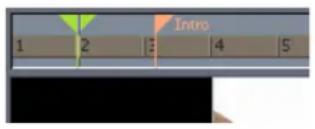
See:
Importing video
Exporting your video
Exporting your video
Once you have finished with all of your music and have your video synced up as you would like it, you'll want to mix it down to a video file that you can share with the world.
- Select everything in the project that you want to export. If you want to export the entire project, simply select Edit > Select > All or press CTRL+A.
- On the File menu, point to Export and click Video.
The Export Video dialog opens. You will notice this is very similar to both the Save As and Export Audio dialogs that were explored in Tutorial 1 and Tutorial 9.
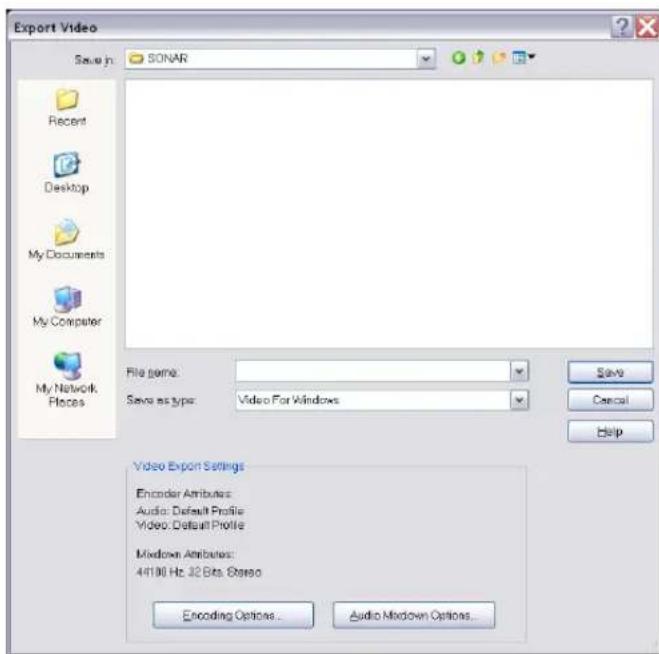
- Similar to saving project files, you will first want to give your video a name by typing one into the File name field.
- Choose the desired video format by selecting it from the Save as type list.
Clicking the Encoding Options button at the bottom will allow you to explore some advanced settings for your video. From this dialog you will be able to change the quality and size of your video. This is particularly important if you plan to upload your video to the web. Some codecs work better than others and are more appropriate for different scenarios. Click the Help button in this dialog for more specific details about different formats.
The Audio Mixdown Options button will bring up settings specific to the audio in your project. Click the Help button for detailed instructions on how to use these settings.
- Specify the location you wish to save the file to and click Save to export it.
Tutorial 9 – Exporting, CD burning and sharing
Once your SONAR project is complete, you will want to share it with the world or burn a CD. SONAR offers many tools to help you do this. In this tutorial, we are going to explore some of the basics of these tools.
Before we get started, let's open one of the example audio projects included with SONAR. If you have your own project that already contains audio, you can load that instead. However, your screen will look different from the images in this tutorial.
- On the File menu, click Open.
The Open dialog appears.
- In the Go to Folder list, select Template Files and then open the Tutorials folder.
- Browse to the project named SONAR AudioDemol.cwp and click Open to load the project.

Note: You may have to rename the file if you saved it with the same name during Tutorial 1.
Now that you have opened the demo project (or your own audio project) click the Play button or press SPACEBAR listen to it. If you do not hear any audio, review the steps in Tutorial 1 to ensure SONAR and your audio device are configured correctly.
Cakewalk Project Files are different from the audio you hear on a CD in that they are often multi-track. In this example, you will notice that there are four audio tracks. In order to burn this mix to a CD or prepare it for distribution, we need to export or mix it down to a stereo track.
First, we need to click File > Export > Audio.
This will bring us to the Export Audio dialog. This has many useful functions. Let's explore some of them in detail.
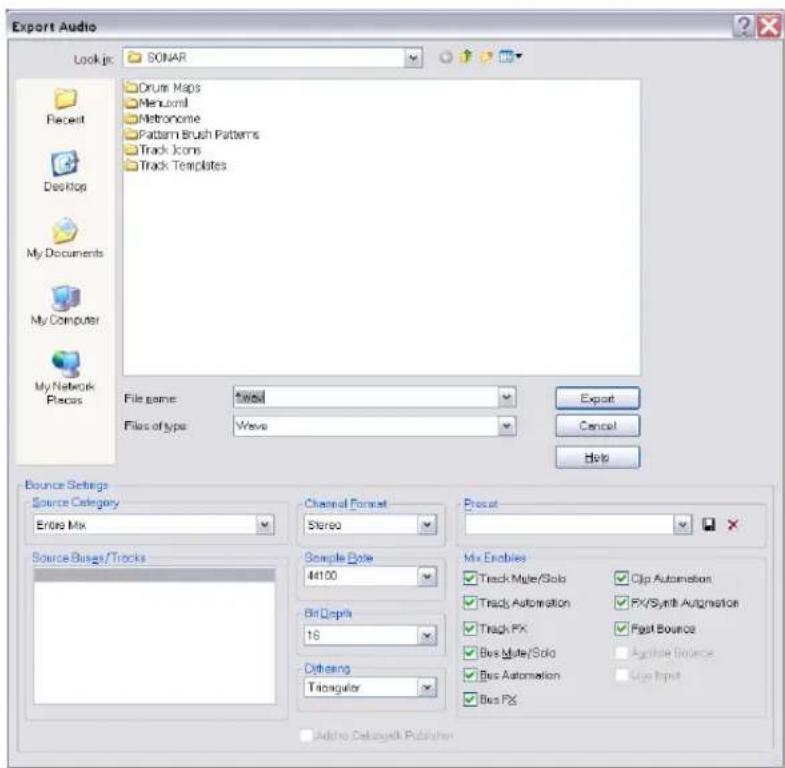
You should notice that the top half of this window is very similar to the Open and Save dialogs that were discussed in Tutorial 1 – Creating, playing, and saving projects. This is used to navigate to locations on your computer's hard drive and tell SONAR where you want to store the exported audio.
For this Tutorial, we are only going to explore some of the more common settings. If you would like to read about all of the options and settings click the Help button.
| Control Function | |
| Channel Format Specifies if the audio should be exported as stereo or mono. | |
| Sample Rate Allows you to set the sample rate of your export. 44100 Hz is used for CD quality audio. | |
| Bit-Depth Allows you to set the bit-depth of your export. 16-bit is used for CD quality and 24-bit is often used for DVD quality audio. | |
| Add to Cakewalk Publisher | Select this option to send your file to Cakewalk Publisher, which is used to put your music on the Internet. |
Table 19.
If you would like to burn an audio CD of your music
- Click File > Export > Audio to open the Export Audio dialog.
- In the Channel Format list, select Stereo.
- In the Sample Rate list, select 44100.
- In the Bit-Depth list, select 16.
- Enter a name for you mix in the File name box.
- In the File type list, select Wave.
- Specify where you want to save the file. Make note of this location, because you will need to use it later.
- Click Export.
A progress bar appears across the bottom of SONAR's screen while a CD quality audio file is exported. When the progress bar disappears, SONAR has finished exporting your project.
Now we need to burn our mix to a CD. SONAR features a powerful built-in CD burning application that can do this for us. Let's open Audio Creator LE and briefly explore its features and how to use it.
See:
Burning an audio CD
Cakewalk Publisher
Burning an audio CD
Select Tools > Burn Audio CD to open the Audio CD Burner dialog.

Simply browse to the audio files you wish to burn and click the Add Track button. You can also drag audio files into the Burner tracklist.

Note: Any files that are not in 16 bit, 44.1kHz wav files will automatically be converted to the proper CD format.
Depending on the type of blank CD you are using, you can fit up to 80 minutes of audio on one CD. Make note of the Space Available and Space Used fields; these will let you know how many more tracks you can fit on your CD. For the best compatibility with most consumer CD players, you should use a CD-R disc. CD-RW discs, while compatible with some newer CD players, may not play back in all systems.
Once you have finished adding all the songs you would like to burn to a CD, the final step is to burn your disc. To do so, do the following:
- Insert the writable CD into the CD-R drive.
The drive containing the writable CD should automatically be detected. If for some reason it isn't detected, manually select the drive letter of your CD Burner from the Target Drive drop down list.
- Click Burn CD.
If you would like to share your music on the internet

Note: Due to licensing restrictions, your Cakewalk software only includes a 30 day free trial of the MP3 encoder. If your 30 day trial period has expired, a full license can be purchased for unlimited use from the Cakewalk web store.
- Click the Export Audio button to open the Export Audio dialog.
- In the Channel Format list, select Stereo.
- In the Sample Rate list, select 44100.
- In the Bit-Depth list, select 16.
- Select the Add to Cakewalk Publisher check box.
- Enter a name for you mix in the File name box.
- In the File type list, select MP3.
- Click Export.
The MP3 Export Options dialog appears. For detailed information about the different options, click Help.
- For our exercise, accept the default settings by clicking OK.
A progress bar appears across the bottom of SONAR's screen. When the progress bar disappears, SONAR has finished exporting your project.
See:
Cakewalk Publisher
Cakewalk Publisher
SONAR includes Cakewalk Publisher, which is a powerful tool to share your music, artwork and playlists on the Internet. A detailed description of Publisher is beyond the scope of this tutorial, but let's take a quick look at its basic features and how it integrates with SONAR.
To open Publisher, select Tools > Publish to Web.
![Publisher PUBLISHER SELECT PUBLISHER NEW PUBLISHER NEW PUBLISHER NEW PUBLISHER SELECT PUBLISHER Title Artist Album URL Album Art Holder [132 x 132] CREATE ORDER Text: Tickets Receipts Albums Units SELECT PUBLISHER TO VIEW C:\WINDOWS.PUBLISHER CW player .swf cw player full.swf cw player slim.swf FELI.24 OK Cancel](/content/2026/05/819773/images/3971ff2eab61388e8ec3cf4f2ab81a1d0f5304853d748915fb3d90d4b25644c4.jpg)
Notice that your recently exported project is already listed in the Track list. This is because you selected the Add to Cakewalk Publisher check box in the Export Audio dialog.
The following table describes a few of the buttons in the publisher interface. If you would like to explore all of the features in Publisher, click the button labeled HELP in the upper right corner of the Publisher window.
| Control Function | |
| CONFIGURE PLAYERS | Used to configure the player and generate the HTML code for pasting into your web site. |
| CHANGE IMAGE | Lets you associate an image with the selected track. This is useful if you want to include album artwork when you upload your music. |
| ADD TRACK | Adds new tracks to the current playlist. |
| DELETE TRACK | Deletes selected tracks from the current playlist. |
| PUBLISH | Once your player has been configured and your playlist is put together, click Publish to upload your files to the Internet. |
Table 20.
Controlling Playback
When you play your SONAR project, you have full control over the tempo or speed of playback, which tracks are played, which sound cards or other devices are used to produce the sound, and what the tracks sound like. You can access most of the playback functions from the Large Transport toolbar.
SONAR's multi-MIDI enhancements give you the ability to play multiple synths or tracks from a single keyboard or controller, or let multiple performers play the same or different tracks. You have total control over MIDI echo (MIDI echo refers to where MIDI input signals are sent once SONAR receives them).

Note: SONAR has a button called the Audio Engine button in the Transport toolbar which you click to stop any feedback you may experience if there is a loop somewhere in your mixer setup. Whenever you play a project, SONAR automatically enables the audio engine, which you can tell by watching the status bar—whenever the audio engine is running, the Audio Running indicator in the status bar lights up.
See also:
The Now time and how to use it
Using the Large Transport
Controlling playback
Track-by-track playback
Changing track settings
Video playback, import, and export
Locating missing audio
Controlling live MIDI playback—MIDI echo
Local control
The Now time and how to use it
Every project has a current time, known as the Now time, which keeps track of where you are in a project. The Now time appears as a vertical line in the Track view and is displayed in both the Large Transport toolbar and the Position toolbar, in two formats.
The measure, beat, and tick number (MBT) identifies the Now time in musical time units. Ticks are subdivisions of quarter notes and indicate the timebase of the project. For more information about the timebase, see "Setting the MIDI timing resolution" on page 241. The other time format is the SMPTE format, expressed in hours, minutes, seconds, and frames.
Figure 17. The Large Transport toolbar
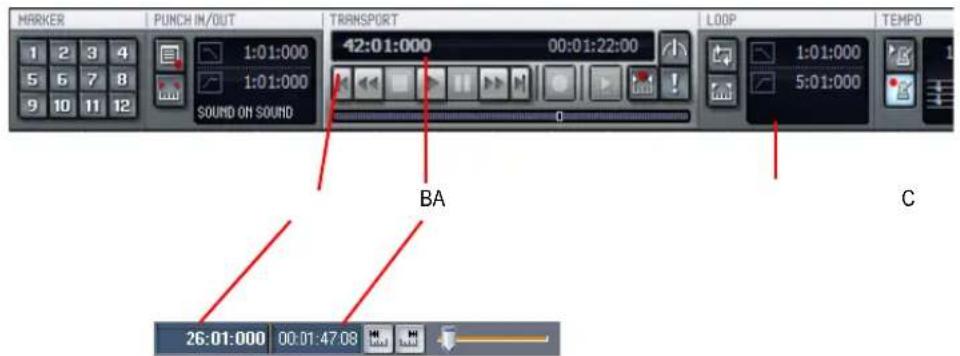
A. The current measure, beat, and tick B. The current time in hours, minutes, seconds, and frames C. Meter Key Signature display
Here are some examples of times expressed in measure, beat, and tick (MBT) format:
Time What it means
1:01:000 First beat of the first measure
9:04:000 Fourth beat of the ninth measure
4:02:060
The 60^th tick of the second beat of the fourth measure
Table 21.
The hours-minutes-seconds-frames format is commonly referred to as the SMPTE time. SMPTE is the acronym for the Society of Motion Picture and Television Engineers. In this format, time is measured in hours, minutes, seconds, and frames. It's not necessary for a project to begin at time zero in this format—any time can be used to represent the start of a project. If you are synchronizing SONAR with an external device whose start time is not 0, you must offset SONAR to match the external device's start time. For more information, see Synchronizing Your Gear.
Here are some examples of times expressed in this format (assuming that zero is the start time):
Time What it means
| 00:00:00:00 The beginning of the project |
| 00:05:10:00 Five minutes and ten seconds from the beginning of the project |
| 01:30:00:00 One hour and thirty minutes into the project |
| 00:00:00:05 Five frames into the project |
Table 22.
SONAR provides many ways to set the Now time. Here are just a few:
To change the Now time
- Click the desired time on The Time ruler in the Track view, Piano Roll view, or Staff view
- In the Navigator pane, click anywhere in the view while holding down the CTRL key to change the Now Time to that location
- Click on the Now time in the Large Transport toolbar, enter the desired time, and press ENTER
- Choose Go > Time or press F5, enter the desired time, and click OK.
- Click on an event in the Event List view.
You can also set the Now time by right-clicking in the Clips pane if you enable the Right Click Sets Now option in the Track View Properties dialog. Right-click a an empty area of the Clips pane, and select View Options from the menu that appears to open the Clip View Properties dialog.
When entering a time in MBT format, the beat and tick values are optional. You can use a colon, space, decimal point, or vertical bar to separate the parts of the Now time:
You enter The Now time is set to
| 2 2:01:000 |
| 4 2 0 4:02:000 |
| 9 9:01:000 |
| 5|1:30 5:01:030 |
Table 23.
When entering a time in SMPTE format, you can enter a single number (hour), two numbers (hour and minutes), three numbers (hour, minutes, and seconds), or all four numbers.
If you click in The Time ruler while the snap grid is enabled, the Now time will be snapped to the nearest point in the grid. By setting the grid size to a whole note or quarter note, you can easily set the Now time to a measure or beat boundary.

Note: The Time Ruler only obeys snap when Musical Time or Absolute Time is selected in the Snap to Grid dialog.
You can also use the buttons and the scroll bar in either the Transport toolbar or Large Transport toolbar to adjust the time.
When playback or recording is stopped, the Now Time either remains at the point where the project stopped or snaps back to the Now Time Marker. This behavior is controlled in the General tab of the Global Options dialog. For more information, see The Now time marker.
MIDI note will continue to play If Now Time is moved
Changing the Now time while a MIDI note is sounding will cause SONAR to play the full duration of the note. This behavior was introduced in SONAR 4.0.3, and is necessary as a result of addressing various gapping issues when editing MIDI data during playback.
If you prefer a slight hiccup instead of hearing the full note duration, you can change the default behavior with the Set Now Time with Full Restart option in Options > Global > General.

Note: Moving a MIDI note event during playback is affected by this same issue.
See:
Displaying the Now time in large print
Other ways to set the Now time
The Now time marker
In the Track view, the Now time appears as a black vertical line. When you set the Now time in the Track view a green triangle called the Now time marker appears in the Time Ruler. This marker represents the point at which the Now time will snap back to after you stop playback or recording.
You can drag the Now Time marker during playback. When the mouse button is released, the transport immediately jumps to the new location.

Note: You can only drag the Now Time marker during playback, not while recording.
You can change the Now time marker behavior so that the marker moves to the current Now time when playback or recording is stopped (use the Options > Global command; on the General tab uncheck On Stop, Rewind to Now Marker).
To change the Now time marker behavior
- Select Options > Global from the SONAR menu.
The Global Options dialog appears.
- Click the General tab.
- Uncheck the On Stop, Rewind to Now Marker option to have the Now time marker move to follow the current Now time when you stop playback.
Or
Check the On Stop, Rewind to Now Marker option to have the Now time snap back to the Now time marker when you stop playback.
- Click OK.
The Track view Now time display
The Track view displays the Now Time above the track strips in a large and configurable format.
Figure 18. The Track view Now time display

Click the display to display the following time formats:
• M:B:T (Measure:Beat:Tick). Example: 8:01:000.
- SMPTE (Hours:Minutes:Seconds:Frames). Example: 00:00:21:00.
- Frames. Example: 629 (only available if project contains video).
- Milliseconds (Hours:Minutes:Seconds:Milliseconds). Example: 00:00:21:000.
• Samples. Example: 926100.
You can also right-click the display, and choose time formats from the pop-up menu.
The pop-up menu also lets you choose the following display options:
• To hide the time display, choose None.
• To show the time display, right-click the empty area and choose one of the available time formats
from the pop-up menu.
- To choose font, size, color, or resizing options, choose Font from the pop-up menu to open the Font dialog. Enabling the Automatically Resize to Window option causes the display to automatically shrink the display to fit the available space.
- To choose alignment options, choose Align > Left, Align > Center, or Align > Left from the pop-up menu.
You can also configure the color from the Configure Colors dialog (Options > Colors; "Track View Header Time Display"). The color is saved with color presets.
The time display settings are global and persist between sessions.
Displaying the Now time in large print
SONAR can display the Now time in large print so that it's easier to see when you are far from your monitor (for example, when you're at your keyboard or another instrument) or when several people need to read the Now time from a distance. Here's how:
To display the Big time view
- Choose Views > Big Time to display the Big Time view.
Figure 19. The Big Time view

- Change the settings according to the table:
To do this Do this
Switch time format Click on the view to toggle between MBT and SMPTE time
Change font or color Right-click on the view, choose the font and color you want, and click OK
Change the size of the view Drag any corner of the view to change its size
Table 24.
Note that SONAR ignores font styles and effects such as strikeout and underline.
Other ways to set the Now time
There are a variety of commands and keyboard shortcuts you can use to set the Now time:
| Command Shortcut What it does | ||
| Go > Time | F5 | Lets you enter the Now time in the Position toolbar or in a dialog box |
| Go > From | F7 | Sets the Now time to the From time (the start time of the current time selection) |
| Go > Thru | F8 | Sets the Now time to the Thru time (the end time of the current time selection) |
| Go > Beginning | CTRL+HOME | Sets the Now time to the beginning of the project |
| Go > End | CTRL+END | Sets the Now time to the end of the project |
| Go > Previous Measure | CTRL+PAGE UP | Sets the Now time to the start of the current measure if the Now time is not on a barline, or to the start of the previous measure if the Now time is on a barline. |
| Go > Next Measure | CTRL+PAGE DOWN | Sets the Now time to the start of the next measure |
Table 25.
If your project has markers, you can use the Marker toolbar to set the Now time:
| To do this | Do this |
| Skip to the next marker | Click 📋 on the Markers toolbar (or press CTRL+SHIFT+PAGE DOWN). |
| Skip to the previous marker | Click 📋 on the Markers toolbar (or press CTRL+SHIFT+PAGE UP). |
| Jump to any marker | Click 📋 on the Markers toolbar to open the Markers view. Click on the marker you want to jump to in the Markers view. |
Table 26.
For more information about markers, see "Creating and Using Markers" on page 318.
The Time ruler
The Time ruler appears in the Track view, Tempo view, Staff view and Piano Roll view. It has several functions, including:
- Making a time selection. The Time ruler follows the Snap to Grid settings, if enabled.
-
Changing the Now time
-
Adding loop, punch, and pitch markers. You can right-click in the Time ruler to add markers. In the Track view, the Time ruler has the following time display options or formats:
• Measures, Beats and Ticks (M:B:T)
• Hours, Minutes, Seconds and Frames (H:M:S:F—also called SMPTE) - Samples
- Milliseconds
Figure 20. The Time ruler

A. M:B:T B. H:M:S:F C. Samples D. Milleseconds E. Add Musical Snap to transient snap pool (see AudioSnap) F. Minus and Plus buttons
The M:B:T setting follows your settings in the Meter/Key view. If you project is set to 4/4 time, you have four beats in the Time ruler for each measure. If your project is set to 6/8 time, you have six beats in the Time ruler for each measure.
If there is only one format displayed in the Time ruler, you can switch the format by right-clicking in the Time ruler and selecting the format you prefer.
To switch the Time ruler format to M:B:T
- Right-click in the Track view Time Ruler.
- In the menu that appears, select Time Ruler Format > M:B:T.
To switch the Time ruler format to H:M:S:F (SMPTE)
- Right-click in the Track view Time Ruler.
- In the menu that appears, select Time Ruler Format > H:M:S:F.
To switch the Time ruler format to samples
- Right-click in the Track view Time Ruler.
- In the menu that appears, select Time Ruler Format > Samples.
To switch the Time ruler format to milliseconds
- Right-click in the Track view Time Ruler.
- In the menu that appears, select Time Ruler Format > Milliseconds.
Additionally, you can add or remove Time ruler formats using the Plus/Minus buttons located just outside the right edge of the Time ruler.

Note: If only one Time ruler format is being used, only the Plus button is displayed.
To add or remove Time ruler formats using the Plus/Minus buttons
- Click the Plus button and select a Time ruler format from the pop-up menu.
- Click the Plus button and select a Time ruler format you would like to add from the pop-up menu.
- Click the Minus button and select from the pop-up menu to remove an active Time ruler format.
- Right-click in the Time ruler and move the cursor to Time ruler format in the pop-up menu. A list of all Time ruler formats appears. Active formats are checked, inactive formats are unchecked.
- Click a checked format to move it down one row.
- Click an unchecked format to replace the topmost displayed format.

Note: Enabling the Display All Times as SMPTE check box in the General tab of the Global Options dialog forces all times in the project to be displayed in SMPTE time, regardless of your setting in the Time ruler.
Controlling playback
To control playback, you have your choice of tools, menu commands, and shortcut keys for most common operations.
When you start playback, the Now time updates continuously to show the current time. When you stop playback, the Now time rewinds to the Now Time Marker. When you start playback again, it continues from the same point.
If the Now time is advancing but you don't hear any sound, see the online help topic
“Troubleshooting.” If you are using MIDI sync or syncing to MIDI time code, SONAR waits to receive external timing data before it begins playing. If the various views are not updating during playback, make sure the Scroll Lock key on your computer keyboard is not enabled. For more information, see the online help topic Synchronizing Your Gear.

Note: If your Windows setup uses any system sounds that are associated with any typical activity, such as minimizing a window, etc., you should disable these sounds. They can sound extremely loud through your monitors, and also interrupt playback and recording, if you open any dialog boxes or do anything that has a system sound attached to it while a project plays. The quickest way to disable all system sounds is to open the Control Panel (Start > Settings > Control Panel), double-click the Sounds icon to open the Sounds Properties dialog box, and in the Schemes field select No Sounds. Click Apply, and then click OK.
To start and stop playback
| To do this Do this | |
| Start playback | Press the SPACEBAR, click ▶, or choose Transport > Play, or double-click in the Time Ruler |
| Stop playback | Press the SPACEBAR, click ▶ or choose Transport > Stop |
| Rewind to the start of the project | Click ▶ press the W key, or choose Transport > Rewind |
| Skip to the end of the project | Click ▶ |
Table 27.

Note: The default behavior for the Now time when you click the Stop button is for it to return to the Now time marker where playback began. If you want the Now time to remain where it is when you stop playback, you can use the keyboard shortcut CTRL+SPACEBAR. If you want to change the default behavior, select Options > Global and click the General tab. In the General tab, uncheck the On Stop, Rewind to Now Marker option.
Allow playback with no data
SONAR is able to start playback even if there is no data in a project. This is useful in various cases, such as:
- If you need to trigger playback of external devices.
- If you need to continue playback beyond the end of the project, for example, to allow MIDI notes and sustains to decay naturally and not end abruptly.
Stop at Project End option
The Stop at Project End global option determines whether or not playback is allowed beyond the last event in a project. This option is enabled by default.
When enabled (default setting):
- Playback will not engage if there is no data present in the project at all.
- Playback will stop when no more data is present going forward.
When disabled:
- Playback will engage if there is no data present in the project at all.
- Playback will continue past the end of a project until the user manually stops playback.
To allow playback with no data
Use the Options > Global command to open the Global Options dialog, and on the General tab, make sure that the Stop at Project End check box is not checked.
Auto fade when starting/stopping playback
SONAR makes it possible to render a smooth fade in/out whenever audio playback is interrupted. This can be useful to smooth out abrupt transitions while stopping and starting the transport rapidly and will reduce ear fatigue during long sessions.
The fade is only applied during playback and is ignored while recording or bouncing audio.
To configure the auto fade times
- Select Options > Audio and click the Advanced tab.
The Audio Options dialog appears.
- Adjust the following options:
- Fade On Start (milliseconds). When this option is set to a value greater than zero, starting playback will cause a gradual fade in of the audio for the specified duration. The valid range is 0–100000 and the default value is 0.
- Fade On Stop (milliseconds). When this option is set to a value greater than zero, stopping playback will cause a gradual fade out of the audio for the specified duration. The valid range is 0–100000 and the default value is 0.
Handling stuck notes
Under MIDI, the events that turn notes on are separate from the events that stop notes from playing. Normally, when you stop playback, SONAR attempts to turn off all notes that are still playing. Depending on how your equipment is configured, it's possible for notes to get stuck in the On position. The Transport > Reset command is used to stop all notes from playing. The Transport > Reset command also stops feedback from input monitoring.

Note: You can control the MIDI messages that are sent by the Transport > Reset command by changing the Panic Strength variable in the Cakewalk.ini file. See "Initialization Files" on page 929 for more information.
To clear stuck notes
- Choose Transport > Reset, or click ! on the Large Transport toolbar.
See:
The Transport > Reset command
Looping
Controlling Playback
Controlling playback
Sometimes you want to listen to one portion of a project over and over, either so you can play along and rehearse or because you want to edit that section of the project while it is playing and hear the results as you make changes. SONAR has a playback looping feature that makes this simple.
Looping is defined in the Loop/Auto Shuttle toolbar, as shown here:
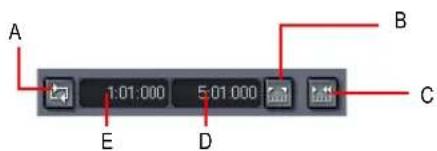
A. Click to turn looping on or off B. Click to copy the selection (From and Thru) times C. Click to open the Loop/Auto Shuttle dialog box D. Loop End time E. Loop Start time
To set up a loop, you do three things:
- Set the start time of the loop
- Set the end time of the loop
- Enable looping
From then on, SONAR will automatically jump back to the start of the loop when it reaches the end. When looping is enabled, the loop times are indicated by special markers in the Time ruler.

A. Loop From B. Loop Thru
To move a loop in the Time ruler
- Click the yellow bar that connects the two loop markers The cursor becomes a horizontal double-headed arrow.
- Drag the loop to the desired location in the Time ruler.
The Loop/Auto Shuttle dialog box, which appears when you use the Transport > Loop and Auto Shuttle command or click the Loop and Auto Shuttle button in the Loop toolbar, contains two additional settings that affect the details of how looping operates:
Option How it works
Stop at the end time Playback does not proceed beyond the end of the loop
Loop continuously When playback reaches the end of the loop and rewinds to the start, playback continues automatically (this option is on by default)
Table 28.
With the default option settings, SONAR will play the loop over and over again, continuously.
If you start playback before the loop start time, SONAR will play until the loop end time is reached, then jump back to the loop start time.

Note: If you stop playback while looping is enabled, the Now time jumps to the Now time marker. If you disable the On Stop Rewind to Now Marker option in the General tab of the Global Options dialog, the Now time stays wherever you stopped playback.
The Rewind command operates slightly differently when looping is in effect. The first time you rewind, the Now time is set to the start of the loop. If the Now time is already at the start of the loop, Rewind takes you to the beginning of the project. From then on, Rewind switches back and forth between the loop start time and the start of measure 1.
To set up a playback loop
-
Set the loop start and end times in one of the following ways:
-
Drag the mouse between two points in the The Time ruler of the Track view, Staff, or Piano Roll view to select a range of times, then click in the Loop/Auto Shuttle toolbar to copy the selection time to the loop time.
- Click between two markers in the Track, Staff, or Piano Roll view to select a range of times, then click in the Loop/Auto Shuttle toolbar to copy the selection time to the loop time.
- Type the loop start and end times directly into the toolbar.
- Select a range of times, then right-click in the Time ruler and choose Set Loop Points (this method makes the second option unnecessary).
Looping is automatically turned on when you use the Set Loop to Selection command.
To change the loop settings
- Click ☐, or choose Transport > Loop and Auto Shuttle to display the Loop/Auto Shuttle dialog box.
- Check the options you want to use.
- Click OK.
To cancel a playback loop
- Click on the toolbar to disable looping.
Using the Large Transport
The Large Transport consists of six sections, each of which can be shown or hidden according to the needs of your project. Right click anywhere in the Large Transport, and deselect any section from the pop-up menu that you wish to hide. The six sections are Markers, Record, Transport, Loop, Tempo and System.
Figure 21. The Large Transport toolbar

A. Markers section B. Punch In/Out section C. Transport section D. Loop section E. Tempo section F. System section G. Click to move ahead one measure H. Auto-punch toggle I. Drag Now Time to any desired position J. Click to jump to the end K. Click to back up one measure L. Click to jump to the beginning
The Large Transport toolbar differs from the Transport toolbar in that it displays a Markers section (numeric keypad), the Now time (which you can set by entering numbers into the display fields in either MBT or SMPTE time), a CPU and Disk Cache Performance meter, and the Time/Key Signature display. The Time/Key Signature display shows the current meter, key signature, and tempo. You can edit the meter and key signature by clicking the display to open the Time/Key Signature dialog box. You can display the Large Transport toolbar by selecting the Views >Toolbars command to open the Toolbars dialog box, and checking Transport (Large). You can also display and hide the Large Transport toolbar by pressing F4.
Using the Markers section
You can store up to 12 markers in the Markers section, making it easy to navigate through your project. Assign markers to milestones in your project using the Insert > Marker command or by pressing F11 when the now time is in the desired location for your marker. When your cursor hovers over a button in the Markers section, the name you assigned to the marker is displayed as a tooltip.
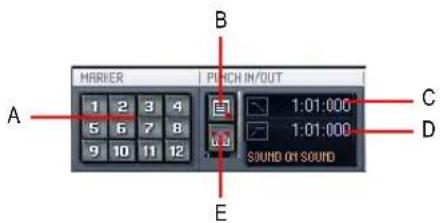
A. Marker buttons B. Record options C. Set punch in time D. Set punch out time E. Set punch points to selection
To use the Punch In/Out section
- Click the Record Options button
The Record Options dialog box appears.
- Select between Blending existing data with new data, or Overwriting existing data with new data.
- Select between storing looped takes in a single track or storing looped takes in individual tracks. For more information see "Loop Recording" on page 262. You can also set Auto-punch from the Record Options dialog. For details, see "To use auto-punch in the Punch In/Out section" on page 185.
To use auto-punch in the Punch In/Out section
- Activate Auto-punch by clicking the Set punch points button
- Click the Punch In M:B:T meter and enter the Punch In time using the spinners or keying in the desired M:B:T.
- Click the Punch Out M:B:T meter and enter the Punch Out time using the spinners or keying in the desired M:B:T.
- Set the Now Time far enough ahead of the Punch In point for you to be ready for it.
- Click the Record button on the Large Transport or press R on your keyboard.
SONAR plays the project, and begins recording on the selected track at the Punch In time you entered, then stops recording at the Punch Out time.
Buttons in the Transport section
- RTZ (Return to zero)
- Start/Stop Rewind
- Stop project
-
Play project
-
Pause project
- Start/Stop Fast-forward
- Go to end of project


- Record
- Audition
- Toggle Auto-punch

- Reset MIDI

- Now Time measured inM:B:T, H:M:S:F
5:03:000 00:00:10:24
- Now Time slider


Note: The Rewind and Fast Forward buttons allow you to rewind and fast forward smoothly during playback. Any audio data will continue to play normally, however the Now Time marker will move smoothly until you release the Rewind or Fast Forward button.
To use the Loop section
- Clip the Loop On/Off button
- Set the Loop Start time in the M:B:T meter either manually or by using the spinner. Set the Loop End time in the M:B:T meter either manually or by using the spinner.
You can also set a loop from the Large Transport toolbar by highlighting a section of your project in the Time ruler and then clicking the Set Loop Points to Selection button 📄.
Reading the Key signature, Time signature, Tempo and System display
The Large Transport displays a variety of information about the project you are working on, including tempo, key, meter, metronome settings, and CPU and disk cache performance.

A. Tempo B. CPU performance meter C. Disk cache performance meter D. Time signature E. Key signature F. Metronome on/off during record G. Metronome on/off during playback
Track-by-track playback
SONAR lets you play back any combination of tracks at one time by changing each track's status. You can control the status of each track with the individual controls that are on every track, or with the global controls on the Playback State toolbar or the status bar that's at the bottom of the SONAR window. For more information about the status bar, see "Status Bar/CPU Meter/Disk Meter" on page 855. For more information about the Playback State toolbar, see "The Playback state toolbar" on page 188.
There are several different status settings for each track:
| Status What it means | |
| Normal The track plays unless one or more of your other tracks is soloed. | |
| Muted The track is not played, but you can turn it on while playback is in progress. | |
| Archived The track is not played, and you must stop playback to re-enable it. Archived tracks do not tax your CPU during playback so they can be used to store alternate takes. | |
| Soloed Only those tracks that are designated as solo tracks are played; all others are muted. | |
| Armed The track is armed for recording. | |
| Mono/Stereo The track plays back in either mono or stereo, depending on what the individual track setting is, and whether the Play in Mono button in the Playback State toolbar is depressed. | |
| Phase normal or inverted | If a track was accidentally recorded out of phase with another track, the Phase button lets you reverse the phase of a track. |
Table 29.
While playback is in progress, you can mute and unmute tracks in any combination, which means you can hear only the tracks that you want. You can change the status of a track in the Track view, the Console view, the Track menu, or the Playback State toolbar.
If a track is both muted and soloed, it does not play. Mute has precedence.
The track status is saved with the SONAR project file. If you save a SONAR project as a standard MIDI File, however, all tracks are saved without mute, solo, or archive indicators.
See:
The Playback state toolbar
Silencing tracks
Soloing tracks
Inverting the phase of a track
Changing tracks' mono/stereo status
The Playback state toolbar
To display the Playback State toolbar, use the Views > Toolbars command to open the Toolbars dialog box, and make sure Playback State is checked. The Playback State toolbar is a global control that allows you to mute or unmute, solo or unsolo, arm or disarm, and toggle the input echo status of all tracks.

A. Drag to reposition B. Mute C. Solo D. Arm E. Input echo or MIDI echo F. Solo Dim
See:
Silencing tracks
Soloing tracks
Silencing tracks
When a track is muted, SONAR processes the track while playback is in progress so that you can unmute the track without stopping playback. If you have lots of muted tracks, this can place a heavy load on your computer. Archived tracks, on the other hand, don't place any load on your computer. Therefore, if there are tracks you want to keep but don't need to play, you should archive them instead. Archived tracks are indicated by the letter A in the Mute button that is displayed in the Track and Console views.
When you mute or unmute a track while playback is in progress, there may be a slight delay before you hear the effect of the change. This is to be expected and does not indicate a hardware or software problem.
To mute or unmute individual tracks
- To mute or unmute a track, click its M button in the Track or Console view.
- To mute or unmute several tracks at once, select the tracks and choose Tracks > Mute, or select the tracks, right-click, and choose Mute from the pop-up menu.
To unmute all tracks
- Click the M button in the Playback State toolbar or the Mute label in the status bar.
To mute all tracks
- If no tracks are currently muted, click the M button in the Playback State toolbar. Or
- Select all tracks, and then use the Tracks > Mute command.
To archive or unarchive tracks
- Select one or more tracks in the Track view.
- Do one of the following:
- Click the track's Archive button

- Choose Tracks > Archive, or right-click and choose Archive from the menu to toggle the archive status of the selected tracks.

Note: A track can not be archived during playback.

Tip: To show/hide the Archive and Freeze buttons in the Track view, open the Widget Tab Manager and specify the visibility of the Track State group. For details, see Widget Tab Manager.
Soloing tracks
Sometimes you want to hear a single track, or a few tracks at once, without having to mute all the other tracks. You can do this by soloing the tracks you want to hear.
As soon as any track is marked as a solo track, SONAR ignores all mute settings (unless a soloed track is also muted—mute takes precedence over solo) and plays only the track or tracks that are set to solo. Any number of tracks at one time can be marked as solo. All these tracks will play together. As soon as the solo status of the final solo track is turned off, SONAR once again plays back tracks based on their mute settings.
To solo or unsolo individual tracks
- To solo or unsolo a track, click the Solo button in the Track or Console view
- To solo or unsolo several tracks at once, select the tracks and choose Tracks > Solo, or right-click, and choose Solo from the pop-up menu.
See also:
Dim Solo mode
To unsolo all tracks
- Click the S button in the Playback State toolbar or the Solo label in the status bar.
To solo all tracks
- If no tracks are currently soloed, click the S button in the Playback State toolbar.
Or - Select all tracks, and then use the Tracks > Solo command.
See also:
Dim Solo mode
Dim Solo mode
Normally when you solo a track/bus in SONAR, the tracks or buses which are not soloed are essentially muted. Dim Solo is a mode in which non-soloed audio tracks/buses are still audible but at a reduced level. The default gain reduction is -6dB, but can also be configured for -12dB and -18dB.
Dim Solo is useful when you want to focus on a specific track but you still want to edit/mix the track in context with the entire mix. This allows you to hear all tracks while the soloed track stands out from non-soloed tracks.

Note: Dim Solo mode only applies to audio tracks and buses, not MIDI tracks.
To enable/disable Dim Solo
When Dim Solo is enabled, non-soloed audio tracks will play at a reduced gain rather than 0 gain (mute).
To enable/disable Dim Solo mode, do one of the following:
- Click the Dim Solo button in the Playback State toolbar. The button lights up when enabled. For more information, see "The Playback state toolbar" on page 188.

A. Dim Solo enable/disable toggle
- Assign Dim Solo Mode to a key binding and use the key binding to enable/disable Dim Solo mode.
The Dim Solo Mode function is listed in the Global Bindings context. For more information, see "Key Bindings" on page 738.

The Dim Solo enable/disable state is saved with each project.
To configure Dim Solo level
When Dim Solo mode is enabled, the amount of gain reduction applied to non-soloed tracks or buses is specified in the Audio Options dialog.
- Select Options > Audio to open the Audio Options dialog and click the General tab.
- Set the Dim Solo Gain setting to either -6dB, -12dB or -18dB and click OK.
The Dim Solo dB setting is saved with each project.
See:
Soloing tracks
The Playback state toolbar
Audio Options dialog—General
Key Bindings
Inverting the phase of a track
A waveform's exact opposite is called an inversion. It is a shift of 180 degrees. A waveform and its inversion cancel each other out completely, so it is usually not desirable to have two track recordings of the same source if one is phase inverted. It can lead to reduced volume, lowered or distorted response in certain frequencies, or even silence in the case of two tracks which are exactly identical (i.e. cloned tracks).
Occasionally, for example when recording a source using two microphones, one of the microphones may be recording an inversion of the other, the resulting tracks may, to some degree, be cancelling each other out. SONAR allows you to invert the phase of a track to match another.
To invert the phase of a track
- Open the Track view or Console view.
- In the track you want to invert the phase, click the Phase inversion button 🔒.
Changing tracks' mono/stereo status
SONAR has a Mono/Stereo button in each track module in the Track and Console views. The buttons in the track modules force each track to play in either stereo or mono, but preserve the tracks' pan positions in the stereo mix.
The Mono/Stereo button in each track forces the track's audio signal to enter any patched plug-ins as either mono or stereo, whether or not the tracks are mono or stereo. This allows you to use either mono effects on a stereo track or stereo effects on a mono track.

Note: You may lose important stereo data by using mono effects with stereo tracks because your stereo tracks are summed to mono in order to pass through the effect. If you never want your stereo data to be summed to mono, select stereo.
To use a track's Stereo/Mono button
- Display the Track view or Console view.
-
In the track you want to force to either mono or stereo for processing effects, click the Stereo/Mono button to the desired position:
-
Speaker icon pointing left. This choice means that you manually selected mono for this track.
- Speaker icon pointing left and right (as pictured above). This choice means that you manually selected stereo for this track.
Mono audio clips may be increased by 3 dB in certain scenarios
There are some situations where the level of a mono clip will be increased by 3 dB if the track's output interleave (mono/stereo toggle) is set to mono:
- If the track has mixed stereo and mono clips
- The track has a synth selected as its input source
3.Input Echo is enabled or the track is armed for recording
In summary, whenever the track output interleave is mono and the data interleave is stereo, mono data will be increased in level by 3 dB.
Using mono VST plug-ins on stereo tracks may cause out of sync audio
When using a mono plug-in on a stereo track (interleave set to Stereo), the left and right channels will be out of sync. The left channel is processed by the mono effect, and delay compensation is applied, while the right channel is not processed and does not have delay compensation applied.
The signal will look something like this:
• Left channel: Wet signal (delayed)
• Right channel: Dry signal (no delay)
A mono VST plug-in will work correctly if Enable Mono Processing is checked in the VST Plug-in Properties dialog and the track interleave is set to mono.

Note: Enable Mono Processing is enabled by default in SONAR 8. If you are playing back a legacy project in SONAR 8, and notice the project does not sound the same, try to disable Enable Mono Processing for any mono plug-ins used in the project.
Changing track settings
Each track in a project contains MIDI or audio information and has a variety of settings (also called parameters) that determine how the track sounds. By changing these parameters, you can change the sound of your project. For audio tracks, you control parameters such as volume, stereo panning, and the output device that is used to produce the sound. For MIDI tracks, you control many additional parameters, including the type of instrument sound that is used to play the notes stored in the track. Both kinds of tracks contain an Automation Read button and an Automation Write button, which enable or disable automation playback and recording, respectively.

Note 1: You can control all sliders and knobs in the Console and Track Views by clicking a control, then hover over it with the mouse and manipulate the mouse wheel. If you move the mouse cursor away from the slider or knob while using the mouse wheel, you will lose control of the slider or knob you are adjusting.

Note 2: You can hide, reorder, and visually group the controls in tracks and buses. You can also control how the display tabs at the bottom of the Track pane function. See “Configuring Track View Controls” on page 297 for more information.
Audio track parameters
The following pictures illustrate the parameters that audio tracks have. The pictures are of an audio track that is located in the Track view, however most of these parameters can also be adjusted in the Console view:
Figure 22. Audio track

Figure 23. Audio track header controls

A. Strip selector B. Header icon C. Track name D. Show layers button E. Maximize track F. Minimize track G. Peak value H. Track number
Figure 24. Audio track interior controls

A. Input echo B. Volume slider C. Send pan D. Send level E. Mono/stereo switch F. Phase button G. Send enable H. Send destination I. Input trim J. Output K. Automation Read and Write buttons L. Input M. Pan slider
Figure 25. Audio track FX bin, meter, and track scale

A. Currently patched effect B. FX interleave indicator C. Track scale D. FX bin
Here is a summary table of the different audio track parameters and how they are used.
| Parameter What it means | |
| Strip selector | Click this to add a track to a Quick Group, which means that certain controls in tracks that are in the Quick Group are grouped. |
| Number A sequential track number used for reference | |
| Name | A name that you assign the track for easy reference. Note that if you do not assign a name to a track, the default name is the track number. This track number will change if you change the order of your tracks. |
| Mute When enabled, mutes the track | |
| Solo When enabled, solos the track | |
| Arm When enabled, arms the track for audio recording. | |
| Input Echo Turns input monitoring on or off. | |
| Automation Read and Write buttons | Enable/disable automation playback and recording, respectively |
| Peak value Displays the Peak value, which is the amplitude of the latest audio peak in the track. | |
| Show Layers button Hides or shows track layers. | |
| Minimize/restore track button | Collapses track to minimum possible height, or restores it to the size it was before it was minimized. |
| Maximize/restore track button | Expands track to maximum possible height, or restores it to the size it was before it was maximized. |
| Vol (volume) The current volume level for the track, ranging from -INF (silent) to +6 dB (maximum volume). | |
| Pan The stereo distribution of the output, ranging from 100% left (hard left) to 100% right (hard right); a value of “C” indicates sound that is centered left-to-right. On stereo tracks, pan acts as balance. | |
Table 30.
Parameter What it means
| Trim (volume trim) | Volume Trim is a pre-fader control which allows the fine tuning of a single track's volume.For example, let's say you have four tracks, three tracks have their volume fader set to 0 dB while the fourth track's fader is set to +10 dB. You want to group the faders and do a slow fade out, but the slightly higher level of the fourth track causes its volume to be higher in relation to the other tracks towards the end of the fade out. To balance the fader levels, reduce the fader level for the fourth track to 0 dB and raise the Volume Trim value for that track to +10 dB. The resulting volume levels for the project are the same, but now you can group the faders and perform a fade out with no track standing out disproportionately at the end of the fade out. |
| Input The input source for the track, used in recording | |
| Output The output bus through which the track is played | |
| Send Enable Activates a send module, which sends a copy of the track signal to a bus. | |
| Send Level Controls volume of audio data sent by this send module. | |
| Send Pan Adjusts the send pan setting. | |
| Send Pre/Post switch Pre (pre-fader) means that the Send signal goes to the bus prior to the track's volume fader; post means the Send signal goes to the bus after the volume fader. | |
| Send destination Displays name of bus that the Send is sending data to. | |
| Mono/Stereo A switch that determines whether a track's signal enters an effect or chain of effects as mono or stereo, regardless of the nature of the track. | |
| Phase In/Out A switch that inverts the phase of the track. | |
| Effects bin The patch point for a track's plug-ins or soft synths. | |
| Meters The recording and playback levels are displayed in the Playback and Record meters. | |
Table 30.
MIDI track parameters
The following pictures illustrate MIDI track parameters:
Figure 26. A MIDI track
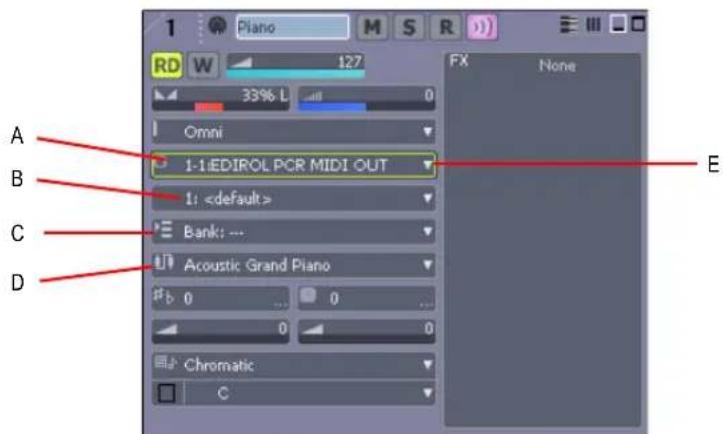
A. Output menu B. Channel menu C. Bank menu D. Patch menu E. Drop-down arrow to display menu
Figure 27. MIDI track header controls

A. Strip selector B. Track name C. Show layers button D. Maximize track E. Minimize track F. PRV Mode button G. Header icon H. Track number
Figure 28. MIDI track interior controls

A. Volume slider B. Trim C. Input D. Output E. Channel F. Bank G. Patch H. Key + I. MIDI chorus J. Snap to Scale On/Off K. Snap to Scale root note L. Snap to Scale scale type M. MIDI reverb N. Time + O. Pan slider P. Automation Read and Write buttons Q. Input Echo button
Figure 29. MIDI track FX bin and track scale
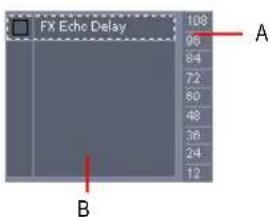
A. Track scale B. MIDI FX bin
Here is a summary table of the different MIDI track parameters and how they are used:
| Parameter What it means | |
| Strip selector | Click this to add a track to a Quick Group, which means that certain controls in tracks that are in the Quick Group are grouped. |
| Track number A sequential track number used for reference | |
Table 31.
| Parameter | What it means |
| Track name A name that you assign the track for easy reference. Note that if you do not assign a name to a track, the default name is the track number. This track number will change if you change the order of your tracks. | |
| Mute When enabled, mutes the track | |
| Solo When enabled, solos the track | |
| Arm When enabled, arms the track for audio recording. | |
| Input Echo Controls whether the track will echo MIDI data or not. | |
| Automation Read and Write buttons | Enable/disable automation playback and recording, respectively |
| PRV Mode button When enabled, displays a track in Inline Piano Roll view mode. | |
| Show Layers button Hides or shows track layers. | |
| Minimize/restore track button | Collapses track to minimum possible height, or restores it to the size it was before it was minimized. |
| Maximize/restore track button | Expands track to maximum possible height, or restores it to the size it was before it was maximized. |
| Vol (volume) The current volume level for the track, ranging from 0 (silent) to 127 (maximum volume). | |
| Pan The stereo distribution of the output, ranging from 100% left (hard left) to 100% right (hard right); a value of “C” indicates sound that is centered left-to-right. | |
| Velocity trim The change in velocity (volume) that will be applied to notes in this track on playback; ranges from -127 to +127 | |
| Input The input source for the track, used in recording | |
| Output The output device through which the track is played | |
| Ch (channel) The MIDI channel through which the notes will be played | |
| Bank The set of patch names available for the track | |
| Patch | The instrument sound that will be used for playback. |
| Time+ | An offset applied to the start time of the events in the track |
| Key+ | The number of steps by which the notes in the track are transposed on playback (e.g., 12 to transpose up one octave) |
| Chorus | Adds MIDI chorus effect to the track |
Table 31.
Parameter What it means
Reverb Adds MIDI reverb effect to the track
Snap to Scale scale type Displays current scale for Snap to Scale feature
Snap to Scale root note Displays root note of current Snap to Scale scale
Snap to Scale on/off Turns Snap to Scale feature on or off
Table 31.
To change a track name
- Double-click on the current track name.
- Enter the new track name.
- Press ENTER.
The default track names (Track 1, Track 2, etc.) are not actually names, but placeholders until you name a track. If you reorder the tracks these placeholders change.
You can rearrange and resize the panes in the Track view as shown in the following table:
To do this Do this
Change the width of the Track pane and Bus pane Drag the divider that separates the Track pane from the Clips panes to the left or right
Change the height of the Mains/Buses pane Drag the divider that separates the Track and Clip panes from the Bus pane up or down
Table 32.
You can customize which tracks are displayed or not displayed, and enlarge or maximize individual tracks while other tracks remain minimized. You can also manually set the exact size of a track's display. The following table shows how to customize the appearance of tracks in the Track pane:
To do this Do this
Hide or show a track Open the Track Manager dialog (press M), and check or uncheck a track's check box in the dialog.
Maximize a track Click the Maximize button in the track
Restore a track to its original size (before it was minimized or maximized) Click the Restore button in the track
Minimize a track Click the Minimize button in the track
Table 33.
| To do this Do this | |
| Change the height of a track using splitter bars | Move the cursor over the gap below a track until the cursor looks like this click and drag until the track is the size you want. |
| Lock or unlock the height of a track Right-click an empty area in the track's controls and choose Lock Height from the menu. | |
Table 33.
You can display subsets of the Track pane's interior controls (the titlebar controls are always displayed) by selecting one of the tabs located at the bottom of the Track view. To choose which controls are displayed on each tab, see "To Configure Track and Bus Tabs" on page 298.
Changing audio track settings in the Track pane
You can change the values in the Track pane in a number of ways:
| Control How to change the setting | |
| Volume, Pan, Volume Trim, Send Output Level, and Send Pan | Click on the control and move your cursor left or right to adjust values, or press ENTER and type a value. |
| Input and Output Click on the black arrow on the right of the control and select a driver from the menu that appears, or double-click on the control and select a driver from the menu. | |
| Buttons Click to enable or disable | |
Table 34.
Changing MIDI track settings in the Track pane
| Control How to change the value | |
| Channel Click on the black arrow on the right of the control and select a channel from the menu that appears, or double-click on the control and enter a value. | |
| Bank Click on the black arrow on the right of the control and select a bank from the menu that appears, or double-click on the control and enter a value. | |
| Patch Click on the black arrow on the right of the control and select a patch from the menu that appears, or double-click on the control and enter a value. | |
| Volume, Pan, Volume Trim, Chorus and Reverb | Click on control and move your cursor left or right to adjust values, or double-click on the control and enter a value. |
Table 35.
Control How to change the value
| Key+ and Time+ | Double-click the control or click on the black arrow on the right of the control and enter a new value, or double-click on the control and enter a value. |
| Input Click on the black arrow on the right of the control and select a MIDI channel from the menu that appears, or double-click on the control and select a driver from the menu. | |
| Output Click on the black arrow on the right of the control and select a driver from the menu that appears, or double-click on the control and select a driver from the menu. | |
| Buttons Click to enable or disable | |
Table 35.
You can change numeric values in MIDI tracks as shown in the following table:
To do this Do this
| Change the value by 1 | Press the - or + key on your numeric keypad, or click on the spinner control |
| Change the value by 10 (for Key+, by 12) | Press the [ or ] key, or right-click on the spinner control |
| Enter a new value Press ENTER and type the new value using the keyboard, and press ENTER | |
Table 36.
For numeric fields, you can press and hold both mouse buttons to change the value by increments of 10 (12, a full octave, for Key+).
You can also edit Track properties in the Track Properties dialog box. To open this dialog box, right-click on the Track bar and select Track Properties.
Figure 30. The Track Properties dialog
You can change the value of a track parameter for several tracks at once using commands on the Tracks > Property menu. For example, to assign a group of tracks to the same output, select the tracks you want to assign, then choose Tracks > Property > Output. These menu commands can also be used to change the settings for individual tracks.
All track parameters are saved with a SONAR project. However, if you export a project to a standard MIDI File, several of the parameters (Key+, Vel+, Time+, and Chan) are applied to the MIDI data as the file is being exported. Other parameters, including Input, Output, Mute, Solo, and Archive, are lost when you export the project to a MIDI file.
The following sections contain more information about many of the parameters in the Track view. For more information about the track inputs and the track Arm button, see "Preparing to record" on page 242.
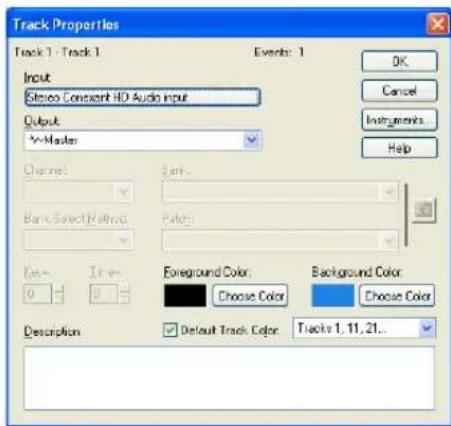
Setting up output devices
The output setting for a track determines which piece of hardware or software synthesizer will be used to produce the sound stored in your project. In a very simple equipment setup, you might have only a computer equipped with a basic sound card. In this case, you want to play all MIDI and audio output through the sound card on your computer.
If your equipment setup also includes a MIDI keyboard attached to the MIDI port on your sound card, you can choose to route MIDI data directly to the sound card or through the sound card MIDI port to the keyboard. If you choose the former, the music will play from your computer speakers. If you choose the latter, the sound will play from the speaker attached to your keyboard. You can even choose to send some MIDI information to each of these devices so that they both play at once.
You can purchase MIDI interfaces that plug into your parallel, serial, or USB port to add MIDI ports to your computer. For more information about complex system configurations, see the online help topic: Hardware Setup.
If your computer has several MIDI outs, choose the ones you want to use and put them in a particular order using the Options > MIDI Devices command. The order in which your MIDI devices appear in the Output menus in the Track and Console views is based solely on the order in which the selected outs appear in the MIDI Devices dialog box. As a result, the order in which your devices appear in a track's output control may not match the port numbers that appear on your external multiport MIDI device.
Figure 31. The MIDI Devices dialog

A. These devices are not selected
When you first run SONAR it asks you to select MIDI devices. You may want to change these selections in the future. You can do so by selecting different devices in the MIDI Devices dialog box.
Your computer is usually equipped with at least one audio device—your computer sound card. Your setup may have several different audio output devices, or you may have a multichannel sound card that presents itself to your computer as though it were several different devices, one for each stereo pair. In SONAR, audio tracks are assigned to main outs or buses. Each main out represents a hardware device. You use the Output control to assign a track in a project to the main or bus you want to use.
While you need to choose the MIDI output devices you want to use before you assign them to tracks, all of your audio devices can be assigned to tracks freely. You do not need to configure them the way you do MIDI devices. If you have a voice modem or speakerphone in your computer, however, you might want to set up SONAR so that it won't use those devices. Also, note that some dedicated audio equipment has specific setup requirements. For more information, see Improving Audio Performance.
To choose MIDI devices
- Choose Options > MIDI Devices to display the MIDI Devices dialog box.
- Click on any MIDI device in the Outputs list.
-
To move any device to the top of the list, deselect all other devices and click Move to Top to move the selected device to the top of the list.
-
When all devices are selected in the order you want, click OK.
See:
MIDI Devices dialog
Creating friendly names for MIDI output and input devices
You may find that a name you make up yourself for a MIDI device is easier to remember or more descriptive than a device's original name. The friendly name for a MIDI device is the name you will see places such as MIDI track Input and Output menus, and the Controllers/Surfaces dialog, if you enable the Use Friendly Names To Represent MIDI Devices check box at the bottom of the MIDI Devices dialog.
To make up a friendly name:
- Choose Options > MIDI Devices to display the MIDI Devices dialog.
- Double-click the name of a device in the Friendly Name column, type a new name, and press ENTER.
- Enable the Use Friendly Names To Represent MIDI Devices check box at the bottom of the MIDI Devices dialog.
- Click OK.
Assigning Inputs & Outputs
You assign each track to a MIDI or an audio output using the Output drop-down in the Track view. From then on, material on that track will be sent to the appropriate output device.

Note: If you rearrange your MIDI output devices after making output assignments, you may find MIDI information being sent to different instruments than you expect. Also, SONAR allows you to define instruments that are associated with certain outputs and channels. If you use this feature, the name of the output will change to reflect the instrument you have chosen.
To assign a track to an output
- Click the Output drop-down of the track you want to assign.
- Select the output you want to use.
To change the output setting for more than one track at a time, select the tracks you want to change and choose Tracks > Property > Output.

Note: Outputs that are used by the External Insert plug-in (see "External Insert plug-in" on page 632) cannot be assigned to track and bus outputs. The only exceptions are master buses that have other instances of the External Insert plug-in routed to them.
To assign the same audio input port to multiple tracks
-
In the Track view, select the tracks whose audio input port you wish to assign.
-
Click the small drop-down arrow in any selected track's Input control The Input Port menu appears.
- Choose Selected Track Inputs from the context menu.
The Track Inputs dialog opens with the selected tracks initially highlighted. You can modify the track selection from within the Track Inputs dialog. For more information, see Track Inputs dialog.

Note: The Selected Track Inputs command is essentially a shortcut for the Tracks > Property > Inputs command.
- Select the desired audio input port and click OK.
The audio input port is assigned to all selected audio tracks.
To assign different audio input ports to multiple tracks
- In the Track view, select the tracks whose audio input port you wish to assign.
- Click the small drop-down arrow in the first selected track's Input control I none
The Input Port menu appears.
- Choose Selected Track Input Series from the context menu.
The Assign Series of Inputs dialog opens, which lets you choose the first input port in the series.
Figure 32. The Assign Series of Inputs dialog

- Select the audio input port that should be assigned to the first selected track and click OK.
SONAR will assign consecutive mono input ports to the selected audio tracks, beginning with the track that was clicked in step 2. If a left or right input is selected, then mono inputs will be assigned. If a stereo input is selected, then stereo inputs will be assigned.
To assign the same audio output port to multiple tracks
- In the Track view, select the tracks whose audio output port you wish to assign.
- Click the small drop-down arrow in any selected track's Output control □ None ▼
The Output Port menu appears.
- Choose Selected Track Outputs from the context menu.
The Track Outputs dialog opens.

Note: The Selected Track Outputs command is essentially a shortcut for the Tracks > Property > Outputs command.
- Select the desired audio output port and click OK.
The audio output port is assigned to all selected audio tracks.
To assign the same audio output port to all stereo buses
- In the Track view, click the small drop-down arrow in any stereo bus' Output control

The Output Port menu appears.

Note: Surround buses are ignored.
- Choose Set All Bus Outputs from the context menu.
The Output port submenu appears.
- Select the desired audio output port.
The audio output port is assigned to all stereo buses

Note: Only hardware main outputs may be assigned, not other buses.
Choosing the instrument sound (bank and patch)
Electronic keyboards and synthesizers often contain hundreds or thousands of different sounds. Each sound is known as a patch. The name comes from the early days of synthesizers, for which you physically rewired (using patch cords) the oscillators and modulators to produce different sounds. Patches are normally organized into groups of 128, called banks. Most instruments have between 1 and 8 banks, but MIDI supports up to 16,384 banks of 128 patches each (that's over 2 million patches).
The bank and patch settings in the Track view control the initial bank and patch of a track during playback. Every time SONAR starts playback at the beginning of a project, the bank and patch settings for the track are set to these initial values. Many instruments have descriptive names for their banks and patches. SONAR stores these names in an instrument definition. If you are using an instrument that supports General MIDI, your patch list will contain the 128 sounds that are defined by the General MIDI specification.

Note: Different MIDI instruments use different types of commands to change banks. SONAR supports four common methods for changing banks. For information about the bank selection method you should use with your MIDI gear, see your MIDI equipment's documentation.

Tip: If your bank name is too long to fit in the Bank field, hold your cursor over the bank name. A tooltip appears with the complete bank name.
Note that a single MIDI channel can only play one patch at a time on each instrument assigned to that channel. Therefore, if two or more MIDI tracks are set to the same output and channel but have different bank and patch settings, the patch of the highest-numbered track will be used for all the tracks.
In some projects you want the sound played by a track to change while playback is in progress. You can accomplish this using the Insert > Bank/Patch Change command. When you start playback in the middle of a project, SONAR searches back through the track to find the correct patch to use—either the initial bank and patch or the most recent bank/patch change. Note that the Track view only shows the initial bank and patch, even while a different bank and patch are being played back. The only way to see and edit a bank/patch change is in the Event List view. For more information, see the online help topic “The Event List View” on page 512.
To assign an initial bank and patch to a track
- Right-click on the Track titlebar (the top of the track which contains the track name) and select Track Properties.
The Track Properties dialog box appears. - In the Track Properties dialog box, choose the desired bank and patch from the drop-down lists.
- To search for a patch containing specific text, click the Patch Browser button to the right of the drop-down lists. You can also open the Patch Browser by right-clicking a bank or patch control in the Track or Console views.
- Click OK.
Another way to assign a patch to a track
- Select the patch you want from the Patch drop-down.
To change the bank and patch settings for more than one track at a time, select the tracks you want to change and choose Tracks > Property > Bank or Tracks > Property > Patch.
To insert a bank/patch change
- Highlight the track whose bank and patch you want to change by clicking on the track number.
- Set the Now time to the time at which you want the change to occur.
- Choose Insert > Bank/Patch Change to display the Bank/Patch Change dialog box.
-
Choose a bank and patch from the lists.
-
Click OK.
SONAR inserts a change in bank and patch. When you play back the project, the initial bank and patch shown in the Track view will be used to the point at which the bank/patch change takes place. You can remove a bank/patch change in the Event List view.
To choose patches with the Patch browser
- In the Track view or Console view, right-click the patch name in the track module you want to change patches in. The Patch browser dialog box appears, displaying a list of all the Instrument patch names that have been installed.

Tip: The Patch Browser can be opened for the selected MIDI track by pressing the SEMICOLON key (;).
- Search for a patch name, if desired, by filling in text in the Search field at the top of the dialog box.
- When you find the right patch, click its name and click OK.
SONAR changes the patch of the track you selected.
See:
Patch Browser dialog
Adding effects
You can add both MIDI and audio effects directly from the Track view. SONAR adds these effects in real-time, preserving your track's original data.
To add an audio effect in the Track pane
- In an audio track, right-click in the FX field, choose Audio Effects > Cakewalk, and select an effect from the menu that appears.
See:
Audio Effects (Audio Plug-ins)
Adjusting volume and pan
The Volume and Pan settings control the initial volume and pan of a track during playback. Every time SONAR starts playback, the Volume and Pan settings for the track are set to these initial levels. SONAR allows you to choose different panning laws if you want (see "Configuring panning laws" on page 210).
In some projects you want the volume or panning of a track to change while playback is in progress. You can accomplish this by drawing a volume or pan envelope in the Track view, or by recording automation. For more information, see the online help topic “Automation”.

Note: SONAR processes the volume and pan settings by transmitting MIDI volume and pan events (controllers 7 and 10, respectively) when playback starts. If two or more MIDI tracks are set to the same output and channel but have different volume or pan settings, the settings for the highest-numbered track will prevail.
Note also that not all keyboards and synthesizers respond to these events. Check your instrument's manual for more information.
To set the initial volume setting
- Move your cursor to the Volume control of the track you want to change.
- Click and drag to the left to lower the volume or the right to raise the volume.
You can also change the volume settings in a variety of other ways. To change the volume settings for more than one track at a time, select the tracks you want to change and choose Tracks > Property > Volume.
To set the initial Pan setting
- Move your cursor to the Pan control of the track you want to change.
- Click and drag to the left to adjust the pan to the left or to the right to adjust the pan to the right. Hard left is 100% left. Hard right is 100% right. Pan is centered at C.
You can also change the pan and volume settings in a variety of other ways. To change the pan settings for more than one track at a time, select the tracks you want to change and choose Tracks > Property > Pan.
Configuring panning laws
You can choose from six different panning laws, if you want. A panning law is the mathematical formula that a sequencer or mixer uses to control panning.
To change panning laws
- Use the Options > Audio command to open the Audio Options dialog.
-
On the General tab, in the Stereo Panning Law field, choose one of these options:
-
(Default) 0 dB center, sin/cos taper, constant power. This choice causes a 3 dB boost in a signal that's panned hard left or right, and no dip in output level in either channel when the signal is center panned.
- -3dB center, sin/cos taper, constant power. This choice causes no boost in a signal that's panned hard left or right, and 3dB dip in output level in either channel when the signal is centered panned.
- 0dB center, square-root taper, constant power. This choice causes a 3 dB boost in a
signal that's panned hard left or right, and no dip in output level in either channel when the signal is center panned.
- -3dB center, square root taper, constant power. This choice causes no boost in a signal that's panned hard left or right, and 3dB dip in output level in either channel when the signal is center panned.
- -6dB center, linear taper. This choice causes no boost in a signal that's panned hard left or right, and 6dB dip in output level in either channel when the signal is center panned.
- 0 dB center, balance control. This choice causes no boost in a signal that's panned hard left or right, and no dip in output level in either channel when the signal is center panned.
3. Click OK.
Adjusting volume trim
Volume Trim acts like the trim control on a mixer, raising or lower the level prior to the volume fader. Volume trim is useful for calibrating your faders to match a dB reference level or for aligning your faders for grouping. The Volume Trim control has a range of -18dB to +18dB. Raising or lowering the Volume Trim raises or lowers the apparent volume of the track by that amount without affecting the actual fader level.
To set the volume trim level
- Move your cursor to the Volume Trim control of the track you want to change.
- Click and drag to the left to lower Volume Trim level or to the right to raise Volume Trim level.
Assigning a MIDI channel (Chn)
MIDI transmits information on 16 channels, numbered 1 through 16. Every MIDI event is assigned to a particular channel. Some MIDI equipment can accept MIDI information on only a single channel. This channel may be preassigned, or you may be able to change it. Other MIDI equipment, including many electronic keyboards and synthesizers, can accept information on several different MIDI channels at once. Usually, these devices use a different instrument sound for each channel.
On playback, the channel number is used to direct the MIDI information to a particular piece of equipment.
The Chn parameter in the Track view redirects all events in the track to the specified channel, ignoring the channel number stored with each event. If this parameter is left blank, all events in the track are sent to their original channels.
This parameter does not affect the channel information that is stored with each MIDI event. When the track is displayed in other views, like the Piano Roll or Event List view, you will see the original channel that is stored in the file. You can edit the channel values in those views or use the Process > Interpolate command.
To set the channel for a track
- In the track you want to change, click on the black arrow to the right of the Chn field and select the channel you want to use.
To change the channel assignment for more than one track at a time, select the tracks you want to change and choose Tracks > Property > Channel.
Adjusting the Key/transposing a track (Key+)
Each MIDI note event has a key number, or pitch. On playback, the key offset (Key+) parameter transposes all notes in the track by the designated number of half-steps. The value can range from -127 to +127. A value of 12 indicates that notes will be played back one octave higher than they are written.
This parameter does not affect the note number that is stored for each note event. When the clip is displayed in other views, like the Piano Roll, Staff, or Event List view, you will see the original notes as they are stored in the file. To permanently change the pitches, you can edit them individually or use the Process >Transpose command.
If the key offset value transposes the key number (MIDI note) outside the allowable MIDI range (0–127), the key number will be transposed to the lowest or highest octave within that range.
You can use the Key+ parameter to assist in preparing scores for instruments whose music is written in something other than “concert” key (such as Bb trumpet). For more information, see the online help topic “Music Notation for Non-concert-key Instruments.”“Music Notation for Non-concert-key Instruments” on page 780.
When you edit the Key+ parameter, pressing [ or ] changes the value by 12 instead of by 10. This makes it easy to transpose by octaves.
To set the key offset for a track
-
In the track you want to change, click on the Key+ control.
-
Enter a value (1 = a semitone), or press the + or - key to change the key by a single semitone. Use the [or] key to change the key by 12 semitones (one octave).
To change the key offset for more than one track at a time, select the tracks you want to change and choose Tracks > Property > Key+.
Adjusting the note velocity (Vel+)
Each MIDI note event has a velocity, which represents how fast the key was struck when the track was recorded. On playback, the velocity offset parameter adjusts the velocity data for all notes in the track by the designated amount. The value can range from -127 to +127. The effect of changing velocities depends on the synthesizer. Some synthesizers do not respond to velocity information. For others, the effect varies depending on the sound or patch you have chosen. Normally, higher velocities result in louder and/or brighter-sounding notes.
This parameter does not affect the velocity that is stored for each note event. When the clip is displayed in other views, like the Piano Roll view, Staff view, or Event List view, you will see the
original velocities as they are stored in the file. You can edit the velocity values in those views, or use the Process > Scale Velocity or Process > Interpolate command.
Velocity is different from volume in that it is an attribute of each event, rather than a controller that affects an entire MIDI channel. Here's an example of where this distinction might be important. Suppose you have several tracks containing different drum parts. All of these parts would probably be assigned to MIDI channel 10 (that's the default channel for percussion in General MIDI). If you change the volume setting for any track that uses channel 10, all the different drum parts—regardless of what track they're in—would be affected. If you change the note velocity for one drum track, it will be the only one whose volume is affected.
To set the velocity offset for a track
- In the track you want to change, click and drag the Vel+ control to the desired setting.
To change the velocity offset for more than one track at a time, select the tracks you want to change and choose Tracks > Property > Vel+.
Adjusting the time alignment of a MIDI track (Time+)
Each event takes place at a known point in the project. On playback, the time offset (Time+) parameter adjusts the times for MIDI events in the track by the designated amount. The value can be as small as a single clock tick or as large as you want.
This parameter can be used to make a part play behind the beat or in front of it or to compensate for tracks that sound rushed or late. The time shift can be used to create a chorus or slap-back echo effect by making a copy of a track and then applying a small offset to the copy. You can use larger time offsets to shift a track earlier or later by several beats or measures.
Note that you cannot shift any event earlier than 1:01:000. For example, if the first event in the track starts at 2:01:000, you cannot shift its start time earlier by more than one measure.
This parameter does not affect the time that is stored for each note event. When the clip is displayed in other views, like the Piano Roll, Staff, or Event List view, you will see the original times as they are stored in the file.
To set the time offset for a track
-
In the track you want to change, click on the Time+ control.
-
Enter a value, or press the + or - key until you reach the value you want.
To change the time offset for more than one track at a time, select the tracks you want to change and choose Tracks > Property > Time+.
Other MIDI playback settings
Two other MIDI settings can affect what happens when you play back your project, as described in the following table:
| Option How it works | |
| Zero Controllers When Play Stops | If this option is enabled, SONAR zeroes (resets) the pitch wheel, the pedal Controller, and the modulation wheel Controller on all 16 MIDI channels whenever playback is stopped. It also sends a “Zero All Continuous Controllers” MIDI message, which turns off other continuous Controllers on newer synthesizers. If you experience frequent stuck notes when playback stops, try checking this option. |
| Patch/Controller Searchback Before Play Starts | If this option is enabled, SONAR searches for and sends the most recent patch change, wheel, and pedal events on each output and MIDI channel before starting playback. This ensures that all these settings are correct, even if you start playback at an arbitrary point in your project. |
Table 37.
To set these options, choose Options > Project and click the MIDI Out tab. If you have set up a playback loop, enabling either of these options can cause an audible delay when the loop is restarted.
Controlling live MIDI playback—MIDI echo
When you play your MIDI keyboard or controller, the sound that SONAR produces is determined by what hardware or software synth SONAR sends the incoming MIDI data to after SONAR receives the data. This is called MIDI echo. By default, SONAR sends the data to the MIDI output or software synth listed in the Output field of the current track. The current track is the one whose titlebar has the lighter color—press the up and down arrows on your computer keyboard and watch each track turn lighter in succession as you change different tracks into the current track (you can also click any of a track's controls to make it current).
However, you can echo MIDI data to much more than just the current track, or turn echoing off on the current track if you want. With a single keyboard or controller, you can echo MIDI data to as many MIDI tracks as you want, meaning that you can simultaneously play as many hardware and software synths as you can hook up to your MIDI interface or run on your computer. You can also have multiple performers on different controllers sending MIDI data to either the same synth or multiple synths. Each SONAR track allows you to select what MIDI input ports and channels the track will respond to. The Output field of the track determines what instrument will sound when the track receives the data. Each track's Input Echo button determines whether the track echoes MIDI data.
The Input Echo button
Each MIDI track has an Input Echo button, which controls whether the track will echo MIDI data or not. The button has three states: on , dimmed , and off . When the button is on, the track
echoes MIDI data. When the button is dimmed, the track echoes MIDI data because the track is the current track. When the button is off, the track does not echo any data, even if it is the current track. The Off position on a current MIDI track is only available if you disable the Always Echo Current MIDI Track option in the General tab of the Global Options dialog (Options > Global command). The dimmed position becomes unavailable with this setting.
There are several ways to turn Input Echoing on:
- Click a track's Input Echo button so that it is on.
- Click a track to make the track the current track (if the Always Echo Current MIDI Track option on the General tab of the Global Options dialog is enabled). In this situation (which is the default), if the track's Input Echo button is not on, it appears dimmed, to show that this track echoes data because it is the current track.
- If the Always Echo Current MIDI Track option on the General tab of the Global Options dialog is disabled, make a track the current track, and use the Tracks > Input Monitor/Echo command (or click the track's Input Echo button).
Storing favorite configurations
If you want a track to respond to more than one port or channel, you must create a preset input configuration. If you create some favorite configurations of MIDI input options, not only will they be stored with the project you created them in, but you can save each one as a preset to load in any MIDI track in any project you want. Clicking the drop-down arrow in a track's Input field displays the Inputs drop-down menu, which has the Manage Presets choice that allows you to create and store your favorite combinations of MIDI input choices.
To play one synth at a time from one or more MIDI keyboards
- Since this is SONAR's default behavior, simply use the UP ARROW or DOWN ARROW keys on your computer keyboard to choose the current track (the current track has a gold titlebar), and choose the synth you want to play by using the track's Output, Bank, Patch, and Channel fields. With the default behavior, all MIDI input from all ports and channels is merged and sent through the current track. Notice that the track's Input field says Omni.
- If you've disabled the default behavior (see next procedure), you must make sure that the current track's Input Echo button is lit up (on) before you can play the synth that the track is patched to.
To disable the default MIDI echo detting
- If you want to turn off the automatic MIDI echoing of the current track, disable the Always Echo Current MIDI Track option in the General tab of the Global Options dialog (Options > Global command). If you then turn off the current track's Input Echo button and play your keyboard, SONAR will not produce sound.
To play multiple synths from a MIDI keyboard
- Choose a synth for each track that you want to play by using each track's Output, Channel, Bank, and Patch fields.
-
In the Input field of each track that you want to play, click the drop-down arrow and choose the MIDI input port and channel that you want the track to respond to from the following options:
-
None. This option actually sets the Input field to Omni. With this setting the track will respond to any MIDI input coming in on any port (MIDI interface input driver) on any channel.
- (name of MIDI input driver) > MIDI Omni. Choosing this option causes the track to respond to any MIDI channel coming from the named MIDI interface input driver.
- (name of MIDI input driver) > MIDI ch 1-16. Choosing this option causes the track to respond ONLY to whatever MIDI channel you choose coming from the named MIDI interface input driver.
- Preset. If you've created any preset collections of input ports and channels, you can select one here.
-
Manage Presets. If you want to create or edit any preset collections of input ports and channels, you can select this option (see following procedure).
-
Make sure that the Input Echo button on each track that you want to play is turned on.
To create or edit a preset input configuration
- In the Input field of a track that you want to select inputs for, click the drop-down arrow and choose Manage Presets from the drop-down menu.
The MIDI Input Presets dialog appears.
- In the Input Port column, find the input port that you want to use for this track (if you only use a single-port MIDI interface, you'll only see one choice).
- To the right of the input port, select the MIDI channels that you want this track to respond to on this MIDI port.
- Select channels for any other MIDI port that's listed, if you want to use channels on that port also.
- If you want to save this configuration, type a name for it in the window at the top of the dialog, and click the Disk icon to save it.
Now, when you choose inputs for other tracks, you can choose the preset you saved by clicking the Presets option in the track's Input drop-down menu. If you want to edit a preset, select it in the top window of the MIDI Input Presets dialog, edit it, and click the Disk icon. If you want to delete a preset, select it in the same dialog and click the X button to delete it.
To use multiple performers on multiple tracks
- For performer number 1, click the Input drop-down menu(s) of the track(s) you want that performer to play, and choose the port and MIDI channel that performer 1's keyboard is sending data to SONAR on.
- Repeat step 1 for all other performers.
- If there is any track that you want more than one performer to play, create a preset of the input ports and channels that you want that track to respond to (see previous procedure).
- Make sure the Input Echo button is on for each track you want to play.
To turn MIDI echo (and input monitoring) On or Off for all tracks
- In the Playback State toolbar (to display, use the Views > Toolbars > Playback State command), click the Input Monitor button (last one on the right).
Local control
You should normally disable the Local Control setting on your master keyboard to prevent notes from being doubled when you play your keyboard. If you disable Local Control, your keyboard sends notes that you play to SONAR, which echoes them to the synthesizer, which plays them only once.
When SONAR starts, you can have it send a special MIDI message that attempts to disable Local Control automatically. Most modern synthesizers respond to this message. If yours does not, you will need to disable Local Control every time you turn it on for use with SONAR.
If your synthesizer does not let you disable Local Control (this is rare), you can use the Local On Port setting in the Input tab of the Project Options dialog box to indicate the number of the output port connected to your synthesizer. SONAR will then refrain from sending MIDI echo data to that port. In this configuration, you may need to turn your synthesizer's volume control up and down from time to time to avoid hearing it play along with your other modules. If this situation doesn't apply to you, the Local On Port should be set to 0.
To automatically disable all local control whenever you launch SONAR
- In the directory where SONAR is installed, double-click on the TTSseq.ini file to open it.
- In the [Options] section, add the line:
SendLocalOff=1
- Save the file and close it.
- When you launch SONAR, it automatically sends a Local Off message to your keyboard.

Note: Not all keyboards respond to Local Off messages.
Playing files in Batch mode
SONAR allows you to play several files in sequence automatically using the Play List view. You can use this feature in live performance applications or just for fun.
SONAR's Play List view lets you create and work with a series of project, MIDI, and bundle files. As each file plays, SONAR loads it and displays it in the Track view and other views like any other project file.
The Play List view
The Play List view lets you create, edit, and save a play list (or set) of up to 999SONAR projects. Once you've created the list, you can play back the entire sequence automatically. You can even program the list to pause between songs for a fixed amount of time or to wait for a keystroke before proceeding.
Figure 33. The Play List view

A. Switch to the next song B. Repeat the list C. Add a song D. Drop a song E. Set a delay F. Display full path G. List of songs H. Enable the play list
Play lists can be saved for future use. Play list files have the extension .set.
To create and edit a play list
To create and edit a play list in the Play List view, follow the instructions in the table:
| To do this Do this | |
| Open an existing play list | Choose File > Open, choose Play List from the Files of Type list, choose the file you want and click Open |
| Create a new play list | Choose File > New, choose Play List Set from the list, and click OK |
| Add songs to the play list | Clickor press INSERT, choose a file from the Add Song to Play List dialog box, and click Open |
| Set the delay after a song | Click on the song in the play list, clickenter the delay you want, and click OK |
| Change the order of songs Drag the file to a new location in the play list | |
| Copy a song to another location in the play list | CTRL-drag the file to a new location in the play list |
| Remove a song from the play list | Select the song and clickpress the DELETE key |
| Save the play list | Choose File > Save; or choose File > Save As, enter a file name, and click Save |
Table 38.
To play files from the Play List view
To play back files from the Play List view, follow the instructions in the table.
| To do this Do this | |
| Activate the play list | Clickin thePlay List view toolbar so that the button is pressed. If this button is not pressed, only a single file will play when you start playback. |
| Choose the starting song | Double-click the file you want to start with. The project is opened and displayed as usual. |
| Start playback | Click, chooseTransport > Play, or press the SPACEBAR. |
| Stop playback | ChooseTransport > Stop, or press the SPACEBAR. |
| Skip to the next file | ClickthePlay List view toolbar. |
| Loop continuously over the play list | Click thebutton in thePlay List view toolbar. |
| Show or hide file name extensions and folder names (path) | Click thebutton to enable or disable the display of folders. |
Table 39.
Video playback, import, and export
Video files play in the Video view in real time as your project plays. You can also view your video on an external DV device connected to an IEEE 1394 port ("FireWire").
The File > Import > Video command lets you include the following video file types in your project:
• AVI (also called Video for Windows)
• M P E G
- Windows Media Video
- QuickTime (.mov files only)

Note: Some .mov and .avi files contain no video. You can't import these files with the File > Import > Video command. You must use the File > Import > Audio command instead, and set the Files of Type field to All Files.
The File > Export > Video command lets you export your audio tracks and your imported video as the following file types:
• AVI (also called Video for Windows)
- Windows Media Video
- QuickTime
SONAR also has a Video Thumbnails pane at the top of the Track view, which shows individual frames of your video at different places in your project (See "Using the Video thumbnails pane" on page 225 for more information).
You open the Video view by using the Views > Video command. The Video view displays the Now time (as in the Big Time view) and the video itself. The display in the Video view is synchronized with the Now time, giving you convenient random access to the video stream. This makes it easy to align music and digitized sound to the video.
Commands in the Video view's right-click pop-up menu let you set the time display format, the size and stretch options for the video display, the video start and trim times, and other options.
QuickTime issues
In order to import/export QuickTime files in SONAR, you must install both the filters AND QuickTime. Below are some other known QuickTime issues:
- QuickTime Import/Export requires version 6.5.1 or higher of the QuickTime Player to be installed. The QuickTime Player is not included with SONAR, but can be downloaded separately from Apple's web site (www.apple.com/quicktime/download/win.html).
- Audio mixdown to QuickTime must be set to 16 bits stereo or mono, or the resulting export will create a unusable file or abort with an error.
- Audio mixdown to QuickTime must be set to 48 KHz or less or the resulting export will create a file that plays back incorrectly.
- When exporting to QuickTime, the frame rate of the QuickTime video compressor will default to "best possible". Since not all movies in a SONAR video project correctly report their frame rate, the best practice is manually enter the desired frame rate. This is done in the video settings of the QuickTime video compressor.
- Exports to QuickTime from a SONAR video project created from an AVI using the Indeo video compressor will create a movie with white frames.
- Exports to QuickTime may have an extra white frame on the last frame of the movie. This extra frame can be removed with the QuickTime Pro Player or another QuickTime editing application.
See:
Importing and playing back videos
Optimizing video performance
Importing and playing back videos
Here are step-by-step procedures for inserting and playing back videos:
To load a video file into a project
- Choose File > Import > Video, or choose Insert from the Video view's pop-up menu.
The Import Video dialog appears.

Tip: You can also drag a video file from the Medai Explorer view and drop it on the Video Thumbnails pane.
- In the Files of Type field, select the kind of video file you're looking for.
- Select a file.
- Check the Show File Info option to display information about the file in the File Info section of the dialog.
- Check the Import Audio Stream option if you want to load the file's audio data.
- Check the Import As Mono Tracks option if you want to import the file's audio data as one or more mono tracks.
- Click Open.
SONAR loads the video file and displays it in the Video view. If you choose to import audio data, SONAR inserts a new track above the currently selected track, and puts the audio data in a clip or clips on the new track.

Note 1: When you save a project that contains video, SONAR saves the project's video file by reference only; the actual video data remains in the original file. Video data is not saved in bundle files, so it must be backed up on its own.

Note 2: After you load a video file into a project, you can play it back either in the Video view, or on an external DV device through a FireWire port. See “Video playback on a FireWire DV device” on page 228 for more information.
To play a video file in the Video view
- Open the Video view by choosing Views > Video.
- Press the SPACEBAR to play or stop video playback.
- To change the display size of the video, right-click in the Video view and choose Stretch Options > [desired size] from the pop-up menu.

Note: When you play a video file that has high temporal compression, such as movies optimized for web delivery, playback may not be smooth unless you disable video thumbnails, (see "Using the Video thumbnails pane" on page 225 for more information).
To delete the video from the project
- Open the Video view by choosing Views > Video.
- Right-click in the Video view and choose Delete.
SONAR removes the video from the project. Note that imported audio data is not deleted.
To enable or disable video playback
- Open the Video view by choosing Views > Video.
- Right-click in the Video view and choose Animate.
If your computer is not fast enough to play back video efficiently, you can get better performance by temporarily disabling video animation during playback.
To set the Time display format
- Click the time display to cycle between MBT, SMPTE, Frames and None Or
- Right-click in the Video view and choose an option from the Time Display Format menu:
To do this Do this
| Select a time format Choose MBT, SMPTE, Frames or None |
Change font or font color
Choose Font and select new font characteristics
Turn off the time display Choose None
Table 40.
To adjust the SMPTE time
- Move the Now time to the place where you want SMPTE time to be either 00:00:00:00, or a number you can enter.
- Use the Transport > Set Timecode At Now command to open the Set Timecode At Now Time dialog.
- If you want to set SMPTE time to 00:00:00:00 (the dialog's default value) at the current Now time, click OK to close the dialog. If you want to set SMPTE time to some other value at the current Now time, type that value into the SMPTE/MTC Time field, and click OK to close the dialog.
To choose a frame rate
- Use the Options > Project command to open the Project Options dialog.
- On the Clock tab, under Timecode Format, choose the frame rate you want from the six choices, and then click OK (for more information, see "SMPTE/MIDI Time Code Synchronization" on page 824).
To set the Video display format
Right-click in the Video view and choose an option from the Stretch Options menu:
| To do this Do this | |
| Display the video in its original size Choose Original Size | |
| Stretch the video to fill the Video view Choose Stretch to Window | |
| Stretch the video as much as possible while preserving the original aspect ratio | Choose Preserve Aspect Ratio |
| Make the video display as large as possible, but only enlarge by integral multiples | Choose Integral Stretch |
| Display the video in full screen mode Choose Full Screen | |
Table 41.
SONAR adjusts the video display according to the selected option. The stretch option is used to recalculate the video display size whenever you resize the Video view.
To set the background color
- Right-click in the Video view and choose a color option from the Background Color menu.
To set the Start and Trim times
- Right-click in the Video view and choose Video Properties.
- Set options as described in the table:
| Option What it means | |
| Start Time | The time in your SONAR project at which you want the video file to start playing |
| Trim-in Time | The time in the video file at which you want video playback to start |
| Trim-out Time | The time in the video file at which you want video playback to stop |
Table 42.
SONAR synchronizes the video to the project according to the specified Start and Trim times.

Note: The project's video file is saved in the project by reference only, the actual video data remains in the original file. Video data is not saved in bundle files, so it must be backed up on its own.
See also:
Exporting video
Optimizing video performance
Exporting video
After you've mixed your audio tracks the way you want them, you can export the inserted video file together with your audio tracks to create a new video file.
When you export a video, any changes you've made to the Start, Trim-In, or Trim-Out times determine how long your new exported video is compared to the original video that you inserted into your SONAR project.

Note: If you're exporting an AVI file, the No Compression option in the Video Codec field of the AVI Encoder Options dialog is a good choice. This choice does not change or compress your source video material. If you want your exported AVI file to be compressed, the Cinepak option will create an AVI file that plays back smoothly with decent quality. The MJPEG option will create an AVI file that does not play back as smoothly, but is a high quality format to archive a file in.
To export a video
- Make sure your audio tracks are completely mixed, and your video Start time, Trim-In time, and Trim-Out time are set the way you want them.
- Use the File > Export Video command.
The Export Video dialog appears. - In the File Name field, type a name for your new video.
- In the Files of Type field, choose the kind of video file you want the exported file to be.
- Click the Encoding Options button to open a dialog of encoding options for the kind of file you're creating. Some codecs do not work: click the Help button in the dialog for help choosing options.

Note: If you're exporting an AVI file to either a 24-bit audio format or to a multi-channel (surround sound) format, set the Audio Codec in the AVI Encoding Options dialog to No Compression.
-
Click the Audio Mixdown Options button to open a dialog of audio mixdown options. Click the Help button in the dialog for help choosing options.
-
Click Save to export your video.
Optimizing video performance
Here are a few tips to optimize video performance:
- Viewing your video in on an external DV device will significantly decrease the processor load on your computer if the video stream is a DV AVI file. See "Video playback on a FireWire DV device" on page 228 for more information.
- If you intend to do a lot of seeking around or looping and editing while a video file is loaded, make sure that your video file has sufficient keyframes. Since each frame has to be computed from the last keyframe encountered, if you have very few keyframes in the video, performance may be slow. To change the number of keyframes, you may recompress the file using the File > Export Video command and specify more frequent keyframes. Choose a suitable video compressor such as Cinepak and change the KeyFrame Rate parameter to a number between 1-5. A value of 1 makes every frame a keyframe, and higher numbers insert a keyframe after that many frames.
- Changing the video properties of an AVI file, such as Trim and Start time, can make realtime performance slightly slower. You can make these changes permanent (and thereby reduce the load on your CPU) by using the File > Export Video command, and then re-importing the file.
- Playing videos at a resolution (video size) of 320x240 is usually a high enough resolution to monitor the video while you're composing a soundtrack. You can still choose to stretch the video to full screen at this resolution. You set the video size on the Render Quality tab of the Video Properties dialog. Using a higher resolution can bog down your computer if you're processing audio tracks at the same time.
See also:
Using the Video thumbnails pane
Using the Video thumbnails pane
At the top of the Track view in SONAR is the Video Thumbnails pane, which displays individual frames of your video at certain time intervals of your project. The time interval between displayed frames is determined by the zoom level you choose. If you zoom in far enough, you can view each individual frame of your video.

Note 1: If you're playing back a highly compressed movie (not many keyframes in the file), it can take about a minute to redraw video thumbnails when you're playing the movie or resizing a window.

Note 2: Some Windows Media videos do not report their frame rate to SONAR. SONAR can play these files, but cannot create thumbnails from them, so no thumbnails appear in the Thumbnail pane.
Figure 34. The Video Thumbnails pane

A. Show/hide frame numbers button B. Show/hide thumbnails button C. Show/hide video pane button D. Splitter bar E. Frame number F. Video track strip
Here are the various commands and functions of the Video Thumbnails pane:
- You can show or hide the pane.
- You can show or hide the video thumbnails.
- You can display absolute frame numbers.
- You can resize the thumbnails while preserving the aspect ratio by dragging the splitter bar.
- The video track strip at the top of the Track pane has display fields for Video File Name, Start Time, Trim-In Time, Trim-Out Time, Duration, and Current Frame, as well as a toggle buttons to show/hide the thumbnails (without hiding the Video Thumbnails pane), and to show/hide frame numbers on individual frames. You can edit the Start Time, Trim-in Time, and Trim-Out Time fields.
- SONAR saves the size and state of the Video Thumbnails pane on a per/project basis.
- The Video Thumbnails pane zooms horizontally when you use the standard Track view commands for horizontal zooming. You control the height of the Video Thumbnails pane by dragging the splitter bar up or down that's at the bottom of the Video Thumbnails pane.
For step-by-step instructions, see the following procedures:
To hide or show the Video thumbnails pane
- Drag the splitter bar that separates the Video Thumbnails pane from the Clips pane. Or
- Use the Views > Video Thumbnails menu command. Or
- Click the Show/Hide Video button in the Track view toolbar.
To turn Video thumbnails On or Off
-
Right-click the Video Thumbnails pane or the Video Thumbnails track strip.
-
Choose Show/Hide Thumbnails from the pop-up menu that appears. Or
- Click the Show/Hide Thumbnails button in the Track view toolbar.
To hide or show frame numbers on frames
- In the video track strip, click the Show/Hide Frame Numbers button 📄.
To open the Video properties dialog
- Double-click the video track strip.
To open the Video view
- Double-click the Video Thumbnails pane.
To move the Now time to a thumbnail
- Click the thumbnail.
To change the Start time
- In the video track strip, click the Start field, type a new number in Measure/Beat/Tick format, and press ENTER. The start time is the time in your SONAR project at which your video starts to play.
To change the Trim-In time
- In the video track strip, click the Trim-In field, type a new number in SMPTE format, and press ENTER (you can press the SPACEBAR instead of typing colons, if you want, and you can type single zeros instead of double zeros). The Trim-In time is the time in your video file at which you want to start video playback.
To change the Trim-Out time
- In the video track strip, click the Trim-Out field, type a new number in SMPTE format, and press ENTER (you can press the SPACEBAR instead of typing colons, if you want, and you can type single zeros instead of double zeros). The Trim-Out time is the time in your video file at which you want to stop video playback.
To use the Video thumbnails context menu
-
Right-click the Video Thumbnails pane or the Video Thumbnails track strip.
-
Choose any of these options from the pop-up menu that appears:
• Show/Hide Thumbnails
- Display Absolute Frames
- Open Video View
- Insert Video
- Delete Video
- Export Video
- Video Properties
Video playback on a FireWire DV device
You can view your video projects on an external FireWire DV device.

Note: This feature will decrease the processor load to your computer if the video stream is a DV AVI file. If the stream is not DV AVI, the CPU load will significantly increase, compared to playing back onscreen with SONAR's Video view.
To convert a Video project to DV AVI format
- Use the File > Export Video command.
The Export Video dialog appears.
- In the File Name field, type a name for your new video.
- In the Save as Type field, choose Video for Windows.
- Click the Encoding Options button to open the AVI Encoder options dialog, and choose DV Video Encoder in the Video Codec field. Click OK.
- Click the Audio Mixdown Options button to open a dialog of audio mixdown options. Choose the audio options you want, but remember that if you plan to save the project to DV tape, choose the following audio format:
• Channel Format. Choose Stereo.
• Sample Rate. Choose 48000.
- Bit Depth. Choose 16.
- Click Save to export your video.
Once you save the video file, it can be re-inserted into a project (see "Importing and playing back videos" on page 220). If the project will ultimately be exported to tape, that project will need to have an audio sample rate of 48 KHz playing back at 16 bits.
To play video on an external DV device
- Connect your external FireWire device. Make sure Windows recognizes the device, and displays the device's icon on the Windows taskbar.
- Launch SONAR and open your video project.
- In SONAR's video view (Views > Video command), right-click the Video view and choose External DV Output >
from the pop-up menu. - Play your SONAR project.
The video disappears from the Video view and appears on your external monitor or camcorder. Leave the Video view open so that you can move the Now Time frame-by-frame with the Video view keyboard shortcuts.
If the Video view is the active window, you can use keyboard shortcuts to advance by a frame or a frame increment. The +/-, and left/right arrow keys move forward/backwards by a single frame. If you
hold down the CTRL key, then the frame increment value is used (default = 5 frames). You can also use the [ and ] keys to seek by the frame increment.
If your video does not play back in sync with your audio, see Synchronizing external video playback to audio.
External DV output (IEEE 1394/FireWire)
SONAR relies on the Microsoft AV/C drivers to communicate with DV devices that are connected to a IEEE 1394 FireWire bus on your computer, in order to control and preview video to digital video devices.
If another software application overwrites or disables these drivers, the Preview to FireWire and Print to Tape feature may not function correctly. If you are going to install a software application that uses DV devices connected to the IEEE 1394 FireWire bus, please check with the software vendor about DV device drivers it may install. Also, please check with the manufacturer of your DV device for AV/C-compliance information. The following devices have been tested and known to work properly with SONAR:
• ADS Pyro A/V Link DV transcoder
• Canopus ADVC-100 DV transcoder
• Canon ZR-85 miniDV camcorder

Note: When using DV AVI movies, the transcoding unit must be set to the same format (NTSC or PAL) as the video file, or Preview to FireWire and Print to Tape will fail to work properly. Also, CPU consumption will be lower when the source material is in DV format, since the format is native to the FireWire device and doesn't incur a CPU hit for transcoding video.
Exporting a project to a FireWire DV device
Once your project sounds the way you want it to, you can export the video and audio together to an external FireWire DV device. This is called “printing to tape,” if your external device uses tape.
To export a project to an external DV device
- Use the File > Export > Video command to open the Export Video dialog.
- In the Save as Type field, choose AVC Compliant Device. You might see a different name in the drop-down menu, depending on what type of external device you are using.
- Click the Audio Mixdown Options button to open the Audio Mixdown Options dialog.
- In the Audio Mixdown Options dialog, choose the following options, and then click OK:
• Channel Format. Choose Stereo.
• Sample Rate. Choose 48000.
- Bit Depth. Choose 16.
-
In the Export Video dialog, click the Encoding Options button to open the property page of your external device.
-
In the property page, use the transport controls to position the tape in your external device to a blank area for recording.
- Close the property page, and click the Save button in the Export Video dialog to start exporting. If you're printing to a device that uses tape, the tape stops rolling when the export process is finished.
Synchronizing external video playback to audio
Because there is more latency in FireWire video playback than in PC digital audio playback, video playback on an external device will probably be playing back later than the audio tracks in SONAR.
To sync external video to audio
- Right-click the Video view and choose Video Properties from the pop-up menu to open the Video Properties dialog.
- On the Render Quality tab of the dialog, under External DV Output, enter an offset number in the Video Sync Offset field. The number you enter here causes the Video to start playing sooner than the audio. It's helpful if your video has some pre-roll footage that contains a visual sync point.

Note: The offset is accurate to 3 decimal places, e.g. 1 ms (a thousandth of a second). One frame of video is approximately 33 ms long for NTSC and 40 ms for PAL; the offset will typically be less than 1 second.
- Click OK to close the dialog. Play your video, and readjust the Video Sync Offset number as needed.
Locating missing audio
If you try to open a project and SONAR is unable to locate all the audio files that the project references, the Find Missing Audio dialog appears. The Find Missing Audio dialog helps you find any missing audio in your project.
See:
The Find missing audio file dialog
Restoring missing audio files
Managing shared and external files
The Find missing audio file dialog
Use the Locate Missing Audio File dialog to find missing audio in your project. The following is a brief description of the options you have in this dialog:
- Open. Click this button once you have searched for and found the missing audio file.
- Skip. Click this button to move to the next missing file. When you skip and audio file your project
opens without that piece of missing audio.
- Skip All. Click this button to skip all missing audio files. When you skip all missing audio files, you project opens without those pieces of missing audio
- Search. Click this button to begin a search of all available hard drives for your missing audio file.
- After locating the file Options. You can choose to either move an audio file to the project's audio data folder, copy an audio file to the project's audio data folder, or leave an audio file in its current folder.
For more information, see Find Missing Audio File dialog.
Restoring missing audio files
When you open a project file that references audio files which SONAR can not find, the Locate Missing Audio dialog appears. Use the following procedure to restore the missing audio files to your project.
To restore missing audio files
- In the Locate Missing Audio dialog, click the Search button.
The Search for Missing Audio dialog appears and SONAR begins searching all available hard drives for the missing file or files.
- When SONAR is finished searching, the files that it has found appear in the dialog.
- Select the file or files that SONAR has found and click OK.
The Locate Missing Audio dialog appears.
-
Select one of the following options:
-
Move file to Project Audio Folder. Use this option if you are sure that no other projects are referencing this file in its present location.
- Copy file to Project Audio Folder. Use this option if the missing file is shared with another project and you want to keep all of your project's audio files together.
-
Reference file from present location. Use this option if you want to leave the missing file in its current location now that SONAR knows where it is.
-
Click Open.
SONAR moves, copies or references the missing file or files as you instructed.
Managing shared and external files
You may want to share files between projects. The files you want to share may be frequently used sound effects or drum loops. SONAR allows you to choose whether to copy imported audio files to your project's audio data directory or to link to them in their current (external) location.

Note: External files are defined as any file not in the project's audio data folder (or a subfolder within the project's audio data folder).
To configure SONAR to always copy files to the project Audio data folder
Use this procedure if you want to keep all of your project's audio in one folder (your project's audio data directory).
- Select Options > Global and click on the Audio Data tab.
- In the All Projects section, click the Always Copy Imported Audio Files option.
To configure SONAR to share external files
SONAR allows you to share external files (files not in the project's audio data directory). There are some exceptions, however. Files that have a different sampling rate or bit depth are always copied to the project's audio data directory. Also, if the Always Copy Imported Audio Files option in the Audio Data tab of the Global Options dialog is checked, imported audio is always copied to your project's audio data directory.
Do the following to ensure that you are sharing files:
- Uncheck the Always Copy Imported Audio Files option in the Global Options dialog.
- In the Open dialog, when importing audio, make sure the Copy Audio to Project Folder option is unchecked.
Recording
You can add sound or music to a SONAR project in many different ways. You can record your own material using a MIDI-equipped instrument, use a microphone or another audio input to record digital audio information, or import sound or music data from an existing digital data file. With the Input monitoring feature, you can hear your audio instruments exactly how they sound in SONAR, including any plug-in effects (effects are not recorded, however). When you record audio or MIDI tracks, SONAR displays a wave preview of your recorded data as you record it.
You can also input new material using your computer keyboard or mouse using the Piano Roll view, the Staff view, or the Event List view. For more information about entering music using these views, see the online help topics: The Staff View, The Piano Roll View, and The Event List View.
See:
Creating a new project
Preparing to record
Recording music from a MIDI instrument
Input quantizing
Arpeggiator
Recording audio
Input Monitoring
Loop Recording
Punch Recording
Step Recording
Recording Specific Ports and Channels
Importing Music and Sound
Saving Your Work
Creating a new project
You can add music and sound to an existing project or to a new project. Just as in any Windows program, you open an existing project file using the File > Open command, and create a new project file using the File > New command.
When you create a new SONAR project, there are some additional parameters you can set to make it easier to work on your project. These include:
- Meter and key signature
• Metronome and tempo settings
• Audio sampling rate - MIDI timing resolution
See:
Creating a new project
Setting the Meter and Key signatures
Setting the Metronome and Tempo settings
Setting the audio sampling rate and bit depth
Using per-project audio folders
For ease of backing up your audio files in a project, SONAR allows you to use a separate audio folder for each project. This feature is off by default.
To enable per-project audio
- Select Options > Global.
The Global Options dialog appears.
- Click the Audio Data tab.
- In the Audio Data tab, click the Use Per-Project Audio Folders option.
- Click OK.

Note: If you use the default project that is created when you open SONAR, you are not using per-project audio. You must use the Copy All Audio with Project option in the Save As dialog to create a per-project audio folder. For more information, see "To Save an Existing Project Using Per-project Audio" on page 838.
Creating a new project File
When you create a new project you are asked to choose a template to use for your new file. If you have per-project audio folders enabled (for more information, see the online help topic Using per-project audio folders), you are also asked to specify a file name, the folder where you want to store
the file, and the folder where you want to store the file's audio. You can override per-project audio by unchecking the Store Project Audio in its Own Folder option.
SONAR includes a set of templates you can use to create a new project. These templates include common types of ensembles, such as rock quartets, jazz trios, and classical full orchestras. When you create a new project using one of these templates, SONAR creates a project that has MIDI settings predefined so that one track is set up for each of the instruments in the ensemble. SONAR also includes a template with two MIDI and two audio tracks (called the Normal template). If you are creating a new project that will contain only audio material, use the Audio Only template. If you are creating a new project that will contain only MIDI material, use the MIDI Only template.
You can create your own template files and use them as the basis for other new projects. For more information, see "Templates" on page 735.
To create a new project file
- Choose File > New to display the New Project File dialog box.
Figure 35. The New Project File dialog
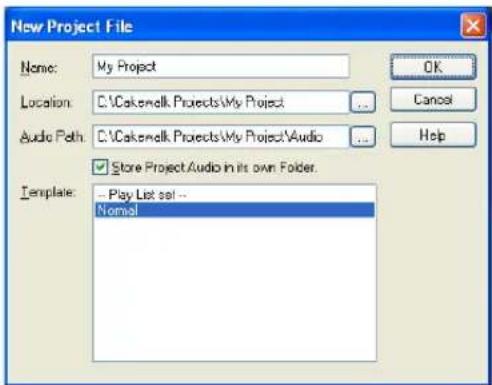
-
If you have the per-project audio folders option enabled, enter a file name, set the folder where you want to store the new file, and set the folder where you want to store the new file's audio.
-
Choose a template from the list.
-
Click OK.
SONAR creates the new project file and displays it with the Track view open.
Setting the Meter and Key signatures
By default, a new SONAR project is in 4/4 time and the key of C major. You can change these settings to any desired Meter or key. These settings apply to all the tracks in a project. You cannot set different meter or key signatures for different tracks.
The meter or key signature of a project can change at any measure boundary. To insert changes in the meter or key signature, use the Views > Meter/Key command to display the Meter/Key view, or use the Insert > Meter/Key Change command.
If you are creating a new project that will contain only audio material (no MIDI material), you do not need to set the meter and key signature.

Note: Groove clips do not follow your project's key. Groove clips follow the project pitch (in the Markers toolbar and pitch markers in the Time Ruler. For more information, see "Working Groove Clip audio" on page 419.
The key signature controls how SONAR displays notes in the Staff view, the Event List view, and elsewhere. The meter tells SONAR the number of beats per measure and the note value of each beat. Common meters include:
• 2/4 (two beats per measure, each quarter note gets a beat)
- 4/4 (four beats per measure, each quarter note gets a beat)
- 3/4 (three beats per measure, each quarter note gets a beat)
- 6/8 (six beats per measure, each eighth note gets a beat)
The top number of a meter, the number of beats per measure, can be from 1 through 99. The bottom number of a meter is the value of each beat. You can pick from a list of values ranging from a whole note to a thirty-second note.
The meter determines the following:
- Where the metronome accents are placed
• How the Now time is displayed
• How the Staff view is drawn - How grid lines are displayed in the Piano Roll view
To Set the Meter and Key signature
- Display the Views toolbar by choosing Views > Toolbars > View.
- Click 📄 on the View toolbar to open the Meter/Key view.
- Click ☐ to open the Meter/Key Signature dialog box.
The Meter/Key Signature dialog appears.
Figure 36. The Meter/Key Signature dialog
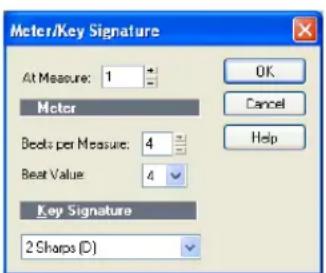
-
Enter the top and bottom meter values in the Beats per Measure and Beat Value fields.
-
Choose the key signature from the Key Signature list.
-
Click OK.
You can also set the meter and key signature in the Large Transport toolbar display, or by using the Insert > Meter > Key Change command.
Setting the Metronome and Tempo settings
The metronome counts off each beat in a measure, so you can hear the tempo of your project. You can choose to have the metronome sound during recording, during playback, or both. When you start recording, SONAR can play any number of beats or measures of metronome clicks before recording begins. This can help you “get in the groove” before you start performing. These beats or measures are called the count-in.
When you create a new project, you should set the metronome to play during the count-in and while recording. If you are adding material to an existing project, you might only need the metronome for the count-in.
You can customize the metronome sound to use audio or any note on a MIDI instrument. By default, SONAR uses a hi-hat cymbal sound from a General MIDI drum kit for the MIDI metronome, but you can change this setting to anything you like by changing the MIDI output, MIDI channel, and duration. You can also choose the note and velocity (volume) to use for the first beat of each measure and for all other beats. The metronome settings are stored separately with each project, so you can use different settings for each one.
Most metronome options can be set in the Metronome toolbar:
Figure 37. The Metronome toolbar

A. Record count-in B. Measures C. Beats D. Metronome during playback E. Metronome during record F. Use Audio Metronome G. Use MIDI metronome H. Metronome settings
If you don't see the Metronome toolbar, use the Views > Toolbars command to open the Toolbars dialog box, and check the Metronome check box. The metronome MIDI note parameters must be set in the Metronome Settings dialog box.

Note: If you are synchronized to an external clock source, you cannot use the count-in feature. For more information, see “Synchronizing Your Gear” on page 819.
To set the tempo and metronome for a new project
-
In the Metronome toolbar, select the Metronome during Recording 📊 and Metronome during Playback 🌐 options.
-
If you want to hear a count-in before recording begins, set the count-in to 1 or more. Select Count-in Measures ☐ or Count-in Beats ⏻.
- Select Use Audio Metronome and/or Use MIDI Metronome
- Arm at least one track.
- Press R or click ☐ to start recording. The count-in will play, and the Now time will start to advance.
- If necessary, stop playback and adjust the tempo using the tempo controls in the toolbar and restart playback. Repeat until the metronome plays the tempo you want.
- Press the SPACEBAR or click ☐ to stop recording.
- Press W, or click to rewind to the beginning of the piece.
Your tempo and metronome settings are now ready. When you save the project file, the metronome and tempo settings will be saved as well.
To change your Metronome settings
-
Open the Metronome Settings dialog box in one of the following ways:
-
Click Metronome Settings in the Metronome toolbar.
-
Choose Options > Project and click the Metronome tab.
-
Change the metronome settings as indicated in the following table:
To do this Do this
| Enable the metronome during playback Check Playback |
Enable the metronome during recording Check Recording
| Enable the count-in | Enter the number of clicks for the count-in in the Count-in box, and select Measures or Beats |
| Use the audio Check Use Audio Metronome | |
| Use a MIDI note as the sound | Check Use MIDI Note and choose the output, channel, and other settings |
Table 43.
- Click OK.
Your metronome settings will be saved with the project file.
To set the MIDI metronome sounds from your MIDI instrument
-
Select a track in the Track view that is assigned to the MIDI device you want to use for the metronome sound.
-
Click Metronome Settings in the Metronome toolbar to open the Project Options dialog box.
- Make sure that the settings in the Output and Channel fields match those for the track in the Track view.
- Click on the Key box in the First Beat or the Other Beats section.
- Play a note on your MIDI instrument. The note number is entered automatically. The velocity is not updated.
- Click OK.
Your metronome settings will be saved with the project file.
Setting the audio sampling rate and bit depth
Each SONAR project has an audio Sampling rate and an audio driver Bit depth that indicate the level of accuracy with which audio data are sampled and processed. The same parameters are used for all the digital audio in a project. When you create a new project, if you do not want to use the default setting, you must choose a sampling rate before you start recording audio.
SONAR lets you choose from several different sampling rates: 11025 Hz, 22050 Hz, 44100 Hz, 48000 Hz, 88200 Hz, 96000 Hz, 176400 Hz, and 192000 Hz. The default used by SONAR is 44100 Hz, the same rate as audio CDs. However, you may choose a higher rate and later mixdown to 44100. You can also enter any hardware-supported value in the Sampling Rate field. Consult your hardware documentation for supported sampling rates.
A higher sampling rate produces better quality sound. However, a higher sampling rate also means that each audio clip takes up more memory and disk space and requires more intensive processing by your computer. If you have an older computer, or a slow hard drive, you might be better off with a lower sampling rate. For more information, see “Improving Performance with Digital Audio” on page 851.
By default, the audio driver bit depth of audio data is 16 bits. If your sound card supports 18, 20, 22, or 24 bit audio, you can choose to take advantage of these higher resolutions.
If you are creating a new project that will contain only MIDI material (no audio), you do not need to set the audio sampling rate or bit depth. If you import audio from a Wave file or another digital audio file, the sampling rate and audio driver bit depth of the wave file are converted to your default setting, if necessary.

Note: If you are planning to move your project to a Digital Audio Tape (DAT) or to some other media via a digital transfer, set your sampling rate and bit depth to match the target unit. For example, use 44,100Hz/16-bit for a project that will be mastered to a CD, so that no sample rate conversion is required.
To set the sampling rate and audio driver bit depth for new projects
-
Choose Options > Audio to display the Audio Options dialog box.
-
On the General tab of the dialog, select a value in the Sampling Rate drop-down menu, and a value from the Audio Driver Bit Depth drop-down menu.
3. Click OK.
The sampling rate and audio driver bit depth are saved with the project file.
Sony Wave-64 support
SONAR 6 and earlier wrote wave files based on the RIFF wave file format. The RIFF format has an inherent file size limitation of 2GB.
SONAR fully supports reading and writing to the Sony Wave-64 format, which has a limit of 8,388,608 terabytes!
SONAR only creates Wave-64 file when needed. The Wave-64 format allows an application to dynamically switch from classic RIFF WAVE to Wave-64 format even if the data was originally created as a RIFF wave file. SONAR detects when a file will exceed 2GB and will dynamically switch to the new Wave-64 format.
The table below shows the maximum duration for a stereo WAVE file before we hit the 2GB limit, as well as the max duration for a stereo Wave-64 file before we hit the 8,388,608 terabyte limit.
| Sample Rate | Bit Depth | RIFF-Wave | Sony Wave-64 |
| 44,100 Hz 16 3.38 hours 14,524,080,431 days | |||
| 44,100 Hz 32 1.69 hours 7,262,040,215 days | |||
| 44,100 Hz 64 50.7 minutes 3,631,020,108 days | |||
| 192,000 Hz 16 46 minutes 3,335,999,724 days | |||
| 192,000 Hz 32 23.3 minutes 1,667,999,862 days | |||
| 192,000 Hz 64 11.65 minutes 833,999,931 days | |||
Table 44.
When Wave-64 Files are created
Wave-64 files are created behind the scenes automatically under the following usage scenarios:
- When the number of samples recorded exceeds the file size limit of a 32-bit RIFF WAV file (approximately 2GB file size).
- When you export, bounce or freeze tracks or clips and the resultant wave size exceeds 2GB.
- When you destructively process audio effects on a SONAR clip whose duration exceeds 2GB.
- When you import audio and choose a wave file that exceeds 2GB in size (this could be a Wave-64 file).
- When you save a CWB file and the size of any chunk in the CWB file exceeds 2GB, the entire
CWB is saved in the new Wave-64 format.

Note: 64-bit CWB files are incompatible with previous versions of SONAR.
64-bit CWB files
CWB files are RIFF files with multiple WAVE chunks. Therefore, CWB files in previous versions of SONAR were subject to the same file size limitations of normal RIFF Wav files. This could potentially result in a CWB file that failed to save because a chunk was too large.
SONAR will automatically use the Wave-64 format if a CWB file exceeds 2GB.

Note: 64-bit CWB files are incompatible with previous versions of SONAR.
Wave-64 file extension
Wave-64 files have a .w64 extension associated with them. Whenever a Wave-64 file is written, SONAR saves it with an extension of w64.
CWP file persistence for 64-bit sample offsets
The SONAR project file format supports writing 64-bit sample offsets for regions and clips. When a project containing 64-bit sample times is detected, saving that project automatically rewrites it in this new format.

Note: Projects that contain 64-bit sample times are incompatible with SONAR 6 and earlier.
Setting the MIDI timing resolution
Each SONAR project has a setting for the timing resolution, or timebase, that indicates the resolution of MIDI data. This resolution is measured in ticks or pulses per quarter note and is often abbreviated as PPQ. The default resolution is 960PPQ, which is accurate enough for most applications. In this timebase, each quarter note is represented by 960 ticks, each eighth note by 480 ticks, each eighth-note triplet by 320 ticks, and so on.
In some projects you may need a different timebase. For example, if you wanted to use eighth-note septuplets (7 eighth notes per quarter note) and represent them accurately, you would need to have a timebase that is divisible by 7, such as 168PPQ. SONAR uses the timebase you choose for a project to determine the range of tick values in the Now time.
To set the timebase for a project
- Choose Options > Project and click the Clock tab.
- Choose the timebase you want from the Ticks per Quarter Note list.
- Click OK.
Preparing to record
To prepare for recording, you need to do the following:
- Set the recording mode.
- Choose your input(s).
- Arm one or more tracks for recording.
- Check your recording levels (audio only).
- Tune your instrument if necessary (audio only).
- Set the Now time to the point where recording should start.
- Start recording.
After you record, you can use the Edit > Undo command to erase the most recently recorded material. You can use the Edit > Redo command to restore the recording and toggle between Undo and Redo as many times as you like.
If you are using MIDI Sync or time code sync for the clock source, SONAR waits to receive external timing data before it begins recording. For more information see the online help topicSynchronizing Your Gear.
See:
Recording modes
Choosing an input
Arming tracks for recording
Auto arming
Recording modes
Any material you record is stored in a new clip. If you record into several tracks at once, one clip is created in each track. If you record into a track that already contains clips, you can choose one of
three recording modes to determine what happens to those clips. When you save your project, you also save whatever recording mode you choose together with that project:
| Recording mode How it works | |
| Sound on Sound | The new material is merged with any existing material. This means that any existing clips on the track are left unchanged and all newly recorded material is stored in new clips. While recording, you will be able to hear material from existing clips. |
| Overwrite The new material replaces (overwrites) any existing material. This means that portions of existing clips may be “wiped clean” to make room for newly recorded material. While recording, you will not be able to hear material from existing clips. | |
| Auto Punch Recording only takes place between the punch-in and punch-out times. You can use Auto Punch in either Sound on Sound or Overwrite mode. | |
Table 45.
To choose a recording mode
- Select a mode from the drop-down list in the Record toolbar.
Or
- Choose Transport > Record Options or click 📄 to display the Record Options dialog box, then select the desired mode.
SONAR saves your recording options with each project, so you can save a different recording mode with each of your projects.
Choosing an input
To record into a track, you must choose an input for the music or sound to be recorded. Usually, you choose All Inputs - Omni to record material from a MIDI instrument, or the left or right channel of a digital audio device (such as a sound card) to record audio material, or stereo if you want to record stereo audio in a single track. The input for each track is displayed in the track's Input field and at the top of each module in the Console view.
When you choose All Inputs > Omni as the input for a track, SONAR merges material from all MIDI inputs and instruments. This means you don't have to worry about input, channel, or other MIDI settings. Sometimes, you may want to record different MIDI channels into different tracks. To learn how to do this, see "Recording Specific Ports and Channels" on page 274.
While each track can have a different input, it is also possible for several tracks to have the same input.
To choose a MIDI input in the Track view
- Click the drop-down arrow of an Input field of a MIDI track (an Input field has this icon to the left of it: ).
A drop-down menu of MIDI inputs appears.
-
Choose an input from the following:
-
None. This option actually sets the Input field to Omni with this setting the track will record any MIDI input coming in on any enabled port (MIDI interface input driver) on any channel.
- All Inputs > (MIDI Omni or MIDI ch 1-16). With this setting the track will record any MIDI input coming in on any enabled port (MIDI interface input driver) on any channel, unless you choose a particular MIDI channel instead of MIDI Omni. Then the track will only record input that's on the MIDI channel you chose.
- (name of MIDI input driver) > (MIDI Omni or MIDI ch 1-16). Choosing this option causes the track to record any MIDI channel coming from the named MIDI interface input driver, unless you choose a particular MIDI channel instead of MIDI Omni. Then the track will only record input that's on the MIDI channel you chose, from the named input driver.
- Preset. If you want to record multiple data from multiple ports and/or channels, you need to select a preset collection of those ports and channels. You can select one here (to create presets, see next line).
- Manage Presets. If you want to create or edit any preset collections of input ports and channels, you can select this option (see "To Create or Edit a Preset Input Configuration" on page 275).
To choose an audio input in the Track view
- Click the drop-down arrow of the Input field of an audio track (an Input field has this icon to the left of it: ).
A drop-down menu of audio drivers appears.
-
Select the audio driver for the sound card you want to record with from these options:
-
None. This choice ensures that you do not record to the track in question.
- Left (name of your sound card). Choose this if you want to record a mono signal on the left channel of your sound card.
- Right (name of your sound card). Choose this if you want to record a mono signal on the right channel of your sound card.
- Stereo (name of your sound card). Choose this if you want to record a stereo signal.
If your sound card has more than one pair of inputs, a pair of numbers appears after the name of each audio driver to indicate which pair of inputs the driver is attached to.

Note: Inputs that are used by the External Insert plug-in (see "External Insert plug-in" on page 632) cannot be assigned to track inputs.
To choose an audio input in the Console view
- At the top of an audio track module, click the Input button.
A pop-up menu of audio drivers appears.
-
Select the audio driver for the sound card you want to record with from these options:
-
None. This choice ensures that you do not record to the track in question. It also turns off input monitoring for this track.
- Left (name of your sound card). Choose this if you want to record a mono signal on the left channel of your sound card.
- Right (name of your sound card). Choose this if you want to record a mono signal on the right channel of your sound card.
- Stereo (name of your sound card). Choose this if you want to record a stereo signal.
If your sound card has more than one pair of inputs, a pair of numbers appears after the name of each audio driver to indicate which pair of inputs the driver is attached to.
To choose a MIDI input in the Console view
- At the top of a MIDI track module, click the Input button.
A pop-up menu of MIDI channels appears.
-
Choose an input from the following:
-
None. This option actually sets the Input field to Omni. With this setting the track will record any MIDI input coming in on any enabled port (MIDI interface input driver) on any channel.
- All Inputs > (MIDI Omni or MIDI ch 1-16). With this setting the track will record any MIDI input coming in on any enabled port (MIDI interface input driver) on any channel, unless you choose a particular MIDI channel instead of MIDI Omni. Then the track will only record input that's on the MIDI channel you chose.
- (name of MIDI input driver) > (MIDI Omni or MIDI ch 1-16). Choosing this option causes the track to record any MIDI channel coming from the named MIDI interface input driver, unless you choose a particular MIDI channel instead of MIDI Omni. Then the track will only record input that's on the MIDI channel you chose, from the named input driver.
- Preset. If you want to record multiple data from multiple ports and/or channels, you need to select a preset collection of those ports and channels. You can select one here (to create presets, see next line).
- Manage Presets. If you want to create or edit any preset collections of input ports and channels, you can select this option (see "To Create or Edit a Preset Input Configuration" on page 275).
Arming tracks for recording
SONAR lets you record any number of tracks at one time. You indicate the tracks you want to record by arming the tracks. You can arm a single track or several tracks at one time. Each track records material received though its selected input. Whenever a track is armed, not only does the track's R button turn red, but the Clips pane that's to the right of that track's controls turns a reddish hue.
To arm one or more tracks for recording
- To arm a track in the Track view, click

Or
- To arm a track in the Console view, click R (to see the Arm button in the Console view, the MSR button on the left side of the Console view must be depressed).
Or
- To arm several tracks at the same time, select one or more tracks in the Track view, then right-click and choose Arm from the pop-up menu.
A track's Arm button turns red to indicate that the track is armed for recording.
To disarm all tracks at once
- Click the red Arm label that's located in the status bar at the bottom of the SONAR window.
Or
- Click the red Arm button in the Playback State toolbar, which you can display by using the
Views > Toolbars command and checking Playback State in the Toolbars dialog box.
Auto arming
You must arm tracks in order to record. To safeguard your data, there is no automatic arming of any tracks.
If you want to record MIDI tracks without arming a track, choose Options > Global, and select the General tab. Click the Allow MIDI Recording without an Armed Track check box.
This feature lets you start recording a new track simply by making it the current track and pressing R or clicking the Record button in the toolbar. Auto-arming makes it possible to inadvertently record over existing material in the current track, however.
Recording music from a MIDI instrument
Once you have set your tempo and metronome, and armed one or more tracks, you are ready to start recording.
To record MIDI
-
Set the Now time to the point in the project where you want to start recording.
-
Click ☐, press R, or choose Transport > Record. If your metronome count-in is turned on, it will play the count-in.
-
Play or perform the material you want to record. As you record, SONAR displays a clip containing the new material in the Clips pane (unless you've turned off this option on the General tab of the Global Options dialog (Options > Global command).
-
Click ☐, press the SPACEBAR, or choose Transport > Stop to stop recording.
To listen to the new material, set the Now time to the start of the clip and press the SPACEBAR or click ▶. If you're not happy with the recording, use Edit > Undo or press CTRL+Z to erase the new material.
When you stop recording, if you do not see a new clip in the Clips pane, you may have a problem with MIDI input. See “Troubleshooting” for more information.
See:
Recording Specific Ports and Channels
Input quantizing
Input quantizing allows you to automatically quantize MIDI input during recording. You can see the results immediately, and hear the results as soon as a track is looped.

Note: Input quantizing does not destroy your original recording. If you press CTRL+Z after you finish recording with input quantizing enabled, the quantized clip is deleted, and the original unquantized clip appears, just as you recorded it. If you are using loop recording in Sound On Sound mode, all the quantized clips are deleted.
You control input quantize options for single tracks from the input quantize controls in MIDI track strips. The input quantize controls appear in Track strips by default just before the Input field when the All tab is selected (see picture below). You control input quantize options for multiple tracks from the Record toolbar, and from the Tracks menu. The toolbar and menu commands affect selected tracks. If no tracks are selected, they affect ALL MIDI tracks.
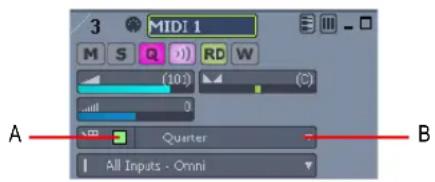
A. Input Quantize enable/disable button B. Input Quantize resolution menu
You can set the input quantize options for either a single track or for multiple tracks.
To turn Input quantizing On or Off
- To turn input quantizing on or off for a single track, click the track's Enable/Disable Input Quantize button.
- To turn input quantizing on or off for selected tracks, select the tracks that you want to turn on or off, then use the Tracks > Input Quantize > Enable/Disable Input Quantize command, or click the Enable/Disable Input Quantize button in the Record toolbar.
- To turn input quantizing on or off for all tracks, make sure no tracks are selected (or press CTRL+A to select all tracks), then use the Tracks > Input Quantize > Enable/Disable Input Quantize command, or click the Enable/Disable Input Quantize button in the Record toolbar.
To set the resolution
- To set the resolution for a single track, click the track's Input Quantize resolution menu, and choose a resolution from the drop-down menu that appears. You can also click Quantize Settings in the resolution menu to open the Input Quantize dialog, and type a number of ticks in the Resolution field.
- To set the resolution for selected tracks, select the tracks that you want to configure, then use the Tracks > Input Quantize > Quantize Settings command or click the Quantize Settings button in the Record toolbar to open the Input Quantize dialog. Then choose a value in the Resolution field, and click OK.
- To set the resolution for all tracks, deselect all tracks (or select all tracks), then use the Tracks > Input Quantize > Quantize Settings command or click the Quantize Settings button in the Record toolbar to open the Input Quantize dialog. Then choose a value in the Resolution field, and click OK.

Note: To quantize to a custom resolution value, open the Input Quantize dialog, and type a custom number of ticks in the Resolution field.
To set options
- To set options for a single track, click the track's Input Quantize resolution menu, and choose Quantize Settings to open the Input Quantize dialog, or right-click the Resolution menu. Then choose options in the dialog, and click OK.

Note: To get explanations of the options in the Input Quantize dialog, press F1 when the dialog is open.
- To set options for selected tracks, select the tracks that you want to configure, and use the Tracks > Input Quantize > Quantize Settings command or click the Quantize Settings button in the Record toolbar to open the Input Quantize dialog. Then choose options in the dialog, and click OK.
- To set options for all tracks, deselect all tracks, then use the Tracks >Input Quantize > Quantize Settings command or click the Quantize Settings button in the Record toolbar to open the Input Quantize dialog. Then choose options in the dialog, and click OK.
Visual indicators
You will see the following visual indicators when Input Quantizing is enabled:
- The Enable/Disable Input Quantize button in the Record toolbar changes.
Figure 38. The Record toolbar

A. Enable/Disable Input Quantize B. Quantize Settings
- The red swath that appears in a track in the area where recording is taking place changes color. You can choose a color for this in the Configure Colors dialog (Options > Colors command) by choosing Clips Pane in the Color Category menu, and changing the entry for Input Quantize Record Preview Background.
- The Arm button in a track that has Input Quantizing enabled changes color when it is armed, and displays Q instead of R.
Key bindings
You can choose key bindings for Input Quantize commands by opening the Key Bindings dialog (Options > Key Bindings command), choosing Global Bindings in the Bind Context menu, and scrolling to the Tracks > Input Quantize commands.
To set key bindings for note resolutions, choose Track View in the Bind Context menu, and scroll to the Input Quantize Resolution commands.
For more information, see Quantizing.
Arpeggiator
The arpeggiator lets you play intricate patterns of notes that would otherwise be extremely difficult or impossible to play manually and at speeds and octave ranges that exist beyond the physical limitations of the player or keyboard range.
Arpeggiated events are new events that are based on notes that you play on your controller keyboard. The new events are rhythmically and harmonically specified by the arpeggiator's preset, allowing you to "play" an endless variety sophisticated musical passages with simple key pressing.
The most significant capability of the arpeggiator is its ability to apply algorithmic variations on your input as well as MIDI-based patterns.
In addition to note events, the arpeggiator can send parameter automation such as pan, volume, and even effects automation for the current track.
Each MIDI and instrument track has its own integrated arpeggiator, visually located in the Track view. Running multiple arpeggiators across tracks can help realize exciting melodic and rhythmic textures.
The arpeggiator appears as a control widget above the FX bin. You can expand the arpeggiator widget to show additional controls.
Figure 39. Click the Show/hide Arpeggiator Controls button to see additional controls.
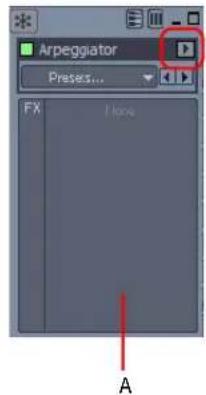

A. Basic Arpeggiator controls visible B. Advanced Arpeggiator controls visible
Figure 40. Arpeggiator controls
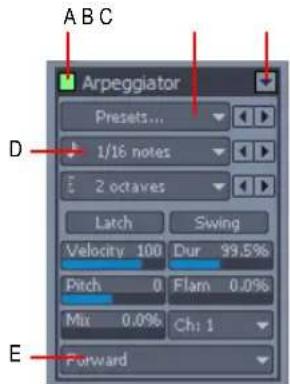
A. Enable/disable B. Presets C. Show/hide Arpeggiator Controls D. Rate menu E. Shapes menu

Tip: As with other widgets in the Track view, you can specify the visibility of the Arpeggiator widget for each tab at bottom of the Track pane. For details, see Widget Tab Manager.
Arpeggiator controls
The following table describes the controls in the Arpeggiator.
| Control Description | |
| Enable/Disable | Enables/disables the arpeggiator on a given track. This control can be assigned to MIDI remote control and modified in real-time during project playback. |
| Preset Control | You can create and edit arpeggiator presets; all user parameters are stored in the preset.• Arpeggiator settings are included in track templates.• Arpeggiator presets can be saved to a file and exchanged with other users.• Arpeggiator files are stored in a shared directory.For details, see Using patterns and presets. |
| Rate Adjusts the relative speed of the arpeggiator sequence by changing all the note durations by a factor of the current tempo. This control can be assigned to MIDI remote control and modified in real-time during project playback. | |
| Octave Range Sets the number of octaves through which the arpeggio will play. A value of 1 means that a held chord will only arpeggiate the notes that are being held within the octave from which the notes are being transmitted. A value of 2 means a held chord will arpeggiate for two octaves.The held chord always represents the bass octave, meaning that the other octaves sound in a higher register.If you specify a range higher than the standard MIDI specifications, the Arpeggiator will repeat the pattern in the highest available octave as necessary.This control can be assigned to MIDI remote control and modified in real-time during project playback. | |
| Latch Latch keeps the arpeggio playing after you let go of the keys.This control can be assigned to MIDI remote control and modified in real-time during project playback. | |
| Swing Applies swing to the arpeggio. Swing is either on or off. | |
| Velocity | An offset control that adds whatever velocity value you select to the velocities of the notes in the pattern. |
| Duration | Controls whether the notes in the pattern are held to their full value, or are held for shorter or longer durations. |
| Pitch Offset A transposition control in half-steps, up or down a maximum of 2 octaves. | |
| Flam Amount | If a pattern contains flams, this menu controls how big a difference there is between the attack time of the flam and the note it is attached to. |
| Source Mix | When 0, simultaneously held notes arpeggiate as single notes. At 50%, simultaneously held notes are heard as a chord in addition to the usual arpeggiated notes, both at equal levels. At 100%, only the held chord is audible.Control: Knob (0 – 100%); this control can be assigned to MIDI remote control and modified in real-time during project playback. |
Table 46. Arpeggiator controls
Recording
Arpeggiator
Control Description
| Ch MIDI input and output menu—the Arpeggiator only affects input data that's on the MIDI channels listed on this menu. The arpeggiator always obeys the track's assigned output channel, plus any additional channels specified in the arpeggiators Ch menu. | |
| Shapes | Choose a shape that specifies the direction in which currently held notes are to be sequenced. The following shapes are available:• Rhythm (implicit rhythm mode)• F o r w a r d• R e v e r s e• Forward Circle 1• R e v e r s e C i r c l e 1• Forward Circle 2• R e v e r s e C i r c l e 2• Inward• O u t w a r d• Inward Circle• Outward Circle• As Played• As Played Circle• Random |
Table 46. Arpeggiator controls (Continued)

Note: Most Arpeggiator parameters can be controlled via MIDI remote control, but automation data can not be recorded into tracks. For details, see To Set Up Remote Control for a Knob, Button, or Fader.
See:
One arpeggiator device appears on every MIDI and instrument track, located in the Track view.
To enable/disable the Arpeggiator
- Click the Enable/Disable Arpeggiator button.

A. Enable/Disable Arpeggiator toggle
To show/hide advanced Arpeggiator controls
- Click the Show/Hide Arpeggiator Controls button.

A. Show/Hide Arpeggiator Controls
Using patterns and presets
Pre-authored patterns are used to apply rhythmic and melodic variations to the arpeggio. SONAR includes many professionally-authored pattern files for you to experiment with. Pattern files have a .ptn file extension.
An Arpeggiator preset stores a pattern along with the current Arpeggiator parameter settings. Preset files have a .arp file extension.
You use the Arpeggiator's Preset control to load patterns and load/save presets.
When playing back through the Arpeggiator, the first pitch in the pattern is moved to the lowest note currently played.

Note: If the pattern file is a Free Mode pattern, the steps are quantized to the nearest 128th note value in order to better preserve timing nuances.
To load an Arpeggiator pattern
-
Click the Preset control in the Arpeggiator widget and select Open Pattern from the drop-down menu.
-
Navigate to the folder that contains your Arpeggiator pattern files (.ptn) and select the desired pattern.

A. Click to load a pattern
To load an Arpeggiator preset
- Click the Preset control in the Arpeggiator widget, point to Presets and select the desired preset.
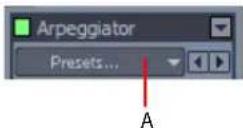
A. Click to load a preset
To load the next/previous Arpeggiator preset
- Click the Next Preset or Previous Preset button in the Arpeggiator widget.
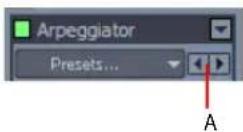
A. Click to load the next/previous preset
To save an Arpeggiator preset
- Click the Preset control in the Arpeggiator widget and select Save Pattern As from the dropdown menu.
The current pattern is saved with the current Arpeggiator parameter settings.

A. Click to save a new preset
See:
Arpeggiator
Recording audio
Before you record audio, you should check your input levels. If the levels are too low, you may end up with too much hiss and background noise in your recording. If the levels are too high, your recording will be inaccurate or distorted. To check your audio levels, use the audio meters in the either the Track view or Console view. To adjust the input levels, you must use your sound card's software mixer program (or the Windows XP mixer) or an external hardware mixer for certain sound cards.
The audio meters indicate the volume at which the audio will be recorded, in units called decibels (dB). The meter values range from -INF (silent) to 0dB (maximum volume). You can change many options in the way SONAR's meters display data: see "Metering" on page 609. To maximize the dynamic range of your recording, you want to set the levels as high as possible without clipping.
When the audio level exceeds 0dB, some of the audio information is lost. This is known as overload. Many sound cards use clipping to deal with an overloaded signal, but clipping can distort the audio signal. As a result, you should avoid letting the meter level exceed 0dB.

Note: Because SONAR is a digital recorder, a level of 0dB indicates digital zero. Digital distortion will occur at 0dB. You will not get analog compression or warmth from pushing the input levels. If you are transferring data from a DAT or another device, you may want to calibrate the input levels of your sound card with the output levels of other devices in your studio. This will ensure that 0dB on one unit will appear as 0dB in SONAR.
To check the Input levels
- In the Track view, choose the inputs for the tracks you want to record, and arm the tracks for recording. Make sure that the Show/Hide All Meters button at the top of the Track view is enabled.
- The default meter range is from 0 dB to -60 dB. To change the range, right-click on the meter and choose a new range from the menu.
- Perform at the loudest level at which you plan to record.
Watch the meters respond. Increase the input volume as high as possible without ever letting the meters move all the way to 0dB, even for an instant, or letting the Clipping indicator turn red. If either of these things happen, reduce the input volume just enough to avoid them during the entire performance. Note that some kinds of audio, such as percussive or plucked musical instruments, can produce very short, high-level “transients” when struck or plucked aggressively, which can lead to clipping if the input volume is set too high. Consider the possibility of these transients when examining the meters and setting your record level.

Note: If the Clipping indicator is illuminated, click on it to reset.
Once you have set your sampling rate and input levels, you are ready to start recording. If the meters do not move, check your sound card software's mixer program and make sure that you have the proper input enabled for recording.
When you record audio, SONAR stores each audio clip in a separate file. These files have the same format as a Wave (.wav) file, but they have special names and are stored in a separate directory on your hard disk. SONAR automatically manages these audio files for you, making it easier for you to manage your projects. If you want to work with these files directly, or to learn more about how SONAR stores audio data, see "System Configuration" on page 843.
Tuning an Instrument
SONAR Chromatic Tuner analyzes any input signal from the sound card and displays the intonation (in cents) on the meter. The tuner automatically determines which string/pitch you are trying to tune, so that you can keep both hands on the instrument while tuning. The VU Meter shows how loud your input signal is—a strong signal is essential for accurate tuning.
The Tuner works just like an effect and each track can have its own instance.
With a microphone, you can also tune acoustic instruments.
To Tune an Instrument
- In the track you want to record your instrument on, right-click in the Effects bin.
- From the menu that appears, select Audio Effects > Cakewalk > Tuner.
- Click the track's Input Monitor button. If you don't click the Input Monitor button on the track the Tuner is patched into, you will not be able to use the tuner.
- With your instrument plugged into your sound card and turned up, play a note.
The Tuner displays the intonation reading on the cents meter and the name of the note you played between the three arrows. One of the three arrows lights up, indicating one of the following:
- Up arrow indicates the note is in tune.
- Right arrow indicates the note is sharp.
-
Left arrow indicates the note is flat.
-
Adjust the pitch if necessary and repeat for the rest of the pitches you need to tune.
To Record Audio
- Choose the audio inputs for the track(s) you want to record.
- Arm the tracks for recording. The Clips pane next to each armed track turns a reddish hue when the track is armed.
- Set the Now time to the point in the project where you want to start recording.
- Click ☐, press R, or choose Transport > Record. If your metronome count-in is turned on, it will play the count-in measures or beats.
- Play or perform the material you want to record.
As you record, SONAR displays a waveform preview of the new material in the Clips pane, unless you've turned off the Display Waveform Preview option on the General tab of the Global Options dialog (Options > Global command). If you've turned off the option, SONAR displays a red swath along the area of the Clips pane where you're recording.
- Click ☐, press the SPACEBAR, or choose Transport > Stop to stop recording.
SONAR displays a clip containing the new material in the Track window. To listen to the new material, set the Now time to the start of the clip and press the SPACEBAR or click ▶ . If you're not happy with the recording, use Edit > Undo to erase the new material.
If you do not see a new clip in the Clips pane, you may have a problem with audio input. See "Troubleshooting" for more information.

Important: Make sure you have enough space on your hard disk when recording digital audio. Running out of hard disk space when recording can lead to unpredictable results.
Confidence Recording and Waveform Preview
When you're recording audio or MIDI data, SONAR gives you many visual cues that tracks are armed and that SONAR is recording data.
When one or more tracks are armed:
- The R button in each armed track turns red.
- The Clips pane next to each armed track gets a reddish hue.
- The R button in the Playback State toolbar is depressed (to display the toolbar, use the Views > Toolbars > Playback State command).
- The Status bar displays the red Arm message.
While you're recording, SONAR displays these cues:
- Audio tracks display a waveform preview in the area in the Clips pane where you're recording. This is actually a visual record of the record meter's progress. When you stop recording, SONAR displays the actual waveform, which is slightly different from the preview. The preview is a
snapshot taken at certain time intervals, while the actual waveform represents all the data that is recorded.
- MIDI tracks display the actual data that they record, both in the Clips pane and the Piano Roll view (not the Staff view).
- Automation envelopes and nodes are drawn in real time as the automation data is being recorded.
If you want to turn off the real-time display of audio clips, see the following procedure.
To Turn Off Waveform Preview for Audio Recording
- Use the Options > Global command to open the Global Options dialog.
- On the General tab, uncheck the Display Waveform Preview While Recording option, and click OK.
Now when you record audio tracks, a red swath appears in the Clips pane in the area you're recording.
Input Monitoring
Being able to hear plug-in audio effects applied to a live signal is an exciting feature of SONAR. However, there are two issues that users commonly stumble upon when using the input monitoring feature. The first is that the monitored signal seems to have an echo associated with it. The second is that live input monitoring can lead to nasty feedback problems, particularly if you have an outboard audio mixer, or you record from a different sound card from the one you are playing back with.
SONAR has several buttons to control input monitoring:
- Per-track Input Echo button. Each audio track has an Input Echo button that turn's that track's input monitoring on or off.
- Global Input Monitor button. The Playback State toolbar (to display, use the Views > Toolbars > Playback State command) has the Input Monitor button on the right end, which turns input monitoring on or off on all audio tracks with one click.
- Audio Engine button 📁. Clicking this button so that it's in its up position turns all audio activity in SONAR off, which includes input monitoring.
Note: When you use input monitoring, make sure that the track you're playing through uses the same audio interface (sound card) for both input and output. Using different audio interfaces for a track's input and output can produce distortion during input monitoring.
To understand the echo and feedback problems, let's look at how audio signals travel through your sound card, the drivers, and SONAR. The following diagram depicts a simplified version of this signal flow.

flowchart
graph TD
    A["SONAR"] --> B["Wave In"]
    A --> C["Wave Out"]
    B --> D["ADC"]
    C --> E["DAC"]
    D --> F["Line In"]
    E --> G["Mixer"]
    F --> H["Line Out"]
    G --> H
    I["•"] --> F
The bottom block of the picture represents the sound card. The shaded area above it represents the audio drivers. The unshaded area at the top represents the main environment of the operating system.
As the diagram shows, analog audio flows into the card's line input (on the left), and is immediately split in two. One branch goes up through the analog-to-digital converter (ADC), where the audio is digitized, buffered and fed to the driver (labeled Wave In in the diagram).
The digital audio data buffers are read by SONAR from the Wave In driver, processed, and then sent out to the Wave Out driver. The driver passes the digital audio buffers through a digital-to-analog converter (DAC), where the audio data is converted back to an analog signal.
Finally, this analog output signal is mixed with the original branch of the input analog signal, and the summed result is presented to the sound card's line output.
With this information in hand, let's follow a simple audio signal through the system to understand how echoes get introduced into the input monitor path.

flowchart
graph TD
    A["SONAR"] --> B["Wave In"]
    A --> C["Wave Out"]
    B --> D["ADC"]
    C --> E["DAC"]
    D --> F["Mixer"]
    E --> F
    F --> G["Line In"]
    F --> H["Line Out"]
    style A fill:#f9f,stroke:#333
    style B fill:#ccf,stroke:#333
    style C fill:#ccf,stroke:#333
    style D fill:#cfc,stroke:#333
    style E fill:#cfc,stroke:#333
    style F fill:#fcc,stroke:#333
    style G fill:#fcc,stroke:#333
Suppose you are counting "1, 2, 3" into your sound card very quickly. When you say the first "1," this sound immediately appears in all the places indicated in the illustration above. In other words, the analog audio signal is pure electrical signal traveling at the speed of light, so it is immediately present across all analog audio paths inside the sound card.

flowchart
graph TD
    A["SONAR"] -->|1| B["Wave In"]
    A -->|1| C["Wave Out"]
    B --> D["ADC"]
    C --> E["DAC"]
    D --> F["Mixer"]
    E --> F
    F --> G["Line Out"]
    style A fill:#f9f,stroke:#333
    style B fill:#ccf,stroke:#333
    style C fill:#ccf,stroke:#333
    style D fill:#cfc,stroke:#333
    style E fill:#cfc,stroke:#333
    style F fill:#fcc,stroke:#333
    style G fill:#fcc,stroke:#333
Next, you say "2." In the time it takes you do that, the ADC has converted the "1" to digital form and the Wave In driver has fed it to SONAR for processing. SONAR processes the buffer right away and passes the processed data right back to the Wave Out driver.

flowchart
graph TD
    A["SONAR"] -->|2| B["Wave In"]
    A -->|2| C["Wave Out"]
    B --> D["ADC"]
    C --> E["DAC"]
    D --> F["Line In"]
    E --> G["Mixer"]
    F --> H["Line Out"]
    G --> I["Line Out"]
    style A fill:#f9f,stroke:#333
    style B fill:#ccf,stroke:#333
    style C fill:#ccf,stroke:#333
    style D fill:#cfc,stroke:#333
    style E fill:#cfc,stroke:#333
    style F fill:#fcc,stroke:#333
    style G fill:#fcc,stroke:#333
    style H fill:#fcc,stroke:#333
Finally, you say "3." By this time the original "1" has been converted back to analog audio by the DAC, and that analog signal is mixed in with the "3" you have just said. The ultimate result is that you hear a "1" and "3" mixed together at the line output of card—seemingly sounding like an echo, but actually just an artifact of the signal flow through the system.
You can eliminate the echo by muting the line-in from playing back (see "To Eliminate the Echo from Input Monitoring" on page 261); you'll send only the processed signal to the sound card outputs. This technique introduces a little extra latency to what you hear coming out of your sound card, but if you use WDM or ASIO drivers with your sound cards, the latency is negligible.
The feedback problem results whenever you have a loop in your mixer path: the output of your mixer is patched into the input of your sound card. Feedback can happen with or without input monitoring, but since input monitoring can add several levels of gain to the signal flow, it's of greater concern when you have input monitoring enabled. Input monitoring is disabled by default when you install SONAR, and you enable it with the following procedure.
To Enable Input Monitoring
- Turn your speakers down, and on an audio track that you want to monitor, click the Input Echo button so that it's lit up (on). To disable monitoring for this track, click the button off. Or
- Turn your speakers down, and on the Playback State toolbar (to display, use the Views > Toolbars > Playback State command), click the Input Monitor button so that it's lit up—this enables input monitoring on all tracks. To disable monitoring for all tracks, click the button off.
Now you can hear your instrument in real time with any plug-in effects that you want to patch into the current track. You might also hear an echo, because the dry signal is coming out of your sound card slightly ahead of the processed signal. To eliminate the dry signal, see the next procedure.
To Eliminate the Echo from Input Monitoring
- Open the software mixer that controls your sound card. If your sound card uses the Windows mixer, open the mixer by using the Start > Programs > Accessories > Entertainment > Volume Control command, or double-clicking the speaker icon on the Windows taskbar.
- In the Play Control window of the mixer, check the Mute check box in the Line-In column, or in the column of whatever jack your instrument is plugged into, and close the mixer window.
Now you can hear only the processed sound when you use input monitoring. Using WDM or ASIO drivers for your sound card keeps latency to a negligible amount.

Note: This procedure does not eliminate feedback from your system, only the echo. If you experience feedback, you have a feedback loop somewhere in your mixer setup.
To Enable input monitoring when arming tracks

Warning: Be extremely careful when enabling input monitoring on an armed track if you are working in a room that contains both live microphones and studio monitors. In such a scenario, enabling input monitoring on an armed track can result in an extremely loud feedback loop between the mirophones and monitors and can damage your ears and speakers.
SONAR makes it possible to automatically enable input monitoring when arming a track for
recording. To do so, hold down the SHIFT key while you click on a track's Arm button. Likewise, holding down the SHIFT key while disabling record during playback will disable input monitoring.
To automatically disable input monitoring during playback
- Go to Options > Global and click the General tab.
- Click Disable Input Monitoring during Playback (off by default).
When this option is enabled, input monitoring will be disabled on all tracks during playback but not during recording.
See also:
Input Monitoring
Arming tracks for recording
The Audio Engine Button
SONAR has a button in the Transport toolbar called the Audio Engine button. This button lets you turn SONAR's audio engine off if you're getting distortion or feedback and want to cut the sound off. When playback or recording are in progress, SONAR enables the button automatically—however, the button appears greyed-out during playback or recording because you can't control the button at that time. Whenever the button is enabled, the Audio Running message lights up on the Status bar that's at the bottom of the SONAR window.
If you experience feedback during input monitoring, you can click the Audio Engine button to turn off the audio engine. However, if playback or recording are in progress, the button is unavailable, and you should click the Reset button! that's just to the right of it instead, or else stop recording or playback first and then click the Audio Engine button.
You may experience slightly better playback and recording performance by turning the Audio Engine button off before you press the Play or Record buttons. This happens if your computer's resources are already stretched to the limit. When you start recording or playback with the audio engine already functioning, there is still some processing that SONAR has to do that's left over when you start the transport. This places an extra load on your system that can cause dropouts if your system is already stretched thin. A more effective solution than disabling the audio engine before starting the transport is to reduce the load on your system by hiding some meters, increasing latency slightly, reducing the number of plug-ins and/or tracks, etc.
See also:
Input Monitoring
Loop Recording
When recording a vocal or an instrumental section, you might want to record several different takes so that you can choose the one you like best. You might even want to record several takes to double a part or merge the best parts of each.
Normally, to record each take you would have to arm a track, start recording, perform the take, and then stop recording. You can record multiple takes more easily using a feature called loop recording. Loop recording lets you start recording and record as many takes as you like, all in a single step.
SONAR loops between the loop start and loop end time, allowing you to record one take on each pass. SONAR creates a clip for each take. You have three choices for where these clips are stored:
- All clips can be recorded in Sound on Sound mode and stored in a single track, where they are stacked on top of one another.
- All clips can be recorded in Overwrite mode in a single track, where each take is successively muted except the last one.
• Each clip can be recorded to a different track. SONAR automatically places each take into a new, empty track. No existing tracks are changed in any way.
When you finish recording, you can use the Edit > Undo command or CTRL+Z to erase all your takes in a single step.
To Use Loop Recording
- Choose the input for the track(s) you want to record, and arm the track(s) for recording.
- Set the loop start and end times in either the Loop/Auto Shuttle dialog box or in the Loop toolbar.
- Choose Transport > Record Options, or click ☐ on the Record toolbar, to display the Record Options dialog box.
Figure 41. The Record Options dialog
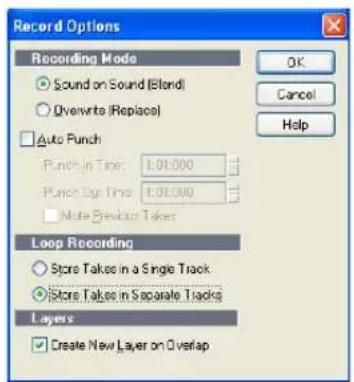
- Choose to stack all takes in a single track or to store them in separate tracks.
- If you choose to stack all takes in a single track, choose either Sound on Sound or Overwrite mode.
If you use single track and Sound on Sound with Track Layers enabled, checking the Create New Layer on Overlap check box will create another track layer if your new clip overlaps an existing clip.
- If you stack all takes in a single track, you can audition them later by using the Track Layers button ☐ in the right of the Track pane (each take will have its own Mute and Solo buttons).
- Click OK to close the Record Options dialog, and set the Now time to the point in the project where you want to start recording.
- Click ☐, or press R, or choose Transport > Record. If your metronome count-in is turned on, it will play the count-in measure.
- Play or perform the material you want to record. At the end of the loop, SONAR will return to the start of the loop and you can record the next take.
- If you want to erase the most recent take while loop recording is underway, choose Transport >Reject Loop Take.
- Click ☐, or press the SPACEBAR, or choose Transport > Stop when you want to stop recording.
The takes are stored in the manner you requested.
Punch Recording
Suppose you are happy with most of a track but want to replace some sound or add new material in one small section—perhaps as small as a couple of notes. This is where punch recording comes in handy, because it lets you record new material only within a specified range of times.
For example, suppose you recorded a 32-bar keyboard solo but made some mistakes in the 24^th and 25^th bars. With punch recording, you can play the entire solo again, so you make sure you can get the feel you want. However, only the bars you want to correct are actually recorded. That way, you don't have to worry about introducing new mistakes elsewhere in the recording.
To use punch recording, follow these steps:
- Enable punch recording.
- Set the start and end times of the punch.
- Choose Sound on Sound mode or Overwrite mode.
- Start recording by pressing R or clicking the button on the Transport toolbar.
The Record toolbar shows the punch settings, as shown here:
Figure 42. The Record toolbar

A. Punch In Time B. Punch Out Time C. Click here to set punch times to the selection start and end times
D. Auto-punch on/off E. Record mode F. Step record G. Click to open the Record Options dialog box
When punch recording is enabled, the punch times are indicated by special markers in the Time Ruler, which is at the top of the Clips pane:

A. Punch In B. Punch Out
After you punch record, choosing Edit > Undo both discards any new material you recorded and restores the original material that had been deleted.
You can also combine loop and punch recording to record several takes of a punch. Say you are working on that perfect take of a guitar solo and you need to hear a couple of bars of the project as "pre-roll" before you punch in. By combining looping with punch, you can have each take begin before you start to play and still have the solo cut in at the appropriate instant.
In the example mentioned previously, you could loop from bar 17 to bar 26 but record only bars 24 and 25. Here's what this looks like:


A. The loop starts and ends here B. The punch starts and ends here
To Punch Record
- Choose the input(s) for the track(s) you want to record, and arm the track(s) for recording.
- Enable the Auto Punch button in the Record toolbar (the button is red when enabled).
-
Set the start and end times in one of the following ways:
-
Enter the times directly on the toolbar
- Select a range of time and click 📋 on the Record toolbar
-
Select a range of time, then right-click in the Time Ruler and choose Set Punch Points
-
Choose either Sound on Sound or Overwrite from the Record toolbar (or in the Record Options dialog—use the Transport > Record Options command to open the dialog).
-
Set the Now time to a point where you want to start playback.
- Click ☐, or press R, or choose Transport > Record. If your metronome count-in is turned on, it will play the count-in measures or beats.
- Play or perform the material you want to record.
- Click ☐, or press the SPACEBAR, or choose Transport > Stop to stop recording.
The material you play during the punch time is recorded in the chosen track, either replacing any existing material (Overwrite mode) or blending with it (Sound on Sound mode).
To Use Punch While Looping
- Choose the input for the track(s) you want to record, and arm the track(s) for recording.
- Set the loop start and end times.
- Set the punch start and end times, as described previously.
- Choose Transport > Record Options, or click 📋 on the Record toolbar, to display the Record Options dialog box.
- Choose to stack all takes in a single track or to store them in separate tracks.
- Set the Now time to the beginning of the loop.
- Click ☐, or press R, or choose Transport > Record. If your metronome count-in is turned on, it will play the count-in measures.
- Play or perform the material you want to record. At the end of the loop, SONAR will return to the start of the loop and you can record the next take.
- If you want to erase the most recent take while loop recording is underway, choose Transport >Reject Loop Take.
- Click □, or press the SPACEBAR, or choose Transport > Stop when you want to stop recording.
The takes are stored in the manner you requested.
Step Recording
Step recording is a method of recording MIDI notes one note or chord at a time. It's a very easy and precise way to record, but can sound mechanical if used in the wrong situation. You use step recording in its typical form by choosing a step size, such as a quarter note, and then playing a note on your MIDI keyboard. When you play the note, SONAR records the note, and moves the insertion point forward by the distance of the step size (moving the insertion point every time you press a note is the default behavior). You can then record more notes of the same duration by playing notes on your keyboard, or you can change the step size while you're recording and record different size notes. You can also choose how long the notes you play will sound, as a percentage of the step size. For example, even though you record some notes that have a step size of a quarter note, if you set the Duration field to 50%, the notes will be recorded and displayed as a series of eighth notes, each followed by an eighth rest. The insertion point for each recorded note in this example moves by a quarter note (the step size) each time you record a note. If the duration is longer than the step size, the notes will overlap with the notes recorded at the next step.
SONAR displays your step-recorded notes in the Staff view, Piano Roll view, Event List, and Clips pane in real time as you step record them. SONAR also lets you:
- Use other commands while step recording

Note: SONAR doesn't respond to sync signals while the Step Record dialog is open and enabled.
- Change tracks while recording
- Add two step sizes together by pressing the + key between each step size selection
- Delete as many step-recorded notes as you want, while moving the insertion point back through the steps you delete
- Configure step recording key bindings (see Step Record Keyboard Shortcuts)
- Make any kind of tuplet
- Create a custom step size lasting any number of ticks (ticks are divisions of a beat—SONAR uses 960 by default); SONAR will remember the custom step size until you change it
- Move the insertion point by beats, measures, or step size
- Link the position of the Now Time to the insertion point
- Offset the insertion point by the number of ticks that you specify
- Randomize duration
- Record notes with constant pitch, and/or velocity, and/or channel
- Hold notes across steps

Tip: With the new keyboard shortcuts, you can leave your left hand on your MIDI keyboard to enter notes with, and control most step recording functions with your right hand on the NumPad.
MIDI data is recorded using step record even if the track is not armed. Loop markers are ignored. And step recording always uses the Sound on Sound (blend) record mode, regardless of the current record mode.
With Auto Advance disabled, you must click Advance each time you want to advance to the next step. While this requires more effort, it also provides you with more flexibility. For example, with Auto Advance disabled, you do not even need to play the notes at a single step at the same time! You can play any number of notes one at a time, and they will all be recorded at the same step until you click the Advance button. You can even record notes of different durations at the same step—simply record the notes of one duration, change the duration, and play more notes, without clicking
Advance.
The Step Record dialog has two modes: Basic (smaller with fewer options), and Advanced (larger, more options). To use Basic mode, click the Bas./Adv. button so that the Adv. button is displayed. To use Advanced mode, click the Bas./Adv. button so that the Bas. button is displayed.
Here's a picture of Basic mode:
Figure 43. The Step Record - Basic window
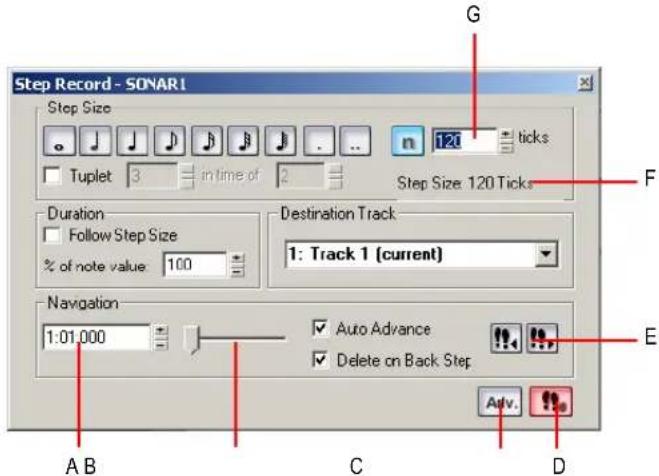
A. Insertion point location B. Position slider C. Basic/Advanced button D. Step Record Toggle button to enable/disable step recording E. Click to move insertion point by step size F. Total step size display G. Custom tick size field
Here's a picture of Advanced mode:
Figure 44. The Step Record - Advanced window

A. Randomize durations field B. Step pattern recording field C. Click to move insertion point by single beat D. Click to move insertion point by single measure
To Use Basic Step Recording
- Open the Step Record dialog by using the Transport > Step Record command, or by clicking in the Record toolbar to display the Step Record dialog box, or press SHIFT+F4.
- Make sure that the Basic mode of the Step Record dialog is displayed (the Adv. button will be showing if the Basic mode is displayed; if the Bas. button is showing, click it).
-
Set the insertion point by doing one or more of the following:
-
Click the Step Advance button 🔊 to move the insertion point forward by the current step size, or click the Step Backwards button 🔊 to move the insertion point backward by the current step size. SONAR displays the insertion point location in the Insertion point location field (see Basic mode picture above).
- Drag the position slider left or right to move the insertion point one measure at a time.
-
Type a location in MBT (Measure-Beat-Tick) format in the Insertion point location field.
-
Choose a step size by doing one of the following:
-
For common step sizes, click one of the notehead icons to choose a step size as large as a whole note or as small as a 64th note. You can increase the step size you choose by 50% or 75% by clicking the dot icon; or double-dot icon, respectively. You can add different step sizes together by holding down the CTRL key while you click extra icons, or by pressing the + key on the NumPad.
- For a tuplet step size, click a notehead icon to choose the "tuplet unit" (for example, for eighth-note triplets, choose an eighth note). Then enable the Tuplet check box and fill in the "n" in time of "n" fields. For example, if you want quarter-note triplets, click the quarter-note icon 🖼, enable the Tuplet check box, and fill in 3 in the time of 2, which means 3 quarter notes in the time of 2 quarter notes. If you want eighth-note triplets, click the eighth-note icon 🖼, enable the Tuplet check box, and fill in 3 in the time of 2. If you wanted 5 notes in one beat, click the quarter-note icon, enable the Tuplet check box, and fill in 5 in the time of 1.
-
If you want to create a custom step size, click the n button n, and fill in the number of ticks in the Ticks field.
-
Choose a duration by doing one of the following:
-
If you want duration and step size to be the same, enable the Follow Step Size check box.
-
If you want duration and step size to be different, disable the Follow Step Size check box and fill in a percentage value in the % of Note Value field.
-
Choose a destination track for your recording in the Destination Track field.
-
If you want the insertion point to advance automatically when you play your MIDI controller, enable the Auto Advance check box.
- Play a note or chord on your MIDI controller. When you release the note(s), the insertion point moves by the step size, if the Auto Advance check box is enabled. If Auto Advance is not enabled, you can release the notes and record more notes, or you can use the Navigation
controls to advance the insertion point. If you are still holding down a note or notes when you advance the insertion point, the step size of the held notes is extended by the current step size.
-
Continue recording notes of the same step size and duration to the same track, or change any of those parameters and continue recording. To create a rest, advance the insertion point without playing any notes. To delete notes on previous steps, you can press CTRL+Z for each recorded step. If you want to delete previous steps and move the insertion point back at the same time, check the Delete on Back Step check box, and click the Step Backward button.
-
When you're finished recording, close the dialog by clicking the X icon in the upper right corner, or by pressing SHIFT+F4.
You can press CTRL+Z during or after recording to undo your recording one step at a time.

Note: Options that you choose in Advanced mode, such as Link to Now Time, are still in force when you use Basic mode.
To Use Advanced Step Recording
The procedure for Advanced step recording is the same as for Basic, but with these extra options, which become available when you click the Bas./Adv. button in the Step Record dialog so that it displays Bas.:
| To do this Do this | |
| Randomize the note duration | Disable the Follow Step Size check box, enter a number into the % of Note Value field (leave it at 100 if you want to follow step size), and enter the maximum duration that the step size should be randomized in the Randomize By field. |
| Choose a constant pitch and/or velocity and/or MIDI channel for the recorded note(s) | To choose a constant value for pitch, velocity, or channel, disable the Use Input check box next to the desired field, and fill in the value you want to use for that particular parameter. |
| Add two step sizes together See “To Add Two Step Sizes Together” on page 271 | |
| Link the insertion point to the Now Time | Enable the Link to Now Time check box. |
| Enter notes at an offset distance from the displayed insertion point. | Enter a positive or negative number of ticks in the Offset field. |
| Move the insertion point back or forward by one beat. | Click the Beat Backward button or the Beat Advance button. |
| Move the insertion point back or forward by one measure. | Click the Measure Backward button or the Measure Advance button. |
| Use step pattern recording. See “Step Pattern Recording” on page 273. | |
Table 47.
To Add Two Step Sizes Together
- Choose your first step size. If desired, use any combination of tuplet and dotted values.
- Press the + key on the Num Pad.
A plus sign appears after the value in the Step Size "n" Ticks field.
- Choose your second step size. If desired, use any combination of tuplet and dotted values.
The total step size appears in the Step Size "n" Ticks field.
- Press the note on your MIDI keyboard that you want to enter.
The new note appears in your track, and the Now Time moves the distance of the two combined steps that you entered. To toggle the plus sign on or off in the Step Size “n” Ticks field, press the + key on the Num Pad. To clear a large value from the Step Size “n” Ticks field, click a smaller value, or use a keyboard shortcut for a smaller value.
To Use Other Commands While Step Recording
- Use the mouse to click the command you want to use.
or
- Click the Activate Step Recording button in the Step Record dialog so that the button is not red. This disables step recording, allowing you to use both the mouse, and any keyboard shortcuts that the Step Record dialog uses, for other commands.
By default, opening the Step Record window will automatically enable step recording. SHIFT+R is the default shortcut to open the Step Record dialog. Once the Step Record window is open, you can enable/disable step recording at will without closing the Step Record window: just click the Activate Step Recording button in the Step Record dialog, or press SHIFT+R.
See also:
Step Record Keyboard Shortcuts
Step Pattern Recording
Step Record Keyboard Shortcuts
The default keyboard shortcuts for step recording are on the NumPad, so that you can keep one hand on your MIDI keyboard to play notes with, and use the other hand on the NumPad to use shortcuts.
To configure your own shortcut, use the Options > Key Bindings command to open the Key Bindings dialog, choose Step Record in the Bind Context field, select a key and a function you
want to bind, and click the Bind button to bind them together. Bind additional keys and commands as needed.
| Default setting or option Default shortcut | |
| Whole note NumPad 1 | |
| Half note NumPad 2 | |
| Quarter note NumPad 4 | |
| Eighth note NumPad 8 | |
| 16th note NumPad 6 | |
| 32nd note NumPad 3 | |
| 64th note NumPad 7 | |
| Custom step size NumPad 9 | |
| Tuplet NumPad / | |
| Dot NumPad * | |
| Double dot SHIFT+NumPad * | |
| Add next step size to previous step size NumPad plus key “+” | |
| Toggle the Delete on Back Step option NumPad minus key “-” | |
| Follow step size CTRL+Num Lock (does not change Num Lock state) | |
| Step backward | NumPad 0 |
| Step advance | NumPad Enter |
| Beat backward | SHIFT+NumPad 0 |
| Beat advance | SHIFT+NumPad Enter |
| Measure backward | CTRL+NumPad 0 |
| Measure advance | CTRL+NumPad Enter |
| Auto Advance | NumPad Period “.” |
| Toggle step recording | SHIFT+ R |
Table 48.
See:
Step Pattern Recording
Step Pattern Recording
The Pattern option lets you define a repeating rhythmic pattern of notes and rests so that you can use step recording more efficiently. For example, suppose your project is in 4/4 time, and one track has a pattern that is two measures long: quarter notes in the first measure and on the first two beats of the second measure, followed by a half-note rest on the last two beats. This pattern has six quarter notes followed by two quarter-note rests.
When you use step recording with Auto Advance, you can play the six quarter notes and SONAR will automatically advance to the next step. However, to skip over the rests, you need to click the Advance button two times.
With pattern recording, you define a pattern that indicates where the rests appear in the pattern. SONAR will then skip over the rests automatically, so you don't need to click the Advance button at all.
SONAR displays patterns as a combination of digits (which represent beats that contain notes) and dots (which represent beats that contain rests). The pattern described previously looks like this:
123456..
Here is another example:
12.4
This pattern automatically skips over every third beat; SONAR interprets this pattern as “one, two, rest, four.”
Here is one final example based on 4/4 time, with a step size of eighth-note triplets (twelve steps per measure):
1234.67.90.2
No matter how you enter a pattern, SONAR displays the digits in sequence, with periods replacing digits at each step where a rest would occur. You can create patterns with up to 64 steps.
To Use Pattern-Based Step Recording
- Choose Transport > Step Record to display the Step Record dialog box.
- Set the insertion point where you want to start recording.
- Click in the Pattern field.
- Press any number key to indicate a beat at which notes will be played.
- Press the SPACEBAR, period, or the letter R to indicate a beat on which there is a rest.
- When the pattern is complete, click elsewhere in the dialog box.
- Step record as before.
From now on, after you record each step, SONAR automatically advances past all rests to the next step on which notes will be played. If you change step sizes while recording, the size of each rest changes also. To stop pattern-based step recording, simply delete the pattern from the Pattern box. SONAR stores up to 10 patterns in the Pattern field.
Recording Specific Ports and Channels
Most MIDI instruments are capable of sending information on several different channels at once. By default, SONAR merges all incoming MIDI data and records it on whatever MIDI tracks are armed. However, SONAR also allows you to control which MIDI input ports and channels each track will record. Here are some examples of when this feature might be useful:
- There are several performers, each playing a different MIDI instrument. By setting each instrument to transmit MIDI on a different channel and/or port, you can record each player's performance into a separate track, even though they are all playing at the same time.
- You are using a MIDI guitar controller and want to record the notes played on each string on a separate track.
- Your electronic keyboard has a built-in auto accompaniment feature that plays a drum part and an accompaniment while you play lead. You want to record each of these three parts into a different track in a SONAR project.
- You have a MIDI sequence stored on your synthesizer's built-in sequencer, and you want to record each channel onto a different track.

You can use external MIDI synchronization to automate the process of loading multichannel sequences from other MIDI devices. For more information, see Synchronizing Your Gear.
You can choose MIDI inputs for a track by using either the Inputs field on each individual track, or by using the Tracks > Property > Inputs command to display the Track Inputs dialog box.
SONAR allows you to filter MIDI input so that you can record only certain kinds of MIDI data (see "Input Filtering" on page 275), and also allows you to automatically turn off the Local On setting of your master keyboard.
To Assign Input Ports and Channels to MIDI Tracks
-
Click the drop-down arrow on an individual track's Input field to display the Input drop-down menu (jump to step 4, below).
Or -
Use the Tracks > Property > Inputs command to display the Track Inputs dialog box.
-
In the Track column, select a MIDI track or tracks that you want to choose inputs for.
-
Click the MIDI Inputs button that's at the bottom of the dialog to open the MIDI inputs drop-down menu.
-
Choose track inputs from these choices:
-
None. This option actually sets the Input field to Omni. With this setting the track will record any MIDI input coming in on any enabled port (MIDI interface input driver) on any channel.
- All Inputs > (MIDI Omni or MIDI ch 1-16). With this setting the track will record any MIDI input coming in on any enabled port (MIDI interface input driver) on any channel, unless you choose a particular MIDI channel instead of MIDI Omni. Then the track will only record input
that's on the MIDI channel you chose.
- (name of MIDI input driver) > (MIDI Omni or MIDI ch 1-16). Choosing this option causes the track to record any MIDI channel coming from the named MIDI interface input driver, unless you choose a particular MIDI channel instead of MIDI Omni. Then the track will only record input that's on the MIDI channel you chose, from the named input driver.
- Preset. If you've created any preset collections of input ports and channels, you can select one here.
- Manage Presets. If you want to create or edit any preset collections of input ports and channels, you can select this option (see following procedure).
5. Click OK.
SONAR shows new track inputs in the Input fields in the Track pane.
To Create or Edit a Preset Input Configuration
- In the Input field of a track that you want to select inputs for, click the drop-down arrow and choose Manage Presets from the drop-down menu (this menu is also available from the MIDI Inputs button in the Track Inputs dialog).
The MIDI Input Presets dialog appears.
- In the Input Port column, find the input port that you want to use for this track (if you only use a single-port MIDI interface, you'll only see one choice).
- To the right of the input port, select the MIDI channels that you want this track to respond to on this MIDI port. Clicking the OMNI button in this row of MIDI channels clears or fills all the check boxes in this row.
- Select channels for any other MIDI port that's listed, if you want to use channels on that port also.
- If you want to save this configuration, type a name for it in the window at the top of the dialog, and click the disk icon to save it.
Now, when you choose inputs for other tracks, you can choose the preset you saved by clicking the Presets option in the track's Input drop-down menu. If you want to edit a preset, select it in the top window of the MIDI Input Presets dialog, edit it, and click the disk icon. If you want to delete a preset, select it in the same dialog and click the X button to delete it.
Input Filtering
SONAR lets you filter out specific types of MIDI messages or filter the MIDI input stream channel by channel. Any MIDI information that is filtered out is neither recorded nor echoed to any other MIDI devices.
You can use the message type filter to screen out resource-intensive MIDI messages like key and channel aftertouch. By default, SONAR records all types of events except these two.
You can use message-type filtering to record short System Exclusive (Sysx) messages in real-time. These will end up in the track as Sysx data events, which can hold System Exclusive messages up to 255 bytes. Leave the Buffers setting at 128 unless you experience data not being recorded. For more information about Sysx, see "System Exclusive Data" on page 805.
To Filter Event Types
- Choose Options > Global and click the MIDI tab.
- Check the message types you want recorded.
- Click OK.
From now on, SONAR records only the types of events you have chosen.
Importing Music and Sound
While recording is perhaps the most common way of adding material to a SONAR project, there are several other methods you can also use. SONAR lets you import music into a project from several different types of digital data files, including MIDI files; audio files in Wave, MP3, AIFF, and other formats; audio CD tracks and other SONAR project files.
See:
Importing Audio CD Tracks
Importing Material from Another SONAR Project
Importing MIDI Files
Importing Audio Files
SONAR lets you insert digital audio information into any track of a project. If the audio file you are importing is in stereo, then it can be imported into a single stereo track, a pair of mono tracks or a single mono track.
The File > Import > Audio command supports the following digital audio file types:
- Wave (extension .wav)
- MPEG (extensions .mpeg, .mpg, .mp2, and .mp3)
• Apple AIFF (extensions .aif and .aiff)
• Active Streaming (extension .asf) - Next/Sun (extensions .au and .snd)
- REX (extensions .rex, .rx2, and.rcy)
- Sony Wave64 (extension .w64)
- FLAC (extension.flac)
• Sound Designer II (extension .sd2) - Core Audio Format (extension .caf)
The sampling rate and bit depth for a project is set based on your default settings in the Audio Options dialog. If the sampling rate from the Wave file does not match the sampling rate in your project, then it will be converted to the current project's sampling rate and bit depth.
To Import an Audio File
- Set the Now time and current track to indicate where the audio should be placed.
- Choose File > Import > Audio to display the Open dialog box.
- Choose the audio file you want to import. SONAR displays information about the file at the bottom of the dialog box.
- Click Play to listen to the audio file before importing.
- If the new file is stereo, check the Stereo Split option if you want to insert the file into two separate tracks.
- Click Open.
SONAR loads the audio data from the audio file and places it in the selected track at the Now time.
Preview bus
Files in the Import Audio dialog box may be selected and previewed in any existing bus in SONAR.
To preview a file
- Select the desired output bus in the Preview Bus combo box
- Click on the file in the file explorer pane
- Click the Play button.
- During playback, the Play button becomes a Stop button. Click Stop to stop playback.

Broadcast Wave Files
Broadcast Wave files are wave files with some additional information stored in them. Broadcast Wave files have the following information:
- Description. A brief description of the contents of the Broadcast wave. Limited to 256 characters.
- Originator. The author of the Broadcast wave. This information is taken from the Author field in the File Info dialog.
- Originator Reference. A unique reference identifier created by SONAR.
- Origination Date. The date the file was created.
- Origination Time. The time the file was created.
- Time Reference. The SMPTE time stamp for the beginning of broadcast wave.
To import a Broadcast Wave file:
- If you want SONAR to import Broadcast Wave files always at their timestamped location, select Options > Global, click the Audio Data tab and check the Always Import Broadcast Waves At Their Timestamp option. Otherwise, set the Now Time and current track to indicate where the audio should be placed.
- Choose File > Import > Audio to display the Open dialog box.
- Choose the audio file you want to import. SONAR displays information about the file at the bottom of the dialog box.
- Click Play to listen to the audio file before importing.
- If the new file is stereo, check the Stereo Split option if you want to insert the file into two separate tracks.
- Click Open.
If the Always Import Broadcast Waves At Their Timestamp option is selected in the Global Options dialog, the imported Broadcast Wave file appears at its timestamp on the selected track. Otherwise, the file appears at the Now Time on the selected track.
Importing Audio CD Tracks
The File > Import > Audio CD command lets you import tracks from audio CD's into any track of a project.
Audio tracks on a CD always have a bit depth of 16, but you can choose to import the tracks at a higher bit depth if desired.
To Import a track from an Audio CD
- Set the Now time and current track to indicate where the audio should be placed.
- Insert an audio CD into the computer's CD drive.
- Choose File > Import > Audio CD to display the Import Audio CD Tracks dialog box.
- Make sure the correct CD drive is selected in the Target Drive drop-down list.
- Choose the audio track you want to import. SONAR displays the length and size of all audio tracks.
- Click Play to listen to the audio track before importing.
- If you wish to import the audio with a different bit depth than the original audio track, choose the desired bit depth from the Import Bit Depth drop-down list.
- Click OK.
SONAR loads the audio data from the audio CD and places it in the selected track at the Now time.
Importing Material from Another SONAR Project
You use the Edit > Copy and Edit > Paste commands to import material from one project to another using the Windows clipboard. The project that contains the material you want to import is the source project. The project into which the material is imported is the target project.
Normally, if you copy material from several different tracks to the Windows clipboard, the information will be pasted back into separate tracks. You can choose to paste all the material from the clipboard into a single destination track in the target project.
You can also copy material from one project to another by displaying the Track view for both projects side by side, then using drag-and-drop editing.
To Import Material from Another Project
- Open the source project, or click in the Track view for that project.
- In the Track view, select the material you want to import.
- Choose Edit > Copy to display the Copy dialog box.
- Make sure that Events in Tracks is checked. If you don't want to import tempo changes, meter/key changes, or markers, uncheck those options. Click OK.
- Open the target project, or click in the Track view for that project.
- Set the Now time and current track to indicate where the material should be placed.
- Choose Edit > Paste to display the Paste dialog box.
- Check Paste to One Track if you want all material imported into the current track (not recommended if you're importing both MIDI and audio data).
- Click OK.
SONAR imports the material and displays it in the Track view.
Importing OMF Projects
With OMFI (Open Media Framework Interchange) support & Broadcast WAVE support SONAR lets you collaborate and exchange project files with users of other programs and platforms. Support for OMFI and Broadcast Wave files provides cross-platform compatibility with OMFI host applications such as Pro Tools, Avid and Logic systems. SONAR also exports projects as OMF files that you can open in Pro Tools and other audio software.
SONAR now allows you to select sample rate and bit depth during OMF import.
A few general guidelines for preparing OMF files for import into SONAR:
- OMF version 2 is preferred.
- AIFC can take slightly longer to open, as the data must be converted to WAVE on read, so WAVE is the best choice.
- If exporting from Avid Xpress DV, select "embed" (not "link") when exporting the OMF file, and don't include any video.
OMF Explained
The OMF format, or OMFI (Open Media Framework Interchange, means the same as OMF), is a file format that can be read by many professional-level audio programs. OMF files contain two basic types of information:
• Audio and/or video files, referred to as media
• Information needed to put the media data in sequence—known as the Composition
The OMF file supplies the following data and information:
- Tracks
- Clip positions—an OMF file's EDL edit resolution can be either frame accurate or sample accurate. SONAR can read either, but always writes sample accurate. The clip position is specified in absolute samples.
- Slip edits
- Fades and crossfades (as destructive edits)—SONAR renders any fades when it writes OMFs, creating separate clips for any fade-ins or fade-outs. SONAR slip-edits the original clip to make room for the fade-in and fade-out clips. If you export to an audio program that supports slip editing, the user can delete the fade clips and roll out the original clip to return to the original raw audio (without fades) if desired.
- Sample rate and audio bit depth, but only if the media are embedded in the OMF
The OMF file does NOT supply the following data and information:
• Volume and pan envelopes—OMF does actually support limited automation. However, as with Nuendo and most other OMF host programs, gains and pans are ignored (on both read and write) in SONAR as they are only supported on MONO tracks (OMF limitation).
- Plug-in effects.
- MIDI data
- Tempo
Whoever supplies the OMF file that you want to open in SONAR should also send along a text file containing all pertinent information about the project, especially tempo.
To Open OMF Files in SONAR
-
Use the File > Open command, which opens the Open dialog.
-
In the Files Of Type field, select OMF File.
-
Navigate to the folder that contains your OMF files, select the OMF file you want to open, and then click the Open button, which opens the Unpack OMF dialog.
-
If you know the exact tempo of the file, enter it into the Initial Tempo field. It is always preferable to know and enter the project tempo at this point. If you don't know the project tempo you can open the file at the default tempo and then change the file's tempo later, but this will cause the clips to move.
-
The Sample Rate field displays the sample rate of the imported audio (if the audio is embedded in the OMF). Use this field to change the sample rate, if you need to.
-
The Bit Depth field displays the bit depth of the imported audio if the audio is embedded. If the audio is external, the Bit Depth field defaults to the Original menu option, which will import the audio at the bit depth the audio is currently using. If you want to import the audio at a different bit depth, you can choose the bit depth in this field.
-
If you have previously enabled SONAR's Use Per-Project Audio Folders option, which is located in SONAR's Global Options dialog, then the Store Project Audio In Its Own Folder check box is already enabled, and the fields under it are available. If you want to use this option, fill out the fields below the check box; otherwise, disable the check box.
-
Click OK.
SONAR opens the OMF file.
You can also export SONAR projects as OMF files (File > Export > OMF command).
See "Exporting OMF Files" on page 678.
Importing MIDI Files
You can create a new SONAR project from a MIDI file simply by opening the file. SONAR takes material from the file and places it into one or more tracks in the Track view.
To Import Data from a MIDI File into a Project
- Open the MIDI file as a new, separate project.
- Choose Edit > Select > All.
- Choose Edit > Copy to display the Copy dialog box.
- Make sure that Events in Tracks is checked. If you don't want to import tempo changes, meter/key changes, or markers, uncheck those options. Click OK.
- Open the target project, or click in the Track view for that project.
- Set the Now time and current track to indicate where the material should be placed.
- Choose Edit > Paste to display the Paste dialog box.
- Check Paste to One Track if you want all material imported into the current track.
- Click OK.
SONAR imports the material and displays it in the Track view.
Importing audio / MIDI files from the Clips pane
It is possible to import audio and MIDI files via the Clips pane context menu. Imported files are inserted at the Now time.
To import audio/MIDI files
- In the Clips pane, right-click the track to which you want to import an audio or MIDI file.
The Clips pane context menu appears.
2. Do one of the following:
- Select Import Audio to import an audio file.
- Select Import MIDI to import a MIDI file.
See:
Importing Music and Sound
Saving Your Work
Like most Windows programs, SONAR has a File > Save command and a File > Save As command to save your work. Normally, you save your projects in the standard project file format, with a file extension of .cwp. This file contains all your MIDI data and all your project settings. Any digital audio that is part of your project is stored in a separate file, as described in “System Configuration” on page 843.
SONAR also lets you save files in several other formats, as described in the table:
File type Format Explanation
| Standard MIDI .mid Used to transfer MIDI-only projects to other software products that support Standard MIDI files. | ||
| Bundle | .cwb | A single file that includes all the material in your project: MIDI data, project settings, and audio data. This format is used for projects that contain digital audio, when you want to back up your work or transfer a project to a different computer. See “Backing Up Projects with Digital Audio” on page 839 for more information.Note: Bundle files do not save video data. |
| Template .cwt A file that is used as a pattern to create another. Templates make it easy to create and configure new projects. See “Layouts, Templates and Key Bindings” on page 731 for more information. | ||
Table 49.
If you have made changes to a project and then attempt to close the project, either by closing the Track view or by choosing File > Close, SONAR asks if you want to save the changes you have made. This prevents you from accidentally losing your work. You can tell whether changes have been made to a project by looking for an asterisk (*) after the project name in the SONAR title bar.
SONAR has an Auto Save feature that periodically saves your work into a special backup file. You can request automatic backups at fixed time intervals or every time a certain number of changes have been made to the file. When the limit is reached, the file is saved automatically. If your original project is called MyProject.cwp, the Auto Save version is called Auto Save Version of MyProject.cwp.
If there is a power failure or if you make a significant mistake, you can recover the last-saved version of your project by opening this file. You should then save your project under a different name by using the File > Save As command.
To Save a Project
- Choose File > Save As to display the Save As dialog box.
- Choose the type of file you want to save from the Save as Type list.
- Enter a file name and click Save.
SONAR saves the file. You can also use File Versioning instead of using Save As. For more information, see "To Use File Versioning" on page 283.
To Change the Auto Save Settings
- Choose Options > Global and click the Autosave and Versioning tab.
- To enable Auto Save, set the number of minutes and/or the number of changes between saves.
- To disable Auto Save, set both values to zero.
- Click OK.
From now on, your projects are saved automatically according to the settings you entered.
Using File Versioning
SONAR can be enabled to keep previously saved versions of your project in a temporary file. You can revert to any of these saved versions or use the default of the most recently saved version.
When file versioning is enabled, SONAR retains a list of previously saved project files in your project folder. The most recent version retains the original name of the project. Previously saved versions are saved with a time stamp following the original project name in order of most recently saved.
To Use File Versioning
- Choose Options > Global and click the Autosave and Versioning tab.
- Check the Enable Versioning Of Project Files check box.
- Use the spinner to select the number of versions of your project you would like SONAR to keep.

Note: If you exceed the maximum number of saved file versions selected in Step 3, the oldest version is discarded.
To Revert to a Previously Saved File
- Choose File > Revert.
A dialog box appears containing a list of dates and file sizes for all previously saved versions of the current project.
- Select the file version you want to work on.
3. Click OK.

Note: If the current project is unsaved at the time you choose File > Revert, you will be prompted with a warning that reverting the project will cause all unsaved changes to be lost. When the reverted project is loaded, the timestamp is stripped off, and the reverted project assumes the project's original name.
Labeling Your Projects
SONAR lets you attach subtitles, composer credits, copyright, and other information to your projects, as shown in the following table:
| Label Description | |
| Title | The title for your project; prints automatically at the top of a Staff view printout. |
| Subtitle | For a subtitle or dedication; prints directly below the title in a Staff view printout. |
| Instructions Use for performance instructions; prints flush left in a Staff view printout. | |
| Author | Put your name here if you are the composer. Prints flush right in a Staff view printout. |
| Copyright Copyright information prints flush right, under the author name, in a Staff view printout. | |
| Keywords Put keywords describing the project here for future reference. | |
| Comments Free text comments. Type as much as you like. You can enter approximately the same amount of text as you can in Windows Notepad. | |
Table 50.
This information is shown in the File Info dialog box, which is displayed using the File > Info command. If the File Info window is open when you save a file, then this window is displayed automatically the next time the file is opened. This is useful if you:
- Share files with others and want them to see special instructions when they open the file
- Want your copyright information to be displayed automatically
If the File Info window is closed when you save the file, it will not be automatically displayed the next time the file is opened.
Although you cannot use Edit menu commands while working in the File Info window, standard Windows hot keys like CTRL+X, CTRL+C, and CTRL+V can be used to cut, copy, and paste text.
To Display and Edit Project Information
- Choose File > Info to display the File Info window.
- Edit the information as desired.
Figure 45. The File Info window
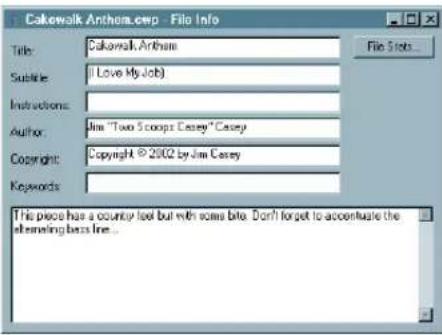
- If you want the File Info window to display automatically, save the file.
- Click Stats to see statistics about the contents of the file.
- Choose File > Print Preview if you want to print the project information
- Close the File Info window.
File Statistics
To open the File Statistics dialog, select File > Info and click the Stats button in the File Info dialog. The File Statistics dialog box displays the following information about the contents of the project file:
| Statistic What it means |
| Created The date the project was first saved. |
| Editing time The total time you've had the project open, from the time it was created to the last time it was saved. This does not include time spent editing the project since you last saved it. If you want to update this value, save the project. |
| Revision Each time you save a file that has been changed, this number is incremented. If you open a project, make no changes, then save it, the revision number is not changed. |
| Events The total number of events in the project. |
| Sample rate The sample rate for digital audio. |
| Bit depth The audio driver bit depth of digital audio. |
| File version The SONAR version number. |
Table 51.
Arranging and editing
The Track view makes it easy to arrange and mix your projects from a single view. From one location, you can select, copy, move, mix, and rearrange the parts of your project, using menu commands or drag-and-drop tools. You can add real-time audio and MIDI effects from the Effects bin and buses. Markers provide easy-to-use reference points and labels for the different parts of your project, and the snap grid makes it easy to align your clips to the desired time points. Slip-editing allows you to non-destructively change the start and/or end time of a clip, just by dragging its borders. With Groove clips, you can easily create repetitions of your clips using your mouse. Both the Track view and Console view have a full set of record and playback meters, which you can configure in several ways. SONAR also has a variety of tools and commands for changing the tempo of your project. Composite tracks allow you to keep all your takes in one track if you want, and selectively mute and solo the various clips in the track. Track folders let you edit multiple tracks at once and conserve screen space.
Arranging Tracks
Working with Track Templates
Track Icons
Arranging Clips
Working with Partial Clips
Markers and the snap grid
Working with Linked Clips
Splitting and Combining Clips
Take Management and Comping Takes
Clip Muting and Isolating (Clip Soloing)
Track Folders
Adding Effects in the Track View
Changing Tempos
Undo, Redo, and the Undo History
Slip-editing (Non-destructive Editing)
Arranging Tracks
SONAR provides a variety of commands that let you work with the tracks in your project. Here are some of the things you can do:
| You can Here's why | |
| Rearrange the tracks in the Track view so that they appear in a different order | This makes it easier to see and work with a subset of tracks, like the rhythm section, or the vocals and vocal backing tracks, or all muted tracks. |
| Hide individual tracks | This makes it easier to work in a large project. You can display only the tracks you want to see at a given time. |
| Move tracks into a track folder Lets you group tracks by function, edit several tracks at once, hide groups of tracks easily, and mute, solo, archive, arm, or input monitor a group or tracks with one click. See “Track Folders” on page 334 for more information. | |
| Make copies of a track | Copying a track and then adding a time offset or changing the patch is an easy way to double a part. You can also copy and then transpose a track to add harmony. |
| Erase or delete a track | Tracks and clips that you are no longer using in your project are distracting and take up space in your project file. |
Table 52.
All the commands you use to arrange tracks work on selected tracks. The current track (the one with the lighter titlebar) is always selected. You can select additional tracks as shown in the table:
| To do this Do this | |
| Select a track Click the track number (click the right side of the track number; the upper left corner of the track number is for grouping tracks) in the Track view. The track is selected, and all other tracks—except the current track—are deselected.When a track is selected, both the track number and all the data in the track appear highlighted. | |
| Select several adjacent tracks | Click the track number for the first track in the group, drag the mouse to the last track number in the group, and release the mouse button. |
| Select/deselect all tracks Double-click a track number. | |
| Add or remove a single track from the selection | Hold the SHIFT key and click the track number to add it to the selection; hold the CTRL key and click the track number to toggle its selection status. |
Table 53.
See:
Changing the Order of Tracks
Configuring the Display of Tracks in the Track View
Inserting Tracks
Copying Tracks
Erasing Tracks
Changing the Order of Tracks
There are several ways you can change the order of tracks in the Track view:
- Drag a track to a new position in the Track view.
- Use the Tracks > Sort command to rearrange the tracks in order based on the track name, status, or other setting.
To Drag a Track to a New Position
- Position the mouse just to the right of the track number, over the track icon of the track you want to move.
The cursor changes to an up/down arrow.
- Drag the track to its new location, and release the mouse button.
SONAR rearranges and renumbers the tracks.
You can sort the tracks in a project based on several parameters, in either ascending or descending order:
| Sort by What happens | |
| Name Ascending puts track in alphabetic order, descending puts them in reverse order | |
| Size, output, or channel | Ascending puts them in increasing numeric order, descending puts them in decreasing numeric order |
| Muted, archived, selected | Ascending puts qualifying tracks at the end, descending puts them at the beginning |
Table 54.
No matter how you sort, blank tracks always go to the end of the list.
Note that track numbers are used for reference only. When you re-arrange the order of tracks, they are automatically assigned sequential numbers based on the order in which they are displayed in the Track view.
To Sort the Tracks
- Choose Tracks > Sort to display the Sort Tracks dialog box.
- Choose the attribute by which to sort from the Sort By list:
| Attribute How it works | |
| Name | If you choose this attribute, SONAR puts the tracks into alphabetical order, either ascending or descending, depending on what you choose in the Order list. |
| Muted If you choose this attribute, SONAR puts all the muted tracks at either the top or bottom of the Tracks window, depending on whether you choose descending (top) or ascending (bottom) in the Order list. | |
| Archived | If you choose this attribute, SONAR puts all the archived tracks at either the top or bottom of the Tracks window, depending on whether you choose descending (top) or ascending (bottom) in the Order list. |
| Selected | If you choose this attribute, SONAR puts all the selected tracks at either the top or bottom of the Tracks window, depending on whether you choose descending (top) or ascending (bottom) in the Order list. |
| Size | If you choose this attribute, SONAR puts the tracks in order by size, either in descending or ascending order. |
| Output If you choose this attribute, SONAR sorts the tracks by output number, either in descending or ascending order. SONAR considers non-numbered outputs to have lower numbers than numbered outputs. | |
| Channel | If you choose this attribute, SONAR sorts the tracks by channel number, either in descending or ascending order:If you choose ascending order, SONAR puts all MIDI tracks at the bottom of the Tracks window, with the lower channel numbers first.If you choose descending order, SONAR puts all MIDI tracks at the top of the Tracks window, with the higher channel numbers first. |
Table 55.
-
Choose the order in which to sort from the Order list.
-
Click OK.
SONAR sorts the tracks according to the settings you chose.
Inserting Tracks
You can insert new tracks by a variety of methods. When you insert multiple tracks, you can set track output properties at the same time. If you want new audio tracks to always use the same output bus, you can set that bus as the default bus.
For step-by-step instructions, follow these procedures:
To Insert a Single Track
- Click the Insert New Tracks or Buses button that's in the Track View toolbar, and choose options from the pop-up menu. Or
- Right-click in the Track pane at the place where you want to insert a track, and select Insert Audio Track to add an audio track or Insert MIDI Track to add a MIDI track. Or
- Press INSERT to add a track of the same type (audio or MIDI) as the current track.
SONAR shifts the current track and all tracks below it down by one, and inserts a blank, new track at the location of the highlight.
To Insert Multiple Tracks
- Use the Insert > Multiple Tracks command to open the Insert Tracks dialog.
-
If you want to insert audio tracks, do the following:
-
Fill in the number of audio tracks you want to insert in the Audio section's Track Count field.
- Pick a main audio output for the tracks in the Main Destination field.
- If you want the main output that you chose to be the default output for new audio tracks, enable the Set as Default Bus check box. You can also choose the default bus by right-clicking a bus, and choosing Set as Default Bus from the pop-up menu.
-
If you want your new audio tracks to contain a Send module that outputs to a specific bus, choose the bus in the Send field. If you choose None, the new audio tracks will not contain a Send module.
-
If you want to insert MIDI tracks, do the following:
-
Fill in the number of MIDI tracks you want to insert in the MIDI section's Track Count field.
- Pick a MIDI output for the tracks in the Port field.
-
Pick a MIDI output channel for the tracks in the Channel field.
-
Click OK to insert your tracks, or click Cancel to cancel the operation.
Your new tracks appear below any pre-existing tracks, with new audio tracks appearing above new MIDI tracks.

Note: You can also choose the default output bus for new audio tracks by right-clicking a bus, and choosing Set as Default Bus from the pop-up menu.
Configuring the Display of Tracks in the Track View
There are several commands in the Zoom tool drop-down menu that allow you to configure the appearance of your tracks in the Track view. You can use these commands to zoom in or out, show
or hide any combination of tracks, and revert back to previous display settings. The following table lists each of these commands and provides an explanation of each:
| Command Description Shortcut | ||
| Show and Fit Selection This command hides all tracks which are not selected. The remaining tracks are adjusted in size vertically and horizontally to fit in the Track view, without scrolling if possible. All track selections are lost after this command is executed. | SHIFT+S | |
| Fit Tracks to Window All currently displayed tracks are adjusted in size vertically to fit in the Track view, without scrolling if possible. | F | |
| Fit Project to Window | This command resizes all tracks both vertically and horizontally to fit in the Tracks view. | SHIFT+F |
| Lock Height This command maintains the track's height when you use a zoom or fit command. See “To Lock or Unlock the Height of a Track” on page 292. | n/a | |
| Show Only Selected Tracks | This command hides all tracks which are not selected. The remaining tracks are adjusted in size vertically. | H |
| Hide Selected Tracks Hides all selected tracks. SHIFT+H | ||
| Show All Tracks | Shows all tracks in your project, including these hidden using the Track Manager. | A |
| Track Manager | Opens the Track Manager dialog. For more information about the Track Manager dialog, see Track Manager dialog. | M |
| Undo View Change This command restores the view to its previous state. There are up to 16 levels of undo. | U | |
| Redo View Change This command restores the view to the state prior to the Undo View Change command. | SHIFT+U | |
| Vertical FX Bins Changes track FX bins from vertical position into horizontal FX fields located with other track property fields. | n/a | |
Table 56.
To Lock or Unlock the Height of a Track
- Right-click an empty area in one of the desired track's controls to display the Track pane context menu.
- Choose Lock Height from the menu.
When a track is locked, the Maximize Strip button in the track appears filled-in:

A. Maximize Strip button
When you lock the height of a track, its height does not change when you use a Zoom or Fit command. When a track's height is locked, you can still drag the track strip's lower border to adjust the track's height. After you drag the border, the altered track height becomes the track's locked height.
Copying Tracks
When you copy one or more tracks using the Tracks > Clone command, you can choose any of the following options:
• What to copy: events, properties, effects, sends
- Repetitions: how many copies of each selected track
- Starting track: where you want the first new track to appear
To Copy Tracks
- Select the tracks that you want to copy.
- Choose Tracks > Clone to display the Clone Track(s) dialog.
- Check the Clone Events, Clone Properties, Clone Effects, and/or Clone Sends boxes to indicate which items you want to copy.
- If you want copied events to become linked clips, check the Link to Original Clips check box.
- Select the number of repetitions of each selected track that you want to create.
-
Select the track number where you want the first new track to appear. The other new tracks appear right after it.
-
Click OK.
SONAR copies the tracks and pastes the selected tracks, with the first new track appearing at the track number you selected. All tracks appear consecutively.
Erasing Tracks
You can easily delete an entire track, including all of the track properties and all of its clips and events. Sometimes, you only want to erase, or wipe, the contents of a track, leaving the track properties as they are. If you delete or wipe a track by mistake, you can use Edit > Undo to restore the deleted material.
When you delete or wipe a track, the track information is not placed on the SONAR clipboard. To remove material from a track and place it on the clipboard, use the Edit > Cut command instead.
To Delete Tracks
- Select the tracks you want to delete.
- Choose Tracks > Delete.
SONAR deletes the selected tracks. You can also right-click individual tracks and choose Delete Track from the pop-up menu.
To Wipe Tracks
- Select the tracks you want to wipe.
- Choose Tracks > Wipe.
SONAR deletes all clips and events from the selected tracks, but leaves the track properties intact.
Working with Track Templates
You can create an unlimited number of track templates for quickly recalling your most often used track settings including the following:
- Track type (MIDI or Audio)
- Mute, Solo and Record state
- Hardware input
- Output destination
- Bus send settings
- Track parameters
- Track icons
• Effects and their settings
• Instrument and Bank/Patch - Track name
To Create a Track Template
- Select the track or tracks you want to save as a preset.
- Select File > Export > Track Template from the main menu.
The Save As dialog appears.
- Enter a name for the template and click Save.
Track templates use the file extension .cwx.
To Insert a Track or Tracks from a Template
- Select Insert > Insert From Track Template > [track template name] or select More Track Templates if you don't see the one you want on the menu.
Or
- Right-click in the Tracks pane and select Insert From Track Template > [track template name]
or select More Track Templates.
This inserts tracks that are exactly like the template. If you don't want to use all of the track characteristics that are in the template, you can filter the characteristics that you don't want by selecting Import Filter from the pop-up menu. This opens the Track Template Import Options dialog, which allows you to specify what track characteristics you want to import.

Note: If the template you insert contains buses, using the Edit > Undo command after you insert the template will remove the new tracks, but not the new buses. If you don't want to insert buses, deselect buses in the Track Template Import Options dialog before you insert a template. You can delete a bus by right-clicking just left of the bus name, and selecting Delete Bus from the pop-up menu.
Track Icons
Track icons allow you to quickly identify a track's contents by instrument. You can assign a new track icon, create your own track icons, and save an icon as part of a track template.
To Show or Hide Track Icons
- To show or hide Track Icons in all views, use the Options > Icons > Show Icons command.
- To show or hide Track Icons in a specific view, use the Options > Icons > [name of desired view] > Show Icons command.
Or
- To hide a track icon, right-click a track icon in the desired view, and choose Show Icons from the pop-up menu. This option is not available in Track view headers.
To Configure Track View Icons
- To show standard track icons in the header of each track in the Track view, use the Options > Icons > Track View > Show in Header command.
- To show custom track icons in the header of each track in the Track view, use the Options > Icons > Track View > Show Custom In Header command.
- To show track icons on the left side of the track controls of each track in the Track view, use the Options > Icons > Track View > Show In Strip command.
To Change the Size of Track Icons
- Right-click a track icon in the desired view, and choose Small Icons or Large Icons from the pop-up menu.
Or - Select Options > Icons > [name of desired view] > Small Icons or Large Icons from the main menu
- Select Small Icons or Large Icons from the menu that appears.
To Change a Track Icon
- Right-click on the icon you want to change.
- Select Load Track Icon from the menu that appears.
The Open dialog appears. -
Select an icon and click Open.
Or -
Put the focus on the track you want to change.
- Use the Tracks > Property > Icon > Load Icon command.
The Open dialog appears. - Select an icon and click Open.

Note: The right-click option is not available when you right-click a track icon in a track header in the Track view. However, you can load a new track icon into a track header by ALT-clicking the track icon to display the Open dialog, and then choosing a new icon. You can ALT-click a track icon in any view to display the Open dialog.
To Reset a Track Icon to its Original Icon
- Right-click on the icon you want to reset.
-
Select Reset Track Icon from the menu that appears.
Or -
Put the focus on the track you want to change.
- Use the Tracks > Property > Icon > Reset Icon command.
To Create a Track Icon
- Create or edit a graphics file in .bmp format, preferably 128 by 128 pixels.
You can use any image as a track icon. You can use any size image, but for best results scale the image to 128 pixels square. Images must be in the .bmp format. - Save the image as a .bmp file in the Track Icons directory in your SONAR program folder.
Track Icon Size(s) and Transparency
You can configure the size of small and large icons in Cakewalk.ini. By default, small icons are 32x32 pixels and large icons are 48x48 pixels. Use the following INI variables to change the default size:
[WinCake]
SmallIconHeight=32
LargelconHeight=48
If you wish to create custom track icons, we recommend that you author them as 96x96 pixel 24-bit bitmaps (.BMP).
The top left pixel in the BMP determines the transparent color. If you prefer to not have transparent icons, add the following variable to Cakewalk.ini:
[WinCake]
IconTopLeftPixelTransparent=0
When transparency is enabled, the global color entry (Options > Colors) called "Track View Icons Background" determines the background color ("Console Strips Icons background" does the same for the Console view and Track Inspector).
Configuring Track View Controls
The Track view strips no longer have a special header section:
- The Number, Name, Peak Meter Indicator and Size buttons still have fixed placements in the top row of the strip.
- All other parameter controls now flow over the full available space in the entire strip.
As a result:
- The MSR buttons (and the Automation Read/Write) buttons follow the same layout rules as any other parameter widget.
- The Vertical VU meter spans the full height of the strip. So even when a strip is minimized, you can still see a 22 pixel high meter.
- The min track height has been slightly increased from 18 to 22 pixels.
- SHIFT-clicking on the minimize or maximize buttons in a Track view strip resizes that strip to its default height.
You can hide, reorder, and visually group the controls in tracks and buses. You can also control how the display tabs at the bottom of the Track pane function.
Changes you make to tracks affect tracks of the same kind in all projects. In other words, the way you configure a MIDI track controls the display of all MIDI tracks in all projects. The way you configure an audio track controls the way all audio tracks appear in all projects. The way you configure a bus controls the way buses appear in all projects. Synth audio tracks follow audio track configuration, and synth MIDI tracks follow MIDI track configuration.
You can reorder each individual control with the exception of AUX controls: these all move as a group. For tracks with more than one send, all send controls move as one.
To Reorder a Track or Bus Control
- Hold down the ALT key, and drag the control that you want to move. A rectangle appears around the control you are dragging.
A small vertical insertion line appears just to the left of the area where the control will be placed.
- Release the mouse button at the location where you want the control to appear.
The control moves to the location where you dropped it.
To Restore the Default Order
- Right-click the kind of track that you want to restore to the default order, and choose Restore Default Widget Order from the pop-up menu. If you want to restore buses to the default order, right-click a bus. Surround buses are separate from stereo buses.
To Configure Track and Bus Tabs
- Right-click a tab, and choose Widget Tab Manager from the pop-up menu. The Widget Tab Manager dialog appears.
- In the Tab Name field, choose the tab that you want to configure, or choose
, and type a name to create a new tab. - In each of the four Strip columns (Audio Strip, MIDI Strip, etc.), check all the controls you want to see on this type of tab in each track or bus type (Audio track, MIDI track, Bus, Surround Bus).
- To select all available controls, click Select All Widgets; to select the default controls, select Restore Tab Defaults (this will delete any new tabs you've created).
- To configure a different tab, select it in the Tab Name field.
- Click OK to implement your changes, or Cancel to delete them.
The order that a control (also called a widget) appears in is the same for all tabs in the same strip type. For example, if the pan control appears first on the Mix tab of audio tracks, it also appears first on any other tabs for audio tracks that display the pan control.
To Change the VU Meter to Horizontal or Vertical Display
- Click the drop-down arrow next to the Show/Hide Meters button , and choose either Horizontal Meters or Vertical Meters from the menu.
Track view control size and layout
It is possible to alter the default size and layout of the controls in the Track view. This requires adding entries to the Cakewalk.ini file.
This variable should be set in the [WinCake] section. For example:
[WinCake]
TVBoldStripNames=0
Below are the variables that affect the control appearance:
TVControlHeight=
Specifies the height of controls. The default height is 17 pixels. This value shouldn't be changed more than 1 or 2 from the default value, or you may experience unexpected results.
TVControlWidth=
Specifies the width of controls. The default width is 41 pixels.
TVControlSpacingX=
Specifies the horizontal space, in pixels, between controls. The default spacing is 3 pixels.
TVControlSpacingY=
Specifies the vertical space, in pixels, between controls. The default spacing is 3 pixels.
TVSpacingXInCluster=
Specifies the horizontal space between each button in a "cluster". The default value is 2 pixels. The following controls are grouped into clusters:
- Mute, Solo, Arm for Recording (MSR)
- Automation Read, Automation Write
• Phase, Interleave (mono/stereo)
TVBoldStripNames=<0 or 1>, default = 1
Specifies whether track/bus names use bold (value=1) or regular (value=0) font style.
TVLargeStripNames=<0 or 1>, default = 1
Specifies the size of track/bus names. The default size is large (value=1).
Arranging Clips
The Track view provides many ways for you to rearrange, copy, and paste clips to arrange your music the way you want. The easiest is to select the clips or portions of clips you want to arrange and then drag and drop them wherever you want. You can drag and drop clips in the Track view even while playback is in progress. You can also arrange clips via the clipboard using the Edit > Cut, Edit > Copy, and Edit > Paste commands, which work like those in almost all Windows programs.
The snap grid enables you to move clips to or by an exact amount of time, such as a quarter note or whole measure. See “To Change the Snap Options” on page 317.
Displaying Clips
Opening Views by Double-clicking Clips
Selecting Clips
Moving and Copying Clips
Displaying Clips
Clips are displayed as rectangles in the Clips pane. Their position and length show you at a glance their starting times and lengths. You can control four aspects of their appearance:
- Color. By default, each track's clips are drawn in a different color. The clip colors restart at the tenth track. You can customize the default colors of clips in the Configure Colors dialog or change the color of any individual clip in the Clip Properties dialog.

Note: In audio clips, the waveform changes color, unless no clip contents are displayed. In MIDI clips, the clip background changes color.
- Name. You can also assign each clip a descriptive name, which is displayed in the upper-left corner of the clip.
Contents. At your option, clips can be displayed with a graphical representation of the events in the clip. The effect is slightly different for MIDI and audio information.

A. A MIDI clip shows each event; by looking at the clips, you can "see" the notes that are being played B. An audio clip shows the actual waveform C. Controller or automation data are also displayed
To inspect the clip contents more closely, use the zoom tools to increase the size in which clips are displayed. Note that displaying the contents of each clip makes your computer work a little harder. As a result, if your computer has an older, slower CPU you may want to turn off the display of clip contents.:
Figure 46. Zoom controls

A. Zoom Clips pane out vertically B. Vertical Zoom fader for Clips pane C. Zoom Clips pane in vertically D. Zoom Bus pane out vertically E. Vertical Zoom fader for Bus pane F. Zoom in horizontally G. Horizontal zoom fader H. Zoom out horizontally
The Track view toolbar contains the Zoom tool:

To Zoom Horizontally
- Click the horizontal zoom buttons to zoom in or out by a fixed percentage each time you click. Or
- Drag the horizontal zoom fader to zoom in or out by the amount you drag.
Or
- Hold down the CTRL key and press the right arrow key (to zoom in) or the LEFT ARROW key (to zoom out).
To Zoom Vertically
- Click the vertical zoom buttons to zoom in or out by a fixed percentage each time you click.
Or
- Drag the vertical zoom fader to zoom in or out by the amount you drag.
Or
- Hold down the CTRL key and press the UP ARROW key (to zoom out) or the DOWN ARROW key (to zoom in).
To Zoom into a Selected Area
- Use the Zoom tool to drag-select an area of a clip or clips that you want to zoom to. When you release the mouse, the area you selected expands to fill the Clips pane window.
Zoom command keyboard shortcuts:
| To do this Use this shortcut | |
| Zoom in vertically CTRL+DOWN ARROW | |
| Zoom in horizontally CTRL+right arrow | |
| Zoom out vertically CTRL+UP ARROW | |
| Zoom out horizontally CTRL+LEFT ARROW | |
| Undo Zoom U | |
| Redo Zoom SHIFT+U | |
| Turn On Zoom tool (use the Zoom tool to select the area to zoom to) | Hold down Z |
| Display Now Time in Center of Clips Pane G | |
| Fit project to window SHIFT+F | |
| Fit tracks and buses to window F | |
Table 57.
To Zoom Using the Mouse Wheel (Fast Zoom)
- Hold down the ALT key and roll the mouse wheel forward to zoom in, backward to zoom out.
- Hold down ALT+SHIFT to intensify mouse wheel zoom effect.
- Hold down ALT+CTRL to adjust track scale (Track View Clips Pane only)
To Select Fast Zoom Options
- Select Fast Zoom Options from the Zoom tool drop-down menu.
The Fast Zoom dialog box opens.
-
Select the intensity of the Zoom effect in Zoom Factor by using the spinners or manually entering a value.
-
Select the vertical and horizontal Zoom focus.
-
Check or uncheck Simultaneous Vertical and Horizontal Zoom.
The default is for Simultaneous Vertical and Horizontal Zoom to be checked. If you uncheck it, Fast Zoom exhibits the following behaviors.
• ALT+Mouse Wheel zooms vertically
- ALT+SHIFT+Mouse Wheel zooms faster vertically
• CTRL+ALT+Mouse Wheel zooms horizontally
- CTRL+ALT+SHIFT+Mouse Wheel zooms faster vertically
- Click OK.
To Display Clip Names and Contents
- Right-click in the Clips pane, and choose View Options from the menu.
- Check the Display Clip Names option to show clip names, or leave it unchecked to hide them.
- Check the Display Clip Contents option to show clip contents, or leave it unchecked to hide them
- Click OK.
SONAR modifies the clips pane to show the information you want.
To Change Clip Names
- Select the clips you want to rename.
- Right-click on one of the selected clips and choose Clip Properties. SONAR opens the Clip Properties dialog box.
Figure 47. The Clip Properties dialog

- Enter a name for the selected clips, and click OK.
SONAR renames the selected clips.
To Change Clip Colors
- Select the clips whose color you want to change.
- Right-click on one of the selected clips and choose Clip Properties. SONAR opens the Clip Properties dialog box.
- Choose a color as follows:
| To do this Do this | |
| Use the default color Check the Default Color box | |
| Use a custom color | Click the Choose Color button and pick a color from the Color dialog box |
Table 58.
4. Click OK.
SONAR changes the color of the selected clips.
Using the Navigator View
The Navigator view displays a large part of your project so you can see an overview of your song. The Navigator view is a floating version of the Navigator pane found at the top of the Track view.
Track Rectangle
The Track Rectangle appears as a green rectangle within the Navigator view. The Track Rectangle indicates the section of your project which appears in the Clips pane of the Track view. You can move the Track Rectangle or change its size.
To Move the Track Rectangle
- Position your cursor inside the Track Rectangle until the icon changes to look like this: ✦.
- Click and drag the rectangle where you want and release.
To Change the Size of the Track Rectangle
- Click one of the nodes on the rectangle border.
- Drag to change the rectangle size.
To Change the Now Time in the Navigator view
- Hold down the CTRL key.
- Click where you want the Now Time to be.
Opening Views by Double-clicking Clips
By default, double-clicking a MIDI clip in the Clips pane opens a Piano Roll view for that track, and double-clicking an Audio clip opens the Loop Construction view for that track.
To Open a View From a Clip
- Right-click in the Clips pane, and choose View from the pop-up menu.
- Choose the type of view you want to work with from the submenu.
Selecting Clips
Before you move, copy, edit, or delete clips you need to select them. There are several ways to select whole clips, as shown in the table:
| To do this Do this | |
| Select a single clip Click on the clip in the Clips pane. | |
| Select several clips at once Drag in a rectangular pattern that touches each clip. | |
| Select all the clips in a track Click on the track number in the Track view. | |
| Select a portion of one or more clips | Press and hold the ALT key and drag across the clips. The Snap to Grid setting determines the size portion you can select. |
| Add clips to the selection | Hold the SHIFT key and either click on the clips or drag a rectangle around the clips. |
| Add or remove clips from the selection | Hold the CTRL key and either click on the clips or drag a rectangle around the clips. |
| Add or remove all clips in a track from the selection | Hold the CTRL key and click on the track number. |
Table 59.
Moving and Copying Clips
You can copy or move clips using drag-and-drop editing or the Cut, Copy, and Paste commands. If you copy or move clips into tracks that contain existing material, you need to let SONAR know how to combine the two.
You have these options:
| Option How it works | |
| Blend Old and New | Events in the copied or moved clip are placed into a new clip that overlaps with the existing clip. This is the same effect as sound-on-sound recording. |
| Replace Old with New | Events in the copied or moved clip are placed into a new clip, and any overlapping events in the existing clip are erased. This is the same effect as overwrite recording. |
| Slide Over to Make Room | The existing clips are shifted in time to make room for the new clips, so they will not overlap. If you check the Align to Measures option, shifted clips are always aligned to measure boundaries; otherwise, the clips are placed end to end. |
Table 60.
When you use the Edit > Paste command to add information to a track that contains existing material, there is one final option you can choose.
| Option What it means | |
| Paste as New Clips New clips are created containing the events on the clipboard, exactly as described in the preceding table. | |
| Paste into Existing Clips (MIDI clips only) | The events on the clipboard are merged into any existing clips that occupy the same region of time. This means you will never end up with clips that overlap. |
Table 61.
Note that if you copy or move clips to new, empty tracks, you don't have to worry about these settings. In this case, the track properties that go with the clips are automatically applied to the new track.
When you use drag-and-drop editing:
- You can set the above options every time you perform an edit, or you can set them once and have the same settings carry over automatically. Check or uncheck the Ask This Every Time box in the Drag and Drop Options dialog to indicate your preference. Open the Drag and Drop Options dialog by right-clicking in the Clips pane and choosing Drag and Drop Options from the pop-up menu.
- If you drag to the edge of the Clips pane, it will scroll automatically in the direction you drag.
- If you change your mind while dragging clips, press the ESC key to cancel the operation.
SONAR also lets you move and copy clips between projects.
To Move Clips Using Drag and Drop
-
Select the clips you want to move.
-
If you want to move the clips by an exact amount of time, enable the snap grid (see "To Change the Snap Options" on page 317).
- Position the mouse over one of the selected clips.
- Press and hold down the left mouse button. A rectangle is displayed around the selected clips.
- Drag the clips to their new location, and release the mouse button.
- If necessary, choose the options you want from the Drag and Drop Options dialog box (use Options > Global and open the Editing tab, or right-click in the Clips pane and select Drag & Drop Options from the menu that appears), and click OK.
Figure 48. The Drag and Drop Options dialog
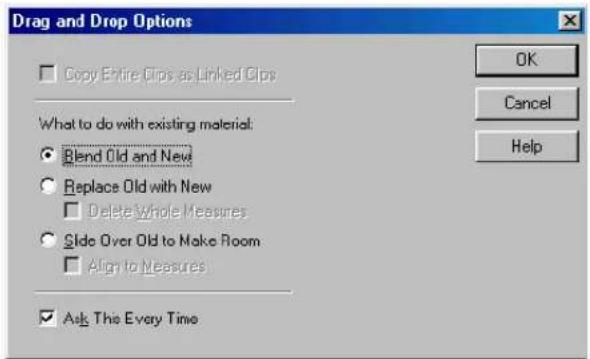
SONAR moves the clips to their new location.

Note: Moving an audio clip (other than a Groove clip) to a part of your project that has a different tempo changes the size of the clip.
To Move Clips Using Cut and Paste
- Select the clips you want to move.
- Choose Edit > Cut to display the Cut dialog box.
Figure 49. The Cut dialog
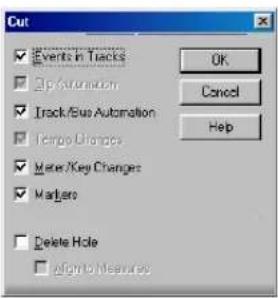
- Choose the options you want and click OK. SONAR cuts the clips from the project and places them on the Windows clipboard.
- Click in the Track pane to set the current track to be the one where clips should be pasted.
- Set the Now time to be the time at which the clips should be pasted.
- Choose Edit > Paste to display the Paste dialog box.
Figure 50. The Paste dialog

- Choose the options you want and click OK.
SONAR places the clips in their new location.
To Choose a Specific Start Time and/or Length for a Clip
- Select the clip you want to edit.
- Right-click on the selected clip and choose Clip Properties. SONAR opens the Clip Properties dialog box.
- Choose the units you want to use for the new start time and/or length by clicking one of the radio buttons:
• M:B:T. Click this if you want the clip to begin and end on a specific measure, beat, or tick.
- Samples. Click this is you want the clip to begin and end on a specific sample.
- H:M:S:F. Click this is you want the clip to begin and end on a specific hour, minute, second, or frame. This is also known as SMPTE time, and lets you start the clip at an absolute-time-based (as opposed to musical-time-based) point in your project.
- Seconds. Click this is you want the clip to begin and end on a specific second.
-
Enter a new start time and/or length, or use the spinners or keyboard to change values.
-
Choose a value in the Time Base field—choose one of the two options in this section to control what happens to the clip's start time when you change the tempo:
-
Musical (M:B:T). If the clip is set to the Musical time base, the clip's M:B:T position stays constant, and its Absolute (SMPTE) position shifts.
• Absolute (SMPTE). If the clip is set to the Absolute (SMPTE) time base, its Absolute position
stays constant, and its M:B:T position shifts.
Note: The length of a clip may also change when you change the tempo—audio clips maintain their absolute (SMPTE) length, while a MIDI clip will follow the value in the Time Base field. If a MIDI clip is set to use musical time, the clip maintains its M:B:T length. If a MIDI clip is set to use absolute time, the clip maintains its absolute length.
- Click OK when you are done.
SONAR adjusts the clip to the values you chose.
Note: The Snap Offset field is for audio clips only. The value of this field is the snap offset of the selected clip, in samples. When you set a snap offset value for a clip, and then drag the clip, the left edge of the clip does not snap to the current snap resolution--the clip snaps to a point on the clip that is the distance from the left edge of the clip to the snap offset value. For example, if you set the snap resolution to move to a measure, and the snap offset of a clip to 1500 samples, when you drag the clip, instead of the left edge of the clip moving to a measure line, the spot on the clip that's 1500 samples right of the beginning of the clip moves to the measure line.
To Copy Clips Using Drag and Drop
- Select the clips you want to copy.
- Enable the snap grid, if desired.
- Position the mouse over one of the selected clips.
- Press and hold the CTRL key and click and hold the left mouse button. A rectangle is displayed around the selected clips.
- Drag the clips to the new location, and release the mouse button.
- If necessary, choose the options you want from the Drag and Drop Options dialog box, and click OK.
SONAR copies the clips to their new location.
To Copy Clips Using Copy and Paste
- Select the clips you want to copy.
- Choose Edit > Copy to display the Copy dialog box.
- Choose the options you want and click OK. SONAR copies the clips to the Windows clipboard.
- Click in the Track pane to set the current track to be the one where clips should be pasted.
- Set the Now time to be the time the clips should be pasted.
- Choose Edit > Paste to display the Paste dialog box.
- Choose the options you want and click OK.
SONAR copies the clips to their new location.
To Delete Clips
- Select the clips you want to delete.
- Do one of the following:
- Choose Edit > Delete, which brings up a dialog box—choose options and click OK.
- Press the DELETE key.
SONAR deletes the selected clips.
See:
Splitting and Combining Clips
Working with Partial Clips
Working with Linked Clips
Reverting clip(s) to original time stamp
All audio and MIDI clips in SONAR have a Original Time property, which stores the original SMPTE time stamp associated with a clip. The Original Time clip property is based on absolute time, not tempo. This allows you to freely re-arrange clips and later revert them back to their original time.
SONAR automatically assigns the Original Time property during import or immediately after record. When an audio clip containing a SMPTE time stamp is imported into SONAR (such as a Broadcast Wave file), the Original Time field is populated with this time stamp. When opening previous SONAR projects, existing clips will be populated with their current time.

Note: The Original Time property can not be edited. If a clip is bounced to a new clip, the Original Time stamp will not propagate to the new clip.

A. Original Time property B. Click to revert clip to the original time stamp
To revert clip(s) to original time stamp
To revert selected clips to their original SMPTE time stamp, do one of the following:
- Choose Edit > Revert Clip(s) to Original Time Stamp.
- Right-click a clip and choose Revert Clip(s) to Original Time Stamp from the context menu.
- Open the Clip Properties dialog and click Revert. See Clip Properties dialog—General.
Locking Clips
You can lock a clip so that it can't be accidentally modified or deleted. You can lock the clip's position and/or its data.
To Lock or Unlock a Clip's Position and/or Data
- Right-click the clip, and choose Clip Properties from the pop-up menu to open the Clip Properties dialog.
- In the Clip Properties dialog, click the Lock check box.
-
If you're locking the clip, use the drop-down menu next to the Lock check box to choose what clip attributes you want to lock:
-
Position and Data. This choice locks position and data, and causes a lock icon to appear on the clip
- Position Only. This choice locks position only, and causes a yellow lock icon with the clasp unlocked to appear on the clip
-
Data Only. This choice locks data only, and causes a blue lock icon with the clasp unlocked to appear on the clip
-
Click OK.
Or
- Select a clip.
-
Use one of the following commands:
-
Edit > Clip Lock > Lock Position. In lock mode, this choice locks position only, and causes a yellow lock icon with the clasp unlocked to appear on the clip, If data is already locked, then both position and data become locked, and a “locked” lock icon appears on the clip. In unlock mode, if both position and data are locked, and you unlock position, then the blue “unlocked” lock icon appears on the clip, meaning that only data is locked.
- Edit > Clip Lock > Lock Data. In lock mode, this choice locks data only, and causes a blue lock icon with the clasp unlocked to appear on the clip. If position is already locked, then both position and data become locked, and a “locked” lock icon appears on the clip. In unlock mode, if both position and data are locked, and you unlock data, then the yellow “unlocked” lock icon appears on the clip, meaning that only position is locked.
Or
- Right-click a clip.
- From the pop-up menu, choose one of the following commands:
- Clip Lock > Lock Position. In lock mode, this choice locks position only, and causes a yellow lock icon with the clasp unlocked to appear on the clip. If data is already locked, then
both position and data become locked, and a "locked" lock icon appears on the clip. In unlock mode, if both position and data are locked, and you unlock position, then the blue "unlocked" lock icon appears on the clip, meaning that only data is locked.
- Clip Lock > Lock Data. In lock mode, this choice locks data only, and causes a blue lock icon with the clasp unlocked to appear on the clip. If position is already locked, then both position and data become locked, and a "locked" lock icon appears on the clip. In unlock mode, if both position and data are locked, and you unlock data, then the yellow "unlocked" lock icon appears on the clip, meaning that only position is locked.

Note: If a clip's position is locked, and you change tempo, what happens to the clip's position depends on what option the Clip Properties Time Base field is set to: Musical (M:B:T), or Absolute (SMPTE). If the clip is set to the Musical time base, the clip's M:B:T position stays constant, and its Absolute position shifts. If the clip is set to the Absolute time base, its Absolute position does not move, but its M:B:T position shifts.
Auto Scroll Lock in Clips pane
While editing, you can prevent the Clips pane from scrolling horizontally during playback. This allows you to focus on the edit location without worrying that the screen will eventually scroll away from the edit location.
When the Left Click Locks Scroll option is enabled (default behavior), the Clips pane will not scroll if you click any object in the Clips pane. When you are done with the edit and want the Clips pane to scroll again during playback, click in the background of the Clips pane to clear auto scroll lock.
To enable/disable auto scroll lock
- On the Options menu, click Clips Pane to open the View Options dialog.
- Select the Left Click Locks Scroll check box.
- Click OK to close the View Options dialog.
Figure 51. View Options dialog
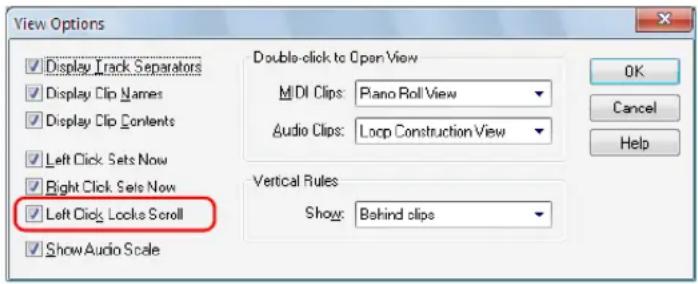
Nudge
Nudging is moving a clip or a MIDI note by a small amount to the left or right or up and down. There are three customizable settings for the Nudge feature. You can also nudge clips (in the Track view) or notes (in the Piano Roll view) up or down, and you can use keyboard shortcuts (see "To Nudge a Clip Using Keyboard Shortcuts" on page 313).
See: Nudge Settings
Nudge Settings
The Nudge tab in the Global Options dialog allows you to set the three Nudge settings.
To Nudge a Clip Left or Right
Use the following procedure to nudge a clip.
-
Select the clip you want to nudge.
-
Select Process > Nudge Left(1-3) from the menu to move the clip left or Process > Nudge Right(1-3) to move the clip right.
The amount the clip or note moves is determined by the settings in the Nudge tab of the Global Options dialog.
To Nudge a Clip Up and Down
Use the following procedure to nudge a clip (in the Track view) or MIDI note (in the Piano Roll view) up or down.
-
Select the clip or note you want to nudge.
-
Select Process > Nudge > Up to move the clip or note up or Process > Nudge > Down to move a clip or note down.
Clips move up or down one track at a time. Notes move up or down one pitch at a time.
To Change Nudge Settings
-
Select Process > Nudge > Settings to open the Nudge tab in the Global Options dialog box.
-
In one of the three Nudge groups, select one of the following:
- Musical Time. Select a note length setting.
• Absolute Time. Select one of the following absolute time options and a number in the first
field:
| Absolute time setting Description |
| Seconds Whole seconds. |
| Milliseconds Thousands of a second. |
| Frames Number of frames. The default frame count is 30 frames per second. The number of frames varies depending on the setting in the Project Options dialog's Clock tab. |
| Samples A very small amount of time. For CD-quality audio there are 44,100 samples per second, so a value of 1 here would not move a clip by a perceptible amount. |
| Ticks The number of ticks per quarter note varies depending on the setting in the Project Options dialog's Clock tab. The default setting is 960. |
Table 62.
- Follow Snap Settings. Moves the clip or note by the current snap setting.
To Nudge a Clip Using Keyboard Shortcuts
- Select the clip you want to nudge.
- If necessary, turn on Num Lock (press the Num Lock key on your keyboard).
- Press the appropriate Num Key.
| Nudge Shortcut | |
| Left 1 NumPad 1 | |
| Right 1 NumPad 3 | |
| Left 2 NumPad 4 | |
| Right 2 NumPad 6 | |
| Left 3 NumPad 7 | |
| Right 3 NumPad 9 | |
| Up NumPad 8 | |
| Down | NumPad 2 |
Table 63.
Working with Partial Clips
SONAR lets you select, copy, move, and delete portions of a project even if they do not match clip boundaries. There are two ways to do this:
- Directly select portions of one or more clips.
- Select a range of times and one or more tracks. SONAR automatically selects the portions of clips that are in both the selected time range and the selected tracks.
You can then copy, move, or delete the material the same way you do with whole clips.
When you select portions of a clip, SONAR may round off the start and end times of your selection based on the snap grid. For more information, see "Defining and Using the Snap Grid" on page 316.
To Select a Portion of a Clip
-
Press and hold the ALT key.
-
Drag the mouse across part of a clip.
SONAR highlights the selected portion of the clip. You can edit this portion of the clip using all the normal editing commands.
To Select a Portion of Several Clips
-
Press and hold the ALT key.
-
Drag the mouse across part of several clips in adjacent tracks.
SONAR highlights the selected portions of all the clips. You can edit these portions of clips using all the normal editing commands.
To Select Partial Clips Using Time Ranges and Tracks
-
Select a range of time in one of the following ways:
-
Drag the mouse in the Time Ruler.
- Click between two markers to select the time between the markers.
- Use the F9 and F10 keys to set the beginning and end selection times.
- Select a clip (SONAR selects the range of time covered by the clip).
-
Choose Edit > Select > By Time, enter the start and end time, and click OK.
-
Select one or more tracks by clicking, SHIFT-clicking, or CTRL-clicking on the track numbers in the Track view.
-
To adjust the start and end time of the selection, hold the SHIFT key while clicking on the Time Ruler.
The relevant portions of clips in the selected tracks are highlighted. You can edit these portions of clips using all the normal editing commands.
To Clear the Partial Clip Selection
You can clear the time-restricted selection in any of the following ways:
- Click in an empty area of the Clips pane to completely clear the selection.
- Choose Edit > Select > None or press CTRL+SHIFT+A to completely clear the selection.
- Click on a single clip in the Clips pane to clear the time selection and select the clip.
Markers and the snap grid
SONAR has a collection of features you can use to simplify and speed the work you do arranging your projects. Here are a few of the most important things you can do:
- Show gridlines on measure boundaries in the Track view.
- Define and use the snap grid to make drag-and-drop editing more accurate.
- Create markers to identify and work with key time points in your project.
See:
Showing gridlines
Defining and Using the Snap Grid
Snap Offsets
Creating and Using Markers
Showing gridlines
Displaying gridlines, or vertical rules, in the Clips pane of the Track view makes it easy to see at a glance how clips align with each other, how they align with measure boundaries, and when they start and end.
To show/hide vertical grid lines
- On the Options menu, click Clips Pane to open the View Options dialog.
- Under Vertical Rules, select one of the following options in the Show list:
- None. No vertical grid lines are displayed
- Behind Clips. Vertical grid lines are displayed, but clips will draw on top of them, so clip contents will not be obstructed.
- In Front of Clips. Vertical grid lines are displayed and drawn on top of clips, always visible.
- Click OK to close the View Options dialog.
Figure 52. View Options dialog
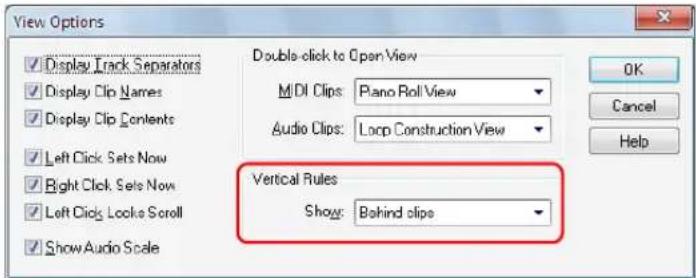
SONAR displays the Track view as you requested.
Defining and Using the Snap Grid
SONAR lets you define a snap grid that makes it easier to arrange clips, select time ranges, and control envelope shape drawing. To use the snap grid, enable the Snap to Grid button and set the grid resolution to an interval of musical time, such as a whole note, half note, or quarter note; a unit of absolute time: a number of frames, seconds or samples; an event; the start or end of a clip; a marker; or audio transients. The grid can use multiple resolutions at the same time, such as a whole note, and audio transients. When the Snap to Grid button is enabled, if you move or paste clips or markers, items will be snapped to the nearest point on the snap grid.
You can also use the snap grid to move clips by a certain interval, rather than snap them to the interval. Moving by an interval can be useful during drag-and-drop operations, if your data are not exactly aligned with measure or note boundaries.
The snap grid in each view is independent. For example, you can enable the snap grid in the Track view without enabling it in the Piano Roll or Staff views. You can also enable the snap grid in several different views, with different grid intervals in each one.
In the Clips pane, the snap grid in the Inline Piano Roll view is independent from the snap grid in Clips view. When you open the Snap to Grid dialog in the Clips pane, the dialog has separate tabs for Clips view and Inline Piano Roll view (called PRV mode in the dialog).
Magnetic snap. Cakewalk's snap grid has an option (on by default) called magnetic snap. This means that when you're dragging the boundary of an object, you can move the boundary freely until the boundary gets within a certain number of ticks from the snap target. The closer the object gets to the snap target, the more strongly the object is pulled to the target. You can set the strength of magnetic snap to low, medium, high, or off. Note that if you are zoomed out a certain amount, the time boundary around the snap target will appear to be quite small, and you might think that the snap grid is not functioning. If this is the case, zoom in closer to enhance your editing experience. If you're dragging a whole clip, magnetic snap is not in effect.
To Enable or Disable the Snap Grid
- To toggle the Snap to Grid button 📄 on or off, press N, or click the button.
To Change the Snap Options
- Click the down arrow in the Snap to Grid combo button or right-click on the Time Ruler and select Snap Properties from the pop-up menu to display the Snap to Grid window
Figure 53. The Snap to Grid window

-
If you open the Snap to Grid window in the Track view, the window contains two tabs: one for the Inline Piano Roll view (the PRV Mode tab), and one for the Clips pane (the Clips tab). Click the tab of the area that you will be editing in.
-
Select one or more of the following resolution options:
• Musical Time. Note intervals (whole, half, etc.)
- Absolute Time. A number of samples, frames, or seconds set by you (choose the units in the drop-down menu on the right)
• Events. Any data in a clip
• Clips. The start or end of any clip
- Markers. Any marker in a project
- Audio transients. These are represented by vertical grid lines, which you can display by using the AudioSnap Palette.
- Snap to Audio Zero Crossings. This option automatically snaps edited audio clips to the nearest zero crossing of the waveform, the point at which there is no volume, to minimize the glitches that can happen when waveforms are spliced together.
-
Select Move To to align data to the grid, or Move By to move data by the grid resolution.
-
If you want to change the magnetic snap strength, or turn off magnetic snap, select one of the buttons in the Magnetic Strength section.
-
If you're using the Snap to Grid dialog in the Track view, you can leave it open or close it while you edit. If you're using it in another view, click OK to close the dialog.
All time selections and drag-and-drop editing operations use the new snap grid resolution(s).
Snap Offsets
Snap offsets allow you to set a point other than the beginning of a clip as the "snap" point used by the Snap to Grid. A snap offset is the number of samples from the beginning of the clip. Snap offsets affect all edits that obey the Snap to Grid setting. Once the snap offset is added, you can set the Timer Ruler to SMPTE or MBT time.

Note: You cannot set a snap offset for a Groove clip.
Creating a Snap Offset
Use the following to add a snap offset to a clip:
- Locate the place in the clip where you want to put the snap offset, and set the Now Time to that location. Use the Scrub tool if necessary.
- Right-click on the clip and select Set Snap Offset to Now Time from the menu that appears.
Edits to that clip, when the Snap to Grid button is depressed, now snap to the snap offset rather than the beginning of the clip.
Deleting a Snap Offset
- Right-click on the clip and select Clip Properties from the menu that appears.
- In the Snap Offset field enter 0 (zero) and click OK.
Creating and Using Markers
Markers are a way of associating a name with a time point in your project. You use markers to name sections of a project, to mark hit points in a film score, or simply to provide a shortcut for working with any time point in a project. Markers make it easy to:
- Jump to a specific time point in a project.
- Select a portion of a project.
- Enter a time in any dialog box, by pressing F5 and choosing the marker you want.
You can see and work with markers in four ways:
- They are displayed in the Time Ruler at the top of the Track, Staff, and Piano Roll view.
- The Markers toolbar lets you add markers and jump to specific marker locations.
- The Markers view displays all markers and lets you add, edit, and delete markers.
- You can press F11 while playback is in progress to add a marker on the fly.
The time associated with a marker can be expressed in musical time or as a locked SMPTE time. If a marker has a musical time (measures, beats, and ticks), the marker stays at that musical time regardless of changes in tempo. If a marker has a locked SMPTE time (hours, minutes, seconds, and frames), the marker stays at the same time even when the tempo is changed. Locked markers
are useful for projects that require you to sync the music or sound with film scores or multimedia presentations. See “To Add a Marker” on page 319.
SONAR takes the current snap grid settings into account when you move or copy markers. For example, if the snap grid is set to even measure boundaries, any time you move or copy a marker, the marker will be snapped to the beginning of the nearest measure. You are allowed to have any number of markers at a single time point.
To display the Markers view, choose View > Markers or click 📋 on the Views toolbar. From the Markers view, you can use the File > Print and File > Print Preview commands to print a listing of markers.
Figure 54. The Markers view
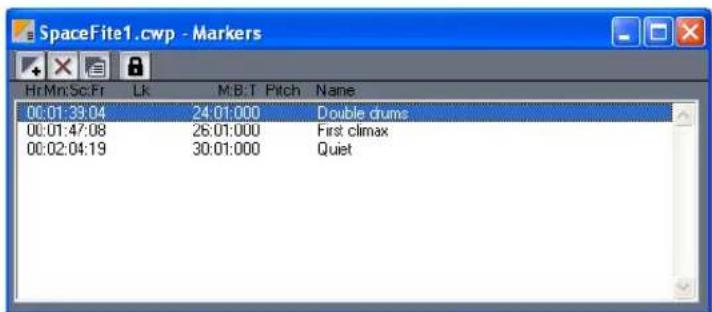
You can add markers while playback is stopped or while playback is in progress (on the fly). When you add a marker while playback is stopped, you can enter a name for the marker and either use the Now time or enter a different time. When you add a marker on the fly, the marker is named automatically and assigned the Now time. Using the Markers view, you can edit the names and times whenever you want.
To Add a Marker
-
Open the Markers dialog in one of the following ways:
-
Click in+the Markers toolbar.
- Press F11.
- Choose Insert > Marker.
- Click in the Markers view.
- CTRL-click in the marker section of the Time Ruler.
- Right-click in the Time Ruler and select Insert Marker.
SONAR displays the Marker dialog box.
Figure 55. The Marker dialog

- Enter a name for the marker in the Name box.
- The time is set to the Now time. If you want, use the spinners to change the time or type in a new marker time.
- Check the Locked to SMPTE box if you want to lock the marker to the SMPTE time.
- Click OK.
SONAR adds the marker and displays it in the Time Ruler, the Markers view, and the Markers toolbar.
To Add a Marker on the Fly
- Click in the Markers toolbar, or Press F11.
SONAR adds a marker at the Now time and displays it in the Time Ruler, the Markers view, and the Markers toolbar.
To Edit a Marker
- Either right-click on the marker in the Time Ruler, or choose a marker in the Markers view and click SONAR displays the Marker dialog box.
- Change the marker name, time, or other settings as desired.
- Click OK.
SONAR updates the marker in the Time Ruler and the Markers view.
To Copy a Marker
- Press and hold the CTRL key.
- Drag a marker in the Time Ruler of the Track view, Staff view, Tempo view, or Piano Roll view. SONARdisplays the Marker dialog box.
- Enter the desired marker settings and click OK.
SONAR copies the marker and displays it in the Time Ruler and the Markers view. You can also cut and paste markers directly from the Markers view.
To Lock or Unlock Several Markers
- In the Markers view, select one or more markers. Use the CTRL and SHIFT keys if necessary to modify the selection.
- Select or deselect 🔒
SONAR updates the markers.
To Move a Marker
- Drag the marker in the Time Ruler.
SONAR updates the marker time and shows it at the new location.
To Delete a Marker
-
Press and hold the left mouse button while pointing to a marker in the Time Ruler.
-
Press DELETE, and release the mouse button.
SONAR deletes the marker. You can use Edit > Undo if you make a mistake.
To Delete Markers from the Markers View
-
In the Markers view, select one or more markers. Use the CTRL and SHIFT keys if necessary to modify the selection.
-
Click or press DELETE.
SONAR deletes the selected markers. You can use Undo if you make a mistake.
To Jump to a Marker
There are many different ways to jump to a specific marker:
- Choose a marker from the drop-down list in the Markers toolbar to jump to that marker.
- Click the Now time in the Position toolbar, press F5 to display a list of markers, choose the marker you want, and click OK.
- Press F5 twice to display a list of markers, choose the marker you want, and click OK.
- Click on a marker in the Markers view to set the Now time to that marker.
- Click ▶ or ▶ in the Markers toolbar to jump to the next or previous marker.
- Choose Go > Next Marker or Go > Previous Marker to jump to the next or previous marker.
To Select a Time Range Using Markers
You can select a range of times by clicking in the marker section of the Time Ruler:
- Click to the left of the first marker to select the time between the start of the project and the first marker.
- Click to the right of the last marker to select the time between the marker and the end of the project.
- Click between two markers to select the time between the markers.
- If looping is enabled, click to the right of the Loop Start marker to select the loop region
- If punch recording is enabled, click to the right of the Punch In marker to select the punch region

Tip: If you press TAB or right-click while holding down the left mouse button over the markers, you can toggle through which of the overlaid markers you'd like to move.
For example, if the Now Time marker, a regular Marker, a Loop point, and a Punch point are all at measure 5, pressing Tab (while holding down the left mouse button) toggles through T (Now Time), M (regular), L (Loop), and P (Punch). If you want to change the regular marker, simply drag the mouse when M is displayed; if you want to adjust the position of the Loop point, tab through to L, and so on.
TAB to transients
You can use the TAB and SHIFT+TAB keys to jump to audio transients, and MIDI Note events. Tabbing is only possible when the transport is not rolling.
TAB to transients is selection-based, which means tabbing will go to the next/previous transient amongst all selected clips. If there is no selection, tabbing operates on the current track.

Note: When using the Free Edit Point, TAB to transients always operates on the current track, regardless of selection.
To move the Now Time to the next transient
- Press TAB.
To move the Now Time to the previous transient
- Press SHIFT+TAB.
TAB to transients landmarks
The following table shows how TAB to transients applies to different SONAR clip types.
Clip type TAB target
Audio Groove clips. Each slice.
| "Stretch to tempo" clips (clips that are not groove clip looped but use groove clip for rendering). | Each slice. |
Regular audio clips. Each transient as detected by AudioSnap.
| Slip stretched audio clips. | Each transient as detected by AudioSnap, scaled to the stretch amount so tabbing continues to line up perfectly. |
Table 64. TAB to transients landmarks
Clip type TAB target
MIDI clips. Each Note event (MIDI Controller data is ignored).
Note: If there are multiple Note events at the exact same tick position, only one of the notes will be tabbed to.
MIDI Groove clips. Each Note event.
Step Sequencer clips. Each step that contains a note.
Table 64. TAB to transients landmarks (Continued)
TAB to transients in the Piano Roll view
In addition to the Track view inline Piano Roll, TAB to transients also works in the Piano Roll view. If multiple tracks are displayed in the Piano Roll view, tabbing only operates on the current track.
Working with Linked Clips
SONAR makes it easy to repeat a pattern over and over using a feature called linked clips. Linked clips always have the same contents, name, and display color. Any change you make to the internal contents of one of the clips, such as adding or editing notes or effects, automatically applies to all of them. Any number of clips may be linked with each other.
To create linked clips, copy the clips and when pasting, check the Linked Clips option in the Paste dialog box or the Drag and Drop Options dialog box. Linked clips are displayed with a dotted border, so they are easy to spot. You can also identify linked clips using the Clip Properties dialog box or the Select All Siblings (available in the Clips pane pop-up menu) command. You can easily unlink linked clips, and then edit them individually. You have two options when unlinking linked clips:
Option How it works
New linked group The clips you selected will still be linked to each other, but won't be linked to any clips that are not selected
Independent Every selected clip will be completely independent
Table 65.
Once you have unlinked linked clips, you cannot re-link them except by using Edit > Undo.
If you attempt to copy only a portion of a linked clip, the copy will not be linked to the original. Copies of a clip can be linked to the original only when you select and copy the entire clip.
To Make Linked Copies of a Clip Using Drag and Drop
- Right-click in the Clips pane and choose Drag & Drop Options to display the Drag and Drop Options dialog box.
-
Check the option labeled Copy Entire Clips as Linked Clips.
-
Click OK.
- Select the clips you want to copy.
- Position the mouse over one of the selected clips.
- Press and hold down the CTRL key.
- Press and hold down the left mouse button. A rectangle is displayed around the selected clips.
- Drag the clips to their new location, and release the mouse button.
- If necessary, confirm the options in the Drag and Drop Options dialog box, and click OK.
SONAR creates copies of the selected clips that are linked to the originals. Any change you make to one of the clips is applied to all linked clips, including the original clip.
To Make Linked Copies of a Clip Using Copy and Paste
- Select the clips you want to copy.
- Choose Edit > Copy to display the Copy dialog box.
- Choose options as desired and click OK. SONAR copies the clips to the Windows clipboard.
- Click in the Track pane to set the current track to be the one where clips should be pasted.
- Set the Now time to be the time at which the clips should be pasted.
- Choose Edit > Paste to display the Paste dialog box.
-
In the Paste dialog, choose one of two options:
-
Linked Repetitions. If you choose this option, only the new copies of the original clip are linked together. Edits you make to the new copies do not affect the original, and vice versa.
-
Link to Original Clip(s). If you choose this option, the new copies and the original clip are linked together. Edits you make to any of the linked clips, including the original, affect all other linked clips in the group.
-
Choose the other options you want and click OK.
SONAR creates copies of the selected clips that are linked in the way you chose.
To Unlink Linked Clips
- In the Clips pane, select the clips you want to unlink.
- Right-click on any selected clip and choose Unlink from the pop-up menu. SONAR displays the Unlink Clips dialog box.
- Choose the unlink option you want, and click OK.
SONAR unlinks the clips and updates the Clips pane accordingly. From now on, any changes you make to one of the clips are applied only to remaining linked clips, if any.
To Select the Clips That Are Linked to Another Clip
- Select one or more clips in the Track view.
- Right-click on any selected clip and choose Select All Siblings from the pop-up menu.
SONAR selects any clip that is linked to one of the currently selected clips.
Splitting and Combining Clips
SONAR provides several commands that are used to split and combine clips. Specifically, you can:
- Split a clip into several smaller clips
- Create a new clip from a selected portion of an existing clip
- Combine adjacent or overlapping clips into a single, longer clip
The following table summarizes the commands you can use:
| To do this Use this command Notes | ||
| Split clips into parts | Edit > Split | Works on all selected clips. You can also press the s key to split all selected clips at the Now Time. |
| Combine several clips into one | Edit > Bounce to Clip(s) | If the selected clips are in separate tracks, one clip is created for each track. All clip automation is applied destructively to the new clip. |
Table 66.

Note: Combining a stereo and mono clip always produces a stereo clip.
The Split command lets you split clips four different ways:
| Option How it works | |
| Split at Time | Splits selected clips at a specific point in time. By default, the split occurs at the Now time, but you can choose any time you want. |
| Split Repeatedly | Splits selected clips at regular intervals, beginning at a specified time, with a specified duration. For example, you could split a long clip into 4-bar clips starting at measure 5. |
| Split at Markers | Splits selected clips at any marker location. This option is available only if your project has markers. |
| Split when Silent Removes “silent” stretches of one measure or more from selected clips. The presence in a measure of any event—including those that make no sound, such as a patch change or lyric event—will cause that measure to be retained. | |
Table 67.
While the Split command works for both MIDI and audio clips, for audio clips, the Split command provides sample accurate editing and snap-to-zero capability.
Note that the Edit > Undo and Edit > Redo commands work with all three of these editing commands.
To Split Clips into Smaller Clips
- Select the clips you want to split.
- Right-click on any selected clip, and choose Split from the pop-up menu. SONAR shows the Split dialog box or press the S key to split the clip(s) at the Now Time.
- Choose the Split option you want to use, and enter the settings you want to use.
- Click OK.
Or
- Select the clips you want to split.
- Set the Now Time to the time you want to split the clips.
- Press the S key.
SONAR splits the selected clips according to your instructions.
To Combine Clips
- Select the clips you want to combine (the clips must be on the same track).
- Right-click on of the clips and select Bounce to Clip(s) from the pop-up menu.
SONAR combines the selected clips into a single, new clip.
Take Management and Comping Takes
By default, SONAR stacks any overlapping clips on top of each other, but you can choose to display them in separate layers (lanes) in the same track. When you store clips in separate layers, it's easy to mute and solo them individually and eventually come up with a composite take, with only the best clips playing back. You can also mute and solo whole layers.
When you use loop recording, you can store all your takes in the same track, and then use the Mute tool or Audition (Selection Playback) to hear only the ones you want.
If you enable a track's Show Layers option, SONAR stores the track's clips in separate layers whenever any of the following happens:
- You use loop recording in Sound on Sound mode, and choose to store takes in a single track.
- You record over some pre-existing data while in Sound on Sound mode.
- You enable the Tracks > Show Layers menu option for a track that contains at least one overlapping clip.

Note 1: You can create as many layers as you want.

Note 2: A multi-layer layer track has only one set of track automation envelopes.
For step-by-step instructions, see the following procedures:
To Enable or Disable the Multi-layer Option
- For single tracks, you can right-click the Track Scale, and choose Show Layers from the pop-up menu, or use the Layers > Show Layers command on the Track pane right-click menu, or click the Track Layers On/Off button.
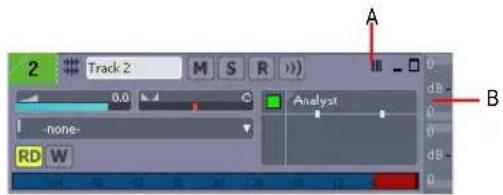
A. Track Layers On/Off button B. Track Scale before showing layers
- For multiple tracks, select the tracks you want to configure by CTRL-clicking the track number of each track, and use the Tracks > Layers > Show Layers menu option.
When the option is first enabled, SONAR moves all overlapping clips in the affected tracks to separate layers, and displays Mute and Solo buttons on the Track Scale for each layer.
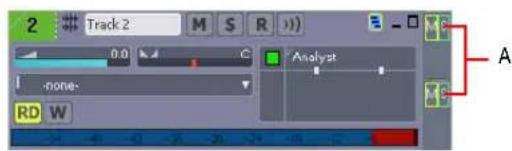
A. Track Layers Mute and Solo on/off buttons
After the option is enabled, you can move clips on top of each other without creating new layers. To move overlapping clips back into separate layers, use the Rebuild command (see below).

Note 1: If you want to move a clip to the exact same time placement in an adjacent layer, hold the SHIFT key down while you drag.

Note 2: If the Automatic Crossfades button is enabled, SONAR adds a crossfade between any newly overlapped clips that are on the same layer.
To Mute or Unmute One or More Layers
- On the Track Scale, click the M button that's at the same vertical level as the layer you want to mute or unmute. You can drag across multiple mute buttons to mute or unmute multiple layers.
Note: If you mute a layer and then disable the Show Layers feature, the Track Scale displays a small blue indicator to show that a hidden layer is muted:
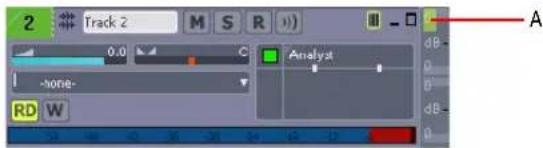
A. Hidden layer mute indicator
To Solo or Unsolo a Layer
- On the Track Scale, click the S button that's at the same vertical level as the layer you want to solo. You can solo one layer at a time.
Note: If you solo a layer and then disable the Show Layers feature, the Track Scale displays a small yellow indicator to show that a hidden layer is soloed:

A. Hidden layer solo indicator
To Rebuild Layers
- To rebuild layers (move overlapping clips to separate layers) in a single-track, right-click the Track Scale and choose Rebuild Layers from the pop-up menu.
- For multiple tracks, select the tracks you want to rebuild, and use the Tracks > Layers > Rebuild Layers command.
To Remove Empty Layers
- To remove empty layers in a single-track, right-click the Track Scale and choose Remove Empty Layers from the pop-up menu.
- For multiple tracks, select the tracks you want to compact, and use the Tracks > Layers > Remove Empty Layers command.
To Add an Empty Layer to a Track
• Right-click the Track Scale at the position where you want the new layer, and choose Insert
Layer from the pop-up menu.
To Delete a Layer from a Track
- Right-click the Track Scale at the position where you want to delete a layer, and choose Delete Layer from the pop-up menu.
To Select a Layer
- Right-click the Track Scale at the same vertical position where the desired layer is, and choose Select Layer from the pop-up menu. You can de-select the layer by clicking an empty area of the Clips pane.
To Loop Record Multiple Takes into Separate Track Layers
- Use the Transport > Record Options command to open the Record Options dialog.
- Under the Recording Mode options, choose Sound on Sound (Blend).
- Under Loop Recording, choose Store Takes in a Single Track, and click OK.
- Make sure that the armed track has its Show Layers option enabled.
- Set your loop boundaries and start recording multiple passes through the looped area.
- Stop recording.
When you finish recording, SONAR displays all your takes in separate layers in the recording track.
To Crop Overlapping Clips to Eliminate Overlap
- In a multi-layer track, move either the Select tool or the Mute tool between two overlapping clips until the cursor turns into the overlap cropping tool.

A. Overlap cropping tool
- In the space between the clips, click the spot where you want the first clip to end and the second one to begin. SONAR crops both clips so that they no longer overlap.
See:
Clip Muting and Isolating (Clip Soloing)
Clip Muting and Isolating (Clip Soloing)
Together with multi-layer tracks, clip muting and isolating (clip soloing) make it easy to build a composite take from multiple takes.
With the new Mute tool 🔒, that's in the Track view toolbar, SONAR offers two styles of clip muting:
- Default style. After you activate the Mute tool, you can drag through time ranges to mute all or part of a clip: dragging through the bottom half of a clip mutes the time range you drag through; dragging through the top half of a clip unmutes the range you drag through. The default setting in the Mute tool drop-down menu produces this behavior (you'll see a checkmark next to Mute Time Ranges under Click+Drag Behavior). If you want to temporarily switch to the Alternate style (see below), hold down the ALT key while you click.
- Alternate style. Use the Mute tool to mute or unmute entire clips by clicking clips instead of dragging through time regions. A clip that is completely muted displays the Mute icon in its upper left corner. You can choose this behavior by choosing Mute Entire Clips under Click+Drag Behavior in the Mute tool drop-down menu. If you decide you want to temporarily switch to the Default style, hold down the ALT key while you drag.
In addition, you can also play back only selected data if you want by pressing the SHIFT key and the SPACEBAR at the same time.
See:
Clip Muting with the Default Style
Clip Muting with the Alternate Style
Isolating (Clip Soloing)
Audition (Selection Playback)
Clip Muting with the Default Style
When you choose Mute Time Ranges under Click+Drag Behavior in the Mute tool drop-down menu, you can use the following procedures to mute all or parts of clips. This is the default behavior.
To Enable or Disable the Mute Tool
- Click the tool or press K on your keyboard. The Mute tool turns blue when it is enabled.
To Mute a Time Range Using Default Style
- Make sure that Mute Time Ranges under Click+Drag Behavior in the Mute tool drop-down menu has a check mark.
- If you want to mute a precise amount of time, enable the Snap to Grid button and set its menu to an appropriate value.
- Using the Mute tool, drag inside the lower half of a clip.
SONAR mutes the area you dragged through and displays the muted waveform or MIDI data as a dotted line.
A. Muted area of clip
To Unmute a Time Range Using Default Style
- Make sure that Mute Time Ranges under Click+Drag Behavior in the Mute tool drop-down menu has a check mark.
- Using the Mute tool, click inside the upper half of a clip in the muted area.
To Mute or Unmute an Entire Clip Using Default Style
- Make sure that Mute Time Ranges under Click+Drag Behavior in the Mute tool drop-down menu has a check mark.
- Using the Mute tool, ALT-click anywhere in the clip (hold down the ALT key while you click). When a clip is currently muted, SONAR displays the Mute icon in the upper left corner of the clip.

A. Mute icon

Note: If the clip you're muting or unmuting with this method already has one or more muted time ranges, these time ranges remain muted while you ALT-click the clip, so you don't lose any precise mute edits you've performed. To completely unmute the clip in the picture below, first ALT-click the clip to remove the Mute icon, and then drag through the upper half of the clip in the muted area(s).
See:
Clip Muting with the Alternate Style
Clip Muting with the Alternate Style
When you choose Mute Entire Clips under Click+Drag Behavior in the Mute tool drop-down menu, you can use the following procedures to mute all or parts of clips. This is the alternate style.
To Enable or Disable the Mute Tool
- Click the Mute tool or press K on your keyboard. The Mute tool turns blue when it is enabled.
To Mute or Unmute an Entire Clip Using Alternate Style
-
Make sure that Mute Entire Clips under Click+Drag Behavior in the Mute tool drop-down menu has a check mark.
-
Using the Mute tool, click anywhere in the clip.
SONAR displays the Mute icon in the upper left corner of a muted clip.

Note: If the clip you're muting or unmuting with this method already has one or more muted time ranges, these time ranges remain muted while you ALT-click the clip, so you don't lose any precise mute edits you've performed.
To Mute a Time Range Using Alternate Style
-
Make sure that Mute Entire Clips under Click+Drag Behavior in the Mute tool drop-down menu has a check mark.
-
If you want to mute a precise amount of time, enable the Snap to Grid button and set its menu to an appropriate value.
-
Using the Mute tool, ALT-drag inside the lower half of a clip.
SONAR mutes the area you dragged through and displays the muted waveform or MIDI data as a dotted line.
To Unmute a Time Range Using Alternate Style
-
Make sure that Mute Entire Clips under Click+Drag Behavior in the Mute tool drop-down menu has a check mark.
-
Using the Mute tool, ALT-click inside the upper half of a clip in the muted area.
Toggling a Clip's Mute Status
You can mute or unmute a clip without using the Mute tool if you want. Pressing Q on your keyboard toggles the mute status of all selected clips. Any muted time ranges remain muted.
See:
Audition (Selection Playback)
Isolating (Clip Soloing)
Audition (Selection Playback)
The Transport > Audition command plays back only selected clips and/or time ranges.
To use the command, hold down the SHIFT key and then press the SPACEBAR. Only the selected data plays back.
Isolating (Clip Soloing)
Isolating works by muting all the clips in a track in the same time region except the ones that you want to hear. Just like clip muting, isolating has two styles:
- Default style. After you activate the Mute tool, you can CTRL-drag through time ranges to isolate all or part of a clip. The default setting in the Mute tool drop-down menu produces this behavior (you'll see a checkmark next to Mute Time Ranges under Click+Drag Behavior). If you want to temporarily switch to the Alternate style (see below), hold down the ALT key along with the CTRL key, and click whole clips instead of dragging through regions.
- Alternate style. Use the Mute tool to isolate entire clips by CTRL-clicking clips instead of dragging through time regions. You can choose this behavior by choosing Mute Entire Clips under Click+Drag Behavior in the Mute tool drop-down menu. If you decide you want to temporarily switch to the Default style, hold down the ALT key along with the CTRL key, and drag through the regions you want isolated.
To Isolate a Region with the Default Style
-
Make sure that Mute Time Ranges under Click+Drag Behavior in the Mute tool drop-down menu has a check mark.
-
Using the Mute tool, hold down the CTRL key and drag through the region of a clip or clips that you want isolated (soloed).
Any overlapping regions become muted. To de-isolate the isolated region, release the CTRL key, and drag through the upper half of any muted regions.
If you want to temporarily switch to the Alternate style of isolating (see procedure below), hold down the ALT key along with the CTRL key, and click whole clips instead of dragging through regions.
To Isolate Clips with the Alternate Style
-
Choose Mute Entire Clips under Click+Drag Behavior in the Mute tool drop-down menu.
-
Using the Mute tool, hold down the CTRL key and click the clips that you want isolated.
Any overlapping clips become muted. To de-isolate the isolated clips, release the CTRL key, and click any muted clips.
If you want to temporarily switch to the Default style of isolating, hold down the ALT key along with the CTRL key, and drag through the regions you want isolated.
Track Folders
A track folder contains tracks in the Track pane of the Track view. Track folders make larger projects much easier to manage—you can group different types of tracks in their own folder: vocals, soft synths, ReWire instruments, drums, etc.
The main characteristics of a track folder are:
- You can edit all the tracks in the folder as if you were editing a single track—especially valuable for drum tracks. The track folder displays a composite clip in the Clips pane of all the clips in the folder. Selecting a time range in the composite clip selects data in all the enclosed tracks in the same time range; now you can edit all the tracks in the folder by editing the selected area of the composite clip.
- You can hide tracks in a folder, freeing up space on your screen.
- A folder can contain any type of track—you can put MIDI, audio, and synth tracks in the same folder.
- You can archive, mute, solo, arm, or input monitor all the tracks in a folder with one click—just click the A, M, S, R, or Input Echo button on the track folder.

A. The tracks in a track folder are indented B. Description box C. Track folder info D. Open/Close folder E. Track folder—click here to select all data in track folder F. A, M, S, R, and Input Echo buttons G. Selected area of composite clip H. Composite clip
To Create a Track Folder
- Right-click in the Track pane of the Track view, and choose Insert Track Folder from the pop-up menu.
Or
- Use the Insert > Track Folder menu command.
Or
- Right-click a track that's not in a track folder and select Move to Folder > New Track Folder from the pop-up menu.
A new track folder appears in the Track pane.
To Add a Track to a Track Folder
- In the Track view, move the mouse cursor just to the right of the track number of a pre-existing track until the cursor turns into a black, double-ended arrow, and then click and drag the track's titlebar onto the track folder. Release the mouse.
Or
- Insert a track when a track within a track folder has focus.
Or
- Right-click a track that's not in a track folder and select Move to Folder > Track Folder "n" from the pop-up menu.
Or
- Select the tracks you want to add to the folder, right-click on the folder and select Add Track(s) to Folder from the menu that appears.
The added track appears in the track folder, and is indented a little to show that it's inside the track folder.
To Remove a Track from a Track Folder
- In the Track view, move the cursor just to the right of the track number of a track until the cursor turns into a black, double-ended arrow, and then click and drag the track's titlebar out of the Track Folder. Release the mouse.
Or
- Right-click the track and select Remove From Folder from the pop-up menu.
To Add Multiple Tracks to a Track Folder
-
Select the tracks you want to add.
-
Right-click a selected track and choose Move to Folder > Track Folder "n" from the pop-up menu.
To Remove Multiple Tracks from a Track Folder
-
Select the tracks you want to remove.
-
Right-click a selected track and choose Remove From Folder from the pop-up menu.
To Delete a Track Folder
-
In the Track view, right-click and select Delete Track Folder from the menu that appears.
-
SONAR asks you if you want to delete all the tracks in the folder along with the track folder—click Yes or No.
SONAR deletes the track folder. If you didn't choose to delete the tracks in the track folders, SONAR moves these tracks to the top level.
To Open or Close a Track Folder
- Click the folder icon that's just left of the track folder's name.
To Select or Deselect all the Tracks in a Track Folder
- Click just to the left of the folder icon.
To Rename a Track Folder
- Double-click the track folder's name, type a new name, and press ENTER. Or
- Right-click the track folder, choose Folder Properties from the pop-up menu, type a name in the Name field of the Folder Properties dialog, and click OK.
To Add a Description to a Track Folder
- Double-click the Description box, type a description, and press ENTER. Or
- Right-click the track folder, choose Folder Properties from the pop-up menu, type a description in the Description field of the Folder Properties dialog, and click OK.
To Select all Clips in a Time Range
- Hold down the ALT key while dragging a selection on the composite clip.
Now you can edit, move, cut and paste all the selected clips by editing the selected part of the composite clip.
Adding Effects in the Track View
You can add both MIDI and audio effects directly from the Track view. SONAR adds these effects in real-time, preserving your track's original data.
To Add Effects in the Track View
- Right-click in the FX bin of the track you want to add effects to. You may have to click the FX tab or the All tab that's at the bottom of the Track pane to display the FX bin, and also expand the track pane a little.
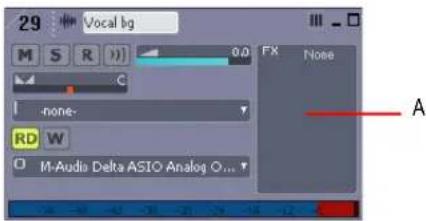
A. Right-click here to add an effect
An effects pop-up menu appears. SONAR displays MIDI effects if you are editing a MIDI track, and audio effects for an audio track.
- Select an effect from the menu.
The name of the effect appears in the Effects bin and the effect's property page appears. To delete the effect, right-click the effect name and choose Delete from the pop-up menu.
- Set the effects parameters or choose a preset.
Play your track and listen to the effect(s).

Note: If you use the same effects for more than one track, it's more efficient to add the effects to an bus. See "To Patch a Track Through a Bus" on page 608.
Changing Tempos
Your project can incorporate all kinds of tempo changes, including step changes from one tempo to another, gradual increases (accelerandos) or decreases (ritardandos), and almost any other type of change you can imagine. The tempo changes you add to your project become part of the project and are saved with the project file.
You can add tempo changes to your project in the following ways:
• Using the Tempo toolbar.
- Using the Insert > Tempo Change and Insert > Series of Tempos commands.
- By drawing tempo changes graphically in the Tempo view.
- Inserting tempo changes in the Tempo view's Tempo List pane.
The Process > Fit to Time and Process > Fit Improvisation commands can also be used to introduce tempo changes into your work file. For more information, see “Stretching and Shrinking Events” on page 486 and “Fit Improvisation” on page 498.
When you change the tempo of a project that contains audio, SONAR allows you to stretch or shrink audio clips when you have converted them to Groove clips and have enabled the Follow Project Pitch option in the Loop Construction view. Otherwise, the MIDI tracks will speed up or slow down
while the audio tracks will play at the same speed. For more information about Groove clips, see "Working Groove Clip audio" on page 419. Audio clips that are not Groove clips change in size when moved to a part of your project that has a different tempo.
Sometimes you don't want to adjust the speed of your audio. Here are some examples:
- If your project contains background music and a voice-over, you might want to change the tempo of the background music without altering the voice-over.
- If you're trying to modify the speed of some MIDI tracks to match a sampled drum groove, you want to leave the audio unchanged.
When you change the tempo of your project, clips having stretching enabled change tempo along with the project, while those that do not have stretching enabled do not. For more information about stretch-enabling clips, see “Enable Stretching” on page 413.
Tempos set when the clock source is set to MIDI Sync do not have any effect, because SONAR follows the external tempo. For more information, see “Synchronizing Your Gear” on page 819.
See:
Using the Tempo Toolbar
Using the Tempo Commands
Using the Tempo View
Using the Tempo Toolbar
The Tempo toolbar displays the current tempo and lets you change the tempo as shown below:
Figure 56. The Tempo toolbar

A. Click to insert a tempo change B. Tempo ratio buttons C. Click to enter a new tempo
When you enter a new tempo directly in the toolbar, you change the most recent tempo setting in the project.
The tempo ratio buttons temporarily change the speed of playback, without affecting the actual tempo that is stored with your project (see Note, below). During playback, the tempo is multiplied by the current tempo ratio. By default, the three tempo ratios are 0.50 (half speed), 1.00 (normal
speed), and 2.00 (double speed). You can change the tempo ratios that are associated with each button.

Note: Tempo ratios can only be used in projects that contain no audio tracks and cannot be used when using any form of synchronization. For more information, see Synchronizing Your Gear.
To Change the Current Tempo in the Tempo Toolbar
- Enable Groove Clip Looping on any audio clips that you want to follow the tempo changes. Do this by selecting one or more clips, right-clicking a selected clip, and choosing Groove > Clip Looping from the pop-up menu. Each clip that has Groove Clip Looping enabled has beveled edges instead of sharp corners. The same command disables Groove Clip Looping on any selected clip that has Groove Clip Looping enabled.
- Click the current tempo in the Tempo toolbar.
- Type a new value and press ENTER, or use the spinners to change the tempo value.
SONAR changes the current tempo to the desired value.
To Set the Tempo Ratio
You can set the tempo ratio in several ways (remember, this function is not available if you have audio clips in your project):
- Click one of the tempo ratio buttons.
- Choose Transport > Tempo Ratio 1, 2, or 3.
- Press CTRL+1, CTRL+2, or CTRL+3.
SONAR changes the speed of playback.
To Change the Tempo Ratio
- SHIFT-click one of the tempo ratio buttons to display the Tempo Ratio dialog box.
Figure 57. The Tempo Ratio dialog

- Enter a new value for the tempo ratio.
- Click OK.
From now on, that tempo ratio button uses the ratio you entered.
Using the Tempo Commands
The Insert > Tempo Change and Insert > Series of Tempos commands can be used to change the existing tempo of a project or to introduce one or more tempo changes at various points in a project. You can enter tempo values directly, introduce smooth increase or decreases in tempo, or even use your mouse to tap out the tempo you want for some portion of a project.
To Insert a Tempo Change
-
Enable Groove Clip Looping on any audio clips that you want to follow the tempo changes. Do this by selecting one or more clips, right-clicking a selected clip, and choosing Groove > Clip Looping from the pop-up menu. Each clip that has Groove Clip Looping enabled has beveled edges instead of sharp corners. The same command disables Groove Clip Looping on any selected clip that has Groove Clip Looping enabled.
-
Click 🖼 in the toolbar or choose Insert > Tempo Change to display the Tempo dialog box.
Figure 58. The Tempo dialog

-
Check the Insert a New Tempo box.
-
Enter a new tempo in one of the following ways:
-
Type a value in the Tempo field.
- Click the arrows to change the value.
-
Tap a new tempo in the space indicated in the dialog box.
-
Enter a starting time for the new tempo.
-
Click OK.
SONAR inserts a tempo change at the designated time.
To Insert a Series of Tempos
-
Enable Groove Clip Looping on any audio clips that you want to follow the tempo changes. Do this by selecting one or more clips, right-clicking a selected clip, and choosing Groove > Clip Looping from the pop-up menu. Each clip that has Groove Clip Looping enabled has beveled edges instead of sharp corners. The same command disables Groove Clip Looping on any selected clip that has Groove clip Looping enabled.
-
Choose Insert > Series of Tempos to display the Insert Series of Tempos dialog box.
Figure 59. The Insert Series of Tempos dialog

- Enter a starting tempo, ending tempo, and step size.
- Enter a starting and ending time for the series of tempo changes.
- Click OK.
SONAR erases any existing tempo changes between the starting and ending time, and inserts a series of tempo changes that change smoothly between the starting and ending time. This command never inserts more than one tempo change on the same clock tick. Audio clips which you want to follow tempo changes can also be converted to Groove clips in the Loop Construction view.
To Modify the Most Recent Tempo Change
- Enable Groove Clip Looping on any audio clips that you want to follow the tempo changes. Do this by selecting one or more clips, right-clicking a selected clip, and choosing Groove > Clip Looping from the pop-up menu. Each clip that has Groove Clip Looping enabled has beveled edges instead of sharp corners. The same command disables Groove Clip Looping on any selected clip that has Groove Clip Looping enabled.
- Choose Insert > Tempo Change to display the Tempo dialog box.
- Check the Change the Most Recent Tempo box.
-
Enter a new tempo in one of the following ways:
-
Type a value in the Tempo field.
- Click the arrows to change the value.
-
Tap a new tempo in the space indicated in the dialog box.
-
Click OK.
SONAR changes the most recent tempo to the new value.
Using the Tempo View
The Tempo view provides a graphic display of the tempo. In the Tempo view you can use your mouse to draw tempo changes directly onto the graph. Choose View > Tempo or click 🔒 on the toolbar to display the Tempo view
The Tempo view provides both a graphic display of the tempo and a list of all tempo changes in your project. In the graphical display you can use your mouse to draw tempo changes directly onto the graph. In the tempo list, you can insert, edit, and delete individual tempo changes. Choose View >
Tempo or click 📄 on the toolbar to display the Tempo view. Click the Tempo List button 📋 to display or hide the tempo list.
The Tempo view If an entire project has a single tempo, the graph shows a straight horizontal line, and

a single tempo in the list.
The graph has several tools you can use to add or modify tempo changes:
| Tool Name What it's for | |
 | Select Drat the Select tool in either the Tempo list or graphic display to select tempos to edit |
 | Draw Draw a custom curve indicating changes in tempo |
| [W236] | Line Draw a straight line indicating a steady increase or decrease in tempo |
 | Erase Eliminate tempo changes already in place for some portion of a project |
 | Snap grid Controls how often you can insert tempo changes—for example, every measure, every eighth note, every 3 samples, etc. |
Table 68.
If you make a mistake using any of these tools, you can use Edit > Undo to correct the error. When you use the Draw tool, the speed with which you drag the mouse determines the density of tempo events. To insert a larger number of relatively small tempo changes, move the mouse slowly. To insert a smaller number of relatively large tempo changes, drag the mouse quickly.
The Tempo List Pane has its own tools for editing tempo changes:
| Tool Name What it's for | |
| Insert Tempo Insert a new tempo change | |
| Delete Tempo Delete a tempo change | |
| Tempo Properties Edit a tempo change | |
Table 69.
To Insert a Tempo Change in the Tempo View
-
Enable Groove Clip Looping on any audio clips that you want to follow the tempo changes. Do this by selecting one or more clips, right-clicking a selected clip, and choosing Groove > Clip Looping from the pop-up menu. Each clip that has Groove Clip Looping enabled has beveled edges instead of sharp corners. The same command disables Groove Clip Looping on any selected clip that has Groove Clip Looping enabled.
-
Select the or the tool.
- Click in the Tempo view at any desired time point and tempo level.
SONAR introduces a tempo change at the indicated point.
To Steadily Increase or Decrease the Tempo in the Tempo View
- Enable Groove Clip Looping on any audio clips that you want to follow the tempo changes. Do this by selecting one or more clips, right-clicking a selected clip, and choosing Groove > Clip Looping from the pop-up menu. Each clip that has Groove Clip Looping enabled has beveled edges instead of sharp corners. The same command disables Groove Clip Looping on any selected clip that has Groove Clip Looping enabled.
- Select the tool.
- Drag a line in the graph from the starting time and tempo to the ending time and tempo.
SONAR introduces a linear series of tempo changes.
To Draw a Series of Tempo Changes in the Tempo View
- Enable Groove Clip Looping on any audio clips that you want to follow the tempo changes. Do this by selecting one or more clips, right-clicking a selected clip, and choosing Groove > Clip Looping from the pop-up menu. Each clip that has Groove Clip Looping enabled has beveled edges instead of sharp corners. The same command disables Groove Clip Looping on any selected clip that has Groove Clip Looping enabled.
- Select the tool.
- Drag the cursor across the graph, adjusting the tempo level as you move left to right.
SONAR introduces a series of tempo changes.
To Erase Tempo Changes in the Tempo View
- Enable Groove Clip Looping on any audio clips that you want to follow the tempo changes. Do this by selecting one or more clips, right-clicking a selected clip, and choosing Groove > Clip Looping from the pop-up menu. Each clip that has Groove Clip Looping enabled has beveled edges instead of sharp corners. The same command disables Groove Clip Looping on any selected clip that has Groove Clip Looping enabled.
- Select the tool.
- Drag the mouse over the graph to highlight the region you want to erase.
- Release the mouse button.
SONAR deletes all tempo changes in the area you marked. The last tempo setting prior to the erased region is now in effect in that region.
To Insert a Tempo Change in the Tempo List in the Tempo View
- Enable Groove Clip Looping on any audio clips that you want to follow the tempo changes. Do this by selecting one or more clips, right-clicking a selected clip, and choosing Groove > Clip Looping from the pop-up menu. Each clip that has Groove Clip Looping enabled has beveled edges instead of sharp corners. The same command disables Groove Clip Looping on any selected clip that has Groove Clip Looping enabled.
- Click the Tempo List button ☐ to display or hide the tempo list.
- Select any tempo change in the list.
- Click Insert Tempo to open the Tempo dialog box.
- Set the tempo, time, and other properties.
- Click OK.
SONAR inserts the new tempo into the list.
To Edit a Tempo Change in the Tempo View
- Enable Groove Clip Looping on any audio clips that you want to follow the tempo changes. Do this by selecting one or more clips, right-clicking a selected clip, and choosing Groove > Clip Looping from the pop-up menu. Each clip that has Groove Clip Looping enabled has beveled edges instead of sharp corners. The same command disables Groove Clip Looping on any selected clip that has Groove Clip Looping enabled.
- Click the Tempo List button ☐ to display or hide the tempo list.
- In the tempo list, select the tempo change to be edited.
- Click Tempo Properties or double-click the tempo change to open the Tempo dialog box.
- Edit the tempo properties as desired.
- Click OK.
To Delete a Tempo Change from the Tempo List in the Tempo View
- Enable Groove Clip Looping on any audio clips that you want to follow the tempo changes. Do this by selecting one or more clips, right-clicking a selected clip, and choosing Groove > Clip Looping from the pop-up menu. Each clip that has Groove Clip Looping enabled has beveled edges instead of sharp corners. The same command disables Groove Clip Looping on any selected clip that has Groove Clip Looping enabled.
- Click the Tempo List button 📋 to display or hide the tempo list.
- In the Tempo list, select the tempo change to be deleted.
- Click Delete Tempo ✗, or press DELETE.
SONAR deletes the selected tempo change. You cannot delete the first tempo in the list.
Undo, Redo, and the Undo History
SONAR provides very powerful Undo and Redo commands that let you move forward or backward through any portion of an editing session. Every project has its own independent undo history. This means you can return to any open project and use the Undo and Redo commands, even if you've spent the last hour working on a different project. The undo history of a project is lost when you close the project.
Remembering everything that is necessary to undo the changes you have made can use a lot of memory. If a change you are about to make requires too much memory and cannot be undone, you will be advised that the operation is too big to undo later and asked if you want to go ahead anyway. If you do choose to perform the operation, you will not be able to undo it. Therefore, you may want to save your project first.
The Edit > History command displays a complete history of the commands and actions you can undo for the current project. The Undo History dialog box looks like this:
Figure 60. The Undo History dialog

A. Most recent change B. Click to clear the undo history C. Adjust the number of steps you can undo
The History command is grayed out until you make a change to the current project that can be undone.
The History list is updated every time you make a change to a project. For example, if you insert a new note into a project using the Piano Roll view, that action is added to the History list. This entry remains on the list—even if you undo the change—so that you can redo the change later on. If you delete the note, this change is added to the History list.
You can click the Clear button in the Undo History dialog box to erase the undo history for the current project and free up some memory. If SONAR is low on memory, it may offer to erase the History list.
To revert to an earlier version of a project, highlight the entry in the History list that represents the point to which you'd like to return, and click OK. SONAR performs the necessary undo or redo actions to take you to that point. Once you edit the project (for example, by inserting a note), the History list is truncated at that point. Then, as you do further work, the History list grows again. Any events occurring before the event you highlighted remain on the list.
By default, SONAR keeps a history of up to 128 editing actions for each open project. Once that limit is reached, each new action pushes out the oldest item from the History list. You can raise or lower that number in the Undo History dialog box.
Slip-editing (Non-destructive Editing)
Slip-editing allows you to non-destructively hide or reveal the beginning of a clip, the end of a clip, or both. The hidden material in a clip is not heard during playback. All hidden material remains intact and can be restored. All slip-editing movements correspond to the current snap to resolution. For more information about the snap to grid, see “Defining and Using the Snap Grid” on page 316.

A. Clip handle B. Slip-edit cursor

Important: Like any clips, slip-edited clips can be combined with other clips using the Bounce to Clip(s) command and slip-edited clips in a track can be mixed down to another track. When a slip-edited clip is combined with another clip or an effect is applied to a clip using the Edit > Apply Audio Effects command, any slip-edited data (audio clips or MIDI events that are cropped from view) is overwritten.
See also:
Using Slip-editing
Using Slip-editing
SONAR makes it easy to edit audio and MIDI clips by way of prominent clip handles that appear as your cursor comes close to the edges of clips. The clip handles are easy to see and are equipped with broad functionality for fade-ins, fade-outs, and crossfades, as well as non-destructive editing of the beginning and end of clips.
To Slip-edit a Clip
-
Set the Snap to Grid ☐ to an appropriate interval.
-
If you're slip editing an audio clip, right-click the clip to open the Clip Properties dialog. Select the Audio Stretching tab, make sure the Enable Looping check box is unchecked, and click OK.
-
Move the cursor over the beginning of the clip until the clip handle appears.

A. Clip handle
- Click and drag the clip handle until the unwanted information has been removed.
The hidden information in the slip-edited clips remains intact but is not heard during playback.
To Move Data Without Moving its Clip
- Hold down ALT+SHIFT while moving the cursor over the middle of the clip you wish to edit.
The cursor changes to look like this

- Click and drag the clip to the left or right as desired.

natural_image
Simple diagram showing a red waveform on a teal background with a ruler above (no text or symbols)As in the case of slip-editing, the hidden information in the clip remains intact but is not heard during playback.
To Move Data and the Clip Edge
- Hold down ALT+SHIFT and move the cursor to the edge of the clip you wish to edit. A clip handle appears at the edge of the clip you are editing.
![Vocal [3] E-5](/content/2026/05/819773/images/1f978f3f8a56b1b547ca5e0466fa020569623335f6b55e8a484b7a0db0869d85.jpg)
- Click and drag the edge of the clip to the desired location.

The hidden information in the clip remains intact but is not heard during playback.
To Permanently Delete Slip-edited Data
- Select the clips that contain the slip-edited data you want to delete.
- Select the Edit > Apply Trimming command.
SONAR permanently deletes the slip-edited data from the clips you selected.
Slip-editing Multiple Clips
You can slip-edit multiple clips at the same time.
To Slip-edit Multiple Clips at Once
- Make sure all clips are not loop-enabled.
- Select the clips you want to slip-edit.
- Move your cursor over the beginning or end range of the selected clips until the blue clip handle appears.
- Drag the boundary to the desired location and release.
Fades and Crossfades
Fades are a gradual increase or decrease in volume at the beginning (fade-in) or end (fade-out) of a clip. A crossfade is when one clip fades out while another fades in. There are two ways to create fades and crossfades in SONAR: offline (destructive) and real-time (non-destructive). To create fades and crossfades offline, see “Applying Fades and Crossfades Offline” on page 565.
See:
Using Fades and Crossfades in Real Time
Using Fades and Crossfades in Real Time
You can create real-time fades and crossfades in the Track view's Clips pane. Real-time fades and crossfades do not change the data in the clip. SONAR reads the fade-in, fade-out, or crossfade in the clip and adjusts the gain accordingly. You can edit the crossfade's start time and end times. You can set the type of fade-in or fade-out you want to use as a default:
- Linear. A straight line, raising or lowering the volume at a steady rate.
- Slow Curve. A curved fade which starts to change the volume slowly at first and then rapidly increasing (fade-in) or decreasing (fade-out) the volume.
- Fast Curve. A curved fade which starts to change the volume quickly at first and then rapidly decreasing (fade-out) or increasing (fade-in) the volume.
To Choose the Fade Type
- Click the drop-down arrow located at the right of the Fade tool
- Choose Fade-in, Fade-out, or Crossfade from the drop-down menu by hovering your cursor over the type of fade you want to make.
A second menu of available fade-in, fade-out, and crossfade envelopes appears. - Click the envelope you want as your default.

To Create a Real-time Fade-in in a Clip
- In the Track view's Clips pane, move your mouse over the top part of the beginning of a clip until the cursor looks like this: , and a red line appears at the edge of the clip.
A filled red triangle appears at the top of the red line indicating the fade marker is ready to be dragged.

A. Filled red triangle
- When your cursor changes and the filled red triangle appears, click and drag to the right until you reach your desired fade-in length.
As you drag your mouse, a fade-in appears on your clip, and the red line moves with the mouse to mark the end of the fade-in.
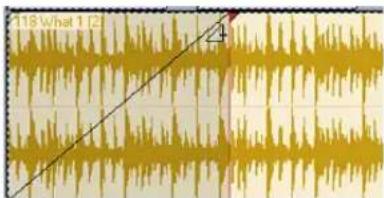
To Edit a Fade-in in a Clip
- To move the entire fade-in to a later point in the clip, drag above the blue horizontal line located a quarter of the way up the blue vertical line
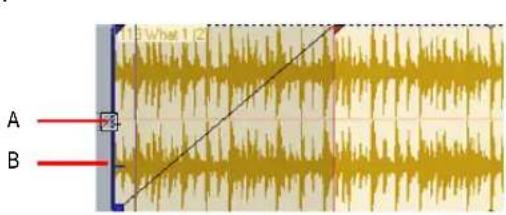
A. Cursor above horizontal blue line B. Horizontal blue line
- To move only the starting point of the fade-in, drag below the horizontal blue line.

natural_image
Abstract pattern with yellow and beige wavy lines, no text or symbols visible- To delete a fade-in from an audio clip, simply drag the triangular fade handle to the front edge of the clip.
The filled blue triangle at the top of the clip handle indicates that dragging the top edge of the clip handle will move the fade along with the crop. The filled blue rectangle at the bottom of the clip handle indicates that dragging the bottom of the clip handle will slip edit the edge, but leave the end of the fade-in where it is.
To Create an Automatic Crossfade (Real-time)
- In the Track view, click the Enable/Disable Automatic Crossfades combo button located next to the Snap to Grid button or press the X key.
- Click the down arrow on the Enable/Disable Automatic Crossfades combo button, select Default Crossfade Curves and select a crossfade curve.
- Select and drag an audio clip so that it overlaps another audio clip. You should overlap the clips by the length you want the crossfade.
- When you have the clip positioned where you want it, release the mouse button to drop the clip. The Drag and Drop Options dialog appears.
- In the Drag and Drop Options dialog, check the Blend Old With New check box and click OK.
- The two clips now overlap with a crossfade, looking something like this:
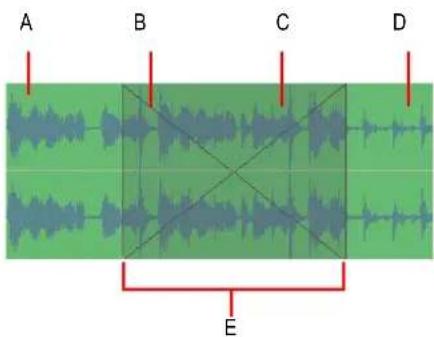
A. First clip B. Fade-out C. Fade-in D. Second clip E. Crossfade
You can edit fade-ins and fade-outs. You can change the start, end and position of a fade. The following procedures all demonstrate edits to a fade-in, but fade-outs work exactly the same.
To Change an Existing Fade
- Move your cursor over the beginning of a fade-out or the end of a fade-in, until your cursor looks like this:
- Right-click to and select the desired fade type from the menu that appears.
To Change an Existing Crossfade
- Move your cursor over the region where the crossfade is.
- Right-click and select the desired crossfade from the menu that appears.
To Edit or Create Fades from the Process Menu
- Select the clip or clips in which you want to create or edit fade-ins and/or fade-outs.
- Select Process > Fade Selected Clips.
The Fade Selected Clips dialog appears.
- Adjust parameters according to the following table:
Parameter Description
Fade In (mS) Select the number of milliseconds you want the fade-in to last.
Fade Out (mS) Select the number of milliseconds you want the fade-out to last.
Fade In Curve Choose a fade-in type. Options are linear, slow or fast curve.
Fade Out Curve Choose a fade-out type. Options are linear, slow or fast curve.
Table 70.
| Parameter Description | |
| Alter Existing Times | Select this option if you wish to change the existing fade lengths. You don't need to check this option if you're creating new fades. |
| Alter Existing Curves | Select this option if you wish to change the existing fade types. You don't need to check this option if you're creating new fades. |
| Only Show if Pressing Shift | Select if you want to apply previous dialog settings without opening the dialog. Hold shift when selecting command to override this option. |
Table 70.
- Click OK to close the dialog.
SONAR creates or edits the fade(s) according to the options you chose in the dialog.
AudioSnap
SONAR's AudioSnap engine and tempo analysis features give you unprecedented rhythmic and tempo control over your audio. Employing sophisticated transient detection technology, the AudioSnap engine automatically analyzes all recorded and imported audio files for rhythmic content to determine where the beats are in the music.
AudioSnap is completely non-destructive, similar to Groove clips and V-Vocal clips. AudioSnap, V-Vocal, and Groove clips are mutually exclusive. Groove clip markers are typically placed at a zero-crossing point before a transient; AudioSnap transient markers are placed where musical changes occur, but may not be exactly at a zero crossing.
What is AudioSnap?
AudioSnap is not a single feature, but rather a collection of different tools that can be used for different tasks. The AudioSnap palette ties it all together in a task-oriented layout.
AudioSnap does several things, in a variety of ways:
- Stretches audio clips to fit project tempo or for quantizing.
• Changes project tempo to fit audio or MIDI clips. - Copies audio rhythms for groove quantizing or doubling sounds.
Figure 61. The AudioSnap palette

How does it work?
AudioSnap works by finding the transients in audio clips. Transients are the areas in an audio clip where the level increases suddenly. These make good locations to shrink, stretch, or split a clip,
without changing its sound quality too drastically. SONAR contains a variety of high-quality stretching algorithms for different kinds of material. You can choose a lower-quality algorithm for real-time playback of your edits, and then choose a better algorithm for mixdown or bouncing to track (see "Algorithms and rendering" on page 406).
SONAR lets you define the default online and offline algorithms via the AudioSnap palette, and you can override the default algorithm(s) on a clip-by-clip basis.

Note: The online algorithm is for preview purposes only during playback. The final audio quality will be greatly improved after the offline algorithm is applied during mixdown/export.
The transients also make it possible for SONAR to calculate a clip's tempo map (see "Editing a clip's tempo map" on page 375).
Figure 62. Audio clip

Figure 63. Audio clip showing transient markers

AudioSnap finds transients automatically, but the transient markers don't always appear exactly where you might want them for the kind of editing you want to do. You can edit the markers by moving them to new locations, adding markers, filtering out markers, deleting markers, and promoting markers (protecting them from being filtered). For information about editing transient markers, see "Editing transient markers" on page 360.
Why would I use it?
Here are some common uses for AudioSnap:
- Aligning measure lines and tempo to audio or MIDI tracks that were recorded without a metronome (see Synchronizing audio and the project tempo).
- Fixing timing errors (see Fixing timing problems in audio clips).
- Synchronizing the rhythms of out-of-sync tracks (see Making multiple clips/tracks groove together).
• Doubling existing sounds with other sounds (see Extracting MIDI timing information from audio) - Changing the tempo of existing projects (see Changing a project's tempo).
- Snapping both audio and MIDI edits to audio beats (see Snapping edits to audio beats).
- Fixing timing errors in multi-track recordings while maintaining phase relationships (see Adjusting the timing of a multi-track performance while maintaining phase relationships).
If you want to edit audio right away with AudioSnap, see Synchronizing audio and the project tempo and Fixing timing problems in audio clips. If you want to learn more about all the AudioSnap tools and options, see the following links.
See:
Using the Transient tool
Editing transient markers
Using the AudioSnap palette
Synchronizing audio and the project tempo
Fixing timing problems in audio clips
Extracting MIDI timing information from audio
General editing
Using the Pool
Algorithms and rendering
Keyboard shortcuts
Using the Transient tool
At the heart of AudioSnap are transient markers. SONAR automatically detects transients for all audio clips in your project. The Transient tool lets you exclusively edit transient markers without worrying about accidentally editing clips or automation data.
Although you can also edit transient markers with the Select tool and Free Edit tool, this chapter focuses on the Transient tool since it is the easiest way to edit transient markers.
To enable the Transient tool
- Click the Transient Tool button in the Track View toolbar.
All audio clips show transient markers and the AudioSnap palette appears.

Note: Displaying transient markers does not mean that AudioSnap is enabled. AudioSnap is only active on a clip when at least one transient marker has been stretched.
If you select another tool, transient markers will no longer be visible and the AudioSnap palette closes.
The following table describes how the Transient tool behaves when interacting with transient markers and clips.
| Action On transient marker On clip | ||
| Click Selects the transient marker. Selects the clip and opens the AudioSnap palette. | ||
| Right-click Opens the transient marker context menu. Opens the AudioSnap context menu. | ||
| Double-click Selects transients from other tracks (from selected clips) that fall within a certain window of time of the transient the user is clicking on. If no clips are selected, only non-hidden tracks are affected. | -- | |
| Drag Non-proportional stretch with selected transients. Note: You can drag a marker from either the head or the line of the marker. Drag the line to stretch a marker and drag the head to move a marker. | Lasso selects transient markers. | |
| Hold down the CTRL key and drag | Proportionally stretches selected transients. Lasso selects transients to add to the current selection. | |
| Hold down the CTRL key and click | Adds transient marker to current selection. -- | |
| Hold down the CTRL key and double-click | Like double-click, but adds transients to the current selection. | -- |
| Hold down the CTRL and SHIFT keys and double-click | Like double-click, but extends the range of selected transients. | -- |
| Hold down the ALT key and click | -- Inserts a new transient marker. | |
Table 71. Transient tool actions
For more information about editing transient markers, see Editing transient markers.
Transient tool (clip) context menu
The Transient tool context menu gives you quick access to commands related to time stretching and tempo mapping:
- Set project tempo from clip. This command copies the clip's tempo map to the project's global tempo map. This allows the project's measure boundaries to align with the audio clip. Whenever the project's tempo map is generated from a clip, the clip's Lock Position property is enabled
automatically.
- Clips follow project tempo. This command forces the clip to follow the project's global tempo map.

Note: The Clips follow project tempo command only works on clips that are configured to use musical time (the Time Base property is set to Musical (M:B:T) in the Clip Properties dialog).
- Edit clip tempo map. Each audio clip has an internal tempo map. This command exposes controls that allow you to edit a clip's tempo map. For details, see Editing a clip's tempo map.
- Merge and Lock Markers. This command combines all transient markers on all selected tracks, so that all selected tracks share identical transient markers. The clip positions are also locked. This will ensure that phase relationships are maintained when quantizing or moving clips across multiple tracks. When using the Transient tool to drag transient markers, all transient markers at exactly the same point in time on selected clips move together as a group.
- Save as groove. This command opens the Define Groove dialog, which lets you save the groove to a file. The groove can then be applied to other audio or MIDI clips.
- Copy as MIDI. This command saves the selected audio as a MIDI clip, which you can paste from the Clipboard into a MIDI track. You select the MIDI note that the transients in the audio clip will be converted to in the AudioSnap Options dialog, which opens when you click the Options button.
- Quantize. This command opens the Quantize dialog, which has options to quantize AudioSnap Beats and Audio Clip Start Times, and also to set automatic crossfade options.
- Groove Quantize. This command opens the Groove Quantize dialog, which has an option to quantize AudioSnap Beats, and controls to set automatic crossfade options.
- Reset transient markers. This command resets all transient markers on the selected clips to their default state.
- Pool > Add MBT to pool. The Track view Time Ruler can be added to the Pool (see Using the Pool). This command adds the current Musical Time snap resolution to the pool, and also displays dotted pool lines in the Clips pane. This can be useful as either a basic visual guide, or for adding the Musical Time to an extracted groove, or to fill in any transients that may be “missing” in a syncopated or sparse section. In the Snap to Grid dialog, set the Musical Time value to the resolution you would like to add to the Pool.
- Pool > Add clip to pool. This command adds or deletes the clip's transient markers from the Pool. The markers do not have to be visible to be added to the Pool. See “Using the Pool” on page 404 for more information.
- Pool > Show pool lines. This command hides or shows the Pool lines.
- Pool > Quantize to pool. This command quantizes the selected clips to the Pool.
- Enable AudioSnap. This command enables or disables AudioSnap on selected audio clips.
See:
Editing transient markers
Using the AudioSnap palette
Fixing timing problems in audio clips
Synchronizing audio and the project tempo
Extracting MIDI timing information from audio
General editing
Using the Pool
Algorithms and rendering
Keyboard shortcuts
Editing transient markers
Transient markers show where the transients of a clip are (areas where the level increases suddenly), and are used to edit the timing of audio clips.
AudioSnap finds transients automatically, but the transient markers don't always appear exactly where you might want them for the kind of editing you want to do.
Most AudioSnap commands edit transient markers automatically as a result of an editing operation, but sometimes you achieve the best results by editing the markers manually.
You can edit the markers by moving them to new locations, adding markers, filtering out markers, deleting markers, and promoting markers (protecting them from being filtered).
Figure 64. Transient markers

See:
To show/hide transient markers
To select a transient marker
To select multiple adjacent transient markers
To select multiple discontinuous transient markers
To select the same transient in multiple clips
To extend a multi-track marker selection
To select all similar transient markers in a clip
To move a transient marker (without stretching audio)
To drag a transient marker and stretch audio
To stretch multiple transient markers in a clip
To stretch multiple transient markers in a clip proportionally
To reset a transient marker
To disable a transient marker
To delete a transient marker
To insert a new transient marker
To copy transient markers from one track to another track
To enable/disable transient markers
To navigate to the next/previous transient (TAB to transients)
Transient marker appearance
Transient marker context menu
To show/hide transient markers
- Click the Transient Tool button in the Track View toolbar.
or
-
On the Views menu, click AudioSnap Palette to open the AudioSnap palette.
-
Select the clips you want to display transient markers on.
-
In the AudioSnap palette, click the Show Transient Markers button

Note: Showing/hiding transient markers only affects the display of transient markers, but does not enable/disable AudioSnap.
To select a transient marker
-
Click the Transient Tool button in the Track View toolbar.
-
Click the desired transient marker.
The marker is highlighted.
To select/deselect all transient markers in a clip
-
Select the desired clip.
-
Do one of the following:
- To select all transient markers, press ALT+SHIFT+A.
- To deselect all transient markers, press ALT+SHIFT+C.
To select multiple adjacent transient markers
-
Click the Transient Tool button in the Track View toolbar.
-
Do one of the following:
-
Draw a lasso around the desired transient markers.
- Click the first marker in the range, hold down the SHIFT key, and click the last marker in the range.
The markers are highlighted.
To select multiple discontinuous transient markers
- Click the Transient Tool button in the Track View toolbar.
- Hold down the CTRL key and click the desired transient markers.
The markers are highlighted.
To select the same transient in multiple clips
- Select the clips that you wish to edit.
- Click the Transient Tool button in the Track View toolbar.
- Double-click a transient marker in any selected clip.
All transient markers near the same position (within a defined time window) in all selected clips are selected.

Note 1: If no clips are selected, transient markers from all clips are eligible to become selected.

Note 2: To specify the size of the time window, click the AudioSnap Options button in the AudioSnap palette to open the AudioSnap Options dialog, then specify the desired Pool Transient Window value.
To extend a multi-track marker selection
When editing multi-track instruments, you may want to simultaneously adjust a range of transients across multiple tracks. In order to do so, you need to select the tracks and time region you wish to edit.
- Select the clips that you wish to edit.
- Click the Transient Tool button in the Track View toolbar.
- Double-click a transient marker in any selected clip.
All transient markers near the same position (within a defined time window) in all selected clips are selected.
- Hold down the CTRL key and double-click another transient marker in any selected clip.
A range or transient markers are selected across all selected clips.
To select all similar transient markers in a clip
-
Click the Select Tool button in the Track view toolbar.
-
Right-click the desired clip and choose from the following options from the pop-up menu:
• AudioSnap > Select > Moved
• AudioSnap > Select > Stretched
• AudioSnap > Select > Disabled
• AudioSnap > Select > Enabled
• AudioSnap > Select > Promoted
• AudioSnap > Select > User
Selecting all markers of a certain type makes it easy to perform operations such as resetting only the stretched markers, or promoting only the disabled markers.
To move a transient marker (without stretching audio)
- Drag the marker handle (diamond).
Figure 65. To move a transient marker, drag the marker head (diamond)
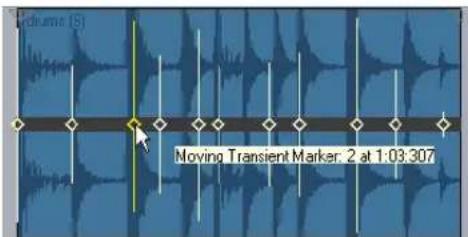
To drag a transient marker and stretch audio
- Drag the marker line.
Figure 66. To stretch a transient, drag the marker line

When you drag and drop the line of a marker, the marker moves to the place where you drop it, and the audio that is located between the dragged marker and the following marker stretches.

Note: If you stretch a transient marker, AudioSnap is enabled on the clip.
You can find additional marker editing commands on the transient marker context menu.
To stretch multiple transient markers in a clip
- Select the desired transient markers.
- Drag any of the selected transient markers.
To stretch multiple transient markers in a clip proportionally
- Select the desired transient markers.
- Hold down the CTRL key and drag any of the selected transient markers.
To reset a transient marker
- Right-click the marker you want to reset and select Reset from the pop-up menu.
To reset all selected transient markers
SONAR has a quick way to reset transient markers.
- Select all clips you wish to reset.
- Press CTRL+ALT and click the Reset button on the AudioSnap Palette. This brings up a dialog asking if you want to Clear All AudioSnap Markers. Clicking Yes will delete all the existing edits and restore clips to the analyzed transients.

Note: This gesture is not undoable, so make sure you really want to reset the transient markers.
An alternate solution is to turn off AudioSnap on the clips and then use Edit > Bounce to Clip(s). However, this will also render any clips fades.
To disable a transient marker
- Right-click the marker you want to disable and select Disable from the pop-up menu.
- Right-click the marker you want to reset and select Delete Marker from the pop-up menu.
To delete a transient marker

Note: You can only delete user-created transient markers.
To insert a new transient marker
- Click the Transient Tool button in the Track View toolbar.
- Hold down the ALT key and click where you would like to insert a new transient marker.
A new transient marker is inserted.
or
- Disable the Snap to Grid button (or press the N key) if the place you need the marker is not on a convenient snap location.
- Select the clip or clips that need the marker.
- Move the Now Time to the place where you want the marker.
- Press CTRL+ALT+I.
The marker appears in the selected clip(s) and displays a hollow square to show that it is a manually created marker:

Note: You can also add markers at Pool lines with a single command. See "To add markers at Pool lines" on page 398.
To copy transient markers from one track to another track
- Click the Transient Tool button in the Track View toolbar.
The AudioSnap palette appears and all audio clips show transient markers.
- Select the target clip (the clip that you want to copy markers to) and drag the Threshold slider in the AudioSnap palette until all transient markers are disabled.
- Select both the source clip (the clip you want to copy markers from) and the target clip.
- Right-click either of the selected clips and select Merge and Lock Markers from the pop-up menu.
The transient markers on the source clip are copied to the target clip.
To enable/disable transient markers
It's sometimes necessary to disable some of the markers so you can extract a clearer groove, or snap or quantize data to only the more important markers. Disabling markers is a way to thin the data so that it creates a clearer time grid to work with. It also avoids stretching any transients that you don't want to stretch as a result of quantizing audio. Disabled markers are not deleted, but are ignored by all AudioSnap functions. Only the head of a disabled marker remains visible.
There are several ways to disable/enable the transient markers in a selected clip:
- The Resolution drop-down list in the AudioSnap palette. The selected Resolution value lets you disable markers based on their time location. This clears out unwanted markers to make editing easier. Larger values create a bigger time window, based on musical time values, which
preserves markers that are closest to the displayed musical time value, and disables others.

Note: The Resolution setting will only work reliably if the audio clip's internal tempo map is accurate. For details, see Editing a clip's tempo map.
- The Threshold slider in the AudioSnap palette. This slider works by disabling markers based on their volume. Dragging the slider to the right creates a larger volume threshold, so that transients that fall below the current volume threshold that the slider defines are disabled.
- The transient marker context menu. You can right-click a marker, and choose Disable from the pop-up menu.
- Press CTRL+ALT+D to disable or re-enable all selected markers.

Tip: If you want to protect a marker from being disabled by the Sensitivity slider or the Threshold slider, you can right-click the marker and enable the Promote option from the transient marker pop-up menu. You can also promote a disabled marker to ensure that it never becomes enabled by the Sensitivity slider.
To navigate to the next/previous transient (TAB to transients)
• D o one of the following:
- To move the Now Time to the next transient, press TAB.
- To move the Now Time to the previous transient, press SHIFT+TAB.

Note: TAB to transients is selection-based, which means tabbing will go to the next/previous transient amongst all selected clips. If there is no selection, tabbing operates on the current track.
For more information, see TAB to transients.
Transient marker appearance
Each transient marker changes its appearance when it is selected, moved, new, disabled, or has certain other characteristics.
The following table lists the variations in appearance that a marker can display. For updated information about AudioSnap and marker colors, please see the ReadMe file.
Marker appearance Description

Soft yellow hollow diamond shape Standard active marker.

Solid diamond shape User inserted marker or promoted marker. A promoted marker is never disabled by the Resolution or Threshold controls in the AudioSnap palette.
Table 72. Transient marker shapes and colors
Marker appearance Description

Bright yellow Selected marker.

Grey; only the head of the marker is Disabled marker. visible

Arrow Stretched marker. Any given transient can only be stretched or shrunk to 25-400% of original length. A small arrow indicates in which direction the audio has been stretched. Note: An important difference between quantizing MIDI and audio is that two or more audio transients can never collapse on top of each other like MIDI notes can.
Table 72. Transient marker shapes and colors
Transient marker context menu
The transient marker context menu appears when you right-click a transient marker. The command you choose from this menu acts on the marker that you right-click, and most commands also act on any markers that are selected. The following table describes each command.
Command Description
Reset Moves a marker back to its original position. Shortcut for selected markers is CTRL+ALT+R.
Disable The marker is ignored. Shortcut for selected markers is CTRL+ALT+D.
Promote By "promoting" a marker, you can set emphasis on certain beats and prevent the marker from becoming disabled when you adjust the Resolution or Threshold controls. Shortcut for selected markers is CTRL+ALT+P.
Delete marker Only available for manually added markers; the command is greyed-out if you right-click an automatically generated marker. Shortcut for selected markers is CTRL+ALT+BACKSPACE.
Snap (stretch) to nearest transient Moves marker to nearest Pool marker. Note: You can also snap transient markers to the time ruler and other transient markers. For details, see To add the Time Ruler to the Pool and Snapping edits to audio beats.
Snap (stretch) Moves marker backward to nearest Pool marker. backward
Snap (stretch) forward Moves marker forward to nearest Pool marker.
Table 73. Transient marker context menu commands
Command Description
| Stretch to | Moves the marker to the project time that you enter in the To Time field, and stretches the audio that is between the previous and next markers. |
| Move to | Moves the marker to the project time that you enter in the To Time field. |
| Audition Beat Auditions the clip up to the next marker. Default shortcut is CTRL+SHIFT+SPACEBAR. | |
| Split Beat Splits the beat at the marker. | |
| AudioSnap Palette | Opens the AudioSnap palette. Shortcut is SHIFT+A to show (but not hide) the palette. |
Table 73. Transient marker context menu commands
See:
Using the Transient tool
Using the AudioSnap palette
Fixing timing problems in audio clips
Synchronizing audio and the project tempo
Extracting MIDI timing information from audio
General editing
Using the Pool
Algorithms and rendering
Keyboard shortcuts
Enabling/disabling AudioSnap
You can enable/disable AudioSnap processing on a clip-by-clip basis. Transient markers are always available to be edited, but AudioSnap is not active on a clip unless at least one transient marker has been stretched.
By disabling AudioSnap on a clip that has stretched transient markers, you can compare how the clip sounds with and without AudioSnap processing. Disabling AudioSnap can also temporarily free up CPU processing power.
To enable or disable AudioSnap
- Select the audio clips you want to enable/disable AudioSnap on.
-
Do one of the following:
-
Click the Bypass button in the AudioSnap palette.
- Right-click a clip and choose AudioSnap > AudioSnap Enable from the pop-up menu.
- Press F12.
AudioSnap is enabled/disabled on the selected audio clips, and transient markers are shown/hidden.

Note: AudioSnap is automatically enabled on a clip if you stretch a transient marker on the clip.
See:
Using the Transient tool
Using the AudioSnap palette
Fixing timing problems in audio clips
Synchronizing audio and the project tempo
Extracting MIDI timing information from audio
General editing
Using the Pool
Algorithms and rendering
Keyboard shortcuts
Using the AudioSnap palette
The AudioSnap palette provides easy access to time stretching and tempo-related tools.
Except for the AudioSnap enable/disable command, the AudioSnap palette's controls apply to the currently selected audio clip or clips.
To show the AudioSnap palette
• D o one of the following:
- On the Process menu, click AudioSnap Palette.
- Press SHIFT+A.
or
-
Click the Transient Tool button in the Track View toolbar.
-
Click an audio clip that you want to edit.
The AudioSnap palette contains the following controls.
Figure 67. AudioSnap palette controls

A. Bypass B. Save as groove C. Copy as MIDI D. Show transient markers E. Split into clips by transient markers F. Toggle sample/musical based clip start time G. AudioSnap properties H. Set project tempo from clip I. Set clip tempo from project J. Clip follows project tempo K. Edit clip tempo map L. Quantize M. Groove quantize N. Threshold O. Resolution P. Applies to Q. Online render mode R. Offline render mode
Tool Bar section
- Bypass 🔊. This button enables or disables AudioSnap on selected audio clips.
- Save as groove H. This button opens the Define Groove dialog, which lets you save the groove to a file. The groove can then be applied to other audio or MIDI clips.
- Copy as MIDI. This button saves the selected audio as a MIDI clip, which you can paste from the Clipboard into a MIDI track. You select the MIDI note that the transients in the audio clip will be converted to in the AudioSnap Options dialog, which opens when you click the Options button.
- Show Transient markers . This button shows or hides the transient markers on selected audio clips.
- Split Beats into Clips. This button splits a clip at each transient marker into multiple clips.
- Clip Timebase (Absolute or Musical) / 📄. There are two timebase settings for a clip in SONAR:
- Musical (default) 📁. Musical Timebase means the clip start position will follow Musical Time (MIDI Tick).
- Absolute (SMPTE). Absolute Timebase means that the clip start time will follow Absolute Time
- AudioSnap Options 📄. This button opens the AudioSnap Options button. This dialog has its own Help topic, which appears when you click its Help button.
Tempo section
- Set Project Tempo From Clip →. This button copies the clip's tempo map to the project's global tempo map. This allows the project's measure boundaries to align with the audio clip.
- Set Clip Tempo From Project 📄. This button copies the project's tempo map to the clip's tempo map. This allows the project's measure boundaries to align with the audio clip.
- Clip Follows Project Tempo. This button forces the clip to follow the project's global tempo map.

Note: The Clips follow project tempo command only works on clips that are configured to use musical time (the Time Base property is set to Musical (M:B:T) in the Clip Properties dialog).
- Edit Clip Tempo Map 📄. Each audio clip has an internal tempo map. This button exposes controls that allow you to edit a clip's tempo map. For details, see Editing a clip's tempo map.
Timing section
- Quantize 📋. This button opens the Quantize dialog, which has options to quantize AudioSnap Beats and Audio Clip Start Times, and also to set automatic crossfade options.
- Groove Quantize 🎨. This button opens the Groove Quantize dialog, which has an option to quantize AudioSnap Beats, and controls to set automatic crossfade options.
Filter section
- Threshold. This slider is available when a clip's transient markers are showing. The slider disables markers based on their volume. This clears out unwanted markers to make editing easier. Dragging the slider to the right creates a bigger volume threshold, which disables markers that are fall below that threshold. Works on selected clips. - Resolution. This drop-down list is available when a clip's transient markers are showing. The selected Resolution value lets you disable markers based on their time location. This clears out unwanted markers to make editing easier. Larger values create a bigger time window, based on musical time values, which preserves markers that are closest to the displayed musical time value, and disables others. Works on selected clips.
Render mode section
- Applies To. This drop-down menu lets you choose whether any changes to the Online and Offline settings apply to clips, tracks, or the default settings. The choices in the drop-down menu are as follows:
-
Clips. When selected, the Online and Offline render mode settings apply to any selected clips. The Online and Offline lists display the current render modes for the selected clip. If you select multiple clips that have different render modes, the Online and Offline lists display (Multi). If the selected clip has inherited render mode settings from the track or from the Default Settings settings, the Online and Offline lists display the inherited render mode in parenthesis.
-
Tracks. When selected, the Online and Offline render mode settings apply to all current and future clips in the selected tracks.
- Default Settings. When selected, the Online and Offline render mode settings apply to the Default (track/global) render mode.
- Online. This choice determines what stretch algorithm is used during real-time playback. The Percussion options works better than the Groove Clip option on percussive material, especially if the stretching is by more than a few beats per minute. For more information about render modes, see Algorithms and rendering.

Note: The Online render mode is for preview purposes only during playback. The final audio quality will be greatly improved after the Offline render mode is applied during mixdown/export.
- Offline. This drop-down menu lets you choose the algorithm that is used when you export or freeze stretched audio. The choices in the drop-down menu are as follows:
- Groove clip. This choice works faster, using less processing power.
- iZotope Radius Mix. This is better for clips containing polyphonic, stereo data.
- iZotope Radius Mix Advanced. This choice is similar to iZotope Radius Mix, but exposes a Smoothing slider that adjust how much detail to preserve.
- iZotope Radius Solo. This is better for clips containing monophonic, solo instruments.
- Percussion. This is the best choice for percussion sounds.
AudioSnap palette auto load
AutoLoadAudioSnapPalette=<0 or 1>, default = 1
By default, the AudioSnap palette appears automatically whenever you enable AudioSnap on a clip. If you prefer to never auto-show the AudioSnap palette, you can change this behavior by adding a variable to the Cakewalk.ini file.
This variable should be set in the [WinCake] section. For example:
[WinCake]
AutoLoadAudioSnapPalette=0
See:
Using the Transient tool
Editing transient markers
Fixing timing problems in audio clips
Synchronizing audio and the project tempo
Extracting MIDI timing information from audio
General editing
Using the Pool
Synchronizing audio and the project tempo
There are many reasons why you may want to synchronize audio clips with the project tempo. The following list presents a few common examples.
AudioSnap provides two ways to quickly synchronize audio and the project tempo map:
- Applying an audio clip's internal tempo map to the project's global tempo map. Use this method if you want the project tempo to match an audio clip's tempo and have audio beats aligned with the project's time ruler.
This is useful in the following scenarios:
- If you recorded an audio track without using the metronome, and you want the project's measure and beat boundaries to align with the audio. For example, you may have recorded an audio track that you would like to use as the tempo reference when recording additional tracks.
- If you want both audio and MIDI edits to snap to audio beats.
- If you want to use the Quantize and Groove Quantize commands on audio clips, and have audio beats quantized correctly.
- If you want to remix an existing song that has been imported into SONAR (from an audio CD or MP3 file, etc.). In order to add new drum loops and MIDI instruments that play in time with the original song, you need to create a tempo map from the original song.
For details, see To sync the project tempo to an audio clip.
- Applying the project's tempo to a clip's tempo map. Use this method if you want a clip to follow the project tempo.
This is useful in the following scenarios:
- If you want to synchronize new audio with existing audio.
- If you want to tighten up a new audio track so it fits well with the timing and tempo of an existing track.
- If you want to globally change the project's tempo after audio has been recorded.
For details, see To sync an audio clip to the project tempo and To copy the project tempo to an audio clip's tempo map.
How does it work?
Each audio clip has an internal tempo map, which makes it possible to synchronize the audio clip with the project's global tempo map (see Editing a clip's tempo map).
SONAR automatically creates a tempo map for each audio clip. In some cases, SONAR can detect the wrong tempo. For example, SONAR might detect a tempo of 120 BPM when the actual tempo is 240 BPM, or a beat may be mapped to the wrong transient. You can easily remap the tempo map, if necessary.
You should make sure a clip's internal tempo map is correct before using any of the tempo-related commands in the AudioSnap palette. For details, see Editing a clip's tempo map.
To sync the project tempo to an audio clip
- Select the audio clip(s) that has the desired tempo map.
- Press SHIFT+A to open the AudioSnap palette.
- Click the Set Project Tempo From Clip button → on the AudioSnap palette.
The clip tempo map is copied to the project tempo map so the tempo maps are identical.

Note: If multiple audio clips have their Clip Timebase property set to Musical, changing the project tempo will affect the relative positions of the audio clips. When using the Set Project Tempo from Clip command, SONAR will offer to convert the timebase to Absolute.
If you need to align the project tempo with freely played MIDI notes, see To sync the project tempo to freely played MIDI.
To sync an audio clip to the project tempo
- Select the audio clip(s) that you want to follow the project tempo.
- Press SHIFT+A to open the AudioSnap palette.
- Click the Clip Follows Project Tempo button 📄 on the AudioSnap palette.
The clip is synchronized to the project's tempo map.

Note: If the audio clip does not play back at the expected tempo, the clip might not have an accurate internal tempo map. For details about editing a clip's tempo map, see Editing a clip's tempo map.
To copy the project tempo to an audio clip's tempo map
- Configure the project's tempo as desired (either specity the tempo manually, or extract the tempo from another audio clip by using the Set Project Tempo from Clip button → on the AudioSnap palette).
- Select the audio clip(s) that you want to follow the project tempo.
- Press SHIFT+A to open the AudioSnap palette.
- Click the Set Clip Tempo From Project button ← on the AudioSnap palette.
The global project tempo map is copied to the clip tempo map so the tempo maps are identical.

Note: AudioSnap will always attempt to find the tempo of any clip recorded or imported into SONAR. While several possible tempos are normally generated, in some cases AudioSnap may be unable to detect the correct tempo or may not detect a tempo at all. This can occur if the source material is highly compressed or does not contain transient markers on all actual beats.
If AudioSnap is unable to detect a tempo from the clip, new transient markers are inserted on each beat corresponding to the project's global tempo map.
If AudioSnap detects possible tempos for the clip, existing transient markers (that appear within a defined window of the project's beats) are reassigned to nearby beat markers on the clip's tempo map.
See:
Editing a clip's tempo map
Changing a project's tempo
Using the Transient tool
Editing transient markers
Using the AudioSnap palette
Fixing timing problems in audio clips
Extracting MIDI timing information from audio
General editing
Using the Pool
Algorithms and rendering
Keyboard shortcuts
Editing a clip's tempo map
Each audio clip has an internal tempo map, which makes it possible to synchronize the audio clip with the project's global tempo map (see Editing a clip's tempo map).
SONAR automatically creates a tempo map for each audio clip. In some cases, SONAR can detect the wrong tempo. For example, SONAR might detect a tempo of 120 BPM when the actual tempo is 240 BPM, or a beat may be mapped to the wrong transient. You can easily remap the tempo map, if necessary.
SONAR provides a convenient graphical interface for editing a clip's tempo map.
You should make sure a clip's internal tempo map is correct before using any of the tempo-related commands in the AudioSnap palette.
The following figure shows what a SONAR-generate clip tempo map might look like.
Figure 68. You can edit the internal tempo map of each audio clip

The following controls are available when editing a clip's tempo map:
- Beat markers. Each detected beat has a corresponding beat marker. You can remap a beat marker by dragging the marker to any active transient marker.
- Average Tempo. This list shows the average tempo candidates: original, 0.5x and 2x. SONAR will do its best to detect the correct average tempo, but a clip can often have multiple potential tempos (60 BPM, 120 BPM, 240 BPM, etc.). If you change the Average Tempo setting, all clip tempo changes are adjusted to scale.
- Beats per measure. This list lets you specify the number of beats per measure. The value range is 2 to 14, and the default value is 4.
To edit a clip's tempo map
- Select the clip or clips you want to edit.
- Click the Edit clip tempo map button on the AudioSnap palette.
A simple tempo map guide appears above the clip, indicating where SONAR has mapped the bars/beats of the clip.
- If the Average Tempo list does not show the correct tempo, select the correct tempo.
- If the Beats per measure box does not show the correct number of beats, specify the correct number of beats per measure.
- Inspect the beat markers above the clip. If any beat marker is mapped to the wrong transient, drag the beat marker to the correct transient.
Figure 69. Drag beat markers to edit the clip tempo map

Note 1: Beat markers can only be dragged to active transient markers. If you need to drag a beat marker to a position that doesn't have a corresponding transient marker, first insert a new transient marker at the desired position. For details, see To insert a new transient marker.
You can also use the Merge and Lock Markers command to merge transient markers from other tracks. This is useful, for example, if one track contains beats 1 and 3 and another track contains beats 2 and 4. For details, see To copy transient markers from one track to another track.
Note 2: If you hold down the CTRL key when you drag a beat marker to the left, the original beat marker and all subsequent beat markers will be renumbered accordingly.
If you hold down the CTRL key when you drag a beat marker to the right, all subsequent beat markers will be moved by the same number of transient markers.
The clip's tempo map is recalculated.
If a beat marker is dragged to a transient marker that is already assigned to a later beat marker, SONAR will automatically re-number all subsequent beat markers accordingly.
A beat marker cannot be dragged to an earlier transient marker if that transient is already assigned to a beat marker.
- To hide the tempo map guide, click the Edit clip tempo map button 📄 on the AudioSnap palette again.

Tip: You can also enable/disable Edit clip tempo map from the Transient tool context menu.
To audition an audio clip when editing the clip tempo map
When you are editing a clip's tempo map, you may frequently need to audition the audio to make sure you are positioning the beat markers at the correct transients.
- Right-click the clip tempo map (above the clip) where you want to audition the clip, and keep the right mouse button pressed.
SONAR creates a one-measure selection, starting from one measure before the position clicked. The selected time will gradually increase the longer you keep the mouse button pressed.
- Release the right mouse button.
SONAR auditions the selection.
See:
Using the Transient tool
Editing transient markers
Using the AudioSnap palette
Synchronizing audio and the project tempo
Fixing timing problems in audio clips
Extracting MIDI timing information from audio
General editing
Using the Pool
Algorithms and rendering
Keyboard shortcuts
Changing a project's tempo
Changing a whole project's tempo is simple with AudioSnap, if the tempo change is not drastic.
Before you change the global tempo of a project that contains audio, you must first make sure the audio clips are configured to follow tempo changes.
After you change the tempo, you may want to bounce some or all of the tracks to new tracks with the Radius algorithms to correct any unwanted change to each track's sound.
To change a project's tempo
-
Use the File > Open command to open the desired project.
-
Use the Edit > Select All command.
-
Press SHIFT+A to open the AudioSnap palette.
-
Zoom in (or press F) to get a better look at your clips.
-
With all clips still selected, enable the Clip Follows Project Tempo button in the AudioSnap palette.

Note: The Clips follow project tempo command only works on clips that are configured to use musical time (the Time Base property is set to Musical (M:B:T) in the Clip Properties dialog).
All the clips display the Auto Stretch icon ↔, and will now conform to any new or future tempo changes.
- In the User1 toolbar, or the Tempo toolbar, click the Tempo value 105.00, type the desired tempo value, and press ENTER.
All the tracks stretch to conform to the new tempo. Listen to the project as a whole, and also solo each track to hear how different the sound is after stretching.
See:
Using the Transient tool
Editing transient markers
Using the AudioSnap palette
Synchronizing audio and the project tempo
Fixing timing problems in audio clips
Extracting MIDI timing information from audio
General editing
Using the Pool
Algorithms and rendering
Keyboard shortcuts
Fixing timing problems in audio clips
AudioSnap provides several ways to fix timing errors in audio clips:
- You can drag individual beats or groups of beats to new positions. This gives you complete control over where each transient ends up.
- You can quantize to a particular note resolution. This can be a very quick way to fix a clip, if your markers are fairly close to where you want them to end up.
- You can quantize to another clip's beats, making the clips share the same groove.
- You can slip-stretch the clip, to make it fit a larger or smaller block of time. This is a very quick way to adjust a clip that has good timing, but whose tempo may be a little different from the project you want to use it in.
- You can combine techniques: slip-stretch a clip to fit a new tempo, then quantize or drag any markers that are out of sync.
The following is a list of common timing problems and solutions:
- If the audio contains various timing problems, but you want to fix them manually instead of letting AudioSnap fix them automatically, see Adjusting the timing of a solo performance. This gives you complete control over every aspect of your audio, and allows you to manually drag audio beats around to perfect the timing.
- If you need to fix a multi-track performance, such as a multi-mic drum kit or a full band, and you need to maintain phase relationships between tracks, see Adjusting the timing of a multi-track performance while maintaining phase relationships.
- If you want to synchronize the timing of clips on different tracks, you can fix this with AudioSnap if the sync errors aren't huge. For details, see Synchronizing the rhythms of out-of-sync tracks.
- If you want to quantize audio to the project's time ruler, see To quantize audio to the project's time ruler.
-
If you want to quickly tighten up a performance in a project that already has a fixed tempo or varying tempo map, see Quantizing audio. This is useful if you like the performance, but the timing is off in a few places.
-
If you want to extract the groove from one clip and apply it to another clip, see To Groove Quantize an audio clip. You can extract a groove from both audio and MIDI clips.
- If you need to synchronize audio with the projects tempo map, see Synchronizing audio and the project tempo.
See:
Adjusting the timing of a solo performance
Adjusting the timing of a multi-track performance while maintaining phase relationships
Synchronizing the rhythms of out-of-sync tracks
Making multiple clips/tracks groove together
Quantizing audio
To quantize audio to the project's time ruler
To Groove Quantize an audio clip
To quantize an audio clip to another audio clip (Quantize to Pool)
Adjusting the timing of a solo performance
When adjusting the timing of a solo performance (for example, a single instrument recorded with a single microphone, or a pre-recorded drum loop, etc.), you can freely drag beats around without worrying about potential phase problems.
By manually adjusting beats, you have complete control over the timing of your audio.
To manually adjust the timing of a solo performance
- Click the Transient Tool button in the Track View toolbar.
Audio clips display transient markers and the AudioSnap palette appears.
- Drag the desired transient markers around to perfect the timing.
For more information about editing transient markers, see Editing transient markers.
See:
Adjusting the timing of a multi-track performance while maintaining phase relationships
Synchronizing the rhythms of out-of-sync tracks
Making multiple clips/tracks groove together
Quantizing audio
To quantize audio to the project's time ruler
To Groove Quantize an audio clip
To quantize an audio clip to another audio clip (Quantize to Pool)
Adjusting the timing of a multi-track performance while maintaining phase relationships
Editing a multi-track instrument, such as a multi-microphone drum kit or a full band, requires a little more care than editing a solo performance.
When stretching or quantizing multi-track audio, it is critical to maintain the phase relationships of the original recording. This can only be achieved if the tracks are stretched at the same exact points in time across all tracks.
AudioSnap provides tools that make it easy to preserve the phase relationship across tracks when editing beats on individual tracks.
In the following example, you will learn how to use AudioSnap to edit a multi-track drum kit alongside a piano track. The drum kit was recorded with three microphones (kick, snare, and overhead), each routed to its own track.
To adjust the timing of a multi-track performance while maintaining phase relationships
The following figure shows the last three hits of a song. The top track is piano and the rest are drums: kick, snare and overhead.
Figure 70. The drum hits are rushed and are not in sync with the Piano track

A. Piano track B. Drum tracks
As you can see, the drummer has rushed and is not in time with the piano. At the beginning of the measure, the drummer is in time with the piano. Over the course of the measure, the drummer is performing a fill and on the next three beats is way ahead of the piano player. You can see how the
transient markers on the drum tracks are progressively earlier as the measure goes on (the drummer is rushing).
Our job is to align the drum hits with the piano hits so that the drum and piano tracks in time all the way through the measure.
- Click the Transient Tool button in the Track View toolbar.
Audio clips display transient markers and the AudioSnap palette appears.
- Select the three drum tracks and make splits right before and right after the area you want to edit. For details, see To Split Clips into Smaller Clips.
- Select only the kick and snare clips.
- On the AudioSnap palette, set Resolution to 1/16.
- Select only the drum overhead track.
- On the AudioSnap palette, set Threshold to 100% to ensure that there are no transients detected. This step is necessary because the overhead track contains audio from both the kick and the snare, and you want to make sure the kick, snare and overhead tracks are always synchronized when stretching beats.
- Select all three drum tracks.
- Right-click any selected clip and select Merge and Lock Markers on the pop-up menu.
All three drum tracks now share the exact same transient markers, and each clip's position is locked.

Note: When you fix timing errors in multi-tracked drum parts, you typically need to adjust all the drum parts in exactly the same way, because drum parts often contain "bleed"—the sound of other drums in the track of the drum that you are trying to record. For example, if your snare mic also picks up some of the hi-hat sound, you can't move hi-hat clips around without also moving the snare clips in exactly the same way, otherwise the sound of the hi-hat in the hi-hat track will conflict with the sound of the hi-hat in the snare track.
Any time you have a track that contains "bleed" from other audio tracks, such as drum overhead tracks or room ambiance tracks, you want to make sure the track has the same identical transient markers as the individual close-mic tracks. The first step is to disable all transient markers in the overhead/room track, then use the Merge and Lock Markers command to copy the transient markers from all individual close-mic tracks.
Figure 71. The Merge and Lock Markers command has copied the same transient markers to all three drum tracks.
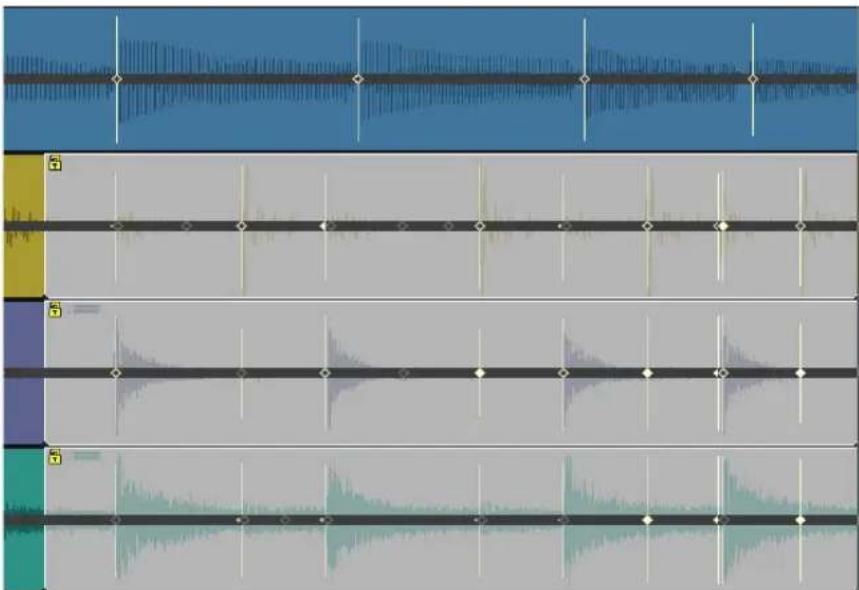
The drum tracks are now ready to be edited.
We want to keep the feel of the piano track, so our goal is align the drum tracks with the piano track, while preserving the phase relationship between the three drum tracks.
When editing multiple transients to adjust the timing of a performance, often times you need to speed up or slow down a section rather than just move an entire section later or earlier. In this example, the drummer was speeding up through the drum fill and then hits next downbeat too early. To fix this, you need to proportionally drag the drum transients so they are better aligned with the piano track.
- Using the Transient tool, lasso select all transient markers from the first hit through the third hit, across all drum tracks.
- Hold down the CTRL key and drag any selected drum transient marker until the third drum hit is aligned with the third piano hits.
The selected transients are stretched proportionally. The first and last drum and piano hits are now aligned. The effect of this edit is that the drummer no longer rushes through the fill and he lands on the downbeat much closer with the piano.
Figure 72. The drum and piano hits are aligned
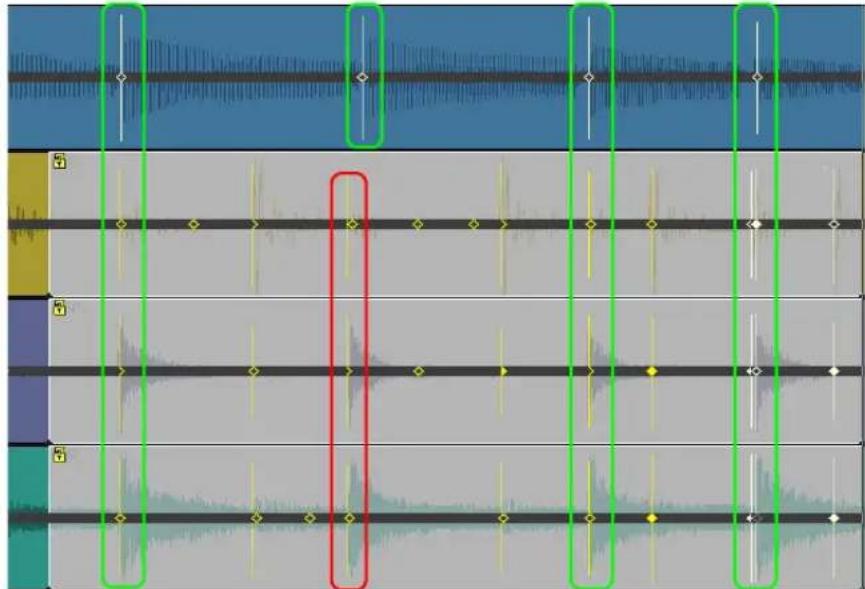
The second drum and piano hits are close but not perfect, so we need to fix this single beat.
- Hold down the CTRL key and double-click any drum transient marker on the second hit.
All drum transient markers for the second hit are selected
- Drag any selected transient markers until it aligns with the second piano hit.
All three drum and piano hits are now aligned properly, and the phase relationships between all drum tracks have been preserved.
Figure 73. All three drum and piano hits are perfectly aligned
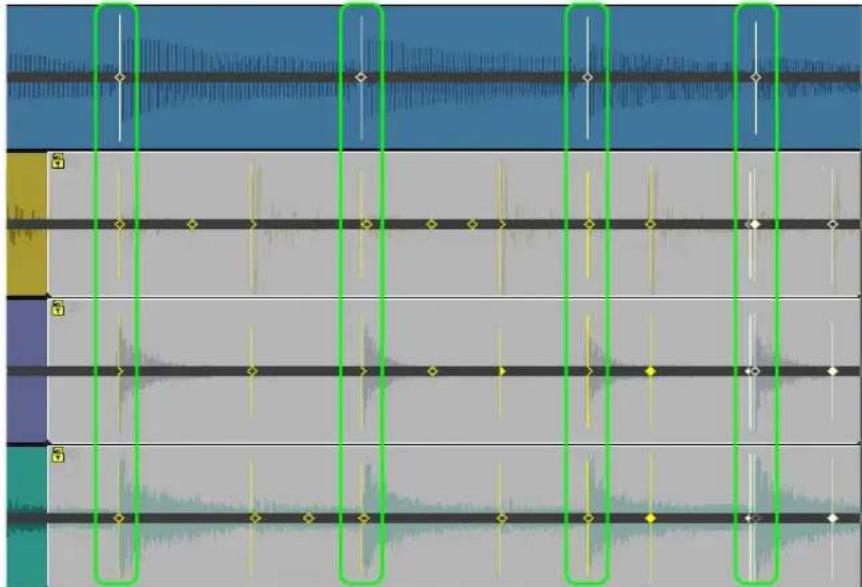
For information about maintaining phase relationships without stretching audio, see To quantize multi-tracked drums without stretching audio.
See:
Adjusting the timing of a solo performance
Synchronizing the rhythms of out-of-sync tracks
Making multiple clips/tracks groove together
Quantizing audio
To quantize audio to the project's time ruler
To Groove Quantize an audio clip
To quantize an audio clip to another audio clip (Quantize to Pool)
Synchronizing the rhythms of out-of-sync tracks
A common problem arises when two or more clips aren't quite in sync with each other. You can fix this with AudioSnap if the sync errors aren't huge. The AudioSnap command that is most helpful in this situation is the Quantize to Pool command. The way it works is you decide which clip has the correct rhythm, you add that clip's transient markers to the Pool, and then you quantize the other
clip's transient markers to the Pool. For details, see To quantize an audio clip to another audio clip (Quantize to Pool).

Tip: You can also copy one clip's tempo to the project tempo, then configure other clips to follow the project tempo. For details, see To sync the project tempo to an audio clip and To sync an audio clip to the project tempo.
See:
Adjusting the timing of a solo performance
Adjusting the timing of a multi-track performance while maintaining phase relationships
Making multiple clips/tracks groove together
Quantizing audio
To quantize audio to the project's time ruler
To Groove Quantize an audio clip
To quantize an audio clip to another audio clip (Quantize to Pool)
Making multiple clips/tracks groove together
You can extract the groove from one audio clip and apply it to another audio clip. You can also apply a pre-existing groove file to all selected audio clips.
For details, see To Groove Quantize an audio clip.
See:
Adjusting the timing of a solo performance
Adjusting the timing of a multi-track performance while maintaining phase relationships
Synchronizing the rhythms of out-of-sync tracks
Quantizing audio
To quantize audio to the project's time ruler
To Groove Quantize an audio clip
To quantize an audio clip to another audio clip (Quantize to Pool)
Using the Transient tool
Editing transient markers
Quantizing audio
Quantizing audio is a quick way to tighten up the feel of an audio track. AudioSnap provides several ways to quantize audio:
- You can quantize audio to the project's time ruler. This is useful for tightening up a performance in a project that already has a fixed tempo or varying tempo map. For details, see To quantize audio to the project's time ruler.
- You can copy the feel of one track and apply it to another track. There are two ways to accomplish this with AudioSnap:
- Method 1: Extract MIDI timing from the source track, then use Groove Quantize on the target track. For details, see To extract MIDI timing from an audio clip and To Groove Quantize an audio clip.
- Method 2: Add the source track to the Pool, then quantize the target track to the pool. For details, see To quantize an audio clip to another audio clip (Quantize to Pool) and Using the Pool.
To quantize audio to the project's time ruler
- Select the audio clip you want to quantize.
- Press SHIFT+A to open the AudioSnap palette.
- Click the Quantize button 📋 in the AudioSnap palette.
The Quantize dialog appear - Make sure the AudioSnap Beats check box is selected.
- Configure the Quantize options as desired, then click OK.
SONAR quantizes the selected clips.

Note: You can only quantize to one rhythmic value at a time. If you don't want to quantize all beats in an audio clip (to ensure the Quantize command doesn't move them to a rhythmic placement where they don't belong), temporarily disable any transient markers you don't want to quantize. For details, see To disable a transient marker.
To Groove Quantize an audio clip
The Groove Quantize command aligns transients with a groove that's on the Clipboard or a pre-existing groove file. If you want to copy the timing from another audio clip to the Clipboard, see To extract MIDI timing from an audio clip.
- Select the audio clip you want to groove quantize.
- Press SHIFT+A to open the AudioSnap palette.
- Click the Groove Quantize button in the AudioSnap palette.
The Groove Quantize dialog appear - In the Groove Pattern field, select the groove pattern that you want to use.
- Select the Resolution value that you want to quantize to.
-
Make sure the AudioSnap Beats check box is selected.
-
In the Groove File field, select either Clipboard or the file that the groove pattern you want to use is saved in.
8. Click OK.
To quantize an audio clip to another audio clip (Quantize to Pool)
A common problem arises when two or more clips aren't quite in sync with each other. You can fix this with AudioSnap if the sync errors aren't huge. The AudioSnap command that is most helpful in this situation is the Quantize to Pool command. The way it works is you decide which clip has the correct rhythm, you add that clip's transient markers to the Pool, and then you quantize the other clip's transient markers to the Pool.
- Click the Transient Tool button in the Track View toolbar.
Audio clips show transient markers and the AudioSnap palette appears.
- Select the audio clip that you want to use as the rhythm guide.
- Disable any transient markers that you want to exclude from the Pool (see To disable a transient marker).
- Do one of the following to add the selected clip to the Pool:
- Press CTRL+F12.
- Right-click the selected clip and select Pool > Add clip to pool on the pop-up menu.
The selected clip is added to the Pool, and its transient markers turn purple.
- Select the audio clip that you want to quantize.
- Right-click the selected clip and select Pool > Quantize to pool on the pop-up menu.
The Quantize to AudioSnap Pool dialog appears.
-
Configure the following settings as desired:
-
Max Distance From Pool. The value in this menu determines which notes are affected by the Quantize to Pool command. For example, if you choose Quarter in the menu, notes that are farther than a quarter note from a Pool line are not quantized.
- Quantize Window. This slider fine tunes the value in the Max Distance From Pool menu. A window of 100 percent includes all markers that lie within the Max Distance From Pool value.
- Quantize Strength. This slider controls quantize strength, which determines how closely the selected notes move to the Pool markers.
8. Click OK.
The transients in the selected clips are quantized to the Pool.
To quantize multi-tracked drums without stretching audio
When you fix timing errors in multi-tracked drum parts, you will frequently need to adjust all the drum parts in exactly the same way, because drum parts often contain “bleed”—the sound of other drums in the track of the drum that you are trying to record. For example, if your snare mic also picks up some of the hi-hat sound, you can’t move hi-hat clips around without also moving the snare clips in exactly the same way, because if you don’t, the sound of the hi-hat in the hi-hat track will conflict with the sound of the hi-hat in the snare track.
AudioSnap's Add Transients to Pool command and Split Beats into Clips command allow you to slice your drum tracks at identical locations, so you can then drag or quantize whole clips without stretching any audio. This method of aligning clips does not change the phase relationships between the clips, as long as you move all the clips identically.
Let's take a look at some multi-tracked drum parts, and see how to quantize them all in exactly the same way. The following project uses 10 mics, including room mics and overhead mics:

- Click the Transient Tool button in the Track View toolbar.
Audio clips display transient markers and the AudioSnap palette appears.
-
If necessary, edit each drum track's transient markers so that there are no extraneous transients (use the Threshold slider, disable some transients, move others, etc.).
-
Disable all the transient markers in the overhead mic and room mic tracks.

Note: The room mics and overhead mics are much farther from the drums than the close mics, so the transients in their tracks occur a little later than the close mic tracks. Because you will eventually split each beat into a separate clip, you only want to use the transient markers from the close mic tracks to avoid cutting off any transients.
-
Select all the drum tracks.
-
Right-click any selected drum track and select Merge and Lock Markers on the pop-up menu.
-
All transient markers on all selected tracks are copied to each drum track, so all drum tracks share identical transient markers. The clip positions are also locked.
-
On the Edit menu, point to Clip Lock and click Lock Position.
The clip positions are no longer locked.
- Select a drum track that has steady beats throughout the song.

Tip: If there is not a single drum track that has steady beats throughout the song, you can create a temporary guide track by bouncing all the drum tracks to a single track (select all the tracks, use the Edit > Bounce to Tracks command, select Main Outputs in the Source Category field in the Bounce to Tracks dialog, and click OK).
- Click the Set Project Tempo From Clip button → to align measure lines with drum track and establish a tempo map.
The project's measure boundaries line up with the transients in the drum tracks.

Note: If the measure boundaries do not line up properly with the drum tracks, you may need to edit the guide track's tempo map. For details, see To edit a clip's tempo map.
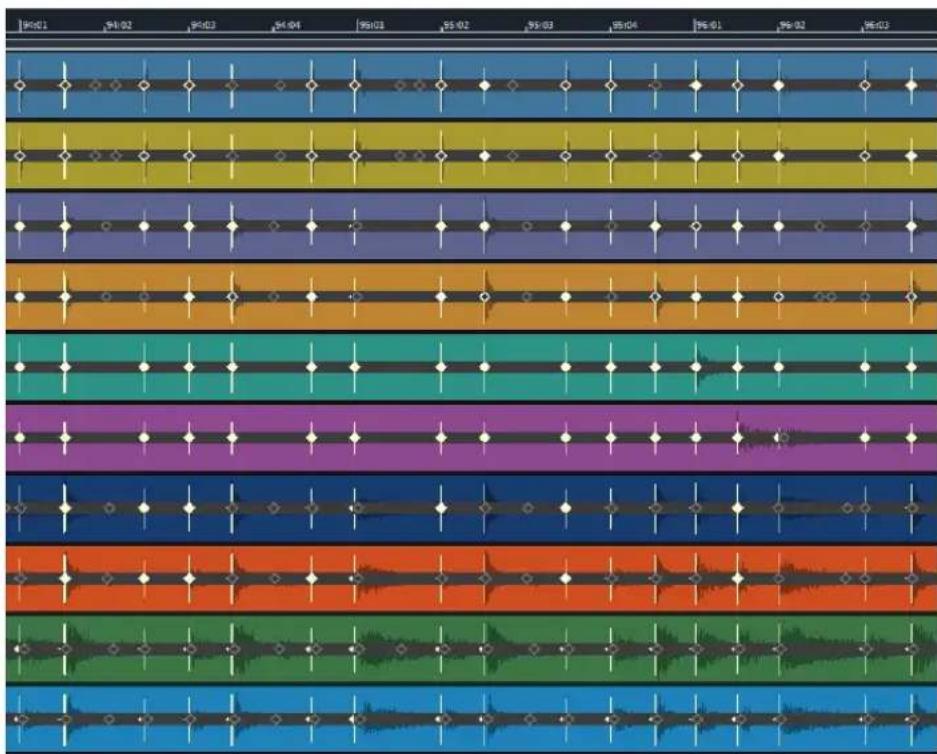
-
Select all the drum tracks.
-
Click the Split Beats into Clips button on the AudioSnap palette.
Each beat is split into a separate clip.

Now we can quantize all the clips at the same time. Let's quantize this example to eighth notes:
- Select all the clips that you want to quantize.
- Use the Process > Quantize command to open the Quantize dialog.
- In the Duration field, choose Eighth (for this example).
- Configure the other settings as follows:
- Make sure the AudioSnap Beats check box is cleared.
- Make sure the Audio Clip Start Times is selected.

- Make sure the Auto XFade Audio Clips check box is selected, and the XFade and Max Gap values are set at their default values.
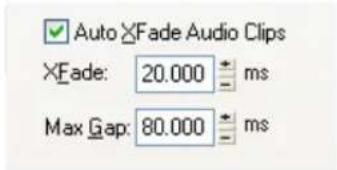
- Click OK to close the Quantize dialog.
After some processing time, the clip start times move to the eighth note boundaries:

Some clips now overlap, and some clips have small gaps between them. Because the Auto XFade Audio Clips check box was enabled, and the XFade and Max Gap values were set at their default values, crossfades have been automatically added between clips, and any gaps that were smaller than the Max Gap value have been filled in. Let's zoom in to take a closer look:

A. Crossfades
Now the clips line up with eighth note boundaries, no audio has been stretched, and phase relationships have been maintained.
For information about maintaining phase relationships when stretching audio, see Adjusting the timing of a multi-track performance while maintaining phase relationships.
See:
Quantizing
To split a clip, quantize it, and fill in the gaps
Using the Transient tool
Editing transient markers
Using the AudioSnap palette
Synchronizing audio and the project tempo
Fixing timing problems in audio clips
Extracting MIDI timing information from audio
General editing
Using the Pool
Algorithms and rendering
Keyboard shortcuts
Extracting MIDI timing information from audio
Extracting MIDI timing information from audio allows you to:
- Double an audio rhythm with a MIDI instrument.
- Replace sounds in an audio clip (commonly used for drum replacement).
- Notate the rhythm of an audio clip.
- Align lyrics with an audio rhythm.
After you extract the timing information from an audio clip, the timing information is copied to the clipboard as MIDI note events. You can paste the MIDI notes to a new MIDI track or use the clipboard as a source for the Groove Quantize command.
To extract MIDI timing from an audio clip
- Press SHIFT+A to open the AudioSnap palette.
- Select the audio clip whose rhythm you want to extract.
- Do any necessary quantizing, and disable any transient markers that you don't want to extract (see Quantizing audio and To disable a transient marker).
- With the clip still selected, click the AudioSnap Options button in the AudioSnap palette to open the AudioSnap Options dialog.
- In the Convert to MIDI Note box, choose C3. This is the note most drum synths use for the bass drum. If your favorite synth uses a different note, choose it now.
- Choose a Note Velocities option: either accept the extrapolated velocities in the audio clip (the Vary With Pulse Level option), or set a constant velocity for the notes in the Set All To Same Value field.
-
Click OK to close the AudioSnap Options dialog.
-
Click the Copy As MIDI button
This adds the extracted groove to the Windows clipboard.
SONAR copies the audio rhythm to the Clipboard as a MIDI clip, with the same pitch assigned to each note.
You can now paste the MIDI notes to a new MIDI track, use the clipboard as a source for the Groove Quantize command, or save the extracted groove as a Groove Quantize file.
To paste the extracted MIDI timing to a MIDI track
- Click the track number of a MIDI track to select it.
- Move the Now Time to the measure where you want the data (we'll use measure 1).

Tip: If you want the MIDI notes to align perfectly with the audio data, press F7 to move the Now time to the beginning of the selected audio clip.
- Press CTRL+V to paste the data.
A new MIDI clip is inserted in the track

Note: All the new MIDI notes have the same pitch, and the tails of the preceding notes reach all the way to the following notes, so you can't see the actual rhythm. You can easily shorten the duration of each note event in order to clearly see each note event. To do so, click Process > Length to open the Length dialog. In the Length dialog, disable the Start Times check box, enable the Duration check box, and type 50 in the Percent field. Click OK to close the dialog. Then click the PRV Mode button in the MIDI track (you can see the rhythm if you enable the Inline Piano Roll view and zoom in).
To save the extracted MIDI timing as a Groove Quantize file
- Press SHIFT+A to open the AudioSnap palette.
- Click the Save as Groove button H.
The Define Groove dialog appears.
- In the File field, choose a file to save the pattern in, or type a name to create a new file.
- In the Pattern field, type a name for the pattern, and click OK.
The extracted MIDI groove is saved as a Groove Quantize file, and can be used at any time with the Groove Quantize command.
See:
Using the Transient tool
Editing transient markers
Using the AudioSnap palette
Synchronizing audio and the project tempo
Fixing timing problems in audio clips
Extracting MIDI timing information from audio
General editing
Using the Pool
Algorithms and rendering
Keyboard shortcuts
General editing
If you want to snap edits in the Clips pane to transient markers, see Snapping edits to audio beats. If you want to split each beat into a separate clip, see Splitting beats into clips.
If you want to stretch the duration of an audio clip, see Slip-stretching audio.
If you want to automatically create envelope nodes that are aligned with transient markers, see Adding automation.
Snapping edits to audio beats
The Snap to Grid dialog has an Audio Transients check box on the Clips tab that allows you to snap edits in the Clips pane to transient markers in selected audio clips. You can toggle this check box on and off by pressing CTRL+ALT+N. The same check box is on the PRV tab of the Snap to Grid dialog, but the Snap to Transients button does not toggle that check box.
In the following example, you will learn how to snap MIDI notes to audio beats.
To snap to audio transients
- Select the audio clips whose rhythm you want to snap to.
- Open the Snap to Grid dialog (press SHIFT+N), and enable the Audio Transients check box on the Clips tab and/or the PRV Mode tab. Deselect Musical Time and all other options.
Figure 74. The Snap to Grid window

- In this example, we're using the Inline Piano Roll view: to enable it, click a MIDI track's PRV Mode button Zoom in enough to see where the edits need to be. Make sure that the Audio Transients check box on the PRV Mode tab of the Snap to Grid dialog is enabled.
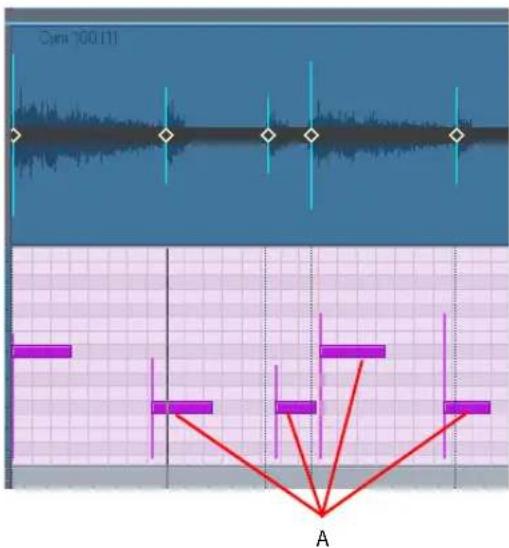
A. These notes don't line up with the audio beats
- Drag the misaligned MIDI notes so they line up with the audio beats. As you're dragging notes, they will automatically snap to the nearest audio beat.

Splitting beats into clips
AudioSnap
General editing
Clicking the Split Beats Into Clips button on the AudioSnap palette splits a selected
AudioSnap-enabled clip into new clips starting at every enabled transient marker. The main reason you might want to do this is to align a clip with a new tempo or quantize it, without stretching the audio. Once you split a clip at its transients, you can move the new clips by dragging or quantizing so that they are aligned the way you want them to be. The advantage is that moving clips instead of transient markers does not stretch any audio, so that the original sound quality is unchanged. The possible disadvantage is that you can create gaps between the new clips when you move them. However, the Quantize, Groove Quantize, and Fade Selected Clips dialogs all have an option to automatically fill in the gaps. This is the Fill Gaps, XFade between Audio Clips option in the Fade Selected Clips dialog, and is the Auto XFade Audio Clips option in the Quantize and Groove Quantize dialogs. Filling the gaps is accomplished automatically by "rolling out" the first clip's right edge and the second clip's left edge to create a crossfade. This option will often be used when quantizing drum parts, which results in smooth-sounding audio without introducing phase problems.

Note: When you align clips on multiple tracks, it is necessary to split and/or quantize all clips at the exact same position in order to avoid phase problems. In order to do so, it is necessary to establish a common, or master, transient pool that all tracks can reference. The Merge and Lock Markers command will use the transient pool as a reference, and insert identical transient markers on all selected clips. You can then use the Split Beats Into Clips button to split clips at audio beats.
To add markers at Pool lines
- Make sure that the Pool contains markers from at least one clip, or from the Time Ruler.
- Select the clips that you want to add markers to.
- Right-click a selected clip, and choose AudioSnap > Apply AudioSnap Pool Transient Markers from the pop-up menu.
Markers appear on the selected clips at Pool lines.

Note: If a selected clip is not AudioSnap-enabled, choosing the Apply AudioSnap Pool Transient Markers command will automatically enable AudioSnap for the clip.
To split a clip at beats
- Select the clip(s) that you want to split.
- Press SHIFT+A to open the AudioSnap palette.
- Click the Split Beats into Clips button
The clip's beats are split into separate clips.

To split a clip, quantize it, and fill in the gaps
- The following picture shows a clip whose transient markers don't line up with the measure lines:

- If we quantize it, the audio will stretch and we may or may not like the resulting sound. Let's try splitting it, and quantizing the clips instead of the transients: click the Split Beats Into Clips button on the AudioSnap palette.
The clip splits at the transients, and only the first new clip is still selected:

- Let's quantize the clips: drag through the clips to select them.
- Click the Quantize button in the AudioSnap palette.
The Quantize dialog appears:

- Make sure that Audio Clip Start Times is selected, and that (for this example) Sixteenth is selected in the Duration field. Leave the Auto XFade Audio Clips option unchecked for now, and click OK. Let's zoom in and look at the quantized clips:

- The start of each clip now lines up where we want it to, but there are gaps between some of the clips. Let's undo what we just did (press CTRL+Z), and quantize again. This time, however we will enable the Auto XFade Audio Clips option in the Quantize dialog, and click OK:

A. Crossfades
7. Where the gaps were between clips, we now see crossfades. The default length of the crossfade is 20 milliseconds, but you can change that by entering a number in the XFade
8. If you don't want wide gaps to be filled in, you can enter a number of up to 200 milliseconds in the Max Gap field. Any gap that is wider than the number in this field will not be filled in.
If we wanted to drag the clips to new locations instead of quantizing them, we could fix any resulting gaps by selecting the clips that have gaps, and using the Process > Fade Selected Clips command.
The Fade Selected Clips dialog has the Fill Gaps, XFade between Audio Clips radio button, the XFade
Figure 75. The Fade Selected Clips dialog

To fill in gaps with the Fade Selected Clips command
- Select the clips that have gaps you want to fill.
-
Use the Process > Fade Selected Clips command to open the Fade Selected Clips dialog.
-
Enable the XFade between Audio Clips radio button, and set any options you want in the XFade
ms field, and Max Gap field. -
Click OK.
See:
Using the Transient tool
Editing transient markers
Using the AudioSnap palette
Synchronizing audio and the project tempo
Fixing timing problems in audio clips
Extracting MIDI timing information from audio
Using the Pool
Algorithms and rendering
Keyboard shortcuts
Slip-stretching audio
You can slip-stretch an audio clip in order to expand or compress its duration. Slip-stretching only works on regular audio clips, not Groove clips or REX loops.
To slip-stretch an audio clip
- Hold down the CTRL key, move the mouse pointer over the end of the clip until the cursor changes into the slip-stretch icon ☐, then drag the end of the clip to the desired position. The clip is stretched and displays a yellow bar at the bottom of the clip along with the stretch amount (percentage of original duration).

A. Stretch amount
Alpha-blended bars on slip-stretched clips
AlphaStretchIndicator=<0 or 1> (default=1)
When an audio clip is slip-stretched, a yellow alpha-blended bar is displayed on the clip. This may affect performance on some systems if there are many slip-stretched clips. There is a new Cakewalk.ini variable to disable the alpha-blended bars, and instead only show the percent value in the lower right corner of the clip.
This variable should be set in the [Wincake] section. For example:
[Wincake]
AlphaStretchIndicator=0
See:
Using the Transient tool
Editing transient markers
Using the AudioSnap palette
Synchronizing audio and the project tempo
Fixing timing problems in audio clips
Extracting MIDI timing information from audio
Using the Pool
Algorithms and rendering
Keyboard shortcuts
Adding automation
If you have an automation envelope on a track, AudioSnap can automatically add nodes to the envelope that align with a selected clip's transient markers. This makes it easy to add special processing at transient locations.
To Add Nodes at Transients
- Select the audio clip(s) that contain the transient markers you want to use as a guide.
- Right-click an automation envelope on the clip, and choose Add Nodes at Transient Markers from the pop-up menu.
Now you can easily edit your envelope at transient locations.
See:
Using the Transient tool
Editing transient markers
Using the AudioSnap palette
Synchronizing audio and the project tempo
Fixing timing problems in audio clips
Extracting MIDI timing information from audio
Using the Pool
Algorithms and rendering
Keyboard shortcuts
Using the Pool
The Pool is a collection of transient markers that can be extracted as a groove, and also function as snap locations. A transient marker that belongs to the pool is displayed in the Clips pane as a solid line within the parent track, and as a dotted line outside the parent track. Hovering the mouse over a dotted line will display a tooltip containing the parent track and position. You can show or hide the dotted pool lines by selecting Pool > Show pool lines on the Transient tool pop-up menu, or by pressing CTRL+ALT+F12.
Figure 76. Pool lines

A. Tooltip B. Solid line C. Dotted line
The Track view Time Ruler can be added to the Pool (see To add the Time Ruler to the Pool).
To add a clip's transients to the Pool
- Select the an AudioSnap-enabled clip.
-
Do one of the following:
-
Right-click the clip and select AudioSnap > AudioSnap Add Transients to Pool from the pop-up menu.
- Select the Add Transients to Pool check box in the Clip Properties dialog.
- Press CTRL+F12.
To hide or show the Pool
-
Click the Transient Tool button in the Track View toolbar.
-
Right-click in the Clips pane and select Pool > Show pool lines on the pop-up menu.
To add the Time Ruler to the Pool
- In the Snap to Grid dialog, set the Musical Time value to the resolution you would like to add to the Pool.
- Click the Transient Tool button in the Track View toolbar.
- Right-click in the Clips pane and select Pool > Add MBT to pool on the pop-up menu.
The current Musical Time snap resolution to the pool, and also displays dotted pool lines in the Clips pane. This can be useful as either a basic visual guide, or for adding the Musical Time to an extracted groove, or to fill in any transients that may be “missing” in a syncopated or sparse section.
To add transient markers at Pool lines
- Make sure that the Pool contains markers from at least one clip, or from the Time Ruler.
- Select the clips that you want to add markers to.
- Right-click a selected clip, and choose AudioSnap > Apply AudioSnap Pool Transient Markers from the pop-up menu.
Markers appear on the selected clips at Pool lines. When aligning clips on multiple tracks, it is necessary to split and/or quantize all clips at the exact same position in order to avoid phase problems when quantizing audio. In order to do so, it is necessary to establish a common, or "master", transient reference pool which can be applied to all tracks. The Apply AudioSnap Pool Transient Markers command will use the transient pool as a reference, and insert identical transient markers on all selected clips.

Note 1: If a selected clip is not AudioSnap-enabled, choosing the Apply AudioSnap Pool Transient Markers command will automatically enable AudioSnap for the clip.

Note 2: Adding markers at Pool lines can add a lot of markers to a clip. If you later decide that you want to work with the clip's original markers, you can remove only the markers that you added by right-clicking the transient marker, and choosing Reset from the pop-up menu.
Groove Quantize and Quantize to Pool
You can use two kinds of groove quantizing on audio clips: the Groove Quantize command aligns transients with a groove that's on the Clipboard, and the Quantize to pool command aligns transients with the Pool.
When you use the Groove Quantize command, you can align a clip with a pre-existing groove, or you can extract a groove from another clip.
For information about extracting a groove, see To extract MIDI timing from an audio clip.
For information about groove quantizing an audio clip, see To Groove Quantize an audio clip.
For information about quantizing to the Pool, see To quantize an audio clip to another audio clip (Quantize to Pool).
See:
Using the Transient tool
Editing transient markers
Using the AudioSnap palette
Synchronizing audio and the project tempo
Fixing timing problems in audio clips
Extracting MIDI timing information from audio
General editing
Algorithms and rendering
Keyboard shortcuts
Algorithms and rendering
When you stretch an audio clip, AudioSnap uses a particular formula, or algorithm, to stretch the audio. The best algorithms take the most computing time and power to complete, so if AudioSnap always used the best available algorithms (the iZotope Radius algorithms), you would not be able to play back your clip in a reasonable amount of time to listen to the timing. That's why you can choose a quick algorithm for "online" rendering (real-time playback), and a different algorithm for "offline" or non-real-time rendering. Offline rendering in an AudioSnap context usually means bouncing to track, but it also refers to other offline processes such as freezing tracks and applying effects. When you do any of these mixdown operations such as bouncing, exporting, or freezing, audio clips use the offline rendering algorithm you have chosen for them.

Note: The Online render mode is for preview purposes only during playback. The final audio quality will be greatly improved after the Offline render mode is applied during mixdown/export.
Typical algorithm choices for an AudioSnap session work like this:
- Do your AudioSnap time stretching, error correction, etc., with a quick algorithm: choose either Percussion or GrooveClip.
• After your AudioSnap editing is finished, bounce to track with a better algorithm: choose one of
the Radius choices, or for drum tracks, Percussion is usually the best choice.

Note: You should avoid rendering AudioSnap clips more than once. Applying stretch algorithms multiple time in succession can degrade the audio quality (similar to transcoding an MP3 file).
Until your project is mixed and finalized, it is recommended that you use the Freeze function instead of Bounce to Track(s) or Bounce to Clip(s) if you need to temporarily off-load CPU processing power. For details, see To freeze an AudioSnap-enabled clip.
The following table describes the available algorithms:
| Algorithm Description | |
| GrooveClip Good all-around algorithm to use while stretching audio | |
| Percussion | Gives a better sound on percussion clips while stretching audio |
| iZotope Radius Mix Best all-around choice when bouncing to track with audio clips that contain a mix of different sounds | |
| iZotope Radius Mix Advanced | This choice is similar to iZotope Radius Mix, but exposes a Smoothness parameter (pitch coherence). Pitch coherence preserves naturalness of timbre for pitched solo voices, such as human speech, saxophone or vocals. While traditional vocoders can smear these signals in time and randomize phase, the pitch coherence parameter of Radius preserves phase coherence for these signals. High values of pitch coherence will avoid phasiness in Radius's output at the expense of roughness (modulation) in processed polyphonic recordings.The Smoothness parameter can be adjusted in the AudioSnap Options dialog. |
| iZotope Radius Solo Best choice when bouncing to track with audio clips of a solo instrument. Although a guitar is a “solo” instrument, if you play chords instead of single notes you may want to select “Radius Mix” instead.Tip: if a clip/track contains a mixture of polyphonic and monophonic parts, you may wish to split the parts into separate clips and experiment with different algorithms for each clip. | |
| iZotope Radius Solo (Bass) Best choice when bouncing to track with audio clips of a bass instrument | |
| iZotope Radius Solo (Vocal) | Best choice when bouncing to track with audio clips of a solo voice |
Table 74.
To choose default algorithms
- Press SHIFT+A to open the AudioSnap palette.
-
In the Applies To list, select Default Settings.
-
Under Render Mode, select the desired Online and Offline render modes
Every AudioSnap-enabled clip that you stretch or bounce uses the settings you choose for default stretch algorithms, except clips that you choose individual settings for.
To choose render algorithms for an individual clip
- Select the clip or clips you want to edit.
- Press SHIFT+A to open the AudioSnap palette.
The AudioSnap palette displays the current render mode of the selected clip. If you select multiple clips that have different render modes, the Online and Offline lists display (Multi).
- In the Applies To list, select Clips.
- Under Render Mode, select the desired Online and Offline render modes.
To choose render algorithms for all current and future clips on a track
- Select the track or tracks you want to edit.
- Press SHIFT+A to open the AudioSnap palette.
- In the Applies To list, select Tracks.
- Under Render Mode, select the desired Online and Offline render modes.
All current and future clips in the selected tracks will inherit the selected render modes.
To freeze an AudioSnap-enabled clip
-
Do one of the following to open the Freeze Options dialog:
-
In the Track view, right-click any track's Freeze button *.
-
Right-click an audio track, and select Freeze > Freeze Options from the pop-up menu.
-
Make sure the Track FX check box is cleared.
- Click OK to close the Freeze Options dialog.
- Do one of the following:
- In the Track view, click the desired track's Freeze button *.
- Right-click the track and select Freeze > Freeze Track from the pop-up menu.
SONAR bounces the audio in the track to a new audio clip or clips.
To bounce an AudioSnap-enabled clip
- Select the clip you want to bounce.
- Use the Edit > Bounce to Tracks command to open the Bounce to Track(s) dialog.
- In the Destination field, choose the track where you want your new audio clip to go.
- In the Source Category field, choose Tracks.
- Choose the Channel Format and Dithering options you want.
- Enable all the options in the Mix Enables section.
7. Click OK.
See:
Freeze Tracks and Synths
To Bounce Multiple Audio Clips to a New Track
To Bounce to Clips
Using the Transient tool
Editing transient markers
Using the AudioSnap palette
Synchronizing audio and the project tempo
Fixing timing problems in audio clips
Extracting MIDI timing information from audio
General editing
Using the Pool
Keyboard shortcuts
Keyboard shortcuts
All the AudioSnap features become much more efficient if you use keyboard shortcuts. The following table describes each shortcut.
| Command Shortcut |
| AudioSnap Enable F12 |
| AudioSnap Add Transients To Pool CTRL+F12 |
| AudioSnap Show Transient Markers SHIFT+F12 |
| AudioSnap Go to Next Transient Marker TAB |
| AudioSnap Go to Previous Transient Marker SHIFT+TAB |
| Set Measure Beat at Now CTRL+M |
| AudioSnap Auto Stretch (Follow Tempo) ALT+F12 |
| AudioSnap Insert Marker CTRL+ALT+I |
| AudioSnap Reset Selected Transient Marker(s) CTRL+ALT+R |
Table 75. AudioSnap keyboard shortcuts
| Command | Shortcut |
| AudioSnap Delete Inserted Marker CTRL+ALT+BACKSPACE | |
| AudioSnap Disable Marker CTRL+ALT+D | |
| AudioSnap Promote Marker CTRL+ALT+P | |
| AudioSnap Snap to Transients CTRL+ALT+N | |
| AudioSnap Audition Beat CTRL+SHIFT+SPACEBAR | |
| AudioSnap Show Palette SHIFT+A | |
| AudioSnap Show Transient Pool CTRL+ALT+F12 | |
| AudioSnap Select All Markers ALT+SHIFT+A | |
| AudioSnap Clear Selection ALT+SHIFT+C | |
| AudioSnap Select Moved Markers ALT+SHIFT+M | |
| AudioSnap Select Stretched Markers ALT+SHIFT+S | |
| AudioSnap Select Disabled Markers ALT+SHIFT+D | |
| AudioSnap Select Enabled Markers ALT+SHIFT+E | |
| AudioSnap Select Promoted Markers | ALT+SHIFT+P |
Table 75. AudioSnap keyboard shortcuts
AudioSnap shortcuts are also listed in the Key Bindings dialog (Options > Key Bindings command): select Track View in the Bind Context menu of the dialog to view or edit the default bindings.
See:
Using the Transient tool
Editing transient markers
Using the AudioSnap palette
Synchronizing audio and the project tempo
Fixing timing problems in audio clips
Extracting MIDI timing information from audio
General editing
Using the Pool
Algorithms and rendering
Working with Loops and Groove Clips
Loops are short digital audio clips which are often designed to be repeated over and over or "looped," although some loops, called one-shots, are intended to play just once. Groove clips, often used as loops, are digital audio clips that "know" their tempo and pitch information. Groove clips automatically respond to changes in a project's tempo and can have their root note pitch adjusted using pitch markers. In SONAR, you can import ACID™ loops, or digital audio clips and convert them to Groove clips. You can also record your own audio and create Groove clips. To download more Groove clips and loops, visit www.cakewalk.com.

Note: Groove clips and ACIDized loops are loaded into RAM, and can take up a lot of memory. Copying them does not increase the amount of memory they take up, but loading the initial copy does.
The Loop Construction View
The Media Browser View
Working with Loops
Working Groove Clip audio
MIDI Groove Clips
Importing Project5 Patterns
The Loop Construction View
The Loop Construction view is where you create and edit Groove clips.
Figure 77. The Loop Construction view

The Loop Construction view toolbar has tools for editing slicing markers and controls for previewing loops.
See:
Loop Construction Controls
See also:
Working with Loops
Working Groove Clip audio
Loop Construction view
Loop Construction Controls
The following is a list of the tools and controls in the Loop Construction view, followed by a description:
Save Loop as WAV
This button opens the Save As dialog. The clip in the Loop Construction view is saved as a Groove Clip/Wave file that has tempo and pitch information stored in it, and can be opened in SONAR or ACID™. For more information, see "Saving Groove Clips as Wave Files/ACIDized Wave Files" on page 424.
Enable Looping
The Enable Looping button allows a clip to be looped by dragging in the Track view. Loop-enabled clips follow changes in the project tempo. Click the Enable Looping button to loop clips in the Track view by dragging the left or right side of a clip with your mouse. When you loop-enable a clip it automatically snaps to the nearest beat boundary (at 1, 2, 4, 8, 16 etc. beats). SONAR calculates the appropriate beat number. Change the number in the Beats in Clip field if you want to change the total number of beats in the clip.
Enable Stretching

The Enable Stretching button allows a clip to follow a project's tempo as it changes. It instructs SONAR to stretch or shrink the clip to fit the project's tempo. SONAR uses the Original BPM parameters to make the change.
Beats in Clip
The number of beats in the clip.
Original BPM
The tempo at which the clip was recorded.
Follow Project Pitch

The Follow Project Pitch option transposes the loop, if necessary, to the project pitch which you can set in the Markers toolbar. A loop recorded in the key of C, used in a project with a default project pitch of A, would be transposed down three semitones if the Follow Project Pitch check box was checked. You can also insert markers in the Time Ruler which change the project pitch. These markers, called pitch markers affect only Groove clips with Follow Project Pitch enabled.
Root Note
The Root Note represents the key in which the loop was originally recorded. The Follow Project Pitch feature uses this information, when checked, to transpose the loop to match the project's default project pitch and pitch markers.
Pitch (coarse)
You can set the transposition of a clip, independent from the project pitch, using the Pitch (Coarse) field. A positive number transposes the clip up by that number of semitones. A negative number transposes the clip down by that number of semitones. Remember that, if the Follow Project Pitch option is checked, the clip follows the project's pitch. Any transposition changes to the pitch with this option checked are changes to the project pitch, not the clip pitch.
An example: The project key is C. The clip key is D. If the Follow Project Pitch is enabled, the clip is transposed down by two semitones. A value entered into the Pitch (coarse) field adjusts the pitch from C. If you enter -1, the pitch would be transposed down by one additional semi tone to B.
Another example: The clip pitch is E. The desired clip pitch is D. If the Follow Project Pitch option is not enabled, and a value of -2 is entered in the Pitch (coarse) field, the clip is transposed down two semitones to D from the original pitch of E.
Pitch (fine)
The Pitch (fine) field allows you to make tuning adjustments or to transpose the pitch of a clip up to 50 cents. There are 100 cents in one semi tone. A Pitch (fine) setting of 1 adjusts the pitch up one hundredth of a semi tone. The Pitch (fine) option can “fine tune” a slightly out of tune clip so that it is in pitch with the remaining clips in a project.
Slices Menu
The Slices menu sets the resolution for the creation of markers, or the “slicing” of the looped clip. This menu uses note lengths, so the settings are:
- Whole notes
- Half notes
- Quarter notes
- Eighth notes
- Sixteenth notes
- Thirty-second notes
The automatic markers appear at the note resolutions according to the slider setting. At the eighth note setting, there are eight markers per measure.
This control works well for slicing audio that has more subtle changes in volume with few dramatic transients.
The markers in a loop clip preserve the timing of the audio at that moment. Too few or too many markers can cause unwanted “artifacts” when a loop clip is stretched.
Trans Detect (%)
The Trans Detect control senses transients in your audio clip and assigns a marker at the beginning and end of each one it finds. As the you increase the sensitivity (by using larger numbers) smaller transients are detected and the number of markers increases.
Stop Preview
Stops loop preview playback.
Preview Loops
Plays the current loop repeatedly. Use the Stop Preview control to stop playback.
Enable Slice Auto-Preview
Plays a slice when you click on it.
Click Auto-Preview Loop
Repeatedly plays a selected slice.
Preview Bus
Select the output through which you want to listen to the clip.
Properties
The Properties button opens the Clip Properties dialog.
Select
Use the Select tool to move markers in the Markers bar.
Erase
Use the Erase tool to delete markers in the Markers bar.
Default All Markers
The Default All Markers tool restores all automatically generated markers to the original position and enables all those that were disabled. Manually created markers remain as is.
Previous Slice
Moves slice selection to the previous slice. Click on a slice to select it.
Next Slice
Moves slice selection to the next slice. Click on a slice to select it.
Show/Hide Gain Envelope
Clicking this button shows or hides the clip's gain envelope. Each slice of the clip has its own segment of the envelope, which you can adjust by dragging the segment up or down.
Show/Hide Pan Envelope
Clicking this button shows or hides the clip's pan envelope. Each slice of the clip has its own segment of the envelope, which you can adjust by dragging the segment up or down.
Show/Hide Pitch Envelope
Clicking this button shows or hides the clip's pitch envelope. Each slice of the clip has its own segment of the envelope, which you can adjust by dragging the segment up or down.
Slice Gain
Changes the selected slice's gain.
Slice Pan
Adjusts the selected slice's pan. Negative is left and positive is right.
Slice Pitch
Adjusts the selected slice's pitch. The first field is in half steps, the second field is in cents.
Slicing Markers
There are two types of slicing markers in the Loop Construction view: automatic and manual. Automatic markers appear in red and are automatically generated by SONAR when you loop enable a clip. The one exception to this is if you import an ACIDized wave file into SONAR. ACIDized files always appear with manual slicing markers. Manual markers appear in purple. If you add a marker or move an automatic marker, it turns purple to show you that it has been edited. For information on editing slicing markers, see “To Edit the Slicing Markers in a Groove Clip” on page 423.
Audio Scaling
Audio scaling is the increase or decrease in the size (scale) of the waveform in clip. Audio scaling allows you to make detailed edits by zooming in on the parts of the waveform closest to the zero crossing (silence) while preserving the track size. By showing just the quietest parts of a clip, you can make very precise edits.
The Audio Scale Ruler is located on the far left of the Loop Construction view.
Figure 78. Audio scale ruler

line
| Time | Value | |------|-------| | 0 | -3.2 | | 1 | -3.0 | | 2 | -2.8 | | 3 | -2.6 | | 4 | -2.4 | | 5 | -2.2 | | 6 | -2.0 | | 7 | -1.8 | | 8 | -1.6 | | 9 | -1.4 | | 10 | -1.2 | | 11 | -1.0 | | 12 | -0.8 | | 13 | -0.6 | | 14 | -0.4 | | 15 | -0.2 | | 16 | 0.0 | | 17 | 0.2 | | 18 | 0.4 | | 19 | 0.6 | | 20 | 0.8 | | 21 | 1.0 | | 22 | 1.2 | | 23 | 1.4 | | 24 | 1.6 | | 25 | 1.8 | | 26 | 2.0 | | 27 | 2.2 | | 28 | 2.4 | | 29 | 2.6 | | 30 | 2.8 | | 31 | 3.0 | | 32 | 3.2 | | 33 | 3.4 | | 34 | 3.6 | | 35 | 3.8 | | 36 | 4.0 | | 37 | 4.2 | | 38 | 4.4 | | 39 | 4.6 | | 40 | 4.8 | | 41 | 5.0 | | 42 | 5.2 | | 43 | 5.4 | | 44 | 5.6 | | 45 | 5.8 | | 46 | 6.0 | | 47 | 6.2 | | 48 | 6.4 | | 49 | 6.6 | | 50 | 6.8 | | 51 | 7.0 | | 52 | 7.2 | | 53 | 7.4 | | 54 | 7.6 | | 55 | 7.8 | | 56 | 8.0 | | 57 | 8.2 | | 58 | 8.4 | | 59 | 8.6 | | 60 | 8.8 | | 61 | 9.0 | | 62 | 9.2 | | 63 | 9.4 | | 64 | 9.6 | | 65 | 9.8 | | 66 | 10.0 | | 67 | 10.2 | | 68 | 10.4 | | 69 | 10.6 | | 70 | 10.8 | | 71 | 11.0 | | 72 | 11.2 | | 73 | 11.4 | | 74 | 11.6 | | 75 | 11.8 | | 76 | 12.0 | | 77 | 12.2 | | 78 | 12.4 | | 79 | 12.6 | | 80 | 12.8 | | 81 | 13.0 | | 82 | 13.2 | | 83 | 13.4 | | 84 | 13.6 | | 85 | 13.8 | | 86 | 14.0 | | 87 | 14.2 | | 88 | 14.4 | | 89 | 14.6 | | 90 | 14.8 | | 91 | 15.0 | | 92 | 15.2 | | 93 | 15.4 | | 94 | 15.6 | | 95 | 15.8 | | 96 | 16.0 | | 97 | 16.2 | | 98 | 16.4 | | 99 | 16.6 | | A | -3.2 | | B | -3.0, -2.8, -2.6, -2.4, -2.2, -2.0, -1.8, -1.6, -1.4, -1.2, -1.0, -0.8, -0.6, -0.4, -0.2, +0.0, +0.2, +0.4, +0.6, +0.8, +1.0, +1.2, +1.4, +1.6, +1.8, +2.0, +2.2, +2.4, +2.6, +2.8, +3.0, +3.2, +3.4, +3.6, +3.8, +4.0, +4.2, +4.4, +4.6, +4.8, +5.0, +5.2, +5.4, +5.6, +5.8, +6.0, +6.2, +6.4, +6.6, +6.8, +7.0, +7.2, +7.4, +7.6, +7.8, +8.0, +8.2, +8.4, +8.6, +8.8, +9.0, +9.2, +9.4, +9.6, +9.8, +10.0, +10.2, +10.4, +10.6, +10.8, +11.0, +11.2, +11.4, +11.6, +11.8, +12.0, +12.2, +12.4, +12.6, +12.8, +13.0, +13.2, +13.4, +13.6, +13.8, +14.0, +14.2, +14.4, +14.6, +14.8, +15.0, +15 .A. Audio Scale Ruler B. Clip
There are three right-click display options in the Audio Scale Ruler:
• Percentage. Shows audio scaling by percentage. For example, if the highest percentage in the Audio Scale Ruler reads 2.0%, then only the parts of the waveform which are within 2% of the zero crossing appear in the clip.
- dB. Shows audio scaling by dB. For example, if the highest dB in the Audio Scaling Ruler reads -36, then only the parts of the waveform which are 36 dB below 0 dB appear in the clip.
- Zoom Factor. Shows audio scaling by a factor. For example, if the Zoom Factor reads 10, then the waveform is zoomed in by a factor of 10.
The Media Browser View
The Media Browser view allows you to browse and preview your audio files (.wav, .mp3, .wma, etc.), MIDI loops (.mid), Project5 patterns (.ptn), step sequencer patterns (.ssp) and REX loops (.rex) before you drag them into your project. If you preview a Groove clip, it plays back at tempo and in the key of your current project.
You can open the Media Browser view in any of the following methods:
- Select Views > Media Browser from the menu.
- Click the Media Browser button on the Views toolbar.
- Press ALT+1
The Media Browser view toolbar has the following controls:
| Tool Name What It Does | ||
 | Move Up Opens the folder one level above the active folder. | |
 | Refresh Refreshes the active folder. | |
 | Windows Explorer Opens Windows Explorer at the same directory being viewed in the Media Browser view. | |
 | Play Plays the selected media file. | |
| [6YDS] | Stop Stops the playback of the selected file. | |
 | Auto Preview Automatically preview files when you click on them in the Media Browser view. If the selected file is a Groove clip, it plays back in the project tempo and key. | |
 | Views Allows you to change the way the files are viewed in the list view:Large iconsSmall iconsListDetails—displays the file size, date and when the file was created and last modified | |
| [0HKW] | Content Location Allows you to save and recall presets to quickly access your favorite folders. | |
 | Preview Bus | Select the output through which you want to listen to the loop. |
| [67BX] | Insert soft synth | Inserts a new soft synth, which can be used to audition MIDI files. |
| [27W5] | Delete soft synth | Deletes the selected soft synth. |
 | Properties | Opens the user interface for the selected soft synth. |
Table 76.
Folders Pane
The Folders pane shows all of the available files and folders in the selected drive.
See also:
To Preview a Groove Clip
Contents List Pane
The Contents List pane displays the folders and files contained in the active folder.
To Preview a Groove Clip
- Click the Auto-preview button in the Media Browser toolbar.
- Click on a Wave file in the Content List pane.
Each successive Wave file you select is previewed. You can also select multiple files and play them simultaneously.
Or
- Select a Wave file in the Content List pane.
-
Click the Play button in the Media Browser toolbar.
-
Click the Stop button to stop playing the selected Wave file.
When you preview a Groove clip in the Media Browser view, the clip plays in the project key and at the project tempo.
To Drag a Loop into a Project
- Click and drag the Wave file from the Media Browser view to the Track view.
- Drop the Wave file in the track and at the time in which you want it in your project. If you drop the file after the last track in your project, a new track is created for the file.
To Drag Multiple Loops into a Project
- Select a Wave file and select additional by holding down the CTRL key and selecting them.
- Drag the Wave files from the Media Browser view to the Track view.
- Drop the Wave files into the Track view at the time in which you want them in your project.
The Wave files appear on consecutive tracks in the Track view at the time selected.
Working with Loops
You can make any audio clip into a loop by checking the Enable Looping check box in the Clip Properties dialog. Once looping is enabled, you can drag out loops to create multiple repetitions. There are several other ways to enable looping:
To Enable or Disable a Clip for Looping
- Double-click on the clip you want to loop.
The Loop Construction view appears.
- In the Loop Construction view, click the Enable Looping button 📄. Or
In the Track view, select a clip and press CTRL+L or select Edit > Groove Clip Looping.
To Create Repetitions of a Loop
- Set the Snap value if you want the loop to repeat at precise time boundaries.
- Move the cursor over the end of the loop-enabled clip until the cursor looks like this ☐.
- When the cursor changes, click the end or beginning of the clip and drag it to the right (if you are dragging out from the end) or left (if you are dragging from the beginning).
The clip repeats itself until you stop dragging.
To Create Partial Repetitions of a Loop
- Move the cursor over the end of the loop-enabled clip until the cursor looks like this ☐.
- When the cursor changes, click the end or beginning of the clip and drag it to the right (if you are dragging out from the end) or left (if you are dragging from the beginning).
If the Snap to Grid button is on, you can create a partial loop as small as the Snap to Grid setting allows. For example, if your Snap to Grid setting is set to quarter notes, you can create partial repetitions as small as a quarter of a measure.
Working Groove Clip audio
Groove clips are .wav files that behave similarly to Sony Media Software's ACIDized loops (SONAR also has MIDI Groove clips—see "MIDI Groove Clips" on page 427). Groove clips contain information about the audio content, including the original tempo, original reference pitch, number of beats in the loop, and audio transient information.
See:
How Groove Clips Work in SONAR
Using Groove Clips
Creating and Editing Groove Clips
Using Pitch Markers in the Track View
"Working with REX files"
How Groove Clips Work in SONAR
Groove clips have information saved within them which allow them to adjust to changes in tempo and pitch. Groove clips can read a project's tempo and tempo changes, and can adjust their root note pitch when they read pitch markers. You can add pitch markers in the Track view's Time Ruler to transpose the Groove clip. As your project passes over a pitch marker, SONAR transposes your
Groove clips based on the clip's root note reference pitch. If you insert no pitch markers in your project, there are no pitch changes in your Groove clips. The default project pitch is C.

Note 1: When working with Groove clips, it is important to know the difference between key and pitch. Your project's key signature has no effect on Groove clips. The pitch of your Follow Project Pitch-enabled Groove clips is dictated by pitch markers in the Time Ruler. If there are no pitch markers in your project, these Groove clips play at the pitch set in the Markers toolbar (the default is C).

Note 2: Groove clips must be at least one beat in length. If you try to loop-enable a clip of a shorter duration you may experience distortion or artifacts.
See also:
Working Groove Clip audio
Using Groove Clips
Creating and Editing Groove Clips
Using Groove Clips
Groove clips are easy to use because they automatically adjust to your project's pitch markers and tempo. You can import existing loops or create your own, using the Loop Construction view.
To Import a Groove Clip into Your Project
- Select a Track in the Track view.
- Set the Now Time to the place you want the clip to begin.
- Select File > Import > Audio from the menu.
The Open dialog appears. - Navigate to a directory that contains Groove clips and select one.
- Click Open.
Or
- Open the Media Browser view.
- Navigate to a directory that contains Groove clips.
- Drag and drop a clip into the Track view, or double-click it to insert it at the Now Time.
- The clip appears on the track and at the time in your project where you drop it, so if you want the clip on a new track, drop it after the last track in your project.
By default, Groove clips are loop-enabled and transposed to match the project's pitch.
Setting the Default Project Pitch
- If necessary display the Markers toolbar by selecting Views > Toolbars to open the Toolbars dialog. In the toolbar dialog click Markers and OK.
- In the Markers toolbar, click the Default Groove Clip Pitch drop-down menu and select a pitch.
Your project now uses the root note of your clips to transpose to the project pitch. Use Pitch markers at different points in your project to change the pitch. For more information about Pitch markers, see "Using Pitch Markers in the Track View" on page 425.
Creating and Editing Groove Clips
Any audio clip can be converted to a Groove clip. Groove clips contain tempo, beat, and pitch information which SONAR uses to stretch and transpose the clips to match the project. Most Groove clips are loop-enabled, meaning that you can use the mouse to drag clip repetitions in the Track view. Groove clips can be either loop-enabled or not, although they usually are. When a Groove clip is loop-enabled, its edges appear beveled. It is sometimes desirable to create clips that follow the project's tempo and key, but are not intended to loop. The following is a list of the attributes contained in a Groove clip:
- Beats in clip. The number of quarter notes in a clip. A four measure clip in 4/4 time should have 16 beats. When you enable looping for a clip, SONAR calculates the number of beats in the clip using an algorithm. This calculation is very often accurate, but in some cases, for instance when the clip has a very slow or very fast tempo or if the clip has an unusual number of beats, then the number of beats in a clip may have to be edited manually in the Beats in clip field.
- Original tempo. The original tempo of the recording. SONAR uses the original tempo to adjust to your project's tempo. The original tempo must be specified for stretching clips.

Note: When you loop-enable a clip, SONAR calculates the original tempo of the clip, and unless the clip's length is in exact beat or measure increments, the original tempo that SONAR calculates may vary from the recorded tempo. These fluctuations are usually quite small and do not affect the quality of the Groove clip you create.
- Reference note. The original key of the recorded clip. SONAR uses the Reference note when it transposes Groove clips to match your project's pitch.
These attributes can be edited in the Loop Construction view. For more information about the Loop Construction view, see Loop Construction view.
To Set the Number of Beats in a Groove Clip
When you open a clip in the Loop Construction view, SONAR determines the number of beats in the clip. In some cases the beat value may not be correct. The beats in clip value can only be changed if the clip is loop enabled.
Do the following to change value in the Beats in clip field.
- Click the Plus or Minus button to the right of the Beats in clip field until the correct value is displayed.
To Change the Loop Construction View Time Ruler Display
You can display the Loop Construction view Time Ruler in measures or in samples. To toggle between the two modes, double click the Time Ruler.
To Set the Tempo of a Groove Clip
When creating a new Groove clip, SONAR sets the clip's tempo to the current project tempo. To ensure proper stretching behavior you must set the value in the Original BPM field to the tempo at which you recorded the clip. The tempo value of a clip can only be changed if the clip is stretch-enabled.
Do the following to change the value in the Original BPM field.
- Click the Plus or Minus button to the right of the Original BPM field until the correct value is displayed. For more precise tempos you can double-click in the Original BPM field and enter a tempo.
To Slice a Groove Clip
- Double-click on a clip in the Clips pane.
The clip appears in the Loop Construction view.
- Slice the clip using one or all of the following methods:
| To do this Do this | |
| Slice the clip on note divisions | Move the Basic Slicing slider to the note resolution you want. The Basic Slicing slider's settings range from whole notes to 64th notes. Selecting quarter notes, for example, would create four markers per measure. |
| Slice the clip at transient peaks | Enter a value into the Transient Detection (Trans Detect %) text field or use the increment/decrement buttons. The larger transients in the clip will be flanked by markers. |
| Slice the clip manually | Move your mouse to the space above the Time Ruler and double-click to add a marker. Click and drag the marker, if necessary, so it aligns with the beginning or end of a transient. |
Table 77.
- Play your project and adjust the slicing of your clip as necessary.

Note: You can use any or all of these methods to slice a clip. If you adjust both the Slices and Trans Detect menus, two markers may be placed right next to each other. If these markers are too close, the markers will automatically merge. Manual markers will not automatically merge.
To Transpose a Groove Clip to Match Your Project's Pitch
Follow this procedure to force the Groove clip to follow the project's default pitch.
- Double-click the clip you want to transpose to the project's pitch.
The clip appears in the Loop Construction view.
- Click the Follow Project Pitch button.
To Transpose a Groove Clip by Semitones
Follow this procedure to transpose a Groove clip by any number of semitones.
- Double-click the clip you want to transpose to the project's pitch.
The clip appears in the Loop Construction view.
- If the Follow Project Pitch button is enabled, click it to disable it.
- In the Pitch (semitones) field, enter the number of semitones you want to transpose the clip by. A negative number in the Pitch (semitones) field transposes a clip down. A positive number in the Pitch (semitones) field transposes the clip up.
To "Fine Tune" a Groove Clip
Follow this procedure to make slight pitch changes to a clip.
- Double-click the clip you want to transpose to the project's pitch.
The clip appears in the Loop Construction view.
- In the Fine Pitch (cents) field, enter the number of cents you want to adjust the pitch. You can enter a number from -50 (transpose the pitch down by a quarter tone) to 50 (transpose the pitch up by a quarter tone).
To Edit the Slicing Markers in a Groove Clip
The table below describes how to create and edit the slicing markers in the Loop Construction view.
| To do this Do this | |
| Add a slicing marker Move the mouse cursor to the Markers bar, at the beginning of a transient and double-click. | |
| Delete a slicing marker | Select the Eraser tool and click on a marker. |
| Move a slicing marker Click and drag a marker | |
| Reset slicing markers to original positions | Click the Default All Markers button |
Table 78.
For more information about slicing markers, see "Slicing Markers" on page 415.
Editing Slices
Each slice (space between the slicing markers) can be adjusted in the Loop Construction view. You can adjust the following slice attributes:
- Gain
- Pan
- Pitch
To Preview a Groove Clip Slice
- Double-click on a clip to open the Loop Construction view.
- Click the Enable Slice Auto-preview button.
- Click a slice to hear it.
To Adjust a Groove Clip Slice Gain
-
In the Loop Construction view, select the slice on which you want to adjust the gain.
-
In the Slice Gain field, click the Plus or Minus buttons to change the gain value. Or
Click between the plus and minus keys until the cursor becomes a double arrow and drag up to increase the value or down to decrease the value.
To Adjust a Groove Clip Slice Pan
- In the Loop Construction view, select the slice on which you want to adjust the pan.
- In the Slice Pan field, click the Plus or Minus buttons to change the pan value. Negative is Left pan and positive is right pan.
To Adjust a Groove Clip Slice Pitch (Half Steps)
- In the Loop Construction view, select the slice on which you want to adjust the pitch.
- In the first Slice Pitch field, click the Plus or Minus buttons to change the pitch value.
To Adjust a Groove Clip Slice Pitch (Cents)
- In the Loop Construction view, select the slice on which you want to adjust the pitch.
- In the second Slice Pitch field, click the Plus or Minus buttons to change the pitch value.
To Adjust Slice Gain, Pan and Pitch Using Slice Envelopes
You can change an envelope's gain, pan and/or pitch settings by dragging the envelope up or down in that slice.
Saving Groove Clips as Wave Files/ACIDized Wave Files
Once you have created a Groove clip in SONAR, you can save the clip as a Groove Clip/Wave file, compatible with ACIDized wave files.
To Save a Groove Clip as a Riff Wave File/ACIDized Wave File
- If you have not already done so, create a Groove clip. See "Creating and Editing Groove Clips" on page 421.
- In the Loop Construction view, click the Save icon.
The Save As dialog appears.
- Use the toolbar in the Save As dialog to navigate to the location where you want to save the file.
- In the File name field, enter a name for the file.
- Click the Save button.
To Drag and Drop a Groove Clip Into Another Application
You can drag and drop clips from SONAR to another application or to a directory in Windows. When you drag a file from SONAR, the source file is copied and the copy is placed in the new directory or application.
Using Pitch Markers in the Track View
Pitch markers change the pitch at which Groove clips sound. All Groove clips in SONAR that have the Follow Project Pitch option enabled adjust their pitch as they encounter pitch markers in SONAR. If there are no pitch markers, all Groove clips play at the default project pitch, unless the Follow Project Pitch parameter is disabled.

A. Pitch marker: Groove clips with Follow Project Pitch enabled play with the Root Note transposed to C B. Time Ruler C. Pitch marker: Groove clips with Follow Project Pitch enabled play with the Root Note transposed to D
To Enable a Clip's Follow Project Pitch Option
- Right-click the clip and choose Clip Properties from the pop-up menu.
The Clip Properties dialog appears. - On the Groove Clips tab, check the Follow Project Pitch check box.
-
Click OK to close the dialog.
-
Make sure that the Reference Note field is correct. When your project reaches a pitch marker, SONAR transposes each groove clip that has the Follow Project Pitch option enabled by the difference between the clip's Reference Note and the current Project Pitch.
To Change Your Project's Default Pitch
- Display the Markers toolbar, if it's not already displayed, by using the Views > Toolbars > Markers command.
- In the Default Groove-Clip Pitch drop-down menu at the right end of the toolbar, choose your project's default pitch.
SONAR transposes each groove clip that has the Follow Project Pitch option enabled by the difference between the clip's Reference Note and the current Project Pitch. Your project's pitch
changes wherever you insert a pitch marker. If you don't insert any pitch markers, your project stays at its default pitch.
To Create a Pitch Marker
- In the Track view, right-click in the Time Ruler.
- Select Create a Marker from the menu that appears.
- The Marker dialog appears.
- In the Groove Clip Pitch drop-down, select a pitch.
- Click OK.
To Move a Pitch Marker
- Click and drag a pitch marker to a new location on the Time Ruler.
See:
"Working with REX files"
Working with REX files
SONAR supports two types of Groove Clips:
- ACIDized Groove Clip
- REX-based Groove Clip
Like ACIDized WAVE files, REX files are audio files that are designed to be looped and follow the project's tempo. The time stretching technology that REX files use is well suited for percussive sounds, such as drums.
You can import REX files into a SONAR project. Once imported, you can work with REX files just as if they were regular Groove Clips (see Working Groove Clip audio).

Note: REX-based Groove Clips can be edited in the Loop Construction view, but certain Loop Construction view tools only apply to ACIDized Groove Clips. The following Loop Construction view commands, settings and tools do not apply to REX files:
- Enable Looping
- Beats in Clip
- Enable Stretching
- Marker tools
- Slice Resolution
- Transient Detection
To import a REX file
- On the File menu, point to Import and click Audio.
The Import Audio dialog appears.
- In the Files of type list, select All Audio or REX (*.rex, *.rx2, *.rcy).
- Find and select the REX file you want to import.
If you want to preview the selected file, click Play. The file will play at the current project tempo.
- Click Open.
The REX file is imported into SONAR as a Groove Clip.
You can also drag REX files into SONAR, paste from the Clipboard, or import from the Media Browser view.
To disable looping of a REX-based Groove Clip
Unlike ACIDized-based Groove Clips, looping can not be disabled for REX based Groove Clips. If you want to disable looping of REX based Groove Clips, use the Edit > Bounce to Clip(s) or Tracks > Freeze > Freeze Tracks commands to render the REX based Groove Clip to a standard audio clip.
For details, see Bouncing to Clips and Freeze Tracks and Synths.
To use pitch markers with REX-based Groove Clips
Unlike ACIDized audio loops, REX files do not store the original pitch (root note) value. If you want a pitched REX file to properly follow your project's pitch markers, you must manually specify the original root note for each REX clip. By default, SONAR assigns a root note value of G#.
Due to limitations of the REX file format, the root note value can not be saved back to the REX file, and must be manually specified each time you import a REX file into a SONAR project. If you want to permanently save the root note value with a REX loop, export the REX Groove clip as an ACIDized .wav file.
For details, see Root Note and Saving Groove Clips as Wave Files/ACIDized Wave Files.
See:
Creating and Editing Groove Clips
MIDI Groove Clips
MIDI Groove clips are MIDI clips that you can roll out like audio Groove clips, and you can also choose to have SONAR transpose MIDI Groove clips when your project reaches a pitch marker.
You can change any MIDI clip into a MIDI Groove clip (or back into a regular MIDI clip) by selecting the clip and using the Edit > Groove Clip Looping command. A MIDI clip that has its Groove clip feature activated appears with beveled edges in the Clips pane.
Here are some other features of MIDI Groove clips:
- You can roll out copies in either direction (just like audio Groove clips). The Snap-to-Grid setting determines what beat boundaries (if any) you can roll to.
- You can edit individual repetitions without altering any other copies (unlike audio Groove clips).

Note: If you then roll the edge of your MIDI Groove clip back over the area you edited, you will lose your edits.
- All new repetitions are based on the first clip (just like audio Groove clips). However, if you split a repetition from its original source clip, the repetition becomes independent: if you copy this clip, SONAR treats it as an original clip.
- You can import MIDI Groove clips from the Import MIDI dialog, the Media Browser view, and by dragging and dropping from the Windows Explorer.
- You can preview MIDI Groove clips in the Import MIDI dialog.
- You can edit MIDI Groove clips wherever you can edit regular MIDI clips.
For step-by-step information, see the following procedures, and also "Exporting, and Importing MIDI Groove Clips" on page 429.
To Enable or Disable a MIDI Clip's Groove Clip Function
To Create Repetitions of a MIDI Groove Clip
To Transpose a MIDI Groove Clip
To Transpose a MIDI Groove Clip with Pitch Markers
To Enable or Disable a MIDI Clip's Groove Clip Function
- Select the clip and press CTRL+L.
Or
- Select the clip and use the Edit > Groove Clip Looping command.
Or
- Right-click the clip and choose Groove Clip Looping from the pop-up menu.
A MIDI clip that has its Groove clip feature activated appears with beveled edges in the Clips pane.
To Create Repetitions of a MIDI Groove Clip
-
Set the Snap value if you want the clip to repeat at precise time boundaries.
-
Move the cursor over the end or beginning of the clip until the cursor looks like this ☐. When the cursor changes, click the end or beginning of the clip and drag it to the right (if you are dragging out from the end) or left (if you are dragging from the beginning).
The clip repeats itself until you stop dragging.
To Transpose a MIDI Groove Clip
- Select the MIDI Groove clip.
-
Hold down the ALT key, and press the + or - key on your computer keyboard to raise or lower the clip's pitches a half-step at a time. You don't have to stop playback.
Or -
Right-click the clip and choose Clip Properties from the pop-up menu.
The Clip Properties dialog appears.
- On the Groove Clips tab, in the Pitch (semitones) field, choose the number of half-steps you want to transpose the clip by: choose negative numbers to transpose down, or positive numbers to transpose up.
Either method transposes the original clip and all repetitions. The original clip displays a positive or negative number in parentheses showing any transposition value you've added to the clip.
If you use pitch markers to transpose a clip, any transposition value you add to the clip by the above two methods changes the final pitch by whatever transposition value you've added.
To Transpose a MIDI Groove Clip with Pitch Markers
Use the same method you use for audio Groove clips: see "Using Pitch Markers in the Track View" on page 425.
See also:
Exporting, and Importing MIDI Groove Clips
Exporting, and Importing MIDI Groove Clips
You can not export MIDI Groove clips by saving your project as a Standard MIDI File—Standard MIDI Files do not contain MIDI Groove clip data, such as transposition value, etc. When you import MIDI Groove clips, you can preview them in the Import MIDI dialog.
There are two methods for exporting MIDI Groove clips:
• Using the File > Export > MIDI Groove Clip command
- Dragging a MIDI Groove clip from SONAR to the Windows Explorer
There are three methods for importing MIDI Groove clips:
• Using the File > Import > MIDI command
• Using the Media Browser view
- Dragging a MIDI Groove clip from the Windows Explorer to a MIDI track in SONAR
For step-by-step information, see the following procedures:
To Export MIDI Groove Clips with the File Command
- Highlight the MIDI Groove clip that you want to export.
- Use the File > Export > MIDI Groove Clip command.
The Export MIDI dialog appears. - to a folder where you store MIDI Groove clips.
- Type a name for the clip in the File Name field.
- Click the Save button.
SONAR exports the MIDI Groove clip, which contains the information displayed in the Clip Properties dialog, on the Groove-Clips tab, except for the Pitch (semitones) field, which does not get exported.
To Export a MIDI Groove Clip with Drag and Drop
- Drag the MIDI Groove clip that you want to export to the folder in the Windows Explorer where you want to keep it.
To Import MIDI Groove Clips with the File Command
- Move the Now Time to the place where you want to import the clip.
- Highlight the track you want to import the clip into.
- Use the File > Import > MIDI command.
The Import MIDI dialog appears, - to a folder where you store MIDI Groove clips. Make sure that the Files of Type field is set to MIDI File.
- Highlight the file you want to import—the File Info field displays the file's MIDI Groove clip data, if any.
- If you want to preview (listen to) the highlighted file, click the Play button in the Import MIDI dialog. When you decide to import the highlighted file, click the Open button.
To Import MIDI Groove Clips from the Media Browser View
- Make sure that the Snap-to-Grid setting is appropriate for what you want to do.
- If the Media Browser view is not open, use the Views > Media Browser command to display it.
- to a folder where you store MIDI Groove clips.
- Do either of the following:
- Drag the file you want to the track and time where you want it.
- Move the Now Time to the place where you want to import the file, highlight the track you want to import the file into, and double-click the file.
To Import a MIDI Groove Clip with Drag and Drop
- Make sure that the Snap-to-Grid setting is appropriate for what you want to do.
- In the Windows Explorer, navigate to a folder where you store MIDI Groove clips.
- Drag the MIDI Groove clip to the track and time where you want it to go.
Importing Project5 Patterns
Project5 is Cakewalk's pattern-based soft synth work station that has its own library (pattern bin) full of MIDI and audio patterns, stored on disk. If you have Project5 MIDI patterns on your hard disk, you can import them directly into SONAR.
To Import a Project5 Pattern
- Move the Now Time to the place where you want to import the pattern.
- Highlight the track you want to import the pattern into.
- Use the File > Import > MIDI command.
The Import MIDI dialog appears, - Change the Files of Type field to P5 Pattern.
- to a folder where you store Project5 MIDI patterns.
- Highlight the file you want to import.
- To import the highlighted file, click the Open button.
SONAR imports the pattern to the selected track at the Now Time.

Tip: You can preview Project5 patterns in the Media Browser view. (new S8.5)
Editing MIDI Events and Continuous Controllers (CC)
SONAR lets you edit the events in your projects in dozens of different ways. The Piano Roll view lets you add and edit notes, controllers, and automation data interactively, using a graphic display.
SONAR's many editing commands can improve the quality of recorded performances, filter out certain types of events, and modify the tempos and dynamics of your projects. The Event List view lets you see and modify every detail of your project. Finally, you can apply a variety of effects and filters to enhance your MIDI data.
SONAR has many additional commands and features for working with audio. For more information, see “Editing Audio” on page 545.
See:
The Piano Roll View
The Inline Piano Roll View
Selecting and Editing Events
Changing the Timing of a Recording
Searching for Events
Controllers, RPNs, NRPNs, and Automation Data
The Event List View
MIDI Effects (MIDI Plug-ins)
To sync the project tempo to freely played MIDI
Event Inspector Toolbar
The Event Inspector toolbar is available from the Views menu by selecting Views > Toolbars and checking Event Inspector in the Toolbars dialog. The Event Inspector has the following:
• Time
- Pitch
- Velocity
- Duration
- Channel
To Display a Note's Properties in the Event Inspector Toolbar
- Select a note.
If you select multiple notes, the Event Inspector toolbar displays the note value if all selected note values are the same. If the note values are different, the Event Inspector does not display anything.
To Change a Note's Properties Using the Event Inspector Toolbar
- Select a note.
- In the appropriate Event Inspector toolbar field, change the value. See the table below for a description of valid value entries for each field in the Event Inspector toolbar.
Event Inspector Field Valid Values
| Time Any valid M:B:T time value. Separate values with a colon or a space. For example, measure 2, Beat 3, Tick 720 would be written as 2:3:720. | |
| Pitch Note names (C0 through G10) and note numbers (0 through 127) are valid in this field. Also, you can use a modifier to raise or lower the value by a number of half-steps. To raise the pitch by 2 half-steps, type +2 and press enter. To lower the pitch by 2 half-steps, type -2 and press enter. | |
| Velocity | A velocity value or modifier value are valid in this field. Valid velocity values are 0 through 127. Valid modifier values are +/- 0 through 127. |
| Duration A PPQ value. | |
| Channel 1 through 16. | |
Table 79.
The Piano Roll View
The Piano Roll view displays all notes and other events from one or more MIDI tracks in a grid format that looks much like a player piano roll. Notes are displayed as horizontal bars, and drum notes as diamonds. Pitch runs from bottom to top, with the left vertical margin indicating the pitches as piano keys or note names. Time is displayed running left to right with vertical measure and beat boundaries. The Piano Roll view makes it easy to add, edit, and delete notes from a track.
A single-track version of the Piano Roll view is available in each track in the Track view. This view is called the Inline Piano Roll view, and replaces the Clips pane in any track that you choose to display in Inline Piano Roll mode.
The Piano Roll view consists of the Note Map pane, the Drum Grid pane, the Notes pane, the Controller pane, the Piano Roll view toolbar, and the Track List pane.
Figure 79. The Piano Roll view
![SpaceFitel.cwp - Piano Roll - Multiple Tracks A B C D E F J 2: Vocals M S R 3: woodblock M S R 8-DM1- Time:5.03.170 (-696)[1 Notes] G H](/content/2026/05/819773/images/6bf4d1ef43ae615538279fd834349af33489ce319f65dca0ace6982d4e7d12a4.jpg)
A. Show/Hide MIDI Events menu B. Edit MIDI Event Type menu C. Note Map pane D. Drum Grid pane E. Notes pane F. Controller pane G. Tooltip shows cursor position and editing data while you edit an event H. Track List pane I. Selected track J. Toolbar
See:
Opening the View
Displaying Notes and Controllers (Piano Roll View Only)
Adding and Editing Notes in the Piano Roll
Adding and Editing Controllers in the Piano Roll
Note Map Pane
Drum Grid Pane
Notes Pane
Controller Pane
Note Names
Track List Pane
Working with Multiple Tracks in the Piano Roll View
Note Map Pane
This pane displays your drum map settings. You can mute or solo individual pitches, and preview individual pitch sounds. For more information about the Note Map Pane, see "The Note Map Pane" on page 537.
See also:
Drum Maps and the Drum Grid Pane
Drum Grid Pane
In the Drum Grid pane you can add, delete, and edit notes and note properties in any MIDI track(s) assigned to a drum map. You can also edit controllers in this pane if you choose to hide the Controller pane.
For more information, see “The Drum Grid Pane” on page 539, and “Adding and Editing Controllers in the Piano Roll” on page 466.
See also:
Drum Maps and the Drum Grid Pane
Notes Pane
In this pane you can add, edit, and delete notes in any MIDI track(s) not assigned to a drum map. You can also edit controllers in this pane if you choose to hide the Controller pane.
See also:
Adding and Editing Notes in the Piano Roll
Controller Pane
This pane displays controller events, which you can edit. You can show or hide this pane by clicking the Use Controller Pane button that is in the Piano Roll view toolbar, or by pressing C. When the Controller pane is hidden, all controller events appear in the Notes pane.
See also:
Adding and Editing Controllers in the Piano Roll
Track List Pane
The Track List pane is home to a list of all tracks currently displayed in the Piano Roll view. In this pane you can enable and disable editing of a track's data; mute, solo and arm a track; and show or hide the track's data in the Notes pane or Drum Grid pane. Track numbers, names and output ports appear in the Track List pane. You can show or hide the Track List pane by clicking the Show/Hide Track Pane button in the Piano Roll view toolbar.
If you see an error message saying that you have masked the active track, it means that the active track is not visible at the moment. To unmask the track click the track's Show/Hide Track button in the Track List pane so that the button appears in color.
See also:
Working with Multiple Tracks in the Piano Roll View
Opening the View
There are several ways to open the Piano Roll view:
- In the Track view, select the track you want to see, then choose Views > Piano Roll or press ALT+5
- In the Track view, right-click on a track and choose Views > Piano Roll from the pop-up menu
- Double-click on a MIDI clip in the Clips pane
Each selected track is displayed. You can always switch to a different track or tracks—simply click the button (or press T) and choose the track you want.
The Piano Roll view lets you edit notes and controllers during playback or recording, in real time. This means you can loop over a portion of your project and hear any change you make on the next loop. The Piano Roll view also shows notes on-screen as you record them.
Like the Track view, the Piano Roll view includes zoom tools that let you change the vertical and horizontal scale of the view. The Piano Roll view also has a Snap to Grid button. For more information about this feature, see "Defining and Using the Snap Grid" on page 316.
See:
Working with Multiple Tracks in the Piano Roll View
Displaying Notes and Controllers (Piano Roll View Only)
Adding and Editing Notes in the Piano Roll
Adding and Editing Controllers in the Piano Roll
Working with Multiple Tracks in the Piano Roll View
Editing MIDI Events and Continuous Controllers (CC)
The Piano Roll View
You can view as many tracks as you want in the Piano Roll view. When you display several tracks at the same time in the Piano Roll view, you control which track(s) you can see and/or edit by using the buttons in the Track List pane. You can show or hide the Track List pane by clicking the Show/Hide Track Pane button in the Piano Roll view toolbar.
If you want to edit the data in a track, you must make the track you want to edit the current track. The name of the current track appears highlighted in the Track List pane. To display the Track List pane in the Piano Roll view, click the Show/Hide Track List Pane button. The following shows three tracks in the Track List pane:
![G A —— M S R 1-SB Live! Synth A [DF20] —— 2: bass drum B —— M S R 1-SB Live! Synth A [DF20] —— 3: snare C —— M S R 1-SB Live! Synth A [DF20] —— I D E F](/content/2026/05/819773/images/15f53d2a13d478b08774c4fd6ccb64542c166a117d3f4720b6bf11a0ca472cf5.jpg)
A. Track's data shown in Notes pane B. Track's data hidden in Notes pane C. Mute D. Track enabled for track editing E. Solo F. Arm G. Track disabled for track editing H. Output I. Current track
To make a track the current track in the Track List pane, click on the track. When a thin dotted line surrounds the track, it is the current track.

Tip: Clicking a note will make the note's parent track the current track.
The following is a list of ways to optimize the multiple track functionality in the Piano Roll view.
Selecting Tracks to View
Use the Pick Tracks combo button ⬆ to assign tracks to the Track List pane. Click on the left side of the Pick Tracks combo button to open the Pick Tracks dialog box. Click on a track name to select it. Hold down the CTRL key and click more track names to select additional tracks. Click on the right side of the Pick Tracks combo button to show the Show Previous/Next Tracks pop-up menu. Selecting Show Previous Track(s) moves the track or range of tracks down by one track number. Selecting Show Next Track(s) moves the track or range of tracks up by one track number. For example, if you have tracks 2, 3 and 7 displayed in the Track List pane and you select Show Previous Track(s), the Track List pane displays tracks 1, 2, and 6.
Display
If the notes of two tracks overlap, the notes of the topmost track in the Track List pane appear over the notes of the other track. You can move a track up or down by in the Track List pane by clicking and holding on the track and moving the track to the desired position.
All tracks ending in the same digit (2, 12, 22, etc.) share the same color. The default colors can be changed using Options > Colors.
The Enable/Disable Track Editing Button
The Enable/Disable Track Editing button 1: sets whether or not you can edit the notes of a track in the Piano Roll view. When the button appears white, editing is enabled and the track appears in color. When the button appears gray, editing is disabled and the track appears in gray.

Note: The Enable/Disable Track Editing button only disables the Piano Roll view tools; other editing commands are still operational.
The Show/Hide Track Button
The Show/Hide Track button ☐ controls whether or not a track appears in the Notes pane. The button appears in color when toggled on, white when off.
The Invert Tracks Button
If you use the Show/Hide Track button to hide any tracks in the Track List pane, you can show all these tracks and hide the ones that are currently displayed by clicking the Invert Tracks button.
See:
Note Names
Note Names
You can change the instrument definition for the active track in the Piano Roll view. Right-click the piano keys in the Notes pane to open the Note Names dialog where you can use note names that are defined as part of any instrument definition. For more information about instrument definitions, see Instrument Definitions.
To Change the Active Track's Instrument Definition
- Right-click the left side of the Notes pane (where the piano keys or note names are displayed) to display the Note Names dialog box.
Figure 80. The Note Names dialog

-
To use the note names from the assigned instrument (the default), click Use the Assigned Instrument Settings. Click Configure to change the instrument definitions.
-
To override the default setting, click Use These Settings Instead, and choose the note names and mode you want to work with.
- Click OK when you are done
The Piano Roll view is updated with the settings you request.
Displaying Notes and Controllers (Piano Roll View Only)
The Show/Hide MIDI Events button 📂 in the Piano Roll view lets you quickly hide or show any combination of the data in a MIDI track or in multiple MIDI tracks. This button is independent of the Show/Hide MIDI Events button in a track's Inline Piano Roll view (see also "Displaying Notes and Controllers in the Inline Piano Roll View" on page 480)).
The Show/Hide MIDI Events button is located in the upper left corner of the Piano Roll view.
To Hide or Show Data in the Piano Roll View
- If you want to display the data from multiple MIDI tracks, first choose and configure the tracks from which you want to display data (see "Working with Multiple Tracks in the Piano Roll View" on page 437).
- Click the drop-down arrow on the Show/Hide MIDI Events button 📂 to display the menu of MIDI data in the current track (the track that is highlighted in the Track List pane, or in the Track view).
-
Choose from the following menu options:
-
To hide or show notes for all displayed tracks, click Show Notes.
- To hide or show the outline(s) of the clip(s) you're looking at, choose Show Clip Outlines.
- To hide or show a controller type for all displayed tracks, click the name of the controller.
• To hide or show the edit handles on controllers, click Show Controller Handles. - To hide or show the velocity columns on all tracks except the active track, click Show Velocity on Active Track Only.
-
To show all controllers in all displayed tracks, click Display All Continuous Events, or just click the left side of the Show/Hide MIDI Events button 🎯. The button turns white when all controllers are hidden, and blue when all controllers are showing.
-
After you choose an option, the menu closes. You can repeat steps 2 and 3 to choose more options.
See:
Adding and Editing Notes in the Piano Roll
Adding and Editing Controllers in the Piano Roll
Adding and Editing Notes in the Piano Roll
You add notes in the Piano Roll view or Inline Piano Roll view by first choosing a note duration in the Piano Roll toolbar (or in the current track's Note Duration menu if you're using the Inline Piano Roll view), and then clicking in the view with the Draw tool at the pitch location and time location where you want the note to go. The pitch locations are marked by grey rows for the sharps or flats, and white rows for naturals. Octaves are labeled on the keyboard display on the left side of the Piano Roll view, and by the MIDI Scale in the Inline Piano Roll view. You can display different octaves by dragging the vertical scroll bar that's on the right side of the Piano Roll view, or by dragging the MIDI Scale in the Inline Piano Roll view. The time locations are marked by the measure numbers in the horizontal time ruler that's at the top of the view, and by the vertical grid lines that mark the beats in the measure. The Snap to Grid menu determines how precisely you can place your notes in time.
You can edit notes by a variety of methods:
- Select notes, and then use editing commands from the Edit menu, the Process menu, or the Event Inspector toolbar
- Move single or groups of selected notes with the Select tool
- Edit the pitch, location, duration, start time, and velocity of individual or groups of selected notes with the Draw tool
- Delete notes with the Erase tool, or by holding the ALT key down while you use the Draw tool
For step-by-step procedures, see the following topics:
Selecting Notes
Editing Notes with the Draw Tool and the Select Tool
Flexible Piano Roll tools
Selecting Notes
There are several ways to select notes in the Piano Roll view and Inline Piano Roll view:
- Click and drag in the Piano Roll view's Time Ruler to select notes (and other MIDI events) that start playing within the time range that you select.
- In the Inline Piano Roll view, click and drag in the Track view's Time Ruler to select notes (and other MIDI events) that start playing within the time range that you select. This selects data in the current track, or all selected tracks.
- Click notes or drag around them with the Select tool.
- In the Piano Roll view only (not the Inline Piano Roll view): click or drag the piano keys to the left of the Notes pane or the drum map rows in Note Map pane to select all notes of the desired pitch(es).
- In the Inline Piano Roll view: SHIFT-click or SHIFT-drag the piano keys on the MIDI Scale to select all notes of the desired pitch(es).
To Select Notes with the Select Tool
- Activate the Select tool by clicking it in either the Piano Roll view toolbar or the Inline Piano Roll toolbar (depending on which view you're working in).
- Select notes as shown in the table:
To do this Do this
| Select a single note Click on the note | |
| Select several notes at once Drag a rectangle around the notes you want to select | |
| Add to the selection Hold the SHIFT key while selecting notes | |
| Toggle the selection Hold the CTRL key while selecting notes | |
| Select notes in a certain time range. | Set the desired Snap to Grid value in either the Piano Roll view or the Inline Piano Roll view (depending on which view you’re working in), and drag in the Time Ruler of the appropriate view. |
Table 80.
Selected notes are highlighted (50% gray mask).
To Select All Notes of Certain Pitches (Piano Roll View Only)
Click the piano keys on the left side of the Notes pane or the drum map rows in the Note Map pane as shown in the table:
To do this Do this
| Select all notes of a single pitch Click on the piano key or drum map row | |
| Select all notes of several pitches Drag across the keys or drum map rows | |
| Add to the selection Hold the SHIFT key while clicking on a piano key or drum map row | |
| Toggle the selection | Hold the CTRL key while clicking on a piano key or drum map row |
Table 81.
To Select All Notes of Certain Pitches (Inline Piano Roll View Only)
- Zoom the MIDI Scale in far enough to see the keys clearly (left-click and drag on the MIDI Scale).
- SHIFT-click a piano key to select all the notes of that pitch, or SHIFT-drag through multiple notes to select them.
CTRL-clicking to select multiple non-adjacent notes is not possible in the MIDI Scale.
See:
Editing Notes with the Draw Tool and the Select Tool
Adding and Editing Controllers in the Piano Roll
Editing Notes with the Draw Tool and the Select Tool
You can edit notes in the Piano Roll view and the Inline Piano Roll view with the same methods. The Draw tool and the Select tool are useful for quick note editing. You can do the same edits with commands in the Process menu (Length, Slide, Transpose). If you want to edit multiple notes at the same time, first select them with the Select tool.
MIDI notes display their velocity value as a wide or narrow column. You can drag the column up or down to edit the note's velocity. Holding the Draw tool over the middle of the note in the upper third of the note displays a small velocity column on the Draw tool to show that the tool is in the target zone.

A. Draw tool in velocity-edit mode B. Tooltip showing cursor position C. Velocity column
Tooltips give you a constant readout of the cursor position, how much you've edited the selection, and how many notes you're editing.
In the picture below, the tooltip lists the current location of the cursor, how far the selection has moved from its original location (1252 ticks to the right), the current pitch level and MIDI note number of the cursor (E8 100), how far from the note's original pitch the cursor has moved (1 half-step higher), and how many notes are in the selection.
![Time:2:01:627 (+1252) Key=E 8 (100) (+1) [1 Notes]](/content/2026/05/819773/images/16b2b57a0fe4463efe5de48842012f0271640fc3c87e6970f50f7b0dac10ef39.jpg)
When you drag multiple notes, if you enable Polyphonic Note Audition in the Edit MIDI Event Type drop-down menu, the Piano Roll view “auditions” them, so you can hear all of them as they pass through different pitch levels.
To Edit Notes with the Draw Tool
-
If you want to edit multiple notes at the same time, select them with the Select tool (see "Selecting Notes" on page 441). Editing any of the notes in the selection edits all the selected notes in the same way.
-
Click ☑ to select the Draw tool. If the Draw tool button is in Auto-Erase mode, it looks like this: AE. If the Draw tool is in Auto-Erase mode, use the drop-down menu that's next to it to disable Auto-Erase mode, unless you want to delete notes.
- Set the Snap to Grid to the desired value (if you're editing in the Inline Piano Roll view, make sure you use the PRV tab of the Snap to Grid dialog).
- Edit notes as described in the table:
To do this Do this
Change the start time, but not the duration
Drag the left edge of the note in either direction.

The start time of the note is moved to the new location.
Change the pitch Drag the middle of the note up or down.
Move the note horizontally
Move the cursor just inside the left edge of the note until it looks like this:

Change the duration Drag the right edge of the note in either direction.

Copy and paste notes Hold the CTRL key down, and drag notes so as to either move them horizontally or change the pitch (see above), and release the mouse at the desired location.
Add a note See "To Draw Notes" on page 444.
Edit velocity See "To Edit Velocity" on page 445.
Delete notes Enable the Draw tool's Auto-Erase mode (in the drop-down menu next to it), and click notes. When the Draw tool's Auto-Erase mode is enabled, a small eraser icon appears at the bottom of the Draw tool when the Draw tool approaches notes from below. Alternatively, click the Erase tool to enable it, and click each note that you want to delete, or drag through multiple notes. Tip: Hold the ALT key down to toggle the Draw tool's Auto-Erase mode, or to temporarily turn the Erase tool into the Draw tool.
Table 82.
To Draw Notes
-
In the Edit MIDI Event Type menu in the Piano Roll view, or the Inline Piano Roll view (depending on which view you're working in), select Notes/Velocity.
-
Enable the Draw tool in the Piano Roll toolbar, or the Inline Piano Roll toolbar.
- Choose a duration for the note by clicking a note-head button in the Piano Roll toolbar, or the Note Duration menu in the track controls if you're using the Inline Piano Roll view.
- Set the Snap to Grid to the desired value (if you're editing in the Inline Piano Roll view, make sure you use the PRV tab of the Snap to Grid dialog).
- Click in the Notes pane at the pitch and location where you want the note; pitch locations are marked by grey rows for the sharps or flats, and white rows for naturals. Octaves are labeled on the keyboard display on the left side of the view (this is called the MIDI Scale in the Inline Piano Roll view). You can display different octaves by dragging the vertical scroll bar that's on the right side of the Piano Roll view, or by dragging the MIDI Scale in the Inline Piano Roll view. The time locations are marked by the measure numbers in the horizontal time ruler that's at the top of each view. You can display vertical grid lines that mark the beats in the measure by clicking the Show/
Hide Grid button 📄 in the Piano Roll view, or by right-clicking the Clips pane (not the Inline Piano Roll view), choosing View Options from the pop-up menu, and checking the Display Vertical Rules check box.
To Use the Erase Tool
- Enable the Erase tool 📋 (make it turn blue) by clicking it, or by pressing E when the Piano Roll view has focus.
- Click or drag through the notes or controllers you want to delete.
- To turn the Erase tool into the Draw tool temporarily, hold the ALT key down.
To Edit Velocity
- If you want to edit multiple notes at the same time, select them with the Select tool (see "Selecting Notes" on page 441 for help). Editing any of the notes in the selection edits all the selected notes in the same way.
- Make sure Velocity has a checkmark next to it in the Show/Hide MIDI Events menu.
- Enable the Draw tool.
- Move the cursor over the upper third of the middle of the note. When you reach the target area, the Draw tool displays a small velocity column to show that you have enabled velocity editing (this only happens if you've hidden the Controller pane).
- Drag up or down to edit velocity. The tooltip shows you the velocity value that the cursor is passing through, the difference from the original value, and how many notes you're editing. If you want to hear the changes in velocity as you make them, enable Velocity Audition in the Edit MIDI Event Type drop-down menu.

Note 1: Instead of moving the cursor over the upper third of the note to activate velocity editing, you can hold down the CTRL key instead. This allows you to drag the Draw tool horizontally to draw the desired velocity level(s).

Note 2: If you prefer to edit velocity in the Controller pane, display the Controller pane (press C), and use the Draw tool to drag horizontally through the vertical lines in the Controller pane that represent the velocity of each note. You can also use the Draw tool or the Select tool to drag the tip of a vertical line up or down. While you drag, a tooltip displays velocity and location data.
MIDI note velocity colorization
PRVColorizeVelocity=<0 or 1>, default = 1
MIDI note colors are tinted depending on their velocities. Notes will appear darker for higher velocities and lighter for lower velocities.
This feature may be enabled (1) or disabled (0) in the [WinCake] section of the Cakewalk.ini file. For example:
[WinCake]
PRVColorizeVelocity=0
Note event colors based on velocity
By default, note events in the Piano Roll are colorized based on velocity. Darker shades of the basic track color indicate higher velocities. Lighter shades of the basic track color indicate lower velocities.
This behavior can be bypassed by adding the following INI variable to the WinCake section of Cakewalk.ini (see Cakewalk.ini):
PRVColorizeVelocity=0
To Edit Notes with the Select Tool
- If you want to edit multiple notes at the same time, select them with the Select tool. Editing any of the notes in the selection edits all the selected notes in the same way.
- Set the Snap to Grid to the desired value (if you're editing in the Inline Piano Roll view, make sure you use the PRV tab of the Snap to Grid dialog).
- Edit notes as described in the table:
To do this Do this
| Change the start time, but not the duration | Drag the note left or right |
Change the pitch Drag the note up or down.
| Move selected notes, or a single note only vertically, or only horizontally | Hold the SHIFT key down, and move the Select tool over a note so that the cursor displays a horizontal double-ended arrow (if you want to drag horizontally) or a vertical double-ended arrow (if you want to drag vertically), and then move the note(s). |
Table 83.
To do this Do this
Copy and paste notes
Hold the CTRL key down, and drag notes horizontally and/or vertically, and release the mouse at the desired location.
Delete notes Press the DELETE key.
Table 83.
To Change Note Properties
- Right-click a single note to display the Note Properties dialog box.
- Edit the desired start time, pitch, duration, velocity, or channel.
- Click OK when you are done.
SONAR updates the note event accordingly. Note that you can also edit note velocity in the Notes pane and the Event Inspector toolbar. For information on changing note velocities in the Drum Grid Editor, see “Editing Note Velocities” on page 536. For more information, see “Velocity, Pitch Wheel, and Aftertouch” on page 512.
To Scrub (Audition) Tracks in the Piano Roll View
- Click for press B to select the Scrub tool.
- Press and hold the left mouse button in the Piano Roll view. SONAR displays a vertical line and plays any notes that are underneath the line.
- Drag the line to the left or right, at any desired speed.
Note that the Mute, Solo and Arm buttons do not affect Scrub. If the track is hidden, however, you do not hear notes in that track.
To Audition Notes
- To audition multiple notes, select them, make sure that Polyphonic Note Audition is selected in the Edit MIDI Event Type drop-down menu, and move the notes with either the Select tool or the Draw tool. You can also click one of the selected notes with the Draw tool, if you first move the Draw tool to the center of a selected note so that the Draw tool cursor becomes a double-ended vertical arrow.
Show velocity on selected notes (optional)
SONAR has an option to show velocities for selected Note events. This option makes it easier to see and edit velocities when many Note events are present. It also makes it easier to change the velocity for individual Note events that are stacked (such as chords).
If there is no selection, velocities are shown for all Note events.
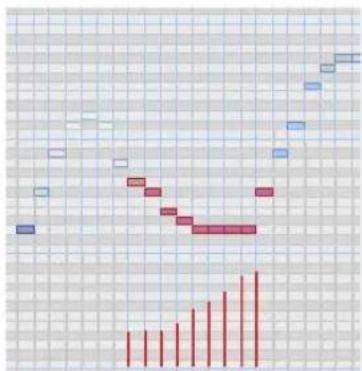
To only show velocity for selected note events
- In the Piano Roll view or inline Piano Roll, click the small drop-down arrow in the Show/Hide MIDI Events button 📂
- Choose Show Velocity on Selected Notes from the pop-up menu.
The state of the Show Velocity on Selected Notes option is saved with the project, and the setting is separate for the Piano Roll view and inline Piano Roll.
See:
Editing Notes with the Draw Tool and the Select Tool
Selection sensitive velocity drawing
If any Note events are selected, velocity painting will only affect those selected Note events. If no Note events are selected, then velocity painting will affect all Note events.
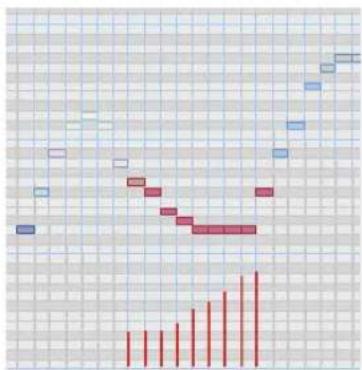
bar
| Category | Value | |---|---| | Row 1 | 10 | | Row 2 | 15 | | Row 3 | 20 | | Row 4 | 25 | | Row 5 | 30 | | Row 6 | 35 | | Row 7 | 40 | | Row 8 | 45 | | Row 9 | 50 | | Row 10 | 55 | | Row 11 | 60 | | Row 12 | 65 | | Row 13 | 70 | | Row 14 | 75 | | Row 15 | 80 | | Row 16 | 85 | | Row 17 | 90 | | Row 18 | 95 | | Row 19 | 100 | | Row 20 | 105 | | Row 21 | 110 | | Row 22 | 115 | | Row 23 | 120 | | Row 24 | 125 | | Row 25 | 130 | | Row 26 | 135 | | Row 27 | 140 | | Row 28 | 145 | | Row 29 | 150 | | Row 30 | 155 | | Row 31 | 160 | | Row 32 | 165 | | Row 33 | 170 | | Row 34 | 175 | | Row 35 | 180 | | Row 36 | 185 | | Row 37 | 190 | | Row 38 | 195 | | Row 39 | 200 | | Row 40 | 205 | | Row 41 | 210 | | Row 42 | 215 | | Row 43 | 220 | | Row 44 | 225 | | Row 45 | 230 | | Row 46 | 235 | | Row 47 | 240 | | Row 48 | 245 | | Row 49 | 250 | | Row 50 | 255 | | Row 51 | 260 | | Row 52 | 265 | | Row 53 | 270 | | Row 54 | 275 | | Row 55 | 280 | | Row 56 | 285 | | Row 57 | 290 | | Row 58 | 295 | | Row 59 | 300 | | Row 60 | 305 | | Row 61 | 310 | | Row 62 | 315 | | Row 63 | 320 | | Row 64 | 325 | | Row 65 | 330 | | Row 66 | 335 | | Row 67 | 340 | | Row 68 | 345 | | Row 69 | 350 | | Row 70 | 355 | | Row 71 | 360 | | Row 72 | 365 | | Row 73 | 370 | | Row 74 | 375 | | Row 75 | 380 | | Row 76 | 385 | | Row 77 | 390 | | Row 78 | 395 | | Row 79 | 400 | | Row 80 | 405 | | Row 81 | 410 | | Row 82 | 415 | | Row 83 | 420 | | Row 84 | 425 | | Row 85 | 430 | | Row 86 | 435 | | Row 87 | 440 | | Row 88 | 445 | | Row 89 | 450 | | Row 90 | 455 | | Row 91 | 460 | | Row 92 | 465 | | Row 93 | 470 | | Row 94 | 475 | | Row 95 | 480 | | Row 96 | 485 | | Row 97 | 490 | | Row 98 | 495 | | Row 99 | 500 | | Column End | - |Example 1. Painting velocity when some Note events are selected. Only those Note events are changed.

bar
| Category | Value | |---|---| | 1 | 0.5 | | 2 | 0.8 | | 3 | 1.2 | | 4 | 1.5 | | 5 | 1.7 | | 6 | 1.6 | | 7 | 1.4 | | 8 | 1.2 | | 9 | 1.0 | | 10 | 0.8 | | 11 | 0.6 | | 12 | 0.5 | | 13 | 0.4 | | 14 | 0.3 | | 15 | 0.2 | | 16 | 0.1 | | 17 | 0.05 | | 18 | 0.03 | | 19 | 0.02 | | 20 | 0.01 | | 21 | 0.005 | | 22 | 0.003 | | 23 | 0.002 | | 24 | 0.001 | | 25 | 0.0005 | | 26 | 0.0003 | | 27 | 0.0002 | | 28 | 0.0001 | | 29 | 0.00005 | | 30 | 0.00003 | | 31 | 0.00002 | | 32 | 0.00001 | | 33 | 0.000005 | | 34 | 0.000003 | | 35 | 0.000002 | | 36 | 0.000001 | | 37 | 0.0000005 | | 38 | 0.0000003 | | 39 | 0.0000002 | | 40 | 0.0000001 | | 41 | 0.00000005 | | 42 | 0.00000003 | | 43 | 0.00000002 | | 44 | 0.00000001 | | 45 | 0.000000005 | | 46 | 0.000000003 | | 47 | 0.000000002 | | 48 | 0.000000001 | | 49 | 0.000000001 | | 50 | 0.5 | | 51 | 1.2 | | 52 | 1.7 | | 53 | 1.8 | | 54 | 1.6 | | 55 | 1.4 | | 56 | 1.2 | | 57 | 1.1 | | 58 | 1.3 | | 59 | 1.5 | | 60 | 1.7 | | 61 | 1.9 | | 62 | 2.1 | | 63 | 2.3 | | 64 | 2.5 | | 65 | 2.7 | | 66 | 2.9 | | 67 | 3.1 | | 68 | 3.3 | | 69 | 3.5 | | 70 | 3.7 | | 71 | 3.9 | | 72 | 4.1 | | 73 | 4.3 | | 74 | 4.5 | | 75 | 4.7 | | 76 | 4.9 | | 77 | 5.1 | | 78 | 5.3 | | 79 | 5.5 | | 80 | 5.7 | | 81 | 5.9 | | 82 | 6.1 | | 83 | 6.3 | | 84 | 6.5 | | 85 | 6.7 | | 86 | 6.9 | | 87 | 7.1 | | 88 | 7.3 | | 89 | 7.5 | | 90 | 7.7 | | 91 | 7.9 | | 92 | 8.1 | | 93 | 8.3 | | 94 | 8.5 | | 95 | 8.7 | | 96 | 8.9 | | 97 | 9.1 | | 98 | 9.3 | | 99 | 9.5 | | Note: The values in the 'Value' column are estimated based on the provided code and are not explicitly labeled in the original text.Example 2. Painting velocity when no Note events are selected. All Note events are changed.
See:
Editing Notes with the Draw Tool and the Select Tool
Note/controller painting (freehand)
Paint Notes/Controllers Free is one of the programmable mouse Actions, which can be assigned to any mouse button and key combination. For more information, see "Flexible Piano Roll tools" on page 457.
When you use the Paint Notes/Controllers Free action, events are painted from the mouse click position to the current mouse position. The start time and duration of events are determined by the Snap to Grid resolution if snap is enabled or by the current default note duration if Snap to Grid is disabled.
See:
To configure a Mouse Action
Note/controller painting (linear)
Paint Notes/Controllers Linear is one of the programmable mouse Actions, which can be assigned to any mouse button and key combination. For more information, see “Flexible Piano Roll tools” on page 457.
When you use the Paint Notes/Controllers Linear action, events are painted in a straight line from the mouse click position to the current mouse position. The start time and duration of events are determined by the Snap to Grid resolution if snap is enabled or by the current default note duration if Snap to Grid is disabled.
See:
To configure a Mouse Action
Controller/velocity painting (freehand)
Paint Controllers/Velocities Free is one of the programmable mouse Actions, which can be assigned to any mouse button and key combination. For more information, see “Flexible Piano Roll tools” on page 457.
When you use the Paint Controllers/Velocities Free action, Controller events of the current edit type are painted from the mouse click position to the current mouse position. Controller events are painted at the snap positions if Snap to Grid is enabled. If Snap to Grid is disabled, Controller events will be placed anywhere in time. Regardless of the Snap to Grid state, Controller events are only inserted where there is a change in value.
When painting velocities in the Notes pane, existing velocities are updated as the mouse passes through Note events. When painting velocities in the Controllers pane, the behavior is the same as the Paint Notes/Controllers Free action.
See:
To configure a Mouse Action
Controller/velocity painting (linear)
Paint Controllers/Velocities Linear is one of the programmable mouse Actions, which can be assigned to any mouse button and key combination. For more information, see “Flexible Piano Roll tools” on page 457.
When you use the Paint Controllers/Velocities Linear action, Controller events of the current edit type are painted linearly from the mouse click position to the current mouse position. Controller events are painted at the snap positions if Snap to Grid is enabled. If Snap to Grid is disabled, Controller events will be placed anywhere in time. Regardless of the Snap to Grid state, Controller evetns are only inserted where there is a change in value.
When painting velocities in the Notes pane, velocities are updated as the mouse passes through Note events. When painting velocities in the Controllers pane, the behavior is the same as the Paint Notes/Controllers Linear action.
See:
To configure a Mouse Action
Note split
SONAR now allows you to click on a Note event to split it into two separate Note events. The split occurs at the mouse position where the Note event is clicked.
Note Split is one of the programmable mouse Actions, which can be assigned to any mouse button and key combination. By default, Note Split is assigned to the middle mouse button when using the Select tool. For more information, see "Flexible Piano Roll tools" on page 457.

Note: The Note Split action only works on one note at a time.
To split a note
- In the Piano Roll view or inline Piano Roll, click the Select button to enable the Select tool.
- Click the middle mouse button at the exact position you wish to split a Note event.
The Note event is split into two separate Note events at the mouse position.

Note: These instructions apply to the default mouse assignments and will not apply if you have re-assigned the Note Split mouse action to different settings (see "Flexible Piano Roll tools" on page 457). If your mouse does not have a middle button, you may want to reassign Note Split to another button.
Note glue
SONAR now allows you to glue multiple Note events together so they form a single Note event.
The Note events you glue together don't have to be consecutive—you can skip some Note events if you like, but only Note events of the same pitch can be glued together.
Note Glue is one of the programmable mouse Actions, which can be assigned to any mouse button and key combination. By default, Note Glue is assigned to ALT+middle-click when using the Select tool. For more information, see “Flexible Piano Roll tools” on page 457.
To glue notes together
- In the Piano Roll view or inline Piano Roll, click the Select button to enable the Select tool.
- Hold down the ALT key and click with the middle mouse button on an empty area or on the first Note event you wish to glue.
- While still holding down the ALT key and middle mouse button, drag across the Note events you wish to glue together.
The first Note event encountered will become the anchor pitch. Any other Note events encountered on that same pitch will be glued together when the mouse button is released, forming a single note event.
The Note events that will be glued together turn red when the mouse crosses them.

Note: These instructions apply to the default mouse assignments and will not apply if you have re-assigned the Note Glue mouse action to different settings (see "Flexible Piano Roll tools" on page 457). If your mouse does not have a middle button, you may want to reassign Note Glue to another button.
Drag-quantize
SONAR makes it very easy to quantize individual Note events (or other MIDI events) without having to use the Process > Quantize command.
Drag Quantize works by clicking on an event (or one of many selected events), and moving the mouse up and down. The up direction moves the events toward the quantize target times; downward motion moves them away from the quantize target times. You immediately see the data being moved towards the target in real-time as you adjust the mouse position.
Drag Quantize is one of the programmable mouse "Actions", which can be assigned to any mouse button and key combination. By default, Drag Quantize is assigned to CTRL+middle-click when using the Select tool. For more information, see "Flexible Piano Roll tools" on page 457.
Drag quantize strength
The quantize strength is continuously variable based on mouse dragging and the results are visible in real-time. It is even possible to have “negative” strength, which allows you to un-quantize events (move them away from the target quantize time).
As you drag the mouse up or down, a dynamic tooltip shows the current quantize strength (-100% to +100%). A “deadband” around 0% allows the Drag Quantize tool to easily position the selected MIDI events at their original position.
Drag quantize resolution
The quantize resolution is determined by the current Snap to Grid resolution if snapping is enabled (see “Defining and Using the Snap Grid” on page 316). If Snap to Grid is disabled, SONAR will analyze the selected events and automatically determine a suitable resolution.
To drag-quantize MIDI events
- Select the MIDI events you wish to quantize (see "Selecting Notes" on page 441 and "Selecting Controllers" on page 472).
- In the Piano Roll view or inline Piano Roll, click the Select button to enable the Select tool.
- Hold down the CTRL key and click the middle mouse button on any of the selected events and do one of the following:
- Move the mouse upward to move the selected events toward the quantize target times.
- Move the mouse downward to move the selected events away from the quantize target times.
As you drag the mouse up or down, a dynamic tooltip shows the current quantize strength (-100% to +100%).

Note: These instructions apply to the default mouse assignments and will not apply if you have re-assigned the Drag Quantize mouse action to different settings (see "Flexible Piano Roll tools" on page 457). If your mouse does not have a middle button, you may want to reassign Drag Quantize to another button.
MIDI event mute
SONAR allows you to mute individual Note events directly in the Piano Roll view or inline Piano Roll. Muted events are excluded from rendering during playback and MIDI meters do not light up for muted events.
Event Mute is one of the programmable mouse Actions, which can be assigned to any mouse button and key combination. By default, Event Mute is assigned to SHIFT+middle-click when using the Select tool. For more information, see "Flexible Piano Roll tools" on page 457.
Muted events are shown using a variation of the Clip Mute color but only the outline of the events are shown. In the following example, the first four Note events are Event-Muted. The last four Note events are muted using the Mute tool on the clip. The Note events in the middle are not muted at all.
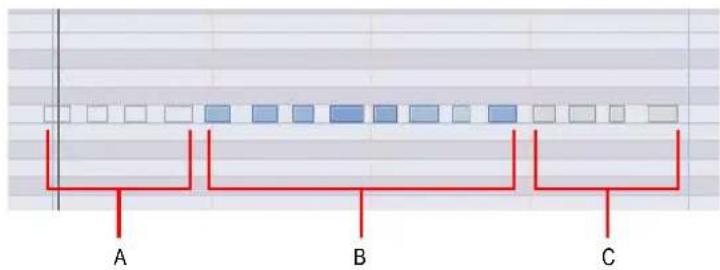
A. Event-Muted (hollow; the note outline uses the Clip Mute color) B. Unmuted events (track color) C. Muted using the Mute tool on the clip (Clip Mute color)
To mute/unmute Note/Controller events
-
In the Piano Roll view or inline Piano Roll, click the Select button to enable the Select tool.
-
Hold down the SHIFT key and do one of the following:
-
To mute/unmute only a single Note or Controller event. Click the middle mouse button on the Note/Controller event you want to mute/unmute and release the mouse button.
- To mute/unmute multiple Note or Controller events. Click the middle mouse button on any Note/Controller event you want to mute/unmute and drag the mouse over all other events you also want to mute/unmute, then release the mouse button.
When dragging over multiple events, the events are temporarily drawn in a different color. All touched events will automatically inherit the opposite mute state of the first event you click, regardless of their current mute state. That is, all touched events are set to the opposite mute state of the first event.
You can choose to abort the mute/unmute operation by pressing Esc before you release the mouse button.

Note: These instructions apply to the default mouse assignments and will not apply if you have re-assigned the Event Mute mouse action to different settings (see "Flexible Piano Roll tools" on page 457). If your mouse does not have a middle button, you may want to reassign Event Mute to another button.
See:
Clip Muting and Isolating (Clip Soloing)
Silencing tracks
Flexible Piano Roll tools
Erase tool behavior
The Erase tool marks events for deletion instead of automatically deleting them. When you touch events with the Erase tool, the events are not actually deleted until you release the mouse button.
Events that are marked for deletion are temporarily drawn in a different color. You can choose to abort the delete operation by pressing Esc before you release the mouse button.
Note hit testing improvements
Note events are painted in chronological order. Note events that are later in time will be at a higher z-order (toward the top) than earlier Note events. As a result, the end time of a Note event may be obscured by a later Note event.

Example 1. Two overlapping Note events. It is not clear where the first Note event ends.

Example 2. The same two overlapping Note events shown as different pitches.
When multiple Note events exist at the mouse location, SONAR will prioritize the best candidate Note event by comparing the mouse location's proximity to the left and right edges of each Note event. When the best candidate is found among the overlapping Note events, SONAR will temporarily show the full duration of that candidate Note event while the mouse is hovering over it. This allows you to alter the right edge of the earlier Note event without having to temporarily move the later Note event out of the way.

Example 3. In SONAR, the full duration of the earlier Note event is shown when hovering the mouse near the end of the Note event.
Velocity Audition options
The Velocity Audition and Polyphonic Velocity Audition options have been moved to a more convenient location in the PRV Tool Configuration dialog.
These two options were previously available in the Edit MIDI Event Type drop-down menu in the Piano Roll view and inline Piano Roll.
See:
To Edit Velocity
PRV Tool Configuration dialog
Hiding events in muted clips
By default, events in muted MIDI clips are shown in the Piano Roll view. SONAR provides an option to exclude muted clips from displaying in the Piano Roll view.
To show/hide events in muted clips
-
In the Piano Roll view or inline Piano Roll, click the small drop-down arrow in the Show/Hide MIDI Events button
-
Choose Hide Muted Clips from the pop-up menu.
The state of the Hide Muted Clips option is saved with the project, and the settings are separate for the Piano Roll view and the inline Piano Roll.
See:
Clip Muting and Isolating (Clip Soloing)
Adjust velocity without changing the Display Type
In previous versions of SONAR, clicking on the Velocity section of a note event would automatically switch the current Edit Type to Velocity and also make velocity tails visible. This is normally not desirable since you may frequently want to adjust velocities while primarily working with a different edit type (Controllers, etc.).
Because Velocity is really an attribute of another event type (Note), SONAR treats Velocity differently than other controller events. This allows you to configure the visibility of continuous controllers (CCs, xRPNs, etc.) and still perform an occasional velocity edit without the need to revert back to the previous display and edit settings.
Example:

natural_image
Abstract blue geometric shapes on a grid background, no text or symbols present- CC7 is the current Edit Type and note velocity tails are hidden.
![Vel30 [-14] [1 Notes]](/content/2026/05/819773/images/3c2e6c17a88a998346604e6e754ad11d4fc909e10ea558a9d73b216ac74f125b.jpg)
- When clicking the Velocity section of a note event, the Edit Type remains CC7 and only the dragged velocity is temporarily shown.

natural_image
Abstract blue geometric shapes on a grid background (no text or symbols)- When the mouse button is released, the Edit Type remains CC7 and velocity tails remain hidden.
See:
Adding and Editing Controllers in the Piano Roll
Flexible Piano Roll tools
SONAR has three different Piano Roll mouse tools. Each tool can be customized to perform any available mouse action. There can be as much or as little overlap in functionality as you want between the tools.
Don't care for some of SONAR's default Piano Roll tool behaviors? No problem, simply re-assign the tools to suit your preferred editing style.
There are approximately 20 different mouse actions that the Piano Roll tools can perform, such as selecting, drawing, erasing, slip-editing, transposing, etc. It's difficult to make a single tool that can perform all of these actions, so SONAR allows you to customize the Piano Roll tools to suit your own editing requirements.
There are three mouse buttons (left, middle and right) and three modifier keys (CTRL, SHIFT and ALT) that can be used in any combination. Your custom Piano Roll tool assignments can be saved as presets and apply to both the Piano Roll view and the inline Piano Roll.
See:
The PRV Tool Configuration dialog
To configure a Mouse Action
Mouse Location
Tool Action
Default PRV tool assignments
The PRV Tool Configuration dialog
You use the PRV Tool Configuration dialog to configure the Piano Roll tools. In order to assign a specific action to a Piano Roll tool, you must specify the following:
- Piano Roll tool. Specify PRV Tool 1 (☐), PRV Tool 2 (☐) or PRV Tool 3 (☐).
- Mouse button. Specify the left, middle or right mouse button.
- Keyboard modifier key(s) (optional). Specify the CTRL, SHIFT or ALT key, or any combination of the three.
- Mouse location (context). Specify one of the seven clickable mouse locations (see "Mouse Location" on page 459).
- Tool action. Specify one of the many available mouse actions (see "Tool Action" on page 460). The objective is to map each of the contexts (mouse locations) to a tool action.

A. Tool B. Context C. Keys D. Mouse Button E. Mouse Location F. Tool Action
See:
Tool
Mouse Button
Keys
Mouse Location
Tool Action
To configure a Mouse Action
Default PRV tool assignments
Tool
The Tool combobox lists the three Piano Roll tools:
- PRV Tool 1. This tool corresponds to the Select tool ( ) in the Piano Roll toolbar.
- PRV Tool 2. This tool corresponds to the Draw tool (☐) in the Piano Roll toolbar.
- PRV Tool 3. This tool corresponds to the Erase tool (☐) in the Piano Roll toolbar.
See:
To Edit Notes with the Draw Tool
To Edit Notes with the Select Tool
To Use the Erase Tool
Mouse Button
SONAR allows you to assign the following mouse buttons:
- Left
- Middle (if available)
- Right
Keys
In addition to a mouse button, you can optionally configure a mouse action to also use any combination of the following keys:
• CTRL
• SHIFT
• ALT

Note: Because Windows has a long-established standard of using CTRL-drag for copy operations, there is a potential conflict when using the CTRL key to program actions that involve moving events. Therefore, the CTRL key requires some special attention:
If the CTRL key is part of a context for a move action, copying will be disabled if the CTRL key is pressed.
Mouse Location
Each Piano Roll tool can perform various actions depending on where you click. The following is a list of the seven clickable mouse locations with regard to events:
- Controller. Click the handle (top part) of a Controller event.
- Note Slip Start (left edge). Click the left edge of a Note event.
- Note Time Adjust. Click near left edge of a Note event, slightly to the right of the Note Slip Start zone.
- Note Pitch Adjust. Click the center part of a Note event.
- Note Slip End (right edge). Click the right edge of a Note event.
- Note Velocity Adjust. Click the top part of a Note event.
- Nowhere. Click anywhere outside a Note event or Controller event.
A diagram displays the possible mouse locations in regards to Note events and Controller events:

A. Controller B. Note Slip Start C. Note Time Adjust D. Note Pitch Adjust E. Note Slip End F. Note Velocity Adjust G. Nowhere
The Note event in the previous diagram has dotted lines that outline the various hit zones on Note events as possible context locations. It also shows a single value (controller) event as another context location. Clicking outside the Note event and value event is referred to as the "Nowhere" context location.
Tool Action
Below is a list of all possible Piano Roll mouse tool actions. Depending on the mouse location (context), only a subset of these actions may be available.

Note: As described in the "Mouse Move" column in the following table, a tool action may behave differently depending on where it is used in the Piano Roll view. The Piano Roll view has three different environments:
- Note-only grid. This refers to the Notes pane when the Controllers pane is shown (see "Notes Pane" on page 436).
- Value-only grid. This refers to the Controllers pane (see "Controller Pane" on page 436).
- Mixed grid. This refers to the Notes pane when both Note events and Controller events are displayed together (the Controllers pane is hidden).
| Action Mouse Down Mouse Move Mouse Up | |||
| No Action n/a n/a n/a | |||
| Insert/Move Note/Controller | Add Note/Controller to edit buffer | Move inserted Note/Controller horizontally and vertically | Commit edit buffer. |
| Paint Notes/ControllersSee Note/controller painting (freehand) | Add Note/Controller to edit buffer | Insert additional events at mouse position. For notes, use snap as interval between and duration of notes. For Controllers, use snap as interval between. | Commit edit buffer. |
| Paint Notes/Controllers LinearSee Note/controller painting (linear) | Add Note/Controller to edit buffer | Insert additional events at mouse position in straight line from where mouse was originally clicked. | Commit edit buffer. |
| Paint Controllers/ VelocitiesSee Controller/velocity painting (freehand) | Add Controller to edit buffer | In note grid, paint existing velocities as mouse passes through notes. In value grid, do same as Paint Notes/Controllers | Commit edit buffer. |
| Paint Controllers/ Velocities LinearSee Controller/velocity painting (linear) | Add Controller to edit buffer | In note grid, paint existing velocities linearly from original mouse click point. In value grid, do same as Paint Notes/Controllers Linear. | Commit edit buffer. |
| Lasso Selection Begin lasso drag Continue lasso rectangle Select all events | within lasso rectangle. Obey CTRL/SHIFT as standard modifiers. | ||
| Erase SweepSee Erase tool behavior | Mark any hit event as deleted | Mark notes that are hit in both pitch and time for deletion. Mark Controllers that are crossed in time for deletion | Commit edit buffer. |
| Move Notes/Controllers n/a Move selected notes/ | Controllers horizontally (in time) and vertically | Commit edit buffer | |
| Move Notes/Controllers (Vert) | n/a Move selected notes/ | Controllers vertically only | Commit edit buffer |
| Move Notes/Controllers (Time) | n/a Move selected notes/ | Controllers in time only (horizontally) | Commit edit buffer |
| Sel and Move Notes/Controllers | Select any hit event. Obey SHIFT/CTRL as standard modifiers | Move selected notes/Controllers horizontally (in time) and vertically | Commit edit buffer |
| Sel and Move Notes/Controllers (Vert) | Select any hit event. Obey SHIFT/CTRL as standard modifiers | Move selected notes/Controllers vertically only | Commit edit buffer |
| Sel and Move Notes/Controllers (Time) | Select any hit event. Obey SHIFT/CTRL as standard modifiers | Move selected notes/Controllers in time only (horizontally) | Commit edit buffer |
| Note Slip Start Adjust n/a Adjust start time and duration of selected notes. Obey snap settings | Commit edit buffer | ||
| Note Slip End Adjust n/a Adjust duration of selected notes. Obey snap settings | Commit edit buffer | ||
| Note Velocity Adjust n/a Adjust velocity of selected notes | Commit edit buffer | ||
| Note SplitSee Note split | Split hit note in to two notes at mouse time. Obey snap settings | n/a Commit edit buffer. | |
| Note GlueSee Note glue | Add any hit note to the edit buffer | Add any notes hit to edit buffer if same pitch as clicked note | Make one long note out of notes in edit buffer. Commit edit buffer. |
| Drag QuantizeSee Drag-quantize | Add Note/Controller to edit buffer | Move mouse upward to move selected events toward quantize target times.Move mouse downward to move selected events away from quantize target times. | Commit edit buffer. |
| Event MuteSee MIDI event mute | Add Note/Controller to edit buffer | Mute any hit event. Commit edit buffer | |
| Context Menu n/a n/a Show context menu | |||
Table 84.
Table 84.
Table 84.
To configure a Mouse Action
- Select Options > PRV Tool Configuration to open the PRV Tool Configuration dialog.
The PRV Tool Configuration dialog appears.
- In the Tools combobox, choose the Piano Roll tool you wish to assign (PRV Tool 1, PRV Tool 2 or PRV Tool 3).
-
Do one of the following:
-
Hold down the key(s) you wish to use (if any) and click with the desired mouse button directly on a context (mouse location) in the diagram. The appropriate Key and Mouse Button check boxes and radio buttons will be automatically checked.
- In the diagram, click on one of the seven contexts (mouse locations) you wish to assign, then select the Mouse Button and Key settings you wish to use.
The clicked mouse location is indicated in the diagram and the Mouse Location box shows the name of the clicked mouse location.
- In the Tool Action combobox, select the desired action (for a description of each action, see "Tool Action" on page 460).

Note: The possible actions will vary depending on the clicked mouse location.
- Click OK to close the PRV Tool Configuration dialog.
See:
The PRV Tool Configuration dialog
Default PRV tool assignments
When using the default tool assignments, the ALT modifier key generally swaps the behavior of the Draw and Select tools, allowing you to perform most common edit operations without having to actually switch tools.

Note: Some of the new tool actions, such as Note Split and Event Mute, are assigned by default to the middle mouse button. If your mouse does not have a middle button, you may want to reassign these actions to another button (see "To configure a Mouse Action" on page 462).
Below is a list of each tool's default assignments.
PRV Tool 1 (Select) default settings
| Location | Mouse Button | Key(s) Action |
| Nowhere Left Lasso Selection | ||
| Note (all zones) Left Select and Move Notes | ||
| Controller Left Select and Move Controllers | ||
| Controller Left ALT Move Notes/Controllers | ||
| Nowhere Left ALT Insert/Move Note/Controller | ||
| Note (Slip Start) Left ALT Note Slip Start Adjust | ||
| Note (Time Adjust) Left ALT Move Notes (Time) | ||
| Note (Pich Adjust) Left ALT Move Notes (Vertically) | ||
| Note (Slip End) Left ALT Note Slip End Adjust | ||
| Note (Velocity Adjust) Left ALT Note Velocity Adjust | ||
| Note (all zones) Middle CTRL | Drag-Quantize | |
| Controller Middle CTRL | Drag-Quantize | |
| Note (all zones) Middle SHIFT | Event Mute | |
| Controller Middle SHIFT | Event Mute | |
| Note (all zones) Middle | Note Split | |
| Note | Middle ALT Note Glue | |
Table 85.
PRV Tool 2 (Draw default settings
| Location Mouse Button Key(s) Action | ||
| Nowhere Left Insert/Move Note/Controller | ||
| Note (Slip Start) Left Note Slip Start Adjust | ||
| Note (Time Adjust) Left Move Notes (Time) | ||
| Note (Pich Adjust) Left Move Notes (Vertically) | ||
| Note (Slip End) Left Note Slip End Adjust | ||
| Note (Velocity Adjust) | Left Note Velocity Adjust | |
| Controller Left Move Controllers | ||
| Nowhere Left CTRL Paint Notes/Controllers Free | ||
| Nowhere Left CTRL+SHIFT Paint Notes/Controllers Linear | ||
| Nowhere Left ALT | Lasso Selection | |
| Note | Left ALT | Select and Move Notes |
| Controller Left ALT | Select and Move Controllers | |
| Nowhere Middle | Erase Sweep | |
| Note | Middle | Erase Sweep |
| Controller Middle | Erase Sweep | |
Table 86.
PRV Tool 3 (Erase default settings
| Location | Mouse Button | Key(s) | Action |
| Nowhere | Left | Erase Sweep | |
| Note | Left | Erase Sweep | |
| Controller | Left | Erase Sweep |
Table 87.
Editing MIDI Events and Continuous Controllers (CC)
Flexible Piano Roll tools
Adding and Editing Controllers in the Piano Roll
Controller events (MIDI continuous controllers, pitch wheel, NRPN's, and RPN's) appear in either the Notes Pane or the Controller pane, depending on whether you choose to display the Controller pane or not. Each controller event has an edit handle at the top, which you can drag to edit, and a tail under the edit handle, which graphically demonstrates the controller event's current value. The tail changes colors to show whether you can edit a particular type of controller, and also turns dark to show that the controller event is selected. Controller events appear in different colors so you can differentiate them when you're displaying multiple controller events, possibly in multiple tracks.

Note: Only the current track and current events appear in a solid color. All other tracks and events appear in de-saturated colors.
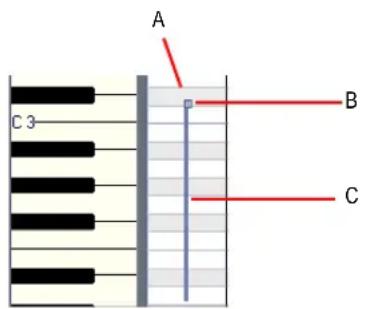
A. A single controller event B. Edit handle (also called Controller handle C. Controller tail
To show which events belong to which track, and which ones are the “current” events (the ones you can edit), and which events are selected, controller events use the following color patterns:
- Controller tail. Uses the same color as the edit handle when the controller can be edited (in other words, when the controller is selected in the Edit MIDI Event Type menu). You can automatically enable a controller type for editing by clicking its edit handle with the Draw tool.
- Selected. If a controller event is selected, both the edit handle and the tail darken in shade the way that selected notes do.
See:
Adding Controllers
Selecting Controllers
Editing Controllers
Multiple automation controller lanes
The Controller pane in the multi-track Piano Roll view (not the inline Piano Roll) is split up into multiple lanes—one lane for each unique event type in the track.
You can freely create new lanes to display and edit MIDI data such as velocity, modulation, pitch bend and CCs (Continuous Controllers) and events can be moved and copied between lanes.

A. Velocity lane B. Wheel lane C. CC92 lane D. Add new lane E. Remove lane F. "Active" lane (darker shade) G. Scale pane H. Controller pane
See:
Working with MIDI data lanes.
To create a new lane.
To delete a lane.
To assign an Event Type to a lane.
To copy events between lanes.
To move events between lanes.
Working with MIDI data lanes
The Controller pane allows you to display and edit non-note MIDI data, such as velocity, modulation, pitch bend and continuous controllers (CCs), in multiple lanes at the bottom of the Piano Roll view.
When you open the Piano Roll view, SONAR will automatically create a separate MIDI data lane for each unique data type that is present in the selected track(s).
When you click on a lane—either in the controller pane or in the scale pane—that lane becomes “active” and turns a slightly darker shade. The significance is that the active lane is the one that becomes controlled by the Event Type pickers in the top left corner of the Piano Roll view.
Each lane can be configured to show one or more event types.

A. The Event Type pickers apply to the active lane B. Show/Hide MIDI Events picker C. MIDI Event Type picker
See:
To assign an Event Type to a lane.
To create a new lane
- In the multi-track Piano Roll view, make sure the Controllers pane is shown at the bottom. If it is not displayed, do one of the following:
- Click the Use Controller Pane button in the Piano Roll view toolbar.
- Press C.
-
Do one of the following:
-
Click the Plus button + in the bottom left corner of any existing lane.
- Press SHIFT+I.
A new lane is inserted below the lane that was clicked (or below the active lane if you pressed SHIFT+L). SONAR will try to automatically assign the lane to any event type that exists in the track, provided the event type is not already assigned to another lane.
To delete a lane
To delete an existing lane, click the Minus button ☐ in the bottom left corner of the lane.
If there is only one lane that is opened, this command will close the Controller Pane.

Note: Deleting a lane does not delete any MIDI events from the track.
To assign an Event Type to a lane
Use the MIDI Event Type drop-down lists in the Piano Roll to select which MIDI data type you want to display and edit in the active lane.
- Click the lane you wish to assign to a specific event type.
The lane appears darker than other lanes to indicate that it is the active lane.
- Click the MIDI Event Type picker 📄 Notes/Velocity ▼
The MIDI Event Type pop-up menu appears.
-
Do one of the following:
-
To specify a new event type that doesn't already exist in the track, choose New Value Type and select the desired event type in the MIDI Event Type dialog.
- To specify an event type that already exists in the track, select the event type from the MIDI Event Type pop-up menu.
The name of the current edit type is displayed in the lane.
See:
Displaying Notes and Controllers (Piano Roll View Only)
To show/hide multiple Event Types in a lane
- Click the lane in which you wish to display multiple event types.
The lane appears darker than other lanes to indicate that it is the active lane.
- Click the small drop-down arrow in Show/Hide MIDI Event Type picker

The Show/Hide MIDI Event pop-up menu appears.
- Select the event type you wish to show/hide in the lane.
Visible event types appear checked and hidden event types appear unchecked.

Note: The event types you wish to display must already exist in the track before you can choose them from the Show/Hide MIDI Events picker.
- Repeat steps 2-3 for any additional event types you wish to show/hide in the active lane.
See:
Displaying Notes and Controllers (Piano Roll View Only)
To copy events between lanes
When you copy events from one lane to another lane, the MIDI data is transformed to match the edit type in the target lane.
- Select the event types you wish to copy to another lane. See "Selecting Controllers" on page 472 for more information.
- In the Scale pane, right-click the lane you wish to copy the selected events to.
The lane context menu appears.
- Click Copy selected events to this lane.
The selected events are copied to the destination track.

Note: It is impossible to copy selected events to a lane that has an edit type of Velocity; the type of event to transform to would be Note and the pitch could not be specified in this case. In this case, the Copy selected events to this lane menu command will be disabled and appear grayed out.

bar
| Metric | Value | | ------------------ | ----- | | Velocity | 127 | | Wheel (Chans 1) | 64 | | Wheel (Chans 1) | 0 | | Wheel (Chans 1) | -8.192| | 32-Tremole depth | 127 | | 32-Tremole depth | 64 |A. Scale pane B. Right-click the lane in the scale pane
To move events between lanes
When you move events from one lane to another lane, the MIDI data is transformed to match the edit type in the target lane.
-
Select the event types you wish to move to another lane. See "Selecting Controllers" on page 472 for more information.
-
In the Scale pane, right-click the lane you wish to move the selected events to.
The lane context menu appears.
- Click Move selected events to this lane.
The selected events are moved to the destination track.

Note: It is impossible to move selected events to a lane that has an edit type of Velocity; the type of event to transform to would be Note and the pitch could not be specified in this case. In this case, the Move selected events to this lane menu command will be disabled and appear grayed out.
Adding Controllers
When you add a new controller type to a track, the controller type is automatically chosen in the Show/Hide MIDI Events menu, so that you can see it. For help showing and hiding all the other MIDI data you may have in your track or tracks, see "Displaying Notes and Controllers in the Inline Piano Roll View" on page 480, "Displaying Notes and Controllers (Piano Roll View Only)" on page 440, and "Working with Multiple Tracks in the Piano Roll View" on page 437.
To Add Controller Data with the Draw Tool
- Click the Edit MIDI Event Type menu allNotesVelocity, and choose New Value Type from the pop-up menu.
The MIDI Event Type dialog appears.
-
Choose options from the following fields:
-
Type. Choose the type of controller you want to add (for example, choose Control if you want to edit volume).
- Value. This field is greyed-out if you choose Wheel or ChanAft in the Type field. If you choose Control, RPN, or NRPN in the Type field, choose which Control, RPN, or NRPN you want to add. For example, to edit volume, choose 7-Volume in this field if you chose Control in the Type field.
-
Channel. Choose a MIDI channel for the controller if you want. If your track has a MIDI channel listed in the Ch field, all MIDI data in your track uses the listed MIDI channel.
-
Click OK to close the dialog.
-
Activate the Draw tool in either the Piano Roll view toolbar or the Inline Piano Roll toolbar (depending on which view you're working in), and add your controller values by using one of the following methods:
- Depress the mouse at the point where you want your controller messages to start, and drag the Draw tool to draw the kind of curve you want your controller messages to follow. A tooltip appears when you depress the mouse, and constantly reports the controller name, channel, value, and location of the controller value that you are entering. Release the mouse where you want your curve to end.

Tip: To draw a straight line, hold the SHIFT key down while you draw.
- To add one controller event at a time, click each place that you want to add a controller value. A tooltip appears when you click, and reports the controller name, channel, value, and location of the controller value that you are entering.
The controller events you added appear as vertical lines, each with an edit handle at the top that you can drag. Each different type of controller event appears with a different color (see “Adding and Editing Controllers in the Piano Roll” on page 466 for more information).
When you use the Draw tool, the speed with which you drag the mouse determines the density of controller events. To insert a larger number of controller events with relatively small changes in value, move the mouse slowly. To insert a smaller number of controller events with relatively large changes in value, drag the mouse quickly.
To Insert a Series of Controllers
- Choose Insert > Controllers to display the Insert Series of Controllers dialog box.
- Choose the controller type from the Insert list.
- Choose the controller number or type from the Number list.
- Use the spinners or enter the desired MIDI channel.
- Enter a starting and ending value in the Begin and End boxes.
- Enter a starting and ending time in the From and Thru boxes.
- Click OK when you are done.
SONAR inserts a series of controller events with values that change smoothly over time from the starting to the ending value indicated in the dialog box. This command never inserts more than one event on the same clock tick. If any controllers of the type you have selected already exist in the time region, SONAR deletes these before inserting the new ones.
See:
Selecting Controllers
Editing Controllers
Selecting Controllers
To perform many editing procedures on controllers, you first need to select the controller events you want to edit. A selected controller event turns dark when it is selected. You can select a single controller event, multiple controller events of the same type, or all controller events.
To Select Controller Events of the Same Type
- Click the Edit MIDI Event Type menu //NotesVelocity, choose the type of event you want to select from the pop-up menu.
-
Activate the Select tool in the Piano Roll toolbar or the Inline Piano Roll toolbar (depending on which view you're working in), and select one or more controller events by using the following techniques:
-
Drag a rectangle around the edit handles of the controller events that you want to select.
- SHIFT-click or SHIFT-drag to add other controllers to the selection.
- CTRL-click to or CTRL-drag toggle the selection state of a controller.
- Click and drag in the Time Ruler.
Select controllers within note duration
When editing MIDI data it is often necessary to align the timing of Controller events with that of Note events. For example, Sustain Pedal (CC64) events need to move along with the notes they are
supposed to sustain, and Pitch Wheel events need to move along with the notes whose pitch they are supposed to modify.
When the Select Controllers within Note Duration mode is enabled, selecting a Note event or a range of Note events will also automatically select any Controller events that exist within the time range of the Note event(s).
Note events can be selected by clicking the notes or by lasso-selecting the notes. For more information, see "Selecting Notes" on page 441.
The following rules apply when multiple Note / Controller event types are selected:
- Dragging a Note event vertically will not affect the selected Controller event(s).
- Dragging a Note event in time (horizontally) will also drag the Controller event(s) along with it in time.
- Dragging Controller events vertically will not affect the selected Note event(s).
- Dragging Controller events in time will also drag Note events along with them in time.
- If multiple Controller types are selected, only the type you click on can be dragged vertically. The rest will only move in time (horizontally).
To enable/disable 'Select Controllers within Note Duration'
Click the Select Controllers within Note Duration button in either the Piano Roll view toolbar or the Inline Piano Roll toolbar in the Track view.
The toolbar button lights up when enabled.

Note: The state of the Select Controllers within Note Duration mode is global and applies to both the Piano Roll view and inline Piano Roll.
Editing Controllers
Each controller value appears with a handle at the top of it, which you can drag vertically with the Select tool or the Draw tool, or horizontally (Select tool only).
Activate the Select tool or the Draw tool by clicking their respective icons in either the Piano Roll view toolbar, or the Inline Piano Roll toolbar, depending on which view you're working in.

Tip: You can assign the Inline Piano Roll view tools to key bindings.
To Edit or Delete Controller Events with the Select Tool
- Select the type of controller events you want to edit by clicking the Edit MIDI Event Type menu. Notes/Velocity, and choosing the controller type from the pop-up menu.
The controller events you chose change shade to show that you can edit them.
-
Drag the edit handle of each controller event that you want to edit vertically and/or horizontally. A tooltip appears when you depress the mouse, and constantly reports the controller name, channel, value, and location of the controller value that you are editing. Release the mouse where you want your controller value to be.
-
To delete controller events, select them, and press the DELETE key.
To Edit or Delete Controller Events with the Draw Tool
- Select the type of controller events you want to edit by clicking the Edit MIDI Event Type menu, and choosing the controller type from the pop-up menu.
Or
- Click an edit handle on the type of controller events you want to edit. This automatically chooses the controller in the Edit MIDI Event Type menu.
The tails of the controller events you choose change to the same color as their edit handles to show that you can edit them.
- Edit the controller by using any of the following methods:
• To edit a single event, drag an edit handle vertically.
- Redraw a series of controller events by dragging a new curve through the events.
- Delete a single controller event by activating the Erase button, and clicking a controller's edit handle. You can override the Erase button (temporarily reverse its current state) by holding down the ALT key while you click.
See:
Working with Multiple Tracks in the Piano Roll View
Piano Roll Microscope mode
The Piano Roll Microscope mode makes it much easier to edit MIDI data without constantly needing to change zoom settings. This is especially useful in the inline Piano Roll where track heights are typically sized such that MIDI notes become very small.
When Microscope mode is enabled, a transparent rounded square centered on the mouse cursor shows a zoomed in region of the Piano Roll data underneath it:

natural_image
Abstract grid pattern with yellow rectangular shapes on white background (no text or symbols)Only the work area under the mouse is zoomed in while the rest of the data retains its normal size. Here is an example of dense MIDI data that is difficult to edit at the current zoom level:

With Microscope mode turned on, the area under the mouse looks like this:
Microscope mode also works with Drum Maps:

To enable/disable Microscope mode
To enable/disable Microscope mode, do one of the following:
- Click the Microscope Enable button in either the Piano Roll view toolbar or the Inline Piano Roll toolbar in the Track view.
- Choose Options > PRV Tool Configuration and toggle the Microscope check box.
How Microscope mode works
Position. The Microscope is always centered on the mouse position.
Size. The size of the Microscope is configurable. The default diameter is 100 pixels. See "Configuring Microscope mode options" on page 476 for more information.
Transparency. The Microscope maintains a certain level of transparency so that the real-sized data can always be seen.
Zoom Factor (vertical). The amount of vertical zoom varies with the existing zoom level of the data. Generally, the note height under the microscope has a minimum height of 8 pixels and scales up from there depending on the existing zoom of the data. The microscope data will always be bigger than the original regardless of how far it is zoomed in.
Zoom Factor (horizontal/time). The microscope will provide some horizontal magnification when the view zoom is such that notes become very narrow.

Tip: Use Fast Zoom in combination with Microscope mode if you wish to quickly zoom around the current mouse position. See "To Zoom Using the Mouse Wheel (Fast Zoom)" on page 301 for more details.
Configuring Microscope mode options
There are several settings that let you configure the size and zoom level of the microscope.
To Configure Microscope Mode Options
To configure the Microscope mode settings, choose Options > PRV Tool Configuration to open the PRV Tool Configuration dialog.

The following options are available:
Microscope. Use this check box to enable/disable Microscope mode (enabled by default).
Diagonal Size. Use this numeric entry box to specify the diameter size in pixels of the microscope. The valid range is 20-250 and the default value is 100.
Show When Note Height Less Than. Microscope mode will only be enabled if the note heights (in pixels) are equal or less than this number. The valid range is 2-20 and the default value is 6.
Magnifying Time. Use this check box to enable/disable horizontal magnification when the Piano Roll view zoom is such that notes become very narrow.
In addition to these options, there are some other parameters that can be configured by adding the following INI variables to the WinCake section of Cakewalk.ini (see Cakewalk.ini):
| Variable Type | Default value | What it does | |
| MicroscopeHZoomThreshold=<1..20> | Integer 8 By default, the | Microscope mode begins horizontal magnification when a 32nd note is narrower than 8 pixels. This line lets you specify the horizontal zoom threshold (1-20 pixels). | |
| MicroscopeHZoomMax=<2.0 - 8.0> | Integer | 3.0 | This line specifies the highest horizontal magnification that will result when using Microscope mode. |
Table 88.
The Inline Piano Roll View
The Inline Piano Roll view lets you edit note and continuous controller events for a single track directly in the Track view. Clicking the PRV Mode button in a track changes the Clips pane for that track into a single-track Piano Roll view which displays all the track's MIDI data, including data from all track layers. If a track uses a Drum Map, the Inline Piano Roll view for that track displays the Drum Map's note names on the track's MIDI Scale (see "The MIDI Scale" on page 479 for more information).
In this view, you can:
- Edit notes and controller events
- Edit multiple notes or events
- Display multiple controller types simultaneously
- Choose which MIDI events you want to display
- Use separate Snap to Grid settings in the Clips pane mode and Inline Piano Roll mode
You control the Inline Piano Roll view with controls in the Inline Piano Roll toolbar, the MIDI Scale, and four buttons found in the Track strip controls of each track: the PRV Mode button, the Show/Hide MIDI Events button, the Edit MIDI Event Type button, and the Note Duration button. These three buttons appear when you enable the PRV Mode button.
The Inline Piano Roll toolbar is part of the Track view toolbar.
See the following two figures:
Figure 81. Track strip in PRV mode
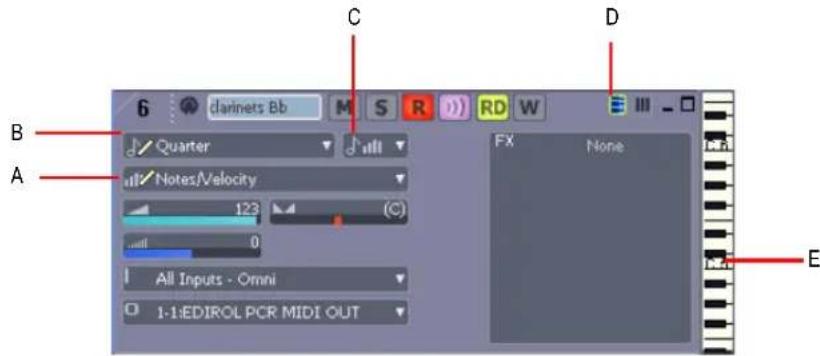
A. Edit MIDI Event Type menu B. Note Duration menu C. Show/Hide MIDI Events button D. PRV Mode button E. MIDI Scale
Figure 82. Inline Piano Roll toolbar
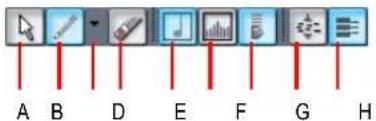
A. PRV Select tool B. Draw tool C. Draw tool Auto Erase menu D. Erase tool E. Show/Hide Notes F. Show/ Hide Controllers G. Show/hide velocity tails (on drum-mapped tacks) H. Fit Content I. PRV Mode
See also:
Displaying the Inline Piano Roll View
The MIDI Scale
Displaying Notes and Controllers in the Inline Piano Roll View
Drawing and editing notes and controllers in the Inline Piano Roll view is the same in the Piano Roll view, with a few exceptions (noted in the appropriate topics). The major difference is that you can display and edit multiple tracks in the Piano Roll view.
To draw and edit notes and controllers in the Inline Piano Roll view, see "Adding and Editing Notes in the Piano Roll" on page 441, and "Adding and Editing Controllers in the Piano Roll" on page 466.
Displaying the Inline Piano Roll View
Use the following methods to hide or show the Inline Piano Roll view.
To Hide or Show an Individual Track's Inline Piano Roll View
- In the Track pane, click the PRV Mode button of the track that you want to display in Inline Piano Roll view mode.
Or
- Double-click a MIDI clip in the Clips pane, if Inline Piano Roll Mode is selected in the MIDI Clips field of the Clip Pane Options dialog. To open the Clips Pane Options dialog, right-click in the Clips pane, and select View Options from the pop-up menu.
To Hide or Show All Tracks' Inline Piano Roll Views
- In the Inline Piano Roll toolbar, click the PRV Mode button. The Inline Piano Roll toolbar is part of the Track view toolbar.
Or
- Use the Tracks > In-line PRV > PRV Mode command.
See also:
The MIDI Scale
Displaying Notes and Controllers in the Inline Piano Roll View
The MIDI Scale
MIDI tracks have a control called the MIDI Scale. This control displays a vertical ruler labeled with MIDI values (in 7bit Values mode) or MIDI notes (in Notes mode), giving you a visual guide for editing notes and controllers. The MIDI Scale is also a vertical zoom control. If a track uses a Drum Map, the MIDI Scale for that track displays the Drum Map's note names on the track's MIDI Scale (in Notes mode).
Figure 83. MIDI Scale in Notes mode

A. MIDI Scale
To Zoom Vertically with the MIDI Scale
-
Put the MIDI Scale into notes mode by right-clicking the MIDI Scale and choosing Notes from the pop-up menu.
-
Hold the mouse over the MIDI Scale so that the cursor changes to a small vertical keyboard, and drag upward to zoom in. The Inline Piano Roll view zooms in.

Note: In Notes mode, if the track is zoomed-out too far, there is not enough room in the MIDI Scale to display the keyboard. To see the keyboard, you need to zoom in far enough to display the keyboard.
- To zoom out, drag downward on the keyboard display.
You can also zoom by using the Track view zoom controls.
To Scroll Vertically with the MIDI Scale
- Right-click the MIDI Scale and drag up or down to scroll.
To Fit a Single Track's Content into its Inline Piano Roll View
- Right-click the MIDI Scale and choose Fit Content from the pop-up menu.
Or
- CTRL-double-click the MIDI Scale.
To Audition and Select Notes
- To audition and select a note, SHIFT-click the note's pitch in the MIDI Scale.
- To audition and select all notes within a certain range, SHIFT-drag through the notes' range of pitches in the MIDI Scale.
To Fit All Tracks' Contents into their Inline Piano Roll Views
-
If you only want to use this command on certain tracks, select the tracks first. If no MIDI tracks are selected, or if all MIDI tracks are selected, the command works on all MIDI tracks.
-
Do one of the following:
Use the Tracks > In-line PRV > Fit Content command.
Or
Click the Fit Content button on the Inline Piano Roll toolbar. The Inline Piano Roll toolbar is part of the Track view toolbar.
To Change the MIDI Scale's Display Mode
- Right-click the MIDI Scale to display the pop-up menu, and choose either 7bit Values (this displays MIDI values), or Notes (this displays the keyboard).
See also:
Displaying the Inline Piano Roll View
Displaying Notes and Controllers in the Inline Piano Roll View
Displaying Notes and Controllers in the Inline Piano Roll View
Every MIDI track in the Track pane displays a Show/Hide MIDI Events button when the track is in Inline Piano Roll mode. These buttons work independently in each track, and are also independent from the Show/Hide MIDI Events button in the Piano Roll view.
To Hide or Show Data in Individual Tracks
- Click the drop-down arrow on the Show/Hide MIDI Events button 🎯 to display the menu of MIDI data in the track.
- Choose from the following menu options:
- To hide or show notes, click Show Notes.
- To hide or show a controller, click the name of the controller (for example, click CC: 1-Modulation (Chan: 2)).
- To show all controllers in the current track, click Display All Continuous Events, or use step 4 below.
-
To show or hide all the outlines of any clips in the track, click Show Clip Outlines.
-
After you choose an option, the menu closes. You can repeat steps 1 and 2 to choose more options.
- To hide or show all controllers, click the left side of the Show/Hide MIDI Events button. The button turns white when all controllers are hidden, and blue when all controllers are showing.
To Hide or Show Notes in All Tracks
- Click the Show/Hide Notes button in the Inline Piano Roll toolbar.
or
- Use the Tracks > Show/Hide Notes command.
Both of these commands override the Show/Hide MIDI Events buttons in individual tracks.
To Hide or Show Controllers in All Tracks
- Click the Show/Hide Continuous button in the Inline Piano Roll toolbar.
or
- Use the Tracks > In-line PRV > Show/Hide Continuous Events command.
Both of these commands override the Show/Hide MIDI Events buttons in individual tracks.
You can zoom in to or out of individual MIDI Tracks by dragging the MIDI Scale up or down. See The MIDI Scale for more information.
See also:
Selecting Notes
Adding and Editing Controllers in the Piano Roll
Adding and Editing Notes in the Piano Roll
Adding Controllers
Selecting Controllers
Editing Controllers
Selecting and Editing Events
SONAR has many editing commands that you can use to modify the events that make up your project. Here are some of the things you can do:
- Transpose events, clips, tracks, or an entire project to a different key
- Shift events to an earlier or later time
- Stretch or shrink material to a different length
- Reverse the notes in a clip to create new arrangements
- Modify the note velocities
The following sections describe these editing commands and how to use them. SONAR also has some special commands you can use to modify or clean up a performance or to search for or select events that meet certain criteria.
See:
Transposing
Shifting Events in Time
Stretching and Shrinking Events
Reversing Notes in a Clip
Adding Crescendos and Decrescendos
Copying and Pasting MIDI Data
You can copy and paste both notes and controller data in SONAR.
To Copy and Paste MIDI Data with the Copy/Paste Commands
- Select the data you want to copy.
- Use the Edit > Copy command, or press CTRL+C.
- Use the Edit > Paste command, or press CTRL+V.
The Paste dialog appears.
- Fill in options, and click OK. Click the Help button in the dialog for an explanation of each option.
SONAR pastes the copied data to the desired location.
Transposing
The Process > Transpose command transposes the pitches of selected note events up or down by a fixed number of steps. It does so by changing the MIDI key numbers of note events. Simply enter the number of half-steps—a negative number to transpose down, a positive number to transpose up.
SONAR can also perform diatonic transposition, which shifts all the notes up and down the major scale of the current signature by the designated number of steps. For instance, if you specify an amount of +1 and the key signature is C-major, a C becomes a D (up a whole step), an E becomes an F (up a half step), and so on. Diatonic transposition assures you that the transposed notes fit with the original key signature.
As an option, you can choose to transpose selected audio clips along with any selected MIDI clips. SONAR uses pitch-shifting (a plug in for changing audio pitch) to perform the transposition. You can transpose audio only a single octave in either direction (-12 to +12), and you cannot transpose audio when you are using diatonic transposition.
To Transpose Selected Events
- Select the tracks, clips, or events you want to transpose.
- Choose Process > Transpose to display the Transpose dialog box
Figure 84. The Transpose dialog.

- Use the spinners or enter the number of semi-tones to transpose.
Or
Use the + and - keys on your keypad to go up or down by one or [ and ] to go up or down by octaves.
- Check Diatonic Math if you want to transpose along the major scale of the current key.
- Choose Transpose Audio if you want to pitch-shift selected audio clips. If you check this check box. SONAR transposes any selected audio data up or down, but only by half-steps, not diatonically. When this check box is enabled, the following two options become available:
- Type. Choose the type of audio data you're transposing. Choose options based on the source material: single voice or instrument versus a group of instruments (ensemble or polyphonic), and how long you want to wait for processing to finish: better quality can take a long time if you're processing several tracks.
- Formant scaling. Possible values range from -2.000 to 2.000 octaves. Formants give a voice its characteristic sound. You can use the Formant Scaling value to offset the pitch transposition you're applying. For example, if you're transposing the pitch down, you can raise the formant to try and maintain the characteristics of the sound.
- Click OK when you are done.
SONAR transposes the selected events.
Shifting Events in Time
The Track view lets you move entire clips forward or backward in time by using drag and drop editing or by changing the start time of selected clips. The Process > Slide command is slightly more flexible—you can use it to shift individual events and markers (or selected events and markers) either forward or backward in time. This has an effect that is similar to the Time+ parameter in the Track view. However, the Process > Slide command modifies the time stored with each event, while the Time+ parameter simply applies a temporary change during playback.
You can also use the Process > Slide command to move markers located within the selection. If you have selected any locked markers, SONAR will ask whether they should slide, too.
To Shift Events in Time
- Select the events and/or markers you want to shift.
- Choose Process > Slide to display the Slide dialog box.
- Check the types of event you want to slide (events and/or markers).
- Enter the number of measures, ticks, seconds, frames or samples to slide. Enter a negative number to shift material earlier. Note that you cannot slide any event earlier than 1:01:000. For example, if the current selection starts at 2:01:000, you cannot slide events earlier by more than one measure.
- Click OK when you are done.
SONAR shifts the selected events and/or markers. You can also use the Process > Nudge command to move events. See "Nudge" on page 312 for more information.
Inserting Time or Measures into a Project
The Insert > Time/Measures command lets you insert any number of blank measures, ticks, seconds, or frames into a project. You can insert the blank measures (or other period of time) into all tracks or into one or more selected tracks. If you insert the blank time into the entire project, all events in each track—markers, meter and key settings, and tempo changes—are shifted automatically by default. If you insert the blank time into one or more selected tracks, only the events in those tracks are shifted by default. You can always choose which types of events should be shifted.
To Insert a Single Blank Measure into a Project
- Press CTRL+SHIFT+A or select Edit > Select > None to make sure that no track or time range is selected.
- Set the Now time to the place where you want to insert the measure.
- Choose Insert > Time/Measures to display the Insert Time/Measures dialog box.
Figure 85. The Insert Time/Measures dialog

- Verify that the settings are correct and click OK.
SONAR inserts a blank measure at the Now time.
To Insert Blank Time or Measures into a Project
- Select Edit > Select > None to make sure that no track or time range is selected.
- Select the range of time you want to insert by dragging in the Time Ruler.
- Choose Insert > Time/Measures to display the Insert Time/Measures dialog box.
- If necessary, adjust the time at which blank space will be inserted.
- If necessary, change the length of time to insert by entering a number and choosing the units you want from the list.
- Choose the types of events that should be shifted automatically from the Slide list.
- Click OK when you are done.
SONAR inserts the desired amount of blank time into the project.
To Insert Blank Time or Measures into Selected Tracks
- Select the range of time you want to insert by dragging in the Time Ruler.
- Select one or more tracks by CTRL-clicking on the track numbers.
- Choose Insert > Time/Measures to display the Insert Time/Measures dialog box.
- If necessary, adjust the time at which blank space will be inserted.
- If necessary, change the length of time to insert by entering a number and choosing the units you want from the list.
- Choose the types of events that should be shifted automatically from the Slide list.
- Click OK when you are done.
SONAR inserts the desired amount of blank time into the project.
Deleting Measures or Time from One or More Tracks
There are two methods for deleting time or measures:
- If there is any audio or MIDI data in the area you want to delete, you can use the Edit > Delete
command to delete the area that you select. Portions of MIDI clips may have no data in them: they have boundaries but no dark lines inside—if that's the case, use the following method.
- If there is no data in the area you want to delete, you can simply drag any clips that come after the empty area to their proper destinations. You can also use this method if there is data in the area you want to delete—you just have to choose whether you want to replace the data in the deleted area, blend it with the data you're moving, or slide it over to make room.
To delete time when there is audio or MIDI data in the area you want to delete:
-
In the Track view, select the track(s) you want to delete measures or time from by doing one of the following:
-
Select a single track by clicking the track number.
-
Select multiple tracks by CTRL-clicking the track numbers.
-
Set the Snap to Grid value to the unit of time you want to delete. For example, if you want to delete whole measures, set the Snap to Grid value to a whole measure.
- In the Clips pane, select the measures or time you want to delete by dragging in the Time Ruler located just above the first track.
- Select Edit > Delete.
The Delete dialog box appears.
-
Click the following check boxes:
-
Events in Tracks
-
Delete Hole. If you want the data that comes after the hole to retain its same placement in a measure, check the Shift by Whole Measures option.
-
Click any of the other options you want to delete.
-
Click OK.
SONAR deletes the time or measures you selected.
To delete time when there is no audio or MIDI data in the area you want to delete (or if there is data, but you like to drag and drop):
- Set the Snap to Grid value to the unit of time you want to delete. For example, if you want to delete whole measures, set the Snap to Grid value to a whole measure.
- In the Track view, select the clips you want to move.
- Drag one of the selected clips to its proper destination—the Drag and Drop Options dialog box appears.
- Choose options and click OK.
All the selected clips move by the amount that you dragged the mouse.
Stretching and Shrinking Events
The Process > Length and Process > Fit to Time commands can be used to stretch or shrink a portion of a project. Process > Length lets you stretch or shrink the selection by a fixed percentage
and makes the adjustment by altering the individual events. A value of 200 percent, for example, stretches the selection to twice its original length, while a value of 50 percent shrinks the selection to half its original length.
Process > Fit to Time stretches or shrinks the selection so that it ends at a specific time, expressed in either measure:beat:tick (MBT) or hours:minutes:seconds:frames (SMPTE) format. This command gives you a choice of modifying the events or modifying the underlying tempo. This is useful when you want a portion of a project to have an exact length. The start time of the selection does not change, but the end time is altered as necessary to fit the required time interval.
Both of these commands offer the option to stretch audio clips along with the MIDI information. Sometimes you don't want to adjust the speed of your audio.
Here are some examples:
- If your project contains background music and a voice-over, you might want to change the tempo of the background music without altering the voice-over
- If you're trying to modify the speed of some MIDI tracks to match a sampled drum groove, you want to leave the audio unchanged
• If your audio consists solely of sound effects, you most likely do not want to adjust them
Audio can be stretched or condensed up to a factor of 4 (e.g., it can be shrunk to as little as 25 percent of its original length, or expanded to as much as 400 percent of its original length).
You can also use the Process > Length command to alter only the start times or the durations of notes. For example, changing the durations of notes to 50 percent of their original length can create a staccato effect.
To Stretch or Shrink Using Percentages
- Select the events you want to change.
- Choose Process > Length to display the Length dialog box.
Figure 86. The Length dialog

- Choose to change the Start Times and/or Durations of selected notes by checking the boxes.
- If you want to stretch selected audio clips, check the Stretch Audio box. When this check box is enabled, the following two options become available:
- Type. Choose the type of audio data you're stretching. Choose options based on the source material: single voice or instrument versus a group of instruments (ensemble or polyphonic),
and how long you want to wait for processing to finish: better quality can take a long time if you're processing several tracks.
- Formant scaling. Possible values range from -2.000 to 2.000 octaves. Formants give a voice its characteristic sound. If you find that changing the length of your audio changes the timbre too much, you can raise or lower the formant to try and maintain the characteristics of the sound
-
Use the spinners or type in the desired percent change in length.
-
Click OK when you are done.
SONAR modifies the length of selected events.
To Stretch or Shrink to a Specific Length
-
Select the events you want to change.
-
Choose Process > Fit to Time to display the Fit to Time dialog box.
Figure 87. The Fit to Time dialog

-
Enter the desired end time in the New Thru box. Click Format to switch between MBT and SMPTE format.
-
Choose one of the following:
- Tempo Map. Choose this option if you want the tempo to change but not the duration of notes and events. For example, if your clip contains quarter notes, and you want those notes to stay quarter notes even though the elapsed time of the clip changes, choose Tempo Map. SONAR alters the tempo but not the events in the track.
- Event Times. Choose this option if you want the tempo(s) to remain unchanged while note durations and event start times change.

Note: This option is unavailable if your selected data includes any Groove clips.
- If you want to stretch selected audio clips, check the Stretch Audio box. The following options become available:
- Type (disabled unless Stretch Audio is checked). Choose options based on the source material: single voice or instrument versus a group of instruments (ensemble or polyphonic),
and how long you want to wait for processing to finish: better quality can take a long time if you're processing several tracks.
- Formant Scaling (disabled unless Stretch Audio is checked). The possible values range from -2.000 to 2.000 octaves. Formants give a voice its characteristic sound. If you find that changing the length of your audio changes the timbre too much, you can raise or lower the formant to try and maintain the characteristics of the sound
- Click OK when you are done.
SONAR modifies the length of selected events or changes the tempo map, as you requested.
High-resolution audio boosted by 6 dB when stretched using MPEX
When using a sample rate of 88.2 kHz or higher and performing any operation that uses MPEX time/pitch stretching, the stretched audio will be boosted by 6 dB.
Reversing Notes in a Clip
The Process > Retrograde command reverses the order of events in a selection. If one or more clips are selected, then the events within each clip are reversed. If several clips are selected from the same track, then the order of the clips is also reversed. You could use this command, for example, to take a scale or other long run of notes and reverse the order in which they are played. The Process > Retrograde command does not reverse the contents of audio clips. It only changes their start times. You can use the Process > Audio > Reverse command to reverse audio clips.
To Reverse the Sequence of Notes or Other Events
- Select the notes you want to reverse.
- Choose Process > Retrograde.
SONAR reverses the order of the selected events.
Adding Crescendos and Decrescendos
The Process > Scale Velocity command lets you create crescendos and decrescendos on those instruments that respond to MIDI velocity. Most such instruments map changes in velocity to changes in note loudness. Many synthesizer patches alter the timbre of the sound as well, so that higher velocities produce brighter, as well as louder, sounds. Changes in velocity also affect the playback of audio clips.
This command lets you set a starting and ending velocity for the entire time range of the selection. SONAR scales the velocity of each event to create a smooth linear change in velocity. As an option, you can enter a starting and ending percentage; existing velocity values are modified by the designated percentage.
You can also edit note velocities in the Notes pane of the Piano Roll view, which lets you draw shapes other than straight line changes. For more information, see “Adding and Editing Notes in the Piano Roll” on page 441.
To Scale Velocities
- Select the events whose velocity data you want to change.
- Choose Process > Scale Velocity to display the Scale Velocity dialog box.
Figure 88. The Scale Velocity dialog

- Enter the starting and ending velocity values.
- Check the Percentages box if the values are percentages.
- Click OK when you are done.
SONAR alters the velocity of selected events.
Changing the Timing of a Recording
When you record a performance, there may be problems you'd like to correct. For example, the note timing may not have been as accurate as you would like. Or, you may have recorded without using a metronome and strayed from the tempo in one direction or another.
SONARhas two types of commands that you can use to modify the timing of a clip. The Quantize commands alter the timing of the notes in your recording so that they fit a time grid.
The grid can have fixed time intervals or intervals that are based on some existing note pattern. The Fit to Improvisation command, on the other hand, sets up a series of tempos that fit the material you have recorded. Here's a summary of when to use each type of command:
Use this command To do this
| Quantize Change the timing of the notes you've recorded to fit with the tempo of a project |
Fit to Improvisation
Change the tempos of a project to fit with the performance you've recorded
Table 89.
These two types of commands are discussed in the following topics.
See: Quantizing Fit Improvisation
Quantizing
Quantizing is one of the most important editing functions in SONAR. You use this feature to correct timing errors you make when recording from a MIDI instrument or to adjust the timing of audio clips.
Very few musicians are capable of performing in perfect time. As you play, you are likely to strike some notes slightly before or after the beat or to hold some notes slightly longer than you intended. The Quantize commands can help to correct these types of timing mistakes.
SONAR has two different quantize commands:
| Command How it works | |
| Process > Quantize | Adjusts the start time and duration of selected notes so that they line up with a fixed size grid |
| Process > Groove Quantize | Lays a grid over an existing piece of music (the groove pattern), and then adjusts the start time, duration, and velocity of selected notes so that they line up with the grid |
Table 90.
See also:
Drag-quantize
These commands have quite a few settings, making them very flexible and powerful. In addition, both of these commands lets you create, save, and re-use presets. This means that once you find the settings you like, you can save them and then apply them to other projects in a consistent way.
Resolution
The resolution indicates the spacing of the grid. You can use any value from a whole note down to a thirty-second note triplet. You can also specify resolution in clock ticks. A rule of thumb is to select a resolution that matches the smallest note in the region you are quantizing. If you are quantizing a run of sixteenth notes, use a sixteenth note as the resolution. If you are quantizing a mix of sixteenth and eighth notes, you should still use a sixteenth note. At the default timebase of 480 PPQ, 480 clock ticks is equal to quarter-note resolution.
When you use Groove Quantize, SONAR creates a grid at the desired resolution on top of the notes in the groove. For example, if the groove contains only quarter notes but you choose sixteenth-note resolution, SONAR builds the grid by dividing the space between each quarter note into four equal sections. In places where the groove file contains no notes, SONAR builds a fixed grid of the desired resolution.
Offset
Normally, the resolution grid is aligned evenly with the start of measures and beats. As an option, you can shift the grid earlier or later by any desired number of clock ticks. If the resolution is a quarter note and you've set the offset to +3 ticks, then a note that is originally near 1:01:000 would be moved to 1:01:003—three ticks beyond the beat boundary.
Duration
As an option, SONAR can adjust the duration of note events so that each note ends one clock tick before the start of the nearest resolution-sized note. This ensures that the notes do not overlap, which can cause problems on some synthesizers. The adjustment may lengthen the duration of some notes and shorten the duration of others.
When you use Groove Quantize, the duration adjustment compares the note length to the duration of the sample note in the groove. If no duration information is available, SONAR uses the distance to the start of the groove event closest to the end of the note.
Velocity
The velocity adjustment, which is only available with the Groove Quantize command, adjusts the note velocity to the velocity of the corresponding notes in the groove.
Strength
The human ear is tuned to the slight “imperfections” we hear from most musicians. If you quantize a project so that all notes are perfectly in position, it may end up sounding mechanical or rigid. To avoid this, SONAR lets you adjust the strength of the adjustment. A strength of 100 percent indicates that all notes are moved so that they are in perfect time, while a strength of 50 percent means that all notes are moved half-way towards the desired position. This lets you “tighten up” the timing as much as you want, without going too far.
The Groove Quantize command also lets you control the strength of duration and velocity adjustments. As you work with this command, you will notice that the note start time has a greater effect than the duration on the rhythmic feel of the track. For this reason, changing the starting times (time strength close to 100 percent) has a more noticeable effect than changing durations (duration strength close to 100 percent). However, there are situations in which you might want to change both to avoid ending up with notes that overlap or with unwanted rests.
Swing
Many projects do not have notes positioned on a perfectly even time grid. For example, projects with a swing feel, though they may be written entirely in eighth notes, are often played more like eighth-note triplets, with the first note extended and the second one shortened. The Swing option lets you distort the timing grid so each pair of notes is spaced unevenly, giving the quantized material a swing feel.
A swing value of 50 percent (the default) means that the grid points are spaced evenly. A value of 66 percent means that the time between the first and second grid points is twice as long as the time between the second and third points.
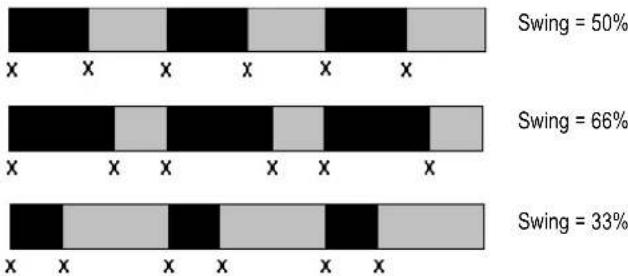
bar_stacked
| Category | Black Segment | Gray Segment | | -------- | ------------- | ------------ | | Swing | 50% | 0% | | Swing | 66% | 0% | | Swing | 33% | 0% |Window
When you quantize some portion of a project, you might not want to adjust notes that are very far from the grid. The window, or sensitivity, setting lets you choose how close to the resolution grid a note must be located for quantize to move it.
A window of 100 percent includes all notes and guarantees that all notes will be shifted to lie exactly on the grid. The window extends half the resolution distance before and after the quantization point. A window of 50 percent extends only a quarter of the way toward the adjacent quantization points.
When you use Groove Quantize, you can also perform adjustments on out-of-window events. There are four options:
| Option How it works | |
| Do Not Change Notes outside the window are not changed. | |
| Quantize to Resolution | Notes outside the window are snapped to a regular grid of the specified resolution. |
| Move to Nearest | The window or sensitivity setting is ignored—all notes are moved toward the nearest reference event, regardless of how far off the grid they are located. |
| Scale Time | SONAR finds the two closest events before and after the event in question that are within the window sensitivity and adjusts any bracketed out-of-window events so that their relative timing is the same. This option can uniformly speed up, slow down, or shift out-of-window events. |
Table 91.
Other Settings
If you want, you can restrict the types of events that are affected by the Quantize commands to only notes, lyrics, and audio clips. If you choose this option, SONAR will not modify other events, like controllers.
To Use the Quantize Command
- Select the material you want to quantize using any of the selection tools and commands.
- Choose Process > Quantize to display the Quantize dialog box.
Figure 89. The Quantize dialog
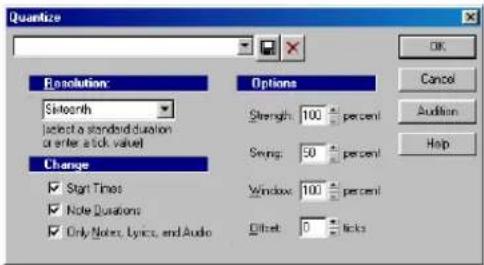
- Choose one of your own presets from the list, or enter the settings you want according to the table:
Setting What to do
Resolution Choose a note size or enter the number of clock ticks
Change Check the event types and characteristics you want to change
Options Enter values for Strength, Swing, Window, and Offset
Table 92.
- Click Audition if you want to hear how the quantization will sound; press Stop to stop auditioning the change.
- Make adjustments as necessary.
- Click OK when you are done.
SONAR quantizes the selected MIDI information and audio clips. You can use Undo to restore the material to its original state.
To Use the Groove Quantize Command
- Select the track or clip you want to quantize, using any of the selection tools and commands.
- Choose Process > Groove Quantize to display the Groove Quantize dialog box.
Figure 90. The Groove Quantize dialog
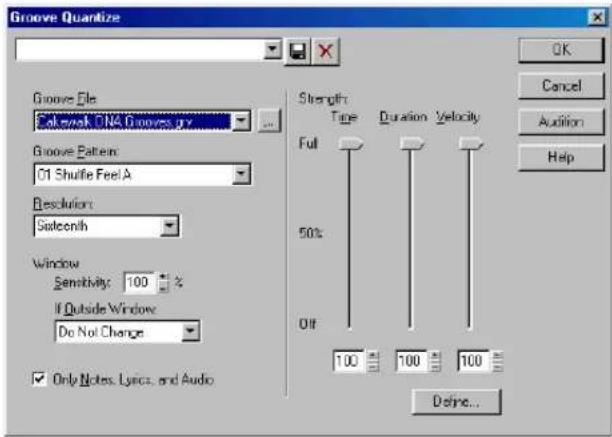
- Choose a groove file from the Groove File field.
- Choose a groove pattern from the Groove Pattern field.
- Use the following fields to configure your pattern:
| Setting What to do | |
| Resolution Choose a note size or enter the number of clock ticks | |
| Window Sensitivity Enter the window sensitivity value (percentage) | |
| If Outside Window Choose what should happen to events outside the window | |
| Only Notes, Lyrics and Audio | Check to prevent MIDI controller, aftertouch, and xRPN data from being adjusted |
| Stretch Audio Check to stretch audio clips to adjust their duration | |
| Strength Use the sliders or enter values for Note strength, Duration strength, and Velocity strength | |
Table 93.
- Click Audition if you want to hear how the quantization will sound; press Stop to stop auditioning the change.
- Make adjustments as necessary.
- Optionally, type a name in the Preset field (located at the top of the dialog box) and click the Save button to save your settings.
- Click OK when you are done.
SONAR quantizes the selected MIDI information and audio clips. You can use Undo to restore the material to its original state. If you saved your settings, you can apply them to any pattern you want
by selecting the pattern and choosing a preset from the Preset field. To delete a group of settings, select the group from the Preset field and click the Delete button.
Defining a Groove
To use the groove quantize feature, you must create or choose a small snippet of music—the groove pattern—for SONAR to use as the timing and accent reference. You can use either of the following:
- A track, clip, or portion of a clip stored on the Windows clipboard
- A groove stored in a SONAR groove file
Any MIDI data that you place onto the Windows clipboard can be used as a groove pattern. With a carefully defined groove pattern, you can give an old project an entirely new feel. If you like the groove pattern you have created, you can save it to a groove file.
Groove files can store one or more groove patterns. SONAR supports two types of groove files:
- DNA™ grooves, which contain only timing information but are compatible with some other MIDI sequencer software products
- SONAR's native groove format, which stores timing, duration, and velocity information and can handle longer patterns and longer gaps between quantization points
You can add groove patterns to these files from the Windows clipboard, edit existing patterns, or delete patterns you do not want to keep. There is no limit to the number of groove patterns that can be stored in a single file. You can organize your grooves into several files or keep them all together in a single file. Groove files have an extension of .grv.
A groove pattern can be as short or long as you like. If the groove pattern is shorter than the material to be quantized, the pattern will be repeated as many times as necessary.
To Define a New Groove
- Select the music that defines the groove using any of the selection tools and commands.
- Choose Edit > Copy to place the music onto the Windows clipboard.
You can now use the Groove Quantize command with the clipboard as the "Groove File."
To Save a Groove Pattern
- Select the music that defines the groove using any of the selection tools and commands.
- Choose Edit > Copy to place the music onto the Windows clipboard.
- Choose Process > Groove Quantize to display the Groove Quantize dialog box.
- Choose the Clipboard as the groove "Groove File."
- Click the Define button to display the Define Groove dialog box.
Figure 91. The Define Groove dialog
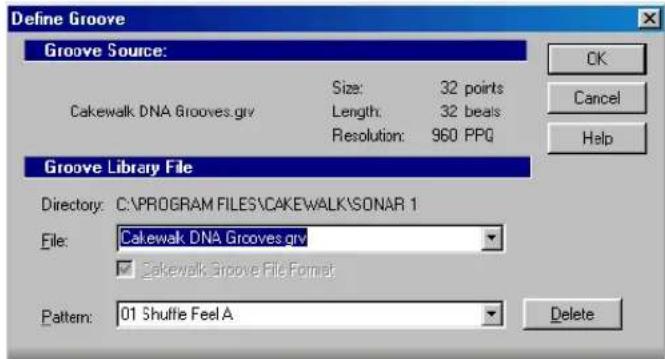
-
Select an existing groove file, or enter the name for a new groove file.
-
Enter a pattern name, or choose an existing pattern to replace.
-
Click OK.
-
If you are replacing a groove, verify that you want to delete the existing version.
-
Click Close when you are done to return to the Groove Quantize dialog box.
SONAR stores the groove in the file and chooses the new groove as the current groove source.
To Copy an Existing Groove
- Choose Process > Groove Quantize to display the Groove Quantize dialog box.
- Choose the groove file and groove pattern you want to copy.
- Click the Define button to display the Define Groove dialog box.
- Select an existing groove file, or enter the name for a new groove file.
- Enter a pattern name, or choose an existing pattern to replace.
- Click OK.
- If you are replacing a groove, verify that you want to delete the existing version.
- Click Close when you are done to return to the Groove Quantize dialog box.
SONAR stores the groove on the Windows clipboard and chooses the new groove as the current groove source.
To Delete a Groove
- Choose Process > Groove Quantize to display the Groove Quantize dialog box.
- Click the Define button to display the Define Groove dialog box.
- Select the file containing the groove to delete.
- Select the pattern name of the groove.
- Click the Delete button, and confirm that you want to delete the groove pattern.
-
Repeat steps 3 to 5 for each groove you wish to delete.
-
Click Close when you are done to return to the Groove Quantize dialog box.
Groove Quantize Tips
Here are some tips to help you with groove quantizing:
Aligning sloppy tracks with a good one. Select the portion of the "good" track that you want to apply to the "sloppy" tracks and copy it to the Clipboard. Select the portion of the sloppy tracks you want to modify. Choose Process > Groove Quantize, choose the Clipboard as the groove source, and click OK.
Accenting beats in each measure. Create a sample measure containing note events at the desired accent points. Give the notes on the accented beats a greater velocity and the others a lesser velocity. Select the measure, copy it to the Clipboard, and then choose Process > Groove Quantize. Set the velocity strength as high as necessary so that the notes get accented the way you want.
Stealing that feeling. Suppose you have a dry piece that was composed and entered into SONAR with a rigid sense of timing (for example, using step recording). You've recorded a bass line that has exactly the off-beat rhythmic dynamic you want for the dry piece. You'd like to force your other tracks to share that feel. Copy the bass track to the Clipboard; from the Groove Quantize dialog box, select the Clipboard as the groove source; choose a resolution value roughly on the order of the duration of the bass notes and a window of 100 percent. SONAR aligns the melody note events with the nearest bass notes.
Synchronizing rhythm and solo tracks. If you want to preserve the unique rhythm of each track but want to synchronize them together in time, try a larger resolution value and a smaller window. For example, suppose you have one track with a highly stylized drum beat and another track containing a jazz solo with some very nice runs in it. The drum beats fall primarily on quarter notes, but the solo consists of runs of fast notes that aren't quite sixteenth triplets. Copy the drum track to the Clipboard, and groove quantize using a quarter-note resolution and a window of perhaps 10 percent. SONAR aligns the solo notes near the quarter-note drum beats but maintains the feel of the solo during the fast runs of notes in between.
Correcting off-tempo tracks. Suppose you have both rhythm and melody tracks recorded, but the melody was played erratically. First, copy the rhythm track to the Windows clipboard. Then use groove quantize with a whole-note resolution, a window of 25 percent or less, and with the Scale Time option selected. The Groove Quantize command will synchronize the melody track with the groove source at roughly measure boundaries, while maintaining the relative timing of the notes in each measure.
Fixing a bad verse. Copy a good verse to the Clipboard. Then change the selected range to cover only the bad verse. Perform a groove quantize using the Clipboard contents as the groove source. The rhythms of the two verses then match.
Fit Improvisation
SONAR lets you record music from a MIDI controller without requiring that you use a fixed tempo. In fact, if you record without using a metronome, you are very likely to end up with a recording that does not fit onto a fixed tempo grid.
The Process > Fit Improvisation command lets you take a recording and create a tempo map (with measure and beat boundaries) that fits what you played. Your performance is not changed in any way, even though the note start times and durations are adjusted to fit the new tempo map. This is important if you later want to use any of SONAR's editing features that depend on a proper tempo map for best results.
To use this command, you must record a reference track containing a single clip that matches your original track or tracks but has only a single note on each beat boundary. You should make sure that the reference track has one event for every single beat, with no extra beats or missing beats. The first beat of the reference track should be at 1:01:000. You can use any editing command to adjust the reference track.
If you want, you can use other types of events as markers on the reference track, such as a sustain pedal. Remember, however, that MIDI sustain pedals generate one event when the pedal is pressed and another when it is released. So if you want to use the sustain pedal for the reference track, keep this in mind. Click down, up, down, up, for one, two, three, four.
Remember that the better the quality of your reference track, the better job the Fit Improvisation command can do. You want each of your reference track events to be as close as possible to the beat of the music. Note that some keyboards transmit aftertouch events when you record your reference track. These extra events will prevent Process > Fit Improvisation from working properly. Therefore, you should delete these events before using this command, or filter them out when recording the reference track (using Options > Global > MIDI).
To Fit Tempos to an Improvisation
- Record the reference track.
- Select the reference track.
- If necessary, combine all clips in the reference track into a single clip using the Edit > Bounce to Clip(s) command.
- Choose Process > Fit Improvisation.
SONAR adds tempo changes as necessary to fit the tempo grid to the reference track. When you're done, you should mute the reference track, since the reference track events are not rescaled.

Note: If the resulting tempo grid exceeds 250 beats per minute, you will see an error message. If this happens, you can shorten the start times of each event using the Process > Length command, decrease the tempo to compensate for the change, and then try again.
You can also use the Set/Measure Beat At Now command to align a freely played MIDI performance with the Time Ruler.
To sync the project tempo to freely played MIDI
If you have recorded a MIDI track without a metronome, you may want to align the project's tempo map with the MIDI performance. The Set/Measure Beat At Now command allows you to create new bar lines to fit your project. This command does not stretch audio. It works by adjusting tempo so that measure lines line up with audio transients or MIDI data. The tempo will ramp up/down from the previous tempo change in order to arrive at the required tempo.
To use the Set Measure/Beat At Now command, you need to be able to identify where you want to put the downbeats of each measure, and possibly where you want to place some other beats of the measure, if the tempo varies a lot.
- Display the MIDI clip that you want the measure/beats to align with in the Inline Piano Roll view: click the MIDI track's PRV Mode button ☐. Zoom in enough to see the MIDI data clearly (you can also use the regular Piano Roll view).

Tip: To make it easier to visually align note events with the Time Ruler, drag the MIDI track to the top position so it appears right below the Time Ruler.

natural_image
Four horizontal brown lines on a yellow grid background, no text or symbols present-
If you want other MIDI clips that exist in the project to retain their current M:B:T positions, select the clips, right-click one of them, and choose Clip Lock > Lock Position from the pop-up menu.
-
Turn off the Snap to Grid button, and use the PRV Select tool (it's in the Track view toolbar) to click the MIDI clip at the place where you want to set a measure or beat. The Now Time cursor moves to the place you clicked:

natural_image
Grid background with four horizontal yellow lines and a red arrow labeled 'A' pointing left (no text or symbols beyond labels)A. Now Time cursor
- Press CTRL+M to open the Measure Beat/Meter dialog.
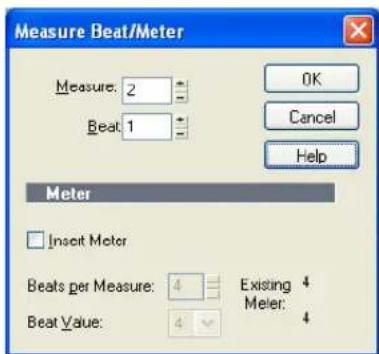
- Enter the desired measure and beat values, and click OK.

Note: SONAR attempts to guess the correct measure/beat, so you usually can just click OK to accept the default values.
- Move the Now Time to the next desired beat (click the start of the next note)..

Tip: Press TAB to jump to the next note, or SHIFT+TAB to jump to the previous note.
- Press CTRL+M to open the Measure Beat/Meter dialog, enter the desired values, and click OK
- Repeat steps 6 and 7 until the Time Ruler is correctly aligned.
After you align the Time Ruler to your clip, you can smooth out the tempo changes in the Tempo view, and your clip will retain its M:B:T position.
Snap to Scale
When Snap to Scale is enabled, any notes that you draw in the Piano Roll view (or Inline Piano Roll view) stay within the selected scale. Also, any notes that you move with the Select tool stay within the selected scale. When Snap to Scale is enabled, both Piano Roll views display grey rows at the pitch levels that are not in the selected scale. Also, both the Select tool and the Draw tool display a tuning fork icon when you create or modify notes to show that Snap to Scale is enabled.
You can create custom scales, modify existing ones, and choose how SONAR handles non-scale notes.
To Enable or Disable Snap to Scale for a Single Track
- In the Track view, in the track that you want to affect, click the Scale Snap button.

A. Scale menu B. Scale Snap button C. Root Note menu
Or
- In the Piano Roll view, in the Track List pane, right-click the track that you want to affect, and choose Enable Snap to Scale from the pop-up menu.
To Momentarily Bypass the Snap to Scale Feature
- Hold down both mouse buttons while you edit.
To Enable or Disable Snap to Scale for Multiple Tracks
-
Select the tracks in which you want to enable or disable Snap to Scale.
-
Use the Tracks > Snap to Scale > Enable/Disable Snap to Scale command.
To Choose a Root Note for a Single Track
- Do either of the following:
- In the Track view, click the drop-down arrow in a track's Root Note menu, and choose a root note from the menu that appears.
- In the Piano Roll view, right-click a track's name in the Track List pane, and choose Root Note > (name of root note) from the pop-up menu.
To Choose a Scale for a Single Track
- Do either or the following:
- In the Track view, click the drop-down arrow in the track's Scale menu, and choose a scale from the menu that appears. The scale options in the menu contain both factory-supplied scales and ones that you create and/or edit.
- In the Piano Roll view, right-click a track's name in the Track List pane, and choose Scales > (kind of scale) > (name of scale) from the pop-up menu.
To Choose a Root Note and/or a Scale for Multiple Tracks
-
Select the tracks for which you want to choose root notes and/or scales.
-
To select a root note for the selected tracks, use the Tracks > Snap to Scale > Root Note command, and select the desired root note from the submenu.
-
To select a scale for the selected tracks, use the Tracks > Snap to Scale > Scales command, and select the desired scale from the submenu.
To Create a Scale
- Open the Scale Manager dialog by clicking the drop-down arrow in the Scale menu, and choosing Scale Manager from the menu that appears (you can also use the Tracks > Snap to Scale > Scales > Scale Manager command, or the right-click menu in the Piano Roll view's Track List pane).
- In the Scale Family field, click the scale family that you want your scale to appear under when your scale appears in the Scale menu.
- Click the Create New Scale button ✪
The Scale Manager displays a default name (New Scale "n") for the new scale, and automatically selects C as the root note of the scale.

Note: All scales in the Scale Manager dialog use C as the root note.
- Edit the name of the new scale by clicking the default name (New Scale "n") where it appears at the very top of the Scale field, and then typing a new name for the scale.
- Include or exclude individual notes for the scale by clicking either the keys in the keyboard display, or by clicking the scale degree buttons under the Scale Degrees field. Included notes appear as blue dots in the keyboard display, as depressed scale degree buttons, and as scale degrees in the Scale Degrees field.
Figure 92. The Scale Manager dialog

A. Keyboard display B. Scale degree buttons
- When you're through choosing scale degrees, click the Close button to save your changes. If you want to delete your scale, just highlight it in the Scale field, and click the Delete button ✗.
To Edit or Delete a Scale
-
Open the Scale Manager dialog (click the drop-down arrow in the Scale menu, and choose Scale Manager from the menu, or use the Track menu command, or the right-click menu in the Track List pane of the Piano Roll view).
-
In the Scale Family field, click the scale family that the desired scale is filed under.
-
Select the desired scale by clicking the scale's name in the Scale field. If you want to delete the scale, click the Delete button ✗
-
Include or exclude individual notes for the scale by clicking either the keys in the keyboard display, or by clicking the scale degree buttons under the Scale Degrees field. Included notes appear as blue dots in the keyboard display, as depressed scale degree buttons, and as scale degrees in the Scale Degrees field.

A. Keyboard display B. Scale degree buttons
- When you're through choosing scale degrees, click the Close button to save your changes.
To Restore a Scale or Scales to Factory Settings
-
Open the Scale Manager dialog.
-
If you want to restore a particular scale to factory settings, select it in the Scale field, click the Defaults button, and in the Scale Defaults dialog, select Restore Current Scale (if factory), and click OK.
-
If you have deleted a factory-supplied scale and want to replace it with the original version, click the Defaults button, and in the Scale Defaults dialog, select Restore Any Missing Scales, and click OK.
-
If you want to restore all factory-supplied scales to factory settings, click the Defaults button, and in the Scale Defaults dialog, select Restore All Factory Scales, and click OK.
To Choose How SONAR Handles Non-scale Notes
- Open the Snap Settings dialog by clicking the drop-down arrow in the Scale menu, and choosing Snap Settings from the menu that appears. You can also use the Tracks > Snap to Scale > Scales > Snap Settings command, or the right-click menu in the Track List pane of the Piano Roll view.
-
Choose one of the following options:
-
Adjust to Next, Higher Note. If you choose this option, SONAR moves any non-scale note that you move to the next higher note in the selected scale.
- Adjust to Previous, Lower Note. If you choose this option, SONAR moves any non-scale note that you move to the previous, lower note in the selected scale.
- Adjust to Nearest Note. If you choose this option, SONAR moves any non-scale note that you move to the note that is closest in pitch in the selected scale.
Searching for Events
The events in a project have many different parameters. For example, all MIDI notes have a channel, starting time, pitch, velocity, and duration. Controllers have a controller number and value. SONAR makes it simple to find, select, and modify events that have certain values for specific attributes.
Here are some of the things you can do and the commands that you would use to do them:
These capabilities can help you find problem spots or errors in a project or make systematic
| Action Command | |
| Search through a project to find the first event that has specific attributes, and then search again to find the next such event | Go > Search, Go > Search Next |
| Select all the events in a project that have the specified attributes | Edit > Select > By Filter |
| Modify an existing selection to keep only those events that have the specified attributes | Edit > Select > By Filter |
Table 94.
changes to events that have particular attributes. All of these capabilities rely on the use of an event filter, which lets you choose the types of events you want to work with and the range of values in which you are interested.
See:
Event Filters
Event Filters
When you select individual clips, or select portions of clips by dragging the Time Ruler, you automatically select all the events that fall within the designated time range. Sometimes you need finer control over which events are selected. For example, you might want to:
- Select the notes that are played in a certain octave, so you can copy them to another track
- Select and boost the velocity of notes that have a velocity below a certain threshold
• Find the first patch change event on a particular track - Select and change the duration of all notes that occur on the third beat of any measure
The Event Filter dialog box looks like this:
Figure 93. The Event Filter - Search dialog

A. Check to include this type of event B. Enter the range of values for the events you want
Different types of events have different parameters, as shown in the table:
This event type Has these parameters
Note Pitch, velocity, and duration
Key Aftertouch Pitch and pressure value
Table 95.
This event type Has these parameters
| Controller Controller number and value | |
| RPN/NRPN | RPN/NRPN number and value |
| Patch Change Bank and patch numbers | |
| Channel Aftertouch Pressure value | |
| Pitch Wheel Value | |
Table 95.
The event filter only accepts events that meet all the specified ranges. This means that a note event must fall within the pitch range, the velocity range, and the duration range in order to be included. The event filter can also be used to accept events that occur in a range of channel numbers, beats, and clock ticks.
You can choose either to include or exclude the events that meet the specified criteria. To exclude events within the designated range and select the ones outside the designated range, check the exc check box for that value range.
The event filter can also be used to identify several special event types: audio, System Exclusive events, Lyrics, MCI commands, envelope shades, and a few others. You do not enter a range of values for these special events; SONAR finds all events of the types you choose.
The All and None buttons help you set up the event filter the way you want:
Click this button To do this
| All Set the event filter to include all events. You can then modify the value ranges to narrow down your search or uncheck the types of events you want to exclude. | |
| None | Set the event filter to not include any events. Starting from a blank slate, you can check off the types of events you want to find or select and enter the desired ranges of values. |
Table 96.
In any place in the event filter where you would normally enter a pitch string, you can also enter the pitch by pressing a key on your MIDI keyboard. Also, you can use the question mark in place of the octave number as a wild card. This lets the event filter accept a single note, regardless of the octave. For example, the pitch string C? will match a C in any octave.
Searching for an Event
The Go > Search command is used to find the next event (searching forward from the Now time) that meets the criteria you lay out in an event filter. Once you have found the first such event, you can find the next event that meets the criteria using the Go > Search Again command (or by pressing F3).
To Search for an Event
- Choose Go > Search to display the Event Filter dialog box.
- Set up the event filter to find the events you want.
- Click OK.
SONAR finds the next event that meets the criteria and sets the Now time to the start time of that event. To find the next occurrence, press F3 or choose Go > Search Again.
Selecting Events
The Edit > Select > By Filter command is used to refine a selection by applying an event filter to an initial selection. You can use this command any number of times to refine the selection even further. Before using this command, use any of the selection commands and tools to create an initial set of selected event. You can use the Edit > Select > All command to select all events in the current view.
The Track view cannot display individual selected events. As a result, the Edit > Select > By Filter command will not necessarily change the appearance of the Track view. SONAR applies the event filter rule, but the change is not visible. However, once you change the selection in any way (for example, by clicking on a track number or by clicking in the Time Ruler), the effects of the event filter are erased. If you want to use the filter, you must choose Edit > Select > By Filter again and click OK to use the same filter values.

Note: The shading of a clip in the Track view indicates how many of the events in the clip are selected. If the clip is shown in solid black, all events in the clip are selected. If a portion of a clip is shown in medium gray, all the events in that time range are selected. If the clip is shown in light gray, only some of the events in the shaded time range are selected.
To Select Events Using the Event Filter
- First, select an initial set of tracks, clips, or events.
- Choose Edit > Select > By Filter to display the Event Filter dialog box.
- Set up the event filter to find the events you want.
- Click OK.
SONAR searches the currently selected events and weeds out those that do not meet the requirements of the event filter.
Example: Splitting Left-Hand and Right-Hand Parts
Suppose you recorded a keyboard riff on Track 1 but want to split the left and right hands apart into separate tracks so you can edit them separately. Suppose that all the right-hand notes are above C4. Here's how to proceed:
- Select all of Track 1 by clicking on the track number in the Track view.
- Choose Edit > Select > By Filter to display the Event Filter dialog box.
-
Click the None button to clear the dialog box.
-
Check the Note check box, and enter a minimum value of C4. The maximum should already be set to C9.
- Click OK. SONAR selects all the notes from C4 up.
- Choose Edit > Cut to move the selected notes to the clipboard.
- Choose Edit > Paste and paste the events to a different track.
Process > Interpolate
The Process > Interpolate command is an extremely flexible way of manipulating the data parameters of events. It works something like the search-and-replace function in a word processor but with scaling rather than simple replacement.
This command uses two event filters. The first event filter lets you set up your search criteria. The second event filter is used to define the replacement value ranges. When an event satisfies the search criteria, its parameters are scaled between the search ranges and the replacement ranges. This permits transposition, inversion, key signature changes, and other operations to be accomplished with this one simple command.
In the second Event Filter dialog box, the check boxes and value ranges for beats and ticks are ignored. Only the replacement value ranges for the selected event types are used.
The Process > Interpolate command understands a wild card octave number in the second event filter to mean, "replace the original note with a different note in the original octave." Using octave wild cards for both the search and replacement event filters lets you, for instance, change all E-flats to E-naturals, preserving the octave of each note.
A few examples will illustrate some of the many uses of the Process > Interpolate command. These examples apply to the note event type, though the command can be used on any type of event.
| Parameter Search range | Replacement range | Effect |
| Pitch (key) From C2 to C4 From C4 to C6 Transposes all notes in the search range up two octaves | ||
| Pitch From E2 to E2 From Eb2 to Eb2 Converts all Es in octave 2 to Eb in the same octave | ||
| Pitch From E? to E? From Eb? to Eb? Converts all Es in all octaves to Eb in the same octave | ||
| Pitch From E? to E? From E? to Eb5 Converts all Es to Eb in octave 5 | ||
| Pitch From C1 to C8 From C8 to C1 Inverts all the notes in the specified range | ||
| Velocity From 0 to 127 From 80 to 127 Compresses the velocity values into a narrower range | ||
Table 97.
| Parameter Search range | Replacement range | Effect | |
| Velocity | From 0 to 127 | From 127 to 0 | Inverts the velocity values (makes loud notes soft, and soft notes loud) |
| Duration From 0:01:00 to 0:02:000 | From 0:01:000 to 0:01:000 | Converts all notes that are between a quarter note and half note in length, and makes them all quarter notes | |
| Channel From 1 to 1 From 2 to 2 Changes all events on MIDI channel 1 to MIDI channel 2 | |||
Channel From 1 to 16 From 4 to 4 Reassigns all events to MIDI channel 4
Table 97.
Controllers, RPNs, NRPNs, and Automation Data
SONAR projects contain a lot more information than the notes and digital audio files that are at the heart of your work. Controllers, RPNs, and NRPNs (xRPNs, for short) are special types of events used by MIDI software and hardware to control the details of how MIDI music is played. Automation data are used to adjust volume, pan, and other parameters of MIDI and audio tracks on the fly while playback is in progress.
SONAR lets you enter or edit controller, xRPN, and automation data in several ways:
• Using envelopes in the Track view
• Using the Piano Roll view and Inline Piano Roll view
• Using the Insert > Controllers command
- Editing controller events in the Event List view
Editing data in the Track view's Clips pane or the Piano Roll view gives you great flexibility. You can examine the controllers in graphical form and edit them even while recording or playback is in progress. This means you can loop over a portion of your project and hear any change you make on the next loop.

Note: MIDI envelopes you create in the Piano Roll view and MIDI envelopes you create in the Track view Clips pane are actually separate envelopes, even if they control the same parameter. Both kinds of envelopes are visible in the Clips pane, and should generally not be used to control the same parameter. You can convert Piano Roll view envelopes to Track view envelopes by selecting the time range and tracks that the Piano Roll envelopes occupy, and using the Edit > Convert MIDI To Shapes command.
For more information about automation, see the online help topics “Automation,” and “Mixing.” For more information about the Event List view, see “The Event List View” on page 512.
See also:
Adding and Editing Controllers in the Piano Roll
Controllers
Controllers are the MIDI events such as volume, sustain pedal, and pan that you use to change the sound while you're playing. You can enter controller data from within SONAR, or record them from external devices such as MIDI keyboards.
Controllers let you control the detail and character of your music. Say you're playing a guitar sound on your synthesizer, but it sounds lifeless and dull. That's partly because a guitar player doesn't just play notes one after another—he often bends or slides on the strings to put emotion into his playing. You can use controllers in the same way, creating bends, volume swells, and other effects that make sounds more realistic and more fun to listen to.
Your computer can work the controllers on your electronic instrument by sending MIDI Controller messages. The MIDI specification allows for 128 different types of controllers, many of which are used for standard purposes. For example, controller 7 is normally used for volume events, and controller 10 is normally used for pan. Every controller can take on a value ranging from 0 to 127.
The Piano Roll toolbar contains several drop-down lists that let you choose the controller you want to see and edit. The contents of these lists depend on the output and channel settings and on the instrument assigned to that output and channel. Different instruments use controllers in different ways. See the online help topic: Instrument Definitions.

Note: SONAR has automatic searchback for all continuous controller data to ensure that the correct controller values are in effect regardless of where you start playback. Suppose you start playback halfway through a project. SONAR searches back from that point to find any earlier controller values that should still apply.
RPNs and NRPNs
RPNs (Registered Parameter Numbers) and NRPNs (Non-Registered Parameter Numbers) are similar to controllers, except that both the parameter number and data value can be any number between 0 and 16,383.
When RPNs and NRPNs are transmitted via MIDI or stored in a standard MIDI file, they are converted into four separate controller messages. SONAR detects incoming xRPN messages from MIDI inputs or files and reassembles them into a single RPN or NRPN event. This provides the convenience of single RPN or NRPN events in SONAR plus compatibility with existing files,
equipment, and software. The following table shows the controller numbers SONAR uses for RPN and NRPN events:
| Message | Parameter number MSB Controller | Parameter number LSB Controller | Data value MSB Controller | Data value LSB Controller |
| RPN 101 100 6 38 | ||||
| NRPN 99 98 6 38 |
Table 98.
Automation Data
The Track and Console views allow you to record automation data that define changes in volume, pan and many other parameters throughout a project. The automation data can include step changes recorded using the Snapshot button or continuous changes recorded while using the knobs, faders, and buttons.
The Track view allows you to create envelopes to adjust several parameters. For more about automation, see the online help topic "Automation."
Velocity, Pitch Wheel, and Aftertouch
SONAR lets you display and edit several other types of data the same way you do controller data. These data include:
- MIDI pitch wheel or pitch-bend messages
- MIDI channel aftertouch (ChanAft) values
- MIDI key aftertouch (KeyAft) values
Remember that note velocity is an attribute of each note and not a completely separate event. You cannot add or remove velocity events in the Notes pane, but you can use the draw tool to adjust the velocity values for existing notes. You can also edit velocities with the Edit > Scale Velocities command. For more information, see "Adding Crescendos and Decrescendos" on page 489. You can edit individual note velocities in the Note Properties dialog box, described in "Changing Note Properties" on page 754.
The Event List View
The Event List view shows events in a list format. You can insert, delete, or modify any kind of event, including notes, pitch-wheel data, velocity, MIDI controllers, patch changes, Wave files, lyrics, text strings, MCI commands, System Exclusive meta-events, and more.
There are three ways to open the Event List view:
- Select one or more tracks and choose Views > Event List
- Select one or more tracks and click in the Views toolbar
- Right-click a clip in the Clips pane and choose Views > Event List from the pop-up menu
Figure 94. The Event List view

A. Toolbar B. Track C. This event is selected D. Event time E. Event channel F. Event type
Figure 95. The Event List toolbar

A. Hide different kinds of events buttons B. Event Manager C. Show events outside slip edit boundary D. Insert E. Delete F. Pick Tracks
The events in the selected tracks are listed one per line, from top to bottom. As you move the highlight through the event list, SONAR updates the Now marker (time display). During playback, the event list scrolls to display the events at the current time. The current event is centered in the Event List during playback, and the highlight is on the correct event when playback stops. Any time you change the Now time, the event list is updated and the highlight is moved to the event that will be played next.
When the Event List view includes more than one track, events are mixed together in chronological order. For example, if you select tracks 1 and 3 when you open the Event List view, you see a single list of intermingled events from tracks 1 and 3. You can have any number of Event List views, each containing any number of tracks, open at the same time. You can change the tracks shown in the Event List view by clicking the ↑↓ button and choosing the tracks you want.
See:
Event List Buttons and Overview
Event List Display Filter
Editing Events and Event Parameters
Additional Event Information
Event List Buttons and Overview
Each line of the Event List view shows a single event along with all of its parameters. There are many different types of events. All share the following parameters:
- The time of the event, displayed in SMPTE (hours:minutes:seconds:frames) format
- The time of the event, displayed in MBT (measures:beats:ticks) format
• The event type, or kind of event
The remaining parameters vary by event type. You can hide or show each kind of event by clicking its button in the Event List toolbar or by checking its check box in the Event Manager dialog box. Here is a summary listing of the parameters that apply to each type of event.
| Short name and display button | Type of event Parameters | |
| Note | MIDI note Pitch (MIDI key number), velocity (0-127), duration(beats:ticks or simply ticks), MIDI channel (1-16) | |
| KeyAft | MIDI key aftertouch Pitch (MIDI key number), pressure amount (0-127), MIDI channel (1-16) | |
| Control | MIDI controller change Controller number (0-127), controller value (0-127), MIDI channel (1-16) | |
| Patch | MIDI patch change Bank select method, bank number, number or name of the patch, MIDI channel (1-16) | |
| ChanAft | MIDI channel aftertouch Pressure amount (0-127), MIDI channel (1-16) | |
| Wheel | MIDI pitch wheel position Wheel position (-8192 to 8191, where the center is 0) | |
| RPN | Registered Parameter Number | Parameter number (0-16383), parameter value (0-16383), MIDI channel (1-16) |
| NRPN | Non-registered Parameter Number | Parameter number (0-16383), parameter value (0-16383), MIDI channel (1-16) |
| Sysx Bank | System Exclusive data bank | Sysx bank number (0-8191) |
| Sysx Data | System Exclusive data message | Sysx message up to 255 bytes long |
| Text | Text Text | |
Table 99.
| Short name and display button | Type of event Parameters | |
| Lyric (swind) | Lyric Text (a single word or syllable) | |
| MCIcmd (swind) | Windows Media Control Interface (MCI) command | MCI command text |
| Wave Audio (swind) | Digital audio wave Name, velocity (0-127), and number of samples | |
| Shape Events (swind) | Automation graph segments made up of a solid line between two nodes | Change in values, kind of shape, and length in MBT format.Note: Shape events cannot be edited, only deleted. |
| Expression (swind) | Staff view expression marking | Text of expression mark |
| Hairpin (swind) | Staff view dynamics marking | Direction (crescendo or diminuendo) and duration |
| Chord (swind) | Staff view chord symbol The name of the chord | |
| Event List Manager | Opens Event Manager dialog box | Shows or hides various kinds of events |
| Events Out of Slip Edit Boundaries | Events that are outside of slip-edited boundaries | Note, audio, or controller data |
| Insert Event | Inserts a copy of highlighted event-double-click the event's Kind parameter to change it to the kind of event you want | Whatever the highlighted event's parameters are |
| Delete Event | Deletes the highlighted event | Whatever the highlighted event's parameters are |
| Pick Tracks and Show Next/Previous Track | Left side of button opens Pick Tracks dialog; right side of button opens Next Track/Previous Track drop-down menu | Allows you to pick what tracks the Event List shows events for |
Table 99.
Here are some notes about events and their parameters:
- The Channel parameter in the Track view can force an event to play on a different MIDI channel from the one shown in the event list.
- Pedal marks entered in the Staff view are displayed in the Event List view as controller events
(64).
- Many keyboards do not support key aftertouch and channel aftertouch. Consult the User's Guide for your keyboard for more information.
- When you double-click the value of a patch event, SONAR displays the Bank/Patch Change dialog box. For more information about bank and patch changes, "To insert a bank/patch change" on page 208.
- See "System Exclusive Data" on page 805, for more information about System Exclusive banks.
- See "Editing Audio" on page 545, for more information about audio clips.
Selecting Events in the Event List View
The following table describes how to select events in the Event List view:
| To do this Do this | |
| Select a single event Click on the event. | |
| Select multiple, contiguous events Select the first event, hold the SHIFT key down and click the last event. | |
| Select multiple, contiguous events using the arrow keys | Hold down the CTRL and SHIFT keys while pressing the up or down arrows. |
| Select multiple, non-contiguous events Select an event, hold the CTRL key while selecting additional events | |
Table 100.
Event List Display Filter
You can configure the Event List view to display different event types, as described in the following table:
| To do this Do this | |
| Hide events of a certain type | Select the event type in the toolbar, in the Event List view pop-up menu, or in the Event Manager. To display a type of event, deselect it. |
| Open the Event Manager | Choose Event Manager from the pop-up menu, or click |
| Show or hide slip-edited events | As a default, if you slip edit the boundaries of a clip, all events outside those boundaries are hidden in the Event List view. If you want to see these events, click this buttonNote: You can not edit slip-edited material in the Event List view. |
Table 101.
Editing Events and Event Parameters
The Event List view lets you add, delete, or change events one by one. You can also print the list of events or audition the events one at a time to see how they sound.
You can change the parameters of any event by moving the rectangular highlight to the cell you want to change and doing one of the following:
- Type a new value and then press ENTER.
- Press the - and + keys on the numeric keypad to decrease or increase values by a small amount.
- Press the [ and ] keys to decrease or increase values by a larger amount.
- Click and hold the mouse button, and then drag the mouse up or down to change the value by a small amount.
- Click and hold both mouse buttons, and then drag the mouse up or down to change the value by a larger amount.
- Double-click a cell, and then enter or choose a new value.
If you change the time of an event, it may also change its position in the event list. The Event List view follows that event to its new location.
If you try to change the event type (kind of event), SONAR lets you choose the kind of event you want from a dialog box. When you change one kind of MIDI event into another kind of MIDI event, SONAR preserves the parameters as fully as possible.

Note: Shape events cannot be edited, only deleted.
To Insert a New Event
- Move the highlight (use the mouse or arrow keys) to the point at which you want to insert an event.
- Press INSERT, or click SONAR makes a copy of the highlighted event.
- Change the event to the kind of event you need by double-clicking the name of the event that's listed in the Kind column. The Kind of Event dialog box appears.
- Choose what kind of event you want and click OK. SONAR changes the highlighted event to the kind you chose.
- Edit the event time and other parameter values as required.
If the Event List is initially empty, pressing the INSERT key creates a default note event.
To Delete an Event
-
Move the highlight (use the mouse or arrow keys) to the event you want to delete.
-
Press DELETE, or click ✗
SONAR deletes the event.
To Delete Several Events
- Select the events you want to delete by clicking, dragging, or CTRL or SHIFT-clicking in the first column of the Event List view.
- Choose Edit > Cut.
SONAR deletes the selected events.
To Print the Event List
- Choose File > Print Preview to display a preview of the printed event listing.
- Click the Zoom button (or just click the page) to zoom in and out, and use the PAGE UP and PAGE DOWN to review the pages.
- Click Print to print the event list, or click Close to close the Preview window without printing.
To Play Events Step by Step
- Using the keyboard, hold the CTRL and SHIFT keys and press the SPACEBAR to play the currently highlighted event. If the event is a note event, it plays until you release the SPACEBAR.
- When you release the SPACEBAR, the highlight moves to the next event.
- Continue pressing the SPACEBAR to play events one by one.
- To edit the last event you heard, release the SHIFT key.
The highlight moves back to the last event you heard, so you can make changes. You can also audition a single event using the mouse. CTRL-click on an event to play the event. If the event is a note or Wave event, it plays until you release the mouse button.
Additional Event Information
Note Events. There are three values parameters for note events:
- A pitch, which represents the MIDI key number as a note and an octave.
- A velocity (0–127), which is how fast the key is struck. Some keyboards don't transmit or receive velocity messages.
- A duration, which is how long the note lasts. This amount is shown in beats:ticks format. (If the note lasts less then one beat, then only the number of ticks is shown.)
Note names may also represent percussion instruments, and lists of such note names are sometimes associated with a particular percussion patch. The note C3, for example, may really be "kick drum." If a patch is associated with a percussion note name list, the name of the percussion instrument appears in Event List view rather than a note and an octave from the piano keyboard.
SONAR uses the following notation to display flats and sharps in this and other views:
| Character Meaning | ||
| b | f | l |
| # sharp | ||
| " double flat | ||
| x double sharp | ||
Table 102.
MCIcmd Events
Media Control Interface (MCI) commands are special events that let you control other multimedia hardware and software (e.g., CD-ROM drives, laserdiscs, sound cards, animations, video) during playback. MCI commands are part of the multimedia extensions in Windows. MCIcmd events have one parameter—the command line text of the MCI command. Here are some examples:
| This command Does this | |
| PLAY C:\Train.wav Plays the Wave file Train.wav | |
| PLAY C:\Videos\Vacation.avi | Plays the video file Vacation.avi from the VIDEOS folder |
| SET CDAUDIO TIME FORMAT TMSF PLAY CDAUDIO 3 | Plays a specific track from the CD drive |
| STOP CDAUDIO Stops the CD from playing | |
Table 103.
While MCI commands can be used to play Wave files, these files are played at their normal speed and are not necessarily synchronized with MIDI or other audio data. By contrast, Wave audio clips are played in lock-step synchronization with MIDI and other audio data.
For complete documentation of Windows MCI commands, search for MCI on the Microsoft World Wide Web site (www.microsoft.com).
MIDI Effects (MIDI Plug-ins)
SONAR provides the ability to use plug-in MIDI effects. Using plug-in effects is similar to using the MIDI processing commands off-line. The overall procedure is as follows:
- Select the MIDI data to be affected.
-
Choose the effect you want from the Process > MIDI Effects menu or from the pop-up menu's MIDI Effects menu.
-
Set effect parameters (or select a preset if you've made one for this purpose).
- Click Audition to preview the music with the effect applied.
- Click OK to apply the effect to the selected MIDI data.
If you're not happy with the result, choose Edit > Undo before doing any additional work.
MIDI effects can be applied to whole or partial clips. For example, you can apply an echo to just one note.
MIDI effects can also be applied to MIDI tracks in real time (during playback) in the Track and Console views. Unlike any of the processing described so far, using effects in real time is non-destructive. This means that the MIDI data itself is not modified.

Note: Offline effects may cause your MIDI events to grow in size. For example, when you apply echo, the clip may need to grow to accommodate the tail end of the echo.
See:
MIDI Effects Presets
Quantizing
Adding Echo/Delay
Filtering Events
Adding Arpeggio
Analyzing Chords
Changing Velocities with the Velocity Effect
Transposing MIDI Notes with the Transpose MIDI Effect
MIDI Effects Presets
The MIDI effects dialogs support the use of presets. For information about presets, see “Presets and Property Pages” on page 625.
Quantizing
Figure 96. MFX Quantize

The Quantize command moves events to (or towards) an evenly-spaced timing grid. The Quantize effect is similar to the Process > MIDI Effects > Cakewalk FX > Quantize command. For more information, see “Other Settings” on page 493.
The quantize effect parameters are as follows:
| Parameter/Option Meaning |
| Start Times Quantize event start times. |
| Durations Quantize event durations. |
| Resolution The spacing of the grid used for quantization. |
| Tuplet Specify the resolution as a tuplet note, for example 5 notes in the time of 4. |
| Strength (%) The strength of the adjustments. 100% indicates perfect quantization; otherwise, the command moves the notes only part way towards the desired position. |
| Swing (%) The distortion of timing used to produce a swing feel. A value of 50% indicates a straight rendition; negative and positive values produce distortion of the timing grid. For more information about swing, see “Swing” on page 492. |
| Window (%) The sensitivity of quantization. A value of 100% causes all notes to be quantized. Lower values cause the effect not to quantize notes that are far from the timing grid. |
| Offset (Ticks) The offset of the quantization grid from the start of measure boundaries. A value of 0 indicates perfect alignment. Values less than 0 shift the grid points earlier; values greater than 0 shift the grid later. |
| Randomize Causes a random time offset to be added to or subtracted from each new event time. You must also specify the maximum offset, as a percentage of the quantization resolution. |
Table 104.
To Quantize MIDI Data
- Select the data to be affected.
- Choose Process-Quantize to open the Quantize dialog box.
- Set the quantization parameters, as described in the table above.
- Click OK.
SONAR applies the specified quantization to the selected data.
Adding Echo/Delay
Figure 97. MFX Echo/Delay

The Echo Delay command creates a series of repeating echoes of each note. The echo notes can decrease or increase in velocity, and can be transposed from the original by regular intervals.
The parameters used to specify the echo/delay effect are as follows:
Parameter/Option Meaning
| Decay (%) The reduction in velocity with each echo. A value greater than 100% indicates an increase in velocity. |
| No. Echoes The number of echo notes for each original note. If the velocity reaches 0 before the specified number of echoes, the effect generates no more echo notes. |
| Delay The delay between successive echo notes. |
| Delay Units The units used to specify the delay. You may specify delay in ticks, in milliseconds, or as a note duration. |
| Tap The delay you specify by tapping the control with the mouse. |
| Swing (%) | The distortion of timing used to produce a swing feel to the echo. A value of 0% indicates a straight rendition; negative and positive values produce distortion of the timing grid. For more information about swing, see “Swing” on page 492. |
| Pitch (Steps) The number of steps to transpose each echo note from the previous. You can specify a Diatonic or Chromatic scale. |
Table 105.
To Apply Echo/Delay to MIDI Data
- Select the data to be affected.
- Choose MIDI Effects > Cakewalk FX > Echo Delay from the Process menu or from the pop-up menu to open the Echo Delay dialog box.
- Set the echo/delay parameters, as described in the table above.
- Click OK.
SONAR applies the specified echo effect to the selected data.
Filtering Events
Figure 98. MFX Event Filter

The Event Filter command lets you remove events from the MIDI data, keeping or passing through only those events that you specify. The Event Filter effect works almost identically to the event filter used by the Edit > Select > By Filter command. For more information, see "Event Filters" on page 505.
To Apply an Event Filter to MIDI Data
-
Select the data to be affected.
-
Choose MIDI Effects > Cakewalk > FX MIDI Event Filter from the Process menu or from the pop-up menu to open the Event Filter dialog box.
-
Set the event filter parameters.
-
Click OK.
SONAR applies the specified event filter to the selected data, removing all those events that do not meet the filter criteria.
Adding Arpeggio
Figure 99. MFX Arpeggiator

The Arpeggiator command applies an arpeggio to its input and plays it back in real time. You can make it arpeggiate with a swing feel, or straight and staccato or legato, vary its speed and direction, and specify its range.
The parameters used to specify the arpeggiator effect are as follows:
| Parameter/Option Meaning | |
| Swing (%) The distortion of timing used to produce a swing feel. A value of 0% indicatesa straight rendition; negative and positive values produce distortion of the timing grid. For more information about swing, see “Swing” on page 492. | |
| Rate The delay between successive notes. | |
| Units The units used to specify the delay. You may specify delay in ticks, in milliseconds, or as a note duration. | |
| Legato (%) The smoothness of the notes of the arpeggio. 1 percent plays each notes and releases it instantly. 99 percent plays each note up to the start of the next note. | |
| Path | The direction of the arpeggio. Options are Up, Up (arpeggios go up), Up, Down (arpeggios go up, then down), Down, Down (arpeggios go down), Down, Up (arpeggios go down, then up). |
| Play thru | The disposition of the notes you play to specify the arpeggio. Checked plays the original notes. Unchecked filters out the original notes. |
| Specify output range The range over which the arpeggio plays. Checked specifies that the arpeggiator repeats notes at each octave over the entire specified range.Unchecked specifies that the arpeggiator includes only the notes you actually play. | |
| Lowest note The MIDI number of the lowest note of the arpeggio. Numbers run from 0 to 127. | |
| Span (Notes) The number of half-steps in the range. Numbers run from 12 to 127. | |
| Use chord control | The chord you specify. Checked specifies that the arpeggiator infers the chord from the notes played in the range. It identifies the chord in the Chord recognized box and uses it to play arpeggios for notes outside the range. |
| Lowest note The MIDI number of the lowest note the arpeggiator uses for chord recognition (0 to 126). | |
| Span (Notes) The number of half-steps in the range. Numbers run from 1 to 127. | |
| Chord recognized The chord the Arpeggiator recognizes and plays. | |
Table 106.
To Apply the Arpeggiator to MIDI Data
- Select the data to be affected.
- Choose MIDI Effects > Cakewalk FX > Arpeggiator from the Process menu or from the pop-up menu to open the Arpeggiator dialog box.
- Set the arpeggiator parameters, as described in the table above.
- Click OK.
SONAR applies the specified arpeggio effect to the selected data.
Analyzing Chords
Figure 100. MFX Chord Analyzer

The Chord Analyzer command analyzes chords. You select the notes to be analyzed in one of SONAR's windows, then open the Chord analyzer and press the Audition button. The chord appears on the MIDI display and the staff, and its name with possible alternatives appears in the Chords recognized box.
You can play the notes on your MIDI input device and have the Chord Analyzer identify the chords in real time. You do not have to set to playback.
You can open the Chord Analyzer in the Track and Console views, press Playback and have the Chord Analyzer identify the chords in real time.
The Chord Analyzer has a single parameter:
Parameter/Option Meaning
Analysis window The frequency with which the Chord Analyzer samples the chord. Lower numbers (smaller intervals) are more accurate, but require more computation.
Table 107.
To Analyze a Chord
- Select the notes to be analyzed.
- Choose MIDI Effects > Cakewalk FX > Chord Analyzer from the Process menu or from the pop-up menu to open the Transpose dialog box.
- Click the Audition key.
SONAR displays the chord and its name.
To clear the display, press the Clear button.

Note: When analyzing chords you may see chords being displayed before you hear them. You can reduce the amount of time these chords appear ahead of playback. To do so, open the MIDI tab in the Global Options dialog (Options > Global) and enter a lower value in the Prepare Using "N" Milliseconds Buffer option. Excessively low values may cause glitches during playback, so it is best to gradually reduce the value in this option until the desired result is achieved.
Changing Velocities with the Velocity Effect
Figure 101. MFX Velocity
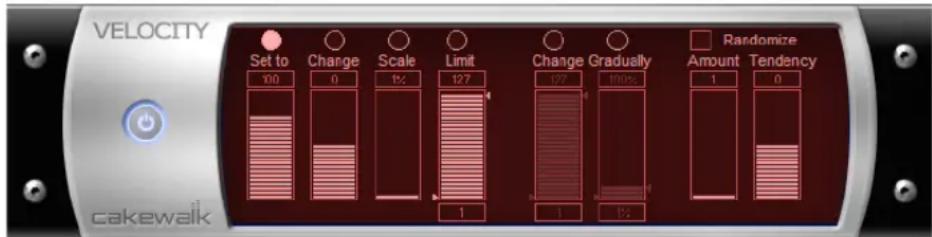
The Velocity effect lets you adjust velocities of MIDI notes. You can set velocity values, set scale values, add specific or random offsets, create smooth transitions, and limit the velocity range.
The velocity effect options are as follows:
| Parameter/Option Meaning | |
| Set all velocities to X Sets all velocities to the specified value. | |
| Change velocities by X Adds a specified increment to all velocities. | |
| Scale velocities to X% of their current value | Multiplies all velocities by a constant factor. |
| Change gradually from X to Y Creates a smooth velocity change across the selection. | |
| Change gradually from X% to Y% | Scales velocities by a gradually changing factor. |
| Limit range from X to Y Brings all velocities into the specified range. | |
| Randomize by +/- X | Adds or subtracts a random offset from each velocity. You must also specify the maximum offset. You can select this option in addition to one of the previous options. |
| Tendency The tendency of the random offset to be lower or higher, on a scale from -10 to 10. | |
Table 108.
Table 108.
To Change Note Velocities
- Select the data to be affected.
- Choose MIDI Effects > Cakewalk FX > Velocity from the Process menu or from the pop-up menu to open the Velocity dialog box.
-
Select options as described in the table above.
-
Click OK.
SONAR changes note velocities according to the specified options.
Transposing MIDI Notes with the Transpose MIDI Effect
Figure 102. MFX Transpose
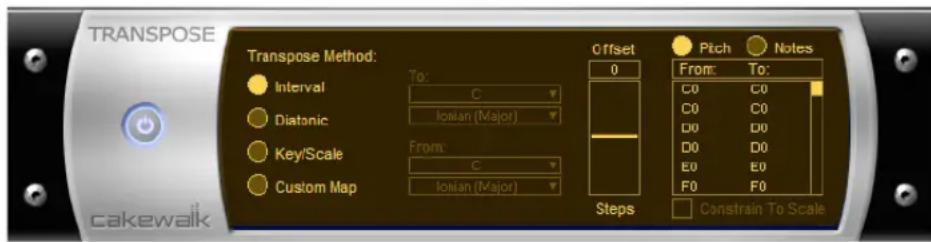
The Process > MIDI Effects > Cakewalk FX > Transpose command is a flexible transposition feature. You can perform simple chromatic or diatonic transpositions, transpose from one key to another, or define your own custom transposition.
The transpose options are as follows:
| Parameter/Option Meaning | |
| Interval | Specifies chromatic transposition. Transposes notes by the specified number of steps. |
| Diatonic Specifies diatonic transposition. Transposes notes by the specified number of scale steps within the specified scale. | |
| Key/Scale Specifies transposition from one scale and key to another. | |
Table 109.
Editing MIDI Events and Continuous Controllers (CC)
MIDI Effects (MIDI Plug-ins)
Parameter/Option Meaning
Custom Map Specifies custom transposition as defined by the map.
Offset For Interval transposition, the number of steps for the transposition. For Diatonic Transposition, the number of scale degrees for the transposition. For Key/Scale transposition, a number of octaves added to each note after transposition.
Key For Diatonic transposition, the key in which the transposition is made.
From, To For Key/Scale transposition, the starting and ending key and scale.
Transposition Map A table of pitch mappings for the specified transposition. You can select to show the pitches as note names or as note numbers. For Diatonic and Key/Scale transpositions, pitches not in the starting (from) key are indented. To change a pitch mapping, click on a From pitch and select a To pitch with the pop-up slider. If you change a pitch mapping, the transposition type is automatically set to Custom Map.
Constrain to Scale For Diatonic and Key/Scale transpositions, forces all non-scale notes to be transposed to the nearest appropriate scale tone.
Table 109.
To Transpose MIDI Data
- Select the data to be affected.
- Choose MIDI Effects > Cakewalk FX > Transpose from the Process menu or from the pop-up menu to open the Transpose dialog box.
- Set the transposition options as described in the table above.
- Click OK.
SONAR transposes the selected data according to the options you specified.
Drum Maps and the Drum Grid Pane
There are several panes in the Piano Roll view designed for use with MIDI drum tracks: the Note Map pane which lists the original pitch values and the mapped values for each note, and the Drum Grid pane which displays your drum tracks (any track assigned to a drum map) and where you can edit your drum tracks.
The Basics
The Note Map Pane
The Drum Grid Pane
Creating and Editing a Drum Map
Using Drum Maps
The Basics
Drum maps are virtual MIDI ports that you create and edit. Drum maps give you total control over all the MIDI drum sounds you have access to either in the form of software (soft synths) or hardware (external MIDI sound modules).
Drum maps in SONAR allow you to do the following:
- Re-map note events, for example, map a General MIDI drum kit to a non-General MIDI drum kit.
- Create a custom drum kit from several MIDI devices (soft synths, hardware synths) and play it from a single MIDI track if desired.
- Use the Drum Grid Editor to show only the drum sounds you want to see.
- Sort drum sounds to suit your needs.
- Mute and solo individual drum sounds
See:
Assigning a MIDI Track to a Drum Map
Creating and Editing a Drum Map
You can create a drum map by either modifying an existing drum map or by creating a new drum map.
See:
The Drum Map Manager
The Map Properties Dialog
Saving a Drum Map
The Drum Map Manager
In the Drum Map Manager dialog you can create and save drum maps for use with hardware or software synths and samplers. You can customize drum maps to select specific sounds on any of your available sound sources.
To Open the Drum Map Manager Dialog
You can open the Drum Map manager in one of the following ways:
- Select Options-Drum Map Manager from the menu Or
- Click on the Output field of your MIDI drum track and select Drum Map Manager
Figure 103. The Drum Map Manager
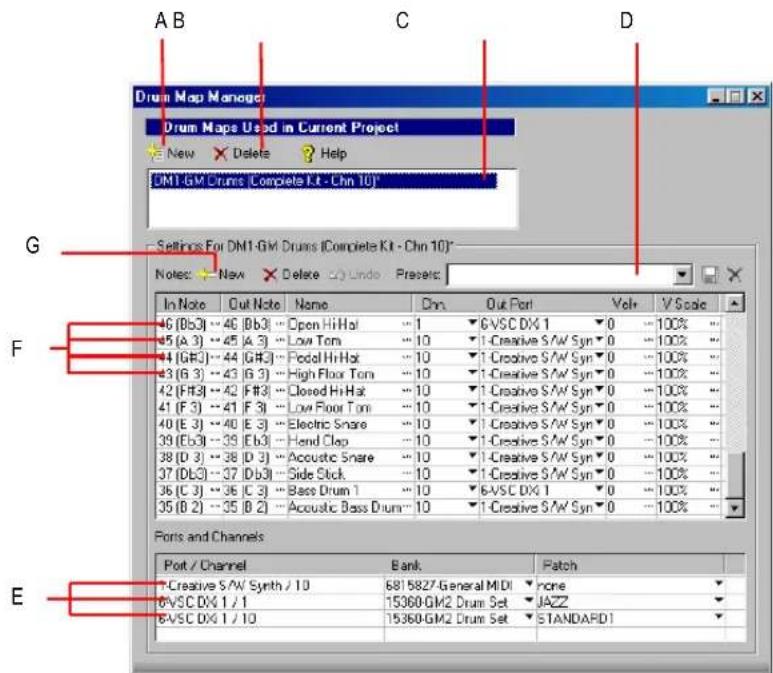
A. New Drum Map button B. Delete Drum Map button C. Current Drum Map D. Preset list E. Port/Channel pairs F. Rows G. Click to create a new row
Drum Maps Used in Current Project
This field displays all the currently available drum maps. click the New button to create a new drum map and Delete × Delete to delete a drum map. Select a drum map to display the drum mappings in the Drum Map Manager. All drum maps in this field are saved with the current project.
Presets
Presets can be used to populate the fields in the Drum Map Manager. This field is also used to save new drum maps by entering a name in the field and clicking the Save button.
Settings
The Settings section is where you map the following for each In Note (source):
• In Note. The source MIDI note value.
- Out Note. The MIDI note value that plays on the destination sound source.
- Name. The user-defined name for the row.
- Chn. The channel on which the note is transmitted.
- Out Port. The hardware output port or software virtual output port to which you are sending the
note.
- Vel+. Apply a velocity offset setting to an individual mapped pitch.
- V Scale. The V Scale value sets a level of compression or expansion. A value below 100% is compression. A value above 100% is expansion. The Vel+ setting allows for gain make-up.
Ports and Channels
This section lists each unique Port and Channel pairing. This allows you to make quick global changes that Port and Channel pairing's Bank and Patch settings.
See:
Working in the Drum Map Manager
Working in the Drum Map Manager
The following table lists several ways of editing settings in the Drum Map Manager.
| To do this Do this | |
| Audition a row Select the row and press SHIFT+SPACEBAR | |
| Sort rows Drag and drop a row to a new location | |
| Select multiple rows Click a row, hold down the CTRL key while selecting additional rows | |
| Change the Output Port for all rows with the same Channel/Port | Press CTRL+SHIFT while changing the port. |
| Undo an edit | Press the Undo button Undo |
Table 110.
See:
The Drum Map Manager
Creating and Editing a Drum Map
Working in the Drum Map Manager
The Map Properties Dialog
The Map Properties dialog lets you change all the settings for an individual mapped note in your drum map. The settings in the Map Properties dialog are the same as a single row in the Drum Map Manager. If you want to edit more than one drum note pitch mapping, click the Map Mgr button to open the Drum Map Manager dialog.
Figure 104. The Map Properties dialog

To Open the Map Properties Dialog
- Double-click on a row in the Note Map pane.
Or
- Right-click on a row in the Note Map pane and select Map Properties from the menu that appears.
See:
The Drum Map Manager
Working in the Drum Map Manager
Creating and Editing a Drum Map
Saving a Drum Map
Use the following procedure to save a new or modified drum map.
-
In the Drum Map Manager, enter a name for the new drum map in the Preset field.
-
Click the Save button
Drum map presets are saved and available for all projects. Drum maps are saved on a per-project basis.
Using Drum Maps
The following topics cover using drum-mapped tracks, including how to display drum tracks in the Drum Grid pane and how to edit note velocities.
See:
Assigning a MIDI Track to a Drum Map
Opening a Drum Map
Displaying Tracks in the Drum Grid Pane
Velocity TailsEditing Note Velocities
To Change the Order of Mapped Notes in the Drum Map Pane
Assigning a MIDI Track to a Drum Map
Use the following procedure to assign a MIDI track to a drum map:
To Assign a MIDI Track to a Drum Map
-
Display the Track view if it is minimized.
-
In the track you want to assign to a drum map, click the Output drop-down and select a drum map from the options in the menu that appears.
See:
Opening a Drum Map
Displaying Tracks in the Drum Grid Pane
Velocity TailsEditing Note Velocities
To Change the Order of Mapped Notes in the Drum Map Pane
Opening a Drum Map
Use the following procedure to open a drum map in the Drum pane:
To Open a Drum Map
-
In the Track view, assign the drum map you want to open to a MIDI track. See “Assigning a MIDI Track to a Drum Map” on page 534.
-
Select the MIDI track you just assigned the drum map to and select Views > Piano Roll.
To Open All Tracks Assigned to a Drum Map
-
Select a single track assigned to the drum map.
-
Hold down CTRL+SHIFT while selecting Views > Piano Roll.
See:
Assigning a MIDI Track to a Drum Map
Displaying Tracks in the Drum Grid Pane
Velocity TailsEditing Note Velocities
To Change the Order of Mapped Notes in the Drum Map Pane
Displaying Tracks in the Drum Grid Pane
Use the following procedure to display a drum track or tracks in the Drum Grid pane.
To Display Tracks in the Drum Grid Pane
- Create a drum map if you have not already done so. See "Creating and Editing a Drum Map" on page 530.
- Change the focus to the Track view.
- In the track(s) you want to view in the Drum Grid Editor, select a drum map from the Output dropdown menu.
- Select the tracks you want to view in the Drum Grid Editor and select Views > Piano Roll.
The Piano Roll view appears with the selected track's data appearing in the Drum Grid Editor.
See:
Assigning a MIDI Track to a Drum Map
Opening a Drum Map
Velocity TailsEditing Note Velocities
To Change the Order of Mapped Notes in the Drum Map Pane
Velocity Tails
In the Drum Grid pane, you have the option of showing the velocity of each note as a series of bars. The higher the bars, the higher the velocity value.
Figure 105. Velocity tails can be shown or hidden

A. Notes with velocity showing B. Notes without velocity showing
To Display Velocity Tails in the Drum Grid Pane
- Click the Show/Hide Velocity Tails button in the Piano Roll view toolbar. Or
- Press the Y key.
See:
Assigning a MIDI Track to a Drum Map
Opening a Drum Map
Displaying Tracks in the Drum Grid Pane
Editing Note Velocities
To Change the Order of Mapped Notes in the Drum Map Pane
Editing Note Velocities
In the Drum Map Editor you can display note velocities as a series of horizontal bars behind the note. Click the Show/Hide Velocity Tails button 📋 to display note velocities.
To Edit a Note Velocity in the Drum Grid Pane
-
Click the Draw tool button
-
Move your cursor over the velocity tail you want to edit until the cursor changes to look like this:

- Click and drag the velocity tail. Drag it up to increase the velocity. Drag it down to decrease the velocity.
To Edit Multiple Note Velocities in the Drum Grid Editor
When you edit multiple notes that have different initial velocities, the velocities are adjusted on a relative basis, so if you reduce a velocity by 50%, all other selected notes have their velocities reduced by the same percentage. For example: you select three notes. The first has a velocity of 100, the second a velocity of 50, and the third a velocity of 30. You click and drag the velocity of the first note down to 50. The second note's velocity changes from 50 to 25 and the third note's velocity changes from 30 to 15.
-
Select the notes you want to change the velocity of.
-
Click the Draw tool button
-
Move your cursor over one of the selected notes.
-
Hold down the SHIFT key.
-
Click and drag the velocity tail. Drag it up to increase the velocity. Drag it down to decrease the velocity.
See:
Assigning a MIDI Track to a Drum Map
Opening a Drum Map
Displaying Tracks in the Drum Grid Pane
Velocity TailsTo Change the Order of Mapped Notes in the Drum Map Pane
Use the following procedure to hear the drum sound you have mapped a note to.
To Preview a Mapped Sound
- In the Note Map pane, click on the name of the sound you want to hear.
See:
Assigning a MIDI Track to a Drum Map
Opening a Drum Map
Displaying Tracks in the Drum Grid Pane
Velocity TailsTo Change the Order of Mapped Notes in the Drum Map Pane
The Note Map Pane
The Note Map pane displays the current drum map. In the Note Map pane each row represents a pitch. The Note In pitch is the recorded pitch. You map the recorded pitch to whatever pitch you want using the Note Out pitch setting. You can also change the name of the mapped note and mute or solo the mapped note.
| Pedal Hi-Hat | 44 | 44 | M | S |
| High Floor Tom | 43 | 43 | M | S |
| Closed Hi-Hat | 42 | 42 | M | S |
| Low Floor Tom | 41 | 41 | M | S |
| Electric Snare | 40 | 40 | M | S |
| Hand Clap | 39 | 37 | M | S |
| Acoustic Snare | 38 | 38 | M | S |
| Side Stick | 37 | 37 | M | S |
| Bass Drum 1 | 36 | 36 | M | S |
| Acoustic Bass Drum | 35 | 35 | M | S |
Changing Mapped-note Settings
Changing Mapped-note Settings
Drum Maps and the Drum Grid Pane
The Note Map Pane
You can change the following settings in the Note Map pane:
- Mapped-note name
- Note Out
- Mute
• S o l o
To Change the Name Setting
The name of a mapped note in the Note Map pane is a user-assigned variable. Make it descriptive for easy reference. To change the Name setting, use the following procedure:
- In the Note Map pane, double-click on the appropriate row.
The Map Properties dialog appears.
- In the Map Properties dialog, enter a new name in the Name field and press the ENTER key.
To Change the Note Out Setting
The Note Out setting is the actual note you hear when the Note In value is played. To change the Note Out setting, use the following procedure:
- In the Note Map pane, double-click on the appropriate row.
The Map Properties dialog appears.
- In the Map Properties dialog, enter a new value in the Note Out field and press the ENTER key, or use the +/- buttons to change the value and press the ENTER key.
To Change Multiple Note Out Settings
-
Open the Drum Map Manager.
-
In the Drum Map Manager, select a contiguous range of rows by selecting the first in the range, and holding down the SHIFT key while selecting the last in the range.
Or
Select a non-contiguous range by selecting one row and holding down the CTRL key while selecting additional rows.
- Hold down both the CTRL and SHIFT keys while selecting a new Output in the Output column.
To Mute or Solo a Mapped Note
The Mute and Solo controls in the Note Map pane allow you to mute or solo an individual mapped note. To mute or solo a mapped note, use the following procedure:
- In the Note Map pane, click the Mute M or Solo S button in the appropriate row.
Or
- Right-click on the row you want to mute or solo and select Mute or Solo from the menu that appears.
To Display the Note In and Note Out Values By Their Pitch Name
You have the option of showing the Note In and Note Out values by their pitch names. To do so, use the following procedure:
- Right-click on any row in the Note Map pane and select the Display Pitch Names command from the menu that appears.
To Change the Order of Mapped Notes in the Drum Map Pane
Use the following procedure to change the order of mapped notes in the Note Map pane.
-
Move your cursor over the row you want to move in the Note Map pane.
-
When your cursor changes to look like this ✦, click and drag the row to the place you want it to be and release the mouse button.
The Drum Grid Pane
The Drum Grid pane is where you edit your drum tracks. The Drum Grid pane is the top pane in the Piano Roll view and opens automatically when you open a MIDI drum track.
The Drum Grid pane is for MIDI drum tracks what the Note pane is for other MIDI tracks. In the Drum Grid pane you can add, delete and edit notes and note properties. You can edit controllers in this pane if you hide the Controller pane. You can customize the number of grid lines in the Drum Grid pane and choose whether or not to show note velocity "tails."
See:
Event Inspector Toolbar
Adding and Editing Controllers in the Piano Roll
Velocity Tails
Grid Lines
Grid Lines
The Drum Grid pane is divided into a time grid. You can set the resolution of the grid lines from 1/4 note to 1/64 note, or to follow the current snap grid setting.
The Show/Hide Grid Lines combo button 📄 - toggles on and off the grid lines in the Drum Grid pane and sets the grid line resolution.
To Turn on Grid Lines in the Drum Map Pane
- Click the Show/Hide Grid Lines combo button - in the Piano Roll view toolbar. Or
- Press the I key.
To Set the Drum Map Pane Grid Line Resolution
- Click the down arrow on the Show/Hide Grid Lines combo button and select an option from the menu that appears.
See:
Piano Roll View
The Pattern Brush Tool
The Pattern Brush Tool
The Pattern Brush tool 📋, on the Piano Roll View toolbar, allows you to insert multiple notes using your mouse, either following a pattern used in an existing MIDI file or at the current note duration setting.
See:
Piano Roll View
How the Pattern Brush Tool Works
Creating Custom Patterns
How the Pattern Brush Tool Works
When you select the Pattern Brush tool you can click and drag in the Drum Grid pane (also works in the Note pane) to produce a series of notes. Which notes appear in the Drum Grid depends on the settings you make in the Pattern Brush tool's drop-down menu. To open the Pattern Brush tool's drop-down menu, click the right side of the Pattern Brush tool.
The following table covers the options found in the Pattern Brush tool's drop-down menu:
| Option Description | |
| Velocity | Select this option to open the Pattern Velocity dialog. The value you enter in this dialog sets the default velocity for all notes entered using the Pattern Brush tool unless you select Use Pattern Velocities. |
| Use Pattern Velocities | Select this option to use the note velocities used in the custom pattern file you are using. If you are using the Note Duration option, this option is not available. |
| Use Pattern Polyphony | Select this option to use the pitch values from the custom pattern file you are using. If you are using the Note Duration option, this option is not available. When using this option, the vertical position of your mouse does not affect the note pitches draw; that information is read from the pattern. |
| Note Duration | This option uses the current note duration setting in the Piano Roll View toolbar as the interval between notes. |
Table 111.
Table 111.
To Paint Notes Using the Pattern Brush Tool
- Open a track in the Drum Grid pane or the Note pane.
- In the Pattern Brush tool's drop-down menu, select Note Duration.
- In the Piano Roll View toolbar, select a note duration. This value is the interval between notes when using the Pattern Brush tool.
- Click the Pattern Brush tool button 📋 to select it.
Your cursor should appear like this when in the Drum Grid pane.
-
Click where you want to begin placing notes and drag until you have inserted all the notes you want.
-
Release the mouse button.
SONAR creates a series of notes, at equal intervals.
To Paint a Custom Pattern of Notes Using the Pattern Brush Tool
- Open a track in the Drum Grid pane.
- In the Pattern Brush tool's drop-down menu, select the custom pattern you want to use. If you need to create a custom pattern, see "Creating Custom Patterns" on page 542.
- Click the Pattern Brush tool button 📋 to select it.
Your cursor should appear like this when in the Drum Grid pane. - Click where you want to begin placing notes and drag until you have inserted all the notes you want.
- Release the mouse button.
To Use a Custom Pattern's Note Velocities
- Open a track in the Drum Grid pane.
- In the Pattern Brush tool's drop-down menu, select the custom pattern you want to use. If you need to create a custom pattern, see Creating Custom Patterns.
- In the Pattern Brush tool's drop-down menu, select Use Pattern Velocities.
- Click the Pattern Brush tool button 📋 to select it.
Your cursor should appear like this when in the Drum Grid pane.
- Click where you want to begin placing notes and drag until you have inserted all the notes you want.
- Release the mouse button.
To Use a Custom Pattern's Pitch Values
- Open a track in the Drum Grid pane.
- In the Pattern Brush tool's drop-down menu, select the custom pattern you want to use. If you need to create a custom pattern, see Creating Custom Patterns.
- In the Pattern Brush tool's drop-down menu, select Use Pattern Polyphony.
- Click the Pattern Brush tool button 📋 to select it.
Your cursor should appear like this when in the Drum Grid pane.
- Click where you want to begin placing notes and drag until you have inserted all the notes you want.
- Release the mouse button.
See:
Piano Roll View
How the Pattern Brush Tool Works
Creating Custom Patterns
Creating Custom Patterns
You can create custom patterns and use the Pattern Brush tool to quickly paint them into the Drum Grid pane. Use the following procedure to create a custom pattern.
To Create a Custom Pattern
- Create a new file, or open an existing MIDI file or pattern file that you want to edit.
- Right-click in the Time Ruler where you want the pattern to start and select Insert Marker from the menu that appears.
The Marker dialog appears.
- Enter the name you want to use for the first pattern and click OK.
- In a MIDI track, enter a pattern of notes.
- If you want to create a second pattern, repeat steps 2 through 4.
-
Create as many patterns as you want, ending the last pattern with a marker called "end".
-
Save the file as a MIDI file (.mid) in the Pattern Brush Patterns folder in the directory where you installed SONAR.

Note: You can change the default directory where SONAR looks for patterns in the Folders tab of the Global Options dialog.
You may need to re-start SONAR to see the new patterns in the drop-down menu next to the Pattern Brush. The name you gave the file appears with an arrow next to it. Move your mouse over it to see a subdirectory which contains each of the patterns you created.
See:
Piano Roll View
How the Pattern Brush Tool Works
Creating Custom Patterns
Editing Audio
The Track view lets you edit and arrange audio clips. You can perform basic tasks such as cut, copy, paste, and move; apply simple audio processing such as gain change, fades, and equalization; and use sophisticated audio effects such as stereo chorus and reverb. The Track view lets you see your audio clips on a timeline, arranged by track, to help you visualize the organization of your project's audio data.
Most audio processing commands and audio effects can be used from the Event List view as well, by selecting one or more audio clips, then choosing the desired command from the Process > Audio or Process > Audio Effects menu. Plug-in effects can also be applied to audio data non-destructively, in real time, in both the Console and Track views. For more information, see the online help topic "Mixing."
See:
Digital Audio Fundamentals
Basic Audio Editing
Basic Audio Processing
Advanced Audio Processing
Applying Fades and Crossfades Offline
Audio Effects (Audio Plug-ins)
Digital Audio Fundamentals
Digital audio is a numeric representation of sound; it is sound stored as numbers. In order to understand what the numbers mean, you need to start with the basic principles of acoustics, the science of sound.
See:
Basic Acoustics
Example—A Guitar String
Waveforms
Recording a Sound
The Decibel Scale
Audio Clips
Managing Audio Data
Basic Acoustics
Sound is produced when molecules in the air are disturbed by some type of motion produced by a vibrating object. This object, which might be a guitar string, human vocal cord, or a garbage can, is set into motion because energy is applied to it. The guitar string is struck by a pick or finger, while the garbage can is hit perhaps by a hammer, but the basic result is the same: they both begin to vibrate. The rate and amount of vibration is critical to our perception of the sound. If it is not fast enough or strong enough, we won't hear it. But if the vibration occurs at least twenty times a second and the molecules in the air are moved enough, then we will hear sound.
See:
Digital Audio Fundamentals
Example—A Guitar String
To understand the process better, let's take a closer look at a guitar string.
When a finger picks a guitar string, the entire string starts to move back and forth at a certain rate. This rate is called the frequency of the vibration. Because a single back and forth motion is called a cycle, we use a measure of frequency called cycles per second, or cps. This measure is also known as Hertz, abbreviated Hz. Often the frequency of vibration of an object is very fast, so we can also express the frequency in thousands of cycles per second, or kilohertz (abbreviated kHz)

natural_image
Sequence of five illustrated violin shapes with curved arrows indicating motion or transformation (no text or symbols)The actual distance the string moves is called its displacement. This is proportional to how hard the string is plucked. A greater displacement results in a louder sound.
The displacement of the string changes as the string vibrates, as shown here:
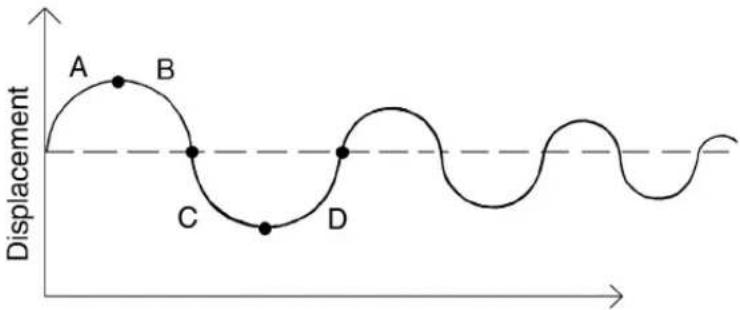
line
| Point | Displacement | |-------|--------------| | A | Peak | | B | Decreasing | | C | Minimum | | D | Increasing |The segment marked “A” represents the string as it is pulled back by the pick; “B” shows it moving back towards its resting point, “C” represents the string moving through the resting point and onward to its outer limit; then “D” has it moving back towards the point of rest. This pattern repeats continuously until the friction of the molecules in the air gradually slows the string to a stop. As the string vibrates, it causes the molecules of air around it to vibrate as well. The vibrations are passed along through the air as sound waves. When the vibrations enter your ear, they make your eardrum vibrate, and you hear a sound. Likewise, if the vibrating air hits a microphone, it causes the microphone to vibrate and send out electrical signals.
In order for us humans to hear the sound, the frequency of the vibration must be at least 20 Hz. The highest frequency sound we can hear is theoretically 20 kHz, but, in reality, it's probably closer to 15 or 17 kHz. Other animals, and microphones, have different hearing ranges.
If the simple back-and-forth motion of the string was the only phenomenon involved in creating a sound, then all stringed instruments would probably sound much the same. We know this is not true, of course; the laws of physics are not quite so simple. In fact, the string vibrates not only at its entire length, but at one-half its length, one-third, one-fourth, one-fifth, and so on. These additional vibrations (overtones) occur at a rate faster than the rate of the original vibration (the fundamental frequency), but are usually weaker in strength. Our ear doesn't hear each frequency of vibration individually, however. If it if did, we would hear a multinote chord every time a single string were played. Rather, all these vibrations are added together to form a complex or composite sound that our ear perceives as a single tone.

line
| Fundamental Frequency | Amplitude | | --------------------- | --------- | | 2x fundamental (2f) | + | | 3x fundamental (3f) | + | | 4x fundamental (4f) | + | | 5x fundamental (5f) | - |This composite waveform still doesn't account for the uniqueness of the sound of different instruments. For example, stringed instruments usually have a resonator. In the case of the guitar, the resonator is the big block of hollow wood to which the string is attached (the guitar body). This has a major impact on the sound we perceive when a guitar is played because it enhances or amplifies some of the vibrations produced by the string and diminishes or attenuates others. The ultimate effect of all the vibrations occurring simultaneously, being altered by the resonator, adds up to the sound we know as guitar.
See:
Digital Audio Fundamentals
Waveforms
A sound wave can be represented in many different ways: as a mathematical formula, as a series of numbers, or graphically as a waveform. A waveform displays the size, or amplitude, of the vibration as a function of time. For example, the waveform of the sound of the plucked guitar string might look like this:

line
| Time | Value | | ------------- | ----- | | 00:00:00:00 | 1.0 | | 00:00:00:10 | 1.5 | | 00:00:00:20 | 2.0 | | 00:00:01:00 | 2.5 | | 00:00:01:10 | 3.0 | | 00:00:01:20 | 3.5 | | 00:00:02:00 | 4.0 |The waveform of a trumpet blast might look like this:
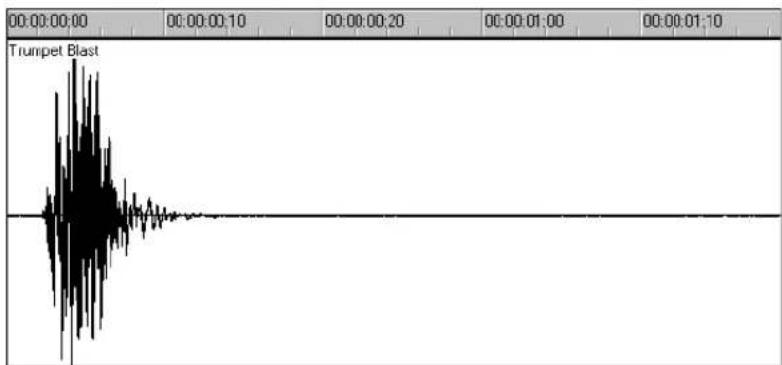
line
| Time | Value | | ---------- | ----- | | 00:00:00:00 | 0 | | 00:00:00:10 | 10 | | 00:00:00:20 | 20 | | 00:00:01:00 | 10 | | 00:00:01:10 | 10 |And the waveform of a spoken word might look like this:

The three waveforms shown above are quite different from one another, both in appearance and sound. Each has its own characteristic shape, or envelope, and each has its own complex combination of frequency components, which can change across the duration of the sound.
The center line of a waveform is the zero line; it corresponds to the rest position (displacement of 0) of the original vibrating object. (A waveform for perfect silence would be a horizontal line at zero.)
Back and forth motions of the vibrating object translate to upward (positive) and downward (negative) excursions of waveform amplitude. For example, a close-up of a portion of the guitar waveform might look like this:
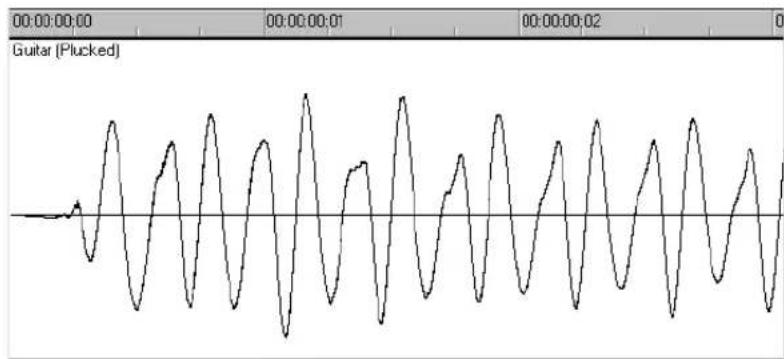
line
| Time | Value | | ---------- | ----- | | 00:00:00:00 | 0 | | 00:00:01:00 | 1 | | 00:00:02:00 | 0 |The waveform crosses the zero line twice during each complete vibration. These zero-crossings are important in digital audio processing; they are good places to cut waveforms apart and splice them together. If waveforms are cut or spliced at other locations, clicks and pops can occur. The maximum amplitude of the waveform in each vibration is also important: it determines the strength of the vibration, and thus the loudness of the sound.
See:
Digital Audio Fundamentals
Recording a Sound
To record digital audio, your computer monitors the electrical signal generated by a microphone (or some other electroacoustical device). Because the signal is caused by a sound, the signal strength varies in direct proportion to the sound's waveform. The computer measures and saves the strength of the electrical signal from the microphone, thus recording the waveform.
There are two important aspects of this measuring process. First is the sampling rate, the rate at which the computer saves measurements of the signal strength. It is a known fact of physics that you must measure, or sample, the signal at a rate at least twice that of the highest frequency you wish to capture. For example, suppose you want to record a moderately high note on a violin—say the A whose fundamental frequency is 440 Hz and all overtones up to five times the fundamental. The highest frequency you want to capture is 2,200 Hz, so you need to measure the electrical signal from the microphone at least 4,400 times per second.
Since humans can hear frequencies well above 10 kHz, most sound cards and digital recording systems are capable of sampling at much higher rates than that. Typical sampling rates used by modern musicians and audio engineers are 22 kHz, 44.1 kHz, and 48 kHz. The 44.1 kHz rate is called CD-quality, since it is the rate used by audio compact discs.
The other important aspect of the measuring process is the sampling resolution. The sampling resolution determines how accurately the amplitude of each sample is measured. At present, the music industry has settled on a system that provides 65,536 different values to assign to the amplitude of a waveform at any given instant. Thus, each sample saved by your computer requires 2 bytes (16 bits) to store, since it takes 2 bytes to store a number from -32,768 to 32,767. The scaling of the electrical input signal level to amplitude value is determined by your audio hardware and by the position of your input level control.
What if the amplitude of the sampled signal gets too high, such that a 16-bit number is not large enough to represent it? What typically happens is that the signal is clipped, cut off at the maximum value.
Here is what a clipped waveform might look like:

line
| Time Point | Value | | ---------- | ----- | | 1 | 0.5 | | 2 | 0.6 | | 3 | 0.7 | | 4 | 0.8 | | 5 | 0.9 | | 6 | 1.0 | | 7 | 0.9 | | 8 | 0.8 | | 9 | 0.7 | | 10 | 0.6 | | 11 | 0.5 | | 12 | 0.4 | | 13 | 0.3 | | 14 | 0.2 | | 15 | 0.1 | | 16 | 0.0 | | 17 | -0.1 | | 18 | -0.2 | | 19 | -0.3 | | 20 | -0.4 | | 21 | -0.5 | | 22 | -0.6 | | 23 | -0.7 | | 24 | -0.8 | | 25 | -0.9 | | 26 | -1.0 | | 27 | -0.9 | | 28 | -0.8 | | 29 | -0.7 | | 30 | -0.6 | | 31 | -0.5 | | 32 | -0.4 | | 33 | -0.3 | | 34 | -0.2 | | 35 | -0.1 | | 36 | 0.0 | | 37 | 0.1 | | 38 | 0.2 | | 39 | 0.3 | | 40 | 0.4 | | 41 | 0.5 | | 42 | 0.6 | | 43 | 0.7 | | 44 | 0.8 | | 45 | 0.9 | | 46 | 1.0 | | 47 | 0.9 | | 48 | 0.8 | | 49 | 0.7 | | 50 | 0.6 | | 51 | 0.5 | | 52 | 0.4 | | 53 | 0.3 | | 54 | 0.2 | | 55 | 0.1 | | 56 | 0.0 | | 57 | -0.1 | | 58 | -0.2 | | 59 | -0.3 | | 60 | -0.4 | | 61 | -0.5 | | 62 | -0.6 | | 63 | -0.7 | | 64 | -0.8 | | 65 | -0.9 | | 66 | -1.0 | | 67 | -0.9 | | 68 | -0.8 | | 69 | -0.7 | | 70 | -0.6 | | 71 | -0.5 | | 72 | -0.4 | | 73 | -0.3 | | 74 | -0.2 | | 75 | -0.1 | | 76 | 0.0 | | 77 | 0.1 | | 78 | 0.2 | | 79 | 0.3 | | 80 | 0.4 | | 81 | 0.5 | | 82 | 0.6 | | 83 | 0.7 | | 84 | 0.8 | | 85 | 0.9 | | 86 | 1.0 | | 87 | -0.9 | | 88 | -1.0 | | 89 | -1.1 | | 90 | -1.2 | | 91 | -1.3 | | 92 | -1.4 | | 93 | -1.5 | | 94 | -1.6 | | 95 | -1.7 | | 96 | -1.8 | | 97 | -1.9 | | 98 | -2.0 | | 99 | -2.1 | | Note: The values in the 'Value' column are estimated based on the provided code snippet 'A', so they are not explicitly labeled in the original text 'A'.Clipping is not usually desirable and may have unpleasant audible effects. Sudden irregularities in the waveform of any type can cause clicks, pops, and distortion of the original sound.
See:
Digital Audio Fundamentals
The Decibel Scale
In acoustics, the decibel (dB) scale is a scale for measuring the relative loudness of two sounds. For example, environmental noise is often measured as follows:
$$ \mathrm{L} = 2 0 \log (\mathrm{p} / \mathrm{p} 0) $$
where L is the sound pressure level (in dB), p is the sound pressure amplitude, and p0 is a reference amplitude of 20 micropascals (less than one billionth of atmospheric pressure). On this scale, a barely audible sound (p = p0) has a sound pressure level of 0 dB, normal conversation (p = 1,000*p0) is at a level of around 60 dB, and a jet engine at close range (p = 1,000,000*p0) is at a level of around 120 dB.
Similar decibel scales are used in other branches of science and engineering to measure electrical power levels and other signal levels, always with respect to some reference level.
In SONAR, decibels are used in several places:
- To indicate volume levels of audio tracks in the Track view and Console view
- To indicate the effects of filters and equalizers
The reference level (0 dB) usually corresponds to the current loudness of the sound. A positive change in decibels makes the sound louder; a negative change makes the sound quieter.
See:
Digital Audio Fundamentals
Audio Clips
If you have read Digital Audio Fundamentals, you should have a good idea of what is contained in a SONAR audio clip. An audio clip contains a long series of numbers, or samples, representing the fluctuating amplitude of a waveform. Audio clips are typically quite large, hundreds of kilobytes to many megabytes in size. By comparison, a MIDI event takes only a few bytes to store.
The Track view lets you see your audio waveforms in great detail; you can zoom in until you see the individual samples.
You should also now be aware of some things to watch out for when editing your audio data. First, if you cut audio clips apart or splice them together, you should do so at zero-crossings in the waveform (places where the amplitude is zero), in order to avoid sudden changes in amplitude that may cause clicks and pops. Second, you should beware of clipping. Clipping of the audio waveform can occur if you record a signal at too high a record level, or if you apply audio processing or effects that increase the waveform amplitude too much. If you accidentally cause the waveform to clip, you should undo the command and try again with different parameters.
Clipping can also occur in other situations, for example, if you try to play or mix several loud audio tracks together, the aggregate signal strength may at times exceed the clipping limit, and the output signal will be distorted. To correct the problem, you can create a volume envelope to reduce the level in loud audio clips or reduce the track volume in the Console or Track views.
See:
Digital Audio Fundamentals
Managing Audio Data
Because of the great size of audio data, SONAR uses an intelligent scheme for storing audio clips on disk to conserve disk space and minimize the time it takes to load and save data. Audio data is not stored directly in your project file, but rather in separate files in a special directory. For more information, see “Audio File Management” on page 833.
You can export your project in MP3, WMA, or Wave format. You can also convert your project's MIDI data to audio and export it to any of the above formats. For more information, see “Preparing Audio for Distribution” on page 669.
See:
Digital Audio Fundamentals
Basic Audio Editing
The Track view lets you perform basic editing tasks such as cut, copy, paste, delete, drag-and-drop, split, and bounce. You can drag fade-ins and fade-outs onto a clip using your mouse or you can set complex envelopes on both clips and tracks. You can use envelopes to change settings for gain (volume), pan, mute, bus send level and bus send pan. The Scrub tool lets you audition portions of audio by dragging the mouse.
Use the Select tool to make selections.
Here is a summary of the ways in which you can select audio clips:
| To do this Do this | |
| Select a single clip Click the clip | |
| Select several clips at once Drag a rectangle around them | |
| Select part of a clip Press ALT and drag over a portion of the clip | |
| Add clips to the selection | Press SHIFT and either click the clips or drag a rectangle around the clips |
| Add or remove clips from the selection | Press CTRL and either click the clips or drag a rectangle around the clips |
| Add or remove clips in a track from the selection | Press CTRL and click the track number |
| Select clips in a time range Drag in the Time Ruler | |
| Select clips between two markers Click between the markers | |
| Remove all selections Click in an empty area outside of any clip | |
Table 112.
See:
Editing Clip Properties
Moving, Copying, Pasting and Deleting Audio Clips
Splitting Audio Clips
Bouncing to Clips
Scrubbing
Editing Clip Properties
Audio clips have several properties that you can change:
Property Description
| Name | The name of a clip is used in the Track view and Event List view. You can assign any name to help you remember the contents of the clip. |
| Start The start determines when the sample is played. | |
| Length The length indicates the size of the clip. | |
| Snap Offset | A value that represents the number of samples into the clip at which the clip snaps to. |
| Display Color The clip's color in the Track view. | |
Table 113.
To Change an Audio Clip's Name
- Right-click the audio clip and choose Clip Properties.
Figure 106. The Clip Properties dialog

- Type a new name in the Name box.
- Click OK.
The new clip name appears in the upper left corner of the clip.
To Change a Clip's Start
- Right-click an audio clip and choose Clip Properties.
- Enter a new starting time in the Start field.
- Click OK.
The Track view displays the clip at the new starting time.
Moving, Copying, Pasting and Deleting Audio Clips
Clips can be cut, copied, pasted, and deleted with Edit menu commands, or moved and copied with drag-and-drop techniques. For more information, see "Arranging and editing" on page 287.
Audio Scaling
Audio scaling is the increase or decrease in the size (scale) of the waveform in a track or bus. Audio scaling allows you to make detailed edits by zooming in on the parts of the waveform closest to the zero crossing (silence) while preserving the track or bus size. By showing just the quietest parts of a clip, you can make very precise edits. You can also zoom out on the waveform.
You can change the audio scale using keyboard shortcuts or the Audio Scale Ruler.
The Audio Scale Ruler is located in the vertical splitter bar between the Clips pane and the Track pane.

A. Track pane B. Clips pane C. Audio Scale Ruler

Note: The Audio Scale Ruler does not appear on multi-layered tracks.
There are three display options in the Audio Scale Ruler:
- Percentage. Shows audio scaling by percentage. For example, if the highest percentage in the Audio Scale Ruler reads 2.0%, then only the parts of the waveform which are within 2% of the zero crossing appear in the clip.
- dB. Shows audio scaling by dB. For example, if the highest dB in the Audio Scaling Ruler reads -36, then only the parts of the waveform which are 36 dB below 0 dB appear in the clip.
- Zoom Factor. Shows audio scaling by a factor. For example, if the Zoom Factor reads 10, then
the waveform is zoomed in by a factor of 10.

Note: The Audio Scale Ruler display reflects the type of audio clip directly beneath it. If it is a stereo waveform, the Audio Scale Ruler appears in stereo (one for each channel). If it is a mono clip it appears in mono. Also, the Audio Scale Ruler only displays numbers when it is above a certain height. If you cannot see the Audio Scale Ruler, increase the size of your track or bus.
To Change the Audio Scale Display Option
- Right-click on the Audio Scale Ruler in any track.
A menu appears. The current display option is checked.
- Select an option from the menu.
To Scale All Audio Tracks Together
To scale all audio tracks together, follow the instructions in the table below:
To do this Do this
Increase the scale for all tracks Press ALT+UP ARROW.
Or
Hold down the CTRL key and click the Vertical Zoom In button. When you hold down the CTRL key and position your cursor over the Vertical Zoom In button, your cursor looks like this:
Decrease the scale for all tracks Press ALT+DOWN ARROW.
Or
Hold down the CTRL key and click the Vertical Zoom Out button. When you hold down the CTRL key and position your cursor over the Vertical Zoom Out button, your cursor looks like this:

Increase/Decrease the scale for all tracks using your mouse
Hold down the CTRL key, click the Vertical Zoom fader and drag the fader up or down. When you hold down the CTRL key and position your cursor over the Vertical Zoom fader, your cursor looks like this:

Table 114.
| To do this Do this | |
| Increase to maximum scale | Hold down the CTRL and SHIFT keys and click theVertical Zoom In button. When you hold down the SHIFT and CTRL keys and position your cursor over theVertical Zoom In button, your cursor looks like this: |
| Decrease to minimum scale | Hold down the CTRL and SHIFT keys and click theVertical Zoom Out button. When you hold down the SHIFT and CTRL keys and position your cursor over theVertical Zoom Out button, your cursor looks like this: |
Table 114.
To Scale a Single Track or Bus
To scale a single audio track, follow the instructions in the table below:
| To do this Do this | |
| Increase/decrease the scale of individual stereo or mono tracks | There are several ways to increase or decrease the size of an individual track's or bus's waveform:Press CTRL+ALT+UP/DOWN ARROW keysClick and drag vertically in the track's Audio Scale Ruler.When you click and drag in the Audio Scale ruler of a track, your cursor looks like this: Select the Zoom tool, hold the SHIFT key and drag around the clip you want to zoom in on. Select the Zoom tool, hold the SHIFT key and drag around the clip you want to zoom in on. |
Restore a track to minimum scale Double-click in the track's Audio Scale Ruler.
Table 115.
To Undo Audio Scaling
- Press the U key.
To Scale a Single Track or Bus Using the Audio Scale Ruler
- In the track in which you want to change the audio scale, click in the Audio Scale Ruler and drag. Drag up to increase the audio scaling. Drag down to decrease the audio scaling.
To Show or Hide the Audio Scale Ruler
- Right-click in the Clips pane.
-
Select View Options from the menu that appears.
The Track View Options dialog appears. -
In the Track View Options dialog, click the Show Audio Scale check box and click OK.
Splitting Audio Clips
You can split long audio clips into shorter ones. This lets you extract and rearrange individual sounds, adjust timing and alignment, and apply effects selectively. Audio clips can be split using the Scissors tool in the Track view or with the Split command.
To Split Clips with the Scissors Tool
- If necessary, zoom-in in the Track view and use the Scrub tool to determine where you want to make a split.
- If you want the split to be made on a note or measure boundary, a marker, or by an event, open the Snap to Grid dialog, make the appropriate settings and click the Snap to Grid button to turn on the Snap to Grid.
- Click the Scissors tool button on the Track view toolbar.
- Click once to make a single split, or to make two splits, click where you want the first split, drag within a clip and release to make a second split.
To Split Clips with the Split Command
- Select the clip you want to split.
- Right-click the selected clip and select Split from the menu.
The Split Clips dialog appears. - In the Split Clips dialog, select from the following options.
| Option Description | |
| Split At Time Specify the time at which you want to split the clip and the time format. | |
| Split Repeatedly | Specify the first measure at which you want to split the clip in the Starting At Measure field and the intervals at which you want to split the clip in the And Again Every field. |
Table 116.
Option Description
Split At Each Marker Creates a split in the clip at every marker.
Split When Silent For At Least Creates a split after each period of silence which exceeds the number of measures specified.
Table 116.
SONAR splits the audio clip according to your specifications. Each new clip has the same name as the original clip.

Note: A shortcut to split a selected clip is to move the Now time to where you want to split it, and press S on your computer keyboard.
Bouncing to Clips
Individual audio clips in the same track can be combined into a single clip with the Bounce to Clip(s) command.

Note 1: Like any clips, slip-edited clips can be combined with other clips using the Bounce to Clip(s) command. When a slip-edited clip is combined with another clip, any slip-edited data (audio clips or MIDI events that are cropped from view) is overwritten.

Note 2: You control the bit depth of all rendering operations (bouncing, freezing, applying effects) on the Audio Data tab of the Global Options dialog (Options > Global command) in the Render Bit Depth field. The default value of 32 is the best for most situations. See “Bit Depths for Rendering Audio” on page 849 for more information.
To Bounce to Clips
- Select the clips to be combined in the Track view.
- Choose Edit > Bounce to Clip(s).
The clips are combined into a single clip. Empty space between clips is filled with silence in the new clip. All clip automation from the source clips is applied to the new clip.
To Bounce Multiple Audio Clips to a New Track
- Select the clips to be combined in the Track view.
- Choose Edit > Bounce to Track(s).
The Bounce to Track(s) dialog appears.
- Select the track you want to bounce to in the Destination field.
- Select other options in the Mixdown Audio/Bounce to Track(s) dialog and click OK.
The clips are combined into a single clip on the destination track. Empty space between clips is filled with silence in the new clip.
Scrubbing
You can use the Scrub tool to locate or audition a particular sound or passage as you drag the mouse. You can scrub a single audio track by dragging over that track or all tracks by dragging in the Time Ruler.

Note: The Scrub tool is not affected by current Mute and Solo settings of a track.
To Audition Audio with the Scrub Tool
- Click the Scrub tool button 📄.
- Click and drag the pointer over an audio track.

Note: To bypass the current volume and pan settings when scrubbing, hold down the ALT key. This will force scrubbing to play back at unity gain and centered.

Tip: To hear the clips in all audio tracks, drag with the Scrub tool in the horizontal ruler.
Scrubbing audio at unity gain
In SONAR 4.0.0, the Scrub function would automatically scrub at unity gain. This has changed in version 4.0.1 and later, where audio scrubbing is performed at the mix level (volume and pan settings are applied). You can also scrub at unity gain by holding down the ALT key while scrubbing.
Basic Audio Processing
Audio processing commands let you modify audio data according to some rule or algorithm. The rule can be as simple as reversing the audio data or boosting it by a certain factor, or as complex as performing a Fourier analysis and selectively amplifying or attenuating sounds at certain frequencies.
Audio processing commands can work on whole, partial and non-contiguous clips. For example, suppose you want to make certain words in a vocal passage softer. You can create a volume envelope and use it to lower the volume, non-destructively in just the section of the track containing those words. You could also use the Process > Audio > Gain command to lower the volume destructively.
You should listen to the results of your work after each audio processing command. If you don't like what you hear, you can use Edit > Undo to restore your audio data to its previous state.
Many of the dialog boxes associated with SONAR's audio processing and effects commands have two important features: Audition and Presets.
The Audition button is used to audition the processed audio data. When you click Audition, SONAR processes the first few seconds of your data, then plays it repeatedly until you click Stop. This helps you to get an idea of whether the settings in the dialog box are producing the desired effect.
The audition duration is three seconds by default. You can change this value by choosing Options > Global, selecting the General tab and changing Audition Commands for ( ) Seconds.
Presets are a way to store dialog settings so that you can apply the exact same processing or effect again in the future. The following table tells you how to use presets in the effects dialog boxes.
| To do this Do this | |
| Save the current settings as a preset | Enter a preset name and click the Save button |
| Use a preset Select the preset from the drop-down list | |
| Delete a preset | Select the preset, then click the Delete button |
Table 117.
Many audio processing and effects presets are supplied with SONAR.
See:
Using the Normalize and Gain Commands
Reversing Audio Data
Using the Normalize and Gain Commands
SONAR provides several commands to boost or cut the volume of audio data. The Process >Audio >Normalize command, and the Process >Audio >Gain commands are used to control the volume of selected audio data, in decibels. For more information about the decibel scale, see "The Decibel Scale" on page 551. The Normalize command "normalizes" the audio data: it boosts the volume until the maximum amplitude is reached somewhere in the data. By normalizing the data, you achieve the maximum possible volume without distortion or clipping. The Gain command lets you edit the volume, phase, and stereo interleave of selected audio data. You can also use this command to remove center material from a clip (good for removing vocals).
Like all the audio processing commands, these commands work by modifying the waveform data. You can achieve volume changes non-destructively using automation. For more information, see the online help topic “Automation.”
When increasing or decreasing the volume of audio clips, you should consider the following points:
- Normalize raises the noise floor; that is, while it increases the volume of the signal, it also boosts the noise it contains. (This is true when you raise the volume by other means, too.)
- Due to the nature and limitations of digital audio, the sum of all audio signals played together cannot exceed the waveform amplitude limit. Even though no individual clip is clipped, the combination may cause distortion.
If the selection contains any loud signals, Normalize may not seem to have any effect. This is because the volume increase is determined by the loudest audio in the selection. If an audio clip contains segments that are too quiet and others that are loud, you should probably split off the quiet segments into separate clips and then normalize those.
To Normalize Audio Data
- Select the audio data to be affected.
- Choose Process > Audio > Normalize from the menu.
The Normalize dialog appears.
- Drag the Normalize Level slider to the approximate level you think is appropriate.
- Click OK to process the selected audio.
Listen to the edited data. You can use the Edit > Undo command if you don't like the results, and then try a different setting in the Normalize dialog.
To Use the Gain Command
- Select the audio data you want to edit.
- Use the Process > Audio > Gain command to open the Gain dialog.
- If you only want to change the overall volume of the selection, move the New Left Channel-From Left slider and the New Right Channel-From Right sliders by a similar amount. You can press the Audition button to try out your edits.
- If you want to switch the two channels, reverse all four sliders from their present positions.
- If you want to invert the left channel phase, click the Invert left-channel phase button ☐. If you want to invert the right-channel phase, click the Invert right-channel phase button in the New Right Channel section.
- If you want to remove center material (usually where the vocal track is), set the New Left Channel-From Left slider and the New Right Channel-From Right slider to 100%, and set the New Left Channel-From Right slider and the New Right Channel-From Left slider to -100% (negative 100%).
- Press the Audition button if you want to audition your edits.
- Click OK to process the selected audio.
Listen to the edited data in your mix. You can use the Edit > Undo command if you don't like the results, and then try different settings in the Gain dialog.
Reversing Audio Data
By reversing audio data, you can make it play backwards. You may wish to do this to obtain unusual sounds for special effects.
The Reverse command does not reverse the musical position of audio data. Use the Process > Retrograde command to invert the order of clips in time.
To Reverse Audio Data
- Select the audio data to be affected.
- Choose Process > Audio > Reverse from the menu.
SONAR reverses the selected audio data.
Advanced Audio Processing
SONAR provides a number of advanced audio processing commands for power users. Among these are commands to remove silent sections of audio from the data and to apply fades, and crossfades.
See:
Removing Silence
Removing Silence
The Remove Silence command detects sections of audio that fall below a given loudness threshold, and replaces those sections with absolute silence. Remove Silence gives you the option of actually deleting the silent sections from the selected audio clips, splitting long audio clips into a greater number of shorter audio clips.
SONAR treats passages of absolute silence intelligently. It doesn't store stretches of silence on disk, and thereby conserves disk space. During a passage of absolute silence, SONAR sends no signal to the digital output port; this results in cleaner audio playback. Remove Silence is great for cleaning up your final audio mix, because it can mute all audio tracks in which the live performers were “laying out.”
Using Remove Silence to split long audio clips into smaller ones opens a variety of creative possibilities.
The parameters in the Remove Silence dialog box are used to specify exactly what you mean by silence. More precisely, Remove Silence employs what is called a digital noise gate. The gate is a type of filter, it passes data through, or stops it from passing through, according to certain criteria. Parameters in the dialog box specify the conditions under which the gate is opened and under which it closes again.
The digital noise gate parameters are described in the following table.
| Parameter Meaning | |
| Open Level (dB) | The loudness threshold for opening the noise gate. The gate officially opens when loudness rises above this level, although it can open earlier because of the Attack Time. |
| Close Level (dB) | The loudness threshold for closing the noise gate. The gate officially closes when loudness falls below this level, although it can stay open later because of the Release Time. |
| Attack Time (ms) | The value in this field is the interval of time after the volume reaches the Open Level for the gate to fully open. Opening the gate gradually produces a fade-in effect instead of an instant on-off sound. |
| Hold Time (ms) | The minimum time for the gate to stay open. Hold Time is useful when you've set high open and close levels, for example, when your source signal is very loud. Noise gates set this way tend to react to repeated percussive passages (such as drum rolls) by repeatedly opening and closing; this can sound unpleasant. By setting a hold time, you can ensure that the gate stays open long enough during percussive passages. |
| Release Time (ms) | The amount of time after the Close Level is reached that the gate actually closes. This lets the tail end of sounds pass through without being clipped. |
| Look Ahead (ms) | The value in this field causes the gate to open slightly before the sound reaches the Open Level so you don't lose the sound's attack. |
Table 118.
To Remove Silence
- Select the audio data to be affected.
- Choose Process > Audio > Remove Silence to open the Remove Silence dialog box.
Figure 107. The Remove Silence dialog

- Set the digital noise gate parameters as described in the table above.
- Check the Split Clips box to delete the silent sections of audio.
- Click OK to remove silence from the selected data.
SONAR processes the audio as directed.
Removing DC Offset
Some models of audio hardware produce a DC offset while recording, which is caused by electrical mismatches between the audio hardware and the input device or instrument. Although imperceptible, DC offset may cause problems in further stages of sound processing.

Note: An easy way to spot DC offset is to zoom in to a silent section of your sound file. If the silent waveform matches the centerline in the waveform display, your file does not contain DC offset.
To Remove DC Offset From Existing Audio
- Select the audio data and choose Process > Audio > Remove DC Offset. This launches the Remove DC Offset dialog.
-
Choose from the following options, and click OK:
-
DC Offset Threshold (dB). You can set a minimum dB threshold. If the analyzed DC offset is below this value, no removal takes place.
- Analyze Left Channel (dB) and Right Channel (dB). This field displays the DC offset separately for the left and right channels. Press the Audition button to update the display.
- Compute DC Offset from first 5 seconds only. To speed processing, select the Compute DC offset from first 5 seconds only check box. Only the first five seconds of a sound file will be analyzed when measuring the DC offset. The only time that five seconds is not sufficient is if a long fade-in or mute has been applied at the beginning of the file.
To Remove DC Offset During Recording
- Use the Process >Audio >Remove DC Offset command to open the Remove DC Offset dialog.
- In the DC Offset Threshold (dB) field, set a minimum dB threshold, and click OK to close the dialog. If the analyzed DC offset is below this value, no removal takes place.
- Open the Audio Options dialog (Options > Audio command), and on the Advanced tab, enable the Remove DC Offset During Recording check box, and click OK.
This option filters out DC Offset according to the threshold value that you set in the Remove DC Offset dialog.
Applying Fades and Crossfades Offline
SONAR provides several commands for applying gradual volume changes to audio data. The first command, Fade/Envelope, lets you fade-in or fade-out, and lets you choose an envelope, a curve that governs the rate of the fade. The starting envelope can be linear (straight line), exponential, or inverse exponential. You can change the shape of the envelope before applying the fade.
The envelope in the Fade/Envelope dialog box is made of one or more connected line segments (the linear curves are a single segment, the exponential curves consist of nine segments each). Although the endpoints of the curve are fixed, you can move the intermediate points, and create new intermediate points, to change the shape of the curve.
| To do this Do this |
| Move a point Click and drag it to a new location |
| Insert a new point Click on the line between existing points |
| Remove a point Drag it onto the next point |
| Restart from the original curve Click Reset |
Table 119.
The second command, Crossfade, lets you create a smooth transition from one audio clip to another, by fading two overlapping audio clips simultaneously (one fades out, the other fades in). As with Fade/Envelope, you can choose from three different starting curves and change the shape of the curve.
To Apply a Fade to Audio Data
- Select the audio data to be affected.
- Choose Process > Audio > Fade/Envelope to open the Fade/Envelope dialog box.
- Select an envelope from the drop-down list.
Figure 108. The Fade/Envelope dialog

- If desired, manipulate the curve as described in the table above.
- Click OK.
SONAR applies the fade to the selected audio data.
To Crossfade Two Overlapping Clips
- Select two overlapping audio clips. They need not be on the same track, but they must overlap in time for the command to have any effect.
- Choose Process > Audio > Crossfade to open the Crossfade dialog box.
- Select an envelope from the drop-down list.
Figure 109. The Crossfade dialog

line
| Name | Value | | ----------------- | ----- | | Inverse Exponential Crosstalk | 100% |-
If desired, manipulate the curve as described in the table above. You can manipulate only the curve pertaining to the first of the two overlapping clips; the second curve is automatically adjusted so that the two curves constantly add up to 100%.
-
Click OK.
SONAR applies the two fades to the selected data.
See "Slip-editing (Non-destructive Editing)" on page 346 for information on non-destructive editing.
Audio Effects (Audio Plug-ins)
SONAR provides the ability to use plug-in audio effects. Some audio plug-in effects are supplied with SONAR. Others can be purchased from third-party software manufacturers, and appear automatically in SONAR's menus once they are installed on your system. If you need help when using a plug-in, press the F1 key on your computer keyboard to open the plug-in's help file. Please note that third-party plug-ins may not have a help file.
This section describes the effects that are included with SONAR.
Using plug-in effects is similar to using the audio processing commands off-line. The overall procedure is as follows:
- In the Track view, right-click the FX bin and select an effect from the pop-up menu.
- Set effect parameters (or select a preset).
- Listen to the track and adjust parameters based on what you hear.
You can add audio effects, like MIDI effects, to audio tracks in real time (during playback) in the Console and Track views. Unlike some of the audio processing discussed so far, using effects in real time is non-destructive. This means that the audio clip data itself is not modified, and no new audio files are created. See “Mixing,” for more information about real-time effects.

Note: Off-line effects may cause your audio clips to grow in length. For example, when you apply reverb, your clip may need to lengthen to accommodate the sound of the reverberation. The additional sound that an effect produces from a clip is called an effects tail.
See:
Real-Time Audio Effects Processing
Destructive Audio Effects Processing
Real-Time Audio Effects Processing
From the Console and Track views you can destructively apply audio effects for one or more tracks. When you are pleased with the audio effects you have patched into a track, you can apply the effects to the track. Destructively applying effects to a track saves resources, allowing you to include additional tracks and/or effects.
To Apply Audio Effects
Add one or more audio effects to one or more tracks in either the Track view or the Console view, and then:
- In the Track view, select the tracks you want to be affected.
- Select Process > Apply Audio Effects from the menu.
- If desired, select the option to delete the effects after applying them.
- Click OK.
If you do not delete the effects from each track after applying them, they remain active.

Note: Applying effects can be undone, but the effects are not then re-patched in the FX bin.
Destructive Audio Effects Processing
You can also directly apply an audio effect to an audio clip. Right-click the clip and select an effect from the Process Effect menu. Set the effect parameters, and click OK to start processing.
Software Instruments
SONAR's Synth Rack view (also referred to as just the Synth Rack) makes inserting a soft synth or ReWire instrument a one-step process, and makes viewing and configuring these instruments simple. In the Synth Rack you can insert and delete synths, create control knobs to control and/or automate parameters, scroll through patches and presets, mute, solo, freeze, and choose what track to display automation data on. You can easily control all of your soft synths from one view.
SONAR also supports multi-port synths, which allow you to use different synth tracks and effects for each patch or group of patches in a multi-timbral, multi-port synth.
SONAR now seamlessly integrates VST synths. The VST Configuration Wizard runs automatically on startup, registering all your VST plug-ins. See "VST Configuration" on page 638 for more information.
For more information, see:
Synth Rack View
Inserting Soft Synths
Playing a Soft Synth
Using the Assignable Controls Feature
Synth Tracks
Multi-port Soft Synths
To Remove A Soft Synth from a Track or Bus
ReWire Instruments
Playing a Stand-alone Synth
Converting Your Soft Synth Tracks to Audio
Recording a Stand-alone Synth
Synth Rack View
Open the Synth Rack view with the Views > Synth Rack command. The Synth Rack view lets you view, insert, delete, and configure your soft synths. You can also mute, solo, and freeze any or all of them from this view. Each time you insert a soft synth into your project, a new row appears in the Synth Rack view with the name of the soft synth and its current preset. You can select different presets from the view. You can insert as many copies of the same soft synth as you like; each new copy appears in a new row and has the same name, but has a higher number after the name (ReWire soft synths can only have one copy open). The new higher-numbered name also appears on the menus of synth track inputs and MIDI track outputs.
Figure 110. One Row in the Synth Rack

A. Connect/Disconnect synth button B. Synth icon C. Synth name D. Automation track menu E. Patch menu F. Mute button G. Solo button H. Freeze/Unfreeze button I. Quick Freeze/Quick Unfreeze button J. Show/Hide Assigned Controls button K. Assign Controls button L. Write button M. Read button N. Automated knobs
For step by step instructions, see:
Inserting Soft Synths
Playing a Soft Synth
Synth Rack Icons
Recording a Soft Synth's MIDI Output
Using the Assignable Controls Feature
Automating Controls from the Synth Rack
To Remove A Soft Synth from a Track or Bus
Freeze Tracks and Synths
Converting Your Soft Synth Tracks to Audio
Multi-port Soft Synths
ReWire Instruments
Playing a Stand-alone Synth
Recording a Stand-alone Synth
Synth Tracks
Using a soft synth introduces a third kind of track to your project alongside audio and MIDI tracks. A synth track functions much like an audio track, but with a few differences:
- A synth track's input is always a synth or a ReWire device, which means you cannot record audio or enable input monitoring from another source on that track.
- A synth track can display a waveform preview of its output. When you enable this display function by clicking the 🧑 button on the track strip, the amplitude of a synth track's audio signal is graphed in real time as a waveform.
- Synth tracks are distinguished by the synth icon to the right of the track number.

A. Synth icon
For step by step instructions, see:
Inserting Soft Synths
Waveform Preview for Buses and Synth Tracks
ReWire Instruments
Freeze Tracks and Synths
Inserting Soft Synths
In order to play a soft synth from a MIDI controller or with recorded MIDI data, you need to have at least one synth track that lists the soft synth in its Input field, and at least one MIDI track that lists the soft synth in its Output field. The data from the MIDI track feeds the synth track and plays the soft synth. If you're playing the soft synth with a MIDI controller, the MIDI track that's feeding the synth track must have the focus (lighter color). You can also patch the soft synth into an audio track's FX bin instead of a synth track's Input field.
To add a soft synth to the audio and synth tracks' Input menus (drop-downs) and the MIDI tracks' Output menus, you have to insert each soft synth that you want to use into each project. There are two basic ways to insert soft synths in SONAR:
- You can insert soft synths from the Synth Rack view or with the Insert > Soft Synths command. If you use this method, you can choose to have SONAR create the necessary synth and MIDI tracks, and patch them together correctly. If you want to use multiple synth tracks to take advantage of SONAR's support for the multi-output soft synth format, you need to create and patch additional MIDI tracks manually to feed the additional synth tracks.
- You can insert soft synths into FX bins of individual audio tracks. If you use this method, you need to set a MIDI track's Output field to the name of the soft synth you inserted. Then you can record MIDI data in the MIDI track to play the soft synth with.
The procedure for inserting multi-output and single-output soft synths is basically the same. There are just more tracks possibly involved when you insert a multi-output soft synth.
You can insert more than one copy (also called an instance) of the same soft synth. Each new copy has the same name as the previous copy except for having a higher number after the name. Every copy appears in a separate row in the drop-down menus of synth and audio track inputs and MIDI track outputs.
To Insert a Soft Synth from the Synth Rack View or Menu
- If you want to use the Synth Rack view, open the Synth Rack view with the Views > Synth Rack command, and click the Insert button + to display the pop-up menu of installed soft synths.
- If you want to use the menu command, use the Insert > Soft Synths command to display the pop-up menu of installed soft synths.
- In the pop-up menu, click the name of the soft synth you want to insert.
The Insert Soft Synth Options dialog appears, unless you've previously unchecked the Ask This Every Time check box that's in the dialog. If you have, SONAR inserts the soft synth according to the preferences you set the last time you used the Insert Soft Synth Options dialog. If you need to open the Insert Soft Synth Options dialog when it's hidden, click the Insert Soft Synth Options button in the Synth Rack view toolbar.
-
Choose options from the Insert Soft Synth Options dialog according to the following:
-
If you want to create a MIDI track that uses the soft synth as an output, check the Create These Tracks: MIDI Source check box.
- If you want to create a single synth track that acts as an output for Output 1 of the soft synth, check the Create These Tracks: First Synth Audio Output check box.
- If you want to create separate synth tracks for each of the soft synth's outputs, check the Create These Tracks: All Synth Audio Outputs check box.
-
If you want to use existing MIDI and audio tracks to play the soft synth, uncheck all of the Create These Tracks options. SONAR adds the soft synth to the audio track input and MIDI track Output menus. You need to set an existing MIDI track's Output field to the soft synth, and set an existing audio track's Input field to the soft synth (the audio track will then become a synth track).
-
If you want to open the soft synth's interface from this dialog, check the Open These Windows: Synth Property Page check box.
- If you opened this dialog from the Insert menu and want to open the Synth Rack view, check the Open These Windows: Synth Rack View check box.
- If the synth you're inserting can create or send MIDI data, and you want to record or redirect this MIDI data, enable the Enable MIDI Output check box.
- Any automation data you create for this synth is displayed by default on the Synth track for this synth. If you want to display this data on a different track, choose the track in the Display Automation On menu.
- If you create some new knobs on the Synth Rack to control certain parameters on a particular synth, you can display the same knobs every time you insert that synth by enabling the Recall Assignable Controls check box.
-
If you want to open this dialog every time you use the Insert > Soft Synths command, or click the Insert button in the Synth Rack view and choose a synth from the pop-up menu, check the Ask This Every Time option. If you always insert soft synths in the same way, you can uncheck this option so you don't have to deal with the dialog each time. To open the dialog when the option is unchecked, click the Insert Soft Synth Options button in the Synth Rack view toolbar.
-
Click OK to close the dialog and insert the synth.
SONAR adds the soft synth to the audio track Input and MIDI track Output menus, and creates any new tracks that you requested. The new tracks already have the correct inputs and outputs patched. Now you can record MIDI data in the soft synth MIDI tracks, and/or play the soft synth from a MIDI keyboard or controller. See Playing a Soft Synth.
To Insert a Soft Synth in an FX Bin
- In either the Track or Console view, right-click the FX bin of an unused audio track or bus.

Note: If you patch a soft synth into a bus that has no audio track assigned to it, the soft synth does not sound. Always use a bus that has at least one audio track sending data to it.
The plug-in menu appears.
- Under Soft Synths, choose the name of a soft synth.
Two things happen: the soft synth's interface appears, and the soft synth's name appears in the track's or bus's FX bin, with a Bypass button next to the name.
- Set the soft synth's parameters (choose sounds, effects, etc.), and drag its interface out of the way.
- Click the Output field of a MIDI track to display the Output menu.
- Select the name of the soft synth that you patched into the audio track or bus.
- If the soft synth is multi-timbral, choose a MIDI channel for the MIDI track.
- Also in the MIDI track, select a bank and patch.
Now you can record some MIDI data into the MIDI track to play the soft synth with. See “To Play a Soft Synth with Recorded MIDI Data” on page 576.
You can also play the soft synth in real-time from a MIDI controller. See “To Play a Soft Synth from a MIDI Controller” on page 576.
See also:
Synth Rack View
Multi-port Soft Synths
Recording a Soft Synth's MIDI Output
Synth Tracks
Playing a Soft Synth
Converting Your Soft Synth Tracks to Audio
Muting and Soloing Soft Synth Tracks
To Remove A Soft Synth from a Track or Bus
Opening a Soft Synth's Property Page
There are several different methods to open a soft synth's property page (interface):
- When you insert the soft synth from the Insert menu or Synth Rack view, check the Open These Windows: Synth Property Page check box in the Insert soft synth Synth Options dialog.
- Double-click the name of the soft synth in either a MIDI track's Output field or a synth track's Input field.
- Double-click the track icon of a MIDI track or the Synth track that the synth uses. This works even when a track is minimized:
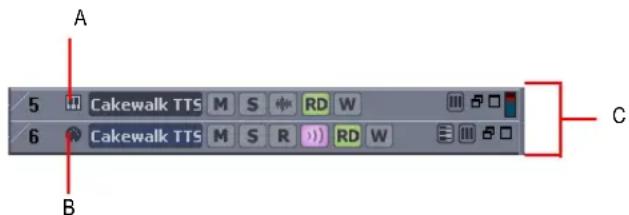
A. Double-click here B. Or here C. Minimized tracks
- Double-click the row in the Synth Rack view that displays the soft synth.
- Double-click the name of the soft synth in an FX bin.
- Click one of the rows in the Synth Rack view to select it, and then click the Properties button in the Synth Rack toolbar (or press C).
Synth Rack Icons
Each Synth Rack strip displays a synth icon so that you can easily tell one synth from another when the rack contains multiple synths.
Icons have the same image format and file location as track icons, and use the same commands to show or hide the icons. Synth Rack Icons are enabled in SONAR by default, and the default icon for each synth is track_icon_dxi_large.bmp. The Synth Rack only displays large format icons, fixed at 48x48 pixels.
Use the following procedures to manage your synth icons:
| To do this Do this | |
| To hide Synth Rack icons | Right-click an icon in the Synth Rack and choose Show Synth Icons from the pop-up menu.OrUse the Options > Icons > Synth Rack > Show Large Icons command. |
| To show Synth Rack icons | Use the Options > Icons > Synth Rack > Show Large Icons command. |
| To load a particular synth icon | Right-click the icon in the Synth Rack that you want to change, and select Load Synth Icon from the pop-up menu. |
| To reset a particular synth icon to its original icon | Right-click the icon in the Synth Rack that you want to reset, and select Reset Synth Icon from the pop-up menu. |
| To open a synth's property page Double-click the synth's icon in the Synth Rack. | |
Table 120.
Playing a Soft Synth
There are several ways to play a soft synth:
- You can record MIDI data and use the soft synth as a playback device.

Note: WDM or ASIO drivers do not improve performance when you play back recorded MIDI data—the improvement comes only when you play a soft synth in real time from an external MIDI controller or keyboard.
- You can play the soft synth in real time from a MIDI controller or keyboard. To avoid excessive latency, your sound card must be using a WDM or ASIO driver. Also, you must set mixing latency to the lowest achievable level (probably less than 10 msec.), which you do by using the Options >Audio command to open the Audio Options dialog box, and dragging the Buffer Size slider on the General tab.
- Some soft synths that use the DXi 2 format can send MIDI data, sometimes including MIDI notes, from their interfaces to SONAR. For example, some soft synths have MIDI keyboards built into their interfaces that you can click to send note on/off messages.
See "Recording a Soft Synth's MIDI Output" on page 583 for more information.
To Play a Soft Synth with Recorded MIDI Data
- Insert a soft synth into the project.
- In the MIDI track that sends its output to the soft synth, choose a MIDI channel.
- Open the soft synth's interface (if it's not open already) by clicking the Properties button in the Synth Rack view, or by double-clicking the name of the soft synth if it's patched into the FX bin of an audio track.
- Set the soft synth's parameters (choose sounds, effects, etc.), and drag its interface out of the way (the soft synth's interface does not have to be open for the soft synth to sound).
- If you want to save your soft synth settings, type a name in the Presets field, and click the Disk icon that's next to the Presets field.
- Record some MIDI data into the MIDI track.
When you play back the recorded MIDI data, you should hear the soft synth through your sound card's outputs. If you don't, make sure your data is in the right range; a bank, patch, and channel are selected; your monitor speakers or headphones are turned up; and that none of the relevant tracks are muted.
You can add effects to each of the synth tracks. You can also add MIDI effects to your soft synth MIDI tracks.
To Play a Soft Synth from a MIDI Controller
- Make sure your controller is set to local off.
- Make sure that the Audio Engine button in the Transport toolbar is depressed.
- Insert a soft synth into your project (see "Inserting Soft Synths" on page 571, if necessary).

Note: If you patch a soft synth into a bus that has no audio track assigned to it, the soft synth does not sound. Always use a bus that has at least one audio track sending data to it.
- In the MIDI track that sends its output to the soft synth, choose a MIDI channel.
- Open the soft synth's interface (if it's not open already) by clicking the Properties button in the Synth Rack view, or by double-clicking the name of the soft synth if it's patched into the FX bin of an audio track.

Note: You can also open a soft synth's interface by double-clicking its name where it appears in a MIDI track's Output menu or a synth track's Input menu.
-
Set the soft synth's parameters (choose sounds, effects, etc.), and drag its interface out of the way.
-
If you want to save your soft synth settings, type a name in the Presets field, and click the Disk icon that's next to the Presets field.
- Make sure that the MIDI track has the focus (its titlebar is lighter), and play your MIDI controller.
When you play your MIDI controller you should hear the soft synth through your sound card's outputs. If you don't, make sure you're playing in the right range; a bank, patch, and channel are selected; your monitor speakers or headphones are turned up; your controller is attached to your MIDI interface; and that none of the relevant tracks are muted.
To Remove A Soft Synth from a Track or Bus
- If your soft synth is patched into the FX bin of an audio track or bus, right-click the name of the soft synth, and choose Delete from the pop-up menu.
OR
- In the synth track that uses the soft synth as an input, choose another input for the track. If you don't select another soft synth as an input, the synth track becomes a regular audio track.
To Remove a Soft Synth from a Project
- If your soft synth is patched into the FX bin of an audio track or bus, right-click the name of the soft synth, and choose Delete from the pop-up menu.
- If your soft synth is patched into the Input field of a synth track, go to the Synth Rack view, click the name of the soft synth to select it, and then click the Delete button. SONAR deletes the soft synth strip from the Synth Rack view and sets the inputs and MIDI outputs of all affected tracks to the next lower-numbered option. SONAR does not delete the affected tracks.

Note: If you're using a ReWire instrument and not a soft synth, always close the ReWire instrument's interface before you delete the instrument from SONAR, or before you close SONAR.
See:
Playing a Stand-alone Synth
Converting Your Soft Synth Tracks to Audio
Recording a Stand-alone Synth
Muting and Soloing Soft Synth Tracks
SONAR automatically places any synth and MIDI tracks that use soft synths into a group that makes muting and soloing the tracks easy:
- To mute or solo a MIDI track that is patched to a synth track, simply mute or solo the MIDI track—SONAR automatically mutes or solos the correct synth track. If another MIDI track uses the synth track as an output, SONAR leaves the synth track unmuted.
• To mute or solo all the MIDI tracks that are patched to a specific soft synth, simply mute or solo the synth track that the MIDI tracks are patched into.—SONAR automatically mutes or solos all
the correct MIDI tracks.
Or
- Click the M or S buttons (mute and solo, respectively) next to the soft synth's name in the Synth Rack view. This mutes or solos all the tracks associated with this instance of the soft synth.
You can use the Mute and Solo buttons in the Track view, Synth Rack view, or Console view.
Rename synths in the Synth Rack view
It is possible to rename synth in the Synth Rack view. This is especially useful if you use many instances of a particular synth and you need to distinguish each instance.
To rename a synth
Do one of the following:
- Double click the Name field of the synth you wish to rename.
- Press F2 key to rename the selected synth.
Multi-port Soft Synths
A multi-port soft synth allows you the option of using a different synth track for every output that the soft synth has. This allows you to use different plug-in effects for each sound (or in some cases, group of sounds) that a soft synth produces. For example, if a soft synth can produce 16 sounds at the same time, and has 4 outputs, you can send any of the 16 sounds out through any of 4 different outputs, giving you a choice of 4 different plug-in configurations for that soft synth. You would use 4 different synth tracks: one for each output. If a soft synth can produce 8 sounds at the same time, and has 8 outputs, you could use 8 synth tracks and 8 plug-in configurations. If you need more plug-in configurations or just more sounds, you can insert more copies of the same soft synth, using new synth tracks for all of the new copy's outputs. You can also send all the MIDI tracks out the same output and synth track if you don't need separate plug-ins for each sound, or just want to use the soft synth's internal effects.
The Insert Soft Synth Options dialog gives you the option of automatically creating a separate synth track for each audio output that the soft synth has, or creating just one synth track for Output 1 of that particular soft synth. Each new copy (also called an instance) of a soft synth is considered to be a separate instrument, and appears in a separate row in the Synth Rack view, with a number after its name representing which copy it is.
For step by step instructions, see:
Synth Rack View
Synth Tracks
Inserting Soft Synths
Playing a Soft Synth
Converting Your Soft Synth Tracks to Audio
Once your project sounds the way you want it to, it's extremely easy to convert your soft synth MIDI tracks to either new audio tracks, or Wave, MP3, or other exported files.
You can also do a temporary conversion, called freezing. See “Freeze Tracks and Synths” on page 617 for more information.
To Convert Your Soft Synth Tracks to New Audio Tracks
- Mute all tracks that you don't want to convert.
- Use the Edit > Bounce to Track(s) command.
The Bounce to Track(s) dialog box appears. - In the Destination field, choose a new or pre-existing track to put the new audio data on.
- If you've saved presets from previous bounce operations, you can choose a preset from the Preset field.
- In the Source Category field, choose Tracks.
- In the Channel Format field, choose mono if you want a mono track, stereo if you want a stereo track, and split mono if you want to create separate mono tracks.
- In the Source/Buses field, choose the output bus(es) that the soft synth tracks are using (usually the main outputs).
- In the Mix Enables field, make sure all choices are selected.
- Click OK.
SONAR creates new audio tracks from the outputs you selected. When you're through converting, don't forget to mute your MIDI tracks so you won't hear them and the new audio track(s) at the same time.

Note: You control the bit depth of all rendering operations (bouncing, freezing, applying effects) on the Audio Data tab of the Global Options dialog (Options > Global command) in the Render Bit Depth field. The default value of 32 is the best for most situations. See “Bit Depths for Rendering Audio” on page 849 for more information.
To Export Your Soft Synth Tracks as Wave, MP3, or Other Type Files
-
Mute all tracks that you don't want to export; make sure you don't mute the synth track or the audio track that the soft synth is patched into, or the MIDI track(s) that you are using as a source.
-
Use the File > Export > Audio command.
-
Mute all tracks that you don't want to export; make sure you don't mute the synth track or the audio track that the soft synth is patched into, or the MIDI track(s) that you are using as a source.
- Use the File > Export > Audio command.
The Export Audio dialog box appears.
- In the Look in field, choose the location where you want the new, exported file to be.
- Type a file name in the File name field.
- Choose the type of file, the format, and the bit depth of the new file you're creating—for MP3 use 16 bits.
- In the Mix Enables field, make sure all choices are selected.
- Click OK.
SONAR creates a new audio file of the type you specified. Find the file in the folder you specified, and double-click it to listen to it.
See:
Drawing Soft Synth Automation in the Clips Pane
Synth Rack View
Using the Assignable Controls Feature
You can create knobs on the Synth Rack to control any of a synth's automatable parameters (each knob learns what parameter to control when you create the knob). This makes it easy to adjust the controls that you use most often on a particular synth, and also lets you record automation from the Synth Rack. After you create some control knobs, the next time you insert the same synth, you can choose to display the same control knobs that you used previously.
You can also group control knobs on the Synth Rack, and use Remote Control to move the knobs.
To Create Control Knobs on the Synth Rack
- In the Synth Rack, open the property page (interface) of the synth that you want to create knobs for.
- In that synth's strip of controls in the Synth Rack, click the Assign Controls button to enable it.
- While the Assign Controls button is enabled, click on each control in the synth's property page that you want to create a knob for.
- When you're finished clicking on controls, click the Assign Controls button to disable it.
The Synth Rack displays knobs for the controls you selected, with the each knob's name displayed below each knob. Now you can adjust some of the synth's parameters by moving the appropriate knob in the Synth Rack.
To Hide or Show Control Knobs on the Synth Rack
- In the Synth Rack, click the Show/Hide Assigned Controls button.
The Synth Rack displays knobs for the controls you selected, with the each knob's name displayed below each knob. Now you can adjust some of the synth's parameters by moving the appropriate knob in the Synth Rack.
See also:
Recording a Soft Synth's MIDI Output
Automating Controls from the Synth Rack
Displaying Synth Rack Automation
Automating Controls from the Synth Rack

Note: Your synth's manufacturer determines which controls (if any) you can automate. If your synth does not expose its controls to SONAR, you can not automate the synth.
Once you create some control knobs on the Synth Rack, you can record automation from them. Use the same procedure you would use to record automation of any other SONAR knob or widget. See "Recording Individual Fader or Knob Movements" on page 709 and "Displaying Synth Rack Automation" on page 582 for more information
You can also draw and edit synth automation in the Clips pane. See Drawing Soft Synth Automation in the Clips Pane "Drawing Soft Synth Automation in the Clips Pane" on page 583 for more information.
See also:
Recording a Soft Synth's MIDI Output
Displaying Synth Rack Automation
You can choose what track you want a synth's automation to appear in for editing. Use the Automation Track menu in each strip of controls in the Synth Rack to choose what track you want to display the synth's automation on. You can display the automation from several different synths on the same track, or put a synth's automation on a track that is completely unrelated to the synth if you want.
See "Synth Rack View" on page 570 for a picture of the Synth Rack and all its components.
See also:
Recording a Soft Synth's MIDI Output
Automating Controls from the Synth Rack
Remote Control of the Synth Rack
Once you create some control knobs on the Synth Rack, you can assign knobs or sliders on your MIDI controller to control the Synth Rack knobs.
See "Using Remote Control" on page 662 for more information.
Drawing Soft Synth Automation in the Clips Pane
Some synths have controls that you can automate by drawing envelopes in the Track view.
To Automate a Soft Synth's Controls in the Clips Pane
- In the Synth Rack, the Automation Track menu in a particular synth's control strip displays the track that this synth's automation appears in. Right-click in the Clips pane of this track, and choose Envelopes > Create Track Envelope > Name of your synth from the pop-up menu.
The Synth Envelope dialog box appears.
-
Click the check box(es) of the parameter(s) you want to draw.
-
Choose a color (optional).
-
Click OK.
SONAR draws an envelope for the parameter that you chose. You can edit the envelope to make the parameter behave as you want it to.
See also:
Recording a Soft Synth's MIDI Output
Automating Controls from the Synth Rack
Displaying Synth Rack Automation
Synth Rack View
Synth Tracks
Playing a Soft Synth
To Remove A Soft Synth from a Track or Bus
Playing a Stand-alone Synth
Converting Your Soft Synth Tracks to Audio
Recording a Stand-alone Synth
Soft Synth MIDI Output Support
Some soft synths produce MIDI output as well as audio output. You can now record the MIDI output of both VST and DirectX instruments that have this feature.
Recording a Soft Synth's MIDI Output
SONAR allows you to record the MIDI output of a synth onto another MIDI track in your project. This can be convenient if your synth creates arpeggios, drum patterns, or other MIDI data that you wish to edit as a MIDI clip.
To Enable MIDI Outputs on a Synth
- When inserting a synth from the Insert menu or the Synth Rack, check the Enable MIDI Output check box in the Insert Soft Synth Options dialog box.
Or
- Right-click a synth name in the Synth Rack to enable or disable Enable MIDI Output from a pop-up menu.
The soft synth will now appear as an Input option on all MIDI tracks just like any hardware inputs.
To Hear a Soft Synth's MIDI Output Through Another Track
- Verify that Enable MIDI Output is enabled for the synth whose MIDI output you wish to hear through another track.
- On a new MIDI track in your project, set the Input to the synth whose MIDI output you wish to hear.
- Set the Output of that track to another synth or MIDI output used in your project and enable Input Echo.
- Play some MIDI data through the synth whose MIDI Output has been enabled.
The MIDI data sent from that synth will be echoed through the Output of the new MIDI track.
To Record a Soft Synth's MIDI Output to a Track
- Verify that Enable MIDI Output is enabled for the synth whose MIDI output you wish to record.
- On a new MIDI track in your project, set the Input to the synth whose MIDI output you wish to record and arm the track.
- Click the Record button to start recording.
- If you're recording live MIDI input through the synth, place track focus on the synth's MIDI track and begin playing your MIDI controller. If you're recording pre-existing MIDI data through the synth, record through the duration of the pre-existing clips.
The MIDI Output of the synth will be recorded to the new MIDI track. You can then edit the MIDI data and route it to a different MIDI output as you see fit.

Note: Be careful to avoid creating a MIDI feedback loop. To prevent this, make sure the Input of a soft synth's MIDI track is not set to the same synth's Output.
ReWire
SONAR can send MIDI events to any object in a ReWire client application on as many MIDI channels as the client application makes available.
ReWire Instruments
ReWire is a technology for transferring audio data between software applications in real time—the software equivalent of a multi-channel audio cable. ReWire is built on the following cornerstones:
• Real-time audio streaming between applications
• Sample accurate synchronization
• Common transport functionality
SONAR supports the ReWire 2.0 format, but with some differences. SONAR interacts with ReWire applications in the following ways:
- You can insert one instance of a ReWire application into each SONAR project.
- You can use as many MIDI channels and devices in each ReWire application as that application makes available.
- You can insert ReWire devices into SONAR projects from the Synth Rack view or Insert menu, and you can tell SONAR to create the necessary synth tracks and one MIDI track at that time. You can also tell SONAR to open the ReWire application's property page, because, unlike synths, ReWire applications must have their property pages (interfaces) open in order to function.
- SONAR's tempo, transport, and loop points are linked to the ReWire application. Activating or changing any of these settings in the ReWire application(s) changes the same setting in SONAR, and vice versa. If you have several applications open and you make a change in one of them, it may be necessary to put the focus on the other application(s) to update their interfaces.
- You cannot send patch or bank changes from SONAR to the ReWire application. All other track property controls in SONAR control the ReWire device, except the pan controls on MIDI tracks. The pan controls on SONAR's synth tracks control the ReWire device's panning.
- You can mix down or bounce ReWire tracks in SONAR the same way you mix down or bounce synth tracks.
- You can use SONAR's automation functions on both synth and MIDI tracks that the ReWire application uses.
- Muting or soloing a synth track that a ReWire device uses automatically mutes or solos the MIDI track that feeds that synth track. Muting or soloing a MIDI track that a ReWire device uses will mute or solo the corresponding synth track only if there is only one MIDI track feeding that synth track.
- You must always close your ReWire application(s) before you close SONAR. Some ReWire applications prevent SONAR from closing properly if the ReWire applications are still open.
For step-by-step procedures, see:
Inserting a ReWire Instrument
To Use Separate Synth Tracks for Each ReWire Device
Automating ReWire Instruments
Mixing Down ReWire Instruments
ReWire Troubleshooting Guide
Inserting a ReWire Instrument
After you install your ReWire applications and reboot your computer, the names of the ReWire applications appear in SONAR's Insert menu under ReWire Devices, and also in the Synth Rack view's Insert button pop-up menu.
To Insert a ReWire Instrument
-
Open a SONAR project. Do not launch your ReWire application.
-
In the SONAR's Synth Rack view, click the Insert button, and click ReWire Devices to display the submenu of installed ReWire devices.
OR
Use the Insert > ReWire Devices command to display the submenu of installed ReWire devices.
- Click the name of the ReWire device you want to insert.
The Insert Soft Synth Options dialog appears.
- Choose options from the Insert Soft Synth Options dialog according to the following:
- If you want to create a MIDI track that uses the ReWire Instrument as an output, check the Create These Tracks: MIDI Source check box.
- If you want to create a single synth track that acts as an output for Output 1 of the ReWire Instrument, check the Create These Tracks: First Synth Audio Output check box.
- If you want to create separate synth tracks for each of the ReWire Instrument's outputs, check the Create These Tracks: All Synth Audio Outputs check box.
- If you want to use existing MIDI and audio tracks to play the ReWire Instrument, uncheck all of the Create These Tracks options. SONAR adds the ReWire Instrument to the audio track Input and MIDI track Output menus. You need to set an existing audio track's Input field to the ReWire Instrument, and set an existing MIDI track's Output field to the ReWire Instrument. The existing audio track will then become a synth track.
- If you want to open the ReWire Instrument's interface from this dialog, check the Open These Windows: Synth Property Page check box (always check this option: ReWire Instruments do not sound unless their property pages are open).
- If you opened this dialog from the Insert menu and want to open the Synth Rack view, check the Open These Windows: Synth Rack View check box.
- If you want to open this dialog every time you use the Insert > ReWire Instrument command, or click the Insert button in the Synth Rack view and choose a ReWire instrument from the pop-up menu, check the Ask This Every Time option. If you always insert ReWire Instruments
in the same way, you can uncheck this option so you don't have to deal with the dialog each time. To open the dialog when the option is unchecked, click the Insert Soft Synth Options button in the Synth Rack view toolbar.
- Click OK to close the dialog.
SONAR adds your ReWire devices to the audio and synth track Input menus and the MIDI track Output and Channel menus, creates any tracks you requested, adds the ReWire instrument to the Synth Rack view, and opens the ReWire application's interface.
- In the MIDI track whose output is the ReWire synth track, click the drop-down arrow in the Channel field to display the names of the available ReWire devices in your ReWire instrument.
- Click the name of the device you want to use.
- Make sure that the synth track you want to hear the ReWire instrument through has the appropriate ReWire channel listed in its Input field.
Now you can record MIDI data in the MIDI track and hear it through the synth track. If you want to use different synth tracks for each ReWire device, see the following procedure.

Note: Always close your ReWire applications before closing a SONAR project.
To Use Separate Synth Tracks for Each ReWire Device
- Open SONAR, insert a ReWire instrument, and choose the All Synth Audio Outputs option in the Create These Tracks field of the Insert Soft Synth Options dialog. Make sure you choose to open the Synth window, and click OK.
SONAR inserts the ReWire instrument and creates multiple synth tracks.
- In your ReWire application, assign the devices you want to use to the outputs or channels you want to use. For example, in Propellerheads Reason, you use the back panel of the mixer to drag cables from a device to the output channel you want to use for that instrument.
- In SONAR, set the Output field of a MIDI track to the name of your ReWire application, and set the Channel field to the name of the ReWire device you want to play with this track.
- Record some MIDI data in the track and play it. Find the synth track whose Input field lists the output channel you patched your device into—the playback meter lights up as you play the MIDI track that plays your device.
Now you can use separate effects for each of your ReWire devices.

Note: Always close your ReWire applications before closing a SONAR project.
See also:
Mixing Down ReWire Instruments
Automating ReWire Instruments
ReWire Troubleshooting Guide
Software Instruments
ReWire
Routing MIDI Data to ReWire Instruments
Some ReWire applications can create large numbers of instruments. You can send a track's MIDI data to any of these instruments by selecting the specific instrument in the MIDI channel menu of the relevant track.
To Send MIDI Data to a Specific ReWire Instrument
- In the SONAR MIDI track that contains the recorded MIDI data you want to send, make sure that the Output menu is set to the correct ReWire device.
- Then use the Ch menu in the same track to choose the instrument you want to send to. This also works if you just want to use this track to play your MIDI controller through a particular instrument in the ReWire application.
Mixing Down ReWire Instruments
To either mix down or bounce ReWire instruments to new audio tracks, use the same procedures as for synths.
See also:
Automating ReWire Instruments
ReWire Troubleshooting Guide
Inserting a ReWire Instrument
Automating ReWire Instruments
You can automate audio and MIDI tracks that are patched to ReWire instruments the same ways you can automate any of SONAR's audio and MIDI tracks.
See also:
Inserting a ReWire Instrument
To Use Separate Synth Tracks for Each ReWire Device
Mixing Down ReWire Instruments
ReWire Troubleshooting Guide
Inserting a ReWire Instrument
ReWire Troubleshooting Guide
The following lists some common issues when you use ReWire with SONAR:
- SONAR Won't Close Properly. Always close your ReWire applications before closing SONAR or a SONAR project.
-
Rebirth Won't Play After I Open Its Property Page. Make sure that the Loop switch in Rebirth is enabled.
-
My ReWire Project Plays at a Different Tempo when Opened from SONAR. When you open a ReWire project from SONAR, the ReWire project assumes SONAR's default tempo, which is 100. Change SONAR's tempo to match your ReWire project.
- My MIDI Controller Works in SONAR or my ReWire Application, but not Both. Choose different MIDI In ports for both SONAR and your ReWire application. Do this in SONAR by using the Options > MIDI Devices command, and highlighting the MIDI In port you want to use in SONAR. If you only have one MIDI In port on your MIDI interface or sound card, enable that input in either SONAR or your ReWire application, and disable that input in the other application.
- I Get a MIDI Input Error Message When I Open a ReWire Application. If you only have one MIDI Input port on your MIDI interface, you probably have that one reserved for SONAR, leaving none for your ReWire application. If you would rather use your MIDI controller in the ReWire application instead of SONAR, you can deselect your MIDI input port in SONAR's MIDI Devices dialog (Options > MIDI Devices command), and then select that MIDI Input from whatever menu your ReWire application has for that purpose. If you have multiple inputs on your MIDI interface, simply select different ones for SONAR and your ReWire application.
ReWire and fast forwarding in SONAR
When there is a ReWire application loaded into a SONAR project, the SONAR Fast Forward button/ command only works if there is a clip at the end of the SONAR project or if Stop at Project End is not checked.
ReWire tracks silent when using metronome record count-in
When using a metronome count-in and recording, any ReWire tracks will be silent at the start of recording. The silence period will equal the count-in duration. To fix this issue, disable metronome count-in (go to Options > Project > Metronome and set Record Count-in to zero).
Stand-alone Synths
Some soft synths can be run independently of SONAR and do not need to be inserted to the Synth Rack or an FX bin to use. After you install this kind of synth and restart your computer, the name of the synth's MIDI driver appears in SONAR's MIDI Devices dialog box under Outputs.
See:
Playing a Stand-alone Synth
Recording a Stand-alone Synth
Playing a Stand-alone Synth
SONAR plays this kind of synth by seeing it as additional MIDI outputs in both the MIDI Devices dialog box and in MIDI tracks' Output fields.
To Play a Stand-alone Synth
- Use the Options > MIDI Devices command to open the MIDI Devices dialog box.
- In the Outputs field, make sure the name of your stand-alone synth's MIDI driver is highlighted, and click OK.
- Click the Output field of an unused MIDI track to display the Output menu.
- Select the name of the stand-alone synth's MIDI driver.
- If your stand-alone synth is multi-timbral, change the track's MIDI channel to the same one that the synth uses for the sound you want to hear.
- Select a bank and patch on your stand-alone synth, if you haven't already.
- Record some MIDI data in the MIDI track, or play any MIDI controller that's an input for the MIDI track.
When you play your MIDI controller or play back the recorded MIDI data, you should hear the stand-alone synth through your sound card's outputs. If you don't, make sure you're playing in the right range and that your monitor speakers or headphones are turned up, and that none of the relevant tracks are muted.
See:
Recording a Stand-alone Synth
Recording a Stand-alone Synth
There are several ways to record a stand-alone synth:
- You can use the synth's wave capture function, if it has one. See your synth's documentation for a procedure. Make a note of where the resulting captured Wave file is stored, and then you can import the file into SONAR by using the File > Import > Audio command.
- You can connect your sound card's outputs to your sound card's inputs, either internally or externally, depending on your sound card's design. After you do this, you need to arm an audio track in SONAR and select one of your sound card's wave drivers as an input. Start recording, and make sure the MIDI track that is routed to the synth is playing back.
- You can use your sound card's wave capture or what-you-hear option, if it has one. See the following procedure.
To Record A Stand-alone Synth with your Sound Card's Wave Capture Function
- Pick a destination audio track and set the Input field to Stereo.

Note: If you have more than one sound card installed, select the one that your stand-alone synth uses as an output.
- Arm the destination track.
-
Mute or archive any tracks that you don't want to record to the destination track.
-
If SONAR's metronome is set to use any software synth to produce a click, disable the Recording option in the Project Options dialog box. To do this, select Options > Project to open the Project Options dialog box, select the Metronome tab and uncheck Recording in the General section.
- Open your sound card's mixer device. This is normally done by double-clicking the speaker icon on the Windows taskbar, or by choosing Start > Programs > Accessories > Multimedia > Volume Control > Options > Properties.

Note: Some sound cards, such as the SoundBlaster Live, have their own proprietary mixer. If yours has one, please use it instead.
- Click Adjust Volume For Recording, and make sure all boxes below are checked.
- Click OK, and locate the slider marked MIDI, Synth, Mixed Input, or What You Hear. Check the Select box at the bottom, then close the window.
- In SONAR, click the Record button.
SONAR records all the MIDI tracks that are assigned to the stand-alone synth as a stereo audio track.
After you finish recording, mute the MIDI tracks that you just recorded so you don't hear them and the new audio track at the same time.
Mixing
SONAR lets you mix your projects with tremendous control and flexibility. The extensive bussing controls, support for DX and VST plug-ins, built-in EQ's, automation, remote control, metering, grouping, and freeze features let you design your own style of mixing, with your own workflow. (Automation is covered in a separate chapter.)
After you finish mixing a project, you can export the project in a variety of audio file formats to create a CD master or to publish your work on the Internet. You can choose to include all real-time effects and control movements in the mixed-down tracks that you export (see "Preparing Audio for Distribution" on page 669 for more information).
See:
Preparing to Mix
Mixing MIDI
Signal Flow
Routing and Mixing Digital Audio
Metering
Using Real-Time Effects
Sidechaining
V-Vocal Clips
Using Control Groups
Main Outs
Using Remote Control
Bouncing Tracks
Preparing Audio for Distribution
Burning audio CDs
Cakewalk Publisher
Freeze Tracks and Synths
Preparing to Mix
The Console and Track views contain all the controls you need to mix your project. To open the Console view click the Console view button 🎯 or choose Views > Console. The Track view is always open.

Note: You can control all sliders and knobs in the Console and Track Views by hovering over them with the mouse and manipulating the mouse wheel.
Figure 111. The Console view

A. Audio module B. MIDI module C. MIDI velocity D. Bus out E. Main out F. Bus pane G. Show/hide strip controls buttons H. Widen all strips I. Show/hide for tracks, buses, mains

Note: The above view does not show EQ. It is pictured below.
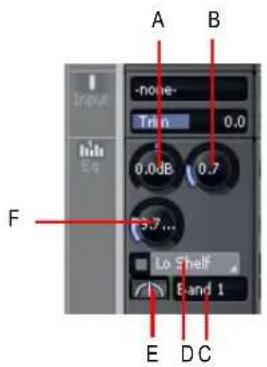
A. Gain B. Band Q C. Band select D. EQ type select E. EQ enable F. Frequency
Sound controls in the Console view are grouped in modules. There are several types of modules:
| Module type What you can do | |
| MIDI track Set the track's output, channel, bank, and patch; set the input; mute, solo, and arm the track; set channel volume, panning, chorus, and reverb levels; add real-time effects | |
| Audio track Set the track's output (bus or Main out destination); choose an input; monitor input levels; mute, solo, and arm the track; set track volume and panning; add real-time effects; send audio data to buses or main outs. | |
| Synth track | Set the track's output (bus or Main out destination); set the input; mute and solo the track; set track volume and panning; add real-time effects; send audio data to buses or main outs. |
| Bus Receive input from one or more audio tracks, add real-time effects, and send the results to a main out or another bus | |
| Main outs Monitor output levels using meters and control the stereo volume of audio to an output on your audio interface. To adjust both the left and right volume levels at the same time, use the Link button for that module. | |
Table 121.
One module's name is always outlined with a white line. This corresponds to the track with the focus. You can change the focus by clicking to the right of the module's volume fader.
You can adjust Console view controls in the following ways:
- Click on the center of the knob and drag the mouse up or down to adjust the knob
- Click and drag a fader up or down
- Double-click the center of the knob to return it to its snap-to position
Volume and pan faders also have snap-to positions; double-click a fader's knob to return the fader to its snap-to value.
The controls and effects patch points all have tool tips associated with them. To see a description of a particular control or effect, simply rest the cursor over the item for a few seconds.
There are four types of modules in the Track view:
| Track type What you can do | |
| MIDI track | Set the track's output, channel, bank, and patch; set the input; mute, solo, and arm the track; set channel volume, panning, chorus, and reverb levels; add real-time effects. |
| Audio track Set the track's output; set the input and monitor input levels; mute, solo, and arm the track; set track volume and panning; add real-time effects; send audio data to buses or main outs. | |
| Synth track | Set the track's output; set the input; mute and solo the track; enable a waveform preview; set track volume and panning; add real-time effects; send audio data to buses or main outs. |
| Bus | Receive input from one or more audio tracks, add real-time effects, and send the results to a main out or another bus. |
Table 122.
For information on using the controls in the Track view, see "Changing track settings" on page 193.
Volume, pan, bus send level and bus send pan also have snap-to positions; double-click the control to return it to its snap-to value.
The controls and effects patch points all have tool tips associated with them. To see a description of a particular control or effect, simply rest the cursor over the item for a few seconds.
See:
Configuring the Console and Track Views
Configuring the Console and Track Views
The Console and Track view can be reconfigured in a variety of ways. You can:
- Choose the tracks that you want to see
- Adjust the display of audio meters and clip indicators
- Change the number of buses
- Set control snap-to positions
- Insert new tracks
- Name tracks and buses

Note: The Console view has additional controls to configure its appearance. See the online help topic "Console View" for more information.
Meters are helpful in determining the relative volumes of your audio tracks and in detecting and preventing overload. By default, the Console view displays output level meters in main out modules at all times, and displays record level meters in individual tracks whenever they are armed and have an audio input. The display of meters, however, can place a considerable load on your computer. Showing only the peak indicators, or hiding the meters entirely, can reduce the load on your computer. This may increase the number of audio tracks and real-time effects you can play back at one time.
In the Track view, there are several ways to configure which tracks are displayed.
To Display All the Tracks in a Project
- Click the Zoom tool button's down arrow and select Show All Tracks from the Zoom tool menu.
To Hide Selected Tracks
-
Select the tracks you want to hide.
-
Click the Zoom tool button's down arrow and select Hide Selected Tracks from the Zoom tool menu.
To Display Only Selected Tracks
-
Select the tracks you want to display.
-
Click the Zoom tool button's down arrow and select Show Selected Tracks from the Zoom tool menu.
To Choose the Tracks that are Displayed Using the Track Manager
-
Click the down arrow next to the Zoom tool and select Track Manager to open the Track Manager dialog boxIn the list, check those tracks you would like displayed in the view in which you are working, and uncheck the rest. You can use SHIFT-click, CTRL-click, or the quick select buttons to select multiple modules; press the SPACEBAR to check or uncheck all the selected modules at once. Please note that the track display selections you make in the Track view do not affect those in the Console view and vice versa.
-
Click OK.
To Hide a Bus or Track
- Right-click on the module and choose Hide Track or Hide Bus.
To Show or Hide Meters in the Track View
- Click the Show/Hide Meters button 📋 to display all meters or click on the arrow to the right of the Show/Hide Meters button to display only the meters you want to see or to customize the
appearance of your meters.
Option What it does
Record meters Displays record meters for any armed track.
Playback meters Displays playback meters.
Output bus meters Displays meters in buses
Table 123.
For more information about metering options, see "Changing the Meters' Display" on page 611.
To Change a Meter's Range
- Right-click on the meter and choose a new range.
To Add a Bus
- Right-click in the Bus pane (to add a bus at the end of the current buses) or over an existing bus (to add a bus before it).
- Select Insert Stereo Bus or Insert Surround Bus from the menu that appears.
A bus appears in the Bus pane.
To Delete a Bus
- Right-click in the Bus pane over an existing bus.
- Select Delete Bus from the menu that appears.
The bus is deleted from the Bus pane.

Note: If you have any track or bus routed through the bus you delete, the signal will be rerouted to the deleted bus's output.
To Create a Bus Send in a Track
- Right-click in an empty part of the Track pane (Track view) or a track module (Console view).
- Select Insert Send for a list of buses available.
- Select a bus from the list.
To Set the Snap-to Position of a Knob or Fader
- Set the control to the desired position.
- Right-click on the control and choose Value > Set Snap-To=Current.
From now on, the control returns to this position when double-clicked.
To Insert a New Track
- Right-click in the Console view or on the header of a track in the Track view.
- Choose Insert Audio Track or Insert MIDI Track.
SONAR adds a new track to the project.
To Rename a Track or Bus
- In the Console view, click on the module name. In the Track view double-click on the Track name.
- Type a new name.
- Press ENTER.
If you rename a track, the new name is copied to the Track view. If no name has been assigned to a track, the Console view and Track view display the track's number.
To Link Left/Right Faders in a Console View Module
- In the module whose faders you want to link, adjust the volume of each fader to the appropriate level.
- Click the Link button 📄.
Console view auto-resizing
By default, the Console view will automatically resize itself vertically as modules are shown or hidden. If you prefer, you can keep the Console view from automatically resizing by holding down the SHIFT key as you click on a module's Show/Hide toggle (leftmost pane in the Console view). This will preserve the current Console view size without resizing the view to fit all visible modules.
Mixing MIDI
SONAR gives you many tools to control your MIDI mix. When your MIDI tracks sound the way you want them to, there are several ways to convert them to audio (see “Converting MIDI to Audio” on page 600).
See:
Mixing a MIDI Track
Converting MIDI to Audio
Mixing a MIDI Track
Mixing
Mixing MIDI
You can control the mixing and playback of a MIDI track as follows:
| To do this Do this | |
| Add a real-time MIDI effect to the track Right-click in the FX bin and select an effect from the list (for more information, see Using Real-Time Effects) | |
| Remove an effect Select the effect and press DELETE or right-click and select Delete. | |
| Select the output | Click the Output control and choose one from the list |
| Select the channel | Click the Channel button and choose one from the list |
| Select the bank | Click the Bank button and choose one from the list |
| Select the patch | Click the Patch button and choose one from the list |
| Set the Chorus level Adjust the Chorus slider | |
| Set the Reverb level Adjust the Reverb slider | |
| Mute the track Click the Mute button | |
| Solo the track Click the Solo button | |
| Arm the track for recording Click the Arm button | |
| Set the Pan level | Adjust the Pan fader |
| Set the Volume level | Adjust the Volume fader |
| Select the input | Click the Input button and choose one from the list |
Table 124.
When moving the Volume fader, the Value box in the toolbar displays the level from a scale of 0 (minimum) to 127 (maximum). When you move the Pan slider, the Value box displays the pan value on a scale that ranges from 100% Left to 100% Right with center represented by a C.
Converting MIDI to Audio
The following options cover three basic MIDI setups:
- If your MIDI tracks play back through a soft synth, use either the File > Export > Audio or Edit > Bounce to Track(s) commands (see the procedures in “To Export Your Soft Synth Tracks as Wave, MP3, or Other Type Files” on page 579, and “To Convert Your Soft Synth Tracks to New Audio Tracks” on page 579).
- If your MIDI tracks play back through your sound card's synthesizer, see the procedure below.
- If your MIDI tracks play back through external MIDI modules, simply connect their analog outputs to the inputs on your sound card, and record to new audio tracks.
To Convert a Sound Card's Synth Tracks to a Stereo Audio Track
- Pick a destination audio track and set the Input field to Stereo-(name of your sound card).

Note: If you have more than one sound card installed, select the one that your synth uses as an output.
-
Arm the destination track.
-
Mute or archive any tracks that you don't want to record to the destination track.
-
If SONAR's metronome is set to use any software synth to produce a click, disable the Recording option in the Project Options dialog box. To do this, select Options > Project to open the Project Options dialog box, select the Metronome tab and uncheck Recording in the General section.
-
Open your sound card's mixer device. This is normally done by double-clicking the speaker icon on the Windows taskbar, or by choosing Start > Programs > Accessories > Multimedia > Volume Control > Options > Properties.
-
Open the sound card's recording control window (the command is probably Options > Properties > Adjust Volume For Recording) and make sure all boxes below Adjust Volume For Recording are checked.
-
Click OK, and locate the slider marked MIDI, Synth, Mixed Input, or What You Hear. Check the Select box at the bottom, then close the window.
-
In SONAR, click the Record button.
SONAR records all the MIDI tracks that are assigned to the sound card synth as a stereo audio track.
After you finish recording, mute the MIDI tracks that you just recorded so you don't hear them and the new audio track at the same time.
Signal Flow
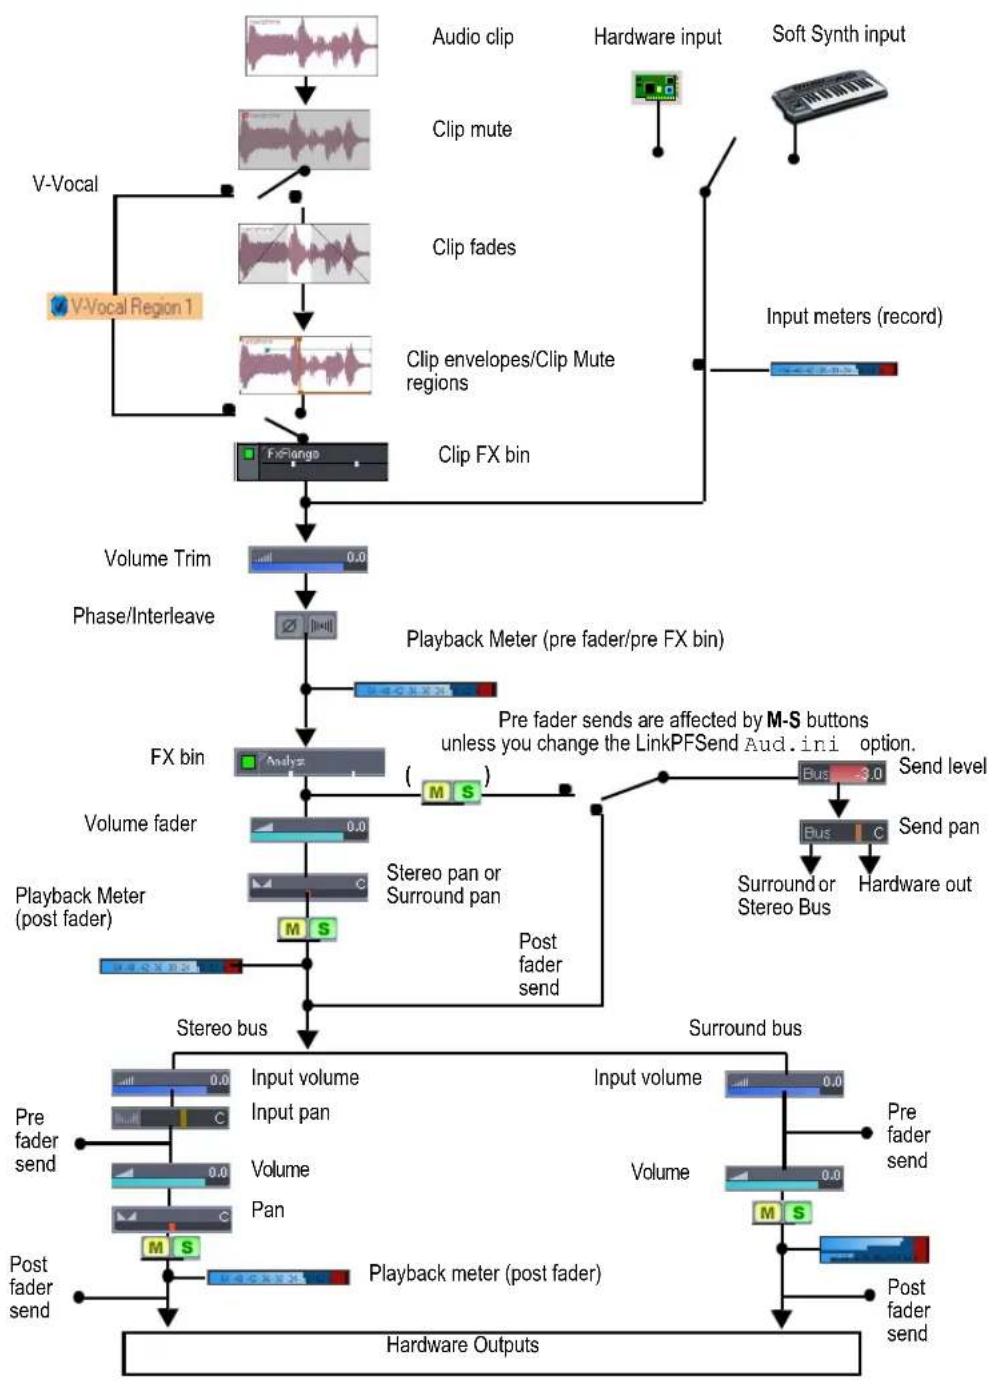
flowchart
graph TD
    A["Audio clip"] --> B["Clip mute"]
    B --> C["Clip fades"]
    C --> D["Clip envelopes/Clip Mute regions"]
    D --> E["Clip FX bin"]
    E --> F["Volume Trim"]
    F --> G["Phase/Interleave"]
    G --> H["Playback Meter (pre fader/pre FX bin)"]
    H --> I["FX bin"]
    I --> J["Pre fader sends are affected by M-S buttons unless you change the LinkPFSend Aud. ini option."]
    J --> K["Bus: 3.0"]
    K --> L["Send level"]
    L --> M["Bus: C"]
    M --> N["Send pan"]
    N --> O["Surround or Stereo Bus"]
    O --> P["Hardware out"]
    I --> Q["Stereo pan or Surround pan"]
    Q --> R["Post fader send"]
    R --> S["Pre fader send"]
    S --> T["Pre fader send"]
    T --> U["Input volume"]
    U --> V["Input pan"]
    V --> W["Volume Pan"]
    W --> X["Pre fader send"]
    X --> Y["Pre fader send"]
    Y --> Z["Post fader send"]
    Z --> AA["Playback meter (post fader)"]
    AA --> AB["Hardware Outputs"]
You control the mixing and playback of an audio track as follows:
| To do this Do this | |
| Add a real-time audio effect to the track | Right-click in the FX bin and select an effect from the list (for more information, see “Using Real-Time Effects” on page 621“). |
| Remove an effect Select the effect and press DELETE or right-click and select Delete. | |
| Send audio data from the track to a bus | Insert a send in the track controls by right-clicking in the track controls and selecting Insert > Send > [name of bus you want the data to go to]. Click the FX tab at the bottom of the Track pane, and then click the track’s Bus Enable button so that it turns green, and set the Bus Send Level and Bus Send Pan (for more information, see “Stereo Buses” on page 607“). |
| Mute the track Click the Mute button. | |
| Solo the track Click the Solo button. | |
| Arm the track for recording Click the Arm button. | |
| Set the Pan level Adjust the Pan control. | |
| Set the Send Pan to be the same as the bus that the send feeds into | Right-click the Send Pan control and choose Follow Track Pan from the pop-up menu. This setting is only active when the send has the same interleave as the bus that the send feeds into, and is set to Post Fader. If enabled, the Send Pan control no longer affects the output. |
| Set the Volume level Adjust the Volume fader. | |
| Select the output | Click the drop-down arrow in the Output field and choose one from the list. |
| Select the input | Click the drop-down arrow in the Input field and choose one from the list. |
Table 125.
SONAR displays volume in dB (decibels). When adjusting the volume or bus send level controls, a value of 0 dB indicates full signal strength; positive values, up to 6 dB, indicate a signal gain; negative values indicate an attenuated signal. When you move the Pan control, the Value box displays the pan value on a scale that ranges from 100%L (hard left) 100%R (hard right).
See also:
Sidechaining Signal Flow
External Insert signal flow
Sidechaining Signal Flow
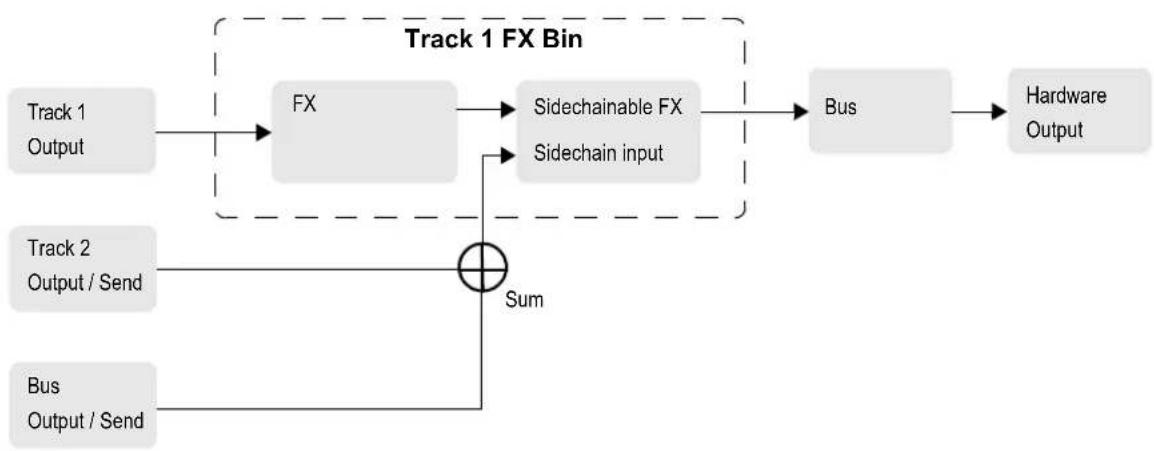
flowchart
graph LR
    A["Track 1 Output"] --> B["FX"]
    C["Track 2 Output / Send"] --> D["Sum"]
    E["Bus Output / Send"] --> D
    B --> F["Sidechainable FX"]
    F --> G["Bus"]
    G --> H["Hardware Output"]
    style B fill:#ccc,stroke:#333
    style F fill:#ccc,stroke:#333
    style G fill:#ccc,stroke:#333
    style D fill:#fff,stroke:#333
    style H fill:#fff,stroke:#333
See also:
Sidechaining
Signal Flow
External Insert signal flow
Routing and Mixing Digital Audio
Any audio track can be tapped, before or after the track volume control, and sent to one or more buses. A bus can tap any number of audio tracks. Each track's data passes through the track's send level knob on its way to the bus. This is shown in the diagram below:
![Aux 1 0.0 RUN POST A Aux 2 0.0 RUN POST C D READ WRITE [=+] H 5 R Pan C -3 -6 -9 -12 -15 -18 -21 -24 -27 -30 -33 -36 -39 0.0 M-Audio D... Vocals B](/content/2026/05/819773/images/c19996cefcbbbee85ef0bb9932f8e9536c1c4edea1b48e186e03c34598f1e3ac.jpg)
A. Pre-fader: output level to Bus 2 is not affected by the track's volume fader B. This track is routed to Aux 1 and Aux 2 C. Bus enable button: must be lit to send track data to bus D. Post-fader: track's volume fader controls output level to Bus 1
The audio in each bus is processed by the input gain and pan controls (main output buses don't have these controls), then processed by any real-time effects you have patched, sent through the bus output level and pan controls, and then sent to the designated main out, in stereo. You can also insert a send control on a bus, and send the bus signal to another bus, or route the output of a bus to another bus.
At each main out, all audio data from audio tracks and buses that were routed to that main are mixed together. Finally, the data passes through each main's master volume fader.
See:
Main Outs
Signal Flow
Stereo Buses
Stereo Buses
Buses are useful for mixing together different audio tracks (in stereo) and applying effects to the mix. You can mix the tracks at different volume levels by adjusting each track's bus send level. Buses output to either other buses or to a main out.
You control the bus as follows:
| To do this Do this | |
| Send audio data from an audio track to the bus | In an audio track, press theBus Send Enablebuttoncorresponding to the bus, or choose the bus as an output for the track. If the track doesn't have a Send module, you can insert one by right-clicking the track and choosingInsert > Send > [name of bus you want the data to go to]. |
| Send audio data from a bus to another bus | If the bus doesn't have a Send module, you can insert one by right-clicking the bus and choosingInsert > Send > [name of bus you want the data to go to]. Then click theBus Send Enablebuttonso that it's green, and adjust theBus Send Leveland Bus Send Pan. |
| Set the level of the audio data sent to the bus | In an audio track, set theBus Send Levelcorresponding to the bus, or volume fader if the output is to the bus |
| Set the pan of the audio data sent to the bus | Adjust theBus Send Panknob |
| Set the input level to the bus | Adjust theInput gainon the bus itself |
| Set the input panning to the bus | Adjust theInput panon the bus itself |
| Display the waveform of the audio that's flowing through the bus | Enable the bus' Waveform Previewbutton |
| Add a real-time audio effect to the bus Right-click in the FX bin and select an effect from the list (for more information, see “Using Real-Time Effects” on page 621) | |
| Remove an effect Select the effect and press DELETE, or right-click and chooseDelete | |
| Set the output level Adjust theOutput volume | |
| Set the output panning Adjust thePansetting | |
Table 126.
To do this Do this
Set the Send Pan to be the same as the bus that the bus feeds into
Right-click the Send Pan control and choose Follow Bus Pan from the pop-up menu. This setting is only active when the send has the same interleave as the bus it feeds into, and is set to Post Fader. If enabled, the Send Pan control no longer affects the output.
Select the output
Click the Output button and choose one from the list
Table 126.
Surround Buses (SONAR Producer Only)
Surround buses are useful for mixing and adding effects to create a surround mix.
To Patch a Track Through a Bus
- Open the Console view (Views > Console) or the Track view (Views > Track).
- If you want to add effects to the bus, right-click in the FX bin of a bus (if it is not in use already) and choose an effect from the effects pop-up menu. (If you are working in the Track view, you may first need to display the Bus pane by clicking the Show/Hide Bus Pane button ▼ located at the bottom of the Track view.)
The name of the effect you have chosen appears in the bus FX bin.
- Set the effect's parameters and close it.
- Repeat steps 2 and 3 for any additional effects you want to use.
-
In a track module that you want to patch through the bus, do the following:
-
Drag the Bus Send Level control for the bus to the approximate level you want.
- Drag the Bus Send Pan to the approximate setting you want.
-
Click the Bus Enable button for the appropriate bus.
-
Repeat step 5 for all the tracks you want to patch through the bus.
-
In the bus, adjust the Input Gain and Output Volume controls to the approximate level you want.
- In the bus, drag the Input Pan and Output Pan controls to the approximate positions you want.
- Play your tracks and adjust the Send Level controls, the Pan controls, etc.
To Mute or Solo a Bus
Each bus has a Mute button and a Solo button. These controls act like the Mute and Solo buttons in a track, but they affect all the signal routed through the bus.
- Open the Track view or the Console view.
- Click the Mute or Solo button in the bus you want to mute or solo.
To Display the Audio Waveform of a Bus
- Enable the bus' Waveform Preview button 🏠. This displays the waveform of the audio that is
flowing through the bus.
Main Outs
Each enabled hardware channel has a main out channel strip in the Console view. Main outs are the final destination for all of your audio in SONAR. Main outs accept input from both tracks and buses.
Main outs contains a left channel and a right channel, but only one volume fader. You control the left/right balance of each main out with the balance slider.
Here's what you can do in a main out module:
To do this Do this
Set the output volume Adjust the Volume control
Adjust the left/right balance
Adjust the Pan slider that's on that output module
Table 127.
Metering
The Console and Track views both have meters to measure playback level, record level, bus output level, and main output level. The Track view also has bus return meters. You can configure the meters differently in each view, if you want.
The responsiveness of your record meters (which also measure input monitoring) is dependent upon the latency setting in the Audio Options dialog and the settings in the Audio Meter Settings dialog. With higher latency settings the meters may appear sluggish.
There are three basic things you should know about meters:
• What the meters measure
- How to show or hide different kinds of meters
- How to choose display options for each kind of meter

Note: Metering uses significant amounts of your computer's processing power, especially RMS metering. If you need to free up resources, turning off metering where you don't absolutely need it helps. Using peak metering on tracks and peak plus RMS metering on the main out is a good option. To disable all metering, turn off metering in both the Track view and Console view.
See:
What the Meters Measure
Hiding and Showing Meters
Mixing
Metering
Changing the Meters' Display
What the Meters Measure
The following table summarizes what each kind of meter measures:
| Kind of meter What it measures | |
| Record The level of the instrument listed as an input for the track you are monitoring—the track must be armed to enable the meter | |
| Playback | A playback meter measures the playback level of any pre-existing data in the track you are monitoring, either before or after the track faders, depending on what display options you choose |
| Main outs The level of the signal output by each main out. | |
| Buses The level of the output signal the bus is sending back from the effects. | |
Table 128.
See also:
Hiding and Showing Meters
Changing the Meters' Display
Hiding and Showing Meters
The display and configuration of the meters in the Track view is independent of the meters in the Console view, and vice versa. The Show/Hide Meters button in the Track view toolbar hides or shows all the meters of each kind in the Track view. The drop-down arrow on the Volume button in the Console view displays the Meter menu in the Console view. To show or hide meters on individual tracks or buses, use the right-click pop-up menu that's available from the title bar of each track or bus.

Note: If you want to conserve the maximum amount of your CPU's resources, turn off all metering in both the Track and Console views.
Track view toolbar Console view Vol button

A. Show/Hide All Meters B. Meter Options menu C. Meter Options menu
To Show or Hide all Meters of a Certain Type
- In the Console view, click the drop-down arrow on the Volume button, and check or uncheck the kind of meters you want to show or hide.
- In the Track view, click the arrow to the right of the Show/Hide Meters button and check or uncheck the kind of meters you want to show or hide. To hide all meters, click the Show/Hide Meters button so that it is not lit.
To Show or Hide Individual Meters on Tracks or Buses
- Right-click the track or bus to display the pop-up menu, and check or uncheck the appropriate show meter option.
See also:
What the Meters Measure
Changing the Meters' Display
Changing the Meters' Display
You control the range and kind of units that the various meters display in the Track and Console views. The display of meters in each of the two views is independent of the display in the other view. In the Track view, you can access all meter options from the Show/Hide All Meters button. In the Console view, you can access all meter options from the drop-down arrow on the Volume button.
You also have the option of using segmented or non-segmented meters in the Track and Console views. The Audio Meter Settings dialog (Options > Audio Meter Settings command) lets you choose segmented or non-segmented meters for the Track and/or Console views. Meter colors are also now customizable in the Configure Colors dialog—use the Options > Colors command, and choose VU LO Level, VU HI Level, or VU Tick Marks.
The drop-down menus give you the following display options:
| Menu option What it does | |
| Horizontal Meters (Track view only) | Choose this option to display the Track view meters horizontally instead of vertically. |
| Vertical Meters (Track view only) | Choose this option to display the Track view meters vertically instead of horizontally. |
| Show Numeric Peak Values (Track view only) | Choose this option to display peak values in each track header next to the Input Echo button (see also “Peak Markers” on page 615) |
| Show Track Peak Markers (Track view only) | See “Peak Markers” on page 615) |
| Show Bus Peak Markers (Track view only) | See “Peak Markers” on page 615) |
| Reset All Meters | If a track clips, its meter shows a red clipping indicator. Click this button to reset the clipping indicator to its non-clipping state. |
| Peak Choosing this option causes the meter to display the highest amplitude in the signal that occurs in a complete cycle of a frequency. | |
| RMS Choosing this option causes the meter to display more of an average of the amplitudes that occur in a complete cycle of a frequency. RMS, or Root-Mean-Square, is a little over seventy percent of peak level. | |
| Peak + RMS Choosing this option causes the meter to display both the RMS and peak levels. The RMS level is displayed by the solid bar on the left side of the meter, and the peak level is displayed as a small line that follows the RMS level just to the right of it. | |
| Pre Fader/Post Fader (This option is for playback and bus meters only) | Choose Pre Fader or Post Fader to measure the playback level either before or after the track's or bus' volume fader. |
| Pre Fader/Post FX (This option is for the buses only) | Choose Pre Fader/Post FX to measure the bus volume before the fader, but after any real-time effects. |
| -12 dB....-90 dB Choosing one of these numbers sets the scale of the meter to a certain range of dB. For example, choosing -90 dB sets the range of measurement of that meter to 90 dB.Note: You can also change the scale of a meter by right-clicking the meter to display a pop-up menu and choosing a new dB range. | |
| Show Labels (Track view only) | Clicking this option hides or shows the dB markings on the meter. Hiding the markings shrinks the meter significantly, saving space. |
Table 129.
Menu option What it does
Hold Peaks Choosing this option causes the meter to display a small vertical line (the peak marker) that shows the peak level and then decays until a new peak is reached.
Lock Peaks Choosing this option causes the meter to lock the peak marker at the highest level, until a higher level occurs.
Table 129.
Enabling mono on a bus/Main will affect upstream meters
If you make a bus or main out mono by toggling its Mono/Stereo switch, any “upstream” meters—that is, meters on any tracks or buses that are assigned to the mono bus/main out—from the bus/main out will also display as mono.

Note: This only affects the meter display, not any audio that is bounced or exported.
See also:
What the Meters Measure
Hiding and Showing Meters
Segmented and Non-segmented Meters
Segmented and Non-segmented Meters
You can display meters as segmented (the default) or non-segmented meters. Non-segmented meters have the advantage of taking up less room in a track strip.

A

B
A. segmented meter B. non-segmented meter
The Audio Meter Settings dialog (Options > Audio Meter Settings command) lets you choose segmented or non-segmented meters for the Track and/or Console views.
Mixing
Metering
You can customize the colors of non-segmented meters in the Configure Colors dialog—use the Options > Colors command, and choose VU LO Level, VU HI Level, or VU Tick Marks.
For more information, see Configure Colors dialog.
Changing the Meters' Performance
There are two major factors that determine the performance of meters in SONAR. One is audio latency which you can adjust, within the limits of your audio hardware drivers, in the General tab of the Audio Options dialog. The second is the settings in the Audio Meter Settings dialog.
SONAR has configurable meter ballistics that allow you to adjust the rise and fall times of both the RMS and Peak Meters. Out of the box, SONAR ships with industry-standard settings that mimic meter ballistics for common hardware consoles.
The following table covers how to adjust your meter settings to meet your needs.
| To do this Do this | |
| Increase or decrease meter refresh rates | In the Audio Meter Settings dialog (select Options >Audio Meter Settings to open), adjust the Refresh rate field. Valid values are from 25 to 250 milliseconds. |
| Change the decay rate (the amount of time the meter display stays at its peak) | In the Audio Meter Settings dialog, adjust the Decay Rate value. Valid values are from 1 to 150 milliseconds. |
| Increase or decrease the amount of time the meter displays a peak value | In the Audio Meter Settings dialog, adjust the Hold Time value. Valid values are from 0 to 5000 milliseconds. |
| Adjust rise and fall times | In the Audio Meter Settings dialog, adjust the Rise or Fall settings for RMS or Peak. Valid Rise values are from 0 to 1000 milliseconds. Valid Fall values are from 0 to 2500 milliseconds. |
Table 130.
Here are the default values for the various settings:
- Refresh Rate = 40 msec
- Peak Hold – Decay Rate = 50 msec
- Peak Hold – Hold Time = 750 msec
• RMS Rise = 300 msec
• RMS Fall = 300 msec - Peak Rise = 0 msec
- Peak Fall = 1000 msec
See also:
Audio Meter Settings dialog
MIDI Activity indicators
Each MIDI track displays a MIDI playback meter in the Track view and Console view. The MIDI meter consists of two sections:
- MIDI Activity Indicator. The MIDI Activity Indicator lights up whenever a MIDI event is encountered in the track.
- MIDI Velocity Meter. The MIDI Velocity Meter shows the greatest current note velocity encountered during playback.


A. MIDI Activity Indicator B. MIDI Velocity Meter
Audio and MIDI meters can be either vertical or horizontal. For more information, see "Changing the Meters' Display" on page 611.
Peak Markers
Buses and audio tracks have a feature called Peak Markers. A Peak Marker in each audio track or bus moves along in the Clips pane just behind the Now Time cursor displaying the highest peak found during playback. Peak Markers appear in two different colors: one color if the peak is below 0 dB, and a different color if the peak is above 0 dB. By default, peaks below 0 dB will be green, and peaks above 0 dB will be red. Colors for both Peak Markers and their text fields are configurable in the Configure Colors dialog (Options > Colors command).

A. Peak marker
To Hide or Show Peak Markers Globally
- Click the Meter Options drop-down arrow in the Track view toolbar, and choose Show Track Peak Markers and/or Show Bus Peak Markers.
Mixing
Metering
To Hide or Show Peak Markers on an Individual Track or Bus
- Right-click the track or bus, and choose Show Peak Marker from the pop-up menu.
To Jump to a Peak Marker
- Right-click the numeric peak display in the track/bus header strip, and choose Go To Peak from the context menu (see picture below). Doing so will center the peak location and Now time in the Clips pane. This is useful because a Peak Marker may be offscreen.

To Hide or Show the Numeric Peak Display
- Click Show Numeric Peak Values in the Meter Options menu.
To Clear Peak Markers From a Track
- Double-click the meter.
Waveform Preview for Buses and Synth Tracks
You can choose to display a waveform for the audio output of a bus or synth track. When you enable the display function, the amplitude of a bus's or synth track's audio signal is graphed in real time as a waveform. The waveform turns red wherever clipping is occurring. Waveform preview allows you to visualize a mix and verify levels over the duration of a project, easily detecting peaks and other level problems that may require attention. You can choose to display Peak Markers if you want to (see "Peak Markers" on page 615 for more information). If you change the volume of the audio signal and replay the project, the waveform changes to reflect the new bus or synth track volume.
Each bus or synth track has a Waveform Preview button, which allows you to enable/disable waveforms display on an individual basis. By default, each button is turned off.
You can change the color of the waveform preview by choosing a color for Waveform Preview in the Configure Colors dialog (Options > Colors command).
To Enable/Disable Waveform Preview on a Bus or Synth Track
- For buses, find the desired bus in the Bus pane of the Track view, and click the bus' Waveform Preview button. This button is also in the Bus Inspector.
- For synth tracks, find the desired synth track in the Track view, and click the track's Waveform Preview button. This button is also in the Track Inspector.

A. Waveform Preview button in Track view B. Waveform Preview
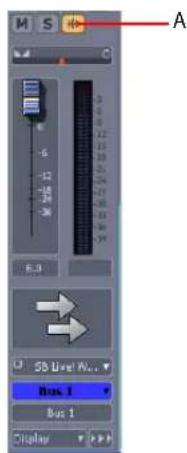
A. Waveform Preview button in Bus Inspector
Freeze Tracks and Synths
The Freeze feature allows you to temporarily bounce your track, including soft synths and effects, to reduce the amount of CPU power needed. The Freeze feature also works for synths patched in the Synth Rack.
The following are the available commands for track freezing:
- Freeze Track. Bounces the audio in the track to a new audio clip or clips, applies any effects, and disables the FX bin.
- Unfreeze Track. Discards the bounced audio, restores the original audio to the way it was before the last Freeze or Quick Freeze command, and enables the FX bin.
- Quick Unfreeze Track. Hides and mutes the bounced audio, restores the original audio to the way it was before the last freeze or quick freeze command, and enables the FX bin. Bounced
audio is retained, however, and toggling between Quick Freeze and Quick Unfreeze should be instantaneous.
- Quick Freeze Track. Only available after a Quick Unfreeze, the Quick Freeze function redisplays and unmutes the bounced audio instantaneously and disables the FX bin.
The following are the available commands for synth freezing:
- Freeze Synth. Audio from a soft synth is bounced and placed on the synth's track. Output from the synth is disabled, as is the FX bin on the synth track.
- Unfreeze Synth. Discards bounced audio, enables the synth and track FX bin. Bounced audio is discarded, and will be re-bounced if you choose Freeze again.
- Quick Unfreeze Synth. Hides and mutes the bounced audio, enables the synth and track FX bin. Bounced audio is retained, and toggling between Quick Freeze and Quick Unfreeze should be instantaneous.
- Quick Freeze Synth. Only available after a Quick Unfreeze, the Quick Freeze function redisplays and unmutes the bounced audio instantaneously, disables the synth, and any effects on the synth track.

Note 1: An Unfreeze or Quick Unfreeze command restores the audio on a track to the way it was before the last Freeze or Quick Freeze command. Any editing you do to a frozen track is discarded when you Unfreeze or Quick Unfreeze the track.

Note 2: You control the bit depth of all rendering operations (bouncing, freezing, applying effects) on the Audio Data tab of the Global Options dialog (Options > Global command) in the Render Bit Depth field. The default value of 32 is the best for most situations. See “Bit Depths for Rendering Audio” on page 849 for more information.
To Freeze a Track
Do one of the following:
- In the Track view, click the track's Freeze button

- Right-click on a track and select Freeze > Freeze Track from the menu that appears.
SONAR bounces the audio in the track to a new audio clip or clips, applies any effects, and disables the FX bin.
To Unfreeze a Track
Do one of the following:
- In the Track view, click the track's Freeze button

- Right-click on a track and select Freeze > Unfreeze Track from the menu that appears.
SONAR discards the bounced audio, restores the original audio, and enables the FX bin. Audio will be re-bounced if Freeze is chosen again.
To Do a Quick Unfreeze of a Track
Do one of the following:
- Hold down the SHIFT key and click the track's Freeze button *.
- Right-click on a frozen track and select Freeze > Quick Unfreeze Track from the menu that appears.
SONAR hides and mutes the bounced audio, restores the original audio, and enables the FX bin. Bounced audio is retained, however, and toggling between Quick Freeze and Quick Unfreeze should be instantaneous.
To Quick Freeze a Track
Do one of the following:
- Click the track's Freeze button.
- Right-click on a track that you did a Quick Unfreeze on and select Freeze > Quick Freeze Track from the menu that appears.
Only available after a Quick Unfreeze, the Quick Freeze function redisplays and unmutes the bounced audio instantaneously
To Freeze a Soft Synth
Do one of the following:
- In the Track view, click any associated track's Freeze button *.
- Right-click a synth track or a synth's MIDI track, and choose Freeze > Freeze Synth from the menu that appears.
- In the Synth Rack view, click the Freeze/Unfreeze button *.
SONAR bounces the synth's audio data to the synth track. SONAR disables the synth's output, and disables the FX bin on the synth track.
Note 1: If a soft synth has been inserted to an audio track's FX bin, the Freeze/Unfreeze button is not present in the Synth Rack view for that synth. To freeze that synth, right-click the track or the synth's MIDI track and choose Freeze > Freeze Synth from the menu that appears.
Note 2: A MIDI track can only be frozen if it is routed to a software instrument.
To Unfreeze a Synth
Do one of the following:
- In the Track view, click any associated track's Freeze button *.
- Right-click a synth MIDI or audio track, and choose Freeze > Unfreeze Synth from the menu that appears.
- In the Synth Rack view, click the Freeze/Unfreeze button *, and choose Freeze > Unfreeze Synth from the menu that appears.
SONAR discards bounced audio, enables the synth and the synth audio track's FX bin. SONAR will be re-bounce the audio if you choose Freeze again.
To Do a Quick Unfreeze of a Synth
Do one of the following:
- Hold down the SHIFT key and click any associated track's Freeze button *.
- Right-click a frozen synth MIDI or audio track, and choose Freeze > Quick Unfreeze Synth from the menu that appears.
- In the Synth Rack view, click the Freeze/Unfreeze button *, and choose Freeze > Quick Unfreeze Synth from the menu that appears.
SONAR hides and mutes the bounced audio, enables the synth and track FX bin. Bounced audio is retained, and toggling between Quick Freeze and Quick Unfreeze should be instantaneous.
To Quick Freeze a Synth
Do one of the following:
- Click any associated track's Freeze button.
- Right-click a quick unfrozen synth track or synth MIDI track, and choose Freeze > Quick Freeze Synth from the menu that appears.
- In the Synth Rack view, click the Freeze/Unfreeze button *, and choose Freeze > Quick Freeze Synth from the menu that appears.
Only available after a Quick Unfreeze, the Quick Freeze command redisplays and unmutes the bounced audio instantaneously, disables the synth, and any effects on the synth track.
To Set Freeze Options
Do one of the following to open the Freeze Options dialog:
- In the Track view, right-click any track's Freeze button *.
- Right-click an audio or synth track, and choose Freeze > Freeze Options from the menu that appears.
- In the Synth Rack view, click the Freeze/Unfreeze button *, and choose Freeze Options from the menu that appears.
Choose options in the Freeze Options dialog. For help choosing options, click the Help button in the dialog.

Tip: All Freeze commands are also available in the Track menu.
Using Real-Time Effects
In the Console view and Track view, you can use plug-in effects non-destructively, in real time (to apply effects offline, see "Applying Audio Effects" on page 656). You can also hear your plug-in effects in real time on any live instruments you are recording—just make sure Input Monitoring is enabled (see "Input Monitoring" on page 258). You can also insert effects directly on clips (see "Effects on Clips" on page 626).
For example, suppose you want to add a reverb effect to an audio track containing a recorded violin solo. You could do it in two different ways:
- Destructive. The digital audio data itself is modified. Although this may be exactly what you want, it does limit your options. If you want to modify the effect parameters slightly or to remove the effect and try a different effect, you must use the Undo command, or revert to a saved copy of the original data.
- Non-destructive (real-time). The digital audio data in your track is not changed but simply altered on the fly during playback. This means you can experiment with effects parameters, bypass effects, or remove them entirely at any time. Since most effects require complex numeric calculations, real-time effects processing puts a heavy load on your computer's CPU. If you use too many effects, the CPU will not be able to keep up and playback will sound choppy and disconnected.
You can also apply real-time audio effects to a submix in a bus. For example, rather than patching separate reverb effects in each of several guitar tracks, you can mix the guitar tracks together in a bus and apply a single reverb effect to the submix. This makes much more efficient use of CPU time. Patching effects on a bus also opens up new creative possibilities.
There are several reasons why you might want to apply effects offline (destructively):
- If you want to apply more effects than your CPU can handle, applying some of the effects offline will reduce CPU usage during playback.
- If you want to apply effects to an individual audio clip, rather than the whole track, it is simpler to do so using offline effects.
The File > Export > Audio command, allows you to apply real-time effects when you export, so you do not need to apply your effects destructively or use the Edit > Bounce to Track(s) command to prepare the tracks beforehand. For information about exporting audio, see “Preparing Audio for Distribution” on page 669.
All plug-in effects and soft synths have a Preset window you can use to save and recall your favorite settings for those plug-ins.
See:
Effects Parameters
How to Use Real-Time Effects
Applying Audio Effects
Applying MIDI Effects
Effects Parameters
Each effect in an effects patch point has its own independent set of parameter values. For example, you can apply a short reverb in one track and a long reverb in another track. The dialog boxes for real-time effects contain the same parameters as the offline effects, though there are a few differences:
- You can adjust the parameters while playback is in progress, so there is no need for an Audition button.
- For Audio effects, because mixing is handled through the Track view or Console view, there is no Mixing tab.
- You do not need to click OK for the effect to be applied.
Refer to the sections “MIDI Effects (MIDI Plug-ins)” on page 519 and “Audio Effects (Audio Plug-ins)” on page 567 for descriptions of the effects and their parameters.
How to Use Real-Time Effects
You can patch effects into the tracks and buses in both the Track view and Console view. After you patch one or more effects into an FX bin, you can reorder the effects, delete them, or add new ones.

A. An FX bin in a track in the Track view B. An FX bin in a bus in the Track view

A. An FX bin in a track in the Console view B. An FX bin in a bus in the Console view
Here's how to insert and configure effects:
| To do this Do this | |
| Add a real-time effect to a MIDI track, audio track, synth track or bus. | Right-click in the FX bin of the track or bus you want to add the effect to, and select an effect from the pop-up menu. |
| Change the order in which effects are used. | Drag an effect up or down in the FX bin. |
| Edit an effect's parameters. Double-click on the effect to open the effect's dialog box. | |
| Move an effect to a different bin. Drag the effect to another effects bin. | |
| Copy an effect to a different bin. Hold down the CTRL key and drag the effect to another effects bin. | |
| Delete an effect. | Right-click the name of the effect, and choose Delete from the pop-up menu. |
| Send all keystrokes to a plug-in that has focus | Enable the Keystroke button in the plug-in's property page |
| Use a preset. See “Presets and Property Pages” on page 625 for more information. | |
Table 131.
When you place an effect in an FX bin, an abbreviated name is used to describe the effect.
Sometimes the limited space makes it impossible to identify the effect. If this occurs, simply rest the cursor over the effect for a second or two, and a tooltip will pop up to display the full name of the effect.
Effects in FX bins display "ticks" that tell you whether the effect is outputting a mono, stereo, or surround signal:

A. Mono indicator

A. Stereo indicator
A. Surround indicator (in 5.1 mode)
You can change the tick color by using the Options > Colors command, and choosing Track View Control Background (for the Track view), and Console Drop-down Controls (for the Console view).
If you're using the double-precision audio engine, plug-ins that can send and receive 64-bit data display doubled ticks.

A. Stereo indicator in 64-bit mode
See also Using the Per-track EQ.
Look-ahead processing at high latencies
Some plug-ins, such as the Sonitus:fx Multiband and other dynamics processors, use a look-ahead buffer mechanism, which results in a short delay being introduced to the output signal when the plug-in is used in real-time. SONAR's automatic delay compensation (ADC) takes care of any delays, but you may experience some anomalies when using such a plug-in to process the output of
a DXi-especially if SONAR is configured to use a high mixing latency. The symptoms include audio that appears to drop out, and/or missed notes (from the MIDI track that is assigned to the DXi). Again, this is more prone to occur with higher latency settings.
This may happen if SONAR doesn't pump ahead enough MIDI data to compensate for ADC. To fix this problem, go to Options > Global > MIDI and increase the Prepare Using [n] Millisecond Buffers value.
Presets and Property Pages
Presets are a way to store property page settings so that you can recall the exact same group of settings again in the future. Effects and soft synths use presets, and so do some other functions you'll find in certain dialogs.
You manage presets with the Presets section that appears at the top of a plug-in property page, and the buttons next to the Presets box.

A. Previous/Next button B. Save button C. The VST button preset controls appear only on VST plug-ins D. Automation read and write buttons E. Send all keystrokes to this plug-in button F. Delete button G. Presets menu displays the name of the current preset
The Presets menu displays presets in the following order:
- Most Recently Used presets. These appear at the top of the Presets menu, up to 8 in number, and followed by a horizontal line to separate this section from the next section of the menu.
- VST factory presets. Any VST factory presets appear below the Most Recently Used section, and are also followed by a horizontal separator line.
- Cakewalk and user presets. These appear at the bottom of the Presets menu.
The following table tells you how to use presets:
To do this Do this
| Load a preset Do either of the following:Click the drop-down arrow on the right side of the Presets menu, and click the name of the preset in the drop-down menu.Click the left or right side of the Prev/Next button to load the previous or next preset in the menu. You can click the button repeatedly to step through the menu. | |
| Save the current settings as a preset | If you're using:A VST factory preset . These can not be deleted or overwritten (the Delete button appears greyed-out). If you want to change one of these, double-click the name, enter a new name, and click the Save button.Note: VST presets can be stored by saving a .fxp file (see below for instructions).A Cakewalk or user preset . Either save these under a new name: double-click the name, enter a new name, and click the Save button, or just click the Save button to overwrite the preset with current values. |
| Delete a preset | VST factory presets can not be deleted. If you're not using a VST factory preset, simply display the preset name in the Presets window, and then click the Delete button. |
| Load or save a .fxp file | Use the Load Preset or Save Preset commands, respectively, in the VST button drop-down menu |
| Load or save a .fxb file | Use the Load Bank or Save Bank commands, respectively, in the VST button drop-down menu |
Table 132.
The Presets window also has a feature called Preset Dirty Flags. A Preset Dirty Flag is an asterisk that appears next to the name of the preset. The asterisk tells you that you changed and saved this particular preset in another project, and the settings in the current project are different from the saved version. If you re-save the preset in the current project with the current settings, the asterisk disappears, but will reappear in the other project, showing you that the displayed settings in that project are different from the last saved version of the preset. If you want to get rid of the asterisk in all projects, save the preset in each project with the exact same settings.
Plug-in property pages have a couple of other controls not related to presets:
- Automation read and write buttons. These buttons enable or disable automation playback and recording for the plug-in's parameters. See the online help topic "Automation," for more information.
- Keystrokes button. Enabling this button sends all keystrokes to a particular instance of a plugin when the plug-in's property page has focus.
Effects on Clips
Both audio and MIDI clips now contain full-featured FX bins. You can insert real-time effects on clips, in both MIDI and audio tracks. Each clip that you insert an effect on displays its own FX bin, that you can use to manage the effects on that clip.
The characteristics of clip-based effects are:
- Splitting a clip copies the effect(s) onto both clips.
- You can copy or move clip-based effects from one clip to another, and to or from the FX bin on a track.
- A clip's FX bin also appears on the General tab of the clip's Clip Properties dialog (to open: right-click the clip and choose Clip Properties from the pop-up menu).

Note: You cannot drag effects to or from the Clip Properties dialog.
- You can patch an effect onto multiple clips at the same time by first selecting the clips.
- Audio effects can be automated by using clip envelopes.
- The Edit > Bounce to Clip(s) command follows clip boundaries—effects tails are cut off, unless you slip-edit the end of the clip to leave space.
- Freezing a track or synth will also freeze the per-clip FX bins.
To Insert an Effect on a Clip or Clips
- If you want to insert an effect onto multiple clips, select the clips.
-
Right-clip a clip that you want to insert an effect onto.
The Clips pane context menu appears. -
Choose Insert Effect > [Audio or MIDI] > [name of desired effect].
The FX icon appears on the clip(s) after you insert the effect (see picture, below).
A

A. FX icon
To Open or Close the FX Bin on a Clip
- To open a clip's FX bin, click the FX icon, or right-click the FX icon and select Open Clip Effects Bin from the pop-up menu.
- To close a clip's FX bin, click the X icon that's in the upper left corner of the clip's FX bin, or click anywhere outside of the FX bin.
To Delete, Bypass, Move, Copy, or Re-order a Clip Effect
- To delete an effect, right-click the effect name and choose Delete from the pop-up menu.
- To bypass or un-bypass all the effects on a clip, right-click in the clips's FX bin and choose Bypass Bin from the pop-up menu.
- To enable or disable an individual effect, click the effect's green on/off switch.
- To move an effect to another FX bin (on a track or a clip), drag the name of the effect to the other FX bin.
- To copy an effect to another FX bin (on a track or a clip), hold the CTRL key down, and then drag the name of the effect to the other FX bin.
- To change the order of an effect in an FX bin, drag the name of the effect up or down to the desired place in the effects chain.
To Apply Inserted Clip Effects
- If you want to apply the inserted effects on more than one clip, select them.
- If you want to leave room at the end of any clips for effects tails, slip-edit the ends of the clips to leave some empty space.
- Use the Edit > Bounce to Clip(s) command.
After the progress bar disappears, the bounced clips appear with new waveforms to reflect the effects processing. The inserted clip effects are removed from the bounced clips automatically.
Canceling changes made to real-time plug-ins
EnablePluginCancelButton=<0 or 1>, default = 0
In SONAR 4.0.2 and earlier, opening the property page of a VST plug-in during playback could result in a slight disruption in playback.
The cause for this problem has its roots in the little Cancel button that sits in the top right corner of the plug-in's property page. The purpose of this button is to allow the user to cancel out of any changes they might have made to the plug-in, restoring back to whatever state the plug-in was in before they opened the GUI window. To make this work, SONAR would need to take an initial snapshot of the plug-in's state, and some plug-ins with large amounts of preset data could cause an audio hiccup if the data was captured for the Cancel button.
To address this issue, SONAR 4.0.3 (and later) does not take a snapshot of the plug-in's state by default, and the Cancel button is not available. There is a new Cakewalk.ini variable to bring back the Cancel button if desired, but be aware that this may also result in hiccups when opening VST plug-ins during playback.
This variable should be set in the [WinCake] section. For example:
[WinCake]
EnablePluginCancelButton=1
Sidechaining
SONAR supports multi-input plug-ins, which are typically sidechain plug-ins that have two inputs: a primary input and a sidechain input.
When SONAR detects such a plug-in in an FX bin, a virtual output port is created for each extra input exposed by the plug-in. Audio track, Bus and Send outputs can be routed to sidechain inputs.
Sidechaining is typically used with compressors to limit one signal depending on the signal level of another. Common applications are to reduce the level of a bass guitar when there is a kick drum, or to reduce the level of music whenever a speaker talks (often used for background music in radio- and television programs). There are of course many more applications that are not mentioned here.
SONAR includes the following plug-ins that support sidechaining:
- Sonitus Compressor
- Sonitus Gate
• Vintage Channel VC-64 (SONAR Producer only)
Sidechaining signal flow

flowchart
graph LR
    A["Track 1 Output"] --> B["FX"]
    C["Track 2 Output / Send"] --> D["Sum"]
    E["Bus Output / Send"] --> D
    B --> F["Sidechainable FX"]
    F --> G["Bus"]
    G --> H["Hardware Output"]
    style B fill:#f9f,stroke:#333
    style F fill:#ccf,stroke:#333
    style G fill:#cfc,stroke:#333
See also:
Signal Flow
To assign a track/bus/send output to a sidechain input
- Insert the sidechain-capable plug-in in a track or bus FX bin (see "Adding effects" on page 209).
The sidechain input is exposed in the list of available output destinations in all Track/Bus/Send Output controls (except for outputs that would result in a feedback loop).
- Assign the desired audio track, bus or Send output to the plug-in's sidechain input. For more information, see "Assigning Inputs & Outputs" on page 205.

Note: All sources that are sent to a sidechain input will be mixed down prior to being sent to the sidechain.
Sidechain plug-ins in clip FX bins and surround bus FX bins:
Sidechain inputs are not exposed by plug-ins that are inserted in clip FX bins and surround bus FX bins. You can insert any multi-input plug-in into a clip FX bin or surround bus FX bin, but the sidechain inputs on these plug-ins will not be active. The plug-in will function as a normal plug-in and only receive input on its primary input.
See:
Real-time bounce
Sidechainable Vintage Channel VC-64 plug-in
Signal Flow
Limit number of plug-in sidechain inputs
Bouncing audio with sidechain plug-ins
In order to render a sidechain input as part of a mix when bouncing audio, you must select all tracks that contribute to the sidechain input.
See:
Bouncing/freezing with sidechain plug-ins
Bouncing audio with sidechain plug-ins
Bouncing Tracks
Bouncing to Clips
Freeze and sidechain inputs
Freeze does not consider sidechain inputs because Freeze only works on a single audio track at a time. To mix down sidechain inputs, use standard bounce with all sidechain sources selected in the mix.
See:
Bouncing/freezing with sidechain plug-ins
Freeze and sidechain inputs
Freeze Tracks and Synths
Bouncing Tracks
Bouncing to Clips
Sidechainable Vintage Channel VC-64 plug-in

Note: The Vintage Channel VC-64 plug-in is only available in SONAR Producer.
The Vintage Channel VC-64 plug-in supports sidechaining (see "Sidechaining" on page 629). When an instance of Vintage Channel VC-64 is inserted in a project, you can assign audio track, bus and send outputs to its sidechain input.
Each Compressor and EQ can be configured to listen to the sidechain input. The sidechain signal is always applied to the last input(s) of the VC-64.
Sidechain controls
The VC-64 has three buttons that affect sidechaining:
Key (for each compressor). Enabling sidechaining on one of the compressors will send the sidechain input(s) to the level detector of that compressor. This function compresses the signal based on the sidechain level rather than the primary input level.
Listen. Enable to listen to the compressor's sidechain signal instead of the ordinary output.
Key (for each EQ). Enabling sidechaining on one of the equalizers will replace its normal input (according to its routing) with the sidechain signal.

Note 1: When you enable Key on one of the compressors, the internal compressor sidechain (detector chain) is fed from the external sidechain inputs. When you enable Listen you will hear what's on the compressor's sidechain regardless if this comes from the external sidechain inputs or not. If you want to hear the external sidechain you must enable both Key and Listen on one of the compressors.

Note 2: If Listen is enabled on both compressors only the sidechain of Compressor 2 will be heard.
Figure 112. Vintage Channel VC-64

A. Sidechain Listen B. Enable/disable sidechaining for the current Compressor C. Enable/disable sidechaining for the current EQ
For more information, see the Vintage Channel VC-64 online help.
External Insert plug-in
The purpose of the External Insert plug-in is to route audio to and from existing I/O ports in SONAR, allowing an external audio device to be effectively patched into any FX bin. This allows you to seamlessly incorporate your favorite outboard gear in a SONAR project.
The External Insert plug-in is able to measure and automatically compensate for the round-trip delay through your audio hardware (the time it takes for the audio to exit you computer, be processed by your external audio hardware and finally returned to the computer).
External Insert interface
The left-hand side contains the hardware/external Send controls and the right-hand side contains the hardware/external Return controls.
Send Stereo Mode buttons:
• L (Left). This toggle enables/disables the left channel send output (enabled by default).
• R (Right). This toggle enables/disables the right channel send output (enabled by default).
- Mono. This toggle sums the stereo signal to make it dual-mono so the send output has the same audio on the left and right channels.
Send Level. This is a +/- 24dB trim to the level that is passed to the external send. This parameter is automatable.
Send VU Meter. This meter shows the signal level being delivered to the external send. Since this is feeding a sound card output, it is important to avoid clipping at this stage.
Send Port Picker. This control lets you choose an audio output that currently has nothing routed to it. This is the port that you should connect to the input(s) of your external gear. All output ports that are already used in the project are excluded (except for master buses that have other instances of the External Insert plug-in routed to them).

Note: Output ports that are used by the External Insert plug-in are excluded from all track and bus Output controls.
Return Phase Control. This control flips the phase of the signal being returned to the external return input. This parameter is automatable.
Return Level. This is a +/- 24dB trim to the level that is passed from the external send. This parameter is automatable.
Return VU Meter. This meter shows the signal level entering the external return.
Return Port Picker. This control lets you choose any available hardware input. This is the port you that you should connect to the output(s) of your external gear. All input ports that are already used in the project are excluded

Note: Input ports that are used by the External Insert plug-in are excluded from all track and bus Input controls.
Delay Measurement. This control shows the last measured round-trip delay through your audio hardware. Click the control to initiate a new measurement.
Manual Delay Offset. The center control displays and resets the manual delay offset. The buttons to the left decrease the manual offset by 1 or 10 samples. The buttons to the right increase the manual offset by 1 or 10 samples. All delay buttons are disabled during playback.

Note 1: Time-based effects such as reverb and delay can artificially increase the latency measurement. Before manually measuring the delay, you may want to bypass the external gear (if Bypass is supported by your external gear).

Note 2: The delay is automatically re-measured if the Audio Buffer size is changed in the Audio Options dialog or if ports are changed.
Figure 113. External Insert

A. Send Stereo Mode (Left, Right, Mono) B. Send Level C. Send VU Meter D. Send Port E. Return Phase F. Return Level G. Return VU Meter H. Return Port I. Delay Measurement J. Send section K. Return section
Figure 114. External Insert signal flow

flowchart
graph LR
    A["Track/Bus output"] --> B["External Insert plug-in"]
    C["Hardware input"] --> D["(mono or stereo)"]
    D --> E["Return"]
    F["Hardware output"] --> G["External FX"]
    G --> H["Out"]
    G --> I["In"]
    B --> J["Bus"]
    B --> K["Send"]
    E --> L["Output"]
    G --> M["Output"]
Automatable parameters
The External Insert plug-in exposes the following automatable parameters:
- Send Gain
- Return Gain
- Phase Invert
- Left Mute
- Right Mute
- Mono
See:
Automating Effects
To use an external effect in a SONAR project
- Make sure your external gear is connected to your audio interface and turned on.
The external gear's audio input must be connected to one of your audio interface's output ports and the external gear's audio output must be connected to one of your audio interface's input ports.
- Right-click an FX bin and select External Insert from the pop-up menu.
The External Insert property page appears. - Click the Send Port control and choose the audio port that is connected to your external gear's audio input.
- Click the Return Port control and choose the audio port that is connected to your external gear's audio output.
- Click the Delay Measurement control to measure the round-trip delay through your audio hardware.
The round-trip time for the signal to return is measured and displayed on the button. This is the delay that will be compensated for in SONAR to keep the track in sync with the rest of the project. For information about testing the delay measurement, see Testing the delay measurement and When to measure the delay.

Note: Time-based effects such as reverb and delay can artificially increase the latency measurement. Before manually measuring the delay, you may want to bypass the external gear (if Bypass is supported by your external gear).
- Play back the project and adjust the Send and Return levels to obtain the desired mix. You may also need to adjust levels on your external gear.

Tip: The Send and Return levels, Phase and I/O port settings can be saved as a preset. If you frequently use a specific external effect, save the settings as a preset that can be quickly recalled in other projects.

Note: If you bounce audio in a project that uses the External Insert plug-in, the bounce operation must be performed in real-time. For more information, see "Real-time bounce" on page 666.
Testing the delay measurement
The External Insert plug-in's delay measurement is normally sample accurate. However, for some hardware configurations, it is possible that a manual adjustment of up to several samples may be required in order to be exactly sample-accurate. If you wish to test the accuracy of the delay measurement for your hardware, follow these steps:
- Create an audio track and record or import some audio.
- Clone the track (including the audio) to a new track.
- Insert the External Insert plug-in on one of the tracks.
- Assign the Send and Return to any available input and output on your audio hardware.
- Patch an audio cable directly between the assigned input and output on your audio hardware.
- Press Play in SONAR.
You should hear both tracks out of time with each other.
- Carefully match the levels of the two tracks.

Tip: While adjusting levels, refer to the numeric peak indicators on the track strip. It is important for this test that the levels match as closely as possible.
- Click the Phase button ☐ on one of the tracks to invert the phase.
- In the External Insert plug-in, click the Delay Measurement control to measure the round-trip delay through your audio hardware.
The round-trip time for the signal to return is measured and displayed on the button.
- Press Play in SONAR again.
You should hear the track play significantly quieter and thinner sounding.
- To confirm if the delay is measured as accurately as possible, adjust the manual offset by one sample in either direction. Press Play after each adjustment and note if the sound gets louder or quieter.
In almost all cases, the sound will be quietest with no manual offset. In some rare circumstances, you may have hardware that requires an offset of a sample or two. If this is the case, you will want to always add that offset when you use the External Insert plug-in.
If your hardware requires a manual offset, you will only need to adjust the offset once for any particular sound card.

Tip: The manual offset can be saved in a preset for the External Insert plug-in.
When to measure the delay
Several things can change the delay of the External Insert, including:
- Changing audio ports.
- Changing audio driver model.
- Changing audio device.
- Changing SONAR's buffer size.
When the current delay setting becomes invalid, an asterisk (*) is displayed next to the delay value. If you notice the asterisk, it means something has changed in your system and it's time to measure the delay again.
Loading a project that uses the External Insert plug-in
When you load a project with the External Insert plug-in (or select a preset in the External Insert interface), SONAR checks to see if the exact same ports are assigned as when the project was saved. SONAR's port assignments can change if you load the project on a different hardware configuration or change driver models. If there is any discrepancy between the port assignments that were saved and the ports that are used in the current configuration, the ports are set to "None". Doing so avoids accidentally loading projects and having audio routed in an unexpected way.
Bouncing or freezing audio that uses the External Insert plug-in
The External Insert is a simple way to use real outboard effects as if they are inside SONAR. However there are several good reasons why you should consider bouncing or freezing the audio that passes through the External Insert in order to capture the result of the external hardware processing:
- If the outboard effect's settings are changed between sessions, your project will sound different.
- If you change SONAR's buffer sizes often, you will need to re-measure the delay on all instances of the External Insert each time.
- If you collaborate with other SONAR users, it will be impossible for other users to get the same sound as you unless they have the exact same outboard gear with exactly the same settings.
- You may want to use that outboard gear for something else - either in an External Insert on another track, or for any other use in your studio.
- There is no way to use the same piece of outboard gear on different projects with different settings.
If you bounce or freeze audio in a project that uses the External Insert plug-in, the bounce operation must be performed in real-time.
When bouncing audio data, SONAR will automatically detect the presence of any External Insert plug-ins (see "External Insert plug-in" on page 632) in tracks or buses, and disallow the bounce operation if the Fast Bounce mix option is enabled.
If you need to bounce or freeze audio in a project that contains any External Insert plug-ins, you have two choices:
- Disable Fast Bounce in the mixdown settings.
- Bypass all active External Insert plug-in's before bouncing.
If you need to make a change later, you can always unfreeze the audio, change settings, then freeze again.
See:
Real-time bounce
Freeze Tracks and Synths
Mixing
External Insert plug-in
Organizing Plug-ins
Once you have more than a few plug-in effects and/or soft synths installed on your computer, you might want to organize the way they appear in the various plug-in and synth menus that you use. The Cakewalk Plug-in Manager is a powerful tool to organize your plug-in menus. Open the Plug-in Manager by using the Tools > Cakewalk Plug-in Manager command, and display the Plug-in Manager's help file by pressing F1.
Even if you don't use the Plug-in Manager, SONAR now automatically organizes all DX and VST plug-ins into a default plug-in menu layout called Default – All Plug-ins. If you select the Plug-in Layouts > Manage Layouts option from a plug-in menu, the Plug-in Manager opens and automatically populates the Plug-in Layout area with the Default Layout, which produces a solid starting point for customizing layouts.
VST plug-ins are organized in menus according to the file folder structure in which they reside on your hard disk.
VST Configuration
SONAR automatically scans your VST folders for new plug-ins on startup, registering any unscanned VST plug-ins so that they become available in SONAR's plug-in menus. You can turn off automatic scanning by using the Options > Global command, and unchecking the Scan For VST Plug-ins On Startup check box that is on the VST Plug-ins tab.
To configure your VST plug-ins manually, use either the VST Plug-ins tab of the Global Options dialog, or the Cakewalk Plug-in Manager. You can use the Global Options dialog to set general VST options, such as choosing which folders to scan, but not specific options on individual plug-ins. Use the Cakewalk Plug-in Manager to set options on individual plug-ins (use the Tools > Cakewalk Plug-in Manager command to open the Plug-in Manager). The following procedures explain how to use the VST Plug-ins tab of the Global Options dialog. The Cakewalk Plug-in Manager has its own help.
To Display the Global Options Dialog/VST Plug-ins Tab
- Use the Options > Global command to open the Global Options dialog, and click the VST Plugins tab.
To Add a Folder to Scan
- On the Global Options dialog/VST Plug-ins tab, click the Add button to open the Browse for Folder dialog.
- Choose the folder you want to add, and click OK.
- Repeat steps 1 and 2 to add any additional folders you might want to scan.
The new folders appear in the VST Scan Folder(s) list, along with any folders that were already in the list.
To Remove a Folder from the VST Scan Folder(s) List
- On the Global Options dialog/VST Plug-ins tab, in the VST Scan Folder(s) list, select the folder you want to remove, and click the Remove button.
To Set Options for All Plug-ins in a Folder
- On the Global Options dialog/VST Plug-ins tab, in the VST Scan Folder(s) list, select the folder you want to set options for, then click the Folder Defaults button.
-
In the dialog that appears, choose from the following options (options that control properties for individual plug-ins are greyed-out: use the Cakewalk Plug-in Manager to set those options):
-
Enable as plug-in. Enable this option if you want to use the plug-ins in this folder as audio effects.
- Configure as tempo-based effect. If the effects in this folder are supposed to respond to tempo information (for example, a tempo-synced delay), and they are not responding, make sure this box is checked.
- Force stereo operation. If you need to use mono plug-ins in situations that requires stereo, you can enable this option to run the plug-ins in stereo mode. This option simply creates two identical output streams from the plug-ins where only one existed.
- Do not intercept NRPNs. SONAR uses NRPNs to run automation of your VST plug-ins. However, some instruments have their own implementation of this process, so checking this box passes the NRPNs directly to the instrument, allowing it to manage its own automation.
- Max used inputs. This option controls the number of sidechain inputs that are exposed by SONAR for the plug-in. The default value is the maximum number of input channels that are exposed by the plug-in. If the value is set to 2, SONAR will not display any sidechainable inputs; if set to 4, SONAR will display 1 sidechainable input, etc.
- Load using jBridge wrapper. This check box is only enabled on systems where jBridge is installed. jBridge allows you to use 32-bit VST effects and instruments when using the x64 version of SONAR, as well as use 64-bit plug-ins when using the x86 version of SONAR. jBridge can also bridge 32-bit plug-ins in the x86 version of SONAR, allowing your computer to overcome the memory limitations of a single 32bit process.
- Enable delay compensation. Usually, you will leave this check box the way you found it. SONAR contains a delay compensator, which turns on and off automatically for each individual plug-in (only a few plug-ins need it). If your plug-in needs extra time to process the audio data, the plug-in sends a message to SONAR, so it can synchronize playback time to the delayed output from the plug-in.
- Serialize Host Access. When Serialize Host Access is selected, communications with the plug-in are serialized as far as possible. The default behavior is OFF, which allows asynchronous calls to the plug-in.
When Serialize Host Access is disabled, SONAR's audio engine runs more efficiently and allows the UI thread to interact independently with the plug-in GUI without impacting the audio engine.
The only reason to enable Serialize Host Access would be for a plug-in that has thread safety problems leading to crashes or glitches when changing plug-in presets.
- Enable mono processing. When enabled, this option replicates the audio signal from the first channel to the left and right channel, effectively forcing the output of VST to be mono.
- Translate Bank/Program Changes. When enabled, this option translates MIDI program change messages into VST preset changes. This is only used for plug-ins that do not support MIDI program change messages.
- Always suspend on stop. When enabled the VST plug-in state will be set to suspended when the transport is stopped in SONAR. The default behavior is to keep VST's always in a resumed state. Enabling this option will prevent effects tails from being heard when the transport is stopped.
- Always suspend on play. When Always suspend on Play is selected, the plug-in will reset when playback starts. Select this option for any VST instruments that have problems with stuck notes when stopping the transport. The Always suspend on Play property is also useful for effects that generate a tail, such as delays and reverbs. The effect is that you will hear the tails when the transport stops, but not when the transport rolls again. Always Suspend on Play is disabled by default.
3. Click OK to close the dialog.
To Turn Automatic Scanning On or Off
- On the Global Options dialog/VST Plug-ins tab, in the VST Scan Options section, check or uncheck the Scan For VST Options On Startup option. The next time you launch SONAR, your VST folders will either be scanned or not, depending on the option you chose.
To Re-scan Failed Plug-ins
- On the Global Options dialog/VST Plug-ins tab, in the VST Scan Options section, enable the Re-scan Failed Plug-ins option. The next time you scan, any plug-ins that did not scan correctly during previous scans will be re-scanned.
To Re-scan Existing Plug-ins
- On the Global Options dialog/VST Plug-ins tab, in the VST Scan Options section, enable the Re-scan Existing Plug-ins option. The next time you scan, any plug-ins that have already been scanned will be re-scanned, and any new folder default options you have chosen will be implemented.
To Run a Scan
- On the Global Options dialog/VST Plug-ins tab, in the VST Scan section, click the Scan VST Folders button.
To Set All VST Plug-ins to Folder Defaults
- On the Global Options dialog/VST Plug-ins tab, in the VST Scan section, click the Reset All VST Plug-ins button. The next time you scan, SONAR will set all plug-ins in your VST Scan folders to your folder default settings.
To set options for individual VST plug-ins (DD2; new S8.5)
-
On the Tools menu, click Cakewalk Plug-in Manager to open the Cakewalk Plug-in Manager.
-
In the Plug-in Categories list, select VST Audio Effects or VST Instruments.
- In the Registered Plug-ins list, select the desired plug-in.
- Under VST Configuration, click Plug-in Properties to open the VST Plug-In Properties dialog.
- Select the desired options, then click OK to close the VST Plug-In Properties dialog.

Note: For any of the VST properties to take effect, the plug-in must be re-instantiated. The simplest way to do that is to delete the plug-in from the FX bin or Synth Rack, then press CTRL+Z to undo.
For more information about adjusting VST plug-in settings, see the Cakewalk Plug-in Manager online Help.
V-Vocal Clips
V-Vocal is a vocal processor that integrates Roland's VariPhrase technology into SONAR Producer. Designed for monophonic sounds, especially vocals, V-Vocal does pitch correction on notes and phrases, edits formants, adds vibrato if you want, and can also correct timing.
Access V-Vocal by selecting audio data, and then inserting an instance of V-Vocal. This creates a monophonic V-Vocal clip, which means that the selected audio data is copied to create the V-Vocal clip, while the original audio data is muted and left unchanged.
The following procedures explain how to manage V-Vocal clips. For information about using V-Vocal, see “Using V-Vocal” on page 642.
To Create a V-Vocal Clip
- Select the audio data you want to use.
- Use the Edit > Create V-Vocal Region command, or right-click the clip and choose V-Vocal > Create V-Vocal Clip from the Clips pane pop-up menu.
SONAR copies the selected audio data, inserts an instance of V-Vocal on the copied data, and displays the new V-Vocal clip (the copied audio data that contains an instance of V-Vocal) where the selected audio data was, and opens the V-Vocal interface. The V-Vocal icon appears on the V-Vocal clip. The original audio data is muted. No track data is moved or otherwise modified by creating a V-Vocal clip. You can drag the V-Vocal clip away from the original audio data if you want.
To Open a V-Vocal Interface
- If the V-Vocal interface of the clip you want to edit is not open, right-click the V-Vocal clip and choose V-Vocal > V-Vocal Editor from the Clips pane pop-up menu. You can also double-click the V-Vocal clip, or create your own key binding to launch V-Vocal.
To Move, Edit, or Copy a V-Vocal Clip
- Use standard editing commands (nudge, drag-and-drop, slip-edit, etc.) to move, edit, or copy the clip. When you move a V-Vocal clip, the original audio clip is revealed underneath it. You can
unmute the original clip by using the Mute tool. You can also or create your own key binding to launch the V-Vocal editor.

Note: Offline processing commands such as Process >Normalize and Process >Gain do not work on a V-Vocal clip.
To Bypass or Unbypass a Single V-Vocal Clip
- Right-click the V-Vocal clip and choose V-Vocal > Bypass/Unbypass from the Clips pane pop-up menu.
When you bypass a V-Vocal clip, you hear the original audio data that makes up the V-Vocal clip without hearing any V-Vocal processing. When Bypass is enabled, the Bypass button in the V-Vocal interface appears red.
To Bypass or Unbypass All V-Vocal Clips in a Track
- Right-click a V-Vocal clip and choose V-Vocal > Bypass All V-Vocal Clips from the Clips pane pop-up menu.
To Delete a V-Vocal Clip
- Select a V-Vocal clip (the orange clip with the V-Vocal icon, not the original audio clip) and use the Edit > Delete command, or press DELETE on your keyboard.

Note: V-Vocal commands can also be accessed by clicking the V icon in the V-Vocal clip V-Vocal Region 1.
Using V-Vocal
V-Vocal is a vocal processor that does pitch correction on notes and phrases, corrects timing, edits formants and dynamics, and can add vibrato.
The following topics describe using the V-Vocal interface to process audio data. For information about inserting and managing V-Vocal in SONAR, see “V-Vocal Clips” on page 641.
Here's a description of the interface:
Figure 115. V-Vocal
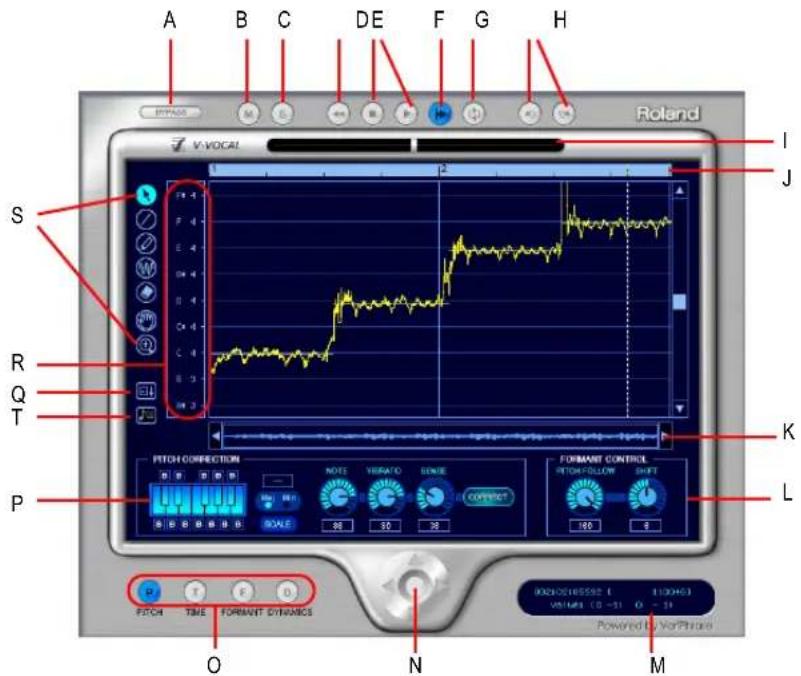
A. Bypass B. Mute C. Solo D. Rewind E. Play/Stop F. AutoScroll G. LoopMode H. Undo/Redo I. Cent indicator J. Timeline K. Scroll L. Formant control M. Information view N. Zoom O. Edit mode P. Pitch correction Q. Spread editing area R. Select pitch correction key S. Tools T. Pitch to MIDI
Description of Interface Components
- Edit mode. Select the parameter you want to edit: pitch, time, formant, or dynamics.
- Zoom. Continuous horizontal or vertical zooming by dragging the center vertically or horizontally. If you drag the center while pressing the SHIFT key, you can restrict the zoom direction to horizontal or vertical. Zoom in or out incrementally by clicking any of the four arrows Double-clicking the center shows the overall clip.
• AutoScroll. The editing display scrolls when you turn on AutoScroll. - Formant control. The Pitch Follow knob increases or decreases the formant according to pitch. The Shift knob increases or decreases the formant for the entire phrase.
- Pitch Correction
- Keyboard and Scale buttons. Assign the target notes with the Keyboard button; each key has a Bypass button (B) located under or over the key. The Scale button lets you assign the target notes by scale: click the Scale button, click Maj or Min, and click a note on the Keyboard button to choose the root of the scale.
- Note button. Use this button to set the rate of pitch correction. This function can adjust the pitch to the selected notes' grids by increasing or decreasing the pitch of the selected region
- Vibrato. Set the depth of the vibrato. If you choose 100%, vibrato depth is set to zero.
-
Sense. This is a sensitivity control for pitch correction for unstable pitch areas such as portamento. Pitch correction gets stronger if you increase the value.
-
Cent indicator. This indicator shows the pitch correction amount by cents in realtime (+/- 100 cents).
• Timeline. This gives a graphical display of the playback time in beats. - Select pitch correction key. Set the target notes for the pitch correction. Each time you click a note, the note's color is changed to red, grey, or blue in turn. Meaning of each color is as follows:
- Blue: selected
- Gray: not selected
- Red: Bypassed
- Arrow tool ⬤. For selecting the editing region, and for increasing or decreasing the pitch of the selected region.
- Line tool ☐. For drawing Pitch, Formant, and Dynamics with straight lines.
- Pen tool 📋. For drawing Pitch, Formant, and Dynamics freehand.
- Vibrato/LFO tool. For adding and editing Vibrato or LFO at the selected region.
- Eraser 📋. For resetting the selected region to its initial value.
- Hand tool 📄. For scrolling the display. If you drag in the editing area while pressing the CTRL key, you can zoom.
- Rectangle zoom. For selecting an area to zoom in to. Drag a border around the area you want to zoom to. Overall area is displayed by double clicking.
See:
Playing Back V-Vocal Clips
Playing Back V-Vocal Clips
You can play back V-Vocal clips by clicking the buttons at the top of the V-Vocal interface. Besides playing the V-Vocal clip, you can mute it, solo it, loop it, and rewind it. Clicking in the time ruler at the top of the graph moves the playback time.
To Play a V-Vocal Clip
• To play a V-Vocal clip, click the Play button in the V-Vocal interface, or press the SPACEBAR.
- To stop playback, press the SPACEBAR, or click the Stop button.
- To mute the track that the V-Vocal clip is in, click the M button in the V-Vocal interface.
• To Solo the track that the V-Vocal clip is in, click the S button in the V-Vocal interface.
• To rewind the V-Vocal clip, click the Rewind button in the V-Vocal interface.
• To loop the V-Vocal clip, click the Loop Mode button in the V-Vocal interface.
• To set the playback time for the V-Vocal clip, click in the timeline that's at the top of the graph.
See:
Pitch Editing
Pitch Editing
Pitch editing requires that the Pitch button in the Edit Mode section is enabled. Here's a description of the interface in pitch editing mode:

- The yellow line is the edited Pitch curve and this line is the actual sounding pitch.
• The red line is the original Pitch curve and this line cannot be edited. - The green dot is a Node. Nodes are automatically assigned to the start and end of the edited region. You can select the specific region between the nodes if you click the yellow line between the nodes.
- The white horizontal line is called Center Pitch. Center Pitch is used as a baseline for increasing or decreasing vibrato or for pitch correction.
To Change the Pitch of a Selected Region
- Use the Arrow tool to select the part of the yellow line that you want to transpose (make sure that the Pitch button in the Edit Mode section is enabled).
The selected region turns blue to show that it is selected.
- Drag the yellow line up or down.
Nodes appear automatically when you shift pitch.
Tips:
- CTRL-dragging snaps the pitch to the pitch correction grid. SHIFT dragging moves the pitch by 100 cent increments.
- You can also edit pitch by dragging a node up or down.
- You can undo each edit you do by pressing CTRL+Z. You can use this command repeatedly to undo multiple edits.
About Pitch Correction
The key for making manipulated sound more natural is using the parameters in the Pitch Correction section: Note, Vibrato and Sense. Functions for each parameter are as follows:
- Note. Controls the ratio of pitch shifting to the nearest scale note. With a value of 100, each section is completely shifting to the nearest scale note.
- Vibrato. As the value increases, the vibrato depth gets narrower. At a value of 100, Vibrato is completely eliminated.
- Sense. As the value increases, the range of affecting pitch correction gets wider.
If you set all of above parameters to a value of 100, you will get a "robot voice"-type sound.
Current default values are:
- Note: 100
• Vibrato: 50 - Sense: 100
This setup is a bit too artificial. If you want to make the sound more natural, we suggest the following setup:
• Note: 70-100; be careful of intonation.
- Vibrato: 0-20; try 0, if you'd like to keep the original.
- Sense: 20-30; adjust to fit the data.
The above suggestion is just one example. Different types of audio might require different settings.
In addition, try adjusting the Pitch Follow parameter in the Formant Control section as follows:
- Set the value close to 100 if you'd like to do subtle pitch correction.
- Set close to 0 if you'd like drastic rephrasing.
To Draw Freehand Pitch Changes
- Click the Pen tool.
- Draw a shape on the graph.
To Draw Straight Line Pitch Changes
- Click the Line tool.
- Draw a line on the graph.
To Correct Pitch
- Select the region you want to correct by using the Arrow tool.
- Select the notes that you want the selected region to become by clicking notes on the Keyboard button. The selected notes should be light blue. The deselected notes are dark blue. When you click the Correct button, the selected area conforms to the light blue notes on the keyboard. You can also click the note names in the Select Pitch Correction field to select notes. Note that light blue note names are selected, grey note names are not selected, and red note names are bypassed.

Note: To display different octaves, drag the vertical scroll bar that is at the right side of the graph up or down.
- Set the amount of pitch correction you want by adjusting the Note knob. 100 cents is equal to a half-step. Between 70 and 100 is a good place to start.
- If the selected region has any unstable pitch areas such as portamento, you can adjust the Sense knob, which adjusts pitch correction sensitivity. Pitch correction gets stronger if you increase the value. 30 is a good starting point. If the selection has vibrato, try 0 to 30.
- Click the Correct button. The pitch in the selected region moves to the target pitches (the light blue notes on the keyboard).
To Conform Pitches to a Scale
- Use the Arrow tool to select the region where you want to correct pitches.
- Click the Scale button so that it is enabled (light blue).
- Click a Maj or Min button to select a major or minor scale, respectively.
- Click a note on the Keyboard button to select the root note of the scale.
The notes of the scale you selected turn light blue on the Keyboard button.
- Click the Correct button.
The selected area conforms to the light blue notes on the keyboard.
To Restore Original Pitch
- Use the Eraser tool to drag over a region. The region you drag over returns to original pitch.
To Add Vibrato
- Click the Vibrato/LFO tool.
- Move the cursor to the place where you want the vibrato to start.
The cursor displays a vibrato icon when it is ready to add new vibrato:

- Drag to the right for the length of the vibrato segment that you want to add.
To Edit Vibrato
- Move the Vibrato/LFO tool over the vibrato segment that you want to edit.
The cursor displays a double-arrow icon when it is ready to edit vibrato:

- Drag the vibrato segment vertically to edit amplitude, or horizontally to edit frequency.
Tips:
- Holding the CTRL key down while you drag restricts vibrato editing to amplitude only.
- Holding the SHIFT key down while you drag restricts vibrato editing to frequency only.
To Fade-in Vibrato
- Move the Vibrato/LFO tool over the beginning of a vibrato segment.
The cursor displays a fade-in icon when it is ready to add a fade-in:
- Drag the vibrato segment to the right for the length of the fade-in that you want to add.
See:
V-Vocal pitch-to-MIDI.
Editing Time.
Editing Time
To edit timing with V-Vocal, the Time button in the Edit Mode section must be enabled.
To Edit Time
- Make sure the Time button is enabled.
- Move the Arrow tool near the vertical center of the graph until the cursor changes to the double arrow, and click at each point where you want to preserve the original timing. A vertical green line appears at each point that you click.
- Now add new green lines between the existing ones.
- Drag the new lines to the left or right to compress or expand each region.
Tips:
- Hold down the CTRL key while you move lines to move all the following lines by an equal amount.
• To erase lines, drag a region with the eraser. Timing reverts to its original condition in the areas where you erase lines.
See:
Editing Formants
Editing Formants
A rough definition of formants is that they are vowel sounds. To edit formants with V-Vocal, the Formant button in the Edit Mode section must be enabled.
Here's a picture of the V-Vocal interface in formant mode:
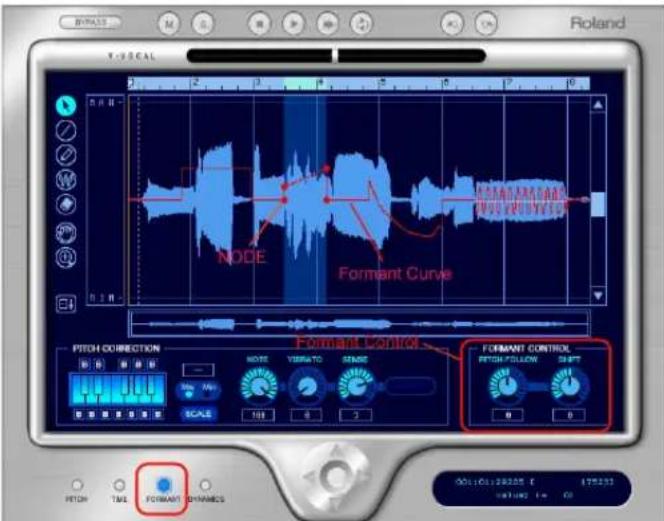
The red line in the graph is the formant line. The red dots on the line are nodes.
To Shift the Formant of a Region
-
Use the Arrow tool to select the region you want to shift.
-
Drag the red line in the region up or down.
When you drag the red line, nodes are automatically created at the start and end of the selected region. You can drag the nodes to create different shapes.
Tips:
- Double-clicking the red line in a selected region adds nodes to the place where you click, and also to the start and end of the selected region.
- You can do freehand editing with the Pen tool.
Mixing
Using V-Vocal
- You can add an LFO to a selected region by dragging the red line up or down with the Vibrato tool. Dragging left or right modifies the LFO frequency.
- You can reset segments of the red line by dragging with the Eraser.
- You can increase or decrease the formant for the entire phrase by adjusting the Shift knob.
To Link the Formant Line to the Pitch Line
- To increase or decrease the formant relative to pitch, adjust the Pitch Follow knob. You can view pitch at the same time as formants by right-clicking the graph, and choosing Views > Pitch from the context menu.
See:
Editing Dynamics
Editing Dynamics
The basic procedures for editing dynamics with V-Vocal are the same as for formant editing, except that dynamics are represented by a yellow line, and you must have the Dynamics button enabled in the Edit Mode section.
See:
Context Menu
Context Menu
If you right-click the graph, the V-Vocal context menu appears.
The menu has the following commands:
- Undo. Use this command to undo your last editing action. You can use this command repeatedly to undo a series of editing actions, starting with the latest.
- Redo. Use this command to redo an editing action that was just cancelled by an Undo command.
- Select All. Use this command to select the whole phrase. You can deselect a selection by clicking away from the waveform.
- View. Use this command and the options in its submenu to hide or show the phrase's waveform (Wave option on submenu), the pitch display (Pitch), the formant line (Formant), and the dynamics line (Dynamics).
- Group Node. Deletes nodes in the selected region.
- Pitch Detect Mode. Method for redetecting center pitch (the white horizontal line) of LFO or Vibrato. After you select the region you want to redetect, choose from these options the following submenus.
- Standard 1. Generally, you do not need to select this option, because it is used to detect
pitch as soon as you create a V-Vocal clip. If you decide to use another method, but change your mind and want to use this method, you can select this method to recreate the original data.
- Standard 2. This is a general pitch detection setting that often performs better on styles with deeper vibratos.
- Deep Vibrato. Special purpose pitch detection method for phrases that contain very deep vibratos; this detection method tends to create longer center pitches, but may detect multiple notes as a single note.
- Precision. Special purpose pitch detection method for very high resolution pitch detection of phrases; this detection method will create more accurate center pitches for styles containing fast variations of pitch. This method, however, may divide a single vibrato section into multiple pitches.
- LFO Pen Type. Select the type of the waves of vibrato added by the vibrato tool.
See:
Keyboard Shortcuts
V-Vocal pitch-to-MIDI
V-Vocal is able to convert pitch to MIDI. V-Vocal data can be dragged from V-Vocal and dropped onto a MIDI track in SONAR's Clips pane.
Pitch to MIDI settings
To open the Pitch to MIDI Settings dialog, right-click in the V-Vocal Edit pane and select Pitch to MIDI Settings from the pop-up menu.
There are two parameters that affect the generated MIDI data.
Pitch Bend Range. This setting is used to specify the pitch bend range to use when converting fine pitch changes to MIDI. The Pitch Bend Range value is specified in semitones and the range is 1-24. The default value is 2 semitones.
Time Resolution (ticks). This setting is used to specify the tick interval between pitch bend events. The choices are 20, 40, 60, 80, 100 and 120, and the default value is 20 ticks.
Use Pitch Bend. This setting specifies whether or not the converted MIDI data will include Pitch Wheel events.
To convert pitch-to-MIDI
Click the Pitch to MIDI button and drag onto a MIDI track in SONAR's Clips pane.
A MIDI representation of the post-correction V-Vocal audio data is copied to the MIDI track.
Keyboard Shortcuts
Mixing
Using V-Vocal
The following table lists the V-Vocal keyboard shortcuts:
| Command Shortcut | |
| Arrow tool S | |
| Line tool L, or hold down SHIFT while using the Pen tool | |
| Pen tool D | |
| Vibrato/LFO tool V | |
| Erase tool E | |
| Hand tool H | |
| Zoom tool Z | |
| Undo zoom U | |
| Redo zoom SHIFT+U | |
| Zoom vertically CTRL+UP/DOWN ARROW keys | |
| Zoom horizontally CTRL+LEFT/RIGHT ARROW keys | |
| Fit entire region into display SHIFT+F | |
| Fit content vertically F | |
| Pitch edit mode 1 | |
| Time edit mode | 2 |
| Formant edit mode | 3 |
| Dynamics edit mode | 4 |
| Cycle through all modes | SHIFT+LEFT/RIGHT ARROW keys |
| Play/Stop | SPACEBAR |
| Rewind | W |
| Bypass | B |
| AutoScroll A | |
| Loop on/off | \ |
| Undo | CTRL+Z |
| Redo | CTRL+SHIFT+Z |
Table 133.
| Command Shortcut |
| Cancel drag gesture ESC |
| Select All CTRL+A |
| Select None CTRL+SHIFT+A |
| Return selection to default settings DELETE |
| Solo track / |
| Show/hide waveform in Pitch edit mode SHIFT+W |
| Go to/Center cursor G |
| Scroll up/down UP/DOWN ARROW keys; PAGE UP/PAGE DOWN |
| Scroll left/right LEFT/RIGHT ARROW keys |
Table 133.
Using the Per-track EQ
SONAR has a 4-band EQ patched into each audio track by default. You can adjust these EQ's in the Console view and the Track Inspector. You can hide the EQ, hide its graph (plot), display only one band, or display all four bands
Here's a graphic of the EQ and its controls:
Console view Track or Bus Inspector

A. Plot B. Enable EQ C. Choose type of filter, band 4 D. Frequency, Gain, and Q controls for band 3 E. Enable band 2 F. EQ Plot button G. EQ button H. Display button I. Module options
Here's how to use it:
To Show or Hide the EQ in all Audio Tracks
- In the Console view, click the EQ button; in the Track or Bus Inspector, click the Display button and click EQ.
To Show Either One Band's Controls or Four Band's Controls
- In the Console view, right-click the EQ button and choose options; in the Track or Bus Inspector, click the Module Options button, choose EQ and Plot, and choose options.
To Enable or Disable the EQ in a Track or Bus
- Click the EQ Enable button.
To Enable or Disable a Band
- Click the Enable/Disable Band button that's at the top of each band's controls.
To Choose the Filter Type for Each Band
- Click the Filter Type menu, and choose a filter type.
To Set Frequency, Gain, and Q for Each Band
- In the Track or Bus Inspector, in the band that you want to configure, drag the frequency slider, gain slider, or Q slider, respectively, to the left or right. In the Console view, rotate the buttons that correspond to each parameter. There are tooltips for each control.
To Hide or Show the Plot (Graph)
- In the Console view, click the Plot button. In the Inspector, click the Display button, and click Plot.
To Change the Plot Resolution
- In the Console view, right-click the Plot button and choose options. In the Inspector, click the Module Options button, choose EQ and Plot, and choose options.
To Open the EQ Interface
- Double-click the Plot.
To Turn Off Bands 5 and 6
- If you are using bands 5 and/or 6, you can turn these bands off by right-clicking the Plot, and choosing Reset Hidden EQ Parameters.
To copy EQ settings
SONAR lets you easily copy EQ settings from one track/bus (source) to another track/bus (target) when using the integrated per-channel EQ in the Console View.
- CTRL-click on the source EQ plot area and hold down the left mouse button.
- While still holding down the CTRL key and left mouse button, drag the mouse cursor over the EQ plot area on the target track.
- Release the left mouse button and CTRL key.
The EQ settings are copied from the source track/bus to the target track/bus. The target EQ will automatically be enabled if it was not already enabled.
This command is undoable, so you can quickly and easily revert to a track/bus' previous EQ settings.

Note: You can only copy settings from an EQ that is enabled.


A. Hold down the CTRL key and left-click in the source EQ plot B. While still holding down the CTRL key and left mouse button, drag the mouse cursor to the target EQ plot and release the mouse button C. The source EQ plot is copied to the target EQ plot
Applying Audio Effects
You can destructively apply audio effects for one or more tracks. When you are pleased with the audio effects you have patched into a track, you can apply the effects to the track. Applying effects to a track saves resources, allowing you to include additional tracks and/or effects

Note: When applied effects are undone, they are not re-patched in the FX bin(s).
To Apply Multiple Audio Effects Offline
- Add one or more audio effects to one or more tracks in either the Track view or the Console view.
- In the Track view, select the tracks or clips you want to be affected.
- Select Process > Apply Audio Effects.
The Apply Audio Effects dialog appears.
- If desired, select the option to delete the effects after applying them.
- Click OK.
If you do not delete the effects after applying them, they remain active.
CPU Usage of Audio Effects
The number of real-time audio effects that your computer can handle depends on the number of audio tracks in your project, the number and type of effects you want to use, and the type and speed of your CPU. Certain effects are more CPU-intensive than others, and enabling certain settings (such as using equalization within the Stereo Reverb) increases CPU usage for those effects.
Applying MIDI Effects
You can destructively apply the MIDI effects in a track's patch point. This makes it easy for you to experiment with MIDI effects before you commit to them on a more permanent basis.
To Apply MIDI Effects Destructively
- In the Track view, select the tracks or clips to be affected.
- Select Process > Apply MIDI Effects.
- If desired, select the option to delete the effects after applying them.
- Click OK.
If you don't delete effects after applying them, they continue to be active during playback, even though they have already been applied.
Using Control Groups
SONAR lets you link faders, knobs, or buttons in the Track and Console views into groups. Groups are collections of controls whose movements are linked together. For example:
- Two Volume faders or controls can be grouped so that when you increase or decrease the volume of one track, the volume of the other track changes in exactly the same way.
- Four Mute buttons can be grouped so that when you click on the Mute button to mute track 1, tracks 1 and 2 are muted and tracks 3 and 4 are un-muted.
The Console view and Track view identify controls, knobs and faders that are grouped using a colored group indicator that is displayed on the controls in each group. The controls in group A are displayed with a red indicator, the controls in group B with a green indicator, and so on. Controls, faders and knobs can be grouped together.
When you group buttons together, the way they work is based on their position when you create the group:
- Buttons that are in the same position when grouped will turn on and off together at all times.
- Buttons that are in opposite positions when grouped will always remain in opposite positions.
When you group buttons with knobs or faders, the button turns on/off when the knob or fader reaches its halfway point.
You have several additional options. There are three general types of groups: absolute, relative, and custom. Here's how they work.
Absolute
The range of motion in all controls in the group is identical. When you move one control in the group, all other controls in the group move the same amount in the same direction. The controls do not necessarily need to start at the same level.
Relative
The range of motion for controls in the group is not the same. All controls in the group have the same value at one point—the lowest level for send, return, and volume levels, and zero for pan controls.
Custom
Sometimes you want to define a more complex relationship between the controls in a group. For example:
- You want two controls two operate in reverse—when one fader drops, the other increases (cross fade).
- You want two volume faders grouped so that they are locked together at maximum level, but drop at different rates.
- You want two faders to be locked together with the same range of motion, but a third fader grouped with them to have a different range of motion.
Custom groups let you set the range of motion for each control in the group by entering a starting and ending value. As any one control in the group is moved from its starting position to its ending position, the other controls in the group exercise their full range of motion.
When you have defined a custom group, you can adjust the starting and ending position of each control using the Group Settings dialog box or using pop-up menus on the controls in the group.

Note: By default, the relative gain between grouped controls that affect gain is preserved. If you prefer the relative position of the controls to be preserved regardless of the relative gain, there is a check box in the Group Properties dialog that will toggle between these two behaviors.
To Add a Control to a Group
- Right-click on the control.
- Choose a group from the Group submenu.
SONAR adds the control to the group. Controls, knobs and faders are highlighted with the group's color indicator.
To Remove a Control from Its Group
- Right-click on the control.
- Choose Remove From Group from the menu.
SONAR removes the control from the group and displays the control with the neutral color indicator.
To Remove All Controls from a Group
- Right-click a control in the group, and choose Clear Group from the pop-up menu.
To Override a Control's Grouping
- Hold down the CTRL key while moving the control.
The control remains part of the group and functions as such once the CTRL key is lifted.
To Set the Group Type to Relative or Absolute
- Right-click on any control in the group and choose Group Manager to display the Group Manager dialog.
Figure 116. The Group Manager dialog
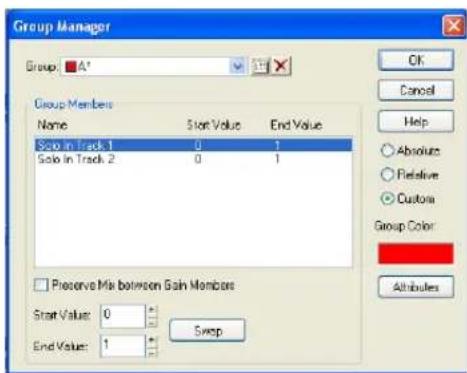
- Choose Absolute or Relative as the group type and click OK.
SONAR uses the type to determine the range of motion for the group's controls.
To Create a Custom Group
-
Right-click on any control in the group and choose Group Manager to display the Group Manager dialog.
-
Choose Custom as the group type. The starting and ending values for each control are displayed.
-
To change the starting or ending value for a control, click on the control in the list and enter new values in the Start and End box.
-
To swap the starting and ending value, click the Swap button.
-
Click Close when you are done.
SONAR uses the type to determine the range of motion for the group's controls.
To Adjust the Start Value of a Control
-
Set the control to the desired starting value.
-
Right-click on the control.
3. Choose Set Start = Current.
SONAR sets the start value of the control.
The Set Start = Current and Set End = Current commands set the range of motion that a grouped control moves through as the other members of the group move through their starting and ending values. You don't have to designate a group as a custom group to create a custom group—just group some controls and set their starting and ending values.
To Adjust the End Value of a Control
- Set the control to the desired ending value.
- Right click on the control.
- Choose Set End = Current.
SONAR sets the end value of the control.
The Set Start = Current and Set End = Current commands set the range of motion that a grouped control moves through as the other members of the group move through their starting and ending values. You don't have to designate a group as a custom group to create a custom group—just group some controls and set their starting and ending values.
See also:
Quick Groups
Quick Groups
You can create a temporary group (a Quick Group) of track or bus controls by clicking the strip selector on each track or bus that you want to group. Similar or identical controls in the grouped tracks or buses will then move synchronously when you adjust them. For example, if you made a Quick Group of an audio track and a MIDI track, and then dragged the volume fader in the MIDI track, the volume fader in the audio track would move in similar fashion. If you dragged the Velocity Trim fader in the MIDI track, the Volume Trim fader in the audio track would move also.

Note: Not all controls can be Quick Grouped or Grouped. Controls such as Input, Output, and Effects Send Selector on Audio tracks as well as the Input, Output, Channel, Bank, Patch, Time+ and Key+ controls on MIDI tracks cannot be grouped (they can have identical values set though by using the Tracks > Property > [name of property] command).
The additional attributes of Quick Groups are:
- Only one Quick Group can exist at a time.
- If a control is part of a Quick Group and a permanent group, the Quick Group takes precedence.
- Track and bus controls cannot be in the same Quick Group.
Strip selectors are located in the upper left corner of a track or bus number in the Track view, and are located in the upper left corner of a track or bus name in the Console view. Traditional track
selection (selecting a track and all its recorded MIDI or audio data) is still performed by clicking the track number, but not in the upper left corner.

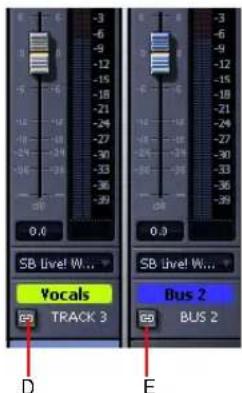
A. A track strip selector in the Track view B. A track selector in the Track view C. A bus strip selector in the Track view D. A track strip selector in the Console view E. A bus strip selector in the Console view
You can make part of a Quick Group into a permanent group by right-clicking a grouped control, and using the Group > Save command from the pop-up menu. This creates a group of whatever kind of control you right-clicked from all the tracks or buses in the Quick Group. For example, if you have a Quick Group made of three audio tracks, you could right-click the Volume fader of one of the tracks, and save the group. This would create a permanent group of the volume faders in the three audio tracks.
To Create a Quick Group
- Highlight the track strip or bus strip selectors of the tracks or buses you want to group by using any of the following methods:
- CTRL-click strip selectors if they are not adjacent.
- Click one strip selector, then SHIFT-click another strip selector to select all tracks or buses that are between them.
- CTRL-click any strip selector that you want to de-select.
- Double-click a strip selector to select all tracks or buses.
To Remove all Controls from a Quick Group
- Click a strip selector that is in or out of the group.
Or
- Right-click a control in the group, and choose Clear Group from the pop-up menu.
To Make a Quick Group a Permanent Group
- In a pre-existing Quick Group, right-click the kind of control that you want to group (for example, volume) to open the pop-up menu.
- Use the Group > Save command from the pop-up menu.
The Group Attributes dialog appears.
- Choose a Group name and color, and click OK.
If you right-click a control to display the pop-up menu again, the name of your new group appears in the Group menu. You can add other controls to the group by right-clicking a control, and choosing the group from the pop-up menu.
You can choose the default color for Quick Groups in the Configure Colors dialog (Options >Colors command).
See also:
To create a Quick Group for all tracks assigned to the same bus
Using Remote Control
This section explains how to assign knobs or sliders on a MIDI controller to control specific parameters on specific tracks. If you have a control surface with groups of faders such as a Tascam US-428 or CM Labs MotorMix, see the online help topic “Working with External Devices.”
SONAR's Remote Control function lets you use a MIDI device to remotely control knobs, buttons, and sliders in the Track and Console views. For example, you can:
- Use a key on your keyboard to temporarily mute a track
• Work the send level in a bus with your pitch bend wheel - Set the main volume levels with NRPN messages
- Prevent SONAR from sending any controller messages to your MIDI device.
- Record automation from an external controller
If you set up remote control for a grouped control, the remote control works all controls in the group.
The type of MIDI message used to work a control is selected in the Remote Control dialog box. The options are as follows:
| Message option | Message effect on buttons | Message effect on sliders and knobs |
| None No remote control No remote control | ||
| Note On | The button state is toggled | The slider/knob is alternately maximized and minimized |
| Note On/Off The button state is toggled when Note On is received, and toggled again when Note Off is received | The slider/knob is maximized when Note On is received, and minimized when Note Off is received | |
| Controller n/a The slider/knob value is set to the controller value | ||
| Wheel n/a The slider/knob value is set to the wheel value, with the values mapped from their original range of -8,192 to 8,191 to a range of 0 to 127 | ||
| RPN n/a The slider/knob value is set to the RPN value, with the values mapped from their original range of 0 to 16,383 to a range of 0 to 127 | ||
| NRPN n/a The slider/knob value is set to the NRPN value, with the values mapped from their original range of 0 to 16,383 to a range of 0 to 127 | ||
Table 134.
To Set Up Remote Control for a Knob, Button, or Fader
- Right-click on the control and choose Remote Control from the pop-up menu.
- Choose the remote control type, as described in the table above.
- Set the note or controller number if applicable.
- Set the MIDI Channel field to the channel that your controller sends out.
- Click OK.
You can now work the control from your MIDI device. If you click the Automation Write button on the track strip of the track you are recording on, you can record your external controller's knob or fader movements. Make sure the Automation Write button in the Automation toolbar is enabled.
To Disable Remote Control
- Right-click on the control and choose Disable Remote Control from the pop-up menu.
To Prevent SONAR from Sending Controller Data to Your MIDI Device
- Right-click each knob or fader in SONAR that is sending unwanted controller data to your MIDI device and choose Disable Control from the pop-up menu.
See:
Using the Learn Option
Using the Learn Option
The Learn option in the Remote Control dialog allows you to bind a parameter in SONAR to a knob or fader on your controller.
To Bind a Control Using the Learn Option
- Right-click on the parameter you want to arm in either the Track view or Console view and select Remote Control from the pop-up menu.
- Move a knob or fader on your controller.
- Click the Learn button in the Remote Control dialog and click OK.
The control in SONAR is now bound to the knob or fader on your controller.
Bouncing Tracks
The Edit > Bounce to Track(s) command lets you combine one or more audio tracks into a submix. A submix can be a mono track, a stereo track or several mono tracks that contain the mixture of the original tracks, preserving the volume, pan, and effects for each track. If you're bouncing tracks that are routed to a surround bus (SONAR Producer only), you can bounce them to as many mono tracks as you have surround channels, by choosing the Split Mono option in the Channel Format field of the Bounce to Tracks dialog, and also choosing a surround bus in the Source Category field. After their creation, the submix tracks are just like any other tracks—you can edit them, add effects, copy them to another project, etc. The original, unmixed audio tracks are not deleted, so you can archive them and recover them later, or continue using them as before.

Note: You control the bit depth of all rendering operations (bouncing, freezing, applying effects) on the Audio Data tab of the Global Options dialog (Options > Global command) in the Render Bit Depth field. The default value of 32 is the best for most situations. See “Bit Depths for Rendering Audio” on page 849 for more information.
The Edit > Bounce to Track(s) command operates completely offline, meaning you can mix down tracks that may be too complex for your machine to actually play in real time.
Here are some reasons to use Edit > Bounce to Track(s):
- Your mix is so complex that real-time playback is impossible. Edit > Bounce to Track(s) produces the correct mix, and store the result in a new track or tracks.
- You require more CPU time for your real-time effects. With Edit > Bounce to Track(s), you can premix some of your tracks with real-time effects applied, saving CPU time during playback.
If you mix down to tracks that already have data, the new events are placed in the track, but do not overwrite existing material.
To Mix Down (Bounce) Audio Tracks
- Set all volume, pan, effects, and automation settings just as you want them.
- Select the tracks or clips you want to mix down.
- If you are using effects on the tracks and want to mix the effects down at this time, select the whole length of the longest track or clip plus an extra measure for the reverb or effects "tail."
- Choose Edit > Bounce to Track(s) to open the Bounce to Track(s) dialog.
Figure 117. The Bounce to Track(s) dialog
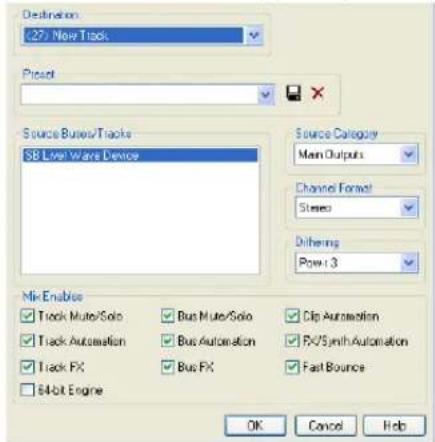
- Select the first destination track for the mixdown.
- If you've saved a preset configuration for the Bounce to Tracks(s) dialog, select it now in the Preset window.
- In the Source Category field, select the source you want to use for your bounced track(s) from the following options:
- Tracks. Choosing this option creates new separate tracks for each track you highlight in the Source Buses/Tracks field. Each track you highlight will produce a new mono track, stereo track, or two new mono tracks (the Split Mono option), depending on what you choose in the Channel Format field.
- Buses. Choosing this option creates new separate tracks for each bus you highlight in the Source Buses/Tracks field. Each bus you highlight will produce a new mono track, stereo track, or two to eight new mono tracks (the Split Mono option), depending on whether the bus is a stereo or surround bus, and depending on what you choose in the Channel Format field.
- Main Outputs. Choosing this option creates new separate tracks for each main output you highlight in the Source Buses/Tracks field. Each main output you highlight will produce a new mono track, stereo track, or two to eight new mono tracks (the Split Mono option), depending on whether the output is a stereo output or the Surround Main, and depending on what you choose in the Channel Format field.
- Entire Mix. Choosing this option bounces your entire mix down to a new mono track, stereo track, or two to eight new mono tracks (the Split Mono option), depending on whether the output is a stereo output or the Surround Main, and depending on what you choose in the Channel Format field.
-
Select a channel format: the kind of track(s) you want to create with your bounce.
-
Select source buses or tracks.
-
Select the kind of dithering you want for your bounce, or select None.
- In the Mix Enables field, choose the elements you want to include in the mixdown. If you want to exclude muted tracks and/or include only soloed tracks, make sure Track Mute/Solo is checked. Make sure Fast Bounce is checked, otherwise the bounce process will take as long as it takes to play your selected track data in real time. Usually, you also want to check 64-bit Mix Engine. This option lets you turn on the 64-bit mix engine temporarily while you bounce your tracks. This produces a higher-quality bounce without taxing your CPU during the rest of your session.
Note 1: If you have patched a synth into a track or bus, make sure you check Track FX to include synths that are patched into tracks, and check Bus FX to include synths that are patched into buses.
Note 2: If you don't check Track Automation, any initial volume and pan settings in an exported track are ignored and the track's audio data will be exported at the level that exists in the track, with pan set to center. If you don't check Clip Automation, any trim settings are ignored during export.
- If you want to save your settings as a preset, type a name for them in the Preset box, and then click the floppy disk icon that's next to the Preset box.
12.Click OK.
SONAR mixes the audio data and a new track or tracks appear in your project.
Real-time bounce
When Fast Bounce is enabled
When Fast Bounce is enabled, the bounce operation is performed by streaming audio as fast as possible through all mixers and buses in the project. During a fast bounce operation, all hardware outputs are temporarily disabled and the bounce is performed silently.
Note: There is no sonic degradation by performing a fast bounce since it uses the same operation that is performed during normal playback.
There are a few limitations to the Fast Bounce operation:
- You cannot perform a fast bounce if the audio contains any External Insert plug-ins. Since the
External Insert plug-in is typically used to receive audio from external hardware, SONAR's audio output must be sent to the external hardware in real-time. SONAR will display an error message if you attempt to bounce audio that is routed to the External Insert plug-in.
- Certain software instruments, such as samplers, cannot process audio faster than real-time and will produce glitches when operated in fast bounce mode.
- Some hardware-based DSP effects have trouble with fast bounce.
When Fast Bounce is disabled
When Fast Bounce is disabled, the bounce is performed in real-time by actually playing back the project audibly in similar fashion to standard playback. In real-time bounce mode, all audio hardware inputs and outputs are active in order to allow I/O to external hardware inserts.
If you manually stop playback during the bounce operation, SONAR will prompt you if you want to keep or cancel the bounce.
Audible bounce
When Fast Bounce is disabled, the real-time bounce operation can be performed either silently or audibly.
The following dialogs have a new Audible Bounce option:
- Bounce to Track(s) dialog
- Export Audio dialog
- Export Video mix options
- Apply Audio Effects dialog
- Freeze Options dialog
When Audible Bounce is unchecked, no audio output will be heard during the bounce process. When in real-time bounce mode (Fast Bounce unchecked) and Audible Bounce is enabled, you can hear the output of the mixdown.

Note: Depending on the gainstages used in the project and the mixdown options selected—such as bouncing with source category assigned to Tracks, or with mute/solo or automation disabled in the bounce settings or while freezing tracks—the output may be louder or softer than during normal playback. Please be sure to turn down the master output level before using real-time audible bounce under these scenarios to avoid the possibility of speaker damage.
Improve real-time bounce performance
When performing a real-time bounce operation, you can use the Pause button as a toggle to temporarily reduce the frequency of GUI updates. This maximizes CPU resources for the audio engine and can be useful while playing projects that consume a lot of CPU, to help avoid dropouts.
For more information, see "The GUI is not Smooth During Playback" on page 917.
Bouncing/freezing with sidechain plug-ins
Sidechain inputs are not automatically included when you bounce a selection. If you want to bounce the output of a single track that contains a sidechain plug-in, the easiest solution is to also select all tracks that contribute to the plug-in's sidechain input, and do a bounce with Fast Bounce disabled and the Source Category set to "Tracks".

Note: Freezing a track with sidechain inputs will not include the sidechain input. If you need to free up CPU on a track that includes a sidechain, use the bounce command with all sidechain sources explicitly selected in the mix.
See:
Sidechaining
External Insert plug-in
Bouncing Tracks
Bouncing to Clips
Preparing to Create an Audio CD
You can create an audio CD from any wave file or files (extension .wav) of up to either 74 or 80 minutes (depending on the recordable CD media you have). If your projects are audio only, you can simply mix down to a stereo wave file. If your projects contain MIDI, you must first convert the MIDI tracks to audio tracks. Once you have all the stereo wave files you want to include on your CD, you are ready to burn a CD. Use the Tools > Burn Audio CD command to burn your tracks to an audio CD.
For step-by-step procedures:
To Export Audio to Wave File Format
Converting MIDI to Audio
To Burn Audio Tracks to an Audio CD
- Make sure the tracks you wish to burn to CD have been saved as 16-bit, 44,100 Hz, stereo Wave (.wav) files.
- Insert a blank CD-R disc in the destination drive.
- Choose Tools > Burn Audio CD to open the Audio CD Burner dialog box.
- Select a destination CD writing drive using the Target Drive drop-down list.
- Click Add Track to locate and import the audio Wave files you wish to burn to CD.
- Place the tracks in the desired order by using the Move Up and Move Down buttons.
- Click Burn CD.
SONAR verifies, performs a layout of the tracks and writes the current track list to CD medium in the selected drive. After the disk is completed, the disk is ejected from the drive.
Preparing Audio for Distribution
The File > Export Audio command exports your project as a new file or files that you can burn to a CD, or distribute via the Web or email. In addition, SONAR Producer allows you to export surround-encoded files (see "Exporting Surround Mixes" on page 704). The following export formats are supported:
| Format Definition | |
| Wave (surround files in Wave format are supported by SONAR Producer only) | The standard digital audio format used under Windows for burning CDs, with a file extension of .wav. |
| Sony Wave64 | The Sony Wave64 file format is similar to the RIFF format, but is a true 64-bit file format designed to overcome the size limitations of the RIFF format. |
| Windows Media Advanced Streaming Format (includes Windows Media Pro; surround files are supported by SONAR Producer only) | Compressed digital audio for streaming over the Internet, with the file extension .wma. |
| MP3 Highly compressed digital audio designed for quick downloads via the Internet, with the file extension .mp3. The MP3 encoder that comes with SONAR is a trial version which will time-out. The full version is available for download at www.cakewalk.com. | |
| Apple AIFF Audio Interchange File Format, co-developed by Apple Inc., is most commonly used on Apple Macintosh computer systems. The file extension is .aif. | |
| NeXT/Sun Au is the standard audio file format used by Sun, Unix and Java. The audio in au files can be 8-bit or 16-bit PCM or compressed with the μLaw, alaw or G729 codecs. The file extension is .au. | |
| FLAC FLAC stands for Free Lossless Audio Codec, which is somewhat similar to MP3, but lossless. Audio in a FLAC file is compressed without any loss in quality. The file extension is .flac. | |
| Sound Designer II | Sound Designer II is the native format of DigiDesign's Sound Designer pro audio software and is also used natively by Macromedia DECK II and many applications. SD2 files be mono or interleaved stereo and the file extension is .sd2. |
Table 135.
Format Definition
| Core Audio Format Core Audio Format is a new 64-bit audio format supported natively in Mac OS X, and is also used by QuickTime 7. Audio in Core Audio Format files can be uncompressed PCM or compressed (such as AAC). The file extension is .caf. | |
| RAW | Rarely used, a RAW file can contain audio in any codec but is usually used with PCM audio data. |
| OMF The Open Media Format, created by AVID Technology, is designed to port a project to other applications or platforms. OMF files preserve tracks, clip positions, slip edits and some other project attributes depending on which application is writing or reading the OMF file. | |
Table 135.
If your audio hardware is configured for stereo playback, Wave files are created in stereo; if your audio hardware is configured for monophonic playback, the Wave file is created in mono.
Cakewalk External Encoder Config utility
SONAR supports external command-line encoders, such as LAME, Ogg Vorbis, Monkey's Audio, etc. If an external command-line encoder is installed on your machine, the 'Cakewalk External Encoder Config' utility allows you to add the encoder to SONAR's list of available file formats when exporting audio (File > Export > Audio).
To use the utility, start SONAR and go to Tools > Cakewalk Ext Encoder Config, then specify the proper settings or the encoder you wish to use.

Note: The SONAR 8 DVD includes several pre-defined profiles for various encoders. These profiles can be found in the \Utilities\External Encoder Profiles folder. You can use these profiles as a starting point when creating your own profiles. Simply double-click the appropriate .reg file to add the information to the Windows registry, then use the 'Cakewalk External Encoder Config' utility to specify the correct install path of the encoder.
To Export Audio to Wave File Format
- Set all volume, pan, effects, and automation settings just as you want them.
- If you only want to mix down parts of tracks, select those clips now. If you don't select anything, everything's selected.
- If you are using effects on the tracks and want to mix the effects down at this time, select the whole length of the longest track or clip plus extra time for the reverb or effects "tail."
- Choose File > Export > Audio to open the Export Audio dialog box.
- Select a destination folder using the Look In field.
- Enter a file name.
- Choose one of the following from the Files of type drop-down list:
- Wave. Choose this if you want to export a standard wave file, or if you're exporting a
surround project in wave format.
- Broadcast Wave (time-stamped). Choose this if you want to create a Broadcast Wave file (see description below).
-
In the Source Category field, select one of the following options:
-
Tracks. Choosing this option creates a separate file for each track that you select in the Source Buses/Tracks field.
- Buses. Choosing this option creates a separate file for each bus that you select in the Source Buses/Tracks field.
- Main Outputs. Choosing this option creates a separate file for each main output that you select in the Source Buses/Tracks field.
-
Entire Mix. Choosing this option creates one file for your entire mix, unless you're exporting a surround mix with Split Mono selected in the Channel Format field.
-
In the Source Buses/Tracks field, choose the buses or tracks you want to use as a source to create your mix. If you chose Tracks in the Source Category field, only tracks will show up as choices in this field.
-
In the Channel Format field, select one of the following options:
-
Stereo. All exported tracks and clips are mixed down to a stereo file or files.
- Mono. All exported tracks and clips are mixed down to a mono file or files.
- Split Mono. All exported tracks and clips are mixed down to separate mono files.
-
Multichannel. All exported tracks are mixed down to a multichannel wave file or files.
-
Choose the sample rate that you want your exported file to be.
-
Select the bit depth that you want the exported file to use. If your source file is 16 and you export to 24, you get more precision for any audio effects in the mix (and a larger file). If your source file is 24 and you export to 16, you lose some sound definition, but you get some of it back if the Dithering option is on in the Audio Options dialog box (see "Dithering" on page 679 for more information).
-
In the Mix Enables field, choose the elements you want to include in the mixdown. If you want to exclude muted tracks and/or include only soloed tracks, make sure Track Mute/Solo is checked.

Note 1: If you have patched a synth into a track or bus, make sure you check Track FX to include synths that are patched into tracks, and check Bus Returns to include synths that are patched into buses.

Note 2: If you don't check Track Automation. any initial volume and pan settings in an exported track are ignored and the track's audio data will be exported at the level that exists in the track, with pan set to center. If you don't check Clip Automation, any trim settings are ignored during export. If you don't check Master Automation, any volume and balance settings at the main outs are ignored.
- If you want to save the settings you created in the Export Audio dialog, type a name for them in the Preset window and then click the floppy disk icon that's next to the window.
15.Click Export.
The audio is exported to the Wave file or files.
If you chose Broadcast Wave as the export format, the following information is stored in the file(s):
- Description. A brief description of the contents of the Broadcast wave. Limited to 256 characters.
- Originator. The author of the Broadcast wave. This information is taken from the Author field in the File Info dialog.
- Originator Reference. A unique reference identifier created by SONAR.
- Origination Date. The date the file was created.
- Origination Time. The time the file was created.
- Time Reference. The SMPTE time stamp for the beginning of broadcast wave.
To Export a Project in Windows Media Format
- Set all volume, pan, effects, and automation settings just as you want them.
- If you only want to mix down parts of tracks, select those clips now.
- If you are using effects on the tracks and want to mix the effects down at this time, select the whole length of the longest track or clip plus extra time for the reverb or effects "tail."
- Choose File > Export > Audio to open the Export Audio dialog box.
- Select a destination folder using the Look In field.
- Enter a file name.
- Choose Windows Media Advanced Streaming Format from the Files of type drop-down list.
- In the Source Category field, select one of the following options:
- Tracks. Choosing this option creates a separate file for each track that you select in the Source Buses/Tracks field.
- Buses. Choosing this option creates a separate file for each bus that you select in the Source Buses/Tracks field.
- Main Outputs. Choosing this option creates a separate file for each main output that you select in the Source Buses/Tracks field.
- Entire Mix. Choosing this option creates one file for your entire mix, unless you're exporting a surround mix with Split Mono selected in the Channel Format field.
-
In the Source Buses/Tracks field, choose the buses or tracks you want to use as a source to create your mix. If you chose Tracks in the Source Category field, only tracks will show up as choices in this field.
-
In the Channel Format field, select one of the following options:
- Stereo. All exported tracks and clips are mixed down to a stereo file or files.
- Mono. All exported tracks and clips are mixed down to a mono file or files.
- Split Mono. All exported tracks and clips are mixed down to separate mono files.
-
Multichannel. All exported tracks are mixed down to a multichannel WMA file or files.
-
Choose the sample rate that you want your exported file to be.
- Select the bit depth that you want the exported file to use. If your source file is 16 and you export to 24, you get more precision for any audio effects in the mix (and a larger file). If your source file is 24 and you export to 16, you lose some sound definition, but you get some of it back if the Dithering option is on in the Audio Options dialog box (see "Dithering" on page 679 for more information).
- In the Mix Enables field, choose the elements you want to include in the mixdown. If you want to exclude muted tracks and/or include only soloed tracks, make sure Track Mute/Solo is checked.

Note 1: If you have patched a synth into a track or bus, make sure you check Track FX to include synths that are patched into tracks, and check Bus Returns to include synths that are patched into buses.

Note 2: If you don't check Track Automation. any initial volume and pan settings in an exported track are ignored and the track's audio data will be exported at the level that exists in the track, with pan set to center. If you don't check Clip Automation, any trim settings are ignored during export. If you don't check Master Automation, any volume and balance settings at the main outs are ignored.
- If you want to save the settings you created in the Export Audio dialog, type a name for them in the Preset window and then click the floppy disk icon that's next to the window.
15.Click Export.
The Windows Media Format Encode Options dialog appears.
- Select options and click OK.
The audio is compacted and exported to a file or files with the extension .wma.
To Export a Project in MP3 Format
- Set all volume, pan, effects, and automation settings just as you want them.
- If you only want to mix down parts of tracks, select those clips now.
- If you are using effects on the tracks and want to mix the effects down at this time, select the whole length of the longest track or clip plus an extra measure for the reverb or effects "tail."
- Choose File > Export > Audio to open the Export Audio dialog box.
- Select a destination folder using the Look In field.
- Enter a file name.
- Choose MP3 from the Files of type drop-down list.
-
In the Source Category field, select one of the following options:
-
Tracks. Choosing this option creates a separate file for each track that you select in the Source Buses/Tracks field.
- Buses. Choosing this option creates a separate file for each bus that you select in the Source Buses/Tracks field.
- Main Outputs. Choosing this option creates a separate file for each main output that you select in the Source Buses/Tracks field.
-
Entire Mix. Choosing this option creates one file for your entire mix.
-
In the Source Buses/Tracks field, choose the buses or tracks you want to use as a source to create your mix. If you chose Tracks in the Source Category field, only tracks will show up as choices in this field.
-
In the Channel Format field, select one of the following options:
-
Stereo. All exported tracks and clips are mixed down to a stereo file or files.
- Mono. All exported tracks and clips are mixed down to a mono file or files.
-
Split Mono. All exported tracks and clips are mixed down to separate mono files.
-
Choose the sample rate that you want your exported file to be.
-
In the Bit Depth field, select 16. If your source file is 24 and you export to 16, you lose some sound definition, but you get some of it back if the Dithering option is on in the Audio Options dialog box (see "Dithering" on page 679 for more information).
-
In the Mix Enables field, choose the elements you want to include in the mixdown. If you want to exclude muted tracks and/or include only soloed tracks, make sure Track Mute/Solo is checked.

Note 1: If you have patched a synth into a track or bus, make sure you check Track FX to include synths that are patched into tracks, and check Bus Returns to include synths that are patched into buses.

Note 2: If you don't check Track Automation. any initial volume and pan settings in an exported track are ignored and the track's audio data will be exported at the level that exists in the track, with pan set to center. If you don't check Clip Automation, any trim settings are ignored during export. If you don't check Master Automation, any volume and balance settings at the main outs are ignored.
- If you want to save the settings you created in the Export Audio dialog, type a name for them in the Preset window and then click the floppy disk icon that's next to the window.
15.Click Export.
The Cakewalk MP3 Encoder dialog appears.
- Choose options and click OK.
The audio is compacted and exported to a file or files with the extension .mp3.
See also:
Cakewalk Publisher
Exporting tracks with no selection
If the source category is Tracks when you bounce or export audio with no selection in, each wave file will be exactly the same duration as the original source track.

Encoding options
After clicking the Export button, an additional dialog will appear showing Extra Encoding Options. These options typically determine the bit depth, endian-ness (the byte ordering in memory used to represent the data), and an encoding type within the major file format.
Figure 118. The Extra Encoding Options dialog
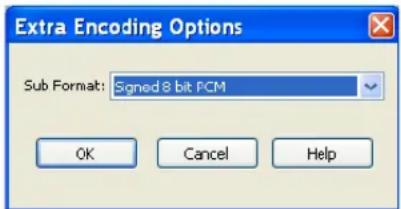
Here is the master list of subformats supported in SONAR:
AIFF (Apple/SGI) (extension "aiff")
- Signed 8 bit PCM
- Signed 16 bit PCM
- Signed 24 bit PCM
- Signed 32 bit PCM
- Unsigned 8 bit PCM
- 32 bit float
- 64 bit float
• U-Law
• A-Law - IMA ADPCM
• GSM 6.10 - 12 bit DWVW
- 16 bit DWVW
- 24 bit DWVW
AIFF (Apple/SGI) (extension "aif")
- Signed 8 bit PCM
- Signed 16 bit PCM
- Signed 24 bit PCM
- Signed 32 bit PCM
- Unsigned 8 bit PCM
- 32 bit float
- 64 bit float
• U-Law
• A-Law
- IMA ADPCM
• GSM 6.10
- 12 bit DWVW
- 16 bit DWVW
- 24 bit DWVW
AU (Sun/NeXT) (extension "au")
- Signed 8 bit PCM
- Signed 16 bit PCM
- Signed 24 bit PCM
- Signed 32 bit PCM
- 32 bit float
- 64 bit float
• U-Law
• A-Law
• 32kbs G721 ADPCM
• 24kbs G723 ADPCM
CAF (Apple Core Audio File) (extension "caf")
- Signed 8 bit PCM
- Signed 16 bit PCM
- Signed 24 bit PCM
- Signed 32 bit PCM
- 32 bit float
- 64 bit float
• U-Law
• A-Law
FLAC (FLAC Lossless Audio Codec) (extension "flac")
- Signed 8 bit PCM
- Signed 16 bit PCM
- Signed 24 bit PCM
RAW (Headerless audio file) (extension "raw")
- Signed 8 bit PCM
- Signed 16 bit PCM
- Signed 24 bit PCM
- Signed 32 bit PCM
- Unsigned 8 bit PCM
- 32 bit float
- 64 bit float
• U-Law
• A-Law
SD2 (Sound Designer II) (extension "sd2")
- Signed 8 bit PCM
- Signed 16 bit PCM
- Signed 24 bit PCM
W64 (Sony Wave-64) (extension "w64")
- Signed 16 bit PCM
- Signed 24 bit PCM
- Signed 32 bit PCM
- Unsigned 8 bit PCM
- 32 bit float
- 64 bit float
• U-Law
• A-Law
- IMA ADPCM
- Microsoft ADPCM
• GSM 6.10
WAV (Microsoft) (extension "wav")
- Signed 16 bit PCM
- Signed 24 bit PCM
- Signed 32 bit PCM
- Unsigned 8 bit PCM
- 32 bit float
- 64 bit float
• U-Law
• A-Law - IMA ADPCM
- Microsoft ADPCM
• GSM 6.10
• 32kbs G721 ADPCM
Exporting OMF Files
OMF (Open Media Format) files are designed for cross-platform compatibility. For more information about the OMF format, see “Importing OMF Projects” on page 279.
If you plan to export a SONAR project to another program that can read OMF files, it pays to consider three things before you start your SONAR project:
- Sample rate and audio bit depth of the target system
• Number of tracks the target system can handle - SONAR and most other audio programs do not include video in the OMF file
To Export a Project as an OMF File
- Select File > Export > OMF.
The Export OMF dialog appears.
-
Enter a File Name (maximum 64 characters—SONAR limits name length for ISO CDR compatibility), and in the Save As Type field, choose OMF Version 1 or 2. Most applications expect Version 2, but check with your engineer.
-
Audio Packaging: usually you should choose Embed Audio Within OMF, which includes the audio data in the OMF file. But you should check with your engineer.
-
Split Stereo Tracks Into Dual Mono. See what your engineer wants. If exporting a 24-bit project to a Pro Tools system, enable Split Stereo Tracks Into Dual Mono, as some Pro Tools systems do not support 24-bit interleaved stereo files.
-
Include Archived Tracks. You can choose to include archived tracks in your exported file.
-
Mix Each Groove Clip As A Separate Clip. If you have several Groove Clips in a track SONAR exports them as one clip unless you check this option. If you check this option, SONAR
has to do a separate export operation for each Groove Clip in the track, which is very time-consuming. If you only have one Groove Clip in a track, and you have rolled out numerous repetitions of the clip, SONAR exports a single clip that is the length of the original clip and all the repetitions, which is not a time-consuming operation.
-
Audio Format. Ask your engineer what format the studio uses, Windows (RIFF Wave) or Mac (AIFC).
-
Click the Save button.
-
SONAR exports the project as an OMF file. In the Save as Type field, select the OMF version you want to save the project as. Version 1 is compatible with older applications. See your target application's documentation for information on which version it supports.
i
Note: OMF files save the following:
- Tracks
- Clip positions
- Slip edits
- Fades and crossfades (as destructive edits)
• The following information is discarded:
• Volume - Pan
- Automation
- Effects
Dithering
Dithering. Whenever an audio signal is converted from a higher-bit resolution to a lower resolution, it is necessary to apply dither to avoid introducing undesirable quantization noise or harmonic distortion into the signal. The purpose of dither is to reduce the resulting distortion by adding low-level random noise or “dither” to the audio signal. Different mathematical calculations are used to generate dither, each method has advantages and disadvantages depending on the particular operation. SONAR features the Pow-r dithering process, short for Psycho-acoustically Optimized Wordlength Reduction, which can produce lower-bit files that sound indistinguishable from higher-bit source files. When this option is turned on, SONAR uses dithering when you export a higher-bit file at a lower resolution, or lower the bit depth of a project’s audio files by using the Tools > Change Audio Format command, or when you “render” audio (bounce, freeze, or apply effects).
SONAR Producer offers five kinds of dithering:
- Rectangular. Essentially white noise, no noise shaping. Advantages: least CPU-intensive, lowest signal-to-noise ratio, preferable to shaped dither when successive dithering can occur (e.g. bouncing, freezing). Disadvantages: suffers from intermodulation distortion, higher perceived loudness than Pow-r dither.
-
Triangular. Higher level than rectangular, no noise shaping. Advantages: low CPU-intensive dither, superior to Rectangular as it does not suffer from modulation noise effects. Preferable to shaped (Pow-r) dither when successive dithering can occur (e.g. bouncing, freezing). Disadvantages: higher perceived loudness than Pow-r dither.
-
Pow-r 1. Noise-shaped dither. Advantages: less CPU-intensive than Pow-r types 2 and 3, lower perceived loudness than Rectangular or Triangular. Disadvantages: less noise shaping than Pow-r types 2 and 3, not recommended for operations where dither will be applied successively (e.g. bounce and freeze).
- Pow-r 2. Noise-shaped dither. Advantages: lowest perceived loudness, highest quality settings, recommended for audio export. Disadvantages: highest CPU-intensive settings, not recommended for operations where dither will be applied successively (e.g. bounce and freeze).
- Pow-r 3. Same as Pow-r 2 except most CPU-intensive and transparent of all choices.
To Choose Dithering Options
- Open the Audio Options dialog (Options > Audio command).
- On the Advanced tab, under Playback and Recording, choose the kind of dithering you want in the Dithering field.
- Click OK.
Burning audio CDs
SONAR has integrated Audio CD burning, which allows you to write your audio tracks to an audio CD that can be played in any standard CD player.
The Tools > Burn Audio CD command lets you burn your tracks to an audio CD that you can play in any standard CD player.
For more information about the Tools > Burn Audio CD command, see Audio CD Burner dialog and the Cakewalk Publisher online Help
Cakewalk Publisher
You can use Publisher to create a customized streaming music player with a playlist of your music, upload the player to your personal or band's web site, and embed it in any other web site. You can also update your playlist with album art, links (URLs), and artist, track, & album information.
Publisher works by connecting to your web host's FTP account (usually provided when you sign up with a web hosting company and create a web site) and uploading files to a location of your choosing. Once these files are successfully transferred to your web site, Publisher generates a simple HTML tag that you can paste into any other web site to embed and display your audio player. For those familiar with it, the process is similar to selecting images that are originally hosted on one web site and displaying them on a different web site.
Figure 119. Cakewalk Publisher

To start Cakewalk Publisher
There are three ways to start Cakewalk Publisher:
- Click Tools > Cakewalk Publisher.
- When exporting audio as an MP3 file, enable the Add to Cakewalk Publisher check box in the Export Audio dialog.
- Click Start > Programs > Cakewalk > Publisher > Cakewalk Publisher.
For more information about Cakewalk Publisher, see the Cakewalk Publisher online help and "Add to Cakewalk Publisher" on page 1309.
Surround Mixing
SONAR Producer fully supports surround mixing (SONAR Studio can open surround projects created in Producer, converting them to stereo). SONAR (Producer) can create finished surround mixes in all popular surround formats, including Windows Media 9 Pro. You can use a joystick to control surround panning if you want.

Note: It's always advisable to know the required sampling rate and audio driver bit depth for the target medium that your surround project will be used in. That way you can work in the correct format from the start, without having to convert later. You can set these parameters in the Audio Options dialog (Options >Audio command).
To get a complete understanding of SONAR's surround functions, start with the "Surround Basics" on page 683.
See:
Surround Basics
Configuring SONAR for Surround Mixing
Panning in Surround
Surround Metering
Bass Management
Surround Effects
Importing Surround Mixes
Exporting Surround Mixes
Surround Basics
Surround sound is a common name for various techniques for positioning audio in reference to the listener. Whereas regular stereo is limited to left/right positioning, within a relatively narrow field, surround sound opens possibilities of positioning an audio source anywhere around the listener. Surround sound comes in many formats. The differences between the formats are in three areas:
- The number of speakers. This varies from 3.2 all the way to 8.1.
• The angles of the speakers. - The intended final coding format. This depends on the media the audio will be "stored" on: film, broadcast video or DVD, for example.
The most common format is 5.1, which consists of five full-range channels and a low-frequency effects (LFE) channel (the “.1” in 5.1 is the LFE or sub channel). The five full-range channels are reproduced by left, right, and center speakers positioned in front of the listener (L, R, and C for short), and left and right surround speakers positioned behind the listener (Ls and Rs for short). The LFE channel can be routed to the main speakers or to a subwoofer that can be positioned almost anywhere.
The center channel is typically used to lock dialog or sounds to a video screen. The LFE channel is generally routed to a subwoofer to enhance low audio frequencies for effects such as explosions or crashes. Audio in this channel is limited to a range of approximately 25 Hz to 120 Hz.
See:
Configuring SONAR for Surround Mixing
Configuring SONAR for Surround Mixing
This section covers setting up SONAR for surround sound.
Using Surround Format Templates
Choosing a Surround Format
Surround Buses
Routing in Surround
Downmixing
Using Surround Format Templates
A Surround Format template specifies the number of speakers and the order in which the speakers are arranged.
There are several different surround formats, including LCRS, 5.1, 6.1, and 7.1, with 5.1 being most common. The number after the decimal point refers to the number of Low Frequency Effect (LFE)
speakers. However, there are even different flavors of 5.1. The different flavors specify in which order the speakers are arranged, and the speaker angles. For example:
| Surround Format Speaker Order |
| 5.1 SMPTE/ITU L, R, C, LFE, Ls, Rs |
| 5.1 Music Alternative L, R, Ls, Rs, C, LFE |
| 5.1 Film Alternative L, C, R, Ls, Rs, LFE |
Table 136.
The speaker positions, moving clockwise from center, are identified as:
| Label Speaker | |
| C Center (directly in front of listener) | |
| Rc Right of Center | |
| R Right (standard Stereo placement) | |
| Sr Side right—directly to the right of the listener | |
| Rs Right Surround | |
| Cs Surround (rear center) | |
| Ls Left Surround | |
| SI Side Left—directly to the left of the listener | |
| L | Left (standard Stereo placement) |
| Lc Left of center | |
| LFE | Low Frequency Effect speaker(s)—placed according to room acoustics |
Table 137.
To mix in surround sound in SONAR, you must insert at least one surround bus.
A project can include multiple surround buses, but all surround buses in a project use the same surround format (5.1, 7.1, etc.).
The project's surround format is based on one of the following Surround Format templates:
• 2.0
• 2.1
- LCR
• LRC+LFE
• LRS
- LFS+LFE
- Matrix UHJ
• Q U A D
• 4.1 (SMPTE/ITU)
- Quad+LFE
- PanAmbio 4.1
• LCRS
- Surround (SMPTE/ITU)
- Surround Media
- LCRS+LFE
• 5.1 (Standard 3/2)
• 5.1 (Film/Alternative)
• 5.1 (Music/Alternative)
• 5.1 (SMPTE/ITU)
- 6.0 (Hexagon)
• 6.0 (Film/Alternative)
• 6.0 (Music/Alternative)
• 6.1 (Film/Alternative)
• 6.1 (Music/Alternative)
• 6.1 (SMPTE/ITU)
• 7.0 (Heptagon)
• 7.0 (Film/Alternative)
• 7.0 (Music/Alternative)
• 7.1 (Film/Alternative)
• 7.1 (Music/Alternative)
• 7.1 (SMPTE/ITU)
• 8.0 (Octagon)
• 8.0 (Film/Alternative)
• 8.0 (Music/Alternative)
• 8.1 (Film/Alternative)
• 8.1 (Music/Alternative)
• 8.1 (SMPTE/ITU)
5.1 (SMPTE/ITU) is the default template.
The Surround Format templates are hard-coded, and cannot be deleted. However, you can freely assign any enabled audio output port to any surround channel, and save the configuration as a preset.
Surround settings are per project. Surround speaker assignments default to unique audio output channels when you choose a new template.
You configure your surround settings in the Project Options dialog on the Surround tab (use the Options > Project command and click the Surround tab).
See:
Choosing a Surround Format
Choosing a Surround Format
Using the Options > Project command and clicking the Surround tab displays several fields of surround options. Choosing a surround format sets the number of speakers your project is using, and lets you choose a specific sound card output for each speaker. Here you can also choose parameters for bass management, and for downmixing, which means converting a surround mix into a stereo mix.
The group of sound card outputs that you choose on the Surround tab of the Project Options dialog make up the "Surround Main." The Surround Main becomes a choice on the Outputs menus of tracks and buses as soon as you insert a surround bus into your project. You won't see a "Surround Main" output module in the output modules section of the Console view, because it's just a term for the group of sound card outputs you choose for surround mixing. The pan control on any track or bus that outputs to the "Surround Main" controls which hardware outputs receive the signal that the track or bus sends to the "Surround Main."
SONAR saves the surround settings you choose on the Surround tab of the Project Options dialog with your project, including your downmixing parameters. If you have some particular settings you might use again, you can save a group of settings as a preset (except for downmixing parameters—you can change these, but they aren't saved in presets). To save a group of settings as a preset, type a name in the Presets field and then click the Disk icon that's to the right of the field. When you want to use this preset in a project, just choose it from the Presets drop-down menu.
To Choose a Surround Format and Set Sound Card Outputs
- Use the Options > Project command.
The Project Options dialog appears.
- Click the Surround tab.
- Select a format from the Surround Format drop-down.
The diagram to the right of the Surround Format menu changes to illustrate the speaker placement of the format that you chose.
- In the Output column, assign each channel to a sound card output.

Note: Consumer-grade sound cards, such as Audigy or SoundBlaster, typically reserve output 4 for the LFE channel. Check your sound card manual for details.
- Click OK.

Note: Take a moment to make sure your speakers are correctly hooked up to the corresponding outputs before you attempt any playback. See the diagram in the Project Options dialog for the speaker setup. If you are not sure what the abbreviations for the speaker names are, see “Surround Basics” on page 683.
See:
Surround Buses
Surround Buses
You have to have at least one surround bus in your project to use surround sound. A surround bus differs from a stereo bus in that it simply has more channels. For example, if a project is set to 7.1, then the bus has 8 channels: 7 directional channels and one LFE channel.
To Insert a Surround Bus
- In the Bus Pane of the Track view or the Console view, right-click to display a pop-up menu of bus options.
- Select Insert Surround Bus from the pop-up menu.
Or
- Use the Insert > Surround Bus menu command.
See:
Routing in Surround
Routing in Surround
Tracks can send output to a surround bus, the Surround Main, or a hardware output. If a track is routed to a surround bus or the Surround Main, it has surround meters and a surround panner. You can route any track or bus to another bus, the Surround Main or a hardware out. However, you are
prevented from creating a signal loop by routing the signal back into a bus that is already in the signal flow. The following table lists how each of these routing options affects the signal:
| Signal Flow Result | |
| Track to stereo bus No change | |
| Mono track to surround bus Mono signal is routed to both Left and Right channels of surround format. You can change the routing to other surround channels by using the surround panner on the track. | |
| Stereo track to surround bus Stereo left channel is routed to Left channel of surround format; stereo right channel is routed to Right channel of surround format. You can change the routing to other surround channels by using the surround panner on the track. | |
| Track to hardware output No change | |
| Stereo bus to stereo bus No change | |
| Stereo bus to surround bus or the Surround Main | Stereo left channel is routed to Left channel of surround format; stereo right channel is routed to Right channel of surround format. You can change the routing to other surround channels by using the surround panner on the stereo bus. |
| Stereo bus to hardware output No change | |
| Surround bus to stereo bus Surround channels are downmixed to stereo | |
| Surround bus to surround bus or the Surround Main | No change |
Table 138.
To Assign a Track to a Surround Bus or Surround Main
- Click in the track's Output field and select a surround bus, the Surround Main, or New Surround Bus as an output.
See:
Downmixing
Downmixing
Downmixing is a way of previewing your surround project in stereo only. There are various cases where surround is not available and it may be that someone plays your project in stereo only. A radio broadcast is a good example. Downmixing is a valuable tool for determining if your project will sound good in stereo. However, you can export your project in stereo, and SONAR uses your downmix settings to create your exported file.
The following table lists the downmixing settings in the Surround tab of the Project Options dialog and gives a brief description of what the setting does. You can also manually enter other values besides these preset ones:
Downmixing Setting Options
| Center Downmix Level (dB) These options determine how much of the center is mixed to the left and right. |
| • -3 dB . Maintains the same level of center channel sound when you listen in a typically reverberant room |
| • -4.5 dB . A compromise level between -3dB and -6 dB |
| • -6 dB . Maintains the same level of center channel sound when you listen to direct sound without typical room reverberations |
| • -INF . Eliminates all of the Center channel signal |
| Surround Downmix Level (dB) | The amount of Left Surround and Right Surround mixed into the Left and Right channels respectively. |
| • -3 dB . Maintains the same level of surround | |
| • -6 dB . Reduces the level of surround so that it doesn't compete with center channel sound such as dialog | |
| • -INF . Eliminates all of the Surround channel signal |
LFE Level (dB) The amount of the LFE channel mixed into the Left and Right channels respectively.
- -12 (or type in a value) . Lets you choose the level of LFE in the stereo mix
- -INF . Eliminates all LFE
Table 139.
To Downmix a Project
- If you do not have a stereo bus in your project, create one by right-clicking in the Bus pane in the Track view or Console view and selecting Insert Stereo Bus from the menu that appears.
- Open the Project Options dialog (Options > Project command), select a center downmix level and a surround downmix level in the Surround tab, and click OK.
- In each of the surround buses, assign the output to a stereo bus.
- Listen to your project through the stereo bus, and make any final adjustments to the stereo mix by changing the values in the Surround tab of the Project Options dialog.
- If you want to export your stereo mix, use the File > Export > Audio command. This command obeys your downmix settings.
See:
Panning in Surround
Panning in Surround
Unlike stereo panning which sends sound to left and right speakers, surround panning means sending sound to multiple speakers at points along a circle.
When a track/bus/send is assigned to a surround bus, the Pan control turns into a multi-dimensional surround panner. The surround panner comes in four sizes:
- Micro. This is found in the Track view.
- Small. This is found on sends.
• Medium. This is the surround panner which is displayed in the Track Inspector and Console view. - Large. This is a large surround panner (see "Controlling Surround Panning" on page 692 for a picture) which has additional controls, and appears when you right-click a surround panner and choose Open Surround Panner from the pop-up menu, or double-click outside the surround panner circle, or press ENTER when the panner has focus.
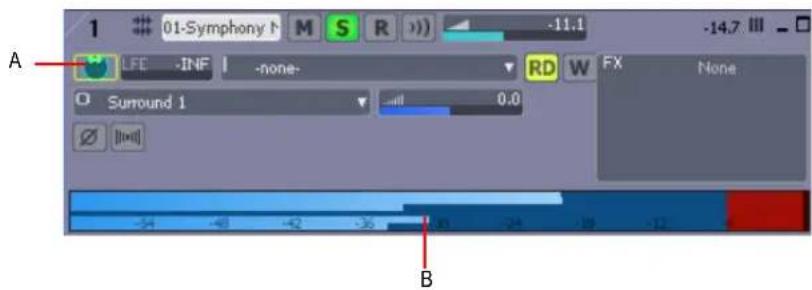
A. Micro surround panner in Track view B. Six channel output meter
Figure 120. Console view surround panner
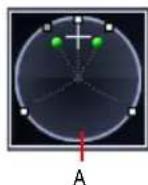
A. Medium surround panner in Console view
The small and large panners are always synchronized; the large panner simply provides increased resolution when you adjust the surround pan position.

Note 1: Surround panning is not available for tracks/sends that are routed to non-surround buses.

Note 2: If the track/bus/send is reassigned to a stereo bus, any surround automation will be orphaned, but will automatically reconnect if the track/bus/send is later assigned back to a surround bus.
See:
Controlling Surround Panning
Controlling Surround Panning
Here are pictures of the large surround panner and medium surround panner:
Figure 121. Large Surround Panner

radar
| Angle | 5.1 (SMPTE/ITU) | |-------|-----------------| | 1.2 | 75.6 | | 60.0 | 0.0 | | -18.8 | LFE Solo |A. Angle and focus marker B. Width markers C. Right speaker icon
Figure 122. Medium Surround Panner

The large surround panner has some sliders at the bottom that the medium surround panner doesn't have, except for the LFE Send slider, which the medium panner has. Except for the sliders, the large and medium surround panners have the following controls:
- Angle and Focus marker. A small sphere that you can drag in any direction to both control and display the following two parameters:
- Angle. This is the perceived angle of the sound source as it differs from the position directly in front of the listener. The scale is 0 to 180 degrees on the listener's right, and 0 to -180 degrees on the listener's left. 0 means the sound is coming from directly in front of the listener, and plus or minus 180 degrees means that the sound is coming from directly behind the listener.
- Focus. This is the perceived distance of the sound source from the center of the circle on a scale of 0 to 100, 0 meaning the center of the circle, and 100 meaning the perimeter.
- Width markers. These are two smaller spheres equidistant from the Angle and Focus marker. Their distance from each other and from the front of the circle shows the Width value (see definition below). You can also drag the Width markers to control Angle and Focus.
- Speaker icons/squares. Each surround channel is represented by a speaker icon in the large panner, and a white square in the small panner. The large panner also has a corresponding volume level in dB directly in front of each icon. The position of each speaker icon shows you each speaker's position in the surround mix. Clicking a speaker icon or square mutes the corresponding channel, causing the icon or square to become grey. Double-clicking the icon solos its channel, turning the icon green.
- Angle slider (large panner only). This slider both displays and controls the angle value.
- Focus slider (large panner only). This slider both displays and controls the focus value.
- Width slider (large panner only). This slider both displays and controls the width value. Width is a measure of how wide an area the sound seems to be coming from on a scale of 0 to 360 degrees. At 0 and 360 degrees, the sound seems to all come from a single speaker. At 180 degrees the sound seems to come from directly opposite sides. The default angle matches the project's left and right channel angle. For example, in 5.1 SMPTE/ITU surround, the default width is 60 degrees.
- Front/Rear Balance slider (large panner only). Abbreviated as FrntRrBI, this slider adjusts the front and rear balance. Drag it to the left to reduce the level from the front speakers, or drag it to the right to reduce rear level.
- LFE slider. This slider both displays and controls the level of sound sent to the LFE channel.
- LFE Only button (large panner only). This button mutes all channels except the LFE channel.
To Open the Large Surround Panner
- Right-click the small surround panner or the pan control in a track, and choose Open Surround Panner from the pop-up menu.
Or
- Select a track, and either use the Views > Surround Panner command, or click the Surround Panner button in the Views toolbar.
Or
- Double-click outside the Surround Panner circle.
Or
- Press ENTER when the panner has focus.
To Change the Angle
- In either the large or small surround panner, drag the Angle and Focus marker to the left or right. Or
- In the large surround panner, drag the Angle slider.
To Change the Focus
- In either the large or small surround panner, drag the Angle and Focus marker toward or away from the center.
Or
- In the large surround panner, drag the Focus slider.
To Mute a Surround Speaker
- In the large surround panner, click a speaker icon to mute its output. The speaker icon turns grey when the speaker is muted.
Or
- In the small surround panner, click a white square to mute a speaker's output. The square turns grey when the speaker is muted.
To Solo a Surround Speaker
- In the large surround panner, double-click a speaker icon to solo its output. The speaker icon turns green when the speaker is soloed.
Or
- In the small surround panner, double-click a white square to solo a speaker's output. The square turns green when the speaker is soloed.
To Change the Width
- In the large surround panner, drag the Width slider.
To Change the Front/Rear Balance
- In the large surround panner, drag the FrntRrBI slider left to reduce front level, or right to reduce rear level.
To Change the LFE Send Level
- In either the large or small surround panner, drag the LFE slider.

Note: Double-clicking any surround panner control will reset the control to its default value, which for the LFE control is -INF.
To Solo or Unsolo the LFE Channel
- In the large surround panner, click the LFE Solo button.
To Isolate a Signal in One Speaker
- In the large surround panner, drag the Width slider to 0, the Focus slider to 100, and then drag the Angle slider until the sphere icon is directly in front of the correct speaker.
Or
- Press the desired Numeric Keypad key that represents the speaker position (7=L, 8=C, 9=R, see "Keyboard Shortcuts" on page 695).
To Group Panner Controls
- In the large surround panner, right-click each slider that you want to add to the group, and choose Group-"n" from the pop-up menu.
Now you can move a single slider, and all sliders in that same group move synchronously.

Note: If you group sliders that are in the same surround panner, you can no longer move the markers that represent those sliders' values. You can only move a grouped marker by moving its associated slider.
Keyboard Shortcuts
The following shortcuts allow you to control a surround panner from the keyboard:
| Shortcut Function | |
| ALT+drag Constrains to angle | |
| ALT+SHIFT+drag Constrains to angle at 100% focus | |
| CTRL+SHIFT+drag Constrains to focus only | |
| SHIFT+click | Sets panner point to the point that you click (large and medium panners only) |
| SHIFT+drag controls (Angle, Width, etc.) | Fine resolution |
| Up/Down cursor keys Move to next/previous widget in surround panner | |
| Left/Right cursor keys Move to next/previous panner in same track | |
| CTRL+up/down Move to surround panner in another track | |
| CTRL+NumPad 0-9 Speaker mutes | |
| NumPad 0-9 Jump to speaker angle at 100% focus | |
Table 140.
NumPad assignments:
• 0 = n / a
• 1 = L s
• 2 = C s
• 3 = R s
• 4 = S I
- 5 = centers the panner
• 6 = S r
• 7 = L
• 8 = C
• 9 = R
• / = L c
• * = R c
See also:
Automating Surround Panning
Automating Surround Panning
You can arm or disarm for automation all the controls in a surround panner by clicking any control in the surround panner (except LFE Solo), and choosing Write Enable from the pop-up menu.
Potential 'pops' when using surround automation (SONAR Producer Only)
If you record Angle surround pan automation, please note that a pop may occur as the angle parameter jumps from 0 degrees to 180 degrees. This may occur if the jump is not instantaneous, and can be easily solved by zooming in the envelope automation and moving the top and bottom nodes so they are aligned in time.

Tip: Enable Snap to make it easier to align the envelope nodes.
See:
Surround Metering
Joystick Support
SONARSONAR allows you to use a joystick to control surround panning. A force-feedback joystick such as the Microsoft® SideWinder® Force Feedback 2 joystick can add a tactile element to mixing sessions, and add button control to some SONAR transport and/or menu commands with the extra buttons on the joystick module.
The joystick will grab the current pan position/sphere anytime you pull the trigger button (the "firing" button under your index finger). When recording automation, you write new automation every time you pull the trigger button.
Various joystick buttons can be used to:
• Control SONAR's transport
- Switch focus to adjacent tracks/sends
- Solo/unsolo current channel
- Open/close the large surround panner window
To Connect the Joystick to SONAR
- Use the Options > Controller/Surfaces command.
- In the Controller/Surfaces dialog, click the Add button ⚠️, and choose Joystick Panner in the Controller/Surface field of the Controller/Surface Settings dialog; click OK.
- Close the Controller/Surfaces dialog, and display the Controller/Surfaces toolbar (Views > Toolbars > Controller/Surfaces command).
-
On the left side of the toolbar, choose Joystick Panner in the drop-down menu, and then click the Properties button that's on the right side of the toolbar.
-
In the Joystick Panner dialog, select button 1 in the Buttons field, and then select Engage Pan Mode in the Button Actions field.
-
Now select Button 2, and select Engage Pan Nav Mode in the Button Actions field.
-
Select any other buttons your joystick has (one at a time), and connect them to any transport or menu commands you want in the Button Actions field; close the Joystick Panner dialog.
Now when you hold down button 1 (the "trigger button"), the joystick controls the surround panner on the current track or send. When the pan/sphere is in the desired position, let button 1 up to hold the position. When you hold down button 2, move the joystick vertically to change the current track, and horizontally to change to a different send control. The window on the right side of the Controller/Surfaces toolbar displays the names of the current track and send. Use any other buttons you configured to control other SONAR Producer functions.
You can save your button assignments as a preset by typing a name for the current group of settings in the Presets window in the Joystick Panner dialog, and then clicking the floppy disk icon that's next to the Presets field. Whenever you want to load a preset, just select it in the Presets window.
Surround Metering
Meters in tracks routed to surround buses or the Surround Main, and meters in surround buses work the same as stereo meters (see "Metering" on page 609), however, surround meters display more channels. For example, a project in 5.1 would have a six-channel meter.
Figure 123. Multi-channel meter

A. Six-channel meter
Each pair of hardware outputs still uses a stereo meter, but you will see the meters on several pairs of outputs displaying levels, depending on how many surround channels your project uses.
See:
Bass Management
Bass Management
A bass management system takes all the frequencies below a certain frequency (normally 80Hz) from the main channels, and the signal from the LFE channel, and mixes them together into the speaker that is best equipped to handle them. This is usually a subwoofer, but sometimes the left and right front speakers are used if a subwoofer isn't available. The reason why this is done is to make use of the subwoofer for more than the occasional low frequency effect, since the subwoofer is there anyway, and to lower the effective response of the system to about 25 Hz.
When you encode to Dolby Digital, the LFE channel gets a +10dB gain on playback from Dolby's decoder. This gives you the option of delivering some really powerful deep bass during playback, like in that earthquake sound effect in your recording. Consider also that this +10 dB of low bass can be added to any low bass that came out of the other 5 channels from redirection, so you realistically can deliver a sound from the subwoofer that is more than +20dB above the sound from any other speaker.
What this means during mixing is that you would have to turn the analog gain to your subwoofer up 10 dB relative to the other 5 speakers, so that you hear the sound as it will be played back in home theater systems that use bass management, and you will get your levels set right in the mix.
SONAR's bass management system allows you to monitor how a surround project will sound with bass management, so you don't have to change the gain to your subwoofer during mixing. SONAR's bass management system only applies to monitoring, and is ignored when you export your file.
To Monitor With Bass Management
- If necessary, open the project you want to use bass management with.
- Select Options > Project from the SONAR menu.
The Project Options dialog appears. - Click the Surround tab.
- Check the Monitor with Bass Management option.
- Select an option in the Low Pass Cutoff (Hz) drop-down, and click OK.
See:
Surround Effects
Surround Effects
SONAR lets you use your existing stereo or mono effects as surround effects. SONAR does this through the SurroundBridge, which automatically sets up your existing mono & stereo plug-ins so you can patch them into surround buses (buses, not tracks).
See:
The SurroundBridge
Effect Property Pages
Effect Presets
How to Patch and Configure Surround Effects
The SurroundBridge
The SurroundBridge automatically loads enough instances of a plug-in to handle all your surround channels. For example, if you patch a stereo effect into a surround bus that uses 5.1 SMPTE/ITU panning, the SurroundBridge automatically assigns the Left and Right channels of the bus to instance 1 of the plug-in, assigns the Left Surround and Right Surround channels to instance 2, the Center channel to instance 3, and the LFE channel to instance 4. If you patch a mono effect into a surround bus, the SurroundBridge assigns each channel to a single instance of the mono effect, which would create six instances of the effect on a 5.1 surround bus. You can view and edit these
assignments on the SurroundBridge tab that's in the property page of every effect that's patched into a surround bus. For example, if you want a certain effect on the Left Surround channel of a surround bus, but not on the Right Surround channel, you can assign these two channels to different instances of the effect you're patching by choosing options on the SurroundBridge tab of the effect's property page.
The SurroundBridge also links the automatable parameters of each instance so that when you change a parameter in one instance, you automatically change the same parameter in all the other instances. You can unlink parameters individually, or per-instance (see "How to Patch and Configure Surround Effects" on page 701).
See:
Effect Property Pages
Effect Presets
How to Patch and Configure Surround Effects
Effect Property Pages
A single property page controls all instances of an effect that is patched into a surround bus. The effect's property page displays a different tab for each instance of the effect. By default, when you change an automatable parameter on one tab of the property page, that change is duplicated on all the tabs of the property page. However, you can "unlink" individual parameters from the other tabs by clicking the Unlink Controls button in the effect property page, and while the button is enabled (red), move the parameter you want to unlink, and then click the Unlink Controls button again to disable it. Now you can change that parameter on one tab without changing the same parameter on the other tabs. You can also link or unlink all of an instance's parameters by using the controls on the SurroundBridge tab.
See:
Effect Presets
The SurroundBridge
Effect Presets
You can use existing (non-surround) effects presets when you patch an effect to a surround bus—selecting a non-surround preset sets all of a plug-in's instances to the settings of the preset; selecting a surround preset sets each instance's parameters individually, according to the information stored in the preset.
See:
How to Patch and Configure Surround Effects
The SurroundBridge
Effect Property Pages
How to Patch and Configure Surround Effects
For step-by-step instructions, see the following procedures.
To Patch an Effect Into a Surround Bus
- Right-click the FX bin of a surround bus and choose a mono or stereo effect from the pop-up menu.
The SurroundBridge patches multiple instances of the effect you chose into the bus's FX bin (however, only one effect appears in the bin), with default assignments of surround channels to plugin instances.

Note: Mono plug-ins may not work properly when inserted in a Surround bus effect bin. A common symptom is a Runtime error message.
To Change Channel Assignments for a Patched Effect
-
If the effect's property page is not open, display it by double-clicking the name of the effect in the surround bus's FX bin.
-
On the SurroundBridge tab of the effect's property page, use the drop-down menus in the Left Input and Right Input columns to assign individual surround channels to instances of the effect.
Your assignments take effect immediately, and the names of the tabs in the property page change to reflect the new assignments.
To Unlink Individual Effect Parameters from Other Effect Instances
-
In the property page of an effect that's patched into a surround bus, click the Unlink Controls button so that it turns red.
-
Make some adjustments to the automatable parameters you want to unlink (non-automatable parameters are not linked together). You can select parameters on any tab. SONAR will automatically capture which controls you change and unlink them from the corresponding controls for the other surround channels.
-
When you're finished adjusting parameters, click the Unlink Controls button again so that it's not red.
Now you can adjust the parameters you adjusted, without automatically adjusting the same parameters that are on other tabs of the effect's property page. As long as the Unlink Controls button is not red, all other controls will remain linked.
A list of the parameters that you unlinked appears in the Unlinked Controls field on the SurroundBridge tab, with the instance number listed in the Plug-in # column of the Unlinked Controls field.
If you unlinked some but not all of an instance's parameters, the instance's check box in the Controls Linked to Group column appears grey, with a check.
To view a list of the automatable parameters in a particular effect, uncheck one of the Controls Linked to Group check boxes on the SurroundBridge tab, and read the list in the Unlinked Controls field.
To Relink Individual Effect Parameters to Other Effect Instances
- In the Unlinked Controls field on the SurroundBridge tab, select the parameters you want to relink—if the parameters you want to select are adjacent, you can SHIFT-click the first and last ones in the group. If they're not adjacent, you can CTRL-click them individually.
- Click the Relink Controls button.
The parameters you relinked are removed from the list.
To Unlink All of an Instance's Parameters from Other Instances
- In the property page of an effect that's patched into a surround bus, click the SurroundBridge tab.
- Find the instance you want to unlink in the Plug-in # column, and uncheck its Controls Linked to Group check box.
The parameters you unlinked appear in the Unlinked Controls field, with the instance number listed in the Plug-in # column of the Unlinked Controls field.

Note: To relink all of an instance's parameters, recheck its Controls Linked to Group check box.
To Disable an Instance
- On the SurroundBridge tab of the effect's property page, uncheck the Enable check box of the plug-in you want to disable. The instance's tab becomes greyed-out when you do this. You can re-enable the instance by rechecking the check box.
The Enable check box is a separate bypass system from the Bypass button that is on the instance's individual property tab. Disabling an instance by using the Enable check box lightens the CPU load by taking the instance out of the processing path. The Bypass button on the instance's property tab does not change color when you click the Enable check box, because it is a separate system. The Bypass button is automatable in some plug-ins.
To Save a Preset
- Set the effect's parameters the way you want them.
- In the Presets field of the effect's property page, type a name for the preset, and click the floppy disk icon that's just right of the Presets field.
Saving a preset of an effect that's patched into a surround bus creates a surround preset, which includes channel assignments and parameter linkage settings.
Importing Surround Mixes
SONAR imports multi-channel (surround) files as a group of mono files. If the files contain information that labels the speaker location of each channel in the file, SONAR copies these labels to the clips in your audio tracks, but does not pan the tracks according to these labels. This is because you may not have your SONAR project set to the same multi-channel format as the imported project.
You can import the following types of multi-channel files:
- Multi-channel PCM wave files (.wav)
- Dolby AC3 encoded files. (.ac3)—these are encoded for Dolby surround. You will need to install an AC3 decoder filter such as this one: http://ac3filter.sourceforge.net in order to be able to decode these files in SONAR.

Important: After installing the above AC3 codec, go to Control Panel and launch the "AC3 Filter" control panel applet. From there you can set up the default speaker output for this filter to 5.1 channels. Until you do this it will only stream in stereo. Also check the sample rate of the imported file. It's recommended that you set your project sample rate to whatever the file uses before importing. Otherwise the import process will go through a time consuming resampling pass for each channel.
- Windows Media Pro
To Import a Surround Multi-channel File
- Use the File > Import > Audio command to open the Import Audio dialog.
- Select a file of a supported file type.
- Check Import As Mono Tracks.
- Click Open.
SONAR imports each channel to a separate mono track.

Tip: You can also rip the soundtrack from a video file by opening the video file directly from the Import Audio dialog.
See:
Exporting Surround Mixes
Exporting Surround Mixes
You can export your surround mixes as multi-channel PCM wave files, or as Windows Media Profiles.
To Export a Surround Multi-channel File
- Use the File > Export > Audio command to open the Export Audio dialog.
- Type a name for your file.
-
In the Files of Type field, choose one of the following:
-
If you want to create a multi-channel wave file, choose RIFF Wave.
-
If you want to create a multi-channel Windows Media file, choose Windows Media Advanced Streaming Format.
-
In the Source Category field, choose Buses, Main Outputs, or Entire Mix.
-
Choose the bus or buses in the Source Buses/Tracks field that you want to export your mix from.
- Choose Multichannel in the Channel Format field.
- Choose any other options you want such as Sample Rate and Bit Depth.
- If you want to save the settings you created in the Export Audio dialog, type a name for them in the Preset window and then click the floppy disk icon that's next to the window.
- Click Export.
SONAR exports your project in the file format you selected.
Standard AVI audio codecs do not support multichannel audio
None of the standard AVI audio codecs support multichannel audio. When exporting multichannel audio to an AVI video file, do not select an audio codec (no compression), or use a codec that is known to support multichannel audio.
Automation
Automation means to record the movement of a fader, knob, or other control so that the next time you play your project, that control moves automatically. SONAR allows you to graphically automate of SONAR much more than just volume and pan controls—you can automate individual controls, faders, and knobs that control the main outs, individual tracks, buses, individual effects' parameters (including some plug-in synths), and even individual clips. Easy to use read and write controls are featured on each automatable component of SONAR.
You can also group several controls together and automate them all by recording only a single control's movements. You can draw freehand and geometric automation curves with the Envelope Draw tool. All automatable controls are in the Console view and the Track view (including the Clips pane), however, you can also graphically automate MIDI controllers from the Piano Roll view in addition to the Console and Track views. You can enable or disable all automation by clicking the
Enable/Disable Automation Playback button in the Automation toolbar. You can also enable or disable automation by track or by parameter using the Automation Read button on track strips, buses, effects bins and soft synths. This is a handy way to turn off automation for a particular section of parameters while mixing. Display the Automation toolbar by using the Views > Toolbars command and making sure that the Automation check box is checked in the Toolbars dialog box.

See:
Quick Automation Guide
The Automation Toolbar
Automation Methods
Automating Effects
Reassigning envelopes
The Envelope Editing and Node Editing menus
Quick Automation Guide
The following table summarizes Console and Track view automation:
| What you can automate | Parameters you can automate How you can automate them | |
| Individual tracks Gain, pan, mute, bus send gain, bus send balance, MIDI controllers, MIDI chorus and reverb, pitch wheel, channel aftertouch, RPN and NRPN | Draw envelopes in the Clips pane, record the fader movements, or take a snapshot | |
| Buses Input gain and pan, output gain and pan Draw envelopes in the Clips pane, record the fader movements, or take a snapshot | ||
| Individual effects Varies with the effect Draw envelopes in the Clips pane, record the fader movements, or take a snapshot | ||
| Soft Synth controls Varies with the synth See “Drawing Soft Synth Automation in the Clips Pane” on page 583 and “Automating Controls from the Synth Rack” on page 582. | ||
| Groups of faders or other controls | Whatever the faders or other controls in the group control | Record fader movements |
| Individual clips Gain and pan for audio clips, velocity for MIDI clips | Draw envelopes in the Clips pane | |
Table 141.
In addition, SONAR allows you to copy and paste envelopes between tracks. The only controls that you can't automate are the Arm, Solo, Pre/Post, Interleave (Mono/Stereo selector), Bus Enable, and Phase buttons; and the Trim fader.
For step-by-step instructions, see:
The Automation Toolbar
Automation Methods
Recording Individual Fader or Knob Movements
Creating and Editing Audio Envelopes
Creating and Editing MIDI Envelopes
Drawing Envelopes on Clips
Showing or Hiding Envelopes
Deleting Envelopes
Copying and Pasting Envelopes
Snapshots
The Automation Toolbar
A. Punch-in time B. Punch-out time C. Set Punch to Selection D. Current record mode E. Automation record options F. Snapshot G. Disarm all controls H. Enable Automation Playback
Display the Automation toolbar 📋 by using the Views > Toolbars command to open the Toolbars dialog box, and making sure that the Automation check box is checked. If you slide the cursor over each button or field in the toolbar, tooltips pop up to tell you each function. The
Automation toolbar gives you quick access to some powerful automation controls:
- Enable/Disable Automation Playback. Click this button to either enable or disable any automation data the project contains.
- Enable/Disable Automation Recording. Click this button to globally turn on/off the ability to record automation.
- Snapshot. Click this button to take a snapshot of all controls at a particular Now time. When you play back your project, when your project reaches the Now time where you took the snapshot, all controls snap to the positions they held when you took the snapshot.
- Clear All Automation Write Enables. Click this button to disarm every control that is armed for automation recording.
- Envelope/Offset mode. Click this button to toggle between Envelope mode and Offset mode. For more information about the Envelope and Offset modes, see Envelope Mode and Offset Mode.
See also:
Automation Methods
Automation Methods
There are several ways to automate controls in the Track and Console views:
- Recording the movements of individual faders, knobs, or controls. This method includes any knob, slider, or control except the Solo, Arm, Phase, Interleave, Vol Trim, Bus Enable, Pre/Post buttons, Bank, Patch, Channel, Key+, Time+, Input and Output.
- Drawing envelopes in the Clips pane for audio and/or MIDI data. An envelope is a graph of the change in level of a particular parameter over time.
- Recording automation data from an external controller.
- Snapshots.
For step-by-step instructions, see:
Automation Read and Automation Write Buttons
Recording Individual Fader or Knob Movements
Creating and Editing Audio Envelopes
Creating and Editing MIDI Envelopes
Using the Envelope Draw Tool
Drawing Envelopes on Clips
Showing or Hiding Envelopes
Deleting Envelopes
Copying and Pasting Envelopes
Snapshots
Automating Individual Effects Parameters
For step-by-step instructions, see:
Recording Individual Fader or Knob Movements
Creating and Editing Audio Envelopes
Creating and Editing MIDI Envelopes
Using the Envelope Draw Tool
Drawing Envelopes on Clips
Showing or Hiding Envelopes
Deleting Envelopes
Copying and Pasting Envelopes
Snapshots
Automating Individual Effects Parameters
Automation Read and Automation Write Buttons
SONAR now has buttons to enable/disable automation playback (the Automation Read buttons) and automation recording (the Automation Write buttons) on the following modules:
- Tracks
- Buses
- Plug-in property pages
- Clip effects property pages (Automation Read button only)
In addition, SONAR has right-click commands to enable/disable automation playback and recording for individual parameters. The Automation Read/Write buttons enable or disable automation playback and recording respectively on all the parameters on an individual track, bus, or plug-in at once. The Automation Read/Write commands enable or disable automation playback and recording respectively on individual parameters of tracks, buses, or plug-ins.
The Automation Read button enables playback of automation envelopes for all automatable parameters in the track, bus, or plug-in that the button is on, and is a handy way to temporarily turn off envelopes for a particular track or bus while mixing.
The Automation Write button replaces the old pre SONAR 6 "automation arm" property and enables all automatable parameters on a specific audio track, bus, or plug-in to be recorded.
The Automation Read and the Automation Write buttons are located by default next to the Mute/Solo/Arm buttons on track and bus strips in the Track View, on the console strip in the Console View, and below the Mute and Solo buttons in the Synth Rack. They are also available in Cakewalk Soft Synth and Cakewalk effects plug-ins. Automation Read and Automation Write buttons have three states; enabled, disabled, and dim. Enabled buttons indicate that all associated parameters are read/write enabled. A dim button indicates that some parameters in the track strip or plug-in are read or write enabled, while others are not. During automation recording, you will see the automation preview envelope being drawn in real time alongside the normal waveform or MIDI preview.
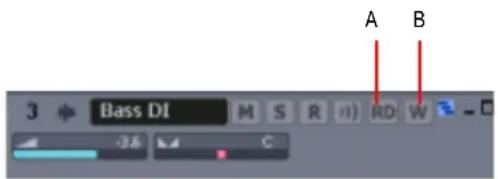
A. Automation Read button B. Automation Write button
Enabling Individual Parameters
You can read-enable or write-enable individual parameters on tracks and buses by right-clicking them and choosing Automation Read Enable or Automation Write Enable from the pop-up menu.
If you right-click an effect in an effect bin, the Read Enable Parameter and Write Enable Parameter menu choices open dialogs that allow you to select which parameters you want to enable.
See Recording Individual Fader or Knob Movements for more information.
Recording Individual Fader or Knob Movements
Recording automation for knobs and faders works in the Track view, the Console view, and Synth Rack. You can record automation during both playback and recording operations.
To Record Individual Fader or Knob Movements
-
Do one of the following:
-
To write-enable an individual track or bus control, right-click the fader or control you want to automate and choose Automation Write Enable from the pop-up menu.
- To write-enable individual plug-in parameters, right-click the name of the plug-in in the FX bin, and choose Write Enable Parameter from the pop-up menu. This opens a dialog that allows you to choose which parameters to write-enable.
- To write-enable individual synth parameters, right-click the synth's Automation Write button in the Synth Rack, and choose Write Enable Parameter from the pop-up menu. This opens a dialog that allows you to choose which parameters to write-enable.
-
To write-enable all parameters in an audio track, bus, synth, or effect, enable the Automation Write button on the track, bus, Synth Rack strip, or plug-in property page you are recording automation for. Enabling the Automation Write button on a track or bus also write-enables all parameters of any effects on the track or bus.
-
Start playback or recording.
- Move the armed parameter control(s).
- Stop playback or recording.
After you record the automation data, SONAR draws a graph of it (an envelope) in the Clips pane, which you can edit with the mouse by adding and dragging nodes. Once you record automation data in a track, the widget that you automated displays an indicator to show that automation has been applied. You can also group controls, so that automating one control automates all the controls in the group.
See also:
The Automation Toolbar
Automated Muting
Using Control Groups
Creating and Editing Audio Envelopes
Creating and Editing MIDI Envelopes
Showing or Hiding Envelopes
Deleting Envelopes
Snapshots
Creating and Editing Audio Envelopes
You can create audio envelopes for both audio tracks and buses. Drawing an envelope for audio data overwrites any preexisting envelope for the same parameter that occurs at the same time in the same track or bus.
After you create an envelope, you can edit it with the following procedure, but you can also edit by using the Envelope Draw tool to draw freehand or preset shapes. See “Using the Envelope Draw Tool” on page 715 for more information.
To Create and Edit Audio Envelopes with the Select or Envelope Tools
- Right-click in the Clips pane in the track (or bus) you want to automate.
The Clips pane pop-up menu appears.
- From the menu, choose Envelopes > Create Track Envelope > (name of the control you want to automate). Notice the envelope's color at the right side of the menu.
The envelope appears in the Clips pane as a straight, dotted line in the envelope's individual color, with a node (very small circle) at the beginning. When you move the cursor over the envelope, a vertical, double-ended arrow appears under it with the name and current value of the envelope in a box next to the cursor. The envelope's vertical position reflects the current value of the parameter you are editing.
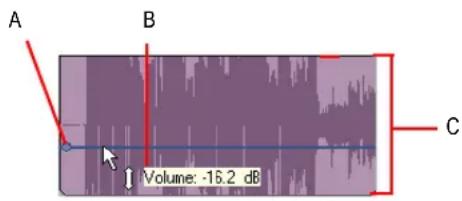
A. Node B. Envelope name and current value C. Envelope value range

Note: An automated mute envelope changes the track's mute status whenever the envelope crosses the middle of its value range.
- Using either the Select or Envelope tools, move the cursor over the envelope until a vertical, double-ended arrow appears under it (notice that the name and current value of the envelope appear in a box next to the cursor), and right-click the envelope. If you use the Envelope tool, you can't accidentally edit any other data besides the envelope.
The Envelope Editing menu appears.
- Choose Add Node from the menu.
A node appears on the envelope.

Note: A shortcut to add a node is to double-click the envelope.
- Move the cursor over the node until a cross appears under it, and drag the node in any direction you want.
- Double-click the envelope to add another node.
-
Drag the new node in any direction you want and release the mouse.
-
Move the cursor over the segment of the envelope that lies between the two nodes until the double-ended arrow appears, and right-click the envelope to open the Envelope Editing menu.
-
Choose one of the following shapes from the Envelope Editing menu:
-
Jump. This choice causes the envelope to make a ninety degree jump where the envelope reaches the second node. SONAR displays jumps with a dotted line, meaning that there is automation data at the nodes where the dotted line begins and ends, but not where the line itself is.
- Linear. This choice draws a straight line between the two nodes.
- Fast Curve. This choice draws a curve between the two nodes that changes value rapidly at first, but more slowly toward the end of the curve.
- Slow Curve. This choice draws a curve between the two nodes that changes value slowly at first, but more rapidly toward the end of the curve.
SONAR adds a shape between the nodes. You can drag any shape except a jump up or down and it maintains its curve or angle. To edit a jump, drag the node that's at either end of the jump.
Make sure the Automation Read button is enabled, play the project and listen to the results. You can undo any step by using the Edit > Undo command (CTRL+Z) directly after that step. You can drag the nodes in any direction you want. You can play back your project with or without the automation data by clicking the Enable Automation Playback button in the Automation toolbar.

Note: When you add a “gain” envelope to a track in SONAR, you increase the track’s level post-effects, or after the effects processors. Some hardware mixers call this level “volume,” because it is post-effects, but other mixers refer to this as “gain.” Either way, SONAR’s gain envelopes increase a track’s level after the effects processors in the signal chain.
When you add multiple envelopes to a track or bus, you can choose which envelopes you want to display. See “Showing or Hiding Envelopes” on page 717.
You can also draw envelopes on MIDI tracks. See “Creating and Editing MIDI Envelopes” on page 712.
See also:
Dotted Lines
The Envelope Editing and Node Editing menus
Automated Muting
Using Control Groups
Deleting Envelopes
Snapshots
Recording Individual Fader or Knob Movements
Creating and Editing MIDI Envelopes
This method is only available in the Clips pane. You can also draw MIDI controller data in the Piano Roll view, but the technique is different (see “Adding and Editing Controllers in the Piano Roll” on page 466).

Note 1: MIDI envelopes you create in the Piano Roll Notes pane and MIDI envelopes you create in the Track view Clips pane are actually separate envelopes, even if they control the same parameter. Both kinds of envelopes are visible in the Clips pane, and should generally not be used to control the same parameter. You can convert Piano Roll view envelopes to Track view envelopes by selecting the time range and tracks that the Piano Roll envelopes occupy, and using the Edit > Convert MIDI To Shapes command.

Note 2: After you create an envelope, you can edit it by adding nodes and choosing shapes for the line segments that are between nodes (see the following procedure), but you can also edit by using the Envelope Draw tool to draw freehand or preset shapes. See “Using the Envelope Draw Tool” on page 715 for more information.
To Draw MIDI Envelopes in the Track View
- Right-click in the Clips pane in the track you want to automate.
The Clips pane pop-up menu appears.
- If you want to create an envelope to control volume, pan, chorus, reverb, or automated mute, choose Envelopes > Create Track Envelope and choose one of those items from the menu.
The envelope appears in the Clips pane as a straight, dotted line in the envelope's individual color, with a node (very small circle) at the beginning. When you move the cursor over the envelope, a vertical, double-ended arrow appears under it with the name and current value of the envelope in a box next to the cursor. The envelope's vertical position reflects the current value of the parameter you are editing.

A. Node B. Envelope name and current value C. Envelope value range

Note: An automated mute envelope changes the track's mute status whenever the envelope crosses the middle of its value range.
- If you want to create an envelope to control any other MIDI controller, choose Envelopes > Create Track Envelope > MIDI.
The MIDI Envelope dialog box appears:
- In the Type field, choose what kind of MIDI event you want to control with your envelope.
- In the Value field, choose the name of the controller you want to edit.
- In the Channel field, choose the MIDI channel that you want the envelope to send data on, and click OK.
SONAR creates the envelope you chose.
- Move the cursor over the envelope until a vertical, double-ended arrow appears under it, and right-click the envelope.
The Envelope Editing menu appears.
- Choose Add Node from the menu.
A node (very small rectangle) appears on the envelope.

Note: A shortcut to create a node is to double-click the envelope.
- Move the cursor over the node until a cross appears under it, and drag the node in any direction you want.
When you release the mouse, the envelope changes to follow the node's new position.
- Double-click the envelope to add another node.
- Drag the new node in any direction you want and release the mouse.
- Move the cursor over the segment of the envelope that lies between the two nodes until the double-ended arrow appears, and right-click the envelope to open the Envelope Editing menu.
-
Choose one of the following shapes from the Envelope Editing menu:
-
Jump. This choice causes the envelope to make a ninety degree jump when the envelope reaches the second node. SONAR displays jumps with a dotted line, meaning that there is automation data at the nodes where the dotted line begins and ends, but not where the line itself is.
- Linear. This choice draws a straight line between the two nodes.
- Fast Curve. This choice draws a curve between the two nodes that changes value rapidly at first, but more slowly toward the end of the curve.
- Slow Curve. This choice draws a curve between the two nodes that changes value slowly at first, but more rapidly toward the end of the curve.
SONAR adds a shape between the nodes. You can drag any shape except a jump up or down and it maintains its curve or angle. To edit a jump, drag the node that's at either end of the jump.
Make sure the Automation Read button is enabled, play your track and listen to the results. You can undo any step by using the Edit > Undo command (CTRL+Z) directly after that step. You can play back your project with or without the automation data by clicking the Enable Automation Playback button in the Automation toolbar.
When you add multiple envelopes to a track, you can choose which envelopes you want to display. See “Showing or Hiding Envelopes” on page 717.
You can also draw envelopes on audio tracks. See “Creating and Editing Audio Envelopes” on page 710.
See also:
Dotted Lines
The Envelope Editing and Node Editing menus
Automated Muting
Using Control Groups
Deleting Envelopes
Snapshots
Recording Individual Fader or Knob Movements
Dotted Lines
The dotted line in an envelope shows two things:
- There is no automation data at the time in a track where the dotted line is.
- The value of the last piece of automation data that exists before the dotted line is represented by the vertical level of the dotted line.
You can move an automated control while your project plays, and if you move it during a time where that control has a dotted line in its envelope, the control will stay where you move it. As soon as the Now time reaches a node or solid line, the control snaps to the value of the node or solid line.
Using the Envelope Draw Tool
The Envelope Draw tool allows you to draw both freehand and preset shapes on an existing envelope.
To Draw Freehand
- Activate the envelope you want to edit (click it with the Envelope tool
- Enable the Envelope Draw tool: click /✓ in the Track view toolbar.
- Click the drop-down arrow on the side of the Envelope Draw tool, and select Freehand from the menu.
- Click and hold the mouse button in the Clips pane at the place where you want to edit the envelope. Drag to the right or left to draw the desired shape, and release the mouse when you're finished.

To Draw a Preset Shape
- Activate the envelope you want to edit (click it with the Envelope tool 🔊).
- Enable the Envelope Draw tool: click 📋 in the Track view toolbar.
- Set the Snap to Grid to the desired length of each cycle of the shape you want to draw. For example, if you want to draw sine curves, and you want each complete sine curve to last one beat, set the Snap to Grid to a value of Quarter. If the Snap to Grid is disabled, the default cycle is one measure.
- Click the drop-down arrow on the side of the Envelope Draw tool, and select the kind of shape you want to draw. After you select a shape, both the Envelope Draw tool and the cursor display the kind of shape you selected.
- Click and hold the mouse button in the Clips pane at the place where you want to edit the envelope. The place where you click also sets the vertical midpoint of the shape you're creating.
- Drag up or down to set the vertical range of the envelope, and then drag to the right or left to set the length of your edit. As you drag, the cursor's vertical distance from the midpoint (the point where you originally clicked) determines the amplitude of the graph. To create a series of identical shapes, hold the SHIFT key down while you drag. To gradually increase or decrease the amplitude, gradually move the cursor farther from or closer to the midpoint.
- Release the mouse when you've finished editing. The shape you selected appears, repeating according to the Snap to Grid setting.
To Halve or Double the Shape Cycle Frequency
- To halve the cycle frequency (for example, if snap resolution = quarter note, make each cycle a half note), hold down the CTRL key while you draw.
- To double the cycle frequency (for example, if snap resolution = quarter note, make each cycle an eighth note), hold down the ALT key while you draw.
To Invert the Phase of a Pattern
- You can invert the phase of the pattern by dragging the cursor below the zero-line/center (where you initially clicked to start the pattern).
To Toggle Between the Envelope Tool and the Envelope Draw Tool
- When the mouse button is NOT pressed, hold down the ALT key to momentarily switch between the two tools.
To Stretch a Shape
-
Select the nodes in the part of the shape that you want to stretch: use the Envelope tool to drag around the part of the shape you want to select. Nodes turn white when they are selected.
-
Drag one of the selected nodes in the direction that you want to move the selected area. Stretching stops if any selected node bumps into an adjacent unselected node.
Drawing Envelopes on Clips
You can also draw envelopes on audio clips, but only for gain, pan, and any automatable effects that are inserted on the clips. On MIDI clips, you can draw velocity envelopes. If there is already a Track-level envelope on the clip, the clip envelope data merges with the track envelope data.

Note: The Trim value of a track is actually a clip parameter, not a track parameter. SONAR applies clip volume settings, including Trim, to a clip before the clip's audio data reaches any plug-in effects. Effects can sound very different when their incoming data changes volume, even if the final volume is unchanged.
To Draw Envelopes on Clips
- Right-click the clip that you want to draw the envelope on.
The Clips pane pop-up menu appears.
- Choose Envelopes > Clip > (Gain or Pan or Velocity) from the menu.
An envelope appears on the clip with a node at each end.
Edit the envelope just as you would a track envelope, using the Select tool, the Envelope tool, and the Envelope Draw tool.
See also:
The Envelope Editing and Node Editing menus
Using the Envelope Draw Tool
Creating and Editing Audio Envelopes
Creating and Editing MIDI Envelopes
Showing or Hiding Envelopes
Deleting Envelopes
Snapshots
Recording Individual Fader or Knob Movements
Showing or Hiding Envelopes
You can choose to show or hide any or all envelopes in a track or bus.
To Show or Hide All Envelopes
- In the Track view toolbar, click the drop-down arrow 🔊 that's next to the Envelope tool to display the Envelope Options menu.
- Choose either Show All Envelopes or Hide All Envelopes.
To Show All of One Kind of Envelope
-
In the Track view toolbar, click the drop-down arrow 🔊 that's next to the Envelope tool to display the Envelope Options menu.
-
Choose the kind of envelope that you want to show.
To Show or Hide Individual Envelopes
- Right-click the Clips pane in the track that contains the envelope(s) that you want to show or hide. The Clips pane pop-up menu appears.
- Choose Envelopes > Show Track Envelopes. A menu of all the envelopes in the track appears. A checkmark appears to the left of each envelope that is currently showing.
- Click the name of one envelope that you want to show (if it's currently hidden), or hide (if it's currently showing). SONAR hides or displays the envelope.
- Repeat steps 1 to 3 for each envelope that you want to show or hide. You can also hide, but not show, individual envelopes by right-clicking an envelope and choosing Hide Envelope from the Envelope Editing menu.
See also:
Using Control Groups
Creating and Editing Audio Envelopes.
Creating and Editing MIDI Envelopes
Deleting Envelopes
Recording Individual Fader or Knob Movements
Deleting Envelopes
To Delete a Single Envelope
- Move the cursor over the envelope until a vertical, double-ended arrow appears under it, and right-click the envelope.
The Envelope Editing menu appears.
- Choose Delete Envelope from the menu.
SONAR deletes the envelope.
To Delete Several or All Envelopes
- Select the data that contains the envelopes you want to delete—you can select parts of tracks, one or more whole tracks, or all tracks.
- Use the Edit > Cut command to open the Cut dialog box.
- Select Track/Bus Automation if it's listed.
-
Select Clip Automation if it's listed.
-
Click OK.
SONAR deletes any track and clip envelopes that are in the data you selected.
See also:
Recording Individual Fader or Knob Movements
Creating and Editing Audio Envelopes
Creating and Editing MIDI Envelopes
Drawing Envelopes on Clips
Showing or Hiding Envelopes
Copying and Pasting Envelopes
Snapshots
Copying and Pasting Envelopes
You can copy and paste envelopes or parts of envelopes between tracks and clips. You cannot, however, copy and paste a clip envelope without also copying and pasting the audio or MIDI data that is in that clip. If you paste a clip envelope into a track without the clip that it came from, the clip envelope becomes a track envelope.
To Copy an Envelope
-
In the Track view or the Clips pane, select the track or clip that has the envelope you want to copy. If you want to copy all the automation data in the track, select the whole track. If you want to select only a clip, but want to select any track envelopes in that track, click the drop-down arrow next to the Select tool 🔍, and make sure that the Select Track Envelopes With Selected Clips option has a checkmark next to it.
-
Press CTRL+C or use the Edit > Copy command.
The Copy dialog box appears.
- Choose Clip Automation and/or Track/Bus Automation.

Note: If the Track/Bus Automation field is greyed-out, you must re-select a part of the clip that contains either a node or a solid line (shape). A dotted line by itself is not an envelope and can not be copied.
-
Choose any other kinds of data you want to copy—if you only want to copy the automation data, choose only Track/Bus Automation and/or Clip Automation.
-
Click OK.
SONAR copies the data you selected to the clipboard.
To Paste an Envelope
-
Select the track(s) and location (Now Time) you want to paste the data to.
-
Press CTRL+V or use the Edit > Paste command.
The Paste dialog box appears.
-
Choose a track and location to paste to, if you haven't already.
-
Click OK.
SONAR pastes the automation data and any other types of data you chose in the Copy dialog box into the track and location you selected.
See also:
Recording Individual Fader or Knob Movements
Creating and Editing Audio Envelopes
Creating and Editing MIDI Envelopes
Drawing Envelopes on Clips
Showing or Hiding Envelopes
Snapshots
Resetting Envelopes and Nodes to Current or Neutral Values
You can reset an envelope so that it becomes a horizontal line at the current value of the parameter it controls, which eliminates any curves or jumps from the envelope. You can reset a node so that it jumps to the neutral value of the parameter it controls. For example, the neutral value of the pan parameter is C, or 0%.
To Reset an Envelope to the Current Value
-
Move the Now time to where the envelope's value is to your liking.
-
Right-click the envelope to display the Envelope Editing menu.
-
Choose Clear All from the menu.
SONAR resets the envelope to the current value.
To Reset a Node to a Neutral Value
Do either of the following:
- Double-click the node.
- Move the cursor over the node until it a cross appears under it, right-click the node, and choose Reset Node from the pop-up menu.
The node jumps to the neutral value for the parameter it controls.
See also:
Recording Individual Fader or Knob Movements
Creating and Editing Audio Envelopes
Creating and Editing MIDI Envelopes
Drawing Envelopes on Clips
Showing or Hiding Envelopes
Copying and Pasting Envelopes
Snapshots
Envelope Mode and Offset Mode
There are two modes which control how your volume faders, pan faders, bus send faders, and bus send pan faders behave during playback. The two modes are Envelope mode and Offset mode.
Envelope mode. In envelope mode, volume and pan faders follow the project's automation and do not respond to changes you make in real-time.
Offset mode. In Offset mode, you "offset" the current automation in a track using a parameter's controls. For example, if a pan envelope is set to hard left (100% left) and you adjust the pan in offset mode to 100% right, then the pan parameter is now set to hard right. Setting the pan in offset mode to 50% right would set the pan to the center.

Note: Any position that you set a fader to in Offset mode remains in effect when you switch back to Envelope mode. For example, if you set a volume fader to -INF while in Offset mode, switch to Envelope mode and drag the fader to its maximum level, you will not hear anything.
To Turn On Offset Mode
There are several ways to turn on Offset mode in SONAR:
- In the Track view toolbar, click the drop-down arrow that's next to Envelope Tool button. Choose Offset from the menu to enable/disable Offset mode.
- In the Automation toolbar, click the Offset button.
- Press the O key.
In Offset mode, all controls that can be offset appear with a plus sign. For example Vol+.
The following audio controls support both Envelope and Offset modes:
| Control Envelope Mode Range Offset Mode Range | |
| Volume -Infinity to +6dB, default is 0dB -Infinity to +6dB, default is 0dB | |
| Pan 100% L to 100% R, default is C 100% L to 100% R, default is C | |
| Bus Send Level -Infinity to +6dB, default is 0 dB -Infinity to +6dB, default is 0dB | |
| Bus Send Pan | 100% L to 100% R, default is C 100% L to 100% R, default is C |
| Bus Return Level | -Infinity to +6dB, default is 0dB -Infinity to +6dB, default is 0dB |
Table 142.
Automation
Automation Methods
| Control | Envelope Mode Range | Offset Mode Range |
| Bus Return Balance 100% L to 100% R, default is C 100% L to 100% R, default is C | ||
| Main Out Volume -Infinity to +6dB, default is 0dB -Infinity to +6dB, default is 0dB | ||
| Main Out Balance 100% L to 100% R, default is C 100% L to 100% R, default is C | ||
Table 142.
The following MIDI controls support both Envelope and Offset modes:
| Control Envelope Mode Range Offset Mode Range | ||
| Volume 0 to 127, default is 101 0 to 127, default is 101 | ||
| Pan | 100% L to 100% R, default is C | 100% L to 100% R, default is C |
| Chorus | 0 to 127, default is 0 | -127 to 127, default is 100 |
| Reverb | 0 to 127, default is 0 | -127 to 127, default is 100 |
Table 143.
To Open Non-SONAR Envelope Display on a Percentage Scale
You can globally configure the placement of 0 dB for your envelopes in the Clips pane. The default placement in the Clips pane of 0 dB is roughly 1/3 from the top of the clip. You can change the position of 0 dB in all envelopes to the middle of the clip.
There are several advantages when using the Envelope Display on a Percentage Scale option:
- It makes it easier to tell if there have been any changes.
- There is a finer resolution around 0 dB.

Note: In Envelope mode, newly created volume clips appear at the same dB value as the current Vol setting. For example, if the Vol setting is +3 dB, a newly created volume envelope appears above the middle of the clip.
To Display Envelopes on a Percentage Scale
- Select Options > Global to open the Global Options dialog.
- In the General tab, click the Display Envelopes on Percentage Scale check box.
- Click OK.
Converting MIDI Envelopes to Shapes
MIDI controllers you edit in the Piano Roll view and MIDI envelopes you create in the Track view. Clips pane are actually separate data, even if they control the same parameter. Both kinds of envelopes are visible in the Clips pane, and should generally not be used to control the same
parameter. You can convert Piano Roll view envelopes to Track view envelopes by selecting the time range and tracks that the Piano Roll envelopes occupy, and using the Edit > Convert MIDI To Shapes command.
To Convert MIDI Controller Envelopes to Shapes
- In the Clips pane, select the time range and track(s) that contain the controller data you want to convert.
- Use the Edit > Convert MIDI To Shapes command.
The Convert MIDI To Shapes dialog box appears.
- In the Type field, select the type of controller you want to convert.
- In the Value field, select the controller number of the controller you want to convert. For example, if you're converting a volume envelope to a shape, select 7.
- In the Channel field, select the channel of the controller you want to convert, and click OK.
SONAR converts the Piano Roll view controller envelope you selected to a Track view shape that controls the same parameter.

Note: If two clips overlap, the Edit > Convert MIDI To Shapes command converts the controller envelopes in both clips, in whatever parts of the clips lie in the selected time range.
Snapshots
Making a snapshot of a single parameter is now a single-click process. A snapshot is a setting or group of settings that SONAR's controls snap to when your project reaches a certain Now Time. You set all the controls to the values you want, and then create a snapshot of these settings at a particular Now Time. This approach is useful, for example, when your project contains a variety of distinct sections and you want to make a sudden change in one or more settings between the sections.
To Create a Snapshot of a Single Parameter
- Move the parameter control to where you want it.
- Move the Now Time to the location where you want to create the snapshot.
- Right-click the control and choose Automation Snapshot in the pop-up menu. You don't have to write-enable the track or bus module.
An indicator will appear on the control to show that automation has been added, and a node will be added to the control's envelope on the track. - Make sure the appropriate Automation Read button is enabled, play your project and listen to the results. You can undo the snapshot by using the Undo command, or by taking another snapshot at the same Now Time.
To Create a Snapshot of Multiple Parameters
-
Arm the Parameters that you want to create a snapshot of by doing one of the following:
-
Enable the Automation Write button in the tracks and/or buses that you want to automate. This also write-enables all parameters of any automatable effects that are in the track or bus. You can click the Clear All Automation Write-Enabled button in the Automation toolbar first if you want to make sure that no hidden tracks or buses are write-enabled.
- Or, disable all write-enabled parameters by clicking the Clear All Automation Write-Enabled button in the Automation toolbar, and then right-click each parameter control that you want to arm and select Automation Write Enable from the pop-up menu.
-
Or, if you want to automate all automatable parameters in a plug-in, enable the Automation Write button in the effect or synth property page, or the synth's strip in the Synth Rack. In the Synth Rack, you can also move any new parameter knobs you've created with the Parameter Learn function to create automation.
-
Set your armed parameters the way you want them.
- Move the Now Time to the location where you want to create the snapshot.
- Click the Snapshot button in the Automation toolbar to make the snapshot.
An indicator will appear on the control to show that automation has been added, and a node will be added to the control's envelope on the track.
- Make sure the Automation Read button for the tracks and/or buses you automated is enabled, play your project and listen to the results. You can undo the snapshot by using the Undo command, or by taking another snapshot at the same Now Time.
You can play back your project with or without the automation data by clicking the Enable Automation Playback button in the Automation toolbar.
Successive snapshots do not update envelope node values
When taking multiple automation snapshots at the same Now time, new envelope nodes are created instead of updating any existing envelope nodes. To address this issue, undo the previous automation snapshot before performing a new snapshot.
Adding Nodes at a Selection
One of the most common automation tasks is to raise or lower an envelope over a specific time range. The Add Nodes at Selection command simplifies this task: simply make a time selection, right-click the desired envelope, and choose Add Nodes at Selection. Two pairs of nodes appear—two nodes at the From time, and two nodes at the Thru time.
Each pair of nodes is only 2 milliseconds apart by default, so each pair looks like a single node, but if you drag the envelope segment between the two pairs up or down, you can see all four nodes.
To Add Nodes at Selection
- Make a time selection.
-
Right-click the desired envelope within the selected time range.
The Envelope Editing menu appears. -
Choose Add Nodes at Selection from the menu.
Two pairs of nodes appear on the envelope—one pair at the start of the selected time range, and one pair at the end. Now you can drag the selected envelope segment up or down, and maintain the envelope's shape.
Automating Effects
SONAR allows you to automate plug-ins, giving you real-time control over dozens of effects parameters.
See also:
Recording Individual Fader or Knob Movements
Creating and Editing Audio Envelopes.
Creating and Editing MIDI Envelopes
Showing or Hiding Envelopes
Deleting Envelopes
Using Control Groups

Note: When using automatable effects, the CPU meter may fluctuate rapidly within a few percentage points. This is normal behavior.
Automating Individual Effects Parameters
You can automate the parameters of some of SONAR's effects by drawing envelopes, or recording fader movements, or creating snapshots. You enable all automatable parameters in an effect when you enable the Automation Write button in an effect property page.
To record fader movements, see "Recording Individual Fader or Knob Movements" on page 709.
To Draw Envelopes for an Individual Effect's Parameters
- Patch an automatable effect into the track or bus where you want to use it, and close the effect's dialog box when it appears.
- Right-click in the Clips pane in the track (or bus) where you patched the effect.
The Clips pane or Bus pane pop-up menu appears.
- If you opened the Clips pane pop-up menu, choose Envelopes > Create Track Envelope > (name of the effect you patched). If you opened the Bus pane pop-up menu, choose Create Bus Envelope > (name of the effect you patched).
The effect's envelope dialog box appears, listing all the parameters you can automate in the Envelope Exists list.
- Check all the parameters you want to create envelopes for; as you check each envelope choice, you can choose a color for the envelope by clicking the Choose Color button that's in the lower right corner of the dialog box.

Note: You can change a plug-in envelope's color whenever you want by highlighting its name in the effect's envelope dialog box and clicking the Choose Color button.
5. Click OK.
All the envelopes that you checked appear in the track or bus you were working in. You can edit them just like any other envelopes.
See also:
Recording Individual Fader or Knob Movements
Creating and Editing Audio Envelopes
Creating and Editing MIDI Envelopes
Drawing Envelopes on Clips
Showing or Hiding Envelopes
Copying and Pasting Envelopes
Snapshots
Recording Automation Data from an External Controller
You can record automation data from an external controller or a MIDI keyboard.
To Record Automation Data from an External Controller
- In either the Track view or Console view, right-click the control or knob that you want to control externally, and choose Remote Control from the pop-up menu.
The Remote Control dialog box appears.
-
If your controller sends standard MIDI messages, RPN's, or NRPN's, choose a controller (such as Wheel) with which to control your knob or control (see Remote Control dialog for more information). Also choose the MIDI channel your controller will be sending the automation data on (it doesn't have to be the same channel that the knob or control's track plays back on), and click OK.
-
If your controller works by sending SysX information instead, choose options in the SysX fields (see Remote Control dialog for more information), and click OK.
-
In either the Track or Console view, write enable the knob or control for automation that you just configured for remote control.
-
Start playback or recording, and move the slider or wheel that you selected on your external controller.
- When you finish recording the automation, click the Stop button in the Transport toolbar.
Listen to your project and either re-record the automation, or disable each armed control by clicking the Disable Automation Recording button in the Automation toolbar. You can disable remote control by right-clicking the relevant knob or fader and choosing Disable Remote Control from the pop-up menu.
See also:
Recording Individual Fader or Knob Movements
Creating and Editing Audio Envelopes
Creating and Editing MIDI Envelopes
Drawing Envelopes on Clips
Showing or Hiding Envelopes
Copying and Pasting Envelopes
Snapshots
Reassigning envelopes
You can reassign an envelope to control a different parameter from the one it originally controlled. For example, you can reassign a volume envelope to control pan.
To Reassign an Envelope
- Move the cursor over the envelope until the cursor changes to a double-ended arrow, and right-click the envelope.
The Envelope Editing menu appears.
- Choose Assign Envelope > (name of the parameter you want the envelope to control).
The envelope changes color to reflect its new parameter assignment.
See also:
Recording Individual Fader or Knob Movements
Creating and Editing Audio Envelopes
Creating and Editing MIDI Envelopes
Drawing Envelopes on Clips
Showing or Hiding Envelopes
Copying and Pasting Envelopes
Automation
Reassigning envelopes
The Envelope Editing and Node Editing menus
The Envelope Editing menu appears when you move the cursor over an envelope until a double-ended arrow 📁 appears under it, and right-click the envelope. The Node Editing menu is almost identical, and appears when you move the cursor over a node until a cross 📁 appears under it and right-click. The menus contain the following options:
| Menu Option What it Does | |
| Jump (Envelope Editing menu only) | This choice causes the envelope to make a ninety degree jump between two nodes. SONAR displays jumps with a dotted line, meaning that there is automation data at the nodes where the dotted line begins and ends, but not where the dotted line itself is. |
| Linear (Envelope Editing menu only) | This choice draws a straight line between two nodes. |
| Fast Curve (Envelope Editing menu only) | This choice draws a curve between the two nodes that changes value rapidly at first, but more slowly toward the end of the curve. |
| Slow Curve (Envelope Editing menu only) | This choice draws a curve between two nodes that changes value slowly at first, but more rapidly toward the end of the curve |
| Add Node (Envelope Editing menu only) | This choice adds a node, which is a point on the line that you can drag, to the place on the envelope where you right-clicked. |
| Add Nodes at Selection This command creates 2 pairs of envelope nodes, one at the beginning of the current selection, and one at the end. Each pair of nodes is only 2 mSec apart. You can easily adjust the selected part of the envelope by dragging the selected envelope segment up or down. See “Adding Nodes at a Selection” on page 724. | |
| Add Nodes at Transient Markers (Envelope Editing menu only) | This command adds nodes to an envelope at the transient markers of any AudioSnap-enabled clips that a track contains. |
| Hide Envelope | This choice hides the envelope that you right-clicked. You can re-display the envelope by right-clicking in the same track and choosing Envelopes > Show Track Envelopes > (name of the envelope you want to show) from the Clips pane pop-up menu. |
| Assign Envelope-(name of the parameter you want to control) | This choice reassigns the envelope to control the parameter that you choose. |
| Delete Envelope This choice deletes the envelope. | |
| Automation Read Enabled | This choice enables automation playback for the envelope. |
| Clear All This choice deletes everything from the envelope except the first node. | |
| Reset Node (Node Editing menu only) | This choice resets the node to the parameter's neutral value. |
| Delete Node (Node Editing menu only) | This choice deletes the node. |
| Properties (Node Editing menu only) | This choice opens the Edit Node dialog box, which allows you to edit the node's value and location. |
Table 144.
Table 144.
Automated Muting
The Mute buttons in the Track view and Console view work in two ways:
- You can record or draw automation for each Mute button, and the automation data controls the buttons.
- You can click a Mute button while playback is in progress and manually override any automation data for that button.
A track's Mute button can display the muted or unmuted status of either the automation envelope or of manual muting. The Tracks > Show Automated Mute command causes the Mute button on a selected track to show whether the track's mute envelope (if any) is in the muted or unmuted position (the automated mute status). When the command is disabled, the track's Mute button shows whether you have depressed the Mute button manually or not (the manual mute status). When the command is enabled, the Mute button displays an armed fader next to the M: 📂. Besides the Tracks > Show Automated Mute command, you can also right-click a Mute button and choose Switch to Automated Mute from the pop-up menu.
To Draw a Mute Envelope
- In the Clips pane, right-click in the track you want to mute, and choose Envelopes > Create Track Envelope > Automated Mute from the Clips pane pop-up menu.
An envelope appears at the bottom of the track.
- Add nodes to the envelope and edit it so that the envelope is more than 50% of its maximum height wherever you want the track muted.
To Record a Mute Button's Movement
- Right-click the Mute button you want to automate and choose Switch to Automated Mute from the pop-up menu.
- Make sure the Mute button or its whole track is write-enabled.
-
Start playback or recording, and click the Mute button on and off where appropriate.
-
Click the Stop button in the Transport toolbar or press the SPACEBAR when the track has been muted in the appropriate places.
SONAR draws an automated mute envelope in the track you recorded on. Before you listen to your track, make sure that the Enable/Disable Automation Playback button 📋 in the Automation toolbar is enabled.
Layouts, Templates and Key Bindings
A layout is the current arrangement of all the views that pertain to a particular project. The layout of each project is stored automatically as part of every project file. In addition, you can save the current layout or load any saved layout and apply it to the current project. You might want to create a layout so you can easily arrange the views in a convenient size and position on the screen.
A template is a special file that is used as a pattern to create similar project files. You might create a template file that defines a particular musical ensemble (say, a string quartet) or a particular studio configuration (MIDI instruments, audio outputs, and so on). Templates make it fast and easy to create and configure new projects.
Note that toolbars are not part of a file layout or template. The toolbar arrangement you choose is stored automatically from session to session.
A key binding lets you associate SONAR commands with keys on your MIDI or computer keyboard. This makes it easy for you to access specific features more quickly and efficiently. You can even assign saved layouts to key bindings for quick access.
See also:
Templates
Key Bindings
Layouts
![SIMMER 4 Proton: Editions - [optional] - Track File Edit View Insert Transport Go Tools Help Options Window Help 1 Load 2 Crown Long 3 Bore 01 4 Proton: 1 5 Proton: 1 6 Vcc 7 Vcc 8 Vcc 9 Vcc 10 Vcc 11 Vcc 12 Vcc 13 Vcc 14 Vcc 15 Vcc 16 Vcc 17 Vcc 18 Vcc 19 Vcc 20 Vcc 21 Vcc 22 Vcc 23 Vcc 24 Vcc 25 Vcc 26 Vcc 27 Vcc 28 Vcc 29 Vcc 30 Vcc 31 Vcc 32 Vcc 33 Vcc 34 Vcc 35 Vcc 36 Vcc 37 Vcc 38 Vcc 39 Vcc 40 Vcc 41 Vcc 42 Vcc 43 Vcc 44 Vcc 45 Vcc 46 Vcc 47 Vcc 48 Vcc 49 Vcc 50 Vcc 51 Vcc 52 Vcc 53 Vcc 54 Vcc 55 Vcc 56 Vcc 57 Vcc 58 Vcc 59 Vcc 60 Vcc 61 Vcc 62 Vcc 63 Vcc 64 Vcc 65 Vcc 66 Vcc 67 Vcc 68 Vcc 69 Vcc 70 Vcc 71 Vcc 72 Vcc 73 Vcc 74 Vcc 75 Vcc 76 Vcc 77 Vcc 78 Vcc 79 Vcc 80 Vcc 81 Vcc 82 Vcc 83 Vcc 84 Vcc 85 Vcc 86 Vcc 87 Vcc 88 Vcc 89 Vcc 90 Vcc 91 Vcc 92 Vcc 93 Vcc 94 Vcc 95 Vcc 96 Vcc 97 Vcc 98 Vcc 99 Vcc](/content/2026/05/819773/images/b099cf2bc30e8f3f843916604e7325554e1002086a7283bde0cf782cc87f6ead.jpg)
The layout of the views that are displayed for a project is stored automatically in the project file when you save the project. By default, the layout of all the views is restored when the file is opened. You can automatically arrange all open views so that they are all visible by using the Window > Tile in Rows command.
In addition, you can save the current layout in a separate list—the global layout list. Once you have saved the layout in this list, you can apply it to any open project. The global layout list can contain as many layouts as you want. Layouts in the list can be updated, renamed, and deleted.
Layouts are stored in a folder on your hard disk. To change the default folder for layouts, choose Options > Global, click the Folders tab, and type the name of a different folder in the Window Layouts field (or click the Browse button that's at the right end of the Window Layouts field, and select a new folder).
There are two options in Windows Layouts dialog (select Views > Layouts to open) that control how layouts are used, as described in the following table.
| Option Meaning | |
| Close Old Windows Before Loading New Ones | If checked, SONAR will close all the views of the current project before applying the layout. If you leave this option unchecked, existing views remain open and additional views are created according to the settings in the layout. |
| When Opening a File, Load Its Layout | If checked, the views of a project are automatically arranged according to the stored layout when the project file is opened. If this option is not checked, only the Track view (and File Info view, if applicable) are displayed when the project file is opened. |
Table 145.
To Create or Save a Layout
- Arrange the views for the current project the way you want.
- Choose Views > Layouts to display the Window Layouts dialog box.
- Click Add to display the New Global Layout dialog box.
- Enter a name for the layout, and click OK. The layout is added to the list.
- Click Close to exit the Window Layouts dialog box.
To Update a Layout
- Arrange the views for the current project the way you want.
- Choose Views > Layouts to display the Window Layouts dialog box.
- Choose the layout you want to update from the list.
- Click Add to display the New Global Layout dialog box.
- Leave the layout name unchanged, and click OK.
- Click OK to confirm that you want to update the layout.
- Click Close to exit the Window Layouts dialog box.
To Load a Layout
- Choose Views > Layouts to display the Window Layouts dialog box.
- Choose the layout you want from the list.
- Click Load.
Views of the current project are arranged according to the layout settings.
To Delete a Layout
-
Choose Views > Layouts to display the Window Layouts dialog box.
-
Choose the layout you want to delete from the list.
- Click Delete.
- Click OK to confirm that you want to delete the layout. The layout is removed from the list.
- Click Close to exit the Window Layouts dialog box.
To Rename a Layout
- Choose Views > Layouts to display the Window Layouts dialog box.
- Choose the layout you want to rename from the list.
- Click Rename to display the Rename Existing Layout dialog box.
- Enter a new name for the layout, and click OK. The layout is renamed in the list.
- Click Close to exit the Window Layouts dialog box.
To Set Layout Options
- Choose Views > Layouts to display the Window Layouts dialog box.
- Check the options you want.
- Click Close.
To Load a Layout with a Keyboard Command
- Use the Options > Key Bindings command to open the Key Bindings dialog box.
- In the Type of Keys field, click either Computer or MIDI. If you click MIDI, also make sure the Enabled check box is checked.
- If you selected MIDI in the Type of Keys field, under MIDI Shift Options select either Key or Controller, and select a value for whichever one you pick.
- Under Bindings, scroll through the Key field and select the key that you want to trigger the layout command with.
- In the Function field, scroll down towards the end of the list, and under Global Layouts, click the name of the layout you want to assign to the key you selected.
- When both the Key and the Function are highlighted in their respective fields. click the Bind button to bind them together.
- Click OK.
Now you can load the layout you selected by pressing the MIDI keys or computer keys that you bound to that particular layout. You can bind as many layouts as you have available key combinations.
See also:
Templates
Floating Views and Dual Monitor Support
SONAR supports dual monitors and allows you to float most of your views to a second monitor giving you more options when working and increasing the number of views that you can have open at one time.

Important: Dual monitor support requires that you have a video card that supports dual monitors. Follow your hardware manufacturers instructions for using dual monitors.
You can float views in SONAR without having a second monitor. Floating a view allows you to move it out of SONAR, over the SONAR toolbars and menus for example, giving you added flexibility when using SONAR with other applications. All views except the Track view can be floated.

Note: If you are using a dual monitor system and experience sluggish performance when selecting and dragging clips in the Clips pane, confirm that both monitors are set to the same "Color Quality" bit depth.
To Float a View
- Open the view you want to float.
- Click the view's icon located in the upper left corner of the view.
A. Piano Roll view icon
3. In the menu that appears, click Enable Floating.
4. Move the view wherever you want.
Templates
Template files make it easy to create new projects with certain predefined settings. To create a template file, create a new project file and arrange the project settings the way you want, then save the project as a template file. Template files have a file extension of .cwt. When you create a new project, you can use the template as the basis for the new project. SONAR looks for template files in a particular folder on your hard disk. By default, this folder is the program folder. To change the template directory, choose Options > Global and click the Folders tab.
Every time you start SONAR, a new, empty project is displayed. If you want, you can determine the settings for this default project by creating and saving a special template file, called Normal.cwt. If
you create or update the Normal.cwt file, SONAR will display this template automatically when the program is started.
As a rule, any parameter that is saved in a project file is also saved in a template file. Following are some useful parameters that are saved in template files:
- Track configuration and track parameters
- Timebase
- Sysx banks
- File information and comments
- Tempo settings
- Meter and key settings
- Clock and synchronization information
- MIDI data
- MIDI In/Out/Thru settings
• MIDI metronome settings - Selection start and end times
• Record mode and punch-in times - Drum maps
- Audio data
- Automation
The following parameters are saved globally and are not stored in template or project files:
- Initialization file parameters
- Big Time font settings
- MIDI device settings
- Instrument definitions
- Autosave options
• Key bindings - Color settings
To Create a Template
- Create a new file using the File > New command.
- Add tracks.
- Set one or more parameters to be the way you want.
- Choose File > Save As to display the Save As dialog box.
- Choose Template from the Save as Type list.
- Enter a template file name and click Save.
SONAR saves the template file.
To Create a New Project from a Template
- Choose File > New to display the New Project File dialog box. The list contains the names of all existing templates.
- Choose a template from the list.
- Click OK.
SONAR creates the new project and displays it in the Track view.
See also:
Template Example: Three MIDI instruments
Templates
Template Example: Three MIDI instruments
Suppose that your system has only a single MIDI output but you own three different synthesizers:
• One synthesizer set to receive on channels 1 through 8
- A general MIDI synthesizer module set to receive data on all 16 channels
- A drum machine set to receive on MIDI channel 10
Here's how you can use a template to make it easy to create new projects that are already configured for the instruments you own.
To create the example template file
- Choose File > New to create a new project file.
- Insert 16 MIDI tracks.
- In the Ch drop-down menu of track 10, enter 10. The drum machine responds to channel 10. For consistency, the drums can be placed on track 10.
- The second synthesizer responds to channels 1 through 8. These can be placed on tracks 1 through 8. For each track, enter the corresponding channel number using the Ch drop-down menu for each track. You should now have tracks 1 through 8 set to channels 1 through 8.
- The third synthesizer can respond to 16 MIDI channels, but the only channels left are 9 and 11 through 16. Enter these numbers in the corresponding tracks. You will need to mute the unused channels on the third synthesizer (1 through 8 and 10) so they won't play. These are assigned to the drum machine and the second synthesizer.
- Name each track and set any track parameters, such as starting patch, volumes, panning, reverb, chorus, and transposition.
- If you like, configure other parameters needed in your projects, such as auto-send Sysx banks, tempo settings, window positions, and comments.
- Choose File > Save, and save the file as a template named my3synths.
Now, each time you want to start working on a new project, you can simply load your template and start recording.
See also:
Templates
Key Bindings
Key bindings let you associate SONAR commands with keys on both your MIDI keyboard and your computer keyboard. This makes it easy for you to access specific features more quickly and efficiently.
In addition, SONAR supports:
- Importing key bindings from other popular sequencer programs (see “Importing Key Bindings” on page 740)
- Exporting key bindings from SONAR (see "Exporting Key Bindings" on page 740)
- Use of any single key as a key binding (number keys on the number pad are separate keys from the other number keys)
- Changing the key bindings for commands that were previously hardwired, including hotkey commands in the various views

Note: The SPACEBAR is now "globally" bound to the Play/stop button, so that when you have a plug-in window open, you can still start and stop playback with the SPACEBAR.
Any one or two of the CTRL, ALT, and SHIFT keys can be used in combination with other keys. Preset key combinations appear in bold, with the command that they're currently assigned to listed at the bottom of the Key Bindings dialog.
Rather than tie up all the notes on your MIDI keyboard with key bindings, SONAR lets you define a key binding shift key on your MIDI keyboard that indicates when you want to use a key binding. For example, you could designate the lowest note on your MIDI keyboard as the key binding shift key, and then assign different notes to specific commands (for example, C4 to Process > Quantize, C5 to Process > Groove Quantize, and so on). If you press the C4 key by itself, the note plays normally. If you press the C4 key in combination with the lowest key on your keyboard (the key binding shift key), then it's just as if you had chosen the Process > Quantize command from the menu.
You can choose one of two options to define the key binding shift key:
- MIDI key (typically, the very lowest or highest key on your MIDI keyboard)
- Controller event (typically, one of the pedals)
If you use a MIDI key as the key binding shift key, then you lose the ability to play that note by itself. When you play the note, SONAR assumes you are about to choose one of the key bindings you
have created and ignores the note. If this is ever a problem, you can disable MIDI key bindings without canceling the key assignments and then re-enable the MIDI key bindings later on.
You can use a key binding to execute a command only when that command is possible. For example, the File > Save command is disabled when no projects are open. If you have assigned the CTRL+F2 key combination to the File > Save command, it won't do anything when no projects are open.
You can use MIDI key bindings and computer keyboard key bindings at the same time.
You use the Options > Key Bindings command to set up and manage your key bindings. Here's how:
To Create a Key Binding Using the Computer Keyboard
- Choose Options > Key Bindings to display the Key Bindings dialog.
- Check Computer in the Type of Keys list.
- To quickly scroll to the key or key combination you want, click the Locate Key button, and then press the key or keys you want to use.
- Highlight the key combination you want to use in the Key list. Keys on the number pad appear as Num "n." If a key or combination is already bound to a global command by default, the name of the key appears in bold text, and the command it is bound to appears at the bottom of the Key Bindings dialog under Global Key Assignment. Binding a key or combination to a command and clicking OK overwrites any default binding for that key or combination.
- In the Bind Context menu, select the context in which you want to use the key binding.
- Highlight the command you want to assign from the Function list.
- Click Bind to bind the key combination to the command.
SONAR places an asterisk next to the key(s) that you chose, and draws a line from the highlighted key(s) to the command that the key(s) will trigger. Any keys that are assigned to commands have asterisks next to them. Any commands that have keys assigned to them list the keys in the Computer column and/or the MIDI column.
-
Repeat steps 3 through 7 for all the keys you want to bind.
-
If you want to save these key bindings for other sessions, make sure that the Save Changes for Next Session check box is checked.
-
Click OK when you are done.
SONAR assigns the key(s) you chose.
To Create a Key Binding Using a MIDI Keyboard
- Choose Options > Key Bindings to display the Key Bindings dialog.
- Check MIDI in the Type of Keys list.
- Check the Enable box to make sure MIDI key bindings are enabled.
- If you haven't already done so, create a key binding shift key by doing one of the following:
- Check Key under MIDI Shift Options, and enter the name of the key you want to use.
- Check Controller under MIDI Shift Options, and choose the controller you want from the list.
- Highlight the key you want to bind from the Key list (if you click inside the Key list to put the focus on it, you can then play a note on your MIDI keyboard, and the note automatically becomes highlighted in the Key list).
- Select the command you want to bind from the Function list.
- Click the Bind button.
SONAR places an asterisk next to the Key that you chose, and draws a line from the highlighted key to the command that it's bound to. Any keys that are assigned to commands have asterisks next to them. Any commands that have keys assigned to them list the keys in the Computer column and/or the MIDI column.
- Repeat steps 5 through 7 for all the keys you want to bind.
- If you want to save these key bindings for other sessions, make sure that the Save Changes for Next Session check box is checked.
- Click OK when you are done.
SONAR assigns the key(s) you chose.
To disable MIDI key bindings, uncheck the Enable box in the Key Bindings dialog.
See also:
Importing Key Bindings
Exporting Key Bindings
Importing Key Bindings
SONAR can use key bindings from other sequencer applications. Clicking the Import button in the Key Bindings dialog allows you to choose a new set of key bindings. After you import new key bindings, you can edit and save them the way you do with the default key bindings.
To Import Key Bindings
- Choose Options > Key Bindings to display the Key Bindings dialog.
- Click the Import button to open the Import Key Bindings dialog.
- Navigate to the SONAR program folder (you don't have to store them there).
- Choose a key bindings file from the choices in the program folder. Key bindings files use the file extension .kbn.
- Click Open.
SONAR loads the key bindings you chose.
Exporting Key Bindings
Clicking the Export button in the Key Bindings dialog allows you to export the current set of key bindings, so that they are available when you want to switch key bindings.
To Export Key Bindings
- Choose Options > Key Bindings to display the Key Bindings dialog.
- Click the Export button to open the Export Key Bindings dialog.
- Navigate to the folder where you want to save the key bindings.
- Type a name for the key bindings.
- Click Save.
SONAR saves the key bindings, and adds the file extension .kbn to the filename.
Notation and Lyrics
This section describes three SONAR views that are used to edit the music notation and lyrics of your project.
- SONAR's Staff view lets you work with your composition in a standard musical staff, guitar tablature and a virtual guitar fretboard. You can add, move, and delete notes with your mouse or with your computer keyboard. You can add chord names, guitar chord grids, expression marks, hairpin symbols, pedal marks, and lyrics. And you can print professional-quality notation of a complete arrangement or individual parts, with up to 24 staves per page.
- The Meter/Key view lets you view, insert, and edit meter and key changes at any measure boundary in the project.
- The Lyrics view lets you edit a track's lyrics, and can be used to cue you with the lyrics during playback or recording.
See:
The Staff View
Basic Musical Editing
Chords and Marks
Tablature
Working with Percussion
Printing
The Meter/Key View
Working with Lyrics
The Staff View
The Staff view is composed of a Staff pane and a Fretboard.
When you first open the Staff view, you may see only the Staff and not the Fretboard. Resize the Staff view by dragging its edges until you can see everything easily. When you save your file, whatever size the Staff view is will be the way it appears the next time you open the file.
The Staff pane displays MIDI note events as musical notation. For some musicians, this may be the most familiar and comfortable view in which to work. The Staff pane provides many features that make it easy for you to compose, edit, and print music.
For guitar players who are new to musical notation, the Fretboard represents the notes in the Staff pane as they would appear on a six-string guitar neck in standard tuning. The number of strings and the tuning are configurable. All notes that appear in the Staff pane at the Now time are shown in the Fretboard. If you enter notes in the Staff at the Now time, they appear on the Fretboard. Likewise, you can enter notes into the Staff at the Now time by clicking the guitar strings on the fretboard. Notes and chords shown in the Fretboard can be easily edited by dragging them up and down the guitar strings.
Figure 124. The Staff view

A. Notehead tools B. Dynamics and markings C. Time and pitch locator D. Editing tools E. Zoom F. Snap grid G. Show/hide track pane H. Fretboard display I. Track list pane J. Fretboard pane
See:
Staff Pane Layout
The Fretboard
Fretboard pop-up menu
Opening the Staff View
There are three ways to open the Staff view:
- In the Track view, select the MIDI tracks you want to see, then click the Staff View button.
- In the Track view, select the MIDI tracks you want to see, then choose Views > Staff.
- Right-click on a track in the Clips pane and choose Views > Staff from the menu.
You can always change the tracks that are displayed: click the Pick Tracks button ⏻ and select the tracks you want. You can display one or more tracks.
The Staff view lets you edit, delete, copy, and move notes during playback or recording, in real time. This means you can loop over a portion of your project and hear any change you make on the next loop. You can freeze the Staff view from automatic scrolling during playback by pressing the Scroll Lock key.
Like many other views, the Staff view includes zoom tools that let you change the vertical and horizontal scale of the view. The Staff view also has a Snap to Grid button. For more information about this feature, see "Defining and Using the Snap Grid" on page 316.
Displaying Tracks
The Staff view also has a Track List pane that allows you to set a track's Mute/Solo/Arm status and to change track focus.
To view the Track List pane:
- Click the Show/Hide button .
To set track focus:
- In the Track List pane, click the track name.
To mute, solo, or arm a track:
- In the Track List pane, click a track's M, S, or R buttons, respectively.

Note: You can right-click in the Track List pane to access Snap to Scale commands. For more information about this feature, see "Snap to Scale" on page 501.
Staff Pane Layout
The Staff pane can display up to 24 staves of standard and percussion notation. When you open the Staff pane, SONAR automatically picks a clef for each track—bass or treble—by looking at the range of pitches in the track. If a track has notes that fall into both clefs, or no notes at all, SONAR automatically splits the track into two staves, treble and bass. You can change the assignment of clefs with the Staff View Layout dialog box.
When you split a track into treble and bass staves, you must select a split point. Notes at or above the split are placed into a treble staff, notes below the split are placed into a bass staff.
A wide variety of editing options for notes, layout, and MIDI effects are available from the Staff pane right-click menu.
Percussion settings are discussed in the section "Setting Up a Percussion Track" on page 773.
The Staff pane right-click menu
The Staff pane right-click menu offers the following editing options:
| Menu command Result | |
| MIDI Effects | Opens the MIDI Effects submenu. See “MIDI Effects (MIDI Plug-ins)” on page 519 for more information. |
| Layout Opens the Staff View Layout dialog box. | |
| Quantize | Opens the Quantize dialog box. See “Quantizing” on page 520 for more information. |
| Groove Quantize | Opens the Groove Quantize dialog box. See “Quantizing” on page 520 for more information. |
| Transpose | Opens the Transpose dialog box. See “Transposing” on page 482 for more information. |
| Slide Opens the Slide dialog box. | |
| Interpolate | Opens the Event Filter Search dialog box. See “Process > Interpolate” on page 509 for more information. |
| Length | Opens the Length dialog box. See “Stretching and Shrinking Events” on page 486 for more information. |
Table 146.
To change the Staff pane layout
- Click the Staff View Layout button 📋 to open the Staff View Layout dialog box.
- Select a track from the list (if the track you want to edit is not in the list, click the Pick Tracks button in the Staff view toolbar and select it). The Clef option shows the track's clef.
- Select a new clef from the list.
- If you select Treble/Bass, select a Split point.
- If you select one of the Percussion options, click Percussion Settings to set up the appearance of percussion notes.
- Repeat steps 2-5 for other tracks.
- Click Close when you are done.
SONAR displays tracks using the new staff settings.

Tip: If a piano part's left-hand and right-hand parts overlap, a split point will not correctly separate the two parts into treble and bass staves. You may prefer to put the two parts into two separate tracks.
The Fretboard
The Fretboard shows you the notes located at the Now time in the Staff pane, laid out on a virtual guitar fretboard. For example, if the Staff pane shows you this:

The Fretboard pane shows you this:
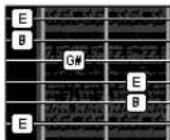
The Fretboard stays in sync with the Now Time during playback and recording, and stays in sync with the scrub time during scrubbing. The color of each note on the Fretboard is the same as the color of the corresponding clip in the Track view. (See “Arranging Clips” on page 299 for information about setting clip properties.)
To turn the display of the Fretboard on or off, click 📄
See:
Editing Notes and Chords from the Fretboard
Fretboard pop-up menu
Moving Notes from within the Fretboard
MIDI Channels and the Fretboard
To Display Notes on the Fretboard Using their MIDI Channels
To Edit a Chord Symbol
Tablature Settings
Changing Fretboard Texture and Orientation
Quick TAB
Regenerate TAB
Entering Notes from the TAB Staff
Single Note Editing from the TAB Staff
Notation and Lyrics
The Staff View
Editing Chords or Groups of Notes from the TAB Staff
Fretboard pop-up menu
When you right-click the Fretboard in the Staff view, the Fretboard pop-up menu appears, giving you choices for note editing, Staff view layout, and Fretboard appearance.
| Menu command Result | |
| Select Changes your cursor to the Select tool. | |
| Draw Changes your cursor to the Draw tool. | |
| Erase Changes your cursor to the Erase tool. | |
| Scrub Changes your cursor to the Scrub tool. | |
| Layout Opens the Staff View Layout dialog box. | |
| Select Fretboard Track | Controls which of the displayed tracks receive the notes you enter on the Fretboard. |
| Export to ASCII TAB Saves the track in ASCII TAB format with the extension .txt. | |
| Mirror Fretboard Inverts Fretboard so highest-sounding string appears at the bottom. | |
| Rosewood Hi Fretboard appears in rosewood with high screen resolution. | |
| Rosewood Lo Fretboard appears in rosewood with low screen resolution. | |
| Ebony Hi Fretboard appears in ebony with high screen resolution. | |
| Ebony Lo Fretboard appears in ebony with low screen resolution. | |
| Maple Hi | Fretboard appears in maple with high screen resolution. |
| Maple Lo | Fretboard appears in maple with low screen resolution. |
Table 147.
To Change the Staff View Layout
- Click the Layout button to open the Staff View Layout dialog box.
Figure 125. The Staff View Layout dialog
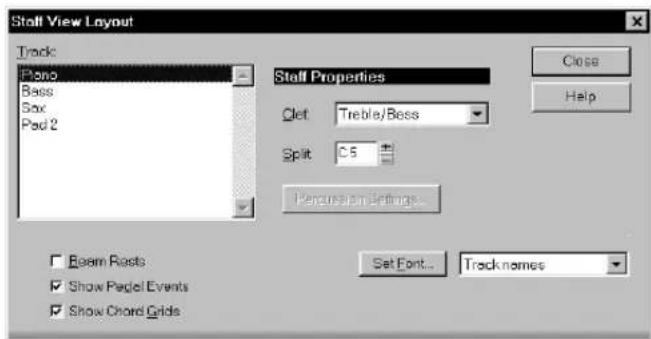
- Select a track from the list (if the track you want to edit is not in the list, click the Pick Tracks button in the Staff view toolbar and select it). The Clef option shows the track's clef.
- Select a new clef from the list.
- If you select Treble/Bass, select a Split point. C5 represents middle C.
- If you select one of the Percussion options, click Percussion Settings to set up the appearance of percussion notes.
- Repeat steps 2-5 for other tracks.
- Click Close when you are done.
SONAR displays tracks using the new staff settings.
Basic Musical Editing
The Staff view's tools let you edit a project by manipulating the elements of standard music notation. Using these tools, you can create and edit notes, chord symbols (guitar fretboards), pedal marks, expression marks, hairpins, and lyrics.
See:
Inserting Notes on the Staff
Inserting Notes with the Fretboard
Selecting Notes
Moving, Copying, and Deleting Notes on the Staff
Moving Notes from within the Fretboard
Auditioning
Changing Note Properties
Deglitch Dialog
Working with Triplets
Notation and Lyrics
Basic Musical Editing
Beaming of Rests
Changing the Way Notes Are Displayed
Using Enharmonic Spellings
MIDI Channels and the Fretboard
Inserting Notes on the Staff
You can add notes to your composition with simple point-and-click techniques. To help with your composing, SONAR gives you audio feedback as you place each note.
You can insert notes anywhere in the Staff pane, but inserting them at the Now time gives you control over the exact time you want to insert to. The SHIFT+RIGHT/LEFT ARROW command moves the Now Time forward or backward by the amount of the note duration you choose. Six buttons let you select a note duration ranging from a whole note to a 32nd note. Buttons to the right of the notehead buttons let you select dotted note or triplet modifiers. The CTRL+RIGHT ARROW/CTRL+LEFT ARROW commands pages you through the track, sounding each note as the cursor passes over it. You can also page through the track by clicking the Play-Next button 📁 or the Play-
Previous button 📄 that are in the Staff view toolbar.

Note: You cannot insert notes whose durations are less than the value in the Display Resolution field, which is located in the top level of the Staff view toolbar.
You may want to pick a different snap-to grid value for a particular note. For example, if you want to insert a half note in the last quarter note position in a measure (in order to get two tied quarter notes), you must set the snap resolution to a quarter note. SONAR will automatically convert the half note to two tied quarter notes. The same method can be used to insert a syncopated note, such as a quarter note at an eighth note position.
You may also wish to disable the Fill Durations 🎯 and Trim Durations 🎯 options before you enter notes on the staff. This will allow you to see the true durations of all the notes you enter. These options are discussed in “Changing the Way Notes Are Displayed” on page 757.
To Insert a Note on the Staff
- Disable the Fill Durations and Trim Durations buttons in the Staff view toolbar, if desired (this is usually the best way when you're entering notes).
- Click the Display Resolution button in the Staff view toolbar and choose a resolution that's as small or slightly smaller than the smallest note you plan to enter.
- Click the Draw tool
-
In the second row of the Staff view toolbar, select a note duration, and a modifier (dot or triplet) if desired. You cannot insert a note that's shorter in length than the note in the Display Resolution field.
-
Move the Now time to the location where you want the new note by pressing SHIFT+RIGHT ARROW or SHIFT+LEFT ARROW. Notice the vertical line that marks the Now time in the Staff pane. The line moves by the duration of the note you selected to enter.
- Click the cursor on the vertical line at the pitch that you want.
- To add a sharp or flat, right-click the note to open the Note Properties dialog box—in the Pitch field, use the + or - buttons to raise or lower the pitch, and click OK. You can type enharmonic spellings into the Pitch field, such as C#5, E"4. and Fx6. The double quotation mark produces a double flat, and the x produces a double sharp.
SONAR places the new note in the staff. If desired, drag the note horizontally or vertically to a new time or pitch.
Inserting Notes with the Fretboard
You can also enter notes onto the staff from the fretboard using the mouse. You always enter notes into the staff at the Now time.
To Insert Notes on the Fretboard with the Mouse
- Click in the Time Ruler to set the Now time.
- Click to select the Draw tool.
- Select a note duration, and a modifier (dot or triplet) if desired.
- Click on the guitar strings in the fretboard to enter notes. You can enter up to six simultaneous notes (one per string).
- Advance the Now Time by the current note duration using the right arrow key while holding down the shift key. This allows you to quickly enter a series of notes.
Selecting Notes
Use the Selection tool to make selections. Selection methods in the Staff view are similar to those in other views. Here is a summary:
| To do this Do this | |
| Select a note or other symbol Click it | |
| Select several symbols at once Click and drag a rectangle around them | |
| Add symbols to the selection | Press SHIFT and either click on the symbols or drag a rectangle around the events |
| Add or remove symbols from the selection | Press CTRL and either click on the symbols or drag a rectangle around the events |
Table 148.
To do this Do this
Select symbols in a time range Click and drag in the Time Ruler
Select symbols between two markers Click between the markers
Remove all selections Click in an empty area
Table 148.

Note: Tied notes must be selected together, since the series is really just a single MIDI note. To select tied notes, you must click or drag a rectangle around the first note of the series.
Moving, Copying, and Deleting Notes on the Staff
Selections can be cut, copied, pasted, and deleted with Edit menu commands. The techniques are similar to those used in other views. Selections can also be dragged and dropped to copy or move them. To keep track of your current position while dragging, you can keep an eye on the time and pitch locator in the upper-right corner of the Staff view.
Notes can be dragged horizontally, to a new time, or vertically, to a new pitch or staff. When you drag a note up or down to a new pitch, the note normally snaps to the notes in the current key signature (diatonic scale). This makes it easy to drag notes quickly among pitches that are in the current key.
If you need to transpose more than a few notes, use the Process > Transpose command. For more information, see “Transposing” on page 482.
To Move a Single Note in the Staff View
- Click the Select tool for the Draw tool .
- Click the note to be moved.
- Drag the note to a new time, pitch, or staff.
SONAR moves the note to the new location.
To Move Several Notes in the Staff View
- Click the Select tool
- Select the notes to be moved.
- Click one of the selected notes.
- Drag the notes to a new time, pitch, or staff.
SONAR moves the notes to the new location.
To Copy One or More Notes in the Staff View
- Click the Select tool
- Select the notes to be copied.
- Press and hold the CTRL key.
- Drag the notes to a new time, pitch, or staff.
SONAR inserts copies of the notes at the new location.
To Erase Notes with the Eraser
- Click the Erase tool
- Click any notehead to erase the note.
- To erase several notes, click and drag the eraser.
Any notes whose notehead is touched by the eraser will be deleted.
Moving Notes from within the Fretboard
You can drag notes displayed in the fretboard horizontally along each string to change their pitch. They always change in the chromatic scale. You can not drag notes from one string to another.
To Change the Pitch of a Single Note in the Fretboard
- Click in the Time Ruler to set the Now time to the time of the note you want to change.
- Click the Select tool or the Draw tool .
- Drag the note along the string to a new fret.
SONAR moves the note to the new pitch.
To Change the Pitch of a Chord in the Fretboard
- Click in the Time Ruler to set the Now time to the time of the chord you want to change.
- Click the Select tool
- While pressing SHIFT, click each of the notes you would like to change.
- While continuing to press SHIFT, drag the notes along the strings.
SONAR moves the notes you selected to the new pitches.

Tip: You can also move the Now time pointer to the exact note by using the Step Play buttons.
Auditioning
Notation and Lyrics
Basic Musical Editing
Sometimes it is useful to listen to your music slowly, note-by-note, rather than at full speed. For example, you may need to locate a bad note, or you may be trying to learn the correct fingering for a difficult passage.
The Staff view has two features that let you audition your composition at reduced speed: Scrub and Step Play. The Scrub tool lets you drag a vertical bar over the staff, playing the notes as it goes. You can scrub backward or forward at any speed. Step Play lets you step through the project note by note, in either direction.
To Audition with the Scrub Tool
- Click the Scrub tool
- Drag the mouse horizontally through the Staff pane to play the notes.
SONAR plays any notes the scrub line passes over.

To Play Notes with Step Play
- Set the Now time by clicking in the Time Ruler.
- Step through the music as follows:
| To do this Do this | |
| Step forward | Click press CTRL+RIGHT ARROW |
| Step backward | Click press CTRL+LEFT ARROW |
Table 149.
Changing Note Properties
The Staff view lets you edit all the MIDI parameters for a note, including those not normally portrayed by standard musical notation. Note properties are as follows:
| Property Meaning |
| Time The starting time of the note |
| Pitch The note's pitch |
| Velocity The note's velocity (0 to 127) |
| Duration The note's duration, in ticks or in beats and ticks |
| Channel The MIDI channel on which the note is played |
Table 150.
To Edit a Note's Properties
- Right-click the note to open the Note Properties dialog box.
Figure 126. The Note Properties dialog

-
Edit the note's properties, as described in the table.
-
Click OK.
SONAR changes the note's parameters and redraws the note if necessary.
Deglitch Dialog
When recording MIDI guitar, even the best players occasionally play unintended notes. The Deglitch feature allows you to filter out the softest, shortest, and highest notes in the file.
There are three filters in the Deglitch dialog:
Pitch
With the Pitch filter you can set the maximum pitch allowed in the track. If a MIDI event has a higher pitch than the maximum you set, it is removed.
Velocity
With the Velocity filter you can set a minimum velocity allowed in the track. If a MIDI event has a lower velocity than the one you set, it is removed.
Duration
With the Duration filter you can set a minimum note duration for the track in either ticks or milliseconds. If a MIDI event has a shorter duration than the one you set, it is removed.
To Use the Deglitch Filter
- Select a track or a section of track.
- Select Process > Deglitch from the menu.
The Deglitch dialog box appears. -
Check each of the filters you want to use.
-
Enter the parameters (maximum or minimum values) you want for each of the filters you are using.
- Click OK.
If you are not happy with the result, select Edit/Undo from the menu to restore the original MIDI track.
Working with Triplets
The Staff view places certain limitations on the use of triplets. The limitations are:
- Triplets must occur in full sets of three.
- All three steps in a triplet must be notes (no rests) of the same basic duration.
- There can be no ties in or out of, or within the triplet.
In most cases, the Staff view can recognize triplets in MIDI data. However, the slight timing inaccuracies inherent in live performances can complicate the detection of triplets. If working from performance data, you may find it useful to quantize the notes closer to exact triplet positions using the Process > Quantize command. See “Quantizing” on page 520 for details.
To Enter a Triplet
-
Enter the first note at the desired location in the staff.
-
Turn on the Snap to Time option.
- Click the Draw tool
- Click the appropriate notehead button.
- Select the Triplet option 3.
SONAR inserts all three triplet notes at the same pitch. You can then drag the second and third notes to their correct pitch locations.
Beaming of Rests
The Staff view supports beaming of rests, a practice that is popular with rhythmically complex music. Beam lengths are extended to include rests that are integral parts of the beamed group of notes. Short stems, called stemlets, extend from the beam toward the rest. This makes the rhythms easier to read, because the beat boundaries are made clear.
To Enable Beaming of Rests
- Click Layout button 📋 to open the Staff View Layout dialog box.
- Select the Beam Rests option.
- Click OK.
Thereafter, the Staff view beams rests as though they were notes.
Changing the Way Notes Are Displayed
Unlike musical notation programs, SONAR uses the MIDI events themselves as the permanent representation of the music; thus, the Staff view is only an interpretation of a MIDI performance.
MIDI notes do not always correspond exactly to notes on a staff. Whereas a staff defines precise grid-like starting times and durations for notes, a MIDI note can start at any arbitrary time during the project, and last for any length of time. If you record a performance from a MIDI keyboard, for example, you'll find that some notes may start slightly before the beat, and some a little after, and that the notes end a little late or a little early. Although these slight imperfections are what gives a performance its “human” quality, you don't necessarily want to see all these imperfections notated with excruciating precision.
The Staff view has two options you can select to affect the way MIDI notes are displayed on the staff:
| Option Purpose | |
| Fill Durations | Visually rounds up note durations to the next beat or the next note, whichever comes first. |
| Trim Durations | Visually rounds down note durations if they extend a little way past the start of the next note. |
Table 151.
Here's what the Staff view looks like with and without these options:
Figure 127. Fill and Trim off

Figure 128. Fill and Trim on

On the other hand, if you are entering notes into the Staff view with the mouse, Fill and Trim Durations may produce confusing results. For example, with Fill Durations, an inserted eighth note in 4/4 time would look like a quarter note until you insert another eighth note immediately following it. It is recommended that you turn off the Fill Durations and Trim Durations options when entering notes; these options are more appropriate for looking at notes you recorded via a performance.
Using Enharmonic Spellings
Any musical note can be referred to by several different names. For example, C#3 and Db3 identify the same pitch, as do G#4 and Ab4. The most appropriate name depends upon the current key signature, but can also depend on musical context.
SONAR uses a set of rules to automatically add accidentals (sharps, flats and naturals) to notes based on the current key signature. These rules cover the most common musical situations and usually lead to pleasing results. However, there is no guaranteed right way to resolve accidentals. Doing so ultimately requires knowledge regarding what key or scale is being evoked—knowledge that only the composer possesses. For example, if a modulation is being prepared, then the new key signature has not yet been completely established, and the harmony has already begun to shift. In fact, there may not even be a scale in a diatonic sense: chromatic scales, for instance, are supposed to sharp on the way up and flat on the way down. Because no set of rules will suffice for all situations, the composer needs the ability to override any default choice.
Notes in SONAR normally do not have a forced enharmonic spelling. This means that they will automatically change to match the default for a new key signature. If you specify spelling that matches the default choice, SONAR will drop any forced spelling and switch back to default behavior. Otherwise, the forced spelling is remembered for that note, and will not change to follow the key signature. If you change the pitch of a note by some other means (for instance, by dragging it up or down), it will lose any forced spelling, because it very likely no longer applies to the new pitch. Enharmonic spelling overrides for each note are saved in the project file.
When you type a note's enharmonic spelling, use the following table as a guide:
| Accidental | Character | Example | Displays as |
| Flat b Cb5 | 1 | ||
| Sharp # C#5 | 1 | ||
| Double flat “ C”5 | 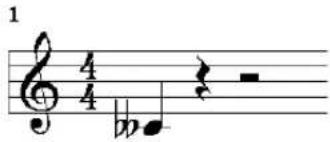 | ||
| Double sharp x Cx5 |  |
Table 152.
Table 152.
To Change a Note's Enharmonic Spelling
- Right-click the note to open the Note Properties dialog box.
- In the Pitch textbox, type a new spelling for the note.
- Click OK.
SONAR displays the note with the new enharmonic spelling.
You can change enharmonic spellings in other views, such as the Event List view, by similarly typing a new spelling wherever the note pitch is displayed as a text string.
You can also use the Process > Interpolate command to change enharmonic spellings—for example, to change multiple occurrences of Eb5 to D#5, or even all Ebs to D#s. See “Process > Interpolate” on page 509 for more information.
MIDI Channels and the Fretboard
You can display notes on the fretboard based on the note event's MIDI channel. (Do not confuse this with the Track MIDI channel.) A single track can hold events on many different MIDI channels. See "Assigning a MIDI channel (Chn)" on page 211 for more information. Displaying notes using this method is 100% accurate because each string is represented by an individual MIDI channel. For example, String 1 = MIDI channel 11, String 2 = MIDI channel 12, etc.
To Display Notes on the Fretboard Using their MIDI Channels
- Set your MIDI guitar to transmit on 6 consecutive channels. This is often referred to as "MONO" mode. Refer to your MIDI Guitar device documentation for more information.
-
Select and Arm a track.
-
If you want the data from all 6 strings to be recorded to a single track, set the Input to OMNI. If you want each string on a separate track, you need to set up each individual track to record on the corresponding MIDI channel. The GT-30 Guitar Synthesizer template is designed to do this, so you may want to open that from the Quick Start menu or from the File menu. To use the File menu method, choose File > Open and choose Cakewalk Template from the Files of type field. Then choose the Roland GT-30 Guitar Synthesizer template.
- Open the Staff view.
- Click the Staff View Layout button ☐
- Click Define.
- In the Method field, click MIDI Channel.
- In the 1st Channel field, set SONAR to transmit on the same series of MIDI channels that you chose in step 1. Select 1 for 1-6, 2 for 2-7, etc.
MIDI guitar devices can transmit in MONO using a different series of MIDI channels, but SONAR needs to be listening to the same channels in order to properly display the MIDI guitar input.
- Click Close.
10.Click OK.
SONAR displays notes on the Fretboard based on their MIDI channels.
If you are planning to record or input notes from a MIDI guitar synth or MIDI converter, you need to set this up on the instrument. In the case of the Roland GT-30, for example, you set it to send on MIDI Channel 11, MONO. This sends out each corresponding string on channels 11-16.
Chords and Marks
The Staff view lets you add and edit chord symbols, dynamic markings, hairpin symbols, and pedal events. Like notes, these symbols are placed in the score with the Draw tool. They can be selected, cut, copied, pasted, deleted, and dragged and dropped. With the exception of pedal marks, though, these symbols have no audible effect; they serve only to enhance and clarify the printed score.
See:
Adding Chord Symbols
Adding Expression Marks
Adding Hairpin Symbols
Adding Pedal Marks
Adding Chord Symbols
The Staff view lets you enter chord symbols above the staff. You can enter both ordinary chord names and guitar chord symbols, which display both the chord name and fingering. SONAR has a
large number of predefined chords from which you can choose. You can also define and save your own chords.
If a track is split into treble/bass staves, chords are allowed only above the upper (treble) staff.
SONAR stores its library of chords in the file Chords.liw. The chords in the library are sorted into groups. You can add and remove chords from the library, create new groups (i.e., for alternative guitar tunings), and add chords from a different library file.
You edit chords in the Chord Properties dialog box. Chord properties are shown in the following table:
Property Meaning
Time The time of the chord, in measure, beat, and tick (MBT) format
Name The name of the chord
Group The chord group
Table 153.
The Chord Properties dialog box also lets you draw guitar chord grids and manage the chord library.
You can suppress the display of all guitar chord diagrams by deselecting the Show Chord Grids option in the Staff view's Layout dialog box. With this option disabled, only chord text appears.
To Add a Chord Symbol
- Click the Draw tool
- Select the Chord tool .c
- Position the pointer above the staff (the pointer changes to a pencil when you are in a legal position).
- Click to place a chord symbol.
SONAR inserts a copy of the most recently added chord (by default, C). You can then edit the symbol to display the chord you want.
To Move a Chord Symbol
- Click the Draw tool
- Drag the chord symbol to a new location.
To Edit a Chord Symbol
-
Right-click the symbol to open the Chord Properties dialog box.
-
Edit information about the chord according to the table:
| To do this Do this | |
| Move a chord in time Change the Time property. | |
| Give the chord a new name | Select a chord from the drop-down list, or type a new name. Use # for sharp and b for flat. |
| Add descriptive text to the chord name | Type the text in square brackets after the chord name. The text does not appear in the Staff view. |
| See a different set of chords | Select a group from the list. This option only applies if you have created a custom chord library. |
Table 154.
- If desired, select a group from the list and/or create a guitar chord grid.
Figure 129. The Chord Properties dialog
![Chord Properties Time: 6.02.000 Name: C [Standard] Group: Guitar Press New Grid for an empty chord grid. Choose Finger end click at each desired point on the grid. Finger 1 2 3 4 I 0 X C OK Cancel Save Delete Import... New Grid Remove Grid Play Help](/content/2026/05/819773/images/bd2c2da8e65bf62988502daa35e523e062cffa6a4e02e8257f7443425ce51b4f.jpg)
- Click OK.
The Staff view displays the chord with the new properties, moving it to a new time if necessary.
To Add a Guitar Chord Grid
-
Right-click the chord symbol to open the Chord Properties dialog box.
-
Follow the instructions in the table:
| To do this Do this | |
| Display a blank chord grid Click New Grid | |
| Place a dot on the grid Select the finger number (1-4, or T for Thumb), then click the grid at the appropriate string and fret location | |
| Assign an open string Select O, then click on the string | |
| Assign a muted string Select X, then click on the string | |
| Change the finger assigned to a dot Click the dot repeatedly to cycle through the fingers | |
| Insert a fret designation | Click to the right of the grid and enter the number of the index finger fret in the Chord Fret Number dialog box |
| Play the chord (Audition) Click Play | |
| Remove the chord grid Click Remove Grid | |
Table 155.
3. Click OK.
The Staff view displays the chord with the new guitar chord grid.
To Manage the Chord Library
- Right-click the chord symbol to open the Chord Properties dialog box.
- Follow the instructions in the table:
| To do this Do this | |
| Add a chord to the library | Select a group, enter a name in the Name box, enter a guitar grid (if desired), and click Save. |
| Delete a chord from the current group | Select the chord from the list and click Delete. |
| Add a new group | Type a name for the group in the Group textbox and click Save. |
| Delete a group | Select a group from the list and click Delete. |
| Merge chords from an external chord library | Click the Import button and select a file. Chord libraries have the extension .liw. |
Table 156.
3. Click OK.
SONAR saves the chord library with the changes you made.
Adding Expression Marks
Expression marks tell a performer how to interpret the notes and durations on the page. They provide a necessary supplement to simple notation, in which notes have only pitch and duration, but no hint of how loudly, softly, or smoothly, they are to be played. Dynamic marks—from ppp (pianissimo) for “very, very softly” through fff (fortissimo) for “very, very forcefully”—allow notation to convey volume instructions. Expression marks are also needed to specify other aspects of performance, such as whether a passage is to be played legato or staccato. Finally, expression marks can be used to convey to the performer the composer's suggestions or requirements as to how a passage should be interpreted. In such cases the language used can leave much to the imagination, as in with majesty or abrasively.
Expression marks do not change the underlying MIDI data. They only provide information to the reader on how a piece should be performed.
If the track is split into treble/bass staves, expression marks are allowed only below the treble staff.
When entering an expression mark, you can leave a dangling hyphen at the end of an expression mark to insert automatic spaced hyphens until the next expression mark. For example:
cresc. --- ff
It is often desirable to terminate such a series of hyphens with a blank expression mark. For example:
accel. ---
Expression text is italicized in the Staff view. Standard dynamic markings also appear bold.
To Add an Expression Mark
- Click the Draw tool

- Select the Expression tool f
- Position the pointer below the lowest note in the staff. (The pointer changes to a pencil when you are in a legal position.)
- Click to open an insertion box.
- Type the expression mark text. Press ESC to abort the operation.
- Press ENTER, or press TAB or SHIFT+TAB to move to the next or previous mark, respectively.
SONAR inserts the new expression mark below the staff.
To Edit an Expression Mark
- Right-click the expression mark to open the Expression Text Properties dialog box.
Figure 130. The Expression Text Properties dialog

-
Edit the time and text of the expression mark as desired.
-
Click OK.
The Staff view displays the expression mark with the new text, including moving it to a new time if necessary. You can also use the Draw tool and click on an expression mark directly to change its text.
Adding Hairpin Symbols
Some musical phrases vary dynamically, increasing or decreasing in loudness for dramatic effect. SONAR lets you insert traditional crescendo and diminuendo hairpin symbols that convey this information to a performer, as shown here:

If the track is split into treble/bass staves, hairpin symbols are allowed only below the treble staff.
To Add a Hairpin Symbol
-
Click the Draw tool
-
Select the Hairpin tool
-
Position the pointer below the staff (the pointer changes to a pencil when you are in a legal position).
-
Click to place a hairpin symbol.
SONAR inserts a copy of the most recently added hairpin symbol, which you can edit as desired.
To Edit a Hairpin Symbol
- Right-click on the hairpin symbol you want to edit.
The Hairpin Properties dialog appears.
- Change any of the following parameters:
• Time. The beginning time of the hairpin symbol
- Crescendo or Diminuendo.
- Duration. Enter the number of beats followed by a colon (for example 4: for one measure in 4/4 time) or a PPQ number value.
Adding Pedal Marks
Pedal marks traditionally indicate where the sustain pedal of a piano is to be pressed and for how long. With SONAR, you can achieve the same effect by inserting a pair of symbols indicating when the sustain pedal controller is to be turned on (down) and when it is to be turned off (up). Unlike chord symbols, expression marks, and hairpin symbols, each pedal symbol corresponds to a MIDI event. The other symbols are purely ornamental, intended to provide a composer with a way to communicate suggestions or requirements to performers.
Pedal event parameters are as follows:
Parameters Meaning
Time The time of the event, in measures, beats, and ticks (MBT).
Channel The MIDI channel on which the event will be sent.
Value The event value. A value of 127 depresses the pedal, a value of 0 raises it. (Some advanced synthesizers support values between 0 and 127 for “partial pedaling.”)
Table 157.
If the track is split into treble/bass staves, pedal marks are allowed only below the bass staff.
You can suppress the display of all pedal marks by deselecting the Show Pedal Events option in the Staff view's Layout dialog box.
To Add a Pedal Mark
- Click the Draw tool

- Select the Pedal tool

- Position the pointer below the staff (the pointer changes to a pencil when you are in a legal position).
- Click to place a pedal mark.
SONAR inserts a pair of pedal symbols (a pedal down and a pedal up). You can click and drag either symbol to a new time.
To Edit a Pedal Event
- Right-click the pedal symbol (pedal down or pedal up) to open the Pedal Event Parameters dialog box.
Figure 131. The Pedal Proerties dialog.

-
Edit the pedal event parameters, as described in the table above.
-
Click OK.
SONAR changes the pedal event parameters, including moving the symbol to a new time if necessary.
Tablature
The Staff view can display guitar or bass MIDI tracks as tablature. You can generate and edit tablature or enter notes on either the fretboard or on the tablature staff to create a new track. You can export tablature to an ASCII file for printing or distribution on the Web.
See:
Tablature Settings
Changing Fretboard Texture and Orientation
Quick TAB
Regenerate TAB
Entering Notes from the TAB Staff
Single Note Editing from the TAB Staff
Editing Chords or Groups of Notes from the TAB Staff
Editing Notes and Chords from the Fretboard
Tablature Settings
Both the Staff View Layout dialog box and the Tablature Settings dialog box create tablature settings for a whole track at a time. To modify tablature for selected parts of a track, select part of a track and use the Regenerate command.
In the Staff View Layout dialog box you can choose a preset style of tablature by choosing from the Preset pop-up menu, or you can define your own style by clicking the Define button in the Staff View Layout dialog box to open the Tablature Settings dialog box.
To Define a Tablature Style
- In the Staff View Layout dialog box, click the name of the track you want to define tablature for.
- Click the Define button (lower right corner).
The Tablature Settings dialog box appears.
-
Click the Tablature tab and choose a tablature method from the Method drop-down list. There are three methods to determine how the TAB is displayed:
-
Floating. Which allows the notes to spread over the entire fretboard
- Fixed. This specifies where on the neck these notes should be played. When Fixed is selected the Finger span and Lowest fret fields are used together to define the "box" where the notes are displayed. The Finger span parameter determines how many consecutive frets will be used to display the note. For example, if Finger span is set to 4, then SONAR will attempt to place all the notes within those 4 frets. The Lowest Fret then determines where on the fretboard the notes will be displayed within the Finger span. The red box in the fretboard display changes to reflect the settings in these two parameters.
- MIDI Channel. This uses the event's MIDI channel to determine which string the note should be displayed on. When MIDI Channel is selected, the user chooses which series of MIDI Channels should be considered. This is useful for MIDI guitarists that record parts in MONO mode, where each string transmits on a different MIDI channel. (Values: 1 - 11). Selecting 1 in the 1st Channel field will cause it to use MIDI channels 1 - 6, selecting 2, 2 - 7, and so on.)

Note: Select the Skip Channel 10 option if you are using a Yamaha G50 or other device which reserves channel 10.
- Type a number into the Number of Frets field. This determines how many frets the guitar has that the tab is based on.
- In the String Tuning fields, choose the instrument from the drop-down list and number of strings from the Number of Strings field.
The open string pitches for the instrument you choose automatically appear in the String Number fields below the drop-down list. - Customize any of the open string pitches by using the + or - buttons on the String Number fields.
- Save your settings by typing a name into the Preset field at the top of the dialog box and clicking the disk icon next to it. You can remove presets from the list by clicking the X button next to the disk icon.
The next time you want to use these settings for a track, choose your Preset in the Staff View Layout dialog box from the Presets drop-down list.
Changing Fretboard Texture and Orientation
You can change fretboard texture and orientation (high string on top or bottom of neck) in the Staff View Layout dialog box, or by right-clicking the Fretboard.
To Change the Fretboard Texture and Orientation
- Open the Staff View Layout dialog box.
- Click the Define button (lower right corner).
The Tablature Settings dialog box appears. - Click the Fretboard tab.
- In the Texture field, choose a texture from the drop-down list.
- If you want to reverse the standard string orientation, in the Orientation field click Low String on Top (Mirror).
- Click OK.
The Fretboard changes to reflect your choices.
Quick TAB
SONAR quickly creates a tablature based on standard fingering patterns. After you try the quick version, you can customize the tablature to your liking.
To Create a Quick TAB
- Open a file that contains a MIDI guitar track.
- In the Track view, select the track number of the track you want to display tablature for.
- Select Views > Staff.
The Staff view appears, displaying a fretboard and the notation of your MIDI track. To see everything, you may need to resize the Staff view by dragging the top border upward a few inches. - From the Staff view toolbar, click the drop-down arrow on the Staff View Layout button to display the tablature drop-down list.
- Choose Quick TAB from the drop-down list.
A tablature grid appears, displaying the fret numbers for all the notes in the track. - From the File menu, choose Save. Saving your file saves TAB settings for each track you generated TABs for.
Press the SPACEBAR to play your file. Notice that the Fretboard displays the name of each note above the string and fret you would play it on as the note plays.
Regenerate TAB
The Regenerate TAB command works on selected regions in a track to modify the fingering according to the method you choose. The TAB display by default uses the Floating algorithm which allows the notes to spread over the entire fretboard. By choosing the Fixed algorithm instead, you
can designate a specific finger span and lowest fret which causes the TAB of a selected region to be displayed within this range. This usually creates a more compact fingering system.
The Regenerate TAB command gives you a third choice for displaying tablature MIDI channel. This uses the event's MIDI channel to determine which string the note should be displayed on. When MIDI Channel is selected, the user chooses which series of MIDI Channels should be considered. This is useful for MIDI guitarists that record parts in MONO mode, where each string transmits on a different MIDI channel.
To Regenerate TAB
- In the Staff view, use the Select tool to drag a rectangle around the notes or TAB numbers you want to change.
- In the Staff view toolbar, click the drop-down arrow on the Staff View Layout button to display the Tablature drop-down list.
- Choose Regenerate TAB to open the Regenerate Tablature dialog box.
- Select Fixed from the Method field and fill in values for Finger Span (usually 4), Lowest Fret, and Number of Frets (usually 21).
- Click OK.
SONAR regenerates a TAB based on your specifications. If notes are out of the range you specified, SONAR displays them as close to that range as possible.
Entering Notes from the TAB Staff
You can enter notes or chords directly from the TAB staff.
To Enter Notes from the TAB Staff
- Open the Staff View, and choose Quick TAB from the Tablature drop-down menu.
- Press CTRL+HOME to move the Now Time to the start of the project. You may want to display the Now Time by choosing Views > Big Time.
- Choose the desired note duration (keyboard shortcut: press 1 for whole note, 2 for half, 3 for a 32nd note, 4 for quarter, 6 for a 16th note, 8 for an 8th note).
- Click the Draw tool.
- Enter a note by clicking a line in the TAB staff.
- Without letting go of the mouse, click and drag the cursor up to set the fret number.

Tip: You can move ahead in the track by pressing SHIFT+RIGHT ARROW, and move back in the track using SHIFT+LEFT ARROW. The Now Time moves by the amount of the note duration you choose in the Staff view toolbar.
Single Note Editing from the TAB Staff
SONAR enables you to edit single notes from the TAB staff in several ways:
- With the Draw tool selected, drag fret numbers up or down. When you reach the desired fret number, release the mouse.
- With the Draw tool selected, move a note to a different string by holding down the ALT key while you drag the fret number to a different line. If the note you are moving won't play on the string you are dragging it to, you won't be able to move it.
- Right-click the fret you want to edit. A list of fret numbers appears. Select the one you want, and the fret you right-clicked changes to the fret number you selected.
Editing Chords or Groups of Notes from the TAB Staff
To edit chords or groups of notes in the TAB staff, first select which notes you want to edit, and then drag them to new pitches or strings.
To Edit Chords or Groups of Notes from the TAB Staff
- Click the Select tool in the Staff view toolbar.
- In the TAB staff, drag a rectangle around the chord or group of notes you want to edit, and release the mouse.
- Drag the fret numbers you selected up or down by the amount you want.
- You can drag the notes to different strings by holding down the ALT key while you drag. If the notes you are moving won't play on the strings you are dragging them to, you won't be able to move them.
To Export to an ASCII TAB File
- Select the track you want to export.
- Open the Staff view.
- In the Staff view, click the Export to ASCII TAB button.
The Save As dialog appears. - Enter a file name in the File name field.
- Click OK.
SONAR saves the track with the file extension .txt.
Editing Notes and Chords from the Fretboard
You can transpose single notes or chords from the Fretboard.
To Transpose Single Notes
- Move the Now Time to the note you want to edit by pressing SHIFT+RIGHT/LEFT ARROW. You may need to change the note duration by clicking one of the note icons in the Staff view toolbar.
- Use the Select tool to drag the note left or right on the fretboard.
To Transpose Chords
- Move the Now Time to display the chord you want to transpose.
- SHIFT-select all the notes in the chord.
- SHIFT-drag the chord to a new position and release the mouse.
Entering Notes from the Fretboard
If you prefer to work with the Fretboard instead of a musical staff, Cakewalk makes it easy to enter notes from the Fretboard. You can enter single notes or chords by clicking the string and fret of the note you want to enter at the Now Time position.
- Display the track you want to add notes to in the Staff view.
- In the Staff view toolbar, click the Draw tool.
Now the cursor appears as a pencil when you move it over the Staff or Fretboard.
- Move the Now Time to where you want to start entering notes by pressing SHIFT+RIGHT ARROW or SHIFT+LEFT ARROW. Each press of the arrow moves the Now Time by the amount of the note duration, which you select by clicking the note icons in the Staff view toolbar. You may want to display the Now Time by choosing Views > Big Time.
- Enter a note by clicking the string and fret where you would play the note.
The note appears on the Fretboard, in the Staff, and in the TAB if you have generated one (you can generate a Quick TAB by choosing Quick TAB from the Tablature drop-down menu that you open by clicking the drop-down arrow on the Staff View Layout button).
- If you are entering a chord, continue clicking notes at the same Now Time. To move ahead, press SHIFT+RIGHT ARROW and click a new note duration, if desired.
You can delete a note right after you enter it by pressing CTRL+Z, or at any time by clicking the Eraser tool and clicking the note in the notation or TAB staffs.
Cakewalk gives you several options to play and hear the notes in your track:
- Scrubbing enables you to click each note in the Fretboard and hear it play. Select the Scrub tool and click the note.
- Scrub strumming enables you to "strum" chords by dragging the Scrub tool through a chord. With the Scrub tool selected, drag through a chord on the Fretboard from below it or above it and back and forth.
- CTRL+RIGHT ARROW/CTRL+LEFT ARROW moves the cursor through the track, playing each note as it reaches it.
Working with Percussion
The Staff view can display percussion tracks on a five-line percussion staff or on a single percussion line. The staff usually displays notes for a drum set or multiple percussion instruments; the line is used to display notes for a single instrument (although it need not be so).
SONAR lets you control the appearance of percussion staffs in considerable detail. You can display percussion notes using several different types of noteheads and articulation symbols, and you can map any percussion sound to any position on the percussion staff (in a percussion track, each MIDI note value designates a different percussion instrument; mapping lets you display any instrument in any position on the staff, regardless of the underlying MIDI note value). You can save your settings as a preset, and use them again on other tracks and in other projects. SONAR supplies a standard preset based on the General MIDI percussion standard and popularly accepted percussion staff positions and noteheads.
See:
Setting Up a Percussion Track
Setting Up a Percussion Staff or Line
Ghost Strokes
Setting Up a Percussion Track
Before you use the percussion capabilities of the Staff view, your percussion track should be set up correctly. This will allow you to hear the proper sounds when placing notes and during playback, and will allow you to see the correct percussion instrument names rather than generic note names in the Piano Roll view, Event List view, and Percussion Notation dialog box.
To Set Up a Percussion Track
- Right-click on the track in the Track pane and choose Track Properties to open the Track Properties dialog box.
- Assign the output and channel for your percussion instrument. For example, if the output is assigned to a sound card that supports General MIDI, use channel 10.
- Click Instruments to open the Assign Instruments dialog box.
- Make sure that the output/channel combination used by your track is assigned to a percussion instrument definition. For example, channel 10 of a General MIDI output should be assigned to the General MIDI Drums instrument definition.
- Click OK in both dialog boxes.
SONAR shows the new track output and channel in the Track view, and will use the proper percussion instrument names in the Piano Roll view, Event List view, and Percussion Notation dialog box.
For more information about instrument definitions, see the online help topic: Instrument Definitions.
Setting Up a Percussion Staff or Line
The first time you display a percussion track in the Staff view, SONAR picks a default percussion clef for the track. Tracks with only one note value are assigned the Percussion Line clef. Tracks with multiple note values are assigned the Percussion Staff clef.
If you want to change a Percussion Staff to a Percussion Line or vice versa, or if you want to change another type of staff to a percussion staff, you can do so in the Staff View Layout dialog box. If you change a track's clef to a non-percussion clef, the percussion notation settings will be lost.
The lowest and highest lines on the Percussion clef are E5 and F6, respectively. The Percussion Line represents E5.
By default, percussion staves are given SONAR's default note bindings and notehead assignments. If you want to use your own notation, or if you want to set up the appearance of a percussion line, you need to use the Percussion Notation Key dialog box. In this dialog box, the percussion sounds and staff positions that are bound have an asterisk near their names. When you select a bound percussion sound, a line joins the sound to its staff position. Each percussion sound can be bound only to a single position, but each position may be bound to several sounds. You can use different notehead types and articulation symbols to visually distinguish the sounds.
To Assign a Percussion Staff or Line to a Track
- Click the Staff View Layout button 📋 to open the Staff View Layout dialog box.
- Select your percussion track from the list.
- Select Percussion Staff or Percussion Line from the Clef drop-down list.
- Click Percussion Settings to set up the appearance of percussion notes (see below).
- Click Close.
SONAR changes the track's clef to the selected percussion clef.
To Set Up a Track's Percussion Notation Key
- Click the Staff View Layout button 📋 to open the Staff View Layout dialog box.
- Select your percussion track from the list.
- Click Percussion Settings to open the Percussion Notation Key dialog box.
- Set up the percussion notation key according to the following table:
To do this Do this
| Map (bind) a percussion sound to a line or space on the staff | Select the sound (or corresponding MIDI note) in the MIDI Note list, select the intended position in the percussion staff in the Display As list, then click Bind. |
| Set the notehead and articulation mark for a percussion sound | Select the sound in the MIDI Note list, then select a Notehead Type and Articulation Symbol. (Only bound sounds can be assigned a notehead type and articulation symbol other than the default.) |
| Control how unbound percussion sounds display | In the Display As list, click the pitch that you want all unbound notes to display as. Then select a Notehead Type and Articulation Symbol, then click the Default note button to apply your changes. |
| To do this Do this | |
| Remove a binding | Select the percussion sound in theMIDI Notelist, then click Unbind.Unbound notes are displayed in the default position. |
| Load a preset Select the preset from thePresetlist. | |
| Save your settings as a preset | Click theSavebuttonand enter a preset name. |
| Clear all bindings ClickZap All. | |
| Select notes in the note lists with a MIDI keyboard | Click in theMIDI Noteor Display Aslist, then strike a key on your keyboard. |
Table 158.
Table 158.
- Click OK to close the Percussion Notation Key dialog box.
- Click Close to close the Staff View Layout dialog box.
The Staff view shows the percussion clef with the note bindings and noteheads you assigned.
Ghost Strokes
In percussion notation, parentheses around a note mean that it is a ghost stroke, played very lightly and barely heard. SONAR supports ghost strokes by displaying parentheses around any percussion note event with velocity less than 32 (a fixed, arbitrary threshold). If necessary, you can adjust the Vel+ parameter of the track and the velocities of the individual notes to effectively move this threshold without changing the way the note sounds.
The picture below shows two tracks displaying ghost strokes:
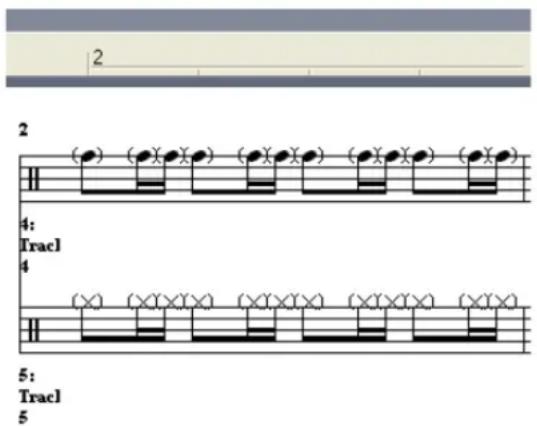
Printing
The Staff view provides printing support of standard musical notation in nine staff sizes. The Staff view prints general project information from the File Info dialog box (see "Labeling Your Projects" on page 284) at the beginning of the score, including the song's title (or file name), subtitle (dedication), playing instructions, author/composer, and copyright. In addition, SONAR identifies the tracks by number and name, and numbers each measure and each page.
SONAR lets you select a size for your printed score. Engravers have nine standardized sizes of the five-line staff. The vertical distance between the lines of each staff is called its astral size, or measurement. Each astral size has a number and is used by publishers for a specific genre of musical composition.
| Number Trade names Genre usage | |
| 0 Commercial or Public Wire-bound manuscript | |
| 1 Giant or English Elementary band and orchestra books; instruction booklets | |
| 2 or 3 Regular, Common, or Ordinary | Sheet music for concertos and classics |
| 4 Peter Folios, works for organ, etc. | |
| 5 Large middle Band/wind ensemble music; sheet music | |
| 6 Small middle Chorals; condensed sheet music | |
| 7 Cadenza Pocket editions; cues in piano parts; military marches | |
| 8 Pearl Thematic advertisement; ossia | |
Table 159.
To Print a Score
- Make sure the Staff view is the current window.
- Choose File > Print Preview.
- If you want, click Zoom, or click in the music, to zoom the view in and out.
- Click the Configure button to select a astral size.
- When zoomed out, you can press PAGE UP and PAGE DOWN to navigate between pages.
- Click Print.
SONAR displays the Windows Print dialog box, from which you can set up your printer and print the score.
Alternatively, you can choose File > Print and skip the print preview window.
Can't print if Staff view is floating
It is not possible to print the Staff view if the Staff view is float-enabled. If necessary, temporarily disable floating if you need to print from the Staff view.
The Meter/Key View
The Meter/Key view lets you enter meter and key changes at measure boundaries. Meter and key changes affect all tracks.
See:
What Is Meter?
What Is Key?
Opening the Meter/Key View
Adding and Editing Meter/Key Changes
Music Notation for Non-concert-key Instruments
What Is Meter?
The meter—also known as the time signature—describes how to divide time into rhythmic pulses. When you set the meter, you are specifying the number of beats per measure and the note value of each beat. Common meters include:
- 2/4 (two beats per measure, quarter note gets a beat)
- 4/4 (four beats per measure, quarter note gets a beat)
• 3/4 (three beats per measure, quarter note gets a beat)
- 6/8 (six beats per measure, eighth note gets a beat)
The top number of a meter is the number of beats per measure, and can be from 1 through 99. The bottom number of a meter is the value of each beat; you can pick from a list of values ranging from a whole note to a thirty-second note.
The meter affects several things in SONAR:
- Metronome accents
- How measure, beat, and tick (MBT) times are calculated and displayed
• How the Staff view is drawn
While SONAR in general allows meters to have up to 99 beats per measure, the Staff view cannot display such measures. You will receive an error message if you try to use the Staff view with meters exceeding its limit.
Internally, SONAR stores times as "raw" ticks or clock pulses. The timebase—the number of pulses per quarter note (PPQ)—is adjustable, from 48 to 960 PPQ. If you are using a timebase of 120 PPQ
and the project file is in 4/4 time, then a whole measure equals 480 ticks. See “Setting the MIDI timing resolution” on page 241 for more information about the timebase.
Usually the easiest approach to working with meter changes is to set all of them up before doing any recording. Use the Meter/Key view or the Insert > Meter/Key Change command to add meter changes at the desired measures.
What Is Key?
In musical terms, a key is a system of related notes based on the tonic (the base pitch) of a major or minor scale. A key signature is a group of sharps or flats placed immediately to the right of the clef sign. The key signature tells a performer that certain notes are to be systematically raised or lowered.
There are fifteen different key signatures—seven with sharps, seven with flats, and one without either. The fifteen key signatures correspond to fifteen different major scales, and to fifteen different minor scales (for example, the key signature for C major is the same as for A minor).
The key signature affects several things in SONAR:
- The key signature controls how SONAR displays notes. In the Event List view and some dialog boxes, SONAR converts the MIDI pitch number to labels like Db (D-flat in the key of C).
- The Staff view uses the key signature to display notation correctly.
- How the notes are transposed when the Diatonic option is enabled.
The key signature affects only how SONAR displays pitches for you. Changing the key signature does not affect the MIDI key number (pitch) stored with each note. To actually transpose pitches, use the Transpose command or edit notes individually by using the Piano Roll, Event List, or Staff views.

Note: Groove clips are not affected by changes to your project's key. Groove clips follow the default project pitch value, located on the Markers toolbar, and Pitch markers in the Time Ruler. For more information, see "Using Pitch Markers in the Track View" on page 425.
Frequently you use only one key signature for an entire project, but SONAR supports multiple key signatures and multiple meter changes in a project. The default key is C. You can change these defaults by creating your own default template file. For more information, see "Templates" on page 735.
Opening the Meter/Key View
To open the Meter/Key view, click 📄 or choose Views > Meter/Key.
The Meter/Key view displays a list of meter/key changes in the project. There is always an entry for measure 1, because there must always be a meter and key signature for the project. The default meter is 4/4 and the default key is C. You can change these defaults by creating your own default template file. For more information, see “Templates” on page 735.
Each meter/key change has the following properties:
Property Meaning
At Measure The measure where the meter/key change takes place.
Beats per Measure The number of beats per measure, the upper number in the time signature.
Beat Value The note length of a beat, the lower number in the time signature. 2 corresponds to a half note, 4 to a quarter note, 8 to an eighth note, etc.
Key Signature The key signature.
Table 160.
Adding and Editing Meter/Key Changes
The Meter/Key view displays a list of all the meter/key changes in the project. You can add, delete, or edit meter/key changes by clicking the buttons at the top of the view. You can also insert meter/key changes into the project with the Insert > Meter/Key Change command.
To Add a Meter/Key Change
- Open the Meter/Key view.
- Click Add ☐, or choose Insert > Meter/Key Change, to open the Meter/Key Signature dialog box.
Figure 132. The Meter/Key Signature dialog

-
Enter information about the new meter/key change.
-
Click OK.
SONAR inserts the meter/key change into the project. The meter/key change will appear in the Staff view at the appropriate measure.
To Delete a Meter/Key Change
- Select the meter/key change to be deleted from the list.
- Select additional meter/key changes by using SHIFT-click and CTRL-click.
3. Click Delete ✗.
SONAR removes the meter/key change from the project. You cannot delete the first meter/key change from measure 1 of a project.
To Move a Meter/Key Change
- Select the meter/key change to be moved.
- Click Add *.
- Edit the Measure parameter to the meter/key change's new measure.
- Click OK.
- Select the original meter/key change again.
- Click Delete ✗.
SONAR removes the original meter/key change and inserts a copy of it at the new measure.
To Edit a Meter/Key Change
- Select the meter/key change to be edited.
- Click Change ☐ to open the Meter/Key Signature dialog box.
- Edit the meter/key change properties.
- Click OK.
SONAR changes the properties of the meter/key change.
Music Notation for Non-concert-key Instruments
For historical reasons, certain musical instruments are traditionally notated in a transposed key rather than the actual key. For example, a normal (Bb) trumpet part is written in the key one whole step higher than the actual concert key, and an Eb alto sax part is written a major sixth higher. Musicians have traditionally learned to read and refer to the notes they play using the proper transposition interval for their instrument.
SONAR supports these non-concert instrumental keys through use of the Key+ control in the Track view. Simply enter or record the notes into the instrument's track transposed as the musician would expect them, and then set the proper transposition interval in the Key+ control to make it play in the correct key. For example, a Bb trumpet track should have all its notes a whole note higher than concert pitch, and should have Key+ set to -2 to transpose it two chromatic steps back down.
Remember, not all trumpets are Bb instruments!
To Notate a Bb Trumpet Part
- Record or enter the notes using the pitches that the musician who will be reading the part needs to see. For example, if the non-transposing instruments are playing in the key of C, a Bb trumpet player needs to see the notes a whole step higher—the key of D. The instrument itself sounds a whole step lower than concert pitch, so when a Bb trumpet plays in the key of D, it sounds in the key of C.
Now that the pitches appear the way that the trumpet player needs to see them, the problem is that when you play your project, the MIDI notes in the trumpet track sound a whole step too high.
- In the Track view, force SONAR to play the trumpet track a whole step lower by entering -2 (negative 2) in the Key+ field and pressing ENTER.
Now the trumpet part in the Staff view appears in the key of D—SONAR automatically adds two sharps to the trumpet track's key signature—but the track sounds in the key of C because you entered -2 in the Key+ field (you may need to close the Staff view and reopen it to see the new key signature). The Staff view automatically transposes the key signature for each track according to the track's Key+ value. Multiple tracks appear and can be printed as an orchestral score, with the proper different key signatures for each track.
Note that this Key+ information is saved in SONAR .cwp files, but not in standard MIDI files. If you save a file as a MIDI file, the Key+ transposition will be applied to each note event, so that the file will sound the same, but the Key+ information will be lost. If you're reading in a MIDI file, you can easily set up the non-concert instrument tracks and then save the file as a normal project file. First set the Key+ offset to reflect the non-concert instrument's key signature. Then, use Transpose to compensate for the Key+ offset.
Working with Lyrics
SONAR lets you create, edit, and display lyrics, the words and syllables associated with notes in a track. Lyrics can be the words to a song, the text of a vocal passage, a narration to be read along with the music, cues of some type, or text totally unrelated to the music. Each word or syllable in the lyrics must be associated with a note in a MIDI track. Each MIDI track can have its own lyrics.
Although lyrics can logically be associated with digital audio data, you cannot actually place lyrics in an audio track. If you want to create lyrics for an audio track, you must create an auxiliary MIDI track to hold the lyrics.
You can enter and edit lyrics in several ways:
• Using the Lyrics tool in the Staff view
• Using the Lyrics view
- Inserting lyric events in the Event List view
The Staff view is usually the preferred location for entering lyrics, since you can see the notes with which the lyrics are associated. The Lyrics view can also be used for entering or editing lyrics, but its main strength is that it can display lyrics in a larger, more readable format. You might use the Lyrics view to display song lyrics during recording and playback, so performers can see the words and sing along. You can make the font size in the Lyrics view as large as desired, so that the lyrics can be read at a distance from the monitor. During playback, the current line in the lyrics is enclosed in a box and the current word is highlighted.
Lyric events are similar to text events. Like any other event, they occur at a particular time. They contain text, just like general-purpose text events, but generally they contain only a single word (or syllable of a word). As events, Lyrics can be edited in the Event List view (see “The Event List View” on page 512).
See:
Adding and Editing Lyrics in the Staff View
Opening the Lyrics View
Adding and Editing Lyrics in the Lyrics View
Adding and Editing Lyrics in the Staff View
The Staff view displays lyrics below their associated track. If the track is split into treble/bass staves, lyrics are aligned with notes in both staves, but are displayed below the treble staff.
When a lyric word or syllable spans multiple notes, a trailing underline or series of regularly spaced hyphens is automatically drawn, following conventional lyric notation practice.
To Add Lyrics to a Track


- Click the Draw tool
- Select the Lyrics tool
- Position the pointer below the staff, under the first note to be assigned lyrics. (The pointer changes to a pencil when you are in a legal position.)
- Click to open an insertion box.
- Follow the instructions in the table:
To do this Do this
Enter a word or syllable Type it in the insertion box
End the word or syllable and move to the next note Type a space, tab, or hyphen
Skip over a note Type a space or hyphen
Move back to the previous note Press SHIFT+TAB
Table 161.
- Press Enter when you are done.
SONAR displays the new lyrics below the staff.
To Edit Lyrics

- Click the Draw tool
- Click the word you want to change.
- Edit the word as desired.
- Press ENTER.
SONAR replaces the old word with the new one.
Opening the Lyrics View
There are three ways to open the Lyrics view:
- In the Track view, select the track whose lyrics you want to see, then click 📁
- In the Track view, select the track whose lyrics you want to see, then choose Views >Lyrics
- Right-click a clip in the Clips pane and choose Lyrics from the menu
The Pick Track button 📁 opens a dialog box where you can select the track whose lyrics you want to see. Select the desired track, then click OK.
To select a font for the display, use one of the following:
| Option/Button Purpose | |
| f_a | Selects the first font. By default, this is a small font useful for editing. |
| f_b | Selects the second font. By default, this is a larger font useful for reading lyrics at a distance. |
| Font... | Opens a dialog where you can select a font. The selected font is then assigned as Font A or B (depending on which is currently selected). |
Table 162.
Adding and Editing Lyrics in the Lyrics View
Lyrics appear in the Lyrics view as a stream of syllables, each one associated with a note in the track. In this context, a syllable is any continuous string of characters, without a hyphen. For example, "love," "desire," and "infatuation" are all syllables; each one would be associated with a single note. If you want to break a word into multiple syllables, you must hyphenate the word. For example, "de-sire" would map onto two notes, since it is now two syllables long.
When you enter the lyrics, you can mark the syllables the way you want, or you can simply type the text in normally and use automatic hyphenation to break the text into syllables. This means that you can add lyrics to a project by copying and pasting them from another application (such as a word processor), and then hyphenate them automatically.
To extend a single syllable over more than one note, you can use extra hyphens, separated by spaces. For example, in "Oh-say can you see…", the "Oh" is extended over two notes. If a track contains no lyrics yet, the display will show only a series of hyphens (one for each note in the track).
If you enter more syllables than there are notes in the track, SONAR assigns the extra lyrics times at quarter note intervals.
To Enter Lyrics in the Lyrics View
- Click in the upper left corner of the view to position the cursor at the start of the text.
- Follow the instructions in the table:
To do this Do this
Enter a word or syllable Type it
End a word or syllable and move to the next note Type a space or hyphen
Break a line for easier viewing Press Enter
Table 163.
To Edit Lyrics in the Lyrics View
Editing in the Lyrics view follows standard Windows conventions for cursor movement, selection, cut (CTRL+X), copy (CTRL+C), paste (CTRL+V), and delete (DELETE). When you pause, SONAR will update all lyric events in the track.
To Hyphenate the Lyrics
- If you want, select a portion of the lyric text. If you do not select any text, all the lyrics will be hyphenated.
- Click the Hyphenate button.
SONAR hyphenates the lyrics.
Instrument Definitions
Instrument definitions are a powerful feature of SONAR that makes it easier for you to find the banks, patches, and controllers of your MIDI instruments. An instrument definition is a file that contains the names of the banks, patches, note names, bank select method, and controllers of an instrument. Instrument definitions for many popular MIDI instruments are included with SONAR or are available on the Cakewalk web site (www.cakewalk.com). If an instrument definition is not available for your instrument, and you are familiar with MIDI and how it works, you can use SONAR to create your own instrument definition.
Most MIDI instruments available today are General MIDI (GM) compatible, which means that they come with the standard set of sounds or patches defined by the GM standard. SONAR initially assumes that your MIDI instruments are GM compatible. The names of patches and controllers that you initially see displayed throughout SONAR are drawn from the GM specification.
At the same time, many MIDI instruments provide additional sounds and controllers beyond those required by the GM standard. In addition, some older MIDI instruments are not GM compatible. If you are using one of these instruments with SONAR, you can use instrument definitions to make sure that the names of banks, patches, and controllers that you see in SONAR are the same ones you see on the display screens of your MIDI keyboards and modules.
See:
Assigning Instruments
Importing Instrument Definitions
Creating Instrument Definitions
To Import Instrument Definitions
To Create a New Instrument
To Rename an Instrument
To Add a Bank or Change the Patch Names for a Bank
To Create and Edit Name Lists
Creating and Editing Patch Name and Other Lists
Copying Name Lists
Assigning the Bank Select Method
Assigning Patch Names
Assigning Note Names
Assigning Controller, RPN, and NRPN Names
Assigning Instruments
SONAR lets you assign a MIDI instrument definition to each available MIDI output and channel. The assignments you make determine the MIDI bank names, patch names, note names, and controller names that you see during your SONAR session.
Suppose that you have a Roland GS-compatible synthesizer attached to MIDI output 1. By assigning all 16 channels of MIDI output 1 to the Roland GS instrument definition, you ensure that the bank, patch, note, and controller name lists you see displayed in SONAR are the same ones that you see on the display screen of your synthesizer.
Often, you want to assign a different instrument to channel 10, which is usually used for percussion. For example, you might assign the Roland GS instrument definition to channels 1 through 9 and 11 through 16, but you would most likely want to assign the Roland GS Drumsets instrument definition to channel 10. That way, any SONAR tracks you assign to channel 10 on that output use the names of drum sets for patch names, and drum notation in the Piano Roll view. If you have several MIDI outputs, with a different MIDI module attached to each one, you would normally assign a different instrument definition to each MIDI output.
For convenience, you can assign a block of channels to one instrument and then change the assignment of one or more of those channels without changing the others. For example, you can highlight all 16 channels of the first MIDI output and assign them to the Roland GS instrument definition. Then, you can highlight channel 10 of that same MIDI output and assign it to the Roland GS Drumset instrument definition. Channels 1 through 9 and 11 through 16 on the first MIDI output will stay assigned to Roland GS.
If you only have one MIDI output, but have several MIDI modules attached to it, you can assign a few channels to each module. For example, you might have a Roland synth receiving on MIDI channels 1 through 9, a Roland drum machine receiving on channel 10, and a basic GM-compatible synth receiving on channels 11 through 16. In this case, you'd use three different instrument definitions for your one and only MIDI output.
To Assign Instrument Definitions to MIDI Outputs and Channels
- Choose Options > Instruments to display the Assign Instruments dialog box.
Figure 133. The Assign Instruments dialog
![Assign Instruments Select one or more Port/Channel destinations, then click on an Instrument. Port/Channel 1: AWE64G MIDI Synth [520] / 1: AWE64G MIDI Synth [520] / 2 1: AWE64G MIDI Synth [520] / 3 1: AWE64G MIDI Synth [520] / 4 1: AWE64G MIDI Synth [520] / 5 1: AWE64G MIDI Synth [520] / 6 1: AWE64G MIDI Synth [520] / 7 1: AWE64G MIDI Synth [520] / 8 1: AWE64G MIDI Synth [520] / 9 1: AWE64G MIDI Synth [520] / 10 1: AWE64G MIDI Synth [520] / 11 1: AWE64G MIDI Synth [520] / 12 1: AWE64G MIDI Synth [520] / 13 1: AWE64G MIDI Synth [520] / 14 1: AWE64G MIDI Synth [520] / 15 1: AWE64G MIDI Synth [520] / 16 Uses Instrument General MIDI General MIDI Drums Generic (Patches 0..127) Generic (Patches 1..128) Poland GS Poland GS Drumsets SoundFont Device Yamaha XG Yamaha XG Drum Kits Save Changes for Next Session](/content/2026/05/819773/images/05e6cb177b1f9112885e1f012efcfc900a703d1b77fafb7d5efd944ba05adbc7.jpg)
- Select one or more MIDI outputs and channels from the Output/Channel list (use SHIFT-click and CTRL-click to select multiple outputs and channels). You can also drag through a bunch of channels to select them. For example, if you want to assign the first 16 MIDI channels on output 1 to a certain MIDI module, drag through the first 16 items in the Output/Channel list to select them.
- Choose the instrument definition to which the selected outputs and channels should be assigned from the Uses Instrument list. A black line connects the two lists. If your MIDI module's name doesn't appear in the list and you don't want to use General MIDI bank and patch names for it, see "Importing Instrument Definitions" on page 788.
- To save these changes permanently, check the Save Changes for Next Session box.
- Click OK to apply your changes.
From now on, the bank, patch, controller, and note names from the assigned instrument definition are used throughout SONAR on any track that uses one of the output/channel combinations you selected in the Output/Channel list.
To Clear Instrument Assignments
- Choose Options > Instruments to display the Assign Instruments dialog box.
- Select the MIDI outputs and channels whose assignments you want to remove from the Output/Channel list.
- Choose
from the Uses Instrument list. A black line connects the two lists. - Click OK when you are done.
You don't really clear instrument assignments—you reassign them to use the default (General MIDI) instrument definition. After you reassign the output/channel combinations, the default (GM) bank, patch, controller, and note names are used throughout SONAR on any track that uses one of the output/channel combinations you reassigned in the Output/Channel list.
See also:
Importing Instrument Definitions
Creating Instrument Definitions
To Import Instrument Definitions
To Create a New Instrument
To Rename an Instrument
To Add a Bank or Change the Patch Names for a Bank
To Create and Edit Name Lists
Importing Instrument Definitions
When you install SONAR, a few common instrument definitions are already set up for you and ready to use. SONAR also includes several hundred additional instrument definitions that you can import.
These instrument definitions are stored in text files in your SONAR folder, organized largely by manufacturer. For example, all the instrument definitions for Roland gear are stored in the Roland.ins file; all the instrument definitions for Yamaha gear are stored in the Yamaha.ins file. The Misc.ins file contains miscellaneous instrument definitions.
If SONAR does not include an instrument definition for your MIDI instrument, you can find additional and updated instrument definitions on the Downloads section of the Cakewalk website (www.cakewalk.com). Simply download the files to your SONAR folder, unzip if necessary, and import the instrument definitions as described below.
When you import an instrument definition, it is added to the master instrument definition file Master.ins. The contents of this file determines the list of instruments that appear in the Assign Instruments dialog box.
To Import Instrument Definitions
- Choose Options > Instruments to display the Assign Instruments dialog box.
- Click Define to display the Define Instruments and Names dialog box.
- Click Import to display the Import Instrument Definitions dialog box.
- Choose the file that contains instrument definitions for your manufacturer, and click Open. SONAR displays a list of all the instrument definitions in the file.
- Choose one or more instruments from the list, and click OK.
- Click Close to close the Define Instruments and Names dialog box.
The instrument definitions you imported should now appear in the Uses Instrument list in the Assign Instruments dialog box.
See also:
Creating Instrument Definitions
To Create a New Instrument
To Rename an Instrument
To Add a Bank or Change the Patch Names for a Bank
To Create and Edit Name Lists
Creating Instrument Definitions
SONAR lets you create and edit instrument definitions. To create an instrument definition, you must answer these types of questions:
• What are the names of the patches in each bank?
- Which note names should be used for each patch?
- What are the names of the MIDI Controllers for this instrument?
- Which RPN and NRPNs are available on the instrument?
- Which Bank Select method does the instrument use?
To collect this information, you need the MIDI documentation for your instrument.
Here's a general outline of the steps you must follow to create an instrument definition:
- Create a new instrument in the Instrument tree.
- Create any new name lists in the Names tree that are required for the instrument.
- Drag name lists and possibly a bank select method to the new instrument from the Names tree.
- Close the Define Instruments and Names dialog box.
For detailed instructions, see "To Create a New Instrument" on page 791.
You define instruments in the Define Instruments and Names dialog box, shown below:
Figure 134. The Define Instruments and Names dialog
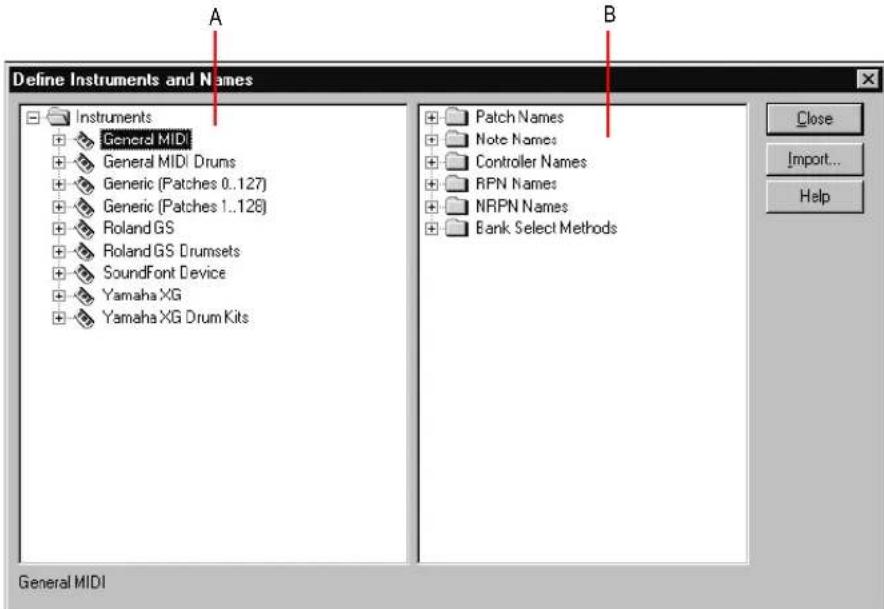
A. The Instruments tree B. The Names tree
The Define Instruments and Names dialog box contains two trees:
- The Instruments tree in the left half of the dialog box lists all defined instruments and their characteristics
- The Names tree in the right half of the dialog box shows all the resources you use to define an instrument
You expand or collapse the folders and lists in each tree by clicking on the + or - key shown to the left of each item. You can also right-click on an item and choose Expand or Collapse from the menu, or double-click on an item to expand or collapse it.
To define an instrument, you drag resources from the Names tree to the name of an instrument on the Instruments tree. Each resource is color-coded—you can only drag a Names list to an Instrument tree branch of the same color. For example, you can only drag a list from the Patch Names folder in the Names tree to a Patch Names for Banks folder in the Instruments tree.
There are six components to an instrument definition:
• Method for bank selection
- Patch names, such as Piano and Bass
- Note names, which are most frequently used to name drum notes, such as kick or snare
- Controller names, like volume and pan
- Names for Registered Parameter Numbers (RPNs)
- Names for Non-Registered Parameter Numbers (NRPNs)
The instrument definitions organize all names (patches, notes, controllers, RPNs, and NRPNs) into lists. You may be able to define a new instrument using existing name lists. For example, two models of synthesizers made by a particular manufacturer may have identical patch name lists but use different NRPNs. In this case, you can use the same patch name lists for both instruments, but you would need to use a different NRPN list (or perhaps create a new NRPN list) for the second synth.
If you want your changes to be remembered the next time you run SONAR, make sure the Save Changes For Next Session option in the Assign Instruments dialog box is checked before clicking OK. Otherwise, to make only temporary changes, be sure to remove the check from that option.
To Create a New Instrument
- In the Define Instruments and Names dialog box, right-click the word Instruments at the top of the Instrument tree, and choose Add Instrument from the pop-up menu.
- Type a name for the new instrument and press ENTER.
The new instrument is provided with default settings for all of its characteristics.
See also:
Creating and Editing Patch Name and Other Lists
Copying Name Lists
Assigning the Bank Select Method
Assigning Patch Names
Assigning Note Names
Assigning Controller, RPN, and NRPN Names
To Rename an Instrument
- In the Define Instruments and Names dialog box, right-click an Instrument name in the Instrument tree and choose Edit from the pop-up menu.
- Type the new name and press ENTER.
To Delete an Instrument
- In the Define Instruments and Names dialog box, right-click an Instrument name in the Instrument tree and choose Delete from the menu.
- Confirm that you want to delete the instrument.
To Save an Instrument Definition
- Click Close to close the Define Instruments and Names dialog box.
- Click OK.
SONAR saves the instrument definition in the Master.ins file.
To Export an Instrument Definition
- In the Define Instruments and Names dialog box, right-click an Instrument name in the Instrument tree and choose Export from the menu to display the Export Instrument Definition dialog box.
- If you don't want to save the file in the folder that's listed in the Save In field, navigate to the folder in which you do want to save the file.
- Enter a file name and click Save.
SONAR saves the file, with the filename extension .ins.

Note: Exporting instrument definitions allows you to share them with other SONAR users.
To Reload instrument definitions
Users of MIDI librarian programs need the ability to update SONAR's instrument definitions in real-time, without having to close and restart SONAR.
When the Reset (Panic) button is pressed, SONAR closes and reopens the instrument manager to reload settings from Master.ins and Instrmap.ini.
Any changes made to patch names or other instrument definitions are reflected immediately.
See also:
Creating and Editing Patch Name and Other Lists
Copying Name Lists
Assigning the Bank Select Method
Assigning Patch Names
Assigning Note Names
Assigning Controller, RPN, and NRPN Names
Creating and Editing Patch Name and Other Lists
You can create and edit the various lists in the Names tree that make up each instrument definition. Patch name, note name, and controller name lists can contain up to 128 entries, numbered 0 through 127. RPN and NRPN name lists can contain up to 16,384 entries, numbered 0 through 16,383.
To Create and Edit Name Lists
• To create, edit, or work with name lists, go to the Names tree of the Define Instruments and
Names dialog box, and follow the directions in the following table:
| To do this Do this | |
| Create a new name list | Duplicate an existing Patch Names or other list by doing one of the following: expand the folder that contains the name list, highlight the name list and press the Ins (Insert) key; highlight the folder and press SHIFT+INSERT; or right-click any folder or name list and choose Add Names List from the menu. Then type a name for the list and press ENTER. |
| Delete a name list | Highlight the names list and press the DELETE key; or right-click on the name list and choose Delete from the menu. You will see a warning if the list is used by any instrument definition. If you delete the list anyway, the instrument definition will change automatically. |
| Add the next item in a name list | Highlight a name and press the Ins key, or right-click on a name and choose Add Name from the menu. Then enter the name. |
| Add a name anywhere in a list | Highlight the name of a list and press SHIFT+INSERT, or right-click on the name of a list and choose Add Name from the menu. Then enter the name. |
| Delete names from a list | Highlight the Names List or Name, and press DELETE. You can also right-click, then choose Delete. |
| Edit a name in a list | Highlight the name or name list and press F2, or right-click and choose Edit from the menu. Then enter the new name. |
Table 164.
See also:
Copying Name Lists
Assigning the Bank Select Method
Assigning Patch Names
Assigning Note Names
Assigning Controller, RPN, and NRPN Names
Copying Name Lists
You can easily create new lists that are similar to other lists. For example, suppose you want to create a new patch name list called NewList that is almost identical to the General MIDI patch list, but with one or two small changes. Here's how you proceed:
- Create a new patch name list in the Patch Names folder of the Names tree called, for example, NewList.
-
Drag the new list onto the General MIDI list in the Names tree. You will be asked if you want to base NewList on the General MIDI list.
-
Click OK. NewList will now be listed under the General MIDI branch. Any patch names that exist in the General MIDI list apply to NewList, too.
- Add new patch names to NewList. These names will override those in the list on which NewList is based.
If you change your mind about NewList and want to make it a stand-alone, separate list, simply drag it to the Patch Names root folder.
See also:
Assigning the Bank Select Method
Assigning Patch Names
Assigning Note Names
Assigning Controller, RPN, and NRPN Names
Assigning the Bank Select Method
Your synthesizer uses one of four bank select methods to switch back and forth between banks of sounds. To find the method used for your instrument, check the instrument's User's Guide or the manufacturer's web site. The four methods are as follows:
Method Used for
| Normal Instruments that respond to Controller 0 or Controller 32 bank select messages |
| Controller 0 only Instruments that only respond to Controller 0 bank select messages |
| Controller 32 only Instruments that only respond to Controller 32 bank select messages |
| Patch 100...127 Instruments that let you change banks by sending patch changes between 100 and 127 |
Table 165.
The bank select method you choose affects the bank numbers that you assign to each patch list, as described in the following section. Here's how you compute the bank numbers:
Bank select method To compute the bank number
| Normal | Take the value of Controller 0, multiply it by 128, and add the value of Controller 32 to derive the bank number. |
| Note: A synthesizer manufacturer may refer to Controller 0 as the MSB (Most Significant Byte) and to Controller 32 as the LSB (Least Significant Byte). |
Controller 0 only The value of Controller 0 is the bank number.
Table 166.
Bank select method To compute the bank number
Controller 32 only The value of Controller 32 is the bank number.
Patch 100...127 Take the patch number and subtract 100 to derive the bank number.
Table 166.
Here is an example of the Normal bank select method. According to the documentation for the Roland JV-1080 synthesizer, the PR-A Bank has a Controller 0 value of 81 and a Controller 32 value of 0. You compute the bank number that you enter in the instrument definition as follows: (81 x 128) + 0 = 10,368.
To Change the Bank Select Method
- Highlight and expand the instrument in the Instrument tree.
- Expand the Bank Select Method branch in the Names tree.
- Drag the desired bank select method from the Names tree to the Instrument tree.
See also:
Creating and Editing Patch Name and Other Lists
Copying Name Lists
Assigning Patch Names
Assigning Note Names
Assigning Controller, RPN, and NRPN Names
Assigning Patch Names
A MIDI instrument can have up to 16,384 banks of 128 patches each. Patches can have names, like "Piano" for patch number 0, "Bass" for patch number 1, and so on. Normally, each bank contains a different set of patches, so each bank needs a separate patch name list. Most synthesizers start with a patch number of 0.
You can assign a patch name list to each bank. You can also assign a default patch name list to the instrument, which is used for all banks for which you haven't assigned a specific list. The previous section describes how to compute the bank numbers to which each patch name list is assigned.
Each bank can also be assigned a special Drum flag, which indicates that all patches in that bank contain drum sounds. If you set this flag, the Piano Roll view will display drum notes as diamonds, and the Staff view will use percussion notation.
To See the Assignment of Patch Name Lists to Banks
- Expand the instrument definition by clicking the + sign next to the instrument name.
- Expand the Patch Names for Banks folder by clicking the + sign. The list expands to show the bank numbers and the patch name list that is assigned to each bank.

A. There are three defined banks B. Instrument name C. The * indicates that this patch list is the default D. This is the name of a patch name list
To Add a Bank or Change the Patch Names for a Bank
- Drag a patch name list from the Names tree to the Patch Names for Banks folder of the instrument you're editing in the Instrument tree.
- Enter a bank number, or enter -1 to indicate that this list of patch names should be used as the default.
SONAR displays the updated banks and patch name lists. If necessary, SONAR adds a new bank to the instrument definition.
To Remove a Bank or Patch Name List
- In the Instrument tree in the Patch Names for Banks folder of the instrument you're editing, highlight the bank and patch names list.
- Press the DELETE key, or right-click on the bank name and choose Delete from the pop-up menu.
To Set or Clear the Drum Flag
• Right-click on the bank in the Instrument tree, and choose Drums from the pop-up menu.
See also:
Creating and Editing Patch Name and Other Lists
Copying Name Lists
Assigning the Bank Select Method
Assigning Patch Names
Assigning Note Names
Assigning Controller, RPN, and NRPN Names
Assigning Note Names
Each patch may have a list of up to 128 names for notes. Usually, note names are labels for percussion instruments. For example, the pitch C3 may really be “Kick Drum,” and D3 may be “Snare.” Because a drum machine may provide different drum kits for each patch, SONAR lets you specify a different list of note names for each patch. The Piano Roll and Event List views show you these note names.
You can assign a note name list to each patch. You can also assign a default note name list to the instrument, which is used for all patches for which you haven't assigned a specific note name list.
Each patch can also be assigned a special Drum flag, which indicates that this patch contains drum sounds. If you set this flag, the Piano Roll view will display drum notes as diamonds, and the Staff view will use percussion notation.
There are several standard note name lists provided with SONAR:
Note name list Contents
0...127 The numbers 0 through 127
Diatonic The default MIDI note names (like C4, E5, and so on)
General MIDI Drums The default instrument names for the General MIDI drum patch
Table 167.
To See the Assignment of Note Name Lists to Patches
- Expand the instrument definition by clicking the + sign next to the instrument name.
- Expand the Patch Names for Banks folder by clicking the + sign.
- Continue expanding the tree by clicking the + sign, until the tree is fully expanded.

flowchart
graph TD
    D["My Instrument"] --> C["Patch Names for Banks"]
    C --> B["Note Names for Patches"]
    B --> A["1 = User Presets A"]
    A --> B
    B --> E["Note Names for Patches"]
    E --> E
    E --> D
    style D fill:#f9f,stroke:#333
    style E fill:#ccf,stroke:#333
A. This is the name of a note name list B. The * indicates that this note name list is the default C. Bank D. Instrument name E. Note name lists are defined for three different patches
To Change the Note Names for a Patch
- Drag a note name list from the Names tree onto the Note Names for Patches folder of the instrument and bank you're editing in the Instruments tree.
- Enter the patch number that should use these note names, or enter -1 to indicate that this list of note names should be used as the default.
SONAR displays the updated patch and note name lists. If necessary, SONAR adds a new patch to the instrument definition.
To Remove a Note Name List
- In the Instrument tree in the Note Names for Patches folder of the instrument you're editing, highlight the name of the note names list (for example, "diatonic").
- Press the DELETE key, or right-click on the note name list and choose Delete from the pop-up menu.
To Set or Clear the Drum Flag
- Right-click on the patch in the Instrument tree, and choose Drums from the menu.
See also:
Creating and Editing Patch Name and Other Lists
Copying Name Lists
Assigning the Bank Select Method
Assigning Patch Names
Assigning Controller, RPN, and NRPN Names
Assigning Controller, RPN, and NRPN Names
SONAR lets each instrument have its own lists of controller names, RPN names, and NRPN names. There is always exactly one list of each type per instrument.
To See the Controller, RPN, and NRPN Name Lists
- Expand the instrument definition by clicking the PLUS (+) sign next to the instrument name.

A. Instrument name B. Controller name list C. RPN name list D. NRPN name list
To Change the Controller, RPN, or NRPN Name List
- In the Names tree, expand the branch containing the Controller name lists, RPN name lists, or NRPN name lists.
- Drag the desired name list from the Names tree onto the corresponding branch of the Instrument tree.
SONAR displays the updated Controller, RPN, or NRPN name lists.
See also:
Creating and Editing Patch Name and Other Lists
Copying Name Lists
Assigning the Bank Select Method
Assigning Patch Names
Assigning Note Names
SONAR Flags in Instrument Definitions
SONAR has several flags that you can use in instrument definition files for use with specific instrument definitions.
UsesNotesAsControllers=n
Some MIDI devices, certain mixers for example, use MIDI Note events instead of Continuous Controller events for automation. It is often desirable to treat the Note events as Controller events in order for them to obey the "Zero Controllers When Play Stops" and "Patch/Controller Searchback Before Play Starts" settings.
You can enter this variable in any instrument definition by using a text editor, such as Windows Notepad. The variable should be entered directly below an instrument definition. For example:
[Mackie OTTO-1604]
UsesNotesAsControllers=1
Control=Mackie OTTO-1604
Patch[*]=Mackie OTTO-1604
Key[*,*]=Mackie OTTO-1604
NoControllerReset=n
Any port/channel using an instrument definition that has a NoControllerReset flag set to 1 does not receive a "zero controller" message upon stop. You can enter this variable in any instrument definition by using a text editor, such as Windows Notepad. The variable should be entered directly below an instrument definition. For example:
[Yamaha Promix 01 Control Chan]
NoControllerReset=1
Control=Yamaha Promix 01 Control Chan
Patch[*]=Yamaha Pro Mix 01
This parameter should be used when it is undesirable to zero/reset controllers when playback stop, such as when using an external effects processor that uses MIDI controllers for real-time parameter control, or when using a digital mixer as a MIDI control surface (and not using the generic control surface plug-in).
Instrument Definition Tutorial
The following tutorial takes you through the process of setting up an instrument definition for a Roland keyboard so that the bank and patch names, including any self-created sounds, read the same in SONAR as they do on the display screen of your keyboard instrument.
Next topic: Why Use Instrument Definitions?
Why Use Instrument Definitions?
The main reason to import or create an instrument definition is so you can use patch names that are specific to the MIDI module you're using, instead of using generic General MIDI patch names. It's much easier to find a particular sound on a MIDI module when the actual names of the patches in the current bank of sounds pop up on a list, instead of just the numbers 0 to 127, or General MIDI names like Trumpet. Of course, if you're only using General MIDI modules, General MIDI patch names might be all you need. You can also rename each MIDI output with the name of the MIDI module it's connected to. For example, it might be more meaningful to name a MIDI output Roland Sound Canvas instead of MOTU MIDI Express 5. That way, you won't have to remember that you connected the Sound Canvas to the MOTU MIDI Express output number 5—the name Sound Canvas shows up as an option in the Output field of each MIDI track in SONAR's track view. Also if you have an effects processor or module that's hard to get to in your studio, you may find it convenient to control it from SONAR.
Next topic: What Can They Do and Not Do?
What Can They Do and Not Do?
Instrument definitions don't increase the number of sounds or the capabilities of your modules, they just make it easier to find and remember the sounds and/or MIDI controllers you want to use, if they're not all generic General MIDI items. After you define an instrument, SONAR displays the names that you choose for the sounds in each of that instrument's banks, rather than displaying the same 128 General MIDI names over and over for each bank of sounds.
Next topic: Where Do Instrument Definitions Come From?
Where Do Instrument Definitions Come From?
The patch names and other characteristics of each particular MIDI module are supplied by the manufacturer, and are contained in an instrument definition file, which is a text file written in a format SONAR can read. Many of these files come with SONAR, and many more are available at Cakewalk's website, and also at lilchips.com. Instrument definition files have the extension .ins and can contain a definition for only one instrument, or definitions for several instruments. For example, the file Roland.ins contains definitions for many Roland modules. The file Misc.ins contains miscellaneous definitions that might include your instrument if you don't see a specific file for it. You can find these files in your SONAR folder. The file Master.ins contains all the instrument definitions currently loaded into SONAR, and determines the list of instruments that appears in the Assign Instruments dialog box.
Next topic: Start of Tutorial
Start of Tutorial
Let's say you have a Roland XP-10 and you want SONAR to display all of its patch names from all of its banks, including any self-created sounds you add to it.
Let's start by importing the names of the built-in banks and patches that the XP-10 has.
To Import a Roland Instrument Definition
- Choose Options > Instruments to display the Assign Instruments dialog box.
- Click Define to display the Define Instruments and Names dialog box.
- Click Import to display the Import Instrument Definitions dialog box.
- Choose the file that contains instrument definitions for your manufacturer, which in this case is the Roland.ins file, and click Open. SONAR displays a list of all the instrument definitions in the file.
- Scroll down the list, select Roland XP-10, and click OK.
- Click Close to close the Define Instruments and Names dialog box.
The instrument definition you imported should now appear in the Uses Instrument list in the Assign Instruments dialog box.
When you import an instrument definition, it is added to the master instrument definition file Master.ins. The contents of this file determines the list of instruments that appear in the Assign Instruments dialog box.
Now let's assign the XP-10 definition to some channels on a MIDI output:
To Assign the Roland XP-10 Bank and Patch Names to a MIDI Output
- Choose Options > Instruments to display the Assign Instruments dialog box.
-
Let's assign all 16 MIDI channels on output 1 to use the XP-10 bank and patch names:
-
Drag through the first 16 items in the Port/Channel list to select them.
• From the Uses Instrument list, click Roland XP-10. A black line connects the two lists. -
To save these changes permanently, enable the Save Changes for Next Session option.
-
Click OK to apply your changes.
From now on, any track that uses any of channels 1 to 16 on output 1 displays bank and patch names from the XP-10.
To check this, assign a MIDI track in a project to Ch 1, assign the Output field to 1-Roland XP-10, and then examine the drop-down lists in the Bank and Patch fields of the track. You should see bank and patch names that are specific to the Roland XP-10.
Let's check some of our bank and patch lists to see if they match up with what we see on the screen of the XP-10. On the XP-10, let's look at the Vari 1 bank: if we look at tone (tone means the same as patch) #005 in the Vari 1 bank on the XP-10, we see that it is called Detuned EP1. If we change the bank on a MIDI track to 128-Roland XP-10 Var #01, and look at the menu of patches in the Pch field, we see that there is no name listed for patch #004 (Roland numbers its patches from 1 to 128; SONAR numbers patches from 0 to 127, so patch #004 in SONAR is the same patch number as patch #005 on the Roland). Let's look at some of the other Roland XP-10 patch name lists in the right window of the Define Instruments and Names dialog box to see if another one has the right patch names in it, and rename it Var #01.
To Substitute and Rename a Patch List
- Use the Options > Instruments command to open the Assign Instruments dialog box, and click the Define button to open the Define Instruments and Names dialog box.
- In the Names Tree window on the right, click the + sign on the Patches folder to expand the tree of patch name lists.
- Scroll down to the Roland XP-10 Var #08 list and click its + sign to expand it.
- Compare the names on the Var #08 list with the patch names of the Vari 1 instruments on the Roland's display screen. You'll see they are the same.
-
Let's substitute the Var #08 list for the Var #01 list that SONAR currently lists as the XP-10's second bank, which has a bank change number of 128:
-
In the Instruments tree in the left window, click the Roland XP-10 entry to expand it, and then expand the Patch Names for Banks list that's directly under it.
-
Expand the Patch Names tree in the right window and find the Roland XP-10 Var #01 list (if there is one) and right-click it to display the pop-up menu.
-
Choose Edit from the pop-up menu, and change the name from Roland XP-10 Var #01 to Roland XP-10 Var #011.
- In the same tree find the Roland XP-10 Var #08 list and change the name from Roland XP-10 Var #08 to Roland XP-10 Var #01.
- Drag the newly renamed list from the Patch Names tree in the right window to the Patch Names for Banks tree in the left window.
-
In the Bank Number dialog box, enter 128, and click OK.
-
Click the Close button to close the Define Instruments and Names dialog box and click OK to close the Assign Instruments and Names dialog box.
Examine the new bank and patch data in a track that uses 1-Roland XP-10 as an output. In the Bnk field, select 128 Roland XP-10 Var #01, then look at the drop-down list of patches in the Pch field. The list should now have the same names that the Roland keyboard uses for its Vari 1 bank.
The Roland XP-10, like most MIDI keyboards, allows you to create your own sounds and store them in one or more User banks. You can create patch name lists in SONAR that are the same as the names you gave to each of your own sounds.
Checking Bank Numbers
You can calculate bank numbers by using the methods described in "Assigning the Bank Select Method" on page 794, but you might find it easier to use the following method:
To Check the Bank Numbers
- Set up a MIDI track to record from your MIDI keyboard or module.
- Click the Record button to start recording, and change banks on your keyboard.
- Stop recording, and open the Event List view.
- The bank change you recorded is displayed in the Event List view in this way: in the Data column you'll see what kind of bank change method your keyboard uses (probably Normal), and in the column to the right of that data is the number of the bank you changed to.
When we changed the Roland XP-10 to the User 1 bank, we recorded a bank number of 8192.
To Create a Patch Name List for Your Own Sounds
- You could create a new list by copying and renaming an existing list (right-click a list and choose New Patch Name List from the pop-up menu), but since the instrument definition we imported for the XP-10 includes a list called Roland XP-10 User Tone 1, let's just edit that one: in the Names Tree window on the right, right-click the Roland XP-10 User Tone 1 list and choose Add Patch Name from the pop-up menu.
A new patch field appears, with the text 0=0 inside. - Replace the first number in the Patch field with the number of a patch you stored in User Bank 1 on the Roland.
-
Replace the second number in the Patch field with the name you made up for the patch you just gave a number to, and press ENTER.
-
Assign names to as many patch numbers as you want—the numbers between 0 and 127 that you don't assign any names to show up in the Track view Patch menu just as patch numbers with no other names.
- When you finish assigning names, drag your edited patch list to the Roland XP-10 Patch Names for Banks tree in the left window.
- Enter 8192 as the bank number, which we know is the correct bank number from the previous procedure.
- Click the Close button to close the Define Instruments and Names dialog box and click OK to close the Assign Instruments and Names dialog box.
Now you can select the 8192-Roland XP-10 User Tone 1 bank in the Bank field of a MIDI track, and then examine the patch list in the Patch menu: you should see the patch list that you just created.
System Exclusive Data
SONAR's System Exclusive (Sysx) librarian provides you with 8192 banks in which to hold MIDI System Exclusive messages. A bank is a storage area plus some associated parameters such as a destination output and an optional description. Each bank can hold any number of messages; the amount of data it can hold is limited only by available memory. The banks are saved in the SONAR project file. Each bank can also be saved as a .syx file.
Figure 135. The Sysx view
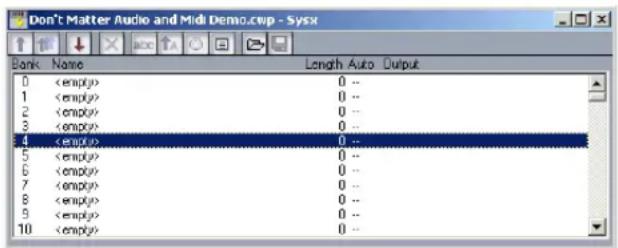
See:
What Is System Exclusive?
Using the System Exclusive View
Sending Sysx Banks at Startup
Importing, Creating, and Dumping Sysx Banks
Transmitting Banks During Playback
Real-time Recording of System Exclusive Messages
Sysx Echo
Sysx .ini File Settings
Troubleshooting
What Is System Exclusive?
System Exclusive data is MIDI's way of letting each synthesizer manufacturer transmit private data about its products. A System Exclusive message has a manufacturer ID; the rest of the message is completely proprietary and varies for each manufacturer, even for each of its products. SONAR does not understand what this data means; it simply can hold onto it for you. You can take snapshots of your equipment's configuration and store them in SONAR's System Exclusive banks for transmitting back to the equipment. You may want to do this simply to back up your equipment's patches and/or settings, much like backing up your computer's hard drive in case something goes wrong. Or you may configure your equipment differently for each project's requirements, which is why storing System Exclusive banks with each SONAR project file can be useful. Of course, for merely backing up your equipment, you can have a project containing only System Exclusive data and no notes.
See:
Sysx Events
Using the System Exclusive View
Sending Sysx Banks at Startup
Transmitting Banks During Playback
Real-time Recording of System Exclusive Messages
Sysx Echo
Sysx .ini File Settings
Troubleshooting
Sysx Events
SONAR provides two distinct kinds of Sysx events: Sysx Bank and Sysx Data.
- Sysx Bank: You can use Sysx Bank events to transmit one of the project's 8192 banks of System Exclusive data. These banks can be recorded, viewed, and edited in the Sysx view, and each bank can contain one or more very large System Exclusive messages. Sysx Banks may also be marked Auto, so that they are sent when the file is loaded rather than during the start of playback.
- Sysx Data: You can also use Sysx Data events, which can each contain a single System Exclusive message up to 255 bytes long. You can view the message bytes in the Event List view.
Sysx Data events can be recorded in real time. See “Real-time Recording of System Exclusive Messages” on page 814 for more information.
See:
Using the System Exclusive View
Transmitting Banks During Playback
Real-time Recording of System Exclusive Messages
Sysx Echo
Sending Sysx Banks at Startup
Sysx .ini File Settings
Troubleshooting
Using the System Exclusive View
The System Exclusive view has a list box for a maximum of 256 Sysx banks, plus a toolbar of buttons. Most of the buttons affect whatever bank you have selected in the list. Certain buttons will be disabled if the selected bank is empty. To open the System Exclusive view, choose the Sysx command from the View menu, or click the Sysx view icon in the Views toolbar.
SONAR stores Sysx messages as either Sysx banks or Sysx data. The main difference is in the number of bytes in the message, and also that Sysx data is only visible in the Event List view as SysxData events. A Sysx data message can have up to 255 bytes in it. You can send Sysx data to an instrument without interrupting playback (depending on the speed of your computer and the number of bytes in the message), however, sending a Sysx bank stops playback until all of the Sysx bank is transmitted. Sysx banks are usually sent to your instrument when you load your work file. SONAR asks you each time you load a project file if you want to send any existing Sysx banks the file contains that are marked for auto-sending. Clicking the Auto Send Bank button in the Sysx view toolbar marks or unmarks a selected bank for auto-sending.
For more information, see:
Importing, Creating, and Dumping Sysx Banks
Editing Sysx Banks
Sending Sysx Banks at Startup
Real-time Recording of System Exclusive Messages
Transmitting Banks During Playback
Sysx View Buttons
Sending Sysx Banks at Startup
You can tell SONAR to send certain Sysx banks to your instrument(s) each time you open the project file that the banks are in.
To Send Sysx Banks at Startup
- In the Sysx view, select a bank that you want to send to an instrument when you open the current project.
SONAR highlights the bank you select.
- Click the Auto Send Bank button _A .
A checkmark appears next to the bank name in the Auto column to show that the bank is marked for auto-sending.
-
While the bank is still highlighted, click the Output button to open the Sysx Bank Output dialog.
-
Enter the number of the output you want to send this bank out through, and click OK.
The output number you entered appears next to the selected bank in the Output column.
- Repeat steps 1-4 for each bank you want to send, and save your project.
The next time you open a project, SONAR asks you if you want to send any Sysx banks in the project that are marked for auto-sending. If you click OK, SONAR sends the bank(s).
If you want SONAR to send auto-send banks every time you open a project without asking you, uncheck the check box in the Auto-Send Sysx dialog that says Ask this question every time. If you decide later that you want to be asked, use the Options > Global command to open the Global Options dialog, click the General tab, and check the check box that says Ask Before Sending System Exclusive (When Opening Projects).
Importing, Creating, and Dumping Sysx Banks
There are several ways to get a sysx bank into SONAR:
- You can import (load) an external .syx file.
- You can edit an empty bank to create a new bank from scratch.
- You can dump a bank into SONAR from the synthesizer itself.
To Import a Sysx Bank into a Project
- In the Sysx view, select an empty bank to import the new bank into (unless you want to add to or overwrite an existing bank).
- Click the Load Bank from File button ↗.
The Open dialog appears.
- If necessary, navigate to the folder that contains your .syx files, select the one you want to import, and click Open.
The file appears as a new bank in the row you selected in the Sysx view. If you want SONAR to send this bank every time you open this project, make sure the bank is selected (highlighted), and click the Auto Send Bank button ↗. A checkmark appears in the Auto column next to all auto-send-enabled banks.
To Create a Sysx Bank
- In the Sysx view, select an empty bank, and click the Edit Data button (or double-click the empty bank).
The Edit System Exclusive Bytes dialog appears.
- Type your message(s). Each message you add to the window must begin with F0 and end with F7 (that's F zero and F seven). See your instrument's manual for the messages you can create.
- When you finish typing the message(s), click OK to close the dialog.
After you close the editing window, your new bank appears in the Sysx view. Use the buttons in the toolbar to name it, give it an output number, and mark it for auto-sending, if you want. Save your project when you're finished.
To Dump a Sysx Bank into SONAR
- Choose Options > Global and click the MIDI tab, and make sure that the System Exclusive item is checked. If it isn't, SONAR won't receive System Exclusive messages.
- In the Sysx view, select an empty bank to dump the new bank into (unless you want to add to or overwrite an existing bank).
- Click the Receive Bank button ↓ (or press C on your computer keyboard).
The Receive System Exclusive dialog appears, which contains a list of Dump Request Macros (DRMs). Each DRM has a name that describes the synthesizer the DRM controls and the type of data that the DRM asks the synthesizer to send.
-
Do one of the following:
-
If the name of your instrument and the kind of data you want to store in SONAR appears in the list, select your choice and click OK.
-
If your instrument and the type of data you want to record are not in the list, select You start dump on instrument, click OK, and press whatever button on your synthesizer that starts a Sysx bank dump. The You start dump on instrument option is not really a Dump Request Macro. It tells SONAR that you will initiate a dump (or multiple dumps) from the front panel of the synthesizer.
-
The DRM may prompt you for additional information, which you should supply.
- Patch number: DRMs that are written to request an individual patch or configuration give you this prompt, so you can specify the one you want to have dumped.

- Channel/unit number: Most synthesizers have a Sysx channel or unit number. This covers the situation in which you own two of the exact same synthesizer, and want to do Sysx with each independently. Your synthesizer manual should describe the factory-set number.
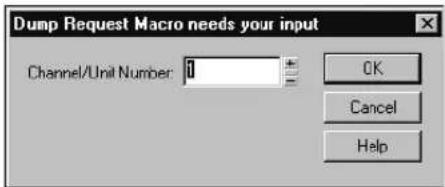
When your instrument starts sending the bank, the Sysx Receive window counts the bytes as SONAR receives them. If the count stays at zero for more than a couple of seconds, something is wrong. The synthesizer may not be hooked up to the MIDI interface in both directions, or you may have answered a DRM prompt incorrectly. Click Cancel. If any data were received, you will see the number of bytes in the bank list.
- Once the bytes received count stops increasing, you can click Done to tell SONAR to stop receiving. However, if your synthesizer also displays a message when the instrument is finished sending a bank, wait until that message says the transmission is finished before you click Done.
The currently selected bank now holds the received Sysx data. At this point, you may want to give the bank a descriptive name by selecting it and clicking abc
See also:
Editing Sysx Banks
Sysx View Buttons

Note: The SONAR librarian may not support synthesizers that require handshaking dump protocols. Some of these synthesizers have a backup protocol where they will do a normal dump if they don't get a handshake. Others do not.
More about Dump Request Macros
DRMs are defined in your DRM.ini file in the [Dump Request Macros] section. You may add your own DRMs or modify the ones that we have provided. Use the Windows Notepad to edit the file. Comments in the DRM.ini file itself describe how to write DRMs. The specific Sysx messages can be found in the instrument manual, or they can be obtained by contacting the manufacturer. Remember that a DRM must start with F0 and end with F7.
Sometimes you will find that the byte size is different when you use a DRM, as opposed to initiating the dump from the instrument. It is possible the instrument is dumping some additional information when you initiate the dump from the instrument, but you should be able to use either method without any problems.
When you press the Receive button in the Sysx window, you may pick from a list of Dump Request Macros. These are short System Exclusive messages sent to a synthesizer to make it dump (send back) System Exclusive data. DRMs are defined in your Cakewalk.ini file in the [Dump
Request Macros] section. You may add your own DRMs or modify the ones that we have provided. Use the Windows Notepad to edit the file.
Please note that many of the DRMs included with SONAR have been donated by customers who are using the particular equipment. In some cases, we have not been able to test those DRMs because we do not have access to that equipment. We redistribute such DRMs on an as-is basis. Additional user-supplied DRMs may be available on the Cakewalk website (www.cakewalk.com).
Editing Sysx Banks
Editing a Sysx bank is very similar to creating one.
To Edit a Sysx Bank
- In the Sysx view, select the bank you want to edit, and click the Edit Data button (or double-click the selected bank).
The Edit System Exclusive Bytes dialog appears. - Edit your message(s). Each message in the window must begin with F0 and end with F7 (that's F zero and F seven). See your instrument's manual for the messages you can create.
- When you finish editing the message(s), click OK to close the window.
Save your project when you're finished.
See also:
Importing, Creating, and Dumping Sysx Banks
Sysx View Buttons
Sysx View Buttons
Here is a description of the buttons in the Sysx view.
Send
Send All
Receive
Name
Auto
Output
Edit Bytes
Clear Bank
Load Bank and Save Bank
System Exclusive Data
Editing Sysx Banks
Send ↑
Send transmits the current bank's System Exclusive message. If nothing seems to happen, make sure you have correctly set the output. This button is disabled if the current bank is empty. The shortcut key is S.
Send All
Send All transmits all non-empty banks. The shortcut key is L.
Receive ↓
Receive dumps data from a synthesizer into the bank. If the bank contains data, SONAR asks you whether you want the new data to overwrite the existing data or be appended to it. The shortcut key is C.
When receiving dumps, remember to connect both the MIDI In and Out ports of the synthesizer to the MIDI interface. Also, make sure that your instruments are set up to receive and/or transmit Sysx. Synthesizers that you normally use only to play sounds—for example, sound modules that don't have keyboards—don't need to be hooked up in both directions except for receiving dumps, so it is easy to forget this. (If you will only be sending Sysx messages to the device, the normal one-direction hookup is sufficient.)
Clear Bank ✗
This deletes the selected bank. The shortcut key is D.
Name abc
You may enter a description for a bank by clicking this button. Names are saved only in .cwp and .cwb files. The shortcut key is N.
Auto
The Auto option tells SONAR to transmit that bank every time it loads the project file. You might use this option for banks that contain System Exclusive messages that load a set of sounds for a synthesizer at or before the start of a project.
Before transmitting, SONAR asks your permission. This is a safety feature for loading a file you have received from someone else; if it happens to contain data for your synthesizer(s), you might lose your patches and configuration information. However, if you don't want to be asked, choose Options > Global, click the General tab, and uncheck the box labeled Ask Before Sending Sysx. The shortcut key is A.
Output
Each bank is transmitted to a particular MIDI output, just as a track is. Click this button to change the output. The shortcut key is P.
Edit Bytes
Although SONAR's Sysx features are designed mainly to store System Exclusive data for you, you can edit the bytes of shorter messages in hex format (many of the more popular synthesizers have special patch-editing programs available that let you edit data using sliders and other tools rather than raw hex data).
When you select a bank and click the Edit Bytes button, SONAR converts the binary data into a text representation and pops up the Edit System Exclusive Bytes dialog box, in which you can edit the text. If you make changes and click OK to keep them, SONAR tries to convert the text back into binary format. You'll get an error message if the text does not begin with an F0 and end with an F7, which are the System Exclusive begin and end bytes.
SONAR may not be able to convert the data to text format. The text representation requires three to four times more memory than the data itself, and the Edit System Exclusive Bytes dialog box can contain roughly as much text as Notepad. The shortcut key is E.
Load Bank and Save Bank
You can import banks from and save banks to files with the file extension .syx. If you try to import to a bank that isn't empty, SONAR asks if you want to append or replace. The Load and Save buttons work only with .syx, not SONAR project files or MIDI files.
You may also use this feature to copy a Sysx bank between two SONAR project files. Save the bank into a file, load the other SONAR project file, then load the bank again. This is also a good way to copy one bank to another in the same project file. The shortcut keys are o and v respectively.
To Export a Sysx Bank to Another Project
- In the Sysx view, select the bank you want to export.
- Click the Save Bank button 📋.
The Save As dialog appears.
- Navigate to the folder in which you want to store the file.
- Enter a file name and click OK.
SONAR saves the file in the location you specified, with the extension .syx.
- Open the project to which you want to import the bank and select an empty bank in the Sysx view (unless you want to add the file to an existing bank).
- Click the Load Bank from File button to open the Open dialog.
- Navigate to the desired folder, select the .syx file you want to import, and click Open.
SONAR loads the selected bank into the current project.
Transmitting Banks During Playback
SONAR has a special meta-event, Sysx Bank, that lets you play a System Exclusive bank at a specified time in your project. You can use a Sysx meta-event to send any of the 8192 available Sysx banks at any time in a sequence. To do this, you have to insert a new event in the Event List using the INSERT key on the PC keyboard. Next you have to double-click Event Kind and change it to System Exclusive. In the Values column, select the bank (0-8191) that you want to send.
MIDI is a serial data transmission, meaning it can do only one thing at a time. If you try to upload a huge sampler dump during a fast drum solo, playback will noticeably lurch. MIDI must complete the System Exclusive message before it can resume playback. The Sysx meta-event is appropriate only for very short System Exclusive messages. The exact length depends on various factors, such as the speed of your computer but as a rule of thumb, 100 bytes is a likely maximum, and even that may often be too large.
You don't need to use Sysx meta-events for sending System Exclusive information at the beginning of your project. Instead, use the Auto option for System Exclusive banks. Banks that are marked Auto are transmitted automatically by SONAR when it loads the project file they are stored in. Use the Sysx meta-event only when you need to send a Sysx Bank during the middle of the project.
See:
Real-time Recording of System Exclusive Messages
What Is System Exclusive?
Real-time Recording of System Exclusive Messages
You can record short System Exclusive messages in real time. These will end up in the track as the new Sysx Data types of events, which can hold System Exclusive messages up to 255 bytes long. Before you record any Sysx messages, choose Options > Global, click the MIDI tab, and make sure that System Exclusive is checked.
To Record Sysx Messages in Real Time
- Arm a MIDI track for recording—use a track that's uses the output you want to send the Sysx data out through.
- Press the Record button or press R to start recording.
- Move the button or fader on your MIDI instrument that sends Sysx data.
- Stop recording.
SONAR records your instrument's Sysx data as a Sysx Data event. Open up the Event List view for the track you recorded on to view the data. When you play back the MIDI track that the Sysx Data event is on, make sure that the Output field of the track is set to the output that the MIDI instrument you want to send Sysx data to is on.
See also:
Sysx Echo
Troubleshooting
Sysx Echo
You can configure SONAR to echo received System Exclusive messages to output devices.
To Echo Sysx Messages
- Choose Options > Global.
- Select the MIDI tab.
- Check the Echo System Exclusive option.
- Click OK.
SONAR echoes received Sysx data according to the echo settings on the MIDI Input tab of the Project Options dialog box.
See:
Troubleshooting
Sysx .ini File Settings
The TTSseq.ini initialization file contains settings that govern the sending and receiving of System Exclusive information. If you are experiencing difficulties using Sysx, you will probably be able to correct the problem by adjusting these settings.
The options described below occur in the [Options] section of the TTSseq.ini file. You can edit this file using the Windows Notepad. Every time you add or change one or more lines in TTSseq.ini, you must restart SONAR in order for the change to take effect.
SysxSendDelayMsecs=n
This setting causes SONAR to delay n milliseconds if it encounters an F7 in a System Exclusive bank, but only if the line SysxDelayAfterF7=n is not zero. The line SysxDelayAfterF7=n enables a delay between Sysx messages, while the line SysxSendDelayMsecs=n sets the size of the delay.
n = 60 Default value (in milliseconds)
SysxDelayAfterF7=n
This setting causes SONAR to delay Sysx transmission for a certain amount of time if it encounters an F7 in a System Exclusive bank. This gives some instruments the required amount of "breathing" time necessary to process the Sysx transmission. The default delay is 1/18 of a second, but can be changed by also adding the SysxSendDelayMsecs=n line, where n is the number of milliseconds that the delay lasts.
The possible values of n in the line SysxDelayAfterF7=n are 0 and 1. Their significance is as follows:
n = 0 No delay
n = 1 Delay between each Sysx message
SysxSendPacketSize=n
System Exclusive bytes are transmitted in packets, with a 1/18-second default delay between each packet. Setting this value to a smaller number will help slower synthesizers avoid overflowing their internal buffers. This line sets the number of bytes between each Sysx transmit delay.
n = 1024 Default value (in bytes)
See:
Troubleshooting
What Is System Exclusive?
Troubleshooting
SONAR Is Not Receiving Sysx Messages
- Make sure all your devices are connected correctly.
- Make sure you have the right MIDI Input selected by using the Options > MIDI Devices command.
- Make sure that your instrument is set up to transmit System Exclusive data.
Sysx Bank Names Don't Show When I Open a File
Sysx bank names are only saved in .cwp and .cwb files (not in .mid files).
SONAR Doesn't Include a DRM for My Instrument
If there is no Dump Request Macro (DRM) for your instrument, you should select You start dump on instrument, then initiate the Sysx dump from the instrument. Once the bytes received count stops increasing, click Done to tell SONAR to stop receiving. The currently selected bank now holds the received Sysx data. You can rename the bank if you want by selecting the bank and clicking the Name button.
You can also add a DRM for any unlisted instrument. For more information about how to do this, read the section "More about Dump Request Macros" on page 810 earlier in this chapter.
Synthesizers Reporting MIDI Data Errors
Some synthesizers will report data errors when you try to send Sysx information to them. This usually happens when SONAR sends data at a rate too fast for the synthesizer to keep up. You can use the SysxSendPacketSize=number setting in TTSseq.ini to make SONAR transmit Sysx data more slowly, as described in Sysx .ini File Settings.
Try setting the number to 64. If that does not solve the problem, try successively smaller values. If 64 works, you may try larger values until it stops working; go back to the largest value that worked and you will have the fastest transmission rate that the problematic synthesizer can keep up with.
My Equipment Is Not receiving Sysx from SONAR
Make sure the instrument is set up to receive System Exclusive messages. In the Sysx View, make sure the right output is selected. Verify that the Sysx message originally transmitted from the same kind of instrument. An instrument will not recognize Sysx messages from a different make or model of instrument.
Finally, try adjusting the parameters in the TTSseq.ini file, as described Sysx.ini File Settings.
Timing Requirements When Receiving Sysx
Some MIDI devices have special timing requirements when receiving System Exclusive transmissions. If your equipment has problems receiving System Exclusive data from SONAR, you might need to introduce some small delays to allow the equipment to digest the information it is receiving.
The line in TTSseq.ini that reads SysxDelayAfterF7=n enables SONAR to introduce a delay between each Sysx message so that the instrument has some time to respond to the message. Setting n to be 1 enables the delay. The line SysxSendDelayMsecs=n lets you control how many milliseconds the delay is, where n is the number of milliseconds that the delay lasts.
Roland Equipment
Some Roland equipment—notably, the GR-1 and GR-50 Guitar Synthesizers—have problems receiving Sysx packets in fast succession. You must use the setting SysxDelayAfterF7 = 1 with these devices.
Ensoniq Instruments
Successfully sending Sysx messages to most Ensoniq instruments requires that you add the following three lines to the [Options] section of TTSseq.ini:
SysxDelayAfterF7=1 Enables delay
SysxSendDelayMsecs=200 Sets delay time to 200 milliseconds
SysxSendPacketSize=65535 Increases packet size to 64k
See:
What Is System Exclusive?
Using the System Exclusive View
Transmitting Banks During Playback
Real-time Recording of System Exclusive Messages
Sysx Echo
Sysx .ini File Settings
Troubleshooting
Synchronizing Your Gear
Your computer is often used with other equipment: sound cards, MIDI equipment, and digital tape decks or other digital recording tools. All these devices can have their own built-in clocks or timing mechanisms.
When several pieces of equipment are used together, it's important that they operate in synchronization. For this to happen, all the equipment must rely on the same source of clock or timing information. SONAR lets you use many different types of synchronization so that you can get your work done quickly and efficiently.
See:
Synchronization Overview
Choosing Clock Sources: SONAR as Master
MIDI Synchronization
SMPTE/MIDI Time Code Synchronization
MIDI Machine Control (MMC)
Synchronization Overview
SONAR supports several different types of synchronization, which rely on a variety of different clock sources:
| Clock source Timing is determined by | |
| Internal The clock on the computer motherboard | |
| Audio The clock on the computer's sound card | |
| MIDI Sync The clock on an external MIDI device | |
| SMPTE/MIDI Time Code (MTC) | A time code signal (in SMPTE or some other format) recorded on some external medium or generated and sent by SONAR |
Table 168.
When you use either the internal or audio clock, SONAR can control other MIDI devices using MIDI Sync. In this case, SONAR is the “master” device and the other MIDI devices are the “slaves.”
When MIDI Sync is the clock source, SONAR operates either in response to incoming MIDI messages or as the sender. In this case, SONAR can be either the master or the slave. Note that audio playback is not supported when using MIDI Sync with SONAR as the slave.
When SMPTE/MIDI Time Code (SMPTE/MTC) is the source of timing information, SONAR operates in response to incoming MTC messages. These messages could be generated by:
- An external MIDI device that is capable of generating MIDI Time Code (like the Roland VS880)
- A MIDI interface that is converting other time code signals (like SMPTE, EBU, or film time code) into MIDI Time Code
When you use some of these synchronization options, some SONAR commands work differently. This section describes each of the synchronization options, how and why each is useful, and the effect each option has on other features and commands.
The Sync toolbar lets you change back and forth quickly between the different clock settings:
Figure 136. The Sync toolbar

You can also choose the sync mode as follows:
- Choose Options > Project, and click the Clock tab.
- Choose the desired clock source from the Clock list.
- Click OK.
The clock source and the type of synchronization that is used are options that are stored as part of your project files. For example, one of your projects might be set up to use the internal clock; a second might use the Audio clock and MIDI Sync with SONAR as the master timing source; and another might use SMPTE/MTC Sync as the clock source.
Many technical support requests concern synchronization problems, which are among the hardest to diagnose and duplicate over the phone. If you experience problems, before you call, perform as much experimentation and gather as much information as possible about what does and doesn't work. The more prepared you are, the more we can help.
Choosing Clock Sources: SONAR as Master
When SONAR is used alone, or with an external device that does not have its own clock or timing signal, you use one of two clock sources: Internal or Audio.
When the clock source is set to Internal, SONAR uses the clock built into the computer or the computer's MIDI interface as its timing source. If your projects contain only MIDI (no audio), this is the most efficient method of playback.
If your projects contain MIDI and audio, or only audio, you should set the clock source to Audio. This lets the sound card clock determine the correct speed for audio playback and automatically
synchronizes MIDI playback to match the audio. For more information, see "System Configuration" on page 843. You cannot use the tempo ratio controls when using the audio clock, because the audio playback speed is determined by the audio clock.
When either of these clock sources is used, you can also configure SONAR to drive other MIDI devices using MIDI Synchronization. For more information, see "MIDI Synchronization" on page 821. If you need to send MIDI Time Code (MTC), SONAR will send this data regardless of the clock setting.
To Use the Internal Clock Source
- Click □ on the Sync toolbar.
OR
- Choose Options > Project, and click the Clock tab.
- Check the Internal box.
- Click OK.
To Use the Audio Clock Source
- Click 🙏 on the Sync toolbar.
OR
Choose Options > Project, and click the Clock tab.
- Check the Audio box.
- Click OK.
MIDI Synchronization
MIDI Synchronization, or MIDI Sync, is usually used to synchronize SONAR with drum machines, stand-alone MIDI hardware sequencers, and sequencers built into MIDI keyboards. SONAR can slave to MIDI Sync, and can send MIDI Sync on multiple output ports.
When MIDI devices are synched, the master device sends messages to all other devices to start and stop playback and to keep all the devices in sync. To change the tempo of a project, you adjust the tempo on the master device. The playback tempo on all slave devices is then set automatically.
The following MIDI messages are sent by the master device to support MIDI Sync:
Message How it is used
Start This message tells slave devices to start playing from the beginning of the currently loaded sequence.
Stop This message tells slave devices to stop playback.
Table 169.
Message How it is used
| Continue This message tells slave devices to continue playing from the current location in the currently loaded sequence. | |
| Song Position Pointer (SPP) | This message tells slave devices to change the current location to the designated point in the project. SONAR normally issues an SPP message immediately prior to any Start or Continue message. |
| Clock The master sends clock messages to each slave device at the rate of 24 per quarter note. The slave devices use these messages to establish the tempo and stay in sync. | |
Table 169.
When you start playback on the master MIDI device, for example, it sends a Start message to all slave devices, announcing that playback has started. If the slave devices are set up correctly, they receive the message and start playing back with the master device. When SONAR is set up as the master device, you can enable or disable these messages.
See:
SONAR as the Slave
SONAR as the Master
Using MIDI Sync with Drum Machines
Troubleshooting MIDI Sync
SONAR as the Slave
When SONAR is slaved to an external MIDI device, the following changes occur:
- When you click the Play or Record button, a message (Waiting for MIDI Sync) is displayed in the status bar. When you start your external device, SONAR will follow.
- If you change the tempo using an external device, the SMPTE time code display in SONAR will be incorrect.
- SONAR will not transmit MIDI Start, Continue, Stop, and Clock messages.
- Digital audio will play back, but not necessarily in sync.
To Use MIDI Sync with SONAR as the Slave
- Configure the external MIDI device you want to use as the master device to transmit MIDI Sync.
- Configure external slave devices to receive MIDI Sync.
- Choose Options > MIDI Devices to display the MIDI Devices dialog box.
- Make sure that your MIDI interface is highlighted in the Inputs list, and click OK.
- Click 📄 on the Sync toolbar to use the MIDI Sync clock source.
From now on, SONAR starts playback and recording only after the appropriate message is received from the master device.

Tip: Make sure the Status bar is displayed when using MIDI Sync. Otherwise, you will not be able to see the MIDI Sync status messages. To display the Status bar, choose Options > Global and click the General tab. Then check the Show Status Bar box.
SONAR as the Master
There are several options, found on the Sync tab of the Project Options dialog box, which you can use when SONAR is the MIDI Sync master device:
| Option What it's for | |
| Transmit MIDI Start/Continue/Stop/Clock | Choosing this option causes SONAR to tell the slave when to start, when to continue, when to stop, and what timing data to go by (SONAR's). |
| Use Start, Never Continue (greyed out unless above option is checked) | If you are using an external drum machine to repeat a drum pattern or loop, you might always want playback on the drum machine to start at the beginning of the loop. When this option is chosen, SONAR sends a Start message to all slave devices when playback is started, even if you are in the middle of a project. (Normally, SONAR would send a Continue message if playback starts from the middle of a project.) |
| Transmit MIDI Song Position Pointer (SPP) | When this options is checked, SONAR sends an SPP message before starting or continuing playback. If you are using a drum machine as described previously, you might want to disable this option. |
| Locate Delay for SPP Recipient | Some older MIDI devices take a small amount of time to respond to SPP messages. This option causes SONAR to delay briefly after sending an SPP message, to give the slave device time to respond. The delay is in 1/18ths of a second. Enter 1 for a 1/18th second delay, 2 for 2/18ths of a second, or 18 for a full second delay. |
MIDI Sync Output Ports Choose the outputs that your slave devices are connected to.
Table 170.
To Use MIDI Sync with SONAR as the Master
- Configure your external MIDI devices to receive MIDI Sync.
- Click 📄 or 🔊 on the Sync toolbar to use the Internal or Audio clock source.
- Choose Options > Project, and click the Sync tab.
- Check the Transmit MIDI Start/Continue/Stop/Clock box.
- For most applications, check the Transmit MIDI Song Position Pointer box.
-
If you are using a drum machine to play patterns or loops, check the Use Start, Never Continue option and disable the Transmit MIDI Song Position Pointer option.
-
In the MIDI Sync Output Ports field, check off the output ports that you want to send the sync signal out of.
- Click OK.
From now on, the transport controls in SONAR control playback on the external MIDI devices.
Using MIDI Sync with Drum Machines
The most flexible way to use a MIDI drum machine is to record the notes it generates into SONAR, then use that machine as a MIDI playback device. This lets you edit, cut, paste, and copy your drum parts like any other clip. You can use MIDI Sync to record the notes from the drum machine into SONAR as follows:
- Use the drum machine's pattern-composing facilities to compose your drum part.
- Configure the drum machine to be a slave device that receives MIDI Sync messages.
- Configure SONAR to send MIDI Stop/Start/Continue/SPP messages.
- Record the drum part from SONAR. The drum machine starts automatically when recording begins and stops automatically when you press Stop.
- Switch the drum machine out of MIDI Sync mode so that it acts simply as a sound-producing module.
Troubleshooting MIDI Sync
If you experience problems with MIDI Sync when SONAR is the master device, verify that your external devices are configured correctly to respond to MIDI Sync. Most devices have a Clock option that should be set to External or MIDI.
If SONAR does not respond to MIDI Sync as a slave device, verify that your external devices are configured correctly to transmit MIDI Sync. Remember that only one external device can be used as the master clock source.
SMPTE/MIDI Time Code Synchronization
SMPTE/MIDI Time Code Sync (SMPTE/MTC) is another method of synchronization that lets SONAR act as a master or slave to external devices. SONAR can send or receive SMPTE/MTC messages to or from external devices that can generate or receive MTC. SONAR can send MTC on multiple output ports simultaneously.
SMPTE/MTC is a position and timing reference that indicates the current location in the project and how quickly the project should be playing. Time code labels the position in a project in hours, minutes, seconds, and frames. The speed of playback is indicated by a frame rate.
Time code is recorded onto tape using a device called a time code generator. The process of recording a time code signal onto a track is called striping. Normally, the start of a tape stripe has a particular time, expressed in hours, minutes, seconds, and frames. For example, the tape stripe
might start at 00:00:00:00, 01:00:00:00, or any other time. The material recorded on the tape usually starts anywhere from 10 seconds to several minutes after the start of the time code. Sometimes, the tape stripe starts at a time like 00:59:50:00, and the material starts 10 seconds later, at 01:00:00:00.
When you create a new SONAR project, by default the project is configured so that the beginning of bar 1 is synchronized with a time code of 00:00:00:00. If the starting point of the material on your tape or external project is not 0, you need to enter an offset to tell SONAR the time code that corresponds to the start of the project.
To Enter an Offset
- Select Options > Project.
The Project Options dialog appears.
- Click on the Clock tab.
- In the Clock tab, enter an offset in the SMPTE/MTC Offset field. To enter an offset of 15 seconds, type 0,0,15 and hit ENTER. The SMPTE/MTC Offset value should now be 00:00:15:00 or 15 seconds.
Frame Rates
Seven time code frame rates are supported in SONAR, which are normally used for the following types of applications:
| External Timecodes | Cakewalk Setting | Description |
| 24 frames per second 24 FPS | Used for theatrical film worldwide. Any film in North America or Japan uses this setting. | |
| 25 frames per second (EBU timecode) | 25 FPS Used for PAL/SECAM video, video and some film in countries that use 50 Hz wall electricity. This is the setting to use when synchronizing to any European video format. | |
| 29.97 frames per second non drop-frame | 29.97 FPS NDF NTSC non-broadcast and short length video in North America and Japan. Some music projects. This setting synchronizes the video perfectly with SONAR, but the sequencer position displayed in the Now Time and Big Time displays will gradually drift and become incorrect over long periods of time. The audio and MIDI synchronization to the external device will not be affected by this discrepancy. | |
| 29.97 frames per second drop-frame | 29.97 FPS DF NTSC broadcast and long format video in North America and Japan. This setting synchronizes the video perfectly with SONAR, but the sequencer position displayed in the Now Time and Big Time displays will gradually drift and become incorrect over long periods of time. The audio and MIDI synchronization to the external device will not be affected by this discrepancy. | |
| 30 frames per second non drop-frame | 30 FPS NDF Most music projects and some film in North America. This is the best choice for any music project and should be used unless the situation dictates otherwise. | |
| 30 frames per second drop-frame | 30 FPS DF Not a standard type of timecode, used rarely for speed correction and transfer problems in tape based systems. | |
Table 171.
Table 171.
For more information about frame rate time formats, see the documentation for your time code hardware.
Refer to the documentation for your MIDI interface or external MIDI device for additional information about SMPTE/MTC.
To Use SONAR as the Master MTC Generator
- Configure the clocks on each external device that you want to synchronize to receive SMPTE/MTC. Make sure they're connected to MIDI outputs from your computer or MIDI interface.
- Click 📋 or 🌐 on SONAR's Sync toolbar to use the Internal or Audio clock source (to display the Sync toolbar, use the Views > Toolbars > Sync command).
- Use the Options > Project command to open the Project Options dialog.
- On the Sync tab, check the Transmit MTC check box (you can also click the Transmit MTC button on the Sync toolbar).
- In the Frame Rate field (it's just below the Transmit MTC check box), choose the frame rate that your project uses (see "Frame Rates" on page 825, if necessary).
- In the MTC Output Ports field, check off the outputs that you want to send MTC on (the outputs your external devices are connected to).
- Click OK.
SONAR saves your sync and MTC output port settings with your project. However, output ports are saved by their number only, not their name. Their number is determined by the order in which they appear in the MIDI Devices dialog under Outputs (Options > MIDI Devices command). If you change the order of devices in this dialog, the MTC output ports in your project will retain the same numbers, but those numbers will now refer to different outputs. Also, if you reduce the number of highlighted outputs in the MIDI Devices dialog, and the MTC ports you chose have higher numbers than what are currently highlighted in the MIDI Devices dialog, SONAR does not substitute new port numbers. Also, SONAR does not send MTC if SONAR's Tempo Ratio buttons are set to any value other than 1.
To Configure SONAR to Sync to SMPTE/MTC
- Click the SMPTE/MTC mode button in the Sync toolbar.
-
Select Options > Global and click on the Timecode tab.
-
Select one of the following options:
- Ask first, then switch to clock source and start. This option prompts SONAR to alert you when it detects a SMPTE/MTC signal, asks if you want to sync to the incoming signal, and if you respond that you do, switches the clock source and starts to receive the signal.
- Always switch the clock source and start. SONAR automatically switches to the clock source of the incoming signal and begins to receive the signal.
- Do not switch clock source, but start if in SMPTE/MTC mode. This option automatically syncs to the incoming signal if SONAR is in SMPTE/MTC mode.

Note: The final option, Never switch clock source, never start, should never be used if you are attempting to sync to an external clock source.
-
Click OK.
-
Choose Options > Project, and click the Clock tab.
-
Choose the frame rate and time offset that are appropriate for your source material.
-
Click OK to close the dialog box.
-
Choose Options > MIDI Devices to display the MIDI Devices dialog box.
-
Make sure that your MIDI interface is highlighted in the Inputs list. If your interface also has a Sync driver, highlight that as well, then click OK.
When SONAR is the slave, here's how things work:
- SONAR monitors for a SMPTE/MTC signal. You are able to perform other action in SONAR while waiting for the signal.
- Start playback on the external device. It takes about two seconds for SONAR to lock from the time it receives time code input.
- If the time code is earlier than the start of the project (based on the time code offset), another message (Chasing...) is displayed in the status bar. When the time code reaches the start of the project, SONAR starts to play in sync.
- If the time code is at or after the start of the project, SONAR starts playback as soon as it locks to the time code.
- When the external device stops (or when the time code ends), SONAR will stop.

Note: If you want SONAR to switch its clock source to SMPTE/MTC automatically when SONAR receives a SMPTE/MTC signal, you can choose this option on the Timecode tab of the Global Options dialog.
See:
Playing Digital Audio under SMPTE/MTC Sync
SMPTE/MTC Sync and Full Chase Lock
Troubleshooting SMPTE/MTC Sync
Playing Digital Audio under SMPTE/MTC Sync
SONAR gives you two choices for controlling audio playback when using time SMPTE/MTC Sync:
| Option How it works | |
| Trigger and freewheel | Audio event playback is started (or triggered) at the exact time code, but then the audio plays at its own internal rate (or freewheels). When audio freewheels, it can gradually drift from the time code due to variations in the time code signal. |
| Full chase lock | The speed of audio event playback is continually adjusted to stay in sync with the time code. If the external clock drifts or changes rate, SONAR adjusts the audio playback speed to stay in sync. This adjustment may introduce slight pitch changes, but those changes will be negligible if the external clock is reasonably steady. |
Table 172.
Some digital sound cards (such as the Frontier Design Wavecenter or the Antex Studio Card) have external clock inputs. If you are using one of these cards, and an external clock source like a digital tape deck is the master timing source for the project, choose the Trigger and Freewheel option. The clock input on the audio card guarantees that there is no drift between the time code and audio playback.
To Set the Audio Playback Option
- Choose Options > Audio, and click the Advanced tab.
- Check the desired option from the Synchronization list.
- Click OK.
Audio playback under time code sync is handled according to the setting you chose.
SMPTE/MTC Sync and Full Chase Lock
When using SMPTE/MTC Sync with full chase lock, the first time you play any audio the pitch may fluctuate wildly for up to 30 seconds. Also, you may occasionally note the pitch of the audio sounding consistently high or low pitch.
A simple analogy makes this behavior easy to understand: Synchronizing audio to SMPTE/MTC is a lot like trying to get even and stay neck-and-neck with another car on the freeway. If the car is ahead of you, you need to drive faster to catch up to it. If it's behind you, you have to slow until the car catches up to you. Once the two cars are neck-and-neck, you can simply keep going at the same speed, unless the other car changes its speed. If the other car speeds or slows, you must speed or slow too.
The first time you play audio under SMPTE/MTC Sync, the audio clock has to get even with the external clock. This could mean racing ahead, which raises the pitch of the audio, or stepping on the
brakes, which lowers the pitch of the audio. These fluctuations continue until SONAR matches its playback speed to the external clock, which usually takes no more than 30 seconds. The stable playback speed, by the way, may be slightly faster or slower than the normal audio playback speed, resulting in a slight change in the pitch of the audio. Here's the best way to address this problem:
- Start each new SONAR session by playing some audio under SMPTE/MTC Sync.
- Let the audio play for 30 seconds or until all audio pitch fluctuations stop.
Once this procedure is complete, SONAR knows the difference in rates between the external time code and the audio clock on your sound card. For the rest of the session, SONAR will start playback closely in sync, without any drastic pitch changes.
If the external timing source were 100 percent stable, the audio would stay in sync with the external clock. Unfortunately, no timing source is perfect. Therefore, every once in a while after playback has started, SONAR may need to vary the playback speed by a tiny amount to stay even with the time code. If the time code signal is unstable (as might be the case from an analog source), these variations can cause noticeable changes in audio pitch, which can in turn cause audible audio distortion.
Troubleshooting SMPTE/MTC Sync
The most common problems with SMPTE/MTC Sync, and ways to correct or avoid them, are shown in the following table:
| Problem What to do | |
| The tape is striped incorrectly Check the tape stripe using your time code generator and, if necessary, restripe the tape. | |
| The MIDI interface isn't producing MIDI Time Code | Use utility programs that come with your MIDI interface to make sure that the time code stripe is being received (sometimes you must enable a Time Code Sync option). Check the MIDI interface settings to make sure that MIDI Time Code is being generated. |
| The frame rate is set incorrectly | The frame rate on the stripe must match the frame rate you set in SONAR. |
| The offset is set incorrectly The offset you enter in SONAR must match the start time of recorded material on the tape. | |
| SONAR is not configured correctly | Verify and/or repeat the steps in “To Configure SONAR to Sync to SMPTE/MTC” on page 826. |
Table 173.
Problem What to do
| Audio playback drifts out of sync with the tape | Enable the Full Chase Lock option, which keeps audio from freewheeling. |
| SONAR continues playing for up to one full second after the time code stops | Some time code readers tolerate dropouts of up to one second, without affecting playback. When you stop the tape deck, it takes a full second for the reader to realize that this isn't merely a dropout and to signal the end of the time code to SONAR. This does not indicate any problem with time code sync. |
Table 173.
No MTC sync within 1 minute of midnight roll-over
SONAR will not sync to MTC within one minute of roll-over (1 minute before midnight; 23:59:00:00 - 23:59:59:xx). To address this, use a SMPTE offset that doesn't require you to trigger the midnight roll-over.
MIDI Machine Control (MMC)
MIDI Machine Control (MMC) is a protocol that controls an MMC-equipped remote device via MIDI. SONAR lets you use MMC to start and stop playback and recording on remote MIDI devices such as tape decks, video recorders, and even other software packages. If you have several MMC-controllable devices in your studio, assign each a unique Unit ID so that MMC commands can be addressed to a particular device.
MMC is very powerful when used with MIDI Time Code sync. For example, suppose you have an MMC-equipped digital tape deck that generates time code and want to use the tape deck as the timing master for a project. You can set up your equipment and software so that the transport controls in SONAR send MMC messages to the tape deck, which in turn starts and stops playback in SONAR via SMPTE/MTC Sync. In this configuration, SONAR's transport buttons (Play, Record, and Stop) are simply remote control substitutes for the buttons on your tape deck. In this type of configuration, you must choose one MMC-controllable device as the time code master.
When MMC is enabled, press Play to start playback on all connected MMC devices, and press Stop to stop all connected devices. If you press Record while playback is underway, all connected MMC devices (e.g., tape decks) begin recording on any armed tracks. If you stop recording (without stopping playback), SONAR instruct the tape decks to punch out. You must arm and disarm tracks on the tape deck; you cannot do this from SONAR.
If you have established punch-in/out points using the Transport > Record Options command, SONAR will attempt to preprogram the punch-in and punch-out times. However, your equipment must recognize the MMC event command for this feature to work. (Consult the owner's manual or contact the equipment manufacturer for more information.) If your equipment behaves erratically with automated punch-in, don't attempt to use it when those pieces of equipment are connected.
SONAR instructs MMC devices to locate the current project position only when playback or recording is started. This prevents excessive wear on the motors and tape heads of the devices.
To Configure MIDI Machine Control
- Choose Options > Project, and click the Clock tab.
- Select SMPTE/MTC as the clock source.
- Click the MIDI Out tab.
- Check the Transmit MMC box.
- Enter the ID of the master timing device in the Time Code Master's Unit ID box.
- Click OK.
MMC is now enabled.
To Disable MIDI Machine Control
- Choose Options > Project, and click the MIDI Out tab.
- Make sure the Transmit MMC box is not checked, and click OK.
MMC is disabled.
Audio File Management
Project files in SONAR do not contain the digital audio itself. A SONAR project file (.cwp) references the audio contained in the project, so care must be taken when backing up your digital audio projects. This section covers file management, including backing up your projects.
See:
Project Files and Bundle Files
Audio Folders
Backing Up Projects with Digital Audio
Deleting Unused Audio Files
The Project Files Dialog
SONAR projects, extension .cwp, contain all your project information with the exception of your digital audio data. This data is stored in a separate folder or folders. You can opt to save the audio data for all of your projects in a single audio folder, or create multiple folders.
The Project Files dialog lists all of your project's audio files and their location. This dialog is a valuable tool for managing your audio files. Access the dialog by opening a project and choosing File > Project Audio Files.
Figure 137. The Project Files dialog
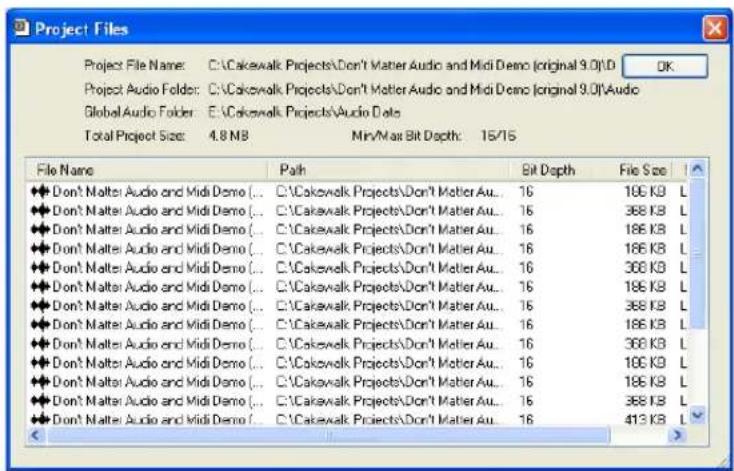
How to use the Project Files Dialog
The Project Files dialog has important information, including:
- Exactly which folders all of your audio files are saved in—know at a glance if you can backup your project by copying the audio folder and the .cwp file or if you need to do a Save As to round up files not in your project's audio folder.
• The filenames for each audio file your project is referencing - The combined size the audio data in your project—important if you are going to backup your project
- The bit depth of every audio file in your project, including a display o the lowest and highest in the Min/Max Bit Depth field
• The location status of each audio file, which could be any of the following: - Global. This means that the file is stored in the Global Audio Data directory. The Global Audio Data directory can be changed in the Audio Data tab of the Global Options dialog.
-
Local. This means that the file is stored in the local wave data directory, a per-project data directory which is a subdirectory in the directory where the project file is stored.
-
External. This means that the file is stored in a directory other than the Global Audio Data directory or in a Local audio data directory.
- Missing. This means that the file is not to be found.
Project Files and Bundle Files
SONAR project files contain various project settings, any MIDI data, and references which "point" to audio clip data. The audio data (and video data) itself is not saved in a project file. To save audio as well, save your project as a Bundle file (extension .cwb). Bundle files contain everything that a project file contains in addition to the digital audio. Bundle files are useful for backing up projects and for burning onto removable media, like a blank CD or DVD.
The following are descriptions of both file types:
| File Type Description When to Use | |
| .cwp Contains MIDI data, project settings, and pointers to audio data in your Data directory. Project files contain no audio data, so they are small. Backing up a Project file does not back up the associated audio data. | Project files are good for routine projects. You can use Project files and back them up as Bundle files at various steps during a projects development. |
| .cwb Contains all project data, including all audio data. Bundle files are large. | Bundle files are useful for backing up projects or for transporting a project to another computer (to bring it to a friend's house, for example). |
Table 174.
See "64-bit CWB files" on page 241.
To Create a Bundle File
- Choose File > Save As to display the Save As dialog box.
- Choose Bundle from the Save as Type list.
- Enter a file name and click OK.
SONAR compacts all the audio and merges it with the remaining project data in a bundle file.
To Unpack a Bundle File
- Choose File > Open to display the Open dialog box.
- Choose a file with a .cwb extension.
- Click Open.
If you have the Per-project Audio Folders option enabled in the Global Options dialog, the Unpack Bundle dialog appears. If this option is not enabled, the bundle file opens and all audio data is stored in the Global Audio Folder.
-
If you want to store the project in its own folder do the following in the Unpack Bundle dialog:
-
Enter a project filename in the Project Name field.
- Use the Browse button to the right of the Location field to select a destination folder for the project, or to create a new folder, enter a new folder pathname in the Location field.
- Use the Browse button to the right of the Audio Path field to select a destination folder for the project's audio data, or to create a new folder, enter a new folder pathname in the Audio Path field.
OR
If you want to store the project in the Cakewalk Projects folder, and its audio in the Global Audio Folder, uncheck the Store Project Audio in its Own Folder option.
- Click OK.
Audio Folders
By default, SONAR stores audio data separately from the rest of your projects, as wave files placed into a special folder called the Global Audio Folder, the location of which is listed in the Global Audio Folder field on the Audio Data tab in the Global Options dialog. You can also create audio folders on a per-project basis.

Note: Previous versions of Cakewalk used a folder called the WaveData folder, located in the product directory.
See:
Global Audio Folders
Per-project Audio Folders
Imported Audio Files
Global Audio Folders
You can change the location of the Global Audio Folder. This may be necessary if, for example, your hard disk is full and you want to move all audio data storage to a different hard disk. We strongly recommend that you do not change the location of the Global Audio Folder unless absolutely necessary.
If your original Global Audio Folder contains any audio files with the extension .wav, you must manually move these files to the new Global Audio Folder using the Windows Explorer, or open the project and use the Missing Audio dialog to find and move the missing files.
To Change the Global Audio Folder
-
Choose Options > Global and click the Audio Data tab.
-
Enter the pathname of the new Global Audio Folder in the Global Audio Folder field, or click the Browse button that's at the right end of the Global Audio Folder field to browse to the new directory.
- Click OK when you are done.
- Use the Windows Explorer or some other program to move all audio files from the old Global Audio Folder to the new Global Audio Folder.
All new audio files will be stored in the new Global Audio Folder, unless you decide to use per-project audio.
It is safer, but more time-consuming, to first save all projects as bundle files, change the Global Audio Folder, then open the bundle files. This ensures that all of the audio data is properly moved to the new Global Audio Folder.

Tip: It is safer, but more time-consuming, to first save the all projects as bundle files, change the Global Audio Folder, then open the bundle files. This ensures that all of the audio data is properly moved to the new Data directory.
Per-project Audio Folders
You have the option of using a single audio data folder or using different audio data folders for each project. By default SONAR stores audio data in per-project audio folders, but you can use the Global Audio Folder if you want. If you want to change the default behavior, use the following procedure:
To Enable or Disable the Per-project Audio Folder Option
- Select Options > Global.
The Global Options dialog appears.
- Select the Audio Data tab.
- In the Per-Project Audio section, check or uncheck the Use Per-Project Audio Folders option.
- Click OK to apply the change.
If you enable the per-project audio folder option, the New Project File allows you to choose the directory where you want to store the new project and a subdirectory where you want to store the project's audio data.

Note: If you want to use per-project audio folders, but you don't want to choose a folder and fill out the New Project File dialog every time you open a new project, you can choose to load the Normal template file every time you use the File > New command. This way you can start using the project right away. While you're recording, new audio data is stored in the Global Audio Folder. When you save the file, you can choose to store the audio in a per-project folder, or leave the audio in the Global Audio Folder. To use this option, enable the Autoload Normal.tpl on Startup check box that's under the Use Per-Project Audio Folders option in the Global Options dialog Audio Data tab.
To Create a New Project Using Per-project Audio
- Select File > New.
The New Project File dialog appears.
- Enter a filename in the Name field
The Location and Audio Path directories are automatically updated in the following format:
- C:\default directory\
. The default directory for new projects is assigned in the Folders tab of the Global Options dialog. is the project's per-project folder name. -
C:\default directory\
\Audio. The default directory for new projects is assigned in the Folders tab of the Global Options dialog. is the project's per-project folder name, and Audio is the subfolder where your audio data will be stored. -
If you want, rename the Location and/or Audio Path directories.
- Click OK.
To Save an Existing Project Using Per-project Audio
You may have older files that are not using per-project audio folders. If you want to save these files using a per-project audio folder, use the following procedure:
- Make sure that per-project audio folders is enabled in the Global Options dialog.
- Open the project whose audio you want to store using per-project audio.
- Select File > Save As.
The Save As dialog appears.
- If you want, change the name of your project.
- In the Project Path field, enter the new directory where you want to save the project, or use the Browse button to the right of the field to navigate to an existing directory.
- Check the Copy all audio with project option.
- Click Save.
- SONAR copies the project to the directory specified in the Project Path field and stores all the project's audio in the directory specified in the Audio Path field.

Note: After you use the above procedure, you have two versions of the same project.
Imported Audio Files
By default, SONAR will make a copy of any audio data imported using the File > Import > Audio command and place the imported audio into the project's audio folder. You can configure SONAR to simply reference audio from its current location if, for example, you want to import large quantities of audio data into a project and don't want to consume time and disk space by making copies of the files. Copies are always made if the imported audio does not match the current project's sampling
rate (and if you edit any of the imported audio data). Automatic handling of imported files is enabled by default. Do not disable this option unless you are prepared to manage the audio files individually. Creating backups of your projects is very easy if all your audio is stored in a single, per-project directory.
To Change Handling of Imported Files
Use the following procedure to allow or disallow file sharing between projects:
- Choose Options > Global and click the Audio Data tab.
- Check the Always Copy Imported Audio Files option to create copies of all imported audio clips as a default.
Or
Uncheck the Always Copy Imported Audio Files option to reference imported audio from its current location.

Note: You can override this setting when importing audio by checking or unchecking the Copy Audio to Project Folder option in the Import Audio dialog.
- Click OK when you are done.
Imported files will be handled based on the settings you have chosen.
See:
Backing Up Projects with Digital Audio
Backing Up Projects with Digital Audio
There are several ways to back up your projects in SONAR. You can use per-project audio folders to keep all a project's audio in its own folder, use the Consolidate Project Audio command to create a backup copy of all your project's audio, or you can save a project as a bundle file (.cwb).
The following table lists several backup methods:
Backup Method Advantages
| Per-project Audio FoldersIf you are using per-project audio folders you can create a copy of the project folder and its audio subfolder. | This method is an exact copy of your project, preserving all clips and pathname information. |
| Consolidate Project AudioIf your project references audio from multiple folders, for example you have a library of loops that you share between several projects, you can gather all the audio for your project into a single folder using the Consolidate Project Audio command. The Consolidate Project Audio command copies every audio file your project references into a backup folder beneath the projects audio data folder. Creating a copy of all your project’s audio may take a lot of disk space. | Allows you to create a complete backup of all project audio even if the audio is in multiple locations. Creates a new folder which you can move or delete without fear of losing the original audio files. |
| Bundle FilesA bundle file is a single file that contains all the information—except video—used in a project. A bundle file includes everything that is stored in a normal project file, plus all the digital audio that is used in the project. | Creates a single file for ease of portability. |
Table 175.
To Backup Projects Using Per-Project Audio Folders
Use this procedure to create a backup of a project that has its own project folder.
- Open the project you want to backup.
- Select File > Project Audio Files.
The Project Files dialog appears.
- In the Project Files dialog, check the Path column to make sure that every audio file is stored in the project's audio folder. If any files are stored in folders other than the project's audio folder, you should use the Consolidate Project Audio command to move all audio to the project's audio folder.
- Close the Project Files dialog once you have confirmed that all audio files are in the project's audio folder.
- Close the project.
- Using Windows Explorer, copy the project folder and its contents, including the project's audio folder, to its backup location (CD-R, CD-RW, DVD-R, DVD-RW, Zip or Jaz drive, another hard drive, network drive, etc.).
You have now created a copy of your project. It is a good idea to open the project once you have backed it up to confirm that all audio loads properly.
To Create a Backup Using the Consolidate Project Audio Command
Use this procedure to backup a project that has multiple audio folders:
- Open the project you want to backup.
- Select Tools > Consolidate Project Audio.
- A message box appears listing the destination folder for your audio backup.
-
Click OK to confirm.
-
Using Windows Explorer, copy the project, the backup folder and all its contents, including the project's audio folder, to its backup location (CD-R, CD-RW, DVD-R, DVD-RW, Zip or Jaz drive, another hard drive, network drive, etc.).

Note: The Consolidate Project Audio command only copies the audio in your project, so make sure you copy the project (.cwp) along with the backup folder.
- Once you have copied the backup folder you can delete it to free up disk space.
Deleting Unused Audio Files
The Tools > Clean Audio Folder command is used to delete digital audio files in an audio folder if they are no longer used by any of your projects. You should use this command from time to time to free up disk space.
This command searches your entire system for project files, and then compiles a list of all the audio files in a specified folder that are not in use by any of these projects. You can then choose to delete these audio files. Make sure that all of your important project (.cwp) files are stored on your local hard disk(s) before using this command. If your project files are stored elsewhere (removable media, etc.), then you risk accidentally deleting important audio files that are associated with your projects.
If you are using another utility program that protects you from accidentally deleting important files (such as Norton Protect), you may need to disable that program. Otherwise, the next time you use the Tools > Clean Audio Folder command you may once again find these not-quite-deleted files.
To Delete Unused Audio Files
- Make sure all project files that contain audio are immediately accessible on a hard disk.
- Choose Tools > Clean Audio Folder to display the Clean Audio Folder dialog box.
- Click the Browse button to the right of the Audio Path field and navigate to the folder you want to search for unused audio files.
- If you want to search all subfolders of the folder you chose in the Audio Path field, click the Recursive option.
- Click the Find button. SONAR searches the selected directory for audio files that appear to be unused by any existing projects, and displays the names of these files in the list.
SONAR searches the entire system for project files. Audio files in the folder or folders you decide to search which do not belong to any of the projects on your system appear in the Clean Audio Folder dialog. If any corrupted or unreadable project files exist on your system, the Unreadable
Files dialog appears. It is very important that you restore any unreadable files from a backup before continuing, otherwise you risk data loss.
- Follow the instructions in the table:
To do this Do this
Listen to a file Highlight the file name in the list and click Play
Delete a file Highlight the file name in the list and click Delete
Delete all files
Click Delete All, and click Yes to confirm
Table 176.
- Click Close when you are done.
Improving Audio Performance
Digital audio presents several challenges: it is large, using enormous amounts of disk space, especially at higher sampling rates and bit-depths, and it is CPU-intensive. Added to this mix is the wide variety of audio hardware available today. This section covers some common problems with recording and playback and how to configure your computer and audio hardware for optimum performance.
See:
System Configuration
Improving Performance with Digital Audio
System Configuration
This section covers optimizing your system configuration to work with SONAR.
See:
The Wave Profiler
Enabling and Disabling Audio Devices
Sampling Rates
Bit Depths, and Float Resolution
The Wave Profiler
The Wave Profiler is a utility that analyzes the sound cards in your computer and determines the best DMA (Direct Memory Access) settings for communicating with SONAR. These DMA settings are displayed in samples, at the sample rates and bit depths your sound card supports. The Wave
Profiler also sets a value in milliseconds for the Buffer Slider, which controls mixing latency. The Wave Profiler is unnecessary if you are using an ASIO driver.
The DMA settings are used to ensure that a project that contains both MIDI and digital audio plays back in tight synchronization. If SONAR is not configured properly with your audio device's DMA settings, MIDI and digital audio material may not play back correctly.
Note to users of previous Cakewalk products: The DMA settings in versions of Cakewalk prior to SONAR 1.0 were displayed in bytes rather than samples. Using your previous DMA settings in SONAR will not work. Try the settings that wave profiler displays, and if you are not satisfied, only then attempt to optimize your settings.
The Wave Profiler utility runs automatically the first time you run SONAR. The wave profiler determines the best DMA settings for the supported bit depths and sample rates of your sound card.

Note: It is possible to load a 48 kHz project when you are using a sound card that does not support 48 kHz. SONAR does not warn you when you do this. Your project may crash, or it may appear to record audio when your project is not actually recording.
All of your audio settings are listed in the Audio Options dialog box, which you open with the Options >Audio command. The following list summarizes all the settings that the Wave Profiler sets. You can override all of them except what audio drivers are listed in the Drivers tab:
- Input and output drivers
• DMA buffer sizes (in samples) - Mixing latency
If you experience MIDI and audio synchronization problems during playback, before contacting technical support, run the Wave Profiler and try the default settings.
To Manually Run the Wave Profiler
- Choose Options > Audio to open the Audio Options dialog box, and click the General tab.
- Click Wave Profiler.
The Wave Profiler examines each of your sound cards in turn, makes default settings in the Audio Options dialog, and displays the name of each sound card and the sample rates that each card supports.
Enabling and Disabling Audio Devices
Your computer may have several installed devices like FAX modems and software synthesizers that Windows recognizes as sound cards containing audio drivers. You do not want to use these devices for audio input or output. If they are listed as audio drivers in the Audio Options dialog box, you need to disable them.
To Enable or Disable an Audio Device
- Choose Options > Audio to open the Audio Options dialog box and click the Drivers tab.
-
In the Input Drivers and Output Drivers fields, do one or both of the following:
-
To enable an audio device, click the name of the device so that it is highlighted.
• To disable an audio device, click the name of the device so that it is not highlighted.
3. Click OK.
Disabling a device in the Audio Options dialog box usually prevents conflicts with other audio devices. Occasionally you may need to disable a device in the Windows Control Panel.
SONAR also allows you to choose the sound card whose clock should be used to control recording and playback timing (if you only have one sound card, SONAR automatically uses it). Every sound card's clock crystal is slightly different, which causes minor differences in the actual playback rate on each card. These differences may lead to slight synchronization problems if you use one card for recording and a different one for playback. Generally, you should choose your highest quality sound card for both recording and playback timing. Note that while some multichannel sound cards have multiple drivers, most sound cards have only a single audio driver.
To Select Playback and Record Timing Masters
- Choose Options > Audio to open the Audio Options dialog box and click the General tab.
- In the Playback Timing Master and Record Timing Master fields, select which sound cards you want to control playback and record timing, respectively.
- Click OK.
While you must choose a playback timing master, you can route audio output through any number of devices at once. For example, suppose your computer has both a high-end audio card and a basic built-in sound card. You should choose the high-end sound card as the record and playback timing master. However, using the buses in the Console or Track views, you could create a headphone or monitor mix and route it through the built-in sound card.
Sampling Rates
SONAR supports all common sampling rates. Only one sampling rate is allowed per project. It's usually better not to change the sampling rate of a project, because this involves exporting your tracks one at a time, and then importing them at the new sampling rate. During this process you lose clip boundaries, envelopes, and other separate data that is mixed into the exported tracks.
To Set the Sampling Rate for New Projects
- Open the Audio Options dialog (Options > Audio command), and on the General tab, change the Sampling Rate field to the desired number. You can choose from the available options, or enter any number that your hardware supports.
- Click OK.
To Change the Sampling Rate of a Project
- Select an audio track and use the File > Export Audio command to open the Export Audio dialog.
- Select the options you want, and click Export to export the track.
-
Repeat steps 1 and 2 for all the audio tracks you want to convert.
-
After you've exported all the tracks you want to convert, open the Audio Options dialog (Options > Audio command), and on the General tab, change the Sampling Rate field to the desired number.
- Use the File > New command to open a new project.
- Use the File > Import > Audio command to open the Import Audio dialog.
- Select the audio files you just exported (hold down the CTRL key while you click each one), and click Open to import the files.
SONAR imports the selected files at the new sampling rate.
To Import Audio That Has a Different Sampling Rate
- Use the File > Import > Audio command to import the audio file(s) (this converts them to the project sampling rate).
Bit Depths, and Float Resolution
SONAR supports all common bit depths, including 64. SONAR's 32-bit mixing provides full floating-point resolution for extended dynamic range, and precise audio processing. For maximum dynamic range and precision, you can also choose 64-bit mixing (Audio Options dialog-General tab-64-bit Double Precision Engine check box). SONAR can import, export, play back, and render 64-bit float files.
A SONAR project can contain files of different bit depths. You can specify different bit depths for playing back, recording, importing, exporting, and rendering audio (bouncing, freezing, applying effects). To play back or record at a specific bit depth, your sound card must support that bit depth.
Notes about 64-bit files:
- 64-bit files can now be imported at their native 64-bit depth.
- At playback time 64-bit files are streamed at full 64-bit resolution when the Double Precision engine is turned on.
- At playback time 64-bit files are converted to 32-bit when the Double Precision engine is turned off.
- 64-bit is a choice in the File Import dialog.
- 64-bit is a choice in the Options > Global > Audio Data file bit depth fields.
- Bounce-to-track now renders at 64-bit if the render bit depth is set to 64.
- You can save and load .cwb files containing any combination of 16/24/32/64 and stereo/mono wave files.
To Find the Bit Depth of Clips in a Project
- Right-click a clip, choose Clip Properties from the pop-up menu, and examine the Audio files tab.
Or
- Use the File > Project Audio Files command to open the Project Files dialog, and examine the
Bit Depth column.
The following topics show you how and why to choose bit depths for various operations.
See:
Bit Depths for Playback
Bit Depths for Recording
Bit Depths for Importing Audio
Bit Depths for Exporting Audio
Bit Depths for Rendering Audio
Bit Depths for Playback
Most sound cards can play audio at 16-bit or 24-bit resolution, with a few sound cards supporting 18-bit and 20-bit resolution. When your project contains files with different bit depths SONAR plays them at the bit depth that your sound card is currently set to. Because SONAR can play projects that contain files of different bit depths, you don't have to convert 16-bit files to 24 bits to play them with other 24-bit files, saving significant storage space. If you're playing 64-bit, 32-bit, or 24-bit files at 16 bits, you can turn dithering on in the Audio Options dialog to compensate for the truncated data.
When you first install SONAR, the Wave Profiler profiles your sound card at all the bit depths that the sound card supports, so when you change the playback bit depth, you don't need to run the Wave Profiler again (you do need to relaunch SONAR).
Here's how to change the playback bit depth for a project:
To Change Playback Bit Depth
-
Use the Options-Audio command to open the Audio Options dialog.
-
On the General tab, choose the bit depth you want to use in the Audio Driver Bit Depth field.
-
Click OK.

Note:
- If you choose to play back at greater than 16 bits, you may need to pick a bit format for your data on the Driver Profiles tab of the Audio Options dialog box in the Stream > 16 Bit Data As field. You may need to consult your sound card's documentation to find the optimum setting.
- Some audio devices, especially USB devices that use WDM drivers, can not operate in 24-bit mode unless a variable in SONAR's Aud.ini file is set to 1. The variable is Use24BitExtensible=<0 or 1>, which goes in the [name of your audio device ('n' in, 'n' out)] section of the Aud.ini file.
- SONAR 4 does not play back projects that contain files with different bit depths (SONAR 5 and later), so if you want to open a multiple bit depth project in SONAR 4, see the following procedure or a conversion procedure.
To Rewrite Audio Files at Different Bit Depths
- Use the Tools > Change Audio Format command to open the Change Audio Format dialog.
- Choose a new bit depth in the New Bit Depth field.
- If you're changing to 16 bits, you can check or uncheck the Apply Dither check box. Dithering means to add a certain audio signal to 16 bit audio to make it sound more like it did as a higher-bit signal.
- Click OK.
SONAR rewrites the audio tracks in your project at the new bit depth.
Bit Depths for Recording
You can choose the bit depth of newly-recorded files in SONAR, and you can change this value at any time. The Status Bar shows the project sampling rate and the current record bit depth setting.
The choices for the recording bit depth setting are 16, 24, 32, and 64. At present, no devices can record at 32-bit or 64-bit resolution, so you don't need to choose these options yet. 24-bit files give greater dynamic range than 16-bit files, so 24 is a good choice for music that gets very soft, as well as loud. 16-bit recording is efficient for many recording projects, especially louder projects.
To Choose a Recording Bit Depth
- Use the Options > Global command to open the Global Options dialog.
- On the Audio Data tab, under File Bit Depths, change the Record Bit Depth field to the desired number.
- Click OK.
Bit Depths for Importing Audio
You can choose the bit depth of imported files in SONAR, and you can also import files at their current bit depth. You can import files at bit depths as high as 64. Because SONAR can play projects that contain files of different bit depths, you don't have to convert 16-bit files to 24 bits to play them with other 24-bit files, saving significant storage space.

Note: If you are playing back 32-bit or 64-bit audio at high sample rates (and high latency sizes), the disk I/O buffer size in the Advanced tab of the Audio Options dialog (Options >Audio command) may need to be increased to handle this extra disk streaming throughput. A too small disk I/O buffer size can result in dropouts or clicks during audio playback of such content. If so try a higher I/O buffer size like 256 or 512.
See "Bit Depths, and Float Resolution" on page 846 for more information about 64-bit files.
To Choose an Importing Bit Depth
-
Use the Options > Global command to open the Global Options dialog.
-
On the Audio Data tab, under File Bit Depths, change the Import Bit Depth field to the desired number. You can choose the Original option to import the files at their current bit depth.
- Click OK.
This process changes the default import bit depth, which appears in the Import Audio dialog. You can override this value for one import process at a time by changing the value in the Import Audio dialog.
See also "SONAR Project File Compatibility Notes" on page 850.
Bit Depths for Exporting Audio
You can choose the bit depth of exported files from SONAR. Unless you are burning a CD or DVD, or are concerned about storage space, you can export files at 32 bits (or even 64) to preserve the precision of any audio processing that was done to the files.
To Choose an Exporting Bit Depth
- Use the File > Export > Audio command to open the Export Audio dialog.
- In the Bit Depth field, select the desired number.
- Choose other options and click OK.
Bit Depths for Rendering Audio
You can choose the bit depth that SONAR uses for such operations as bouncing tracks, freezing tracks, and applying effects (these processes are referred to as rendering). This bit depth is set at 32 by default, which allows large level changes without clipping, and with greater dynamic range, especially in soft parts of your music. You can also render at 64 bits for greatest precision.
To Choose a Rendering Bit Depth
- Use the Options > Global command to open the Global Options dialog.
- On the Audio Data tab, under File Bit Depths, change the Render Bit Depth field to the desired number.
- Click OK.
Preparing Higher-quality Audio for CD Burning
If your project uses a different sampling rate from 44,100, or contains files that are not 16-bit, use this procedure to prepare your project for CD-burning:
To Prepare Higher-quality Audio for CD Burning
-
Use the File > Export > Audio command to open the Export Audio dialog. Choose RIFF Wave in the Files of Type field, Export to Stereo File(s) in the Format field, and 16 in the Bit Depth field.
-
After exporting the audio, close SONAR and open up your sound card control panel (for M-Audio cards, usually the Delta Control Panel, for Echo Audio, usually the Echo Console, for MOTU it's the 324 console, etc.) Once the control panel is open, change the setting for your sampling rate to 44.1 kHz.
- Next launch SONAR and use the Options > Audio command to open the Audio Options dialog. In the General section change the Audio Driver Bit Depth to 16. Change Default Settings for New Projects to 44100 Hz for the Sampling Rate.
- After making these adjustments, click the Wave Profiler button in the Audio Options dialog. In some instances, with certain audio hardware configurations you may be prompted with an audio driver error dialog during this process. This is nothing to be concerned about. You will have to exit SONAR, re-launch, verify the settings you made in the Audio Options dialog, and click the Wave Profiler button again. When you can successfully run the Wave Profiler without an audio driver error, proceed to the next step.
- Create a new project (File > New command). The Normal option is fine for this.
- Import the mixed down audio by using the File > Import Audio command.
- Confirm the bit depth and sample rate of the imported audio by using the File > Info command, and clicking File Stats. The File Stats dialog lists the correct sample rate and bit depth.
- Final step: use the File > Export > Audio command. Be sure to select 16 for the Bit Depth and uncheck all Mix Enables.
Now you can burn your exported audio file to CD, using Pyro Audio Creator, or other software.
SONAR Project File Compatibility Notes
Cakewalk Bundle (.cwb) files containing double precision 64-bit floating point files will not open in SONAR 5 or earlier versions.
Project files saved in SONAR 5 will not open in SONAR 4 if they reference or include any of the following types of data or information:
- 32 bit audio clips.
• Audio clips that are not all of the same bit depth.
SONAR 5 project files may contain new features that will be missing if opened in SONAR 4, including:
- Clip effects and clip automation:
- Effects are removed.
- Automation envelopes are orphaned.
- Group s :
- SONAR 5 groups are preserved but will not be completely functional in SONAR 4.
- Controls may be removed from groups.
- Groups can't be added to or changed.
- Group names will be truncated.
- SONAR 4 may add extra groups to the project.
Re-saving a SONAR 5 project file in SONAR 4 may permanently remove the project data described above.
Improving Performance with Digital Audio
When a project contains many tracks of digital audio or when many real-time effects are in use, your computer may have difficulty keeping up during playback. When this occurs, you'll hear portions of the audio drop out, stutter, or pop. Or maybe your project responds slowly to real-time effects and volume changes. In an extreme case audio playback may stop altogether. If you experience a dropout, a dialog appears with suggestions for fixing the problem. This section covers performance issues specific to digital audio, including how to get the more tracks of audio, more real-time effects, lower latency and how to fix audio dropouts.
For more information see: "Getting the Most Out of Your PC" on page 851, "Mixing Latency" on page 853 and "Reduce GUI updates to improve playback performance" on page 856.
Getting the Most Out of Your PC
Mixing Latency
Dropouts and Other Audio Problems
Reduce GUI updates to improve playback performance
Getting the Most Out of Your PC
The maximum number of audio tracks you can expect to play on your computer depends on the audio sample rate, the speed of your hard disk, and the speed of your computer's CPU.
The effect of your CPU on audio track throughput is much more difficult to quantify. Throughput is affected by the type of chip, clock speed, the number and type of real-time effects in use, cache size and settings, and many other factors.
There are a variety of things you can do to increase the number of audio tracks and effects you can play on your computer, as outlined in the following table:
Approach How it works
Avoid compressed disks If you use DoubleSpace, Stacker, or some other disk compression system, it will slow down playback of audio tremendously. Configure your system so that the Data directory is on a hard disk that is not compressed.
Exit other programs The more programs you have open, the more CPU cycles you are taking away from your project. Exit any programs unnecessary to the task at hand.
Table 177.
Approach How it works
| Refrain from other activity during playback | If you open and close windows or do lots of editing while playback is in progress, you may steal CPU cycles that would otherwise be used for playback. |
| Apply some audio effects offline | If you are happy with your real-time effects, consider using the Process > Apply Audio Effects command to apply those effects offline. Then remove those effects from real-time use and free up lots of CPU power. |
| Archive unused audio tracks | Audio tracks that are muted continue to place a load on your processor. To lessen the burden and free up cycles to handle more audio, archive all unused audio tracks. See “To archive or unarchive tracks” on page 189 for more information. |
| Mix down or freeze your audio/synth tracks | If your project contains many different audio/synth tracks or many real-time effects, you can use the Edit > Bounce to Track(s) command or the Track > Freeze > Freeze Track command to reduce all of this content to an audio track or tracks with no active effects. |
| Change I/O Buffer Size on the Advanced tab of the Audio Options dialog box | The default setting is 64 KB. Yours may work better with 128, 32, or 16. If those values don’t help, try 256, 512, or move on to another remedy. |
| Defragment your hard disk | If your hard disk is fragmented, playback of audio will be slower. Use the Disk Defragmenter to correct the situation. |
| Turn off dithering on the Advanced tab of the Audio Options dialog box (choose None in the Dithering field). | Dithering subtly improves your mix, but most people can’t hear it. Turn it back on for mastering. |
| Enable read and write caching | By default, SONAR bypasses all disk caching, which typically results in better performance with audio data. If your computer has an older IDE disk controller, or a disk controller that does not use DMA transfers, enabling caching may improve SONAR's audio performance. Note: Changes to these settings only take effect when you restart SONAR. Choose Options > Audio and click the Advanced tab to change the Enable Read Caching and Enable Write Caching settings. |
| Disable the Display Clip Contents options | Drawing the contents of audio clips in the Clips pane uses some CPU cycles. If you are using a slow machine, you may want to disable this feature. To do so, right-click in the Clips pane, choose View Options, and disable the Display Clip Contents option. |
Table 177.
Digital Audio Files and Storage
Digital audio requires a large amount of disk storage. The table below shows the disk space requirements in megabytes for a single minute of digital audio in mono and stereo at various sampling rates:
| Sampling rate 16 bit 24 bit |
| 11 kHz Mono 1.3 MB per minute 1.9 MB per minute |
| 11 kHz Stereo 2.5 MB per minute 3.8 MB per minute |
| 22 kHz Mono 2.8 MB per minute 3.8 MB per minute |
| 22 kHz Stereo 5.0 MB per minute 7.6 MB per minute |
| 44.1 kHz Mono 5.0 MB per minute 7.6 MB per minute |
| 44.1 kHz Stereo 10.1 MB per minute 15.1 MB per minute |
| 48 kHz Mono 5.5 MB per minute 7.6 MB per minute |
| 48 kHz Stereo 11.0 MB per minute 16.5 MB per minute |
| 96 kHz Mono 11.2 MB per minute 16.5 MB per minute |
| 96 kHz Stereo 22.0 MB per minute 33.0 MB per minute |
Table 178.
For more information, consult, Dropouts and Other Audio Problems.
See:
Mixing Latency
Queue Buffers
Status Bar/CPU Meter/Disk Meter
Mixing Latency
SONAR has a slider in the Audio Options dialog box, on the General tab, to set mixing latency. Mixing latency is the amount of time SONAR allocates to prepare a buffer full of audio data for playback. Lower latency settings add processing time because of the need to refill the smaller data buffers more often. You may need to use the slider to increase mixing latency under the following conditions:
- You use lots of real-time effects, and you hear dropouts. Check the CPU meter for high readings; try increasing the latency.
- Your sound card does not function well at lower latency. Some sound cards just do not function well at lower latency settings. Even though SONAR's CPU meter and Dropout indicator report no
problems, if you hear dropouts try increasing the mixing latency.
Sound cards differ in the precision of their timing, what size audio buffers they require, and other characteristics. SONAR has a utility called the Wave Profiler that can usually automatically detect the type of sound card that you have installed and configure its settings for best performance. If your sound card is a well-known model, you can usually use SONAR without having to change many audio settings. However, if you experience synchronization problems between MIDI and digital audio, like to use different sample rates and bit depths, or want to experiment with mixing latency, you need to do some optimization yourself.
See:
The Wave Profiler
Status Bar/CPU Meter/Disk Meter
ASIO Drivers
SONAR supports ASIO drivers. You are limited to a single sound card when using an ASIO driver.
To Use an ASIO Driver
Use the following procedure to enable SONAR for use with an ASIO driver.
- Select Options > Audio to open the Audio Options dialog.
- In the Audio Options dialog, click the Advanced tab.
- In the Playback and Recording section, select ASIO from the Driver Mode drop-down menu.
- Restart SONAR.
ASIO sample position
UseHardwareSamplePosition=<0, 1>, default = 0
This variable applies to ASIO mode only and controls whether SONAR internally compute the sample position based on buffer switch calls or uses the ASIOGetSamplePosition reported value to retrieve the driver reported value.
Some drivers change the reported sample position based on how long a buffer switch took to complete and this can cause problems since SONAR expects the reported position to be in sync with the number of buffers actually streamed.
This Aud.ini variable defaults to 0.
Queue Buffers
SONAR allows you to set the number of queue buffers in the Audio Options dialog box, in the General tab. A higher number of queue buffers will take longer to fill, and therefore cause an increase in latency. A lower number of queue buffers decreases latency, but may cause "dropouts." The default setting is 2. For more information, see: Mixing Latency, and Dropouts and Other Audio Problems.
Status Bar/CPU Meter/Disk Meter
SONAR has several tools to help you identify and correct audio problems, including the CPU meter, the Disk meter, and the Dropout indicator. These tools are all located on the Status bar, which is at the bottom of the screen. The Status bar also contains a measurement of available hard disk space. If you do not see the Status bar, go to Options > Global, select the General tab, and make sure Show Status Bar is selected. The Status bar contains the following fields, reading from left to right:
- Cursor location. The left-most field on the Status bar shows the location of your mouse cursor.
- Audio Running. Whenever the Audio Engine button in the Transport toolbar is depressed, the Audio Running indicator lights up.
- Dropout indicator. The Dropout indicator is in the same field as the Audio Running indicator. The Dropout indicator displays the word Dropout whenever your project requires more resources than your CPU, main memory, and disk can supply.
- Mute. Whenever a track is muted, the Mute indicator lights up. You can click the Mute indicator to unmute all muted tracks.
- Solo. Whenever a track is soloed, the solo indicator lights up. You can click the Solo indicator to unsolo all soloed tracks.
- Arm. Whenever a track is armed for recording audio or MIDI data, the red Arm indicator lights up. This indicator is in the same field as the red Aut indicator. You can click the Arm indicator to disarm all armed tracks.
- Automation Write. Whenever a parameter is armed for automation recording, the Automation Write indicator lights up. This indicator is in the same field as the red Arm indicator. You can click the Write indicator to disarm all armed parameters.
- AUTO. Whenever any control is armed for automation recording, the red Aut indicator lights up. This indicator is in the same field as the red Arm indicator. You can click the Aut indicator to disarm all armed tracks
- Sample rate and record bit depth. This field lists the project's sample rate and the current recording bit depth
- Disk Space. This field shows how many megabytes of disk space you have left on the hard drive where your wave data directory is. It also shows this amount of space as a percentage of that drive's total space.
- CPU meter. The CPU meter displays the time it takes to process a buffer full of audio data as a percentage of the maximum time available to process that data and maintain uninterrupted playback. There is some tolerance built into the meter, so it's very possible that it will exceed 100% at times (more so during recording than playback). When the meter exceeds 100%, it displays the word "Overload."
- Disk meter. The Disk meter measures how much of the available time SONAR is using to perform input/output functions on your hard disk. The size of your setup's I/O buffer (listed in the Audio Options dialog box, in the Advanced tab) determines how much time is allowed to perform disk operations and maintain uninterrupted playback. When SONAR performs disk operations, the Disk meter jumps up in value and shows the percentage of the allowed time
SONAR is taking to complete each cycle of disk Input/Output.

Note: If you experience a dropout or your CPU or Disk meters are reading high, there are steps you can take to improve your audio performance. For more information, see “Dropouts and Other Audio Problems” on page 858.
SONAR's status bar displays bold letters to indicate when Caps Lock, Scroll Lock, Pause and Num Lock are enabled.
2:03:41 CSPN
| Indicator Means |
| C Caps Lock is enabled |
| S Scroll Lock is enabled |
| P Pause is enabled |
| N Num Lock is enabled |
Table 179.
See also:
Status Bar/CPU Meter/Disk Meter
Reduce GUI updates to improve playback performance
SONAR has a CPU conservation mode that reduces the number of GUI updates with no effect on actual playback quality and rendering. This maximizes CPU resources for the audio engine and can be useful while playing projects that consume a lot of CPU, to help avoid dropouts.
Like the Scroll Lock key, the Pause key now works as a special GUI throttle toggle key. When the Pause key is pressed, SONAR runs in a CPU conservation mode by reducing the frequency of GUI updates. For example, VU meter updates, Now position pointer and progress updates will appear to update less frequently.
During CPU conservation mode, the UI is only updated once per second.
This mode can also be helpful to conserve CPU while doing a real-time bounce (see “Real-time bounce” on page 666).

Note: When CPU conservation mode is active, SONAR's status bar displays the letter P.
24-bit Tips
Here are a few tips for playing back and/or recording at 24-bits:
- Try to play back at 24-bits even if your sound card only operates at 20- or 18-bits:
Having established the default settings for new files, you must also specify at what playback bit-depth you want your sound card to use. In the Audio Options dialog box, set the Audio Driver Bit Depth to the desired value. Even if your sound card's highest bit-depth is only 18- or 20-bits, you should try selecting an Audio Driver Bit Depth of 24 first. If you receive an error message when doing so, try selecting 20. If this also produces an error message, try selecting 18. In other words, if you want SONAR to operate your sound card at any bit-depth greater than 16-bits, try selecting the highest value possible in the Audio Driver Bit Depth setting, and work downward from there if you have to.
(If your sound card's maximum bit-depth is 20-bits and you specify an Audio Driver Bit Depth of 24 as advised above, audio data will still be sampled by your sound card in 20-bit samples, but each sample will automatically be padded with extra 0's to produce a 24-bit sample, which will be stored at full 24-bit resolution in your project file.
- Some 24-bit cards require you to configure the order in which data is streamed:
If necessary, open the Audio Options dialog, click on the Advanced tab. In the Stream > 16-bit data as option, select one of the following:
- 3 bytes
- 4 bytes, right justified
- 4 bytes, left justified
• 32-bit PCM, right justified
• 32-bit PCM, left justified
These settings affect how 24-bit audio samples are transferred from the sound card into the SONAR software, and affect the efficiency of the transfer. You'll get the best performance from this card when working at 24-bits if you use the correct setting for your sound card. If you're not sure whether your particular sound card requires these settings, consult the documentation that came with your sound card. You should also check the web page www.cakewalk.com/Support/Docs/sound cardTips.html to see if any information is available there regarding configuration of your particular sound card in Cakewalk. When in doubt, leave these settings disabled.
(These settings are only relevant when working with sound cards at >16 bits-per-sample. You can ignore them when operating at normal 16-bit depth.)
- Using 24-bit depth and/or high sampling rate can be costly:
While using 24-bit audio can improve the sound quality of your recordings, there are some important drawbacks to keep in mind. Projects stored at 24-bit depth will require 50% more disk space than those stored at 16-bits; if you have a large number of audio tracks (and keep in mind that stereo tracks require twice as much data as mono tracks!), your audio project file can grow very large and use up lots of disk space. Also note that recording, playing, and processing 24-bit data utilizes more CPU resources than working with 16-bit data. This means that for a given computer configuration, you will be able to record/play/process a smaller number of total
simultaneous tracks, and use a smaller number of simultaneous real-time effects, in a 24-bit project than you would be able to in a 16-bit project. This is also true when working at higher sampling rates (i.e., a 24-bit/96khz project requires substantially more computing resources than a corresponding 16-bit/44.1khz project). Depending on the size of your project and the configuration of your computer (CPU, RAM, disk), you may need to reconsider whether working at the higher bit-depth/sampling rate is justified or even possible.
Some plug-ins do not function well at a 96 kHz sampling rate.
Using an audio bit depth of 24 can enhance the performance of some plug-ins, but raising the sampling rate to 96 kHz does not offer much improvement, and can cause some plug-ins to add unintended artifacts to the sound. Using a 24-bit, 44.1 kHz setup for your audio provides plenty of enhanced performance for plug-ins that can take advantage of it, without risking the problems that 96 kHz audio causes with some plug-ins.
It's also worth noting that not all audio projects benefit equally from the use of higher bit-depth/sampling rates. Most professional sound engineers will tell you that 24-bit, higher-sampling-rate audio is most beneficial when working with music that focuses on natural acoustic instruments and/or vocals recorded with very high-quality microphones. The benefits of 24-bit/high-sampling-rate recording are less audible when working with highly synthetic or highly compressed program material, often found in contemporary popular music. You must make your own judgement about whether the benefits of higher-capacity audio justify the extra demands it places on your computer.

Note: Red Book Audio CDs are still 16-bit (44.1 sampling rate), so if your goal is to burn a CD, you will have to mix down to 16-bit.
Dropouts and Other Audio Problems
If your SONAR application suddenly stops producing audio while in the midst of recording or playback, you've very likely experienced a "dropout." Sometimes instead of a dropout, you may experience a "stutter" during playback (a small section of audio repeats itself once or twice before normal playback resumes). Or, you may occasionally experience a "glitch" or "pop" during audio playback (a brief interruption or clicking noise is heard, but audio playback then continues normally from that point). It is possible to experience a dropout while working exclusively with MIDI (i.e., no audio data in the project), but this is a different matter and is not covered here.
All of these audio problems are the result of audio information not being sent to or received from your sound card fast enough or reliably enough. During recording, the sound card sends incoming audio data to the sound card driver, which in turn sends audio data to SONAR to store on hard disk. When playing back, SONAR reads audio data from the hard disk and feeds it to the sound card driver, which in turn passes it to the sound card for audible output. If these activities can't be completed fast enough, or if the communication between SONAR and the sound card driver is broken in some way, recording and/or playback will be disturbed.
Causes and Cures
The exact cause of your audio problem will vary depending on the configuration of your computer and/or the content of the project file you're working with. The majority of audio problems are caused
by one of the factors listed below. Read each of the topics below, in the order shown, and follow the recommendations provided:
The CPU is being interrupted by "background" activities having nothing to do with audio
Cakewalk doesn't properly "recognize" your sound card
The "I/O Buffer Size" may not be well matched to your hard disk
Mixing latency may be set too low
Your hard disk may be excessively fragmented
Your project file may be excessively fragmented
Your sound card's driver may be obsolete
There may be a conflict with your video card or other multimedia streaming card
Your sound card may have a conflict with another device in your computer
Your project may simply be too "complex" for your computer
Upgrade your computer hardware: More RAM, a faster CPU, and a faster disk drive
The CPU is being interrupted by "background" activities having nothing to do with audio
Turn off these other activities, so your CPU can process audio without interruption:
- Turn off the Microsoft Office FastFind option if present on your system.
- Don't use any scheduled background tasks (e.g., tasks which are part of the Windows Plus package, or which you have scheduled yourself using the Windows Task Scheduler utility).
- Discontinue use of any networking or communications applications on your computer. For example, don't run email programs (like Microsoft Outlook), Web browsers, or AOL client software while you are running SONAR. These programs send and receive chunks of information over a modem or a network connection; when one of these data chunks is sent or received, your CPU may be unexpectedly interrupted from SONAR audio processing to deal with the modem or network data. That interruption can disrupt the smooth processing of audio data, causing a dropout or glitch. If possible, you should disconnect your computer from a local area network, and/or disconnect from any dial-up telecommunications while recording or playing back audio in SONAR.
- Turn off your screen saver (if present).
- Turn off the Auto-Notification option for your CD-ROM drive. If it is turned on, the insertion of a CD-ROM can interrupt audio processing.
To disable it, open the System applet in the Control panel, click on the Device Manager tab, expand the CD-ROM list entry, double-click on the listed CD-ROM device, click on the Settings tab, and uncheck the Auto Insert Notification check box.
- Disable any kind of virus scanning program that might be running in the background. To find out what programs are currently running, press the CTRL-ALT-DELETE keys simultaneously to display the Windows Task Manager; if you see an anti-Virus program shown on the list of currently running tasks, select that program and click End Task.
- If SONAR's Auto Save feature is enabled, disable it.
- Remove all programs from the Windows Start Up folder (\Windows\Start Menu\Programs\Start Up).
Cakewalk doesn't properly "recognize" your sound card
Re-run the SONAR Wave Profiler, which will attempt to analyze your sound card and establish proper settings for it:
- Choose Options-Audio, then click on the General tab. Click on the Wave Profiler button at the bottom of the dialog box.
- If Wave Profiler offers you the chance to use "default settings" for your sound card, accept the defaults, close the Options Audio dialog box, and check audio playback/recording.
- If problem(s) continue, re-run the Wave Profiler, but this time do not accept any default settings.
- If you decline to use default settings (or if Wave Profiler can't find any for your sound card), Wave Profiler will analyze your sound card's capabilities by running some tests and automatically establish appropriate settings based on the test results.
- If your sound card is listed at www.cakewalk.com/Support/Docs/sound cardtips.html, read and follow any special card-specific operating instructions listed there.
- Re-test audio recording/playback. If problem(s) persist, go to the Next Step.
The "I/O Buffer Size" may not be well matched to your hard disk
SONAR may be reading and writing audio data to/from your hard disk in chunks that are either too large or too small for your particular hard disk's characteristics.
Select Options > Audio, click the Advanced tab, and try different values in the I/O Buffer Size box until you find a value that works well for your particular hard disk:
- The default value is 64. Try reducing this value, to 32, then 16. After each change, close the dialog box (click OK) and re-test your project's recording/playback behavior.
- If problem(s) persist, try increasing this value, to 128, then 256, then 512. Again, close the dialog box and re-try your project after each change.
- If you have an older, slower computer or an older, slower hard disk, you should try increasing the buffer size; decreasing is not advised on slower hardware. However, increasing this setting uses more of your computer's RAM. If you have a smaller amount of RAM in your computer, increasing the buffer size may not help.
If problem(s) persist, restore this value to its default and continue with the next step.
Mixing latency may be set too low
SONAR tries to send and receive audio data to/from your sound card with very a minimal delay (so that any real-time adjustments you make to a track's volume, pan, or other settings will take effect rapidly). If the latency setting is set too low, the sound card driver may not be able to keep up with the SONAR, and audio will be disrupted.
Try higher latency settings:
- Select Options > Audio, and click the General tab. Move the Mixing Latency Buffer Size slider
control to the right in small increments until you see the value to the right of the slider increase; close the dialog (click OK) and re-test your project after each increment.
- If problem(s) continue, move the slider control back to its original position, and try increasing the number in the Buffers in Playback Queue textbox. (This value starts out at 4; try increasing it to 5, 6, 7, or 8). Close the dialog (click OK) and re-test your project after each such change.
- The total effective latency is displayed below the slider; it is determined by multiplying the per-buffer latency time (in msec) by the number of buffers in the playback queue.
- If problem(s) continue, click the Advanced tab in this dialog, and turn off the WavePipe Accelerator check box. Click OK to close the dialog and re-test your project.
- If problem(s) persist, turn the WavePipe Accelerator check box back on, and continue.
Your hard disk may be excessively fragmented
Audio data can be processed most efficiently if it is arranged in consecutive physical locations on your hard drive. Over time, the chunks become distributed at various discontinuous locations on your disk, which makes it more time consuming for SONAR to access the chunks. This extra access time can interfere with smooth audio recording and/or playback.
Try defragmenting the hard disk:
- Make sure SONAR, and the Wave data directory are not installed on a compressed hard disk.
- Defragment your hard disk. If you have more than one hard disk in your computer, identify the disk which contains the SONAR Data directory (this is where your projects' audio clips are stored.) To defragment the hard disk, exit SONAR first. Then, select Start > Programs > System Tools > Accessories > Disk Defragmenter. We recommend that you backup your hard disk before defragmenting it.
Your project file may be excessively fragmented
Audio data can be processed most efficiently if it is arranged in consecutive physical locations on your hard drive. During normal SONAR usage, a project's audio data can become fragmented into chunks stored at discontinuous locations on your disk. Accessing these discontinuous chunks can consume extra processing time, which can lead to dropouts.
Try defragmenting your project file:
- Open the project file that has audio problems.
- Save it as a Cakewalk Bundle (.cwb) file by selecting Save As from the File menu and selecting Cakewalk Bundle from the Save As Type drop down list and clicking the Save button.
- Close the project.
- Open the Cakewalk Bundle you just closed
Saving then re-opening the bundle file automatically defragments the audio data used by the project, reducing the chances of a dropout or other audio problem.
When you are ready to save the file again, you may want to save it as a normal (.cwp) file. Saving and opening .cwp files takes less time than saving and opening bundle files.
Your sound card's driver may be obsolete
Obtain and install a new sound card driver (if available):
- Consult your sound card manufacturer's web site (or contact their Customer Service department) to check for the availability of a later driver version. If one exists, obtain it and install it on your computer according to their instructions. With the new driver installed, restart the computer, then delete the file cw9auddx.ini from your SONAR folder. Launch SONAR and let it re-profile your audio hardware. When it's done, re-test your audio recording/playback.
- If problem(s) persist, continue with the next step.
There may be a conflict with your video card or other multimedia streaming card
Some video drivers contain bugs which can interfere with SONAR's operation. Or, the driver may be "stealing" excessive CPU time away from SONAR (some video card vendors, in an attempt to make their cards operate faster, supply drivers that tie up the computer's bus for relatively long intervals (so-called "PCI bus contention"). This can interrupt the smooth flow of audio data between SONAR and the sound card's driver.)
Try to remove the video card conflict as follows:
- Try turning off "hardware acceleration" on your video card (if available). This may cause more sluggish screen drawing, but may improve the flow of audio data to your sound card, thereby reducing the possibility of dropouts.
To disable the hardware acceleration on your graphics card: Launch Control panel (Start > Settings > Control panel). Double-click the Display icon. Select the Settings tab. Click on the Advanced Properties button. Select the Performance tab. Move the slider for Hardware Acceleration one notch at a time toward 'none' and re-test your recording/playback after each such adjustment. If problem(s) persist, leave the slider at 'none' and proceed with the next step.
- Try Using the Windows driver for your specific sound card (instead of the manufacturer's driver).
- Try using the standard VGA/SVGA drivers provided with Windows (instead of the drivers provided by the manufacturer).
- Check your video card manufacturer's web site for a later driver version. If a newer driver is available, download it and install it on your computer following the manufacturer's instructions.
- If you have an STB Velocity 128 card, and your graphics card was configured and shipped with a new PC, you may want to check the PC vendor's website (instead of STB's site) to see if they offer a driver update for the STB card. PC vendors often will customize drivers to their specific needs and you should use their driver updates.
- Try reducing the number of colors used by your video card. 16-, 24-, or 32-bit true color display settings can severely hamper real-time audio performance on some computers; using fewer colors allows your computer to spend more of its processing time on audio and MIDI.
You can adjust color depth by right-clicking on your Windows desktop, clicking Properties, clicking on the Settings tab, and selecting a suitable entry in the Colors list. Also, try reducing the display resolution. Re-test your audio playback/recording with these changes.
- If you have one of the following specific video cards, applying the following card-specific .ini file
settings can reduce PCI bus contention problems. Be sure to check out www.cakewalk.com/Support/Docs/VideocardTips.html for more information about these and other popular video cards:
• If you have a Hercules Dynamite 128 card:
Open the System.ini file in Notepad (or any text editor). In the section called [Hercules], check to ensure that this line is present:
Optimization=1
(The default is 0; if necessary, edit the value to 1 and save the file. Restart Windows.
• If you have a Matrox Millenium card:
Open the System.ini file in Notepad (or any text editor). In the section called [mga.drv], add the following line:
Pcichipset=1
Edit the file as necessary, and save the file. Restart Windows.
If you have an early Matrox video card, Disable Use PowerGDI acceleration:
(Start > Settings > Control panel > Display > MGA Settings > Advanced > Performance)
If you have a later Matrox video card, enable Use Bus Mastering and Disable use Automatic PCI Busd Retries:
(Start > Settings > Control panel > Display > Settings > PowerDesk button)
- If you have a card based on the S3 chipset (S3, Inc. provides graphics chips for other manufacturers; consult your card manufacturer's website to see if that card is S3-based):
Open the System.ini file in Notepad (or any text editor). In the section called [display], make sure the following line is present:
BusThrottle=1
Edit as necessary, and save the file. Restart Windows.
- If problem(s) persist, continue with the next step.
Your sound card may have a conflict with another device in your computer
Try resolving this device conflict as follows:
- Ensure that your sound card is not sharing IRQs with any other device. Although some sound cards claim that they work properly on a shared IRQ, this is usually not the case and it is advisable to avoid such sharing. To do this, right click on My Computer and select Properties from the pop-up menu. In the System Properties dialog, click on the Device Manager tab, then double-click on the Computer icon at the top of the list. This allows you to look at all the devices on your system and which IRQs they are using. Scroll through the list until you see your sound card. Check the IRQ setting to the left of the icon. If there are other devices (such as a video card) that are assigned to the same IRQ, you should try moving your sound card to a different slot in your computer. Note that entries which say something like "IRQ Holder for PCI Steering" do not indicate conflicting devices, and can be ignored.
- Select Options >Audio, click the Drivers tab, and make sure that only your sound card's input and output drivers are highlighted in both menus. (If you have more than one sound card installed in your system, try using only a single sound card and deselecting the other(s). If you can get audio to record/playback properly on a single sound card, but you encounter problems using two sound cards simultaneously, there may be a conflict between the two sound cards. Contact Cakewalk Technical Support for assistance in this event.)
- If problem(s) continue, another multimedia audio device on your system (like a built-in sound card or voicemodem) could be interfering with your sound card's functionality. To see if this is the cause of your problem(s), you'll have to temporarily disable these other devices. Note that this may cause other programs which rely on these other devices to no longer work correctly.
To disable these other device(s), in Windows go to the Control Panel, and double-click the Multimedia icon. Click the Advanced tab, and click the plus sign next to Audio Devices. Double-click any audio devices listed there that AREN'T the sound card, and choose Do Not Use Audio Features on This Device. Click OK, and repeat this step for any non-sound card device, including voicemodems, 'virtual audio devices' or 'game-compatible devices'. Once the sound card is the only device left, click OK, and restart the computer. After restarting, delete the file cw9auddx.ini from your Cakewalk folder. Once you've deleted those files, launch Cakewalk, and let it profile your audio hardware. When it's done, try playing your audio again.
- If problem(s) continue, try deselecting any MIDI devices which you might be using. In SONAR, click Options > MIDI Devices and deselect every MIDI device in both Inputs and Outputs, then when SONAR asks, select Continue with no MIDI input and Continue with no MIDI output, and try re-test your audio recording/playback.
- If problem(s) persist, reselect your audio and MIDI devices, and continue with the next step.
Your project may simply be too "complex" for your computer
Your computer may not have enough processing power to deal with all of the tracks, clips, and real-time effects used in your project. You can upgrade your computer hardware (see later items, below) or you can simplify your project's content so it demands less processing power.
If possible, try reducing the complexity of your project in any of the following ways:
- Reduce the number of real-time effects used in your project. Instead of generating the effects in real-time (nondestructively) during playback, consider applying the effects offline (destructively), before beginning playback.
- Reduce the number of distinct tracks being played back simultaneously. Consider “sub-mixing” several of your audio tracks into one track (using the Edit > Bounce to Tracks command), and then archiving the individual tracks which were combined in the sub-mix. (Archived tracks don’t use up any CPU resources during playback, leaving more CPU resources available to properly play the non-archived tracks.)
- Where possible, record audio using a mono source, rather than a stereo source. Mono clips require less processing power than stereo clips.
- Avoid using overlapping audio clips. Where possible, combine/blend overlapping clips into a single clip, which uses less processing power.
- Thin the amount of MIDI controller data and the number of SysEx messages in your tracks.
- If you can't reduce your project's complexity, or if problems persist even after the complexity has been reduced, proceed to the next step.
Upgrade your computer hardware: More RAM, a faster CPU, and a faster disk drive
If your project makes extensive use of real-time effects (plug-ins), you should consider upgrading to a faster CPU. If your primary concern is playing or recording a large number of tracks, a faster CPU will help, but you may find that adding more RAM, a faster hard disk, and/or an improved hard disk controller may help even more.
The following are some tips on upgrading your hardware:
Audio problems are often caused by a hard disk which is transferring data too slowly. The disk could simply be physically incapable of reading and writing data fast enough, or the disk controller could be causing too much CPU time to be consumed when transferring audio data to/from the disk.
Consider upgrading your equipment as follows:
- Ensure that your hard drive controller is NOT configured to operate in “compatibility mode” which can greatly slow data transfer to/from your hard disk and make it almost impossible to record/play audio in Cakewalk reliably. To do this, go to the Control Panel and double-click on the System icon. Click the Performance tab. At the top of the Performance screen read the entries across from File Systems and Virtual Memory. They both need to say 32-bit. If they mention MS-DOS Compatibility Mode, then your computer has a serious problem, beyond the scope of what a Cakewalk technician can fix. Your computer is processing the audio data very slowly and Cakewalk will not work properly until the MS-DOS Compatibility Mode problem is eliminated. Help is available on the Microsoft Technical Support Web page at www.microsoft.com/Support. Click on the Support Online link and search for the phrase Troubleshooting MS-DOS
Compatibility Mode on Hard Disks. This problem can arise when installing a new hard disk in your computer; if Windows cannot find a suitable driver for the disk, it installs a generic driver and operates in Compatibility Mode. - If you're using a hard disk controller that employs "programmed I/O", upgrade to a disk controller that uses "bus mastering" instead. (This is sometimes also known as an UltraDMA IDE Controller). The former technique relies on the CPU to transfer the data to/from the hard disk, stealing cycles which the CPU could be sending audio data to/from the sound card. With the latter technique, the hard disk controller itself is primarily responsible for transferring the data to/from the hard disk, relieving the CPU of much of that burden.
- Install a faster hard disk. If you're using an IDE- or E-IDE-type hard drive, try to find one which has a lower disk access time (e.g., less than 9msec). Use the Win Tune test application available at www.winmag.com, this diagnostic tool measures your hard drive's uncached transfer rate.
Optimized Picture Cache Redrawing
There are several options in the .ini files to speed up picture cache redrawing The biggest improvement will be seen on machines with multiple processors. Parallel processing can yield a significant boost in performance.
There is also an option in the Clips Properties dialog to selectively redraw waveforms for individual clips that may have a corrupt waveform display (see “To Redraw Waveforms” on page 866).
.INI File Picture Cache Options
3 new INI file variables that are used by picture cache generation and display:
• l n Aud.ini:
In the [Aud] section:
EnablePicCacheThreads=1 (default)
This option creates extra background worker threads for the generation of wave pictures when you load a project. One worker thread is automatically created per CPU/core. Setting EnablePicCacheThreads=0 reverts back to only using a single thread for picture computation.
If you are running a system with multiple CPU's or cores setting this to 1 can greatly speed up the computation of pictures.
Notes:
-These threads are only active while the picture is being computed.
-This option is only applicable on multiprocessor/multicore systems.
Also in the [Aud] section:
ComputePicturesWhilePlaying=1 (default)
This option allows waveform pictures to be computed in the background while audio playback is in progress. Most modern computers should be able to handle this load with no problems. Note that work is only done while new pictures are actually being computed—once the pictures are finished rendering there is no overhead.
• In Cakewalk.ini:
In the [WinCake] section:
ProgressiveWavePictures=1 [default]
This option enables progressive display of waveform pictures. When enabled you will see pictures being displayed in the clips view dynamically as they are being computed. The waveforms will update in the background when the application is idle. If the
ComputePicturesWhilePlaying flag is set to 1, waveforms will continue being displayed progressively even while audio playback is in progress. This can save time waiting for a complete picture to be finished before you can see it.
To Redraw Waveforms
-
Select the clips that you want to redraw.
-
Right-click a selected clip, and choose Clip Properties from the pop-up menu to open the Clip Properties dialog.
-
On the Audio Files tab, click the Recompute Picture(s) button. A dialog appears, asking if you want to recompute the pictures on the selected clips.
-
Click Yes.
Improving recording performance
EnableCacheWriteThru=<0 or 1>, default = 1
This Aud.ini variable enables disk write thru caching, on by default. When write thru caching is on, data recorded to wave files is written to the hard disk immediately, circumventing the hardware disk cache. Having write thru caching off can be more efficient for disk I/O but can result in data loss if your system crashes.
MIDI Prepare Buffer Size and automation
If your project contains several track/clip automation envelopes, setting your MIDI playback buffer size too low (in Options > Global > MIDI) can cause audio to crackle if your audio latency is also set very low. This problem will be somewhat worse if you enable multiprocessing in the audio engine. To minimize or eliminate these crackles, please be sure to keep your MIDI playback buffers at or above the default setting of 500 msec.
External Devices
SONAR can be controlled by a wide range of MIDI controllers and external MIDI devices. SONAR also contains two generic controller/surface plug-ins (the ACT MIDI Controller plug-in, and the Cakewalk Generic Surface Plug-in), which allow you to use almost any MIDI controller or controller/surface with SONAR. You can also control certain external devices from SONAR by using StudioWare or OPT (Open Plug-in Technology) panels.
SONAR allows you to control soft synths as well as effect plug-ins. Active Controller Technology (ACT) allows you to control any plug-in that has focus, using the same widget mappings for each instance of the same plug-in (Note: some older plug-ins do not support ACT). You can also choose to lock a particular controller/surface to a particular instance of a plug-in.
To keep track of your mappings, SONAR displays different-colored markers on each track and/or bus to show you which controller/surface is currently controlling that particular module. These visual markers on tracks and buses are called the WAI display (Where Am I).
SONAR includes preset mappings for popular controllers/surfaces and MIDI controllers such as the Edirol PCR series. If SONAR does not currently include preset mappings for your controller/surface, you can create mappings by using the built-in ACT MIDI Controller Plug-in or Cakewalk Generic Surface Plug-in.
See:
Edirol PCR Controllers
Setting up Control Surfaces
ACT MIDI Controller Plug-in
Cakewalk Generic Surface Plug-in
The WAI Display
ACT
OPT Panels
Working with StudioWare
Edirol PCR Controllers
SONAR has a custom controller/surface plug-in that allows an Edirol PCR controller to control SONAR track, bus, and plug-in parameters (both effects and synths). This includes support for ACT (Active Controller Technology), which lets you use your controller to adjust plug-in parameters on whatever plug-in currently has focus.
Using your Edirol PCR to control SONAR is as easy as:
- Enabling the Edirol MIDI drivers in SONAR.
- Choosing the correct Edirol In Port in SONAR's Controller/Surfaces dialog.
- Loading the correct memory preset in your Edirol PCR.
To Enable Edirol MIDI Input Drivers
- Use the Options > MIDI Devices command to open the MIDI Devices dialog.
- In the Inputs pane on the left side of the dialog, make sure that the MIDI Input driver or drivers that your controller/surface uses are enabled (highlighted).
If you have installed the drivers for your PCR from the installation CD you got with your controller, you can use the following table to choose the input drivers:
| Edirol PCR model Choose these input drivers | |
| PCR-30/50/80, PCR-M30/M50/M80, PCR-M1 EDIROL PCR MIDI InEDIROL PCR1EDIROL PCR2* | |
| PCR-A30 EDIROL PCR-A MIDI InEDIROL PCR-A 1EDIROL PCR-A 2* | |
| PCR-1 EDIROL PCR-1 MIDI InEDIROL PCR-1 1EDIROL PCR-1 2* |
Table 180.
* See note, below.
If you are using the generic drivers that come with the Windows XP operating system, the driver names for all PCR models will be:
- USB Audio Device
- USB Audio Device [2]
- USB Audio Device [3]*
- Click OK.
To Connect an Edirol PCR to SONAR
- Follow your controller/surface's instructions for physically connecting your PCR to your computer.
- In SONAR, use the Options > Controllers/Surfaces command to open the Controllers/Surfaces dialog.
- Click the Add Controller/Surface button ✦, which opens the Controller/Surface Settings dialog.
- In the Controller/Surface field of the Controller/Surface Settings dialog, select Edirol PCR-M30.
- In the Input Port and Output Port fields, select which MIDI input and output ports the controller/surface uses.

Note: You may need to read the documentation for your controller/surface to find out which MIDI input driver your controller/surface uses to control software applications (see asterisks above). If your controller/surface includes a MIDI keyboard, your controller/surface might use one MIDI input driver for the controller/surface functions (use this driver), and a different MIDI input driver to send MIDI notes and pitch bend data to the application (the piano keyboard functions).
-
Click OK to close the Controller/Surface Settings dialog.
-
In the Controllers/Surfaces dialog, make sure that the WAI Display check boxes and the ACT Indicators check boxes are enabled, and click Close.
To Load the Correct Edirol PCR Memory Preset
- Press the MEMORY button on your Edirol PCR.
- Use the INC and/or DEC buttons to enter 1, which is the correct preset to control SONAR (only when you are using the default PCR factory presets).
- Press the ENTER button on your PCR.
Now that your controller/surface is connected, you can see which tracks and/or buses are being controlled by it by looking at the colored markings (the WAI display: see "The WAI Display" on page 886 for more information) in SONAR's interface. Open your controller/surface's property page by double-clicking the WAI display, or by clicking the Controller/Surface Properties button ☐ on the Controllers/Surfaces toolbar (use the Views > Toolbars > Controllers/Surfaces command), or by choosing the controller/surface from the Tools menu.
Once the Edirol property page is open, press F1 on your computer keyboard to open the help file for the property page.
See:
The WAI Display
ACT
Setting up Control Surfaces
If you are not using an Edirol PCR controller, use the following procedures to connect or disconnect your controller/surface:
To Enable MIDI Input and Output Drivers
- Use the Options > MIDI Devices command to open the MIDI Devices dialog.
- In the Inputs pane on the left side of the dialog, make sure that the MIDI Input driver or drivers that your controller/surface uses are enabled (highlighted).
- If you have a bi-directional controller/surface (one that both sends and receives data in order to control a software application), also make sure that the MIDI Output driver or drivers that the controller/surface uses are enabled in the Outputs pane on the right side of the dialog.
- Click OK.
To Connect a Controller/Surface to SONAR
- Follow your controller/surface's instructions for physically connecting your controller/surface to your computer (you may need to close SONAR first).
- In SONAR, use the Options > Controllers/Surfaces command to open the Controllers/Surfaces dialog.
- Click the Add Controller/Surface button ✝, which opens the Controller/Surface Settings dialog.
- In the Controller/Surface field of the Controller/Surface Settings dialog, find the name of your controller/surface, and select it. However, if you want to use Active Controller Technology, or if your controller/surface is not listed, select either the Cakewalk Generic Surface or the ACT MIDI Controller.

Note: The Cakewalk Generic Surface plug-in is not bi-directional.
- In the Input Port and Output Port fields, select which MIDI input and output ports the controller/surface uses.

Note: You may need to read the documentation for your controller/surface to find out which MIDI input driver your controller/surface uses to control software applications. If your controller/surface includes a MIDI keyboard, your controller/surface might use one MIDI input driver for the controller/surface functions, and a different MIDI input driver to send MIDI notes and pitch bend data to the application (the piano keyboard functions).
-
Click OK to close the Controller/Surface Settings dialog.
-
In the Controllers/Surfaces dialog, make sure that both the ACT and WAI check boxes are enabled, and click Close.

Important: If your controller/surface needs to be in a certain mode, or have a certain memory preset loaded in order to control a software application, put your controller/surface in the proper mode or load the required memory preset now.
Now that your controller/surface is connected, you can see which tracks and/or buses are being controlled by it by looking at the colored markings (the WAI display, (see The WAI Display for more information) in SONAR's interface.
If you selected the ACT MIDI Controller plug-in or the Cakewalk Generic Surface plug-in for your controller/surface, you can load a default set of mappings by opening the property page for either plug-in, and selecting the name of your controller/surface from the Presets window in the property page.
See also:
To Use ACT with the ACT MIDI Controller Plug-in
To Disconnect a Controller/Surface from SONAR
- Use the Options > Controllers/Surfaces command to open the Controllers/Surfaces dialog.
- In the controller/surface column, click the name of the controller/surface that you want to disconnect.
- Click the Delete button ✗, which deletes the name of the controller/surface that you selected.
- Click Close.
Control surface refresh rate
Control surfaces are refreshed by posting a windows message every 75 milliseconds.
CtrlSurfaceRefreshMS=<50 - 5000> (default=75)
You may wish to increase the value of this Cakewalk.ini variable if you are experiencing sluggish UI responsiveness when using a control surface and playing back high CPU projects.
Also, if you are using a control surface that is not bi-directional, the surface does not need to be refreshed at all and you can safely increase the value.
This variable should be set in the [Wincake] section. For example:
[Wincake]
CtrlSurfaceRefreshMS=75
See:
ACT MIDI Controller Plug-in
Cakewalk Generic Surface Plug-in
ACT MIDI Controller Plug-in
The ACT MIDI Controller plug-in can be configured to support any generic MIDI controller (controller/surface), such as the JL Cooper FaderMaster, Peavey PC-1600, and Kenton Control Freak. Generic controllers/surfaces typically have 8-16 strips of faders/knobs buttons, are non-motorized, and can often be configured to transmit any MIDI message (continuous controllers, NRPNs, Sysx, etc.). The ACT MIDI Controller supports ACT.
After you have connected your controller/surface, and selected the ACT MIDI Controller plug-in in the Controllers/Surfaces dialog (see "Setting up Control Surfaces" on page 872 if necessary), open the ACT MIDI Controller property page, and select a preset for your controller/surface (load the default mappings).
To Open the ACT MIDI Controller Property Page
- In the Controllers/Surfaces toolbar (Views > Toolbars > Controllers/Surfaces command), make sure that ACT MIDI Controller appears in the drop-down menu. If you can't find it in the drop-down menu, you need to add it in the Controllers/Surfaces dialog (see "Setting up Control Surfaces" on page 872 if necessary).
- Click the Properties button that is in the Controllers/Surfaces toolbar. You can also double-click the WAI display of the ACT MIDI Controller plug-in.

Note: Except for the buttons on the right end of the toolbar, the toolbar is for display purposes only. To enable another controller/surface, use the Options >Controllers/Surfaces command. To change the bank of tracks that the controller/surface controls, use the buttons on the controller/surface itself (or drag the WAI display). Use the drop-down menu on the toolbar to choose what controller/surface the toolbar displays information for. Click the Properties button in the toolbar to display the property page (interface) of the currently displayed controller/surface.
See also:
To Use ACT with the ACT MIDI Controller Plug-in
Using the ACT MIDI Controller Property Page
Using the ACT MIDI Controller Property Page
The ACT MIDI Controller property page gives you a wide range of options to control track, bus, and plug-in parameters.
You can press F1 when the property page is open to get a description of all the fields and controls.
- In the Presets list, select the name of your controller/surface. If your controller/surface does not have a preset, select the Default preset, and see "Assigning Controls on Your Controller/Surface to Cells in the ACT MIDI Property Page" on page 875.

Important: After you load the preset for your controller/surface, look at the Comments field on the Options tab of the ACT MIDI Controller property page. The Comments field will usually list the factory memory preset that your controller/surface must be using to use the ACT MIDI Controller plug-in. Make sure that you have loaded the correct memory preset in your controller/surface's memory.
- On the Options tab, in the Rotaries, Sliders, or Buttons fields, choose the Bank of parameter mappings that you want to edit, then select a new parameter for that Bank. For example, if in the Rotaries field, you select Bank 4, and the parameter field next to the Bank field now reads Send 2 Pan, you could select Send 2 Vol instead. If you then click the Controllers tab, and select Bank 4 in the Bank menu that's in the rotaries row, the rotary knobs will now control Send 2 Volume on all the tracks currently under control. If you have at least 2 sends in each track, the Rotary fields on the Controllers tab will now display the name and current level of each Send 2 in the controlled tracks.
You can restore the default parameter assignments by clicking the Defaults button.
If you want to choose a different knob or other control to control a specific cell in the property page (the MIDI Learn function), see "Assigning Controls on Your Controller/Surface to Cells in the ACT MIDI Property Page" on page 875.
See:
ACT presets
ACT presets
After you have carefully configured the ACT MIDI Controller property page to work with your controller/surface, you will likely want to save the configuration as a preset.
To Save a Preset
- Type a name in the Presets window, then click the Save (floppy disk) button.
See:
Assigning Controls on Your Controller/Surface to Cells in the ACT MIDI Property Page
Assigning Controls on Your Controller/Surface to Cells in the ACT MIDI Property Page
External Devices
ACT MIDI Controller Plug-in
Each cell or field on the Controllers tab of the ACT MIDI Controller property page lists the SONAR or plug-in parameter that is currently controlled by that cell. However, if your controller/surface does not have a preset, no knobs or sliders on your controller/surface will be assigned to that cell, or the knobs may be assigned in a pattern that you don't prefer.
If your controller/surface does not have a preset, or if you want to change the knobs and sliders that control specific cells in the ACT MIDI Controller property page, use the MIDI Learn function to assign knobs and sliders to cells:
To Assign Controls on Your Controller/Surface to Cells in the ACT MIDI Controller Property Page
- Click the cell on the Controllers tab of the ACT MIDI Controller property page that you want to control with a specific knob or control on your controller/surface. You can assign knobs to cells that do not currently list any SONAR or plug-in parameter.
The cell displays the MIDI Learn message. - Move the control on your controller/surface that you want to use to control that cell. This assigns the control to the cell.
- You can edit the cell label by clicking the label and entering a new name in the Edit Label dialog. This way you can immediately see which knobs or sliders on your controller/surface are controlling which cell in the ACT MIDI Controller property page.
- Repeat steps 1-3 for all the cells you want to control. Remember, you can assign controls to cells that do not currently list any SONAR or plug-in parameters.
- When you are finished assigning controls to cells, save your work as a preset: choose a preset or type a new name in the Presets box, and click the Save button (floppy disk icon) that's next to the Presets window.
See also:
To Use ACT with the ACT MIDI Controller Plug-in
Cakewalk Generic Surface Plug-in
The Cakewalk Generic Surface Plug-in supports both ACT and WAI. See “The WAI Display” on page 886, and “ACT” on page 888 for more information.
After you have connected your controller/surface (including loading the correct memory preset in your controller/surface's memory), and selected the Cakewalk Generic Surface plug-in in the Controllers/Surfaces dialog (see "Setting up Control Surfaces" on page 872 if necessary), open the Cakewalk Generic Surface property page.
To Open the Cakewalk Generic Surface Property Page
- In the Controllers/Surfaces toolbar (Views > Toolbars > Controllers/Surfaces command), make sure that Cakewalk Generic Surface appears in the drop-down menu. If Cakewalk
Generic Surface is not available in the drop-down menu, see “Setting up Control Surfaces” on page 872.
- Click the Properties button that is in the Controllers/Surfaces toolbar. You can also double-click the WAI display of the Cakewalk Generic Surface plug-in.
See:
Loading Cakewalk Generic Surface Presets
Loading Cakewalk Generic Surface Presets
SONAR contains preset mappings for most controllers/surfaces. Before creating a set of mappings from scratch, load one of the preset mappings for your controller/surface and see if you like it. Even if the preset doesn't meet all of your needs, it is usually a good base for creating your own presets.

Note: To use ACT with the Cakewalk Generic Surface property page, you need to first assign the knobs and controls on your controller/surface to radio buttons 1-9 and A-G in the ACT Controls section of the property page, and save these assignments as a new preset. See "To Use ACT with the Cakewalk Generic Surface" on page 878.
To Load a Preset
- At the top of the Cakewalk Generic Surface property page, in the Presets field, click the drop-down arrow that is at the right edge of the Presets box to display the menu of built-in presets.
- Find the name of your controller/surface. There may be several versions of presets for your controller/surface, if your controller/surface has multiple presets.
- Click one of the versions. If there are no versions for your controller/surface, see "Assigning Faders and Knobs to Control SONAR Parameters" on page 877.
Try out the available presets for your controller/surface. If you want to edit one of them, first save it under a new name: type a new name for it in the Presets window, and then click the Save button that's next to the Presets box.
See:
Assigning Faders and Knobs to Control SONAR Parameters
ACT
Assigning Faders and Knobs to Control SONAR Parameters
The Cakewalk Generic Surface property page has separate sections that control track parameters (the Track Parameters section), plug-in parameters (the ACT Controls section), and global parameters (the Global Parameters section).
To Configure Track Parameters
- In the Cakewalk Generic Surface property page, in the Use ACT or Strip Params fields, make sure that either the ACT Enable check box is disabled, or that the Both check box is enabled. If the Both check box is enabled, your controller/surface is controlling both track and plug-in parameters.
- In the Configure Strip Number field, use the drop-down menu to choose which track strip in the current bank of tracks you want to configure (the number of tracks in the current bank is listed in the Number of Track Strips field).
- If you want to change how many tracks are in a single bank, enter a new number in the Number of Track Strips field.
- Click the radio button of the Parameter that you want to configure (choose from Parameters 1-16).
- Use the drop-down menu next to the parameter you clicked to choose exactly what parameter you want to configure.
- Move the control on your controller/surface that you want to use to control this parameter.
- Click the Learn button in the dialog. The MIDI message that the control you moved sent out appears in the MIDI Message for the Current SONAR Parameter section.
- You can edit how SONAR interprets this particular message if you want. See "MIDI Message Interpretation" on page 884 for more information.
- Repeat steps 4-8 if you want to configure more parameters for this track strip, or choose a new track strip in the Configure Strip Number field, and then repeat steps 4-8
When you've finished your edits, either type a name for this group of settings in the Presets window and click the Save button (recommended), or just click the Save button to overwrite the current preset. You can then reload this collection of track settings any time you want to by choosing the name of the preset that you saved in the Presets window.
To Use ACT with the Cakewalk Generic Surface
-
Make sure you have completed the following preliminary steps:
-
Successfully connected your controller/surface to SONAR (if necessary, see "Setting up Control Surfaces" on page 872).
-
Opened the Cakewalk Generic Surface property page (if necessary, see “To Open the Cakewalk Generic Surface Property Page” on page 876).
-
In the ACT Controls section of the Cakewalk Generic Surface property page are radio buttons 1-9 and A-G. These buttons control plug-in parameters in the active effect or synth plug-in. You first need to assign a knob or control on your controller/surface to each one of these radio buttons. Do this by clicking a radio button, moving a knob or control on your controller/surface, and then clicking the Learn button in the Cakewalk Generic Surface property page. You can check what MIDI message you've assigned to each button by clicking a button and then reading the value in the MIDI Message for Current SONAR Parameter section. If the None radio button is highlighted after you click an ACT Controls radio button, you have not assigned a control to that ACT Controls radio button. When you finish, save your assignments as a preset.
-
Next, in the Cakewalk Generic Surface property page, in the Use ACT or Strip Params fields, make sure that either the ACT Enable check box is enabled, or that the Both check box is enabled. If the Both check box is enabled, your controller/surface is controlling both track parameters and plug-in parameters.
- In SONAR, put the focus on the plug-in effect or synth -that you want to configure: either click its property page, or click its name in an FX bin.
The name of the plug-in appears in the Context field in the Cakewalk Generic Surface property page.
- Enable the Learn button act on the Controllers/Surfaces toolbar.
- In the property page of the plug-in that you want to control, click the parameters that you want to control.
- Move the sliders/knobs on your controller/surface that you want to use to control the parameters with, in the same order that you clicked the parameters (you can reverse steps 6 and 7).
- Disable the Learn button on the Controllers/Surfaces toolbar.
- A dialog appears, asking if you want to keep your assignments. Click Yes or No.
As soon as you disable the Learn button, any plug-in mappings that you keep are saved globally, and will be the same in every project for a particular plug-in. Now your controller/surface can control whatever soft synth or effect currently has focus. If you want to control only a single instance of a plug-in, regardless of which plug-in has focus, enable the Lock Context check box. For more information about ACT, see “ACT” on page 888.
You can save Track parameter mappings and knob/radio button mappings in the Presets window that is at the top of the Cakewalk Generic Surface property page.
Assigning Forward and Rewind Buttons
The Forward and Rewind assignments are special cases in the Cakewalk Generic Surface property page. When you click select either of these parameters, notice that Literally/Toggle field becomes greyed-out, and the On/Off fields become available. This is because the Forward and Rewind commands both require two different MIDI messages to function: one MIDI message to turn the operation on, and a different message to turn the operation off. This kind of operation is best assigned to a button that sends out one MIDI message when you hold or push it down, and a different MIDI message when you let the button up. The property page can usually fill in the On field and the Off field correctly if you push the desired button a few times and then click the Learn button. But it helps if you know exactly what MIDI messages the desired button sends out. That way, you can fill in the correct trigger values in the On and Off fields if the displayed values are incorrect.
Conserving Knobs and Buttons
There are a few tricks you can use if you're running out of buttons, or if your controller/surface only has a couple of buttons on each strip, and you want to control more parameters on each track:
- Assign a two-way knob or button to control two different parameters. If a knob sends out one MIDI message when it's turned to the right and a different MIDI message when it's turned to the left, you could use it to control 2 toggle-type parameters, such as Solo and Arm. For example, if a knob sends out NRPN # 5000 with a data value of 1 when you turn it to the right and a data
value of 16383 when you turn it to the left, you could use a Trigger Value of 1 to turn the Arm button on and off, and a Trigger Value of 16383 to turn the Solo button on and off. That way, each time you turn the knob to the right, the Arm button turns on or off. Each time you turn the knob left, the Solo button turns on or off.
- Assign a two-way knob to control a continuous parameter. If your fader is assigned to control Volume, you can use a two-way knob to control Pan or some other continuous parameter such as Send 1 Level. For example, if a knob sends out NRPN # 5000 with a data value of 1 when you turn it to the right and a data value of 16383 when you turn it to the left, you could use a value of 1 in the Increment/Decrement Plus + field, and a value of 16383 in the Increment/Decrement Minus - field. That way, each time you turn the knob to the right, the Pan parameter (or whatever parameter you want) increases by 1. Each time you turn the knob to the left, the parameter decreases by 1. The parameter continues to increase if you keep turning the knob to the right, and decreases similarly if you keep turning the knob to the left.
- Use multiple strips to control one track at a time. Assign as many knobs and faders as you want to control lots of parameters on only one track (leave the Configure Strip Number field set to 1 while you're assigning faders and knobs). Then assign a couple of buttons to Move 1 Left and Move 1 Right, so you can shift your controller/surface one track at a time.
See also:
Controlling Different Tracks or Groups of Tracks
Controlling Different Tracks or Groups of Tracks
The Cakewalk Generic Surface plug-in can control anywhere from 1-32 tracks simultaneously, as specified by whatever number you fill in the Number of Track Strips field in the Cakewalk Generic Surface property page. There is always at least one track being controlled, referred to as the Base Track. The Number of Track Strips value refers to the base track plus 'n' number of additional tracks. The toolbar automatically updates to display the range of tracks (1-8, 2-9, 9-16, etc.) that your control surface currently controls.
If multiple controller/surfaces are enabled, the Controllers/Surfaces toolbar lets you select which controller/surface to display track information for.
The currently controlled tracks are displayed in the Controllers/Surfaces toolbar. Go to Views >Toolbars, and select Controllers/Surfaces if the toolbar is not already displayed. It is important to understand that this toolbar is for display purposes only—it gets information from the Cakewalk Generic Surface plug-in (or any other active controller/surface plug-in), but the toolbar cannot update, or send information to the Cakewalk Generic Surface plug-in. Changing which tracks are controlled must be done with the Move 1 Left, Move 1 Right, Move Bank Left, or Move Bank
Right parameters, or by clicking the BaseTrack buttons that are at the top of the Cakewalk Generic Surface property page.

Note: If you don't have any buttons left over to assign to the Move 1 or Move Bank parameters, you can click the right or left buttons in the BaseTrack section of the Cakewalk Generic Surface property page to move the Base Track to the right or left by one track. The buttons are located so that you can resize the property page to just show the buttons and the Presets field.
To Control the Next Track or Bank of Tracks
- In the Cakewalk Generic Surface property page under Global Parameters, select Move 1 Right to control the next higher-numbered track, or Move Bank Right to control the next higher-numbered bank of tracks.
- Move (twice) the button or knob that you want to use to shift the controller/surface to the next higher-numbered track or bank (for example, from track 1 to track 2, or from tracks 1-8 to tracks 9-16).
- Click the Learn button.
The property page reads the type of MIDI message and displays the characteristics in the appropriate fields. - Press the TAB key to accept the data.
- Move the button or knob again and watch the display in the Controllers/Surfaces toolbar to see if the current tracks shift by the appropriate number.
Repeat this procedure, but use a different knob, and select Move 1 Left or Move Bank Left so that you can move the current track or bank to a lower-numbered one.
See also:
The Cakewalk Generic Surface Property Page
The Cakewalk Generic Surface Property Page
The Cakewalk Generic Surface property page appears when you click the Properties button in the Controllers/Surfaces toolbar (Views > Toolbars > Controllers/Surfaces command) while Cakewalk Generic Surface appears in the drop-down menu in the toolbar. The Cakewalk Generic Control controller/surface plug-in must be enabled first, however (see "Setting up Control Surfaces" on page 872, if necessary).
The property page has several sections, as described below:
BaseTrack
This section contains 2 buttons on either side of a number field. You can click the buttons to move the Base Track to a higher-numbered track (right button) or lower-numbered track (left button). The Base Track is the first track in the bank of tracks that your controller/surface is currently controlling.
You define how many tracks are in a bank by entering a number in the Number of Track Strips field. The number can be from 1 to 32, inclusive. The property page is designed so that you can minimize it (by dragging the border) to show only the BaseTrack buttons and Preset window, so you can click the buttons while you're working. The buttons are an alternative way to change the Base Track if you haven't assigned any buttons on your controller/surface to do that. The Move 1 and Move Bank fields are what you use to assign those functions.
Track Parameters
This section lists the particular track strip you are assigning controls for, the number of strips that make up a bank of tracks, and the various track parameters you can control with the faders and knobs on your controller/surface. You can assign the following different track parameters (they are listed in the drop-down menu next to each Parameter "n" field):
• Volume
- Pan
- M u t e
• Solo
- Record Arm
- Write Enable
- Phase
- Send "n" Level ("n" = 1 - 16; depending on number of active buses; Send 1 Level=Reverb for MIDI tracks, Send 2 Level=Chorus for MIDI tracks)
- Send "n" Pan ("n" = 1 - 16)
- Send "n" Enable ("n" = 1 - 16)
- Send "n" Pre/Post ("n" = 1 - 6)
Use ACT or Strip Params
This section lets you decide whether your controller/surface is controlling track parameters, plug-in parameters, or both.

Note: It's possible to use the same control on your controller/surface to control both a track parameter and a plug-in parameter. It's not usually a good idea to control both at the same time.
This section has the following controls:
- ACT Enable radio button. Lets you assign a control on your controller/surface to enable or disable the ACT Enable check box. Radio buttons are used with Learn mode.
- ACT Enable check box. When this check box is enabled (and not greyed-out), your controller/surface controls plug-in parameters only.
- Both check box. When this check box is enabled, your controller/surface controls both track and plug-in parameters. When neither the Both check box nor the ACT Enable check box are enabled, your controller/surface controls track parameters only. In Both mode, you typically
allocate some physical controls to control Track parameters, while other physical controls are allocated to control plug-in parameters.
ACT Controls
This section let's you assign buttons and knobs to control plug-ins. This section has the following controls:
- Lock Context radio button. Lets you assign a control on your controller/surface to enable or disable the Lock Context check box.
- Lock Context check box. When this check box is enabled, your controller/surface controls only the particular instance of the particular plug-in that had focus when you enabled this check box.
- Context field. Displays the name of the plug-in that currently has focus, unless the Lock Context check box is enabled.
- Physical Control Type. This field lets you tell SONAR what kind of control you are using for the selected parameter. For example, if the parameter you're controlling is an On/Off type of parameter, like a power button, it would be a good idea to use a button or switch on your controller instead of a slider.
- Radio buttons 1-9 and A-G. Each of these 16 radio buttons lets you map up to 16 plug-in parameters to controls on your controller/surface. The name of each of the 16 plug-in parameters that are currently being controlled are listed in order next to each radio button. To use these buttons, you must first assign a control on your controller/surface to each one of these buttons. See “To Use ACT with the Cakewalk Generic Surface” on page 878.
MIDI Message for the Current SONAR Parameter
This section is where you can choose a specific kind of MIDI message to control whatever parameter is selected in the Track Parameters, ACT Controls (including the ACT Enable check box), or Global Parameters sections. Most of the time you don't need to choose, because the Learn button fills in the fields automatically.
Choose from the following options:
- None. Click this button to disable control of the selected parameter.
- Learn. If you don't know the exact MIDI message that a fader/knob/button transmits, you can simply move the fader/knob/button a couple of times, and then click Learn to automatically fill in the correct MIDI message.
- Controller. With this button enabled and a Controller number entered in the Number field, SONAR moves the selected parameter whenever it receives this specific controller message from your controller/surface on the specified channel.
- Channel. The MIDI channel the controller/surface uses for the MIDI Message that is controlling the current parameter.
- NRPN. With this button enabled and a NRPN number entered in the Number field, SONAR moves the selected parameter whenever it receives this specific NRPN message from your controller/surface on the specified channel.
-
Trigger Value. For triggered actions (mute, solo, play, stop, etc.), specify the Controller, NRPN or RPN value that will trigger the current parameter.
-
RPN. With this button enabled and a RPN number entered in the Number field, SONAR moves the selected parameter whenever it receives this specific RPN message from your controller/ surface on the specified channel.
- Note. You can use a Note On message to trigger a parameter or action. The Number field next to the radio button displays the note number, and the Trigger Value field displays the velocity the note must use to trigger the desired parameter. If you use a MIDI keyboard for this field, you can enter zero in the Trigger Value field, and the property page will then use the Note Off signal as a trigger, instead of the Note On.
- Wheel. You can use a pitch wheel to trigger a parameter. In this case, the Trigger Value field uses a range of numbers from 0 to 16383. Continuous parameters such as Pan or Volume are the best choices for a pitch wheel (except for the fact that the wheel usually returns to its original position when you let go of it), but you can use a wheel to control toggle-type parameters by entering 0 or 16383 in the Trigger Value field. That way, you'll trigger the desired parameter when the wheel reaches its maximum or minimum position.
- Sysx Single Byte. Selecting this option tells SONAR that the significant data (the variable, or parameter value) in the incoming Sysx message is in the form of a single byte. The Sysx Single Byte option has the following structure: F0 ? VV ? F7. The pre string should be F0 ?, where you must include the F0 byte, and the post string should be ? F7, where you must include the F7 byte.
- Sysx High Byte First. Selecting this option tells SONAR that the significant data in the incoming Sysx message is in the form of two bytes, with the high byte first. The Sysx High Byte First option has the following structure: F0 ? HI LO ? F7.
- Sysx Low Byte First. Selecting this option tells SONAR that the significant data in the incoming Sysx message is in the form of two bytes, with the low byte first. The Sysx Low Byte First option has the following structure: F0 ? LO HI ? F7.
- Starts With. Fill in the string that your controller/surface sends in Sysx messages that precedes the significant data.
- Ends With. Fill in the string that your controller/surface sends in Sysx messages that follows the significant data.
- Sysx Trigger. Triggered targets (play, mute, solo, etc.) are enacted by using a Sysx trigger, where the user simply types the entire Sysx message F0 ?? F7 that will trigger the action.
- Trigger Message. The exact Sysx message, in the form of F0 ? ? F7, for the Sysx Trigger option.

Note: The Sysx Single Byte, Sysx High Byte First, and Sysx Low Byte First options assume that the Sysx message will be interpreted as a value to control continuous parameters such as Volume, extracted from somewhere in the middle of the message. That is why those three options are unavailable for “triggered” targets, like play, record, mute, solo, move 1 left, move 1 right, etc.
MIDI Message Interpretation
A special interpretation of a MIDI message is commonly used in the following two cases:
- Literally/Toggle. The property page interprets almost all MIDI messages as either literal values
or toggle-type values, so most of the time this button is checked. A fader usually sends out a stream of different messages that are different for each position of the fader. The values of these messages are used "literally" to make timely changes in a continuous parameter such as Volume. The other common interpretation of a MIDI message is that it is meant to "toggle" a control such as a Mute button on and off. The property page interprets almost all MIDI messages as one of these two types of message.
- Increment/Decrement. This option is valuable if you want to use a button or knob that can only send two different values to control a continuous parameter, such as Pan or Volume (see "Conserving Knobs and Buttons" on page 879).
- Plus+. The value that causes the desired parameter to increase by 1.
- Minus-. The value that causes the desired parameter to decrease by 1.
- On/Off. This option is currently only used with the Forward >> and Rewind << shuttle actions. You should only assign buttons to these functions if each button sends a different MIDI message when it is released from the message it sends when it is pushed. The On field displays the value the button sends when you push it, and the Off field displays the value the button sends when you release it.
Global Parameters
This section let's you assign buttons and knobs to control SONAR's transport. The parameters you can control are:
- Play
- Stop
• Forward >> - R e w i n d < <
- Record
- Write Automation
• Jog <- (previous measure)
- Jog -> (next measure)
- Move 1 Left. This parameter changes the currently-controlled track to the next lower-numbered track.
- Move Bank Left. This parameter changes the currently-controlled bank of tracks to the next lower-numbered bank of tracks.
- Move 1 Right. This parameter changes the currently-controlled track to the next higher-numbered track.
- Move Bank Right. This parameter changes the currently-controlled bank of tracks to the next higher-numbered bank of tracks.
Presets
After you have carefully configured the Cakewalk Generic Surface property page to work with your control surface, you will likely want to save the configuration as a preset.
To Save a Preset
- Type a name in the Preset box, then click the Save (floppy disk) button.
Euphonix EuCon control surface support
SONAR supports the Euphonix EuCon protocol, which allows SONAR to be controlled by Euphonix surfaces such as the MC and CM408 series.
To enable EuCon support in SONAR
- Follow your Euphonix surface's instructions for physically connecting the Euphonix surface to your computer and configure the Euphonix software.
- In SONAR, use the Options > Controllers/Surfaces command to open the Controllers/Surfaces dialog.
- Click the Add Controller/Surface button ✦, which opens the Controller/Surface Settings dialog.
- In the Controller/Surface field of the Controller/Surface Settings dialog, select EuCon Controller.
- Click OK to close the Controller/Surface Settings dialog.

Note: It is not necessary to select any input or output ports.
- In the Controllers/Surfaces dialog, make sure that the WAI Display check boxes and the ACT Indicators check boxes are enabled, and click Close.
For more information about using the EuCon Controller surface, see the separate EuCon Controller online help (open the EuCon Controller plug-in and press F1).
See also:
To Connect a Controller/Surface to SONAR
The WAI Display
The WAI display (short for Where Am I) is a group of colored markers to show you which tracks and/or buses are currently being controlled by which controller/surface. Each controller/surface uses different colored markers.
In the following picture controller/surface 1 (blue markers) is controlling tracks 2-5, and controller/surface 2 (red markers) is controlling tracks 7-14. You can drag the markers to different groups of
tracks to change which tracks each controller/surface is controlling. You can also double-click the WAI markers to open the property page of that particular controller/surface.
Figure 138. WAI display
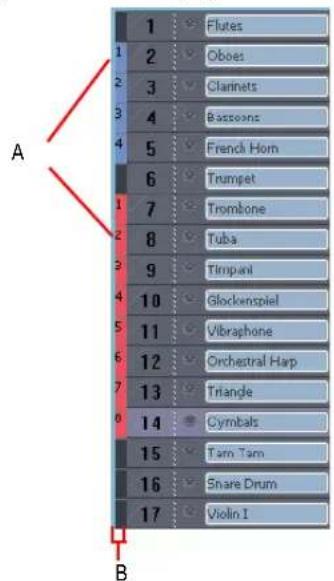
A. WAI markers B. WAI strip
If multiple controller/surfaces overlap, the narrowest strip range appears on top of the widest strip range.

flowchart
graph TD
    A[" Node A "] --> B[" Node B "]
    B --> C[" 1 Flutes "]
    B --> D[" 2 Oboes "]
    B --> E[" 3 Clarinets "]
    B --> F[" 4 Bassoons "]
    B --> G[" 5 French Horn "]
    B --> H[" 6 Trumpet "]
    B --> I[" 7 Trimbone "]
    B --> J[" 8 Tube "]
    B --> K[" 9 Timpani "]
    B --> L[" 10 Glackenspiel "]
A. Red markers B. Blue markers
The following table describes how you can use WAI markers:
| To do this Do this | |
| Change the group of tracks or buses that a controller/surface controls | Drag the WAI markers from one group of tracks to another group, or from one group of buses to another group. OrRight-click in the WAI strip, and choose Move > [name of controller/surface] > here from the pop-up menu. |
| Open the property page of a controller/surface | Double-click the WAI markers for that controller/surface. |
| Show or hide the WAI markers in the Track view and/or Console view | In the Controllers/Surfaces dialog (Options > Controllers/ Surfaces command), in the WAI Display section, enable or disable the Track view and/or Console view check boxes. |
| Show or hide the WAI markers for a specific controller/surface | In the Controllers/Surfaces dialog (Options > Controllers/ Surfaces command), in the WAI column just to the right of the name of the controller/surface, enable or disable the check box. |
| Change the color of the WAI markers for a specific controller/surface | In the Controllers/Surfaces dialog (Options > Controllers/ Surfaces command), in the WAI color column just to the right of the name of the controller/surface, choose a new color from the drop-down menu. |
Table 181.
See:
ACT
ACT
Active Controller Technology (ACT) allows you to control whatever plug-in effect or soft synth currently has focus. The controller/surface mappings for a particular plug-in work the same on each instance of that plug-in, whenever that instance has focus. You can change the focus to a particular plug-in by clicking either the plug-in's interface, or its name in an FX bin.
SONAR has built-in mappings for all relatively recent SONAR plug-ins, however some older plug-ins such as the TTS-1 do not support ACT.

Note: If you're not using an Edirol PCR controller/surface, using ACT at this date means using either the ACT MIDI Controller Plug-in, or the Cakewalk Generic Surface Plug-in. The ACT MIDI Controller Plug-in has presets for most popular controller/surfaces that include built-in links between the knobs and controls on a given controller/surface and the cells on the Controllers tab of the ACT MIDI Controller property page. If you're not using one of the factory presets (or there isn't one for your controller/surface) OR if you're using the Cakewalk Generic Surface Plug-in, you need to establish some links between the knobs and controls on your controller/ surface, and either the cells in the ACT MIDI Controller property page or the radio buttons in the Cakewalk Generic Surface Plug-in property page. To do either of these, see "Assigning Controls on Your Controller/Surface to Cells in the ACT MIDI Property Page" on page 875, or "To Use ACT with the Cakewalk Generic Surface" on page 878.
To Use ACT with the ACT MIDI Controller Plug-in
-
Make sure you have completed the following preliminary steps:
-
Successfully connected your controller/surface to SONAR (if necessary, see "Setting up Control Surfaces" on page 872)
- Opened the ACT MIDI Controller property page (if necessary, see "To Open the ACT MIDI Controller Property Page" on page 874)
-
Selected a preset from the ACT MIDI Controller property page Presets menu, either a factory preset for your controller/surface, or a self-created preset (if there is no preset, see "Assigning Controls on Your Controller/Surface to Cells in the ACT MIDI Property Page" on page 875).
-
Enable ACT in the ACT MIDI Controller property page by enabling the Active Controller Technology Enable check box. The ACT MIDI Controller can enable this check box from the controller/surface itself.
- Put the focus on the plug-in that you want to control.
The name of the plug-in appears in the Active Controller Technology field of your controller/surface's property page, and the current mappings appear above the Knob and Slider fields in the controller/surface property page.
- Adjust the plug-in's parameters by moving the controls on your controller/surface (if you're using a self-created preset for the first time, you may have to create your own ACT Mappings before you can do this step—see the following procedure).
- If you want to control only this instance of the plug-in with your controller/surface, enable the Lock check box in the ACT MIDI Controller property page, or enable the ACT Lock button in the Controllers/Surfaces toolbar.
- If you are not locking the controller/surface to a single instance of a plug-in, put the focus on another plug-in, if desired, and adjust its parameters.
To Edit the Default ACT Mappings
- Enable ACT in the ACT MIDI Controller property page by enabling the Active Controller Technology Enable check box.
- Enable the Learn button ACT on the Controllers/Surfaces toolbar.
- Open the property page of the plug-in that you want to control.
- Click the parameters in the property page that you want to control.
- Move the sliders/knobs on your controller/surface that you want to use to control the parameters with, in the same order that you clicked the parameters (you can reverse steps 4 and 5).
- Disable the Learn button on the Controllers/Surfaces toolbar.
- A dialog asks if you want to keep your assignments. Click Yes or No.
Any assignments you keep are saved automatically as soon as you disable the Learn button. These assignments are global, so they are the same for every project.
OPT Panels
OPT stands for Open Plug-in Technology. If you have a Yamaha sound module that uses OPT panels, you can open the panels directly from SONAR, edit your sounds, and save them as presets.
To Open an OPT Panel
- Make sure your Yamaha module is connected to your computer and turned on.
- Use the Views > OPT Panel command to display the submenu of installed OPT panels, and click the name of the OPT panel you want to display.
The OPT panel appears.
- If you want to edit a preset you've previously created, choose the preset from the Presets window; otherwise type a name for your new preset in the Presets window.
- Edit your sound (each OPT panel has its own help file).
- Click the floppy disk icon that's next to the Presets box to save your edited sound.
Working with StudioWare
StudioWare panels are software interfaces to external MIDI devices such as samplers, keyboards, automatable mixers, and effects units. These interfaces allow you to manipulate the controls on any external MIDI device from graphical controls on your screen. The changes you make to these controls can even be recorded and then played back as part of your project.
SONAR includes a wide variety of StudioWare panels for popular MIDI devices, with new panels constantly under development here at Cakewalk, by equipment manufacturers, and by SONAR
users. Check the Cakewalk web site (www.cakewalk.com) from time to time for new and updated StudioWare panels.
StudioWare Panels
SONAR comes with a variety of StudioWare panels. Some are designed to control a specific external MIDI device, while others are useful with a variety of devices. Here is a listing of some of the panels that are included with SONAR:
| Panel name What it's for | |
| Line 6 POD Provides control for the Line 6 POD 2.0/Pro amp modeler. | |
| Line 6 POD Provides control for the Line 6 Bass POD amp modeler. | |
| Fender Cyber Twin Provides control for the Fender Cyber Twin amp modeler. | |
| ART SQX20 Provides control for the ART SGX 2000 Express guitar preamp/processor | |
| AWE Controls the wavetable synthesizer on SoundBlaster AWE sound cards | |
| EMU Orbit Provides basic control of the EMU's Orbit synthesizer | |
| General MIDI Provides parameters and control for any General MIDI compatible synthesizer | |
| Mackie OTTO 1604 Fader and Mute control designed for the Mackie 1604 mixer | |
| MMC MIDI Machine Control panel, providing track arming and transport control for any device that responds to MMC commands | |
| Novation Bass Station BS1 Panel for controlling the settings of the Novation BassStation | |
| Novation Bass Station Rack BSR1 | Panel for controlling the settings of the Novation BassStation rack version |
| Novation DrumStationRack DRM-1 | Panel for controlling the settings of the Novation DrumStation |
| Novation Super Bass Station Rack | Panel for controlling the settings of the Novation SuperBassStation rack version |
| Roland GS | Control panel providing parameter manipulation for any GS-compatible synth |
| Roland VS-880 Provides parameter and transport control for the Roland VS-880 digital audio workstation | |
| Tascam RC-808 Control Interface modeled after the Tascam RC-808 remote control unit, used with the DA-38, DA-88, and DA-98 multitrack recorders | |
Table 182.
Panel name What it's for
Yamaha ProMix 01 Provides parameter control for the Yamaha ProMix digital mixer
Yamaha 03D Provides parameter control for the Yamaha 03D digital mixer
Roland UA-100 Provides parameter control for the Roland UA-100 audio canvas
Table 182.
To Open a StudioWare Panel
- Choose File > Open to display the Open File dialog box.
- Choose StudioWare from the Files of Type list.
- Choose a StudioWare file and click Open.
SONAR opens and displays the StudioWare panel.
Using StudioWare Panels
Every StudioWare panel is made up of a collection of controls and other information displays. The controls are software representations of the knobs, buttons, and sliders on an external MIDI device. By moving the controls on the screen, you adjust the controls on the external MIDI device. If you want, you can also configure the StudioWare panel so that moving the controls on the external device adjusts the controls on your computer screen. Some StudioWare panels contain controls that perform other functions within SONAR, such as changing track parameters or running CAL programs.
Because StudioWare panels can be used to control many different types of devices, and because each and every panel can be tailored for a specific application and hardware environment, it is impossible to explain here all the different ways to use a particular panel. Instead, this section tells you how to use the different types of controls and how to record the changes you make to each control as part of your project.
There are three types of controls in most StudioWare panels: buttons, knobs, and sliders. In addition, panels may contain LED indicators, level meters, text, and bitmap images. The appearance of controls and other displays may vary greatly from panel to panel. They may be of very different sizes, and they may be designed with custom styles, bitmaps, and colors. In addition, sliders and meters may be laid out either horizontally or vertically.

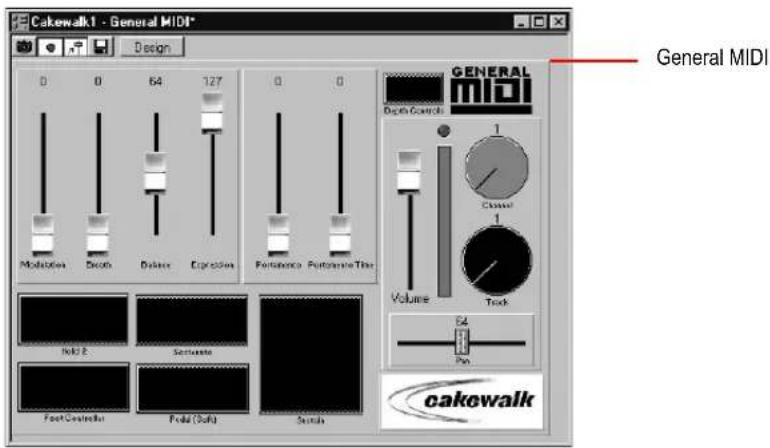

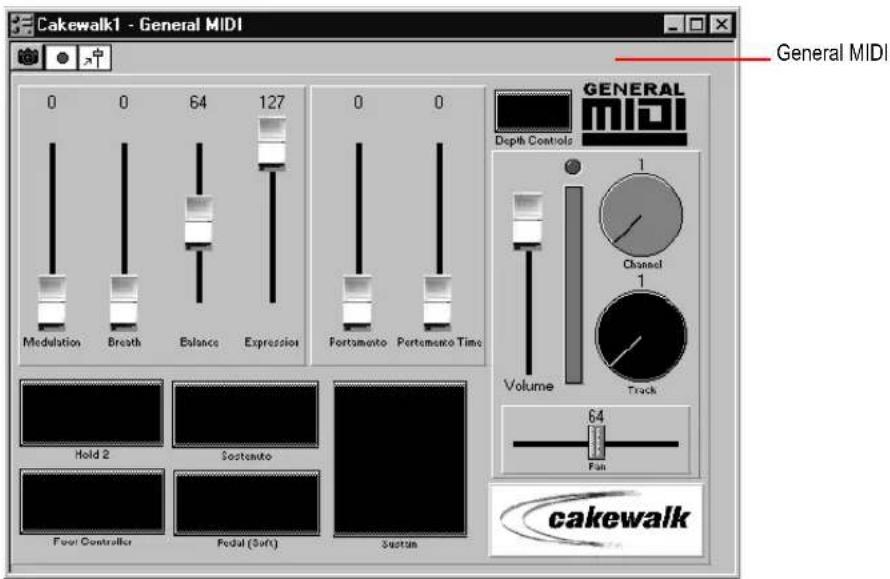
There are a variety of ways to adjust the values of buttons, sliders, and knobs:
To change this Do this
The status of a button Click on the button
Table 183.
To change this Do this
| The value of a slider | Click on the desired slider position to move the slider to that position, or drag the slider to the desired position |
| The value of a knob Click along the outer edge of the knob to move the knob to that position, or drag the outer edge of the knob in a circular motion to set the desired position | |
Table 183.
To change the value of a knob or slider using the keyboard, you must first select the control:
• To select a control that has a numeric value display or label, click on the value or the label.
- To select a control without a numeric value display, click on the control, being careful to click at the current control position. If you do not click at the current control position, the control will change values as a result of the mouse click.
To adjust a knob or slider using the keyboard:
- Press the - and + keys to decrease or increase the value of the selected control by the smallest amount
- Press the [ and ] keys to decrease or increase the value of the selected control by steps of 10
Grouping Controls
SONAR lets you create groups of StudioWare controls. When several controls are in a single group, you can move a single control and have the remaining controls in the group adjust automatically. This is useful for many different mixing and crossfade applications.
When you create a group of controls, each control in the group has a starting and an ending value. Here's how these values are used:
- When you move any control in the group to its starting value, all controls in the group are set to their starting value
- When you move any control in the group to its ending value, all controls in the group are set to their ending value
- When you position any control in the group somewhere between its starting and ending value, all controls in the group are set to the same relative position between their starting and ending value
The initial range for each control is set based on the position of the controls at the time you group them.
You can adjust the range for any individual control, even if it is part of a group, simply by holding the SHIFT key while you move the control. When you adjust an individual control by holding the SHIFT key, its maximum or minimum is adjusted, depending on whether the entire group is closer to its minimum or maximum value.
To Create a Group of Controls
- Select any control by clicking on it with the mouse.
- Hold down the CTRL key and click on one or more additional controls.
SONAR creates a group from the selected controls.
To Remove Controls from a Group
- Hold down the CTRL key and click on any control in the group.
SONAR removes the control from the group.
To Adjust a Single Control in a Group
- Hold down the SHIFT key and drag the control to a new value.
The range for the control is adjusted so that its current position corresponds with the current position of other controls in the group.
Example: To Set Two Faders for a Crossfade
- Move the two faders to their midpoint.
- Click on the first fader, and then CTRL-click on the second to create a group.
- Move both faders to their highest position.
- SHIFT-drag the second fader to its lowest position.
- Drag the first fader to its lowest position.
- SHIFT-drag the second fader to its highest position.
These two controls are now grouped so that they move in opposite directions.
The minimum and maximum values of the faders look like this:
| Fader Starting value Ending value |
| #1 0 127 |
| #2 127 0 |
Table 184.
To set faders that are always the same distance apart, set the ranges something like this:
| Fader Starting value Ending value |
| #1 0 63 |
| #2 64 127 |
Table 185.
To set faders to move over different ranges of values, set them something like this:
Fader Starting value Ending value
1 0 127
2 0 100
Table 186.
Recording Control Movements
You can move the controls in a StudioWare panel while playing back a project to adjust the levels or other MIDI activity that the panel is designed to accommodate. In addition, you can record changes that you make to the controls in a panel so that these changes become a part of your project. Recording changes so that they play back automatically is known as automation.
There are two general approaches to recording control movements, as indicated in the following table:
Approach How it works
| Snapshot You set all the controls to the values you want, and then create a snapshot of these settings at a particular Now time. When you play back the project later, all the controls will snap back to these settings when you reach the appropriate Now time. | |
| Real-time recording | You move controls in any way you like, recording the series of changes you make so they become part of your project. When you play back the project later, the controls move exactly as you recorded them. |
Table 187.
The first approach is useful, for example, when your project contains a variety of distinct sections and you want to make a sudden change in one or more settings between the sections.
The latter approach is most useful when you want to create smooth transitions from one section to another. For example, you could slowly add modulation to a MIDI piano or move the faders on a digital mixing console. Once you record these changes, they will play back along with your project automatically.
StudioWare lets you record and re-record automation data as many times as necessary. When you record new movements for a control, any old events for that control are replaced by the newer ones. Movements of other controls are unaffected. You can re-record moves again and again until you've got the movement exactly the way you want it. You can also edit automation data using the Notes pane in the Piano Roll view.
There are three tools in the StudioWare toolbar that are used to control recording and automation:
Icon Tool What it's for

Update Makes the controls in the panel update automatically during playback or when MIDI data is received by the panel

Snapshot Records a snapshot of the current position of all controls

Record Activates real-time recording of all control movements
Table 188.
Most StudioWare panels are designed to both send and receive MIDI data. This means two things:
- If you move the controls on your external MIDI device, the StudioWare panel will be notified of the changes
- When you play back a project containing automation data, the StudioWare panel is notified of the automation changes
The Update button in the StudioWare toolbar indicates whether these changes are played back visually on the StudioWare panel. Press this button to make sure that automation parameters and changes made on the external MIDI device are displayed in the StudioWare panel. Turn this option off if you do not want to see these changes.
If you are recording a snapshot while playback is in progress, you should probably disable Update. Otherwise, some of the controls may move as a result of previously recorded automation events, even while you are trying to position them correctly.
When you are recording real-time control movements, you probably want Update enabled, so that the controls will show the events that have already been recorded.
If you record automation data on a track that contains linked clips, SONAR automatically unlinks the clips so that the automation data do not apply to other instances of the linked clip. As an example, suppose you have four repetitions of a particular riff, stored in four linked clips that play in sequence. When you record a fade-out over these four clips, SONAR automatically splits the clips into four independent clips, each with automation data representing some portion of the fade.
If you record a snapshot of control positions on a track that contains linked clips, the clips remain linked, and the snapshot applies to all copies of the linked clip.
If you are not happy with the automation data you recorded, you can always use the Edit > Undo command to remove it.
The automation data you record using a StudioWare panel can be displayed and edited using either the Notes pane in the Piano Roll view or the Event List view. For more information about the Controller pane, see “Controllers, RPNs, NRPNs, and Automation Data” on page 510. For more information about the Event List view, see “The Event List View” on page 512.
To Record a Snapshot While Playback Is Stopped
-
Set the Now time to the point in the project where you want the settings to take effect.
-
Move the controls to the settings you desire.
-
Click
SONAR records a snapshot of the current control settings.
If the Now time is the very beginning of the project, then the snapshot will change the track parameters to match the controls in the panel instead of recording automation events.
To Record a Snapshot While Playback Is in Progress
- Make sure the button in the StudioWare toolbar is not pressed so that Update is disabled.
- Change the Now time to a few bars or seconds before the time you wish to take the snapshot.
- Start playback.
- When you have reached the appropriate time, click on the Snapshot button.
SONAR records a snapshot of the current control settings.
To Record Control Changes in Real Time
- Make sure the button in the StudioWare toolbar is pressed so that Update is enabled.
- Make sure the button in the StudioWare toolbar is pressed so that Recording is enabled.
- Set the Now time to a few bars or seconds before the time at which you want to record control movements.
- Click ▶ press SPACEBAR to start playback.

Note: Do not press the Record button in the Transport toolbar!
- Adjust the controls as you wish while playback is in progress. Each time you adjust a control, the Record tool is activated.
- When you are done, click ■ or press the SPACEBAR to stop playback.
- Click the button in the StudioWare toolbar to turn off real-time recording.
SONAR records the control changes that you entered while playback was in progress.
Control Settings
The controls in a StudioWare panel are designed to send and receive various types of MIDI information. This information can be transmitted to two possible destinations:
• A specific track in your project
- A MIDI output
When you want to record the movements of controls within a panel, you must make sure that MIDI data from the control are directed to a MIDI track.
StudioWare Panel Drawing Speed
Some StudioWare panels use bitmap graphics to enhance their appearance. These graphics can slow down the speed with which a panel is displayed on some slower PCs. You can turn off these bitmap graphics by adding this line to the [WinCake] section of the Cakewalk.ini file, as follows.
PanelsShowWidgetBitmaps=0
To turn bitmap graphics on again, change the entry to:
PanelsShowWidgetBitmaps=1
For more information about the Cakewalk.ini file, see the online help topic: Initialization Files.
Using CAL
Cakewalk Application Language (CAL) is an event-processing language that you use to extend SONAR with custom editing commands.
See:
Running CAL Programs
Sample CAL Files
Running CAL Programs
To interrupt a CAL program while it is running, press the Esc (Escape) key. Press OK to confirm that you want to interrupt the CAL program. As a rule, you shouldn't interrupt a CAL program in this way unless you suspect it is stuck in an infinite loop.
To Open a CAL Program
- Select the MIDI data you want to edit.
- Choose Process > Run CAL.
The Open dialog box appears.
- Navigate to the folder that contains the CAL program you want to run.
- Choose the file you want to open and click Open.
The CAL program you chose runs and modifies the selected MIDI data.
Sample CAL Files
The following is a description of the sample CAL programs that come with SONAR. You can use these programs as is or modify them to suit your own needs.
See:
SPLIT NOTE TO TRACKS.cal
SPLIT CHANNEL TO TRACKS.cal
RANDOM TIME.cal
THIN CONTROLLER DATA.cal
THIN CHANNEL AFTERTOUCH.cal
THIN PITCH WHEEL.cal
MAJOR CHORD.cal, MINOR CHORD.cal
SPLIT NOTE TO TRACKS.cal
This program splits individual notes to separate tracks. It is useful if you have one drum track but want to split each drum to a separate track (for more flexible editing).
SPLIT CHANNEL TO TRACKS.cal
This program splits a track by channel into 16 new tracks. This can be useful for Type 0 MIDI files, which may have data recorded on many channels but only one track.
To use the program
- Select only one track.
- Set the From and Thru markers for any part of the track (you don't have to split the whole track).
- Run the Split Channel to Tracks.cal program.
SONAR displays a dialog box. - Select the first track for the 16 split-channel tracks (preferably, the first of 16 blank tracks).
- Click OK.
RANDOM TIME.cal
This program randomizes event starting times. It asks you for a number of ticks. The program then changes each event time by an amount that is randomly between plus or minus one-half the number of ticks that you supply.
For example, if you type the number 4, each event time will have -2, -1, 0, 1, or 2 added to it.
THIN CONTROLLER DATA.cal
This thins continuous Controller data. It prompts you for two numbers.
- The number of the Controller that you want to thin. For example, MIDI assigns the Volume controller to number 7.
- A thinning factor. For example, if you specify the number 3, the program deletes every third Controller event of the kind you've specified.
This program never deletes Controllers with the values 0, 64, or 127, because the goal is to thin the data without destroying the fundamental shape of it.
THIN CHANNEL AFTERTOUCH.cal
This works almost exactly like the previous program, but it thins channel aftertouch (ChanAft) events. It asks you for the thinning factor.
THIN PITCH WHEEL.cal
This works almost exactly like the previous two programs, but it thins pitch-wheel events. It asks you for the thinning factor.
This program never deletes wheel events with these special values:
-8192, 0, and 8191.
MAJOR CHORD.cal, MINOR CHORD.cal
These two CAL programs and the three other chord-building CAL programs that come with SONAR build chords using existing events in the track(s) as chord roots.
For instance, if you select a single note as the region and run Major_chord.cal, two notes are added above the original note. The resulting chord is a major triad.
Normally, you'll use these programs on a region containing a single note. You can, however, apply these to tracks containing many notes. Each original note will become the root of a chord.
Troubleshooting
If you're having a problem with SONAR, don't panic. This chapter lists some common problems and how to solve them.
If you don't find an answer here, there are two other important places to look for help:
- Check the ReadMe file that came with your software. It contains additional information that wasn't available when this User's Guide was printed. To view the Readme file, select Help > View README.RTF.
- Visit our website at www.cakewalk.com, where you'll find answers to frequently asked questions, tech support documents, program patches and updates, and more.
Frequently Asked Questions
Audio dropouts or crash when playing back large files at maximum latency
When I Play a File, I Don't Hear Anything
I Can't Record from My MIDI Instrument
When I Play a File Containing Audio, the Audio Portion Doesn't Play
I Can't Record Any Audio
The Music Is Playing Back with the Wrong Instrument Sounds
My Keyboard Doubles Every Note I Play
I Don't See the Clips Pane in the Track View
Why Can't SONAR Find My Audio Files?
Why Do I Get Errors from the Wave Profiler?
My Track or Bus Fader is Maximized, But There's No Sound or Level
How Do I Use SONAR to Access All the Sounds on My MIDI Instrument?
I Hear an Echo When I Record
Dropouts Happen in High Bit-depth or High Sample Rate Audio
Patching an Effect into SONAR Causes a Dropout
I Can't Open My Project
Audio Distorts at Greater than 16 Bits
No Sound from My Soft Synth
My Pro Audio 9 Files Sound Louder/Softer When I Open Them in SONAR
SONAR Can't Find the Wavetable Synth or MPU401
I Get an Error Message When I Change a Project to 24-bit Audio
Bouncing Tracks Takes a Long Time
The GUI is not Smooth During Playback
Plug-in windows flicker or don't display properly
File Recovery mode
Audio dropouts or crash when playing back large files at maximum latency
Symptom: after several seconds of playback the audio begins to cut out, although the transport appears to keep rolling. If the project file is loaded with several plug-ins you may experience a crash.
Solution: if you ever set the Buffers Size field on the General tab of the Audio Options dialog so that the buffer size exceeds the disk buffer size, audio won't play properly. If you want latency that high you must also increase the disk buffer size: in the Audio Options dialog, on the Advanced tab, try increasing the I/O Buffer Size (KB) field by blocks of 128 KB.
More Frequently Asked Questions.
When I Play a File, I Don't Hear Anything
Open a project (.cwp) and click the Play button. If you don't hear any music, try the following suggestions:
| Possible problem What to do | |
| Your speakers aren't connected properly or the volume is turned down. | Make sure your speakers are on and the volume is turned up. |
| Your sound card isn't hooked up correctly. | See if other programs play sound correctly through your speakers. A good program to try is the Media Player (Start > Programs > Accessories > Entertainment > Windows Media Player). If other programs do not work, check your sound card documentation to make sure the card is properly installed and configured. |
| You don't have Bank and Patch settings in your MIDI track | Check the Bank and Patch settings for each track. Make sure that each track has a Bank and Patch assigned to it. |
| You don't have an Output setting | Check Output settings for each track. Make sure that each MIDI track is assigned to a MIDI output which is connected to a MIDI device capable of playback. Make sure each audio track is assigned to an output that is connected to your speaker system. |
| No MIDI output device is selected. | Choose Options > MIDI Devices, and check the Output device list. Make sure that your computer sound card is highlighted and at the top of the list. If this doesn't work, try choosing different output devices, one at a time, to see if any of them produces sound. |
| Your sound card or MIDI interface is not set up correctly. | Make sure you have installed and tested each card according to the manufacturer's instructions. |
| You may have too many MIDI drivers. | Make sure you only install the drivers that you need, and remove any old or unused drivers. To access the driver list, choose Start > Settings > Control Panel, then double-click Multimedia and click on the Advanced tab. |
| Your MIDI driver is incorrect or outdated. | Make sure that the driver you have installed is the correct driver for your hardware. Also try downloading and installing the latest driver release from your hardware manufacturer. |
| Your MIDI driver is configured incorrectly. | Make sure the driver's IRQ and port address settings match the physical settings on the card. |
Table 189.
Table 189.
If none of these suggestions works, check our website for additional suggestions or contact technical support.
More Frequently Asked Questions.
I Can't Record from My MIDI Instrument
If you are unable to record music from your electronic keyboard, synthesizer, or other MIDI instrument, first test to see if you are able to play back a project through the keyboard. Then try the following:
| Possible problem What to do | |
| No MIDI input device is selected. | Choose Options > MIDI Devices, and check the Input device list.Make sure that the MIDI input on your computer sound card is highlighted. |
| Your MIDI cables are reversed. Make sure that the MIDI Out plug is connected to the MIDI In jack on your keyboard and that the MIDI In plug is connected to the MIDI Out jack on your keyboard. | |
| SONAR is not receiving MIDI data. | Check the MIDI Input/Output Activity monitor on the Windows Status bar. Check to see if the left LED is flashing red. If not, then SONAR is not receiving MIDI data. Check you connections and try again. |
| You have not set up SONAR to record. | Make sure that 1) you have chosen an input for the track; 2) you have armed the track for recording; and 3) you have pressed the Record button, and not the Play button. |
Table 190.
If none of these suggestions works, check our web site for additional suggestions or contact technical support.
More Frequently Asked Questions.
When I Play a File Containing Audio, the Audio
Portion Doesn't Play
Open a bundle file (.cwb) and click the Play button. Do you hear the audio tracks in the project (there may be MIDI tracks in the bundle file, so you must mute them). If not, try the following:
| Possible problem What to do | |
| Your speakers aren’t connected properly, or the volume is turned down. | Make sure your speakers are connected properly and the volume is turned up. |
| Your sound card isn’t hooked up correctly. | Run the Microsoft Sound Recorder (Start > Programs > Accessories > Entertainment > Sound Recorder). Open any wave file and see if it plays sound correctly through your speakers. If not, check your sound card documentation to make sure the card is properly installed and configured. |
| The volume setting is turned down on your software mixer. | Double-click on the yellow speaker icon in the Windows task bar to display the mixer, and make sure all the volume settings are turned up and that none are muted. |
| Your audio tracks are assigned to the wrong output. | Check the output assignment for your audio tracks in the Track pane. |
| SONAR doesn’t recognize your sound card. | Choose Options > Audio, click the General tab, and then click the Wave Profiler button to test your audio hardware. Then, re-open the bundle file and try again. |
Table 191.
If none of these suggestions works, check our website for additional suggestions or contact technical support.
More Frequently Asked Questions.
I Can't Record Any Audio
If you are unable to record audio through your sound card, try the following suggestions:
| Possible problem What to do | |
| The track is not set up to receive audio input. | Make sure that the input for the track you are recording (in the Track view) is set to an Audio input before recording. |
| The software mixer is not set up properly. | Double-click on the speaker icon in the Windows task bar to display the mixer. Choose Options > Properties, select Adjust Volume for Recording, and click OK. Make sure the appropriate Select boxes have checkmarks and the input volume is turned up. |
Table 192.
Possible problem What to do
| Your sound card isn't hooked up correctly. | Try recording audio using the Microsoft Sound Recorder (Start > Programs > Accessories > Entertainment > Sound Recorder). If it fails, check your sound card documentation to make sure it is properly installed and configured. |
| You have not set up SONAR to record. | Make sure that 1) you have chosen an input for the track; 2) you have armed the track for recording; and 3) you have pressed the Record button, and not the Play button. |
Table 192.
If these suggestions don't work, check our website for additional suggestions or contact technical support.
More Frequently Asked Questions.
The Music Is Playing Back with the Wrong Instrument Sounds
If the tracks in your project are assigned to the same MIDI output and channel, the same sound will be used for all of them. To fix this problem, simply assign each track to a different channel (using the Channel control in the Track view), and then choose the sound (or patch) you want to use for each one. If you are playing songs through your MIDI keyboard or synthesizer, you need to 1) check that your instrument is able to receive MIDI data on multiple channels, and 2) configure your instrument to play a different patch on each channel (this is called Multi Mode on many instruments). See the documentation for your instrument for more information.
Another possibility is that you are playing back a GM (General MIDI)-authored MIDI file on a non-GM compatible device.
More Frequently Asked Questions.
My Keyboard Doubles Every Note I Play
When your keyboard doubles the notes, each note seems heavier or thicker than usual, as if two notes of the same pitch are emitted when you press the key. Also, you may find that you can play only half as many notes at one time before some of the held notes drop out.
This can occur when MIDI echo is enabled. The keyboard plays the note for the key you've pressed. At the same time, the note is sent through the MIDI interface and echoed back to the keyboard, where it is played a second time.
The best way to resolve the problem is to disable Local Control on the keyboard, following the instructions that came with the keyboard. This stops the keyboard from playing independently. The keys you play still produce sound on the keyboard because they are echoed back by the MIDI
interface. In many cases, SONAR disables local control automatically when the program is started, but this is not always possible.
It's also possible that your keyboard is transmitting information on two channels at once. To see if this is so, create a new project and record two notes from the keyboard. Then look at what you've recorded in the Event list view. If you see four notes displayed instead of two, then your keyboard is transmitting on two channels. See the documentation for your keyboard to learn how to correct the problem.
More Frequently Asked Questions.
I Don't See the Clips Pane in the Track View
The splitter bar may be so far to the right that the Track pane fills the entire Track view. Here's how to solve the problem:
- Place your cursor over the splitter bar. It is located on the far right side of the Track view, just to the left of the vertical scroll bar. When you place the cursor over the splitter it changes to a double-headed arrow.
- Click and drag the splitter bar to the left. You should be all set.
More Frequently Asked Questions.
Why Can't SONAR Find My Audio Files?
SONAR looks for all audio data in a certain directory or folder, called the Data Directory, in Cakewalk Projects (or the WaveData Directory in previous versions of Cakewalk products). If you have renamed or moved either SONAR or the Data Directory, SONAR may not be able to find your audio files. If you know where the audio files are stored, choose Options > Audio, click Advanced and enter the full path name of the directory in the Data Directory box. If you don't know where the audio data are stored, choose Start > Find > Files or Folders and search for files named *.wav.
For more information about the wavedata folder, see Audio File Management.
More Frequently Asked Questions.
Why Do I Get Errors from the Wave Profiler?
Audio devices such as voice modems or speakerphone devices can cause an error message when running the Wave Profiler. Sometimes these errors are harmless; on other occasions you need to disable the voice modem or speaker-phone device before running the Wave Profiler. To do so:
- Choose Options > Audio and click the Drivers tab.
-
Make sure that the voice modem or speaker-phone device is not selected in both the Input and Output device lists.
-
Click OK.
- Choose Options > Audio, click the General tab, and run the Wave Profiler again.
My Track or Bus Fader is Maximized, But There's No Sound or Level
SONAR has two modes that govern how fader levels function: Envelope Mode and Offset Mode. In Envelope Mode, any envelopes in the track or bus control the level, and ignore any movements you make to the fader. In Offset mode, any envelopes in the track or bus add their level to any level that the fader contributes. For example, the level you see in the Vol field of a track's properties combines with the levels that any volume envelope in that track produces as the track plays. When you switch back to Envelope mode, any level that the Vol field displays while in Offset mode continues to combine with any envelope in the track, but does not show in the Vol field while you're in Envelope mode. So, if you have a large negative value such as -INF in the Vol field, even though the volume envelope is at its maximum level, the sum of the two values is still inaudible because the negative value is so large.
Whenever you have mysterious levels in a track or bus, click the Envelope/Offset Mode button that is in the Automation toolbar to switch modes (or press O in the Track or Console views), and then look in the track or bus property fields to see what values show. Change the values to neutral ones if you don't want them to affect your levels.
How Do I Use SONAR to Access All the Sounds on My MIDI Instrument?
SONAR is normally set up to access the 128 sounds that are part of the General MIDI standard. SONAR also includes custom instrument definitions that match the sounds on many popular instruments. To use a custom instrument definition:
- Choose Options > Instruments to display the Assign Instruments dialog box.
- Click the Define button to display the Define Instruments and Names dialog box.
- Click Import, and then choose the file for the manufacturer of your instrument.
- Choose your instrument from the list and click OK.
- Click Close to return to the Assign Instruments dialog box.
- Select from the Output/Channel list all the outputs and channels that are being sent to that instrument.
- Click on the instrument in the Uses Instrument list.
- Click OK when you are done.
If your manufacturer or instrument doesn't appear, check our web site to see if an updated instrument definition is available. You can also create your own instrument definition. For more information about instrument definitions, see the online help topic: Instrument Definitions.
More Frequently Asked Questions.
I Hear an Echo When I Record
If you have input monitoring enabled, when you play an instrument that is plugged into your sound card, you hear the direct signal that goes straight through your sound card, and an instant later you hear the sound that is processed by SONAR, including any plug-in effects you may be using. Only the processed sound is recorded.
You can eliminate the echo in either of two ways:
- Mute the direct signal so you only hear the sound that is processed by SONAR. If you choose this method, you may hear too much of a lag between the time you play your instrument and the time you hear it, depending on the latency of your system (using WDM audio drivers is a great way to achieve lower latency).
- Disable input monitoring so you only hear the raw signal that's coming through your sound card. If you choose this method, you won't hear any plug-in effects you may be using.
To disable input monitoring:
- On the track where you want to disable input monitoring, click the track's Input Echo button so that it is in the off position:
To mute your sound card's direct sound:
- Open the software mixer that controls your sound card. If your sound card uses the Windows mixer, open the mixer by using the Start > Programs > Accessories > Entertainment > Volume Control command, or by double-clicking the speaker icon on the Windows taskbar.
- In the Play Control window of the mixer, check the Mute check box in the Line-In column, or in the column of whatever jack your instrument is plugged into, and close the mixer window.
More Frequently Asked Questions.
Dropouts Happen in High Bit-depth or High Sample Rate Audio
If you are hearing consistent dropouts/clicks in your audio and if your project contains high bit depth (32/64 bit) or high sample rate audio (88.2K or higher), it may be indicative of a too small I/O buffer size. If so try a higher I/O buffer size like 256 or 512. If audio problems persist, reset to 128 and try a different remedy.
Use the Options > Audio command to open the Audio Options dialog, click the Advanced tab, and in the I/O Buffer Size (KB) field, enter 256 or 512.
Patching an Effect into SONAR Causes a Dropout
You may have simply reached the maximum number of tracks and effects your CPU can handle. However, if your CPU meter doesn't appear to be maxed out, or other plug-ins seem to work, you may need to address the problem by editing a line in the Aud.ini file.
Using Notepad, open the Aud.ini located in the directory where you installed SONAR. The default value of the ExtraPluginBufs variable is 0. Try changing that value to 1, saving Aud.ini and patching in the effect that caused the dropout. If it still causes a dropout, try changing the value in ExtraPluginBufs to 2. Continue to double the value in this variable until you reach 128 (4, 8, 16, 32). If a value of 128 does not fix the problem, it is time to try something else. See Dropouts and Other Audio Problems for more information about potential reasons for dropouts.
More Frequently Asked Questions.
I Can't Open My Project
Your project may have become corrupted. You can attempt to open the project using Safe Mode.
To Use Safe Mode
- If you are opening a file from the Most Recently Used files list in the File menu, hold down the SHIFT key while selecting file name.
- If you are opening the file from the Open dialog, select the file in the dialog and hold down the SHIFT key while clicking the OK button.
Safe Mode does the following: - Opens only the Track view.
- Prompts you if you want to open the plug-ins saved with your project. Each plug-in gets a prompt, so you can open some and not open others.
See:
File Recovery mode
Audio Distorts at Greater than 16 Bits
There are several settings in the Audio Options dialog box (Options > Audio command) you need to set before using audio formats greater than 16. See “System Configuration” on page 843.
More Frequently Asked Questions.
No Sound from My Soft Synth
Use the following table to troubleshoot problems hearing a synth in SONAR:
| Possible problem What to do | |
| Synth doesn't sound when a recorded MIDI track is sent to it. | Make sure you select a MIDI channel in the MIDI track'sOutputfield; you may also need to select aPatchandBank.Make sure that neither the MIDI track nor the audio track that contains the synth are muted.Make sure the MIDI notes are in the right range for the synth's patch. |
| Synth patched into a main out or bus doesn't sound. | Make sure that at least one audio track is configured to send data to that bus.Make sure that theAudio Enginebuttonin theTransporttoolbar is depressed. |
| Soft synth doesn't sound when you play a MIDI controller. | Make sure that theAudio Enginebuttonin theTransporttoolbar is depressed.Make sure that the MIDI track that has the focus lists the soft synth in itsOutputfield.If you patched the soft synth into an audio track, make sure that track is not muted.If you patched the soft synth into a bus, make sure that at least one audio track is configured to send data to that bus.Make sure you're playing in the right range for the soft synth's patch. |
| I hear more than one sound when I play a soft synth. | Make sure your MIDI controller is set to local off. |
Table 193.
More Frequently Asked Questions.
My Pro Audio 9 Files Sound Louder/Softer When I Open Them in SONAR
Pro Audio 9 has a setting in the Audio Options dialog box called MIDI Volume Mapping. This setting determines how many dB that a movement of a volume fader produces. This setting is not stored in each project file, so SONAR can't tell precisely what dB scale was used to produce the file you're opening. If the volume sounds incorrect:
- Open SONAR's Aud.ini file (find it in your SONAR folder and double-click it).
- Change the line that says VolMethod=n. If n=1, change n to 0; if n=0, change n to 1.
-
Save the file and close it.
-
Reopen the Pro Audio file in SONAR. If the volume sounds correct, save the file in SONAR. If other Pro Audio 9 files were opening correctly in SONAR, change the VoMethod=n line in SONAR's Aud.ini file back to what it originally was, and re-save the file.
More Frequently Asked Questions.
SONAR Can't Find the Wavetable Synth or MPU401
Follow this procedure:
- Open the Audio Options dialog (Options > Audio command), and on the Advanced tab, check the Always Use MME Interface, Even When WDM Drivers Are Available option.
- Click OK to close the dialog.
- Close SONAR and reopen it.
- Use the Options > MIDI Devices command to open the MIDI Devices dialog.
- Highlight the Wavetable synth and/or the MPU401 (or whatever synth your sound card contains).
- Click OK to close the dialog.
Now your sound card synth and/or the MPU401 should appear in the drop-down menus of the Output fields of your MIDI tracks.
I Get an Error Message When I Change a Project to 24-bit Audio
Some audio devices, especially USB devices that use WDM drivers, can not operate in 24-bit mode unless a variable in SONAR's Aud.ini file is set to 1. The variable is Use24BitExtensible=<0 or 1>, which goes in the [name of your audio device ('n' in, 'n' out)] section.
For more information, see AUD.INI.
More Frequently Asked Questions.
Bouncing Tracks Takes a Long Time
By default, SONAR uses a buffer for bouncing tracks that is the same size as the Mixing Latency value that you set in the Audio Options dialog. But with some projects, especially ones that use certain soft synths, the bounce buffer needs to have its own value. You can set the value in the Aud.ini file with the BounceBufSizeMsec=0 line in the Wave section. At a value of 0, the bounce buffer is the same size as the Mixing Latency value that you set in the Audio Options dialog. You can set the bounce value to 100, or some value between 0 and 350 so that the bounce buffer will use a more efficient size for bouncing, which has different requirements from normal playback latency.
For more information, see AUD.INI.
More Frequently Asked Questions.
The GUI is not Smooth During Playback
If the GUI does not update smoothly during playback, press the Pause key to make sure you didn't inadvertently put SONAR in CPU conservation mode. If the Pause key has been pressed, SONAR will display the letter P in the status bar.
For more information, see "Reduce GUI updates to improve playback performance" on page 856.
More Frequently Asked Questions.
Plug-in windows flicker or don't display properly
X-Ray Windows is not compatible with plug-ins that use DirectDraw to create their windows, such as many recent plug-ins by Waves. If a plug-in is not compatible with X-Ray, the plug-in's window will either flicker or not display properly. If you have any plug-ins that are affected by this, you can exclude the plug-n(s) from X-Ray by following the instructions below:
- Open the Cakewalk Plug-in Manager (Tools > Cakewalk Plug-in Manager).
- In the Plug-in Categories window, select the category that the plug-in you want to exclude is in.
- In the Registered Plug-ins window, select the plug-in that you want to exclude.
- If the plug-in is a DirectX effect or an MFX, write down (or select and copy) the CLSID value that's in the CLSID field at the bottom of the dialog.
- If the plug-in is a VST or VSTi, write down the VST ID value that's in the VST ID field at the bottom of the dialog.
-
Close the Plug-in Manager dialog.
-
Use Notepad to open the XRayExclude.ini file that's in your SONAR program folder (C:\Documents and Settings\
\Application Data\Cakewalk\SONAR 8 Producer Edition).

Note: If you use SONAR Studio, substitute "Producer" with "Studio".
- At the end of the file, find the [EffectProps View] section.
You will see entries such as the following:
; Waves SSL EQ Stereo
XRayExclude11=1397510483
XRayExclude12={E451379E-F7E1-4E82-98D9-BEB87AC45E90}
- Exclude your plug-in by creating a blank line below the last entry in the [EffectProps View] section, and then typing:
;[name of your plug-in, but without brackets]
XRayExclude[type the next available number in XRayExclude list, but without brackets]=[VST ID number, with no brackets, or CLSID number, with curly braces at start and finish]
For example, if the last entry in the [EffectProps View] section was:
; Waves SSL EQ Stereo
XRayExclude11=1397510483
XRayExclude12={E451379E-F7E1-4E82-98D9-BEB87AC45E90}
If you wanted to exclude the Cakewalk FxDelay from the X-Ray Windows feature, after creating a blank line you would type:
; Cakewalk FxDelay
XRayExclude13={985DAF67-589F-4B8D-8BBC-D7AD651B9022}
If there was also a VST version of the Cakewalk FxDelay, you would add another line:
XRayExclude14=[some VST ID number, with no brackets]
- Save and close the XRayExclude.ini file, and restart SONAR to implement your changes.
File Recovery mode
SONAR 5 introduced a special diagnostic mode called Safe Mode to fix problems with project files that would not open. Safe mode is activated when you open a file while the SHIFT key is pressed.
In certain rare circumstances, on attempting to open a project file you may see the following error message:
"This file you are trying to open is not compatible with this version of SONAR".
This message indicates that SONAR detected errors in the project file and was unable to open it. This normally indicates that your project file has data corruption.
Data corruption on a DAW can occur due to various reasons, a few of which are listed below:
- Your hard drive might suffer data loss.
- Windows delayed writes might fail leading to data corruption.
- Many hard disks have a "write through cache" buffer for efficiency. Occasionally this write through buffer might not get flushed due to a driver error or system crash. In such cases data might not be flushed to your hard driver causing corrupt files (SONAR requests Windows to flush this buffer after a file save operation).
- A plug-in can corrupt the SONAR's memory space causing invalid data to be written to disk when the project is saved.
- During a file save the system can crash. In such situations you will have a truncated file on disk.
You save a “recovery file” through SONAR’s crash exception dialog. When a crash occurs in SONAR you are presented with this dialog allowing you to attempt to save a recovery file. While this works most of the time, occasionally SONAR may be in a compromised state due to memory corruption. Under these circumstances, saving a file might cause a crash or the file might contain invalid data.
In general, the best insurance against the data corruption scenarios above is to follow standard safe computing practices to guard against data loss (keep regular backups, use autosave with versioning, etc.). However, occasionally you may be faced with a situation where you do not have a backup copy of a critical project that now fails to open.
SONAR's File Recovery Mode offers a means to help recover data from damaged project files.
To use File Recovery mode
Do one of the following:
- If you are opening a file from the Most Recently Used files list in the File menu, hold down the SHIFT key while selecting file name.
- If you are opening the file from the Open dialog, select the file in the dialog and hold down the SHIFT key while clicking the OK button.
What does File Recovery mode do?
File Recovery Mode applies the following behavior when opening a project file:
- Opens only the Track view, skipping all other opened views in the project including effects windows, Console View etc.
- Prompts you if you want to open the plug-ins saved with your project. Each plug-in gets a prompt, so you can open some and not open others.

Important: If you choose to not open a plug-in, that plug-in is stripped out of the project, so resaving the file will cause a loss of any project specific settings for that plug-in.
- Ignores various strict error checks that would normally prevent a file from loading (only applies when the original project fails to load normally).
- Detects corrupt data and skips over "chunks" that are found to be invalid. E.g., if a track/event is detected to contain invalid data, SONAR will attempt to skip over that track/event and proceed to load the next track/event (only applies when the original project fails to load normally).
In many cases, File Recovery Mode may be able to open damaged projects with minimal data loss. However, the level of success depends on the nature and extent of the data corruption, so the results are not predictable. As a result of this, after opening a damaged project in File Recovery Mode, you must carefully observe whether your settings have been retained or if the project exhibits
other problems. If you notice problems you should copy and paste the critical data from the recovered file into a brand new empty project to start clean.

Important: Since File Recovery Mode ignores many critical error checks while loading a file, depending on the nature of the data corruption in the file, it is possible that opening a file with File Recovery Mode might cause SONAR to crash or become unresponsive. Please ensure that you save all your current work and close all open projects before attempting to open a file with File Recovery Mode.
After loading a file with File Recovery Mode, it is recommended that you resave the file—preferably with a new name—and then shut down and restart SONAR before proceeding.
Hardware Setup
This appendix contains additional details on configuring your equipment for use with SONAR.
See:
Connect Your MIDI Equipment
Set Up to Record Digital Audio
Connect Your MIDI Equipment
If you are using a MIDI interface (such as an MPU-401 or Sound Blaster MIDI option) with an external MIDI keyboard, you need to connect the equipment using MIDI cables.
It is possible to connect your equipment in some rather complex ways that may cause problems. If you call for technical support with a problem concerning equipment that doesn't seem to be responding, we'll probably suggest that you reconnect things in one of the ways listed below before we explore the problem further. Also be sure to check the Troubleshooting chapter before calling us.
There are two methods that fit many circumstances. The one you choose depends on whether your keyboard has:
- All three types of MIDI jacks: In, Out, and Thru
- Only two types of MIDI jacks: In and Out
If you have only one keyboard, read "If Your Keyboard Doesn't Have a MIDI Thru Jack" on page 923 (regardless of whether you have MIDI Thru or not).
If Your Keyboard Has a MIDI Thru Jack
If your keyboard has three MIDI jacks—In, Out, and Thru—then use the following diagram.
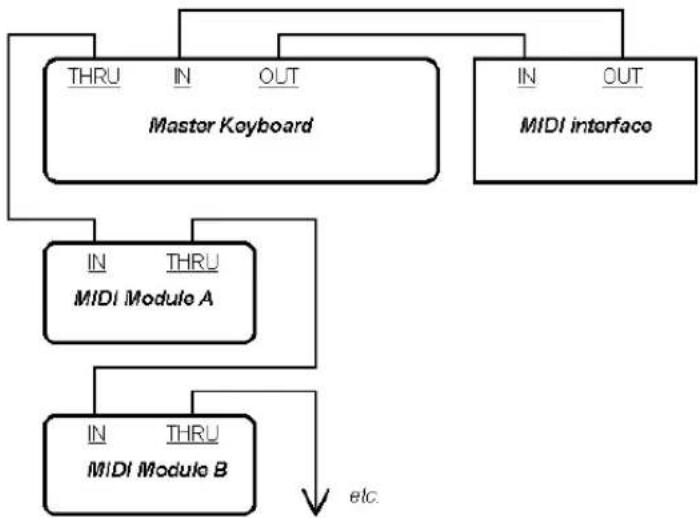
flowchart
graph TD
    A["Master Keyboard"] --> B["IN"]
    A --> C["OUT"]
    A --> D["MIDI interface"]
    B --> E["IN"]
    B --> F["THRU"]
    B --> G["MIDI Module A"]
    C --> H["IN"]
    C --> I["OUT"]
    E --> J["IN"]
    E --> K["THRU"]
    F --> L["MIDI Module B"]
    G --> M["etc."]
    H --> M
    I --> M
If you are using a 15-pin joystick adapter cable that splits into two MIDI cables:
- Connect the 15-pin jack to your computer's joystick port.
- Connect the In cable to your instrument's MIDI Out jack.
- Connect the Out cable to your instrument's MIDI In jack.
Here's a checklist:
| Connect this To this |
| Master keyboard Out MIDI interface In |
| MIDI interface Out Master keyboard In |
| Master keyboard Thru Another MIDI module's In |
| That MIDI module's Thru Yet another MIDI module's In |
Table 194.
Continue the sequence, repeating the last connection for each of your sound modules.
Each MIDI device should be set to a unique MIDI channel or range of channels to avoid note-doubling. Refer to the manuals for your MIDI devices for information on how to set their MIDI channels.
Your MIDI interface may have a Thru jack as well as In and Out jacks. If your master keyboard lacks MIDI Thru, you can add more MIDI modules to your setup by connecting the MIDI interface's Thru to the first module's In. You can then chain subsequent modules onto the first module, as described earlier.
If Your Keyboard Doesn't Have a MIDI Thru Jack
If your keyboard has only two MIDI jacks—In and Out—or if you have only one keyboard, use the following diagrams instead:
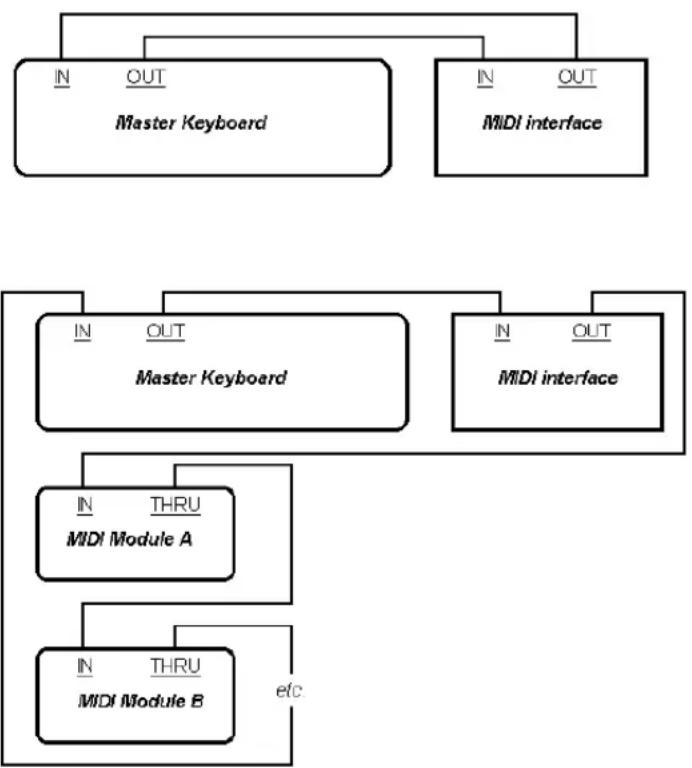
flowchart
graph TD
    A["Master Keyboard"] --> B["IN OUT"]
    A --> C["IN OUT"]
    A --> D["MIDI interface"]
    E["Master Keyboard"] --> F["IN OUT"]
    E --> G["IN OUT"]
    E --> H["MIDI interface"]
    I["MIDI Module A"] --> J["IN THRU"]
    I --> K["MIDI Module B"]
    L["THRU"] --> M["etc"]
Each MIDI device should be set to a unique MIDI channel or range of channels to avoid note-doubling. Refer to the manuals for your MIDI devices for information on how to set their MIDI channels.
If your master keyboard now seems to double notes (they sound thicker), or if you can play only one half as many at once, first make sure that no MIDI channel is being used by more than one of your MIDI devices. If no MIDI channel is assigned to duplicate devices and you hear doubling or only half as many notes as you should, see "My Keyboard Doubles Every Note I Play" on page 910.
Set Up to Record Digital Audio
In general, the inputs of sound cards take 1/8 inch stereo mini-jacks. Sound cards usually have two inputs—one for line level inputs and the other for microphones (at mic level). The line level input is stereo; the mic input could be either stereo or mono. If your final output does not terminate in a 1/8 inch jack (and it probably doesn't), you will need an adapter to plug it into your sound card.
Most sound cards use the Windows Volume Control to adjust the master input and output volumes and to control which recording inputs are active. If you don't hear audio tracks, or if you can't easily control the audio volume in SONAR, go to Start > Programs > Accessories > Entertainment > Volume Control and check the settings there. See your sound card's documentation for more.
Electric Guitar Direct-In
You can connect an electric guitar directly to your sound card using a 1/4 inch mono to 1/8 inch stereo adapter. The following diagram shows this setup:

The 1/8 inch jack should be plugged into the sound card's mic input, although plugging into the line input may also work.
Electric Guitar Through Effects Rack
You can also plug an electric guitar into an effects rack, then send the output of the rack to the sound card's input, as shown in the following diagram:
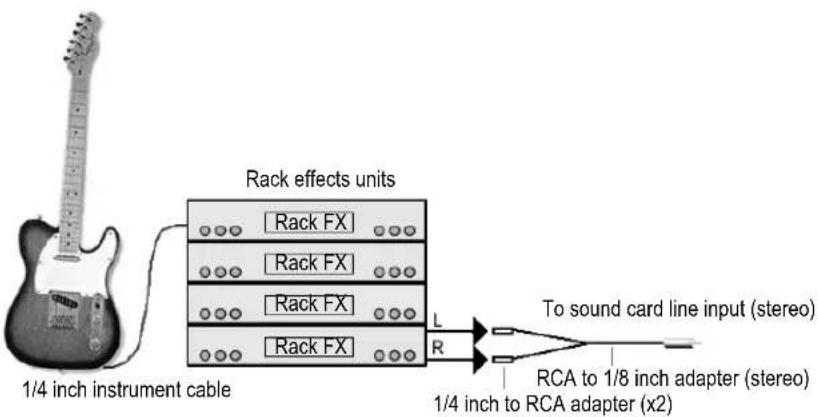
This diagram assumes that the output of the rack is at line level. If it is at pro level instead (+4 dB), and your card does not accept a +4 db input, you will need to attenuate (lower) the F/X rack's signal. To do this, use a mixer between the rack's output and the Y-adapter. If the rack has only a mono output, a 1/4 inch mono to 1/8 inch stereo adapter should be used instead of a Y-adapter.
If you want to connect a guitar amplifier's direct output to the sound card, you should base your setup on this example.
Microphone Direct-In
Microphones can be plugged into the sound card's mic input. Some inexpensive microphones are made especially for use with sound cards and come equipped with 1/8 inch jacks. However, better quality microphones take better quality cables, which do not terminate in 1/8 inch jacks.
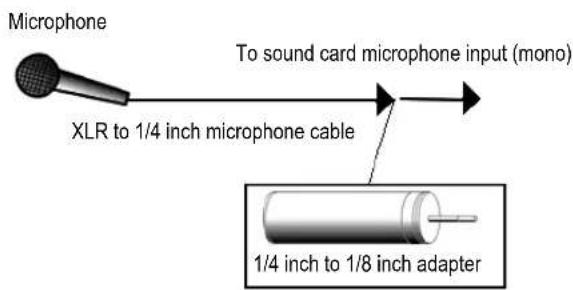
Home Stereo, CD Player, Radio Tuner, Preamp Output
The output of a stereo component can be connected to the sound card's line in, using a dual RCA to 1/8 inch stereo mini Y-adapter. Many portable cassette players come with this kind of adapter, or even with a single cable with all the necessary jacks. In the following diagram, a stereo component is connected to the Y-adapter using standard RCA cables:
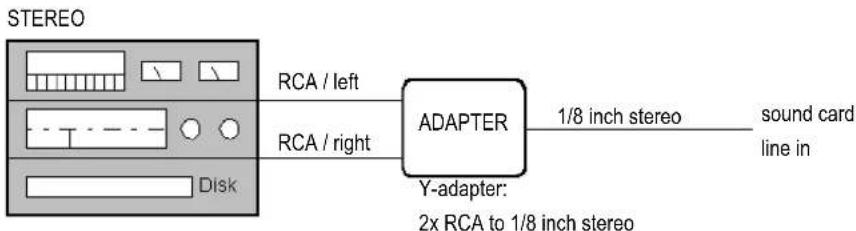
flowchart
graph LR
    A["STEREO"] -->|RCA / left| B["ADAPTER"]
    C["Disk"] -->|RCA / right| B
    B -->|1/8 inch stereo| D["sound card line in"]
    B -->|Y-adapter: 2x RCA to 1/8 inch stereo| E
Internal CD Player
If you are using your computer's internal CD player, and it does not have its audio outs connected internally to the sound card, run a cable from the CD player's Headphone jack to the card's Line In jack. If there is no Headphone jack, you'll need to use an external CD player.
Mixer
You can connect a mixer to the sound card with a setup of the following kind:
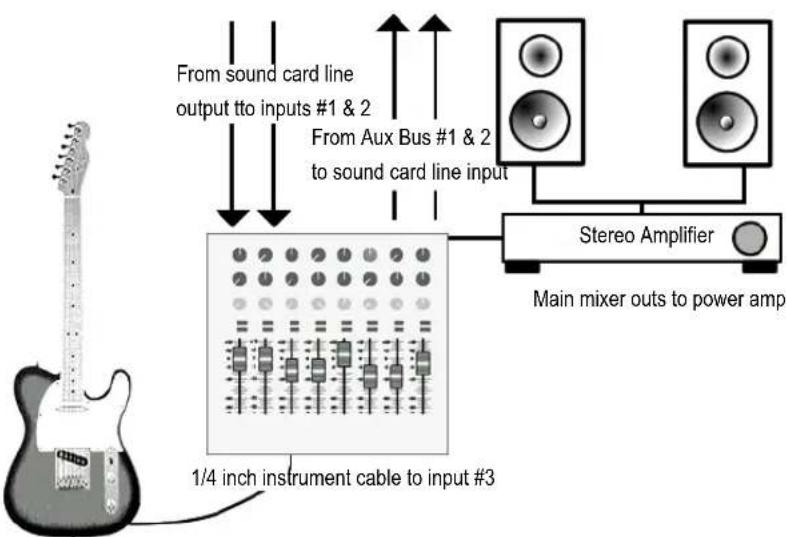
flowchart
graph TD
    A["1/4 inch instrument cable to input #3"] --> B["Main mixer outs to power amp"]
    C["From sound card line output tto inputs #1 & 2"] --> B
    D["From Aux Bus #1 & 2 to sound card line input"] --> B
    B --> E["Stereo Amplifier"]

Note: If your mixer has buses, use them! This helps to avoid feedback.
Initialization Files
Many Windows applications, as well as Windows itself, use files to store information about your preferences and configuration. Often applications store values to these files when you make selections in the program using menus or dialog boxes. However, you can also change these files directly. In some cases, there is no way to change the settings in the application, and changing the file directly is the only way.
See:
Initialization Files
Initialization File Format
Variables in the [Options] Section
Variables in the [MIDI Input Devices] Section
Variables in the [MIDI Output Devices] Section
Variables in AUD.ini
Initialization Files
This appendix documents three initialization files, which are stored in the SONAR program folder (by default, C:\Program Files\Cakewalk\SONAR 8.5.
- Cakewalk.ini
- TTSseq.ini
- Aud.ini
To view and edit the Cakewalk.ini file, choose Options > Initialization File. Use the Windows Notepad to open and alter any of the three files. There are several other .ini files in the SONAR folder, but you should not attempt to edit or modify these files in any way. Changes to these other files could cause SONAR to stop operating properly.
Before making any changes to any of the .ini files, you should make a backup copy in case you make a mistake. After you have made your changes, save the file and close Notepad. SONAR reads
the settings in these files only when it first starts up. Therefore, if you change any settings while SONAR is running, you should exit and restart SONAR in order for the changes to take effect.
See:
Initialization File Format
Variables in the [Options] Section
Variables in the [MIDI Input Devices] Section
Variables in the [MIDI Output Devices] Section
Variables in AUD.ini
Cakewalk.ini
TTSSEQ.INI
AUD.INI
Initialization File Format
Initialization files all follow a common format. They are divided into sections whose names appear in the file in brackets, like this:
[Section Name]
Within each section, variables are of the form:
<variable name>=<value>
For example, the DrawPlayingAudio variable belongs in the [Wincake] section in Cakewalk.ini, and determines whether the audio waveform is redrawn or not when the display is scrolling during playback. If the value is 0 (FALSE), then the waveforms are not redrawn. If the value is 1 (TRUE), then waveforms are redrawn. To redraw waveforms when scrolling during playback, the entry in the file looks like this:
[Wincake]
DrawPlayingAudio=1
The variable names contain no spaces. They are not case sensitive.
See:
Cakewalk.ini
TTSSEQ.INI
AUD.INI
Cakewalk.ini
Many of the items in Cakewalk.ini are set using SONAR menus and dialog boxes. However, some items can be changed only by using the Options > Initialization File command or by directly editing this file using the Windows Notepad.
Cakewalk.ini is divided into different sections. Unless otherwise noted below, all entries should appear in the section that starts with the line:
[Wincake]
For example, if you want to add the line PanicStrength=1 to Cakewalk.ini, you should put it on the line under [Wincake], like this:
[Wincake]
PanicStrength=1
The following section lists the different variables you can change in Cakewalk.ini.
| Variable | Type | Default value | What it does |
| JogPosTimer=default=120)PauseOnJog=<0 or 1>(default=0; off) | There are two variables that control the behavior of using a control surface jog wheel to change SONAR's Now time:JogPosTimer is the period of the now time throttle. When a jog message comes in, SONAR sets the transport time immediately but will not set the transport time again for this length of time. During the time, SONAR just remembers the latest jog time received.PauseOnJog is the main switch. 1 does a pause and invokes the throttle timer. 0 just sends the now time with no pause and no throttle timer. If 0, the setting of JogPauseTimer is "don't care."For example:[Wincake]JogPosTimer=120PauseOnJog=0 | ||
| WavePreviewSampleFrequency=<1-10> | Integer 1 By default, waveform previews take a meter sample for each meter frame. The default interval between meter frames is 40 milliseconds. The WavePreviewSampleFrequencyCakewalk.ini variable lets you specify how frequently samples are taken. The value can be an integer between 1 and 10, and represents the number of frames to sample. It goes in the [Wincake] section of Cakewalk.ini. For example:WavePreviewSampleFrequency=1With the default value (1), every meter frame gets written to the history file. With higher values (2-10), frames will be skipped, causing fewer history frames to be written to the history file. Higher values may be desirable if the waveform previews are affecting playback performance. | ||
| WavePreviewInputBuffers=<1-4>) | Integer 4 This variable allows control of the number of Waveform preview input buffers. The input buffers allow more efficient access to the recorded meter history on disk, and greatly speeds up performance access to previews while zooming and scrolling the clips view when waveform preview is active. You can control the actual number of history page buffers with this variable. This value is an integer and the minimum value is 1 and the default is 4 buffers. 2-4 buffers should be sufficient for most usage scenarios. Each buffer consumes approx 32K per preview track. Lower values consume less memory but may cause more disk access when scrolling or zooming large projects when preview is active. | ||
| DrawPlayingAudio=<0 or 1> | Boolean 0 (disable) This line controls whether the audio waveform is redrawn or not when the display is scrolling during playback. By setting the value to 1, you can force the Track view to always redisplay audio data, even during playback. This is recommended only for very fast machines. | ||
| HyphenDir=<drive:path name> | Path\ttshyph.dll | This determines the location of the Hyphenator extension .dll used by SONAR, and is written during installation. This should never need to be changed. | |
| PanelsShowWidgetBitmaps=<0 or 1> | Boolean 1 (enable) This line controls whether SONAR hides (n=0) or shows (n=1) all widget bitmaps while in Use mode (except those in Image widgets). | ||
| PanicStrength=<0 or 1> | Boolean 0 (controller 123 only) | The Panic/Reset button stops playback and turns off any stuck notes. There are two ways a MIDI note can be turned off: By a note-off message (n=1) or by MIDI controller number 123 (all notes off). By default, Panic uses controller 123 only (n=0). | |
| StaffViewChanSeparateVoic es=<0 or 1> | Boolean 1 (enable) This line specifies whether or not SONAR should treat channels assigned to each note as separate voices. This is useful if you want to force note stems up or down for different voices. | ||
Table 195.
Table 195.
Initialization Files
Initialization File Format
| Variable | Type | Default value | What it does |
| TVWidgetsStickInHeader=<0 or 1> | Boolean 0 By default, Track view controls (widgets) will only appear in the track header bar if the track is minimized and there is enough room to display at least one control.When TRUE (value=1) widgets stay in the header bar regardless of the height of a track.Note: the following controls will never appear in the track header bar: Send widgets, Meters, and Vertical FX Bin. | ||
| VelocitySolidWidth=<1..4> | Integer | 1 | By default, note velocity tails are displayed as 1 pixel wide solid vertical lines in the Piano Roll view. To make the velocity tails wider (2-4 pixels wide), add the following line to Cakewalk.ini in the [WinCake] section: VelocitySolidWidth=For example: VelocitySolidWidth=2 |
| VelocityAutoshrinkWidth=<0 or 1> | Boolean 0 If you set this to 1, solid velocity tails will become narrower by one pixel if the vertical zoom is such that notes are less than 5 pixels high. For example, with: [Wincake] VelocitySolidWidth=2 VelocityAutoshrinkWidth=1 you get bigger velocity tails (ala SONAR 4) when the notes are big enough to edit, but really thin velocities tails when the notes are too small to edit. | ||
| VelocityAsBargraph=<0 or 1> | Boolean 0 By default, note velocity tails are displayed as thin vertical lines in the Piano Roll view, and the color is the same as note events. If “Notes/Velocity” is not the current edit type, this color will be slightly lightened. To override this and use bar graph indicators for velocity tails, add the following line to the [WinCake] section: VelocityAsBargraph=1 | ||
| VelocityBargraphFullWidth=<0 or 1> | Boolean 0 When displaying velocity tails as bar graphs(see above), you can specify whether the velocity tails should be fixed at 3 pixels wide (default), or extend the full width of the note event. To display full-width velocity tails, add the following line to the [WinCake] section: VelocityBargraphFullWidth=1 | ||
| PRVUseForegroundColor=<0 or 1> | Boolean 1 The Piano Roll view and Inline Piano Roll note event colors are based on the track color. By default, note events use a track's foreground (data) color instead of the background (clip) color.To override this and use background colors instead, add the following line to the [WinCake] section: PRVUseForegroundColor=0 | ||
| PRVColorizeVelocity=<0 or 1> | Boolean 1 By default, note events in the Piano Roll are colorized based on velocity. Darker colors indicate higher velocities.To override this and use the static track color instead, add the following line to the [WinCake] section: PRVColorizeVelocity=0 | ||
| MicroscopeHZoomThreshold=<1..20> | Integer 8 By default, the Microscope mode begins horizontal magnification when a 32nd note is narrower than 8 pixels. This line lets you specify the horizontal zoom threshold (1-20 pixels). | ||
| MicroscopeHZoomMax=<2.0 - 8.0> | Integer 3.0 This line specifies the highest horizontal magnification that will result when using Microscope mode. | ||
| ShowClipShadow=<0 or 1> | Boolean 0 By default, a drop shadow is not displayed on clips in the Track view. To always display a drop shadow on clips, add this to the [Wincake] section: ShowClipShadow=1 | ||
| PauseDuringSave=<0 or 1> f | Boolean 0 By default, when saving a project file during playback, SONAR saves the file asynchronously while playback continues. While this is not a problem with most projects, complex projects under high CPU load conditions (particularly while running under low latency) may take longer to save than if the transport was not playing.Setting PauseDuringSave to a value of 1 in the [Wincake] section changes the default behavior and pauses playback temporarily for the duration of the file save. This allows the file save to proceed as fast as possible before playback resumes. | ||
| StaffViewPreScanMeasures = | Integer 16 (measures) This line specifies how far back (in measures)SONAR should search for long elements in order to display them in the Staff view. If a long element does not start within the specified time, then it will not be displayed in the Staff view (although it will print). | ||
| ToolTempFileDir= | Path | This line specifies where to store temporary .wav files when launching a third party wave editor from the Tools menu. | |
| ProgressiveWavePictures=<0 or 1> f | Boolean 1 This option enables progressive display of waveform pictures. When enabled you will see pictures being displayed in the clips view dynamically as they are being computed. The waveforms will update in the background when the application is idle. If the ComputePicturesWhilePlaying flag is set to 1, waveforms will continue being displayed progressively even while audio playback is in progress. This can save time waiting for a complete picture to be finished before you can see it. | ||
| CtrlSurfaceRefreshMS=<50 - 5000> | Integer 75 You may wish to increase the value of thisCakewalk.ini variable if you are experiencing sluggish UI responsiveness when using a control surface and playing back high CPU projects.Also, if you are using a control surface that is not bi-directional, the surface does not need to be refreshed at all and you can safely increase the value. | ||
| AutoLoadAudioSnapPalette=<0 or 1> | Boolean 1 By default, the AudioSnap palette appears automatically whenever you enable AudioSnap on a clip. If you prefer to never auto-show the AudioSnap palette, you can change this behavior by setting the value to 0. | ||
| AlphaStretchIndicator=<0 or 1> | Boolean 1 When an audio clip is slip-stretched, a yellow alpha-blended bar is displayed on the clip. This may affect performance on some systems if there are many slip-stretched clips. To disalbe the alpha-blended bars, and instead only show the percent value in the lower right corner of the clip, set the value to 0. | ||
| DrawToolbarGradient=<0 or 1 | Boolean 1 Global and view toolbars are drawn with a background gradient. If you prefer a flat background, set the value to 0. | ||
| TVControlHeight=<number of pixels> | Integer 17 Specifies the height of controls in the Track view. The value shouldn't be changed more than 1 or 2 from the default value, or you may experience unexpected results. | ||
| TVControlWidth=<number of pixels> | Integer 41 Specifies the width of controls in the Track view. | ||
| TVControlSpacingX=<number of pixels> | Integer 3 Specifies the horizontal space, in pixels, between controls in the Track view. | ||
| TVControlSpacingY=<number of pixels> | Integer 3 Specifies the vertical space, in pixels, between controls in the Track view. | ||
| TVSpacingXInCluster=<number of pixels> | Integer 2 Specifies the horizontal space between each button in a "cluster". The default value is 2 pixels. The following controls are grouped into clusters:• Mute, Solo, Arm for Recording (MSR)• Automation Read, Automation Write• Phase, Interleave (mono/stereo) | ||
| TVBoldStripNames=<0 or 1> | Boolean 1 Specifies whether track/bus names use bold(value=1) or regular (value=0) font style in the Track view. | ||
| TVLargeStripNames=<0 or 1> | Boolean 1 Specifies the size of track/bus names in the Track view. The default size is large (value=1). | ||
| TransparentClipNames=<0 or 1> | Boolean 0 SONAR can write Clip Names with an alpha channel such that the waveform behind the clip name can be seen.To enable this effect, set the value to 1. | ||
| SmallIconHeight Integer 32 This variable specifies the small track icon size.By default, small icons are 32x32 pixels. | |||
| LargelconHeight Integer 48 This variable specifies the large track icon size.By default, large icons are 48x48 pixels. | |||
| IconTopLeftPixelTransparent Boolean 1 By default, track icons support transparency.The top left pixel in the BMP determines the transparent color. If you prefer to not have transparent icons, set the variable value to 0.Note:When transparency is enabled, the global color entry (Options > Colors) called "Track View Icons Background" determines the background color ("Console Strips Icons background" does the same for the Console view and Track Inspector). | |||
| CPUMeterMode=<0 - 2> | Integer 0 This variable specifies how the CPU meterappears in the status bar on multiprocessorsystems. The values are as follows:0 = The peak thread load is displayed as the bar and a yellow indicator shows the average of all audio threads. This the default mode.1 = The average audio thread load is displayed as the bar and a yellow indicator shows the peak thread.2 = A bar is shown for each audio thread. This is the same display as previous versions of SONAR. | ||
Table 195.
Table 195.
Table 195.
Table 195.
Table 195.
| Variable | Type | Default value | What it does |
| CreateNewGroupsOnPaste=<0 or 1> | Boolean 1 | When you copy and paste clips that belong to a clip group, this variable specifies if the pasted clips should be placed in a new clip group or continue to be grouped with the original clip group. By default, a new clip group is created. The values are as follows:0 = The pasted clips will belong to the same clip group as the clips that were copied.1 = A new clip group is created for the pasted clips. This is the default behavior. | |
| EnablePluginCancelButton=<0 or 1> | Boolean 0 | In SONAR 4.0.2 and earlier, opening the property page of a VST plug-in during playback could result in a slight disruption in playback.The cause for this problem has its roots in the little Cancel button that sits in the top right corner of the plug-in's property page. The purpose of this button is to allow the user to cancel out of any changes they might have made to the plug-in, restoring back to whatever state the plug-in was in before they opened the GUI window. To make this work, SONAR would need to take an initial snapshot of the plug-in's state, and some plug-ins with large amounts of preset data could cause an audio hiccup if the data was captured for the Cancel button.To address this issue, SONAR 4.0.3 (and later) does not take a snapshot of the plug-in's state by default, and the Cancel button is not available. | |
Table 195.
TTSSEQ.INI
The TTSseq.ini file can only be changed using Windows Notepad.
Variables in the [Options] Section
| Variable | Type | Default value | What it does |
| MfxLookAhead=<ticks> | Integer | 960*4 | Defines how much extra MIDI data is sent to plug-ins, so that they have extra room to quantize events into the future. Lower values mean MFX plug-ins can work more "just in time." Example: MfxLookAhead=480. |
| SendResetsToSoftSynths=<0 or 1> | Boolean 0 This variable controls (globally) whether SONAR sends MIDI controller resets to DXi's.This variable should be set in the [OPTIONS] section. Legal values are:0 (default): Resets are not sent to DXi's1: SONAR will send MIDI controller resets to DXi's.This is what SONAR already does for hardware synths. For example:If you are freezing synth tracks that have MIDI controller messages, setting this variable to TRUE (1) will ensure that synths will have their MIDI controllers reset before a freeze operation. | ||
| GeneralMidiSMFs=<0 or 1> | Boolean | 1 (enable) | This line controls whether or not SONAR creates a General MIDI setup measure when loading Standard MIDI Files. |
| LyricTrack=<num> | Integer | 3 (track 4) | This line specifies which track is to contain lyrics from Type 0 Standard MIDI files. A zero means track 1, a 1 means track 2, and so on. |
| SendLocalOff=<0 or 1> | Boolean | 1 (enable) | This line determines whether or not SONAR should send a Local Control OFF message during startup. |
| SendLocalOn=<0 or 1> | Boolean | 0 (disable) | This line determines whether or not SONAR should send a Local Control ON message at exit. |
| Table 196. | |||
| Variable | Type | Default value | What it does |
| IgnoreMidilnTimeStamps=<0 or 1> | Boolean 0 (disable) This line determines whether or not SONAR ignores any MIDI time stamping that a MIDI driver does. If you're experiencing increasing delays between the time you play a MIDI note on a controller and the time you hear SONAR echo it, setting this line to 1 may help. Also, if you find that SONAR is recording MIDI data at a different time from when the data was played, setting this line to 1 may help. If the MIDI driver is using a different clock from SONAR, the time discrepancy increases the longer that the MIDI driver is open, so you need to tell SONAR to ignore the timestamp that the MIDI driver adds to the data (set the value to 1). | ||
| SysxDelayAfterF7=<0 or 1> | Boolean 1 (enable) | This setting causes SONARSONAR to delay Sysx transmission for a certain amount of time if it encounters an F7 in a Sysx bank. This gives some instruments a required amount of delay time that is necessary to process the Sysx transmission. The default delay is 1/18 of a second, but can be changed by also adding the SysxSendDelayMsecs=<n>line (see below).The possible values are 0 and 1. Their significance is as follows:0: no delay1: delay between each Sysx string (F0 ... F7) | |
| SysxSendDelayMsecs=<num> | Integer 60 This setting causes SONAR to delay a specified number of milliseconds if it encounters an F7 in a Sysx bank. | ||
| SysxSendPacketSize=<num> | Integer 1024 This line specifies the number of bytes between Sysx transmit delays. Sysx bytes are transmitted in packets, with a 1/18 second delay between each packet.Setting this value smaller will help slower MIDI devices (synthesizers, etc.) avoid overflowing their internal buffers. | ||
| UseCableMetaEvents=<0 or 1> | Boolean 1 (enable) This line specifies whether or not SONAR should use nonstandard “Cable” meta-events for storing Sysx bank output number into Standard MIDI files (by default, n=1). | ||
Table 196.
Variables in the [MIDI Input Devices] Section
| Variable | Type | Default value | What it does |
| MaxInPort=<num> Integer 15 (16 outputs) This variable determines the maximum number of MIDI inputs. The value is 0 based, so a value of 15 means that the limit is 16 outputs. | |||
Table 197.
Variables in the [MIDI Output Devices] Section
| Variable | Type | Default value | What it does |
| MaxOutPortInteger 15 (16 outputs) This variable determines the maximum number of MIDI outputs. The value is 0 based, so a value of 15 means that the limit is 16 outputs. | |||
Table 198.
AUD.INI
To edit Aud.ini, do the following:
- On SONAR's Options menu, select Audio and then click the Advanced tab.
- Under Configuration Settings, click Edit Config File.
The Aud.ini file opens in the default Windows text editor.
- Edit Aud.ini as desired.
- Save Aud.ini and close the Windows text editor.
- Click Reload Config Settings to reload the current audio configuration settings from Aud.ini.
Variables in AUD.ini
| Variable | Type | Default Value | What it does |
| MeterFrameSizeMS=<10-200> | Integer 40 Meters in SONAR show peak (or RMS) values at a given instant in time. The actual peak value displayed by a meter is the highest peak recorded in an interval of time referred to as a "Meter Frame." The default size for a meter frame is 40 milliseconds, which is an accuracy of 25 FPS. The MeterFrameSizeMS variable allows you to change the size of this interval. It goes in the [Wave] section. For example:[Wave]MeterFramSizeMS=40Setting this value to a lower value will make the meters record peak info for smaller time slices. However this can also increase the metering CPU and memory cost.Note: although SONAR doesn't enforce a fixed value range, the recommended range should be between 10 and 200 milliseconds. | ||
| PicCacheMB=<size in MB> | Integer | 20 | This variable specifies the maximum size of the picture cache. The picture cache is located in the directory specified by the PictureDir=variable (defaults toPicture Cache). |
| PictureDir=<drive:path name> Path< Cakewalk directory>\Picture Cache | This line specifies where to store the picture cache. | ||
| ComputePicturesWhilePlaying=<1 or 0> | Boolean 1 This option allows waveform pictures to be computed in the background while audio playback is in progress.Most modern computers should be able to handle this load with no problems. Note that work is only done while new pictures are actually being computed—once the pictures are finished rendering there is no overhead. | ||
| EnablePicCacheThreads=<1 or 0> | Boolean 1 This option creates extra background worker threads for the generation of wave pictures when you load a project. One worker thread is automatically created per CPU/core. Setting EnablePicCacheThreads=0 reverts back to only using a single thread for picture computation.If you are running a system with multiple CPU's or cores setting this to 1 can greatly speed up the computation of pictures. | ||
| FlushWriteBeforeRead=<1 or 0> | Boolean 0 The default setting causes SONAR to perform disk reads (for audio playback) before attempting any disk writes (for audio recording). Overriding this value by setting it to 1 causes SONAR to attempt disk writes first. This yields the best results when you are attempting to record a large number of tracks at high latency. | ||
| FlushMultiple=<0 or 1> Boolean 1 This variable determines how SONAR performs writes to disk in cases where multiple inputs are being recorded simultaneously. The default setting causes SONAR to write all the data for all inputs all at once, and then wait for the entire set of writes to complete. Overriding this value by setting it to 0 causes SONAR to perform each input's write separately, and wait for each individual write to complete before proceeding to the next one. | |||
| ExtraPluginBufs=<0 to no upper limit> | integer 0 It instructs SONAR to set aside extra audio data buffers, to accommodate plug-ins which do large amount of internal buffering and therefore "keep" data buffers to themselves. Recommended maximum setting of 64 or 128. | ||
| Use24BitExtensible=<0 or 1> | Boolean 0 | This line goes in the section of the Aud.ini file under [name of your sound card ('n' in , 'n' out)]. If you get an error message when you try to change the audio driver bit depth to 24, try setting this line to 1. Most USB audio devices that use WDM drivers need this line set to 1. | |
| GapDezipperUsec=<0-1000> | Integer | 500 | The audio engine will now render a smooth fade in whenever audio playback is interrupted and there is a abrupt transition in gain. The purpose of doing this is to dezipper (smooth out) the gain transition due to the discontinuity. For example, if you click on the time ruler to jump to a new time location during playback, the engine will smoothly render the transition to the new gain level as a fade in. This smoothing also takes place whenever playback gapping occurs. You can control the fade in time via the GapDezipperUsec variable, which is expressed in microseconds per dB and controls the speed of the fade in to the new gain value. (default = 500 microseconds. i.e. the fade will take 500 microseconds per change in dB at the transition point). You may increase or shorten the time of the fade by increasing or decreasing this value. The normal legal value range for this variable is 0 to 1000 microseconds. This variable should be set in the [Wave] section. A value of zero turns off dezippering on gapping completely. |
| MixDezipperUsec=<0-1000> | Integer | 50 | This variable is similar to GapDezipperUsec except that it controls how the mixer itself renders abrupt gain transitions due to envelopes in the project. This variable is expressed in microseconds per dB and controls the speed of the fade in to the new gain value (default = 50 microseconds). The normal legal value range for this variable is 0 to 1000 microseconds.This variable should be set in the [Wave] section.Important:Changing the value of this variable will affect how envelopes are rendered by the mixer and may cause your mixes to sound slightly different.Setting MixDezipperUsec too low can cause clicks while rendering abrupt gain changes due to envelopes. |
| AllowOfflineRenderMixThreads=<0 or 1> | Boolean 1 A value of 1 (default) allows multiprocessing during fast bounce when multiprocessing is enabled in SONAR. Set to 0 to temporarily disable multi-threaded mixing mixing during a fast bounce operation. | ||
| LinkPFSendMute=<0 or 1> | Boolean 0 If this is set TRUE, pre fader sends on both tracks and buses are automatically muted when the track/bus is muted. Also if another track is soloed the pre fader sends on other tracks will be muted.This basically conforms to pre SONAR 4 behavior. | ||
| DefaultEqPosition=<0 or 1> | Boolean | 0 | The integrated channel EQ is pre FX bin by default, but you can change the position of any channel EQ by right-clicking the EQ plot and choosing the desired position from the context menu.The DefaultEqPosition Aud.ini variable lets you specify the default EQ position for all new tracks/buses. This variable lives in the [Aud] section of Aud.ini, and legal values are: 0 (pre FX) or 1 (post FX). |
| BounceBufSizeMsec=<0 to 350> | Integer | 0 | This is a line in the Wave section of the Aud.ini file that sets the buffer size for bouncing tracks. At a value of 0, the bounce buffer is the same size as the Mixing Latency value that you set in the Audio Options dialog. If you find that bouncing tracks, especially with certain soft synths, takes a very long time, you can set this value to 100, or some value between 0 and 350 so that the bounce buffer will use a more efficient size for bouncing, which has different requirements from normal playback latency.Note:on larger projects, setting this variable to a large value can cause out-of-memory errors. |
| DropoutMsec=<num> Integer 250 Under high system load conditions, the SONAR audio pump mechanism may become starved. When this condition is detected, SONAR drops out. The DropoutMsec variable allows you to configure the tolerance time in milliseconds. This variable applies to all driver modes.Setting DropoutMsec to a positive value >0 specifies the actual time in milliseconds to tolerate before dropping out due to starvation.Setting DropoutMsec to a negative value <0 means we use a multiple of the audio buffer size as the tolerance. i.e. -2 means we use twice the audio buffer size. Note that setting this value too low (e.g. 0) can result in more frequent dropouts in the program. If you notice too many dropouts, try raising it in buffer multiples or by explicitly specifying a millisecond value. | |||
| SuspendPluginsOnBounce=<0 or 1> | Boolean | 1 | This is a line in the [Wave] section of the Aud.ini file that controls whether VST plug-ins are suspended and resumed prior to starting a bounce operation.When set to 1 (default), VST plug-ins are suspended and resumed both before and after the bounce process. This flushes any residual buffers that might be present from plugins that have internal latency. |
| ShowMultiChannelInputs = <0 or 1> | Boolean | 1 | This is a line in the Wave section of the Aud.ini file that specifies whether SONAR uses multichannel audio devices as multiple stereo pairs or just a single stereo pair. |
| ShowMultiChannelOutputs= <0 or 1> | Boolean | 1 | This is a line in the Wave section of the Aud.ini file that specifies whether SONAR uses multichannel audio devices as multiple stereo pairs or just a single stereo pair. |
| MinimizeDriverStateChanges =<0 or 1> | Boolean 1 | This is a line in the Wave section of the Aud.ini file that controls whether or not audio devices are reset in response to transport changes (play/stop).Valid values are as follows:0 = off.1 = On for ASIO only (default).2 = On for WDM only.3 = On for both ASIO and WDM. | |
| MMCSSTaskKey= | Name Pro Audio By default, SONAR uses the MMCSS task profile namedPro Audio. If desired, you can instruct SONAR to use a custom MMCSS task profile. | ||
| ManageASIOThreadPriority= <0 or 1> | Integer 1 This determines whether SONAR manages the ASIO thread priority when necessary. This defaults to 1. | ||
| EnableCacheWriteThru= <0 or 1> | Boolean 1 This variable enables disk write thru caching. When write thru caching is on, data recorded to wave files is written to the hard disk immediately, circumventing the hardware disk cache. Having write thru caching off can be more efficient for disk I/O but can result in data loss if your system crashes. | ||
| RealtimePreroll=<0 or 1> | Boolean 0 This variable specifies whether preroll buffers are pumped as fast as possible or in real-time.Prerolling in realtime may improve buffering and CPU load when using hardware DSP solutions such as the Universal Audio UAD-1 or Focusrite Liquid Mix. | ||
| WaveInBuffers=<2 - 8> | Integer 8 When using the External Insert plug-in alongside the original dry signal in WDM mode, you might notice a flanging or flaming effect. To minimize this effect, we recommend that you set the WaveInBuffers Aud.ini variable to 2.Note: Setting the value to 2 might have an adverse effect with certain audio hardware, causing recording to drop out. If this occurs, reset the value to 8 and try using ASIO drivers if your hardware has ASIO support. | ||
Table 199.
Table 199.
Table 199.
Table 199.
Table 199.
Initialization Files
Initialization File Format
| Variable | Type | Default Value | What it does |
| ThreadSchedulingModel=<0 - 2> | Integer | 1 | This variable goes in the [Wave] section and controls the interaction of the main audio thread and worker threads on multiprocessor systems when the Use Multiprocessing Engine option is enabled. Depending on the system, a particular model may result in less glitching and better overall performance. The values are as follows:0 = Same as previous versions of SONAR.1 = (default) Better thread balance. Model is more efficient and can provide cycles for other tasks.2 = Additional worker thread is created. This may result in improvement with Quad processor systems or higher. Not recommended for Dual processor systems. |
| UseHardwareSamplePosition=<0, 1> | Boolean 0 This variable applies to ASIO mode only and controls whether SONAR internally compute the sample position based on buffer switch calls or uses the ASIOGetSamplePosition reported value to retrieve the driver reported value.Some drivers change the reported sample position based on how long a buffer switch took to complete and this can cause problems since SONAR expects the reported position to be in sync with the number of buffers actually streamed. | ||
Table 199.
MIDI Files
The Standard MIDI file format is a file interchange format defined by the MIDI Manufacturers Association (MMA). The purpose of the format is to allow for the exchange of MIDI data between different programs. Any program that can read and write MIDI files has a common language with which to talk to other MIDI software. The compact size of MIDI music files makes them particularly useful for delivering music online.
SONAR can open standard MIDI files, and can save your projects in standard MIDI file formats. Note that only the MIDI portion of your projects is saved in a standard MIDI file. If your projects contain digital audio, the audio portion of the project will be lost when you save it to a standard MIDI file.

Note: If you load a standard MIDI file into SONAR, SONAR strips out any initial volume and pan settings and sets the volume and pan controls for any affected tracks to those values. Initial volume and pan settings in a standard MIDI file are those that occur within the first measure. Any affected volume and pan controls will show the initial values that SONAR loaded from the standard MIDI file. Any volume and pan controls that are not affected, in other words that don't have initial values stored in the file, will show their current values in parentheses. These controls are disabled until you move one of them and therefore give it a value, at which point the control becomes enabled and the parentheses disappear. If you save a file as a standard MIDI file, SONAR saves the values of all enabled controls as initial values. However, as a project plays, SONAR's controls do not display MIDI controller values that change throughout the track—SONAR's controls only display automation values, i.e. shapes. If you want SONAR's controls to display MIDI controller values throughout the project, use the Edit > Convert MIDI to Shapes command.
SONAR supports two different MIDI file formats, MIDI Format 0 and MIDI Format 1. Format 0 MIDI files contain a single track, with all events stored in that track. Format 1 MIDI files can store up to 7256 tracks, just like SONAR project files. When you load a MIDI Format 0 file, SONAR splits it into 16 separate tracks, based on the MIDI channels assigned to each event. When you save a project to a MIDI Format 0 file, SONAR collapses MIDI information from all of its tracks into one single track.
SONAR also lets you save and load files in the RIFF MIDI file format. This is a standard Resource Interchange File Format specification that encapsulates a Standard MIDI File of either format 0 or format 1. These files typically have an extension of .rmi.
A disadvantage of MIDI files is that the way the file sounds on playback varies based upon the sound reproduction hardware you are using. The same project sounds very different on two different synthesizers or two different sound cards. Another problem is that the Standard MIDI File specification leaves some details open to interpretation by software and hardware manufacturers.
To Save a Project as a Standard MIDI File or RIFF MIDI File
- Choose File > Save As to display the Save As dialog box.
- Choose the desired format from the Save as Type list.
- Enter a file name and click Save.
See:
Timebases
Supported MIDI File Meta-Events
Features Not Supported by MIDI Files
Other MIDI File Handling Notes
Special Handling of GM, GS, and XG MIDI Files
If You Have Problems Playing MIDI Files
If You Plan to Publish Your Songs
Timebases
MIDI files can be expressed in any of a number of timebases (ppq resolutions). It is likely that most MIDI files you will encounter use a common timebase, such as 96 or 120. Although SONAR supports many timebases, it is possible that a MIDI file may use a timebase that SONAR does not support. In that case, the times will be converted into whatever timebase is currently the default.
Supported MIDI File Meta-Events
MIDI files can contain meta-events. The types of meta-events that SONAR supports are listed in the following table:
| MIDI File Meta-event How it is represented in SONAR | |
| Meter and key signature Meter/key signature map entry | |
| Tempo Tempo change | |
| General text Track name | |
| General text in the conductor track of a Format 1 file | Markers view markers |
Table 200.
MIDI File Meta-event How it is represented in SONAR
Track name Track name
Port number (format 1) Port assignments are maintained. Only available when the Write Cable Meta Events to MIDI Files (Output Select)
Table 200.
Features Not Supported by MIDI Files
While the MIDI file format is very flexible and extensive, it cannot store the following parameters that are part of a standard project file: key offset, velocity offset, time offset, and forced channel.
When you save a project to a MIDI file, most of these parameters are applied to the individual events. For instance, if you have assigned track 1 to channel 10 in the Track view, SONAR will write the MIDI file so that every event on track 1 has a channel number of 10. When you subsequently load the MIDI file all of those Track view parameters will have vanished. But the music will sound the same, because SONAR has made these changes to the events themselves.
Other MIDI File Handling Notes
Here are a few specific points about how SONAR works with MIDI files:
- SONAR places Lyric events found in Format 0 MIDI files into Track 4, in accordance with conventions used by karaoke players.
- SONAR inserts any Text or Lyric events found at time 0 in a track into the Comments field in the File Info dialog box, unless the Text or Lyric event is preceded by a Note event.
- SONAR automatically enables the Zero Controllers when Play Stops option (available through the Options > Project command, on the MIDI Out tab) whenever a MIDI file is loaded.
- If a general MIDI file contains a copyright notice, the File Info window will be displayed automatically when the file is opened.
Special Handling of GM, GS, and XG MIDI Files
General MIDI compatibility of a song file is indicated by the presence of a special System Exclusive message at the beginning of the song. When SONAR finds a GM, GS or XG reset message, it assumes that you would like to work within the GM Score Production guidelines. This causes SONAR to use special timing for program change information when writing MIDI Files, and allows it to search more aggressively for track parameters when reading MIDI files. The result is that it is easier than ever to create and use General MIDI song files with SONAR.
SONAR does not enforce or even verify compliance with the GM guidelines for your music data. But SONAR does comply with them when generating events that represent track parameters. If necessary, SONAR will insert blank setup measures at the start of your song. This makes space for certain events to be inserted at the correct times at the start of each track: bank changes, patch changes, volume, and pan. This means that you can use SONAR's track parameters for these
settings when composing songs: When you save your work as a MIDI File, SONAR will place these events in the track at the specific clock ticks recommended by the guidelines.
You can tell SONAR to follow the GM guidelines by loading the "Turn GM System On" Sysx bank in the Sysx View (gmsystem.syx in your Cakewalk directory), and then either inserting a sysx event at time 1:1:0 or using the Auto setting for that bank.
When loading a GM file, each track's bank, patch, volume and pan parameters are lifted from the data stream and placed in SONAR's Track view for you to see and edit onscreen. The GM mode ensures that all patches, banks and controllers are placed at specified times throughout a setup measure when you save a MIDI file. This ensures that all setup information can be digested by your synthesizer before it starts playback. If you don't have a setup measure in your project, SONAR will insert one for you.
If there is no GM, GS, or XG reset System Exclusive message present at the start of your project, SONAR will not operate in this GM mode.
If You Have Problems Playing MIDI Files
A MIDI file can cause playback problems if all of the following are true:
- The MIDI file is a GM-compatible Standard MIDI Format 1
- All patches, banks and/or controllers are stored in one track
- All related note events are stored in a different track
When SONAR loads such a file, it may try to optimize the program changes, causing incorrect selection of synthesizer voices during playback (the GM, GS, and XG specifications all recommend the use of Standard MIDI Format 0 for distribution of music data, which would make this problem irrelevant). If you encounter this problem, simply re-select your instruments and re-save the file.
If You Plan to Publish Your Songs
If you plan to publish your own songs, we encourage you to follow the General MIDI authoring guidelines. These guidelines are quite detailed about the exact layout of many types of song data, and a complete discussion of them can be found on the World Wide Web at www.midi.org. However, SONAR can help you to conform with the GM guidelines if you follow these practices:
- Always save your master copy of any work in progress in SONAR project (.cwp) file format. When you are ready to publish your work, use the File > Save As command to create a Standard MIDI Format 0 file.
- All of the major publishing guidelines recommend that you use Standard MIDI File Format 0 instead of Format 1. Some sequencers cannot read the more complex Format 1 files, particularly sequencers embedded in some types of hardware such as karaoke players.
- Load the "Turn GM System On" system exclusive bank (gmsystem.syx in your Cakewalk directory) in the Sysx view, and set the bank to Auto Send. This message will not only re-initialize a General MIDI compatible sound module to a known state, but will also tell SONAR to generate GM setup measures for your program changes when you save the project in Standard MIDI Format. See "Variables in the [Options] Section" on page 940 for information on disabling setup measure.
- For best results, you should always place program changes and other MIDI messages in the same tracks as the notes they affect. This keeps the data for each track together as a single unit, and avoids problems that might occur when SONAR cannot easily correlate the program changes with the note events.
New features in SONAR 8.5
SONAR 8.5 has many new features (some features are in SONAR Producer only). The following is a list and description of each new feature.
New sound shaping effects:
PX-64 Percussion Strip 959
VX-64 Vocal Strip. 959
Session Drummer 3....961
Alias Factor 962
Classic Phaser 962
HF Exciter 963
Mod Filter.... 963
Multivoice Chorus/Flanger 964
Para-Q 964
Stereo Compressor/Gate 965
Stereo Delay 965
Studioverb2 966
New Impulse Responses for Perfect Space 966
MIDI enhancements:
Step Sequencer 2.0 966
Integrated arpeggiator 967
Support for more MIDI ports 968
Recording and mixing enhancements:
Matrix view 968
REX file import....969
Freeze and Archive buttons in Track view. 970
New Freeze option....970
Solo track/bus from plug-in window....970
Insert Send Assistant enhancements 971
DC offset meter in Analyst....973
Editing enhancements:
AudioSnap 2.0....973
TAB to transients 974
Auto Scroll Lock in Clips pane....975
Clips pane vertical grid lines 975
Transport enhancements:
Draggable Now Time marker....975
Miscellaneous enhancements:
Change I/O devices without restarting SONAR 976
VST plug-in compatibility options....976
Media Browser enhancements 977
New in SONAR 8.3
Miscellaneous enhancements:
Live Input PDC override.... 1028
Multiprocessor load balancing....1029
AIM Assist enhancements 1029
Snap to Grid enhancements 1030
Dynamic Arm enhancement 1031
External insert enhancements....1032
Global effects bypass 1032
Split clip group enhancement 1033
Create new group when pasting grouped clips 1033
New split clip options 1034
Notification when track/bus outputs are assigned to silent output ..... 1034
GUITAR RIG 3.2.1 LE enhancements ..... 1035
TruePianos Vista 64 support 1035
New sound shaping effects:
TS-64 Transient Shaper plug-in. 978
TL-64 Tube Leveler plug-in 979
Beatscape 980
Dimension Pro 981
Channel Tools plug-in. 982
Native Instruments GUITAR RIG 3 LE. 983
TruePianos Amber Module VSTi plug-in 983
Digital Sound Factory Volume 2 Classic Keys for Dimension Pro . . . . . . . . 984
Hollywood Edge FX for Dimension Pro 984
Dimension Pro expansion packs 985
Audio engine performance optimizations:
Assign tracks to mono hardware outputs. 986
Enhanced CPU performance 987
Audio driver changes without restart 987
Minimize driver state changes 988
Vista audio enhancements.... 989
Recording and mixing enhancements:
Instrument track 992
Media Browser enhancements 995
Arm tracks during playback/recording 1001
Insert Send Assistant 1001
Exclusive Solo mode 1005
Solo Override 1006
Live input bounce.... 1006
Editing enhancements:
Clip selection groups 1007
Enhanced editing with keyboard 1012
Aim Assist line 1019
Free Edit tool 1020
Quick Group enhancement 1021
Edit tools enhancements....1021
Transport enhancements:
Transport enhancements....1021
Pause button 1021
True Rewind and Fast Forward buttons.... 1022
Audition button....1022
Control surface enhancements:
Synchronizing channel strips between SONAR and control surfaces ..... 1023
Control surfaces keep MIDI port assignments.... 1023
Display logical VST parameter values 1024
Miscellaneous enhancements:
MIDI out port assignments are retained when adding/removing MIDI devices 1024
Audio Option configuration settings 1025
Limit number of plug-in sidechain inputs 1026
Select all AudioSnap/SlipStretched clips 1027
SurCode Dolby Surround encoders....1027
QuickTime 7 import/export....1027
Updated ACT mappings and presets.... 1027
PX-64 Percussion Strip

Note: The PX-64 Percussion Strip plug-in is only available in SONAR Producer.
Figure 139. PX-64 Percussion Strip

PX-64 Percussion Strip is a multi-functional plug-in that combines a series of effects specifically optimized and streamlined for drum and percussion processing. Combining transient shaping, compression, expansion, equalization, delay and tube saturation in one convenient plug-in, PX-64 Percussion Strip is designed to make it fast and easy to enhance any drum or percussion track.
For more information, see the PX-64 Percussion Strip online Help.
See:
"New features in SONAR 8.5" on page 955
VX-64 Vocal Strip

Note: The VX-64 Vocal Strip plug-in is only available in SONAR Producer.
Figure 140. VX-64 Vocal Strip

VX-64 Vocal Strip is a multi-functional plug-in that combines a series of effects specifically optimized and streamlined for vocal processing. Combining compression, expansion, equalization, deessing, doubling, delay and tube saturation in one convenient plug-in, VX-64 Vocal Strip is designed to make it fast an easy to enhance any vocal track.
VX-64 Vocal Strip features include:
- 5 professional quality effect modules, each with its own bypass toggle.
- All modules are specifically tuned for vocal processing.
- Advanced tube saturation modeling available on input, output and EQ modules.
- Deesser with switchable center frequency and threshold.
- Configurable effect chain routing.
- Smooth, zipperless automatable parameters.
- Library of presets.
For more information, see the VX-64 Vocal Strip online Help.
See:
"New features in SONAR 8.5" on page 955
Session Drummer 3

Note: The Session Drummer 3 synth is only available in SONAR Producer.
Figure 141. Session Drummer 3

Session Drummer 3 is a professional drum sampler and pattern player. It features Cakewalk's patented Expression Engine technology, an anti-aliased, real-time sound production system for multisample audio playback. Session Drummer 3 accurately replicates the sound of its real-world counterpart and features a highly-detailed user interface as well as simple but powerful controls. You can load single samples (Wave or AIFF files), or multisamples (SFZ files) which already contain key mapping and velocity switching assignments. You can load samples in any bit depth and sample rate, in mono or stereo, in looped or unlooped format. Wave and AIFF files can be loaded directly, or as a sample inside an SFZ definition file.
Samples can be of any bit depth (8 to 32-bit), any sample rate, and either mono or stereo. Each sample in a multisample can be a standard PCM Windows Wave file (.wav), an Apple audio format (.aiff) or a compressed file in the standard, high-quality, open and royalty-free ogg-vorbis format (.ogg).
Alternatively, it is possible to open multisample definition files (.sfz) or individual samples by dragging them to an instrument pad.
Session Drummer 3 features include:
• MIDI pattern playback.
- Multi-velocity acoustic and electronic drum kits.
- A comprehensive collection of presets and MIDI-based loop files, providing you with a creative jump-start.
- An animated user interface (UI).
- Controls for volume, pan and tuning of each drum kit piece.
For more information, see the Session Drummer 3 online Help.
See:
"New features in SONAR 8.5" on page 955
Alias Factor
Figure 142. Alias Factor

Alias Factor combines bit crushing and low pass filtering in a unique way, allowing you to decimate your audio to create tones as varied as vintage samplers, cell phones, or old video games. Decimator effects are nothing new, but Alias Factor generates this effect using a special technique that generates aliasing without the unwanted harsh effects provided by other options, offering sounds that are grainy in a "smooth" and organic way. Alias Factor also allows for further creation of attention grabbing new timbres by linking a low pass resonant filter to the decimator for a new means of tweaking your sound.
For more information, see the Alias Factor online Help.
See:
"New features in SONAR 8.5" on page 955
Classic Phaser
Figure 143. Classic Phaser

This is a classic phaser effect that uses a modulating notch filter with a feedback loop. The "Quadra" mode provides extra wide imaging and animation.
For more information, see the Classic Phaser online Help.
See:
"New features in SONAR 8.5" on page 955
HF Exciter
Figure 144. HF Exciter

HF Exciter lets you enhance the higher end of the frequency spectrum. This produces the psycho-acoustic affect that the signal is brighter and clearer. This is done by adding harmonic content that is not present in the original signal.
For more information, see the HF Exciter online Help.
See:
"New features in SONAR 8.5" on page 955
Mod Filter
Figure 145. Mod Filter

Mod Filter produces a dynamic filtering effect, in that the actual filter can respond to incoming signal or follow the cycle of a tempo-synchronized LFO. The filter itself is a low-pass filter type, which filters out higher frequencies.
For more information, see the Mod Filter online Help.
See:
"New features in SONAR 8.5" on page 955
New features in SONAR 8.5
HF Exciter
Multivoice Chorus/Flanger
Figure 146. Multivoice Chorus/Flanger

Chorus/Flanger lets you add depth and thickness to the signal. The EQ section in the feedback path allows you to create some truly unique sounds.
For more information, see the Multivoice Chorus/Flanger online Help.
See:
"New features in SONAR 8.5" on page 955
Para-Q
Figure 147. Para-Q
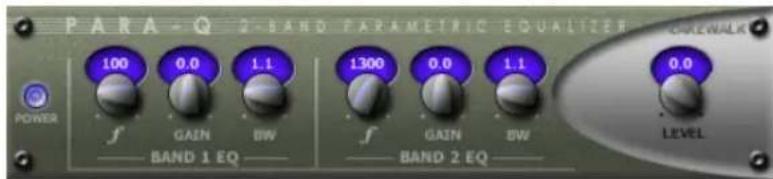
Para-Q is a two-band true parametric EQ that can be used to boost or attenuate generally high or low bands of the signal. It consumes very little processing power, which allows you to use it on many tracks simultaneously.
For more information, see the Para-Q online Help.
See:
"New features in SONAR 8.5" on page 955
Stereo Compressor/Gate
Figure 148. Stereo Compressor/Gate

Stereo Compressor/Gate combines a compressor and a gate into a single effect, so you can increase the overall dynamic level of an audio signal, without distorting the loud parts, and without excessively boosting low-level noise. You can manually trigger the gate via MIDI, which makes it simple to produce stuttering effects.
For more information, see the Stereo Compressor/Gate online Help.
See:
"New features in SONAR 8.5" on page 955
Stereo Delay
Figure 149. Stereo Delay

Stereo Delay produces a tempo-synchronized echo on whichever channel it is patched to. The three-band EQ section in the feedback path allows you to create some truly unique sounds.
For more information, see the Stereo Delay online Help.
See:
"New features in SONAR 8.5" on page 955
Studioverb2
Figure 150. StudioVerb2

Studioverb2 provides very dense and warm reverberation with 32-bit floating point implementation. This eliminates the digital grunge and harshness that occurs even in the best studio reverberation systems, which are implemented using less advanced fixed point processing. The Studioverb2 provides extremely high efficiency, typically using half of the CPU load of other premium reverb plugins.
For more information, see the StudioVerb 2 online Help.
See:
"New features in SONAR 8.5" on page 955
New Impulse Responses for Perfect Space
SONAR 8.5 includes many new impulse responses for Perfect Space. For information about using impulse responses, see the Perfect Space online Help.
See:
"New features in SONAR 8.5" on page 955
Step Sequencer 2.0
The enhanced Step Sequencer makes it easier than ever to compose patterns using a grid.
New enhancements include:
- The Step Sequencer interface has been streamlined to be more efficient and powerful.
- The Step Sequencer is no longer dependent on drum maps, and rows can be assigned directly to the track output, or any available software instrument.
-
Option to preserve the original timing of note events when converting a MIDI clip to a step sequencer clip.
• Per note flam and time offset. -
Style settings, such as Duration, Swing, Time offset, Flam, and Slide/Portamento can be adjusted per row.
- Velocity is now displayed as a vertical bar inside the step.
- Ability to edit multiple rows simultaneously.
- All modulation controls are per row.
• Dedicated Step Recording button. - Preview Step Sequencer patterns in the Media Browser view.
Figure 151. Step Sequencer

Some of the editing gestures have changed slightly, so be sure to see Step Sequencer View for complete details.
Integrated arpeggiator
Each MIDI and instrument track has its own integrated arpeggiator, visually located in the Track view. The arpeggiator lets you play intricate patterns of notes that would otherwise be extremely difficult or impossible to play manually and at speeds and octave ranges that exist beyond the physical limitations of the player or keyboard range.
Arpeggiated events are new events that are based on notes that you play on your controller keyboard. The new events are rhythmically and harmonically specified by the arpeggiator's preset, allowing you to "play" an endless variety sophisticated musical passages with simple key pressing.
The most significant capability of the arpeggiator is its ability to apply algorithmic variations on your input as well as MIDI-based patterns.
Figure 152. Each MIDI and instrument track has an integrated arpeggiator.

See:
Arpeggiator
Support for more MIDI ports
The maximum number of MIDI ports that can be used simultaneously has been increased from 64 to 256.
See:
Setting up output devices
Matrix view

Note: The Matrix view is only available in SONAR Producer.
The Matrix view lets you trigger individual or multiple audio and MIDI patterns, either with a computer keyboard, mouse or via MIDI remote control. The Matrix view consists of a grid, with unlimited rows and columns. You can drag audio, MIDI Groove Clips, Step Sequencer patterns and Project5 patterns to cells in the grid, and each row can be routed to any track in your project. You can record the Matrix performance to the Clips pane.
The Matrix view can be used as a stand-alone pattern trigger, or it can be synchronized with your project during playback.
There are many uses for the Matrix view, including:
- Experiment with different arrangements or combinations of loops, then record the performance
into the Clips pane.
- Trigger any combination of loops in real-time
Figure 153. The Matrix view

See:
Matrix view
REX file import

Note: REX file import is currently not supported under SONAR x64.
Like ACIDized WAVE files, REX files are audio files that are designed to be looped and follow the project's tempo. The time stretching technology that REX files use is well suited for percussive sounds, such as drums.
You can import REX files into a SONAR project. Once imported, you can work with REX files just as if they were regular Groove Clips (see Working Groove Clip audio).
See:
Working with REX files
Freeze and Archive buttons in Track view
SONAR 8.5 makes it easier than ever to archive and freeze tracks by providing per-track Archive
A and Freeze buttons in the Track view.
You can also right-click any Freeze button to open the Freeze Options dialog.
Figure 154. Freeze and Archive buttons have been added to the Track view
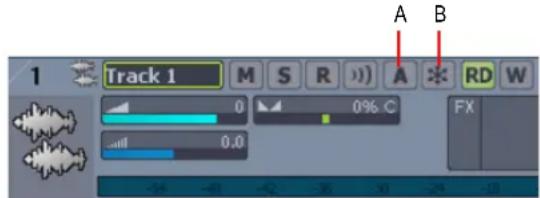
A. Archive button B. Freeze button
See:
To archive or unarchive tracks
Freeze Tracks and Synths
New Freeze option
The Freeze Options dialog has a new Track FX option, which allows you to either include or exclude track FX bins during freeze operations.
When freezing AudioSnap clips in order to conserve CPU resources, it is often desirable to not render track FX bins.
See:
Freeze Options dialog
Freeze Tracks and Synths
Solo track/bus from plug-in window
When tweaking an effect, it is often desirable to only hear the audio that is passing through the effect.
A Solo button is available on all plug-in property pages, which allows you to quickly solo the track or bus that the effect is inserted on while adjusting the plug-in. The Solo button functions the exact same way as the Solo button on the source track/bus.
Figure 155. A Solo button is available on each plug-in property page

A. Solo button
Note: If you solo a software instrument in the Synth Rack, the Solo button will also affect all associated MIDI and audio tracks.
See:
Soloing tracks
Muting and Soloing Soft Synth Tracks
Audio Effects (Audio Plug-ins)
Insert Send Assistant enhancements
The Insert Send Assistant dialog has an improved layout and a new Match Track's Pan and Gain option that makes it easier to create headphone mixes.
Figure 156. The Insert Send Assistant dialog
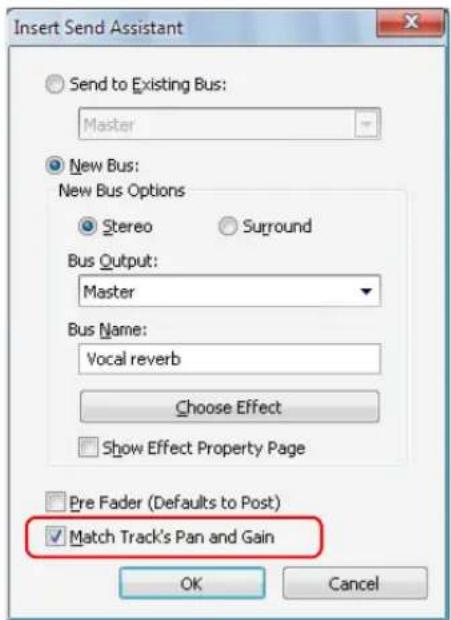
When Match Track's Pan and Gain is selected, the newly created send will have Gain and Pan settings that match those of the strip's Main Gain and Pan. As a result, the headphone mix matches the main mix, and from there you can adjust the headphone mix as desired.

Note: The Match Track's Pan and Gain setting does not affect sends that are assigned to surround buses.
See:
Insert Send Assistant
DC offset meter in Analyst

bar_line
| Time | Bar Value | Line Value | |------|-----------|------------| | 5.1K | 5.1K | 5.1K | | 10.2I| 10.2I | 10.2I |A. DC offset meter
The DC offset meter is a bi-directional bargraph meter that lets you detect DC offset in audio. There are various ways DC offset can be introduced into a mix. DC offset can come from recording sources, software instruments, or it could be present in imported wave files. Although the effect of DC offset is normally impossible to hear, it can produce some very unwanted side-effects, including:
- Loss of apparent loudness in mix. Because the audio in the final mix is skewed positive or negative, you run out of headroom sooner and must reduce gain to compensate.
- Loss of quality when using mastering compression. Because the waveform is off-center, a compressor will asymmetrically alter the waveform producing low frequency harmonic distortion.
- The DC is essentially sub-sonic information that will affect the lowest band of any multi-band processing.
To check your audio for DC offset in real-time before exporting/mastering, patch Analyst in a mix bus. Ideally, the DC offset meter should appear as a small dot in the middle of the scale. As the DC offset in the input signal moves away from 0dB, the DC offset meter bar lengthens up or down, indicating either a positive or negative DC offset. As the DC offset becomes larger, the color of the meter bar changes from blue to red. The scale of the meter is -50% to +50% dbFS.
For information about removing DC offset, see Removing DC Offset.
AudioSnap 2.0
AudioSnap 2.0 provides simplified workflow and introduces many enhancements that make it easier to fix timing problems in audio and align audio with the project tempo.

AudioSnap 2.0 highlights include:
- Audio clips are always ready to be processed via AudioSnap, without having to first enable AudioSnap on clips.
- A dedicated Transient tool that makes it easier to select and edit transient markers.
• A streamlined AudioSnap palette.
• Each audio clip has an internal tempo map that can be edited. - Synchronize audio to the project tempo in one simple step.
- Synchronize the project tempo to an audio clip's tempo map in one simple step.
- Simplified workflow for fixing multi-track audio while maintaining phase relationships.
• Enhanced TAB to transients. - Improved real-time stretching algorithms.
- Ability to stretch multiple transients proportionally.
- You can snap edits to any transient marker (no longer limited to the Pool).
For more information, see "AudioSnap" on page 355.
TAB to transients
You can use the TAB and SHIFT+TAB keys to jump to audio transients, and MIDI Note events.
In SONAR 8.5, TAB to transients is always available when the transport is idle, and is no longer dependent on AudioSnap.
TAB to transients is now selection-based, which means tabbing will go to the next/previous transient amongst all selected clips. If there is no selection, tabbing operates on the current track.
To move the Now Time to the next transient, press TAB.
To move the Now Time to the previous transient, press SHIFT+TAB.
See:
TAB to transients
Auto Scroll Lock in Clips pane
While editing, you can prevent the Clips pane from scrolling horizontally during playback. This allows you to focus on the edit location without worrying that the screen will eventually scroll away from the edit location.
When the Left Click Locks Scroll option is enabled (default behavior), the Clips pane will not scroll if you click any object in the Clips pane. When you are done with the edit and want the Clips pane to scroll again during playback, click in the background of the Clips pane to clear auto scroll lock.
See:
Auto Scroll Lock in Clips pane
Clips pane vertical grid lines
Vertical rules in the Clips pane can be hidden, shown behind clips or shown in front of clips.
See:
Showing gridlines
Clip View Options dialog
Draggable Now Time marker
You can drag the Now Time marker during playback. When the mouse button is released, the transport immediately jumps to the new location.

Note: You can only drag the Now Time marker during playback, not while recording.
See:
"The Now time and how to use it" on page 172
"The Now time marker" on page 174
Change I/O devices without restarting SONAR
You can add or remove USB/FireWire audio and MIDI devices while SONAR is running, and the audio and MIDI engines will dynamically respond to any changes.
When a device is added or removed, SONAR prompts you to confirm or cancel the change. If you click Yes, playback stops and the audio and MIDI engines reload.
See:
Changing I/O devices
Hardware Setup
VST plug-in compatibility options
The Cakewalk Plug-in Manager has two new per plug-in properties to address some common VST operational and performance issues:
- Always suspend on play. When Always suspend on play is selected, the plug-in will reset when playback starts. Select this option for any VST instruments that have problems with stuck notes when stopping the transport. The Always suspend on play property is also useful for effects that generate a tail, such as delays and reverbs. The effect is that you will hear the tails when the transport stops, but not when the transport rolls again. Always Suspend on play is disabled by default.
- Serialize Host Access. When Serialize Host Access is selected, communications with the plug-in are serialized as far as possible. The default behavior is OFF, which allows asynchronous calls to the plug-in.
When Serialize Host Access is disabled, SONAR's audio engine runs more efficiently and allows the UI thread to interact independently with the plug-in GUI without impacting the audio engine.
The only reason to enable Serialize Host Access would be for a plug-in that has thread safety problems leading to crashes or glitches when changing plug-in presets.
BitBridge enhancements
Cakewalk's BitBridge technology allows you to use 32-bit VST effects and instruments when using the x64 version of SONAR.
Earlier versions of SONAR x64 could load only up to 4GB worth of 32 bit plug-ins. SONAR can now use all addressable RAM in your computer.
BitBridge now also supports VST's that generate MIDI.
jBridge support
Similar to BitBridge, jBridge allows you to use 32-bit VST effects and instruments when using the x64 version of SONAR, as well as use 64-bit plug-ins when using the x86 version of SONAR. jBridge can also bridge 32-bit plug-ins in the x86 version of SONAR, allowing your computer to overcome the memory limitations of a single 32bit process.
To enable jBridge, select the Load using jBridge wrapper check box in the VST Plug-In Properties dialog. This check box is only enabled on systems where jBridge is installed.
For information about adjusting VST settings, see "To set options for individual VST plug-ins (DD2; new S8.5)" on page 640 and the Cakewalk Plug-in Manager online Help.
See:
Organizing Plug-ins
VST Configuration
Media Browser enhancements

Note: The Loop Explorer view is now called the Media Browser view.
The Media Browser view has the following new enhancements:
- You can preview Project5 patterns (.ptn), step sequencer patterns (.ssp) and REX loops (.rex).
- You can preview MIDI and audio files simultaneously.
- You can simultaneously preview multiple files in different folders.
- You can save and recall Content Location presets to quickly access you favorite folders.
- You can drag video files to the Video Thumbnail pane.
See:
Media Browser enhancements
TS-64 Transient Shaper plug-in

Note: The TS-64 Transient Shaper plug-in is only available in SONAR Producer.
The TS-64 Transient Shaper plug-in provides powerful control over the dynamics of audio tracks and mixes.
In a musical context, the term transient refers to a sudden increase in sound output that occurs for a short period of time. For example, the attack portion of a drum hit is a transient.
Unlike a typical compressor, TS-64 Transient Shaper lets you shape the audio signal's attack phase independently of the decay/sustain phase.
TS-64 Transient Shaper is primarily designed for drums and percussion, but can also be useful on other percussive sounds, such as guitar and electric piano.
TS-64 Transient Shaper features include:
- Powerful envelope/transient-detection.
• Linear-phase filtering. - Gain-shaping.
- Shape the transients independently of the tail or ambience.
• Automatable parameters. - Smooth, zipperless output.
Figure 157. TS-64 Transient Shaper

For more information, see the TS-64 Transient Shaper online Help.
TL-64 Tube Leveler plug-in

Note: The TL-64 Tube Leveler plug-in is only available in SONAR Producer.
The TL-64 Tube Leveler plug-in is a preamp/processor that employs advanced analog vacuum-tube circuit modeling, which allows you to apply ultra-high-quality analog warmth and saturation to tracks and mixes.
TL-64 Tube Leveler provides complete models of entire vacuum-tube circuits. Under the hood are dynamic, virtual vacuum-tubes that mimic the “animated” nature of their real, analog counterpart as they respond to different input audio. The result is the coveted warm, lively and realistic analog sound of classic vacuum-tube processors and amplifiers.
Digital audio recordings can sometimes sound sterile and lifeless. Use TL-64 Tube Leveler to add just the right amount of warm tube saturation to individual tracks or full mixes.
Figure 158. TL-64 Tube Leveler

For more information, see the TL-64 Tube Leveler online Help.
Beatscape

Note: The Beatscape synth is only available in SONAR Producer.
SONAR 8 introduces an exciting new way to create inspired beats from loops and samples. Beatscape combines a sophisticated 16-pad REX file player and beat slicer with per-pad effects, a step generator, extensive MIDI control, and more.
Beatscape makes it easy to conform multiple loops to the same tempo, to reorder slices without changing the groove, or to break a loop up into a construction kit. Creating remixes is as simple as loading the stems and a few choice loops onto pads-Beatscape tempo-matches them all as you trigger, mute, process, reorder, deconstruct, and recombine the elements into your unique vision. Most importantly, using Beatscape feels like playing an instrument. It's intuitive, creative, and a lot of fun.
Figure 159. Beatscape

For more information, see the Beatscape online Help.
Dimension Pro

Note: The Dimension Pro synth is only available in SONAR Producer.
At Dimension Pro's core is a powerful sample-playback engine paired with advanced synthesis capabilities. It draws on a comprehensive library of sounds covering every aspect of contemporary music. Dimension Pro is also expandable, meaning more sounds can be added to the instrument via expansion packs, or user multisamples based on standard PCM wave files.
Besides sample-playback, Dimension Pro is capable of Wavetable synthesis, and Physical Modeling (Waveguide) synthesis. These two synthesis methods allow a broad sound palette, ranging from synthesized analog sounds, to plucked instruments, to precise reproductions of acoustic instruments.
Figure 160. Dimension Pro
![Subsonic Growth [1.7 MB] DIMENSIONPRO pink.wav [1.7 MB] Lo/Fl sky 0 217 Transpore 0 PLW Let Lo/Fl Vol 0 217 Pulse 0 Plychury 25 Swe# Str/Vig 2 2 CayTrack 0 Swp/Boot on On Shift +L2 Layer 0 LOFI FIRE SET RED DECK FILTER UP DRIVE SHIFT DRIVE EQ1 EQR FREQ EQ2 ERQ FREQ 0 EQ3 SRN FREQ 0 FX TYPE FILTER LEFT CENTER RIGHT FREQ CUT OFF RES LTO LTO FREQ DECK INPUT DRY/MET MODULATORS PITCH CUT RECO PAN EP App1-table - 45/36 type: 263.4 shift: 85.2 time: 0.3sec LTO Stator: 0.0 Freq: 1.00 Spec: 0.00 Below: 0.00 Fade: 0.00 Depth: 0.00 LIMITER ELEMENT1 ELEMENT2 ELEMENT3 ELEMENT4 FIX FX2 PIN VOL FX1 FX2 PIN VOL FX1 FX2 PIN VOL FX2 FX2 PIN VOL](/content/2026/05/819773/images/f4c806328e397159c1bc7d2267973237249e5daf18941e5119b50475a7f12c3a.jpg)
For more information, see the Dimension Pro online Help.
Channel Tools plug-in
The Channel Tools plug-in provides easy and powerful channel processing for gain, Mid-Side decoding, delay and stereo panning. Channel Tools is ideal for enhancing and adjusting stereo separation for stereo tracks and full mixes.
With Channel Tools you can:
- Use intuitive controls to easily place the left and right channels individually anywhere in the stereo space.
• Automatically decode Mid-Side channel recordings.
• Enhance the spatial characteristics of your mixes. - Adjust for phase problems due to microphone placement.
- Swap the left and right channels.
- Invert the polarity (phase) of each channel.
- Fine-tune the timing of recordings by delaying the left and/or right channel by a specific number of samples or milliseconds.
Figure 161. Channel Tools
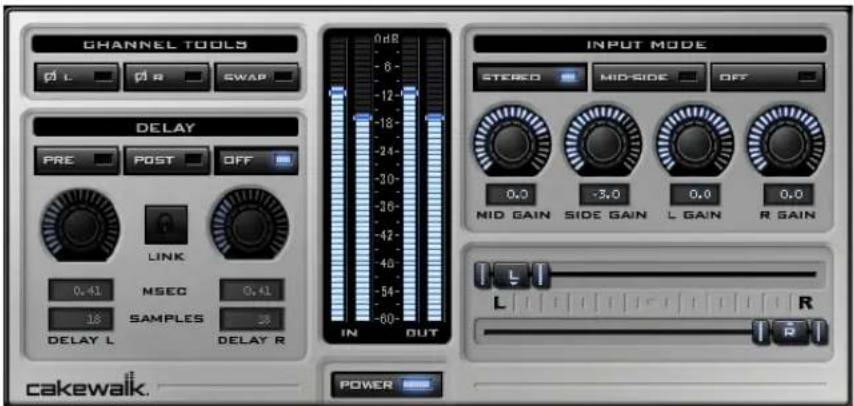
For more information, see the Channel Tools online Help.
Native Instruments GUITAR RIG 3 LE

Note: The GUITAR RIG 3 LE plug-in is only available in SONAR Producer.
GUITAR RIG 3 LE is built on the latest award-winning guitar amp modeler from Native Instruments. This special edition contains 3 amps and cabinets, 11 effects, tuner, metronome and over 50 presets.
Figure 162. GUITAR RIG 3 LE
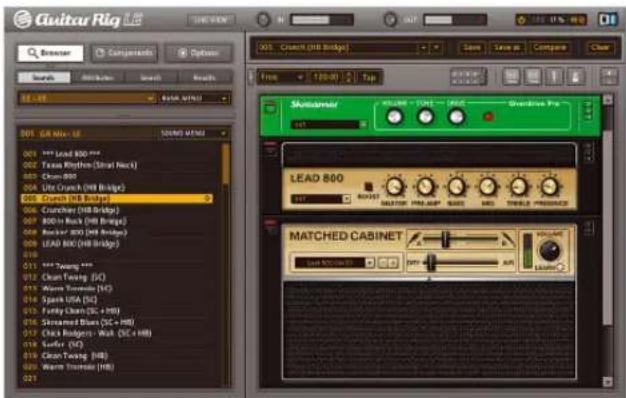
For more information, see the GUITAR RIG 3 LE online Help.
TruePianos Amber Module VSTi plug-in

Note: The TruePianos Amber Module synth is only available in SONAR Producer.
One of four modules that currently ship with the full version of 4Front Technologies' TruePianos VSTi, the TruePianos Amber Module provides world-class, playable piano sounds through its combination sampling, modeling, and synthesis sound design. TruePianos sounds and feels great, just like a real acoustic piano, with all the important characteristics: sympathetic resonance, interstring harmonics, repedalling and more.
- Designed to blend transparently with the musician's hands through its unique capabilities of matching to the players own playing style (and characteristics of his/her MIDI keyboard) with the help of intuitive controls.
- Optimized for real-time performance, with low CPU usage even at 96khz host sampling rates and advanced polyphony levels.
Figure 163. TruePianos VST

natural_image
Interior view of a grand piano with visible keys and wood (no text or symbols on the instrument itself)For more information, see the TruePianos VST online Help.
Digital Sound Factory Volume 2 Classic Keys for Dimension Pro

Note: The Digital Sound Factory Classic Keys expansion pack is only available in SONAR Producer.
The Digital Sound Factory Classic Keys expansion pack for Dimension Pro contains 1GB of classic electric piano sounds, created by the sound designer for the original E-Mu Proteus 2000 and Vintage Keys sound modules.
Hollywood Edge FX for Dimension Pro

Note: The Hollywood Edge FX library is only available in SONAR Producer.
The Hollywood Edge FX library is a collection of world-class sound effects from the critically acclaimed The Hollywood Edge sample collection, programmed specifically for Dimension Pro.
Dimension Pro expansion packs

Note: The Dimension Pro expansion packs are only available in SONAR Producer.
SONAR 8 includes two expansion packs for Dimension Pro.
Expansion pack 1
- 350 new programs and over 120 MB of new samples and wavetables.
- New programs expand the factory sound set with new digital and FM sounds, dimensions, electric pianos, guitars, leads and keys, orchestral sounds, organs, real and synth basses, clusters and harmonies, splits and layers, sweeps, analog sounds, pads, twisted waveguide patches, and world sounds.
- Includes a new emulation of the legendary Hammond B3™ organ. Each component of the original organ, including all drawbar levels, percussion level, keyclick, the rotary speaker, drive, and cabinet simulator were precisely crafted to recreate all characteristics of this legendary instrument.
- The pack includes new wavetables, multisamples, and cabinet/speaker simulations.
Expansion pack 2
• 350 new professional sound programs by Frank Genus and René Ceballos.
- 120 MB of new multisamples.
- New programs expand the factory sound set with new digital and FM sounds, dimensions, drums, electric pianos, drum n' bass breaks, hip hop breaks, guitars, leads and keys, orchestral sounds, organs, real and synth basses, reeds and brass, sweeps, analog, pads, and more.
- Loopmasters sample content includes hip-hop and drum n' bass grooves in REX2 format.
Assign tracks to mono hardware outputs
SONAR 8 lets you assign audio track and bus outputs to individual (mono) hardware outputs in addition to stereo pairs.
This is very useful, for example, if you record in SONAR but want to use an external mixing console to mix.
To show mono hardware outputs
SONAR does not show mono hardware outputs by default. To show mono outputs, do the following:
- On the Options meny, click Audio and then click the Drivers tab.
- Select the Show Mono Outputs check box and then click OK to close the Audio Options dialog. Mono hardware outputs are now available in all locations that display audio output ports, with the exception of the Media Browser view, Loop Construction view and Import Audio dialog. Each available audio port exposes Left, Right and Stereo channels.

Note: The Show Mono Outputs option only affects the display of mono hardware outputs in SONAR; it does not affect current output port assignments on tracks and buses. Existing mono output assignments are retained even if you disable the Show Mono Outputs option.
Assigning stereo tracks to mono outputs
When a stereo track is assigned to a mono hardware output, the left and right channels are downmixed to mono. All track/bus gain and pan settings are applied prior to mono conversion.
Backward compatibility
Loading a SONAR 8 project with mono output assignments in an earlier version SONAR will cause the mono assignments to be lost.
Enhanced CPU performance
SONAR 8's CPU performance has been optimized in many different areas, including:
- Faster program start time.
- Improved performance when using many tracks and low latency settings.
- Reduced screen flicker when resizing windows.
• Better meter performance. - More responsive zoom and scroll.
Audio driver changes without restart
You can now change audio driver settings in the Audio Options dialog without having to restart SONAR before the changes take effect.

Note: If you switch from ASIO to WDM, WASAPI or MME, or from WDM to MME, you will be prompted to re-profile the hardware just as if you restarted the application.
Minimize driver state changes
SONAR 8 has a new option to no longer reset audio devices each time playback or recording starts. This option minimizes device state transitions in response to transport operations. When enabled, SONAR attempts to keep the device in a running state as far as possible.
To configure the MinimizeDriverStateChanges option
- On SONAR's Options menu, select Audio and then click the Advanced tab.
- Under Configuration Settings, click Edit Config File.
The Aud.ini file opens in the default Windows text editor.
- In Aud.ini, locate the entry called MinimizeDriverStateChanges and set it to the desired value. For example:
MinimizeDriverStateChanges=1
Valid values are as follows:
• 0 = off.
- 1 = On for ASIO only (default).
- 2 = On for WDM only .
- 3 = On for both ASIO and WDM .
- Save Aud.ini and close the Windows text editor.
- Click Reload Config Settings to reload the current audio configuration settings from Aud.ini.

Note: The MinimizeDriverStateChanges variable only applies when using ASIO or WDM driver modes, not when using the MME driver mode.
Vista audio enhancements
SONAR 8 introduces several enhancements for communicating with audio devices in Windows Vista, including:
- Support for WASAPI, which is the new standard for audio in Windows Vista and future Windows operating systems.
- MMCSS task profile support.
- Optimized WaveRT streaming.
See:
WASAPI support
MMCSS task profile support
WaveRT updates
WASAPI support
SONAR 8 introduces support for WASAPI (Windows Audio Session API), which is the new standard for audio in Windows Vista and future Windows operating systems. Windows Vista SP1 or higher is required to use WASAPI.
The primary advantages of WASAPI are:
- Better compatibility with consumer audio devices:
- Supports a wide variety of audio devices, including newer WaveRT devices and legacy Windows audio devices.
- Lets you use consumer audio devices that don't have ASIO drivers or drivers that don't work well under WDM.
- Provides low latency access to audio devices.
Using WASAPI in Windows Vista
WASAPI has four different modes of operation. SONAR supports WASAPI Exclusive mode using event signaling, because this mode is best suited for audio programs.
In order to use WASAPI in SONAR, your audio device must have WDM drivers that Windows can successfully communicate with, and the audio device must be enabled to work in Exclusive mode.
Exclusive mode is the default in Windows Vista and can be configured from your audio device's taskbar or Properties dialog in Device Manager. Consult your audio device's manual if you need further information.
Exclusive mode requires exclusive access to the audio device. Another program will not be able to use the audio device simultaneously with SONAR.

Tip: If you select Share Drivers With Other Programs in Options >Audio >Advanced, SONAR will relinquish control of the audio device when the program loses Windows focus.
To enable WASAPI mode SONAR
- On the Option menu, select Audio and then click the Advanced tab.
- In the Driver Mode list, select WASAPI.
- Click the Drivers tab.
- In the Input Drivers and Output Drivers lists, select the desired input and output ports.
- Click OK to close the Audio Drivers dialog.

Note: The WASAPI driver mode is only available when using Windows Vista SP1 or a later operating system.
See also:
WaveRT updates
MMCSS task profile support
The Multimedia Class Scheduler Service (MMCSS) provides Windows multimedia programs, including SONAR, with prioritized access to CPU resources for time-sensitive processing.
By default, SONAR uses the MMCSS task profile named Pro Audio. If desired, you can instruct SONAR to use a custom MMCSS task profile.
To use a custom MMCSS task profile in SONAR
- Determine the name of the MMCSS task profile that you want to use. MMCSS task profiles are listed in the Windows registry under
HKEY_LOCAL_MACHINE\SOFTWARE\Microsoft\Windows
NT\CurrentVersion\Multimedia\SystemProfile\Tasks. Ensure that the registry entry exists for the profile you want to use. - If you have added any new profiles, reboot your computer to allow the MMCSS service to see the new profiles.
- On SONAR's Options menu, select Audio and then click the Advanced tab.
- Under Configuration Settings, click Edit Config File.
The Aud.ini file opens in the default Windows text editor. - In Aud.ini, locate the entry called MMCSSTaskKey and set it to the desired profile name. For example:
MMCSSTaskKey=Pro Audio
- Save Aud.ini and close the Windows text editor.
- Click Reload Config Settings to reload the current audio configuration settings from Aud.ini.
SONAR will now use the new task profile for MMCSS.
WaveRT updates
SONAR's WaveRT driver support has been updated and enhanced to work properly with Vista SP1.
SONAR supports WaveRT in two ways:
WDM driver mode. WaveRT event mode access is available in SONAR when you are using WDM as a driver mode and a WaveRT capable audio device is detected. A [WaveRT] suffix is added to the driver name in this case.
WASAPI driver mode. Event mode WaveRT drivers are automatically listed and available in WASAPI mode.
Instrument track
SONAR has a new track type called instrument track, which makes it very simple to work with soft synths. An instrument track is essentially two tracks—a MIDI track and an audio track, both associated with the same soft synth—contained in a single track strip. An instrument track allows you to control the MIDI data that is sent to a soft synth and the audio signal that is returned from the soft synth.
To create an instrument track
In order to create an instrument track, you must first insert a new soft synth.
- Click the Add Track button +, then point to Instrument Track and select the desired soft synth. -or-
-
Do one of the following to insert a new soft synth:
-
On the Insert menu, point to Soft Synths and select the desired soft synth.
- In the Synth Rack view, click the Insert Soft Synth and ReWire devices button and select the desired soft synth from the pop-up menu.
The Insert Soft Synth Options dialog appears.
Figure 164. The Insert Soft Synth Options dialog

- Select the Instrument Track check box, then click OK to close the Insert Soft Synth Options dialog.
A new instrument track is inserted.
Instrument tracks have a unique track icon and track name color. The track name defaults to the soft synth name.
Figure 165. Instrument track strip

Instrument track controls
Because an instrument track is a hybrid between an audio and a MIDI track, an instrument track strip contains both audio and MIDI controls.
The instrument track strip exposes MIDI input and audio output controls. Internally, the MIDI output is assigned to the soft synth's MIDI input, and the audio input is assigned to the soft synth's main output.
The following table shows all controls that are available on an instrument track, and indicates if a control applies to audio or MIDI data.
| Control type Audio MIDI |
| Mute X |
| Solo X |
| Arm X |
| Input Monitor X |
| Automation Read/Write X |
Table 201.
| Control type | Audio | MIDI |
| Inline Piano Roll X | ||
| Volume X | ||
| Pan X | ||
| Trim X | ||
| Input Quantize X | ||
| Input (Internally assigned to synth output) | X | |
| Output X (Internally assigned to synth input) | ||
| MIDI Channel X | ||
| Bank X | ||
| Patch X | ||
| Time+ X | ||
| Pitch+ X | ||
| Sends | X | |
| Snap to scale | X | |
| FX bin | X | |
| Meter | X | |
| Track scale | (When track is frozen) | X |
Table 201.
Editing in the Clips pane
By default, MIDI clips are displayed and can be edited in the Clips pane. MIDI track and clip envelopes are not available.
If an instrument track is frozen, audio clips are displayed and can be edited in the Clips pane. Audio track and clip envelopes are also available.

Note: The inline Piano Roll is not available on a frozen instrument track.
Exporting and bouncing
When exporting or bouncing an instrument track, both MIDI and audio data are taken into account. The result is the same as if the track is frozen.
Converting an audio and MIDI track to a single instrument track
If an existing audio track and MIDI track are assigned to the same soft synth, you can convert the two tracks to a single instrument track.
- Select the audio and MIDI tracks that you want to combine into a single instrument track.
- Right-click one of the selected track strips and select Make Instrument Track from the pop-up menu.
The audio and MIDI tracks and combined into an instrument track.
Splitting an instrument track to separate audio and MIDI tracks
You can split an instrument track into separate audio and MIDI tracks. The audio and MIDI tracks will remain assigned to the same soft synth.
- In the Track view, right-click the track strip and select Split Instrument Track from the pop-up menu.
The instrument track is converted to separate audio and MIDI tracks, both assigned to the soft synth.
Media Browser enhancements
The Media Browser view allows you to browse and preview your audio files (.wav, .mp3, .wma, etc.), MIDI loops (.mid), Project5 patterns (.ptn), step sequencer patterns (.ssp) and REX loops (.rex) before you drag them into your project. If you preview a Groove clip, it plays back at tempo and in the key of your current project.
Audio files can be auditioned through any bus and MIDI files can be auditioned through any soft synth.
You can also drag video files to the Video Thumbnails pane.
Media Browser interface
The Media Browser view is divided into three panes. From left to right, the panes are as follows:
Synth Rack pane. Lists all soft synths in a project. This pane shows the same synths as the Synth Rack view.
Each synth has a corresponding instrument track in the Track view. If the instrument track is muted or soloed, the Synth Rack pane displays a small Mute M or Solo S icon next to the corresponding synth name. If the synth is disabled, a Disabled DCDn is displayed.
Figure 166. The Synth pane is a mirror of the Synth Rack view
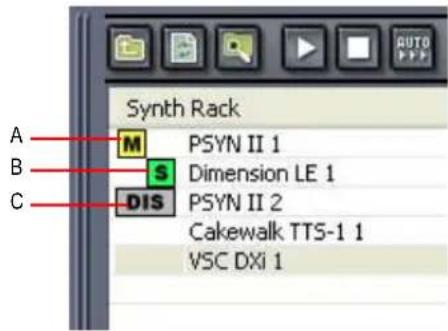
A. Mute B. Solo C. Disabled

Folders pane. Lists folders on your computer's hard disk. Select a folder to show all audio and MIDI files in that folder.

Tip: If you don't see the Folders pane, click the Views arrow and select Folders from the shortcut menu.
Content List pane. Lists all files in the selected folder. Select an audio or MIDI file to audition the file. The Media Browser view status bar shows information about the selected file.
Figure 167. Media Browser view

A. Synth Rack pane B. Folders pane C. Content List pane
Media Browser view toolbar
The Media Browser view toolbar contains the following controls:
- Move Up .Move up one folder level.
- Refresh Views 📄. Refresh the contents of the Media Browser view.
- Windows Explorer 📄. Opens the selected folder in a standard Windows Explorer window.
- Play ▶ Play the selected file.

Note: Playback stops if you change the directory or close the Media Browser view.
- Stop ■ Stop playing the selected file.
- Auto Play AUTO. When enabled, you can simply click a file to play the file.
- Views 📄. Lets you change how you view items in a folder. Content can be displayed as Large Icons, Small Icons, List, Details or Folders.
- Content Location preset list. Lets you select a saved Content Location preset.
- Delete Content Location preset. Lets you delete the selected Content Location preset.
- Save Content Location preset. Lets you save the current folder as a Content Location preset.
- Preview Bus. Lets you specify the bus to use when auditioning audio files. The selected preview bus is saved with the project.
- Insert Synth +. Insert a new soft synth, which can be used to audition MIDI files.
- Delete Synth . Delete the selected soft synth.
- Open Synth Properties Page ☐. Open the user interface for the selected soft synth.
Figure 168. Media Browser view toolbar

A. Move Up B. Refresh views C. Windows Explorer D. Play E. Stop F. Auto Play G. Views H. Content location I. Delete Content Location preset J. Save Content Location preset K. Preview bus L. Insert synth M. Delete synth N. Open synth property page
Auditioning loops during playback
You can audition loops during playback and when the transport is idle.
If you audition a loop during playback, the loop jumps to the current Now time and remains synchronized with SONAR's transport until you stop playback. After you stop playback, the loop restarts.
Auditioning audio files
You can audition regular audio files, Groove Clips, ACIDized files and REX files.
To audition an audio file
- Click the Preview Bus arrow and choose the desired bus that you want to audition the audio file through.
- Browse to the folder that contains the file you want to audition.
-
Select the desired file. If you want to audition multiple files simultaneously, either in the same or in different folders, hold down the CTRL or SHIFT key and select each file you want to audition.
-
Click the Play button

Tip: If Auto Play ☐ is enabled, you can simply click a file to audition the file.
See also:
To Preview a Groove Clip
To drag an audio file into a project
- Drag the audio file from the Media Browser view to the Track view.
- Drop the Wave file in the track and at the time in which you want it in your project.

Tip: You can double-click a file in the Media Browser to insert the file on a new track at the current Now time.
A new audio track is created if:
- There are no audio tracks in the project.
- An audio track is not selected.
- You double-click a file in the Media Browser.
- You drop the file after the last track in the project.
See also:
The Media Browser View
To Drag a Loop into a Project
To Drag Multiple Loops into a Project
Auditioning MIDI files
You can audition standard MIDI files, MIDI patterns, MIDI Groove Clips, Project5 patterns and step sequencer patterns.
You can audition multiple MIDI files simultaneously, either through the same synth or through multiple synths.

Note: MIDI Groove Clips loop indefinitely, but standard MIDI files play only once and do not repeat.
To audition a MIDI file
- In the Synth Rack pane, select the desired synth that you want to audition the MIDI file through.

Note: If the are no synths in the project, click Insert Synth + to insert a new soft synth.
-
Browse to the folder that contains the file you want to audition.
-
Select the desired file. If you want to audition multiple files simultaneously, either in the same or in different folders, hold down the CTRL or SHIFT key and select each file you want to audition.
-
Click the Play button

Tip: If Auto Play ☐ is enabled, you can simply click a file to audition the file.
To audition through a different synth
- Hold down the CTRL key and click the file that you want to audition through a different synth.
The MIDI file is no longer associated with the synth.
-
In the Synth Rack pane, select the new synth that you want to audition the MIDI file through.
-
Select the MIDI file again.
The MIDI file now plays through the new synth, without affecting any MIDI files that may be playing through other synths.
To drag a MIDI file into a project
-
Drag the MIDI file from the Media Browser view to the Track view.
-
Drop the MIDI file in the track and at the time in which you want it in your project.

Tip: You can double-click a file in the Media Browser to insert the file in the current track at the Now time.
A new MIDI track is created if:
- There are no MIDI tracks in the project.
- You drop the file after the last track in the project.
- Getting started
- Table of Contents
- Tutorial 1 – Creating, playing, and saving projects ..... 93
- Tutorial 2 – Using the Media Browser ..... 107
- Tutorial 3 – Recording vocals and musical instruments.... 115
- Tutorial 4 – Playing and recording software instruments ..... 121
- Tutorial 5 – Working with music notation.... 129
- Tutorial 6 – Editing your music .... 137
- Tutorial 7 – Mixing and adding effects.... 145
- Tutorial 8 – Working with video ...... 153
- Tutorial 9 – Exporting, CD burning and sharing 163
- Controlling Playback 171
- Recording.... 233
- Arranging and editing 287
- Working with Loops and Groove Clips 411
- Editing MIDI Events and Continuous Controllers (CC) 433
- Drum Maps and the Drum Grid Pane 529
- Editing Audio....545
- Software Instruments.... 569
- Mixing 593
- Surround Mixing.... 683
- Automation....705
- Instrument Definitions 785
- System Exclusive Data....805
- Synchronizing Your Gear 819
- Audio File Management.... 833
- Improving Audio Performance 843
- External Devices 869
- Using CAL.... 901
- Troubleshooting.... 905
- Hardware Setup....921
- Initialization Files 929
- MIDI Files 949
- New features in SONAR 8.5 955
- Included plug-ins 1037
- Cyclone 1087
- Menu Reference 1099
- Beginner's Guide to Cakewalk Software 1215
- Dialog Reference.... 1245
- View Reference 1437
- Introduction
- About SONAR
- Publish
- Music Composition and Exploration
- Remixing
- Game Sound Development
- Sound Production and Engineering
- Web Authoring
- Film and Video Scoring and Production
- Publishing Music on the Internet
- Burning Audio CDs
- Flexibility
- Computers, Sound, and Music
- MIDI
- Digital audio
- Sound Waves
- Recording digital audio
- Setup
- User accounts
- Windows XP:
- Windows Vista:
- Audio connections
- Analog and digital Inputs
- Type of analog input/output Description
- Type of digital input/output Description
- To connect an electric guitar or keyboard to your computer
- To connect a microphone to your computer
- MIDI Connections
- Changing I/O devices
- Preserve selected audio devices on device changes
- Loading a project after changing audio devices
- Remapping using friendly driver names
- Automatic MIDI port remapping for control surfaces
- Starting SONAR
- RIFF/MID will not launch SONAR when double-clicked
- Migrating preferences
- Running Wave Profiler
- Setting up the MIDI In and MIDI Out devices
- Using MIDI devices after making driver changes
- Defining your MIDI instrument or sound card
- SONAR basics
- SONAR file types
- Other types of files
- File type Description
- Opening a file
- To open a file in SONAR
- Views
- The Track View
- What it does Key
- Table 6.
- To Do this
- Table 7.
- Track/Bus Inspector
- To do this Do this
- The Console View
- Other views
- Zoom controls
- Key What it does
- Table 11.
- Docking views
- Locking views
- Floating views
- X-Ray windows
- To select key bindings for X-Ray windows
- To use X-Ray windows
- To Adjust X-Ray Windows Options
- To exclude a plug-in from X-Ray capability
- Customizable menus
- To customize a toolbar:
- To rename a toolbar:
- To dock or undock a toolbar:
- Layouts
- Working on a project
- Windows taskbar indicators
- Screen colors and wallpaper
- To Assign Custom Colors
- To restore the default colors
- To change the wallpaper
- Color presets
- To load a color preset
- To save a color preset
- To export the current color arrangement
- To import one or more color presets
- To export all your color presets
- Installing SONAR
- To install SONAR
- Uninstalling SONAR
- Starting to use SONAR
- Tutorial 1 – Creating, playing, and saving projects
- Creating a new project
- Opening project files
- Playing project files
- Configuring your sound device
- Setting the tracks outputs
- To expand a track to make all of its controls visible
- Playing the project
- Looping project files
- Saving project files
- Tutorial 2 - Using the Media Browser
- Finding and previewing audio loops
- Previewing MIDI groove clips
- Adding loops to your project
- Tutorial 3 – Recording vocals and musical instruments
- Adding an audio track
- Getting ready to record
- Recording your performance
- Troubleshooting
- I only get one side of my guitar/microphone recorded
- Previously recorded tracks are mixed into my new recordings
- Only a flat line/silence is recorded
- To view the recording controls in Windows XP:
- To view the recording controls in Windows Vista:
- Tutorial 4 – Playing and recording software instruments
- Adding an instrument track to your project
- Recording MIDI
- Manually entering MIDI notes
- What if I already have a project that contains MIDI tracks?
- Tutorial 5 - Working with music notation
- Selecting the note value
- Adding a note
- Selecting notes
- Moving Notes - Change timing or pitch
- Copying notes
- Changing the duration of a note
- Note Duration in ticks
- Deleting a note
- Adding lyrics
- Adding chord symbols
- Adding expressions
- Adding a crescendo or decrescendo/diminuendo
- Adding pedal marks (sustain)
- Printing your notation
- Tutorial 6 – Editing your music
- Selection
- Method 1:
- Method 2:
- Moving clips
- Splitting Clips
- Cropping Clips
- Fading Clips
- Undo and Redo
- Tutorial 7 - Mixing and adding effects
- Volume and pan
- To open the Console view
- Adding effects (FX)
- Compression and EQ
- Reverb and Delay
- Click OK.
- Set the Reverb control to 0.0 dB and the Dry control to -Inf..
- Using Automation
- Tutorial 8 - Working with video
- Importing video
- Option What it does
- Table 16.
- What if I don't see the Video Thumbnail pane or Video view?
- Changing the video properties
- Working with markers
- Control Description
- Exporting your video
- Tutorial 9 – Exporting, CD burning and sharing
- If you would like to burn an audio CD of your music
- Burning an audio CD
- If you would like to share your music on the internet
- Cakewalk Publisher
- Controlling Playback
- The Now time and how to use it
- Time What it means
- To change the Now time
- MIDI note will continue to play If Now Time is moved
- The Now time marker
- To change the Now time marker behavior
- The Track view Now time display
- Displaying the Now time in large print
- To display the Big time view
- Table 24.
- Other ways to set the Now time
- The Time ruler
- To switch the Time ruler format to M:B:T
- To switch the Time ruler format to H:M:S:F (SMPTE)
- To switch the Time ruler format to samples
- To switch the Time ruler format to milliseconds
- To add or remove Time ruler formats using the Plus/Minus buttons
- To start and stop playback
- Allow playback with no data
- Stop at Project End option
- When enabled (default setting):
- When disabled:
- To allow playback with no data
- Auto fade when starting/stopping playback
- To configure the auto fade times
- Handling stuck notes
- To clear stuck notes
- Looping
- To move a loop in the Time ruler
- Option How it works
- Table 28.
- To set up a playback loop
- To change the loop settings
- To cancel a playback loop
- Using the Large Transport
- Using the Markers section
- To use the Punch In/Out section
- To use auto-punch in the Punch In/Out section
- Buttons in the Transport section
- To use the Loop section
- Reading the Key signature, Time signature, Tempo and System display
- Track-by-track playback
- The Playback state toolbar
- Silencing tracks
- To mute or unmute individual tracks
- To unmute all tracks
- To mute all tracks
- To archive or unarchive tracks
- Soloing tracks
- To solo or unsolo individual tracks
- To unsolo all tracks
- To solo all tracks
- Dim Solo mode
- To enable/disable Dim Solo
- To configure Dim Solo level
- Inverting the phase of a track
- To invert the phase of a track
- Changing tracks' mono/stereo status
- To use a track's Stereo/Mono button
- Mono audio clips may be increased by 3 dB in certain scenarios
- Using mono VST plug-ins on stereo tracks may cause out of sync audio
- Changing track settings
- Audio track parameters
- MIDI track parameters
- Parameter What it means
- To change a track name
- Changing audio track settings in the Track pane
- Changing MIDI track settings in the Track pane
- Figure 30. The Track Properties dialog
- Setting up output devices
- To choose MIDI devices
- Creating friendly names for MIDI output and input devices
- Assigning Inputs & Outputs
- To assign a track to an output
- To assign the same audio input port to multiple tracks
- To assign different audio input ports to multiple tracks
- To assign the same audio output port to multiple tracks
- To assign the same audio output port to all stereo buses
- Choosing the instrument sound (bank and patch)
- To assign an initial bank and patch to a track
- Another way to assign a patch to a track
- To insert a bank/patch change
- To choose patches with the Patch browser
- Adding effects
- To add an audio effect in the Track pane
- Adjusting volume and pan
- To set the initial volume setting
- To set the initial Pan setting
- Configuring panning laws
- To change panning laws
- Click OK.
- Adjusting volume trim
- To set the volume trim level
- Assigning a MIDI channel (Chn)
- To set the channel for a track
- Adjusting the Key/transposing a track (Key+)
- To set the key offset for a track
- Adjusting the note velocity (Vel+)
- To set the velocity offset for a track
- Adjusting the time alignment of a MIDI track (Time+)
- To set the time offset for a track
- Other MIDI playback settings
- Controlling live MIDI playback—MIDI echo
- The Input Echo button
- Storing favorite configurations
- To play one synth at a time from one or more MIDI keyboards
- To disable the default MIDI echo detting
- To play multiple synths from a MIDI keyboard
- To create or edit a preset input configuration
- To use multiple performers on multiple tracks
- To turn MIDI echo (and input monitoring) On or Off for all tracks
- Local control
- To automatically disable all local control whenever you launch SONAR
- Playing files in Batch mode
- The Play List view
- To create and edit a play list
- To play files from the Play List view
- Video playback, import, and export
- QuickTime issues
- Importing and playing back videos
- To load a video file into a project
- To play a video file in the Video view
- To delete the video from the project
- To enable or disable video playback
- To set the Time display format
- To adjust the SMPTE time
- To choose a frame rate
- To set the Video display format
- To set the background color
- To set the Start and Trim times
- Exporting video
- To export a video
- Optimizing video performance
- Using the Video thumbnails pane
- To hide or show the Video thumbnails pane
- To turn Video thumbnails On or Off
- To hide or show frame numbers on frames
- To open the Video properties dialog
- To open the Video view
- To move the Now time to a thumbnail
- To change the Start time
- To change the Trim-In time
- To change the Trim-Out time
- To use the Video thumbnails context menu
- Video playback on a FireWire DV device
- To convert a Video project to DV AVI format
- To play video on an external DV device
- External DV output (IEEE 1394/FireWire)
- Exporting a project to a FireWire DV device
- To export a project to an external DV device
- Synchronizing external video playback to audio
- To sync external video to audio
- Locating missing audio
- The Find missing audio file dialog
- Restoring missing audio files
- To restore missing audio files
- Managing shared and external files
- To configure SONAR to always copy files to the project Audio data folder
- To configure SONAR to share external files
- Recording
- Using per-project audio folders
- To enable per-project audio
- Creating a new project File
- To create a new project file
- Setting the Meter and Key signatures
- To Set the Meter and Key signature
- Setting the Metronome and Tempo settings
- To set the tempo and metronome for a new project
- To change your Metronome settings
- To set the MIDI metronome sounds from your MIDI instrument
- Setting the audio sampling rate and bit depth
- To set the sampling rate and audio driver bit depth for new projects
- Sony Wave-64 support
- When Wave-64 Files are created
- 64-bit CWB files
- Wave-64 file extension
- CWP file persistence for 64-bit sample offsets
- Setting the MIDI timing resolution
- To set the timebase for a project
- Preparing to record
- Recording modes
- To choose a recording mode
- Choosing an input
- To choose a MIDI input in the Track view
- To choose an audio input in the Track view
- To choose an audio input in the Console view
- To choose a MIDI input in the Console view
- Arming tracks for recording
- To arm one or more tracks for recording
- To disarm all tracks at once
- Auto arming
- Recording music from a MIDI instrument
- To record MIDI
- Input quantizing
- To turn Input quantizing On or Off
- To set the resolution
- To set options
- Visual indicators
- Key bindings
- Arpeggiator
- Arpeggiator controls
- To enable/disable the Arpeggiator
- To show/hide advanced Arpeggiator controls
- Using patterns and presets
- To load an Arpeggiator pattern
- To load an Arpeggiator preset
- To load the next/previous Arpeggiator preset
- To save an Arpeggiator preset
- Recording audio
- To check the Input levels
- Tuning an Instrument
- To Tune an Instrument
- To Record Audio
- Confidence Recording and Waveform Preview
- To Turn Off Waveform Preview for Audio Recording
- Input Monitoring
- To Enable Input Monitoring
- To Eliminate the Echo from Input Monitoring
- To Enable input monitoring when arming tracks
- To automatically disable input monitoring during playback
- The Audio Engine Button
- Loop Recording
- To Use Loop Recording
- Punch Recording
- To Punch Record
- To Use Punch While Looping
- Step Recording
- Advance.
- To Use Basic Step Recording
- To Use Advanced Step Recording
- To Add Two Step Sizes Together
- To Use Other Commands While Step Recording
- Step Record Keyboard Shortcuts
- Step Pattern Recording
- To Use Pattern-Based Step Recording
- Recording Specific Ports and Channels
- To Assign Input Ports and Channels to MIDI Tracks
- Click OK.
- Input Filtering
- To Filter Event Types
- Importing Music and Sound
- Importing Audio Files
- To Import an Audio File
- Preview bus
- To preview a file
- Broadcast Wave Files
- Importing Audio CD Tracks
- To Import a track from an Audio CD
- Importing Material from Another SONAR Project
- To Import Material from Another Project
- Importing OMF Projects
- OMF Explained
- To Open OMF Files in SONAR
- Importing MIDI Files
- To Import Data from a MIDI File into a Project
- Importing audio / MIDI files from the Clips pane
- To import audio/MIDI files
- Do one of the following:
- Saving Your Work
- To Save a Project
- To Change the Auto Save Settings
- Using File Versioning
- To Use File Versioning
- To Revert to a Previously Saved File
- Labeling Your Projects
- To Display and Edit Project Information
- File Statistics
- Arranging and editing
- Arranging Tracks
- Changing the Order of Tracks
- To Drag a Track to a New Position
- To Sort the Tracks
- Inserting Tracks
- To Insert a Single Track
- To Insert Multiple Tracks
- Configuring the Display of Tracks in the Track View
- To Lock or Unlock the Height of a Track
- Copying Tracks
- Erasing Tracks
- To Delete Tracks
- To Wipe Tracks
- Working with Track Templates
- To Create a Track Template
- To Insert a Track or Tracks from a Template
- Track Icons
- To Show or Hide Track Icons
- To Configure Track View Icons
- To Change the Size of Track Icons
- To Change a Track Icon
- To Reset a Track Icon to its Original Icon
- To Create a Track Icon
- Track Icon Size(s) and Transparency
- Configuring Track View Controls
- To Reorder a Track or Bus Control
- To Restore the Default Order
- To Configure Track and Bus Tabs
- To Change the VU Meter to Horizontal or Vertical Display
- Track view control size and layout
- Arranging Clips
- Displaying Clips
- To Zoom Horizontally
- To Zoom Vertically
- To Zoom into a Selected Area
- To Zoom Using the Mouse Wheel (Fast Zoom)
- To Select Fast Zoom Options
- To Display Clip Names and Contents
- To Change Clip Names
- To Change Clip Colors
- Using the Navigator View
- Track Rectangle
- To Move the Track Rectangle
- To Change the Size of the Track Rectangle
- To Change the Now Time in the Navigator view
- Opening Views by Double-clicking Clips
- To Open a View From a Clip
- Selecting Clips
- Moving and Copying Clips
- To Move Clips Using Drag and Drop
- To Move Clips Using Cut and Paste
- To Choose a Specific Start Time and/or Length for a Clip
- To Copy Clips Using Drag and Drop
- To Copy Clips Using Copy and Paste
- To Delete Clips
- Reverting clip(s) to original time stamp
- To revert clip(s) to original time stamp
- Locking Clips
- To Lock or Unlock a Clip's Position and/or Data
- Auto Scroll Lock in Clips pane
- To enable/disable auto scroll lock
- Nudge
- Nudge Settings
- To Nudge a Clip Left or Right
- To Nudge a Clip Up and Down
- To Change Nudge Settings
- To Nudge a Clip Using Keyboard Shortcuts
- Working with Partial Clips
- To Select a Portion of a Clip
- To Select a Portion of Several Clips
- To Select Partial Clips Using Time Ranges and Tracks
- To Clear the Partial Clip Selection
- Markers and the snap grid
- Showing gridlines
- To show/hide vertical grid lines
- Defining and Using the Snap Grid
- To Enable or Disable the Snap Grid
- To Change the Snap Options
- Snap Offsets
- Creating a Snap Offset
- Deleting a Snap Offset
- Creating and Using Markers
- To Add a Marker
- To Add a Marker on the Fly
- To Edit a Marker
- To Copy a Marker
- To Lock or Unlock Several Markers
- To Move a Marker
- To Delete a Marker
- To Delete Markers from the Markers View
- To Jump to a Marker
- To Select a Time Range Using Markers
- TAB to transients
- To move the Now Time to the next transient
- To move the Now Time to the previous transient
- TAB to transients landmarks
- Clip type TAB target
- TAB to transients in the Piano Roll view
- Working with Linked Clips
- To Make Linked Copies of a Clip Using Drag and Drop
- To Make Linked Copies of a Clip Using Copy and Paste
- To Unlink Linked Clips
- To Select the Clips That Are Linked to Another Clip
- Splitting and Combining Clips
- To Split Clips into Smaller Clips
- To Combine Clips
- Take Management and Comping Takes
- To Enable or Disable the Multi-layer Option
- To Mute or Unmute One or More Layers
- To Solo or Unsolo a Layer
- To Rebuild Layers
- To Remove Empty Layers
- To Add an Empty Layer to a Track
- To Delete a Layer from a Track
- To Select a Layer
- To Loop Record Multiple Takes into Separate Track Layers
- To Crop Overlapping Clips to Eliminate Overlap
- Clip Muting and Isolating (Clip Soloing)
- Clip Muting with the Default Style
- To Enable or Disable the Mute Tool
- To Mute a Time Range Using Default Style
- To Unmute a Time Range Using Default Style
- To Mute or Unmute an Entire Clip Using Default Style
- Clip Muting with the Alternate Style
- To Mute or Unmute an Entire Clip Using Alternate Style
- To Mute a Time Range Using Alternate Style
- To Unmute a Time Range Using Alternate Style
- Toggling a Clip's Mute Status
- Audition (Selection Playback)
- Isolating (Clip Soloing)
- To Isolate a Region with the Default Style
- To Isolate Clips with the Alternate Style
- Track Folders
- To Create a Track Folder
- To Add a Track to a Track Folder
- To Remove a Track from a Track Folder
- To Add Multiple Tracks to a Track Folder
- To Remove Multiple Tracks from a Track Folder
- To Delete a Track Folder
- To Open or Close a Track Folder
- To Select or Deselect all the Tracks in a Track Folder
- To Rename a Track Folder
- To Add a Description to a Track Folder
- To Select all Clips in a Time Range
- Adding Effects in the Track View
- To Add Effects in the Track View
- Changing Tempos
- Using the Tempo Toolbar
- To Change the Current Tempo in the Tempo Toolbar
- To Set the Tempo Ratio
- To Change the Tempo Ratio
- Using the Tempo Commands
- To Insert a Tempo Change
- To Insert a Series of Tempos
- To Modify the Most Recent Tempo Change
- Using the Tempo View
- To Insert a Tempo Change in the Tempo View
- To Steadily Increase or Decrease the Tempo in the Tempo View
- To Draw a Series of Tempo Changes in the Tempo View
- To Erase Tempo Changes in the Tempo View
- To Insert a Tempo Change in the Tempo List in the Tempo View
- To Edit a Tempo Change in the Tempo View
- To Delete a Tempo Change from the Tempo List in the Tempo View
- Undo, Redo, and the Undo History
- Slip-editing (Non-destructive Editing)
- Using Slip-editing
- To Slip-edit a Clip
- To Move Data Without Moving its Clip
- To Move Data and the Clip Edge
- To Permanently Delete Slip-edited Data
- Slip-editing Multiple Clips
- To Slip-edit Multiple Clips at Once
- Fades and Crossfades
- Using Fades and Crossfades in Real Time
- To Choose the Fade Type
- To Create a Real-time Fade-in in a Clip
- To Edit a Fade-in in a Clip
- To Create an Automatic Crossfade (Real-time)
- To Change an Existing Fade
- To Change an Existing Crossfade
- To Edit or Create Fades from the Process Menu
- Parameter Description
- AudioSnap
- What is AudioSnap?
- How does it work?
- Why would I use it?
- Using the Transient tool
- To enable the Transient tool
- Transient tool (clip) context menu
- Editing transient markers
- To show/hide transient markers
- To select a transient marker
- To select/deselect all transient markers in a clip
- To select multiple adjacent transient markers
- To select multiple discontinuous transient markers
- To select the same transient in multiple clips
- To extend a multi-track marker selection
- To select all similar transient markers in a clip
- To move a transient marker (without stretching audio)
- To drag a transient marker and stretch audio
- To stretch multiple transient markers in a clip
- To stretch multiple transient markers in a clip proportionally
- To reset a transient marker
- To reset all selected transient markers
- To disable a transient marker
- To delete a transient marker
- To insert a new transient marker
- To copy transient markers from one track to another track
- To enable/disable transient markers
- To navigate to the next/previous transient (TAB to transients)
- Transient marker appearance
- Marker appearance Description
- Transient marker context menu
- Command Description
- Enabling/disabling AudioSnap
- To enable or disable AudioSnap
- See:
- Using the AudioSnap palette
- To show the AudioSnap palette
- Tool Bar section
- Tempo section
- Timing section
- Filter section
- Render mode section
- AudioSnap palette auto load
- Synchronizing audio and the project tempo
- To sync the project tempo to an audio clip
- To sync an audio clip to the project tempo
- To copy the project tempo to an audio clip's tempo map
- Editing a clip's tempo map
- To edit a clip's tempo map
- To audition an audio clip when editing the clip tempo map
- Changing a project's tempo
- To change a project's tempo
- Fixing timing problems in audio clips
- Adjusting the timing of a solo performance
- To manually adjust the timing of a solo performance
- Adjusting the timing of a multi-track performance while maintaining phase relationships
- To adjust the timing of a multi-track performance while maintaining phase relationships
- Synchronizing the rhythms of out-of-sync tracks
- Making multiple clips/tracks groove together
- Quantizing audio
- To quantize audio to the project's time ruler
- To Groove Quantize an audio clip
- Click OK.
- To quantize an audio clip to another audio clip (Quantize to Pool)
- To quantize multi-tracked drums without stretching audio
- Extracting MIDI timing information from audio
- To extract MIDI timing from an audio clip
- To paste the extracted MIDI timing to a MIDI track
- To save the extracted MIDI timing as a Groove Quantize file
- General editing
- Snapping edits to audio beats
- To snap to audio transients
- Splitting beats into clips
- To add markers at Pool lines
- To split a clip at beats
- To split a clip, quantize it, and fill in the gaps
- To fill in gaps with the Fade Selected Clips command
- Slip-stretching audio
- To slip-stretch an audio clip
- Alpha-blended bars on slip-stretched clips
- Adding automation
- To Add Nodes at Transients
- Using the Pool
- To add a clip's transients to the Pool
- To hide or show the Pool
- To add the Time Ruler to the Pool
- To add transient markers at Pool lines
- Groove Quantize and Quantize to Pool
- Algorithms and rendering
- To choose default algorithms
- To choose render algorithms for an individual clip
- To choose render algorithms for all current and future clips on a track
- To freeze an AudioSnap-enabled clip
- To bounce an AudioSnap-enabled clip
- Click OK.
- Keyboard shortcuts
- Working with Loops and Groove Clips
- The Loop Construction View
- Loop Construction Controls
- Save Loop as WAV
- Enable Looping
- Enable Stretching
- Beats in Clip
- Original BPM
- Follow Project Pitch
- Root Note
- Pitch (coarse)
- Pitch (fine)
- Slices Menu
- Trans Detect (%)
- Stop Preview
- Preview Loops
- Enable Slice Auto-Preview
- Click Auto-Preview Loop
- Properties
- Select
- Erase
- Default All Markers
- Previous Slice
- Next Slice
- Show/Hide Gain Envelope
- Show/Hide Pan Envelope
- Show/Hide Pitch Envelope
- Slice Gain
- Slice Pan
- Slice Pitch
- Slicing Markers
- Audio Scaling
- The Media Browser View
- Folders Pane
- Contents List Pane
- To Preview a Groove Clip
- To Drag a Loop into a Project
- To Drag Multiple Loops into a Project
- Working with Loops
- To Enable or Disable a Clip for Looping
- To Create Repetitions of a Loop
- To Create Partial Repetitions of a Loop
- Working Groove Clip audio
- How Groove Clips Work in SONAR
- Using Groove Clips
- To Import a Groove Clip into Your Project
- Setting the Default Project Pitch
- Creating and Editing Groove Clips
- To Set the Number of Beats in a Groove Clip
- To Change the Loop Construction View Time Ruler Display
- To Set the Tempo of a Groove Clip
- To Slice a Groove Clip
- To Transpose a Groove Clip to Match Your Project's Pitch
- To Transpose a Groove Clip by Semitones
- To "Fine Tune" a Groove Clip
- To Edit the Slicing Markers in a Groove Clip
- Editing Slices
- To Preview a Groove Clip Slice
- To Adjust a Groove Clip Slice Gain
- To Adjust a Groove Clip Slice Pan
- To Adjust a Groove Clip Slice Pitch (Half Steps)
- To Adjust a Groove Clip Slice Pitch (Cents)
- To Adjust Slice Gain, Pan and Pitch Using Slice Envelopes
- Saving Groove Clips as Wave Files/ACIDized Wave Files
- To Save a Groove Clip as a Riff Wave File/ACIDized Wave File
- To Drag and Drop a Groove Clip Into Another Application
- Using Pitch Markers in the Track View
- To Enable a Clip's Follow Project Pitch Option
- To Change Your Project's Default Pitch
- To Create a Pitch Marker
- To Move a Pitch Marker
- Working with REX files
- To import a REX file
- To disable looping of a REX-based Groove Clip
- To use pitch markers with REX-based Groove Clips
- MIDI Groove Clips
- To Enable or Disable a MIDI Clip's Groove Clip Function
- To Create Repetitions of a MIDI Groove Clip
- To Transpose a MIDI Groove Clip
- To Transpose a MIDI Groove Clip with Pitch Markers
- Exporting, and Importing MIDI Groove Clips
- To Export MIDI Groove Clips with the File Command
- To Export a MIDI Groove Clip with Drag and Drop
- To Import MIDI Groove Clips with the File Command
- To Import MIDI Groove Clips from the Media Browser View
- To Import a MIDI Groove Clip with Drag and Drop
- Importing Project5 Patterns
- To Import a Project5 Pattern
- Editing MIDI Events and Continuous Controllers (CC)
- Event Inspector Toolbar
- To Display a Note's Properties in the Event Inspector Toolbar
- To Change a Note's Properties Using the Event Inspector Toolbar
- The Piano Roll View
- Note Map Pane
- Drum Grid Pane
- Notes Pane
- Controller Pane
- Track List Pane
- Opening the View
- Working with Multiple Tracks in the Piano Roll View
- Selecting Tracks to View
- Display
- The Enable/Disable Track Editing Button
- The Show/Hide Track Button
- The Invert Tracks Button
- Note Names
- To Change the Active Track's Instrument Definition
- Displaying Notes and Controllers (Piano Roll View Only)
- To Hide or Show Data in the Piano Roll View
- Adding and Editing Notes in the Piano Roll
- To Select Notes with the Select Tool
- To Select All Notes of Certain Pitches (Piano Roll View Only)
- To Select All Notes of Certain Pitches (Inline Piano Roll View Only)
- Editing Notes with the Draw Tool and the Select Tool
- To Edit Notes with the Draw Tool
- To Draw Notes
- To Use the Erase Tool
- To Edit Velocity
- MIDI note velocity colorization
- Note event colors based on velocity
- To Edit Notes with the Select Tool
- Table 83.
- To Change Note Properties
- To Scrub (Audition) Tracks in the Piano Roll View
- To Audition Notes
- Show velocity on selected notes (optional)
- To only show velocity for selected note events
- Selection sensitive velocity drawing
- Note/controller painting (freehand)
- Note/controller painting (linear)
- Controller/velocity painting (freehand)
- Controller/velocity painting (linear)
- Note split
- To split a note
- Note glue
- To glue notes together
- Drag-quantize
- Drag quantize strength
- Drag quantize resolution
- To drag-quantize MIDI events
- MIDI event mute
- To mute/unmute Note/Controller events
- Erase tool behavior
- Note hit testing improvements
- Velocity Audition options
- Hiding events in muted clips
- To show/hide events in muted clips
- Adjust velocity without changing the Display Type
- Flexible Piano Roll tools
- The PRV Tool Configuration dialog
- Tool
- Mouse Button
- Keys
- Mouse Location
- Tool Action
- To configure a Mouse Action
- Default PRV tool assignments
- PRV Tool 1 (Select) default settings
- PRV Tool 2 (Draw default settings
- PRV Tool 3 (Erase default settings
- Adding and Editing Controllers in the Piano Roll
- Multiple automation controller lanes
- Working with MIDI data lanes
- To create a new lane
- To delete a lane
- To assign an Event Type to a lane
- To show/hide multiple Event Types in a lane
- To copy events between lanes
- To move events between lanes
- Adding Controllers
- To Add Controller Data with the Draw Tool
- To Insert a Series of Controllers
- Selecting Controllers
- To Select Controller Events of the Same Type
- Select controllers within note duration
- To enable/disable 'Select Controllers within Note Duration'
- Editing Controllers
- To Edit or Delete Controller Events with the Select Tool
- To Edit or Delete Controller Events with the Draw Tool
- Piano Roll Microscope mode
- To enable/disable Microscope mode
- How Microscope mode works
- Configuring Microscope mode options
- The Inline Piano Roll View
- Displaying the Inline Piano Roll View
- To Hide or Show an Individual Track's Inline Piano Roll View
- To Hide or Show All Tracks' Inline Piano Roll Views
- The MIDI Scale
- To Zoom Vertically with the MIDI Scale
- To Scroll Vertically with the MIDI Scale
- To Fit a Single Track's Content into its Inline Piano Roll View
- To Audition and Select Notes
- To Fit All Tracks' Contents into their Inline Piano Roll Views
- To Change the MIDI Scale's Display Mode
- Displaying Notes and Controllers in the Inline Piano Roll View
- To Hide or Show Data in Individual Tracks
- To Hide or Show Notes in All Tracks
- To Hide or Show Controllers in All Tracks
- Selecting and Editing Events
- Copying and Pasting MIDI Data
- To Copy and Paste MIDI Data with the Copy/Paste Commands
- Transposing
- To Transpose Selected Events
- Shifting Events in Time
- To Shift Events in Time
- Inserting Time or Measures into a Project
- To Insert a Single Blank Measure into a Project
- To Insert Blank Time or Measures into a Project
- To Insert Blank Time or Measures into Selected Tracks
- Deleting Measures or Time from One or More Tracks
- Stretching and Shrinking Events
- To Stretch or Shrink Using Percentages
- To Stretch or Shrink to a Specific Length
- High-resolution audio boosted by 6 dB when stretched using MPEX
- Reversing Notes in a Clip
- To Reverse the Sequence of Notes or Other Events
- Adding Crescendos and Decrescendos
- To Scale Velocities
- Changing the Timing of a Recording
- Quantizing
- Resolution
- Offset
- Duration
- Velocity
- Strength
- Swing
- Window
- Other Settings
- To Use the Quantize Command
- Setting What to do
- Table 92.
- To Use the Groove Quantize Command
- Defining a Groove
- To Define a New Groove
- To Save a Groove Pattern
- To Copy an Existing Groove
- To Delete a Groove
- Groove Quantize Tips
- Fit Improvisation
- To Fit Tempos to an Improvisation
- To sync the project tempo to freely played MIDI
- Snap to Scale
- To Enable or Disable Snap to Scale for a Single Track
- To Momentarily Bypass the Snap to Scale Feature
- To Enable or Disable Snap to Scale for Multiple Tracks
- To Choose a Root Note for a Single Track
- To Choose a Scale for a Single Track
- To Choose a Root Note and/or a Scale for Multiple Tracks
- To Create a Scale
- To Edit or Delete a Scale
- To Restore a Scale or Scales to Factory Settings
- To Choose How SONAR Handles Non-scale Notes
- Searching for Events
- Event Filters
- This event type Has these parameters
- Searching for an Event
- To Search for an Event
- Selecting Events
- To Select Events Using the Event Filter
- Example: Splitting Left-Hand and Right-Hand Parts
- Process > Interpolate
- Controllers, RPNs, NRPNs, and Automation Data
- Controllers
- RPNs and NRPNs
- Automation Data
- Velocity, Pitch Wheel, and Aftertouch
- The Event List View
- Event List Buttons and Overview
- Selecting Events in the Event List View
- Event List Display Filter
- Editing Events and Event Parameters
- To Insert a New Event
- To Delete an Event
- To Delete Several Events
- To Print the Event List
- To Play Events Step by Step
- Additional Event Information
- MCIcmd Events
- MIDI Effects (MIDI Plug-ins)
- MIDI Effects Presets
- To Quantize MIDI Data
- Adding Echo/Delay
- To Apply Echo/Delay to MIDI Data
- Filtering Events
- To Apply an Event Filter to MIDI Data
- Adding Arpeggio
- To Apply the Arpeggiator to MIDI Data
- Analyzing Chords
- Parameter/Option Meaning
- To Analyze a Chord
- Changing Velocities with the Velocity Effect
- To Change Note Velocities
- Transposing MIDI Notes with the Transpose MIDI Effect
- To Transpose MIDI Data
- Drum Maps and the Drum Grid Pane
- The Basics
- Creating and Editing a Drum Map
- The Drum Map Manager
- To Open the Drum Map Manager Dialog
- Drum Maps Used in Current Project
- Presets
- Settings
- Ports and Channels
- Working in the Drum Map Manager
- The Map Properties Dialog
- To Open the Map Properties Dialog
- Saving a Drum Map
- Using Drum Maps
- Assigning a MIDI Track to a Drum Map
- To Assign a MIDI Track to a Drum Map
- Opening a Drum Map
- To Open a Drum Map
- To Open All Tracks Assigned to a Drum Map
- Displaying Tracks in the Drum Grid Pane
- To Display Tracks in the Drum Grid Pane
- Velocity Tails
- To Display Velocity Tails in the Drum Grid Pane
- Editing Note Velocities
- To Edit a Note Velocity in the Drum Grid Pane
- To Edit Multiple Note Velocities in the Drum Grid Editor
- To Preview a Mapped Sound
- The Note Map Pane
- Changing Mapped-note Settings
- To Change the Name Setting
- To Change the Note Out Setting
- To Change Multiple Note Out Settings
- To Mute or Solo a Mapped Note
- To Display the Note In and Note Out Values By Their Pitch Name
- To Change the Order of Mapped Notes in the Drum Map Pane
- The Drum Grid Pane
- Grid Lines
- To Turn on Grid Lines in the Drum Map Pane
- To Set the Drum Map Pane Grid Line Resolution
- The Pattern Brush Tool
- How the Pattern Brush Tool Works
- To Paint Notes Using the Pattern Brush Tool
- To Paint a Custom Pattern of Notes Using the Pattern Brush Tool
- To Use a Custom Pattern's Note Velocities
- To Use a Custom Pattern's Pitch Values
- Creating Custom Patterns
- To Create a Custom Pattern
- Editing Audio
- Digital Audio Fundamentals
- Basic Acoustics
- Example—A Guitar String
- Waveforms
- Recording a Sound
- The Decibel Scale
- Audio Clips
- Managing Audio Data
- Basic Audio Editing
- Editing Clip Properties
- To Change an Audio Clip's Name
- To Change a Clip's Start
- Moving, Copying, Pasting and Deleting Audio Clips
- To Change the Audio Scale Display Option
- To Scale All Audio Tracks Together
- To Scale a Single Track or Bus
- To Undo Audio Scaling
- To Scale a Single Track or Bus Using the Audio Scale Ruler
- To Show or Hide the Audio Scale Ruler
- Splitting Audio Clips
- To Split Clips with the Scissors Tool
- To Split Clips with the Split Command
- Option Description
- Table 116.
- Bouncing to Clips
- To Bounce to Clips
- To Bounce Multiple Audio Clips to a New Track
- Scrubbing
- To Audition Audio with the Scrub Tool
- Scrubbing audio at unity gain
- Basic Audio Processing
- Using the Normalize and Gain Commands
- To Normalize Audio Data
- To Use the Gain Command
- Reversing Audio Data
- To Reverse Audio Data
- Advanced Audio Processing
- Removing Silence
- To Remove Silence
- Removing DC Offset
- To Remove DC Offset From Existing Audio
- To Remove DC Offset During Recording
- Applying Fades and Crossfades Offline
- To Apply a Fade to Audio Data
- To Crossfade Two Overlapping Clips
- Audio Effects (Audio Plug-ins)
- Real-Time Audio Effects Processing
- To Apply Audio Effects
- Destructive Audio Effects Processing
- Software Instruments
- Synth Rack View
- Synth Tracks
- Inserting Soft Synths
- To Insert a Soft Synth from the Synth Rack View or Menu
- To Insert a Soft Synth in an FX Bin
- Opening a Soft Synth's Property Page
- Synth Rack Icons
- Playing a Soft Synth
- To Play a Soft Synth with Recorded MIDI Data
- To Play a Soft Synth from a MIDI Controller
- To Remove A Soft Synth from a Track or Bus
- To Remove a Soft Synth from a Project
- Muting and Soloing Soft Synth Tracks
- Rename synths in the Synth Rack view
- To rename a synth
- Multi-port Soft Synths
- Converting Your Soft Synth Tracks to Audio
- To Convert Your Soft Synth Tracks to New Audio Tracks
- To Export Your Soft Synth Tracks as Wave, MP3, or Other Type Files
- Using the Assignable Controls Feature
- To Create Control Knobs on the Synth Rack
- To Hide or Show Control Knobs on the Synth Rack
- Automating Controls from the Synth Rack
- Displaying Synth Rack Automation
- Remote Control of the Synth Rack
- Drawing Soft Synth Automation in the Clips Pane
- To Automate a Soft Synth's Controls in the Clips Pane
- Soft Synth MIDI Output Support
- Recording a Soft Synth's MIDI Output
- To Enable MIDI Outputs on a Synth
- To Hear a Soft Synth's MIDI Output Through Another Track
- To Record a Soft Synth's MIDI Output to a Track
- ReWire
- ReWire Instruments
- Inserting a ReWire Instrument
- To Insert a ReWire Instrument
- To Use Separate Synth Tracks for Each ReWire Device
- Routing MIDI Data to ReWire Instruments
- To Send MIDI Data to a Specific ReWire Instrument
- Mixing Down ReWire Instruments
- Automating ReWire Instruments
- ReWire Troubleshooting Guide
- ReWire and fast forwarding in SONAR
- ReWire tracks silent when using metronome record count-in
- Stand-alone Synths
- Playing a Stand-alone Synth
- To Play a Stand-alone Synth
- Recording a Stand-alone Synth
- To Record A Stand-alone Synth with your Sound Card's Wave Capture Function
- Mixing
- Preparing to Mix
- Configuring the Console and Track Views
- To Display All the Tracks in a Project
- To Hide Selected Tracks
- To Display Only Selected Tracks
- To Choose the Tracks that are Displayed Using the Track Manager
- To Hide a Bus or Track
- To Show or Hide Meters in the Track View
- To Change a Meter's Range
- To Add a Bus
- To Delete a Bus
- To Create a Bus Send in a Track
- To Set the Snap-to Position of a Knob or Fader
- To Insert a New Track
- To Rename a Track or Bus
- To Link Left/Right Faders in a Console View Module
- Console view auto-resizing
- Mixing MIDI
- Mixing a MIDI Track
- Converting MIDI to Audio
- To Convert a Sound Card's Synth Tracks to a Stereo Audio Track
- Signal Flow
- Sidechaining Signal Flow
- Routing and Mixing Digital Audio
- Stereo Buses
- Surround Buses (SONAR Producer Only)
- To Patch a Track Through a Bus
- To Mute or Solo a Bus
- To Display the Audio Waveform of a Bus
- Main Outs
- Metering
- What the Meters Measure
- Hiding and Showing Meters
- To Show or Hide all Meters of a Certain Type
- To Show or Hide Individual Meters on Tracks or Buses
- Changing the Meters' Display
- Menu option What it does
- Enabling mono on a bus/Main will affect upstream meters
- Segmented and Non-segmented Meters
- Changing the Meters' Performance
- MIDI Activity indicators
- Peak Markers
- To Hide or Show Peak Markers Globally
- To Hide or Show Peak Markers on an Individual Track or Bus
- To Jump to a Peak Marker
- To Hide or Show the Numeric Peak Display
- To Clear Peak Markers From a Track
- Waveform Preview for Buses and Synth Tracks
- To Enable/Disable Waveform Preview on a Bus or Synth Track
- Freeze Tracks and Synths
- To Freeze a Track
- To Unfreeze a Track
- To Do a Quick Unfreeze of a Track
- To Quick Freeze a Track
- To Freeze a Soft Synth
- To Unfreeze a Synth
- To Do a Quick Unfreeze of a Synth
- To Quick Freeze a Synth
- To Set Freeze Options
- Using Real-Time Effects
- Effects Parameters
- How to Use Real-Time Effects
- Look-ahead processing at high latencies
- Presets and Property Pages
- Effects on Clips
- To Insert an Effect on a Clip or Clips
- To Open or Close the FX Bin on a Clip
- To Delete, Bypass, Move, Copy, or Re-order a Clip Effect
- To Apply Inserted Clip Effects
- Canceling changes made to real-time plug-ins
- Sidechaining
- To assign a track/bus/send output to a sidechain input
- Sidechain plug-ins in clip FX bins and surround bus FX bins:
- Bouncing audio with sidechain plug-ins
- Freeze and sidechain inputs
- Sidechainable Vintage Channel VC-64 plug-in
- Sidechain controls
- External Insert plug-in
- External Insert interface
- Send Stereo Mode buttons:
- Automatable parameters
- To use an external effect in a SONAR project
- Testing the delay measurement
- When to measure the delay
- Loading a project that uses the External Insert plug-in
- Bouncing or freezing audio that uses the External Insert plug-in
- Organizing Plug-ins
- VST Configuration
- To Display the Global Options Dialog/VST Plug-ins Tab
- To Add a Folder to Scan
- To Remove a Folder from the VST Scan Folder(s) List
- To Set Options for All Plug-ins in a Folder
- Click OK to close the dialog.
- To Turn Automatic Scanning On or Off
- To Re-scan Failed Plug-ins
- To Re-scan Existing Plug-ins
- To Run a Scan
- To Set All VST Plug-ins to Folder Defaults
- To set options for individual VST plug-ins (DD2; new S8.5)
- V-Vocal Clips
- To Create a V-Vocal Clip
- To Open a V-Vocal Interface
- To Move, Edit, or Copy a V-Vocal Clip
- To Bypass or Unbypass a Single V-Vocal Clip
- To Bypass or Unbypass All V-Vocal Clips in a Track
- To Delete a V-Vocal Clip
- Using V-Vocal
- Description of Interface Components
- Playing Back V-Vocal Clips
- To Play a V-Vocal Clip
- Pitch Editing
- To Change the Pitch of a Selected Region
- Tips:
- About Pitch Correction
- To Draw Freehand Pitch Changes
- To Draw Straight Line Pitch Changes
- To Correct Pitch
- To Conform Pitches to a Scale
- To Restore Original Pitch
- To Add Vibrato
- To Edit Vibrato
- To Fade-in Vibrato
- Editing Time
- To Edit Time
- Editing Formants
- To Shift the Formant of a Region
- To Link the Formant Line to the Pitch Line
- Editing Dynamics
- Context Menu
- V-Vocal pitch-to-MIDI
- Pitch to MIDI settings
- To convert pitch-to-MIDI
- Using the Per-track EQ
- To Show or Hide the EQ in all Audio Tracks
- To Show Either One Band's Controls or Four Band's Controls
- To Enable or Disable the EQ in a Track or Bus
- To Enable or Disable a Band
- To Choose the Filter Type for Each Band
- To Set Frequency, Gain, and Q for Each Band
- To Hide or Show the Plot (Graph)
- To Change the Plot Resolution
- To Open the EQ Interface
- To Turn Off Bands 5 and 6
- To copy EQ settings
- Applying Audio Effects
- To Apply Multiple Audio Effects Offline
- CPU Usage of Audio Effects
- Applying MIDI Effects
- To Apply MIDI Effects Destructively
- Using Control Groups
- Absolute
- Relative
- Custom
- To Add a Control to a Group
- To Remove a Control from Its Group
- To Remove All Controls from a Group
- To Override a Control's Grouping
- To Set the Group Type to Relative or Absolute
- To Create a Custom Group
- To Adjust the Start Value of a Control
- Choose Set Start = Current.
- To Adjust the End Value of a Control
- Quick Groups
- To Create a Quick Group
- To Remove all Controls from a Quick Group
- To Make a Quick Group a Permanent Group
- Using Remote Control
- To Set Up Remote Control for a Knob, Button, or Fader
- To Disable Remote Control
- To Prevent SONAR from Sending Controller Data to Your MIDI Device
- Using the Learn Option
- To Bind a Control Using the Learn Option
- Bouncing Tracks
- To Mix Down (Bounce) Audio Tracks
- Real-time bounce
- When Fast Bounce is enabled
- When Fast Bounce is disabled
- Audible bounce
- Improve real-time bounce performance
- Bouncing/freezing with sidechain plug-ins
- Preparing to Create an Audio CD
- To Burn Audio Tracks to an Audio CD
- Preparing Audio for Distribution
- Cakewalk External Encoder Config utility
- To Export Audio to Wave File Format
- 15.Click Export.
- To Export a Project in Windows Media Format
- To Export a Project in MP3 Format
- Exporting tracks with no selection
- Encoding options
- AIFF (Apple/SGI) (extension "aiff")
- AIFF (Apple/SGI) (extension "aif")
- AU (Sun/NeXT) (extension "au")
- CAF (Apple Core Audio File) (extension "caf")
- FLAC (FLAC Lossless Audio Codec) (extension "flac")
- RAW (Headerless audio file) (extension "raw")
- SD2 (Sound Designer II) (extension "sd2")
- W64 (Sony Wave-64) (extension "w64")
- WAV (Microsoft) (extension "wav")
- Exporting OMF Files
- To Export a Project as an OMF File
- i
- Dithering
- To Choose Dithering Options
- To start Cakewalk Publisher
- Surround Mixing
- Surround Basics
- Configuring SONAR for Surround Mixing
- Using Surround Format Templates
- Choosing a Surround Format
- To Choose a Surround Format and Set Sound Card Outputs
- Surround Buses
- To Insert a Surround Bus
- Routing in Surround
- To Assign a Track to a Surround Bus or Surround Main
- Downmixing
- To Downmix a Project
- Panning in Surround
- Controlling Surround Panning
- To Open the Large Surround Panner
- To Change the Angle
- To Change the Focus
- To Mute a Surround Speaker
- To Solo a Surround Speaker
- To Change the Width
- To Change the Front/Rear Balance
- To Change the LFE Send Level
- To Solo or Unsolo the LFE Channel
- To Isolate a Signal in One Speaker
- To Group Panner Controls
- Automating Surround Panning
- Potential 'pops' when using surround automation (SONAR Producer Only)
- Joystick Support
- To Connect the Joystick to SONAR
- Surround Metering
- Bass Management
- To Monitor With Bass Management
- Surround Effects
- The SurroundBridge
- Effect Property Pages
- Effect Presets
- How to Patch and Configure Surround Effects
- To Patch an Effect Into a Surround Bus
- To Change Channel Assignments for a Patched Effect
- To Unlink Individual Effect Parameters from Other Effect Instances
- To Relink Individual Effect Parameters to Other Effect Instances
- To Unlink All of an Instance's Parameters from Other Instances
- To Disable an Instance
- To Save a Preset
- Importing Surround Mixes
- To Import a Surround Multi-channel File
- Exporting Surround Mixes
- To Export a Surround Multi-channel File
- Standard AVI audio codecs do not support multichannel audio
- Automation
- Quick Automation Guide
- The Automation Toolbar
- Automation Methods
- - Snapshots.
- Automation Read and Automation Write Buttons
- Enabling Individual Parameters
- Recording Individual Fader or Knob Movements
- To Record Individual Fader or Knob Movements
- Creating and Editing Audio Envelopes
- To Create and Edit Audio Envelopes with the Select or Envelope Tools
- Creating and Editing MIDI Envelopes
- To Draw MIDI Envelopes in the Track View
- Dotted Lines
- Using the Envelope Draw Tool
- To Draw Freehand
- To Draw a Preset Shape
- To Halve or Double the Shape Cycle Frequency
- To Invert the Phase of a Pattern
- To Toggle Between the Envelope Tool and the Envelope Draw Tool
- To Stretch a Shape
- Drawing Envelopes on Clips
- To Draw Envelopes on Clips
- Showing or Hiding Envelopes
- To Show or Hide All Envelopes
- To Show All of One Kind of Envelope
- To Show or Hide Individual Envelopes
- Deleting Envelopes
- To Delete a Single Envelope
- To Delete Several or All Envelopes
- Copying and Pasting Envelopes
- To Copy an Envelope
- To Paste an Envelope
- Resetting Envelopes and Nodes to Current or Neutral Values
- To Reset an Envelope to the Current Value
- To Reset a Node to a Neutral Value
- Envelope Mode and Offset Mode
- To Turn On Offset Mode
- To Open Non-SONAR Envelope Display on a Percentage Scale
- To Display Envelopes on a Percentage Scale
- Converting MIDI Envelopes to Shapes
- To Convert MIDI Controller Envelopes to Shapes
- Snapshots
- To Create a Snapshot of a Single Parameter
- To Create a Snapshot of Multiple Parameters
- Successive snapshots do not update envelope node values
- Adding Nodes at a Selection
- To Add Nodes at Selection
- Automating Effects
- Automating Individual Effects Parameters
- To Draw Envelopes for an Individual Effect's Parameters
- Recording Automation Data from an External Controller
- To Record Automation Data from an External Controller
- Reassigning envelopes
- To Reassign an Envelope
- The Envelope Editing and Node Editing menus
- Automated Muting
- To Draw a Mute Envelope
- To Record a Mute Button's Movement
- Layouts, Templates and Key Bindings
- To Create or Save a Layout
- To Update a Layout
- To Load a Layout
- To Delete a Layout
- To Rename a Layout
- To Set Layout Options
- To Load a Layout with a Keyboard Command
- Floating Views and Dual Monitor Support
- To Float a View
- Templates
- To Create a Template
- To Create a New Project from a Template
- Template Example: Three MIDI instruments
- To create the example template file
- To Create a Key Binding Using the Computer Keyboard
- To Create a Key Binding Using a MIDI Keyboard
- Importing Key Bindings
- To Import Key Bindings
- Exporting Key Bindings
- To Export Key Bindings
- Notation and Lyrics
- The Staff View
- Opening the Staff View
- Displaying Tracks
- Staff Pane Layout
- The Staff pane right-click menu
- To change the Staff pane layout
- The Fretboard
- Fretboard pop-up menu
- To Change the Staff View Layout
- Basic Musical Editing
- Inserting Notes on the Staff
- To Insert a Note on the Staff
- Inserting Notes with the Fretboard
- To Insert Notes on the Fretboard with the Mouse
- Moving, Copying, and Deleting Notes on the Staff
- To Move a Single Note in the Staff View
- To Move Several Notes in the Staff View
- To Copy One or More Notes in the Staff View
- To Erase Notes with the Eraser
- Moving Notes from within the Fretboard
- To Change the Pitch of a Single Note in the Fretboard
- To Change the Pitch of a Chord in the Fretboard
- Auditioning
- To Audition with the Scrub Tool
- To Play Notes with Step Play
- Changing Note Properties
- To Edit a Note's Properties
- Deglitch Dialog
- Pitch
- To Use the Deglitch Filter
- Working with Triplets
- To Enter a Triplet
- Beaming of Rests
- To Enable Beaming of Rests
- Changing the Way Notes Are Displayed
- Using Enharmonic Spellings
- To Change a Note's Enharmonic Spelling
- MIDI Channels and the Fretboard
- To Display Notes on the Fretboard Using their MIDI Channels
- Chords and Marks
- Property Meaning
- To Add a Chord Symbol
- To Move a Chord Symbol
- To Edit a Chord Symbol
- To Add a Guitar Chord Grid
- To Manage the Chord Library
- Adding Expression Marks
- To Add an Expression Mark
- To Edit an Expression Mark
- Adding Hairpin Symbols
- To Add a Hairpin Symbol
- To Edit a Hairpin Symbol
- Adding Pedal Marks
- Parameters Meaning
- To Add a Pedal Mark
- To Edit a Pedal Event
- Tablature
- Tablature Settings
- To Define a Tablature Style
- Changing Fretboard Texture and Orientation
- To Change the Fretboard Texture and Orientation
- Quick TAB
- To Create a Quick TAB
- Regenerate TAB
- To Regenerate TAB
- Entering Notes from the TAB Staff
- To Enter Notes from the TAB Staff
- Single Note Editing from the TAB Staff
- Editing Chords or Groups of Notes from the TAB Staff
- To Edit Chords or Groups of Notes from the TAB Staff
- To Export to an ASCII TAB File
- Editing Notes and Chords from the Fretboard
- To Transpose Single Notes
- To Transpose Chords
- Entering Notes from the Fretboard
- Working with Percussion
- Setting Up a Percussion Track
- To Set Up a Percussion Track
- Setting Up a Percussion Staff or Line
- To Assign a Percussion Staff or Line to a Track
- To Set Up a Track's Percussion Notation Key
- Ghost Strokes
- Printing
- To Print a Score
- Can't print if Staff view is floating
- The Meter/Key View
- What Is Meter?
- What Is Key?
- Opening the Meter/Key View
- Adding and Editing Meter/Key Changes
- To Add a Meter/Key Change
- To Delete a Meter/Key Change
- Click Delete ✗.
- To Move a Meter/Key Change
- To Edit a Meter/Key Change
- Music Notation for Non-concert-key Instruments
- To Notate a Bb Trumpet Part
- Working with Lyrics
- Adding and Editing Lyrics in the Staff View
- To Add Lyrics to a Track
- Table 161.
- To Edit Lyrics
- Opening the Lyrics View
- Adding and Editing Lyrics in the Lyrics View
- To Enter Lyrics in the Lyrics View
- To Edit Lyrics in the Lyrics View
- To Hyphenate the Lyrics
- Instrument Definitions
- Assigning Instruments
- To Assign Instrument Definitions to MIDI Outputs and Channels
- To Clear Instrument Assignments
- Importing Instrument Definitions
- To Import Instrument Definitions
- Creating Instrument Definitions
- To Create a New Instrument
- To Rename an Instrument
- To Delete an Instrument
- To Save an Instrument Definition
- To Export an Instrument Definition
- To Reload instrument definitions
- Creating and Editing Patch Name and Other Lists
- To Create and Edit Name Lists
- Copying Name Lists
- Assigning the Bank Select Method
- Bank select method To compute the bank number
- Table 166.
- To Change the Bank Select Method
- Assigning Patch Names
- To See the Assignment of Patch Name Lists to Banks
- To Add a Bank or Change the Patch Names for a Bank
- To Remove a Bank or Patch Name List
- To Set or Clear the Drum Flag
- Assigning Note Names
- Note name list Contents
- To See the Assignment of Note Name Lists to Patches
- To Change the Note Names for a Patch
- To Remove a Note Name List
- Assigning Controller, RPN, and NRPN Names
- To See the Controller, RPN, and NRPN Name Lists
- To Change the Controller, RPN, or NRPN Name List
- SONAR Flags in Instrument Definitions
- UsesNotesAsControllers=n
- NoControllerReset=n
- Instrument Definition Tutorial
- Why Use Instrument Definitions?
- What Can They Do and Not Do?
- Where Do Instrument Definitions Come From?
- Start of Tutorial
- To Import a Roland Instrument Definition
- To Assign the Roland XP-10 Bank and Patch Names to a MIDI Output
- To Substitute and Rename a Patch List
- Checking Bank Numbers
- To Check the Bank Numbers
- To Create a Patch Name List for Your Own Sounds
- System Exclusive Data
- What Is System Exclusive?
- Sysx Events
- Using the System Exclusive View
- Sending Sysx Banks at Startup
- To Send Sysx Banks at Startup
- Importing, Creating, and Dumping Sysx Banks
- To Import a Sysx Bank into a Project
- To Create a Sysx Bank
- To Dump a Sysx Bank into SONAR
- More about Dump Request Macros
- Editing Sysx Banks
- To Edit a Sysx Bank
- Sysx View Buttons
- Send ↑
- Send All
- Receive ↓
- Clear Bank ✗
- Name abc
- Auto
- Output
- Edit Bytes
- Load Bank and Save Bank
- To Export a Sysx Bank to Another Project
- Transmitting Banks During Playback
- Real-time Recording of System Exclusive Messages
- To Record Sysx Messages in Real Time
- Sysx Echo
- To Echo Sysx Messages
- Sysx .ini File Settings
- SysxSendDelayMsecs=n
- SysxDelayAfterF7=n
- SysxSendPacketSize=n
- SONAR Is Not Receiving Sysx Messages
- Sysx Bank Names Don't Show When I Open a File
- SONAR Doesn't Include a DRM for My Instrument
- Synthesizers Reporting MIDI Data Errors
- My Equipment Is Not receiving Sysx from SONAR
- Timing Requirements When Receiving Sysx
- Roland Equipment
- Ensoniq Instruments
- Synchronizing Your Gear
- Synchronization Overview
- Choosing Clock Sources: SONAR as Master
- To Use the Internal Clock Source
- To Use the Audio Clock Source
- MIDI Synchronization
- Message How it is used
- SONAR as the Slave
- To Use MIDI Sync with SONAR as the Slave
- SONAR as the Master
- To Use MIDI Sync with SONAR as the Master
- Using MIDI Sync with Drum Machines
- Troubleshooting MIDI Sync
- SMPTE/MIDI Time Code Synchronization
- To Enter an Offset
- Frame Rates
- To Use SONAR as the Master MTC Generator
- To Configure SONAR to Sync to SMPTE/MTC
- Playing Digital Audio under SMPTE/MTC Sync
- To Set the Audio Playback Option
- SMPTE/MTC Sync and Full Chase Lock
- Troubleshooting SMPTE/MTC Sync
- No MTC sync within 1 minute of midnight roll-over
- MIDI Machine Control (MMC)
- To Configure MIDI Machine Control
- To Disable MIDI Machine Control
- Audio File Management
- The Project Files Dialog
- How to use the Project Files Dialog
- Project Files and Bundle Files
- To Create a Bundle File
- To Unpack a Bundle File
- Audio Folders
- Global Audio Folders
- To Change the Global Audio Folder
- Per-project Audio Folders
- To Enable or Disable the Per-project Audio Folder Option
- To Create a New Project Using Per-project Audio
- To Save an Existing Project Using Per-project Audio
- Imported Audio Files
- To Change Handling of Imported Files
- Backing Up Projects with Digital Audio
- To Backup Projects Using Per-Project Audio Folders
- To Create a Backup Using the Consolidate Project Audio Command
- Deleting Unused Audio Files
- To Delete Unused Audio Files
- Improving Audio Performance
- System Configuration
- The Wave Profiler
- To Manually Run the Wave Profiler
- Enabling and Disabling Audio Devices
- To Enable or Disable an Audio Device
- To Select Playback and Record Timing Masters
- Sampling Rates
- To Set the Sampling Rate for New Projects
- To Change the Sampling Rate of a Project
- To Import Audio That Has a Different Sampling Rate
- Bit Depths, and Float Resolution
- Notes about 64-bit files:
- To Find the Bit Depth of Clips in a Project
- Bit Depths for Playback
- To Change Playback Bit Depth
- Note:
- To Rewrite Audio Files at Different Bit Depths
- Bit Depths for Recording
- To Choose a Recording Bit Depth
- Bit Depths for Importing Audio
- To Choose an Importing Bit Depth
- Bit Depths for Exporting Audio
- To Choose an Exporting Bit Depth
- Bit Depths for Rendering Audio
- To Choose a Rendering Bit Depth
- Preparing Higher-quality Audio for CD Burning
- To Prepare Higher-quality Audio for CD Burning
- SONAR Project File Compatibility Notes
- Improving Performance with Digital Audio
- Getting the Most Out of Your PC
- Approach How it works
- Digital Audio Files and Storage
- Mixing Latency
- ASIO Drivers
- To Use an ASIO Driver
- ASIO sample position
- Queue Buffers
- Status Bar/CPU Meter/Disk Meter
- Reduce GUI updates to improve playback performance
- 24-bit Tips
- Dropouts and Other Audio Problems
- Causes and Cures
- The CPU is being interrupted by "background" activities having nothing to do with audio
- Cakewalk doesn't properly "recognize" your sound card
- The "I/O Buffer Size" may not be well matched to your hard disk
- Mixing latency may be set too low
- Your hard disk may be excessively fragmented
- Your project file may be excessively fragmented
- Your sound card's driver may be obsolete
- There may be a conflict with your video card or other multimedia streaming card
- Your sound card may have a conflict with another device in your computer
- Your project may simply be too "complex" for your computer
- Upgrade your computer hardware: More RAM, a faster CPU, and a faster disk drive
- The following are some tips on upgrading your hardware:
- Optimized Picture Cache Redrawing
- .INI File Picture Cache Options
- To Redraw Waveforms
- Improving recording performance
- MIDI Prepare Buffer Size and automation
- External Devices
- Edirol PCR Controllers
- To Enable Edirol MIDI Input Drivers
- To Connect an Edirol PCR to SONAR
- To Load the Correct Edirol PCR Memory Preset
- Setting up Control Surfaces
- To Enable MIDI Input and Output Drivers
- To Connect a Controller/Surface to SONAR
- To Disconnect a Controller/Surface from SONAR
- Control surface refresh rate
- ACT MIDI Controller Plug-in
- To Open the ACT MIDI Controller Property Page
- Using the ACT MIDI Controller Property Page
- ACT presets
- Assigning Controls on Your Controller/Surface to Cells in the ACT MIDI Property Page
- To Assign Controls on Your Controller/Surface to Cells in the ACT MIDI Controller Property Page
- Cakewalk Generic Surface Plug-in
- To Open the Cakewalk Generic Surface Property Page
- Loading Cakewalk Generic Surface Presets
- To Load a Preset
- Assigning Faders and Knobs to Control SONAR Parameters
- To Configure Track Parameters
- To Use ACT with the Cakewalk Generic Surface
- Assigning Forward and Rewind Buttons
- Conserving Knobs and Buttons
- Controlling Different Tracks or Groups of Tracks
- To Control the Next Track or Bank of Tracks
- The Cakewalk Generic Surface Property Page
- BaseTrack
- Track Parameters
- Use ACT or Strip Params
- ACT Controls
- MIDI Message for the Current SONAR Parameter
- MIDI Message Interpretation
- Global Parameters
- Euphonix EuCon control surface support
- To enable EuCon support in SONAR
- The WAI Display
- ACT
- To Use ACT with the ACT MIDI Controller Plug-in
- To Edit the Default ACT Mappings
- OPT Panels
- To Open an OPT Panel
- Working with StudioWare
- StudioWare Panels
- Panel name What it's for
- To Open a StudioWare Panel
- Using StudioWare Panels
- To change this Do this
- Grouping Controls
- To Create a Group of Controls
- To Remove Controls from a Group
- To Adjust a Single Control in a Group
- Example: To Set Two Faders for a Crossfade
- 0 127
- 0 100
- Recording Control Movements
- Icon Tool What it's for
- To Record a Snapshot While Playback Is Stopped
- To Record a Snapshot While Playback Is in Progress
- To Record Control Changes in Real Time
- Control Settings
- StudioWare Panel Drawing Speed
- Using CAL
- Running CAL Programs
- To Open a CAL Program
- Sample CAL Files
- SPLIT NOTE TO TRACKS.cal
- SPLIT CHANNEL TO TRACKS.cal
- To use the program
- RANDOM TIME.cal
- THIN CONTROLLER DATA.cal
- THIN CHANNEL AFTERTOUCH.cal
- THIN PITCH WHEEL.cal
- MAJOR CHORD.cal, MINOR CHORD.cal
- Frequently Asked Questions
- Audio dropouts or crash when playing back large files at maximum latency
- When I Play a File, I Don't Hear Anything
- I Can't Record from My MIDI Instrument
- When I Play a File Containing Audio, the Audio
- Portion Doesn't Play
- I Can't Record Any Audio
- The Music Is Playing Back with the Wrong Instrument Sounds
- My Keyboard Doubles Every Note I Play
- I Don't See the Clips Pane in the Track View
- Why Can't SONAR Find My Audio Files?
- Why Do I Get Errors from the Wave Profiler?
- My Track or Bus Fader is Maximized, But There's No Sound or Level
- How Do I Use SONAR to Access All the Sounds on My MIDI Instrument?
- I Hear an Echo When I Record
- Dropouts Happen in High Bit-depth or High Sample Rate Audio
- Patching an Effect into SONAR Causes a Dropout
- I Can't Open My Project
- To Use Safe Mode
- Audio Distorts at Greater than 16 Bits
- No Sound from My Soft Synth
- My Pro Audio 9 Files Sound Louder/Softer When I Open Them in SONAR
- SONAR Can't Find the Wavetable Synth or MPU401
- Follow this procedure:
- I Get an Error Message When I Change a Project to 24-bit Audio
- Bouncing Tracks Takes a Long Time
- The GUI is not Smooth During Playback
- Plug-in windows flicker or don't display properly
- File Recovery mode
- To use File Recovery mode
- What does File Recovery mode do?
- Hardware Setup
- Connect Your MIDI Equipment
- If Your Keyboard Has a MIDI Thru Jack
- If Your Keyboard Doesn't Have a MIDI Thru Jack
- Set Up to Record Digital Audio
- Electric Guitar Direct-In
- Electric Guitar Through Effects Rack
- Microphone Direct-In
- Home Stereo, CD Player, Radio Tuner, Preamp Output
- Internal CD Player
- Mixer
- Initialization Files
- Initialization File Format
- Cakewalk.ini
- TTSSEQ.INI
- Variables in the [Options] Section
- Variables in the [MIDI Input Devices] Section
- Variables in the [MIDI Output Devices] Section
- AUD.INI
- Variables in AUD.ini
- MIDI Files
- To Save a Project as a Standard MIDI File or RIFF MIDI File
- Timebases
- Supported MIDI File Meta-Events
- MIDI File Meta-event How it is represented in SONAR
- Features Not Supported by MIDI Files
- Other MIDI File Handling Notes
- Special Handling of GM, GS, and XG MIDI Files
- If You Have Problems Playing MIDI Files
- If You Plan to Publish Your Songs
- New features in SONAR 8.5
- New sound shaping effects:
- MIDI enhancements:
- Recording and mixing enhancements:
- Editing enhancements:
- Transport enhancements:
- Miscellaneous enhancements:
- New in SONAR 8.3
- Audio engine performance optimizations:
- Control surface enhancements:
- PX-64 Percussion Strip
- VX-64 Vocal Strip
- Session Drummer 3
- Alias Factor
- Classic Phaser
- HF Exciter
- Mod Filter
- Multivoice Chorus/Flanger
- Para-Q
- Stereo Compressor/Gate
- Stereo Delay
- Studioverb2
- New Impulse Responses for Perfect Space
- Step Sequencer 2.0
- Integrated arpeggiator
- Support for more MIDI ports
- Matrix view
- REX file import
- Freeze and Archive buttons in Track view
- New Freeze option
- Solo track/bus from plug-in window
- Insert Send Assistant enhancements
- DC offset meter in Analyst
- AudioSnap 2.0
- Clips pane vertical grid lines
- Draggable Now Time marker
- Change I/O devices without restarting SONAR
- VST plug-in compatibility options
- BitBridge enhancements
- jBridge support
- Media Browser enhancements
- TS-64 Transient Shaper plug-in
- TL-64 Tube Leveler plug-in
- Beatscape
- Dimension Pro
- Channel Tools plug-in
- Native Instruments GUITAR RIG 3 LE
- TruePianos Amber Module VSTi plug-in
- Digital Sound Factory Volume 2 Classic Keys for Dimension Pro
- Hollywood Edge FX for Dimension Pro
- Dimension Pro expansion packs
- Expansion pack 1
- Expansion pack 2
- Assign tracks to mono hardware outputs
- To show mono hardware outputs
- Assigning stereo tracks to mono outputs
- Backward compatibility
- Enhanced CPU performance
- Audio driver changes without restart
- Minimize driver state changes
- To configure the MinimizeDriverStateChanges option
- Vista audio enhancements
- WASAPI support
- Using WASAPI in Windows Vista
- To enable WASAPI mode SONAR
- MMCSS task profile support
- To use a custom MMCSS task profile in SONAR
- WaveRT updates
- Instrument track
- To create an instrument track
- Instrument track controls
- Editing in the Clips pane
- Exporting and bouncing
- Converting an audio and MIDI track to a single instrument track
- Splitting an instrument track to separate audio and MIDI tracks
- Media Browser interface
- Media Browser view toolbar
- Auditioning loops during playback
- Auditioning audio files
- To audition an audio file
- To drag an audio file into a project
- Auditioning MIDI files
- To audition a MIDI file
- To audition through a different synth
- To drag a MIDI file into a project
Brand : CAKEWALK
Model : Sonar 8.5
Category : Photo/Video Software