
RSL-2701 - Laminator Royal Sovereign - Free user manual and instructions
Find the device manual for free RSL-2701 Royal Sovereign in PDF.


| Product Type | Laminator |
| Model | RSL-2701 |
| Brand | Royal Sovereign |
| Lamination Type | Pouch |
| Maximum Pouch Size | 9 inches wide |
| Laminating Speed | 12 inches per minute |
| Warm-Up Time | 3-5 minutes |
| Number of Rollers | 2 |
| Temperature Settings | Hot and Cold |
| Auto Shut-Off | Yes |
| Power Supply | 120V, 60Hz |
| Power Consumption | 250W |
| Dimensions (L x W x H) | 15 x 4 x 5 inches |
| Weight | 4.5 lbs |
| Material | ABS Plastic |
| Color | Black/White |
| Safety Features | Auto shut-off, overheat protection |
| Maintenance | Use cleaning sheet regularly |
| Warranty | 1 year limited |
Frequently Asked Questions - RSL-2701 Royal Sovereign
User questions about RSL-2701 Royal Sovereign
0 question about this device. Answer the ones you know or ask your own.
Ask a new question about this device
Download the instructions for your Laminator in PDF format for free! Find your manual RSL-2701 - Royal Sovereign and take your electronic device back in hand. On this page are published all the documents necessary for the use of your device. RSL-2701 by Royal Sovereign.
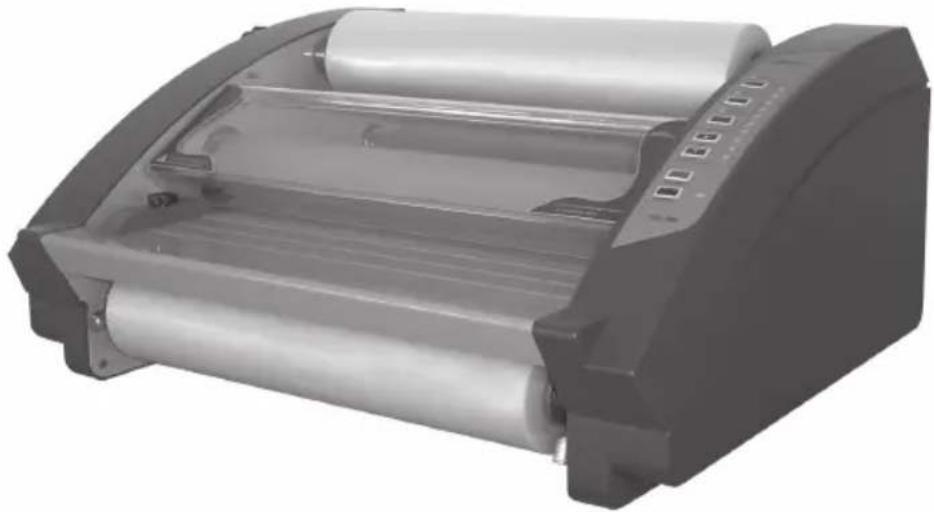
USER MANUAL RSL-2701 Royal Sovereign
OWNER'S MANUAL
RSL-2701
natural_image
Exterior view of a modern office building (no signage)Read all instructions carefully before use.
For any Customer Support needs please choose the
Customer Support tab on www.royalsovereign.com
Royal Sovereign International Inc.
www.royalsovereign.com
TABLE OF CONTENTS
TOPIC
PAGE
- Introduction 3
- Package Contents.... 3
- Safety Precautions.... 4
- Parts 5
- Control Panel 6
- Features Guide.... 7
- Film Loading and Threading 8
- Operation Instructions.... 11
- Maintenance 11
- Trouble Shooting Guide 12
- Specification 13
12.Warranty 14
1. INTRODUCTION
Thank you for purchasing the Table Top Laminator. It has been designed and manufactured to provide years of continuous service. For high quality lamination, please read this instruction manual thoroughly. This manual will provide you with complete operating and maintenance information.
- PACKAGE CONTENTS
natural_image
Technical line drawing of a mechanical device with internal components and mounting brackets (no text or symbols)
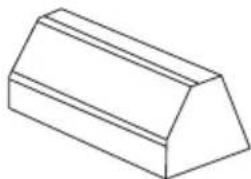
Film leader board Manual Core 4EA Dust cover
natural_image
Technical line drawing of a mechanical pulley or bushing component (no text or symbols)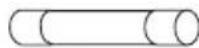
Fuse
natural_image
Simple line drawing of a 3D geometric shape resembling a truncated prism (no text or symbols)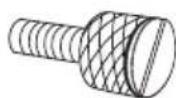
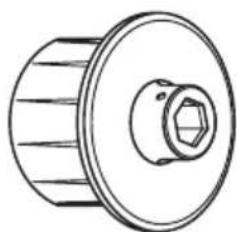
Core bolt 4EA
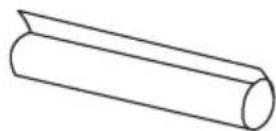
Sample roll film 2EA
3. SAFETY PRECAUTIONS
Failure to comply with any of the following safety procedures could result in serious injury. Please read the instructions carefully and keep for future reference.
- Only a licensed electrician should install wiring and outlet for the laminator.
- Ensure the unit is plugged into a properly grounded outlet with the correct voltage.
- Keep hands and clothing (i.e. Neckties) away from rollers. The rollers have pinch points that can trap body parts or clothing and cause serious injury.
- Keep flammable and wet objects away from the machine.
- Place machine on a level surface.
- Avoid excessive sunlight, humidity and extreme temperatures.
- Ensure the unit is turned off, cooled, and unplugged from the outlet prior to moving and/or repairing.
- Keep out of reach of children.
- Only authorized maintenance and service technicians should make repairs.
- Do not attempt to laminate items that exceed total recommended material thickness for the unit
- When cleaning the machine, don't use flammable sprays or materials.
- Do not touch the rollers when hot. Do not place any foreign objects inside the laminator.
- Do not cover the surface of the machine until the machine has completely cooled.
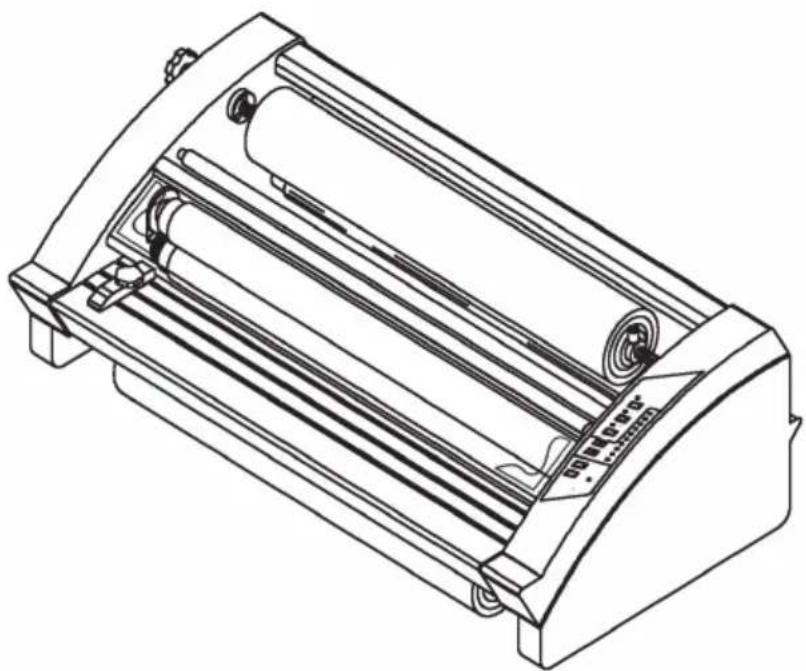
4. PARTS
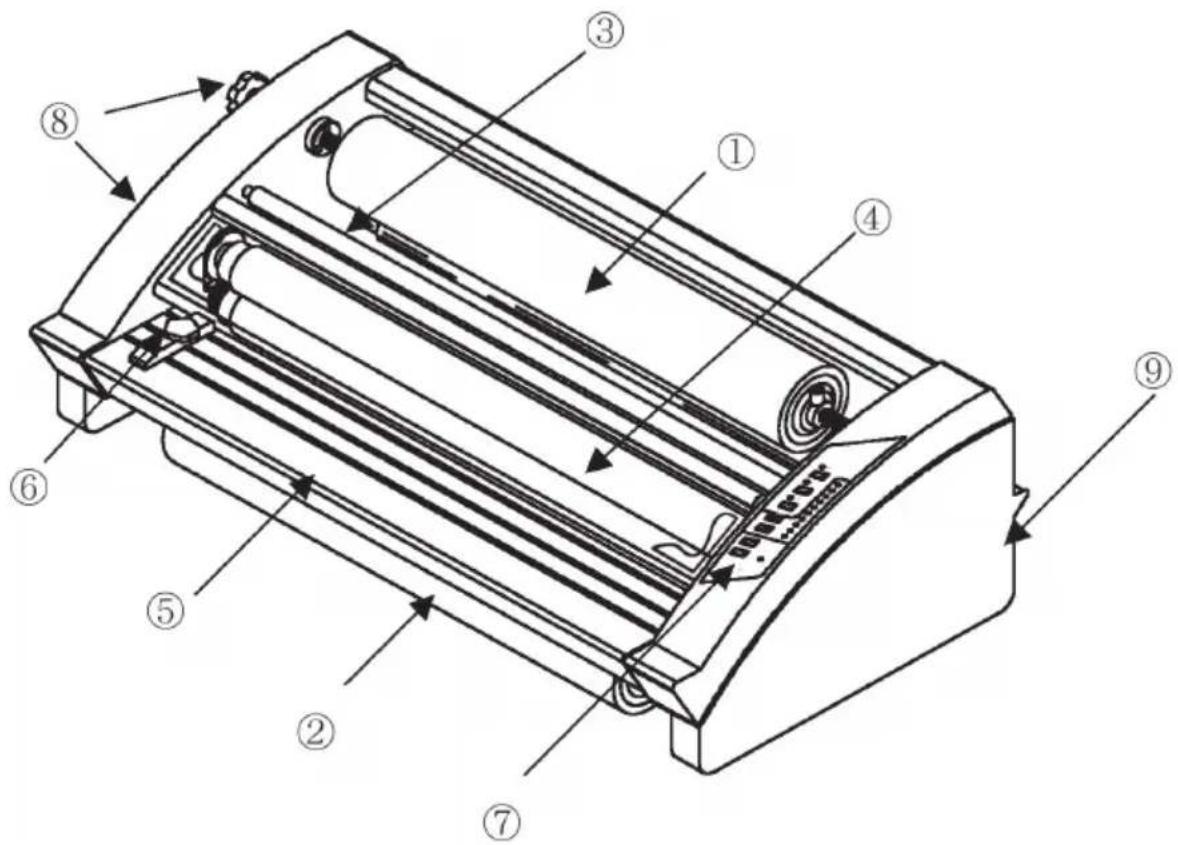
- Upper Film
- Lower Film
- Idle Bar
- Hot Rollers 5. Feed Table 6. Paper Guide
- Control Panel 8. Tension Knob 9. Power Switch
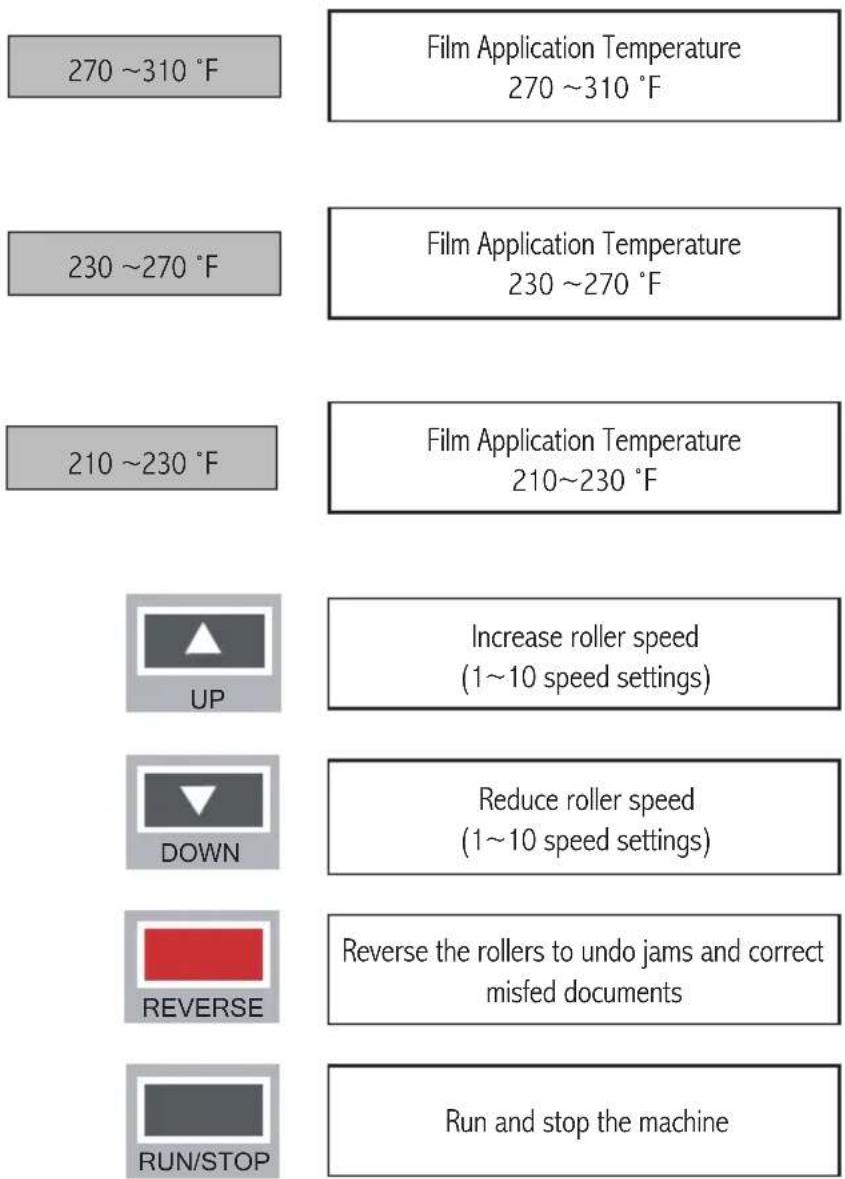
5. CONTROL PANEL

RSL-2701
6. FEATURES GUIDE
Power Switch ①
Located on the rear of the machine. "I" (on) "O" (off). (Fig. 2)
Cross Cutter ②
Used to cut off the laminated web. (Fig. 2)
Feed Guide ③
The feed guide permits alignment of the item(s) to be laminated. To position the adjustable guide, loosen the knob, slide it to the desired position and tighten the knob to secure the feed guide in place. (Fig. 3)
Safety Cover ④
Cover + Protect the hot rollers.
NOTE: If the safety cover is opened, this rollers stop turning.
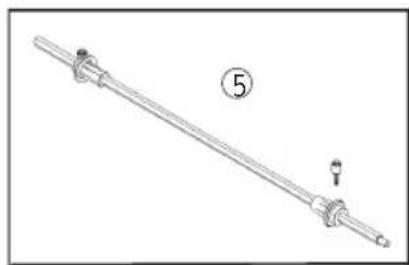
Film Shaft and Locking Core Adapter ⑤
The film shaft holds the film supply on the machine. The locking core holds and locks the film on the shaft to prevent shifting. (Fig. 4)
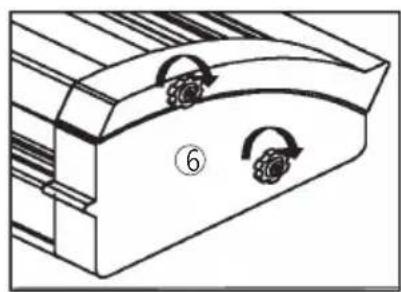
Film Tension Adjustment ⑥
Allows the operator to increase or decrease roll film tension. To increase the tension turn the knob clockwise and to decrease tension turn the knob counterclockwise. (Fig. 5)
NOTE: - Excess tension on the top roll feed will cause upward curl.
- Excess tension on the bottom roll feed will cause downward curl.
- Tension should be adjusted until the laminated materials exit flat.
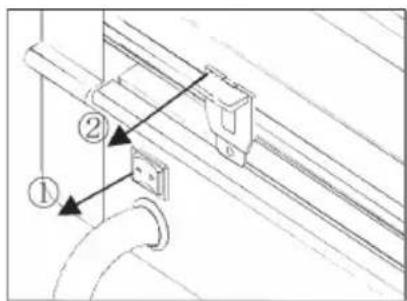
Figure 2
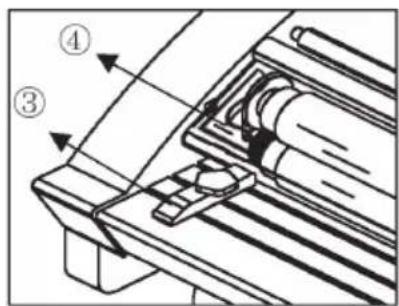
Figure 3
natural_image
Technical line drawing of a mechanical shaft with two end caps and a labeled section (5), no text or symbols present.Figure 4
natural_image
Technical line drawing of a mechanical component with two circular features and an arrow indicating rotation (no text or symbols)Figure 5
7. FILM LOADING & THREADING
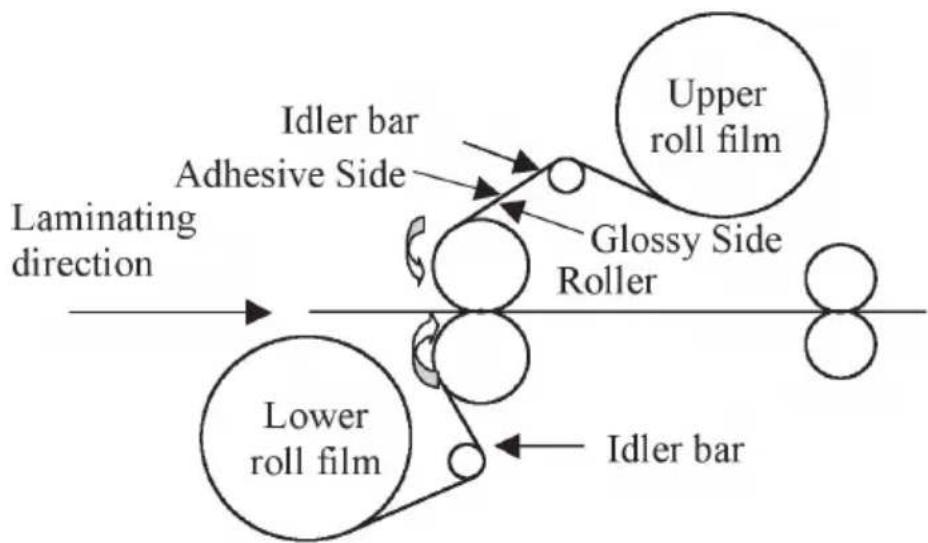
Figure 6
-
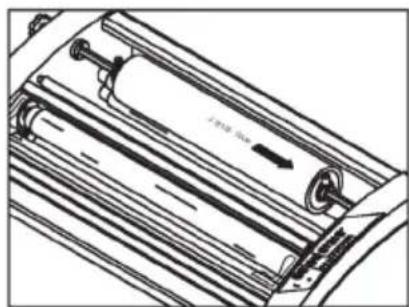
Slightly slide the upper film shaft to the right and pull it out from the machine. (Fig. 7)
-
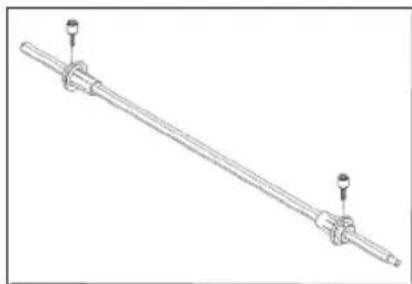
Take both lock core adapters off from the shaft. (Fig. 8)
natural_image
Technical line drawing of a mechanical component with no visible text or symbolsFigure 7
natural_image
Technical line drawing of a mechanical shaft with two end fasteners (no text or symbols)Figure 8
-
Insert one of the core adapters into the right end of the film core. For film with poly-in (adhesive side is inside the web), make sure the adhesive side is facing upward. (Fig. 9)
-
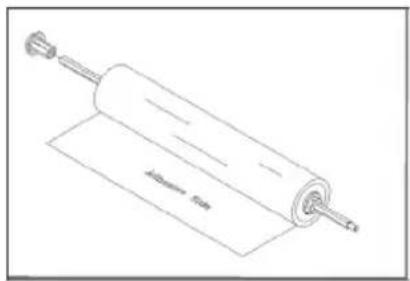
Insert the film shaft into the roll of film from the right side with the copper end last. Align and insert the core adapter on the left end of the film core. (Fig. 10)
-
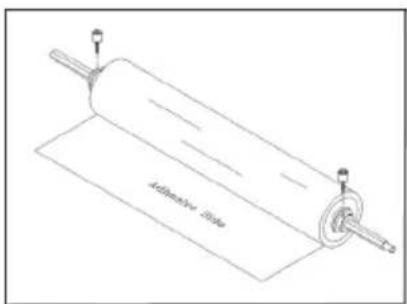
Center the film on the shaft and lock it in place with the locking core adapters. (Fig. 11)
-
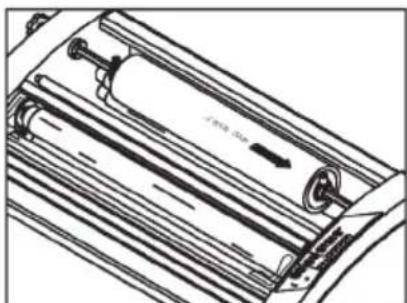
Carefully return the film shaft back into place. (Fig. 12)
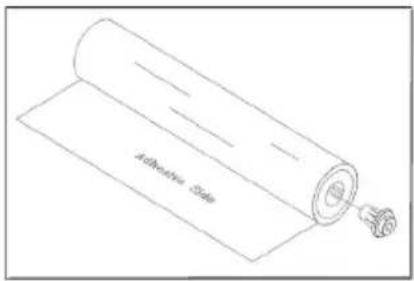
Figure 9
natural_image
Technical line drawing of a cylindrical mechanical component with a base plate and protruding rod (no text or symbols)Figure 10
natural_image
Technical line drawing of a rolled roller with a flat plate and two cylindrical components attached (no text or symbols)Figure 11
natural_image
Technical line drawing of a mechanical component with no visible text or symbolsFigure 12
LOADING LOWER ROLL FILM
- Repeat steps 1-5 to load the lower roll film.
- Once the upper and lower film is on the shaft, pull the film from the top and roll down to the bottom roll to make certain that the film is aligned properly. Then tighten the lower locking core screws.
NOTE: If the film is not aligned properly exposed adhesive will adhere to the rollers and may cause the film to jam.
FILM THREADING / WEBBING
- Set the temperature and speed according to the Recommended Temperature and Speed section.
- Remove the Front Table.
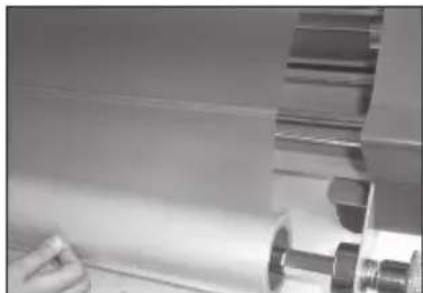
- Pull down the upper film over the Safety Cover to the lower film; align and center the lower film to upper film. (Picture 1)
- Rewind the upper film until the film aligns with the Safety Cover.
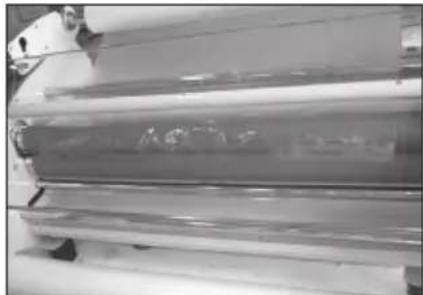
- Thread the film over the Upper Idle Bar and underneath the Safety Cover and pull down until it drapes over both upper and lower hot rollers. (picture 2)
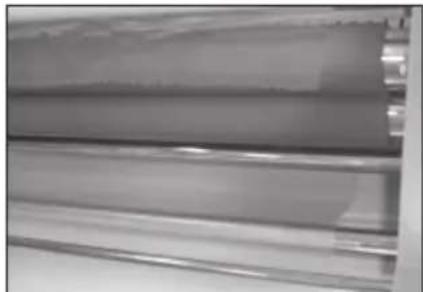
- Carefully pull up the laminate from the lower roll up and drape it over top of the upper film (over the top hot roller). (picture 3)
- Reinstall the Front Table and close the Safety Cover.
- Insert and push the leader board into the hot rollers and press the Run button. (picture 4)
- Press the Stop button when the leader board has completely exited the rear of the laminator.
- Use the Cross-Cutter to remove the leader board.
- Trim any excess film off of the leader board. The leader board can be re-used.
natural_image
Close-up of a mechanical assembly with gears and shafts (no visible text or symbols)Picture 1
natural_image
Close-up of a transparent cylindrical object with layered material, possibly a mechanical or industrial component (no visible text or symbols)Picture 2
natural_image
Close-up of a metallic sheet or panel with horizontal bands, no visible text or symbolsPicture 3
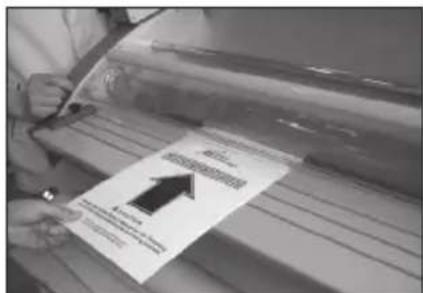
Picture 4
8. OPERATION INSTRUCTIONS
- Turn the laminator ON (I) located on the rear of the machine. (Fig. 2)
- Choose appropriate laminating temperature and speed. (Fig. 1)
- Do not begin laminating until the blinking light is steady (approximately 8 minutes).
- Position the item to be laminated on the feed table.
- Press the RUN button. The rollers will begin to turn, and feed the item into the machine.
- Stop the laminator when all of the items have completely exited the rear of the machine.
- Adjust top + bottom roll feed tension until lamination is flat.
(See film tension adjustment page 8.)
NOTE: Stand by mode and auto power off mode
- Stand by mode: If no activity is made within 30 minutes after each use the machine will automatically switch into stand by mode. (In stand-by mode the temperature will decrease to 80\~90°C and the three temperature setting indicators will blink).
- Auto power off mode: If the machine is in stand by mode and no activity is made for 60 minutes the machine will automatically power off.
- If any activity is made while in stand by or auto power off mode the machine will return to it's previous stage.
9. MAINTENANCE
- Do not apply any cleaning fluids to the rollers certain fluids may cause damage.
- Do not clean rollers with sharp or pointed objects.
- Use a crepe rubber cleaning block to remove adhesive from rollers. Works best when rollers are hot.
- Use a damp cloth with water to clean the body of the machine.
- Store machine in a dry clean area.
10.TROUBLE SHOOTING GUIDE
| Symptom Cause Possible Solution | ||
| Rollers do not operate after the RUN/ STOP button is pressed | 1. Safety cover is opened2. Power cord is not plugged in3. Front table is not on properly4. Machine is not turned on | 1. Check safety cover is properlyclosed2. Plug in the power cord3. Check installed properly4. Turn the machine on |
| Roller is not heating Call your authorized dealer | footerized dealer Call your authorized dealer | |
| Poor Lamination | 1. Film tension is unbalanced.2. Lower idler bar is not located in proper position3.Wrong temperature / speed setting | 1. Adjust film tension2. Push idler bar in proper position3. Follow manufacturers recommended temperature and speed |
- SPECIFICATIONS
| MODEL RSL-2701 | ||
| Power supply AC120V 60Hz | ||
| Power consumption 1450W | ||
| Max laminating width 685mm | ||
| Film thickness 25~250mic /1~10mil | ||
| Max laminating speed 2.5m/min | ||
| Ready time 10min | ||
| Heating method Hot Roller | ||
| Driving motor DC geared motor | ||
| Temperature control Digital(micom) | ||
| Speed control Digital(10steps) | ||
| Transport type 4Roller | ||
| Cross cutter Yes | ||
| Hot lamination | Single No | |
| Double Yes | ||
| Reverse | Yes | |
| Dimensions(w×d×h) | 920×520×320mm | |
| Unit weight | 50kg | |
11. WARRANTY
Royal Sovereign International warrants the equipment sold is free from defects in material and workmanship for a period of One (1) year for Parts and Labor from the date of installation, excluding lamination rollers which are warranted for Six (6) months. This warranty is extended only to the original purchaser. This warranty is the only warranty made by Royal Sovereign International and cannot be modified or amended. Royal Sovereign's sole and exclusive liability and the customer's sole and exclusive remedy under this warranty shall be, at Royal Sovereign's option, to repair or replace any such defective part or product. These remedies are only available if Royal Sovereign's examination of the product discloses to Royal Sovereign's satisfaction that such defects actually exist and were not caused by misuse, neglect, attempt to repair, unauthorized alternation or modification, incorrect line voltage, fire, accident, flood or other hazard.
All warranty claims must be filed through the authorized Royal Sovereign dealer or reseller through which the equipment was originally purchased. Model, serial number and date of delivery are required for all claims.
The warranty made herein is in lieu of all other warranties, expressed or implied, including any warranty or merchantability or fitness for a particular purpose. Royal Sovereign will not be liable for personal damage or personal injury (unless primarily caused by its negligence), loss of profit, or other incidental or consequential damages arising out of the use or inability to use this equipment.
LIMITED WARRANTY
This warranty specifically does not cover damage to laminating rollers caused by knives, razor blades, or any sharp objects or abrasives, or failure caused by adhesives, or damage caused by lifting, tilting or improper use of the machine. Warranty repair or replacement by Royal Sovereign or its authorized Reseller(s) does not extend the warranty beyond the initial one year period from the date of installation. Unauthorized customer alterations will void this warranty.
ROYAL SOVEREIGN INTERNATIONAL INC.
2 Volvo Drive Rockleigh, NJ 07647 USA
E-mail: info@royalsovereign.com
RS EUROPE LIMITED.
66 SALISBURY ROAD, WORCESTER PARK,
SURREY KT4 7DE UK
E-mail : rseu@royalsovereign.com
RS CANADA INC.
5610 Timberlea Blvd, Mississauga Ontario L4W 4M6 CANADA
TEL: +1) 905-461-1095 FAX: +1) 905-461-1096
TF: +1) 866 961-6673
E-mail: info-ca@royalsovereign.com
RS INTERNATIONAL AUSTRALIA PTY. LTD.
30 Prime Drive, Seven Hills, NSW 2147, Australia
TEL : +61) 2-9674-2127
E-mail : salesaust@royalsovereign.com
- OWNER'S MANUAL
- TABLE OF CONTENTS
- TOPIC
- PAGE
- INTRODUCTION
- SAFETY PRECAUTIONS
- Failure to comply with any of the following safety procedures could result in serious injury. Please read the instructions carefully and keep for future reference.
- PARTS
- CONTROL PANEL
- FEATURES GUIDE
- FILM LOADING & THREADING
- LOADING LOWER ROLL FILM
- FILM THREADING / WEBBING
- OPERATION INSTRUCTIONS
- MAINTENANCE
- 10.TROUBLE SHOOTING GUIDE
- WARRANTY
- LIMITED WARRANTY
- ROYAL SOVEREIGN INTERNATIONAL INC.
- RS EUROPE LIMITED.
- RS CANADA INC.
- RS INTERNATIONAL AUSTRALIA PTY. LTD.
Brand : Royal Sovereign
Model : RSL-2701
Category : Laminator