
Pro8100 - Vidéo-projecteur VIEWSONIC - Free user manual and instructions
Find the device manual for free Pro8100 VIEWSONIC in PDF.


| Product Type | Home Theater Projector |
| Model | Pro8100 |
| Brand | ViewSonic |
| Display Technology | 3 x 0.74-inch LCD |
| Native Resolution | 1920 x 1080 (Full HD 1080p) |
| Brightness (Typical) | Approx. 1000 ANSI lumens (estimated) |
| Contrast Ratio | Up to 20000:1 with Auto Iris |
| Lens | Motorized 1.6x optical zoom, motorized focus |
| Lens Shift | Motorized horizontal (120% total) and vertical (250% total) |
| Projection Distance | 1.25 m to 9.36 m (40" to 300" diagonal) |
| Inputs | 2x HDMI 1.3, 2x Component Video, 1x Composite Video, 1x S-Video, 1x RGB (D-sub 15), RS-232, USB, DC 5V, DC 12V trigger |
| Video Compatibility | NTSC, PAL, SECAM, 480i/p, 576i/p, 720p, 1080i, 1080p/24/50/60 |
| Image Enhancement | HQV (Hollywood Quality Video), Precision Color System (PCS), Auto Iris, Daylight Sensor, 3D Color Management |
| Lamp Life | Approx. 3000 hours (Normal mode), up to 4000 hours (Eco mode) |
| Power Supply | 100-240 V AC, 50/60 Hz (Auto switching) |
| Power Consumption | Approx. 350 W (Normal), <1 W (Standby) |
| Dimensions (W x H x D) | 537 x 170 x 389 mm |
| Weight | 9 kg (19.85 lbs) |
| Remote Control | Backlit, discrete power on/off, direct input buttons |
| Noise Level | Approx. 29 dB (Eco mode) |
| Keystone Correction | Vertical and horizontal digital keystone, auto keystone |
| Air Filter | Replaceable, cleaning interval approximately 200 hours |
| Warranty | 3 years parts and labor (excluding lamp), 1 year on lamp (varies by region) |
| Accessories Included | Power cord, HDMI cable, Component (RCA) cable, remote control with batteries, micro-fiber cloth, dust cover, quick start guide, user manual |
Frequently Asked Questions - Pro8100 VIEWSONIC
User questions about Pro8100 VIEWSONIC
0 question about this device. Answer the ones you know or ask your own.
Ask a new question about this device
Download the instructions for your Vidéo-projecteur in PDF format for free! Find your manual Pro8100 - VIEWSONIC and take your electronic device back in hand. On this page are published all the documents necessary for the use of your device. Pro8100 by VIEWSONIC.
USER MANUAL Pro8100 VIEWSONIC
natural_image
Close-up of a black projector with a circular lens and rectangular body (no visible text or symbols)Precision
by ViewSonic®
Home Theater Projector
User's Manual
ENG
FRN
ESP
HQV
HDMI™
MODI-COMPUTER MULTI-MEDIA INTERFACE
PCS
This device complies with part 15 of FCC Rules. Operation is subject to the following two conditions: (1) this device may not cause harmful interference, and (2) this device must accept any interference received, including interference that may cause undesired operation.
This equipment has been tested and found to comply with the limits for a Class B digital device, pursuant to part 15 of the FCC Rules. These limits are designed to provide reasonable protection against harmful interference in a residential installation. This equipment generates, uses, and can radiate radio frequency energy, and if not installed and used in accordance with the instructions, may cause harmful interference to radio communications. However, there is no guarantee that interference will not occur in a particular installation. If this equipment does cause harmful interference to radio or television reception, which can be determined by turning the equipment off and on, the user is encouraged to try to correct the interference by one or more of the following measures:
- Reorient or relocate the receiving antenna.
- Increase the separation between the equipment and receiver.
- Connect the equipment into an outlet on a circuit different from that to which the receiver is connected.
- Consult the dealer or an experienced radio/TV technician for help.
Warning: You are cautioned that changes or modifications not expressly approved by the party responsible for compliance could void your authority to operate the equipment.
For Canada
• This Class B digital apparatus complies with Canadian ICES-003.
CE Conformity for European Countries

The device complies with the requirements of the EEC directive 2004/108/EC as amended by 92/31/EEC and 93/68/EEC Art.5 with regard to "Electromagnetic compatibility", and 2006/95/EC as amended by 93/68/EEC Art.13 with regard to "Safety."
Following information is only for EU-member states:
The mark shown to the right is in compliance with the Waste Electrical and Electronic Equipment Directive 2002/96/EC (WEEE).
The mark indicates the requirement NOT to dispose the equipment as unsorted municipal waste, but use the return and collection systems according to local law.

Important Safety Instructions
- Read these instructions.
- Keep these instructions.
- Heed all warnings.
- Follow all instructions.
- Do not use this unit near water.
- Clean with a soft, dry cloth. If still not clean, see "Cleaning the Display" in this guide for further instructions.
- Do not block any ventilation openings. Install the unit in accordance with the manufacturer's instructions.
- Do not install near any heat sources such as radiators, heat registers, stoves, or other devices (including amplifiers) that produce heat.
- Do not defeat the safety purpose of the polarized or grounding-type plug. A polarized plug has two blades with one wider than the other. A grounding type plug has two blades and a third grounding prong. The wide blade and the third prong are provided for your safety. If the provided plug does not fit into your outlet, consult an electrician for replacement of the obsolete outlet.
- Protect the power cord from being walked on or pinched particularly at plugs. Convenience receptacles and the point where they exit from the unit. Be sure that the power outlet is located near the unit so that it is easily accessible.
- Only use attachments/accessories specified by the manufacturer.
- No one with the cart, stand, tripod, bracket, or table specified by the manufacturer, or sold with the unit. When a cart is used, use caution when moving the cart/unit combination to avoid injury from tipping over.
- Unplug this unit when unused for long periods of time.
- Refer all servicing to qualified service personnel. Servicing is required when the unit has been damaged in any way, such as: if the power-supply cord or plug is damaged, if liquid is spilled onto or objects fall into the unit, if the unit is exposed to rain or moisture, or if the unit does not operate normally or has been dropped.
Declaration of RoHS Compliance
This product has been designed and manufactured in compliance with Directive 2002/95/EC of the European Parliament and the Council on restriction of the use of certain hazardous substances in electrical and electronic equipment (RoHS Directive) and is deemed to comply with the maximum concentration values issued by the European Technical Adaptation Committee (TAC) as shown below:
| Substance | Proposed Maximum Concentration | Actual Concentration |
| Lead (Pb) 0.1% < 0.1% | ||
| Mercury (Hg) 0.1% < 0.1% | ||
| Cadmium (Cd) 0.01% < 0.01% | ||
| Hexavalent Chromium ( Cr^6+ ) 0.1% < 0.1% | ||
| Polybrominated biphenyls (PBB) 0.1% < 0.1% | ||
| Polybrominated diphenyl ethers (PBDE) 0.1% < 0.1% |
Certain components of products as stated above are exempted under the Annex of the RoHS Directives as noted below:
Examples of exempted components are:
- Mercury in compact fluorescent lamps not exceeding 5 mg per lamp and in other lamps not specifically mentioned in the Annex of RoHS Directive.
- Lead in glass of cathode ray tubes, electronic components, fluorescent tubes, and electronic ceramic parts (e.g. piezoelectronic devices).
- Lead in high temperature type solders (i.e. lead-based alloys containing 85% by weight or more lead).
- Lead as an allotting element in steel containing up to 0.35% lead by weight, aluminium containing up to 0.4% lead by weight and as a cooper alloy containing up to 4% lead by weight.
Copyright Information
Copyright© ViewSonic© Corporation, 2008. All rights reserved.
Macintosh and Power Macintosh are registered trademarks of Apple Computer, Inc.
Microsoft, Windows, Windows NT, and the Windows logo are registered trademarks of Microsoft Corporation in the United States and other countries.
ViewSonic, the three birds logo, OnView, ViewMatch, and ViewMeter are registered trademarks of ViewSonic Corporation.
VESA is a registered trademark of the Video Electronics Standards Association, DPMS and DDC are trademarks of VESA.
PS/2, VGA and XGA are registered trademarks of International Business Machines Corporation.
Disclaimer: ViewSonic Corporation shall not be liable for technical or editorial errors or omissions contained herein; nor for incidental or consequential damages resulting from furnishing this material, or the performance or use of this product.
In the interest of continuing product improvement, ViewSonic Corporation reserves the right to change product specifications without notice. Information in this document may change without notice.
No part of this document may be copied, reproduced, or transmitted by any means, for any purpose without prior written permission from ViewSonic Corporation.
Product Registration
To meet your future needs, and to receive any additional product information as it becomes available, please register your product on the Internet at: www.viewsonic.com. The ViewSonic® Wizard CD-ROM also provides an opportunity for you to print the registration form, which you may mail or fax to ViewSonic.
| For Your Records | |
| Product Name: | Pro8100Home Theater Projector |
| Model Number: | VS11856 |
| Document Number: | Pro8100_UG_ENG Rev. 1C 04-16-08 |
| Serial Number: | |
| Purchase Date: | |

The lamp in this product contains mercury.
Please dispose of in accordance with local, state or federal laws.
Table of Contents
Compliance Information......i
FCC Statement
For Canada
CE Conformity for European Countries
Following information is only for EU-member states
Important Safety Instructions
Declaration of RoHS Compliance
Copyright Information
Product Registration
Chapter 1: Introduction......1
Projector Features
Notes on the AC Power Cord
Package Contents
Projector Overview
Control Panel
Connection ports
Remote Control
Installing the Batteries
Remote Control Operation
Chapter 2: Installation......6
Power connection
Audio and Video Devices Connectivity Configuration
Adjusting the Projected Image
Adjusting Projection Image Size
Projection Screen Selection
Chapter 3: Remote Control
direct acess....12
Picture Modes
Color Temperature
PCS (Precision Color System)
HQV
Black Level
Daylight Sensor
Input Source Select
Direct Input Keys
Aspect Ratio
Overscan
Freeze
Keystone
Zoom and Focus
Lens Shift
Power
Light
Chapter 4: ADVANCED OPERATION (OSD Menu)....20
-
Main Menu
-
Setup Menu
2-1. Picture Sub-Menu
2-1-1 Basic Sub-Menu
2-1-2 Color Temperature Sub-Menu
2-1-3 Image Adjust Sub-Menu
2-1-4 Aspect Ratio
2-1-5 Overscan
2-1-6 Geometry Adjust
2-2. Advanced Sub-Menu
2-2-1 Picture Mode
2-2-2 Black Level
2-2-3 HQV
2-2-4 Noise Reduction
2-2-5 Color Space
2-3 Config Sub-Menu
2-3-1 Projector Settings
2-3-2 OSD
2-3-3 Languages
2-3-4 Timers
2-3-5 High Altitude
2-3-6 Auto Iris
2-4 PCS Settings Sub-Menu
2-4-1 PCS
2-4-2 PCS Display
2-4-3 Flesh tone
2-4-4 Edge Enhancement
2-4-5 Gamma Correction
2-4-6 3D Color Management
2-5 Memory Settings Sub-Menu
2-5-1 Custom Color Temperature
2-5-2 Save
2-5-3 Load
2-5-4 Reset
2-5-5 System Status Screen
Chapter 5: Making and Recalling the User Adjustments....42
Making Adjustments
1-1. User Picture Mode Adjustments
1-2. User Color Temperature Adjustments
1-3. User PCS Adjustments
2-1 Recalling the User Picture Mode & Color Temperature
2-2 Recalling the User PCS Adjustments
2-3 Recalling Both User Picture Mode and User PCS (Custom 1 & 2)
Appendix......46
Maintenance
Cleaning the Lens
Cleaning the Projector Housing
Maintaining the Air Filter
Replacing the Air Filter
Replacing the Lamp
Troubleshooting
List of Compatible Signals
LED Indicator Message
Product Specification
RS232 command code
Remote control code
Customer Support
Limited Warranty
Chapter 1: Introduction
Projector Features
The projector integrates high-performance optical engine projection and a user-friendly design to deliver high reliability and ease of use.
• 1080P (1920x1080) Full HD native resolution.
• C ^2 Fine ^TM LCD panel for superior performance.
- Silicon Optix HQV ^TM for highest quality video.
- Precision Color System for true color image enhancement.
• Power horizontal and vertical lens shift.
• HDMI 1.3 support with HDCP compliance.
• 1.6x power optical zoom lens.
• Auto-iris enables high contrast to produce deeper black levels.
- Daylight sensor for auto setting based on ambient light conditions.
• 1080p 24fps capable
- Full discrete IR and RS-232 command codes
Notes on the AC Power Cord
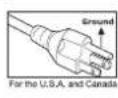
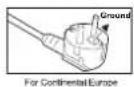
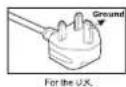
AC Power Cord must meet the requirement of countries where you use this projector. Please confirm your AC plug type with the graphics below and ensure that the proper AC Power Cord is used. If the supplied AC Power Cord does not match your AC outlet, please contact your sales dealer. This projector is equipped with a grounding type AC line plug. Please ensure that your outlet fits the plug. Do not defeat the safety purpose of this grounding type plug. We highly recommend using a video source device also equipped with a grounding type AC line plug to prevent signal interference due to voltage fluctuations.

Package Contents
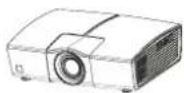
When you unpack the projector, make sure you have all these components:
Projector Projector dust
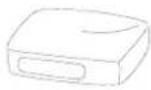
cover
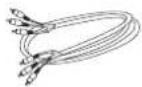
Component (RCA) cable
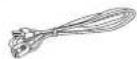
Power cord
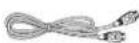
HDMI cable


-
Projector
-
Micro-fiber wiping cloth. x1
-
Projector dust cover. x1
-
AA size batteries for remote control x 2
-
Component (RCA) cable x1
-
Remote control x1
-
Power cord x1
-
Quick start guide x1
-
HDMI cable x1
-
User Guide x1
《 NOTE 》
- Save the original shipping carton and packing material; they will come in handy if you ever to ship your unit. For maximum protection, repack your unit as it was originally packed at the factory.
• Accessories and components may vary by retailer and region.
Projector Overview
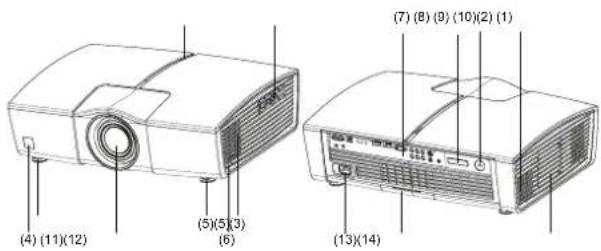
- Control panel
- LED indicator
- Air inlet grille
- Front IR remote control sensor
- Elevation foot
- Elevation button
- Connection ports
-
Rear IR remote control sensor
-
Kensington lock
- Air outlet grille
- Lamp cover
- Air filter cover
- AC power socket
- Projection lens
- Ceiling mount (3-M6)
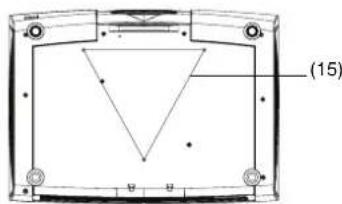
《 NOTE 》
- This projector can be used with a ceiling mount for support. The ceiling mount is not included in the package.
Control Panel
LED indicator:
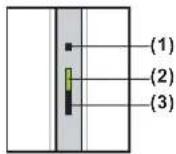
- Daylight sensor.
- Power indicator
Refer to "LED Indicator Message" (Page 50).
- Status indicator
Refer to "LED Indicator Message" (Page 50).
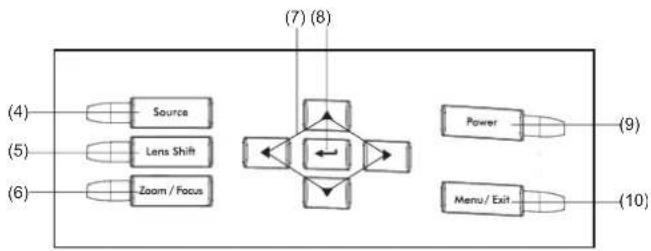
Button Function:
flowchart
graph TD
    A["Source"] --> B["Central Box"]
    C["Lens Shift"] --> B
    D["Zoom / Focus"] --> B
    E["Power"] --> B
    F["Menu / Exit"] --> B
    style B fill:#f9f,stroke:#333,stroke-width:2px
- Source
Manually selects an input source.
- Lens Shift
Motorized vertical and horizontal lens shift for positioning display image without physically moving the unit.
- Zoom/Focus
Motorized zoom and focus adjust.
- Four directional buttons
Use four directional buttons to select items or make adjustments to your selections.
- Enter
To confirm selected menu item.
- Power
Turn on or off the projector.
- Menu/Exit
Opens and Exits the on-screen menu.
Connection ports
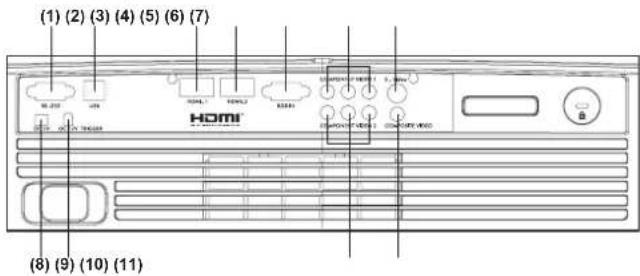
When operating the projector via a computer, connect this to the controlling computer's RS-232C port.
- USB terminal (Service purpose)
This connector is for firmware upgrade.
- HDMI-1 terminal
Interface for digital video.
- HDMI-2 terminal
Interface for digital video.
- RGB IN terminal
Connects PC input signal (analog) to this jack.
- COMPONENT VIDEO 1 terminals
Analog/digital video interface transmits via three separate signals - Y, Cb/Pb, Cr/Pr.
- S-VIDEO terminal
Connects S-Video output from video equipment to this jack.
-
DC 5V terminal
-
DC 12V TRIGGER terminal
-
COMPONENT VIDEO 2 terminals
Analog/digital video interface transmits via three separate signals - Y, Cb/Pb, Cr/Pr.
- COMPOSITE VIDEO terminal
Connects composite video output from video equipment to this jack.
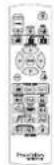
Remote Control
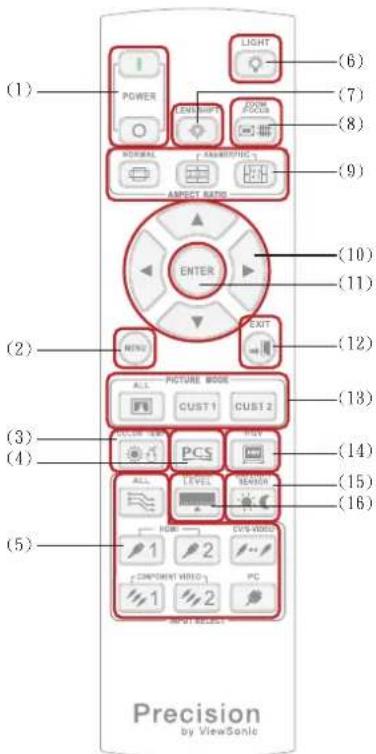
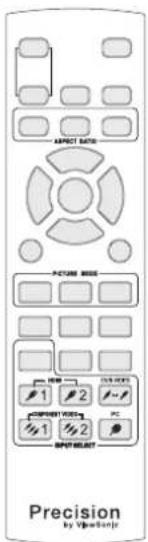
- POWER
Power On: Discrete power on key.
Power Off: Discrete power off key.
- MENU
Opens and Exits the on-screen menu.
- COLOR TEMP
Selections of color shading. Browse through factory defaults and user color temp.
4.PCS
Selection of PCS mode.
PCS On: Use ViewSonic default PCS settings.
USER: Use user defined PCS settings.
PCS Off: Turn off all PCS settings.
5. INPUT SELECT
All: Browse through HDMI 1/2, Component Video 1/2, Composite, S-Video and PC inputs.
HDMI 1: Direct access key for HDMI 1 input.
HDMI 2: Direct access key for HDMI 2 input.
Component Video 1: Direct access key for Component Video 1.
Component Video 2: Direct access key for Component Video 2.
Composite Video and S-Video selection. Browse through Composite Video and S-Video inputs.
PC: Direct access key for PC input.
6. LIGHT
Keypad Light Enable. Keypad will also light up if any other remote control key is pressed.
7. LENS SHIFT
Motorized vertical and horizontal lens shift for positioning display image without physically moving the unit.
8. ZOOM/FOCUS
Motorized zoom and focus adjust.
9. ASPECT RATIO
Selections of screen proportion.
Normal: Browse through Standard, Full Screen, Crop and Flexview aspect ratios.
Anamorphic 1: Use in conjunction of 16:9 to 2:35:1 conversion lens.
Anamorphic 2: Use in conjunction of 16:9 to 2:35:1 conversion lens.
Note: Requires use of optional .Anamorphic lens. ViewSonic does not provide this optional lens. For more details on where to purchase the Anamorphic 2.35:1 lens, please visit www.viewsonic.com
10. FOUR DIRECTIONAL BUTTONS
Use four directional buttons to select items or make adjustments to your selection.
11. ENTER
To confirm selected menu item.
12. EXIT
To Exits the on-screen menu or Cancel the current OSD selection.
13. PICTURE MODE
Selections of picture modes, for easy access to ViewSonic customized presets and customized settings.
All: Browse through Normal, Vivid, Cinema and Professional picture mode.
Custom 1: Recall customized setting 1.
Custom 2: Recall customized setting 2.
14. HQV
HQV enable.
On: Use ViewSonic default HQV settings.
Off: Turn off all HQV settings.
Note: User defined HQV settings can only be accessed in the OSD.
15. DAYLIGHT SENSOR
Daylight sensor enable.
Auto: Daylight mode bases on light sensor detection.
Manual: Manually selects daylight mode.
Off: Turn off daylight mode.
16. BLACK LEVEL
Defines the brightness levels at the darkest visual image point.
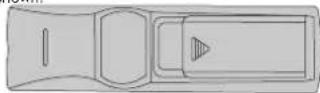
Installing the Batteries
- Open the battery cover in the direction shown.
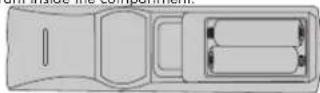
- Install batteries as indicated by the diagram inside the compartment.
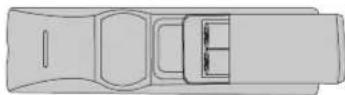
- Close the battery cover into position.
《NOTE》
- Keep the batteries out of the reach of children. There is a danger of death by accidentally swallowing the battery.
- Remove batteries from remote control when not being used for extended periods.
- Do not dispose of the used battery along with household waste. Dispose of used batteries according to local regulations.
- Danger of explosion may occur if batteries are incorrectly replaced. Replace all the batteries with new ones.
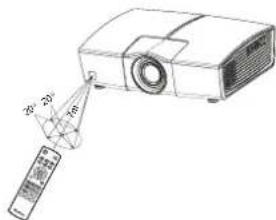
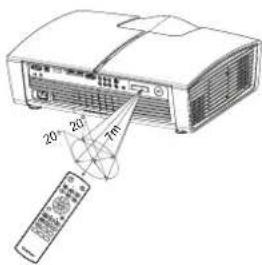
Remote Control Operation
Point the remote control at the infrared remote sensor and press a button.
- Operating the projector from the front
- Operating the projector from the rear
《NOTE》
- Do not point the LED light pointer directly to the people's eyes (especially small children). There is a danger of injury to the eyes.
- The remote control may not operate when there is sunlight or other strong light such as a fluorescent lamp shining on the remote sensor.
- Operate the remote control from a position where the remote sensor is visible.
- Do not drop the remote control or jolt it.
- Keep the remote control out of locations with excessively high temperature or humidity.
- Do not get water on the remote control or place wet objects on it.
- Do not disassemble the remote control.
Chapter 2: Installation
Power connection
- Remove the projector lens cap.
- Plug the attached power cord into the AC power socket of this projector.
- Plug the other end of the power cord into a power outlet.
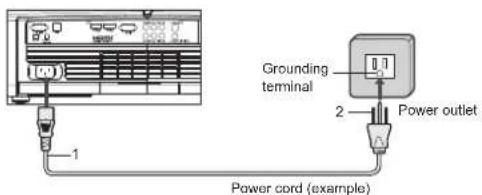
- The power cords for use in the U.S., UK and Europe are included with this projector. Use the appropriate one for your country.
- This projector uses the power plug of three-pin grounding type. Do not remove the grounding pin from the power plug. If the power plug doesn't fit your wall outlet, ask an electrician to change the wall outlet.
- The provided power cord for the U.S. is rated at 120 V. Never connect this cord to any outlet or power supply using other voltages or frequencies than rated. If you use a power supply using other voltage than rated, prepare an appropriate power cord separately.
- Use 100-240 V AC 50/60 Hz to prevent fire or electric shock.
- Do not place any objects on the power cord or do not place the projector near heat sources to prevent damage to the power cord. If the power cord should be damaged, contact your dealer for replacement because it may cause fire or electric shock.
- Do not modify or alter the power cord. If the power cord is modified or altered, it may cause fire or electric shock.
Caution:
- Plug in the power cord firmly. When unplugging, hold and pull the power plug, not the power cord.
- Do not plug in or out the power cord with your hand wet. It may cause electric shock.
Audio and Video Devices Connectivity Configuration
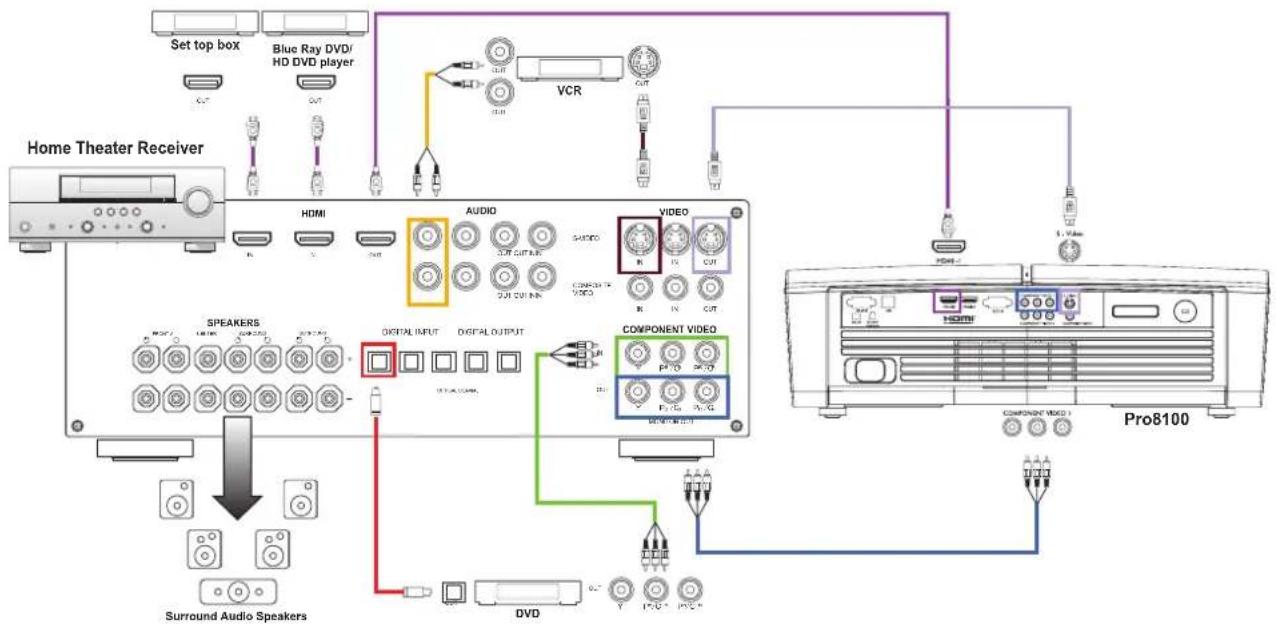
ViewSonic Pro8100 offers a full complementary video input connectivity - from the hi-tech HDMI to the basic composite video.
There are vast possibilities of audio & video connectivity configurations user can choose from.
However the best setup combination relies on user's equipments and using preferences.
Please seek professional advice for best matching setup. The video input type priority sequence is listed below:
- HDMI - Component Video • S-Video • Composite Video
The illustration below shows some recommended setup configuration possibilities.
A. Using Home Theater System as hub
This setup is recommended if a highly sophisticated home theater system is available.
This setup offers a great ease on utility for user, since settings of both audio and video can be changed without manual matching.
Pros: Eliminate audio and video source matching between projector and audio amplifier. Increase number of connecting devices. Reduce cabling to the projector.
Cons: High cost.
flowchart
graph TD
    A["Set top box"] --> B["Blue Ray DVD/HD DVD player"]
    B --> C["VCR"]
    C --> D["Home Theater Receiver"]
    D --> E["SPEAKERS"]
    E --> F["Surround Audio Speakers"]
    F --> G["DVD"]
    G --> H["COMPONENT VIDEO"]
    H --> I["Pro8100"]
    I --> J["COMPOUND VIDEO 1"]
    J --> K["Output"]
    style A fill:#f9f,stroke:#333
    style B fill:#ccf,stroke:#333
    style C fill:#cfc,stroke:#333
    style D fill:#fcc,stroke:#333
    style E fill:#ffc,stroke:#333
    style F fill:#cfc,stroke:#333
    style G fill:#cfc,stroke:#333
    style H fill:#cfc,stroke:#333
    style I fill:#fcc,stroke:#333
    style J fill:#cfc,stroke:#333
    style K fill:#fcc,stroke:#333
Note: The illustrated home theater receiver contains HDMI out, component video out, S-Video out and composite video out. Not all home theater receiver has full complementary of video output.
B. Using Projector as hub
This setup is recommended for low to mid range home theater system.
When changing input source, both projector and home theater system's remote controls need to be activated.
Projector and home theater system controls can be centralizing controlled by 3rd party's home appliances control system (Projector is via RS232).
Please seek professional advice for best suited type of home appliances control system.
Pros: Low budget.
Cons: It is required to match audio and video sources between projector and audio amplifier manually. Masses of routing cables need to be connected to projector.
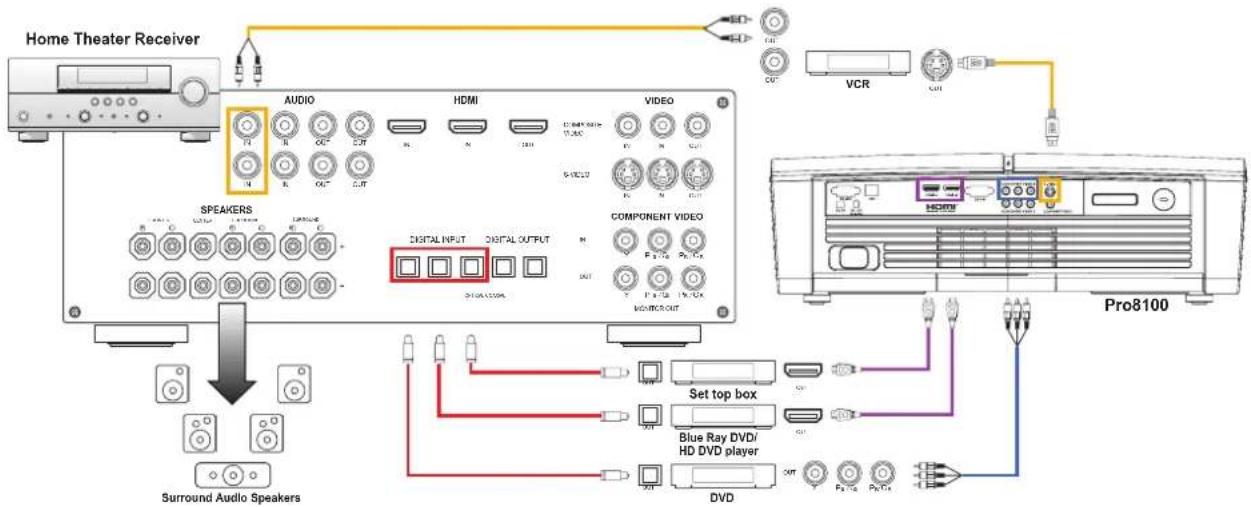
C. Connecting Cable or Satellite TV
There's no build-in TV tuner in ViewSonic Pro8100.
It will only take direct video output (HDMI, Component Video, S-Video or Composite Video.) with cable or satellite set-top-box.
Please use by the recommended input priority order.
Please to use HDMI or Component Video connection only if cable or satellite offers HDTV signals (Check with cable or satellite TV provider).
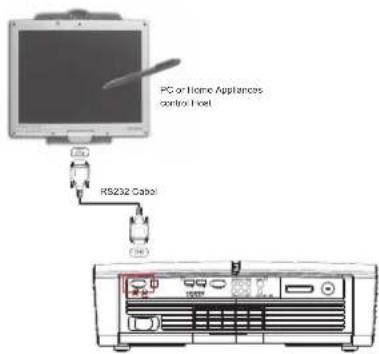
D. RS232 Connection
The illustration shows the connection to a home appliances control device. ViewSonic Pro8100's RS232 command code table and setup protocol are listed in the Appendix section.
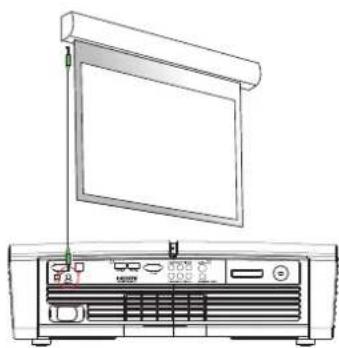
E. 12V Screen Curtain Trigger
ViewSonic Pro8100 offers a 12V trigger control pulse upon power-on and power-off. This 12V trigger pulse can be utilized to motor drive of a home theater's curtain or a drop-down projection screen.
natural_image
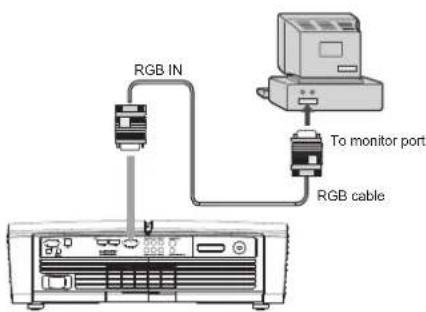
Line drawing of a projector unit with a screen and indicator lights (no text or symbols)F. PC Input
ViewSonic Pro8100 can take analog PC video signal by RGB IN (Shown in the illustration below).
《 NOTE 》
- When connecting cable, power cords of both a projector and external equipment should be disconnected from AC outlet.
- The figure above is a sample connection. This does not mean that all of these devices can or must be connected simultaneously.
- The cables that come with the projector may differ from the above illustration. The included cables are based on actual shipment delivery.
Adjusting the Projected Image
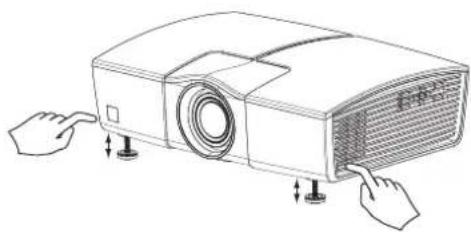
Adjusting the Projector Height
natural_image
Line drawing of a projector with two hands pointing at the base (no text or symbols)The projector is equipped with two elevation feet to adjust the image height.
To raise the image:
- Press the elevation button.
- Raise the image to the desired height angle, then release the button to lock the elevation foot into position.
To lower the image:
- Press the elevation button.
- Lower the image, then release the button to lock the elevation feet into position.
《 NOTE 》
- To avoid damaging the projector, make sure that the elevation feet are fully retracted before placing the projector in its package.
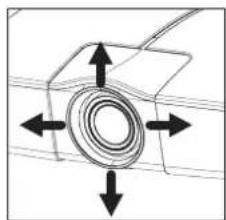
Adjusting the Projector Lens Position
natural_image
Pure mechanical diagram showing a circular component with directional arrows, no text or symbols present- Press the Lens Shift button.
- Use four directional buttons to adjust the lens position.
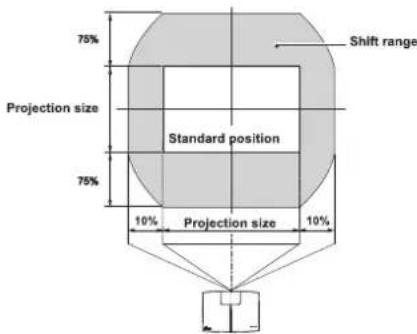
The adjustable projection range
Adjusting Projection Image Size
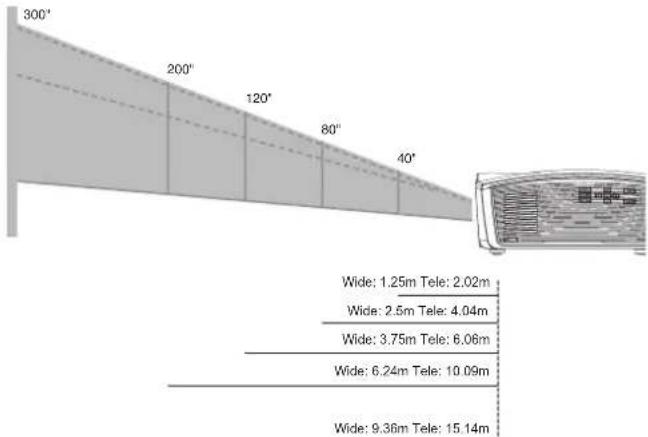
Refer to the graphic and table below to determine the screen size and projection distance.
other
| Section | Width (m) | Telewidth (m) | |---|---|---| | Top Section | 1.25 | 2.02 | | Middle Section | 2.5 | 4.04 | | Bottom Section | 3.75 | 6.06 | | Right Section | 6.24 | 10.09 | | Bottom Section | 9.36 | 15.14 | The chart displays a schematic representation of the air conditioner system with angular positions (300° to 40°) and distance measurements (200° to 80°). The right panel includes a small illustration of a refrigerator.Projection Screen Selection
ViewSonic Pro8100's preset image modes are calibrated based on a no-gain, pure flat white projection screen. For best preset performance, it is highly recommended to use a no-gain, flat white professional projection screen. The projection screens used in most office are gain-screens. Material used in brightness gain screen will cause decrease in viewing angle and hot-spot symptom. Black level and contrast performances can also be altered by the gain-screen since the gain will also boost the dark level brightness. The so-called hi-contrast gray projection screen can also alter the contrast and black level performance. The best viewing performance can not be brought by the standard factory presets, when using these types of projection screens. Please seek professional help for adapting a specialized screen, when calibrating the projector settings manually.
| Screen Size (Diagonal) | 16 : 9 Screen | |||
| Wide Projection Distance | Tele Projection Distance | |||
| m inch m inch | ||||
| 40" 1.25 49.2 2.02 79.5 | ||||
| 50" 1.56 61.5 2.52 99.4 | ||||
| 60" 1.87 73.7 3.03 119.2 | ||||
| 70" 2.19 86.0 3.53 139.1 | ||||
| 80" 2.50 98.3 4.04 159.0 | ||||
| 90" 2.81 10.6 4.54 178.8 | ||||
| 100" 3.12 122.9 5.05 198.7 | ||||
| 120" 3.75 147.5 6.06 238.5 | ||||
| 150" 4.68 184.3 7.57 298.1 | ||||
| 200" 6.24 245.8 10.09 397.4 | ||||
| 250" 7.80 307.2 12.62 496.8 | ||||
| 300" 9.36 368.7 15.14 596.2 | ||||
《NOTE》
- Position the projector in a horizontal position; other positions can cause heat build-up and damage to the projector.
• Make sure all intake and exhaust ventilation are not blocked. - Do not use the projector in a smoky environment. Smoke residue can cause buildup on critical parts.
Chapter 3: Remote Control direct access
Power
| Power ON | Press an the remote control/top panel to turn on projector. |
| Power OFF | Press 6h the remote control/top panel, it would pop up a confirmation screen showing: "Press Power Button Again to power off." Once this confirmation pops up, Press 6h the remote control/top panel again to turn the power off. After lamp cooling cycle is completed, the unit will enter Stand-By mode. |
| Cancel Power OFF | Press 6H the remote control to cancel the power off process, once this confirmation pops up. |
Light
| LIGHT | |
| RESET MODE | |
| POTATO MODE | |
| INPUT MODE | |
| INPUT MODE | |
| INPUT MODE |
| To illuminate remote control key pad backlight. | |
| Light ON, no action | Pressthe remote control to illuminate the remote control keypad backlight. Backlight will automatically switch off after 10 seconds, if no other key is pressed. |
| Light ON, action | Press any remote control key will illuminate the keypad backlight and cells up the function at the same time.Backlight will automatically switch off after 10 seconds, if no other key is pressed. |
Lens Shift
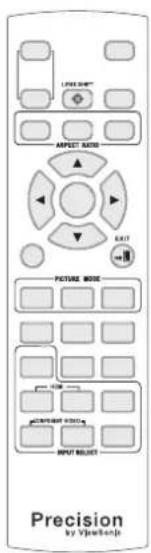
Motorized vertical and horizontal lens shift for positioning display image without physically moving the unit.
Press on the remote control to evoke lens shift adjustment function.
Press on the remote control to leave the adjusting section.

Press ▲ on the remote control/top panel to move display image up.
Press ▼ on the remote control/top panel to move display image down.
Press ▶ on the remote control/top panel to move display image right.
Press ◀ on the remote control/top panel to move display image left.
Zoom and Focus
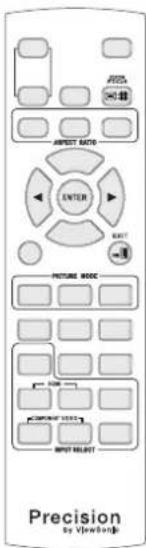
Motorized zoom and focus adjust.
Press On the remote control to browse through zoom and focus adjust options.
Press ENTER on the remote control to confirm the selection.
Press on the remote control to leave the adjusting section.

Enlarge/minimise the image optically.
Press ▶ on the remote control/top panel to Zoom in. Press ◀ on the remote control/top panel to Zoom out.

Adjust the clarity and sharpness of the image optically. Press ▶ and ◀ on the remote control/top panel to adjust the focus.
Aspect Ratio
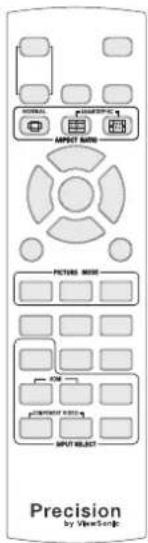
| Selections of screen proportion. | |
| Press on the remote control to browse through available aspect ratio options. | |
| Anamorphic 1: Use in conjunction of 16:9 to 2.35:1 conversion lens. Morphing a 2.35:1 film content from a 16:9 letter box to a full screen 2.35:1 output. | |
| Anamorphic 2: Use in conjunction of 16:9 to 2.35:1 conversion lens. Morphing a 4:3 or 16:9 film contents from a 16:9 format to a 2.35:1 format. | |
Note: Requires use of optional .Anamorphic lens. ViewSonic does not provide this optional lens. For more details on where to purchase the Anamorphic 2.35:1 lens, please visit www.viewsonic.com
Picture Modes
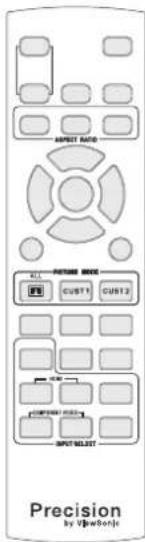
Pres: 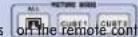 rol to browse through avail-able rol to browse through avail-able   All: I All: I  al, Vivid, Cinema and Professional picture mode.CUS al, Vivid, Cinema and Professional picture mode.CUS  l setting 1.CUS l setting 1.CUS  l setting 2. l setting 2. | |
 | Normal: Image is presented in original content. All special enhancement features are off. |
 | Vivid: High contrast, richer color and detail enhancement. Attention: Extended viewing may cause fatigue to the eyes. |
 | Cinema: Emphasis on enhancements of skin tone performance and cinematic effect. |
 | Professional: Emphasis on grayscale accuracy and color performance. |
 | Cust 1: Recall customized settings 1. |
 | Cust 2: Recall customized settings 2. |
Color Temperature
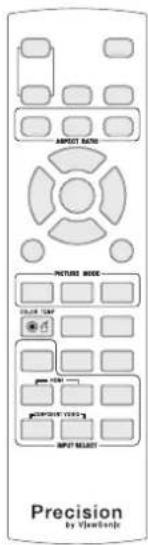
| Selections of color shading. COLOR TEMP Press On the remote control to browse through selections of color temperature. | |
| [CHBZ] | 14,000K: Deep blue sky color shade. |
 | 11,000K: Light blue sky color shade. |
 | 8,500K: Balanced color shade. |
 | 6,500K: Daylight color, slightly reddish shade. |
 | 5,000K: Dusky sky alike color shade. |
 | User: Recall customized color temperature settings in user memory |
PCS (Precision Color System)
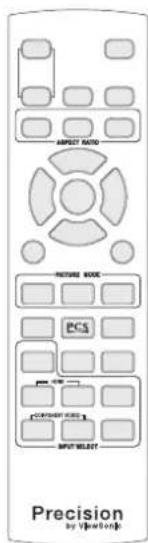
PCS consists of advanced color enhancement functions such as flesh tone correction, edge enhancement, gamma correction and 3D color management. Preset or customized settings can be selected in the OSD menu, PCS Settings section (page 33).
Press On the remote control to turn on or off the PCS feature.



HQV
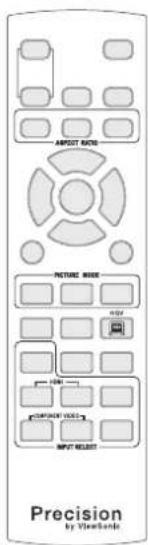
HQV (Hollywood Quality Video) consists of image enhancement functions such as advanced motion, adaptive noise reduction, advanced film mode detection and advanced details enhancement. User HQV settings can be defined in Advanced Operation section (page 26).
Press on the remote control to turn on or off the HQV feature.

(Green)
HQV ON.

(Red)
HQV OFF.
Black Level
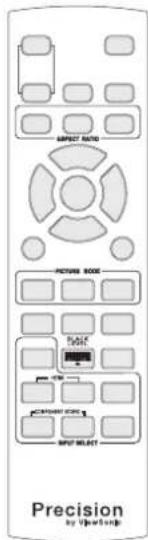
Black level defines the brightness levels at the darkest visual image point. Higher black level removes color noise at darker grayscales and increase contrast level. However, darker images will be less visible if black level is set too high.Pres  a remote control to browse through available black levels a remote control to browse through available black levels | |
| N | Normal: Standard NTSC black level. Contents below standard black level will not be visible. |
 | Low: Portion of color noise reduced at darker grayscales. |
 | Mid: Majority of color noise reduced at darker grayscales. |
 | High: All color noise reduced at darker grayscales. |
 | Blacker than black: Black level is defined at 0 IRE. Image details that are darker than standard black level is visible, resulting in brighter images. Make sure the source content's (such as a DVD player) black level filter is turned off. |
Daylight Sensor
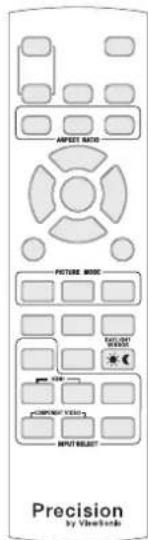
| Enable daylight sensor to automatically adjust the best viewing condition based on ambient light condition. Press On the remote control to turn on or off the daylight sensor. | |
 | Daylight Sensor AUTO: Automatically adjust for best viewing setting based on room ambient light condition. |
 | MANUAL: Recall customized setting in user memory. |
 | Daylight Sensor OFF: All settings will remain constant. |
Input Select
| APPROT MATS | |
| FIGURE MODE | |
| ALL | |
| ONION TEST | |
| NEXT RESET |
| Select connected input sources.Press [IMAGE] on the remote control will show source status,press twice or more to browse through available input sources. | |
| HDMI: High Definition Multimedia Interface. Combined interface (multiple signals) for digital video and audio. Support up to 1080p. Video performance is constant and less dependence on cable quality in short distance transmission. | |
| Component Video: Analog/digital video interface transmits via three separate signals - Y, Cb/Pb, Cr/Pr. Support up to 1080p. Video performance relies highly on cable quality when it is in analog format. | |
| Composite Video: All video signals are combined into one signal line. Lowest video performance quality compared to other input formats. | |
| S-Video: Separate video. Video signals are transmitted via two lines - Y luminance and C chrominance. A step up in video performance compared to composite video. | |
| PC: Personal Computer. 15 pins D-sub analog computer VGA signal input. | |
Direct Input Keys
| Direct input source switching without browsing through entire input selections.Press once on the remote control will show source status, press twice for direct input access. | |
 | HDMI 1: Direct access key for HDMI 1 input.HDMI 2: Direct access key for HDMI 2 input. |
 | Component Video 1: Direct access key for Component Video 1.Component Video 2: Direct access key for Component Video 2. |
 | Composite Video and S-Video selection. Browse through Composite Video and S-Video inputs. |
 | PC: Direct access key for PC input. |
Chapter 4: ADVANCED OPERATION (OSD Menu)
1. Main Menu
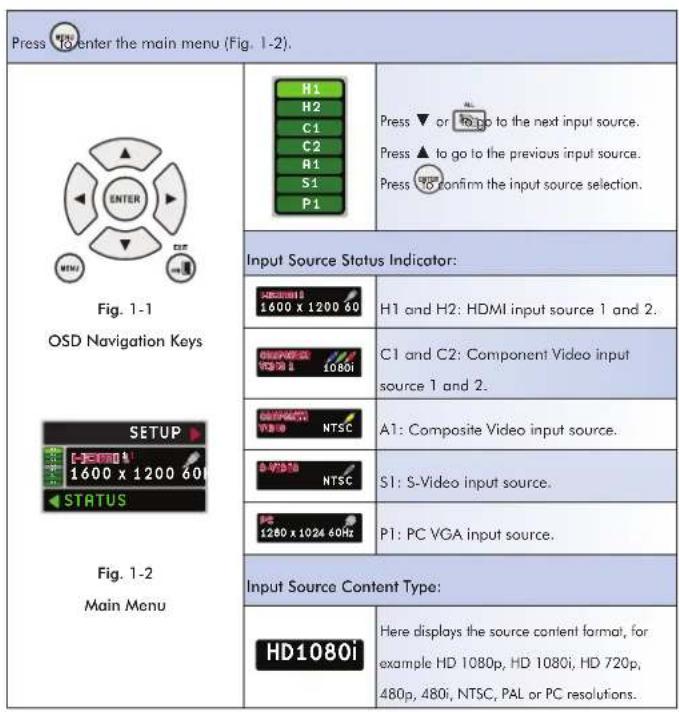
2. Setup Menu
| From the Main Menu, press ▶ to enter the Setup Menu (Fig. 2). Use ▶, ▶, ▲ and ▼ to navigate the Setup Menu Selections: Press To confirm the Sub-Menu selection. Press To go to previous menu. Double click to exit OSD setting. | ||
| FIG. 2 Setup Menu | PICTURE | Picture adjustment Sub-Menu. |
| ADVANCED | Advanced features adjustment Sub- Menu. | |
| CONFIG | System Configuration Sub-Menu. | |
| MEMORY SETTINGS | Memory Settings Sub-Menu. | |
| PCS PRECISION COLOR SYSTEM | ||
| PCS Settings Sub-Menu | ||
2-1. Picture Sub-Menu
| Use ▲ and ▼ to navigate the Picture Sub-Menu (Fig. 2-1) Selections:PressTo confirm the Sub-Menu selection.PressTo go to previous menu. | ||
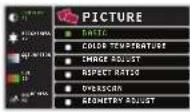 Fig. 2-1Picture Sub-Menu Fig. 2-1Picture Sub-Menu | BASIC | Selections of Contrast, Brightness,Saturation, Hue and Sharpness. |
| COLORTEMPERATURE | Selections of Color Temperatures. | |
| IMAGE ADJUST | Selections of PC timing adjustments. | |
| ASPECT RATIO | Selections of Screen aspects. | |
| OVERSCAN | Overscan selections and manualadjustments. | |
| GEOMETRYADJUST | Selections of V. Keystone, H. Keystone,Rotation & Auto Keystone On & Off. | |
2-1-1 Basic Sub-Menu
| Use ▲ and ▼ to navigate the Basic Sub-Menu Selections. Press To confirm the Sub-Menu selection. Press To go to previous menu. | |
| Fig. 2-1-1 Basic Sub-Menu | CONTRAST 50 Contrast: Adjust contrast level. Press ▶ to increase the gain; press ◀ to decrease the gain. BRIGHTNESS 50 Brightness: Adjust brightness level. Press ▶ to increase the gain; press ◀ to decrease the gain. SATURATION 50 Saturation: Adjust color saturation level. Press ▶ to increase the saturation; press ◀ to decrease the saturation. HUE 50 Hue: Adjust green and red balance. Press ▶ to increase green; press ◀ to increase the red. SHARPNESS 50 Sharpness: Adjust the finest of image. Press ▶ to sharpen the image; press ◀ to soften the image. |
2-1-2 Color Temperature Sub-Menu
| Use ▲ and ▼ to navigate the Color Temperature Sub-Menu Selections. Press To confirm the Sub-Menu selection. Press to go to previous menu. | ||
| Fig. 2-1-2 Color Temperature Sub-Menu | Cool 2 14,000K color temperature. | |
| Cool 1 11,000K color temperature. | ||
| Normal 8,500K color temperature. | ||
| Warm 1 6,500K color temperature. | ||
| Warm 2 5,000K color temperature. | ||
| User | Customized color temperature (See page 37 for details see user color setting.). | |
2-1-3 Image Adjust Sub-Menu
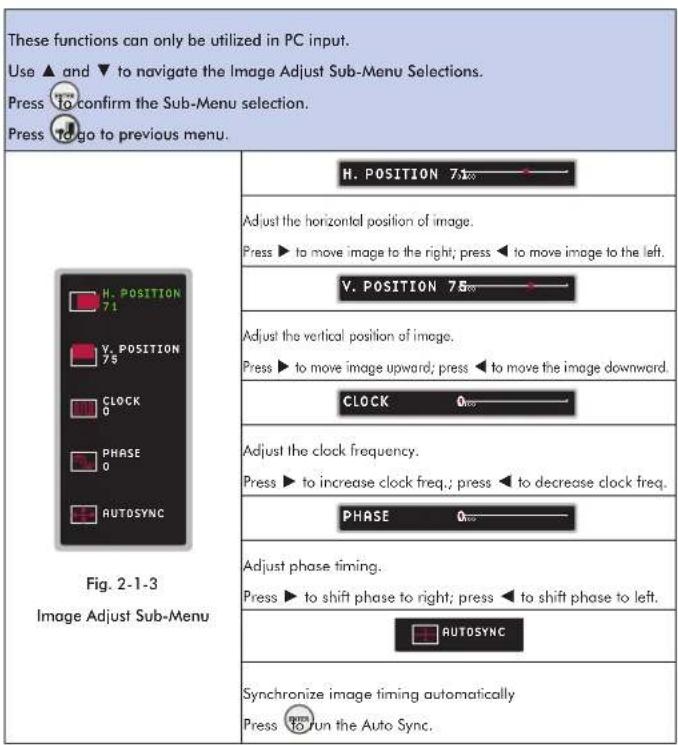
2-1-4 Aspect Ratio
| These functions can only be utilized in video inputs.Use ▲ and ▼ to navigate the Image Adjust Sub-Menu Selections.Press [to] confirm the Sub-Menu selection.Press [to] go to previous menu. | ||
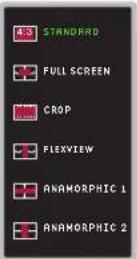 Fig. 2-1-4Aspect Ratio Sub-Menu Fig. 2-1-4Aspect Ratio Sub-Menu | Standard Original content aspect ratio | |
| Full Screen Full screen by linear stretching. | ||
| Crop Full screen by cropping. | ||
| Flexview Full screen by non-linear stretching. | ||
| Anamorphic 1 | Anamorphic 1: Use in conjunction of 16:9 to 2.35:1 conversion lens. Morphing a 2.35:1 film content from a 16:9 letter box to a full screen 2.35:1 output. | |
| Anamorphic 2 | Anamorphic 2: Use in conjunction of 16:9 to 2.35:1 conversion lens. Morphing a 4:3 or 16:9 film contents from a 16:9 format to a 2.35:1 format. | |
Note: Requires use of optional .Anamorphic lens. ViewSonic does not provide this optional lens. For more details on where to purchase the Anamorphic 2.35:1 lens, please visit www.viewsonic.com
2-1-5 Overscan
| Overscan controls portions of image being pushed out of the display area.Use ▲ and ▼ to navigate the Overscan Sub-Menu Selections.Pressto confirm the Sub-Menu selection.Pressto go to previous menu. | ||
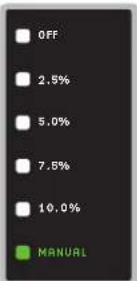 Fig. 2-1-5Overscan Sub-Menu Fig. 2-1-5Overscan Sub-Menu | OFF No overscan. | |
| 2.5% 2.5% overscan. | ||
| 5.0% 5.0% overscan. | ||
| 7.5% 7.5% overscan. | ||
| 10.0% 10.0% overscan. | ||
| MANUAL | ||
| Press◀ and ▶ to navigate the Manual Overscan selections.Press ▲ and ▼ to set overscan portions | ||
Note: 1080i and 1080p maximum overscan is 7.5%
2-1-6 Geometry Adjust
Adjust image geometry distortion caused by improper placement of projector electronically. Note: For best video performance, it is highly recommended to correct image distortion by physically correct the placement of the unit.
Use ▲ and ▼ to navigate the Geometry Adjust Sub-Menu Selections.
Press to confirm the Sub-Menu selection.
Press to go to previous menu.
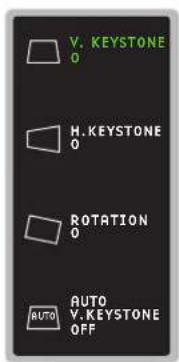
Fig. 1-6
Geometry Adjust Sub-Menu

Press ◀ and ▶ to set figures of vertical keystone

Press ◀ and ▶ to set figures of horizontal keystone

Press ◀ and ▶ to set figures of rotation
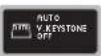
Press ◀ and ▶ to toggle auto vertical keystone on or off.
2-2. Advanced Sub-Menu
| Advanced options for image quality enhancement.Use ▲ and ▼ to navigate the Advanced features (Fig. 2-2) Selections:Press ☑ confirm the Sub-Menu selection.Press ☑ go to previous menu. | ||
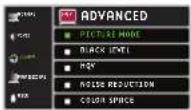 Fig. 2-2Advanced Sub-Menu Fig. 2-2Advanced Sub-Menu | PICTURE MODE | Selections of Normal, Vivid, Cinema,Professional and User image modes. |
| BLACK LEVEL | Selections of Normal, Low, Mid, High andBlacker than Black black-level. | |
| HQV | Selections of HQV Detail Enhancement,Advanced Film Mode detection, LTI andCTI. | |
| NOISEREDUCTION | Selections of Motion adaptive HQV NoiseReduction, TNR, MNR and BAR. | |
| COLOR SPACE | Selections of RGB, YCbCr, YPbPr and Autocolor space. | |
Fig. 2-2
Advanced Sub-Menu
2-2-1 Picture Mode
ViewSonic customized presets for various viewing pleasures.
Use ▲ and ▼ to navigate the image Mode (Fig. 2-2-1) Selections.
Press to confirm the Sub-Menu selection.
Press to go to previous menu.
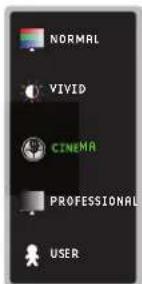
Fig. 2-2-1
Image Mode

NORMAL

VIVID

CINEMR

PROFESSIONA

USER
Normal: Image is presented in original content. All special enhancement features are off.
Vivid: High contrast, richer color and detailed enhancement. Attention: Long time viewing may cause fatigue to the eyes.
Cinema: Emphasis on enhancements of skin tone performance and cinematic effect.
Professional: Emphasis on grayscale and color accuracy. Easier viewing condition with tradeoff to contrast and color vividness.
User: Recall customized settings in user memory.
2-2-2 Black Level
Black Level selections for visual brightness levels of the virtual pure black point in video content.
Use ▲ and ▼ to navigate the Black Level Sub-Menu (Fig. 2-2-2). Selections:
Press to confirm the Sub-Menu selection.
Press to go to previous menu.
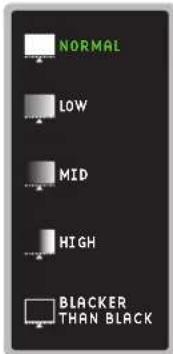
Fig. 2-2-2
Black Level Sub-Menu


Normal: Standard NTSC black level. Contents below standard black level will not be visible.
Low: Portion of color noises reduced at darker grayscales.
Mid: Majority of color noises reduced at darker grayscales.
High: All color noises reduced at darker grayscales.
Blacker than black: Black level is defined at 0 IRE. Image details that are darker than standard black level is visible, resulting in brighter images. Make sure the source content's (such as a DVD player) black level filter is turned off.
2-2-3 HQV
Selections of HQV (Hollywood Quality Video) for further details enhancements, film detecting modes, and luminance level adjustments.
Use ▲ and ▼ to navigate the Basic Sub-Menu (Fig. 2-2-3) Selections.
Press 10 confirm the Sub-Menu selection.
Press to go to previous menu.
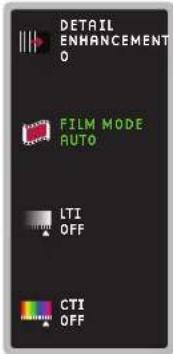
Fig. 2-2-3
HQV Sub-Menu

Detail Enhancement: Enrich details in lower resolution video contents (HD Simulation for SD/ED video.).
Press ▶ to increase details; press ◀ to lessen details,

Auto: Automatically switch between video and film modes of the video content.
Video: Automatically de-Interface video signals to achieve optimum viewing quality.
Film: Automatically detects fitting cadence of film for optimum viewing quality.
Press ◀ and ▶ to select film mode.
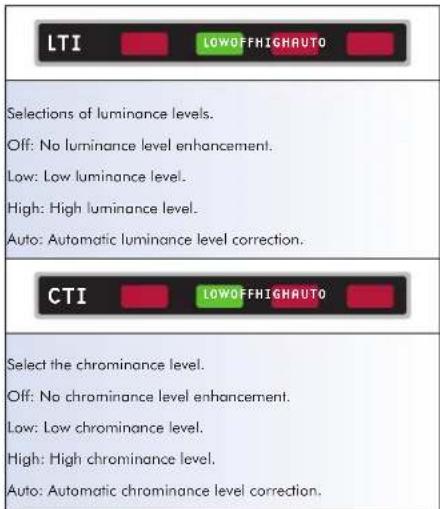
2-2-4 Noise Reduction
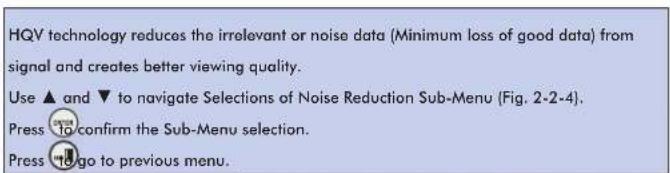
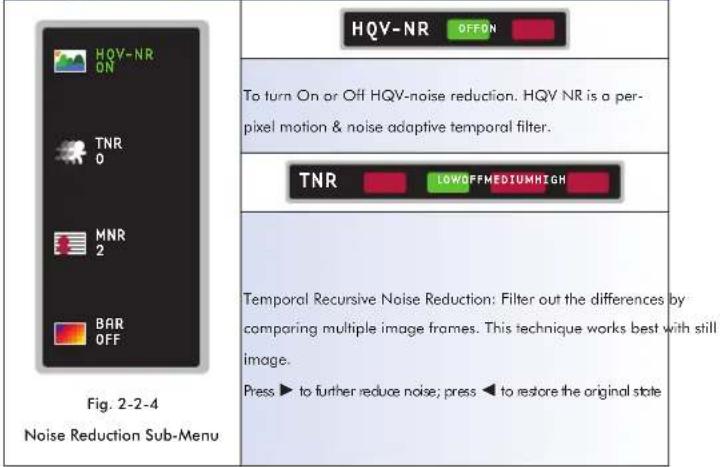
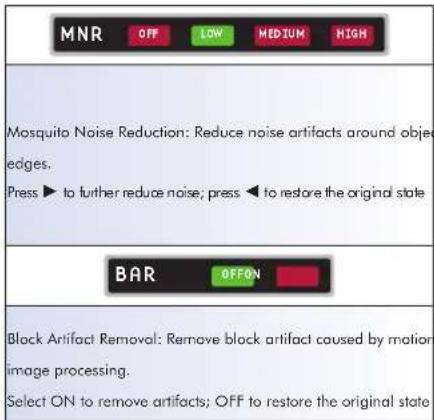
2-2-5 Color Space
| Select the correct color spacing for the given input video format. Wrong selection may result in abnormal color performance. Selections.Use ▲ and ▼ to navigate Selections of Color Space Sub-Menu (Fig. 2-2-5)Press [IMAGE]to confirm the Sub-Menu selection.Press [IMAGE]to go to previous menu. | ||
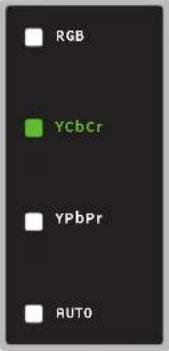 Fig. 2-2-5Color Space Sub-Menu Fig. 2-2-5Color Space Sub-Menu |  | For RGB video format. No subsampling.All information is accurately transmitted. |
 | For component video YCbCr video format.Some subsampling to the color informationresulting in reduced transmission with littleimpact on what is perceived by the viewer.Used in most higher-end digital formats. | |
 | For component video YPbPr video format.Best color sampling ratio, used as anintermediate format in high-end filmscanners and cinematic production. | |
 | Automatically choose the mostsuitable chroma subsampling scheme.Recommended !! | |
2-3 Config Sub-Menu
| Configuration options for basic Projector settingsUse ▲ and ▼ to navigate the Config Sub-Menu (Fig. 2-3) Selections.Pressto confirm the Sub-Menu selection.Pressto go to previous menu. | ||
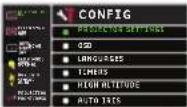 Fig. 2-3Config Sub-MenuProjection Front / Desk Fig. 2-3Config Sub-MenuProjection Front / Desk | PROJECTOR SETTINGS | Selections of Auto Source, Fixed Sync, Auto Shutdown, Lamp mode, Daylight Sensor and Projection. |
| OSD | Selections of OSD Location, Time out and Transparency. | |
| LANGUAGES | Selections of English, German, French, Spanish, Portuguese, Italian, Russian, Swedish, Finnish, Simplified Chinese & Traditional Chinese. | |
| TIMERS | Selections of Lamp Timer Reset, Filter Timer Reset & System Time. | |
| HIGH ALTITUDE | Selections of fan speed for operating at High altitude or Normal environment. | |
| AUTO IRIS | Selections of automatically adjusting the light output for better contrast performance and feature off. | |
2-3-1 Projector Settings
Projector Setting selections
Use ▲ and ▼ to navigate Selections of Projector Settings Sub-Menu (Fig. 2-3-1)
Press to confirm the Sub-Menu selection.
Press to go to previous menu.
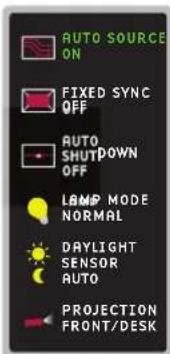
Fig. 2-3-1
Projector Settings Sub-Menu

Automatically select the next active input source Select ON to enable the feature; OFF to disable the feature

Use default timing data stored in the projector instead of consistent auto sync sampling. Auto sync will cause incorrect image sizing if the on-screen image has black border. The problem is further complicated if the source content's screen resolution is not consistent.
Select ON to enable the feature; OFF to disable the feature

Automatically shut down the projector after standby 5 / 15 / 30 / 45 / 60 minutes or feature off.

Select lamp power efficiency mode
Normal: Standard mode, maximum lumen and power output Eco: Reduced power, less fan noise, and lamp life can be extended.

Adjust the viewing condition based on ambient light environment OFF: Disable the feature
Auto: Enable the feature and adjust automatically Manual: Enable the feature and adjust manually

Manually choose the light rate.
Low: Dim environment
Middle: Average light environment
High: Bright environment
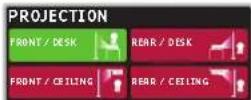
Projection method selections
Use ▲ and ▼ to choose the right projection method.
2-3-2 OSD
| OSD location Use ▲ and ▼ to navigate Selections of Projector Settings Sub-Menu (Fig. 2-3-1) Press ▲to confirm the Sub-Menu selection. Press ▲go to previous menu. | |
| LOCATION TOP LEFT TIMEOUT TRANSPARENCY TYPE 1 Fig. 2-3-2 OSD Sub-Menu | LOCATION TOP RIGHTTOP CENTER BOTTOM LEFT BOTTOM RIGHT |
| OSD location on the projected screen Press ▲▶▲▼ to navigate and select the best position for OSD location. | |
| TIMEOUT 30 CLOCK | |
| OSD timeout timing (seconds) setting Press ▲ to expand the timeout timing or ▲ to decrease | |
| TRANSPARENCY TYPE 1 TYPE 2 TYPE 3 | |
| OSD Transparency selections Press ▲ or ▲ to select various transparency settings. | |
2-3-3 Languages
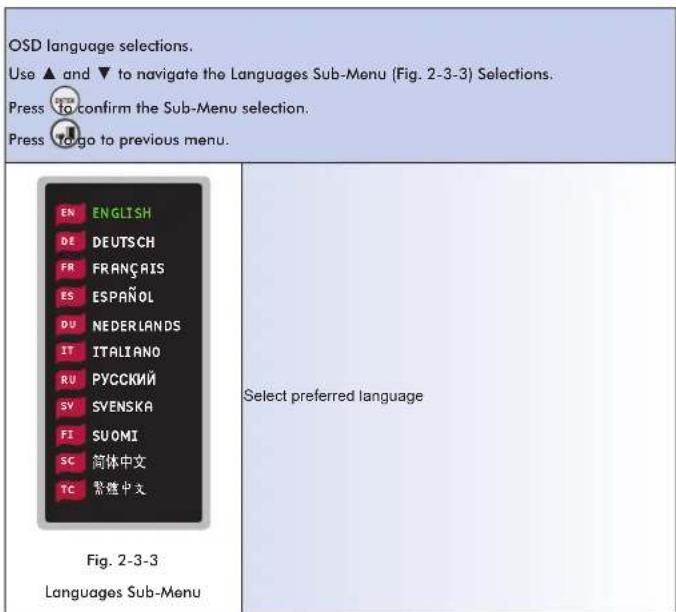
2-3-4 Timers
Timer settings
Use ▲ and ▼ to navigate the Timers Sub-Menu (Fig. 2-3-4) Selections.
Press to confirm the Sub-Menu selection.
Press "to go to previous menu.
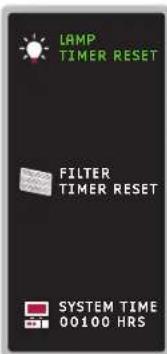
Fig. 2-3-4
Timers Sub-Menu

Reset Lamp timer. Reset Lamp timer after each replacement of new lamp.
This timer is for user's own tracking purpose; the lamp warranty time will not be renewed by this act. (See section ??? for lamp warranty details.)

Reset filter Timer. Reset filter timer after each cleaning or replacement of new filter.
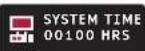
Total Projector operating time (Operating timer cannot be changed by user).
2-3-5 High Altitude
Using Projector in high altitude. Projector fan spins faster to accommodate the low-atmospheric pressure environment.
Use ▲ and ▼ to navigate Selections of High Altitude Sub-Menu (Fig. 2-3-5).
Press to confirm the Sub-Menu selection.
Press to go to previous menu.
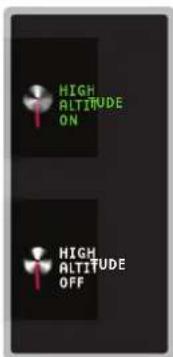
Fig. 2-3-5
High Altitude Sub-Menu
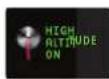
ON: Projector is used in high altitude. High fan speed mode.
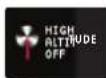
OFF: Projector is not used in high altitude. Normal fan speed mode.
2-3-6 Auto Iris
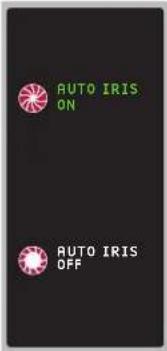
Automatically control the portion of projected light to increase contrast and transition speed Use ▲ and ▼ to navigate Selections of Auto Iris Sub-Menu (Fig. 2-3-6).
Press ☐ to confirm the Sub-Menu selection. Press ☐ go to previous menu.
| Fig. 2-3-6 Auto Iris Sub-Menu | Enable Auto Iris feature | |
| Disable Auto Iris feature |
2-4 PCS Settings Sub-Menu
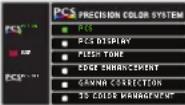
| PCS Setting selectionsUse ▲ and ▼ to navigate Selections of PCS Setting Sub-Menu (Fig. 2-4)PressTo confirm the Sub-Menu selection.PressYogo to previous menu. | ||
| PCS PASCENSION COLOR SYSTEMPCS DISPLAYFLESH TONEEDGE ENHANCEMENTGROUND SELECTIONTO COLOR MANAGEMENT | PCS | Precision Color System |
| PCS DISPLAY | Split screen for Precision Color System comparison | |
| FLESH TONE Skin tone correction | ||
| EDGEENHANCEMENT | Emphasis on image edges | |
| GAMMACORRECTION | Personalized gamma correction. | |
| 3D COLORMANAGEMENT | Advanced colors enhancement management. | |
2-4-1 PCS
PCS image management
Use ▲ and ▼ to navigate Selections of PCS Sub-Menu (Fig. 2-4-1)
Press to confirm the Sub-Menu selection.
Press "to go to previous menu.
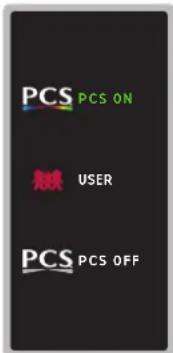
Fig. 2-4-1
PCS Settings Sub-Menu
PCS PCS ON
Enable all default PCS settings

Customized PCS settings.

Disable all PCS enhancement settings
2-4-2 PCS Display
PCS display selections:
Use ▲ and ▼ to navigate Selections of PCS display Sub-Menu (Fig. 2-4-2)
Press to confirm the Sub-Menu selection.
Press to go to previous menu.
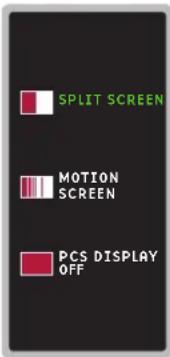
Fig. 2-4-2
PCS display Sub-Menu

Split screen
Left half - PCS enabled screen
Right half - PCS disabled screen
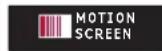
Motion screen
Left portion of the bar - PCS
enabled screen
Right portion of the bar - PCS
disabled screen
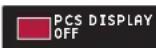
PCS display off
PCS enabled in full screen
2-4-3 Flesh tone
Skin tone correction
Use ▲ and ▼ to navigate Selections of Flesh tone Sub-Menu (Fig. 2-4-3) Selections.
Press 10 confirm the Sub-Menu selection.
Press "to go to previous menu."
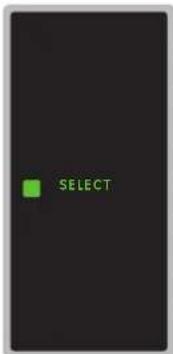
Fig. 2-4-3
Flesh tone Sub-Menu
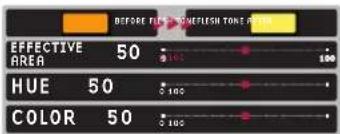
Effective Area: The affected color range adjustment.
Press ▶ to increase range; press ◀ to decrease range.
Hue: Gradation adjustment of the output color
Press ▶ or ◀ to adjust the selected color
Color: Saturation adjustment of the output color
Color - Press ▶ for richer color or ◀ for less saturated color
2-4-4 Edge Enhancement
Adjustment of image outline edge thickness
Use ▲ and ▼ to navigate Selections of Edge Enhancement Sub-Menu (Fig. 2-4-4).
Press to confirm the Sub-Menu selection.
Press to go to previous menu.
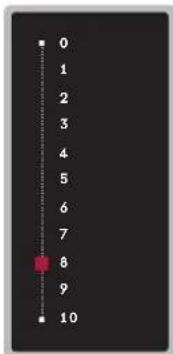
Fig. 2-4-4
Edge Enhancement Sub-Menu
Press ▲ to increase outline thickness or ▼ or to decrease outline thickness.
2-4-5 Gamma Correction
Gamma selections and custom adjustments.
Use ▲ and ▼ to navigate Selections of Gamma Correction Sub-Menu (Fig. 2-4-5).
Press to confirm the Sub-Menu selection.
Press to go to previous menu.
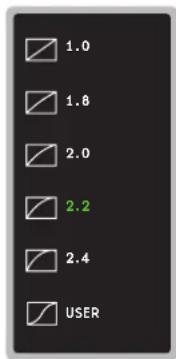
Fig. 2-4-5
Gamma Correction Sub-Menu
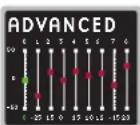
Advanced option: 9 segments of gamma correction for customization.
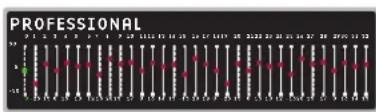
Professional option: 33 segments of gamma correction for customization.
2-4-6 3D Color Management
Advanced color management. Isolated color correction only affects the selected color.
Use ▲ and ▼ to navigate Selections of 3D Color Management Sub-Menu (Fig. 2-4-6).
Press to confirm the Sub-Menu selection.
Press to go to previous menu.
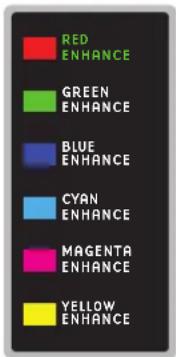
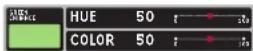
Hue - Press ▶ for more yellowish or ◀ for magenta tone
Color - Press ▶ for richer color or ◀ for less saturated color
Green color Enhancement
Hue - Press ▶ for a more cyanic or ◀ for yellowish tone
Color - Press ▶ for richer color or ◀ for less saturated color
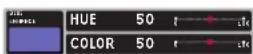
Blue color Enhancement
Hue – Press ▶ for more magenta or ◀ for cyanic tone
Color - Press ▶ for richer color or ◀ for less saturated color
2-5 Memory Settings Sub-Menu
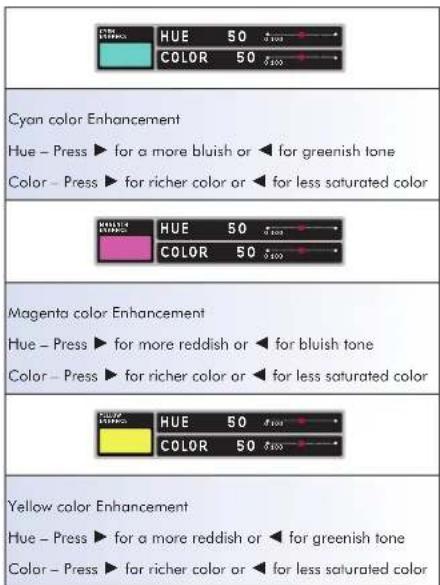
| Use ▲ and ▼ to navigate the Memory Settings (Fig. 2-5) Selections.PressTo confirm the Sub-Menu selection.PressTo go to previous menu. | ||
| Figure 2-5Memory Settings Sub-Menu | CUSTOM COLOR TEMPERATURE | Customized color temperature settings |
| SAVE | 2 slots for saving changed items. All changes should be saved in memory for future use. | |
| LOAD | 2 slots for loading changed items. Load previously saved customized data. All customized data can be utilized under "User" section of each adjustment. | |
| RESET ALL | Resetting all ViewSonic defaults.Customized Data will not be overwritten. It can still be recalled by "Load" data option. | |
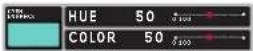
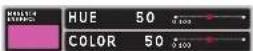
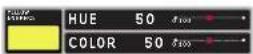
2-5-1 Custom Color Temperature
Customize color temperature adjustment. This defines color temperature in white balance and offset colors.
Use ▲ and ▼ to navigate through Custom Color Temperature (Fig. 2-5-1) Selections.
Press to confirm the Sub-Menu selection.
Press to go to previous menu.
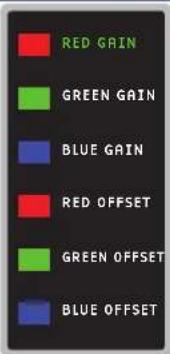
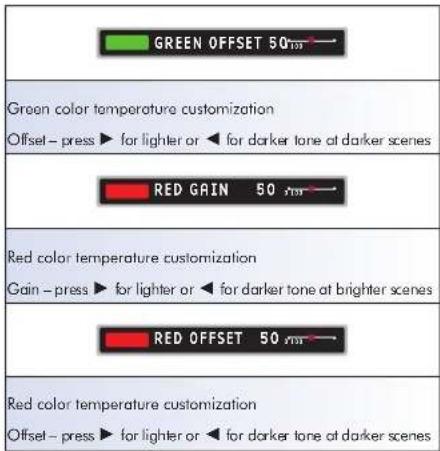
Blue color temperature customization
Gain - press ▶ for lighter or ◀ for darker tone at brighter scenes

Blue color temperature customization
Offset - press ▶ for lighter or ◀ for darker tone at darker scenes

Green color temperature customization
Gain - press ▶ for lighter or ◀ for darker tone at brighter scenes
2-5-2 Save
Saving Changed Items
Use ▲ and ▼ to navigate the Saving (Fig. 2-5-2) Selections.
Press to confirm the Sub-Menu selection.
Press to go to previous menu.
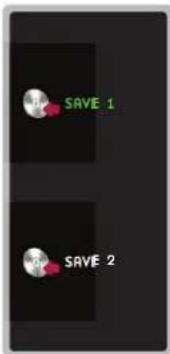
Fig. 2-5-2
Save Sub-Menu
SAVE 1 YES NO
Yes - confirm. No - cancel
2-5-3 Load
Loading changed items
Use ▲ and ▼ to navigate the Loading (Fig. 2-5-3) Selections.
Press to confirm the Sub-Menu selection.
Press to go to previous menu.
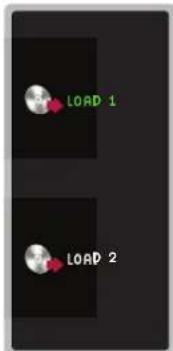
Fig. 2-5-3
Load Sub-Menu
LOAD 1 YES NO
Yes - confirm. No - cancel
2-5-4 Reset
Resets of ViewSonic defaults
Use ▲ and ▼ to navigate the Reset (Fig. 2-5-4) Selections.
Press to confirm the Sub-Menu selection.
Press to go to previous menu.
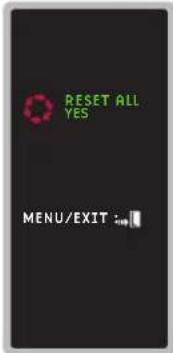
Fig. 2-5-4
Reset Sub-Menu
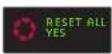
Yes - confirm.
2-5-5 System Status Screen
Press on the remote control to call up the main menu screen (Fig. 2-5-5-1).
Press ◀ on the remote control/side panel to bring up the system status bar (Fig. 2-5-5-1).
The status screen will remain active until it is closed by user.
Press ◀ on the remote control/side panel again to close the system status bar.
Press on the remote control to close the main menu.
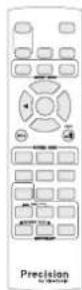
Fig. 2-5-5-1


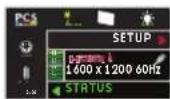
Fig. 2-5-5-2
Status Bar
Lomp timer: Can be reset by user (Refer to
timer reset in section 2-3-4). Lamp usage time
counter.
0 - 2500hrs: Normal status.
2501 - 3000hrs: Near lamp life time. Place
new order of lamp.
3001hrs or more: Over lamp life time. Please
replace with new lamp.


Filter status, display if filter needs to be
cleaned/changed
 | Daylight sensor status: Indication if daylight sensor is active.Auto: Daylight sensor is in automatic mode.Manual: Manually select daylight sensor mode.Off: Daylight sensor disabled. |
 | |
 | |
 | Precision Color System status, display if PCS is in useOn - ViewSonic defined PCS enabledOff - PCS disabledUser - User define PCS settings. |
 | |
| [BTX6] |
 | Picture mode: Indication of current picture mode selection.Picture mode include: Normal, Vivid,Cinema, Professional and User. |
 | |
 | |
 | |
 | |
| System temperature status, display if system is operating under ideal temperature: Normal – System under ideal operating temperature. | |
| Caution – System is above normal but below critical. Recommend to check setup environment to return operation temperature to normal. Warning – System temperature above recommend level, please shut down the projector and let it cools down to room temperature before further usage. If temperature is above critical level, system will automatically shut down. | |
| F/W version |
Chapter 5: Making and Recalling the User Adjustments
Making Adjustments
1-1. User Picture Mode Adjustments
User Picture Mode includes the following adjustments:
Under "Picture" sub-menu in the OSD
- Contrast - Brightness - Saturation - Hue - Sharpness
Under "Advanced" sub-menu in the OSD
- Black Level - Detail Enhancement
Perform adjustments:
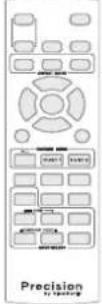 Fig. 1-1 User Picture Mode Select Fig. 1-1 User Picture Mode Select | CUST1 CUST2 | Press either "CUST 1" or "CUST 2" button on the remote control. | |
| 1 2 | Icon of the selected one will be displayed on the screen. | ||
 | 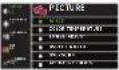 | Make the necessary adjustments in "Picture" and "Advanced" sub-menus in the OSD. | |
 |  | Select "Save 1" to save the settings to memory location 1 ("Save 2" to memory location 2.). Note: Only Picture Made data will be saved. | |
 | Select "Yes" to confirm and "No" to cancel. | ||
1-2. User Color Temperature Adjustments
User Color Temperature includes the following adjustments:
- Red Gain • Green Gain • Blue Gain • Red Offset • Green Offset • Blue Offset
Perform the adjustments:
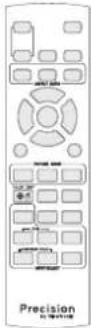 Fig. 1-2 Color Temperature Select Fig. 1-2 Color Temperature Select | COLOR TEMP | Press "Color Temp" button on the remote control. |
 | Browse through the Color Temperature Selections and choose "User Color Temperature" (Icon of multi-color "Users" will be displayed on the screen). | |
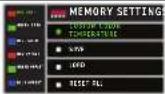 | Make the necessary adjustments in "Custom Color Temperature" sub-menu in the OSD. | |
 | |  | Select "Save 1" to save the settings to memory location 1 ("Save 2" to memory location 2.). Note: Only color temperature data will be saved. | |
 | Select "Yes" to confirm and "No" to cancel. |
1-3. User PCS Adjustments
User PCS includes the following adjustments:
- Flesh Tone - Edge Enhancement - Gamma Correction - 3D Color Management
Perform adjustments:
| Fig. 1-3 Color TemperatureSelect | 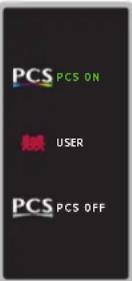 | Go to PCS sub-menu andselect "User" in the OSD.Note: When PCS "User"mode is selected, Flesh Tone,Edge Enhancement, GammaCorrection and 3D ColorManagement options will beopened for adjustments. |
 | Make the necessaryadjustments in "Flesh Tone","Edge Enhancement","Gamma Correction" and "3DColor Management" sub-menus in the OSD.All adjustments mode will besaved immediately to PCS usermemory. |
2-1 Recalling the User Picture Mode & Color Temperature
Perform adjustments:
| User Picture Mode | ||
| Press "Menu" button on the remote control. | ||
| Go to Advanced sub-menu's Picture Mode Selections and choose "User Picture Mode" (Fig. 2-1-2). | ||
| User Color Temperature | ||
| Press "Color Temp" button on the remote control. | ||
| Browse through the Color Temperature Selections and choose "User Color Temperature" (Icon of multi-color "Users" will be displayed on the screen). Note: User Color Temperature can also be selected from the OSD. | ||
| Load Memory | ||
| Go to "Memory Settings" sub-menu in the OSD. Select the "Load" option. | ||
| Select "Load 1" to load the settings from memory location 1 to User Picture Mode and User Color Temperature ("Load 2" from memory location 2.). | ||
| Select "Yes" to confirm and "No" to cancel. | ||
2-2 Recalling the User PCS Adjustments
Perform adjustments:
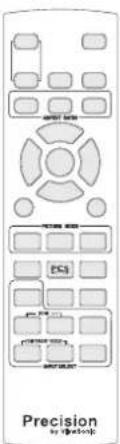 Fig. 2-2 PCS Select Fig. 2-2 PCS Select |  | Press the “PCS” button on the remote control. |
 | Browse through the PCS Selections and choose "User PCS" mode (Icon of single color "Users" will be displayed on the screen.).Note: User PCS can also be selected from the OSD. |
2-3 Recalling Both User Picture Mode and User PCS (Custom 1 & 2)
Pro8100 offers two quick access keys (Custom 1 and 2) on the remote control. It provides an easy execution for recalling custom-setting combinations.
Pressing "Cust 1" or "Cust 2" to:
- "Load 1" if "Cust 1" is pressed ("Load 2" if "Cust 2" is pressed.).
- Select "User" Picture Mode.
- Select "User" PCS Mode.
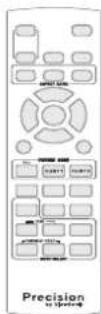
Fig. 2-3 Custom Setting Select

Press "CUST 1" button on the remote control to select custom setting 1 ("CUST 2" to custom setting 2.). Note: Color Temperature data stored in memory location 1 or 2 will also be recalled to User Color Temperature. Pressing Custom 1 or 2 buttons doesn't mean the User Color Temperature will be selected automatically. Follow the instruction for User Color Temperature recalling in section 2-1 (page 45) for User Color Temperature.
Appendix
Maintenance
The projector needs proper maintenance. You should keep the lens clean as dust, dirt or spots will project on the screen and diminish image quality. If any other parts need replacing, contact your dealer or qualified service personnel. When cleaning any part of the projector, always switch off and unplug the projector first.
Warning:
Never open any of the covers on the projector. Dangerous electrical voltages inside the projector can cause severe injury. Do not attempt to service this product yourself. Refer all servicing to qualified service personnel.
Cleaning the Lens
Gently wipe the lens with Micro-fiber wiping cloth. Do not touch the lens with your hands.
Cleaning the Projector Housing
Gently wipe with a soft cloth. If dirt and stains are not easily removed, use a soft cloth damped with water, or water and neutral detergent, and wipe dry with a soft, dry cloth.
Maintaining the Air Filter
The air filter, which is located at the back of the projector, should be replaced or cleaned when warned by system either because 200 hours of use or rise of internal temperature. If it is not cleaned periodically, it can become clogged with dust and prevent the projector from being ventilated properly. This can cause over heating and damage the projector.
To clean the air filter:
- Pull down the filter module cover.
- Remove the filter module cover.
- Remove the dirty filter directly.
- Attach the clean air-filter.
- Attach the filter cover to the projector.
Replacing the Air Filter
The air filter should be replaced when cleaning is ineffective contact an authorized service center for the optional air filter.
《 NOTE 》
- Turn off the projector and remove the AC power cord from the power outlet before beginning maintenance work.
• Make sure the lens is cool before cleaning. - Do not use detergents or chemicals other than those noted above. Do not use benzene or thinners.
- Do not use chemical sprays.
- Use a soft cloth or lens paper only.
Replacing the Lamp
Projector lamps have a finite life. Replace the lamp when:
- A warning message "Lamp is approaching the end of its useful life in full power operation. Replacement suggested!" appears on the screen.
- The image becomes darker and hues become weaker after a lamp has been for a long period of time.
- The projector lamp LED indicator turns into amber. Refer to section titled "LED Indicator Messages" for further details.
《NOTE》
- The lamp will remain in high temperature even after the projector's power is turned off. Wait for at least 45 minutes after power off to cool down the lamp. Touching the lamp prior proper cool down time can cause skin scalding.
- Do not touch any glass portion of the lamp at any time. The lamp may explode due to improper handling or grease generated from finger.
- Lamp lifetime may differ from lamp to lamp and according to the environment of use. There is no guarantee of the same lifetime for each lamp. Some lamps may fail or terminate their lifetime in a shorter period of time than other similar lamps.
- A lamp may explode as a result of vibration, shock or degradation as a result of hours of use as its lifetime draws to an end. Risk of explosion may differ according to the environment or conditions in which the projector and lamp are being used.
- Wear protective gloves and eyeglasses when fixing or detaching the lamp.
- Short on-off-cycles will damage the lamp and reduce lamp life. Wait at least for 7 minutes to turn off the projector after powering on.
- Do not operate the lamp in proximity to paper, cloth, or other combustible material nor cover it with such materials. Otherwise it could cause a fire.
- Do not operate the lamp in an atmosphere containing an inflammable substance, such as thinner. Otherwise it could cause a fire or explosion.
- Thoroughly ventilate the area or the room when operating the lamp in an oxygen atmosphere (in the air). If ozone is inhaled, it could cause headaches, nausea, dizziness, etc.
- The lamp contains inorganic mercury. If the lamp bursts, the mercury inside the lamp will go out of the projector. Leave the area immediately if the lamp shatters while being operated and ventilate the area for at least 30 minutes in order to avoid the inhalation of mercury fumes. Otherwise it could be harmful to user's health.
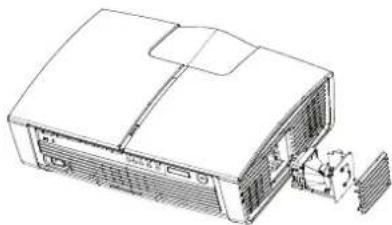
To replace the lamp:
- Loosen the two screws of lamp cover.
- Remove the lamp cover.
- Loosen the two screws of lamp module.
- Pull out the old lamp module by lamp handle.
- Mount the new lamp.
- Replace the lamp cover.
- Reset the lamp timer.
natural_image
Line drawing of a portable projector with ventilation slots and a detached unit (no text or symbols)《 NOTE 》
- Dispose of the used lamp according to local regulations.
- Ensure that screws are tightened properly. Screws not tightened fully may result in injury or accidents.
- Since the lamp is made of glass, do not drop the unit and do not scratch the glass.
- Do not reuse the old lamp. This could cause the lamp to explode.
- Be sure to turn off the projector and unplug the AC power cord before replacing the lamp.
- Do not use the projector with the lamp cover removed.
Troubleshooting
If you think something is wrong, check the followings before contacting customer service.
| If This Happens Check | |
| No power | * Is the power cord or battery pack plugged in?* Is it connected to the projector? |
| Power is lost during use | * Is the ambient temperature high?* Is the air intake or air exhaust blocked? |
| No picture | * Is the projector turned on?* Are the connections set up correctly?* Are all the connected devices functioning properly? |
| Picture not displayed correctly | * Is the input signal supported by the projector?,* Is something generating an abnormal video signal, for instance the video tape? |
| Picture blurred Part of picture out of focus | * Is the lens dirty?* Is the lens focus adjusted optimally?* Is the projection distance within the projector's supported range?* Is the projector's screen placement angle tilted too far?* Are the sharpness or sampling phase adjustments off? |
| Colors too lightBad shading | * Are the color or tint, adjustments off?* Is the screen dirty? |
List of Compatible Signals
| Analog PC timing | |||
| Mode Resolution V-Sync H Sync | |||
| VGADOS/Text modevisible | 640 x 480 50 Hz 24.69 | kHz | |
| 640 x 480 60 Hz 31.5 kHz | |||
| 640 x 480 72 Hz 37.9 kHz | |||
| 640 x 480 75 Hz 37.5 kHz | |||
| 640 x 480 85 Hz 43.3 kHz | |||
| SVGA 800 x 600 50 Hz | 30.99 kHz | ||
| 800 x 600 56 Hz 35.2 kHz | |||
| 800 x 600 60 Hz 37.9 kHz | |||
| 800 x 600 72 Hz 48.1 kHz | |||
| 800 x 600 75 Hz 46.9 kHz | |||
| 800 x 600 85 Hz 53.7 kHz | |||
| XGA 1024 x 768 50 Hz | 39.63 kHz | ||
| 1024 x 768 60 Hz 48.4 kHz | |||
| 1024 x 768 70 Hz 56.5 kHz | |||
| 1024 x 768 75 Hz 60.0 kHz | |||
| 1024 x 768 85 Hz 68.7 kHz | |||
| WXGA 1280x768 60 Hz | 47.8 kHz | ||
| SXGA 1280 x 1024 64.0 kHz 60 Hz | |||
| 1280 x 1024 80.0 kHz 75 Hz | |||
| Coordinated VideoTiming | 640 x 480 67 Hz 35 kHz | ||
| 832 x 624 75 Hz 49.72 kHz | |||
| 1024 x 768 75 Hz 60.2 kHz | |||
| Others | 1280 x 720 60 Hz 45.1 | kHz | |
| 1280 x 800 60 Hz 49.7 | kHz | ||
| 1280 x 800 75 Hz 62.8 | kHz | ||
| 1280 x 800 85 Hz 71.6 | kHz | ||
| 1360 x 768 60 Hz 47.7 | kHz | ||
| 1400 x 1050 60 Hz 65.3 | kHz | ||
| 1440 x 900 60 Hz 55.9 | kHz | ||
| 1600 x 1200 60 Hz 75 | kHz | ||
| 1680 x 1050 60 Hz 65.3 | kHz | ||
| 1920 x 1080 60 Hz 33.8 | kHz | ||
| 1920 x 1080 60 Hz 67.5 | kHz | ||
| Digital PC timing (HDMI) | |||
| Mode Resolution V-Sync H Sync | |||
| VGA (DOS/Text mode visible) 640 x 480 60 Hz 31.5 kHz | 5 kHz | ||
| 480p 720 x 483 60 Hz 31.5 kHz | |||
| SVGA 800 x 600 60 Hz 37.9 kHz | |||
| XGA 1024 x 768 60 Hz 48.4 kHz | |||
| 720p 1280 x 720 60 Hz 45 kHz | |||
| WXGA 1280 x 768 60 Hz 47.8 kHz | |||
| SXGA 1280 x 1024 60 Hz 64.0 kHz | |||
| SXGA+ | 1400 x 1050 60 Hz 65.3 kHz | ||
| WSXGA+ | 1680 x 1050 60 Hz 65.3 kHz | ||
| 1080i | 1920 x 1080 60 Hz 33.8 kHz | ||
| 1080p 1920 x 1080 60 Hz 67.5 kHz | |||
| UXGA | 1600 x 1200 60 Hz | 75 kHz | |
| Others | 1280 x 800 60 Hz | 49.7 kHz | |
| 1280 x 960 60 Hz | 60.0 kHz | ||
| 1360 x 768 60 Hz | 47.7 kHz | ||
| 1440 x 900 60 Hz | 55.9 kHz | ||
| Compatible/Supportive timingNote: the Projector may need minor adjustment in the OSD to get optimized performance, when below video signals is input to it through the HDMI connector. | |||
| 480i60 | 720x480 | 60 | 15.8k |
| 480p60 | 720x480 | 60 | 31.5k |
| 480p120 | 720x480 | 120 | 61.98k |
| 576i50 | 720x576 | 50 | 15.6k |
| 576p50 | 720x576 | 50 | 31.3k |
| 576p100 | 720x576 | 100 | 61.2k |
| 720p50 | 1280x720 | 50 | 37.5k |
| 720p60 | 1280x720 | 60 | 45.0k |
| 720p120 | 1280x720 | 120 | 92.89k |
| 1080i50 | 1920x1080 | 50 | 28.1k |
| 1080i60 | 1920x1080 | 60 | 33.8k |
| 1080p24 | 1920x1080 | 24 | 27.0K |
| 1080p50 (Native) | 1920x1080 | 50 | 56.3k |
| 1080p60 (Native) | 1920x1080 | 60 | 67.5k |
LED Indicator Message
| Power LED Status LED Indicates | ||
| Blinking in Green Off Standby mode | ||
| Green Green Warming up | ||
| Green Off Projector ON. | ||
| Green Blinking in Green Cooling down | ||
| Orange Green | In-proper shutdown due to power cut off. | |
| Orange Off | A certain error has been detected. | |
| Orange Red Over temp. | ||
| Orange Blinking in Red Lamp error. |
Product Specification
| Display type 3 x 0.74-inch LCD | projector |
| Resolution 1920 x 1080 (1.07) | Billion Colors |
| F # F = 1.83 - 2.36 | |
| Focal Length f = 23.5 to 37.6 | mm |
| Focus / Zoom | Motorized / Motorized 1.6x |
| Lens shift | Horizontal: Total of 120% of movement distance, 10% on each sideVertical: Total of 250% of movement distance, 75% on each side |
| Projection distance | 40" - 300" |
| Computer input | Analog RGB, D-sub 15 pin |
| Video input | HDMlx2, Component video (YCbCr/YPbPr)x2, Composite videox1, S-Videox1. |
| Other terminals | RS-232, USB, DC 5V, DC 12V trigger |
| Computer Compatibility | Please refer to timing table above. |
| Video Compatibility | NTSC, PAL, SECAM, 480i/p, 576i/p, 720p, 1080i, 1080p/60, 1080p/50, 1080p/24. |
| Scanning Frequency Horizontal Frequency Vertical Frequency | 15-100kHz50 - 90Hz |
| Operating temperature | +41°F (+5°C) to +95°F (+35°C) |
| Rated voltage | 100-120VAC/220-240VAC(Auto Switching) |
| Dimension (W x H x D) | 537 x 170 x 389mm |
| Weight | 19.85 lbs (Approx. 9kg) |
RS232 command code
- Protocol Setting
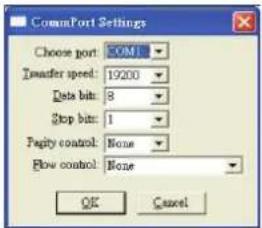
- Power ON/OFF command
| Command | Send String (HEX) |
| Power ON | BE EF 10 05 00 C6 FF 11 11 01 00 01 00 |
| Power OFF | BE EF 02 06 00 57 D0 2E 00 00 00 00 00 |
- Source select command
| Computer ( Analog RGB 1) | |
| Send String (HEX) | BE EF 02 06 00 0B D2 32 00 00 00 00 00 |
| Component 1 | |
| Send String (HEX) | BE EF 02 06 00 DA D3 33 00 00 00 00 00 |
| Component 2 | |
| Send String (HEX) | BE EF 02 06 00 85 DA 5C 00 00 00 00 00 |
| S-Video | |
| Send String (HEX) | BE EF 02 06 00 6D D2 34 00 00 00 00 00 |
| Composite Video | |
| Send String (HEX) | BE EF 02 06 00 BC D3 35 00 00 00 00 00 |
| HDMI-1 | |
| Send String (HEX) | BE EF 02 06 00 8F D3 36 00 00 00 00 00 |
| HDMI-2 | |
| Send String (HEX) | BE EF 02 06 00 5E D2 37 00 00 00 00 00 |
4.1 Key-Pad & IR command
| Command Send String (HEX) | |
| Picture mode BE | EF 02 06 00 3B D9 42 00 00 00 00 00 |
| Color Temp. BE | EF 02 06 00 EA D8 43 00 00 00 00 00 |
| Aspect Ratio BE | EF 02 06 00 5D D9 44 00 00 00 00 00 |
| Menu BE EF | 02 06 00 8C D8 45 00 00 00 00 00 |
| Exit BE EF | 02 06 00 BF D8 46 00 00 00 00 00 |
| Up | BE EF 02 06 00 6E D9 47 00 00 00 00 00 |
| Down BE EF | 02 06 00 91 D9 48 00 00 00 00 00 |
| Left | BE EF 02 06 00 40 D8 49 00 00 00 00 00 |
| Right | BE EF 02 06 00 73 D8 4A 00 00 00 00 00 |
| PCS | BE EF 02 06 00 A2 D9 4B 00 00 00 00 00 |
| Daylight Sensor BE | EF 02 06 00 15 D8 4C 00 00 00 00 00 |
| Overscan | BE EF 02 06 00 C4 D9 4D 00 00 00 00 00 |
| Black level | BE EF 02 06 00 F7 D9 4E 00 00 00 00 00 |
| HQV | BE EF 02 06 00 26 D8 4F 00 00 00 00 00 |
| Freeze | BE EF 02 06 00 49 DA 50 00 00 00 00 00 |
| Input | BE EF 02 06 00 98 DB 51 00 00 00 00 00 |
| V/H keystone | BE EF 02 06 00 AB DB 52 00 00 00 00 00 |
4.2 Key-Pad & IR command 2
| Command Send String (HEX) | |
| Aspect Ratio | Normal BE EF 02 06 00 8A DF 63 00 00 00 00 00 |
| Anamorphic 1 BE EF 02 06 00 3D DE 64 00 00 00 00 00 | |
| Anamorphic 2 BE EF 02 06 00 EC DF 65 00 00 00 00 00 | |
| Picture Mode | A11 BE EF 02 06 00 DF DF 66 00 00 00 00 00 |
| Cust 1 BE EF 02 06 00 OF DE 67 00 00 00 00 00 | |
| Cust 2 BE EF 02 06 00 F1 DE 68 00 00 00 00 00 | |
- Data get
| Command | Send String (HEX) | |
| Byte 0 ~ Byte 11 Byte12 ~ Byte1 | 8 | |
| Error Code Get | BE EF 1A 0C 00 7A 46 4F 00 01 00 00 00 00 00 00 00 00 00 00 | 00 00 00 00 00 00 00 |
| Filter Counter Get | BE EF 1A 0C 00 91 93 50 00 01 00 00 00 00 00 00 00 00 00 00 | 00 00 00 00 00 00 00 |
| Temp Get | BE EF 1A 0C 00 52 6E 51 00 01 00 00 00 00 00 00 00 00 00 00 | 00 00 00 00 00 00 00 |
| Lamp Life Get | BE EF 1A 0C 00 56 6A 52 00 01 00 00 00 00 00 00 00 00 00 | 00 00 00 00 00 00 00 |
| Unit on time Get | BE EF 1A 0C 00 89 8B 5A 00 01 00 00 00 00 00 00 00 00 | 00 00 00 00 00 00 00 |
| Return 1E | —— —— | |
- Special command
| Command Send String (HEX) | |
| Lens shift Right | BE EF 02 06 00 54 DB 5D 00 00 00 00 00 |
| Lens shift Left | BE EF 02 06 00 67 DB 5E 00 00 00 00 00 |
| Lens shift Up | BE EF 02 06 00 B6 DA 5F 00 00 00 00 00 |
| Lens shift Down | BE EF 02 06 00 B9 DF 60 00 00 00 00 00 |
| Focus + BE | EF 02 06 00 E3 DA 5A 00 00 00 00 00 |
| Focus - BE | EF 02 06 00 32 DB 5B 00 00 00 00 00 |
| Zoom + BE | EF 02 06 00 68 DE 61 00 00 00 00 00 |
| Zoom - BE | EF 02 06 00 5B DE 62 00 00 00 00 00 |
Remote control code
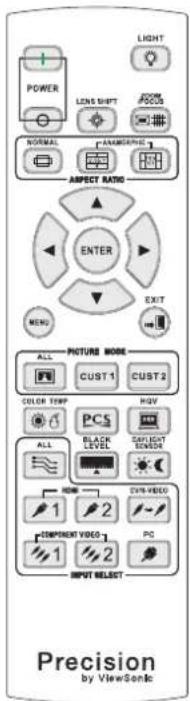
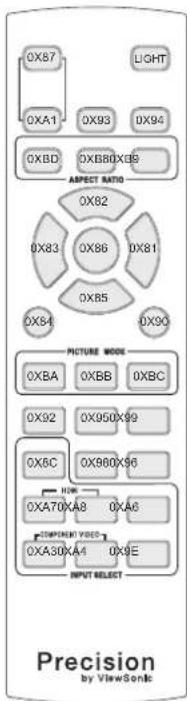
Note: Manufacture prefix code needs to be added to the IR command code. ViewSonic manufacture prefix code is 0x83, 0xF4.
Complete IR command code table:
Code Protocol Type: NEC format
| Command | Function Name | Description | Command | Function Name | Description |
| 0x87 | Power On Discrete Power On.1 | 0x94 | Zoom/Focus Zoom/Focus toggle | ||
| Power On/Off Toggle Power On/Off.2 | 0x8D | V/H Keystone | V/H Keystone toggle | ||
| 0xA1 | Power Off Discrete Power Off | 0x82 | Up | ||
| 0x9E | PC Direct PC select | 0x85 | Down | ||
| 0x9B | Component Video Component 1/2 browse | 0x83 | Left | ||
| 0xA3 | Component 1 Direct Component 1 select | 0x81 Right | |||
| 0xA4 | Component 2 Direct Component 2 select | 0x86 Enter Confirm selection | |||
| 0xA6 | CV/S-Video CV/S-Video browse | 0x84 | Menu | Open/Exit OSD | |
| 0x9C | S-Video Direct S-Video select | 0x90 | Exit Cancel selection | ||
| 0x9D | CV Direc CV select | 0x95 | PCS PCS browse | ||
| 0x9A | HDMI HDMI 1/2 browse | 0x96 Daylight Sensor | DS browse | ||
| 0xA7 | HDMI 1 Direc HDMI 1 select | 0x97 | Overscan | Overscan browse | |
| 0xAB | HDMI 2 Direc HDMI 2 select | 0x98 | Black Level | Black Level browse | |
| 0x91 | Picture Mode | All mode browse | 0x99 HQV HQV enable | ||
| 0xBA | Picture Mode All | All mode browse excl. user. | 0x80 Freeze Image freeze | ||
| 0xBB | Cust 1 | Custom mode 1 | 0x80 | Lens Shift Right | |
| 0xBC | Cust 2 | Custom mode 2 | 0xB1 | Lens Shift Left | |
| 0x92 | Color Temp Color Temp browse | 0xB2 | Lens Shift Up | ||
| 0x8E | Aspect Ratio | All AR browse | 0xB3 | Lens Shift Down | |
| 0x8D | Normal AR | Normal AR browse | 0xB4 | Focus + | |
| 0xB8 | Anamorphic 1 Anamorphic 1 AR direct | 0xB5 | Focus - | ||
| 0xB9 | Anamorphic 2 Anamorphic 2 AR direct | 0xB6 | Zoom + | ||
| 0x93 | Lens Shift | 0xB7 Zoom - | |||
^1 When discrete code mode is enabled.
^2 When discrete code mode is disabled.
Customer Support
For technical support or product service, see the table below or contact your reseller.
Note: You will need the product serial number.
| Country/Region Web Site | T=TelephoneF=Fax | ||
| Australia/New Zealand www.viewsonic.com.au | AUS-1800 680 816NZ-0800 006 822 | service@su.viewsonic.com | |
| Canada www.viewsonic.com | T (Toll-Free)= 1-868-463-4775T (Toll)- 1-424-233-2533F= 1-909-468-1202 | service.cs@viewsonic.com | |
| Europe/Middle East/Saltic countries/North Africa | www.viewsonicsurope.com Contact your reseller | ||
| Hong Kong www.hk.viewsonic.com T= 852 3102 2800 servis@hk.viewsonic.com | |||
| India www.in.viewsonic.com T= 1800 11 9999 service@in.viewsonic.com | |||
| Korea | www.ir.viewsonic.com | T= 080 265 9080 | service@ir.viewsonic.com |
| Latin America (Argentina) | www.viewsonic.com/air T= 0800 666 0194 soporte@viewsonic.com | ||
| Latin America (Brazil) | www.viewsonic.com/air T= 0800 691 6964 soporte@viewsonic.com | ||
| Latin America (Chile) | www.viewsonic.com/air | T= 800 440 303 | soporte@viewsonic.com |
| Latin America (Columbia) | www.viewsonic.com/air | T= 01 800 915 6586 | soporte@viewsonic.com |
| Latin America (Mexico) | www.viewsonic.com/air | T= 001 800 514 6518 | soporte@viewsonic.com |
| Renta y Datos, 29 SUR 721, COL. LA PAZ, 72160 PUEBLA, PUE. Tel: 01.222.691.55.77 CON 10 LINEAS Electrocer. Av Reforma No. 403Gx39 y 41, 97000 Merida, Yusalan. Tel: 01.999.925.19 16 Other places please refer to http://www.viewsonic.com/la/sports/index.html#Mexico | |||
| Latin America (Peru) | www.viewsonic.com/air | T= 0800 53456 | soporte@viewsonic.com |
| Macau | www.hk.viewsonic.com T= 853 700 303 service@hktViewsonic.com | ||
| Puerto Rico & Virgin Islands | www.viewsonic.com | T= 1-800-688-5688 (English)T= 1-886-379-1304 (Spanish)F= 1-909-468-1202 | service.us@viewsonic.comsoporte@viewsonic.com |
| Singapore/Malaysia/ Thailand | www.sp.viewsonic.com T= 65 646 8044 service@sp.viewsonic.com | ||
| South Africa | www.viewsoniceurope.com www.viewsoniceurope.com/Jak/Support/Calldesk.htm | ||
| United Kingdom | www.viewsonicaurope.com/Jak/ | www.viewsonicourope.com/Juk/Support/Calldesk.htm | |
| United States | www.viewsonio.com | T (Toll-Free)= 1-800-668-6688T (Toll)= 1-424-233-2530F= 1-909-468-1202 | service.us@viewsonic.com |
Limited Warranty
VIEWSONIC® PROJECTOR
What the warranty covers:
ViewSonic warrants its products to be free from defects in material and workmanship, under normal use, during the warranty period. If a product proves to be defective in material or workmanship during the warranty period, ViewSonic will, at its sole option, repair or replace the product with a like product. Replacement product or parts may include remanufactured or refurbished parts or components.
How long the warranty is effective:
North and South America: Please check with your local dealer or local ViewSonic office for the warranty information.
Europe: 3 years for all parts excluding the lamp, 3 years for labor, 1 year for the original lamp from the date of the first consumer purchase.
Other regions or countries: Please check with your local dealer or local ViewSonic office for the warranty information.
Lamp warranty subject to terms and conditions, verification and approval. Applies to manufacturer's installed lamp only.
All accessory lamps purchased separately are warranted for 90 days.
Who the warranty protects:
This warranty is valid only for the first consumer purchaser.
What the warranty does not cover:
-
Any product on which the serial number has been defaced, modified or removed.
-
Damage, deterioration or malfunction resulting from:
a. Accident, misuse, neglect, fire, water, lightning, or other acts of nature, unauthorized product modification, or failure to follow instructions supplied with the product. b. Repair or attempted repair by anyone not authorized by ViewSonic.
c. Any damage of the product due to shipment.
d. Removal or installation of the product.
e. Causes external to the product, such as electric power fluctuations or failure.
f. Use of supplies or parts not meeting ViewSonic's specifications.
g. Normal wear and tear.
h. Any other cause which does not relate to a product defect.
-
Any product exhibiting a condition commonly known as "image burn-in" which results when a static image is displayed on the product for an extended period of time.
-
Removal, installation, and set-up service charges.
How to get service:
- For information about receiving service under warranty, contact ViewSonic Customer Support (please refer to "Customer Support" page). You will need to provide your product's serial number.
-
To obtain warranted service, you will be required to provide (a) the original dated sales slip, (b) your name, (c) your address, (d) a description of the problem, and (e) the serial number of the product.
-
Take or ship the product freight prepaid in the original container to an authorized ViewSonic service center or ViewSonic.
- For additional information or the name of the nearest ViewSonic service center, contact ViewSonic.
Limitation of implied warranties:
There are no warranties, express or implied, which extend beyond the description contained herein including the implied warranty of merchantability and fitness for a particular purpose.
Exclusion of damages:
ViewSonic's liability is limited to the cost of repair or replacement of the product. ViewSonic shall not be liable for:
- Damage to other property caused by any defects in the product, damages based upon inconvenience, loss of use of the product, loss of time, loss of profits, loss of business opportunity, loss of goodwill, interference with business relationships, or other commercial loss, even if advised of the possibility of such damages.
- Any other damages, whether incidental, consequential or otherwise.
- Any claim against the customer by any other party.
Effect of state law:
This warranty gives you specific legal rights, and you may also have other rights which vary from state to state. Some states do not allow limitations on implied warranties and/or do not allow the exclusion of incidental or consequential damages, so the above limitations and exclusions may not apply to you.
Sales outside the U.S.A. and Canada:
For warranty information and service on ViewSonic products sold outside of the U.S.A. and Canada, contact ViewSonic or your local ViewSonic dealer.
The warranty period for this product in mainland China (Hong Kong, Macao and Taiwan Excluded) is subject to the terms and conditions of the Maintenance Guarantee Card.
For users in Europe and Russia, full details of warranty provided can be found in www.viewsoniceurope.com under Support/Warranty Information.
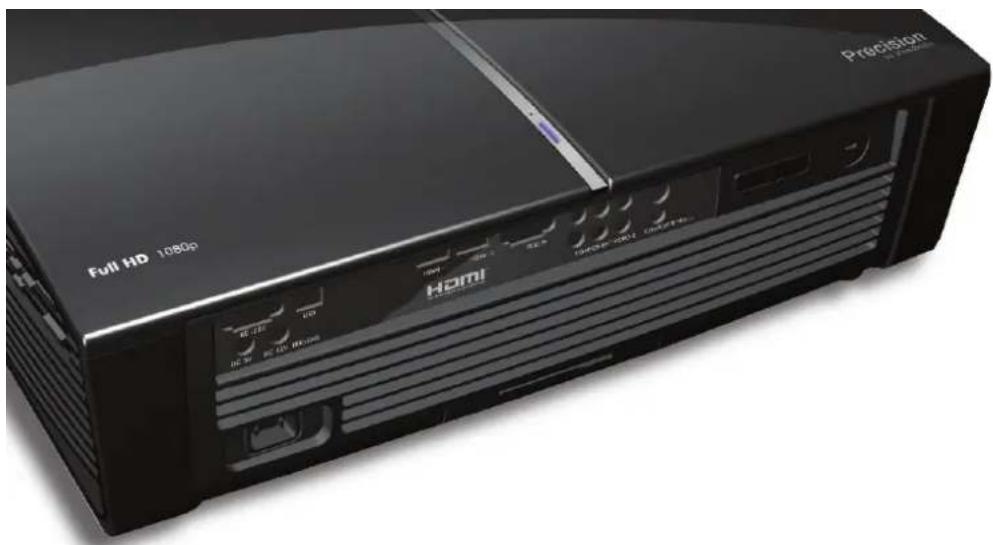
natural_image
Exterior view of a black Full HD 1080p projector with visible ports and control buttons (no readable text beyond branding)


- Precision
- For Canada
- CE Conformity for European Countries
- Following information is only for EU-member states:
- Important Safety Instructions
- Declaration of RoHS Compliance
- Copyright Information
- Product Registration
- Table of Contents
- Compliance Information......i
- Chapter 1: Introduction......1
- Chapter 2: Installation......6
- Chapter 3: Remote Control
- direct acess....12
- Chapter 4: ADVANCED OPERATION (OSD Menu)....20
- Chapter 5: Making and Recalling the User Adjustments....42
- Appendix......46
- Chapter 1: Introduction
- Projector Features
- Notes on the AC Power Cord
- Package Contents
- 《 NOTE 》
- Control Panel
- 4.PCS
- INPUT SELECT
- LIGHT
- LENS SHIFT
- ZOOM/FOCUS
- ASPECT RATIO
- FOUR DIRECTIONAL BUTTONS
- ENTER
- EXIT
- PICTURE MODE
- HQV
- DAYLIGHT SENSOR
- BLACK LEVEL
- Installing the Batteries
- 《NOTE》
- Remote Control Operation
- Chapter 2: Installation
- Power connection
- Caution:
- Audio and Video Devices Connectivity Configuration
- Using Home Theater System as hub
- Using Projector as hub
- Connecting Cable or Satellite TV
- RS232 Connection
- 12V Screen Curtain Trigger
- PC Input
- Adjusting the Projected Image
- Adjusting Projection Image Size
- Projection Screen Selection
- Chapter 3: Remote Control direct access
- Lens Shift
- Zoom and Focus
- Aspect Ratio
- Picture Modes
- Color Temperature
- PCS (Precision Color System)
- HQV
- Black Level
- Daylight Sensor
- Input Select
- Direct Input Keys
- Chapter 4: ADVANCED OPERATION (OSD Menu)
- Main Menu
- Setup Menu
- 2-1. Picture Sub-Menu
- 2-1-1 Basic Sub-Menu
- 2-1-2 Color Temperature Sub-Menu
- 2-1-3 Image Adjust Sub-Menu
- 2-1-4 Aspect Ratio
- 2-1-5 Overscan
- 2-1-6 Geometry Adjust
- 2-2. Advanced Sub-Menu
- 2-2-1 Picture Mode
- 2-2-2 Black Level
- 2-2-3 HQV
- 2-2-4 Noise Reduction
- 2-2-5 Color Space
- 2-3 Config Sub-Menu
- 2-3-1 Projector Settings
- 2-3-2 OSD
- 2-3-3 Languages
- 2-3-4 Timers
- 2-3-5 High Altitude
- 2-3-6 Auto Iris
- 2-4 PCS Settings Sub-Menu
- 2-4-1 PCS
- 2-4-2 PCS Display
- 2-4-3 Flesh tone
- 2-4-4 Edge Enhancement
- 2-4-5 Gamma Correction
- 2-4-6 3D Color Management
- 2-5 Memory Settings Sub-Menu
- 2-5-1 Custom Color Temperature
- 2-5-2 Save
- 2-5-3 Load
- 2-5-4 Reset
- 2-5-5 System Status Screen
- Chapter 5: Making and Recalling the User Adjustments
- Making Adjustments
- 1-1. User Picture Mode Adjustments
- 1-2. User Color Temperature Adjustments
- 1-3. User PCS Adjustments
- 2-1 Recalling the User Picture Mode & Color Temperature
- 2-2 Recalling the User PCS Adjustments
- 2-3 Recalling Both User Picture Mode and User PCS (Custom 1 & 2)
- Appendix
- Maintenance
- Warning:
- Cleaning the Lens
- Cleaning the Projector Housing
- Maintaining the Air Filter
- To clean the air filter:
- Replacing the Air Filter
- Replacing the Lamp
- To replace the lamp:
- Troubleshooting
- RS232 command code
- Remote control code
- Complete IR command code table:
- Customer Support
- Limited Warranty
- VIEWSONIC® PROJECTOR
- What the warranty covers:
- How long the warranty is effective:
- Who the warranty protects:
- What the warranty does not cover:
- How to get service:
- Limitation of implied warranties:
- Exclusion of damages:
- Effect of state law:
- Sales outside the U.S.A. and Canada:
Brand : VIEWSONIC
Model : Pro8100
Category : Vidéo-projecteur