VP-15S1 - Vidéo-projecteur MARANTZ - Free user manual and instructions
Find the device manual for free VP-15S1 MARANTZ in PDF.


| Product Type | DLP Projector |
| Display Technology | 1080p DLP (1920 x 1080 pixels) |
| Lamp | 200W SHP lamp, life up to 2000 hours |
| Lens | 1.45x zoom, f: 30.7-44.5mm |
| Lens Shift | Vertical lens shift (up to +100% / -85% range) |
| Keystone Correction | Digital vertical keystone correction (-25 to +25) |
| Projection Size | 70 to 250 inches (diagonal) |
| Video Inputs | 2x HDMI (HDCP), 2x Component, 1x S-Video, 1x Composite, 1x RGB (D-Sub 15) |
| Control Ports | RS-232C, 2x Trigger output (12V), Remote IN/OUT, Marantz system bus |
| Supported Video Signals | NTSC, PAL, SECAM, 480i/p, 576i/p, 720p, 1035i, 1080i, 1080p |
| Picture Modes | Theater, Standard, Dynamic, User (9 gamma curves, 18 memory slots) |
| Image Processing | Gennum VXP (TruMotionHD, FineEdge, RealityExpansion, FidelityEngine) |
| Optical System | Konica Minolta custom lens with 98mm 6-segment color wheel |
| Operating Noise | Low noise design: die-cast silent duct, sealed color wheel motor, fan speed control |
| Dimensions (W x D x H) | 404.5 x 489.5 x 158 mm |
| Weight | 13 kg (28.7 lbs) |
| Power Consumption | 350 W max; Standby < 0.5 W |
| Power Supply | AC 120V/60Hz (USA) or AC 230V/50Hz (Europe) |
| Cleaning | Clean lens with soft dry cloth; use approved optical lens cleaner |
| Safety | Class B digital device, UL/CSA/EN60950-1 certified; lamp replacement caution (hot, high pressure) |
| Optional Accessories | Replacement lamp unit (LU-12VPS3), Ceiling mount kit (MOUNT 20), Extension pole (EXT-10) |
Frequently Asked Questions - VP-15S1 MARANTZ
User questions about VP-15S1 MARANTZ
0 question about this device. Answer the ones you know or ask your own.
Ask a new question about this device
Download the instructions for your Vidéo-projecteur in PDF format for free! Find your manual VP-15S1 - MARANTZ and take your electronic device back in hand. On this page are published all the documents necessary for the use of your device. VP-15S1 by MARANTZ.
USER MANUAL VP-15S1 MARANTZ
The lightning flash with arrowhead symbol within an equilateral triangle is intended to alert the user to the presence of uninsulated "dangerous voltage" within the product's enclosure that may be of sufficient magnitude to constitute a risk of electric shock to persons.

The exclamation point within an equilateral triangle is intended to alert the user to the presence of important operating and maintenance (servicing) instructions in the literature accompanying the product.
WARNING
TO REDUCE THE RISK OF FIRE OR ELECTRIC SHOCK, DO NOT EXPOSE THIS PRODUCT TO RAIN OR MOISTURE.
CAUTION: TO PREVENT ELECTRIC SHOCK, MATCH WIDE BLADE OF PLUG TO WIDE SLOT, FULLY INSERT.
ATTENTION: POUR ÉVITER LES CHOC ÉLECTRIQUES, INTRODUIRE LA LAME LA PLUS LARGE DE LA FICHE DANS LA BORNE CORRESPONDANTE DE LA PRISE ET POUSSER JUSQU'AU FOND.
NOTE:
This equipment has been tested and found to comply with the limits for a Class B digital device, pursuant to Part 15 of the FCC Rules. These limits are designed to provide reasonable protection against harmful interference in a residential installation. This equipment generates, uses and can radiate radin frequency energy and, if not installed and used in accordance with the instructions, may cause harmful interference to radio communications. However, there is no guarantee that interference will not occur in a particular installation. If this equipment does cause harmful interference in radio or television reception, which can be determined by turning the equipment off and on, the user is encouraged to try to correct the interference by one or more of the following measures:
- Reorient or relocate the receiving antenna.
- Increase the separation between the equipment and receiver.
- Connect the equipment into an outlet on a circuit different from that to which the receiver is connected.
- Consult the dealer or an experienced radio/TV technician for help.
NOTE:
Changes or modifications not expressly approved by the party responsible for compliance could void the user's authority to operate the equipment.
This Class B digital apparatus complies with Canadian ICES-003.
IMPORTANT SAFETY INSTRUCTIONS
READ BEFORE OPERATING EQUIPMENT
This product was designed and manufactured to meet strict quality and safety standards. There are, however, some installation and operation precautions which you should be particularly aware of.
- Read these instructions.
- Keep these instructions.
- Heed all warnings.
- Follow all instructions.
- Do not use this apparatus near water.
- Clean only with dry cloth.
- Do not block any ventilation openings. Install in accordance with the manufacture's instructions.
- Do not install near any heat sources such as radiators, heat registers, stoves, or other apparatus (including amplifiers) that produce heat.
- Do not defeat the safety purpose of the polarized or grounding-type plug. A polarized plug has two blades with one wider than the other. A grounding type plug has two blades and a third grounding prong. The wide blade or the third prong are provided for your safety. If the provided plug does not fit into your outlet, consult an electrician for replacement of the obsolete outlet.
- Protect the power cord from being walked on or pinched particularly at plugs, convenience receptacles, and the point where they exit from the apparatus.
- Only use attachments/accessories specified by the manufacturer.
- Use only with the cart, stand, tripod, bracket, or table specified by the manufacturer, or sold with the apparatus. When a cart is used, use caution when moving the cart/apparatus combination to avoid injury from tip-over.

- Unplug this apparatus during lightning storms or when unused for long periods of time.
- Refer all servicing to qualified service personnel. Servicing is required when the apparatus has been damaged in any way, such as power-supply cord or plug is damaged, liquid has been spilled or objects have fallen into the apparatus, the apparatus has been exposed to rain or moisture, does not operate normally, or has been dropped.
Additional Safety Information!
- This product should not be placed in a built-in installation such as a bookcase or rack unless proper ventilation is provided or the manufacturer's instructions have been adhered to.
- Apparatus shall not be exposed to dripping or splashing and that no objects filled as vases, shall be placed on the apparatus.
- When the switch is in the OFF position, the apparatus isn't completely switched-off from the MAINS.
DECLARATION OF CONFORMITY
This device complies with Part 15 of the FCC rules. Operation is subject to the following conditions: (1) This device may not cause harmful interference, and (2) this device must accept any interference received, including interference that may cause undesired operation.
U.S. Responsible Party: Marantz America, Inc.
100 Corporate Drive,
Mahwah, NJ, 07430, U.S.A.
TEL: 630-741-0300
Type of Product: DLP Projector
Model:
VP-15S1
ENGLISH
FOREWORD
This section must be read carefully before any connection is made to the mains supply.
WARRANTY
For warranty information, contact your local Marantz distributor.
RETAIN YOUR PURCHASE RECEIPT
Your purchase receipt is your permanent record of a valuable purchase. It should be kept in a safe place to be referred to as necessary for insurance purposes or when corresponding with Marantz.
IMPORTANT
When seeking warranty service, it is the responsibility of the consumer to establish proof and date of purchase. Your purchase receipt or invoice is adequate for such proof.
FOR U.K. ONLY
This undertaking is in addition to a consumer's statutory rights and does not affect those rights in any way.
EQUIPMENT MAINS WORKING SETTING
Your Marantz product has been prepared to comply with the household power and safety requirements that exist in your area.
COPYRIGHT
Recording and playback of some material may require permission. For further information refer to the following:
- Copyright Act 1956
- Dramatic and Musical Performers Act 1958
- Performers Protection Acts 1963 and 1972
- Any subsequent statutory enactments and orders
WARNINGS
- Do not expose the equipment to rain or moisture.
- Do not remove the cover from the equipment.
- Do not insert anything into the equipment through the ventilation holes.
- Do not handle the mains cord with wet hands.
- Do not cover the ventilation with any items such as tablecloths, newspapers, curtains, etc.
- No naked flame sources, such as lighted candles, should be placed on the equipment.
- When disposing of used batteries, please comply with governmental regulations or environmental public instruction's rules that apply in your country or area.
- Make a space of about 0.2 meter around the unit.
- When the projector is mounted on the ceiling, the Ceiling Mount Kit approved by MARANTZ must be used for installation.
- Do not look into the lens when the projector is turned on. It could damage your eyesight.
- Unplug the projector from the wall outlet if it is not to be used for a few days.
- No objects filled with liquids, such as vases, shall be placed on the equipment.
- When the switch is in the OFF position, the equipment is not completely switched off from MAINS.
– The equipment shall be installed near the power supply so that the power supply is easily accessible.
Lamp Handing Precautions
DANGER
This SHP uses a high voltage glass mercury vapor lamp. The lamp can break or fail to light if handled wrongly during replacement or because of the projector's surrounding temperature. Lamp life also varies according to the lamp with some even breaking or failing to light as soon as they are used the first time. If the lamp breaks, glass fragments may be scattered inside the lamp unit and projector, and gas inside the lamp bulb that contains mercury vapor may be emitted from the projector's vent. Before use, carefully read the projector user guide and the lamp replacement instructions. Remember to handle the lamp with care. In the event of serious trouble, call for Marantz authorized dealer.
- Do not look directly into the lamp with bare eyes while lit. The bright light can cause sore eyes and impair vision.
- Do not directly expose skin to the light of the lamp. Direct exposure can inflame the skin.
- Do not drop, impact, subject to excessive force or otherwise damage the lamp.
- Replacing the lamp runs the risk of burns and electric shock, therefore shut OFF power supply, unplug the AC power cord from AC power outlet and wait at least 60 minutes for the lamp to cool down before attempting to replace it.
- If the lamp breaks, unplug the AC power cord from AC power outlet and call for Marantz authorized dealer to replace it. Do not replace the lamp yourself or clean up broken glass inside the projector as this can result in cuts and burns to you or damages inside the projector.
- If the projector is hung from a ceiling or installed in a high place, it is extremely dangerous to replace the lamp. In this case, do not replace or handle the damaged lamp yourself.
CAUTION
- The chance of the lamp breaking is high after extended use. It is recommended to replace the lamp when near the end of its designed life. Do not use a lamp beyond the maximum lighting time.
- Use only Marantz original lamp units. Check the model code of the lamp unit matches that in the user guide.
- Before replacing the lamp, read carefully "Lamp Unit Replacement" in the user guide. Replace the lamp as explained therein.
- Entrust disposal of a used lamp to a licensed industrial waste handler or return it to the place of purchase. Do not break the lamp or discard with general waste.
- If the lamp breaks, leave the area immediately and stay away for at least 30 minutes, and ventilate the room so as not to inhale the mercury vapor.
- If you inhale the mercury vapor, see a physician immediately and follow his instructions.
FRANÇAIS
AVANT-PROPOS
- Copyright Act 1956
- Dramatic and Musical Performers Act 1958
- Performers Protection Acts 1963 and 1972
- Copyright Act 1956
- Dramatic and Musical Performers Act 1972
IMPORTANT SAFEGUARDS ....2
Caution Concerning the Setup of the Projector....2
Caution Concerning the Lamp Replacement 2
Caution Concerning the Lamp Unit 2
Notes on Operation 2
FEATURES 3
ACCESSORIES....3
PROJECTOR LAYOUT AND FUNCTIONAL OVERVIEW....4
Front and Top View 4
Rear and Terminals View 5
Bottom View 5
Remote Controller 6
Remote Controller Operational Range 8
Preparing the Remote Controller....8
CONNECTION....9
Connection with AC Power Supply 9
Connection with Video Equipments....9
Connection with a HD-Video, DVD Player, Satellite, Cable Tuner or PC....10
Advanced Connection 10
INITIAL SETTING....11
Turning on the Power 11
Zooming and Focusing....11
Detail Focusing....11
Adjusting the Image Position....12
Adjusting the Height 12
Keystone Correction....12
INSTALLATION 13
Recommended Setting....13
Screen Size and Projection Distance (inch) VP-15S1....14
Screen Size and Projection Distance (mm) VP-15S1 14
Screen Size and Projection Distance (inch) VP-15S1L....15
Screen Size and Projection Distance (mm) VP-15S1L 15
Lens shift position VP-15S1 16
Lens shift position VP-15S1L 17
BASIC OPERATIONS....18
Turning on the Power 18
Selecting the Input Signal Source 18
Selecting the Aspect Mode....18
The Screen Images in a 16:9 screen 19
The Screen Images in a 4:3 screen 20
To Turn off the Power....20
OPERATIONS....21
Menu Structure....21
Functions by Signal....22
Picture Mode 24
How to Operate Menus 24
Picture Adjust 25
Fine Menu 1....26
Fine Menu 2 26
Input Signal 27
RGB/HD Adjust 27
HDMI 28
Display....28
OSD/Blanking....29
Configuration 30
MAINTENANCE 31
Lamp Life and Replace Lamp 31
Replacing Lamp Unit 31
Cleaning the Lens 33
Replacement Parts....33
Optional Accessories....33
TROUBLESHOOTING 34
ERROR MODE....35
ON SCREEN MESSAGE 35
GLOSSARY....35
SPECIFICATIONS....36
DIMENSIONS....37
VP-15S1 37
VP-15S1L 37
For Europe –
A NOTE ABOUT RECYCLING

This product's packaging materials are recyclable and can be reused. This product and the accessories packed together are the applicable product to the WEEE directive except batteries.
Please dispose of any materials in accordance with your local recycling regulations.
When discarding the unit, comply with your local rules or regulations.
Batteries should never be thrown away or incinerated but disposed of in accordance with your local regulations concerning chemical wastes.
IMPORTANT SAFEGUARDS
Caution Concerning the Lamp Replacement
There is potential glass particle hazard if the lamp ruptures.
Caution Concerning the Lamp Unit
There is a potential hazard of glass particle if the lamp ruptures.
In case of lamp rupture, contact your nearest Marantz Authorized Dealer or Service Center for a replacement.
See "Replacing Lamp Unit". (P.31)
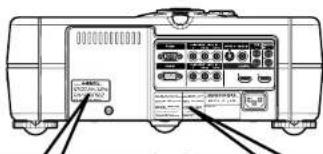
For USA
WARNING
THIS COVER IS PROVIDED WITH INTERLOCK TO REDUCE THE RISK OF EXCESSIVE ULTRAVIOLET RADIATION. DO NOT DEFEAT ITS PORPOSE OR ATTEMPT TO SERVICE WITHOUT REMOVING COVER COMPLETELY.
For Europe
CAUTION HOT
UNPLUG THE POWER CORD AND WAIT 60 MINUTES BEFORE CHANGING THE LAMP.
ATTENTION CHAUD DEBRANCER LE CORD ON D'ALIMENTION ET ATENDER 60 MINUTES AVANT DE CHANGER LAMPE.
WARNUNG HEISS
ZIEHEN SIE DEN NETZSTECKER AB UND WARTEN SIE 60 MINUTEN, BEVOR SIE DIE GLUHLAMPE WECHSELN.
For USA
CAUTION : HIGH PRESSURE LAMP MAY EXPLODED IF IMPROPERLY HANDLED REFER SERVICING TO QUALIFIED SERVICE PERSONNEL.
ATTENTION : LA LAMPE SOUS HAUTE PRESSION PEUT SI ELLE, N'EST PAS MANIPULEE CORRECTEMENT; CONFIER L'OPERATION A UM PERSONNEL D'ENTRETIEN QUALIFIE.
For Europe
CAUTION
HIGH PRESSURE LAMP MAY EXPLODED IF IMPROPERLY HANDLED. REFER SERVICING TO QUALIFIED SERVICE PERSONNEL.
ATTENTION
LA LAMPE SOUS HAUTE PRESSION PEUT EXPLOSER SI ELLE, N'EST PAS MANIPULEE CORRECTEMENT, CONFIER L'OPERATION A UN PERSONNEL D'ENTRETIEN QUALIFIE.
CAUTION HOT : UMPLUG THE POWER CORD AND WAIT 60 MINUTES BEFORE CHARGING THE LAMP.
ATTENTION CHAUD : DEBRANCER LE CORD ON D'ALOMENTION ET ATENDER 60 MINUTES AVANT DE CHANGER LAMPE.
VORSICHT :
Concerning the Setup of the Projector
For minimal servicing and to maintain high image quality, avoid humidity, dust and cigarette smoke.
When the projector is subjected to these environments, the lens and part of ventilation holes must be cleaned more often than usual. As long as the projector is properly maintained in this manner, use in these environments will not reduce the overall operation life. Please note that all internal cleaning must be performed by an Marantz Authorized Dealer, or Service Center.
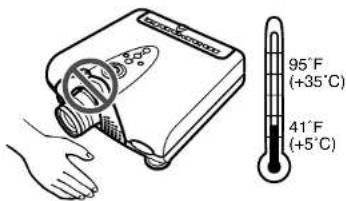
Do not expose the projector to extreme heat or cold. Operating temperature: 41 °F to 95 °F (+5 °C to 35 °C) Storage temperature: -4 °F to 140 °F (-20 °C to +60 °C)
Notes on Operation
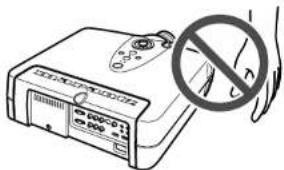
- The exhaust ventilative hole, the lamp cage cover and adjacent areas may get extremely hot during projector operation. To prevent injury, do not touch these areas until they have sufficiently cooled down.
- Allow at least 1 foot (30 cm) of space between the exhaust ventilative hole and the nearest wall or obstruction.
- If the cooling fan becomes obstructed, a protection device will automatically turn off the projector lamp. This does not indicate a malfunction. Remove the projector power cord from the wall outlet and wait at least 10 minutes.
Then turn on the power by plugging the power cord back in. This will return the projector to the normal operating condition.
FEATURES
- Incorporates the latest DLP ^6 chip -- "1080p DLP ^6 " (1920 x 1080 pixel, 16:9 wide panel). Using an optimized system for movie viewing with specially designed image circuits and optical parts, the VP-15S1 bring high color reproduction with the pitch black of movie films that reproduces images in rich tones and crisp black.
- Images are sharply detailed, smooth and high quality owing to a powerful chip that builds into a dedicated processor an Image processing IC featuring Gennum's proud "VXP™" high quality contouring technology, "TruMotionHD™", "FineEdge™", "RealityExpansion™" and "FidelityEngine™".
- Konica Minolta optical system custom-made for Marantz.
• A large 98mm 6-segment color wheel.
• 4 Picture Modes (Theater, Standard, Dynamic, User) - 5 built-in preset gammas
- Fine-adjustment menus that allow the user to adjust images as they like
• 18 user menus for saving adjusted images
• Color temperature setting (5250K, 5800K, 6500K, 7500K, 9300K) - Black level adjustment
- Supports input of NTSC, PAL, SECAM and satellite broadcasts (480i/p, 540p, 576i/p, 720p, 1035i, 1080i/p).
- Rich array of input jacks including HDCP supporting HDMI digital input jack and dual system component jacks
• 1.45x zoom lens - Lens shift feature for vertically positioning the projection point
• Digital correction of vertical keystone distortion - Projection modes for functional, hanging and rear projection
- Remote controller with all back-lit keys
• Equipped with RS-232C port and 12V trigger terminal for custom installation
• Marantz system bus port - Low operating noise thanks to a die-cast silent duct, hermetically sealed color wheel motor and fan speed control
• Highly rigid die-cast chassis to minimize radiating noise - 2000 hr long-life 200W SHP lamp with double-shielded safety structure
– Digital Light Processing, DLP, DLP logo and DLP Medallion logo are registered trademarks of Texas Instruments.
– VXP, Visual Excellence Processing and the VXP Logo are trademarks or registered trademarks of Gennum Corporation.
- All trademarked product names mentioned in this manual are the property of their respective companies.
– HDMI, the HDMI logo and High-Definition Multimedia Interface are trademarks or registered trademarks of HDMI Licensing LLC.
ACCESSORIES
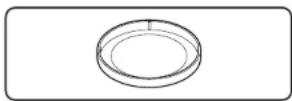
- Lens Cap x 1
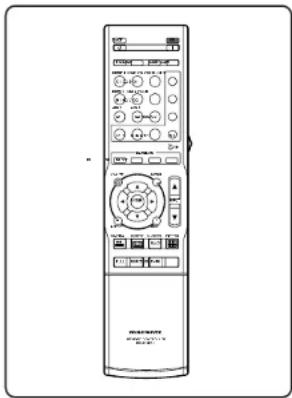
- Remote Controller x 1
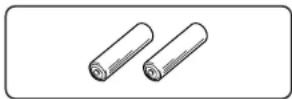
- AAA Size Batteries x 2
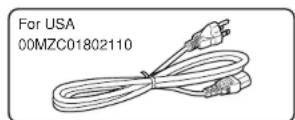
- AC Power Code
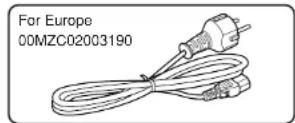
- User Guide x 1
natural_image
Simple line drawing of a closed book with no visible text or symbols on the cover or spine.- Warranty Card
(1 copy each for USA, CANADA)
Comes with USA model only.
PROJECTOR LAYOUT AND FUNCTIONAL OVERVIEW
Front and Top View
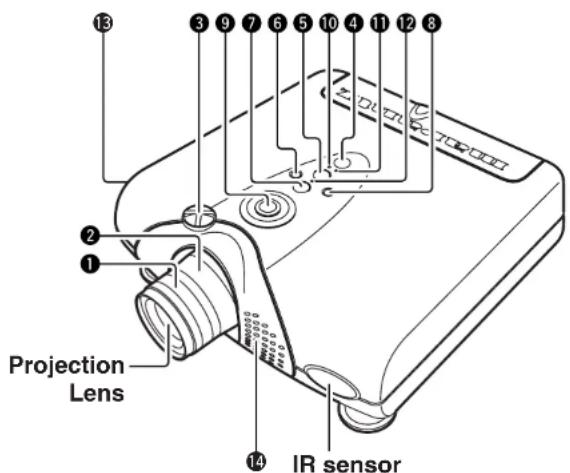
① Focus ring (P.11)
Adjust the picture focus.
② Zoom ring (P.11)
Adjust the size of the projected image.
③ Lens Shift knob (P.12)
Manually adjust the position of the image vertically.
④ button ( P.18)
Press to turn the projector ON or STANDBY mode.
⑤ MENU button (P.21)
Display the on-screen menu.
⑥ ENTER button
Press to enter the selected menu item.
⑦ INPUT SELECT button (P.18)
Selects the input signal (COMPONENT 1, COMPONENT 2, S-VIDEO, VIDEO, RGB, HDMI 1 and HDMI 2).
⑧ PATTERN button (P.11)
Projects a focus pattern on the screen.
⑨ The ▲/▼/◄/► buttons
Control the MENU cursor.
⑩ ON indicator
Lights up blue when power is ON. When power is shut OFF, the lamp flashes for about 1 minute before going out.
⑪ STANDBY indicator
Lights up green when the projector is on standby.
⑫ WARNING/LAMP indicator
Flashes or lights up when something is wrong with the lamp cover, lamp, fan, or temperature inside the projector.
For more information on the error mode, see the "Error Mode List" (P.35)
⑬ Ventilation holes (intake)
⑭ Ventilation holes (exhaust)
Notes:
- Do not place anything near the ventilation holes to avoid overheat inside the unit.
- Do not place your hand or objects near the ventilation holes; the air is coming out.
Note: Pixel defects
DLP ^® chip is one of the most advanced technologies for consumer products. The DLP ^® chip made by high precision technology, however some pixel defects may be found on the projected image. We are trying our best to control the quality in order to reduce the number of defective pixels. It is almost impossible to have zero pixel defects, even using the most advanced technology. This is not a problem only for Marantz, but all DLP ^® projector manufactures. Therefore we have to note that the warranty does not cover the DLP ^® chip for pixel defects. We appreciate your understandings.
Note: Lamp
SHP lamp is one of the most advanced technologies for consumer products. The lamp made by high precision technology, however some lamps might be failing before it reaches its life. And projector's brightness is getting darker along with accumulated lamp usage hours. We are trying our best to control the quality in order to reduce lamp failures. It is almost impossible to have zero failure, even using the most advanced technology. This is not a problem only for Marantz, but all projector manufactures. Therefore we have to note that the warranty does not cover the SHP lamp for lamp failures: explosion, and non-lighting except initial use. And also we have to note that the warranty does not cover the SHP lamp for lamp failures: flickering, and getting darker along with accumulated lamp usage hours. We appreciate your understandings.
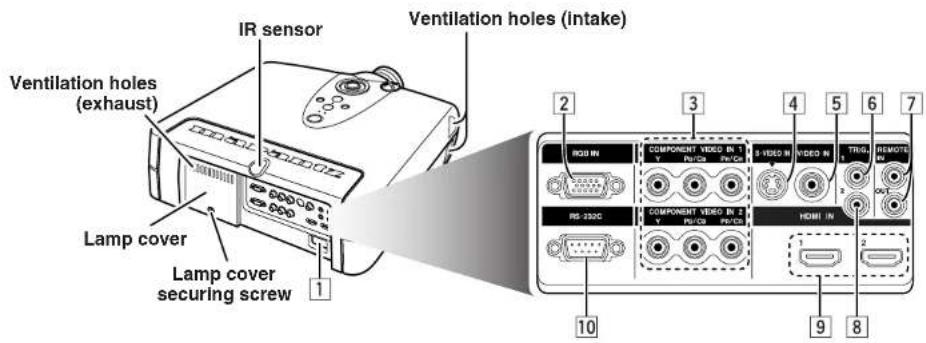
Rear and Terminals View
Bottom View
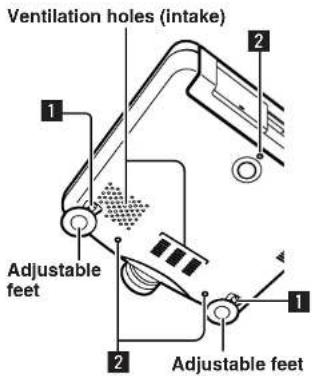
1 AC INu(P.9)
Connect the supplied AC power code.
2 RGB IN
Connect the analog RGB output from an IBM VGA or compatible equipment.
3 COMPONENT VIDEO IN 1 and 2
Terminals 1 and 2 have each Y, Pb/Cb, Pb/Ca terminals. Connect them to the component video output of a video device, AV amp/processor, DVD player, etc.
4 S-VIDEO IN
Connect the S-VIDEO output from a video equipment.
5 VIDEO IN
Connect the composite video output from a video equipment.
6 TRIG.1(TRIGGER 1)
When the unit is turned on, 12V is output. When the unit is turned off, no voltage is output. This allows such as a powered up/down screen, whenever the projector is turned on or off.
Note:
- Do not use TRIG.1, as the power source.
• To connect with external devices, use an ordinal 3.5mm mini-plug (mono) cable.
7 REMOTE IN/OUT
By connecting this projector to another Marantz audio component using a supplied System Control cable, you can remotely operate the components as a single system.
- When connecting to component with a remote sensor (such as the SR9500,SR8500), be sure to connect the "REMOTE CONTROL IN" jack of this projector to the "REMOTE CONTROL OUT" jack of the component with the remote sensor.
Note:
For connections, use the control adaptor cable. (Mini jack to RCA)
8 TRIG.2(TRIGGER 2)
Select ON or OFF at each aspect mode, such as Full, Normal, Zoom, V-Stretch and Through to control screen aspect ratio with powered up/down dual aspect ratio screen.
Notes:
- Do not use TRIG.2, as the power source.
• To connect with external devices, use an ordinal 3.5mm mini-plug (mono) cable.
|9| HDMI IN 1 and 2
Connect the digital signal (TMDS compliant, single link only)
Note:
To use the HDMI terminal, please follow the cautions on page 10.
10 RS-232C
This is the control port for the custom installer.
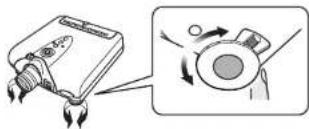
1 Adjustment lever (P.12)
Lift the projector and turn the adjustment lever right or left. The adjustable feet will extend from the projector. Then, release the lever, the adjustable feet is locked.
2 Screw holes for ceiling mount kit
Remote Controller
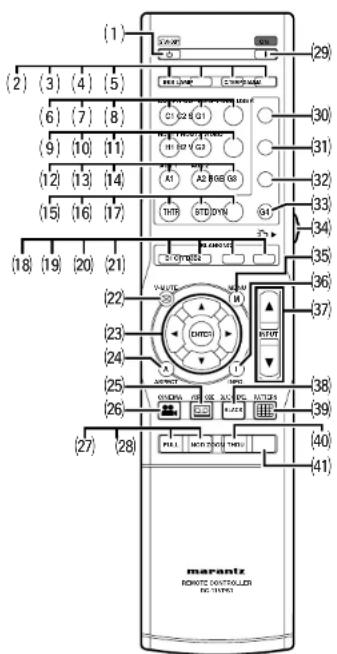
(1) STANDBY button (P.20)
Turn the projector off.
(2) IRIS button
Switches lens and illumination aperture.
(3) LAMP button
Switches the lamp between the normal and energy-saving modes.
(4) C.TEMP button
Sets color temperature to 1, 2, 3, 4, 5 or HB.
(5) GAMMA button
Sets the gamma curve to Theater, Standard, Dynamic, A, B, C, D or E, when the picture mode is set to User.
(6) COMP. 1 (Component video in 1) button (P.18)
Selects the device connected to the COMPONENT VIDEO IN 1 jack as the input source.
(7) COMP. 2 (Component video In 2) button (P.18)
Selects the device connected to the COMPONENT VIDEO IN 2 jack as the input source.
(8) S-VIDEO button (P.18)
Select the S-VIDEO IN signal.
(9) HDMI 1 button (P.18)
Select the HDMI 1 IN signal.
(10) HDMI 2 button (P.18)
Select the HDMI 2 IN signal.
(11) VIDEO button (P.18)
Select the VIDEO IN signal.
(12) A1 button
This button does not work with this projector.
(13) A2 button
This button does not work with this projector.
(14) RGB button (P.18)
Select the RGB IN signal.
(15) THEATER (THTR) button (P.24)
Select the Theater picture mode.
Theater mode is designed for high fidelity black appearance and is good for movie pictures.
Every time THTR button is pressed, the selection rotates in the order of Theater 1 → Theater 2 → Theater 3 → Default.
(16) STANDARD (STD) button (P.24)
Select the STANDARD picture mode.
Standard mode is good for normal pictures.
Every time the button is pressed, the selection rotates in the order of Standard 1 → Standard 2 → Standard 3 → Default.
(17) DYNAMIC (DYN) button(P.24)
Select the Dynamic picture mode.
Dynamic mode is good for visually dynamic pictures.
Every time the button is pressed, the selection rotates in the order of Dynamic 1 → Dynamic 2 → Dynamic 3 → Default.
(18) B1 button(P.29)
Selects Blanking Memory 1.
(19) B2 button (P.29)
Selects Blanking Memory 2.
(20) B3 button (P.29)
Selects Blanking Memory 3.
(21) OFF button(P.29)
Turns the blanking mode off.
(22) V-MUTE button
Turn the picture into black. Press again to resume.
(23) ▲ / ▼ / ◀ / ▶ / ENTER buttons
Press the cursor buttons (▲ [UP], ▼ [DOWN], ◀
[LEFT], ▶ [RIGHT]) to select menu items. Press the ENTER button to enter the selected menu item.
(24) ASPECT (Aspect select) button (P.18)
Selects the aspect ratio. Every time the button is pressed, the selection rotates in the order of Full → Normal → Zoom → V Stretch → Through.
(25) VCR MODE button(P.26)
Turns the VCR mode on and off.
(26) CINEMA button(P.26)
Turns the 2-3 pull down mode on and off.
(27) FULL button(P.18)
Sets aspect ratio to full mode.
(28) NORMAL button(P.18)
Sets aspect ratio to normal mode.
(29) ON button(P.18)
Turn the projector on.
(30) USER G1 button(P.24)
Selects the user mode.
The user mode is for enjoying images at a user-selected gamma curve.
Every time the button is pressed, the selection rotates in the order of User 1 → User 2 → User 3. For more information on how to select gamma curve, (P.25)
(31) USER G2 button(P.24)
Selects the user mode.
The user mode is for enjoying images at a user-selected gamma curve.
Every time the button is pressed, the selection rotates in the order of User 4 → User 5 → User 6. For more information on how to select gamma curve. (P.25)
(32) USER G3 button (P.24)
Selects the user mode.
The user mode is for enjoying images at a user-selected gamma curve.
Every time the button is pressed, the selection rotates in the order of User 7 → User 8 → User 9. For more information on how to select gamma curve. (P.25)
(33) USER G4 button
This button does not work with this projector.
(34) LIGHT button
Lights all buttons for about 10 sec.
(35) MENU button (P.21)
Display the on-screen menu
If pressed again, the on-screen menu disappears.
(36) INFO. button(P.31)
Turn the information menu on or off.
(37) INPUT (Input signal select) button (P.18)
Selects the input signal. Every time the ▲/▼ buttons are pressed, the input signal rotates in the order of COMPONENT 1 ↔ COMPONENT 2 ↔ S-VIDEO ↔ VIDEO ↔ RGB ↔ HDMI 1 ↔ HDMI 2.
(38) BLACK LEVEL button(P.26)
Sets the black level.
During analog signal input .....0 IRE/7.5 IRE
During HDMI signal input.....Expand/Normal
(39) PATTERN button (P.11)
Projects a focus pattern on the screen.
(40) ZOOM button(P.18)
Sets aspect ratio to zoom mode.
(41) THROUGH button(P.18)
Sets aspect ratio to through mode.
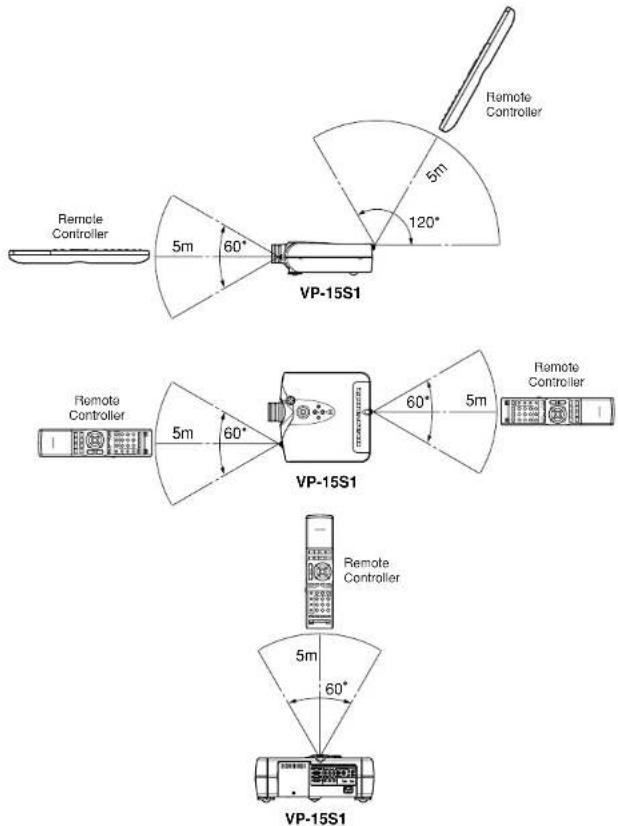
Remote Controller Operational Range
Operate the remote controller within a distance of approximately 5m from the IR sensor (remote sensor) on the projector. Remote control operation may not be possible if the remote control unit's transmitter is not pointing in the direction of the remote sensor or if there is an obstruction between the transmitter and the remote sensor.
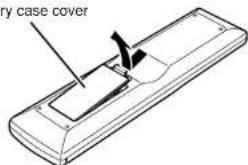
Preparing the Remote Controller
- Take the cover off the battery case on the remote control backside.
Battery case cover
- Insert two AAA size batteries. Make sure the polarities match the + and - marks inside the battery compartment.
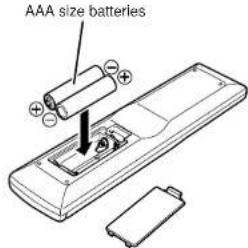
- Reattach the battery case cover as before.
Battery case cover
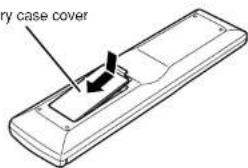
Notes :
- Do not mix alkaline and manganese batteries. - Do not mix old and new batteries.
CAUTIONS ON BATTERIES
- Use AAA alkaline batteries in this remote controller.
- If the remote control unit does not operate from close to the main unit, replace the batteries with new ones, even if less then a year has passed.
- The included battery is only for verifying operation. Replace it with a new battery as soon as possible.
- When inserting the batteries, be careful to do so in the proper direction, following the + and - marks in the remote control unit's battery compartment.
- To prevent damage or battery fluid leakage:
- Do not use a new battery with an old one.
- Do not use two different types of batteries.
- Do not short-circuit, disassemble, heat or dispose of batteries in flames.
- Remove the batteries when not planning to use the remote control unit for a long period of time.
- If the batteries should leak, carefully wipe off the fluid from the inside of the battery compartment, then insert new batteries.
- When disposing of used batteries, please comply with governmental regulations or environmental public instruction's rules that apply in your country or area.
CONNECTION
When making connections be sure to:
- Turn off all equipment before making any connections.
- Use the proper cables for each connection.
- Securely insert the plug into the port to connect cables. Loose cables can lead to trouble and damage.
When pulling out a cable:
- Be sure to grab the plug, not the cable itself.
Connection with AC Power Supply
Connect the supplied AC power cord into the AC IN socket of the projector.
The STANDBY Indicator lights up and the projector goes into the standby mode.
Note : Make sure the AC power cord is firmly connected into the AC IN socket.
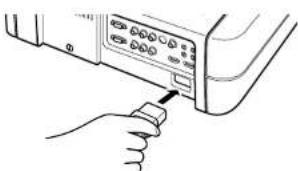
natural_image
Hand inserting a USB into a device panel (no text or symbols visible)SUOMI
VARO
Connection with Video Equipments
You can connect this projector to a VCR, DVD player and other video equipment.
Connecting a video source using S-VIDEO IN and VIDEO IN terminals.
- Connect one of the S-video cable to the S-VIDEO IN terminal, or one end of the video cable to the VIDEO IN terminal on the projector.
- Connect the other end of the S-video cable or the video cable to the S-video output terminal or video output terminal of the video source.
Connecting a DVD player to the COMPONENT VIDEO IN 1 or 2 terminal (Devices can be connected to both terminals at the same time.)
- Connect the individual terminals of the component video cable into the COMPONENT VIDEO IN 1 or 2 terminal of the projector.
- Connect the other end of the cable to the corresponding terminals on a DVD player.
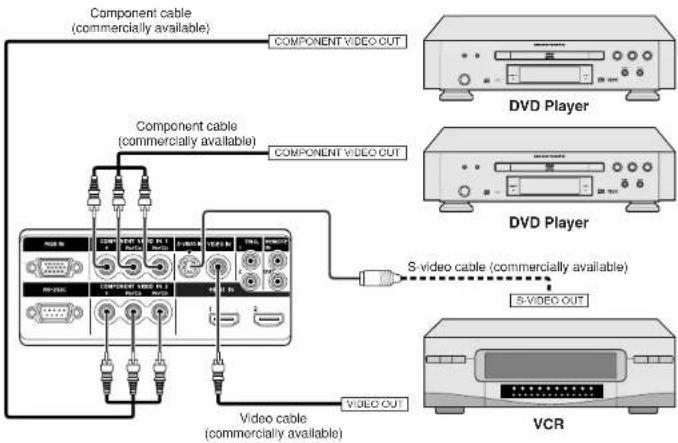
Connection with a HD-Video, DVD Player, Satellite, Cable Tuner or PC
You can connect this projector to HD-Video /PC using RGB IN port, or DVD Piyer /Satellite /Cable Tuner /PC using HDMI IN port.
- Connect one end of the RGB cable to the RGB IN port, or one end of the HDMI cable to the HDMI IN port on the projector.
- Connect the other end to the corresponding port on a HD-Video, Satellite, Cable Tuner or personal computer.
- If using DVI-A or DVI-D output, use respectively a DVI-A-RGB or DVI-D-HDMI conversion cable.
Note: When projecting a video image from a device connected to the HDMI terminal, follow the procedure below.
-
Turn on power of this unit. (P.18)
-
Set the input video source to HDMI input. (P.18)
-
Turn on power of the device connected to the HDMI terminal of the unit (i.e. DVD player). If the procedure above is not followed, projected image may corrupt. For the details of the HDMI terminal on the device connected with the unit, see the instruction manual of the device.
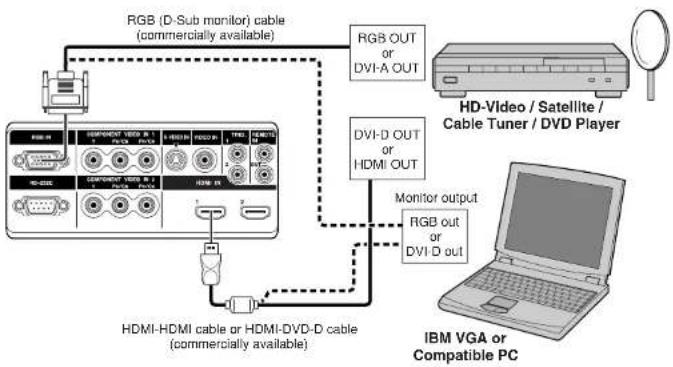
flowchart
graph TD
    A["RGB (D-Sub monitor) cable (commercially available)"] --> B["HD-Video / Satellite / Cable Tuner / DVD Player"]
    A --> C["RGB OUT or DVI-A OUT"]
    A --> D["DVI-D OUT or HDMI OUT"]
    A --> E["Monitor output"]
    E --> F["IBM VGA or Compatible PC"]
    G["HDMI-HDMI cable or HDMI-DVD-D cable (commercially available)"] --> H["USB/DDR/12"]
Advanced Connection
You can control total home theater system using PC or Marantz receiver equipment. For installing below system, consult with Marantz authorized dealer.
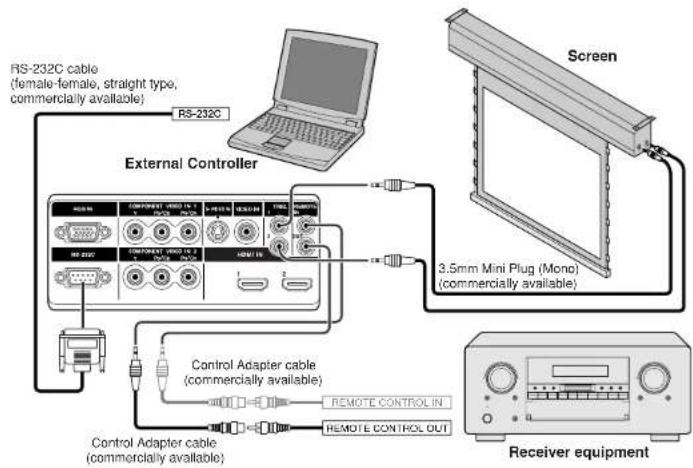
INITIAL SETTING
Turning on the Power
- Connect the supplied AC power cord. ( P.9)
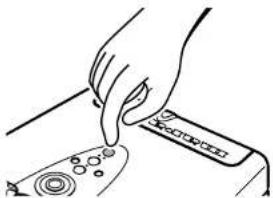
- Press the ON button on the remote controller or the ⏻/I button on the projector. The ON indicator lights up.
natural_image
Line drawing of a hand pressing down on a device component (no text or symbols)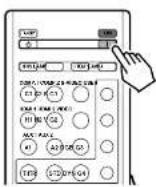
Zooming and Focusing
Project an image on the screen roughly at first.
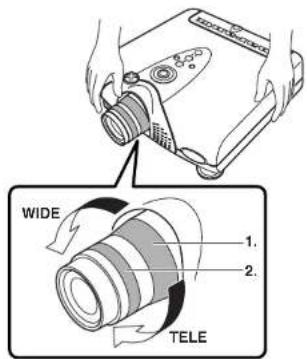
- Turn the Zoom ring and adjust to the desired size within the zoom range.
WIDE: Enlarges (zooms in) the projected image.
TELE: Reduces (zooms out) the projected image.
- Turn the Focus ring until the image on the screen becomes clear.
Detail Focusing
You can strictly focus the image with focus pattern.
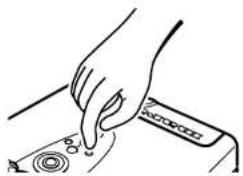
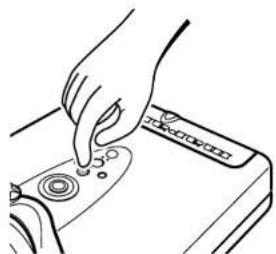
1. Press the PATTERN button to project the focus pattern on the screen.
natural_image
Illustration of a hand pressing down on a device component (no text or symbols visible)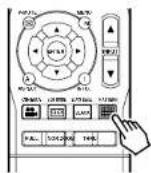
- Turn the Focus ring to make an adjustment.
Adjust the focus for the sharpest image possible to obtain, using focus pattern.
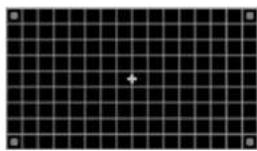

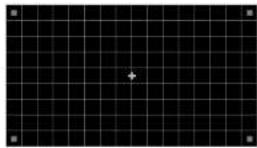
- Press the PATTERN button again to hide the focus pattern. This completes fine focusing.
Note :
Focus Pattern Color by Lens Shift Position (P.16)
The focus pattern changes color depending on the lens position. There are two colors and they can be used for checking the quality of the projected image. The white focus pattern uses the highest optical performance to maximize the sharpness of the projected image. To enjoy the highest sharpness, it is recommended to position the lens within this range.
When the lens is shifted outside the aforementioned range, the focus pattern turns green. Rough focusing in this range looses image sharpness.
Adjusting the zoom position from WIDE to TELE enhances sharpness even at the same lens position.
Adjusting the Image Position
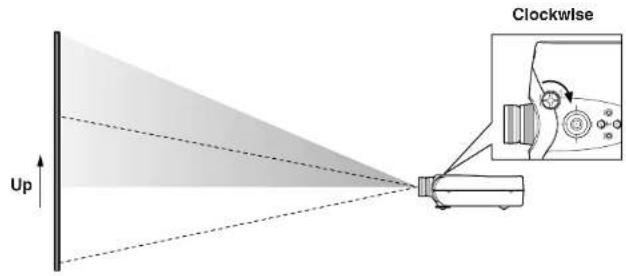
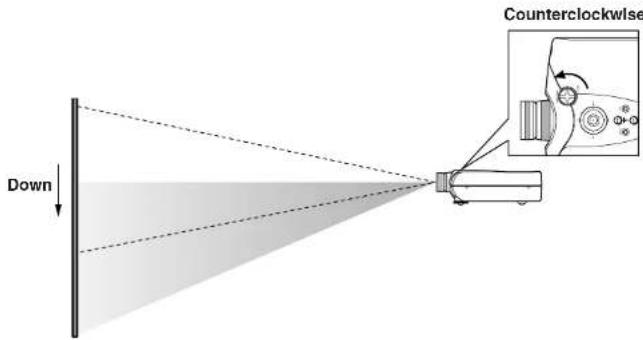
You can adjust the image position with the Lens Shift knob.
◆Turn the Lens Shift knob to clockwise : The image goes up.
✿Turn the Lens Shift knob to counterclockwise : The image goes down.
Adjusting the Height
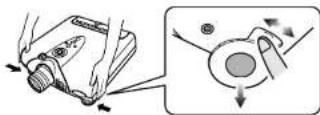
You can position the projected image by changing the height of the projector's adjusters.
- Move the adjuster lever to the left or right to enable adjuster changing. Carefully lift the projector.
- Once having positioned the projector, return the adjuster lever as before to lock in place. Check the adjusters are securely locked before releasing your hands from the projector.
- Turn the adjuster to fine-adjust the height.
natural_image
Illustration of a device with a scroll and directional arrows indicating motion (no text or symbols)◆Returning the Projector to its Initial Position
Slightly lift the projector, turn the adjuster lever to the left or right, then carefully set the projector down.
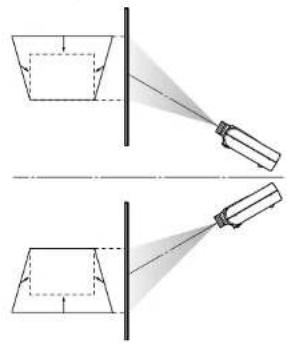
Keystone Correction
When the projecting image is a trapezoid, correct it in Keystone and in the Display Menu.
See "Display". (P.28)
When using the keystone feature to correct a trapezoidal image, picture contours can look like staircases because of image correction.
Keystone
(Electronic keystone correction)
natural_image
Diagram showing two identical setups with a light source, no text or symbols presentINSTALLATION
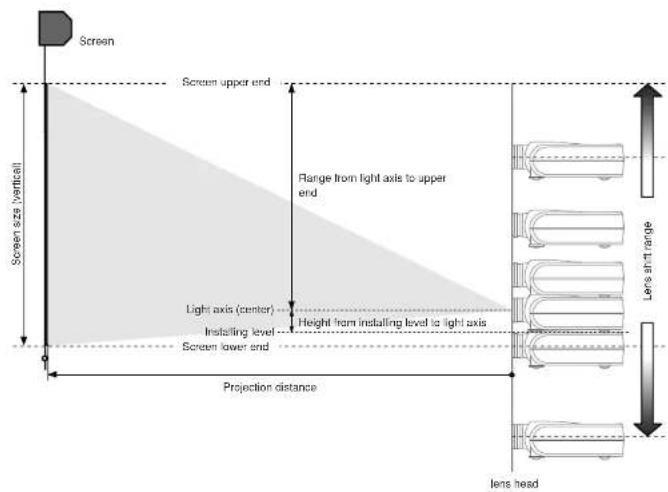
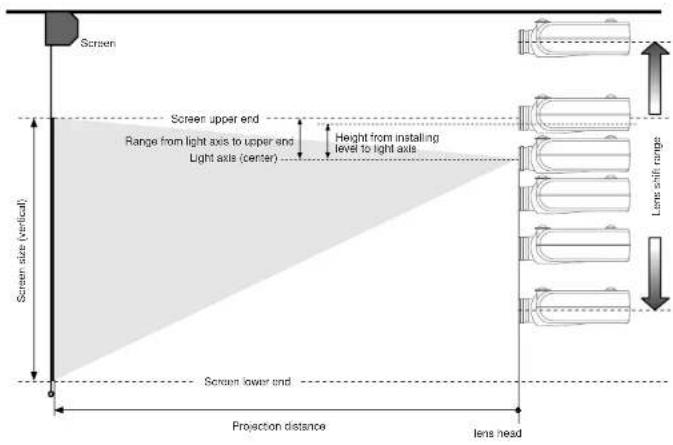
Recommended Setting
◆Installing on a tabletop
◆Mounting on the ceiling
CAUTION
- For ceiling installation, consult with Marantz authorized dealer.
- Do not look into the lens when the projector is turned on. It could damage your eyesight.
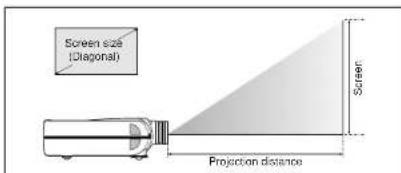
Screen Size and Projection Distance (inch) VP-15S1
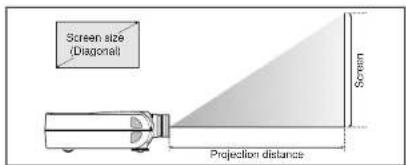
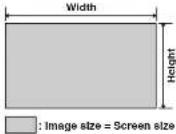
◆16 : 9 Screen
In case of displaying the 16:9 picture on the whole of the 16:9 screen.
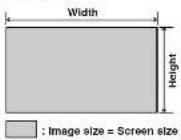
16:9 Screen Size (1.77:1 Aspect Ratio) Projection Distance
| Dingonal Width Height Minimum Maximum | ||||
| inch Inch Inch Inch Inch | ||||
| 70 | 61 | 34 5/16 | 88 5/16 | 129 1/16 |
| 72 | 82 12/12 | 25 5/16 | 90 15/16 | 132 13/16 |
| 80 | 89 12/12 | 39 4/16 | 101 5/16 | 147 12/16 |
| 82 | 71 8/12 | 40 3/16 | 103 14/16 | 151 9/16 |
| 84 | 75 3/12 | 41 3/16 | 106 7/16 | 155 5/16 |
| 90 | 76 7/12 | 44 2/16 | 114 3/16 | 168 8/16 |
| 92 | 80 3/12 | 45 2/16 | 116 13/16 | 173 4/16 |
| 100 | 87 3/12 | 49 | 127 2/16 | 185 4/16 |
| 106 | 92 6/12 | 51 15/16 | 134 14/16 | 198 7/16 |
| 110 | 95 14/12 | 53 15/16 | 140 1/16 | 203 15/16 |
| 120 | 104 9/12 | 59 13/12 | 153 | 222 11/16 |
| 123 | 107 3/12 | 60 5/16 | 158 14/16 | 228 4/16 |
| 133 | 113 13/12 | 65 3/16 | 169 12/16 | 247 |
| 135 | 117 11/12 | 66 3/16 | 172 6/16 | 250 12/16 |
| 150 | 130 12/12 | 73 9/16 | 191 12/16 | 278 12/16 |
| 170 | 143 3/12 | 83 9/16 | 217 9/16 | 318 4/16 |
| 200 | 174 5/12 | 96 1/16 | 256 6/16 | 372 6/16 |
| 250 | 217 14/12 | 122 9/16 | 321 | 465 13/16 |
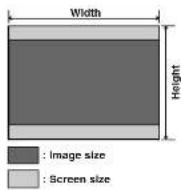
◆4 : 3 Screen
In case of displaying the 16:9 picture on the whole of the 4:3 screen.
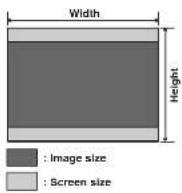
4:3 Screen Size (1.33:1 Aspect Ratio) Projection Distance
| Diagonal Width Height Minimum (Maximum) | ||||
| Inch Inch Inch Inch | ||||
| 70 | 56 | 42 | 100 6/16 | 158 5/16 |
| 72 | 57 10/15 | 43 3/16 | 111 10/16 | 162 14/16 |
| 80 | 64 | 46 | 124 5/16 | 181 3/16 |
| 82 | 65 10/15 | 49 3/16 | 127 7/16 | 185 13/16 |
| 84 | 67 3/16 | 50 6/16 | 130 10/16 | 190 6/16 |
| 90 | 72 | 54 | 140 1/16 | 204 2/16 |
| 92 | 73 10/16 | 55 3/16 | 143 4/16 | 208 11/16 |
| 100 | 80 | 50 | 153 14/16 | 227 |
| 106 | 84 13/16 | 63 10/16 | 163 6/16 | 243 12/16 |
| 110 | 86 | 50 | 171 11/16 | 249 14/16 |
| 120 | 90 | 72 | 187 6/16 | 272 12/16 |
| 123 | 98 6/16 | 73 13/16 | 192 4/16 | 279 10/16 |
| 133 | 105 6/16 | 79 13/16 | 208 | 302 6/16 |
| 135 | 108 | 81 | 211 3/16 | 307 2/16 |
| 150 | 120 | 90 | 234 14/16 | 341 7/16 |
| 170 | 138 | 102 | 266 8/16 | 387 4/16 |
| 200 | 162 | 120 | 313 14/16 | 455 14/16 |
| 250 | 200 | 150 | 302 14/16 | 570 6/16 |
Screen Size and Projection Distance (mm) VP-15S1
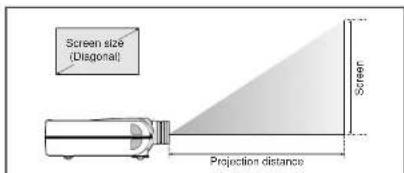
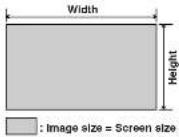
◆16:9 Screen
In case of displaying the 16:9 picture on the whole of the 16:9 screen.
4:3 Screen
In case of displaying the 16:9 picture on the whole of the 4:3 screen.
16:9 Screen Size (1.77:1 Aspect Ratio) Projection Distance
| Diagonal Width Height Minimum Maximum | ||||
| inch mm m/h mm mm | ||||
| 70 | 1550 | 872 | 2243 | 3276 |
| 72 | 1594 | 887 | 2308 | 3371 |
| 80 | 1771 | 996 | 2571 | 3751 |
| 82 | 1813 | 1021 | 2636 | 3846 |
| 84 | 1862 | 1046 | 2702 | 3841 |
| 90 | 1902 | 1121 | 2830 | 4226 |
| 92 | 2037 | 1145 | 2964 | 4321 |
| 100 | 2514 | 1245 | 3227 | 4701 |
| 106 | 2347 | 1320 | 3423 | 4386 |
| 110 | 2435 | 1370 | 3555 | 5176 |
| 120 | 2657 | 1494 | 3683 | 5851 |
| 123 | 2723 | 1532 | 3981 | 5794 |
| 133 | 2944 | 1656 | 4309 | 6269 |
| 135 | 2980 | 1681 | 4375 | 6364 |
| 150 | 3321 | 1868 | 4837 | 7076 |
| 170 | 3763 | 2117 | 5523 | 8026 |
| 200 | 4428 | 2491 | 6507 | 9451 |
| 250 | 5535 | 3113 | 6147 | 11826 |
4:3 Screen Size (1.33:1 Aspect Ratio) Projection Distance
| Diagonal Width Height Minimum Maximum | ||||
| Inch mm min mm mm | ||||
| 70 | 1432 | 1057 | 2754 | 4218 |
| 72 | 1453 | 1057 | 2834 | 4134 |
| 80 | 1626 | 1219 | 3155 | 4509 |
| 82 | 1686 | 1250 | 3235 | 4715 |
| 84 | 1707 | 1260 | 3315 | 4852 |
| 90 | 1829 | 1372 | 3558 | 5180 |
| 92 | 1889 | 1402 | 3638 | 5206 |
| 100 | 2032 | 1524 | 3557 | 5761 |
| 106 | 2154 | 1615 | 4197 | 6110 |
| 110 | 2235 | 1676 | 4358 | 6342 |
| 120 | 2436 | 1829 | 4759 | 6953 |
| 123 | 2499 | 1875 | 4879 | 7298 |
| 133 | 2733 | 2937 | 5280 | 7579 |
| 135 | 2743 | 2957 | 5360 | 7795 |
| 150 | 3046 | 2286 | 5862 | 8566 |
| 170 | 3454 | 2591 | 6764 | 9928 |
| 200 | 4054 | 3046 | 7967 | 11571 |
| 250 | 5090 | 3810 | 9972 | 14475 |
Screen Size and Projection Distance (inch) VP-15S1L
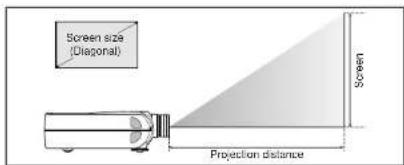
16:9 Screen
In case of displaying the 16:9 picture on the whole of the 16:9 screen.
| 16:5 Screen Size (1.7:1; Aspect Ratio) Projection Distance | ||||
| Disgense Width Height Minimum Maximum | ||||
| Inch inch Inch inch Inch | ||||
| 60 | 52 5/16 | 29 7/16 | - | |
| 70 | 61 | 54 5/16 | - | - |
| 72 | 62 1/16 | 85 5/16 | ||
| 80 | 65 1/16 | 56 4/16 | 147 3/16 | 222 3/16 |
| 82 | 71 8/16 | 46 3/16 | 150 15/16 | 227 13/16 |
| 84 | 73 3/16 | 41 3/16 | 154 13/16 | 230 2/16 |
| 90 | 78 7/16 | 44 2/16 | 165 16/16 | 280 5/16 |
| 92 | 93 3/16 | 45 2/16 | 169 13/16 | 255 15/16 |
| 100 | 97 3/16 | 49 | 184 13/16 | 278 5/16 |
| 106 | 102 6/16 | 51 15/16 | 195 13/16 | 295 2/16 |
| 110 | 105 1/16 | 53 15/16 | 200 X/16 | 306 6/16 |
| 120 | 104 5/16 | 58 13/16 | 222 | 334 16/16 |
| 123 | 107 3/16 | 60 5/16 | 227 13/16 | 343 |
| 133 | 113 3/16 | 65 3/16 | 235 3/16 | 371 1/16 |
| 135 | 117 1/16 | 66 3/16 | 250 2/16 | 379 13/16 |
| 150 | 120 12/16 | 73 8/16 | 278 3/16 | 418 14/16 |
| 170 | 148 5/16 | 85 6/16 | 315 13/16 | 472 |
| 200 | 174 5/16 | 98 1/16 | 371 12/16 | 559 5/16 |
| 250 | 217 14/16 | 122 9/16 | 405 X/16 | 599 12/16 |
| 300 | 261 8/16 | 147 1/16 | 558 14/16 | 640 4/16 |
| To calculate the Installation measurement (unit : Inch)Minimum = 2 13/16 x Screen Size - 2 9/16Maximum = 1 14/16 x Screen Size - 2 5/16Note: When insulating the projection, consider a 5% tolerance for the Projection Distance in the above table. | ||||
◆4 : 3 Screen
In case of displaying the 16:9 picture on the whole of the 4:3 screen.
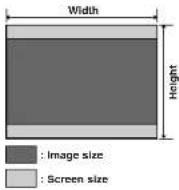
| 4:3 Screen Size (1.3:31 Aspect Ratio) Projection Distance | ||||
| Diagonal Width Height Minimum Maximum | ||||
| Inch Inch Ins. Inch inch | ||||
| 60 | 49 | 28 | 202 13/15 | |
| 70 | 56 | 42 | 157 11/15 | 236 4/15 |
| 72 | 57 12/15 | 43 3/15 | 192 4/15 | 245 2/15 |
| 80 | 54 | 49 | 193 8/15 | 272 19/15 |
| 82 | 65 13/15 | 50 3/15 | 195 3/15 | 273 6/15 |
| 84 | 57 3/15 | 50 6/15 | 188 12/15 | 290 2/15 |
| 90 | 72 | 54 | 203 8/15 | 307 |
| 92 | 73 13/15 | 55 3/15 | 239 1/15 | 318 15/15 |
| 100 | 80 | 65 | 225 5/15 | 341 7/15 |
| 105 | 84 13/15 | 63 13/15 | 253 2/15 | 352 1/15 |
| 110 | 88 | 66 | 249 4/15 | 375 13/15 |
| 120 | 95 | 72 | 272 2/15 | 410 3/15 |
| 123 | 98 6/15 | 73 13/15 | 275 | 420 5/15 |
| 133 | 105 9/15 | 75 13/15 | 301 14/15 | 454 15/15 |
| 135 | 108 | 81 | 338 8/15 | 461 13/15 |
| 150 | 125 | 62 | 340 13/15 | 513 6/15 |
| 170 | 135 | 102 | 386 13/15 | 582 3/15 |
| 200 | 160 | 124 | 455 4/15 | 685 5/15 |
| 250 | 200 | 150 | 569 12/15 | 857 6/15 |
| 300 | 240 | 190 | 687 3/15 | 1029 8/15 |
Screen Size and Projection Distance (mm) VP-15S1L
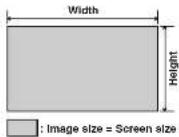
◆16:9 Screen
In case of displaying the 16:9 picture on the whole of the 16:9 screen.
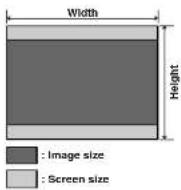
◆4 : 3 Screen
In case of displaying the 16:9 picture on the whole of the 4:3 screen.
| 15/9 Screen Size (1.7T-1 Aspect Ratio) Projection Distance | ||||
| Disagonal Width Height Minimum Maximum | ||||
| Inch mm mm/mm mm | ||||
| 60 | 1328 | 747 | ||
| 70 | 1553 | 872 | ||
| 72 | 1594 | 807 | ||
| 80 | 1771 | 906 | 9735 | 5943 |
| 82 | 1815 | 1021 | 9836 | 5782 |
| 84 | 1893 | 1043 | 9625 | 5925 |
| 90 | 1982 | 1121 | 4210 | 8353 |
| 92 | 2037 | 1146 | 4365 | 8435 |
| 100 | 2214 | 1245 | 4685 | 7935 |
| 106 | 2347 | 1329 | 4970 | 7593 |
| 110 | 2335 | 1373 | 5166 | 7779 |
| 120 | 2557 | 1494 | 6635 | 9592 |
| 123 | 2723 | 1532 | 5778 | 8706 |
| 133 | 2944 | 1655 | 6253 | 9419 |
| 135 | 2989 | 1891 | 6348 | 9551 |
| 150 | 3321 | 1989 | 7060 | 10551 |
| 170 | 3753 | 2117 | 6610 | 12357 |
| 200 | 4429 | 2481 | 9435 | 14190 |
| 250 | 5535 | 3113 | 11810 | 17751 |
| 300 | 6541 | 3739 | 14185 | 21326 |
| 4:3 Screen Size (1.3):1 Aspect Ratio Projection Distance | ||||
| Diagonal Width/Height Minimum Minimum | ||||
| Inch mm mm/mm mm | ||||
| 60 | 1218 | 914 | - | 5174 |
| 70 | 1422 | 1067 | 4002 | 6057 |
| 72 | 1463 | 1097 | 4118 | 6221 |
| 80 | 1626 | 1219 | 4365 | 6923 |
| 82 | 1666 | 1250 | 4502 | 7394 |
| 84 | 1707 | 1286 | 4616 | 7289 |
| 90 | 1828 | 1372 | 4784 | 7793 |
| 92 | 1868 | 1402 | 4980 | 7957 |
| 100 | 2038 | 1524 | 5745 | 8935 |
| 106 | 2154 | 1615 | 6094 | 9189 |
| 110 | 2235 | 1676 | 6326 | 9539 |
| 120 | 2438 | 1828 | 6907 | 10412 |
| 123 | 2498 | 1875 | 7382 | 10974 |
| 133 | 2708 | 2027 | 7668 | 11547 |
| 135 | 2743 | 2087 | 7779 | 11721 |
| 150 | 3048 | 2286 | 8050 | 13051 |
| 170 | 3454 | 2551 | 8612 | 14777 |
| 200 | 4061 | 3048 | 11555 | 17306 |
| 250 | 5080 | 3810 | 14463 | 21761 |
| 300 | 6056 | 4572 | 17365 | 25126 |
Lens shift position VP-15S1
◆ Standard condition (From -85% to +100%)
◆ Extended mounting condition (From +100% to +165%)
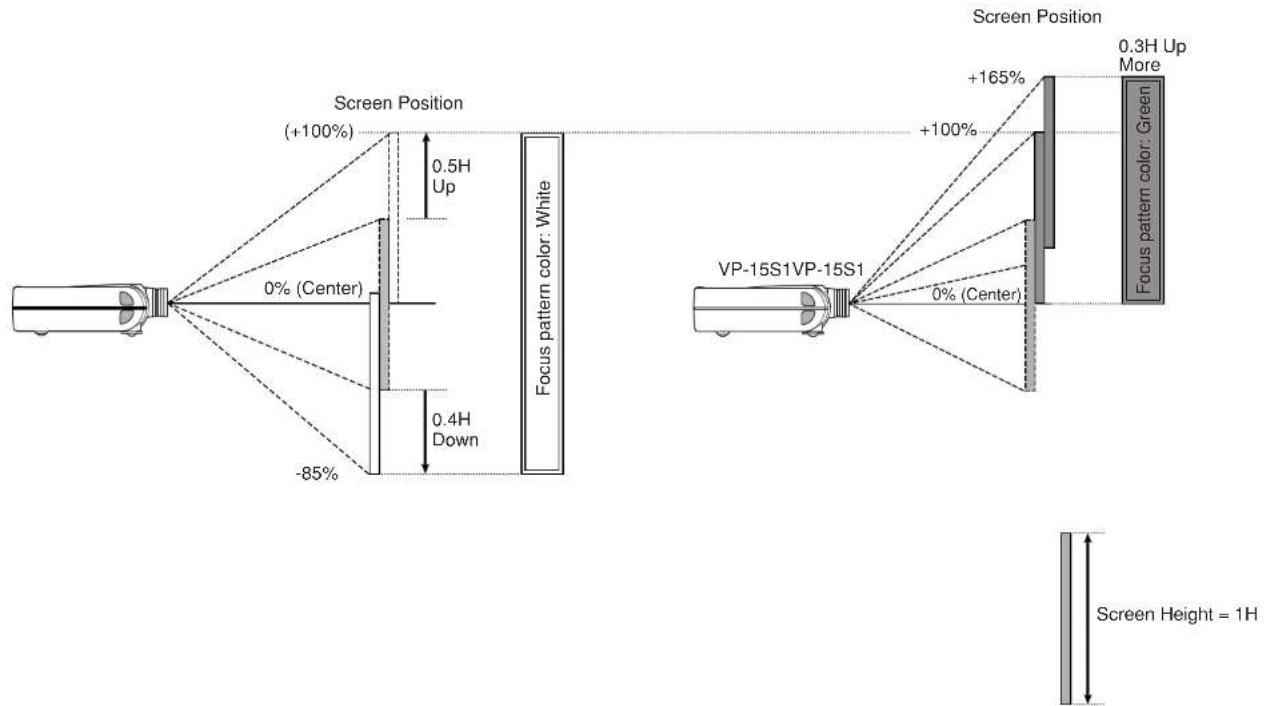
CAUTION:
In the expanded mounting condition (green focus pattern), the corners of the picture may appear dark or distorted.
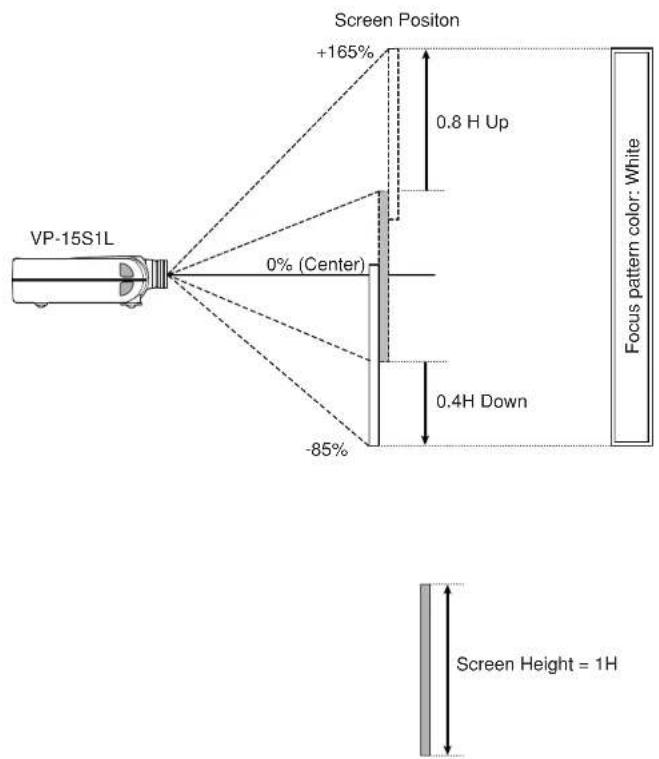
Lens shift position VP-15S1L
◆Standard condition (From -85% to +165%)
BASIC OPERATIONS
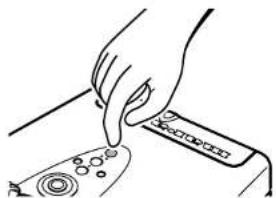
Turning on the Power
Press the ON button on the remote controller or the ⏻ /1 button on the projector. The ON indicator lights up.
natural_image
Hand inserting a small electronic device into a device (no text or symbols visible)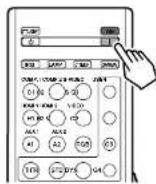
Selecting the Input Signal Source
Switch to the equipment connected to the projector.
Every time the INPUT button of the projector or the INPUT ▲ button of the remote controller is pressed, the input signal rotates in the order of COMPONENT 1 → COMPONENT 2 → S-VIDEO → VIDEO → RGB → HDMI 1 → HDMI 2. When the INPUT ▼ button of the remote controller is pressed, the input signal rotates in the opposite order. An input signal can also be directly selected by pressing one of the COMP.1, COMP.2, S-VIDEO, VIDEO, RGB, HDMI 1 and HDMI 2 buttons on the remote control.
natural_image
Line drawing of a hand pressing down on a device with a scroll wheel (no text or symbols)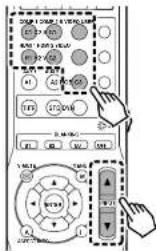
Selecting the Aspect Mode
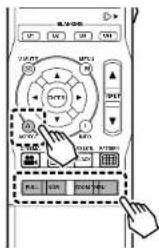
You can select 5 kinds of ASPECT mode using remote controller. Pressing the ASPECT button on the remote control rotates the aspect ratio in the order of FULL → NORMAL → ZOOM → V-STRETCH → THROUGH, allowing you to select an aspect ratio. An aspect ratio can also be directly selected by pressing one of the FULL, NORMAL, ZOOM or THROUGH buttons on the remote controller. A selection can also be made from the menu. (F.P.26)
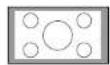
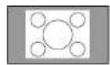
The Screen Images in a 16:9 screen
- Press the ZOOM button, the NORMAL button or the FULL button on the remote controller for the 4:3 aspect ratio video source.
- Press the FULL button on the remote controller for 16:9 aspect ratio video source, such as 1080i, 1035i, and 720p video systems.
- Use Zoom mode when projecting a 480i, 480p, 576i, or 576p squeezed image with a 2.35: 1 aspect ratio.
- Use V-Stretch mode when projecting a 720p, 1080i, or 1080p squeezed image with a 2.35: 1 aspect ratio.
◆Original Source Image
16:9 video source
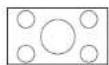
4:3 video source

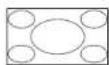
Full mode
The 16:9 squeezed image is displayed with the correct aspect.
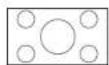
The 4:3 image is enlarged horizontally.
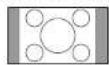
Normal mode
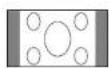
The picture in normal ratio 4:3 is displayed.
Zoom mode
A 2.35:1 Image is displayed in the entire screen. This function is best used when a 480i, 480p, 576i, or 576p squeezed image is input.
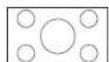
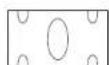
V-Stretch mode
The 2.35:1 image is shown across the entire screen. The vertical component of the aspect ratio is elongated in this case. This function is best used when a 720p, 1080i, or 1080p squeezed image is input.
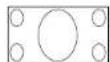
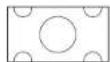
Through mode
Images are shown at the same resolution as RGB/video signals.
The Screen Images in a 4:3 screen
- Press the ZOOM button, the NORMAL button or the FULL button on the remote controller for the 4:3 aspect ratio video source.
- Press the FULL button on the remote controller for 16:9 aspect ratio video source, such as 1080i, 1035i, and 720p video systems.
- Use Zoom mode when projecting a 480i, 480p, 576i, or 576p squeezed image with a 2.35:1 aspect ratio.
- Use V-Stretch mode when projecting a 720p, 1080i, or 1080p squeezed image with a 2.35: 1 aspect ratio.
◆Original Source Image
16:9 video source
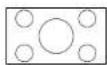
4:3 video source

Full mode
The 16:9 squeezed image is displayed with the correct aspect.
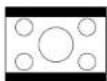
The 4:3 image is enlarged horizontally.
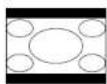
Normal mode
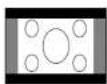
The picture in normal ratio 4:3 is displayed.
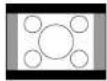
Zoom mode
A 2.35:1 image is displayed in the entire screen. This function is best used when a 480i, 480p, 576i, or 576p squeezed image is input.
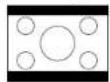
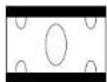
◆V-Stretch mode
The 2.35:1 Image is shown across the entire screen. This function is best used when a 720p, 1080i, or 1080p squeezed image is input.
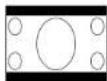
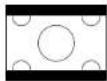
Through mode
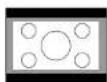
Images are shown at the same resolution as RGB/video signals.
To Turn off the Power
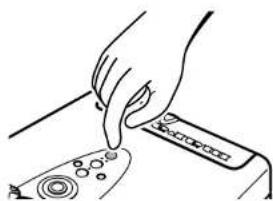
- Press the STANDBY button on the remote controller or the ⏻ /I button on the projector.
- The fan continues running for about 1 minute to internally cool the projector. In the meantime, the ON indicator on the projector flashes a blue color and buttons on the projector and remote control are irresponsive to touch. Once the fan stops, the ON indicator goes out and the STANDBY indicator lights up a green color to indicate the projector is on standby.
natural_image
Line drawing of a hand pressing down on a device component (no text or symbols)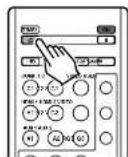
Notes :
- Do not pull out the AC power cord until the projector turns in standby mode.
- Do not pull out the power cord suddenly in the state of "POWER ON." It can cause a breakdown.
- If the WARNING indicator lights up or blinks a yellow color, check that the fan has stopped then unplug the AC power cord from its outlet.
- The projector will not be turned on if the ON button on the remote controller or the ⏻ / I button on the projector is pressed immediately after turning off. Press the ON button on the remote controller or ⏻ / I button on the projector after the projector turns into standby mode.
- When on standby, power to the projector is not OFF completely. If not planning to use the projector for an extended period of time, unplug the AC power cord from AC power outlet as explained above.
OPERATIONS
Menu Structure
| Main Menu | Item | |
| Picture Mode | Theater | Default / 1" / 2/3" |
| Standard | Default / 1" / 2/3" | |
| Dynamic | Default / 1" / 2/3" | |
| User | 1" / 2/3" / 4/9/5/7/8/9" | |
| Picture Adjust | Gamma | A |
| B | ||
| C | ||
| D | ||
| E | ||
| Picture P25 | Contrast | -50 ~ 6" 50 |
| Brightness | -50 ~ 6" 50 | |
| Color | -50 ~ 6" 60 | |
| Tint | R10 ~ 0" G10 | |
| Sharpness | 0" 50 | |
| Color Temp. | 1 / 2 / 3" / 4 / 5 / HB | |
| Lamp Mode | Normal* / Economy | |
| Iris 1 / 2 / 3" | ||
| Fine Menu 1 | Noise Reduction | 0" 50 |
| R Gain | -50 ~ 6" 60 | |
| G Gain | -50 ~ 6" 50 | |
| B Gain | -50 ~ 6" 60 | |
| R Bias | -50 ~ 6" 50 | |
| G Bias | -50 ~ 6" 60 | |
| B Bias | -50 ~ 6" 50 | |
| Luminance Gain | -50 ~ 6" 50 | |
| Chrome Delay | -5 ~ 6" ~ 5 | |
| Fine Menu 2 | Aspect | Full* |
| Normal | ||
| Zoom | ||
| V-Stretch | ||
| Through | ||
| Cinema | Auto* / Off | |
| VCR Mode | On / Off* | |
| Black Level | 0 IRE* / 7.5 IRE | |
| During HDMI Input, "Expand or Normal" is shown. | ||
| FRC | Auto 1" / Auto 2" / 60Hz / 50Hz / 48Hz | |
| DEC | On / Off* | |
| Picture Shift V | -50 ~ 6" 60 | |
| Diverscan | Enable* / Disable | |
| Main Menu | Item |
| Input Signal | Component 1 |
| P27 | 720p 480V576I |
| 1035I 480p | |
| 1080I 540p | |
| 1080p 576p | |
| Component 2 | Auto* |
| 720p 480V576I | |
| 1035I 480p | |
| 1080I 540p | |
| 1080p 576p | |
| S-Video Auto* | NTSC |
| PAL | |
| SECAM | |
| Video | Auto* |
| NTSC | |
| PAL | |
| SECAM | |
| RGB | Auto* |
| 480V576I | |
| 480p | |
| 540p | |
| 576p | |
| HDMI 1 Auto* | 480V576I |
| 480p | |
| 576p | |
| HDMI 2 Auto* | 480V576I |
| 480p | |
| 576p | |
| 720p |
| Main Menu | Item | |
| RGB/HD Adjust | Mode | Auto* |
| Memory1 | ||
| Memory2 | ||
| P27 | ||
| Readjust | Yes / No* | |
| Resolution H | 0°---25 | |
| Resolution V | 0°---25 | |
| Position H | -50~0° 60 | |
| Position V | -10~0° 40 | |
| Phase | -10~0° 40 | |
| Clamp Position | -50~0° 60 | |
| Clamp Width | -50~0° 60 | |
| HDMI | CSC HDMI 1 | Auto* |
| RGB | ||
| YPePx 4:4:4 | ||
| YPePx 4:2:2 | ||
| CSC HDMI 2 | Auto* | |
| YCeCn 4:4:4 | RGB | |
| YCeCn 4:2:2 | YPePx 4:4:4 | |
| YPePx 4:2:2 | ||
| Deep Color HDMI 1 Auto* | ||
| Deep Color HDMI 2 | Auto* | |
| Display | Keystone | -25~0° 25 |
| Scale | -100 0°--- | |
| Width | -100 0°--- | |
| Position H | -50~0° 50 | |
| Position V | -50~0° 60 | |
| Installation | Front* | |
| R + Ceiling | ||
| Rear | ||
| F + Ceiling | ||
| Main Menu | Item | |
| OSD/Blanking | Menu Position | Top-L* |
| Center-R | ||
| Bottom-L | ||
| Bottom | ||
| Bottom-R | ||
| Language | English* | |
| Portugues | ||
| Italiano | ||
| Français | ||
| Español | ||
| Config. (Configuration) | Status Info. Enable / Disable | |
| Power-OFF Confirm. Enable / Disable* | ||
| Blanking Memory Off / 1/2/3 | ||
| Blanking Top | 0° 448— | |
| Blanking Bottom | 0° 440— | |
| Blanking Left | 0° 440— | |
| Blanking Right | 0° 440— | |
| Auto Power OFF | Enable / Disable* | |
| Trigger 2 Full | On* / Off | |
| Trigger 2 Normal | On* / Off | |
| Trigger 2 Zoom | On* / Off | |
| Trigger 2 V-Sretch | On* / Off | |
| Trigger 2 Through | On* / Off | |
| Remote Control | Wireless / Wired | |
| Reset Lamp Life | Yes / No | |
| Reset All | Yes / No | |
* Default setting
Functions by Signal
| NO SIGNAL VALID SIGNAL | |||||||||||
| ANY INPUT | VIDEO or S-VIDEO COMPONENT RGB HDMI | ||||||||||
| NTSC PAL/SECAM 480i/576i 480p/576p | 1080i/720p/p576p Other1080p/540p | ||||||||||
| Picture Mode Theater | - | ● | ● | ● | ● | ● | ● | ● | |||
| Standard - ● | ● | ● | ● | ● | ● | ● | ● | ||||
| Dynamic - ● | ● | ● | ● | ● | ● | ● | ● | ||||
| User | - ● | ● | ● | ● | ● | ● | ● | ● | |||
| Picture Adjust | Gamma | - | *1 | *1 | *1 | *1 | *1 | *1 | *1 | *1 | *1 |
| Contrast | - | *9 | *9 | *9 | *9 | *9 | *9 | *9 | *9 | *9 | |
| Brightness | - | *9 | *9 | *9 | *9 | *9 | *9 | *9 | *9 | *9 | |
| Color | - | *9 | *9 | *9 | *9 | *9 | - | - | - | *9 | |
| Tint | - | *9 | *9 | *9 | *9 | *9 | - | - | - | *9 | |
| Sharpness | - | *9 | *9 | *9 | *9 | *9 | *9 | *9 | *9 | *9 | |
| Color Temp. | - | *9 | *9 | *9 | *9 | *9 | *9 | *9 | *9 | *9 | |
| Lamp Mode | - | *9 | *9 | *9 | *9 | *9 | *9 | *9 | *9 | *9 | |
| Iris | - | *9 | *9 | *9 | *9 | *9 | *9 | *9 | *9 | *9 | |
| Fine Menu 1 | Noise Reduction | - | *9 | *9 | *9 | *9 | *9 | *9 | *9 | *9 | *9 |
| R Gain | - | *9 | *9 | *9 | *9 | *9 | *9 | *9 | *9 | *9 | |
| G Gain | - | *9 | *9 | *9 | *9 | *9 | *9 | *9 | *9 | *9 | |
| B Gain | - | *9 | *9 | *9 | *9 | *9 | *9 | *9 | *9 | *9 | |
| R Bias | - | *9 | *9 | *9 | *9 | *9 | *9 | *9 | *9 | *9 | |
| G Bias | - | *9 | *9 | *9 | *9 | *9 | *9 | *9 | *9 | *9 | |
| B Bias | - | *9 | *9 | *9 | *9 | *9 | *9 | *9 | *9 | *9 | |
| Luminance Gain | - | *9 | *9 | *9 | - | - | - | - | - | - | |
| Chroma Delay | - | *9 | *9 | *9 | - | - | - | - | - | - | |
| Fine Menu 2 | Aspect | - | ● | ● | ● | ● | ● | ● | ● | ||
| Cinema | - | ● | ● | ● | - | *2 | ● | - | *2 | *2 | |
| VCR Mode | ● | ● | ● | ● | - | - | - | - | - | - | |
| Black Level | ● | ● | ● | ● | ● | ● | ● | ● | *10 | ● | |
| FRC | ● | ● | ● | ● | ● | ● | ● | ||||
| CEC | - | - | - | - | - | *3 | - | - | *3 | *3 | |
| Picture Shift V | - | *4 | *4 | *4 | *4 | *4 | *4 | *4 | *4 | *4 | |
| Overscan | - | ● | ● | ● | ● | - | ● | ● | - | *7 | |
| RGB/HD Adjust | Mode | - | - | - | - | -● | - | - | ● | *11 | |
| Readjust | - | - | - | - | - | *5 | - | - | *5 | *5 *11 | |
| Resolution H | - | - | - | - | - | *6 | - | - | *6 | *6 *11 | |
| Resolution V | - | - | - | - | - | *6 | - | - | *6 | *6 *11 | |
| Position H | - | - | - | - | - | *5 | - | - | *5 | *5 *11 | |
| Position V | - | - | - | - | - | *5 | - | - | *5 | *5 *11 | |
| Phase | - | - | - | - | - | *5 | - | - | *5 | - | |
| Clamp Position | - | - | - | - | - | *5 | - | - | *5 | - | |
| Clamp Width | - | - | - | - | - | *5 | - | - | *5 | - | |
| HDMI CSC HDMI 1 | ●- | - | - | - | - | - | - | - | - | ||
| CSC HDMI 2 ●- | - | - | - | - | - | - | - | ● | |||
| Deep Color HDMI 1 | ● | - | - | - | - | - | - | - | - | ● | |
| Deep Color HDMI 2 | ● | - | - | - | - | - | - | - | - | ● | |
| Display Keystone | ● | ● | ● | ● | ● | ● | ● | ● | |||
| Scale | -● | ● | ● | ● | ● | ● | ● | ● | |||
| Width | -● | ● | ● | ● | ● | ● | ● | ● | |||
| Position H | -● | ● | ● | ● | ● | ● | ● | ● | |||
| Position V | -● | ● | ● | ● | ● | ● | ● | ● | |||
| Installation | ● | ● | ● | ● | ● | ● | ● | ||||
| OSD/Blanking | Menu Position | ● | ● | ● | ● | ● | ● | ● | ● | ● | ● |
| Language | ● | ● | ● | ● | ● | ● | ● | ||||
| Status Info. | ● | ● | ● | ● | ● | ● | ● | ||||
| Power-OFF Confirm. | ● | ● | ● | ● | ● | ● | ● | ||||
| Blanking Memory | -● | ● | ● | ● | ● | ● | ● | ● | |||
| Blanking Top | - | *8 | *8 | *8 | *8 | *8 | *8 | *8 | *8 | *8 | |
| Blanking Bottom | - | *8 | *8 | *8 | *8 | *8 | *8 | *8 | *8 | *8 | |
| Blanking Left | - | *8 | *8 | *8 | *8 | *8 | *8 | *8 | *8 | *8 | |
| Blanking Right | - | *8 | *8 | *8 | *8 | *8 | *8 | *8 | *8 | *8 | |
| Configuration | Auto Power Off | ● | ● | ● | ● | ● | ● | ● | |||
| Trigger 2 Full | ● | ● | ● | ● | ● | ● | ● | ||||
| Trigger 2 Normal | ● | ● | ● | ● | ● | ● | ● | ||||
| Trigger 2 Zoom | ● | ● | ● | ● | ● | ● | ● | ||||
| Trigger 2 V-Strech | ● | ● | ● | ● | ● | ● | ● | ||||
| Trigger 2 Through | ● | ● | ● | ● | ● | ● | ● | ||||
| Remote Control | ● | ● | ● | ● | ● | ● | ● | ||||
| Reset Lamp Life | ● | ● | ● | ● | ● | ● | ● | ||||
| Reset All | ● | ● | ● | ● | ● | ● | ● | ||||
*1 Can be selected only when User is selected for the Picture Mode.
*2 On only when interlaced signals are input. (Off for progressive signals.)
*3 On only when 1035i / 1080i signals are input.
*4 On when Aspect is set to V-Stretch for HD signals. For other signals, On when Aspect is set to Zoom or V-Stretch.
*5 On when the RGB/HD Adjust mode is set to Memory.
*6 On when the RGB/HD Adjust mode is set to Memory. However, as an exception, it is Off when Aspect is set to Through or V-Stretch.
*7 On when 480i/p or 576i/p signals are input.
*8 On when Blanking Memory is selected for OSD/Blanking.
^9 Cannot be selected when the default is selected for Picture Mode.
*10 Can be selected when the input signal is 540p, 720p, 1035i, 1080i, or 1080p.
*11 Off when the input signal is 480i/p or 576i/p.
Picture Mode
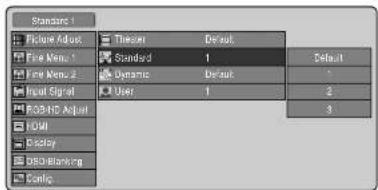
This unit has four picture modes: Theater, Standard, Dynamic and User. The picture quality recommended by Marantz Is already set for each mode. The User mode has eight gamma curves that can be chosen and saved by users. Also, the Theater, Standard and Dynamic modes three indexes for memorizing picture quality adjustments. Similarly, the User mode has nine, making a total of 18 indexes available for use.
| Picture mode | Index |
| Theater | Default, 1, 2, 3 |
| Standard | Default, 1, 2, 3 |
| Dynamic Default | 1, 2, 3 |
| User | 1, 2, 3, 4, 5, 6, 7, 8, 9 |
– Theater: Reproduces the black suited for movie software.
- Standard: Suited for normal movie software.
– Dynamic: Suited for visually dynamic image software.
- User 1-9: Enable the user to adjust the gamma curve as preferred. (P.25).
Picture mode selection
There are two ways to select the Picture mode: selecting a mode from the MENU screen or pressing the picture mode buttons (THTR, STD, DYN) on the remote controller. To use the remote controller buttons to select a picture mode, make sure the MENU screen does not appear on the screen and press the desired picture mode button any number of times. (Iss* P.6)
To select an picture mode from the menu, do as follows.
- Press the MENU button. The MENU screen appears on the screen.
- Use the ▲/▼ buttons to select the Picture Mode displayed at the top of the menu.
- Press the ENTER button to display the picture mode selection screen. Use the ▲, ▼, ▶ and ◀ buttons to select an picture mode.
- Press the ENTER button to decide the selected picture mode. Once the mode has been entered, the screen returns to the previous menu.
Memorizing settings in an index
The settings made in "Picture Adjust" and "Fine Menu 1" of the main menu are automatically memorized in the currently selected picture mode. Therefore, first select an picture mode and index, and then make settings.
Note : When default is selected, "Picture Adjust" and "Fine Menu 1" cannot be selected from the menu.
How to Operate Menus
This projector has menus that make setting and adjustment easy.
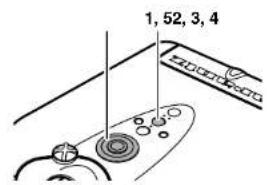
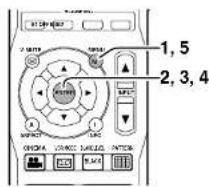
- Press the MENU button. The MENU screen appears on the screen.
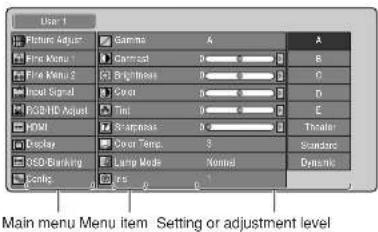
- Use the ▲ and ▼ buttons to select a menu (Picture Adjust, Fine Menu 1, Fine Menu 2, Input Signal, RGB/HD Adjust, Display, OSD/Blanking, Config) and press the ▶ button. For image mode selection, see "Picture Mode". (P.24)
- Use the ▲ and ▼ buttons to select a menu item and press the ▶ button.
- Use the ▲, ▼, ◀ and ▶ buttons to make the setting or adjustment of the selected item. • The current setting or adjustment level is displayed to the right of each menu item.
- Press the MENU button again to close the menu.
- Adjustment bar
When there is a ° " right of a menu item, this ▶ acts as a button for engaging an adjustment mode. In the adjustment mode, the menu disappears and only an adjustment bar, like that shown below, appears along the bottom of the display. Use the ◀ and ▶ buttons to adjust the item to the desired level. Press the ▲button to return to the menu.

Picture Adjust
Picture quality in each of the picture modes can be adjusted to your liking and those adjustments can be saved in memory.
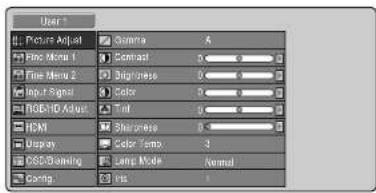
| Item | Adjustments |
| Gamma | A, B, C, D, E, Theater, Standard, Dynamic |
| Contrast | -50←→ 0←→ 50(Weak) (Default) (Strong) |
| Brightness | -50←→ 0←→ 50(Dark) (Default) (Bright) |
| Color | -50←→ 0←→ 50(Light) (Default) (Deep) |
| Tint | R10←→ 0←→ G10(Purple) (Default) (Green) |
| Sharpness | 0←→ 50 |
| Color Temp. (Color Temperature) | 1 2 3 4 5 HB(Red) ←→ (Blue) |
| Lamp Mode | Normal, Economy |
| Iris | 1 2 3Contrast (High) ←→ (Low)Brightness (Low) ←→ (High)Sets the lens and illumination aperture. |
- Gamma setting
To change the type of Gamma curve, set the Picture Mode (p.24) to User (1-9). Select "Gamma" from the displayed menu followed by the desired gamma curve (A, B, C, D, E, Theater, Standard or Dynamic).

- Color Temp. (Color Temperature)
1 : Red comes out strong. Color temperature is about 5250 K.
2: Red is mildly strong. Color temperature is about 5800 K.
3: Normal. Color temperature is about 6500 K.
4 : Blue is mildly strong. Color temperature is about 7500 K.
5: Blue comes out strong. Color temperature is about 9300 K.
HB : High Bright : Display brightest image.
NOTES:
- To adjust picture quality, set the index to a mode other than the default. See "Picture Mode". (P.24)
- The Gamma cannot be set unless User (1 - 9) is set for the Picture Mode (P.24).
- Tint cannot be adjusted for RGB input. For details, see "Functions by Signal." (P.22-23)
- The settings made in Picture Adjust are saved in the currently selected Picture Mode index.
Fine Menu 1
By adjusting this Fine Menu, you can make fine picture adjustment.
| Standard 1 | ||
| Picture Adjust | Noise Reduction | C |
| Fine Menu 1 | R Gain | C |
| Fine Menu 2 | R Gain | C |
| Input Signal | R Gain | C |
| E0/HD Adjust | R Bias | C |
| IOM | R Bias | C |
| Display | R Bias | C |
| DOUTBanking | Lumference Gain | C |
| Config | Chroma Delay | C |
| Item | Adjustments |
| Noise Reduction | 0 ←→ 50 |
| R Gain | -50 ←→ 0 ←→ 50 |
| G Gain | -50 ←→ 0 ←→ 50 |
| B Gain | -50 ←→ 0 ←→ 50 |
| R Bias | -50 ←→ 0 ←→ 50 |
| G Bias | -50 ←→ 0 ←→ 50 |
| B Bias | -50 ←→ 0 ←→ 50 |
| Luminance Gain | -50 ←→ 0 ←→ 50 |
| Chroma Delay | -5 ←→ 0 ←→ 5 |
- Noise Reduction
Adjust the noise reduction.
- R Gain
This menu allows the users to set the gain for red.
- G Gain
This menu allows the users to set the gain for green.
-B Gain
This menu allows the users to set the gain for blue.
- R Bias
This menu allows the users to set the bias for red.
- G Bias
This menu allows the users to set the bias for green.
-B Bias
This menu allows the users to set the bias for blue.
- Luminance Gain
This menu allows the users to set the luminance gain.
- Chroma Delay
This menu allows the users to set the chrominance delay.
Note :
- The settings made in Fine Menu 1 are saved in the currently selected Picture Mode index (Default excluded).
Fine Menu 2
| Standard 1 | ||
| Picture Adjust | Aspect | Full |
| Fine Menu 1 | Shinoma | Auto |
| Fine Menu 2 | MUT Mode | Or |
| Input Signal | Back Load | 0.186 |
| RGB/HD Adjust | BRC Auto | |
| HDMI | DEC Off | |
| Display | Picture Shift V | 0 |
| RED-Banking | Overcoat | Enable |
| Controls | ||
| Item | Adjustments |
| Aspect | Full, Normal, Zoom,V-Stretch, Through |
| Cinema | Auto, Off |
| VCR Mode | On, Off |
| Black level | 0 IRE, 7.5 IRE /Expand,Normal (For HDMI Input) |
| FRC | Auto 1, Auto 2, 60Hz,50Hz, 48Hz |
| CEC | On, Off |
| Picture Shift V | -50←→0←→50 |
| Overscan | Enable, Disable |
- Cinema
Auto : Automatically selects the cinema mode when a video signal is input.
NTSC: 3-2 pull down. PAL: 2-2 pull down
Off : Pull-down processing is not performed.
- VCR Mode
On : A projector is forced into the intra-field only deinterlacing mode.
Off: A projector is used with external field memories and operates in the full set of deinterlacing modes, i.e., motion adaptive video deinterlacing and full frame film source deinterlacing using 3:2 pulldown detection (2:2 pulldown for 625/50 sources).
- Black level
Select the black level by a video source.
- FRC (Frame Rate Conversion)
Auto 1: Frame Rate Conversion function is basically off. However FRC turns on automatically depending on vertical frequency of input signal. Normally, use this mode.
Auto 2: Use this mode when the image stops momentarily.
60Hz : Frame Rate Conversion function is "On". (59.94Hz fixed)
50Hz : Frame Rate Conversion function is "On". (50.00Hz fixed)
48Hz : Frame Rate Conversion function is "On". (47.95Hz fixed)
- CEC (Chroma Error Correction)
On : Reduces CUE (Chroma Up-sampling Error) of 1080i signals.
Off: Normally, use this mode.
- Picture Shift V
When Aspect on the Picture Adjust menu is set to "Zoom" or "V-Stretch", this setting allows the user to move the projected image vertically in order to see parts on the image not appearing on the screen.
- Overscan
Selects whether to show or hide picture borders with NTSC, PAL, SECAM, 480i, 480p, 576i and 576p signals.
Enable: Does not display borders of image signals. (Normally, use this mode.)
Disable: Displays the entire image signal.
Notes :
- There are some parameters can not adjust according to input signal.
- The settings made in Fine Menu 2 are saved in each currently selected Input signal source.
Input Signal
| Template 1 | |
| Picture Adjust | Component 1 Auto |
| Fine Video | Component 2 Auto |
| Fine Audio 2 | 3-Video Auto |
| Input Signal | Video Auto |
| RGB/HD Adjust | RGB Auto |
| NCM | MDM1 Auto |
| Display | MDM2 Auto |
| BSD Banking | |
| Config | |
| Item | Adjustments |
| Component1, Component2 | Auto, 480i/576i, 480p, 540p, 576p, 720p, 1035i, 1080i, 1080p |
| S-Video | Auto, NTSC, PAL, SECAM |
| Video | Auto, NTSC, PAL, SECAM |
| RGB | Auto, 480i/576i, 480p, 540p, 576p, 720p, 1035i, 1080i, 1080p |
| HDMI 1, HDMI 2 | Auto, 480i/576i, 480p, 576p, 720p, 1035i, 1080i, 1080p |
NTSC(NTSC-3.58)
: Conventional analog broadcasting used mainly in USA, Canada, Taiwan, Korea, and Japan.
PAL(PAL-4.43)
Conventional analog broadcasting used mainly in United Kingdom and Germany.
SECAM : Conventional analog broadcasting used mainly in France and Russia.
480p : Standard digital broadcasting
540p : Special digital broadcasting (for example: RCA DTC100)
576p : Standard digital broadcasting
720p, 1080p : High Definition digital broadcasting
1035I: Japanese "Hi-Vision" broadcasting
RGB/HD Adjust
| Standard 1 | ||
| Format Adjust | Maps | Memory 1 |
| Bit Mina 1 | Reagent | |
| Flow Mina 2 | Resolution H | 0 |
| Input Stage | Resolution V | 0 |
| Input/HD Adjust | Position H | 0 |
| HCM | Position V | 0 |
| Display | Phase | 0 |
| SSC/Damping | Clamp Position | 0 |
| Config | Clamp Shift | 0 |
| Item | Adjustments |
| Mode | Auto, Memory 1, Memory 2, Memory 3 |
| Readjust | Yes, No |
| Resolution H | 0 ←→ 25(Default) (Large) |
| Resolution V | 0 ←→ 25(Default) (Large) |
| Position H | -50 ←→ 0 ←→ 50(Left) (Default) (Right) |
| Position V | -10 ←→ 0 ←→ 10(Down) (Default) (Up) |
| Phase | -10 ←→ 0 ←→ 10(Backward) (Default) (Forward) |
| Clamp Position | -50 ←→ 0 ←→ 50(Backward) (Default) (Forward) |
| Clamp Width | -50 ←→ 0 ←→ 50(Small) (Default) (Large) |
- Mode
Auto: Each item is adjusted automatically.
Memory1-3: If something wrong with Auto Adjust, select Memory, please adjust each item manually.
- Readjust
Select to readjust settings automatically for each item in this menu.
- Resolution H, V
Adjusts the horizontal and vertical resolution of the RGB/HD input signals.
- Position H. V
Adjust the position of the input signal. H adjusts the horizontal position of the input signal. V adjusts the vertical position of the input signal.
- Phase
Adjust the phase of the DMD dots and the computer signal input from the RGB IN. Adjust the picture to where it looks clearest.
- Clamp Position, Width
Adjusts the clamp position and width used in RGB/HD input.
HDMI
| Standard 1 | |
| Balance Adjust | GSC HDMI 1 Auto |
| Fine Menu 1 | GSC HDMI 2 Auto |
| Fine Menu 2 | Deep Color HDMI 1 Auto |
| Signal Signal | Deep Color HDMI 2 Auto |
| RGB/HD Active | |
| HDMI | |
| Display | |
| Off-Blocking | |
| Config | |
| Item | Adjustments |
| CSC HDMI 1,CSC HDMI 2 | Auto, RGB, YPbPa 4:4:4, YPbPn 4:2:2,YCbCa 4:4:4, YCbCa 4:2:2Select the color space conversion for HDMI input. |
| Deep Color HDMI 1,Deep Color HDMI 2 | Auto, 8Bit, 10Bit, 12BitSelect the color depth for HDMI input. |
- CSC HDMI 1/CSC HDMI 2
Auto: The color space is automatically selected based on the input signal.
RGB: This is effective for DVI and similar signals.
YPaPc: This is effective for 720p, 1080i, and other high-resolution TV signals.
YC_3CR : This is effective for 480p, 480i, and other standard TV signals.
- Deep Color HDMI 1/Deep Color HDMI 2
Auto: This automatically selects the color depth based on the input signal. Normally, use at Auto.
8/10/12bit: Select this option when the video displayed in Auto is not correct. The input settings for the color depth are set to 8Bit, 10Bit, and 12Bit.
Display
| Standard 1 | ||
| Future Adjust | Keystone | 0 |
| First Menu 1 | Skew | 0 |
| First Menu 2 | Math | 0 |
| Input Signal | Position H | 0 |
| RSB/HC Adjust | Position V | 0 |
| GSM | Installation | Front |
| Display | ||
| GSD/Banking | ||
| Contig | ||
| Item Adjustments | |
| Keystone(Electronic verticalkeystone correction) | -25 260←→(▽) □ (△X) |
| Scale | -100 →(Min) (Max) |
| Width | -100 →(Min) (Max) |
| Position H | -50 500←→(Left) (Right)(Default) |
| Position V | -50 500←→(Down) (Up)(Default) |
| Installation | Front, Rear, F+Ceiling,R+Ceiling |
- Keystone
Adjust trapezoid image to rectangle image.
- Scale
Reduces the image without changing the aspect ratio. The image can be reduced to about 70% the original size.
-Width
Reduces the image width without changing the image height. The width can be reduced to about 75% the original size.
- Position H, V
Adjust the position of the input signal. H adjusts the horizontal position of the input signal. V adjusts the vertical position of the input signal.
- Instillation
Sets the installation mode of the projector.
Front: Select to set the projector on a tabletop and project from in front of the screen.
Rear: Select to set the projector on a tabletop and project from behind the screen.
F + Ceiling: Select to mount the projector on the ceiling and project from in front of the screen.
R + Ceiling: Select to mount the projector on the ceiling and project from behind the screen.
OSD/Blanking
| Standard 1 | ||
| Picture Adjust | Menu Position | Top L |
| Bloc None 1 | Language | English |
| One None 2 | Status Into | Enable |
| Bup/ Signal | Power Diff Contra | Cache |
| RGB/HD Adjust | Blanking Memory | Memory 1 |
| IOMN | Blanking Top | 0 |
| Display | Blanking Design | 0 |
| CSC Branding | Blanking Left | 0 |
| Config | Blanking Right | 0 |
| Item | Adjustments |
| Menu Position | Top-L, Top, Top-R, Center-L, Center, Center-R, Bottom-L, Bottom, Bottom-R |
| Language | English, Deutsch, Français, Español, Português, Italiano |
| Status Info. | Enable, Disable |
| Power-OFF Confirm. | Enable, Disable |
| Blanking Memory | Off, Memory 1, Memory 2, Memory 3 |
| Blanking Top | 0 100→ |
| Blanking Bottom | 0 100→ |
| Blanking Left | 0 100→ |
| Blanking Right | 0 100→ |
- Menu Position
OSD position is selected from 9 positions.
- Status Info.
Enable: Displays the current status of the projector for a set amount of time in the upper right-hand corner of the screen at startup and whenever the Input Source, Picture Mode, Aspect ratio or other setting is changed.
Disable: Does not display Status Info.
- Power-OFF Confirm.
Disable: Directly puts the projector on standby without displaying the confirmation message when power is shut off from the button on the remote controller or the ⏻/I button on the projector.
Enable: Displays a confirmation message asking whether to shut the power off or continue use when power is shut off from the ⭕ button on the remote controller or the ⭕ fl button on the projector. To shut off the power immediately, select "Yes" and press the ENTER button. To not shut off the power, select "No" and press the ENTER button.
- Blanking Memory
Sets the blanking mode with which part of the screen can be hidden in black bands. To use this mode or change the setting, select from Memory 1 to 3.
Off: Turns the blanking mode off. No masking occurs.
Memory 1-3: Memorize the blanking width of the top, bottom, left and right masks set with the below features. Up to three settings can be memorized.
- Blanking Top, Bottom, Left and Right
Set the blanking width of the top, bottom, left and right masks, which are then memorized in Memory 1 – 3 of Blanking Memory. Each can be set from 0 (no mask) to a maximum 100.
Configuration
| Standard 1 | ||
| Balance Adjust | Auto Power On | Disable |
| Line Menu 1 | Trigger 2 Full | On |
| Line Menu 2 | Trigger 2 Normal | On |
| Signal Signal | Trigger 2 Zoom | On |
| RGB/HD Action | Trigger 2 View On | |
| HDMI | Trigger 2 Through On | |
| Display | Remote Control | |
| Off/Blanking | Reset Lamp Life | |
| Config | Reset X1 | |
| Item | Adjustments |
| Auto Power Off | Enable, Disable |
| Trigger 2 Full On, Off | |
| Trigger 2 Normal On, Off | |
| Trigger 2 Zoom On, Off | |
| Trigger 2 V-stretch On, Off | |
| Trigger 2 Through On, Off | |
| Remote Control | Wireless, Wired |
| Reset Lamp Life Yes, No | |
| Reset All Yes, No |
- Auto Power Off
When the auto power off feature is set to Enable, power to the projector automatically shuts off if no signals are received and no operations are performed for about 10 consecutive minutes. If 9 minutes pass without the projector receiving any signals or being operated in anyway, the below message appears on the screen.
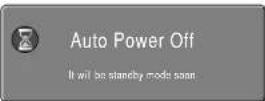
About 1 minute after the message appears on the screen, power to the projector shuts off.
Note:
After the above message appears on the screen, pressing any button on the projector or remote control other than the ⏻ / I button on the projector and the ON or STANDBY buttons on the remote control resets the auto power off feature.
The auto power off feature will activate again if, after that, the projector goes without receiving any signals or being operated in anyway for 10 consecutive minutes.
- Tigger 2
Select either 12V output or 0V output by choosing On or Off for each aspect mode. Full, Normal, Zoom, V-stretch and Through.
This allows you to control such as a powered dual aspect screen with the outputs for the aspect modes.
On: Output DC 12V.
Off: No output.
- Remote Control
Wireless: Set to use the included remote controller.
Wired: Set to control the projector from either Marantz's AV components connected to the REMOTE CONTROL IN/OUT terminals or a PC or other device connected to the RS-232C terminal of the projector. The included remote controller cannot be used in this case. When this item is selected, a confirmation message appears asking whether to change the currently selected mode to the other mode or not. To change the mode, select "Yes" and press the ENTER button on the projector. To keep the same mode, select 'No' and press the ENTER button.
Notes:
- To prevent misoperation, the ENTER button of the remote controller does not respond to touch when the Wired/Wireless setting is displayed. Press the ENTER button of the projector to enter the setting.
- To change from Wired to Wireless, set "Wireless" from the menu using the buttons of the projector.
- Reset Lamp Life
If the lamp is replaced before reaching its 2000 hours lamp life, be sure to reset the lamp's life counter. To do this, select "Reset Lamp Life" from the Configuration menu. When the user selects this item, the following message appears:
Select "Yes", and press the ENTER button. Then the lamp life is initialized.
- Reset All
All settings are reset to the factory default settings except the lamp life.
When the user selects this item, the following message appears:
Select "Yes", and press the ENTER button.
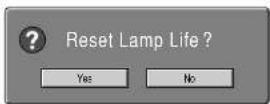
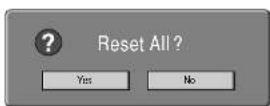
MAINTENANCE
Lamp Life and Replace Lamp
Lamp Life
Display the remaining lamp life by pressing the INFO. button on the remote controller.
| Video Type | Component A, x 1086 / 80 |
| Picture Mode | Use 1 |
| Gamma | A |
| Aspect | For use |
| Lamp Mode | Eccentric |
| RS | I |
| Lamp Use | 92 Watts |
| Total Time | 2023 Hours |
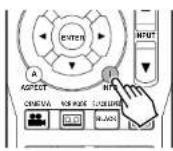
Notes:
- The maximum life limit of the lamp is 2000 hours. Although we care very much about quality, the lamp can rarely breaks down if running time exceeds 1000 hours. Therefore we recommend to replace the lamp if Lamp Life gets under 1000 hours. The lamp cannot be used exceeding the maximum life limit.
- This product is checked under strict quality control when it is shipped out from factory. "Total Hours" in the menu includes the time for this check. So "Total Hours" may not be 0 hours when it is used first time.
- When the lamp life becomes less than 100 hours and the unit is still on, the remaining lamp life is displayed on the screen automatically.

Warning
Lamp Life 100 Hours
- When the lamp life becomes less than 5 hours, the remaining lamp life is displayed on the screen.

Warning
Lamp Life 5 Hours
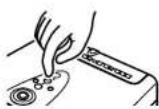
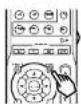
To clear the warning, press the MENU button.
- Approximately 2 minutes after the lamp reaches the end of its lamp life, power to the projector shuts OFF and the WARNING indicator lights up a yellow color. If the below message appears on the screen and power shuts OFF soon thereafter, promptly replace the lamp with a new one. (See "Replacing Lamp Unit" P.31)

Warning
Lamp Life 0 Hours
◆ Initialize the Lamp Life
The lamp has a lamp life of 2000 hours. The projector is designed to shut OFF power if the lamp is used beyond this 2000 hours lamp life. In such case, replace the lamp and reset the lamp life counter as follows.
- After the message "Lamp Life 0 Hours" appears, power to the projector shuts OFF. Promptly replace the lamp with a new one. (P.31 "Replacing Lamp Unit")
- Once the lamp has been replaced, press the ON button on the remote control or the ☑ button on the projector.
The below message appears on the screen for 120 seconds.
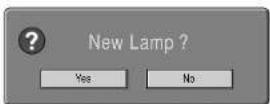
- Select "Yes", using the ◀/▶ buttons.
- Press the ENTER button. The lamp life indicator is now initialized.
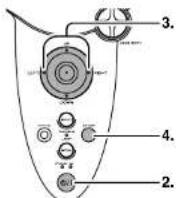
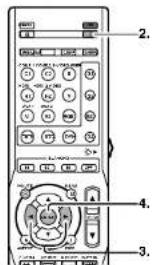
Replacing Lamp Unit
CAUTION:
- Do not touch the lamp and the lamp unit carelessly. It is extremely hot. Wait at least one hour for the lamp to cool down before handling.
- Do not loosen any screws except for those mentioned below.
• The lamp may break if handled improperly. - Do not use other than a Marantz replacement lamp unit.
◆How to replace the Lamp Unit
PREPARATION:
When replacing the lamp, turn off the power for the projector. After the cooling fan stops, disconnect the power cord and wait for one hour until the lamp is cooled down completely, then replace the lamp.
- Press the STANDBY button on the remote controller or the _1 button on the projector to turn the projector off.
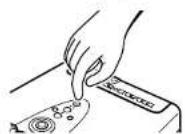
- After the cooling fan stops, Unplug the AC power cord.
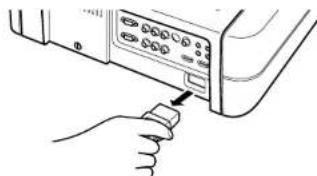
natural_image
Hand inserting a cable into a device panel (no text or symbols visible)- Wait at the least one hour for the lamp and lamp unit to cool down.
- Read the caution and warning labels on the unit.
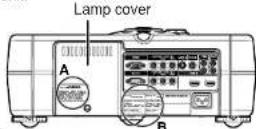
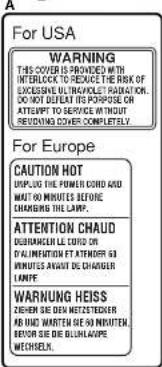
- Remove the lamp cover screw.
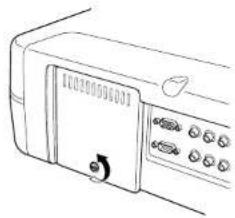
natural_image
Line drawing of a portable electronic device with control buttons and a scroll (no text or symbols)- Remove the lamp cover in the direction of the arrow.
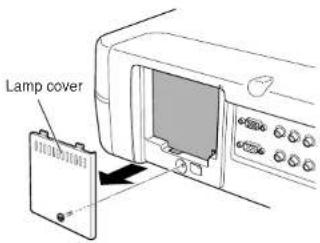
- Holding the handle and pull the lamp unit out toward your side.
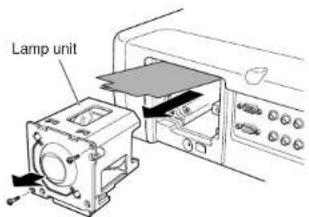
- Install a new lamp unit in position securely.
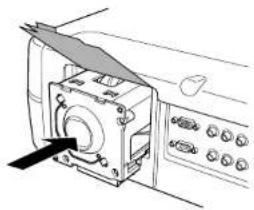
natural_image
Diagram of a device with an open lid and a black arrow pointing to a component (no text or symbols visible)- Lock the lamp unit in place with the two screws removed in step 7. Press on the handle until it folds over and close the cover sheet.
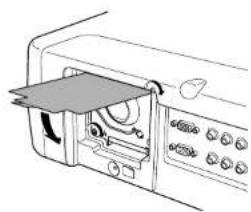
natural_image
Line drawing of a printer or scanner device with control panel and paper clip (no text or symbols)- Install the lamp cover back in its original position and fasten with the fastening screw.
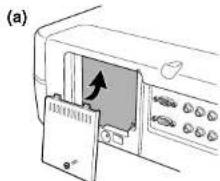
natural_image
Diagram of a printer or scanner with an open slot and a paper clip, showing no text or symbols.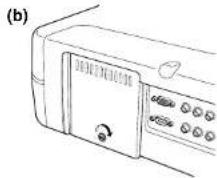
-
Plug in the video projector and turn on the power and project the image.
-
If the lamp is replaced before reaching its 2000 hours lamp life, see "Reset Lamp Life" (P.30).
- If the lamp is replaced after reaching its 2000 hours lamp life, see "Initialize the Lamp Life" (P.31).
E
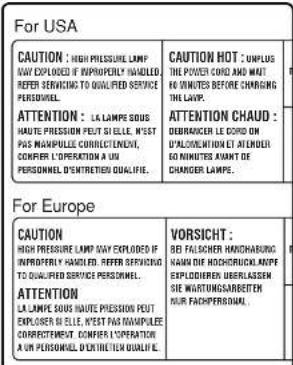
- Open the cover sheet and remove the two screws (slotted head screwdriver required) that lock down the lamp unit. Do not remove any other screws.
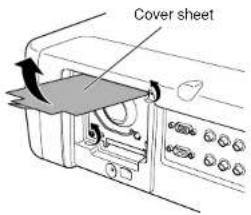
Cleaning the Lens
If the lens becomes dirty or smudged, clean it with a soft dry cloth only. Use optical lens cleaners that are approved for eyeglasses or cameras. Do not use a dampen cloth, detergent solution, or thinner. It may damage the lens and remain as stains.
Replacement Parts
When replacement parts are required, be sure to inform a Marantz authorized service center. Use only replacement parts specified by Marantz. Unauthorized substitutions may result in fire, electric shock, or other hazards. And, the warranty may not be guaranteed.
Optional Accessories
Lamp Unit : LU-12VPS3
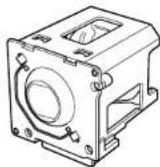
Ceiling Mount kit : MOUNT 20
This kit is specially designed to mount the unit on ceiling.
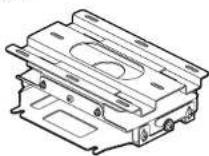
Extension Pole : EXT-10
This tool is to adjust height with the Ceiling Mount Kit MOUNT 20.
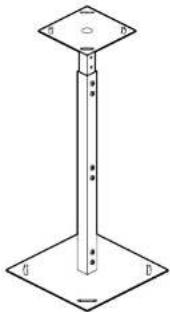
natural_image
Technical line drawing of a vertical support structure with base plate (no text or symbols)CAUTION:
For ceiling installation, consult with the Marantz Authorized dealer.
TROUBLESHOOTING
Try the following troubleshooting before calling for service.
- Are the connections made properly?
- Are you operating the unit properly, following the instructions?
If the unit does not operate properly, check the items shown in the following table.
If any trouble cannot be solved by the instructions below, malfunction of the internal circuitry is suspected; immediately unplug the AC power cord and contact Marantz dealer or service center.
| Possible CauseSymptom Remedy | ||
| No power | AC power cord is not connected correctly. | Connect the AC power cord properly. |
| Lamp cover is not closed correctly. | Close the cover properly. (P.P.32) | |
| Image is not displayed. | A signal cable is not connected correctly. | Connect a signal cable properly. |
| Selected Input Is Incorrect. | Select the correct input source. (P.P.18) | |
| The picture mute is active. | Press the V-MUTE button to release the mute. | |
| Poor color. | Picture is not adjusted properly. | Adjust the picture in the MENU mode. |
| Picture is too dark. | Lamp life is running out. | Replace the lamp. (P.P.31) |
| Contrast or brightness is not adjusted properly. | Adjust contrast or brightness properly. | |
| Picture is not clear. | Picture is out of focus. | Adjust the focus. (P.P.11) |
| Dew is on the lens. | Run the projector for about two hours. | |
| Picture rolls. | A signal cable is not properly connected. | Connect a signal cable properly. |
| The Remote Controller does not work. | Batteries are exhausted. | Replace batteries. (P.P.8) |
| The distance to the unit is too far. | Make the distance between the unit and the remote control closer. (P.P.8) | |
| IR sensor on unit is obstructed. | Remove any obstacles. | |
| The "Wired" position in the Menu is selected. | Select the "Wireless" position. (P.P.30) |
Notes:
- If the lamp still does not function after the replacement and initialization of the lamp life, contact a Marantz authorized dealer, or service center.
- This projector uses a microcomputer. External noise can cause malfunctions. In such case, shut power OFF and unplug the power cable from AC power outlet. Then, plug the AC power cable back in, press the ⏻/I button on the projector or the ON button on the remote control and check operation.
ERROR MODE
WARNING/LAMP Indicator, ON Indicator, and STANDBY Indicator diagnose error mode of the projector as follows.
| Error mode | Indicators | Possible Cause Recommendation | |||
| WARNING /LAMP | ON STANDBY | ||||
| Lamp cover | ON | OFF | Flashing | The lamp cover is not closed properly. | Close the cover correctly. |
| Lamp | ON | OFF | OFF | The lamp has failed, or the lamp is completely worn out. | Replace the lamp and reset lamp life. |
| Temperature | Flashing | OFF | Flashing | Projector internal temperature is higher than the allowed level. | Check if anything is blocking the exhaust vent. |
| Fan | Flashing | OFF | ON | Trouble has occurred with the fan. | |
| Other | Flashing | OFF | OFF | Internal program error | Shut power OFF and ON again. |
ON SCREEN MESSAGE
Use the list below to check the message displayed on the screen.
| MeaningMessage | Remedy | |
| NO SIGNAL | No input signal. | Properly connect the cables. |
| REPLACE LAMP! | The lamp has reached the end of its life. | Replace the lamp and reset lamp life. |
| OUT OF RANGE | Improper signal feed to the projector. | Adjust resolution, V(Hz) : refresh rate of the equipment, referring to the Timing Chart. |
GLOSSARY
Aspect ratio
Width and height ratio of an image. The normal aspect ratio of a computer and video image is 4:3. There are also wide images with an aspect ratio of 16:9 and 21:9.
Black Level (Black setup)
The signal level which represents black picture intensity. For NTSC system for USA, this level is 7.5IRE. NORMAL: 16 (Black) - 235 (White) For NTSC system for Japan and DVD, this level is 0IRE. EXPAND: 0 (Black) - 246 (White)
Color Temperature
White color hue. Low color temperature implies a warmer (more yellow/red) light. High color temperature implies a colder (more blue) light.
Keystone
Distortion of the image caused by projection to a wrong vertical angle.
SPECIFICATIONS
◆Optical characteristics
| Panel 1080p DLP | × (1920 x 1080 pixels) |
| Lamp | Super High Pressure 200W DC |
| Lens VP-15S1: f: | 30.7 to 44.5mmVP-15S1L: f: 44.5 to 66.75mm |
| Projection size 70 to 250 inches | |
Input/Output
| VIDEO IN RCA x 1 | NTSC-3.58/PAL-4.43/SECAM Composite video 1.0Vp-p/75 Ohm |
| S-VIDEO IN S-Connector x 1 | NTSC-3.58/PAL-4.43/SECAM S-Video |
| COMPONENT 3R IN | CA x 2Y, Cs/Ps, Cn/Pn |
| RGB/HD IN D-sub | M 15 pin x 1Analog RGBHD:1080i, 720p, 480p |
| HDMI IN HDMI x 2 | HDMI 1.3 compliant(single link only) |
| REMOTE CONTROLLER IN | Mini jack type x 1 |
| REMOTE CONTROLLER OUT | Mini jack type x 1 |
| AC IN 3 Prong Grounding Type | |
| TRIG.1 OUT, Mini TRIG.2 OUT Output: DC12V or 0V | Jack x 2 |
| RS-232C RS-232C receptacle plug x 1 | |
◆General
| Power requirement | For USA: AC 120V/60HzFor Europe: AC 230V/50Hz |
| Power consumption | < 350 W |
| Standby consumption | For USA: < 0.3 W (AC 120V)For Europe: < 0.5 W (AC 230V) |
| Chassis isolation | Class-1 |
| Safety | UL60950-1CSA C22.2 E60950EN60950-1 |
| EMC | FCC Part-15 Class-BEN55022 Class-B |
| Dimensions | VP-15S1:15 15:16(W) x 18 5:16(D)x 6 1:8(H) inch404.5(W) x 489.5(D) x 158(H) mmVP-15S1L:15 15:16(W) x 19 19:32(D)x 6 1:8(H) inch404.5(W) x 497.5(D) x 158(H) mm |
| Net weight | 13 kg |
| OperatingTemperature | 5 to 35 °C |
| Operating humidity | 30 to 85% |
| Storage Temperature | -20 to 60 °C |
| Storage humidity | 30 to 85% |
◆Accessories
- Lens cap x 1
- Remote controller x 1
- Batteries x 2
- AC power code x 1
- User Guide x 1
- Warranty Card
(1 copy each for USA, CANADA)
Comes with USA model only.
Timing chart
| Format | Resolution | V (Hz) | H (KHz) | Comp. 1/2 | CVBS/S-Video | RGB HDMI | |
| NTSC 3.58 | - | 59.94 / 60 | 15.734/15.75 | ● | |||
| NTSC 4.43 | - | 59.94 / 60 | 15.734/15.75 | ● | |||
| PAL-B/G | - | 50 | 15.625 | ● | |||
| PAL M | - | 59.94 / 60 | 15.734/15.75 | ● | |||
| PAL N | - | 50 | 15.625 | ● | |||
| PAL 60 | - | 59.94 / 60 | 15.734/15.75 | ● | |||
| SECAM | - | 50 | 15.625 | ● | |||
| 480/60i | 720 ×487 | 59.94 / 60 | 15.734/15.75 | ● | ● | ||
| 480/60p | 720 ×483 | 59.94 / 60 | 31.469/31.5 | ● | ● | ● | |
| 576/50i | 720 ×576 | 50 | 15.625 | ● | ● | ||
| 576/48p | 720 ×576 | 48 | 30 | ● | ● | ● | |
| 576/50p | 720 ×576 | 50 | 31.25 | ● | ● | ● | |
| 540/60p | 1920× 540 | 59.94 / 60 | 33.746/33.78 | ● | ● | ||
| 720/24p | 1280× 720 | 23.98 / 24 | 17.985/18 | ● | ● | ||
| 720/25p | 1280× 720 | 25 | 18.75 | ● | ● | ||
| 720/30p | 1280× 720 | 29.97 / 30 | 22.478/22.5 | ● | ● | ||
| 720/50p | 1280× 720 | 50 | 37.5 | ● | ● | ● | |
| 720/60p | 1280× 720 | 59.94 / 60 | 44.955/45 | ● | ● | ● | |
| 1035/60i | 1920 ×1035 | 59.94 / 60 | 33.716/33.75 | ● | ● | ● | |
| 1080/50i | 1920 ×1080 | 50 | 28.125 | ● | ● | ● | |
| 1080/60i | 1920 ×1080 | 59.94 / 60 | 33.716/33.75 | ● | ● | ● | |
| 1080/24PsF | 1920 ×1080 | 23.98 / 24 | 26.978/27 | ● | ● | ||
| 1080/25PsF | 1920 ×1080 | 25 | 28.125 | ● | ● | ||
| 1080/30PsF | 1920 ×1080 | 29.97 / 30 | 33.716/33.75 | ● | ● | ||
| 1080/24p | 1920 ×1080 | 23.98 / 24 | 26.978/27 | ● | ● | ● | |
| 1080/25p | 1920 ×1080 | 25 | 28.125 | ● | ● | ● | |
| 1080/30p | 1920 ×1080 | 29.97 / 30 | 33.716/33.75 | ● | ● | ● | |
| 1080/50p | 1920 ×1080 | 50 | 62.5 | ● | ● | ● | |
| 1080/60p | 1920 ×1080 | 59.94 / 60 | 67.433/67.5 | ● | ● | ● | |
| 640 × 350@70Hz | 640 ×350 | 70 | 31.489 | ● | |||
| 640 × 350@85Hz | 640 ×350 | 85 | 37.861 | ● | ● | ||
| 640 × 400@70Hz | 640 ×400 | 70 | 31.489 | ● | |||
| 640 × 400@85Hz | 640 ×400 | 85 | 37.861 | ● | ● | ||
| 640 × 480@60Hz | 640 ×480 | 60 | 31.469 | ● | ● | ||
| 640 × 480@72Hz | 640 ×480 | 72 | 37.861 | ● | ● | ||
| 640 × 480@75Hz | 640 ×480 | 75 | 37.5 | ● | ● | ||
| 640 × 480@85Hz | 640 ×480 | 85 | 43.269 | ● | ● | ||
| 800 × 600@56Hz | 800 ×600 | 56 | 35.156 | ● | ● | ||
| 800 × 600@60Hz | 800 ×600 | 60 | 37.879 | ● | ● | ||
| 800 × 600@72Hz | 800 ×600 | 72 | 48.077 | ● | ● | ||
| 800 × 600@75Hz | 800 ×600 | 75 | 46.875 | ● | ● | ||
| 800 × 600@85Hz | 800 ×600 | 85 | 53.673 | ● | ● | ||
| 1024 × 768@60Hz | 1024× 768 | 60 | 48.363 | ● | ● | ||
| 1024 × 768@70Hz | 1024× 768 | 70 | 56.476 | ● | ● | ||
| 1024 × 768@75Hz | 1024× 768 | 75 | 60.023 | ● | ● | ||
| 1024 × 768@85Hz | 1024× 768 | 85 | 68.678 | ● | |||
| 1280 × 1024@60Hz | 1280 ×1024 | 60 | 63.981 | ● | |||
| 1600 × 1200@60Hz | 1600 ×1200 | 60 | 75 | ● | |||
Specifications may be subjected to change without any prior notice.
DIMENSIONS
VP-15S1 VP-15S1L
Top
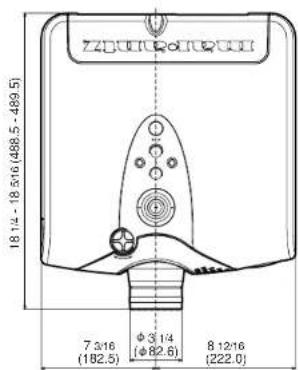
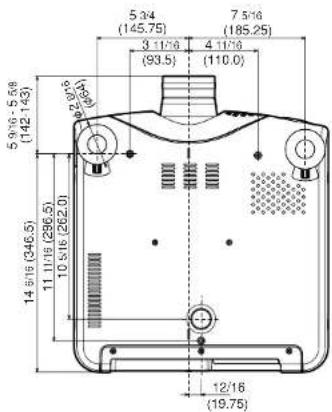
Top
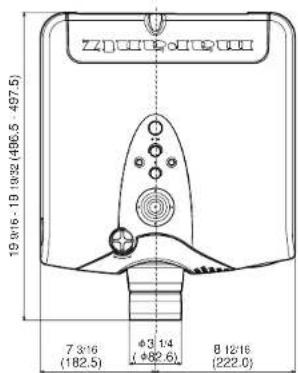
BottomBottom
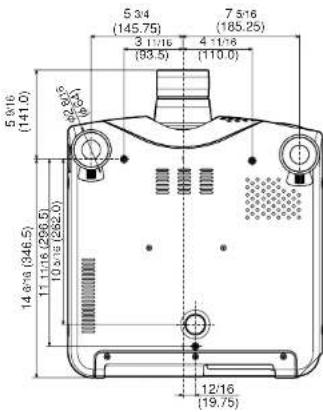
Front
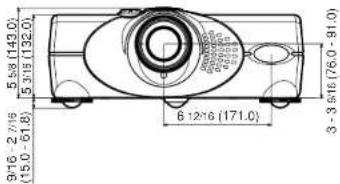
Rear
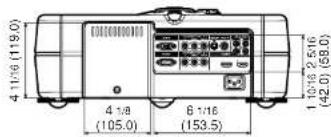
Front
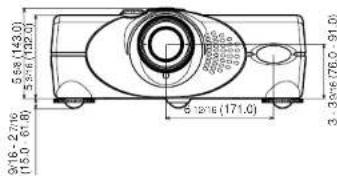
Rear
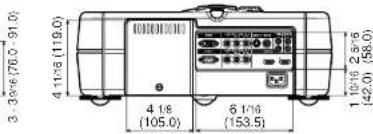
Unit : inch (mm)
Note
www.marantz.com
You can find your nearest authorized distributor or dealer on our website.
marantz® is a registered trademark.
- WARNING
- NOTE:
- IMPORTANT SAFETY INSTRUCTIONS
- Additional Safety Information!
- DECLARATION OF CONFORMITY
- ENGLISH
- FOREWORD
- WARRANTY
- RETAIN YOUR PURCHASE RECEIPT
- IMPORTANT
- FOR U.K. ONLY
- EQUIPMENT MAINS WORKING SETTING
- COPYRIGHT
- WARNINGS
- Lamp Handing Precautions
- DANGER
- CAUTION
- FRANÇAIS
- AVANT-PROPOS
- IMPORTANT SAFEGUARDS ....2
- FEATURES 3
- ACCESSORIES....3
- PROJECTOR LAYOUT AND FUNCTIONAL OVERVIEW....4
- CONNECTION....9
- INITIAL SETTING....11
- INSTALLATION 13
- BASIC OPERATIONS....18
- OPERATIONS....21
- MAINTENANCE 31
- TROUBLESHOOTING 34
- ERROR MODE....35
- ON SCREEN MESSAGE 35
- GLOSSARY....35
- SPECIFICATIONS....36
- DIMENSIONS....37
- For Europe –
- A NOTE ABOUT RECYCLING
- IMPORTANT SAFEGUARDS
- Caution Concerning the Lamp Replacement
- Caution Concerning the Lamp Unit
- For USA
- For Europe
- CAUTION HOT
- WARNUNG HEISS
- ATTENTION
- VORSICHT :
- Concerning the Setup of the Projector
- Notes on Operation
- FEATURES
- ACCESSORIES
- PROJECTOR LAYOUT AND FUNCTIONAL OVERVIEW
- Rear and Terminals View
- Bottom View
- Remote Controller
- Remote Controller Operational Range
- Preparing the Remote Controller
- Notes :
- CAUTIONS ON BATTERIES
- CONNECTION
- When making connections be sure to:
- When pulling out a cable:
- Connection with AC Power Supply
- SUOMI
- VARO
- Connection with Video Equipments
- Connecting a video source using S-VIDEO IN and VIDEO IN terminals.
- Connecting a DVD player to the COMPONENT VIDEO IN 1 or 2 terminal (Devices can be connected to both terminals at the same time.)
- Connection with a HD-Video, DVD Player, Satellite, Cable Tuner or PC
- Advanced Connection
- INITIAL SETTING
- Turning on the Power
- Zooming and Focusing
- Detail Focusing
- Note :
- Adjusting the Image Position
- Adjusting the Height
- Keystone Correction
- INSTALLATION
- Recommended Setting
- ◆16 : 9 Screen
- ◆4 : 3 Screen
- ◆16:9 Screen
- 4:3 Screen
- 16:9 Screen
- Lens shift position VP-15S1
- CAUTION:
- Lens shift position VP-15S1L
- BASIC OPERATIONS
- Selecting the Input Signal Source
- Selecting the Aspect Mode
- The Screen Images in a 16:9 screen
- ◆Original Source Image
- Full mode
- Normal mode
- Zoom mode
- V-Stretch mode
- Through mode
- The Screen Images in a 4:3 screen
- ◆V-Stretch mode
- To Turn off the Power
- OPERATIONS
- Picture Mode
- Picture mode selection
- Memorizing settings in an index
- How to Operate Menus
- - Adjustment bar
- Picture Adjust
- - Gamma setting
- - Color Temp. (Color Temperature)
- NOTES:
- Fine Menu 1
- Fine Menu 2
- Input Signal
- NTSC(NTSC-3.58)
- PAL(PAL-4.43)
- RGB/HD Adjust
- - Mode
- - Readjust
- - Resolution H, V
- - Position H. V
- - Phase
- - Clamp Position, Width
- HDMI
- - CSC HDMI 1/CSC HDMI 2
- - Deep Color HDMI 1/Deep Color HDMI 2
- Display
- - Keystone
- - Scale
- -Width
- - Position H, V
- - Instillation
- OSD/Blanking
- - Menu Position
- - Status Info.
- - Power-OFF Confirm.
- - Blanking Memory
- - Blanking Top, Bottom, Left and Right
- Configuration
- - Auto Power Off
- - Tigger 2
- - Remote Control
- - Reset Lamp Life
- - Reset All
- MAINTENANCE
- Lamp Life and Replace Lamp
- Lamp Life
- ◆ Initialize the Lamp Life
- Replacing Lamp Unit
- ◆How to replace the Lamp Unit
- PREPARATION:
- Cleaning the Lens
- Replacement Parts
- Optional Accessories
- TROUBLESHOOTING
- ERROR MODE
- ON SCREEN MESSAGE
- GLOSSARY
- Aspect ratio
- Black Level (Black setup)
- Color Temperature
- Keystone
- SPECIFICATIONS
- ◆Accessories
- DIMENSIONS
- VP-15S1 VP-15S1L
- Note
Brand : MARANTZ
Model : VP-15S1
Category : Vidéo-projecteur