
MonzaMP3 7887 - Mp3 player BECKER - Free user manual and instructions
Find the device manual for free MonzaMP3 7887 BECKER in PDF.


| Product Type | MP3 Player |
| Brand | Becker |
| Model | MonzaMP3 7887 |
| Dimensions | Approx. 90 x 40 x 10 mm |
| Weight | Approx. 40 g |
| Power Source | Built-in rechargeable lithium-ion battery |
| Battery Life | Up to 15 hours of music playback |
| Storage Capacity | 8 GB internal memory (supports microSD up to 32 GB) |
| Supported Audio Formats | MP3, WMA, WAV |
| Display | 1.8-inch TFT color screen |
| Interface | USB 2.0 for file transfer |
| Earphone Jack | 3.5 mm stereo |
| Additional Functions | FM radio, voice recording, playback modes, equalizer |
| Care and Maintenance | Clean with a soft dry cloth; avoid moisture and extreme temperatures |
| Safety | Do not disassemble; keep away from water; use only designated charger |
| Spare Parts | Available through authorized Becker service centers |
| Repairability | Not user-serviceable; contact support for repairs |
| General Information | User manual available as PDF; firmware updates may be available |
Frequently Asked Questions - MonzaMP3 7887 BECKER
User questions about MonzaMP3 7887 BECKER
0 question about this device. Answer the ones you know or ask your own.
Ask a new question about this device
Download the instructions for your Mp3 player in PDF format for free! Find your manual MonzaMP3 7887 - BECKER and take your electronic device back in hand. On this page are published all the documents necessary for the use of your device. MonzaMP3 7887 by BECKER.
USER MANUAL MonzaMP3 7887 BECKER
Information regarding general road safety
This car radio device is intended and approved for installation and operation in passenger cars, commercial vehicles and buses (vehicle classes M, N and O) whose electric system has a rated voltage of 12V.
Installation and maintenance should only be carried out by specialists. Faulty installation or maintenance can result in the malfunctioning of the motor vehicle's electronic systems. The vehicle manufacturer's safety instructions must be observed.
The vehicle's electronics (e.g. speedometer signal) must only be worked on by an authorised service garage. We assume no liability for any impairment of the vehicle's electronics.
This device is only intended for installation in the area provided for this purpose by the vehicle manufacturer.
The method of attachment used must ensure that the device will remain properly attached, should the vehicle be involved in a crash.
The power supply must be properly fused.
Using mobile phones without an external antenna in the proximity of the radio unit may cause interference.
Familiarise yourself with the device and how it works before embarking on your journey. Whilst on the move, only operate the device in appropriate traffic conditions. The volume of the device should be set at a level that enables external noises (e.g. police sirens) to be easily heard.

Table of Contents
Information regarding general road safety 43
Arrangement of controls 46
Anti-theft device 47
Entering the code number 47
General operation 48
Switching on / off 48
Setting the volume 48
Activating the tone menu 48
Setting the bass 48
Setting the treble 48
Fader 49
Setting the balance 49
Linear adjustment 49
Switching loudness on / off 49
Adjusting the volume of the subwoofer or centre speaker 50
Radio mode 51
Switching on FM mode 51
Switching on FM menu mode 51
Selecting FM memory level 51
Settings for FM station selection 51
Dynamic autostore (FM-DAS) 52
Station search FM - DAS 52
FM Scan search 53
Programme filtering for FM DAS 53
Programme type selection (PTY) 54
Turning PTY display on / off 54
Calling up / storing FM stations 54
Manual FM tuning 55
Regionalisation 55
Switching regionalisation on / off 56
Turning frequency display on or off 56
Switching radio text on / off 56
Traffic programme (TP) 57
Activating / quitting the TP menu 57
Switching TP on / off 58
Selecting automatic tracking 58
Selecting / cancelling direct programming 58
Switching mute function on / off 59
Interrupting TP announcements 59
TP Announcement volume 59
Telephone mute function 60
Selecting AM mode 60
Switching on AM menu mode 60
Select AM band 60
Settings for AM station selection 61
Station search MW, LW, SW 61
AM Scan search 61
Calling up / storing MW, LW, SW stations 61
Autostore MW, LW 62
Manual tuning MW, LW, SW 62
Table of Contents
CD mode 63
Notes on compact discs (CD) 63
Note on condensation of humidity 63
Notes on CD-R and CD-RWs 63
Notes on copy-protected CDs 63
Inserting / ejecting CDs 64
Forward / backward track skipping 64
Scan search 64
Fast forward / reverse 65
Random play 65
Track repeat 65
Track display 65
Display CD text 66
Temperature protection circuit 66
MP3 mode 67
General instructions for MP3 67
Creating an MP3 storage medium 67
Selecting a directory 68
Track display 68
Total number of tracks 68
Displaying the track name 69
CD changer mode
Operational readiness of CD changer 70
Loading / ejecting the CD magazine 70
Playing CDs 70
Selecting CDs 71
Naming a CD 71
CD filter function 72
User menu 73
Calling up / exiting user menu 73
Setting the GAL (Gal) 73
Telephone mute function (Tel) 74
LED setting 74
Setting reception optimisation (M/S) 74
AUX input (Aux) 75
Signal tone volume (Bev) 75
Service menu
Calling up / exiting service menu 76
Triggering a reset 76
Connection instructions
Installation and removal instructions 78
General instructions
RDS SYSTEM 80
DAS Seek Qual. level 80
DAS Seek Name level 80
RDS Stations level 80
Stations Fix level 80
PTY (programme type) 81
Technical data
NOTICE 83
Arrangement of controls


1 Left-hand rotary control
2 On / off switch () ON
3 Road traffic announcement button ( ) TP
4 Tone button () SOUND
5 Menu button ( ) MENUE
6 LED (anti-theft warning)
7 CD mode selection () CD
8 FM mode selection ( ) FM
9 AM mode selection ( ) AM
10 CD eject button ( )
11 Right-hand rotary control
12 Multifunction buttons
13 Display
Entering the code number
If the car radio is disconnected from the electrical supply source, the anti-theft device prevents it from being reconnected. After switching on via the button, the prompt Enter CodeNumber is displayed.

Using multifunction buttons -1, enter the five-digit code number.
Example: Code number 15372 (the code number can be found on the enclosed CODE CARD).
Enter code number using the multifunction buttons. The unit automatically switches on when the fifth digit is entered and all other digits were entered correctly.
Note: It is important to store the CODE CARD in a safe place outside of the vehicle. This will prevent unauthorised use. The window stickers provided should be attached to the windscreen/windows inside your vehicle.
If an incorrect code number is entered, the prompt Enter CodeNumber will be displayed again. If an incorrect code number is entered three times in a row, the unit will display Codewait, and the unit will be blocked for approximately 60 minutes.

Three further incorrect entries block the unit for another 60 minutes.
Attention: The blocking time will elapse only while the unit is turned on.
General operation
Switching on / off
Press ON.
Alternatively, switch on/off: via the vehicle ignition. To switch the unit on via the ignition, the unit must have previously been turned off via the ignition. After switching off the ignition, the unit can be prevented from switching off by pressing the button within 3 seconds.
Note: The unit can also be switched on with the ignition switched off via the button, but it will switch off automatically after 1 hour.
Setting the volume
Turn the left-hand rotary control ●The volume increases or decreases.
Activating the tone menu
Press SOUND menu is activated. The following functions can be called up: Bas (Bass), Trb (Treble), Fad (Fader), Bal (Balance), Flt (Linear Setting), Sub (Subwoofer) and Ldn (Loudness).
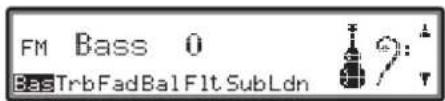
Bass, treble, fader, balance, and loudness settings for the FM, AM (MW, LW, SW) wavebands; road traffic announcements; telephone operation; audio CD, MP3 CD and CDC/AUX operation are stored separately.
Setting the bass
Press the SOUND then the multifunctions button.
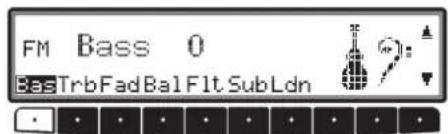
Set the desired bass level using the right-hand rotary control
Setting the treble
Press the SOUND then the multifunction button.

Set the desired treble level using the right-hand rotary control.
General operation
Fader
Press the SOUND then the multifunctional button.

Use the right-hand rotary control ●to achieve the desired fader setting.
Setting the balance
Press the SOUND then the multifunction 1 button.

Set the desired balance level using the right-hand rotary control
Linear adjustment
Briefly press the SOUND

Briefly press the Multifunction button - Toneflat is displayed. Pressing the Multifunction button again will reset the tone adjustments for the current signal source (e.g. FM) to mid-level.
Switching loudness on / off
Press the SOUND then the multifunction button.

You can use the Lowiffunction button to select either Loudness on (ON) or Loudness off (OFF).
For the MW, LW and SW wavebands, loudness is turned off.
General operation
Adjusting the volume of the subwoofer or centre speaker
Press the SOUND then the multifunction button.
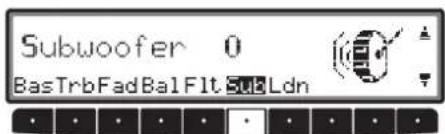
Use the right-hand rotary control to achieve the desired subwoofer volume setting.
Radio mode
Switching on FM mode
Press FM.
The FM waveband will start up with the memory level that was last selected.
Switching on FM menu mode
Press the FM n whilst in FM mode.
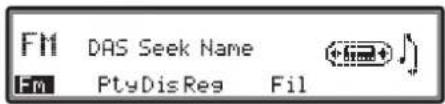
The FM menu mode is activated and displayed. If no button is pressed within the next 8 seconds, FM menu mode will be cancelled.
Selecting FM memory level
Switching on FM menu mode

The DAS Seek Qual., DAS Seek Name, Stations RDS and StationsFix memory levels can be selected by pressing the Fm multifunction button repeatedly.
• DASSeekQual. (see also page 81).
• DASSeekName(see also page 81)
• StationsRDS (see also page 81)
• StationsFix (see also page 81)
Settings for FM station selection
The desired station can be selected via dynamic autostore, station search, scan search, manual tuning, and station buttons.
Radio mode
Dynamic autostore (FM-DAS)
Whilst in FM menu mode, press the multifunction button as many times as necessary to display DASSeekQual. or DASSeekName.

In FMDAS mode, the receivable stations are displayed via the multifunction buttons depending on the settings.

Set the desired station by pressing the button directly below the abbreviated station designation. If the selected broadcaster transmits several programmes/regional programmes, a submenu is automatically displayed so that the desired programme can be selected.

If a programme has previously been selected that belongs to the particular station programming chain, the last stored programme entry will be automatically selected.
The multifunction button shows which buttons can be pressed to display and select other stations.
In cases where the station name is being misused for the purpose of broadcasting adverts or news, the abbreviation L-1... L-Z (L = Local) is used. This prevents the lower display line from constantly changing. When a station is selected, it is identified by a star (e.g. L*1).
The first time the unit is operated, or after the electrical supply has been interrupted, it may take the radio some time to evaluate the station signals. The display will appear incrementally as the evaluation progresses.
Station search FM - DAS
Turn the right-hand rotary control to the left or right. The radio displays the receivable and identified stations in descending/ascending order.
FM Scan search
Press the right-hand rotary control ● whilst in FM mode and 30 will be displayed.

An automatic station search will be initiated. The first run is performed on an insensitive plane, all further runs on a sensitive plane. Receivable stations will remain audible for 8 seconds. If you wish to select one, press the right-hand rotary control ● again.
Note: With FMDAS, the Scan search is conducted in alphabetical order.
Programme filtering for FM DAS
You have the option of filtering various stations from the FM DAS station list.
Whilst in FM menu mode, press the Multifunction button.

The individual programmes can be selected using the right-hand rotary control By pressing the right-hand rotary control You can choose between Play (programme unfiltered) and Sk iP (programme filtered out).
To turn the filter function on or off, press the multifunction button repeatedly to turn the filter function on (Filon) or off (NoFil).
Radio mode
Programme type selection (PTY)
Whilst in FM menu mode, press the function button.

Afterwards, select the desired PTY (see also page 82) using the Pty multifunction button.
Note: Only the currently available PTYs can be selected.
If a PTY is selected in FMDAS mode, only those stations with this particular PTY can be selected.
By selecting NOPTY whilst in FM-DAS mode, all stations will once again be displayed.
Turning PTY display on / off
Switching on FM menu mode

Use the multifunction button to select either PTY (PTY Display On) or Frequency (PTY Display Off).
Calling up / storing FM stations
Whilst in FM menu mode, use the multifunction button to select either the StationsRDS or the StationsFix memory levels
- StationsRDS (see also page 81)
- StationsFix (see also page 81)
Storing: 12 frequencies or programmes can be stored per waveband.
To store the desired station or program, press the multifunction button - 1or - until you hear a 12 signal tone.

To reach presets 10 - 12, press the multifunction button.
Calling up a preset: Press multifunction button -1 9 or -1 and the stored station will be called up.
Manual FM tuning
Whilst in FM menu mode, use the multifunction button to select the StationsFix level.
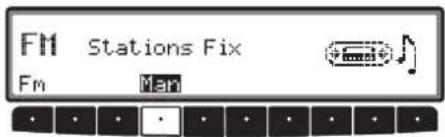
Press the multifunction button twice.
Next, turn the right-hand rotary control
Tuning is performed in increments of 100 kHz.
If manual tuning is currently active MAN will be shown in the display. If the right-hand rotary control is not turned immediately, after a short while MAN will disappear from the display and manual tuning will be cancelled.
Regionalisation
The RDS diversity function is independent of region. As a result, the RDS diversity function can lead to the radio switching between various regional programmes which may vary in terms of broadcasting content. In such a case, the special regional programming must be selected directly.
If several regional programmes are transmitted by one station, this can only be seen when the station is selected.
Stations with various regional alternatives are indicated by means of a star (e.g. 4*).

When one of these stations is selected (e.g. 4*), all receivable regional alternatives for this station will be displayed.
You can then select the desired regional alternative (e.g.).Ka

If the signal quality of a regional alternative drifts despite the RDS Diversity function, it may mean that regional alternatives are only transmitted on a few frequencies. Therefore, there are fewer frequencies with strong signals available for the unit to switch to.
Radio mode
Switching regionalisation on / off
Switching on FM menu mode
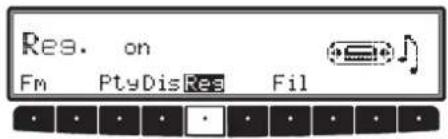
Use the function button to turn regionalisation on (on) or off (off).
Turning frequency display on or off
Switching on FM menu mode

Use the Multifunction button to select either Frequency (Frequency display on) or PTY (Frequency display off).
Switching radio text on / off
Press the left-hand rotary control ● display radio text for the currently selected FM station.

The car radio filters data transmitted by the radio station and displays it in the form of radio text.
Radio text cannot be displayed unless the selected station transmits it in the first place.
Poor reception or interference may distort the radio text or prevent it from being displayed completely.
In order to quit the radio text level, press the FIM or the left-hand rotary control.
Note: Since information transmitted via radio text is
constantly changing, we recommend displaying the radio text only when the vehicle is stationary to avoid unnecessary distraction for the driver. This is a necessary precaution for accident prevention.
Traffic programme (TP)
If an RDS Diversity station broadcasts TP announcements, the CD-, MP3,- CDC/AUX-, MW-, LW-, and SW modes can be interrupted or the mute function suspended in order to switch to the TP announcements. Moreover, you can listen to one FM station while receiving TP announcements transmitted by another FM station.
There are two ways to select a TP transmitter:
- automatic tracking
- direct programming
Automatic tracking always uses the FM station currently being received as the TP transmitter. If the selected FM station has poor signal quality or cannot function as a TP transmitter, the unit applies specified criteria to search for a new TP transmitter.
With direct programming, a TP station other than the one being listened to can be programmed. This means, for example, that a particular FM station can be listened to whilst TP announcements are received from another one.
If the programmed TP transmitter reception is poor, the unit switches to automatic tracking until the programmed TP transmitter can be restored.
If an RDS station features traffic programmes, this is indicated on the display by TP.
An inverse appears on the display to indicate that the traffic programme is active.
Activating / quitting the TP menu
Activating: Press the 71 ton (traffic announcements must not be transmitted).

Press the multifunction button.
Quitting: Press the TP h; otherwise, the TP menu will automatically disappear after 8 seconds if no further operations are performed.
Radio mode
Switching TP on / off
In all modes and wavebands, TP can be turned on or off by pressing and holding the TFP in for more than 2 seconds.
TP can also be switched on or off whilst in the TP menu.
Switching on: To turn on TP in the TP Menu, repeatedly press the multifunction button until TPos appears.

Switching off: To switch TP off whilst in the TP Menu, press the multifunction button repeatedly until TPoff appears.
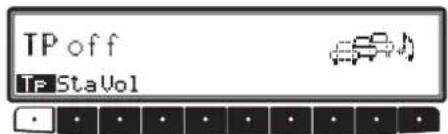
TP is switched off after returning to normal display.
Selecting automatic tracking
In all modes and wavebands, automatic tracking can be turned on by pressing and holding the TJP in for more than 2 seconds.
To switch on automatic tracking whilst in the TP Menu, press the multifunction button repeatedly until TPon appears.
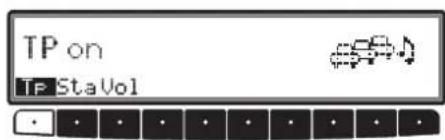
Note: If a TP station has already been programmed directly, it will once again be selected as the TP station.
Selecting / cancelling direct programming
Activate the TP menu.
Selecting: Press the multifunction button.
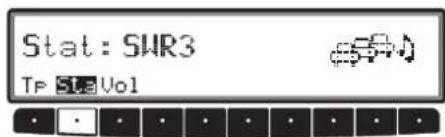
Use the right-hand rotary control ☐ no select the desired TP station. After a short delay and without actuation, the selected transmitter is accepted.
Cancelling: Press the multifunction button.
Stat: Autoselect TP Ste Vol


Use the right-hand rotary control to select Autoselect and press to confirm. After a short delay and without actuation, direct programming is cancelled. Quit the TP menu.
Switching mute function on / off
Once a TP or EON station has been selected, the mute function can be activated by briefly pressing the T 12 on.
TP Info - SWR3 TP StaVol

Following this, only traffic announcements will be switched through. The mute function is cancelled by pressing the TP button again.
Interrupting TP announcements
Briefly press the TTP on during the TP announcement.
The announcement currently being broadcast will be interrupted and the system will automatically return to the previously selected mode.
TP Announcement volume
Activate TP Menu. Press the multifunction button.

With the right-hand rotary control ●four different settings (0 - 3) can be selected. This means that the volume can be raised by a fixed amount depending on the setting.
- S e 0 - No increase
• S e 1 - Slight increase
• S e £ - Medium increase - S e E - Strongincrease
Radio mode
Telephone mute function
If a telephone is installed in the vehicle and its mute control is linked to the car radio, the User menu (Page 75) can be used to determine how it should behave.
With the mute setting selected, the radio will be switched to mute when a call comes in. PhoneMute will appear in the display.
With the audiosignal setting selected, the telephone's ringtone will be heard through the radio unit if a call comes in (vehicle ignition must be on).
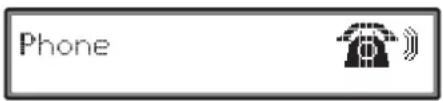
This is only possible if, in addition to the telephone, a hands-free unit with loudspeaker output is installed and connected to the radio. If this is the case Phone will be displayed.
Selecting AM mode
Press AM
The last selected AM waveband is called up.
Switching on AM menu mode
Press the button whilst in AM mode.
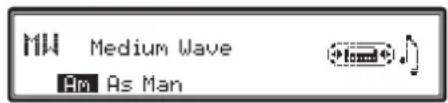
The AM menu mode is activated and displayed. If no button is pressed within the next 8 seconds, AM menu mode will be cancelled.
Select AM band
Switching on AM menu mode

Press the multifunction button repeatedly to choose between MW (Medium Wave), LW (Long Wave) and SW (ShortWave) wavebands.
Settings for AM station selection
The desired station can be selected via autostore (MW, LW), station search, scan search, manual tuning and station buttons.
Station search MW, LW, SW
Whilst in the desired waveband (MW, LW or SW) turn the right-hand rotary control to the left or right. The radio searches for reception frequencies in descending or ascending order of frequency.
AM Scan search
Whilst in the desired waveband (MW, LW or SW) press the right-hand rotary control and be displayed.

An automatic station search will be initiated. The first run is performed on an insensitive plane, all further runs on a sensitive plane. Receivable stations will remain audible for 8 seconds. If you wish to store one, press the right-hand rotary control
Calling up / storing MW, LW, SW stations
Storing: In each case up to 12 stations can be stored using the station buttons. Search for the desired station and press the desired multifunction button until a signal tone sounds. To reach presets 10 – 12, press the multifunction button.

Calling up stations: Press multifunction buttons -1 9 or -1 and the stored station will be called up.
Radio mode
Autostore MW, LW
Switching on AM menu mode
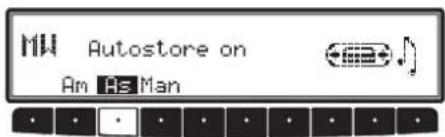
Press the multifunction button until Autostoreon is displayed.
Keep pressing the multifunction button until Seek Autostore is displayed.
The 6 stations with the strongest signal will be stored under the station buttons in order of signal strength.
To exit the autostore memory level, turn off the autostore memory level (off) using the multifunction button.
The radio switches back to the station button level.
Manual tuning MW, LW, SW
Switching on AM menu mode

Press the multifunction button twice.
Then turn the right-hand rotary control.
Tuning will be in increments of 9kHz (MW), 3kHz (LW) or 5kHz (SW).
If manual tuning is currently active MAN will be shown in the display. If the right-hand rotary control is not turned immediately, after a short while MAN will disappear from the display and manual tuning will be cancelled.
Notes on compact discs (CD)
Sound interruptions may occur if the CD is soiled. In order to ensure optimum tone quality, please note the following:
- Always touch the CD at the edges only. Keep the disc clean and never touch the surface.
- Never stick anything on the CD.
- Protect the CDs against direct sunlight and from heat sources such as heaters etc.
- Before playing the CD, it should be cleaned with a special, commercially available cleaning cloth, wiping from the centre outwards. Solvents such as benzene, thinners or other commercially available cleaners and anti-static sprays must not be used.
| Correct |  Incorrect Incorrect |
 Incorrect Incorrect |  Correct Correct |
Note on condensation of humidity
During periods of rain or extreme humidity, humidity may condense on the lenses located inside the unit. This will impair the unit's ability to perform CD playback. Remove the CD from the drive and wait for approximately one hour to allow the condensation to evaporate.
Notes on CD-R and CD-RWs
You can play CD-Rs/CD-RWs (writeable/rewritable CDs) on this unit, but please comply with legal restrictions. These restrictions may vary from one country to another.
Depending upon the recording device used to record the CD-R/CD-RW and / or the CD-R/CD-RW itself, it may not be possible to play some CD-Rs/CD-RWs on this unit.
CD-Rs/CD-RWs must be manufactured according to the "Red Book" or "Yellow Book" standards (not applicable to MP3-CD's).
Notes on copy-protected CDs
In some cases, problems may arise when attempting to play copy-protected CDs, such as long reading times or a total inability to perform playback.
CD mode
Inserting / ejecting CDs
Insertion:
Insert the disc into the CD slot with the printed side facing upwards. The CD will be drawn into the unit automatically. In the case of an audio CD, the unit will then begin to play the first track and in the case of an MP3 CD, the first track in the first directory.
After the last track of the CD has finished playing, the unit will automatically repeat the CD from the first track.
If there is already a CD in the slot, press the button. If CD changer / AUX mode was the last selection made, then the
Cd multifunction button must be used to switch to mode or the Multifunction button used to switch to MP3 mode.

Ejecting the CD:
To eject a CD, press the button, and the CD will be ejected. Remove the CD.
Attention: When the unit is turned off, the CD will not be ejected, but will remain in the CD slot.
Forward / backward track skipping
Audio CD tracks or tracks from the current MP3 CD directory can be selected by turning the right-hand rotary control.
When you get to the last track, in the case of an audio CD the unit continues to the first track or in the case of an MP3 CD, to the first directory. In a similar manner, it switches from the first track back to the final track.
If a track has been playing for more than 10 seconds when the skip button is pressed, the unit will skip back to the beginning of the selected track.
Scan search
Press right-hand rotary control ● with appear in the display.

All following CD tracks are played for 12 seconds each. Press the right-hand rotary control ●again to terminate the scan search.
Fast forward / reverse
Fast forward (audible) is activated by pressing the multifunction button and fast reverse (audible) is activated by pressing the multifunction button.
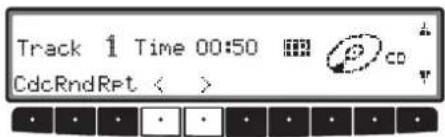
Fast forward / reverse terminates when the multifunction button is released.
Note: Fast reverse terminates automatically as soon as the beginning of the current track is reached.
Random play
Pressing the Rnd function button activates the random play function. Subsequently, the titles from the current CD will be played in random order. The prompt Rnd is displayed inversely.
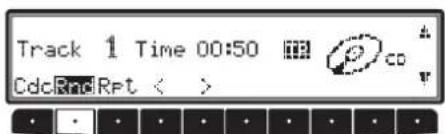
Pressing the Multifunction button again deactivates the "Random play" function.
Track repeat
"Track repeat" is activated by pressing the Multifunction button. The prompt RFT is displayed inversely.
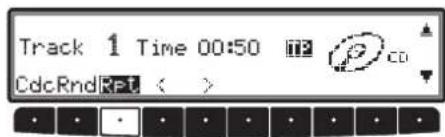
Pressing the Findifunction button again deactivates "Track repeat".
Track display
Press the CD in CD mode.
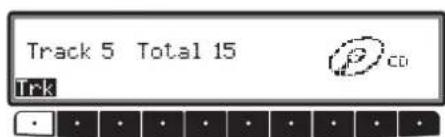
Pressing the Multifunction button will briefly display the number of the current track and the total number of tracks.
CD mode
Display CD text
If the CD features CD text information, this can be displayed.
Press the left-hand rotary control ● whilst in CD mode.
Madonna / Like A Virgin Material Girl
If CD text information is available for the current track, it will be displayed. If no CD text is available NoInfo will be displayed.
If CD text information is already active when the next track is played, the display will be updated automatically.
CD text will continue to be displayed until the unit is switched off or the left-hand rotary control or the button is pressed.
Temperature protection circuit
To protect the laser diode from excessive heat, a temperature protection circuit is integrated into the unit.
On activation of the temperature protection circuit, Temp will appear for 8 seconds and the unit will be switched back to the radio source.
After a cool down period, single CD mode or CD changer mode can be called up again. If the temperature is still too high, the unit will once again switch back to the previously selected radio source.
General instructions for MP3
The music that can be played when your unit is in MP3 mode is generally copyright-protected under applicable international and national laws. In several countries, the reproduction of copyrighted material is not permitted, even if only for personal use, without the express prior consent of the copyright holder. Please check the current copyright laws for your country and comply with them. These restrictions naturally do not apply to your own compositions and recordings, or for recordings for which authorisation has been obtained from the copyright holder.
Creating an MP3 storage medium
- The maximum number of files per medium is 400.
- Only MP3 music files stored on a CD in compliance with ISO 9660 can be played.
- If the artist's name and track title are to be displayed, an ID3 tag must be added to the MP3 file. This unit supports versions ID3v1 and ID3v2 with a maximum acceptable tag length of 4 KB.
-
The display of artist's name and track title is restricted to a total maximum length of 50 characters.
-
The MP3 formats MPEG1, MPEG2 and MPEG2.5 Layer3 are supported by the unit.
Fixed and variable bit rates of 8 -280 kbit/s and scan rates of 8-48 kHz are supported. - We recommend a bit rate of at least 160 kbit/s for compressing MP3 files. It should be noted that with MP3 files having a variable bit rate, the display of the elapsed playing time may deviate from real time.
- If both MP3 data and conventional audio tracks are included on the CD it is usually referred to as a mixed-mode CD. On this kind of CD the audio tracks are generally located in the first directory on the CD.
For further information about creating MP3 files and ID3 tags, please consult your dealer or check on the Internet.
Note: Due to the abundance of different kinds of CD burning software and their associated settings we cannot guarantee the playback quality of MP3 CDs.
MP3 mode
Selecting a directory
If the files on the MP3 CD are arranged in several folders, the folders will be handled in a similar manner to different CDs in the CD changer.

The individual directories can be selected by pressing multifunction buttons. The number after Fd shows you which directory is currently selected.
Once the last track in the directory has been played, the next directory will be selected and played automatically.
For additional operating instructions, refer to CD mode (Page 64):
- "Notes on compact discs (CD)" on page 64
- "Forward / backward track skipping" on page 65
- “Scan search” on page 65
- "Fast forward / reverse" on page 66
- “Random play” on page 66
- "Track repeat" on page 66
Track display
Press the button whilst in MP3 mode.

Pressing the Multifunction button will briefly display the number of the current track and the total number of tracks in the currently selected directory.
Total number of tracks
Press the CD on whilst in MP3 mode.

Pressing the Multifunction button will briefly display the number of all directories and the total number of tracks they contain.
Displaying the track name
After pressing the left-hand rotary control ● the artist's name and track name are displayed in the format "Artist's name – Track name". However, this is only displayed if an ID3 tag with the corresponding content is provided.
Commander Tom Are am Eye?
If no ID3 tag or an ID3 tag that lacks this information is provided, NoInfo will be displayed.
Text exceeding the length of the display will be presented as moving text (from right to left). If the ID3 tag function is already active when the next track is played, the display will be updated automatically.
ID3 tags will continue to be displayed until the unit is switched off or the left-hand rotary control or the button is pressed.
CD changer operation
Operational readiness of CD changer
If a CD changer is connected to the car radio, the CD changer is ready for operation as soon as the filled CD magazine is loaded. Close the sliding cover after loading. All further operation is performed from the car radio control panel.
Loading / ejecting the CD magazine
To remove the CD magazine, open the sliding cover on the changer and press the eject button. The magazine is ejected and can be removed.
When inserting CDs into the magazine, please note the instructions printed on the magazine.
Attention: Incorrectly inserted CDs will not be played.
Note: To allow for the fastest possible change of CDs, the magazine should be loaded successively, beginning with compartment 1.
Playing CDs
Press CD unit was last set to CD changer operation or there is no CD in the CD drive, the CD changer menu is now active.
If CD operation was selected last, the unit must be switched to CD changer operation by pressing the multifunction button.
Playback begins with the last CD played, at the track playing before switching off.
For additional operating instructions, refer to CD mode (Page 64):
- "Notes on compact discs (CD)" on page 64
- "Forward / backward track skipping" on page 65
- "Scan search" on page 65
- "Fast forward / reverse" on page 66
- "Random play" on page 66
- "Track repeat" on page 66
- "Track display" on page 66
Selecting CDs

The individual CDs in the magazine can be selected by pressing multifunction buttons and .
During the selection time, LoadingCDX is displayed. The magazine compartment number or the name of the CD (if allocated) and the number of the current track on the selected CD are then displayed.
If no CD is loaded in the selected magazine compartment (e.g. compartment 2), NOCD2 will briefly appear on the display.
After playing the last track of a CD, the unit automatically selects and plays the next CD in the magazine.
Naming a CD
Press CD changer mode. Then press multifunctionbutton Nam

To name a CD or to change an existing name, press multifunction button Edit

Using multifunction buttons and, select the desired position (inverse editing symbol).
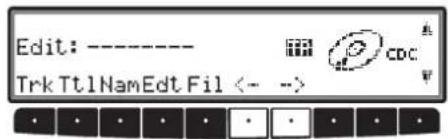
CD changer operation
Using the right rotary control ●select the desired letters and press the control to confirm.
Press the right rotary control ● move to the next position.
A maximum of 8 characters can be entered.
The name is stored after exiting the CDC menu.
To delete an existing name, press multifunction button .Nam Using the right rotary control ● select the name to be deleted.
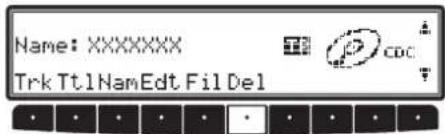
Now, press multifunction button to delete the name.
CD filter function
Press CD changer mode.
Then press multifunction button .Fil

For the Silverstone 2660 CD changer, the individual tracks of the current CD can be selected using the right rotary control By pressing the right rotary control selection can be made between Play (track unfiltered) and Skip (track filtered out).
To switch the filter function on or off, press the Multi-function button repeatedly to switch the filter function on (Filon) or off (HoFil).
For the Silverstone 2630 and 2640 CD changers, it is possible to select between Play (track unfiltered) and SkIP (track filtered out) for the current track by pressing the right rotary control.
The filter function is not available for the Silverstone 7860 CD changer.
Attention: The filter function can only be activated when the selected CD has been named.
Calling up / exiting user menu
The user menu is called up by pressing the


After calling up the user menu, the following basic settings can be made on two levels according to your personal preferences.
• Gal - Speed dependent volume control (GAL)
- Tel - Adjusting telephone function settings
• M/S - Setting for reception optimisation
• Flux - Setting for the AUX input
- Bev - Adjustment of signal tone volume
Quitting:
To quit the user menu, press the MENUE in. Alternatively, the menu will be cancelled after a short delay if no further operations are performed.
Setting the GAL (Gal)
The GAL is a car radio control circuit, which automatically adjusts the car radio volume according to vehicle speed. This results in compensation of the driving noise produced at higher speeds. If you wish to make use of this feature, a speed signal must be linked to the unit.
Call up the user menu. Press the nullifunction button.
Use the right-hand rotary control ●to choose a value between 0 and +15.

The GAL setting can be used to specify the starting point for the volume adjustment according to vehicle speed.
The setting is stored automatically.
The settings are:
- No volume increase
• +1 - Volume increase begins at low vehicle speed
• +15 - Volume increase begins at higher vehicle speed
User menu
Telephone mute function (Tel)
If a telephone with hands-free operation is installed, the call may be routed through the speaker system. This eliminates the need for an additional speaker. However, the signal leads (AF – Telephone input and Earth – Telephone input) must be connected to the car radio (see page 83).
To set, call up user menu. Press the function button to choose between AudioSie. (audio signal) and Mute.
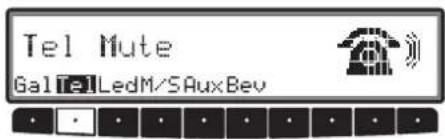
- Mute - Telephone mute setting
• AudioSis. - Telephone conversation via car radio
LED setting
This function can be used to switch the LED function (flashes when the unit is switched off) on and off.
Call up user menu. Press the Indiffunction button to choose between blinking (LED on) and off (LED off).

The setting is stored automatically.
Setting reception optimisation (M/S)
In order to suppress reception-related interference, three different parameters can be set for reception optimisation. Call up user menu. Press the function button to select Stereo, Mono or Auto.

- Auto: Setting for normal operation - i.e. the unit switches from stereo to mono reception and back, depending on the reception conditions (for nearly all reception areas, this is the optimal setting).
- Stereo: Setting for exceptional reception conditions - i.e. the unit is constantly set to stereo.
- Mono: Setting for reception conditions in which reflections constantly occur - i.c., the unit is constantly set to mono.
The setting is effective immediately and is also retained after power is turned off.
AUX input (Aux)
This can be used to switch on the CD changer AF connections if no CD changer is connected. An external unit (Discman, Walkman, etc.) can then be connected.
To set, call up user menu. Use the multifunction button to select either AUXModeon (on) or AuxModeoff (off)
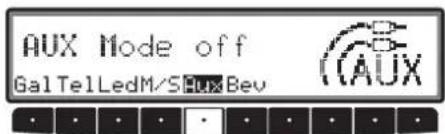
The setting is stored automatically.
The multifunction button must be pressed whilst in CD mode to select AUX mode.
Signal tone volume (Bev)
The volume of signal tones (e.g. storage confirmation) can be set using this function.
Press the Multifunction button. Use the right-hand rotary control to select between 0 (Quiet) or +5 (Loud).

The setting is stored automatically.
Service menu
Calling up / exiting service menu
To select the service menu, press the AMI n and the multifunction button 10 whilst in radio mode.
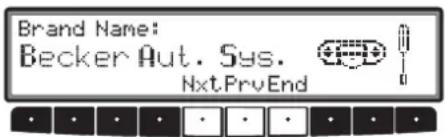
The individual entries can be selected by pressing multifunction buttons hand, or by turning the right-hand rotary control
To exit the Service menu, press the Emaltifunction button.
The following information can be called up whilst in the Service menu.
• ModelNo. : - Displays the model number
- SerialNo.: - Displays the serial number
- ChangerReset - Triggers a CDC reset (if available). To reset, press the function button
• GAL - Displays current GAL adjustment
• RadioSoftware: - Displays radio software version
Triggering a reset
If the unit malfunctions and is therefore no longer capable of operating properly, or is defective in some other way, the unit's internal software can be restarted (reset) by pressing the following combination of buttons:
To trigger a reset, simultaneously press multifunction button 1, multifunction button 3 and the MENUE button.
Connection instructions

Warning! Terminal 30 and Terminal 15 must always be connected separately, otherwise increased power consumption will occur when the unit is switched off. Connection socket A is not the same for all vehicle types. Therefore, always measure voltages before installation.
Socket A
1 Speed Signal (GAL)
2 not assigned
3 Telephone mute / clearing function
4 Permanent positive (Terminal 30)
5 Control output for automatic antenna / amplifier
6 Illumination (Terminal 58)
7 Switched positive (Terminal 15)
8 Earth (Terminal 31)
Socket B
1 Loudspeaker right rear +
2 Loudspeaker right rear -
3 Loudspeaker right front +
4 Loudspeaker right front -
5 Loudspeaker left front +
6 Loudspeaker left front -
7 Loudspeaker left rear +
8 Loudspeaker left rear -
Socket C1
1 LineOut left rear
2 LineOut right rear
3 A F E a r t h
4 LineOut left front
5 LineOut right front
6 Subwoofer LineOut
Socket C2
7-12 Specific connection for Becker CD changer
Socket C3
13 AF - Telephone input
14 Earth – Telephone input
15-17 Specific connection for Becker CD changer
18 CD AF Earth (AUX)
19 CD AF left (AUX)
20 CD AF right (AUX)
Installation and removal instructions
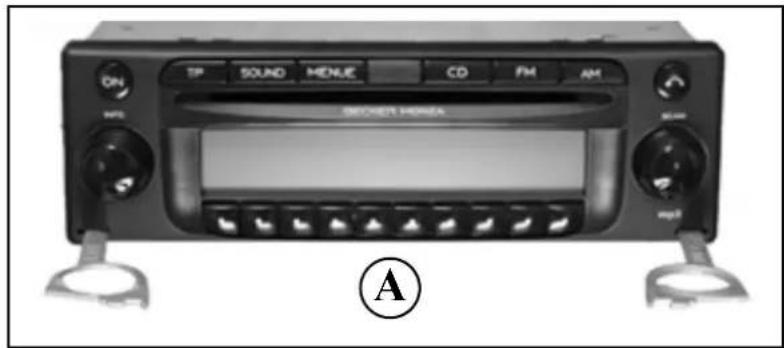
A universal bracket for DIN installation slots is integrated into this car radio. An installation frame is not required. The unit is inserted into the installation slot and secured with the slides supplied.
To install, complete all electrical connections. Then push the unit into the installation slot. Afterwards, insert slides into the openings on the front of the unit until the first detent position is reached (Figure A). Now lock the radio by pulling both slides, as shown in Figure B. Subsequently, remove the slides.
natural_image
Black rectangular breakfast TV case with control knobs and a digital display (no visible text or symbols on the device itself)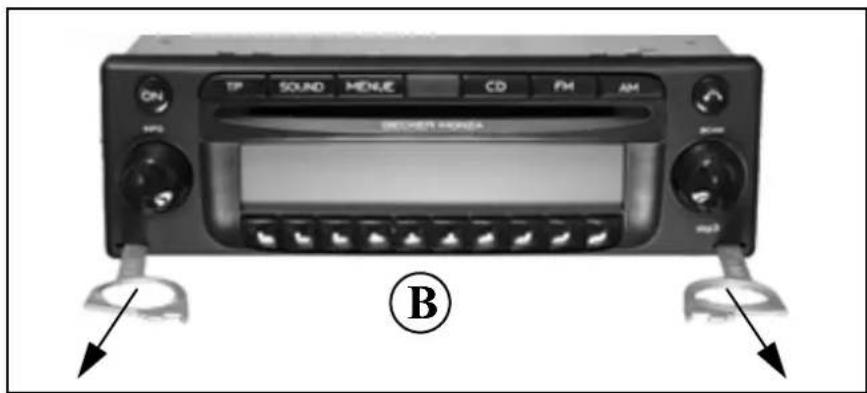
Installation and removal instructions
To remove the unit, it must first be unlocked. To do this, push in both slides to the second detent position as shown in Figure A. Subsequently, withdraw the unit using both slides (Figure C). Then remove the slides by pressing the springs on the right and left sides of the unit.
If the unit was previously installed in another vehicle, it may be necessary to adjust the springs on the unit before installation. To adjust the springs, insert slide as shown in Figure D and afterwards adjust as shown in Figure E (gently press slide in the direction of "1", whilst at the same time moving the slide in the direction of "2" or "3").

natural_image
Front view of a black audio driver console with control knobs and a CD player, no visible text or symbols on the device itself.
natural_image
Close-up of a computer drive chassis with a labeled component (D) and a circular arrow indicating a specific part, no text or symbols present.
General instructions
RDS SYSTEM
This car radio is capable of receiving RDS signals (RDS = Radio Data System) on the VHF bands. RDS is a technique for the transmission of inaudible information in the VHF broadcasting range. This means that the broadcaster sends information to be analysed by the car radio.
DAS Seek Qual. level
On the DAS seek quality level, all receivable and identifiable RDS programmes are stored in a list sorted by quality. The dynamic autostore, search and scan search functions access this list.
DAS Seek Name level
On the DAS seek name level all receivable and identifiable RDS programmes are stored in a list alphabetically by name. The dynamic autostore, search and scan search functions access this list.
RDS Stations level
On the Stations RDS level only identified RDS stations can be stored. The unit constantly switches to the best receivable transmission frequency for the station.
During search for RDSStations the unit will stop only at identifiable stations.
Stations Fix level
On the Stationsfix level frequencies can be assigned to the station buttons. RDS evaluation does not take place. The search for StationsFix is equivalent to manual FM tuning (Page 56).
General instructions
PTY (programme type)
Specific types of programme, such as sport, pop music, classical music etc. can be selected using the PTY function.
The PTY is transmitted by the RDS station, provided that the broadcaster has this function installed. The selected transmitter programme type can be displayed or a search for a specific PTY transmitter can be performed.
Examples of programme types:
News News
Pop Music Pop music
Affairs Politics and current events
Rock Music Rock music
Info Spoken-word programmes
Science Science
Educate Education
LightMusicLight music
Drama Radio plays and literature
Classics Classical music
Culture Culture, religion and society
EasyMusic Easy listening music
Varied Light entertainment
Sport Sport
Other Music Special interest music programmes
Weather Weather reports
Finance Business / financial information
Children's programmes
Social affairs
Religion Religious affairs
Phone In Phone-ins
Travel Travel reports
Leisure Leisure reports
Jazz Jazz music
Country Country and Western music
NationM National folk music
Oldies Golden oldies
Folk Folklore music
Document Documentaries
NOPTY No PTY
Technical data
Wavebands : FM 87.5 MHz - 108 MHz
MW 531 kHz - 1620 kHz
LW 153 kHz - 282 kHz
SW 5800 kHz - 6250 kHz
Frequency range : 20 Hz - 20 kHz for CD mode
30 Hz - 15 kHz for FM
50 Hz - 2,5 kHz for MW, LW, SW
Output power : 4 x 18 Watt
Line cross section : min. 0.75 mm 4
Loudspeaker impedance: m i n . 4 Ω
Line out : 4 x analogue Line Out (Ua max 3Veff at 10 kΩ)
GAL : in order to utilise the GAL, a square wave voltage with a mass-related amplitude of +4 V to +12 V must be provided by the vehicle's electronic speedometer.
Volume is increased in 7 increments of 2.5 dB each.
Antenna : Impedance 50 Ω
AF-Telephone input : Max. input voltage of 8 V (if interference occurs, a commercially-available
1 : 1 repeater should be connected into the signal cable).
AUX input : 16 KΩ Input resistance, max. input voltage 1.7 Veff
Telephone mute : Low active level < 2 Volt
Supply voltage : 1 2 V
CD connection : The Becker Silverstone 2630, 2640, 2660 and 7860 CD changers can be connected.
\Playable CDs: The only CDs that can be used are those that comply with DIN EN 60908. \
The use of 8 cm CDs with an adapter is not recommended.
NOTICE
Dear Listener,
In conformance with current EC guidelines, any person may operate this radio receiver.
This unit conforms to the current valid European or harmonised national standards. This designation is your guarantee that the unit conforms to the applicable specifications concerning electromagnetic compatibility. This means that interference with other electrical/electronic devices caused by the unit, or interference with this unit caused by other electrical/electronic devices is largely prevented.
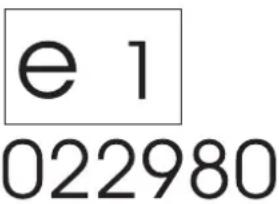
- The EC type-approval mark (e1) issued by the Federal Office for Transport (KBA) in accordance with European Directive 95/54/EC governing the EMC of motor vehicles authorises installation and operation of the unit in motor vehicles (classes M, N and O).
- With regard to the following European standards, the EMC requirements that apply specifically to this unit have been met:
- EN 55013
- EN 55020
- Information regarding general road safety
- Table of Contents
- Information regarding general road safety 43
- Arrangement of controls 46
- Anti-theft device 47
- General operation 48
- Radio mode 51
- CD mode 63
- MP3 mode 67
- CD changer mode
- User menu 73
- Service menu
- Connection instructions
- Installation and removal instructions 78
- General instructions
- Technical data
- NOTICE 83
- Arrangement of controls
- Entering the code number
- General operation
- Switching on / off
- Setting the volume
- Activating the tone menu
- Setting the bass
- Setting the treble
- Fader
- Setting the balance
- Linear adjustment
- Switching loudness on / off
- Adjusting the volume of the subwoofer or centre speaker
- Radio mode
- Switching on FM mode
- Switching on FM menu mode
- Selecting FM memory level
- Settings for FM station selection
- Dynamic autostore (FM-DAS)
- Station search FM - DAS
- FM Scan search
- Programme filtering for FM DAS
- Programme type selection (PTY)
- Turning PTY display on / off
- Calling up / storing FM stations
- Manual FM tuning
- Regionalisation
- Switching regionalisation on / off
- Turning frequency display on or off
- Switching radio text on / off
- Traffic programme (TP)
- - automatic tracking
- - direct programming
- Activating / quitting the TP menu
- Switching TP on / off
- Selecting automatic tracking
- Selecting / cancelling direct programming
- Switching mute function on / off
- Interrupting TP announcements
- TP Announcement volume
- Telephone mute function
- Selecting AM mode
- Switching on AM menu mode
- Select AM band
- Settings for AM station selection
- Station search MW, LW, SW
- AM Scan search
- Calling up / storing MW, LW, SW stations
- Autostore MW, LW
- Manual tuning MW, LW, SW
- Notes on compact discs (CD)
- Note on condensation of humidity
- Notes on CD-R and CD-RWs
- Notes on copy-protected CDs
- CD mode
- Inserting / ejecting CDs
- Insertion:
- Ejecting the CD:
- Forward / backward track skipping
- Scan search
- Fast forward / reverse
- Random play
- Track repeat
- Track display
- Display CD text
- Temperature protection circuit
- General instructions for MP3
- Creating an MP3 storage medium
- MP3 mode
- Selecting a directory
- Total number of tracks
- Displaying the track name
- CD changer operation
- Operational readiness of CD changer
- Loading / ejecting the CD magazine
- Attention: Incorrectly inserted CDs will not be played.
- Playing CDs
- Selecting CDs
- Naming a CD
- CD filter function
- Calling up / exiting user menu
- Quitting:
- Setting the GAL (Gal)
- User menu
- Telephone mute function (Tel)
- LED setting
- Setting reception optimisation (M/S)
- AUX input (Aux)
- Signal tone volume (Bev)
- Calling up / exiting service menu
- Triggering a reset
- Socket A
- Socket B
- Socket C1
- Socket C2
- Socket C3
- Installation and removal instructions
- RDS SYSTEM
- DAS Seek Qual. level
- DAS Seek Name level
- RDS Stations level
- Stations Fix level
- PTY (programme type)
- NOTICE
Brand : BECKER
Model : MonzaMP3 7887
Category : Mp3 player