
UB10.5 Pro - Exercise bike TAURUS - Free user manual and instructions
Find the device manual for free UB10.5 Pro TAURUS in PDF.


| Product Type | Treadmill |
| Brand | Taurus |
| Model | UB10.5 Pro |
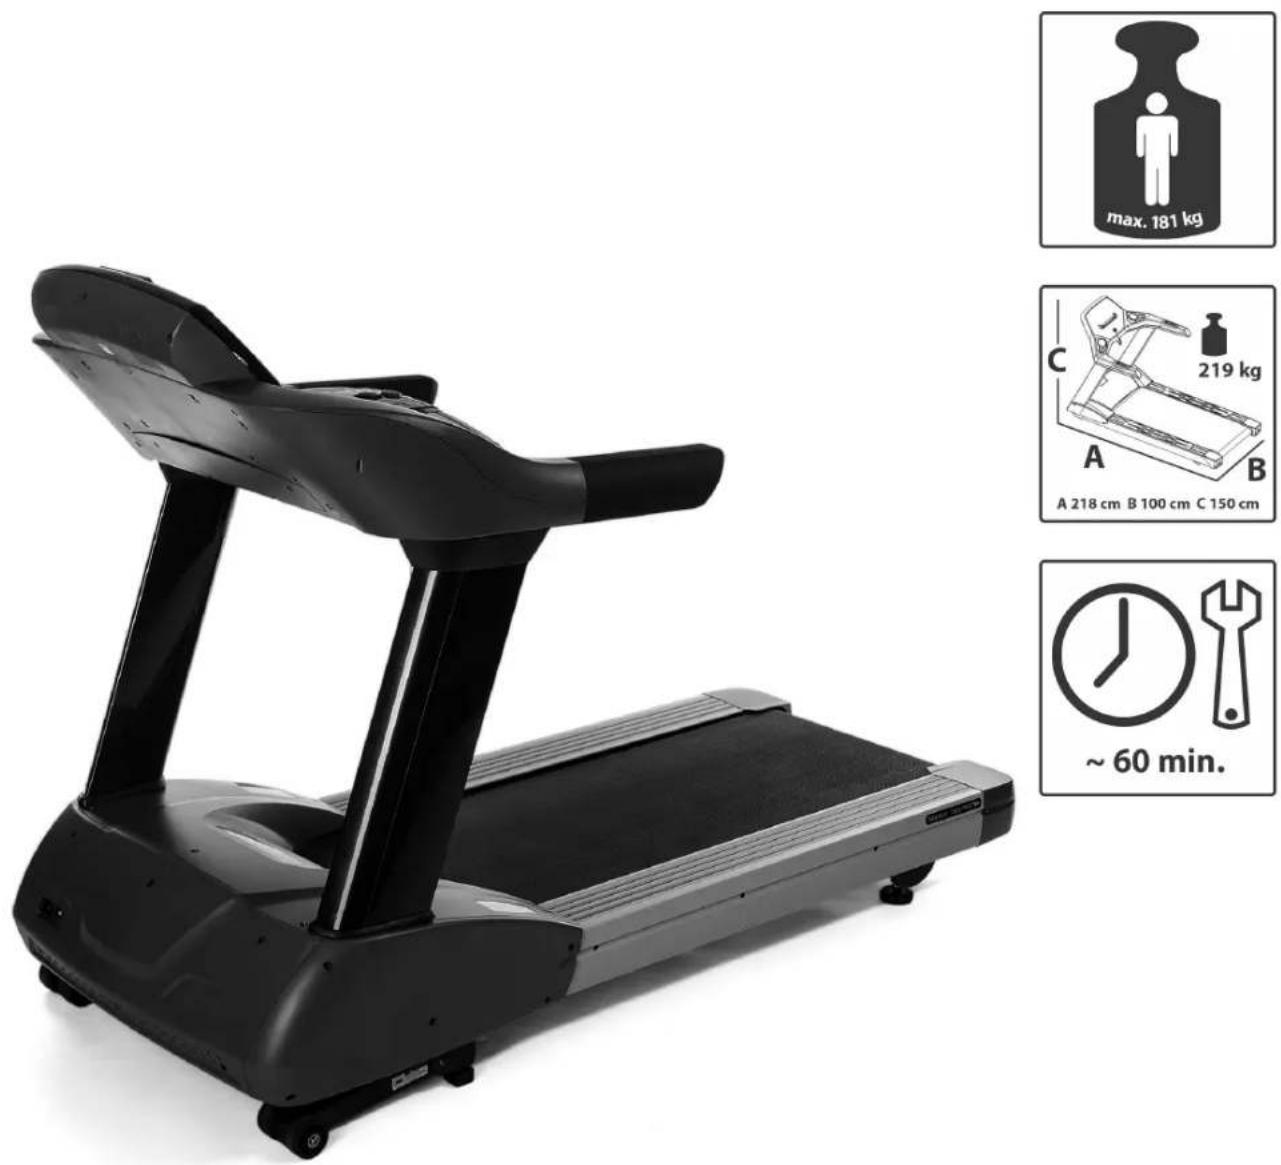
| Max User Weight | 181 kg (399 lbs) |
| Setup Dimensions (L x W x H) | 218 x 100 x 150 cm |
| Net Weight | 219 kg |
| Motor Power | 3 HP continuous (2.2 kW), peak 4.1 kW (6 HP) |
| Speed Range | 0.8 - 25 km/h (0.5 - 15 mph) |
| Incline Range | 0 - 15% |
| Running Surface (L x W) | 158 x 56 cm |
| Running Belt Thickness | 3.3 mm (orthopedic) |
| Running Deck Thickness | 25.4 mm |
| Display Metrics | Speed, Time, Distance, Calories, Heart Rate, Incline, Watt, METs, Cadence, Resistance Level |
| Programs | Manual, Weight Reduction, 5K Run, Interval, Cardio, User-defined (6 total) |
| Heart Rate Monitoring | Hand grip sensors and telemetric (chest strap compatible) |
| Safety Features | Safety key emergency stop |
| Power Supply | 220-240V / 50Hz |
| Warranty (Home Use) | 24 months full, 30 years frame, 10 years motor |
| Maintenance | Belt alignment, tensioning, lubrication; cleaning with damp cloth; monthly screw check |
| Assembly Required | Yes (adults, ~60 min) |
Frequently Asked Questions - UB10.5 Pro TAURUS
User questions about UB10.5 Pro TAURUS
0 question about this device. Answer the ones you know or ask your own.
Ask a new question about this device
Download the instructions for your Exercise bike in PDF format for free! Find your manual UB10.5 Pro - TAURUS and take your electronic device back in hand. On this page are published all the documents necessary for the use of your device. UB10.5 Pro by TAURUS.
USER MANUAL UB10.5 Pro TAURUS
Assembly and operating instructions
_
[Non-Text]
[Non-Text]
[Non-Text]
[Non-Text]
[Non-Text]
[Non-Text]
[Non-Text]
[Non-Text]
[Non-Text]
[Non-Text]
[Non-Text]
[Non-Text]
[Non-Text]
[Non-Text]
[Non-Text]
[Non-Text]
[Non-Text]
[Non-Text]
[Non-Text]
[Non-Text]
[Non-Text]
[Non-Text]
[Non-Text]
[Non-Text]
[Non-Text]
[Non-Text]
[Non-Text]
[Non-Text]
[Non-Text]
[Non-Text]
[Non-Text]
[Non-Text]
[Non-Text]
[Non-Text]
[Non-Text]
[Non-Text]
[Non-Text]
[Non-Text]
[Non-Text]
[Non-Text]
[Non-Text]
[Non-Text]
[Non-Text]
[Non-Text]
[Non-Text]
[Non-Text]
[Non-Text]
[Non-Text]
[Non-Text]
[Non-Text]
[Non-Text]
[Non-Text]
[Non-Text]
[Non-Text]
[Non-Text]
[Non-Text]
[Non-Text]
[Non-Text]
[Non-Text]
[Non-Text]
[Non-Text]
[Non-Text]
[Non-Text]
[Non-Text]
[Non-Text]
[Non-Text]
[Non-Text]
[Non-Text]
[Non-Text]
[Non-Text]
[Non-Text]
[Non-Text]
1
|
|
1
[Non-Text]
[Non-Text]
[Non-Text]
一
( x - 2x) t - xy^2 = ( x - 2x) f^ t
1
| _
[Non-Text]
[Non-Text]
[Non-Text]
[Non-Text]
[Non-Text]
[Non-Text]
[Non-Text]
[Non-Text]
[Non-Text]
[Non-Text]
[Non-Text]
[Non-Text]
[Non-Text]
[Non-Text]
[Non-Text]
[Non-Text]
[Non-Text]
[Non-Text]
[Non-Text]
[Non-Text]
[Non-Text]
[Non-Text]
[Non-Text]
[Non-Text]
[Non-Text]
[Non-Text]
[Non-Text]
[Non-Text]
[Non-Text]
[Non-Text]
[Non-Text]
[Non-Text]
[Non-Text]
[Non-Text]
[Non-Text]
[Non-Text]
[Non-Text]
[Non-Text]
[Non-Text]
[Non-Text]
[Non-Text]
[Non-Text]
[Non-Text]
[Non-Text]
[Non-Text]
[Non-Text]
[Non-Text]
[Non-Text]
[Non-Text]
[Non-Text]
[Non-Text]
[Non-Text]
[Non-Text]
[Non-Text]
[Non-Text]
[Non-Text]
[Non-Text]
[Non-Text]
[Non-Text]
[Non-Text]
[Non-Text]
[Non-Text]
[Non-Text]
[Non-Text]
[Non-Text]
[Non-Text]
[Non-Text]
[Non-Text]
[Non-Text]
[Non-Text]
[Non-Text]
[Non-Text]
-
-
-
-
[Non-Text]
[Non-Text]
[Non-Text]
一
|
|
Dear Customer,
Thank you for deciding for a high-quality training equipment of the brand Taurus, the brand that makes athlete's hearts beat faster. Taurus offers a wide range of home fitness equipment like elliptical cross trainers, ergometers, treadmills and rowing machines. Taurus equipment is the optimal equipment for all those who want to train at home independent of goals and fitness level. For further information please visit www.sport-tiedje.com or www.taurus-fitness.de.

SAFETY NOTICE
Please read all of the instructions carefully before assembly and first use. These instructions are intended to ensure speedy assembly and explain safe usage. Make sure that all people exercising with the equipment (in particular children and persons with limited physical, sensory, mental or motor capabilities) are informed about these instructions and its content in advance. In case of doubt, a responsible person must supervise the use of the equipment.
This equipment has been manufactured according to the latest safety knowledge. As far as possible, potential safety hazards which could cause injury have been eliminated. Make sure to follow the instructions carefully and that all parts are securely in place. If required, read through the instructions again to correct any mistakes.
Please pay close attention to the safety and maintenance instructions given here. The contract partner cannot be held liable for damage to health, accidents or damage to the equipment when it is not used in accordance with these instructions.
The equipment is suitable for home use, semi-professional use (e. g., hospitals, clubs, hotels, schools, etc.) as well as for commercial or professional use (e. g., commercial gyms).
Retain these instructions in a safe place for future reference, maintenance or when ordering replacement parts.
CONTENTS
1 GENERAL INFORMATION
6
| 1.1 | Technical | data | 6 |
| 1.2 | Personal | safety | 7 |
| 1.3 | Electrical | safety | 8 |
| 1.4 | Set-up | place |
2 ASSEMBLY INSTRUCTIONS, MAINTENANCE AND CARE 10
| 2.1 | General | instructions | ||
| 2.2 | Errors | and | error | diagnosis |
| 2.3 | Care | and | maintenance | |
| 2.4 Maintenance and service calendar | 14 |
3 ASSEMBLY
15
| 3.1 | Package | contents | 15 |
| 3.2 | Assembly | instructions |
4 OPERATING INSTRUCTIONS
22
| 4.1 | Console | display | 22 | ||
| 4.2 | Button | functions | 24 | ||
| 4.3 | Turning | on the equipment | |||
| 4.4 | Programs | 26 | |||
| 4.4.1 | Manual | program | 26 | ||
| 4.4.2 | Weight | reduction | 28 | ||
| 4.4.3 | 5k | RUN | 30 | ||
| 4.4.4 | Interval | program | 32 | ||
| 4.4.5 | Cardio | program | 35 | ||
| 4.4.6 | User-defined | training | program | ||
5 WORKOUT INSTRUCTIONS
40
| 5.1 | Heart | rate | measuring |
| 5.2 | 10 tips for effective running training | ||
| 5.3 | Designing | a | workout |
5.4 Stretching exercises for leg & chest muscles 46
5.5 Workout journal
6 WARRANTY INFORMATION 49
7 DISPOSAL 51
8 ORDERING ACCESSORIES 52
9 ORDERING SPARE PARTS 53
9.1 Service hotline
9.2 Serial number and model name 53
9.3 Parts list 54
9.4 Exploded drawing 57
1 GENERAL INFORMATION
1.1 Technical data
LCD display of
- speed in km/h
- training time in min
- training distance in km
- calories burnt in kcal
- heart rate (when using the hand sensors or a chest strap)
- incline in %
- Watt
- METs
- cadence (rotations per minute)
- resistance level
Motor output: 3 HP continuous output (AC motor)
Max. motor continuous output: 2.2 kW / 3 HP
Max. motor peak rating: 4.1 kW / 6 HP
Speed range: 0.8 - 25 km/h
Incline range: 0 - 15 %
Total number of training programs: 6
Pre-set programs: 4
Heart rate controlled programs: 1
User-defined programs: 1
Running surface size (L x W): 158 x 56 cm
Wheel diameter: 89 mm
Running belt thickness: 3.3 mm (orthopedic running belt)
Running deck thickness: 25.4 mm
Weight and dimensions:
Article weight (gross, including packaging): 244 kg
Article weight (net, without packaging): 219 kg
Packaging dimensions (L x W x H): approximately 2210 mm x 940 mm x 520 mm
Set-up dimensions (L x W x H): approximately 2180 mm x 1000 mm x 1500 mm
Maximum user weight: 181 kg / 399 lbs
1.2 Personal safety
- Before you start using the equipment, you should consult your physician that this type of exercise is suitable for you from a health perspective. Particularly affected are persons who: have a hereditary disposition to high blood pressure or heart disease, are over the age of 45, smoke, have high cholesterol values, are overweight and/or have not exercised regularly in the past year.
- Please note that working out excessively can seriously damage your health. Please also be aware that heart rate monitoring systems might be imprecise.
- The equipment may only be used for its intended purpose; that means for running training by adults.
- Any other usage is prohibited and potentially dangerous. The contract partner cannot be held liable for damage resulting from improper use.
- The equipment is strictly for use by one person at a time.
- Children should not be allowed unsupervised access to the equipment.
- Before starting your training, make yourself familiar with all of the equipment's functions and setting options. Have an expert explain the correct usage of the product to you.
- Make sure that nobody is in the range of motion of the equipment while exercising.
- Keep your hands, feet and other body parts, hair, clothing, jewelry and other objects well clear of moving parts.
- During use, wear suitable sports clothing rather than loose or baggy clothing. When selecting sports shoes, think about the suitability of the sole – preferably this should be made of rubber or other non-slip materials. Shoes with heels, leather soles, studs or spikes are not suitable. Never work out in bare feet.
- It is also important to take note of the information given in the workout instructions for creating a workout plan.
- At the first signs of weakness, nausea, dizziness, pain, difficulty in breathing or other abnormal symptoms, stop your workout immediately and, if necessary, consult your physician.
- Without prior agreement from your authorized contract partner, opening the equipment is prohibited.
- The equipment has stable steps on the sides that you can stand on in case of an emergency and leave the equipment.
- The safety key should be inserted during all training.
- The safety key and the power cable should be removed when you are not present in order to rule out improper usage by third parties.
Safety Key
- The equipment has an EMERGENCY STOP mechanism for your safety. The equipment may only be operated when the safety key is properly attached to the contact point of the cockpit. The equipment will automatically stop immediately if the safety key is no longer on the contact point. That is why you should attach the safety key string with the clip to your clothing before training. Remove the safety key from the cockpit with the help of the string if you would like to quickly stop the treadmill, you can no longer handle the speed or an emergency occurs.
- In order for the safety key to be released from the cockpit contact point in the event of a fall, the clip from the safety key must be attached to your clothing!
- An uncontrolled usage of the equipment by third parties can be avoided by removing and storing the safety key.
- Prevent children from having access to the safety key.
1.3 Electrical safety
- The equipment requires a 220 - 240V / 50 Hertz mains power supply.
- The equipment should be connected directly to a grounded plug socket only by means of the power cable supplied. The use of multi-socket adapters or similar is not recommended. Extension leads must comply with local electrical safety guidelines. Always fully unwind the power cable.
- The outlet should be secured with a fuse with a minimum value of „16 amperes, slow“.
- In order to reduce the risk of an electric shock, always unplug the equipment from the mains socket immediately after your workout, before assembly or dismantling, and before maintenance or cleaning. Do not pull on the cable.
- When plugged in, do not leave the equipment unattended at any time. To avoid use by anyone unfamiliar with the operating instructions, the power cable should be removed when the equipment is not in use.
- Keep the power cable away from heat, oil and sharp edges. Do not route the power cable underneath the equipment or under a carpet or rug, and do not place any objects on top of it.
- Make no modifications to either the power cable or the mains plug.
- If the power cable or the plug are damaged or defective, contact your authorized contract partner. Do not use the equipment in the meantime.
- Do not keep electrical devices (e. g., mobile phones) in close proximity to the console or the control electronics, otherwise display values (e. g., pulse measuring) could be inaccurate.
1.4 Set-up place
- The equipment should only be used indoors, in a sufficiently heated and dry area (ambient temperature between 10°C and 35°C). The equipment should not be used outdoors or in rooms with high humidity (over 70%) like swimming pools. The equipment should only be stored in surroundings with an ambient temperature between 5°C and 45°C.
- The training room should be well ventilated during training and not be exposed to any draughts.
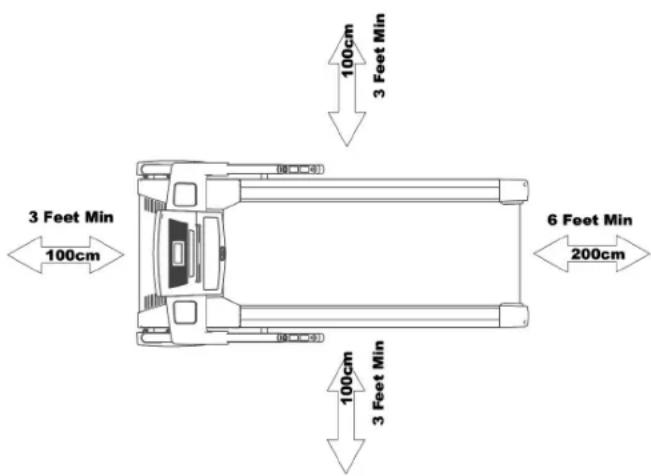
- Choose a location in which to place the equipment such that there is enough free space/clearance to the front, the rear and to the sides of the equipment (at least 1.50 m). Furthermore, the equipment should not be set up in main entrances or on escape routes.
- Always keep the power cable away from hot surfaces and grounds and make sure that the cable is not stuck somewhere or becomes a „trip hazard“.
- No objects of any type should be inserted into the openings of the equipment.
- The equipment should be placed on a level and solid surface, any unevenness in the floor should be leveled out.
- A floor protective mat / equipment underlay can help to protect high-quality floor coverings (parquet, laminate, cork, carpets) from dents and sweat and can help to level out slight unevenness.
2.1 General instructions
- Please check if all parts and tools belonging to the equipment are included in the delivery and if there is any transport damage. If there are any complaints, please contact your contract partner directly.
- Some of the nuts and bolts to be used in assembly are already pre-mounted in order to make set-up as easy as possible.
- The equipment must be assembled by adults. In case of doubt, ask for assistance from another person with technical skills.
- Keep children away from the equipment during assembly, because small parts are included in the delivery and may be swallowed.
- Make sure that you have enough space (at least 1.50 m) in every direction during assembly.
- Do not leave any tools and packaging materials like plastic sheeting laying around to avoid danger of suffocation for children.
- Assemble the equipment on an underlay mat or on the cardboard packaging in order to avoid damage to the equipment and to the floor (scratches).
- Before starting assembly, all individual parts should be placed on the floor next to each other.
- Read the assembly instructions carefully and assemble the equipment according to the illustrations. Proceed carefully and cautiously.
- First loosen all parts and check for their correct fitting. Then tighten the screws using a tool.
- Modifications to the design or improper repairs may pose a hazard to the user and should not be carried out. The product warranty may be void as a result.
- Only authorized service technicians are permitted to carry out all servicing and/or repairs – it excludes maintenance and care.
- Damaged or worn components may impair your safety and the lifespan of the equipment. You should therefore immediately replace damaged or worn components. Please contact your contract partner in such a case. The equipment should no longer be used until it has been repaired. When needed, only use original Taurus spare parts.
- Check the tightness of all screw connections once a month.
- In order to be able to guarantee the constructively defined safety level of this equipment, we recommend having the equipment regularly maintained (at least once a year) by specialists (service technicians of your contract partner).
+ The equipment may be cleaned of dust, dirt and sweat using a damp cloth. The use of solvents should be strictly avoided. Also, make sure that no liquids (e.g. sweat) get into the openings of the equipment (e.g. console).
2.2 Errors and error diagnosis
The equipment runs through regular quality controls during production. Nevertheless, errors or malfunctions on the equipment may occur. Individual parts are often the cause of faults and replacement is usually sufficient. Please use the following overview to see the six most common errors and how to repair them. If the equipment still does not work properly, please contact your contract partner.
| Error Cause Repair | ||
| Console only shows lines | Safety key missing Check if the safety key is inserted and place it in | |
| Running belt tilted | Running belt not aligned | Align running belt in accordance with the instructions |
| Running belt slips through/stops | Belt tension/lubrication not ok | Check belt tension/lubrication in accordance with the instructions |
| Scraping noises | Running belt scrapes, because it is not aligned | Align running belt in accordance with the instructions |
| Display does not show anything | Check plug connections (cables) | Mains switch on “on”, make sure that the safety key is inserted |
| No pulse display | Sources of interference in the roomWith chest strapUnsuitable chest strapPosition of the chest strap incorrectBatteries empty | Remove sources of interference (e.g. mobile phone, speakers, etc.)Use suitable chest strap (see recommendedaccessories)Reposition chest strap and/or moisten electrodesChange batteries |
2.3 Care and maintenance
The most important maintenance measure is taking care of the running belt. It includes the adjustment, tensioning and lubrication of the running belt. Damage caused due to a lack of care or negligence will not be covered by the warranty. Thus, check for maintenance in regular intervals. Be extremely careful when adjusting and tensioning the belt, because a strong over or under tension may cause damages. The running belt is set properly in the factory before delivery. However, the running belt may get out of place during transport.
Aligning the running mat
- During training, the running belt should run as centered and straight as possible. The alignment of the running belt may change depending on the stress and load. Another reason can be the positioning of the equipment on an uneven surface.
- While adjusting the belt, let the equipment run with a speed of approximately 5km/h. Nobody may be on the equipment during this process.
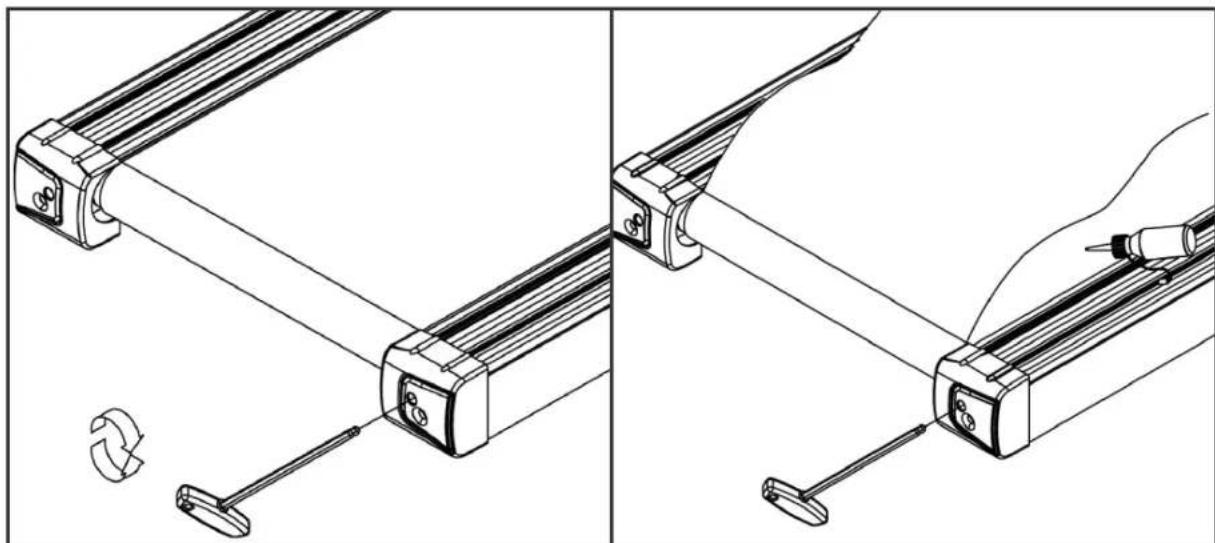
- If the running belt is offset to the left, turn the left setting screw on the rear end of the equipment at most 1/4 rotation clockwise and the right setting screw at most 1/4 rotation counterclockwise (fig. C).
- If the running belt is offset to the right, turn the right setting screw on the rear end of the equipment at most 1/4 rotation clockwise and the left setting screw at most 1/4 rotation counterclockwise (fig. D).
- Then watch how the belt runs for approximately 30 seconds, because the change will not be visible immediately.
- Repeat the process until the running belt runs straight again. If the running belt cannot be adjusted, please contact your contract partner.
natural_image
Technical line drawing showing two mechanical assembly steps with tool holders and a tool inserted (no text or symbols)Tensioning the belt
- If the running belt slips over the rollers during operation (if this is the case, a noticeable jerking will be noticed while running), the running belt must be tightened again. In most cases, the cause for the slipping is a straining of the belt through usage. This is completely normal.
- It can be tightened through the same setting screws that were used during alignment.
- While tensioning the belt, let the equipment run with a speed of 5km/h.
- Turn the left and right setting screws directly after each other a max. of 1/4 rotation clockwise.
- Then check if the running belt is still slipping. If this is still the case, the described process needs to be repeated.
Lubricating the running belt
- If the running belt is inadequately lubricated, the friction will increase significantly and this leads to strong wear of the endless belt, running panel, motor and circuit board.
- If you feel an increase in friction from the running belt, this is an indicator that you should lubricate the belt (however, a lubrication should be done at least every three months).
-
The treadmill has a reminder for lubricating the treadmill: A symbol is displayed on the console every 100 operating hours. The symbol appears on the display for five minutes and then turns off. In order to turn off the symbol prematurely, press the INCLINE up and INCLINE down buttons at the same time.
-
In order to be able to optimally lubricate the treadmill, the running belt must be lifted slightly. Then apply some silicone spray on the entire running deck. Apply three short (approximately 1 second) sprays of silicone lubricant between the belt and the running deck.
- The spraying tube should be held sideways in order to guarantee a moistening of the entire underside of the belt. Continue to rotate the belt by hand so that the entire area between the endless belt and running deck is lubricated. Wipe off the excess lubricant.
- This maintenance must also be executed after the equipment has not been used for a longer period of time.
2.4 Maintenance and service calendar
The cockpit, casing, handrails and entire frame must be cleaned after every training session with a moist towel (no solvent!) in order to avoid damage caused by sweat. After 150 hours of operation, the maintenance symbol reminds you to clean the treadmill. After you have cleaned the treadmill and checked all components, turn off the symbol by simultaneously pressing the INCLINE up and INCLINE down buttons.
The following routine work must be done in the specified time intervals:
| Part Weekly Monthly 2x annually Annually | ||||
| Display console c l | ||||
| Belt tension | I | |||
| Belt lubrication | I | |||
| Plastic covers | c | I | ||
| Screws & cable connections | I | |||
| Legends: C = cleaning; I = inspect | ||||
3.1 Package contents
The package contains the parts represented in the illustration, including a power cable with mains plug. If one of the illustrated parts is missing, please contact your contract partner.
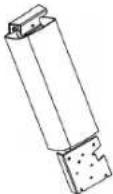
| Left Upright Post Assembly | Right Upright Post Assembly | Handrail Assembly |
 | 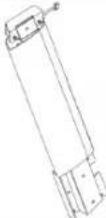 | 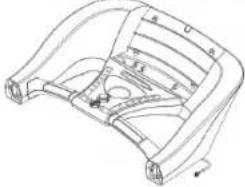 |
| Upright Decoration Cover | Console Back Cover | Console Assembly |
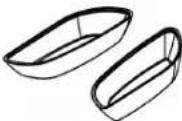 | 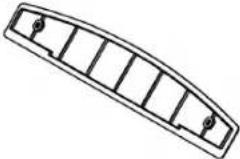 | 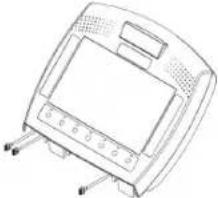 |
| Left Side Motor Cover | Right Side Motor Cover | Main Frame Assembly |
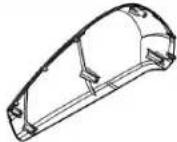 | 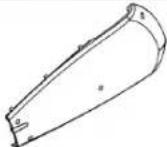 | 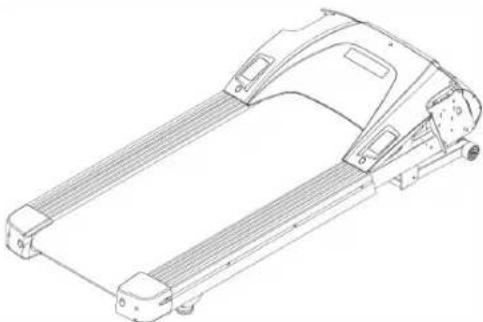 |
| Upright Sleeve | Side Handrail | |
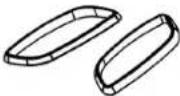 | 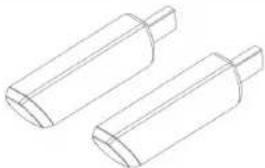 |
Tools and screw sets
| Drawing Part no. and description Qty. | ||
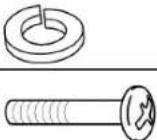 | 75) Spring washer (M10) 4 | |
| 76) Bolt (M5x15mm) 16 | ||
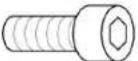 | 102) Bolt (M10x20mm) 4 | |
 | 105) Bolt (M10x65mm) 2 | |
 | 115) Nylon nut (M10xp1.5) 2 | |
 | Screwdriver 1 | |
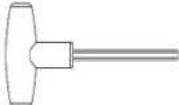 | Allen wrench (6mm / 8mm) 1 | |
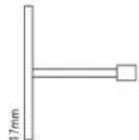 | T-hand socket wrench (17mm) 1 | |
3.2 Assembly instructions
Before starting assembly, look carefully through the individual assembly steps shown and assemble the equipment in the order indicated.
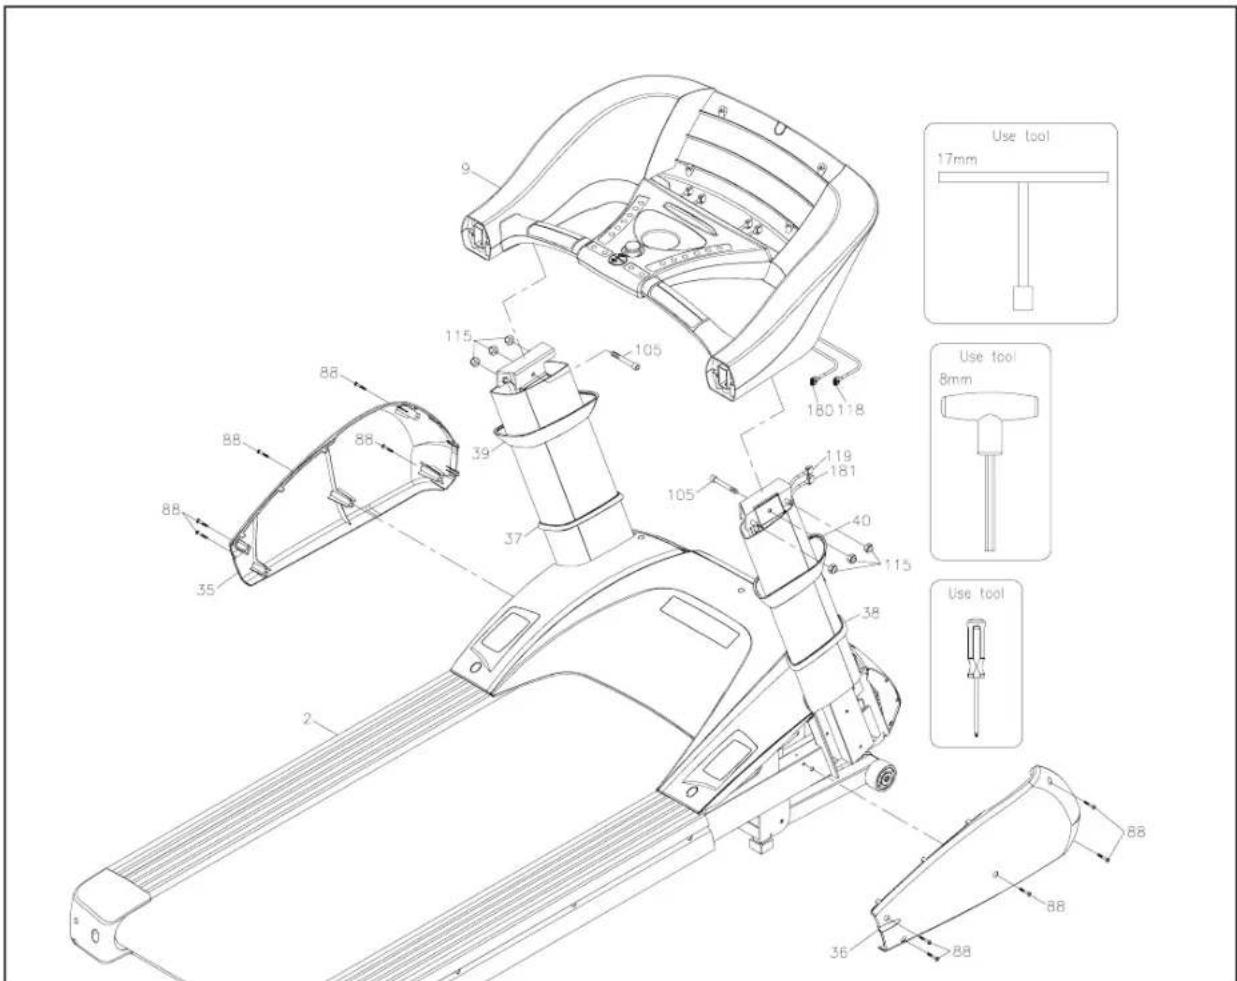
Step 1: Assembly of the console mast
Note: Two nylon nuts (M10xp1.5)(115) were pre-mounted on each front side of the frame (2); a total of four nylon nuts (115) are pre-mounted.
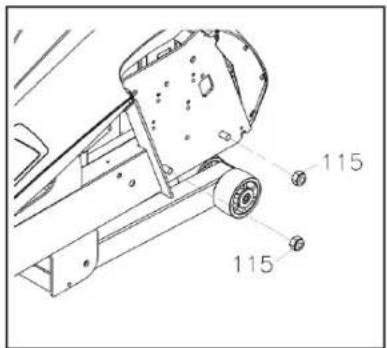
Step 1: Assembly of the console mast
a. Remove two nylon nuts (M10xp1.5)(115) on the right of the frame assembly (2). b. Mount the right console mast assembly (8) on the frame (2) with two shims (M10)(75), two bolts (M10x20mm)(102) and two nylon nuts (M10xp1.5)(115).
Note: Tighten the shims, bolts and nylon nuts later (see point d in Step 2).
c. Carefully pull the rear connecting cable (119) through the right console mast assembly (8).
Warning: Do not bend the cable.
d. Determine the correct direction of the right sleeve (38) and the right decorative cover (40). "FR" is engraved on the inner side of the right sleeve (38) and the right decorative cover (40).
e. Carefully push the right sleeve (39) and the right decorative cover (40) on the right console mast assembly (8).
f. Repeat the step for the left side.

Step 2: Assembly of the handrail
Note: Two nylon nuts (M10xp1.5)(115) were pre-mounted on each side of the upper console mast assembly; a total of four nylon nuts (115) are pre-mounted.
a. Remove two nylon nuts (M10xp1.5)(115) on the right of the console mast assembly.
b. Mount the handrail assembly (9) on the frame assembly (2) with three nylon nuts (M10xp1.5)(115) and a bolt (M10x65mm) (105).
c. Slide the sleeve (38) down until it meets the upper motor cover (22).
d. Follow FIG. A, tighten the two shims (M10)(75), two bolts (M10x20mm)(102) and two nylon nuts (M10xp1.5)(115), which connect the console mast assembly and the frame.
e. Repeat the step on the left side.
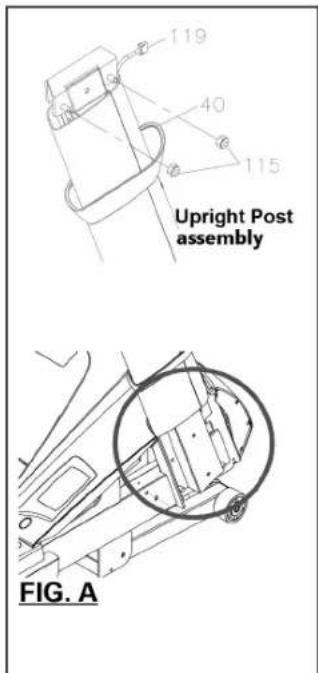
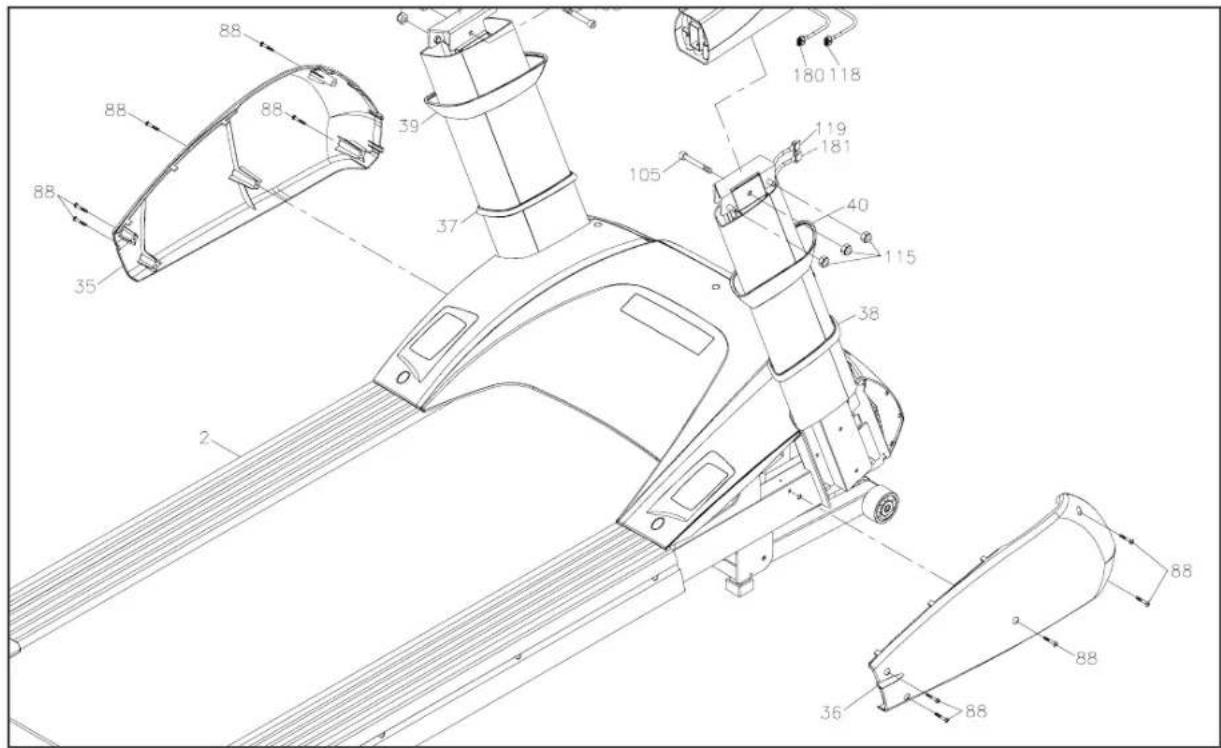
Step 3: Assembly of the motor covers
a. Mount the right side motor cover (36) on the frame assembly (2) with five bolts (M5x15mm)(88).
b. Repeat the step for the left side.
c. Connect the middle connecting cable (118) with the rear connecting cable (119). Do not bend the cable.
d. Connect the ERP middle connecting cable (180) with the ERP connecting cable (181). Do not bend the cable.
e. Move the right decorative cover (40) up and slide the right decorative cover (40) carefully into the cavities behind the handrail assembly (9).
f. Repeat the step on the left side.
Note: Make sure that the upper parts are tightened before you go to the next step.
Step 4: Assembly of the console
Note: The handrail assembly (9), rear console cover (48) and two bolts (M5x15mm) (88) are pre-mounted together.
a. Remove the rear console cover (48) from the handrail assembly (9) by loosening and removing the two bolts (M5x15mm)(88).
Note: Four nylon nuts (M10xp1.5)(115) are already pre-mounted on the backside of the handrail assembly (9).
b. Pay attention to FIG. B (see below) and remove the four nylon nuts (M10xp1.5) (115) from the handrail assembly (9).
c. Connect the middle front handle cable (124) with the upper front handle cable (123). Do not bend the cable.
d. Connect the middle handle cable (126) with the upper handle connecting cable (125). Do not bend the cable.
e. Connect the middle connecting cable (118) with the upper connecting cable (117). Do not bend the cable.
f. Connect the ERP middle connection cable (180) to the ERP upper connection cable (179). Do not bend the cable.
g. Pay attention to FIG. B. and mount the console (46) on the handrail assembly (9) with four nylon nuts (M10xp1.5)(115) and four bolts (M5x15mm)(88).
h. Mount the rear console cover (48) on the console (46) with two bolts (M5x15mm) (88).
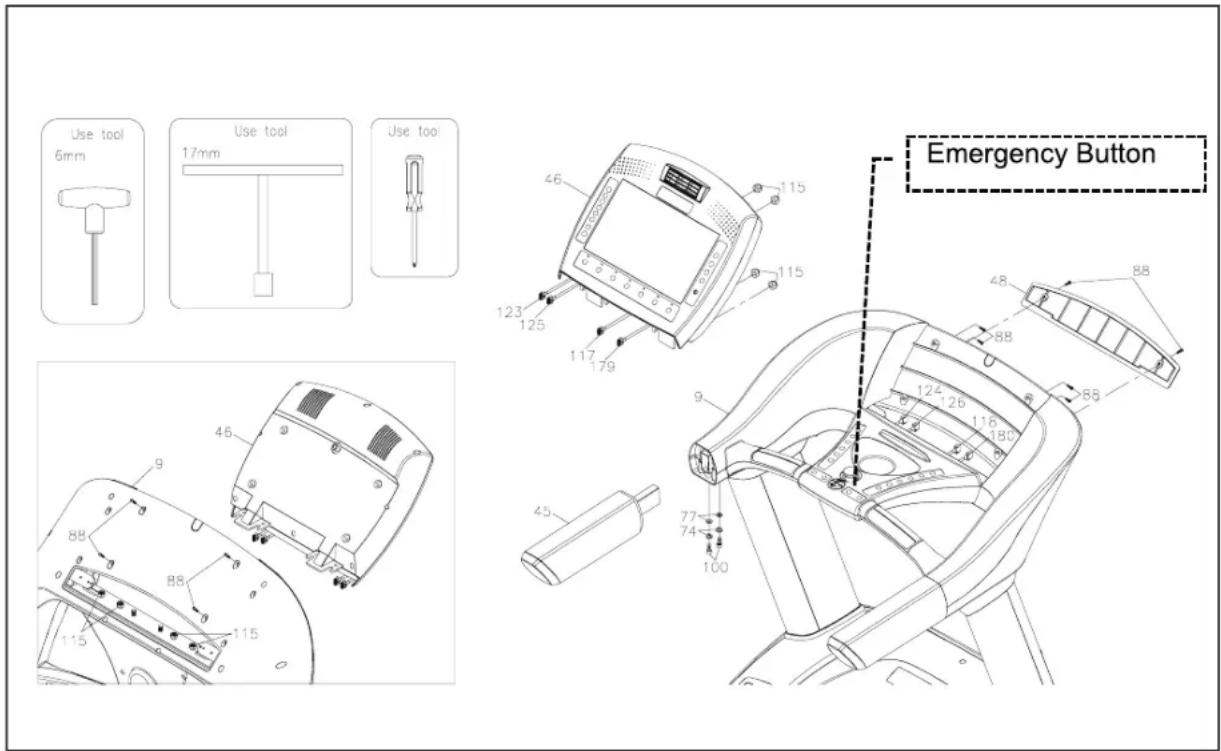
Step 5: Assembly of the side handrails
Note: Two shims (M8)(74), two washers (M8x16x2.0t)(77) and two bolts (M8x20mm) (100) are already pre-mounted on the left side handrail (45).
a. Remove the two shims (M8)(74), two washers (M8x16x2.0t)(77) and two bolts (M8x20mm)(100) from the left side handrail (45).
b. Mount the left side handrail (45) on the left side of the handrail assembly (9) with two shims (M8)(74), two washers (M8x16x2.0t)(77) and two bolts (M8x20mm)(100).
c. Repeat the steps for the assembly of the right side handrail (45).
d. Loosen the emergency button to the normal setting by pulling it slightly upwards, see figure below.
e. Finish the assembly. Make sure that all parts are tightened before you use the equipment.
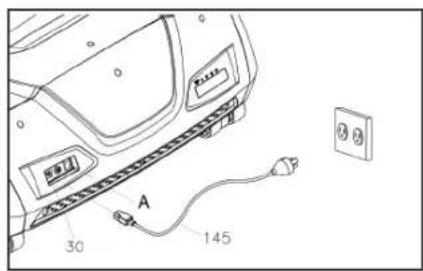
Step 6: Attaching the power cable
a. Connect the power cable (145) with the power switch (30) on the front right side of the frame.
b. Connect the power cable (145) to an outlet in order to turn on the console.
c. Turn on the main power switch (A) in the front of the equipment at the power cable.
Step 7: Transportation of the treadmill
Note: We recommend transporting the equipment with two persons.
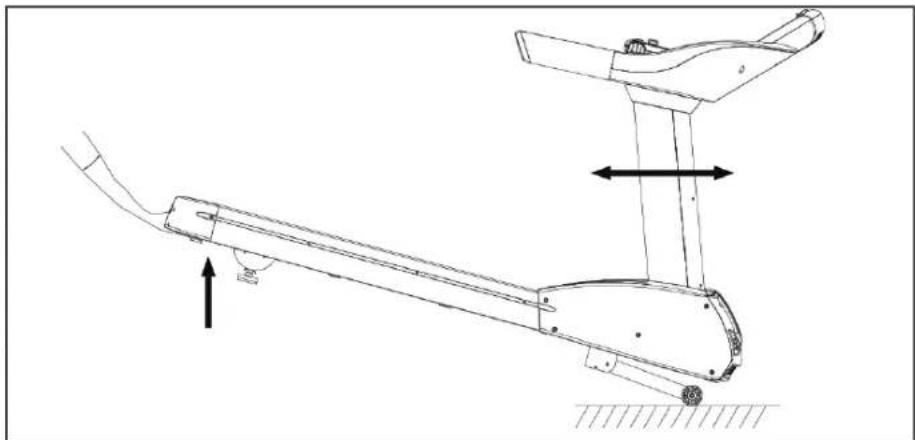
The treadmill has four wheels for transportation. Grab the rear frame tightly and carefully lift up the treadmill. Then you can transport it comfortably.
natural_image
Line drawing of a stationary exercise machine with directional arrows indicating motion (no text or symbols)4 OPERATING INSTRUCTIONS
4.1 Console display
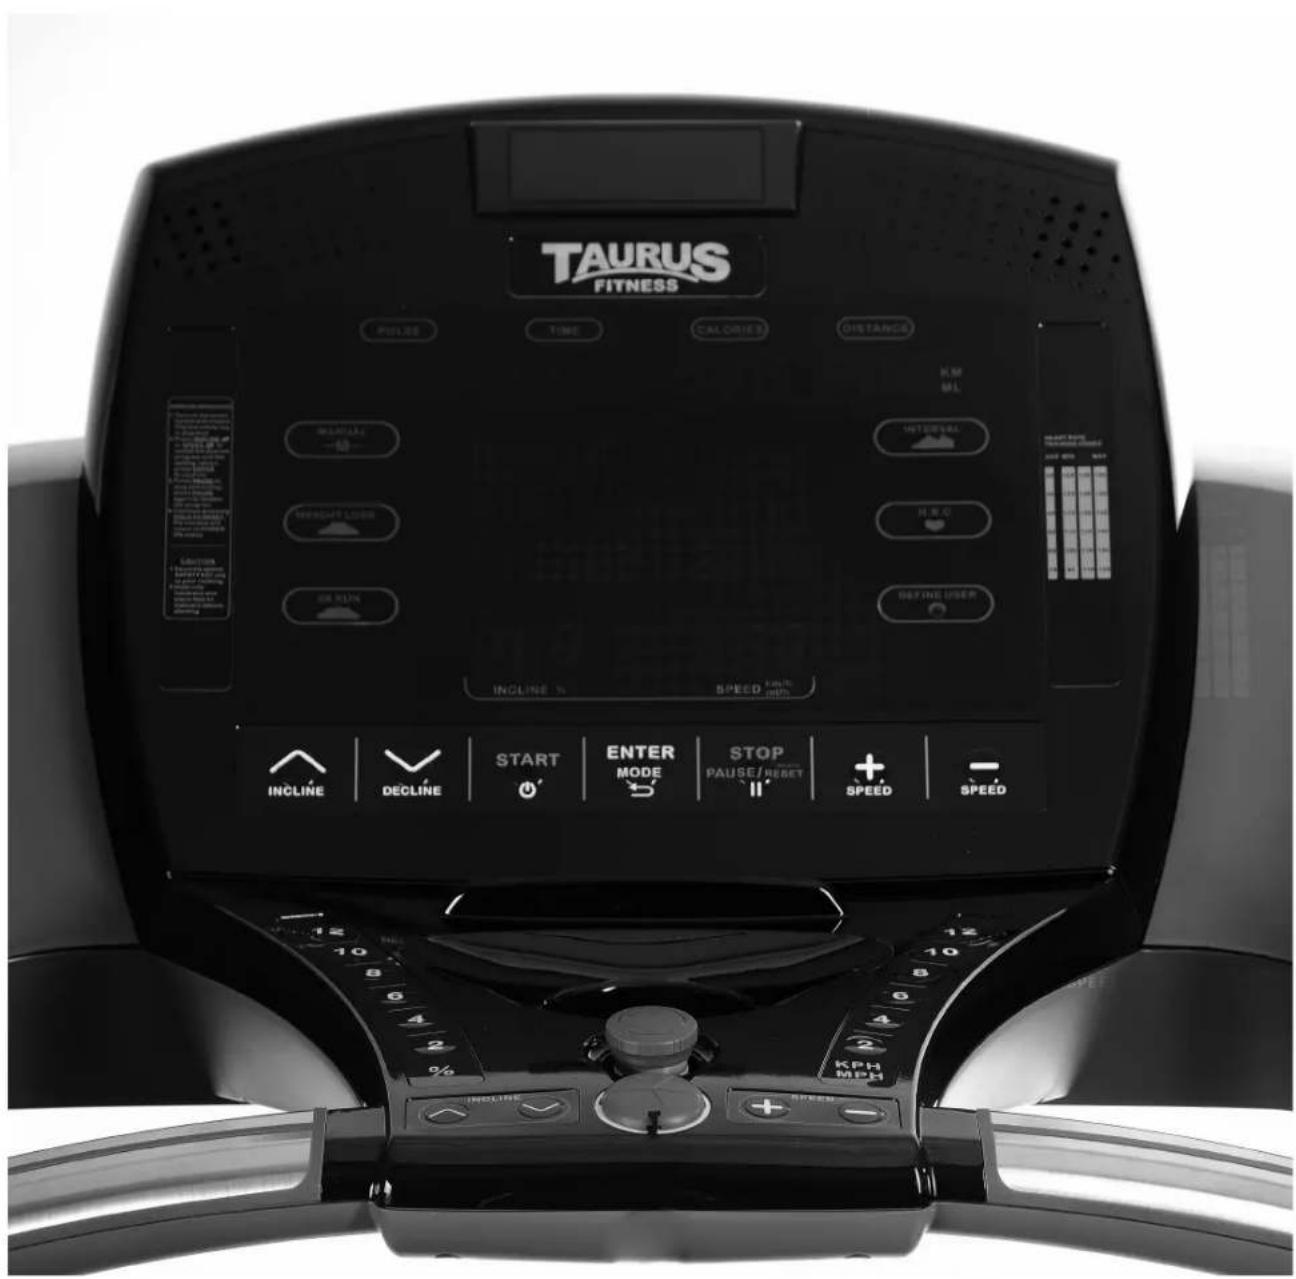
| TIME | Count up: If no target time was selected, the TIME will count up from 0:00 to a maximum of 99:99 minutes.Count down: If you entered a target time (10:00 to 99:00; 1 min. increments), the console will count down from the selected time to 0:00. |
| INCLINE | Press INCLINE up or DECLINE down in order to increase or decrease the incline from 0% to 15%; 1% increments. |
| SPEED | Press SPEED (+) or SPEED (-) in order to increase or decrease the speed from 0.8 to 25 km/h/0.5 to 15 mph; 0.1 km/h/mph INCREMENTS. |
| PULSE | Wear a compatible chest strap or grab the hand pulse sensors with both hands. Your pulse will be displayed after a few seconds. If you do not wear a compatible chest strap or your hands do not correctly grab the sensors and a few seconds pass without a pulse, the console will turn off the pulse circuit. The console will then show the error message “P”. If you grab the pulse sensors correctly again with both hands, the pulse will be displayed. |
| AGE | During setting, the value here stands for “AGE”. Please look at each instruction from the console programs for detailed information. Display range: 10 to 99 years; 1 year increments.NOTE: Even though the console allows a minimum age of 10 years, the equipment is not recommended for usage by children. |
| CALORIES | Indicates the estimated number of calories burnt. |
| WEIGHT | During setting, the value here stands for “WEIGHT”. Please look at each instruction from the console programs for detailed information.30 to 180kg/40 to 400 lbs; 1 kg/lbs increments; After you pressed ENTER to confirm the desired value for WEIGHT, the desired value for WEIGHT will become a “default” when the user starts again. |
| DISTANCE | The distance is calculated based on your speed. |
Turn on
a. Make sure that the power cable is inserted correctly in an outlet.
b. Turn on the main power switch located in the front on the treadmill.
c. Insert the safety key to turn on the console.
Turn off
After 20 minutes of no usage, the console will automatically change into SLEEP MODE.
Press any button to turn the console back on.
4.2 Button functions
 |  |  |  |  |  |  |
| START | Press START to start the exercise.In order to continue the program, press START again to continue having all values displayed until the program is complete.If you have not made a selection and press START directly, the MANUAL program will be selected. |
| STOP/PAUSE/HOLD TO RESET | Press STOP (PAUSE/HOLD TO RESET) in order to stop/interrupt all functions during a training program. All data on the display will freeze.Note: After 5 minutes, the console will return to the start menu if the console is in the STOP (PAUSE/HOLD TO RESET) mode.Press STOP (PAUSE/HOLD TO RESET) twice to end the workout.Press STOP (PAUSE/HOLD TO RESET) three times to return to the start mode.Continue to press STOP (PAUSE/HOLD TO RESET) and all data will be set to 0 and the console returns to the start mode. |
| ENTER/MODE | Press ENTER to confirm the entered values for TIME, WEIGHT, SPEED, AGE, TARGET PULSE and INCLINE. |
| SPEED+ | Press SPEED (+), to select your desired program (MANUAL, WEIGHT REDUCTION, 5K RUN, INTERVAL, CARDIO, USER PROGRAM).Press SPEED (+), to increase the entered values for TIME, WEIGHT, SPEED, AGE, TARGET PULSE.During the workout, press SPEED (+) to increase the SPEED. |
| SPEED-INCLINE up | Press SPEED (-), to select your desired program (MANUAL, WEIGHT REDUCTION, 5K RUN, INTERVAL, CARDIO, USER PROGRAM).Press SPEED (-), to decrease the entered values for TIME, WEIGHT, SPEED, AGE, TARGET PULSE.During the workout, press SPEED (-) to decrease the SPEED.Press INCLINE up to select a desired program (MANUAL, WEIGHT REDUCTION, 5K RUN, INTERVAL, CARDIO, USER PROGRAM).Press INCLINE up to increase the entered values for TIME, WEIGHT, SPEED, AGE, TARGET PULSE and INCLINE. During the workout, press INCLINE up to increase the INCLINE. |
| DECLINE down | Press DECLINE down to select a desired program (MANUAL, WEIGHT REDUCTION, 5K RUN, INTERVAL, CARDIO, USER PROGRAM).Press DECLINE down to decrease the entered values for TIME, WEIGHT, SPEED, AGE, TARGET PULSE and INCLINE.During the workout, press DECLINE down to decrease the INCLINE. |
4.3 Turning on the equipment
Console display - start menu
Once you have turned on the console (short beep), the console shows the "WELCOME" notification. After a few minutes, the console will go to the start menu.
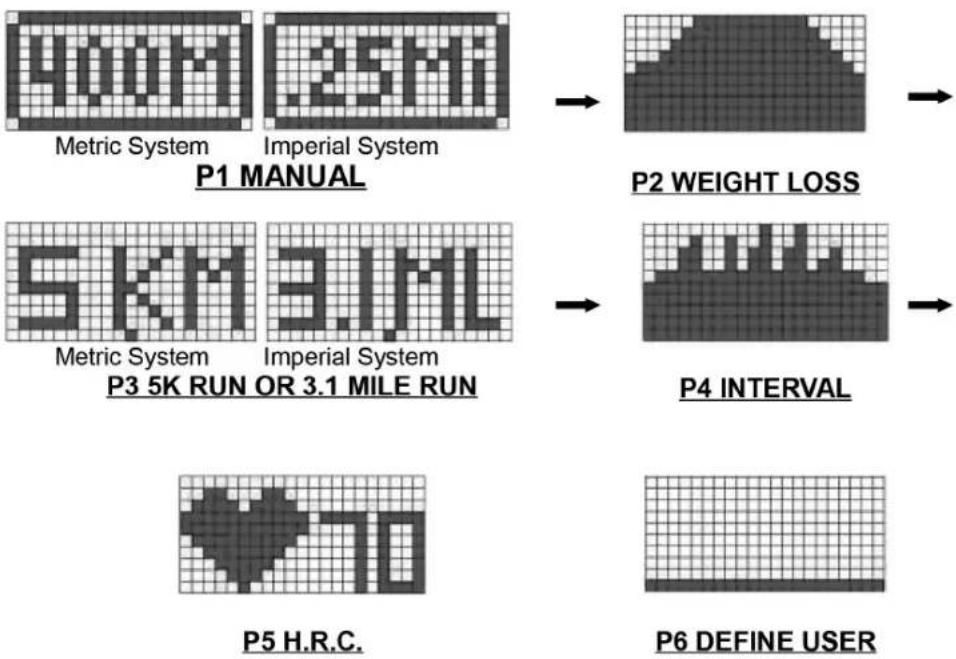
The display in the main LED window runs through all programs as shown below and allows the user to select the desired individual program.
Note: The console has metric and imperial system differences due to usage in different countries.
flowchart
graph TD
    A["400M Metric System"] --> B["25MI Imperial System"]
    C["5KM Metric System"] --> D["3.1ML Imperial System"]
    E["70 H.R.C."] --> F["P6 DEFINE USER"]
    B --> G["P2 WEIGHT LOSS"]
    D --> H["P4 INTERVAL"]
    F --> I["P6 DEFINE USER"]
4.4 Programs
You can select one of the following program categories:
- Manual program
• Weight reduction program - 5K RUN program
- Interval program
• Heart rate controlled program - User program
- Define
4.4.1 Manual program
Press INCLINE up or DECLINE down / SPEED (+) or SPEED (-) in order to select the MANUAL PROGRAM (P1).
After a few seconds, the LED window will display the notification "PRESS ENTER TO MODIFY OR START TO BEGIN WORKOUT" (press ENTER in order to change or start the workout).
The notification above informs the user to press the button to continue.
Select your desired button for the next step:
START: Press this button in order to immediately start the exercise without entering TIME and WEIGHT.
ENTER: Press this button in order to enter the desired TIME and WEIGHT.
STOP: Press this button to return to the start menu.
ENTER: Press ENTER in order to enter the time.
TIME illuminates on the display with "00:00".
Select TIME (10:00 to 99:00; 1 min. increments) with INCLINE up or DECLINE down / SPEED (+) or SPEED (-).
COMMENT on TIME
Count up: If no target time was selected, the TIME will count up from 0:00 to a maximum of 99:99 minutes.
Count down: If you entered a target time, the console will count down from the selected time to 0:00.
ENTER: Press ENTER in order to confirm the TIME.
CALORIES lights up. Now the value means "WEIGHT". After this, the main LED window
will display the notification "ADJUST BODYWEIGHT THEN PRESS ENTER MODE".
Select WEIGHT (30 to 180kg/40 to 400 lbs; 1 kg/lbs increments) with INCLINE up or DECLINE down / SPEED (+) or SPEED (-).
ENTER: Press ENTER to confirm the WEIGHT. Make sure that you have selected the correct values for TIME and WEIGHT.
START: Press START to start the exercise.
"3 2 1 GO" appears on the main LED window as the countdown for your workout.
After a long beep, the MANUAL (400meter/0.25 mile) PROGRAM profile (see below) will appear in the main LED window.
Manual Training (P1) Comment on the manual during the workout
No pulse signal
You must either wear a compatible chest strap or grab the pulse sensors on the handles. Your pulse will be displayed after a few seconds.
If you do not wear a compatible chest strap or your hands do not correctly grab the sensors and a few seconds pass without a pulse, the console will turn off the pulse circuit. The console will then show the error message "P".
If you place your hands on the pulse sensors again, the pulse display will light up again.
Enter INCLINE
While training, the INCLINE can be adjusted at any time in order to achieve your training goal.
Press INCLINE up or DECLINE down in order to increase or decrease the incline from 0% to 15% in 1% increments.
Enter SPEED
During training, the SPEED can be adjusted at any type in order to achieve your training goal.
Press SPEED (+) or SPEED (-) in order to increase or decrease the speed from 0.8 to 25 km/h/0.5 to 15 mph; 0.1 km/h/mph increments.
Press STOP (PAUSE/HOLD TO RESET) in order to stop/interrupt all functions during a training program. All data on the display froze.
NOTE: After five minutes, the console will return to the start menu if the console is in the STOP (PAUSE/HOLD TO RESET) mode.
If you enter an INCLINE, INCLINE will automatically return back to 0%. In order to continue the program, press START so that all data is displayed again. INCLINE
automatically returns to the previously entered position.
Press STOP (PAUSE/HOLD TO RESET) twice to end the workout.
Now the user can select other programs (MANUAL, WEIGHT REDUCTION, 5K RUN, INTERVAL, CARDIO, USER-DEFINED) in order to continue with the workout.
Press STOP (PAUSE/HOLD TO RESET) three times to return to the start menu.
If you press STOP (PAUSE/HOLD TO RESET), all data will return to zero and the console goes back to the start menu.
4.4.2 Weight reduction (P2)
Press INCLINE up or DECLINE down / SPEED (+) or SPEED (-) in order to select the PROGRAM WEIGHT LOSS (P2).
After a few seconds, the main LED window will display the notification "PRESS ENTER TO MODIFY OR START TO BEGIN WORKOUT" (press ENTER in order to change or start the workout).
The notification above informs the user to press the button to continue.
Select one of the following buttons:
START: Press the button to immediately start training without entering the TIME, WEIGHT and SPEED.
ENTER: Press the button in order to enter the TIME, WEIGHT and SPEED.
STOP: Press this button to return to the start menu.
ENTER: Press ENTER in order to enter the time.
TIME illuminates on the display with "30:00".
Select the TIME (10:00 to 99:00; 1 min. increments) with INCLINE up or DECLINE down / SPEED (+) or SPEED (-).
COMMENT on TIME
Count up: If no target time was selected, the TIME will count up from 0:00 to a maximum of 99:99 minutes.
Count down: If you entered a target time, the console will count down from the selected time to 0:00.
ENTER: Press ENTER in order to confirm the TIME.
CALORIES lights up. Now the value means "WEIGHT". After this, the main LED window will display the notification "ADJUST BODYWEIGHT THEN PRESS ENTER MODE".
Select WEIGHT (30 to 180 kg/40 to 400 lbs; 1 kg/lbs increments) with INCLINE up or DECLINE down / SPEED (+) or SPEED (-).
COMMENT on WEIGHT
30 to 180kg/40 to 400lbs; 1 kg/lbs increments; The equipment is not recommended for usage by children.
If you confirmed the desired value for WEIGHT with ENTER, this desired value for WEIGHT will become the "default" when the user restarts the program.
ENTER: Press ENTER to confirm the WEIGHT.
SPEED lights up.
Select the max. SPEED 5 (5 to 25 km/h/3 to 15 mph; 0.1 km/h/mph increments) with INCLINE up or DECLINE down / SPEED (+) or SPEED (-)
ENTER: Press ENTER to confirm the SPEED. Make sure that the TIME, WEIGHT and SPEED were entered correctly.
START: Press START to start the training.
"3 2 1 GO" appears on the main LED window as the countdown for your workout. After a long beep, the WEIGHT REDUCTION PROGRAM profile will appear in the main LED window.
Weight reduction (P2) Comment on the manual during the workout
No pulse signal
You must either wear a compatible chest strap or grab the pulse sensors on the handles. Your pulse will be displayed after a few seconds.
If you do not wear a compatible chest strap or your hands do not correctly grab the sensors and a few seconds pass without a pulse, the console will turn off the pulse circuit. The console will then show the error message "P".
If you place your hands on the pulse sensors again, the pulse display will light up again.
Enter INCLINE
While training, the INCLINE can be adjusted at any time in order to achieve your training goal.
Press INCLINE up or DECLINE down in order to increase or decrease the incline from 0% to 15% in 1% increments.
Enter SPEED
During training, the SPEED can be adjusted at any type in order to achieve your training goal.
Press SPEED (+) or SPEED (-) in order to increase or decrease the speed from 0.8 to 25 km/h/0.5 to 15 mph; 0.1 km/h/mph increments.
Press STOP (PAUSE/HOLD TO RESET) in order to stop/interrupt all functions during a training program. All data on the display froze.
NOTE: After five minutes, the console will return to the start menu if the console is in the STOP (PAUSE/HOLD TO RESET) mode.
If you enter an INCLINE, INCLINE will automatically return back to 0%. In order to continue the program, press START so that all data is displayed again. INCLINE automatically returns to the previously entered position.
Press STOP (PAUSE/HOLD TO RESET) twice to end the workout.
Now the user can select other programs (MANUAL, WEIGHT REDUCTION, 5K RUN, INTERVAL, CARDIO, USER-DEFINED) in order to continue with the workout.
Press STOP (PAUSE/HOLD TO RESET) three times to return to the start menu.
If you press STOP (PAUSE/ HOLD TO RESET), all data will return to zero and the console goes back to the start menu.
4.4.3 5k RUN (P3)
Press INCLINE up or DECLINE down / SPEED (+) or SPEED (-) in order to select the PROGRAM 5K (P3).
After a few seconds, the main LED window will display the notification "PRESS ENTER TO MODIFY OR START TO BEGIN WORKOUT" (press ENTER in order to change or start the workout).
The notification above informs the user to press the button to continue.
Select one of the following buttons:
START: Press the button to immediately start training without entering the WEIGHT.
ENTER: Press the button in order to enter the WEIGHT.
STOP: Press this button to return to the start menu.
ENTER: Press ENTER in order to enter the time.
TIME illuminates on the display with "30:00".
Select the TIME (10:00 to 99:00; 1 min. increments) with INCLINE up or DECLINE down / SPEED (+) or SPEED (-).
COMMENT on TIME
Count up: If no target time was selected, the TIME will count up from 0:00 to a maximum of 99:99 minutes.
Count down: If you entered a target time, the console will count down from the selected time to 0:00.
ENTER: Press ENTER in order to confirm the TIME.
CALORIES lights up. Now the word means "WEIGHT". After this, the main LED window will display the notification "ADJUST BODYWEIGHT THEN PRESS ENTER MODE".
Select WEIGHT (30 to 180 kg/40 to 400 lbs; 1 kg/lbs increments) with INCLINE up or DECLINE down / SPEED (+) or SPEED (-).
COMMENT on WEIGHT
30 to 180 kg/40 to 400 lbs; 1 kg/lbs increments; The equipment is not recommended for usage by children.
If you confirmed the desired value for WEIGHT with ENTER, this desired value for WEIGHT will become the "default" when the user restarts the program.
ENTER: Press ENTER to confirm the WEIGHT.
SPEED lights up.
Select the max. SPEED 5 (5 to 25 km/h/3 to 15 mph; 0.1 km/h/mph increments) with INCLINE up or DECLINE down / SPEED (+) or SPEED (-).
ENTER: Press ENTER to confirm the SPEED. Make sure that the TIME, WEIGHT and SPEED were entered correctly.
START: Press START to start the training.
"3 2 1 GO" appears on the main LED window as the countdown for your workout. After a long beep, the 5K RUN/3.1 MILE PROGRAM will appear in the main LED window.
5k RUN (P3) Comment on the manual during the workout
No pulse signal
You must either wear a compatible chest strap or grab the pulse sensors on the handles. Your pulse will be displayed after a few seconds.
If you do not wear a compatible chest strap or your hands do not correctly grab the sensors and a few seconds pass without a pulse, the console will turn off the pulse circuit. The console will then show the error message "P".
If you place your hands on the pulse sensors again, the pulse display will light up again.
Enter INCLINE
While training, the INCLINE can be adjusted at any time in order to achieve your training goal.
Press INCLINE up or DECLINE down in order to increase or decrease the incline from 0% to 15% in 1% increments.
Enter SPEED
During training, the SPEED can be adjusted at any type in order to achieve your training goal.
Press SPEED (+) or SPEED (-) in order to increase or decrease the speed from 0.8 to 25 km/h/0.5 to 15 mph; 0.1 km/h/mph increments.
Press STOP (PAUSE/HOLD TO RESET) in order to stop/interrupt all functions during a training program. All data on the display froze.
NOTE: After five minutes, the console will return to the start menu if the console is in the STOP (PAUSE/HOLD TO RESET) mode.
If you enter an INCLINE, INCLINE will automatically return back to 0%. In order to continue the program, press START so that all data is displayed again. INCLINE automatically returns to the previously entered position.
Press STOP (PAUSE/HOLD TO RESET) twice to end the workout.
Now the user can select other programs (MANUAL, WEIGHT REDUCTION, 5K RUN, INTERVAL, CARDIO, USER-DEFINED) in order to continue with the workout.
Press STOP (PAUSE/HOLD TO RESET) three times to return to the start menu.
If you press STOP (PAUSE/HOLD TO RESET), all data will return to zero and the console goes back to the start menu.
4.4.4 Interval program (P4)
Press INCLINE up or DECLINE down / SPEED (+) or SPEED (-) in order to select the PROGRAM interval (P4).
After a few seconds, the main LED window will display the notification "PRESS ENTER TO MODIFY OR START TO BEGIN WORKOUT" (press ENTER in order to change or start the workout).
The notification above informs the user to press the button to continue.
Select one of the following buttons: START: Press the button to immediately start training without entering the TIME, WEIGHT and SPEED.
ENTER: Press the button in order to enter the TIME, WEIGHT and SPEED.
STOP: Press this button to return to the start menu.
ENTER: Press ENTER in order to enter the time.
TIME illuminates on the display with "30:00".
Select the TIME (10:00 to 99:00; 1 min. increments) with INCLINE up or DECLINE down / SPEED (+) or SPEED (-).
COMMENT on TIME
Count up: If no target time was selected, the TIME will count up from 0:00 to a maximum of 99:99 minutes.
Count down: If you entered a target time, the console will count down from the selected time to 0:00.
ENTER: Press ENTER in order to confirm the TIME.
CALORIES lights up. Now the value means "WEIGHT". After this, the main LED window will display the notification "ADJUST BODYWEIGHT THEN PRESS ENTER MODE".
Select WEIGHT (30 to 180 kg/40 to 400 lbs; 1 kg/lbs increments) with INCLINE up or DECLINE down / SPEED (+) or SPEED (-).
COMMENT on WEIGHT
30 to 180 kg/40 to 400 lbs; 1 kg/lbs increments; The equipment is not recommended for usage by children.
If you confirmed the desired value for WEIGHT with ENTER, this desired value for WEIGHT will become the "default" when the user restarts the program.
ENTER: Press ENTER to confirm the WEIGHT.
SPEED lights up.
Select the max. SPEED 5 (5 to 25 km/h/3 to 15 mph; 0.1 km/h/mph increments) with INCLINE up or DECLINE down / SPEED (+) or SPEED (-)
ENTER: Press ENTER to confirm the SPEED. Make sure that the TIME, WEIGHT and SPEED were entered correctly.
START: Press START to start the training.
"3 2 1 GO" appears on the main LED window as the countdown for your workout. After a long beep, the INTERVAL PROGRAM (P4) will appear in the main LED window.
Interval program (P4) Comment on the manual during the workout
No pulse signal
You must either wear a compatible chest strap or grab the pulse sensors on the handles. Your pulse will be displayed after a few seconds.
If you do not wear a compatible chest strap or your hands do not correctly grab the sensors and a few seconds pass without a pulse, the console will turn off the pulse circuit. The console will then show the error message "P".
If you place your hands on the pulse sensors again, the pulse display will light up again.
Enter INCLINE
While training, the INCLINE can be adjusted at any time in order to achieve your training goal.
Press INCLINE up or DECLINE down in order to increase or decrease the incline from 0% to 15% in 1% increments.
Enter SPEED
During training, the SPEED can be adjusted at any type in order to achieve your training goal.
Press SPEED (+) or SPEED (-) in order to increase or decrease the speed from 0.8 to 25 km/h/0.5 to 15 mph; 0.1 km/h/mph increments.
Press STOP (PAUSE/HOLD TO RESET) in order to stop/interrupt all functions during a training program. All data on the display froze.
NOTE: After five minutes, the console will return to the start menu if the console is in the STOP (PAUSE/HOLD TO RESET) mode.
If you enter an INCLINE, INCLINE will automatically return back to 0%. In order to continue the program, press START so that all data is displayed again. INCLINE automatically returns to the previously entered position.
Press STOP (PAUSE/HOLD TO RESET) twice to end the workout.
Now the user can select other programs (MANUAL, WEIGHT REDUCTION, 5K RUN, INTERVAL, CARDIO, USER-DEFINED) in order to continue with the workout.
Press STOP (PAUSE/HOLD TO RESET) three times to return to the start menu.
If you press STOP (PAUSE/ HOLD TO RESET), all data will return to zero and the console goes back to the start menu.
4.4.5 Cardio program (P5)
Press INCLINE up or DECLINE down / SPEED (+) or SPEED (-) in order to select the CARDIO (P5) program.
After a few seconds, the main LED window will display the notification "PRESS ENTER TO MODIFY OR START TO BEGIN WORKOUT" (press ENTER in order to change or start the workout).
The notification above informs the user to press the button to continue.
Select one of the following buttons:
START: Press the button to immediately start training without entering the TIME, WEIGHT and TARGET PULSE.
ENTER: Press the button in order to enter the TIME, WEIGHT and TARGET PULSE.
STOP: Press this button to return to the start menu.
ENTER: Press ENTER in order to enter the time.
TIME illuminates on the display with "30:00".
Select the TIME (10:00 to 99:00; 1 min, increments) with INCLINE up or DECLINE down / SPEED (+) or SPEED (-).
COMMENT on TIME
Count up: If no target time was selected, the TIME will count up from 0:00 to a maximum of 99:99 minutes.
Count down: If you entered a target time, the console will count down from the selected time to 0:00.
ENTER: Press ENTER in order to enter the time.
PULSE (pulse/heart rate) value lights up. Now the value means "AGE".
After this, the main LED window will display the notification "ADJUST AGE THEN PRESS ENTER MODE".
Select the AGE (10 to 99 years; 1 year increments) with INCLINE up or DECLINE down / SPEED (+) or SPEED (-).
COMMENT about the AGE
Even though the console allows a minimum age of 10 years, the equipment is not recommended for usage by children.
ENTER: Press ENTER to confirm the AGE.
PULSE LED lights up.
Select the target pulse (60-220 BPM (beats per minute); 1 BPM increments) with INCLINE up or DECLINE down / SPEED (+) or SPEED (-)
ENTER: Press ENTER to confirm the TARGET PULSE. Make sure that the TIME, WEIGHT and TARGET PULSE were entered correctly.
START: Press START to start the training.
"3 2 1 GO" appears on the main LED window as the countdown for your workout. After a long beep, the CARDIO PROGRAM (P5) will appear in the main LED window.
Cardio program (P5) Comment on the manual during the workout
No pulse signal
You must either wear a compatible chest strap or grab the pulse sensors on the handles. Your pulse will be displayed after a few seconds.
If you do not wear a compatible chest strap or your hands do not correctly grab the sensors and a few seconds pass without a pulse, the console will turn off the pulse circuit. The console will then show the error message "P".
If you place your hands on the pulse sensors again, the pulse display will light up again.
Enter SPEED
During training, the SPEED can be adjusted at any type in order to achieve your training goal.
Press SPEED (+) or SPEED (-) in order to increase or decrease the speed from 0.8 to 25 km/h/0.5 to 15 mph; 0.1 km/h/mph increments.
Press STOP (PAUSE/HOLD TO RESET) in order to stop/interrupt all functions during a training program. All data on the display froze.
NOTE: After five minutes, the console will return to the start menu if the console is in the STOP (PAUSE/HOLD TO RESET) mode.
If you enter an INCLINE, INCLINE will automatically return back to 0%. In order to continue the program, press START so that all data is displayed again. INCLINE automatically returns to the previously entered position.
Press STOP (PAUSE/HOLD TO RESET) twice to end the workout.
Now the user can select other programs (MANUAL, WEIGHT REDUCTION, 5K RUN, INTERVAL, CARDIO, USER-DEFINED) in order to continue with the workout.
Press STOP (PAUSE/HOLD TO RESET) three times to return to the start menu.
If you press STOP (PAUSE/ HOLD TO RESET), all data will return to zero and the console goes back to the start menu.
4.4.5 User-defined training program (P6)
Press INCLINE up or DECLINE down / SPEED (+) or SPEED (-) in order to select the DEFINE USER PROGRAM (P6) program.
After a few seconds, the main LED window will display the notification "PRESS ENTER TO MODIFY OR START TO BEGIN WORKOUT" (press ENTER in order to change or start the workout).
The notification above informs the user to press the button to continue.
Select one of the following buttons:
START: Press the button to immediately start training without entering the TIME, WEIGHT and SPEED during every time interval.
ENTER: Press the button to enter the TIME, WEIGHT and SPEED or INCLINE during every time interval.
STOP: Press this button to return to the start menu.
ENTER: Press ENTER in order to enter the time.
Select the TIME (10:00 to 99:00; 1 min. increments) with INCLINE up or DECLINE down / SPEED (+) or SPEED (-).
COMMENT on TIME
Count up: If no target time was selected, the TIME will count up from 0:00 to a maximum of 99:99 minutes.
Count down: If you entered a target time, the console will count down from the selected time to 0:00. The input value is saved as the "default" for the next user-defined training.
ENTER: Press ENTER to confirm the weight.
CALORIES lights up. Now the word means "WEIGHT". After this, the main LED window will display the notification "ADJUST BODYWEIGHT THEN PRESS ENTER MODE".
Select WEIGHT (30 to 180 kg/40 to 400 lbs; 1 kg/lbs increments) with INCLINE up or DECLINE down / SPEED (+) or SPEED (-).
COMMENT on WEIGHT
30 to 180 kg/40 to 400 lbs; 1 kg/lbs increments; The equipment is not recommended for usage by children.
If you confirmed the desired value for WEIGHT with ENTER, this desired value for WEIGHT will become the "default" when the user restarts the program.
ENTER: Press ENTER to confirm the WEIGHT.
SPEED appears for the first time interval in the LED window.
Select SPEED (0.8 to 25 km/h/0.5 to 15 mph; 0.1 km/h/mph increments) for the first time interval with SPEED (+) or SPEED (-)
Then press INCLINE up or DECLINE down to enter the incline for the first time interval.
Select INCLINE up or DECLINE down in order to enter the desired INCLINE (0% to 15%; 1% increments).
ENTER: Press ENTER in order to confirm the selected SPEED and INCLINE in the first time interval. Then SPEED will light up in the LED window again.
Repeat the steps above in order to select SPEED and INCLINE for the seconds and the other time intervals (max. 21 time intervals).
START: Press START to start the training.
"3 2 1 GO" appears on the main LED window as the countdown for your workout. After a long beep, the created USER PROGRAM profile will appear in the main LED window.
User program (P6) Comment on the manual during the workout
No pulse signal
You must either wear a compatible chest strap or grab the pulse sensors on the handles. Your pulse will be displayed after a few seconds.
If you do not wear a compatible chest strap or your hands do not correctly grab the sensors and a few seconds pass without a pulse, the console will turn off the pulse circuit. The console will then show the error message "P".
If you place your hands on the pulse sensors again, the pulse display will light up again.
Enter SPEED
During training, the SPEED can be adjusted at any type in order to achieve your training goal.
Press SPEED (+) or SPEED (-) in order to increase or decrease the speed from 0.8 to 25 km/h/0.5 to 15 mph; 0.1 km/h/mph increments.
Press STOP (PAUSE/HOLD TO RESET) in order to stop/interrupt all functions during a training program. All data on the display froze.
NOTE: The console returns to the start menu after five minutes if the console is still in the STOP (PAUSE/HOLD TO RESET) mode.
If you enter an INCLINE, INCLINE will automatically return back to 0%. In order to continue the program, press START so that all data is displayed again. INCLINE automatically returns to the previously entered position.
Press STOP (PAUSE/HOLD TO RESET) twice to end the workout. Now the user can select other programs (MANUAL, WEIGHT REDUCTION, 5K RUN, INTERVAL, CARDIO, USER-DEFINED) in order to continue with the workout.
Press STOP (PAUSE/HOLD TO RESET) three times to return to the start menu.
If you press STOP (PAUSE/ HOLD TO RESET), all data will return to zero and the console goes back to the start menu.
5.1 Heart rate measuring
Pulse measuring through hand sensors
The hand sensors integrated in the handles allow you to determine your heart rate. You can measure your heart rate by lightly grasping the sensors with both hands at the same time. Blood pressure changes occur due to the heartbeat. The sensors measure the changes to the electric skin resistance caused by it. These values are then used to create an average and are displayed on the screen of the console as a heart rate.
Note:
For some people, the skin resistance change caused by the heart rate is so minimal that the measurements do not allow for usable values. Strong callus or sweat on the hands may also impair a correct measurement. In such cases, the heart rate will not be shown at all or only incorrectly.
If the measurement is incorrect or not taken at all, please check if it happens to only one person or to several people. If the pulse display only does not work in a single case, the equipment is not defective. In this case, we recommend using a chest strap to achieve a permanently correct heart rate display.
CAUTION: Your training equipment is not a medical device. Different factors may influence the accuracy of the heart rate display. The heart rate display only serves as a training aid.
Telemetric heart rate measuring
This treadmill is already equipped with a heart rate receiver as standard. Using a chest strap makes it possible for you to have a wireless heart rate measuring. This optimal and ECG-precise type of measuring reads the heart rate directly from the skin through a transmitting chest strap. The chest strap then sends the impulse to the receiver integrated in the console.
Positioning the chest strap and moistening the electrodes:
Place the belt directly below the chest, while the transmitter should be placed on the middle of the chest. The chest strap should sit comfortably, but not too loose. If the belt is too loose, the contact to the electrodes may be disrupted or the belt may slip while exercising. The transmitter turns on automatically once it is put on. In order to allow for a precise measuring, you should moisten the rubber electrodes. This is best done with a special chest strap contact gel, which is also used for ultrasound scans.
Note:
If you have not been active in doing sports for a longer period of time, you should first go to your physician in order to discuss your training with them. You should also contact your physician in advance in the event of heart problems, high/low blood pressure and obesity.
Training with heart rate orientation
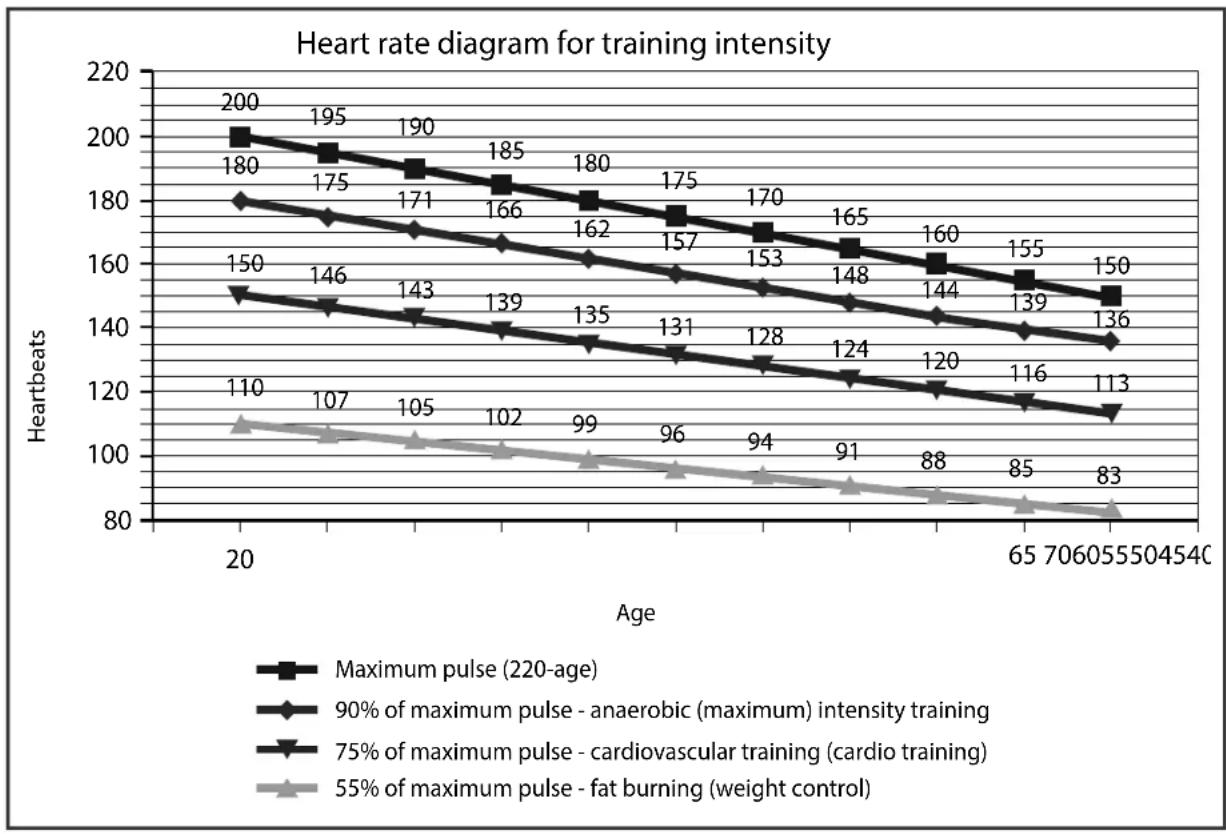
Heart rate orientation guarantees an extremely effective and healthy training. Through your age and the following table, you can quickly and easily read and determine the optimal pulse for your training. An alarm will sound if your heart rate exceeds the set target heart rate. Which target heart rate is important for which training goal can be found out in the following.
Fat burning (weight management): The main goal here is to burn deposits of fat. In order to achieve this training goal, a low training intensity (approximately 55% of the maximum heart rate) and a longer training period are required.
Cardiovascular training (cardio training): The primary goal is to increase stamina and fitness through an improved provision of oxygen through the cardiovascular system. In order to achieve this training goal, medium intensity (approximately 75% of the maximum heart rate) with a medium training period is required.
Anaerobic (maximum) load training: The main goal of maximum load training is to improve recovery after short, intense loads in order to be able to quickly return to the aerobic zone. In order to achieve this training goal, a high intensity (approximately 90% of the maximum heart rate) with short, intense load is required, which is followed by a recovery phase in order to prevent muscle fatigue.
Example:
For a 45-year-old man or woman, the maximum heart rate is 175 (220 - 45 = 175).
- The fat burning target zone (55%) is at approximately 96 beats/min.
$$ = (2 2 0 - \text { age }) \times 0. 5 5. $$
• The cardio target zone (75%) is at approximately 131 beats/min.
$$ = (2 2 0 - \text { age }) \times 0. 7 5. $$
- The maximum heart rate for an anaerobic load training (90%) is at approximately 157 beats/min. = (220 - age) x 0.9.
5.2 10 tips for effective running training
1. Set goals
What would you like to achieve with your training? Weight regulation, improved stamina, prevent risk of disease, more mobility, cardiovascular training, etc. In order to achieve your long-term training goal, set individual partial goals, e. g., weekly or monthly goals.
2. Concentration on training
Try to only dedicate yourself to your training session and do not be distracted.
3. Position yourself correctly while exercising
When you execute the movement, you should start with a moderate speed and hold on if needed. The speed can then be increased gradually. The adjustment of your natural running style will occur relatively quickly. Beginners and overweight people should start with a walking program in order to not overload their joints in the beginning.
4. Correct breathing / appropriate resistance level
Do not overexert yourself physically and mentally by starting with resistance levels that are too high. Start slowly and increase the resistance steadily. Aim for regular and calm breathing.
5. Keep yourself properly hydrated
Drink, drink, drink! Have a drinking bottle close by during your workout.
6. Sufficient recovery periods
Allow your body and your muscles enough time to recover after your workout. Only a relaxed muscle will be fully operational again.
7. Choose a diversified program
Different program functions from your training console support you in doing this. For example, you can complete an interval, incline or step number training unit.
8. Creating the right workout
Every training session should have a warm-up phase, a cool-down phase and a targeted stretching. It increases physical and mental performance and prevents injuries and sore muscles.
9. Workout journal
Keep a record of your training sessions. Note the date, resting pulse, active pulse, recovery pulse, resistance level, time, distance, calories burnt and fitness level.
10. Reward yourself
Do something good for you and your body after training or after achieving a partial goal. Go to the sauna or a swimming pool. Mix a protein shake or enjoy a delicious salad.
5.3 Designing a workout
We recommend two or three workouts per week. Warm up for about five minutes before starting each workout. Finish the workout with a cool-down and targeted stretching.
Warm-up approx. five min. Dynamic movement of large muscle groups at a low intensity. Core body temperature increases and the metabolic process is speeded up.
| WEEK 1 + 2 | ||||
| Beginner Advanced | ||||
| Days | Duration Intensity | Duration Intensity | g | speed |
| Mon 20 min. Brisk | walking 30 min. Running | g at a slow speed | ||
| Wed 20 min. Brisk | walking 30 min. Running | g at a slow speed | ||
| Fri | 20 min. Brisk walking 30 min. Running | g at a slow speed | ||
| Increased speed for two to three minutes in between in the first week. Maintain your heart rate. | Increase the speed in between in the second week. Maintain your heart rate. | |||
| WEEK 3 + 4 | ||||
| Beginner | Advanced | |||
| Days | Duration Intensity Duration Intensity | Intensity | ||
| Mon 25 min. After | every 10 min. run for 1 min. | 35 min. | Running at a moderate speed | |
| Wed 25 min. After | every 10 min. run for 1 min. | 35 min. | Running at a moderate speed | |
| Fri 25 min. After every 10 min. run for 1 min. | 35 min. Running at a moderate speed |
| In the third week, run for two minutes after every 10 minutes. Maintain your heart rate. | In the fourth week, increase the speed for one minute each. Maintain your heart rate. |
WEEK 5 + 6
| Beginner Advanced | ||||
| Days | Duration Intensity Duration Intensity | |||
| Mon 30 | min. Alternate walking and running | 40 min. Running according to heart rate | ||
| Wed 30 | min. Alternate walking and running | 40 min. Running according to heart rate | ||
| Fri 30 | min. Alternate walking and running | 40 min. Running according to heart rate | ||
| In the fifth week, run for three minutes after every eight minutes. In the sixth week, run for three minutes after every six minutes. Maintain your heart rate. | Pay attention to your heart rate. | |||
WEEK 7 + 8
| Beginner Advanced | ||||
| Days | Duration | Intensity | Duration | Intensity |
| Mon | 35 min. | Walk 8 minutes, run 5 minutes | 45 min. Running according to heart rate | |
| Wed | 35 min. | Walk 8 minutes, run 5 minutes | 45 min. Running according to heart rate | |
| Fri | 35 min. | Walk 8 minutes, run 5 minutes | 45 min. Running according to heart rate | |
| Increase in the eight week: Walk five minutes, run seven minutes. Maintain your heart rate. | If you feel comfortable, then include a few steps or hills in your training. | |||
Cool-down approximately five min.
Finish your training at low resistance and at slow speed. Allow your body to gently slow back down.
5.4 Stretching exercises for leg & chest muscles
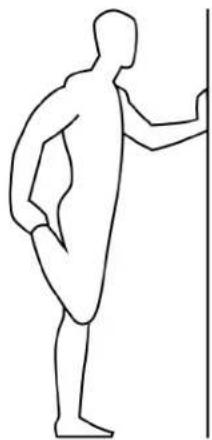
1. Exercise: Stretching of front thigh / leg extension (quadriceps)
• Stable position, grab arches of feet
- Pull heel towards buttocks, knee points downwards (no abduction)
- Straight upper body, avoid tilting the pelvic forward (hollow back) by tensing the abdominal muscles
- Change legs
natural_image
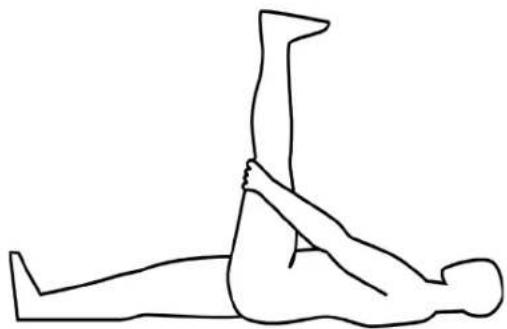
Line drawing of a human figure in standing pose next to vertical line (no text or symbols)2. Exercise: Stretching the back thigh / leg curl (hamstring)
- Pull thigh towards upper body with both hands
- Stretch through increased stretching in the knee joint
• The lower leg maintains contact with the floor, keep hips bent
- Change legs
natural_image
Line drawing of a person performing a seated leg raise exercise (no text or symbols)3. Exercise: Stretching the calf muscles (gastrocnemius)
- Place feet parallel to each other pointing forward, the heels touch the floor
- Support yourself on a chair coming from a lunge
- Move your body weight to the front leg, press your heel from the rear leg towards the floor and hold the contact
- Slowly stretch your knee of the rear leg until you feel the stretch in your calves
- Change legs
natural_image
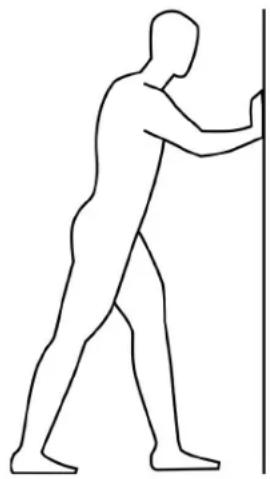
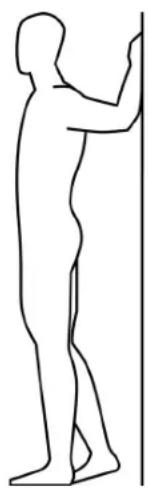
Line drawing of a human figure pushing a vertical pole (no text or symbols)4. Exercise: Stretching the chest muscles (pectoralis major)
- Stand parallel to a wall
- Place your forearm at 90^ to the wall with the elbow just above shoulder height
- Turn your head and upper body gradually to the opposite sides until you feel a stretch in the front chest, of the shoulder being leaned on
- Pay attention to tension in your abdominal and gluteal muscles
- Your weight is on your front leg
- Change legs
natural_image
Silhouette of a human figure in standing pose next to vertical line (no text or symbols)All recommendations of these instructions apply solely to healthy persons and are not suitable for those with heart or cardiovascular problems. All of the tips are intended only as a guide to help you create a workout. Your physician can offer appropriate advice for particular, personal requirements.
We hope you enjoy your workout and have a lot of success!
5.5 Workout journal
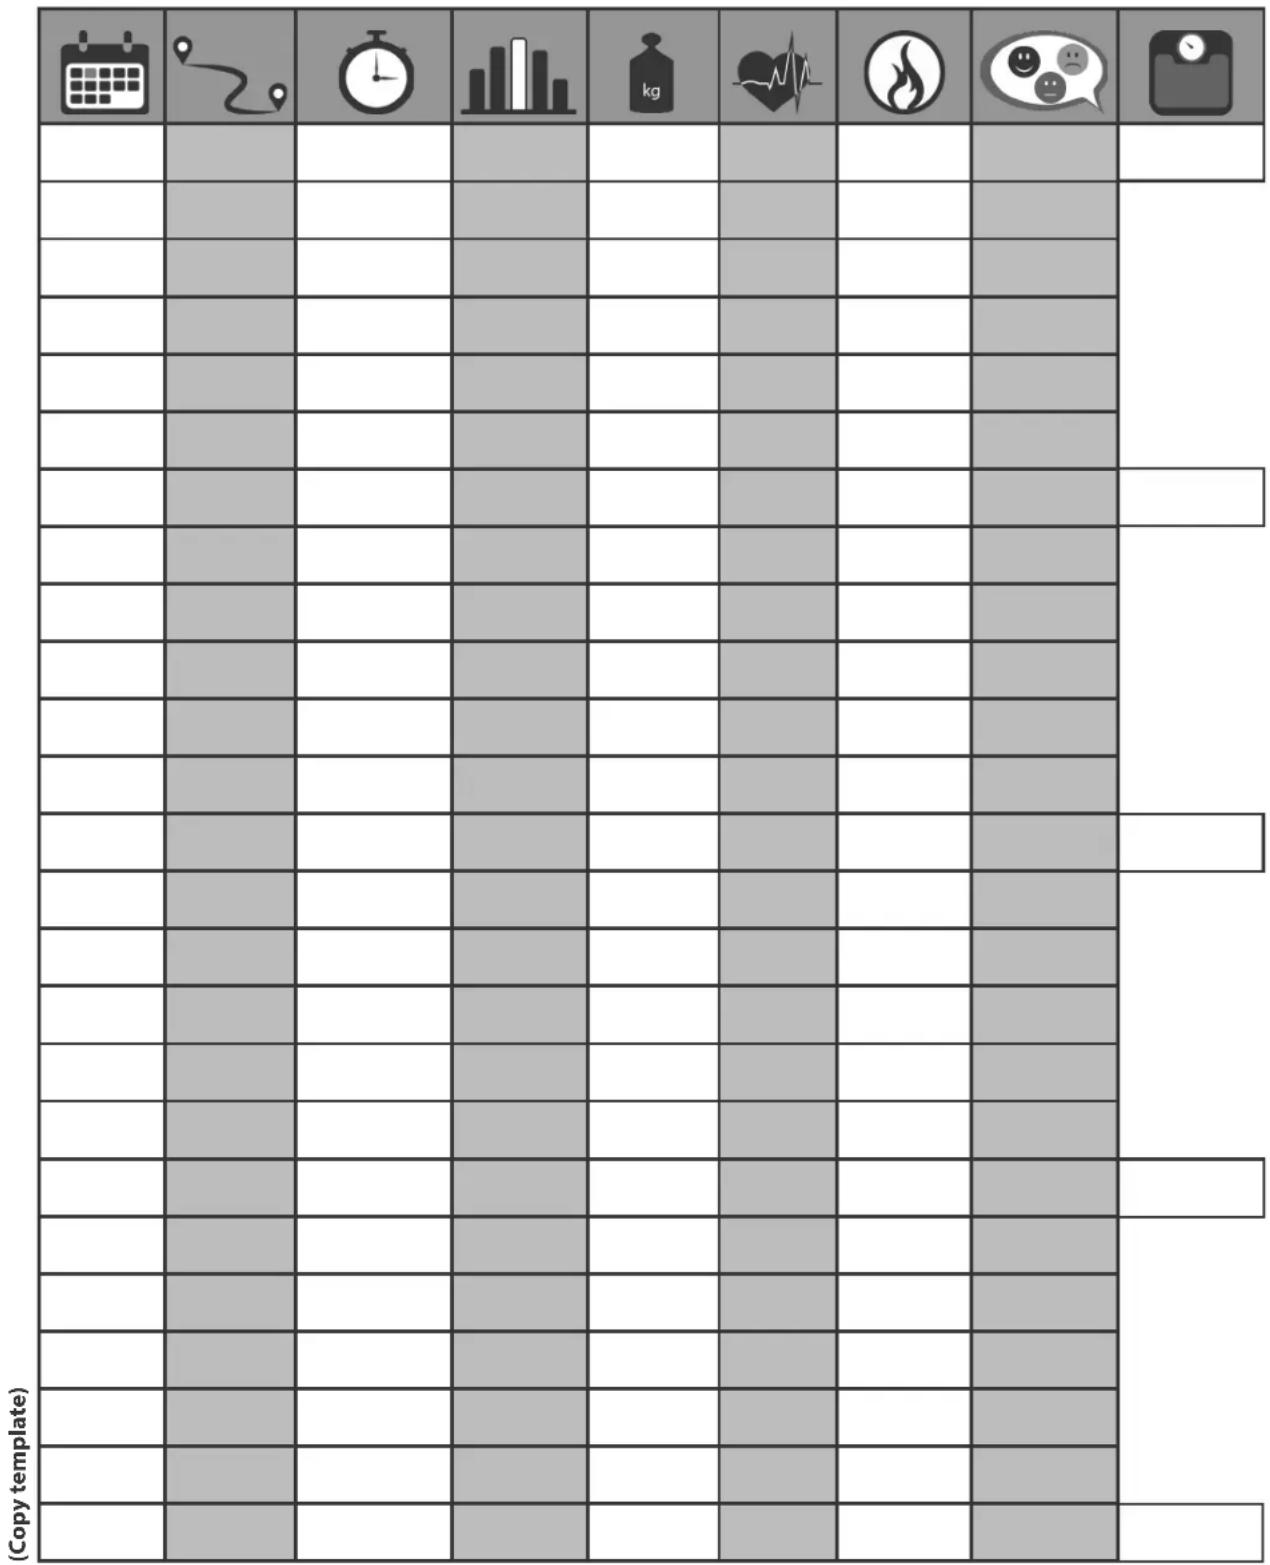

Date
Distance

Time (min.)
Resistance level

Training weight

∅ Pulse

Calories burnt Body weight
Body weight
I feel ...

Taurus training fitness equipment is subject to strict quality controls. However, if a fitness equipment purchased from us does not work perfectly, we take it very seriously and ask you to contact our customer service as indicated. We are happy to help you by phone via our service hotline.
Error descriptions
Your fitness equipment is developed for long-term, high-quality training. However, should a problem arise, please first read the operating instructions. For further assistance, please contact your contract partner or call our service hotline. To ensure your problem is solved as quickly as possible, please describe the defect as exactly as possible.
In addition to the statutory warranty, we provide a warranty for every fitness equipment purchased from us according to the following provisions.
Your statutory rights are not affected.
Warrantee
The warrantee is the first/original buyer and/or any person who received a newly purchased product as a gift from the original buyer.
Warranty periods
The following warranty periods begin on delivery of the fitness equipment.
| Model Use Full warranty Frame Motor | ||||
| T10.5 Pro | Home use 24 months | 30 years 10 years | ||
| Semi-professional use | 24 months | |||
| Professional use 12 months | ||||
Repair costs
According to our choice, there will either be a repair, a replacement of individual damaged parts or a complete replacement. Spare parts, that have to be mounted while assembling the equipment, have to be replaced by the warrantee personally and are not a part of repair. After the expiration of the warranty period for repair costs, a pure parts warranty applies, which does not include the repair, installation and delivery costs.
The terms of use are defined as follows:
• Home use: solely for private use in private households up to 3 hours per day
- Semi-professional use: up to 6 hours per day (e. g. rehabilitation centers, hotels, clubs, company gyms)
• Professional use: more than 6 hours per day (e. g. commercial gyms)
Warranty service
Within the warranty period, equipment which develops faults as a result of material or manufacturing defects, will be repaired or replaced at our discretion. Ownership of equipment or parts of equipment which have been replaced is transferred to us. The warranty period is not extended nor does a new warranty period begin following repair or replacement under the warranty.
Warranty conditions
For the warranty to be valid, the following steps must be taken:
Please contact our customer service by email or phone. If the product under warranty has to be sent in for repair, the seller bears costs. After expiry of the warranty, the buyer bears the costs of transport and insurance. If the fault is covered by our warranty, you will receive a new or repaired equipment in return.
Warranty claims are invalid in case of damage resulting from:
- misuse or improper handling
• environmental influences (moisture, heat, electrical surge, dust, etc.) - failure to follow the current safety measures for the equipment
- failure to follow the operating instructions
- use of force (e.g. hitting, kicking, falling)
• interventions which were not carried out by one of our authorized service centers - unauthorized repair attempts
Proof of purchase and serial number
Please make sure that you are able to provide the appropriate receipt when claiming on your warranty. So that we can clearly identify the model of your equipment, and for the purposes of our quality control, you will need to give the serial number of your equipment, when contacting the service team. Where possible please have your serial number and your customer number ready when you call our service hotline. It will help us to deal with your request swiftly.
If you have trouble finding the serial number on your fitness equipment, our service team is at your disposal to offer further information.
Service outside the warranty period
We are also happy to issue an individual cost estimate if there is a problem with your fitness equipment after the warranty has expired, or in cases which do not fall under the terms of the warranty, e. g. normal wear and tear. Please contact our customer service team to find a quick and cost-effective solution to your problem. In such a case you will be responsible for the delivery costs.
Communication
Many problems can be solved just by speaking to us as your contract partner. We know how important it is to you as a user of the fitness equipment to have problems solved quickly and simply, so you can enjoy working out with minimal interruption. For that reason, we also want to resolve your queries quickly and in a straightforward manner. Thus, please always keep your customer number and the serial number of the faulty equipment handy.
7 DISPOSAL
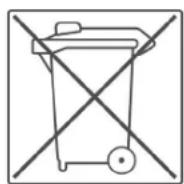
At the end of its operational life, this equipment cannot be disposed of in normal household waste. Instead, it must be disposed of via an electricals recycling centre. Further information can be obtained from your local authority's recycling service.
The materials can be recycled as per their symbols. Through the reuse, recycling of materials or other forms of recovery of old equipment, you make an important contribution to the protection of the environment.
8 ORDERING ACCESSORIES
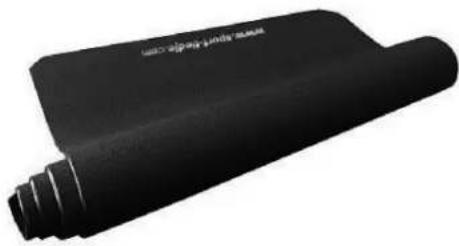 | Sport-Tiedje floor mat size XXLArt. No. ST-FM-XXL | |
 | Polar transmitter chest strap T34 uncodedArt. No. T34 | |
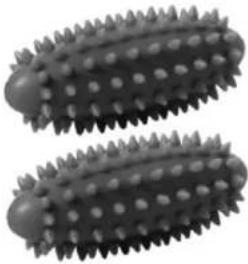 | Togu Senso Walking TrainerArt. No. TOGU-470501 | |
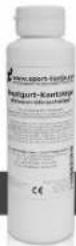 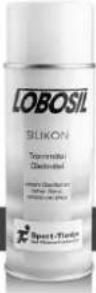 [Sport-Tiedje(De France)Routique] [Sport-Tiedje(De France)Routique]    | Chest strap contact gel 250mlArt. No. BK-250 | Sport-Tiedje silicone sprayArt. No. ST-1003 |
| Fitness equipment care setArt. No. HF-500 | ||
9.1 Service hotline
So that we can give you the best possible service, please have your model name, part number, serial number, exploded drawing and parts list ready.
SERVICE-HOTLINE
DE
+49 4621 4210-0

+49 4621 4210-699

service@sport-tiedje.de
Mon - Fri 8:00 am - 6:00 pm
Sat 9:00 am - 6:00 pm
NL
+31 172 619961

info@fitshop.nl
Mon - Thu 9 am - 5 pm
Fri 9 am - 9 pm
Sat 10 am - 5 pm
UK
+44 141 876 3972

orders@powerhousefitness.co.uk
Mon - Fri 9 am - 5 pm
9.2 Serial number and model name
Before assembling your equipment, find the serial number on the white sticker and enter it in the appropriate space.
Serial number:
Brand / category: Model name:
Taurus treadmill T10.5 Pro
9.3 Parts list
| No. | Description | Qty. | No. | Description | Qty. |
| 1 | Running Deck Frame 1 34 Square Plug (38x50mm) 2 | ||||
| 2 | Main Frame 1 35 Left Side Motor Cover 1 | ||||
| 3 | Motor Cover Support Tube 1 36 Right Side Motor Cover 1 | ||||
| 4 | Elevation Frame 1 37 Left Upright Sleeve | 1 | |||
| 5 | Left Side Rail Frame 1 38 Right Upright Sleeve 1 | ||||
| 6 | Right Side Rail Frame 1 39 Left Upright Decoration Cover 1 | ||||
| 7 | Left Upright Post 1 40 Right Upright Decoration Cover 1 | ||||
| 8 | Right Upright Post 1 41 Left Handrail Cover 1 | ||||
| 9 | Handrail Frame 1 42 Right Handrail Cover 1 | ||||
| 10 | Console Frame 1 43 Bottom Handrail Cover 1 | ||||
| 11 | Running Deck 1 44 Safety Key Switch 1 | ||||
| 12 | Running Belt 1 45 Side Handrail 2 | ||||
| 13 | Motor Belt 1 46 Console 1 | ||||
| 14 | Deck Frame Lower Cover 1 47 Console Bottom Cover 1 | ||||
| 15 | Elastomer 8 48 Console Back Cover 1 | ||||
| 16 | Motor Support Plate 4 49 Plug for Aluminum Upright Cover 4 | ||||
| 17 | Guiding Plug 2 50 Square Stand 2 | ||||
| 18 | Round Plug (22.2mm) 2 51 Motor 1 | ||||
| 19 | Square Plug (20x40mm) 8 52 Front Roller | 1 | |||
| 21 | Front Motor Cover 1 53 Rear Roller 1 | ||||
| 22 | Upper Motor Cover 1 54 Dust-Resistance Plate 1 | ||||
| 23 | Motor Decoration Plate 2 55 Motor Adjustment Bracket 1 | ||||
| 24 | Left Side Rail 1 56 Lower Controller Bracket 1 | ||||
| 25 | Right Side Rail 1 58 Front Roller Bracket 1 | ||||
| 26 | Rotation Stand 2 61 Elevation Motor 1 | ||||
| 27 | Left Rear EndCap 1 63 Power Switch Bracket 1 | ||||
| 28 | Right Rear EndCap 1 64 Suspension Bracket 2 | ||||
| 29 | Suspension Support Plate 2 65 Shock Absorbing Suspension System 2 | ||||
| 30 | Power Switch 1 66 Suspension Connection Arm 2 | ||||
| 32 | Stopper (24mm) 2 67 Spacer 2 | ||||
| 33 | Transportation Wheel 4 68 Support Cap | 4 | |||
| 69 Left | -Front Aluminum Upright Cover 1 101 Bolt (M8×40mm) | 2 | |||
| 70 Left | -Rear Aluminum Upright Cover 1 102 Bolt (M10×25mm) | 4 | |||
| 71 Right | - Front Aluminum Upright Cover 1 103 Bolt (M10×55mm) | 1 | |||
| 72 Right | - Rear Aluminum Upright Cover 1 104 Bolt (M10×65mm) | 1 | |||
| 73 Lock | Washer (M6) 26 105 Bolt (M10×65mm) | 2 | |||
| 74 Lock | Washer (M8) 22 106 Bolt (M10×80mm) | 2 | |||
| 75 Lock | Washer (M10) | 4 | 107 Bolt (M8×50mm) | 6 | |
| 76 Washer | (6×13×2.0t) | 16 | 108 Bolt (M10×50mm) | 2 | |
| 77 Washer | (8×16×2.0t) | 14 | 109 Bolt (M10×80mm) | 3 | |
| 78 Washer | (8×26×2.0t) | 4 | 110 Nut (M10×p1.5) | 4 | |
| 79 Screw | (M2.6×8mm) | 30 | 111 Thin Nylon | Nut (M10×p1.5) | 1 |
| 80 Bolt | (M8xp1.25×75mm) | 8 | 112 Nylon Nut | M5×p0.8) | 18 |
| 81 Screw | (M4×12mm) | 8 | 113 Nylon Nut | M6×p1.0) | 14 |
| 82 Screw | (M4×20mm) | 46 | 114 Nylon Nut | (M8×p1.25) | 18 |
| 83 Screw | (M5×18mm) | 24 | 115 Nylon Nut | (M10×p1.5) | 33 |
| 84 | Screw (M5×50mm) | 2 | 117 | Upper Connection Wire | 1 |
| 85 | Bolt (M5×12mm) | 11 | 118 | Middle Connection Wire | 1 |
| 86 Bolt | (M3×10mm) 4 119 Rear Connection Wire | 1 | |||
| 87 | Bolt (M10×25mm) | 4 | 123 | Upper Front-Handrail Wire | 1 |
| 88 | Bolt (M5×15mm) | 23 | 124 | Middle Front-Handrail Wire | 1 |
| 89 Bolt | (M5×35mm) 6 125 Upper Handrail Connection Wire | 1 | |||
| 90 Bolt | (M5×95mm) 6 126 Middle Handrail Connection Wire | 1 | |||
| 91 Bolt | (M6×12mm) 2 127 Upper Speed Sensor Wire | 1 | |||
| 92 Bolt | (L=27mm) | 2 | 128 Lower Speed Sensor Wire | 1 | |
| 93 Bolt | (M8×20mm) 4 129 Connection Wire A | 1 | |||
| 94 | Bolt (M10×60mm) | 4 | 130 | Connection Wire B | 1 |
| 95 Bolt | (M8×55mm) 2 131 Connection Wire C | 2 | |||
| 96 Bolt | (M6×90mm) 8 132 Connection Wire D | 1 | |||
| 97 Bolt | (M6×25mm) 2 133 Connection Wire E | 1 | |||
| 98 Bolt | (M6×40mm) 4 134 Converter | 1 | |||
| 99 | Bolt (M6×50mm) | 8 | 136 | Power Transfer Board | 1 |
| 100 Bolt | (M8×20mm) 6 138 Elevation Adjustment Board | 1 | |||
| 139 | Speed Adjustment Board 1 161 Bolt (M6xp) | 1.0x15m | m) 2 | ||
| 140 | Wireless Pulse Sensor 1 162 Emergency Button Connection | Button Connection | Connection | Wire 1 | |
| 141 | Elevation Key Board 1 163 Bolt (M5xp0.8x20mm) | 0mm) 1 | |||
| 142 | Speed Key Board 1 | 164 | Side Handrail Frame 2 | ||
| 143 | Inductor | 1 165 | Upper Handrail Cover | 1 | |
| 144 | Filter | 1 166 | Hand Pulse Sensor Ass'y Set | 2 | |
| 145 | Power Cord | 1 | 167 | Square Pad | 2 |
| 146 | Converter Sensor Wire | 1 | 168 | Washer (6x26x2.0t) | 16 |
| 147 | Converter Ground Wire | 1 | 169 | Filter Bracket | 1 |
| 148 | Leveler | 2 170 | Bolt (M8xp) | 1.25x30mm) | 4 |
| 149 | Bearing (6004zz) | 4 171 | Sleeve | 2 | |
| 150 | Insulation Spacer | 6 172 | Washer (8x38x2.0t) | 8 | |
| 151 | Insulation Sleeve | 12 | 173 | ERP Board | 1 |
| 152 | Insulation Washer (10x2.0t) | 6 | 174 | ERP Power Control Set | 1 |
| 153 | Insulation Washer (13x3.0t) | 8 | 175 | Hex Treaded Spacer | 4 |
| 154 | Washer (5x1.0t) | 8 | 176 | Bolt (M3x6m) | 4 |
| 155 | Washer (10x2.0t) | 6 | 177 | Connection Wire H | 2 |
| 156 | Lock Washer (M5) | 3 | 178 | Connection Wire I | 2 |
| 157 | Emergency Button | 1 | 179 | ERP Upper Connection Wire | 1 |
| 158 | Bolt (M6xp1.0x25mm) | 2 | 180 | ERP Middle Connection Wire | 1 |
| 159 | Nut (M6xp1.0) | 2 | 181 | ERP Bottom Connection Wire | 1 |
| 160 | Emergency Button Bracket | 1 | 182 | Washer (20x30x2.0t) | 1 |
9.4 Exploded drawing
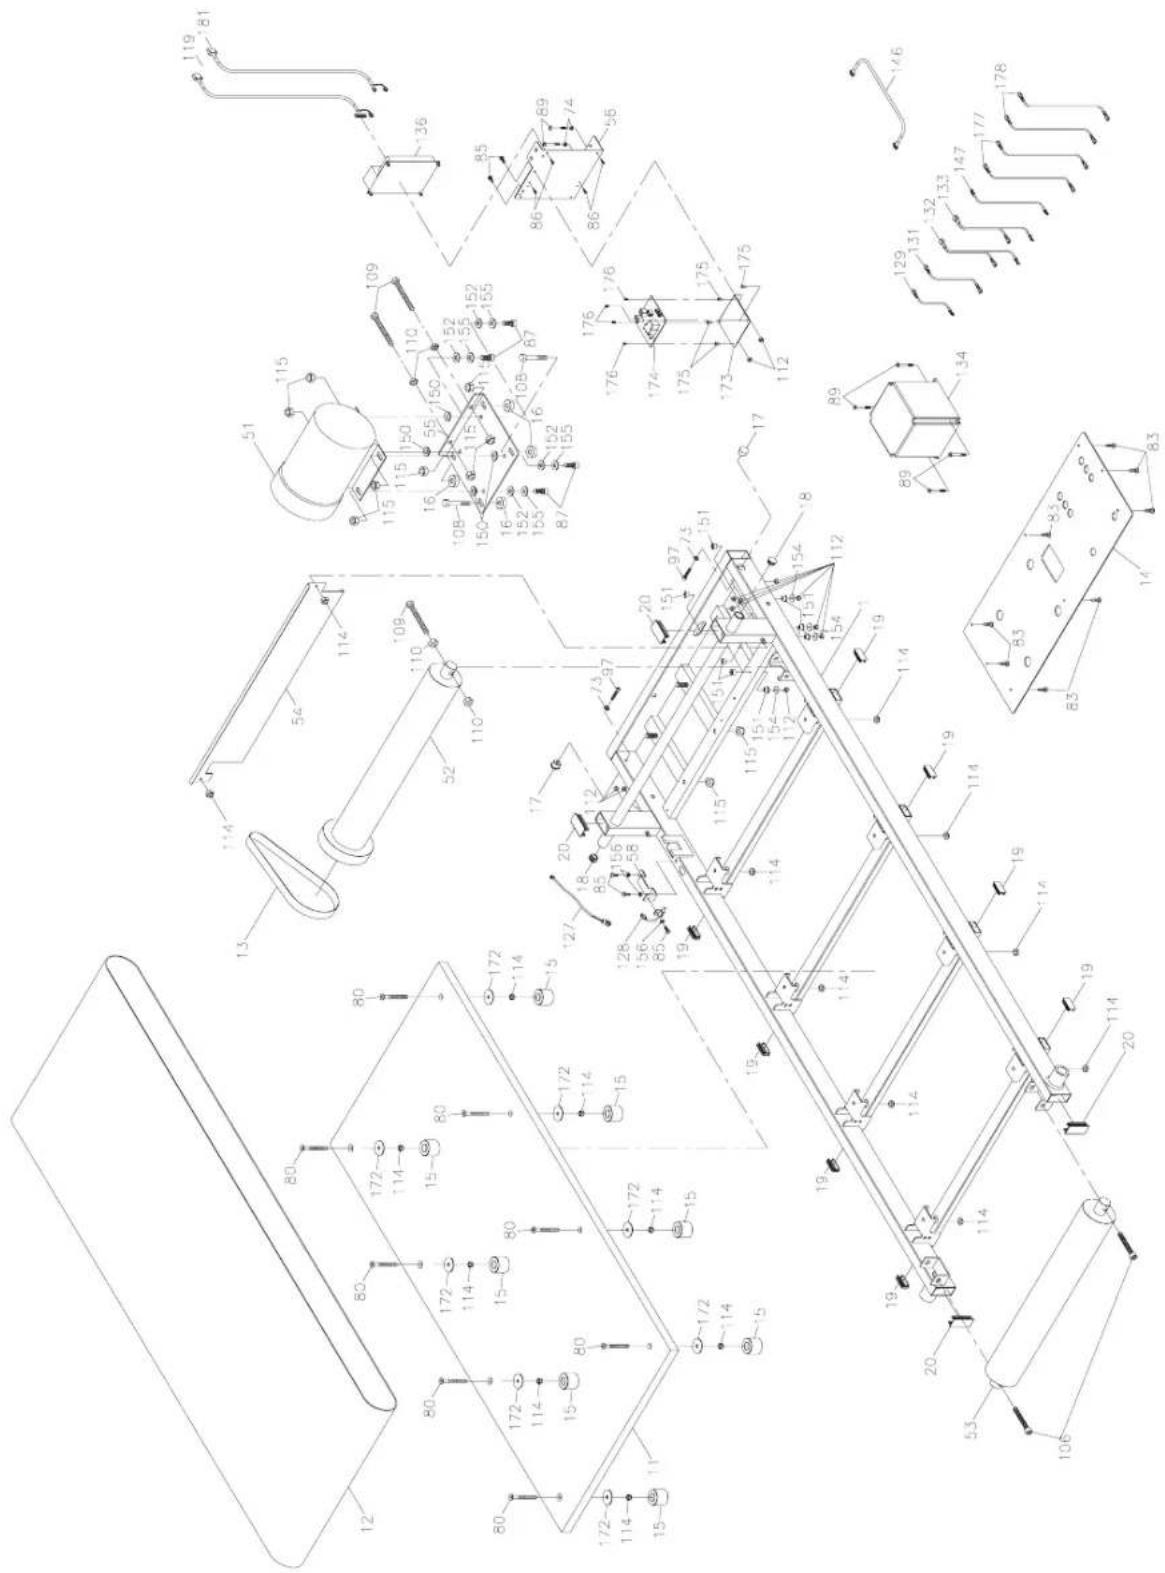
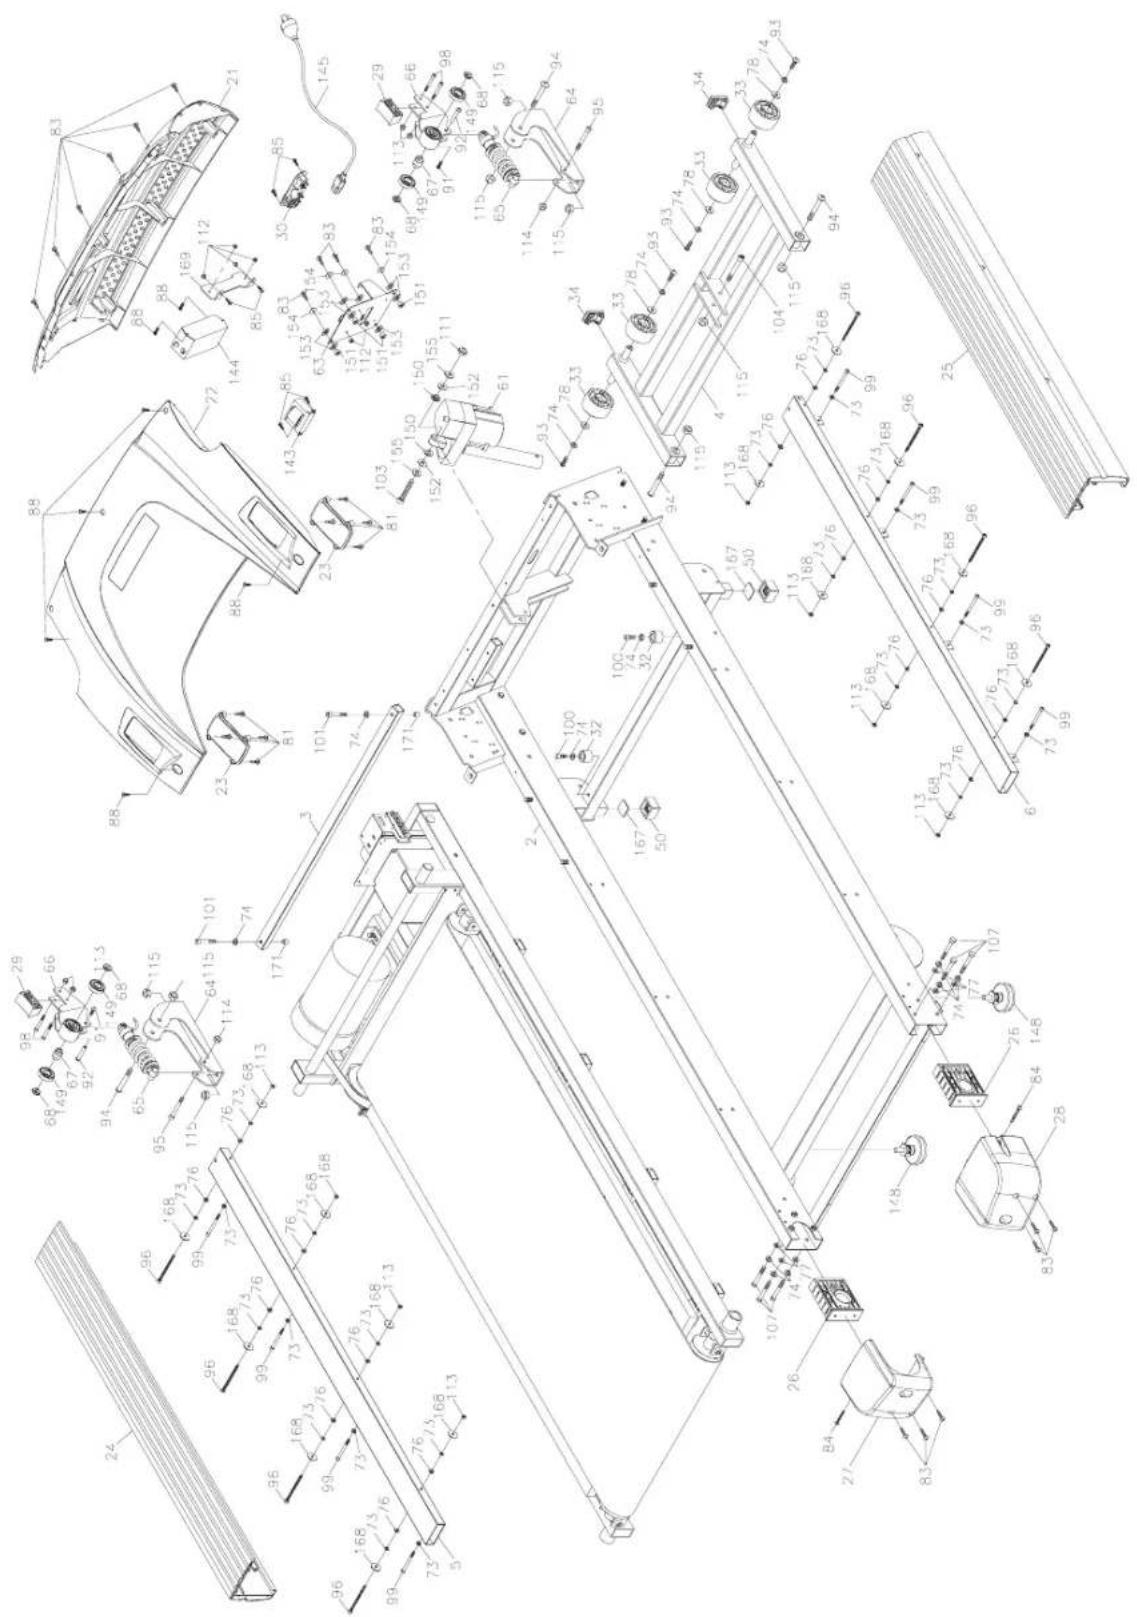
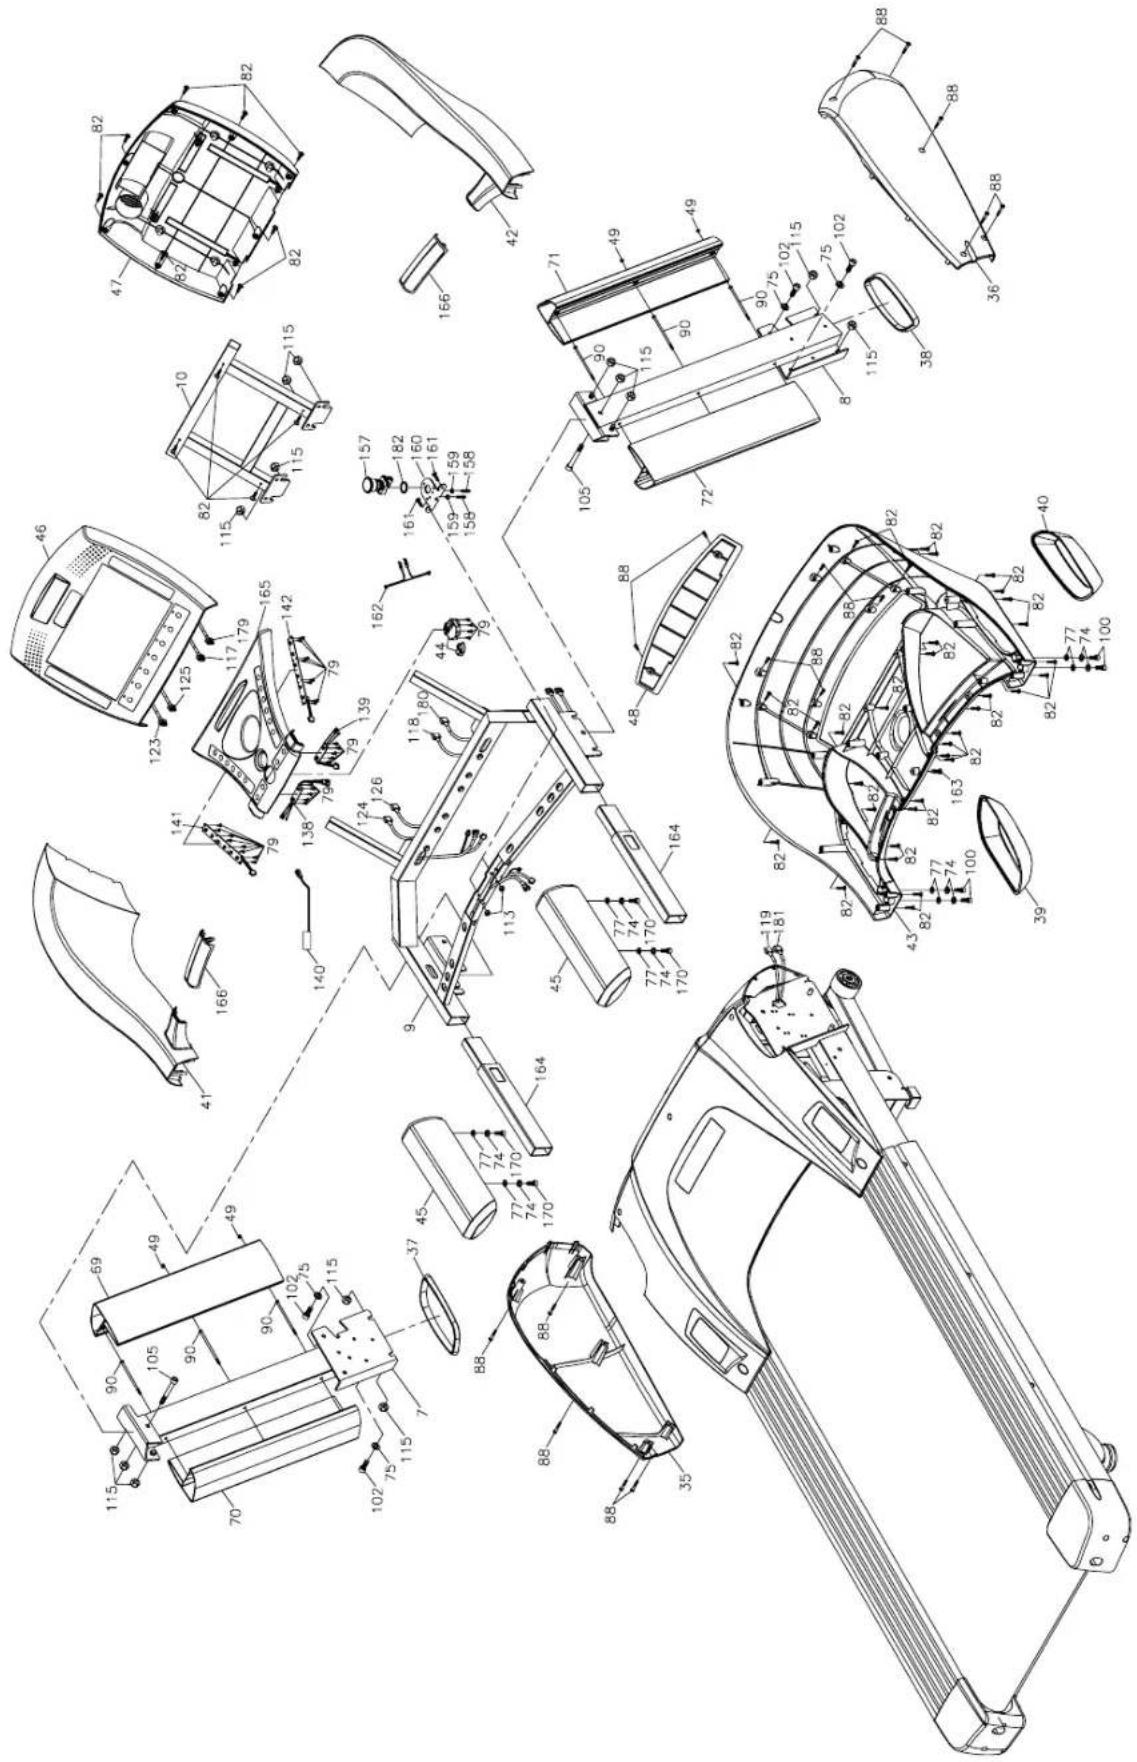
CONTACT
Company head office
Sport-Tiedje GmbH
Flensburger Str. 55
24837 Schleswig
Germany
GENERAL INFORMATION:
DE 49 4621 4210-0
info@sport-tiedje.com
NL 31 172 619961
info@fitshop.nl
UK 44 141 876 3972
orders@powerhousefitness.co.uk
Hotline for Technical Information
DE 49 4621 4210-0
49 4621 4210-699
service@sport-tiedje.de
NL 31 172 619961
info@fitshop.nl
UK 44 141 876 3986
support@powerhousefitness.co.uk
www.sport-tiedje.com
www.taurus-fitness.de
DISCLAIMER
©2011 TAURUS is a registered brand of the company Sport-Tiedje GmbH. All rights reserved. Any use of this trademark without the explicit written permission of Sport-Tiedje is prohibited.
Product and instructions are subject to change. Technical data can be changed without advance notice.
Please find a detailed overview including address and opening hours for all specialist fitness stores of the Sport-Tiedje Group in Germany and abroad on the following website.
www.sport-tiedje.com/en/stores
Note
Note
TAURUS
Treadmill T10.5 Pro

- Dear Customer,
- SAFETY NOTICE
- CONTENTS
- GENERAL INFORMATION
- ASSEMBLY INSTRUCTIONS, MAINTENANCE AND CARE 10
- ASSEMBLY
- OPERATING INSTRUCTIONS
- WORKOUT INSTRUCTIONS
- Technical data
- LCD display of
- Weight and dimensions:
- Personal safety
- Safety Key
- Electrical safety
- Set-up place
- General instructions
- Errors and error diagnosis
- Care and maintenance
- Aligning the running mat
- Tensioning the belt
- Lubricating the running belt
- Maintenance and service calendar
- Package contents
- Tools and screw sets
- Assembly instructions
- Step 1: Assembly of the console mast
- Step 2: Assembly of the handrail
- Step 3: Assembly of the motor covers
- Step 4: Assembly of the console
- Step 5: Assembly of the side handrails
- Step 6: Attaching the power cable
- Step 7: Transportation of the treadmill
- Console display
- Turn on
- Turn off
- Button functions
- Turning on the equipment
- Console display - start menu
- Programs
- Manual program
- COMMENT on TIME
- Manual Training (P1) Comment on the manual during the workout
- No pulse signal
- Enter INCLINE
- Enter SPEED
- Weight reduction (P2)
- COMMENT on WEIGHT
- Weight reduction (P2) Comment on the manual during the workout
- 5k RUN (P3)
- 5k RUN (P3) Comment on the manual during the workout
- Interval program (P4)
- Interval program (P4) Comment on the manual during the workout
- Cardio program (P5)
- COMMENT about the AGE
- Cardio program (P5) Comment on the manual during the workout
- User-defined training program (P6)
- User program (P6) Comment on the manual during the workout
- Heart rate measuring
- Pulse measuring through hand sensors
- Note:
- Telemetric heart rate measuring
- Positioning the chest strap and moistening the electrodes:
- Training with heart rate orientation
- Example:
- 10 tips for effective running training
- Set goals
- Concentration on training
- Position yourself correctly while exercising
- Correct breathing / appropriate resistance level
- Keep yourself properly hydrated
- Sufficient recovery periods
- Choose a diversified program
- Creating the right workout
- Workout journal
- Reward yourself
- Designing a workout
- Stretching exercises for leg & chest muscles
- Exercise: Stretching of front thigh / leg extension (quadriceps)
- Exercise: Stretching the back thigh / leg curl (hamstring)
- Exercise: Stretching the calf muscles (gastrocnemius)
- Exercise: Stretching the chest muscles (pectoralis major)
- Error descriptions
- Your statutory rights are not affected.
- Warrantee
- Warranty periods
- Repair costs
- The terms of use are defined as follows:
- Warranty service
- Warranty conditions
- Proof of purchase and serial number
- Service outside the warranty period
- Communication
- DISPOSAL
- ORDERING ACCESSORIES
- Service hotline
- SERVICE-HOTLINE
- DE
- NL
- UK
- Serial number and model name
- Parts list
- CONTACT
- Company head office
- GENERAL INFORMATION:
- Hotline for Technical Information
- DISCLAIMER
- TAURUS
Brand : TAURUS
Model : UB10.5 Pro
Category : Exercise bike