
Pressure Air Fryer Plus - Air fryer Emeril Lagasse - Free user manual and instructions
Find the device manual for free Pressure Air Fryer Plus Emeril Lagasse in PDF.


| Product Type | Multi-function Pressure Cooker and Air Fryer |
| Brand | Emeril Lagasse |
| Model | Y6D-AF-36B |
| Capacity | 6 qt (5.7 L) |
| Power | 1450 W |
| Voltage / Frequency | 120 V ~ 60 Hz |
| Working Pressure | 0–80 kPa |
| Safety Working Pressure | 80–90 kPa |
| Functions | Pressure Cook, Air Fry, Sous Vide, Slow Cook, Sauté, Steam, Yogurt, Rice, Chicken, Beef, Fish, Stew |
| Preset Programs | 12 preprogrammed settings |
| Temperature Range (Air Fry) | 180–400 °F (82–204 °C) |
| Temperature Range (Sauté) | 95–360 °F (35–182 °C) |
| Timer Range (most modes) | 1–90 minutes (1 min increments) |
| Delay Timer | Up to 24 hours (10 min increments) |
| Keep Warm Mode | Up to 24 hours (automatic after cooking) |
| Lids | Pressure Lid (with inner lid), Air Frying Lid, Glass Lid (optional) |
| Main Material | Stainless steel housing and inner pot |
| Inner Pot Coating | PTFE and PFOA free stainless steel |
| Safety Features | Lid lock, float valve, pressure release valve, anti-blockage guard, automatic temperature control, overheating protection, automatic shut-off |
| Accessories Included | Inner pot, pressure lid, air frying lid, glass lid (optional), condensation collector, measuring cup, ladle, wire rack, mesh basket |
| Dishwasher Safe Parts | Inner pot, measuring cup, spoon (hand washing recommended) |
| Dimensions (approx.) | 14" x 14" x 12" (356 x 356 x 305 mm) |
| Weight (approx.) | 15 lb (6.8 kg) |
| Warranty | 90-day money-back guarantee |
| Country of Origin | China |
Frequently Asked Questions - Pressure Air Fryer Plus Emeril Lagasse
User questions about Pressure Air Fryer Plus Emeril Lagasse
0 question about this device. Answer the ones you know or ask your own.
Ask a new question about this device
Download the instructions for your Air fryer in PDF format for free! Find your manual Pressure Air Fryer Plus - Emeril Lagasse and take your electronic device back in hand. On this page are published all the documents necessary for the use of your device. Pressure Air Fryer Plus by Emeril Lagasse.
USER MANUAL Pressure Air Fryer Plus Emeril Lagasse
Owner's Manual
Save These Instructions – For Household Use Only
MODELS: Y6D-AF-36B (6 qt.)
When using electrical appliances, basic safety precautions should always be followed. Do not use the Emeril Lagasse Pressure Air Fryer Plus ^TM until you have read this manual thoroughly.
Visit TristarCares.com for tutorial videos, product details, and more. Guarantee Information Inside
Emeril Lagasse Pressure AirFryer Plus
BEFORE YOU BEGIN
The Emeril Lagasse Pressure AirFryer Plus will provide you many years of delicious family meals and memories around the dinner table. But before you begin, it's very important that you read this entire manual, making certain that you are totally familiar with this appliance's operation and precautions.
Table of Contents
IMPORTANT SAFEGUARDS 4
Attaching the Power Cord 7
Parts & Accessories 8
Features & Benefits 12
A. Built-In Safety Devices 12
B. Special Features 13
Releasing Pressure After 14 Pressure Cooking
Natural Release and Rapid Release 14
Instructions for Pressure Lid Assembly 16
Preparing for Pressure Cooking 18
Check Parts & Accessories 18
Test Run Conducted with Water Only 18
Instructions for Pressure Cooking 20
Instructions for Air Frying 22
Preset Cooking Programs 24
General Pressure Cooking Time Charts 29
Sous Vide 26
Yogurt 28
Frequently Asked Questions 30
Care & Cleaning 31
Troubleshooting 32
90-Day Guarantee 34
IMPORTANT SAFEGUARDS
WARNING
PREVENT INJURIES! – CAREFULLY READ ALL INSTRUCTIONS BEFORE USE!
When using electrical appliances, always follow these basic safety precautions.
- Read all instructions carefully to prevent injuries.
- This appliance is not intended for use by persons with reduced physical, sensory, or mental capabilities or a lack of experience and knowledge unless they are under the supervision of a responsible person or have been given proper instruction in using the appliance. Do not leave unattended with children or pets. Keep appliance and cord away from children. Anyone who has not fully read and understood all operating and safety instructions contained in this manual is not qualified to operate or clean this appliance.
- ALWAYS PLACE UNIT ON A FLAT, HEAT RESISTANT SURFACE. Intended for countertop use only. DO NOT operate on unstable surface. Do not place on or near a hot gas or electric burner or in a heated oven. Do not operate the Unit in an enclosed space or under hanging cabinets. Proper space and ventilation is needed to prevent property damage that may be caused by steam released during operation. Never operate the Unit near any flammable materials, such as dish towels, paper towels, curtains, or paper plates.
- Do not let the cord hang over the edge of the table or counter or touch hot surfaces.
- A short power-supply cord (or detachable power-supply cord) is provided to reduce the risk resulting from it being grabbed by children, becoming entangled in the cord, or tripping over a longer cord.
- NEVER FORCE THE LID OPEN. Never attempt to open Lid during operation as a pressure cooker. Any pressure in the cooker can be hazardous. Do not open the pressure cooker until Unit has cooled and all internal pressure has been released. If the lid is difficult to open, this indicates that the Unit
is still under pressure – do not force it open. Once pressure is released, follow instructions to open Lid. Always open Lid away from face and body to avoid steam burns (see INSTRUCTIONS FOR PRESSURE COOKING, p. 20).
- Lid should rotate freely and any resistance indicates that the Lid is improperly placed or under pressure.
- Always attach plug to appliance first, then plug cord into the wall outlet. To disconnect, turn any control to "off," then remove plug from wall outlet.
- This appliance cooks under pressure. Improper use may result in scalding injury. Make certain Unit is properly closed before operating and the Pressure Release Valve is free from debris (see ATTACHING LID in PREPARING FOR PRESSURE COOKING, p. 18).
- Extreme caution must be used when moving an appliance containing hot oil or other hot liquids. RECOMMENDED: DO NOT LIFT OR MOVE THE UNIT when under pressure or when contents are hot. To remove contents in cooker, use ladle provided.
- Always check the pressure release devices for clogging before use.
- CAUTION HOT SURFACES: This appliance generates extreme heat and steam during use. Do not touch hot surface. Use handles or knobs. To avoid injury, do not touch the hot surfaces or the Pressure Release Valve on the Lid during operation. Proper precautions must be taken to prevent the risk of personal injury, fires, and damage to property.
- DO NOT use this appliance for anything other than its intended use.
- NEVER use the Lid Handle to lift or move cooker. Use only the black handles located on the side of the Unit's base when lifting or moving the Unit (see PREPARING FOR PRESSURE COOKING, p. 18).
- NEVER fill above the Inner Pot's max fill line (FULL CUP). Overfilling can clog the Pressure Release Valve, which can cause excess pressure to develop.
IMPORTANT SAFEGUARDS
-
WARNING: To reduce risk of electric shock, cook only in the removable container (Inner Pot) provided.
-
Some foods, such as rice, beans, applesauce, cranberries, pearl barley, oatmeal or other cereals, split peas, noodles, macaroni, rhubarb, and spaghetti, expand and create foam when cooking and need special cooking instructions. Pay particular attention to liquid quantities. DO NOT fill the Inner Pot more than halfway when cooking with these foods.
-
DO NOT fill the Unit over maximum fill line at 23 full. When cooking foods that expand during cooking, such as rice or dried vegetables, do not fill the Unit beyond the recommended level at 12 full. Overfilling may cause a risk of clogging the Pressure Release Valve and developing excess pressure (please refer to the recipe).
-
CAUTION: NEVER deep fry or fill with oil. Do not use this pressure cooker for pressure frying with oil.
-
The use of accessory attachments NOT RECOMMENDED by the appliance manufacturer may cause injuries.
-
NEVER use outlet below counter.
-
WARNING: Spilled food can cause serious burns. Keep the appliance and cord away from children. Never drape the cord over the edge of the counter, never use an outlet below the counter, and never use with an extension cord.
-
DO NOT use Unit outdoors.
-
DO NOT operate if the cord, plug, or appliance are damaged. If the appliance begins to malfunction during use, immediately unplug the cord from the power source. Do not use or attempt to repair a malfunctioning appliance. Contact Customer Service for assistance (see the back of the manual for contact information).
-
TO PREVENT risk of explosion and injury, replace only the Rubber Gaskets (dynamic seal ring) as recommended by the manufacturer (see INSTRUCTIONS FOR PRESSURE LID ASSEMBLY, p 16).
-
UNPLUG the Unit from the outlet when not in use and before cleaning. Let the appliance cool down for approximately 30 mins. before handling, cleaning, or storing.
-
NEVER IMMERSE THE CORD, PLUG, UNIT BASE, OR AIR FRYING LID IN WATER. if unit falls or accidentally becomes immersed in water, unplug from wall outlet immediately. Do not reach into liquid if unit is plugged in and immersed. Do not immerse or rinse cords or plugs in water or other liquids.
-
Before using your new Emeril Lagasse Pressure AirFryer Plus on any countertop surface, CHECK with your countertop manufacturer or installer for recommendations about using appliances on your surfaces. Some manufacturers and installers may recommend protecting your surface by placing a hot pad or trivet under the Emeril Lagasse Pressure AirFryer Plus for heat protection. Your manufacturer or installer may recommend that hot pans, pots, or electrical appliances should not be used directly on top of the countertop. If you are unsure, place a trivet or hot pad under the Emeril Lagasse Pressure AirFryer Plus before using it.
-
DO NOT place your Emeril Lagasse Pressure AirFryer Plus on a hot cooktop because it could cause a fire or damage the Emeril Lagasse Pressure AirFryer Plus, your cooktop, and your home.
-
To avoid electrical shock, DO NOT put liquid of any kind into the Unit Base containing the electrical components.
-
If the power cord is damaged, YOU MUST have it replaced by the manufacturer, its service agent, or a similarly qualified person in order to avoid hazard.
-
Keep the power cord away from hot surfaces. DO NOT PLUG in the power cord or operate the Unit controls with wet hands.
-
NEVER connect this appliance to an external timer switch or separate remote-control system.
-
NEVER pour oil into the Mesh Basket. Fire and personal injury could result.
IMPORTANT SAFEGUARDS
-
While cooking, the internal temperature of the Unit reaches several hundred degrees fahrenheit.
To AVOID personal injury, never place hands inside the Unit unless it is thoroughly cooled. -
When cooking, DO NOT place the appliance against a wall or against other appliances. Leave at least 5 in. free space on the back and sides and above the appliance. Do not place anything on top of the appliance.
-
DO NOT place the Unit on stove top surfaces.
-
DO NOT operate the appliance on or near combustible materials, such as tablecloths and curtains.
-
To prevent food contact with the heating elements, DO NOT overfill the Inner Pot when using the Air Frying Lid.
-
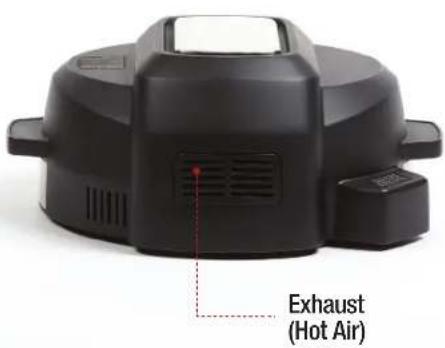
To prevent uneven cooking, overheating, or damage to the Unit, DO NOT cover the Air Intake Vent or Air Outlet Vent while the Air Frying Lid is closed.
-
During operation, hot steam is released through the Air Outlet Vent. ENSURE that the Air Outlet Vent is not directed toward the power cord, power outlets, or other appliances. Keep your hands and face away from the Air Outlet Vent.
-
The Air Frying Lid becomes hot during the cooking process. ALWAYS place the Air Frying Lid, with the heating element facing downward, on a wire rack after use to cool.
-
DO NOT use your bare hands to touch any accessories that were placed in the Inner Pot during the cooking process.
-
If the Unit emits black smoke during the air frying process, UNPLUG the unit immediately. Wait for the smoking to stop before removing the Air Frying Lid.
-
USE EXTREME CAUTION when closing the Air Frying Lid. Ensure that nothing is caught between the Lid and the Unit Base.
-
USE CAUTION when searing meats and sautéing in hot oil. Keep your hands and face away from the Inner Pot, especially when adding new ingredients, because hot oil might splatter.
-
This appliance is intended for normal household use only. It is NOT INTENDED for use in commercial or retail environments.
-
If the Emeril Lagasse Pressure AirFryer Plus is used improperly or for professional or semiprofessional purposes or if it is not used according to the instructions in the user manual, the guarantee becomes invalid and Tristar will not be held liable for damages.
-
ALWAYS unplug the appliance after use.
-
Before initial use and after subsequent use, hand wash the Inner Pot and other cooking accessories. Then, wipe the outside and inside of the Unit with a warm, moist cloth and mild detergent. Finally, preheat the Unit for a few minutes to burn off any residue.
-
The Unit may smoke the FIRST TIME IT IS USED. The Unit is not defective. The smoke is the manufacturer's oil burning off. The smoke and smell should clear within a few minutes.
SAVE THESE INSTRUCTIONS FOR HOUSEHOLD USE ONLY
IMPORTANT SAFEGUARDS

WARNING:
For California Residents
This product can expose you to Bisphenol A, which is known to the State of California to cause birth defects or other reproductive harm. For more information, go to www.P65Warnings.ca.gov.
Overheating Protection
Should the inner temperature control system fail, the overheating protection system will be activated and the Unit will not function. Should this happen, unplug the power cord. Allow time for the Unit to cool completely before restarting or storing.
Automatic Shut-Off
The appliance has a built-in shut-off device, that will automatically shut down the Unit when the cooking timer reaches zero. You can manually switch off the appliance by selecting the Cancel Button.
Electromagnetic Fields
This appliance complies with all standards regarding electromagnetic fields. If handled properly and according to the instructions in this user manual, the appliance is safe to use based on scientific evidence available today.
Electric Power
If the electrical circuit is overloaded with other appliances, your new Unit may not operate properly. This Unit should be operated on a dedicated electrical circuit.

CAUTION: Attaching the Power Cord
- Always attach electrical cord to the Emeril Lagasse Pressure AirFryer Plus before plugging the Unit into an outlet. Plug into a 3-prong wall outlet with no other appliances on the same outlet. Plugging other appliances into the outlet will cause the circuit to overload. If the electrical circuit is overloaded with other appliances, your Unit may not operate properly.
-
DO NOT USE AN EXTENSION CORD WITH THIS PRODUCT.
-
Model Y6D-AF-36B has been designed for use with a 3-prong, grounded, 120V dedicated electrical outlet only. DO NOT USE WITH ANY OTHER ELECTRICAL OUTLET or modify the plug.
- A short power-supply cord, equipped with grounding conductor and plug, is provided to reduce the risk of becoming entangled or tripping over a longer cord.
- To disconnect, turn any control to "off," then remove plug from wall outlet.
Parts & Accessories
PRESSURE LID – TOP VIEW PRESSURE LID – UNDERSIDE
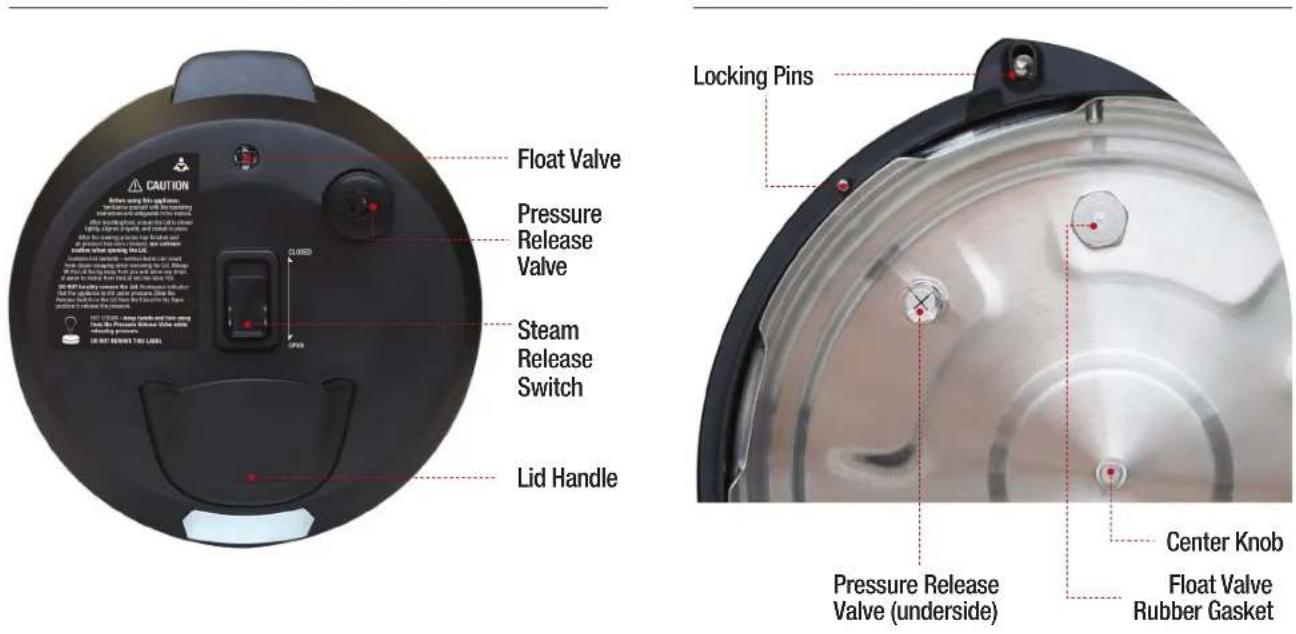
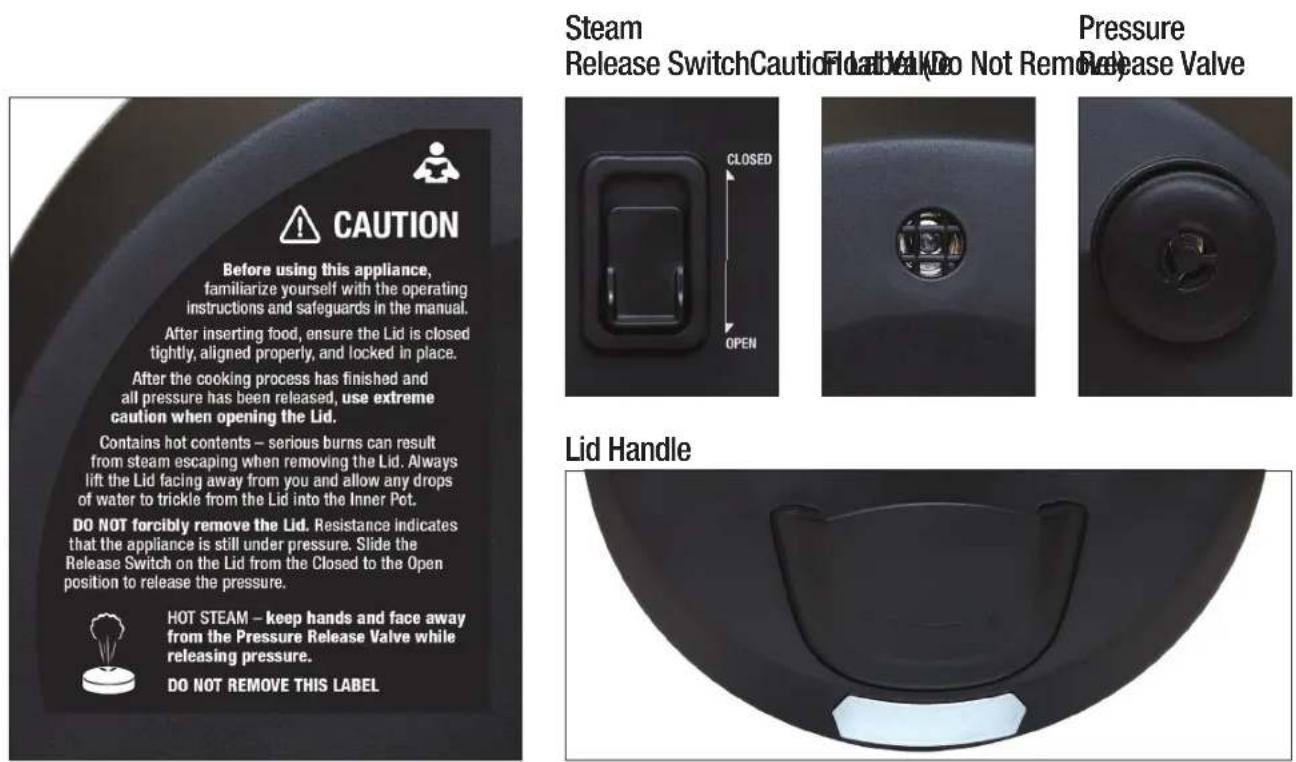
Parts & Accessories
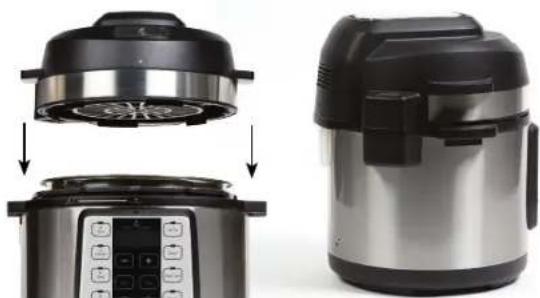
AIR FRYING LID – UNDERSIDE AIR FRYING LID – TOP VIEW
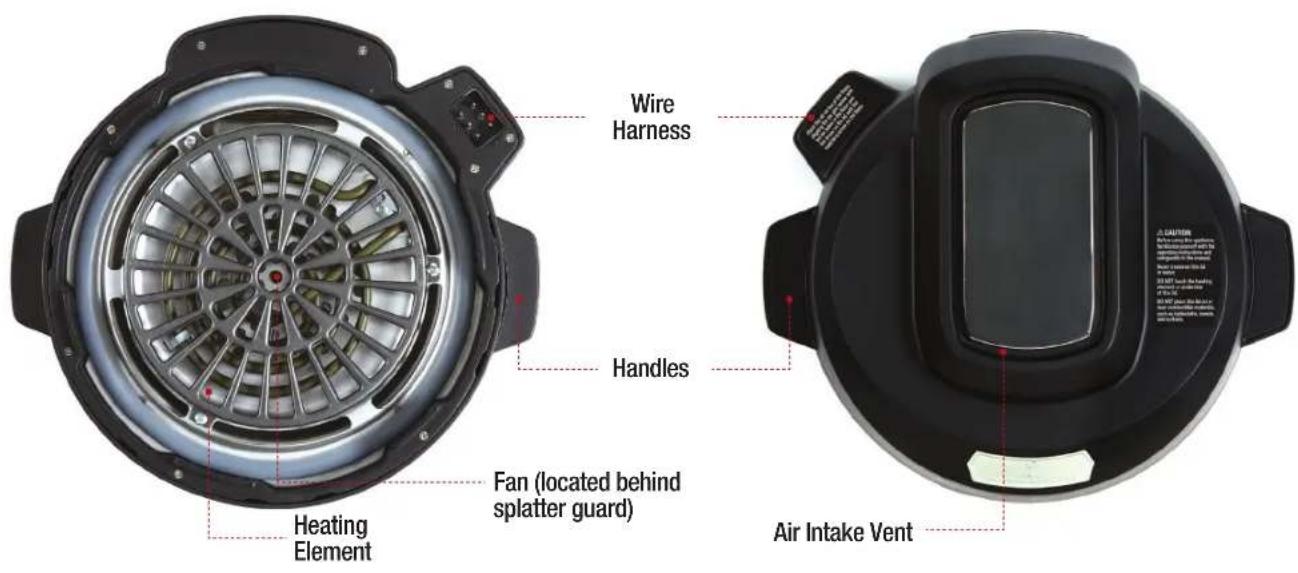
AIR FRYING LID – BACK VIEW AIR FRYING LID ALIGNMENT
natural_image
Three views of an electric rice cooker showing internal components and cooling process (no text or symbols visible)NOTE: Do not tilt or angle the lid when placing or removing. Lift or lower the lid straight up or down to ensure that the wire harnesses in the lid and base connect properly.
Parts & Accessories
FRONT STAINLESS STEEL INNER POT
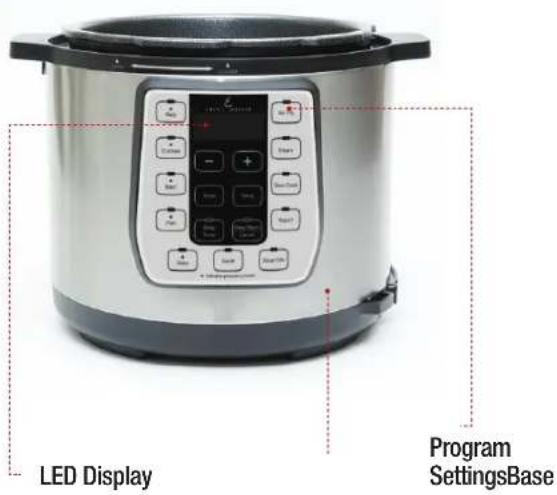
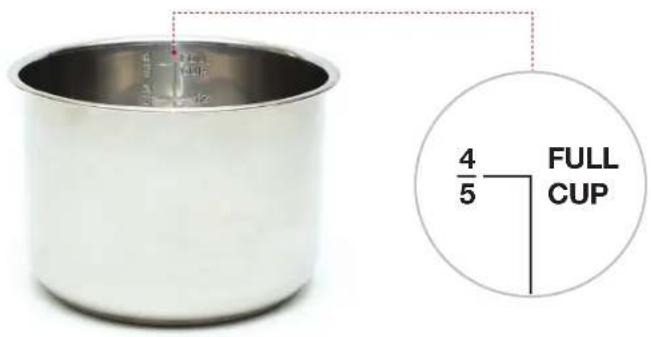
The Max Fill Line in the Inner Pot is represented by "FULL CUP." DO NOT fill past the Max Fill Line.
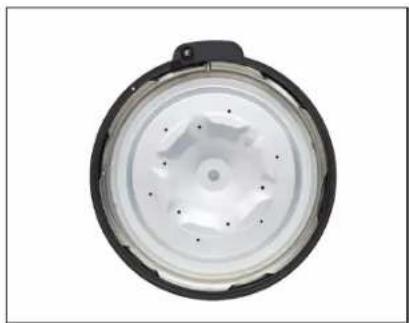
Pressure Lid Underside (with Inner Lid)
natural_image
Circular mechanical component with radial grooves and central hub (no text or symbols visible)Pressure Lid:
Inner Lid Center Gasket
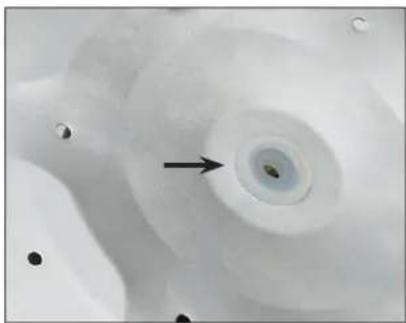
natural_image
Close-up of a circular, textured object with a central dark spot and an arrow pointing to it (no visible text or symbols)Pressure Lid:
Inner Lid Outer Gasket
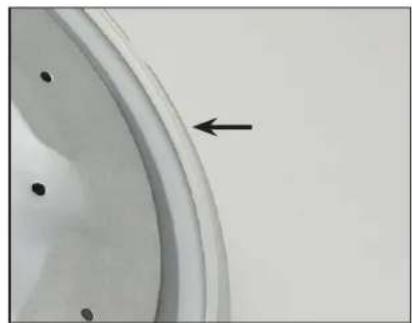
natural_image
Close-up of a curved metallic object with four small dark spots and an arrow pointing to it (no text or symbols visible)Parts & Accessories
Glass Lid (Optional)
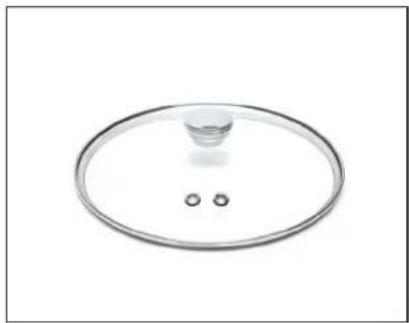
natural_image
Top-down view of a circular glass lid with two small holes, no text or symbols presentWire Rack (Optional)
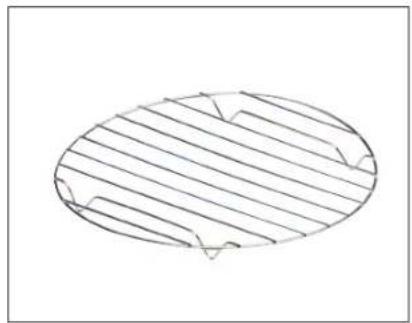
natural_image
Simple line drawing of an oval shape with diagonal hatching and corner marks (no text or symbols)Mesh Basket (Optional)
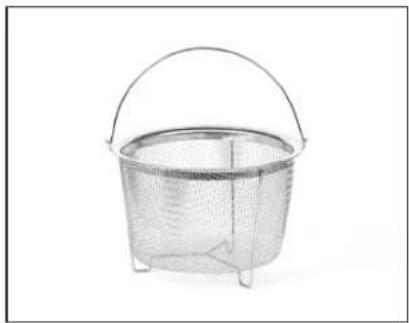
natural_image
Metal basket with handle and mesh pattern (no text or symbols)Condensation Collector Measuring Cupadle
natural_image
White ceramic bowl with a semi-circular top, isolated on a plain background (no text or symbols)
natural_image
White plastic spatula on plain background (no text or symbols)
natural_image
White plastic cup on a plain background (no text or symbols)Float Valve Pin
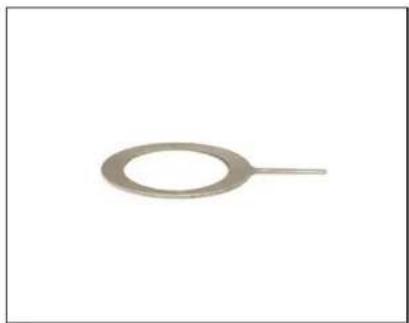
natural_image
Simple metallic ring-shaped object with a thin end, isolated on white background (no text or symbols)Power Cord
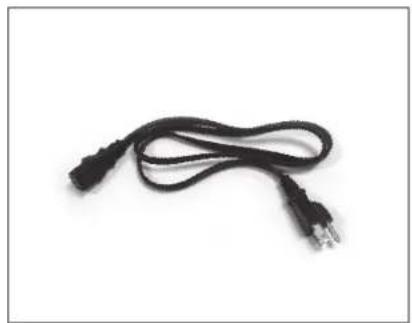
natural_image
Black cable with two connectors, no text or symbols visibleYour Emeril Lagasse Pressure AirFryer Plus has been shipped with parts and accessories as shown above (except optional accessories). Check everything carefully before use. If any part appears damaged, do not use this product. Contact Customer Service using the contact information located in the back of this manual. For replacement parts, visit: www.PressureAirFryer.com.
Features & Benefits
A. BUILT-IN SAFETY DEVICES
- SAFETY LID LOCK: The Pressure Lid tabs connect under the Base tabs to lock the Pressure Lid to the Base when fully closed.
- POSITIVE PRESSURE MECHANISM (FLOAT VALVE): When the pressure reaches a required point, the pressure lifts the Float Valve up, contacting the Locking Pin.
- LID POSITIONING SENSOR: A magnetic sensor indicates whether the Lid is fully closed. The Unit will beep and display "LID" when the Lid is not locked or is not required for a preprogrammed setting.
- LID INNER TRAY (GUARD): The Inner Lid of the Pressure Lid prevents food from entering the Upper Lid and entering the Float Valve and Pressure Release Chambers.
- ANTI-BLOCKAGE GUARD: Guards the underside of the Pressure Release Valve.
- TWO-STEP SECURITY RESET FOR QUICK RELEASE: To open the Pressure Lid, slide the Steam Release Switch to the Open position to release steam. Continue holding the Steam Release Switch in the Open position until all steam has escaped. Once steam is no longer emitting from the Unit, you must release the Steam Release Switch to open the lid.
-
EXCESS PRESSURE RELEASE SYSTEM: The Pressure Release Valve regulates the pressure inside the Unit to a controlled value. When sufficient pressure has built up inside the Unit, the Pressure Release Valve opens to release excess pressure.
-
AUTOMATIC TEMPERATURE CONTROL: The temperature is regulated by the programming to maintain a consistent temperature.
- PRESSURE CONTROLLER: The Inner Pot sits on a pressure plate. When there is too much pressure, the plate depresses and turns off the heater, which stops the pressure from increasing.
- ELECTRICAL (CURRENT-TEMP)
PROTECTION: There is a temperature sensor on the Base of the Unit. When the temperature rises above the preprogrammed setting, the heater shuts off and then fluctuates to allow the Unit to maintain the correct temperature.
- ANTI-TAMPER FLOAT VALVE GUARD:
A screen on the Lid covers the Float Valve, so it cannot be tampered with. - AUTO LID PROGRAM SELECTOR: The Sous Vide, Steam, Sauté, Slow Cook, and Yogurt presets will not start if the Pressure Lid is locked. The Glass Lid must be used for these settings to prevent splatter and maintain a consistent temperature. The Air Fry preset will not start unless the Air Frying Lid is in place.
- SMART COOLING TECHNOLOGY: The Air Frying Lid runs for 2 minutes after the cooking cycle is complete to cool down the lid.
Features & Benefits
B. SPECIAL FEATURES
-
LED DISPLAY: The LED Display on your Emeril Lagasse Pressure AirFryer Plus offers a wide range of 12 preprogrammed settings. Cooking time may be adjusted to suit any recipe or personal preference or may be delayed to meet required time frames.
-
KEEP WARM MODE: At the completion of the cooking cycle, except for Sous Vide and Yogurt, the Unit will automatically switch to Keep Warm mode. Keep Warm mode keeps cooked food warm for up to 24 hours. Do not use Keep Warm mode to warm uncooked food.
NOTE: Foods kept at Keep Warm mode for longer than 6–8 hours may lose flavor and texture.
- STEAM RELEASE SWITCH: Slide the Steam Release Switch on the top of the Pressure Lid from the Closed position to the Open position. Doing so quickly lowers the pressure inside the Unit by opening the Pressure Release Valve.
WARNING: After sliding the Steam Release Switch from the Closed Position to the Open position, hot steam and/or liquid can emit
from the Pressure Release Valve. Keep bare hands or exposed skin away from the Pressure Release Valve when it is emitting HOT steam. Do not attempt to open the Pressure Release Valve manually. Always use the Steam Release Switch.
-
ONE-TOUCH TECHNOLOGY: With 12 preprogrammed settings, your family's favorite homemade meals can be quickly and easily cooked to perfection in a single pot with a single touch of a button and a turn of a dial.
-
COOL-TO-THE-TOUCH LID HANDLE: The Handle stays cool to the touch, so you can open the lids even when there is hot food inside. It is always recommended to use oven mitts when opening the lids after the cooking cycle is complete. Be sure your mitts allow you to maintain a sufficient grip on the lid.
-
STAINLESS STEEL INNER POT: The Inner Pot is made of stainless steel, which means it is completely PTFE and PFOA free.
Releasing Pressure After Pressure Cooking
NATURAL RELEASE AND RAPID RELEASE
Natural release and rapid release are two common methods used to depressurize a pressure cooker once active cooking is complete. Pressure cookers use steam pressure that builds up inside the closed pot to cook food. As the pot heats up, the liquid inside forms steam, which raises the pressure in the pot, cooking food at up to triple the normal rate. After active cooking is complete, the pressure built up inside the pressure cooker needs to be released.
The Emeril Lagasse Pressure AirFryer Plus has a safety mechanism that prevents the Pressure Lid from opening until the pressure has been lowered. There are two ways to release the pressure within the Unit: natural release and rapid release. While both methods depressurize the Unit, the process for each method differs, and each process has a different impact on the food inside the Unit.
HOW NATURAL RELEASE WORKS AND WHEN TO USE IT
Natural release lets pressure reduce slowly on its own. Once the active cooking cycle is complete, you can press the Cancel Button on the Control Panel and the pressure will automatically drop inside the pressure cooker slowly. Because of this slow drop in pressure and heat, when using natural release, food continues cooking even though active cooking is complete.
Use this method when cooking meats, foods that increase in volume or that foam (like dried beans and legumes), soups, or any other foods that are primarily liquid.
Timing for natural release varies and will differ based on the type and amount of food being cooked. Generally, natural release takes between 20 and 60 mins.
NOTE: check that all pressure has been released by sliding the Steam Release Switch to the Open position and let go. There should not be any steam releasing from the Unit.
Releasing Pressure After Pressure Cooking
HOW RAPID RELEASE WORKS AND WHEN TO USE IT
To use rapid release, once the active cooking cycle is complete, cancel the cooking cycle by pressing the Cancel Button. Then, slide the Steam Release Switch to the Open position, let go of the Steam Release Switch, and wait for the steam to evacuate. Once the steam has been released, the Pressure Lid will slide open freely.
The rapid release process requires an extra degree of care because a burst of steam is released through the Pressure Release Valve. Rapid release takes no more than a few minutes and works best with foods
like eggs, vegetables, or delicate ingredients that do not benefit from any extra cooking time. This method is also helpful when you need to check the doneness of food or to add additional ingredients to the Emeril Lagasse Pressure AirFryer Plus, such as when cooking a stew.
Avoid using rapid release when cooking foods that foam, froth, or increase in volume, such as legumes, or foods that are mostly liquid, such as soup, because the liquid can boil up and vent through the Pressure Release Valve.
Instructions for Pressure Lid Assembly
INNER LID ASSEMBLY
REMOVING LID
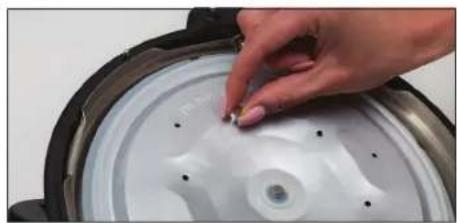
- Hold the Knob on the underside of the Inner Lid and pull to remove the Inner Lid (see Fig. i).
INSERTING INNER LID
- Ensure that the Knob on the underside of the Inner Lid is facing outward, away from the Lid.
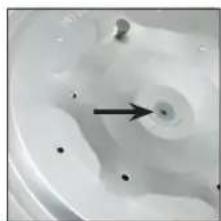
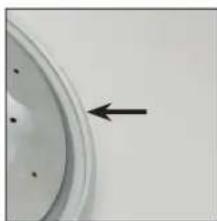
- Ensure that the Inner Lid Rubber Gaskets are properly attached to the Inner Lid (see Fig. ii-a & ii-b).
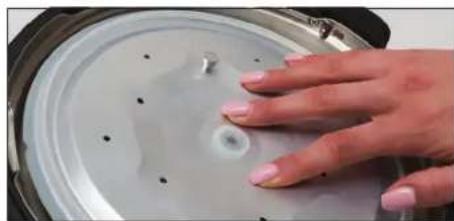
- Press the hole on the Inner Lid into the Center Knob on the underside of the Lid (see Fig. iii).
- Ensure that Knob is visible when the Inner Lid is in place and that the Inner Lid Rubber Gaskets are positioned evenly and onto the rim of the Inner Lid (see Fig. ii-a).
CHANGING OR CLEANING THE INNER LID
- Hold the Inner Lid Knob on the underside of the Inner Lid and pull to remove the Inner Lid (see Fig. i).
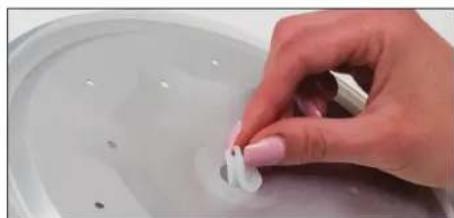
- Pull off the Inner Lid Center Gasket (see Fig. iv) and the Inner Lid Outer Gasket (see Fig. ii-b).
- Clean the Inner Lid Rubber Gaskets after each use. Inspect the Inner Lid Rubber Gaskets to ensure that they are clear of debris.
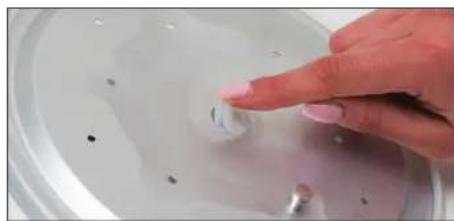
- Place the new or clean Inner Lid Center Gasket in the hole in the Inner Lid (see Fig. v). Attach the new or clean Inner Lid Outer Gasket to the outside of the Inner Lid. When properly attached, the Inner Lid Rubber Gaskets should sit evenly.
- Ensure that the Knob on the Inner Lid is facing outward, away from the Lid. You should be able to see the Knob (see Fig. ii-a).
- Press the Inner Lid onto the Lid and press the hole on the Inner Lid onto the Center Knob on the underside of the Lid (see Fig. iii).
- Ensure that the Inner Lid is facing outward and that the Inner Lid Rubber Gasket sits correctly and evenly on the Inner Lid.
FIG. i
natural_image
Close-up of a hand pressing down on a white circular component with a small hole, no visible text or symbolsFIG. ii-a
natural_image
Close-up of a white bathtub with a black arrow pointing to a circular opening (no text or symbols visible)FIG. ii-b
natural_image
Close-up of a white circular object with a black arrow pointing to it, no visible text or symbols.FIG. iii
natural_image
Close-up of hands pressing a circular component on a tire (no visible text or symbols)FIG. iv
natural_image
Close-up of a hand holding a small white plastic component, partially covered by a transparent bowl (no text or symbols visible)FIG. v
natural_image
Close-up of a hand pressing down on a circular metallic component with holes (no visible text or symbols)Instructions for Pressure Lid Assembly
FLOAT VALVE ASSEMBLY
- Remove the Lid from the Unit and remove the Inner Lid (see INNER LID ASSEMBLY, p. 16).
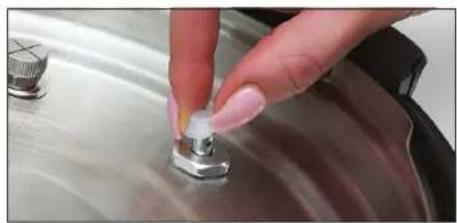
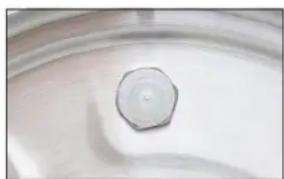
- Pull off the Rubber Gasket at the bottom of the Float Valve (see Fig. vi). The Float Valve will be loose in its chamber.
- Inspect the Float Valve Chamber to ensure that no food is stuck in the chamber. Run water through the Float Valve Chamber to clean it. Be cautious not to submerge the whole Pressure Lid.
- When the chamber is clear of debris, turn the Pressure Lid right side up to allow the Float Valve to drop into the Float Valve Chamber on the underside of the Lid. Turn the lid to the side so you can view the float valve
- Stick the pointed end of the Float Valve Pin into the side hole of the Float Valve (see Fig. vii).
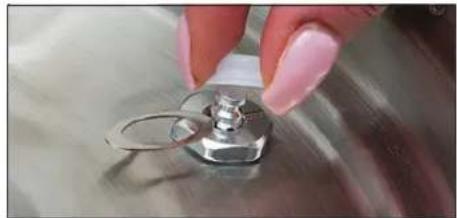
- With the Float Valve Pin inserted into the side hole, slide the Rubber Gasket onto the Float Valve, ensuring that the wider side of the Rubber Gasket is against the Pressure Lid (see Fig. viii).
- The Rubber Gasket should be snug on the Float Valve.
- Remove the Float Valve Pin (see Fig. vii).
PRESSURE RELEASE VALVE ASSEMBLY
NOTE: Do not attempt to assemble or disassemble the Pressure Release Valve when the Emeril Lagasse Pressure AirFryer Plus is in use.
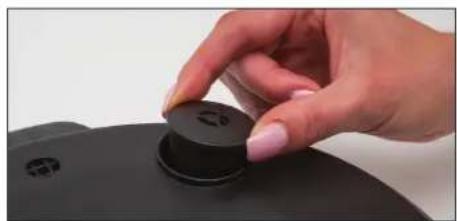
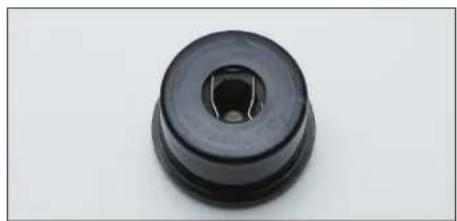
- Pull to remove the Pressure Release Valve (see Fig. ix).
- Ensure that the Pressure Release Valve and holes are not blocked by food or debris. If blocked, wash out or use a pin to unblock.
- Look at the clip on the underside of the Pressure Release Valve (see Fig. x). It should not be damaged or severely bent.
- Press the Pressure Release Valve back into the hole on the Lid. If the Valve does not insert correctly, it may have a bent clip.
FIG. vi
natural_image
Close-up of a hand pressing a small metallic component on a metal surface (no text or symbols visible)FIG. vii
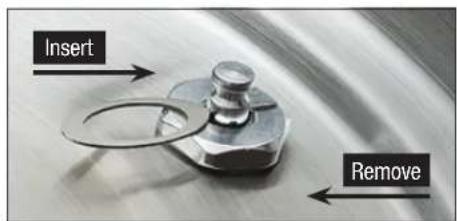
FIG. viii
natural_image
Close-up of a hand holding a small metallic object with a ring, partially submerged in liquid (no text or symbols visible)FIG. ix
natural_image
Close-up of a hand holding a black circular object with a small mark, against a plain background (no text or symbols visible)FIG. x
natural_image
Close-up of a black plastic mechanical component with a central hole (no text or symbols visible)Preparing for Pressure Cooking
CHECK PARTS & ACCESSORIES
-
Before first use, remove parts and accessories from the package and ensure all parts have been included before discarding any packaging materials. Remove all packing materials such as plastic film, cardboard, and stickers on the Pressure Release Valve and Condensation Collector (see PARTS & ACCESSORIES, p. 8).
-
CLEAN INSIDE: Remove the Inner Lid from the Pressure Lid by pulling the Knob. Remove the Rubber Gaskets from the Inner Lid (see
INNER LID ASSEMBLY, p. 16). Wash the Inner Lid, Rubber Gasket, Inner Pot, and other loose accessories with warm, soapy water; rinse; and dry. NOTE: Be sure to replace the Rubber Gaskets (see CHANGING THE INNER LID RUBBER GASKETS and FLOAT VALVE ASSEMBLY sections) before reinstalling the Inner Lid. Periodically check that the Inner Lid Rubber Gaskets are not cracking, breaking, or stretching and are properly installed.
TEST RUN CONDUCTED WITH WATER ONLY
natural_image
Close-up of a metallic bowl with a small, rounded object on its surface (no text or symbols visible)FIG. A (Float Valve Rubber Gasket)

natural_image
Close-up of a hand holding a small object next to a metallic container with an upward arrow (no text or symbols visible)FIG. B (Condensation Collector)
Before first use and periodically afterward, perform a test run conducted with water only to ensure that the Unit is operating properly. To perform the test:
- Place the Unit on a clean, flat surface.
- Attach the Condensation Collector to the side of the Unit by sliding it into the slots (see Fig. B). NOTE: The Condensation Collector may be preassembled.
- Remove the Pressure Lid. Place the Inner Lid
Outer Gasket around the outside of the Inner Lid and the Inner Lid Center Gasket in the center hole. Make sure the Float Valve and Rubber Gasket are in place in the Pressure Lid (see INSTRUCTIONS FOR PRESSURE LID ASSEMBLY, p. 16).
- Place the Inner Pot in the Base. Pour 2 cups (473 ml) of water in the Inner Pot.
- Attach the Power Cord to Unit Base and then a wall outlet (see ATTACHING THE POWER CORD, p. 7). When the Unit is first plugged in, “----” will appear on the LED Display. The Unit is automatically “ON” when plugged in.
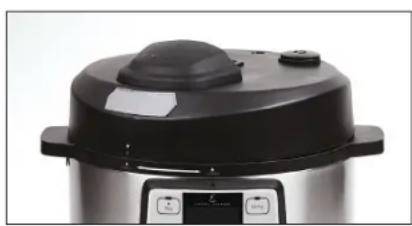
- ATTACHING LID: With the LED Display facing you, place the Pressure Lid on the Unit, aligning the Lid Position Mark with the Open Mark (see Fig. C). Twist the Pressure Lid counterclockwise about 30° and align the Lid Position Mark with the Closed Mark (see Fig. D). When the Pressure Lid is locked, the Release Switch will move to the Closed position (see Fig. E).
Preparing for Pressure Cooking
NOTE: The Magnetic Safety Sensor assures the Pressure Lid is properly closed before the Unit can pressurize. If the Pressure Lid is not closed correctly when starting a cooking cycle, a beeping noise will sound and the word "LID" will appear on the display, indicating the Pressure Lid is not fully closed.
- Once the Pressure Lid is properly attached, select the Stew Button on the Panel. This setting will automatically set a 10-min. cooking time.
CAUTION: THE TIMER STARTS COUNTING DOWN ONCE THE UNIT IS UNDER PRESSURE. DO NOT ATTEMPT TO OPEN THE LID WHEN THE UNIT IS UNDER PRESSURE.
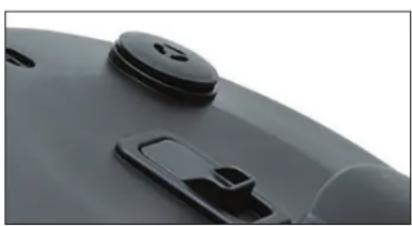
- SAFELY RELEASE PRESSURE: Once the cycle is complete, the Unit will beep. Press the Cancel Button. Slide the Release Switch from the Closed to the Open position and let go (see Fig. F). Allow all pressure to escape from the Unit. You will notice a slight incline of the Pressure Release Valve while pressure is being released (see Fig. H). After no steam is coming out of the Pressure Release Valve, the Pressure
Lid can be removed easily.
WARNING: Keep your body (face, arms, torso) away from Pressure Release Valve area when operating the Release Switch to avoid being exposed to the steam released from the valve. Follow these safety precautions when releasing pressure to prevent serious injury.
- Allow the water in the Inner Pot to cool. Remove and empty the Inner Pot. Rinse and towel dry.
WARNING: DO NOT LIFT BASE TO REMOVE CONTENTS from Inner Pot. Do not lift Inner Pot from Base when contents are hot.
NOTE: Do not use metal utensils in the Inner Pot.
WARNING: PREVENT BURNS! DO NOT TOUCH THE STAINLESS STEEL EXTERIOR. ONLY USE THE BLACK HANDLE ON THE LID TO OPEN. CONTENTS IN THE UNIT ARE HOT. ALWAYS OPEN THE LID AWAY FROM FACE AND BODY.
FIG. C (Open Position)
natural_image
Close-up of a black and white cooking pot with control buttons (no visible text or symbols)FIG. E (Closed Position)
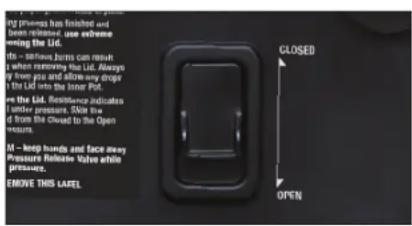
FIG. G (Valve is Down and Closed)
natural_image
Close-up of a gray surface with black circular and rectangular features (no text or symbols visible)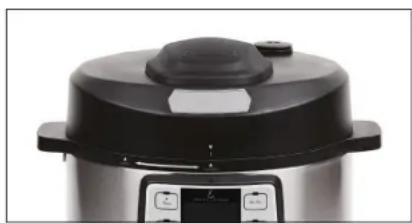
natural_image
Close-up of a black and white cooking pot with digital display (no visible text or symbols)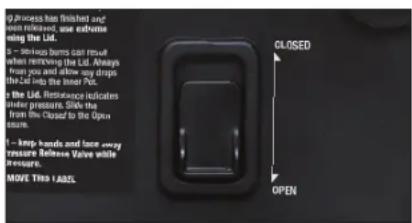
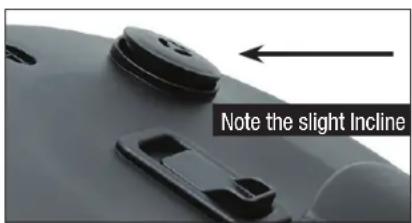
FIG. D (Locked Position)
FIG. F (Open Position)
FIG. H (Valve is Up and Open)
Instructions for Pressure Cooking
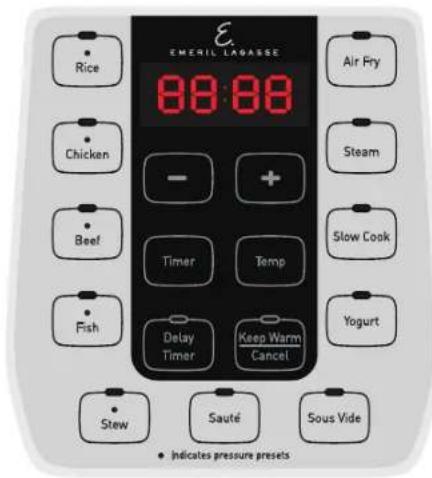
IMPORTANT: Any function can be stopped immediately by pressing the Cancel Button.
- Review PREPARING FOR PRESSURE COOKING (see p. 18) to learn about the Unit.
- Place the Emeril Lagasse Pressure AirFryer Plus on a clean, flat surface.
- Attach the Condensation Collector to the side of the Unit (see Fig. B).
- Open the Pressure Lid by sliding and letting go of the Steam Release Switch from the Closed position to the Open position. Then, grab the handle and twist the Lid clockwise to open the Lid see OPEN LID in PREPARING FOR USE.
- Place the Inner Pot in the Base. Add ingredients to the Inner Pot. NEVER FILL THE INNER POT ABOVE THE FULL CUP LINE (see IMPORTANT SAFEGUARDS, p. 4).
- ATTACHING LID: With the LED Display facing you, place the Pressure Lid on the Unit, aligning the Lid Position Mark with the Open Mark (see Fig. C). Twist
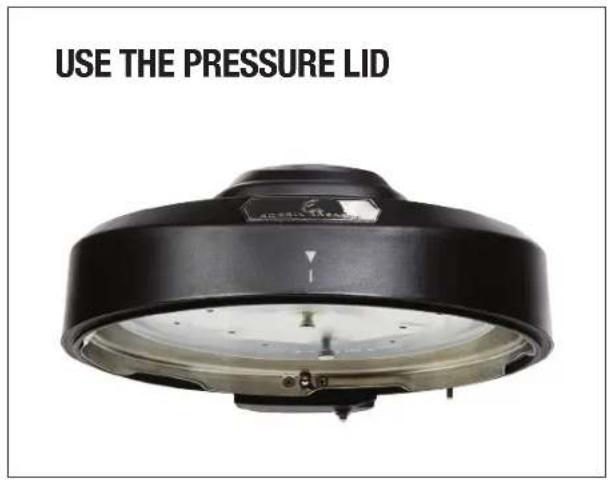
the Pressure Lid counterclockwise about 30° (see Fig. D). When the Pressure Lid is locked, the Release Switch will move to the Closed position (see Fig. E).
- Attach the Power Cord into the Emeril Lagasse Pressure AirFryer Plus and then into a wall outlet (see ATTACHING THE POWER CORD, p. 7). When the Unit is initially plugged in, “----” will appear on the LED Display. The Unit automatically powers on when plugged in.
- SELECT COOKING MODE: You can select a preprogrammed setting (see part A, p. 24–25). Once a setting is selected, the Unit will beep to indicate that the cooking cycle has started.
- SELECT COOKING TIME: You can press the Timer Button and use the +/- Buttons to manually adjust the cooking time (see part C, p. 24–25).
- USE DELAY TIMER: The Delay Timer lets you delay the beginning of the cooking cycle. To use the Delay Timer, select a cooking time and temperature. Then, press the Delay Timer Button. Finally, use the +/- Buttons to select the desired time delay.
Instructions for Pressure Cooking
NOTE: Using a delay time greater than 2 hours is not recommended because bacteria can form when uncooked food sits in the Inner Pot for too long.
- Once a cooking time has been set, pressure will build inside the Emeril Lagasse Pressure AirFryer Plus.
NOTE: DURING THIS TIME OR ANY TIME DURING THE COOKING CYCLE, DO NOT ATTEMPT TO MOVE THE UNIT OR OPEN THE PRESSURE LID.
- At the completion of the cooking cycle, the Unit will "beep" and enter Keep Warm mode until manually cancelled by pressing the Cancel Button.
NOTE: Foods kept at Keep Warm mode for longer than 6–8 hours may lose their flavor and texture.
- Open and remove the Pressure Lid by sliding the Steam Release Switch to the Open position and then letting go. The Pressure Release Valve should move from the Closed position to the Open position (see Fig. H). A quick burst of steam will release from the Pressure Release Valve (💡). If pressure and steam are being released, wait until no steam is being emitted by the Pressure Release Valve before trying to open the Pressure Lid. Do not force the Pressure Lid open until all the pressure is released, which may take several minutes. Next, grab the handle and twist the Pressure Lid clockwise approximately 30°.
NOTE: Some foods, especially thickly textured stews and sauces and oily foods, will percolate and form bubbles. The bubbles can burst and splatter. Before removing the Pressure Lid, gently tap/jiggle the Unit after releasing pressure to burst the bubbles.
Instructions for Air Frying
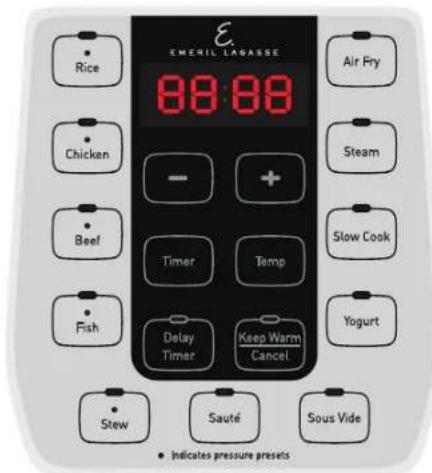
IMPORTANT: Any function can be stopped immediately by pressing the Cancel Button.
- Review PREPARING FOR PRESSURE COOKING (see p. 18) to learn about the Unit.
- Place the Emeril Lagasse Pressure AirFryer Plus on a clean, flat surface.
- If the Pressure Lid is attached to the Unit, remove the Pressure Lid by sliding and letting go of the Steam Release Switch from the Closed position to the Open position. Then, grab the handle and twist the Pressure Lid clockwise to remove the Lid see OPEN LID in PREPARING FOR USE.
- Place the Inner Pot in the Base. Place a rack in the Inner Pot. Place ingredients on the rack. NEVER FILL THE INNER POT ABOVE THE FULL CUP LINE (see IMPORTANT SAFEGUARDS, p. 4).
- ATTACHING LID: Place the Air Frying Lid on top of the Base, aligning the six pins in the Air Frying Lid's Wire Harness with the six holes in the Base's Wire Harness. The Air Fry preset will not function unless the Wire Harnesses are aligned properly (see p. 13). Do not twist the Air Frying Lid to close. The Air Frying Lid does not lock.
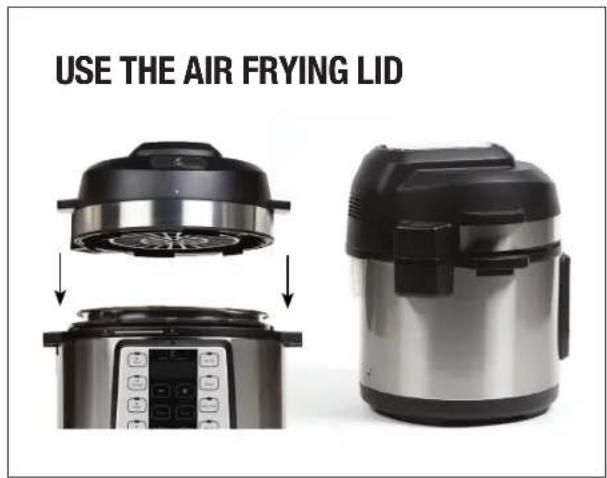
TIP: Do not tilt or angle the lid when placing or removing. Lift or lower the lid straight up or down to ensure that the wire harnesses in the lid and base connect properly.
- Attach the Power Cord into the Emeril Lagasse Pressure AirFryer Plus and then into a wall outlet (see ATTACHING THE POWER CORD, p. 7). When the Unit is initially plugged in, “----” will appear on the LED Display. The Unit automatically powers on when plugged in.
- SELECT COOKING MODE: Select the Air Fry setting (see part A, p. 24–25). Once a setting is selected, the Unit will beep to indicate that the cooking cycle has started. The Air Fry preset will not function if the Pressure Lid is attached to the Unit.
- SELECT COOKING TIME AND TEMPERATURE: You can select the Timer Button and use the +/- Buttons to manually adjust the cooking time (see part C, p. 24-25). You can also select the Temp Button and use the +/- Buttons to manually adjust the cooking temperature for most presets to suit the needs of your recipe (see part D, p. 24-25).
- Once a cooking time and temperature have been confirmed, the cooking cycle will begin.
Instructions for Air Frying
NOTE: DURING THIS TIME OR ANY TIME DURING THE COOKING CYCLE, DO NOT ATTEMPT TO MOVE THE UNIT OR OPEN THE LID.
-
Once the cooking cycle is complete, the LED Display will display a rotating icon for 2 minutes while the fan cools down the Air Frying Lid. DO NOT attempt to remove the Air Frying Lid until the fan has finishing cooling down the lid.
-
Once the fan has stopped running, open and remove the Air Frying Lid. The Air Frying Lid will be hot. ALWAYS place the Air Frying Lid, with the heating element facing downward, on a wire rack or heat-resistant trivet that overlaps the lid after use to cool. Placing only the heating element on a small heat-resistant surface might damage the heating element.
AIR FRYING TIPS
- Foods that are smaller in size usually require a slightly shorter cooking time than larger foods.
- Large quantities of food only require a longer cooking time than smaller quantities.
-
Adding a bit of vegetable oil to fresh potatoes is suggested for a crispier result. When adding oil, do so just before cooking and add only a small amount onto the potato.
-
Snacks normally cooked in an oven can also be cooked in the Pressure AirFryer Plus.
- Use premade dough to prepare filled snacks quickly and easily. Premade dough also requires a shorter cooking time than homemade dough.
- You can use the Pressure AirFryer Plus to reheat foods. Simply set the temperature and time to however warm you want your food.
Preset Cooking Programs
| A | B | C | D |
| PRESET COOK TIME | COOK TIME | TEMP | |
| Default Time | Adjust Range (Increments) | Adjust Range (Increments) | |
| Pressure | |||
| RICE 8 mins. 1–59 mins. (1 min.) - | |||
| CHICKEN 15 mins. 1–59 mins. (1 min.) - | |||
| BEEF 25 mins. 1–90 mins. (1 min.) - | |||
| FISH 2 mins. 1–59 mins. (1 min.) - | |||
| STEW 10 mins. 1–90 mins. (1 min.) - | |||
| Heat | |||
| SAUTÉ 20 mins. 1–59 mins. (1 min.) 95–360° F (5° F)/35–182° C (5°C) | |||
| SOUS VIDE 1 hr. 10 mins.–24 hrs. (5 mins.) 95–195° F (5° F)/35–90° C (5°C) | |||
| YOGURT | 5 hrs. | 4–10 hrs. (15 mins.) | - |
| SLOW COOK | 6 hrs. | 1–12 hrs. (15 mins.) | - |
| STEAM | 10 mins. 1–59 mins. (1 min.) - | ||
| Air Frying | |||
| AIR FRY | 20 mins. 1–59 mins. (1 min.) 180–400° F (5° F)/82–204° C (5°C) | ||
- The default temperature for the Sous Vide, Sauté, Slow Cook and Air Fry presets are 140°, 350°, 200° F, and 350° F (60°, 175°, 95° C, and 175° C), respectively.
- The maximum time the cooking cycle can be delayed with the Delay Timer Button for all presets is 24 hours (with increments of 10 mins.). When cooking perishable food (meat, fish, chicken, etc.), do not delay the cooking cycle for more than 2 hours.
- The Keep Warm function for all presets (except Sous Vide and Yogurt) lasts for a maximum time of 24 hours. Foods kept at Keep Warm mode for longer than 6–8 hours may lose flavor and texture.
- Consult recipes to use the appropriate liquid amount when cooking. It is not recommended to cook dry contents unless using the Sauté function.
- It is recommended to use the Glass Lid to maintain a consistent temperature during the Sous Vide, Steam, Sauté, Slow Cook, and Yogurt cooking cycles.
General Pressure Cooking Time Charts
NOTE: All pressure cooking modes require the addition of liquid in some form (water, stock, etc.). Unless you are familiar with the pressure cooking process, follow recipes carefully for liquid addition suggestions.
NOTE: A minimum of 1 cup of liquid is needed to build pressure.
| Vegetable | Liquid Amount (cups) | Approx. Time (min.) |
| Asparagus, thin whole | 1 | 1–2 |
| Beans, fava | 1 | 4 |
| Beans, green | 1 | 2–3 |
| Beans, lima | 1 | 2 |
| Beets, medium | 1 | 10 |
| Broccoli, pieces | 1 | 2 |
| Brussels sprouts, whole | 1 | 4 |
| Carrots, 1-in. pieces | 1 | 4 |
| Corn, on the cob | 1 | 3 |
| Pearl onions, whole 1 | 2 | |
| Potatoes, 1 1⁄2-in. chunks | 1 | 6 |
| Potatoes, whole, medium | 1 | 10–11 |
| Squash, acorn, halved | 1 | 7 |
| Squash, summer, zucchini 1 | 4 |
| Meat Liquid Amount | (cups) | Approx.Time (min.) |
| Beef/veal, roast or brisket | 3–4 | 35–40 |
| Beef, meatloaf (2 lb) | 1 | 10–15 |
| Beef, corned 4 50–60 | ||
| Pork, roast 1 40–45 | ||
| Pork, ribs (2 lb) 3 20 | ||
| Leg of lamb | 2–4 | 35–40 |
| Chicken, whole (2–3 lb) | 3–4 | 20 |
| Chicken, pieces (2–3 lb) | 3–4 | 15–20 |
| Cornish hens, two | 1 15 | |
| Meat/poultry soup/stock | 4–6 | 15–20 |
| Seafood/Fish | Liquid Amount (cups) | Approx. Time (min.) |
| Clams | 1 | 2–3 |
| Lobster (1 1⁄2–2 lb) | 1 | 2–3 |
| Shrimp | 1 | 1–2 |
| Fish, soup, or stock | 1–4 | 5–6 |
Sous Vide
Using traditional cooking methods, heat is transferred from a hot burner or oven to a pan and then to your food, which is heated from the outside to the middle. Using guesswork and a little luck, you sometimes get good results, but the food is often overdone on the outside and sometimes undercooked toward the center. The heat generated by a pan or air inside an oven is usually much hotter than it needs to be. If you don't remove the food at precisely the right time, results will be inconsistent.
Sous vide cooking utilizes precise temperature control to produce results that you cannot achieve
through any other cooking technique. Set up the Emeril Lagasse Pressure AirFryer Plus as shown in this manual; place your seasoned food in a slider, snap shut, or vacuum-sealable food storage bag; place the bag in the water; and set the time and temperature. Your food will cook to perfect doneness. Once cooked, you can leave the food in the water bath until you are ready to serve.
NOTE: Do not keep food heated at the temperature beyond the completion of its cooking cycle. Doing so can cause a loss of flavor or texture.
OPERATING INSTRUCTIONS
-
Put seasoned food in a sealable bag(s).
-
Remove as much air as possible from the bags(s) before sealing. You may use a vacuum sealer for best results.
-
Pour water into the Inner Pot, being careful not to add so much water that the water passes the FULL CUP Line when the bags are added.
NOTE: You can place the food bags in the Inner Pot first and then add the water to ensure that the water does not fill above the FULL CUP Line. Then, remove the bags before beginning the cooking cycle and preheating the water.
-
Press the Sous Vide Button. You may press the Timer Button and use the +/- Buttons to adjust the time to a custom time setting. Then, press the Temp Button and use the +/- Buttons to adjust the cooking temperature to your desired temperature.
-
The Unit will start heating up. Once the desired cooking temperature has been reached, Unit will beep and the timer will begin counting down.
-
Carefully place the food bag in the water. Make sure you don't drop the bag in the water.
-
Once the timer has completed, use tongs to remove the sealed bag with food. Do not use your hands because the water will be hot. Do not press the Keep Warm Button.
SOUS VIDE TIPS
NOTE: Do not place food in the water without placing it in a sealable bag.
- You may add seasonings and rubs to food before bagging.
- Always use BPA-free vacuum-seal or snap seal food storage bags for cooking.
- The thickness of meat, poultry, or fish will determine the cooking time. Use a food thermometer after removing food from the bag to guarantee that a safe food temperature has been reached.
- For health and safety, if unsure of doneness, add 30 mins. to the cooking time (for example, to pasteurize eggs or poultry).
- Ensure that the sealed bag with food is constantly submerged so the food is fully cooked. Clip a food-safe or sous vide weight (not included) to the food bag.
- Searing after cooking gives foods a finished look and texture. To achieve this, toss butter into a smoking-hot skillet and quickly sear cooked meat for 30 secs. on each side.
- Cook fruit to make toppings, purées, and syrups. Cook for 2–2 12 hours at 160° F and let cool in the bag before using.
SUGGESTED TIMES & TEMPERATURES
FOOD TEMP. TIME
| Beef | |
| Rare 125°F (52°C) 1 hr. 15 mins. | |
| Medium Rare 135°F (57°C) 1 hr. 15 mins. | |
| Medium 140°F (60°C) 1 hr. 15 mins. | |
| Medium Well 150°F (65°C) 1 hr. 15 mins. | |
| Well Done 160°F (71°C) | 1 hr. 15 mins. |
| Rib Roast – Med. | 140°F (60°C) 6–14 hr. |
| Pork | |
| Roast | 155°F (68°C) 3 hrs. |
| Chops – Medium | 145°F (63°C) 1 hr. |
| Chops – Well Done | 160°F (71°C) 1 hr. |
| Poultry | |
| Chicken Breast | 150°F (65°C) 1 hr. |
| Dark Meat | 165°F (74°C) 1 hr. |
| Fish | |
| Filet or Steak | 125°F (52°C) 45 mins. |
| Eggs | |
| Poached | 150°F (65°C) 1 hr. |
| Vegetables | |
| Green Vegetables | 180°F (82°C) 5–20 mins. |
| Root Vegetables | 180°F (82°C) 1.5–3 hrs. |
THE YOGURT-MAKING PROCESS
- Place the Inner Pot in the Base.
- Pour 2 qts. of whole or 2% milk into the Inner Pot.
- Press the Yogurt Button. The LED Display will show "5:00." The Unit wil start heating up.
- Once the Unit reaches 180^ F, the Unit will stop heating and the LED Display will show "COOL."
- Once the milk reaches 110°F, the Emeril Lagasse Pressure AirFryer Plus will beep and the LED Display will show "ADD." Using a ladle or measuring cup, remove 1 cup of milk from the Inner Pot. Mix the 1 cup milk with 2 tbsp. yogurt or yogurt starter. Then, return the milk mixture into the Inner Pot with the remaining heated milk and stir gently.
- Press the Yogurt Button. You may press the Timer Button and use the +/- Buttons to adjust the time to a custom time setting.
NOTE: If the Yogurt Button is not pressed, the Unit will beep continuously, and the Emeril Lagasse Pressure AirFryer Plus will return to standby mode.
-
Place the Glass Lid on the Emeril Lagasse Pressure AirFryer Plus.
-
Leave the Emeril Lagasse Pressure AirFryer Plus undisturbed, allowing the yogurt to incubate for 4 -10 hours.
-
Once the incubation is complete, remove the yogurt, and store in a container in the refrigerator.
Yogurt
TIPS
- The incubation process can be shorter (as low as 4 hours) or longer (as long as 10 hours) depending on the desired thickness of the yogurt. Longer incubation periods produce thicker, tarter yogurt.
- For thicker, Greek-style yogurt: After incubation, spoon the yogurt into a cheesecloth-lined colander set over a bowl and let the yogurt
drain for at least 1 hr. (let thicker yogurt drain overnight) in the refrigerator. Discard or reserve the whey (the liquid that passes through the cheesecloth).
- Yogurt can be stored in the refrigerator in covered glass, ceramic, or plastic containers for up to two weeks (the flavor will be best within the first week).
Frequently Asked Questions
1. What is the material of construction?
This appliance has a stainless steel housing and Inner Pot.
2. How do you assemble/disassemble the Unit?
This appliance comes fully assembled with the Float Valve, Pressure Release Valve, and Inner Lid already assembled in the Pressure Lid. Attach the Condensation Collector before operation (see PREPARING FOR PRESSURE COOKING, p. 18).
3. What is the default time?
Each cooking mode has a default time that appears as soon as you select a desired program button. Before the timer on the LED Display begins counting down, the appliance must first reach the proper pressure and/or temperature for that mode.
4. How long does it take for the Unit to reach full pressure and for the cook time clock to start a countdown?
When the Unit reaches the desired cooking pressure, the cooking time will begin counting down. The time required to reach the desired pressure setting depends on the volume, concentration, and ratios of solid to liquid in the Unit – generally 5–40 mins.
Can you change the cook time from the default setting?
Yes! You may press the Timer Button and use the +/- Buttons to adjust the time to a custom time setting. Then, press the Temp Button and use the +/- Buttons to adjust the cooking temperature to your desired temperature.
5. Can you leave the Unit on while not at home?
The Emeril Lagasse Pressure AirFryer Plus has a delayed start function, but leaving the Unit on while not at home is not recommended.
6. Can you put frozen foods into the Unit without defrosting?
Yes! Remember to add an average of 10 extra mins. to the cooking time when cooking frozen meals.
7. Can I deep fry in this Unit?
No! Do not attempt to deep fry in the Emeril Lagasse Pressure AirFryer Plus. The Unit does not have safety measures to prevent oil fumes and fire. Pressurized oil fumes are very dangerous and can cause an explosion.
8. How do I turn off the Unit?
Press the Cancel Button on the Control Panel and unplug the Power Cord from the wall outlet and the Unit Base.
Care & Cleaning
CAUTION
Any leftover food or debris remaining in the Unit could prevent safety devices from operating correctly during subsequent use! FOLLOW THESE CLEANING INSTRUCTIONS AFTER EACH USE.
-
Allow the Unit to cool to room temperature before cleaning. Do not attempt to clean a hot Emeril Lagasse Pressure AirFryer Plus!
-
Unplug the Power Cord from the wall and then from the Unit Base in a straight motion. Do not twist or pull the Power Cord at an angle. Twisting or pulling at an angle may damage the Power Cord, plug, or Base.
-
Clean the exterior of the Unit with a soft, damp cloth or paper towel. Do not immerse the power cord, plug, Unit Base, or Air Frying Lid in water or pour water into the housing.
-
If the Pressure Lid is attached to the Unit, unlock the Pressure Release Valve by sliding the Steam Release Switch to the Open position and let go. Wash with mild, soapy water and rinse well. Use a small pin if necessary to remove any blockages that may have occurred during cooking process. Check to see that the interior spring-loaded part moves freely by pressing down on it. Check to see that it is free from debris.
-
If the Pressure Lid was used, clean the Pressure Lid and Inner Lid (see INNER LID ASSEMBLY, p. 16). Remove the Inner Lid Rubber Gaskets from the Inner Lid. The Inner Lid Rubber Gaskets must be washed separately with a sponge or soft cloth and warm, soapy water. Rinse well. Reattach the Inner Lid Rubber Gasket to the Inner Lid.
NOTE: Check before each use to make sure the Rubber Gasket is clean, flexible, and not torn.
If damaged, replace before operating Unit (see INNER LID ASSEMBLY, p. 16).
-
Rinse upper and underside of Lid with warm water, making sure the Float Valve and Pressure Release Valve are free from debris. Both valves should be able to move up and down freely, with the Float Valve stopping only when the Float Valve Rubber Gasket meets the Lid. Dry.
-
Attach the Inner Lid to the Lid. Improper placement of the Inner Lid will prevent the Lid from closing properly. (see INNER LID ASSEMBLY, p. 16).
-
If the Air Frying Lid was used, let the lid cool and then clean it with a damp, moist cloth.
CAUTION: Do not submerge or rinse the Air Frying Lid in water. Only clean it with a damp, moist cloth.
-
Remove the Inner Pot after every use. The Inner Pot is dishwasher safe, but to prolong its use, you should wash it by hand using warm, soapy water and a soft cloth or sponge. Rinse and towel dry. Do not use harsh chemicals or scouring pads.
-
To clean the Condensation Collector, slide to remove it; clean it with warm, soapy water; allow it to dry; and then reattach it.
NOTE: Customer Service should be contacted for any questions or parts (see the back of this manual for contact information).
NOTE: The following parts can be placed in dishwasher: Inner Pot, Measuring Cup, Spoon. We recommend hand washing all parts to prolong the life of the components. Any other servicing should be performed by an authorized service representative.
Troubleshooting
Symptom Possible Cause Solution
| Cannot open Pressure Lid | DO NOT FORCE OPEN. | |
| Pressure Lid does not lock | Inner Lid Rubber Gasket is not properly installed | Reinstall Inner Lid Rubber Gasket. |
| Cannot open Pressure Lid after pressure is released | Float Valve and Pressure Release Valve are still raised | Ensure the Pressure Release Valve is open, the Steam Release Switch is in the Open position, and you have let go of the Steam Release Switch.CAUTION:Hot steam may be released during this process.DO NOT FORCE THE UNIT OPEN.Do not place face, hands, or body near valve opening. |
| Air escapes from the rim of the Pressure Lid and pressure will not increase | Pressure Lid incorrectly installed | SeeATTACHING LIDinINSTRUCTIONS FOR PRESSURE COOKING,p. 20. |
| Inner Lid not installed | Install Inner Lid (seeINNER LID ASSEMBLYinINSTRUCTIONS FOR PRESSURE LID ASSEMBLY,p. 16). | |
| Inner Lid Rubber Gasket not installed or incorrectly installed | Install Inner Lid Rubber Gasket. | |
| Food residue on Inner Lid Rubber Gasket Clean Inner Lid Rubber Gasket. | ||
| Inner Lid Rubber Gasket is damaged or worn out | Replace Inner Lid Rubber Gasket. Contact Customer Service (see the back of the manual for contact information). for replacement parts. | |
| Air escapes from Float Valve during operation | Food stuck on Float Valve Rubber Gasket Clean Float Valve Rubber Gasket. | |
| Inner Lid not installed Install Inner Lid. | ||
| Float Valve does not rise | Float Valve Rubber Gasket is worn out | Replace Float Valve Rubber Gasket. Contact Customer Service for assistance (see the back of the manual for contact information). |
| Appliance is not filled with enough food or water | Check recipe for proper quantities of solids and liquids. | |
| Air is escaping from rim of Lid and/or from Pressure Release Valve | Contact Customer Service for assistance (see the back of the manual for contact information). | |
| Float Valve not assembled correctly | Float Valve should be able to move up and down, stopping only when its Rubber Gasket meets the Lid interior. Ensure that its Rubber Gasket is clean and the Float Valve can move freely.* | |
| Liquid spitting out of Float Valve | Too much liquid in Unit | Allow the cooking cycle to finish. Clean the Float Valve thoroughly. Use less liquid in future recipes. |
| Unit turns off unexpectedly | Appliance is overheated Unplug and let the Unit cool for 30 mins. in order to reset. | |
CONTINUED ON NEXT PAGE
Troubleshooting
| Symptom | Possible Cause | Solution |
| Display reads “LID” and beeping sound occurs | Lid not positioned correctly or not fully closed | Adjust Lid by followingATTACHING LIDin INSTRUCTIONS FOR PRESSURE COOKING, p. 20.NOTE: Non-pressure programs require the Glass Lid and not the main Lid.Air frying presets require the Air Frying Lid. |
| Lid does not open | Lid is put on incorrectly | DO NOT FORCE LID OPEN. Unplug the Unit and allow to cool down.Then, attempt to remove the Lid. |
| Air Fryer does not work | Air Frying Lid is put on incorrectly | The Wire Harness must be firmly connected. |
*NOTE: If necessary to reassemble Float Valve, see FLOAT VALVE ASSEMBLY, p. 17.
DISPLAY ERROR INDICATOR
Error Code Cause of Error Solution
| E1 Bottom sensor open Contact Customer Service* |
| E2 Bottom sensor short circuit Contact Customer Service* |
| E3 Unit has overheated Let the Unit cool down before use |
| E4 Pressure switch malfunction Contact Customer Service* |
| E5 Air Frying Lid short circuit Contact Customer Service* |
| E6 Air Frying Lid overheating Let the Air Frying Lid cool down before use |
| LID Wrong lid Attach the correct lid before use |
NOTE: DO NOT use or attempt to repair a malfunctioning appliance.
*See the back of the manual for Customer Service contact information.
Unit Specifications
| Model Number | Supply Power | Rated Power | Capacity of Inner Pot | Working Pressure | Safety Working Pressure |
| Y6D-AF-36B | AC 120V~60Hz | 1450W | 6 qt. | 0–80 kPa | 80–90 kPa |
EMERIL LAGASSE
Pressure AirFryer Plus™
90-Day Money-Back Guarantee
If you decide that you don't love this product, your order is covered by our 90-Day Money-Back Guarantee. You have 90 days from the day you receive your product to request a replacement product or refund of the purchase price minus processing and handling fees.
To receive a refund or replacement, you must return the product to us at your expense. To return the product, call customer service at 1-973-287-5132 and request a return merchandise authorization number. Pack the product carefully and include in the package a note with (1) your name, (2) mailing address, (3) phone number, (4) email address, (5) reason for return, and (6) proof of purchase or order number, and (7) specify on the note whether you are requesting a refund or replacement. Write the return merchandise authorization number on the outside of the package.
Send the product to the following return address:
Emeril Lagasse Pressure AirFryer Plus
Tristar Products
500 Returns Road,
Wallingford, CT 06495
|
[Non-Text]
[Non-Text]
[Non-Text]
[Non-Text]
[Non-Text]
[Non-Text]
[Non-Text]
[Non-Text]
[Non-Text]
[Non-Text]
[Non-Text]
[Non-Text]
[Non-Text]
[Non-Text]
[Non-Text]
[Non-Text]
[Non-Text]
[Non-Text]
[Non-Text]
[Non-Text]
[Non-Text]
[Non-Text]
[Non-Text]
[Non-Text]
[Non-Text]
[Non-Text]
[Non-Text]
[Non-Text]
[Non-Text]
[Non-Text]
[Non-Text]
[Non-Text]
[Non-Text]
[Non-Text]
[Non-Text]
[Non-Text]
[Non-Text]
[Non-Text]
[Non-Text]
[Non-Text]
一
|
[Non-Text]
[Non-Text]
[Non-Text]
[Non-Text]
|
广力云
[Non-Text]
[Non-Text]
[Non-Text]
[Non-Text]
[Non-Text]
[Non-Text]
[Non-Text]
[Non-Text]
[Non-Text]
[Non-Text]
[Non-Text]
[Non-Text]
[Non-Text]
[Non-Text]
[Non-Text]
[Non-Text]
[Non-Text]
[Non-Text]
[Non-Text]
[Non-Text]
[Non-Text]
[Non-Text]
[Non-Text]
[Non-Text]
[Non-Text]
[Non-Text]
[Non-Text]
[Non-Text]
[Non-Text]
[Non-Text]
[Non-Text]
[Non-Text]
[Non-Text]
[Non-Text]
[Non-Text]
[Non-Text]
[Non-Text]
[Non-Text]
[Non-Text]
1
|
[Non-Text]
[Non-Text]
[Non-Text]

EMERIL LAGASSE
Pressure AirFryer Plus™
We are very proud of the design and quality of our Emeril Lagasse Pressure AirFryer Plus ^TM .
This product has been manufactured to the highest standards. Should you have any questions, our friendly customer service staff is here to help you.
Visit us at www.TristarCares.com, email us at customerservice@tristarprodutcsinc.com, or call us at 973-287-5132

Distributed by:
Tristar Products, Inc.
Fairfield, NJ 07004
© 2019 Tristar Products, Inc.
Made in China
EMERIL-PAFP_IB_TP_ENG_V3_190611


- Owner's Manual
- Emeril Lagasse Pressure AirFryer Plus
- BEFORE YOU BEGIN
- Table of Contents
- IMPORTANT SAFEGUARDS 4
- Attaching the Power Cord 7
- Parts & Accessories 8
- Features & Benefits 12
- Releasing Pressure After 14 Pressure Cooking
- Instructions for Pressure Lid Assembly 16
- Preparing for Pressure Cooking 18
- Instructions for Pressure Cooking 20
- Instructions for Air Frying 22
- Preset Cooking Programs 24
- General Pressure Cooking Time Charts 29
- Sous Vide 26
- Frequently Asked Questions 30
- IMPORTANT SAFEGUARDS
- WARNING
- PREVENT INJURIES! – CAREFULLY READ ALL INSTRUCTIONS BEFORE USE!
- SAVE THESE INSTRUCTIONS FOR HOUSEHOLD USE ONLY
- WARNING:
- Overheating Protection
- Automatic Shut-Off
- Electromagnetic Fields
- Electric Power
- CAUTION: Attaching the Power Cord
- Parts & Accessories
- Features & Benefits
- BUILT-IN SAFETY DEVICES
- SPECIAL FEATURES
- Releasing Pressure After Pressure Cooking
- NATURAL RELEASE AND RAPID RELEASE
- HOW NATURAL RELEASE WORKS AND WHEN TO USE IT
- HOW RAPID RELEASE WORKS AND WHEN TO USE IT
- Instructions for Pressure Lid Assembly
- INNER LID ASSEMBLY
- REMOVING LID
- INSERTING INNER LID
- CHANGING OR CLEANING THE INNER LID
- FLOAT VALVE ASSEMBLY
- PRESSURE RELEASE VALVE ASSEMBLY
- Preparing for Pressure Cooking
- CHECK PARTS & ACCESSORIES
- TEST RUN CONDUCTED WITH WATER ONLY
- Instructions for Pressure Cooking
- NOTE: DURING THIS TIME OR ANY TIME DURING THE COOKING CYCLE, DO NOT ATTEMPT TO MOVE THE UNIT OR OPEN THE PRESSURE LID.
- Instructions for Air Frying
- AIR FRYING TIPS
- General Pressure Cooking Time Charts
- Sous Vide
- OPERATING INSTRUCTIONS
- SOUS VIDE TIPS
- SUGGESTED TIMES & TEMPERATURES
- THE YOGURT-MAKING PROCESS
- Yogurt
- TIPS
- Frequently Asked Questions
- What is the material of construction?
- How do you assemble/disassemble the Unit?
- What is the default time?
- How long does it take for the Unit to reach full pressure and for the cook time clock to start a countdown?
- Can you change the cook time from the default setting?
- Can you leave the Unit on while not at home?
- Can you put frozen foods into the Unit without defrosting?
- Can I deep fry in this Unit?
- How do I turn off the Unit?
- Care & Cleaning
- CAUTION
- Troubleshooting
- DISPLAY ERROR INDICATOR
- Pressure AirFryer Plus™
- 90-Day Money-Back Guarantee
Brand : Emeril Lagasse
Model : Pressure Air Fryer Plus
Category : Air fryer