
MC332W - Vidéo-projecteur NEC - Free user manual and instructions
Find the device manual for free MC332W NEC in PDF.


| Product Type | LCD Video Projector |
| Model | NEC MC332W |
| Display Technology | 0.59 inch LCD with Micro Lens Array, Aspect Ratio 16:10 |
| Native Resolution | WXGA (1280 x 800 dots) |
| Light Output (Lumens) | 3300 lm (ECO MODE OFF) |
| Contrast Ratio | 16000:1 (with Iris) |
| Lens | 1.2x Manual Zoom, F=1.6-1.8, f=19.2-23.0 mm |
| Lamp Life | Up to 15000 hours (ECO mode), up to 10000 hours (Normal mode) |
| Screen Size (Diagonal) | 30-300 inches |
| Projection Distance | 0.9-10.9 m (35-431 inches) |
| Keystone Correction | Automatic and Manual (Vertical, Horizontal, Cornerstone, Pincushion) |
| Built-in Speaker | 1 x 16 W (Monaural) |
| Input Connectors | 1 x RGB/Component (D-Sub 15 pin), 2 x HDMI (Type A, HDCP), 1 x Video (RCA), 1 x Stereo Mini Audio, 1 x USB Type A, 1 x USB Type B, 1 x RJ-45 (LAN) |
| Output Connectors | 1 x RGB (D-Sub 15 pin), 1 x Stereo Mini Audio |
| Control | RS-232 (D-Sub 9 pin), LAN, IR Remote, Virtual Remote Tool (via VGA) |
| Power Consumption | ECO OFF: 267 W (100-130 V), 259 W (200-240 V); Normal: 228 W (100-130 V), 223 W (200-240 V); Standby (Normal): 0.18 W (100-130 V), 0.26 W (200-240 V) |
| Power Supply | 100-240 V AC, 50/60 Hz, 3.3-1.3 A |
| Dimensions (W x H x D) | 345 mm x 108.4 mm x 261 mm (including protrusions), 345 mm x 104.6 mm x 261 mm (without protrusions) |
| Weight | 3.1 kg |
| Operating Temperature | 5°C to 40°C (41°F to 104°F), 20-80% humidity (non-condensing) |
| Filter Cleaning/Cleaning | Cleaning filter and lens required; replace filter every 6000 hours (or as needed) |
| Safety Features | Security slot (Kensington), Security chain opening, Password protection, Control panel lock |
Frequently Asked Questions - MC332W NEC
User questions about MC332W NEC
0 question about this device. Answer the ones you know or ask your own.
Ask a new question about this device
Download the instructions for your Vidéo-projecteur in PDF format for free! Find your manual MC332W - NEC and take your electronic device back in hand. On this page are published all the documents necessary for the use of your device. MC332W by NEC.
USER MANUAL MC332W NEC
Please visit our web site for User's Manual in the latest version:
https://www.nec-display.com/dl/en/pj_manual/lineup.html
- The ME342U, MC332W, MC422X, MC342X and MC302X are not distributed in North America. Model No. NP-ME382U/NP-ME342U/NP-ME372W/NP-MC382W/NP-MC332W/NP-ME402X/NP-MC422X/NP-MC372X/NP-MC342X/NP-MC302X
- Apple, Mac, Mac OS, OS X, MacBook, and iMac are trademarks of Apple Inc. registered in the U.S. and other countries.
- iOS is a trademark or registered trademark of Cisco in the U.S. and other countries and is used under license.
- APP Store is a service mark of Apple Inc.
- Microsoft, Windows, Windows Vista, Internet Explorer, .NET Framework and PowerPoint are either a registered trademark or trademark of Microsoft Corporation in the United States and/or other countries.
- MicroSaver is a registered trademark of Kensington Computer Products Group, a division of ACCO Brands in the U.S. and other countries.
- AccuBlend, NaViSet, MultiPresenter, and Virtual Remote are trademarks or registered trademarks of NEC Display Solutions, Ltd. in Japan, in the United States and other countries.
- The terms HDMI and HDMI High-Definition Multimedia Interface, and the HDMI Logo are trademarks or registered trademarks of HDMI Licensing Administrator, Inc. in the United States and other countries.
HDMI®
HIGH-DEFINITION MULTIMEDIA INTERFACE
- Trademark PJLink is a trademark applied for trademark rights in Japan, the United States of America and other countries and areas.
- Wi-Fi®, Wi-Fi Alliance®, and Wi-Fi Protected Access (WPA, WPA2®) are registered trademarks of the Wi-Fi Alliance.
- Blu-ray is a trademark of Blu-ray Disc Association.
- CRESTRON and ROOMVIEW are registered trademarks of Crestron Electronics, Inc. in the United States and other countries.
- Ethernet is either a registered trademark or trademark of Fuji Xerox Co., Ltd.
- Android and Google Play are trademarks of Google Inc.
- Other product names and logos mentioned in this user's manual may be the trademarks or registered trademarks of their respective holders.
• Virtual Remote Tool uses Winl2C/DDC library, © Nicomsoft Ltd.
• GPL/LGPL Software Licenses
The product includes software licensed under GNU General Public License (GPL), GNU Lesser General Public License (LGPL), and others.
For more information on each software, see “readme.pdf” in the “about GPL&LGPL” folder on the supplied CD-ROM.
NOTES
(1) The contents of this user's manual may not be reprinted in part or whole without permission.
(2) The contents of this user's manual are subject to change without notice.
(3) Great care has been taken in the preparation of this user's manual; however, should you notice any questionable points, errors or omissions, please contact us.
(4) Notwithstanding article (3), NEC will not be responsible for any claims on loss of profit or other matters deemed to result from using the Projector.
Safety Cautions
Precautions
Please read this manual carefully before using your NEC projector and keep the manual handy for future reference.
CAUTION

To turn off main power, be sure to remove the plug from power outlet.
The power outlet socket should be installed as near to the equipment as possible, and should be easily accessible.
CAUTION

TO PREVENT SHOCK, DO NOT OPEN THE CABINET.
THERE ARE HIGH-VOLTAGE COMPONENTS INSIDE.
REFER SERVICING TO QUALIFIED SERVICE PERSONNEL.

This symbol warns the user that uninsulated voltage within the unit may be sufficient to cause electrical shock. Therefore, it is dangerous to make any kind of contact with any part inside of the unit.
This symbol alerts the user that important information concerning the operation and maintenance of this unit has been provided.
The information should be read carefully to avoid problems.
WARNING: TO PREVENT FIRE OR SHOCK, DO NOT EXPOSE THIS UNIT TO RAIN OR MOISTURE.
DO NOT USE THIS UNIT'S PLUG WITH AN EXTENSION CORD OR IN AN OUTLET UNLESS ALL THE PRONGS CAN BE FULLY INSERTED.
DOC Compliance Notice (for Canada only)
This Class B digital apparatus complies with Canadian ICES-003.
Machine Noise Information Regulation - 3. GPSGV,
The highest sound pressure level is less than 70 dB (A) in accordance with EN ISO 7779.
CAUTION

Avoid displaying stationary images for a prolonged period of time.
Doing so can result in these images being temporarily sustained on the surface of the LCD panel.
If this should happen, continue to use your projector. The static background from previous images will disappear.
Disposing of your used product
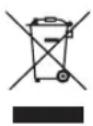
In the European Union
EU-wide legislation as implemented in each Member State requires that used electrical and electronic products carrying the mark (left) must be disposed of separately from normal household waste. This includes projectors and their electrical accessories. When you dispose of such products, please follow the guidance of your local authority and/or ask the shop where you purchased the product.
After collecting the used products, they are reused and recycled in a proper way. This effort will help us reduce the wastes as well as the negative impact to the human health and the environment at the minimum level.
The mark on the electrical and electronic products only applies to the current European Union Member States.
Outside the European Union
If you wish to dispose of used electrical and electronic products outside the European union, please contact your local authority and ask for the correct method of disposal.

For EU: The crossed-out wheeled bin implies that used batteries should not be put to the general household waste! There is a separate collection system for used batteries, to allow proper treatment and recycling in accordance with legislation.
According to EU directive 2006/66/EC, the battery can't be disposed improperly. The battery shall be separated to collect by local service.
FCC Information (for USA only)
WARNING
The Federal Communications Commission does not allow any modifications or changes to the unit EXCEPT those specified by NEC Display Solutions of America, Inc. in this manual. Failure to comply with this government regulation could void your right to operate this equipment. This equipment has been tested and found to comply with the limits for a Class B digital device, pursuant to Part 15 of the FCC Rules. These limits are designed to provide reasonable protection against harmful interference in a residential installation. This equipment generates, uses, and can radiate radio frequency energy and, if not installed and used in accordance with the instructions, may cause harmful interference to radio communications. However, there is no guarantee that interference will not occur in a particular installation.
If this equipment does cause harmful interference to radio or television reception, which can be determined by turning the equipment off and on, the user is encouraged to try to correct the interference by one or more of the following measures:
• Reorient or relocate the receiving antenna.
- Increase the separation between the equipment and receiver.
- Connect the equipment into an outlet on a circuit different from that to which the receiver is connected.
- Consult the dealer or an experienced radio / TV technician for help.
For UK only: In UK, a BS approved power cord with moulded plug has a Black (five Amps) fuse installed for use with this equipment. If a power cord is not supplied with this equipment please contact your supplier.
Important Safeguards
These safety instructions are to ensure the long life of your projector and to prevent fire and shock. Please read them carefully and heed all warnings.

Installation
- Do not place the projector in the following conditions:
- on an unstable cart, stand, or table.
- near water, baths, or damp rooms.
- in direct sunlight, near heaters, or heat radiating appliances.
- in a dusty, smoky or steamy environment.
- on a sheet of paper or cloth, rugs or carpets.
- If you wish to have the projector installed on the ceiling:
- Do not attempt to install the projector yourself.
- The projector must be installed by qualified technicians in order to ensure proper operation and reduce the risk of bodily injury.
- In addition, the ceiling must be strong enough to support the projector and the installation must be in accordance with any local building codes.
- Please consult your dealer for more information.
- Do not install and store the projector in the below circumstances. Failure to do so may cause of malfunction.
- In powerful magnetic fields
- In corrosive gas environment
- Outdoors
- If intense light like laser beams enters from the lens, it could lead to malfunction.
CAUTION

This equipment is designed to be used in the condition of the power cord connected to earth. If the power cord is not connected to the earth, it may cause electric shock. Please make sure the power cord is earthed properly.
Cable information
CAUTION

Use shielded cables or cables attached ferrite cores so as not to interfere with radio and television reception. For details, please refer to “Making Connections” in this user’s manual.
WARNING
- Do not cover the lens with the lens cap or equivalent while the projector is on. Doing so can lead to melting of the cap due to the heat emitted from the light output.
- Do not place any objects, which are easily affected by heat, in front of the projection window. Doing so could lead to the object melting from the heat that is emitted from the light output.
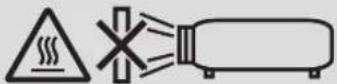
- Do not use a spray containing flammable gas to get rid of accumulated dust and dirt on the filter and the projection window. It may cause of fire.
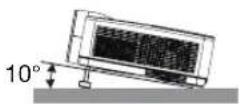
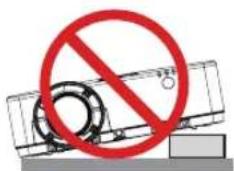
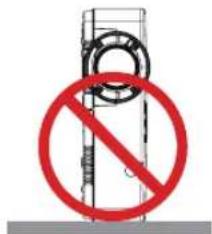
Place the projector in a horizontal position
The tilt angle of the projector should not exceed 10 degrees, nor should the projector be installed in any way other than the desktop and ceiling mount, otherwise lamp life could decrease dramatically.

Fire and Shock Precautions

- Ensure that there is sufficient ventilation and that vents are unobstructed to prevent the build-up of heat inside your projector. Allow at least 4 inches (10 cm) of space between your projector and a wall.
- Do not try to touch the exhaust vent as it can become heated while the projector is turned on and immediately after the projector is turned off. Parts of the projector may become temporarily heated if the projector is turned off with the POWER button or if the AC power supply is disconnected during normal projector operation. Use caution when picking up the projector.

- Prevent foreign objects such as paper clips and bits of paper from falling into your projector. Do not attempt to retrieve any objects that might fall into your projector. Do not insert any metal objects such as a wire or screwdriver into your projector. If something should fall into your projector, disconnect it immediately and have the object removed by a qualified service personnel.
- Do not place any objects on top of the projector.
- Do not touch the power plug during a thunderstorm. Doing so can cause electrical shock or fire.
- The projector is designed to operate on a power supply of 100-240V AC 50/60 Hz. Ensure that your power supply fits this requirement before attempting to use your projector.
- Do not look the lens while the projector is on. Serious damage to your eyes could result. The following label, that is indicated near the lens-mounting-section on the projector cabinet, describes this projector is categorized in the risk group 2 of IEC 62471-5: 2015. As with any bright source, do not stare into the beam, RG2 IEC 62471-5: 2015.
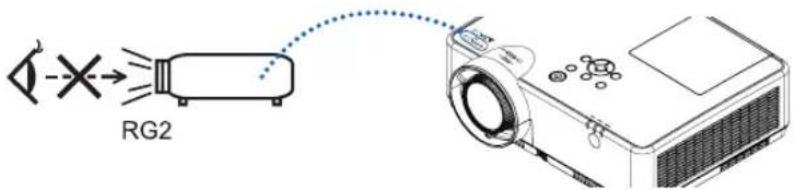
- Keep any items such as magnifying glass out of the light path of the projector. The light being projected from the lens is extensive, therefore any kind of abnormal objects that can redirect light coming out of the lens, can cause unpredictable outcome such as fire or injury to the eyes.
- Do not place any objects, which are easily affected by heat, in front of a projector exhaust vent.
Doing so could lead to the object melting or getting your hands burned from the heat that is emitted from the exhaust.
- Do not splash water over the projector. Doing so can cause electrical shock or fire. If the projector gets wet, turn off the projector, unplug the power cord and have the projector serviced by a qualified service personnel.
-
Handle the power cord carefully. A damaged or frayed power cord can cause electric shock or fire.
-
Do not use any power cord other than the one supplied with the projector.
- Do not bend or tug the power cord excessively.
- Do not place the power cord under the projector, or any heavy object.
- Do not cover the power cord with other soft materials such as rugs.
- Do not heat the power cord.
- Do not handle the power plug with wet hands.
- Turn off the projector, unplug the power cord and have the projector serviced by a qualified service personnel under the following conditions:
- When the power cord or plug is damaged or frayed.
- If liquid has been spilled into the projector, or if it has been exposed to rain or water.
- If the projector does not operate normally when you follow the instructions described in this user's manual.
- If the projector has been dropped or the cabinet has been damaged.
-
If the projector exhibits a distinct change in performance, indicating a need for service.
-
Disconnect the power cord and any other cables before carrying the projector.
- Turn off the projector and unplug the power cord before cleaning the cabinet or replacing the lamp.
- Turn off the projector and unplug the power cord if the projector is not to be used for an extended period of time.
- When using a LAN cable:
For safety, do not connect to the terminal for peripheral device wiring that might have excessive voltage.

CAUTION
- Do not use the adjustable tilt foot for purposes other than originally intended. Misuses such as gripping the tilt-foot or hanging on the wall can cause damage to the projector.
- Do not turn off the AC power for 60 seconds after the lamp is turned on and while the POWER indicator is blinking blue. Doing so could cause premature lamp failure.
Remote Control Precautions
- Handle the remote control carefully.
- If the remote control gets wet, wipe it dry immediately.
- Avoid excessive heat and humidity.
- Do not short, heat, or take apart batteries.
- Do not throw batteries into fire.
- If you will not be using the remote control for a long time, remove the batteries.
- Ensure that you have the batteries' polarity (+/-) aligned correctly.
- Do not use new and old batteries together, or use different types of batteries together.
- Dispose of used batteries according to your local regulations.
Note for Canadian Environmental Protection Act, 1999
The lamp(s) in this product contains mercury. Please dispose according to your local authority law.
FOR MORE INFORMATION, CONTACT:
NEC Display Solutions of America, Inc.
3250 Lacey Rd, Ste 500
Downers Grove, IL 60515
TELEPHONE 630-467-4712
www.necdisplay.com
Note for US Residents
The lamp in this product contains mercury. Please dispose according to Local, State or Federal Laws.
Lamp Replacement
- Use the specified lamp for safety and performance.
- To replace the lamp, follow all instructions provided on page 111.
- Be sure to replace the lamp and filter when the message [THE LAMP HAS REACHED THE END OF ITS USABLE LIFE. PLEASE REPLACE THE LAMP AND FILTER.] appears. If you continue to use the lamp after the lamp has reached the end of its usable life, the lamp bulb may shatter, and pieces of glass may be scattered in the lamp case. Do not touch them as the pieces of glass may cause injury.
If this happens, contact your dealer for lamp replacement.
A Lamp Characteristic
The projector has a discharge lamp for special purposes as a light source.
A lamp has a characteristic that its brightness gradually decreases with age. Also repeatedly turning the lamp on and off will increase the possibility of its lower brightness.
The actual lamp life may vary depending upon the individual lamp, the environmental conditions and usage.

CAUTION:
- DO NOT TOUCH THE LAMP immediately after it has been used. It will be extremely hot. Turn the projector off and then disconnect the power cord. Allow at least one hour for the lamp to cool before handling.
- When removing the lamp from a ceiling-mounted projector, make sure that no one is under the projector. Glass fragments could fall if the lamp has been burned out.
About High Altitude mode
- Set [FAN MODE] to [HIGH ALTITUDE] when using the projector at altitudes approximately 5500 feet/1700 meters or higher.
Using the projector at altitudes approximately 5500 feet/1700 meters or higher without setting to [HIGH ALTITUDE] can cause the projector to overheat and the protector could shut down. If this happens, wait a couple minutes and turn on the projector.
- Using the projector at altitudes less than approximately 5500 feet/1700 meters and setting to [HIGH ALTITUDE] can cause the lamp to overcool, causing the image to flicker. Switch [FAN MODE] to [AUTO].
- Using the projector at altitudes approximately 5500 feet/1700 meters or higher can shorten the life of optical components such as the lamp.
About Copyright of original projected pictures:
Please note that using this projector for the purpose of commercial gain or the attraction of public attention in a venue such as a coffee shop or hotel and employing compression or expansion of the screen image with the following functions may raise concern about the infringement of copyrights which are protected by copyright law.
[ASPECT RATIO], [KEYSTONE], Magnifying feature and other similar features.
Turkish RoHS information relevant for Turkish market
This device is not intended for use in the direct field of view at visual display workplaces. To avoid incommodding reflections at visual display workplaces this device must not be placed in the direct field of view.
Power management function
The projector has power management functions. To reduce power consumption, the power management functions (1 and 2) are factory preset as shown below. To control the projector from an external device via a LAN or serial cable connection, use the on-screen menu to change the settings for 1 and 2.
1. STANDBY MODE (Factory preset: NORMAL)
To control the projector from an external device, select [NETWORK STANDBY] or [SLEEP] for [STANDBY MODE].
NOTE:
- When [NORMAL] is selected for [STANDBY MODE], the following terminals and functions will not work: COMPUTER OUT terminal, AUDIO OUT terminal, USB-B port, LAN functions, Mail Alert function, DDC/CI (Virtual Remote Tool). Please refer to page 71 about details.
- When [NETWORK STANDBY] has been set for [STANDBY MODE] and the LAN has been in link-down condition for 3 minutes, [STANDBY MODE] will transit into [NORMAL] automatically for the purpose to save the consumption power.
2. AUTO POWER OFF (Factory preset: 1 hour)
To control the projector from an external device, select [OFF] for [AUTO POWER OFF].
NOTE:
- When [1:00] is selected for [AUTO POWER OFF], you can enable the projector to automatically turn off in 60 minutes if there is no signal received by any input or if no operation is performed.
Important Information......i
1. Introduction.... 1
① What's in the Box? 1
② Introduction to the Projector 2
Features you'll enjoy: 2
About this user's manual....3
③ Part Names of the Projector.... 4
Front/Top 4
Rear 5
Top Features....6
Terminal Panel Features 7
④ Part Names of the Remote Control....8
Battery Installation....9
Remote Control Precautions 9
Operating Range for Wireless Remote Control 9
2. Projecting an Image (Basic Operation) 10
① Flow of Projecting an Image.... 10
② Connecting Your Computer/Connecting the Power Cord .... 11
③ Turning on the Projector.... 12
Note on Startup screen (Menu Language Select screen)....13
④ Selecting a Source 14
Selecting the computer or video source.... 14
⑤ Adjusting the Picture Size and Position 15
Adjust the Tilt Foot.... 16
Zoom....17
Focus 17
6 Correcting Keystone Distortion [KEYSTONE] 18
⑦ Optimizing Computer Signal Automatically 20
Adjusting the Image Using Auto Adjust....20
⑧ Turning Up or Down Volume 20
⑨ Turning off the Projector 21
10 When Moving the Projector.... 22
3. Convenient Features....23
① Turning off the Image and Sound.... 23
② Freezing a Picture.... 23
③ Magnifying a Picture....23
④ Changing Eco Mode/Checking Energy-Saving Effect 24
Using Eco Mode [ECO MODE] 24
Checking Energy-Saving Effect [CARBON METER] 25
⑤ Using 4-Point Corner to Correct Keystone Distortion [CORNERSTONE]....26
Cornerstone 26
Pincushion 28
6 Preventing the Unauthorized Use of the Projector [SECURITY] 30
⑦ Operating Your Computer’s Mouse Functions from the Projector’s Remote Control via the USB Cable (Remote Mouse Function) 33
⑧ Projecting Your Computer’s Screen Image from the Projector via the USB Cable (USB Display) 34
9 Projecting an Image from an Angle (Geometric Correction Tool in Image Express Utility Lite)....36
What you can do with GCT.... 36
Projecting an Image from an Angle (GCT) 36
4. Using the VIEWER.... 38
① Things you can do with the VIEWER.... 38
② Projecting the pictures on a USB memory (basic operation) 39
3 Slide screen operations.... 43
4 File list screen operations.... 44
⑤ Option menu.... 46
⑥ Changing the logo data (background image).... 47
5. Using On-Screen Menu.... 49
① Using the Menus 49
② Menu Elements....50
③ List of Menu Items....51
4 Menu Descriptions & Functions [INPUT]....54
HDMI1 and HDMI2....54
COMPUTER....54
VIDEO....54
USB-A....54
LAN....54
USB-B....54
⑤ Menu Descriptions & Functions [ADJUST]....55 [PICTURE]....55 [IMAGE OPTIONS]....58 [AUDIO]....62
⑥ Menu Descriptions & Functions [SETUP]....63 [GENERAL]....63 [MENU]....65 [INSTALLATION]....67 [OPTIONS(1)]....69 [OPTIONS(2)]....71
⑦ Menu Descriptions & Functions [INFO.] .... 74 [USAGE TIME].... 74 [SOURCE(1)].... 75 [SOURCE(2)].... 75 [WIRED LAN].... 75 [WIRELESS LAN].... 76 [VERSION].... 76 [OTHERS].... 76
⑧ Menu Descriptions & Functions [RESET]....77 Returning to Factory Default [RESET]....77
6. Installation and Connections....78
① Setting Up the Screen and the Projector....78 Throw Distance and Screen Size....85
② Making Connections .... 88 Connecting Your Computer.... 88 Connecting an External Monitor.... 90 Connecting Your DVD Player or Other AV Equipment .... 91 Connecting Component Input.... 92 Connecting HDMI Input.... 93 Connecting to a Wired LAN.... 94 Connecting to a Wireless LAN (Optional: NP05LM series).... 95
7. Connecting to a Network....96
① Things you can do by connecting the projector to a network.... 96
2 Connecting to MultiPresenter 97
3 NETWORK SETTINGS 99
4 Controlling the Projector by Using an HTTP Browser.... 104
8. Maintenance ...... 108
① Cleaning the Filter 108
② Cleaning the Lens.... 110
③ Cleaning the Cabinet.... 110
④ Replacing the Lamp and the Filter 111
9. Appendix......116
1 Troubleshooting .... 116 Feature of each indicator.... 116 Indicator Message (Status message) .... 116 Indicator Message (Error message).... 117 Explanation on the POWER indicator and standby state.... 118 Common Problems & Solutions .... 120 If there is no picture, or the picture is not displayed correctly.... 121
② Specifications.... 122
③ Cabinet Dimensions 124
④ Pin Assignments of D-Sub COMPUTER Input Terminal 126
⑤ Compatible Input Signal List 127
6 PC Control Codes and Cable Connection 128
⑦ Using the Computer Cable (VGA) to Operate the Projector (Virtual Remote Tool) ... 130
8 Troubleshooting Check List 132
9 REGISTER YOUR PROJECTOR! (for residents in the United States, Canada, and Mexico).... 134
1. Introduction
① What's in the Box?
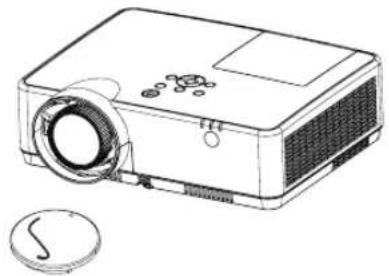
Make sure your box contains everything listed. If any pieces are missing, contact your dealer. Please save the original box and packing materials if you ever need to ship your projector.
Projector
natural_image
Line drawing of a projector with a circular inset showing a magnified view (no text or symbols)Lens cap (24F55631) Lens cap strap × 1 (24J23901)
natural_image
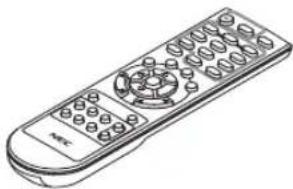
Line drawing of a remote control with keypad and scroll (no text or symbols)Remote control (7N901171)
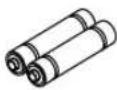
Batteries (AAA × 2)
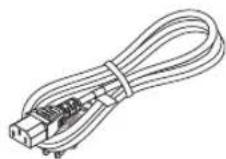
Power cord (US: 7N080242) (EU: 7N080028)
natural_image
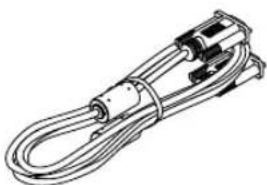
Line drawing of a coiled cable or wire with connectors (no text or symbols)Computer cable (VGA) (7N520089)
Strap × 1 (24J41711)
natural_image
Two overlapping gray rectangular panels with no text or symbols• Important Infomation (7N8N9391)
- Quick Setup Guide(UG) (7N8N9381)
Quick Setup Guide(G2) (7N8N9431)

NEC Projector CD-ROM
User's manual (PDF)
(7N952821)
For North America only
Limited warranty
For customers in Europe:
You will find our current valid Guarantee Policy on our Web Site:
www.nec-display-solutions.com
② Introduction to the Projector
This section introduces you to your new projector and describes the features and controls.
Features you'll enjoy:
• Quick Power Off, Direct Power Off
The projector can be put away immediately after the projector is powered down. No cool down period is required after the projector is turned off from the remote control or cabinet control panel.
The projector has a feature called “Direct Power Off”. This feature allows the projector to be turned off (even when projecting an image) by using the Main Power Switch or disconnecting the AC power supply.
To turn off the AC power supply when the projector is powered on, use a power strip equipped with a switch and a breaker.
• 0.18W(100-130 V AC)/0.26W (200-240 V AC) in standby condition with energy saving technology
Selecting [NORMAL] for [STANDBY MODE] from the menu can put the projector in power-saving mode that consumes only 0.18W(100-130 V AC)/0.26W (200-240 V AC).
- Carbon Meter
This feature will show energy-saving effect in terms of CO _2 emission reduction (kg) when the projector's [ECO MODE] is set to [AUTO ECO], [NORMAL], or [ECO].
The amount of CO _2 emission reduction will be displayed in the confirmation message at the time of power-off and in the INFO of the on-screen menu.
• Lamp life up to 15000 hours
Using in Eco Mode (ECO) allows you to prolong the projector's lamp life up to 15000 hours (up to 10000 hours in ECO MODE OFF).
• Two HDMI inputs support digital signals
The two HDMI inputs provide HDCP compatible digital signals. The HDMI input also supports audio signal.
• Integrated RJ-45 terminal for wired networking capability along with wireless networking capabilities
An RJ-45 terminal is standard. An optional USB Wireless LAN Unit is required for wireless LAN connection.
• INTELLIGENT CONNECTION
It enables easily to connect your projector to computers or smartphones, on which the application software, MultiPresenter, has been installed, by inputting PIN code.
• 16 W built-in speaker for an integrated audio solution
Powerful 16 watt monaural speaker provides volume need for large rooms.
- The supplied remote control allows you to assign a CONTROL ID to the projector
Multiple projectors can be operated separately and independently with the same single remote control by assigning an ID number to each projector.
- USB Display
Using a commercially available USB cable (compatible with USB 2.0 specifications) to connect the computer with the projector allows you to send your computer screen image to the projector without the need of a traditional computer cable (VGA).
- Convenient utility software (User Supportware)
This projector supports our utility software (NaViSet Administrator 2, Virtual Remote Tool, etc.) NaViSet Administrator 2 helps you control the projector by a computer via wired LAN connection. Virtual Remote Tool helps you perform operations by a virtual remote control such as projector's power on or off and signal selection via wired LAN connection. Moreover, it has function to send an image to the projector and register it as the logo data.
Image Express Utility Lite (for Windows) can be started from a commercially available USB memory or SD card without the need of installing on your computer.
Please visit our web site for downloading each software.
URL: https://www.nec-display.com/dl/en/index.html
• AUTO POWER ON and AUTO POWER OFF features
The DIRECT POWER ON, AUTO POWER ON, AUTO POWER OFF, and OFF TIMER features eliminate the need to always use the POWER button on the remote control or projector cabinet.
• Preventing unauthorized use of the projector
Enhanced smart security settings for keyword protection, cabinet control panel lock, security slot, and security chain opening to help prevent unauthorized access, adjustments and theft deterrence.
• High resolution up to WUXGA\*1
High resolution display - up to WUXGA compatible, XGA (ME402X/MC422X/MC372X/MC342X/MC302X) / WXGA (ME372W/MC382W/MC332W) / WUXGA (ME382U/ME342U) native resolution.
- An image with higher or lower resolution than the projector's native resolution (ME402X/MC422X/MC372X/MC342X/MC302X: 1024 × 768 / ME372W/MC382W/MC332W: 1280 × 800 / ME382U/ME342U: 1920 × 1200) will be displayed with Advanced AccuBlend.
*1 When WXGA MODE is set to ON.
- CRESTRON ROOMVIEW compatibility
The projector supports CRESTRON ROOMVIEW, allowing multiple devices connected in the network to be managed and controlled from a computer or controller.
About this user's manual
The fastest way to get started is to take your time and do everything right the first time. Take a few minutes now to review the user's manual. This may save you time later on. At the beginning of each section of the manual you'll find an overview. If the section doesn't apply, you can skip it.
③ Part Names of the Projector
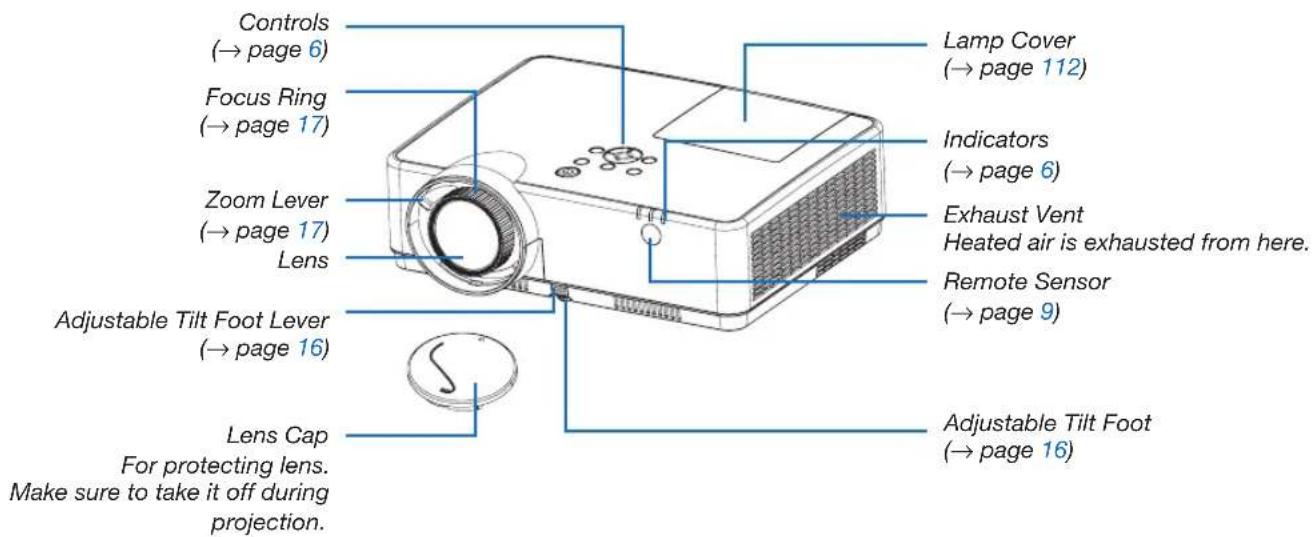
Front/Top
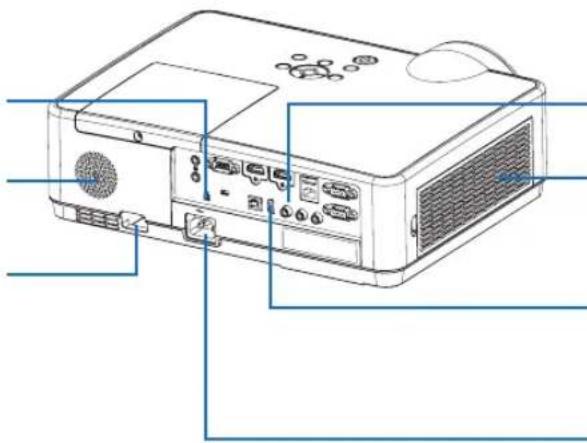
Rear
Built-in Security Slot (K)*
Monaural Speaker (16 W)
Security chain opening Attach an anti-theft device. The security chain opening accepts security wires or chains up to 0.18 inch/4.6 mm in diameter.
natural_image
Line drawing of a projector case with labeled ports and connectors (no text or symbols)Terminal Panel
(→ page 7)
Intake Vent / Filter Cover
(→ page 108, 114)
As the theft and dropping-off prevention measure, fix on the supplied strap.
AC Input
Connect the supplied power cord's three-pin plug here, and plug the other end into an active wall outlet.
(→ page 11)
* This security slot supports the MicroSaver ® Security System.
Top Features
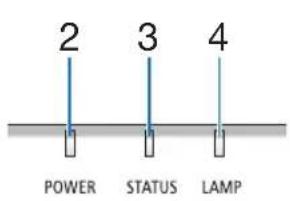
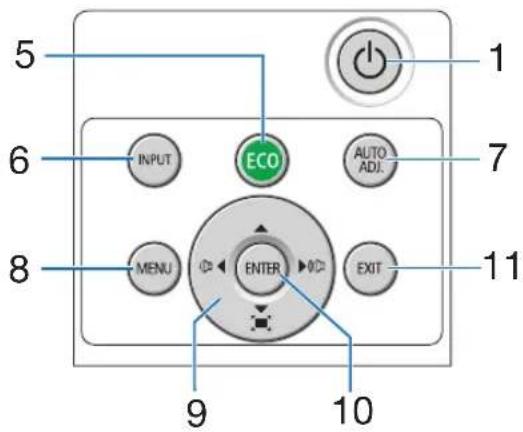
- ⏻(POWER) Button
(→ page 12, 21)
- POWER Indicator
(→ page 11, 12, 21, 116)
- STATUS Indicator
(→ page 116)
- LAMP Indicator
(→ page 111, 116)
- ECO Button
(→ page 24)
- INPUT Button
(→ page 14)
- AUTO ADJ. Button
(→ page 20)
- MENU Button
(→ page 49)
- ▲▼◀▶ / Volume Buttons ◀▶ / Keystone Buttons
(→ page 18, 20, 26, 49)
- ENTER Button
(→ page 49)
- EXIT Button
(→ page 49)
Terminal Panel Features
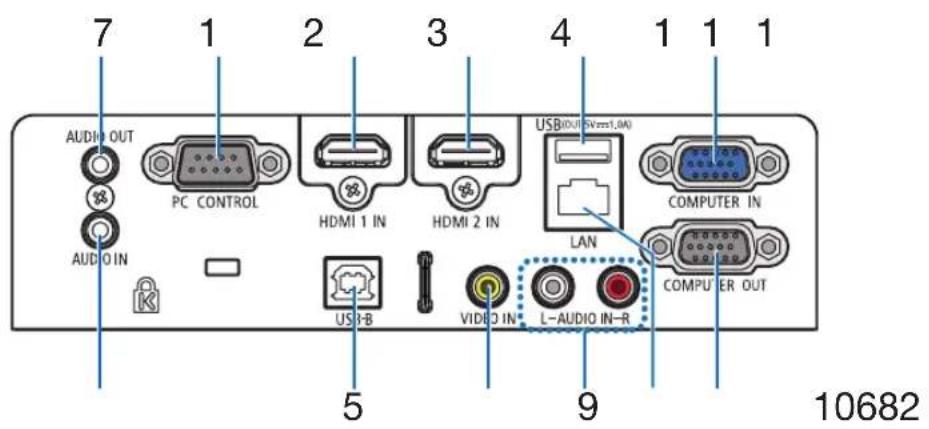
- COMPUTER IN/ Component Input Terminal (Mini D-Sub 15 Pin)
(→ page 11, 88, 92)
- COMPUTER AUDIO IN Mini Jack (Stereo Mini)
(→ page 88, 92)
- HDMI 1 IN Terminal (Type A)
(→ page 88, 89, 93)
- HDMI 2 IN Terminal (Type A)
(→ page 88, 89, 93)
- USB Port (Type B)
(→ page 33, 34, 88)
- COMPUTER OUT Terminal (Mini D-Sub 15 Pin)
(→ page 90)
- AUDIO OUT Mini Jack (Stereo Mini)
(→ page 90)
NOTE: The AUDIO OUT mini jack does not support earphone/headphone terminal.
- VIDEO IN Terminal (RCA)
(→ page 91)
- VIDEO AUDIO IN L/MONO, R (RCA)
(→ page 91)
- LAN Port (RJ-45)
(→ page 94)
- USB Port (Type A)
For USB memory or optional Wireless LAN unit ( page 39, 95)
- PC CONTROL Port (D-Sub 9 Pin)
(→ page 128)
Use this port to connect a PC or control system. This enables you to control the projector using serial communication protocol. If you are writing your own program, typical PC control codes are on page 128.
④ Part Names of the Remote Control
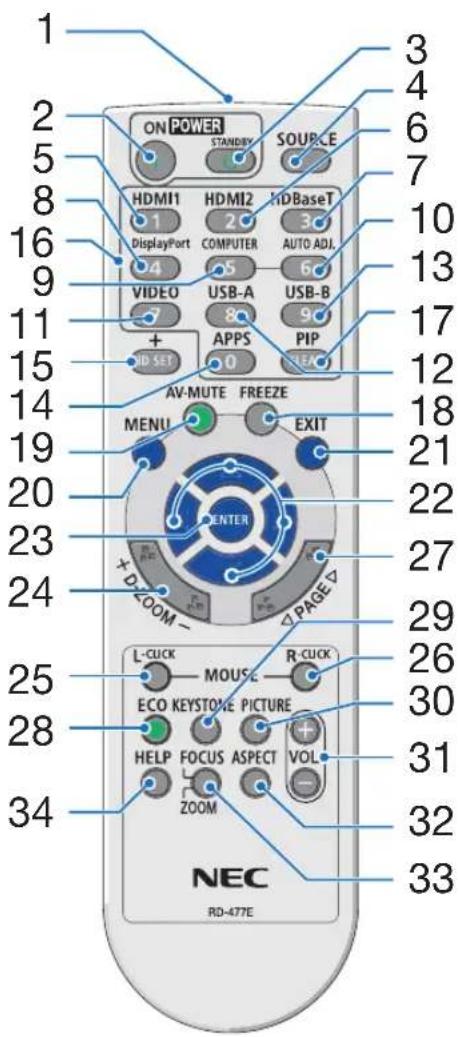
- Infrared Transmitter (→ page 9)
- POWER ON Button (→ page 12)
- POWER STANDBY Button (→ page 21)
- SOURCE Button (→ page 14)
- HDMI 1 Button (→ page 14)
- HDMI 2 Button (→ page 14)
- HDBaseT Button
(This button does not work on this series of projectors) - DisplayPort Button
(This button does not work on this series of projectors) - COMPUTER Button (→ page 14)
- AUTO ADJ. Button (→ page 20)
- VIDEO Button (→ page 14)
- USB-A Button (→ page 14, 39, 54)
- USB-B Button (→ page 14, 33, 54, 88)
- APPS Button (→ page 14)
- ID SET Button (→ page 68)
- Numeric Keypad Button/ CLEAR Button (→ page 68)
-
PIP Button (PIP button does not work on this series of projectors)
-
FREEZE Button (→ page 23)
-
AV-MUTE Button (→ page 23)
-
MENU Button (→ page 49)
-
EXIT Button (→ page 49)
-
▲▼◀▶ Button (→ page 49)
-
ENTER Button (→ page 49)
-
D-ZOOM (+)(−) Button (→ page 23, 24)
-
MOUSE L-CLICK Button* (→ page 33)
-
MOUSE R-CLICK Button* (→ page 33)
-
PAGE / Button (→ page 33)
-
ECO Button (→ page 24)
-
KEYSTONE Button (→ page 18, 26)
-
PICTURE Button (→ page 55, 57)
-
VOL. (+)(−) Button (→ page 20)
-
ASPECT Button (→ page 60)
-
FOCUS/ZOOM Button (This button does not work on this series of projectors)
-
HELP Button (→ page 74, 77, 113)
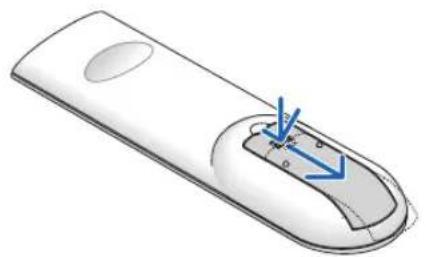
Battery Installation
-
Press firmly and slide the battery cover off.
-
Install new batteries (AAA). Ensure that you have the batteries' polarity (+/-) aligned correctly.
-
Slip the cover back over the batteries until it snaps into place. Do not mix different types of batteries or new and old batteries.
natural_image
Illustration of a remote control device with blue arrows indicating movement or change (no text or symbols)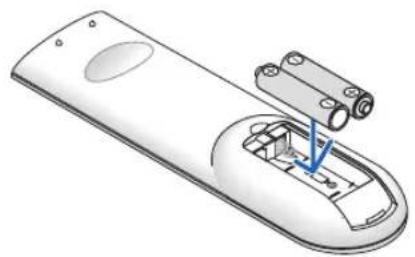
natural_image
Illustration of a remote control device with a handle and internal components (no text or symbols)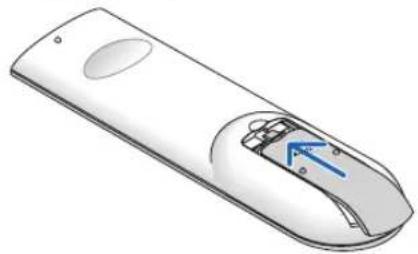
natural_image
Illustration of a remote control with a blue arrow indicating left side (no text or symbols)Remote Control Precautions
- Handle the remote control carefully.
- If the remote control gets wet, wipe it dry immediately.
- Avoid excessive heat and humidity.
- Do not short, heat, or take apart batteries.
- Do not throw batteries into fire.
- If you will not be using the remote control for a long time, remove the batteries.
- Ensure that you have the batteries' polarity (+/-) aligned correctly.
- Do not use new and old batteries together, or use different types of batteries together.
- Dispose of used batteries according to your local regulations.
Operating Range for Wireless Remote Control
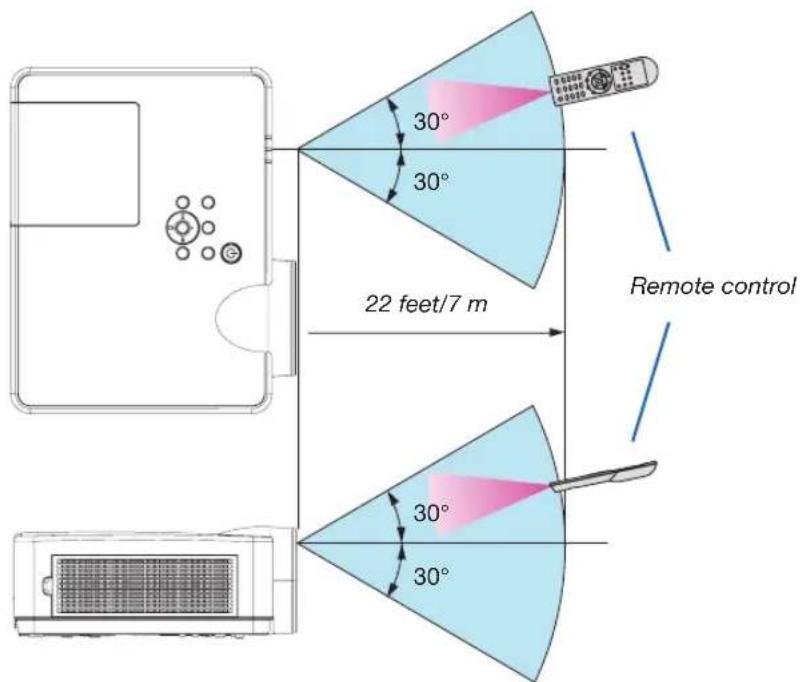
- The infrared signal operates by line-of-sight up to a distance of about 22 feet/7 m and within a 60-degree angle of the remote sensor on the projector cabinet.
- The projector will not respond if there are objects between the remote control and the sensor, or if strong light falls on the sensor. Weak batteries will also prevent the remote control from properly operating the projector.
2. Projecting an Image (Basic Operation)
This section describes how to turn on the projector and to project a picture onto the screen.
① Flow of Projecting an Image
Step 1
- Connecting your computer / Connecting the power cord (→ page 11)

Step 2
• Turning on the projector ( page 12)

Step 3
• Selecting a source ( page 14)

Step 4
- Adjusting the picture size and position (→ page 15)
- Correcting keystone distortion [KEYSTONE] (→ page 18)

Step 5
• Adjusting a picture and sound
- Optimizing a computer signal automatically (→ page 20)
- Turning up or down volume ( page 20)

Step 6
• Making a presentation

Step 7
• Turning off the projector ( page 21)

Step 8
- When Moving the Projector ( page 22)
② Connecting Your Computer/Connecting the Power Cord
1. Connect your computer to the projector.
This section will show you a basic connection to a computer. For information about other connections, see "6. Installation and Connections" on page 88.
Connect the computer cable (VGA) between the projector's COMPUTER IN terminal and the computer's port (mini D-Sub 15 Pin). Turn two thumb screws of both terminals to fix the computer cable (VGA).
2. Connect the supplied power cord to the projector.
First connect the supplied power cord's three-pin plug to the AC IN of the projector, and then connect the other plug of the supplied power cord in the wall outlet.
The projector's power indicator will start blinking orange.
* This will apply for both indicators when [NORMAL] is selected for [STANDBY MODE]. See the Power Indicator section. (→ page 116)
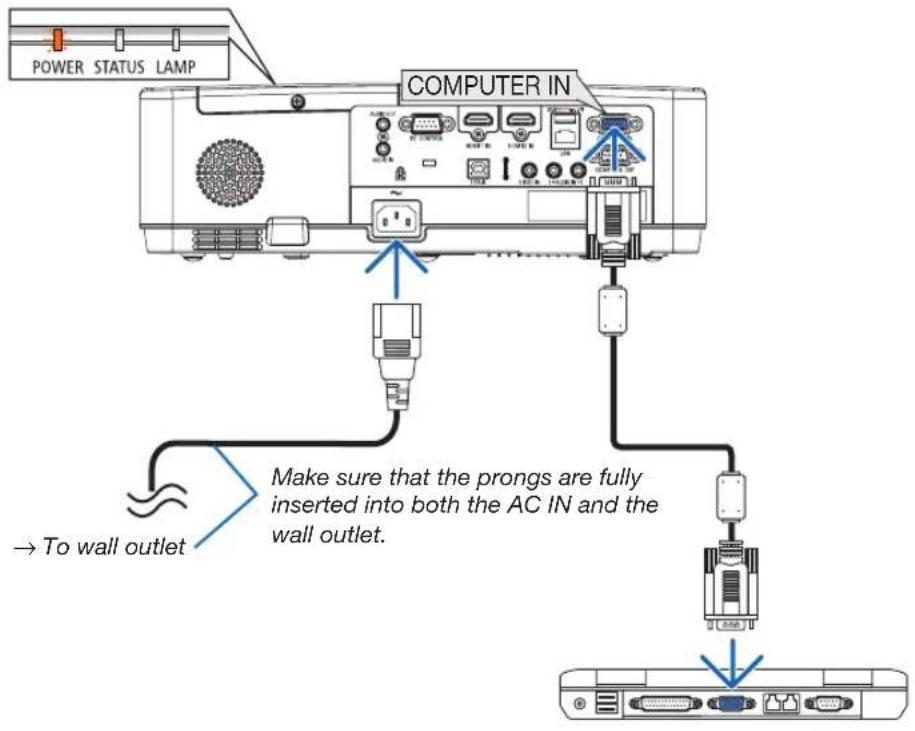

CAUTION:
Parts of the projector may become temporarily heated if the projector is turned off with the POWER button or if the AC power supply is disconnected during normal projector operation. Be careful to handle the projector.
③ Turning on the Projector
1. Remove the lens cap.
Press and hold both ends of the lens cap and pull it toward you.
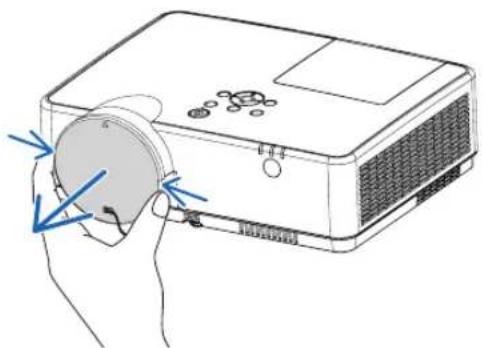
natural_image
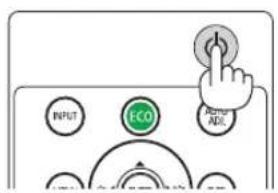
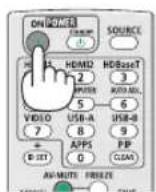
Illustration of a projector with a circular lens and blue arrows indicating motion (no text or symbols)2. Press the ⓊPOWER) button on the projector cabinet or the POWER ON button on the remote control.
The POWER indicator will blink and the projector will become ready to use.
TIP:
- When the message "Projector is locked! Enter your password." is displayed, it means that the [SECURITY] feature is turned on. (→ page 31)
After you turn on your projector, ensure that the computer or video source is turned on.
NOTE: When no input signal is present, the no-signal guidance is displayed (factory menu setting).
Standby Blinking Power On
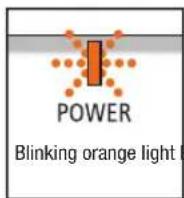
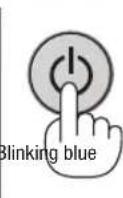
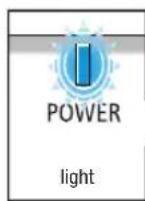
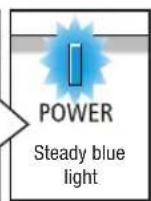
(→ page 116)
Note on Startup screen (Menu Language Select screen)
When you first turn on the projector, you will get the Startup menu. This menu gives you the opportunity to select one of the 30 menu languages.
To select a menu language, follow these steps:
- Use the ▲, ▼, ◀ or ▶ button to select one of the 30 languages from the menu.
PLEASE SELECT A MENU LANGUAGE.
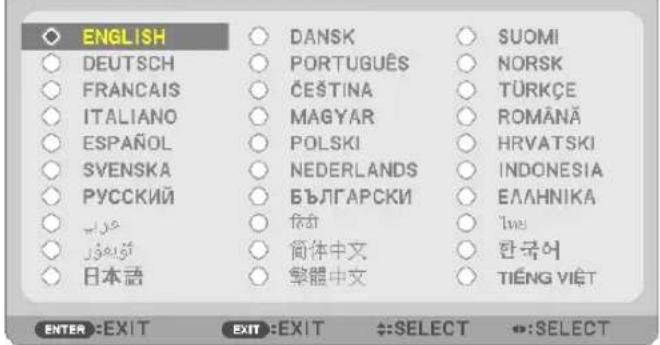
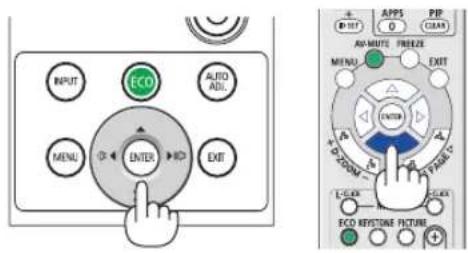
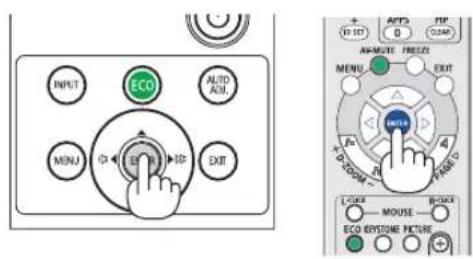
2. Press the ENTER button to execute the selection.
After this has been done, you can proceed to the menu operation.
If you want, you can select the menu language later.
(→ [LANGUAGE] on page 51 and 65)
NOTE:
- If the projector is shut off by DIRECT POWER OFF (pulling out the power cord) during projection, wait for 1 second at least for reconnect the power cord for turning on the projector.
Failing to do so could result in no power to the projector. (There will be no stand-by LED)
Should this happen, unplug the power cord and plug it in again. Turn on the main power.
• If one of the following things happens, the projector will not turn on.
- If the internal temperature of the projector is too high, the projector detects abnormal high temperature. In this condition, the projector will not turn on to protect the internal system. If this happens, wait for the projector's internal components to cool down.
- When the lamp reaches its end of usable life, the projector will not turn on. If this happens, replace the lamp.
- If the STATUS indicator lights orange with the power button pressed, it means that the [CONTROL PANEL LOCK] is turned on. Cancel the lock by turning it off. (→ page 67)
-
If the lamp fails to light, and if the POWER indicator blinks in red and the LAMP indicator lights in red, wait a full minute and then turn on the power.
-
While the POWER indicator is blinking blue in short cycles, the power cannot be turned off by using the power button.
- Immediately after turning on the projector, screen flicker may occur. This is normal. Wait 3 to 5 minutes until the lamp lighting is stabilized.
- When the projector is turned on, it may take some time before the lamp light becomes bright.
- If you turn on the projector immediately after the lamp is turned off or when the lamp temperature is high, the fans run without displaying an image for some time and then the projector will display the image.
④ Selecting a Source
Selecting the computer or video source
NOTE: Turn on the computer or video source equipment connected to the projector.
Detecting the Signal Automatically
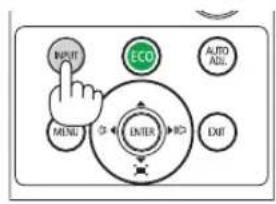
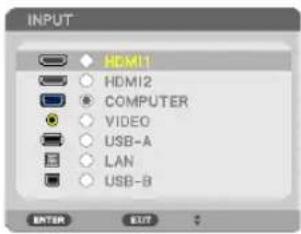
Press the INPUT button once. The projector will search for the available input source and display it. The input source will change as follows:
HDMI1 → HDMI2 → COMPUTER → VIDEO → USB-A → LAN → USB-B
- With the INPUT screen displayed, you can press the INPUT button a few times to select the input source.
TIP: If no input signal is present, the input will be skipped.
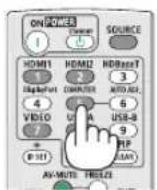
Using the Remote Control
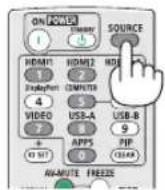
Press any one of the COMPUTER, HDMI1, HDMI2, VIDEO, USB-A, USB-B, or APPS buttons.
Selecting Default Source
You can so that it will be displayed each time the projector is turned on.
- Press the MENU button.
The menu will be displayed.
- Press the ▶ button twice to select [SETUP] and the ▼ button or the ENTER button to select [GENERAL].
- Press the ▶ button four times to select [OPTIONS(2)].
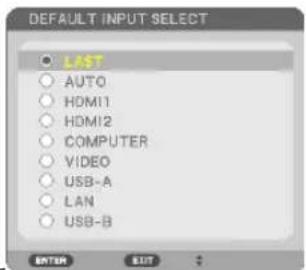
- Press the ▼ button five times to select [DEFAULT INPUT SELECT] and press the ENTER button.
The [DEFAULT INPUT SELECT] screen will be displayed.
(→ page 73)
- Select a source as the default source, and press the ENTER button.
- Press the EXIT button a few times to close the menu.
- Restart the projector.
The source you selected in step 5 will be projected.
TIP:
- When the projector is in Standby mode, applying a computer signal from a computer connected to the COMPUTER IN input will power on the projector and simultaneously project the computer's image.
([AUTO POWER ON] → page 72)
- On Windows 7, a combination of the Windows and P keys allows you to set up external display easily and quickly.
![INPUT ADJUST SETUP INFO. RESET OPTIONS(3) 2/2 STANDBY MODE NORMAL DIRECT POWER ON OFF AUTO POWER ON OFF AUTO POWER OFF 1:00 DEFAULT INPUT SELECT LAST CARBON CONVERT 0.505[kg-CD2/kWh] CURRENCY $ CURRENCY CONVERT 0.11[$/kWh] STATIC CONVERGENCE ENTER #SELECT EXIT#EXIT #MOVE COMPUTER ADVANCED](/content/2026/05/813417/images/041a00c6f70842c58a1e5567d8b9fe6520f2a4fcc9cfcc80c5c06cfc153726b2.jpg)
⑤ Adjusting the Picture Size and Position
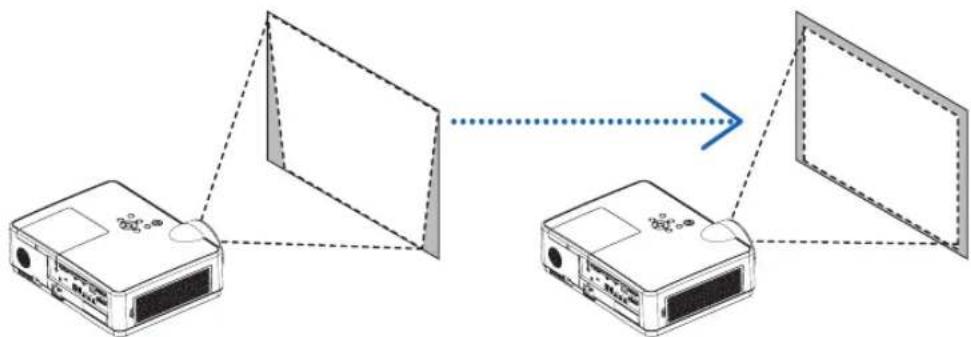
Use the adjustable tilt foot, the zoom function or the focus ring to adjust the picture size and position. In this chapter drawings and cables are omitted for clarity.
Adjusting the throw angle (the height of an image) [Tilt foot] (→ page 16)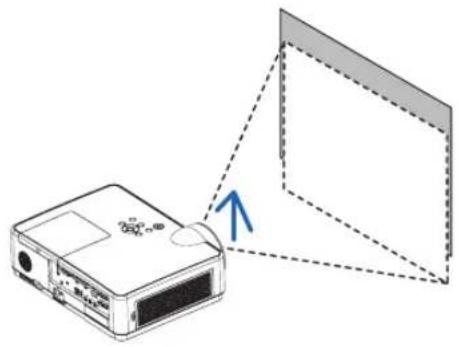 | Finely adjusting the size of an image [Zoom lever] (→ page 17)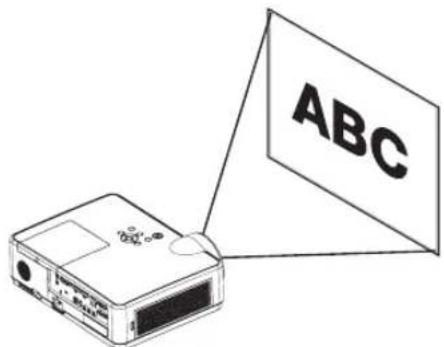 |
Adjusting the focus [Focus ring] (→ page 17)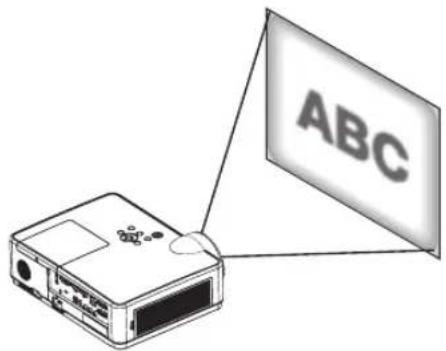 |
Adjusting the keystone correction [KEYSTONE]* (→ page 18)
flowchart
graph TD
    A["Device 1"] -->|Data Flow| B["Device 2"]
    B -->|Data Flow| C["Device 3"]
    style A fill:#f9f,stroke:#333
    style B fill:#bbf,stroke:#333
    style C fill:#dfd,stroke:#333
Automatic Keystone Correction function is turned on at the time of shipment. To perform keystone correction manually, see "6. Correcting Keystone Distortion [KEYSTONE]" on page 18.
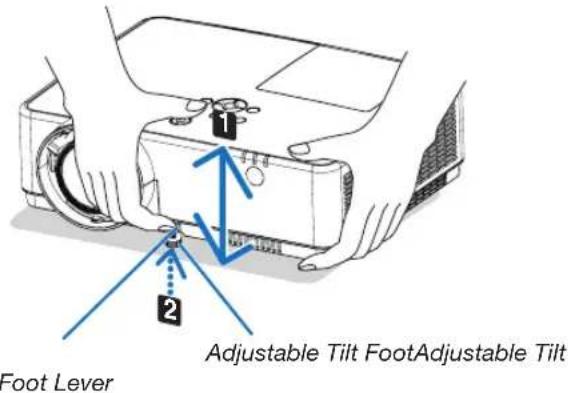
Adjust the Tilt Foot
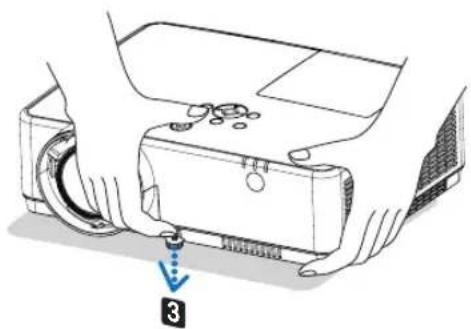
- Lift the front edge of the projector.

CAUTION:
Do not try to touch the exhaust vent during Tilt Foot adjustment as it can become heated while the projector is turned on and after it is turned off.
-
Push up and hold the Adjustable Tilt Foot Lever on the front of the projector to extend the adjustable tilt foot.
-
Lower the front of the projector to the desired height.
-
Release the Adjustable Tilt Foot Lever to lock the Adjustable tilt foot.
The tilt foot can be extended up to 1.6 inch/40 mm.
There is approximately 10 degrees (up) of adjustment for the front of the projector.

CAUTION:
- Do not use the tilt-foot for purposes other than originally intended. Misuses such as using the tilt foot to carry or hang (from the wall or ceiling) the projector can cause damage to the projector.
natural_image
Diagram of a projector with a labeled component (no text or symbols present)Zoom
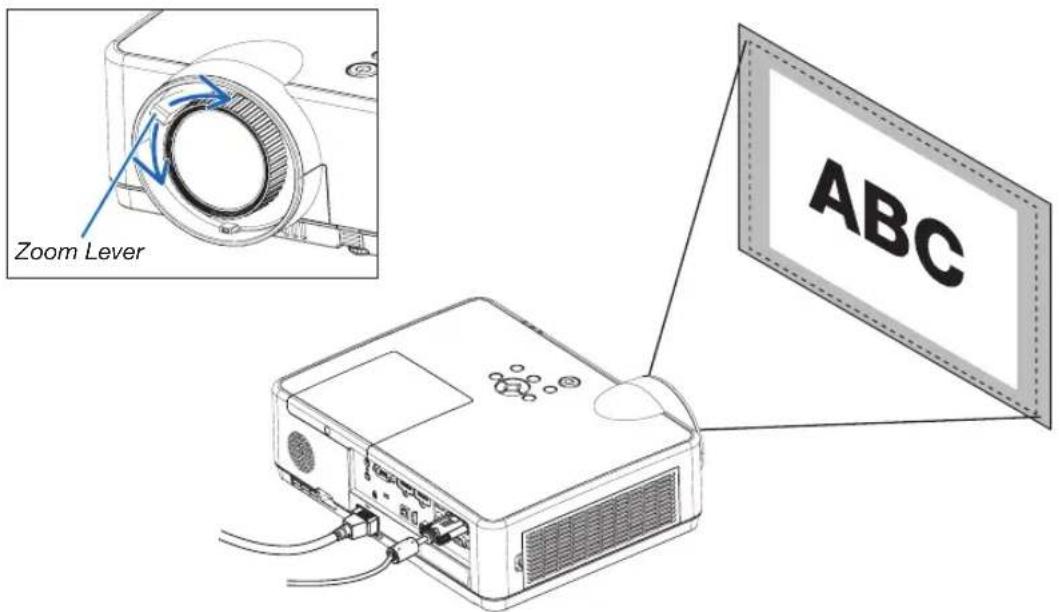
Use the ZOOM lever to adjust the image size on the screen.
Focus
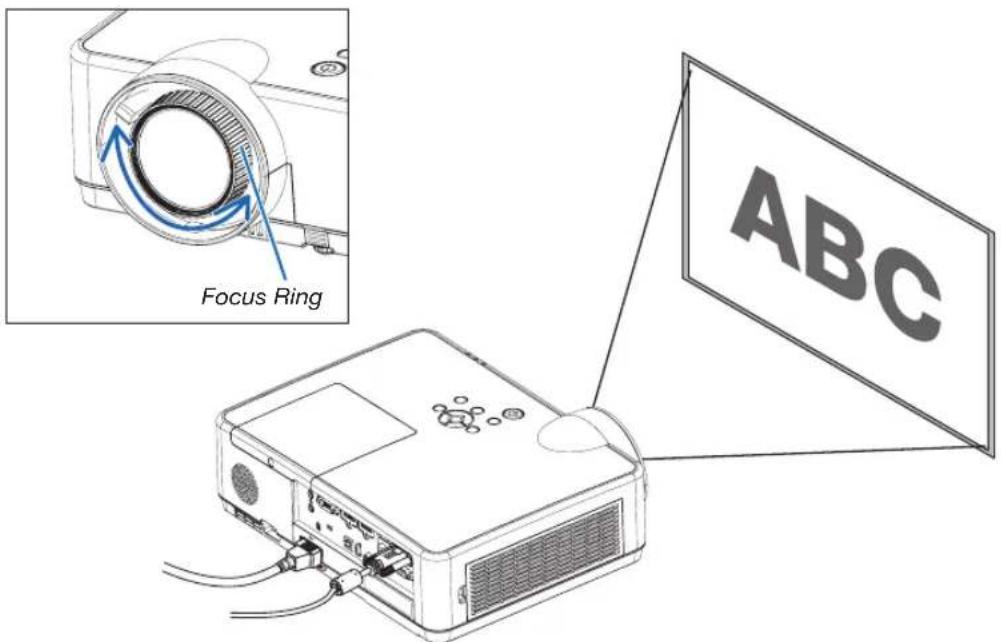
Use the FOCUS ring to obtain the best focus.
⑥ Correcting Keystone Distortion [KEYSTONE]
When the projector and screen are not set correctly, keystone distortion occurs. For correcting this distortion, you can use the "Keystone" function, a digital technology that can adjust for keystone-type distortion, resulting in a crisp, square image.
The function of Automatic Keystone Correction is ON as the default factory setting.
The following procedure explains how to use the [KEYSTONE] screen from the menu to correct trapezoidal distortions when the projector is placed diagonally to the screen.
• Before performing KEYSTONE correction
The KEYSTONE correction has four features, KEYSTONE HORIZONTAL, KEYSTONE VERTICAL, PINCUSHION LEFT/RIGHT, PINCUSHION TOP/BOTTOM, and CORNERSTONE. If the value of either CONERSTONE or PIN-CUSHION has corrected, KEYSTONE HORIZONTAL and KEYSTONE VERTICAL are disabled. In this case, RESET the corrected values and restart to correct distortion.
![NEC MC332W - ⑥ Correcting Keystone Distortion [KEYSTONE] - 1](/content/2026/05/813417/images/beafbbcfe9ca0bb95ee8695bf2c9c31d69badf963a35643e30781cf73978c864.jpg)
flowchart
graph LR
    A["Light Blue Shape"] --> B["Empty Square"]
    B --> C["Left Arrow"]
1. Press the ▼ button on the projector cabinet.
The Keystone screen will be displayed on the screen.
- Press the KEYSTONE button when using the remote control.
• See page for PINCUSHION.
• See page for CORNERSTONE.
• See page for RESET.
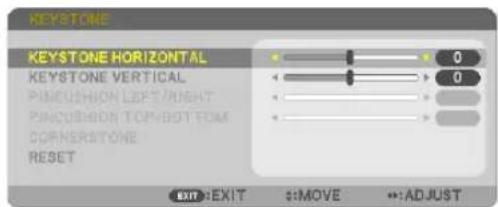
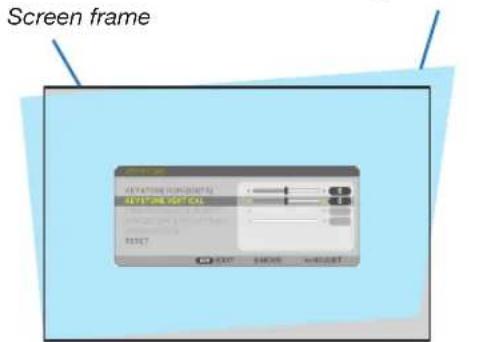
2. Press the ▼ button to select [KEYSTONE VERTICAL] and then use the ◀ or ▶ so that the left and right sides of the projected image are parallel.
* Adjust the vertical keystone distortion.
Projected area
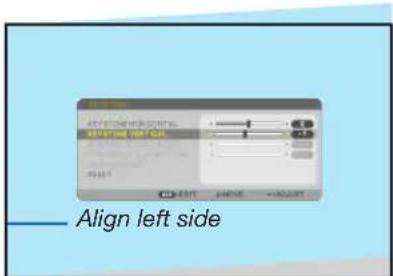
3. Align the left (or right) side of the screen with the left (or right) side of the projected image.
- Use the shorter side of the projected image as the base.
• In the right example, use the left side as the base.
- Press the ▲ button to select [KEYSTONE HORIZONTAL] and then use the ◀ or ▶ so that the top and bottom sides of the projected image are parallel.
- Adjust the horizontal keystone distortion.
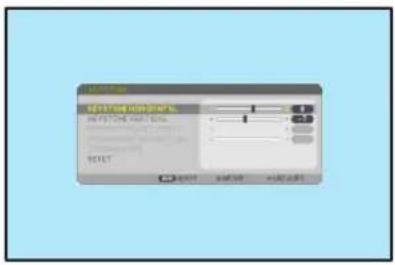
- Repeat steps 2 and 4 to correct keystone distortion.
- After completing Keystone correction, press the EXIT button.
The Keystone screen will disappear.
- To perform Keystone correction again, press the ▼ button to display the Keystone screen and repeat above steps 1 to 6.
natural_image
Plain light blue rectangle with a thin black border (no text or symbols)To return the keystone adjustments to default:
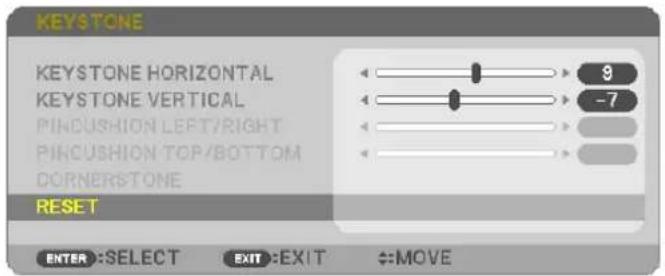
- Press the ▼ button to select [RESET] and press the ENTER button.
- Press the ◀ or ▶ button to select [YES] and press the ENTER button.
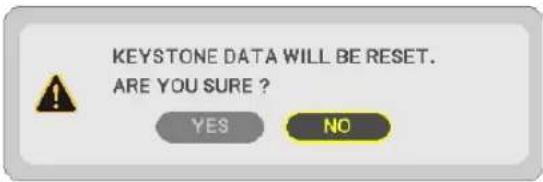
The adjustments will be reset.
All the adjustments for all the five items will be reset at the same time.
- The KEYSTONE feature can cause an image to be slightly blurred because the correction is made electronically.
⑦ Optimizing Computer Signal Automatically Adjusting the Image Using Auto Adjust
Optimizing a computer image automatically. (COMPUTER)
Press the AUTO ADJ. button to optimize a computer image automatically. This adjustment may be necessary when you connect your computer for the first time.
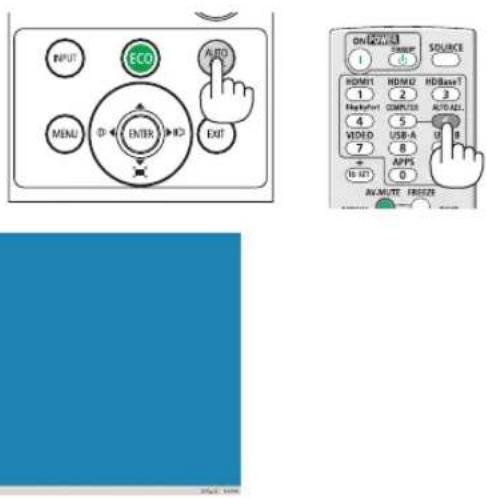
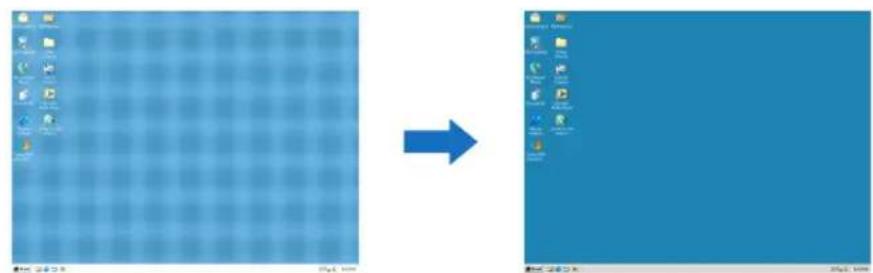
[Poor picture] [Adjusted picture]
NOTE:
Some signals may take time to display or may not be displayed correctly.
- If the Auto Adjust operation cannot optimize the computer signal, try to adjust [HORIZONTAL], [VERTICAL], [CLOCK], and [PHASE] manually. (→ page 58, 59)
⑧ Turning Up or Down Volume
Sound level from the speaker or audio output can be adjusted.
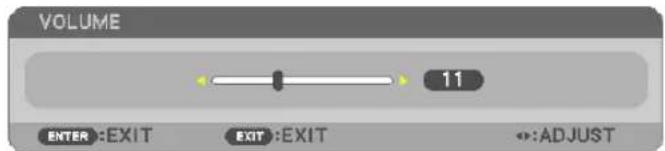
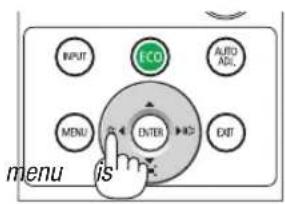
TIP: When no menus appear, the ◀ and ▶ buttons on the projector cabinet work as a volume control.
NOTE:
- Volume control is not available with the ◀ or ▶ button when an image is magnified by using the D-ZOOM (+) button or displayed.
- Volume control is not available with the ◀ or ▶ button when VIEWER is used.
TIP: The [BEEP] sound volume cannot be adjusted. To turn off the [BEEP] sound, from the menu, select [SETUP] → [OPTIONS (1)] → [BEEP] → [OFF].
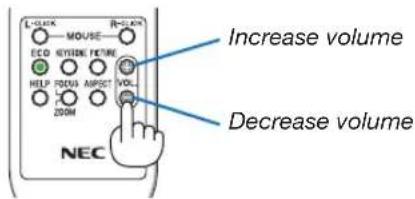
when the
⑨ Turning off the Projector
To turn off the projector:
- First, press the POWER) button on the projector cabinet or the STANDBY button on the remote control. The confirmation message will be displayed.
![POWER OFF ARE YOU SURE ? YES NO CARBON SAVINGS-SESSION 0.000[g-CO2] LAMP LIFE REMAINING 100 [%]](/content/2026/05/813417/images/04cadb4d69f4afc0cc113b12073172bcf038da89d7eaae883f8ba406bd69588c.jpg)
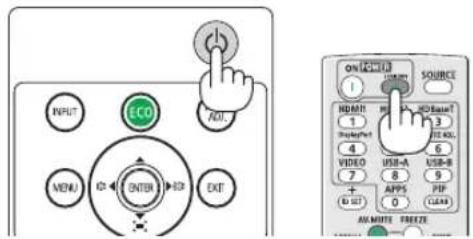
2. Secondly, press the ENTER button or press (POWER) or the STANDBY button again.
The lamp will turn off and the projector will go into standby mode. When in standby mode, the POWER indicator will blinking orange and the STATUS indicator will turn off when [NORMAL] is selected for [STANDBY MODE].
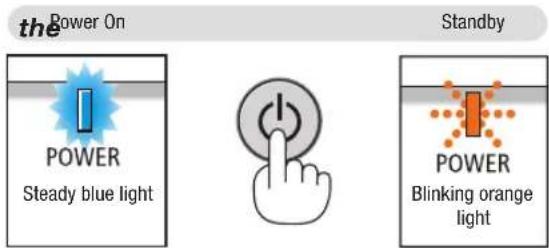

CAUTION:
Parts of the projector may become temporarily heated if the projector is turned off with the POWER button or if the AC power supply is disconnected during normal projector operation. Use caution when picking up the projector.
NOTE:
• While the power indicator is blinking blue in short cycles, the power cannot be turned off.
• You cannot turn off the power for 60 seconds immediately after turning it on and displaying an image.
- Do not disconnect the AC power supply to the projector within 10 seconds after making adjustment or setting changes and closing the menu. Doing so can cause loss of adjustments and settings.
⑩ When Moving the Projector
Preparation: Make sure that the projector is turned off.
-
Put on the lens cap.
-
Unplug the power cord.
-
Disconnect any other cables.
- Remove the USB memory or the wireless LAN Unit if it is inserted into the projector. (→ page 41, 95)
3. Convenient Features
① Turning off the Image and Sound
Press the AV-MUTE button to turn off the image and sound for a short period of time. Press again to restore the image and sound.
The projector's power-saving function will work 10 seconds after the image is turned off.
As a result, the lamp power will be reduced.
NOTE:
• Even though the image is turned off, the menu still remains on the screen.
• Sound from the AUDIO OUT jack (Stereo mini) can be turned off.
- Even when the power-saving function works, the lamp power may be restored to its original level temporarily.
- To restore the image, even if you press the AV-MUTE button immediately after the start of the power-saving function, the lamp brightness may not be restored to its original level.
② Freezing a Picture
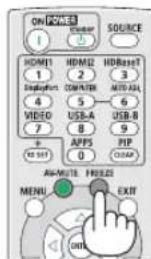
Press the FREEZE button to freeze a picture. Press again to resume motion.
NOTE: The image is frozen but the original video is still playing back.
- This feature can not be used when USB-A is selected as the input terminal.
③ Magnifying a Picture
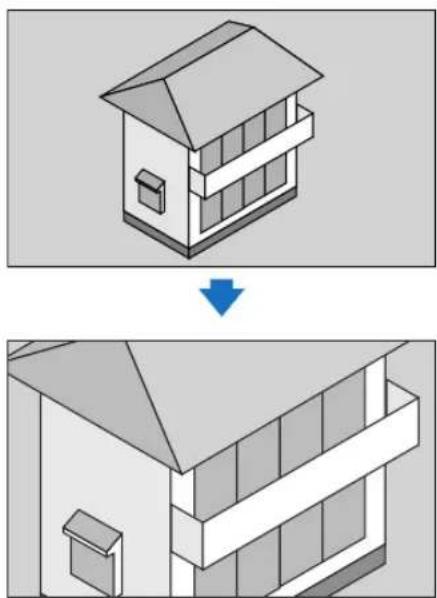
You can enlarge the picture up to four times.
NOTE:
- The maximum magnification may be less than four times depending on the signal.
• This feature can not be used when LAN, and USB-B is selected as the input terminal.
To do so:
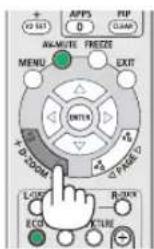
1. Press the D-ZOOM (+) button to magnify the picture.
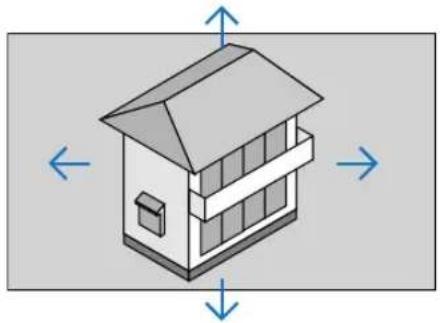
To move the magnified image, use the ▲,▼,◀ or ▶ button.
natural_image
Diagram showing a house with a roof and window, before and after structural change (no text or symbols)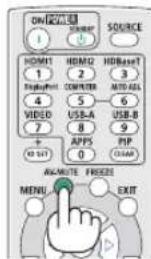
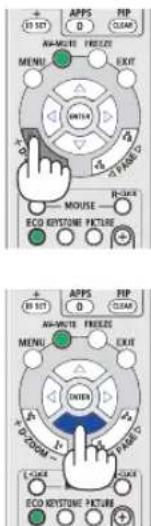
2. Press the ▲▼◀▶ button.
The area of the magnified image will be moved.
natural_image
Isometric illustration of a two-story house with directional arrows indicating orientation (no text or symbols)3. Press the D-ZOOM (-) button.
Each time the D-ZOOM (−) button is pressed, the image is reduced.
NOTE:
• The image will be magnified or demagnified at the center of the screen.
- Displaying the menu will cancel the current magnification.
④ Changing Eco Mode/Checking Energy-Saving Effect Using Eco Mode [ECO MODE]
The ECO MODE (NORMAL and ECO) increases lamp life, while lowering power consumption and cutting down on CO_2 emissions.
Four brightness modes of the lamp can be selected: [OFF], [AUTO ECO], [NORMAL] and [ECO] modes.
| [ECO MODE] Description Status of LAMP indicator | ||||
| [OFF] The lamp brightness is 100%. | ![NEC MC332W - ④ Changing Eco Mode/Checking Energy-Saving Effect Using Eco Mode [ECO MODE] - 1](/content/2026/05/813417/images/b17e2437899f30c72b0cdb2116cec4bc24b57356cf4bd63c9760ba1605d73c21.jpg) depending on depending on | Steady Green light | ||
[AUTO ECO]![NEC MC332W - ④ Changing Eco Mode/Checking Energy-Saving Effect Using Eco Mode [ECO MODE] - 2](/content/2026/05/813417/images/a1ca5cd8ef1279dd28ebf4bbbcae8acb1f370863372eb4ca888923300b8d4a6d.jpg) | Lamp power consumption will be changed between [OFF] and [NORMAL] automatically according to picture levelNOTE: A bright gradation may be less visible the image. | |||
[NORMAL]![NEC MC332W - ④ Changing Eco Mode/Checking Energy-Saving Effect Using Eco Mode [ECO MODE] - 3](/content/2026/05/813417/images/13ea220131ee854ef48ae63fffec26a3179866e879d413fcab2939a1f56d31ec.jpg) | Lamp power consumption: approx. 80% brightness (MC372X: 86%). The lamp life will extend by lowering the lamp power. | ![NEC MC332W - ④ Changing Eco Mode/Checking Energy-Saving Effect Using Eco Mode [ECO MODE] - 4](/content/2026/05/813417/images/42bab42da2b638466a4c9a4da8ec4ecd70d4f8515050ca8b9da41372f8f490bb.jpg) | Blinking Green light | |
[ECO]![NEC MC332W - ④ Changing Eco Mode/Checking Energy-Saving Effect Using Eco Mode [ECO MODE] - 5](/content/2026/05/813417/images/ddcf892d776d3a74d2c14eb3a6fa741bbf316897525b1e2aad8d4bb7196cbdc0.jpg) | Lamp power consumption: approx. 67% brightness (MC372X: 72%). The lamp life will extend longer than the one on NORMAL mode by controlling power appropriate for the lamp. | |||
To turn on the [ECO MODE], do the following:
-
Press the ECO Button on the remote control to display [ECO MODE] screen.
-
Press the ECO button again to select a mode you wish.
• Each time the ECO button is pressed, the choices will be changed:
OFF → AUTO ECO → NORMAL → ECO → OFF
TIP:
• The leaf symbol at the bottom of the menu shows the current selection of ECO mode.
![NEC MC332W - ④ Changing Eco Mode/Checking Energy-Saving Effect Using Eco Mode [ECO MODE] - 6](/content/2026/05/813417/images/afe160c983bee4998bafe3ee00ea5715491ace4ece1192a123bc8c404e1e7fda.jpg)
NOTE:
- The [ECO MODE] can be changed by using the menu. Select [SETUP] → [GENERAL] → [ECO MODE].
- The lamp life remaining and lamp hours used can be checked in [USAGE TIME]. Select [INFO.] →[USAGE TIME].
- The projector is always in [NORMAL] for 90 seconds after the lamp is turned on and while the POWER indicator is blinking blue. The lamp condition will not be affected even when [ECO MODE] is changed.
- After a lapse of 1 minute from when the projector displays no-signal guidance, a blue, black or logo screen, [ECO MODE] will automatically switch to [ECO]. The projector will return to its original setting once a signal is accepted.
- If the projector is overheated in [OFF] mode, there may be a case where the [ECO MODE] automatically changes to [NORMAL] mode to protect the projector. When the projector is in [NORMAL] mode, the picture brightness decreases. When the projector comes back to normal temperature, the [ECO MODE] returns to its original setting.
Thermometer symbol [ ] indicates the [ECO MODE] is automatically set to [NORMAL] mode because the internal temperature is too high.
- Immediately after [ECO MODE] is changed from [ECO] to one of [OFF], [AUTO ECO], or [NORMAL], the lamp brightness may decrease temporarily. This is not a malfunction.
Checking Energy-Saving Effect [CARBON METER]
This feature will show energy-saving effect in terms of CO_2 emission reduction (kg) when the projector's [ECO MODE] is set to [AUTO ECO], [NORMAL], or [ECO]. This feature is called as [CARBON METER].
There are two messages: [TOTAL CARBON SAVINGS] and [CARBON SAVINGS-SESSION]. The [TOTAL CARBON SAVINGS] message shows the total amount of CO_2 emission reduction from the time of shipment up to now. You can check the information on [USAGE TIME] from [INFO.] of the menu. ( page 74)
![INPUT ADJUST SETUP INFO. RESET USAGE TIME • SOURCE(1) • SOURCE(2) 1/3 LAMP LIFE REMAINING LAMP HOURS USED 00000[H] FILTER HOURS USED 00000[H] TOTAL CARBON SAVINGS 0.000[kg-CO2] TOTAL COST SAVINGS 0.00[$] 100% EXIT:EXIT +:MOVE +:MOVE HDMI1 ADVANCED](/content/2026/05/813417/images/c952434b1c6b47da97269c2d1eb070a695656a2e7a87082f5586de6ae20e2be0.jpg)
The [CARBON SAVINGS-SESSION] message shows the amount of CO_2 emission reduction between the time of changing to ECO MODE immediately after the time of power-on and the time of power-off. The [CARBON SAVINGS-SESSION] message will be displayed in the [POWER OFF/ ARE YOU SURE?] message at the time of power-off.
![POWER OFF ARE YOU SURE ? YES NO CARBON SAVINGS-SESSION 0.000[g-CO2] LAMP LIFE REMAINING 100 [%]](/content/2026/05/813417/images/05ca5a30fa3469c7d8b547f3ab2fb4463da22574e855b48fba0e5686414faca6.jpg)
TIP:
- The formula as shown below is used to calculate the amount of C_2 emission reduction.
Amount of CO_2 emission reduction = (Power consumption in OFF for ECO MODE – Power consumption in AUTO ECO/NORMAL/ECO for ECO MODE) × CO_2 conversion factor.* When the image is turned off with the AV-MUTE button, the amount of CO_2 emission reduction will also increase.
* Calculation for amount of CQemission reduction is based on an OECD publication “CQEmissions from Fuel Combustion, 2008 Edition”.
• The [TOTAL CARBON SAVINGS] is calculated based on savings recorded in 15 minutes intervals. - This formula will not apply to the power consumption which is not affected by whether [ECO MODE] is turned on or off.
⑤ Using 4-Point Corner to Correct Keystone Distortion [CORNERSTONE]
Use the [CORNERSTONE] and [PINCUSHION] features to correct keystone (trapezoidal) distortion to make the top or bottom and the left or right side of the screen longer or shorter so that the projected image is rectangular.
Before performing correction
The KEYSTONE correction has features, KEYSTONE (HORIZONTAL/VERTICAL), PINCUSHION (LEFT/RIGHT, TOP/BOTTOM), and CORNERSTONE. If the value of either CONERSTONE or PINCUSHION has corrected, KEYSTONE HORIZONTAL and KEYSTONE VERTICAL are disabled. In this case, RESET the corrected values and restart to correct distortion.
Cornerstone
1. Press the KEYSTONE button with no menu displayed.
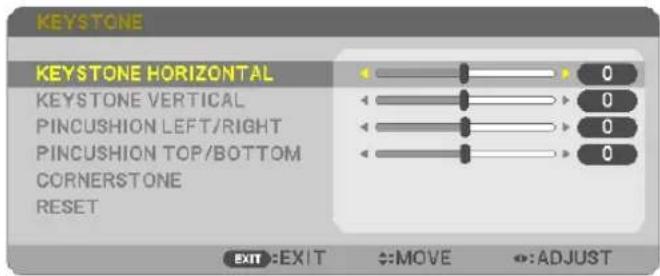
The KEYSTONE screen will be displayed.
- Press the KEYSTONE button when using the remote control.
• See page for PINCUSHION.
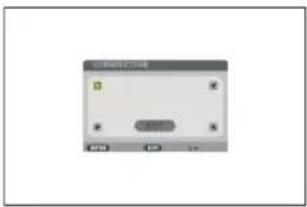
2. Press the ▼ button to select [CORNERSTONE] and press the ENTER button.
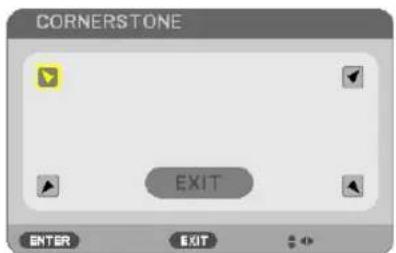
The drawing shows the upper left icon (▼) is selected.
The CORNERSTONE screen will be displayed.
3. Project an image so that the screen is smaller than the area of the raster.
4. Pick up any one of the corners and align the corner of the image with a corner of the screen.
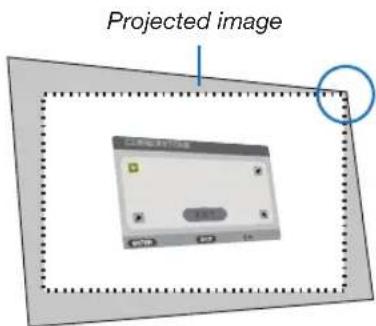
The drawing shows the upper right corner.
TIP: If either CORNERSTONE or PINCUSION is adjusted, the options KEYSTONE VERTICAL and KEYSTONE HORIZONTAL become unavailable. In this case, RESET the corrected values and restart to correct distortion.
- Use the ▲▼◀▶ button to select one icon (▲) which points in the direction you wish to move the projected image frame.
- Press the ENTER button.
- Use the ▲▼◀▶ button to move the projected image frame as shown on the example.
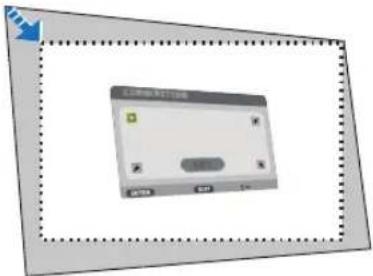
- Press the ENTER button.
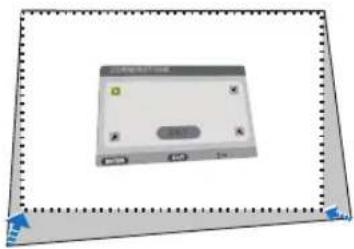
natural_image
Simple illustration of a computer monitor with control buttons and a small screen (no text or symbols)- Use the ▲▼◀▶ button to select another icon which points in the direction.
On the Cornerstone adjustment screen, select [EXIT] or press the EXIT button on the remote control.
The confirmation screen is displayed.
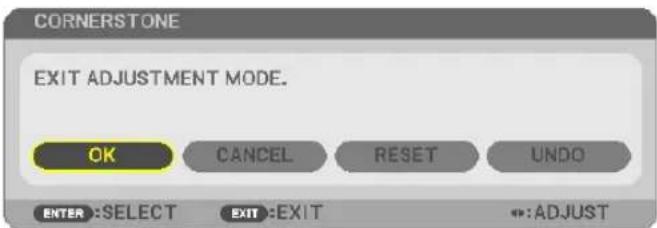
- Press the ◀ or ▶ button to highlight the [OK] and press the ENTER button.
This completes the Cornerstone correction.
Selecting [CANCEL] will return to the adjustment screen without saving changes (Step 3).
Selecting [RESET] will return to the factory default.
Selecting [UNDO] will exit without saving changes.
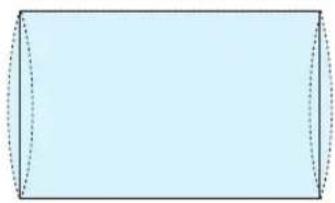
Pincushion
By this feature, it enables to adjust left and right side or top and bottom side independently for reforming pincushion distortion.
1. Press the KEYSTONE button with no menu displayed.
The KEYSTONE screen will be displayed.
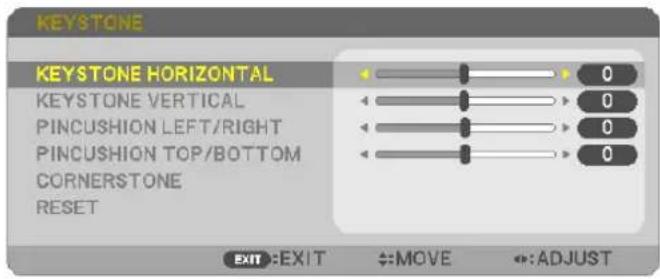
- Press the KEYSTONE button when using the remote control.
2. Press the ▼ or ▲ button to select [PINCUSHION LEFT/RIGHT] or [PINCUSHION TOP/BOTTOM].
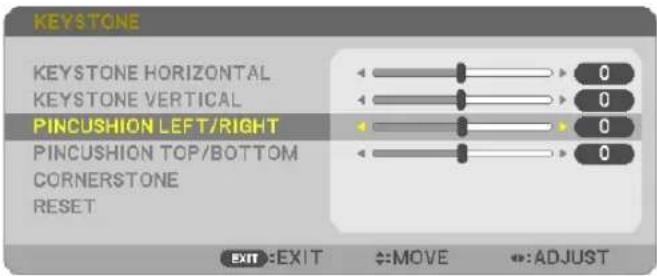
3. Press the ◀ or ▶ button to correct distortion.
NOTE:
- The [PINCUSHION LEFT/RIGHT] or [PINCUSHION TOP/BOTTOM] item is not available when [KEYSTONE HORIZONTAL], [KEYSTONE VERTICAL] or [CORNERSTONE] is activated.
• Before performing correction, set the lens shift to the center position.
4. Press the EXIT when PINCUSHION adjustment is completed.
natural_image
Simple 3D rectangular prism diagram with dashed lines indicating hidden edges (no text or symbols)NOTE:
• Even when the projector is turned on, the last used correction values are applied.
- [PINCUSHION] and [CORNERSTONE] corrections can cause the image to be slightly blurred because the correction is made electronically.
Reset the keystone and pincushion adjustment to the default value
1. Press the KEYSTONE button with no menu displayed.
On the displayed KEYSTONE menu, set the cursor at RESET using the ▼ button and press ENTER button.
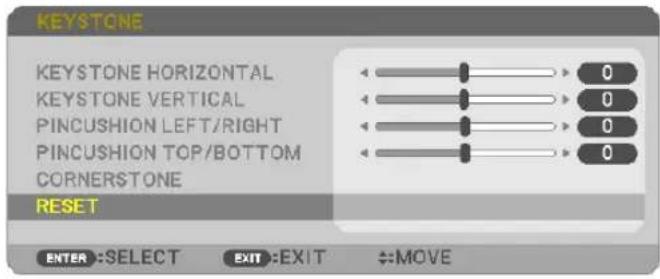
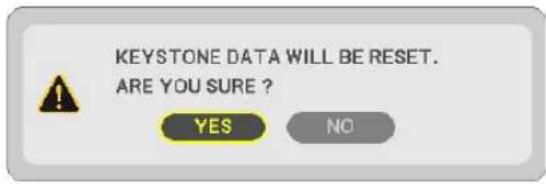
- Confirmation message is displayed on.
2. Move the cursor onto YES using either ◀ or ▶ button and then press the ENTER.
NOTE:
- All adjusted values set in the KEYSTONE adjustment are reset to initial values.
TIP:
Adjustable range of the KEYSTONE and the CORNERSTONE:
| Horizontal Direction | Vertical Direction | |
| CORNERSTONE | Approx. ± 30^ (Max) | Approx. ± 30^ (Max) |
| KEYSTONE |
Adjustable range may be narrower depending on input signal.
⑥ Preventing the Unauthorized Use of the Projector [SECURITY]
A keyword can be set for your projector using the Menu to avoid operation by an unauthorized user. When a keyword is set, turning on the projector will display the Keyword input screen. Unless the correct keyword is entered, the projector cannot project an image.
- The [SECURITY] setting cannot be cancelled by using the [RESET] of the menu.
To enable the Security function:
1. Press the MENU button.
The menu will be displayed.
- Press the ▶ button twice to select [SETUP] and press the ▼ button or the ENTER button to select [GENERAL].
- Press the ▶ button to select [INSTALLATION].
- Press the ▼ button three times to select [SECURITY] and press the ENTER button.
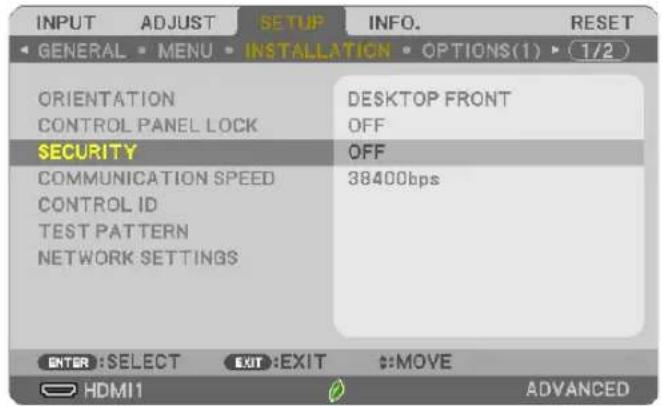
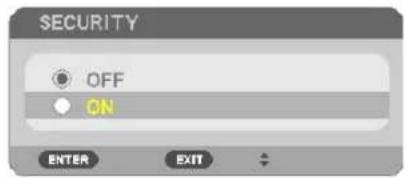
The OFF/ON menu will be displayed.
- Press the ▼ button to select [ON] and press the ENTER button.
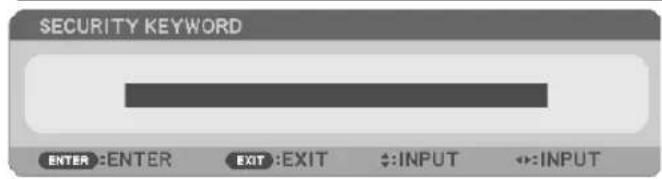
The [SECURITY KEYWORD] screen will be displayed.
- Type in a combination of the four ▲▼◀▶ buttons and press the ENTER button.
NOTE: A keyword must be 4 to 10 digits in length.
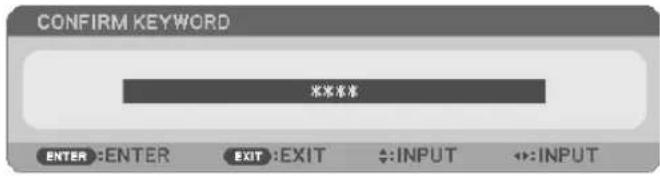
The [CONFIRM KEYWORD] screen will be displayed.
- Type in the same combination of ▲▼◀▶ buttons and press the ENTER button.
The confirmation screen will be displayed.
- Select [YES] and press the ENTER button.
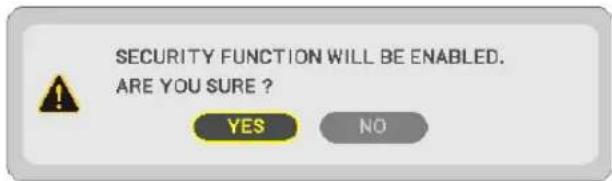
The SECURITY function has been enabled.
To turn on the projector when [SECURITY] is enabled:
- Press the POWER button.
The projector will be turned on and display a message to the effect that the projector is locked.
- Press the MENU button.
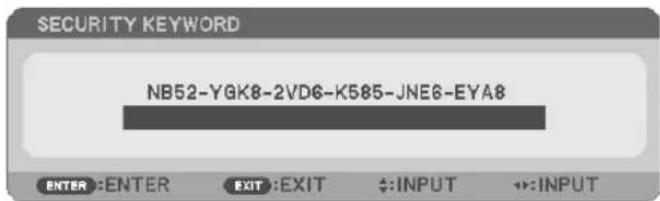
- Type in the correct keyword and press the ENTER button. The projector will display an image.
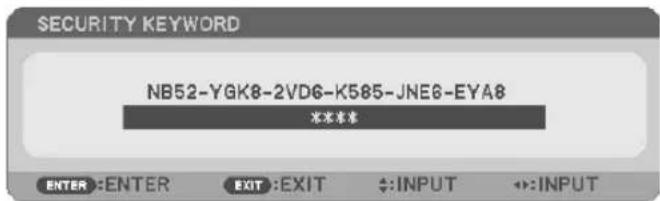
NOTE: The security disable mode is maintained until the main power is turned off or unplugging the power cord.
To disable the SECURITY function:
1. Press the MENU button.
The menu will be displayed.
- Select [SETUP] → [INSTALLATION] → [SECURITY] and press the ENTER button.
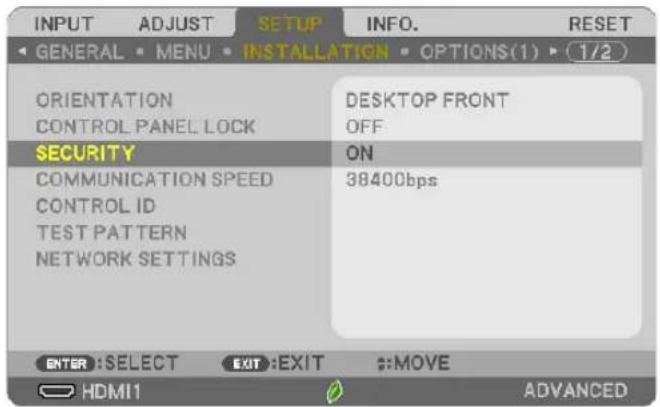
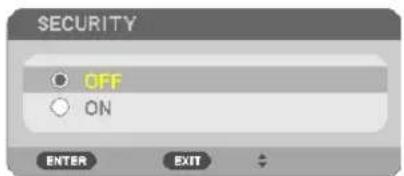
The OFF/ON menu will be displayed.
- Select [OFF] and press the ENTER button.
The SECURITY KEYWORD screen will be displayed.
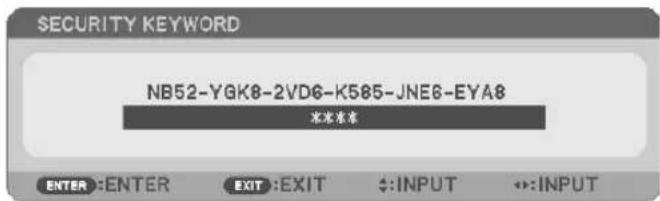
4. Type in your keyword and press the ENTER button.
When the correct keyword is entered, the SECURITY function will be disabled.
NOTE: If you forget your keyword, contact your dealer. Your dealer will provide you with your keyword in exchange for your request code. Your request code is displayed in the Keyword Confirmation screen. In this example [NB52-YGK8-2VD6-K585-JNE6-EYA8] is a request code.
⑦ Operating Your Computer's Mouse Functions from the Projector's Remote Control via the USB Cable (Remote Mouse Function)
The built-in remote mouse function enables you to operate your computer's mouse functions from the supplied remote control when the projector is connected to a computer via a commercially available USB cable (compatible with USB 2.0 specifications).
Press the USB-B button on the remote control, or select [USB-B] for the source on the On-screen menu.
- Using the USB cable to connect the projector and the computer will also start USB Display function.
- When you connect your computer and the projector by a USB cable for the first time, your computer will read in the software. It will take few minutes for starting up the USB display.
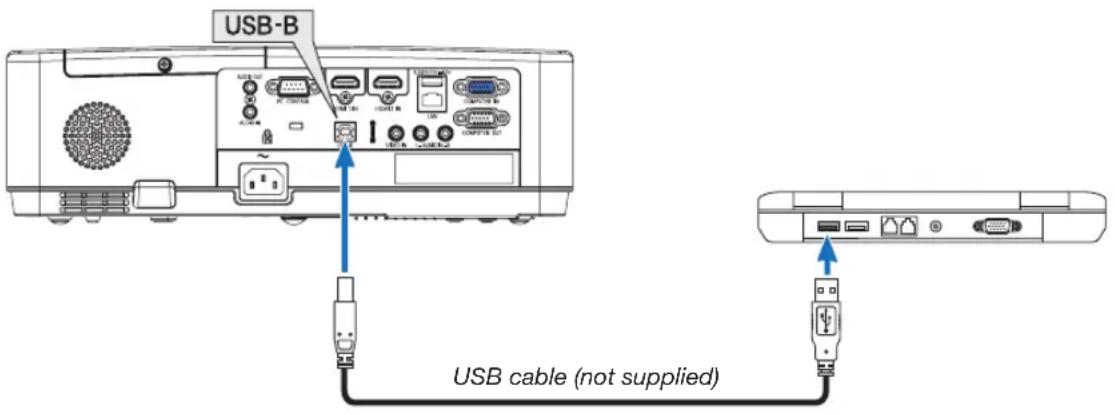
NOTE:
• A USB cable must support the USB 2.0 Specifications.
• The mouse function can be used with the following operating systems:
Windows 7, Windows XP, Windows Vista
- Wait at least 5 seconds after disconnecting the USB cable before reconnecting it and vice versa. The computer may not identify the USB cable if it is repeatedly connected and disconnected in rapid intervals.
- Connect the projector to the computer with a USB cable after starting the computer. Failure to do so may fail to start the computer.
Operating your computer's mouse from the remote control
You can operate your computer's mouse from the remote control.
PAGE ▽/△ Button...... scrolls the viewing area of the window or to move to the previous or next slide in PowerPoint on your computer.
▲▼◀▶ Buttons ...... moves the mouse cursor on your computer.
MOUSE L-CLICK/ENTER Button......works as the mouse left button.
MOUSE R-CLICK Button......works as the mouse right button.
NOTE:
- When you operate the computer using the ▲▼◀ or ▶ button with the menu displayed, both the menu and the mouse pointer will be affected. Close the menu and perform the mouse operation.
TIP: You can change the Pointer speed on the Mouse Properties dialog box on the Windows. For more information, see the user documentation or online help supplied with your computer.
⑧ Projecting Your Computer's Screen Image from the Projector via the USB Cable (USB Display)
Using a commercially available USB cable (compatible with USB 2.0 specifications) to connect the computer with the projector allows you to send your computer screen image to the projector for displaying. Power On/Off and source selection of the projector can be done from your computer without connecting a computer cable (VGA).
The USB Display utilizes the function of Image Express Utility Lite which is pre-installed software on the projector.
NOTE:
• To make the USB-Display available on Windows XP, the Windows user account must have "Administrator" privilege.
- USB Display will not work in [NORMAL] of [STANDBY MODE]. (→ page 71)
1. Start the computer.
- Connect the projector's power cord to the wall outlet and put the projector into standby condition.
- Use the USB cable to connect the computer with the projector.
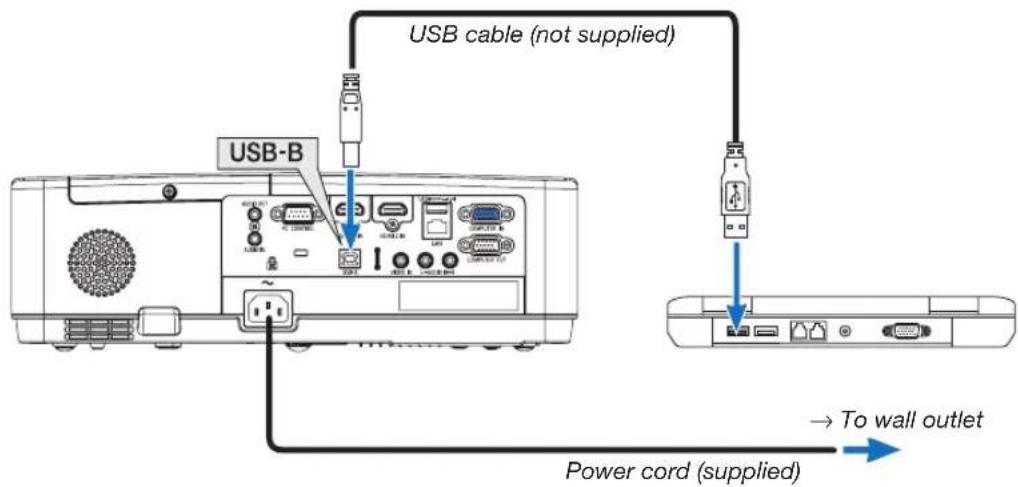
The message "The projector is in standby mode. Connect it?" will be displayed on the computer screen.
- The control window of Image Express Utility Lite will be displayed on the top of the screen.
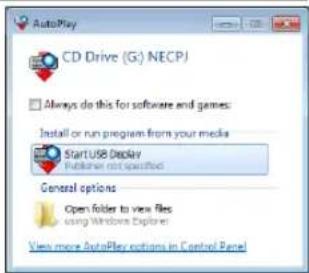
NOTE: Depending on the computer setting, the "AutoPlay" window may be displayed when the computer detects the connection to the projector. If this happens, click the "Start USB Display" window.
4. Click "Yes".
The projector will turn on and the message "The projector is getting ready. Please wait." will be displayed on the computer screen. This message will disappear in a few seconds.
5. Operate the control window.
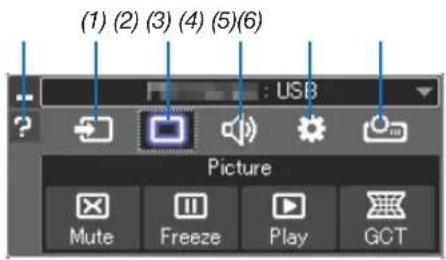
(1) (Source).....Selects an input source of the projector.
(2) (Picture).....Turns on or off AV-MUTE (Picture mute), and turns on or off FREEZE (Freeze a picture).
(3) (Sound).....Turns on or off AV-MUTE (Sound mute), play the sound and turns up or down the volume.
(4) ⚙ (Others) ...... Uses "Update", "HTTP Server"*, "Settings" and "Information".
* The HTTP Server cannot be selected when a USB cable is connected.
(5) (Projection).. Enables to change screen size for presentation, menu indication (hide/indicate), interruption prohibition/accept interruption.
(6) ? (Help)......Displays the help of Image Express Utility Lite.
⑨ Projecting an Image from an Angle (Geometric Correction Tool in Image Express Utility Lite)
The Geometric Correction Tool (GCT) that is a function of the pre-installed software on the projector "Image Express Utility Lite" allows you to correct distortion of images projected even from an angle.
What you can do with GCT
• The GCT feature includes the following three functions
- 4-point Correction: You can fit a projected image within the border of the screen easily by align the four corners of an image to the ones of the screen.
- Multi-point Correction: You can correct a distorted image on the corner of a wall or irregular shaped screen by using many separated screens to correct the image as well as 4-point Correction.
- Parameters Correction: You can correct a distorted image by using a combination of transformational rules prepared in advance.
This section will show an example for use with 4-point Correction.
For information about "Multi-point Correction" and "Parameters Correction", see the help file of Image Express Utility Lite.
- Your correction data can be stored in the projector or your computer which can be restored when necessary.
Projecting an Image from an Angle (GCT)
Preparation:
(1) Connect the projector to a computer by a USB cable. (→ page 34, USB Display)
(2) Adjust the projector position or the zoom so that the projected image can cover the whole screen area.
- Click the " (Picture) icon and then the " button.
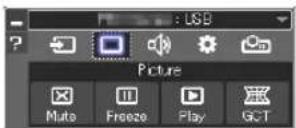
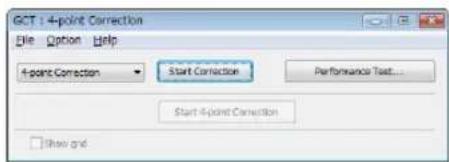
The "4-point Correction" window will be displayed.
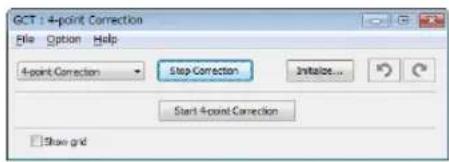
2. Click the "Start Correction" button and then "Start 4-point Correction" button.
A green frame and a mouse pointer ( + ) will be displayed.
• Four [●] marks will be appeared at four corners.
3. Use the mouse to click the [●] mark of which corner you wish to move.
The currently selected [●] mark will turn red.
![NEC MC332W - Use the mouse to click the [●] mark of which corner you wish to move. - 1](/content/2026/05/813417/images/3c96c6ce26685fb31807eb40e8318a0f4c34f3fff8972471955127de0707ce33.jpg)
natural_image
Illustration showing a laptop and a device with overlapping screen views (no text or symbols)(In the above example, Windows screens are omitted for clarification.)
4. Drag the selected [●] mark to the point you wish to correct and drop it.
- When you click somewhere within the project image area, the nearest corner will go to the position where the mouse cursor is.
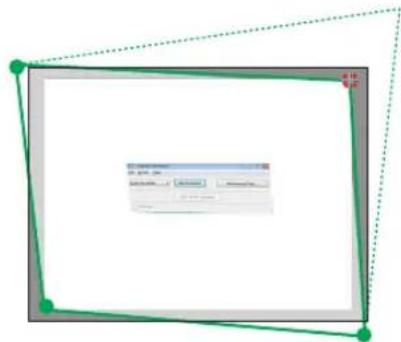
5. Repeat Step 3 and 4 to correct the distortion of the projected image.
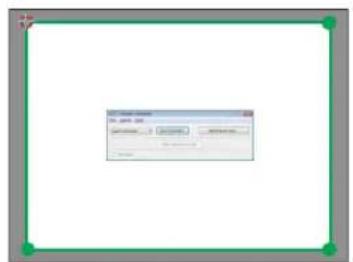
6. After completing, right-click the mouse.
The green frame and the mouse pointer will disappear from the projected image area. This will complete the correction.
7. Click the "X" (close) button on the "4-point Correction" window.
The "4-point Correction" window will disappear and the 4-point correction will take effect.
8. Click the "n" (Projection) icon and then the "Exit" (Exit) button.
9. Click "Yes".
TIP:
- After performing the 4-point correction, you can save the 4-point correction data to the projector by clicking "File" → "Export to the projector..." on the "4-point Correction" window.
• See the Help of Image Express Utility Lite for operating "4-point Correction" window and other functions than GCT.
① Things you can do with the VIEWER
The VIEWER has the following features.
- When you insert a commercially available USB memory containing the picture into the USB port (Type A) of the projector, the images on the USB can be projected by the projector. By doing this, you can make a presentation without using a personal computer.
- The types of images that can be projected in the VIEWER are JPEG and PNG.
- Thumbnails can be displayed in the VIEWER, allowing you to quickly select a picture to be projected.
- When projecting multiple pictures continuously (SLIDESHOW), the pictures may be switched manually (manual playback) or automatically (AUTO PLAY). The interval for changing the pictures can also be modified during AUTO PLAY.
- The projection order can be specified by the picture file name, file type, date and size, and the ascending/descending order can be selected.
- The orientation of the picture can be rotated in units of 90^ .
- You can change the screen of the input terminal in a signal-less state (background logo) or the background image of the MultiPresenter start-up screen (MultiPresenter logo). You can also set a password to prohibit third parties from changing the pictures.
NOTE:
- When the VIEWER (slide screen, file list screen) is being displayed, keystone correction using the ▼ / ▲ buttons is not possible. To perform keystone correction when the VIEWER is being displayed, press the MENU button 2 times to display the on-screen menu.
- When the VIEWER is being displayed, the FREEZE button on the remote control does not work.
- When you select [RESET] → [ALL DATA] in the on-screen menu, the option menu settings of the VIEWER return to the default state when shipped from the factory.
- About USB memory
Format the USB memory used by the VIEWER of the projector in the FAT32 format or FAT16 format.
- The projector cannot recognize a USB memory that has been formatted in the NTFS format.
- Check the file system format if the USB memory inserted into the projector is not recognized.
- Refer to the instruction manual or the help file of the Windows you are using for details on how to format a USB memory.
- The USB port of the projector does not guarantee that all USB memories commercially available will work.
• About compatible images
- The following pictures can be projected by the VIEWER.
| JPEG Extension | jpg, jpe, jpeg (case insensitive) | |
| Format Baseline, progressive | ||
| Color RGB, grayscale | ||
| Resolution Baseline: Maximum 10000 × 10000 (pixel)Progressive: Maximum 2000 × 2000 (pixel) | ||
| EXIF EXIF information (rotation/tholumnail, etc.) is not supported. | ||
| PNG Extension | png (case insensitive) | |
| Format Normal, interlace | ||
| Color RGB, index color, grayscale | ||
| Resolution Normal: Maximum 10000 × 10000 (pixel)Interlace: Maximum 2000 × 2000 (pixel) | ||
② Projecting the pictures on a USB memory (basic operation)
This section explains the basic operations of the VIEWER. This is the operating procedure when the option menu ( page 46) of the VIEWER is in the default state when shipped from the factory.
① Start the VIEWER
-
Turn on the projector.
-
Insert a USB memory into the USB-A port projector.
NOTE:
To remove a USB memory from the projector, press the MENU button in the file list screen or DRIVE LIST screen and select [REMOVE USB DEVICE]. (→ Page 41 "Remove the USB memory")
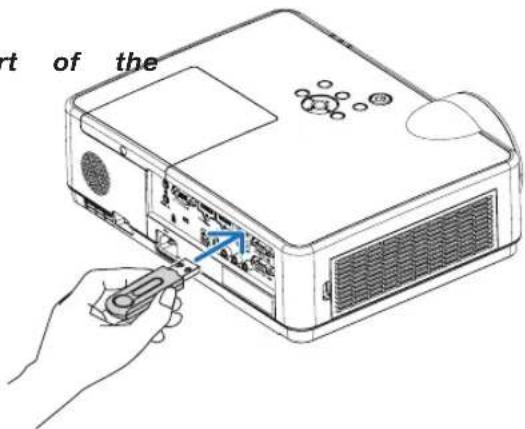
3. Press the INPUT button.
The [INPUT] screen is displayed.
- Press the SOURCE button when using the remote control.
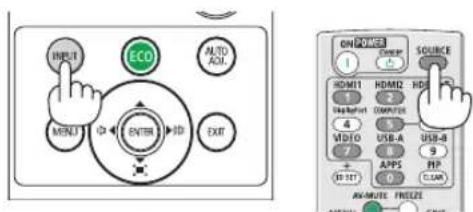
-
Press the INPUT button a few times and move the cursor to [USB-A].
-
Every time the INPUT button is pressed briefly, the cursor moves to the next input terminal.
- Move the cursor to [USB-A] and wait for a while for the VIEWER to start and the DRIVE LIST screen on the USB memory to be projected.
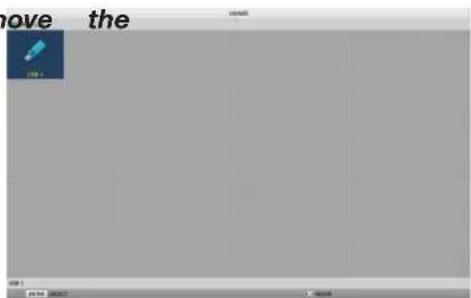
5. Check that the cursor is moved to [USB 1] and press the ENTER button.
The file list screen will be displayed.
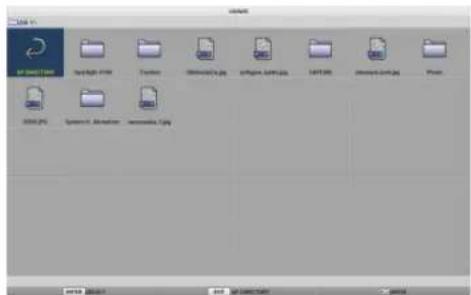
6. Move the cursor to the folder or image file with the ▲▼◀▶ buttons and press the ENTER button.
- When a folder is selected, the file list screen for the folder is displayed.
- If an image file is selected, the slide screen will be displayed.
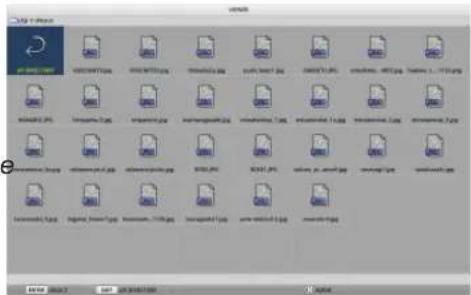
7. Move the cursor to the image file in the file list screen, then press the ENTER button.
The slide screen will be displayed.
natural_image
Exterior view of a modern city skyline with skyscrapers under a clear blue sky (no signage or text visible)8. Press the ▶ button.
The next image will be projected.

natural_image
Field of blooming iris flowers with purple and white blooms, surrounded by greenery (no text or symbols visible)9. Press the ◀ button.
The previous image will be projected.
10. Press the MENU button.
The control bar will be displayed.
- Press the MENU button while the control bar is being displayed to display the [INPUT] screen. When you press the MENU button again, the [INPUT] screen disappears.
- When you press the EXIT button while the control bar is being displayed, the control bar disappears.
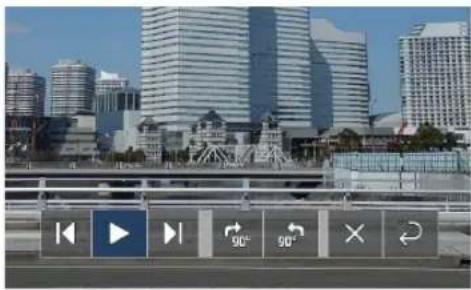
- Press the ▶ button to move the cursor to 📋 then press the ENTER button.
The picture will rotate clockwise by 90°.
- Every time you press the ENTER button in this state, the picture rotates 90° clockwise.
- Press the ▶ button to move the cursor to ✗, then press the ENTER button.
The control bar disappears.
- Press the EXIT button.
The display changes to the file list screen.
- You can also move the cursor to 📋 with the control bar of the step 10 and press the ENTER button to change the file list screen.
- To return to the slide screen from the file list screen, move the cursor to the picture to be displayed in the slideshow and press the ENTER button.
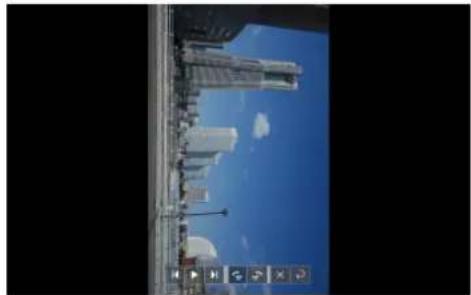
natural_image
Exterior view of a modern office building (no signage)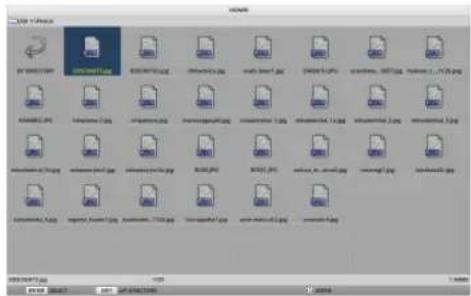
② Remove the USB memory
- Press the MENU button in the file list screen or drive list screen.
A pop-up menu will be displayed at the bottom left of the screen.
- Press the MENU button while the pop-up menu is being displayed to display the [INPUT] screen. When you press the MENU button again, the [INPUT] screen disappears.
-
When you press the EXIT button while the pop-up menu is being displayed, the pop-up menu disappears.
-
Move the cursor to [REMOVE USB DEVICE] and press the ENTER button.
A confirmation message will be displayed in the center of the screen.
- To remove the USB memory, press the ◀ button to move the cursor to [OK] and press the ENTER button.
The message displayed in the center of the screen changes.
- Press the ENTER button.
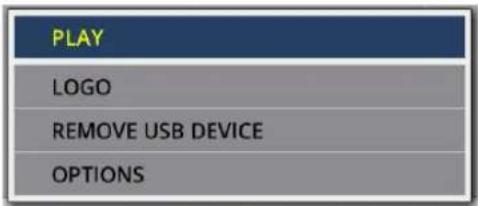
5. Remove the USB memory from the projector.
NOTE:
If you remove a USB memory from the projector without executing [REMOVE USB DEVICE] in the menu, the operation of the projector may become unstable. In that case, turn off the power of the projector once and unplug the power cord from the outlet. Subsequently, wait for about 3 minutes before connecting the power cord to the socket and turning on the power of the projector.
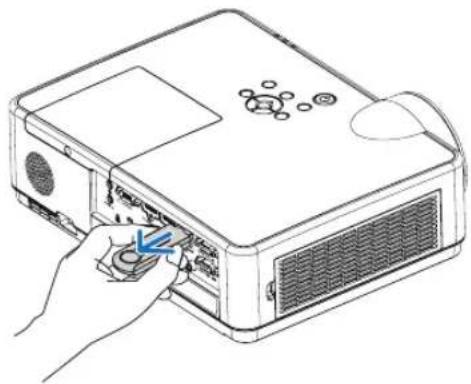
natural_image
Line drawing of a projector with a hand inserting a button to the front panel (no text or symbols)③ End the VIEWER
1. Press the MENU button in the slide screen or file list screen.
A control bar or a pop-up menu will be displayed.
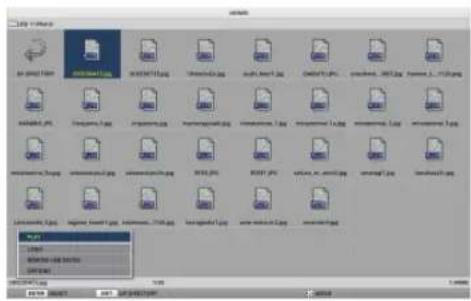
2. Press the MENU button again.
The [INPUT] screen is displayed.
3. Move the cursor to an input terminal [USB-A] and press the ENTER button.
The VIEWER will end.
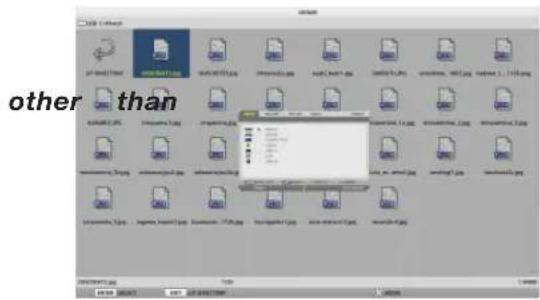
TIP:
- When using the remote control, press the HDMI 1 button etc. to end the VIEWER.
![NEC MC332W - Move the cursor to an input terminal [USB-A] and press the ENTER button. - 2](/content/2026/05/813417/images/d4f81bbd15d024f4bc8e2ea5028dd626cb99a04a3e1ca1314b4dbd449d6b0456.jpg)
③ Slide screen operations
The following operations can be performed on the slide screen.
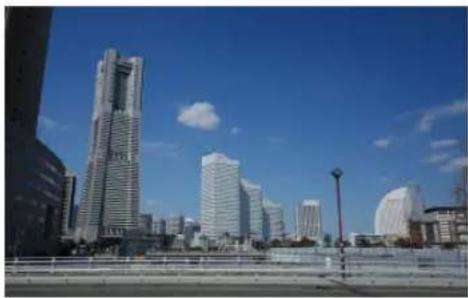
natural_image
City skyline with modern skyscrapers under a clear blue sky, no visible text or signage| Button name Description | |
| ▶, PAGE ▽ | Project the next picture. |
| ◀, PAGE △ | Project the previous picture. |
| ENTER | Display the pointer (→). The pointer moves when you press the ▼▲◀▶ button. If you press the ENTER button again, the pointer disappears. |
| EXIT Switch to the file list screen. | |
| MENU Display the control bar. | |
On the control bar, press the ◀ / ▶ button to move the yellow cursor and press the ENTER button at the desired item. The function of each item is as follows.
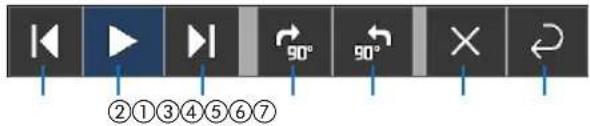
| Items on the control bar Description | |
| 1 Back | Project the previous picture. |
| 2 Play / Stop | Start automatic playback of the slideshow. Or stop the slide show. |
| 3 Next | Project the next picture. |
| 4 Rotate 90° to the right | Rotate the picture clockwise by 90°. |
| 5 Rotate 90° to the left | Rotate the picture counter-clockwise by 90°. |
| 6 End | Turn off the control bar. |
| 7 Return to the file list screen | Switch to the thumbnail screen. |
4 File list screen operations
How to view the file list screen
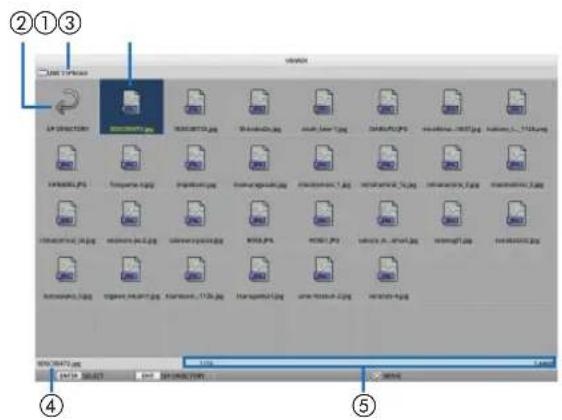
| Display name Description | |
| 1 Path | Display the path of the projected folder.When a USB memory is inserted, the drive name is displayed as “USB”. |
| 2 To the upper level | Return to the folder at the upper (parent) level. |
| 3 Picture or folder (icon display or) thumbnail display | Display pictures and folders as icons or thumbnails (zoom out). |
| 4 File name of the selected picture | Display the file name of the picture corresponding to the cursor. |
| 5 Information display | When the cursor is on a picture, the order of the picture (the number out of all the pictures), the latest date and time the picture was updated, and the file size are displayed.When the cursor is on a folder, the update date and time of the folder is displayed.When the cursor is on a drive, the free space of the drive is displayed. |
File list screen operations
| Button name Description | |
| ▼▲◀▶ | Move the cursor. |
| ENTER | If the cursor is on a picture, the display switches to the slide screen.If the cursor is on a folder, the files in the folder are displayed.If the cursor is on [UP DIRECTORY], the display returns to the folder in the upper (parent) level. |
| EXIT Return to the folder at | the upper (parent) level. |
| MENU Display the following | pop-up menu. |
| PAGE ∨ | Display the next file list screen. |
| PAGE △ | Display the previous file list screen. |
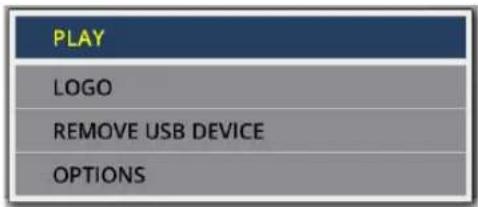
| Menu item Description | |
| PLAY Start the slideshow. | |
| LOGO Change the screen of the input terminal in a signal-less state (background logo) or the background image of the MultiPresenter start-up screen (MultiPresenter logo). | |
| REMOVE USB DEVICE Disable the use of the USB memory inserted in the projector. Execute this menu item before removing the USB memory from the projector. | |
| OPTIONS | Display the option menu. (→ page 46) |
⑤ Option menu
| Menu item Description | When shipped from the factory | |
| PLAY MODE Select the display mode of the slide screen.MANUAL: Switch the picture manually.AUTOMATIC: Switch the picture automatically according to the interval setting. | MANUAL | |
| INTERVAL Set the display interval when playing a slideshow automatically.Selectable range: Set the interval from 5-300 (seconds) by 1 second increment. | 5 SECONDS | |
| REPEAT Repeat the slideshow.OFF: Do not repeat. End the slideshow after the last picture is displayed.ON: Repeat. Return to the first picture after the last picture is displayed. | OFF | |
| START Set the screen to be displayed when the USB-A terminal is selected.SLIDE: Display the slide screen.THUMBNAILS: Display the list screen. | THUMBNAILS | |
| SHOW THUMBNAILS | Set whether to display the thumbnails of picture files displayed in the file list screen.OFF: Display as icons.ON: Display as thumbnails.Example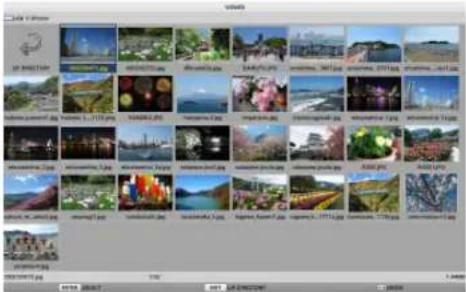 | OFF |
| SORT Set the sort order when the file list is displayed.NAME (ABC ..)/NAME (ZYX ..): Display in the order of the character codes of the files and folder names.EXT. (ABC ..)/EXT. (ZYX ..): Display in the order of the character codes of the extensions.DATE (NEW)/DATE (OLD): Display the file update date/ time in ascending or descending order.SIZE (BIG)/SIZE (SMALL): Display in ascending or descending order of file size. | NAME (ABC ..) | |
TIP:
- About "Save Setting"
Save each setting immediately after pressing the ENTER button. However, the value set in "SORT" is maintained until the power is turned off, returning to "NAME (ABC ..)" the next time the power is turned on.
⑥ Changing the logo data (background image)
- You can change the screen of the input terminal in a signal-less state (background logo) or the background image of the MultiPresenter start-up screen (MultiPresenter logo).
- You can also set a password to prohibit third parties from changing the pictures.
- You can set pictures that satisfy all of the following conditions.
| Format JPEG or PNG pictures that can be displayed with the VIEWER | |
| Resolution Below the panel resolution of the projectorME382U/ME342U: WUXGA (1920 × 1200)ME372W/MC382W/MC332W: WXGA (1280 × 800)ME402X/MC422X/MC372X/MC342X/MC302X: XGA (1024 × 768) | |
| File size 1 megabyte or less |
- Display the file list screen.
- Move the cursor to the picture to set in the background logo or the MultiPresenter logo and press the MENU button.
The pop-up menu will be displayed.
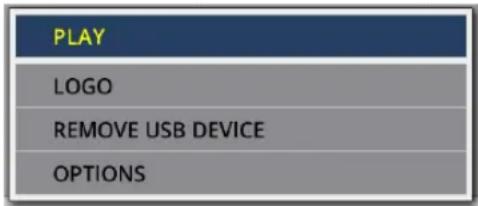
- Move the cursor to [LOGO] and press the ENTER button.
The sub-menu will be displayed.
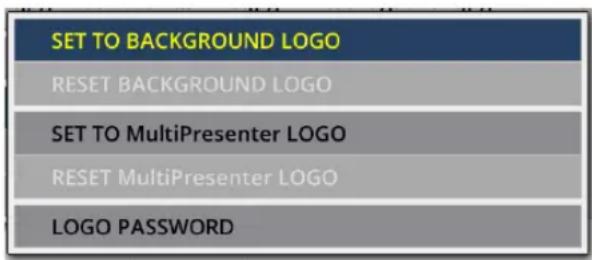
① Setting the background logo or MultiPresenter logo
-
Move the cursor to [SET TO BACKGROUND LOGO] or [SET TO MultiPresenter LOGO] in the sub-menu and press the ENTER button.
-
If a [LOGO PASSWORD] has been set, enter the [LOGO PASSWORD] when the [LOGO PASSWORD] input screen appears.
-
A screen to confirm whether to change the logo or not is displayed.
-
Move the cursor to [YES] and press the ENTER button.
② Initializing the background logo or MultiPresenter logo
-
Move the cursor to [RESET BACKGROUND LOGO] or [RESET MultiPresenter LOGO] and press the ENTER button.
-
If a [LOGO PASSWORD] has been set, enter the [LOGO PASSWORD] when the [LOGO PASSWORD] input screen appears.
-
A screen to confirm whether to initialize the logo or not is displayed.
-
Move the cursor to [YES] and press the ENTER button.
③ Set a password so that the logo will not be changed without authorization
This section explains the procedure for setting the password for the first time.
- Move the cursor to [LOGO PASSWORD] in the sub-menu and press the ENTER button.
- The PASSWORD SETTING screen is displayed.
-
Move the cursor to "NEW PASSWORD" and press the ENTER button.
-
The character input screen will be displayed. Enter the password using the ▲▼◀▶ buttons and press the ENTER button.
- Only 1–10 alphanumeric characters are allowed to be used in the password.
-
When the password is entered, it will be indicated by asterisks in the entry field.
-
Move the cursor to "CONFIRM NEW PASSWORD" and press the ENTER button.
- Enter the same password again.
- Move the cursor to "OK" on the password setting screen and press the ENTER button.
The LOGO PASSWORD will be set.
TIP:
• How to erase the set LOGO PASSWORD
① Move the cursor to "LOGO PASSWORD" in the sub-menu and press the ENTER button.
② Press the ENTER button in the password entry screen.
③ Enter the password, move the cursor to "OK" and press the ENTER button. The PASSWORD SETTING screen will be displayed.
④ Move the cursor to "NEW PASSWORD" and press the ENTER button.
- Move the cursor to "OK" without entering anything in the character input screen and press the ENTER button.
⑤ Move the cursor to "CONFIRM NEW PASSWORD" and press the ENTER button.
- Move the cursor to "OK" without entering anything in the character input screen and press the ENTER button.
⑥ Move the cursor to "OK" in the password setting screen and press the ENTER button.
The set LOGO PASSWORD will now be deleted.
5. Using On-Screen Menu
① Using the Menus
NOTE: The on-screen menu may not be displayed correctly while interlaced motion video image is projected.
- Press the MENU button on the remote control or the projector cabinet to display the menu.
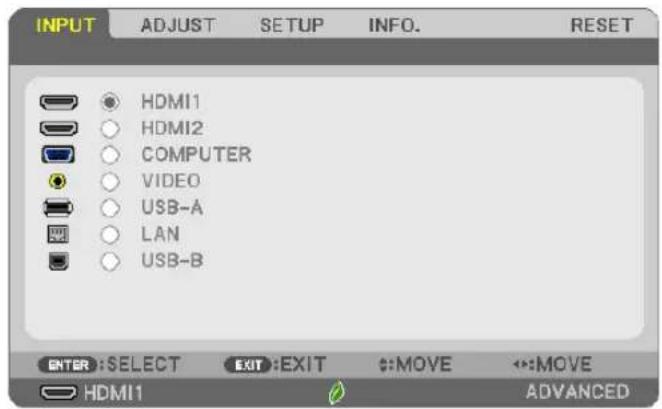
NOTE: The commands such as ENTER, EXIT, ▲▼, ◀▶ in the bottom show available buttons for your operation.
- Press the ◀▶ buttons on the remote control or the projector cabinet to display the submenu.
- Press the ENTER button on the remote control or the projector cabinet to highlight the top item or the first tab.
- Use the ▲▼ buttons on the remote control or the projector cabinet to select the item you want to adjust or set.
You can use the ◀▶ buttons on the remote control or the projector cabinet to select the tab you want. - Press the ENTER button on the remote control or the projector cabinet to display the submenu window.
- Adjust the level or turn the selected item on or off by using the ▲▼◀▶ buttons on the remote control or the projector cabinet.
Changes are stored until adjusted again.
- Repeat steps 2 -6 to adjust an additional item, or press the EXIT button on the remote control or the projector cabinet to quit the menu display.
NOTE: When a menu or message is displayed, several lines of information may be lost, depending on the signal or settings.
- Press the MENU button to close the menu.
To return to the previous menu, press the EXIT button.
② Menu Elements
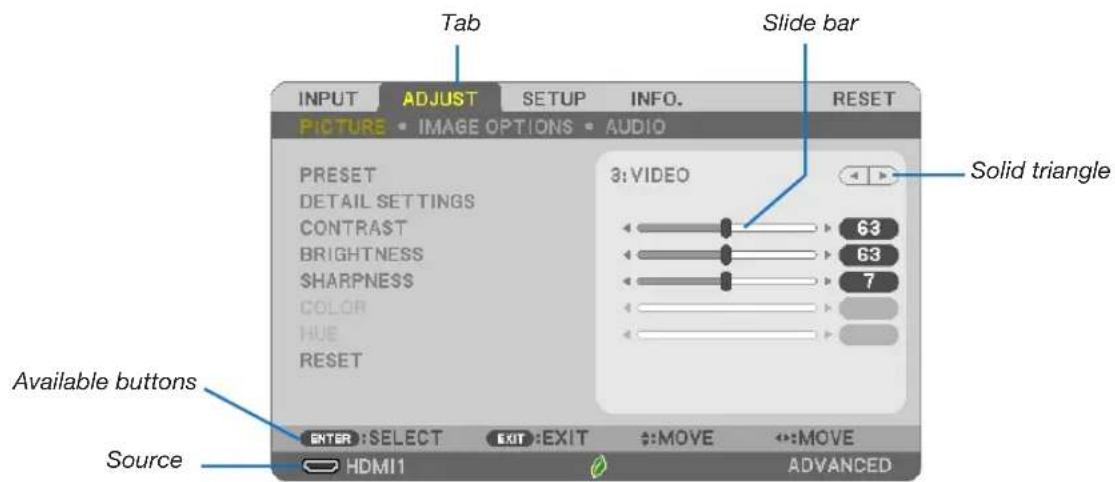
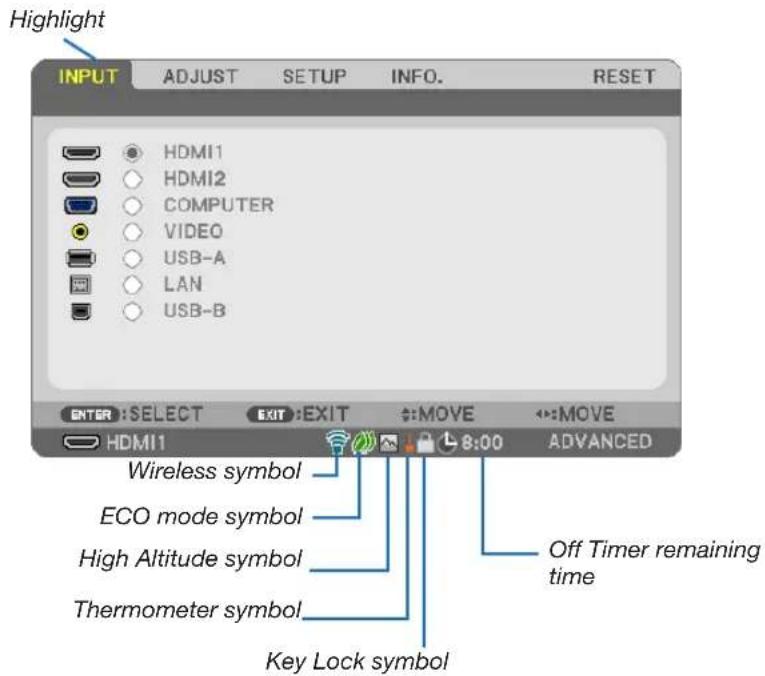
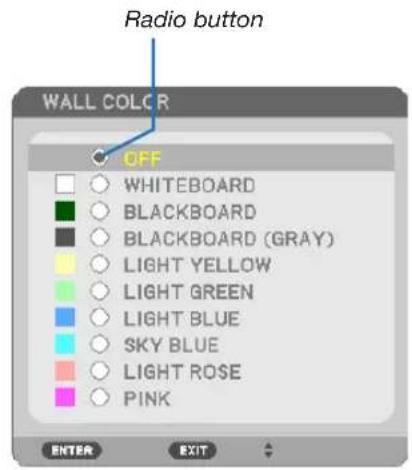
Menu windows or dialog boxes typically have the following elements:
Highlight .....Indicates the selected menu or item.
Solid triangle....Indicates further choices are available. A highlighted triangle indicates the item is active.
Tab......Indicates a group of features in a dialog box. Selecting on any tab brings its page to the front.
Radio button.....Use this round button to select an option in a dialog box.
Source ....Indicates the currently selected source.
Off Timer remaining time......Indicates the remaining countdown time when the [OFF TIMER] is preset.
Slide bar .....Indicates settings or the direction of adjustment.
ECO mode symbol......Indicates ECO MODE is set.
Key Lock symbol......Indicates the [CONTROL PANEL LOCK] is enabled.
Thermometer symbol ...... Indicates the [ECO MODE] is forcibly set to [NORMAL] mode because the internal temperature is too high.
High Altitude symbol......Indicates the [FAN MODE] is set to [HIGH ALTITUDE] mode.
Wireless symbol.....Indicate the wireless LAN connection is enabled.
③ List of Menu Items
Some menu items are not available depending on the input source.
| Menu Item Default Options | |||||
| INPUT | HDMI1 * | ||||
| HDMI2 * | |||||
| COMPUTER * | |||||
| VIDEO * | |||||
| USB-A * | |||||
| LAN * | |||||
| USB-B * | |||||
| ADJUST | PICTURE | PRESET * 1-7 | |||
| DETAIL SETTINGS | GENERAL | ||||
| REFERENCE * HIGH-BRIGHT, PRESENTATION, VIDEO, MOVIE, GRAPHIC, sRGB, DICOM SIM. | |||||
| GAMMA CORRECTION DYNAMIC, NATURAL, BLACK DETAIL | |||||
| SCREEN SIZE * LARGE, MEDIUM, SMALL | |||||
| COLOR TEMPERATURE * 5000-10500 | |||||
| DYNAMIC CONTRAST * OFF, ON | |||||
| IMAGE MODE * STILL, MOVIE | |||||
| COLOR ENHANCEMENT * OFF, LOW, MEDIUM, HIGH | |||||
| WHITE BALANCE | |||||
| CONTRAST R O | |||||
| CONTRAST G O | |||||
| CONTRAST B O | |||||
| BRIGHTNESS R * | |||||
| BRIGHTNESS G * | |||||
| BRIGHTNESS B * | |||||
| CONTRAST | 63 | ||||
| BRIGHTNESS | 63 | ||||
| SHARPNESS | 7 | ||||
| COLOR 31 | |||||
| HUE | 31 | ||||
| RESET | |||||
| IMAGE OPTIONS | CLOCK | * | |||
| PHASE | * | ||||
| HORIZONTAL | * | ||||
| VERTICAL | * | ||||
| OVERSCAN | * AUTO, 0 [%], 5[%], 10[%] | ||||
| ASPECT RATIO | * | WUXGA/WXGA: AUTO, 4:3, 16:9, 15:9, 16:10, LETTERBOX, NATIVE XGA: AUTO, 4:3, 16:9, 15:9, 16:10, WIDE ZOOM, NATIVE | |||
| POSITION (Not available on ME382U/ME342U/ME372W/MC382W/MC332W) | 0 | ||||
| AUDIO | VOLUME | 11 | 0-31 | ||
| SETUP | GENERAL | AUTO KEYSTONE | ON | OFF, ON | |
| KEYSTONE | KEYSTONE HORIZONTAL O | ||||
| KEYSTONE VERTICAL | 0 | ||||
| PINCUSHION LEFT/RIGHT | 0 | ||||
| PINCUSHION TOP/BOTTOM | 0 | ||||
| CORNERSTONE | 0 | ||||
| RESET | |||||
| WALL COLOR | OFF | OFF, WHITEBOARD, BLACKBOARD, BLACKBOARD (GRAY), LIGHT YELLOW, LIGHT GREEN, LIGHT BLUE, SKY BLUE, LIGHT ROSE, PINK | |||
| ECO MODE | AUTO ECO | OFF, AUTO ECO, NORMAL, ECO | |||
| CLOSED CAPTION | OFF | OFF, CAPTION1, CAPTION2, CAPTION3, CAPTION4, TEXT1, TEXT2, TEXT3, TEXT4 | |||
| OFF TIMER | OFF | OFF, 0:30, 1:00, 2:00, 4:00, 8:00, 12:00, 16:00 | |||
| ADMINISTRATOR MODE | MENU MODE | ADVANCED | ADVANCED, BASIC | ||
| NOT SAVE SETTING VALUES | OFF | OFF, ON | |||
| KEYWORD | OFF | OFF, ON | |||
| LANGUAGE | ENGLISH | ENGLISH, DEUTSCH, FRANÇAIS, ITALIANO, ESPAÑOL, SVENSKA, 日本語 DANSK, PORTUGUÉS, ČEŠTINA, MAGYAR, POLSKI, NEDERLANDS, SUOMI NORSK, TÜRKÇE, РУСКИЙ, Еллгика, 简体中文, 한국어, TIĚNG VIĚT ROMÁNĂ, HRVATSKI, БЪЛГАРСКИ, INDONESIA, Јहनिरी, İтау, түйөнөр, 繁體中文 | |||
| SETUP | MENU | COLOR SELECT COLOR COLOR, MONOCHROME | |||
| INPUT DISPLAY ON OFF, ON | |||||
| ID DISPLAY ON OFF, ON | |||||
| ECO MESSAGE OFF OFF, ON | |||||
| DISPLAY TIME AUTO 45 SEC MANUAL, AUTO 5 SEC, AUTO 15 SEC, AUTO 45 SEC | |||||
| BACKGROUND BLUE BLUE, BLACK, LOGO | |||||
| FILTER MESSAGE 10000[H] OFF, 100[H], 500[H], 1000[H], 2000[H], 5000[H], 10000[H] | |||||
| INSTALLATION | ORIENTATION DESKTOP FRONT DESKTOP FRONT, CEILING REAR, DESKTOP REAR, CEILING FRONT | ||||
| CONTROL PANEL LOCK OFF OFF, ON | |||||
| SECURITY | OFF OFF, ON | ||||
| COMMUNICATION SPEED | 38400bps | 4800bps, 9600bps, 19200bps, 38400bps | |||
| CONTROL ID | CONTROL ID NUMBER | 1 | 1-254 | ||
| CONTROL ID | OFF OFF, ON | ||||
| TEST PATTERN | |||||
| NETWORK SETTINGS | |||||
| OPTIONS(1) | SEAMLESS SWITCHING OFF OFF, ON | ||||
| FAN MODE | AUTO | AUTO, HIGH ALTITUDE | |||
| SIGNAL SELECT | COMPUTER | RGB/COMPONENT | RGB/COMPONENT, RGB, COMPONENT | ||
| WXGA MODE | WUXGA/WXGA: ON XGA: OFF | OFF, ON | |||
| DEINTERLACE | ON OFF, ON | ||||
| VIDEO LEVEL | HDMI1 | AUTO | AUTO, NORMAL, ENHANCED | ||
| HDMI2 | AUTO | AUTO, NORMAL, ENHANCED | |||
| BEEP | ON OFF, ON | ||||
| OPTIONS(2) | STANDBY MODE NORMAL NORMAL, NETWORK STANDBY, SLEEP | ||||
| DIRECT POWER ON | OFF OFF, ON | ||||
| AUTO POWER ON | OFF OFF, ON | ||||
| AUTO POWER OFF | STANDBY (NORMAL): 1:00 NETWORK STANDBY: 0:15 | OFF, 0:05, 0:10, 0:15, 0:20, 0:30, 1:00 | |||
| DEFAULT INPUT SELECT | LAST LAST, | AUTO, HDMI1, HDMI2, COMPUTER, VIDEO, USB-A, LAN, USB-B | |||
| CARBON CONVERT | |||||
| CURRENCY | , €, JP¥, RMB¥ | ||||
| CURRENCY CONVERT | |||||
| STATIC CONVERGENCE *1 | HORIZONTAL R | 0 | -1~1 | ||
| HORIZONTAL G | 0 | -1~1 | |||
| HORIZONTAL B | 0 | -1~1 | |||
| VERTICAL R | 0 | -1~1 | |||
| VERTICAL G | 0 | -1~1 | |||
| VERTICAL B | 0 | -1~1 | |||
* The asterisk (*) indicates that the default setting varies depending on the signal.
*1 This feature is not supported by ME372W/MC382W/MC332W/ME402X/MC422X/MC372X/MC342X/MC302X.
| Menu Item Default Options | ||||
| INFO. | USAGE TIME | LAMP LIFE REMAINING | ||
| LAMP HOURS USED | ||||
| FILTER HOURS USED | ||||
| TOTAL CARBON SAVINGS | ||||
| TOTAL COST SAVINGS | ||||
| SOURCE(1) | SOURCE NAME | |||
| SOURCE INDEX | ||||
| HORIZONTAL FREQUENCY | ||||
| VERTICAL FREQUENCY | ||||
| SYNC TYPE SEPARATE SYNC, COMPOSITE SYNC, SYNC ON GREEN, SYNC ON VIDEO | ||||
| SYNC POLARITY | ||||
| SCAN TYPE | ||||
| SOURCE(2) | SIGNAL TYPE | |||
| VIDEO TYPE | ||||
| BIT DEPTH 8[bits], 10[bits], 12[bits] | ||||
| VIDEO LEVEL | ||||
| WIRED LAN | IP ADDRESS | |||
| SUBNET MASK | ||||
| GATEWAY | ||||
| MAC ADDRESS | ||||
| WIRELESS LAN | IP ADDRESS | |||
| SUBNET MASK | ||||
| GATEWAY | ||||
| MAC ADDRESS | ||||
| SSID | ||||
| NETWORK TYPE | ||||
| SECURITY | ||||
| CHANNEL | ||||
| SIGNAL LEVEL | ||||
| VERSION | FIRMWARE | |||
| DATA | ||||
| OTHERS | PROJECTOR NAME | |||
| HOST NAME | ||||
| MODEL NO. | ||||
| SERIAL NUMBER | ||||
| LAN UNIT TYPE | ||||
| CONTROL ID (when [CONTROL ID] is set) | ||||
| RESET | CURRENT SIGNAL | |||
| ALL DATA | ||||
| CLEAR LAMP HOURS | ||||
| CLEAR FILTER HOURS | ||||
* The asterisk (*) indicates that the default setting varies depending on the signal.
④ Menu Descriptions & Functions [INPUT]
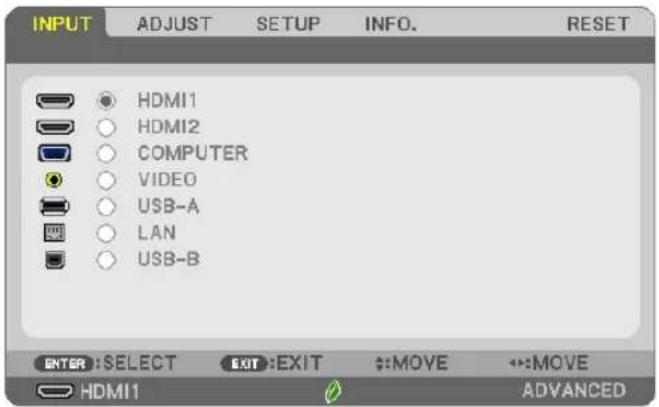
HDMI1 and HDMI2
Selects the HDMI compatible equipment connected to your HDMI1 or 2 IN terminal.
COMPUTER
Selects the computer connected to your COMPUTER input terminal signal.
NOTE: When the component input signal is connected to the COMPUTER IN terminal, select [COMPUTER].
VIDEO
Selects what is connected to your VIDEO input-VCR, DVD player or document camera.
USB-A
This feature enables you to make presentations using a USB memory that contains slides. (→ page 38 “4. Using the VIEWER”)
LAN
Selects a signal from the LAN port (RJ-45) or the installed USB wireless LAN unit (optional).
USB-B
Selects the computer connected to the USB-B port by using a commercially available USB cable. (→ page 34)
⑤ Menu Descriptions & Functions [ADJUST] [PICTURE]
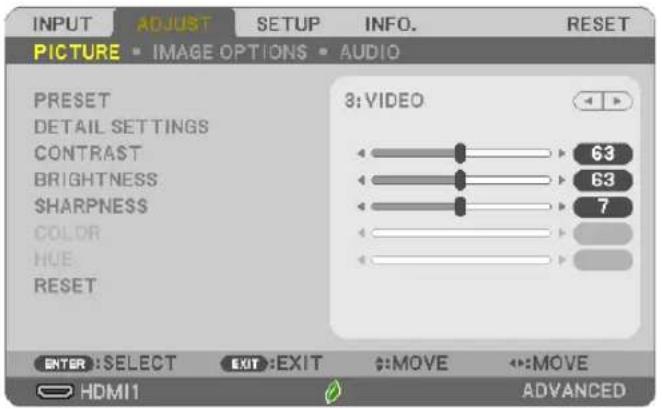
[PRESET]
This function allows you to select optimized settings for your projected image.
You can adjust neutral tint for yellow, cyan or magenta.
There are seven factory presets optimized for various types of images. You can also use [DETAIL SETTINGS] to set user adjustable settings to customize each gamma or color.
Your settings can be stored in [PRESET 1] to [PRESET 7].
HIGH-BRIGHT ......Recommended for use in a brightly lit room.
PRESENTATION......Recommended for making a presentation using a PowerPoint file.
VIDEO......Recommended for typical TV program viewing.
MOVIE......Recommended for movies.
GRAPHIC ......Recommended for graphics.
sRGB......Standard color values
DICOM SIM......Recommended for DICOM simulation format.
NOTE:
• The [DICOM SIM.] option is for training/reference only and should not be used for actual diagnosis.
- DICOM stands for Digital Imaging and Communications in Medicine. It is a standard developed by the American College of Radiology (ACR) and the National Electrical Manufacturers Association (NEMA).
The standard specifies how digital image data can be moved from system to system.
[DETAIL SETTINGS]
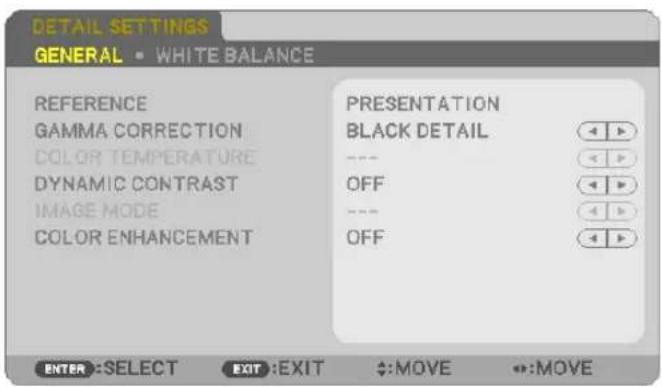
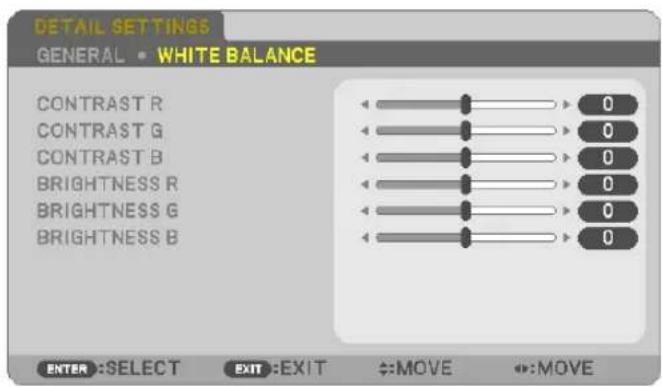
[GENERAL]
Storing Your Customized Settings [REFERENCE]
This function allows you to store your customized settings in [PRESET 1] to [PRESET 7].
First, select a base preset mode from [REFERENCE], then set [GAMMA CORRECTION] and [COLOR TEMPERATURE]. HIGH-BRIGHT ......Recommended for use in a brightly lit room.
PRESENTATION......Recommended for making a presentation using a PowerPoint file.
VIDEO......Recommended for typical TV program viewing.
MOVIE......Recommended for movies.
GRAPHIC ......Recommended for graphics.
sRGB......Standard color values.
DICOM SIM......Recommended for DICOM simulation format.
Selecting Gamma Correction Mode [GAMMA CORRECTION]
Each mode is recommended for:
DYNAMIC ....Creates a high-contrast picture.
NATURAL....Natural reproduction of the picture.
BLACK DETAIL......Emphasizes detail in dark areas of the picture.
NOTE: This function is not available when [DICOM SIM.] is selected for [DETAIL SETTINGS].
Selecting Screen Size for DICOM SIM [SCREEN SIZE]
This function will perform gamma correction appropriate for the screen size.
LARGE......For screen size of 110"
MEDIUM......For screen size of 90"
SMALL......For screen size of 70"
NOTE: This function is available only when [DICOM SIM.] is selected for [DETAIL SETTINGS].
Adjusting Color Temperature [COLOR TEMPERATURE]
This option allows you to select the color temperature of your choice.
NOTE: When [HIGH-BRIGHT] is selected in [REFERENCE], this function is not available.
Adjusting Brightness and Contrast [DYNAMIC CONTRAST]
This function allows you to adjust the contrast ratio optically using the built-in iris.
To increase the contrast ratio, select [ON].
Selecting Still Image Mode or Movie Mode [IMAGE MODE]
This function allows you to select the still image mode or the movie mode.
STILL ......This mode is for a still image.
MOVIE ...... This mode is for a movie.
NOTE: This function is available only when [HIGH-BRIGHT] is selected for [REFERENCE].
Enhancing the Color [COLOR ENHANCEMENT]
This function allows you to enhance the color of image.
NOTE: This function is available only when [PRESENTATION] is selected [REFERENCE].
Adjusting White Balance [WHITE BALANCE]
This allows you to adjust the white balance. Contrast for each color (RGB) to adjust the white level of the screen; Brightness for each color (RGB) is used to adjust the black level of the screen.
[CONTRAST]
Adjusts the intensity of the image according to the incoming signal.
[BRIGHTNESS]
Adjusts the brightness level or the back raster intensity.
[SHARPNESS]
Controls the detail of the image.
[COLOR]
Increases or decreases the color saturation level.
[HUE]
Varies the color level from +/- green to +/- blue. The red level is used as reference.
| Input signal CONTRAST BRIGHTNESS SHARPNESS COLOR HUE | ||||
| COMPUTER/HDMI (RGB) Yes Yes Yes No No | ||||
| COMPUTER/HDMI (COMPONENT) Yes Yes Yes Yes Yes | ||||
| USB-B Yes Yes Yes No No | ||||
| VIDEO Yes Yes Yes Yes Yes | ||||
| USB-A/LAN Yes Yes Yes No No | ||||
Yes = Adjustable, No = Not adjustable
[RESET]
The settings and adjustments for [PICTURE] will be returned to the factory settings with the exception of the following; Preset numbers and [REFERENCE] within the [PRESET] screen.
The settings and adjustments under [DETAIL SETTINGS] within the [PRESET] screen that are not currently selected will not be reset.
[IMAGE OPTIONS]
![INPUT ADJUST SETUP INFO. RESET PICTURE • IMAGE OPTIONS • AUDIO CLOCK PHASE HORIZONTAL VERTICAL OVERSCAN ASPECT RATIO POSITION 0[%] AUTO ENTER: SELECT EXIT: EXIT ↔:MOVE ↔:MOVE HDMI1 ADVANCED](/content/2026/05/813417/images/1e871760a9dab6c2c81c182384d265e84b876b1f24f72dabb2d12899ee2c8679.jpg)
Adjusting Clock and Phase [CLOCK/PHASE]
This allows you to manually adjust CLOCK and PHASE.
![NEC MC332W - Adjusting Clock and Phase [CLOCK/PHASE] - 1](/content/2026/05/813417/images/bff056f2abcc0456da6e567b6a4a024ec961e6f7c7813c80ecc5fb322f287e8d.jpg)
natural_image
Two-step diagram showing transformation of geometric shapes (circle, square, triangle) from a blank canvas to a blank canvas with rulers and rulers (no text or symbols)CLOCK .... Use this item to fine tune the computer image or to remove any vertical banding that might appear. This function adjusts the clock frequencies that eliminate the horizontal banding in the image. This adjustment may be necessary when you connect your computer for the first time.
![NEC MC332W - Adjusting Clock and Phase [CLOCK/PHASE] - 2](/content/2026/05/813417/images/d0e37fa48934a9d7467042d7a9d4425c96df5f6db807fd7ae47960d79da7318c.jpg)
natural_image
Two-step diagram showing transformation from a blank canvas to a gray geometric shapes (circle, triangle, rectangle) on a canvas, with no text or symbols present.PHASE....Use this item to adjust the clock phase or to reduce video noise, dot interference or cross talk. (This is evident when part of your image appears to be shimmering.) Use [PHASE] only after the [CLOCK] is complete.
Adjusting Horizontal/Vertical Position [HORIZONTAL/VERTICAL]
Adjusts the image location horizontally and vertically.
![NEC MC332W - Adjusting Horizontal/Vertical Position [HORIZONTAL/VERTICAL] - 1](/content/2026/05/813417/images/0c6b23ce0ce0551fe510c16945181be1aed1c743fdb14c9855ca09797e188b5a.jpg)
- An image can be distorted during the adjustment of [CLOCK] and [PHASE]. This is not malfunction.
- The adjustments for [CLOCK], [PHASE], [HORIZONTAL], and [VERTICAL] will be stored in memory for the current signal. The next time you project the signal with the same resolution, horizontal and vertical frequency, its adjustments will be called up and applied.
To delete adjustments stored in memory, from the menu, you select [RESET] → [CURRENT SIGNAL] or [ALL DATA] and reset the adjustments.
Selecting Overscan Percentage [OVERSCAN]
Select overscan percentage (AUTO, 0%, 5% and 10%) for signal.
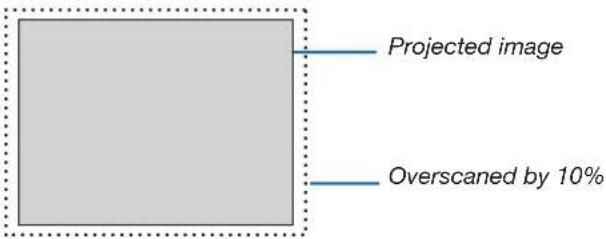
NOTE:
• The [0[%]] cannot be selected when VIDEO signal is used.
• The [OVERSCAN] item is not available:
- when [NATIVE] is selected for [ASPECT RATIO].
Selecting Aspect Ratio [ASPECT RATIO]
The term “aspect ratio” refers to the ratio of width to height of a projected image.
The projector automatically determines the incoming signal and displays it in its appropriate aspect ratio.
- This table shows typical resolutions and aspect ratios that most computers support.
| Resolution Aspect Ratio | |
| VGA 640 × 480 4:3 | |
| SVGA 800 × 600 4:3 | |
| XGA 1024 × 768 4:3 | |
| WXGA 1280 × 768 15:9 | |
| WXGA 1280 × 800 16:10 | |
| WXGA+ 1440 × 900 16:10 | |
| SXGA 1280 × 1024 5:4 | |
| SXGA+ 1400 × 1050 4:3 | |
| UXGA 1600 × 1200 4:3 | |
| WUXGA 1920 × 1200 16:10 | |
| Options Function | |
| AUTO | The projector will automatically determine the incoming signal and display it in its aspect ratio. (→next page)The projector may erroneously determine the aspect ratio depending on its signal. If this occurs, select the appropriate aspect ratio from the following. |
| 4:3 | The image is displayed in 4:3 aspect ratio. |
| 16:9 | The image is displayed in 16:9 aspect ratio. |
| 15:9 | The image is displayed in 15:9 aspect ratio. |
| 16:10 | The image is displayed in 16:10 aspect ratio. |
| WIDE ZOOM(ME402X/MC422X/MC372X/MC342X/MC302X) | The image is stretched left and right.Parts of the displayed image are cropped at the left and right edges and therefore not visible. |
| LETTERBOX(ME382U/ME342U/ME372W/MC382W/MC332W) | The image of a letterbox signal is stretched equally in the horizontal and vertical directions to fit the screen. Parts of the displayed image are cropped at the top and bottom edges and therefore not visible. |
| NATIVE | The projector displays the current image in its true resolution when the incoming computer signal has a lower resolution than the projector's native resolution.[Example 1] When the incoming signal with the resolution of 800 × 600 is displayed on the ME382U/ME342U/ME372W/MC382W/MC332W:[Example 2] When the incoming signal with the resolution of 800 × 600 is displayed on the ME402X/MC422X/MC372X/MC342X/MC302X:![NEC MC332W - Selecting Aspect Ratio [ASPECT RATIO] - 1](/content/2026/05/813417/images/3b4b12e9084dca779a833353c7b4bb6ebf57445d305f91bfcd64b46f169ab8ea.jpg) ![NEC MC332W - Selecting Aspect Ratio [ASPECT RATIO] - 2](/content/2026/05/813417/images/e0221e5cb97f5319848347710dc346dcc5e419d7339f834195b921ae4ff26486.jpg) NOTE:When a non-computer signal is displayed, the [NATIVE] is not available.When a signal with a higher resolution than the projector's native resolution is displayed, [NATIVE] is not available. NOTE:When a non-computer signal is displayed, the [NATIVE] is not available.When a signal with a higher resolution than the projector's native resolution is displayed, [NATIVE] is not available. |
Sample image when the appropriate aspect ratio is automatically determined ME402X/MC422X/MC372X/MC342X/MC302X
[Computer signal]
| Aspect ratio of incoming signal 4:3 5:4 16:9 15:9 16 | 10 | ||||
| Sample image when the appropriate aspect ratio is automatically determined |  | 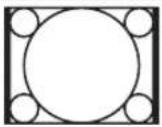 | 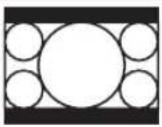 | 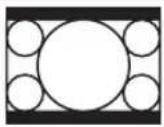 | 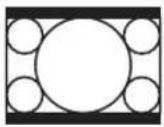 |
[Video signal]
| Aspect ratio of incoming signal 4:3 Letterbox Squeeze | ||||
| Sample image when the aspect ratio is automatically determined | 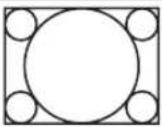 | 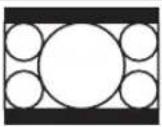 | 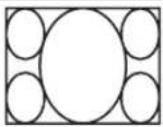 NOTE: To display a squeezed signal properly, select [16:9] or [WIDE ZOOM]. NOTE: To display a squeezed signal properly, select [16:9] or [WIDE ZOOM]. | |
ME382U/ME342U/ME372W/MC382W/MC332W
[Computer signal]
| Aspect ratio of incoming signal 4:3 5:4 16:9 15:9 16:10 | |||||
| Sample image when the appropriate aspect ratio is automatically determined | 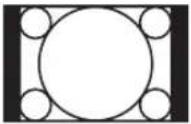 | 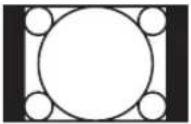 | 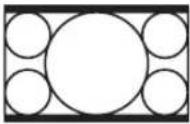 | 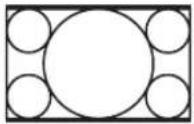 | 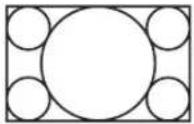 |
[Video signal]
| Aspect ratio of incoming signal 4:3 Letterbox Squeeze | |||
| Sample image when the aspect ratio is automatically determined | 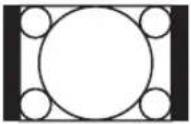 | 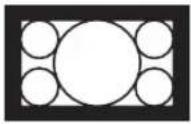 NOTE: To display a letterbox signal properly, select [LETTERBOX]. NOTE: To display a letterbox signal properly, select [LETTERBOX]. | 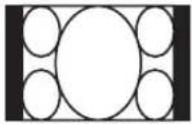 NOTE: To display a squeezed signal properly, select [16:9]. NOTE: To display a squeezed signal properly, select [16:9]. |
TIP:
- Image position can be adjusted vertically using [POSITION] when the [16:9], [15:9], or [16:10] aspect ratios are selected.
- The term "letterbox" refers to a more landscape-oriented image when compared to a 4:3 image, which is the standard aspect ratio for a video source.
The letterbox signal has aspect ratios with the vista size "1.85:1" or cinema scope size "2.35:1" for movie film. - The term "squeeze" refers to the compressed image of which aspect ratio is converted from 16:9 to 4:3.
Adjusting the Vertical Position of Image [POSITION] (not available on ME382U/ME342U/ME372W/MC382W/MC332W)
(only when [16:9], [15:9], or [16:10] is selected for [ASPECT RATIO])
When [16:9], [15:9], or [16:10] is selected in [ASPECT RATIO], the image is displayed with black borders on the top and bottom.
You can adjust the vertical position from the top to the bottom of the black area.
![NEC MC332W - Adjusting the Vertical Position of Image [POSITION] (not available on ME382U/ME342U/ME372W/MC382W/MC332W) - 1](/content/2026/05/813417/images/26ce649687b430094b16a97196a180960d55959b4ccbef78a975fcf08bcb005d.jpg)
natural_image
Diagram showing two rectangular blocks with circular holes and a blue double-headed arrow indicating transformation (no text or symbols)[AUDIO]
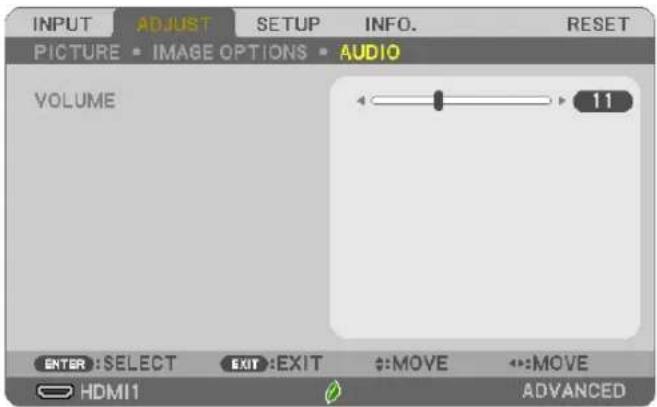
Turning Up or Down Sound
Adjusts the volume of the projector speaker and AUDIO OUT (Stereo Mini Jack).
TIP:
- When no menus appear, the ◀ and ▶ buttons on the projector cabinet and the VOL. +/- buttons on the remote control work as a volume control. (→ page 20)
⑥ Menu Descriptions & Functions [SETUP]
[GENERAL]
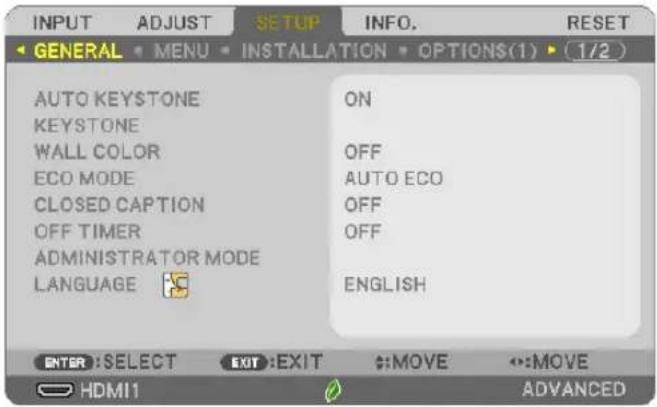
Enabling Auto Keystone [AUTO KEYSTONE]
This feature allows the projector to detect its tilt and correct vertical distortion automatically.
To turn on the AUTO KEYSTONE feature, select [ON]. To adjust the KEYSTONE feature manually, select [OFF].
NOTE:
- The [AUTO KEYSTONE] function is not available when an orientation type such as [CEILING REAR], [DESKTOP REAR], [CEILING FRONT] other than [DESKTOP/FRONT] is selected for [ORIENTATION].
- While the [AUTO KEYSTONE] is [ON], the following functions are not available, [PINCUSHION LEFT/RIGHT], [PINCUSHION TOP/BOTTOM], and [CORNERSTONE].
TIP
- Adjustable angle range by the [AUTO KEYSTONE] is approx. 30 degrees in vertical direction.
- During projecting image, [AUTO KEYSTONE] will be started to perform approx. 2 seconds after fixing the throw angle.
Correcting Keystone Distortion Manually [KEYSTONE]
You can correct horizontal or vertical keystone, pincushion LEFT/RIGHT or TOP/BOTTOM, or cornerstone distortion manually.
NOTE:
- [KEYSTONE HORIZONTAL] and [KEYSTONE VERTICAL] can be adjusted at once.
• To change from one item to another item, reset the first item. - Adjustment values will be overwritten. They will not be deleted even when the projector is turned off.
- Using [KEYSTONE], [PINCUSHION] and [CORNERSTONE] correction can cause the image to be slightly blurred because the correction is made electronically.
- When the [AUTO KEYSTONE] has been [ON], it automatically performs vertical keystone correction every time the projector is powered on.
KEYSTONE HORIZONTAL......Corrects horizontal keystone distortion. (→ page 18)
KEYSTONE VERTICAL......Corrects vertical keystone distortion. (→ page 18)
PINCUSHION LEFT/RIGHT......Corrects pincushion distortion at the left or right side. (→ page 28)
PINCUSHION TOP/BOTTOM......Corrects pincushion distortion at the top or bottom side. (→ page 28)
CORNERSTONE....Fits a projected image within the border of the screen easily by align the four corner of an image to the ones of the screen. (→ page 26)
RESET......Returns all the above items to the factory preset values.
TIP:
- Adjustable angle range in horizontal and vertical direction in the cornerstone and the keystone corrections: Approx. 30 degrees (Max) - Depending on input signal, the adjustable range may be narrower.
Using the Wall Color Correction [WALL COLOR]
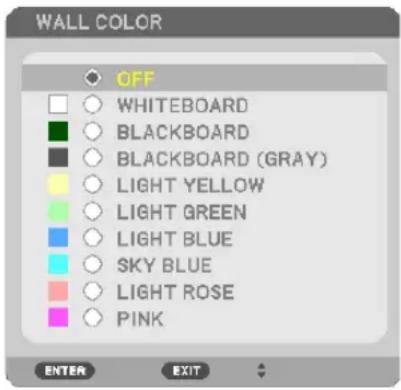
This function allows for quick adaptive color correction in applications where the screen material is not white.
NOTE: Selecting [WHITEBOARD] reduces lamp brightness.
Setting Eco Mode [ECO MODE]
The ECO MODE increases lamp life, while lowering power consumption and cutting down on CO_2 emissions. Four brightness modes of the lamp can be selected: [OFF], [AUTO ECO], [NORMAL] and [ECO] modes. ( page 24)
Setting Closed Caption [CLOSED CAPTION]
This option sets several closed caption modes that allow text to be superimposed on the projected image of Video. OFF....This exits the closed caption mode.
CAPTION 1-4......Text is superimposed.
TEXT 1-4......Text is displayed.
NOTE:
• The closed caption is not available under the following conditions:
- when messages or menus are displayed.
- when an image is magnified, frozen, or muted.
- Portions of superimposed text or closed caption may be truncated. If that happens, try to place the superimposed text or closed caption within the screen.
Using Off Timer [OFF TIMER]
- Select your desired time between 30 minutes and 16 hours: OFF, 0:30, 1:00, 2:00, 4:00, 8:00, 12:00, 16:00.
- Press the ENTER button on the remote control.
- The remaining time starts counting down.
- The projector will turn off after the countdown is complete.
NOTE:
• To cancel the preset time, set [OFF] for the preset time or turn off the power.
- When the remaining time reaches 3 minutes before the projector is turned off, the [THE PROJECTOR WILL TURN OFF WITHIN 3 MINUTES] message will be displayed on the bottom of the screen.
ADMINISTRATOR MODE
This allows you to select MENU MODE, save settings, and set a password for the administrator mode.
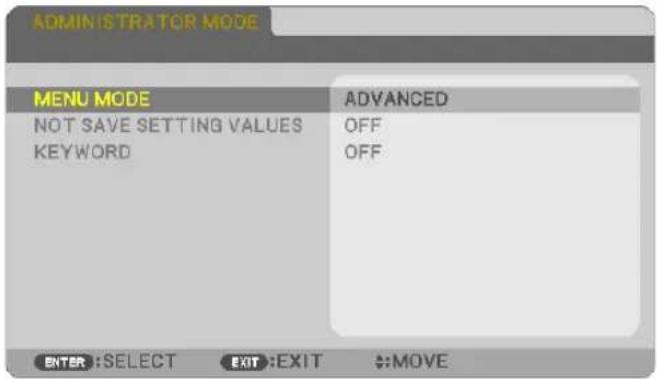
| MENU MODE Select | either [BASIC] or [ADVANCED] menu. — | |
| NOT SAVE SETTING VALUES | Placing a check mark will not save your projector settings.Clear this check box to save your projector settings. | — |
| KEYWORD Assign a | password for the administrator mode. Up to 10 alphanumeric characters | |
Selecting Menu Language [LANGUAGE]
You can choose one of 30 languages for on-screen instructions.
NOTE: Your setting will not be affected even when [RESET] is done from the menu.
[MENU]
![INPUT ADJUST SETUP INFO. RESET GENERAL MENU INSTALLATION OPTIONS(1) 1/2 COLOR SELECT COLOR INPUT DISPLAY ON ID DISPLAY ON ECO MESSAGE OFF DISPLAY TIME AUTO 45 SEC BACKGROUND BLUE FILTER MESSAGE 10000[H] ENTER:SELECT EXIT:EXIT :MOVE :MOVE HDMI1 ADVANCED](/content/2026/05/813417/images/a406a00328b3fae07b0baa42ae6c5dd2b24e3ae16dc5327a2becdc2ad27a93d1.jpg)
Selecting Menu Color [COLOR SELECT]
You can choose between two options for menu color: COLOR and MONOCHROME.
Turning On / Off Source Display [INPUT DISPLAY]
This option turns on or off input name display such as HDMI1, HDMI2, COMPUTER, VIDEO, USB-A, LAN, USB-B, to be displayed on the top right of the screen.
When no input signal is present, the no-signal guidance prompting you to check for an available input will be displayed. When the [USB-A] or [LAN] item is selected for [INPUT], the no-signal guidance will not be displayed.
Turning ON/OFF Control ID [ID DISPLAY]
This option turns on or off the ID number which is displayed when the ID SET button on the remote control is pressed.
Turning On / Off Eco Message [ECO MESSAGE]
This option turns on or off the following messages when the projector is turned on.
The Eco Message prompts the user to save energy. When [OFF] is selected for [ECO MODE], you will get a message to prompt you to select [AUTO ECO], [NORMAL], or [ECO] for [ECO MODE].
When [AUTO ECO], [NORMAL], or [ECO] is selected for [ECO MODE]
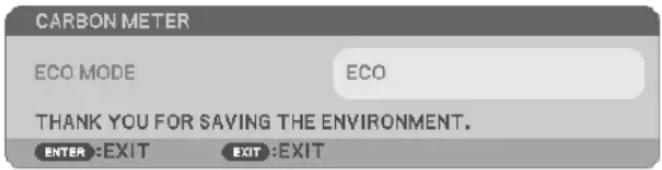
To close the message, press any one of the buttons. The message will disappear if no button operation is done for 30 seconds.
When [OFF] is selected for [ECO MODE]
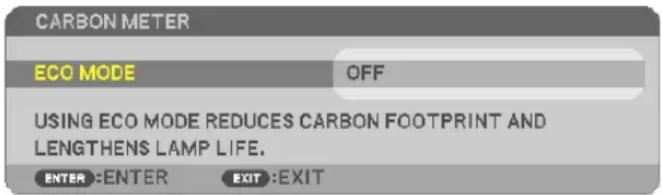
Pressing the ENTER button will display the [ECO MODE] screen. (→ page 24)
To close the message, press the EXIT button.
Selecting Menu Display Time [DISPLAY TIME]
This option allows you to select how long the projector waits after the last touch of a button to turn off the menu. The preset choices are [MANUAL], [AUTO 5 SEC], [AUTO 15 SEC], and [AUTO 45 SEC]. The [AUTO 45 SEC] is the factory preset.
Selecting a Color or Logo for Background [BACKGROUND]
Use this feature to display a blue/black screen or logo when no signal is available. The default background is [BLUE].
NOTE:
- If the [LOGO] item is selected for [BACKGROUND] with the [LAN] or [USB-B] source selected, the [BLUE] item will be selected regardless of its selection.
- When [INPUT DISPLAY] is turned on, the no-signal guidance prompting you to check for an available input will be displayed at the center of the screen regardless of its selection.
- Your setting will not be affected even when [RESET] is done from the menu.
Selecting Interval Time for Filter Message [FILTER MESSAGE]
This option allows you to select the time preference between displaying the message for cleaning the filter. Clean the filter when you get the message “PLEASE CLEAN THE FILTER.” ( page 108)
Seven options are available:
OFF, 100[H], 500[H], 1000[H], 2000[H], 5000[H], 10000[H]
NOTE: Your setting will not be affected even when [RESET] is done from the menu.
[INSTALLATION]
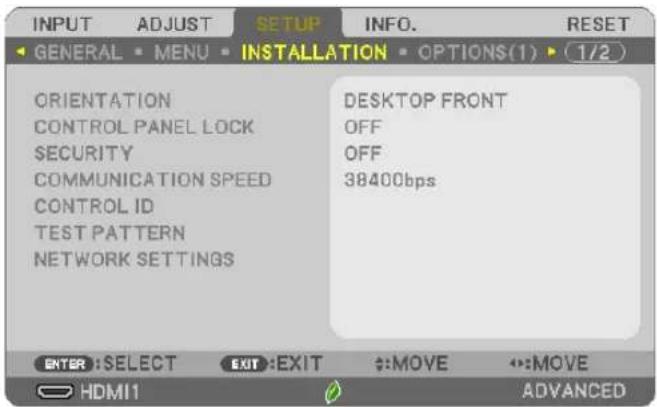
Selecting Projector Orientation [ORIENTATION]
This reorients your image for your type of projection. The options are: desktop front projection, ceiling rear projection, desktop rear projection, and ceiling front projection.
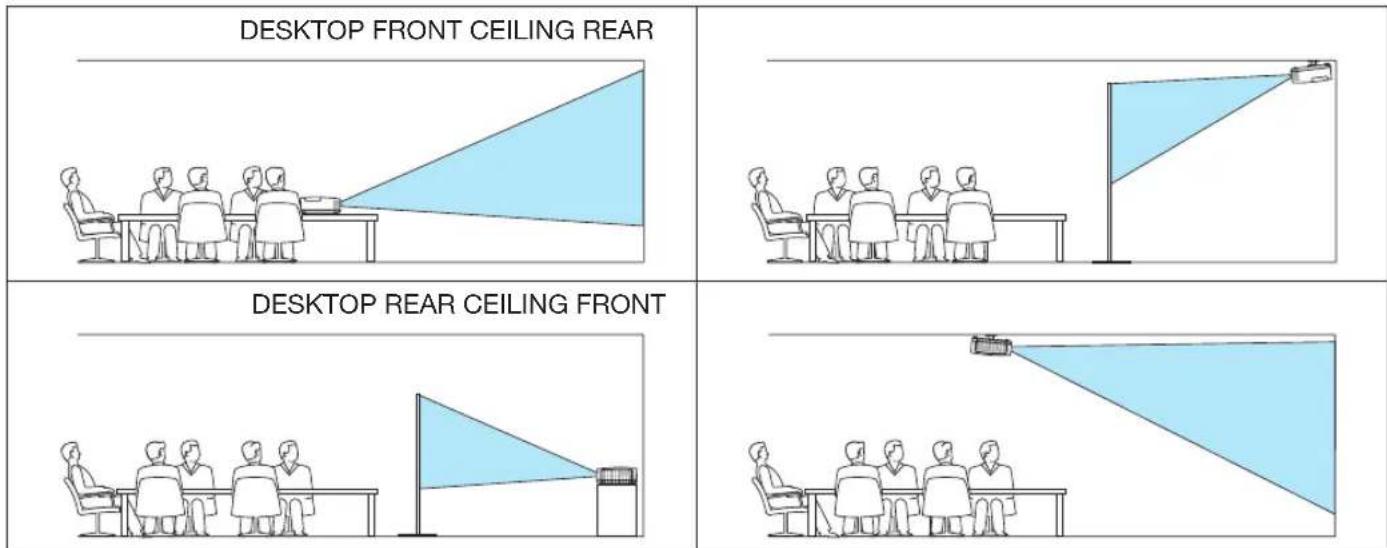
Disabling the Cabinet Buttons [CONTROL PANEL LOCK]
This option turns on or off the CONTROL PANEL LOCK function.
NOTE:
• This CONTROL PANEL LOCK does not affect the remote control functions.
- When the control panel is locked, pressing and holding the INPUT button on the projector cabinet for about 10 seconds will change the setting to [OFF].
TIP: When the [CONTROL PANEL LOCK] is turned on, a key lock icon [ ] will be displayed at the bottom right of the menu.
Enabling Security [SECURITY]
This feature turns on or off the SECURITY function.
Unless the correct keyword is entered, the projector cannot project an image. (→ page 30)
NOTE: Your setting will not be affected even when [RESET] is done from the menu.
Selecting Communication Speed [COMMUNICATION SPEED]
This feature sets the baud rate of the PC Control port (D-Sub 9P). It supports data rates from 4800 to 38400 bps. The default is 38400 bps. Select the appropriate baud rate for your equipment to be connected (depending on the equipment, a lower baud rate may be recommended for long cable runs).
NOTE: Your selected communication speed will not be affected even when [RESET] is done from the menu.
Setting ID to the Projector [CONTROL ID]
You can operate multiple projectors separately and independently with the single remote control that has the CONTROL ID function. If you assign the same ID to all the projectors, you can conveniently operate all the projectors together using the single remote control. To do so, you have to assign an ID number to each projector.
CONTROL ID NUMBER......Select a number from 1 to 254 you wish to assign to your projector.
CONTROL ID......Select [OFF] to turn off the CONTROL ID setting and select [ON] to turn on the CONTROL ID setting.
NOTE:
- When [ON] is selected for [CONTROL ID], the projector cannot be operated by using the remote control that does not support the CONTROL ID function. (In this case, the buttons on the projector cabinet can be used.)
- Your setting will not be affected even when [RESET] is done from the menu.
- Pressing and holding the ENTER button on the projector cabinet for 10 seconds will display the menu for canceling the Control ID.
Assigning or Changing the Control ID
1. Turn on the projector.
2. Press the ID SET button on the remote control.
The CONTROL ID screen will be displayed.
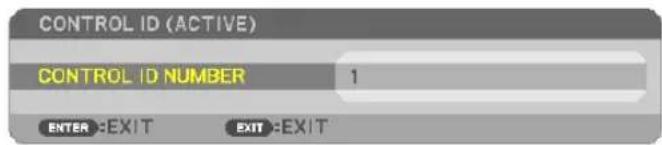
If the projector can be operated with the current remote control ID, the [ACTIVE] will be displayed. If the projector cannot be operated with the current remote control ID, the [INACTIVE] will be displayed. To operate the inactive projector, assign the control ID used for the projector by using the following procedure (Step 3).
3. Press one of numeric keypad buttons while pressing and holding the ID SET button on the remote control.
Example:
To assign "3", press the "3" button on the remote control.
No ID means that all the projectors can be operated together with a single remote control. To set "No ID", enter "000" or press the CLEAR button.
TIP: The range of IDs is from 1 to 254.
4. Release the ID SET button.
The updated CONTROL ID screen will be displayed.
NOTE:
• The IDs can be cleared in a few days after the batteries are run down or removed.
- Accidentally pressing any one of the buttons of the remote control will clear currently specified ID with batteries removed.
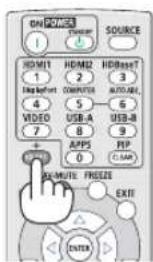
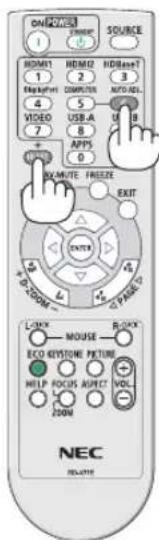
Using Test Pattern [TEST PATTERN]
Displays the test pattern to check for image distortion at the time of the projector setup. Press the ENTER button to display the test pattern; press the EXIT button to close the test pattern and return to the menu. Menu operation and corrections for keystone, cornerstone and pincushion are not available when the test pattern is displayed.
[NETWORK SETTINGS]
For details on each of the [NETWORK SETTINGS], see "7-3. NETWORK SETTINGS" ( page 99).
[OPTIONS(1)]
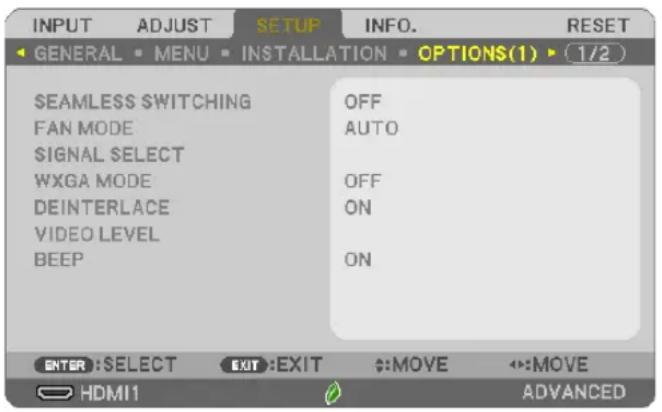
[SEAMLESS SWITCHING]
When the input connector is switched, the image displayed before switching is held to switch to the new image without a break due to absence of a signal.
Selecting Fan Mode [FAN MODE]
This option allows you to select two modes for fan speed: Auto mode and High Altitude mode.
AUTO ....The built-in fans automatically run at a variable speed according to the internal temperature.
HIGH ALTITUDE......The built-in fans run at a high speed. Select this option when using the projector at altitudes approximately 5500 feet/1700 meters or higher.
NOTE:
- Set [FAN MODE] to [HIGH ALTITUDE] when using the projector at altitudes approximately 5500 feet/1700 meters or higher.
- Using the projector at altitudes approximately 5500 feet/1700 meters or higher without setting to [HIGH ALTITUDE] can cause the projector to overheat and the protector could shut down. If this happens, wait a couple minutes and turn on the projector.
- Using the projector at altitudes less than approximately 5500 feet/1700 meters and setting to [HIGH ALTITUDE] can cause the lamp to overcool, causing the image to flicker. Switch [FAN MODE] to [AUTO].
- Using the projector at altitudes approximately 5500 feet/1700 meters or higher can shorten the life of optical components such as the lamp.
- Your setting will not be affected even when [RESET] is done from the menu.
TIP:
- When [HIGH ALTITUDE] is selected, an icon[] is displayed at the bottom of the on-screen menu.
Selecting Signal Format [SIGNAL SELECT]
[COMPUTER]
Allows you to choose [COMPUTER] for an RGB source such as a computer, or [COMPONENT] for a component video source such as a DVD player. Normally select [RGB/COMPONENT] and the projector automatically detects a component signal. However there may be some component signals that the projector is unable to detect. If this is the case, select [COMPONENT].
Enabling or Disabling WXGA Mode [WXGA MODE]
Selecting [ON] will give priority to WXGA (1280 × 800)/WUXGA (1920 × 1200) signals in recognizing an input signal. When [WXGA MODE] is set to [ON], XGA (1024 × 768)/UXGA (1600 × 1200) signals may not be recognized on ME402X/MC422X/MC372X/MC342X/MC302X. In this case, select [OFF].
NOTE:
• [OFF] is selected at the time of shipment of ME402X/MC422X/MC372X/MC342X/MC302X.
• [ON] is selected at the time of shipment of ME382U/ME342U/ME372W/MC382W/MC332W.
Enabling the deinterlace [DEINTERLACE]
Turns on or off the deinterlace function for a telecine signal.
OFF......Select this option if there is any jitter or artifacts in video. ON......Default standard setting.
NOTE: This feature is not available for HDTV (progressive) and computer signals.
Setting Video Level [VIDEO LEVEL]
Selection of the video signal level when connecting an external device to the HDMI 1 IN terminal or HDMI 2 IN terminal of the projector.
AUTO ....The video level is switched automatically based on the information from the device outputting the signal. Depending on the connected device, this setting may not be made properly. In this case, switch to "NORMAL" or "ENHANCED" from the menu and view with the optimum setting.
NORMAL......This disables the enhanced mode.
ENHANCED....This improves the image's contrast, expressing the dark and light sections more dynamically.
Enabling Key Sound and Error Sound [BEEP]
This feature turns on or off the button sound or alarm when an error occurs or the following operations are performed.
- Displaying the main menu
- Switching sources
- Resetting data by using [RESET]
- Pressing POWER ON or STANDBY button
TIP:
- Volume control for [BEEP] is disabled. AV-MUTE button is not effective to stop beeping sound. If you want to activate BEEP function, set [BEEP] to [OFF].
[OPTIONS(2)]
![INPUT ADJUST SETUP INFO. RESET OPTIONS(2) 2/2 STANDBY MODE DIRECT POWER ON AUTO POWER ON AUTO POWER OFF DEFAULT INPUT SELECT CARBON CONVERT CURRENCY CURRENCY CONVERT STATIC CONVERGENCE NORMAL OFF OFF 1:00 LAST 0.505[kg-CO2/kWh] $ 0.11[$/kWh] ENTER :SELECT EXIT :EXIT :MOVE :MOVE HDMI1 ADVANCED](/content/2026/05/813417/images/3847ec68e4f9d3ddd969bd4d95cf2d422cc95fa7bd77dfff8b27cc68a92d0d5b.jpg)
Selecting Power-saving in [STANDBY MODE]
The projector has three standby modes: [NORMAL], [NETWORK STANDBY], and [SLEEP].
The NORMAL mode is the mode that allows you to put the projector in the power-saving condition which consumes less power than the NETWORK STANDBY mode.
| NORMAL......When [NORMAL] is selected, only the following buttons and feature will work:POWER buttons on the projector cabinet and the remote control, AUTO POWER ON, and powering on from PC Control command. |
| NETWORK STANDBY......When [NETWORK STANDBY] is selected, the projector can be turned on over a wired LAN connection and only the following buttons, port, and features will work:POWER buttons on the projector cabinet and the remote control, powering on from PC Control command, AUTO POWER ON, LAN port, wireless LAN unit (optional), operation by User Supportware, LAN feature, and Mail Alert feature. |
| SLEEP......Maintain the state of sleep. Consumption power becomes higher than the setting of NORMAL. Select this mode in the following cases:For using the USB-A port constantly. |
IMPORTANT:
- When [NETWORK STANDBY] has been set for [STANDBY MODE] and the LAN has been in link-down condition for 3 minutes, [STANDBY MODE] will transit into [NORMAL] automatically for the purpose to save the consumption power.
- When [NETWORK STANDBY] has been selected, [AUTO POWER OFF] becomes ineffective (displayed in grey) and [0:15] is selected automatically.
- In the below conditions, setting of the [STANDBY MODE] is disabled and the projector will go into the SLEEP mode*.
* Sleep mode refers the mode without functional restrictions by the [STANDBY MODE]. Power consumption in the SLEEP mode is relatively higher than the [NETWORK STANDBY] mode. The Status indicator turns on in Green.
When [STANDBY MODE] → [NETWORK STANDBY] is selected - When [NETWORK SERVICE] → [AMX SETTINGS] → [ENABLE] is selected
- When [NETWORK SERVICE] → [CRESTRON SETTINGS] → [CRESTRON CONTROL] → [ENABLE] is selected
- When [NETWORK SETTINGS] → [WIRELESS LAN] → Except for [DISABLE] and mounting the wireless LAN unit to the projector.
- When the signal is input to the COMPUTER, HDMI 1 IN, HDMI 2 IN or USB-B terminals
NOTE:
• Even when [NORMAL] is selected for [STANDBY MODE], power on or off can be done by using the PC CONTROL port.
• The power consumption in the standby mode will not be included in calculating C _2 emission reduction.
- Your setting for [STANDBY MODE] will not be affected even when [RESET] is done from the menu.
Enabling Direct Power On [DIRECT POWER ON]
Turns the projector on automatically when the power cord is inserted into an active power outlet. This eliminates the need to always use the POWER button on the remote control or projector cabinet.
Turning On the Projector By Applying Computer Signal [AUTO POWER ON]
When the projector is in Standby mode, applying a computer or HDMI signal from a computer connected to the COMPUTER IN input, HDMI1, or HDMI2 input will power on the projector and simultaneously project the image.
This functionality eliminates the need to always use the POWER button on the remote control or the projector cabinet to power on the projector.
To use this function, first connect a computer to the projector and the projector to an active AC input.
NOTE:
- Disconnecting a computer signal from the computer will not power off the projector. We recommend using this function in combination of the AUTO POWER OFF function.
• This function will not be available under the following conditions: - when a component signal is applied to the COMPUTER IN terminal
- when a Sync on Green RGB signal or composite sync signal is applied
• To enable the AUTO POWER ON after turning off the projector, wait 5 seconds and input a computer or HDMI signal.
If a computer or HDMI signal is still present when the projector is turned off, the AUTO POWER ON will not work and the projector remains in standby mode. - Depending on the projector in use, the AUTO POWER ON may not work properly. In this case, set [STANDBY MODE] to [NETWORK STANDBY].
Enabling Power Management [AUTO POWER OFF]
When this option is selected you can enable the projector to automatically turn off (at the selected time: 0:05, 0:10, 0:15, 0:20, 0:30, 1:00) if there is no signal received by any input or if no operation is performed.
Selecting Default Source [DEFAULT INPUT SELECT]
You can set the projector to default to any one of its inputs each time the projector is turned on.
LAST....Sets the projector to default to the previous or last active input each time the projector is turned on.
AUTO ....Searches for an active source in order of HDMI1 → HDMI2 → COMPUTER → VIDEO → USB-A → COMPUTER and displays the first found source.
HDMI1......Displays the digital source from the HDMI 1 IN terminal every time the projector is turned on.
HDMI2....Displays the digital source from the HDMI 2 IN terminal every time the projector is turned on.
COMPUTER ...... Displays the computer signal from the COMPUTER IN terminal every time the projector is turned on.
VIDEO......Displays the Video source from the VIDEO IN terminal every time the projector is turned on.
USB-A....Displays slides or plays back movie files from the USB memory device every time the projector is turned on.
LAN......Displays a signal from LAN port (RJ-45) or the USB Wireless LAN Unit.
USB-B......Displays the computer signal from the USB-B terminal every time the projector is turned on.
The projector does not search signal from USB-B in AUTO. For projecting image from the USB-B port, select either USB-B or LAST.
Setting carbon footprint factor [CARBON CONVERT]
Adjusts the carbon footprint factor in the carbon saving calculation. The initial setting is 0.505[kg-CO2/kWh] based on the CO2 Emissions from Fuel Combustion (2008 Edition) published by OECD.
Selecting your currency [CURRENCY]
Displays electricity pricing (available in 4 currency units).
\$......US Dollar
€......EU Euro
JP¥......Japanese Yen
RMB¥.....Chinese Yuan
Changing currency setting and currency convert setting [CURRENCY CONVERT]
Changes currency setting and currency convert setting for CARBON METER.
The initial setting are as follows:
US Dollar....0.11 [\$/kWh]
EU Euro....0.19 [€/kWh]
Japanese Yen......20 [¥/kWh]
Chinese Yuan .....0.48 [¥/kWh]
The initial settings for US dollar, EU Euro, and Japanese Yen are based on “Energy Prices and Taxes (second quarter 2010)” published by OECD.
The initial setting for Chinese Yuan is based on “Chinese Data File (2010)” published by JETRO.
[STATIC CONVERGENCE]
This feature allows you to adjust for color deviation in the picture. This can be adjusted in units of ± 1 pixel in the horizontal direction for HORIZONTAL R, G and B, in the vertical direction for VERTICAL R, G and B.
- This feature is not supported by ME372W/MC382W/MC332W/ME402X/MC422X/MC372X/MC342X/MC302X.
⑦ Menu Descriptions & Functions [INFO.]
Displays the status of the current signal and lamp usage. This item has seven pages. The information included is as follows:
TIP: Pressing the HELP button on the remote control will show the [INFO.] menu items.
[USAGE TIME]
![INPUT ADJUST SETUP INFO. RESET 1/3 USAGE TIME SOURCE(1) SOURCE(2) LAMP LIFE REMAINING LAMP HOURS USED 00000[H] FILTER HOURS USED 00000[H] TOTAL CARBON SAVINGS 0.000[kg-CO2] TOTAL COST SAVINGS 0.00[$] EXIT:EXIT :MOVE :MOVE HDMI1 ADVANCED](/content/2026/05/813417/images/f33e9195285f1954829df42b3103e1a3d7984415b8d198c4a675a5497259ca4a.jpg)
[LAMP LIFE REMAINING] (%)*
[LAMP HOURS USED] (H)
[FILTER HOURS USED] (H)
[TOTAL CARBON SAVINGS] (kg-CO2)
[TOTAL COST SAVINGS]
* The progress indicator shows the percentage of remaining bulb life.
The value informs you of the amount of lamp usage. When the remaining lamp time reaches 0, the LAMP LIFE REMAINING bar indicator changes from 0% to 100 Hours and starts counting down.
If the remaining lamp time reaches 0 hours, the projector will not turn on.
- The message to the effect that the lamp or the filter should be replaced will be displayed for one minute when the projector is turned on and when the POWER button on the projector or the remote control is pressed.
To dismiss this message, press any button on the projector or the remote control.
| Lamp life (H) | Replacement lamp | ||
| ECO MODE | |||
| OFF/AUTO ECO | NORMAL ECO | ||
| 10000 12000 | 15000 NP47LP | ||
*1 This is not a warranty time. Repair or replacement parts may be required before the lamp is replaced.
• [TOTAL CARBON SAVINGS]
This displays the estimated carbon saving information in kg. The carbon footprint factor in the carbon saving calculation is based on the OECD (2008 Edition). ( page 25)
[SOURCE(1)]
![INPUT ADJUST SETUP INFO. RESET USAGE TIME SOURCE(1) SOURCE(2) (1/3) SOURCE NAME 1024x768 SOURCE INDEX 108 HORIZONTAL FREQUENCY 48[kHz] VERTICAL FREQUENCY 60[Hz] SYNC TYPE SEPARATE SYNC SYNC POLARITY H:(+) V:(+) SCAN TYPE NON-INTERLACE EXIT:EXIT #:MOVE #:MOVE HDMI1 ADVANCED](/content/2026/05/813417/images/7312262c9217fba4cf5575c2b71fec51afbdeca7477cdd9c110d6513fea00b0e.jpg)
[SOURCE NAME] [SOURCE INDEX]
[HORIZONTAL FREQUENCY] [VERTICAL FREQUENCY]
[SYNC TYPE] [SYNC POLARITY]
[SCAN TYPE]
[SOURCE(2)]
![INPUT ADJUST SETUP INFO. RESET USAGE TIME SOURCE(1) SOURCE(2) (1/3) SIGNAL TYPE RGB VIDEO TYPE ---- BIT DEPTH 8[byte] VIDEO LEVEL FULL EXIT:EXIT :MOVE :MOVE HDMI1 ADVANCED](/content/2026/05/813417/images/248f4042a7f4a386eb75c959b89cb59b2179ffa964b30996d915f8ef3739356b.jpg)
[SIGNAL TYPE] [VIDEO TYPE]
[BIT DEPTH] [VIDEO LEVEL]
[WIRED LAN]
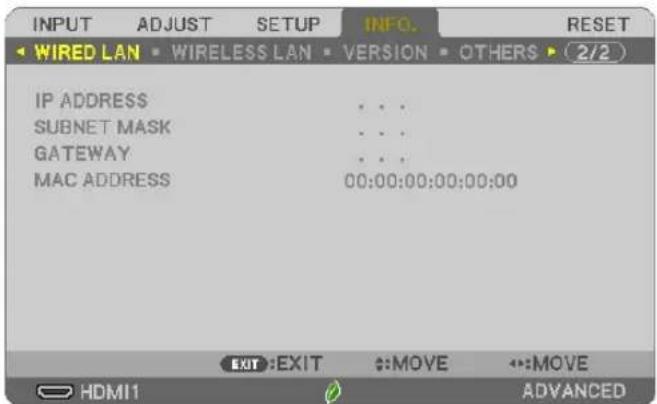
[IP ADDRESS] [SUBNET MASK]
[GATEWAY] [MAC ADDRESS]
[WIRELESS LAN]
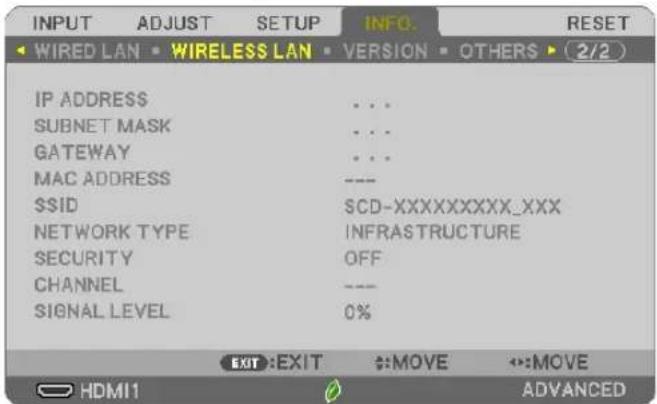
[IP ADDRESS] [SUBNET MASK]
[GATEWAY] [MAC ADDRESS]
[SSID] [NETWORK TYPE]
[SECURITY]
[SIGNAL LEVEL]
[CHANNEL]
[VERSION]
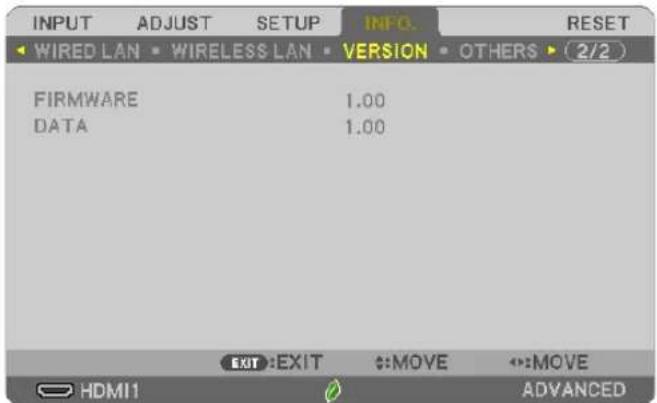
[FIRMWARE] Version
[DATA] Version
[OTHERS]
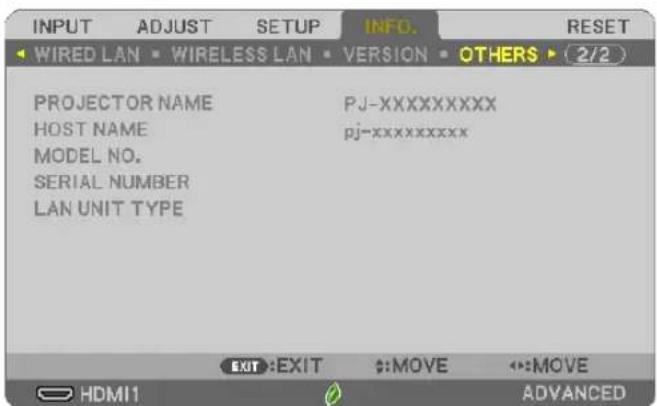
[PROJECTOR NAME]
[HOST NAME]
[MODEL NO.]
[SERIAL NUMBER]
[LAN UNIT TYPE]
[CONTROL ID] (when [CONTROL ID] is set)
⑧ Menu Descriptions & Functions [RESET]
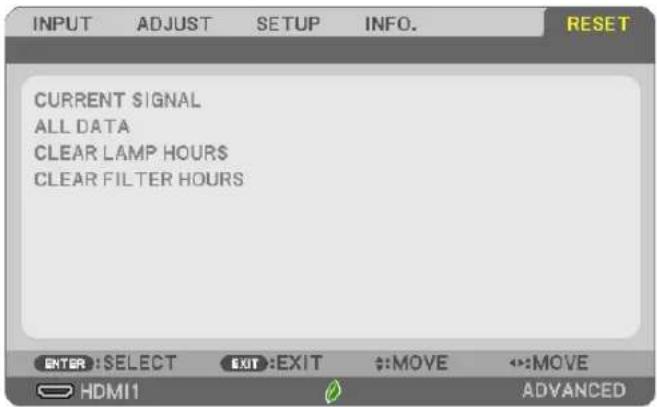
Returning to Factory Default [RESET]
The RESET feature allows you to change adjustments and settings to the factory preset for a (all) source (s) except the following:
[CURRENT SIGNAL]
Resets the adjustments for the current signal to the factory preset levels.
The items that can be reset are: [PRESET], [CONTRAST], [BRIGHTNESS], [COLOR], [HUE], [SHARPNESS], [ASPECT RATIO], [HORIZONTAL], [VERTICAL], [CLOCK], [PHASE], and [OVERSCAN].
[ALL DATA]
Reset all the adjustments and settings for all the signals to the factory preset.
All items can be reset EXCEPT [LANGUAGE], [BACKGROUND], [ORIENTATION], [FILTER MESSAGE], [STATIC CONVERGENCE], [ADMINISTRATOR MODE], [SECURITY], [COMMUNICATION SPEED], [CONTROL ID], [STANDBY MODE], [FAN MODE], [CARBON CONVERT], [CURRENCY], [CURRENCY CONVERT], [LAMP LIFE REMAINING], [LAMP HOURS USED], [FILTER HOURS USED], [TOTAL CARBON SAVINGS], [WIRED LAN], and [WIRELESS LAN].
To reset the lamp usage time, see "Clearing Lamp Hour Meter [CLEAR LAMP HOURS]" below.
Clearing Lamp Hour Meter [CLEAR LAMP HOURS]
Resets the lamp clock back to zero. Selecting this option displays submenu for a confirmation. Select [YES] and press the ENTER button.
NOTE: Elapsed time of the lamp use will not be affected even when [RESET] is done from the menu.
NOTE: The projector will turn off and go into standby mode when you continue to use the projector for another 100 hours after the lamp has reached the end of its life. In this condition you cannot clear the lamp hour meter on the menu. If this happens, press the HELP button on the remote control for 10 seconds to reset the lamp clock back to zero. Do this only after replacing the lamp.
Clearing the Filter Usage Hours [CLEAR FILTER HOURS]
Resets the filter usage back to zero. Selecting this option displays submenu for a confirmation. Select [YES] and press the ENTER button.
NOTE: Elapsed time of the filter use will not be affected even when [RESET] is done from the menu.
6. Installation and Connections
① Setting Up the Screen and the Projector
Use this to get a general idea of what the screen size will be when set in a certain position, what size screen you will need, and what distance you will need to project images of the desired size.
The projection distance range at which focusing is possible is 0.9 m (for 30 inches) to 10.9 m (for 300 inches). Install within this range.
[MC422X/MC372X]
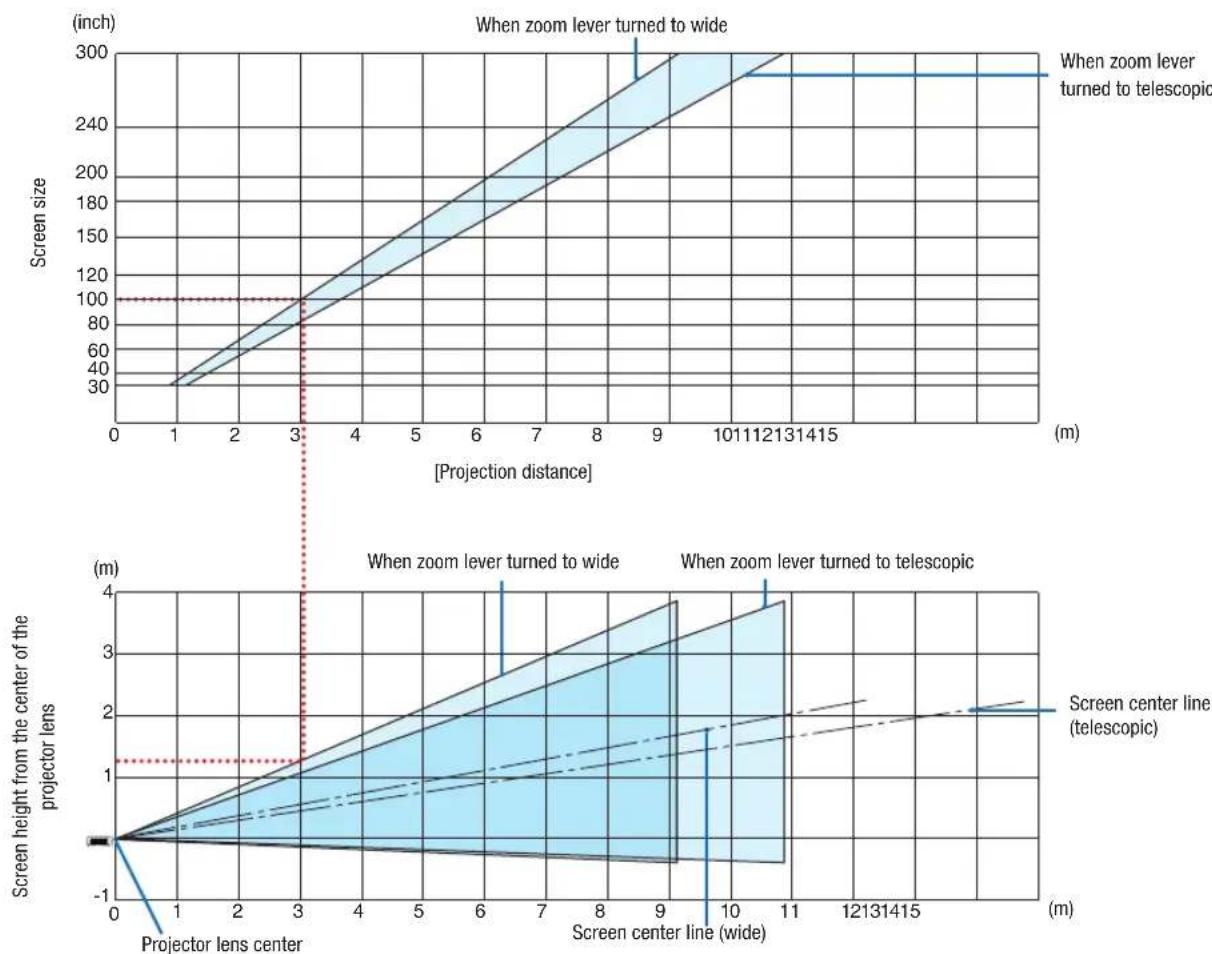
line
| Projection distance (m) | Screen size (inch) - When zoom lever turned to wide | Screen size (inch) - When zoom lever turned to telescopic | Screen height from the center of the projector lens (m) - Projector lens center | Screen height from the center of the projector lens (m) - Screen center line (telescopic) | | ----------------------- | -------------------------------------------------- | -------------------------------------------------------- | -------------------------------------------------------------------------- | --------------------------------------------------------------------------------------------- | | 0 | 30 | 30 | 0 | 0 | | 1 | 60 | 60 | 0.5 | 0.5 | | 2 | 90 | 90 | 1.0 | 1.0 | | 3 | 120 | 120 | 1.5 | 1.5 | | 4 | 150 | 150 | 2.0 | 2.0 | | 5 | 180 | 180 | 2.5 | 2.5 | | 6 | 210 | 210 | 3.0 | 3.0 | | 7 | 240 | 240 | 3.5 | 3.5 | | 8 | 270 | 270 | 4.0 | 4.0 | | 9 | 300 | 300 | 4.5 | 4.5 | | 10 | 300 | 300 | 5.0 | 5.0 | | 11 | 300 | 300 | 5.5 | 5.5 | | 12 | 300 | 300 | 6.0 | 6.0 | | 13 | 300 | 300 | 6.5 | 6.5 | | 14 | 300 | 300 | 7.0 | 7.0 | | 15 | 300 | 300 | 7.5 | 7.5 | | 16 | 300 | 300 | 8.0 | 8.0 | | 17 | 300 | 300 | 8.5 | 8.5 | | 18 | 300 | 300 | 9.0 | 9.0 | | 19 | 300 | 300 | 9.5 | 9.5 | | 20 | 300 | 300 | 10.0 | 10.0 | | Note: The actual values for the zoom lever turned to wide and the zoom lever turned to telescopic are not provided in the code snippet. The caption above is "When zoom lever turned to wide" and "When zoom lever turned to telescopic". The caption below is "Screen center line (telescopic)". The data is presented in two separate panels with shaded regions and dashed lines representing different conditions or models.[Reading the Table]
From the upper table on this page, to project wide images on a 100 screen, install at about 3.0m from the front. Also, from the lower table we can see that about 1.3m are required from the projector's lens center to the upper edge of the screen. Use this to see whether or not enough height can be provided from the projector to the ceiling and for installing the screen. The diagram shows the projection distance when the projector is installed horizontally.
The projection distance range at which focusing is possible is 0.8 m (for 30 inches) to 13.8 m (for 300 inches). Install within this range.
[ME402X]
![NEC MC332W - [Reading the Table] - 1](/content/2026/05/813417/images/486f48d9464f8ee1cd3e7707cc501dcf6408569d32f7c3e0c52a1904bd9d0883.jpg)
line
| Projection distance (m) | Screen size (inch) - When zoom lever turned to wide | Screen size (inch) - When zoom lever turned to telescopic | | ----------------------- | -------------------------------------------------- | -------------------------------------------------------- | | 0 | 30 | 100 | | 3 | 100 | 100 | | 8 | 240 | 240 | | 15 | 300 | 300 |[Reading the Table]
From the upper table on this page, to project wide images on a 100 screen, install at about 2.7 m from the front. Also, from the lower table we can see that about 1.3 m are required from the projector's lens center to the upper edge of the screen. Use this to see whether or not enough height can be provided from the projector to the ceiling and for installing the screen.
The projection distance range at which focusing is possible is 0.9 m (for 30 inches) to 10.9 m (for 300 inches). Install within this range.
[MC342X/MC302X]
![NEC MC332W - [Reading the Table] - 1](/content/2026/05/813417/images/e1e98dc1b2102d33eca449da15bb60e91fd0ee8a085b3be732278719663482f8.jpg)
line
| Projection distance (m) | Screen size (inch) | Screen height from the center of the projector lens (m) | | ----------------------- | ------------------ | ------------------------------------------------------ | | 0 | 30 | 0 | | 1 | 40 | 0.5 | | 2 | 60 | 1.0 | | 3 | 80 | 1.5 | | 4 | 100 | 2.0 | | 5 | 120 | 2.5 | | 6 | 140 | 3.0 | | 7 | 160 | 3.5 | | 8 | 180 | 4.0 | | 9 | 200 | 4.5 | | 10 | 220 | 5.0 | | 11 | 240 | 5.5 | | 12 | 260 | 6.0 | | 13 | 280 | 6.5 | | 14 | 300 | 7.0 | | 15 | 300 | 7.5 | | 16 | 300 | 8.0 | | 17 | 300 | 8.5 | | 18 | 300 | 9.0 | | 19 | 300 | 9.5 | | 20 | 300 | 10.0 |[Reading the Table]
From the upper table on this page, to project wide images on a 100 screen, install at about 3.0m from the front. Also, from the lower table we can see that about 1.3m are required from the projector's lens center to the upper edge of the screen. Use this to see whether or not enough height can be provided from the projector to the ceiling and for installing the screen. The diagram shows the projection distance when the projector is installed horizontally.
The projection distance range at which focusing is possible is 0.8 m (for 30 inches) to 13.4 m (for 300 inches). Install within this range.
[ME372W]
![NEC MC332W - [Reading the Table] - 1](/content/2026/05/813417/images/5068d991ca97e3386fac420f11de9873a86067cebde356d5272521a92ac0a622.jpg)
[Reading the Table]
From the upper table on this page, to project wide images on a 100 screen, install at about 2.7m from the front. Also, from the lower table we can see that about 1.2m are required from the projector's lens center to the upper edge of the screen. Use this to see whether or not enough height can be provided from the projector to the ceiling and for installing the screen.
The projection distance range at which focusing is possible is 0.9 m (for 30 inches) to 10.7 m (for 300 inches). Install within this range.
[MC382W]
![NEC MC332W - [Reading the Table] - 1](/content/2026/05/813417/images/f768517f29e9cd312bea9c90de0d9a325774c75b7bcb14c4caaa9b0fe22acf42.jpg)
[Reading the Table]
From the upper table on this page, to project wide images on a 100 screen, install at about 3.0m from the front. Also, from the lower table we can see that about 1.2m are required from the projector's lens center to the upper edge of the screen. Use this to see whether or not enough height can be provided from the projector to the ceiling and for installing the screen. The diagram shows the projection distance when the projector is installed horizontally.
The projection distance range at which focusing is possible is 1.0 m (for 30 inches) to 11.6 m (for 300 inches). Install within this range.
[MC332W]
![NEC MC332W - [Reading the Table] - 1](/content/2026/05/813417/images/44aa84e0dcef4046ddf0c2d26965e1eea9a83fd9b115955202bb2e1c75e39929.jpg)
[Reading the Table]
From the upper table on this page, to project wide images on a 100 screen, install at about 3.2m from the front. Also, from the lower table we can see that about 1.3m are required from the projector's lens center to the upper edge of the screen. Use this to see whether or not enough height can be provided from the projector to the ceiling and for installing the screen. The diagram shows the projection distance when the projector is installed horizontally.
The projection distance range at which focusing is possible is 0.8 m (for 30 inches) to 12.9 m (for 300 inches). Install within this range.
[ME382U/ME342U]
![NEC MC332W - [Reading the Table] - 1](/content/2026/05/813417/images/729595b2abf78dae8fc0dfb7c20d19f1b389a3bec57508da604da0ab35051fe9.jpg)
line
| Projection distance (m) | Screen size (inch) | Screen height from the center of the projector lens (m) | | ----------------------- | ------------------ | ------------------------------------------------------ | | 0 | 30 | 0 | | 2 | 60 | 0.5 | | 4 | 100 | 1.0 | | 6 | 150 | 1.5 | | 8 | 200 | 2.0 | | 10 | 250 | 2.5 | | 12 | 300 | 3.0 | | 14 | 300 | 3.5 | | 16 | 300 | 4.0 |[Reading the Table]
From the upper table on this page, to project wide images on a 100 screen, install at about 2.6 m from the front. Also, from the lower table we can see that about 1.2 m are required from the projector's lens center to the upper edge of the screen. Use this to see whether or not enough height can be provided from the projector to the ceiling and for installing the screen.
Throw Distance and Screen Size
The following shows the proper relative positions of the projector and screen. Refer to the table to determine the position of installation.
Distance Chart
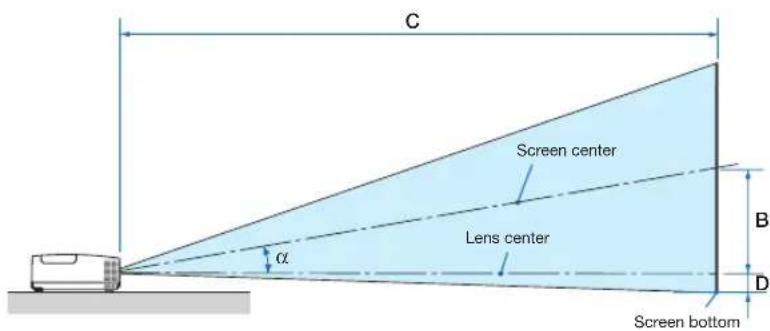
B = Vertical distance between lens center and screen center
C = Throw distance
D = Vertical distance between lens center and screen bottom (top of screen for ceiling application)
= Throw angle
NOTE: The values in the tables are design values and may vary.
[MC422X/MC372X]
| Screen Size | B | C | D | α | |||||||||||||
| Diagonal Width Height Wide Tele Wide Tele | |||||||||||||||||
| inch mm inch mm inch mm inch mm - inch mm inch mm Degree - Degree | |||||||||||||||||
| 30 | 762 | 24 | 610 | 18 | 457 | 6 | 163 | 35 | 900 | - | 43 | 1083 | -3 | -65 | 10.3 | - | 8.6 |
| 40 | 1016 | 32 | 813 | 24 | 610 | 9 | 218 | 47 | 1204 | - | 57 | 1448 | -3 | -87 | 10.3 | - | 8.6 |
| 60 | 1524 | 48 | 1219 | 36 | 914 | 13 | 327 | 71 | 1812 | - | 86 | 2179 | -5 | -130 | 10.2 | - | 8.5 |
| 80 | 2032 | 64 | 1626 | 48 | 1219 | 17 | 436 | 95 | 2421 | - | 115 | 2910 | -7 | -174 | 10.2 | - | 8.5 |
| 100 | 2540 | 80 | 2032 | 60 | 1524 | 21 | 545 | 119 | 3029 | - | 143 | 3641 | -9 | -217 | 10.2 | - | 8.5 |
| 120 | 3048 | 96 | 2438 | 72 | 1829 | 26 | 653 | 143 | 3637 | - | 172 | 4372 | -10 | -261 | 10.2 | - | 8.5 |
| 150 | 3810 | 120 | 3048 | 90 | 2286 | 32 | 817 | 179 | 4550 | - | 215 | 5468 | -13 | -326 | 10.2 | - | 8.5 |
| 180 | 4572 | 144 | 3658 | 108 | 2743 | 39 | 980 | 215 | 5462 | - | 258 | 6564 | -15 | -391 | 10.2 | - | 8.5 |
| 200 | 5080 | 160 | 4064 | 120 | 3048 | 43 | 1089 | 239 | 6070 | - | 287 | 7295 | -17 | -435 | 10.2 | - | 8.5 |
| 240 | 6096 | 192 | 4877 | 144 | 3658 | 51 | 1307 | 287 | 7287 | - | 345 | 8756 | -21 | -522 | 10.2 | - | 8.5 |
| 270 | 6858 | 216 | 5486 | 162 | 4115 | 58 | 1470 | 323 | 8199 | - | 388 | 9853 | -23 | -587 | 10.2 | - | 8.5 |
| 300 | 7620 | 240 | 6096 | 180 | 4572 | 64 | 1634 | 359 | 9112 | - | 431 | 10949 | -26 | -652 | 10.2 | - | 8.5 |
[ME402X]
| Screen Size | B | C | D | α | |||||||||||||
| Diagonal Width Height Wide Tele Wide Tele | |||||||||||||||||
| inch mm inch mm inch mm inch mm - inch mm inch mm Degree - Degree | |||||||||||||||||
| 30 | 762 | 24 | 610 | 18 | 457 | 6 | 157 | 31 | 778 | - | 52 | 1327 | -3 | -71 | 11.4 | - | 6.8 |
| 40 | 1016 | 32 | 813 | 24 | 610 | 8 | 210 | 42 | 1056 | - | 70 | 1788 | -4 | -95 | 11.2 | - | 6.7 |
| 60 | 1524 | 48 | 1219 | 36 | 914 | 12 | 314 | 63 | 1612 | - | 107 | 2710 | -6 | -143 | 11.0 | - | 6.6 |
| 80 | 2032 | 64 | 1626 | 48 | 1219 | 17 | 419 | 85 | 2168 | - | 143 | 3632 | -8 | -191 | 10.9 | - | 6.6 |
| 100 | 2540 | 80 | 2032 | 60 | 1524 | 21 | 524 | 107 | 2724 | - | 179 | 4554 | -9 | -238 | 10.9 | - | 6.6 |
| 120 | 3048 | 96 | 2438 | 72 | 1829 | 25 | 629 | 129 | 3280 | - | 216 | 5476 | -11 | -286 | 10.8 | - | 6.5 |
| 150 | 3810 | 120 | 3048 | 90 | 2286 | 31 | 786 | 162 | 4114 | - | 270 | 6859 | -14 | -357 | 10.8 | - | 6.5 |
| 180 | 4572 | 144 | 3658 | 108 | 2743 | 37 | 943 | 195 | 4948 | - | 324 | 8242 | -17 | -429 | 10.8 | - | 6.5 |
| 200 | 5080 | 160 | 4064 | 120 | 3048 | 41 | 1048 | 217 | 5504 | - | 361 | 9164 | -19 | -476 | 10.8 | - | 6.5 |
| 240 | 6096 | 192 | 4877 | 144 | 3658 | 50 | 1257 | 260 | 6616 | - | 433 | 11008 | -23 | -572 | 10.8 | - | 6.5 |
| 270 | 6858 | 216 | 5486 | 162 | 4115 | 56 | 1414 | 293 | 7450 | - | 488 | 12391 | -25 | -643 | 10.8 | - | 6.5 |
| 300 | 7620 | 240 | 6096 | 180 | 4572 | 62 | 1572 | 326 | 8284 | - | 542 | 13774 | -28 | -714 | 10.7 | - | 6.5 |
[MC342X/MC302X]
| Screen Size | B | C | D | α | |||||||||||||
| Diagonal Width Height Wide Tele Wide Tele | |||||||||||||||||
| inch mm inch mm inch mm inch mm - inch mm inch mm Degree - Degree | |||||||||||||||||
| 30 | 762 | 24 | 610 | 18 | 457 | 6 | 163 | 34 | 876 | - | 42 | 1058 | -3 | -65 | 10.6 | - | 8.8 |
| 40 | 1016 | 32 | 813 | 24 | 610 | 9 | 218 | 46 | 1180 | - | 56 | 1422 | -3 | -87 | 10.5 | - | 8.7 |
| 60 | 1524 | 48 | 1219 | 36 | 914 | 13 | 327 | 70 | 1786 | - | 85 | 2150 | -5 | -130 | 10.4 | - | 8.6 |
| 80 | 2032 | 64 | 1626 | 48 | 1219 | 17 | 436 | 94 | 2393 | - | 113 | 2879 | -7 | -174 | 10.3 | - | 8.6 |
| 100 | 2540 | 80 | 2032 | 60 | 1524 | 21 | 545 | 118 | 3000 | - | 142 | 3607 | -9 | -217 | 10.3 | - | 8.6 |
| 120 | 3048 | 96 | 2438 | 72 | 1829 | 26 | 653 | 142 | 3606 | - | 171 | 4335 | -10 | -261 | 10.3 | - | 8.6 |
| 150 | 3810 | 120 | 3048 | 90 | 2286 | 32 | 817 | 178 | 4517 | - | 214 | 5427 | -13 | -326 | 10.2 | - | 8.6 |
| 180 | 4572 | 144 | 3658 | 108 | 2743 | 39 | 980 | 214 | 5427 | - | 257 | 6520 | -15 | -391 | 10.2 | - | 8.5 |
| 200 | 5080 | 160 | 4064 | 120 | 3048 | 43 | 1089 | 238 | 6033 | - | 285 | 7248 | -17 | -435 | 10.2 | - | 8.5 |
| 240 | 6096 | 192 | 4877 | 144 | 3658 | 51 | 1307 | 285 | 7247 | - | 343 | 8704 | -21 | -522 | 10.2 | - | 8.5 |
| 270 | 6858 | 216 | 5486 | 162 | 4115 | 58 | 1470 | 321 | 8157 | - | 386 | 9797 | -23 | -587 | 10.2 | - | 8.5 |
| 300 | 7620 | 240 | 6096 | 180 | 4572 | 64 | 1634 | 357 | 9067 | - | 429 | 10889 | -26 | -652 | 10.2 | - | 8.5 |
[ME372W]
| Screen Size | B | C | D | α | |||||||||||||
| Diagonal Width | Height Wide Tele | Wide Tele | |||||||||||||||
| inch mm | inch mm | inch mm | inch mm | - inch mm | inch mm | Degree | Degree | ||||||||||
| 30 | 762 | 25 | 646 | 16 | 404 | 6 | 154 | 30 | 755 | - | 51 | 1291 | -2 | -48 | 11.5 | - | 6.8 |
| 40 | 1016 | 34 | 862 | 21 | 538 | 8 | 206 | 40 | 1025 | - | 69 | 1740 | -3 | -64 | 11.3 | - | 6.7 |
| 60 | 1524 | 51 | 1292 | 32 | 808 | 12 | 309 | 62 | 1565 | - | 104 | 2638 | -4 | -95 | 11.2 | - | 6.7 |
| 80 | 2032 | 68 | 1723 | 42 | 1077 | 16 | 411 | 83 | 2105 | - | 139 | 3536 | -5 | -127 | 11.1 | - | 6.6 |
| 100 | 2540 | 85 | 2154 | 53 | 1346 | 20 | 514 | 104 | 2645 | - | 175 | 4434 | -6 | -159 | 11.0 | - | 6.6 |
| 120 | 3048 | 102 | 2585 | 64 | 1615 | 24 | 617 | 125 | 3186 | - | 210 | 5332 | -8 | -191 | 11.0 | - | 6.6 |
| 150 | 3810 | 127 | 3231 | 79 | 2019 | 30 | 771 | 157 | 3996 | - | 263 | 6679 | -9 | -238 | 10.9 | - | 6.6 |
| 180 | 4572 | 153 | 3877 | 95 | 2423 | 36 | 926 | 189 | 4806 | - | 316 | 8025 | -11 | -286 | 10.9 | - | 6.6 |
| 200 | 5080 | 170 | 4308 | 106 | 2692 | 40 | 1028 | 210 | 5346 | - | 351 | 8923 | -13 | -318 | 10.9 | - | 6.6 |
| 240 | 6096 | 204 | 5169 | 127 | 3231 | 49 | 1234 | 253 | 6427 | - | 422 | 10719 | -15 | -381 | 10.9 | - | 6.6 |
| 270 | 6858 | 229 | 5816 | 143 | 3635 | 55 | 1388 | 285 | 7237 | - | 475 | 12066 | -17 | -429 | 10.9 | - | 6.6 |
| 300 | 7620 | 254 | 6462 | 159 | 4039 | 61 | 1543 | 317 | 8048 | - | 528 | 13413 | -19 | -477 | 10.8 | - | 6.6 |
[MC382W]
| Screen Size | B | C | D | α | |||||||||||||
| Diagonal Width Height Wide Tele Wide Tele | |||||||||||||||||
| inch mm inch mm inch mm inch mm - inch mm inch mm Degree - | Degree | ||||||||||||||||
| 30 76 | 25 646 | 16 404 6 | 160 34 856 | -41 1046 | -2 | -42 10.6 | - | 8.7 | |||||||||
| 40 | 1016 | 34 | 862 | 21 | 538 | 8 | 214 | 45 | 1153 | - | 55 | 1403 | -2 | -55 | 10.5 | - | 8.7 |
| 60 | 1524 | 51 | 1292 | 32 | 808 | 13 | 321 | 69 | 1748 | - | 83 | 2117 | -3 | -83 | 10.4 | - | 8.6 |
| 80 | 2032 | 68 | 1723 | 42 | 1077 | 17 | 428 | 92 | 2342 | - | 111 | 2831 | -4 | -111 | 10.3 | - | 8.6 |
| 100 | 2540 | 85 | 2154 | 53 | 1346 | 21 | 534 | 116 | 2937 | - | 140 | 3545 | -5 | -139 | 10.3 | - | 8.6 |
| 120 | 3048 | 102 | 2585 | 64 | 1615 | 25 | 641 | 139 | 3531 | - | 168 | 4260 | -7 | -166 | 10.3 | - | 8.6 |
| 150 | 3810 | 127 | 3231 | 79 | 2019 | 32 | 802 | 174 | 4423 | - | 210 | 5331 | -8 | -208 | 10.3 | - | 8.6 |
| 180 | 4572 | 153 | 3877 | 95 | 2423 | 38 | 962 | 209 | 5314 | - | 252 | 6402 | -10 | -250 | 10.3 | - | 8.5 |
| 200 | 5080 | 170 | 4308 | 106 | 2692 | 42 | 1069 | 233 | 5909 | - | 280 | 7116 | -11 | -277 | 10.3 | - | 8.5 |
| 240 | 6096 | 204 | 5169 | 127 | 3231 | 50 | 1283 | 279 | 7097 | - | 336 | 8544 | -13 | -333 | 10.2 | - | 8.5 |
| 270 | 6858 | 229 | 5816 | 143 | 3635 | 57 | 1443 | 315 | 7989 | - | 379 | 9615 | -15 | -374 | 10.2 | - | 8.5 |
| 300 | 7620 | 254 | 6462 | 159 | 4039 | 63 | 1603 | 350 | 8881 | - | 421 | 10686 | -16 | -416 | 10.2 | - | 8.5 |
[MC332W]
| Screen Size | B | C | D | α | |||||||||||||
| Diagonal Width Height Wide Tele Wide Tele | |||||||||||||||||
| inch mm inch mm inch mm inch mm - inch mm inch mm Degree - Degree | |||||||||||||||||
| 30 | 762 | 25 | 635 | 16 | 406 | 7 | 174 | 38 | 955 | - | 45 | 1149 | -1 | -29 | 10.3 | - | 8.6 |
| 40 | 1016 | 34 | 864 | 21 | 533 | 9 | 229 | 50 | 1277 | - | 60 | 1536 | -2 | -38 | 10.2 | - | 8.5 |
| 60 | 1524 | 51 | 1295 | 32 | 813 | 14 | 348 | 76 | 1922 | - | 91 | 2311 | -2 | -58 | 10.2 | - | 8.5 |
| 80 | 2032 | 68 | 1727 | 42 | 1067 | 18 | 457 | 101 | 2567 | - | 121 | 3086 | -3 | -77 | 10.2 | - | 8.5 |
| 100 | 2540 | 85 | 2159 | 53 | 1346 | 23 | 577 | 126 | 3211 | - | 152 | 3860 | -4 | -96 | 10.2 | - | 8.5 |
| 120 | 3048 | 102 | 2591 | 64 | 1626 | 27 | 697 | 152 | 3856 | - | 182 | 4635 | -5 | -115 | 10.2 | - | 8.5 |
| 150 | 3810 | 127 | 3226 | 79 | 2007 | 34 | 860 | 190 | 4823 | - | 228 | 5797 | -6 | -144 | 10.2 | - | 8.5 |
| 180 | 4572 | 153 | 3886 | 95 | 2413 | 41 | 1035 | 228 | 5790 | - | 274 | 6959 | -7 | -173 | 10.2 | - | 8.5 |
| 200 | 5080 | 170 | 4318 | 106 | 2692 | 45 | 1154 | 253 | 6435 | - | 304 | 7733 | -8 | -192 | 10.2 | - | 8.5 |
| 240 | 6096 | 204 | 5182 | 127 | 3226 | 54 | 1383 | 304 | 7725 | - | 365 | 9283 | -9 | -230 | 10.2 | - | 8.5 |
| 270 | 6858 | 229 | 5817 | 143 | 3632 | 61 | 1557 | 342 | 8692 | - | 411 | 10445 | -10 | -259 | 10.2 | - | 8.5 |
| 300 | 7620 | 254 | 6452 | 159 | 4039 | 68 | 1732 | 380 | 9659 | - | 457 | 11607 | -11 | -288 | 10.2 | - | 8.5 |
[ME382U/ME342U]
| Screen Size | B | C | D | α | |||||||||||||
| Diagonal Width Height Wide Tele Wide Tele | |||||||||||||||||
| inch mm inch mm inch mm inch mm - inch mm inch mm Degree - Degree | |||||||||||||||||
| 30 | 762 | 25 | 646 | 16 | 404 | 6 | 154 | 29 | 745 | - | 49 | 1240 | -2 | -48 | 11.7 | - | 7.1 |
| 40 | 1016 | 34 | 862 | 21 | 538 | 8 | 206 | 40 | 1012 | - | 66 | 1670 | -3 | -64 | 11.5 | - | 7.0 |
| 60 | 1524 | 51 | 1292 | 32 | 808 | 12 | 309 | 61 | 1545 | - | 100 | 2532 | -4 | -95 | 11.3 | - | 6.9 |
| 80 | 2032 | 68 | 1723 | 42 | 1077 | 16 | 411 | 82 | 2079 | - | 134 | 3393 | -5 | -127 | 11.2 | - | 6.9 |
| 100 | 2540 | 85 | 2154 | 53 | 1346 | 20 | 514 | 103 | 2612 | - | 167 | 4254 | -6 | -159 | 11.1 | - | 6.9 |
| 120 | 3048 | 102 | 2585 | 64 | 1615 | 24 | 617 | 124 | 3145 | - | 201 | 5115 | -8 | -191 | 11.1 | - | 6.9 |
| 150 | 3810 | 127 | 3231 | 79 | 2019 | 30 | 771 | 155 | 3945 | - | 252 | 6407 | -9 | -238 | 11.1 | - | 6.9 |
| 180 | 4572 | 153 | 3877 | 95 | 2423 | 36 | 926 | 187 | 4745 | - | 303 | 7699 | -11 | -286 | 11.0 | - | 6.9 |
| 200 | 5080 | 170 | 4308 | 106 | 2692 | 40 | 1028 | 208 | 5278 | - | 337 | 8560 | -13 | -318 | 11.0 | - | 6.9 |
| 240 | 6096 | 204 | 5169 | 127 | 3231 | 49 | 1234 | 250 | 6345 | - | 405 | 10283 | -15 | -381 | 11.0 | - | 6.8 |
| 270 | 6858 | 229 | 5816 | 143 | 3635 | 55 | 1388 | 281 | 7145 | - | 456 | 11575 | -17 | -429 | 11.0 | - | 6.8 |
| 300 | 7620 | 254 | 6462 | 159 | 4039 | 61 | 1543 | 313 | 7945 | - | 507 | 12867 | -19 | -477 | 11.0 | - | 6.8 |
WARNING
- Installing your projector on the ceiling must be done by a qualified technician. Contact your NEC dealer for more information.
- Do not attempt to install the projector yourself.
- Only use your projector on a solid, level surface. If the projector falls to the ground, you can be injured and the projector severely damaged.
- Do not use the projector where temperatures vary greatly. The projector must be used at temperatures between 41°F (5°C) and 104°F (40°C) (Eco mode selected automatically at 95°F to 104°F/35°C to 40°C).
- Do not expose the projector to moisture, dust, or smoke. This will harm the screen image.
- Ensure that you have adequate ventilation around your projector so heat can dissipate. Do not cover the vents on the side or the front of the projector.
② Making Connections
Connecting Your Computer
Computer cables, HDMI and USB can be used to connect to a computer. The connection cable is not enclosed with the projector. Please get ready a suitable cable for the connection.
NOTE: Signals supported by Plug & Play (DDC2)
| INPUT | ||
| COMPUTER IN HDMI 1 IN HDMI 2 INanalog digital digital | ||
| Yes Yes Yes | ||
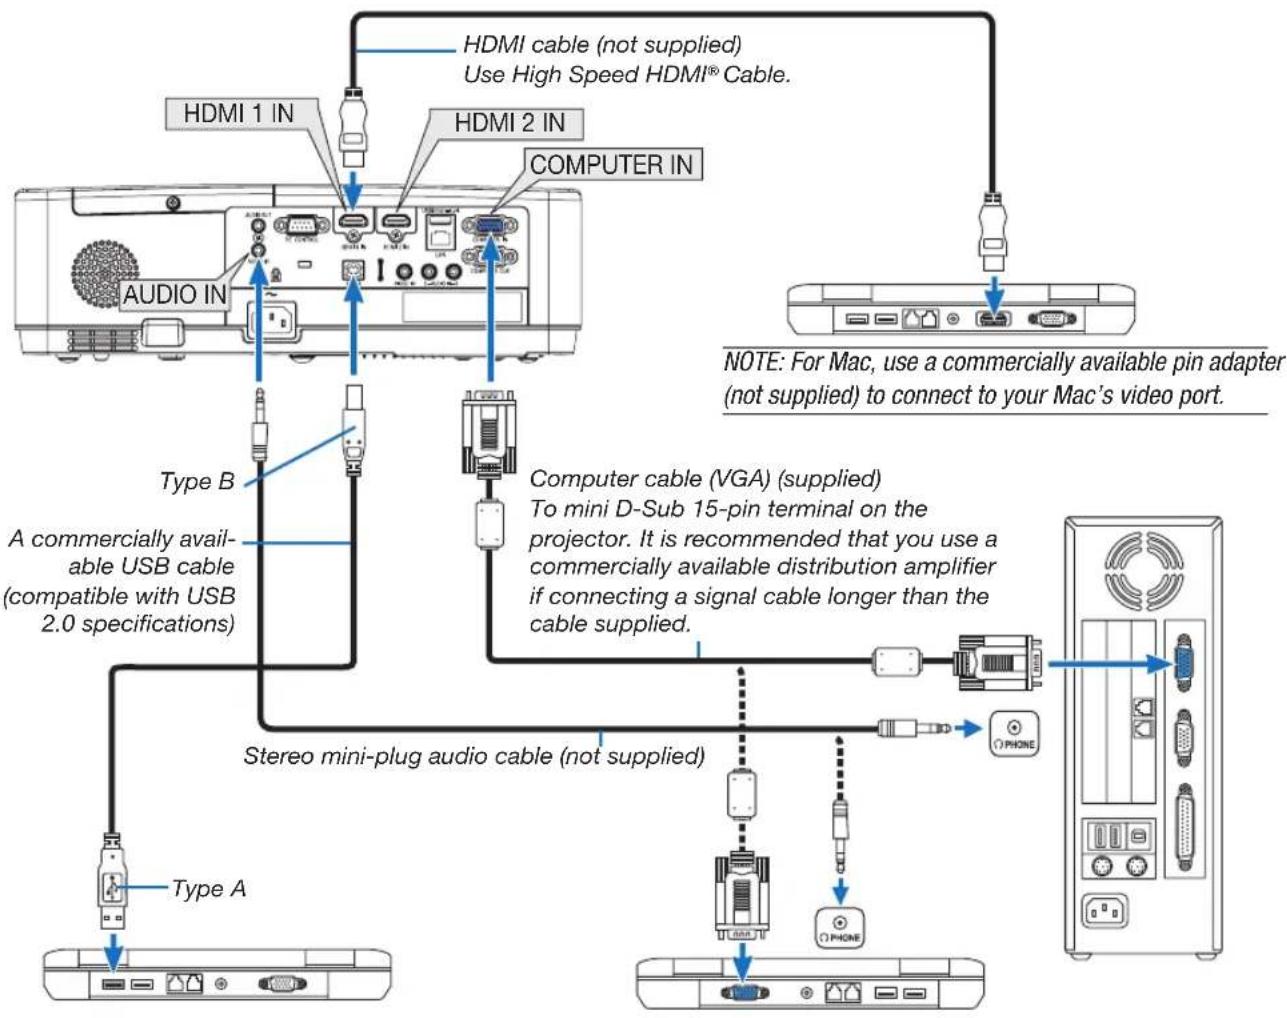
- Select the source name for its appropriate input terminal after turning on the projector.
| Input terminal | INPUT button on the projector cabinet | Button on the remote control |
| COMPUTER IN | (COMPUTER) | |
| HDMI 1 IN | ||
| HDMI 2 IN | ||
| USB-B |
NOTE: The projector is not compatible with video decoded outputs of the NEC ISS-6020 switcher.
NOTE: An image may not be displayed correctly when a Video source is played back via a commercially available scan converter. This is because the projector will process a video signal as a computer signal at the default setting. In that case, do the following.
* When an image is displayed with the lower and upper black portion of the screen or a dark image is not displayed correctly: Project an image to fill the screen and then press the AUTO ADJ. button on the remote control or the projector cabinet.
Enabling the computer's external display
Displaying an image on the notebook PC's screen does not necessarily mean it outputs a signal to the projector.
When using a PC compatible laptop, a combination of function keys will enable/disable the external display.
Usually, the combination of the “Fn” key along with one of the 12 function keys gets the external display to come on or off. For example, NEC laptops use Fn + F3, while Dell laptops use Fn + F8 key combinations to toggle through external display selections.
Cautions when using a DVI signal
- When the computer has a DVI output terminal, use a commercially available converter cable to connect the computer to the projector's HDMI 1 or HDMI 2 input terminal (only digital video signals can be input).
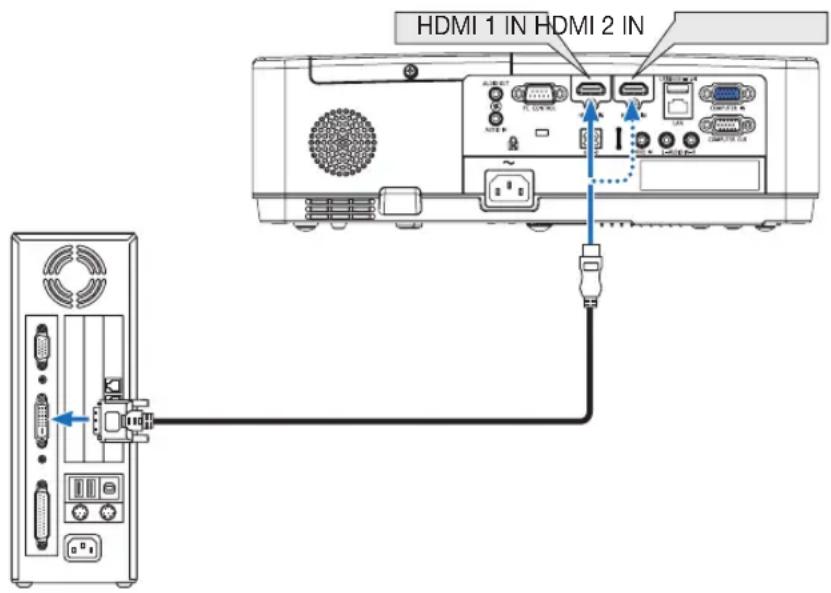
NOTE: When Viewing a DVI Digital Signal
• Turn off the power of the computer and projector before connecting.
- When a video deck is connected via a scan converter, etc., the display may not be correct during fast-forwarding and rewinding.
- Use a DVI-to-HDMI cable compliant with DDWG (Digital Display Working Group) DVI (Digital Visual Interface) revision 1.0 standard. The cable should be within 197"/5 m long.
• Turn off the projector and the PC before connecting the DVI-to-HDMI cable.
- To project a DVI digital signal: Connect the cables, turn the projector on, then select the HDMI input. Finally, turn on your PC. Failure to do so may not activate the digital output of the graphics card resulting in no picture being displayed. Should this happen, restart your PC.
- Do not disconnect the DVI-to-HDMI cable while the projector is running. If the signal cable has been disconnected and then reconnected, an image may not be correctly displayed. Should this happen, restart your PC.
• The COMPUTER video input terminals support Windows Plug and Play.
- A Mac signal adapter (commercially available) may be required to connect a Mac computer.
Connecting an External Monitor
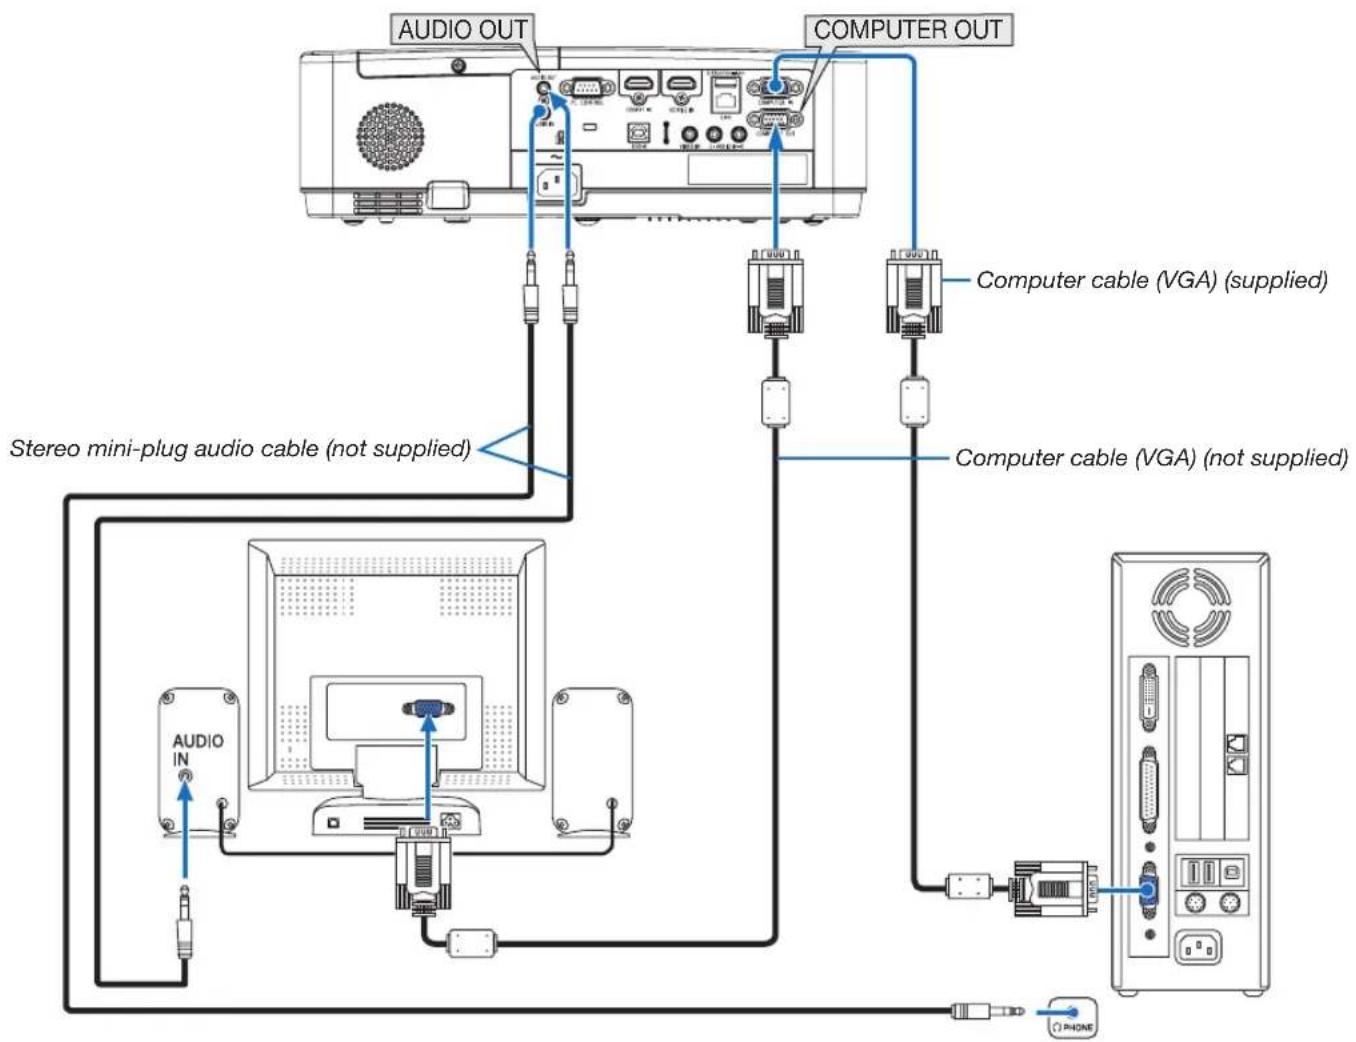
You can connect a separate, external monitor to your projector to simultaneously view on a monitor the computer analog image you're projecting.
NOTE:
• The AUDIO OUT mini jack does not support earphone/headphone terminal.
- When audio equipment is connected, the projector speaker is disabled.
• The signal output from the COMPUTER OUT of this projector is for projecting image on exclusive one display.
- When no signal is applied over 3 minutes in the condition of projector standby when NETWORK STANDBY is set in the Standby mode, output from the COMPUTER OUT or AUDIO OUT terminal will be stopped. In this case, pull out the computer cable and set it back after inputting video signal.
Monitor out and sleep mode:
• The COMPUTER OUT terminal will not work when [NORMAL] is selected for [STANDBY MODE].
The COMPUTER OUT terminal will work only in the sleep mode.
Applying a signal from the COMPUTER IN terminal will put the projector in the sleep mode, which allows you to use the COMPUTER OUT terminal and the AUDIO OUT mini jack.
The sleep mode is one of the standby modes.
• In the network standby mode, sound for the last viewed computer or video source will be heard.
BNC-to-COMPUTER IN terminal converted signal will not be output in the standby mode and sleep mode.
Connecting Your DVD Player or Other AV Equipment
Connecting Video Input
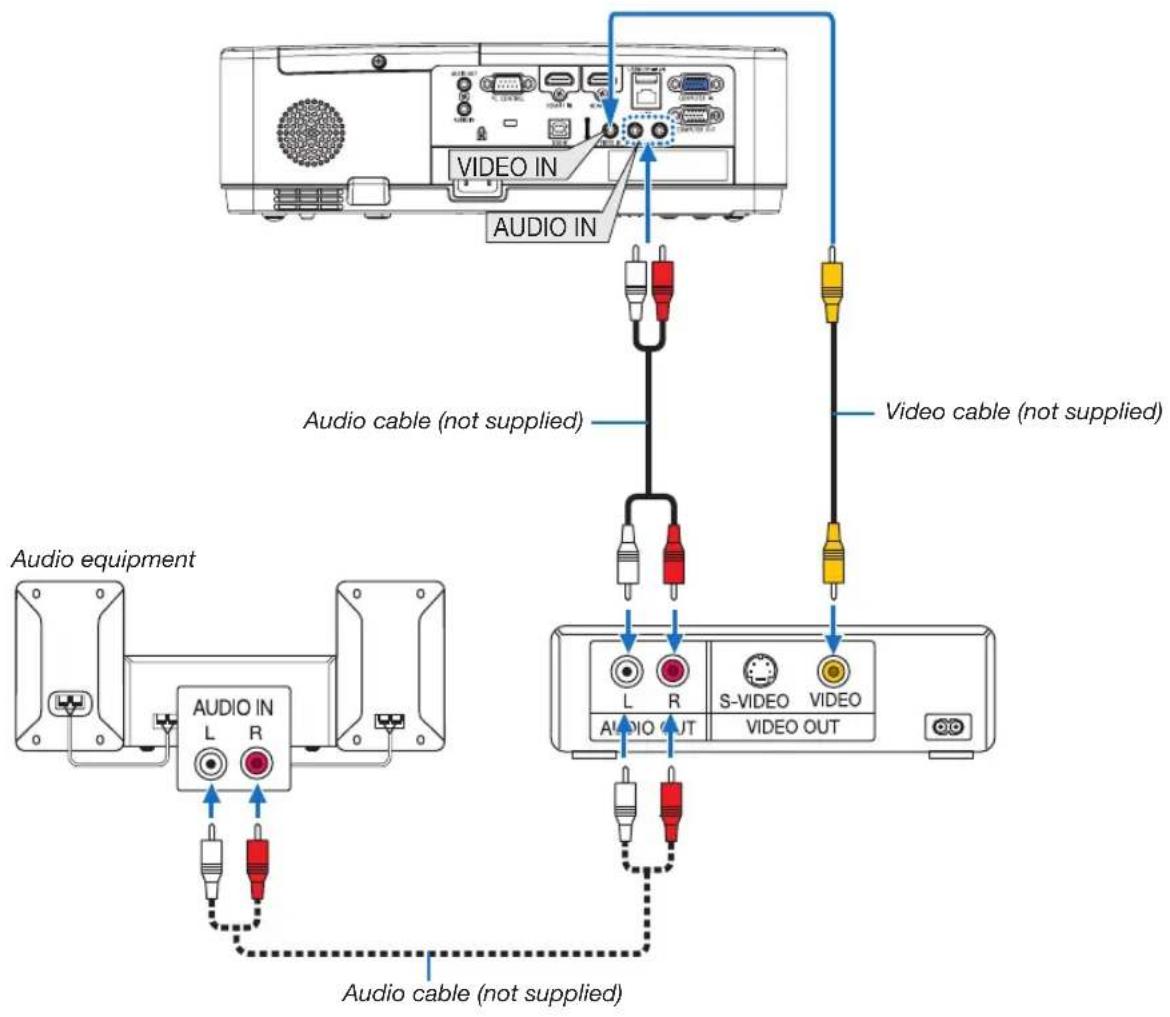
- Select the source name for its appropriate input terminal after turning on the projector.
| Input terminal | INPUT button on the projector cabinet | Button on the remote control |
| VIDEO IN | ∅VIDEO | (VIDEO) |
NOTE: Refer to your VCR owner's manual for more information about your equipment's video output requirements.
NOTE: An image may not be displayed correctly when a Video source is played back in fast-forward or fast-rewind via a scan converter.
Connecting Component Input
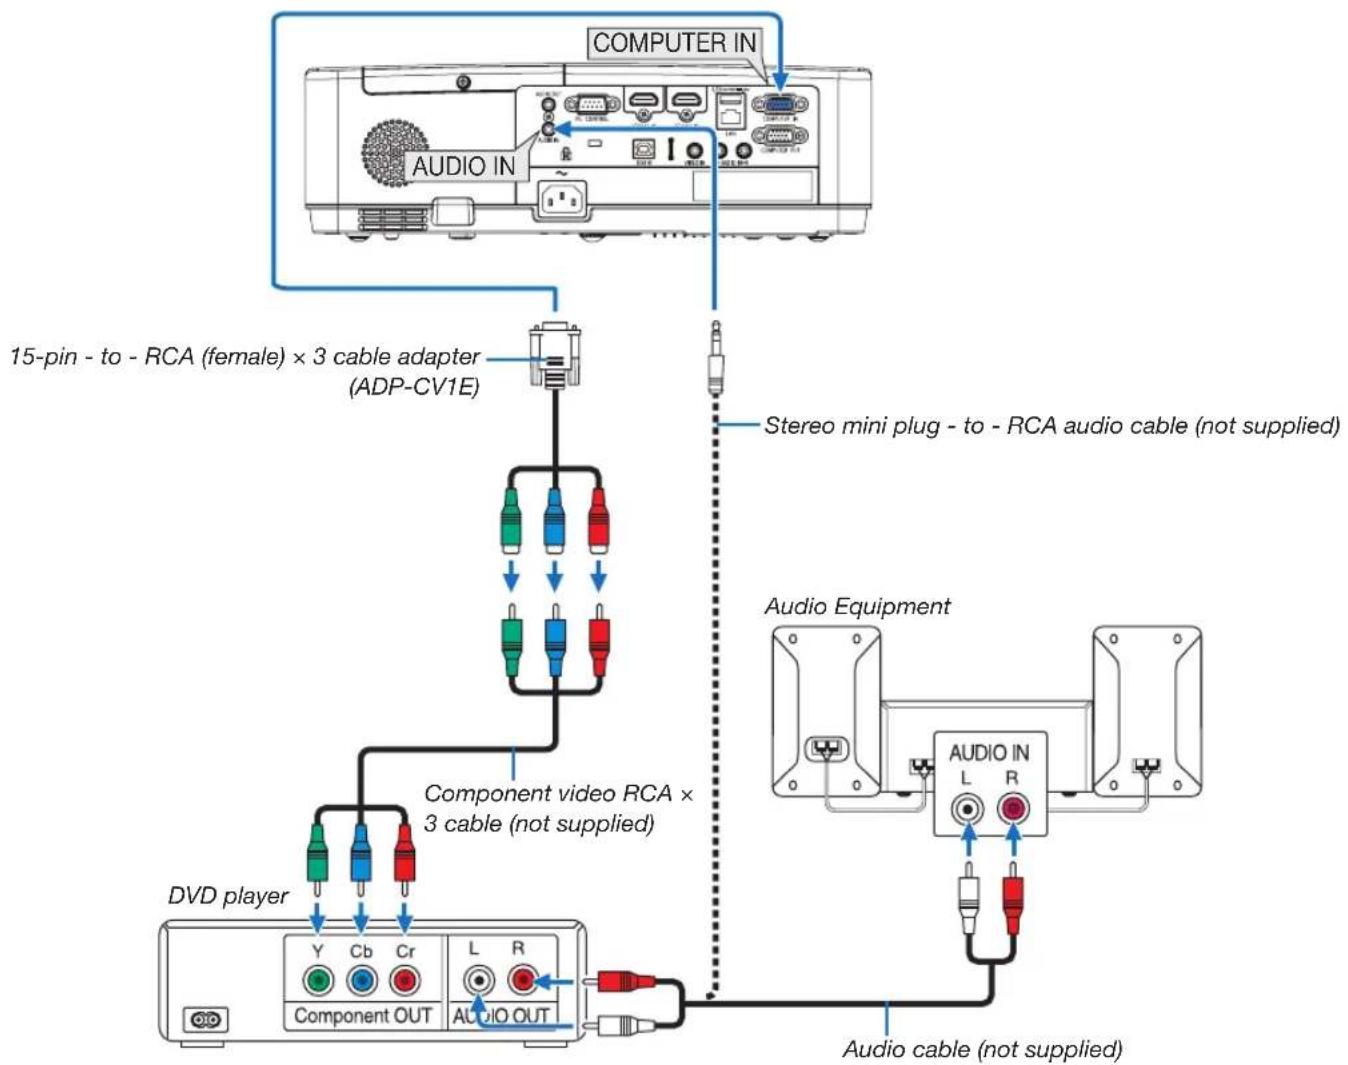
flowchart
graph TD
    A["COMPUTER IN"] --> B["15-pin - to - RCA (female) × 3 cable adapter (ADP-CV1E)"]
    B --> C["Component video RCA × 3 cable (not supplied)"]
    C --> D["DVD player"]
    D --> E["Component OUT"]
    E --> F["Audio OUT"]
    F --> G["Audio cable (not supplied)"]
    H["AUDIO IN"] --> I["Audio Equipment"]
    I --> J["Stereo mini plug - to - RCA audio cable (not supplied)"]
A component signal will be automatically displayed. If not, from the menu, select [SETUP] → [OPTIONS(1)] → [SIGNAL SELECT] → [COMPUTER], and then place a check mark in the Component radio button.
- Select the source name for its appropriate input terminal after turning on the projector.
| Input terminal | INPUT button on the projector cabinet | Button on the remote control |
| COMPUTER IN | (COMPUTER) |
NOTE: Refer to your DVD player's owner's manual for more information about your DVD player's video output requirements.
Connecting HDMI Input
You can connect the HDMI output of your DVD player, hard disk player, Blu-ray player, or notebook type PC to the HDMI IN terminal of your projector.
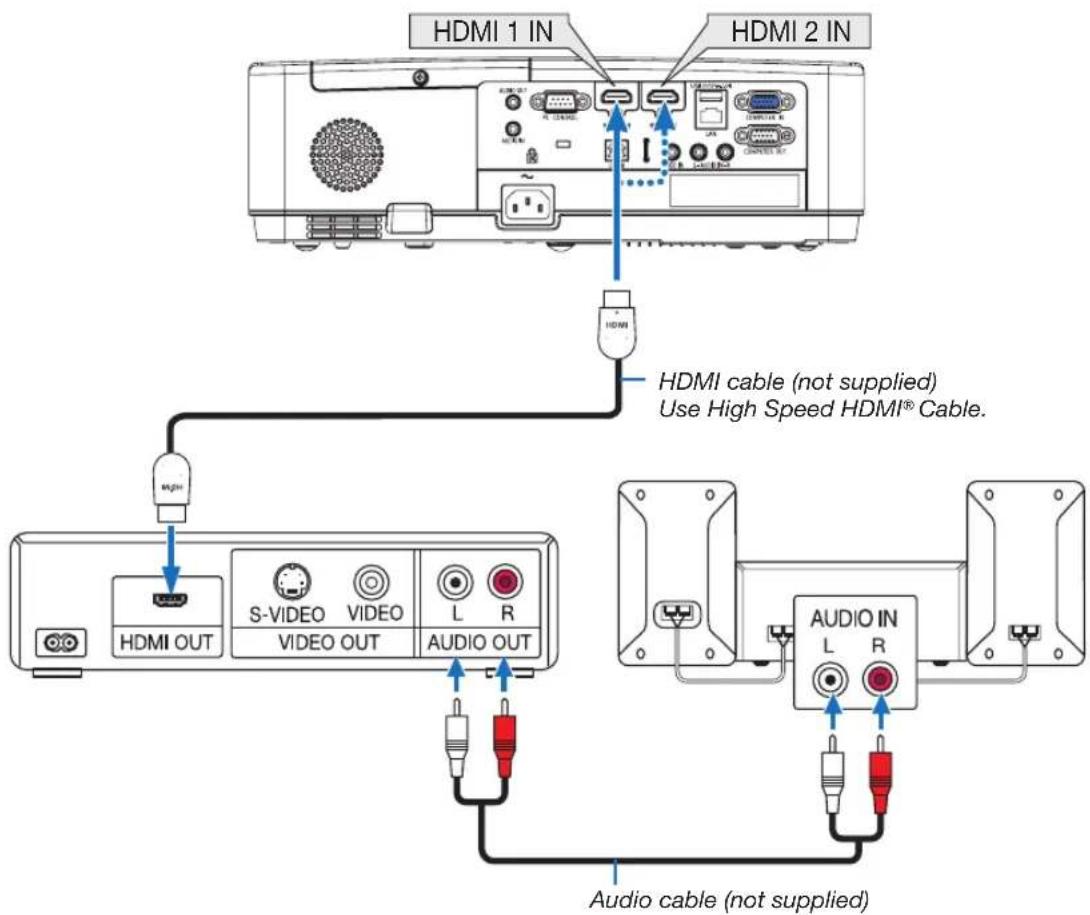
flowchart
graph TD
    A["HDMI 1 IN"] --> B["High Speed HDMI Cable"]
    C["HDMI 2 IN"] --> B
    D["HDMI OUT"] --> E["S-VIDEO"]
    D --> F["VIDEO"]
    D --> G["VIDEO OUT"]
    D --> H["L"]
    D --> I["R"]
    J["AUDIO OUT"] --> K["Audio cable (not supplied)"]
    L["AUDIO IN"] --> M["L"]
    L --> N["R"]
- Select the source name for its appropriate input terminal after turning on the projector.
| Input terminal | INPUT button on the projector cabinet | Button on the remote control |
| HDMI 1 IN | ||
| HDMI 2 IN |
- When connecting the HDMI1 IN terminal (or HDMI2 terminal) of the projector to the DVD player, the projector's video level can be made settings in accordance with the DVD player's video level. In the menu select [SETUP] → [OPTIONS(1)] → [VIDEO LEVEL] and make necessary settings.
Connecting to a Wired LAN
The projector comes standard with a LAN port (RJ-45) which provides a LAN connection using a LAN cable. To use a LAN connection, you are required to set the LAN on the projector menu. (→ page 99)
Example of LAN connection (1)
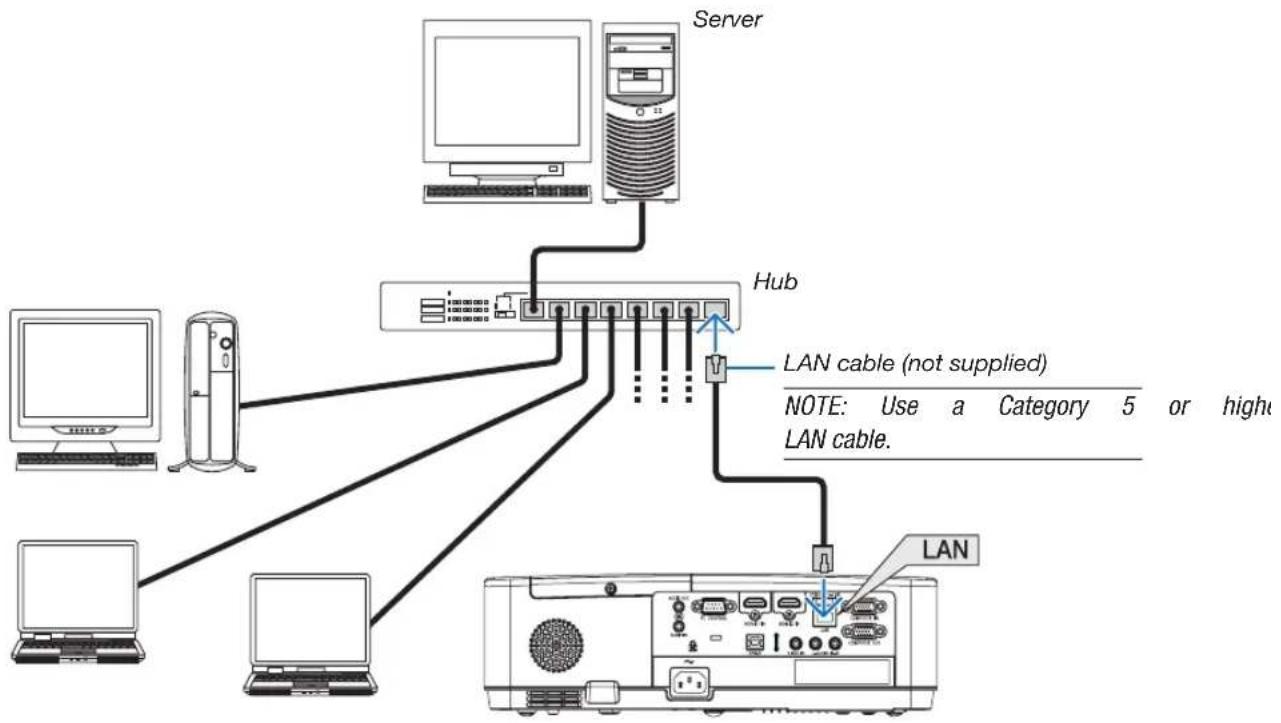
flowchart
graph TD
    Server["Server"] --> Hub["Hub"]
    Hub -->|LAN cable (not supplied)| LAN1["LAN"]
    LAN1 -->|NOTE: Use a Category 5 or higher LAN cable.| LAN2["LAN"]
    LAN2 -->|Note: Use a Category 5 or higher LAN cable.| LAN3["LAN"]
    LAN3 -->|Note: Use a Category 5 or higher LAN cable.| LAN4["LAN"]
    LAN4 -->|Note: Use a Category 5 or higher LAN cable.| LAN5["LAN"]
    LAN5 -->|Note: Use a Category 5 or higher LAN cable.| LAN6["LAN"]
    LAN6 -->|Note: Use a Category 5 or higher LAN cable.| LAN7["LAN"]
    LAN7 -->|Note: Use a Category 5 or higher LAN cable.| LAN8["LAN"]
    LAN8 -->|Note: Use a Category 5 or higher LAN cable.| LAN9["LAN"]
Example of LAN connection (2)
Via a wireless LAN access point, it enables to easily connect to terminals by INTELLIGENT CONNECTION.
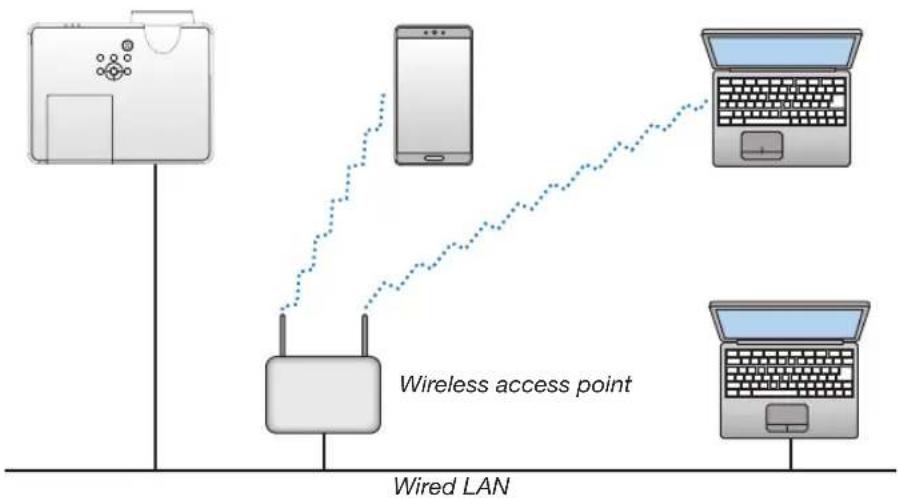
flowchart
graph TD
    A["Wireless access point"] --> B["Wireless LAN"]
    C["Laptop"] --> D["Wireless LAN"]
    E["Laptop"] --> F["Wireless LAN"]
    G["Desktop"] --> H["Desktop"]
Connecting to a Wireless LAN (Optional: NP05LM series)
The USB Wireless LAN Unit also provides a wireless LAN connection. To use a wireless LAN connection, you are required to assign an IP address to the projector.
Important:
- If you use the projector with the USB Wireless LAN Unit in the area where the use of wireless LAN equipment is prohibited, remove the USB Wireless LAN Unit from the projector.
- Buy the appropriate USB Wireless LAN Unit for your country or area.
NOTE:
• The green LED on the USB Wireless LAN Unit flashes to show that the USB Wireless LAN Unit is working.
- Your computer's wireless LAN adapter (or unit) must be complied with Wi-Fi (IEEE 802.11b/g/n) standard.
Attaching the USB Wireless LAN Unit
NOTE:
- The USB Wireless LAN Unit must be inserted into the USB Wireless LAN Unit port in the correct direction. It cannot be inserted in the reverse direction. If the USB Wireless LAN Unit is inserted in the reverse direction with excessive force applied, the USB port may break.
- Before touching the USB Wireless LAN Unit, touch a metallic object (such as a door knob or aluminum window frame) to discharge the static electricity from your body.
- Always insert or remove the USB Wireless LAN unit when the main power is turned off. Failure to do so may cause projector malfunction or damage to the USB wireless LAN unit. If the projector will not work correctly, turn off the projector, disconnect the power cord, and then connect it again.
- The USB port of the projector is common use for the VIEWER. When the USB memory is installed and activate the VIEWER, you can not utilize wireless LAN.
1. Press the POWER button to turn off the projector and set it into standby condition, and disconnect the power cord.
2. Slowly insert the USB Wireless LAN Unit into the USB port.
Remove the cap from the USB Wireless LAN Unit, and then insert it with the surface (side of indicator) facing down. Keep the cap for later use.
NOTE:
• Do not force to insert the USB Wireless LAN Unit.
- Set the supplied strap onto the strap fixing hole for the anti-theft and dropping-off.
To remove the USB Wireless LAN Unit, disconnect the power cord and use the above procedure.
NOTE:
- The green LED on the USB Wireless LAN Unit flashes to show that Wireless LAN Unit is working. If the USB Wireless LAN Unit is incorrectly attached, the blue LED will not flash.
- Do not press the button on the USB Wireless LAN Unit. The button will not work with this model.
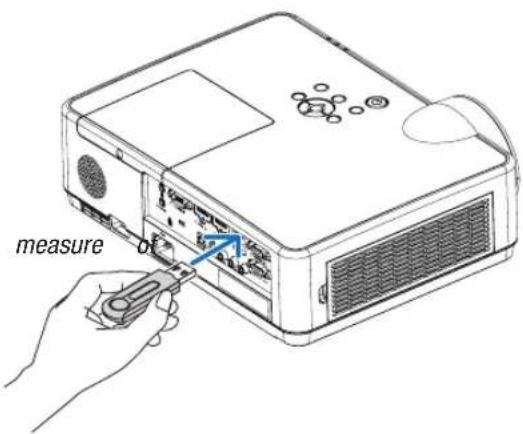
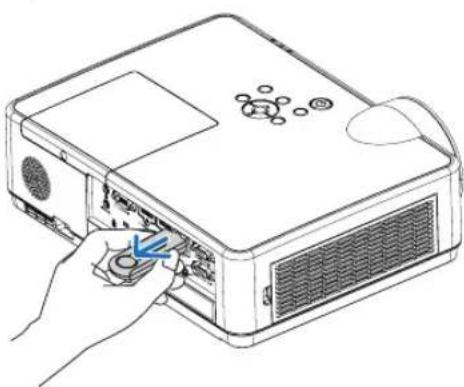
natural_image
Line drawing of a projector with a hand inserting a button to the front panel (no text or symbols)7. Connecting to a Network
① Things you can do by connecting the projector to a network
- You can send screen images via a wired LAN/wireless LAN from a terminal installed with our MultiPresenter app to the projector and project them onto a screen.
See our company's website for more details about MultiPresenter.
https://www.nec-display.com/dl/en/soft/multipresenter/index.html
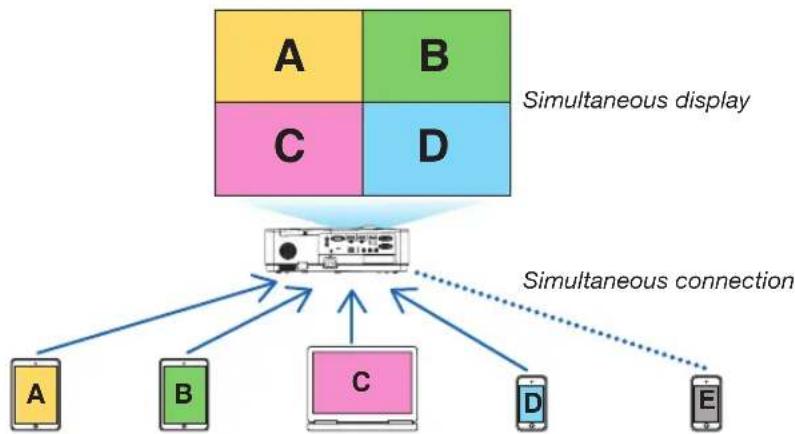
flowchart
graph TD
    A["A"] -->|Simultaneous display| Monitor["Monitor"]
    B["B"] -->|Simultaneous display| Monitor
    C["C"] -->|Simultaneous display| Monitor
    D["D"] -->|Simultaneous display| Monitor
    E["E"] -->|Simultaneous connection| Monitor
    Monitor --> A
    Monitor --> B
    Monitor --> C
    Monitor --> D
    Monitor --> E
- When connecting the projector using a wireless LAN, you can set the following 3 profiles under the [NETWORK SETTINGS] in the menu.
| Profile name Description | |
| INTELLIGENT CONNECTION | The projector can be easily connected peer-to-peer to a computer or tablet terminal installed with MultiPresenter. |
| INFRASTRUCTURE Connect the | projector to an existing access point and connect it to a computer or tablet terminal installed with MultiPresenter. |
| SIMPLE ACCESS POINT Turn the | projector into a simple access point to connect to a computer or tablet terminal. |
- Multiple computers or tablet terminals can be connected at the same time. A maximum of 16 units can be connected in the FREE mode and a maximum of 50 units can be connected in the MANAGED mode.
- Using the web browser of a computer and tablet terminal connected to a wired LAN/wireless LAN, you can connect the projector to a HTTP server to control the projector or configure the NETWORK SETTINGS.
- By configuring the network service settings of the projector, AMX BEACON, HTTP server logon password, PJLink, ALERT MAIL, CRESTRON, etc., can be used.
② Connecting to MultiPresenter
Preparations:
- When connecting the projector to a wired LAN, connect a LAN cable to the projector. (→ page 94)
- When connecting the projector to a wireless LAN, install a separately-sold (or the enclosed) LAN unit (NP05LM) in the projector. (→ page 95)
- Configure the NETWORK SETTINGS of the projector. (→ page 99)
• Install the MultiPresenter app in the computer or tablet terminal.
https://www.nec-display.com/dl/en/soft/multipresenter/index.html
The procedure is described here for each wireless LAN profile "INTELLIGENT CONNECTION", "INFRASTRUCTURE", and "SIMPLE ACCESS POINT".
① When connecting with an INTELLIGENT CONNECTION
1. Turn on the power of the projector and press the APPS button on the remote control.
The start-up screen of MultiPresenter is displayed.
2. Start MultiPresenter.
The target device screen is displayed.
3. Enter the 4-digit PIN code displayed in the start-up screen in the target device screen.
When connection with the projector is completed, the screen of the computer or tablet terminal is projected on the screen.
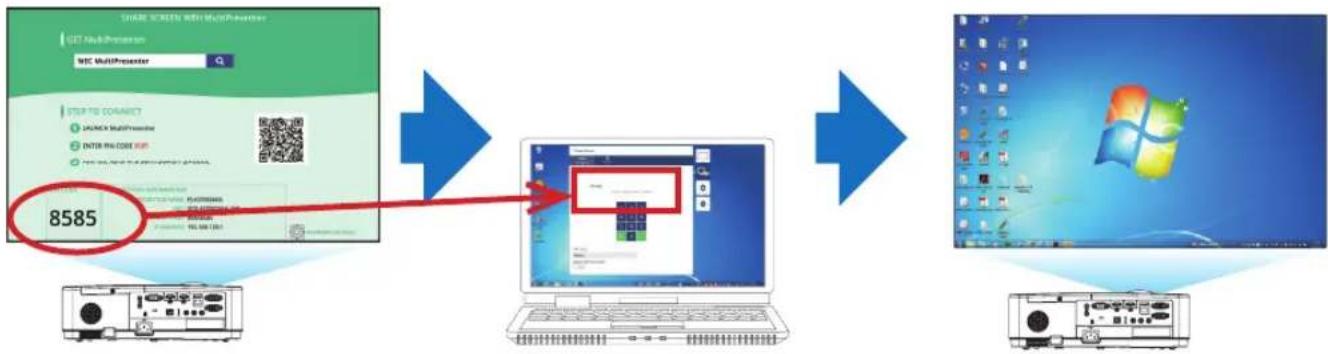
flowchart
graph LR
    A["SHARE SCREEN WITH Multipresenter"] --> B["8585"]
    B --> C["计算机"]
    C --> D["Windows"]
    style A fill:#d4edda,stroke:#333
    style B fill:#e6f7ff,stroke:#333
    style C fill:#e6f7ff,stroke:#333
    style D fill:#e6f7ff,stroke:#333
② When connecting with INFRASTRUCTURE
- Turn on the power of the projector and press the APPS button on the remote control.
The start-up screen of MultiPresenter is displayed.
- Connect the projector and your computer or tablet terminal to the same network.
NOTE:
- Check with the network administrator for the “CONNECTION INFORMATION” of the network to be connected.
- Start MultiPresenter.
The target device screen is displayed.
- Enter the 4-digit PIN code displayed in the start-up screen in the target device screen.
When connection with the projector is completed, the screen of the computer or tablet terminal is projected on the screen.
③ When connecting with a SIMPLE ACCESS POINT
- Turn on the power of the projector and press the APPS button on the remote control.
The start-up screen of MultiPresenter is displayed.
-
Connect your computer or tablet terminal to the access point matching the "SSID" displayed in the start-up screen.
-
Start MultiPresenter.
The target device screen is displayed.
- Enter the 4-digit PIN code displayed in the start-up screen in the target device screen.
When connection with the projector is completed, the screen of the computer or tablet terminal is projected on the screen.
③ NETWORK SETTINGS
Move the cursor to [NETWORK SETTINGS] at the bottom right of the start-up screen and press the ENTER button to display the [NETWORK SETTINGS] screen.
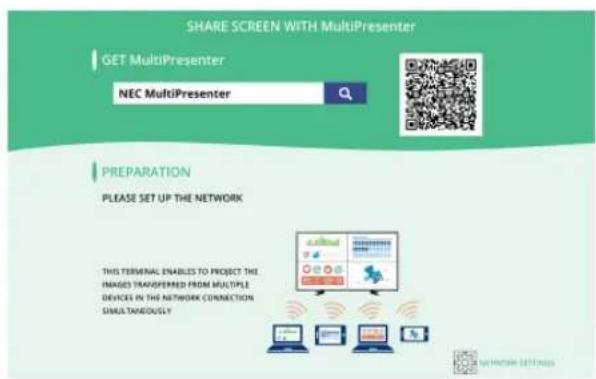

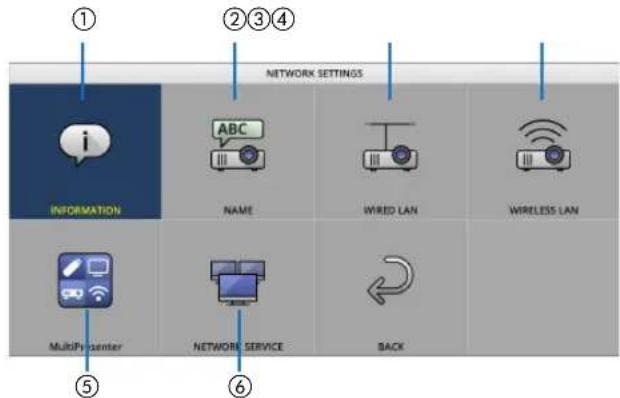
① INFORMATION
Displays information regarding the wired LAN and wireless LAN of the projector.
• To return to the NETWORK SETTINGS screen, press the EXIT button.
② NAME
Sets the PROJECTOR NAME and HOST NAME.
| Item name Description | |
| PROJECTOR NAME Set the | PROJECTOR NAME.Initial value: “PJ-XXXXXXXXX”The initial value “PJ-XXXXXXXXX” represents the “PJ-” + “Serial Number”.Allowable characters: alphanumeric symbols (including space)Number of characters: 1–16 characters |
| HOST NAME Set the HOST | NAME.Initial value: “pj-XXXXXXXXX”The initial value “pj-XXXXXXXXX” represents the “pj-” + “Serial Number”.Allowable characters: alphanumeric, “-”NOTE:You can not enter “-” at the beginning or end of the HOST NAME.Number of characters: 1–16 characters |
③ WIRED LAN
Configure the PROFILE of the wired LAN, DHCP, IP ADDRESS, SUBNET MASK, GATEWAY, DNS and so on.
- When using a wired LAN, set the PROFILE to [ENABLE] and configure the necessary settings.
- If you are not using a wired LAN, set the profile to [DISABLE].
- Once you have configured the settings, move the cursor to [OK] and press the ENTER button.
④ WIRELESS LAN
Configure the wireless LAN settings.
| Item name Description | |
| PROFILE There are 4 wireless | LAN profiles as shown below.DISABLE (initial value)INTELLIGENT CONNECTIONSIMPLE ACCESS POINTINFRASTRUCTUREIf you are not using a wireless LAN, set the profile to [DISABLE].The settings of the other 3 profiles are different from each other. This will be explained later. |
DISABLE
Disable the WIRELESS LAN of the projector.
INTELLIGENT CONNECTION
Compared to connecting with infrastructure or a simple access point, it is easier to connect to MultiPresenter that has been installed in a computer or tablet terminal.
| Item name Description | |
| PROFILE INTELLIGENT CONNECTION | |
| MODE Select the wireless mode (IEEE802.11b/g/n or IEEE802.11a/n).Initial value: IEEE802.11b/g/n | |
| CHANNEL Set the wireless channel.Initial value: AUTO | |
| SECURITY TYPE Set the SECURITY TYPE (DISABLE or WPA2-PSK).Initial value: DISABLENOTE:When the PIN TYPE set in the MultiPresenter settings is ONE-TIME, the SECURITY TYPE cannot be specified as it will be applied automatically. | |
| SECURITY KEY Set the SECURITY KEY.Initial value: BlankAllowable characters: alphanumeric symbols (including space)Number of characters: 8–63 charactersWhen a SECURITY KEY is set, a number of asterisks “*” equivalent to the number of characters is displayed.NOTE:When the PIN TYPE set in the MultiPresenter settings is ONE-TIME, the SECURITY KEY cannot be set as it will be set automatically. |
SIMPLE ACCESS POINT
Turn the projector into the [SIMPLE ACCESS POINT] to connect computers or tablet terminals installed with MultiPresenter to the projector.
| Item name Description | |
| PROFILE SIMPLE ACCESS | POINT |
| MODE Select the wireless mode (IEEE802.11b/g/n or IEEE802.11a/n).Initial value: IEEE802.11b/g/n | |
| CHANNEL Set the wireless channel.Initial value: AUTO | |
| SSID Set the SSID. | Initial value: “AP-XXXXXXXXX”The initial value “AP-XXXXXXXXX” represents the “AP-” + “Serial Number”.Allowable characters: alphanumeric symbols (including space)Number of characters: 1–32 characters |
| SECURITY TYPE Set the SECURITY TYPE (DISABLE or WPA2-PSK).Initial value: DISABLE | |
| SECURITY KEY Set the SECURITY KEY. | Initial value: BlankAllowable characters: alphanumeric symbols (including space)Number of characters: 8–63When the character security key is set, a number of asterisks “*” equivalent to the number of characters is displayed. |
INFRASTRUCTURE
Connect the projector to an existing access point.
| Item name Description | |
| PROFILE INFRASTRUCTURE | |
| DHCP, IP ADDRESS,SUBNET MASK,GATEWAY, AUTO DNS,DNS ADDRESS | Set the DHCP, IP address, subnet mask, gateway, auto DNS, and DNS address. |
| SITE SURVEY Perform a site | survey to search for access points.The SSID and SECURITY TYPE are set according to the selected access point. |
| SSID Set the SSID. | Initial value: NECPJAllowable characters: alphanumeric symbols (including space)Number of characters: 1–32 characters |
| SECURITY TYPE Set the SEC | URITY TYPE (DISABLE, WPA2-PSK, or WPA/WPA2-PSK).Initial value: DISABLE |
| SECURITY KEY Set the SEC | URITY KEY.Initial value: BlankAllowable characters: alphanumeric symbols (including space)Number of characters: 8–63 charactersWhen a SECURITY KEY is set, a number of asterisks “*” equivalent to the number of characters is displayed. |
⑤ MultiPresenter
Set the MultiPresenter operation.
| Item name Description | |
| MODE Select FREE mode or | MANAGED mode.When you are in the MANAGED mode, you can change the split pattern of the screen by pressing the ENTER button on the remote control of the projector while projecting the MultiPresenter screen.• Initial value: FREE |
| NOTE:• The mode setting is applied when all connections are cut off. | |
| PIN TYPE Select ONE-TIME | or STATIC.• Initial value: ONE-TIME• A ONE-TIME PIN code will be generated automatically, so the “PIN CODE” cannot be entered for the next item.• For STATIC, enter an arbitrary PIN code. |
| PIN CODE Enter a PIN code | for [STATIC].• Initial value: 4-digit random number• Allowable characters: numeral• Number of characters: 4 characters (0000–9999) |
| UTILIZE PIN CODE AS CONNECTION PASSWORD | Select not to use the PIN code as a password (OFF), or to use the PIN code as a password (ON).• Initial value: ON |
| COMMUNICATION SPEED LIMIT | Set the upper limit of the communication speed that MultiPresenter uses for transmission.• Initial value: DISABLE |
| START-UP SCREEN | |
| GET APPS GUIDE Select wh | whether or not to display the Get MultiPresenter display on the start-up screen.• Initial value: ON (display) |
| CONNECTION STEP GUIDE | Select whether or not to display the connection procedure on the start-up screen.• Initial value: ON (display) |
| CONNECTION INFORMATION | Select whether or not to display the connection information on the start-up screen.• Initial value: ON (display) |
| MultiPresenter SCREEN | |
| CONNECTION INFORMATION | Select whether or not to display the connection information in the screen when MultiPresenter is connected.• Initial value: ON (display) |
⑥ NETWORK SERVICE
Configure the AMX BEACON, HTTP SERVER, PJLink, ALERT MAIL, CRESTRON and other settings.
| Item name Description | |
| AMX BEACON Select whether or not to transmit AMX beacons. | Initial value: OFF (do not transmit) |
| HTTP SERVER Set the password to log into the projector's HTTP server. | Initial value: BlankAllowable characters: alphanumeric symbolsNumber of characters: 0–10 charactersWhen a password is set, a number of asterisks “*” equivalent to the number of characters is displayed. |
| Item name Description | ||
| PJLink Set the PJLink password. | ||
| PASSWORD SETTINGS | Set the PJLink password.• Initial value: Blank• Allowable characters: alphanumeric characters• Number of characters: 0-32 charactersWhen a password is set, a number of asterisks “*” equivalent to the number of characters is displayed. | |
| ALERT MAIL Set alert mail and perform a transmission test. | ||
| CRESTRON Set the CRESTRON function. | ||
④ Controlling the Projector by Using an HTTP Browser
Overview
The HTTP Server function provides settings and operations for:
- Setting for wired/wireless network (NETWORK SETTINGS)
To use wireless LAN connection, the optional USB Wireless LAN Unit is required. ( page 95)
To use wired/wireless LAN connection, connect the projector to the computer with a commercially available LAN cable. ( page 94)
• Setting Alert Mail (ALERT MAIL)
When the projector is connected to a wired/wireless network, lamp replace time or error messages will be sent via e-mail.
• Operating the projector
Power on/off, selecting input, volume control and picture adjustments are possible.
- Setting PJLink PASSWORD, HTTP SERVER, ALERT MAIL, AMX BEACON, and CRESTRON
How to access to the HTTP server:
- Start the Web browser on the computer via the network connected to the projector and enter the following URL :
http://
TIP: The factory setting IP address is [DHCP ON].
NOTE:
• To use the projector in a network, consult with your network administrator about network settings.
- The display's or button's response can be slowed down or operation may not be accepted depending the settings of your network. Should this happen, consult your network administrator. The projector may not respond if its buttons are repeatedly pressed in rapid intervals. Should this happen, wait a moment and repeat. If you still can't get any response, turn off and back on the projector.
- If the PROJECTOR NETWORK SETTINGS screen does not appear in the web browser, press the Ctrl+F5 keys to refresh your web browser (or clear the cache).
- This device uses “JavaScript” and “Cookies” and the browser should be set to accept these functions. The setting method will vary depending on the version of browser. Please refer to the help files and the other information provided in your software.
Preparation before Use
Connect the projector to a commercially available LAN cable before engaging in browser operations. ( page 94) Operation with a browser that uses a proxy server may not be possible depending on the type of proxy server and the setting method. Although the type of proxy server will be a factor, it is possible that items that have actually been set will not be displayed depending on the effectiveness of the cache, and the contents set from the browser may not be reflected in operation. It is recommended that a proxy server not be used unless it is unavoidable.
Handling of the Address for Operation via a Browser
Regarding the actual address that is entered for the address or entered to the URL column when operation of the projector is via a browser, the host name can be used as it is when the host name corresponding to the IP address of the projector has been registered to the domain name server by a network administrator, or the host name corresponding to the IP address of the projector has been set in the "HOSTS" file of the computer being used.
Example 1: When the host name of the projector has been set to "pj.nec.co.jp", access is gained to the network setting by specifying
http://pj.nec.co.jp/index.html
for the address or the entry column of the URL.
Example 2: When the IP address of the projector is "192.168.73.1", access is gained to the network setting by specifying
http://192.168.73.1/index.html
for the address or the entry column of the URL.
PROJECTOR ADJUSTMENT
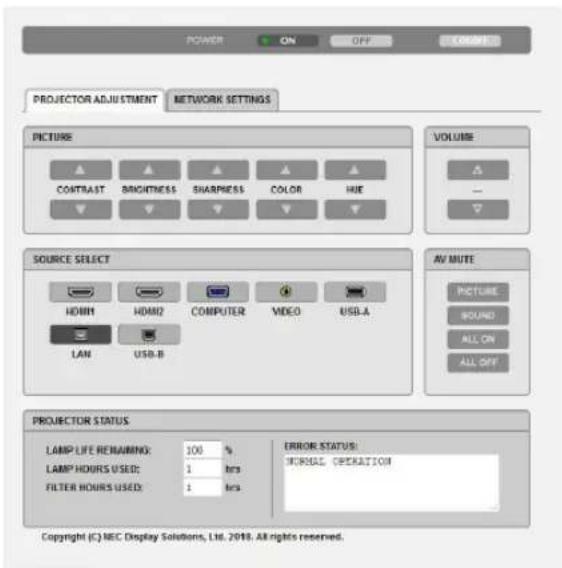
POWER: This controls the power of the projector.
ON....Power is switched on.
OFF....Power is switched off.
VOLUME: This controls the volume of the projector.
▲......Increases the volume adjustment value.
▼Decreases the volume adjustment value.
AV-MUTE: This controls the mute function of the projector.
PICTURE ON ......Mutes the video.
PICTURE OFF......Cancels the video muting.
SOUND ON ......Mutes the audio.
SOUND OFF......Cancels the audio muting.
ALL ON......Mutes each of the video, and audio functions.
ALL OFF ....Cancels the muting of each of the video, and audio functions.
PICTURE: Controls the video adjustment of the projector.
CONTRAST ▲......Increases the contrast adjustment value.
CONTRAST ▼......Decreases the contrast adjustment value.
BRIGHTNESS ▲......Increases the brightness adjustment value.
BRIGHTNESS ▼......Decreases the brightness adjustment value.
SHARPNESS ▲......Increases the sharpness adjustment value.
SHARPNESS ▼......Decreases the sharpness adjustment value.
COLOR ▲......Increases the color adjustment value.
COLOR ▼......Decreases the color adjustment value.
HUE ▲......Increases the hue adjustment value.
HUE ▼......Decreases the hue adjustment value.
- The functions that can be controlled will vary depending on the signal being input to the projector. (→ page 57)
SOURCE SELECT: This switches the input terminal of the projector.
HDMI1....Switches to the HDMI 1 IN terminal
HDMI2....Switches to the HDMI 2 IN terminal.
COMPUTER ......Switches to the COMPUTER IN terminal.
VIDEO....Switches to the VIDEO IN terminal.
USB-A...... Switches to the data on the USB memory device.
LAN....Switches to a LAN signal.
USB-B ...... Switches to the USB Port.
PROJECTOR STATUS: This displays the condition of the projector.
LAMP LIFE REMAINING......Displays the remaining life of the lamp as a percentage.
LAMP HOURS USED......Displays how many hours the lamp has been used.
FILTER HOURS USED ......Displays how many hours the filter has been used.
ERROR STATUS ......Displays the status of errors occurring within the projector.
LOG OFF: Logging off your projector and returning to the authentication screen (LOGON screen).
NETWORK SETTINGS
For details on each of the [NETWORK SETTINGS], see "7-3. NETWORK SETTINGS" (→ page 99).
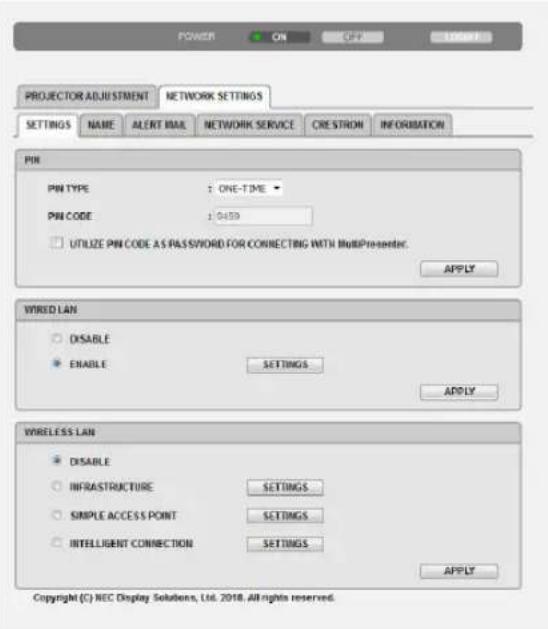
8. Maintenance
This section describes the simple maintenance procedures you should follow to clean the filter, the lens, the cabinet, and to replace the lamp and the filter.
① Cleaning the Filter
The air-filter sponge keeps dust and dirt from getting inside the projector and should be frequently cleaned. If the filter is dirty or clogged, your projector may overheat.

WARNING
- Please do not use a spray containing flammable gas to remove dust attached to the filter, etc. Doing so may result in fires.
NOTE: The message for filter cleaning will be displayed for one minute after the projector is turned on or off. When the message is displayed, clean the filter. The time to clean the filter is set to [10000 H] at time of shipment.
To cancel the message, press any button on the projector cabinet or the remote control.
To clean the filter, detach the filter unit and the filter cover.

CAUTION
- Before cleaning the filter, turn off the projector, disconnect the power cord and then allow the cabinet to cool. Failure to do so can result in electric shock or burn injuries.
1. Push button to release the filter unit and pull it out.
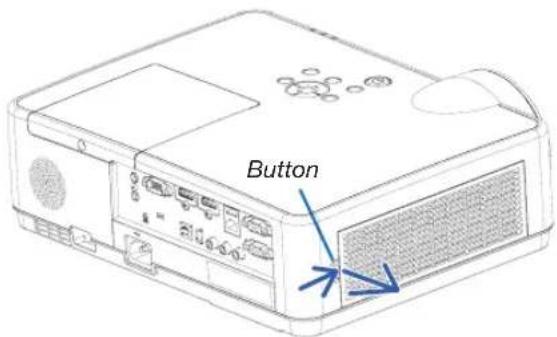
2. Remove the filter.
- Remove the filter from the filter cover.
3. Remove dust from the filter and the filter cover.
- Clean both outside and inside.
NOTE:
- Whenever you dust the filter, use the soft brush attachment to dust. This is to avoid damage to the filter.
- Do not wash the filter with water. Doing so can result in filter clogging.
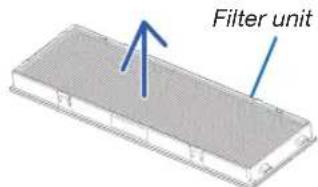
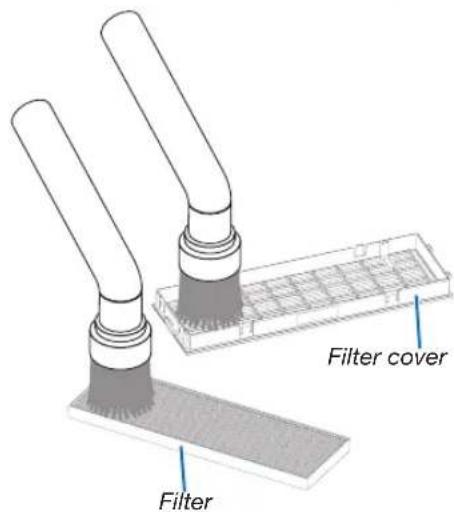
4. Attach the filter to the filter cover.
5. Put the filter unit back to the projector cabinet.
Insert two catches of the tip of the filter unit into the groove of the cabinet, and push the button to close the filter unit.
- Push the filter unit until it clicks into place.
6. Clear the filter usage hours.
Plug the power cord into the wall outlet, and then turn on the projector.
From the menu, select [RESET] → [CLEAR FILTER HOURS]. (→ page 77)
The interval time to clean the filter is set to [OFF] at time of shipment. When using the projector as it is, you do not clear the filter usage.
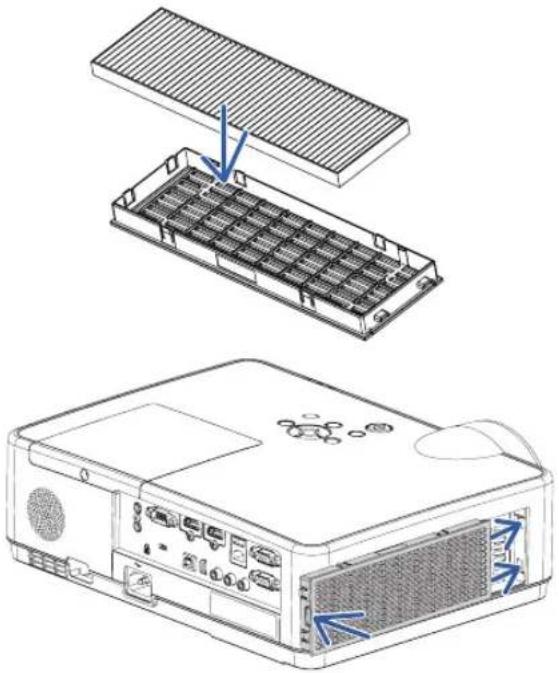
natural_image
Technical line drawing of an electronic device showing internal components and a separate view (no text or symbols)② Cleaning the Lens
• Turn off the projector before cleaning.
- The projector has a plastic lens. Use a commercially available plastic lens cleaner.
- Do not scratch or mar the lens surface as a plastic lens is easily scratched.
- Never use alcohol or glass lens cleaner as doing so will cause damage to the plastic lens surface.

WARNING
- Please do not use a spray containing flammable gas to remove dust attached to the lens, etc. Doing so may result in fires.
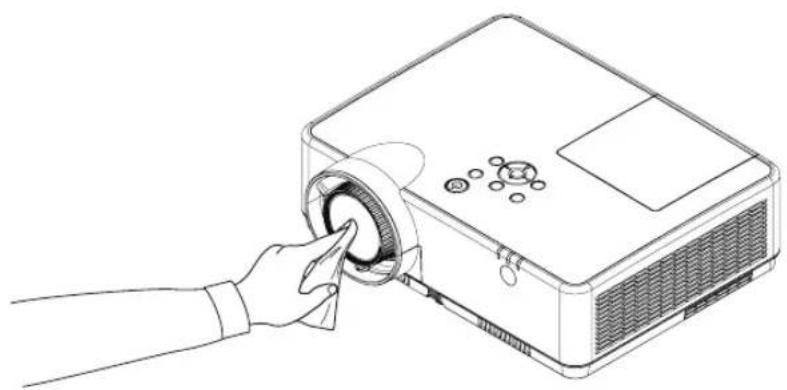
natural_image
Line drawing of a hand inserting a circular component into a projector (no text or symbols)③ Cleaning the Cabinet
Turn off the projector, and unplug the projector before cleaning.
- Use a dry soft cloth to wipe dust off the cabinet.
If heavily soiled, use a mild detergent. - Never use strong detergents or solvents such as alcohol or thinner.
- When cleaning the vents or the speaker using a vacuum cleaner, do not force the brush of the vacuum cleaner into the slits of the cabinet.
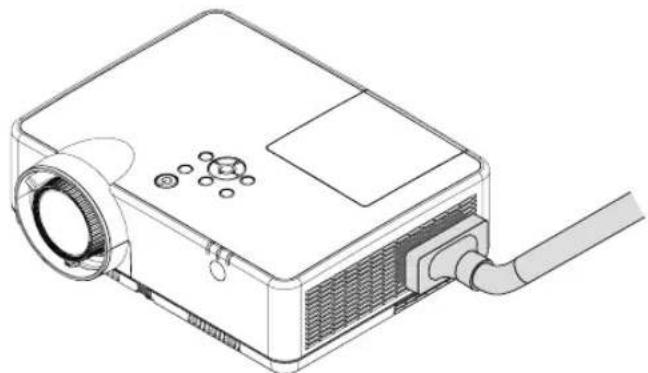
natural_image
Line drawing of a projector with a cable inserted, showing internal components and no text or symbols.Vacuum the dust off the vents.
- Clogged vents may cause a rise in the internal temperature of the projector, resulting in malfunction.
- Do not scratch or hit the cabinet with your fingers or any hard objects.
- Contact your dealer for cleaning the inside of the projector.
NOTE: Do not apply volatile agent such as insecticide on the cabinet, the lens, or the screen. Do not leave a rubber or vinyl product in prolonged contact with it. Otherwise the surface finish will be deteriorated or the coating may be stripped off.
④ Replacing the Lamp and the Filter
When the lamp reaches the end of its life, the LAMP indicator in the cabinet will blink ORANGE and the message "THE LAMP HAS REACHED THE END OF ITS USABLE LIFE. PLEASE REPLACE THE LAMP AND FILTER." will appear (*). Even though the lamp may still be working, replace the lamp to maintain the optimal projector performance. After replacing the lamp, be sure to clear the lamp hour meter. (→ page 77)

CAUTION
- DO NOT TOUCH THE LAMP immediately after it has been used. It will be extremely hot. Turn the projector off and then disconnect the power cord. Allow at least one hour for the lamp to cool before handling.
- Use the specified lamp for safety and performance.
To order the replacement lamp, specify your lamp type, NP47LP.
The replacement lamp comes with filters.
- DO NOT REMOVE ANY SCREWS except one lamp cover screw and three lamp housing screws. You could receive an electric shock.
- Do not break the glass on the lamp housing.
Keep finger prints off the glass surface on the lamp housing. Leaving finger prints on the glass surface might cause an unwanted shadow and poor picture quality.
- The projector will turn off and go into standby mode when you continue to use the projector for another 100 hours after the lamp has reached the end of its life. If this happens, be sure to replace the lamp. If you continue to use the lamp after the lamp reaches the end of its life, the lamp bulb may shatter, and pieces of glass may be scattered in the lamp case. Do not touch them as the pieces of glass may cause injury. If this happens, contact your NEC dealer for lamp replacement.
*NOTE: This message will be displayed under the following conditions:
• for one minute after the projector has been powered on
- when the (POWER) button on the projector cabinet or the POWER (STANDBY) button on the remote control is pressed
To turn off the message, press any button on the projector cabinet or the remote control.
Optional lamp and tools needed for replacement:
• Phillips screwdriver (plus-head)
- Replacement lamp
Flow of Replacing the Lamp and the Filter
Step 1. Replace the lamp
Step 2. Replace the filter ( page 114)
Step 3. Clear the lamp usage hours and the filter usage hours ( page 115)
To replace the lamp:
1. Remove the lamp cover.
(1) Loosen the lamp cover screw.
- The lamp cover screw is not removable.
(2) Push and slide the lamp cover off.
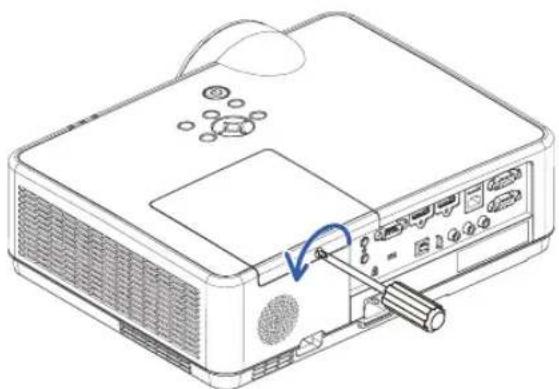
natural_image
Line drawing of a projector with a cable inserted, showing ports and a blue arrow indicating the cable's direction (no text or symbols present)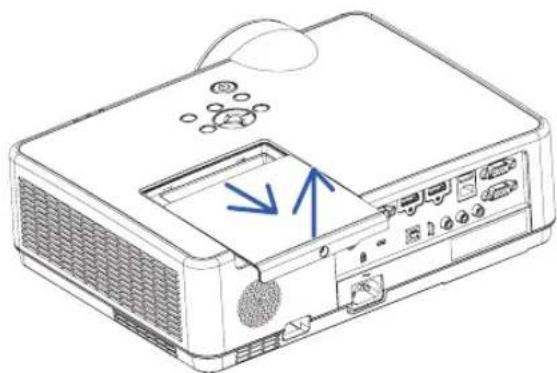
natural_image
Line drawing of a projector with ventilation slots and an open lid (no text or symbols)2. Remove the lamp housing.
(1) Loosen the three screws securing the lamp housing until the phillips screwdriver goes into a freewheeling condition.
• The three screws are not removable.
• One of the screws is interlocked to prevent electric shock. Do not attempt to circumvent this interlock.
(2) Remove the lamp housing by holding it.

CAUTION:
Make sure that the lamp housing is cool enough before removing it.
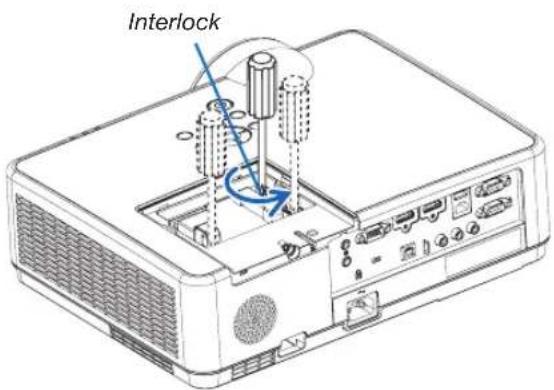
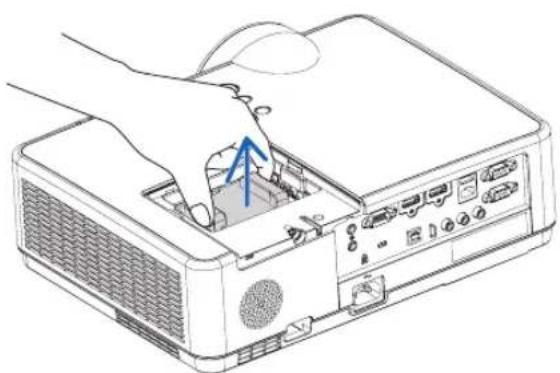
natural_image
Line drawing of a projector with a hand inserting a cable into the case (no text or symbols)3. Install a new lamp housing.
(1) Insert a new lamp housing until the lamp housing is plugged into the socket.
(2) Push the top center of the lamp housing to secure it.
(3) Secure it in place with the three screws.
- Be sure to tighten the screws.
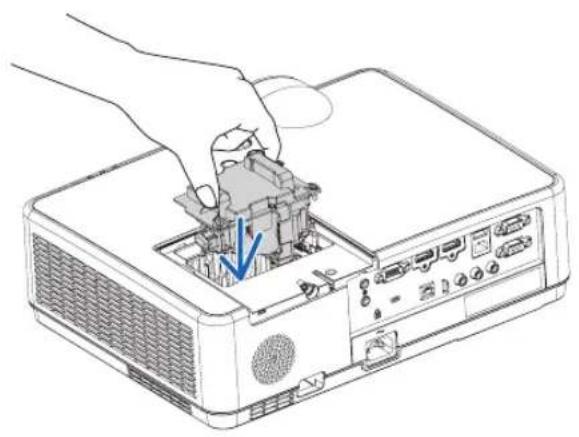
natural_image
Line drawing of a projector with a hand inserting a component into the case (no text or symbols)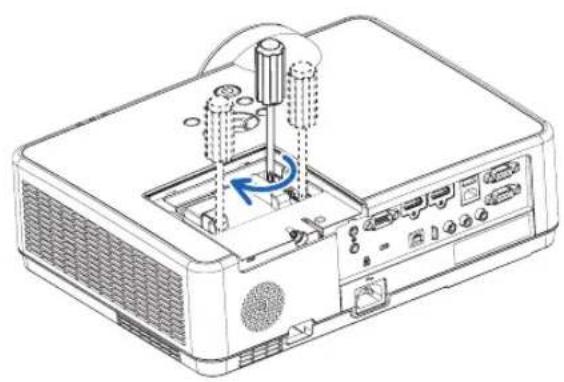
natural_image
Line drawing of an electronic projector with ports and a blue circular arrow indicating rotation (no text or symbols)4. Reattach the lamp cover.
(1) Slide the lamp cover back until it snaps into place.
(2) Tighten the screw to secure the lamp cover.
- Be sure to tighten the screw.
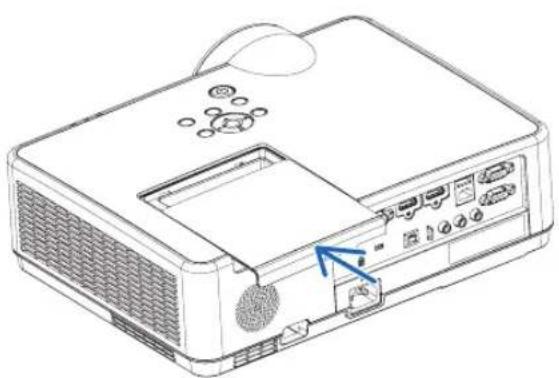
natural_image
Line drawing of a projector with ventilation slots and a blue arrow pointing to the front panel (no text or symbols)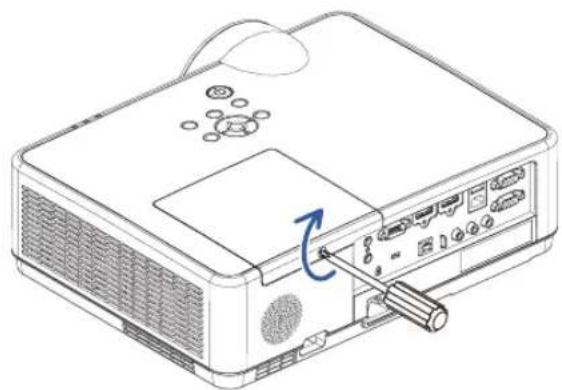
natural_image
Line drawing of a projector with a blue arrow indicating the blade (no text or symbols present)This completes the lamp replacement. Go on to the filter replacement.
NOTE: When you continue to use the projector for another 100 hours after the lamp has reached the end of its life, the projector cannot turn on and the menu is not displayed.
If this happens, press the HELP button on the remote control for 10 seconds to reset the lamp clock back to zero.
When the lamp time clock is reset to zero, the LAMP indicator goes out.
To replace the filter:
NOTE:
• Before replacing the filter, wipe off dust and dirt from the projector cabinet.
• The projector is precision equipment. Keep out dust and dirt during filter replacement.
- Do not wash the filter with soap and water. Soap and water will damage the filter membrane.
- Put filter into place. Incorrect attachment of a filter may cause dust and dirt to get into the inside of the projector.
1. Push button to release the filter unit and pull it out.
2. Remove the filter.
- Remove the filter from the filter cover.
3. Remove dust from the filter cover.
- Clean both outside and inside.
4. Attach a new filter to the filter cover.
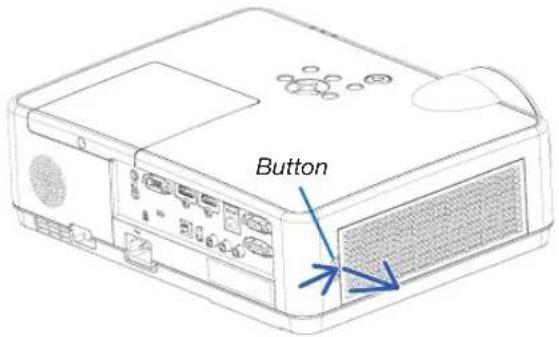
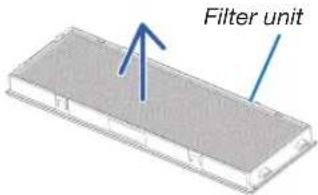
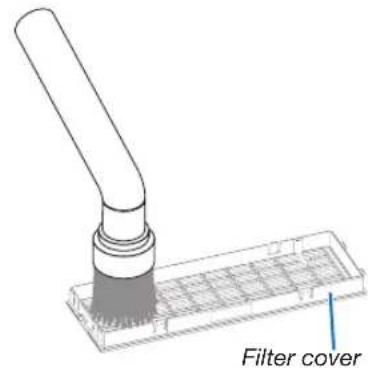
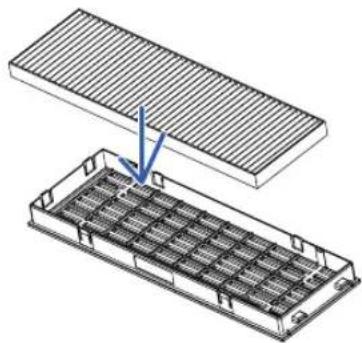
natural_image
Technical illustration of a grid-based component with a blue arrow indicating a downward force or assembly (no text or symbols present)5. Put the filter unit back to the projector cabinet.
Insert two catches of the tip of the filter unit into the groove of the cabinet, and push the button to close the filter unit.
- Push the filter unit until it clicks into place.
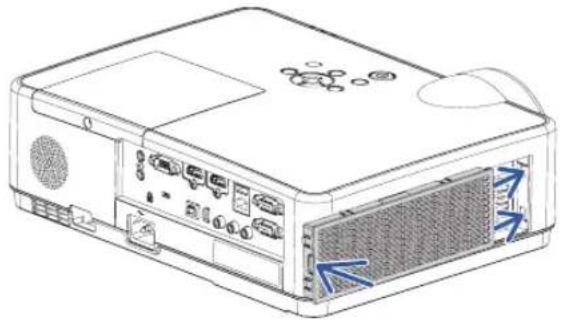
natural_image
Line drawing of a computer monitor with ventilation slots and ports (no text or symbols)This completes the filter replacement. Go on to the clearing lamp and filter hour meters.
To clear the lamp usage hours and the filter usage hours:
- Place the projector where you use it.
- Plug the power cord into the wall outlet, and then turn on the projector.
-
Clear the lamp usage hours and the filter usage hours.
-
From the menu, select [RESET] → [CLEAR LAMP HOURS] and reset the lamp usage hours.
- Select [CLEAR FILTER HOURS] and reset the filter usage hours. (→ page 77)
9. Appendix
① Troubleshooting
This section helps you resolve problems you may encounter while setting up or using the projector.
Feature of each indicator
①
②
③
① POWER indicator
This indicator informs the power status of the projector.
② STATUS indicator
This indicator lights/blinks when a button is pressed while the CONTROL PANEL LOCK function is utilized, or while performing the specific operations.
③ LAMP indicator
This indicator informs the state of lamp, usage time of the lamp, and the status of ECO MODE.
Indicator Message (Status message)
POWER STATUS LAMP Projector status
| Power is off | ||
| Off Off Off | ||
| In the state of Standby (Standby mode is NETWORK STANDBY and network is ready) | ||
| Orange(Blink*1) | Off Off | |
| In the state of Standby (Network is unavailable) | ||
| Orange(Blink*2) | Off Off | |
| In the state of Standby (Standby mode is NETWORK STANDBY and network is available) | ||
| Orange(Light) | Off Off | |
| In the state of Sleep | ||
| Green(Light) | Off Off | |
| Powered state (ECO mode is OFF) | ||
| Blue(Light) | Off Green(Light) | |
| Powered state (ECO mode is ON) | ||
| Blue(Light) | Off Green (Blink*3) | |
| OFF Timer is activated, OFF time as the program timer is activated (Powered state) | ||
| Blue(Blink*3) | Off Status varies | |
| Preparing for powering ON | ||
| Blue(Blink*4) | Off Off |
*1 Repetition to light on for 1.5 seconds / off for 1.5 seconds
*2 Repetition to light on for 1.5 seconds / off for 7.5 seconds
*3 Repetition to light on for 2.5 seconds / off for 0.5 seconds
*4 Repetition to light on for 0.5 seconds / off for 0.5 seconds
Indicator Message (Error message)
| POWER STATUS LAMP Projector status Procedure | ||||
 Blink Orange Blink Orange |  (Light) (Light) | Status varies | A button has been pressed while the KEY LOCK is activated. | The projector's keys are locked. The setting must be canceled to operate the projector. (→ page 67) |
| ID numbers for the projector and the remote control do not match. | Check the control IDs (→ page 68) | |||
| Status varies Off | Orange |  (Blink*4) (Blink*4) | Lamp replacement grace period. The lamp | has reached the end of its service life and is now in the replacement grace period (100 hours). Replace the lamp to new one as soon as possible. (→ page 111) |
| Status varies Off | Red |  (Blink*4) (Blink*4) | Lamp replacement time exceeded. The lamp | has exceeded its replacement time. Replace the lamp immediately. |
 Blue (Blink*4) Off Blue (Blink*4) Off | Green (Blink*4) |  | Preparing to relight lamp after lighting has failed. | Wait a while. |
 Blue(Light) Blue(Light) | Off Orange |  (Light) (Light) | Temperature problem (In the Forced ECO) | Ambient temperature is high. Lower the room temperature. |
 Red(Blink*4) Red(Blink*4) | Off Off |  | Temperature problem Ambient temperature is out of the operation temperature. Check if any obstruction stays near the exhaust vent. | |
 Red(Blink*4) Red(Blink*4) | Green(Light) |  Red(Light) Red(Light) | Lamp does not light. Wait at least 1 minute, then turn on the power back on. If the lamp still does not light, contact your dealer or service personnel. | |
 Red(Blink*4) Red(Blink*4) | Red(Light) |  Green(Light) Green(Light) | Lamp cover problem Lamp cover is not mounted properly. Mount it (→ see page 113). | |
 Red(Light) Red(Light) | Status varies |  Status varies Status varies | Error requiring service support | Contact your dealer or service personnel. Make sure to check and inform indicator status for asking to repair. |
*1 Repetition to light on for 1.5 seconds / off for 1.5 seconds
*2 Repetition to light on for 1.5 seconds / off for 7.5 seconds
*3 Repetition to light on for 2.5 seconds / off for 0.5 seconds
*4 Repetition to light on for 0.5 seconds / off for 0.5 seconds
- When the thermal protector is activated:
When inside temperature of the projector becomes too high or low, the POWER indicator start to red blink in a short cycle. After this happened, the thermal protector will activate and the projector may be turned off.
In this case, please take the below measures:
- Pull out the power plug from the wall inlet.
- Place the projector in cool place if it has been placed in high ambient temperature.
- Clean the exhaust vent if dust has accumulated on.
- Leave the projector for about one hour until inside temperature gets lower.
Explanation on the POWER indicator and standby state
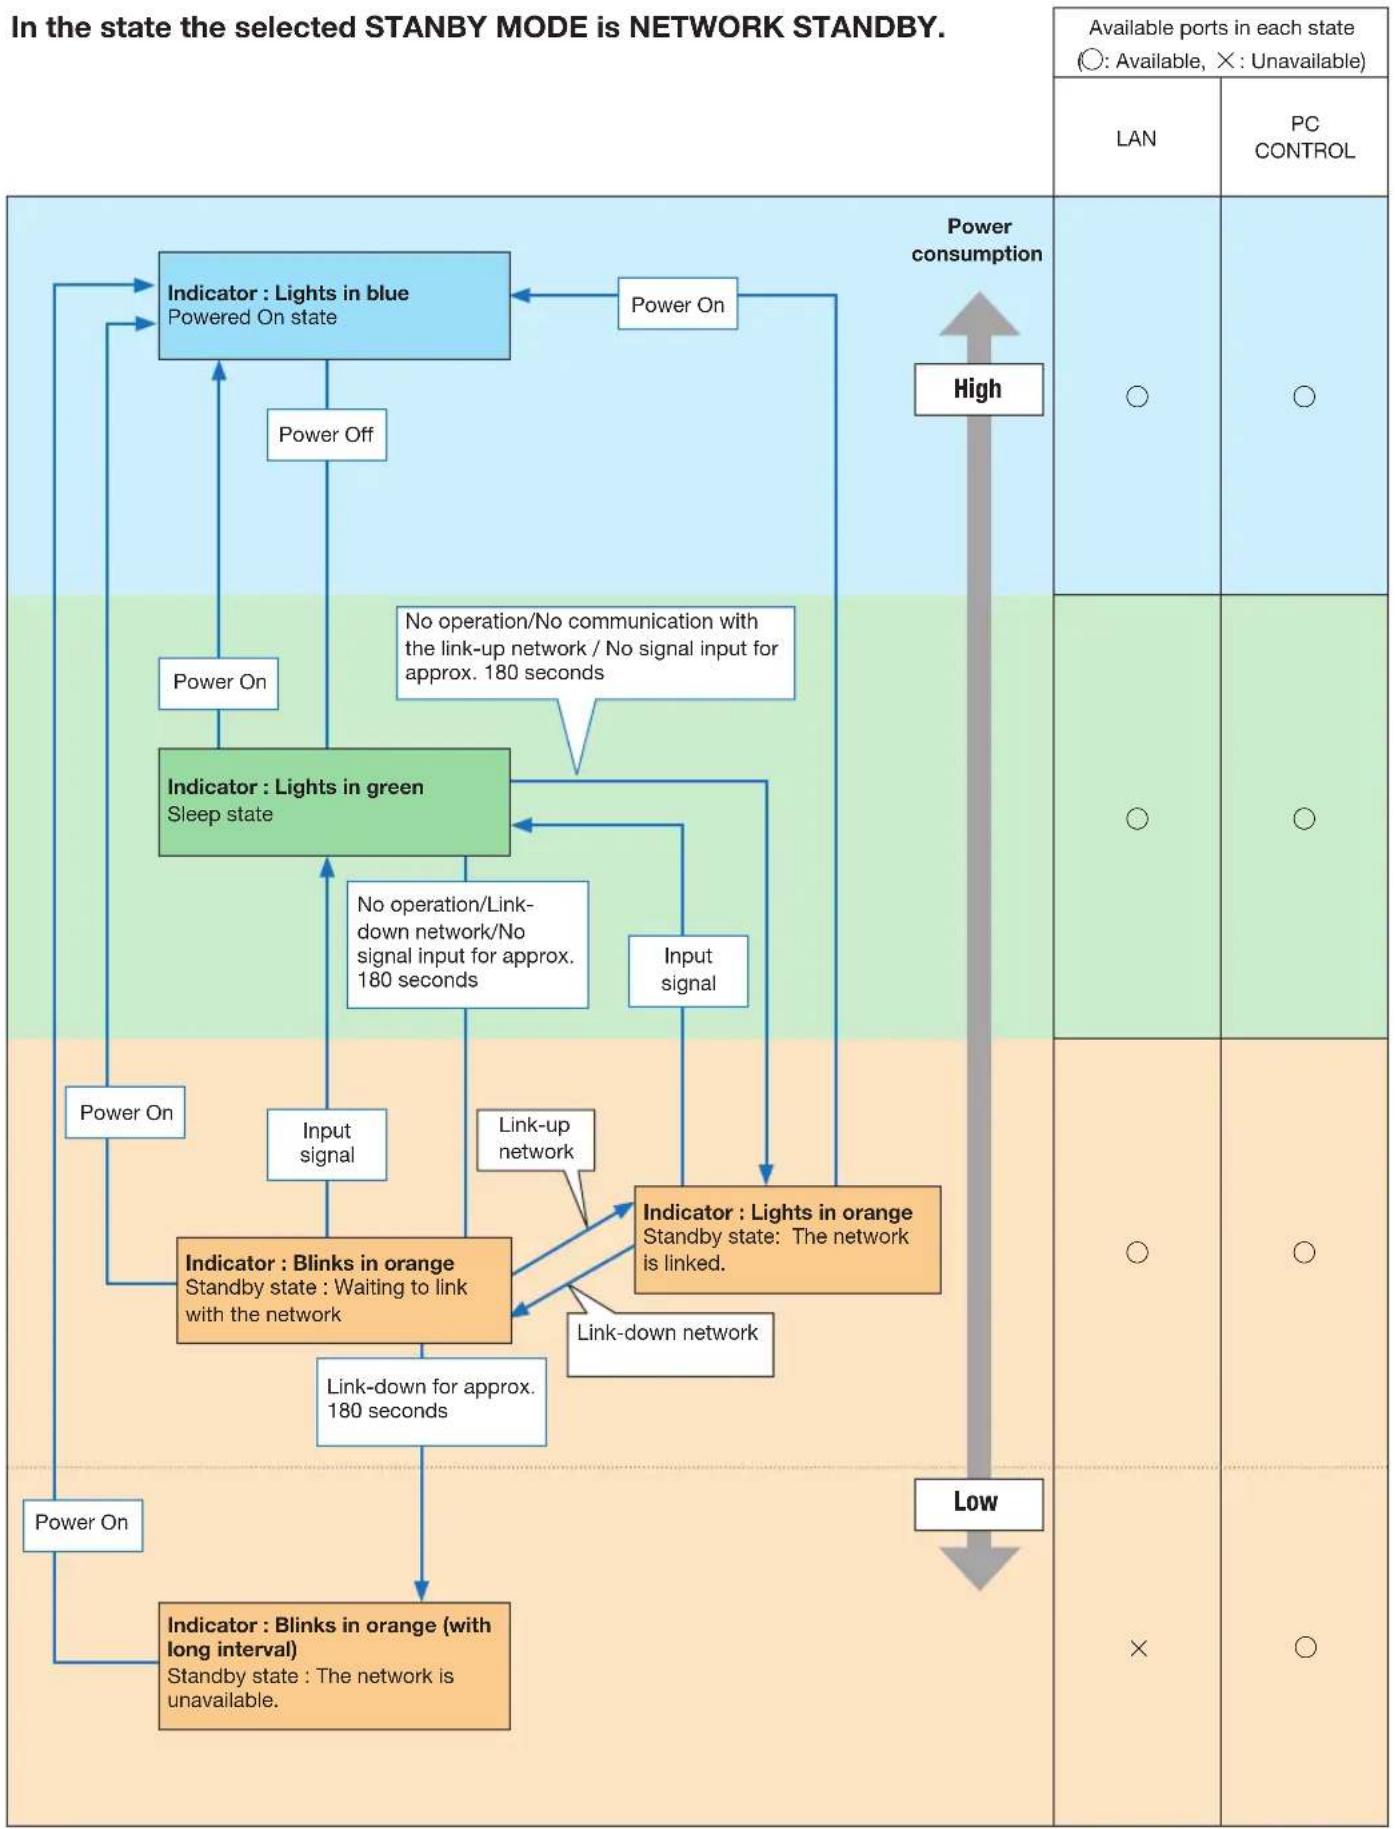
flowchart
graph TD
    A["Indicator : Lights in blue\nPowered On state"] --> B["Power On"]
    A --> C["Power Off"]
    A --> D["Power On"]
    A --> E["Indicator : Lights in green\nSleep state"]
    E --> F["No operation/Link-down network/No signal input for approx. 180 seconds"]
    E --> G["Input signal"]
    E --> H["Indicator : Lights in orange\nStandby state: The network is linked."]
    H --> I["Link-down network"]
    H --> J["Link-up network"]
    H --> K["Output Signal"]
    H --> L["Output Power On"]
    H --> M["Output Power Off"]
    H --> N["Output Power On"]
    H --> O["Output Power Off"]
    H --> P["Output Power On"]
    H --> Q["Output Power Off"]
    H --> R["Output Power On"]
    H --> S["Output Power Off"]
    H --> T["Output Power On"]
    H --> U["Output Power Off"]
    H --> V["Output Power On"]
    H --> W["Output Power Off"]
    H --> X["Output Power On"]
    H --> Y["Output Power Off"]
    H --> Z["Output Power On"]
    H --> AA["Output Power Off"]
    H --> AB["Output Power On"]
    H --> AC["Output Power Off"]
    H --> AD["Output Power On"]
    H --> AE["Output Power Off"]
    H --> AF["Output Power On"]
    H --> AG["Output Power Off"]
    H --> AH["Output Power On"]
    H --> AI["Output Power Off"]
    H --> AJ["Output Power On"]
    H --> AK["Output Power Off"]
    H --> AL["Output Power On"]
    H --> AM["Output Power Off"]
    H --> AN["Output Power On"]
    H --> AO["Output Power Off"]
    H --> AP["Output Power On"]
    H --> AQ["Output Power Off"]
    H --> AR["Output Power On"]
    H --> AS["Output Power Off"]
    H --> AT["Output Power On"]
    H --> AU["Output Power Off"]
    H --> AV["Output Power On"]
    H --> AW["Output Power Off"]
    H --> AX["Output Power On"]
    H --> AY["Output Power Off"]
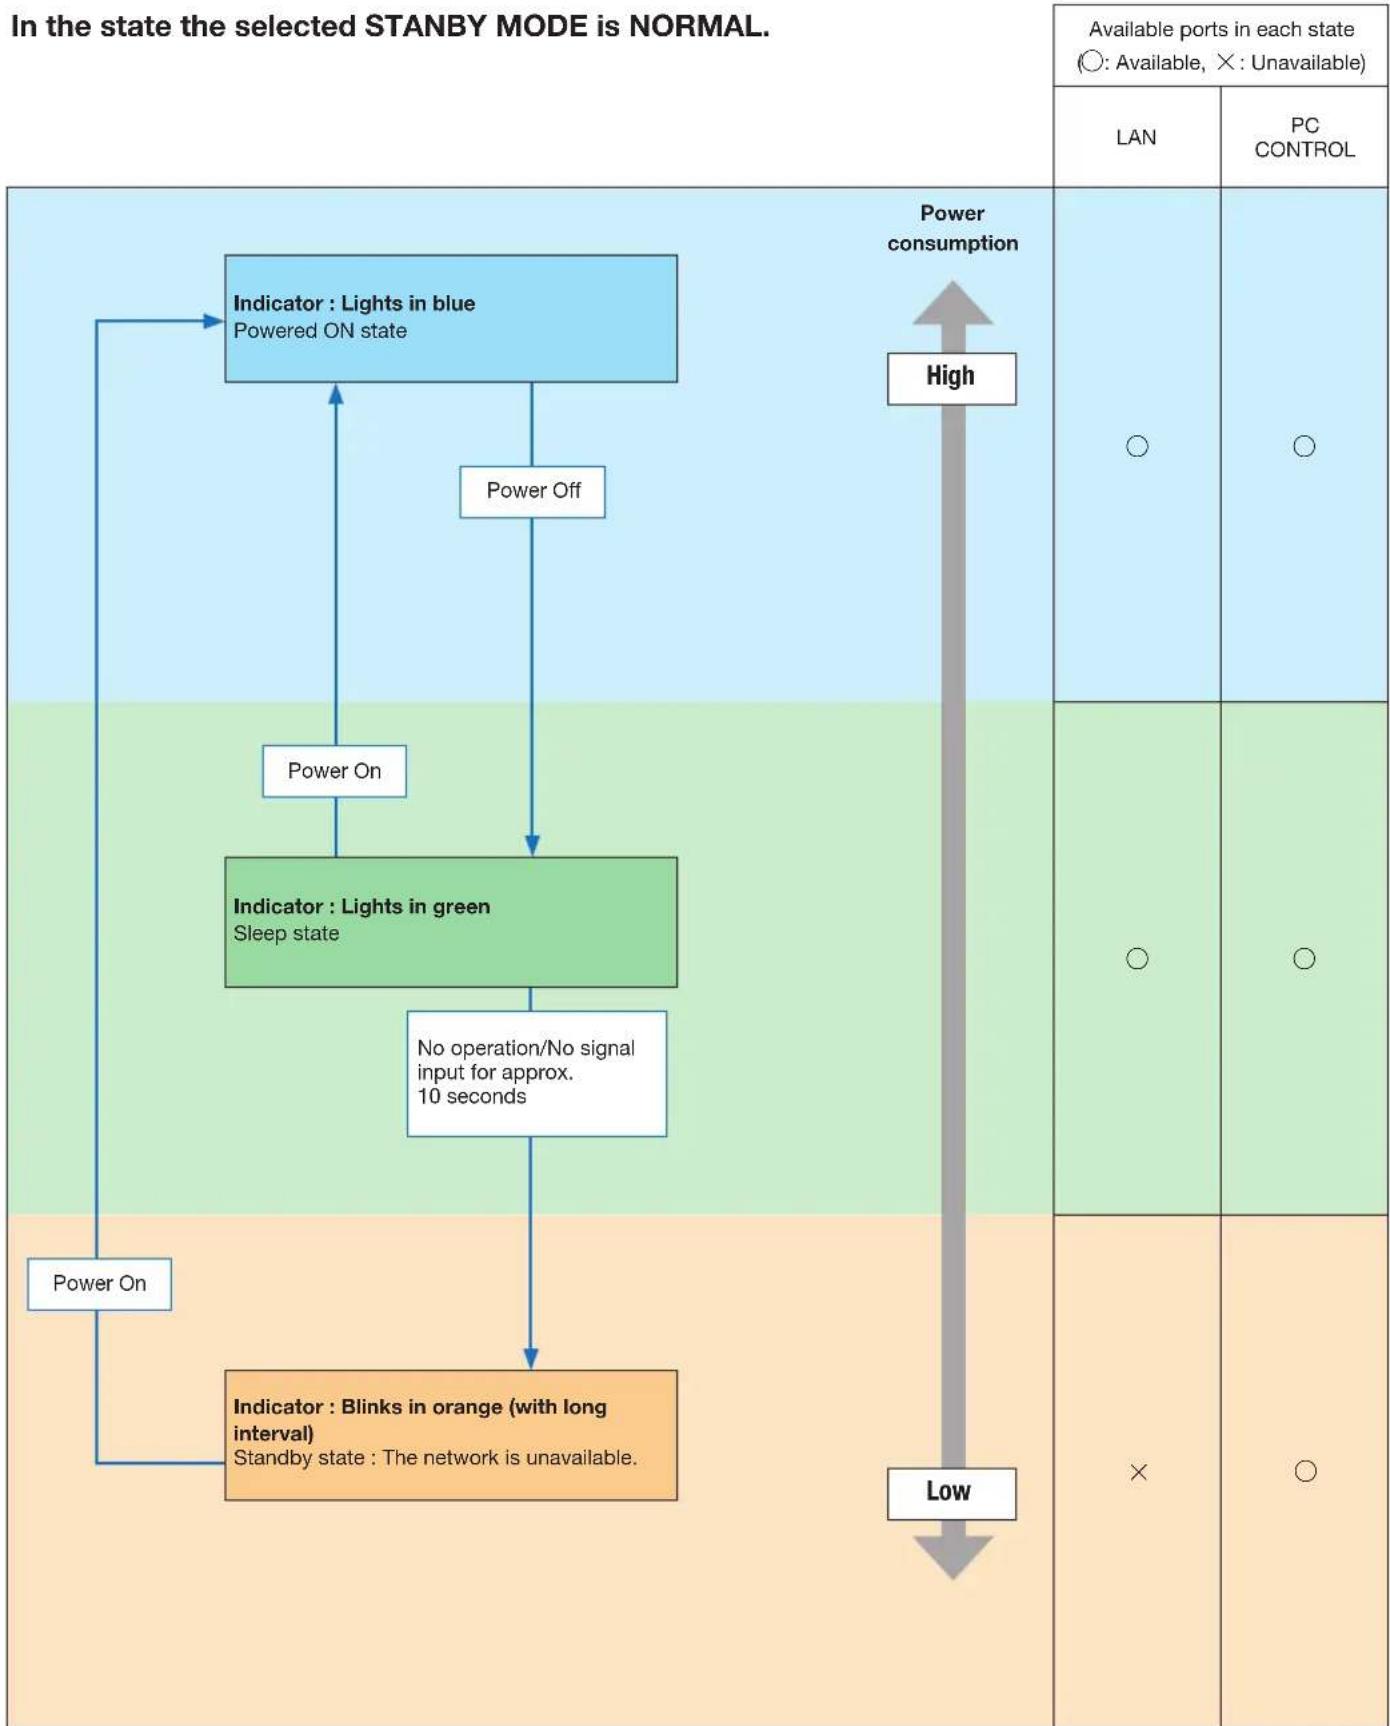
flowchart
graph TD
    A["Indicator : Lights in blue\nPowered ON state"] --> B["Power Off"]
    B --> C["Power On"]
    C --> D["Indicator : Lights in green\nSleep state"]
    D --> E["No operation/No signal input for approx. 10 seconds"]
    E --> F["Indicator : Blinks in orange (with long interval)\nStandby state : The network is unavailable."]
    F --> G["Power consumption"]
    G --> H["Low"]
    H --> I["×"]
    I --> J["○"]
    K["Available ports in each state\n(○: Available, ×: Unavailable)"] --> L["LAN"]
    L --> M["PC CONTROL"]
Common Problems & Solutions
(→ "Power/Status/Lamp Indicator" on page 116.)
| Problem Check These Items | |
| Does not turn on or shut down | Check that the power cord is plugged in and that the power button on the projector cabinet or the remote control is on. (→ pages 11, 12)Ensure that the lamp cover is installed correctly. (→ page 113)Check to see if the projector has overheated. If there is insufficient ventilation around the projector or if the room where you are presenting is particularly warm, move the projector to a cooler location.Check to see if you continue to use the projector for another 100 hours after the lamp has reached the end of its life. If so, replace the lamp. After replacing the lamp, reset the lamp hours used. (→ page 77)The lamp may fail to light. Wait a full minute and then turn on the power again.Set [FAN MODE] to [HIGH ALTITUDE] when using the projector at altitudes approximately 5500 feet/1700 meters or higher. Using the projector at altitudes approximately 5500 feet/1700 meters or higher without setting to [HIGH ALTITUDE] can cause the projector to overheat and the projector could shut down. If this happens, wait a couple minutes and turn on the projector. (→ page 69)If you turn on the projector immediately after the lamp is turned off, the fans run without displaying an image for some time and then the projector will display the image. Wait for a moment. |
| Will turn off | Ensure that the [OFF TIMER] or [AUTO POWER OFF] is off. (→ page 64, 72) |
| No picture | Use the COMPUTER, HDMI1, HDMI2, VIDEO, USB-A, USB-B or APPS button on the remote control to select your source (COMPUTER, HDMI1, HDMI2, VIDEO, USB-A, LAN or USB-B). (→ page 14) If there is still no picture, press the button again.Ensure your cables are connected properly.Use menus to adjust the brightness and contrast. (→ page 57)Reset the settings or adjustments to factory preset levels using the [RESET] in the Menu. (→ page 77)Enter your registered keyword if the Security function is enabled. (→ page 30)Be sure to connect the projector and notebook PC while the projector is in standby mode and before turning on the power to the notebook PC.In most cases the output signal from the notebook PC is not turned on unless connected to the projector before being powered up.* If the screen goes blank while using your remote control, it may be the result of the computer's screen-saver or power management software.See also thenext page. |
| Picture suddenly becomes dark | Check if the projector is in the Forced ECO mode because of too high ambient temperature. (→ page 69) |
| Color tone or hue is unusual | Check if an appropriate color is selected in [WALL COLOR]. If so, select an appropriate option. (→ page 64)Adjust [HUE] in [PICTURE]. (→ page 57) |
| Image isn't square to the screen | Reposition the projector to improve its angle to the screen. (→ page 15, 16)Use the Keystone correction function to correct the trapezoid distortion. (→ page 18) |
| Picture is blurred | Adjust the focus. (→ page 17)Reposition the projector to improve its angle to the screen. (→ page 15, 16)Ensure that the distance between the projector and screen is within the adjustment range. (→ page 85)Condensation may form on the lens if the projector is cold, brought into a warm place and is then turned on. Should this happen, let the projector stand until there is no condensation on the lens. |
| Flicker appears on screen | Set [FAN MODE] to other than [HIGH ALTITUDE] mode when using the projector at altitudes approximately 5500 feet/1700 meters or lower. Using the projector at altitudes less than approximately 5500 feet/1700 meters and setting to [HIGH ALTITUDE] can cause the lamp to overcool, causing the image to flicker. Switch [FAN MODE] to [AUTO]. (→ page 69) |
| Image is scrolling vertically, horizontally or both | Check the computer's resolution and frequency. Make sure that the resolution you are trying to display is supported by the projector. (→ page 127)Adjust the computer image manually with the Horizontal/Vertical in the [IMAGE OPTIONS]. (→ page 59) |
| Remote control does not work | Install new batteries. (→ page 9)Make sure there are no obstacles between you and the projector.Stand within 22 feet (7 m) of the projector. (→ page 9) |
| Indicator is lit or blinking | See the POWER/STATUS/LAMP Indicator. (→ page 116) |
| Cross color in RGB mode | Press the AUTO ADJ. button on the projector cabinet or the remote control. (→ page 20)Adjust the computer image manually with [CLOCK]/[PHASE] in [IMAGE OPTIONS] in the menu. (→ page 58) |
For more information contact your dealer.
If there is no picture, or the picture is not displayed correctly.
• Power on process for the projector and the PC.
Be sure to connect the projector and notebook PC while the projector is in standby mode and before turning on the power to the notebook PC.
In most cases the output signal from the notebook PC is not turned on unless connected to the projector before being powered up.
NOTE: You can check the horizontal frequency of the current signal in the projector's menu under Information. If it reads "0kHz", this means there is no signal being output from the computer. (→ page 75 or go to next step)
- Enabling the computer's external display.
Displaying an image on the notebook PC's screen does not necessarily mean it outputs a signal to the projector. When using a PC compatible laptop, a combination of function keys will enable/disable the external display. Usually, the combination of the "Fn" key along with one of the 12 function keys gets the external display to come on or off. For example, NEC laptops use Fn + F3, while Dell laptops use Fn + F8 key combinations to toggle through external display selections.
• Non-standard signal output from the computer
If the output signal from a notebook PC is not an industry standard, the projected image may not be displayed correctly. Should this happen, deactivate the notebook PC's LCD screen when the projector display is in use. Each notebook PC has a different way of deactivate/reactivate the local LCD screens as described in the previous step. Refer to your computer's documentation for detailed information.
• Image displayed is incorrect when using a Mac
When using a Mac with the projector, set the DIPswitch of the Mac adapter (not supplied with the projector) according to your resolution. After setting, restart your Mac for the changes to take affect.
For setting display modes other than those supported by your Mac and the projector, changing the DIP switch on a Mac adapter may bounce an image slightly or may display nothing. Should this happen, set the DIP switch to the 13" fixed mode and then restart your Mac. After that, restore the DIP switches to a displayable mode and then restart the Mac again.
NOTE: A Video Adapter cable manufactured by Apple Inc. is needed for a MacBook which does not have a mini D-Sub 15-pin terminal.
• Mirroring on a MacBook
* When using the projector with a MacBook, output may not be set to 1024 × 768 unless “mirroring” is off on your MacBook. Refer to owner’s manual supplied with your Mac computer for mirroring.
- Folders or icons are hidden on the Mac screen
Folders or icons may not be seen on the screen. Should this happen, select [View] → [Arrange] from the Apple menu and arrange icons.
② Specifications
This section provides technical information about projector's performance.
Optical
| Model Number | ME382U | ME342U | MC382W | ME372W | MC332W | MC422X | ME402X | MC372X | MC342X | MC302X | |
| LCD Panel 0.64 inch | LCD with Micro Lens Array (Aspect Ratio 16:10) | 0.64 inch LCD with Micro Lens Array (Aspect Ratio 16:10) | 0.59 inch LCD with Micro Lens Array (Aspect Ratio 16:10) | 0.63 inch LCD with Micro Lens Array (Aspect Ratio 4:3) | 0.63 inch LCD (Aspect Ratio 4:3) | ||||||
| Resolution*1 | WUXGA (1920 dots × 1200 lines) | WXGA (1280 dots × 800 lines) XGA (1024 dots × 768 lines) | |||||||||
| Lens ZOOM Ratio = | 1.6F=1.5-2.1 /f=17.2-27.7 mm | ZOOMRatio=1.2F=1.6-1.8 /f=19.2-23.0 mm | ZOOMRatio=1.7F=1.7-2.2 /f=17.4-29.0 mm | ZOOMRatio=1.2F=1.6-1.8 /f=19.2-23.0 mm | ZOOMRatio=1.2F=1.6-1.8 /f=19.2-23.0 mm | ZOOMRatio=1.7F=1.7-2.2 /f=17.4-29.0 mm | ZOOMRatio=1.2F=1.6-1.8 /f=19.2-23.0 mm | ZOOMRatio=1.2F= 2.1 - 2.3 /f=19.1-22.9 mm | |||
| Zoom Manual | |||||||||||
| Focus Manual | |||||||||||
| Lamp ECO MODE OFF | 225 W 210 W 225 W | ||||||||||
| NORMAL 180 W | |||||||||||
| ECO 151 W | |||||||||||
| Light Output*2*3 | 3800 lm 3400 lm 3800 lm 3700 lm 3300 lm 4200 lm 4000 lm 3700 lm 3400 lm 3000 lm | ||||||||||
| NORMAL Approx. 80% 86% 80% | |||||||||||
| ECO Approx. 67% 72% 67% | |||||||||||
| Contrast Ratio (full white/full black) | 16000:1 with Iris | ||||||||||
| Screen Size (Diagonal) | 30-300 inches | ||||||||||
| Projection Distance (Min.-Max.) | 29-507 inches /0.7-12.9 m | 34-421inches /0.9-10.7 m | 30-528inches /0.8-13.4 m | 38-457inches /1.0-11.6 m | 35-431inches /0.9-10.9 m | 31-542inches /0.8-13.8 m | 35-431inches /0.9-10.9 m | 34-429 inches /0.9-10.9 m | |||
| Projection Angle 11 | 0^ - 11.7^ (Wide) / 6.8^ - 7.1^ (Tele) | 10.2^ - 10.6^ (Wide) / 8.5^ - 8.7^ (Tele) | 10.8^ - 11.5^ (Wide) / 6.6^ - 6.8^ (Tele) | 10.2^ - 10.3^ (Wide) / 8.5^ - 8.6^ (Tele) | 10.7^ - 11.4^ (Wide) / 6.5^ - 6.8^ (Tele) | 10.2^ - 10.3^ (Wide) / 8.5^ - 8.6^ (Tele) | 10.2^ - 10.6^ (Wide) / 8.5^ - 8.8^ (Tele) | ||||
*1 Effective pixels are more than 99.99%.
*2 This is the light output value (lumens) when the [PRESET] mode is set to [HIGH-BRIGHT]. If any other mode is selected as the [PRESET] mode, the light output value may drop slightly.
*3 Compliance with ISO21118-2012
Electrical
| Model Number | ME382U | ME342U | MC382W | ME372W | MC332W | MC422X | ME402X | MC372X | MC342X | MC302X |
| Inputs | 1 × RGB/Component (D-SUB 15 P), 2 × HDMI Type A (19P, HDMI ^ Terminal) HDCP supported ^*4 , 1 × Video (RCA), 1 × (L/R) RCA Audio, 1 × Stereo Mini Audio | |||||||||
| Outputs | 1 × RGB (D-Sub 15 P), 1 × Stereo Mini Audio | |||||||||
| PC Control | 1 × PC Control Port (D-Sub 9 P) | |||||||||
| Wired LAN Port | 1 × RJ-45 (10BASE-T/100BASE-TX) | |||||||||
| Wireless LAN Port(Optional) | IEEE 802.11 b/g/n (optional USB Wireless LAN Unit required) | |||||||||
| USB Port | 1 × Type A, 1 × Type B | |||||||||
| Color Reproduction 10-bit signal processing (1.07 billion colors) (VIEWER, Network: 16.7 million colors) | ||||||||||
*4 HDMI® (Deep Color, Lip Sync) with HDCP
What is HDCP/HDCP technology?
HDCP is an acronym for High-bandwidth Digital Content Protection. High bandwidth Digital Content Protection (HDCP) is a system for preventing illegal copying of video data sent over a High-Definition Multimedia Interface (HDMI).
If you are unable to view material via the HDMI input, this does not necessarily mean the projector is not functioning properly. With the implementation of HDCP, there may be cases in which certain content is protected with HDCP and might not be displayed due to the decision/intention of the HDCP community (Digital Content Protection, LLC).
Video: Deep Color; 8/10/12-bit, LipSync
Audio: LPCM; up to 2 ch, sample rate 32/44.1/48 KHz, sample bit; 16/20/24-bit
| Model Number ME382U ME342U MC382W ME372W MC332W MC422X ME402X MC372X MC342X MC302X | ||||||
| Compatible Signals*5 | Analog: VGA/SVGA/XGA/WXGA/Quad-VGA/SXGA/SXGA+/WXGA+/WXGA++/UXGA/WSXGA+/HD/Full HD/WUXGA/Mac 13", 16", 21", 23"Component: 480i/480p/576i/576p/720p/1080i/1080pHDMI: VGA/SVGA/XGA/WXGA/Quad-VGA/SXGA/SXGA+/WXGA+ /WXGA++/WSXGA+/4K/480p/576p/720p/1080i/1080p | |||||
| Horizontal Resolution | 540 TV lines: NTSC/NTSC4.43/PAL/PAL-M/PAL-N/PAL60300 TV lines: SECAM | |||||
| Scan Rate Horizontal: | 15 kHz to 100 kHz (RGB: 24 kHz or over)Vertical: 50 Hz to 120 Hz | |||||
| Sync Compatibility Separate Sync | ||||||
| Built-in Speaker 1×16 W (monaural) | ||||||
| Power Requirement 100 to 240 V AC, 50/60 Hz | ||||||
| Input Current 3.4-1.4 A 3.3-1.3 A | ||||||
| Power consumption | ECOMODEOFF | 295 W (100-130 V)283 W (200-240 V) | 288 W (100-130 V)277 W (200-240 V) | 267 W(100-130 V)259 W(200-240 V) | 288 W (100-130 V)277 W (200-240 V) | |
| NORMAL 238 W (100-130 V)232 W (200-240 V) | 229 W (100-130 V)223 W (200-240 V) | 228 W(100-130 V)223 W(200-240 V) | 229 W (100-130 V)223 W (200-240 V) | |||
| ECO 207 W (100-130 V)202 W (200-240 V) | 196 W (100-130 V)192 W (200-240 V) | 196 W(100-130 V)191 W(200-240 V) | 196 W (100-130 V)192 W (200-240 V) | |||
| STANDBY(NETWORK STANDBY) | 1.5 W (100-130 V)1.6 W (200-240 V) | |||||
| STANDBY(NORMAL) | 0.18 W (100-130 V)0.26 W (200-240 V) | |||||
*5 An image with higher or lower resolution than the projector's native resolution (ME402X/MC422X/MC372X/MC342X/MC302X: 1024 × 768 / ME372W/MC382W/MC332W: 1280 × 800 / ME382U/ME342U: 1920 × 1200) will be displayed with Advanced AccuBlend. (→ page 127)
Mechanical
| Model Number ME382U ME342U MC382W ME372W MC332W MC42X ME402X MC372X MC342X MC302X | ||||||||
| Installation Orientation | Desktop/Front, Desktop/Rear, Ceiling/Front, Ceiling/Rear | |||||||
| Dimensions 345 mm (W) × 113.5mm (H) × 284.5 mm (D)(including protrusions)345 mm (W) × 104.6mm (H) × 261 mm (D)(not including protrusions) | 345 mm (W) × 108.4 mm (H) × 261 mm (D) (including protrusions)345 mm (W) × 104.6 mm (H) × 261 mm (D) (not including protrusions) | |||||||
| Weight | 3.5 kg | 3.1 kg | 3.2 kg | 3.1 kg | 3.2 kg | 3.1 kg | ||
| Environmental Considerations | Operational Temperatures: 41° to 104°F (5° to 40°C),(ECO mode selected automatically at 95°F to 104°F/35°C to 40°C)20% to 80% humidity (non-condensing)Storage Temperatures: 14° to 122°F (-10° to 50°C),20% to 80% humidity (non-condensing)Operating altitude: 0 to 3000 m/9800 f (Set [FAN MODE] to [HIGH ALUTITUDE] when using the projector at altitudes approximately 1700 m/5500 f or higher.) | |||||||
For additional information visit:
US : https://www.necdisplay.com/
Europe : https://www.nec-display-solutions.com/
Global : https://www.nec-display.com/global/index.html
For information on our optional accessories, visit our website or see our brochure.
The specifications are subject to change without notice.
③ Cabinet Dimensions
Unit: mm (inch)
[ME382U/ME342U]
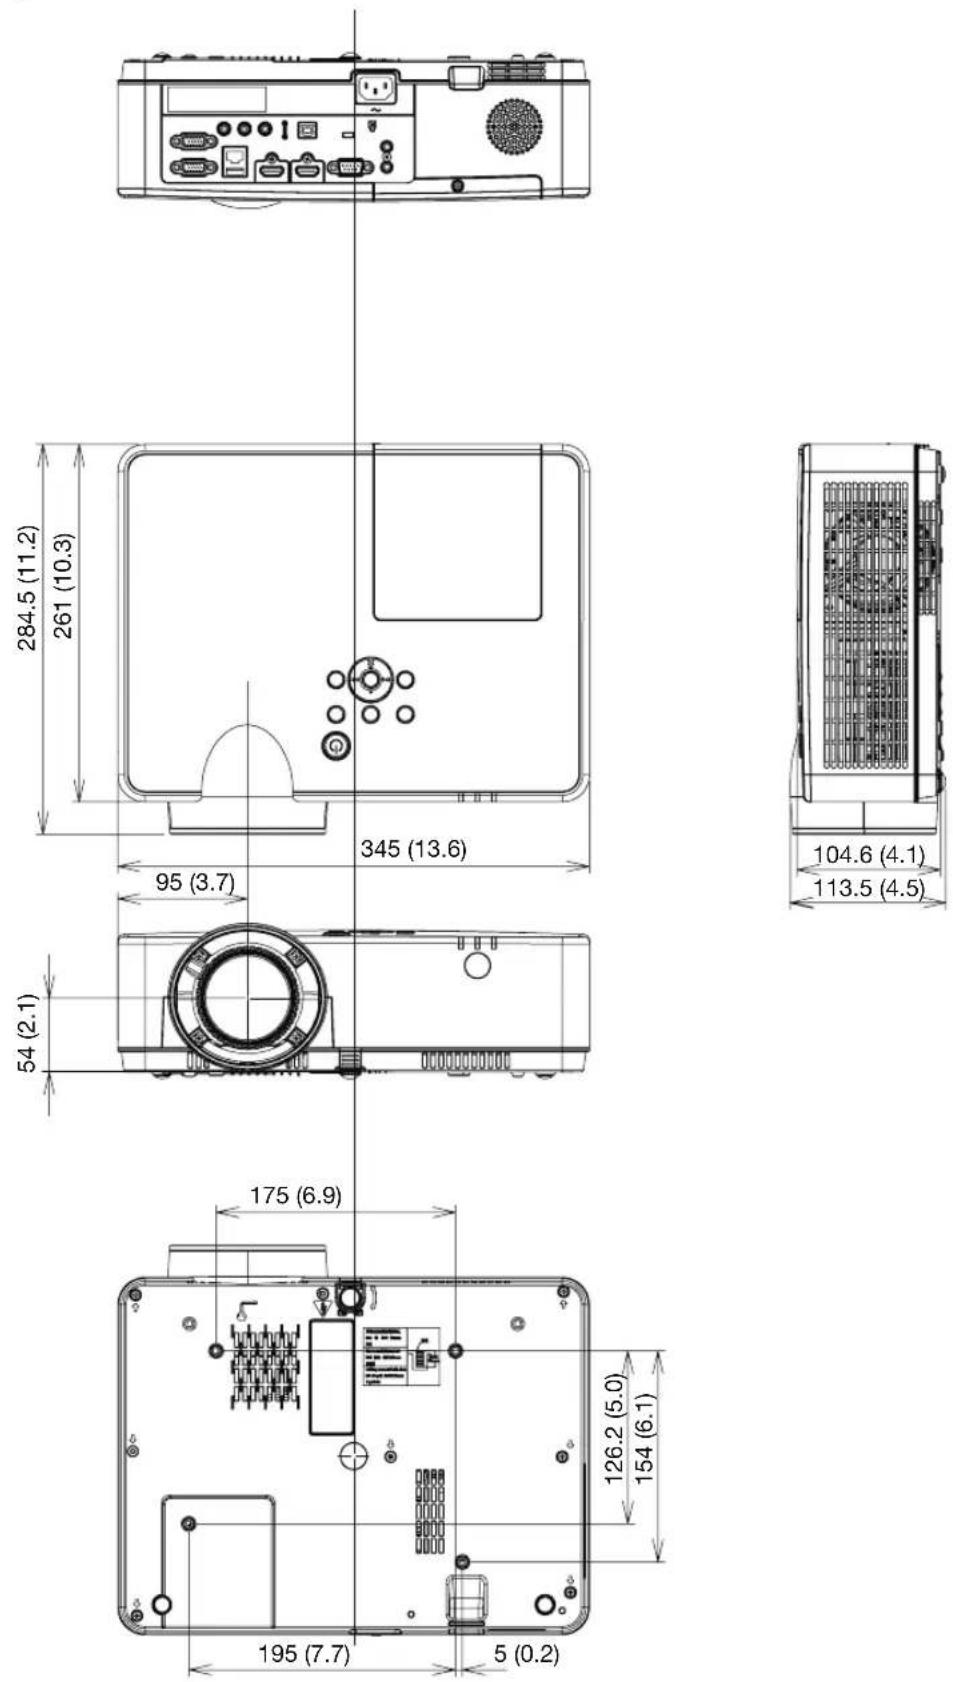
Unit: mm (inch)
[ME372W/MC382W/MC332W/ME402X/MC422X/MC372X/MC342X/MC302X]
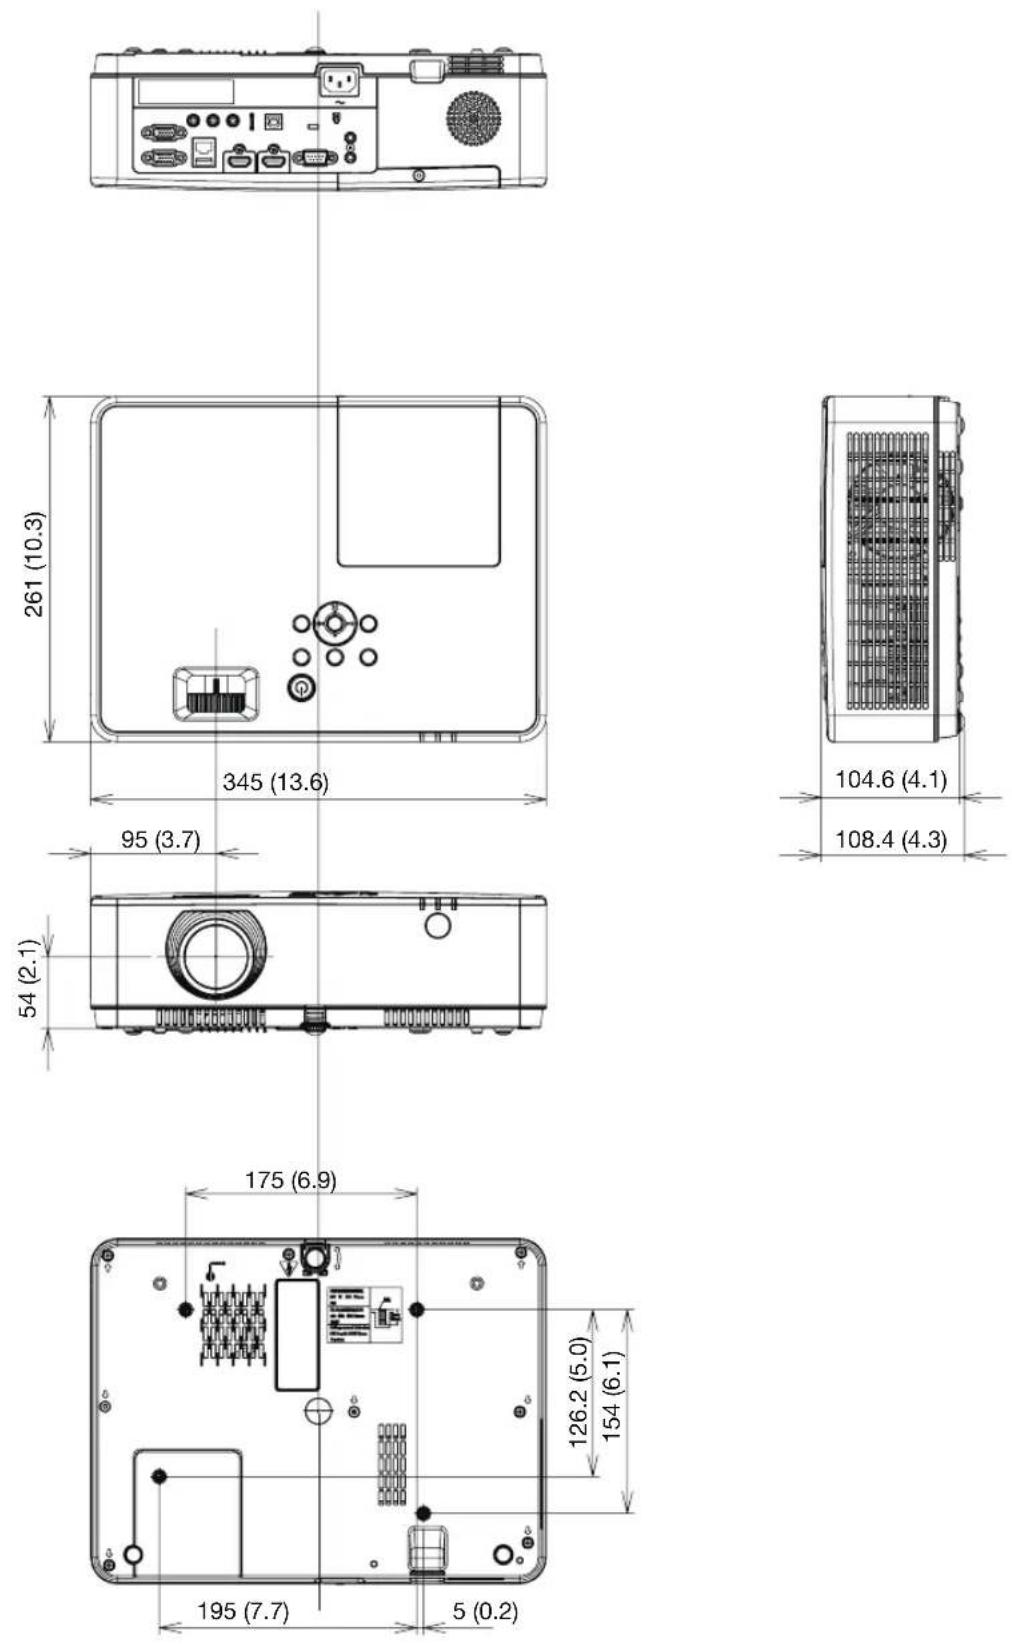
④ Pin Assignments of D-Sub COMPUTER Input Terminal
Mini D-Sub 15 Pin Terminal
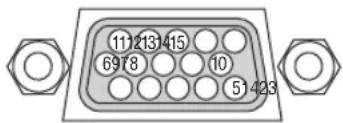
Signal Level
Video signal : 0.7Vp-p (Analog)
Sync signal : TTL level
| Pin No. | RGB Signal (Analog) | YCbCr Signal |
| 1 Red Cr | ||
| 2 Green | or Sync on Green Y | |
| 3 Blue Cb | ||
| 4 Ground | ||
| 5 Ground | ||
| 6 Red G | ound Cr Ground | |
| 7 Green | Ground | Y Ground |
| 8 Blue G | round | Cb Ground |
| 9 Hotplug | ||
| 10 | Sync Signal Ground | |
| 11 | No Connection | |
| 12 | Bi-directional DATA (SDA) | |
| 13 | Horizontal Sync or Composite Sync | |
| 14 | Vertical Sync | |
| 15 | Data Clock | |
COMPUTER IN
NOTE: Pin Nos. 12 and 15 are required for DDC/CI.
⑤ Compatible Input Signal List
Analog RGB
| Signal | Resolution (dots) | Aspect Ratio | Refresh Rate (Hz) |
| VGA 640 × 480 | 4:3 60/72/75/85/iMac | ||
| SVGA 800 × 600 | 4:3 56/60/72/75/85/iMac | ||
| XGA 1024 × 768 * | 1 | 4:3 60/70 | /75/85/iMac |
| WXGA 1280 × | 768 * | 15:9 60 | |
| 1280 × 800 * | 16:10 60 | ||
| 1360 × 768 * | 16:9 60 | ||
| 1366 × 768 * | 16:9 60 | ||
| Quad-VGA 1280 × 960 | 4:3 60/75 | ||
| SXGA 1280 × | 1024 5:4 60/75 | ||
| SXGA+ 1400 × | 1050 4:3 60 | ||
| WXGA+ | 1440 × 900 16:10 | 60 | |
| WXGA++ | 1600 × 900 * | 16:9 60 | |
| UXGA | 1600 × 1200 * | 4:3 60 | |
| WSXGA+ | 1680 × 1050 | 16:10 | 60 |
| HD | 1280 × 720 16:9 | 60 | |
| Full HD 1920 × | 1080 | 16:9 60 | |
| WUXGA | 1920 × 1200 * | 16:10 60 | |
| MAC 13" | 640 × 480 4:3 67 | ||
| MAC 16" | 832 × 624 4:3 75 | ||
| MAC 19" | 1024 × 768 4:3 75 | ||
| MAC 21" | 1152 × 870 4:3 75 | ||
| MAC 23" | 1280 × 1024 5:4 65 |
Component
| Signal | Format | Aspect Ratio | Refresh Rate (Hz) |
| HDTV (1080p) | 1920 × 1080 | 16:9 | 50/60 |
| HDTV (1080i) | 1920 × 1080 | 16:9 | 50/60 |
| HDTV (720p) | 1280 × 720 | 16:9 | 50/60 |
| SDTV (480p) | 720 × 480 | 4:3/16:9 | 60 |
| SDTV (576p) | 720 × 576 | 4:3/16:9 | 50 |
| SDTV (480i) | 720 × 480 | 4:3/16:9 | 60 |
| SDTV (576i) | 720 × 576 | 4:3/16:9 | 50 |
Composite Video
| Signal | Aspect Ratio | Refresh Rate (Hz) |
| NTSC | 4:3 60 | |
| PAL | 4:3 50 | |
| PAL60 | 4:3 60 | |
| SECAM | 4:3 50 |
HDMI
| Signal | Resolution (dots) | Aspect Ratio | Refresh Rate (Hz) |
| VGA 640 × 480 | 4:3 60 | ||
| SVGA 800 × 60 | 00 4:3 60 | ||
| XGA 1024 × 768 | *1 | 4:3 60 | |
| WXGA 1280 × | 768 *2 | 15:9 60 | |
| 1280 × 800 *2 | 16:10 60 | ||
| 1366 × 768 16:9 60 | |||
| Quad-VGA 1280 × 960 4:3 60 | |||
| SXGA 1280 × 1024 5:4 60 | |||
| SXGA+ 1400 × 1050 4:3 60 | |||
| WXGA+ | 1440 × 900 16:10 | 60 | |
| WXGA++ | 1600 × 900 16:9 60 | ||
| WSXGA+ | 1680 × 1050 | 16:10 | 60 |
| WUXGA | 1920 × 1200 | 16:10 | 60*7 |
| 4K | 3840 × 2160 | 16:9 | 23.98/24/25/29.97/30 |
| HDTV (1080p) | 1920 × 1080 | 16:9 | 50/60 |
| HDTV (1080i) | 1920 × 1080 | 16:9 | 50/60 |
| HDTV (720p) | 1280 × 720 16:9 | 50/60 | |
| SDTV (480p) | 720 × 480 | 4:3/16:9 60 | |
| SDTV (576p) | 720 × 576 | 4:3/16:9 50 | |
| SDTV(480i) 720 × 480 | 4:3/16:9 | 60 | |
| SDTV(576i) 720 × 576 | 4:3/16:9 | 50 | |
*1 Native resolution on XGA model (ME402X/MC422X/MC372X/MC342X/MC302X)
*2 Native resolution on WXGA model (ME372W/MC382W/MC332W)
*3 The projector may fail to display these signals correctly when [AUTO] is selected for [ASPECT RATIO] in the on-screen menu. The factory default is [AUTO] for [ASPECT RATIO]. To display these signals, select [16:9] for [ASPECT RATIO].
*4 WXGA MODE: OFF
*5 WXGA MODE: ON
*6 Native resolution on WUXGA model (ME382U/ME342U)
*7 RB (Reduced blanking signal) is effective up to 154MHz.
NOTE:
- An image with higher or lower resolution than the projector's native resolution (ME402X/MC422X/MC372X/MC342X/MC302X: 1024 × 768 / ME372W/MC382W/MC332W: 1280 × 800 / ME382U/ME342U: 1920 × 1200) will be displayed with Advanced AccuBlend.
- Sync on Green and Composite sync signals are not supported.
- Signals other than those specified in the table above may not be displayed correctly. If this should happen, change the refresh rate or resolution on your PC. Refer to Display Properties help section of your PC for procedures.
6 PC Control Codes and Cable Connection
PC Control Codes
Function Code Data
| POWER | ON | 02H | 00H | 00H | 00H | 00H | 02H | ||||
| POWER | OFF | 02H | 01H | 00H | 00H | 00H | 03H | ||||
| INPUT | SELECT | COMPUTER | 02H | 03H | 00H | 00H | 02H | 01H | 01H | 09H | |
| INPUT | SELECT | HDMI1 | 02H | 03H | 00H | 00H | 02H | 01H | 1AH | 22H | |
| INPUT | SELECT | HDMI2 | 02H | 03H | 00H | 00H | 02H | 01H | 1BH | 23H | |
| INPUT | SELECT | VIDEO | 02H | 03H | 00H | 00H | 02H | 01H | 06H | 0EH | |
| INPUT | SELECT | USB-A | 02H | 03H | 00H | 00H | 02H | 01H | 1FH | 27H | |
| INPUT | SELECT | LAN | 02H | 03H | 00H | 00H | 02H | 01H | 20H | 28H | |
| INPUT | SELECT | USB-B | 02H | 03H | 00H | 00H | 02H | 01H | 22H | 2AH | |
| PICTURE | MUTE | ON | 02H | 10H | 00H | 00H | 00H | 12H | |||
| PICTURE | MUTE | OFF | 02H | 11H | 00H | 00H | 00H | 13H | |||
| SOUND | MUTE | ON | 02H | 12H | 00H | 00H | 00H | 14H | |||
| SOUND | MUTE | OFF | 02H | 13H | 00H | 00H | 00H | 15H | |||
NOTE: Contact your local dealer for a full list of the PC Control Codes if needed.
Cable Connection
Communication Protocol
Baud rate 38400 bps
Data length 8 bits
Parity ...... No parity
Stop bit.... One bit
X on/off......None
Communications procedure......Full duplex
NOTE: Depending on the equipment, a lower baud rate may be recommended for long cable runs.
PC Control Terminal (D-SUB 9P)
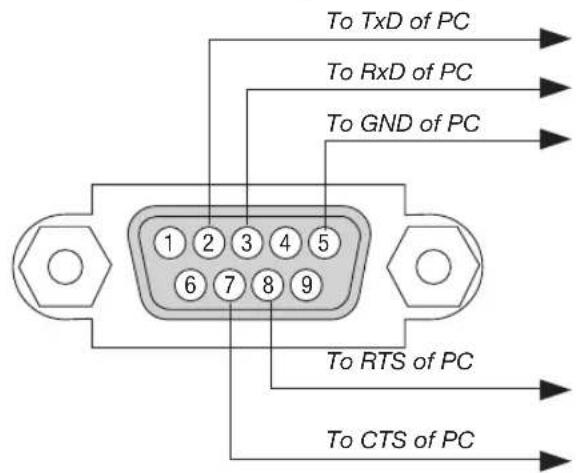
NOTE 1: Pins 1, 4, 6 and 9 are no used.
NOTE 2: Jumper "Request to Send" and "Clear to Send" together on both ends of the cable to simplify cable connection.
NOTE 3: For long cable runs it is recommended to set communication speed within projector menus to 9600 bps.
ABOUT THE ASCII CONTROL COMMAND
This device supports the common ASCII Control Command for controlling our projector and monitor.
Please visit our web site for detailed information about the command.
https://www.nec-display.com/dl/en/pj_manual/lineup.html
HOW TO CONNECT WITH AN EXTERNAL DEVICE
There are two methods to connect the projector with an external device such as a computer.
- Connection thru the serial port.
Connects the projector to a computer by a serial cable (a cross cable).
- Connection via network (LAN)
Connects the projector to a computer by a LAN cable.
Concerning to the type of LAN cable, please ask to your network administrator.
CONNECTION INTERFACE
- Connection thru the serial port.
Communication Protocol
| Item Information | |
| Baud rate 38400/19200/9600/4800 bps | |
| Data length 8 bits | |
| Parity bit No parity | |
| Stop bit 1 bit | |
| Flow control None | |
| Communications procedure Full duplex | |
- Connection via network
Communication Protocol (Connection via LAN)
| Item Information | |
| Communication speed Set automatically | (10/100 Mbps) |
| Supported standard IEEE802.3 (10BASE-T) | |
Use the TCP port number 7142 for transmitting and receiving command.
PARAMETERS FOR THIS DEVICE
Input command
| Input terminal Response Parameter | ||
| HDMI1 HDMI1 hdmi1 | ||
| HDMI2 HDMI2 hdmi2 | ||
| COMPUTER COMPUTER computer | 1, computer, rgb, rgb1, vga, vga1 | |
| VIDEO | VIDEO | video |
| USB-A USB-A | usb-a | |
| USB-B USB-B | usb-b | |
| LAN | LAN | lan |
Status command
| Response | Error Status |
| error:temp | Temperature error |
| error:fan | Fan trouble |
| error:light | Light source trouble |
| error:lens | Lens trouble |
| error:system | System trouble |
⑦ Using the Computer Cable (VGA) to Operate the Projector (Virtual Remote Tool)
Using the utility software "Virtual Remote Tool" that is available to download from our web site, Virtual Remote screen (or toolbar) can be displayed on your computer screen.
This will help you perform operations such as projector's power on or off and signal selection via the computer cable (VGA), serial cable, or LAN connection. Only via serial or LAN connection it is also used to send an image to the projector and register it as the logo data of the projector. After registering it, you can lock the logo to prevent it from changing.
Control Functions
Power On/Off, signal selection, picture freeze, picture mute, audio mute, Logo transfer to the projector, and remote control operation on your PC.
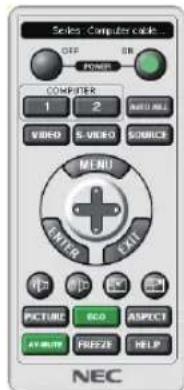
Virtual Remote screen Toolbar
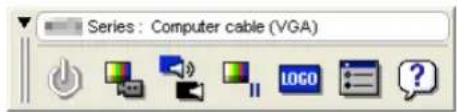
For getting the Virtual Remote Tool, please visit our web site and download it: https://www.nec-display.com/dl/en/index.html
NOTE:
- When [COMPUTER] is selected from your source selection, the Virtual Remote screen or the toolbar will be displayed as well as your computer screen.
- Use the supplied computer cable (VGA) to connect the COMPUTER IN terminal directly with the monitor output terminal of the computer to use Virtual Remote Tool.
Using a switcher or other cables than the supplied computer cable (VGA) may cause failure in signal communication.
VGA cable terminal:
Pin Nos. 12 and 15 are required for DDC/CI.
- Virtual Remote Tool may not work depending on your computer's specifications and version of graphic adapters or drivers.
- To run Virtual Remote Tool, "Microsoft .NET Framework Version 2.0" is required. The Microsoft .NET Framework Version 2.0, 3.0 or 3.5 is available from Microsoft's web page. Download and install it on your computer.
- Logo data (graphics) that can be sent to the projector with Virtual Remote Tool has the following restrictions: (Only via serial or LAN connection)
- File size: Less than 1 MB
- Image size (resolution):
ME382U/ME342U: Horizontal 1920 × vertical 1200 dots or less
ME372W/MC382W/MC332W: Horizontal 1280 × vertical 800 dots or less
ME402X/MC422X/MC372X/MC342X/MC302X: Horizontal 1024 × vertical 768 dots or less
- Number of colors: 256 colors or less
- To put the default "NEC logo" back in the background logo, you need to register it as the background logo by using the image file (ME382U/ME342U: /Logo/necpj_bbwux.bmp, ME372W/MC382W/MC332W: /Logo/necpj_bbwx.bmp, ME402X/MC422X/MC372X/MC342X/MC302X: /Logo/necpj_bb_x.bmp) included on the supplied NEC Projector CD-ROM.
TIP:
• Virtual Remote Tool can be used with a LAN and a serial connection. USB connection is not supported by Virtual Remote Tool.
- The projector's COMPUTER IN terminal supports DDC/CI (Display Data Channel Command Interface). DDC/CI is a standard interface for bidirectional communication between display/projector and computer.
⑧ Troubleshooting Check List
Before contacting your dealer or service personnel, check the following list to be sure repairs are needed also by referring to the “Troubleshooting” section in your user’s manual. This checklist below will help us solve your problem more efficiently.
* Print this page and the next page for your check.
Frequency of occurrence □ always □ sometimes (How often?____) □ other (____)
Power
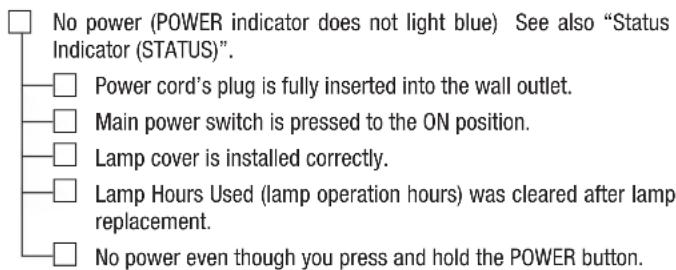
![Shut down during operation. Power cord's plug is fully inserted into the wall outlet. Lamp cover is installed correctly. [AUTO POWER OFF] is turned off (only models with the [AUTO POWER OFF] function). [OFF TIMER] is turned off (only models with the [OFF TIMER] function).](/content/2026/05/813417/images/42063ff60543670c97723873387fdfbb563f84a0a0f3f534ad33aa8f261ef684.jpg)
Video and Audio
![No image is displayed from your PC or video equipment to the projector. Still no image even though you connect the projector to the PC first, then start the PC. Enabling your notebook PC's signal output to the projector. A combination of function keys will enable/disable the external display. Usually, the combination of the "Fn" key along with one of the 12 function keys turns the external display on or off. No image (blue or black background, no display). Still no image even though you press the AUTO ADJUST button. Still no image even though you carry out [RESET] in the projector's menu. Signal cable's plug is fully inserted into the input terminal. A message appears on the screen. (____) The source connected to the projector is active and available. Still no image even though you adjust the brightness and/or the contrast. Input source's resolution and frequency are supported by the projector. Image is too dark. Remains unchanged even though you adjust the brightness and/ or the contrast. Image is distorted. Image appears to be trapezoidal (unchanged even though you carry out the [KEYSTONE] adjustment).](/content/2026/05/813417/images/3cd34b94d8cab07d46398ab7c80f05a9b38a1847f867ad531ab4c9b1d8ef73d1.jpg)
![Parts of the image are lost. Still unchanged even though you press the AUTO ADJUST button. Still unchanged even though you carry out [RESET] in the projector's menu. Image is shifted in the vertical or horizontal direction. Horizontal and vertical positions are correctly adjusted on a computer signal. Input source's resolution and frequency are supported by the projector. Some pixels are lost. Image is flickering. Still unchanged even though you press the AUTO ADJUST button. Still unchanged even though you carry out [RESET] in the projector's menu. Image shows flickering or color drift on a computer signal. Still unchanged even though you change [FAN MODE] from [HIGH ALTITUDE] to [AUTO]. Image appears blurry or out of focus. Still unchanged even though you checked the signal's resolution on PC and changed it to projector's native resolution. Still unchanged even though you adjusted the focus. No sound. Audio cable is correctly connected to the audio input of the projector. Still unchanged even though you adjusted the volume level. AUDIO OUT is connected to your audio equipment (only models with the AUDIO OUT terminal).](/content/2026/05/813417/images/be80dd55dea8900238932377cd2c82dfd9758352ffc66cc47a406f4898e07f1c.jpg)
Other
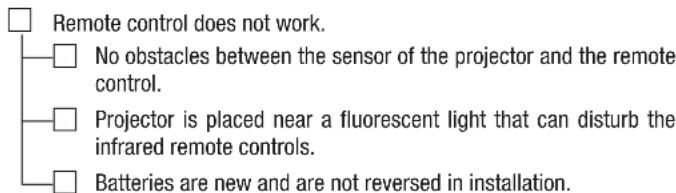
![Buttons on the projector cabinet do not work (only models with the [CONTROL PANEL LOCK] function) [CONTROL PANEL LOCK] is not turned on or is disabled in the menu. Still unchanged even though you press and hold the INPUT button for a minimum of 10 seconds.](/content/2026/05/813417/images/b04123e39618e24fba67e64d05db3200af3734b450c4ad7d9596a227f965a696.jpg)
In the space below please describe your problem in detail.
Information on application and environment where your projector is used
Projector
Model number:
Serial No.:
Date of purchase:
Lamp operating time (hours):
Eco Mode: □ OFF □ AUTO ECO
□ NORMAL □ ECO
Information on input signal:
Horizontal synch frequency [ ] kHz
Vertical synch frequency [ ] Hz
Synch polarity H □ (+) □ (−)
V
Synch type □ Separate □ Composite
□ Sync on Green
Indicator Message:
□ POWER
Blinks in □ Blue □ Green □ Orange □ Red
[ ] cycles
Lights in □ Blue □ Green □ Orange □ Red
□ STATUS
Blinks in □ Blue □ Green □ Orange □ Red
[ ] cycles
Lights in □ Blue □ Green □ Orange □ Red
□ LAMP
Blinks in □ Blue □ Green □ Orange □ Red
[ ] cycles
Lights in □ Blue □ Green □ Orange □ Red
Remote control model number:
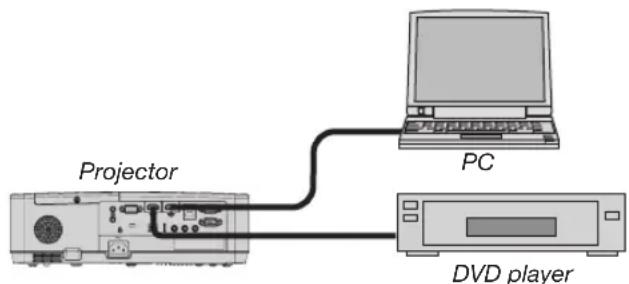
Signal cable
NEC standard or other manufacturer's cable?
Model number: Length: inch/m
Distribution amplifier
Model number:
Switcher
Model number:
Adapter
Model number:
Installation environment
□ (+Screen)size: inch
Screen type: □ White matte □ Beads □ Polarization
□ Wide angle □ High contrast
Throw distance: feet/inch/m
Orientation: □ Ceiling mount □ Desktop
Power outlet connection:
□ Connected directly to wall outlet
☐ Connected to power cord extender or other (the number of connected equipment____)
☐ Connected to a power cord reel or other (the number of connected equipment ____ )
Computer
Manufacturer:
Model number:
Notebook PC □ / Desktop □
Native resolution:
Refresh rate:
Video adapter:
Other:
Video equipment
VCR, DVD player, Video camera, Video game or other
Manufacturer:
Model number:
⑨ REGISTER YOUR PROJECTOR! (for residents in the United States, Canada, and Mexico)
Please take time to register your new projector. This will activate your limited parts and labor warranty and InstaCare service program.
Visit our web site at www.necdisplay.com, click on support center/register product and submit your completed form online.
Upon receipt, we will send a confirmation letter with all the details you will need to take advantage of fast, reliable warranty and service programs from the industry leader, NEC Display Solutions of America, Inc.
NEC

- HDMI®
- HIGH-DEFINITION MULTIMEDIA INTERFACE
- NOTES
- Safety Cautions
- Precautions
- CAUTION
- DOC Compliance Notice (for Canada only)
- Machine Noise Information Regulation - 3. GPSGV,
- Disposing of your used product
- In the European Union
- Outside the European Union
- FCC Information (for USA only)
- WARNING
- Important Safeguards
- Installation
- Cable information
- Place the projector in a horizontal position
- Fire and Shock Precautions
- Remote Control Precautions
- Note for Canadian Environmental Protection Act, 1999
- Note for US Residents
- Lamp Replacement
- A Lamp Characteristic
- CAUTION:
- About High Altitude mode
- About Copyright of original projected pictures:
- Turkish RoHS information relevant for Turkish market
- Power management function
- STANDBY MODE (Factory preset: NORMAL)
- NOTE:
- AUTO POWER OFF (Factory preset: 1 hour)
- Important Information......i
- Introduction.... 1
- Projecting an Image (Basic Operation) 10
- Convenient Features....23
- Using the VIEWER.... 38
- Using On-Screen Menu.... 49
- Installation and Connections....78
- Connecting to a Network....96
- Maintenance ...... 108
- Appendix......116
- Introduction
- ① What's in the Box?
- ② Introduction to the Projector
- Features you'll enjoy:
- • Quick Power Off, Direct Power Off
- • 0.18W(100-130 V AC)/0.26W (200-240 V AC) in standby condition with energy saving technology
- - Carbon Meter
- • Lamp life up to 15000 hours
- • Two HDMI inputs support digital signals
- • Integrated RJ-45 terminal for wired networking capability along with wireless networking capabilities
- • INTELLIGENT CONNECTION
- • 16 W built-in speaker for an integrated audio solution
- - The supplied remote control allows you to assign a CONTROL ID to the projector
- - USB Display
- - Convenient utility software (User Supportware)
- • AUTO POWER ON and AUTO POWER OFF features
- • Preventing unauthorized use of the projector
- • High resolution up to WUXGA\*1
- - CRESTRON ROOMVIEW compatibility
- About this user's manual
- ③ Part Names of the Projector
- Front/Top
- Rear
- Top Features
- Terminal Panel Features
- ④ Part Names of the Remote Control
- Battery Installation
- Operating Range for Wireless Remote Control
- Projecting an Image (Basic Operation)
- ① Flow of Projecting an Image
- Step 1
- Step 2
- Step 3
- Step 4
- Step 5
- Step 6
- Step 7
- Step 8
- ② Connecting Your Computer/Connecting the Power Cord
- Connect your computer to the projector.
- Connect the supplied power cord to the projector.
- ③ Turning on the Projector
- Remove the lens cap.
- Press the ⓊPOWER) button on the projector cabinet or the POWER ON button on the remote control.
- Note on Startup screen (Menu Language Select screen)
- To select a menu language, follow these steps:
- Press the ENTER button to execute the selection.
- ④ Selecting a Source
- Selecting the computer or video source
- Detecting the Signal Automatically
- Using the Remote Control
- Selecting Default Source
- ⑤ Adjusting the Picture Size and Position
- Adjust the Tilt Foot
- Zoom
- Focus
- ⑥ Correcting Keystone Distortion [KEYSTONE]
- Press the ▼ button on the projector cabinet.
- Press the ▼ button to select [KEYSTONE VERTICAL] and then use the ◀ or ▶ so that the left and right sides of the projected image are parallel.
- Align the left (or right) side of the screen with the left (or right) side of the projected image.
- ⑦ Optimizing Computer Signal Automatically Adjusting the Image Using Auto Adjust
- ⑧ Turning Up or Down Volume
- ⑨ Turning off the Projector
- To turn off the projector:
- Secondly, press the ENTER button or press (POWER) or the STANDBY button again.
- ⑩ When Moving the Projector
- Convenient Features
- ① Turning off the Image and Sound
- ② Freezing a Picture
- ③ Magnifying a Picture
- To do so:
- Press the D-ZOOM (+) button to magnify the picture.
- Press the ▲▼◀▶ button.
- Press the D-ZOOM (-) button.
- ④ Changing Eco Mode/Checking Energy-Saving Effect Using Eco Mode [ECO MODE]
- Checking Energy-Saving Effect [CARBON METER]
- TIP:
- ⑤ Using 4-Point Corner to Correct Keystone Distortion [CORNERSTONE]
- Before performing correction
- Cornerstone
- Press the KEYSTONE button with no menu displayed.
- Press the ▼ button to select [CORNERSTONE] and press the ENTER button.
- Project an image so that the screen is smaller than the area of the raster.
- Pick up any one of the corners and align the corner of the image with a corner of the screen.
- Pincushion
- Press the ▼ or ▲ button to select [PINCUSHION LEFT/RIGHT] or [PINCUSHION TOP/BOTTOM].
- Press the ◀ or ▶ button to correct distortion.
- Press the EXIT when PINCUSHION adjustment is completed.
- Reset the keystone and pincushion adjustment to the default value
- Move the cursor onto YES using either ◀ or ▶ button and then press the ENTER.
- ⑥ Preventing the Unauthorized Use of the Projector [SECURITY]
- To enable the Security function:
- Press the MENU button.
- Type in your keyword and press the ENTER button.
- ⑦ Operating Your Computer's Mouse Functions from the Projector's Remote Control via the USB Cable (Remote Mouse Function)
- Operating your computer's mouse from the remote control
- ⑧ Projecting Your Computer's Screen Image from the Projector via the USB Cable (USB Display)
- Start the computer.
- Click "Yes".
- Operate the control window.
- ⑨ Projecting an Image from an Angle (Geometric Correction Tool in Image Express Utility Lite)
- What you can do with GCT
- Projecting an Image from an Angle (GCT)
- Preparation:
- Click the "Start Correction" button and then "Start 4-point Correction" button.
- Use the mouse to click the [●] mark of which corner you wish to move.
- Drag the selected [●] mark to the point you wish to correct and drop it.
- Repeat Step 3 and 4 to correct the distortion of the projected image.
- After completing, right-click the mouse.
- Click the "X" (close) button on the "4-point Correction" window.
- Click the "n" (Projection) icon and then the "Exit" (Exit) button.
- Click "Yes".
- ① Things you can do with the VIEWER
- ② Projecting the pictures on a USB memory (basic operation)
- ① Start the VIEWER
- Press the INPUT button.
- Check that the cursor is moved to [USB 1] and press the ENTER button.
- Move the cursor to the folder or image file with the ▲▼◀▶ buttons and press the ENTER button.
- Move the cursor to the image file in the file list screen, then press the ENTER button.
- Press the ▶ button.
- Press the ◀ button.
- Press the MENU button.
- Remove the USB memory from the projector.
- ③ End the VIEWER
- Press the MENU button in the slide screen or file list screen.
- Press the MENU button again.
- Move the cursor to an input terminal [USB-A] and press the ENTER button.
- ③ Slide screen operations
- File list screen operations
- ⑥ Changing the logo data (background image)
- ③ Set a password so that the logo will not be changed without authorization
- Using On-Screen Menu
- ① Using the Menus
- ② Menu Elements
- Menu windows or dialog boxes typically have the following elements:
- ③ List of Menu Items
- ④ Menu Descriptions & Functions [INPUT]
- HDMI1 and HDMI2
- COMPUTER
- VIDEO
- USB-A
- LAN
- USB-B
- ⑤ Menu Descriptions & Functions [ADJUST] [PICTURE]
- [PRESET]
- [DETAIL SETTINGS]
- [GENERAL]
- Storing Your Customized Settings [REFERENCE]
- Selecting Gamma Correction Mode [GAMMA CORRECTION]
- Selecting Screen Size for DICOM SIM [SCREEN SIZE]
- Adjusting Color Temperature [COLOR TEMPERATURE]
- Adjusting Brightness and Contrast [DYNAMIC CONTRAST]
- Selecting Still Image Mode or Movie Mode [IMAGE MODE]
- Enhancing the Color [COLOR ENHANCEMENT]
- Adjusting White Balance [WHITE BALANCE]
- [CONTRAST]
- [BRIGHTNESS]
- [SHARPNESS]
- [COLOR]
- [HUE]
- [RESET]
- [IMAGE OPTIONS]
- Adjusting Clock and Phase [CLOCK/PHASE]
- Adjusting Horizontal/Vertical Position [HORIZONTAL/VERTICAL]
- Selecting Overscan Percentage [OVERSCAN]
- Selecting Aspect Ratio [ASPECT RATIO]
- Sample image when the appropriate aspect ratio is automatically determined ME402X/MC422X/MC372X/MC342X/MC302X
- ME382U/ME342U/ME372W/MC382W/MC332W
- Adjusting the Vertical Position of Image [POSITION] (not available on ME382U/ME342U/ME372W/MC382W/MC332W)
- [AUDIO]
- Turning Up or Down Sound
- ⑥ Menu Descriptions & Functions [SETUP]
- Enabling Auto Keystone [AUTO KEYSTONE]
- TIP
- Correcting Keystone Distortion Manually [KEYSTONE]
- Using the Wall Color Correction [WALL COLOR]
- Setting Eco Mode [ECO MODE]
- Setting Closed Caption [CLOSED CAPTION]
- Using Off Timer [OFF TIMER]
- ADMINISTRATOR MODE
- Selecting Menu Language [LANGUAGE]
- [MENU]
- Selecting Menu Color [COLOR SELECT]
- Turning On / Off Source Display [INPUT DISPLAY]
- Turning ON/OFF Control ID [ID DISPLAY]
- Turning On / Off Eco Message [ECO MESSAGE]
- Selecting Menu Display Time [DISPLAY TIME]
- Selecting a Color or Logo for Background [BACKGROUND]
- Selecting Interval Time for Filter Message [FILTER MESSAGE]
- [INSTALLATION]
- Selecting Projector Orientation [ORIENTATION]
- Disabling the Cabinet Buttons [CONTROL PANEL LOCK]
- Enabling Security [SECURITY]
- Selecting Communication Speed [COMMUNICATION SPEED]
- Setting ID to the Projector [CONTROL ID]
- Assigning or Changing the Control ID
- Turn on the projector.
- Press the ID SET button on the remote control.
- Press one of numeric keypad buttons while pressing and holding the ID SET button on the remote control.
- Example:
- Release the ID SET button.
- Using Test Pattern [TEST PATTERN]
- [NETWORK SETTINGS]
- [SEAMLESS SWITCHING]
- Selecting Fan Mode [FAN MODE]
- Selecting Signal Format [SIGNAL SELECT]
- [COMPUTER]
- Enabling or Disabling WXGA Mode [WXGA MODE]
- Enabling the deinterlace [DEINTERLACE]
- Setting Video Level [VIDEO LEVEL]
- Enabling Key Sound and Error Sound [BEEP]
- [OPTIONS(2)]
- :MOVE
- Selecting Power-saving in [STANDBY MODE]
- IMPORTANT:
- Enabling Direct Power On [DIRECT POWER ON]
- Turning On the Projector By Applying Computer Signal [AUTO POWER ON]
- Enabling Power Management [AUTO POWER OFF]
- Selecting Default Source [DEFAULT INPUT SELECT]
- Setting carbon footprint factor [CARBON CONVERT]
- Selecting your currency [CURRENCY]
- Changing currency setting and currency convert setting [CURRENCY CONVERT]
- [STATIC CONVERGENCE]
- ⑦ Menu Descriptions & Functions [INFO.]
- [SOURCE(1)]
- [SOURCE(2)]
- [WIRED LAN]
- [WIRELESS LAN]
- [VERSION]
- [OTHERS]
- ⑧ Menu Descriptions & Functions [RESET]
- Returning to Factory Default [RESET]
- Clearing Lamp Hour Meter [CLEAR LAMP HOURS]
- Clearing the Filter Usage Hours [CLEAR FILTER HOURS]
- Installation and Connections
- ① Setting Up the Screen and the Projector
- [Reading the Table]
- Throw Distance and Screen Size
- ② Making Connections
- Connecting Your Computer
- Enabling the computer's external display
- Cautions when using a DVI signal
- NOTE: When Viewing a DVI Digital Signal
- Connecting an External Monitor
- Connecting Your DVD Player or Other AV Equipment
- Connecting Component Input
- Connecting HDMI Input
- Connecting to a Wired LAN
- Example of LAN connection (2)
- Connecting to a Wireless LAN (Optional: NP05LM series)
- Attaching the USB Wireless LAN Unit
- Press the POWER button to turn off the projector and set it into standby condition, and disconnect the power cord.
- Slowly insert the USB Wireless LAN Unit into the USB port.
- Connecting to a Network
- ① Things you can do by connecting the projector to a network
- ② Connecting to MultiPresenter
- Preparations:
- ① When connecting with an INTELLIGENT CONNECTION
- Turn on the power of the projector and press the APPS button on the remote control.
- Start MultiPresenter.
- Enter the 4-digit PIN code displayed in the start-up screen in the target device screen.
- ② When connecting with INFRASTRUCTURE
- ③ When connecting with a SIMPLE ACCESS POINT
- ③ NETWORK SETTINGS
- ① INFORMATION
- ② NAME
- ③ WIRED LAN
- ④ WIRELESS LAN
- DISABLE
- INTELLIGENT CONNECTION
- SIMPLE ACCESS POINT
- INFRASTRUCTURE
- ⑤ MultiPresenter
- ⑥ NETWORK SERVICE
- ④ Controlling the Projector by Using an HTTP Browser
- Overview
- Preparation before Use
- Handling of the Address for Operation via a Browser
- PROJECTOR ADJUSTMENT
- NETWORK SETTINGS
- Maintenance
- ① Cleaning the Filter
- Push button to release the filter unit and pull it out.
- Remove the filter.
- Remove dust from the filter and the filter cover.
- Attach the filter to the filter cover.
- Put the filter unit back to the projector cabinet.
- Clear the filter usage hours.
- ② Cleaning the Lens
- ③ Cleaning the Cabinet
- ④ Replacing the Lamp and the Filter
- Flow of Replacing the Lamp and the Filter
- To replace the lamp:
- Remove the lamp cover.
- Remove the lamp housing.
- Install a new lamp housing.
- Reattach the lamp cover.
- This completes the lamp replacement. Go on to the filter replacement.
- To replace the filter:
- Remove dust from the filter cover.
- Attach a new filter to the filter cover.
- To clear the lamp usage hours and the filter usage hours:
- Appendix
- ① Troubleshooting
- Feature of each indicator
- Indicator Message (Status message)
- Explanation on the POWER indicator and standby state
- If there is no picture, or the picture is not displayed correctly.
- ② Specifications
- ③ Cabinet Dimensions
- ④ Pin Assignments of D-Sub COMPUTER Input Terminal
- Mini D-Sub 15 Pin Terminal
- COMPUTER IN
- ⑤ Compatible Input Signal List
- PC Control Codes and Cable Connection
- PC Control Codes
- Cable Connection
- ABOUT THE ASCII CONTROL COMMAND
- HOW TO CONNECT WITH AN EXTERNAL DEVICE
- CONNECTION INTERFACE
- PARAMETERS FOR THIS DEVICE
- ⑦ Using the Computer Cable (VGA) to Operate the Projector (Virtual Remote Tool)
- Control Functions
- ⑧ Troubleshooting Check List
- Power
- Video and Audio
- Other
- Projector
- Signal cable
- Installation environment
- Video equipment
- ⑨ REGISTER YOUR PROJECTOR! (for residents in the United States, Canada, and Mexico)
Brand : NEC
Model : MC332W
Category : Vidéo-projecteur