
Komplete Kontrol A25 - MIDI Keyboard NATIVE INSTRUMENTS - Free user manual and instructions
Find the device manual for free Komplete Kontrol A25 NATIVE INSTRUMENTS in PDF.


| Product Type | MIDI Keyboard Controller |
| Brand | Native Instruments |
| Model | Komplete Kontrol A25 |
| Number of Keys | 25 |
| Key Type | Velocity-sensitive, semi-weighted with aftertouch |
| Dimensions (W x D x H) | 16.5 x 6.7 x 2.4 in (420 x 170 x 60 mm) |
| Weight | 2.5 kg (5.5 lbs) |
| Power Supply | USB bus-powered (500 mA) |
| Connectivity | USB-B port, 1/4" TS sustain pedal input |
| Controls | Touch strip pitch and mod, 4 encoders, transport buttons, 2 knobs |
| Display | 2-line OLED display with parameter names |
| Light Guide | RGB LEDs above each key for key zones, scales, and drum cells |
| Smart Play Features | Scale modes, arpeggiator, chord mode, note repeat |
| Software Included | Komplete Kontrol, Maschine Essentials, and access to Komplete Select |
| Compatibility | Windows 10+, macOS 10.13+, iOS via Camera Connection Kit |
| Color | Black |
| Maintenance | Wipe with a soft dry cloth; avoid liquids and solvents |
| Safety | Keep away from moisture and heat sources; unplug when not in use |
| Repairability | No user-serviceable parts; contact Native Instruments support |
| Spare Parts | Not available separately; unit must be serviced as a whole |
Frequently Asked Questions - Komplete Kontrol A25 NATIVE INSTRUMENTS
User questions about Komplete Kontrol A25 NATIVE INSTRUMENTS
0 question about this device. Answer the ones you know or ask your own.
Ask a new question about this device
Download the instructions for your MIDI Keyboard in PDF format for free! Find your manual Komplete Kontrol A25 - NATIVE INSTRUMENTS and take your electronic device back in hand. On this page are published all the documents necessary for the use of your device. Komplete Kontrol A25 by NATIVE INSTRUMENTS.
USER MANUAL Komplete Kontrol A25 NATIVE INSTRUMENTS
natural_image
Close-up of a black and white MIDI controller with piano keys and control knobs (no readable text or symbols)
NATIVE INSTRUMENTS
THE FUTURE OF SOUND
The information in this document is subject to change without notice and does not represent a commitment on the part of Native Instruments GmbH. The software described by this document is subject to a License Agreement and may not be copied to other media. No part of this publication may be copied, reproduced or otherwise transmitted or recorded, for any purpose, without prior written permission by Native Instruments GmbH, hereinafter referred to as Native Instruments.
“Native Instruments”, “NI” and associated logos are (registered) trademarks of Native Instruments GmbH.
Ableton is a trademark of Ableton AG.
VST, HALion, Cubase, and Nuendo are registered trademarks of Steinberg Media Technologies GmbH. ASIO is a trademark and software of Steinberg Media Technologies GmbH.
Mac, macOS, GarageBand, Logic, iTunes and iPod are registered trademarks of Apple Inc., registered in the U.S. and other countries.
Windows, Windows Vista and DirectSound are registered trademarks of Microsoft Corporation in the United States and/or other countries.
All other trademarks are the property of their respective owners and use of them does not imply any affiliation with or endorsement by them.
Document authored by: Jan Ola Korte, Christian Schulz, Gustav Sto. Tomas, David Gover, and Nicolas Sidi
Software version: 2.0.2 (05/2018)
Hardware version: KOMPLETE KONTROL S-Series MK2
Special thanks to the Beta Test Team, who were invaluable not just in tracking down bugs, but in making this a better product.
NATIVE INSTRUMENTS GmbH
203B & 201B, Nanshan E-Commerce Base Of Innovative Services
Shi Yun Road, Shekou, Nanshan, Shenzhen China
www.native-instruments.com

NATIVE INSTRUMENTS
© NATIVE INSTRUMENTS GmbH, 2018. All rights reserved.
Table of Contents
1 Welcome to KOMPLETE KONTROL 12
1.1 Document Conventions 12
1.2 Box Contents 14
1.3 System Requirements 15
1.4 Accessibility 16
1.4.1 Keyboard Overview 16
1.4.2 Activating Accessibility Features 19
1.4.3 Training Mode 20
1.4.4 Feature Overview 20
2 New Features in KOMPLETE KONTROL 2.0.2 22
3 The KOMPLETE KONTROL Workflow 24
4 Setting up KOMPLETE KONTROL 26
4.1 Connecting the Keyboard to the Computer 27
4.2 Setting up the Stand-Alone Application 28
4.3 Setting up Host Integration 30
4.3.1 Setting up Apple Logic Pro X and GarageBand 31
4.3.2 Setting up Steinberg Cubase/Nuendo 31
4.3.3 Setting up Ableton Live (macOS) 32
4.3.4 Setting up Ableton Live (Windows) 34
4.4 Connecting Pedals to the Keyboard 36
4.5 Connecting External MIDI Equipment to the Keyboard 39
5 Software Overview 41
5.1 Header 42
5.2 Browser 44
5.2.1 Library Pane 45
5.2.2 Product Selector 47
5.2.3 Files Pane 49
5.3 Perform Panel 50
5.4 Plug-in Panel 51
5.5 Plug-in Chain Panel 51
5.6 MIDI Assignment Editor 52
5.7 Plug-in Area 54
6 Keyboard Overview 55
6.1 Perform and Edit Section 58
6.2 Transport Section 59
6.3 Control Section 60
6.4 Mode Buttons 61
6.5 Navigation and the 4-D Encoder 62
6.6 Keybed and Light Guide 63
6.7 Modulation Wheels 64
6.8 Touch Strip 65
6.9 Transpose and Fixed Velocity Buttons 66
7 Global Controls and Preferences 67
7.1 Instrument Views 67
7.1.1 Default View 68
7.1.2 Additional View 68
7.1.3 Edit View 70
7.2 Switching Instances 71
7.3 Transport and Tempo....73
7.3.1 Resetting the Clock 74
7.3.2 Adjusting Tempo 74
7.4 Adjusting Master Volume 75
7.5 Preferences 75
7.5.1 Preferences – Audio Page 76
7.5.2 Preferences – MIDI Page 79
7.5.3 Preferences – General Page 80
7.5.4 Preferences – Library Page 82
7.5.5 Preferences – Plug-ins Page 87
7.6 Keyboard Settings 90
7.7 Loading a Plug-in in Default State 91
8 MIDI Communication 93
8.1 Host Automation 94
8.1.1 Automation IDs for the Perform Panel 94
8.1.2 Recording Automation 95
8.2 Using the Keyboard in MIDI Mode 98
8.2 Using the Keyboard in MIDI Mode 98
8.3 Using the Keyboard as Stand-Alone MIDI Controller 99
8.2 Using the Keyboard in MIDI Mode 98
8.3 Using the Keyboard as Stand-Alone MIDI Controller 99
9 Using the MIDI Assignment Editor 102
9.1 The Mapping System 102
9.2 Opening the MIDI Assignment Editor 103
9.3 Assigning MIDI Messages to Control Elements 104
9.4 Creating a New MIDI Template 106
9.5 Renaming MIDI Templates 108
9.6 Creating Key Zones 109
9.6.1 About Key Zones 109
9.6.2 Splitting a Key Zone 111
9.6.3 Selecting another MIDI Channel for a Key Zone 113
9.6.4 Recoloring Key Zone 114
9.6.5 Resizing Key Zones 115
9.6.6 Disabling a Key Zone 116
9.6.7 Deleting a Key Zone 118
9.6.8 Transposing Key Zones 119
9.7 MIDI Message Types and Assignments 121
9.7.1 MIDI Message Types – Type Menu 121
9.7.2 Assignments for Knobs 122
9.7.3 Assignments for Buttons 124
9.7.4 Assignments for Key Zones 125
9.7.5 Assignments for the Touch Strip 126
9.7.6 Assignments for Pedals (Switch) 127
9.7.7 Assignments for Pedals (Continuous) 128
10 Host Integration ....129
10.1 Integration with MASCHINE 129
10.1.1 Basic Control Functions 130
10.1.2 Advanced Integration Control Functions 133
10.2 Integration with Apple Logic Pro X and GarageBand 141
10.3 Integration with Ableton Live 144
10.4 Integration with Steinberg Cubase and Nuendo 147
11 Browsing the Library 150
11.1 Browser Basics 150
11.1.1 Product Types: Instrument and Effect 150
11.1.2 About the Library and Meta-Information 151
11.1.3 Browsing the Library vs. Browsing Your Hard Disks 152
11.2 Opening the Browser 152
11.3 Overview of the Browser on the Keyboard 153
11.4 Loading Preset Files 154
11.5 Choosing Between Factory Content and User Content 155
11.6 Loading an Instrument with its default Preset File 157
11.7 Filtering Instrument Preset Files by Bank 161
11.8 Resetting the Selection 163
11.9 Types and Modes Tag Filters 164
11.9.1 Filtering Preset Files by Types and Modes 167
11.9.2 Selecting Multiple Tags from the Same Level 171
11.10 Working with Favorites 171
11.10.1 Adding Preset Files to the Favorites 172
11.10.2 Displaying Favorites in the Results List 174
11.10.3 Removing Preset Files from the Favorites 175
11.11 Performing a Text Search....177
11.12 Displaying Preset File Information 177
11.13 Auditioning your Preset Files 178
12 Working with Effects 180
12.1 Opening the Plug-in Chain Panel 180
12.2 Adding Effects 181
12.3 Selecting Plug-in Slots 184
12.4 Reordering Effects 185
12.5 Scrolling the Plug-in Chain 186
12.6 Bypassing Effects 187
12.7 Removing Effects 189
13 Managing the Library....191
13.1 Saving Preset Files to the User Library 191
13.2 Deleting User Preset Files from the User Library 193
13.3 Editing the Tags and Properties of User Preset Files 194
13.4 Working with the Files Pane 197
13.4.1 Additional Results List Features List in the Files Pane 198
13.4.2 Navigating to File Locations with the Location Bar 199
13.4.3 Navigating to Recent File Locations 200
13.4.4 Working with File Location Favorites 200
13.5 Loading VST Plug-ins 202
13.6 Installing NKS Instruments 203
13.7 Importing KOMPLETE KONTROL-Compatible User Files 206
14 Controlling Instrument and Effect Parameters 208
14.1 About Pre-Mapped Instruments and Effects 208
14.2 Adjusting Parameters 208
14.3 Switching Parameter Pages 209
14.4 Customizing Parameter Mappings using the Plug-in Panel 209
15 Playing and Editing Scales and Chords 212
15.1 A Note about Music Theory 212
15.2 Activating the Scale Engine 213
15.3 Playing a Scale 214
15.4 Playing Chords 215
15.5 Editing Scales and Chords 216
15.6 Setting the Scale Parameters 217
15.6.1 Scale Root Note 217
15.6.2 Scale Bank and Type 218
15.7 Setting the Key Mode Parameter 225
15.8 Setting the Chord Parameters 227
15.8.1 Chord Mode 227
15.8.2 Chord Type 229
15.8.3 Chord Position 232
16 Playing and Editing the Arpeggiator 234
16.1 Playing Arpeggiator Sequences 235
16.2 Using a Sustain Pedal to Control the Arpeggiator 235
16.3 Using Arpeggiator Snapshots on the Keyboard 236
16.4 Editing the Arpeggiator 237
16.5 Setting the Main Parameters 238
16.5.1 Main Mode 238
16.5.2 Main Type 239
16.6 Setting the Rhythm Parameters 239
16.6.1 Rhythm Rate 240
16.6.2 Rhythm Sequence 241
16.6.3 Rhythm Swing 242
16.7 Setting the Other Parameters 242
16.7.1 Other Octaves 243
16.7.2 Other Dynamic 244
16.7.3 Other Gate 244
16.8 Setting the Advanced Parameters 244
16.8.1 Advanced Retrigger 245
16.8.2 Advanced Repeat 245
16.8.3 Advanced Offset 246
16.8.4 Advanced Inversion 246
16.9 Setting the Range Parameters 246
16.9.1 Range Min. Key 247
16.9.2 Range Max. Key 247
16.10 Setting the Hold Parameter 248
Index 249
1 Welcome to KOMPLETE KONTROL
Thank you for choosing KOMPLETE KONTROL!
The KOMPLETE KONTROL software and its dedicated keyboard—the KOMPLETE KONTROL S-Series—form a tightly integrated music production and performance system that brings all the sounds from KOMPLETE and the Native Kontrol Standard (NKS) to the heart of your work-flow.
KOMPLETE KONTROL offers advanced integration with a number of hosts and provides full control of any Instruments supporting NKS, both from Native Instruments and partners. The keyboard lets you browse your Instruments and Effects in an intuitive way and play them creatively with KOMPLETE KONTROL's unique Scale engine and Arpeggiator.
We hope you enjoy this fantastic instrument as much as we do.
—The team at Native Instruments
1.1 Document Conventions
This document uses particular formatting to point out special facts and to warn you of potential issues. The icons introducing the following notes let you see what kind of information can be expected:

The speech bubble icon indicates a useful tip that may often help you to solve a task more efficiently.

The exclamation mark icon highlights important information that is essential for the given context.

The red cross icon warns you of serious issues and potential risks that require your full attention.
Furthermore, the following formatting is used:
- Text appearing in (drop-down) menus (such as Open..., Save as... etc.) in the software and paths to locations on your hard disk or other storage devices is printed in italics.
- Text appearing elsewhere (labels of buttons, controls, text next to checkboxes etc.) in the software is printed in blue. Whenever you see this formatting applied, you will find the same text appearing somewhere on the screen.
- Text appearing on the displays of the controller is printed in light grey. Whenever you see this formatting applied, you will find the same text on a controller display.
- Text appearing on labels of the hardware controller is printed in orange. Whenever you see this formatting applied, you will find the same text on the controller.
- Important names and concepts are printed in bold.
- References to keys on your computer's keyboard you'll find put in square brackets (e.g., "Press [Shift] + [Enter]").
▶ Single instructions are introduced by this play button type arrow.
→ Results of actions are introduced by this smaller arrow.
Naming Convention
Throughout the documentation we will refer to KOMPLETE KONTROL keyboard (or just keyboard) as the hardware controller and KOMPLETE KONTROL software as the software installed on your computer.
Unlabeled Buttons on the Keyboard
The buttons and knobs above and below the displays on the KOMPLETE KONTROL keyboard do not have labels.
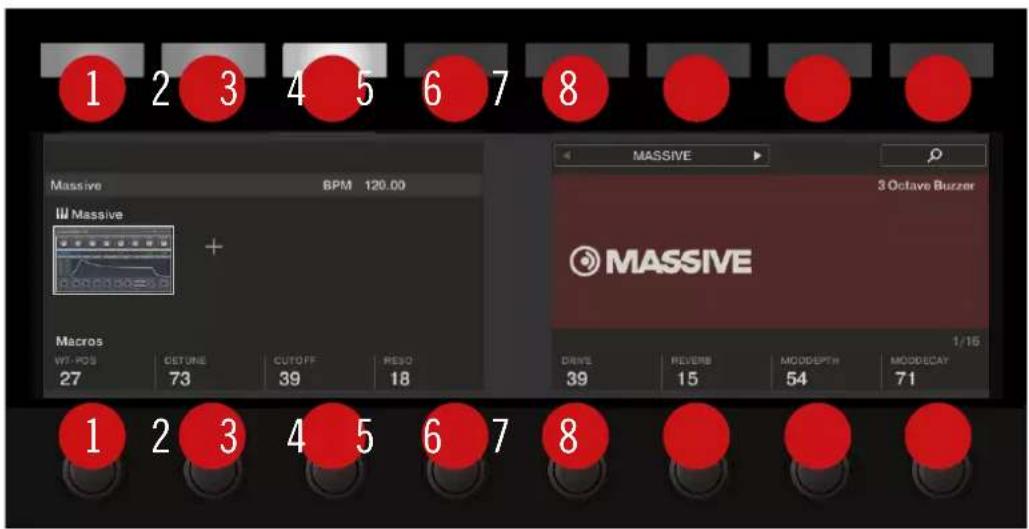
The unlabeled buttons and knobs on the KOMPLETE KONTROL keyboard.
For better reference, we applied a special formatting here: throughout the document, the elements are capitalized and numbered, so the buttons above the displays are written Button 1 to Button 8, while the knobs under the displays are written Knob 1 to Knob 8.
1.2 Box Contents
The box contains the following items:
- Information flyer providing:
- the hardware serial number of the KOMPLETE KONTROL keyboard
- a web link for downloading the KOMPLETE SELECT software bundle (including KOMPLETE KONTROL)
• KOMPLETE KONTROL keyboard - Safety Instructions flyer
- USB cable
1.3 System Requirements
For KOMPLETE KONTROL to fully function as indented, your system needs to meet certain requirements. The latest KOMPLETE KONTROL system requirements and compatibility information is available here:
www.native-instruments.com/products/komplete/keyboards/komplete-kontrol-s-series/specifications/
KOMPLETE
KOMPLETE KONTROL is optimized for use with KOMPLETE 11 SELECT, KOMPLETE 11 and KOMPLETE 11 ULTIMATE.
The latest KOMPLETE system requirements and compatibility information is available here:
www.native-instruments.com/products/komplete/bundles/komplete-11/specifications/
1.4 Accessibility
KOMPLETE KONTROL offers a set of accessibility features for visually-impaired users. These are focused exclusively on the KOMPLETE KONTROL keyboard itself and include speech output via your computer for the following features:
- Perform, Transpose, Page left / right buttons
- All Browser functions
- Instance switching
- The current edit mode, including the Plug-in panel and the Perform panel (Scale, Arp)
- Names of parameters and parameter sections when touching knobs, including all edit modes
- Tempo (KOMPLETE KONTROL stand-alone application only)

The accessibility features are particularly useful when combined with KOMPLETE KONTROL's host integration and Apple VoiceOver in Apple Logic Pro X and GarageBand.
1.4.1 Keyboard Overview
The buttons and knobs on the KOMPLETE KONTROL keyboard are organized in the following groups:
- Perform and Edit section
- Transport section
- Solo and Mute buttons
- Preset and Page buttons
- Arrange buttons (only functional in MASCHINE)
- Control section
- Navigation and Mode buttons
- 4-D encoder
- Transpose and Fixed Velocity buttons
The Perform and Edit section is located at the top left of the keyboard. It contains six buttons that are arranged in two rows.
The buttons in the first row are (from left to right):
- SHIFT
- SCALE (Edit)
- ARP (Edit)
The buttons in the second row are (from left to right):
- UNDO (Redo)
- QUANTIZE
- AUTO
The Transport section is located directly below the Perform and Edit section. It contains six buttons that are arranged in two rows.
The buttons in the first row are (from left to right):
- LOOP
■ METRO - TEMPO
The buttons in the second row are (from left to right):
- PLAY (Restart)
- REC (Count-In)
- STOP
The Solo and Mute buttons are located to the top right of the Perform and Edit section. The two buttons are arranged in a row.
The buttons are (from left to right):
- Mute
- Solo
The Preset and Page buttons are located to the bottom right of the Perform and Edit section, below the Solo and Mute buttons. The four buttons are arranged in a column.
The buttons are (from top to bottom):
- PRESET Up
- PRESET Down
- Page Left and Page Right (next to each other)
The Arrange buttons, which are only functional in MASCHINE, are located to the right of the Solo and Mute buttons and the Preset and Page buttons. The five buttons are arranged in a column.
The buttons are (from top to bottom):
- SCENE
- PATTERN
- TRACK
KEY MODE - CLEAR
The Control section is located in the center of the KOMPLETE KONTROL keyboard. It contains eight buttons and eight knobs. The buttons are arranged in a row at the very top of the keyboard. The knobs are arranged in a row directly above the keypad.
The Navigation and Mode buttons are on the top right of the KOMPLETE KONTROL keyboard. The six buttons are arranged in two rows.
The buttons in the first row are (from left to right):
- BROWSER
- PLUG-IN
- MIXER
The buttons in the second row are (from left to right):
- INSTANCE
MIDI
- SETUP
The 4-D encoder is located directly below the Navigation and Mode buttons.
The Transpose and Fixed Velocity buttons are located at the far left of the keyboard next to the keypad and directly above the Pitch and Modulation wheels. The three buttons are arranged in a row.
The buttons are (from left to right):
- FIXED VEL (TS Mode)
- OCT Down
- OCT Up
1.4.2 Activating Accessibility Features
In order to activate or deactivate the accessibility features from the KOMPLETE KONTROL keyboard while the KOMPLETE KONTROL software is running:
- Press and hold the SHIFT button on the top left of the keyboard.
- While holding SHIFT press the MIXER button on the top right of the keyboard.
→ The accessibility features are activated or deactivated.
When the accessibility features are activated, you can choose whether or not speech output should be enabled for names of Preset files while browsing:
- Press and hold the SHIFT button on the top left of the keyboard.
- While holding SHIFT press Button 5 in the Control section.
→ Speech output for names of Preset files while browsing is enabled or disabled.

The accessibility features are designed to be used with the KOMPLETE KONTROL plug-in. However, the KOMPLETE KONTROL stand-alone application must be opened after initial installation and after installing additional Instruments and Effects. This will ensure that all Instruments and Effects are displayed correctly in the KOMPLETE KONTROL Browser.
1.4.3 Training Mode
KOMPLETE KONTROL Training Mode makes it easy to locate a specific button or parameter without accidentally triggering an action. When Training Mode is activated, all button presses and parameter names are announced but the corresponding action is not triggered.
▶ To activate or deactivate Training Mode from the KOMPLETE KONTROL keyboard while the KOMPLETE KONTROL software is running, double-press the SHIFT button on the top left of the keyboard.

Training Mode is only available when the accessibility features have been activated.
1.4.4 Feature Overview
The following table outlines the availability of accessibility features for different aspects of KOMPLETE KONTROL from both the KOMPLETE KONTROL keyboard and the KOMPLETE KONTROL software.
| Feature Accessible | from Key-board | |
| Accessibility Enable and | disable Accessibility mode Yes | |
| Browser Browse for Factory and User Preset files Yes | ||
| Switch between Category and Vendor sorting Yes | ||
| Set or sort by Favorites | Yes | |
| Save and edit User Preset files No | ||
| Browse for NKS plug-ins from other vendors Yes | ||
| Instrument control Adjust | key Instrument parameters Yes | |
| Custom map Instrument parameters No | ||
| Smart Play Adjust Scale & Chord parameters Yes | ||
| Adjust Arp parameters Yes | ||
| Touch Strips | Adjust Touch Strip parameters | No |
| Tempo | Adjust BPM | Yes |
| Training mode | Find a control without accidentally triggering actions | Yes |
| Preferences | Adjust software & hardware preferences | No |
| Software dialog | Be notified if a dialog box opens in the software (dialog content is not available for speech output) | Yes |

Accessibility for KOMPLETE KONTROL's host integration is only available when using Apple Voice-Over in Logic Pro X and GarageBand. For more information about KOMPLETE KONTROL's host integration features, refer to ↑10, Host Integration.
2 New Features in KOMPLETE KONTROL 2.0.2
The release of KOMPLETE KONTROL 2.0.2 brings the following new features, improvements, and changes:
NKS Effect and VST Effect Support
KOMPLETE KONTROL now supports NKS Effects and VST Effects. In addition to the loaded Instrument you can load Effects to further tweak your sound. The Effects are arranged in a horizontal series inside the new Plug-in chain. The NKS Effect parameters are mapped to the keyboard's controls and can be customized. All NKS Effects are fully accessible to visually-impaired users via KOMPLETE KONTROL S-Series keyboards.
For more information about the Plug-in chain and working with Effects, refer to 5.5 , Plug-in Chain Panel and 12 , Working with Effects respectively.
Accessibility Features now for Windows Users
Accessibility features are now available for Windows users. For more information on Accessibility, refer to 1.4, Accessibility.
Naming MIDI Templates
It is now possible to name MIDI templates as they are created and to rename existing MIDI templates. For more information refer to 9.4 , Creating a New MIDI Template and 9.5 , Renaming MIDI Templates respectively.
Creating Key Zones with the MIDI Assignment Editor
The MIDI Assignment editor now allows you to manage Key Zones. Key Zones can be used to assign different MIDI channels to certain keys on your KOMPLETE KONTROL S-Series keyboard. For more information on creating Key Zones refer to ↑9.6, Creating Key Zones.
Mute and Solo State Indicators in Mixer view when used in DAW
For advanced Host Integration Mute and Solo state indicators are now visible in the Mixer view when using with Logic Pro X, GarageBand, Ableton Live, Cubase and Nuendo.
Ableton Live Host Integration Change
After updating the KOMPLETE KONTROL application to version 2.0 you need to set up Ableton Live Host Integration again due to a change in the Integration design. For more information refer to ↑4.3.3, Setting up Ableton Live (macOS) or ↑4.3.4, Setting up Ableton Live (Windows) respectively.
3 The KOMPLETE KONTROL Workflow
KOMPLETE KONTROL brings all the sounds from KOMPLETE and the Native Kontrol Standard (NKS) to the heart of your workflow. Its advanced integration in a number of hosts enables you to quickly capture ideas, with immediate access to the sounds you need—all directly from the KOMPLETE KONTROL keyboard.
The KOMPLETE KONTROL workflow is streamlined to remove any obstacles when sketching out a new song in a supported host:
- Select a track that hosts the KOMPLETE KONTROL plug-in with the navigation controls on the keyboard. This is made possible by KOMPLETE KONTROL's advanced host integration.
- Find a Preset file you like from any of the Instruments in your KOMPLETE KONTROL Library by browsing with the keyboard, supported by the Browser's filters and Preview functions.
- Use the keyboard's Control section to adjust the loaded Instrument and create your own unique sound.
- Optionally, you can enable KOMPLETE KONTROL's Smart Play features to enrich your playing with the Scale engine and the Arpeggiator.
- Record a new clip in the host, conveniently controlling transport and loop functions directly from the keyboard. Again, made possible by KOMPLETE KONTROL's advanced host integration.
- If you need to start over, undo and redo functions are right at your fingertips. To further refine your recording, you can apply quantization and automation to a clip by pressing the corresponding buttons on the keyboard.
→ You have quickly captured a musical idea and can continue sketching out a new song by repeating the process and layering more tracks.
Key Features
The following key features facilitate the KOMPLETE KONTROL workflow:
- Host integration: Advanced integration in a number of hosts allows you control core functionality directly from the keyboard. For more information, refer to ↑4.3, Setting up Host Integration and ↑10, Host Integration.
- Browser: The Browser is your interface for finding, loading and organizing Instruments, Effects, and Preset files from the KOMPLETE KONTROL Library. For more information, refer to ↑11, Browsing the Library, ↑12, Working with Effects, and ↑13, Managing the Library.
- Instrument control: The Touch Strip and knobs on the keyboard are pre-mapped to all KOMPLETE and NKS Instruments and Effects for immediate control. For more information, refer to ↑14, Controlling Instrument and Effect Parameters and ↑9.7.5, Assignments for the Touch Strip.
- Smart Play: The Scale engine and the Arpeggiator let you play and generate scales, chords, and arpeggiator sequences. For more information, refer to ↑15, Playing and Editing Scales and Chords and ↑16, Playing and Editing the Arpeggiator.
4 Setting up KOMPLETE KONTROL
This section provides basic setup information and guides you through the process of integrating KOMPLETE KONTROL with supported hosts.
The KOMPLETE KONTROL software is installed both as a stand-alone application as well as a VST, Audio Unit, and AAX plug-in.

The KOMPLETE KONTROL stand-alone application must be opened once before using the plug-in within your DAW for the first time, and after installing new Instruments and Effects.
The KOMPLETE KONTROL stand-alone application directly communicates with your audio and MIDI interfaces, which you can configure in the KOMPLETE KONTROL Preferences. When KOMPLETE KONTROL is used as a plug-in within a host, the communication with your audio and MIDI interfaces is managed by the host.

For details about the audio and MIDI configuration of the host, and how to load plug-ins, please refer to its documentation.
4.1 Connecting the Keyboard to the Computer
To connect the KOMPLETE KONTROL keyboard to your computer:
- Attach the device end of the included USB cable to the USB socket on the rear panel of the keyboard.
- Attach the computer end of the USB cable to an available USB 2.0 (or later) port on your computer.
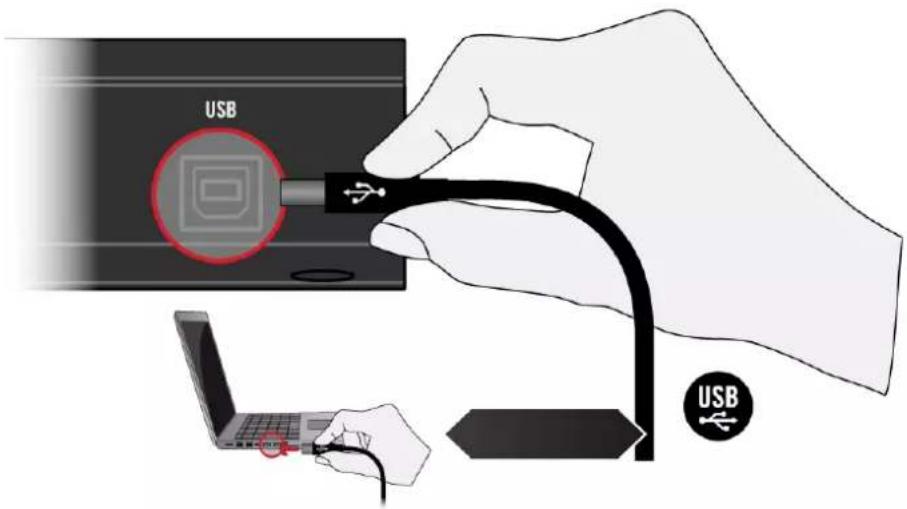
- Press the power switch on the rear panel of the keyboard to switch it on.
→ The keyboard is now detected by the operating system.

Non-powered USB hubs are not supported. The keyboard should always be connected directly to the USB port of the computer, or be used with a powered USB hub.
4.2 Setting up the Stand-Alone Application
When you launch the KOMPLETE KONTROL software from its installation directory, it starts as a stand-alone application independently from a host.
By default, the application uses the standard audio interface of your computer. In order to use another audio interface, and receive MIDI notes from the keyboard, you need to configure the application in its Preferences.
Configuring Audio Interface
- In the Main menu click on Edit > Preferences to open the Preferences.
- Click on Audio to display the Audio page.
- Select the hardware driver supported by your audio interface from the Driver drop-down menu.
- Select the audio interface from the Device drop-down menu.
- Select the left and right output channels of your audio interface you want to use for KOMPLETE KONTROL's master output in the Komplete Kontrol Out 1 L and Komplete Kontrol Out 1 R drop-down menus under Routings.
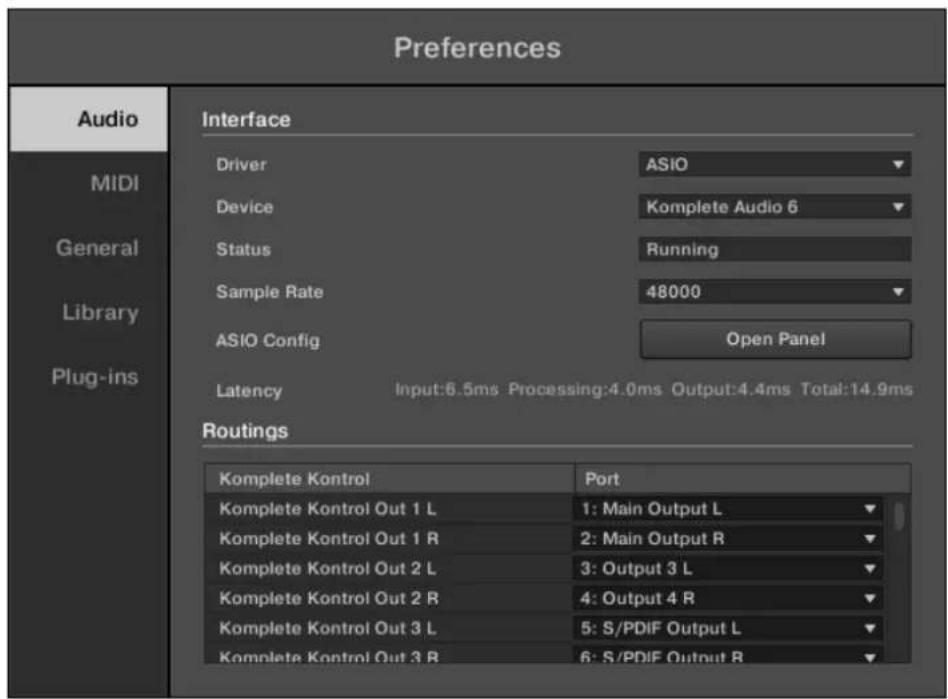
Preferences panel — Audio page
Enabling MIDI Control
- Click on MIDI to display the MIDI page.
- Click on Input to display the available devices for incoming MIDI signals.
- Click the Komplete Kontrol checkboxes to activate incoming MIDI signals from the keyboard.
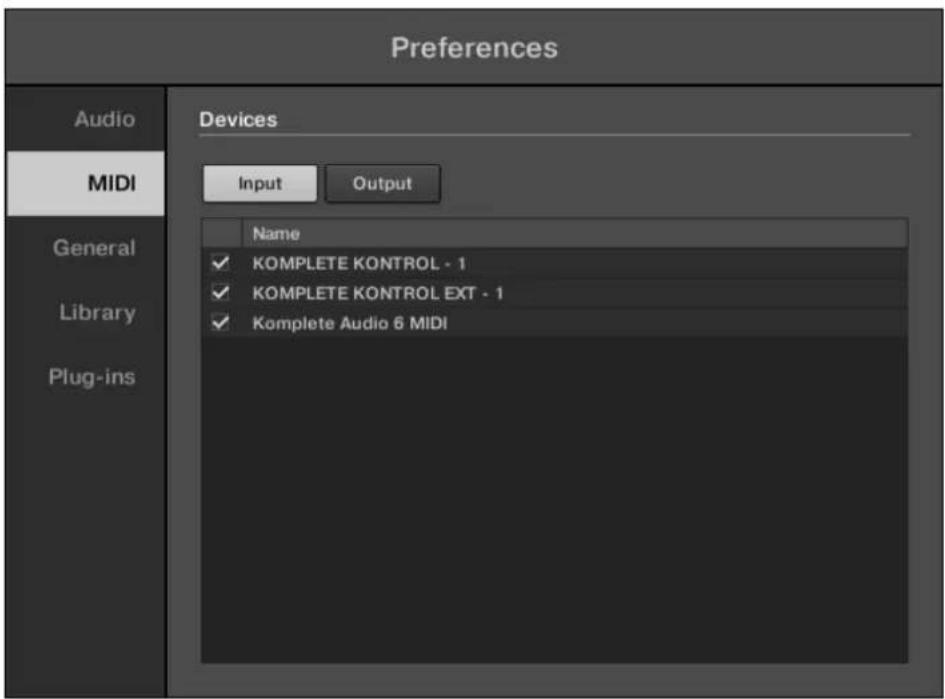
Preferences panel — MIDI page (entries may vary on your computer)
→ The software is configured and ready to be controlled with the keyboard.

The MIDI Output settings are required for using KOMPLETE KONTROL's Smart Play features with other MIDI instruments.
4.3 Setting up Host Integration
KOMPLETE KONTROL integrates with a number of hosts to facilitate a fluent workflow for performing and recording music with your KOMPLETE KONTROL Library.
Advanced integration of KOMPLETE KONTROL is available in the following hosts:
- MASCHINE 2
- Apple Logic Pro X
- Apple GarageBand
- Ableton Live 9
- Steinberg Cubase Artist 8.5/9/9.5
- Steinberg Cubase Pro 8.5/9/9.5
- Steinberg Nuendo 7/8
Before using the KOMPLETE KONTROL keyboard to control a supported host, a few configuration steps are required:
4.3.1 Setting up Apple Logic Pro X and GarageBand
Apple Logic Pro X and GarageBand are automatically configured for advanced integration with KOMPLETE KONTROL once you launch the respective application for the first time after installing the KOMPLETE KONTROL software. Ensure that the keyboard is connected and switched on before launching the application.
A dialog asks you to confirm this after launching the application:
When the message OSC app "KOMPLETE KONTROL S-Series" wants to connect to Logic Pro X / GarageBand appears on screen, click OK.

The KOMPLETE KONTROL stand-alone application must be opened once before using the plug-in within your DAW for the first time, and after installing new Instruments and Effects.
For a detailed overview of Integration controls for Logic Pro X / GarageBand refer to 10.2, Integration with Apple Logic Pro X and GarageBand
4.3.2 Setting up Steinberg Cubase/Nuendo
Steinberg Cubase/Nuendo must be configured for advanced integration with KOMPLETE KON-TROL.
- Ensure that the keyboard is connected and switched on before launching the application.
-
Launch Steinberg Cubase/Nuendo.
-
In Steinberg Cubase/Nuendo, open the Device Setup. from the Devices menu (Steinberg Cubase 9.5: Studio Setup from the Studio menu).
- Click the + button in the upper left corner of the Device Setup and select Komplete Control S-Series from the drop-down menu.
- Set MIDI Input and MIDI Output for Komplete Kontrol S-Series to the ports named Komplete Kontrol DAW (macOS) / KOMPLETE KONTROL (not KOMPLETE KONTROL EXT, Windows).
→ Steinberg Cubase Nuendo is now ready to be used with KOMPLETE KONTROL.

The KOMPLETE KONTROL stand-alone application must be opened once before using the plug-in within your DAW for the first time, and after installing new Instruments and Effects.
For a detailed overview of Integration controls for Steinberg/Nuendo refer to 10.4 , Integration with Steinberg Cubase and Nuendo.
4.3.3 Setting up Ableton Live (macOS)
Ableton Live must be configured for advanced integration with KOMPLETE KONTROL.
Installing the MIDI Remote Script
The MIDI Remote Script allows Ableton Live to recognize KOMPLETE KONTROL as a control surface. It must be copied into Live's MIDI Remote Scripts directory:
- Ensure that Ableton Live is not running.
- Navigate to the following folder: Macintosh HD/Library/Application Support/Native Instruments/Host Integration/Ableton Live/
- Copy the _NativeInstruments folder, as well as the Komplete_Kontrol_Mk2 folder to the clipboard.
- Open your Applications folder and right-click the Ableton Live application symbol. In the context menu, click Show Package Contents.
-
In the Ableton Live package, navigate to Contents > App-Resources > MIDI Remote Scripts.
-
Paste the folders you have copied to the clipboard into the MIDI Remote Scripts folder.
Installing the KOMPLETE KONTROL Instrument Racks
KOMPLETE KONTROL is loaded into Ableton Live in the form of an Instrument Rack. In order to make the required Instrument Rack available in Ableton Live's browser, it must be added to your Ableton Live User Library:
- Navigate to the following folder: Macintosh HD/Library/Application Support/Native Instruments/Host Integration/Ableton Live/.
- Copy the KOMPLETE KONTROL VST.adg file to the clipboard.
- Paste the file you have copied to the clipboard into your Ableton Live Instrument Rack folder. By default this folder is located here: Macintosh HD/Users/*Username*/Music/Ableton/User Library/Presets/Instruments/Instrument Rack/.
Configuring Ableton Live for KOMPLETE KONTROL
Once the MIDI Remote Script and the Instrument Rack file are installed in the correct location, you need to add KOMPLETE KONTROL as a control surface in Ableton Live's preferences.
- Launch Ableton Live.
- In Ableton Live, go to the Preferences and open the MIDI / Sync tab.
- Assign a free Control Surface slot to KOMPLETE KONTROL by selecting KOMPLETE KONTROL MK2 from the drop-down menu.
- Leave both the Input and the Output for the KOMPLETE KONTROL control surface set to None.
Loading KOMPLETE KONTROL in Ableton Live

The KOMPLETE KONTROL stand-alone application must be opened once before using the plug-in within your DAW for the first time, and after installing new Instruments and Effects.
-
Ensure that the keyboard is connected and switched on.
-
To load KOMPLETE KONTROL in Ableton Live, drag the KOMPLETE KONTROL Instrument Rack from the browser to an empty MIDI track. You can find it here in the Ableton Live browser: Instruments/Instrument Rack/KOMPLETE KONTROL VST.adg.
→ You are now ready to use KOMPLETE KONTROL within Ableton Live.

You must use the KOMPLETE KONTROL Instrument Rack (KOMPLETE KONTROL VST.adg) to ensure a reliable connection with the KOMPLETE KONTROL keyboard.
For a detailed overview of Integration controls for Ableton Live refer to 10.3, Integration with Ableton Live.
4.3.4 Setting up Ableton Live (Windows)
Ableton Live must be configured for advanced integration with KOMPLETE KONTROL.
Installing the MIDI Remote Script
The MIDI Remote Script allows Ableton Live to recognize KOMPLETE KONTROL as a control surface. It must be copied into Live's MIDI Remote Scripts directory:
- Ensure that Ableton Live is not running.
- Navigate to the following folder: C:\Program Files\Common Files\Native Instruments\Host Integration\Ableton Live\
- Copy the _NativeInstruments folder, as well as the Komplete_Kontrol_Mk2 folder to the clipboard.
- Navigate to the MIDI Remote Scripts folder in Ableton Live's installation directory: C:\ProgramData\Ableton\Live 9\Resources\MIDI Remote Scripts
- Paste the folders you have copied to the clipboard into the MIDI Remote Scripts folder.
Installing the KOMPLETE KONTROL Instrument Racks
KOMPLETE KONTROL is loaded into Ableton Live in the form of an Instrument Rack. In order to make the required Instrument Rack available in Ableton Live's browser, it must be added to your Ableton Live User Library:
- Navigate to the following folder: C:\Program Files\Common Files\Native Instruments\Host Integration\Ableton Live
- Copy the KOMPLETE KONTROL VST.adg file to the clipboard.
- Paste the file you have copied to the clipboard into your Ableton Live Instrument Rack folder. By default this folder is located here: C:\Users*Username*\Documents\Ableton\User Library\Presets\Instruments\Instrument Rack\
Configuring Ableton Live for KOMPLETE KONTROL
Once the MIDI Remote Script and the Instrument Rack file are installed in the correct location, you need to add KOMPLETE KONTROL as a control surface in Ableton Live's preferences.
- Launch Ableton Live.
- In Ableton Live, go to the Preferences and open the MIDI / Sync tab.
- Assign a free Control Surface slot to KOMPLETE KONTROL by selecting it from the dropdown menu.
- Leave both the Input and the Output for the KOMPLETE KONTROL control surface set to None.
Loading KOMPLETE KONTROL in Ableton Live

The KOMPLETE KONTROL stand-alone application must be opened once before using the plug-in within your DAW for the first time, and after installing new Instruments and Effects.
▶ To load KOMPLETE KONTROL in Ableton Live, drag the KOMPLETE KONTROL Instrument Rack (KOMPLETE KONTROL VST.adg) from the browser to an empty MIDI track. You can find it here in the Ableton Live browser: Instruments/Instrument Rack/KOMPLETE KONTROL VST.adg
For a detailed overview of Integration controls for Ableton Live refer to 10.3, Integration with Ableton Live.
4.4 Connecting Pedals to the Keyboard
The KOMPLETE KONTROL keyboard provides you two pedal inputs (in the form of 1/4" sockets) on its rear panel: PEDAL A and PEDAL B.

The pedal inputs on the rear panel of the keyboard.
These inputs both allow you to connect either a continuous or a switch pedal in order to further refine your performance. They can be freely configured for sustain or expression behavior.

You can define the MIDI messages assigned to the pedal inputs in KOMPLETE KONTROL's MIDI Assignment editor. For more information, refer to 9 , Using the MIDI Assignment Editor.
Connecting Pedals
Connect a continuous or switch pedal to the PEDAL A or PEDAL B inputs on the rear panel of the keyboard.
Configuring the Pedal Input for a Sustain Pedal
When a switch pedal is connected:
- Click the MIDI Assignment editor button in the Header to open the MIDI Assignment editor.
- Select the control element type PEDALS.

- Select the pedal input you want to configure, either Pedal A or Pedal B.

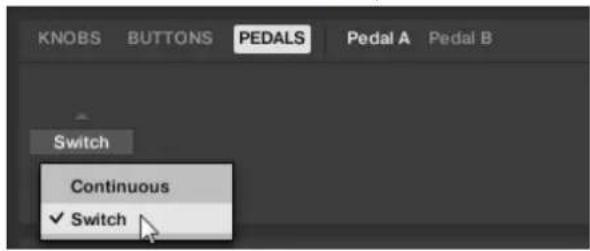
- Select Switch from the Mode drop-down menu.
- Depending on inverted tip/ring connectivity of the pedal, select either Tip or Ring.
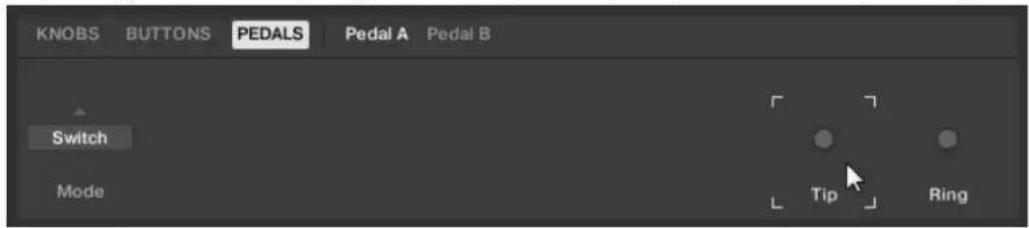
→ The pedal input is configured for a switch pedal with sustain behavior. If you need to change the MIDI Control Change message assigned to the pedal input, refer to ↑9, Using the MIDI Assignment Editor.
Configuring the Pedal Input for an Expression Pedal
When a continuous pedal is connected:
- Click the MIDI Assignment editor button in the Header to open the MIDI Assignment editor.
- Select the control element type PEDALS.

- Select the pedal input you want to configure, either Pedal A or Pedal B.

- Select Continuous from the Mode drop-down menu.
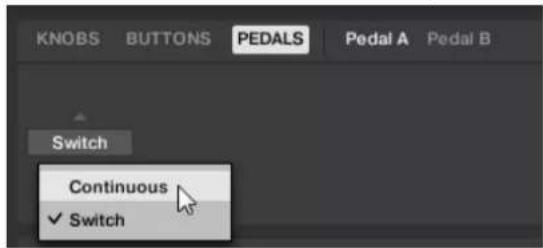
→ The pedal input is configured for a continuous pedal with expression behavior. If you need to change the MIDI Control Change message assigned to the pedal input, refer to ↑9, Using the MIDI Assignment Editor.
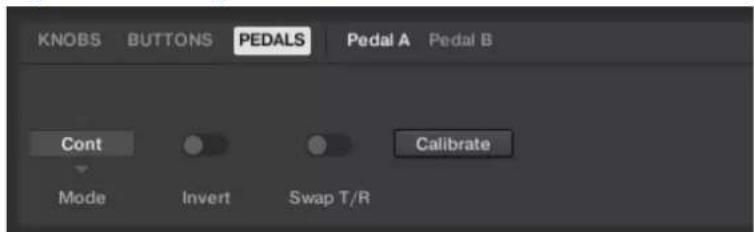
Depending on the type of pedal, you need to make further adjustments by using the provided options. The following table gives you an overview of these options:
| Option Description | |
| Invert toggle switch Some cont | inuous pedals internally support the inverted pedal range but cannot be configured on the pedal directly. The Invert Range function allows you to invert the range of the pedal connected to the keyboard. |
| Swap T/R toggle switch Allows | you to use pedals with inverted tip/ring connectivity. |
| Recalibrate button Allows you | to recalibrate the input. |

When using the MIDI Assignment editor, all keyboard controls (i.e. navigation, transport, etc.) are blocked.
4.5 Connecting External MIDI Equipment to the Keyboard
The KOMPLETE KONTROL keyboard has dedicated MIDI sockets that allow you to directly connect other MIDI devices using a 5-pin DIN MIDI cable and integrate the keyboard into your MIDI setup.

The MIDI sockets on the rear panel of the KOMPLETE KONTROL keyboard.
To connect your external MIDI equipment:
- Connect the device receiving MIDI signals to the MIDI OUT socket on the rear panel of the keyboard using a 5-pin DIN MIDI cable.
- Connect the device sending MIDI signals to the MIDI IN socket on the rear panel of the keyboard using a 5-pin DIN MIDI cable.
→ The MIDI equipment is connected.
Depending on your use case, additional configuration is required in the software:
- If KOMPLETE KONTROL is running as a stand-alone application, you need to activate the corresponding MIDI inputs and outputs of the keyboard on the MIDI page of the Preferences. For more information refer to ↑8.3, Using the Keyboard as Stand-Alone MIDI Controller.
- If KOMPLETE KONTROL is running as a plug-in in a host, the MIDI configuration is managed by the host. For more information refer to ↑8.2, Using the Keyboard in MIDI Mode.
- If you are using the keyboard as MIDI controller without a USB connection, MIDI data is directly sent and received via the keyboard's MIDI IN and MIDI OUT sockets. For detailed information on MIDI mapping refer to ↑9, Using the MIDI Assignment Editor.
5 Software Overview
This section gives an overview of the areas and controls of the KOMPLETE KONTROL software.
![KOMPLETE KONTROL Library Files All Instruments TYPES Raos Bowel Strings Brass Ozone Flute Guitar Mallet Instruments Multistrack Organ Percussion Piano, Keya Plucked Strings Sound Instruments Sound Effects Soundscopies Synth Lead Synth Misc Synth Pad Visual MODES Adover Apergapsed Cloud Dry FM Olic-Pitch Mod Granular Lung Release Long-Terming Monaphonic Percussive Physical Model Processed Sample-based Sequence/Loop Slow Attack Sumbend Synthetic Tempo-synosed Use the Browser or + button above to load an instrument [PRIS]1 [PRIS]2 01 LP Ep Org (E1.02) CO Boom 01 LP Epic Org (E3.01) AD Boom 01 LP Epic Organic (E.00) CT Boom](/content/2026/05/812765/images/f69bb2c93b1136b5901792cd8124f4d5ef829c0e56d1b772b9c047dab4c0f61d.jpg)
Overview of the KOMPLETE KONTROL software.
(1) Header: Provides access to general functions like the Main menu, the Preset display, the Transport and Master Volume controls, as well as options to show and hide user interface areas. For more information, refer to ↑5.1, Header.
(2) Plug-in area: Shows your loaded Instrument or Effect and lets you control it directly in the software. For more information, refer to ↑5.7, Plug-in Area.
(3) Browser: Lets you browse for Instruments and Effects, and manage all your Preset files. For more information, refer to ↑5.2, Browser.
5.1 Header
The header is where you find general settings that affect KOMPLETE KONTROL globally. It also lets you access additional user interface areas.

The header.
(1) KOMPLETE KONTROL logo: Opens the About screen, which shows the version number of the KOMPLETE KONTROL software.
(2) Browser button: Shows or hides the Browser.
(3) Main menu: Opens the Main menu, which contains a number of general functions and settings, including the Preferences.
(4) Preset display: Displays the name of the loaded Preset file or KONTAKT key switch. The arrow buttons on the right skip to the next Preset file in the Browser's result list.
(5) Perform panel button: Shows or hides the Perform panel, which gives you access to the parameters of the Scale engine and the Arpeggiator. The Perform panel button lights up blue when the Scale engine and/or the Arpeggiator are enabled.
(6) Plug-in panel button: Shows or hides the Plug-in panel, which allows you to customize the parameter mapping for the Control section on the keyboard for every Preset file.
(7) Plug-in chain panel button: Shows or hides the Plug-in chain panel and lights up white when enabled.
(8) View button: Switches between Default view and Additional view of the loaded Instrument. The View button only appears if the loaded Instrument contains an Additional view. The View button is not available when an Effect is selected.
(9) Keyboard button: Shows the currently connected keyboard, S25, S49, S61, or S88. If multiple instances of the KOMPLETE KONTROL software are running (for example in a host), clicking the button connects the keyboard to this instance. This indicator only appears if at least one compatible device is connected.
(10) Transport controls: Lets you start, stop, and reset the internal clock. When KOMPLETE KONTROL is loaded as a plug-in in a host, the transport automatically follows the host transport and this feature is greyed out.
(11) Tempo control: Lets you adjust the tempo in BPM (beats per minute).
(12) Master Volume control: Lets you adjust the overall output volume of KOMPLETE KON-TROL. The meter shows the current peak level of the output signal.
(13) CPU meter: Represents the current load on your computer's processor; it should not go above 70% to avoid clicks and interruptions.
(14) MIDI Assignment editor button: Lets you to access all the settings related to the keyboard's MIDI mode, as well as pedals. This button only appears in the KOMPLETE KONTROL stand-alone application.
(15) NI logo: The NI logo opens the About screen, which shows the version number of the KOMPLETE KONTROL software.
5.2 Browser
The Browser gives you access to your KOMPLETE KONTROL Library and lets you add, edit, and organize Preset files. It consists of the Library pane together with the Product selector, and of the Files pane which are explained in the following overviews.
For more information on using the Browser and managing your Preset files, refer to 11 , Browsing the Library, 12 , Working with Effects, respectively 13 , Managing the Library.
5.2.1 Library Pane
The Library pane is the place where you browse for Instruments, Effects, and Preset files. It consists of the following elements:
![KOMPLETE KONTROL Library Files All Instruments TYPES Base Bowed Strings Brass Drums Flute FM Guitar Instruments Lo-Fi Mallet Instruments Multitrack Organ Percussion Piano/Keys Plucked Strings Road Instruments Sound Effects Soundscapes Synth Load Synth Misc Synth Pad Vocal MODES Additive Aspegglated Chard Dry FM Glide/Pitch Mod Granular Long Release Long release Long/Evolving Monophonic Percussive Physical Model Processed Sample-based Sequence/Long Slow Attack Surround Synthetic Tempo-synced [PRIS]1 [PRIS]2 01 LP Ep Org (EI 02) C0 Boom 01 LP Epic Org (EI 01) A6 Boom](/content/2026/05/812765/images/243bc049fa9b818df11ae7f75c03c667465dce650ba582e61716903639b22fd8.jpg)
The Library pane.
(1) Library: Displays the Library pane.
(2) Product Type icon: Displays the current context either of browsing for Instruments or browsing for Effects. This is determined automatically by the currently selected Plug-in slot in the Plug-in chain. For more information on switching between Product Types, refer to ↑11.1.1, Product Types: Instrument and Effect.
(3) Content selector: The Globe icon selects factory content and the User icon selects user content. Only Preset files of the selected content type are displayed in the Results list (7).
(4) Product selector: Selects a particular Instrument or Effect, Instrument category, and bank of the selected Product. Only Preset files matching your selection are displayed in the Results list (7).
(5) TYPES: Lets you browse for Preset files based on Type and Sub-Type tags that have been applied to them. You can collapse or expand this section by clicking on the little arrow next to TYPES.
(6) MODES: Lets you browse for Preset files based on Mode tags that have been applied to them. You can collapse or expand this section by clicking on the little arrow next to MODES.
(7) Favorites: Lets you filter the search results by Favorites. When enabled, only favorite Preset files are displayed in the Results list (8).
(8) Results list: Displays all Preset files that match your entered search criteria.
(9) Control bar: Provides useful tools when browsing and editing the KOMPLETE KONTROL Library:
- The Information button (i) displays additional information for the selected Preset file(s).
- The EDIT button opens the Attribute editor for displaying and editing the tags and properties of the selected Preset file(s).
(10) Prehear controls: Lets you audition Preset Files.
(11) Search field: Lets you perform a text search.
5.2.2 Product Selector
When browsing for Instruments or Effects the Product selector allows you to limit your search to a certain category, a particular Product, and Banks of Instruments.
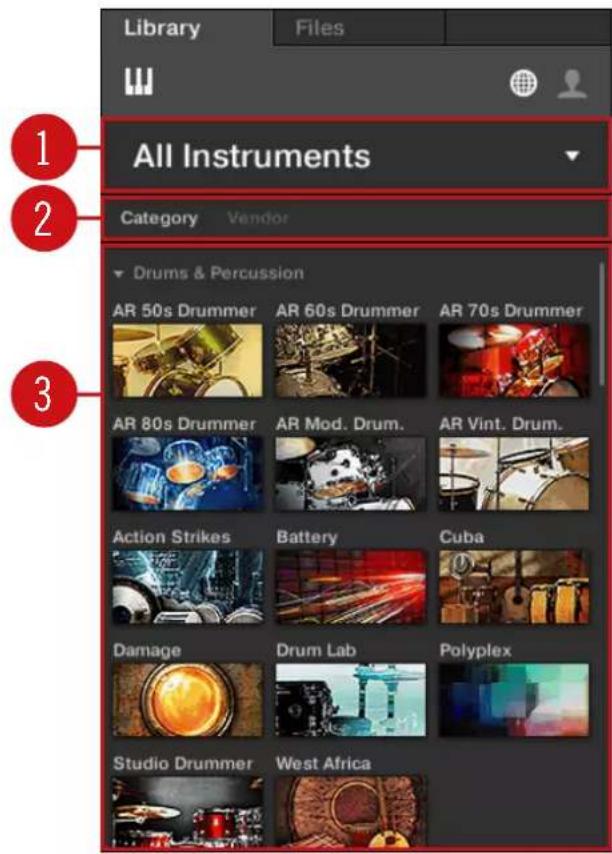
The Product selector.
(1) Product selector header: The header shows the selected Product—if there is no selection it shows a generic label (All Instruments or All Effects). A click on the header opens or closes the Product selector.
(2) Category / Vendor selector: Allows you to sort the Product list by Category or by Vendor.
(3) Product list: Shows all Products that are available in your KOMPLETE KONTROL Library.
5.2.3 Files Pane
The Files pane contains following elements:
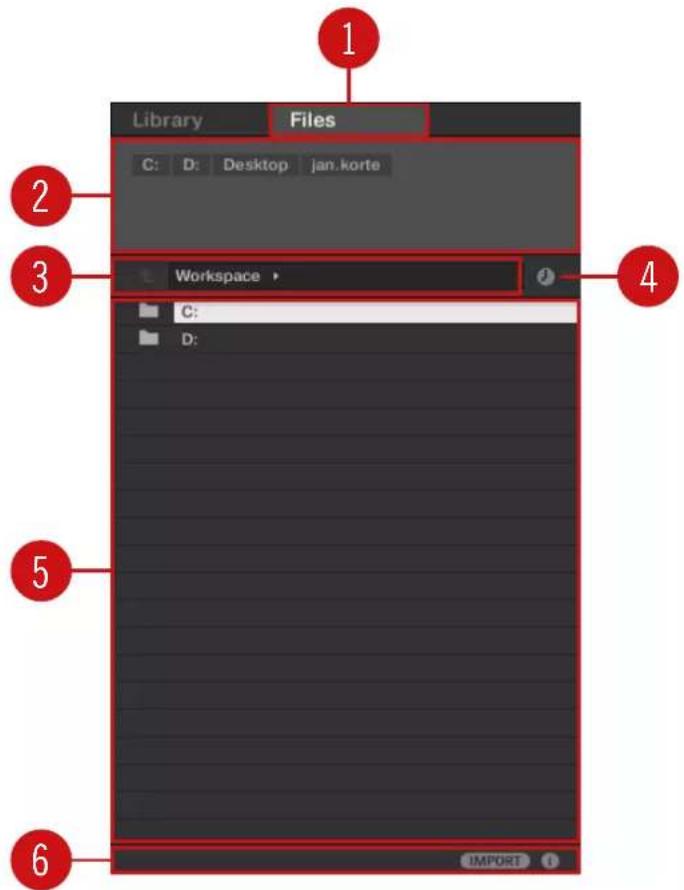
The Files pane in the Browser.
(1) Files: Displays the Files pane.
(2) Favorite bar: Displays all your favorite folders. A click on any favorite folder lets you jump directly to that particular path and display its content in the Result list (5).
(3) Location bar: Displays the selected path. The Location bar provides various tools to quickly navigate your file system.
(4) Recent Locations button: Opens a list of the last visited locations for quickly jumping to any of them.
(5) Results list: Displays the content (files and folders) of the folder shown in the Location bar. Only files compatible with KOMPLETE KONTROL are displayed.
(6) Control bar: Provides useful tools when browsing your file system:
- The Information button (i) displays additional information for the selected files.
- The IMPORT button lets you import the content of the selected folder to the KOMPLETE KONTROL Library. Before any files are imported, you can choose which tags will be assigned to the files in the Attribute editor.
5.3 Perform Panel
The Perform panel lets you access all the parameters related to the Scale engine and the Arpeggiator.
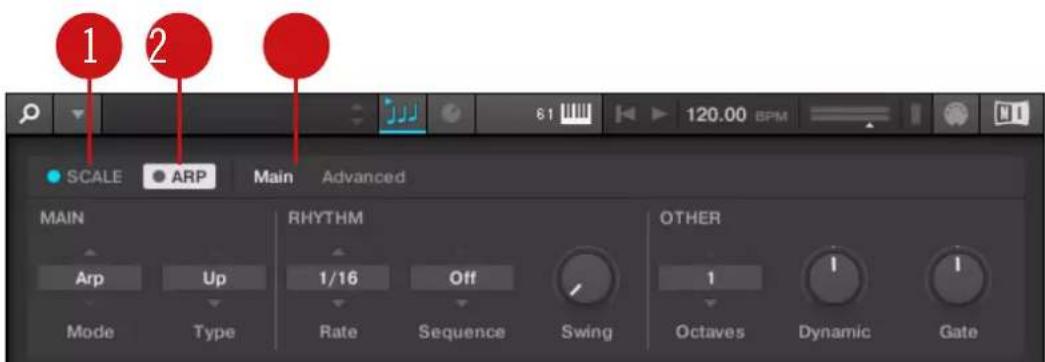
The Perform panel.
(1) SCALE: Clicking the round button left of SCALE switches the Scale engine on or off. Clicking the SCALE label displays the Scale engine's parameters. See ↑15, Playing and Editing Scales and Chords for details.
(2) ARP: Clicking the round button left of ARP switches the Arpeggiator on or off. Clicking the ARP label displays the Arpeggiator's parameters. See ↑16, Playing and Editing the Arpeggiator for details.
(3) Parameter pages: If multiple pages of parameters are available, you can switch between them here.
For more information, refer to 15, Playing and Editing Scales and Chords.
5.4 Plug-in Panel
The Plug-in Panel lets you view and customize the parameters mapped to the Control section on the KOMPLETE KONTROL keyboard for individual Preset files. The amount of pages and parameters vary depending on the loaded Instrument or Effect.

The Plug-in Panel.
For more information, refer to ↑14.4, Customizing Parameter Mappings using the Plug-in Panel.
5.5 Plug-in Chain Panel
At the top of the Plug-in area there is situated the Plug-in chain panel with the Plug-in chain. The Plug-in chain is the place where you can directly load Instrument Plug-ins (Plug-in slot 1) and Effect Plug-ins (Plug-in slot 2 onwards) and arrange them in horizontal series. Each Plug-in is loaded into a Plug-in slot which create the Plug-in chain. The arrangement of the Plug-ins is customizable, but the first Plug-in slot always has to have an Instrument loaded.
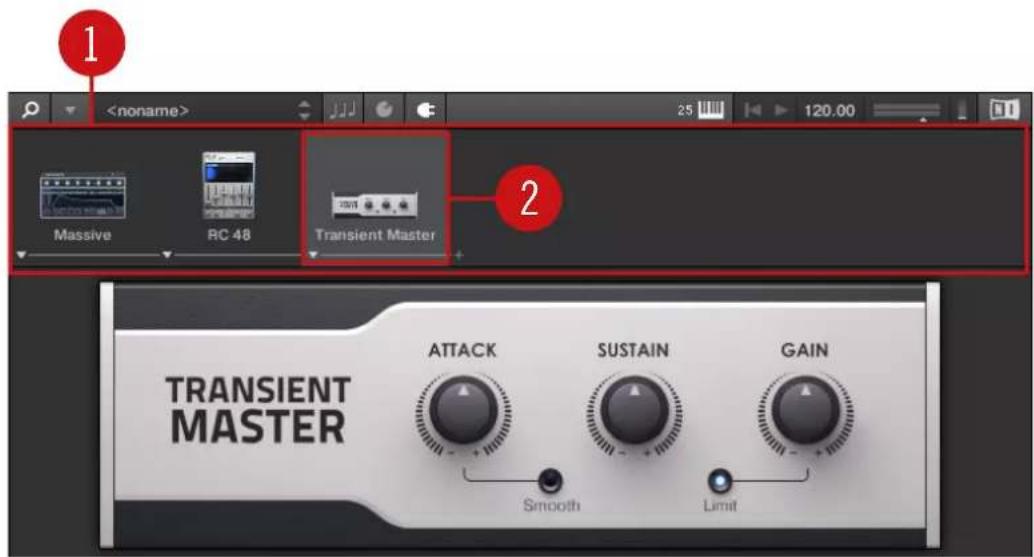
Overview Plug-in Chain Panel
(1) Plug-in chain: Shows the loaded Instrument and added Effects in horizontal arrangement.
(2) Plug-in slot: Each Plug-in slot represents a Plug-in and displays the Product's name and image. Use the Plug-in slots to directly load Plug-ins, bypass Effects and customize the order.
5.6 MIDI Assignment Editor
The MIDI Assignment editor allows you to define what kind of MIDI messages are assigned to the controls on the KOMPLETE KONTROL keyboard in MIDI mode. This way you can use the keyboard with MIDI applications or MIDI devices that require specific MIDI messages to be sent in order to control certain parameters or functions. Multiple templates can be configured for quick recall, allowing you to prepare controller assignments for different applications and/or devices. The MIDI Assignment editor lets you change the assignments for the knobs, buttons, the Touch Strip in the keyboard's Control section, as well as for connected pedals.
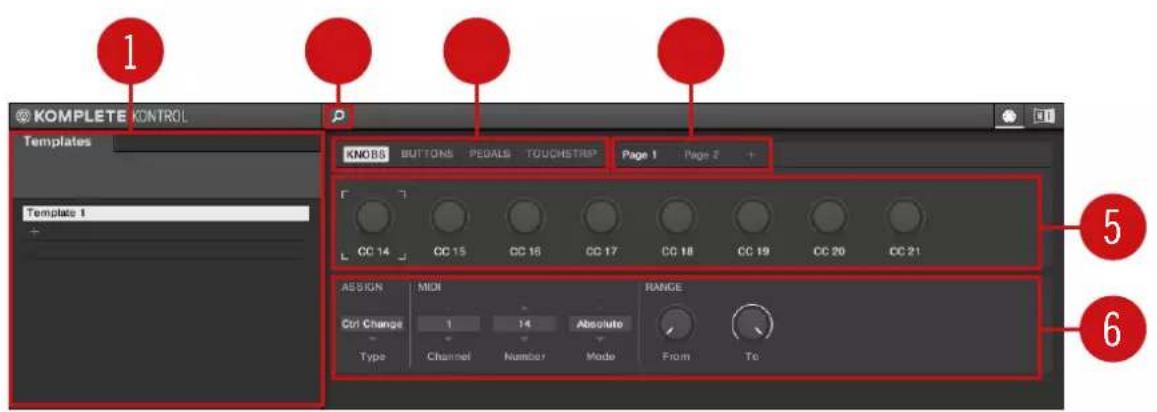
Overview of the MIDI Assignment editor.
(1) Templates pane: Allows you to create and manage your Templates for MIDI assignments.
(2) Templates pane button: Shows/hides the Templates pane.
(3) KNOBS, BUTTONS, PEDALS, TOUCHSTRIP: Here you can select the type of control element to which you can make MIDI assignments.
(4) Pages / Pedal A and Pedal B: For the Knobs and Buttons you can have multiple assignments, organized in pages. Here you can select and manage up to four pages. Pedal Assignments are global and not distinct per Template. Pedals A and B can be independently configured.
For the pedals it is not possible to have multiple assignments.
(5) Control elements: Here you can select the control element for a MIDI assignment.
(6) Definition area: Defines the MIDI assignment properties for the selected control element.
For more information, refer to 9 , Using the MIDI Assignment Editor.
5.7 Plug-in Area
The Plug-in area of the KOMPLETE KONTROL software is where your Instruments and Effects are displayed once you have loaded them from the Browser. Each Instrument offers a different set of controls and parameters that are all easily controlled directly on the computer screen or from the keyboard. Parameter changes are mutually reflected by both the displays on the keyboard and the Instrument's user interface in the Plug-in area.

For most Instruments, additional views are available that give you access to another set of controls. See ↑7.1, Instrument Views for details.
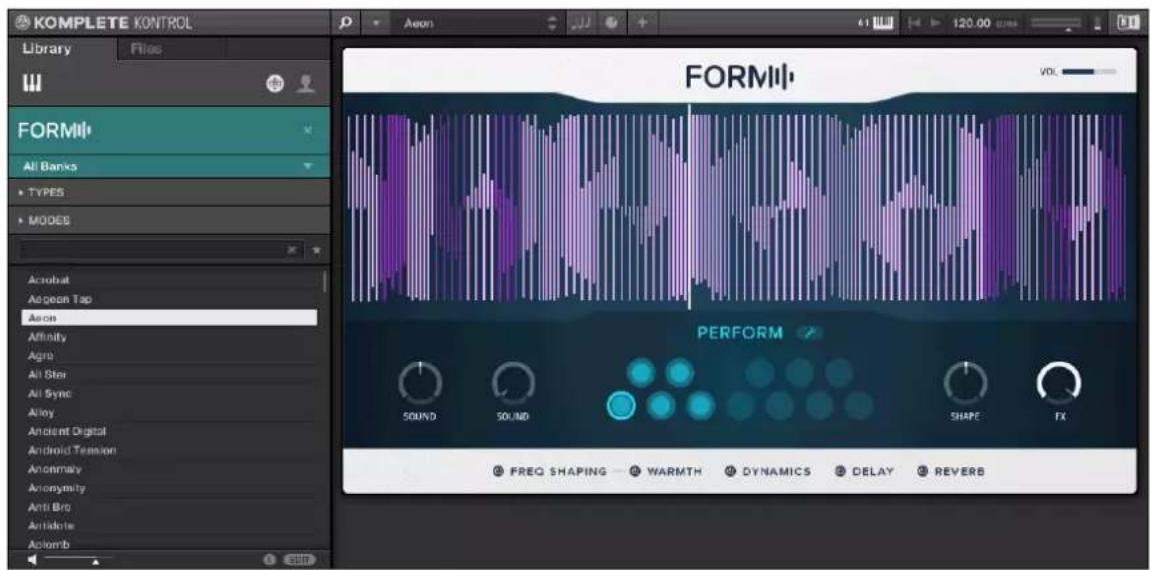
The Plug-in area displaying the Instrument Form.
6 Keyboard Overview
The KOMPLETE KONTROL keyboard is tightly integrated into the software and can be used to browse, control and play your Products as well as to control supported hosts.
The keyboard is available in two sizes: The S49, and S61 are equipped with the same top-quality semi-weighted Fatar keypad with aftertouch. Beyond the keypad, all keyboards come with identical features.
The keyboard is equipped with the following sections:
Top View
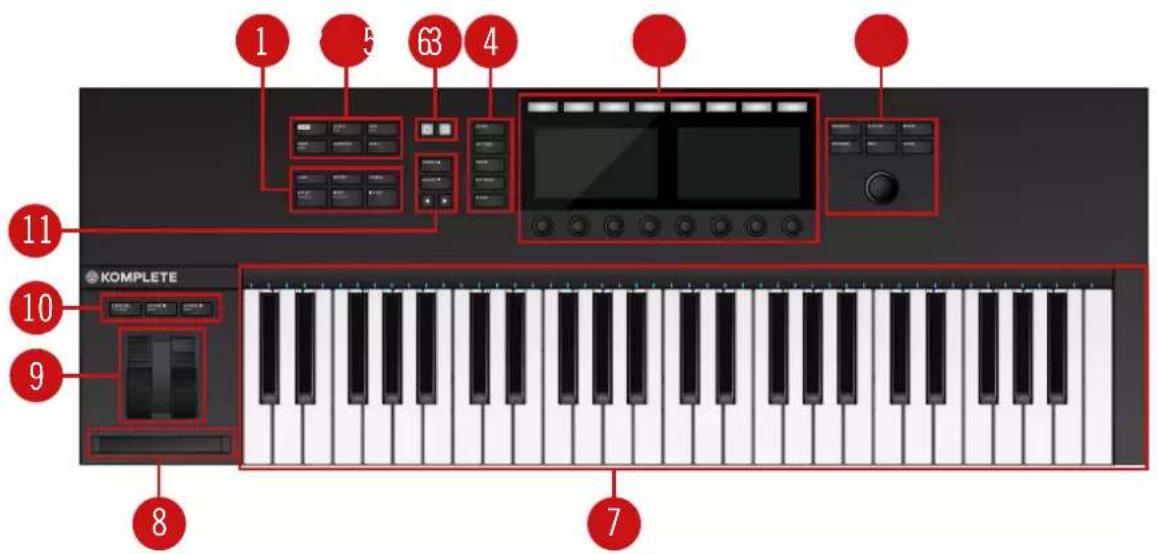
KOMPLETE KONTROL S49
(1) Transport section: Controls the transport of supported hosts when KOMPLETE KONTROL is used as a plug-in.
(2) Perform and Edit section: Lets you edit and control the Smart Play features, i.e. playing scales, chords, and arpeggiator sequences. The settings made in the Perform and Edit section are displayed in the Control section (5) and are reflected by the Light Guide and keyed (7).
(3) Solo and Mute buttons: Let you instantly solo and mute any Sound or Group in supported hosts.
(4) Arrange buttons: Let you switch between the different arrangement views and modes in supported hosts.
(5) Control section: The knobs and displays are automatically assigned to parameters of the loaded Product or selected mode.
(6) Navigation and Mode buttons: Lets you browse your KOMPLETE KONTROL Library and navigate in your DAW with the 4-D encoder, as well as directly access functions like the Mixer and MIDI mode.
(7) Keybed and Light Guide: Reflect the Smart Play functions by switching LEDs on or off to indicate active and inactive keys. The Light Guide also reflects the settings of the loaded Instrument and can be very helpful to illustrate e.g. BATTERY or KONTAKT mappings.
(8) Touch Strip: The Touch Strip can be assigned to parameters via the MIDI learn function of the loaded Instrument.
(9) Pitch & Modulation Wheels: The Pitch Wheel and the Modulation Wheel are automatically assigned to corresponding controls of the loaded Instrument.
(10) Transpose and Fixed Velocity buttons: The FIXED VEL (TS Mode) button sets the note velocity for all keys to a fixed value of 127. The OCTAVE (Semi) down / up buttons transpose the entire keypad one octave down / up. Pressing SHIFT + OCTAVE (Semi) down / up transposes the entire keypad a semitone down / up.
(11) Preset and Page buttons: The PRESET up / down buttons let you skip to the next or previous Preset file of the loaded Product. The Page left / right buttons let you skip to the next page and thus remap the Knobs and displays to another set of parameters.
Rear View

Keyboard Interface rear view.
(1) Kensington Lock: Attaches a Kensington lock for protecting the keyboard against theft.
(2) MIDI IN/OUT socket: Connect devices for MIDI control.
(3) Pedal A and Pedal B sockets: Connects sustain and expression pedals.
(4) PSU socket (15V - 1.2A): Connects the optional power supply which can be purchased separately in the Native Instruments online shop.
(5) USB connector: Connects the keyboard to your computer with the supplied USB cable.
(6) Power button: Switches the keyboard on and off.
6.1 Perform and Edit Section
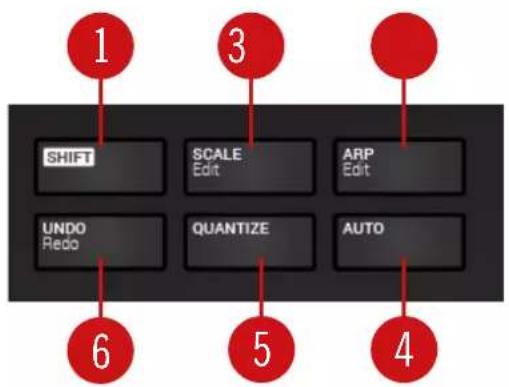
The buttons in the Perform and Edit section on the far left of the KOMPLETE KONTROL keyboard let you switch the Scale engine and the Arpeggiator on or off and access their parameter for editing. The parameters are visible in the displays and editable with the knobs in the Control section.
flowchart
graph TD
    A["SHIFT"] --> B["SCALE Edit"]
    C["UNDO Redo"] --> D["QUANTIZE"]
    E["ARP Edit"] --> F["AUTO"]
    G["1"] --> H["3"]
    I["4"] --> J["5"]
    K["6"] --> L["6"]
The Perform and Edit section.
(1) SHIFT: Lets you access the secondary functions of buttons labeled as such, for example the Edit functions of the SCALE (Edit) and ARP (Edit) buttons.
(2) SCALE (Edit): Switches the Scale engine on or off, and lets you edit the Scale engine parameters.
(3) ARP (Edit): Switches the Arpeggiator on or off, and lets you edit the Arp parameters.
(4) AUTO: Lets you activate or deactivate automation in supported hosts.
(5) QUANTIZE: Lets you quantize events to the step grid in supported hosts.
(6) UNDO (Redo): Lets you undo or redo your last action in supported hosts.
6.2 Transport Section
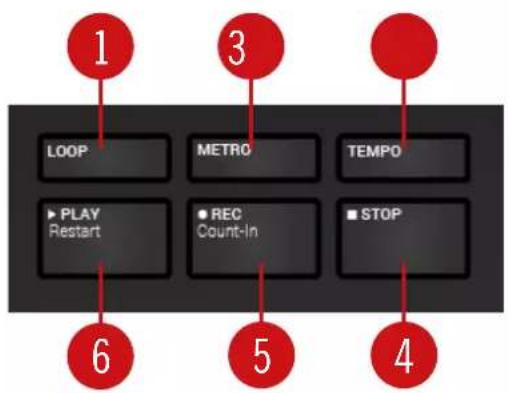
The TRANSPORT section at the far left on the keyboard gives you quick and easy access to functions like play, record, loop, etc. in supported hosts.
flowchart
graph TD
    A["LOOP"] --> B["PLAY Restart"]
    C["METRO"] --> D["REC Count-In"]
    E["TEMPO"] --> F["STOP"]
    G["1"] --> H["3"]
    I["4"] --> J["5"]
    K["6"] --> L["6"]
The Transport section.
(1) LOOP: Switches between standard and loop playback.
(2) METRO: Switches the metronome on or off.
(3) TEMPO: Lets you tap in the tempo.
(4) STOP: Stops playback.
(5) REC (Count-in): REC (Count-in) switches record on or off. SHIFT + REC (Count-in) switches the count-in on or off.
(6) PLAY (Restart): PLAY (Restart) starts playback. SHIFT + PLAY (Restart) starts playback from the beginning.
6.3 Control Section
The Control section is located at the center of the KOMPLETE KONTROL keyboard. The knobs, buttons, and displays are automatically assigned to parameters of the loaded Product or selected mode. They provide immediate control and allow for deep editing of various aspects of KOMPLETE KONTROL.
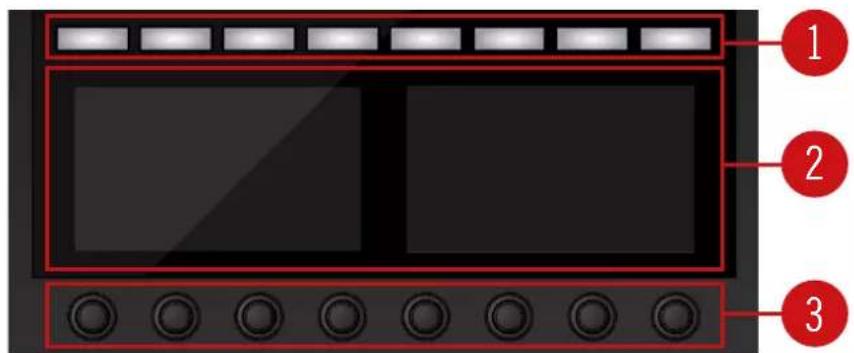
The controls of the Control section.
(1) Buttons 1-8: The eight buttons dynamically adapt their assignment to the selected mode, allowing for direct access to the most important functions and sub-sections. The displays show the current assignment below each button.
(2) Displays: The displays give you information related to the shown Product or selected mode, and show the functions and parameters assigned to the buttons and knobs.
(3) Knobs 1-8: The eight knobs dynamically adapt their assignment to the selected mode, allowing for direct access to the available parameters. The displays show the current assignment above each Knob. As the knobs are touch-sensitive, you can tap them to see additional information.
6.4 Mode Buttons
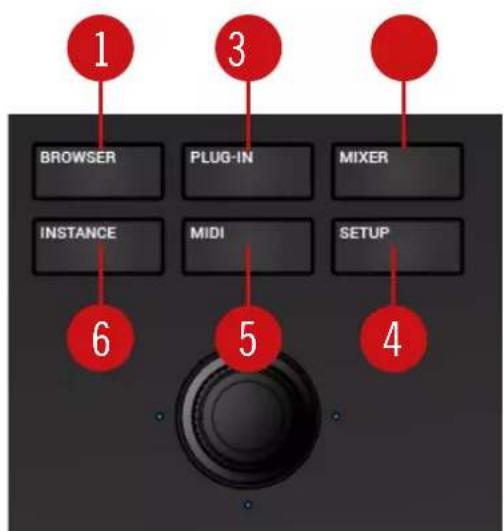
Mode Buttons.
(1) BROWSER: Displays the Browser in the Control section.
(2) PLUG-IN: Displays the Plug-in Chain and the selected plug-in the Control section.
(3) MIXER: Displays the mixer of supported hosts in the Control section.
(4) SETUP: Displays the hardware serial number and the firmware version, and lets you change the display brightness.
(5) MIDI: Accesses MIDI mode that allows you to use the KOMPLETE KONTROL keyboard as a MIDI controller.
(6) INSTANCE: When using KOMPLETE KONTROL as a plug-in in a host without advanced integration, this button lets you switch between KOMPLETE KONTROL instances and MIDI Mode.
6.5 Navigation and the 4-D Encoder
The 4-Directional Push Encoder (referred to as the 4-D encoder) combines the functionalities of a conventional joystick, of a button, and of a continuous encoder. These aspects make it a multi-functional control element that can be used for navigation, for adjusting values of parameters, and for controlling Products. Hence, it can be moved to the four directions: up, down, left, and right, as well as being pushed and rotated.
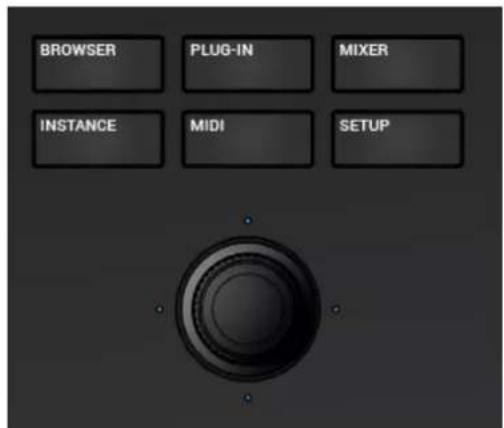
The 4D Encoder situated below the Mode buttons.
Depending on the menu or context, the available actions differ:
- The displays are navigated by pushing the 4-D encoder in a direction indicated by the four LEDs.
- Entries in a list are browsed by turning the 4-D encoder.
- The value of a highlighted parameter is adjusted by turning the 4-D encoder.
- A selection is confirmed by pushing the 4-D encoder.
6.6 Keybed and Light Guide
The Light Guide above the keyed visualizes the key mapping of loaded Instruments and samples by color coding. Active and inactive keys respectively sample based Instruments are indicated by the LEDs. The Light Guide also reflects the Smart Play settings. This means when you select e.g. a scale or chord, the LEDs corresponding to the keys contained in that scale or chord will light up, whereas inactive keys remain unlit. The Light Guide also gives you visual feedback when you play back incoming MIDI note patterns from the host.

natural_image
Front view of a KOMPLETE keyboard interface (no text or symbols on the instrument)The Light Guide
6.7 Modulation Wheels
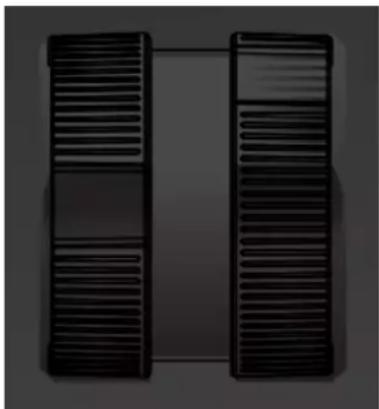
The two Modulation Wheels to the left of the keybed let you control pitch and modulation parameters of the loaded Instrument.
natural_image
Two black corrugated heat exchangers with horizontal lines, no text or symbols visibleModulation Wheels
The left Modulation Wheel, called Pitch Wheel, lets you adjust the pitch of the loaded Instrument. The right Modulation Wheel, called Modulation Wheel, lets you adjust the default modulation parameter of the loaded Instrument.
6.8 Touch Strip
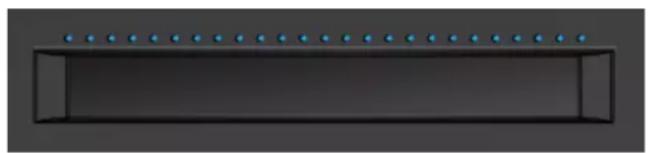
The Touch Strip is an intuitive control element that gives you immediate control over Instrument parameters. It can send MIDI pitchbend or control change messages and can be configured in the MIDI Assignment editor. For more information, refer to 9 , Using the MIDI Assignment Editor.
natural_image
Pure diagram of a rectangular container with blue dots on top and bottom, no text or symbols presentThe Touch Strip.
6.9 Transpose and Fixed Velocity Buttons
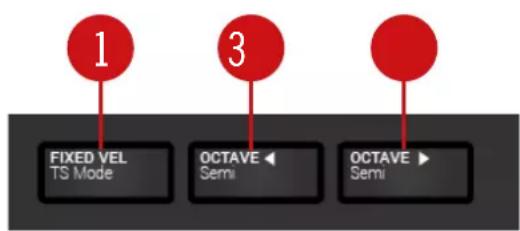
flowchart
graph TD
    A["1"] --> B["FIXED VEL TS Mode"]
    C["3"] --> D["OCTAVE Semi"]
    E["3"] --> F["OCTAVE Semi"]
Transpose and Fixed Velocity Buttons.
(1) FIXED VEL (TS Mode): Sets the note velocity for all keys to a fixed value of 127.
(2 - 3) OCTAVE (Semi) down and OCTAVE (Semi) up : Transpose the entire keyed one octave down / up. Pressing SHIFT + OCTAVE (Semi) down / up transposes the entire keyed a semi-tone down / up. Pressing both buttons simultaneously resets the keyed to the central octave.
7 Global Controls and Preferences
This sections introduces the global controls and the Preferences you can access via the Header of KOMPLETE KONTROL.
7.1 Instrument Views
Once you have loaded an Instrument from the Browser, it appears in the Plug-in area of the KOMPLETE KONTROL software. Most KOMPLETE Instruments come equipped with more than one view, giving you access to another set of controls or letting you edit certain features in finer detail. The three possible Instrument views are Default View, Additional View, and Edit View which can be selected directly in the KOMPLETE KONTROL menu.
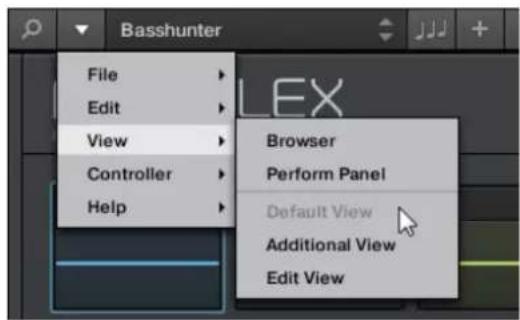
Instrument views in the KOMPLETE KONTROL menu.
▶ Alternatively, you can switch between Default View and Additional View by clicking on the View button in the Header (+ icon).
All Instrument parameters can be controlled at all time from the KOMPLETE KONTROL keyboard, regardless of the selected Instrument view in the KOMPLETE KONTROL software.

The available views may vary with the loaded Instrument.
7.1.1 Default View
The Default View is the view that first appears when you load an Instrument from the Browser. It gives you access to some of the most important features of each NKS Instrument with an easy-to-use interface.
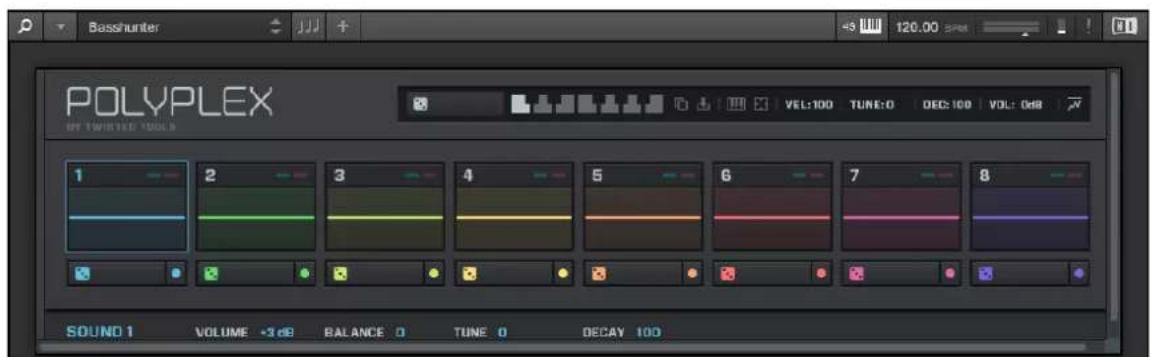
POLYPLEX in Default View.
7.1.2 Additional View
Most NKS Instruments have more parameters that can be displayed at once in small surface and therefore come with a second, Additional View. The Additional View can give you access to detailed edit controls or to a completely different set of controls altogether depending on the loaded Instrument.
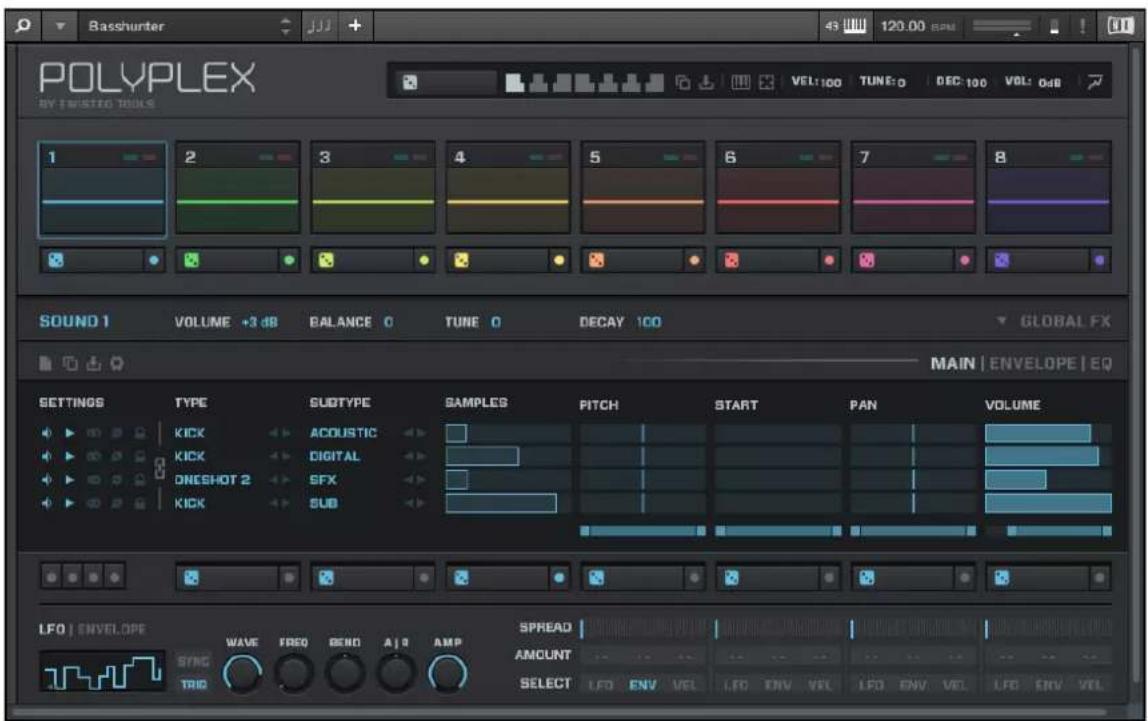
POLYPLEX in Additional View.
Besides of selecting Additional View via the KOMPLETE KONTROL Menu and the application menu, you can also do this by clicking the + button in the KOMPLETE KONTROL header. Clicking it again will return to the Default View.
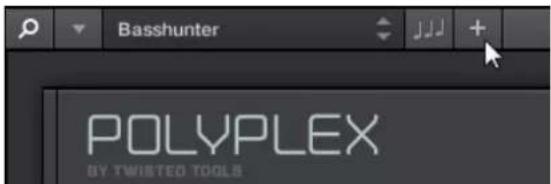
The + button opens and closes the Additional View.
7.1.3 Edit View

Edit view is only available for Instruments powered by KONTAKT or REAKTOR.
In the Edit View you have also the possibility to open any KOMPLETE Instrument that can be loaded or played by either the KONTAKT PLAYER or REAKTOR PLAYER. This gives you access to all the flexible controls and features you would normally have when using KONTAKT or RE-AKTOR in stand-alone mode.
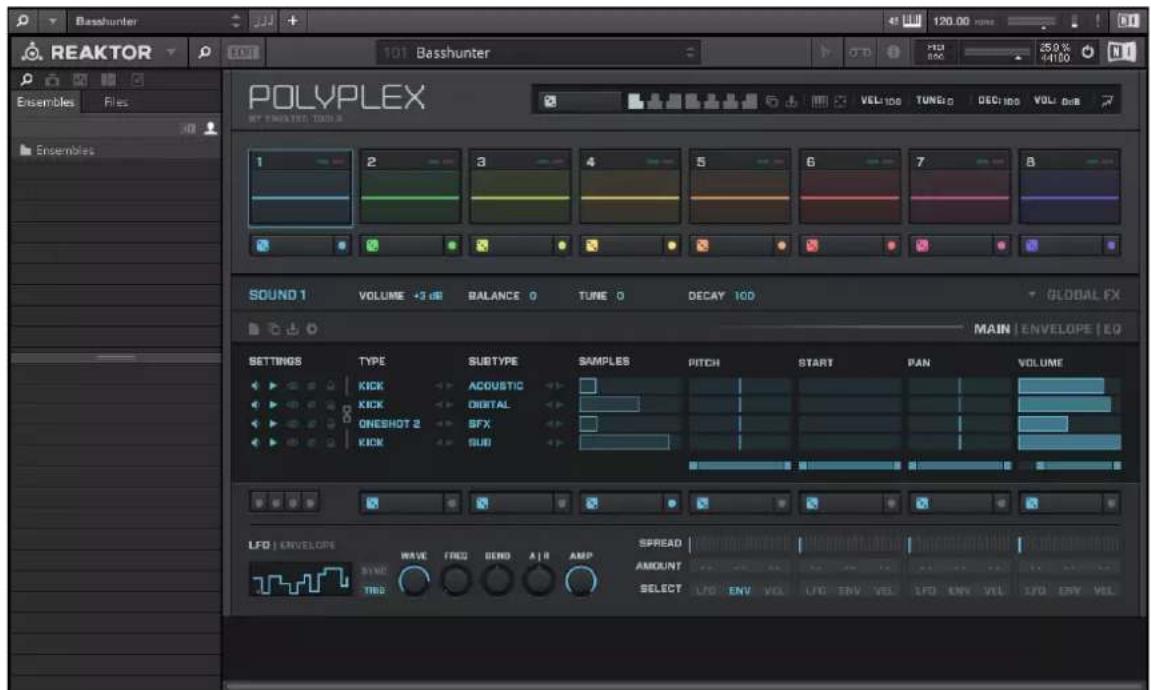
POLYPLEX in Edit View.

Edit view enables you to access files that cannot be loaded from the KOMPLETE KONTROL Browser, e.g. KONTAKT Multis which can be loaded from the KONTAKT Browser in edit view.
7.2 Switching Instances
When two or more instances of the KOMPLETE KONTROL software are running (e.g. as a plugin on different tracks of the host), you can choose which instance you want to control from the KOMPLETE KONTROL keyboard.
Switching to an Instance from the Software
▶ To switch the keyboard to a particular instance of the KOMPLETE KONTROL software, click the Connect button (keyboard icon) in the header of that instance.
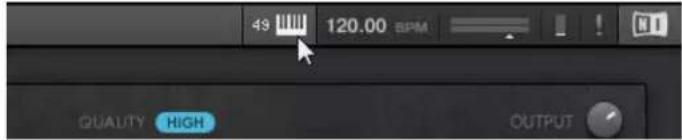
Automatic Switching in a Host
When using KOMPLETE KONTROL as a plug-in in a host with advanced integration, the keyboard automatically switches between controlling the KOMPLETE KONTROL software and MIDI mode, depending on the content of the selected track.
- If you select a track that hosts the KOMPLETE KONTROL plug-in, the keyboard automatically switches to this instance of the KOMPLETE KONTROL software. This allows you to immediately control all of your Product's parameters from the keyboard.
- If you select a track that does not host the KOMPLETE KONTROL plug-in, the keyboard automatically switches to MIDI mode. This allows you to assign the available controls on the keyboard to parameters in the host or in an inserted plug-in via MIDI learn (if supported).
▶ To select a track in a supported host from the keyboard, move the 4-D encoder up or down until the track is highlighted.
Switching to an Instance from the Keyboard
If you use KOMPLETE KONTROL as a plug-in in a host without advanced integration, you cannot rely on automatic switching between instances. However, you can still select a particular instance of the KOMPLETE KONTROL software from the keyboard using its displays and 4-D encoder.
To display and switch between KOMPLETE KONTROL instances from the keyboard, follow the instructions below:
- Press the INSTANCE button to show all active instances of the KOMPLETE KONTROL software on the keyboard displays.
- Use the 4-D encoder to select an instance.
- Press the 4-D encoder to switch to the selected instance.
→ You can now control the selected instance of the KOMPLETE KONTROL software from the keyboard.
7.3 Transport and Tempo
If KOMPLETE KONTROL is used as a stand-alone application, it features its own Transport and Tempo controls. They are used by sequenced KONTAKT and REAKTOR Instruments as well as the Arpeggiator. Additionally, the tempo is used by all Instruments that allow you to set timing parameters in relation to the musical tempo (e.g. rhythmic modulation, delay effects).
You can find the Transport and Tempo controls in the Header:
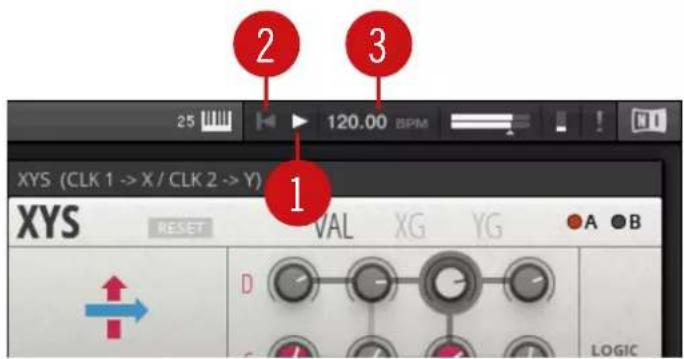
Transport and tempo controls in KOMPLETE KONTROL.
(1) Play button: Starts and stops the internal clock. This can be used to control the playback of sequenced KONTAKT and REAKTOR Instruments.
(2) Reset button: Resets the internal clock to its start position. Consequently, sequencers in KONTAKT and REAKTOR Instruments will start their playback from the beginning. The same applies to the Arpeggiator.
(3) Tempo control: Sets the tempo in BPM (beats per minute).

When using KOMPLETE KONTROL as a plug-in, it is automatically synchronized to the host. Therefore the Transport and Tempo controls are grayed out and inactive.
7.3.1 Resetting the Clock
Resetting the Clock in the Software
- When the internal clock is stopped, clicking the Reset button allows you to reset the internal clock. Clicking the Play button will start playback from the beginning.
- When the internal clock is running, clicking the Reset button allows you to reset the internal clock and resume playback from the beginning.
Resetting the Clock from the Keyboard
- When the internal clock is stopped, pressing STOP allows you to reset the internal clock. Pressing PLAY (Restart) will start playback from the beginning.
- When the internal clock is stopped, pressing SHIFT + PLAY (Restart) allows you to reset the internal clock and start playback from the beginning.
- When the internal clock is running, pressing SHIFT + PLAY (Restart) allows you to reset the internal clock and resume playback from the beginning.
7.3.2 Adjusting Tempo
Adjusting Tempo in the Software
The Tempo control allows you to set the tempo in BPM (beats per minute):
- Click the display and drag the up / down.
- Alternatively, you can double-click the display and enter a value numerically.
→ The tempo adjusts in increments of one.
Adjusting Tempo from the Keyboard
You can also use the KOMPLETE KONTROL keyboard to set the tempo in BPM (beats per minute):
-
Press and hold TEMPO.
-
While holding TEMPO turn Knob 1 in the Control section.
→ The tempo is adjusted in increments of 1 BPM.
7.4 Adjusting Master Volume
The Master Volume slider lets you adjust the overall output volume of KOMPLETE KONTROL. The Volume meter shows the current peak level of the output signal.
Master Volume controls.
In order to adjust the output volume:
▶ Click and drag the slider to the left or to the right.
This will adjust the output volume in 0.5dB increments from -30dB to +10dB. Below -30dB, the keyboard's volume control is exponentially scaled and quickly lowers the output signal to complete silence.
Adjusting Master Volume with the Keyboard
In order to adjust the output volume on the keyboard:
-
Press and hold SHIFT.
-
While holding SHIFT turn the Knob 1.
7.5 Preferences
In the Preferences you can specify various settings for KOMPLETE KONTROL.
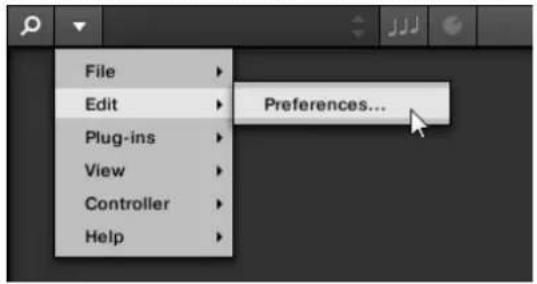
To open the Preferences:
▶ Click Edit > Preferences in the KOMPLETE KONTROL menu:
7.5.1 Preferences – Audio Page
The Audio page holds settings related to your audio interface when KOMPLETE KONTROL is running as a stand-alone application.

When using KOMPLETE KONTROL as a plug-in, the audio configuration is managed by the host, and the Audio page is not available.
The Routings section allows you to configure the connections between the virtual outputs of KOMPLETE KONTROL and the physical outputs of your audio interface.
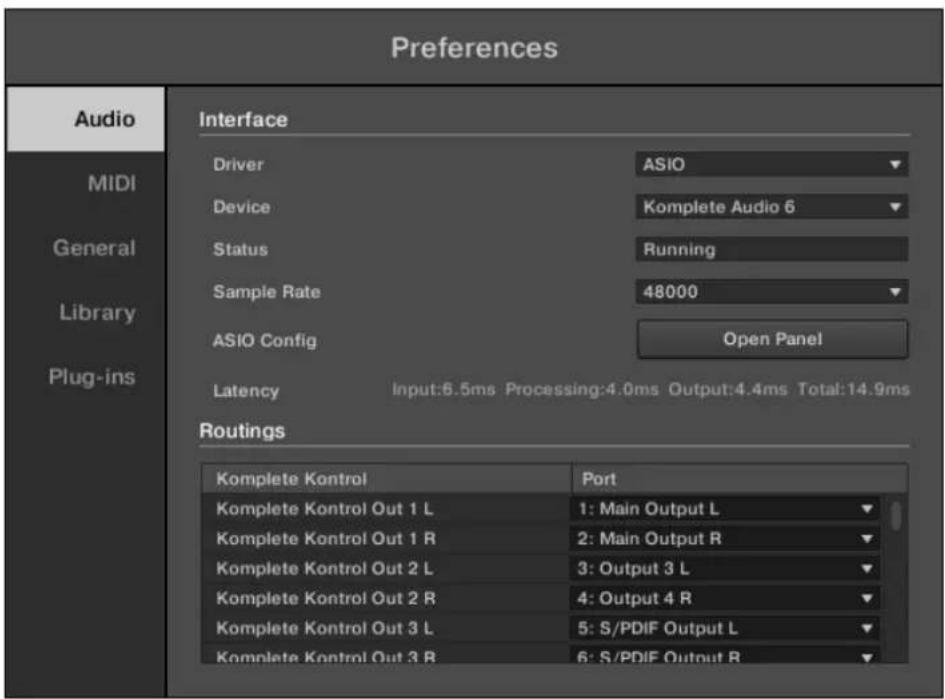
Preferences panel — Audio page
| Setting Description | |
| Driver Here you can select the audio driver. | |
| Device This allows you to choose from the available devices if you have connected more than one audio interface. | |
| Status This shows you whether your audio interface is currently running. | |
| Sample Rate This displays the selected sample rate of your audio interface.Please restart KOMPLETE KONTROL after changing the sample rate. | |
| Buffer Size | macOS: This slider allows you to adjust the buffer size of your audio interface in samples. Lower values result in a more immediate playing response but increase the CPU load, and may result in audible clicks and pops. Larger values decrease the CPU load but introduce a larger latency (a small delay between hitting a pad and hearing it). It is recommended to find the lowest value that does not cause clicks and pops even when playing more demanding Products.Windows: When using an ASIO driver, the Audio page shows an ASIO Config button instead of the Buffer Size slider. Click this button to open the settings window of the selected ASIO driver. |
| Latency | This shows the delays introduced by the current Buffer Size setting. |
| Routings Under Routings, you | u will be presented with a list of the 16 stereo outputs from KOMPLETE KONTROL: In the right column, you can assign them to the outputs of your audio interface. Click the fields in the right column to select the desired outputs via a drop-down menu. |
7.5.2 Preferences – MIDI Page
The MIDI page allows you to set up the MIDI input and output ports that you want to use when KOMPLETE KONTROL is running as a stand-alone application.

When using KOMPLETE KONTROL as a plug-in, the MIDI configuration is managed by the host, and the MIDI page is not available.
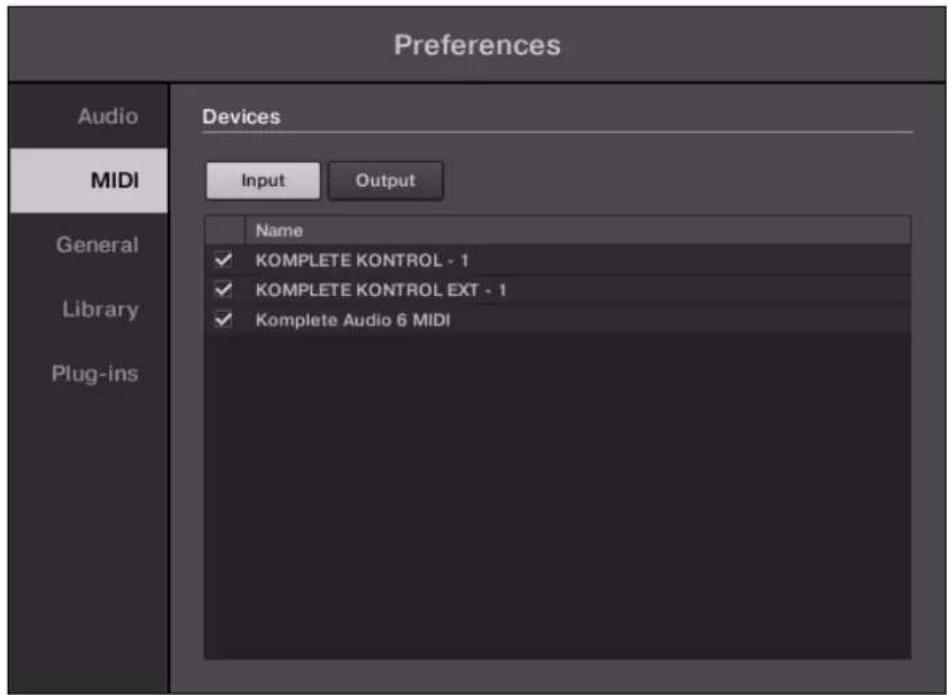
Preferences panel — MIDI page (entries may vary on your computer)
| Element Description | |
| Input | Clicking Input displays a list of all the available MIDI inputs of your system. You can activate/deactivate each input by clicking the checkbox next to its name. |
| Output | Clicking Output displays a list of all the available MIDI outputs of your system. You can activate/deactivate each input by clicking the checkbox next to its name. |
The MIDI Output settings are required for using KOMPLETE KONTROL's Smart Play features with other MIDI instruments.
7.5.3 Preferences – General Page
The General page holds Usage Data Tracking settings. Usage Data Tracking technology enables KOMPLETE KONTROL to automatically track anonymous usage data that you can choose to share with us.
Usage Data Tracking can be enabled or disabled in the General page of the Preferences in the KOMPLETE KONTROL software. However, we encourage all users to keep Data Tracking enabled as it provides a valuable tool for understanding the performance of Native Instruments applications when they are used in real life situations. The data sent to Native Instruments is one hundred percent anonymous and will not affect performance.
For more detailed information about Usage Data Tracking, please refer to the following Knowledge Base article on the Native Instruments website:
https://support.native-instruments.com/hc/en-us/articles/209545029
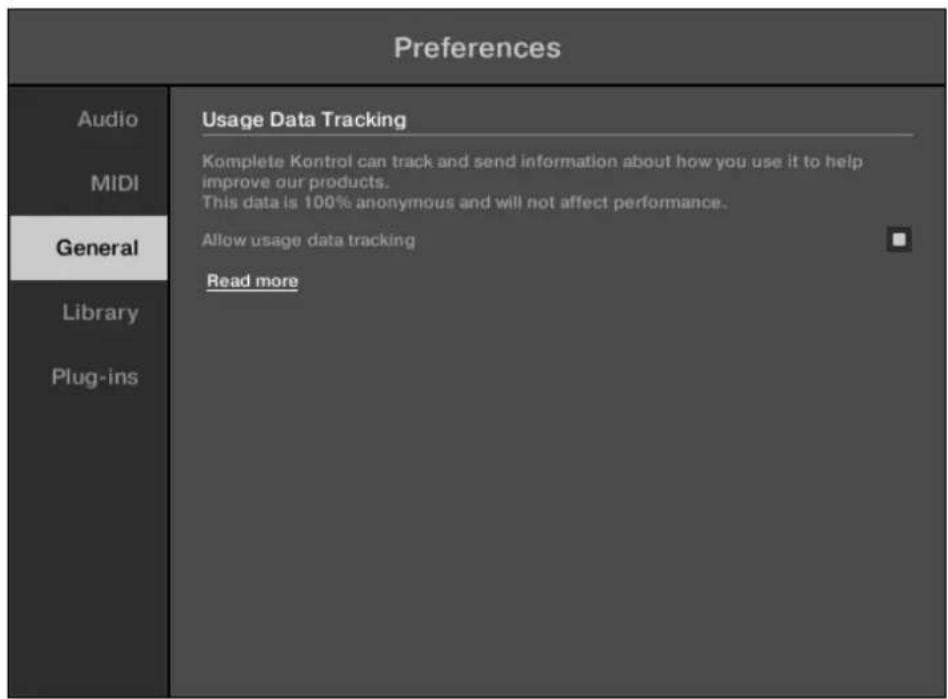
Usage Data Tracking in the KOMPLETE KONTROL Preferences.
To enable or disable Usage Tracking:
- Open the General page of the Preferences by clicking Preferences... in the KOM- PLETE KONTROL menu.
- Click the Allow usage data tracking checkbox to enable or disable user data tracking.
7.5.4 Preferences – Library Page
The Library page allows you to edit the locations of all KOMPLETE KONTROL Library files (both Factory and User) that appear in the Library pane of the Browser.
At the top of the page, the Factory and User buttons allow you to switch between the Factory pane and the User pane.
Factory Pane
The Factory pane shows all factory libraries available. These libraries will appear in the Factory view of the Browser's Library pane.
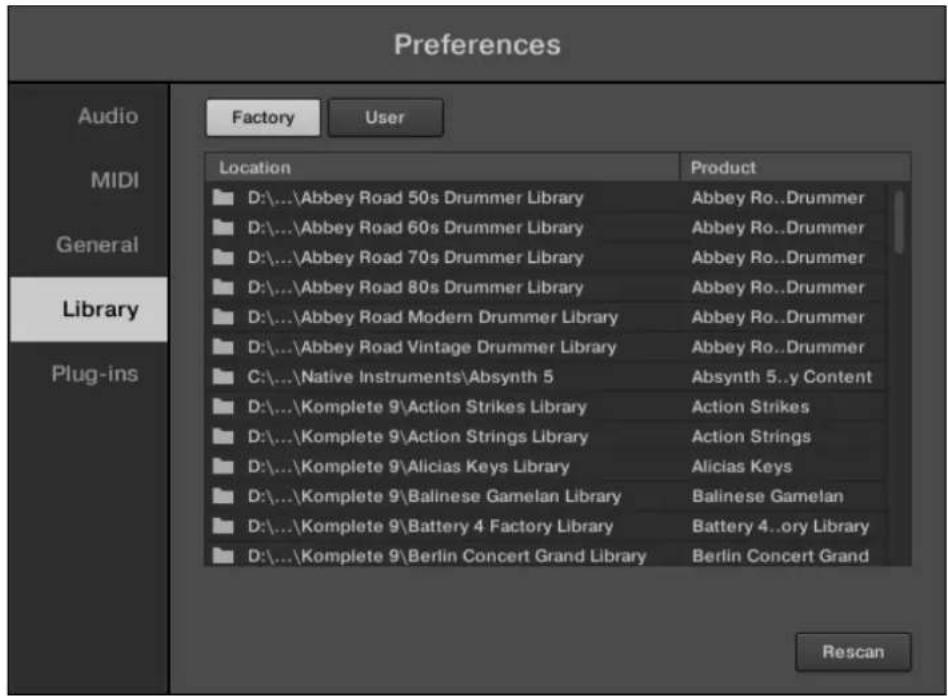
Preferences panel – the Library page's Factory pane.
| Element Description | |
| Location column Shows the path of each library. If you have moved any library to another location on your computer, click the folder icon on the left of that library and select its new path. | |
| Product column Shows the name of each product. These names cannot be edited. | |
| Rescan button If you have made any change to a library (e.g., changed its location), select it in the list and click the Rescan button to rescan that library. | |
User Pane
The User pane shows all user libraries currently used. These include KOMPLETE KONTROL's standard user directory as well as any other user directory you might have defined. These libraries will appear in the User view of the Browser's Library pane.
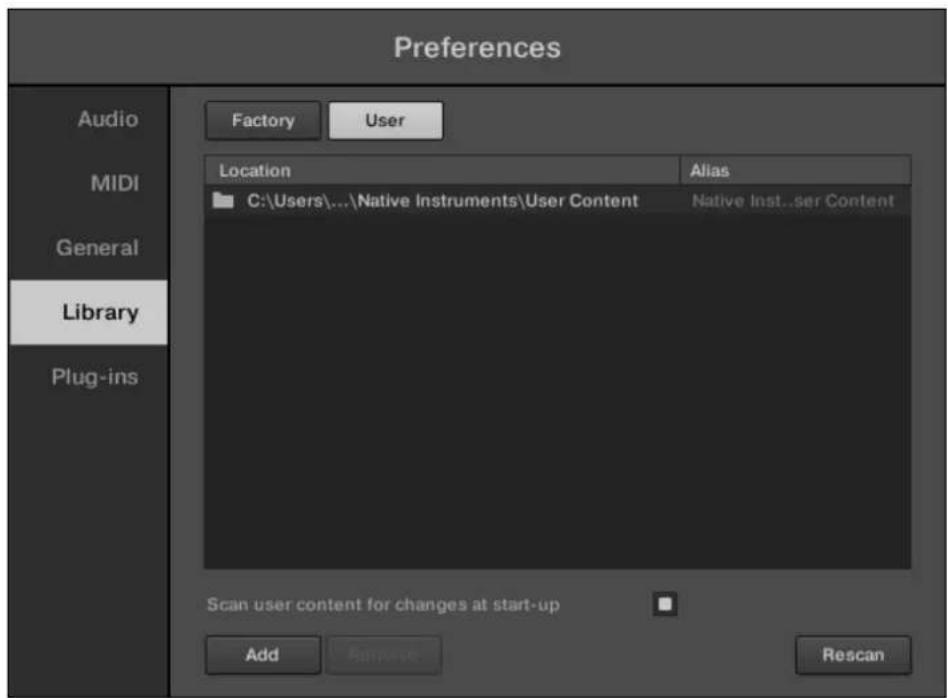
Preferences panel – the Library page's User pane.
| Element Description | |
| Location column Shows the alias stored for each library. Click an alias to edit it.Defining aliases for your user folders is not mandatory, but it can be of great help when working on different computers (see description below). After adding a location (see Add below), click the field in the new row and in the Alias column to set the alias for that new location. The alias of the default user folder, Native Instruments User Directory, cannot be edited — this is the location where all your user files will be stored by default. | |
| Scan user content for changes at start-up | Enabled by default, this option automatically detects any new added user content when starting KOMPLETE KONTROL. |
| Add button | Click Add to manually add directories to the user library. See below for more details. |
| Remove button | Click Remove to remove the selected user library. Files will only be removed from the KOMPLETE KONTROL Browser, not from your hard disk. |
| Rescan button If you have made any change to a library (e.g., added/removed files), select it in the list and click the Rescan button to rescan that library. | |

You can resize the Preferences panel at your convenience using the usual method on your operating system. You can also resize each column by clicking and dragging the limit between both column headers.
Adding Folders to the User Library
In the User pane of the Library page, you can add other folders to the user content of your KOMPLETE KONTROL Library. To do this:
- Click Add at the bottom of the pane. A folder selection dialog opens up.
- In the dialog, navigate to the desired folder on your computer and click OK (Choose on macOS).
→ All KOMPLETE KONTROL-compatible files found in the selected folder are added to your user content in KOMPLETE KONTROL.

KOMPLETE KONTROL-compatible files include ens, rkplr, nrkt, nksn, nfm8, nabs, nki, nmsv, nbkt, nis.
Furthermore, the attributes (Instrument/Bank/Sub-Bank, Type/Sub-Type/Mode tags, as well as properties) of all imported files will be retained.
By adding a folder to the user content of your KOMPLETE KONTROL Library, you make their files available in the Browser's Library pane for quick searching and loading.

Paths to folders added via the IMPORT button in the Browser's Files pane will also show up here. The only difference between adding folders via the Add button in Preferences panel described here, and via the IMPORT button in the Files pane of the Browser is that the latter allows you to directly tag the files as they are imported.
Please note that the selected folder cannot contain, or be contained within, a folder already listed in the User or Factory pane. If KOMPLETE KONTROL detects such a folder as you press OK (Choose on macOS) in the folder selection dialog, a Duplicate Location message appears: Click OK to return to the folder selection dialog and select another folder on your computer.
Removing Folders from the User Library
You can also remove any user folder from your library—except the default user content directory Native Instruments User Content.
7.5.5 Preferences – Plug-ins Page
The Plug-ins page allows you to manage your VST plug-ins in KOMPLETE KONTROL.
At the top of the page, the Manager and Locations buttons allow you to switch between the Manager pane and the Locations pane.
Manager Pane
The Manager Pane allows you to view and manage all VST plug-ins available in KOMPLETE KONTROL. By default, all available plug-ins are activated for use in KOMPLETE KONTROL.
▶ To deactivate a plug-in for use in KOMPLETE KONTROL, click on the checkbox icon next to its name so it is unchecked.
The option to Always use latest version of NI Plug-ins selects whether or not your Library content is always loaded with the latest version of the associated plug-in. If this option is disabled, your Library content is loaded with the lowest required version of the associated plug-in found on the computer.

For example, this option is required if you have installed both the full version of REAKTOR 5 as well as a KOMPLETE Instrument that came with REAKTOR 6 Player. By disabling the option, the REAKTOR 5 Factory Library will be loaded with the full version of REAKTOR 5, while the KOMPLETE Instrument will be loaded with REAKTOR 6 Player. This is necessary since the REAKTOR 5 Factory Library is not authorized for use with REAKTOR 6 Player.
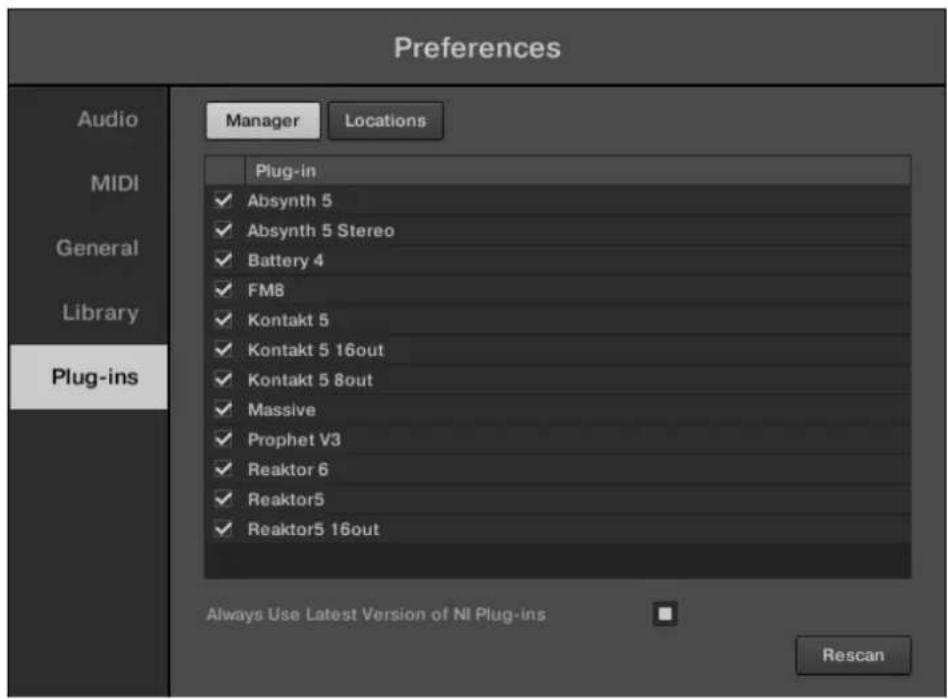
Preferences panel — the Plug-ins page's Manager pane.
| Element Description | |
| Checkbox column Activates or deactivates a plug-in for use in KOMPLETE KONTROL. | |
| Plug-in column Lists all available VST plug-ins in KOMPLETE KONTROL. | |
| Always use latest version of NI Plug-ins | If this option is enabled (default), Library content is loaded with the latest version of the associated plug-in.If this option is disabled, Library content is loaded with the lowest required version of the associated plug-in. |
Locations Pane
The Locations pane allows you manage the folders containing your plug-ins on the hard drive. KOMPLETE KONTROL scans these folders for VST plug-ins and adds them to the Manager pane. You can Add and Remove folders from the list, as well as use the Rescan function to update the available plug-ins in KOMPLETE KONTROL according to any changes made to the folders or their contents.
▶ To display the Locations pane, click the Locations button at the top of the Plug-ins page.
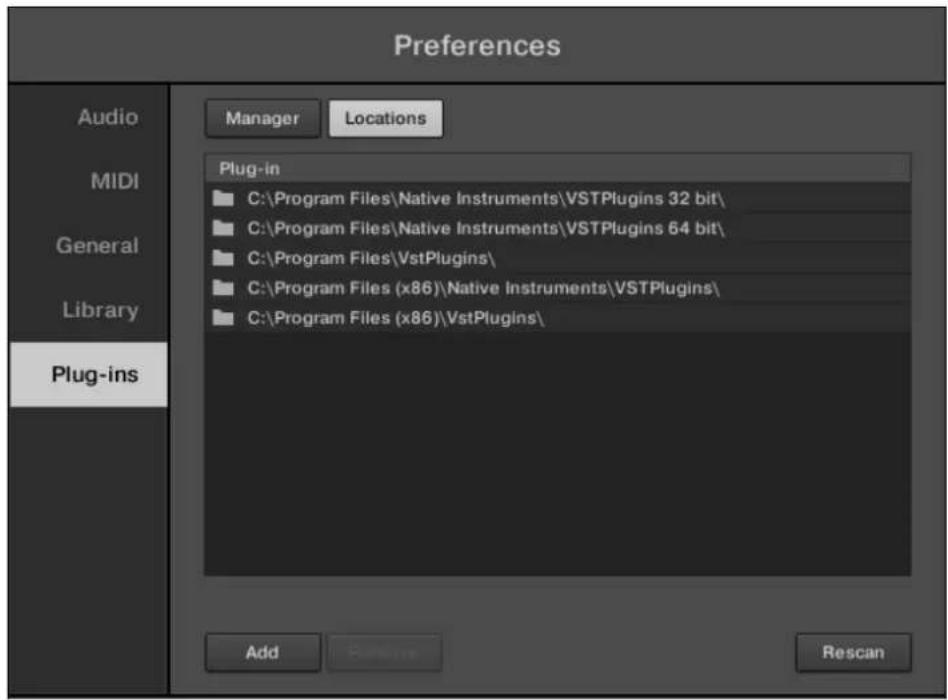
Preferences panel — the Plug-ins page's Locations pane.
| Setting Description | |
| Plug-in column Lists | all folders that KOMPLETE KONTROL scans for VST plug-ins. |
| Add Opens a file dialogue that lets you add another folder to the list. | |
| Remove Removes the | currently selected folder from the list. |
| Rescan Scans all folders in the list for compatible plug-ins and updates the Manager pane accordingly. | |
7.6 Keyboard Settings
The KOMPLETE KONTROL keyboard's SETUP page gives you access to information and settings related to the hardware.
▶ To open the SETUP page, press the SETUP button on the keyboard.
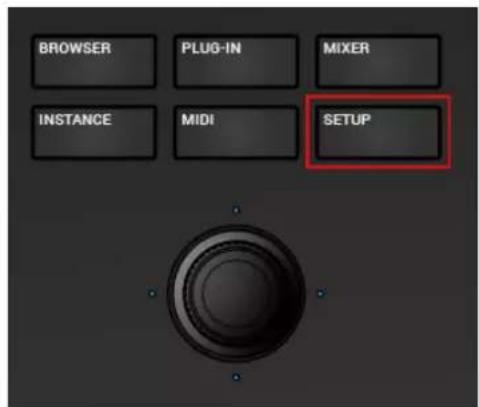
The following information and settings are available:
- Firmware: The version number of the firmware installed on the keyboard.
-
Serial Nr.: The hardware serial number of the keyboard.
-
Velocity / SCALING: Lets you adjust the velocity response curve of the keyed. Use the Soft 3, Soft 2, Soft 1 settings to compensate for gentle playing (velocity response is more sensitive), and the Hard 1, Hard 2, Hard 3 settings to compensate for strong playing (velocity response is insensitive).
- Displays / BRIGHTNESS: Lets you adjust the brightness of the keyboard's displays.
7.7 Loading a Plug-in in Default State
You can load a Plug-in in default state directly from the KOMPLETE KONTROL menu:
In the KOMPLETE KONTROL menu select e.g. Plug-ins > Native Instruments > Massive.
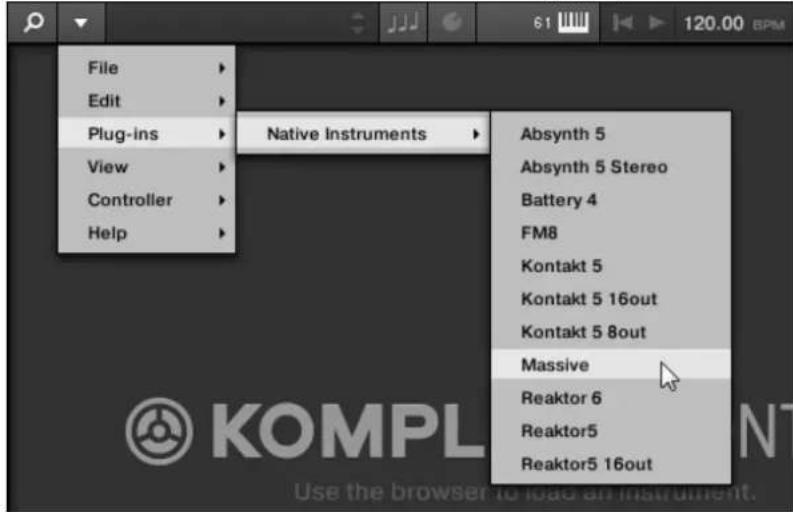
→ The Plug-in is loaded. All parameters are set to their default values.
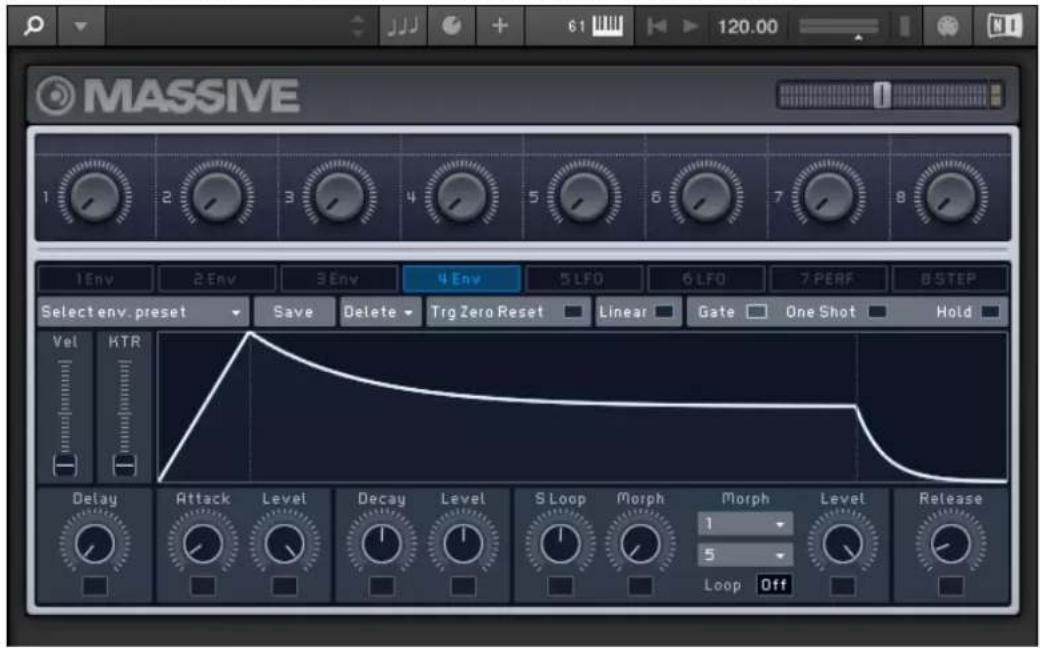

Loading Plug-ins in default state is only possible in the software.
8 MIDI Communication
KOMPLETE KONTROL provides you with flexible MIDI control and host automation capabilities for easy integration with your MIDI environment. In this section you are provided with overall information about MIDI communication and Host automation and you learn how to use the keyboard in MIDI mode and as stand-alone MIDI controller.
Incoming MIDI
KOMPLETE KONTROL and the Instruments you load inside it can be controlled via MIDI and the host (when KOMPLETE KONTROL is loaded as a plug-in):
- Triggering Instruments via MIDI notes: By default, incoming MIDI notes trigger the loaded Instrument and will also be visually reflected by the Light Guide.
- Controlling parameters via host automation: You can control parameters of both KOM-PLETE KONTROL and your loaded Instruments via host automation (when KOM-PLETE KONTROL is loaded as a plug-in).
Receiving MIDI Clock
KOMPLETE KONTROL does not receive MIDI Clock. However, when using KOMPLETE KONTROL as a plug-in, it is automatically synchronized to the host tempo. The tempo display in KOMPLETE KONTROL's header is grayed out and tempo is adjusted in the host.
Outgoing MIDI
You can also send MIDI data from KOMPLETE KONTROL:
- Triggering MIDI instruments and recording MIDI notes: KOMPLETE KONTROL sends MIDI Note, Pitch Bend, and Channel Pressure (aftertouch) messages to the host and to any MIDI application or device.
- Controlling MIDI applications and devices: KOMPLETE KONTROL's MIDI mode allows you to send Control Change and Program Change messages to any MIDI application or device.
- Routing and recording processed MIDI notes: KOMPLETE KONTROL outputs the MIDI notes generated by the Scale engine and the Arpeggiator through the MIDI outputs of the stand-alone application as well as the plug-in. You can route the MIDI notes to other MIDI instruments or record them as a MIDI pattern in the host.

MIDI output is only supported by the stand-alone application as well as the VST and AAX versions of the plug-in. The AU (Audio Unit) version of the plug-in does not support MIDI output.
8.1 Host Automation
When you load KOMPLETE KONTROL as a plug-in in a host, the parameters of the loaded Instrument, the Scale engine, and the Arpeggiator become available for automation from the host.
Available Parameters for Host Automation
All parameters available for automation are found in the Perform panel and the Plug-in panel. Browser controls cannot be automated.
8.1.1 Automation IDs for the Perform Panel
The following automation IDs are reserved for parameters in KOMPLETE KONTROL's Perform panel:
| Automation ID Parameter | |
| 000 Reserved for Instance Recognition and Automatic Focus Follow | |
| 001 Scale On / | Off |
| 002 Root Note (Scale) | |
| 003 Scale Type (Scale) | |
| 004 Key Mode (Scale) | |
| 006 Chord Mode (Scale) | |
| 007 Chord Type (Scale) | |
| 026 Arp On / Off | |
| 027 Mode (Arp) | |
| 028 Type (Arp) | |
| 029 Rate (Arp) | |
| 030 Sequence (Arp) | |
| 031 Swing (Arp) | |
| 032 Octaves (Arp) | |
| 033 Dynamic (Arp) | |
| 034 Gate (Arp) | |
| 035 Retrigger (Arp) | |
| 036 Repeat (Arp) | |
| 037 Offset (Arp) | |
| 038 Inversion (Arp) | |
| 039 Min. Key (Arp) | |
| 040 Max. Key (Arp) | |
| 041 Hold (Arp) | |
8.1.2 Recording Automation
Many hosts require that you have enabled transport record in order to record automation, while others make use of dedicated automation controls. Once the host is ready to record automation, you can start playback and adjust parameters on the KOMPLETE KONTROL keyboard in order to record them.

For detailed information regarding automation recording in the host, refer to its documentation.
Changing the State of an On/Off Switch
To change the state of an on/off switch:
- Click the corresponding button with your computer mouse.
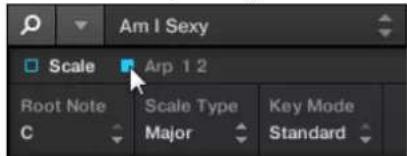
- Turn the knob on the keyboard currently assigned to the corresponding parameter.
Selecting Another Entry from a Drop-Down Menu
To select another entry from a drop-down menu:
- Click the corresponding menu with your computer mouse and select an entry.
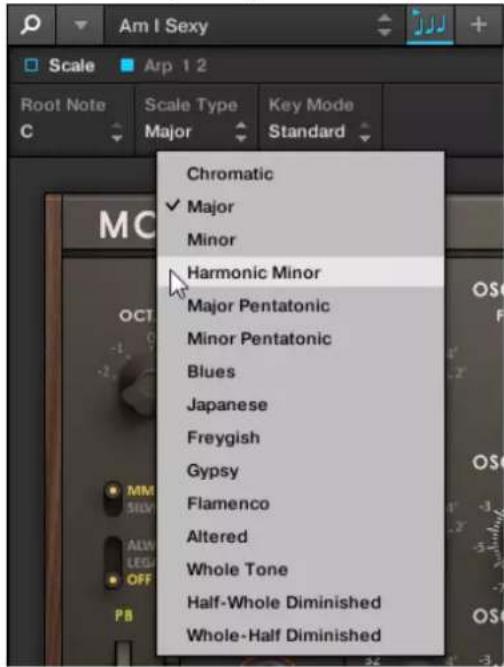
- Turn the knob on the keyboard currently assigned to the corresponding parameter.
Changing the Value of a Drag Control
To change the value of a drag control:
- Click and drag the corresponding drag control with your computer mouse.
- Turn the knob on the keyboard currently assigned to the corresponding parameter.
Some hosts let you handle automation by using automation IDs that are mapped to specific parameters of the plug-in. KOMPLETE KONTROL comes with a predefined list of automation IDs that lets the host find them automatically.
8.2 Using the Keyboard in MIDI Mode
Besides using the KOMPLETE KONTROL keyboard in combination with the KOMPLETE KONTROL software, you can also use it in MIDI mode as a versatile MIDI controller to pilot MIDI applications or devices, both via USB or via 5-pin DIN MIDI connections.
KOMPLETE KONTROL sends MIDI Note, Pitch Bend, and Channel Pressure (aftertouch) messages to trigger MIDI instruments, as well as Control Change and Program Change messages to control any MIDI application or device.
- When you switch on the keyboard and the displays show the message PRESS BROWSE, you are controlling an instance of the KOMPLETE KONTROL software.
- When you switch on the keyboard and the displays show various MIDI CC numbers, the keyboard is in MIDI mode. The keyboard directly launches into MIDI mode when the KOM-PLETE KONTROL software is not running.
Switching to MIDI Mode
To switch the keyboard between controlling the KOMPLETE KONTROL software and MIDI mode:
- Press MIDI on the keyboard.
- To leave MIDI mode, press any button switching to another mode.

When using the KOMPLETE KONTROL plug-in in a supported host, the keyboard automatically switches between controlling the KOMPLETE KONTROL software and MIDI mode, depending on the content of the selected track.
MIDI Assignment
The MIDI mode's versatility is made possible by the MIDI Assignment editor, which allows you to freely define MIDI assignments for the controls on the keyboard. For more information, refer to ↑9, Using the MIDI Assignment Editor.
- Use the Page left / right buttons on the keyboard to switch between Pages you created in the MIDI Assignment editor.
- Use the PRESET up/down buttons on the keyboard to switch between Templates you created in the MIDI Assignment editor.
8.3 Using the Keyboard as Stand-Alone MIDI Controller
If you power up the KOMPLETE KONTROL keyboard without a USB connection (while the power supply is connected), you can use it as a stand-alone MIDI controller by connecting MIDI devices to the 5-pin DIN MIDI sockets on the keyboard's rear panel.
The keypad and the controls on the keyboard send out the following MIDI messages:
| Control El- ement | Message Type | CC# Mode / Type Range / | Values | Control Function |
| Pedal A Con | controller Tip 64 Ring 65 | Gate 0-127 Damper | Pedal On / | Off (Sustain) |
| Pedal B Con | controller 11 - | 0-127 Expression | Controller | |
| Pitch Wheel | Pitch Bend | -- 0-16384 Pitch Bend | ||
| Modulation Wheel | Controller 1 | - 0-127 Modulation Wheel | or Lever | |
| Touch Strip | Controller 1 | 1 Mode: Standard Display: Unipolar LED Mode: Bar | 0-127 Expression | Controller |
| Encoder 1 | Controller 14 | Absolute 0-127 Undefined | ||
| Encoder 2 | Controller 15 | Absolute 0-127 Undefined | ||
| Encoder 3 | Controller 16 | Absolute 0-127 General Purpose | Controller 1 | |
| Encoder 4 | Controller 17 | Absolute 0-127 General Purpose | Controller 2 | |
| Encoder 5 | Controller 18 | Absolute 0-127 General Purpose | Controller 3 | |
| Encoder 6 | Controller 19 | Absolute 0-127 General Purpose | Controller 4 | |
| Encoder 7 | Controller 20 | Absolute 0-127 Undefined | ||
| Encoder 8 | Controller 21 | Absolute 0-127 Undefined | ||
| Button 1 | Controller 112 | Toggle (Action on Down) | Off 0 / On 127 Undefined | |
| Button 2 | Controller 113 | Toggle (Action on Down) | Off 0 / On 127 Undefined | |
| Button 3 | Controller 114 | Toggle (Action on Down) | Off 0 / On 127 Undefined | |
| Button 4 | Controller 115 | Toggle (Action on Down) | Off 0 / On 127 Undefined | |
| Button 5 | Controller 116 | Toggle (Action on Down) | Off 0 / On 127 Undefined | |
| Button 6 | Controller 117 | Toggle (Action on Down) | Off 0 / On 127 Undefined | |
| Button 7 | Controller 118 | Toggle (Action on Down) | Off 0 / On 127 Undefined | |
| Button 8 | Controller 119 | Toggle (Action on Down) | Off 0 / On 127 Undefined |
9 Using the MIDI Assignment Editor
This section guides you through the process of assigning MIDI messages to control elements and creating Key Zones using the MIDI Assignment editor. It also makes you familiar with the mapping system and gives you the reference information of MIDI message types and assignments.

When using the MIDI Assignment editor, all keyboard controls (i.e. navigation, transport, etc.) are blocked.
Whatever you do on the keyboard, the MIDI Assignment editor translates it into a MIDI message that is then sent to your computer via USB connection. This is what the MIDI Assignment editor is all about: mapping human actions to MIDI events.
The MIDI Assignment editor's mapping system is structured in a way that allows you to efficiently organize your assignments. This makes the whole mapping process a lot easier and informs you about what will happen whenever you actuate a control element on the keyboard. The next paragraphs will introduce you to some basic concepts.
Assignable Controls Elements
Assignable control elements are knobs, buttons, keys, pedals, and the Touch Strip. All other controls and buttons are not assignable.
Assignments
An assignment defines which MIDI event is triggered by a particular control element. Available MIDI event types are MIDI messages such as Control Change and Program Change. Every action on a control element is translated into one MIDI event, the corresponding assignment defines the rules of that translation.
Depending on the type of control element (buttons, knobs, keys, pedals, and Touch Strip), the available assignments differ.
Pages
You can have multiple assignments, organized within Pages. A Page contains eight knobs and eight buttons, and corresponds to the hardware. One Page can be selected and loaded at a time. You can have up to four Pages which can be directly selected in the MIDI Assignment editor and from the keyboard.
When you select another Page, all assignments for the control elements in the Page area are updated accordingly.
MIDI Templates
A MIDI Template holds a mapping configuration for knobs, buttons, and keys on the keyboard, including all Pages that might exist. One MIDI Template can be selected at a time. Switching between different MIDI Templates can be used, for example, to address different applications on your computer or different MIDI instruments.

The configuration of the Touch Strips and the Pedals are saved globally and not per Template. This means all settings made under TOUCHSTRIP and PEDALS remain the same when switching between Templates.
9.2 Opening the MIDI Assignment Editor
You can open the MIDI Assignment editor with the MIDI Assignment editor button.
▶ Click on the MIDI Assignment editor button in the Header.
→ The MIDI Assignment editor opens. Now you have access to all the settings related to the keyboard's MIDI mode.

The MIDI Assignment editor button is only visible when the KOMPLETE KONTROL S-Series keyboard is connected to your computer and switched on.
9.3 Assigning MIDI Messages to Control Elements
This tutorial covers the workflow of assigning MIDI messages to the knobs, buttons, pedals, and the Touch Strip. If you intend to create new Key Zones, refer to section ↑9.6, Creating Key Zones.
In order to assign MIDI messages to control elements:
- Click on the MIDI Assignment editor button to open the MIDI Assignment editor.
- Select a MIDI Template in the Templates pane.
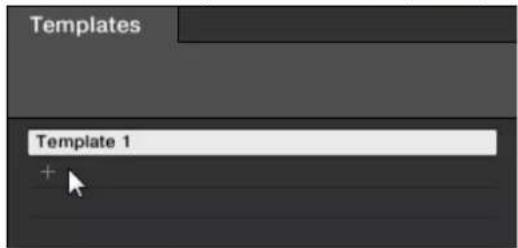
- Select the type of control element.

- Select the control element you want to assign a MIDI message to.
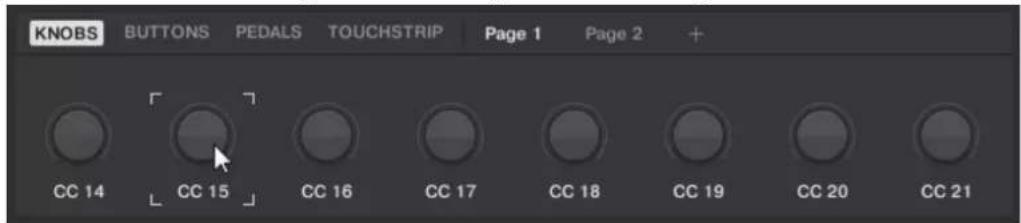
- Select the MIDI message using the drop-down menus and options in the Definition area.
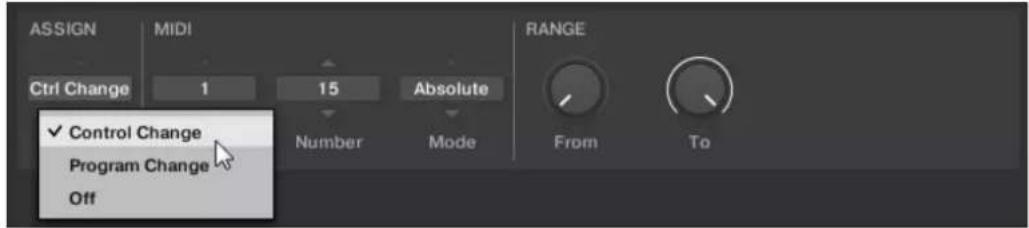
⇒ The available drop-down menus and options in the Definition area vary depending on the selected type of control element as well as from the selections in the Definition area itself.
- If required select or create another page for making multiple assignments.
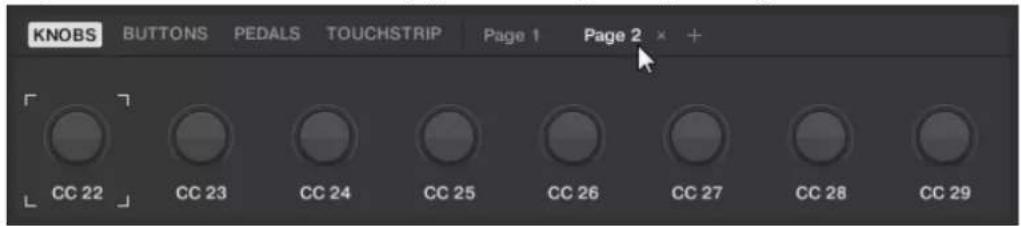
- When you have finished assigning MIDI messages, close the MIDI Assignment editor.
→ Your edits are saved to the MIDI Template.
For more information on MIDI message types and assignments, refer to ↑9.7, MIDI Message Types and Assignments.
Renaming Control Elements
As the default names do not reveal which parameters they are assigned to, you can rename them:
- Double-click the name of the control element.
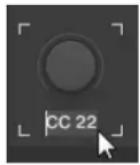
- Enter the desired name with a maximum length of seven characters.
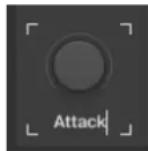
- Press the enter key to confirm.
→ The name of the control element has changed.
9.4 Creating a New MIDI Template
When using the keyboard in different situations, e.g., in a studio or live on stage, you can create a different MIDI Template for each setup.
To create a new Template:
- In the Templates pane click the + icon.
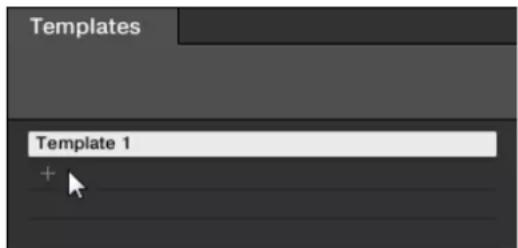
⇒ The Add Template dialog appears.
- Enter a name for the new MIDI Template.
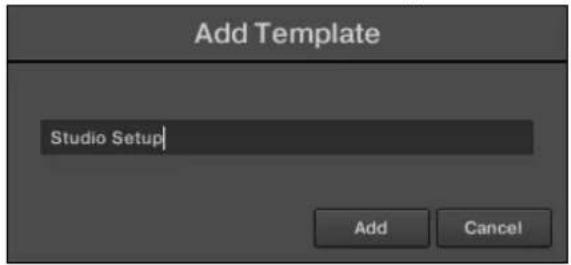
- Click Add.
→ The new MIDI Template is created. The MIDI Templates are arranged in alphabetical order.
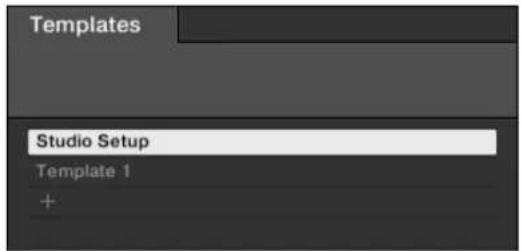
9.5 Renaming MIDI Templates
If you want to change the name of an existing MIDI Template, proceed as follows:
- Right-click the MIDI Template and select Rename from the context menu.
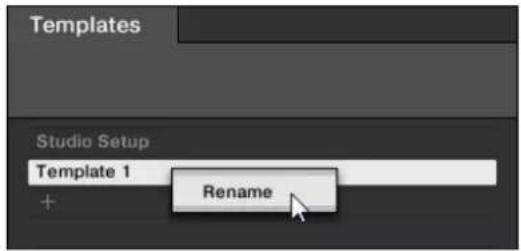
⇒ The Rename Template dialog with the current MIDI Template name appears.
- Enter the desired MIDI Template name.
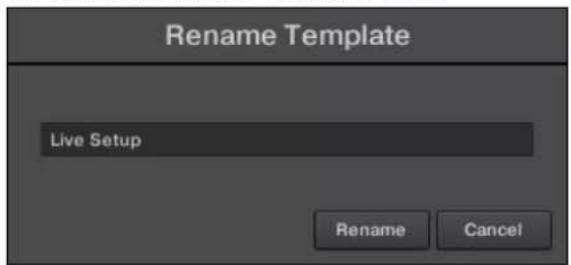
- Click Rename to confirm.
→ The MIDI Template name has changed.
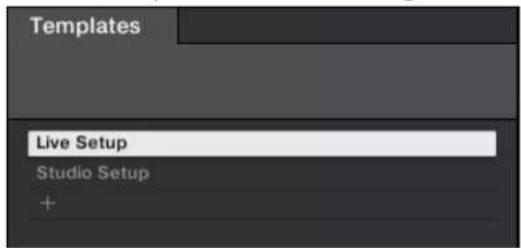
9.6 Creating Key Zones
The MIDI Assignment editor allows you to manage Key Zones. Key Zones can be used to assign different MIDI channels to certain keys. In this section you learn about Key Zones, how you can create them, how you select another MIDI channel and set the Light Guide color, and how you transpose key pitches.
9.6.1 About Key Zones
A Key Zone is a group of contiguous keys to which you can assign a particular MIDI channel. Key Zones are a flexible and handy tool that allows you to quickly set up advanced key mappings.
- You do not have to assign each key individually. Instead, assigning a key range to the Key Zone will automatically set the correct assignments to all included keys.
- Each Key Zone can have its own MIDI channel, and color setting. These settings are applied to all of the keys in a Key Zone.
- Key Zones span the entire range of MIDI notes. You can have between 1 and 16 Key Zones. Key Zones cannot overlap (i.e. each key can only belong to one single Key Zone), and they cannot have gaps between them (i.e. each key must belong to a Key Zone). You can disable particular Key Zones: in this case their keys will not send any MIDI Note message (dead keys).
- Key Zone assignments are valid per MIDI Template.
Key Zones in the KEYS Tab
At the top of the KEYS tab, the depicted Keybed area allows you to define and manage your Key Zones over the full range of notes:
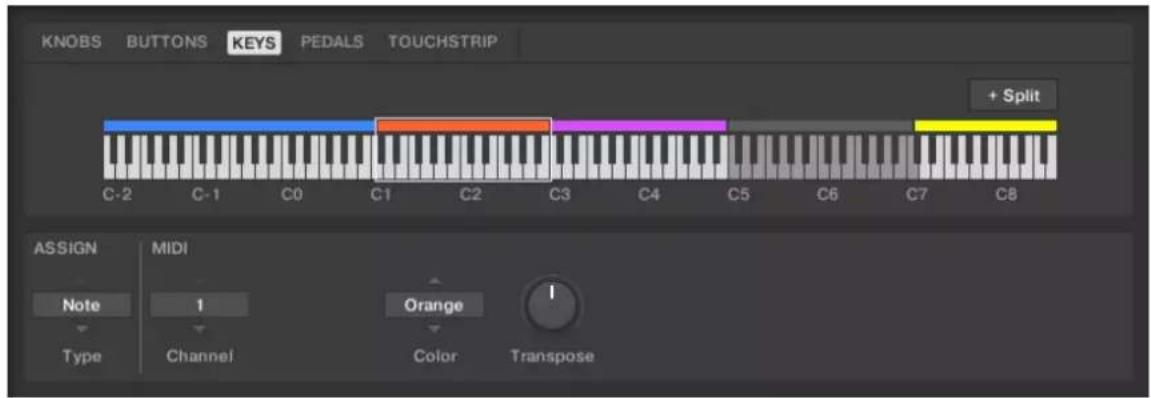
The Keybed area lets you easily create and modify your Key Zones.
The Keybed area shows 128 keys along with a few additional elements:
- Each existing Key Zone is shown with its color and borders on the keyed.
- The octave markers under the keybed indicates the beginning of each octave.
- The white frame indicates the selected Key Zone.
- Disabled Key Zones are grayed out.
9.6.2 Splitting a Key Zone
The process of creating a new Key Zone is straight-forward, and can be achieved by selecting and splitting an existing Key Zone.
In order to split a Key Zone:
- Select an existing Key Zone. If there is only one Key Zone it is always selected by default.

- Click the +Split button to the right above the keybed area.

→ The Key Zone is split into two halves. The right half appears in a different color but has the same MIDI channel of the left half.


If you already have 16 Key Zones, the +Split button is disabled.

If the selected Key Zone is only one-key-wide, the +Split button is disabled.
9.6.3 Selecting another MIDI Channel for a Key Zone
After creating a new Key Zone you can select another MIDI channel for the Key Zone so that it can be used to control another instrument.
To select another MIDI channel for a Key Zone:
- Select the Key Zone for which you want to select another MIDI channel.

- Select a MIDI channel from the Channel drop-down menu.
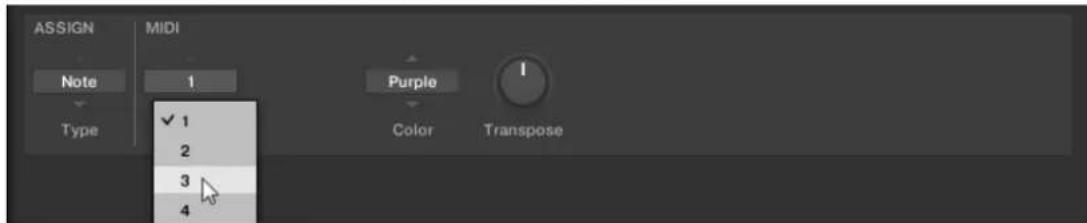
→ The Key Zone's MIDI channel has changed.
9.6.4 Recoloring Key Zone
When splitting Key Zones the newly created Key Zone automatically gets one of 16 different colors assigned. If you want to recolor a Key Zone, proceed as follows:
- Select the Key Zone you want to recolor.

- Select a color from the Color drop-down menu.
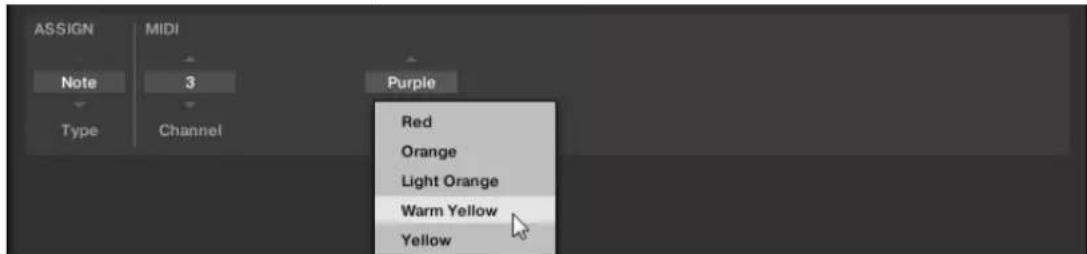
→ The Key Zone's color has changed and is reflected by the Light Guide. Repeat the aforementioned steps if you want to change the colors for other Key Zones.

9.6.5 Resizing Key Zones
To resize a Key Zone:
- Select the Key Zone you want to resize.

- Hover the mouse over the selected Key Zone's lower or upper border.

- Click and drag your mouse horizontally to the position of your liking and release.

→ The Key Zone is resized. Since Key Zones cannot overlap, dragging the border of a Key Zone simultaneously resizes the neighboring Key Zone so that both Key Zones stay “in contact”.
When resizing Key Zones the lower border of the leftmost Key Zone as well as the upper border of the rightmost Key Zone are fixed and cannot be dragged. You cannot resize a Key Zone to less than one key, this is also true for the neighboring Key Zone that is simultaneously resized.
9.6.6 Disabling a Key Zone
Disabling a Key Zone disables the assignments for all included keys: from then on, these keys will no longer trigger any notes. For example, this can be useful when you want to avoid triggering unwanted MIDI messages by mistake as you play keys in the neighboring Key Zones, or simply to have a clean, better organized keypad.
To disable a Key Zone:
- Select the Key Zone you want to disable.

- Select the value Off from the Type drop-down menu.
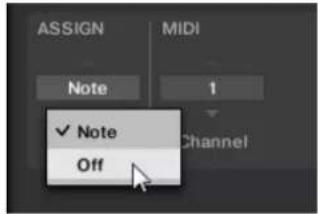
→ The Key Zone and its MIDI assignment are disabled and grayed out in the Keybed area. Repeat the aforementioned steps if you want to disable other Key Zones.
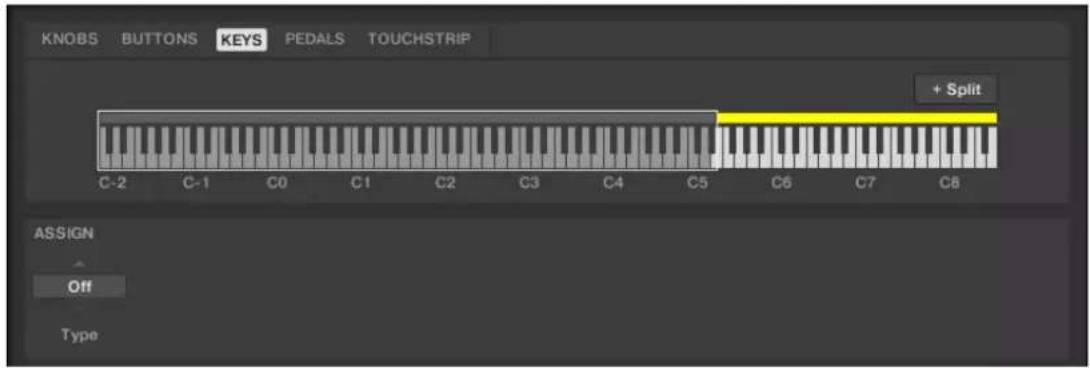

On the Light Guide of your KOMPLETE KONTROL S-Series keyboard, a disabled Key Zone will be indicated by unlit LEDs for the corresponding keys.
Re-enabling Key Zones
You can re-enable a Key Zone at any time.
To re-enable a Key Zone:
- Select the Key Zone you want to re-enable.
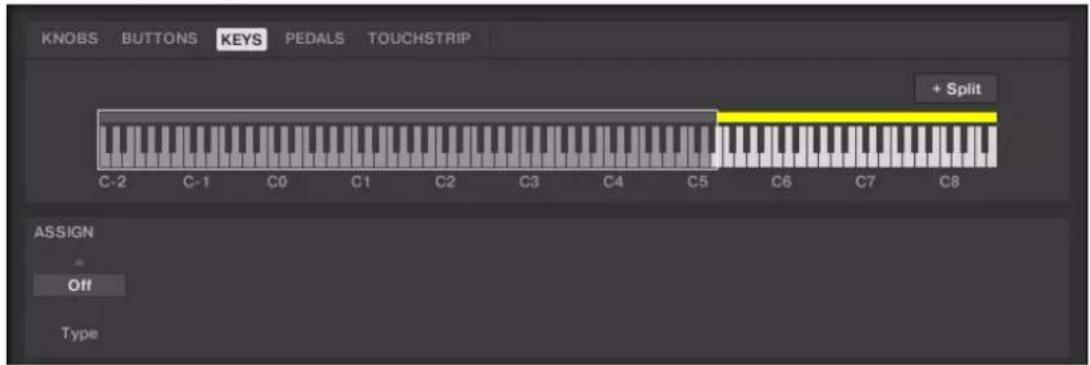
- Select the value Note from the Type drop-down menu.
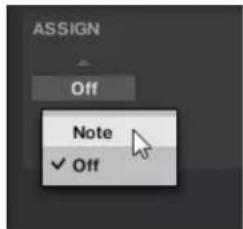
→ The Key Zone with its MIDI assignment is re-enabled. Repeat the aforementioned steps if you want to re-enable other Key Zones.
9.6.7 Deleting a Key Zone
You can delete a Key Zone as follows:
- Hover the mouse over the Key Zone you want to delete.
- Click the little cross icon that appears when hovering the mouse over a Key Zone.

→ The Key Zone is deleted and its keys are incorporated into the next Key Zone to the left. If you delete the leftmost Key Zone, its keys are incorporated into the next Key Zone to its right.


If you only have one Key Zone set up, the cross icon is not available when hovering the mouse the Key Zone.
9.6.8 Transposing Key Zones
By transposing a Key Zone you raise or lower the MIDI notes assigned to all keys included in a Key Zone by the same interval, for example, this is useful if you want the keys in separate Key Zones to trigger the same MIDI notes. Using the Transpose knob you can transpose any Key Zone within the range from -127 to 127 MIDI notes. The Transpose knob is set to the default value 0 if a Key Zone is not transposed.
To transpose a Key Zone, proceed as follows:
- Select the Key Zone you want to transpose.
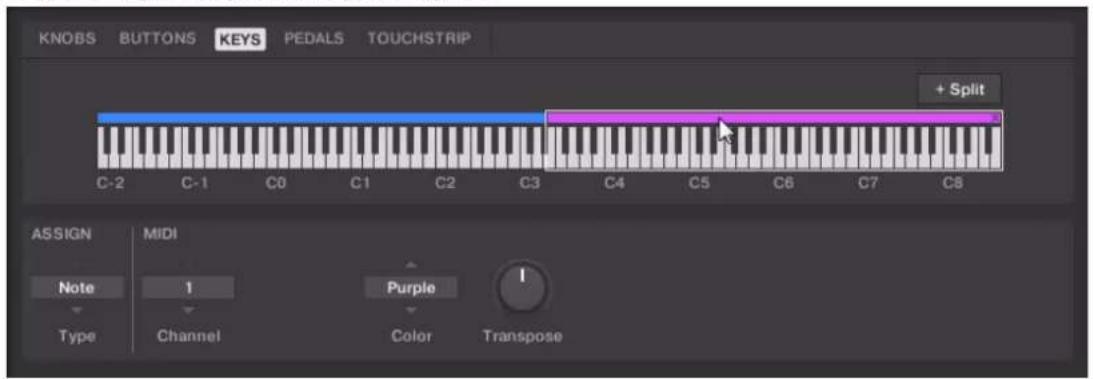
- Turn the Transpose knob to raise or lower the MIDI notes by the desired value.
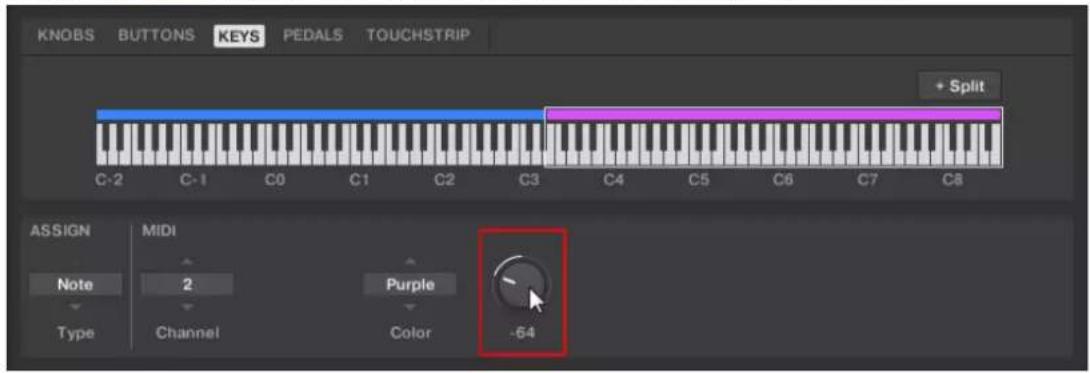
→ The Key Zone is transposed.
When splitting a transposed Key Zone, the original transpose value is also applied to the newly created Key Zone.
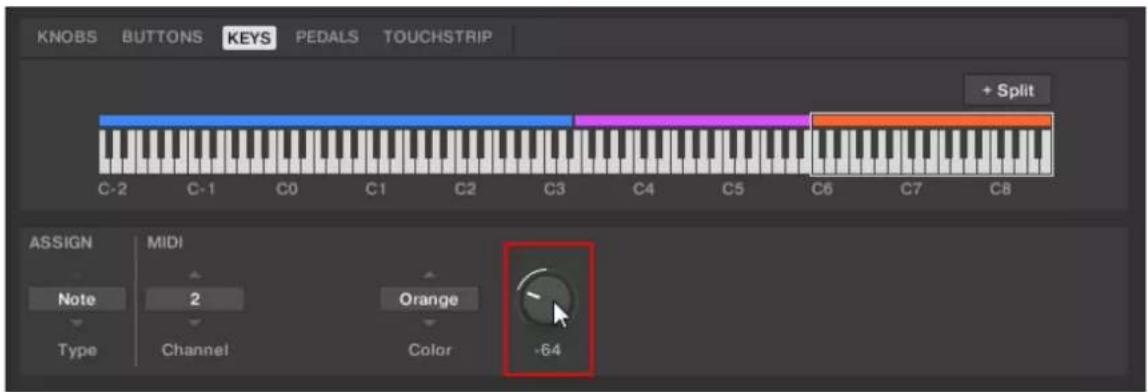
The original transpose value also is applied to the newly created Key Zone.

If you transpose one-key wide Key Zones, you can specify the pitch for one-shot samples.
9.7 MIDI Message Types and Assignments
In this section you find reference information about the MIDI message types provided in the Type menu and about the several assignments for control elements and for Key Zones.
9.7.1 MIDI Message Types – Type Menu
For all control elements, the assignment definition starts with the same menu: the Type menu.
The Type drop-down menu specifies the type of MIDI message that has to be sent upon action on this control element. Depending on the type of control element, the entries in this menu will differ (for example, sending a “play” command from a knob wouldn’t make much sense).
All other parameters displayed in the Definition area depend both on the type of control element that you are working on, and on the type of MIDI message selected in this Type menu.
Below is a list of all possible MIDI message types to be found in the Type menu.
- Control Change: Sends MIDI Control Change messages on a specific MIDI channel set by the Channel parameter (range from 1 to 16, 1 by default). This message changes the value of a specific continuous controller of the MIDI destination — controlling for example some effect's depth in your music application. The continuous controller (CC) number is specified via the Number parameter (range from 0 to 127). The values to be sent for that controller are specified in various ways, depending on the type of the selected control element (see next sections).
- Program Change: Sends MIDI Program Change messages on a specific MIDI channel set by the Channel parameter (range from 1 to 16, 1 by default). This message switches to another program (or patch, preset...) of the MIDI destination. The program number to be sent can be specified in various ways, depending on the type of the selected control element (see next sections).
-
Note: Sends MIDI Note On/Off messages on a specific MIDI channel set by the Channel parameter (range from 1 to 16, 1 by default). These messages start and stop MIDI notes specified by the Note parameter (range from C-2 to G8), at a velocity set by the Value parameter (range from 0-127).
-
Pitchbend: Sends MIDI pitchbend messages on a specific MIDI channel set by the Channel parameter (range from 1 to 16, 1 by default). This message changes the pitch of the MIDI notes sent on the same MIDI channel. Depending on the MIDI destination, it can also be used to control other parameters.
- Off: Deactivates MIDI for the control element. Select this entry to disable the control element or action. The control element/action does not send any MIDI message, hence no parameter is displayed.
9.7.2 Assignments for Knobs
For the knobs, the Type menu offers the entries Control Change and Program Change. Depending on the selected entry, a different set of additional parameters is available:
| Type Mode RANGE Number Step | ||||
| Control Change Absolute From 0-126 / To | 1-127 | 0-127 | ||
| Relative -32 to 31 | ||||
| Relative (Offset) | -32 to 31 | |||
| Program Change | From 0-126 / To 1-127 | |||
Mode Menu Values for Knobs
For the type Control Change, a Mode menu allows you to select between three operating modes:
- Absolute: In this mode the control element sends absolute values. The From, To, and Resolution parameters are the same as for the other message types (see above).
-
Relative: In this mode the sent message is in a +1/-1 fashion — actually 1/127, which is then understood by the target software as +1/-1 in that case. This allows the control element to set the new Control Change value relative to its current value. Two parameters are available:
-
Step: Defines the increment to use. Increase the Step value to trigger greater jumps in the target parameter value. If you choose a negative value for Step, the control will be inverted.
- Resolution: Adjusts the sensitivity of the control element to your actions. At high Resolution values, a little movement of the control element will be enough to trigger the message. At lower Resolution values, you will have to move it more frankly to trigger the message.
- Relative (Offset): This mode is similar to the Relative mode explained above, with the difference that here the values sent for the “+1” and “-1” messages are 65 and 63, respectively — in other terms, they are centered around 64 instead of 0. This is well suited for some particular software implementations. As in Relative mode, a Step parameter defines the increment to use, and a Resolution parameter adjusts the sensitivity of the control element to your actions.
9.7.3 Assignments for Buttons
For the buttons, the Type menu offers the entries Control Change, Program Change, and Note. Depending on the selected entry, a different set of additional parameters is available:
| Type Mode Value Number Note | ||||
| Control Change | Toggle | Off/On 0-127 | 0-127 | |
| Trigger 0 - 127 | ||||
| Program Change Toggle Off/On 0-127 | ||||
| Trigger 0 - 127 | ||||
| Note Toggle 0 - 127 C-2 – G8 | ||||
| Gate | 0 - 127 C-2 – G8 | |||
Mode Menu Values for Buttons
For the buttons control elements listed in the above table, and only for some of the MIDI message types available for these control elements, you can choose from different behaviors for the way the data is sent. This is controlled by the Mode menu. This menu can have up to four entries, depending on the message type that you have selected in the Type menu. Here is the list of all possible entries:
- Toggle: In this mode, the control element has two states, on and off. When you press once, it switches to the on state — when you press again, it switches to the off state. For instance, this can be useful for enabling and disabling an effect and check how it affects the original sound. In this mode, there are two VALUE settings: Off defines the value for the off state (from 0 to 127, 0 by default), and On defines the value for the on state (0 to 127, 127 by default). For the Note message type, since the off state is predefined (it's the MIDI Note Off message), you find instead a single VALUE setting defining the velocity of the MIDI Note On message.
- Trigger: In this mode, only one message is sent when you hit the control element. For instance, this can be useful for switching to another program (preset, patch...) or for triggering one-shot samples (e.g. drum sounds or any other envelope-controlled sounds). In this mode, you thus find only one VALUE setting, defining the value to be sent when you hit the control element. It goes from 0 to 127 (127 by default).
- Gate: In this mode, which is only available for the Note message type, the control element sends MIDI Note messages. When you press a control element, it sends a MIDI Note On message — when you release the control element, it sends a MIDI Note Off message. For instance, this can be useful to temporarily enable an effect while playing. Since the off state is predefined (it's the MIDI Note Off message), you find instead a single VALUE setting defining the velocity of the MIDI Note On message.
9.7.4 Assignments for Key Zones
The assignments described here are valid for the Key Zones.
Type
For Key Zones, the Type menu offers the following entries: Note and Off.
- Note: Sends MIDI Note On/Off messages. These messages are sent over a specific MIDI channel set by the Channel parameter. It tells your target to play/stop the note corresponding to the key you press/release on your keyboard.
- Off: Disables a Key Zone including the MIDI assignment. When a Key Zone gets re-enabled the previous MIDI assignment is recalled.
Channel
The selected value in the Channel menu determines the MIDI channel for the selected Key Zone.
- Values range from 1 to 16.
- Value 1 is always set by default.
Color
The Color setting defines which color should be used in the Light Guide (the LEDs above the keys on your keyboard) for the selected Key Zone:
- Red, Orange, Light Orange, Warm Yellow, Yellow, Lime, Green, Mint, Turquoise, Cyan, Blue, Plum, Violet, Purple, Magenta, and Fuchsia.
Transpose
The Transpose knob lowers or raises MIDI notes of a Key Zone.
- Value range from -127 to 127.
- Value 0 is always set by default.
9.7.5 Assignments for the Touch Strip
For the Touch Strip, the Type menu offers the entries Control Change and Pitchbend. Depending on the selected entry, a different set of additional parameters is available:
| Type Range Number Strength | |||
| Control Change | From 0-126/To 1-127 | 0-127 | |
| Pitchbend 0-100% |

Selecting a Type also changes the behavior of Touch Strip. When Control Change is selected, the Touch Strip can be used like a fader that retains its position even after you have removed your finger. When Pitchbend is selected, the Touch Strip behaves like a spring that returns to zero position after you have removed your finger.
For Control Change, you can set the Range of values that is sent when swiping the Touch Strip, and the Number of the Control Change message. For Pitchbend, you can set the Strength of the Touch Strip's spring behavior. As you increase this value, the Touch Strip returns to the zero position more quickly.

The configuration of the Touch Strips and the Pedals are saved globally and not per Template. This means all settings made under TOUCHSTRIP and PEDALS remain the same when switching between Templates.
9.7.6 Assignments for Pedals (Switch)
For Pedals used as switch, the Type menu offers the entries Control Change and Program Change. Depending on the selected entry, a different set of additional parameters is available:
| Type | Mode Value | Range Value | Number | Step Wrap | ||
| Control Change | Toggle/ Gate | Off/On | 0-127 | 0-127 | ||
| Trigger 0 | - | 127 | 0-127 | |||
| Inc Min/Max | (0-127) | -128 | to 127 On/Off | |||
| Program Change | Toggle/ Gate | Off/On | 0-127 | |||
| Trigger 0 | - | 127 | ||||
| Inc Min/Max | 0-127 | -128 | to 127 On/Off | |||
Mode Menu Values for Pedals (Switch)
For the button-like control elements listed in the above table, and only for some of the MIDI message types available for these control elements, you can choose from different behaviors for the way the data is sent. This is controlled by the Mode menu. This menu can have up to four entries, depending on the message type that you have selected in the Type menu. Here is the list of all possible entries:
- Toggle: In this mode, the control element has two states, On and Off. If you press once, it switches to the On state — if you press again, it switches to the Off state. This can be useful for example for activating some effect, then deactivating it later. This is usually the default mode. In this mode, you find two numeric fields: Off Value defines the value for the
Off state (from 0 to 127, 0 by default), and On Value defines the value for the On state (0 to 127, 127 by default). For the Note message type, since the Off state is predefined (it's the MIDI Note Off message), you find instead a single Value parameter defining the velocity of the MIDI Note On message.
- Gate: This mode is equal to Toggle with the difference that the state is active for the time the Pedal is held depressed. In Toggle mode the state is activated until the next time the Pedal is pressed again.
- Trigger: In this mode, only one message is sent when you hit the control element. There are no On or Off states. For example, this can be useful for switching to another program (preset, patch...) or for triggering one-shot samples (e.g. drum sounds or any other envelope-controlled sounds). In this mode, you thus find only one numeric field called Value, defining the value to be sent when you hit the control element. It goes from 0 to 127 (127 by default).
- Inc: In this mode you can configure the press of a pedal to step through a list of values by choosing the size of the jump (e.g. 1-2-3-4-5, 2-4-6-8-10 or 3-6-9-12-15), and whether or not the values wrap around back to the beginning, or stop when they reach their minimum or maximum.
9.7.7 Assignments for Pedals (Continuous)
For Pedals used as continuous control, the Type menu offers the entries Control Change and Program Change. Depending on the selected entry, a different set of additional parameters is available:
| Type Mode Range Number | |||
| Control Change From | 0-126 / To 1-127 0-127 | ||
| Program Change From | 0-126 / To 1-127 |
For Control Change, you can set the Range of values that is sent when pressing the pedal, and the Number of the Control Change message. For Program Change, you can set the Range of values that is sent when pressing the pedal.
10 Host Integration
When using advanced host integration, the KOMPLETE KONTROL keyboard becomes the centerpiece of your studio setup. You can use it to control not only the Instrument or Effect loaded in KOMPLETE KONTROL but also core functionality of supported hosts.

Before you can make use of advanced host integration you need to set it up first. For more information, refer to 4.3 , Setting up Host Integration.
Advanced integration of KOMPLETE KONTROL is available in the following hosts:
- MASCHINE 2
- Apple Logic Pro X
- Apple GarageBand
- Ableton Live 9
• Steinberg Cubase Artist 8.5/9/9.5 - Steinberg Cubase Pro 8.5/9/9.5
- Steinberg Nuendo 7/8
10.1 Integration with MASCHINE
If you own MASCHINE, you can control many of MASCHINE's functions directly from the KOMPLETE KONTROL keyboard. Furthermore, the Arrange buttons located at the left of the keyboard's displays give you access to certain modes and views of the MASCHINE software that makes the integration of KOMPLETE KONTROL into MASCHINE straight-forward. This section gives you an overview of the basic controls functions as well as of the advanced integration controls using the Arrange buttons.
In order to connect the KOMPLETE KONTROL keyboard to the MASCHINE software:
▶ Click on the Keyboard icon in the Header.
Connect to MASCHINE using the Keyboard
- Press INSTANCE on the keyboard.
- Select the MASCHINE instance shown in the display.
- Press Button 8 (SELECT) to connect the keyboard to MASCHINE.
10.1.1 Basic Control Functions
The available basic control functions of MASCHINE mapped to the keyboard's controls are grouped in the tables below.
TRANSPORT Control
| Action in MASCHINE Button on KOMPLETE KONTROL S-Series | |
| Start/stop playback PLAY | |
| Restart playback at the beginning of the Loop Range | SHIFT + PLAY (RESTART) |
| Enable/disable recording REC (COUNT-IN) | |
| Record with count-in SHIFT + REC (COUNT-IN) | |
| Stop playback/recording STOP | |
| Enable/disable the metronome METRO | |
| Adjust Tempo TEMPO + Knob 1 | |
| Enable/disable Loop LOOP | |
PERFORM Control
| Action in MASCHINE Button on KOMPLETE KONTROL S-Series | |
| Enable/disable Scale engine for selected Group | SCALE (Edit) |
| Enable/disable Arpeggiator for selected Group | ARP (Edit) |
| Edit Scale engine for selected Group | SHIFT + SCALE (Edit) |
| Edit Arpeggiator for selected Group | SHIFT + ARP (Edit) |
| Display quantization settings QUANTIZE | |
| Enable/disable quantization grid QUANTIZE + Knob 1 | |
| Adjust quantization value QUANTIZE + Knob 2 | |
| Enable/disable automation AUTO | |
| Undo action UNDO (Redo) | |
| Redo action SHIFT + UNDO (Redo) | |
Navigation
| Action in MASCHINE | Button on KOMPLETE KONTROL S-Series |
| Select previous Preset file PRESET Up | |
| Select next Preset file PRESET Down | |
| Select previous Plug-in page Page Left | |
| Select next Plug-in page Page Right |
Mode Buttons
| Action in MASCHINE Button on KOMPLETE KONTROL S-Series | |
| Open Browser BROWSER | |
| Open Plug-in view PLUG-IN | |
| Open Mix mode MIXER | |
| Switch between MASCHINE and KOMPLETE KONTROL instances | INSTANCE |
| Enter MIDI Mode MIDI | |
| Display hardware serial number and firmware version, and change display brightness | SETUP |
10.1.2 Advanced Integration Control Functions
The advanced integration controls using the Arrange buttons located to the left of the KOMPLETE KONTROL keyboard's displays and the MIXER button are listed below.
Ideas View
When you press SCENE on the KOMPLETE KONTROL S-Series, you are presented with the Ideas view in the displays. This view is identical to the Ideas view of the MASCHINE software and gives you instant control over Scenes and Patterns.
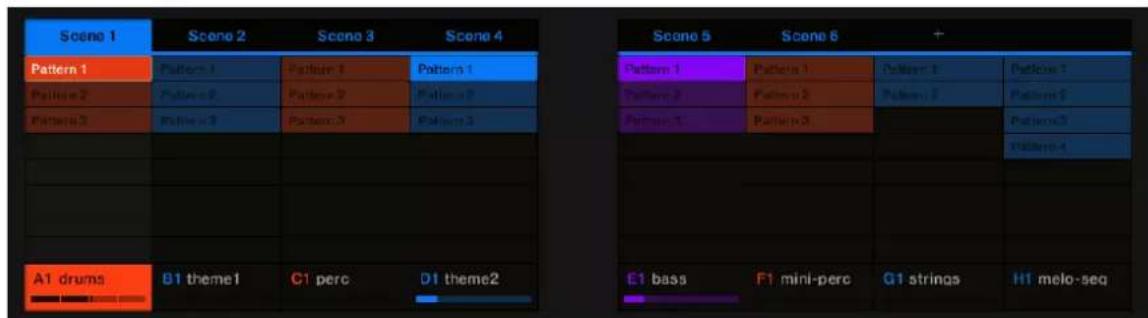
MASCHINE's Ideas view on the KOMPLETE KONTROL keyboard.
In the Ideas view you can perform the following actions:
| Action in MASCHINE Button on KOMPLETE KONTROL S-Series | |
| Select Scene or create new Scene, respectively | Button 1–8 |
| Select another Pattern in Scene and select the corresponding Group in touch | Knob 1–8 |
| Insert copy of selected Scene SHIFT + Button 4 (DUPLICATE) | |
| Insert empty Scene SHIFT + Button 5 (INSERT) | |
| Delete selected Scene SHIFT + Button 6 (DELETE) | |
| When enabled, the next Scene that is selected will be forced to play from start | SHIFT + Button 8 (RETRIGGER) |
| Delete selected Pattern CLEAR | |
Pattern View
When you press PATTERN on the keyboard, you are presented with the Pattern view in the displays. The Pattern view is the recommended view for recording.
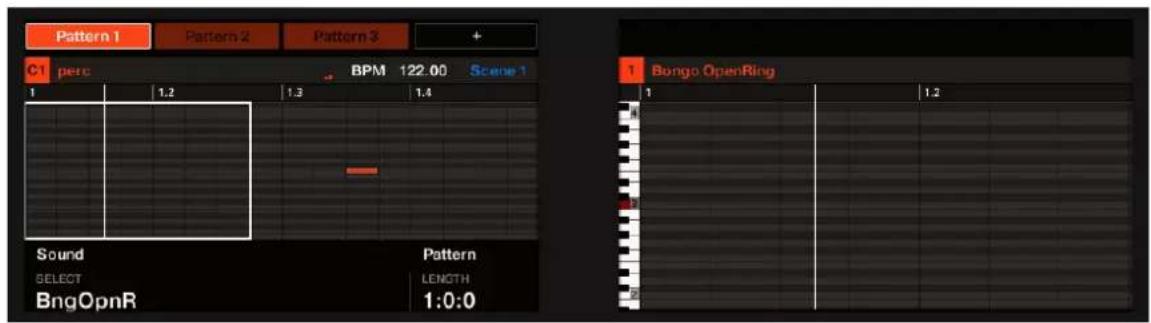
MASCHINE's Pattern view on the KOMPLETE KONTROL keyboard.
| Action in MASCHINE Button on KOMPLETE KONTROL S-Series | |
| Select Pattern or create new Pattern for the selected Scene | Button 1–8 |
| Select another Sound in Pattern Knob 1 | |
| Select another Pattern Turn 4-D encoder or move 4-D encoder up or down | |
| Select another Group Move 4-D encoder to the left or to the right | |
| Double Pattern length SHIFT + Button 3 (DOUBLE) | |
| Insert copy of selected Pattern SHIFT + Button 4 (DUPLICATE) | |
| Insert empty Pattern SHIFT + Button 5 (INSERT) | |
| Delete selected Pattern SHIFT + Button 6 (DELETE) | |
| Adjust Pattern length Knob 4 | |
| Zoom in or zoom out the Pattern view Knob 5 | |
| Horizontally move visible area in the displays Knob 6 | |
| Vertically move the visible area of the Pattern in the displays, if notes are residing out of the visible area | Knob 7 |
| Delete Pattern content CLEAR | |
TRACK View
When you press and hold TRACK on the keyboard, you are presented with the Track view in the displays. The Track view is available from every view and can be used for quickly selecting Groups and Sounds. In other words, it works like a shortcut page. The Track view stays visible as long as the TRACK button is depressed.
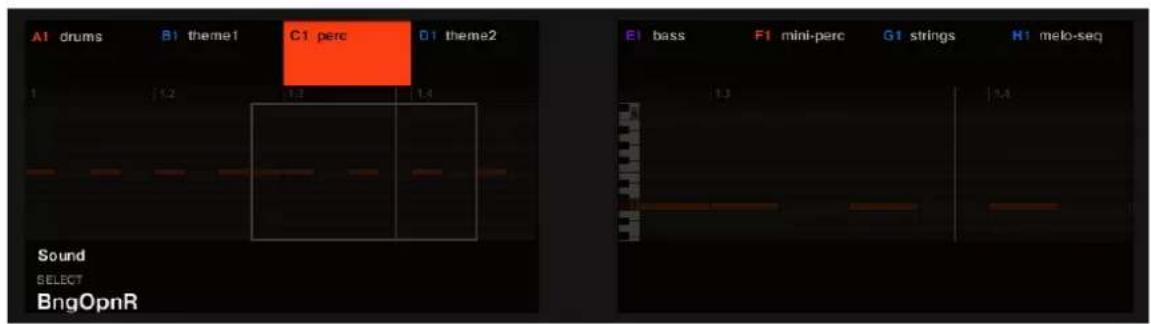
Track view on the KOMPLETE KONTROL keyboard.
In the Track view you can perform the following actions:
| Action in MASCHINE Button on KOMPLETE KONTROL S-Series | |
| Jump to another Group TRACK + Button 1–8 | |
| Select another Sound of that Group TRACK + Knob 1–8 | |
| Select the Group in the previous/next Scene TRACK + move 4-D encoder to the left or to the right | |
| Browse and select another Sound in selected Group | TRACK + turn 4-D encoder |
| Delete selected Group CLEAR | |
Mix Mode
When you press MIXER on the keyboard, you are presented with the Mix mode in the displays. The Mix mode displays eight of 16 channel strips with Sounds and Groups. The further eight Sounds can be displayed by pressing the Page buttons.
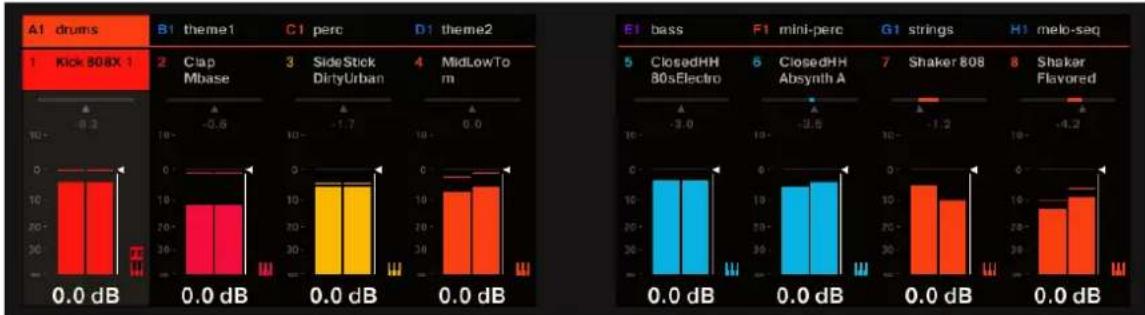
bar
| Feature | Group | Value | | :--- | :--- | :--- | | Kick 808X 1 | A1 drums | -0.3 | | | | | | | B1 theme1 | | | | C1 perc | | | | D1 theme2 | | | | | | | | | | | | | | | | | | | | | | | | | | | | | | | | | | | | | | | | | | | | | | | | | | | | | | | | | | | | | -1.7 | | | | | | | | | | | | | | | | | | | | | | | | | | | | | | | | | | | | | | | | | | | | | | | | | | | | | | | | | | | | | | | | | | | | | | | | | | | | | | | | | | | | | | | | | | | | | | | | | | | | | | | | | | | | | | | | | | | | | | | | | | | | | | | | | | | | | | | | | | | | | | | | | | | | | | | | | | | | | | | | | | | | | | | | | | | | K1 drums (0.0 dB) | 0.0 | | | | 0.0 | | | | 0.0 | | | | 0.0 | | | | 0.0 | | | | 0.0 | | | | 0.0 | | | | 0.0 | | | | 0.0 | | | | 0.0 | | | | 0.0 | | | K1 drums (0.0 dB) (B1 theme1) | 0.0 | | | | 0.0 | | | | 0.0 | | | | 0.0 | | | | 0.0 | | | | 0.0 | | | | 0.0 | | | | 0.0 | | | | 0.0 | | | | 0.0 | | / melo-seq (B1 themes1) / melo-seq (B1 themes2) / melo-seq (B1 themes3) / melo-seq (B1 themes4) / melo-seq (B1 themes5) / melo-seq (B1 themes6) / melo-seq (B1 themes7) / melo-seq (B1 themes8) / melo-seq (B1 themes9) / melo-seq (B1 themes10) / melo-seq (B1 themes11) / melo-seq (B1 themes12) / melo-seq (B1 themes13) / melo-seq (B1 themes14) / melo-seq (B1 themes15) / melo-seq (B1 themes16) / melo-seq (B1 themes17) / melo-seq (B1 themes18) / melo-seq (B1 themes19) / melo-seq (B1 themes20) / melo-seq (B1 themes21) / melo-seq (B1 themes22) / melo-seq (B1 themes23) / melo-seq (B1 themes24) / melo-seq (B1 themes25) / melo-seq (B1 themes26) / melo-seq (B1 themes27) / melo-seq (B1 themes28) / melo-seq (B1 themes29) / melo-seq (B1 themes30) / melo-seq (B1 themes31) / melo-seq (B1 themes32) / melo-seq (B1 themes33) / melo-seq (B1 themes34) / melo-seq (B1 themes35) / melo-seq (B1 themes36) / melo-seq (B1 themes37) / melo-seq (B1 themes38) / melo-seq (B1 themes39) / melo-seq (B1 themes40) / melo-seq (B1 themes41) / melo-seq (B1 themes42) / melo-seq (B1 themes43) / melo-seq (B1 themes44) / melo-seq (B1 themes45) / melo-seq (B1 themes46) / melo-seq (B1 themes47) / melo-seq (B1 themes48) / melo-seq (B1 themes49) / melo-seq (B1 themes50) / melo-seq (B1 themes51) / melo-seq (B1 themes52) / melo-seq (B1 themes53) / melo-seq (B1 themes54) / melo-seq (B1 themes55) / melo-seq (B1 themes56) / melo-seq (B1 themes57) / melo-seq (B1 themes58) / melo-seq (B1 themes59) / melo-seq (B1 themes60) / melo-seq (B1 themes61) / melo-seq (B1 themes62) / melo-seq (B1 themes63) / melo-seq (B1 themes64) / melo-seq (B1 themes65) / melo-seq (B1 themes66) / melo-seq (B1 themes67) / melo-seq (B1 themes68) / melo-seq (B1 themes69) / melo-seq (B1 themes70) / melo-seq (B1 themes71) / melo-seq (B1 themes72) / melo-seq (B1 themes73) / melo-seq (B1 themes74) / melo-seq (B1 themes75) / melo-seq (B1 themes76) / melo-seq (B1 themes77) / melo-seq (B1 themes78) / melo-seq (B1 themes79) / melo-seq (B1 themes80) // melo-seq (B1 theme4/ B1 theme5/ B1 theme6/ B1 theme7/ B1 theme8/ B1 theme9/ B1 themeA/ B1 themeC/ B1 themeD/ B1 themeE/ B1 themeF/ B1 themeG/ B1 themeH/ B1 themeI/ B1 themeJ/ B1 themeK/ B1 themeL/ B1 themeM/ B1 themeN/ B1 themeO/ B1 themeP/ B1 themeQ/ B1 themeR/ B1 themeS/ B1 themeT/ B1 themeU/ B1 themeV/ B1 themeW/ B1 themeX/ B1 themeY/ B1 themeZ/ B1 themeA/ B1 themeA/ B1 themeA/ B1 themeA/ B1 themeA/ B1 themeA/ B1 themeA/ B1 themeA/ B1 themeA/ B1 themeA/ B1 themeA/ B2 index of the 'b' series in the table above the chart.Mix mode on the KOMPLETE KONTROL keyboard.
In Mix mode you can perform the following actions:
| Action in MASCHINE Button on KOMPLETE KONTROL S-Series | |
| Toggle between volume and panorama control for Knob 1–8 | Press 4-D encoder |
| Set Button 1–8 to control Group mode Move 4- | D encoder up |
| Set Button 1–8 to control Sound mode Move 4- | D encoder down |
| Jump to another Group in Group mode Button 1–8 | |
| Jump to another Sound in Sound mode Button | 1–8 |
| Coarse adjust output volume of the respective Group or Sound | Knob 1-8 |
| Fine adjust output volume of the respective Group or Sound | SHIFT + Knob 1–8 |
| Select previous or next Sound or another Group | Move 4-D encoder to the left or to the right |
| Coarse adjust output volume of selected Group or Sound | Turn 4-D encoder |
| Fine adjust output volume of selected Group or Sound | SHIFT + Turn 4-D encoder |
bar
A1 drums 1 Kick 808X 1 | Category | Value (dB) | | :--- | :--- | | 0.2 | 10 |
bar
| Category | Value | | -------- | ----- | | melo-seq | -4.2 | | Shaker Flavored | 0.0 |Plug-In View
When you press PLUG-IN on the keyboard, you are presented with the Plug-in view in the displays. The Page buttons give access to other pages containing further functions to control the selected Plug-in with the keyboard.
Plug-in view on the KOMPLETE KONTROL keyboard.
In the Plug-in view you can perform the following actions:
| Action in MASCHINE Button on KOMPLETE KONTROL S-Series | |
| Select MASTER channel Button 1 (MASTER) | |
| Select GROUP channel Button 2 (GROUP) | |
| Select SOUND channel Button 3 (SOUND) | |
| Select next or previous Plug-in in Plug-in chain or in Plug-in Browser | Button 5 and 6 |
| Quick browse Preset files for selected Plug-in Button 8 | |
| Select Preset files in Quick browse Push 4-D encoder | |
| Select next or previous parameter page Page Left/Page Right | |
| Adjust parameter values Knob 1–8 | |
| Select another Plug-in in Plug-in chain Move 4-D encoder left/right | |
| Open Plug-in Browser Push 4-D encoder | |
| Select Plug-in Turn 4-D encoder | |
| Insert Plug-in Push 4-D encoder | |
| Delete Plug-in from Plug-in chain CLEAR | |
Key Mode
When you press KEY MODE on the keyboard, you are presented with the Key mode in the displays. When the Key mode is active the Keybed and Light Guide reflect the PADs behavior and PADs colors as of the MASCHINE controller.
Key mode on the KOMPLETE KONTROL keyboard.
10.2 Integration with Apple Logic Pro X and GarageBand
If you own Apple Logic Pro X or GarageBand, you can control many of their functions directly from the KOMPLETE KONTROL keyboard. The available functions mapped to the sections of the keyboard are listed below.
For more information on how to set up Host Integration with Apple Logic Pro X or GarageBand, refer to ↑4.3.1, Setting up Apple Logic Pro X and GarageBand.
Transport Control
| Action in Logic Pro X and GarageBand Button on KOMPLETE KONTROL S-Series | |
| Start playback PLAY (Restart) | |
| Restart playback SHIFT + PLAY (Restart) | |
| Start recording REC (Count-In) | |
| Punch out when recording PLAY (Restart) | |
| Punch in when playing REC (Count-In) | |
| Stop playback/recording at current position STOP | |
| Relocate playhead position to song start when stopped | STOP |
| Scroll playhead position Turn 4-D encoder | |
| Enable/disable count-in | SHIFT + REC (Count-In) |
| Enable/disable metronome METRO | |
| Enable/disable loop mode LOOP | |
| Move Loop by its own length LOOP + turn 4-D encoder | |
| Tap tempo TEMPO | |
Edit Control
| Action in Logic Pro X and GarageBand Button on KOMPLETE KONTROL S-Series | |
| Undo action UNDO (Redo) | |
| Redo action SHIFT + UNDO (Redo) | |
| Quantize to grid value QUANTIZE | |
| Toggle automation between Read mode and Touch mode | AUTO |
| Enable/disable Scale engine SCALE (Edit) | |
| Change Scale engine parameters | SHIFT + SCALE (Edit) |
| Enable/disable Arpeggiator ARP (Edit) | |
Mute and Solo
| Action in Logic Pro X and GarageBand | Button on KOMPLETE KONTROL S-Series |
| Mute/unmute selected Track M | |
| Solo/unsolo selected Track S |
Track Navigation
| Action in Logic Pro X and GarageBand | Button on KOMPLETE KONTROL S-Series |
| Select previous/next track Move 4-D encoder left/right | |
| Select previous/next Region Move 4-D encoder | up/down |
Mixer Controls
| Action in Logic Pro X and GarageBand Button on KOMPLETE KONTROL S-Series | |
| Mute/unmute track M + Button 1–8 | |
| Solo/unsolo track S + Button 1–8 | |
| Jump to track Button 1–8 | |
| Switch Bank Page Left/Page Right | |
| Set Knob 1–8 to control panorama SHIFT + move | 4-D encoder up |
| Set Knob 1–8 to control volume SHIFT + move | 4-D encoder down |
| Select previous Track Move 4-D encoder left | |
| Select next Track Move 4-D encoder right | |
| Coarse adjust panorama/volume for selected track | Knob 1–8 |
| Fine adjust panorama/volume for selected track | SHIFT + Knob 1–8 |
10.3 Integration with Ableton Live
If you own Ableton Live, you can control many of its functions directly from the KOMPLETE KONTROL keyboard. The available functions mapped to the sections of the keyboard are listed below.
For more information on how to set up Host Integration with Ableton Live, refer to 4.3.3 , Setting up Ableton Live (macOS) respectively 4.3.4 , Setting up Ableton Live (Windows).

The following functionality descriptions apply to the default Ableton Live setup. If e.g. different playback settings have been selected the functionality will respect those settings.
Transport Control
| Action in Ableton Live Button on KOMPLETE KONTROL S-Series | |
| Start playback PLAY (Restart) | |
| Start recording REC (Count-In) | |
| Restart playback/recording PLAY (Restart) | |
| Stop playback/recording at current position STOP | |
| Relocate playhead position to song start when stopped | STOP |
| Start Arranger recording | SHIFT + REC (Count-In) |
| Scroll playhead position Turn 4-D encoder | |
| Enable/disable loop mode LOOP | |
| Enable/disable metronome METRO | |
| Tap tempo TEMPO | |
Edit Control
| Action in Ableton Live | Button on KOMPLETE KONTROL S-Series |
| Undo action UNDO (Redo) | |
| Redo action SHIFT + UNDO (Redo) | |
| Quantize to grid value QUANTIZE | |
| Toggle automation for selected Track on/off AUTO | |
| Enable/disable Scale engine SCALE (Edit) | |
| Change Scale engine parameters | SHIFT + SCALE (Edit) |
| Enable/disable Arpeggiator ARP (Edit) | |
| Change Arpeggiator parameters | SHIFT + ARP (Edit) |
Arranger Control
| Action in Ableton Live Button on KOMPLETE KONTROL S-Series | |
| Select previous/next Track Move 4-D encoder left/right | |
| Select previous/next Clip Slot in Track 4-D encoder down/up | |
| Start/stop selected Clip Push 4-D encoder | |
| Mute/unmute selected Track M | |
| Solo/unsolo selected Track S | |
Mixer Control
| Action in Ableton Live | Button on KOMPLETE KONTROL S-Series |
| Mute/unmute Channel M + Button 1–8 | |
| Solo/unsolo Channel S + Button 1–8 | |
| Jump to Track Button 1–8 | |
| Select previous/next Track Move 4-D encoder left/right | |
| Switch Bank Page Left/Page Right | |
| Set Knob 1–8 to control panorama SHIFT + move 4-D encoder up | |
| Set Knob 1–8 to control volume SHIFT + move | 4-D encoder down |
| Show master output volume channel SHIFT + Page Left/Page Right button | |
| Coarse adjust panorama/volume of selected Track | Knob 1–8 |
| Fine adjust panorama/volume for selected Track | SHIFT + Knob 1–8 |
10.4 Integration with Steinberg Cubase and Nuendo
If you own Steinberg Cubase or Nuendo, you can control many of their functions directly from the KOMPLETE KONTROL keyboard. The available functions mapped to the sections of the keyboard are listed below.
For more information on how to set up Host Integration with Cubase/Nuendo, refer to 4.3.2 , Setting up Steinberg Cubase/Nuendo.
Transport Control
| Action in Cubase and Nuendo Button on KOMPLETE KONTROL S-Series | |
| Start playback PLAY (Restart) | |
| Start recording REC (Count-In) | |
| Punch out while recording PLAY (Restart) | |
| Punch in while playing REC (Count-In) | |
| Stop playback/recording at current position STOP | |
| Relocate playhead position to song start when stopped | STOP |
| Scroll playhead position Turn 4-D encoder | |
| Enable/disable count-in | SHIFT + REC (Count-In) |
| Enable/disable metronome METRO | |
| Enable/disable loop mode LOOP | |
| Move loop by its own length LOOP + turn 4-D encoder | |
| Tap tempo TEMPO | |
Editing
| Action in Cubase and Nuendo Button on KOMPLETE KONTROL S-Series | |
| Undo action UNDO (Redo) | |
| Redo action SHIFT + UNDO (Redo) | |
| Set quantize to grid value QUANTIZE | |
| Enable/disable automation write AUTO | |
| Enable/disable Scale engine SCALE (Edit) | |
| Edit Scale engine parameters | SHIFT + SCALE (Edit) |
| Enable/disable Arpeggiator ARP (Edit) | |
| Edit Arpeggiator parameters | SHIFT + ARP (Edit) |
Mute and Solo
| Action in Cubase and Nuendo | Button on KOMPLETE KONTROL S-Series |
| Mute/unmute selected Track M | |
| Solo/unsolo selected Track S |
Track Navigation
| Action in Cubase and Nuendo | Button on KOMPLETE KONTROL S-Series |
| Select previous/next track Move 4-D encoder up/down | |
| Select previous/next Region Move 4-D encoder left/right |
Mixer control
| Action in Cubase and Nuendo Button on KOMPLETE KONTROL S-Series | |
| Mute/unmute track M + Button 1–8 | |
| Solo/unsolo track S + Button 1–8 | |
| Jump to track Button 1–8 | |
| Select previous/next track Move 4-D encoder left/right | |
| Switch Bank Page Left/Page Right | |
| Set Knob 1–8 to control panorama SHIFT + move 4-D encoder up | |
| Set Knob 1–8 to control volume SHIFT + move | 4-D encoder down |
| Coarse adjust Panorama/Volume for selected Track | Knob 1–8 |
| Fine adjust Panorama/Volume for selected Track | SHIFT + Knob 1–8 |
11 Browsing the Library
The Browser is the place where you can find and load Instruments, Effects, and Preset files in KOMPLETE KONTROL as well as organizing your own Preset files. You will at first learn about the Browser basics followed by explaining the browsing workflows. This section details both, the workflows in the software and on the keyboard side by side.
Browsing Effects is identical to Browsing Instruments
This section covers only the workflows for browsing Instruments as the workflows for browsing Effects are identical. The Product Type Instrument or Effect cannot be selected in the Browser directly as this is determined by the Plug-in chain. For more information on Product Types and on switching between Product Types, refer to 11.1.1 , Product Types: Instrument and Effect.
For detailed overview of the Browser elements, refer to 5.2 , Browser.
11.1 Browser Basics
This section describes some general concepts about the Browser.
11.1.1 Product Types: Instrument and Effect
Although the Library contains Instruments and Effects, it is not possible to browse for these two Product Types at the same time. Depending on the selected Plug-in slot the Product Type in the Browser switches either to “Instrument” or “Effect”:
- When you start KOMPLETE KONTROL or when you select the first Plug-in Slot in the Plug-in chain, the Product Type is set to Instrument which is reflected by the respective icon in the Browser.
- Consequently, when you select any other Plug-in slot, the Product Type is set to Effect which is reflected by the respective icon in the Browser.
For more information on the Plug-in chain and usage, refer to 5.5 , Plug-in Chain Panel respectively 12 , Working with Effects.
11.1.2 About the Library and Meta-Information
To organize, find, keep track of, and provide you thousands of Preset files at any time ready for loading, KOMPLETE KONTROL makes use of a Library. The Library contains the factory content of your KOMPLETE Instruments and NKS Instruments, Effects, as well as your own user content.
Tags
To help you find the right Preset file quickly and efficiently, the Library implements various techniques that go far beyond the classic folder structure of your operating system—the usage of tags. For example, each Preset file included in the Library contains tags which describe the Preset file according to following aspects:
- The content type of the Preset file, i.e. whether it originates from a Product's factory library or if it was created by a user.
- The Product where the Preset file come from—this can include, e.g., a hierarchical structure with a Product category, a particular Product, and possibly a Bank of a Product.
- A variable amount of tags used to describe various characteristics of the Preset file, for example, the type of effect, the sonic character, the context in which it is used—in a word, anything that might help you find the file.
Included Preset Files in the Library
The Preset files included in the Library are all KOMPLETE KONTROL-relevant files found in the folders whose paths are listed in the Library page of the Preferences panel.
You can also save the sounds you created in KOMPLETE KONTROL to the User content section of the Library pane.
11.1.3 Browsing the Library vs. Browsing Your Hard Disks
Besides of browsing KOMPLETE KONTROL Library the Browser also allows you to navigate your file system in a classic way. For each way the Browser provides a single pane with its own tools:
- The Library pane allows you to browse the KOMPLETE KONTROL Library. This is the preferred way to search for files meeting particular musical requirements. This pane also allows you to tag your own Preset files to your liking.
- The Files pane allows you to browse your hard disks by using the hierarchical folder structure of your operating system. For example, you can use it to navigate KOMPLETE KONTROL-relevant files that have not been imported into the KOMPLETE KONTROL Library—and you can import them from there!
The Library pane respectively the Files pane can be accessed by clicking the corresponding tab at the top of the Browser.
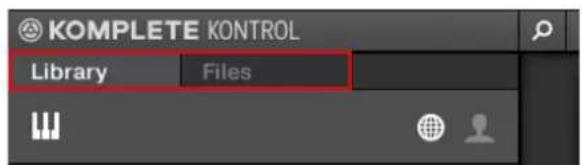
Click the desired tab to show the corresponding pane of the Browser.

Browsing and loading files from the file system using the KOMPLETE KONTROL keyboard is not possible. The Browser called up from the keyboard can only load files that have already been added to the Library. This is why you should always import all your files to the Library and tag them using the software Browser beforehand.
11.2 Opening the Browser
A click on the Browser button (the magnifier symbol) in the header opens and closes the Browser. You can also select View > Browser in the KOMPLETE KONTROL menu.
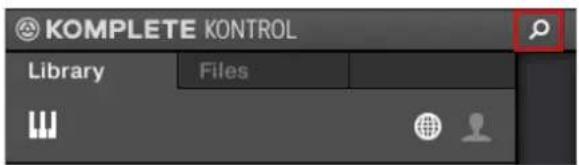
The Browser button in the header.

In stand-alone mode, you can also open/close the Browser from your computer keyboard via the [B] key.
Opening the Browser on the Keyboard
On the Plug-in page when the Plug-in chain is entirely empty the displays show No INSTRUMENT Loaded.
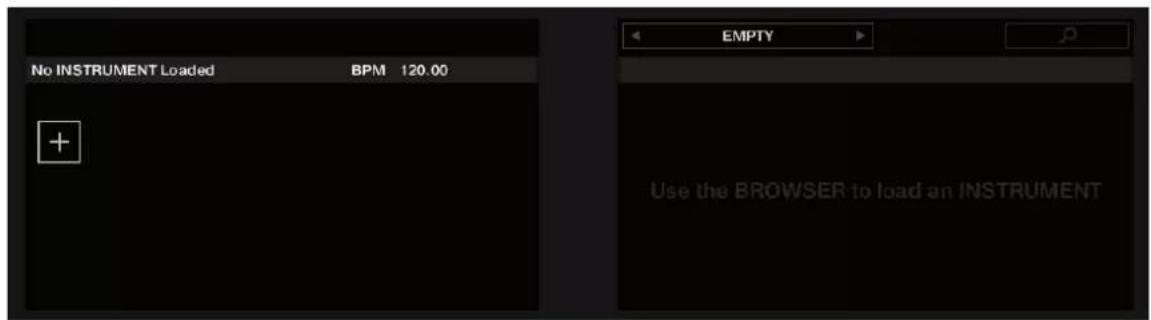
No Instrument loaded
In order to call up the Browser on the keyboard's displays:
▶ Press the BROWSE button.
11.3 Overview of the Browser on the Keyboard
On the displays of the keyboard, the Browser is organized as follows:
![INSTRUMENTS AR 50s Drummer AR 60s Drummer AR 70s Drummer AR 80s Drummer AR Mod. Drum. AR Vint. Drum. All Categories All Products EMPTY [PRIS]1 [PRIS]2 01 LP Ep Org (EI 02) C0 Boom 01 LP Epic Or..I 01) A0 Boom 01 LP Epic Or..I 03) C1 Boom 01 LP Epic Organic B1 Tribull * 01 LP Epic Te..01) A0 LoTom All Types All Modes 16422 Results](/content/2026/05/812765/images/7b044469b9eb50dd0775501d14478e18209ce23bb077086dfcf0af07e741cd10.jpg)
The Browser on the keyboard's displays.
- The left display allows you to narrow your search by selecting the content type (factory or user content), as well as a product category, a product, a bank, and a sub-bank.
- The right display allows to further refine your search by selecting the desired Type (and possibly Mode) tags. It also shows you the corresponding result list.
11.4 Loading Preset Files
When the Browser is open, you can directly load any of the Preset files shown in the Results list.
▶ To load a Preset file, double click the corresponding entry in the Results list.
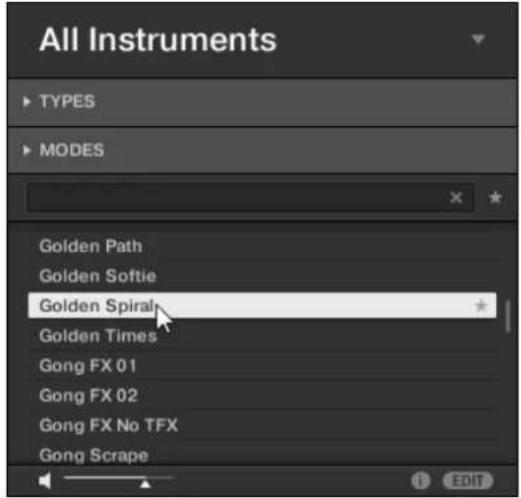
Loading a Preset File Using the Keyboard
To load a Preset file using the Keyboard:
- Open the Browser by pressing the BROWSER button.
- Select a Preset file in the Results list by turning Knob 8 in the Control section or by turning the 4-D encoder.
- Load the selected Preset file by pressing Button 8 in the Control section (LOAD) or by pressing the 4-D encoder.
→ The Preset file is loaded and the keyboard switches to the PLUG-IN page, showing the Product parameters in the Control section.
11.5 Choosing Between Factory Content and User Content
The Content selector shows two icons, one representing the factory content on the left, and one representing the user content on the right:
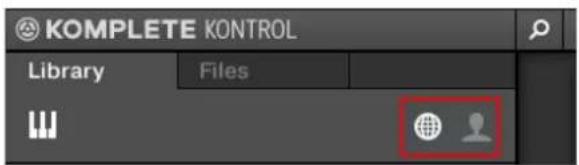
The Content selector.
▶ Click the NI icon to search the factory content, or click the User icon to search the user content.
Choosing Between Factory and User Content on the Keyboard
In order to choose between Factory and User content on the keyboard:
▶ Press Button 4 to choose between Factory content (USER off) and User content (USER on). By default, the Factory content is selected.
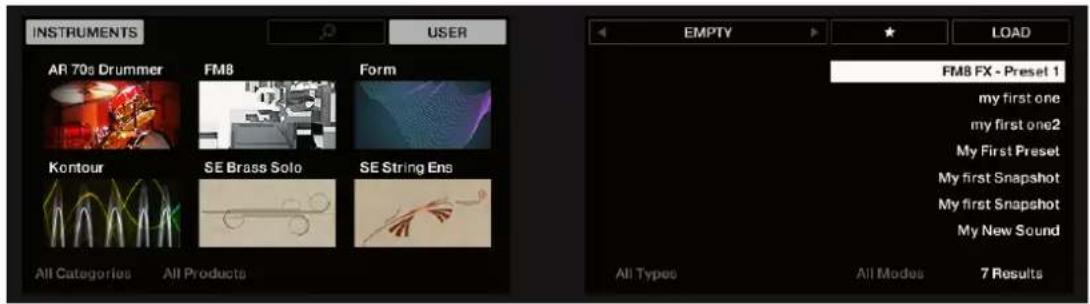
11.6 Loading an Instrument with its default Preset File
The Product selector allows you to limit your search to a certain Product category, a particular Product, or a specific Bank of the Product. You can load a Product along with its default Preset file directly from the Product selector in the Library pane. By default there is no particular selection in the Product selector header; it reads All Instruments or All Effects.
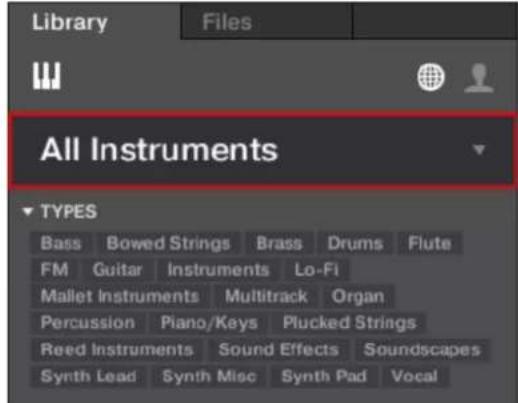
In order to load an Instrument:
- Click on the Product selector header to open it.
⇒ The Product selector opens up, showing you all Instruments available in your KOM- PLETE KONTROL Library.
- Sort the Instruments by Category or by Vendor using the Category / Vendor selector.
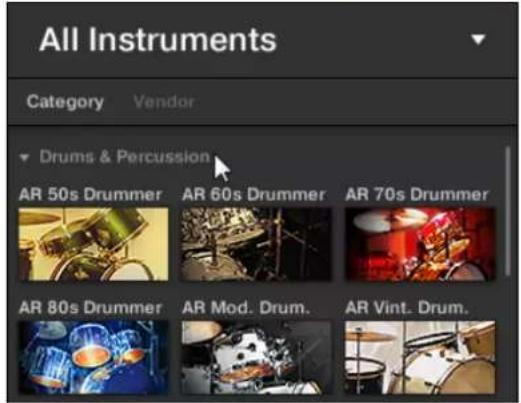
- Navigate through the Instrument groups to find the Instrument to your liking.
- Place the mouse over the Instrument entry in the Product selector and click on the arrow symbol that appears in the upper right corner of the Instrument entry.
→ The Instrument with its default Preset file has been loaded into the first Plug-in slot of the Plug-in chain. With your selection the Product selector automatically closes, the Instrument name and icon appear in the Product selector header. You can now browse for all Preset files associated with your selection in the Results list.
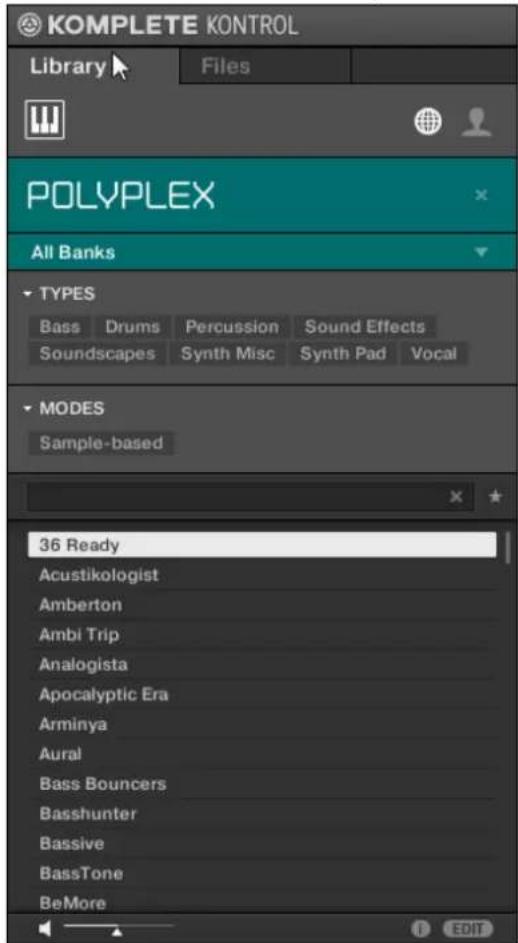
Instead of immediately loading an Instrument you also can get provided with all Preset files associated with the Instrument in the Results list by a click in the middle of the Instrument entry.
Loading an Instrument using the Keyboard
In order to load an Instrument on the keyboard:
- Press and hold SHIFT to access the secondary Browser functions.
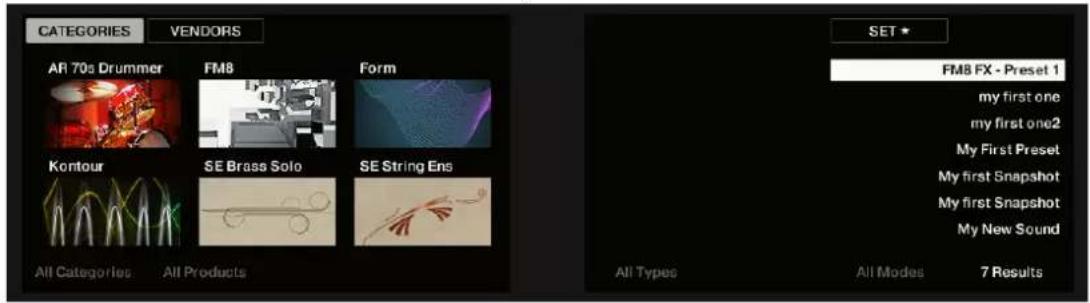
- While holding SHIFT press Button 1 for sorting the Product list by CATEGORY or press Button 2 for sorting the Product list by VENDOR. By default the Product list is showing all Instruments.
- Release SHIFT.
- Turn Knob 1 to select a category or a vendor, respectively.
![INSTRUMENTS Absynth Flesh FM8 All... Drums & Percussion Sampled Instruments Synthesizers All Products EMPTY LOAD [PRIS]1 [PRIS]2 2 Fish in a Snowstorm 2 Trompets 2d Arcade 2Pranged 3 Oct Hook All Types All Modes 9372 Results](/content/2026/05/812765/images/eb3fd5d0779ef1224ef76b5f8f5c7d8c3f5e3afc4aa59db48ba343698bef81bc.jpg)
- Turn Knob 2 to scroll through the Product list and find an Instrument to your liking.
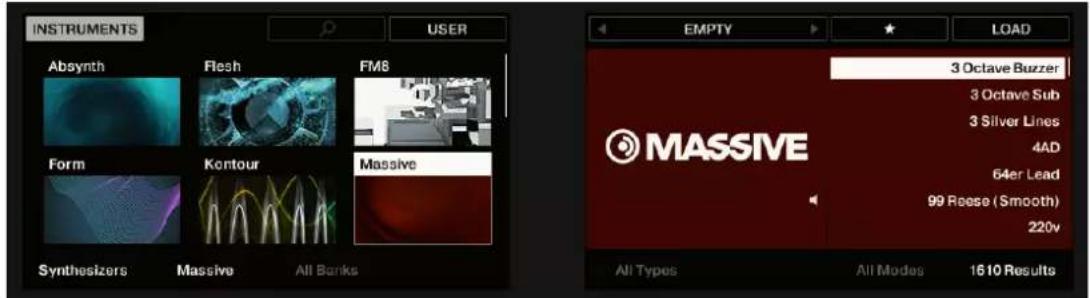
- Press Button 8 to load the Instrument.
→ The Instrument with its default Preset file has been loaded into the first Plug-in slot of the Plug-in chain. You can now browse for all Preset files associated with your selection in the Results list.
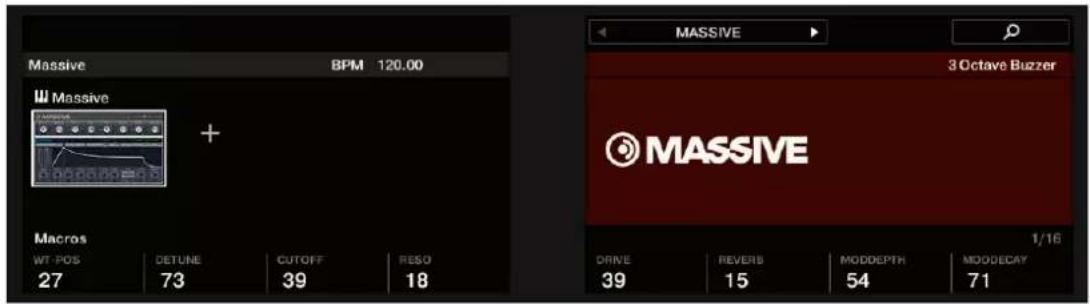
11.7 Filtering Instrument Preset Files by Bank
Banks can be additional Libraries (for example Expansions), different versions of the original Factory Library (for example FM7 Legacy and FM8 Factory Library), or any other content categorization specific to a particular Instrument.
When you select specific Instruments in the Product list, an additional Bank drop-down menu appears under the closed Product selector. The Bank drop-down menu allows you to select a particular Bank of Preset files for the selected Instrument.
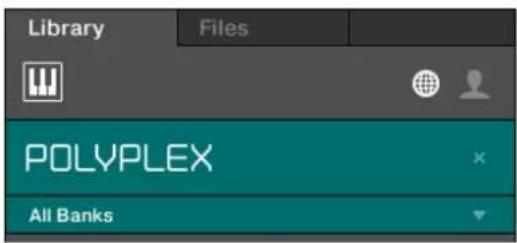
The Bank menu showing All Banks for POLYPLEX
To select a particular Bank of Preset files for the selected Instrument:
- Click the arrow under the Instrument icon to open the Bank drop-down menu.
- Choose a Bank from the available entries.
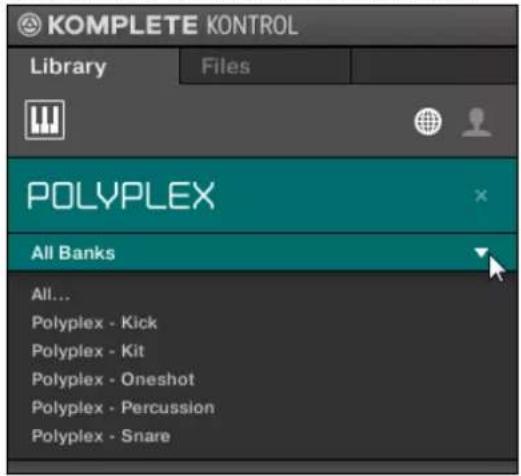
→ Upon your selection the Bank drop-down menu closes and displays the selected Bank. The results list underneath further narrow its content accordingly.
As with the Instrument selection, you can remove the selected Bank by clicking the little cross next to the Bank name in the closed drop-down menu.
Filtering Instrument Preset Files by Bank using the Keyboard
In order to select a particular Preset File Bank of the selected Instrument:
▶ Turn Knob 3 to select the desired Bank of the Instrument.
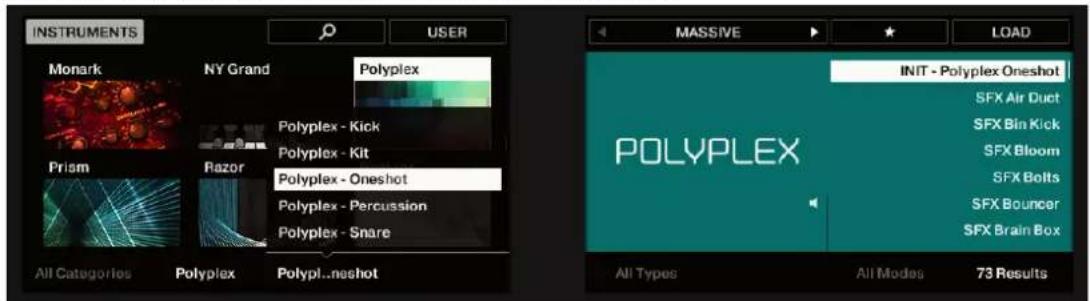
→ The Results list only displays the associated Preset files.
11.8 Resetting the Selection
In order to select another Product, or show Preset files for all Products in your KOM- PLETE KONTROL Library, you have to reset the selection:
To reset the selection made in the Product selector:
▶ Click the little cross at the right of the Prodcut name.
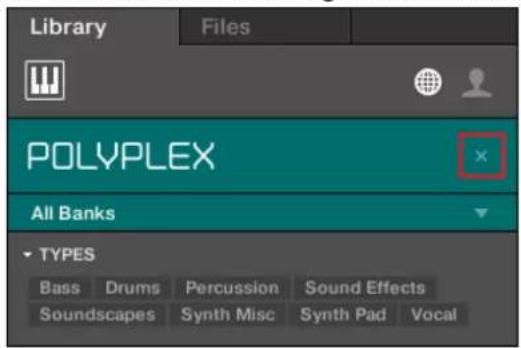
→ The selection is reset. The Product selector displays the generic label All Instruments or All Effects. The TYPES and MODES filters and the Results list under the Product selector now includes Preset files for all Instruments respectively Effects.

Products are shown in the Product selector only if the Library contains files for them. If a particular Instrument does not show up, make sure that it is installed correctly and has been updated to the latest available version.
Resetting the Instrument Selection on the Keyboard
To reset the Instrument selection:
▶ Turn Knob 2 anti-clockwise until ALL PRODUCTS is shown above in the display.
![INSTRUMENTS AR 50s Drummer AR 60s Drummer AR 70s Drummer AR 80s Drummer AR Mod. Drum. AR Vint. Drum. All Categories All Products EMPTY LOAD [PRIS]1 [PRIS]2 01 LP Ep Org (El 02) C0 Boom 01 LP Epic Or...I 01) A0 Boom 01 LP Epic Or...I 03) C1 Boom 01 LP Epic Organic B1 Tribull * 01 LP Epic Te...01) A0 LoTom All Types All Modes 16422 Results](/content/2026/05/812765/images/7fea9c12e7c6f6d35e3d92c331fe02321d5c2442efc612bf1879cdcd18d7e9eb.jpg)
→ The Instrument selection is reset.
11.9 Types and Modes Tag Filters

The MODES tag filter is not available when browsing Effects.
The TYPES and MODES tag filter menus appear under the Product selector allow you to search for Preset files according to particular characteristics of a sound. Recommended but not mandatorily the TYPES and MODES tag filters bring best results in combination with a selected Instrument.
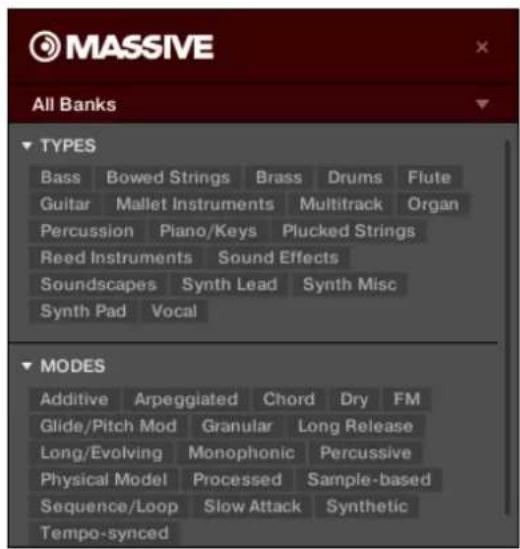
TYPES and MODES filters for MASSIVE
As soon the desired tags in the tag filters are selected the search is limited to the Preset files that are tagged correspondingly. Tags can also be deselected to broaden the search.
TYPES
The tags of the TYPE filter are structured into two hierarchical levels—top-level tags and sub-level tags.
- At first the TYPES filter displays the available top-level tags only.
- As soon as a tag in the top level selected, the second level appears underneath with sub-tags of the selected top-tag.
- The hierarchical structure means that the sets of sub-tags are specific to each tag of the level above.
MODES
The MODES filter provides an additional level that is independent of the Type levels:
- In general, Mode tags will rather refer to technical terms (e.g., Arpeggiated, Percussive, Synthetic, etc.).
- The MODES filter is always displayed. You can start your search with the MODES filter before (or even without) using the TYPES filter.
- However, the list of tags available in the MODES filter will vary depending on the tags selected in the TYPES filter. If no file contains both the Type and Mode tags that you have selected, the Type tags will prevail and the Mode tags will be deselected.
If you don't select any tag in the TYPES or the MODES filter, the result list will include all available files for the selected Instrument.
Both the Types as well as the Modes filter menus can be collapsed and expanded with a click on the arrows to allow for a larger result list.
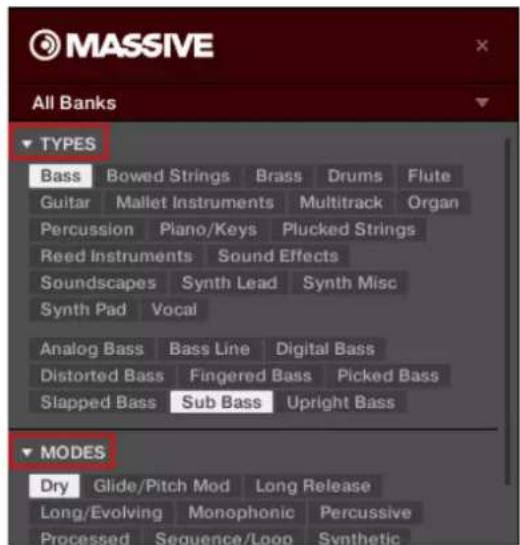
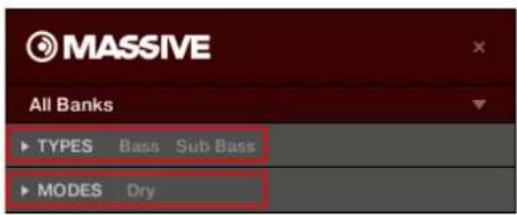
11.9.1 Filtering Preset Files by Types and Modes

The MODES tag filter is not available when browsing Effects.
In this tutorial you will learn how to filter find a bass line Preset file exemplary from the MON-ARK Instrument using the Types filter. We assume here you have already selected the MON-ARK Instrument in the Product selector. For now the TYPES filter shows only top-level tags:
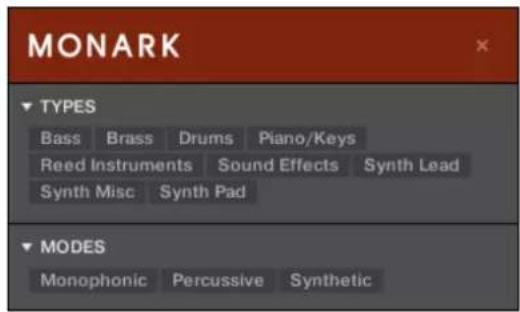
The MONARK Instrument is selected in the Product selector.
In order to find a bass sound:
- Select the Bass tag from the TYPES filter.
Upon your selection the second level of tags appears underneath with Sub-Types like Analog Bass, Fingered Bass, etc.
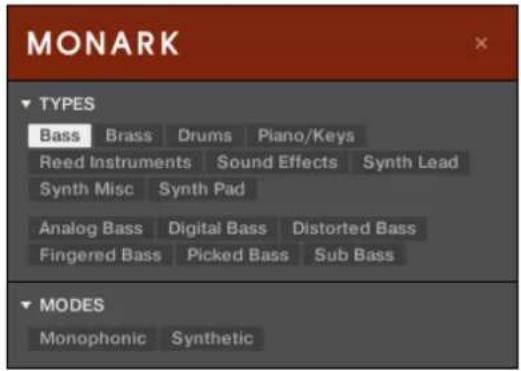
- Select the Sub-Type matching the desired characteristic for your bass line. By selecting any of these tags, say, Distorted Bass, you will narrow your search to this particular Sub-Type of bass sounds.
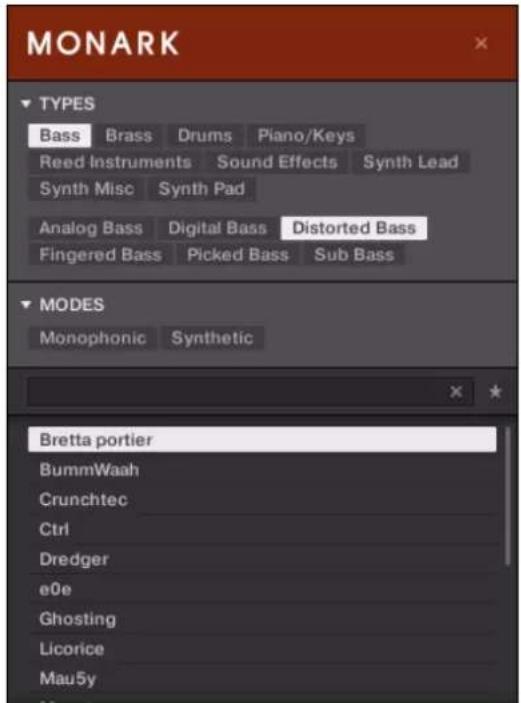
- Select the Synthetic tag from the MODES filter.
→ The Results list is filtered accordingly to the Types and Modes filters.
This method allows you to quickly find various Preset files for an Instrument with similar characteristics.
Filtering Preset Files by Types and Modes Using the Keyboard
In order to find a bass sound:
- Turn Knob 5 (All Types) to select the Bass tag from the Types filter.
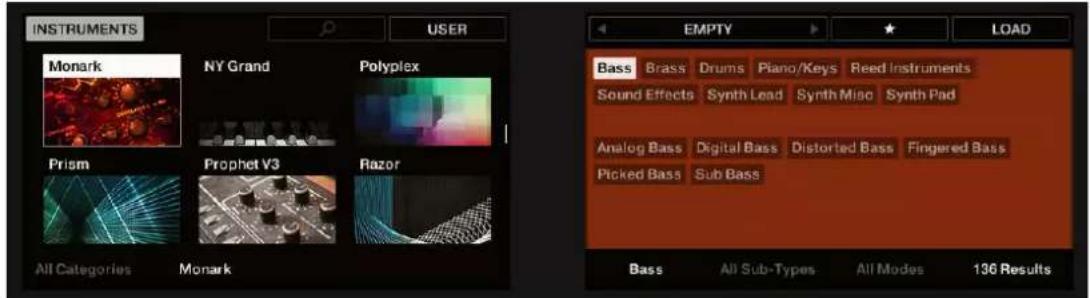
⇒ Upon your selection the second level of tags appears above Knob 6 displaying All Sub-Types.
- Turn Knob 6 to select the Sub-Type matching the desired characteristic for your bass line, say, Distorted Bass.
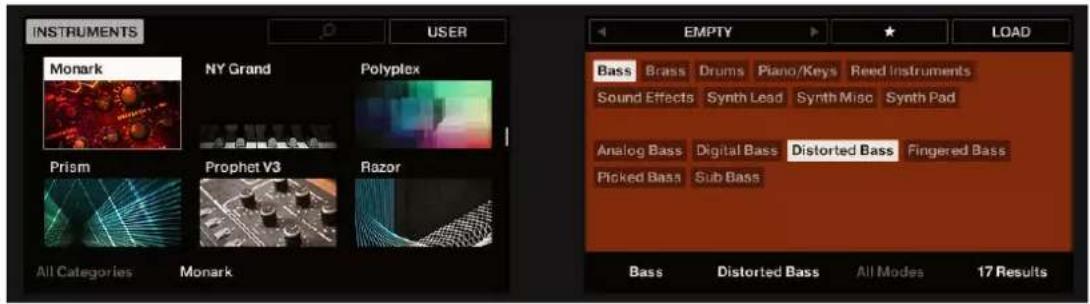
→ The Results list is filtered accordingly to the Types and Modes filters.
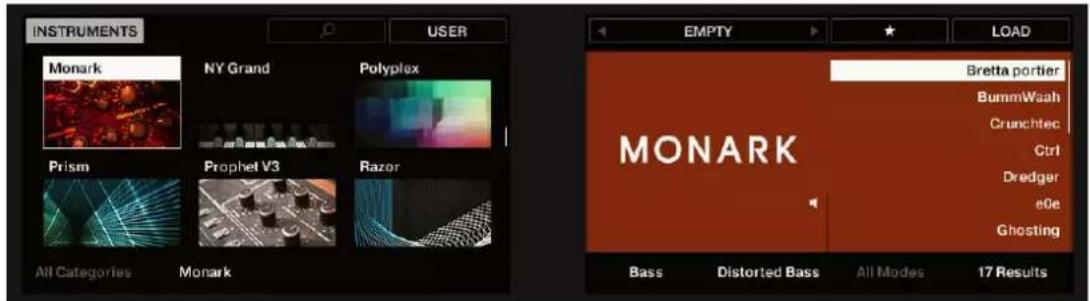
11.9.2 Selecting Multiple Tags from the Same Level

The MODES tag filter is not available when browsing Effects.
In both TYPES and MODES filter you can select multiple tags from the same level:
- Hold [Shift] on your computer keyboard and click two tags at a particular level to select these tags and all tags in-between.
- Hold [Ctrl] ([Cmd] on macOS) on your computer keyboard and click any number of tags at a particular level to select these particular tags.
→ The result list will include all files satisfying at least one of the selected tags.

Selecting multiple tags from the same level using the keyboard is not possible. Nevertheless, the display on the keyboard will show (multi) when multiple tags are selected in the software.
11.10 Working with Favorites
Favorites in the KOMPLETE KONTROL Browser allow you to quickly view and browse your most frequently used Preset files. Any Preset file can be assigned to be a Favorite. The Favorites serve as an additional filter in the Library pane. When activated, the Results list will only show Preset files that have been assigned to be a Favorite, and also match all other selected filters, including the search query entered into the search field.
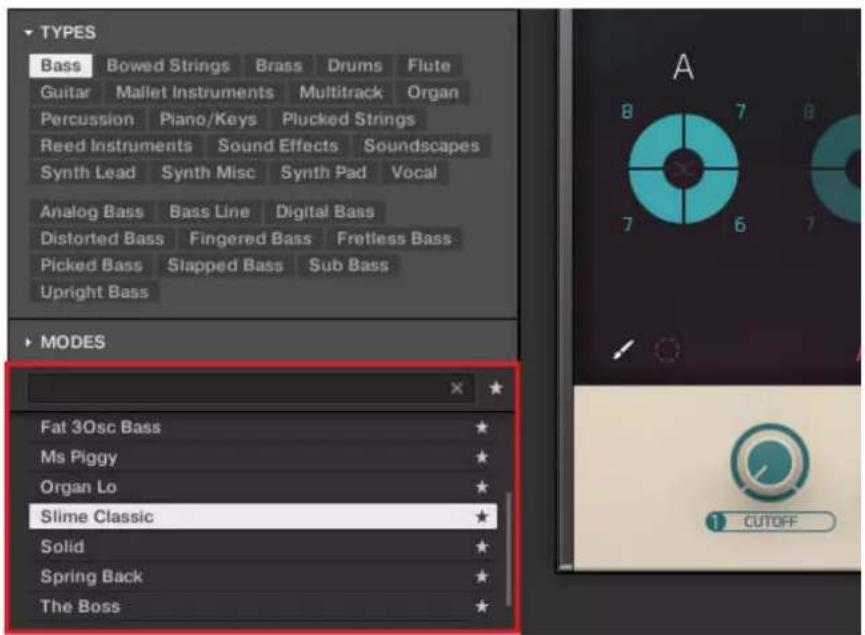
The KOMPLETE KONTROL Browser showing all Favorites tagged with the Type Bass
11.10.1 Adding Preset Files to the Favorites
To add a Preset File to the Favorites:
- Place the mouse cursor over any selected or unselected entry in the Results list.
⇒ The entry is highlighted and the Set Favorite icon on right appears.
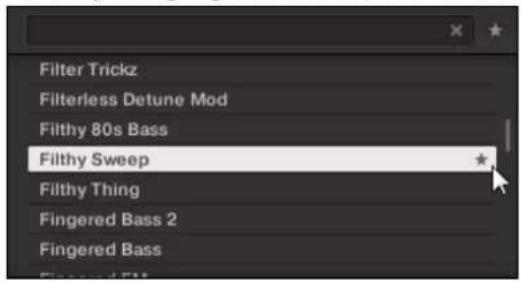
- Click on the Set Favorite icon to add the corresponding Preset file to the Favorites.
→ The Preset file is added to the Favorites, indicated by the lit Set Favorite icon next to its name.
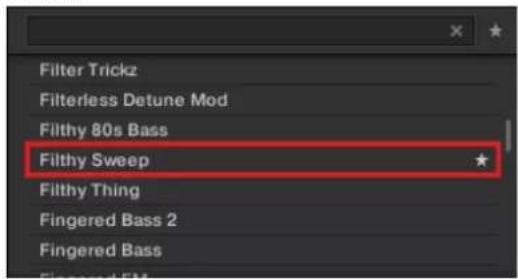
You can add any Preset File in the Results list to the Favorites, no matter if it is selected or not.
Adding Preset Files to the Favorites on the Keyboard
In order to add a Preset File to the Favorites on the keyboard:
- Turn Knob 8 to select/highlight the Preset File you want to add to the Favorites in the Results list.
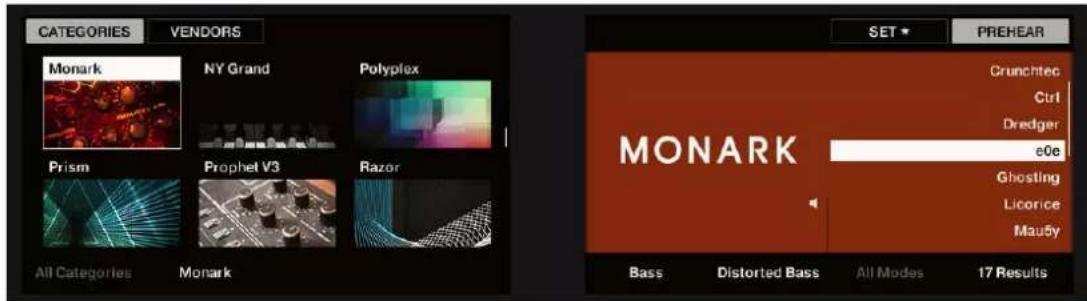
- Press Button 7.
→ The Preset File is added to the Favorites, indicated by the lit Set Favorite icon next to its name.
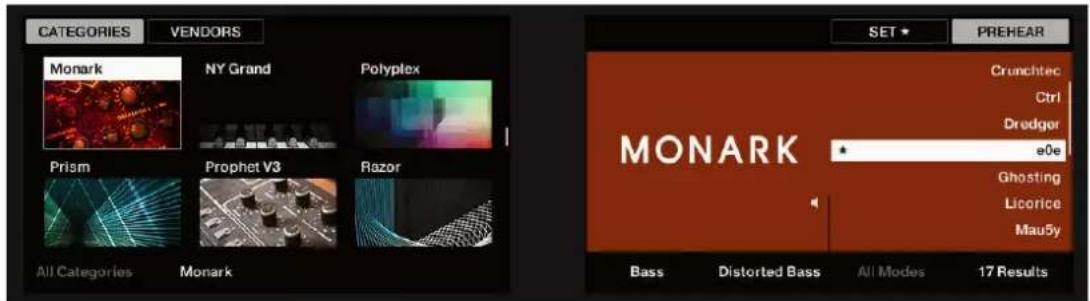
11.10.2 Displaying Favorites in the Results List
To activate the Favorites filter:
▶ Click on the Favorites icon next to the search field to activate the Favorites filter.
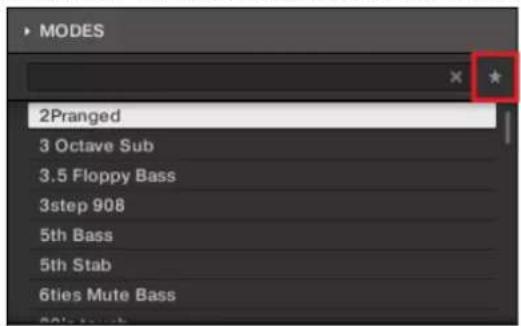
→ The Favorites icon is now lit and the Results list shows all favorite Preset Files.
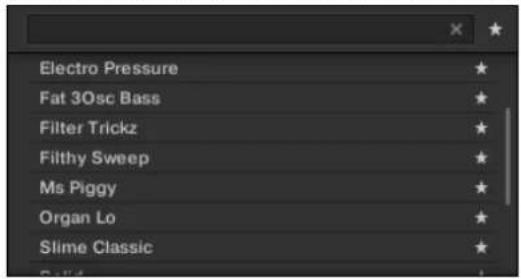
Displaying all Favorites in the Results list on the Keyboard
In order to display all Favorites in the Results list on the keyboard:
▶ Press Button 4.
→ The Favorites icon is now highlighted in the display and the Results list shows all favorite Preset Files.
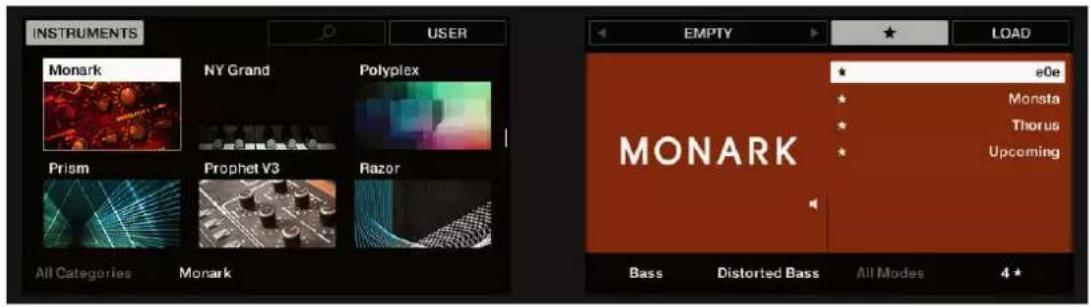
11.10.3 Removing Preset Files from the Favorites
To remove a Preset file from the Favorites:
▶ Click on the lit Set Favorite icon to remove the corresponding Preset file from the Favorites.
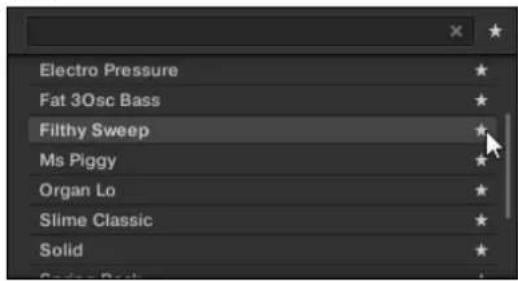
→ The Preset file is removed from the Favorites, indicated by the hidden Set Favorite icon. The next time you select the Favorites filter, the Preset file will not be shown in the Results list.
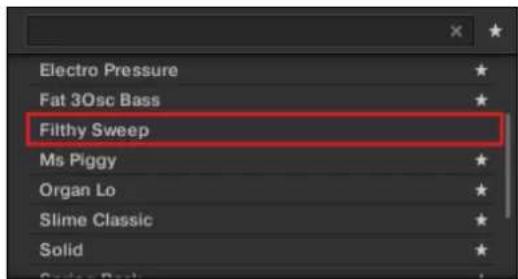
You can also remove a Preset file from the Favorites when the Results list is not filtered by Favorites.
Removing Preset Files from the Favorites on the Keyboard
In order to remove a Preset File from the Favorites on the keyboard:
▶ Press Button 7 to remove the corresponding Preset file from the Favorites.
→ The Preset File has been removed from the Favorites, indicated by the hidden Set Favorite icon.
11.11 Performing a Text Search
In the search field you can enter your search query. The search considers all properties such as Preset file names, Instruments, Banks, Type and Mode tags, directly as you type.

The search field.
- Click in the search field.
- Type the desired text to limit the Results to files containing this text.
→ As you start typing, the list of matches will start narrowing in the result list below.
You can also limit the search by selecting Types and Mode tags.
In order to reset both text search tag search, use the Reset button (showing a little cross) on the right side of the search field. The Instrument selection is not affected.
11.12 Displaying Preset File Information
▶ Click the Information button (showing a little "i") next to the EDIT button in the right part of the Control bar to display information on the file(s) selected in the result list.

→ A box appears above with various information on the selected file(s): File Format, Date modified, File Size, Type, as well as the Author and Manufacturer properties, if any.
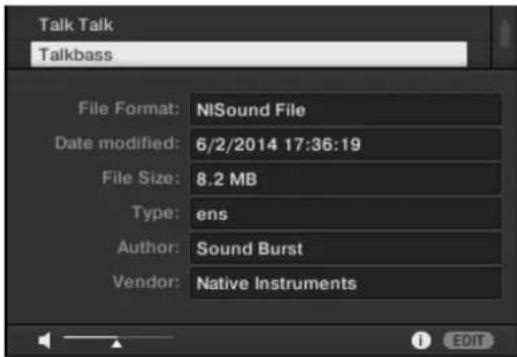
The Information box provides various information on the selected file(s).
If the selected files have different characteristics, the corresponding fields in the Information box will read multi.
11.13 Auditioning your Preset Files
When you are browsing Preset Files, you can audition Preset Files by using the Prehear feature at the bottom of the Browser. For this you need to enable the Prehear feature.

The Prehear controls.
- Click the Prehear button (showing a little speaker icon) to enable/disable Prehear.
When Prehear is enabled, you can directly hear Preset Files as you select them in the Result list of the Library pane or Files pane. - Drag the Prehear Volume slider next to the Prehear button to adjust the volume of the Preset Files you are pre-listening to.
- Click on any entry in the Results list.

In order to hear audio of the Prehear feature it is mandatory to configure the audio interface in the Preferences of KOMPLETE KONTROL.
Auditioning Your Preset Files using the Keyboard
You can also enable/disable the Prehear feature on the keyboard:
- Press and hold SHIFT.
- Press Button 8 (PREHEAR) to enable/disable the Prehear feature.
- Release SHIFT.
- Turn Knob 8 to select another Preset File in the Results list.
→ Upon selection this Preset file is played back and the previous Preset file stops playing instantly.
When you disable Prehear, the playback of any Preset file still being pre-listened is stopped.
12 Working with Effects
In this section you learn how to work with the Plug-in chain in terms of adding Effects, and organizing the Plug-in chain. Also, this section assumes you are familiar using the Browser and already loaded an Instrument.
For more information on using the Browser, refer to 11 , Browsing the Library.
12.1 Opening the Plug-in Chain Panel
In order to work with the Plug-in chain in the KOMPLETE KONTROL software you need to make sure the Plug-in chain panel is displayed.
If this is not the case you can display the Plug-in chain panel by the following action:
▶ Click on the Plug-in chain panel button in the Header.
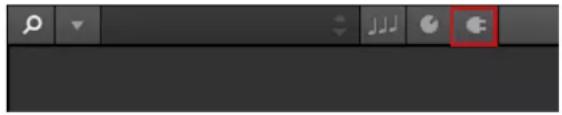
→ The Plug-in chain panel and the loaded Instrument are displayed. You can now add Effects to the Plug-in chain.
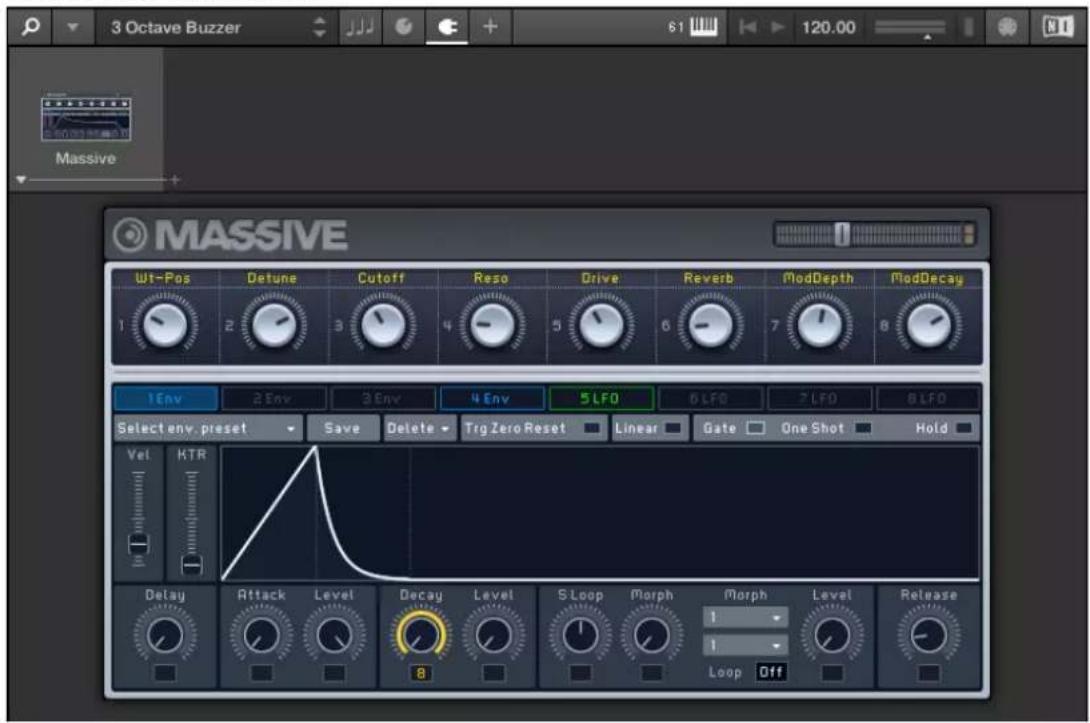
On the KOMPLETE KONTROL S-Series keyboard the Plug-in chain is displayed on the Plug-in page.
12.2 Adding Effects
Assuming an Instrument has already been loaded into the first Plug-in slot you can then add Effects to the Plug-in chain.
In order to add an Effect to the Plug-in chain:
- Click on the empty Plug-in slot to select it.
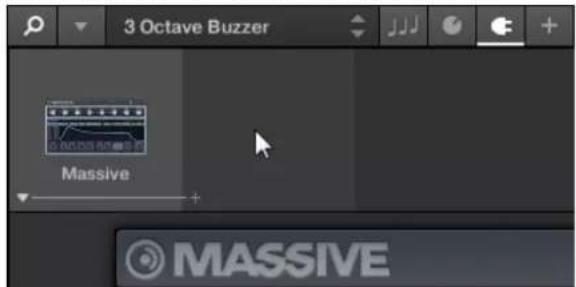
- Browse for an Effect of your liking.
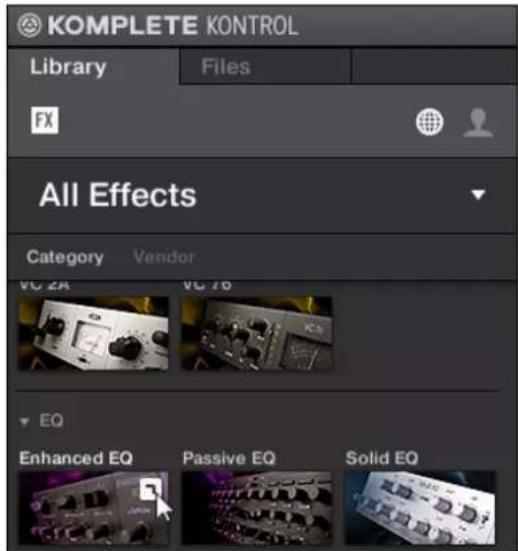
→ The Effect is loaded. Its image (or a generic icon for non-NKS Plug-ins) and name are shown in the second Plug-in slot. To add more Effects to the Plug-in chain, repeat the aforementioned steps.
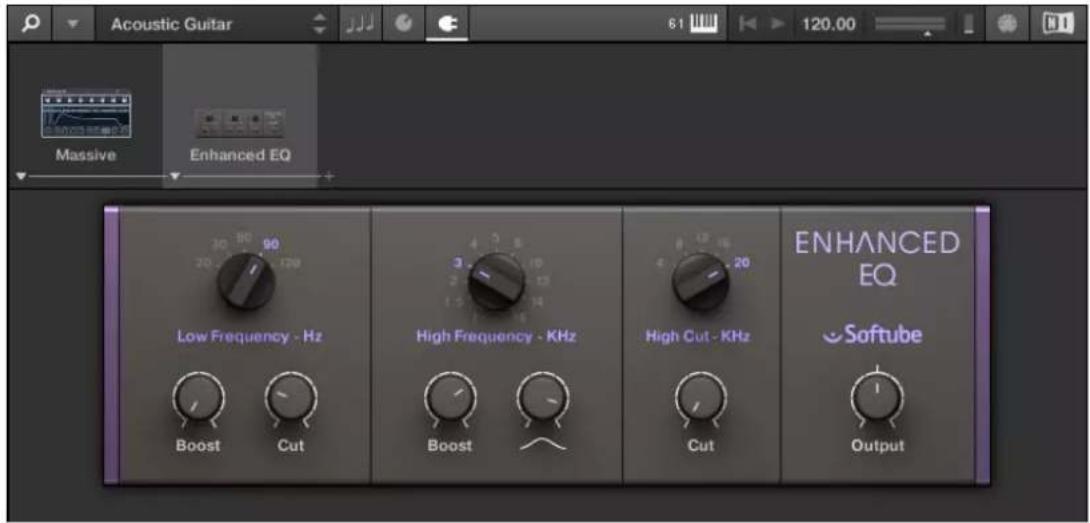
Adding Effects using the Keyboard
In order to add an Effect to the Plug-in chain using the keyboard:
- Press the PLUG-IN button to show the Plug-in page.
- Press Button 6 until you select the empty Plug-in slot.
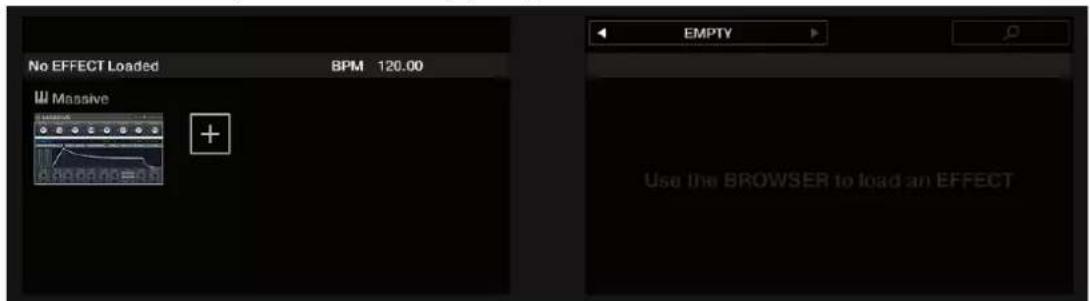
- Press the BROWSE button to open the Browser.
⇒ The label below Button 1 shows the current Product Type EFFECTS.
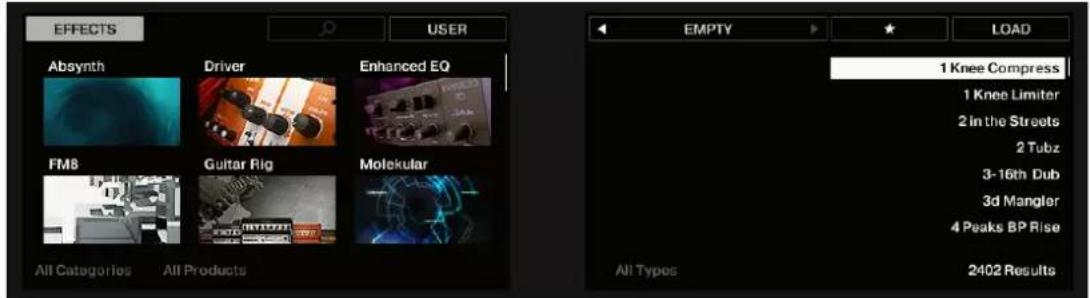
- Select an Effect together with a Preset file.
- Press Button 8 or the 4-D encoder to load the selection.
→ The Effect is added to the second Plug-in slot in the Plug-in chain. To add more Effects to the Plug-in chain, repeat the aforementioned steps.
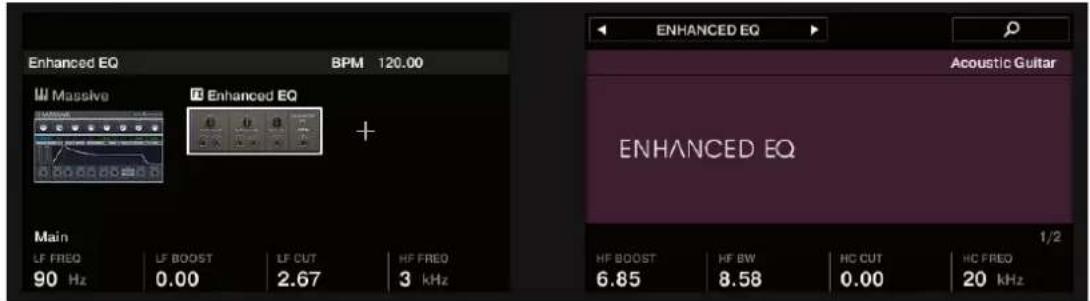
12.3 Selecting Plug-in Slots
When you have several Effects added to the Plug-in chain you can directly jump to a Plug-in slot in order to adjust the included Effect.
In order to jump to another Plug-in slot and display the Effect's controls:
▶ Click on the Plug-in slot you want to select.
Selecting another Plug-in Slot using the Keyboard
In order to select another Plug-in slot in the Plug-in chain using the keyboard:
- Press PLUG-IN to show the Plug-in page.
- Press Button 5 or Button 6 to select the previous or next Plug-in slot in the Plug-in chain.
→ The Plug-in controls are mapped to the encoders accordingly.
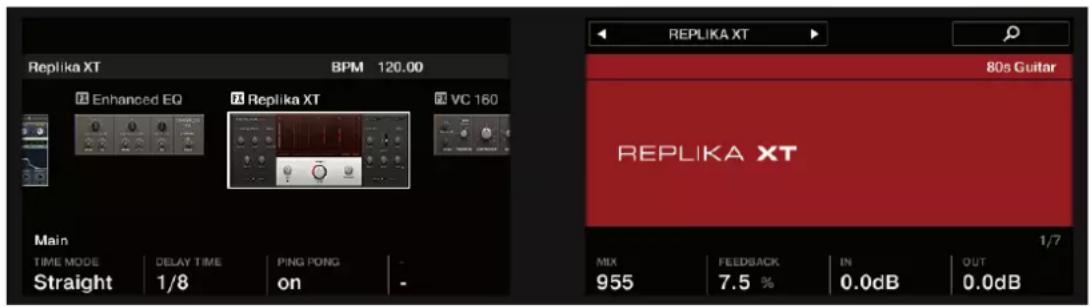

You can also select another Plug-in Slot using Button 5 and 6 directly in the Browser.
12.4 Reordering Effects
If you want to reorder your Effects in the Plug-in chain you can easily move them by drag and drop.
In order to move an Effect in the Plug-in chain:
- Hover the mouse over the Plug-in slot you want to move.
- Click and hold the left mouse button and move the mouse pointer to the desired position in the Plug-in chain.
⇒ The white line between the borders of the Plug-in slots is the current position for dropping the Plug-in slot.

flowchart
graph LR
    A["Massive"] --> B["Enhanced EQ"]
    B --> C["Replika XT"]
    C --> D["VC 160"]
    D --> E["Driver"]
    E --> F["Solid EQ"]
- Drop the Effect into a new position in the effects chain.
→ The Plug-in slot now sits at another position in the Plug-in chain and the other Plug-in slots have moved accordingly.

flowchart
graph LR
    A["Massive"] --> B["Replika XT"]
    B --> C["Enhanced EQ"]
    C --> D["VC 160"]
    D --> E["Driver"]
    E --> F["Solid EQ"]
Reordering Effects on the Keyboard
In order to move an Effect in the Plug-in chain:
- Press the PLUG-IN button.
- Press Button 5 or Button 6 to select the Plug-in slot with the Effect you want to move.
-
Press and hold SHIFT in order to access additional controls.
-
While holding SHIFT press Button 5 or Button 6 to move the selected Effect in the Plug-in chain.
12.5 Scrolling the Plug-in Chain
Theoretically, it is possible to add an unlimited amount of Effects to the Plug-in chain. If the Plug-in chain exceeds the space on the GUI due to numerous Effects loaded, big scroll arrows appear on the left and/or on the right border.

Right scroll arrow
In order to scroll through the Plug-in chain:
▶ Click the scroll arrow for the respective direction.
12.6 Bypassing Effects
If you temporarily want to listen to the Instrument without a specific Effect for an A/B comparison but do not want to delete it from the Plug-in chain, you can bypass Effects.
In order to bypass an Effect:
- Hover the mouse over the Plug-in slot containing the Effect you want to bypass.
⇒ Additional controls are displayed.
- Click the Bypass button at the top left of the Plug-in slot.
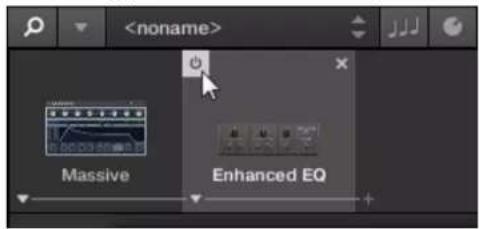
→ The Effect is now bypassed and the image is grayed out.
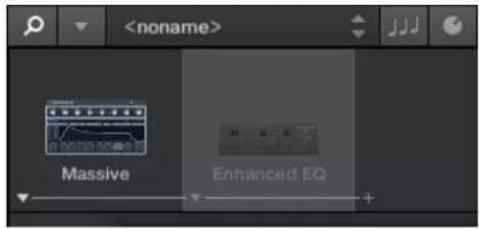
Bypassing Effects using the Keyboard
- Press the PLUG-IN button to show the Plug-in page.
- Select the Plug-in slot containing the Effect you want to bypass in the Plug-in chain.
- Press and hold SHIFT in order to access additional controls.
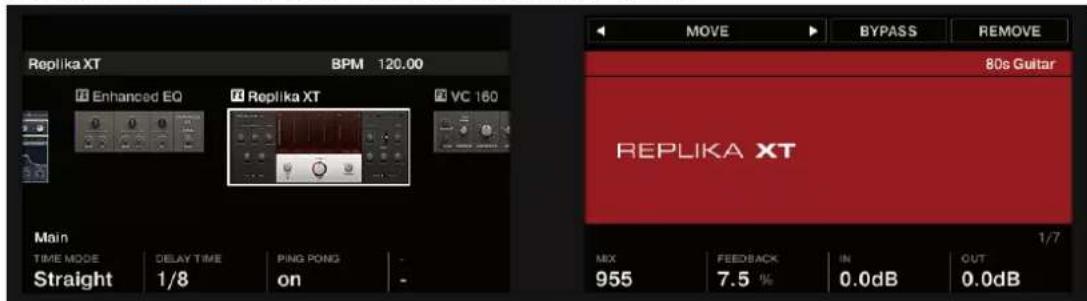
- While holding SHIFT press Button 7 (BYPASS).
- The Effect is now bypassed and its name is grayed out.
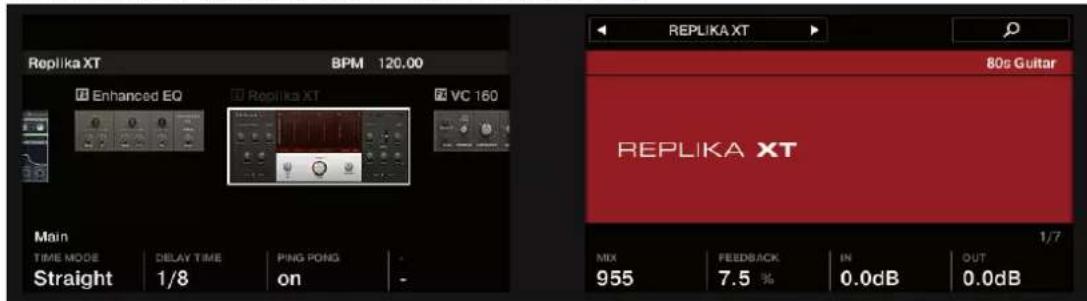
12.7 Removing Effects
In order to remove an Effect from the Plug-in chain:
- Hover the mouse over the Plug-in slot containing the Effect you want to remove.
⇒ Additional controls are displayed. - Click the Remove button at the top right of the Plug-in slot.
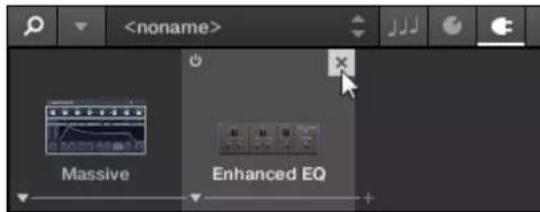
→ The Effect is now removed from the Plug-in chain.
Removing Effects from the Plug-in Chain using the Keyboard
In order to remove an Effect from the Plug-in chain:
- Press PLUG-IN to show the Plug-in page.
- Press and hold SHIFT in order to access additional controls.
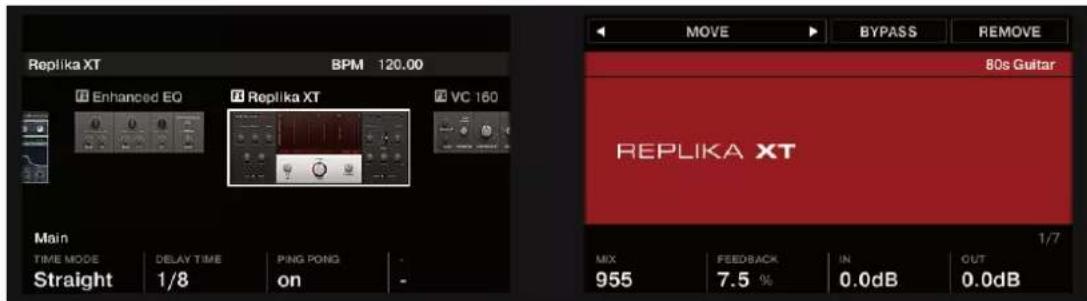
-
While holding SHIFT Press Button 8 (REMOVE).
-
The Effect is removed from the Plug-in chain.
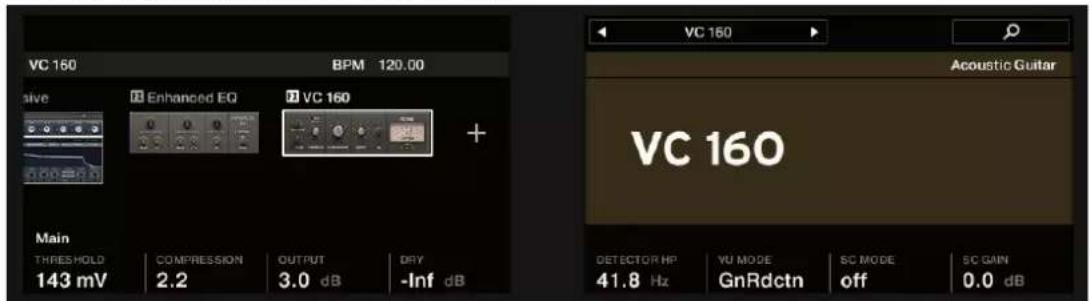
13 Managing the Library
With the Browser you can also organize your own Preset files. In this section you will learn how you save and manage your own Preset files in the User Library and how to import KOM-PLETE KONTROL-compatible user files.
The workflows for organizing Instrument Preset files and the workflows for organizing Effect Preset files are identical. The Product Type Instrument or Effect cannot be selected in the Browser directly as this is determined by the Plug-in chain. For more information on Product Types and on switching between Product Types, refer to ↑11.1.1, Product Types: Instrument and Effect.
For detailed overview of the Browser elements, refer to 5.2 , Browser.
13.1 Saving Preset Files to the User Library
KOMPLETE KONTROL allows you to conveniently save any sound you created with your Instruments and Effects in a new user Preset file. Your saved Preset files are automatically added to the user content section of the Library pane and can be filtered and searched like any other Preset file in the KOMPLETE KONTROL Library. On your hard drive, the user Preset files are saved in the following folder (sorted by Instrument, in corresponding subfolders):
- Windows: C:\Users\
\Documents\Native Instruments\User Content\ - macOS: Macintosh HD/Users/
/Documents/Native Instruments/User Content/
The Preset files saved for KOMPLETE Instruments with KOMPLETE KONTROL are compatible with the stand-alone and plug-in versions. This way you can, for example, open a KONTAKT file you saved with KOMPLETE KONTROL in the KONTAKT stand-alone application or the plug-in by opening the file from the user content folder described above.

The Preset files you save in KOMPLETE KONTROL are compatible with MASCHINE. To add them to the user content section of MASCHINE's Library pane, click on Rescan in the User pane of the Library page in the MASCHINE Preferences.
Saving a Preset File
Follow the instructions to save a sound in a new Preset file:
- Select the Instrument or Effect Plug-in slot for which you wish to save a Preset file.
- In the File submenu of the KOMPLETE KONTROL menu, click on Save :
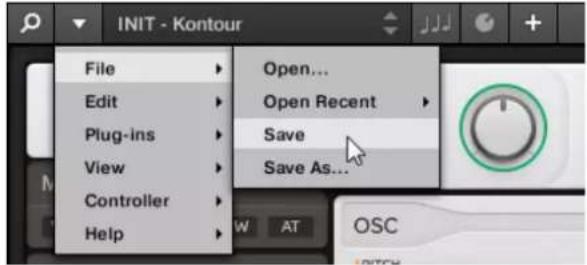
Or, if you want to save a Preset file you are working on with a new name, click on Save As... in the File submenu of the KOMPLETE KONTROL menu:
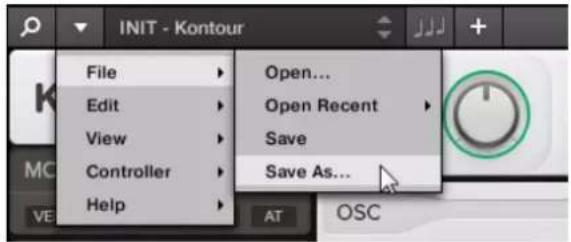
- Enter a name for your new Preset file and click Save in the Save Preset dialog to save the Preset file.
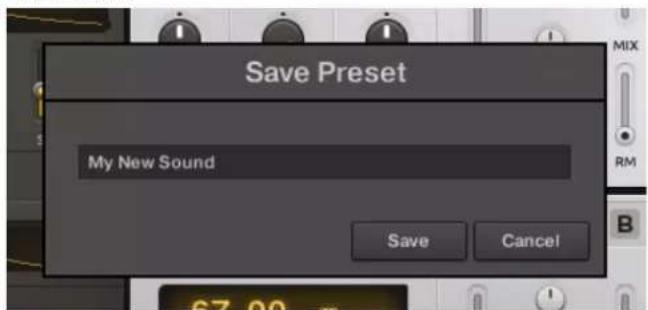
→ Your new Preset file immediately appears in the user content section of the Library pane.
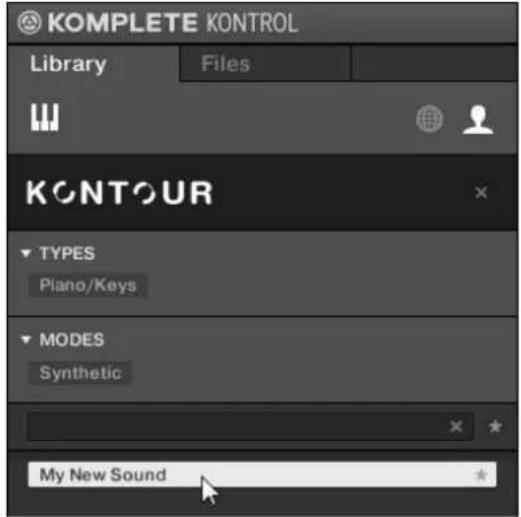
13.2 Deleting User Preset Files from the User Library
You can delete user Preset files directly from the Results list:
- Right-click the desired Preset file and select Delete from the context menu. If you want to delete several user Preset files at once, first select them as described above, and right-click any of them.
A warning dialog opens to inform you that the Preset file will be not only removed from the KOMPLETE KONTROL Library but also deleted from your hard disk.
- Click OK to confirm the deletion (or Cancel to keep the file).
→ The Preset file is deleted from the KOMPLETE KONTROL Library and from your hard disk.

When browsing factory content, the Delete entry is not available in the context menu.
13.3 Editing the Tags and Properties of User Preset Files
When you save user Preset files in KOMPLETE KONTROL, they are automatically assigned to Instruments and Banks depending on the Instrument you are using. To further define the attributes of your user Preset files, you can edit the Type and Mode tags as well as the general properties of the file. This allows you to organize your user content in a meaningful way and search for your files by using the Type and Mode filters in the Library pane.

The Type and Mode tags are also recognized by the MASCHINE Browser. This way, you can easily find the user Preset files you saved with KOMPLETE KONTROL in the User content section of MASCHINE's Library pane.

The MODES tag filter is not available when browsing Effects.
Follow the instructions below to assign tags to your Preset file and change its properties:
- Select the Preset file in the Results list and click EDIT in the Control bar to open the Attribute Editor.
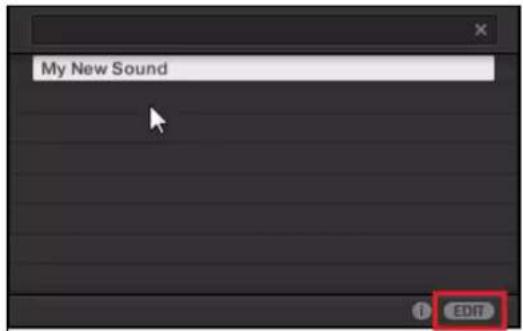
- Click on TYPES to edit the Type tags for your Preset file:
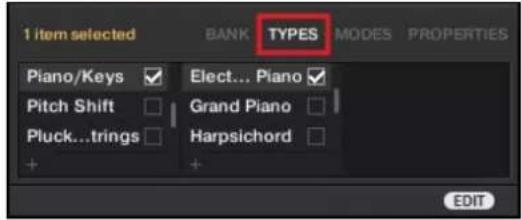
- Click and drag the upper edge of the Attribute Editor upwards to increase its size. This makes it easier to navigate in the list of available tags.
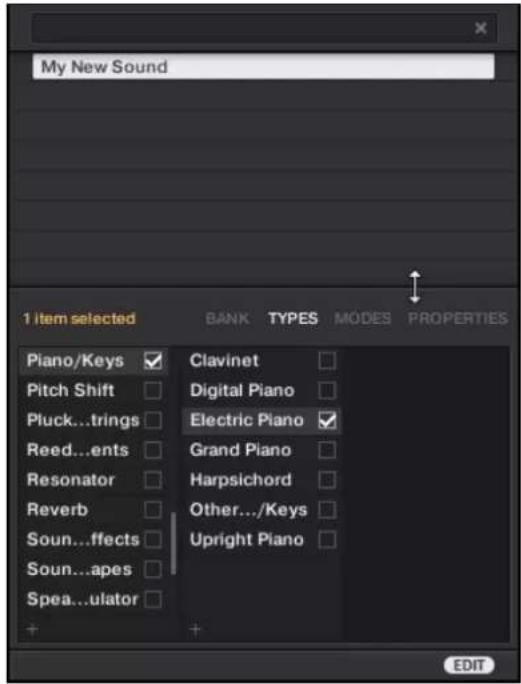
- Assign the appropriate tags to your Preset file by clicking the checkboxes next to their names.
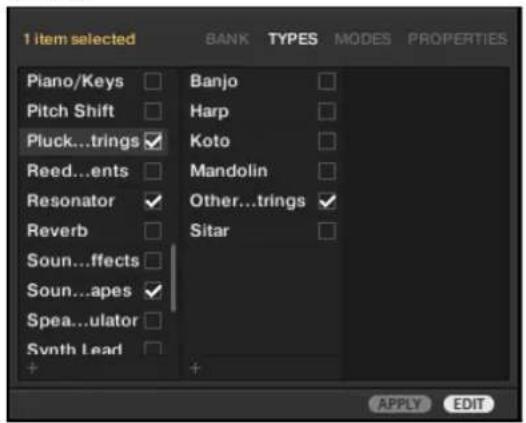
- Click on MODES to edit the Mode tags for your Preset file. You can assign them in the same way you assigned the Type tags before, by clicking on the checkboxes next to their names.
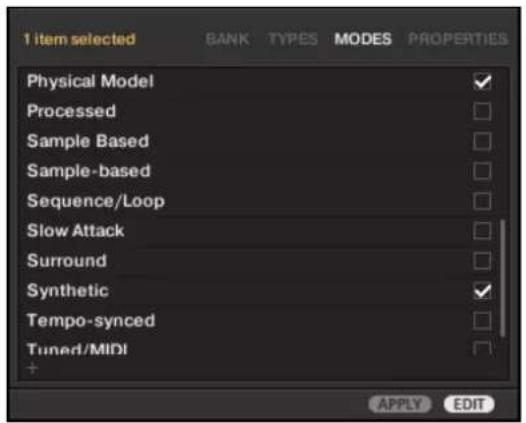
- Click on PROPERTIES to edit additional information included in your Preset file. You can enter your name in the Author field, or, in case you intend to share the Preset file, leave a note in the Comment field for other users to read.
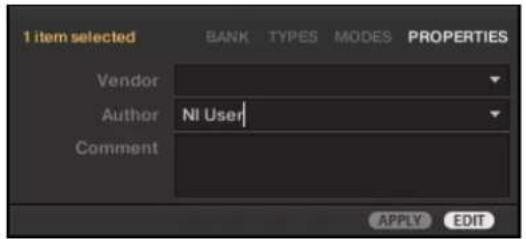
- To apply any changes made in the Attribute Editor, click on APPLY.
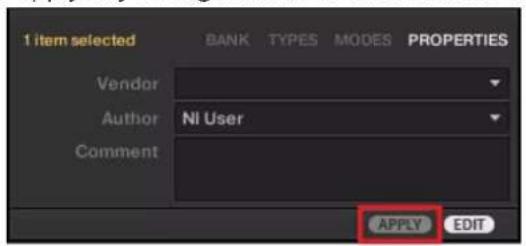
→ Your Preset file is now tagged according to your selection of Types and Modes and the properties are saved. You can close the Attribute Editor by clicking on EDIT again.
13.4 Working with the Files Pane
This section details the actions you can perform that help you to browse for files on your hard disks using the Files pane. The Results list of the Files pane shows the files and folders found in the path selected in the Location bar above.

Only KOMPLETE KONTROL-compatible files are shown in the Results list.
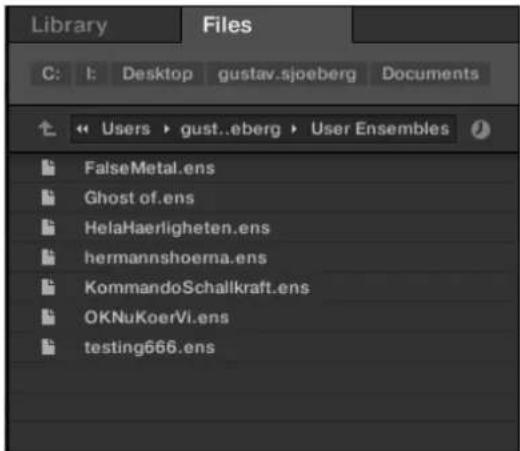
The Results list of the Files pane.
13.4.1 Additional Results List Features List in the Files Pane
In the Files pane the Results list offers a context menu with additional commands. You can open it with a right-click on the selected entry or entries, respectively.
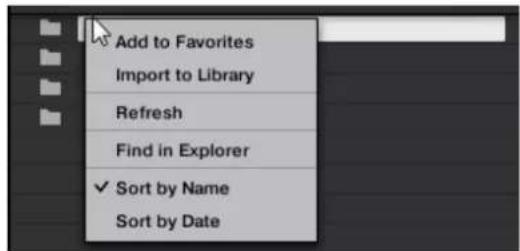
The context menu in the result list of the Files pane.
Following commands are available:
| Command | Description |
| Add to Favorites (folders only) Adds the selected folder to your Favorites. | |
| Import to Library (folders only) Imports the selected folder(s) into the Library. | |
| Command Description | |
| Refresh Refreshes the display of the list, in case items have been modified in that folder. | |
| Find in Explorer / Find in Finder | Opens an Explorer/Finder window pointing to the selected folder. |
| Sort by Name Sorts the Result list | according to the item names. |
| Sort by Date Sorts the Result list | according to the item dates. |
13.4.2 Navigating to File Locations with the Location Bar
The Location bar shows and lets you modify the selected path. At any time the Results list will display the content of the path shown here.
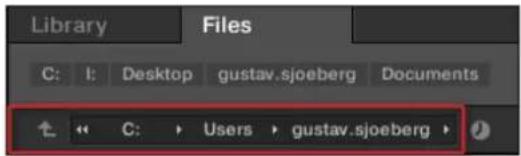
The Location bar
The Location bar provides following tools:
- Up arrow: Use the Up arrow on the left to go one level up in your file system.
- Selected path: Within the path displayed, you can:
- Click any folder name to jump to that folder.

- Click any right-pointing arrow after a folder name to open a list of its subfolders, and select any entry in the list to jump to that folder.

- If all the levels cannot be displayed in the path, click the double left-pointing arrow left of the path to display the remaining upper levels (up to the Workspace, representing the highest level in your file system), and select any entry in the list to jump to that location.

13.4.3 Navigating to Recent File Locations
The Recent Locations button shows a clock icon at the right of the Location bar:
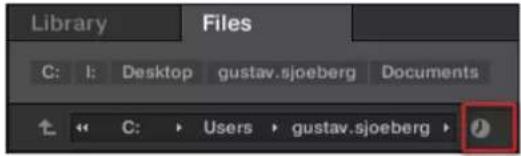
The Recent Location button.
The last 10 locations you have visited are stored by KOMPLETE KONTROL and available here:
▶ Click the Recent Location button and select any recently visited location from the list.
→ This location is loaded in the Location bar and its content displayed in the result list.
13.4.4 Working with File Location Favorites
Located at the top of the Files pane, the favorite bar displays all your favorites folders. Favorite folders are shortcuts to specific locations in your file system.
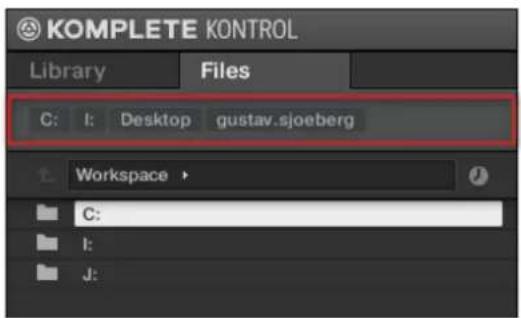
The Favorite bar, at the top of the Files pane.
Favorite folders can be useful if you often return to the same location while browsing your file system in the Files pane. The default favorite folders are the roots of each of your hard disks, your desktop folder, and your user folder.
Jumping to Favorite Folders
▶ Click any favorite folder in the Favorite bar to jump to that location.
→ The selected location is loaded in the Location bar and its content appears in the Results list.
Adding and Removing Favorite Folders
You can add your own favorite folders to the Favorites bar. This is done in the Results list:
-
Navigate to the parent folder containing the folder you want to use as a favorite so that this folder appears in the Results list.
-
In the Results list, right-click the desired folder and select Add to Favorites from the context menu.
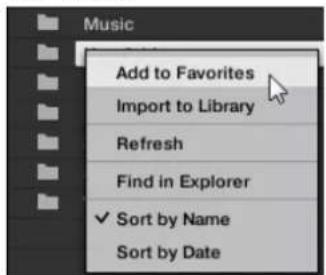
You can also remove any Favorite from the Favorite bar:
▶ To remove a favorite folder, right-click it in the Favorite bar and select Remove from Favorites.
13.5 Loading VST Plug-ins
KOMPLETE Instruments and VST plug-ins supporting the Native Kontrol Standard (NKS) are automatically loaded when you call up a Preset file from the KOMPLETE KONTROL Library.
However, you can also load plug-ins directly, allowing you to integrate any VST plug-in in KOM- PLETE KONTROL. This way you can play your VST plug-ins using the Smart Play features, map their parameters to the controls on the keyboard, and save Preset files for them in your KOM- PLETE KONTROL User Library.
To load a VST plug-in in KOMPLETE KONTROL:
▶ Select the plug-in you want to load in the Plug-ins submenu of the KOMPLETE KONTROL menu.
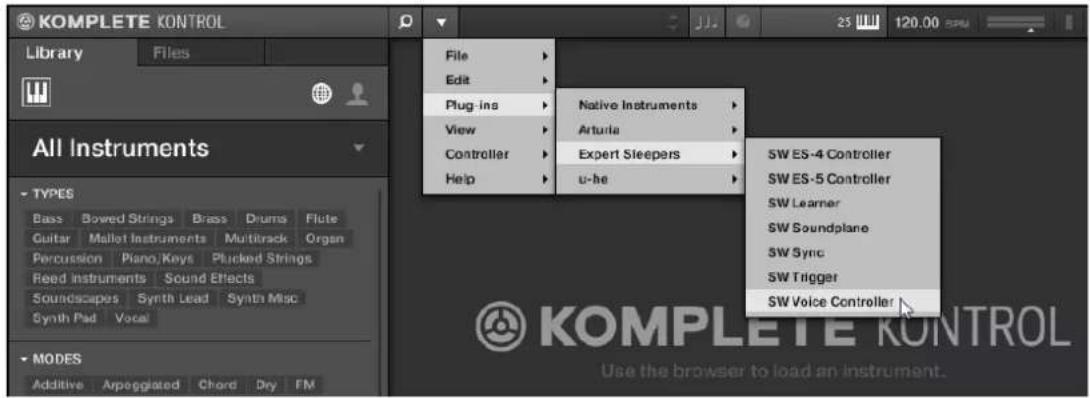

If your VST plug-ins do not show up in the Plug-ins submenu, check if the VST plug-in folders on your hard drive are correctly added to the Locations pane on the Preferences' Plug-ins page.
13.6 Installing NKS Instruments
Native Kontrol Standard (NKS) is a software instrument format that allows third-party developers to integrate with KOMPLETE KONTROL and MASCHINE hardware and software at the same deep level as KOMPLETE Instruments and Effects.
The Native Kontrol Standard includes:
- Seamless integration into the KOMPLETE KONTROL Browser for a unified browsing experience.
- Full parameter mapping for instant hands-on control.
- Support of KOMPLETE KONTROL S-Series features such as the Light Guide.
NKS Instruments can be found in the KOMPLETE KONTROL Browser next to your KOMPLETE Instruments. All of their Preset files are fully tagged, so filtering in the Browser gives you matching results from both KOMPLETE Instruments and NKS Instruments. And when you load a Preset file from an NKS Instrument, its parameters are automatically mapped to the controls on the keyboard.
Installing VST Plug-ins with NKS Support
VST plug-ins with NKS support are automatically added to your Library when you start KOM- PLETE KONTROL for the first time after completing their installation. The folders containing the Preset files for NKS support can be managed in the Factory pane on the Library page of the Preferences. For more information, refer to ↑7.5.4, Preferences – Library Page.
Installing KONTAKT and REAKTOR Instruments with NKS Support
Third-party developers of KONTAKT and REAKTOR Instruments provide you with a folder that contains all Instrument files, including Preset files and samples. Instead of running an installer, this folder needs to be stored on the hard drive. The Instrument can then be activated with Native Access, which also adds it to the KOMPLETE KONTROL Library. If you are using KONTAKT or REAKTOR, the Instrument is automatically added to their respective Browser, too.
To activate your KONTAKT Instrument with NKS support and add it to the KOMPLETE KON-TROL Library, follow the steps below:
-
Start the stand-alone version of the KOMPLETE KONTROL software.
-
Open the File sub-menu in the KOMPLETE KONTROL menu and click on Manage Products...
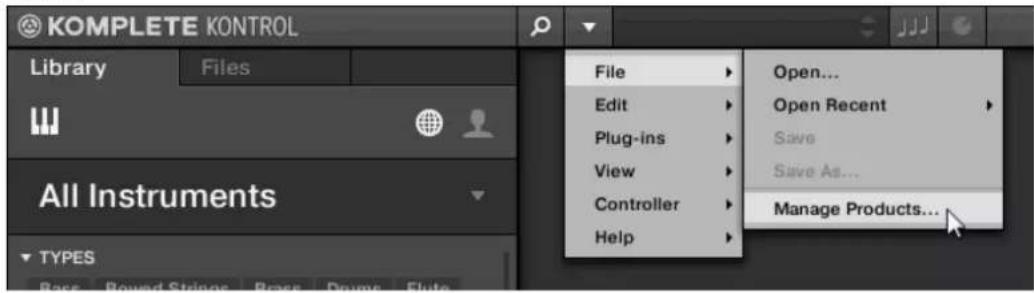
- Click on Add a serial in the top-left corner of Native Access.
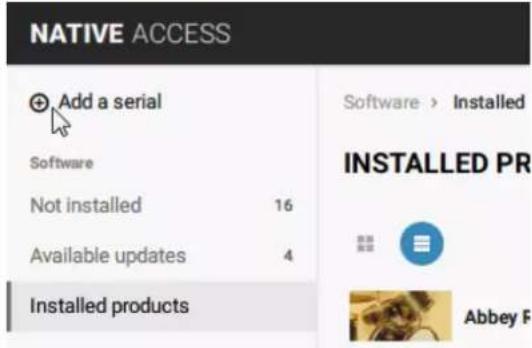
- Enter the serial number of the Instrument and click ADD SERIAL.
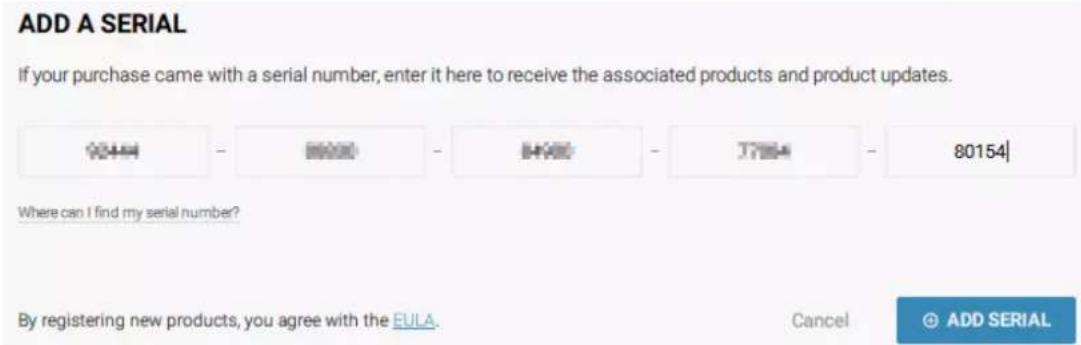
-
Click BROWSE and open the folder containing the Instrument files in the file dialog.
-
Click on INSTALL to add the Instrument to your KOMPLETE KONTROL Library.
THANK YOU FOR REGISTERING NOVACHORD
To continue installing please browse to the folder where you have unzipped Novachord.
Novachord
C:/Users/Public/Documents/
BROWSE
Close
INSTALL
→ The Instrument is installed. KOMPLETE KONTROL automatically scans for the new content and adds it to the KOMPLETE KONTROL Browser.

Install successful
Novachord was successfully installed

The KOMPLETE KONTROL Library and the KONTAKT Browser reference the Instrument files contained in the folder. It is recommended to not delete or move the folder afterwards, otherwise KOMPLETE KONTROL and KONTAKT will not be able to find the Instrument files. If an Instrument cannot be found, use the Rescan function on the Preferences' Library page to update the Library with the correct folder location.
13.7 Importing KOMPLETE KONTROL-Compatible User Files
Apart from the huge KOMPLETE factory library, you might want to use, e.g., your own REAKTOR ensembles or KONTAKT Instrument files you received from other users.
You can load them directly from the Files pane, but you won't be able to find and load them from the keyboard's on-screen Browser nor from the Library pane.
For this you will have to import the files into the Library first. Importing files does not mean they will be moved from the directory they currently reside in, they will only be referenced by the Browser. That's why whenever you move files, make sure to update the paths to their respective directories in the Library page of the Preferences panel.
The Files pane allows you to import whole folders. All KOMPLETE KONTROL-compatible files found in the selected folder(s) will be imported.
Procedure
To import a folder, do the following:
- In the Files pane, navigate to the folder containing the files you want to import.
- Select the desired folder.
- Click the IMPORT button at the bottom right of the Browser.
⇒ You will be presented with the Attribute Editor.
- In the Attribute Editor, tag the files you are about to import to the Library.
- Click OK at the bottom right of the Browser to import the files to the Library.
→ All KOMPLETE KONTROL-compatible files found in the selected folder(s) are imported to your Library. They are added as user content. Furthermore, the paths of the imported folders are added to the list of user libraries in the User pane of the Library page in the Preferences panel.

You can also apply/remove tags at any time after they are imported. However, it may be best to tag files upon import, since it will make it easier to find them later.
14 Controlling Instrument and Effect Parameters
This section introduces you to controlling Instrument and Effect parameters using the KOM- PLETE KONTROL keyboard and explains how to customize parameter mappings.
14.1 About Pre-Mapped Instruments and Effects
All KOMPLETE and NKS Instruments and Effects are pre-mapped, which means that the keyboard's knobs and Touch Strips are automatically assigned to key parameters as soon as you load an Instrument in KOMPLETE KONTROL. You do not have to manually configure a mapping or assign knobs via MIDI learn.

You can customize the parameter mapping for each Preset file in the Plug-in Panel of the KOM-PLETE KONTROL software. For more information, refer to ↑14.4, Customizing Parameter Mappings using the Plug-in Panel.
14.2 Adjusting Parameters
Once you have loaded an Instrument, the eight knobs on the keyboard are automatically assigned to eight Instrument parameters. Whenever you turn a knob on the KOMPLETE KON-TROL keyboard, the mapped parameter visually reflects the movement in the KOM-PLETE KONTROL software.
▶ To adjust an Instrument parameter, turn the corresponding knob on the keyboard. The mapping of each knob is indicated by the displays.
14.3 Switching Parameter Pages
Many Instruments and Effects are equipped with much more than eight parameters. To provide quick access to additional parameters, the Page buttons (left and right arrows) to the left of the Control section let you skip through parameter pages. This remaps the knobs to a different set of Instrument parameters.
▶ To skip to another parameter page and remap the eight knobs to a new set of controls, press the Page buttons left or right.
→ The number at the bottom right of the right display indicates the current parameter page and the total number of available pages for the loaded Instrument.
14.4 Customizing Parameter Mappings using the Plug-in Panel
If you want to customize the parameter mapping for an Instrument's Preset file, you have to enable the Edit mode of the Plug-in panel.
To enable or disable the Plug-in panel's Edit mode, click on the Edit mode button in the upper right corner.
The Edit mode allows you to:
- Add, delete, and replace parameters in the mapping.
- Learn parameters to controls.
-
Rename controls.
-
Add pages to the Control section, or delete existing pages.
- Add and rename sections on the pages to group controls.

In order to make your changes permanent, you have to save the Preset file to the KOMPLETE KON-TROL User Library. For more information, refer to ↑13.1, Saving Preset Files to the User Library.
Plug-in Panel Edit Mode
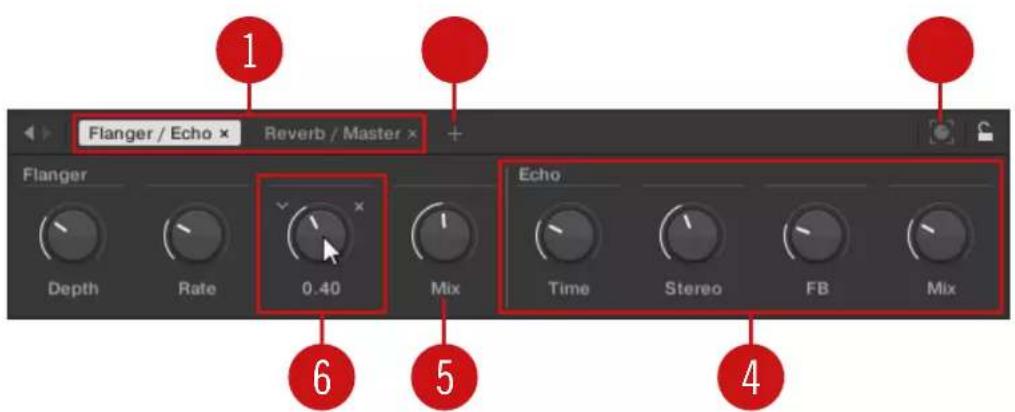
The Edit mode of the Plug-in panel
Each page (1) of the Control section on the KOMPLETE KONTROL keyboard shows up as a label at the top of the Plug-in panel.
- Click on a label to view and edit the controls on this page. The current page is highlighted.
- To delete a page, click on the cross icon next to its label.
The Add Page button (2) allows you to add more pages to the Control section for the current Preset file, while the Learn button (3) enables Learn mode for the Plug-in panel.
In Learn mode, select a control in the Plug-in panel and move any parameter on the Instrument's panel to learn this parameter to the selected control (highlighted in blue).
Controls can be grouped to sections (4) to show related parameters in a coherent manner.
- Double-click on the empty space above a parameter, enter a name, and then press [enter] or click elsewhere to create a new section starting with the chosen parameter.
- To rename an existing section, double-click on it and enter a new name. Press [enter] or click elsewhere to confirm the changes.
The name of each control is shown below the corresponding knob in the Plug-in panel (5).
▶ To change the name of a control, double-click on it and enter a new name. Press [enter] or click elsewhere to confirm the changes.
If you place the mouse over a control (6) in Edit mode, additional options allow for changing the parameter mapping of this control.
- Click on the arrow icon at the left of the control's knob and select a parameter from the drop-down menu to map it to this control.
- Click on the cross icon at the right of the control's knob to delete this control from the current page.
15 Playing and Editing Scales and Chords
KOMPLETE KONTROL's Scale engine comes equipped with a vast amount of scales that you can select and use to play your Instruments. This opens up possibilities to play an Instrument such as a piano according to, e.g., the minor pentatonic scale without hitting a “false” note. In Chord mode you can use the provided scales to combine individual note harmonies into chords. Combined with the Arpeggiator, you can even play scales automatically simply by pressing down a key on the KOMPLETE KONTROL keyboard or receiving an incoming MIDI note.
When you select a scale in the Perform panel and switch the Scale engine on, the scale gets mapped onto the keyboard and is reflected by the Light Guide. This means that regardless of what keys you actually press down on the keyboard—or what MIDI notes you send from the host—the notes that are being played back are always mapped onto the closest notes contained in the scale that you selected.
15.1 A Note about Music Theory
KOMPLETE KONTROL has built-in scales and harmonies that you can select to play your Instruments with chords and arpeggiator sequences. To learn more about what that really means, continue reading below.
Scales
Traditionally music is built by combining elements of rhythm and harmony. There are many exceptions to this, but to understand the concepts of scales, chords and arpeggiator sequences let's start from there.
All notes and keys correspond to a pitch—or tone frequency. On a keyboard, each key typically represents a semitone, meaning that it is a “half step” higher or lower in pitch than the next key (though other tunings exist as well). To play melodies or chords that sound good together, notes are usually grouped together in scales. In the Western music tradition, a scale typically covers seven white keys and five black keys on a keyboard or piano: an octave. It is called so because the eighth key that follows the seventh contiguous white key plays the same note as the first of the seven. That key is called the root note. A scale then, is a certain combination of
white and black keys (each representing a semitone) within an octave. By playing only the keys belonging to some scale, you are certain to stay “in key” within that scale. Important to note though, is that scales are not made up by absolute note values, but rather consist of relative changes in pitch—or steps along the scale. For example, the major scale consists of “whole step—whole step—half step—whole step—whole step—half step,” which means that you can transpose the scale up and down a keyboard; choose any root note you want and play the scale from there.
Chords
Polyphonic Instruments let you play multiple notes simultaneously—in other words chords. As an example, let’s see how to build up a chord by selecting individual notes from a scale and playing them simultaneously. In this case, we’ll use the C major scale. As we saw above, the major scale starts with two whole steps, followed by a half step, and then three more whole steps until it ends with another half step. We can use this knowledge to play a C major chord by pressing the root note C, then pressing another key two whole steps above C (the E note) and then yet another key a half step and a whole step further up the keyboard (the G note) all simultaneously. This C major chord corresponds to a root note (C), a third (E) and a fifth (G), which is the note interval of a major triad. By playing a triad chord you have just learned the concept of musical harmony, where notes are stacked together into chords and played simultaneously.
Arpeggiator Sequences
In above section you read about the combination of notes and playing them together as chords. You can also play them like diachronic note sequences, quite like playing the harp—or arpeggiator sequence. If chords have to do with adding harmony to a note, then arpeggiator sequences add time and rhythm. Instead of playing a chord consisting of three notes simultaneously, you can play the same three notes as a sequence in a given order (e.g. top-down) and at a certain rate (e.g. 1/16 notes). This is also a way for monophonic Instruments to play “chords.”
15.2 Activating the Scale Engine
In order to activate the Scale engine:
- Click the Perform panel button in the Header to show the Perform panel.

⇒ The Perform panel appears.
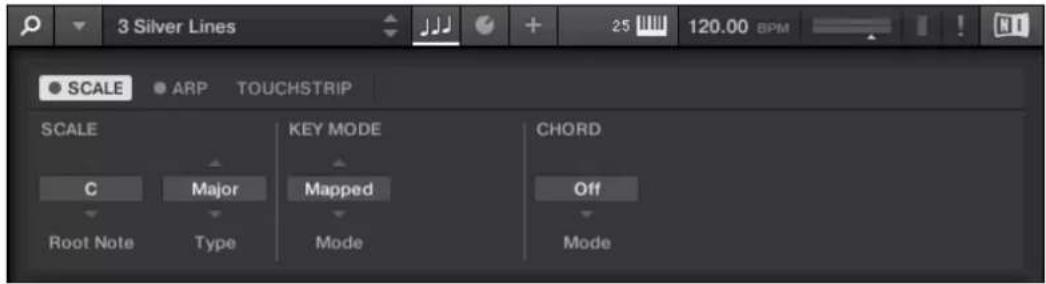
- To switch on the Scale engine, click the check box next to SCALE in the Perform section so it is filled blue.
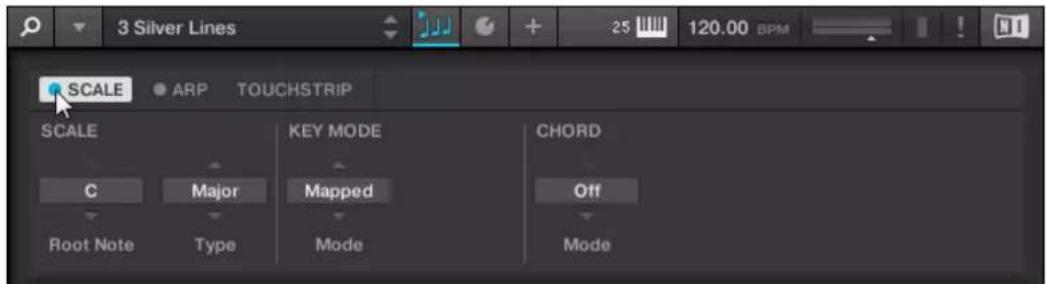
Activating the Scale Engine on the Keyboard
To switch on the Scale engine, press SCALE (Edit) in the Perform and Edit section on the keyboard.
15.3 Playing a Scale
To select and play a scale on the KOMPLETE KONTROL keyboard, follow these instructions:
- Press SHIFT + SCALE (Edit) to map the displays and knobs of the Control section to the Scale engine parameters.
- To select a scale, turn Knob 2 (BANK, by default set to MAIN) and Knob 3 (TYPE, by default set to MAJOR) until you find a scale you like.
- To play the scale you selected, ensure that the SCALE (Edit) button is lit.
⇒ The keys on the keyboard are now mapped to the notes in the selected scale. The mapping is reflected visually by the Light Guide. Pressing any unlit key automatically activates the nearest lit key so that only notes belonging to the selected scales are being played back! - To map the knobs and displays to Instrument parameters again, press PLUG-IN. The Scale engine will still be switched on.

If you selected Scale Type CHROM, all keys are lit.
15.4 Playing Chords
You can play chords in the usual way by pressing any number of keys simultaneously (or send multiple MIDI notes simultaneously from the host), but KOMPLETE KONTROL also lets you create and play chords by using Smart Play.

To play multiple notes in a chord simultaneously, the loaded Instrument must be able to handle polyphony.
To play a chord by only pressing a single key on the keyboard, follow these instructions:
- Press SHIFT + SCALE (Edit) to map the displays and knobs of the Control section to the Scale engine parameters.
- To activate Chord mode, set MODE to HARM by turning Knob 5 (by default set to OFF).
-
Define the intervals of your chord with the TYPE parameter by turning Knob 6 (by default set to 1-3-5).
-
To enable playing full chords, ensure that the SCALE (Edit) button is lit.
Chord mode is activated and set to Harmonizer. Pressing any key automatically activates and plays back the nearest lit key according to the mapping by selected scale. It also plays back the third and the fifth note above the pressed key in the selected scale, in accordance with the interval value set by Knob 6 (1-3-5, meaning the first, third, and fifth note of a chord). All played back notes are indicated by the Light Guide.
- To map the knobs and displays to Instrument parameters again, press PLUG-IN. The Scale engine remains switched on.
15.5 Editing Scales and Chords
You have the possibility to tailor the scales and chords to your liking using the Scale engine parameters.
▶ To edit the Scale engine parameters in the KOMPLETE KONTROL software, click on SCALE in the Perform panel so it is highlighted.
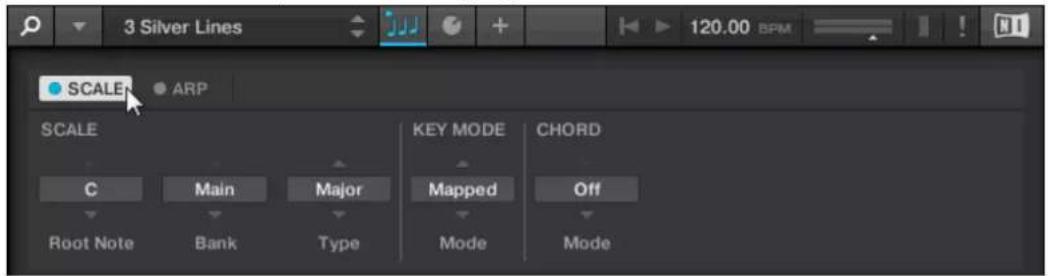
To enable Scale Edit mode and map the Scale engine parameters to the keyboard's Control section, press SHIFT + SCALE (Edit).
→ You can now edit the Scale engine parameters on the keyboard's Control section.
Available Scale Parameters
- To select the scale to be mapped to the keys of the keyboard and set its root note, use the SCALE parameters Root Note, Bank, and Type.
- To define how the selected scale is mapped to the keys of the keyboard, use the KEY MODE parameter.
- To automatically generate custom chords while playing on the keyboard, use the CHORD parameters Mode, Type, and Position.
15.6 Setting the Scale Parameters
The SCALE parameters Root Note, Bank, and Type allow you to select the scale to be mapped to the keys of the keyboard and set its root note.
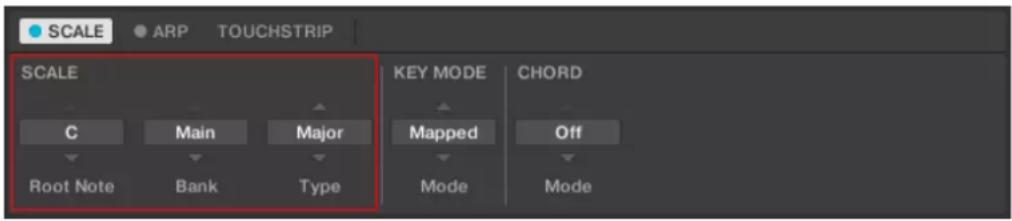
The SCALE parameters Root Note, Bank, and Type.
15.6.1 Scale Root Note
The first SCALE parameter is Root Note. On the keyboard, it is mapped to Knob 1 of the Control section in Scale Edit mode. Setting the root note of a scale means deciding what key the scale will begin with. The following notes of the scale depend on which scale pattern you select with the SCALE Type parameter (see below). You can transpose any scale pattern up or down by selecting a different Root Note.

The Light Guide indicates the selected Root Note via fully lit LEDs, while other active keys are half-lit.
The Root Note setting includes the following values:
·C
• C#
15.6.2 Scale Bank and Type
The second and third SCALE parameters from the left are Bank and Type. On the keyboard, they are mapped to Knob 2 and Knob 3 of the Control section in Scale Edit mode. Use them to decide the scale pattern according to which the notes will be mapped onto the keys of the KOMPLETE KONTROL keyboard. Each Bank consists of 15 thematically related scales, which can be selected by using the Type control.
For example, using the default Root Note value C combined with the default Type Major from the default Bank Main, you get the scale C major, which spans over one octave and contains the notes C, D, E, F, G, A, and B (followed by C again). If instead you select G as your Root Note, the G major scale contains the notes G, A, B, C, D, E, and F# (followed by G again). You will notice that the distance between each note follows the same pattern of “whole step–whole step–half step–whole step–whole step–whole step–half step,” which is the pattern of the Major scale.
If you are triggering an Instrument via an incoming MIDI pattern from the host, the notes of the MIDI pattern will be mapped onto the closest keys belonging to the selected Type. This means that, for example (with Root Note set to C) a MIDI pattern consisting of the notes C-D-D# will be played back as such if Type is set to Chromatic (named CHROM on the keyboard) from Bank Main, but instead as C-D-E if Type is set to Major.

The Light Guide indicates the active keys in the selected Type via lit LEDs, while inactive keys are unlit.
The following scales are available:
| Scale Bank Type Degree Formula | |||
| Chromatic | Main | Chrom | 1 b2 2 b3 3 4 b5 5 b6 6 b7 7 |
| Major Main Major 1 2 3 4 | 5 6 7 | ||
| Minor | Main | Minor | 1 2 b3 4 5 b6 b7 |
| Harm Min Main Harm Min | 1 2 b3 4 5 b6 7 | ||
| Maj Pent Main Maj Pent 1 | 2 3 5 6 | ||
| Min Pent Main Min Pent 1 | b3 4 5 b7 | ||
| Blues | Main | Blues | 1 b3 4 #4 5 b7 |
| Japanese | Main | Japanese | 1 2 b3 5 b6 |
| Freygish | Main | Freygish | 1 b2 3 4 5 b6 b7 |
| Gypsy | Main | Gypsy | 1 2 b3 #4 5 b6 7 |
| Arabic | Main | Arabic | 1 b2 3 4 5 b6 7 |
| Altered | Main | Altered | 1 b2 #2 3 #4 b6 b7 |
| Whole Tone | Main | WH Tone | 1 2 3 #4 #5 b7 |
| H-W Dim | Main | H-W Dim | 1 b2 #2 3 #4 5 6 b7 |
| W-H Dim | Main | W-H Dim | 1 2 b3 4 #4 #5 6 7 |
| Ionian | Modes Ionian | 1 2 3 | 4 5 6 7 |
| Dorian | Modes | Dorian | 1 2 b3 4 5 6 b7 |
| Phrygian | Modes | Phrygian | 1 b2 b3 4 5 b6 b7 |
| Lydian | Modes | Lydian | 1 2 3 #4 5 6 7 |
| Mixolydian | Modes | Mixolyd | 1 2 3 4 5 6 b7 |
| Aeolian | Modes | Aeolian | 1 2 b3 4 5 b6 b7 |
| Locrian | Modes | Locrian | 1 b2 b3 4 b5 b6 b7 |
| Ionian b2 | Modes | Ion b2 | 1 b2 3 4 5 6 7 |
| Scale Bank Type Degree Formula | |||
| Dorian b5 | Modes | Dor b5 | 1 2 b3 4 b5 6 b7 |
| Harm Phryg | Modes | Har Phry | 1 b2 b3 4 5 b6 7 |
| Phryg Major Modes Phry Maj 1 b2 b3 4 | Maj 1 b2 b3 4 | 5 6 7 | |
| Lydian b3 Modes Lyd b3 1 2 b3 #4 5 6 | 7 | ||
| Major Locrian | Modes | Maj Loc | 1 2 3 4 b5 b6 b7 |
| Minor Locrian | Modes | Min Loc | 1 2 b3 4 b5 b6 b7 |
| Super Locrian | Modes | Sup Loc | 1 b2 b3 b4 b5 b6 b7 |
| Lydian b7 | Jazz | Lyd b7 | 1 2 3 #4 5 6 b7 |
| Altered | Jazz | Altered | 1 b2 #2 3 #4 b6 b7 |
| Diminished | Jazz | Diminshd | 1 b2 #2 3 #4 5 6 b7 |
| Mixo b13 | Jazz | Mix b13 | 1 2 3 4 5 b6 b7 |
| Mixo b9 b13 | Jazz | Mixb9b13 | 1 b2 3 4 5 b6 b7 |
| Lydian b7 b2 | Jazz | Lyd b7b2 | 1 b2 3 #4 5 6 b7 |
| Bebop | Jazz | Bebop | 1 2 3 4 5 6 b7 7 |
| Whole Tone | Jazz | Whole Tn | 1 2 3 #4 #5 b7 |
| Blues Maj | Jazz | Blues Ma | 1 2 b3 3 5 6 |
| Blues Min | Jazz | Blues Mi | 1 b3 4 #4 5 b7 |
| Blues Combined | Jazz | BluesCmb | 1 2 b3 3 4 #4 5 6 b7 |
| Lydian #5 | Jazz | Lyd #5 | 1 2 3 #4 #5 6 7 |
| Jazz Minor | Jazz | Jazz Mi | 1 2 b3 4 5 6 7 |
| Half Dim | Jazz | Half Dim | 1 2 b3 4 b5 b6 b7 |
| Augmented | Jazz | Augmentd | 1 b3 3 5 #5 7 |
| Hungarian Min | World | Hung Min | 1 2 b3 #4 5 b6 7 |
| Scale Bank Type Degree Formula | |||
| Hungarian Maj | World | Hung Maj | 1 #2 3 #4 5 6 b7 |
| Neapolitan | World | Neapoltn | 1 b2 b3 4 5 b6 7 |
| Spanish | World | Spanish | 1 b2 b3 3 4 5 b6 b7 |
| Greek | World | Greek | 1 2 b3 b4 5 b6 b7 |
| Jewish 1 | World | Jewish 1 | 1 b2 3 4 5 b6 b7 |
| Jewish 2 | World | Jewish 2 | 1 2 b3 #4 5 6 b7 |
| Indian 1 | World | Indian 1 | 1 b2 b3 #4 5 b6 7 |
| Indian 2 World Indian 2 1 | 2 b3 #4 5 6 | 7 | |
| Indian 3 World Indian 3 1 | b2 2 4 5 b6 | 6 | |
| Indian 4 World Indian 4 1 | #2 3 4 5 #6 | 7 | |
| Mid East 1 | World | M East 1 | 1 b2 3 4 5 b6 7 |
| Mid East 2 | World | M East 2 | 1 b2 3 4 b5 b6 7 |
| Mid East 3 | World | M East 3 | 1 b2 b3 4 b5 6 b7 |
| Mid East 4 | World | M East 4 | 1 b2 3 4 b5 6 b7 |
| Penta I | 5-Tone | Pent I | 1 2 3 5 6 |
| Penta II | 5-Tone | Pent II | 1 2 4 5 b7 |
| Penta III | 5-Tone | Pent III | 1 b3 4 b6 b7 |
| Penta IV 5-Tone Pent IV | 1 2 4 5 6 | ||
| Penta V | 5-Tone | Pent V | 1 b3 4 5 b7 |
| Hirajoshi | 5-Tone | Hira | 1 2 b3 5 b6 |
| Insen | 5-Tone | Insen | 1 b2 4 5 b7 |
| Kokin Joshi | 5-Tone | Kokin 1 2 4 5 b6 | |
| Akebono | 5-Tone | Akebono | 1 2 b3 5 6 |
| Ryukuan 5-Tone Ryukuan | 1 3 4 5 7 | ||
| Abhogi 5-Tone Abhogi 1 2 | b3 4 6 | ||
| Bhupathi 5-Tone Bhupkali | 1 2 3 5 b6 | ||
| Hindolam | 5-Tone | Hindolam | 1 b3 4 b6 b7 |
| Bhupalam 5-Tone Bhupalam | 1 b2 b3 5 | b6 | |
| Amritavarshini 5-Tone Amrita | 1 3 #4 5 7 | ||
| Octatonic | Modern | Octatonc | 1 2 b3 4 #4 #5 6 7 |
| Acoustic | Modern | Acoustic | 1 2 3 #4 5 6 b7 |
| Augmented | Modern | Augmentd | 1 b3 3 5 #5 7 |
| Tritone | Modern | Tritone | 1 b2 3 b5 5 b7 |
| Leading Wh Tone | Modern | Lead Wh | 1 2 3 #4 #5 #6 7 |
| Enigmatic | Modern | Enigmatc | 1 b2 3 #4 #5 #6 7 |
| Scriabin | Modern | Scriabin | 1 2 3 #4 6 b7 |
| Tcherepnin | Modern | Tcherepn | 1 #1 #2 3 4 5 #5 6 7 |
| Messiaen I | Modern | Mes I | 1 2 3 #4 #5 #6 |
| Messiaen II | Modern | Mes II | 1 b2 #2 3 #4 5 6 b7 |
| Messiaen III | Modern | Mes III | 1 2 b3 3 #4 5 b6 b7 7 |
| Messiaen IV | Modern | Mes IV | 1 b2 2 4 #4 5 b6 7 |
| Messiaen V | Modern | Mes V | 1 b2 4 #4 5 7 |
| Messiaen VI | Modern | Mes VI | 1 2 3 4 #4 #5 #6 7 |
| Messiaen VII | Modern | Mes VII | 1 b2 2 b3 4 #4 5 b6 6 7 |
| Natural | Major | Natural | 1 2 3 4 5 6 7 |
| Lydian | Major | Lydian | 1 2 3 #4 5 6 7 |
| Scale Bank Type Degree Formula | |||
| Mixolydian Major Mixolyd | 1 2 3 4 5 6 b | 7 | |
| Major Minor Major Maj Min | 1 2 3 4 5 b | 6 b7 | |
| Harmonic Major Major Har | Maj 1 2 3 4 | 5 b6 7 | |
| Dbl Har Major Major Dbl | Maj 1 b2 3 4 | 5 b6 7 | |
| Neapolitan Maj Major Nea | Maj 1 b2 3 4 | 5 6 7 | |
| Major Locrian | Major | Maj Loc | 1 2 3 4 b5 b6 b7 |
| Blues Major Major Blues Ma | 1 2 | b3 3 5 6 | |
| Bebop Major | Major | Bebop Ma | 1 2 3 4 5 #5 6 7 |
| Hexa 1 | Major Hexa 1 | 1 2 3 5 6 7 | |
| Hexa 2 | Major Hexa 2 | 1 2 3 4 5 6 | |
| Penta 1 | Major Penta | 1 1 2 3 5 6 | |
| Penta 2 | Major Penta | 2 1 3 4 5 7 | |
| Penta 3 | Major Penta | 3 1 3 5 6 7 | |
| Natural | Minor | Natural | 1 2 b3 4 5 b6 b7 |
| Dorian | Minor | Dorian | 1 2 b3 4 5 6 b7 |
| Phrygian | Minor | Phrygian | 1 b2 b3 4 5 b6 b7 |
| Minor Major Minor | Min Maj 1 2 | b3 4 5 6 7 | |
| Harmonic Minor | Minor | Har Min | 1 2 b3 4 5 b6 7 |
| Dbl Har Minor | Minor | Dbl Min | 1 2 b3 #4 5 b6 7 |
| Neapolitan Min | Minor | Nea Min | 1 b2 b3 4 5 b6 7 |
| Minor Locrian | Minor | Min Loc | 1 2 b3 4 b5 b6 b7 |
| Blues Min | Minor | Blues Mi | 1 b3 4 #4 5 b7 |
| Bebop Minor | Minor | Bebop Mi | 1 2 b3 4 5 b6 b7 7 |
| Scale Bank Type Degree Formula | |||
| Hexa 1 | Minor | Hexa 1 | 1 2 b3 5 b6 b7 |
| Hexa 2 Minor Hexa 2 1 2 | b3 4 5 b6 | ||
| Penta 1 Minor Penta 1 1 | 2 b3 5 b6 | ||
| Penta 2 Minor Penta 2 1 | b3 4 5 b7 | ||
| Penta 3 | Minor | Penta 3 | 1 b3 5 b6 b7 |
15.7 Setting the Key Mode Parameter
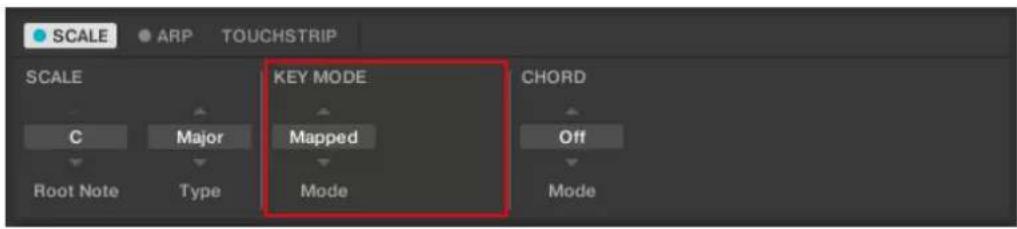
The KEY MODE parameter Mode.
The only KEY MODE parameter is Mode. On the keyboard, it is mapped to Knob 3 of the Control section in Scale Edit mode. It defines how the selected is mapped to the keys of the keyboard. This is also reflected by the Light Guide. The KEY MODE menu consists of the following three modes, which are described in detail below:
In Mapped mode, the notes are mapped to the keyboard according to the selected scale. Notes outside of the selected scale are not active. Pressing the corresponding keys will trigger the next available note in the selected scale. The Light Guide highlights the active keys via lit LEDs. The Root Note is indicated by a brighter lit LED.

Both sections Root Note and Scale Type describe the use of Scale on the assumption that the KEY MODE is set to its default value Mapped.
Guide Mode
In Guide mode, the notes are mapped to the keyboard in the same way as in Mapped mode, however notes outside of the selected scale remain active. The mapping only affects the representation of the scale by means of the Light Guide.
Easy Mode
In Easy mode, the notes of the selected scale are mapped to the keyboard so that any scale can be played using the white keys of the keyboard only. The black keys are inactive and pressing them will not trigger any other notes.

Selecting the 12-step Chromatic scale in KEY MODE Easy maps the keys in the same way as in the Mapped mode.
The Root Note is always mapped to the middle C key (commonly called C3). If the selected scale consists of seven notes, it matches the seven white keys of a single octave on the keyboard. In this case, the Root Note coincides with the key C across all octaves of the keyboard. If instead the selected scale consists of more or less than seven notes, it does not match the seven white keys of a single octave on the keyboard and the Root Note is shifted throughout adjacent octaves accordingly.
The Light Guide highlights all white keys of the keyboard. The Root Note is indicated by a brighter lit LED.
For two examples of the Easy mode mappings in Major and Minor, see below.
| Scale Type Mapping in Key Mode: Easy | ||||||||
| White Keys C3 D3 E3 F3 G3 A3 B3 | ||||||||
| Major | ||||||||
| Corresponding Mapping R 2 3 4 5 6 7 | ||||||||
| Example with Root Note: C | C D E F | G A B | ||||||
| Minor | ||||||||
| Corresponding Mapping R 2 b3 4 5 b6 b7 | ||||||||
| Example with Root Note: C | C D Eb | F G Ab Bb | ||||||
15.8 Setting the Chord Parameters
15.8.1 Chord Mode
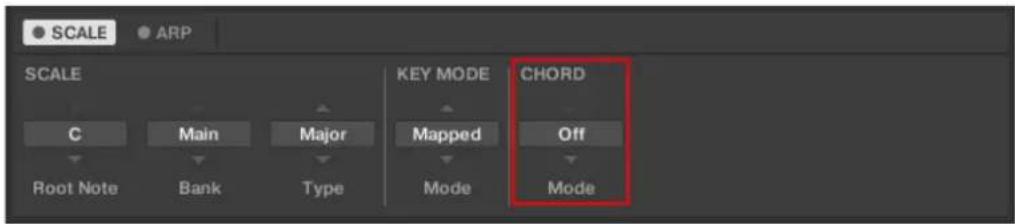
The CHORD parameter Mode.
The first CHORD parameter is Mode. On the keyboard, it is mapped to Knob 5 of the Control section in Scale Edit mode. Use it to generate chords from single notes, either from the KOMPLETE KONTROL keyboard or from incoming MIDI notes from the host.

The Light Guide indicates the keys being played back in a chord via fully lit LEDs, while active keys are half-lit and inactive keys are unlit.
CHORD Mode has one inactive (Off) and two active states, which are described in detail below:
- Off
- Harm
- Chd Set
Harm
If CHORD Mode is set to Harm, the CHORD Type menu allows you to specify the interval of notes in the selected SCALE Type that will constitute the chord: E.g. a triad in the form of the root note, the third note, and the fifth note (CHORD Type value 1-3-5).
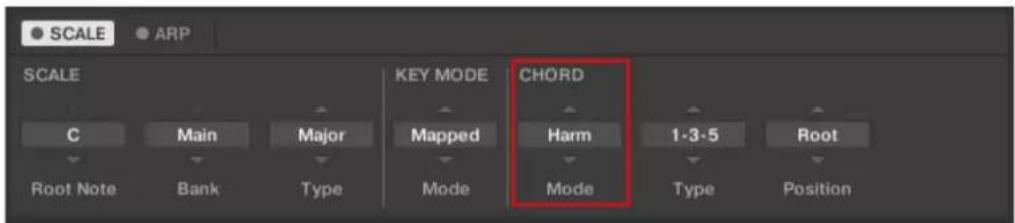
The CHORD parameter Mode, set value Harm.
Chd Set
If CHORD Mode is set to Chd Set, the CHORD Type menu allows you to choose from a selection of major and minor chords depending on the current Root Note.
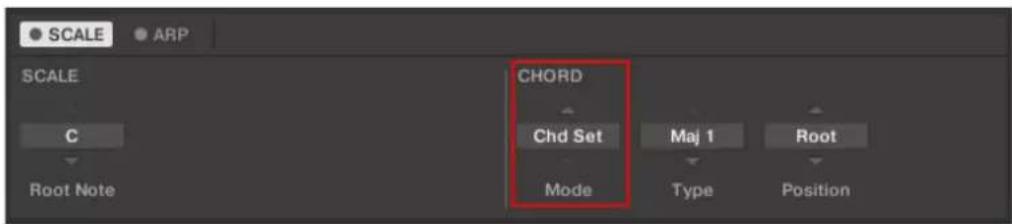
The CHORD parameter Mode, set value Chd Set.

The SCALE Type and KEY MODE parameters are not available when CHORD Mode is set to Chd Set.
15.8.2 Chord Type
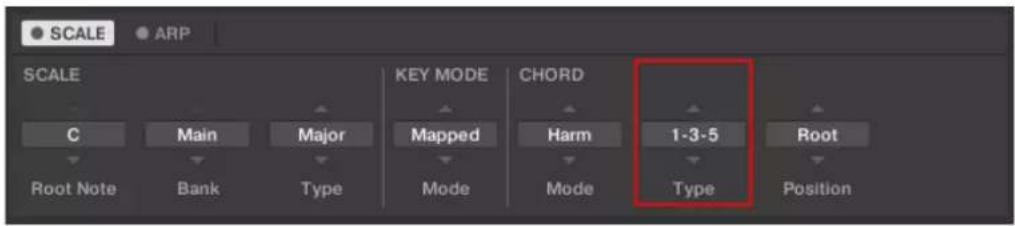
The CHORD parameter Type.
The second CHORD parameter is Type. On the keyboard, it is mapped to Knob 6 of the Control section in Scale Edit mode. Use it to define a chord that will be generated from a single note used as input.

The Light Guide indicates the keys being played back in a chord via fully lit LEDs, while active keys are half-lit and inactive keys are unlit.
The available CHORD Type values depend on whether CHORD Mode is set to Harm or Chd Set, as described in detail below.
Chord Type, Chord mode Set to Harmonizer
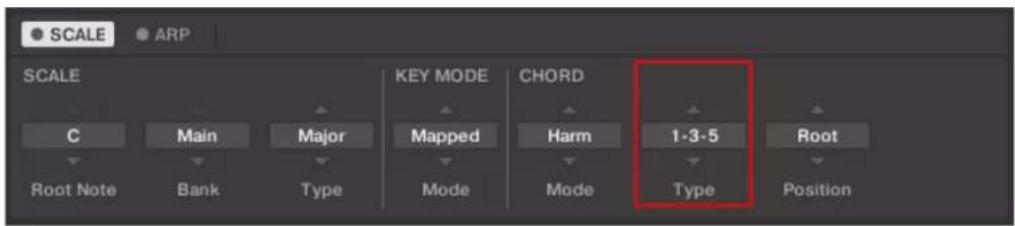
The CHORD parameter Type, set value 1-3-5 (Mode set to Harm).
If CHORD Mode is set to Harm, then CHORD Type will offer you a selection of individual notes present in the selected SCALE Type. This means that for all scales except the 12-tone Chrom scale (see further below), you can select the interval of notes that will make up your chord.
The note interval is added onto the key of an incoming MIDI note, either from the KOM-PLETE KONTROL keyboard or from the host. For example, you can select to play a C minor triad by setting Root Note to C, SCALE Type to Minor, CHORD Mode to Harm, and CHORD Type to 1-3-5. If all of this seems complex, try setting a random value and use the keyboard's Light Guide to see what keys are active, inactive, and played back.
When CHORD Mode is set to Harm, the CHORD Type setting includes the following values:
| Chord Type Interval Added to Played Note | |
| Octave Octave | |
| 1-3 3rd | |
| 1-5 5th | |
| 1-3-5 3rd and 5th | |
| 1-4-5 4th and 5th | |
| 1-3-5-7 3rd, 5th and 7th | |
| 1-4-7 4th and 7th | |
Chord Type, Chord mode Set to Chord Set
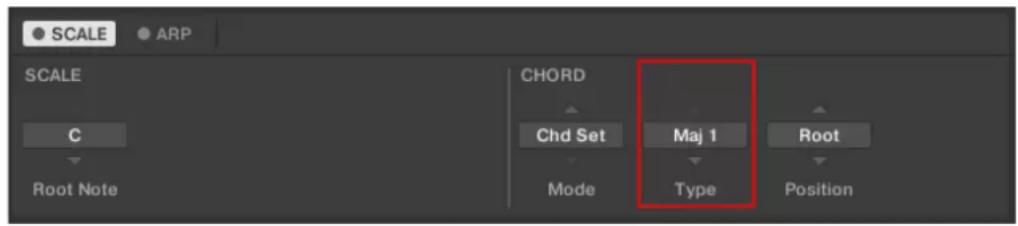
The CHORD parameter Type, set value Maj 1 (Mode set to Chd Set).
If CHORD Mode is set to Chd Set and, for example, the Root Note is set to C, then the CHORD Type menu presents you with a list of selectable chords. Values are, e.g., Maj 4 and Min 7, which would generate a major and minor chord, respectively—both using C as the chord's root note.
When CHORD Mode is set to Chd Set, the CHORD Type setting includes the following values:
• Maj 1
- Maj 2
• Maj 3
- Maj 4
- Maj 5
- Maj 6
• Maj 7
• Maj 8
- Min 1
- Min 2
- Min 3
- Min 4
- Min 5
- Min 6
- Min 7
- Min 8
Chord Type and the Chromatic Scale
The Chrom scale consists of every semitone in an octave. That means that when you play every white key and every black key of an octave up or down, you are playing the 12-step Chrom scale. Since all semitones of an octave are present in the Scale, you can use all keys to form chords. In turn, selecting Chrom as SCALE Type means that you can select virtually any CHORD Type. The following chords are available and can be generated:
| Chord Type Semitones Added above Played Note | |
| Octave 12 | |
| Perf 4 (Perfect 4) 5 | |
| Perf 5 (Perfect 5) 7 | |
| Major 4 and 7 | |
| Minor 3 and 7 | |
| Sus 4 (Suspended 4) 5 and 7 | |
| Maj 7 (Major 7) 4, 7 and 11 | |
| Min 7 (Minor 7) 3, 7 and 10 | |
| Dom 7 (Dominant 7) 4, 7 and 10 | 10 |
| Dom 79(Dominant 9) 4, 7, 10 and 14 | |
| Min 7 b5 (Minor 7 b5) 3, 6 and 10 | |
| Dim 7 (Diminished 7) 3, 6 and 9 | |
| Aug (Augumented) 4 and 8 | |
| Quartal 5, 10 and 15 | |
| Trichd (Trichord) 5 and 11 | |
15.8.3 Chord Position
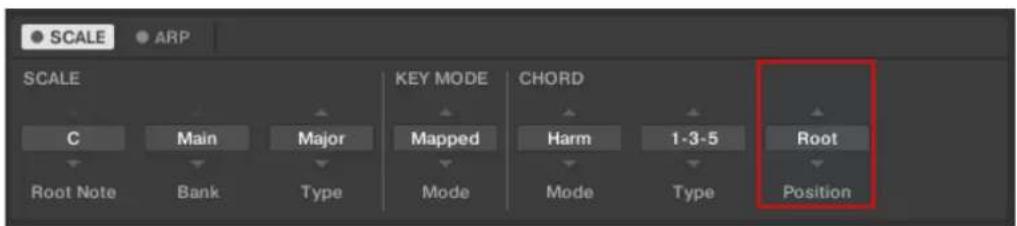
The CHORD parameter Position.
The third CHORD parameter is Position. On the keyboard, it is mapped to Knob 7 of the Control section in Scale Edit mode. Use it to spread the notes of a chord generated from a single note and to aid a more musical transition between chords.
The Position parameter is available when CHORD Type is set to Harm or Chd Set and includes the following values:
| Position Description | |
| Root The root-position of the selected chord is always played. | |
| -1 to -8 | Decreasing Position with negative values moves the highest note of the current chord down by an octave, this inverts the chord to a lower position in the selected scale. |
| +1 to +8 | Increasing Position with positive values moves the lowest note of the current chord up by an octave, this inverts the chord to a higher position in the selected scale. |
| Auto This provides a more human feel in the transition from one chord to another. The notes used to form each chord are automatically selected to provide the best inversion. | |
16 Playing and Editing the Arpeggiator
Smart Play features a flexible and versatile Arpeggiator that lets you play your Instruments in note sequences according to the keys you press on the keyboard. You can also use the Arpeggiator in combination with the scales and chords created with the Scale engine. To play an arpeggiated note sequence you only need to press any key on the KOMPLETE KONTROL keyboard or receive an incoming MIDI note from the host.
Activating the Arpeggiator in the KOMPLETE KONTROL Software
▶ Click the Perform panel button in the Header to show the Perform panel.

→ The Perform panel appears in KOMPLETE KONTROL.
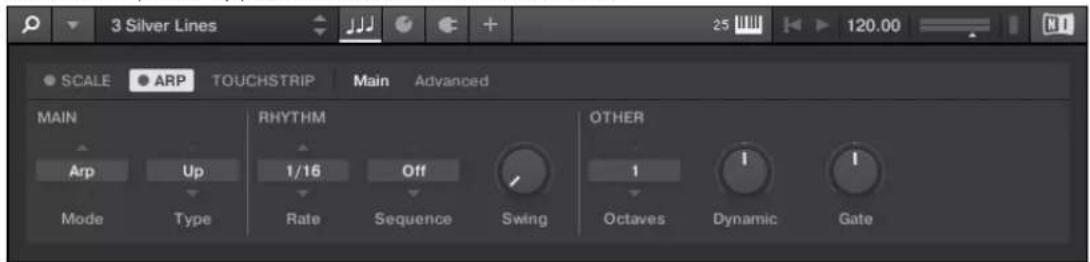
To switch on the Arpeggiator, click the blue check box next to ARP in the Perform panel so it is filled.
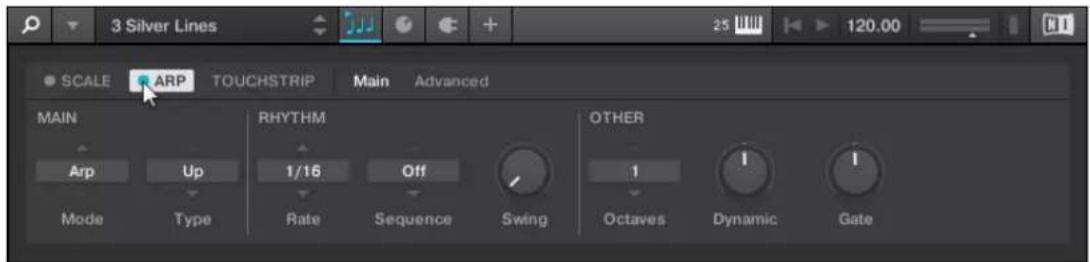
Activating the Arpeggiator on the Keyboard
▶ To switch on the Arpeggiator, press ARP (Edit) in the Perform and Edit section on the keyboard.
16.1 Playing Arpeggiator Sequences
KOMPLETE KONTROL lets you create and play complex arpeggiator sequences using Smart Play.
- Switch on the Arpeggiator by pressing the ARP (Edit) button on the keyboard.
- Press a number of keys to start the Arpeggiator.
- The Arpeggiator automatically plays back the notes corresponding to the pressed keys as a sequence, rather than simultaneously.
You can also edit the Arpeggiator parameters in the Control section for further tweaking of the sequence:
-
Press SHIFT + ARP (Edit) to map the displays and knobs of the Control section to the Arpeggiator parameters.
-
To change the direction of the sequence to e.g. UP-DOWN, turn Knob 2 (TYPE, by default set to UP).
-
To adjust the OCTAVES reach of the Arpeggiator, turn Knob 6 (by default set to 1) to e.g. 4.
16.2 Using a Sustain Pedal to Control the Arpeggiator
You can use a sustain pedal to control the Arpeggiator.
-
Pressing the sustain pedal while keys are held and then releasing those keys continues the arpeggiator sequence. This way the footswitch behaves as a trigger for the Arpeggiator. When a new key is pressed, the new note is added to the current sequence.
-
Releasing the sustain pedal with no keys pressed stops the sequence and all playing notes. Releasing the sustain pedal with keys still pressed removes all notes from the sequence except those corresponding to the pressed keys—the sequence continues with the pressed keys only.
16.3 Using Arpeggiator Snapshots on the Keyboard
The Arpeggiator snapshots let you quickly recall four sets of Arpeggiator settings. This way you can compare settings, or quickly switch between them during a performance. On the keyboard, the snapshots are mapped to Button 5–8 on the Control section in Arp Edit mode. In the displays, they are labeled with their respective settings for the RATE parameter (e.g. 1/8, 1/16, 1/16 T, etc.).
To select a snapshot, press its corresponding button on the keyboard's Control section.
→ All settings associated with this snapshot are instantly recalled.
▶ To change the settings associated with a snapshot, select it and adjust the parameters.
→ The new settings are saved automatically, and you can switch forth and back between snapshots to recall them.
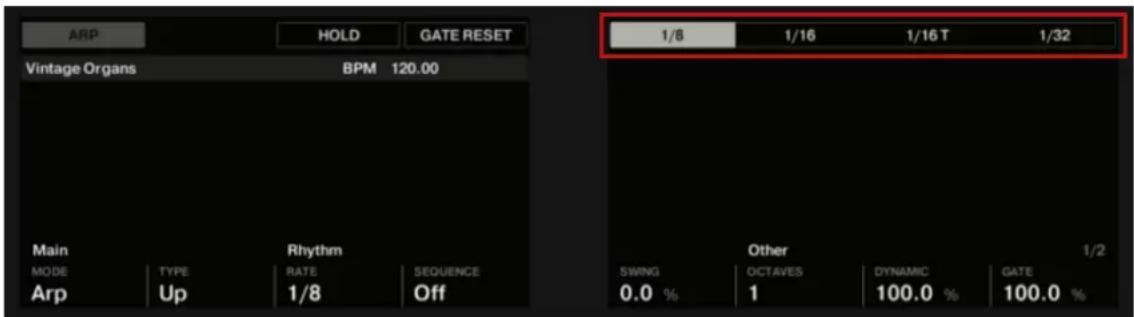
Arpeggiator snapshots in the Control section
16.4 Editing the Arpeggiator
The Arpeggiator's parameters give you many possibilities to shape your own note sequences.
To edit the Arpeggiator parameters in the KOMPLETE KONTROL software, click on ARP in the Perform panel so it is highlighted.
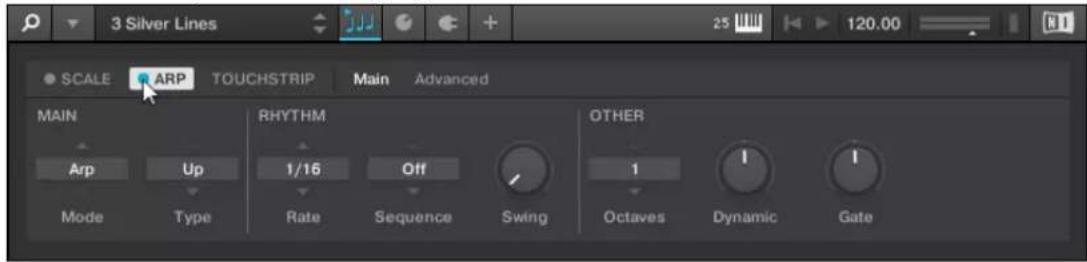
To enable Arpeggiator Edit mode and map the Arpeggiator parameters to the keyboard's Control section, press SHIFT + ARP (Edit).
→ You can now edit the Arpeggiator parameters on the keyboard's Control section. Note that the Arpeggiator Edit mode consists of two pages.
Available Arpeggiator Parameters
- To switch between Arp and Note Repeat mode and change the playback direction of the arpeggiator sequence, use the MAIN parameters Mode and Type.
- To create interesting rhythms for the arpeggiator sequence, use the RHYTHM parameters Rate, Sequence, and Swing.
- To change the range of available notes for the arpeggiator sequence, as well as their velocity and length, use the OTHER parameters Octaves, Dynamic, and Gate.
- To explore alternative versions of the same arpeggiator sequence, use the ADVANCED parameters Retrigger, Repeat, Offset, and Inversion.
- To change the range of keys that trigger the arpeggiator sequence, use the RANGE parameters Min. Key and Max. Key.
- To latch the playback of the arpeggiator sequence, use the HOLD parameter.
16.5 Setting the Main Parameters
The MAIN parameters Mode and Type allow you to switch between Arp and Note Repeat mode and change the playback direction of the arpeggiator sequence.
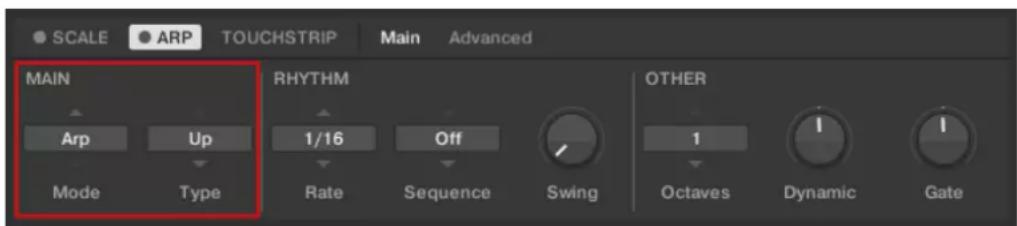
The MAIN parameters Mode and Type.
16.5.1 Main Mode
The first MAIN parameter is Mode. On the keyboard, it is mapped to Knob 1 of the Control section in Arp Edit mode. It lets you select either Arp or Note Repeat. Depending on your selection, a different set of Arpeggiator parameters will be available for further editing.
The Mode setting consists of the following two modes:
- Arp mode, which generates arpeggiator sequences based on chords you play on the keyboard, or the output of the Scale engine. With ARP switched on and Mode set to Arp, any chord you created using the Scale engine will play as an arpeggiated note sequence. In this case, you only need to press one key on the keyboard to hear the arpeggiated notes play out according to the selected scale.
- Note Repeat mode, which deactivates the Arpeggiator and instead repeats whichever note is input until KOMPLETE KONTROL receives a MIDI note-off message. Use the parameters Rate, Swing, and Gate to change the rhythm of the repeats.
16.5.2 Main Type
The second MAIN parameter, Type, is only available in Arp mode. On the keyboard, it is mapped to Knob 2 of the Control section in Arp Edit mode. It sets the sequential order of the arpeggiated notes. Choose whether your arpeggiated chord should be played from the root note and up, the other way around, or even simultaneously. Selecting Order Played will play back the notes in the order you pressed down the corresponding keys on the KOMPLETE KONTROL keyboard. Automating the Type parameter in the host can create interesting variations and textures.
The Type setting includes the following values:
- Up
- Down
- Up & Down (UP-DOWN on the keyboard)
- Order Played (PLAYED on the keyboard)
- Chord
16.6 Setting the Rhythm Parameters
The RHYTHM parameters Rate, Sequence, and Swing allow you to create interesting rhythms for the arpeggiator sequence.
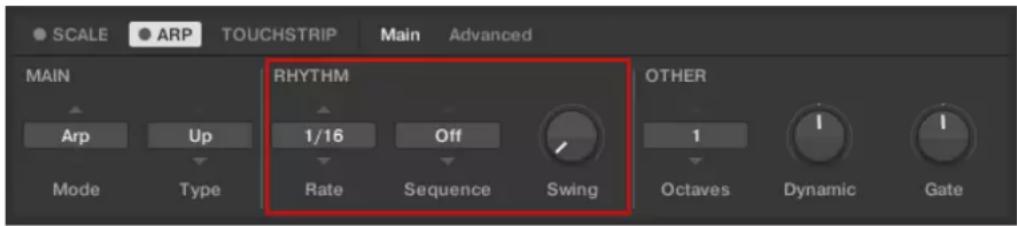
The RHYTHM parameters Rate, Sequence, and Swing.
16.6.1 Rhythm Rate
The first RHYTHM parameter, Rate, is available in both Arp and Note Repeat mode. On the keyboard, it is mapped to Knob 3 of the Control section in Arp Edit mode. It sets the beat of the Arpeggiator in relation to global tempo in musical values, ranging from 1/1 to 1/128. All note values (except 1/1 and 1/128) are available as basic notes, dotted notes, and triplets. Dotted notes are 1.5 times longer than the corresponding basic notes. Triplets are 2/3 the duration of their corresponding basic notes, so that e.g. three 1/4 notes are equal in duration to two basic 1/4 notes.
The Rate setting includes the following values:
· 1/1
- 1/2 Dotted (1/2 D)
- 1/1 Triplet (1/1 T)
· 1/2
- 1/4 Dotted (1/4 D)
- 1/2 Triplet (1/2 T)
· 1/4
- 1/8 Dotted (1/8 D)
- 1/4 Triplet (1/4 T)
1/8
- 1/16 Dotted (1/16 D)
- 1/8 Triplet (1/8 T)
· 1/16
- 1/32 Dotted (1/32 D)
- 1/16 Triplet (1/16 T)
1/32
- 1/64 Dotted (1/64 D)
- 1/32 Triplet (1/32 T)
· 1/64 - 1/128 Dotted (1/128 D)
- 1/64 Triplet (1/64 T)
· 1/128
16.6.2 Rhythm Sequence
The second RHYTHM parameter, Sequence, is only available in Arp mode. On the keyboard, it is mapped to Knob 4 of the Control section in Arp Edit mode. It gives you a way of adding interesting rhythms to your arpeggiated notes. Select one of eight different sequences and apply it to the arpeggiator sequence you are playing. Combine Sequence with the Rate parameter to create a huge variety of rhythms at different tempos. If Rate is set to a basic or dotted value, then Sequence applies a 16-step sequencer to the notes. If Rate is instead set to a triplet value, then Sequence applies a 12-step sequencer to the notes.
You can switch sequences in real time during playback. For example, if sequence 1 is running and you instead select sequence 2 after the fourth MIDI note in a pattern has been played back, then sequence 2 starts when the fifth MIDI note in the pattern is played back.
The Sequence setting includes the following values:
The third RHYTHM parameter, Swing, is available in both Arp and Note Repeat mode. On the keyboard, it is mapped to Knob 5 of the Control section in Arp Edit mode. Adding Swing to your note sequence can make it feel less quantized and sound more natural. Swing works by introducing a delay to every second note in a sequence. Doing so often adds a certain groove to the music.
Swing is a drag control that lets you select a value between 0% and 100%:
- Set a value of 0% to play the note sequence without swing.
- Increase the Swing value to add swing by delaying every second note. The delay length is a percentage of the current step size.

To display the set value of the SWING parameter, tap Knob 5.
Using Swing in combination with the Gate parameter adds further variations in note duration. For example, if Gate is set to 100%, KOMPLETE KONTROL sends a MIDI note-off message before each note and plays back the sequence legato. If Gate is set to values larger or smaller than 100%, then notes will be scaled after the value of the Swing parameter has been applied, leaving the groove intact.
16.7 Setting the Other Parameters
The OTHER parameters Octaves, Dynamic, and Gate allow you to change the range of available notes for the arpeggiator sequence, as well as their velocity and length.
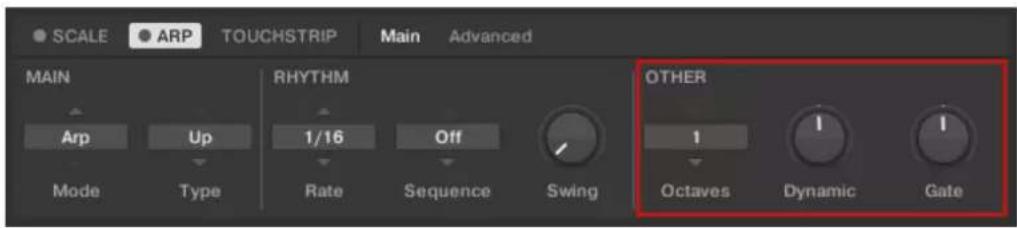
The OTHER parameters Octaves, Dynamic, and Gate.
16.7.1 Other Octaves
The first OTHER parameter, Octaves, is only available in Arp mode. On the keyboard, it is mapped to Knob 6 of the Control section in Arp Edit mode. It lets you decide the range of the arpeggiator sequence. You can choose to play back your sequence within the octave of only the keys you pressed on the KOMPLETE KONTROL keyboard, or you can select up to eight octaves and let the corresponding notes of your chord or scale be played back in as many octaves.
Depending on the settings you have made to the Type parameter, the octaves played back can be above (e.g. Up), below (e.g. Down) or both above and below (Up & Down) the pressed keys.
The Octaves setting includes the following values:

To display the set value of the OCTAVES parameter, tap Knob 6.
16.7.2 Other Dynamic
The second OTHER parameter, Dynamic, is only available in Arp mode. On the keyboard it is mapped to Knob 7 of the Control section in Arp Edit mode. It reads the velocity of the input—e.g. a key you pressed on the KOMPLETE KONTROL keyboard or an incoming MIDI note from the host—and scales it by the factor you set with the Dynamic parameter. The scaling is applied per note. The velocity of each played note is taken and multiplied by the value set with the Dynamic parameter.
Dynamic is a drag control that lets you set a value between 1.0% and 200.0%.

To display the set value of the DYNAMIC parameter, tap Knob 7.
16.7.3 Other Gate
The third OTHER Parameter, Gate, is available in both Arp and Note Repeat mode. On the keyboard, it is mapped to Knob 8 of the Control section in Arp Edit mode. It lets you decide the length of the notes in your sequence. Setting a value between 1% and 99% makes the duration of the notes shorter than they otherwise would be. Setting a value between 101% and 200% instead elongates the duration of the notes by the selected value.
Gate is a drag control that lets you set a value between 1.0% and 200.0%.
The GATE RESET function, mapped to Button 4 of the Control section lets you reset the GATE parameter to its default value of 100% at any time.

To display the set value of the GATE parameter, tap Knob 8.
16.8 Setting the Advanced Parameters
The ADVANCED parameters Retrigger, Repeat, Offset, and Inversion allow you to explore alternative versions of the same arpeggiator sequence.
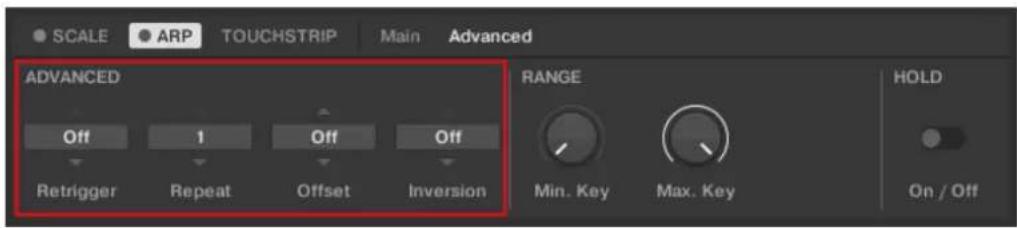
The ADVANCED parameters Retrigger, Repeat, Offset, and Inversion.
16.8.1 Advanced Retrigger
The first ADVANCED parameter, Retrigger, is only available in Arp mode. On the keyboard, it is mapped to Knob 1 of the Control section when page 2 is selected in Arp Edit mode. Retrigger sets a number of steps in the arpeggiator sequence after which the sequence restarts its cycle, regardless of the number of pitches in the sequence.
For example:
- If the arpeggiator sequence consists of a 5 note cycle (1 - 2 - 3 - 4 - 5) and Retrigger is set to 3, the Arpeggiator output is 1 - 2 - 3 - repeat.
- If the arpeggiator sequence consists of a 5 note cycle (1 - 2 - 3 - 4 - 5) and Retrigger is set to 8, the Arpeggiator output is 1 - 2 - 3 - 4 - 5 - 1 - 2 - 3 - repeat.
Rests in a Sequence are treated as steps:
- If the arpeggiator sequence consists of 6 pitches, the Sequence is 1 - 2 - 3 - rest - 4 - 5 - 6 - rest, and Retrigger is set to 5, the Arpeggiator output is 1 - 2 - 3 - rest - 4 - repeat.
16.8.2 Advanced Repeat
The second ADVANCED parameter, Repeat, is only available in Arp mode. On the keyboard, it is mapped to Knob 2 of the Control section when page 2 is selected in Arp Edit mode. Repeat sets a number by which each step in the arpeggiator sequence is repeated.
For example:
- If the arpeggiator sequence consists of a 3 note cycle (1 - 2 - 3) and Repeat is set to 3, the Arpeggiator output is 1 - 1 - 1 - 2 - 2 - 2 - 3 - 3 - 3 - repeat.
16.8.3 Advanced Offset
The third ADVANCED parameter, Offset, is only available in Arp mode. On the keyboard, it is mapped to Knob 3 of the Control section when page 2 is selected in Arp Edit mode. Offset sets a number by which the steps in the arpeggiator sequence are shifted in the cycle.
For example:
- If the arpeggiator sequence consists of a 5 note cycle (1 - 2 - 3 - 4 - 5) and Offset is set to O, the Arpeggiator output is 1 - 2 - 3 - 4 - 5 - repeat.
- If the arpeggiator sequence consists of a 5 note cycle (1 - 2 - 3 - 4 - 5) and Offset is set to +1, the Arpeggiator output is 2 - 3 - 4 - 5 - 1 - repeat.
- If the arpeggiator sequence consists of a 5 note cycle (1 - 2 - 3 - 4 - 5) and Offset is set to -1, the Arpeggiator output is 5 - 1 - 2 - 3 - 4 - repeat.
16.8.4 Advanced Inversion
The fourth ADVANCED parameter, Inversion, is only available in Arp mode. On the keyboard, it is mapped to Knob 4 of the Control section when page 2 is selected in Arp Edit mode. Inversion adds inverted alternations of the arpeggiator sequence to the cycle.
For example:
- If the arpeggiator sequence consists of a 3 note cycle (1 - 2 - 3), Type is set to Up , and Inversion is set to O , the Arpeggiator output is 1 - 2 - 3 - repeat.
- If the arpeggiator sequence consists of a 3 note cycle (1 - 2 - 3), Type is set to Up , and Inversion is set to I , the Arpeggiator output is 1 - 2 - 3 - 2 - 3 - repeat.
- If the arpeggiator sequence consists of a 3 note cycle (1 - 2 - 3), Type is set to Up, and Inversion is set to 2, the Arpeggiator output is 1 - 2 - 3 - (2 - 3 - 1 octave up) - (3 - 1 - 2 octave up) - repeat.
16.9 Setting the Range Parameters
The RANGE parameters Min. Key and Max. Key allow you to change the range of keys that trigger the arpeggiator sequence.
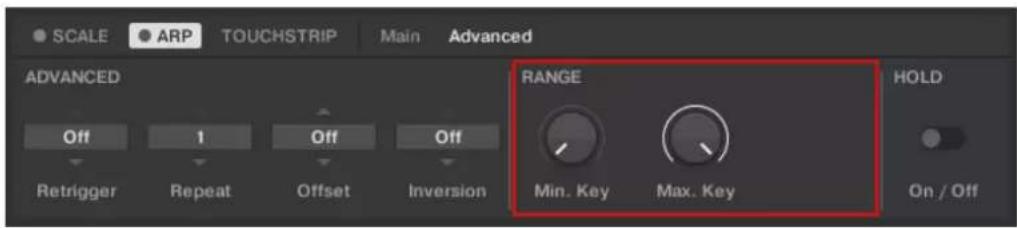
The RANGE parameters Min. Key and Max. Key.
16.9.1 Range Min. Key
The first RANGE parameter, Min. Key, is only available in Arp mode. On the keyboard, it is mapped to Knob 5 of the Control section when page 2 is selected in Arp Edit mode. Min. Key sets the lowest key that can be used as an input for the arpeggiator sequence.

The Arpeggiator can still generate pitches below the Min. Key setting.
16.9.2 Range Max. Key
The second RANGE parameter, Max. Key, is only available in Arp mode. On the keyboard, it is mapped to Knob 6 of the Control section when page 2 is selected in Arp Edit mode. Max. Key sets the highest key that can be used as an input for the arpeggiator sequence.

The Arpeggiator can still generate pitches above the Max. Key setting.
16.10 Setting the Hold Parameter
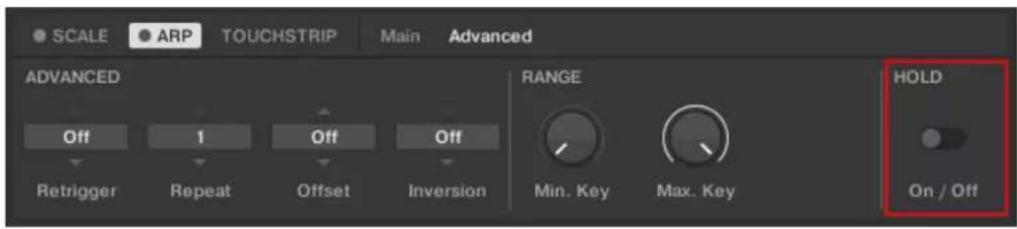
The HOLD parameter On / Off.
The HOLD parameter On/Off is available in both Arp and Note Repeat mode. On the keyboard, it is mapped to Button 3 of the Control section in Arp Edit mode. The HOLD function allows you to latch the notes played by the Arpeggiator. When set to On, the Arpeggiator will continuously play a sequence according to the last pressed keys on the keyboard.
HOLD On/Off is a switch control that lets you select the values On and Off.
- Pressing any key while HOLD is On will set a new sequence.
- To stop the Arpeggiator playback, set the HOLD parameter to Off.

Alternatively, you can switch the Arpeggiator completely off to stop playback by pressing ARP (Edit) in the keyboard's PERFORM section. When you switch the Arpeggiator back on, HOLD will still be active and you can continue to play latched note sequences with the Arpeggiator.
Index
Numerics
4-D encoder [62]
A
Accessibility [16]
activate speech output [19]
feature overview [20]
keyboard overview [16]
Training mode [20]
ARP (Edit) button [58]
Arpeggiator [237]
advanced parameters [244]
Dynamic [244]
editing [237]
Gate [244]
Gate Reset [244]
Groove [242]
Hold [248]
Inversion [246]
Main [238]
Main mode [238]
Main type [239]
Max. Key [247]
Min. Key [247]
note value [240]
Octaves [243]
Offset [246]
Other [242]
playing sequences [235]
Range [243] [246]
rate [240]
Repeat [245]
Retrigger [245]
rhythm [239] [241]
Sequence [241]
sustain pedal control [235]
Swing [242]
tempo [240]
Velocity [244]
Arpeggiator Mode
Note Repeat [238]
Arpeggiator sequence [213] [237]
Arpeggiator Snaphots [236]
ASIO driver [78]
Audio driver (selecting) [77]
Audio interface
selecting and outputs [76]
settings [76]
Auditioning Preset files [178]
AUTO button [58]
Automatically assigned controls [208]
B
Browser [41]
Files pane [49]
in the displays [153]
Library pane [45]
Loading Preset files [154]
Product selector [47]
showing and hiding [152]
Browsing
choosing factory or user content [155]
displaying Preset file information [177]
filtering by Bank [161]
filtering by TYPES and MODES [167]
loading Products [157]
performing a text search [177]
Prodcut types [150]
resetting the selection [163]
TYPES and MODES tag filters [164]
C
Chord mode [227]
Chord position [233]
Chord type [229]
chromatic Scale [231]
Chords [213]
Chord Set [227]
editing Chords [216]
generating [227] [229] [233]
Harmonizer [227]
playing Chords [215]
Chromatic Scale [231]
Content selector [45]
Control section [60]
Controlling Instrument and Effect Parameters [208]
about pre-mapped Instruments and Effects [208]
adjusting parameters [208]
customizing parameter mappings [209]
Controlling Parameters
switching parameter pages [209]
D
Driver
selecting an audio driver [77]
E
Effects [180]
bypassing [187]
reordering [185]
F
Favorites
adding [172]
displaying [174]
removing [175]
working with Favorites [171]
Files pane [49]
additional Results list features [198]
Control bar [50]
Favorite bar [49]
IMPORT button [50]
Information button [50]
Location bar [50]
navigating file locations [199]
Recent Locations button [50]
Results list [50]
working with the Files pane [197]
FIXED VEL (TS Mode) button [66]
H
Header
Browser [42]
CPU meter [43]
Keyboard button [43]
Main menu [42]
Master Volume control [43]
MIDI Assignment editor button [43]
NI logo [43]
Perform panel button [42]
Plug-in chain panel button [42]
Plug-in panel button [42]
Preset display [42]
Tempo control [43]
Transport controls [43]
View button [42]
Host automation [94]
recording Automation [95]
Host Control [59]
Host Integration [129]
advanced integration control functions (MASCHINE) [133]
basic control functions (MASCHINE) [130]
integration with Ableton Live [144]
integration with Apple GarageBand [141]
integration with Apple Logic Pro X [141]
integration with MASCHINE [129]
integration with Steinberg Cubase/Nuendo [147]
setting up [30]
setting up Ableton Live on macOS [32]
setting up Ableton Live on Windows [34]
setting up Apple GarageBand [31]
setting up Apple Logic ProX [31]
setting up Steinberg Cubase/Nuendo [31]
supported hosts [30] [129]
Host Transport Control [59]
|
IMPORT button [207]
Importing KOMPLETE KONTROL-Compatible User Files [206]
INSTANCE button [98]
Instances
automatic switching [71]
switching [71]
Instrument Views [67]
Additional View [68]
Default View [68]
Edit View [70]
K
Keyboard
controls [55]
overview [55]
Keyboard LEDs [63]
Keyboard overview [55]
Arrange buttons [56]
Buttons 1-8 [60]
Control section [56]
displays [60]
Kensington Lock [57]
keybed [56]
Knobs 1-8 [60]
Light Guide [56]
MIDI IN/OUT socket [57]
Navigation and Mode buttons [56]
Pedal A and Pedal B sockets [57]
Pedals: Pedal A and Pedal B sockets [57]
Perform and Edit section [56]
Pitch & Modulation Wheels [56]
Power button [57]
Preset and Page buttons [56]
PSU socket [57]
Solo and Mute buttons [56]
Touch Strip [56]
Transport section [55]
Transpose and Fixed Velocity buttons [56]
USB connector [57]
Keyboard settings [90]
KOMPLETE KONTROL
key features [24]
setting up [26]
Workflow [24]
L
Latency [78]
LEDs
Keybed [63]
Light Guide [63]
Library [151]
importing your own files [206]
organizing [191]
saving Preset files [191]
tags [151]
Library pane [45]
Content selector [45]
Control bar [46]
EDIT button [46]
Favorites [46]
Information button [46]
Library [45]
MODEs filter [46]
Prehear controls [46]
Product selector [46] [47]
Product Type icon [45]
Results list [46]
Search field [46]
TYPES filter [46]
Light Guide [63]
LEDs [63]
Loading a Plug-in in default state [91]
Location bar
navigating file locations [199]
Locations bar
adding and removing file location favorites [201]
jumping to file location favorites [201]
navigating to recent file locations [200]
LOOP button [59]
M
Master Volume
adjusting in the software [75]
adjusting with the Keyboard [75]
Master Volume control [43]
METRO button [59]
MIDI
automation [94]
configuration [79]
connecting external equipment [39]
Controlling MIDI applications and devices [93]
controlling parameters via [94]
incoming MIDI [93]
MIDI Assignment editor [52]
MIDI Button [61]
MIDI communication [93]
MIDI message types [121]
outgoing MIDI [93]
receiving MIDI clock [93]
routing and recording processed MIDI notes [94]
triggering MIDI instruments and recording MIDI notes [93]
MIDI Assignment editor [52]
about Key Zones [109]
assigning a MIDI channel to Key Zone [113]
assigning MIDI messages to control elements [104]
assignments [102]
creating a new Key Zone [111]
creating new MIDI Template [106]
deleting Key Zone [118]
disabling a Key Zone [116]
MIDI Templates [103]
opening [103]
Pages [103]
recoloring Key Zone [114]
renaming control elements [106]
renaming MIDI Templates [108]
resizing Key Zones [115]
the mapping system [102]
MIDI message types
assignments for buttons [124]
assignments for knobs [122]
assignments for Pedals (continuous) [128]
assignments for Pedals (switch) [127]
assignments for the Touch Strip [126]
Type menu [121]
MIDI mode [98]
MIDI assignment [99]
switching to MIDI mode [98]
Mode Buttons
BROWSER button [61]
INSTANCE button [61]
MIDI button [61]
MIXER button [61]
PLUG-IN button [61]
SETUP button [61]
MODES filter [46]
Modulation Wheels [64]
Modulation Wheel [64]
Pitch Wheel [64]
Music theory
Arpeggiator sequence [213]
Chords [213]
Scales [212]
N
Native Kontrol Standard [203]
NKS
installing KONTAKT and REAKTOR Instruments with NKS Support [204]
installing NKS Instruments [203]
installing VST plug-ins with NKS support [204]
Note Repeat mode [238]
0
OCTAVE (Semi) down button [66]
OCTAVE (Semi) up button [66]
P
Pedals
configuring pedal inputs (expression) [37]
configuring pedal inputs (sustain) [36]
connecting pedals [36]
Perform and Edit Section [58]
Perform panel [50]
overview [50]
Scale [212]
PLAY (Restart) button [59]
Plug-in area [54]
Plug-in chain
bypassing Effects [187]
Plug-in chain [52]
Plug-in slot [52]
removing Effects [189]
reordering Effects [185]
scrolling [186]
selecting Plug-in slots [184]
Plug-in chain panel [51]
opening [180]
overview [51]
Plug-in chain [52]
Plug-in slot [52]
Plug-in panel [51]
Edit mode [209]
overview [51]
Plug-in slot [52]
Plug-ins
Loading a Plug-in in default state [91]
Preferences [75]
Audio page [76]
Audio Routings [76]
General page [80]
Library page [82]
MIDI page [79]
Plug-ins page [87]
Usage Data Tracking [80]
Prehearing Preset files [178]
Pre-mapped Instruments [208]
Preset files
deleting user Preset files [193]
finding [151]
managing [191]
organizing [151]
saving to the Library [191]
saving user Preset files [192]
Product selector [46] [47]
Category/Vendor selector [48]
Product list [48]
Product selector header [47]
Product types
Instrument and Effect [150]
Q
QUANTIZE button [58]
R
REC (Count-in) button [59]
Removing Effects [189]
Reordering Effects [185]
Resetting the clock
from the Keyboard [74]
in the software [74]
Results list [46]
Root Note [217]
S
Sample rate
selecting [77]
Scale [212]
available Scale parameters [216]
Chord [227]
Chord mode [227]
Chord Position [233]
Chord Type [229]
editing Scales [216]
Key mode [225]
playing a Scale [214]
Root Note [217]
Scale [217]
Scale type [218]
SCALE (Edit) button [58]
Scale engine [212]
activating [213]
Scale type [218]
chromatic [231]
Scales [212]
Searching
Preset files [151]
Setting up
connecting the keyboard to the computer [27]
Host integration [30]
Stand-alone application [28]
SHIFT button [58]
Software Overview [41]
Browser [41] [44]
Header [41] [42]
MIDI Assignment editor [52]
Plugin- area [41]
Plug-in area [54]
Soundcard
output routing [76]
settings [76]
Stand-alone application
Setting up [28]
STOP button [59]
Switching Instances [71]
T
Tags
categories of [151]
using tags to find Preset files [151]
Tempo
adjusting Tempo from the keyboard [74]
adjusting Tempo in the software [74]
TEMPO button [59]
Text search [177]
Touch Strip [65]
Transport and Tempo controls [73]
Play button [73]
Reset button [73]
Tempo control [73]
TRANSPORT section [59]
TYPES and MODES
selecting multiple tags from the same level [171]
TYPES filter [46]
U
UNDO (Redo) button [58]
Usage Data Tracking
enabling/disabling [81]
User Library
adding folders [86]
removing folders [86]
User Preset files
deleting [193]
editing tags and properties [194]
saving [192]
V
Volume Control [43]
VST plug-ins [87] [202]
loading [202]
managing [87]

- NATIVE INSTRUMENTS GmbH
- NATIVE INSTRUMENTS
- Table of Contents
- Welcome to KOMPLETE KONTROL 12
- New Features in KOMPLETE KONTROL 2.0.2 22
- The KOMPLETE KONTROL Workflow 24
- Setting up KOMPLETE KONTROL 26
- Software Overview 41
- Keyboard Overview 55
- Global Controls and Preferences 67
- MIDI Communication 93
- Using the MIDI Assignment Editor 102
- Working with Effects 180
- Managing the Library....191
- Controlling Instrument and Effect Parameters 208
- Playing and Editing Scales and Chords 212
- Playing and Editing the Arpeggiator 234
- Welcome to KOMPLETE KONTROL
- Document Conventions
- Naming Convention
- Unlabeled Buttons on the Keyboard
- Box Contents
- System Requirements
- KOMPLETE
- Accessibility
- Keyboard Overview
- - SETUP
- Activating Accessibility Features
- Training Mode
- Feature Overview
- New Features in KOMPLETE KONTROL 2.0.2
- NKS Effect and VST Effect Support
- Accessibility Features now for Windows Users
- Naming MIDI Templates
- Creating Key Zones with the MIDI Assignment Editor
- Mute and Solo State Indicators in Mixer view when used in DAW
- Ableton Live Host Integration Change
- The KOMPLETE KONTROL Workflow
- Key Features
- Setting up KOMPLETE KONTROL
- Connecting the Keyboard to the Computer
- Setting up the Stand-Alone Application
- Configuring Audio Interface
- Enabling MIDI Control
- Setting up Host Integration
- Setting up Apple Logic Pro X and GarageBand
- Setting up Steinberg Cubase/Nuendo
- Setting up Ableton Live (macOS)
- Installing the MIDI Remote Script
- Installing the KOMPLETE KONTROL Instrument Racks
- Configuring Ableton Live for KOMPLETE KONTROL
- Loading KOMPLETE KONTROL in Ableton Live
- Setting up Ableton Live (Windows)
- Connecting Pedals to the Keyboard
- Connecting Pedals
- Configuring the Pedal Input for a Sustain Pedal
- Configuring the Pedal Input for an Expression Pedal
- Connecting External MIDI Equipment to the Keyboard
- Software Overview
- Header
- Browser
- Library Pane
- Product Selector
- Files Pane
- Perform Panel
- Plug-in Panel
- Plug-in Chain Panel
- MIDI Assignment Editor
- Plug-in Area
- Keyboard Overview
- Rear View
- Perform and Edit Section
- Transport Section
- Control Section
- Mode Buttons
- Navigation and the 4-D Encoder
- Keybed and Light Guide
- Modulation Wheels
- Touch Strip
- Transpose and Fixed Velocity Buttons
- Global Controls and Preferences
- Instrument Views
- Default View
- Additional View
- Edit View
- Switching Instances
- Switching to an Instance from the Software
- Automatic Switching in a Host
- Switching to an Instance from the Keyboard
- Transport and Tempo
- Resetting the Clock
- Resetting the Clock in the Software
- Resetting the Clock from the Keyboard
- Adjusting Tempo
- Adjusting Tempo in the Software
- Adjusting Tempo from the Keyboard
- Adjusting Master Volume
- Adjusting Master Volume with the Keyboard
- Preferences
- Preferences – Audio Page
- Preferences – MIDI Page
- Preferences – General Page
- Preferences – Library Page
- Factory Pane
- User Pane
- Adding Folders to the User Library
- Removing Folders from the User Library
- Preferences – Plug-ins Page
- Manager Pane
- Locations Pane
- Keyboard Settings
- Loading a Plug-in in Default State
- MIDI Communication
- Incoming MIDI
- Receiving MIDI Clock
- Outgoing MIDI
- Host Automation
- Available Parameters for Host Automation
- Automation IDs for the Perform Panel
- Recording Automation
- Changing the State of an On/Off Switch
- Selecting Another Entry from a Drop-Down Menu
- Changing the Value of a Drag Control
- Using the Keyboard in MIDI Mode
- Switching to MIDI Mode
- MIDI Assignment
- Using the Keyboard as Stand-Alone MIDI Controller
- Using the MIDI Assignment Editor
- Assignable Controls Elements
- Assignments
- Pages
- MIDI Templates
- Opening the MIDI Assignment Editor
- Assigning MIDI Messages to Control Elements
- Renaming Control Elements
- Creating a New MIDI Template
- Renaming MIDI Templates
- Creating Key Zones
- About Key Zones
- Key Zones in the KEYS Tab
- Splitting a Key Zone
- Selecting another MIDI Channel for a Key Zone
- Recoloring Key Zone
- Resizing Key Zones
- Disabling a Key Zone
- Re-enabling Key Zones
- Deleting a Key Zone
- Transposing Key Zones
- MIDI Message Types and Assignments
- MIDI Message Types – Type Menu
- Assignments for Knobs
- Mode Menu Values for Knobs
- Assignments for Buttons
- Mode Menu Values for Buttons
- Assignments for Key Zones
- Type
- Channel
- Color
- Transpose
- Assignments for the Touch Strip
- Assignments for Pedals (Switch)
- Mode Menu Values for Pedals (Switch)
- Assignments for Pedals (Continuous)
- Host Integration
- Integration with MASCHINE
- Connect to MASCHINE using the Keyboard
- Basic Control Functions
- Advanced Integration Control Functions
- Ideas View
- Pattern View
- TRACK View
- Mix Mode
- Plug-In View
- Key Mode
- Integration with Apple Logic Pro X and GarageBand
- Integration with Ableton Live
- Integration with Steinberg Cubase and Nuendo
- Browsing the Library
- Browsing Effects is identical to Browsing Instruments
- Browser Basics
- Product Types: Instrument and Effect
- About the Library and Meta-Information
- Tags
- Included Preset Files in the Library
- Browsing the Library vs. Browsing Your Hard Disks
- Opening the Browser
- Opening the Browser on the Keyboard
- Overview of the Browser on the Keyboard
- Loading Preset Files
- Loading a Preset File Using the Keyboard
- Choosing Between Factory Content and User Content
- Choosing Between Factory and User Content on the Keyboard
- Loading an Instrument with its default Preset File
- Loading an Instrument using the Keyboard
- Filtering Instrument Preset Files by Bank
- Filtering Instrument Preset Files by Bank using the Keyboard
- Resetting the Selection
- Resetting the Instrument Selection on the Keyboard
- Types and Modes Tag Filters
- TYPES
- MODES
- Filtering Preset Files by Types and Modes
- Filtering Preset Files by Types and Modes Using the Keyboard
- Selecting Multiple Tags from the Same Level
- Working with Favorites
- Adding Preset Files to the Favorites
- Adding Preset Files to the Favorites on the Keyboard
- Displaying Favorites in the Results List
- Displaying all Favorites in the Results list on the Keyboard
- Removing Preset Files from the Favorites
- Removing Preset Files from the Favorites on the Keyboard
- Performing a Text Search
- Displaying Preset File Information
- Auditioning your Preset Files
- Auditioning Your Preset Files using the Keyboard
- Working with Effects
- Opening the Plug-in Chain Panel
- Adding Effects
- Adding Effects using the Keyboard
- Selecting Plug-in Slots
- Selecting another Plug-in Slot using the Keyboard
- Reordering Effects
- Reordering Effects on the Keyboard
- Scrolling the Plug-in Chain
- Bypassing Effects
- Bypassing Effects using the Keyboard
- Removing Effects
- Removing Effects from the Plug-in Chain using the Keyboard
- Managing the Library
- Saving Preset Files to the User Library
- Saving a Preset File
- Deleting User Preset Files from the User Library
- Editing the Tags and Properties of User Preset Files
- Working with the Files Pane
- Additional Results List Features List in the Files Pane
- Navigating to File Locations with the Location Bar
- Navigating to Recent File Locations
- Working with File Location Favorites
- Jumping to Favorite Folders
- Adding and Removing Favorite Folders
- Loading VST Plug-ins
- Installing NKS Instruments
- Installing VST Plug-ins with NKS Support
- Installing KONTAKT and REAKTOR Instruments with NKS Support
- THANK YOU FOR REGISTERING NOVACHORD
- Novachord
- Install successful
- Importing KOMPLETE KONTROL-Compatible User Files
- Procedure
- Controlling Instrument and Effect Parameters
- About Pre-Mapped Instruments and Effects
- Adjusting Parameters
- Switching Parameter Pages
- Customizing Parameter Mappings using the Plug-in Panel
- Playing and Editing Scales and Chords
- A Note about Music Theory
- Scales
- Chords
- Arpeggiator Sequences
- Activating the Scale Engine
- Activating the Scale Engine on the Keyboard
- Playing a Scale
- Playing Chords
- Editing Scales and Chords
- Available Scale Parameters
- Setting the Scale Parameters
- Scale Root Note
- Scale Bank and Type
- Setting the Key Mode Parameter
- Guide Mode
- Easy Mode
- Setting the Chord Parameters
- Chord Mode
- Harm
- Chd Set
- Chord Type
- Chord Type, Chord mode Set to Harmonizer
- Chord Type, Chord mode Set to Chord Set
- Chord Type and the Chromatic Scale
- Chord Position
- Playing and Editing the Arpeggiator
- Activating the Arpeggiator in the KOMPLETE KONTROL Software
- Activating the Arpeggiator on the Keyboard
- Playing Arpeggiator Sequences
- Using a Sustain Pedal to Control the Arpeggiator
- Using Arpeggiator Snapshots on the Keyboard
- Editing the Arpeggiator
- Available Arpeggiator Parameters
- Setting the Main Parameters
- Main Mode
- Main Type
- Setting the Rhythm Parameters
- Rhythm Rate
- Rhythm Sequence
- Setting the Other Parameters
- Other Octaves
- Other Dynamic
- Other Gate
- Setting the Advanced Parameters
- Advanced Retrigger
- For example:
- Advanced Repeat
- Advanced Offset
- Advanced Inversion
- Setting the Range Parameters
- Range Min. Key
- Range Max. Key
- Setting the Hold Parameter
- Index
- Numerics
- A
- Arpeggiator Mode
- Audio interface
- B
- Browser [41]
- Browsing
- C
- D
- E
- F
- H
- Header
- Host automation [94]
- Host Control [59]
- Host Integration [129]
- Host Transport Control [59]
- |
- IMPORT button [207]
- Importing KOMPLETE KONTROL-Compatible User Files [206]
- INSTANCE button [98]
- Instances
- Instrument Views [67]
- K
- Keyboard
- Keyboard LEDs [63]
- Keyboard overview [55]
- Keyboard settings [90]
- KOMPLETE KONTROL
- L
- Latency [78]
- LEDs
- Library [151]
- Library pane [45]
- Light Guide [63]
- Loading a Plug-in in default state [91]
- Location bar
- Locations bar
- LOOP button [59]
- M
- Master Volume
- Master Volume control [43]
- METRO button [59]
- MIDI
- MIDI Assignment editor [52]
- MIDI message types
- MIDI mode [98]
- Mode Buttons
- MODES filter [46]
- Modulation Wheels [64]
- Music theory
- N
- Native Kontrol Standard [203]
- NKS
- Note Repeat mode [238]
- 0
- P
- Pedals
- Perform and Edit Section [58]
- Perform panel [50]
- PLAY (Restart) button [59]
- Plug-in area [54]
- Plug-in chain
- Plug-in chain panel [51]
- Plug-in panel [51]
- Plug-in slot [52]
- Plug-ins
- Preferences [75]
- Prehearing Preset files [178]
- Pre-mapped Instruments [208]
- Preset files
- Product selector [46] [47]
- Product types
- Q
- R
- Resetting the clock
- S
- Sample rate
- Scale [212]
- SCALE (Edit) button [58]
- Scale engine [212]
- Scale type [218]
- Searching
- Setting up
- T
- U
- V
Brand : NATIVE INSTRUMENTS
Model : Komplete Kontrol A25
Category : MIDI Keyboard