
VmicLink5 - Microphone Saramonic - Free user manual and instructions
Find the device manual for free VmicLink5 Saramonic in PDF.


| Product Type | 5.8GHz Wireless Microphone System |
| Model | VmicLink5 |
| Brand | Saramonic |
| Receiver (RX) Dimensions | 113 x 64 x 28 mm |
| Transmitter (TX) Dimensions | 113 x 64 x 28 mm |
| System Weight | 810 g (including batteries) |
| Battery Type | Rechargeable Li-ion, 7.2V / 1000mAh (LP-E17 compatible) |
| Power Consumption (RX) | 180 mA @ 6V |
| Power Consumption (TX) | 140 mA @ 6V |
| RF Frequency | 5.725 - 5.875 GHz |
| RF Power | 15 dBm (30 mW) |
| Channels | 3 channel groups (A, B, C) |
| Transmission Distance | Up to 30 meters (no obstacle) |
| Audio Frequency Response | 40 Hz - 18 kHz (±1 dB) |
| Sample Rate | 48 kHz / 16-bit |
| Voice Delay | 18 ms |
| Total Harmonic Distortion + Noise | -92 dB |
| Receiver Sensitivity | -98 dB |
| Inputs (TX) | Mic input (max 160 mV), Line input (max 2V, 50V DC isolation) |
| Outputs (RX) | Line out (3.5mm locking), Phone out (3.5mm stereo headphone) |
| Operating Temperature | 0°C to 50°C |
| Storage Temperature | -20°C to 55°C |
| Package Includes | RX, TX, antennas, belt clips, shoe mount, batteries, charger, cables, lavalier mic, warranty card, manual |
Frequently Asked Questions - VmicLink5 Saramonic
User questions about VmicLink5 Saramonic
0 question about this device. Answer the ones you know or ask your own.
Ask a new question about this device
Download the instructions for your Microphone in PDF format for free! Find your manual VmicLink5 - Saramonic and take your electronic device back in hand. On this page are published all the documents necessary for the use of your device. VmicLink5 by Saramonic.
USER MANUAL VmicLink5 Saramonic
5.8GHz Wireless Microphone System VmicLink5
Statement
Please read this manual carefully before using and strictly operate and store in accordance with the instructions. Please save it for your future reference.
If the user manual can not help you to solve certain problems, please ask your retailer for help or email us: info@saramonic.com.
Cautions
- Do not use the unit under water, don't expose it to rain. Please store it in a cool, dry place.
- Please use and store it in normal temperature. Do not move it from overheated to supercooled condition frequently as well as keep away from heat sources such as heater and oven.
- When using and storing, please pay attention to dust and moisture.
- Be careful to violent collision.
- To avoid acoustical feed-back, do not hold the microphone close to the loudspeakers.
- For the best sound pick-up pattern do not hold your hand against the microphone head.
- Remove the batteries from the battery compartment when the device is not used for a long time.
Contents
General Introduction 2
Highlights 2
Portable Receiver VmicLink5-RX 2
Product Structure 2
Attaching Accessories 3
LCD Display Operation Guide 3
Body-pack Transmitter VmicLink5-TX 5
Product Structure 5
Attaching Accessories 6
LCD Display Operation Guide 6
Battery Charger 8
Specifications 8
Packing List 9
Package 9
1 General Introduction
The Saramonic VmicLink5 wireless microphone system utilizes the new 5.8GHz transmission technology to transfer high quality audio.
One receiver can work with up to three transmitters simultaneously, which is very useful and flexible for audio recording in DSLR video, field recording, filmmaking, broadcast & TV, electric news gathering (ENG), on-the-spot interviews, sound design and more.
2 Highlights
• The 5.8GHz provides high quality audio.
- Record audio up to 30 meters away with no obstacle.
• Automatic channel switch programme to avoid interference from multiple systems in the same environment.
- With three discrete channel groups.
• One receiver can work with up to three transmitters simultaneously.
- Line & Mic inputs provide wide range of input options.
• Real-time headphone monitor jack.
- Detachable and flexible antenna can be rotated 360° accordingly for best sound.
• Rechargeable li-ion battery (included).
3 Portable Receiver VmicLink5-RX
The Saramonic VmicLink5-RX is a camera-mountable integrated wireless receiver. It features an easy-to-read LCD display and DigRF synchronization between transmitter and receiver.
The selectable output mode allows you to choose the output signal to be mono or stereo.
3.1 Product Structure
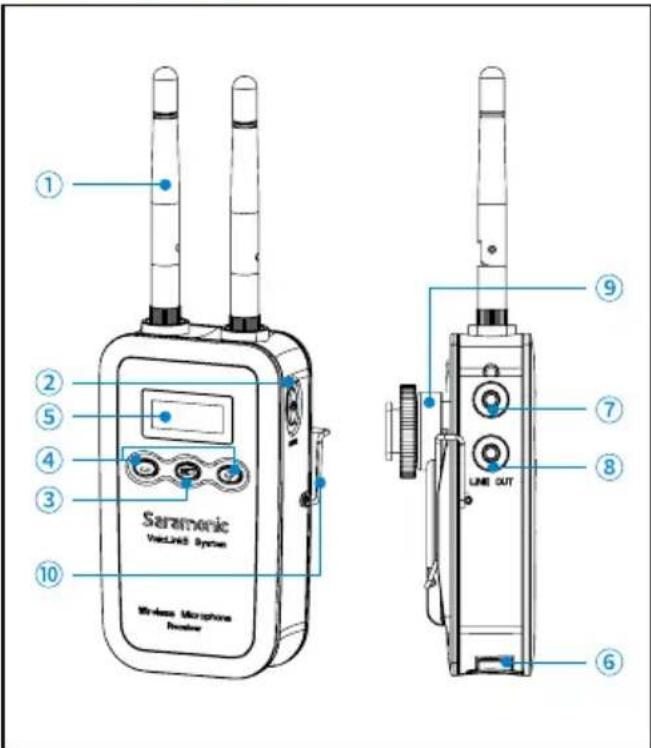
① Antennas
Screw clockwise to install.
Screw counterclockwise to dismantle.
Adjust the antennas accordingly to get the best sound reception.
② Power / Mute button
Long press to turn on/off.
Short press to turn on/off the MUTE function.
③ SET button
Long press the SET button to enter the displayed menu.
Then, short press the SET button to confirm your option or long press again to exit without saving.
④ + or - button
Select functions or values shown on the display.
⑤ LCD display
Display menus, please refer to "1.3.3 LCD Display Operation Guide" (page 3) for more details.
⑥ Battery compartment
Install battery:
Slide the switch on the battery compartment
cover according to the indicating arrow to open the battery compartment.
Install a battery properly and the battery will be locked automatically. Slide the switch to close the battery compartment.
Remove a battery:
Slide the switch on the battery compartment cover according to the indicating arrow to open the battery compartment. Slide the battery locking unit to release the battery.
⑦ PHONE jack
3.5mm stereo mini headphone jack.
Connect a headphone to monitor the audio output.
⑧ LINE out jack
Connect the RX to a video camera, camcorder, mixer or amplifier with the supplied output cable.
⑨ Standard mount cold shoe
⑩ Belt clip
3.2 Attaching Accessories
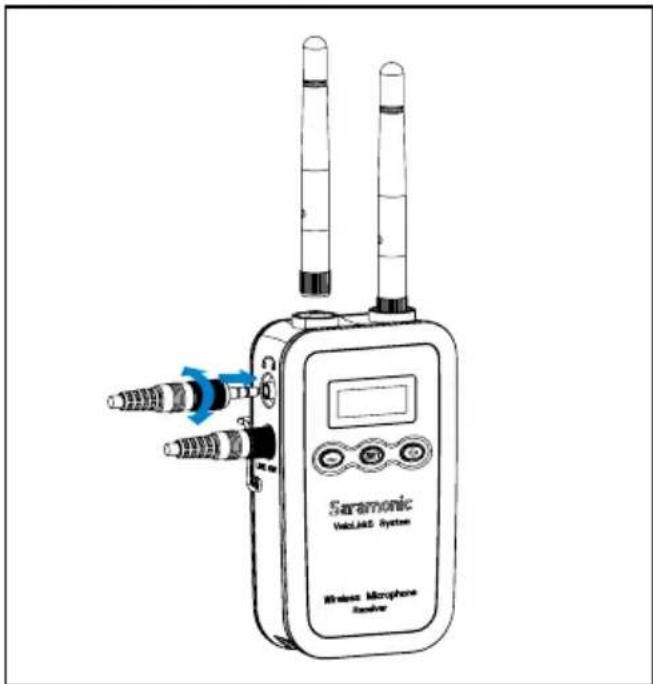
Connect the supplied cable to the Line out
Plug the supplied 3.5mm cable into the LINE OUT. For a secure connection, rotate clockwise to lock the connector.
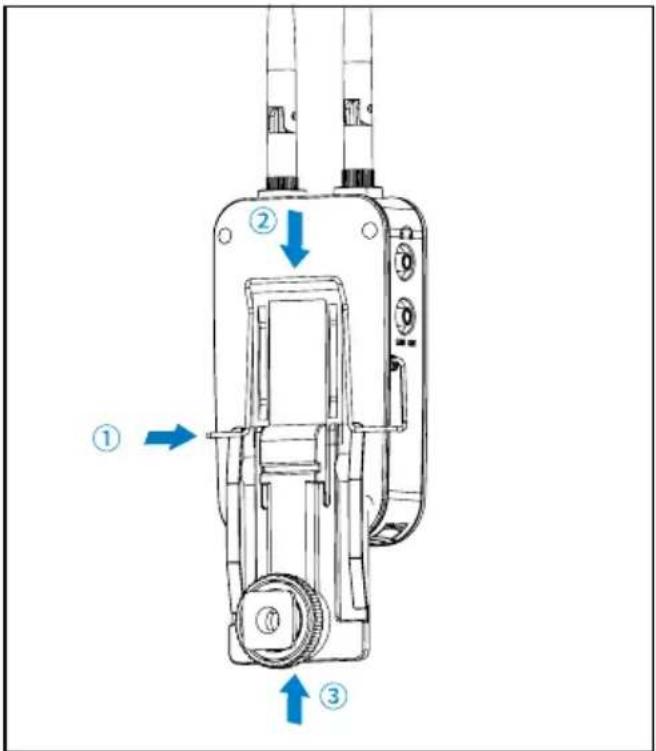
① Attach the shoe mount adapter
Please attach the belt clip upside-down before attaching the shoe mount adapter.
② Push the bottom of the belt clip to make some space between the belt clip and the receiver.
③ Align the belt clip with the two vertical grooves on the shoe mount adapter and insert the adapter in the direction of the arrow. Push the shoe mount adapter in fully until the belt clip fits into the horizontal groove on the adapter holds.
3.3 LCD Display Operation Guide
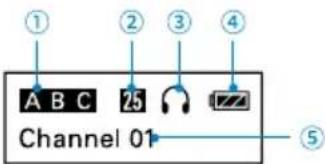
Home screen
If no operation is performed for 20 seconds on the other screens, the display will automatically return to the home screen.
① RX & TX connecting indicator
"----": The RX hasn't been matched with a TX in this group.
"A" or "B" or "C" flashing: The RX has been matched but hasn't been connected with the TX in this group.
"A" or "B" or "C" solid: The RX has been matched with the TX successfully in this group.
NOTE: Details please refer to "Match with TX" & "Match with RX" (page 4/7).
② Volume indicator
Indicates the volume of audio output.
③ Mute indicator

MUTE ON

UTE OFF
NOTE: MUTE on RX will mute the output audio.
④ Battery level indicator
Displays the battery level. Please replace both batteries immediately when the indicator starts flashing.
NOTE: Low battery might cause an unstable transmission of audio signal.
⑤ Current channel
Displays the current channel number.
NOTE: The channel can only be changed manually in the RX.
Once the RX is matched with the TX(s), the channel number of TX(s) will be changed with RX synchronously all the time.
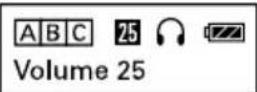
Set output volume
Long press the SET button to enter the menu. Use the "+" and "-" to set the volume of output audio within the range 0 to 31, short press for exit with saving. The setting is retained even after the power is turned off.
- Default is "25."
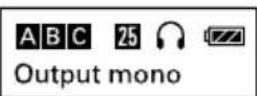
Output mode
The output mode can be selected to mono or stereo.
When the output mode is mono, the audio from left and right channel will be mixed. When it is stereo, the left and right audio channel output will be separated.
In Stereo mode, the audio of group A & C will be output to left channel, the audio of Group B will be output to right channel.
- Default is "mono."

Power locked / unlocked
Long press the SET button to enter the menu. Use the "+" and "-" to set unlocked or locked the power key. Lock the power key to prevent the receiver being turned off unwittingly while using.
- Unlocked: Long press the power key to turn on/off the receiver (System default).
- Locked: The receiver will not be turned off even after pressing the power key.
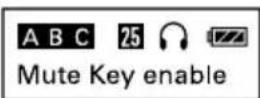
Mute key enable / disable
Long press the SET button to enable / disable Mute function.
- Enable: Press power button to turn Mute On / Off.
- Disable: The audio will not be muted during using.
- Default is "enable."
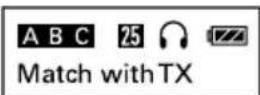
Match with TX
Long press the SET button to enter "Match with TX". Then, short press to start "Match with TX" in the RX and "Match with RX" in the TX simultaneously to match the TX with RX.
The RX can't match with two or three TXs simultaneously, please match the RX with TX(s) one by one.
According to the chronological order of matching, the group number of each TX(s) will be A, B, C by turns.
NOTE: Please match the TX and RX if they haven't been matched before.
Once RX and TX have been matched successfully, the setting is retained even after the power is turned off.
The RX and TX will automatically match with each other every time after powered on.
If use another TX, please match the RX with the new TX.
When need to relieve TX and RX connection, select and confirm "Restore default" menu.
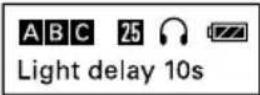
Set backlight
Select ON, OFF or Delay 10 / 30 /60 seconds. Default is "Delay 10s."
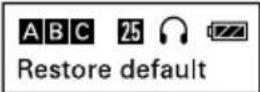
Restore settings
Confirm it then the parameters of RX are restored to their factory default settings.
NOTE: The matching setting will also be cleared after restoring.
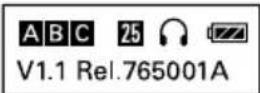
Version of the RX
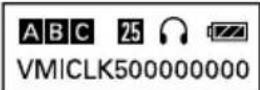
Serial number
4 Body-pack Transmitter VmicLink5-TX
The VmicLink5-TX is a compact transmitter that employs a crystal-controlled PLL synthesizer. It is equipped with a muting function and lock-type Mic and Line input connectors.
4.1 Product Structure
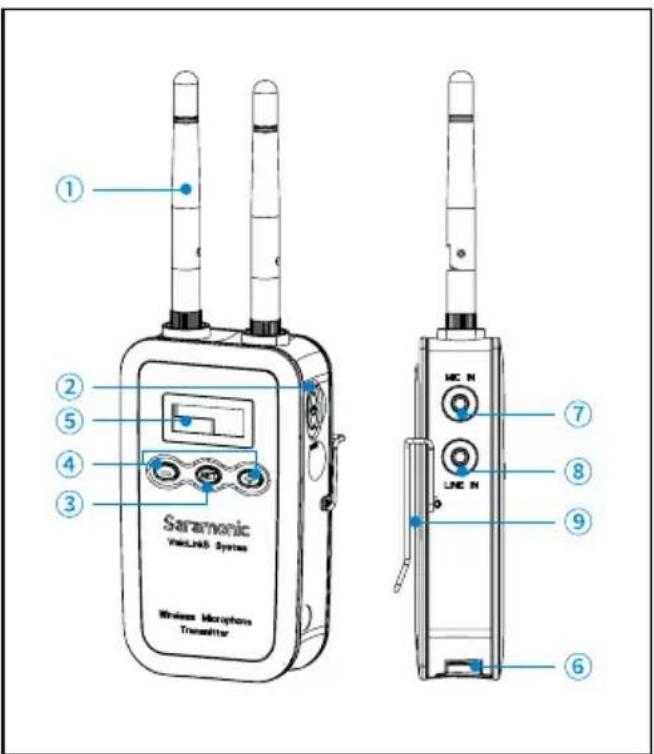
① Antennas
Screw clockwise to install.
Screw counterclockwise to dismantle.
Adjust the antennas accordingly to deliver the best transmission.
② Power / Mute button
| Function Operation | |
| Power ON Press button for one second or longer | |
| Power OFF Press button until it turns off | |
| Mute ON | Short press button |
| Mute OFF | |
③ SET button
Long press the SET button to enter the displayed menu.
Then, short press the SET button to confirm your option or long press again to exit without saving.
④ + or - button
Select functions or values shown on the display.
⑤ LCD display
Display menus, please refer to "1.4.3 LCD
Display Operation Guide" for more details.
⑥ Battery compartment
Install and remove the battery instructions are the same as receiver.
⑦ Mic input jack
Connect to the supplied lavalier microphone.
⑧ Line input jack
Connect to audio devices with line output.
⑨ Belt clip
4.2 Attaching Accessories
natural_image
Technical line drawing of a mechanical device with two vertical tubes and a central square component, showing no text or symbols.Attach a belt clip
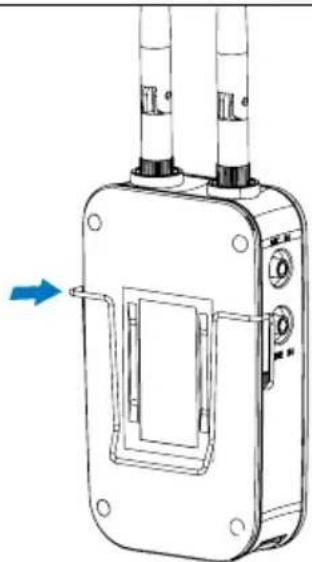
Insert one end of the belt clip into one of two holes on either side of the transmitter, and then insert the other end into the hole on the other side.
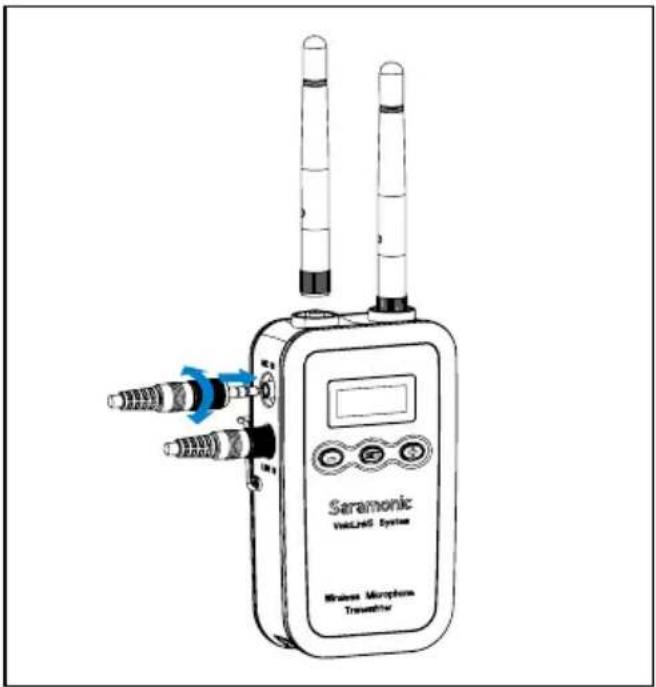
- Connect the microphone / audio device.
- For a secure connection, turn to lock the connector.
NOTE: Please turn off the transmitter before attaching or removing the microphone / audio device.
4.3 LCD Display Operation Guide
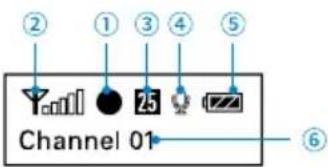
Home screen
If no operation is performed for 20 seconds on the other screens, the display will automatically return to the home screen.
① RX & TX connecting indicator
"A or B or C": The TX has been matched with the RX successfully.
"○" & "●" flashing: The TX hasn't been matched with the RX.
NOTE: Details please refer to "Match with TX" & "Match with RX" (page 4/7).
② RF level indicator
Indicates the current transmission level.
③ Volume indicator
Indicates the volume of audio output.
④ Mute indicator

MUTE ON

UTE OFF
Note: If turn on Mute of the TX, only this TX will be muted.
⑤ Battery level indicator
Displays the battery level. Please replace the battery immediately when the indicator starts flashing.
NOTE: Low battery might cause an unstable transmission of audio signal.
⑥ Current channel
Displays the current channel number.
NOTE: The channel can only be changed manually in the RX.
Once the RX is matched with the TX(s), the channel number of TX(s) will be changed with RX synchronously all the time.
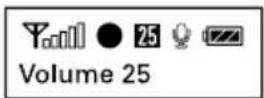
Volume setting
Long press the SET button to enter the menu. Use the "+" and "-" to set the volume of output audio within the range 0 to 31, short press for exit with saving. The setting is retained even after the power is turned off.
- Default is "25."

Power locked/ unlocked
Long press the SET button to enter the menu. Use the "+" and "-" to set unlocked or locked the power key. Lock the power key to prevent the receiver being turned off unwittingly while using.
- Unlocked: Long press the power key to turn on/off the receiver (System default).
- Locked: The receiver will not be turned off even after pressing the power key.
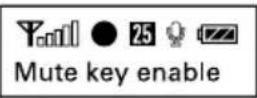
Mute key enable / disable
Long press the SET button to enable / disable Mute function.
- Enable: Press power button to turn Mute On / Off.
- Disable: The audio will not be muted during using.
- Default is "enable."
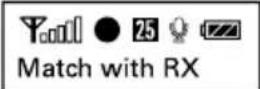
Match with RX
- Long press the SET button to enter "Match with RX". Then, short press to start "Match with TX" in the RX and "Match with RX" in the TX simultaneously to match the TX with RX.
- The RX can't match with two or three TXs simultaneously, please match the RX with TX(s) one by one.
- According to the chronological order of matching, the group number of each TX(s) will be A, B, C by turns.
NOTE: Please match the TX and RX if they haven't been matched before
- Once RX and TX has been matched successfully, the setting is retained even after the power is turned off.
The RX and TX will automatically match with each other every time after powered on.
- If use another TX, please match the RX with the new TX.
- When need to relieve TX and RX connection, select and confirm "Restore default" menu.
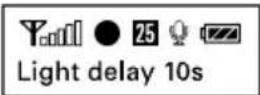
Set backlight
Set the background LED light to ON or Delay 60/30/10 seconds or OFF. Default is "Delay 10s."
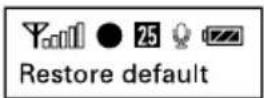
Restore all settings of the TX to default settings.
NOTE: The matching setting will also be cleared after restoring.
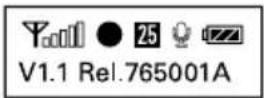
Version of the TX
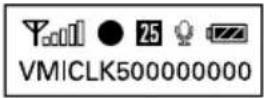
Serial number
5 Battery Charger
Use the battery charger to recharge the battery of VmicLink5 system.
The indicator turns red while the battery is charging.
The indicator turns green while the battery has been fully charged.
6 Specifications
| VmicLink5 System | |
| RF power 15dBm(30mW) | |
| RF frequency 5725-58 | 75MHz |
| Channel | 3CH, RX channel changeable, TX follow with RX |
| Transmission distance | 30m with no obstacle |
| Interface | Transmitter Mic in: Max 160mV/-13dBu, 1.8V phantom power |
| Transmitter Line in: Max 2V/8dBu, 50V DC isolation | |
| Receiver Phone out: Max 70mW/32Ω, 10V DC isolation | |
| Receiver Line out: 4 times mic in gain, 50V DC isolation | |
| Receive sensitivity 98dB | |
| THD+N -92dB | |
| Sample rate 48K/16bit | |
| Audio frequency response | 40Hz-18KHz/±1dB |
| Voice delay 18ms | |
| Power consumption | RX: 180mA/6V |
| TX: 140mA/6V | |
| Antenna gain 3dBi | |
| Weight 810g | |
| Battery 7.2V/1000mAh | Li-ion |
| Battery type LP-E17(CANON EOS M3/750D/760D) | |
| Dimensions | RX: 113x64x28mmTX: 113x64x28mm |
| Operating temperature | 0°C-50°C |
| Storage temperature | -20°C-55°C |
7 Packing List 8 Package
natural_image
Illustration of various electronic devices and components including a transducer, sensors, and connectors (no text or labels visible)RX
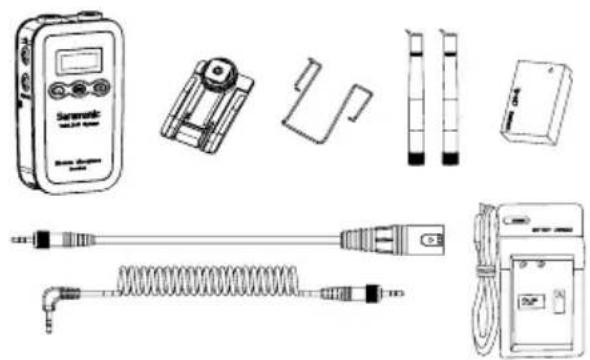
- Portable receiver: VmicLink5-RX
- Shoe mount adapter
- Belt clip
- Antenna
- Rechargeable Li-ion battery
- XLR to 3.5mm locking-type plug audio output cable
• 3.5mm locking-type plug audio cable - Battery charger
natural_image
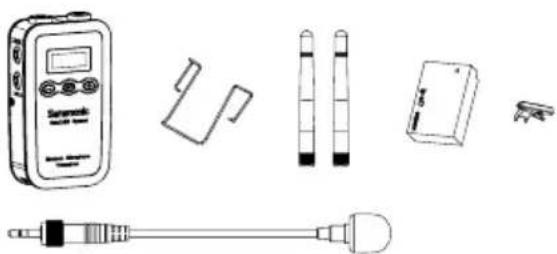
Illustration of various electronic devices including a digital multimeter, pen holder, test tube, battery pack, and probe (no text or labels)TX
• Body-pack transmitter: Vmic Link5-TX
- Belt clip
- Antenna
- Rechargeable Li-ion battery
- Microphone holder clip
- Omni-directional lavalier microphone
- Warranty card
- User manual
VmicLink5 RX+TX
This package includes one receiver RX and one transmitter TX.
VmicLink5 RX+TX+TX
This package includes one receiver RX and two transmitters TX.
VmicLink5 RX+TX+TX
This package includes one receiver RX and three transmitters TX.
NOTE: Any package RX and TX can be used in combination.


- Statement
- Cautions
- Contents
- General Introduction 2
- Highlights 2
- Portable Receiver VmicLink5-RX 2
- Body-pack Transmitter VmicLink5-TX 5
- Battery Charger 8
- Specifications 8
- Packing List 9
- Package 9
- General Introduction
- Highlights
- Portable Receiver VmicLink5-RX
- Product Structure
- ① Antennas
- ② Power / Mute button
- ③ SET button
- ④ + or - button
- ⑤ LCD display
- ⑥ Battery compartment
- ⑦ PHONE jack
- ⑧ LINE out jack
- ⑨ Standard mount cold shoe
- ⑩ Belt clip
- Attaching Accessories
- Connect the supplied cable to the Line out
- LCD Display Operation Guide
- Home screen
- ① RX & TX connecting indicator
- ② Volume indicator
- ③ Mute indicator
- ④ Battery level indicator
- ⑤ Current channel
- Set output volume
- Output mode
- Power locked / unlocked
- Mute key enable / disable
- Match with TX
- Set backlight
- Restore settings
- Version of the RX
- Serial number
- Body-pack Transmitter VmicLink5-TX
- Product Structure
- Attaching Accessories
- Attach a belt clip
- LCD Display Operation Guide
- Volume setting
- Power locked/ unlocked
- Match with RX
- Version of the TX
- Battery Charger
- Specifications
- Packing List 8 Package
- RX
- TX
- VmicLink5 RX+TX
- VmicLink5 RX+TX+TX
Brand : Saramonic
Model : VmicLink5
Category : Microphone