
LDS3276 - Television DENVER - Free user manual and instructions
Find the device manual for free LDS3276 DENVER in PDF.


| Product Type | Television |
| Brand | Denver |
| Model | LDS3276 |
| Screen Size | 32 inches (82 cm) |
| Display Resolution | HD (1366 x 768) typical |
| Energy Class | E (48 kWh/annum) |
| Power Consumption | 33 Watt (typical) |
| TV Tuner | DVB-T/T2/C/S/S2, ATV |
| HDMI Inputs | 3 (HDMI 1, 2, 3) |
| USB Ports | 2 (USB 1, 2) |
| Connectivity | Ethernet (RJ45), Wi-Fi (built-in), Optical audio out, AV in, Headphone out, CI slot, SAT antenna, ANT |
| Smart Features | Netflix, YouTube, HbbTV, NetRange app store |
| PVR Recording | Yes, via USB (DTV mode) |
| Time Shift | Yes |
| Electronic Program Guide (EPG) | 7-day EPG (DTV mode) |
| Remote Control | Included, with numeric keypad, source, menu, Netflix, YouTube, and colored buttons |
| Wall Mount | VESA mount compatible (not specified size, typical 200x200 or 100x100) |
| Safety Instructions | Do not expose to water or moisture; clean only with damp cloth; do not block ventilation |
| Stand Included | Yes |
| Dimensions (without stand) | Approx. 73.3 x 43.5 x 7.6 cm (estimated for 32") |
| Weight (without stand) | Approx. 4.2 kg (estimated for 32") |
Frequently Asked Questions - LDS3276 DENVER
User questions about LDS3276 DENVER
0 question about this device. Answer the ones you know or ask your own.
Ask a new question about this device
Download the instructions for your Television in PDF format for free! Find your manual LDS3276 - DENVER and take your electronic device back in hand. On this page are published all the documents necessary for the use of your device. LDS3276 by DENVER.
USER MANUAL LDS3276 DENVER
natural_image
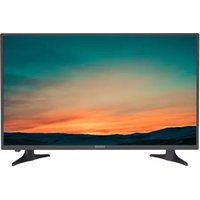
Front view of a flat-screen computer monitor with stand legs (no text or symbols visible)Model: LDS-3276
To obtain the best performance and safety, please read this manual carefully. Please keep this manual for future reference.
CONTENTS
SAFETY INSTRUCTIONS 2
EXTERNAL SCHEMATIC AND INSTALLATION 3
Antenna/Cable Connection 4
REMOTE CONTROLLER 5
SOURCE 6
BASIC OPERATION 6
Initial Setup 6
HOME Menu 11
Setting 11
Picture 14
Sound....16
Programme 17
Lock 26
PVR Option (DTV Mode) 28
Network 30
Other Information 32
Using the Features 33
MULTIMEDIA OPERATION 35
Movies 35
Music 35
Photos 35
SAFETY INSTRUCTIONS
IMPORTANT SAFETY INSTRUCTIONS - PLEASE READ CAREFULLY BEFORE USE.
The following safety instructions are located on the back of the TV.

DANGER OF ELECTRIC SHOCK! NEVER REMOVE THE SCREWS OF THE COVER. NO USER-SERVICEABLE PARTS IN THE DEVICE. REPAIR ONLY BY QUALIFIED SERVICE PERSONNEL.

The exclamation mark in the equilateral triangle indicates important operating and maintenance instructions

The flash in the equilateral triangle indicates high voltage in the device, which can lead to electric shock
Please follow the instructions below:
Do not use this TV near water.
❖ Only clean the device with a damp cloth.
Do not block any ventilation openings.
- Set up the television in accordance with the supplied quick guide and these operating instructions.
- Lay the power cable so that it cannot be stepped on or pinched. Pay special attention to the plug and the point at which the cable is led out of the television.
Do not let the power cord hang over the edge of the table.
- Disconnect the TV from the mains if there is a thunderstorm or if it is not used for a long period

WARNING! EXPOSE THE TELEVISION TO AVOID FIRE OR ELECTRIC SHOCK OR RAIN OR MOISTURE. THE TELEVISION SHOULD NEVER BE EXPOSED TO SPLASH / DRIP WATER AND NO OBJECTS FILLED WITH LIQUID ON THE TELEVISION
NOTE: Open flames (such as candles) should never be placed on the TV. Smells from the TV
New TVs can cause unusual smells when they are switched on for the first time.
Due to the manufacturing process of the components, the television and other electronic products may have parts that produce odors when they are first turned on and warmed up.
The smell usually disappears after a few days of use and does not return.
This is normal and occurs with many electronic devices. Ensure that there is sufficient ventilation in and around the device so that the smell can disappear.
EXTERNAL SCHEMATIC AND INSTALLATION

Optical Out: Digital Audio Output from TV
RJ45: Ethernet/LAN input from Router to TV
HDMI1/HDMI2/HDMI3: Connect HDMI input signal from signal source such as DVD
AV In: Connect Audio and Video input signal from source such as DVD
SAT: Connect RF signal from satellite/DVB-S
ANT: Connect Analog/ATV signal or Digital/DVB-T or DVB-C signal
CI Slot: Insert CI card for Digital TV
Earphone Out: Audio Output from TV through Earphone
USB1/USB2: USB support multimedia playback and software upgrade
EXTERNAL SCHEMATIC AND INSTALLATION
Antenna/Cable Connection

flowchart
graph TD
    A["VHF TV ANTENNA"] --> B["Two kinds of antenna"]
    C["UHF TV ANTENNA"] --> D["Coaxial ANTENNA"]
    E["UV METER"] --> D
    D --> F["No need to install adapter (Note 1)"]
    D --> G["Need to install adapter (Note 2)"]
    H[" Flat Cable "] --> I["To TV VHF/UHF ANTENNA jack"]
    I --> J["VHF/UHF (PID.)"]
a. Connect the Plug of the antenna cable or CATV cable to the cable (not provided with this unit), then connect to the antenna input of this unit for best reception.
b. If the antenna cable in your home is other than the above two or you have problems in installing the antenna, please contact your dealer.
Notes:
a. Current outdoor antenna or cable TV use 75 OHM coaxial antenna cable. For better reception suggest this kind of antenna cable
b. Flat cable or indoor antenna are old designed, the reception may not be good enough
REMOTE CONTROLLER
-
: Turn on the TV or enter standby mode
-
☑: Turn off the sound and turn on when press again
-
0\~9 : Figures0-9 are used to directly input channel number
-
FPO: Press to display Electronic Program Guide and select the favorite channel
-
Press to enter Teletext when play the program
-
☐: Input source selection button
-
: Press to enter the Home Page
-
V+: Increase the volume
-
V-: Decrease the volume
-
P∧: Increase the program
-
P\~: Decrease the program
-
⚙: Start system menu
-
i : Press to display the source and channels display
-
To confirm the choice with the highlighted menu item
-
Ⓞ: Press these buttons to select items
-
☐: Press these buttons to select and adjust items
-
BACK: Go back to the previous step
-
EXIT: Press to exit the OSD menu
-
NETFLIX : Press to launch the Netflix
-
📷 : Press to launch the YouTube
-
☐: Press to launch NetRange app store
-
: Press to enter USB mode
-
GREEN/RED/YELLOW/CYAN button: Press these buttons according to different prompts
-
: Press to fast reverse in USB mode
-
: Press to fast forward in USB mode
-
☑: Press to play the video and press again to pause the
video
-
Press to start recording the program
-
□: Hold on or off for current page display
29: Press to change the language when palying the stream which contains multi-language

SOURCE

1). Press the button on the remote control to display the Input source menu bar.
2). Press the ◀▶ buttons to select the input source that you want: DVBT / DVBS / DVBC / ATV / HDMI 1 / HDMI 2 / HDMI 3 / USB / HOME.
3). Press the OK button to confirm your selection. If you do not press the OK button to confirm, the TV will automatically confirm the selected input source within few seconds.
BASIC OPERATION
Initial Setup
Choosing Your OSD Language
The first time you switch your TV on, it will automatically be in the initial setup mode. This will guide you through the whole setup process of selecting your desired language, connecting to the internet, signing in to your account and tuning in TV channels.

1). Press ▲▼ the buttons to highlight your desired OSD language then press the OK button.
2). Data Collection and Firmware Updates Notice page will appear. Press the ▲▼buttons to select the menu option.

VIEW ADDITIONAL DETAILS
Go to view more detailed firmware/software network download update instructions.
BASIC OPERATION
ACCEPT
Accept all agreements and agree to the firmware/software network to automatically download updates
3). If you select VIEW ADDITIONAL DETAILS, the detailed firmware/software network download update instructions will display. Initially, the default focus will be on the text description section. Press ▲▼the buttons will drop the text to the bottom. Press the ▼ buttons, ACCEPT ALL will highlight. Press the ▲▼buttons then the OK button to confirm the selection.
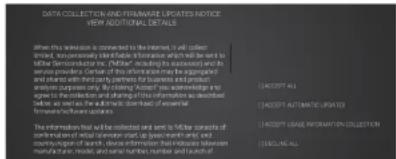
ACCEPT ALL
Accept all protocol sections and agree to the firmware/software network to automatically download updates.
ACCEPT AUTOMATIC UPDATES
Accept all protocol parts and manually select whether to agree to the firmware/software network download update if there is a firmware/software update.
ACCEPT USAGE INFORMATION COLLECTION
Suppliers accepting the agreement section collect some non-personal user information.
DECLINE ALL
Reject all protocols to disable firmware/software network updates.
4). Press ▲▼ the buttons to select your country where you will operate the TV. Press the OK button to confirm.

Connecting to the Internet
You have 2 options when connecting your TV to the internet. You can connect wirelessly via Wi-Fi or connect your TV to your router directly by connecting a LAN cable (wired connection). Choose your connection method and follow these instructions.

Wi-Fi Network
1). Press the ▲▼buttons to highlight Wi-Fi Network then press the OK button. Your TV will automatically scan for your wireless network, then show you a list of networks that it's found. Highlight your network and press the OK button.
BASIC OPERATION
2). Use the ▶▲▼▶buttons to navigate the keypad in the screen to entry your Wi-Fi password, then press the OK button to select the characters. Finally select the → and press the OK button. In a second or two your TV will show Success after connection successful.
WIRED Connection
If you have connected your Ethernet cable to the LAN socket on the back of your TV, select Wired Network and the press the OK button. Then select Connect to start connect to the internet.
SKIP Connection
1). If you do not need to connect to the network, select Skip and press the OK button to confirm.

2). A pop up menu will be displayed. If you want to go back the network setting page, select Set up Network. If you want to confirm to skip the network setting, select Skip. Then will enter to Input Source menu and start TV Tuning.
Signing in to Your Netflix Account
Press the ▲▼buttons to select Start Netflix then press the OK button. You will now be asked to sign in to your Netflix account. If you don't already have an account you can set one up on your TV go to the 'Join Now' section.
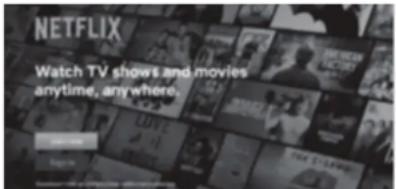
If you want to temporary skip the Netflix setting, select Skip to enter to Input Source menu and start TV Tuning.
If you complete Netflix setting, press the EXIT button to leave and press the 🎨 button and select Programme, then select Auto Tuning for TV tuning.
Tuning in Your TV
If you select Skip option in Netflix setting page, then you now need to tune in your TV so that you can watch LIVE TV (broadcast TV). If you watch TV via a Set Top Box you can skip this section by selecting the correct HDMI input source.
BASIC OPERATION
DVB-T
1) Input Source page shown on the TV, use the ▲▼buttons to select TV. Then press the OK button.
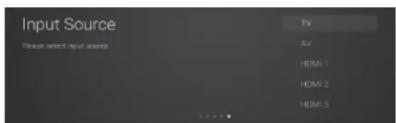
2) In DVB Tuning Type page, use the ▲▼ buttons to select DVB-T.

3) Your TV will now start scanning for all the available TV channels. This operation may take a few minutes. The display will show the progress of the tuning and the number of channels found.

4) If you want to skip the DTV tuning, press the OK button to interrupt the tuning half way. A pop-up screen will be displayed, press the ◀button to select YES to confirm. e. Your TV is now setup and ready to watch.
DVB-S
1). Input Source page shown on the TV, use the ▲▼ buttons to select TV. Then press the OK button.
2). In DVB Tuning Type page, use the ▲▼ buttons to select DVBS.
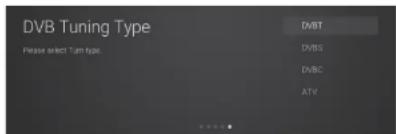
3). Auto Tuning window will be displayed. use the ▲▼buttons to select options. Press the OK button and then press the ◀▶buttons to adjust each option's setting. Press the OK button to confirm.
BASIC OPERATION

Satellite
Selects your desired satellite.
Transponder
Selects your desired frequency.
Scan Mode
Selects your desired watching channel type: Free + Scramble / Free / Scramble.
Service Type
Selects the channel service type: DTV + Radio / Radio / DTV.
Network Search
Whether to perform Network Quick Search (Search Mode is optional for FAST SCAN)
Search Mode
Selects the scanning method: BLIND SCAN / FAST SCAN.
Search
Starts searching.
4). Your TV will now start scanning for all the available TV channels. This operation may take a few minutes. The display will show the progress of the tuning and the number of channels found.

5). If you want to skip the DTV tuning, press the OK button to interrupt the tuning half way. A pop-up screen will be displayed, press the ◀button to select YES to confirm.
6). Your TV is now setup and ready to watch.
DYB-C
1). Input Source page shown on the TV, use the ▲▼buttons to select TV. Then press the OK button.
2). In DVB Tuning Type page, use the ▲▼ buttons to select DVBC.
BASIC OPERATION

3). Your TV will now start scanning for all the available TV channels. This operation may take a few minutes. The display will show the progress of the tuning and the number of channels found.
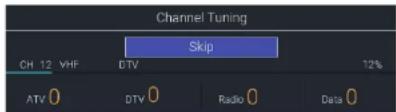
4). If you want to skip the tuning, press the OK button to interrupt the tuning half way. A pop-up screen will be displayed, press the ◀button to select YES to confirm.
5). Your TV is now setup and ready to watch.
HOME Menu
1). Press the button to display the home menu.
2). Use the ▲▼buttons to switch between the Apps, NETFLIX, Input, and Settings sections of the Home page.
3). Use the ◀▶buttons to select the desired App, Input source or Setting, then press the OK button to confirm.

Setting
Allows you to set various performance of your TV.
1). Press the 🎨 button to display the main menu.
2). Press the ▲▼ buttons to select Setting menu and then press the OK button.
BASIC OPERATION

3). Press the ▲▼ buttons to select following setting options. Press the OK button and then press the ◀▶buttons to adjust each option's setting.
Language
OSD Language
Allows you to select your desired On Screen Display language.
Audio Language
Allows you to select your desired audio language. (Available for digital channels if multiple audio languages are broadcast)
Press the OK button to enter the submenu to select Primary and Secondary audio language.
Subtitle Language
Allows you to select your desired subtitle language or turn off the subtitle. (Available for digital channels if multiple subtitle languages are broadcast)
Press the OK button to enter the submenu then use the ▶▶buttons to switch On or Off on Subtitle, select Primary and Secondary subtitle language, and switch On or Off on Hearing Impaired.
OSD Time
You can select a time that your on-screen menu will be displayed: 5 / 10 / 15 Seconds / Always. If you select Always, the menu will remain on the screen until you press a button to remove it.
HBBTV
HbbTV (Hybrid broadcast broadband TV) is a service offered by certain broadcasters and available only on some digital TV channels. HbbTV delivers interactive television over broadband Internet.
To use HbbTV please ensure your TV is connected to Internet and HbbTV is switched on.
Link Setup
Allows you to command and control two or more CEC-enabled devices, that are connected
BASIC OPERATION
through HDMI, by using only one of the remote controls (e.g. controlling a TV set, set-top box and DVD player using only the remote control of the TV). CEC also allows individual CEC-enabled devices to command and control each other without user intervention.
Make sure that your CEC-compliant device is connected to your TV using a HDMI cable and the correct HDMI input source is selected prior to using this function. (Some HDMI cables may not support HDMI-CEC functions.)
HDMI - CEC
Allows you to control other CEC enabled devices (connected via HDMI) using your TV remote control.
HDMI ARC
When HDMI - CEC is set to On, press the ◀▶buttons to select On to enable to send audio to CEC-compliant audio devices or select Off to disable the function.
Auto Power
When HDMI - CEC is set to On, press the ◀▶buttons to select On to enable to set CEC-compliant devices to auto power off.
Auto Standby
When HDMI - CEC is set to On, press the ◀▶buttons to select On to enable to set TV auto power on if an CEC-compliant devices is switch on.
Time
Allows to set the time and date manually or set automatically when receiving a digital signal.
Auto Sync
If Auto Sync is set to On, the time and date will be set from the broadcast signal. If you want to set the time and date manually, set Auto Sync to Off.
Clock
When Auto Sync is set to Off, press the ▲▼buttons to enter the Clock page. Use the ◀▲▼▶ buttons set Year / Month / Day / Hour / Minute.
Off Time
Allows you to set the shutdown time. Press the OK button to enter Off Time page. Use the ▶▲▼▶ buttons set the options: Off Time Mode / Hour / Minute.
On Time
Allows you to set the boot up time. Press the OK button to enter Off Time page. Use the ▶▲▼▶ buttons set the options: Off Time Mode / Hour / Minute / Source.
BASIC OPERATION
Sleep Timer
The sleep timer automatically switches the TV to standby after the preset time has elapsed. The clock will be set automatically when receiving a digital signal. Time must be set before using Sleep Timer function.
Press the ◀▶buttons to select a period of time after which the TV automatically switches to standby mode: OFF / 10 / 20 / ... / 180 / 240 min. The timer begins to count down from the number of minutes selected.
Auto Sleep
If Auto Sleep is set to On, the unit will automatically switch to standby mode 4 hours after the last time the remote control was used. A reminder screen will pop up and count down before the unit switches to standby mode.
Time Zone
When you select a time zone city, the TV time is set by the time offset information based on Time Zone and GMT (Greenwich Mean Time) which is received with the broadcast signal and the time is set automatically by a digital signal.
Environment
Allows you to select Home mode to maximize energy efficiency or Shop mode if you would like your picture to be brighter.
Reset
Restores all settings to the factory defaults.
4). Press the BACK button to return to the previous menu. Press the EXIT button to exit the menu.
Picture
Allows you to set your preferred picture mode.
1). Press the ⚙ button to display the main menu.
BASIC OPERATION

2). Press the ▲▼ buttons to select Picture menu and then press the OK button.
3). Press the ▲▼buttons to select following picture options. Press the OK button and then press the ◀▶ buttons to adjust each option's setting.
Picture Mode
Select among picture mode: Standard / Movie / User / Dynamic.
Contrast
Adjusts the difference between light and dark levels in the picture (for User mode).
Brightness
Increases or decreases the amount of white in the picture (for User mode).
Color
Controls the color intensity (for User mode).
Sharpness
Adjusts the level of crispness in the edges between light and dark areas of the picture (for User mode).
Tint (For NTSC format)
Adjusts the balance between red and green levels (Tint is only available for ATV mode or NTSC signal reception).
Backlight
Adjusts the backlight setting of your TV. This controls the brightness and display performance of the screen.
Color Temperature
Select among color temperature: Standard / Warm / Cool.
Aspect Ratio
Allows you to watch the screen in various picture formats: 16:9 / Movie / Subtitle /
4:3. Different screen adjustment options are displayed depending on the current input source.
Noise Reduction
Select to reduce the noise level of the connected device: Off / Low / Middle / High / Auto.
4). Press the BACK button to return to the previous menu. Press the EXIT button to exit the menu.
BASIC OPERATION
Sound
Allows you to select an audio-enhancement technique.
1). Press the

button to display the main menu.
2). Press the ▲
▼ buttons to select Sound menu and then press the OK button.
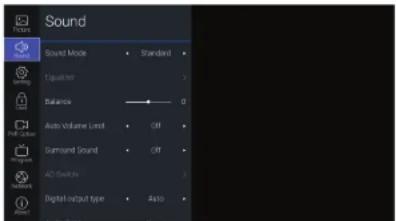
3). Press the ▲▼buttons to select following sound options. Press the OK button and then press the ◀▶buttons to adjust each option's setting.
Sound Mode
You can select this function when surround sound switch off. Press the ◀▶ buttons to select an audio-enhancement technique: Standard / Music / Movie / Sport / User.
Equalizer (for User mode)
Adjusts the sound by raising or lowering the level of specific frequency from 0-100: 120Hz / 500Hz / 1.5KHz / 5KHz / 10KHz.
Balance
Adjusts the relative volume of the speakers in a multiple speaker system.
Auto Volume Limit
Volume levels are automatically controlled (e.g., advertisements tend to be louder than the Programs).
Surround Sound
Delivers an immersive virtual surround sound experience over front facing speaker configurations, complete with Rich Bass, High Frequency Detail and Clear Dialogue.
AD Switch (for DTV mode)
Audio Description is an auxiliary audio function that provides an additional audio track for visually challenged persons. This function handles the Audio Stream for the AD (Audio Description), when it is sent along with the main audio from the broadcaster.
BASIC OPERATION
- Set to "Off" for normal broadcasting sound coming out from speakers.
- Set to "On" to activate the description sound track if available. Press the ◀▶ buttons to adjust the AD volume. The availability of Audio Description sound track is indicated by the visually impaired icon "V.I." in the information banner.
Digital Output Type
Selects the type of digital audio output: Auto / Dolby DD / Dolby DD+ / PCM.
Audio Type (for DTV mode)
Selects the type of audio output: Normal / Hearing Impaired / Visual Impaired.
Audio Delay
Adjusts the audio delay setting from 0-250: SPDIF Delay / Speaker Delay / HDMI ARC Delay.
4). Press the BACK button to return to the previous menu. Press the EXIT button to exit the menu.
Programme
Auto Tuning (DTV Mode)
Use this to automatically find and store all available channels. This is normally recommended if some channels have been added or removed by the broadcaster or if you have moved.
1). Press the

button to display the main menu.
2). Press the ▲▼ buttons to select Programme menu and then press the OK button.
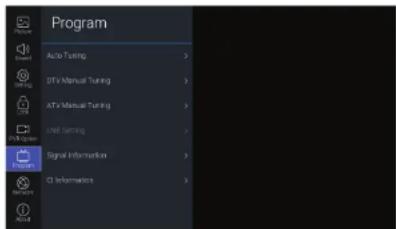
3). Press the ▲▼ buttons to select Auto Tuning menu and then press the OK button.
4). In the Auto Tuning menu, select Tuning Mode and then press the ◀▶ buttons to select DTV / ATV / DTV+ATV.
BASIC OPERATION

5). Press the ▼button and then press the ◀▶buttons to select the country where you will operate the TV. Press the ▼button.
6). Press the OK button to start auto tuning.
7). If the input source is DVB-S, Auto Tuning window will be displayed. Use the ▲▼ buttons to select the options, then use the ◀▶ buttons to adjust each option's setting. Press the ▲▼ buttons to select Search and press the OK button to start searching.

Satellite
Selects your desired satellite.
Transponder
Selects your desired frequency.
Scan Mode
Selects your desired watching channel type: Free + Scramble / Free / Scramble.
Service Type
Selects the channel service type: DTV + Radio / Radio / DTV.
Network Search
Whether to perform Network Quick Search (Search Mode is optional for FAST SCAN)
BASIC OPERATION
Search Mode
Selects the scanning method: BLIND SCAN / FAST SCAN.
Search
Start searching.
8). Your TV will now start scanning for all the available TV channels. This operation may take a few minutes. The display will show the progress of the tuning and the number of channels found.
9). If you select DTV+ATV mode and want to skip the DTV tuning, press the OK button to interrupt the tuning half way. A pop-up screen will be displayed, press the ◀button to select YES to confirm. You will then go straight to ATV tuning. You may repeat the above step if you also want to skip the ATV tuning.

10). Your TV is now setup and ready to watch.
DTV Manual Tuning (DVB-T Mode)
Allows you to make manual fine tuning adjustments to the channel under DTV mode.
1). Press the 🎨 button to display the main menu.
2). Press the ▲▼ buttons to select Programme menu and then press the OK button.
3). Press the ▲▼buttons to select DTV Manual Tuning menu and then press the OK button.

4). The DTV Manual Tuning screen will pop up. Press the ◀▶ buttons to select the desired VHF channel and then press the OK button to commence the search of that channel. When the signal has been tuned, the picture and signal strength will be displayed on the screen.
5). Press the BACK button to return to the previous menu. Press the EXIT button to exit the menu.
BASIC OPERATION
DTV Manual Tuning (DVB-S Mode)
Allows you to make manual fine tuning adjustments to the channel under DTV mode.
1). Press the 🎨 button to display the main menu.
2). Press the ▲▼buttons to select Programme menu and then press the OK button.
3). Press the ▲▼buttons to select DTV Manual Tuning menu and then press the OK button.

4). The DTV Manual Tuning screen will pop up, use the ▲▼buttons to select the options, then use the ◀▶buttons to adjust each option's setting. Press the ▲▼buttons to select Search and press the OK button to start searching.
Satellite
Selects your desired satellite.
Frequency
Selects the frequency.
Symbol
Selects the symbol.
Polarization
Selects the type of polarization.
Network Search
Whether to perform Network Quick Search.
BASIC OPERATION
Scan Mode
Selects your desired watching channel type: Free + Scramble / Free / Scramble.
Service Type
Selects the channel service type: DTV + Radio / Radio / DTV.
Search
Start searching.
5). When the signal has been tuned, the picture and signal strength will be displayed on the screen.
6). Press the BACK button to return to the previous menu. Press the EXIT button to exit the menu.
DTV Manual Tuning (DVB-C Mode)
Allows you to make manual fine tuning adjustments to the channel under DTV mode.
1). Press the ⏻ button to display the main menu.
2). Press the ▲▼ buttons to select Programme menu and then press the OK button.
3). Press the ▲▼buttons to select DTV Manual Tuning menu and then press the OK button.
4). The CADTV screen will pop up, use the ▲▼buttons to select the options, then use the ◀▶buttons to adjust each option's setting. Press the ▲▼buttons to select Search and press the OK button to start searching.

Frequency
Selects the frequency.
BASIC OPERATION
Symbol
Selects the symbol.
Modulation
Selects the modulation.
5). When the signal has been tuned, the picture and signal strength will be displayed on the screen.
6). Press the BACK button to return to the previous menu. Press the EXIT button to exit the menu.
ATV Manual Tuning (ATV Mode)
Allows you to make manual fine tuning adjustments if the channel reception is poor under ATV mode.
1). Press the 🎨 button to display the main menu.
2). Press the ▲▼buttons to select Programme menu and then press the OK button.
3). Press the ▲▼buttons to select ATV Manual Tuning menu and then press the OK button.
4). The ATV Manual Tuning screen will pop up, use the ▲▼buttons to select the options, then use the ◀▶buttons to adjust each option's setting. Press the ▲▼buttons to select Search and press the OK button to start searching.

Current Channel
Displays the current channel number.
BASIC OPERATION
Search
Press to start the manual tuning.
Fine-Tune
Press to make manual fine tuning adjustments.
Save
Save the setting.
Sound System
Selects the sound system: BG / I / DK / L / M.
Color System
Selects the color system: PAL / SECAM / NTSC.
5). After searching, Press the ▲▼ buttons to select Save and the OK button to confirm.
6). Press the BACK button to return to the previous menu. Press the EXIT button to exit the menu.
LNB Setting (DVB-S Mode)
Allows you setup your satellite. The Low Noise Block down Converter (LNB) amplifies the signal received by the satellite dish and lowers the frequency of the signal.
1). Press the ⏻ button to display the main menu.
2). Press the ▲▼ buttons to select Programme menu and then press the OK button.
3). Press the ▲▼ buttons to select LNB Setting menu and then press the OK button.
4). The LNB Setting screen will pop up, use the ▲▼ buttons and the OK button to select the options, then use the ◀▶ buttons to adjust each option's setting. Press the BACK button to return to previous menu.
BASIC OPERATION

Satellite
Selects your desired satellite.
Transponder
Selects your desired frequency.
LNB Power
Select LNB power on to output LNB voltage.
Low/High Freq
Select the low and high frequency of LNB.
22kHz Tone
Depending on the satellite switch box or LNB. When selecting the U-LNB 1 and U-LNB 2, the 22KHz will be dimmed. (MOTOR DiSEqC 1,2).
Toneburst
Depending on the user's antenna switch box: None / BurstA / BurstB.
DISEqC1.0
The TV is designed to be DiSEqC 1.0 compatible. Select one of LNB1 to LNB4 or Disable according to the option or the configuration of DiSEqC switch box or antenna.
DiSEqC1.1
The TV is designed to be DiSEqC 1.1 compatible. Select one of LNB1 to LNB16 or Disable
BASIC OPERATION
according to the option or the configuration of DiSEqC switch box or antenna.
Motor
Select DiSEqC1.2 or DiSEqC1.3 then press the colored button to enter the submenu. Then use the ◀▲▼▶ buttons to advance settings.
SingleCable
Select and control of plural Satellite antennas through the combined single antenna cable. Use the ◀▲▼▶buttons to advance settings.
5). Press the BACK button to return to the previous menu. Press the EXIT button to exit the menu.
Signal Information (DTV Mode)
Allows you to view the signal information.
1). Press the ⏻ button to display the main menu.
2). Press the ▲▼buttons to select Programme and then press the OK button.
3). Press the ▲▼buttons to select Signal Information and then press the OK button to view the signal information.
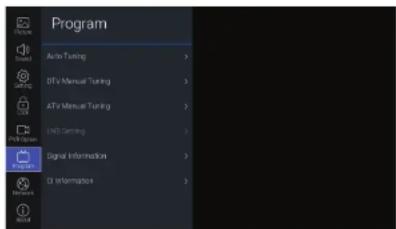
4). Press the BACK button to return to the previous menu. Press the EXIT button to exit the menu.
CI (Common Interface) (DTV Mode)
The common interface allows the use of a Common Access Module to enable you to view scrambled (pay to view) services. These services are provided by TopUp TV (UK only) and others. The Common Access Module and viewing card can be obtained from the service provider.
To insert the Common Access Module
1). Before you insert the Common Access Module, ensure that the TV is switched off and the viewing card is inserted In accordance with the Service Provider's Instructions.
BASIC OPERATION
2). Insert the Common Access Module into the slot. Flip the Common Access Module to another side and try again if you feel resistance.
3). Switch the TV on.
To view the module information
1). Press the 🎨 button to display the main menu.
2). Press the ▲▼buttons to select Programme menu and then press the OK button.
3). Press the ▲▼buttons to select CI Information menu and then press the OK button to view CI information.
Lock
To access the LOCK menu, you must enter the password. Enter the default password "0000" for first time use. To change the password, please refer to the section "Set Password".
Lock System
The Lock System is designed to prevent accidental re-tuning of the TV / losing of channels and to prevent children from watching unsuitable programs.
The Lock System must be set to On for this function to operate. If the Lock System is set to On, a valid password must be entered when you access Auto Tuning / Manual Tuning / LNB Setting / Reset.
1). Press the ⏻ button to display the main menu.
2). Press the ▲▼buttons to select Lock menu and then press the OK button.

3). Use the 0-9 buttons to input a 4-digit password to enter the LOCK menu.
4). Press the OK button to select Lock System.
5). Press the ▲▼buttons to select Lock System and then the ◀▶buttons to select On / Off. If the Lock System is set to On, a valid password must be entered when you access Auto Tuning / Manual Tuning / LNB Setting / Reset.
BASIC OPERATION
6). Press the BACK button to return to the previous menu. Press the EXIT button to exit the menu.
Set Password
1). Press the ⚙ button to display the main menu.
2). Press the ▲▼ buttons to select Lock menu and then press the OK button.

3). Use the 0-9 buttons to input a 4-digit password to enter the LOCK menu.
4). Press the OK button to select Lock System.
5). Press the ▲▼buttons to select Lock System and then press the ◀▶buttons to select On.
6). Press the ▲▼buttons to select Set Password and then press the OK button.
7). Use the 0-9 buttons to input the old password and then input the new 4-digit password. Re-enter new password for confirmation.
8). Press the BACK button to return to the previous menu. Press the EXIT button to exit the menu.
Parental Guidance
This function allows you to set up blocking schemes to block specific channels and ratings. It operates according to information from the broadcasting station, therefore if the signal has incorrect information, this function will not operate.
This TV is programmed to remember the last option set even if the TV is switched off. When a programme is locked or rated, a valid password must be entered.
1). Press the ⚙ button to display the main menu.
2). Press the ▲▼buttons to select Lock menu and then press the OK button.
BASIC OPERATION

3). Use the 0-9 buttons to input a 4-digit password to enter the LOCK menu.
4). Press the OK button to select Lock System.
5). Press the ▲▼buttons to select Lock System and then press the ◀▶buttons to select On.
6). Press the ▲▼buttons to select Parental Guidance.
7). Press the ◀▶buttons to select an age rating: Off, 4-18.
8). Press the BACK button to return to the previous menu. Press the EXIT button to exit the menu.
. The default password is "0000".
. If you change the password, be sure to remember the new password! If you forget the new password, enter the master password*8899".
PVR Option (DTV Mode)
Allows you to set your preferences in the PVR File System, PVR recording and Timeshift.
1). Press the ⏻ button to display the main menu.
2). Press the ▲▼ buttons to select PVR Option menu and then press the OK button.
BASIC OPERATION
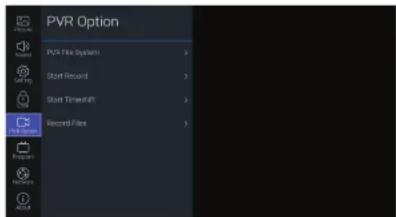
3). Press the ▲▼ buttons to select following setting options. Press the OK button and then press the ◀▶ buttons to adjust each option's setting.
PVR File System
Allows you to select your preferences in the PVR File System.
Select Disk
Selects the disk where you want to store your recorded content.
Select Partition
Selects disk partition where the recorded file is supposed be saved.
Time Shift Size
Selects the format size of the disk for Time Shift.
Format
Start formatting the disk.
Speed
This shows the transfer rate of your USB storage device.
Start Record
Start PVR Recording.
Start Timeshift
Start Timeshift.
Record Files
Views the recorded programs in the Recorded List.
4). Press the BACK button to return to the previous menu. Press the EXIT button to exit the menu.
BASIC OPERATION
Network
Adjust all your network setting and check your connection if you are having connection problems.
1). Press the ⚙ button to display the main menu.
2). Press the ▲▼buttons to select Network and then press the OK button.

3). Press the ▲▼buttons to select following setting options. Press the OK button and then press the ◀▶buttons to adjust each option's setting.
Wi-Fi
The built-in wireless LAN device allows you to access the Internet and enjoy the benefits of Networking in a cable-free environment.
Auto Scan
The TV will automatically scan and show all available wireless networks in the area. Choose the desired network and press the OK button, then enter Network Security Key.
Manual Input
Choose to manually setup Static IP information.
Manual Setup is only for advanced users and network where the network client devices need specific setting to access the network.
IP
Display the connected wireless network IP address.
Netmask
Display the connected wireless network subnet mask.
Gateway
Display the connected wireless network gateway.
BASIC OPERATION
DNS
Display the connected wireless DNS.
Ethernet
Connect your TV to your network by connecting the LAN port on the back of your TV to an external modem or router using a LAN (Ethernet/Cat 5) cable.
Protocol
Select wired network protocol: IPv4 / IPv6.
Configuration
Select wired network IP acquisition method: DHCP / Static.
IP
Set the wired network IP address. (Configuration is set to Static)
Prefix
Set the number of bits in the wired network subnet mask. (Configuration is set to Static)
Gateway
Set the wired network gateway. (Configuration is set to Static optional)
DNS
Set the wired network DNS. (Configuration is set to Static optional)
Connect
Connect to a wired network.
Wake On LAN
Turn on / off the TV wake-on-LAN.
Wake on WLAN
Turn on / off the TV wake-on-WLAN.
BASIC OPERATION
Other Information
1). Press the ⏻ button to display the main menu.
2). Press the ▲▼buttons to select About and then press the OK button.

3). Press the ▲▼buttons to select following setting options. Press the OK button and then press the ◀▶buttons to adjust each option's setting.
4). Press the BACK button to return to the previous menu. Press the EXIT button to exit the menu.
Netflix
Allows to control your Netflix account
Netflix Deactivate
Select YES to confirm to clear your Netflix login account.
Terminate Netflix
Select YES to confirm to terminate your Netflix.
Netflix ESN
Display your ESN key information.
Netflix Version
Display the Netflix version.
View End-User License Agreement
Display Firmware/Software Network Download Update Agreement Description. You can select VIEW ADDITIONAL DETAILS to display more details.
System information
Display your TV system information.
Net Ready Information
Display Net Ready information.
BASIC OPERATION
Software Update (USB)
This function is only for servicing purposes.
Internet Update Check
Check and automatically update the software of NetReady.
Using the Features
EPG (Electronic Programme Guide) (DTV or Radio Mode)
This system has an Electronic Programme Guide (EPG) to help you navigate through all the possible viewing options.
The EPG supplies information such as programme listings, start and end times for all available services. In addition, detailed information about the programme is often available in the EPG (the availability and amount of programme information will vary, depending on the particular broadcaster).
This function can be used only when the EPG information is broadcast by broadcasting companies.
The EPG displays the programme details for the next 7 days.
Switch On / Off EPG
1). Press the EPG button to switch on EPG.
2). Press the EPG button or the EXIT button again to switch off EPG and return to normal TV viewing.

Select a Programme
Press the ▲▼buttons to select the desired channel and then press the ◀▶buttons to select the desired programme. Press the OK button to confirm.
BASIC OPERATION
Button Functions in a 7-Day Guide
| Remote Control Button | Function | |
| ▲or▼or ◀or▶ | Press to select a channel and programme or switch between Schedule and guide menu. | |
| OK | Press to confirm the selection or view the selected programme. | |
| EPG / EXIT | Press to switch off the EPG. | |
Red Button (Interactive Services) (DTV Mode)
Red button services are available on BBC TV and Radio channels. The services are gradually changing to an internet based service rather than the conventional over air (though your aerial). To make the most out of the Red Button services make sure your TV is connected to the internet.
Accessing the Information
1). In DTV mode, press the 📂 button to display the main information page. You may see slightly different looking pages depending if your TV is accessing the page over air or via the internet.

2). Follow the instructions on the interactive services page and move around the page by pressing the ◀▲▼▶, OK, RED, GREEN, YELLOW, BLUE or 0-9 buttons etc.
To change digital teletext services, you will need to exit the current text service and change channels. Then enter the text service on the newly selected channel.
3). Press the ☑ button to exit.
MULTIMEDIA OPERATION
Movies
1). Press the ▲▼ buttons to select MOVIE and then press the OK button.
2). If you have more the one devices connected, press the ◀▶ buttons to select your storage device and then press the OK button.
3). Press the ◀▲▼▶ buttons to navigate in the movie files and then press the OK button to view.
4). Press the OK button to display the function bar. Press the ◀▶ buttons and then press the OK button to select the function: Pause (Play) / Prev. / Next / Playlist.
5). Press the EXIT button to return to the previous menu.
Music
1). Press the ▲▼ buttons to select MUSIC and then press the OK button.
2). If you have more the one devices connected, press the ◀▶ buttons to select your storage device and then press the OK button.
3). Press the ◀▲▼▶ buttons to navigate in the music files and then press the OK button to listen.
4). Press the OK button to display the function bar. Press the ◀▶buttons and then press the OK button to select the function: Pause (Play) / Prev. / Next / Repeat (Repeat All / Repeat None / Repeat 1) / Playlist.
5). Press the EXIT button to return to the previous menu.
Photos
1). Press the SOURCE button on the TV or on the 📄 button on the remote control to display the Input Source bar. Use the ◀▶buttons to select USB and then press the OK button to confirm. Press the ▲▼buttons to select PHOTO and then press the OK button.
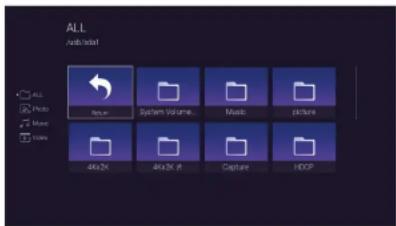
MULTIMEDIA OPERATION
2). If you have more the one devices connected, press the ◀▶ buttons to select your storage device and then press the OK button.
3). Press the ◀▲▼▶ buttons to navigate in the picture files and then press the OK button to view.
4). Press the OK button to display the function bar. Press the ◀▶ buttons and then press the OK button to select the function: Pause (Play) / Music / Playlist / Rotate.
5). Press the EXIT button to return to the previous menu.
ENERGY LABEL
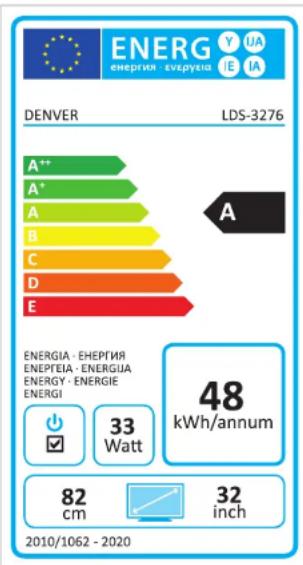
Please notice - All products are subject to change without any notice. We take reservations for errors and omissions in the manual.
ALL RIGHTS RESERVED, COPYRIGHT DENVER ELECTRONICS A/S
DENVER®
www.denver-electronics.com

Electric and electronic equipment and included batteries contains materials, components and substances that can be hazardous to your health and the environment, if the waste material (discarded electric and electronic equipment and batteries) is not handled correctly.
Electric and electronic equipment and batteries is marked with the crossed out Irash can symbol, seen above. This symbol signifies that electric and electronic equipment and batteries should not be disposed of with other household waste, but should be disposed of separately.
As the end user it is important that you submit your used batteries to the appropriate and designated facility. In this manner you make sure that the batteries are recycled in accordance with legislature and will not harm the environment.
All cities have established collection points, where electric and electronic equipment and batteries can either be submitted free of charge at recycling stations and other collection sites, or be collected from the households. Additional information is available at the technical department of your city.
Hereby, Inter Sales A/S declares that the radio equipment type LDS-3276 is in compliance with Directive 2014/53/EU. The full text of the EU declaration of conformity is available at the following internet address: www.denver-electronics.com and then click the search ICON on topline of website. Write model number: LDS-3276. Now enter product page, and red directive is found under downloads/other downloads.
http://www.denver-electronics.com/denver-cau-438/Operating Frequency Range: 42MHz-230MHz (VHF) and 474MHz-862MHz(UHF)
Max Output Power: 45W
DENVER ELECTRONICS A/S
Omega 5A, Soeften
DK-8382 Hinnerup
Denmark
www.facebook.com/denverelectronics


- CONTENTS
- SAFETY INSTRUCTIONS
- EXTERNAL SCHEMATIC AND INSTALLATION
- Notes:
- REMOTE CONTROLLER
- SOURCE
- BASIC OPERATION
- Initial Setup
- Choosing Your OSD Language
- VIEW ADDITIONAL DETAILS
- ACCEPT
- ACCEPT ALL
- ACCEPT AUTOMATIC UPDATES
- ACCEPT USAGE INFORMATION COLLECTION
- DECLINE ALL
- Connecting to the Internet
- Wi-Fi Network
- WIRED Connection
- SKIP Connection
- Signing in to Your Netflix Account
- Tuning in Your TV
- DVB-T
- DVB-S
- Satellite
- Scan Mode
- Service Type
- Network Search
- Search Mode
- DYB-C
- HOME Menu
- Setting
- Language
- OSD Language
- Audio Language
- Subtitle Language
- OSD Time
- HBBTV
- Link Setup
- HDMI - CEC
- HDMI ARC
- Auto Power
- Auto Standby
- Time
- Auto Sync
- Clock
- Off Time
- On Time
- Sleep Timer
- Auto Sleep
- Time Zone
- Environment
- Reset
- Picture
- Picture Mode
- Sound
- Sound Mode
- Equalizer (for User mode)
- Balance
- Auto Volume Limit
- Surround Sound
- AD Switch (for DTV mode)
- Digital Output Type
- Audio Type (for DTV mode)
- Audio Delay
- Programme
- Auto Tuning (DTV Mode)
- Transponder
- Search
- DTV Manual Tuning (DVB-T Mode)
- DTV Manual Tuning (DVB-S Mode)
- Frequency
- Symbol
- Polarization
- DTV Manual Tuning (DVB-C Mode)
- Modulation
- ATV Manual Tuning (ATV Mode)
- Current Channel
- Fine-Tune
- Save
- Sound System
- Color System
- LNB Setting (DVB-S Mode)
- LNB Power
- Low/High Freq
- 22kHz Tone
- Toneburst
- DISEqC1.0
- DiSEqC1.1
- Motor
- SingleCable
- Signal Information (DTV Mode)
- CI (Common Interface) (DTV Mode)
- To insert the Common Access Module
- To view the module information
- Lock
- Lock System
- Set Password
- Parental Guidance
- PVR Option (DTV Mode)
- PVR File System
- Select Disk
- Select Partition
- Time Shift Size
- Format
- Speed
- Start Record
- Start Timeshift
- Record Files
- Network
- Wi-Fi
- Auto Scan
- Manual Input
- IP
- Netmask
- Gateway
- DNS
- Ethernet
- Protocol
- Configuration
- Prefix
- Connect
- Wake On LAN
- Wake on WLAN
- Other Information
- Netflix
- Netflix Deactivate
- Terminate Netflix
- Netflix ESN
- Netflix Version
- View End-User License Agreement
- System information
- Net Ready Information
- Software Update (USB)
- Internet Update Check
- Using the Features
- EPG (Electronic Programme Guide) (DTV or Radio Mode)
- Switch On / Off EPG
- Select a Programme
- Red Button (Interactive Services) (DTV Mode)
- Accessing the Information
- MULTIMEDIA OPERATION
- Movies
- Music
- Photos
- DENVER®
Brand : DENVER
Model : LDS3276
Category : Television