
BR-800 - Media player BOSS - Free user manual and instructions
Find the device manual for free BR-800 BOSS in PDF.


| Product Type | Digital Recorder |
| Brand | BOSS |
| Model | BR-800 |
| Dimensions | 289 (W) x 184 (D) x 58 (H) mm / 11-7/16 x 7-1/4 x 2-5/16 inches |
| Weight | 890 g / 2 lbs (excluding batteries) |
| Power Supply | DC 9V via included AC adaptor, 6x AA alkaline batteries, or USB bus power |
| Sample Rate | 44.1 kHz |
| AD/DA Conversion | 24-bit |
| Tracks | 8 tracks with 64 V-tracks (8 per track), 4 simultaneous recording tracks |
| Effects | COSM effects: insert effects (guitar, bass, vocal), mastering effects, loop effects, track EQ |
| Rhythm Function | Built-in rhythm section with preset patterns and arrangements, drum kits |
| Recording Media | SD card (compatible: SD/SDHC, up to 2 GB/32 GB) |
| Inputs | GUITAR/BASS (Hi-Z), INPUT 1-4 (XLR/TRS combo, phantom power on INPUT 4), LINE IN (stereo mini), built-in stereo microphones |
| Outputs | LINE OUT (RCA), PHONES (1/4" stereo) |
| USB | USB B connector for audio interface, control surface, file transfer, backup |
| Display | 128 x 64 dot backlit LCD |
| Additional Features | EZ Recording, Song Sketch, Loop Recording, Punch-in/out, Scrub/Preview, Tuner, Phrase Trainer (Time Stretch, Center Cancel) |
| Care and Cleaning | Use soft dry cloth; avoid solvents. Wipe AC adaptor prongs regularly. |
| Safety Warnings | Use only included AC adaptor; avoid extreme temperatures, moisture; unplug during lightning. |
| Spare Parts / Repairability | Contact Roland service center. Do not disassemble. Use specified foot switch/expression pedal (EV-5, FV-500L/H, FS-5U, DP-2). |
| General Information | Supports WAV (44.1kHz, 16/24-bit). Backup data to computer regularly. Touch sensor top panel. |
Frequently Asked Questions - BR-800 BOSS
User questions about BR-800 BOSS
0 question about this device. Answer the ones you know or ask your own.
Ask a new question about this device
Download the instructions for your Media player in PDF format for free! Find your manual BR-800 - BOSS and take your electronic device back in hand. On this page are published all the documents necessary for the use of your device. BR-800 by BOSS.
USER MANUAL BR-800 BOSS
BR-800
DIGITAL RECORDER
Owner's Manual

BOSS
* Microsoft and Windows are registered trademarks of Microsoft Corporation.
* Windows® is known officially as: "Microsoft® Windows® operating system."
* Apple and Macintosh are registered trademarks of Apple Inc.
* Mac OS is a trademark of Apple Inc.
* All product names mentioned in this document are trademarks or registered trademarks of their respective owners.
* The SD logo (SD) and SDHC logo (SD ^TM HG) are trademarks of SD-3C, LLC.
* MMP (Moore Microprocessor Portfolio) refers to a patent portfolio concerned with microprocessor architecture, which was developed by Technology Properties Limited (TPL). Roland has licensed this technology from the TPL Group.
Before using this unit, carefully read the sections entitled: "USING THE UNIT SAFELY" (p. 4) and "IMPORTANT NOTES" (p. 6). These sections provide important information concerning the proper operation of the unit.
Additionally, in order to feel assured that you have gained a good grasp of every feature provided by your new unit, Owner's manual should be read in its entirety. The manual should be saved and kept on hand as a convenient reference.
Recording Flow on the BR-800
Preparations for Recording
• Make Connections (p. 32)
- Turn the Power On/Off (p. 34)
Record/Playback
- Record (p. 36)
- Playback (p. 41)
to Record
Recording/Playback
Record with Effects Applied
- Turning the Insert Effect On/Off (p. 55)
- Easily Edit the Insert Effect (p. 55)
ient Using Effects
Record while Listening to Rhythm
• Turn Rhythm On/Off (p. 90)
- Play Patterns (p. 91)
Rhythm ungsinhuiBCovve
EditingMaste
Edit Your Song
• Copy or Erase Tracks (p. 105)
• Name Your Song (p. 110)

Master Your Song
• Using Mastering in Creating a Song (p. 114)
- Making Use of Songs After Mastering (p. 118)
k StarGetting Real Functions
Appendixes Qu
USING THE UNIT SAFELY
INSTRUCTIONS FOR THE PREVENTION OF FIRE, ELECTRIC SHOCK, OR INJURY TO PERSONS
About ⚠ WARNING and ⚠ CAUTION Notices
| ⚠ WARNING | Used for instructions intended to alert the user to the risk of death or severe injury should the unit be used improperly. |
| ⚠ CAUTION | Used for instructions intended to alert the user to the risk of injury or material damage should the unit be used improperly.* Material damage refers to damage or other adverse effects caused with respect to the home and all its furnishings, as well to domestic animals or pets. |
About the Symbols
| The △symbol alerts the user to important instructions or warnings. The specific meaning of the symbol is determined by the design contained within the triangle. In the case of the symbol at left, it is used for general cautions, warnings, or alerts to danger. | |
| The ⊗symbol alerts the user to items that must never be carried out (are forbidden). The specific thing that must not be done is indicated by the design contained within the circle. In the case of the symbol at left, it means that the unit must never be disassembled. | |
| The ●symbol alerts the user to things that must be carried out. The specific thing that must be done is indicated by the design contained within the circle. In the case of the symbol at left, it means that the power-cord plug must be unplugged from the outlet. |
ALWAYS OBSERVE THE FOLLOWING
WARNING
- Do not open (or modify in any way) the unit or its AC adaptor.
- Do not attempt to repair the unit, or replace parts within it (except when this manual provides specific instructions directing you to do so). Refer all servicing to your retailer, the nearest Roland Service Center, or an authorized Roland distributor, as listed on the "Information" page.

- Never install the unit in any of the following locations.


- Subject to temperature extremes (e.g., direct sunlight in an enclosed vehicle, near a heating duct, on top of heat-generating equipment); or are
- Damp (e.g., baths, washrooms, on wet floors); or are
- Exposed to steam or smoke; or are
- Subject to salt exposure; or are
- Humid; or are
- Exposed to rain; or are
- Dusty or sandy; or are
- Subject to high levels of vibration and shakiness.
- Make sure you always have the unit placed so it is level and sure to remain stable. Never place it on stands that could wobble, or on inclined surfaces.

- Be sure to use only the AC adaptor supplied with the unit. Also, make sure the line voltage at the installation matches the input voltage specified on the AC adaptor's body. Other AC adaptors may use a different polarity, or be designed for a different voltage, so their use could result in damage, malfunction, or electric shock.

WARNING
- Do not excessively twist or bend the power cord, nor place heavy objects on it. Doing so can damage the cord, producing severed elements and short circuits. Damaged cords are fire and shock hazards!

- This unit, either alone or in combination with an amplifier and headphones or speakers, may be capable of producing sound levels that could cause permanent hearing loss. Do not operate for a long period of time at a high volume level, or at a level that is uncomfortable. If you experience any hearing loss or ringing in the ears, you should immediately stop using the unit, and consult an audiologist.

- Do not allow any objects (e.g., flammable material, coins, pins); or liquids of any kind (water, soft drinks, etc.) to penetrate the unit.


- If any of the following occurs, immediately turn off the power, remove the AC adaptor from the outlet, and disconnect the USB cable. Then, request servicing by your retailer, the nearest Roland Service Center, or an authorize distributor, as listed on the "Information" page

- The AC adaptor or the power-supply cord has been damaged; or
• If smoke or unusual odor occurs - Objects have fallen into, or liquid has been spilled onto the unit; or
- The unit has been exposed to rain (or otherwise has become wet); or
- The unit does not appear to operate normally or exhibits a marked change in performance.
- In households with small children, an adult should provide supervision until the child is capable of following all the rules essential for the safe operation of the unit.


WARNING
- Protect the unit from strong impact. (Do not drop it!)

- Do not force the unit's power-supply cord to share an outlet with an unreasonable number of other devices. Be especially careful when using extension cords—the total power used by all devices you have connected to the extension cord's outlet must never exceed the power rating (watts/amperes) for the extension cord. Excessive loads can cause the insulation on the cord to heat up and eventually melt through.

- Before using the unit in a foreign country, consult with your retailer, the nearest Roland Service Center, or an authorized Roland distributor, as listed on the "Information" page.

- Batteries must never be recharged, heated, taken apart, or thrown into fire or water.

- Never expose Battery to excessive heat such as sunshine, fire or the like.


CAUTION
- The unit and the AC adaptor should be located so their location or position does not interfere with their proper ventilation.

• Always grasp only the output plug or the body of the AC adaptor when plugging into, or unplugging from, this unit or an outlet.

- At regular intervals, you should unplug the AC adaptor and clean it by using a dry cloth to wipe all dust and other accumulations away from its prongs. Also, disconnect the power plug from the power outlet whenever the unit is to remain unused for an extended period of time. Any accumulation of dust between the power plug and the power outlet can result in poor insulation and lead to fire.

- Try to prevent cords and cables from becoming entangled. Also, all cords and cables should be placed so they are out of the reach of children.

- Never climb on top of, nor place heavy objects on the unit.

- Never handle the AC adaptor body, or its output plugs, with wet hands when plugging into, or unplugging from, an outlet or this unit.


CAUTION
- Before moving the unit, disconnect the AC adaptor and all cords coming from external devices.

- Before cleaning the unit, turn off the power and unplug the AC adaptor from the outlet (p. 32).

- Whenever you suspect the possibility of lightning in your area, disconnect the AC adaptor from the outlet.

- If used improperly, batteries may explode or leak and cause damage or injury. In the interest of safety, please read and observe the following precautions (p. 19).

- Carefully follow the installation instructions for batteries, and make sure you observe the correct polarity.

- Avoid using new batteries together with used ones. In addition, avoid mixing different types of batteries.

- Remove the batteries whenever the unit is to remain unused for an extended period of time.
- If a battery has leaked, use a soft piece of cloth or paper towel to wipe all remnants of the discharge from the battery compartment. Then install new batteries. To avoid inflammation of the skin, make sure that none of the battery discharge gets onto your hands or skin. Exercise the utmost caution so that none of the discharge gets near your eyes. Immediately rinse the affected area with running water if any of the discharge has entered the eyes.
- Never keep batteries together with metallic objects such as ballpoint pens, necklaces, hairpins, etc.
• Used batteries must be disposed of in compliance with whatever regulations for their safe disposal that may be observed in the region in which you live.

- Keep any screws or card cover you may remove and the included SD card in a safe place out of children's reach, so there is no chance of them being swallowed accidentally.

• Always turn the phantom power off when connecting any device other than condenser microphones that require phantom power. You risk causing damage if you mistakenly

supply phantom power to dynamic microphones, audio playback devices, or other devices that don't require such power. Be sure to check the specifications of any microphone you intend to use by referring to the manual that came with it.
(This instrument's phantom power: 48 V DC, 10 mA Max)
Power Supply: Use of Batteries
- Do not connect this unit to same electrical outlet that is being used by an electrical appliance that is controlled by an inverter (such as a refrigerator, washing machine, microwave oven, or air conditioner), or that contains a motor. Depending on the way in which the electrical appliance is used, power supply noise may cause this unit to malfunction or may produce audible noise. If it is not practical to use a separate electrical outlet, connect a power supply noise filter between this unit and the electrical outlet.
- The AC adaptor will begin to generate heat after long hours of consecutive use. This is normal, and is not a cause for concern.
- The use of an AC adaptor is recommended as the unit's power consumption is relatively high. Should you prefer to use batteries, please use the alkaline type.
- When installing or replacing batteries, always turn off the power on this unit and disconnect any other devices you may have connected. This way, you can prevent malfunction and/or damage to speakers or other devices.
- Before connecting this unit to other devices, turn off the power to all units. This will help prevent malfunctions and/or damage to speakers or other devices.
Placement
- Using the unit near power amplifiers (or other equipment containing large power transformers) may induce hum. To alleviate the problem, change the orientation of this unit; or move it farther away from the source of interference.
- This device may interfere with radio and television reception. Do not use this device in the vicinity of such receivers.
- Noise may be produced if wireless communications devices, such as cell phones, are operated in the vicinity of this unit. Such noise could occur when receiving or initiating a call, or while conversing. Should you experience such problems, you should relocate such wireless devices so they are at a greater distance from this unit, or switch them off.
-
Do not expose the unit to direct sunlight, place it near devices that radiate heat, leave it inside an enclosed vehicle, or otherwise subject it to temperature extremes. Excessive heat can deform or discolor the unit.
-
When moved from one location to another where the temperature and/or humidity is very different, water droplets (condensation) may form inside the unit. Damage or malfunction may result if you attempt to use the unit in this condition. Therefore, before using the unit, you must allow it to stand for several hours, until the condensation has completely evaporated.
- Depending on the material and temperature of the surface on which you place the unit, its rubber feet may discolor or mar the surface.
You can place a piece of felt or cloth under the rubber feet to prevent this from happening. If you do so, please make sure that the unit will not slip or move accidentally.
Maintenance
- For everyday cleaning wipe the unit with a soft, dry cloth or one that has been slightly dampened with water. To remove stubborn dirt, use a cloth impregnated with a mild, non-abrasive detergent. Afterwards, be sure to wipe the unit thoroughly with a soft, dry cloth.
- Never use benzine, thinners, alcohol or solvents of any kind, to avoid the possibility of discoloration and/or deformation.
Repairs and Data
- Please be aware that all data contained in the unit's memory may be lost when the unit is sent for repairs. Important data should always be backed up on an SD card, a computer, or written down on paper (when possible). During repairs, due care is taken to avoid the loss of data. However, in certain cases (such as when circuitry related to memory itself is out of order), we regret that it may not be possible to restore the data, and Roland assumes no liability concerning such loss of data.
Additional Precautions
- Please be aware that the contents of memory can be irretrievably lost as a result of a malfunction, or the improper operation of the unit. To protect yourself against the risk of losing important data, we recommend that you periodically save a backup copy of important data you have stored in the unit's memory on an SD card or a computer.
- Unfortunately, it may be impossible to restore the contents of data that was stored in the unit's memory or an SD card once it has been lost. Roland Corporation assumes no liability concerning such loss of data.
-
Use a reasonable amount of care when using the unit's buttons, sliders, or other controls; and when using its jacks and connectors. Rough handling can lead to malfunctions.
-
Never strike or apply strong pressure to the display.
- When connecting / disconnecting all cables, grasp the connector itself—never pull on the cable. This way you will avoid causing shorts, or damage to the cable's internal elements.
- To avoid disturbing your neighbors, try to keep the unit's volume at reasonable levels. You may prefer to use headphones, so you do not need to be concerned about those around you (especially when it is late at night).
- When you need to transport the unit, package it in the box (including padding) that it came in, if possible. Otherwise, you will need to use equivalent packaging materials.
- Use only the specified expression pedal (Roland EV-5, BOSS FV-500L/FV-500H; sold separately). By connecting any other expression pedals, you risk causing malfunction and/or damage to the unit.
- Some connection cables contain resistors. Do not use cables that incorporate resistors for connecting to this unit. The use of such cables can cause the sound level to be extremely low, or impossible to hear. For information on cable specifications, contact the manufacturer of the cable.
Before Using SD Cards Using SD Cards
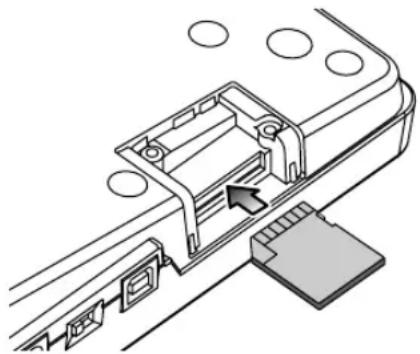
- Carefully insert the SD card all the way in—until it is firmly in place.
natural_image
Technical line drawing of a mechanical assembly with no visible text or symbols- Never touch the terminals of the SD card. Also, avoid getting the terminals dirty.
-
SD cards are constructed using precision components; handle the cards carefully, paying particular note to the following.
-
To prevent damage to the cards from static electricity, be sure to discharge any static electricity from your own body before handling the cards.
- Do not touch or allow metal to come into contact with the contact portion of the cards.
-
Do not bend, drop, or subject cards to strong shock or vibration.
-
Do not keep cards in direct sunlight, in closed vehicles, or other such locations.
- Do not allow cards to become wet.
- Do not disassemble or modify the cards.
Handling DVD-ROMs
- Avoid touching or scratching the shiny underside (encoded surface) of the disc. Damaged or dirty DVD-ROM discs may not be read properly. Keep your discs clean using a commercially available DVD cleaner.
Copyright
- Recording, duplication, distribution, sale, lease, performance, or broadcast of copyrighted material (musical works, visual works, broadcasts, live performances, etc.) belonging to a third party in part or in whole without the permission of the copyright owner is forbidden by law.
- This product can be used to record or duplicate audio or visual material without being limited by certain technological copy-protection measures. This is due to the fact that this product is intended to be used for the purpose of producing original music or video material, and is therefore designed so that material that does not infringe copyrights belonging to others (for example, your own original works) can be recorded or duplicated freely.
- Do not use this unit for purposes that could infringe on a copyright held by a third party. We assume no responsibility whatsoever with regard to any infringements of third-party copyrights arising through your use of this unit.
Operating Buttons
- The BR-800's top panel employs touch sensors. To prevent the touch sensors from malfunctioning, please observe the following precautions.
- During the time from when you turn on the power until the name of a song appears, do not touch the top panel and do not allow any objects to come into contact with it.
- While using the BR-800, keep all cables and similar items away from the top panel, so they don't come into contact with it. Do not place any objects on the panel.
Examples: Headphones or cables Mic or guitar cables
- The buttons might not respond correctly in the following situations.
- If you operate them wearing gloves
- If you operate them with a pen or any object other than your finger
- If beads of water have formed on the BR-800
- If an object is resting on the BR-800
- If two or more buttons are being touched
Contents
Recording Flow on the BR-800 3
USING THE UNIT SAFELY...... 4
IMPORTANT NOTES...... 6
Main Features.... 11
Panel Descriptions.... 12
Top Panel.... 12
Front Panel.... 16
Rear Panel 17
Side Panel.... 18
Installing Batteries 19
Quick Start 21
Listening to the Demo Songs ...... 22
-
Make Connections ...... 22
-
Turn on the Power 23
-
Listen to the Demo Songs ...... 24
Recording with the EZ Recording
Function 26
-
Make Recording Settings ...... 26
-
Recording 27
-
Playing Back 29
EZ Recording Parameter List 30
Getting Ready to Record ..... 31
Making Connections 32
Using the Cord Hook 33
Turning the Power On/Off...... 34
Turning the Power On 34
Turning the Power Off 34
Recording/Playback ...... 35
Recording.... 36
Creating a New Song (SONG NEW)..... 36
Selecting a Song (SONG SELECT)...... 36
Selecting the Input Source 37
Adjusting the Input Sensitivity...... 37
Adjusting the Recording Level ...... 38
Selecting the Track(s) for Recording ..... 38
Selecting V-Tracks.... 39
Adjusting the Stereo Feel of the Input Sound (PAN).... 40
Recording 40
Loop Recording 41
Playback.... 41
Recording Additional Performances (Overdubbing) 42
Playing Back Repeatedly (Repeat)...... 43
Specifying the Repeat Region...... 43
Setting the Repeat Region to an Exact Interval.... 44
Re-Recording Only Over a Mistake (Punch-In/Out) 45
Manual Punch-In/Out 45
Auto Punch-In/Out 46
Cancelling an Operation (UNDO/REDO) 48
Returning to the Previous State (UNDO) 48
Canceling the Undo (REDO) 48
Viewing Information about the Song.. 49
Viewing the Remaining Recording Time.... 49
Viewing Song Information 49
Simple Recording (SONG SKETCH)... 50
Switching to Song Sketch Mode...... 50
Recording 50
Playback....51
Erasing a WAV File.... 51
Naming a WAV File.... 52
Viewing Information about the WAV File....52
Using Effects 53
Using Insert Effects 54
Effect Patches and Banks 54
Turning the Insert Effect On/Off ...... 55
Easily Creating an Insert Effect (EZ TONE) 55
Editing the Insert Effect Settings...... 56
Saving the Insert Effect Settings (Write) .. 57
Changing the Location of the Insert Effect (LOCATION).... 58
Copying Insert Effects (EFFECT BANK COPY) .... 59
Algorithm List 60
Parameter List.... 65
Adding a Sense of Spaciousness ...... 84
Adjusting the Loop Effect Depth...... 84
Editing the Loop Effect 84
Parameter List.... 85
Adjusting the Tone of Each Track...... 86
Editing the Track EQ 86
Parameter List.... 86
Using Rhythm 87
Overview of the Rhythm Section ..... 88
Patterns and Arrangements.... 88
About the Drum Sounds (Drum Kits)... 89
Turning the Rhythm On/Off 90
Switching between Pattern Mode and Arrangement Mode 90
Playing Patterns.... 91
Changing the Tempo.... 92
Using [TAP TEMPO] Button to Set the Tempo....92
Playing an Arrangement 93
Changing the Tempo.... 94
Using [TAP TEMPO] Button to Set the Tempo.... 94
Changing the Drum Sounds (Drum Kit) 95
Selecting a Drum Kit.... 95
Creating an Original Arrangement ..... 96
Inserting a Step.... 98
Erasing a Step 98
Naming an Arrangement.... 99
Copying an Arrangement 100
Erasing an Arrangement ...... 101
Delaying the Pattern/Arrangement
Playback (OFFSET) 102
Editing ......103
Finding the Location at which a Sound
Begins or Ends (Scrub/Preview) ..... 104
Editing.... 105
Track Editing 105
Copying a Song (SONG COPY) ...... 109
Erasing a Song (SONG ERASE) ...... 109
Naming a Song (SONG NAME) ...... 110
Protecting a Song (SONG PROTECT) .. 110
Saving a Song
(SAVE CURRENT STATE) 111
Saving Memory on the SD Card ...... 111
Mastering ....113
Using Mastering in Creating a Song . 114
Editing the Mastering Effect Settings.. 116
Saving the Mastering Effect Settings (Write).... 117
Parameter List.... 117
Making Use of Songs After
Mastering.... 118
Making Use of Songs on Your Computer 118
Recording the Mastered Song to an External Device.... 118
Using USB ......119
Before Using USB 120
About the "BR-800 DVD-ROM" ...... 120
Installing the USB Driver 120
Data Structure on the SD Card...... 120
Contents
Using the BR-800 as an Audio
Interface 121
Recording Audio from the BR-800 on
Your Computer 121
Using the BR-800 to Hear Songs
Played Back by Your Computer ...... 121
Using the BR-800 to Record Songs
Played Back by Your Computer ...... 121
Using the BR-800 as a Control
Surface.... 122
Using SONAR LE.... 123
Controllers that Can Be Used in
Control Surface Mode 123
Exchanging Data with Your
Computer.... 124
Using BOSS BR Series Wave
Converter.... 124
Transferring WAV Files 124
Saving Data on Your Computer
(Backup/Recover) 126
Making Settings for USB
Functionality 128
Parameter List.... 128
Convenient Functions ...... 131
Adjusting the Display Contrast...... 132
Using a Foot Switch/Expression
Pedal 133
Using an Expression Pedal 133
Using a Foot Switch.... 133
Tuning Your Instrument (TUNER).... 134
Switching to the Tuner.... 134
Tuning.... 134
Specifying the Tuner's Reference
Pitch 135
Mixing the Sound from an Audio
Device (LINE IN MIX) 136
Output Settings (OUTPUT)...... 137
Output Settings for LINE OUT and
Headphone (OUTPUT MODE)...... 137
Adjusting the Headphone Volume
(PHONES LEVEL).... 137
Practicing Phrases
(PHRASE TRAINER)...... 138
Slowing Down the Speed (TIME
STRETCH).... 138
Minimizing Sounds in the Center
(CENTER CANCEL)...... 139
Restoring the Factory Settings
(FACTORY RESET).... 140
Initializing an SD Card (FORMAT)... 141
Viewing the SD Card Usage
(SD CARD INFORMATION) ...... 142
Reducing the Battery Consumption
(POWER SAVE).... 143
Using a Condenser Microphone
(PHANTOM POWER).... 144
Adjusting the Sensitivity of the
Touch Sensors.... 145
Appendixes......147
SD Cards that Can Be Used with the
BR-800 148
BR-800 Effect Patch List.... 150
Insert Effects.... 150
Mastering Effects.... 151
Arrangement / Pattern List...... 152
Preset Arrangement List 152
Preset Pattern List 153
Troubleshooting 154
Problems with the Power Supply ..... 154
Problems with the Sound.... 154
Problems with the SD Card .... 155
Problems with USB 156
Problems with the Buttons.... 156
Error Message List 157
Specifications 160
Index.... 161
The BR-800 is a digital recorder that allows even the beginner to create songs easily.
From recording to mastering, this convenient device makes it easy for you to start enjoying the benefits of digital recording.
Four-Track Simultaneous Recording/Eight-Track Simultaneous Playback
The BR-800 provides recording capabilities to meet a wide range of needs.
Numerous High-Quality Effects (p. 53, p. 113)
- COSM effects for electric guitar/bass are taken from the BOSS GT-10/10B.
- Effects for vocals which provide for pitch correction, and those that realistically model the sound of an acoustic guitar are provided.
- Since the BR-800 comes equipped with mastering effects that you can use at anytime, as well as loop effects, it alone is just about all you need for creating some truly high-quality songs.
Rhythm Function (p. 87)
Comes with Rhythm production functionality that offers high-quality drum sounds.
You can use this as a guide during recording, or create your own original rhythm part and record it along with your performance.
EZ Recording Function (p. 26)
The EZ Recording function provides quick setup for various types of recording.
Song Sketch Function (p. 50)
The Song Sketch function lets you record and play back stereo WAV files.
This is a convenient way to record audio memos of your musical ideas and phrases.
Connecting via USB (p. 119)
There are three ways of powering the unit: with an AC adaptor, with batteries, or by connecting it to a USB bus. This means that you can use the BR-800 just about anywhere.
Built-in Stereo Microphones
The built-in stereo microphones provide a convenient way to record your band performance or acoustic instruments.
Three-Way Power Supply
The BR-800 can be operated using an AC adaptor, batteries, or USB bus power.

About COSM (Composite Object Sound Modeling)
Composite Object Sound Modeling—or “COSM” for short—is BOSS/Roland’s innovative and powerful technology that’s used to digitally recreate the sound of classic musical instruments and effects. COSM analyzes the many factors that make up the original sound—including its electrical and physical characteristics—and creates a digital model that accurately reproduces the original.
Top Panel
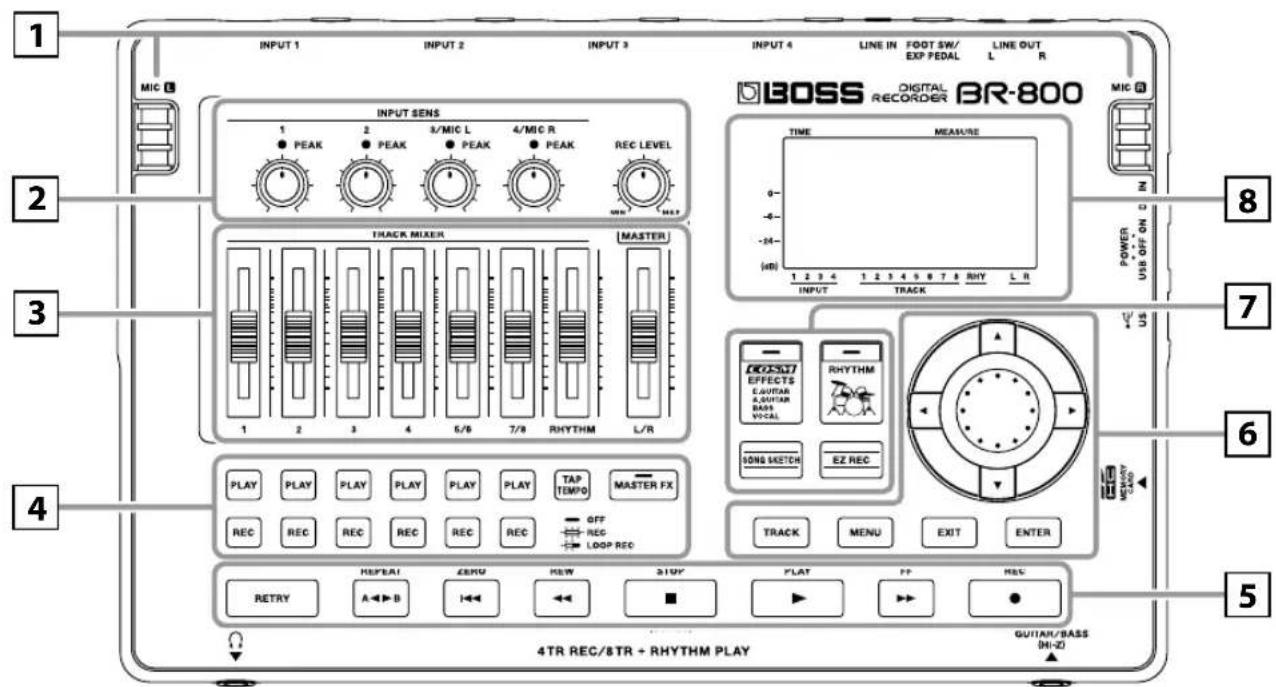
1
MIC L/R (internal stereo microphones L/R)
You can use these microphones to record in stereo.

"Selecting the Input Source" (p. 37)
* Speakers are not built in. In order to hear the sound, you'll need to use headphones or connect amplified speakers to LINE OUT jacks.
2
[INPUT SENS (Input sensitivity) [1], [2] knobs
These knobs adjust the input sensitivity of the devices connected to INPUT 1 and 2 jacks.
INPUT SENS (Input sensitivity) [3/MIC L], [4/MIC R] knobs
These knobs adjust the input sensitivity of the devices connected to INPUT 3 and 4 jacks, or of the internal stereo microphones.
![BOSS BR-800 - INPUT SENS (Input sensitivity) [3/MIC L], [4/MIC R] knobs - 1](/content/2026/05/810967/images/d984ee6e9a80890844801f16e0043b3925e8f28395a70a8dc7b9fe31570fc16d.jpg)
"Adjusting the Input Sensitivity" (p. 37)
PEAK indicators
These indicate whether distortion is occurring with respect to INPUT 1–4 jacks or with the internal stereo microphones (input sources).

The indicator will light approximately -6 dB below the level at which distortion begins. Use the INPUT SENS knobs to adjust the input sensitivity so that the PEAK indicators light occasionally when you play strongly.

"Adjusting the Input Sensitivity" (p. 37)
[REC LEVEL] (Recording level) knob
This knob adjusts the volume of the recording on the track.
* If you turn down the [REC LEVEL] knob during recording in order to decrease the monitoring volume, the input source will be recorded at a lower volume. This will cause noise to be more noticeable when you raise the track's volume during playback.
If you want to decrease the monitoring volume, you should use the [MASTER] fader to lower the volume. If you want to change the volume during playback, adjust the [TRACK] faders of each track.
![BOSS BR-800 - [REC LEVEL] (Recording level) knob - 1](/content/2026/05/810967/images/a2bab9ece0ecf685828f7c6ae7d72381b2f09a4b3b154e5774db1e63d6ea1227.jpg)
"Adjusting the Recording Level" (p. 38)
3
Track [1]-[7/8] faders
These faders adjust the playback volume of each track.
[RHYTHM] fader
This fader adjusts the volume of the rhythm.
![BOSS BR-800 - [RHYTHM] fader - 1](/content/2026/05/810967/images/46b2be6a2e4521392c124fe73c00dccd53e6ca53b06bb4887e3c5d4c42e9333d.jpg)
"Playing Patterns" (p. 91)
"Playing an Arrangement" (p. 93)
[MASTER] fader
This fader adjusts the overall volume.
4
Track 1-7/8 [PLAY] buttons
These buttons select the tracks that will play.
Unlit: Track that contains no data (unrecorded)
Lit: Track that will play (contains data)
Blinking: Track that will not play (contains data)
Track 1-7/8 [REC] buttons
These buttons select the tracks that will be recorded.
Unlit: Track that will not be recorded
Lit: Track that will be recorded
Blinking: Track that will be loop-recorded
![BOSS BR-800 - Track 1-7/8 [REC] buttons - 1](/content/2026/05/810967/images/35d50db94d82fe2fcf598985388b1268d8ba03e259f878b732c2009d5786a4d9.jpg)
"Recording" (p. 36)
[TAP TEMPO] button
You can set the tempo of the rhythm by repeatedly pressing this button at the desired timing.
![BOSS BR-800 - [TAP TEMPO] button - 1](/content/2026/05/810967/images/aafc9e0cf89a2266da449506fbae85aceb957025cf46323c31f1497b5fa6c709.jpg)
"Using [TAP TEMPO] Button to Set the Tempo" (p. 92), (p. 94)
[MASTER FX] (Mastering effect) button
This button accesses a screen where you can turn the mastering effect on/off and edit its settings.
![BOSS BR-800 - [MASTER FX] (Mastering effect) button - 1](/content/2026/05/810967/images/6b05da0eb3809ba4f35981b3883716c29c2d3924d138acb27b9f691f25333961.jpg)
"Mastering" (p. 113)
5
[RETRY] button
This button returns to the time location at which you last started recording.
[REPEAT] button
Use this button to specify a desired section for repeated listening.
![BOSS BR-800 - [REPEAT] button - 1](/content/2026/05/810967/images/e9b322589adf0850870549a05df5618678fe837ed1b590a24e1a063a30462283.jpg)
"Playing Back Repeatedly (Repeat)" (p. 43)
[ZERO] button
This button moves you to the 00:00:00-00:0 time location.
[REW] (Rewind) button
The song will continue rewinding while you hold down this button.
[FF] (Fast-forward) button
The song will continue fast-forwarding while you hold down this button.
[STOP] button
This button stops recording/playback.
![BOSS BR-800 - [STOP] button - 1](/content/2026/05/810967/images/3977623d01126790bcd4a1fa80c5c0e99cdc32be73d4bf78c11a28e37cbda198.jpg)
"Recording" (p. 40)
"Playback" (p. 41)
[PLAY] button
This button plays the song. If the [REC] button is blinking, pressing [PLAY] button will start recording. This button will light green during recording or playback.
![BOSS BR-800 - [PLAY] button - 1](/content/2026/05/810967/images/6d643f476dc00b6e73624c45fd351d9f9204801b22f99f55649aa1d435e10f32.jpg)
"Recording" (p. 40)
"Playback" (p. 41)
[REC] (Recording) button
This is the Recording button. In addition to the normal Recording operation, it is also used to punch-in/out. While in recording standby, this button will blink red, and will change to steadily lit red during recording.
![BOSS BR-800 - [REC] (Recording) button - 1](/content/2026/05/810967/images/b3db3f0d36cd8497f8affd114e753f1ebf58574aaa44e39c3e0f941d8e874ed0.jpg)
"Recording" (p. 40)
"Manual Punch-In/Out" (p. 45)
Panel Descriptions
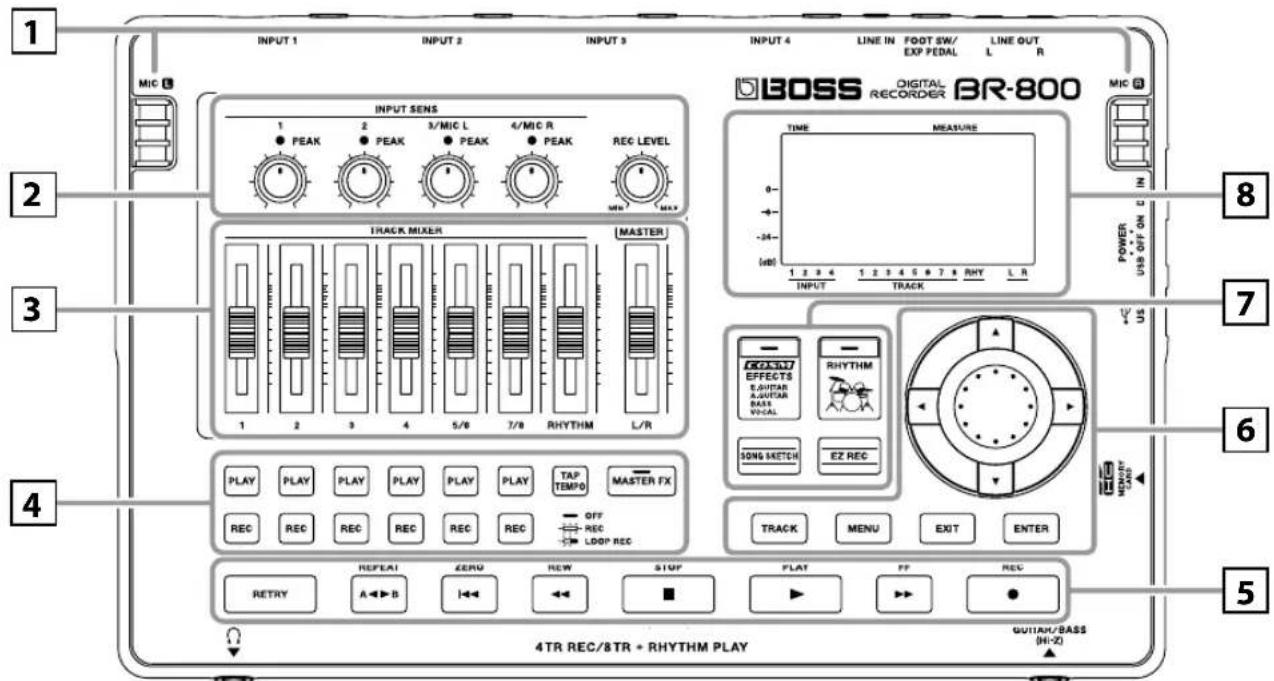
6
[TRACK] button
This button allows you to adjust each track's tone quality or edit the track (p. 105).
[MENU] button
This button accesses various functions, such as settings for the entire BR-800.
[EXIT] button
This button returns you to the previous screen, or cancels an operation.
[ENTER] button
This button confirms a selection or finalizes an entry.
Dial
Use this to move the current location of the song (fast-forward or rewind). When making settings for various functions, this dial is used to edit values.
CURSOR buttons
These buttons move the cursor.
7
[ EFFECTS] button
This button accesses a screen in which you can turn the insert effect (p. 54) on/off and edit its settings.
[RHYTHM] button
This button accesses a screen in which you can turn the rhythm on/off and edit its settings.
![BOSS BR-800 - [RHYTHM] button - 1](/content/2026/05/810967/images/06e82a2d61ab6b34ad8d9274a86d4a2298b7cd43bc4597c7ee136075d213fceb.jpg)
"Overview of the Rhythm Section" (p. 88)
[SONG SKETCH] button
This button takes you to Song Sketch mode.
![BOSS BR-800 - [SONG SKETCH] button - 1](/content/2026/05/810967/images/b7abbe8003d96dc3d68343c2790f8352b8e1602bc3bb0ee4e7cb2460d8c6dead.jpg)
"Simple Recording (SONG SKETCH)" (p. 50)
[EZ REC] (EZ recording) button
This button enters EZ Recording mode.
![BOSS BR-800 - [EZ REC] (EZ recording) button - 1](/content/2026/05/810967/images/215c2548e1090620aca53ce93d73d374ff7b30b15a076e2450a196fb24e3554c.jpg)
"Recording with the EZ Recording Function" (p. 26)
8
Display
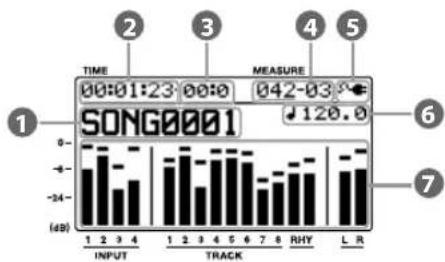
bar
| Channel | Value | | :--- | :--- | | INPUT | -24 | | TRACK | -6 | | RHY | -8 | | L | -12 | | R | -16 | | R | -20 | | MEASURE | 042-03 | | TIME | 00:01:23 | | 1 | 0 | | 2 | 0 | | 3 | 0 | | 4 | 0 | | 5 | 0 | | 6 | 120.0 |This shows various types of information depending on the settings you're making, such as volume levels, menu screens, and parameter editing screens.
If you find the display screen difficult to read, refer to "Adjusting the Display Contrast" (p. 132).
1 Song
This shows the song name.
2 Time
This shows the current time location in the song in terms of “** hours (h) ** minutes (m) ** seconds (s).”
3 Frame
This shows the frame number of the current position in the song.
The BR-800 is set to use a frame rate of 30 frames per second (non-drop). This protocol setting is defined as part of the MTC (MIDI Time Code) specifications. To synchronize the performance of this device with another device, using MIDI, you will need to set the other device so it operates at 30 frames per second (non-drop).
4 Measure
This shows the current location in the song. From the left, the values indicate the "measure number" – "beat number."
5 Power
This indicates the power supply status.
| Indication | Explanation |
 | Power is being supplied from the AC adaptor. |
 | Power is being supplied from the computer. |
 | The batteries are in good condition. |
 | The batteries are running low. |
 | The batteries are almost empty. Install fresh batteries as soon as possible. |
 | The batteries are empty. Install fresh batteries. |
6 Tempo
This indicates the tempo of the rhythm.
7 Level meter
This indicates the volume.
| Item | Explanation |
| INPUT | This indicates the volume of the input. |
| TRACK | This indicates the volume of the output from each track. |
| RHY | This indicates the volume of the output from the rhythm. |
| L R | This indicates the volume of the output following the [MASTER] fader. |
About the Play Screen
On the BR-800, the main screen that appears (for example) immediately after the power is turned on (see below) is called the "Play screen."
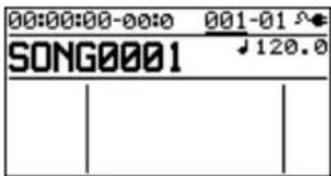

The explanations in this manual include illustrations that depict what should typically be shown by the display. Note, however, that your unit may incorporate a newer, enhanced version of the system (e.g., includes newer sounds), so what you actually see in the display may not always match what appears in the manual.
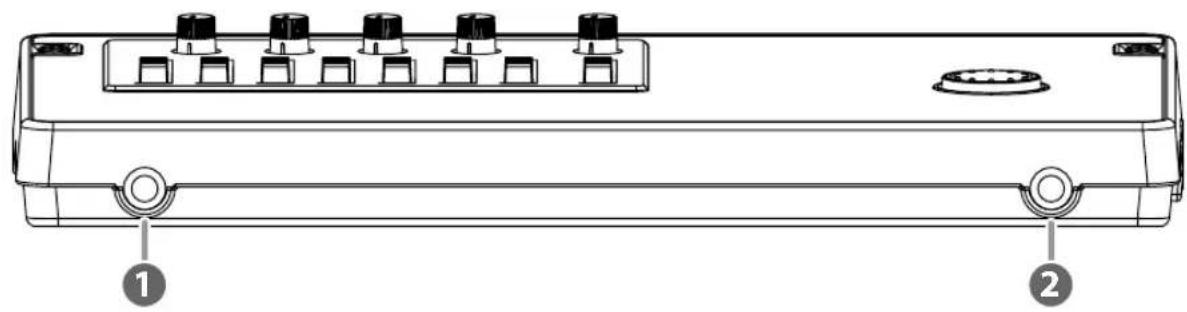
Front Panel
natural_image
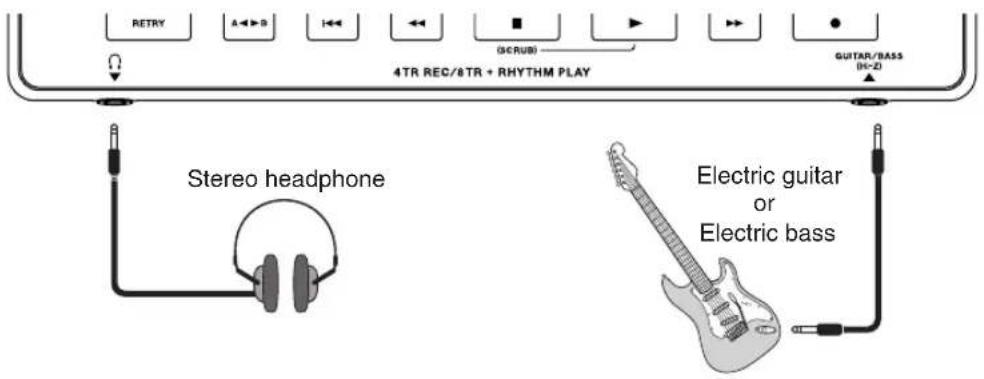
Technical line drawing of a portable electronic device with labeled ports (no text or symbols beyond labels)1 PHONES jack (stereo phone type)
Connect separately sold stereo headphones here. Connecting headphones will allow you to hear the same sound as the LINE OUT jacks outputs.
Use the [MASTER] fader to adjust the headphone volume.

If the OUTPUT MODE (p. 137) is set to "SPLIT," only the sound of the rhythm track will be output from the PHONES jack.
2 GUITAR/BASS jack
Connect your guitar or bass here. This is a high-impedance input jack.
Rear Panel
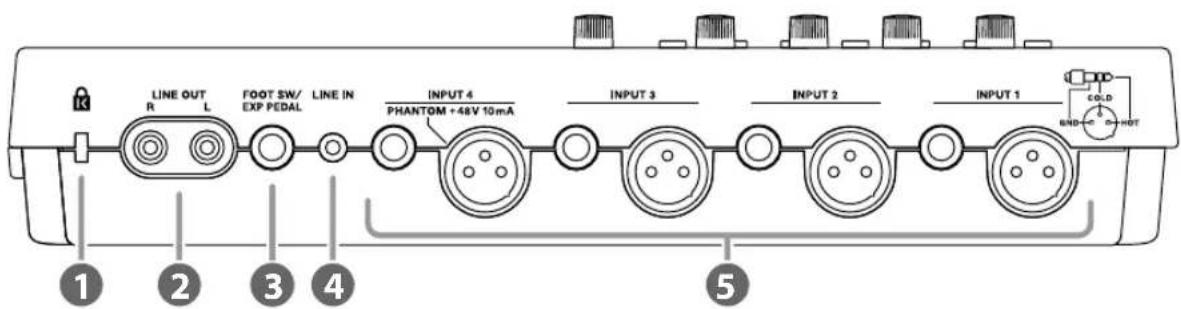
1 Security Slot (
http://www.kensington.com/
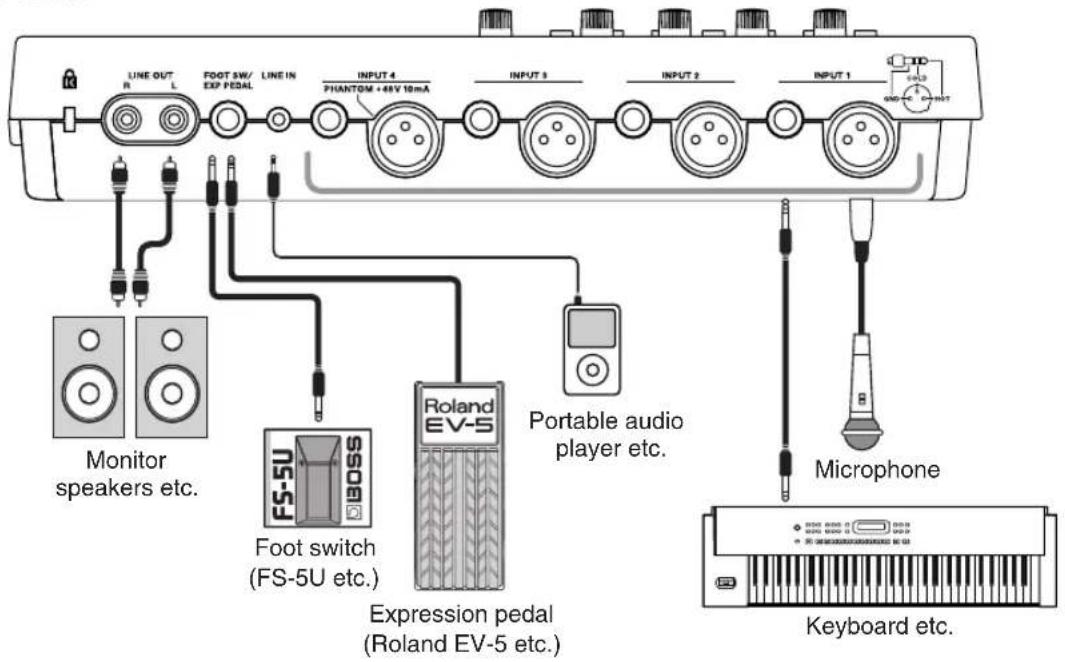
2 LINE OUT jacks
These are analog audio output jacks. You can connect them to external audio equipment (e.g., a stereo amp), or to a CD recorder or similar device to record the BR-800's analog output (p. 118).
3 FOOT SW/EXP PEDAL (Foot switch/Expression pedal) jack
A separately sold foot switch (BOSS FS-5U, Roland DP-2) or expression pedal (Roland EV-5, BOSS FV-500L/FV-500H) can be connected here.
If a foot switch is connected, you can use your foot to start/stop song playback or to punch-in/out.
If an expression pedal is connected, you can use your foot to control the insert effect.

"Using a Foot Switch/Expression Pedal" (p. 133)
4 LINE IN jack
This is an input jack for analog audio signals. You can connect the output of your portable audio player or similar device to this jack.
5 INPUT 1-4 jacks
These are microphone/line input jacks/connectors. Two types are provided: mono phone jacks (TRS balanced input) and XLR connectors (balanced input).
The XLR connector of INPUT 4 is able to provide 48V phantom power. The mono phone jacks accept both balanced and unbalanced connections.

"Using a Condenser Microphone (PHANTOM POWER)" (p. 144)
* You can't use the mono phone jack and the XLR connector simultaneously for the same input. Do not connect plugs to both simultaneously.
Side Panel
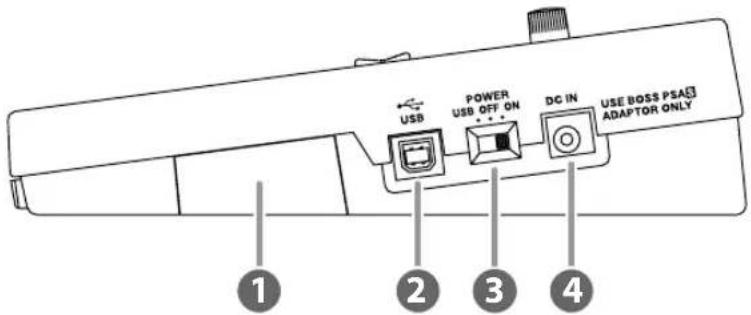
1 MEMORY CARD (SD card) slot
Insert an SD card. Recording is not possible unless an SD card is inserted.

"SD Cards that Can Be Used with the BR-800" (p. 148)
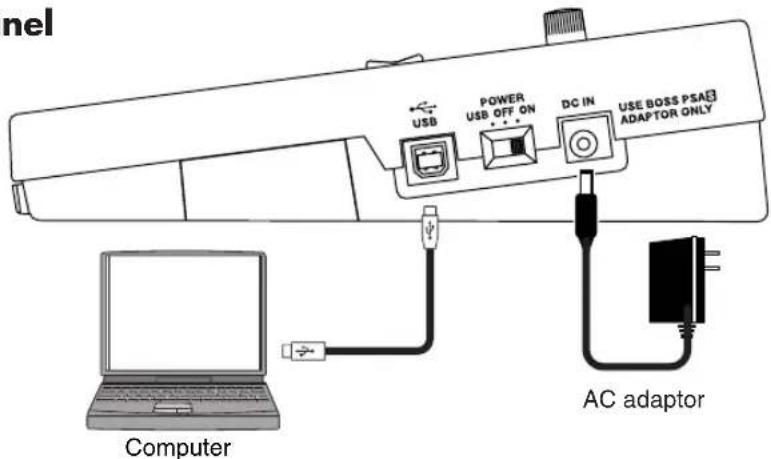
2 USB connector
This connector lets you connect the BR-800 to your computer via a USB cable. When connected to a computer, you'll be able to do the following things.
- Use the BR-800 as an audio interface and control surface
- Transfer audio data to and from the computer
- Create original rhythms and drum kits
- Back up your data

"Using USB" (p. 119)
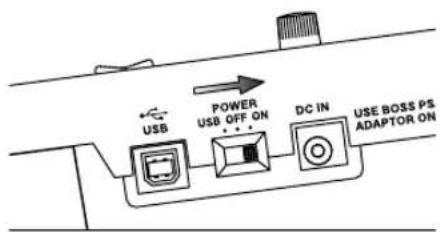
3 [POWER] switch
This is the power switch. It turns the BR-800's power on/off (p. 34).
| Position | Explanation |
| ON | Power is on, when using the included AC adaptor or batteries |
| OFF Power is off | |
| USB | Power is on, when connected via USB cable.USB (bus power) can be used when the BR-800 is connected to your computer via a USB cable.Power is supplied from your computer via the USB cable. If using bus power, set the power switch to the USB position.* Before you can power the unit via a USB bus, you first need to install the appropriate driver in your computer (p. 120).* Depending on your computer, the BR-800 might not be able to operate using bus power. If so, please use the included AC adaptor. |
4 DC IN (AC adaptor) jack
Connect the included AC adaptor here (p. 32).

- Use only the included AC adaptor. Using any other adaptor may cause overheating and malfunction.
- Important data may be damaged if the AC adaptor is disconnected during use.
Installing Batteries
1
Make sure that the [POWER] switch is "OFF."
2
Turn the BR-800 upside down.
3
Detach the battery cover.
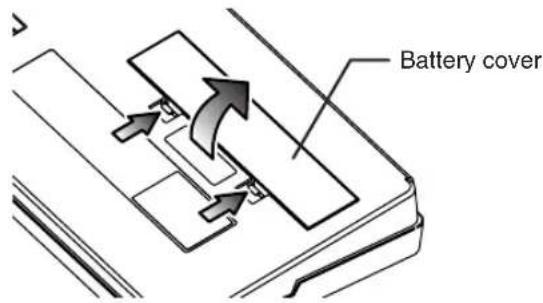
4
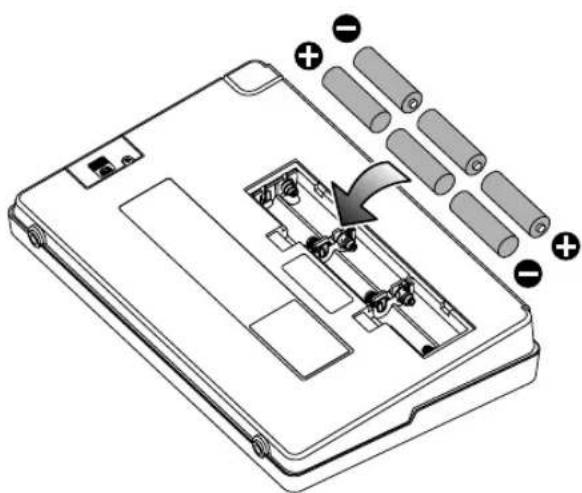
Insert six AA batteries into the battery compartment, taking care to observe the correct polarity (+/-orientation).
5
Attach the battery cover.
NOTE
- When turning the unit upside-down, get a bunch of newspapers or magazines, and place them under the four corners or at both ends to prevent damage to the buttons and controls. Also, you should try to orient the unit so no buttons or controls get damaged.
- When turning the unit upside-down, handle with care to avoid dropping it, or allowing it to fall or tip over.
-
If used improperly, batteries may explode or leak and cause damage or injury. In the interest of safety, please read and observe the following precautions.
-
Carefully follow the installation instructions for batteries, and make sure you observe the correct polarity.
- Avoid using new batteries together with used ones. In addition, avoid mixing different types of batteries.
- Remove the batteries whenever the unit is to remain unused for an extended period of time.
- If a battery has leaked, use a soft piece of cloth or paper towel to wipe all remnants of the discharge from the battery compartment. Then install new batteries. To avoid inflammation of the skin, make sure that none of the battery discharge gets onto your hands or skin. Exercise the utmost caution so that none of the discharge gets near your eyes. Immediately rinse the affected area with running water if any of the discharge has entered the eyes.
- Never keep batteries together with metallic objects such as ballpoint pens, necklaces, hairpins, etc.
• We recommend that you use alkaline batteries, which have a longer life span.
- When the batteries run low, the display will indicate "Battery Low!" When this message appears, replace the batteries as soon as possible.
- The battery life will depend on the conditions of use and on the model of batteries. It will also be affected by the type and capacity of the SD card.
MEMO
Quick Start
Listening to the Demo Songs
The SD card included with the BR-800 contains demo songs. Here's how to play back the demo songs.
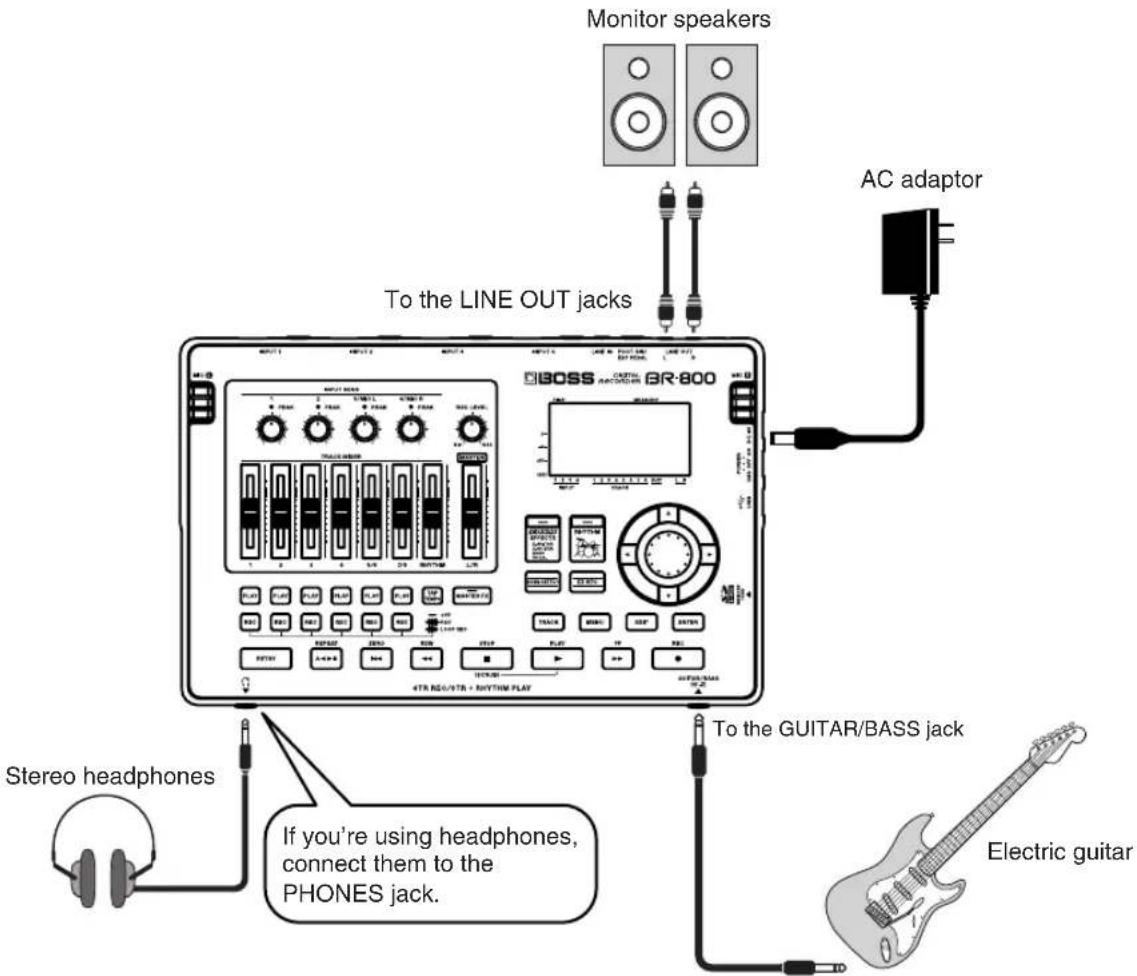
1. Make Connections
With the power switched off on both the BR-800 and your monitor speakers, make connections as shown below.
2. Turn on the Power
* You must use the following procedure to turn on the power. Using an incorrect order may cause malfunction or speaker damage.
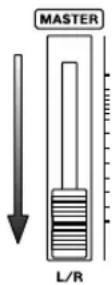
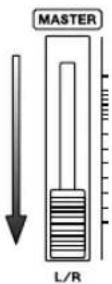
1 Lower the BR-800's [MASTER] fader.
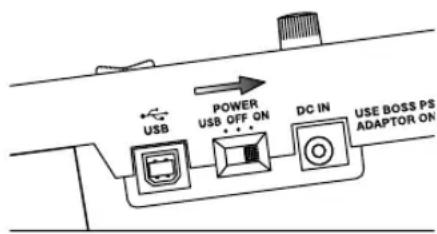
2 Turn on the [POWER] switch.
flowchart
graph TD
    A["USB"] --> B["Power USB OFF ON"]
    B --> C["DC IN"]
    C --> D["USE BOSS PS ADAPTOR ON"]
3 Turn on the power of your monitor speakers.
Turning the Power Off
1 Make sure that song playback is stopped. If the song is playing, press the [STOP] button to stop playback.
2 Turn off the power of your monitor speakers.
3 Turn off the [POWER] switch.
* Don't turn off the power if the "Keep power on!" indication is shown.
3. Listen to the Demo Songs
1
Press the [MENU] button.
The MENU screen will appear.
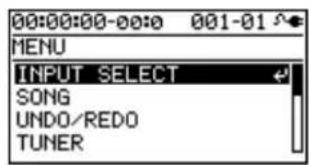
2
Use the CURSOR [ ] buttons to move the cursor to "SONG," and press the [ENTER] button.
The SONG screen will appear.
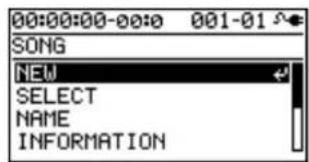
3
Use the CURSOR [ ] buttons to move the cursor to "SELECT," and press the [ENTER] button.
The SONG SELECT screen will appear.
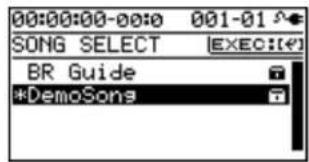
4
Use the CURSOR [▲] buttons to move the cursor to "DemoSong," and press the [ENTER] button.
The play screen will appear.
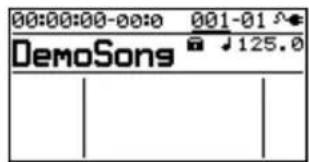
5
Set the faders to the positions shown below.
![TRACK MIXER 1 2 3 4 5/6 7/8 RHYTHM MASTER Track faders to nominal position. [MASTER] fader at minimum.](/content/2026/05/810967/images/7f32e24b8d9c0a9088410c6084fbbcbedfed1ba4b863af959f530700e7fb44ed.jpg)
6
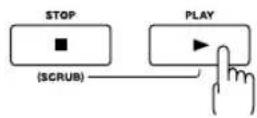
Press the [PLAY] button.
Song playback will start. Slowly raise the [MASTER] fader to adjust the volume.
7
Move the track faders to adjust each track's volume as desired.
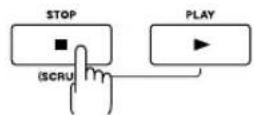
8
Press the [STOP] button to stop playback.
NOTE
- Use of the demo song supplied with this product for any purpose other than private, personal enjoyment without the permission of the copyright holder is prohibited by law. Additionally, this data must not be copied, nor used in a secondary copyrighted work without the permission of the copyright holder.
• Music Data Copyright: © 2010 BOSS Corporation
Recording with the EZ Recording Function
EZ Recording is a function that makes it easy to start recording. Simply select a recording source and the desired musical style, and the most suitable effect and rhythm settings will be made automatically.
As an example, here how to record your guitar.

For details on connections and turning on the power, refer to "1. Make Connections" (p. 22) and "2. Turn on the Power" (p. 23).
1. Make Recording Settings
1
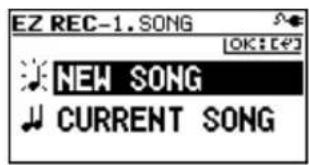
Press the [EZ REC] button.
The EZ REC-1 screen will appear.
2
Use the CURSOR [▲] buttons to move the cursor to "NEW SONG," and press the [ENTER] button.
The EZ REC-2 screen will appear.
![EZ REC-2. SOURCE [SOURCE] C. GUITAR [CATEGORY] ROCK](/content/2026/05/810967/images/d7583d0d30e90049fcb2033585e3e895469beafc89f0fd9edab6f47936da14e3.jpg)

A new song will be created if you select "NEW SONG" (p. 36).
If you want to use EZ Recording with the currently selected song, select "CURRENT SONG."
3
Use the CURSOR [ ] buttons and the dial to choose the "SOURCE" and "CATEGORY."
Since you'll be inputting your guitar, choose "E. GUITAR" as the SOURCE.
As the CATEGORY, choose the style that's closest to what you have in mind for your song.
![EZ REC-2. SOURCE [SOURCE] E. GUITAR [OK: EP] [CATEGORY] ROCK](/content/2026/05/810967/images/839a76f52bd7a53736cfc2f78c110af2be508d623e3aacd9b07d5a80cf5e8ef0.jpg)

For details on the parameters for SOURCE and CATEGORY, refer to "EZ Recording Parameter List" (p. 30).
4
Press the [ENTER] button.
The EZ REC-3 screen will appear.
The effect and rhythm for the selected SOURCE and CATEGORY are shown.
![EZ REC-3. RESULT OK: [49] INPUT [GUITAR/BASS] EFFECT : 01 StckLead RHYTHM : 002 ROCK1-V1](/content/2026/05/810967/images/8c5a92fc760945f24da5676c8e0853761b3ae77db3eda08ea3ddd49b23df00c7.jpg)
![BOSS BR-800 - Press the [ENTER] button. - 2](/content/2026/05/810967/images/ad963a1c068e942501fc8523b3c53d560e1f62317a6d51f2c3a32a5c847a9697.jpg)
You can use the CURSOR [ ] buttons and the dial to change the effect or rhythm.
5
Press the [ENTER] button.
This completes the recording settings.
2. Recording
1
Set the faders to the positions shown below.
![TRACK MIXER 1 2 3 4 5/6 7/8 RHYTHM MASTER Track faders to nominal position. [MASTER] fader at minimum.](/content/2026/05/810967/images/2592d606304b2b534abd8cf0cd7f0370b1f6c05923930920486c3f6fc3b8241b.jpg)
2
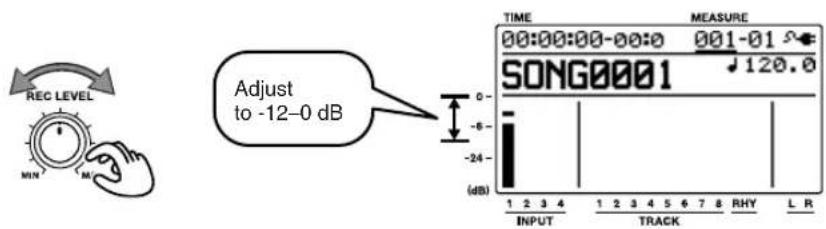
Turn the [REC LEVEL] knob to adjust the recording level.
Adjust the level so that the INPUT level meter moves within the range of -12 (between -24 and -6)–0 dB.
3
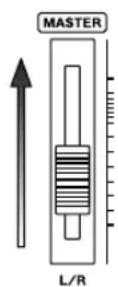
Slowly increase the [MASTER] fader to adjust the volume to the appropriate level for monitoring.
4
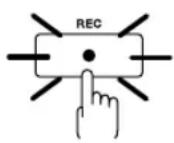
Press the [REC] button.
The [REC] button will blink red; the BR-800 is now in recording-standby mode.
Blinking
5
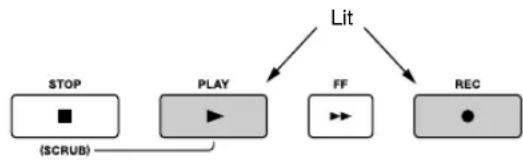
Press the [PLAY] button.
The [PLAY] button will light green, the [REC] button will light red, and recording will begin. At the same time that recording begins, the rhythm will start sounding.
flowchart
graph TD
    A["STOP"] --> B["(SCRUB)"]
    C["PLAY"] --> D["→"]
    E["FF"] --> F["→"]
    G["REC"] --> H["●"]
    I["Lit"] --> J["→"]
    J --> C
6
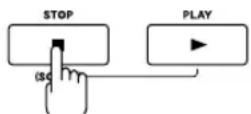
Press the [STOP] button to stop recording.
The track 1 [PLAY] button will light green, indicating that recording has been performed on track 1.
3. Playing Back
1
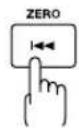
Press the [ZERO] button to return to the beginning of the song. The current time location will change to 00:00:00-00:0.
2
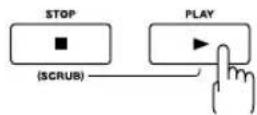
Press the [PLAY] button.
Song playback will start. Use the [MASTER] fader to adjust the playback volume.
This completes recording using the EZ Recording function. Go ahead and try using the same procedure for other instruments or the internal microphones.
EZ Recording Parameter List
SOURCE
Choose the setting that's appropriate for the input source you're recording.
| Parameter | Explanation |
| E.GUITAR | Choose this when recording an electric guitar connected to the GUITAR/BASS jack. |
| AC.GUITAR (GTR IN) | Choose this when recording an acoustic guitar connected to the GUITAR/BASS jack. |
| AC.GUITAR (MIC) | Choose this when recording an acoustic guitar via the internal stereo microphones. |
| BASS | Choose this when recording an electric bass connected to the GUITAR/BASS jack. |
| VOCAL (MIC) | Choose this when recording vocals via the internal stereo microphones. |
| VOCAL (IN4) | Choose this when recording vocals via a microphone connected to the INPUT4 jack. |
| SIMUL (E+IN4) | Choose this when recording a guitar connected to the GUITAR/BASS jack simultaneously with the vocals via a microphone connected to the INPUT4 jack. |
| SIMUL (AC+IN4) | Choose this when recording an acoustic guitar connected to the GUITAR/BASS jack simultaneously with the vocals via a microphone connected to the INPUT4 jack. |
| SIMUL (E+MIC) | Choose this when recording a guitar connected to the GUITAR/BASS jack simultaneously with the vocals via the internal stereo microphones. |
| KEYBOARD | Choose this when recording a keyboard connected in stereo to the INPUT 1 jack and INPUT 2 jack. |
| MIC | Choose this when using the internal stereo microphones. |
| IN1&IN2 | Choose this when recording via microphones connected to the INPUT 1 jack and INPUT 2 jack. |
| LINE IN | Choose this when recording sound from a portable audio player or other device connected to the LINE IN jack. |
| USB | Choose this when recording sound that's input via the USB connector. |
| 4CH INPUT | Choose this when recording via microphones or other devices connected to the INPUT 1–4 jacks. |
CATEGORY
Choose the style of music that's closest to what you have in mind for your song.
| Parameter |
| ROCK |
| METAL |
| POP |
| BALLAD |
| BLUES |
| R&B |
| JAZZ |
| FUSION |
| COUNTRY |
Getting Ready to Record
Making Connections
Make connections as shown in the illustrations below. Make sure that the power to all of your equipment is switched off before you make connections.
■ Front Panel
■ Rear Panel
■ Side Panel
NOTE
- To prevent malfunction and/or damage to speakers or other devices, always turn down the volume, and turn off the power on all devices before making any connections.
-
Howling could be produced depending on the location of microphones relative to speakers. This can be remedied by:
-
Changing the orientation of the microphone(s).
- Relocating microphone(s) at a greater distance from speakers.
- Lowering volume levels.
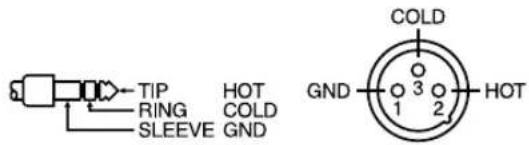
- This instrument is equipped with balanced (XLR/TRS) type jacks. Wiring diagrams for these jacks are shown below. Make connections after first checking the wiring diagrams of other equipment you intend to connect.
The XLR connector of INPUT 4 can provide 48 V phantom power, allowing you to connect a phantom-powered condenser microphone (p. 144).
- Some connection cables contain resistors. When connection cables with resistors are used, the sound level may be extremely low, or impossible to hear. For information on cable specifications, contact the manufacturer of the cable.
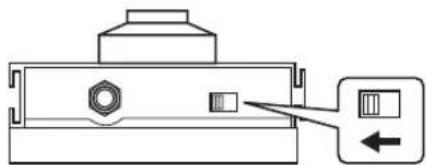
- When using the FS-5U foot switch (sold separately), set the polarity switch as shown below.
natural_image
Technical diagram of a mechanical component with a labeled inset showing a rectangular slot (no text or symbols present)Polarity Switch
- Use only the specified expression pedal (Roland EV-5, BOSS FV-500L/FV-500H; sold separately). By connecting any other expression pedals, you risk causing malfunction and/or damage to the unit.
- When using an expression pedal, set the pedal's MIN volume to "0."
Using the Cord Hook
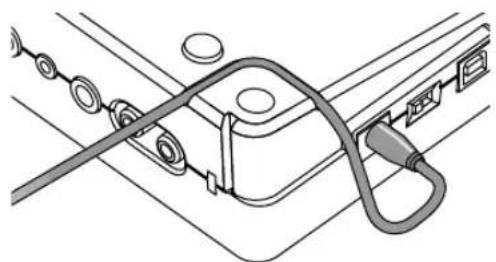
A slot (cord hook) for securing the AC adaptor cord is built into the bottom of the BR-800.
To prevent the inadvertent disruption of power to your unit (should the plug be pulled out accidentally), and to avoid applying undue stress to the AC adaptor jack, anchor the power cord using the cord hook, as shown in the illustration.
natural_image
Technical line drawing of a mechanical assembly with no visible text or symbolsNOTE
- Do not use excessive force when pressing the cord into the cord hook. Doing so may break the cord.
- When turning the unit upside-down, get a bunch of newspapers or magazines, and place them under the four corners or at both ends to prevent damage to the buttons and controls. Also, you should try to orient the unit so no buttons or controls get damaged.
- When turning the unit upside-down, handle with care to avoid dropping it, or allowing it to fall or tip over.
Turning the Power On/Off
Turning the Power On
Once the connections have been completed (p. 32), turn on power to your various devices in the order specified. By turning on devices in the wrong order, you risk causing malfunction and/or damage to speakers and other devices.
1
Check the following before you turn on the power.
□ Have connections with your external equipment been made correctly?
☐ Are the volume controls of the BR-800 and the connected equipment set to the minimum position?
☐ Is the SD card inserted? (p. 148)
2
Lower the BR-800's [MASTER] fader.
3
Switch on the power to the equipment connected to the input jacks (GUITAR/BASS, INPUT, LINE IN).
4
Turn on the [POWER] switch located on the side panel.
flowchart
graph LR
    A["USB"] --> B["POWER USB OFF ON"]
    B --> C["DC IN"]
    C --> D["USE BOSS PS ADAPTOR ON"]
5
Switch on the power to the equipment connected to LINE OUT jacks.
Turning the Power Off
1
Make sure that song playback is stopped.
2
Turn off your equipment in the reverse order of when you turned them on.
3
Make sure that the BR-800's display does not indicate "Keep power on!"
4
Turn the BR-800's [POWER] switch off.
NOTE
- Make sure that the recorder is stopped before you switch off the BR-800's power. If you turn off the power during recording or playback, the data, mixer settings, or effect patch data will be lost.
- When using the AC adaptor, take care that the AC adaptor is not unplugged during use. Data may be lost if the AC adaptor is unplugged during operation.
- When powering the unit on power from a USB bus, exercise due caution in preventing the USB cable from being disconnected during use of the unit. You risk damaging your data should the USB cable get disconnected.
- Turning the power off while the display indicates "Keep power on!" will result in loss of data. Never turn off the power while this indication is shown.
- This unit is equipped with a protection circuit. A brief interval (a few seconds) after power up is required before the unit will operate normally.
- When the BR-800 is shipped from the factory, an SD card is inserted in the MEMORY CARD slot.
- Always make sure to have the volume level turned down before switching on power. Even with the volume all the way down, you may still hear some sound when the power is switched on, but this is normal, and does not indicate a malfunction.
- Do not touch the buttons while turning on the BR-800's power.
The unit might malfunction if you turn on the power while touching a button.
Recording/Playback
Creating a New Song (SONG NEW)
The BR-800 manages your recordings in units called "songs."
To record a new song, carry out the procedure below.
1
Press the [MENU] button.
2
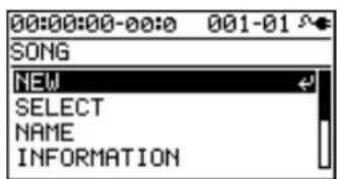
Use the CURSOR [ ] buttons to move the cursor to "SONG," and press the [ENTER] button.
3
Use the CURSOR [ ] buttons to move the cursor to "NEW," and press the [ENTER] button.
The SONG NEW screen will appear.
![00:00:00-00:0 001-01 SONG NEW NEW [ENTER]:CREATE NEW SONG](/content/2026/05/810967/images/14fa2fa2c5d19ca92a198456ae9ceb1d034607e2f7217f6b32127e0f496402f5.jpg)
4
Press the [ENTER] button.
The display will ask "Are you sure?"
5
Press the [ENTER] button.
A new song will be created, and you will return to the play screen.
* The display will indicate "Keep power on!" while the data is being updated. Never turn off the power while this message is shown.
Selecting a Song (SONG SELECT)
Select the song that you want to record.
1
Press the [MENU] button.
2
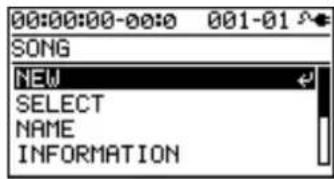
Use the CURSOR [ ] buttons to move the cursor to "SONG," and press the [ENTER] button.
3
Use the CURSOR [ ] buttons to move the cursor to "SELECT," and press the [ENTER] button.
The SONG SELECT screen will appear.
![00:00:00-00:0 001-01 SONG SELECT |EXEC:[4] *SONG0001 SONG0002 SONG0003](/content/2026/05/810967/images/91c561beb3d96f303e012ae5e91b89b20f5a543e42ce044f9f05a5ea9b5c4045.jpg)
An “*” is displayed next to the currently selected song.
4
Use the CURSOR [ ] buttons to select a song.
5
Press the [ENTER] button.
The song will be selected, and you'll return to the play screen.
* The display will indicate "Keep power on!" while the data is being updated. Never turn off the power while this message is shown.
Selecting the Input Source
Here's how to select the input source you'll be recording, and specify the number of tracks that you want to record.
1
Press the [MENU] button.
2
Use the CURSOR [W] buttons to move the cursor to "INPUT SELECT," and press the [ENTER] button.
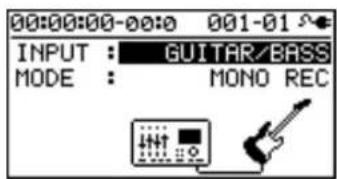
3
Use the CURSOR [W] buttons to move the cursor to "INPUT," and use the dial to choose the input source that you want to record.
| Setting | Explanation |
| GUITAR/BASS | Choose this when recording a guitar or bass connected to the GUITAR/BASS jack. |
| MIC L/R | Choose this when using the internal stereo microphones. |
| INPUT 1 & 2 | Choose this when recording micro-phones or instruments connected to the INPUT 1 jack and INPUT 2 jack. |
| INPUT4 | Choose this when recording a micro-phone or instrument connected to the INPUT4 jack. |
| LINE IN | Choose this when recording the sound from a portable audio player or other device connected to the LINE IN jack. |
| USB | Choose this when recording the sound that's being input via the USB connector. |
| GTR & MIC L/R | Choose this when recording a guitar or bass connected to the GUITAR/BASS jack simultaneously with the vocals via the internal stereo microphones. |
| GTR & INPUT4 | Choose this when recording a guitar or bass connected to the GUITAR/BASS jack simultaneously with the vocals via a microphone connected to the INPUT4 jack. |
| INPUT 1-4 | Choose this when recording micro-phones or other devices connected to the INPUT 1-4 jacks. |
4
Use the CURSOR [▲] ▼ buttons to move the cursor to "MODE," and use the dial to choose the number of tracks that you'll be recording.
| Setting Explanation | |
| INPUT OFF | Input will be off (recording will not occur). |
| MONO REC | Recording will occur on one track. |
| STEREO REC | Recording will occur on two tracks (stereo). |
| SIMUL REC | Each input will be recorded on a separate track simultaneously. |
| 4TRACK REC | Four tracks will be recorded simultaneously. |
* The available MODE settings will depend on the input source you choose in INPUT.
5
Press the [EXIT] button a number of times to return to the play screen.
Adjusting the Input Sensitivity
Adjust the input sensitivity as appropriate for your input source.
| Input | To adjust the sensitivity |
| INPUT 1-4 jacks | Use the INPUT SENS knob for each input to adjust the input sensitivity. Adjust the sensitivity so that the PEAK indicator lights briefly at the loudest sounds. |
| Internal stereo microphones | |
| GUITAR/BASS jack | Adjust the volume on the external device that's connected. The input sensitivity cannot be adjusted on the BR-800. |
| LINE IN jack | |
| USB connector |
Adjusting the Recording Level
Here's how to adjust the volume of the recording on the track.
1 Lower the [MASTER] fader.
2 Turn the [REC LEVEL] knob to approximately the center position, and slowly raise the [MASTER] fader.
3 Use the [REC LEVEL] knob to adjust the recording level.
Adjust the level so that the INPUT level meter moves within the range of -12 (between -24 and -6)–0 dB.

Try to record at the highest volume possible before the sound begins to distort. If you want to decrease the monitoring volume, lower the [MASTER] fader.
4 Use the [MASTER] fader to adjust the volume appropriately for monitoring (listening).
* If you use a connection cable that contains a built-in resistor, the volume on the connected device may be insufficient. In this case, please use a connection cable that does not contain a built-in resistor (such as one from the Roland PCS series).
Selecting the Track(s) for Recording
1 Press one of the track 1-7/8 [REC] buttons to select the track(s) on which recording will occur.
The indicators on the buttons show the track status as follows.
| Indicator Explanation |
| Unlit Track that will not be recorded |
| Lit Track that will be recorded |
| Blinking Track that will be loop-recorded (p. 41) |
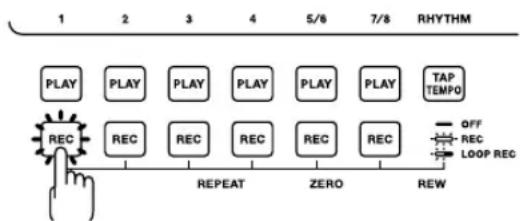
flowchart
graph TD
    A["1"] --> B["PLAY"]
    B --> C["RECEC"]
    C --> D["REPEAT"]
    D --> E["ZERO"]
    E --> F["REW"]
    G["5/8"] --> H["PLAY"]
    H --> I["PLAY"]
    I --> J["RECEC"]
    J --> K["REPEAT"]
    L["7/8"] --> M["PLAY"]
    M --> N["TAP TEMPO"]
    O["OFF"] --> P["LOOP REC"]
    Q["REC"] --> R["RECEC"]
    S["LOOP REC"] --> T["REPEAT"]
The track(s) that can be selected will depend on the MODE you selected for INPUT.
| MODE | Explanation |
| MONO REC | Mono recording using one track. You can choose one of the tracks 1-4.You can also record in stereo by pressing the track 5/6 [REC] or track 7/8 [REC] button. |
| STEREO REC | Stereo recording using two tracks. Press the track 1 [REC] or track 2 [REC] button to select the pair of tracks 1 and 2, or press the track 3 [REC] or track 4 [REC] button to select the pair of tracks 3 and 4. |
| SIMUL REC | Simultaneous recording using two tracks.Press the track 1 [REC] or track 2 [REC] button to select the pair of tracks 1 and 2, or press the track 3 [REC] or track 4 [REC] button to select the pair of tracks 3 and 4. |
| 4TRACK REC | Simultaneous recording using four tracks.Press any one of the track 1-4 [REC] buttons to select the four tracks 1-4, or press the track 5/6 [REC] or track 7/8 [REC] button to select the four tracks 5-8. |
Selecting V-Tracks
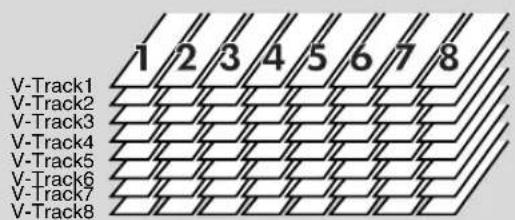
Each of the BR-800's tracks contains eight "V-tracks," and you can choose one of these V-tracks for recording or playback.
By using V-tracks, you can record and compare multiple takes of a guitar solo or vocal, and then use the take you think is best.
1
Press the [TRACK] button.
2
Use the CURSOR [W] buttons to move the cursor to "V-TRACK," and press the [ENTER] button. The V-TRACK screen will appear.
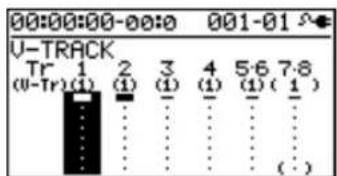
| Indication | Explanation |
| Currently selected V-track (recorded data exists) | |
| Currently selected V-track (no recorded data) | |
| V-track containing recorded data | |
| V-track containing no recorded data |
3
Use the track 1-7/8 [REC] buttons or the CURSOR [◀] buttons to select the track whose V-track you want to switch.
4
Use the dial to switch the V-track.
* V-MST of track 7/8 is the V-track for mastering. It can also be used for conventional recording.
5
Press the [EXIT] button a number of times to return to the play screen.

What are V-Tracks?
Each track consists of eight virtual tracks, and you can choose any one of these tracks for recording or playback. This means that you can record to up to a maximum of 64 tracks, and then select any eight of them to play back. These virtual tracks that make up the actual tracks are called "V-Tracks."
Adjusting the Stereo Feel of the Input Sound (PAN)
You can adjust the stereo feel (pan) of your instruments' input sound.
1
Press the [TRACK] button.
2
Use the CURSOR [ ] buttons to move the cursor to "PAN," and press the [ENTER] button.
The PAN screen will appear.
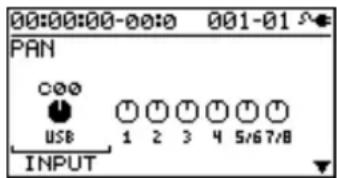
3
Use the CURSOR [ ] buttons to select the input or track whose setting you want to edit.
* You can move the cursor to each track by pressing that track's track [REC] button.
4
Use the dial to adjust the pan while listening to the input sound.
The pan setting you make here is automatically applied to the pan of the recording-destination track. This means that when you play back, you'll hear the sound with the same panning as during recording.
5
Press the [EXIT] button a number of times to return to the play screen.
HINT
If you're recording new material while listening to the playback of previously recorded material, there may be cases in which the sound you're playing now is buried in the previously recorded sound, making it difficult to hear. In such cases, adjusting the pan will make it easier to hear yourself. You might find it helpful to pan the playback tracks to the left (or right) and pan your own current performance to the right (or left).
Recording
1
Press the [REC] button.
The [REC] button will blink red, and the BR-800 will enter recording-standby mode.
![STOP PLAY FF Blinking [SCRUB] [RECK]](/content/2026/05/810967/images/6211a0cf29c28de2b9e80f59b49e5c73783decd82503b4bf5996d0b123ded9f2.jpg)
2
Press the [PLAY] button.
Recording will begin.
The [PLAY] button will light green, and the [REC] button will light red.
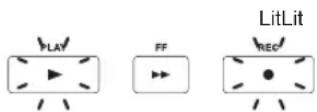
3
To stop recording, press the [STOP] button.
The track [PLAY] button will light green, indicating that sound has been recorded on that track.
* It's not possible to play back sound that is shorter than one second of recording time.
* The display will indicate "Keep power on!" while the data is being updated. Never turn off the power while this message is shown.
MEMO
If you want to re-record
Press the [RETRY] button to return to the time location at which you most recently started recording. You can also press this button to return even during recording or playback.
This is convenient when you want to re-record immediately.
Loop Recording
Loop recording is a function that copies the recorded data when you stop recording, making it occupy approximately 200 measures.
By using Loop recording you can easily create looped phrases that repeat the same phrase a number of times.
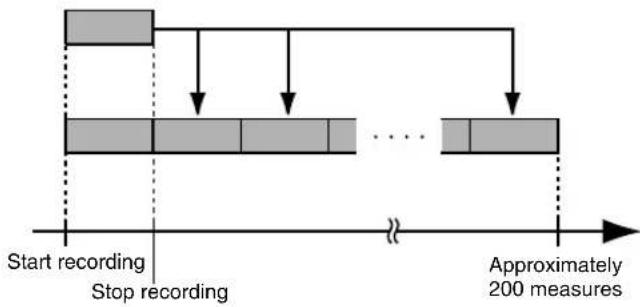
flowchart
graph TD
    A["Start recording"] --> B["Stop recording"]
    B --> C{Approximately 200 measures}
    C --> D["..."]
    D --> E["End"]
    style A fill:#ccc,stroke:#333
    style B fill:#ccc,stroke:#333
    style C fill:#ccc,stroke:#333
    style D fill:#ccc,stroke:#333
    style E fill:#ccc,stroke:#333
1
Press the desired track 1-7/8 [REC] button a number of times to make track 1-7/8 [REC] button blink.
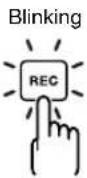
2
Record as described in "Recording" (p. 40).
When recording ends, the recorded data will be copied so that it occupies approximately 200 measures.
Playback
1
Press the [ZERO] button.
The time location of the song will return to 00:00:00-00:0.
2
Press the [PLAY] button.
The [PLAY] button will light green, and playback will begin.
You can use the track faders to adjust the playback volume of each track.
3
To stop playback, press the [STOP] button.
Recording Additional Performances (Overdubbing)
Tracks whose track [PLAY] button is lit or blinking already contain recorded sound.
The process of listening to previously recorded sound while you record additional material on another track is called "overdubbing." This allows you to record parts such as bass, guitar, and vocals on separate tracks, and then adjust their volume balance and panning afterward, or re-record the performance of a specific part.
1
Press one of the track 1–7/8 [PLAY] buttons to select the track that you want to play back.
The status of each track is shown by how its track [PLAY] button is lit.
| Indicator Explanation | |
| Unlit | Track that contains no data (unrecorded) |
| Lit Track that will be played | |
| Blinking Track that will not be played | |
2
Use the track faders to adjust the volume of the tracks that will be playing.
3
Press the [REC] button of a track from 1 to 7/8 to select the track to record.
4
Press the [REC] button.
[REC] will blink red, and the BR-800 will enter recording-standby mode.
5
Press the [PLAY] button.
Recording will begin.
The [PLAY] button will light green, and the [REC] button will light red.
Only the sound you're performing now will be recorded on the new track; the sound of the tracks that are playing back will not be recorded.
* If you turn down the [REC LEVEL] knob during recording to lower the monitoring volume of the input source, the sound will be recorded on the track at a lower volume. This might cause noise to be more obtrusive when you raise the track's volume during playback.
If you want to lower the monitoring volume of the input
source during recording, use the [MASTER] fader to lower the volume. If you want to adjust the volume of the performances that are playing back, use the track faders of each track.
6
When you've finished recording, press the [STOP] button.

- Be aware that if you record on a track that already contains recorded sound, the previous recording will be erased.
- If you record sound that's shorter than one second, that sound cannot be played back.
HINT
A useful tip for overdubbing
When recording new material while listening to previously recorded material, the sound you're currently playing can be buried in the previously recorded sounds that are playing back, making it difficult to hear yourself. If this is the case, you can make it easier to hear yourself by slightly lowering the faders of the playback tracks, or by turning the pan of the playback tracks all the way to the left (right) while turning the pan of the sound you're currently playing all the way to the right (left).

"Adjusting the Stereo Feel of the Input Sound (PAN)" (p. 40)
Playing Back Repeatedly (Repeat)
Specifying the Repeat Region
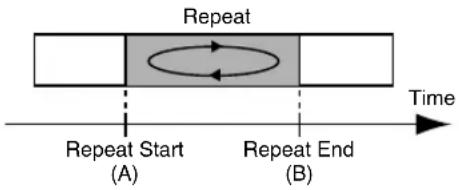
By using the "repeat" function you can repeatedly play back a specified region.
The repeat region will repeatedly play back as follows.
1
Press the [REPEAT] button at the point where you want to start repeating (point A).
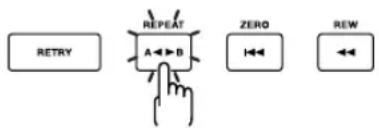
The Repeat A symbol ( ) will appear in the screen, indicating that the beginning of the repeat (point A) has been specified.
2
Press the [REPEAT] button at the point where you want to stop repeating (point B).
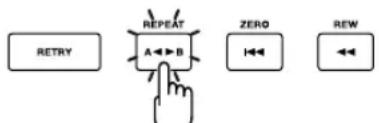
The Repeat B symbol (▶) will appear in the screen, indicating that the repeat region (A-B) has been specified.
3
When you want to clear the repeat setting, press the [REPEAT] button once again.
The repeat settings will be cleared, and the repeat symbol will disappear from the screen.
4
If you want to save the repeat region you specified, save the song.

"Saving a Song (SAVE CURRENT STATE)" (p. 111)

- There must be at least one second between the repeat start (A) and end (B) points. You can't set the end point closer than one second from the start point.
- If you press the [REPEAT] button at a location closer than one second from the repeat start point (A), the repeat start point (A) will be re-set at that location.
Setting the Repeat Region to an Exact Interval
Normally, the repeat start/end points will be set to the moments at which you press the [REPEAT] button, meaning that the repeat region might not be set precisely as you intended.
In such cases, you can use the "Quantize" feature so that the repeat region will be set in precise one-measure units regardless of the timing at which you press the [REPEAT] button.
To use Quantize, make the following settings.
1
Press the [MENU] button.
2
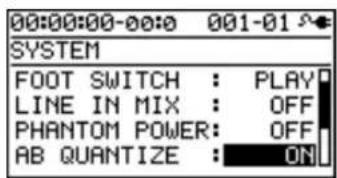
Use the CURSOR [W] buttons to move the cursor to "SYSTEM," and press the [ENTER] button.
3
Use the CURSOR [W] buttons to move the cursor to "AB QUANTIZE," and use the dial to change the setting to "ON."
If this if OFF, Quantize will not be applied.
4
Press the [EXIT] button a number of times to return to the play screen.

If you use Quantize when specifying the repeat region, and you change the tempo after making the setting, the repeat start/end points will no longer match the beginning and end of the measure.

By pressing the [REPEAT] button twice at the same location, you can set the repeat region to a single measure.
Re-Recording Only Over a Mistake (Punch-In/Out)
When recording, there may be times when you made a mistake or were unable to play as you intended. In such cases, you can use punch-in/out to re-record only the region you specify.
While the track plays, you can "punch-in" to switch from playback to record; then you can "punch-out" to resume playback, all without stopping.
Punch-in at the point where you want to start re-recording, and then punch-out when you want to stop re-recording.
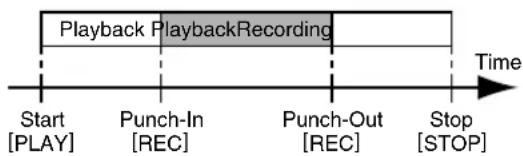
flowchart
graph LR
    A["Start [PLAY"]] --> B["Punch-In [REC"]]
    B --> C["Punch-Out [REC"]]
    C --> D["Stop [STOP"]]
    style A fill:#f9f,stroke:#333
    style B fill:#ccf,stroke:#333
    style C fill:#cfc,stroke:#333
    style D fill:#fcc,stroke:#333
On the BR-800, you can use either "manual punch-in/out" or "auto punch-in/out."
Manual Punch-In/Out
This method lets you use the [REC] button or a foot switch to perform punch-in/out operations.
* When using manual punch-in/out, make sure that there is at least 1.0 seconds between punch-in and punch-out.
■ Using the [REC] button
In this example, we'll explain how you can use manual punch-in/out to re-record a portion of the previously recorded track 1.
1
Press the track 1 [REC] button.
The track 1 [REC] button will light.
2
Set the track [1] fader to the position shown in the illustration.
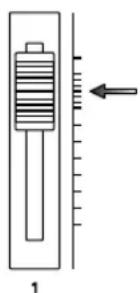
3
Play back the song, and use the [REC LEVEL] knob to adjust the volume of the input source.
While listening to compare the track to be re-recorded with the input source, use the [REC LEVEL] knob to adjust the input source so that there is no difference in volume.
4
Move to a position in the song earlier than the point where you want to start re-recording, and then press the [PLAY] button to start playback.
5
At the moment you want to start re-recording, press the [REC] button.
Punch-in will occur, and you'll be in record mode.
6
When you want to punch-out, press the [REC] button once again (or press the [PLAY] button).
Each time you press the [REC] button, you'll alternate between punching-in and punching-out; you can repeat this procedure as many times as you like if there are other regions that you want to re-record.
7
To stop recording, press the [STOP] button.
* While the data is being updated, the display will indicate "Keep power on!" Do not turn off the power while this message is shown.
8
Listen to the re-recorded result.
Return to a point earlier than where you began re-recording, and play back.
Use the track [1] fader to adjust the volume of track 1.

You can use the Undo function (p. 48) to return to the state prior to re-recording.
■ Using a foot switch
If you're recording an instrumental performance by yourself and simultaneously operating the recording system, it's convenient to use a separately sold foot switch (e.g., BOSS FS-5U or Roland DP-2) so that operations can be performed using your foot.
Connect your foot switch to the FOOT SW/EXP PEDAL jack, and change the function of the FOOT SW/EXP PEDAL jack as follows.
1
Press the [MENU] button.
2
Use the CURSOR [ ] buttons to move the cursor to "SYSTEM," and press the [ENTER] button.
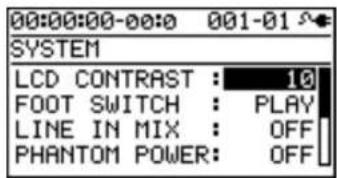
3
Use the CURSOR [ ] buttons to select "FOOT SWITCH."
4
Use the dial to select "REC."
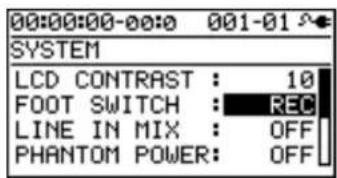
5
Press the [EXIT] button a number of times to return to the play screen.
MEMO
You can punch-in by pressing the foot switch during song playback, and punch-out by pressing the foot switch once again.
Auto Punch-In/Out
"Auto punch-in/out" is the operation of automatically punching-in/out at the locations you specify beforehand.
This is useful when you want to punch-in/out at precise locations, or when you want punch-in/out to occur automatically so that you can concentrate on your playing.
* When using auto punch-in/out, there must be more than 1.0 seconds between the punch-in and punch-out points.
■ Specifying the locations
You'll need to specify the punch-in and punch-out locations before you begin recording.
1
Press the [MENU] button.
2
Use the CURSOR [ ] buttons to move the cursor to "AUTO PUNCH IN/OUT," and press the [ENTER] button.
![00:00:00-00:0 001-01 AUTO PUNCH |SET:[4] ON/OFF : ON IN : 00:00:00-00:0 OUT : 00:00:01-00:0 DISP : TIME](/content/2026/05/810967/images/2633a3d8d903002962b40bd8edf2692ab8e0421ad1aeeb784f947751827e705e.jpg)
3
Use the CURSOR [ ] buttons to move the cursor to "ON/OFF," and turn the dial to choose "ON."
| Setting | Explanation |
| ON | Auto punch-in/out will be on. |
| OFF Auto punch-in/out will be off. | |
4
Use the CURSOR [ ] buttons to move the cursor to "DISP," and turn the dial to choose the units in which you'll specify the locations.
| Setting Explanation | |
| TIME Specify | the locations in units of time. |
| MEASURE | Specify the locations in units of measures. |
MEMO
After specifying the time in the procedure above, a “+” may appear to show that there is a discrepancy between the actual current position and the position displayed.
If you specify the locations using measures, specify the locations at each screen using the dial to eliminate the discrepancy.
5
Use the CURSOR [ ] buttons to move the cursor to "IN," and turn the dial to specify the punch-in location.
MEMO
You can move to the current location by pressing the [ENTER] button.
6
Use the CURSOR [ ] buttons to move the cursor to "OUT," and turn the dial to specify the punch-out location.
7
Press the [EXIT] button a number of times to return to the play screen.
The display will indicate "A. PUNCH," indicating that the punch-in/out locations have been specified.
■ Recording
In this example, we'll explain how to specify the auto punch-in/out locations beforehand, and then re-record a specified region of the previously recorded track 1.
1
Press the track 1 [REC] button.
The track 1 [REC] button will light.
2
Set the track [1] fader to the position shown in the illustration.
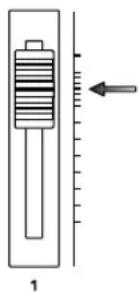
3
Play back the song, and use the [REC LEVEL] knob to adjust the volume of the input source.
While listening to compare the track to be re-recorded with the input source, use the [REC LEVEL] knob to adjust the input source so that there is no difference in volume.
4
Move to a location earlier than where you want to start re-recording.
5
Press the [REC] button to enter recording-standby mode, and then press the [PLAY] button.
Punch-in will automatically occur at the location you specified; re-record your performance.
Playback will automatically resume at the punch-out location you specified.
6
When you've finished recording, press the [STOP] button to stop.
* While the data is being updated, the display will indicate "Keep power on!" Do not turn off the power while this message is shown.
7
Listen to the re-recorded result.
Return to a point earlier than where you began re-recording, and play back.
Use the track [1] fader to adjust the volume of track 1.
Cancelling an Operation (UNDO/REDO)
There may be times when you would like to cancel the result of an operation; for example, when recording, you might not have been able to record as you intended, or you might have made a mistake when making editing settings. In such cases, you can use "Undo."
Undo means to return to the state prior to the most recent operation. If you decide to cancel Undo, you can use "Redo."
For example, let's suppose that you were using punch-in recording, and recorded the same region twice in succession. If you wanted to cancel the most recent recording and return to the state just after the first recording, you would execute the Undo operation.
After executing Undo, you could execute Redo to cancel the Undo and return to the state just after the second recording.

• After executing Undo, only Redo can be executed.
- Undo applies to audio data recorded on a track.
Returning to the Previous State (UNDO)
1
Press the [MENU] button.
2
Use the CURSOR [W] buttons to move the cursor to "UNDO/REDO," and press the [ENTER] button. The UNDO/REDO will appear.
![00:00:00-00:0 001-01 UNDO/REDO [ENTER]: UNDO](/content/2026/05/810967/images/e4ca59ab8bef33b5fe2ff6d9227e21f1de9ef11fce7facb5c76a28f6368e5c3f.jpg)
3
To execute Undo, press the [ENTER] button.
When you press the [ENTER] button, the most recent recording or editing operation will be cancelled. If you decide not to Undo, press the [EXIT] button.
Canceling the Undo (REDO)
If you decide to cancel the Undo operation you just performed, you can execute Redo.
1
Press the [MENU] button.
2
Use the CURSOR [ ] buttons to move the cursor to "UNDO/REDO," and press the [ENTER] button. The UNDO/REDO screen will appear.
![00:00:00-00:00 001-01 UNDO/REDO [ENTER]:REDO](/content/2026/05/810967/images/af733591f6ab9b73d9e6013e87347237509d05015149ca5454a56adea1b5d238.jpg)
3
To execute the Redo, press the [ENTER] button. The previous Undo operation will be canceled. If you decide not to Redo, press the [EXIT] button.
Viewing Information about the Song
Viewing the Remaining Recording Time
Here's how you can make the recording-standby or recording screen show the remaining recording time.
1
Press the [MENU] button.
2
Use the CURSOR [ ] buttons to move the cursor to "SYSTEM," and press the [ENTER] button.
3
Use the CURSOR [ ] buttons to move the cursor to "REMAIN INFO," and use the dial to choose "ON."
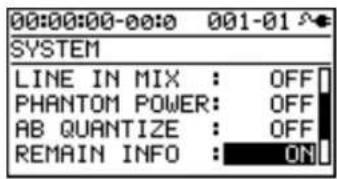
| Setting | Explanation |
| ON | The remaining recording time is shown in “hours : minutes : seconds.” |
| OFF | The remaining recording time is not shown. |
4
Press the [EXIT] button a number of times to return to the play screen.
From the play screen, press the [REC] button to enter recording-standby mode (the [REC] button will blink); the TIME display area will show the remaining time.
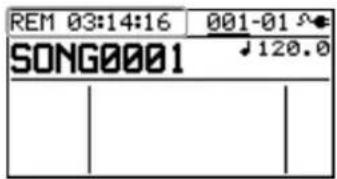
Viewing Song Information
Here's how to view information about the song.
1
Press the [MENU] button.
2
Use the CURSOR [ ] buttons to move the cursor to "SONG," and press the [ENTER] button.
3
Use the CURSOR [ ] buttons to move the cursor to "INFORMATION," and press the [ENTER] button.
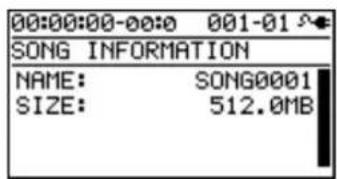
Song information will be displayed.
| SONG INFORMATION | Explanation |
| NAME | Name of the currently selected song |
| SIZE | Space consumed used by the song |
* The actual size of the song is shown in megabyte units, each one consisting of 1,048,576 bytes. The displayed amount is an approximation.
4
Press the [EXIT] button a number of times to return to the play screen.
Simple Recording (SONG SKETCH)
By putting the BR-800 in Song Sketch mode, you can use it as a stereo WAV file recorder/player.
This provides an easy way to record your song ideas and phrases.
Switching to Song Sketch Mode
Press the [SONG SKETCH] button to enter Song Sketch mode. The SONG SKETCH screen will appear.
Press the [EXIT] button to return to normal mode.
The SONG SKETCH screen displays the following information.
During playback: T length of the file
During recording: R remaining recording time
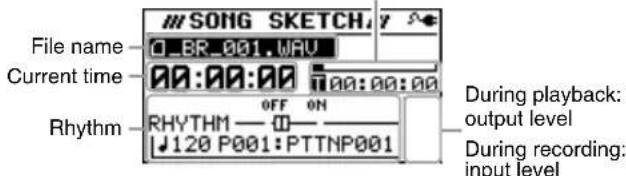
You can edit the following settings by moving the cursor to the file name, current time, or rhythm and then turning the dial.
| Item | Explanation |
| File name | Select the file to play back. |
| Current time | Move the time location. |
| Rhythm | Turn the rhythm on/off.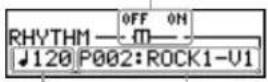 Set the tempo.Select a pattern. Set the tempo.Select a pattern. |
MEMO
- You can store/play up to 999 songs.
- You can use the Repeat function (p. 43) to repeatedly play back a specified region.
- You can record the sound from each input as WAV format data. WAV format is recorded as 44.1 kHz 16-bit data.
• Audio is recorded in stereo. - If you record while playing a rhythm, the sound of the rhythm will be recorded as well.
Recording
1 Press the [SONG SKETCH] button.
The SONG SKETCH screen will appear.
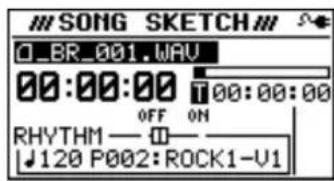
2 Press the [MENU] button.
3 Use the CURSOR [▲] buttons to move the cursor to "INPUT SELECT," and press the [ENTER] button.
4 Use the dial to select the input source that you want to record.
| Setting | Explanation |
| GUITAR/BASS | Choose this when recording a guitar or bass connected to the GUITAR/BASS jack. |
| MIC L/R | Choose this when using the internal stereo microphones. |
| INPUT 1 & 2 | Choose this when recording micro-phones or instruments connected to the INPUT 1 jack and INPUT 2 jack. |
| INPUT4 | Choose this when recording from a microphone or instrument connected to the INPUT 4 jack. |
| LINE IN | Choose this when recording the sound from a portable audio player or other device connected to the LINE IN jack. |
5 Press the [EXIT] button a number of times to return to the SONG SKETCH screen.
6
Press the [REC] button.
Recording will begin.
The [PLAY] button will light green, and the [REC] button will light red.
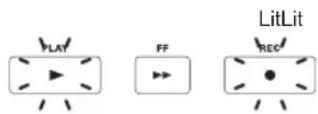
7
When you're finished recording, press the [STOP] button.
The recorded data is saved in the SKETCH folder (p. 120).
The recorded data can be imported into a track.

"Importing song sketch data into a track" (p. 108)

About file names
When a WAV file is saved, a file name will be automatically assigned as follows.
(Ex.)
_BR_001.WAV
+
_BR_999.WAV
The file name will consist of _BR_ followed by a sequential number and a file extension of .WAV.
Playback
Here's how to play back a WAV file that was saved in the SKETCH folder.
1
Press the [SONG SKETCH] button.
The SONG SKETCH screen will appear.
2
Use the CURSOR [ ] buttons to move the cursor to the file name, and use the dial to select the file that you want to play back.
3
Press the [PLAY] button.
Playback will begin.
4
To stop playback, press the [STOP] button.
Erasing a WAV File
Here's how to erase a WAV file.
1
Press the [SONG SKETCH] button.
The SONG SKETCH screen will appear.
2
Use the CURSOR [ ] buttons to move the cursor to the file name, and use the dial to select the file that you want to erase.
3
Press the [MENU] button.
4
Use the CURSOR [ ] buttons to move the cursor to "FILE," and press [ENTER].
5
Use the CURSOR [ ] buttons to move the cursor to "ERASE," and press [ENTER].
The FILE ERASE screen will appear.
![SONG SKETCH FILE ERASE [ENTER]:ERASE](/content/2026/05/810967/images/3238cc54f615f75a5e236ef24a54e28a6e9d74d296c8a0eb28b7d6315bf46a3c.jpg)
6
If you want to erase the file, press the [ENTER] button.
The screen will ask "Are you sure?"
7
Press the [ENTER] button
The file will be erased.
* The display will indicate "Keep power on!" while the data is being updated. Do not turn off the power while this message is shown.
Naming a WAV File
You are free to assign a name to a WAV file.
1
Press the [SONG SKETCH] button.
The SONG SKETCH screen will appear.
2
Use the CURSOR [ ] [▲buttons to move the cursor to the file name, and use the dial to select the file that you want to rename.
3
Press the [MENU] button.
4
Use the CURSOR [ ] [▲] buttons to move the cursor to "FILE," and press the [ENTER] button.
5
Use the CURSOR [ ] [▲] buttons to move the cursor to "NAME," and press the [ENTER] button.
6
Press the [ENTER] button.
The FILE NAME screen will appear.
![SONG SKETCH FILE NAME INS:[▲] BR_000 0123456789_](/content/2026/05/810967/images/3c41e43e08ba64f366bcf5c945b5d5bb039adcc771b141dafe7a4d1ba204461a.jpg)
7
Use the CURSOR [ ] [ ] buttons to move the cursor to the character that you want to change.
8
Turn the dial to choose the desired character.
9
When you've finished specifying the file name, press the [EXIT] button a number of times to return to the SONG SKETCH screen.
Viewing Information about the WAV File
Here's how to view information about the WAV file.
1
Press the [SONG SKETCH] button. The SONG SKETCH screen will appear.
2
Use the CURSOR [ ] [▲] buttons to move the cursor to the file name, and use the dial to select the file whose information you want to view.
3
Press the [MENU] button.
4
Use the CURSOR [ ] [▲] buttons to move the cursor to "FILE," and press the [ENTER] button.
5
Use the CURSOR [ ] [▲] buttons to move the cursor to "INFORMATION," and press the [ENTER] button.
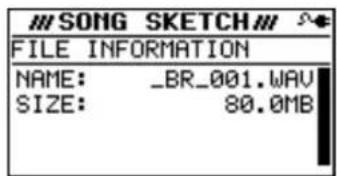
Information about the file will be displayed.
| FILE INFORMATION | Explanation |
| NAME | Name of the currently selected file |
| SIZE Space occupied by the file | |
* The actual size of the song is shown in megabyte units, each one consisting of 1,048,576 bytes. The displayed amount is an approximation.
6
Press the [EXIT] button a number of times to return to the SONG SKETCH screen.
Using Effects
Using Insert Effects
The BR-800 has independent processors for four different kinds of effects: insert effects, loop effects, track EQ, and mastering effects.
You can use these simultaneously, and make settings for each as appropriate for your needs.
This chapter explains how to edit the insert effect processor, and how to save your edited settings.

"Adding a Sense of Spaciousness" (p. 84)
"Adjusting the Tone of Each Track" (p. 86)

Not only can you use an insert effect during recording, you can also apply an effect to the sound of each track during mixdown.
For details, refer to "Changing the Location of the Insert Effect (LOCATION)" (p. 58).
Effect Patches and Banks
By calling up "effect patches," you can switch the effects used by the insert effect and the parameters of each effect.
The BR-800 provides a variety of effect patches suitable for use with vocals and a variety of instruments. These effect patches are organized by their type into six "banks."
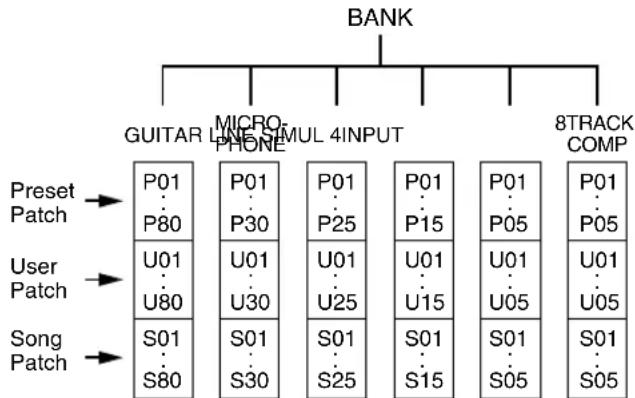
flowchart
graph TD
    A["BANK"] --> B["GUITAR"]
    A --> C["MIROPHONE"]
    A --> D["SMUL 4INPUT"]
    A --> E["8TRACK COMP"]

    subgraph Preset Patch
        F1["P01 P80"] --> G1["U01 U80"]
        G1 --> H1["S01 S80"]
    end

    subgraph User Patch
        I1["P01 P30"] --> J1["U01 U30"]
        J1 --> K1["S01 S30"]
    end

    subgraph Song Patch
        L1["P01 P25"] --> M1["U01 U25"]
        M1 --> N1["S01 S25"]
    end

    G1 --> H1
    H1 --> K1
    K1 --> L1
    L1 --> N1
    N1 --> M1
    M1 --> L1
    L1 --> N1

    subgraph 8Track Comp
        O1["P01 P05"] --> P1["P01 P05"]
        P1 --> Q1["U01 U05"]
        Q1 --> R1["S01 S05"]
        R1 --> S1
        S1 --> N1
    end
Effect patches are further organized within each bank as follows.
Preset patches
Preset patches already contain patch data; although you are free to edit these settings, you cannot write modified settings into the preset patches.
User patches
User patches can be rewritten, and the user patch data is stored in the BR-800's internal memory. If you've created a patch and would like to use it in another song as well, it's convenient to store it as a user patch.
Song patches
Song patches can be rewritten in the same way as user patches, but the patch data is stored on the SD card along with the song data.
This is convenient if you used the patch when recording a performance, and would like to save it together with the song.
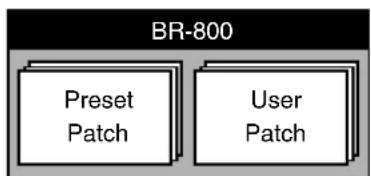
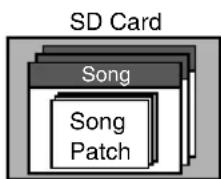

Song patches (S) cannot be selected if no SD card is inserted.

When the BR-800 is shipped from the factory, each bank's user patches (U) and song patches (S) contain the same patches as the preset patches (P).
Turning the Insert Effect On/Off
1
Press the [EFFECTS] button.
The [EFFECTS] button will light, and the insert effect will turn on.
Press the [EFFECTS] button once again to turn the insert effect off. The [EFFECTS] button will go out.
Easily Creating an Insert Effect (EZ TONE)
EZ Tone makes it easy to create your sound without having to edit parameters in detail.
* EZ Tone is not available if 4INPUT or 8TRACK COMP is selected as the effect bank (p. 54).
1
Press the [EFFECTS] button.
The EFFECT screen will appear.
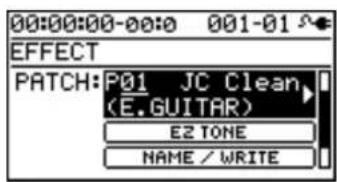
2
Select the effect patch that's closest to the sound you have in mind.
Use the [CURSOR] buttons and dial to select the bank, preset/song/user, and number.
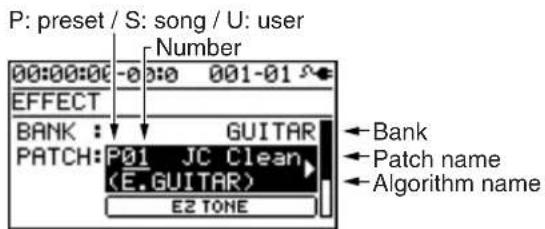
3
Use the CURSOR [▲] buttons to move the cursor to "EZ TONE," and press the [ENTER] button. The EZ TONE screen will appear.
4
Use the [CURSOR] buttons to operate the tone grid to get the desired sound.
For the GUITAR bank
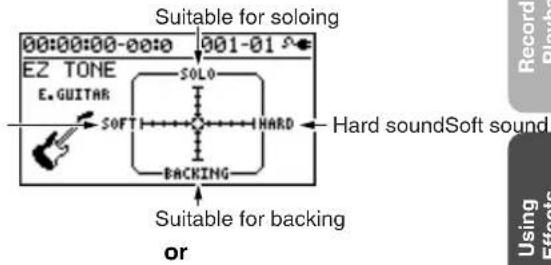
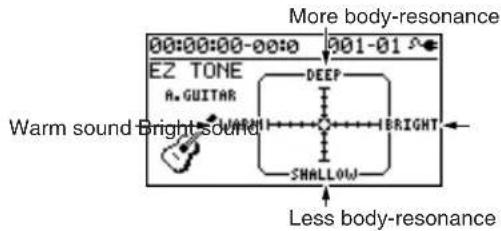
For the MICROPHONE or LINE banks
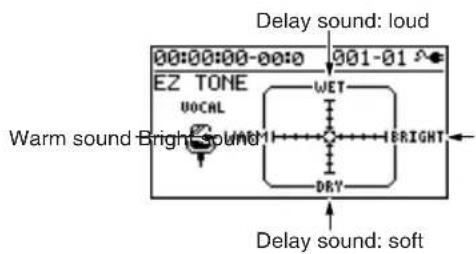
For the SIMUL bank
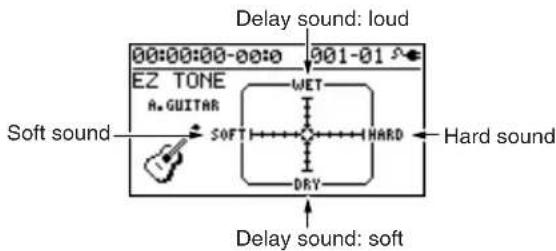
5
If you want to save the current effect settings, proceed as described in "Saving the Insert Effect Settings (Write)" (p. 57).

The effect settings you edit are temporary. If you exit the effect edit screen without saving the edited effect patch, an “*” is displayed in front of the patch name. If you select a different effect patch when this “*” indication is shown, the edited effect patch will revert to its original state, and the changes you made will be lost.
Editing the Insert Effect Settings
To create a new effect sound, choose an existing patch that's close to what you have in mind, and then edit it. When saving the edited patch, save it as a user patch or song patch.

If there's a specific effect that you want to use, you should choose a patch whose algorithm includes that effect.
The available effects differ for each algorithm. For details on the effects for each algorithm, refer to "Algorithm List" (p. 60).
1
Press the [EFFECTS] button.
The EFFECT screen will appear.
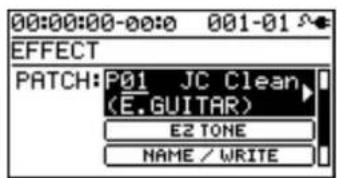
2
Select an effect patch.
Use the CURSOR buttons and dial to select the bank, preset/song/user, and number.
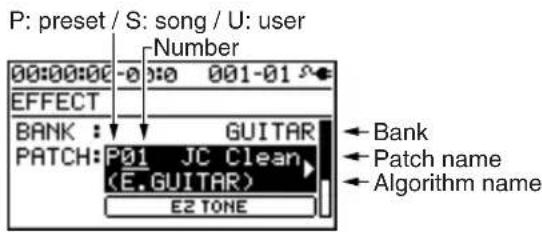
3
Use the CURSOR [ ] buttons to move the cursor to "PATCH," and press the [ENTER] button.
The effect edit screen will appear, and the algorithm (the available effects and their connection order) will be displayed.
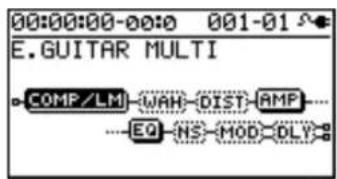
4
Use the CURSOR [ ] buttons to move the cursor to each effect, and use the dial to specify the on/off status of each effect.
The icons show the status of each effect as follows.
| Indication Explanation | |
| Effect on (selected) | |
| Effect on | |
| Effect off (selected) | |
| Effect off | |
5
Use the CURSOR [ ] buttons to move the cursor to the effect whose parameters you want to edit, and press the [ENTER] button.
The parameter edit screen for that effect will appear.
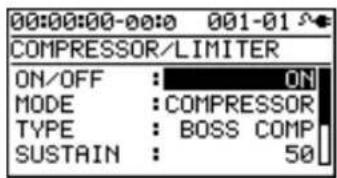
6
Use the CURSOR [ ] buttons to select a parameter, and use the dial to edit its value.
7
If there are other effects that you want to edit, press the [EXIT] button to return to the previous screen, and repeat steps 5–6.
8
If you want to save the current effect settings, proceed as described in "Saving the insert effect settings" (the following section).

The effect settings you edit are temporary. If you exit the effect edit screen without saving the edited effect patch, an “*” is displayed in front of the patch name. If you select a different effect patch when this “*” indication is shown, the edited effect patch will revert to its original state, and the changes you made will be lost.
Saving the Insert Effect Settings (Write)
Here's how to assign a name (patch name) to the effect settings you edited, and save them as a new effect patch.
1
Press the [EFFECTS] button.
2
Use the CURSOR [ ] buttons to move the cursor to "NAME/WRITE," and press the [ENTER] button. The write screen will appear.
![00:00:00-00:0 001-01 EFFECT [NAME:[▼] Write to [EXEC:[◆] GUITAR S01 [JC Clean]](/content/2026/05/810967/images/33a94a34f9ddbc18956f63cbcbdd121005508eed75b69db9ecf6cc9081c0bb4a.jpg)
3
If you want to enter a patch name, press the CURSOR [button.
If you don't need to change the patch name, proceed to step 6.
![00:00:00-00:0 001-01 EFFECT NAME WRITE:[▲] JC Clean ABCDEFGHIJKLMNOPQRSTUVWXYZ ABCDEFGHIJKLMNOPQRSTUVWXYZ ABCDEFGHIJKLMNOPQRSTUVWXYZ](/content/2026/05/810967/images/7e4e817c335b954b1bc411ccd6b24e8d72b857e4f45f1ce53f4f6233718994a9.jpg)
4
Use the CURSOR [ ] buttons and the dial to enter the desired patch name.
5
When you've finished entering the patch name, press CURSOR [▲]
6
Using the CURSOR buttons and the dial, choose the Effect Patch that is to become the destination of the write.
7
Once you've specified the destination at which to write the effect patch, press the [ENTER] button.
The confirmation message "Are you sure?" will appear.
8
If you're sure you want to save the settings, press the [ENTER] button. If you decide to cancel without saving, press the [EXIT] button.
When the data has been written, you will return to the EFFECT screen.
* The display will indicate "Keep power on!" while the data is being updated. Do not turn off the power while this message is shown.
Changing the Location of the Insert Effect (LOCATION)
The BR-800 lets you change the location of the insert effect, allowing you to use it for a variety of different purposes.
1
In the EFFECT screen, press the CURSOR [▼] button to move the cursor to "LOCATION," and press the [ENTER] button.
The LOCATION screen will appear.
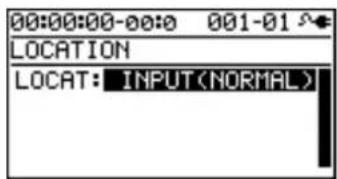
2
Turn the dial to specify the location in which the insert effect will be connected.
3
Press the [EXIT] button a number of times to return to the play screen.
* The display will indicate "Keep power on!" while the data is being updated. Do not turn off the power while this message is displayed.
Insert Effect Connection Locations
■ INPUT
This setting lets you monitor the sound that has passed through the insert effect, and the sound that has passed through the insert effect will be recorded. Normally, you should use this setting.
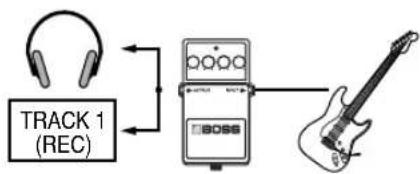
flowchart
graph LR
    A["TRACK 1 (REC)"] --> B["OBSB Controller"]
    B --> C["Output Stage"]
■ INPUT
This setting lets you monitor the sound that has passed through the insert effect, but the sound unprocessed by the effect (i.e., the dry sound) will be recorded. Use this setting if you want to try out various effects after recording.
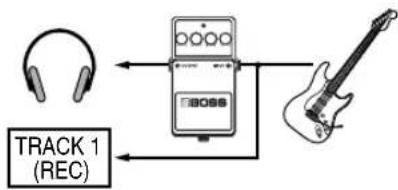
flowchart
graph LR
    A["Headphones"] --> B["Track 1 (REC)"]
    B --> C["Reactor with 3000Ω"]
    C --> D["Guitar"]
    D --> B
■ TRACK 1-8, 1/2, 3/4, 5/6, 7/8, 1-4, 5-8, 1-8
These settings apply the insert effect to the sound played back from the track. Use these settings when you want to try various effects after recording the dry sound, or when you want to apply an effect only to a specific track.
* Depending on the selected combination of effect and bank, the effect might not apply to all tracks.
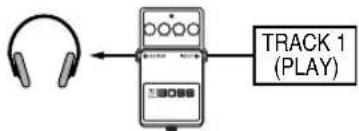
flowchart
graph LR
    A["Headphones"] --> B["Device with '0000' label"]
    B --> C["TRACK 1 (PLAY)"]
    D["Arrow left"] --> B
RHYTHM
This setting applies the insert effect to the rhythm sound.
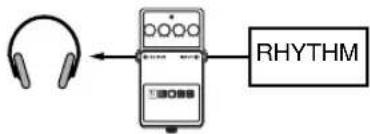
flowchart
graph LR
    A["Headphones"] --> B["Audio Amplifier"]
    B --> C["RHYTHM"]
■ MASTER
This setting connects the insert effect immediately before the mastering effect (p. 114). Use this setting when you want to apply the insert effect to the overall sound, such as when adjusting the tone quality during mastering, or to obtain a special effect.
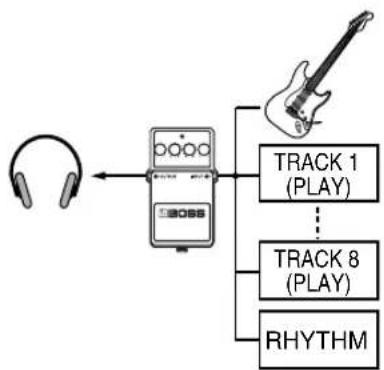
flowchart
graph LR
    A["Headphones"] --> B["DSSS"]
    B --> C["Track 1 (PLAY)"]
    B --> D["Track 8 (PLAY)"]
    B --> E["RHYTHM"]
    C --> F["Handheld"]
    D --> G["Handheld"]
    E --> H["Handheld"]
Copying Insert Effects (EFFECT BANK COPY)
The user patches for an insert effect can be copied to song patches in the same bank, or song patches can be copied to user patches in the same bank.
Since user patches stored in this unit can be copied to songs on an SD card, you can conveniently use this for a variety of purposes, including making backups.
1
Press the [EFFECTS] button.
2
Use the CURSOR [W] buttons to move the cursor to "BANK COPY," and press the [ENTER] button.
![00:00:00-00:0 001-01 S BANK COPY [EXEC:] BANK : GUITAR MODE : USER -> SONG USER PATCH SONG PATCH](/content/2026/05/810967/images/4d92d63e4e194c849edbfc6a0cbf552020db45269167846caca83d4775d1edfc.jpg)
3
Use the CURSOR [ ] buttons to move the cursor to "BANK," and use the dial to select the desired bank. If you select "ALL," copy of all the user (song) patches in all the banks will be carried out.
4
Use the CURSOR [ ] buttons to move the cursor to "MODE," and use the dial to select the copy mode.
| Mode | Explanation |
| USER→SONG | All user patches in the selected bank will be copied to song patches. |
| SONG→USER | All song patches in the selected bank will be copied to user patches. |
5
To copy the data, press the [ENTER] button.
A message will ask "Are you sure?"
6
If you're sure you want to copy the data, press the [ENTER] button. If you decide to cancel without copying, press the [EXIT] button.
When the data has been written, you will return to the EFFECT screen.
* The display will indicate "Keep power on!" while the data is being updated. Do not turn off the power while this message is shown.
Algorithm List
The algorithms (the available effects and their connection order) that can be used as an insert effect are shown below.
The algorithms that can be selected will differ for each bank. To select the algorithm that you wish to use, first select the effect bank that includes that algorithm, and select a patch that uses the desired algorithm.
The line or lines connecting the algorithm indicate whether the effect features mono output (single line) or stereo output (two lines).
(Ex.)
Output: Mono
Output: Stereo
-[COMP/LM]-[WAH]-
- [MOD]=[DLY]=
BANK : GUITAR
1. E.GUITAR MULTI
This is a multi-effect designed for electric guitar.
This provides an amp sound using a preamp and speaker simulator.
-[COMP/LM]-[WAH]-[DIST]-[AMP]-
-EQ-[NS]-[MOD]=[DLY]=
Compressor/Limiter
Wah
Distortion
Amp
Equalizer
Noise Suppressor
Modulation
- Enhancer
- Guitar Sim
- Slow Gear
- Sitar Sim
- Octave
- Pitch Shifter
- Phaser
- Flanger
- Tremolo
- Rotary
- Uni-v
- Pan
- Vibrato
- Ring Mod
- Chorus
- Doubling Delay
Delay
2. ACOUSTIC SIM
This is a multi-effect designed for electric guitar. It allows you to use an electric guitar to produce sounds similar to those of an acoustic guitar.
-[ASIM]-[COMP/LM]-[EQ]-[NS]
[CHO]=[DLY]=
Acoustic Simulator
Compressor/Limiter
Equalizer
Noise Suppressor
Chorus
Delay
3. GUITAR TO BASS
Simulates the sound of a bass guitar.
Obtain the sound of a bass guitar while playing an electric guitar.
* You should avoid playing chords when using the GUITAR TO BASS.
-[G->B]-[COMP/LM]-[WAH]-[DIST]
- [AMP]-[EQ]-[NS]-[MOD]=
Guitar to Bass
Compressor/Limiter
Wah
Distortion
Amp
Equalizer
Noise Suppressor
Modulation
- Enhancer
- Slow Gear
- Defretter
- Octave
- Pitch Shifter
- Phaser
- Flanger
- Tremolo
- Pan
- Vibrato
- Ring Mod
- Chorus
- Doubling Delay
4. A.GUITAR MULTI
This is a multi-effect designed for acoustic guitar.
Even when an electric-acoustic guitar is connected at line level, this provides a warm sound similar to what is obtained through a microphone.
-[ACP]-[COMP/LM]-[EQ]-[NS]-[CHO]=[DLY]=
Acoustic Processor
Compressor/Limiter
Equalizer
Noise Suppressor
Chorus
Delay
5. BASS MULTI
This is a multi-effect designed for bass guitar.
Appropriate for creating standard bass sound.
-[COMP/LM]-[WAH]-[DIST]-[AMP]
-[EQ]-[NS]-[MOD]=[DLY]=
Compressor/Limiter
Wah
Distortion
Amp
Equalizer
Noise Suppressor
Modulation
- Enhancer
- Bass Sim
- Slow Gear
- Defretter
- Octave
- Pitch Shifter
- Phaser
- Flanger
- Tremolo
- Pan
- Vibrato
- Ring Mod
- Chorus
- Doubling Delay
Delay
BANK : MICROPHONE
6. VOCAL MULTI
This is a multi-effect for vocals.
It provides effects that are optimized for vocals.
![-[PCR]-[DYN]-[SFX]-[EQ]-[NS] [DB/HR]=[DLY]=](/content/2026/05/810967/images/f40d34531d14d39f6ddd16418ead346b8998ac2bce6d60417ae625ab9cca88b1.jpg)
Pitch Correct
Dynamics
Tone/SFX
Equalizer
Noise Suppressor
Double/Harmony
Delay
7. MIC MULTI
This is a multi-effect for microphone.
It provides the basic effects needed for a microphone.
![-[L. CUT]-[COMP/LM]-[EQ]-[NS] [MOD]=[DLY]=](/content/2026/05/810967/images/48426c8cd80ada1a9a9eb87126b1171a8c361183dce07aa86d3d8d36505fea8a.jpg)
Low Cut
Compressor/Limiter
Equalizer
Noise Suppressor
Modulation
- Enhancer
- Pitch Shifter
- Phaser
- Flanger
- Tremolo
- Pan
- Vibrato
- Ring Mod
- Chorus
- Doubling Delay
Delay
BANK : LINE
8. STEREO MULTI
This algorithm connects seven types of effect, all in full stereo.
![=[COMP/LM]=[LOFI]=[EQ]=[NS] [MOD]=[CHO]=[DLY]=](/content/2026/05/810967/images/8eac6f96bfadc1e1f242573081f9c4d78af790a79d4762fbec298f8b1d7dcd61.jpg)
Compressor/Limiter
Lo-fi
Equalizer
Noise Suppressor
Modulation
- Enhancer
- Slow Gear
- Pitch Shifter
- Phaser
- Flanger
- Tremolo
- Rotary
- Pan
- Vibrato
- Ring Mod
- Doubling Delay
Chorus
Delay
BANK : SIMUL
9. VO + GT.AMP
This algorithm is for use when simultaneously recording a vocal and electric guitar.
For the guitar, you can produce an amp sound using a preamp and speaker simulator.
(GUITAR)
-[COMP/LM]-[AMP]-[EQ]-[NS]-[MOD]-[DLY]--[COMP/LM]-[EQ]-[NS]-[MOD]-[DLY]-
Compressor/Limiter
Amp
Equalizer
Noise Suppressor
Modulation
- Enhancer
- Guitar Sim
- Slow Gear
- Sitar Sim
- Octave
- Pitch Shifter
- Phaser
- Flanger
- Tremolo
- Rotary
- Uni-v
- Vibrato
- Ring Mod
- Chorus
- Doubling Delay
Delay
(MIC)
Compressor/Limiter
Equalizer
Noise Suppressor
Modulation
- Enhancer
- Pitch Shifter
- Phaser
- Flanger
- Tremolo
- Vibrato
- Ring Mod
- Chorus
- Doubling Delay
Delay
10. VO + AC.SIM
This algorithm is for use when simultaneously recording a vocal and electric guitar.
For the guitar, you can make the electric guitar sound like an acoustic guitar.
(GUITAR)
-[ASIM]-[COMP/LM]-[EQ]-[NS]-[CHO]-[DLY]-
Acoustic Simulator
Compressor/Limiter
Equalizer
Noise Suppressor
Chorus
Delay
(MIC)
-[COMP/LM]-[EQ]-[NS]-[MOD]-[DLY]-
Compressor/Limiter
Equalizer
Noise Suppressor
Modulation
- Enhancer
- Pitch Shifter
- Phaser
- Flanger
- Tremolo
- Vibrato
- Ring Mod
- Chorus
- Doubling Delay
Delay
11. VO + ACOUSTIC
This algorithm is for use when simultaneously recording a vocal and acoustic guitar.
For the guitar, you can produce a warm sound as though a microphone were being used, even when an electric-acoustic guitar is connected by a direct line.
(GUITAR)
-[ACP]-[COMP/LM]-[EQ]-[NS]-[CHO]-[DLY]-
Acoustic Processor
Compressor/Limiter
Equalizer
Noise Suppressor
Chorus
Delay
(MIC)
-[COMP/LM]-[EQ]-[NS]-[DLY]-
Compressor/Limiter
Equalizer
Noise Suppressor
Delay
BANK : 4INPUT
12. 4-INPUT MULTI
This is an effect for four-channel microphone recording. It provides the effects needed for recording with multiple microphones.
-[L.CUT]-[COMP/LM]-[EQ]-[NS]-
-[L.CUT]-[COMP/LM]-[EQ]-[NS]-
-[L.CUT]-[COMP/LM]-[EQ]-[NS]-
-[L.CUT]-[COMP/LM]-[EQ]-[NS]-
Low Cut
Compressor/Limiter
Equalizer
Noise Suppressor
BANK : 8TRACK COMP
13. 8-TRACK COMP/LIM
This provides an independent compressor/limiter for each track.
It allows you to make the playback volume of each track more consistent.
-[COMP/LM]-
-[COMP/LM]-
-[COMP/LM]-
-[COMP/LM]-
=[COMP/LM]=
=[COMP/LM]=
Compressor/Limiter
Parameter List
The trademarks listed in this document are trademarks of their respective owners, which are separate companies from BOSS. Those companies are not affiliated with BOSS and have not licensed or authorized BOSS's BR-800. Their marks are used solely to identify the equipment whose sound is simulated by BOSS's BR-800.
COMPRESSOR/LIMITER
This is an effect that produces a long sustain by evening out the volume level of the input signal. You can switch it to a limiter to suppress only the sound peaks and prevent distortion.
| Parameter/Range | Explanation | |
| ON/OFF | ||
| OFF, ON | Turns the COMPRESSOR/LIMITER effect on/off. | |
| MODE | ||
| Selects the COMPRESSOR/LIMITER mode. | ||
| COMPRESSOR The effect operates as a compressor. | ||
| LIMITER The effect operates as a limiter. | ||
| TYPE | ||
| COMPRESSOR | BOSS COMP | Models the BOSS CS-3 compact effects processor. |
| HI-BAND | This is a compressor that adds an even stronger effect in the high end. | |
| LIGHT This is a compressor with a light effect. | ||
| D-COMP This models a MXR DynaComp. | ||
| ORANGE | This models a DAN ARMSTRONG ORANGE SQUEEZER. | |
| FAT | When applied heavily, this compressor effect provides a fat tone with a boosted midrange. | |
| MILD | When applied heavily, this compressor effect produces a sweet tone with the high end cut. | |
| LIMITER | BOSS LIM This selects a stereo limiter. | |
| RACK 160 D This models a dbx 160X. | ||
| VTG RACK U This models a UREI 1178. | ||
| SUSTAIN *1 | ||
| 0–100 | Adjusts the range (time) over which low-level signals are boosted. Larger values will result in longer sustain. | |
Using Insert Effects
| Parameter/Range | Explanation |
| ATTACK | |
| 0–100 | Adjusts the strength of the picking attack when the strings are played. Higher values result in s sharper attack, creating a more clearly defined sound. |
| TONE *1 | |
| -50–+50 | Adjusts the tone. |
| THRESHOLD *2 | |
| 0–100 | Adjust this as appropriate for the input signal from your guitar. When the input signal level exceeds this threshold level, limiting will be applied. |
| RATIO *2 | |
| 1:1–∞:1 | This selects the compression ratio used with signals in excess of the threshold level. |
| RELEASE *2 | |
| 0–100 | Adjusts the time from when the signal level drops below the threshold until when limiting is removed. |
| LEVEL | |
| 0–100 | Adjusts the volume. |
*1 Setting available when MODE is set to COMPRESSOR.
*2 Setting available when MODE is set to LIMITER.
With "BASS MULTI" algorithms
| Parameter/Range | Explanation | |
| ON/OFF | ||
| OFF, ON | Turns the COMPRESSOR/LIMITER effect on/off. | |
| TYPE | ||
| COMPRESSOR | BOSS COMP | Models the BOSS CS-3 compact effects processor. |
| D-COMP This | models a MXR DynaComp. | |
| LIMITER | BOSS LIM This | selects a stereo limiter. |
| RACK 160 D This | models a dbx 160X. | |
| VTG RACK U This | models a UREI 1178. | |
| Parameter/Range | Explanation | |
| LIMITER | MULTI BAND | This limiter lets you divide the input signal into four separate bands—ultra low, low, high, and ultra high frequency ranges—and apply different settings to the low and high frequency ranges. You can set the frequencies separating each band using the XOVER F L, M, and H parameters.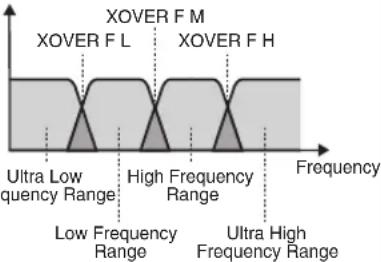 Fre Fre The limiter is applied neither to the ultra low range, which is critical to the bass's sound, nor to the ultra high range, which affects the nuance of the attack. The limiter is applied neither to the ultra low range, which is critical to the bass's sound, nor to the ultra high range, which affects the nuance of the attack. |
| NATURAL | This compressor is configured using the same frequency divisions as MULTI BAND, but with simplified parameter settings. | |
| SUSTAIN *1 | ||
| 0–100 | Adjusts the range (time) over which low-level signals are boosted. Larger values will result in longer sustain. | |
| ATTACK *2 | ||
| 0–100 | Adjusts the strength of the picking attack when the strings are played. Higher values result in s sharper attack, creating a more clearly defined sound. | |
| TONE | ||
| -50—+50 | Adjusts the tone. | |
| THRESHOLD *3 | ||
| 0–100 | When the input signal level exceeds this threshold level, limiting will be applied. | |
| RATIO *3 | ||
| 1:1–∞:1 | This selects the compression ratio used with signals in excess of the threshold level. Higher values create a stronger compression effect. | |
| Parameter/Range | Explanation |
| RELEASE *3 | |
| 0–100 | Adjusts the time from when the signal level drops below the threshold until when limiting is removed. |
| LO THRES *4 | |
| 0–100 | In the Low Frequency Range, when the input signal level exceeds this threshold level, limiting will be applied. |
| LO RATIO *4 | |
| 1:1–∞:1 | In the Low Frequency Range, this selects the compression ratio used with signals in excess of the threshold level. Higher values create a stronger compression effect. |
| HI THRES *4 | |
| 0–100 | In the High Frequency Range, when the input signal level exceeds this threshold level, limiting will be applied. |
| HI RATIO *4 | |
| 1:1–∞:1 | In the High Frequency Range, this selects the compression ratio used with signals in excess of the threshold level. Higher values create a stronger compression effect. |
| XOVER F L (Crossover Frequency Low) *4 | |
| 32Hz–315Hz | This sets the frequency dividing the ultra low- and low-frequency ranges. |
| XOVER F M (Crossover Frequency Middle) *4 | |
| 100Hz–4.00kHz | This sets the frequency dividing the low- and high-frequency ranges. |
| XOVER F H (Crossover Frequency High) *4 | |
| 2.50kHz–10.0kHz | This sets the frequency dividing the high- and ultra high-frequency ranges. |
| DRIVE *5 | |
| 0–100 | Adjusts the range (time) over which low-level signals are boosted. Larger values will result in longer sustain. |
| LEVEL | |
| 0–100 | Adjusts the volume. |
*1 Setting available when TYPE is set to BOSS COMP or D-COMP.
*2 Setting available when TYPE is set to BOSS COMP, D-COMP, BOSS LIM, RACK 160 D, or VTG RACK U.
*3 Setting available when TYPE is set to BOSS LIM, RACK 160 D, or VTG RACK U.
*4 Setting available when TYPE is set to MULTI BAND.
*5 Setting available when TYPE is set to NATURAL.
WAH
The wah effect creates a unique tone by changing the frequency response characteristics of a filter.
| Parameter/Range | Explanation | |
| ON/OFF | ||
| ON, OFF Turns | the WAH effect on/off. | |
| MODE | ||
| Selects the wah mode. | ||
| TOUCH | LPF | You can produce a wah effect with the filter changing in response to the guitar/bass level. |
| BPF | The wah effect will be controlled in real time by an expression pedal connected to the FOOT SW/EXP PEDAL jack. | |
| TYPE | ||
| Selects the wah mode. | ||
| TOUCH | LPF | This creates a wah effect over a wide frequency range. |
| BPF | This creates a wah effect in a narrow frequency range. | |
| PEDAL | CRY WAH | This models the sound of the CRY BABY wah pedal popular in the '70s. |
| VO WAH | This models the sound of the VOX V846. | |
| FAT WAH | This is a wah sound featuring a bold tone. | |
| LIGHT WAH | This wah has a refined sound with no unusual characteristics. | |
| 7STRWAH *1 | This expanded wah features a variable range compatible with seven-string and baritone guitars. | |
| BASS WAH *2 | This wah has been specially adapted for use in the bass registers.Inclusion of the low-frequency range in the wah sound produces a robust wah effect, with no dilution of the sound. | |
| RESO WAH | This completely original effect offers enhancements on the characteristic resonances produced by analog synth filters. | |
| POLARITY *3 | ||
| Selects the direction in which the filter will change in response to the input. | ||
| DOWN The frequency of the filter will fall. | ||
| UP The frequency of the filter will rise. | ||
| SENS (Sensitivity) *3 | ||
| 0-100 | Adjusts the sensitivity at which the filter will change in the direction determined by the POLARITY setting.Higher values will result in a stronger response. With a setting of 0, the strength of picking will have no effect. | |
Using Insert Effects
| Parameter/ Range | Explanation |
| FREQUENCY *3 | |
| 0-100 | Adjusts the center frequency of the Wah effect. |
| PEAK *3 | |
| Adjusts the way in which the wah effect applies to the area around the center frequency. | |
| 0-100 | Higher values will produce a stronger tone which emphasizes the wah effect more. With a value of 50 a standard wah sound will be produced. |
| PEDAL POS (Pedal Position) *4 | |
| 0-100 | Adjusts the position of the wah pedal. |
| PEDAL MIN (Pedal Minimum) *4 | |
| 0-100 | Selects the tone produced when the heel of the pedal is depressed. |
| PEDAL MAX (Pedal Maximum) *4 | |
| 0-100 | Selects the tone produced when the toe of the pedal is depressed. |
| E.LEVEL (Effect Level) | |
| 0-100 | Adjusts the volume of the effect sound. |
| D.LEVEL (Direct Level) | |
| 0-100 | Adjusts the volume of the direct sound. |
*1 Setting available when the algorithm is set to GUITAR MULTI.
*2 Setting available when the algorithm is set to BASS MULTI or GUITAR TO BASS.
*3 Setting available when MODE is set to TOUCH.
*4 Setting available when MODE is set to PEDAL.
DISTORTION
This effect distorts the sound to create long sustain.
| Parameter/Range | Explanation | |
| ON/OFF | ||
| OFF, ON | Turns the DISTORTION effect on/off. | |
| TYPE | ||
| Selects the type of distortion. | ||
| BOOSTER | MID BOOST | This is a booster with unique characteristics in the midrange.Making the connection before the COSM amp produces sound suitable for solos. |
| CLN BOOST | This not only functions as a booster,but also produces a clean tone that has punch even when used alone. | |
| TREB BOOST | This is a booster that has bright characteristics. | |
| Parameter/Range | Explanation | |
| BLUES | BLUES OD | This is a crunch sound of the BOSS BD-2. This produces distortion that faithfully reproduces the nuances of picking. |
| CRUNCH | A lustrous crunch sound with an added element of amp distortion. | |
| NATURAL OD | This is an overdrive sound that provides distortion with a natural feeling. | |
| OD | OD-1 | This is the sound of the BOSS OD-1. This produces sweet, mild distortion. |
| T-SCREAM This models an Ibanez TS-808. | ||
| TURBO OD | This is the high-gain overdrive sound of the BOSS OD-2. | |
| WARM OD This is a warm overdrive. | ||
| DIST | DISTORTION | This gives a basic, traditional distortion sound. |
| MILD DS | This is a distortion sound that provides a mild distortion. | |
| MID DS | This distortion sound features a boosted midrange. | |
| CLASSIC | RAT This models a Proco RAT. | |
| GUV DS This models a Marshall GUV' NOR. | ||
| DST+ This models a MXR DISTORTION+. | ||
| MODERN | MODERN DS | This is the deep distortion sound of a large high-gain amp. |
| SOLID DS | This is a distortion sound featuring an edge effect. | |
| STACK | A fat sound with an added element of a stack amp's distortion. | |
| METAL | LOUD | This is distortion sound that is ideal for performances of heavy riffs. |
| METAL ZONE | This is the sound of the BOSS MT-2. It produces a wide range of metal sounds, from old style to slash metal. | |
| LEAD | Produces a distortion sound with both the smoothness of an overdrive along with a deep distortion. | |
| FUZZ | '60s FUZZ | This models a FUZZFACE. It produces a fat fuzz sound. |
| OCT FUZZ This models an ACETONE FUZZ. | ||
| MUFF FUZZ | This models an Electro-Harmonix big Muff π. | |
| DRIVE | ||
| 0–120 | Adjusts the depth of distortion. | |
| BOTTOM | ||
| -50–+50 | Adjusts the tone for the low frequency range. Turning this to the left (counter-clockwise) produces a sound with the low end cut; turning it to the right boosts the low end in the sound. | |
| Parameter/ Range | Explanation |
| TONE | |
| -50—+50 | Adjusts the tone. |
| E.LEVEL (Effect Level) | |
| 0–100 | Adjusts the volume of the effect sound. |
| D.LEVEL (Direct Level) | |
| 0–100 | Adjusts the volume of the direct sound. |
With "BASS MULTI" or "GUITAR TO BASS" algorithms
| Parameter/ Range | Explanation |
| ON/OFF | |
| OFF, ON | Turns the DISTORTION effect on/off. |
| TYPE | |
| Selects the type of distortion. | |
| BOOSTER | This not only functions as a booster, but also produces a clean tone that has punch even when used alone. |
| NATURAL | This is an overdrive sound that provides distortion with a natural feeling. |
| BASS DRIVER | Models the TECH21 SANSAMP BASS DRIVER DI. |
| BASS OD | Overdrive tuned especially for use with basses. |
| BLUES OD | This is a crunch sound of the BOSS BD-2. This produces distortion that faithfully reproduces the nuances of picking. |
| BASS DS | Distortion tuned especially for use with basses. |
| GUV DS This m | models a Marshall GUV' NOR. |
| BASS MT Wild | radical distortion sound. |
| METAL ZONE | This is the sound of the BOSS MT-2. It produces a wide range of metal sounds, from old style to slash metal. |
| BASS FUZZ Fu | zz tuned especially for use with basses. |
| MUFF FUZZ | This models an Electro-Harmonix big Muff π. |
| HI BAND DRV | With this effect, distortion is applied only to the high frequency sounds, and not to the sounds in the low frequency range. |
| DRIVE | |
| 0–100 | Adjusts the depth of distortion. |
| TONE | |
| -50–+50 | Adjusts the tone. |
| Parameter/Range | Explanation |
| E.LEVEL (Effect Level) | |
| 0–100 | Adjusts the volume of the effect sound. |
| D.LEVEL (Direct Level) | |
| 0–100 | Adjusts the volume of the direct sound. |
| BOTTOM | |
| 0–100 | Extracts the low-frequency components of the sound input to this effect, and adjusts the amount added to the effect sound. |
AMP
COSM technology simulates different preamp characteristics, speaker sizes, and cabinet shapes.
| Parameter/Range | Explanation | |
| ON/OFF | ||
| OFF, ON | Turns the AMP effect on/off. | |
| TYPE | ||
| This sets the type of the preamp. | ||
| JC CLEAN | BOSS CLEAN | This is a clean sound that is smooth and warm. |
| JC-120 This is the sound of the Roland JC-120. | ||
| JAZZ COMBO | This is a sound suited to jazz. | |
| FULL RANGE | This is a sound with flat response.Good for acoustic guitar. | |
| TW CLEAN | CLEAN TWIN | This models a Fender TWIN REVERB. |
| PRO CRNCH | This models a Fender PRO REVERB. | |
| TWEED | This models a Fender Bassman 4 x 10"Combo. | |
| DELUXCRNCH | This models a Fender DELUXE RE-VERB. | |
| CRUNCH | BOSS CRNCH | This is a crunch sound that can faithfully reproduce the nuances of picking. |
| BLUES This is a sound suited to blues. | ||
| WILDCRNCH | This is a crunch sound with wild dis-tortion. | |
| STACKCRNCH | This is a crunch sound with high gain. | |
| COMBO | VO DRIVE | This models the drive sound of a VOX AC-30TB.This is a sound that it suited to sixties-style British rock. |
| VO LEAD | This models the lead sound of the VOX AC-30TB. | |
| VO CLEAN | This models the clean sound of the VOX AC-30TB. | |
| MATCH | MATCH DRIVE | This models the sound input to left input on a Matchless D/C-30.A simulation of the latest tube amp widely used in styles from blues and rock. |
| FAT MATCH | This models the sound of a Matchless with a modified high gain. | |
| MATCH LEAD | This models the sound input to right input on a Matchless D/C-30. | |
| BG LEAD | BG LEAD | This models the lead sound of the MESA/Boogie combo amp.The sound of a tube amp typical of the late '70s to '80s. |
| BG DRIVE | This models a MESA/Boogie with TREBLE SHIFT SW on. | |
| BG RHYTHM | This models the rhythm channel of a MESA/Boogie. | |
| MS CLASSIC | MS1959 I | This models the sound input to Input I on a Marshall 1959.This is a trebly sound suited to hard rock. |
| MS1959 I+II | The sound of connecting inputs I and II of the guitar amp in parallel, creating a sound with a stronger low end than I. | |
| MS MODERN | MS HIGAIN | This models the sound of a Marshall with a modified midrange boost. |
| MS SCOOP | This is a Marshall sound that's been tweaked for metal sound. | |
| R-FIER | R-FIER VNT | Models the sound of the Channel 2 VINTAGE Mode on the MESA/Boogie DUAL Rectifier. |
| R-FIER MDN | Models the sound of the Channel 2 MODERN Mode on the MESA/Boogie DUAL Rectifier. | |
| R-FIER CLN | Models the sound of the Channel 1 CLEAN Mode on the MESA/Boogie DUAL Rectifier. | |
| T-AMP | T-AMP LEAD | This models a Hughes & Kettner Tri-amp AMP3. |
| T-AMP CRNCH | This models a Hughes & Kettner Tri-amp AMP2. | |
| T-AMP CLEAN | This models a Hughes & Kettner Tri-amp AMP1. | |
| HI-GAIN | BOSS DRIVE | This is a drive sound producing awesome distortion. |
| SLDN | This models a Soldano SLO-100.This is the typical sound of the eighties. | |
| LEAD STACK | This is a lead sound with high gain. | |
| HEAVY LEAD | A powerful lead sound featuring extreme distortion. | |
| Parameter/Range | Explanation | |
| METAL | BOSS METAL | This is a metal sound suited to heavy riffs. |
| 5150 DRIVE | This models the lead channel of a Peavey EVH 5150. | |
| METAL LEAD | This is a lead sound suited to metal. | |
| EDGE LEAD | This is a sharp sound suited for lead play. | |
| GAIN | ||
| 0–120 | Adjusts the distortion of the amp. | |
| BASS | ||
| 0–100 | Adjusts the tone for the low frequency range. | |
| MIDDLE | ||
| 0–100 | Adjusts the tone for the middle frequency range. | |
| TREBLE | ||
| 0–100 | Adjusts the tone for the high frequency range. | |
| PRESENCE | ||
| 0–100 | Adjusts the tone for the ultra high frequency range. | |
| LEVEL | ||
| 0–100 | Adjusts the volume of the entire preamp.* Be careful not to raise the Level setting too high. | |
| BRIGHT | ||
| Turns the bright setting on/off.* The BRIGHT parameter setting is only partially available with some JC CLEAN, TW CLEAN, CRUNCH, or BG LEAD settings in Preamp Type. | ||
| OFF | Bright is not used. | |
| ON | Bright is switched on to create a lighter and crisper tone. | |
| GAIN SW | ||
| LOW,MIDDLE,HIGH | Provides for selection from three levels of distortion: LOW, MIDDLE, and HIGH.Distortion will successively increase for settings of LOW, MIDDLE and HIGH.* The sound of each Type is created on the basis that the Gain is set to MIDDLE.So, normally set it to MIDDLE. | |
| SP TYPE (Speaker Type) | ||
| Select the speaker type. | ||
| OFF This turns off the speaker simulator. | ||
| Parameter/ Range | Explanation |
| ORIGINAL | This is the built-in speaker of the amp you selected with PREAMP TYPE. |
| 1x8" | This is a compact open-back speaker cabinet with one 8-inch speaker. |
| 1x10" | This is a compact open-back speaker cabinet with one 10-inch speaker. |
| 1x12" | This is a compact open-back speaker cabinet with one 12-inch speaker. |
| 2x12" | This is a general open-back speaker cabinet with two 12-inch speakers. |
| 4x10" | This is an optimal speaker cabinet for a large enclosed amp with four 10-inch speakers. |
| 4x12" | This is an optimal speaker cabinet for a large enclosed amp with four 12-inch speakers. |
| 8x12" | This is a double stack of two cabinets, each with four 12-inch speakers. |
| MIC TYPE | |
| This setting selects the simulated microphone type. | |
| DYN57 | This is the sound of the SHURE SM-57.General dynamic microphone used for instruments and vocals. Optimal for use in miking guitar amps. |
| DYN421 | This is the sound of the SENNHEISER MD-421.Dynamic microphone with extended low end. |
| CND451 | This is the sound of the AKG C451B.Small condenser microphone for use with instruments. |
| CND87 | This is the sound of the NEUMANN U87.Condenser microphone with flat response. |
| FLAT | Simulates a microphone with perfectly flat response. Produces a sonic image close to that of listening to the sound directly from the speakers (on site). |
| MIC DIS (Mic Distance) | |
| Simulates the distance between the microphone and speaker. | |
| OFF MIC | This setting points the microphone away from the speaker. |
| ON MIC | Provides conditions whereby the micro-phone is directed more towards the speaker. |
| MIC POS (Mic Position) | |
| This simulates the microphone position. | |
| CENTER | Simulates the condition that the microphone is set in the middle of the speaker cone. |
| 1-10 | Simulates the condition that the micro-phone is moved away from the center of the speaker cone. |
| Parameter/ Range | Explanation |
| MIC LEV (Mic Level) | |
| 0–100 | Adjusts the volume of the microphone. |
| D.LEVEL (Direct Level) | |
| 0–100 | Adjusts the volume of the direct sound. |
With "BASS MULTI" or "GUITAR TO BASS" algorithms
| Parameter/ Range | Explanation |
| ON/OFF | |
| OFF, ON | Turns the AMP effect on/off. |
| TYPE | |
| This sets the type of the preamp. | |
| SUPER FLAT An amp with flat response. | |
| FLIP TOP Models the Ampeg B-15. | |
| B MAN Models the Fender Bassman 100. | |
| CONCERT 810 Models the Ampeg SVT. | |
| BASS 360 Models the acoustic 360. | |
| T.E. Models the Trace Elliot AH600SMX. | |
| SESSION Models the SWR SM-400. | |
| AC BASS An amp ideal for ACOUSTIC BASS. | |
| GAIN | |
| 0-100 | Adjusts the distortion of the amp. |
| BASS | |
| 0-100 | Adjusts the tone for the low frequency range. |
| MIDDLE | |
| 0-100 | Adjusts the tone for the middle frequency range. |
| MID FREQ (Middle Frequency) *1 | |
| 220Hz, 800Hz, 3.0kHz | Specifies the center of the frequency range that will be adjusted by the Mid Freq. |
| TREBLE | |
| 0-100 | Adjusts the tone for the high frequency range. |
| PRESENCE *2 | |
| 0-100 | Adjusts the tone for the ultra high frequency range. |
| LEVEL | |
| 0-100 | Adjusts the volume of the entire preamp.* Be careful not to raise the Level setting too high. |
Using Insert Effects
| Parameter/ Range | Explanation |
| BRIGHT *3 | |
| Turns the bright setting on/off. | |
| OFF Bright is not used. | |
| ON | Bright is switched on to create a lighter and crisper tone. |
| DEEP *4 | |
| OFF, ON | This switch changes the character of the lower range. |
| ULTRA LO *5 | |
| -, 0, + | This controls the character of the lower range. |
| ULTRA HI *5 | |
| OFF, ON | This controls the ultra high-frequency range lying beyond treble. |
| PRE SHAPE *6 | |
| OFF, 1, 2 | This is a shape switch that adds a particular nuance to the midrange. |
| ENHANCER *7 | |
| 0-100 | This controls the clarity and presence of the sound. |
| RESPONSE *1 | |
| BASS, FLAT | This controls the overall amp characteristics. Select the position corresponding to the characteristics for one of the two types of sound. |
| SP TYPE (Speaker Type) | |
| Select the speaker type. | |
| OFF This turns | off the speaker simulator. |
| ORIGINAL | This is the built-in speaker of the amp you selected with PREAMP TYPE. |
| 1x15" | This is a compact open-back speaker cabinet with one 15-inch speaker. |
| 1x18" | This is a compact open-back speaker cabinet with one 18-inch speaker. |
| 2x15" | This is a general open-back speaker cabinet with two 15-inch speakers. |
| 4x10" | This is an optimal speaker cabinet for a large enclosed amp with four 10-inch speakers. |
| 8x10" | This is a double stack of two cabinets, each with four 10-inch speakers. |
| MIC POS (Mic Position) | |
| This simulates the microphone position. | |
| CENTER | Simulates the condition that the microphone is set in the middle of the speaker cone. |
| Parameter/ Range | Explanation |
| 1–10 | Simulates the condition that the micro- phone is moved away from the center of the speaker cone. |
| MIC LEV (Mic Level) | |
| 0–100 | Adjusts the volume of the microphone. |
| D.LEVEL (Direct Level) | |
| 0–100 | Adjusts the volume of the direct sound. |
*1 Setting available when TYPE is set to FLIP TOP, B MAN, CONCERT 810, T.E., or SESSION.
*2 Setting available when TYPE is set to SUPER FLAT or AC BASS.
*3 Setting available when TYPE is set to FLIP TOP, CONCERT 810, or BASS 360.
*4 Setting available when TYPE is set to B MAN.
*5 Setting available when TYPE is set to CONCERT 810.
*6 Setting available when TYPE is set to T.E.
*7 Setting available when TYPE is set to SESSION.
EQUALIZER
This adjusts the tone as a equalizer. A parametric type is adopted for the high-middle and low-middle range.
| Parameter/ Range | Explanation |
| ON/OFF | |
| OFF, ON | Turns the EQUALIZER effect on/off. |
| LOW CUT (Low Cut Filter) | |
| FLAT, 55Hz-800Hz | This sets the frequency at which the low cut filter begins to take effect. When “FLAT” is selected, the low cut filter will have no effect. |
| LOW GAIN | |
| -20-+20dB | Adjusts the low frequency range tone. |
| LOW-MID F (Low Middle Frequency) | |
| 20.0Hz-10.0kHz | Specifies the center of the frequency range that will be adjusted by the LO-MID G. |
| LOW-MID Q (Low Middle Q) | |
| 0.5-16 | Adjusts the width of the area affected by the EQ centered at the LO-MID F. Higher values will narrow the area. |
| LOW-MID G (Low Middle Gain) | |
| -20-+20dB | Adjusts the low-middle frequency range tone. |
| HI-MID F (High Middle Frequency) | |
| 20.0Hz-10.0kHz | Specifies the center of the frequency range that will be adjusted by the HI-MID G. |
| HI-MID Q (High Middle Q) | |
| 0.5-16 | Adjusts the width of the area affected by the EQ centered at the HI-MID F. Higher values will narrow the area. |
| HI-MID G (High Middle Gain) | |
| -20-+20dB | Adjusts the high-middle frequency range tone. |
| HIGH GAIN | |
| -20-+20dB | Adjusts the high frequency range tone. |
| HIGH CUT (High Cut Filter) | |
| 700Hz-11.0kHz, FLAT | This sets the frequency at which the high cut filter begins to take effect. When “FLAT” is selected, the high cut filter will have no effect. |
| LEVEL | |
| -20-+20dB | Adjusts the overall volume level of the equalizer. |
NOISE SUPPRESSOR
This effect reduces the noise and hum picked up by guitar pickups. Since it suppresses the noise in synchronization with the envelope of the guitar sound (the way in which the guitar sound decays over time), it has very little effect on the guitar sound, and does not harm the natural character of the sound.
| Parameter/ Range | Explanation |
| ON/OFF | |
| OFF, ON | Turns the NOISE SUPPRESSOR effect on/ off. |
| THRESHOLD | |
| 0–100 | Adjust this parameter as appropriate for the volume of the noise.If the noise level is high, a higher setting is appropriate. If the noise level is low, a lower setting is appropriate. Adjust this value until the decay of the guitar sound is as natural as possible.*High settings for the threshold parameter may result in there being no sound when you play with your guitar volume turned down. |
| RELEASE | |
| 0–100 | Adjusts the time from when the noise suppressor begins to function until the noise level reaches “0.” |
MODULATION
Use TYPE to select the effect that you want to use.
| Parameter/ Range | Explanation | |
| ON/OFF | ||
| OFF, ON | Turns the MODULATION effect on/off. | |
| MOD TYPE (Modulation Type) | ||
| This selects the type of modulation.* The available types will depend on the algorithm. For details on the types that can be used with each algorithm, refer to “Algorithm List” (p. 60). | ||
| ENHANCER | Enhancer P.73 | |
| GTR SIM Guitar Simulator P.73 | ||
| BASS SIM Bass Simulator P.74 | ||
| SLOW GEAR Slow Gear P.74 | ||
| DEFRETTER Defretter P.74 | ||
| SITAR SIM Sitar Simulator p. 76 | ||
| OCTAVE Octave p. 76 | ||
| P SHIFTER Pitch Shifter p. 76 | ||
| PHASER Phaser | p. 77 | |
| FLANGER | Flanger | p. 77 |
| TREMOLO | Tremolo | p. 77 |
| ROTARY | Rotary | p. 78 |
| UNI-V | Uni-Vibe | p. 78 |
| PAN | Pan | p. 78 |
| VIBRATO Vibrato | p. 78 | |
| RING MOD | Ring Modulator | p. 78 |
| CHORUS | Chorus | p. 79 |
| DBL DELAY | Doubling Delay | p. 79 |
ENHANCER
This is an effect that clarifies the contour of the input sound by emphasizing the attack of the sound following changes in the input level.
| Parameter/ Range | Explanation |
| SENS (Sensitivity) | |
| 0–100 | This adjusts the Enhancer sensitivity. The more the value is increased, the more softly you can play and still have the effect applied. |
| LOW FREQ (Low Frequency) | |
| 31.5Hz–125Hz | Sets the low frequency range for the enhanced sound. |
| Parameter/ Range | Explanation |
| LOW LEVEL | |
| 0–100 | Adjusts the enhancer volume for the low frequency range. |
| HIGH FREQ (High Frequency) | |
| 800Hz– 8.00kHz | Sets the high frequency range for the enhanced sound. |
| HIGH LEVEL | |
| 0–100 | Adjusts the enhancer volume for the high frequency range. |
GTR SIM (Guitar Simulator)
Simulation of the characteristics of particular guitar components such as pickups and different guitar bodies allows you to switch among a number of different guitar types all while using a single guitar.
| Parameter/ Range | Explanation |
| TYPE | |
| Selects the type of the guitar simulator. | |
| S→H | Changes from a single-coil pickup tone to a humbucking pickup tone. |
| H→S | Changes from a humbucking pickup tone to a single-coil pickup tone. |
| H→HF | Changes from a humbucking pickup tone to a single-coil pickup half tone. |
| S→HOLLOW | Changes a single-coil pickup tone to a full-acoustic guitar tone with the body resonance added. |
| H→HOLLOW | Changes a humbucking pickup tone to a full-acoustic guitar tone with the body resonance added. |
| LOW | |
| -50→+50 | Adjusts the tone for the low frequency range. |
| HIGH | |
| -50→+50 | Adjusts the tone for the High frequency range. |
| BODY | |
| 0–100 | Adjusts the way the body sounds when Type is set to S → HOLLOW or H → HOLLOW.The body sound increases as the value is raised; reducing the value produces a tone similar to that from a piezo pickup. |
| LEVEL | |
| 0–100 | Adjusts the volume. |
BASS SIM (Bass Simulator)
Simulation of the characteristics of particular bass components such as pickups and different bass bodies allows you to switch among a number of different bass types all while using a single bass.
| Parameter/ Range | Explanation |
| TYPE | |
| Selects the type of the bass simulator. | |
| PAS→ACT | Changes from a passive type pickup tone to an active type pickup tone. |
| ACT→PAS | Changes from an active type pickup tone to a passive type pickup tone. |
| SGL→HUM | Changes from a single-coil pickup tone to a humbucking pickup tone. |
| HUM→SGL | Changes from a humbucking pickup tone to a single-coil pickup tone. |
| SLD→HLW | Changes a solid body bass tone to a hollow body bass tone with the body resonance added. |
| SGL→ACO | Changes a single-coil pickup tone to an acoustic bass tone. |
| HUM→ACO | Changes a humbucking pickup tone to an acoustic bass tone. |
| LOW | |
| -50→+50 | Adjusts the tone for the low frequency range. |
| HIGH | |
| -50→+50 | Adjusts the tone for the high frequency range |
| BODY | |
| 0–100 | Adjusts the way the body sounds when Type is set to SLD→HLW, SGL→ACO, or HUM→ACO.The body sound increases as the value is raised; reducing the value produces a tone similar to that from a piezo pickup. |
| LEVEL | |
| 0–100 | Adjusts the volume. |
SLOW GEAR
This produces a volume-swell effect ("violin-like" sound).
| Parameter/Range | Explanation |
| SENS (Sensitivity) | |
| 0–100 | Adjusts the sensitivity of the slow gear. When it is set to a lower value, the effect of the slow gear can be obtained only with a stronger picking, while no effect is obtained with a weaker picking.When the value is set higher, the effect is obtained even with a weak picking. |
| RISE TIME | |
| 0–100 | Adjusts the time needed for the volume to reach its maximum from the moment you begin picking. |
DEFRETTER
This simulates a fretless bass guitar.
| Parameter/Range | Explanation |
| TONE | |
| -50—+50 | Adjusts the amount of blurring between the notes. |
| SENS (Sensitivity) | |
| 0–100 | This controls the input sensitivity of the defretter. |
| ATTACK | |
| 0–100 | Adjusts the attack of the picking sound. |
| E.LEVEL (Effect Level) | |
| 0–100 | Adjust the volume of the defretter sound. |
| D.LEVEL (DIRECT Level) | |
| 0–100 | Adjust the volume of the direct sound. |
SITAR SIM (Sitar Simulator)
This simulates the sound of the sitar.
| Parameter/Range | Explanation |
| TONE | |
| -50—+50 | This adjusts the tone.The high end is boosted as the value increases. |
| SENS (Sensitivity) | |
| 0–100 | Adjusts the sensitivity of the sitar.When it is set to a lower value, no effect of the sitar is obtained with weaker picking, while stronger picking produces the effect.When it is set to a higher value, the effect of the sitar can be obtained whether the pick-ing is weak or strong. |
| DEPTH | |
| 0–100 | This adjusts the amount of effect applied. |
| RESONANCE | |
| 0–100 | This adjusts the undulation of the resonance. |
| BUZZ | |
| 0–100 | Adjusts the amount of characteristic buzz produced by the “buzz bridge” when the strings make contact with it. |
| E.LEVEL (Effect Level) | |
| 0–100 | Adjust the volume of the sitar sound. |
| D.LEVEL (Direct Level) | |
| 0–100 | Adjust the volume of the direct sound. |
OCTAVE
This adds a note one octave lower, creating a richer sound.

Because of the need to analyze the pitch, chords (two or more sounds played simultaneously) cannot be played.
| Parameter/Range | Explanation |
| OCT LEVEL (Octave Level) | |
| 0–100 | Adjusts the volume of the sound one octave below. |
| D.LEVEL (Direct Level) | |
| 0–100 | Adjusts the volume of the direct sound. |
P SHIFTER
This effect changes the pitch of the original sound (up or down) within a range of two octaves.
| Parameter/Range | Explanation |
| TYPE | |
| Selects either manual pitch shifter “MANUAL” or pedal pitch shifter “PEDAL.” | |
| MANUAL This | is a simple pitch shifter. |
| PEDAL | The effect will function as a pedal pitch shifter.The effect of the wah pedal can be obtained by operating the Expression pedal.For a detailed explanation, see “Using an Expression Pedal” (p. 133). |
| MODE | |
| Selection for the pitch shifter mode. | |
| FAST,MEDIUM,SLOW | The response is slower in the order of FAST, MEDIUM and SLOW, but the modulation is lessened in the same order. |
| PITCH | |
| -24–+24 | Adjusts the amount of pitch shift (the amount of interval) in semitone steps. |
| FINE | |
| -50–+50 | Make fine adjustments to the interval.The amount of the change in the Fine 100 is equivalent to that of the Pitch 1. |
| PRE DELAY | |
| 0ms–300ms | Adjusts the time from when the direct sound is heard until the pitch shifted sounds are inputted. Normally you can leave this set at 0ms. |
| FBK (Feedback) | |
| 0–100 | Adjusts the feedback amount of the pitch shift sound. |
| LEVEL | |
| 0–100 | Adjusts the volume of the pitch shifter |
| D.LEVEL (Direct Level) | |
| 0–100 | Adjusts the volume of the direct sound. |
PHASER
By adding varied-phase portions to the direct sound, the phaser effect gives a whooshing, swirling character to the sound.
| Parameter/Range | Explanation |
| TYPE | |
| Selects the number of stages that the phaser effect will use. | |
| 4 STAGE | This is a four-phase effect. A light phaser effect is obtained. |
| 8 STAGE | This is an eight-phase effect. It is a popular phaser effect. |
| 12 STAGE | This is a twelve-phase effect. A deep phase effect is obtained. |
| BI-PHASE | This is the phaser with two phase shift circuits connected in series. |
| RATE | |
| 0–100 | This sets the rate of the phaser effect. |
| DEPTH | |
| 0–100 | Determines the depth of the phaser effect. |
| MANUAL | |
| 0–100 | Adjusts the center frequency of the phaser effect. |
| RESONANCE | |
| 0–100 | Determines the amount of resonance (feedback). Increasing the value will emphasize the effect, creating a more unusual sound. |
| STEP RATE | |
| OFF, 0–100 | This sets the cycle of the step function that changes the rate and depth.When it is set to a higher value, the change will be finer. Set this to “OFF” when not using the Step function. |
| E.LEVEL (Effect Level) | |
| 0–100 | Adjusts the volume of the phaser. |
| D.LEVEL (Direct Level) | |
| 0–100 | Adjusts the volume of the direct sound. |
FLANGER
The flanging effect gives a twisting, jet-airplane-like character to the sound.
| Parameter/ Range | Explanation |
| RATE | |
| 0-100 | This sets the rate of the flanging effect. |
| DEPTH | |
| 0-100 | Determines the depth of the flanging effect. |
| MANUAL | |
| 0-100 | Adjusts the center frequency at which to apply the effect. |
| RESONANCE | |
| 0-100 | Determines the amount of resonance (feedback). Increasing the value will emphasize the effect, creating a more unusual sound. |
| SEPARATION | |
| 0-100 | Adjusts the diffusion. The diffusion increases as the value increases. |
| E.LEVEL (Effect Level) | |
| 0-100 | Adjusts the volume of the flanger. |
| D.LEVEL (Direct Level) | |
| 0-100 | Adjusts the volume of the direct sound. |
TREMOLO
Tremolo is an effect that creates a cyclic change in volume.
| Parameter/Range | Explanation |
| WAVE SHAPE | |
| 0–100 | Adjusts changes in volume level.A higher value will steepen wave's shape. |
| RATE | |
| 0–100 | Adjusts the frequency (speed) of the change. |
| DEPTH | |
| 0–100 | Adjusts the depth of the effect. |
Using Insert Effects
ROTARY
This produces an effect like the sound of a rotary speaker.
| Parameter/ Range | Explanation |
| SPEED SEL (Speed Select) | |
| SLOW, FAST | This parameter changes the simulated speaker's rotating speed (SLOW or FAST). |
| RATE-SLOW | |
| 0-100 | This parameter adjusts the SPEED SEL of rotation when set to "SLOW." |
| RATE-FAST | |
| 0-100 | This parameter adjusts the SPEED SEL of rotation when set to "FAST." |
| RISE TIME | |
| 0-100 | This parameter adjusts the time it takes for the rotation SPEED SEL to change when switched from "SLOW" to "FAST." |
| FALL TIME | |
| 0-100 | This parameter adjusts the time it takes for the rotation SPEED SEL to change when switched from "FAST" to "SLOW." |
| DEPTH | |
| 0-100 | This parameter adjusts the amount of depth in the rotary effect. |
UNI-V (Uni-Vibe)
This models a Uni-Vibe.
Although this resembles a phaser effect, it also provides a unique undulation that you can't get with a regular phaser.
| Parameter/ Range | Explanation |
| RATE | |
| 0–100 | Adjusts the rate of the UNI-V effect. |
| DEPTH | |
| 0–100 | Adjusts the depth of the UNI-V effect. |
| LEVEL | |
| 0–100 | Adjusts the volume. |
PAN
With the volume level of the left and right sides alternately changing, when playing sound in stereo, you can get an effect that makes the guitar sound appear to fly back and forth between the speakers.
| Parameter/ Range | Explanation |
| WAVE SHAPE | |
| 0–100 | Adjusts changes in volume level.A higher value will steepen wave's shape. |
| RATE | |
| 0–100 | Adjusts the frequency (speed) of the change. |
| DEPTH | |
| 0–100 | Adjusts the depth of the effect. |
VIBRATO
This effect creates vibrato by slightly modulating the pitch.
| Parameter/ Range | Explanation |
| RATE | |
| 0–100 | Adjusts the rate of the vibrato. |
| DEPTH | |
| 0–100 | Adjusts the depth of the vibrato. |
RING MOD (Ring Modulator)
This creates a bell-like sound by ring-modulating the guitar sound with the signal from the internal oscillator. The sound can be unmusical and lack distinctive pitches.
| Parameter/ Range | Explanation |
| FREQUENCY | |
| 0–100 | Adjusts the frequency of the internal oscillator. |
| E.LEVEL (Effect Level) | |
| 0–100 | Adjusts the volume of the effect sound. |
| D.LEVEL (Direct Level) | |
| 0–100 | Adjusts the volume of the direct sound. |
CHORUS
In this effect, a slightly detuned sound is added to the original sound to add depth and breadth.
| Parameter/Range | Explanation |
| MODE | |
| Selection for the chorus mode. | |
| MONO | This chorus effect outputs the same sound from both L channel and R channel. |
| STEREO1 | This is a stereo chorus effect that adds different chorus sounds to L channel and R channel. |
| STEREO2 | This stereo chorus uses spatial synthesis, with the direct sound output in the L channel and the effect sound output in the R channel. |
| RATE | |
| 0–100 | Adjusts the rate of the chorus effect. |
| DEPTH | |
| 0–100 | Adjusts the depth of the chorus effect. To use it for doubling effect, set the value to 0. To use it for doubling effect, set the value to 0. |
| PRE DELAY | |
| 0.0ms–40.0ms | Adjusts the time needed for the effect sound to be output after the direct sound has been output.By setting a longer pre delay time, you can obtain an effect that sounds like more than one sound is being played at the same time (doubling effect). |
| E.LEVEL (Effect Level) | |
| 0–100 | Adjusts the volume of the effect sound. |
DBL DELAY (Doubling Delay)
By adding a slightly time-delayed sound to the direct sound, this produces the impression that multiple sources are sounding together (a "doubling" effect). Best results will be achieved when stereo recording.
| Parameter/Range | Explanation |
| DLY TME (Delay Time) | |
| 0.5–50.0 ms | This parameter adjusts the delay time (i.e., the interval for which sound is delayed). |
| SEPARATION | |
| -50–+50 | Adjusts the diffusion. The panning of the direct sound and effect sound can be spread to left and right.This effect is obtained with stereo recording (using two tracks). |
| E.LEVEL (Effect Level) | |
| 0–120 | This adjusts the volume of the delay sound. |
DELAY
This effect adds delayed sound to the direct sound, giving more body to the sound or creating special effects.
| Parameter/Range | Explanation |
| ON/OFF | |
| OFF, ON | Turns the DELAY effect on/off. |
| TYPE | |
| This selects which type of delay. | |
| STANDARD This is a simple delay. | |
| PAN | This delay is specifically for stereo output.This allows you to obtain the tap delay effect that divides the delay time, then deliver them to L and R channels.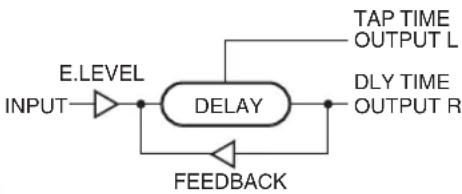 |
| DLY TIME (Delay Time) | |
| 1ms–3400ms | This determines the delay time. |
| FEEDBACK | |
| 0–100 | This sets the amount of delay sound returned to the input.A higher value will increase the number of the delay repeats?Feedback is returning a delay signal to the input. |
| HIGH CUT (High Cut Filter) | |
| 700Hz–11kHz,FLAT | This sets the frequency at which the high cut filter begins to take effect. When “FLAT” is selected, the high cut filter will have no effect. |
| E.LEVEL (Effect Level) | |
| 0–120 | Adjusts the volume of the delay sound. |
| D.LEVEL (Direct Level) | |
| 0–100 | Adjusts the volume of the direct sound. |
| TAP TIME | |
| 0–100% | Adjusts the delay time of the left channel delay.This setting adjusts the L channel delay time relative to the R channel delay time (considered as 100%). |
*1 Setting available when TYPE is set to PAN.
ACOUSTIC SIMULATOR
Simulation of the characteristics of particular guitar components such as pickups and different guitar bodies allows you to switch among a number of different guitar types all while using a single guitar.
| Parameter/Range | Explanation |
| ON/OFF | |
| OFF, ON | Turns the ACOUSTIC SIMULATOR effect on/off. |
| TYPE | |
| Selects the type of the acoustic simulator. | |
| S→AC | Changes a single-coil pickup tone to an acoustic guitar tone. |
| H→AC | Changes a humbucking pickup tone to an acoustic guitar tone. |
| LOW | |
| -50→+50 | Adjusts the tone for the low frequency range. |
| HIGH | |
| -50→+50 | Adjusts the tone for the high frequency range |
| BODY | |
| 0–100 | Adjusts the way the body sounds when Type is set to S → AC or H → AC.The body sound increases as the value is raised; reducing the value produces a tone similar to that from a piezo pickup. |
| LEVEL | |
| 0–100 | Adjusts the volume. |
GUITAR TO BASS
Simulates the sound of a bass guitar. Obtain the sound of a bass guitar while playing an electric guitar.

You should avoid playing chords when using the GUITAR TO BASS.
| Parameter/Range | Explanation |
| ON/OFF | |
| OFF, ON | Turns the GUITAR TO BASS effect on/off. |
| TYPE | |
| Select the type of GUITAR TO BASS processor. | |
| JB The sound of a Fender Jazz Bass. | |
| PB The sound of a Fender Precision Bass. | |
| REAR VOL (Rear Volume) *1 | |
| 0-100 | Sets the volume of the rear pickup. With a setting of 0, there will be no sound. |
| FRONT VOL (Front Volume) *1 | |
| 0-100 | Sets the volume of the front pickup. With a setting of 0, there will be no sound. |
| TONE | |
| 0-100 | Adjusts the tone. |
| LEVEL | |
| 0-100 | Adjusts the volume. |
*1 Setting available when TYPE is set to JB.
ACOUSTIC PROCESSOR
This transforms the pickup output of an electro-acoustic guitar into a richer sound, as though it had been recorded using a microphone.
| Parameter/ Range | Explanation |
| ON/OFF | |
| OFF, ON | Turns the ACOUSTIC PROCESSOR effect on/off. |
| TYPE | |
| Select the type of acoustic processor. | |
| BRIGHT | This is a bright sound that emphasizes the string resonances. |
| WARM | This is a warm sound that emphasizes the body resonances. |
| BODY | |
| 0-100 | This adjusts the sound of the body resonances. It controls the tonal warmth that is distinctive of an acoustic guitar. |
| LEVEL | |
| 0-100 | Adjusts the volume. |
PITCH CORRECT
Corrects inaccuracies in the pitch.
With certain settings, pitch correct can make the pitch change in a coarse "stair-step" fashion to produce a mechanical vocal tone.
| Parameter/Range | Explanation |
| ON/OFF | |
| OFF, ON | Turns the PITCH CORRECT effect on/off. |
| TYPE | |
| Select the type of PITCH CORRECT. | |
| SOFT The pitch | will be corrected smoothly. |
| HARD The pitch | will be corrected quickly. |
| ELECTRIC | Corrects pitch variation to a stair-step change. |
| ROBOT Corrects | the pitch to the specified note. |
| SCALE *1 | |
| CHROMATIC | The pitch is corrected to the nearest chromatic semitone. |
| MAJ (MIN) | The pitch is corrected according to the Key setting. |
| KEY *2 | |
| C-B, Cm-Bm | Specifies the key of the song you're singing. |
| NOTE *3 | |
| C-B | Fixes the pitch. |
| GENDER | |
| -10-0-+10 | Changes your voice to a masculine or feminine character. |
| OCTAVE | |
| -1OCT, 0,+1OCT | Specifies the amount by which the pitch will change. |
*1 Setting available when TYPE is set to SOFT, HARD, or ELECTRIC.
*2 Setting available when SCALE is set to MAJ (MIN).
*3 Setting available when TYPE is set to ROBOT.
DYNAMICS
Makes the volume more consistent.
| Parameter/ Range | Explanation |
| ON/OFF | |
| OFF, ON | Turns the DYNAMICS effect on/off. |
| DEPTH | |
| 0–100 | Adjusts the depth of DYNAMICS. |
| ENHANCE | |
| 0–10 | Adjusts the depth of the Enhance effect. Higher settings will give the sound sharper definition. |
TONE/SFX
Adjusts the tonal character or applies special effects.
| Parameter/ Range | Explanation |
| ON/OFF | |
| OFF, ON | Turns the TONE/SFX effect on/off. |
| TYPE | |
| DISTORTION | Produces a distorted voice. |
| RADIO Produces | a radio voice. |
| STROBE Finely slices the voice. | |
| CHORUS Adds richness to the voice. | |
| FLANGER Adds a “swooshing” modulation. | |
| DRIVE *1 | |
| 0–100 | Adjusts the degree of distortion. |
| TONE *1 | |
| -50–0–+50 | Adjusts the tonal character. |
| SPEED *2 | |
| 0–100 | Specifies the speed. |
| DEPTH *3 | |
| 0–100 | Adjusts the depth of CHORUS. |
*1 Setting available when TYPE is set to DISTORTION.
*2 Setting available when TYPE is set to STROBE or FLANGER.
*3 Setting available when TYPE is set to CHORUS.
DOUBLE/HARMONY
Produces a double-tracked effect or harmony effect. You can layer up to two parts (PART 1 and PART 2).

What is double-tracking?
This is a popular recording studio technique in which a vocalist records a melody, then overdubs a second performance of the same melody along with the first recording. When the two performances are played back together, it gives the effect of a thick and rich single voice.
| Parameter/Range | Explanation |
| ON/OFF | |
| OFF, ON | Turns the DOUBLE/HARMONY effect on/off. |
| PART1TYPE | |
| DOUBLE | Produces a double-tracking effect. |
| Parameter/ Range | Explanation |
| -1OCT- +1OCT | If you've specified the key of your song, harmony that is suitable for that key will be added at the interval you specify here. |
| UNISON | By changing the vocal character, this produces the impression that another person is singing the same melody along with you. |
| PART1DBL (Part 1 Double) *1 | |
| LIGHT, NORMAL, DEEP | Adjusts the intensity of the Double effect in three levels (LIGHT / NORMAL / DEEP). |
| PART1LEVEL *2 | |
| 0-100 | Adjusts the volume of the part. |
| PART1GENDER *2 | |
| -10-0-+10 | Transforms the voice by giving it a masculine or feminine character. |
| PART1PAN | |
| L50-CENTER-R50 | Specifies the panning (stereo position) of the sound. |
| PART2TYPE | |
| DOUBLE | Produces a double-tracking effect. |
| -1OCT- +1OCT | If you've specified the key of your song, harmony that is suitable for that key will be added at the interval you specify here. |
| UNISON | By changing the vocal character, this produces the impression that another person is singing the same melody along with you. |
| PART2DBL (Part 2 Double) *1 | |
| LIGHT, NORMAL, DEEP | Adjusts the intensity of the Double effect in three levels (LIGHT / NORMAL / DEEP). |
| PART2LEVEL *2 | |
| 0-100 | Adjusts the volume of the part. |
| PART2GENDER *2 | |
| -10-0-+10 | Transforms the voice by giving it a masculine or feminine character. |
| PART2PAN | |
| L50-CENTER-R50 | Specifies the panning (stereo position) of the sound. |
| KEY *2 | |
| C-B, Cm-Bm | Specifies the key of the song you're singing. |
*1 Setting available when TYPE is set to DOUBLE.
*2 Setting available when TYPE is set to -1OCT - +1OCT or UNISON.
LOW CUT
This filter cuts out vocal pop and other unwanted low-band noise.
| Parameter/ Range | Explanation |
| ON/OFF | |
| OFF, ON | Turns the LOW CUT effect on/off. |
| DEPTH | |
| 20 –2000 Hz | This parameter sets the frequency below which vocal pop and other undesirable lower-range noises will be filtered out. |
LO-FI
This effect is used to produce a lo-fi sound.
| Parameter/ Range | Explanation |
| ON/OFF | |
| OFF, ON | Turns the LO-FI effect on/off. |
| TYPE | |
| Select the type of lo-fi box. | |
| RADIO | The audio will sound as if it is being played on an AM radio.By adjusting “TUNING,” you can simulate the transient sounds that would occur as you adjust the radio’s tuning frequency. |
| VINYL | The audio will sound as if it is being played on a gramophone.Needle noise caused by scratches and dust on the record is also simulated. |
| DIGITAL | This setting allows you to create a lo-fi sound by lowering the sample rate and/or decreasing the number of bits.A bank of series-connected real-time modify filters allow the sound to be freely reshaped. |
| TUNING *1 | |
| 0–100 | This parameter is used with the RADIO setting.It simulates the transient sounds that would occur as you adjust the AM radio’s tuning frequency. |
| WOW FLUTTER *2 | |
| 0–100 | This parameter is used with the VINYL setting.It simulates the wow and flutter that occur when the speed of the turntable is not constant. |
| NOISE *3 | |
| 0–100 | This parameter is used to simulate noise. |
| Parameter/ Range | Explanation |
| FILTER *3 | |
| 0-100 This parameter adjusts the filter. | |
| D:E *3 | |
| 100:0-0:100 | This adjusts the balance of the direct and effect volumes. |
| PRE FILTER *4 | |
| OFF, ON | This filter reduces the amount of digital distortion. When turned off, it allows you to create an intense lo-fi sound that includes digital distortion. |
| SAMPLE RATE *4 | |
| OFF, 1/2-1/32 | This parameter allows you to modify the sampling rate. |
| BIT *4 | |
| OFF, 15-1 | Modifies the number of data bits. When turned off, the number of data bits will remain unchanged.If an extremely low number of bits is selected, certain input sources may result in loud noises being input, even when there is no input sound. In such a case, raise the noise suppressor's threshold. |
| POST FILTER *4 | |
| OFF, ON | This filter reduces the amount of digital distortion produced by the lo-fi. By turning this off, you can create an extremely lo-fi sound. |
| E.LEVEL (Effect Level) *4 | |
| 0-100 | Adjusts the overall volume of the lo-fi sound. |
| D.LEVEL (Direct Level) *4 | |
| 0-100 | Adjusts the volume of the direct sound. |
| MODIFY FIL (Modify Filter) *4 | |
| Select the effect of modify filter. | |
| OFF No modify filter will be used. | |
| LPF A low-pass filter will be used. | |
| BPF A band-pass filter will be used. | |
| HPF A high-pass filter will be used. | |
| CUTOFF F *4 | |
| 0-100 | This parameter adjusts the cutoff frequency. |
| RESONANCE *4 | |
| 0-100 | This parameter adjusts the resonance. |
| GAIN *4 | |
| 0- +24 dB | Adjusts the volume level of the sound that has passed through the modify filter. |
*1 Setting available when TYPE is set to RADIO.
*2 Setting available when TYPE is set to VINYL.
*3 Setting available when TYPE is set to RADIO or VINYL.
*4 Setting available when TYPE is set to DIGITAL.
Adding a Sense of Spaciousness
By making use of the BR-800's onboard "Loop Effects," you can add a sense of spaciousness and depth to your sounds. You can adjust the effect depth by adjusting the send level from each input or track to the loop effect.
Since each input and track has its own independent send level, you can make adjustments separately; for example, you might apply deep reverberation to the vocal, but shallow reverberation to the drums.
Adjusting the Loop Effect Depth
Here's how to adjust the send level of each track to change the depth of the loop effect.
1
Press the [TRACK] button.
2
Use the CURSOR [W] buttons to move the cursor to "REVERB" or "CHO/DLY," and press the [ENTER] button.
The send level edit screen will appear.
For REVERB
![00:00:00-00:00 001-01 REVERB EDIT:[+] USB 30 1 2 3 4 5/67/8 RHY INPUT](/content/2026/05/810967/images/36bb2aa6172dd02f9b89bca1eb1d13615884646fff42c54d7cb2b29be2397706.jpg)
For CHO/DLY
![00:00:00-00:0 001-01 CHORUS (CHO/DLY) EDIT:[&] GUITAR 1 2 3 4 5/67/8 RHY INPUT](/content/2026/05/810967/images/c4d6f06a7e757fe894a20d5e6ffbced433376a3f78a07d17cbdf37f5a79b900c.jpg)
3
Use the CURSOR [ ] buttons and the dial to adjust the send level of each track.
* You can move the cursor to each track by pressing that track's track [REC] button. To adjust the send level of the input source, move the cursor to "INPUT." To adjust the send level of the rhythm, move the cursor to "RHY." Then use the dial to edit the setting.
4
When you've finished adjusting the send levels, press the [EXIT] button a number of times to return to the play screen.
Editing the Loop Effect
1
Press the [TRACK] button.
2
Use the CURSOR [ ] buttons to move the cursor to "REVERB" or "CHO/DLY," and press the [ENTER] button.
The send level screen will appear.
![00:00:00-00:0 001-01 REVERB EDIT:[E] USB 1 2 3 4 5/67/8 RHY INPUT](/content/2026/05/810967/images/36dfb5d71b1e16c6c25e9f1ab50d206a2712939c4f2dfbe2ea28fda06c211198.jpg)
3
Press the [ENTER] button.
The loop effect parameter edit screen will appear.
For REVERB
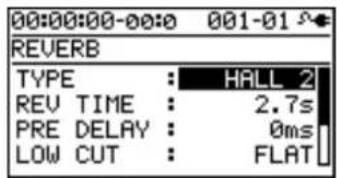
For CHO/DLY
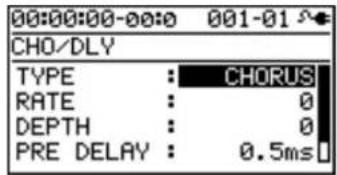
4
Use the CURSOR [ ] buttons to select a parameter, and use the dial to edit the value.

For details on the parameters for each effect, refer to "Parameter List" (p. 85).
5
When you've finished editing, press the [EXIT] button a number of times to return to the play screen.

The loop effect does not have "patches." Loop effect settings are saved as part of the song data.
Parameter List
REVERB
This effect adds reverberation to the sound.
| Parameter/ Range | Explanation |
| TYPE | |
| Select the type of reverb. Various different simulations of space are offered. | |
| AMBIENCE | Simulates an ambience microphone (off-mic, placed at a distance from the sound source) used in recording and other applications. Rather than emphasizing the reverberation, this reverb is used to produce a sense of openness and depth. |
| ROOM | Simulates the reverberation in a small room. Provides warm reverberations. |
| HALL 1 | Simulates the reverberation in a concert hall. Provides clear and spacious reverber- ations. |
| HALL 2 | Simulates the reverberation in a concert hall. Provides mild reverberations. |
| PLATE | Simulates plate reverberation (a reverb unit that uses the vibration of a metallic plate). Provides a metallic sound with a distinct upper range. |
| SPRING | This simulates the sound of a guitar amp's built-in spring reverb. |
| MODULATE | This reverb adds the wavering sound found in hall reverb to provide an extremely pleasant reverb sound. |
| REV TIME (Reverb Time) | |
| 0.1s-10.0s | Adjusts the length (time) of reverberation. |
| PRE DELAY | |
| 0ms-500ms | Adjusts the time until the reverb sound ap- pears. |
| LOW CUT (Low Cut Filter) | |
| FLAT, 55Hz-800Hz | This sets the frequency at which the low cut filter begins to take effect. When "FLAT" is selected, the low cut filter will have no ef- fect. |
| HIGH CUT (High Cut Filter) | |
| 700Hz-11kHz, FLAT | This sets the frequency at which the high cut filter begins to take effect. When "FLAT" is selected, the high cut filter will have no effect. |
| DENSITY | |
| 0-10 | Adjusts the density of the reverb sound. |
| Parameter/ Range | Explanation |
| E.LEVEL (Effect Level) | |
| 0-100 | Adjusts the volume of the reverb sound. |
| SPRG SENS (Spring Sensitivity) *1 | |
| 0-100 | Adjusts the sensitivity of the spring reverb effect. When the value is set higher, the effect is obtained even with a weak picking. |
*1 Setting available when TYPE is set to SPRING.
CHORUS/DELAY
| Parameter/ Range | Explanation |
| TYPE | |
| Select the type of effect. | |
| CHORUS | A sound with a subtly shifted pitch is added to the direct sound, making the final output sound thicker and broader. |
| DELAY | This creates a thicker sound by applying a delayed sound to the direct sound. |
| RATE *1 | |
| 0 – 100 | Adjusts the rate of the Chorus effect. |
| DEPTH *1 | |
| 0 – 100 | Adjusts the depth of the Chorus effect. |
| PRE DLY (Pre Delay) *1 | |
| 0.5 – 50.0ms | Adjusts the time needed for the effect sound to be output after the direct sound has been output. |
| E.LEVEL (Effect Level) *1 | |
| 0 – 100 | Adjusts the volume of the effect sound. |
| DLY TME (Delay Time) *2 | |
| 10 – 1000ms | This parameter adjusts the delay time (i.e., the interval for which sound is delayed). |
| FEEDBACK *2 | |
| 0 – 100 | This parameter adjusts the amount of feedback. Changing the amount of feedback causes the number of time the delayed sound is repeated to change as well. |
| E.LEVEL (Effect Level) *2 | |
| 0 – 100 | This adjusts the volume of the delay sound. |
| REV SEND (Reverb SEND) *2 | |
| 0 – 100 | Adjust the volume of the reverb that is applied to the delayed sound. |
*1 Setting available when TYPE is set to CHORUS.
*2 Setting available when TYPE is set to DELAY.
Adjusting the Tone of Each Track
The BR-800 provides a three-band equalizer that's independent for each track. You can use this to adjust the tone quality of each track.
Editing the Track EQ
1 Press the [TRACK] button.
2 Use the CURSOR [ ] buttons to move the cursor to "EQ," and press the [ENTER] button. The EQ edit screen will appear.
![00:00:00-00:0 001-01 EQ EDIT:[E] OFF OFF OFF OFF OFF OFF 1 2 3 4 5/6 7/8](/content/2026/05/810967/images/fabb1dedfd907ed46b049d0a0d256e47a204c02dd5f01f39bba5571920f5f380.jpg)
3 Use the CURSOR [ ] buttons and the dial to turn each track's EQ on or off.
* You can move the cursor to each track by pressing that track's Track [REC] button.
4 Press the [ENTER] button. The EQ parameter edit screen will appear.
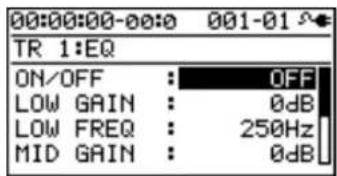
5 Use the CURSOR [▲] buttons to select a parameter, and use the dial to edit the value.

For more about the track EQ parameters, refer to "Parameter List" (p. 86).
6 When you've finished editing, press the [EXIT] button a number of times to return to the play screen.

The track EQ does not have "patches." Track EQ settings are saved as part of the song data.
Parameter List
| Parameter/ Range | Explanation |
| ON/OFF | |
| OFF, ON | Turns the EQUALIZER effect on/off. |
| LOW GAIN | |
| -12–+12dB | Adjusts the low frequency range tone. |
| LOW FREQ (Low Frequency) | |
| 40Hz–1.6kHz | Specifies the center of the frequency range that will be adjusted by the LOW GAIN. |
| MID GAIN (Middle Gain) | |
| -12–+12dB | Adjusts the middle frequency range tone. |
| MID FREQ (Middle Frequency) | |
| 20Hz–10kHz | Specifies the center of the frequency range that will be adjusted by the MID GAIN. |
| MID Q (Middle Q) | |
| 0.5–16 | Adjusts the width of the area affected by the EQ centered at the MID FREQ. Higher values will narrow the area. |
| HIGH GAIN | |
| -12–+12dB | Adjusts the high frequency range tone. |
| HIGH FREQ (High Frequency) | |
| 400Hz–16kHz | Specifies the center of the frequency range that will be adjusted by the HIGH GAIN. |

If you adjust the equalizer while listening to the sound, you may notice a clicking noise. This is not a malfunction. If the noise is objectionable, make adjustments while the sound is not playing.
Using Rhythm
Overview of the Rhythm Section
The BR-800 provides a dedicated rhythm generator that is separate from the audio tracks 1–7/8.
You can use this rhythm as a guide during recording, or create an original rhythm backing by arranging various internal rhythms to match the structure of your song.
Patterns and Arrangements
Broadly speaking, the BR-800's rhythms consist of "patterns" and "arrangements."
Patterns
Typically, a drummer playing in a band repeatedly plays fixed sequences one or two measures in length. On the BR-800, these basic repeated units are called "patterns."
An example of a pattern
For a four-beat rhythm, performance data such as the following will be played repeatedly.
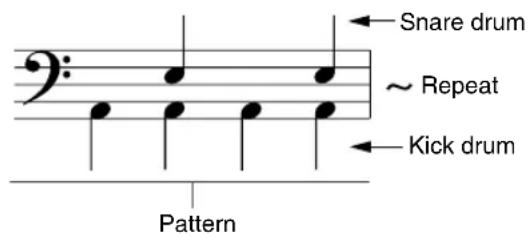
Song patterns (S001-S100)
One hundred patterns can be stored for each song on an SD card.
Preset patterns (P001-P327)
The BR-800 provides 327 "preset patterns" (P001–P327) that are suitable for various musical styles such as rock or jazz.
* You can't edit these patterns or rewrite the data.

For details on how to play patterns, refer to "Playing Patterns" (p. 91).
MEMO
The preset patterns include patterns for intro, verse, fill, and ending. The various types can be distinguished by the characters at the end of the pattern name.
(Ex)
ROCK1-IN (intro)
ROCK1-V1 (verse 1)
ROCK1-V2 (verse 2)
ROCK1-F1 (fill 1)
ROCK1-F2 (fill 2)
ROCK1-E (ending)

"Preset Pattern List" (p. 153)
IN (intro)
These patterns are suitable for an intro (introduction).
V (verse) 1, 2
These are the main patterns.
1 is the basic pattern, and 2 is a variation of 1.
F (fill) 1, 2
These are ornamental patterns inserted between phrase changes. Choose 1 or 2 depending on the pattern that will follow the fill.
E (ending)
These patterns are suitable for the end of a song.
* You can't edit the preset patterns or rewrite the data.
Using BR-800 Rhythm Editor
By using "BR-800 Rhythm Editor" you can create your own original patterns, arrangements, and drum kits using a computer.
"BR-800 Rhythm Editor" is provided on the "BR-800 DVD-ROM." For details on where to find "BR-800 Rhythm Editor," refer to "ReadmeEN.txt" on the "BR-800 DVD-ROM."
* You won't be able to create patterns or drum kits using just the BR-800.
* You must install the USB driver before you connect the BR-800 to your computer (p. 120).
■ Arrangements
Although a pattern can be used by itself like a metronome to guide your practicing, that would mean that the rhythm does not change from the beginning to the end of the song. If you want to create a song that has musical variation, you'll want to place different patterns in an appropriate order such as intro → chorus → break → ending.
On the BR-800, data that places patterns in a specific order for performance is called an “arrangement.”
| IntroTempo: 120.0 | VerseTempo: 110.0 | FillTempo: 130.0 |

Preset arrangements (P01-P50)
The BR-800 contains fifty "preset arrangements" (P01–P50) that are suitable for styles such as rock or jazz.
* You can't edit the preset arrangements or rewrite the data.
The preset arrangements (except for Metro 4/4) have a three measure BREAK (rest) following E (ending), and will then repeat V1 (verse 1).

"Preset Arrangement List" (p. 152)
Song arrangements (S01-S05)
You can store five arrangements for each song on an SD card.

In order to play arrangements, the BR-800 must be in Arrangement mode.
For more about this, refer to "Playing an Arrangement" (p. 93).
About the Drum Sounds (Drum Kits)
Typically, a drum performance uses a set that includes a variety of percussion instruments (such as kick drum and snare drum) suitable for that musical style.
The BR-800 provides nine different drum sets that are suitable for various styles. Each set is called a "drum kit."
Turning the Rhythm On/Off

Press the [RHYTHM] button.
The [RHYTHM] button will light, and the rhythm will turn on.
When you press the [RHYTHM] button once again, the [RHYTHM] button will go out; rhythm will be off.
Switching between Pattern Mode and Arrangement Mode
The BR-800 lets you use rhythm in either of two modes: Pattern mode and Arrangement mode.
Pattern mode
The selected pattern will play repeatedly from the beginning to the end of the song.
Arrangement mode
Patterns will switch as the song progresses, according to the order of patterns specified in the arrangement.

Press the [RHYTHM] button.

Use the CURSOR [ ] buttons to move the cursor to "TYPE."
When in Pattern mode
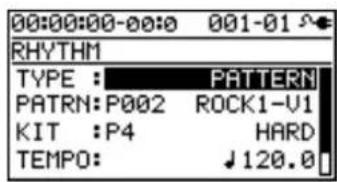
When in Arrangement mode
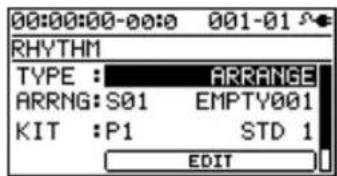

Turn the dial to select the desired rhythm mode.
| Setting Explanation |
| PATTERN Pattern mode is selected. |
| ARRANGE Arrangement mode is selected. |

Press the [EXIT] button a number of times to return to the play screen.
Playing Patterns
Here's how to select one of the internal patterns and make it play repeatedly.
1
Press the [RHYTHM] button.
The [RHYTHM] button will light, indicating that Rhythm is turned on.
2
Use the CURSOR [ ] buttons to move the cursor to "TYPE."
3
Turn the dial to select "PATTERN."
4
Use the CURSOR [ ] buttons to move the cursor to "PATRN."
5
Use the CURSOR [ ] buttons and the dial to select the pattern that you want to play.
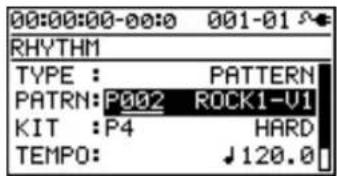
| Setting | Explanation |
| P001-P327 | Preset patterns 1-327 |
| S001-S100 Song patterns 1-100 *1 | |
*1 On your computer, you can create your own original patterns using "BR-800 Rhythm Editor."

"Using BR-800 Rhythm Editor" (p. 88)
6
Press the [EXIT] button a number of times to return to the play screen.
7
Press the [PLAY] button.
The recorder will begin playback, and the rhythm will also play.
8
Use the [RHYTHM] fader and the [MASTER] fader to adjust the volume appropriately.
9
To stop playback, press the [STOP] button.

- When the BR-800 is shipped from the factory, the song patterns (S001–S100) contain no data, so nothing will play even if you select them.
- The pattern "P327: BREAK" contains only rests. No sounds will be heard if you select this pattern.
Changing the Tempo
Here's how to change the pattern playback tempo when you're in the play screen.
1
Use the CURSOR [▲] buttons to move the cursor to the tempo indication.
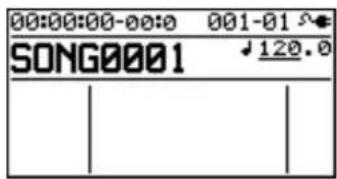
2
Turn the dial to adjust the tempo.
The pattern playback tempo will change.
Using [TAP TEMPO] Button to Set the Tempo
You can change the pattern playback tempo by pressing the [TAP TEMPO] button at the desired timing.
Press the [TAP TEMPO] button at least four times in succession; the tempo will be set to the timing at which you pressed the button.
![BOSS BR-800 - Using [TAP TEMPO] Button to Set the Tempo - 1](/content/2026/05/810967/images/7cd4272dd7fed23dbf1dabc71d76ec60036d8fbc386f57d36249bc3ba2c3a131.jpg)
NOTE
- The pattern tempo will be saved when recording ends or when you save the song (p. 111). One tempo setting is saved for each song.
- The tempo is common to all patterns. You can't specify a different tempo for each pattern.
- You can adjust the tempo in a range of 25.0–250.0.
Playing an Arrangement
Here's how to select and play one of the internal arrangements.
1
Press the [RHYTHM] button.
The [RHYTHM] button will light, indicating that Rhythm is on.
2
Use the CURSOR [ ] buttons to move the cursor to "TYPE."
3
Turn the dial to select "ARRANGE."
4
Use the CURSOR [ ] buttons to move the cursor to "ARRNG."
5
Use the CURSOR [◀] buttons and the dial to choose the arrangement that you want to play.
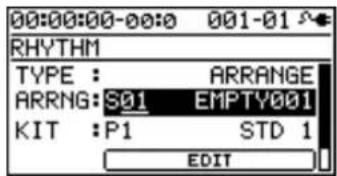
| Setting Explanation |
| P01-P50 Preset arrangements 1-50 |
| S01-S05 Song arrangements 1-5 |
6
Press the [EXIT] button a number of times to return to the play screen.
7
Press the [ZERO] button.
You will return to the beginning of the song.
8
Press the [PLAY] button.
The recorder will begin playing, and the selected arrangement will also play.
9
Use the [RHYTHM] fader and the [MASTER] fader to adjust the volume appropriately.
10
To stop playback, press the [STOP] button.

When the unit left the factory, "Metro" (Metronome) was set for the Song Arrangements (S01--S05).
Changing the Tempo
Here's how to change the playback tempo of an arrangement when you're in the play screen.
1
Use the CURSOR [▲] buttons to move the cursor to the tempo indication.
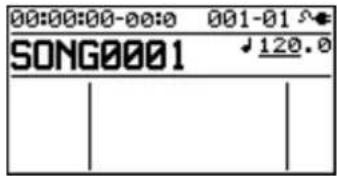
2
Use the dial to adjust the tempo.
The arrangement's playback tempo will change.
Using [TAP TEMPO] Button to Set the Tempo
You can temporarily change the arrangement playback tempo by pressing the [TAP TEMPO] button at the desired timing.
Press the [TAP TEMPO] button at least four times in succession; the tempo will be set to the timing at which you pressed the button.
![BOSS BR-800 - Using [TAP TEMPO] Button to Set the Tempo - 1](/content/2026/05/810967/images/d77d52b34c9233a6855e7d8dc863f3531cadbf9b65aa8abd1ab5b416fcdd304f.jpg)
NOTE
- The tempo that's specified for the arrangement will be temporarily ignored.
- The tempo change is temporary. If you want to change the tempo of the arrangement and save it, refer to "Creating an Original Arrangement" (p. 96).
- You can adjust the tempo in a range of 25.0–250.0.
Changing the Drum Sounds (Drum Kit)
A drum kit is a set containing various rhythm instrument sounds. The BR-800 contains nine "preset drum kits."
By using "BR-800 Rhythm Editor" you can create five of your own original drum kits. Drum kits are saved for each song on the SD card.

"Using BR-800 Rhythm Editor" (p. 88)
The arrangements and patterns are played using the instrumental sounds of the drum kit.
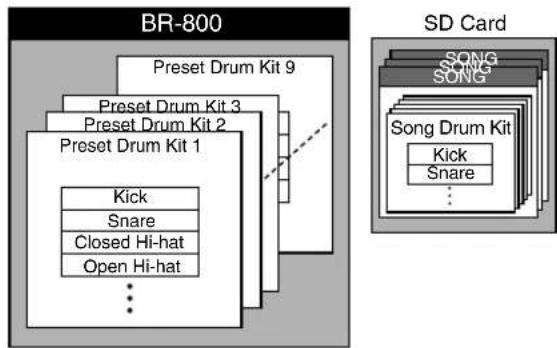
flowchart
graph TD
    subgraph BR-800
        A["Preset Drum Kit 1"] --> B["Preset Drum Kit 2"]
        B --> C["Preset Drum Kit 3"]
        C --> D["Preset Drum Kit 9"]
        E["Kick"] --> F["Closed Hi-hat"]
        G["Snare"] --> H["Open Hi-hat"]
        I["..."] --> J["..."]
    end
    subgraph SD Card
        K["SONG"] --> L["Song Drum Kit"]
        M["SONG"] --> N["Song Drum Kit"]
        O["SONG"] --> P["Song Drum Kit"]
        Q["Song"] --> R["Song Drum Kit"]
        S["Song"] --> T["Song Drum Kit"]
        U["Song"] --> V["Song Drum Kit"]
        W["Song"] --> X["Song Drum Kit"]
        Y["Song"] --> Z["Song Drum Kit"]
        AA["Song"] --> AB["Song Drum Kit"]
        AC["Song"] --> AD["Song Drum Kit"]
        AE["Song"] --> AF["Song Drum Kit"]
        AG["Song"] --> AH["Song Drum Kit"]
        AI["Song"] --> AJ["Song Drum Kit"]
        AK["Song"] --> AL["Song Drum Kit"]
        AM["Song"] --> AN["Song Drum Kit"]
        AO["Song"] --> AP["Song Drum Kit"]
        AQ["Song"] --> AR["Song Drum Kit"]
        AS["Song"] --> AT["Song Drum Kit"]
        AU["Song"] --> AV["Song Drum Kit"]
        AW["Song"] --> AX["Song Drum Kit"]
        AY["Song"] --> AZ["Song Drum Kit"]
        BA["Song"] --> BB["Song Drum Kit"]
        BC["Song"] --> BD["Song Drum Kit"]
        BE["Song"] --> BF["Song Drum Kit"]
        BG["Song"] --> BH["Song Drum Kit"]
        BI["Song"] --> BJ["Song Drum Kit"]
        BK["Song"] --> BL["Song Drum Kit"]
        BM["Song"] --> BN["Song Drum Kit"]
        BO["Song"] --> BP["Song Drum Kit"]
        BQ["Song"] --> BR["BR-800"]

- The drum kit is stored for each arrangement.
- The drum kit cannot be changed if a Preset Arrangement is selected for Arrange mode.
Selecting a Drum Kit

Press the [RHYTHM] button.

Use the CURSOR [ ] buttons to move the cursor to "KIT."
In Pattern mode
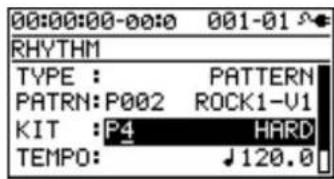
In Arrangement mode
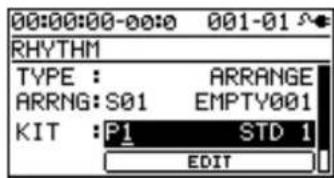

Turn the dial to select a drum kit.
| Setting | Explanation | |
| P1 | STD 1 | Standard drum kits |
| P2 STD 2 | ||
| P3 ROOM | A drum kit with an appropriate amount of ambience | |
| P4 HARD | A drum kit suitable for hard rock | |
| P5 JAZZ A drum kit suitable for jazz | ||
| P6 HIP-HOP | A drum kit suitable for dance music | |
| P7 HOUSE | ||
| P8 REGGAE A drum kit suitable for reggae | ||
| P9 808 | A drum kit based on the classic Roland TR-808 rhythm machine | |
| S1 SongKit1 | The original drum kits stored in each song | |
| S2 SongKit2 | ||
| S3 SongKit3 | ||
| S4 SongKit4 | ||
| S5 SongKit5 | ||

Press the [EXIT] button a number of times to return to the play screen.
Creating an Original Arrangement
The BR-800 lets you place patterns in the desired order to make an arrangement, thus creating the structure of your entire song from intro to ending. Once you've created an arrangement, you can save it as a song arrangement.
An arrangement can contain up to 999 measures.
MEMO
Steps
You create a song arrangement by specifying "steps." Each step consists of a pattern number and the measure number at which that step will start.
For example, suppose you want to create a song that has the following structure:
Section Measure length Pattern
Intro 2 measures Pattern P001
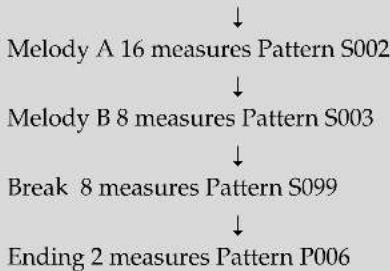
flowchart
graph TD
    A["Melody A 16 measures Pattern S002"] --> B["Melody B 8 measures Pattern S003"]
    B --> C["Break 8 measures Pattern S099"]
    C --> D["Ending 2 measures Pattern P006"]
To create the song structure described above, you would place the following steps in the arrangement.
Step number Starting measure Pattern number
Step 1 1 P001: ROCK-1 IN
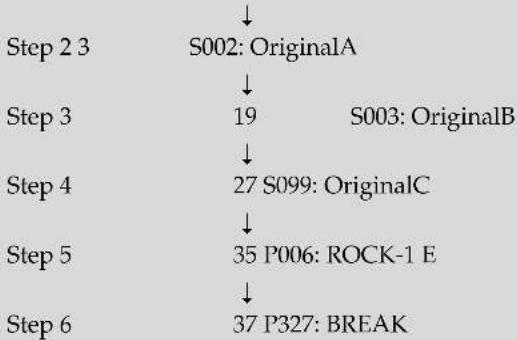
flowchart
graph TD
    A["Step 2 3"] --> B["S002: OriginalA"]
    B --> C["Step 3"]
    C --> D["19"]
    D --> E["S003: OriginalB"]
    E --> F["Step 4"]
    F --> G["27 S099: OriginalC"]
    G --> H["Step 5"]
    H --> I["35 P006: ROCK-1 E"]
    I --> J["Step 6"]
    J --> K["37 P327: BREAK"]
The sections of even a long song's structure can be specified using only a few steps. The BR-800 lets you use up to fifty steps.
Now let's try actually creating an arrangement.
1
Press the [RHYTHM] button.
The [RHYTHM] button will light.
2
Use the CURSOR [ ] buttons to move the cursor to "TYPE."
3
Turn the dial to select "ARRANGE."
4
Use the CURSOR [ ] buttons to move the cursor to "EDIT," and press the [ENTER] button.
* If you select a preset arrangement, you won't be able to continue with the rest of this procedure.
5
Use the CURSOR [ ] buttons to move the cursor to "STEP," and press the [ENTER] button.
The ARRANGE STEP screen will appear.
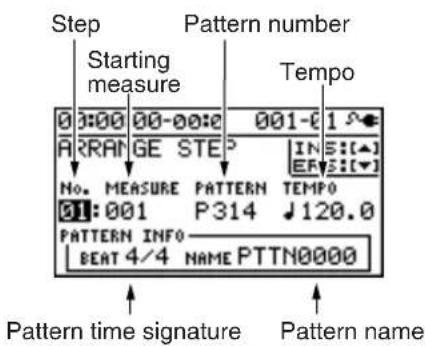
6
Use the CURSOR [◀] buttons to move the cursor to the "step" position, and use the dial to select the step that you want to edit.
You can move to the previous step by pressing the [REW] button, or to the next step by pressing the [FF] button.
7
Use the CURSOR [ ] buttons to move the cursor to the parameter that you want to edit, and use the dial to edit the value.
By pressing the [PLAY] button you can audition the pattern of the currently selected step (the current pattern).
Starting measure
This specifies the measure at which the current pattern will begin playing.
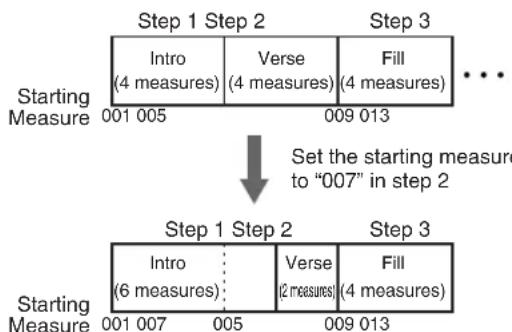
flowchart
graph TD
    A["Starting Measure 001 005"] --> B["Step 1 Step 2"]
    B --> C["Intro (4 measures)"]
    B --> D["Verse (4 measures)"]
    B --> E["Fill (4 measures)"]
    F["Step 3 009 013"] --> G["Set the starting measure to "007" in step 2"]
    G --> H["Step 1 Step 2"]
    H --> I["Intro (6 measures)"]
    H --> J["Verse (2 measures)"]
    H --> K["Fill (4 measures)"]
    L["Step 3 009 013"] --> M["Step 1 Step 2"]
    M --> N["Intro (6 measures)"]
    M --> O["Verse (2 measures)"]
    M --> P["Fill (4 measures)"]
Pattern number
This selects the pattern. As shown in the illustration below, it specifies the pattern for each step.
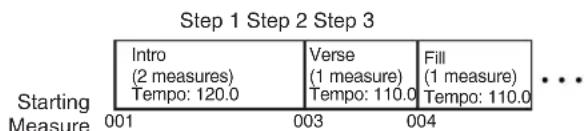
Time signature
This indicates the time signature of the current pattern.
Tempo
This specifies the tempo at which the current pattern will play.
Range: 25.0–250.0
8
When you're finished creating the arrangement, press the [EXIT] button a number of times.
You will return to the play screen, and the arrangement you created will be saved.
* The display will indicate "Keep power on!" while the data is being updated. Do not turn off the power while this message is shown.
NOTE
- The starting measure of step 1 will always be "001." You can't change this.
- The starting measure cannot be the same as the previous step or any earlier measure.
- You can't make a setting that would extend beyond the starting measure of the next step.
- When you play back an arrangement in the play screen, and it has played all the way to the end of the arrangement, the pattern assigned to the last step will continue repeating.
If you want the arrangement to stop playing at the last step, assign preset pattern "P327 BREAK (rest)" to the last step. This will cause rests to be played repeatedly, which is essentially the same as stopping arrangement playback.
(Ex.)
| Step 1 Step 2 | ... | Step 20 | Last step | |
| Intro | Verse | Ending | P327 BREAK | |
Inserting a Step
Here's how to insert a new step at the current step.
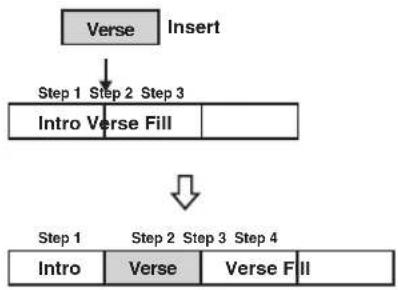
flowchart
graph TD
    A["Verse"] --> B["Insert"]
    B --> C["Step 1 Step 2 Step 3"]
    C --> D["Intro Verse Fill"]
    D --> E["Step 1 Step 2 Step 3 Step 4"]
    E --> F["Intro Verse Fill"]
1
Access the ARRANGE STEP screen as described in steps 1–5 of "Creating an Original Arrangement" (p. 96).
2
Use the CURSOR [ ] buttons and the dial to select the location (step number) at which you want to insert a step.
![00:00:00-00:0 001-01 ARRANGE STEP [INS:] [ERS:] No. MEASURE PATTERN TEMPO 31:001 P314 ↓120.0 PATTERN INFO BEAT 4/4 NAME Metro4/4](/content/2026/05/810967/images/f9adcd405393b50dacc38f7f1b576a514ca17e87735d80fc3aafd374b7b1d0c7.jpg)
3
Press the CURSOR [ ]button.
A message will ask "Insert?"
4
Press the [ENTER] button.
The selected step will be copied and inserted. When the operation has been completed, you will automatically return to the ARRANGE STEP screen.
Erasing a Step
Here's how to erase the selected step. The erased step will inherit the contents of the following step.
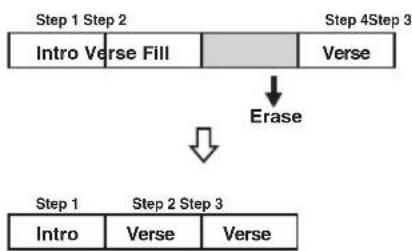
flowchart
graph TD
    A["Step 1 Step 2"] --> B["Intro Verse Fill"]
    B --> C["Verse"]
    C --> D["Erase"]
    D --> E["Step 1 Step 2 Step 3"]
    E --> F["Intro"]
    E --> G["Verse"]
    E --> H["Verse"]
1
Access the ARRANGE STEP screen as described in steps 1–5 of "Creating an Original Arrangement" (p. 96).
2
Use the CURSOR [◀] buttons and the dial to select the step that you want to erase.
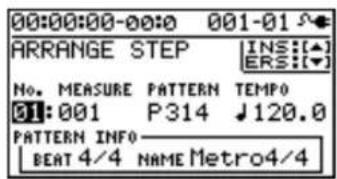
3
Press the CURSOR [button.
A message will ask "Erase?"
4
Press the [ENTER] button.
The data will be erased. When the operation has been completed, you will automatically return to the ARRANGE STEP screen.
Naming an Arrangement
You can freely assign a name (arrangement name) of up to eight characters to a song arrangement.
1
Press the [RHYTHM] button.
2
Use the CURSOR [ ] buttons to move the cursor to "TYPE."
3
Turn the dial to select "ARRANGE."
4
Use the CURSOR [ ] buttons to move the cursor to "ARRNG."
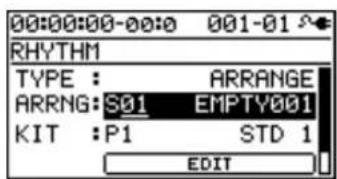
5
Use the CURSOR [ ] buttons and the dial to select a song arrangement (S01-05).
6
Use the CURSOR [ ] buttons to move the cursor to "EDIT," and press the [ENTER] button.
7
Use the CURSOR [ ] buttons to move the cursor to "NAME," and press the [ENTER] button. The ARRANGE NAME screen will appear.
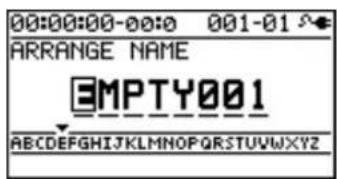
8
Use the CURSOR [ ] buttons and the dial to edit the characters.
9
Press the [EXIT] button a number of times to return to the play screen.
The screen will indicate "Keep power on!" and the edited arrangement name will be saved.

You can't edit the name of a preset arrangement.
Copying an Arrangement
If you want to slightly modify a preset arrangement, or create a variation of an existing arrangement, you can do so by copying it as a song arrangement and then editing the copy.
1 Press the [RHYTHM] button.
2 Use the CURSOR [W] buttons to move the cursor to "TYPE."
3 Turn the dial to select "ARRANGE."
4 Use the CURSOR [ ] buttons to move the cursor to "ARRNG."
5 Use the CURSOR [ ] buttons and the dial to select the copy-source arrangement (P01-P50, S01-05).
6 Use the CURSOR [W] buttons to move the cursor to "EDIT," and press [ENTER].
7 Use the CURSOR [▲] buttons to move the cursor to "COPY," and press the [ENTER] button. The ARRANGE COPY screen will appear.
![00:00:00-00:0 001-01 ARRANGE COPY IEXEC:[4] COPY TO:S01 EMPTY001](/content/2026/05/810967/images/c33c47981eaee02b3b27fa9d515158d67348cb283062a1915f0e836649f2cbd1.jpg)
8 Use the dial to select the copy-destination song arrangement (S01–S05).
9 Press the [ENTER] button. The copy confirmation screen will appear.
![Are you sure? [EXIT]:CANCEL [ENTER]:OK](/content/2026/05/810967/images/766e554588bca5279a57b034acecd51850e7dfcfc5a8254c7f16123139ee7c93.jpg)
10 Press the [ENTER] button once again. The screen will indicate "Keep power on!" and the copy will be executed.
11 Press the [EXIT] button a number of times to return to the play screen.
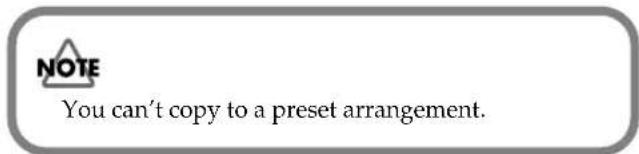
Erasing an Arrangement
Here's how to erase step 2 and all following steps of the song arrangement.
Step 1 will remain without being erased, and will be set to "Metro" (metronome).
1
Press the [RHYTHM] button.
2
Use the CURSOR [ ] buttons to move the cursor to "TYPE."
3
Turn the dial to select "ARRANGE."
4
Use the CURSOR [ ] buttons to move the cursor to "EDIT," and press the [ENTER] button.
5
Use the CURSOR [ ] buttons to move the cursor to "ERASE," and press the [ENTER] button. The ARRANGE ERASE screen will appear.
![00:00:00-00:0 001-01 ARRANGE ERASE [EXEC:] ERASE: S01 EMPTY001](/content/2026/05/810967/images/d70800deab7b60b28d469bf4b1a7a3089cfdebfcaf756cc21f74bb3cabcc702b.jpg)
6
Use the dial to select the song arrangement (S01–S05) that you want to erase.
7
Press the [ENTER] button.
A confirmation message will appear.
![ARE you sure? [EXIT]:CANCEL [ENTER]:OK](/content/2026/05/810967/images/0e566f06825f4d9610955302c57d27376c3928db3c416eb2ba080cf9c474aa14.jpg)
8
If you're sure that you want to erase the arrangement, press the [ENTER] button.
If you decide to cancel, press the [EXIT] button.
* The screen will indicate "Keep power on!" and the contents of the arrangement will be erased.
9
Press the [EXIT] button a number of times to return to the play screen.

You can't erase a preset arrangement.
Delaying the Pattern/ Arrangement Playback (OFFSET)
Here's how you can specify a time offset by which the pattern or arrangement will be delayed relative to the playback of the audio tracks.
1
Press the [RHYTHM] button.
2
Use the CURSOR [W] buttons to move the cursor to "OFFSET," and press the [ENTER] button.
![00:00:00-00:0 001-01 RHYTHM OFFSET (SET:[4] OFFSET: 00:00:00-00:0](/content/2026/05/810967/images/4dfa7cb8e487371882fdfa36f4c6788787671dd340c0ab93eaf3b5071cec9e83.jpg)
3
Use the CURSOR [◀] buttons and the dial to specify the desired offset time.
Range: 00:00:00-00:0-23:59:59-29:9
For example, if you want the pattern or arrangement to start when the audio tracks reach "00h00m30s00", then you would set this to "00:00:30:00".
MEMO
Pressing the [ENTER] button will assign the current time as this setting.
4
Press the [EXIT] button a number of times to return to the play screen.
MEMO
The offset is remembered for each song.
Editing
Finding the Location at which a Sound Begins or Ends (Scrub/Preview)
Scrub function
When editing a song, you might need to find the precise location at which a sound begins or the region on which you want to perform auto punch-in recording.
The BR-800 provides a "scrub" function that is a convenient way to find such locations.
Using the scrub function will repeatedly play an extremely short region (approximately 45 milliseconds) that starts or ends at the current location.
Preview function
The preview function plays approximately one second before or after the current location.
By using this function and the scrub function while you move the current location little by little, you can easily find the boundaries between phrases.
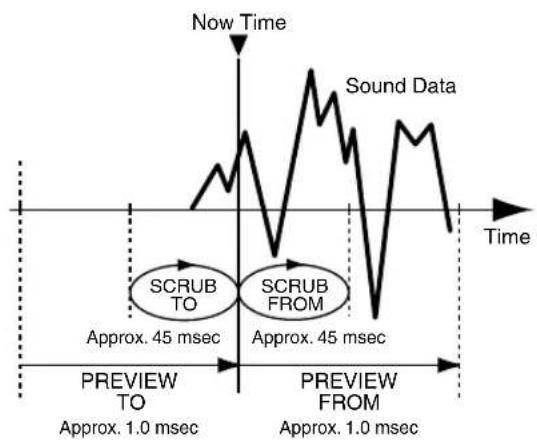
line
| Time Period | Event | Approx. msec | | ----------------- | ------------- | ------------ | | Before Preview | SCRUB TO | 45 | | After Preview | SCRUB FROM | 45 | | After Preview | Preview From | 1.0 |1
Hold down the [STOP] button and press the [PLAY] button.
The [PLAY] button will blink, and scrub playback will begin.
The tempo indication area will show either “SCRUB FROM” or “S(RUB TO), indicating the scrub point for the current location.
When the cursor is at the scrub point indication, you can use the dial to switch the scrub point.
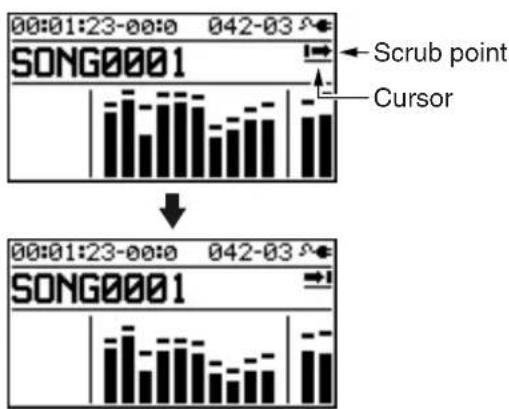
2
Turn the dial to move the current location little by little, and find the point at which the next phrase begins (i.e., the instant that the sound starts).
3
When you've found the precise location at which the sound starts, press the [STOP] button to stop scrub playback.
Use the preview function
- By pressing the [PLAY] button during scrub playback, you can preview the sound according to the currently specified scrub point.
PREVIEW FROM
→: PREVIEW TO
- By performing the following operations during scrub playback, you can preview the sound.
Press the [FF] button: PREVIEW FROM
Press the [REW] button: PREVIEW TO
Track Editing
You can copy or erase tracks, or import song sketch data.

The results of your track editing operations are saved to the song when you return to the play screen.
■ Copying track data
The specified source track data will be copied to the specified destination track. If recorded data exists at the destination of the copy, it will be overwritten by the data that was copied.
Example 1: Copying twice to the same track
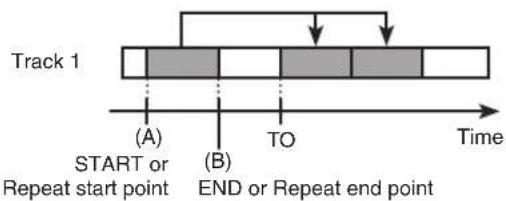
Example 2: Copying twice to a different track
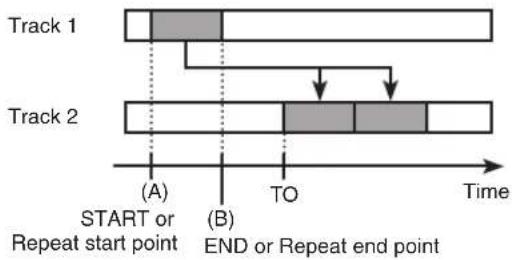
1 Press the [TRACK] button.
2 Use the CURSOR [ ] buttons to move the cursor to "TRACK EDIT," and press the [ENTER] button.
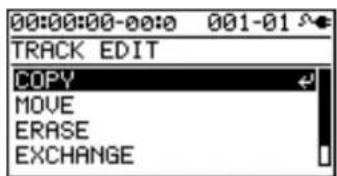
3 Use the CURSOR [ ] buttons to move the cursor to "COPY," and press the [ENTER] button.
![00:00:00-00:0 001-01 TRACK COPY [EXEC:] SOURCE: TRACK 1 - U1 DEST : TRACK 1 - U1 TYPE : TIME START : 00:00:00-00:0](/content/2026/05/810967/images/af36076bd076c91609411c3689c5822bcc4d0677371b1607de3b05ef81654adb.jpg)
4 Make the settings for performing a copy using the CURSOR buttons and the dial.
| Parameter | Explanation |
| SOURCE | |
| Select the copy-source track and V-track. | |
| DEST | |
| Select the copy-destination track and V-track. | |
| TYPE | |
| Select the type of copy.* The parameters displayed will depend on the type you select. | |
| AB (TIME) | The START and END will be the time locations you specified for AB Repeat (p. 43).TO is specified as a time location. |
| AB(MEASURE) | The START and END will be the time locations you specified for AB Repeat (p. 43).TO is specified as a measure. |
| TIME | Specify START, END, and TO as time locations. |
| MEASURE | Specify START, END, and TO as measures. |
| ALL (TIME) | The entire track will be copied.TO is specified as a time location. |
| ALL(MEASURE) | The entire track will be copied.TO is specified as a measure. |
| START | |
| Specify the start of the copy source. | |
| END | |
| Specify the end of the copy source. | |
| TO | |
| Specify the start of the copy destination. | |
| REPEAT | |
| Specify the number of repetitions (1–99). | |
5 To copy the data, press the [ENTER] button.
A message will ask "Are you sure?" If you decide to cancel the procedure, press the [EXIT] button.
Editing
6
Press the [ENTER] button.
The copy will be carried out.
* The display will indicate "Keep power on!" while the data is being updated. Do not turn off the power while this message is shown.
7
Press the [EXIT] button a number of times to return to the play screen.
■ Moving Track Data
This operation moves the data of the specified track.
If recorded data exists at the destination of the move, it will be overwritten by the data that was moved.
Example 1: Moving within the same track
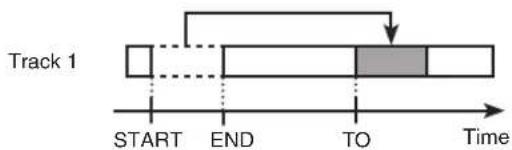
Example 2: Copying twice to a different track
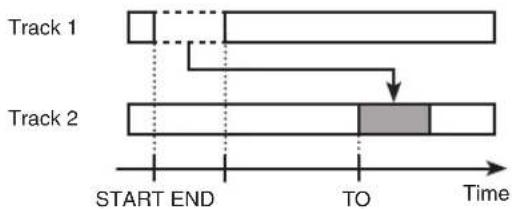
1
Press the [TRACK] button.
2
Use the CURSOR [ ] buttons to move the cursor to "TRACK EDIT," and press the [ENTER] button.
3
Use the CURSOR [ ] buttons to move the cursor to "MOVE," and press the [ENTER] button.
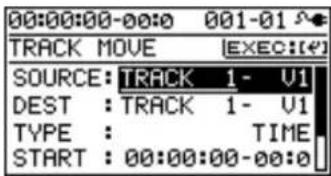
4
Make the settings for performing a move using the CURSOR buttons and the dial.
| Parameter | Explanation |
| SOURCE | |
| Select the move-source track and V-track. | |
| DEST | |
| Select the move-destination track and V-track. | |
| TYPE | |
| Select the type of move.* The parameters displayed will depend on the type you select. | |
| TIME | Specify START, END, and TO as time locations. |
| MEASURE | Specify START, END, and TO as measures. |
| ALL (TIME) | The entire track will be moved.TO is specified as a time location. |
| ALL(MEASURE) | The entire track will be moved.TO is specified as a measure. |
| START | |
| Specify the start of the move source. | |
| END | |
| Specify the end of the move source. | |
| TO | |
| Specify the start of the move destination. | |
5
To move, press the [ENTER] button.
A message will ask "Are you sure?"
If you decide to cancel the procedure, press the [EXIT] button.
6
Press the [ENTER] button.
The data will be moved.
* The display will indicate "Keep power on!" while the data is being updated. Do not turn off the power while this message is shown.
7
Press the [EXIT] button a number of times to return to the play screen.
■ Erasing track data
This operation erases data from the specified region.
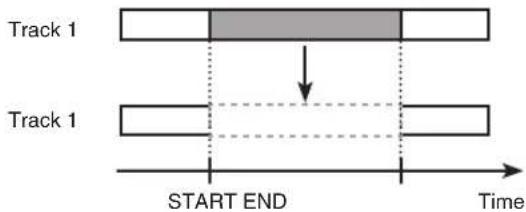
flowchart
graph TD
    A["Track 1"] --> B["Start"]
    B --> C["Track 1"]
    C --> D["Start"]
    D --> E["Track 1"]
    style A fill:#f9f,stroke:#333
    style B fill:#ccf,stroke:#333
    style C fill:#cfc,stroke:#333
    style D fill:#fcc,stroke:#333
    style E fill:#ffc,stroke:#333
1 Press the [TRACK] button.
2 Use the CURSOR [ ] buttons to move the cursor to "TRACK EDIT," and press the [ENTER] button.
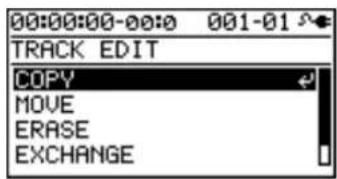
3 Use the CURSOR [ ] buttons to move the cursor to "ERASE," and press the [ENTER] button.
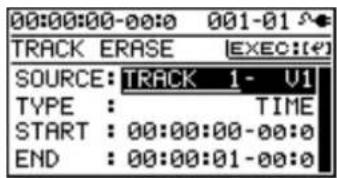
4 Make the settings for performing an erasure using the CURSOR buttons and the dial.
| Parameter | Explanation |
| SOURCE | |
| Select the erase-source track and V-track. | |
| TYPE | |
| Select the type of erasure.* The parameters displayed will depend on the type you select. | |
| TIME | Specify START and END as time locations. |
| MEASURE | Specify START and END as measures. |
| ALL The entire | track will be erased. |
| START | |
| Specify the start of the erase source. | |
| END | |
| Specify the end of the erase source. | |
5 To erase, press the [ENTER] button.
A message will ask "Are you sure?"
If you decide to cancel the procedure, press the [EXIT] button.
6 Press the [ENTER] button.
The data will be erased.
* The display will indicate "Keep power on!" while the data is being updated. Do not turn off the power while this message is shown.
7 Press the [EXIT] button a number of times to return to the play screen.
■ Exchanging Data
This operation exchanges data between two tracks.
Example: Exchanging the entire contents of tracks 1 and 2
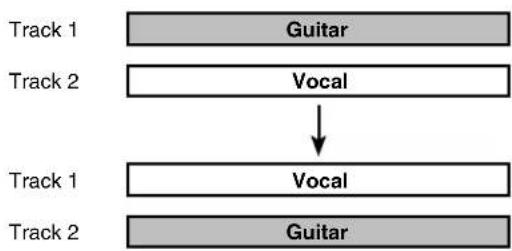
flowchart
graph TD
    A["Guitar"] --> B["Vocal"]
    C["Track 1"] --> D["Vocal"]
    E["Track 2"] --> F["Guitar"]
1 Press the [TRACK] button.
2 Use the CURSOR [ ] buttons to move the cursor to "TRACK EDIT," and press the [ENTER] button.
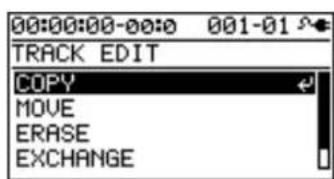
3 Use the CURSOR [▲] buttons to move the cursor to "EXCHANGE," and press the [ENTER] button.
![00:00:00-00:0 001-01 S TRACK EXCHANGE [EXEC:] SOURCE: TRACK 1 - U1 DEST : TRACK 1 - U1](/content/2026/05/810967/images/4ced72d10a5556c783a0fb1a87859757dd77fdd9b023a7961331e059501bac67.jpg)
Editing
4
Use the CURSOR buttons and the dial to select the tracks and V-tracks that you want to exchange.
5
To exchange, press the [ENTER] button.
A message will ask "Are you sure?"
If you decide to cancel the procedure, press the [EXIT] button.
6
Press the [ENTER] button.
The data will be exchanged.
* The display will indicate "Keep power on!" while the data is being updated. Do not turn off the power while this message is shown.
7
Press the [EXIT] button a number of times to return to the play screen.
■ Importing song sketch data into a track
1
Press the [TRACK] button.
2
Use the CURSOR [▲] buttons to move the cursor to "TRACK EDIT," and press the [ENTER] button.
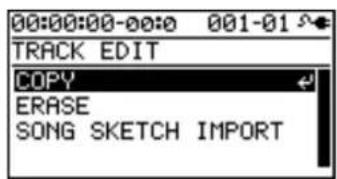
3
Use the CURSOR [ ] buttons to move the cursor to "SONG SKETCH IMPORT," and press the [ENTER] button.
4
Use the CURSOR buttons and the dial to specify how the data is to be imported.
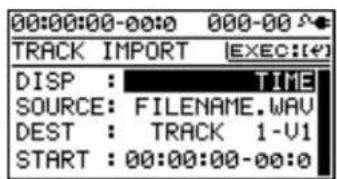
| Parameter | Explanation |
| DISP | Select the units indicated by START.Choose either TIME or MEASURE. |
| SOURCE | The song sketch data that will be im-ported |
| DEST | The track into which the data will be imported |
| START | The location at which the data will be inserted into the import-destination track. |
5
To import the data, press the [ENTER] button.
A message will ask "Are you sure?"
6
Press the [ENTER] button.
The data will be imported.
* While the data is being updated, the display will indicate "Keep power on!" Do not turn off the power while this message is shown.
7
Press the [EXIT] button a number of times to return to the play screen.
Copying a Song (SONG COPY)
Here's how to copy the currently selected song.
1
Press the [MENU] button.
2
Use the CURSOR [ ] buttons to move the cursor to "SONG," and press the [ENTER] button.
3
Use the CURSOR [ ] buttons to move the cursor to "COPY," and press the [ENTER] button. The SONG COPY screen will appear.
![00:00:00-00:0 001-01 SONG COPY [ENTER]:COPY](/content/2026/05/810967/images/f0207f644ca29d2a1b4abd1867a37407873639a132d6fffcaa1aac406a620e2f.jpg)
4
To copy the song, press the [ENTER] button. A message will ask "Are you sure?"
5
Press the [ENTER] button.
The copy will be executed. When the copy is completed, you will return to the play screen.

If the screen indicates "Card full!"
If this message appears before you copy, there is insufficient space on the SD card. Please delete unneeded data from the SD card.
Erasing a Song (SONG ERASE)
Here's how to erase a song from SD card.
1
Press the [MENU] button.
2
Use the CURSOR [ ] buttons to move the cursor to "SONG," and press the [ENTER] button.
3
Use the CURSOR [ ] buttons to move the cursor to "ERASE," and press the [ENTER] button. The SONG ERASE screen will appear.
![00:00:00-00:0 001-01 SONG ERASE |EXEC:[4] *SONG0001 SONG0002 SONG0003 SONG0004](/content/2026/05/810967/images/d2d81d087c0add8156f84cee147da3e218da57cf61d6a2670eb1716cdd41bc22.jpg)
4
Use the CURSOR [▲] buttons to select the song that you want to erase.
5
To erase the song, press the [ENTER] button. A message will ask "Are you sure?"
6
Press the [ENTER] button.
The song will be erased.
* While the data is being updated, the display will indicate "Keep power on!" Do not turn off the power while this message is shown.
7
Press the [EXIT] button a number of times to return to the play screen.

If you erase the song that you're currently using, a song from the SD card will automatically be selected. If no other song exists, a new song will be created.
Naming a Song (SONG NAME)
When you create a new song, it will automatically be given a name such as "SONG 0001." When you've finished a song, you should give it an appropriate name so that your song data will be easier to manage.
1
Press the [MENU] button.
2
Use the CURSOR [ ] buttons to move the cursor to "SONG," and press the [ENTER] button.
3
Use the CURSOR [ ] buttons to move the cursor to "NAME," and press the [ENTER] button. The SONG NAME screen will appear.
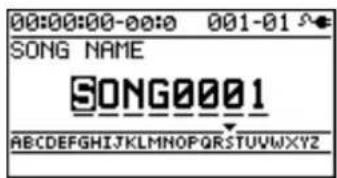
4
Use the CURSOR [◀] buttons to move the cursor to the character that you want to edit.
5
Turn the dial to select the desired character.
6
When you've finished specifying the song name, press the [EXIT] button a number of times to return to the play screen.
* While the data is being updated, the display will indicate "Keep power on!" Do not turn off the power while this message is shown.
Protecting a Song (SONG PROTECT)
A song you've created can be inadvertently recorded over or unintentionally erased.
To prevent such accidents, you can protect the song data from being rewritten (Song Protect).
If Song Protect is enabled, the following operations cannot be performed.
- Recording
- Track editing
- Changing the song name
- Song erase
• Rhythm editing
• Writing to the song effect patches - Undo/Redo
• Factory reset (SONG EFFECT/RHYTHM/ALL)
1
Press the [MENU] button.
2
Use the CURSOR [ ] buttons to move the cursor to "SONG," and press the [ENTER] button.
3
Use the CURSOR [ ] buttons to move the cursor to "PROTECT," and press the [ENTER] button. The SONG PROTECT screen will appear.
![00:00:00-00:0 001-01 SONG PROTECT [DIAL]:PROTECT OFF/ON](/content/2026/05/810967/images/574802ee0ac23d73064eaa96fa7bdc4f9ce1294784efb40fd1e11bce89a378ee.jpg)
4
Use the dial to select the "ON" setting.
5
Press the [EXIT] button a number of times to return to the play screen.
* While the data is being updated, the display will indicate "Keep power on!" Do not turn off the power while this message is shown. If a song is protected, the song protect symbol is shown in the screen.
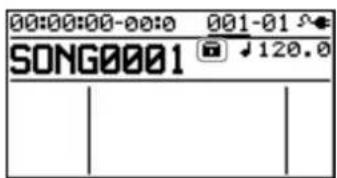
Saving a Song (SAVE CURRENT STATE)
On the BR-800, the following content is saved as song data.
- Recorded data
• The state of the mixer (pan, track EQ, etc.) - Arrangement/Pattern
- Loop effect
The above content is saved when you stop recording or when you return to the play screen.
The screen will show a message confirming the save, so you don't need to be specifically aware of this. However, if you want to save the song in its current state, proceed as follows.
1
Press the [MENU] button.
2
Use the CURSOR [ ] buttons to move the cursor to "SONG," and press the [ENTER] button.
3
Use the CURSOR [W] buttons to move the cursor to "SAVE CURRENT STATE," and press the [ENTER] button.
The SAVE CURRENT STATE screen will appear.
4
To save the song, press the [ENTER] button.
* While the data is being updated, the display will indicate "Keep power on!" Do not turn off the power while this message is shown.
5
Press the [EXIT] button a number of times to return to the play screen.
Saving Memory on the SD Card
When you overwrite or erase audio data by overdubbing, punch in/out recording, or track editing, this audio data will not actually be deleted from the SD card.
A significant amount of the SD card's storage space can end up being wasted as a result of this unnecessary data.
On the BR-800, such unnecessary data is erased from the SD card when you carry out the procedure for saving the song (SAVE CURRENT STATE).
The size of the song might be reduced after you've carried out this procedure, and in many cases some additional free space might be created on the SD card.
* Since the recording data needed for performing an undo won't be erased, you'll still be able to return to the previous state.
MEMO
Mastering
Using Mastering in Creating a Song
This chapter explains the process of mixing down your recorded tracks onto two tracks and applying a “mastering effect” to create a finished song with the optimal volume level.
The sound of the rhythm and of the input source selected by INPUT SELECT (p. 37) can also be combined at this time.
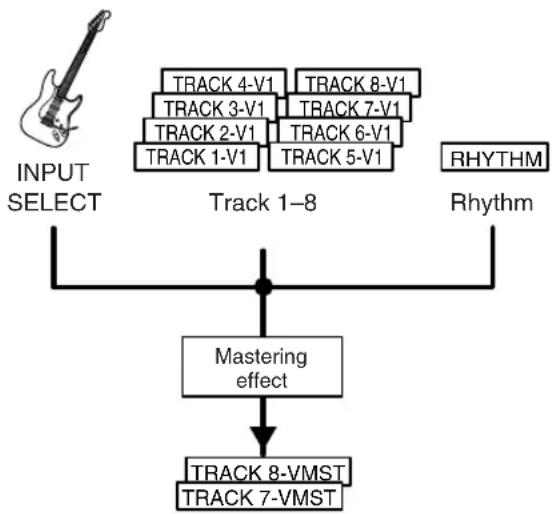
flowchart
graph TD
    A["INPUT SELECT"] --> B["Track 1-8"]
    B --> C["Rhythm"]
    B --> D["TRACK 4-V1"]
    B --> E["TRACK 3-V1"]
    B --> F["TRACK 2-V1"]
    B --> G["TRACK 1-V1"]
    B --> H["TRACK 8-V1"]
    B --> I["TRACK 7-V1"]
    B --> J["TRACK 6-V1"]
    B --> K["TRACK 5-V1"]
    D --> L["Mastering effect"]
    E --> L
    F --> L
    G --> L
    H --> L
    I --> L
    J --> L
    K --> L
    L --> M["TRACK 8-VMST\nTRACK 7-VMST"]
Mastering-destination tracks
What is the mastering effect?
When creating a CD from your recorded songs, it's important to manage the overall volume so that the loudest section of your songs will stay within the available range of the CD. However this will lower the overall volume, causing the music to sound less powerful.
Additionally, excessive sound in the low frequency range that is difficult for the human ear to hear can cause the level meter to move all the way to the maximum in spite of the fact that the actual sound does not appear to be loud. This can also make your music sound less powerful.
By using the mastering effect, you can make the volume of your song more consistent, and correct the balance of the low-frequency range. We recommend that you use the mastering effect to add the final touch to your song.
* The mastering effect provides 19 “preset patches” (P01–P16), 19 rewritable “user patches” (U01–U19), and 19 “song patches” (S01–S19) which are stored for each song.
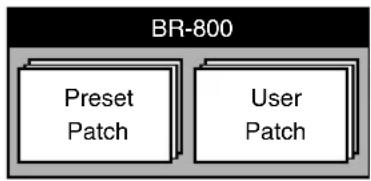
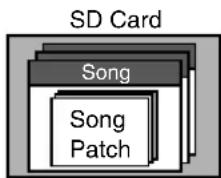
MEMO
You can turn on the mastering effect even when you're not in Mastering mode.
If you use the mastering effect during normal recording, you'll be able to hear the mastered sound while you record.
1 Press the [MENU] button.
2 Use the CURSOR [▲] buttons to move the cursor to "MASTERING," and press the [ENTER] button.
3 Use the dial to turn MASTERING "ON." You're now in Mastering mode.
4 Press the [EXIT] button a number of times. The MASTERING screen will appear.
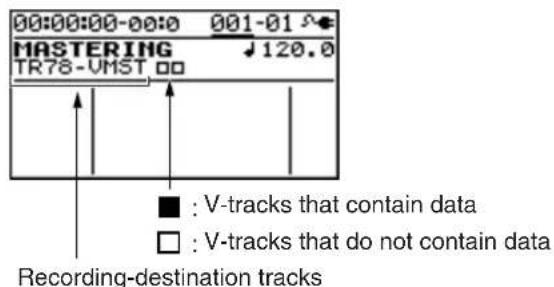
As the recording destination, track 7/8 VMST will be selected as the V-tracks for mastering. If you want to record onto other tracks, use the CURSOR buttons and the dial to select the desired recording-destination tracks.
5 Play back your song, and use the track faders to adjust the volume balance.
Use the [MASTER] fader to adjust the overall volume. You should raise the volume as far as possible without causing the sound to distort. If there are any tracks that you don't want to appear in the mix, lower their faders.
* If you want to record the rhythm as part of the mix, raise the [RHYTHM] fader.
6 Press the [MASTER FX] button.
The [MASTER FX] button will light, and the mastering effect will turn on. The MASTER FX screen will appear.
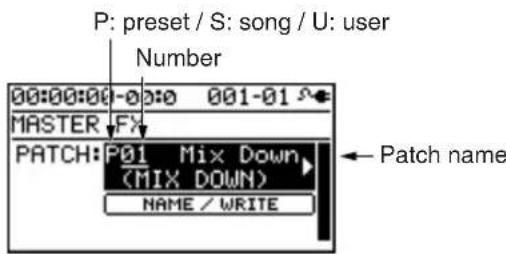
7 Choose a mastering effect.
Use the CURSOR [ ] buttons and the dial to select preset/song/user and the desired number.
8 Press the [EXIT] button to return to the play screen.
9 Press the [ZERO] button to return to time location 00:00:00-00:0.
10 Press the [REC] button.
The [REC] button will blink red, and the BR-800 will enter recording-standby mode.
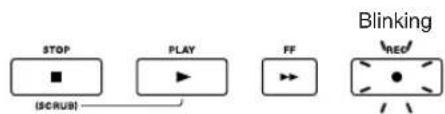
flowchart
graph LR
    A["STOP"] --> B["PLAY"]
    B --> C["FF"]
    D["(SCRUB)"] --> A
    E["Blinking"] --> F["REO"]
11 Press the [PLAY] button.
Recording will begin. The [PLAY] button will light green, and the [REC] button will light red.
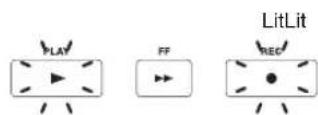
Using Mastering in Creating a Song
12
When you've finished mastering, press the [STOP] button.
The result will be saved on the mastering-destination track, and the PREVIEW screen will appear.
![PREVIEW 00:00:00-00:0 TR78-UMST ■■ [EXIT]:CLOSE](/content/2026/05/810967/images/f900bd0d469a4c780c49e93c4b5135d05b1c7bc64d227b87911be38ca47cb9f3.jpg)
If you press the [PLAY] button, the result of mastering will play back.
Use the [MASTER] fader to adjust the volume.
Press the [EXIT] button to return to the MASTERING screen.
* The display will indicate "Keep power on!" while the data is being updated. Do not turn off the power while this message is shown.
13
To exit MASTERING mode, turn MASTERING "OFF."
Editing the Mastering Effect Settings
To create a new patch, choose the existing patch that's closest to what you have in mind, and then edit its settings.
If you want to keep the edited settings, save them as a user patch or song patch.
1
Press the [MASTER FX] button.
The MASTER FX select screen will appear.
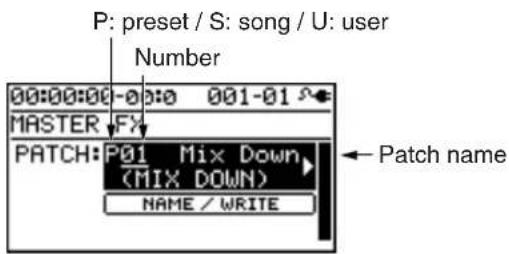
2
Choose a mastering effect.
Use the CURSOR [ ] buttons and the dial to select preset/song/user and the desired number.
3
Press the [ENTER] button.
The mastering effect edit screen will appear.
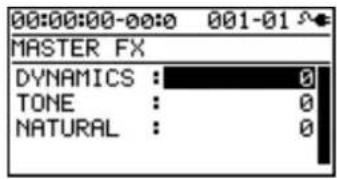
4
Use the CURSOR [ ▲ ] buttons to move the cursor to each parameter, and use the dial to make settings.
For details about the effect settings, refer to the following section "Parameter List" (p. 117).
5
If you want to save the current effect settings, proceed as described in the following section "Saving the Mastering Effect Settings (Write)" (p. 117).

The changes you make are temporary. If you leave the edit screen without saving the edited patch, an "*" is shown at the patch indication. If you select another patch when this "*" is shown, the edited patch will revert to its original state, and your changes will be lost.
Saving the Mastering Effect Settings (Write)
Here's how to assign a name to the patch you created, and save it as a new patch.
1
From the mastering effect select screen, press the CURSOR [ ] button to move the cursor to "NAME/ WRITE," and press the [ENTER] button.
The Write screen will appear.
![00:00:00-00:0 000-00 S MASTER FX NAME:[▲] Write to EXEC:[●] S01 [Mix Down]](/content/2026/05/810967/images/06db47b709c64cdd55de0fe455f9350e92d2e6112fd73077a8b678c0b48c788a.jpg)
2
If you want to enter a patch name, press the CURSOR [button.
If you don't need to change the patch name, proceed to step 5.
![00:00:00-00:0 001-01 S MASTER FX NAME IWRITE:[▲] Mix Down ABCDEFGHIJKLMNOPQRSTUVWXYZ ABCDEFGHIJKLMNOPQRSTUVWXYZ ABCDEFGHIJKLMNOPQRSTUVWXYZ](/content/2026/05/810967/images/37fd38234ecc35b6a954115534467224e98735c1888abc93e8cc2bb3a630d496.jpg)
3
Use the CURSOR [ ] buttons and the dial to enter a patch name.
4
When you've finished entering the patch name, press the CURSOR [ ]button.
5
Use CURSOR [ ] buttons and the dial to select the desired write-destination mastering effect.
6
Once you've selected the destination at which to write the mastering effect, press the [ENTER] button.
A confirmation message will ask "Are you sure?"
7
Press the [ENTER] button to save the settings, or press the [EXIT] button if you decide to cancel.
When writing has been completed, you will return to the mastering effect select screen.
* The display will indicate "Keep power on!" while the data is being updated. Do not turn off the power while this message is shown.
Parameter List
| Parameter/Value | Explanation |
| DYNAMICS | |
| -20–+20 | This adjusts the variation in volume between loud and soft passages in the performance. Raising this setting will decrease the variation in volume. Although this is a convenient way to improve the overall loudness for your song, it will decrease the natural dynamics of the music.Lowering this setting will increase the variation in volume; while this will make it difficult to obtain overall loudness for your song, the music will be closer to the natural dynamic variation of the original performance.If this setting is at 0, the patch will produce its standard effect. |
| TONE | |
| -6–+6 | If you raise this setting, the low-frequency and high-frequency ranges will be boosted, producing a more aggressive tone. If you lower this setting, the low-frequency and high-frequency ranges will not be boosted, and the tone will be mild. If this setting is at 0, the patch will produce its standard effect. |
| NATURAL | |
| -50–+50 | If you raise this setting, the mastering effect will be applied more gently, producing a more natural impression. Since sudden peaks in volume will still be reproduced without modification, this will make it more difficult to boost the overall loudness.If you lower this setting, the mastering effect will be applied more rapidly to sudden volume peaks, but the sense of naturalness will be impaired.If this setting is at 0, the patch will produce its standard effect. |
Making Use of Songs After Mastering
Making Use of Songs on Your Computer
Songs you've created using the BR-800 can be converted to WAV/AIFF files using the "BOSS BR Series Wave Converter."
The following things become possible once you've converted your songs to WAV/AIFF format.
- Play back your songs using your computer software
- Create original CDs
- Listen to your songs on your portable audio player after you've imported them
* For details, refer to the owner's manual of your software.

"Using BOSS BR Series Wave Converter" (p. 124)
Recording the Mastered Song to an External Device
Here's how to record your mastered song onto your CD recorder or other device.
1
Connect the BR-800's LINE OUT jacks to your recorder's input jacks.
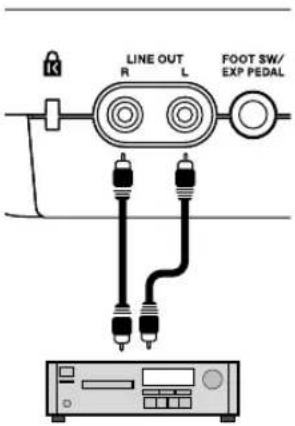
CD Recorder etc.
2
Put your recorder in recording mode.
3
Press the BR-800's [PLAY] button to play back your recorded data.
4
When playback is finished, stop recording on your recorder, and press the BR-800's [STOP] button.
Using USB
The BR-800 is equipped with a USB connector. When connected to your computer, you'll be able to perform the following operations.
- Use the BR-800 as an audio interface or control surface (p. 121, p. 122).
● Transfer audio data between the BR-800 and your computer (p. 124).
● Create original rhythms and drum kits for use on the BR-800 (p. 88).
● Back up BR-800 data (p. 126).

For details on USB operating requirements, refer to the Roland website (http://www.roland.com/).
About the "BR-800 DVD-ROM"
The BR-800 is shipped with a DVD-ROM that contains the drivers you'll need when connecting it to your computer, as well as convenient software.
For details on the contents of the "BR-800 DVD-ROM," refer to "ReadmeEN.txt" on the "BR-800 DVD-ROM."
Installing the USB Driver
You must install the USB driver into your computer before connecting the BR-800 via USB to your computer.
The USB driver is on the included "BR-800 DVD-ROM."
For details on the location of the USB driver, refer to "ReadmeEN.txt" on the "BR-800 DVD-ROM."
You should also carefully read the "Readme.htm" file in the folder containing the driver for each operating system.
Data Structure on the SD Card
The folders and files created on the SD card are in the following structure.
* Do not delete or rename any folder or file that's been created on the SD card.
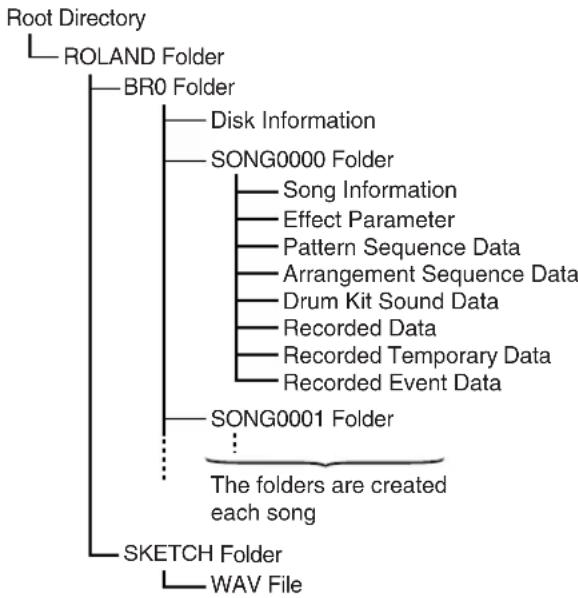
flowchart
graph TD
    A["Root Directory"] --> B["ROLAND Folder"]
    B --> C["BR0 Folder"]
    C --> D["Disk Information"]
    C --> E["SONG0000 Folder"]
    E --> F["Song Information"]
    E --> G["Effect Parameter"]
    E --> H["Pattern Sequence Data"]
    E --> I["Arrangement Sequence Data"]
    E --> J["Drum Kit Sound Data"]
    E --> K["Recorded Data"]
    E --> L["Recorded Temporary Data"]
    E --> M["Recorded Event Data"]
    B --> N["SONG0001 Folder"]
    N --> O["The folders are created each song"]
    B --> P["SKETCH Folder"]
    P --> Q["WAV File"]
ROLAND folder
The BR-800's data is saved in the following folders.
BRO folder
A folder for each song contains the song data.
SKETCH folder
This folder contains the WAV files used in Song Sketch mode.
If you place a WAV file from your computer into this folder, you'll be able to play it back on the BR-800.
WAV files created on the BR-800 can also be copied from the SKETCH folder into your computer.
For details, refer to "Transferring WAV Files" (p. 124).
Using the BR-800 as an Audio Interface

You must install the USB driver before connecting the BR-800 to your computer (p. 120).
Recording Audio from the BR-800 on Your Computer
Using USB, the sound you input to the BR-800 or the sound from tracks being played back can be recorded by your personal computer software.
You'll also be able to make settings with respect to the signal that is output by the BR-800.

"OUT POSITION (Output position)" (p. 129)
1
Use a USB cable to connect the BR-800 to your computer.
2
In your computer's audio recording software, you need to change the audio input source so that the BR-800 is selected.
For information on how to change the input source, refer to the user's guide that came with your software.
Using the BR-800 to Hear Songs Played Back by Your Computer
Here's how audio played back by your computer can be sent to the BR-800 via USB and heard through an output device connected to the BR-800.
1
Use a USB cable to connect the BR-800 to your computer.
2
In your computer's audio playback software, switch the audio output destination to the BR-800.
For details on how to switch the output destination, refer to the owner's manual for the software you're using.
Using the BR-800 to Record Songs Played Back by Your Computer
Here's how audio data played back by your computer can be sent to the BR-800 via USB and recorded on the BR-800's tracks.
1
Use a USB cable to connect the BR-800 to your computer.
2
In your computer's audio playback software, switch the audio output destination to the BR-800.
For details on how to switch the output destination, refer to the owner's manual for the software you're using.
3
Press [MENU].
The MENU screen will appear.
4
Use the CURSOR [ ] buttons to move the cursor to "INPUT SELECT," and press the [ENTER] button.
The INPUT SELECT screen will appear.
5
Use the CURSOR [ ] buttons to move the cursor to "INPUT," and use the dial to choose USB.
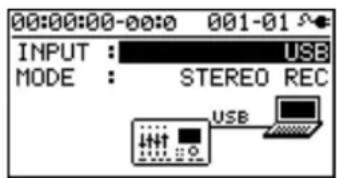
6
Press [EXIT] a number of times to return to the play screen.
7
Record as described in "Recording" (p. 36).

You must install the USB driver before connecting the BR-800 to your computer (p. 120).
The BR-800 can operate via USB as a controller for your music production software (DAW software).
* When the BR-800 is used as a control surface, you will have control over INPUT SELECT and EFFECT. Additionally, it can be used as an audio interface.
* When using the BR-800 as a control surface, you should enter Control Surface mode first, then start up your DAW software. If you start up your DAW software before entering control surface mode, the state of the various indicators might not be displayed correctly.
1 Use a USB cable to connect the BR-800 to your computer.
2 Press the [MENU] button. The MENU screen will appear.
3 Use the CURSOR [ ] buttons to move the cursor to "USB," and press the [ENTER] button. The USB screen will appear.
4
Use the CURSOR [ ] buttons to move the cursor to "CONTROL SURFACE," and press the [ENTER] button.
The BR-800 is now in Control Surface mode.
5 Start up your DAW software.
6
Make the appropriate control surface settings in your DAW software.
Specify "Mackie control" as the type of control surface. For details on how to make control surface settings, refer to the owner's manual of your software.
7 To exit Control Surface mode, press the [EXIT] button a number of times to return to the play screen.
Using SONAR LE
SONAR LE can be found on the "BR-800 DVD-ROM." For details on the location of SONAR LE, refer to "ReadmeEN.txt" in the "BR-800 DVD-ROM."
For details on installation and settings, refer to the SONAR LE Startup Guide in the "BR-800 DVD-ROM."
* The included SONAR LE is software for Windows. Please be aware that it is not compatible with Mac OS.
Controllers that Can Be Used in Control Surface Mode
You can use the following controllers to control your DAW software.
| Controller | Function |
| Track faders | Control the fader of the selected track |
| [MASTER] fader Control the MASTER fader | |
| Track [PLAY] buttons Mute the selected track | |
| Track [REC] buttons | Put the selected track in recording-standby mode |
| [TAP TEMPO] button Shift the track group (-) | |
| [MASTER FX] button Shift the track group (+) | |
| [ENTER] button Confirm a selection or entry | |
| Dial | Used to change things such as the current position in the song |
| [CURSOR] buttons Move the cursor | |
| [REW] button Rewind | |
| [STOP] button Stop recording/playback | |
| [PLAY] button Play | |
| [FF] button Fast-forward | |
| [REC] button Record | |
* The functions that can be used will differ depending on the DAW software that you use.
* The track 1–7/8 track faders, track [PLAY] buttons, and track [REC] buttons correspond to track groups 1–6 in your DAW software. To control other tracks, use the [TAP TEMPO] button or [MASTER FX] button to shift the selected group.
* The following controllers have no function in Control Surface mode.
• [RHYTHM] fader
• [RHYTHM] button
• [SONG SKETCH] button
- [EZ REC] button
- [TRACK] button
- [RETRY] button
- [REPEAT] button
- [ZERO] button
Exchanging Data with Your Computer

- You must install the USB driver before connecting the BR-800 to your computer (p. 120).
- The BR-800 does not support long file names. For data with a long file name, the file name will not be displayed correctly.
Keep the file name within eight characters, not including the file name extension.
(Ex.)
123MUSIC.WAV (eight characters)
The BR-800 can use the following characters.
A-Z (English uppercase letters)
0–9 (Numerals)
_(Underscore)
Using BOSS BR Series Wave Converter
By using "BOSS BR Series Wave Converter" you can convert BR-800 audio data to WAV/AIFF files, or convert WAV/AIFF files from your computer to BR-800 audio data. "BOSS BR Series Wave Converter" is on the "BR-800 DVD-ROM." For details on the location of "BOSS BR Series Wave Converter," refer to "ReadmeEN.txt" on the "BR-800 DVD-ROM."
Transferring WAV Files

The BR-800 can use WAV files that are in the following format.
Files in any other format cannot be played.
- Stereo
• Sampling rate: 44.1 kHz - Sample size: 16-bit
1
Use a USB cable to connect the BR-800 to your computer.
2
Press the [MENU] button.
The MENU screen will appear.
3
Use the CURSOR [ ] buttons to move the cursor to "USB," and press the [ENTER] button.
The USB screen will appear.
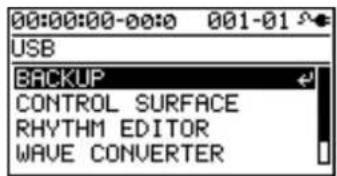
4
Use the CURSOR [ ] buttons to move the cursor to "BACKUP," and press the [ENTER] button.
The BACKUP screen will appear.
![00:00:00-00:0 001-01 BACKUP Press [ENTER] to start connection.](/content/2026/05/810967/images/f79f74b93ef6fa15746e3f41f1f5b7fa9043994f6c4d3e16c539b79607d5c9f3.jpg)
5
Press [ENTER].
The Idling screen will appear.
![Idling... [EXIT]:DISCONNECT](/content/2026/05/810967/images/940323cc54413950fb747571307defe2b9cabb7131570c519965ea0fb6549ae1.jpg)
A "BOSS_BR-800" icon (or a "removable disk (*:)" icon) will appear on your computer.
* If the Idling screen does not appear, you won't be able to proceed with the following steps. Please check the connection.
6
Transfer the WAV file.
To copy a WAV file from the BR-800 to your computer
- Double-click the "BOSS_BR-800" icon (or the "removable disk (*:)" icon); the "ROLAND" folder will appear.
The saved audio files are shown inside the "SKETCH" folder located inside the "ROLAND" folder.
- From the SKETCH folder, drag and drop the desired WAV files to copy them to a folder on your computer.
When copying is completed, the Idling screen will reappear.
To copy a WAV file from your computer to the BR-800
- Double-click the "BOSS_BR-800" icon (or the "removable disk (*:)" icon); the "ROLAND" folder will appear.
The saved audio files are shown inside the "SKETCH" folder located inside the "ROLAND" folder.
The "SKETCH" folder located inside the "ROLAND" folder will appear.
- Drag and drop the desired WAV file from your computer into the SKETCH folder.
When copying is completed, the Idling screen will reappear.
7
Stop the connection between the BR-800 and your computer.
Windows users
In My Computer, right-click the "BOSS_BR-800" icon (or the "removable disk (*:)" icon), and choose "Eject."
Mac OS users
Drag the "BR-800" icon to the "Eject" icon.
8
Press [EXIT].
You will return to the play screen.
* When the following screen appears, press the [ENTER] button.
![E ? Disconnect OK? [EXIT]:CANCEL [ENTER]:OK](/content/2026/05/810967/images/83b8eed7cde8b126f5a5ece09bb0fd61b24f2a84c2babc0f4e9a5011139121e7.jpg)

The SD card might be damaged if you fail to stop the connection between the BR-800 and your computer using the correct procedure.
Saving Data on Your Computer (Backup/Recover)

You must install the USB driver before connecting the BR-800 to your computer (p. 120).
When your SD card has filled up, or if you want to save important data on your computer, you can create a backup. It's a good idea to make regular backups as a safeguard against unexpected failure of your SD card.
The following types of song data will be backed up.
- Recorded data
- Mixer status (pan, track EQ, etc.)
- Insert effect song patches
• Mastering effect song patches - Patterns (song)
- Arrangements (song)
- Loop effect
1 Use a USB cable to connect the BR-800 to your computer.
2 Press the [MENU] button. The MENU screen will appear.
3 Use the CURSOR [W] buttons to move the cursor to "USB," and press the [ENTER] button. The USB screen will appear.
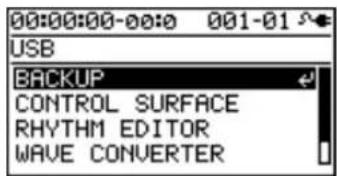
4
Use the CURSOR [ ] buttons to move the cursor to "BACKUP," and press the [ENTER] button. The BACKUP screen will appear.
![00:00:00-00:0 001-01 BACKUP Press [ENTER] to start connection.](/content/2026/05/810967/images/095d9fffd8604207f38e984480e40d5297a4bb6415329cc802c1b194d0a69c40.jpg)
5
Press [ENTER].
The Idling screen will appear.
![Idling... [EXIT]:DISCONNECT](/content/2026/05/810967/images/7776b4b585954136f71f6b1b50a439786b51970f1cdde736bcdd5ad356e83875.jpg)
A "BOSS_BR-800" icon (or a "removable disk (*:)" icon) will appear on your computer.
* If the Idling screen does not appear, you won't be able to proceed with the following steps. Please check the connection.
6
Back up or recover your data.
To back up
1) Double-click the "BOSS_BR-800" icon (or the "removable disk (*:)" icon).
2) Drag and drop the "ROLAND" folder into a folder on your computer.
When the backup is completed, the Idling screen will reappear.
To recover
Drag and drop the "ROLAND" folder onto the "BOSS_BR-800" icon (or the "removable disk (*:)" icon).
When the recover operation is completed, the Idling screen will reappear.
NOTE
- When backing up or recovering, you must drag and drop the entire "ROLAND" folder. If you copy only a portion of the folders, the data might not be usable on the BR-800.
- In some cases during the recover operation, your computer might display a message asking you to confirm the overwrite. Choose "Yes" for all. If you choose "No," the recovery will be incomplete, and malfunctions might occur later while operating the BR-800.
- When you recover the data, the data in the SD card will be overwritten.
7
Stop the connection between the BR-800 and your computer.
Windows users
In My Computer, right-click the "BOSS_BR-800" icon (or the "removable disk (*:)" icon), and choose "Eject."
Mac OS users
Drag the "BR-800" icon to the "Eject" icon.
8
Press [EXIT].
You will return to the play screen.
* When the following screen appears, press the [ENTER] button.
![Disconnect OK? [EXIT]:CANCEL [ENTER]:OK](/content/2026/05/810967/images/05abbee50eae713e613f5f82f992a006c5511fadae195f8936f4739e0b3579f4.jpg)
NOTE
The SD card might be damaged if you fail to stop the connection between the BR-800 and your computer using the correct procedure.
Making Settings for USB Functionality
This section explains how to make settings for the BR-800's USB-related functionality. Make the settings that are appropriate for how you're using the BR-800.
1
Press the [MENU] button.
The MENU screen will appear.
2
Use the CURSOR [ ] buttons to move the cursor to "USB," and press [ENTER].
The USB screen will appear.
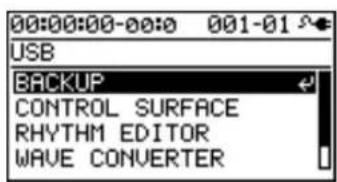
3
Use the CURSOR [ ] buttons to move the cursor to "SETTING," and press the [ENTER] button.
The SETTING screen will appear.
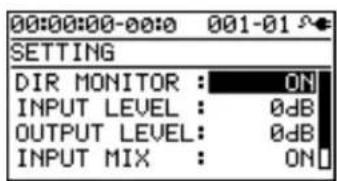
4
Use the CURSOR [ ] buttons to move the cursor to the parameter that you want to edit, and use the dial to edit the value.
For details on each parameter, refer to "Parameter List" (p. 128).
5
Press the [EXIT] button a number of times to return to the play screen.
Parameter List
| Parameter/Value | Explanation |
| DIR MONITOR (Direct monitor) | |
This specifies whether the BR-800's audio output will be sent to the PHONES jack and LINE OUT jacks.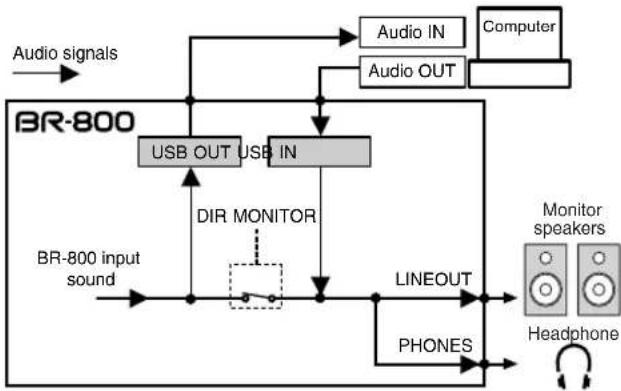 | |
| OFF | Choose the OFF setting if the audio data is being passed "thru" your computer.If this setting is selected, you won't hear the sound unless Thru is enabled in your computer. |
| ON | The BR-800's audio input will be output directly. Choose the ON setting if you're using the BR-800 on its own without connecting it to a computer. (If you choose the OFF setting, only the sound being input via USB IN will be output.) |
| INPUT LEVEL | |
| -20-+20 dB | This adjusts the level of the signal being input via USB. |
| OUTPUT LEVEL | |
| -20-+20 dB | This adjusts the level of the signal being output via USB. |
| INPUT MIX | |
| This specifies whether the USB input will be mixed with the BR-800's output.* If INPUT SELECT (p. 37) is set to "USB," the INPUT MIX setting is ignored. | |
| OFF | The input from USB will not be mixed with the BR-800's output. |
| ON | The input from USB will be mixed with the BR-800's output. |
| OUT POSITION (Output position) | |
| This specifies which signal of the BR-800 will be output via USB.* In Control Surface mode, the signal as it is immediately after passing through the [REC LEVEL] knob will be output. | |
| MASTER | The signal as it is immediately after passing through the [MASTER] fader will be output. |
| REC LEV | The signal as it is immediately after passing through the [REC LEVEL] knob (i.e., the signal being recorded on the BR-800) will be output.* When “INPUT 1–4” has been set for INPUT SELECT (p. 37), only the signals for INPUT 1, 2 will be output. |
MEMO
Convenient Functions
Adjusting the Display Contrast
Depending on the location in which the BR-800 is placed or the conditions of use, you might find the display difficult to read. If so, proceed as follows to adjust the display's contrast.
1
Press the [MENU] button.
2
Use the CURSOR [W] buttons to move the cursor to "SYSTEM," and press the [ENTER] button.
3
Use the CURSOR [W] buttons to move the cursor to "LCD CONTRAST," and use the dial to adjust the contrast.
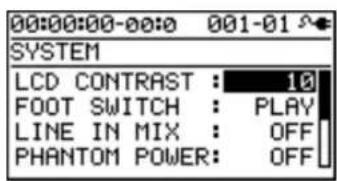
Range: 1–16
4
Press the [EXIT] button a number of times to return to the play screen.
Using a Foot Switch/Expression Pedal
If you connect a foot switch (such as the separately available BOSS FS-5U or Roland DP-2) to the FOOT SW/EXP PEDAL jack on the rear panel, you'll be able to control some functions using your foot.
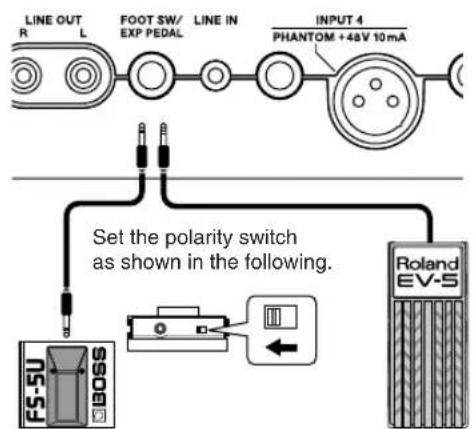
Foot Switch (FS-5U etc.)
Expression Pedal (Roland EV-5 etc.)

- Use only the specified expression pedal (Roland EV-5, BOSS FV-500L/FV-500H; sold separately). By connecting any other expression pedals, you risk causing malfunction and/or damage to the unit.
- When using an expression pedal, set the pedal's MIN volume to "0."
Using an Expression Pedal
The expression pedal can be used when the insert effect is turned on.
Depending on the effect settings, it will function as follows.
- If the WAH (p. 67) TYPE is set to "PEDAL," the expression pedal will function as a wah pedal.
- If the PITCH SHIFTER (p. 76) TYPE is set to "PEDAL," the expression pedal will function as a pitch shifter pedal.
- If TYPE for WAH and TYPE for PITCH SHIFTER have both been set to something other than "PEDAL," the expression pedal will function as a volume pedal.
Using a Foot Switch
Here's how to assign the function of the foot switch.
1
Press the [MENU] button.
2
Use the CURSOR [ ] buttons to move the cursor to "SYSTEM," and press the [ENTER] button.
3
Use the CURSOR [ ] buttons to move the cursor to "FOOT SWITCH" and use the dial to specify the function of the foot switch.
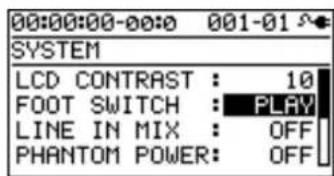
| Value | Explanation |
| PLAY | The song will alternate between play and stop each time you press the foot switch. |
| REC | The foot switch will perform the same operation as pressing the [REC] button. |
4
Press the [EXIT] button a number of times to return to the play screen.
Tuning Your Instrument (TUNER)
The BR-800 provides a Chromatic Tuner function that makes it easy to tune an instrument. The built-in tuner supports guitar or bass guitar.
Here's how to tune your guitar.
* Playback or recording is not possible while using the tuner.
First, make sure that:
- Your guitar is connected to the GUITAR/BASS INPUT jack
- The INPUT SELECT (p. 37) INPUT setting is at "GUITAR/BASS"
Switching to the Tuner
1
Press the [MENU] button.
2
Use the CURSOR [ ] buttons to move the cursor to "TUNER," and press the [ENTER] button.
The TUNER screen will appear.
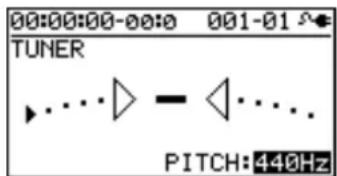
3
To turn off the tuner, press the [EXIT] button.

If you don't want sound to be heard while you're tuning, lower the [MASTER] fader.
■ Indications while tuning
The BR-800's built-in tuner shows the reference pitch, note name, and tuning guide.
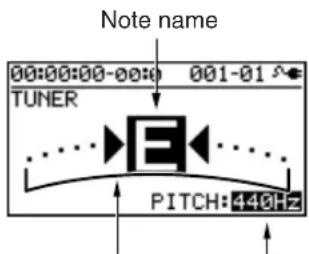
Reference pitchTuning guide
The tuning guide indicates the difference between the input pitch and the displayed note name. If the difference between the input and the correct pitch is within ±50 cents, the tuning guide shows the amount of difference.
Tuning
1
Play a single note on the open string that you're tuning.
The display will show the note name that is closest to the pitch of the string you played.
* You must cleanly play a single note on only the string you're tuning.
2
Tune your instrument so that the correct note name of the string you're tuning appears in the display.
Standard tuning
| 7th string | 6th string | 5th string | 4th string | 3rd string | 2nd string | 1st string | |
| Guitar | B E A | D G B E | |||||
| Bass - - | B E A | D G |
3
While watching the tuning guide, tune your instrument so that the center indicator is lit.
If the difference is within ±50 cents of the correct pitch, the tuning guide will show the difference between your instrument and the displayed pitch.
If your instrument is sharp
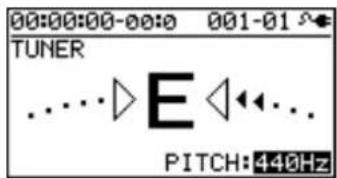
If your instrument matches the displayed pitch
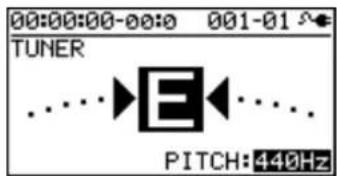
If your instrument is flat
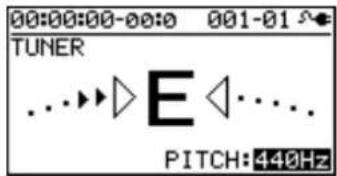
4
Repeat steps 1–3 to tune each string of your instrument.
MEMO
If you're tuning a guitar that has a whammy bar, tuning one string might cause the other strings to drift out of tune. Start by tuning each string to the approximate pitch so that the correct note name is displayed, and then retune each string successively as many times as needed.
Specifying the Tuner's Reference Pitch
When tuning an instrument, the reference pitch is conventionally given as the frequency of the A4 note (middle A on a piano keyboard).
You can adjust the tuner's reference pitch in the range of 435–445 Hz.
In the TUNER screen, you can use the dial to set the reference pitch.
With the factory settings, this is set to 440 Hz.
MEMO
The reference pitch setting is saved within the BR-800.
Mixing the Sound from an Audio Device (LINE IN MIX)
"Line In Mix" is a function that allows the input from LINE IN to be mixed with the output from LINE OUT.
By using "Line In Mix" you can avoid having to use an external mixer. The sound of your external audio device will be mixed inside the BR-800 with the BR-800's own output.
LINE IN MIX: OFF
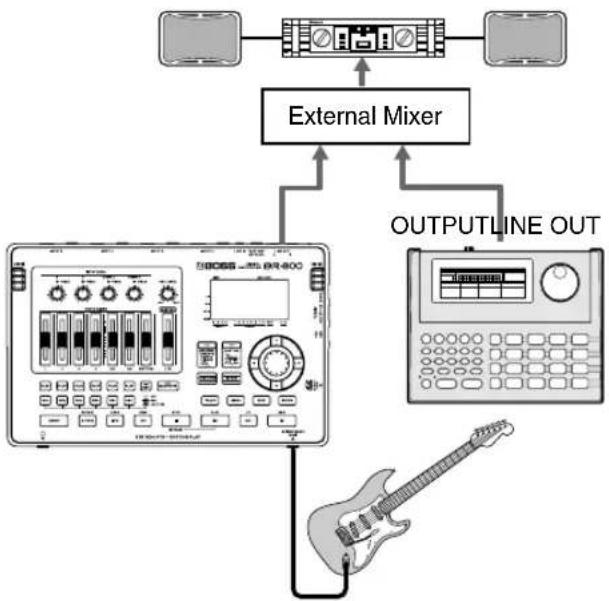
flowchart
graph TD
    A["External Mixer"] --> B["Output Line"]
    A --> C["External Audio"]
    B --> D["Guitar"]
    C --> D
    D --> E["Output Line OUT"]
LINE IN MIX: ON
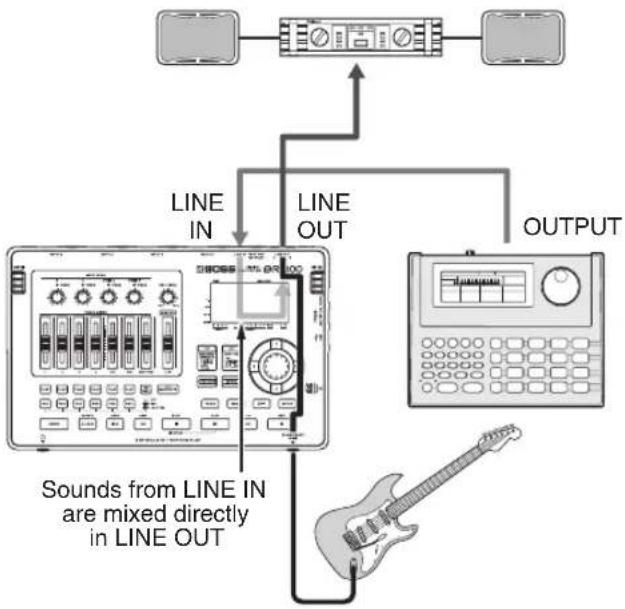
flowchart
graph TD
    A["Line IN"] --> B["Line OUT"]
    B --> C["Output"]
    D["Sound from LINE IN are mixed directly in LINE OUT"] --> B
    E["Radioform"] --> B
1 Press the [MENU] button.
2 Use the CURSOR [ ] buttons to move the cursor to "SYSTEM," and press the [ENTER] button.
3 Use the CURSOR [ ] buttons to move the cursor to "LINE IN MIX," and use the dial to turn the setting "ON."
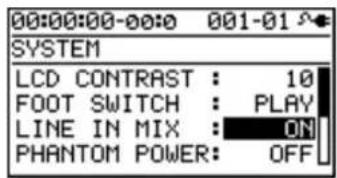
| Setting | Explanation |
| OFF | Line In Mix will be off. |
| ON Line In Mix will be on. | |
4 Press the [EXIT] button a number of times to return to the play screen.

If the INPUT SELECT (p. 37) INPUT setting is "LINE IN," the Line In Mix function will not work even if LINE IN MIX is turned "ON."
Output Settings (OUTPUT)
Output Settings for LINE OUT and Headphone (OUTPUT MODE)
The sound of the tracks and the rhythm sound can be divided between LINE OUT jacks and PHONES jack output.
This is convenient when you want to play back the sound of the tracks from LINE OUT jacks while monitoring the sound of only the rhythm in your headphones.
1 Press the [MENU] button.
2 Use the CURSOR [W] buttons to move the cursor to "OUTPUT," and press the [ENTER] button.
3 Use the CURSOR [W] buttons to move the cursor to "OUTPUT MODE," and use the dial to select "SPLIT."
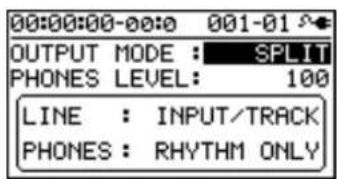
| Setting | Explanation |
| NORMAL | The sound of the tracks and the rhythm sound will be output from both LINE OUT and from PHONES. |
| SPLIT | The sound of the tracks will be output from LINE OUT, and the rhythm sound will be output from PHONES. |
4 Use the CURSOR [ ] buttons to move the cursor to "PHONES," and use the dial to adjust the headphone volume.
5 Press the [EXIT] button a number of times to return to the play screen.
Adjusting the Headphone Volume (PHONES LEVEL)
1 Press the [MENU] button.
2 Use the CURSOR [ ] buttons to move the cursor to "OUTPUT," and press the [ENTER] button.
3 Use the CURSOR [ ] buttons to move the cursor to "PHONES LEVEL," and use the dial to adjust the headphone volume.
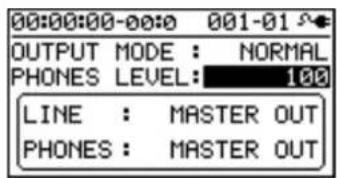
4 Press the [EXIT] button a number of times to return to the play screen.

When you turn on the BR-800's power, the "PHONES LEVEL" setting is reset to "100."
Practicing Phrases (PHRASE TRAINER)
The BR-800 provides a Phrase Trainer function, which lets you slow down the playback speed (Time Stretch) or minimize a vocal or guitar solo that's localized at the center of the sound field (Center Cancel), so you can conveniently practice your instrument by playing along with a recording.
* Phrase Trainer can be used only with tracks 5/6.
Slowing Down the Speed (TIME STRETCH)
Here's how to slow down the playback to half speed without changing the pitch.
* Time Stretch can be used only with tracks 5/6.
1
Use tracks 5/6 to record the phrase that you want to practice.
2
Press the [MENU] button.
3
Use the CURSOR [ ] buttons to move the cursor to "PHRASE TRAINER," and press the [ENTER] button.
4
Use the CURSOR [ ] buttons to move the cursor to "TIME STRETCH," and use the dial to turn it "ON."
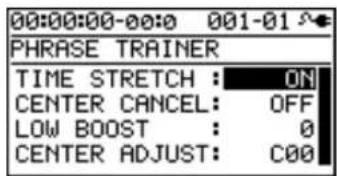
| Setting | Explanation |
| ON | The playback speed will decrease by half without affecting the pitch. |
| OFF | Neither the pitch nor the playback speed will change. |
5
Press [PLAY] to start playback.
The phrase recorded on tracks 5/6 will play at half speed.

- You can't perform recording operations while using Phrase Trainer (Time Stretch or Center Cancel).
- Rhythm will not sound while you're using Phrase Trainer.
Minimizing Sounds in the Center (CENTER CANCEL)
This function lets you minimize the sounds that are heard in the center (such as vocals or guitar solo). This is convenient when you're practicing with a song as backing.
* Center Cancel can be used only with tracks 5/6.
1
Press the [MENU] button.
2
Use the CURSOR [ ] buttons to move the cursor to "PHRASE TRAINER," and press the [ENTER] button.
3
Use the CURSOR [ ] buttons to move the cursor to "CENTER CANCEL," and use the dial to turn it "ON."
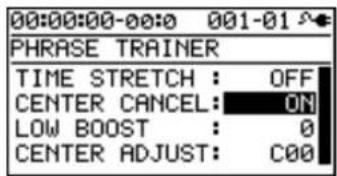
| Setting Explanation | |
| ON | Sounds heard from the center (e.g., vocals or guitar solo) will be minimized. |
| OFF The sound will play back normally. | |
If the sound is not minimized as you expect, or if you want to boost the sound of the bass, proceed as follows.
4
If you want to boost the sound of the bass, use the CURSOR [ ] buttons to move the cursor to "LOW BOOST," and use the dial to adjust the sound of the bass as desired.
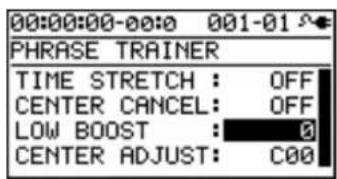
5
Use the CURSOR [ ] buttons to move the cursor to "CENTER ADJUST," and use the dial to adjust the setting so that the sound you want to eliminate is minimized.
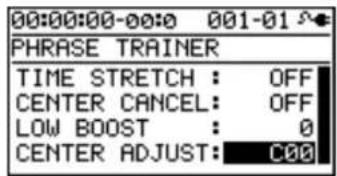
6
Press the [EXIT] button to return to the play screen.

- Depending on the recorded phrase, it might not be possible to entirely eliminate the sound.
• The sound that is played back will be monaural.

You can use the Time Stretch and Center Cancel functions simultaneously.
Restoring the Factory Settings (FACTORY RESET)
The "Factory Reset" operation returns the BR-800 to its factory-set state.
You can also specify the range of settings that will be returned to their factory-set state.
1
Press the [MENU] button.
2
Use the CURSOR [ ] buttons to move the cursor to "FACTORY RESET," and press the [ENTER] button.
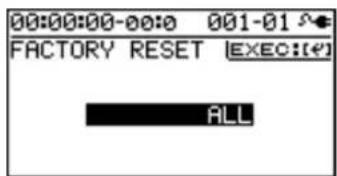
3
Use the dial to select the things that you want to return to their factory-set state.
| Parameter | Items to be initialized |
| ALL | System parametersRhythm (arrangements/patterns/ drum kits) *1Effect user patchesEffect song patches *1 |
| SYSTEM System parameters | |
| RHYTHM | Rhythm (arrangements/patterns/ drum kits) *1 |
| USER EFFECT | Effect user patches |
| SONG EFFECT | Effect song patches *1 |
*1 The settings for the currently selected song will be initialized.
4
Press the [ENTER] button.
The message "Are you sure?" will ask you for confirmation.
![A? Are you sure? [EXIT]:CANCEL [ENTER]:OK](/content/2026/05/810967/images/b33491904bf88a78dac9d297d98cb4fc15c0b6f9e638c345c75505671a1e194a.jpg)
5
Press the [ENTER] button if you want to execute the Factory Reset operation, or press the [EXIT] button if you decide to cancel.
If you press the [ENTER] button, the Factory Reset will be executed, and then you will return to the play screen.
Initializing an SD Card (FORMAT)

- When you format a card, the entire contents of that card will be lost. Be sure to back up important data before you continue (p. 126).
- If you format the SD card that's included with the BR-800, the demo song data will be lost.
- Before you use a commercially available SD card, you must format it on the BR-800.
- Make sure that the BR-800's power is turned off before you insert or remove an SD card. Inserting or removing an SD card while the power is on may destroy the data on the SD card or damage the SD card itself.
- Depending on the capacity of the SD card, formatting may take several minutes. This does not indicate a malfunction. Do not turn off the power until formatting is completed.
- Never remove the SD card or turn off the power while the message "Keep power on!" is shown. Doing so will destroy the data on the SD card or damage the SD card itself.
1
Press the [MENU] button.
2
Use the CURSOR [ ] buttons to move the cursor to "SD CARD," and press the [ENTER] button.
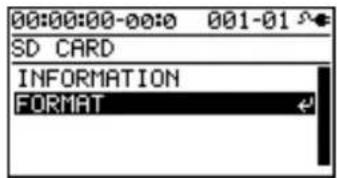
3
Use the CURSOR [ ] buttons to move the cursor to "FORMAT," and press the [ENTER] button.
![00:00:00-00:0 001-01 FORMAT [ENTER]: START FORMAT](/content/2026/05/810967/images/094ffafb79f33b36bd7def628dc3ffe50d3d49f9eb1c2f3ec35164d330e43caf.jpg)
4
Press the [ENTER] button.
The confirmation message "Are you sure?" will appear.
![F Are you sure? [EXIT]:CANCEL [ENTER]:OK](/content/2026/05/810967/images/41373ed9fe1368f418ed629a4dfeae848c7617cdc44a93af766310b260d25df4.jpg)
5
Press the [ENTER] button to format the card, or press the [EXIT] button if you decide to cancel without formatting.
When you press the [ENTER] button, formatting will be carried out. You'll then be returned to the play screen.
Then the display will indicate "Keep power on! Song creating..." and a new song will be automatically created.
When the song has been created, you will return to the play screen.
Viewing the SD Card Usage (SD CARD INFORMATION)
Here's how to view the usage status of the SD card.
1
Press the [MENU] button.
2
Use the CURSOR [ ] buttons to move the cursor to "SD CARD," and press the [ENTER] button.
3
Use the CURSOR [ ] buttons to move the cursor to "INFORMATION," and press the [ENTER] button.
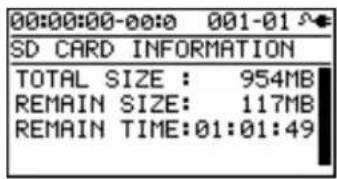
The SD card's usage status will be displayed.
| SD CARD INFORMATION | Explanation |
| TOTAL SIZE | Total capacity of the SD card |
| REMAIN SIZE | Free space remaining on the SD card |
| REMAIN TIME Remaining recordable time | |
4
Press the [EXIT] button a number of times to return to the play screen.
Reducing the Battery Consumption (POWER SAVE)
This function dims the display backlight and buttons to conserve power if no switch or dial has been operated for a certain length of time.
When the Power Save function is active, the following will be shown in the display.
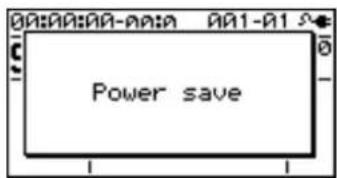
1 Press the [MENU] button.
2 Use the CURSOR [ ] buttons to move the cursor to "SYSTEM," and press the [ENTER] button.
3 Use the CURSOR [ ] buttons to move the cursor to "POWER SAVE," and use the dial to specify the time (minutes) to pass before the Power Save function is activated.
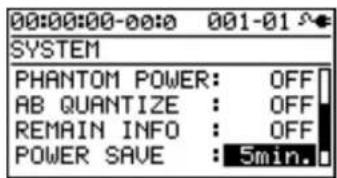
4 Press the [EXIT] button to return to the play screen.
■ Exiting the Power Save state
When you operate a button or the dial, you'll exit the Power Save state.
Power Save will not operate while you're recording or playing a song.
Using a Condenser Microphone (PHANTOM POWER)
If you're using a condenser microphone that requires phantom power, turn on the phantom power as follows. The BR-800 can provide +48 V phantom power to a condenser microphone connected to the XLR connector of INPUT 4.

- You must turn off phantom power unless you've connected a condenser microphone that requires phantom power. Supplying phantom power to a dynamic microphone or audio playback device will cause malfunctions. For details on the specifications of your microphone, refer to the owner's manual for the microphone you're using. (The BR-800's phantom power supply is DC 48V, 10mA Max).
- Before turning the phantom power on/off, you must make sure that the BR-800's [MASTER] fader, the INPUT SENS [4/MIC R] knob, and the [REC LEVEL] knob are all minimized. If you turn the phantom power on/off with these faders or knobs raised, high-volume noise will be produced, possibly damaging your amp or speakers.
- Since turning phantom power on will increase the power consumption, we recommend that you use the AC adaptor.
- When you turn on the BR-800's power, the phantom power setting is reset to "OFF." You'll need to turn it "ON" each time you want to use it.
- If you're using an external microphone preamp or a dedicated external phantom power supply, there's no need to supply phantom power from the BR-800. In this case, turn the phantom power "OFF."
1 Press the [MENU] button.
2 Use the CURSOR [ ] buttons to move the cursor to "SYSTEM," and press the [ENTER] button.
3 Use the CURSOR [ ] buttons to move the cursor to "PHANTOM POWER," and use the dial to turn the setting "ON."
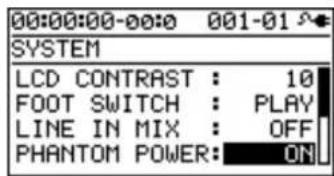
| Setting | Explanation |
| ON | Phantom power will be supplied to the XLR connector of INPUT 4. |
| OFF Phantom | power will not be supplied. |
4 Press the [EXIT] button a number of times to return to the play screen.
Adjusting the Sensitivity of the Touch Sensors
The top panel of the BR-800 employs touch sensors. Over time, depending on the location in which you use the BR-800 and the type of usage you subject it to, you may notice a decline in the response of these touch sensors, or find that they've become unnecessarily sensitive. In such cases, you should adjust the sensitivity of the sensors using the following procedure.
1
Switch off the BR-800's power.
2
Eject the SD card.
* For instructions on how to eject and insert SD cards, see p. 148, p. 149 in the Owner's Manual.
3
Connect the AC adaptor.
* Make sure that the BR-800 is powered using the AC adaptor while you are adjusting the sensitivity of the sensors.
4
Turn on the BR-800's power.
NOTE
After you turn on the power, make sure that you do not touch any part of the top panel until the SW SENSITIVITY (sensitivity adjustment) screen appears.
The SW SENSITIVITY screen (for adjusting the sensitivity of the touch sensors) will appear.
![SW SENSITIVITY SENSITIVITY: 5 Press any switch! [EXIT]:QUIT [ENTER]:SAVE](/content/2026/05/810967/images/e9e19ac32efab0d4a5368bfa71009dbc9f05bfe31d8ef635c0991fdd9d8c9d46.jpg)
5
Using the dial, adjust the sensitivity.
Range: 1–10
* When the instrument is shipped from the factory, this is set to "5."
6
Press the various buttons on the top panel to check their sensitivity.
Press all of the buttons except the [EXIT] button and [ENTER] button.
Using the dial, adjust the value until a button's name appears in the screen as soon as you press the button.
7
Once you've finished checking the sensitivity for all the buttons, press the [ENTER] button.
If you want to exit without saving your settings, press the [EXIT] button.
When you press the [ENTER] button
The message "Save and exit?" will appear, asking you for confirmation.
![SM SFNSTITUTTY Save and exit? [EXIT]:CANCEL [ENTER]:OK [EXIT]:WILL ENTER:SHVE](/content/2026/05/810967/images/36345e960a997f0d2517c340baeb2d3115ddf5ae60c129446bcaee680d8ae25c.jpg)
To save your settings, press the [ENTER] button; to return to the SW SENSITIVITY screen, press the [EXIT] button.
When you press the [EXIT] button
The message "Quit without saving?" will appear, asking you for confirmation.
![S#M SFNSTITUTTY ? Quit without savings? [EXIT]:CANCEL [ENTER]:OK [EXIT]:WUT ENTER:SHVE](/content/2026/05/810967/images/0b63aa6c4dc5e5646346f41f8eb14be6680b8288c105828080cbe0926b41cf8a.jpg)
If you don't want to save your settings, press the [ENTER] button; to return to the SW SENSITIVITY screen, press the [EXIT] button.
8
Once the play screen appears, switch off the BR-800's power.
9
After confirming that the unit's power is off, insert the SD card.
MEMO
Appendixes
SD Cards that Can Be Used with the BR-800
The BR-800 uses SD cards to record and play back.
■ SD cards that are known to work
If using an SD card other than the included one, refer to the Roland website (http://www.roland.com/) for the most recent information on cards that are known to work with the BR-800.

- The BR-800 supports SD/SDHC cards up to a maximum of 32 GB.
- Some SD card types or SD cards from some manufacturers may not record or play back properly on the BR-800.
■ Recording time
The following table shows the length of recording that is possible on a single card.
| SD card capacity | Recording time | |
| Normal recording (calculated as 1 track) | Song Sketch mode | |
| 1GB | approx. 520 minutes approx. 90 minutes | |
| 2GB | approx. 17 hours approx. 3 hours | |
| 4GB | approx. 34 hours approx. 6 hours | |
| 8GB | approx. 68 hours approx. 12 hours | |
| 16GB | approx. 136 hours approx. 24 hours | |
| 32GB | approx. 272 hours approx. 48 hours | |

- The above recording times are approximate. They may be slightly shorter depending on the number of songs created.
- For normal recording, the listed recording times assume the use of only one track. For example, if you're using all eight tracks to record, the available recording time for each track will be 1/8th of the time listed above.
- The sampling rate is 44.1 kHz. You cannot change the sampling rate.
■ Formatting an SD card
If you're using a commercially available SD card, you'll need to format it before use.
Format the card as described in "Initializing an SD Card (FORMAT)" (p. 141).
■ Removing the card cover
When the BR-800 is shipped from the factory, the card cover is fastened to the unit using a screw to discourage theft of the SD card.
Here's how to remove the card cover.
1
Turn the BR-800 upside down.
2
Use a Phillips (+) screwdriver to remove the screw from the card cover on the bottom panel.
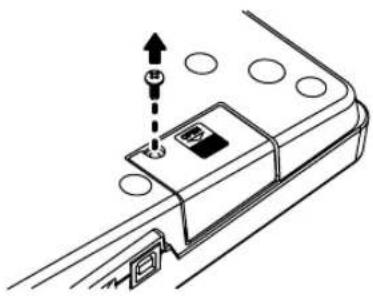
natural_image
Technical line drawing of a mechanical component with a central button and mounting holes (no text or symbols)3
Pull out the card cover in the direction shown by the arrow in the illustration below.
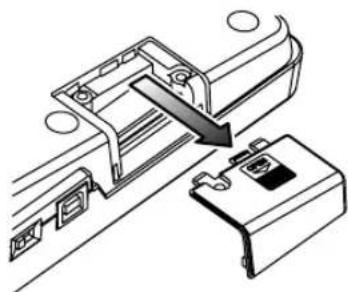
natural_image
Diagram of a device assembly showing a component being inserted into a housing (no text or symbols visible)4
To prevent the removed screw from being lost, use a Phillips (+) screwdriver to attach it in the location shown in the illustration below.
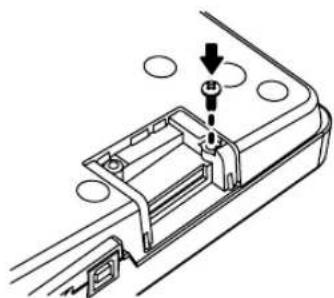
natural_image
Technical line drawing of a mechanical assembly with a component and mounting holes (no text or symbols)NOTE
- When turning the unit upside-down, get a bunch of newspapers or magazines, and place them under the four corners or at both ends to prevent damage to the buttons and controls. Also, you should try to orient the unit so no buttons or controls get damaged.
- When turning the unit upside-down, handle with care to avoid dropping it, or allowing it to fall or tip over.
- Keep any screws or card cover you may remove and the included SD card in a safe place out of children's reach, so there is no chance of them being swallowed accidentally.
■ Inserting an SD card
Insert the SD card so that its contacts are facing upward.
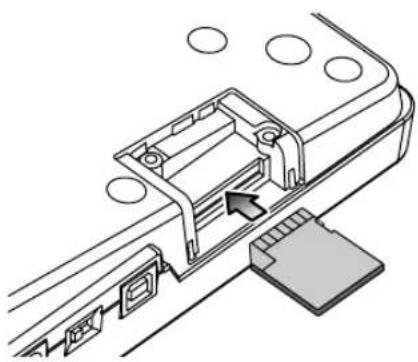
natural_image
Technical line drawing of a mechanical assembly with no visible text or symbols■ Removing an SD card
Gently press the SD card inward, and then release your finger.
The SD card will pop out slightly, allowing you to remove it.
NOTE
- Carefully insert the SD card all the way in—until it is firmly in place.
- Do not touch the contacts of the SD card or allow them to get dirty.
- Never insert or remove an SD card while this unit's power is on. Doing so may corrupt the unit's data or the data on the SD card.
■ The SD card write protect feature (LOCK)
The contents of the SD card can be protected by write protecting it. To write protect a card, slide the write protect switch on the side of the SD card to the "LOCK" position. Unlock write protect to delete data on the SD card.
Writing allowed
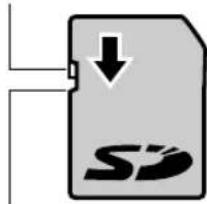
natural_image
Generic file icon showing a document with a downward arrow and 'SD' symbol, no text or labels present.Writing prohibited (LOCK)
Insert Effects
BANK: GUITAR
E.GUITAR MULTI
| 1 StckLead |
| 2 70HrdRck |
| 3 | ERUPTING |
| 4 TexasDrv |
| 5 WahBoost |
| 6 DS DRIVE |
| 7 UNI-V Ld |
| 8 FZ BOOST |
| 9 90Grunge |
| 10 DRIVEN |
| 11 GRN PUNK |
| 12 MS+OD-1 |
| 13 80s Solo |
| 14 HeavyRff |
| 15 ModernHM |
| 16 SldScoop |
| 17 HiGain'd |
| 18 PrgMetal |
| 19 Fat Riff |
| 20 MetalCln |
| 21 GroovCln |
| 22 RhythmGt |
| 23 FunkWah |
| 24 CleanCHO |
| 25 CleanPH |
| 26 Jazzy |
| 27 JAZZ OD |
| 28 WestCln |
| 29 SURFLINE |
| 30 VO Drive |
| 31 60s UK |
| 32 ProCrnch |
| 33 BG DELAY |
| 34 SmoothLd |
| 35 WarmDrv |
| 36 StudioLd |
| 37 ChiBlues |
| 38 | BLUESY |
| 39 US Combo |
| 40 Blues Ld |
| 41 ComboDrv |
| 42 BluesDrv |
| 43 DrvnTwin |
| 44 Cntry Bg |
| 45 50s Echo |
| 46 TREMOLO |
| 47 | ROTARY |
48 SPACY
49 OCT LEAD
50 PedalWah
ACOUSTIC SIM
51 for LP
52 for ST
53 Bright
54 forSlide
55 Dream
GUITAR TO BASS
56 TigtBass
57 LoosBass
58 DrvBass
59 FrtIssBs
60 OctWahBs
A.GUITAR MULTI
61 Natural
62 AG Solo
63 Mic'd AG
64 Nice
65 Wide
BASS MULTI
66 ScoopSlp
67 60s R&B
68 PUNK
69 ToACTIVE
70 LoPickBs
71 4BandLMT
72 TWahFUNK
73 Fltr Slp
74 Chrs Slp
75 OctGroov
76 FRETLESS
77 DRIVE810
78 Vntg Drv
79 METAL
80 EARTHQAK
BANK: MICROPHONE
VOCAL MULTI
1 ROCK
2 POP
3 VOI PERC
4 DOUBLE
5TRIPLE
6 6 VOICE
7 5th HRM
8 3rd HRM
9 5th+DBL
10 3rd+DBL
11 3+5 LOW
12 3rd+5th
13 3+5 HIGH
14 DIST
15 RADIO
16 STROBE
17 FLANGER
18 PCH COR
19 ELECTRIC
20 ROBOT
MIC MULTI
21 Vo COMP1
22 Vo COMP2
23 Kick CMP
24 SnareCMP
25 BrassCMP
26 FatBRASS
27 Dark EQ
28 Vocal EQ
29 BrightEQ
30 ENH+BCUT
BANK: LINE
STEREO MULTI
1 CM+FatEQ
2 CM+ThnEQ
3 TIGHT EQ
4 CM+BigEQ
5 SMALL EQ
6 R.MOD
7 DEEP FLG
8 ROTARY
9 StCHORUS
10 ENHANCER
11 MdrnPHAS
12 PS:DETUN
13 PS:-1OCT
14 PS:+1OCT
15 ST DOUBL
16 SLOW PAN
17 CHRS+DLY
18 120 RMOD
19 PAN+DLY
20 ST TREM
21 60sRADIO
22 PHONGRPH
23 VntgSMPL
24 RModSMPL
25 2-BIT DS
BANK: SIMUL
VO + GT.AMP
1 Clean
2 Bluesy
3 Crunch
4 HardRock
5 Metal
VO + AC.SIM
6 for LP
7 for ST
8 Bright
9 forSlide
10 Dream
VO + ACOUSTIC
11 Natural
12 AG Solo
13 Mic'd AG
14 Nice
15 Wide
BANK: 4INPUT
4-INPUT MULTI (*)
1 4CH LMT
24CH COMP
3 Drums
4 RockBand
5 JazzBand
BANK: 8TRACK COMP
8-TRACK COMP/LIM
1 Natural
2 Soft LMT
3 Hard LMT
4 Soft CMP
5 Hard CMP
* See "Recommended
Connections (4-INPUT MULTI)" (p.151).
Recommended Connections (4-INPUT MULTI)
| No. | Patch Name | Recommended Connection |
| 1 4CH | LMT | INPUT1: for any instruments |
| INPUT2: for any instruments | ||
| INPUT3: for any instruments | ||
| INPUT4: for any instruments | ||
| 2 | 4CHCOMP | INPUT1: for any instruments |
| INPUT2: for any instruments | ||
| INPUT3: for any instruments | ||
| INPUT4: for any instruments | ||
| 3 Drums | INPUT1: Kick (Mic) | |
| INPUT2: Snare (Mic) | ||
| INPUT3: Top L (Mic) | ||
| INPUT4: Top R (Mic) | ||
| 4 RockBand | INPUT1: Guitar Amp (Mic) | |
| INPUT2: Bass Amp (Mic) | ||
| INPUT3: Drums (Mic) | ||
| INPUT4: Vocal (Mic) | ||
| 5 JazzBand | INPUT1: Guitar Amp (Mic) | |
| INPUT2: Bass Amp (Mic) | ||
| INPUT3: Drums (Mic) | ||
| INPUT4: Piano (Mic) | ||
Mastering Effects
| 1 | Mix Down |
| 2 | PreMastr |
| 3 | Live Mix |
| 4 | Pop Mix |
| 5 | DanceMix |
| 6 | JingIMix |
| 7 | HardComp |
| 8 | SoftComp |
| 9 | CleanCmp |
| 10 | DanceCmp |
| 11 | OrchComp |
| 12 | VocalCmp |
| 13 | Acoustic |
| 14 | RockBand |
| 15 | Orchestr |
| 16 | LowBoost |
| 17 | Brighten |
| 18 | DJsVoice |
| 19 | PhoneVox |
Preset Arrangement List
Each of the preset Arrangement (except Metro4/4) is set so that a BREAK, followed by V1 (verse) comes after the E (ending).
| No. | Arrangement Name | Initial Tempo | Beat | Starting measure | BREAK | V1 | Drum Kit | ||||||
| IN V1 | F1 V2 | F2 V2 | END | ||||||||||
| P01 | ROCK1 130 | 4/4 1 2 5 6 | 9 10 12 | 16 19 | ROOM | ||||||||
| P02 | ROCK2 130 4/4 | 1 2 5 6 9 1 | 0 12 15 | 18 | ROOM | ||||||||
| P03 | ROCK3 118 4/4 | 1 3 6 7 10 | 11 15 17 | 20 | ROOM | ||||||||
| P04 | ROCK4 118 4/4 | 1 5 8 9 12 | 13 15 19 | 22 | ROOM | ||||||||
| P05 | ROCK5 104 4/4 | 1 5 8 9 12 | 13 15 17 | 20 | ROOM | ||||||||
| P06 | ROCK6 86 4/4 1 | 2 9 10 17 | 18 22 24 | 27 | STD 2 | ||||||||
| P07 | HdRck1 130 4/4 | 1 5 8 9 12 | 13 15 18 | 21 | ROOM | ||||||||
| P08 | HdRck2 98 4/4 1 | 3 10 11 18 | 19 23 | 25 | 28 | HARD | |||||||
| P09 | HdRck3 126 4/4 | 1 5 8 9 12 | 13 15 20 | 23 | ROOM | ||||||||
| P10 | HdRck4 120 4/4 | 1 2 5 6 9 1 | 0 13 14 | 17 | ROOM | ||||||||
| P11 | HdRck5 118 4/4 | 1 2 5 6 9 1 | 0 12 13 | 16 | ROOM | ||||||||
| P12 | HEAVY1 210 4/4 | 1 5 11 13 | 19 21 25 | 29 | 32 | HARD | |||||||
| P13 | HEAVY2 120 4/4 | 1 3 9 11 | 17 19 21 | 23 | 26 | HARD | |||||||
| P14 | HEAVY3 120 4/4 | 1 3 10 11 | 18 19 22 | 24 | 27 | HARD | |||||||
| P15 | HEAVY4 162 4/4 | 1 3 9 11 | 17 19 21 | 24 | 27 | ROOM | |||||||
| P16 | HEAVY5 109 4/4 | 1 5 8 9 12 | 13 15 | 16 | 19 | ROOM | |||||||
| P17 | POP1 118 4/4 1 | 3 6 7 10 1 | 1 13 17 | 20 | ROOM | ||||||||
| P18 | POP2 118 4/4 1 | 3 6 7 10 1 | 1 13 15 | 18 | STD1 | ||||||||
| P19 | POP3 118 4/4 1 | 3 6 7 10 1 | 1 13 15 | 18 | ROOM | ||||||||
| P20 | POP4 118 4/4 1 | 3 6 7 10 1 | 1 13 17 | 20 | ROOM | ||||||||
| P21 | POP5 140 4/4 1 | 3 6 7 10 1 | 1 13 16 | 18 | ROOM | ||||||||
| P22 | POP6 | 96 4/4 1 | 3 6 7 10 | 11 | 13 | 15 | 18 | STD 1 | |||||
| P23 | POP7 | 66 4/4 1 | 4 7 8 11 | 12 | 14 | 16 | 19 | STD 2 | |||||
| P24 | POP8 151 4/4 1 | 5 8 9 16 1 | 7 21 24 | 27 | STD 1 | ||||||||
| P25 | BALLAD1 | 70 4/4 1 | 5 8 9 12 | 13 | 15 | 18 | 21 | ROOM | |||||
| P26 | BALLAD2 | 89 4/4 1 | 2 5 6 9 1 | 0 | 12 | 14 | 17 | STD 2 | |||||
| P27 | BLUES1 | 124 4/4 1 | 2 5 6 9 1 | 0 | 13 | 16 | 19 | STD 2 | |||||
| P28 | BLUES2 | 192 4/4 1 | 5 12 13 | 20 | 21 | 25 | 29 | STD 1 | |||||
| P29 | BLUES3 | 124 4/4 1 | 3 9 11 17 | 19 | 27 | 28 | 32 | STD 2 | |||||
| P30 | BLUES4 | 148 4/4 1 | 5 8 9 12 | 13 | 15 | 17 | 20 | STD 1 | |||||
| P31 | R&B1 | 110 4/4 1 | 5 8 9 12 | 13 | 15 | 18 | 21 | STD 1 | |||||
| P32 | R&B2 | 154 4/4 1 | 3 6 7 10 | 11 | 13 | 18 | 21 | STD 1 | |||||
| P33 | R&B3 | 108 4/4 1 | 5 8 9 12 | 13 | 15 | 18 | 21 | STD 2 | |||||
| P34 | R&B4 | 96 4/4 1 | 5 12 13 | 20 | 21 | 27 | 28 | STD 1 | |||||
| P35 | R&B5 | 94 4/4 1 | 5 8 9 12 | 13 | 15 | 19 | 22 | STD 1 | |||||
| P36 | JAZZ1 | 140 4/4 1 | 3 5 7 9 1 | 1 | 13 | 15 | 18 | JAZZ | |||||
| P37 | JAZZ2 | 140 4/4 1 | 5 7 9 11 | 13 | 15 | 17 | 20 | JAZZ | |||||
| P38 | JAZZ3 | 140 4/4 1 | 5 12 13 | 20 | 21 | 25 | 30 | JAZZ | |||||
| P39 | FUSION1 | 120 4/4 1 | 5 12 13 | 20 | 21 | 25 | 29 | STD2 | |||||
| P40 | FUSION2 | 118 4/4 1 | 2 5 6 9 1 | 0 | 12 | 15 | 18 | RCOM | |||||
| P41 | HipHop1 | 93 4/4 1 | 2 9 10 17 | 18 | 22 | 23 | 26 | HIP-HOP | |||||
| P42 | HipHop2 | 102 4/4 1 | 3 10 11 | 18 | 19 | 23 | 25 | 808 | |||||
| P43 | FUNK | 110 4/4 1 | 2 5 6 9 1 | 0 | 12 | 13 | 16 | HIP-HOP | |||||
| P44 | HOUSE 114 4/4 | 1 3 6 7 10 | 11 13 15 | 18 | HOUSE | ||||||||
| P45 | Cntry1 | 118 4/4 1 | 3 6 7 10 | 11 | 13 | 14 | 17 | JAZZ | |||||
| P46 | Cntry2 | 118 4/4 1 | 2 5 6 9 1 | 0 | 12 | 14 | 17 | JAZZ | |||||
| P47 | Other1 | 96 4/4 1 | 2 9 10 17 | 18 | 22 | 24 | 27 | REGGAE | |||||
| P48 | Other2 | 118 4/4 1 | 5 7 9 11 | 13 | 15 | 19 | 22 | STD 2 | |||||
| P49 | Other3 | 125 4/4 1 | 2 5 6 9 1 | 0 | 12 | 14 | 17 | RCOM | |||||
| P50 | Metro4/4 | 120 | 4/4 | 1 | - | - | - | - | - | - | - | - | STD 1 |
Preset Pattern List
| Pattern Name(Abbreviation shown in display) | Initial Tempo | Beat | Measure | |||||
| IN V1 | F1 V2 F2 | E | ||||||
| ROCK1 | 130 4/4 | 1 2 1 2 1 4 | ||||||
| ROCK2 130 4/4 1 2 1 2 1 3 | ||||||||
| ROCK3 118 4/4 2 2 1 2 1 2 | ||||||||
| ROCK4 118 4/4 4 2 1 2 1 4 | ||||||||
| ROCK5 104 4/4 4 2 1 2 1 2 | ||||||||
| ROCK6 86 4/4 1 4 1 4 1 2 | ||||||||
| Hard Rock 1 (HdRc1) 130 | 4/4 4 2 1 2 1 3 | |||||||
| Hard Rock 2 (HdRc2) 98 4/4 2 4 1 4 1 | 2 | |||||||
| Hard Rock 3 (HdRc3) 126 | 4/4 4 2 1 2 1 5 | |||||||
| Hard Rock 4 (HdRc4) 120 | 4/4 1 2 1 2 1 1 | |||||||
| Hard Rock 5 (HdRc5) 118 | 4/4 1 1 1 1 1 1 | |||||||
| HEAVY1 (HEVY1) | 210 4/4 | 4 4 2 4 2 4 | ||||||
| HEAVY2 (HEVY2) | 120 4/4 | 2 2 2 2 2 2 | ||||||
| HEAVY3 (HEVY3) | 120 4/4 | 2 2 1 2 1 2 | ||||||
| HEAVY4 (HEVY4) | 162 4/4 | 2 2 2 2 2 3 | ||||||
| HEAVY5 (HEVY5) | 109 4/4 | 4 2 1 2 1 1 | ||||||
| POP1 | 118 4/4 | 2 2 1 2 1 4 | ||||||
| POP2 | 118 4/4 | 2 2 1 2 1 2 | ||||||
| POP3 | 118 4/4 | 2 2 1 2 1 2 | ||||||
| POP4 | 118 4/4 | 2 1 1 1 1 4 | ||||||
| POP5 | 140 4/4 | 2 1 1 1 1 3 | ||||||
| POP6 | 96 4/4 | 2 2 1 2 1 2 | ||||||
| POP7 | 66 4/4 | 3 2 1 2 1 2 | ||||||
| POP8 | 151 4/4 | 4 2 1 2 1 3 | ||||||
| BALLAD1 (BALD1) | 70 4/4 | 4 2 1 2 1 3 | ||||||
| BALLAD2 (BALD2) | 89 4/4 | 1 2 1 2 1 2 | ||||||
| BLUES1 (BLUS1) | 124 4/4 | 1 4 1 4 1 3 | ||||||
| BLUES2 (BLUS2) | 192 4/4 | 4 4 1 4 1 4 | ||||||
| BLUES3 (BLUS3) | 124 4/4 | 2 4 2 4 2 3 | ||||||
| BLUES4 (BLUS4) | 148 4/4 | 4 2 1 2 1 2 | ||||||
| R&B1 | 110 4/4 | 4 2 1 2 1 3 | ||||||
| R&B2 | 154 4/4 | 2 2 1 2 1 5 | ||||||
| R&B3 | 108 4/4 | 4 2 1 2 1 3 | ||||||
| R&B4 | 96 4/4 | 4 4 1 4 1 1 | ||||||
| R&B5 | 94 4/4 | 4 2 1 2 1 4 | ||||||
| JAZZ1 | 140 4/4 | 2 2 2 2 2 2 | ||||||
| JAZZ2 | 140 4/4 | 4 2 2 2 2 2 | ||||||
| JAZZ3 | 140 4/4 | 4 4 1 4 1 5 | ||||||
| FUSION1 (FUSN1) | 120 4/4 | 4 4 1 4 1 4 | ||||||
| FUSION2 (FUSN2) | 118 4/4 | 1 2 1 2 1 3 | ||||||
| HipHop1 (H.Hp1) | 93 4/4 | 1 4 1 4 1 1 | ||||||
| HipHop2 (H.Hp2) | 102 4/4 | 2 4 1 4 1 2 | ||||||
| FUNK | 110 4/4 | 1 2 1 2 1 1 | ||||||
| HOUSE | 114 4/4 | 2 2 1 2 1 2 | ||||||
| Cntry1 (Cnty1) | 118 4/4 | 2 1 1 1 1 1 | ||||||
| Cntry2 (Cnty2) | 118 4/4 | 1 2 1 2 1 2 | ||||||
| OTHER1 (Othr1) | 96 4/4 | 1 2 1 2 1 2 | ||||||
| OTHER2 (Othr2) | 118 4/4 | 4 2 2 2 2 4 | ||||||
| OTHER3 (Othr3) | 125 4/4 | 1 2 1 2 1 2 | ||||||
| Metro | - | - | - | - | - | - | - | - |
| BREAK | - | - | - | - | - | - | - | - |
This section contains tips to help you solve problems.
If this information does not help you solve the problem, please contact a customer service location listed at the end of this manual.
Problems with the Power Supply
| Item | Explanation Page | |
| Power won’t turn on | Is the BR-800’s power switch set correctly?Make sure that the BR-800’s power switch is set to “USB” if you’re using USB bus power, or to “ON” if you’re using the AC adaptor or batteries. | p. 18 |
| Is sufficient power being supplied to your computer or USB hub?The connection cannot be established if insufficient power is being supplied to the BR-800. Make sure that none of the following cases apply.If you’re using a notebook computer that’s running on its battery, operation may be unstable in the case of some computers. In this case, connect an AC adaptor to your computer.The power management settings of your computer may be limiting the power that is supplied to USB. Check the settings on your computer.In some cases, the BR-800 cannot be used with bus-powered hubs (USB hubs that do not contain a power supply). Please use a self-powered hub (a hub that contains a power supply). | – |
Problems with the Sound
| Item | Explanation Page | |
| No sound | Is power to the BR-800 and any connected equipment turned on? | p. 34 |
| Could the PHONES LEVEL be set to 0? p. 137 | ||
| Are the audio cables connected correctly? p. 32 | ||
| Could an audio cable be broken? - | ||
| Could the volume be turned down on the connected amp or mixer? - | ||
| Could the [MASTER] fader be lowered? - | ||
| Is an SD card inserted? p. 148 | ||
| Could an SD card not supported by the BR-800 be inserted? p. 148 | ||
| Could you be attempting to play back a phrase that is shorter than 1.0 seconds? Phrases shorter than 1.0 seconds cannot be played back. | - | |
| Could DIR MONITOR be turned “OFF”? p. 128 | ||
| Can’t play back a WAV file | Could you be attempting to play back a WAV file in an unsupported format? | p. 124 |
| Insufficient volume from a device connected to the GUITAR/BASS jack or LINE IN jack | Could you be using a connection cable that contains a resistor? Use a connection cable that does not contain a resistor. | - |
| Is the volume of your external device adjusted correctly? - | ||
| No sound from a specific track | Could the track’s volume level be lowered? p. 38 | |
| Could the wrong V-track be selected? p. 39 | ||
| Could the track be muted? p. 13 | ||
| Can’t hear the input source | Is INPUT SELECT set correctly? p. 37 | |
| Did you adjust the INPUT SENS knob? p. 37 | ||
| Could the [REC LEVEL] knob be minimized? | p. 38 | |
| Can't record | Could the song be protected? | p. 110 |
| Is an SD card inserted? p. 148 | ||
| Could the SD card have insufficient free space? p. 142 | ||
| Could the SD card be locked? p. 149 | ||
| Could you be using the Phrase Trainer? p. 138 | ||
| Could scrub playback be in use? p. 104 | ||
| Could control surface mode be in use?You can't record on the BR-800 in control surface mode. | p. 123 | |
| You want to turn off the reverb | Check the reverb send level amounts for the loop effect.The BR-800 provides reverb as a loop effect.Reverb is applied by default. If you want to turn off the reverb effect, set each track's send level amount to "0." | p. 84 |
| Recorded sound contains noise or distortion | Is the input sensitivity appropriate?The recorded sound will be distorted if the input sensitivity is too high, and noise will be excessive if the input sensitivity is too low. Adjust the input sensitivity so that the PEAK indicator briefly lights when the loudest passages occur. | p. 37 |
| Are the track output levels appropriate?If there is noise or distortion following mastering, the track output levels are too high. | - | |
| Could a microphone with high output impedance be connected directly to the BR-800?Since the INPUT 1–4 jacks are designed for a low input impedance, the recording level may be too low depending on the characteristics of the microphone. In this case, pass the signal through a commercially available microphone preamp before recording it. | - | |
| Oscillation occurs | Could INPUT SELECT be set to "USB"?If INPUT SELECT is set to "USB," the settings of your software may cause the audio signal to be looped. In this case, you can solve the problem by taking one of the following actions.Stop playback in your software, or turn off the Soft Thru function.Turn off the audio input of your software.Change INPUT SELECT to a setting other than "USB." | p. 37 |
Problems with the SD Card
| Item | Explanation Page | |
| Data on the SD card was damaged | Data on the SD card can be damaged due to the following reasons. Please format the SD card.Could you have turned off the power while the recorder was operating?Could the SD card have been subjected to strong physical shock?Could you have turned off the power while the SD card was being accessed?Could you be using an SD card that was formatted by a computer or digital camera? | p. 141 |
Problems with USB
| Item | Explanation Page | |
| Idling screen does not appear | Is the USB cable connected correctly? | p. 32 |
| Does your computer's operating system support the BR-800? p. 120 | ||
| Can't hear sound being input via USB | Could INPUT MIX be “OFF”? | p. 128 |
| Control surface mode does not work correctly | Could you have started your DAW software before setting the BR-800 to control surface mode? | p. 123 |
| Have you made the correct settings in your DAW software?In order to use the BR-800 as a control surface with your DAW software, the control surface setting of your DAW software must be set to “Mackie control.” For details, refer to the owner's manual of the DAW software you're using. | - |
Problems with the Buttons
The BR-800 uses touch sensors. The buttons will respond when you touch them directly with your finger.
| Item | Explanation Page | |
| Button response is poor/unresponsive | Could you be operating the buttons while wearing gloves? | - |
| Could you be operating the buttons with an object other than your finger, such as a pen? - | ||
| Could there be droplets of water on the BR-800?Turn off the power, wipe off the water droplets, and turn the power on again. | - | |
| Could an object be resting on the BR-800?Turn off the power, take the object off the BR-800, and turn the power on again.During the time from when you turn on the power until the name of a song appears, do not touch the top panel and do not allow any objects to come into contact with it. | - | |
| Could you be pressing two or more buttons simultaneously?The BR-800 can detect that two buttons are pressed only when activating the Scrub operation (hold down the [STOP] button and press the [PLAY] button).Simultaneous button operation will not work correctly in other situations.Touch only the button you want to operate—keep fingers and other objects away from all the other buttons.When you need to press a number of buttons in succession, make sure to remove your finger from the top panel after each press of a button. | - | |
| Is a fluorescent light nearby?Move the BR-800 away from fluorescent lights. | - |
Error Message List
An error message will appear in the display if you attempt to perform an invalid operation or if an operation could not be executed correctly.
Take the appropriate action for the message that appears.
| Message | Cause Action Page | ||
| Already exists! | There is a file of the same name. | Create the file using a different name. - | |
| Battery low! | The operating batteries have run low. | Replace the batteries as soon as possible. p. 19 | |
| Cannot change file name! | The file name contains some characters which are incompatible with BR-800 or the file name is too long (File name (excl. extension) should be within eight characters). | Please change the file name with using your computer. | p. 126 |
| Cannot erase! | You attempted to erase a step from a song arrangement that contained only one step. | Enter two or more steps before erasing a step. p. 96 | |
| You attempted to erase a step from a song arrangement that contained no data. | Erase a step that contains data. p. 96 | ||
| Cannot insert! | The song arrangement exceeded 50 steps. | A song arrangement cannot have more than 50 steps. | p. 96 |
| The song arrangement exceeded 999 measures. | A song arrangement cannot have more than 999 measures. | p. 96 | |
| Cannot undo!/ redo! | Undo/Redo is not possible when there is no editing history. | Perform undo/redo after you've left an editing history. | - |
| Card full! | Recording or copying is not possible because there isn't enough free space on the SD card. | Back up important data to your computer, and delete unwanted data from the card. | p. 128 |
| Card locked! | Writing or erasure cannot be performed because the SD card's Lock feature is on. | Turn off the power, remove the SD card, and turn Lock off. | p. 149 |
| Card read error! | Data could not be read correctly from the SD card. | Turn off the power, reinsert the SD card securely, and then turn on the power again.If the same message appears even after you've performed the above action, the SD card may be damaged. | p. 148 |
| Format the SD card.If the same message appears even after you've performed the above action, the SD card may be damaged. | p. 141 | ||
| Card write error! | An error occurred while writing data to the SD card. | Format the SD card. The song data you were attempting to save will be lost.If the same message appears even after you've performed the above action, the SD card may be damaged. | p. 141 |
| Data too short! | You attempted to import a WAV file that was shorter than one second. | The WAV file must be longer than one second for it to be imported. | - |
Error Message List
| Message | Cause Action Page | ||
| Drive busy! | Data could not be read or written fast enough because the data is stored on the SD card in a fragmentary manner. Alternatively, you are using an SD card that is not fast enough. This problem is more likely to occur if you join together phrases (recorded data) of only a few seconds in length, such as when using punch-in/out recording. | Reduce the number of tracks being played simultaneously. Use the Mastering function to combine tracks, and erase the tracks that you don't need to play back. Then, carry out playback again. | p. 114 |
| Reduce the number of tracks being recorded simultaneously. | p. 38 | ||
| Event full! | The maximum number of events that the BR-800 can handle in one song has been exceeded. | Erase unneeded tracks. p. 105 | |
| What is an event?An "event" is the smallest unit used by the BR-800 to manage the data recorded on an SD card. Approximately 30,000 events are allocated for each newly created song. For each track, each recording operation will consume two events. Operations such as punch-in/out and track copy will also consume events. The number of events consumed will change in a complex way depending on the conditions. For example, even if there actually is free space remaining on the SD card, no further recording or track editing will be possible if all of the events have been used up. If this occurs, the error message "Event Full!" will appear. | |||
| No card! | You performed a recorder or SD card operation when no SD card was inserted, or the card was incompletely inserted. | Turn off the power, firmly reinsert the SD card, and then turn the power on again. | p. 148 |
| You removed the SD card after selecting data on the SD card. | |||
| No file! | When importing WAV data, the file to be imported did not exist. | Prepare the file that is to be imported. - | |
| No song! | The SD card does not contain songs. | Create a new song. p. 36 | |
| The song folder contains incorrect data, or does not contain the necessary data. | Restore the backed-up data from your computer back to the BR-800.* Restore the entire "ROLAND" folder to the BR-800. | p. 126 | |
| Not available! | The operation you attempted cannot be executed in the current mode. | If you were in Song Sketch mode:Press the [SONG SKETCH] button to exit Song Sketch mode, and then perform the operation. | p. 50 |
| If you were in Mastering mode:Turn MASTERING "OFF" to exit Mastering mode, and then perform the operation. | p. 114 | ||
| If you were in Control Surface mode:Press the [EXIT] button a number of times to exit Control Surface mode, and then perform the operation. | p. 122 | ||
| Power down! | The internal power supply voltage has fallen below the allowable range for recorder operation. | If you're using the adaptor:It may be that the cable is broken or the adaptor is faulty. Please contact Roland customer service or your dealer. | - |
| If you're using batteries:Install fresh batteries. | p. 19 | ||
| Protected! | You attempted to write data to a song whose Song Protect setting is "ON." | Turn Song Protect "OFF." p. 110 | |
| Stop P.Trainer! | The operation you attempted cannot be executed while the Phrase Trainer (p. 138) is operating. | Turn the Time Stretch and Center Cancel function “OFF.” | p. 138 |
| Stop recorder! | The operation you attempted cannot be executed while the recorder is operating (i.e., during playback or recording). | Press the [STOP] button to stop playback or recording. | - |
| System error! | Writing to the BR-800's memory failed. | It may be that the BR-800 has malfunctioned. Please contact Roland customer service or your dealer. | - |
| Too many files! | You attempted to create more than 1,000 files in Song Sketch mode. | Delete unneeded files. p. 51 | |
| Too many songs! | You attempted to create more than 100 songs. | Delete unneeded songs. p. 109 | |
| Unformatted card! | The SD card is of a type that cannot be used on the BR-800. | Turn off the power, firmly reinsert the SD card, and then turn the power on again. | - |
| Format the card on the BR-800. p. 141 | |||
| Unsupported card! | An SD card not supported by the BR-800 is inserted. | Use an SD card that is supported by the BR-800. p. 148 | |
| Unsupported format! | An SD card of a format not usable by the BR-800 is inserted. | Format the card on the BR-800. p. 141 | |
| You attempted to import a WAV file that the BR-800 does not support. | Check the format of the WAV file. p. 124 | ||
| USB buffer full! | A larger amount of MIDI messages than could be processed correctly was received via USB. | Reduce the amount of MIDI messages being sent to the BR-800. | - |
| Memory full! | The song size exceeded 1 GB. | Erase unneeded tracks. p. 107 | |
| When you carry out the SAVE CURRENT STATE procedure, the size of the song might be reduced. | p. 111 | ||
BR-800 : Digital Recorder
| Tracks | Track: 8Simultaneously recording track: 4V-Track: 64 (8 V-Tracks per each Track) |
| Sample Rate | 44.1 kHz |
| Frequency Response | 20 Hz to 20 kHz (+1/-3 dB) |
| AD Conversion | 24-bit24-bit + AF-AD (GUITAR/BASS) |
| DA Conversion | 24-bit |
| Nominal Input Level | GUITAR/BASS jack: -10 dBuINPUT 1-4 jacks: -50 - -20 dBu (XLR type)-26 - +4 dBu (1/4" TRS phone type)LINE IN jack: -10 dBu |
| Input Impedance | GUITAR/BASS jack: 1M ohmINPUT 1-4 jacks: 3k ohms (XLR type)47k ohms (1/4" TRS phone type)LINE IN jack: 10 k ohms |
| Nominal Output Level | LINE OUT jacks: -10 dBu |
| Output Impedance | LINE OUT jacks: 1 k ohm |
| Recommended Load Impedance | LINE OUT jacks: 20 k ohms or greaterPHONES jack: 32-100 ohms |
| Residual Noise Level | LINE OUT jacks: -85 dBu or less (IHF-A Typ.) |
| Display | 128 x 64 dots (Backlit LCD) |
| Connectors | GUITAR/BASS jack (1/4" phone type)INPUT 1-4 jacks (XLR type / 1/4" TRS phone type)LINE IN jack (Stereo miniature phone type)FOOT SW/EXP PEDAL jack (1/4" TRS phone type)LINE OUT jacks (RCA phono type)PHONES jack (Stereo 1/4" phone type)USB connectorDC IN jack |
| Power Supply | DC 9V: AC Adaptor, Size AA Dry battery x 6 (alkaline batteries recommended), USB Bus Power |
| Current Draw | 280 mA (DC IN), 480 mA (USB Bus Power)Alkaline dry cell batteries: Approximately 5.5 hours* May vary according to usage conditions, phantom power used, batteries used, and type of SD card used. |
| Dimensions | 289 (W) x 184 (D) x 58 (H) mm11-7/16 (W) x 7-1/4 (D) x 2-5/16 (H) inches |
| Weight | 890 g / 2 lbs (excluding batteries) |
| Accessories | SD CardAC AdaptorUSB CableBR-800 DVD-ROMOwner's Manual |
| Options | Foot Switch: FS-5UPedal Switch: DP-2 (Roland)Expression Pedal: EV-5 (Roland), FV-500L/FV-500HSoft Case: BA-CB1 |
* In the interest of product improvement, the specifications and/or appearance of this unit are subject to change without prior notice.
* 0 dBu = 0.775 Vrms
* AF method (Adaptive Focus method)
Adaptive Focus is a unique Roland/BOSS technology that allows the signal noise (S/N) ratios of AD and DA converters to be vastly improved.
Numerics
4-INPUT MULTI 65
8-TRACK COMP/LIM 65
A
A.GUITAR MULTI 61
AC adaptor 18
ACOUSTIC PROCESSOR 81
ACOUSTIC SIM 60
ACOUSTIC SIMULATOR 80
AMP 69
Arrangement
Copying 100
Created 96
Erasing 101
Erasing a step 98
Inserting a step 98
Naming 99
Play 93
Tempo 94
Arrangement mode 90
Audio interface 121
AUTO PUNCH IN/OUT 46
Auto punch-in 46
Auto punch-out 46
B
BACKUP 126
BANK
4INPUT 65
8TRACK COMP 65
GUITAR 60
LINE 62
MICROPHONE 62
SIMUL 63
Banks 54
BASS MULTI 61
BASS SIM 74–75
Bass Simulator 74–75
Battery 19
C
CATEGORY 30
CENTER CANCEL 139
CHO/DLY 84
CHORUS 74,79
CHORUS/DELAY 85
COMPRESSOR/LIMITER 65
Connection 32
Contrast 132
Control surface 122
COPY 100
Copying
Arrangement 100
Song 109
Track 105
Cord hook 33
COSM 11
D
DBL DELAY 74,79
DC IN 18
DEFRETTER 74–75
DELAY 80
Display 15, 132
DISTORTION 68
DOUBLE/HARMONY 82
Drum kit 95
DYNAMICS 81
E
E.GUITAR MULTI 60
Effect
Insert effect 54,84
Loop effect 84
Mastering effect 114
Track EQ 86
Effect patch 54
EFFECTS 14, 55–57
ENHANCER 74
ENTER 14
EQ 86
EQUALIZER 73
ERASE 101
Erasing
Arrangement 101
Song 109
Song Sketch 51
Track 107
Exchanging
Track 107
EXIT 14,50
EXP PEDAL 133
EZ REC 14,26
EZ Recording 26
EZ TONE 55
F
Factory Reset 140
Factory-set 140
FF 13
FLANGER 74,77
FOOT SW/EXP PEDAL 17
FOOT SWITCH 46,133
Frame 15
G
GTR SIM 74
Guitar Simulator 74
GUITAR TO BASS 61,80
GUITAR/BASS 16
H
Headphone 16,137
|
INFORMATION SD CARD 142
Information
Song 49
Song Sketch 52
INPUT 17,37,58
INPUT SENS 12
Input source 37
Insert effect 54
Naming 57
Setting 56
K
KIT 95
L
LINE IN 17
LINE IN MIX 136
LINE OUT 17
LOCATION 58
LO-FI 83
Loop effect 84
LOOP REC 41
Loop recording 41
LOW CUT 83
M
MASTER 13,58
MASTER FX 13
Mastering 114
Mastering effect 114
Naming 117
Saving 117
Measure 15
MEMORY CARD 18
MENU 14
MIC 12
MIC MULTI 62
MODULATION 74
Moving 106
Index
N
NAME 117
Naming
Arrangement 99
Insert effect 57
Mastering effect 117
Song 110
Song Sketch 52
NOISE SUPPRESSOR 73
0
OCTAVE 74,76
OFFSET 102
OUTPUT 137
Overdubbing 42
P
P SHIFTER 74
PAN 40,74,78
Pattern 88
Play 91
Tempo 92
Pattern mode 90
PEAK 12
PHASER 74,77
PHRASE TRAINER 138
PITCH 135
PITCH CORRECT 81
PITCH SHIFTER 76
PLAY 13
Play screen 15
Playback
Song 41
Song Sketch 51
POWER 18
Preset Arrangement 152
Preset Pattern 153
Preview 104
Protect 110
punch-in 45
punch-out 45
Q
Quantize 44
R
REC 13
REC LEVEL 12,38
Recording
Song 40
Song Sketch 50
Recording level 38
Recover 126
REDO 48
Reference pitch 135
REPEAT 13,43-44
Repeat 43
RETRY 13,40
REVERB 84-85
REW 13
RHYTHM 13–14, 58, 90
Rhythm Editor 88
RING MOD 74,78
Ring Modulator 74,78
ROTARY 74,78
S
Saving
Insert effect 57
Mastering effect 117
Song 111
SCRUB 104
SD CARD
FORMAT 141
INFORMATION 142
SD card 18,148
Sitar 76
SITAR SIM 74,76
Sitar Simulator 74,76
SLOW GEAR 74–75
SONAR LE 123
SONG 36
Song 36
Copying 109
Create 36
Erasing 109
Information 49
Naming 110
Playback 41
Recording 40-41
Saving 111
Select 36
SONG SKETCH 14,50
Song Sketch
Erasing 51
Importing 108
Information 52
Naming 52
Playback 51
Recording 50
SOURCE 30
STEP 96
Step 96
STEREO MULTI 62
STOP 13
T
TAP TEMPO 13, 92, 94
TEMPO 15, 92, 94
Time 15
TIME STRETCH 138
TONE/SFX 82
TRACK 14,58
Track 13
Copying 105
Erasing 107
Exchanging 107
Moving 106
Select 38
Track EQ 86
TREMOLO 74,77
TUNER 134
TUNING 134
TYPE 69,71,80
U
UNDO 48
UNI-V 74,78
Uni-Vibe 74,78
USB 18,120
USB driver 120
V
VIBRATO 74,78
VO + AC.SIM 64
VO + ACOUSTIC 64
VO + GT.AMP 63
VOCAL MULTI 62
Volume-swell Effect 75
V-track 39
W
WAH File 67
Z
ZERO 13
MEMO
MEMO
For EU Countries

UK This symbol indicates that in EU countries, this product must be collected separately from household waste, as defined in each region. Products bearing this symbol must not be discarded together with household waste.
This equipment has been tested and found to comply with the limits for a Class B digital device, pursuant to Part 15 of the FCC Rules. These limits are designed to provide reasonable protection against harmful interference in a residential installation. This equipment generates, uses, and can radiate radio frequency energy and, if not installed and used in accordance with the instructions, may cause harmful interference to radio communications. However, there is no guarantee that interference will not occur in a particular installation. If this equipment does cause harmful interference to radio or television reception, which can be determined by turning the equipment off and on, the user is encouraged to try to correct the interference by one or more of the following measures:
- Reorient or relocate the receiving antenna.
— Increase the separation between the equipment and receiver. - Connect the equipment into an outlet on a circuit different from that to which the receiver is connected.
- Consult the dealer or an experienced radio/TV technician for help.
This device complies with Part 15 of the FCC Rules. Operation is subject to the following two conditions:
(1) this device may not cause harmful interference, and
(2) this device must accept any interference received, including interference that may cause undesired operation.
This equipment requires shielded interface cables in order to meet FCC class B limit.
Any unauthorized changes or modifications not expressly approved by the party responsible for compliance could void the user's authority to operate the equipment.
For Canada
NOTICE
This Class B digital apparatus meets all requirements of the Canadian Interference-Causing Equipment Regulations.
AVIS
This product contains chemicals known to cause cancer, birth defects and other reproductive harm, including lead.
For the USA
DECLARATION OF CONFORMITY Compliance Information Statement
Model Name: BR-800
Type of Equipment: Digital Recorder
Responsible Party : Roland Corporation U.S.
Address: 5100 S.Eastern Avenue, Los Angeles, CA 90040-2938
Telephone : (323) 890-3700
Information
When you need repair service, call your nearest Roland Service Center or authorized Roland distributor in your country as shown below.
AFRICA
EGYPT
Al Fanny Trading Office
- EBN Hagar Al Askalany Street,
ARD E1 Golf, Heliopolis,
Cairo 11341, EGYPT
TEL:(022)-417-1828
REUNION
MARCEL FO-YAM Sarl
Royal Cape Park, Unit 24
Londonderry Road, Ottery 7800
Cape Town, SOUTH AFRICA
TEL:(021)7994900
ASIA
CHINA
Roland Shanghai Electronics
Co.,Ltd.
SF. No.1500 Pingliang Road
Shanghai 200090, CHINA
TEL:(021)SS80-0800
Roland Shanghai Electronics
Co., Ltd. (BEIJING OFFICE)
3F, Soluxe Fortune Building
63 West Dawang Road, Chaoyang
District, Beijing, CHINA
TEL: (010) S960-2565
HONG KONG
Tom Lee Music
11/F Silvercord Tower 1
30 Canton Rd
Tsimshatsui, Kowloon,
HONG KONG
TEL:852-2737-7688
Parsons Music Ltd.
8th Floor, Railway Plaza, 39
Chatham Road South, T.S.T.
Kowloon, HONG KONG
TEL:852-2333-1863
INDIA
Rivera Digitec (India) Pvt. Ltd.
411, Nirman Kendra Mahalaxmi
Flats Compound Off. Dr. Edwin
Moses Road, Mumbai-400011, INDIA
INDIA
TEL: (022) 2493 9051
INDONESIA
PT. Citra Intirama
Ruko Garden Shopping Arcade
Unit 8 CR, Podomoro City
JL.Letjend. S.Parman Kav.28
Jakarta Barat 11470, INDONESIA TEL: (021)5698-5519/5520
KOREA
Cosmos Corporation
1461-9, Seocho-Dong
Seocho Ku, Seoul KOREA
TEL: (02) 3486-8855
MALAYSIA/
SINGAPORE
Roland Asia Pacific Sdn. Bhd.
45-1, Block C2, Jalan PJU 1/39,
Dataran Prima, 47301 Petaling
Jaya, Selangor, MALAYSIA TEL: (02) 7805-3262
TEL: (03) 7805-3263
PHILIPPINES
G.A. Yupangco & Co. Inc.
339 Gil J. Puyat Avenue
Makati, Metro Manila 1200,
PHILIPPINES
TEL:(02)899 9801
TAIWAN
ROLAND TAIWAN ENTERPRISE
CO., LTD.
9F-S, No. 112 Chung Shan
North Road Sec. 2 Taipei 104,
TAIWAN R.O.C.
TEL:(02)25613339
THAILAND
Theera Music Co., Ltd.
100-108 Soi Verng Nakornkasem,
New Road, Sumpantawong.
Bangkok 10100, THAILAND
TEL:(02)224-8821
VIET NAM
VIET THUONG CORPORATION
386 CACH MANG THANG TAM ST
DIST.3, HO CHI MINH CITY,
VIET NAM
TEL:(08)9316540
OCEANIA
AUSTRALIA/
NEW ZEALAND
Roland Corporation
Australia Pty., Ltd.
38 Campbell Avenue
Dee Why West. NSW 2099,
AUSTRALIA
For Australia
TEL: (02) 9982 8266
For New Zealand
TEL:(09)3098715
CENTRAL/LATIN AMERICA
ARGENTINA
Instrumentos Musicales S.A.
Av.Santa Fe 2055
(1123) Buenos Aires, ARGENTINA
TEL: (011) 4508-2700
BARBADOS
A&B Music Supplies LTD
12 Webster Industrial Park
Wildey, St.Michael, BARBADOS
TEL: (246) 430-1100
BRAZIL
Roland Brasil Ltda.
Rua San Jose, 21
Parque Industrial San Jose
Cotia - Sao Paulo - SP, BRAZIL TEL: (011) 4615-5666
TEL (011) 4615 5666
CHILE
Comercial Fancy II S.A.
Rut.: 96.919.420-1
Nataniel Cox #739, 4th Floor
Santiago - Centro,
TEL:(02)688-9540
COLOMBIA
Centro Musical Ltda.
Cra 43 B No 25 A 41 Bododega 9
Medellin, COLOMB
TEL:(574)3812529
COSTA RICA
JUAN Bansbach Instrumentos
Musicales
Ave.1. Calle 11, Apartado 10237,
San Jose, COSTA RICA
TEL:258-0211
CURACAO
Zeelandia Music Center Inc.
Orionweg 30
Curacao, Netherland Antilles
TEL:(305) 5926866
DOMINICAN REPUBLIC
Instrumentos Fernando Giraldez
Boulevard Andrews, Albrook,
Panama City, REP. DE PANAMA
TEL:315-0101
PARAGUAY
155, New National Road
Patras 26442, GREECE
TEL: 2610 435400
HUNGARY
Roland East Europe Ltd.
E2 Calmount Park, Calmount
Avenue, Dublin 12.
Republic of IRELAN
TEL:(01)4294444
ITALY
Roland Italy S. p. A.
- BR-800
- DIGITAL RECORDER
- Recording Flow on the BR-800
- Preparations for Recording
- Record/Playback
- Record with Effects Applied
- Record while Listening to Rhythm
- Edit Your Song
- Master Your Song
- USING THE UNIT SAFELY
- INSTRUCTIONS FOR THE PREVENTION OF FIRE, ELECTRIC SHOCK, OR INJURY TO PERSONS
- ALWAYS OBSERVE THE FOLLOWING
- WARNING
- CAUTION
- Power Supply: Use of Batteries
- Placement
- Maintenance
- Repairs and Data
- Additional Precautions
- Before Using SD Cards Using SD Cards
- Handling DVD-ROMs
- Copyright
- Operating Buttons
- Contents
- Quick Start 21
- Getting Ready to Record ..... 31
- Recording/Playback ...... 35
- Using Effects 53
- Using Rhythm 87
- Editing ......103
- Mastering ....113
- Using USB ......119
- Convenient Functions ...... 131
- Appendixes......147
- Four-Track Simultaneous Recording/Eight-Track Simultaneous Playback
- Numerous High-Quality Effects (p. 53, p. 113)
- Rhythm Function (p. 87)
- EZ Recording Function (p. 26)
- Song Sketch Function (p. 50)
- Connecting via USB (p. 119)
- Built-in Stereo Microphones
- Three-Way Power Supply
- About COSM (Composite Object Sound Modeling)
- Top Panel
- 1
- MIC L/R (internal stereo microphones L/R)
- 2
- [INPUT SENS (Input sensitivity) [1], [2] knobs
- INPUT SENS (Input sensitivity) [3/MIC L], [4/MIC R] knobs
- PEAK indicators
- [REC LEVEL] (Recording level) knob
- 3
- Track [1]-[7/8] faders
- [RHYTHM] fader
- [MASTER] fader
- 4
- Track 1-7/8 [PLAY] buttons
- Track 1-7/8 [REC] buttons
- [TAP TEMPO] button
- [MASTER FX] (Mastering effect) button
- 5
- [RETRY] button
- [REPEAT] button
- [ZERO] button
- [REW] (Rewind) button
- [FF] (Fast-forward) button
- [STOP] button
- [PLAY] button
- [REC] (Recording) button
- Panel Descriptions
- 6
- [TRACK] button
- [MENU] button
- [EXIT] button
- [ENTER] button
- Dial
- CURSOR buttons
- 7
- [ EFFECTS] button
- [RHYTHM] button
- [SONG SKETCH] button
- [EZ REC] (EZ recording) button
- 8
- Display
- Song
- Time
- Frame
- Measure
- Power
- Tempo
- Level meter
- About the Play Screen
- Front Panel
- PHONES jack (stereo phone type)
- GUITAR/BASS jack
- Rear Panel
- Security Slot (
- LINE OUT jacks
- FOOT SW/EXP PEDAL (Foot switch/Expression pedal) jack
- LINE IN jack
- INPUT 1-4 jacks
- Side Panel
- MEMORY CARD (SD card) slot
- USB connector
- [POWER] switch
- DC IN (AC adaptor) jack
- Installing Batteries
- NOTE
- MEMO
- Quick Start
- Listening to the Demo Songs
- Make Connections
- Turn on the Power
- Turning the Power Off
- Listen to the Demo Songs
- Recording with the EZ Recording Function
- Make Recording Settings
- Press the [ENTER] button.
- Recording
- Turn the [REC LEVEL] knob to adjust the recording level.
- Playing Back
- EZ Recording Parameter List
- SOURCE
- CATEGORY
- Getting Ready to Record
- Making Connections
- Using the Cord Hook
- Turning the Power On/Off
- Turning the Power On
- Recording/Playback
- Creating a New Song (SONG NEW)
- Selecting a Song (SONG SELECT)
- Selecting the Input Source
- Adjusting the Input Sensitivity
- Adjusting the Recording Level
- Selecting the Track(s) for Recording
- Selecting V-Tracks
- What are V-Tracks?
- Adjusting the Stereo Feel of the Input Sound (PAN)
- HINT
- Recording
- If you want to re-record
- Loop Recording
- Playback
- Recording Additional Performances (Overdubbing)
- A useful tip for overdubbing
- Playing Back Repeatedly (Repeat)
- Specifying the Repeat Region
- Setting the Repeat Region to an Exact Interval
- Re-Recording Only Over a Mistake (Punch-In/Out)
- Manual Punch-In/Out
- ■ Using the [REC] button
- ■ Using a foot switch
- Auto Punch-In/Out
- ■ Specifying the locations
- ■ Recording
- Cancelling an Operation (UNDO/REDO)
- Returning to the Previous State (UNDO)
- Canceling the Undo (REDO)
- Viewing Information about the Song
- Viewing the Remaining Recording Time
- Viewing Song Information
- Simple Recording (SONG SKETCH)
- Switching to Song Sketch Mode
- About file names
- Erasing a WAV File
- Naming a WAV File
- 9
- Viewing Information about the WAV File
- Using Effects
- Using Insert Effects
- Effect Patches and Banks
- Preset patches
- User patches
- Song patches
- Turning the Insert Effect On/Off
- Easily Creating an Insert Effect (EZ TONE)
- Editing the Insert Effect Settings
- Saving the Insert Effect Settings (Write)
- Changing the Location of the Insert Effect (LOCATION)
- Insert Effect Connection Locations
- ■ INPUT
- ■ TRACK 1-8, 1/2, 3/4, 5/6, 7/8, 1-4, 5-8, 1-8
- RHYTHM
- ■ MASTER
- Copying Insert Effects (EFFECT BANK COPY)
- Algorithm List
- BANK : GUITAR
- E.GUITAR MULTI
- ACOUSTIC SIM
- GUITAR TO BASS
- A.GUITAR MULTI
- BASS MULTI
- BANK : MICROPHONE
- VOCAL MULTI
- MIC MULTI
- BANK : LINE
- STEREO MULTI
- BANK : SIMUL
- VO + GT.AMP
- (GUITAR)
- -[COMP/LM]-[AMP]-[EQ]-[NS]-[MOD]-[DLY]--[COMP/LM]-[EQ]-[NS]-[MOD]-[DLY]-
- Compressor/Limiter
- Modulation
- Delay
- (MIC)
- VO + AC.SIM
- VO + ACOUSTIC
- BANK : 4INPUT
- 4-INPUT MULTI
- BANK : 8TRACK COMP
- 8-TRACK COMP/LIM
- Parameter List
- WAH
- DISTORTION
- AMP
- EQUALIZER
- NOISE SUPPRESSOR
- ENHANCER
- GTR SIM (Guitar Simulator)
- BASS SIM (Bass Simulator)
- SLOW GEAR
- DEFRETTER
- SITAR SIM (Sitar Simulator)
- OCTAVE
- P SHIFTER
- PHASER
- FLANGER
- TREMOLO
- ROTARY
- UNI-V (Uni-Vibe)
- PAN
- VIBRATO
- RING MOD (Ring Modulator)
- CHORUS
- DBL DELAY (Doubling Delay)
- ACOUSTIC SIMULATOR
- GUITAR TO BASS
- ACOUSTIC PROCESSOR
- PITCH CORRECT
- DYNAMICS
- TONE/SFX
- DOUBLE/HARMONY
- LOW CUT
- LO-FI
- Adding a Sense of Spaciousness
- Adjusting the Loop Effect Depth
- Editing the Loop Effect
- REVERB
- Adjusting the Tone of Each Track
- Editing the Track EQ
- Using Rhythm
- Overview of the Rhythm Section
- Patterns and Arrangements
- Patterns
- Song patterns (S001-S100)
- Preset patterns (P001-P327)
- IN (intro)
- V (verse) 1, 2
- F (fill) 1, 2
- E (ending)
- Using BR-800 Rhythm Editor
- ■ Arrangements
- Preset arrangements (P01-P50)
- Song arrangements (S01-S05)
- About the Drum Sounds (Drum Kits)
- Turning the Rhythm On/Off
- Switching between Pattern Mode and Arrangement Mode
- Pattern mode
- Arrangement mode
- Playing Patterns
- Changing the Tempo
- Using [TAP TEMPO] Button to Set the Tempo
- Playing an Arrangement
- 10
- Changing the Drum Sounds (Drum Kit)
- Selecting a Drum Kit
- Creating an Original Arrangement
- Steps
- Starting measure
- Pattern number
- Time signature
- Tempo
- Inserting a Step
- Erasing a Step
- Naming an Arrangement
- Copying an Arrangement
- Erasing an Arrangement
- Delaying the Pattern/ Arrangement Playback (OFFSET)
- Editing
- Finding the Location at which a Sound Begins or Ends (Scrub/Preview)
- Scrub function
- Preview function
- Use the preview function
- Track Editing
- ■ Copying track data
- Press the [TRACK] button.
- Use the CURSOR [ ] buttons to move the cursor to "TRACK EDIT," and press the [ENTER] button.
- Use the CURSOR [ ] buttons to move the cursor to "COPY," and press the [ENTER] button.
- Make the settings for performing a copy using the CURSOR buttons and the dial.
- To copy the data, press the [ENTER] button.
- ■ Moving Track Data
- ■ Erasing track data
- ■ Exchanging Data
- ■ Importing song sketch data into a track
- Copying a Song (SONG COPY)
- If the screen indicates "Card full!"
- Erasing a Song (SONG ERASE)
- Naming a Song (SONG NAME)
- Protecting a Song (SONG PROTECT)
- Saving a Song (SAVE CURRENT STATE)
- Saving Memory on the SD Card
- Mastering
- Using Mastering in Creating a Song
- What is the mastering effect?
- 12
- 13
- Editing the Mastering Effect Settings
- Saving the Mastering Effect Settings (Write)
- Making Use of Songs After Mastering
- Making Use of Songs on Your Computer
- Recording the Mastered Song to an External Device
- Using USB
- About the "BR-800 DVD-ROM"
- Installing the USB Driver
- Data Structure on the SD Card
- ROLAND folder
- BRO folder
- SKETCH folder
- Using the BR-800 as an Audio Interface
- Recording Audio from the BR-800 on Your Computer
- Using the BR-800 to Hear Songs Played Back by Your Computer
- Using the BR-800 to Record Songs Played Back by Your Computer
- Using SONAR LE
- Controllers that Can Be Used in Control Surface Mode
- Exchanging Data with Your Computer
- Using BOSS BR Series Wave Converter
- Transferring WAV Files
- To copy a WAV file from the BR-800 to your computer
- To copy a WAV file from your computer to the BR-800
- Windows users
- Mac OS users
- Saving Data on Your Computer (Backup/Recover)
- To back up
- To recover
- Making Settings for USB Functionality
- Convenient Functions
- Adjusting the Display Contrast
- Using a Foot Switch/Expression Pedal
- Using an Expression Pedal
- Using a Foot Switch
- Tuning Your Instrument (TUNER)
- First, make sure that:
- Switching to the Tuner
- ■ Indications while tuning
- Tuning
- Specifying the Tuner's Reference Pitch
- Mixing the Sound from an Audio Device (LINE IN MIX)
- Output Settings (OUTPUT)
- Output Settings for LINE OUT and Headphone (OUTPUT MODE)
- Adjusting the Headphone Volume (PHONES LEVEL)
- Practicing Phrases (PHRASE TRAINER)
- Slowing Down the Speed (TIME STRETCH)
- Minimizing Sounds in the Center (CENTER CANCEL)
- Restoring the Factory Settings (FACTORY RESET)
- Initializing an SD Card (FORMAT)
- Viewing the SD Card Usage (SD CARD INFORMATION)
- Reducing the Battery Consumption (POWER SAVE)
- ■ Exiting the Power Save state
- Using a Condenser Microphone (PHANTOM POWER)
- Adjusting the Sensitivity of the Touch Sensors
- When you press the [ENTER] button
- When you press the [EXIT] button
- Appendixes
- SD Cards that Can Be Used with the BR-800
- ■ SD cards that are known to work
- ■ Recording time
- ■ Formatting an SD card
- ■ Removing the card cover
- ■ Inserting an SD card
- ■ Removing an SD card
- ■ The SD card write protect feature (LOCK)
- Insert Effects
- Problems with the Buttons
- Error Message List
- Numerics
- A
- B
- C
- D
- E
- F
- G
- H
- |
- K
- L
- M
- Index
- N
- 0
- P
- Q
- R
- S
- T
- U
- V
- W
- Z
- For EU Countries
- NOTICE
- AVIS
- DECLARATION OF CONFORMITY Compliance Information Statement
- Information
- AFRICA
- EGYPT
- REUNION
- ASIA
- CHINA
- HONG KONG
- INDIA
- INDONESIA
- KOREA
- MALAYSIA/
- SINGAPORE
- PHILIPPINES
- TAIWAN
- THAILAND
- VIET NAM
- OCEANIA
- AUSTRALIA/
- NEW ZEALAND
- CENTRAL/LATIN AMERICA
- ARGENTINA
- BARBADOS
- BRAZIL
- CHILE
- COLOMBIA
- COSTA RICA
- CURACAO
- DOMINICAN REPUBLIC
- PARAGUAY
- HUNGARY
- ITALY
Brand : BOSS
Model : BR-800
Category : Media player