
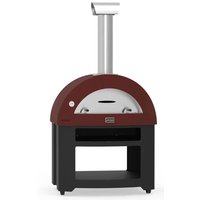
Ciao - Pizza oven ALFA - Free user manual and instructions
Find the device manual for free Ciao ALFA in PDF.


| Product Type | Pizza Oven |
| Brand | Alfa |
| Model | Ciao |
| Cooking Area | Approximately 0.5 m² (single pizza) |
| Dimensions (W x D x H) | 100 x 60 x 50 cm (39.4 x 23.6 x 19.7 in) |
| Weight | 30 kg (66 lb) |
| Fuel Type | Gas (propane/butane) or wood (multifuel) |
| Power Output | ~4 kW (gas burner) |
| Temperature Range | 200°C to 450°C (392°F to 842°F) |
| Heating Time | Approximately 20 minutes for pizza cooking temperature |
| Main Functions | Baking pizza, bread, roasting vegetables |
| Fuel Consumption | Gas: ~0.5 kg/h; Wood: ~2 kg/h |
| Material | Stainless steel, refractory bricks or stone |
| Accessories Included | Pizza peel, gas regulator (if gas model) |
| Installation | Outdoor use, stable surface, away from flammable materials |
| Maintenance | Regular cleaning of ash/grease, check gas connections |
| Cleaning Instructions | Use a damp cloth, avoid abrasive cleaners; burn off residues |
| Safety Features | Gas shut-off valve, heat-resistant handle, stable base |
| Spare Parts Availability | Through Alfa dealers or authorized service centers |
| Repairability | Modular design; damaged bricks or burners replaceable |
| Certifications | CE, Gas Appliance Directive compliance |
| Warranty | 2 years (standard) |
| Manual Languages | Italian, English, French, German, Spanish |
Frequently Asked Questions - Ciao ALFA
User questions about Ciao ALFA
0 question about this device. Answer the ones you know or ask your own.
Ask a new question about this device
Download the instructions for your Pizza oven in PDF format for free! Find your manual Ciao - ALFA and take your electronic device back in hand. On this page are published all the documents necessary for the use of your device. Ciao by ALFA.
USER MANUAL Ciao ALFA
Write in this section the data of your product.
Oven Model:
Serial number:
Purchase date:
NB: The identification label is located on the

Visit www.alfaforni.com and register your oven today.



02 WARNINGS
05 WARRANTY
06 INSTALLATION
07 GAS CONNECTION
10 GAS CONNECTION NORTH AMERICA
13 GAS CONVERSION
16 OVEN USE
18 COOKING
26 MAINTENANCE AND CARE
29 TROUBLESHOOTING
GENERAL WARNINGS
RETAIN THIS MANUAL FOR FUTURE REFERENCE
Additional copies of this manual at www.alfaforni.com
For US go to alfaovens.com
WARNING: improper installation, adjustment, alteration, service or maintenance can cause property damage, Injury or death. read the installation, operating and maintenance instructions thoroughly before installing or servicing this equipment.
PLEASE READ THE FOLLOWING INFORMATION FOR PROPER INSTALLATION AND OPTIMUM PERFORMANCE OF THE OVEN.
- The identification plate, with technical data, lot number and brand name is visibly applied on the device. Do not remove this label
- Remove all protective film before putting the unit into operation. To facilitate the separation, use warm air (for example, a hairdryer)
- Never use steel sponges or sharp scrapers, it can damage the surfaces. Use ordinary non-abrasive products. If necessary, use wood or plastic tools. Rinse thoroughly and dry with a soft cloth or microfiber cloth.
- Do not use dishes or containers made of plastic material. The high temperatures inside the oven could melt the plastic, damaging the appliance.
- Use tools and utensils that are resistant to high temperatures.
- Position the oven on a flat and level surface.
- Due to the temperature, the color of the surfaces may vary in time.
- Do not paint or apply objects to the oven.
- Installation of the product must allow for easy access for cleaning.
- Use the special wheel-stop included or locking castors to prevent the oven from moving once positioned.
- Never store, use or put flammable liquids or objects in or near the oven.
-
Alfa stainless steel ready-to-use ovens can become hot on the outside even with two layers of high quality insulation
-
Always remove the oven door by gripping the handles and using
- gloves when hot.
- Closing the door when the oven is lit with flame can cause the flame
to go out from lack of oxygen - Do not touch the surfaces of the chimney flue during use.
- Keep any electrical wiring and fuel lines away from hot surfaces.
- Do not use the oven if it's not working properly or you suspect a fault in operation.
- Do not move the oven during use or when it is hot.
- Do not lean on or rest objects on the oven, this may compromise its stability.
- Never extinguish the flame with water.
- In the event that a grease fire occurs, turn off the gas and leave the door closed until the fire is extinguished.
- When using the oven wear heat resistant oven gloves.
- The parts that are sealed by the manufacturer should not be modified by the user.
- Do not block the openings and slots provided for ventilation and heat dissipation.
- When using charcoal, only use high quality natural lump wood charcoal. Do not use briquettes, lava rock, liquid fuels, accelerants or anything other than that expressly indicated.
- Do not lift the oven from the sill or shelf
SAFETY WARNINGS
READ ALL INSTRUCTIONS BEFORE INSTALLING AND USING THIS APPLIANCE
Please read this entire manual before you install the oven. Contact your local building or fire officials about restrictions and installation inspection in your area.
FOR YOUR SAFETY: Do not store or use gasoline or other flammable vapors or liquids in the vicinity of this or any other appliance. Also, always keep the area under and around this appliance free and clear of any and all combustible materials.
WARNING:Improper installation, adjustment, alteration, service or maintenance can cause property damage, injury or death.

SAFETY WARNINGS ONLY FOR GAS VERSION

GAS LEAKS MAY RESULT IN FIRE OR EXPLOSION AND CAUSE SERIOUS PERSONAL INJURY OR DEATH, OR PROPERTY DAMAGE.
IF YOU SMELL GAS:
- Turn the gas off.
- Put out any live fire or flames.
- Open the door to the oven.
- Consult a licensed gas professional
ATTENTION! The gas oven may be converted from LPG to natural gas and viceversa using the Alfa Ovens supplied conversion kit. Follow the supplied instructions or contact a qualified and licensed gas professional.
WARNING: If the gas oven is not used close the gas supply valve.
WARNING: Do not store unused gas cylinders near the oven.
WARRANTY
Alfa ovens fully comply with the Italian and European proposed regulations. The oven is guaranteed for 2 (two) years against defects and craftsmanship; good maintenance and proper use can make sure that the oven lasts much longer.
Warranty covers parts and components for wood and 1 (one) year for labor on natural gas and LPG ovens. Shipping and assembly costs are charged to the customer.
PLEASE RETAIN YOUR SALES RECEIPT OR INVOICE WRITE HERE UNDER THE SERIAL NUMBER ON THE PRODUCT IDENTIFICATION TAG
The warranty does not apply in the following options:
- If the oven is not properly used and installed as described in this manual.
- If the oven has been damaged either voluntarily or involuntarily in any way.
- In the event the equipment is improperly or inadequately maintained. Burner problems resulting from debris or ash in the burner well will not be covered by the warranty.
- If the oven, for any cause, has been altered and is no longer in the condition detected at delivery of the product.
• If products have been used other than suggested, Do not use liquid fire starters for barbecues, other chemicals or products that contain liquid fuels. - If the damage is the result of the use of chemicals inside or outside the oven.
- Normal wear of the burner, thermometer, ignition, electrodes, ignition cable, gas hose and refractory stones.
- Damage caused by exceeding the temperature limit of 500^ / 1000^ .
- Void if replacement components not produced or approved by Alfa are installed.
- Damage to parts not functional and decorative that do not affect the normal use of the oven, including scratches and colors differences.
• In the event that the rating plate has been removed, altered or obliterated.
We recommend the exclusive use of spare parts recommended by Alfa.
POSITIONING THE OVEN

THE OUTER WALLS OF OVEN MAY REACH HIGH TEMPERATURES GREATER THAN 50°C / 120°F. ANY FLAMMABLE MATERIAL SHOULD BE KEPT AT LEAST 1 METRE (3 FEET) AWAY FROM THE OVEN.

CAUTION! When being used, place the oven at a safe distance from flammable materials or substances that may be damaged by heat.
CAUTION - Put the oven in a place sheltered from wind or strong drafts.

CAUTION! Place the oven on a flat, stable surface to prevent it from moving during use.
CAUTION: Position the oven at a minimum distance of 20 cm (8 in) from the walls and from any other equipment.
TOP VERSION OVENS SHOULD BE PLACED ON FIXED TABLES OR TABLES WITH LOCKING WHEELS OR OTHER FIREPROOF SURFACES WITH ADEQUATE LOAD-BEARING CAPACITY. IF NEEDED, ADJUST THE LEGS TO LEVEL THE SUPPORTING SURFACE.

Your Oven comes from the factory set up for LPG. LPG cylinder is not supplied with the oven.

Your Oven comes from the factory set up for natural gas. LPG cylinder is not supplied with the oven.
WARNINGS: Follow the following advises for a correct use of the gas cylinder.
- Use the supplied conversion kit, pressure regulator and hose. - ONLY IN NORTH AMERICA
- Use a suitable pressure regulator and hose according to the regulations in force.
- LPG is heavier than air. Any losses of LPG may collect in a lover part of the environment.
- The LPG cylinder must always be installed, transported and stored in a vertical position. Handle with care and do not drop the LPG cylinders.
- Make sure the gas tank is placed in a ventilated place that it is away from other objects.
- Never store a spare gas cylinder near the gas oven.
- Do not leave or transport the LPG cylinders in places where temperatures can reach 50°C / 120°F (too hot to handle. For example: Do not leave the cylinder in the car on hot days).
- Treat "empty" LPG cylinders with the same attention as full ones. Even if there is no more liquid in the cylinder there may always be gas
- Always close cylinder valve before disconnecting as there could still be pressure
- Always check all gas connections before using the oven.
- Make sure to use the proper PTFE gas piping tape for all threaded connections.
- Pressure left in the cylinder. Always close the cylinder valve before disconnecting it.
- It is recommended that all gas connections are checked before using the oven.
- Make sure that the valve on the LPG cylinder or the regulator is closed. Replacement of the cylinder must be performed away from sources of heat and ignition.
- It is advisable to replace the gas pipe every 2-3 years.
- Only use LPG cylinders
- Do not twist the hose.
- Before each use check that the hose does not have any marks, cracks, abrasions or cuts. If the hose is damaged in some way, do not use the oven.
CONNECTION
CONNECT THE LPG CYLINDER (only for LPG oven)
Connect the flexible nose to the back of the oven.
PRESSURE REGULATOR:
- gas flow:
10 kg/h - 22 lbs/h
- outlet pressure
butane G30: 28 - 30 mbar
propane G31: 30 - 37 mbar
FLEXIBLE HOSE:
Diameter 1/2
Length 1.5 meters
CYLINDER:
almost 30 kg / 66 lbs

natural_image
Green gas cylinder with red valve and orange handle (no text or symbols visible)Pressure regulator, flexible hose and cylinder are not supplied with the oven.
CONNECTION
- Connect the flexible hose to the back of the oven.
- The natural gas supply must be delivered through a galvanized pipe ∅ 1/2" or equivalent copper pipe, located at the burner inlet hole.
- Install the gas shut-off valve in a suitable position up-line.

natural_image
Close-up of a metallic valve with yellow handle and blue body (no text or symbols visible)ATTENTION! Follow our advice to correctly use your oven.
- We recommend checking gas connection before using the oven.
- Make sure the gas tap is turned off when the oven is not being used and during maintenance or cleaning operations.
- Replace the gas hose every 2-3 years. Do not kink the gas hose.
- Before using the oven, check out the hose searching for cracks, cuts or any wearing sign. If the hose is damaged, do not use the oven.

NORTH AMERICA ONLY
GAS CONNECTION AND INSTALLATION
THIS OVEN COMES FROM THE FACTORY SET UP FOR NATURAL GAS HOOK UP

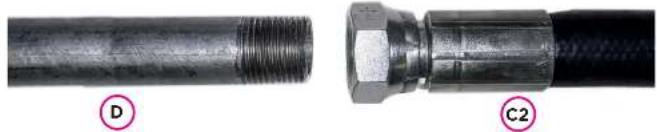
CONNECTION KIT
A - Regulator connect to oven
B - BSPP - NPT adapter
C1 - Gas hose to oven
C2 - Gas hose to gas supply
D - Gas supply piping
10 11


Mount the adapter (B) on the gas inlet (Cl), followed by the regulator (A).
natural_image
Close-up of two metallic pipe fittings with threaded end and flanged connectors, labeled D and C2 (no text or symbols on the fittings themselves)Connect the gas supply (D) to the gas hose (C2)

CAUTION
Respect the direction indicated by the arrow to connect the regulator.


NORTH AMERICA ONLY
CONNECTION TO THE GAS CYLINDER

CONNECTION KIT
A - Regulator connect to oven
E - 1/2" male gas fitting (3/8" OD Flare x 1/2" MIP - Tapped 3/8" FIP
F1 - LPG hose connect to oven
F2 - LPG hose/regulator connect to propane gas cylinder.
Connect Regulator (A) to the oven.
Connect Propane Hose (FI) to the Regulator (A) using 1/2" Male Gas
Fitting (E) - 3/8" OD Flare x 1/2" MIP - Tapped 3/8" FIP.
Connect Propane Hose/Regulator to Propane Gas Cylinder
12 13

*use gas seal tape or pipe thread sealant where needed
CONVERTING YOUR OVEN

natural_image
Close-up of a metallic mechanical component with a yellow knob and labeled point A (no text or symbols beyond labels)Begin by Converting the Regulator to LPG
-1-
Natural gas supply (H)

natural_image
Close-up of hands holding a metallic mechanical component with a yellow tag (no visible text or symbols)-2-
Unscrew the cap to access the regulator adjustment.

natural_image
Close-up of hands holding a mechanical component with a yellow circular mark and metallic housing (no visible text or symbols)-3-
The plastic adapter should be turned upside down depending on the type of gas supply.

-4-

LPG SET UP

NATURAL GAS
SET UP

natural_image
Close-up of hands holding a mechanical component with a yellow tag, no visible text or symbols-5-
Refit the cap.


CONVERSION
LPG - METHANE

ONLY USE THE COMPONENTS AND PARTS SUPPLIED WITH THE CONVERSION KIT
WARNING: The following conversion must be performed by authorized professionals when the oven is completely cold.
Improper Installation, adjustment, alteration can cause property damage or injury.
Remove the gas kit according to the instructions in the appropriate section of the manual.
2 REPLACEMENT OF THE MAIN NOZZLE
Unscrew the fixing screw (a) and remove the plate (b) covering the nozzle. Unfasten the main nozzle (e) to the holder screw (d) by using an 11 mm spanner. Replace the nozzle with orifice supplied in the kit and screw it back to the holder (d). During these operations, secure lock the nozzle holder (d) to keep it from rotating.


natural_image
Close-up of a mechanical assembly with labeled parts (d, e), no visible text or symbols beyond labels3.1 REPLACEMENT OF THE PILOT NOZZLE.
Unscrew the fixing screw (h) of the pilot light tube.

natural_image
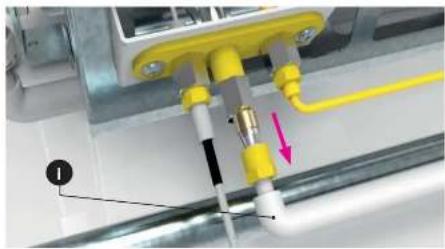
Mechanical assembly diagram showing pipe connections and a yellow component (no text or symbols visible)3.2
Remove the tube (i) from the seat.
natural_image
Mechanical assembly diagram showing yellow and pink components with no visible text or symbols3.3
Remove the pilot nozzle (j) from the cone-like support (o) and replace it with the spare component supplied in the kit. Reassemble everything following the same steps in reverse order.
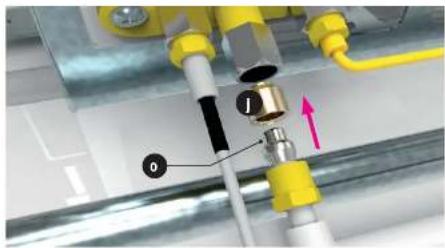
Following the conversion, apply the new label on the product and check that the size of the nozzle corresponds to that shown on the label.
OVEN USE
WARNING: Follow the instructions before turning on the oven.
- Do not use flammable liquids or other fuels to light the oven.
- Make sure that there are no flammable materials near the oven and that the minimum safety distance is respected.
LIGHTING
- STEP 1 - Make a small pile of wood in the centre of the oven with small pieces of dry wood.

- STEP 2 - When the wood is well-lit, add two larger logs and move the fire to one side.

- STEP 3 - After a few minutes of continuous burning, never excessive, the temperature of 400°C/750°F will be reached, burning to a dark soot. This is the moment the oven is ready to be used.

TURNING OFF
- To turn the oven off, close the oven door and wait for ash to form.
- When the fire is out and oven has been completely shut down off for 60 minutes you can remove the ashes into a fire safe metal ash can.
- Never put hot coals or ashes on the ground, patio, deck or near plants or trees.
DIFFERENT TYPES OF WOOD
- Use small sized wood pieces that are very dry for lighting.
- Treated wood, pine, resin or scrap woods are strictly prohibited.
- Wet or damp wood can be difficult to start and can pop due to the increased volume of water. This will produce a lot of smoke and ash and less than optimal heat and performance.
FOR YOUR SAFETY:
- Do not exceed the temperature limit of 500°C / 1000°F
- Do not leave the oven unattended when the fire is going.
- To keep constant temp, throw in small quantities of firewood at regular
intervals; do not keep adding more logs to avoid a dangerous rise in temperature or flames spilling out of the oven that might damage people or property.

OVEN USE
WARNING: Follow the instructions before turning on the oven.
- Check all gas connections for gas leak before starting your oven.
- Use the proper PTFE gas piping tape for all threaded connections
- Do not lean over the oven when lighting. Keep your face and body at a safe distance from the oven door.
- When lighting the oven, the oven door must be open.
- The burner control knob must be in the off position before turning on the LGP cylinder valve.
-
Do not move the oven while it is in use.
-
STEP 1 - Push IN the burner knob and turn it counterclockwise to the star symbol on the control panel, to ignite pilot flame.
- STEP 2 - While KEEPING the burner knob pushed in, push the ignitor button at the same time to light the burner pilot flame.
NOTE: Lighting the pilot flame for the first time or after it has cooled could take a few attempts due to air in the supply line. Be patient. - STEP 3 - Once the pilot flame is lit properly you will see a small flame inside (rear left corner) the oven. You can then release the ignition button BUT will need to KEEP the burner knob pushed in for 15 seconds. This will insure that the thermocouple is hot enough to allow the pilot flame to stay on.
- STEP 4 - Release the burner knob and turn it counter-clockwise to the larger dual flame symbol on the control panel. The oven burner is now on high and you can start preheating the oven.

natural_image
Four-panel diagram showing a hand holding a red object, a close-up of a device with a blue sphere, and a final close-up of a bone-like structure (no text or symbols)FOR YOUR SAFETY:
- Do not close the door when the oven is lit with the flame at the maximum position.
- Do not exceed the temperature limit of 500°C / 1000°F.
- Never disconnect the gas pipe or other fittings when using the oven.
LIGHTING THE OVEN
1.1 For Neapolitan pizza
Pizza needs both flame and very hot sustained temperature (floor and dome). Use small dry pieces of wood to start your fire and control your flame and temperature:

Start the fire with small pieces of wood in the center of the oven floor.
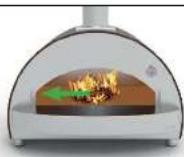
After fire has fully started and burning thoroughly move to the left side using the wood or pizza turner tools.

Continue to add wood as needed (one or two pieces) to keep temperature around 400°C (750°F).
- 1.2 For grilling
Grilling uses more embers to get the smoke flavor in the oven and less flame to prevent burning. Larger pieces of wood or lump charcoal (not briquettes) can help control temps.

Start the fire with small pieces of wood in the center of the oven floor. Add larger pieces of wood or lump charcoal making sure to keep the flame low unless searing.
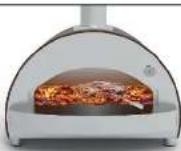
Wait for the oven temps to stabilize around 180°C (350°F), a good temperature for grilling. Higher temps can be achieved with more flame for searing.
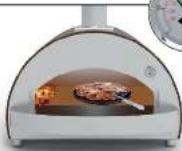

1.3 For baking / tray
The stainless steel ovens are made to light up and increase temperature in a short time and hold temps for extended periods of time.

Start the fire with small pieces of wood in the center of the oven floor.
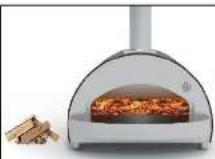
Add larger pieces of wood or lump charcoal making sure to have glowing embers and no flame. Stabilizing your oven around 180°C (350°F) or your desired baking temperature.

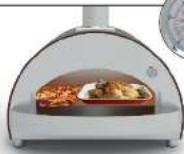
When 180°C (350°F) is reached and at least 1/3 of the cooking floor is full of embers insert the tray or the bread and close the door. If temp lowers, insert a small piece of wood or lump charcoal, if temp rises slightly open door (par.2)
SMOKE
- 2.1 Manage the smoke
Smoke can be desired for traditional barbeque but also can be to much for certain foods and for the people that you are entertaining - both taste wise and vision/smell wise
- Use dry wood (wet wood doesn't burn well and makes smoke)
- Try to keep the flame always on
- If you have embers (no flame) insert a small piece of paper or starters and then put a small piece of wood, paying attention to let the air enter among embers and wood
- To avoid the smoke do not use the door - more air enters, less smoke you'll have
- Place the oven strategically so smoke is manipulated to flow away from your entertaining area - the wind can affect smoke as wellespecially on an abnormally breezy day
2.2 Looking for the smoke
For the people who want to cook with smoke we suggest to:
1. Try to close the door when the flame is on
2. Use big pieces of wood or lump charcoal
3. If the flame is high break the flame to produce embers (and then use the door or big pieces of wood)
4. Incorporate a smoker box filled with soaked wood chips of desired flavor
USE THE DOOR AND SMALL PIECES OF WOOD TO STABILIZE
3.1 Stabilize the temperature
The wood fired oven is designed to let the user choose the right temperature depending on what they are cooking. Stabilizing the temperature is the biggest challenge for the user but with experience it becomes much easier. There are 3 elements designed to assist in Temperature stabilization:
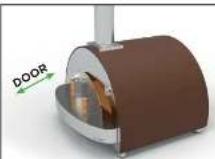
The Door (use the door to control the internal temperature, open more to cool down and close more to raise it up). Completely Close to smother the fire

The Fuel: Small pieces of wood or lump charcoal (once temperature is consistent and stable, add small pieces of lump coal or wood chunks to maintain the desired temperature and to avoid either temperatures that are too low or creating sudden jolts of high temperatures or flames)

Rotation -Control and check distance of food from the flame and embers to prevent burning your meal (closest to flame/embers is the highest temperature) Rotation is a key technique
- 3.2 Cool down the oven
The wood fired oven is a machine that can easily reach temps over 500°C (1000°F) but with no possibility to switch off (never use the water as it can cause the oven floor fire bricks to be damaged). We suggest doing these 3 actions:

Open the oven door gradually keeping the flame exiting through the chimney flue, the more you can open the more the oven can cool down.

Use the pizza turner or wood rake to break the fire and wood.

Spread the embers over the cooking floor.
3.3 Raise the temperature up
The wood fired oven is a machine that can also raise the temperature quickly, with stainless steel dome oven, it's simply and easy to do.

natural_image
Illustration of a brown oven with a gas meter and a small orange object nearby (no text or symbols)FROM 150°C (300°F) TO 250°C (480°F) Insert 1 small piece of wood and close the door partially on the opposite side of the flame

natural_image
Modern kitchen appliance with a large pressure gauge and a small cross symbol (no text or labels visible)FROM 200°C (400°F) TO 300°C (570°F) Insert 2-3 small pieces of wood and leave the door open to let the air enter
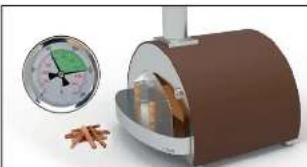
natural_image
Illustration of a brown industrial stove with a circular gauge and scattered food items (no text or symbols)FROM 200°C (400°F) TO 400°C (750°F) Insert 3-5 small pieces of wood and leave the door open to let the air enter

natural_image
Illustration of a brown and silver portable stove or oven with a cylindrical top and glass cover (no text or symbols visible)RAISE 50°C (100°F) Close the door and check the temperature
FLAME INTENSITY, COOKING FLOOR AND TEMPERATURE
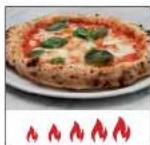
- 4.1 Flame and cooking floor for Neapolitan pizza
The flame for the Neapolitan Pizza has to be strong. Use laser thermometer to measure the temperature of the oven floor. The ambient and oven floor temps should both be about 700°F. The flame should go across the top of the dome ceiling in the oven.

- 4.2 Flame for roman and focaccia pizza
The focaccia (also called roman pizza) needs lower temperature than the Neapolitan pizza. Reaching this temperature is easy: you need a small flame that reaches the highest point of the dome.

- 4.3 Deep Dish Pizza/Detroit Style Pizza
Pizza in a tray/pan is made for more toppings and a thicker pan crust. Cast Iron, stainless steel or mixed-use heavy trays are recommended. The difficulty in cooking this kind of pizza is to cook the bottom of the pizza: we suggest covering the pizza with an aluminum foil with flame. After 10 minutes, check the bottom of pizza: if it is almost brown, you can remove the aluminum paper and leave the pizza to be cooked on top.

- 4.4 Small bread (rest of the pizza dough)
It is common to have some leftovers when you make many dough balls.
We suggest freezing them. Otherwise, you can give them as a present to your party guests and cook for them before they go. Put a small piece of wood, close the door partially and reach 450°F. Stretch to lengthen the dough, put the oil on top and place it on the cooking floor; after 15 minutes your bread should be ready. Do not cut it till it gets cold (we know the smell will attract you so much).
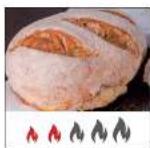
4.5 Big bread (rest of the pizza dough)
If you want to cook a larger loaf of bread (at least 4 pizza dough, 1 Kg) you want to have lot of embers. With temperature approximately 400^ and the cooking floor is around 400^ you can insert the bread dough. We suggest closing the door and checking the temperature every 5-10 minutes. The oven should cool down to 325^ in one hour and the bread should be ready (do not cut it till it's cold).
TIPS TO ORGANIZE A PIZZA PARTY
- 5.1 How many people there are at the party?
You can organize parties from 3 to 100 people, just don't panic and remember some small tips:
- If less than 10 people you can make a more sophisticated menu (many different kinds of pizza); if more people we suggest being really focused on basic Neapolitan pizza and minimal toppings
- We usually count 1-2 10" pizzas for each guest (then 250-300 grams of flour each)
- Always keep in mind your guests: if they have any special requirements or food allergies you need to plan in your menu
- You can include appetizers to let people eating while waiting and give to the oven maestro enough time to get everything ready
- 5.2 Am I alone or do I have any assistant at the party?
When you organize a pizza party with more than 10 guests, we suggest you to have an assistant to help with your preparations or cooking.
- Fire up and take care of the
- Cut all the pizza ingredients
- Set up the table
- 5.3 Weeknights after work?
If you are hosting the party during weekdays with a better need to organize your time. The ALFA oven is ready to cook 30 minutes! We suggest making the pizza dough 1-2 days ahead of the party. You can also make the pizza dough weeks before and freeze the dough balls. Remember to take it out from the freezer 24-48 hours before your event and slow thaw in the fridge. Remove dough immediately when home as its necessary for the pizza dough to acclimate to room temperature, usually 1-2 hours.
- 5.4 Make your party unforgettable! Include your guests in the party — let them make pizza!
During the pizza party people love to be involved, so keep in mind they can be your assistants. Teach your friends, family and guests to enjoy the ALFA Oven just like you do. Cutting finished pizzas, adding fresh toppings and taking care of the oven... but most of all they love to stretch pizzas and make their own special pizza like the oven maestro does. Stretching the pizza will be the funniest game for adults and children, let's try! Cooking pizzas for friends, family and guests is all about the lifestyle and entertaining. Talk, cook, have a drink and most of all HAVE FUN!
YOUR TO-DO LIST FOR A PERFECT PIZZA PARTY (WITH BRUSCHETTA)

Make the pizza dough well in advance before the party*
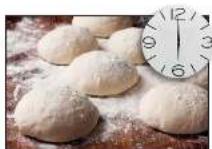
Prepare the dough balls in room temperature 1 to 2 hours before the party*

Light up the oven 30 minutes before and in the meantime cut the ingredients.
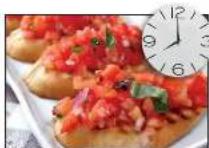
Cook some bruschettas (with tomatoes and basil on top) while waiting for the oven to reach the temperature

Start the pizza party, using your imagination to invent original pizzas

Finish the party giving people the leftover dough or cooked pizzas!
*These timings depend on the season and the outside temperature: in Summer can be lower; in Winter you will need to find the hottest room of your house to wait for the pizza dough to raise.
"Cooking with a wood fired oven is to celebrate our roots, where we come from, what we love more, spending time with our families and friends, smelling a wonderful perfume of flour, meat and wood. I think there is no any better emotion we can enjoy in life."
— Rocco Lauro founder
"Everytime friends organize a pizza party I try to stay away from the cooking stage: but the oven attracts me too much. All the parties finish in the same way: me, enjoying that time using the Alfa oven."
— Marcello Ortuso, founder
ALFA SPECIAL RECIPE FOR THE PERFECT PIZZA DOUGH Recipe for 5 medium or 4 big pizzas
INGREDIENTS

Flour: 1 Kg (look for an Italian brand: "5 Stagioni" or "Caputo" are the most famous in the States)

Water: 630 grams or ml (we suggest to use a good mineral water)
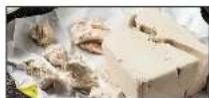
Brewer Yeast (not dried): quantity depends on the weather - 1gr and 6h if in Summer, 3gr and 24 hour if in Winter

Salt: 30 gr Oil: a spoon or more

if you like
a softer dough; we suggest
Italian cold pressed oil.

Honey or malt: a spoon
PREPARATION
You start from putting all the warm water in a bowl. Then you take the oil, the yeast and the honey and you melt them together.

Then you take half flour and you mix it till it gets a cream.

Then you put salt and other 50% of flour and mix till you can see a smooth dough (the secret to make it really smooth is to leave it resting for 5 minutes while you're pulling the dough).
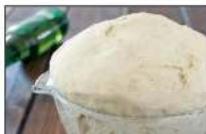
You wait till the dough has raised 2-3 times its original volume (we always choose the coldest place in the house during the Summer: if it's really hot you can put it in the fridge).

Then you cut it with a knife and you make dough balls (around 250-300 grams each).

You wait till they have raised again and then you just have to enjoy! We suggest semolina flour to stretch the dough.
REGULAR MAINTENANCE
1. Clean the combustion chamber Pyrolysis 500°C-1.000°F
The Alfa oven can be cleaned by the fire itself through a process called "pyrolysis" (pyro "fire" + lysis "separating"). It is one of the processes involved in charring wood and it has a function of thermal cleaning, which removes organic substances from products or production components. During the thermal cleaning process, organic material is converted by pyrolysis and oxidation into volatile organic compounds, hydrocarbons and carbonized gas. Inorganic elements remain. To clean the oven will keep the temperature at 500°C / 1.000°F for 2-3 min

natural_image
Modern kitchen oven with open interior showing internal combustion flame (no text or symbols visible)2. Clean the cooking floor
After the pyrolysis you need to wait the oven to cool down and then take the ashes away. (ALWAYS to use a fire resistant bin to hold the used ashes). When you are 100% certain the ashes are cold you can empty them or you can also use the ashes as a fertilizer for the trees. If you wish you can also draw the ashes from the holes of the cooking floor with an outdoor shop vac.

natural_image
Exterior view of a modern open-pit induction cooktop with a wooden stove inside (no text or symbols visible)3. Clean the oven outside
Like all 304 stainless & powder coated products, these are built to withstand and resists many environments including coastal salt marine, but will need regular care and maintenance. Wash with a soft cloth and a solution of soap and water or use a cleaning solution mixture of 50/50 Baking Soda and Dish Washing liquid detergent. With scouring side of sponge, scrub WITH THE GRAIN of the stainless steel and rinse with clean water. We recommend Barry's Restore It All products for ALFA Stainless Steel >> www.barrysrestoreitall.com.

natural_image
Illustration of a brown industrial stove with a spray bottle and hand inserting a paper (no text or symbols)PERIODIC MAINTENANCE
1. Clean the stainless steel
Alfa ovens are made with high quality 304 stainless steel outside and 441 inside. To clean the stainless steel we suggest using an inox cleaner. Be sure to read the instructions reported on the product.

natural_image
Illustration of a brown toaster oven with a spray bottle and a hand holding a label (no text or symbols on the main subject)2. Protect stainless steel
To better protect the stainless steel, we suggest using Vaseline or oil (some people use olive or baby oil)

3. Cover the oven
Don't forget to use the Alfa covers to protect your oven.

natural_image
Black rectangular object resembling a stylized arch or container, with two side protrusions (no text or symbols visible)EVERY 2-3 YEARS
1. Clean some rust spot
Stainless steel is rust-proof but in some case (humidity, sea salt, etc.) some rust spots may appear. You can use a rust remover to get your stainless steel perfect again.

- When the fire has gone out and the oven is not hot enough, collect the ashes left over from previous cooking with a metallic brush and a pan.

- The gas burner should be cleaned periodically by carefully sucking up any cooking residues.
- When cleaning valves and burners, be careful not to damage the burner.
- Remove any residues from the burners with a brush.
- Do not enlarge burner holes (openings).
GAS KIT DISASSEMBLY
- The gas burner should be cleaned periodically by carefully sucking up any cooking residues.
- When cleaning valves and burners, be careful not to damage the burner.
- Before cleaning is necessary to remove the burner from the oven by following the procedure in the assembly instructions.
STORING THE OVEN
- If the gas oven is not used close the supply valve of the gas cylinder.
- If the gas oven is placed in a closed space, disconnect the gas supply. The gas cylinder must be left outside in a well-ventilated area.
- In the event that the cylinder is not removed from gas oven, place the entire device and the cylinder in a well-ventilated outdoor area.
- The gas cylinders must be stored outdoors in a well-ventilated area and out of the reach of children. Cylinders not in use must not be stored in a building, garage or other enclosed space.
TROUBLESHOOTING
Contact us directly for expert advice on the web site www.alfafornl.com For United States go to alfaovens.com
| WOOD VERSION | THE OVEN PRODUCES SMOKE | - Check that the wood is not too moist and the embers are not unburned.- Make sure that you have started a fire with vivid flames, gradual but steady, in order to avoid incomplete combustion.- If the oven is installed indoors, check the chimney flue and any air inlets in the room.- It is recommended to close the oven door. |
| THE OVEN DOES NOT HEAT | - Check that the fire is on one side of the oven and not near the mouth.- Fire with vivid flames for 20 minutes.- Do not amass the wood over the embers.- Gradually add the wood to the fire. | |
| THE OVEN COOLS DOWN QUICKLY | - Check that no moisture or water has infiltrated the oven.- It may be lit for the first time or after a long idle period.- Avoid sudden short fires that do not warm the bottom of the oven. | |
| THE FLAMES COME OUT OF THE MOUTH OR CHIMNEY CAP | - Avoid excessive fires and immediately dampen the flames that reach out of the oven by resting the door over- the mouth of the oven, leaving a gap of 2 or 3 cm. | |
| THE OVEN DOESN'T COOK AS YOU WOULD LIKE | - Ensure the oven is at the right temperature.- Ensure the oven maintains the desired temperature for the duration of the cooking time; use the counter to- Adjust the heat intensity as well as the flame adjuster: open and close it to raise or lower the temperature as necessary. |
| GAS VERSION | THE OVEN COOLS DOWN TOO EARLY | - Make sure that neither moisture nor water have gathered inside the oven.- Firing the oven for the first time or after a long period of idleness.- Do not build a powerful but short-lived fire that won't heat the oven thoroughly.- Verify that the burner is working and close the door. |
| IF THE OVEN DOESN'T COOK AS YOU WOULD LIKE | - Ensure the oven is at the right temperature.- Fire with high vivid flames for 10 minutes.- Ensure the oven maintains the desired temperature for the duration of the cooking time; use the counter- To adjust the heat intensity as well as the flame adjuster: open and close the counter to raise or lower the temperature as necessary. |
Alfa Forni is not responsible for veins, cracks, hairline cracks of the floor as they are an intrinsic characteristic of the material.
V.2019114

- GENERAL WARNINGS
- RETAIN THIS MANUAL FOR FUTURE REFERENCE
- PLEASE READ THE FOLLOWING INFORMATION FOR PROPER INSTALLATION AND OPTIMUM PERFORMANCE OF THE OVEN.
- SAFETY WARNINGS
- SAFETY WARNINGS ONLY FOR GAS VERSION
- GAS LEAKS MAY RESULT IN FIRE OR EXPLOSION AND CAUSE SERIOUS PERSONAL INJURY OR DEATH, OR PROPERTY DAMAGE.
- IF YOU SMELL GAS:
- WARRANTY
- PLEASE RETAIN YOUR SALES RECEIPT OR INVOICE WRITE HERE UNDER THE SERIAL NUMBER ON THE PRODUCT IDENTIFICATION TAG
- POSITIONING THE OVEN
- WARNINGS: Follow the following advises for a correct use of the gas cylinder.
- CONNECTION
- CONNECT THE LPG CYLINDER (only for LPG oven)
- ATTENTION! Follow our advice to correctly use your oven.
- CONNECTION KIT
- CAUTION
- CONVERTING YOUR OVEN
- CONVERSION
- ONLY USE THE COMPONENTS AND PARTS SUPPLIED WITH THE CONVERSION KIT
- REPLACEMENT OF THE MAIN NOZZLE
- REPLACEMENT OF THE PILOT NOZZLE.
- 3.2
- 3.3
- OVEN USE
- WARNING: Follow the instructions before turning on the oven.
- LIGHTING
- TURNING OFF
- DIFFERENT TYPES OF WOOD
- FOR YOUR SAFETY:
- LIGHTING THE OVEN
- For Neapolitan pizza
- - 1.2 For grilling
- For baking / tray
- SMOKE
- - 2.1 Manage the smoke
- Looking for the smoke
- USE THE DOOR AND SMALL PIECES OF WOOD TO STABILIZE
- Stabilize the temperature
- - 3.2 Cool down the oven
- Raise the temperature up
- FLAME INTENSITY, COOKING FLOOR AND TEMPERATURE
- - 4.1 Flame and cooking floor for Neapolitan pizza
- - 4.2 Flame for roman and focaccia pizza
- - 4.3 Deep Dish Pizza/Detroit Style Pizza
- - 4.4 Small bread (rest of the pizza dough)
- Big bread (rest of the pizza dough)
- TIPS TO ORGANIZE A PIZZA PARTY
- - 5.1 How many people there are at the party?
- - 5.2 Am I alone or do I have any assistant at the party?
- - 5.3 Weeknights after work?
- - 5.4 Make your party unforgettable! Include your guests in the party — let them make pizza!
- YOUR TO-DO LIST FOR A PERFECT PIZZA PARTY (WITH BRUSCHETTA)
- ALFA SPECIAL RECIPE FOR THE PERFECT PIZZA DOUGH Recipe for 5 medium or 4 big pizzas
- REGULAR MAINTENANCE
- Clean the combustion chamber Pyrolysis 500°C-1.000°F
- Clean the cooking floor
- Clean the oven outside
- PERIODIC MAINTENANCE
- Clean the stainless steel
- Protect stainless steel
- Cover the oven
- EVERY 2-3 YEARS
- Clean some rust spot
- GAS KIT DISASSEMBLY
- STORING THE OVEN
- TROUBLESHOOTING
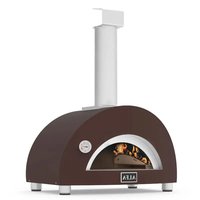
Brand : ALFA
Model : Ciao
Category : Pizza oven