
Apollo Solo USB - DJ Equipment Universal Audio - Free user manual and instructions
Find the device manual for free Apollo Solo USB Universal Audio in PDF.


| Product Type | USB 3 Audio Interface with UAD-2 DSP |
| Channels | 2 In / 4 Out (2x4) |
| Sample Rate | Up to 192 kHz at 24-bit |
| Mic Preamps | 2 High-resolution digitally-controlled with Unison technology |
| Instrument Input | 1 Hi-Z (front panel, channel 1) |
| Monitor Outputs | 2 (balanced TRS, line level) |
| Headphone Output | 1 (stereo, 1/4") |
| Digital Conversion | Best-in-class A/D and D/A conversion |
| DSP Processing | Onboard UAD-2 SOLO core (SHARC processor) |
| UAD Plug-Ins | Realtime Analog Classics bundle included; over 100 available |
| Unison Technology | Yes - emulates mic preamps and guitar amps with impedance/gain staging |
| Computer Connectivity | USB 3 SuperSpeed (Type-C) |
| Power Supply | External 12V DC (locking connector) |
| Dimensions (approx.) | 8.5" x 5.5" x 2.5" (216 x 140 x 64 mm) |
| Weight (approx.) | 1.5 lb (0.68 kg) |
| Construction | Robust all-metal desktop design |
| Software | Console application for mixing and monitoring |
| Driver Support | ASIO, WDM (Windows) |
| System Requirements | Windows PC with USB 3 port, Intel Core i-Series or Xeon |
| Package Contents | Apollo Solo USB, power supply with region plugs, Getting Started card |
| Safety & Maintenance | Read manual; clean with dry cloth; no user-serviceable parts |
Frequently Asked Questions - Apollo Solo USB Universal Audio
User questions about Apollo Solo USB Universal Audio
0 question about this device. Answer the ones you know or ask your own.
Ask a new question about this device
Download the instructions for your DJ Equipment in PDF format for free! Find your manual Apollo Solo USB - Universal Audio and take your electronic device back in hand. On this page are published all the documents necessary for the use of your device. Apollo Solo USB by Universal Audio.
USER MANUAL Apollo Solo USB Universal Audio
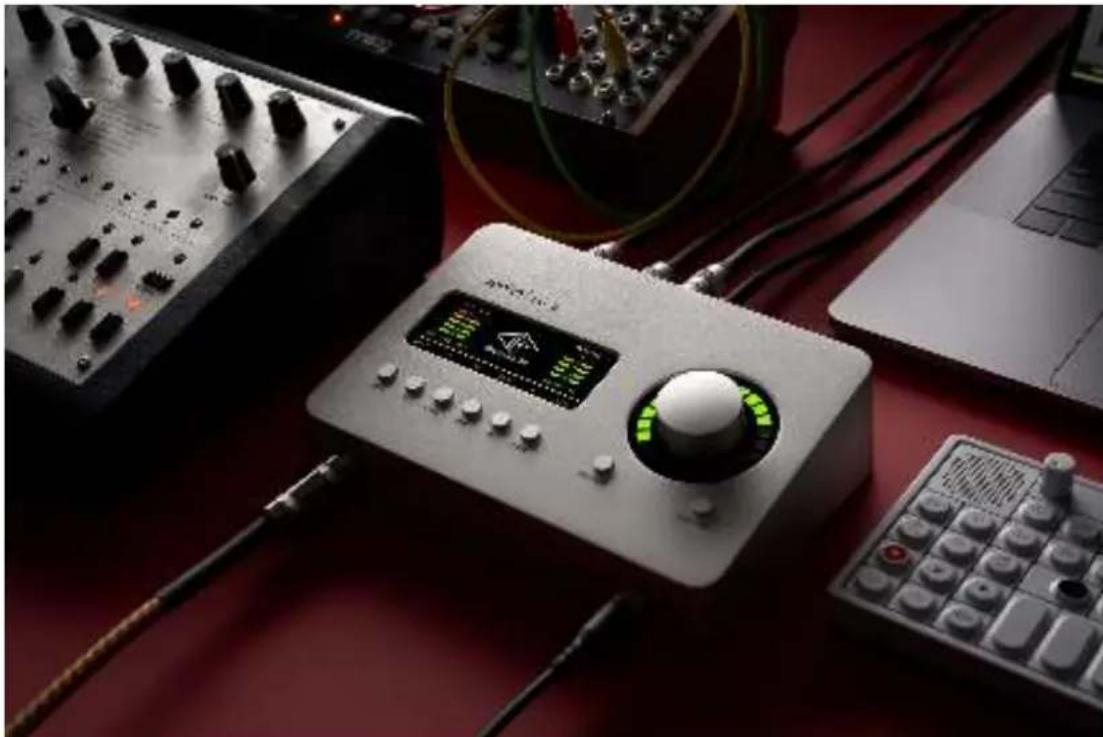
natural_image
Exterior view of a silver audio recording device with control panel and buttons (no readable text or symbols)Apollo Solo USB Manual
UAD Software Version 9
Manual Version 200729
UNIVERSAL AUDIO
www.uaudio.com
Table Of Contents
Tip: Click any section or page number to jump directly to that page.
A Letter from Bill Putnam Jr. 7
Introducing Apollo Solo USB 8
Apollo Solo USB Software Features 11
UAD Powered Plug-In Features 13
About Apollo Solo USB Documentation.... 14
Technical Support.... 15
Getting Started....16
Overview 16
Apollo Solo USB System Requirements.... 16
Hardware Setup.... 17
Windows Setup.... 19
Audio Setup 20
Setting Hardware Input/Output Levels.... 21
What Next? 22
Hardware Controls & Connectors 23
Controls Overview 23
Top Panel.... 26
Display Panel 29
Front Panel 30
Rear Panel 31
Apollo Solo USB System Overview 33
Apollo Solo USB Hardware 33
Apollo Solo USB Software.... 34
UAD Powered Plug-Ins 37
Apollo Audio Interfaces 39
UAD Software Installer 39
UA Account & Store 40
UA Website 40
Working With Apollo Solo USB 41
Essential Apollo Solo USB Concepts 42
Setting the DAW to use Apollo Solo USB I/O.... 44
Accessing Apollo Solo USB's I/O in the DAW 46
Input Monitoring with the DAW 48
Using Console with the DAW 52
UAD Plug-Ins: Console versus DAW 54
Virtual I/O 56
Using Apollo Solo USB for System Sound I/O 59
Using Apollo Solo USB Without Audio Software 61
Console Overview....62
What is Console? 62
Console Functions 63
Global Functions 63
When To Use Console 64
Interactions Between Console and Apollo Solo USB 64
Accessing Console 65
Console Layout 66
Global Window Elements 68
Meter Bridge Overview....69
Info Bar Overview 70
Current Bank Overview 71
View Column Overview....72
Monitor Column Overview 74
Channel Strips Overview 75
Console Plug-In Inserts Overview 76
Insert Effects Overview....77
Popover Windows....78
HP Cue Overview 79
Sends Overview 80
Console Sessions Overview....83
Console Settings Overview 84
Multiple Undo/Redo 85
Keyboard Focus & Control 86
Adjusting Console Controls 87
Controls Shortcuts 87
Keyboard Shortcuts....88
Console Reference 89
Meter Bridge 89
View Column 92
View Options 95
Info Bar 101
Channel Input Controls.... 104
Sends Popover.... 107
Monitor Mix Controls 108
Aux Returns 114
Monitor Column.... 117
Cue Outputs Popover.... 121
Control Room Column 123
Console Sessions 125
Sessions Manager Popover 127
Window Title Bar.... 131
Application Menus.... 132
Console Plug-In Inserts 136
Insert Types.... 136
Inserts Signal Flow 137
Inserting UAD Plug-Ins.... 137
Removing UAD Plug-Ins 137
Editing UAD Plug-Ins 137
Insert Assign Popover 137
Inserts Display.... 138
Insert State Indicators.... 139
Insert Hover Options 139
Insert Options Menu 140
Channel Insert Effects.... 141
Plug-In Editor Window.... 142
Channel Strips.... 145
Presets Manager 147
Presets Manager Popover 150
Save Preset Popover.... 152
Console Settings.... 153
Console Settings Overview 153
Hardware Settings Panel 155
Display Panel 160
Plug-Ins Panel 162
MIDI Panel 164
Unison.... 166
What is Unison? 166
Unison Plug-Ins.... 167
Activating Unison 168
Unique Behavior of Unison Inserts 169
Controlling Unison Plug-Ins with Apollo Solo USB.... 170
Gain Stage Mode 173
Unison Load/Save Behaviors 176
Unison Operation Notes.... 177
Console Recall Plug-In 179
Console Recall Controls.... 180
How To Use Console Recall.... 181
UAD Meter & Control Panel 183
Launching the Application.... 183
UAD Meter Window.... 184
UAD Control Panels 187
System Information Panel.... 188
Plug-Ins Panel....191
Configuration Panel.... 193
Help Panel....197
Using UAD Plug-Ins....198
Loading UAD Plug-Ins.... 198
The UAD Plug-In Interface.... 198
UAD Toolbar....199
LiveTrack Mode 202
Adjusting Parameters 203
Shortcuts 204
DSP Loading Notes 205
Mono (m) UAD plug-ins.... 206
Tempo Sync 207
Tempo Sync Plug-Ins 207
Sync Activation 208
Available Note Values....208
Entering Values 209
Precision Delay Modes with Tempo Sync 210
Galaxy Tape Echo & Roland RE-201 Sync 210
UA Account & Store 211
Account Overview 211
Store Overview....212
UAD Authorization Overview.... 213
Demo Mode....214
Buying UAD Plug-Ins 215
UAD Authorization Procedure.... 216
Offline UAD Authorization.... 217
Latency & Apollo Solo USB....219
Delay Compensation with Apollo Solo USB 219
Minimizing UAD Input Latency When Software Monitoring....221
Latency Basics 222
Device Drivers 224
Apollo Solo USB Drivers Overview.... 224
Driver I/O Table 225
Troubleshooting 226
Glossary....227
Specifications 234
Hardware Block Diagram 237
Universal Audio History 238
Pioneering audio recording for more than 50 years....238
Bill Putnam Sr....240
Pros Talk UA 247
Thank You....251
Notices....252
Warranty 252
Repair Service 252
Maintenance 252
Important Safety Information 253
Technical Support 256
Universal Audio Knowledge Base 256
YouTube Support Channel 256
Universal Audio Community Forums 256
Contact Universal Audio Support 256
A Letter from Bill Putnam Jr.
Thank you for choosing the Apollo Solo USB 3 Audio Interface as part of your music making experience. We know that any new piece of gear requires an investment of time and money — and our goal is to make your investment pay off.
Universal Audio's family of audio interfaces represent the best examples of what UA has stood for over its long history; from its original founding in the 1950s by my father, to our current vision of delivering the best of both analog and digital audio technologies.
Starting with its high-quality analog I/O, Apollo Solo USB's superior sonic performance serves as its foundation. This is just the beginning however, as Apollo Solo USB allows you to run UAD plug-ins in real time. Want to monitor yourself through a Neve® channel strip while tracking bass through a classic Fairchild or LA-2A compressor? Or track vocals through a Studer® tape machine with some Lexicon® reverb?* With our growing library of more than 100 UAD plug-ins, the choices are limitless.
At UA, we are dedicated to the idea that technology should serve the creative process — not be a barrier. These are the very ideals my father embodied as he invented audio equipment. We believe Apollo Solo USB will earn its way into your creative workflow by providing stunning fidelity and rock-solid reliability for years to come.
Please feel free to reach out to us via our website www.uaudio.com, and via our social media channels. We look forward to hearing from you, and thank you once again for choosing Universal Audio.
Sincerely,
natural_image
Abstract line drawing with curved and dotted elements (no text or symbols)Bill Putnam Jr.
*All trademarks are recognized as property of their respective owners. Individual UAD Powered Plug-Ins sold separately.
Introducing Apollo Solo USB
Shape your Recordings Into Records with Genuine UA Conversion and Classic Studio Sounds.
Apollo Solo USB is a desktop recording audio interface for Windows — delivering class-leading audio conversion, two Unison™ mic preamps, and a suite of onboard UAD plugins for recording album-quality results, in real time.
This compact 2x4 interface starts with esteemed Apollo A/D and D/A conversion to sonically outperform anything in its class. And with its Unison technology and built-in UAD-2 processing, you can record through classic studio tools including the UA 610-B Tube Preamp & EQ, LA-2A and 1176 compressors, and more — with near-zero latency.
Now You Can:
- Record with class-leading A/D and D/A conversion — as heard on hundreds of hit records
- Track with near-zero latency through mic preamp and guitar amp emulations from Neve,® API,® Fender,® and more using Unison™ technology*
- Mix with included UAD plug-ins like the Teletronix® LA-2A and 1176 compressors, Pultec® EQs, and more
- Enjoy clear, detailed monitoring with the best-sounding headphone amplifier in its class
Unison™ Technology for Stunning Mic and Guitar Preamp Emulations
Apollo Solo USB's Unison technology gives you the tone, touch, and “feel” of the world's most sought-after preamps. These include the bundled UA 610-B Tube Preamp, plus authentic mic preamp emulations from Neve® and API,® plus guitar amp emulations from Fender® and Marshall® — complete with their signature impedance, gain stage “sweet spots,” and component-level circuit behaviors.*
The secret to Unison is its hardware-software integration between Apollo Solo USB's mic preamps and its onboard UAD-2 processing. Simply place a Unison preamp plug-in on your mic input in Apollo Solo USB's Console software, and it physically reconfigures Apollo Solo USB's impedance and gain staging — giving you the classic tube and transformer sounds of the world's most recorded mic preamps and guitar amps.
A Full Suite of Classic Studio Processing Onboard
Right out of the box, Apollo Solo USB provides a suite of incredible analog emulation plug-ins including the world's only authentic Teletronix LA-2A and 1176LN compressors, Pultec EQs, and much more. From the tube warmth of the Pultec EQ on guitars, to the gentle limiting of the LA-2A on vocals, your recordings will take a giant leap forward in rich, sonically complex analog sound.
*All trademarks are recognized as property of their respective owners. Individual UAD Powered Plug-Ins sold separately.
Access the World of UAD Powered Plug-Ins
Beyond the included Realtime Analog Classics plug-ins, Apollo Solo USB lets you tap into the full library of award-winning UAD Powered Plug-Ins — including vintage EQs, Compressors, Reverbs, Tape Machines, Auto-Tune and more — in real time. With exclusive emulations from Neve, Ampex, Lexicon, Fender, Antares, Moog, and more,* the creative possibilities are nearly endless.
Vintage Guitar and Bass Amps
For guitarists and bassists, Apollo Solo USB includes Unison technology on its front panel instrument input — giving you access to dead-on emulations of amps like the Fender® '55 Tweed Deluxe, Ampeg® B-15N Bass Amplifier, and the included Marshall® Plexi Classic — all available at near-zero latency for songwriting and recording.
Best-in-Class Headphone Amplifier
Apollo Solo USB's onboard headphone output is louder and punchier, with lower noise and flatter frequency response versus any interface in its class. This means you can confidently track and mix using headphones, knowing you're hearing every sonic detail.
Ready to Go
With its robust all-metal construction and exceptional sound quality, Apollo Solo USB is the only desktop audio interface for Windows users that truly delivers professional results. It's like having a virtual analog studio that fits onto any desktop, and easily travels in your laptop bag.
natural_image
Close-up of audio recording equipment including a CD mixer and control panel, with no visible text or symbols.*All trademarks are recognized as property of their respective owners. Individual UAD Powered Plug-Ins sold separately.
Apollo Solo USB Hardware Features
Key Features
- Best in class audio quality with 24-bit/192 kHz conversion
- Realtime UAD Processing — track through vintage compressors, EQs, tape machines, and guitar amp/pedal plug-ins with near-zero latency
- 2 premium mic/line preamps, 2 monitor outputs, front-panel Hi-Z instrument input and stereo headphone output
- Unison™ technology for stunning models of classic mic preamps and guitar amps
• UAD-2 DSP accelerator processing onboard - USB 3 connection (Type-C) for fast speed on modern computers
- Uncompromising analog design, superior components, and premium build quality throughout
Audio Interface
• Sample rates up to 192 kHz at 24-bit word length
- 2 x 4 simultaneous input/output channels
- Two channels of analog-to-digital conversion via:
- Two balanced mic/line inputs
• One Hi-Z instrument input
- Four channels of digital-to-analog conversion via:
- Stereo monitor outputs
- Stereo headphone output
Microphone Preamplifiers
- Two high-resolution, ultra-transparent, digitally-controlled analog mic preamps
- Unison technology for stunning models of classic mic preamps and guitar amps
- Front panel and software control of all preamp parameters
- Low cut filter, 48V phantom power, 20 dB pad, polarity inversion, and stereo linking
Monitoring
- Stereo monitor outputs
- 14 " stereo headphone output
- All outputs are independently addressable
UAD-2 Inside
- Onboard UAD-2 DSP Accelerator with SHARC ^ SOLO core processing
• Realtime UAD Processing on all inputs - Same features and functionality as other UAD-2 devices and plug-ins when used with a DAW
- Complete UAD Powered Plug-Ins library is available online
Other
- Attractive and durable desktop form factor
- Easy firmware updates
• One year limited warranty
Package Contents
- Apollo Solo USB 3 Audio Interface
- External power supply with changeable region-specific AC connectors
• Getting Started URL card
Apollo Solo USB Software Features
Console Application
General:
- Enables tracking and/or monitoring with Realtime UAD Processing and Unison technology
- Analog-style mixer for low-latency monitoring and tracking with UAD plug-ins
- Remote control of Apollo Solo USB hardware features and functionality
- Console sessions can be saved/loaded for instant recall of any configuration
• Virtual I/O for routing DAW channels into Console and Console channels into DAW - Multiple Undo/Redo for edit operations
Realtime UAD Processing:
- UAD plug-in processing on Apollo Solo USB inputs with indiscernible latency
- Up to five UAD plug-ins can be serially chained on each input and aux return
- UAD insert processing can be monitored while recording wet or dry
- Sub-2ms round-trip latency with five serial UAD plug-ins at 96 kHz sample rate
Channel Inputs:
- Input channels for hardware and virtual inputs
• Level, pan, solo, and mute controls on all inputs - Two stereo auxiliary sends with level and pan controls on all inputs
• Virtual inputs accept any outputs from DAW - Stereo headphone cue sends with level and pan controls on all inputs and auxes
- Adjacent input pairs can be linked for convenient stereo control
Monitoring:
- Stereo monitor mix bus with level, mute, solo, dim, and source select controls
- Separate stereo headphone cue mix bus
- Independent monophonic sum controls for both mix buses
Auxiliary Buses:
- Two stereo auxiliary send/return buses with independent level, mute, and mono sum controls
- Four plug-in inserts per auxiliary return for Realtime UAD Processing on auxes
- Auxiliary buses can be routed to main monitor mix and/or headphone outputs
- Independent pre/post switching on each auxiliary bus
Metering:
- Signal level meters with peak hold and clip indicators on all inputs
- Dual peak hold meters with signal peak LEDs display monitor bus levels
- Input meters are globally switchable to display pre or post fader signal levels
- Independently selectable peak/clip hold times and global clear clips button
Console Recall plug-in
- Convenient access to Console's monitor controls via DAW plug-in
- Saves Apollo Solo USB configurations inside DAW sessions for easy recall of settings
• VST and AAX 64 plug-in formats
UAD Powered Plug-Ins
- Award-winning audio plug-ins for monitoring, tracking, mixing, and mastering
- UAD plug-ins can be used simultaneously within Console and/or DAW
- All UAD plug-ins include fully-functional 14-day demo period
- Complete UAD plug-ins library is available online at www.uaudio.com
UAD Meter & Control Panel application
- Configures global UAD settings
• UAD-2 resource gauges for DSP and Memory usage
• Facilitates automatic authorization of UAD plug-in licenses
Device Drivers
- All hardware inputs and outputs can be individually addressed by DAW
- All of Console's mix buses can be routed to DAW inputs for recording
UAD Powered Plug-In Features
- Run UAD plug-ins with Apollo Solo USB's integrated UAD-2 DSP Accelerator
- Apollo Solo USB includes the Realtime Analog Classics UAD plug-ins bundle
• Over 100 UAD plug-ins available at the UA online store - Fully functional 14 day demo available for all UAD plug-ins
- Realtime UAD Processing via Console allows monitoring and tracking through UAD plug-ins with near-zero latency, regardless of DAW's I/O buffer setting
- Includes VST and AAX 64 plug-in formats for compatibility with all major DAWs including Cubase, Pro Tools, and more
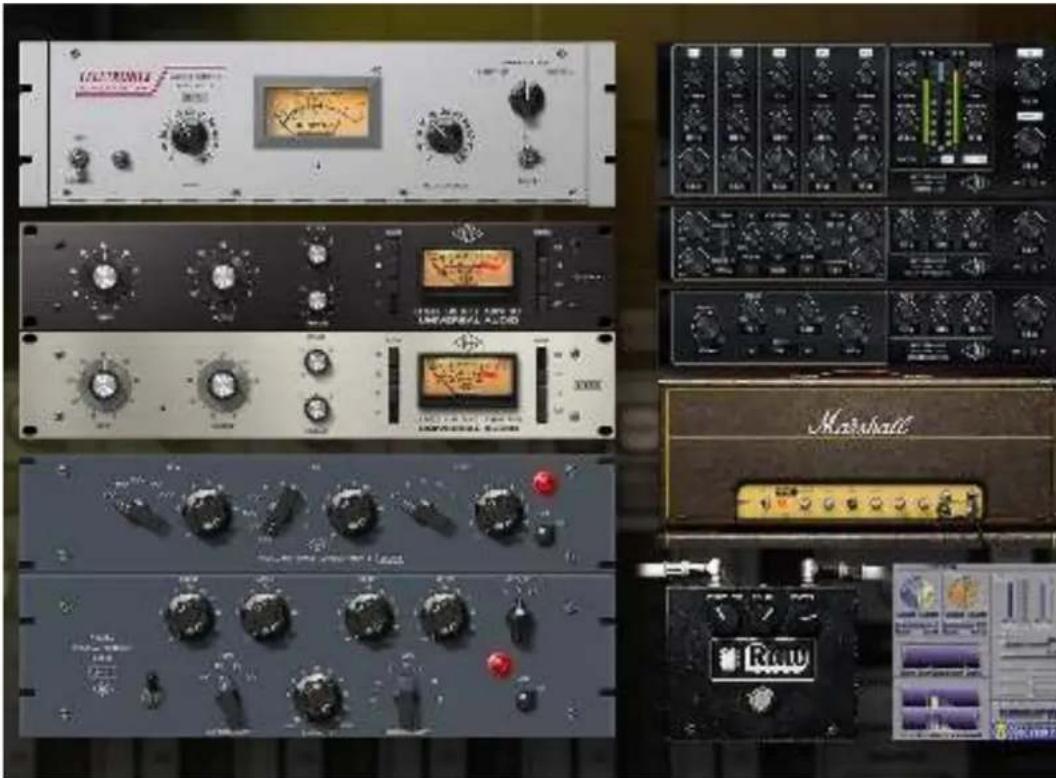
natural_image
Collection of audio equipment modules including audio amplifiers, knobs, and audio dividers (no visible text or labels)Some of the UAD plug-ins included with Apollo Solo USB
About Apollo Solo USB Documentation
Documentation for Apollo Solo USB and UAD Powered Plug-Ins are separated by areas of functionality, as described below. The user manuals are placed on the system drive during software installation. They can also be downloaded at help.uaudio.com.
Note: All manual files are in PDF format. PDF files require a free PDF reader application such as Edge (included with Windows 10).
Apollo Solo USB Manual
The Apollo Solo USB user manual includes everything about Apollo Solo USB except the descriptions of, and operating instructions for, individual UAD plug-in titles.
Hardware – Complete details about the Apollo Solo USB hardware, including detailed descriptions of all hardware features, controls, connectors, and specifications.
Software – Detailed information about how to integrate Apollo Solo USB's functionality into the DAW environment and configure and operate all Apollo Solo USB software features using the Console application, Console Settings window, and Console Recall plug-in.
System – Detailed information about the overall Apollo Solo USB/UAD-2 system, the UAD Meter & Control Panel application, buying optional plug-ins at the UA online store, and more.
UAD Plug-Ins Manual
The features and functionality of all individual UAD Powered Plug-Ins developed by Universal Audio are detailed in the UAD Plug-Ins Manual. Refer to this document to learn about the operation, controls, and user interface of each UAD plug-in title developed by UA.
Direct Developer Plug-In Manuals
UAD plug-ins include titles created by our Direct Developer partners. Documentation for these 3rd-party plug-ins are separate files written and provided by the plug-in developers. The file names for these plug-in manuals are the same as the plug-in titles.
Accessing Installed Documentation
Either of these methods can be used to access the installed documentation files:
- Choose Documentation from the Help menu within the Console application
- Click the Product Manuals button in the Help panel within the UAD Meter & Control Panel application
- Manuals are also available online at help.uaudio.com.
Host DAW Documentation
Each host DAW software application has its own particular methods for configuring and using audio interfaces and plug-ins. Refer to the host DAW documentation for specific instructions about using audio interface and plug-in features within the DAW.
Glossary
This manual uses technical terms and acronyms that may be unfamiliar. Refer to the Glossary for the definitions of many of these terms.
Hyperlinks
Links to other manual sections and web pages are highlighted in blue text. Click a hyperlink to jump directly to the linked item.
Tip: Use the back button in the PDF reader application to return to the original page after clicking a hyperlink.
Technical Support
For additional resources, or if you need to contact Universal Audio for assistance, see the Technical Support page.
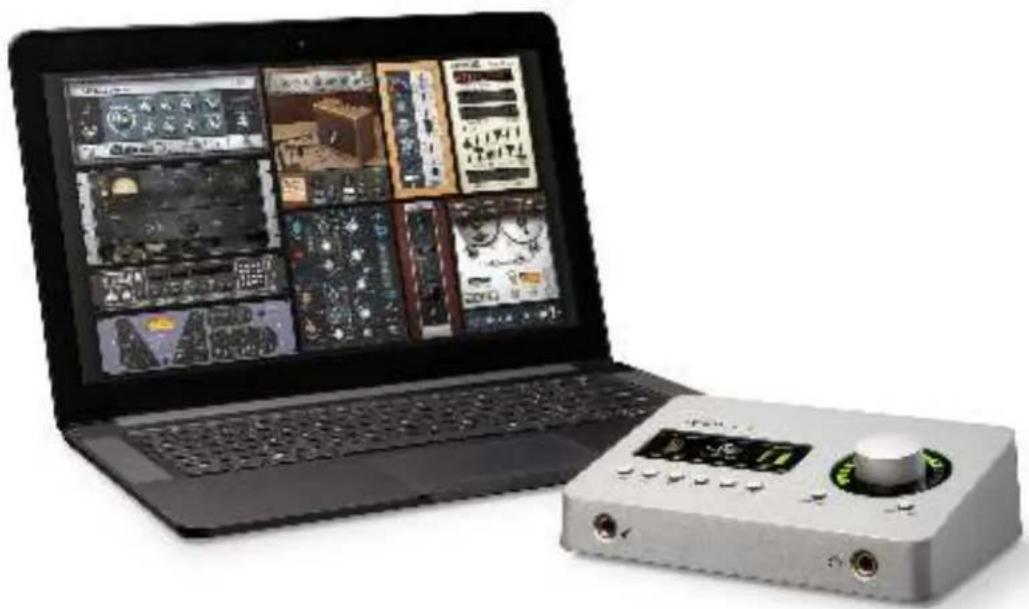
natural_image
Laptop displaying a multi-panel video editing interface with multiple audio and audio recording screens (no visible text or symbols on screen)Getting Started
Overview
Before you can use Apollo Solo USB, you need to complete these steps:
- Connect Apollo Solo USB to your computer with a USB 3 cable and power on
- Download and install the latest UAD software
- Register your Apollo Solo USB hardware
- Authorize your UAD plug-ins
Additionally, you'll want to learn these essential Apollo Solo USB operations:
- Connect to Input Sources and Monitor System – How to connect your audio gear.
- Setting Hardware Input/Output Levels – Learn how to adjust Mic/Line/Instrument input gain levels and monitor/headphone output volume levels.
This chapter will guide you through these procedures. For assistance, see the Technical Support page.
Apollo Solo USB System Requirements
Note: For complete compatibility information, including operating system and storage requirements, visit help.uaudio.com.
- PC with available built-in* USB 3 SuperSpeed (Type-A or Type-C port)
- Intel Core i-Series or Xeon processor*
- USB 3 cable with Type-C connector (not included)*
- Internet connection to download software and authorize UAD plug-ins
\*Notes
- IF-certified USB 3 SuperSpeed cable (Type-A to Type-C, or Type-C to Type-C)
- Quad Core i7 or better recommended for optimum DAW performance
- USB 3 adapters (such as PCIe-to-USB 3 expansion cards) are not tested
- 2-in-1 systems (notebook/tablet) are not recommended
Hardware Setup
Choose a Suitable Location
- Locate Apollo Solo USB on a flat surface.
- The location should be sturdy enough to securely hold its weight and withstand the pressure of operating the top panel controls.
- Leave enough room at the front and rear of the unit for connecting cables.
USB 3 Cable Length
Apollo Solo USB is designed for use with a USB 3 SuperSpeed cable length of two meters or less (approximately six feet or less). Using longer USB 3 cables can have adverse effects on system performance.
Important: Connect Apollo Solo USB to the computer with a USB 3 SuperSpeed cable that is no longer than two meters in length.
Connect to Computer and Power
Caution: Before powering Apollo Solo USB on or off, lower the volume of the monitor speakers (if connected) and remove headphones from your ears.
- Connect a USB 3 SuperSpeed cable between Apollo Solo USB's Type-C port and a USB 3 port on the host computer. Ensure the cable is fully inserted at both ends.
- Connect the included power supply to an AC outlet (Apollo Solo USB cannot be bus powered).
- Connect the locking power supply to the rear panel of Apollo Solo USB. Align the two tabs on the power cable's connector to the notches on the input, then rotate the barrel to prevent accidental disconnection.
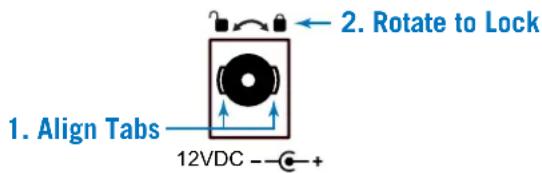
- Apply power to Apollo Solo USB using the rear panel's power switch. Apollo Solo USB is now ready for Software Setup.
Software Setup
The Apollo Solo USB software must be installed to use Apollo Solo USB and UAD plug-ins. The UAD Powered Plug-Ins Installer places the software onto the computer's startup drive. After software installation, you'll register your Apollo Solo USB hardware and authorize your UAD plug-ins.
Our Web Pages Guide You
The Universal Audio website guides you through the process of UAD software installation, Apollo Solo USB hardware registration, and UAD plug-in authorization. The procedure you'll follow to complete this process is detailed below, but the web pages can guide you.
To begin the installation, registration, and authorization process, visit:
www.uaudio.com/register
If you've already registered your Apollo Solo USB and simply want to update to a newer version of UAD software, the latest UAD software is available at www.uaudio.com., or click Check for Updates in the UAD Meter & Control Panel application.
Installation, Registration, and Authorization Procedure
Note: For optimum results, connect Apollo Solo USB to the computer and power on before installing the UAD software. See instructions on the previous page.
- Visit www.uaudio.com/register and follow the on-screen instructions.
- Open the downloaded UAD installer application. The software installer will guide you. Be sure to restart the computer when prompted.
Note: If prompted to update the Apollo Solo USB firmware, see the procedure below.
-
After restarting, your web browser launches and connects to the Universal Audio website. Follow the instructions on our web pages to complete registration of your Apollo Solo hardware and claim your bundled UAD plug-ins.
-
After registration is complete, authorize your UAD system by following the guidance on the registration web pages (or see the UAD Authorization Procedure).
-
See Windows Setup on the following page for additional configuration steps.
Firmware Update Procedure
If the "Apollo Solo USB Firmware Update" dialog window appears:
- Click "Load" to begin the process. The "firmware is updating" window appears.
- Wait for the "Power Off Apollo Solo USB" window, which appears after the firmware is updated.
- Power off Apollo Solo USB for several seconds with the rear panel power switch. After powering Apollo Solo USB back on again, the firmware update is complete.
Windows Setup
Disable Windows Notification Sounds
Windows notification sounds (such as a "ding" when an alert window appears) can interfere with DAW audio. Follow the procedure below to disable all notification sounds.
- Open the Sound control panel. Sound can be accessed by right-clicking the Windows Start Menu and selecting Control Panel from the contextual menu, clicking Hardware and Sound, then clicking Sound within the Hardware and Sound window.
- Click the Sounds tab within the Sound control panel window. The Windows notification sounds options are displayed.
- Click the "Sound Scheme" drop menu to display the menu items.
- Select "No Sounds" from the Sound Scheme drop menu.
- Click the Apply button to activate the new setting.
Important: Ensure the "Play Windows Startup sound" box is unchecked.
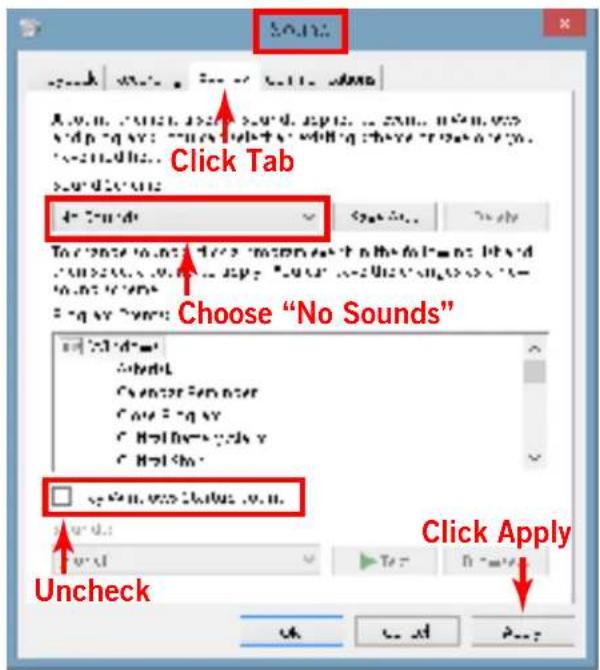
Correct setting shown — "No Sounds" scheme is selected in Sound control panel
Important: See Windows WDM System Sound Notes for important related information when using Apollo Solo USB for system sound I/O.
Additional Windows Optimizations
- Visit the Apollo Solo USB Knowledge Base at help.uaudio.com for updated technical news and system optimization information.
Audio Setup
Connect to Input Sources and Monitor System
One typical Apollo Solo USB audio setup is illustrated below. For complete details about all of Apollo Solo USB's connectors and controls, see the Hardware Controls & Connectors chapter in this manual.
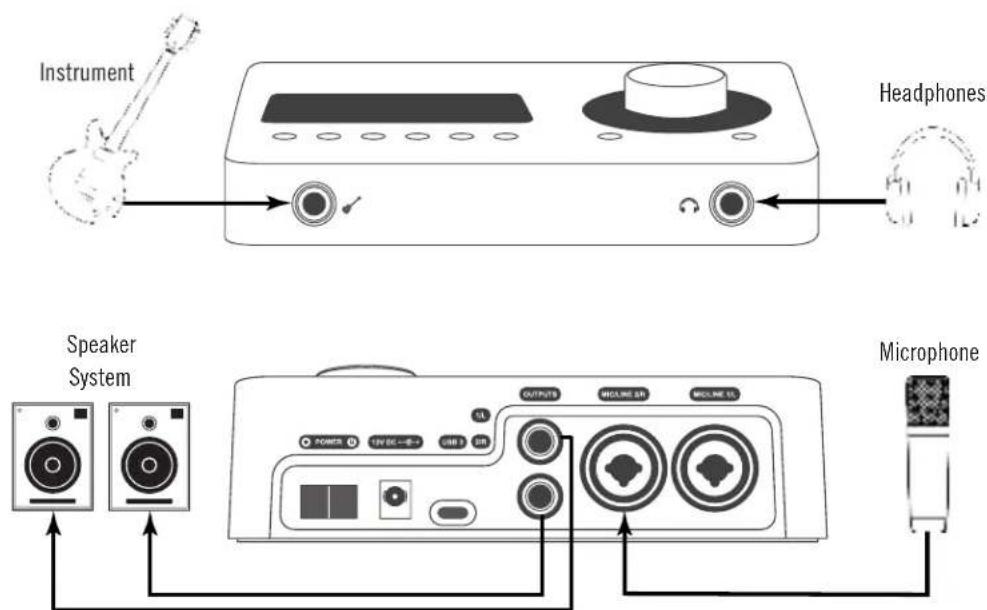
Typical Apollo Solo USB audio connections
Audio Connection Notes
- Important: When plugging into a rear panel combo jack input, the input source jack (either XLR or 14 " phone) must be manually selected with the top panel INPUT button while in PREAMP Mode. Select MIC when connecting XLR plugs, and LINE when connecting 14 " phone plugs. See Controls Overview for details.
- When an instrument is plugged into the front panel Hi-Z jack, channel 1 automatically switches to the Hi-Z input. To use a MIC or LINE input with channel 1, the Hi-Z instrument jack must be disconnected.
- The main outputs are line level. Connect the main outputs to the line level inputs of powered monitors or an amplifier+speaker system. Balanced TRS or unbalanced TS cables with 14 " plugs may be used.
- In the illustration above, the microphone is plugged into input 2 so the mic (channel 2) can be used at the same time as the Hi-Z instrument (channel 1).
- For optimum sonic performance, always use high-quality shielded audio cables.
Setting Hardware Input/Output Levels
This section explains how to set input gain levels for the hardware inputs (mic, line, and Hi-Z instrument) and adjust volume levels for the stereo hardware outputs (monitor speakers and headphones). Refer to the Top Panel and Display Panel illustrations for the control names and numbers mentioned below.
Important: Before proceeding, lower the volume of the monitor speakers and remove headphones from your ears.
Set Input Gains
- Select the input channel to be adjusted by pressing the PREAMP button (4) until the Channel Selection Indicator (7) displays the channel (CH1 or CH2).
- Select the input jack (MIC or LINE) by pressing the Input Select button (5-a) until the Input Selection indicator (9) displays the desired input jack* (see note below).
- Adjust the channel's gain by increasing the LEVEL knob (1) until the input meter for the channel (8) approaches maximum, but does not reach the red clip LED when the loudest input signal is present. If the level is too high to avoid clipping (if the red "C" LED illuminates) when the LEVEL knob is all the way down, enable the attenuation PAD (5-d).
- To set the input gain for the other input channel, repeat steps 1 - 3.
Adjust Output Volumes
- Select the output volume to be adjusted (monitor or headphone) by pressing the MONITOR button (3) until the Monitor Selected (10) or Headphone Selected (12) indicator is lit.
- Set the volume level by carefully increasing the LEVEL knob (1) until the desired volume is reached (you might need to adjust the volume of the speaker system).
- To set the volume for the other output (monitor or headphone), repeat steps 1 - 2.
Mute (and Unmute) Monitor Outputs
- Select the Monitor outputs by pressing the MONITOR button (3) until the Monitor Selected (10) indicator is lit.
- Press the LEVEL knob (1) to mute the monitor outputs. The Volume Level Indicator LEDs (2) are red when the monitors are muted and MONITOR is selected (10).
- To toggle the monitor mute state, press the LEVEL knob (1) whenever MONITOR (10) is selected.
Notes:
- *The Hi-Z input is automatically selected and overrides the channel 1 MIC and LINE inputs when a 14 " mono TS (tip-sleeve) plug is connected to the Hi-Z Instrument jack (14) on the front panel.
- To control both channels simultaneously when a stereo source is connected, press the LINK button (5-f) when an input is selected (9).
What Next?
After the initial setups in this chapter are complete, Apollo Solo USB is ready to be used with the included Console application, your DAW (digital audio workstation) software, and UAD Powered Plug-Ins. To learn how to operate Apollo Solo USB, refer to the areas of functionality below.
Hardware Controls & Connectors
To learn how to use the controls on Apollo Solo USB's top panel and how the front and rear connections can be used, see Hardware Controls & Connectors.
Apollo Solo USB System Overview
Reviewing the Apollo Solo USB System Overview is especially recommended for those that are unfamiliar with digital audio workstation environments.
Using Apollo Solo USB's Unique Features
Apollo Solo USB has unique features in addition to those of a typical audio interface. To take advantage of Apollo Solo USB's low-latency input monitoring, Realtime UAD Processing, and UAD-2 DSP accelerator features, there are some core differences in how to operate the DAW with Apollo Solo USB versus most audio interfaces.
To learn how to integrate Apollo Solo USB and Console within a DAW environment and related information, see the Working With Apollo Solo USB chapter.
Console Application
The included Console application is the software interface for the Apollo Solo USB hardware. Console controls Apollo Solo USB's mixing, low-latency input monitoring, and Realtime UAD Processing features. Console is also used to configure various Apollo Solo USB settings.
For an overview of Console's features and functions, see Console Overview. For complete details about how to operate every Console function and setting, see Console Reference.
Operating UAD Plug-Ins
To learn how to load, edit, and remove UAD plug-ins within Console, see Console Plug-In Inserts. To learn how to use UAD plug-ins within the DAW, see the DAW documentation.
The features and functions of individual UAD plug-in titles are detailed in the UAD Plug-Ins Manual. Refer to these manuals to learn about the operation, controls, and user interface of each individual UAD plug-in.
Technical Support
For additional resources such as setup and operation videos, the UA Knowledge Base, user community forums, or if you need to contact Universal Audio for assistance, see the Technical Support page.
Hardware Controls & Connectors
Complete details about all Apollo Solo USB hardware controls and connector jacks are provided in this chapter.
Tip: To learn how to set input gain levels (Mic, Line, and Hi-Z instrument) and output volumes (monitors and headphones), see Setting Hardware Input/Output Levels in the Getting Started chapter.
Controls Overview
Some Apollo Solo USB controls have multiple functions. The function of each control depends on the current operating mode and the current settings within that mode. To control a particular function, the control must be activated.
Operating Modes
Apollo Solo USB's top panel has two operating modes: PREAMP and MONITOR. The function and availability of the top panel controls vary depending on the active operating mode. The active mode is selected with the PREAMP and MONITOR buttons. Press the button to activate the mode. Each mode is explained in greater detail below.
Tip: All top panel functions can be operated at the same time (without switching modes) from within the companion Console software application.
PREAMP Mode
When Apollo Solo USB is in preamp mode, the top panel controls adjust the input functions only. To adjust any input function, press the PREAMP button to enter preamp mode and activate the input channel controls.
Important: Apollo Solo USB must be in PREAMP mode to adjust input channel settings with the hardware controls. Input settings can be adjusted with the Console software application when Apollo Solo USB is not in preamp mode.
Preamp Channels
Apollo Solo USB has two independent analog input channels. Each input channel has a preamplifier. Both input channels can be independently controlled and used at the same time for A/D conversion.
Preamp Controls
Apollo Solo USB has one set of input channel preamp controls. The input channel controls adjust all preamp functions for the currently selected input channel. The other input channel preamp can be adjusted by changing the selected channel.
Selected Channel
The currently selected input channel is shown by the CH1 and CH2 indicators at the upper left of the main display panel, above the input meters, as shown at right. The top panel controls adjust the functions of the currently selected channel only.
Important: To adjust an input channel's settings, that input channel must be selected. The currently selected channel may need to be changed to the other channel.
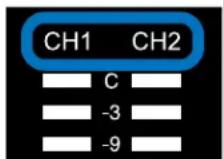
Selected channel indicators
Changing Channels
When in preamp mode, press the PREAMP button to change the selected input channel so its controls can be adjusted. Press PREAMP again to switch the selected channel back to the other channel.
Tip: When in PREAMP mode, pressing the main LEVEL knob also changes the selected channel.
Input Source
The Mic, Line, or Hi-Z inputs are routed into the input channel's preamplifier. The active input source is shown by the indicators below the input meters, as shown at right.
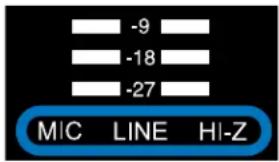
Input source indicators
The Mic or Line input source is selected by the pressing the INPUT button when the channel is selected. The Hi-Z input (available on channel 1 only) is automatically selected when an instrument cable is plugged into the Hi-Z input on the front panel.
Note: Only one input source at a time (Mic, Line, or Hi-Z) can be used as the channel's input source.
Preamp Gain
When an input channel is selected, its input gain is adjusted with the main LEVEL knob. Preamp gain is applied to the Mic, Line, or Hi-Z input of the selected channel.
Preamp Options
Each input channel has six preamp options. The preamp options for the currently selected input channel are enabled using the row of six buttons at the bottom of the top panel when in PREAMP mode.

Preamp options display
The current state of the preamp options is displayed by the six options indicators (shown above) at the bottom of main display. Available options are dim when inactive, bright when enabled, and unlit when unavailable.
Note: Not all preamp options are available with all input types. For specific details, see the Top Panel section later in this chapter.
MONITOR Mode
When Apollo Solo USB is in monitor mode, all top panel controls are related to output functions only. To adjust any output function, press the MONITOR button to enter monitor mode and activate the monitor controls.
Important: Apollo Solo USB must be in MONITOR mode to adjust the volume of the monitor and headphone outputs with the hardware controls. Monitor volume can be adjusted with the Console software application when Apollo Solo USB is not in monitor mode.
Stereo Outputs
Apollo Solo USB has two stereo outputs that can be controlled with the top panel hardware: MONITOR and HEADPHONE. These two stereo outputs are independently controlled.
Output Volume
The LEVEL knob is used to set the volume level for each stereo output independently. The LEVEL knob adjusts the volume of the currently selected output only.
Output Selection
The currently selected output is shown by the MONITOR and HEADPHONE indicators at the right of the main display, above and below the output meters.
When in monitor mode, press the MONITOR button to change the selected output. Press MONITOR again to switch back to the other output.
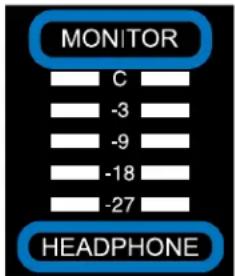
Output selection indicators
Monitor Mute
When MONITOR is selected, press the LEVEL knob to mute (silence) the stereo monitor outputs. Press the LEVEL knob again to unmute the monitor outputs. The green level indicators (the ring of LEDs around the LEVEL knob) and the monitor output selection indicator are RED when the monitor outputs are muted.
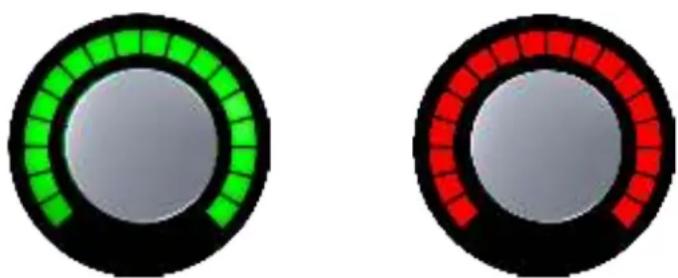
LED ring showing monitor outputs unmuted (left) and muted (right)
Top Panel
Refer to the illustration below for descriptions in this section.
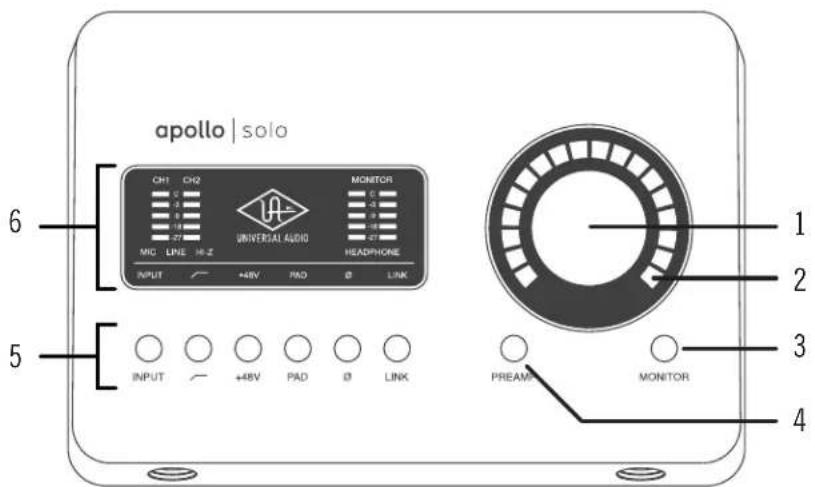
Top panel elements
(1) LEVEL Knob & Switch
The LEVEL knob & switch controls multiple functions. The knob's current function is selected with the MONITOR (3) and PREAMP (4) buttons.
Monitor Mode
When in MONITOR Mode (3), rotate clockwise to increase the monitor output level or headphone output level, depending on which output (10 or 12) is selected with the MONITOR (3) button.
When MONITOR (10) is selected in monitor mode, press to mute/unmute the monitor outputs.
Note: MUTE does not apply to the headphone output.
Preamp Mode
When in PREAMP Mode (4), rotate the knob clockwise to increase the amount of preamp gain for the currently selected input channel.
Tip: When in preamp mode, press to toggle between selection of channels 1 & 2.
Unison Integration

The LEVEL knob can be used to control Unison-enabled UAD preamp plug-ins. See the Unison chapter for complete details.
(2) PREAMP Gain & Volume Level Indicator LEDs
The LEDs around the LEVEL knob indicate the relative level of the selected function (input preamp gain or monitor/headphone volume).
Note: The indicator LEDs are RED when MONITOR (3) is selected and MUTE is active.
(3) MONITOR Button
Press this button to enter MONITOR mode for controlling the monitor and headphone functions. Press again to alternate between control of MONITOR and HEADPHONE volumes with the LEVEL knob (1).
Tip: Indicators (10) and (12) determine which volume (monitor or headphone) is being controlled with the LEVEL knob (1).
(4) PREAMP Button
Press this button to enter PREAMP mode and activate the input channel controls. Press again to alternate between channels 1 & 2.
Tip: When in preamp mode, press the LEVEL knob (1) to toggle between selection of channels 1 & 2.
(5) Preamp Option Buttons
These six buttons control the Preamp Options (a through f on following page) when the input channel is selected (7). The preamp option is active when its indicator is lit. When MONITOR (10) or HEADPHONE (12) is selected, the preamp options cannot be modified and the options display (13) is unlit. See the next page for preamp option descriptions.

Preamp option buttons
Unison Integration

In PREAMP mode, the option buttons can be used to control Unison-enabled UAD plug-ins. See the Unison chapter for complete details.
(6) Display Panel
This panel displays the status of various Apollo Solo USB functions. See Display Panel for detailed descriptions of all panel elements.
Preamp Options
The option buttons control the PREAMP options (labeled a through f below) for an input channel when that channel is selected (7) with the PREAMP button (4). A preamp option is active when its indicator (13) in the display is lit, and inactive when the indicator is dim. If the indicator is unlit, the option is unavailable.
Note: In MONITOR Mode, the preamp options cannot be modified and all preamp options in the display are unlit.

Preamp options
(a) INPUT Select
Selects the active input source jack for the channel. Press to alternate between the mic and line inputs. The current selection is displayed by the input source indicators (7).
The Hi-Z input is selected automatically whenever a 14 " mono (tip-sleeve) plug is connected to the front panel's Hi-Z Instrument jack (14).
Note: Hi-Z instrument input is available for channel 1 only.
(b) FILTER
Enables a low cut (high pass) rumble filter with a cutoff frequency of 75 Hz.
(c) +48V
Enables +48 Volt phantom power for the mic input. Phantom power is typically needed for condenser microphones. +48V is available for the microphone inputs only.
Caution: To avoid potential equipment damage, disable +48V phantom power on the channel before connecting or disconnecting its XLR input.
(d) PAD
Attenuates (lowers) the mic input signal level by 20 dB. Pad is unavailable for the line inputs and the Hi-Z instrument input.
(e) POLARITY ∅
Inverts the polarity (aka phase) of the input signal. Polarity inversion can help reduce phase cancellations when more than one microphone is used to record a single source.
(f) LINK
Links input channels 1 and 2 as a stereo pair. When the inputs are stereo linked, all input control adjustments are applied to both input channels equally.
Note: The Hi-Z instrument input cannot be linked to a mic or line input.
Therefore, LINK cannot be activated when a plug is inserted in the Hi-Z jack (14).
Display Panel
Refer to the illustration below for descriptions in this section.
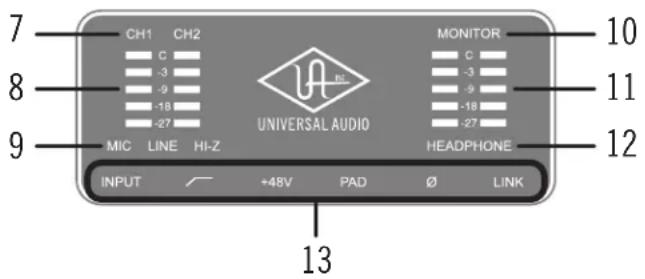
Display panel elements
(7) Channel Selection Indicators
The currently selected input channel is indicated by the lit channel name above its input meter (CH1 or CH2). Press the PREAMP button (4) to switch between channels 1 & 2.
(8) Input Meters
These meters display the incoming signal level for input channels 1 & 2. Reduce the channel's preamp gain (see Setting Hardware Input/Output Levels) if its red clip LED illuminates.
(9) Input Source Indicators
These indicators show which input source (MIC, LINE, or HI-Z) is active for the selected channel. Use the Input Select button (5-a) to change the input source.
Note: Hi-Z instrument input is available for channel 1 only.
(10) Monitor Selected Indicator
When lit, the LEVEL knob (1) controls volume the monitor outputs (17). Press the MONITOR button (3) to activate the monitor controls if this indicator is not already lit.
Note: The MONITOR indicator (10) is RED when the monitor outputs are muted.
(11) Stereo Output Meters
These meters display the main stereo signal output levels.* Output meter levels are independent of monitor and headphone volume levels. If a red "C" (clip) LED at the top of the Output Meters illuminates, reduce levels feeding the output(s).
*Exception: If HEADPHONE is currently selected (12) and the Headphone Source within the CUE OUTPUTS window in the Console software application is set to HP, these output meters indicate the level being sent to the headphone bus via Console's headphone sends and/or the DAW.
(12) Headphone Selected Indicator
When lit, the LEVEL knob (1) controls the volume of the headphone output (15). Press the MONITOR button (3) to light this indicator and activate headphone volume control (you may need to push it twice).
(13) Preamp Options Display
This area displays the status of the six preamp options, which are controlled by the six preamp option buttons (5). Three status indications are possible:
Bright – The preamp option is active.
Dim - The preamp option is inactive.
Off – The preamp option is not available.
Front Panel
Refer to the illustration below for descriptions in this section.
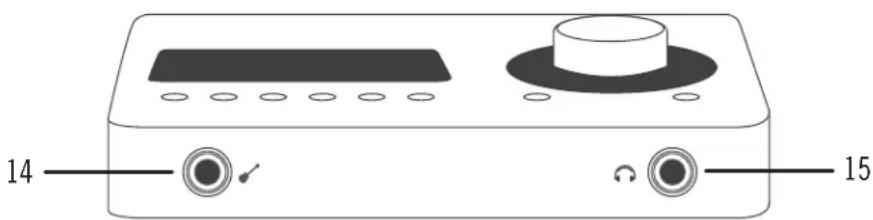
Front panel connectors
(14) Hi-Z Instrument Input
Connect any guitar, bass, or other high impedance instrument here. This jack automatically overrides the channel 1 mic and line inputs on the rear panel.
Levels for the Hi-Z instrument input are set using the same method as the mic and line inputs.
Note: This jack accepts a 14 " mono (tip-sleeve) plug only.
(15) Headphone Output
Connect 14 " stereo headphones here. Volume is set with the LEVEL knob (1) when HEADPHONE (12) is selected with the MONITOR button (3).
Rear Panel
Refer to the illustration below for control descriptions in this section.
Note: All rear panel 14 " jacks can accept unbalanced TS (tip-sleeve) or balanced TRS (tip-ring-sleeve) connections.
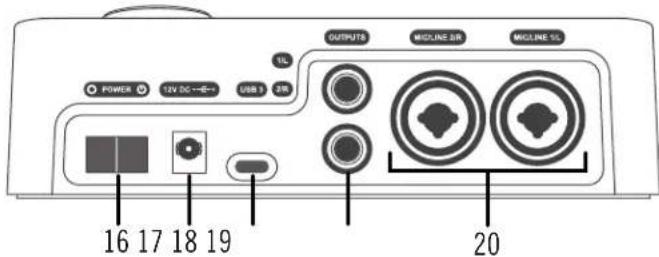
Rear panel connectors
(16) Power Switch
This rocker switch applies power to Apollo Solo USB. Switch to OFF when not in use.
Caution: Before powering Apollo Solo USB, lower the volume of the monitor speakers and remove headphones from your ears.
(17) Power Supply Input
Connect the included power supply here (Apollo Solo USB cannot be bus powered). Rotate the locking connector to prevent accidental disconnection.
Important: After ensuring the locking barrel tabs are aligned with the chassis slots and the barrel is fully inserted, rotate the barrel to secure the connector to the chassis.
(18) USB 3 Port
Connect a USB 3 SuperSpeed cable (not included) between this USB 3 Type-C port and the USB 3 port on the host computer.
Important: Use only a USB 3 SuperSpeed cable to connect Apollo Solo USB to the host computer. USB 2 cables cannot be used.
(19) Monitor Outputs
Connect powered monitor speakers (or an amplifier+speaker system) here. Volume is set with the LEVEL knob (1) when MONITOR is selected (10) with the MONITOR button (3).
Caution: Before powering Apollo Solo USB, lower the volume of the monitor speakers and remove headphones from your ears.
(20) Mic/Line Inputs 1 & 2
The female combo jacks for channels 1 & 2 accept either a male XLR plug for connecting to the mic input, or a 14 phone plug for connecting to the line input.
The input jack that is used for the channel (MIC or LINE) is specified with the Input Select button (5-a).
Caution: To avoid potential equipment damage, disable +48V phantom power on the channel before connecting or disconnecting its XLR input.
Apollo Solo USB System Overview
To get the most from your Apollo Solo USB and UAD plug-ins, it helps to have an understanding of the overall Apollo Solo USB system. This chapter provides an overview of the Apollo Solo USB hardware and software components.
Apollo Solo USB Hardware
USB 3 Audio Interface for Windows
First and foremost, Apollo Solo USB is a premium 2 x 4 USB 3 desktop audio interface with best-in-class 24-bit/192 kHz conversion. Apollo Solo USB connects to the inputs and outputs of other audio gear to perform analog-to-digital (A/D) and digital-to-analog (D/A) audio conversion of the gear's signals. The converted digital audio signals are routed into and out of a USB 3 host computer via the high-speed USB 3 protocol, which is carried over a single USB 3 SuperSpeed cable.
Apollo Solo USB leverages Universal Audio's expertise in DSP acceleration, UAD plugins, and analog hardware design by integrating the latest cutting edge technologies in high-performance A/D–D/A conversion, DSP signal reconstruction, and connectivity.
Integrated UAD-2 DSP Accelerator
Apollo Solo USB includes a built-in SOLO core UAD-2 DSP accelerator that performs digital signal processing using Universal Audio's acclaimed UAD Powered Plug-Ins. UAD plug-ins provide the world's best emulations of vintage and modern analog and digital hardware.
UAD plug-ins can run in Apollo Solo USB's Console software for realtime signal processing with indiscernible latency, delivering the ultimate sonic experience to artists while monitoring and/or tracking. UAD plug-ins can also be used within a DAW during mixdown and mastering.
Note: As with other UAD-2 and Apollo devices, Apollo Solo USB can only load UAD plug-ins, which are specifically designed to run on UAD-2 DSP accelerators. Native (host CPU-based) plug-ins cannot run on Apollo Solo USB's UAD-2 DSP.
System Expansion
Apollo Solo USB is compatible with Universal Audio's family of UAD-2 DSP Accelerator and Apollo audio interface products, allowing you add UAD DSP and I/O as your needs grow.
Various Universal Audio products are available to accommodate your particular computer system, processing needs, and budget. For the complete product lineup, visit the UA website at www.uaudio.com.
Apollo Solo USB Software
Apollo Solo USB has several software components that are part the complete Apollo Solo USB system. A brief description of each component is provided below, along with a link to complete details about the component.
Console Application
The included Console application is Apollo Solo USB's software interface. Console controls Apollo Solo USB's input monitoring, Realtime UAD Processing, Unison technology, audio interface hardware settings, and more. Console's analog-style workflow is designed to provide quick access to the most commonly needed features in a familiar, easy-to-use mixer interface.
Console is the key to unleashing the power of Apollo Solo USB. For an overview of the application, see Console Overview. For complete details about every available function, see Console Reference.
Important Fundamental Concept: The primary function of Console is to control Apollo Solo USB's low-latency hardware input monitoring, Unison plug-ins, and Realtime UAD Processing. Console MUST be used to take advantage of these features. Console replaces the software input monitoring feature of the DAW mixer.
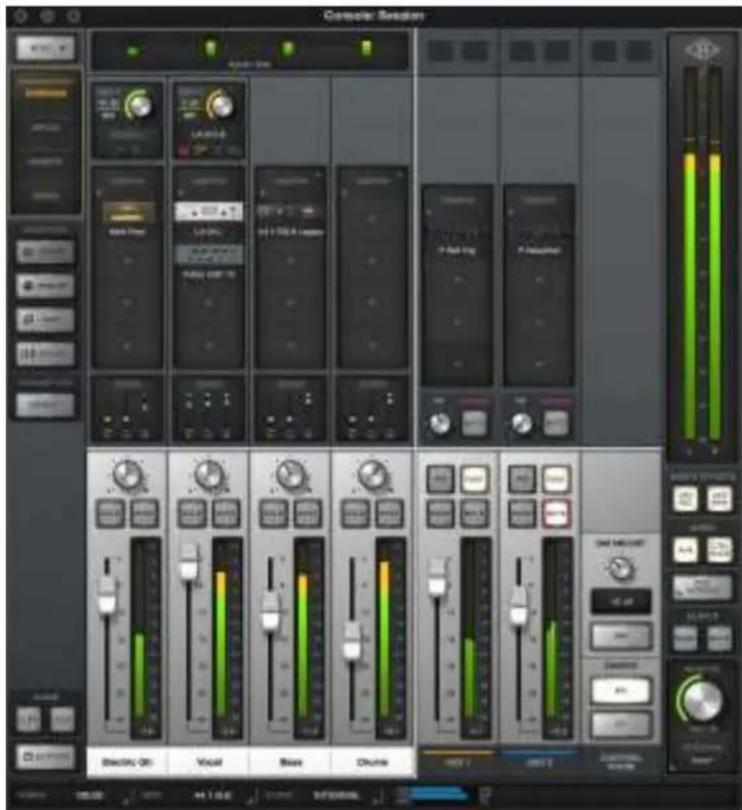
Console application
Realtime UAD Processing
Apollo Solo USB can process UAD Powered Plug-Ins with sub-2ms latency, delivering the ultimate sonic experience while monitoring and/or tracking your performance. This feature is named Realtime UAD Processing.
Realtime UAD Processing is a special function that is only available within Console. This function is completely independent of the DAW's I/O hardware buffer size setting, so even when the I/O buffer setting is high — where any plug-ins in a DAW have noticeable latency — UAD plug-in latency is still indiscernible.
With Realtime UAD Processing, up to five UAD plug-ins can be stacked in series without any increase in latency, for flexible and complex signal processing chains. Realtime UAD Processing is automatically active with every UAD plug-in that's inserted in Console. To learn more, see Console Plug-In Inserts.
Unison Technology
Unison™ is an exclusive analog/digital integration system built into Apollo Solo USB's microphone preamplifiers. Unison is an audio processing breakthrough that starts right at the source, the input stage, allowing Apollo Solo USB's mic preamps to sound and behave like the world's most sought-after tube and solid state preamps, guitar amps, and pedals — including their all-important impedance, gain stage “sweet spots,” and component-level circuit behaviors.
Unison is activated when a UAD Unison plug-in is loaded in Console's dedicated Unison insert slot. To learn more, see Unison.
Console Recall Plug-In
Console Recall is a special DAW plug-in supplied in VST and AAX 64 formats. Console Recall offers additional convenience when using Apollo Solo USB and/or the Console application in conjunction with a DAW.
The Console Recall plug-in does not process audio. Instead, the primary function of Console Recall is to store complete Console configurations within the DAW project file. It also provides access to key Console functions (monitor volume, mono, and mute) without leaving the DAW. To learn more, see Console Recall Plug-In.
![STRTC CCTWBS上 [混(滤波器)] H0.0 dB MOSC MUTY](/content/2026/05/807951/images/31a8ad29b95715da96b72ab4ca6c5336f377bca48fdce9e4a96f7790b3a58bde.jpg)
Console Recall plug-in
UAD Meter & Control Panel Application
The UAD Meter & Control Panel application is used to configure global UAD-2 system functions and monitor UAD-2 DSP resources (including multiple devices, if connected). The application also facilitates authorization of UAD plug-ins and UAD-2 devices.
The application consists of two components: The UAD Meter, and the UAD Control Panels. To learn more, see UAD Meter & Control Panel.
UAD Meter
The UAD Meter displays the current UAD plug-in DSP and memory loads of all active UAD-2 hardware. These meters are also present at the bottom of the Console application window.
Note: Apollo Solo USB uses DSP and memory for its internal DSP mixer.
Therefore, the UAD meter displays DSP and memory usage even when UAD plugins are not in use.
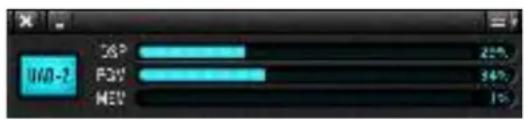
UAD Meter
UAD Control Panels
The UAD Control Panel window has multiple panels that display, and enable control of, the various UAD-2 system, plug-in, and global configuration parameters.
The screenshot below shows the System Info panel, one of four control panel windows in the UAD Meter & Control Panel application.
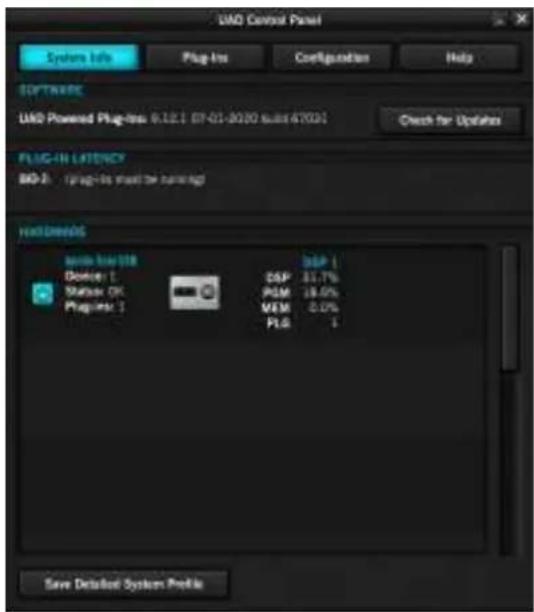
UAD Control Panel with System Info panel selected
UAD Powered Plug-Ins
UAD plug-ins are the software titles containing audio signal processing algorithms such as compressors, equalizers, mic preamps, guitar amps, and special effects. Each UAD plug-in contains various control parameters that can be adjusted to achieve the desired sonic results.
The Authentic Sound of Analog
From project studios to multi-platinum mix engineers, UAD Powered Plug-Ins have been winning over audio professionals for more than 15 years with their stunning analog sound. The UAD library now features more than 90 plug-ins, co-created with the biggest brands in audio. Developed by UA's world-renowned team of DSP engineers, UAD plug-ins set the standard by which all other audio plug-ins are judged.

Typical UAD plug-in interface
Plug-In Host Applications
UAD plug-ins are loaded within a host application (such as Apollo Solo USB's Console or a DAW) for signal processing of the host's audio signals on Apollo Solo USB's integrated UAD-2 DSP accelerator. UAD plug-ins are typically used in Console for Realtime UAD Processing when monitoring and tracking, and in a DAW when mixing and mastering. UAD plug-ins are provided in VST and AAX 64 formats for compatibility with all major DAWs.
Tip: When loaded in Apollo Solo USB's Console application, UAD plug-ins run in real time, with indiscernible latency, completely independent of the DAW's I/O buffer size setting.
Bundled & Optional Plug-Ins
Apollo Solo USB includes a variety of UAD plug-ins bundled with the device, and optional UAD plug-in licenses can be purchased at the UA online store.
Try Before You Buy
All optional UAD plug-ins UAD plug-ins can be evaluated without functional limitations for 14 days in trial demo mode.
Apollo Audio Interfaces
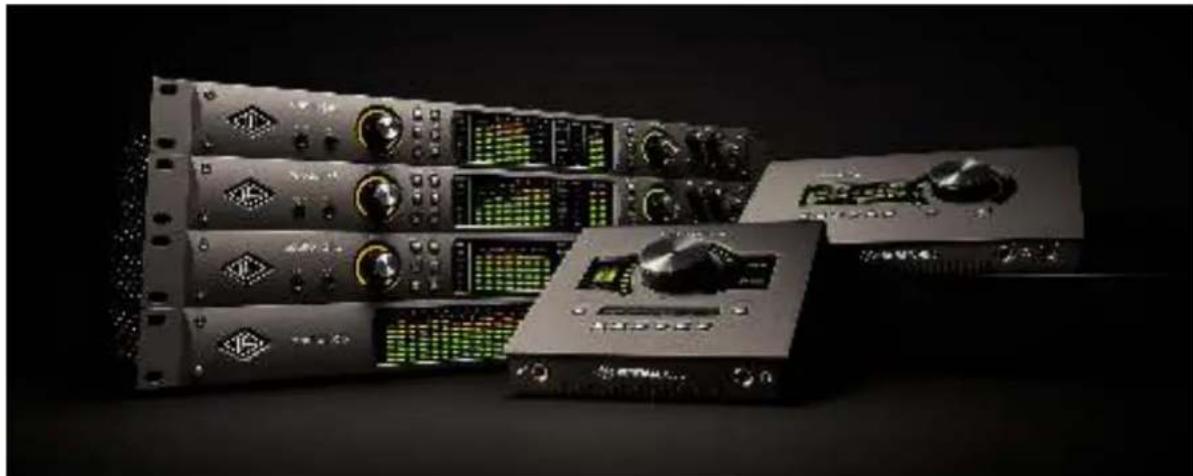
Apollo is Universal Audio's line of high-resolution audio interfaces with class-leading sound quality, Realtime UAD Processing, and elegant hardware design and workflow.
Apollo Solo USB can be combined with UAD-2 DSP Accelators to increase UAD DSP processing power as your system needs grow. Up to six UAD devices can connected in one system. See the UA Knowledge Base for specific details about multi-device compatibility for each UA model.
natural_image
Exterior view of a multi-tiered audio recording equipment with multiple channels and dials (no visible text or labels)UAD Software Installer
The UAD Powered Plug-Ins software installer contains all UA audio interface and UAD-2 software components and places them on the system drive during installation. These components include the Console and UAD Meter & Control Panel applications, all UAD plug-ins (including unlicensed plug-ins, UAD drivers, and documentation.

The UAD software installer supports all variations of UA audio interface and UAD-2 products. The most recent UAD software is always recommended so you’ll have access to the latest UAD plug-ins and platform updates. The latest software is available at www.uaudio.com.
UA Account & Store
UA Account
Your Universal Audio account is where all your UAD devices, and their associated UAD plug-ins, are registered and managed.
An account is required to download UAD software, register and authorize your Apollo Solo USB hardware, claim bundled UAD plug-ins, and receive customer support.
UA Store
The Universal Audio online store is where optional UAD plug-in licenses are purchased and UA coupons are redeemed. For related information, see UA Account & Store.
UAD Authorization
UAD plug-ins must be authorized before they will process audio. UAD plug-ins in your UA account are authorized automatically (internet connection required).
Note that UAD plug-in authorizations are stored on the UAD device, not the computer. If the device is moved to a different computer, it's not necessary to reauthorize the device.
When an optional UAD plug-in license is purchased at the UA store, it needs to be manually authorized. The store shows you how, or see UAD Authorization Procedure for instructions.
Note: When an optional UAD plug-in license is purchased, you don't download that individual plug-in. Instead, you reauthorize the system, which activates the UAD plug-in that is already installed.
UA Website
UA Blog
The blogs at www.uaudio.com contain a wealth of information about UA products and how to use them. In-depth artist interviews and how-to videos are routinely published.
UA Knowledge Base
UA's Knowledge Base is your complete technical resource for the latest compatibility information, setup videos, customer support, and more. See the Technical Support page for details.
Technical Support
For additional resources such as setup/operation videos, the UA Knowledge Base, user community forums, or if you need to contact Universal Audio for assistance, see the Technical Support page.
Working With Apollo Solo USB
Apollo Solo USB is a flexible audio interface and DSP accelerator that can be used in many ways. This chapter explains how to setup and use Apollo Solo USB and Console in digital audio environments.
Each chapter section covers the area of functionality listed below. Click a blue page number to jump directly to the section for details.
Tip: The Apollo Solo USB System Overview provides an introduction to the UAD environment.
In This Chapter:
Essential Apollo Solo USB Concepts 42
The DAW Environment 42
Setting the DAW to use Apollo Solo USB I/O 44
Specifying the Audio Interface Device 44
Accessing Apollo Solo USB's I/O in the DAW 46
Selecting Apollo Solo USB's Inputs and Outputs 46
Available I/O 46
Default Outputs 46
Apollo Solo USB I/O Driver Names 47
I/O Numbers versus Names 47
Input Monitoring with the DAW 48
Use Software OR Hardware Input Monitoring 48
Disable Unused Input Monitoring System 48
How To Disable Software Input Monitoring 48
How To Disable Hardware Input Monitoring 51
Input Monitoring Tips 51
Using Console with the DAW 52
Controlling Apollo Solo USB's Unique Functions 52
Sharing UAD Resources 52
Saving Console Setups Within DAW 52
Routing and Recording Console I/O 53
DAW Mixdown and Console 53
UAD Plug-Ins: Console versus DAW 54
UAD Processing in Console (Realtime) 54
UAD Processing in DAW (Buffered) 55
UAD Processing in both Console and DAW 55
Virtual I/O 56
Routing DAW Outputs to Console Inputs 57
Routing Console Outputs to DAW Inputs 57
Virtual I/O Examples 58
Using Apollo Solo USB for System Sound I/O 59
System Sound Routing 59
Setting System Sound I/O 60
Windows ASIO versus WDM 60
Windows WDM System Sound Notes 61
Using Apollo Solo USB Without Audio Software 61
Essential Apollo Solo USB Concepts
Apollo Solo USB's basic audio interface functionality with a DAW operates the same as other typical (non-DSP) interfaces. However, Apollo Solo USB has unique features in addition to those of a typical audio interface.
To take advantage of Apollo Solo USB's unique low-latency input monitoring, Realtime UAD Processing, and UAD-2 DSP accelerator features, there are some core differences in how to operate the DAW with Apollo Solo USB versus most audio interfaces.
The companion Console application is used to control Apollo Solo USB's unique features. Understanding the interactions between Apollo Solo USB, Console, and the DAW will help you optimize workflows.
Note: To learn how to operate the DAW with basic audio interface functionality, consult the DAW documentation.
The DAW Environment
To get the most from your Apollo Solo USB system, it will help to understand the core concepts and terms below, which are integral to digital audio workstation workflows. These terms are used when describing how to operate Apollo Solo USB and Console.
Input Monitoring
Input Monitoring is the process of listening to live inputs, such as when an artist is performing with a musical instrument and/or vocals. When the artist has great input monitoring, they may deliver a more inspired performance.
Generally speaking, you'll want to use Console for input monitoring when working with a DAW so you can take advantage of Apollo Solo USB's Realtime UAD Processing for great input sounds.
Input Latency
Various sources of audio latency (time delay) are inherent in all digital audio systems. However, latency is normally only an issue when an artist is input monitoring their performance through headphones or speakers.
If what is heard in headphones arrives later than when the sound is produced, the performance may be compromised. Using Console eliminates input latency when monitoring, tracking, and/or overdubbing with a DAW.
I/O Buffering
I/O buffering is the shuttling of audio data back and forth between the DAW and the audio interface. The DAW's I/O buffer size setting determines the amount of input latency when software monitoring via the DAW. Smaller buffer sizes reduce latency, but increases CPU loading of the host computer. Lower buffer sizes do not increase UAD DSP loads.
Using Console to control Apollo Solo USB's input hardware monitoring completely bypasses DAW I/O buffering, so there is no input latency, regardless of DAW's I/O buffer size setting.
Software Input Monitoring
Software input monitoring refers to using the DAW's software mixer for monitoring live inputs instead of hardware input monitoring via the audio interface. Software input monitoring allows plug-ins (UAD or otherwise) loaded in a DAW to process live inputs, but the monitored signals are subject to the input latency caused by DAW I/O buffering.
Note: The DAW's software input monitoring feature is enabled by default. To prevent doubled signals at Apollo Solo USB's outputs when software monitoring via the DAW, Apollo Solo USB's hardware monitoring must be disabled by muting Console's inputs.
Hardware Input Monitoring
Hardware input monitoring means an audio interface's inputs are routed directly to its outputs, which avoids discernible audio latency by eliminating DAW I/O buffering. Apollo Solo USB features low-latency hardware input monitoring via its internal digital mixer, which is controlled by Apollo Solo USB's companion Console application.
Note: Apollo Solo USB's hardware input monitoring is active by default. To prevent signal doubling at Apollo Solo USB's outputs when hardware input monitoring via Apollo Solo USB's Console, the DAW's software input monitoring feature must be disabled.
Delay Compensation
Various sources of input and output latency are inherent in complex digital audio environments. However, when the DAW and Console are properly configured and operated, all time and phase alignment of all audio within a session is managed automatically by the DAW's delay compensation feature. See Delay Compensation with Apollo Solo USB and Latency Basics for more information.
Setting the DAW to use Apollo Solo USB I/O
Apollo Solo USB's ASIO device drivers enable the device to be used as the audio interface hardware for any compatible ASIO DAW. After the DAW is set to use Apollo Solo USB as the audio interface hardware device, the DAW can directly access and route the audio signals at Apollo Solo USB's inputs and outputs.
Specifying the Audio Interface Device
To set Apollo Solo USB as the DAW's audio interface, select Apollo Solo USB's device driver name as the audio device in the DAW's hardware setup preferences. The name of Apollo Solo USB's device driver is Universal Audio.
The methods for specifying the audio interface hardware device, and the name of the setting, are different for each DAW. Examples of how to specify the audio interface within major DAWs are provided below. For more specific details, refer to the DAW documentation.
Tip: For helpful videos that show how to setup popular DAWs with Apollo Solo USB, visit the UA Knowledge Base at help.uaudio.com.
Steinberg Cubase
- Open the Device Setup window.
- Select VST Audio System in the Devices column (left side of window).
- Locate the ASIO Driver menu under VST Audio System (right side of window).
- Select Universal Audio from the ASIO Driver drop menu.
- Click Apply. Cubase is now set to use Apollo Solo USB I/O.
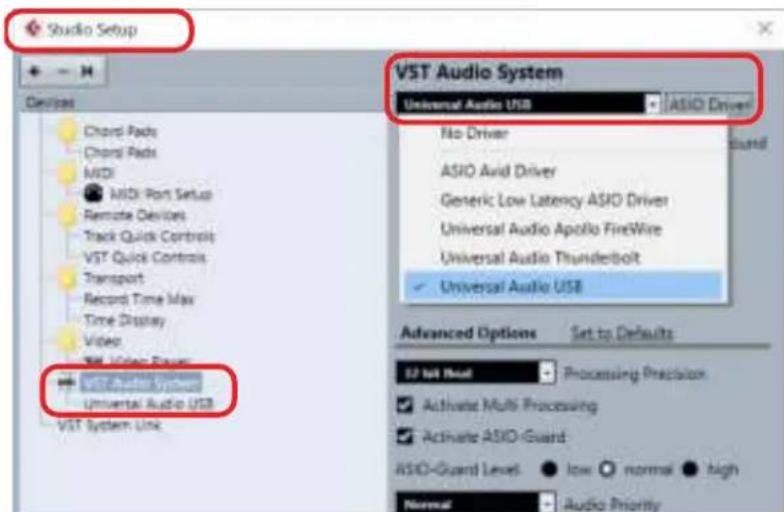
Apollo Solo USB selected as the VST Audio System device in Cubase Device Setup
Ableton Live
- Open the Preferences window.
- Select the Audio tab at left side of the Preferences window.
- Select Universal Audio from the Audio Input Device and Audio Output Device drop menus. Live is now set to use Apollo Solo USB I/O.
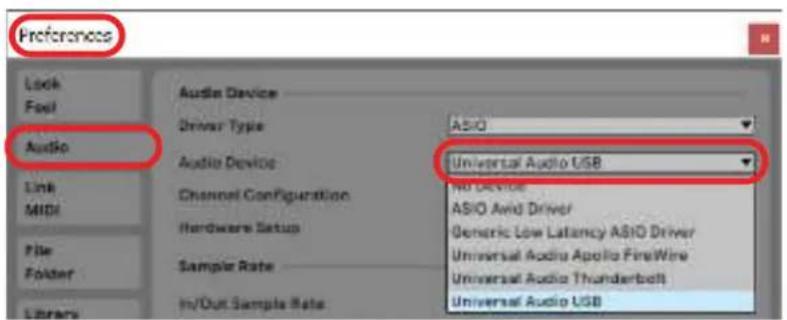
Apollo Solo USB selected as the audio input and output device in Ableton Live preferences
Avid Pro Tools
- Open the Setup > Playback Engine window.
- Select Universal Audio from the Playback Engine drop menu.
- Click OK. Pro Tools is now set to use Apollo Solo USB I/O.
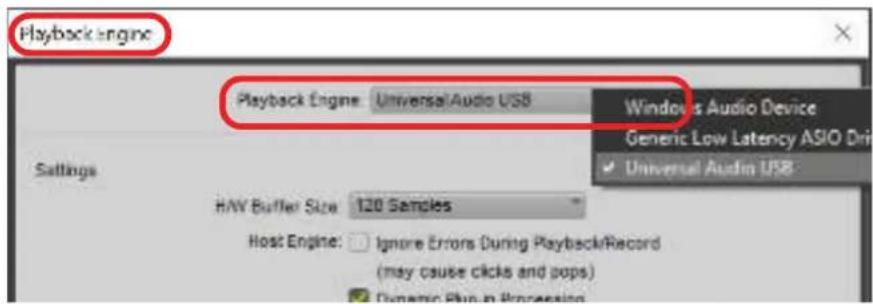
Apollo Solo USB selected as the Playback Engine in Pro Tools
Accessing Apollo Solo USB's I/O in the DAW
After Setting the DAW to use Apollo Solo USB I/O/O, the DAW can access and route all of Apollo Solo USB's inputs and outputs directly.
Selecting Apollo Solo USB's Inputs and Outputs
The methods for selecting channel inputs and outputs are different for each DAW. One example of how to choose I/O is shown below. For instructions, refer to the DAW documentation.
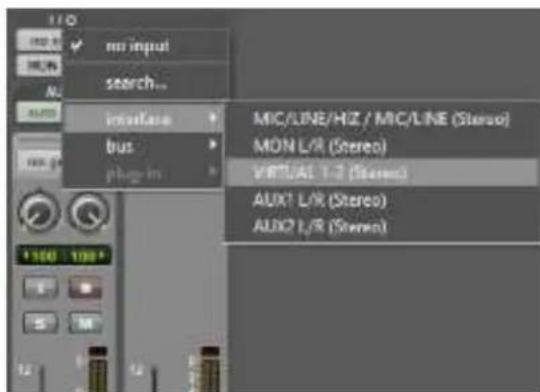
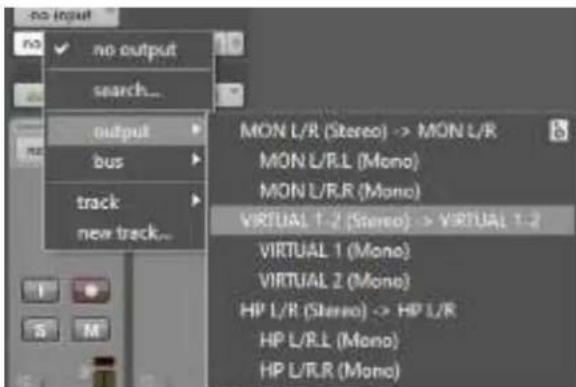
Apollo Solo USB's inputs (left) and outputs (right) as they appear when selecting I/O in a DAW
Available I/O
Apollo Solo USB's available inputs and outputs, along with their default channel names are numbers, are listed in the Driver I/O Table.
Available I/O includes Apollo Solo USB's physical inputs and outputs, as well as its virtual inputs and outputs. Virtual I/O are software-only channels for digitally routing DAW audio into and out of Console. See Virtual I/O for more information.
Default Outputs
The main stereo outputs of a DAW usually output to channels 1 and 2 by default. Because channels 1 and 2 correspond to Apollo Solo USB's main outputs, the DAW's main outputs are sent to Apollo Solo USB's main outputs by default. The channels used for DAW output can usually be changed within the DAW settings.
Apollo Solo USB I/O Driver Names
Each Apollo Solo USB input and output has a channel number and name provided by the Apollo Solo USB drivers to ASIO. Depending on the DAW (see Numbers versus Names below), these channel numbers and/or names are used when selecting and displaying Apollo Solo USB I/O.
I/O Numbers versus Names
Apollo Solo USB's drivers describe all I/O channels by name and number, but what is actually displayed depends on each particular DAW. Names are not displayed by all DAWs.
All Apollo Solo USB driver default I/O numbers and names are listed in the Driver I/O Table. These values can be used to reference specific Apollo Solo USB inputs or outputs by name when selecting I/O in an application that does not display the driver names.
Input Monitoring with the DAW
Input monitoring is the process of listening to live inputs, such as when an artist is performing with a musical instrument and/or vocals. When using Apollo Solo USB with a DAW, there are two ways to monitor inputs:
Software Input Monitoring via DAW– The DAW's software mixer is used to control input monitoring and plug-in processing. Inputs are subject to DAW I/O buffering latency.
Hardware Input Monitoring via Console – Console is used to control Apollo Solo USB's low-latency hardware input monitoring and Realtime UAD Processing. Inputs are routed directly to outputs, bypassing DAW I/O buffering latency.
Use Software OR Hardware Input Monitoring
When monitoring live inputs, it's important that only one input monitoring system is active. If software and hardware input monitoring are both active, the input signal(s) will be heard twice at Apollo Solo USB's outputs — first from Console's low-latency mix, and shortly thereafter from the DAW's I/O buffered (higher latency) software mix. Doubled signals can cause undesirable “thin” sounds or other anomalies due to phase cancellations.
Tip: Use Console for hardware input monitoring to take advantage of Apollo Solo USB's low-latency monitoring and Realtime UAD Processing features.
Disable Unused Input Monitoring System
By default, the DAW's software input monitoring and Console's hardware monitoring are both enabled. Therefore, one of the input monitoring systems must be manually disabled to prevent doubled signals at Apollo Solo USB's outputs. Instructions are provided in following sections.
Important: To prevent doubled signals at Apollo Solo USB's outputs when input monitoring via Apollo Solo USB's Console, DAW software input monitoring must be disabled. Conversely, if DAW software input monitoring is enabled, Apollo Solo USB's hardware input monitoring must be disabled by muting Console's inputs.
How To Disable Software Input Monitoring
To prevent doubled signals at Apollo Solo USB's outputs when hardware monitoring live inputs via Console, the DAW's software input monitoring feature must be disabled. Note that DAW software input monitoring is usually enabled by default in the DAW's settings.
The methods for disabling DAW software input monitoring, and the name of the setting, are different for each DAW. Examples of how to disable software input monitoring within major DAWs are provided below. For more specific details, refer to the DAW's documentation.
Note: Some DAWs have multiple ways to disable software input monitoring.
Steinberg Cubase Auto Monitoring
- Open the Preferences window.
- Click VST in the left column of the Preferences window.
- Select Manual from the Auto Monitoring drop menu.
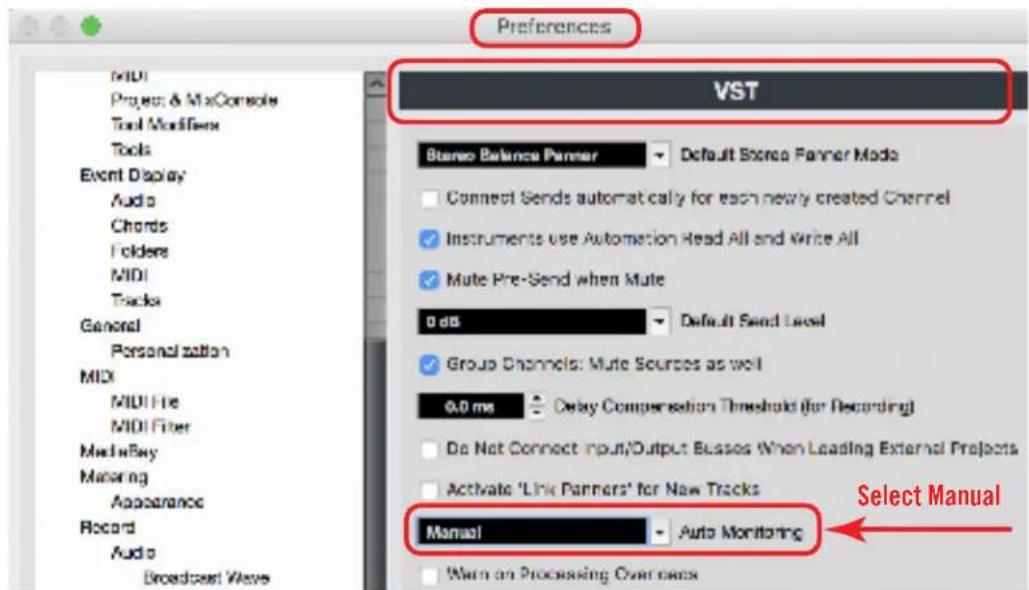
Cubase: Set Auto Monitoring to Manual in VST preferences
Ableton Live Monitor Mode
- In the View menu, ensure the Mixer and In/Out options are checked so you can see the monitoring buttons. If in Arrangement View, unfold and resize the track to see the In/Out section.
- Click the Off button in the Monitor section within the In/Out options. The button is orange when software monitoring is disabled.
Tip: If multiple tracks are selected, pressing an Off button applies the selection to all selected tracks.
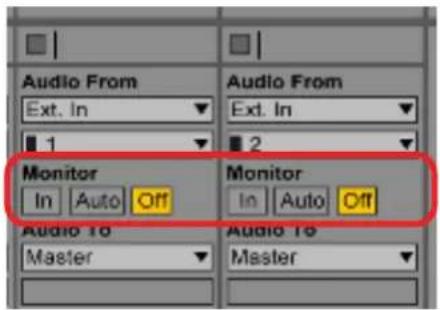
Ableton Live: Set Monitor to Off in mixer In/Out section
Avid Pro Tools Low Latency Monitoring
- Assign each track output to either Output 1 or Output 2 (mono), or both (stereo). Only tracks assigned to these outputs use Low Latency Monitoring.
- Record enable audio track(s) by clicking their Record Enable buttons.
- Select Options > Low Latency Monitoring. Software monitoring is disabled when Low Latency Monitoring is checked in the Options menu.
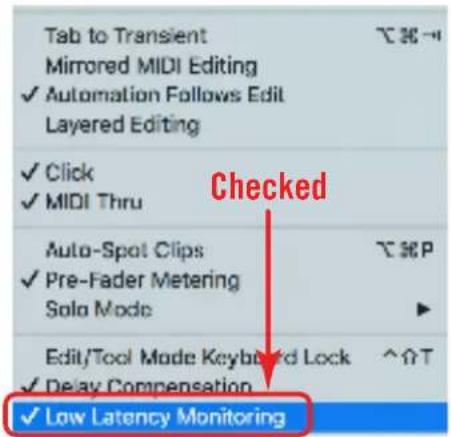
Pro Tools: Low Latency Monitoring checked under Options menu
How To Disable Hardware Input Monitoring
To prevent doubled signals at Apollo Solo USB's outputs when software input monitoring via the DAW, Apollo Solo USB's hardware input monitoring feature via Console must be disabled. Note that Console input monitoring is enabled by default.
- Open Console.
- Mute input channels within Console by clicking the MUTE buttons so they are red.
Tip: In Console, option-click any input MUTE switch to quickly toggle the mute state of all input channels.
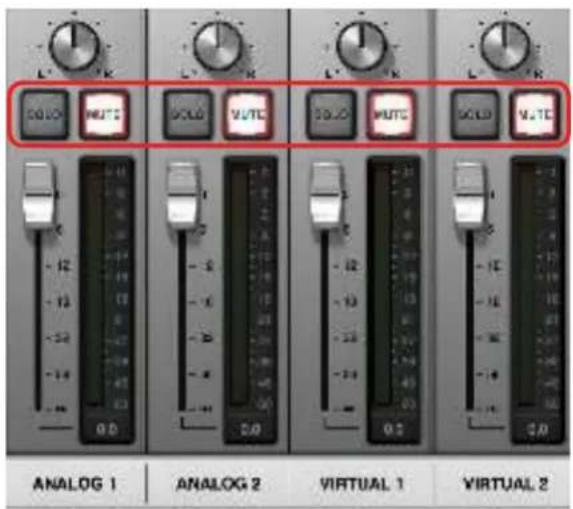
Console: Mute inputs when software monitoring via DAW
Input Monitoring Tips
- Use Console for front-end hardware input monitoring to eliminate I/O buffering latency caused by DAW software monitoring — regardless of the DAW's buffer size setting.
- Prevent signal doubling at Apollo Solo USB's outputs by allowing only Console's hardware input monitoring or the DAW's software input monitoring feature — not both at the same time. Signal doubling can make input signals sound "thin" due to phase cancellations and/or comb filtering that occurs when two identical signals are mixed together and they are not phase-aligned.
- Route the DAW's main outputs into Console's virtual inputs via Virtual I/O when overdubbing so you can balance the levels of the DAW's pre-recorded tracks with Apollo Solo USB's live inputs — all within the Console mixer.
- If monitoring/recording a virtual software instrument in the DAW and you want to process the instrument with UAD plug-ins, route the output of the software instrument channel into Console's virtual input(s) and apply the UAD plug-ins in Console instead of the DAW. This technique reduces latencies caused by I/O buffering.
Using Console with the DAW
The primary function of Console is the low-latency monitoring of Apollo Solo USB's inputs during live performance, either with or without Realtime UAD Processing. When used with a DAW, Console controls front-end monitor mixing and signal processing, replacing the DAW's software monitoring functions.
Important Fundamental Concept: The primary function of Console is to control Apollo Solo USB's low-latency hardware input monitoring, Unison plug-ins, and Realtime UAD Processing. Console must be used to take advantage of these features.
Disable DAW Input Monitoring when Input Monitoring via Console
When using Console for low-latency input monitoring and recording with a DAW, the DAW's software input monitoring feature must be disabled to prevent doubled signals at Apollo Solo USB's outputs. See How To Disable Software Input Monitoring for details and methods.
Disable Console Input Monitoring when Input Monitoring via DAW
When monitoring live inputs via the DAW's software monitoring feature, Console's inputs must be muted to prevent doubled signals at Apollo Solo USB's outputs. See How To Disable Hardware Input Monitoring for details and method.
Controlling Apollo Solo USB's Unique Functions
Apollo Solo USB's unique Unison and Realtime UAD Processing features are controlled by the Console application. These are special functions that are available only when UAD plug-ins are inserted within Console. To activate these features, simply insert UAD plug-ins within Console. See Console Plug-In Inserts for details.
Sharing UAD Resources
The UAD DSP resources that are available for UAD plug-in processing are shared between UAD plug-ins loaded within Console and UAD plug-ins loaded within the DAW.
To maximize UAD resources when monitoring and tracking live inputs, disable unused UAD plug-ins within the DAW. Conversely, when mixing, disable unused UAD plug-ins within Console.
Note: For important related information, see UAD Plug-Ins: Console versus DAW.
Saving Console Setups Within DAW
The Console Recall plug-in offers additional convenience when using Apollo Solo USB with a DAW. Console Recall is a utility plug-in that doesn't process audio. Instead, it stores Console's current configuration within the DAW project file. When the saved DAW project is subsequently opened, the complete Console configuration is restored.
The Console Recall plug-in also features Console monitor controls, enabling adjustments of level, mono, and mute without leaving the DAW. For details, see Console Recall Plug-In.
Routing and Recording Console I/O
Recording Console Inputs
To record any Console input (physical or virtual), select the Console channel as the source for the DAW's audio channel(s). See Accessing Apollo Solo USB's I/O in the DAW for an example.
Recording Console Outputs
Console's four stereo mix bus outputs (MON, HP, AUX 1, AUX 2) can be digitally routed into the DAW. This feature can be used, for example, to send Console's stereo monitor mix, stereo headphone cue mix, and/or stereo AUX processing into the DAW for recording.
To record Console outputs, select the outputs as the source for the DAW's audio channel(s). See Accessing Apollo Solo USB's I/O in the DAW for details.
Route DAW Outputs Into Console
DAW output channel(s) can be digitally routed via software into Console's virtual input channel(s). With this feature, DAW outputs can be used for routing and processing within Console, just as if they were physical inputs.
The Virtual I/O feature can be used for the DAW's main stereo mix outputs, virtual instrument plug-in channels, or any other DAW output that can be assigned to hardware outputs.
To route DAW outputs into Console's virtual inputs, select the virtual input as the output route for the DAW's output channel(s). See Virtual I/O for details.
Recording Realtime UAD Processing
When monitoring Apollo Solo USB's inputs with Realtime UAD Processing, those inputs can be recorded with processing (wet) or without processing (dry). This function is accomplished with the Insert Effects switch. See the Insert Effects Overview for details.
DAW Mixdown and Console
Console has less utility when mixing prerecorded tracks in the DAW. Because the DAW tracks are already recorded, input latency and I/O buffering are never an issue during mixdown, so Console's input functions aren't needed.
Note that Console's configuration does not need to be changed when moving between tracking and mixdown. Console simply remains idle, ready to monitor and process those last-minute takes when inspiration strikes.
Tip: The Console application can remain open or closed at any time. Console plugins and routings remain active even when the application is closed.
UAD Plug-Ins: Console versus DAW
There are important fundamental differences between using UAD plug-ins within Console versus within a DAW. Apollo Solo USB features two distinct methods for using UAD plug-ins:
Console processing (Realtime) – Low-latency hardware input monitoring and recording with Realtime UAD Processing via UAD plug-ins that are loaded within Console.
DAW processing (Buffered) – DSP-accelerated processing via UAD plug-ins in VST or AAX 64 formats that are loaded within a DAW.
These two methods are not a switched mode, but instead simply depend on which host application, either Console or a DAW, contains the UAD plug-in(s). Note that both methods can be used at the same time for maximum flexibility. Each method is explained in greater detail below.
UAD Processing in Console (Realtime)
UAD plug-ins run in realtime, without discernible latency, only when used within Console. Hardware input monitoring with Realtime UAD Processing via Console is optimum for artists and engineers that need to monitor and capture performances without DAW I/O buffering latency and its associated hindrances.
Important: UAD plug-ins used within Console only run on the DSP within Apollo Solo USB. If UAD-2 DSP accelerators are active in the same system, the DSP on those devices cannot be used to process UAD plug-ins in Console.
The special Realtime UAD Processing functionality is achieved via Apollo Solo USB's unique ultra-low latency DSP+FPGA+Console design. Although every audio interface has undetectable latency that is inherent to the A/D-D/A process, routing Apollo Solo USB's input signals through UAD plug-ins within Console does not add to this inherent latency.
Up to five UAD plug-in instances can be inserted serially (aka, stacked or chained) on each of Console's inputs and/or auxiliary buses at the same time, without adding to the inherent A/D–D/A latency.
Console inputs and stereo mix buses (monitor, headphone, auxiliary), with or without Realtime UAD Processing, are routed into the DAW via Apollo Solo USB's device drivers. These channels can be optionally recorded as either processed (wet) or unprocessed (dry) audio using the Insert Effects feature in Console (see Insert Effects Overview).
Console Processing Notes
- Console controls Apollo Solo USB's Unison and Realtime UAD Processing features. These are special functions that are available only when UAD plug-ins are inserted within Console. To activate these features, simply insert UAD plug-ins within Console.
- As with all UAD devices, Apollo Solo USB can only load UAD plug-ins, which are specifically designed to run on UAD DSP. Host CPU-based (native) plug-ins cannot run on UAD DSP or be inserted in Console.
- Upsampled UAD plug-ins add negligible latency (usually indiscernible) when used within Console or a DAW. See Upsampled UAD Plug-Ins for more information.
UAD Processing in DAW (Buffered)
When UAD plug-ins are used within compatible VST or AAX 64 host DAW applications (i.e., outside of Console), monitored input signals are subject to I/O buffering latency because the data must be shuttled back and forth between the DAW and the audio interface.
The amount of input latency depends on the I/O buffer size setting (including when plugins are not used, UAD or otherwise). As the buffer size is increased, more input latency is induced. At lower buffer sizes, input latency is reduced but the host computer's CPU loads increase. With larger buffer sizes, input buffering latency makes software monitoring via the DAW mixer while recording live inputs less practical — if the sound is heard noticeably later than it is produced, it can compromise the performance.
Note that latency is not an issue during mixdown in a DAW because the performances are already captured. The benefits of using Apollo Solo USB's integrated DSP acceleration when mixing with UAD plug-ins in the DAW include the off-loading of plug-in processing from the host computer's CPU, and the sonic rewards of UAD plug-ins.
DAW Processing Notes
- UAD plug-ins within a DAW are heard only when Apollo Solo USB and/or UAD-2 DSP accelerators are active in the system. UAD plug-ins can be loaded in a DAW when UAD DSP is unavailable, but they will not process audio.
- When monitoring or recording Apollo Solo USB's inputs in a DAW, eliminate I/O buffering latency by using Console for hardware input monitoring and Realtime UAD Processing.
UAD Processing in both Console and DAW
UAD plug-ins can be used within Console and a DAW at the same time. In this scenario, Apollo Solo USB's UAD DSP resources are shared between the two host applications. Realtime UAD Processing is available via Console, and I/O buffered (non-realtime) UAD processing is available via VST or AAX 64 plug-ins in the DAW.
Note: UAD plug-ins within a DAW can also run at the same time as native (host CPU based) plug-ins, in any combination.
Bypass UAD plug-ins within DAW when monitoring with Console
To maximize available DSP resources for UAD plug-in processing within Console when monitoring, power off or unload UAD plug-ins in the DAW.
Bypass Console plug-ins when mixing in DAW
To maximize available DSP resources for UAD plug-in processing within the DAW when mixing, power off or unload the UAD plug-ins in Console.
Tip: Use the “Disable All” feature within Console (see Channel Options) to quickly disable/enable all UAD plug-ins within Console.
Virtual I/O
Apollo Solo USB's device drivers carry various virtual (software only) input and output channels in addition to its physical hardware inputs and outputs. Virtual I/O enables digital routing of DAW signals back and forth between Console. The virtual channels consist of Console's virtual inputs, Console's virtual outputs, and all of Console's MON, HP, and AUX mix bus outputs.
Flexible, Pristine Signal Routing
Virtual I/O facilitates highly flexible signal routing via the DAW, without needing to reach behind gear for manual cable patching. Additionally, because the virtual I/O channel audio streams are in the digital domain, a pristine audio signal path is maintained by not requiring additional A/D–D/A conversions.
Virtual Inputs into Console
The virtual input channels enable any DAW output to be routed directly into Console's virtual inputs so Realtime UAD Processing can be applied to the DAW signal(s).
Tip: This feature is particularly useful when performing live with virtual software instruments inserted in the DAW, because the throughput latency associated with I/O buffering is reduced in this configuration.
Virtual Outputs into DAW
Virtual outputs enable any (or all) of Console's virtual input channels, and the stereo MON, HP, and AUX mix bus outputs, to be directly routed to any DAW input so they can be recorded. With virtual outputs, it's easy to capture Console signals, with or without Realtime UAD Processing.
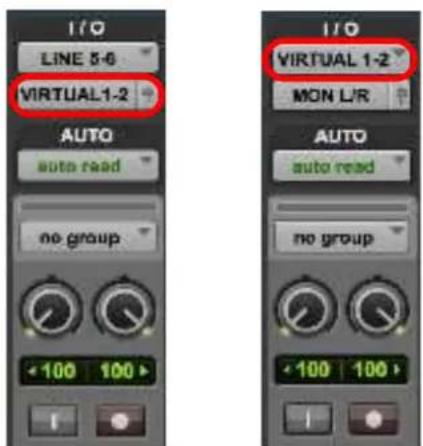
Pro Tools screen shots showing signals being digitally routed from the DAW into Console for monitoring and/or Realtime UAD Processing (left) and from Console into the DAW for recording and/or further processing (right)
Routing DAW Outputs to Console Inputs
To route a DAW output signal into Console for monitoring and/ Realtime UAD Processing, assign any Console virtual channel (or channel pair, when the DAW source is stereo) as the output device for any DAW track, bus, or output.
That DAW output signal then appears in the associated virtual input channel(s) in Console, and it can be processed or routed the same as Apollo Solo USB's hardware inputs.
At Right: A stereo DAW channel's outputs assigned to Console's virtual inputs
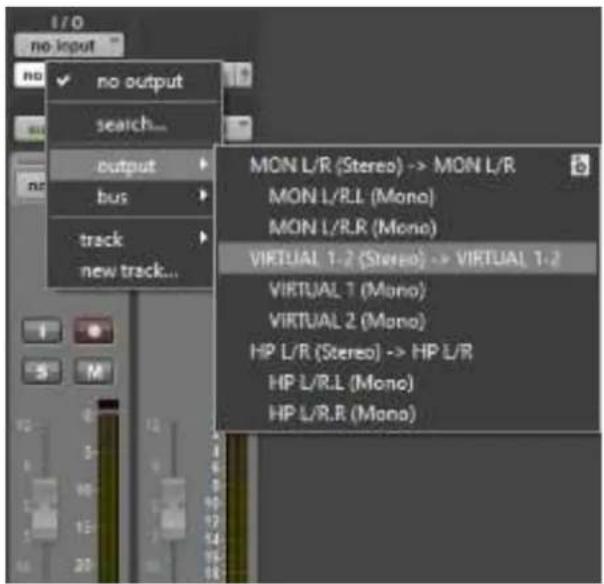
Routing Console Outputs to DAW Inputs
To route a Console output signal into the DAW so it can be recorded, assign any Console virtual channel (or channel pair, when the Console source is stereo) as the input source for any DAW input.
That Console signal can then be recorded or routed by the DAW as if it were a hardware input.
Tip: This technique can be used to re-capture and record (bounce) a software instrument performance that was virtually routed from the DAW into Console for Realtime UAD Processing.
At right: Console's virtual outputs assigned to a DAW channel's input. Note that any output listed here (including Console's stereo MON, HP, and AUX mix buses) can be used for DAW input.
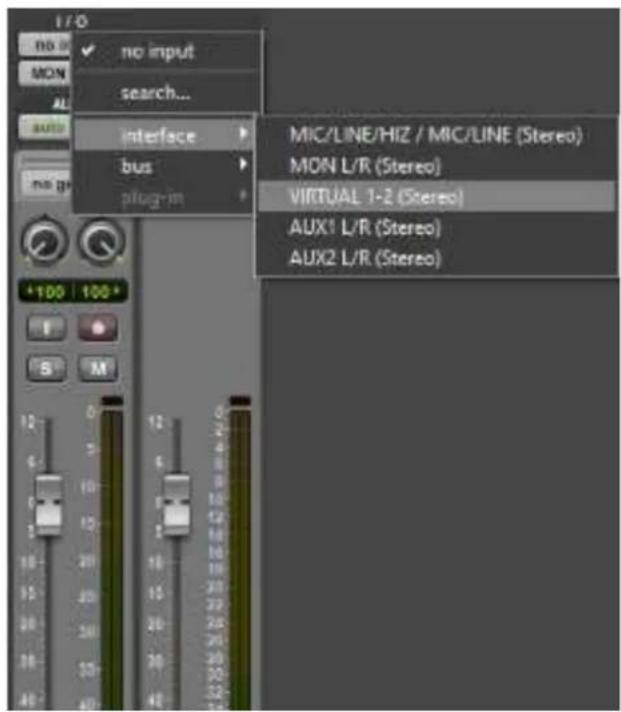
Virtual I/O Examples
Adjust DAW Levels Within Console
By default, the DAW's main stereo outputs (the playback mix) is routed to Apollo Solo USB's main outputs and blended with Console's inputs, and the DAW playback level is adjusted with the DAW's outputs controls.
By digitally routing the DAW playback mix into Console's virtual input(s) with Virtual I/O, the DAW playback level can be adjusted with Console's virtual input faders. This is particularly useful when overdubbing — you can balance the DAW playback level along with the live input levels without leaving Console.
Reduce UAD Processing Latency on Virtual Instruments
When playing a virtual software instrument plug-in via the DAW, the monitored performance is subject to I/O buffering latency. If the live instrument is processed by a UAD plug-in in the DAW, latency is further increased due to additional buffering to and from Apollo Solo USB's DSP.
By digitally routing the live software instrument channel into Console's virtual input(s) with Virtual I/O, the UAD plug-in(s) can be used inside Console for Realtime UAD Processing instead of the DAW's buffered UAD plug-in processing. This setup reduces monitored input latency by more than half.
Using Apollo Solo USB for System Sound I/O
Apollo Solo USB's I/O can be used for the computer's system sound audio. System sound audio I/O is used by music players, web browsers, system software alert sounds, and similar applications — essentially, any audio application that doesn't access Apollo Solo USB's ASIO drivers directly.
If an audio application doesn't have its own setting for accessing an I/O device directly, it uses the device specified within the Sound control panel in the operating system. When Apollo Solo USB is set as the audio I/O device in the OS, any audio software that uses system sound will use Apollo Solo USB for I/O.
Important: To prevent system sounds from being inadvertently routed into Apollo Solo USB's outputs and/or DAW recordings, setting Apollo Solo USB as the output device for system sounds is generally not recommended when using a DAW.
System Sound Routing
When the OS is set to use Apollo Solo USB for system sound I/O, audio levels are controlled by the audio application, Apollo Solo USB, or both, as described below.
System Sound Output
Audio from the application is routed to Apollo Solo USB's main outputs and mixed with Apollo Solo USB's input signals. The application's audio level is controlled from within the audio application, while Apollo Solo USB's input levels are controlled within Console.
Note: To adjust the level of system audio at Apollo Solo USB's outputs, use the output level control within the audio application.
System Sound Input
The level of Apollo Solo USB's input signals being routed into the audio application are adjusted with the preamp controls — and UAD plug-ins, if any — in Console. In this scenario, Console's input faders don't control levels routed to the audio application. Signals routed to audio applications are always pre-fader (Console's input faders control monitoring levels only, not recording levels).
Tip: It's usually best to keep Console metering set to pre-fader (in Console Settings>Display Panel) so the input meters accurately represent the signal level at the audio application's inputs.
Setting System Sound I/O
To use Apollo Solo USB I/O for system sound:
- Open Windows Control Panel > Sounds.
- In the Playback tab, select Universal Audio WDM. Click Apply, then click Set Default.
- In the Recording tab, select Universal Audio WDM. Click Apply, then click Set Default.
Important: See Windows WDM System Sound Notes for important information when using Apollo Solo USB for system sound I/O.

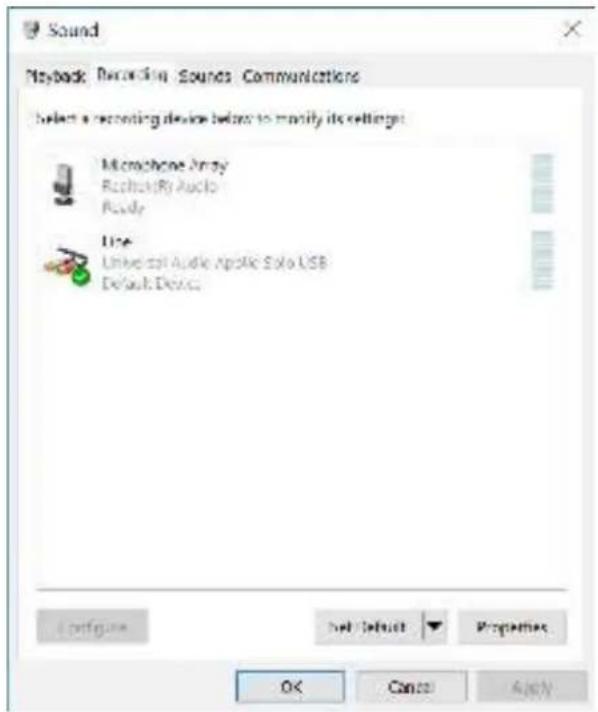
Apollo Solo USB selected for WDM system audio output (left) and input (right) in the Sound control panel
Windows ASIO versus WDM
On Windows systems, ASIO and WDM are different subsystems that are configured and operated separately. ASIO is typically used for DAW setups, while WDM is typically used for system sound I/O.
ASIO system settings are configured in the Apollo Solo USB Console Settings>Hardware panel and within the DAW preferences. WDM system settings are configured in the Sound control panel within the Windows OS.
Important: When using Apollo Solo USB for WDM system sound I/O, the sample rate of both subsystems must be set the same rate to be heard in both subsystems. See Windows WDM System Sound Notes for related information.
Windows WDM System Sound Notes
Windows WDM system audio is used for audio input and playback in media players, web browsers, audio conference, and similar programs.
To ensure proper audio system functionality, follow these guidelines when using Apollo Solo USB as the input and/or output device for Windows WDM system audio.
- Disable system notification sounds. Turn off all Windows system alert sounds using the procedure detailed on the previous page.
- ASIO and WDM sample rates must match. All sample rate values in ASIO DAW programs and WDM audio programs must be set to the same sample rate. If the ASIO and WDM sample rates are not the same, audio from one or more programs will not be heard correctly.
- WDM sample rate changes. Set the sample rate in Apollo Solo USB's Console before changing sample rates in the Sound>Playback or Sound>Recording control panels within Windows. Note that WDM programs may need to be closed then reopened to be heard correctly if the sample rate is changed in the Sound control panel within Windows.
- DAW sample rate changes. If the DAW sample rate is changed, WDM audio will no longer be heard correctly because the sample rates no longer match. In this case, the WDM sample rate must be changed in the Windows Sound>Playback panel to match the DAW sample rate.
Additional Windows Optimizations
- Visit the Apollo Solo USB Knowledge Base at help.uaudio.com for updated technical news and system optimization information.
Using Apollo Solo USB Without Audio Software
Apollo Solo USB and Console can be used without a DAW or any other audio software. For example, Apollo Solo can be used as a signal processor for live performance when a DAW's recording and playback features are not needed. In this scenario, Console controls Apollo Solo USB's digital mixing, monitoring, and Realtime UAD Processing features.
To use Console by itself for input monitoring and Realtime UAD Processing, there aren't any special considerations — simply launch Console and start using it.
Console Overview
What is Console?
The included Console application is the companion software interface for the Apollo Solo USB audio interface hardware. Console's analog-style workflow is designed to provide quick access to the most commonly needed features in a familiar, easy-to-use application.
Console's function is to control the Apollo Solo USB hardware unit and its digital mixing and low-latency monitoring capabilities. Console is where Realtime UAD Processing and Unison UAD plug-ins are configured and operated.
Important Fundamental Concept: The primary function of Console is to control Apollo Solo USB's low-latency hardware input monitoring, Unison plug-ins, and Realtime UAD Processing. Console MUST be used to take advantage of these features. Console replaces the software input monitoring feature of the DAW mixer.
Console remotely controls the digital mixing and signal processing functions that are performed within the Apollo Solo USB hardware. Although Console runs on the host computer, the computer's CPU is not performing these audio functions. All audio mixing and signal processing occurs on the SHARC DSP inside the hardware unit.
Console can be used at the same time as a DAW for front-end signal processing and low-latency monitoring and/or tracking. Complete Console sessions can be saved as presets for easy recall of the entire configuration, or individual channel strips can be save and recalled using Channel Strip Presets. Console can also be used to configure Apollo Solo USB's audio interface I/O settings such as sample rate, clock source, and reference levels.
Note: Apollo interfaces use UAD DSP and memory resources for its internal DSP mixer. Therefore, the UAD Meters will show DSP and memory usage when Apollo Solo USB is connected, even if Console and/or UAD plug-ins are not currently loaded.
Console's application icon and main window
Console Functions
Console enables the following functionality when used with Apollo Solo USB:
- Hardware control. All of Apollo Solo USB's front panel hardware controls (except headphone volume) can be software controlled using Console, facilitating easy hardware manipulation even if Apollo Solo USB is placed out of reach of the computer operator.
- Low-latency monitoring. Using Console eliminates the latency associated with DAW I/O buffering that makes monitoring problematic for the performer. By removing the DAW's software input monitoring feature from the monitoring signal flow altogether, the need to adjust I/O buffer sizes and latency is no longer an issue.
- Realtime UAD Processing. UAD Powered Plug-Ins can be inserted into all Console inputs and/or auxiliary returns (within available DSP resources), for the ultimate latency-free sonic experience while monitoring and/or tracking live performance. All processed (or unprocessed) inputs and stereo mix buses, including the monitor, auxiliary, and headphone buses, can be optionally routed into the DAW for recording.
- Unison. Apollo Solo USB's Unison™ technology gives you the tone of the world's most sought-after tube and solid state mic preamps, guitar amps, and pedals — including their all-important impedance, gain stage “sweet spots,” and component-level circuit behaviors.
- Send/Return auxiliary buses. Console has two stereo aux buses, with independent send levels per input, for grouped signal processing (conserving UAD DSP resources) or routing to the DAW.
- Flexible cue monitor mixing. A separate stereo headphone cue mix bus is available with per-input sends to ensure performers are able to hear “more me” if desired.
- Session management. Complete Console configurations can be saved and loaded to/from disk as presets, for convenient and unlimited session management. Console sessions can also be stored/recalled within the DAW project using the Console Recall plug-in.
Global Functions
Parameters within Console Settings are available for configuring various global behaviors:
- Hardware. Global interface settings such as sample rate and reference levels.
- Software. Global software settings for Console such as metering and plug-in window behaviors.
When To Use Console
Console can be used without a DAW, simultaneously in conjunction with a DAW, or not at all. These scenarios are covered in greater detail in Working With Apollo Solo USB.
Note: Console processing is always active, even after the application is quit. Console can be launched or quit at any time, whether or not a DAW is already running.
Console without DAW. Console can be used by itself without the use of a DAW or any other audio software. Using Console without a DAW provides access to all Apollo Solo USB functionality and simplifies the use of Apollo Solo USB's digital mixing, monitoring, and Realtime UAD Processing features when a DAW's recording and playback features are not needed.
Console with DAW. Console is used at the same time as a DAW when low-latency monitoring and/or recording of Apollo Solo USB's inputs with (or without) Realtime UAD Processing is desired. In this scenario, Console is used as a front end to control input monitoring when recording, and the DAW's software input monitoring feature is disabled. This workflow completely eliminates the I/O buffering latencies associated with using software monitoring via the DAW.
Important: To eliminate doubled signals, software monitoring in the DAW must be disabled when Console is used for input monitoring. Conversely, Console inputs must be muted if the DAW's software monitoring feature is enabled.
UAD plug-ins can be used within Console and a DAW at the same time. In this scenario, Apollo Solo USB's DSP resources are shared between the two host applications. Realtime UAD Processing is available via Console, and buffered (non-realtime) UAD processing is available via VST or AAX 64 plug-ins in the DAW. See UAD Plug-Ins: Console versus DAW for more details about this workflow.
Interactions Between Console and Apollo Solo USB
Console's settings mirror the Apollo Solo USB hardware. Changes made to one are also made on the other, and vice versa. If changes are made to Console when Apollo Solo USB is not connected, and then Apollo Solo USB is subsequently connected, the Console settings are sent to the hardware.
Accessing Console
Any of the methods below can be used to open the Console application.
- Access the program from the Windows Start Menu
- Right-click the blue UA diamond logo in the Windows System Tray (in taskbar at lower right of screen), then select Console from its contextual menu
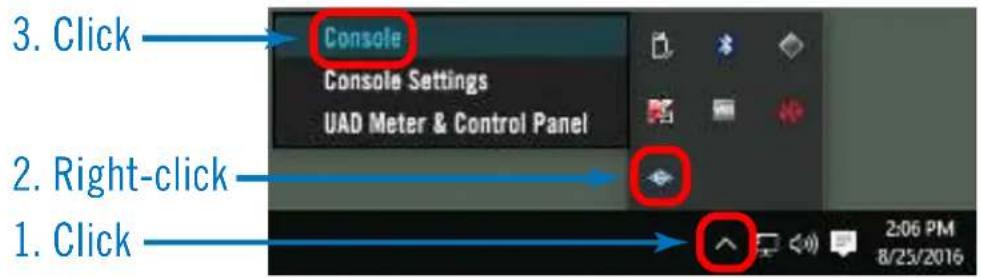
Accessing Console from the Windows System Tray
Quitting Console
Close all Console windows (main Console window and Console Settings window) by clicking the Close (X) button in the Window Title Bar
Console Layout
Console's visual and control elements are grouped according to functionality, with a layout similar to that found on typical analog mixers. These groups are illustrated below. Detailed explanations of all the Console control functions are similarly grouped and presented later in the Console Reference chapter.
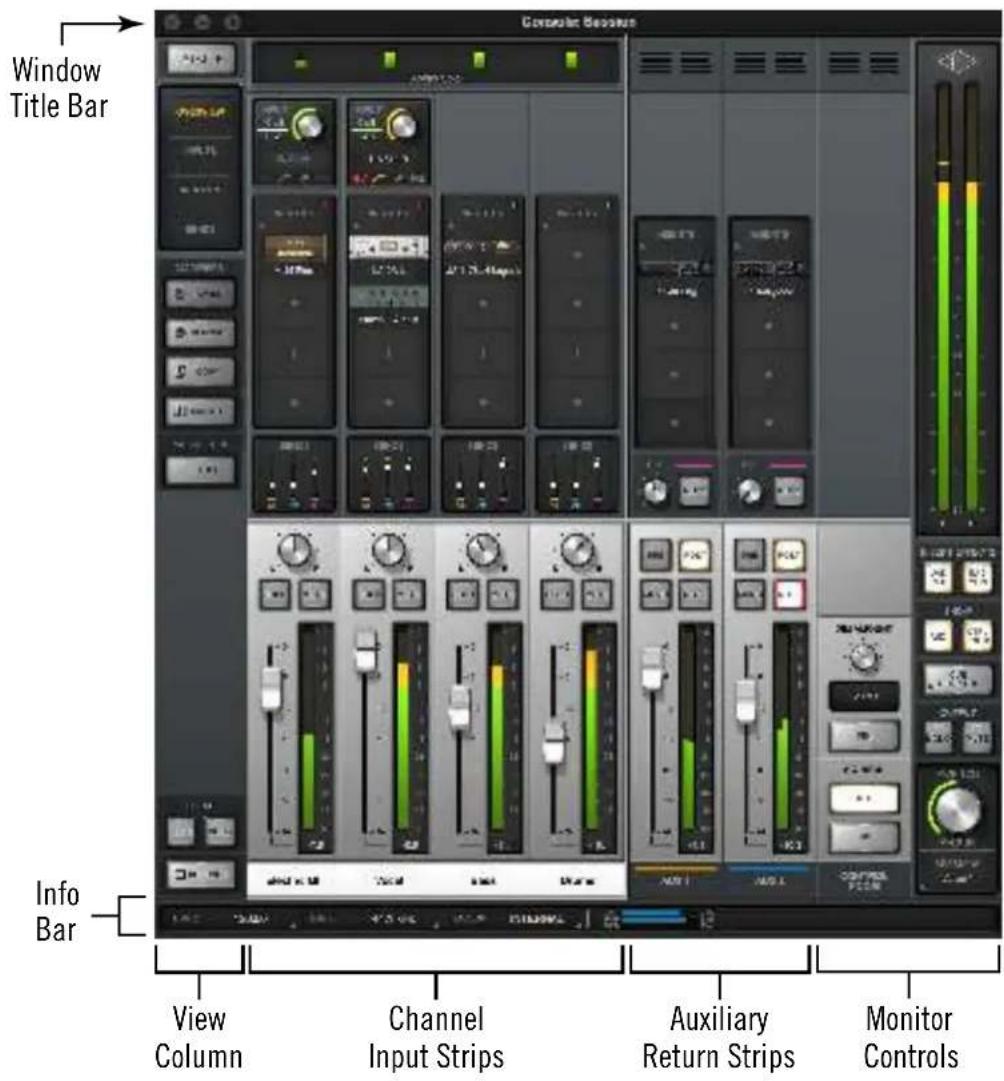
Console's main window and controls layout
Dynamic Window Size
The size of Console's window can be dynamically adjusted to fit any workspace. To adjust the window size, click+drag any corner or edge of the window.
Width
Reducing the Console window width may reduce the number of visible input channels. Use the Bank Bar in the Meter Bridge to view input channels that may be currently out of view.
Height
When Console's window size is vertically adjusted, displayed elements are dynamically modified to fit available space. As the height is increased, some elements are enlarged for easier viewing and manipulation. As height is decreased, some elements are reduced to fit in the available space.
Drag any corner or edge to dynamically re-size the Console window
Note: All display and control elements are always available regardless of window size.
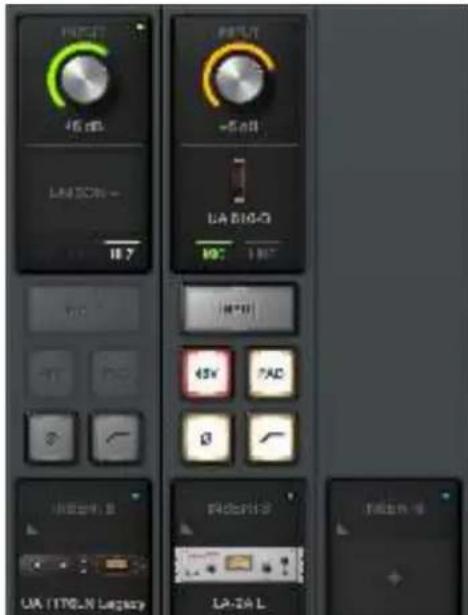
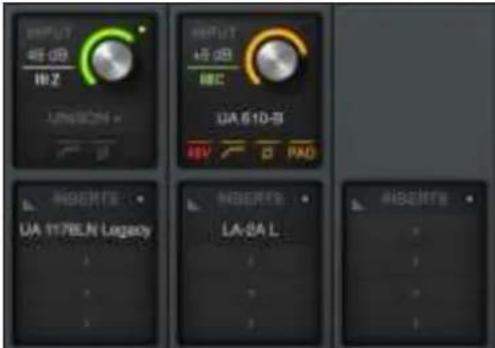
Partial screenshots showing how control and display elements are changed with window size adjustments.
Above: The elements shown at left are more compact when vertical size is reduced.
Global Window Elements
Some visual and control elements are always displayed in the Console window, while others depend on the current selection(s) in the View Column and Monitor Column, as illustrated below.
An brief overview of each global element is provided in this chapter. Detailed descriptions of all functions are provided in a later chapter.
The following elements are always visible in the Console window:
| View Column Meter Bridge | |
| Monitor Column Current Bank | |
| Info Bar Bank Bar (if channels out of view) | |
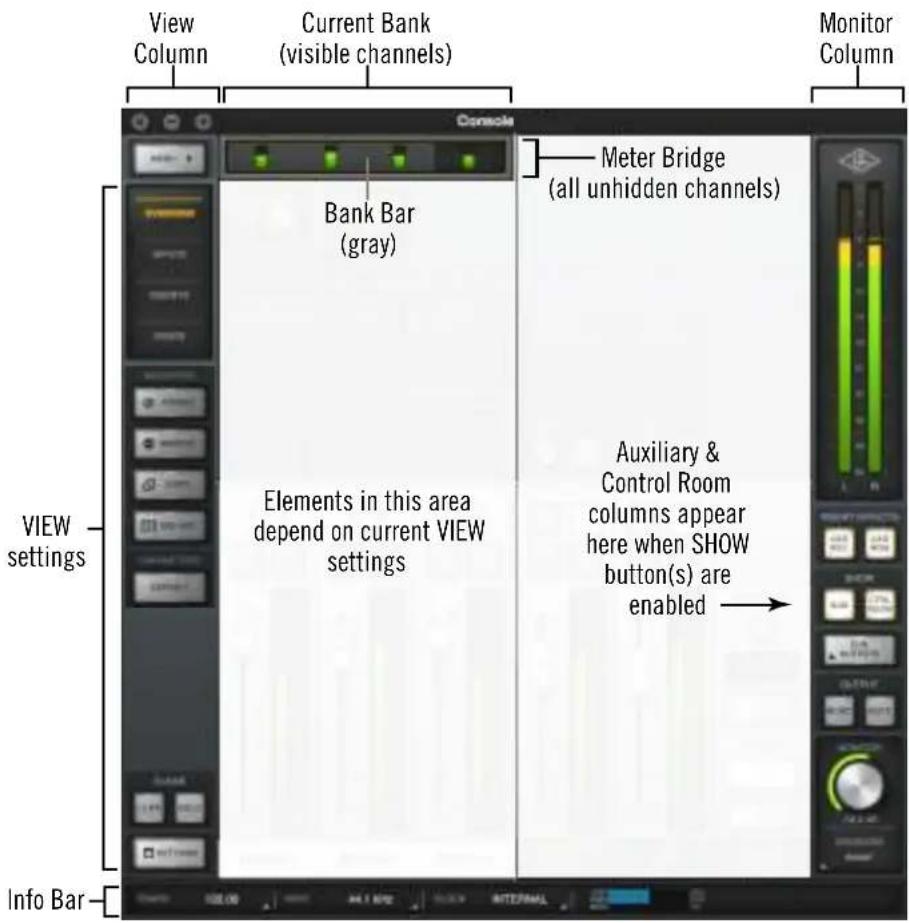
Console elements that are always visible
Meter Bridge Overview
The Meter Bridge (illustrated below) is always visible at the top of the Console window. It displays all non-hidden input channels (those that are not hidden with the Show/Hide Inputs feature), signal activity at these inputs, and the Bank Bar, which is used to scroll inputs that are out of horizontal view.
For detailed descriptions of all Meter Bridge elements, see Meter Bridge.
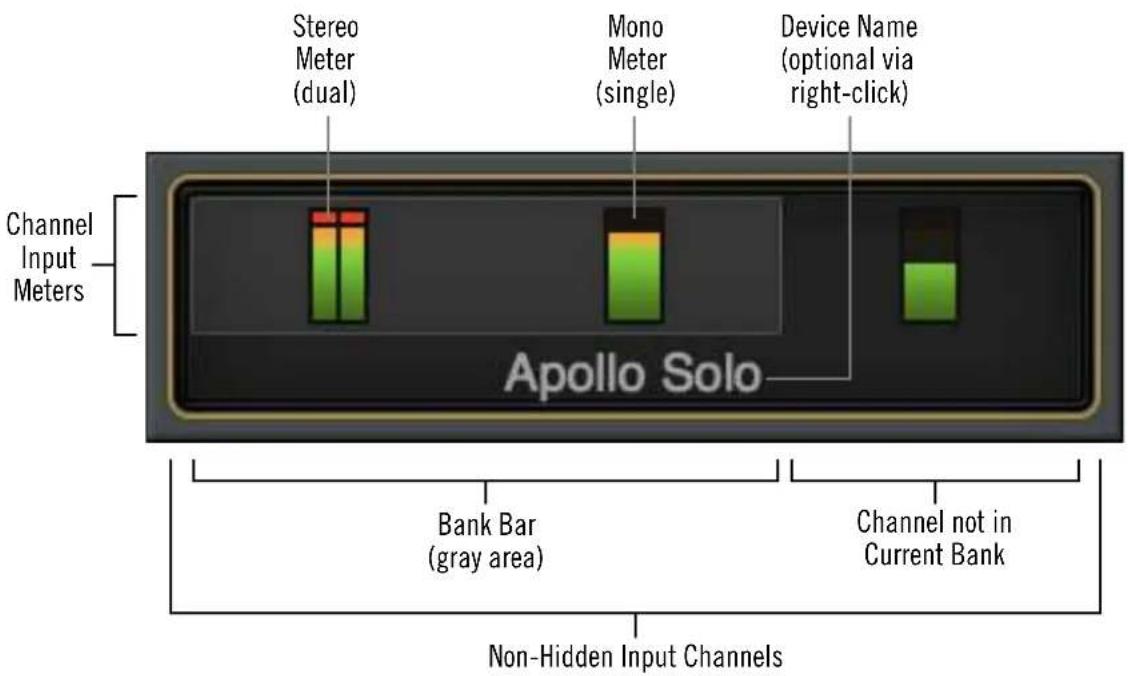
Meter Bridge elements
Info Bar Overview
The Info Bar (illustrated below) is always visible at the bottom of the Console window. It displays and provides access to several important functions.
Note: For detailed descriptions, see Info Bar.
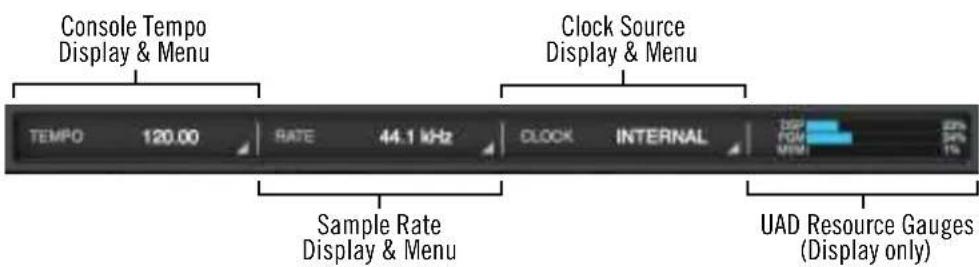
Info Bar elements
Tempo
Console's current tempo is displayed here in beats per minute (BPM). The value is used by UAD plug-ins within Console that are set to use Tempo Sync. Click this area to enter or tap a different tempo.
Sample Rate
Apollo Solo USB's current sample rate is displayed here. Click this area to select a different sample rate from the drop menu when using Console without a DAW.
Note: When using a DAW, the sample rate is managed within the DAW.
UAD Resource Gauges
This area displays DSP and memory resource loads used by all loaded UAD plug-ins (within both Console and DAW). UAD loads can be monitored as needed, for example when deciding which UAD plug-ins to load, based upon how much DSP is available.
Values displayed here are mirrored in the UAD Meter & Control Panel application. More detailed (per-SHARC) display of DSP usage is available in the System panel within the UAD Meter & Control Panel application.
Current Bank Overview
An important navigational concept in Console is the Current Bank. The Current Bank is all input channels that are currently visible in the main body of the Console window (below the Meter Bridge) as shown in the illustration below. Sliding the gray Bank Bar changes the Current Bank so the other inputs can be seen.
Note: The Bank Bar only appears when the Console window is too narrow to display all input channels.
This feature is especially useful when the system is expanded with additional I/O by connecting one or more Universal Audio Apollo interfaces. For complete details, see Current Bank.
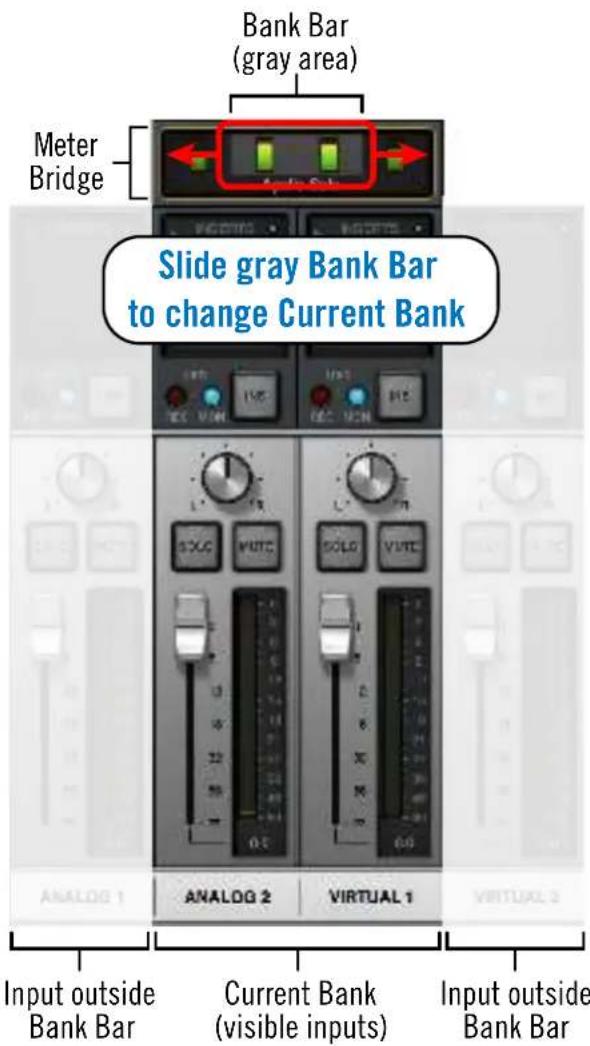
Conceptual illustration of the Current Bank. In this example, inputs Analog 2 and Virtual 1 are in the Current Bank, while Analog 1 and Virtual 2 are not visible. Sliding the Bank Bar brings the other inputs into view.
View Column Overview
The View Column (illustrated at right) is always visible at the left side of the Console window. The View Column contains the Application Menu, View selectors, View Options, Clear switches, and Settings switch, as shown at right.
For detailed descriptions, see View Column.
Views
Four Views are available in Console: Overview, Inputs, Inserts, and Sends. Each View displays related elements and associated functionality in the main area of the Console window.
View Selectors
Any of these methods can be used to change the current View:
- Click the View Column Options in the View Column
- Select the View from the Application Menu
• Use the Keyboard Shortcuts
View Options
The View Column Options activate various control functions within each View. The displayed View Options are contextual; some options change when a different View is selected.
Application Menus
Clicking the Menu switch presents the Application Menus, where various Console functions are accessed.

The Application Menus
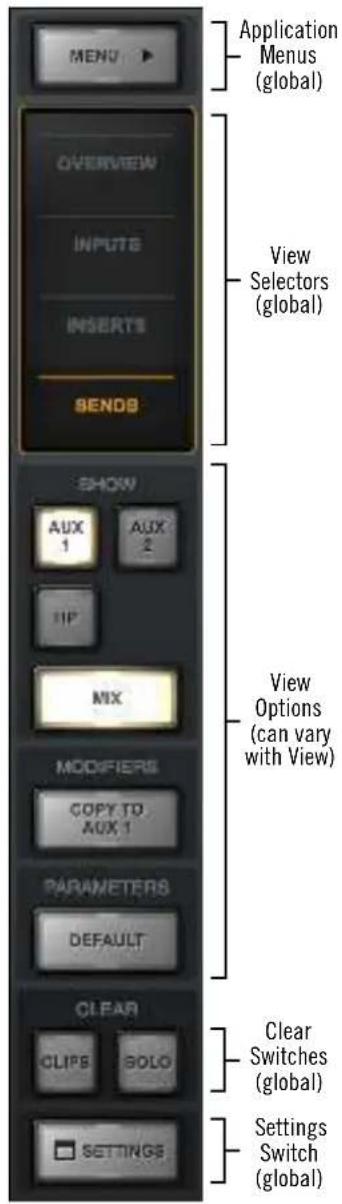
View Column as it appears in Sends View
Clear
The Clear Switches are used to reset all signal clipping indicators and turn off/on the solo function on all channels.
Settings
The Settings switch opens the separate Console Settings window, where various global Apollo Solo USB functions are defined.
View Elements
Each View displays related elements and associated functionality in input channel strips within the main area of the Console window.
Note: The main monitor mix controls (input labels, faders, solo, mute, pan) are the same in all views unless specifically hidden in Sends view.
The channel input elements of each view are shown below. Complete details for all elements are described in Console Reference.
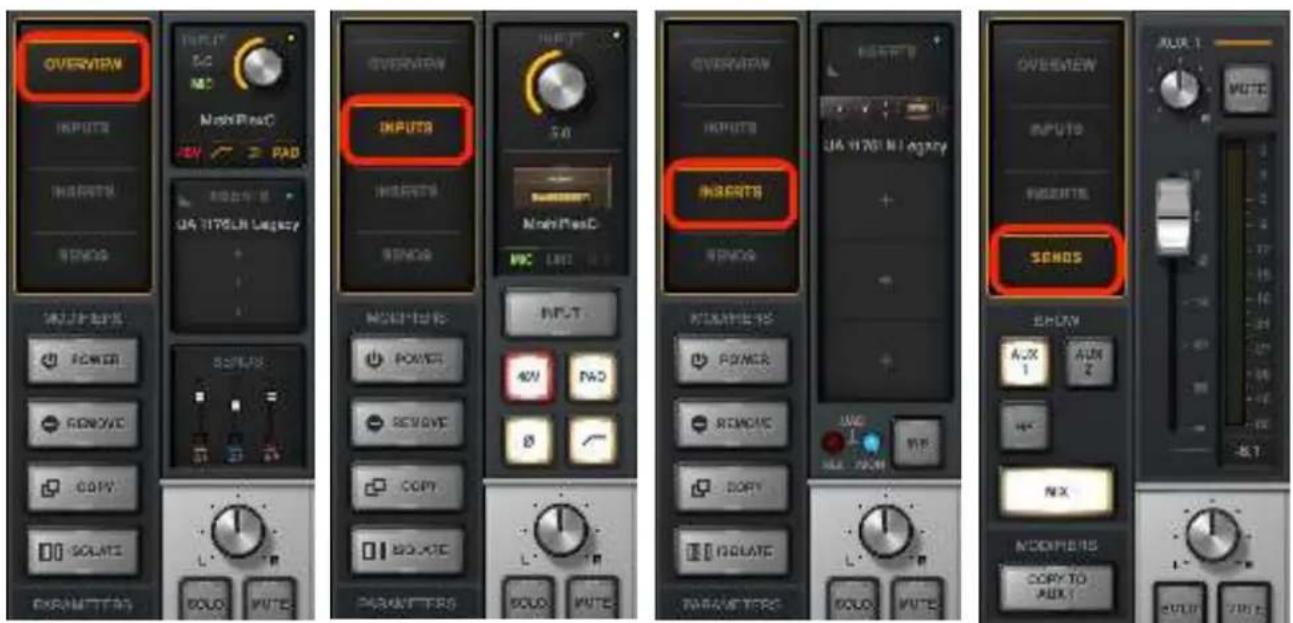
Each View displays different elements in the input channel strips
Monitor Column Overview
The Monitor Column (illustrated at right) is always visible at the right side of the Console window. The Monitor Column contains elements related to monitor outputs, cue (HP) outputs, insert effect printing, and session file management.
For detailed descriptions, see Monitor Column.
Monitor Meters
These meters display the signal levels of the monitor mix bus just before the monitor level control. Levels displayed here mirror the state of the dual Monitor LED meters on Apollo Solo USB's top panel.
Global Insert Effects
These switches globally switch all Console inputs to either pass UAD insert effect processing to the DAW (print wet) or not (monitor wet but print dry).
Insert Effects can also be individually switched on a per-channel basis (see Channel Insert Effects). The Global Insert Effects switches override the individual channel settings.
Show Strips
These switches show and hide the visibility of the auxiliary return strips and/or the control room options strip. Each strip is visible when its SHOW switch is lit.
Cue Outputs Popover
Clicking this switch opens the Cue Outputs Popover, where the headphone output source (either the main monitor mix or the HP cue mix) is selected.
Monitor Output Options
The main monitor outputs can be muted and/or set to monophonic with these switches.
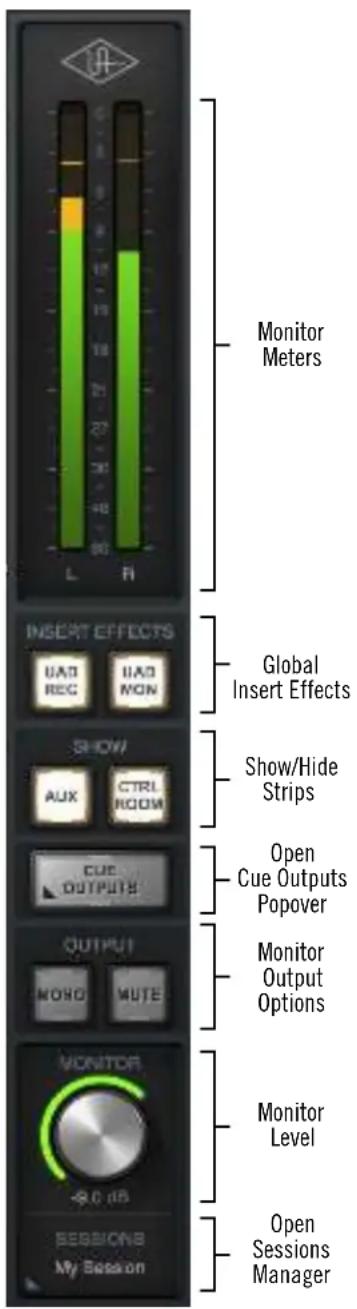
Monitor Column
Monitor Level
This is the master level control for Apollo Solo USB's main outputs. It performs the same function as the MONITOR knob on Apollo Solo USB's top panel. When the ring around the knob is RED, the monitor outputs are muted.
Sessions Menu
Clicking this switch opens the Session Manager popover window, where Console configuration files are managed.
Channel Strips Overview
Each Console input channel strip (illustrated at right) controls a corresponding Apollo Solo USB input. The output of all Console channel input strips are always routed to Console's monitor outputs (except when muted). Console's input channel strips are essentially the same for all inputs, however there are some differences among the analog and virtual inputs, as noted below.
Note: For detailed descriptions, see Channel Input Controls.
Signal Flow
Audio signals in a Console channel flow through the inserts serially from top to bottom. Therefore, if more than one plug-in is inserted in a channel, the location of a plug-in within the inserts can impact the sound of the channel. Plug-ins can be reordered by dragging them to change the serial processing order.
Input Types
Console has analog and virtual inputs. The controls that are available in each strip depends on the type of input.
Preamp Inputs
Inputs 1 and 2 are analog preamp channels that have multiple physical inputs (mic, line, Hi-Z) that can be selected with the preamp controls.
The analog inputs are switched between mic and line inputs manually via Console or Apollo Solo USB's top panel. Channel 1 is automatically switched to Hi-Z input when a 14 " mono (tip-sleeve) cable is plugged into Apollo Solo USB's front panel Hi-Z input jack.
Virtual Inputs
The virtual input channels do not control Apollo Solo USB's hardware inputs. Instead, they receive digital signals from DAW outputs via Apollo Solo USB's device drivers, enabling Realtime UAD Processing on any DAW output. This feature is especially useful when playing virtual software instruments live through UAD plugins because it reduces I/O buffered input latency. For complete details about this feature, see Virtual I/O.
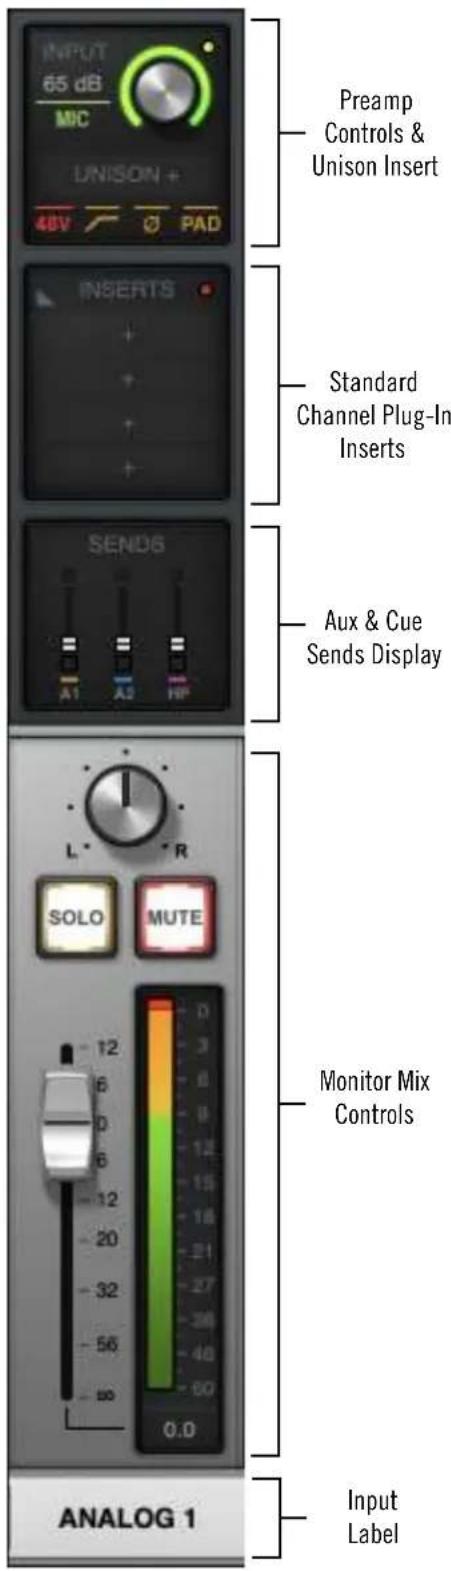
Input channel strip
Console Plug-In Inserts Overview
The UAD plug-in inserts within each input and auxiliary strip is where UAD Powered Plug-Ins are selected and used for Realtime UAD Processing within Console.
Both of Apollo Solo USB's analog preamp inputs have a special dedicated Unison insert in addition to four standard inserts. Both virtual inputs, and both auxiliary returns, also have four standard inserts each. Therefore, up to five UAD plug-ins can be serially chained (stacked) per channel within the constraints of available DSP resources.
Note: For complete details, see Console Plug-In Inserts.
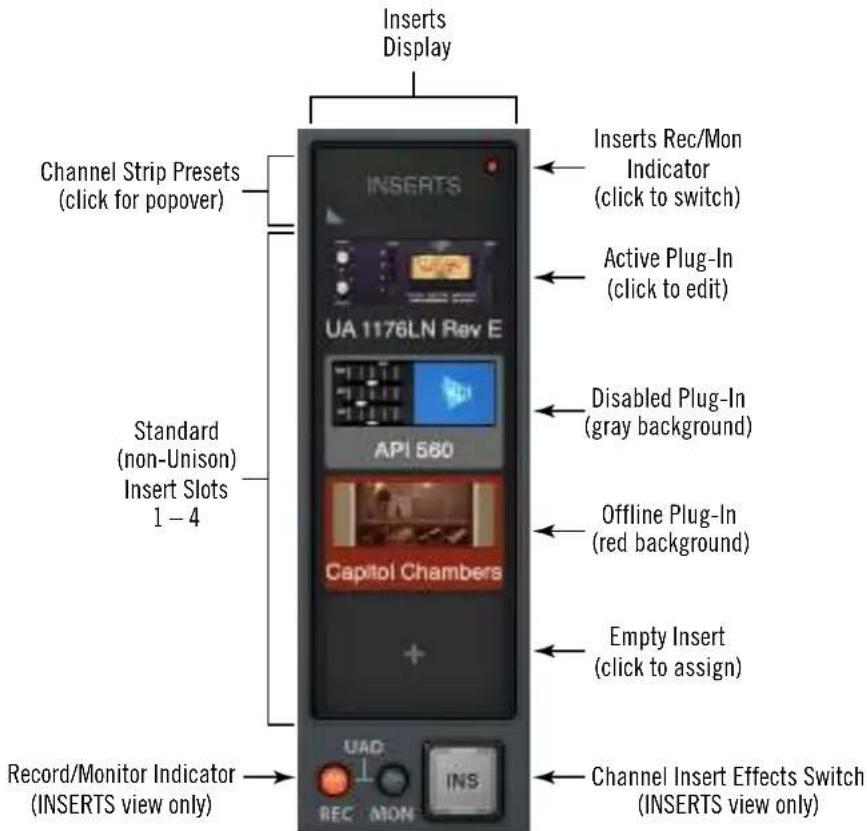
Channel Inserts
Unison Insert
Apollo Solo USB's Unison technology is activated when a Unison-enabled UAD plug-in is loaded in the special dedicated Unison insert slot located above the preamp options (as shown at right, outlined in red).
Note: Audio on preamp channels is processed by the Unison insert (if populated) before the channel inserts.
The special dedicated Unison insert is only available on Apollo Solo USB preamp channels. However, Unison inserts are operated exactly the same way as standard channel inserts. See the Unison chapter for related information.
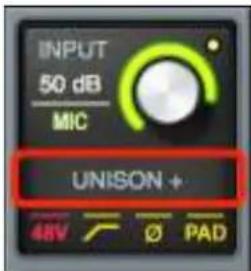
Unison Insert
Insert Effects Overview
The Insert Effects settings are used to specify whether or not Realtime UAD Processing in Console is recorded (printed) in the DAW.
- Console inputs are recorded with processing (wet) when Insert Effects is enabled. The UAD-processed signals are heard and recorded.
- Console inputs are recorded without processing (dry) when Insert Effects are disabled. The UAD-processed signals are heard, but not recorded.
Important: UAD plug-in processing in Console's Unison insert and auxiliary inserts are always routed to the DAW, regardless of the current Insert Effects setting (Unison and aux insert processing is always recorded).
Function of the Insert Effects Switch
The Insert Effects switch determines if the DAW records Console's inputs with or without Realtime UAD Processing, regardless of the actual wet or dry state of the monitor mix. This is accomplished by routing Console's inputs into the DAW from before the plug-in inserts (dry recording) or after the plug-in inserts (wet recording).
Record With Effects
When Insert Effects are record-enabled (UAD REC lit), Apollo Solo USB's channel input signals are processed by Console's standard UAD plug-in inserts before being routed into the DAW.
In this mode, the post-insert (wet) state of all Console inputs with Realtime UAD Processing is routed to the DAW inputs.
Tip: This setting is used to record “wet” with Realtime UAD Processing.
Monitor With Effects
When Insert Effects is not record-enabled (UAD MON lit), Apollo Solo USB's channel input signals are routed directly into the DAW before being processed by Console's standard UAD plug-in inserts.
In this mode, the pre-insert (dry) state of all Console inputs is routed to the DAW inputs, even if Realtime UAD Processing is occurring in the monitor mix.
Tip: This setting is used to record "dry" when Realtime UAD Processing is active.
Individual Channel Insert Effects
Insert Effects can be recorded wet or dry on a per-channel basis. For details, see Channel Insert Effects.
Global Insert Effects
Insert Effects for all channels can be globally switched to override the individual channel insert effect switches. For details, see Global Insert Effects.
Popover Windows
Some Console functions that are not visible in the main window are accessed in popover windows. Popovers are a special type of window that automatically close when any area outside of the popover is clicked.
Note: The size of popover windows cannot be adjusted.
Typical popover window — in this example, the rename/link popover
To close any popover, click anywhere outside of the popover, press the X button at upper right of the window, or type the esc (escape) key on the computer's keyboard.
The following functions are accessed via popover windows:
| Cue output assign Channel presets | |
| Rename/link input channels Console session presets | |
| Sends (Aux & Cue) Console Tempo | |
| Plug-in insert assign Plug-in presets | |
HP Cue Overview
A cue mix bus is used to create a unique mix that is separate from the main monitor mix. Cues are typically used for performers that want to hear a headphone mix that is different from the main monitor mix (“more me”), sending separate mixes to other rooms or audio equipment, and similar applications.
In addition to the main monitor stereo mix bus and the two auxiliary stereo mix buses, Apollo Solo USB features one stereo cue mix bus that can be routed to the headphones or a DAW.
HP Cue Label
Apollo Solo USB's cue mix bus is labeled HP (headphones) to reflect the available hardware outputs on the device.
Cue Components
The complete HP cue system is comprised of the cue mix bus, the cue sends, and the cue outputs.
Cue Mix Bus – The HP cue mix bus is the summed stereo mix of individual audio signals. Signals are routed into the cue mix bus via the cue send controls, and returned from the cue mix bus via the cue output controls in the CUE OUTPUTS popover.
Cue Sends – The cue sends adjust the individual channel signals going into the cue mix bus. Each input channel and aux return contains individual level, pan, ^* and mute controls for the cue mix bus. All cue sends are pre-fader and pre-mute so they are not affected by adjustments to the main monitor mix.
*Exception: If two input channels are stereo-linked, the cue sends on the stereo pair cannot be panned. Sends for stereo channels are hard-panned left and right.
Cue Outputs – The cue mix bus is returned via the CUE OUTPUTS popover, which optionally routes the cue to Apollo Solo USB's headphones output.
Note: By default, the main monitor mix is routed to the headphones. To hear the cue mix, HP must be selected as the source in the CUE OUTPUTS popover.
Cue Monitoring – The HP cue output can be selected as a source for the main monitor outs via the Monitor Source Select switch, enabling the HP cue bus to be heard in the main monitor speakers.
Cue Count
Apollo Solo USB has one HP cue mix bus. Other Apollo models have up to four separate cue mixes available.
Sends Overview
Apollo Solo USB has four stereo mix buses that are configured and adjusted within Console: Monitor, auxiliary 1, auxiliary 2, and HP cue. Each Apollo Solo USB input has independent level, pan, and mute controls for each of the stereo mix buses. These controls are used to “send” signals into the mix bus.
Stereo Mix Buses
In addition to the main monitor mix, the following stereo mix buses are available:
AUX 1 & AUX 2
The two stereo auxiliary buses are typically used for shared effect processing (to reduce UAD resource usage) for realtime monitoring with time-based effects such as reverb and/or delay. The aux mixes are adjusted via each input's two aux send controls.
By default, the aux sends are post-fader and post-mute. The aux sends can be switched to be pre-fader and pre-mute. The Aux Pre / Aux Post function switch for each aux is located in its respective auxiliary bus return strip.
HP Cue
The HP cue bus is for creating a stereo mix that is different from the main monitor mix. Cues are typically used for performers that want to hear a headphone mix that is different from the main monitor mix, or for routing individual channels or mixes to other equipment.
The HP cue mix is adjusted via the HP send on each input and aux strip. All HP sends are pre-fader and pre-mute so they are not affected by adjustments to the main monitor mix.
Mix Bus Returns
The stereo mix bus returns are used to route the mix to available outputs.
AUX
The auxiliary mixes are routed to the aux return strips. HP sends are available on the aux returns for routing aux effects to the HP cue mix bus.
See Aux Returns for details.
HP Cue
The HP cue mix is heard via the selections in the monitor controls section. To hear the HP cue mix in the headphones, HP must be manually routed to the HP output via the Cue Outputs Popover.
The Monitor outputs can be switched to output the HP cue mix instead of the monitor mix.
Sends Access
The Sends can be accessed and adjusted in the Overview and Sends views.
Note: Sends are not visible in the Inputs and Inserts views.
Overview View
An overview of an input's sends state is shown in each input channel strip, as shown below. Clicking this overview opens the Sends Popover, where the send levels can be adjusted. If the Console window is vertically re-sized tall enough, individual send knobs appear in place of the sends overview.
Tip: If the HP output source is currently assigned to the main monitor mix in the Cue Outputs popover, the HP bus color is gray.

The Sends Display within each input channel strip in Overview view
Sends View
A single send is displayed for all channels simultaneously in Sends View. The displayed send is selected with the SHOW switches in the View column. Sends view offers long-throw faders for finer control resolution.
Tip: To increase the Send control's resolution when in Sends view, increase the vertical size of the Console window and/or deactivate the MIX switch within the View column's SHOW area.
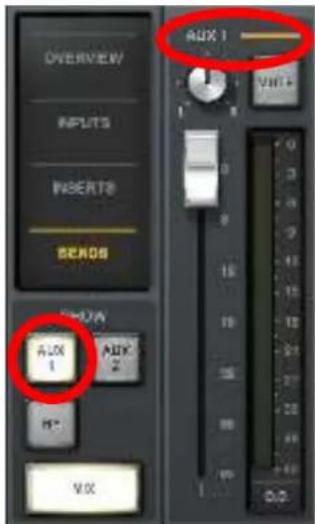
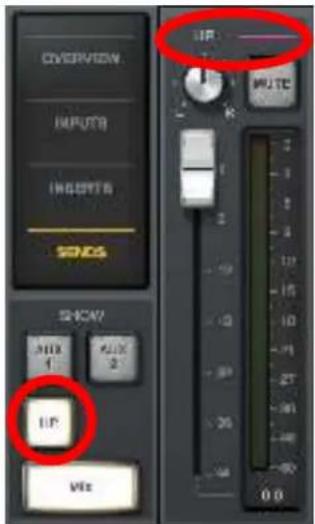
In Sends view, the same send is visible on all inputs. Clicking the available SHOW switches displays the different sends.
Show All Sends Option
All sends can be viewed simultaneously by holding the Windows key on the computer keyboard while clicking any AUX or HP SHOW switch in Sends View.
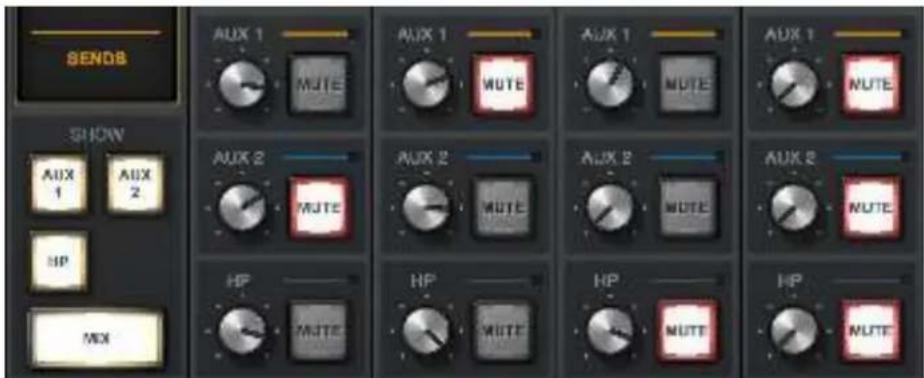
All sends are visible at the same time when an AUX or HP SHOW switch is option-clicked
Console Sessions Overview
The controls within the Sessions Manager popover provide methods for managing complete Console configurations as session preset files. When a Console session file is saved, the current Console configuration is written to disk.
When a session file is subsequently reloaded, Console is returned to the exact same configuration state, regardless of any changes to Console that were made in the interim.
Note: Monitor settings and hardware settings are global parameters that are not saved in Console session files.
For complete details, see Console Sessions.
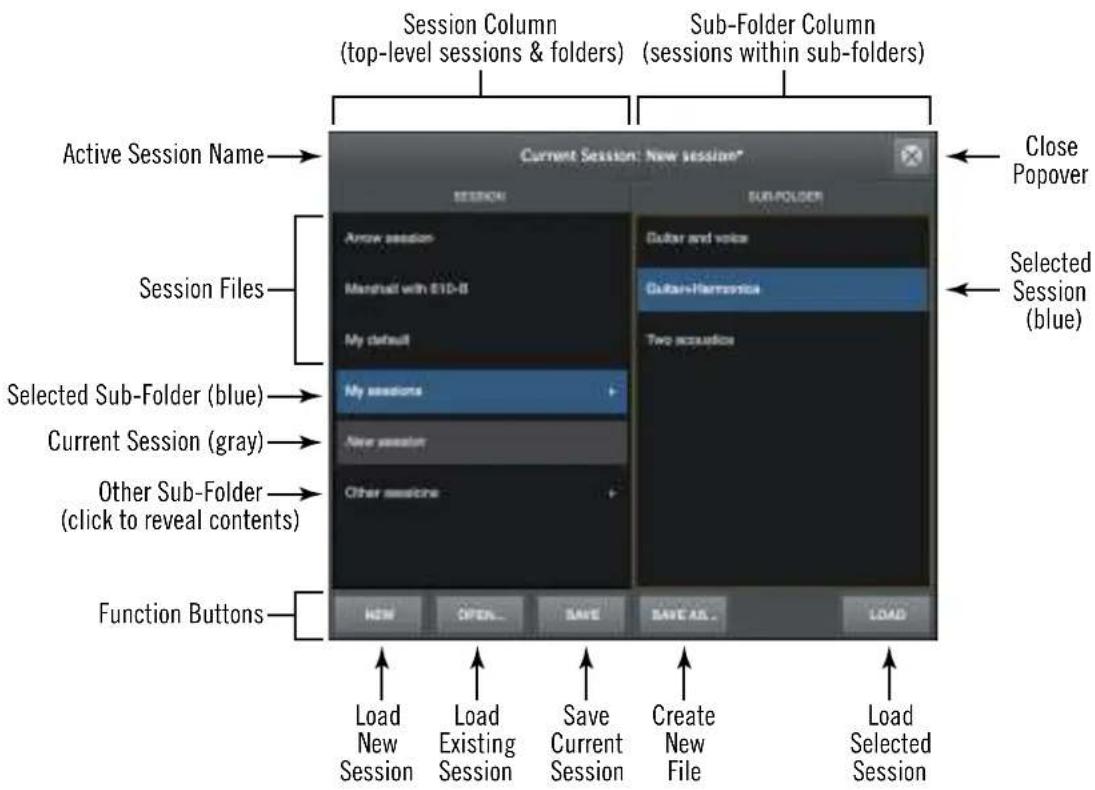
Sessions Manager popover
Console Settings Overview
Global parameters for Apollo Solo USB and Console are configured in the separate Console Settings Window.
Note: For complete details, see Console Sessions.
Console Settings Panels
Controls within the Console Settings window are arranged according to related functions. Each set of related controls are contained within a single panel.
Five panels are available in the Console Settings window:
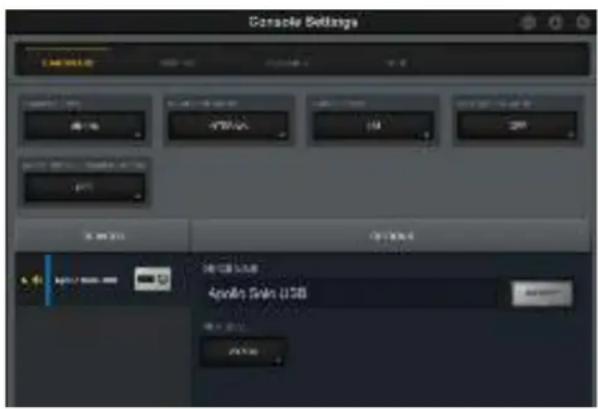
The Hardware panel within the Console Settings window
Hardware – Settings related to Apollo Solo USB hardware device setup
Display – Settings related to how and what items are displayed in Console
Plug-Ins – Settings related to UAD plug-ins used within Console
MIDI – Settings for configuring MIDI control of Tap Tempo within Console
Accessing Console Settings
The Console Settings window can be opened using any of these methods:
- Choose View>Settings from the Application Menus
- Click the SETTINGS button at the bottom of the View Column
- Use the ctrl+comma keyboard shortcut
- Right-click the blue UA diamond logo in the Windows System Tray (at lower right of screen), then choose Console Settings from the contextual menu
Multiple Undo/Redo
Console supports multiple levels of Undo and Redo for all edit operations. Undo and Redo operations can be performed repeatedly to step backwards and forwards through edit operations as long as the current session is open.
- To step backwards and undo (revert) edit operations, choose Undo from the Edit Menu or type command-z.
- To step forwards and re-execute the edit, choose Redo from the Edit Menu or type command-shift-z.
Undo/Redo Cache
Edits are stored in the Undo/Redo cache. Edits within a particular session can be reverted with Undo/Redo until the cache is cleared. Both of these operations will clear the Undo/Redo cache:
- Console is quit
- A different Console session is loaded
Important: Prior Undo/Redo operations cannot be performed after the Undo/Redo cache is cleared.
Keyboard Focus & Control
Many Console functions can be controlled without using a mouse. When elements on the screen have keyboard focus, they can be quickly navigated with the computer's QWERTY keyboard.
Focus Indication
Keyboard focus in Console is indicated by a orange-colored highlight box outlining the screen elements that are targeted for keyboard control.
Focus Navigation
Focus between elements can be changed with the computer's TAB key, or by clicking another area of the screen with the mouse.
Focus Control
Focused items can be selected by using the up/down/left/right Apollo Solo USB keys and/or the Return/Enter keys.
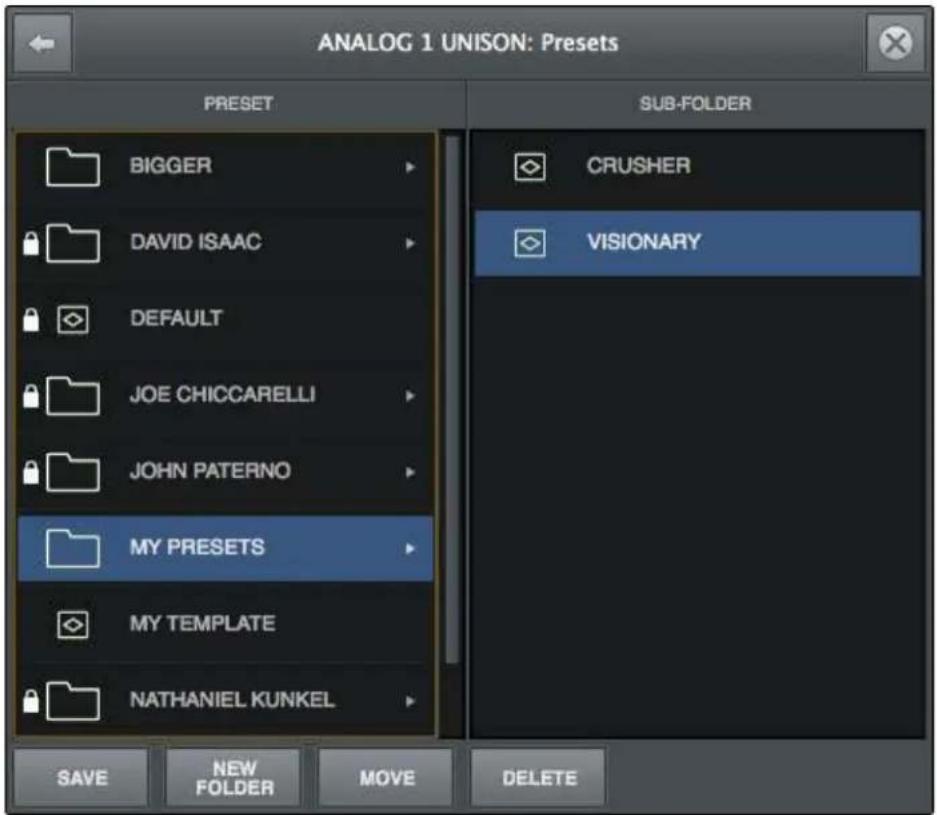
Typical focus indication. The PRESET column on the left has focus (orange outline) and can be navigated with the up/down Apollo Solo USB keys on the keyboard. The tab key alternates focus between the two columns.
Adjusting Console Controls
Console uses typical software control techniques to adjust parameters.
2-state switches: Click to toggle the state.
Knobs: Click+drag to adjust, or use the Controls Shortcuts. Console's rotary controls (and UAD plug-in knobs) can respond to Linear, Circular, or Relative Circular adjustments modes. The CONTROL MODES preference is set in DISPLAY panel within the Console Settings window.
Faders: Click+drag to adjust, or use the Controls Shortcuts.
Drop Menus: Click to view the drop menu contents, then click an item in the drop menu to select the item.
UAD Powered Plug-Ins: Most UAD plug-in controls use the same methods as above. However, some plug-in parameters may have custom controls that are unfamiliar or not obvious. All custom controls are detailed for individual plug-ins in the UAD Plug-Ins Manual.
Controls Shortcuts
In addition to the keyboard shortcuts below, several other shortcuts are available to simplify Console control adjustments.
Fine Control: Continuous controls (knobs and faders) can be adjusted with increased resolution by depressing the SHIFT while adjusting these controls.
Scroll Wheel: Continuous controls (knobs and faders) can be adjusted by using the computer input device's scroll function (e.g., mouse scroll wheel). To modify the parameter value, hover the cursor over the control and adjust the scroll wheel.
Adjust All: If the Windows key is held down while modifying any control, the same control on all inputs (or aux returns) will be adjusted at the same time. The relative difference is maintained between the same controls until any control reaches its minimum or maximum value.
Return To Default: If the Command key is held when a control is clicked, the control will return to its default value. Command+Option+Click will return all controls of the same type to their default value.
Mute/Solo All Toggle: Option-click a Mute or Solo switch to toggle the state on all channels.
Drop Menus: Menus continue to display after a single click. The mouse button does not need to be held down to view the menu.
Keyboard Shortcuts
Console supports the keyboard shortcuts listed in the table below.
| Shortcut Name Keyboard Command Description | ||
| New Session Ctrl+N | Create a new default session | |
| Open Session Ctrl+O | Load an existing session file from disk | |
| Save Session Ctrl+S | Save current session file to disk | |
| Save Session As... Ctrl+Shift+S | Save current session as new file with optional rename | |
| Hide Application Ctrl+H | Hide application from view | |
| Quit Application Ctrl+Q | Quit Console application | |
| Overview Ctrl+1 Switch main view to OVERVIEW | ||
| Inputs Ctrl+2 Switch main view to INPUTS | ||
| Inserts | Ctrl+3 Switch main view to INSERTS | |
| Sends | Ctrl+4 Switch main view to SENDS | |
| Show/Hide Aux Ctrl+A | Show/ | Hide the Auxiliary Returns |
| Show/Hide Inputs | Ctrl+I(the letter i) | Activate Show/Hide Inputs modifiers |
| Focus Navigation | Tab | Cycle through orange-outlined areas that can be focused/controlled/navigated with the Apollo Solo USB keys |
| Show Plug-In Editors | Ctrl+P | Bring all open UAD plug-in windows to foreground |
| Close All Editors | Ctrl+Option+W | Close all open UAD plug-in windows |
| Close Window | Ctrl+W | Close foreground window |
| Element Navigation | Left/Right/Up/Down(arrow keys) | Select focused elements with the arrow keys |
| Cancel Dialog | ESC (escape) | Cancel dialog functions such as Plug-In Assign, Preset Select, Save As, Popovers, etc. |
| Confirm Dialog | Return or Enter | Accept dialog functions such as Plug-In Assign, Preset Select, Save As, etc. |
| Console Settings | Ctrl+, (comma) | Open Console Settings window |
| Undo Edit | Ctrl+z | Revert the last executed function(multiple Undo possible) |
| Redo Edit | Ctrl+Shift+z | Revert the last executed Undo(multiple Redo possible) |
Console Reference
This chapter provides in-depth descriptions of all controls within Console. For a general operational overview, see Console Overview.
Meter Bridge
The Meter Bridge is always visible at the top of the Console window. It displays all visible input channels, signal activity at these inputs, and the Bank Bar, which is used to scroll inputs that are out of horizontal view (if any).
Refer to the diagram below for descriptions in this section.
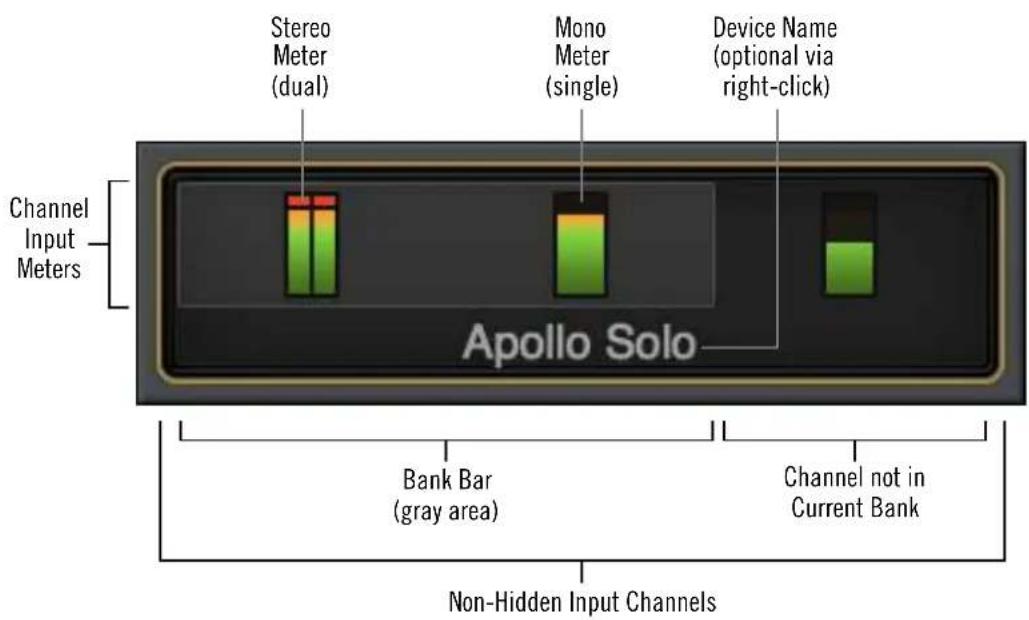
Meter Bridge elements
Input Channels
The Meter Bridge represents all Apollo Solo USB input channels. When an input channel is hidden with the Show/Hide Inputs function, that channel is not displayed in the Meter Bridge.
Channel Meters
Each vertical green meter represents input signal activity in the channel. These small meters mirror the activity of each high-resolution Input Meter that is displayed next to each channel's Input Fader.
Bank Bar
When the Console window does not have enough available horizontal space to display all available input channels, the gray Bank Bar appears within the Meter Bridge.
The Bank Bar “floats” on top of all input channels in the Meter Bridge. The Bank Bar is used to change the channels that are visible within the Current Bank.
Note: The Bank Bar only appears when the Console window is too narrow to display all input channels.
Current Bank
The Current Bank is all input channels that are currently displayed in the main body of the Console window (below the Meter Bridge) as shown in the illustration below. The gray Bank Bar is used to change the Current Bank.
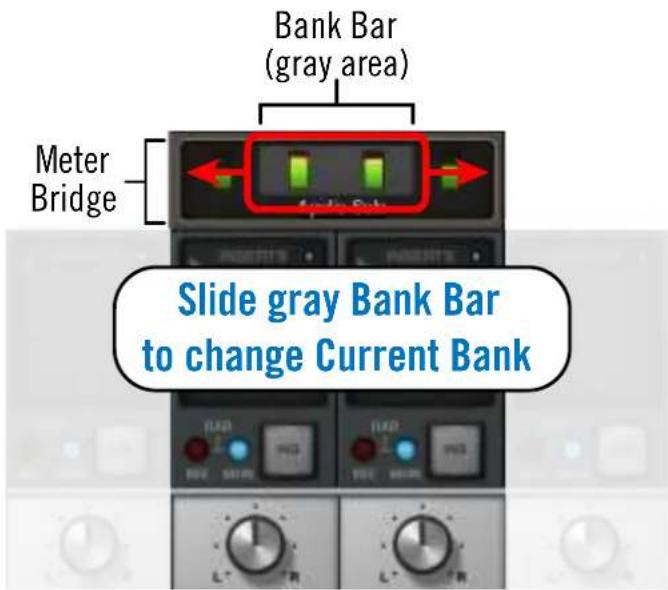
Slide the Bank Bar or use the methods below to bring other inputs into view
Changing the Current Bank
Any of these methods can be used to change the channels within the Current Bank:
Click – Click anywhere within the Meter Bridge, but outside of the Bank Bar. The Bank Bar jumps to the channel that is clicked in the Meter Bridge.
Drag - Click-hold-drag the gray Bank Bar to slide it across available channels.
Hover Scroll – Position the mouse over the Meter Bridge then scroll horizontally with the computer's input device.
Arrow keys – When the Bank Bar has keyboard focus, use the computer's left/right arrow keys to navigate the Current Bank.
Meter Bridge Menu
The Meter Bridge menu provides access to various functions related to the Meter Bridge. To view the menu, right-click or control-click within the Meter Bridge.
Show/Hide Device Names – See Show Device Names.
Show/Hide Offline Devices – By default, devices in the Hardware panel within the Console Settings window that are not currently
connected are displayed in the Meter Bridge. To show/hide offline devices, choose this item from the menu. Show/Hide Offline Devices is available exclusively within this menu.
Identify – See Identify.
Rename – See Device Name.
Note: All functions in the Meter Bridge menu except Show/Hide Offline Devices are available elsewhere within Console.
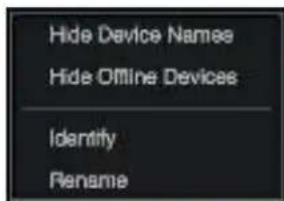
View Column
Note: For an overview of Console's View Columns, see the View Column Overview.
The View Column is always visible at the left side of the Console window. The View Column contains the View Selectors and switches for the View Options (functions) available within each view.
Each View Column also contains several common view elements that are available in every View.
Available Views
Four Views are available in Console: Overview, Inputs, Inserts, and Sends. Each View displays related elements and associated functionality in the main area of the Console window.
Common View Elements
Most display and control elements that appear within the main Console area (see Global Window Elements) in each View are common to all the Views.
The common elements are detailed separately from the View Column descriptions.
View Selectors
Any of these methods can be used to change the current View:
- Click any View Selector in the View Column
- Choose the View from the Application Menus
- Use the keyboard shortcuts: ctrl 1, ctrl 2, ctrl 3, ctrl 4
View Column Options
The View Options activate the various control functions available within each view. The View Options in Overview, Inputs, and Inserts Views are identical; the View Options change when Sends View is active.
View Option functions are performed using latched modifiers. See the Modifiers Overview for details on how to operate the View Option controls. See View Options for descriptions of the individual option functions.
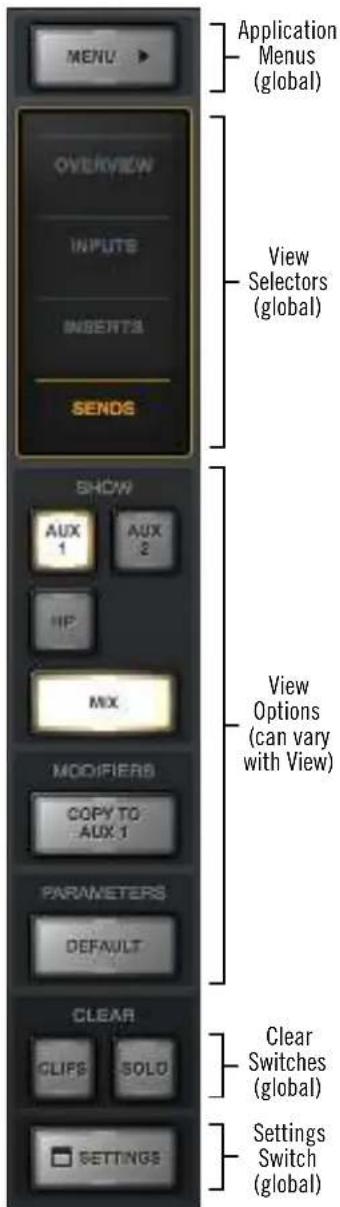
The View Column as it appears in SENDS View
Global View Column Controls
Several controls appear in all View Columns. These controls (detailed below) have identical functionality in all Views.
Menu Switch
The MENU switch is located at the top of the View Column. Clicking the switch reveals the Application Menus, where various Console functions can be accessed.
Default Switch
When Option Latch is active with the parameters DEFAULT switch, clicking any control returns the parameter to its default value.
Note: The DEFAULT function is primarily for knob and fader values. It does not apply to any preamp settings, plug-in inserts, SOLO/MUTE switches, monitor levels, customized input names, and similar functions.
Clear Switches
The CLEAR switches are located near the bottom of all View columns.
CLEAR CLIPS
This switch clears all clip indicators and peak hold indicators on all meters.
Tip: Clip and peak hold indicators can be individually cleared by clicking any individual meter.
CLEAR SOLO
Whenever SOLO is engaged on any channel input, the CLEAR SOLO switch flashes yellow. Clicking the Clear Solo switch deactivates the Solo function of any/all channel inputs.
Tip: Click Clear Solo again to return all channels to their previous Solo states.
Settings Switch
The SETTINGS switch is located at the bottom of all View columns. It opens the Console Settings window, where many global functions are defined. For complete details, see Console Settings.
Modifiers Overview
The View Column Options in each View Column enable various operations to be performed on the items within the View.
View Option operations are performed by selecting an option to latch the function, executing the operation(s) using Modifiers, then exiting the latched function.
Option Latch
When a View Option switch is clicked, the switch flashes yellow, indicating that the function is latched and ready to be executed using the Modifiers.
Option Unlatch
The latched option is unlatched (the switch stops flashing) when:
- Any same or different option switch is clicked
• A different View is selected - No operations are executed during the Modifiers Timeout period
Power option latched
Modifiers Timeout
When an option is latched, it is automatically unlatched (times out) after the Modifiers Timeout period to prevent inadvertent modifications.
Timeout preference
The Modifiers Timeout is a preference set in the Display panel within the Console Settings window. The default Modifiers Timeout period is six seconds/flashes.
Modifiers
Modifiers are icons superimposed on various elements when a View Option is latched. Modifiers are used to execute the operations. The specific modifiers that appear, and where they are located, depend upon the specific option that is latched.
Inserts modifiers are superimposed on insert slots for individual inserts, and the input channel names for plug-in channel strips.
Paste Modifiers
Modifier Swipe Shortcuts
View Options can be executed extremely rapidly across many channels and/or inserts in the Current Bank using the modifiers swipe shortcuts. When a View Option is latched, click+hold the mouse, then drag vertically and/or horizontally across inserts and/or channel input names to perform the function on all locations that are swiped.
Tip: Modifier swipe shortcuts are the fastest way to perform the same function on multiple inserts.
-
Click+Hold Modifier
-
Swipe Across Inserts

Swipe to rapidly perform the latched function on many inserts
View Options
The individual View Column Options are detailed in this section. See the Modifiers Overview for details about how to operate the Modifier controls.
Overview, Inputs, & Inserts View Options
The View Options for the Overview, Inputs, and Inserts Views are identical. Each option is described below.
Note: In the Overview View Column, the Power, Remove, Copy, and Isolate modifiers may not be visible if the Console window size is vertically condensed. To bring all Overview modifiers into view, increase the vertical window size if possible, or select a different View.
Power Modifier
This option toggles an individual plug-in's power state within a single insert. When disabled, the plug-in no longer uses UAD DSP resources.
Click the POWER modifier switch to latch the option, then toggle any plug-in's power state by clicking its modifier, or swipe across multiple modifiers.
Overview, Inputs, & Inserts View modifier switches
Note: This option performs the same function as the Plug-In Power switch in the header within the plug-in editor window.
When POWER is latched, disabled plug-ins are indicated by a gray modifier icon, and active plug-ins have a green modifier icon.

The POWER modifier when latched. Plug-ins are shown powered (left) and disabled (right).
Because this function unloads and loads the plug-in from the DSP, audio artifacts can occur if the power state is changed while audio is being processed by the plug-in.
Tip: To disable individual plug-in processing without audio artifacts, use the power control within the plug-in interface instead, which keeps the plug-in loaded on the DSP.
Remove Modifier
This option deletes the plug-in from the insert slot. When the REMOVE switch is latched, click any insert's modifier to delete the plug-in, or swipe across multiple modifiers.

The REMOVE modifier when latched. Plug-ins are removed by clicking/swiping its modifier.
Note: Because this function unloads the plug-in from the DSP, audio artifacts can occur if a plug-in is removed while audio is being processed by the plug-in.
Copy/Paste Modifier
This option is used to duplicate individual plug-ins or channel strips, and their current settings, from one insert(s) to any other insert(s).
Copy/Paste is a two step process. First the insert or channel strip is copied with the COPY modifier, then the copied data is pasted to the destination insert or channel.
Copy Individual Plug-In
When COPY is latched, click any insert modifier to copy the insert's plug-in.

The insert COPY modifier when latched
Copy Channel Strip
When Copy is latched, click any input name modifier (at the bottom of the input strips) to copy all plug-ins in the channel inserts.
Note: Only channels containing plug-ins will display the copy modifier.

The channel strip COPY modifier when latched
Paste Modifier
After any insert is copied, the COPY switch changes to PASTE. The copied data can be pasted to multiple destinations while the paste option remains latched.
Paste Individual Plug-In
After an insert is copied, click or swipe across one or more destinations while the paste switch is latched.
The PASTE modifiers appear on all inserts after copying an insert
Paste Channel Strip
After a channel strip is copied, click or swipe across any input name modifier to paste the copied channel strip plug-ins into the channel while the paste switch is latched.

The PASTE modifier appears on input names after copying a channel strip
Isolate Modifier
Isolate always retains current channel settings when different Console and LUNA sessions are loaded. Isolated channels are also not controlled by LUNA. Isolate allows you to seamlessly monitor live hardware inputs with Realtime UAD Processing, even when changing Console and LUNA sessions.
Tip: To quickly isolate an individual channel, right-click a channel's input label then choose Isolate from the Input Label Menu.
![-∞ 0.0 ANALOG 1 [ ISOLATE ]](/content/2026/05/807951/images/df180a8c68579008672cd317d753f5f895743641fd4250cdb6af58e570097f20.jpg)
When active, the [ISOLATE] label is displayed below input channel labels
Sends View Options
All View Options within Sends View are described below. See the Sends Overview for related information.
Available Sends
Two SHOW AUX switches and one SHOW HP cue switch are always visible, reflecting Apollo Solo USB's available mix buses that a channel's signal can be routed to using the send controls.
Show Sends
In Sends View, all mix controls for a single send mix bus, and/or the monitor mix bus, are displayed for all Console inputs simultaneously (see screenshots below).
Note: Only one send mix can be displayed at a time (the SHOW SEND switches are mutually exclusive).
The displayed mixes are determined by the state of the send and monitor SHOW switches in the Sends View column. The mix is visible when its switch is engaged (lit).
SHOW MIX switch on – The send's mix controls are displayed above the monitor mix controls (left screenshot).
SHOW MIX switch off – Only the send's mix controls are visible, offering maximum send fader resolution (center screenshot).
SHOW MIX switch on and all SHOW SEND switches off – Only the monitor mix controls are visible, offering maximum monitor fader resolution (right screenshot).
Tip: Sends View offers long-throw faders and meters for finer control resolution. To increase the control resolution of the mix faders in Sends View, increase the vertical size of the Console window.
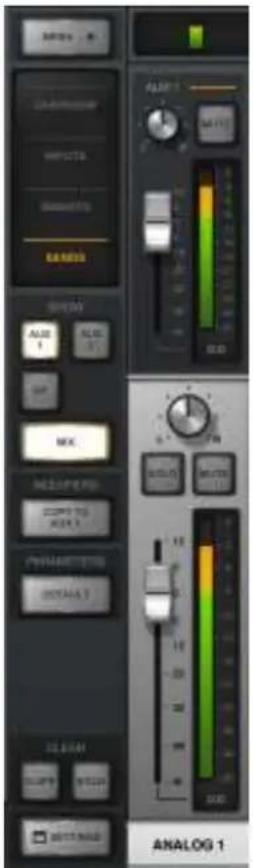
Example screenshots of interaction between the send and monitor SHOW switches. By showing only one type of fader (either Send or Monitor), the faders are taller, offering finer control resolution.
Show All Sends Option
All sends can be viewed simultaneously by holding the Windows key on the computer keyboard while clicking any smaller SHOW switch in Sends View.
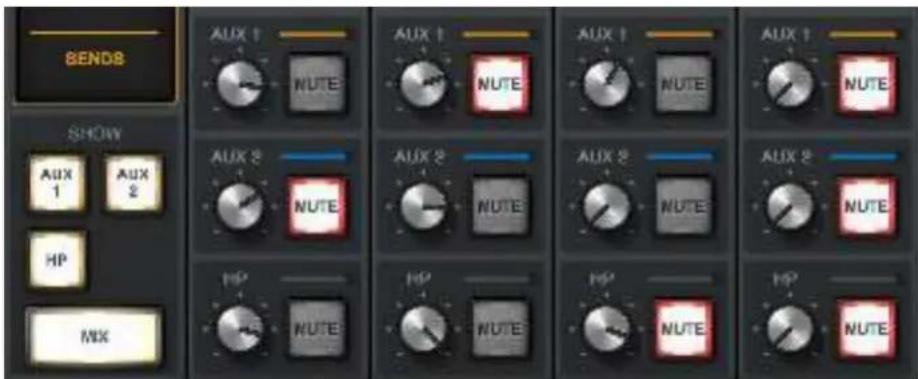
All sends are visible when a SHOW switch is option-clicked
Sends COPY TO Modifier
This switch instantly copies the current monitor mix to the send mix that is currently selected with the Available Sends switches.
Tip: The COPY TO function is typically used when a HP mix that is similar to the monitor mix is needed, but with minor adjustments (e.g., creating a “more me” cue mix).
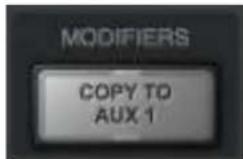
COPY TO modifier
The text label within the COPY TO switch changes to the send mix that is currently selected with the Available Sends switches, indicating the destination of the pasted monitor mix.
Caution: Use the COPY TO function carefully. Depending on the states of the monitor mix and the destination send mix, cue output routings, and the volume setting of monitoring systems (e.g., headphones) attached the cue outputs, this function could cause an extreme increase in volume at the destination outputs.
COPY TO Menu
Right-clicking (or control-clicking) the main (silver) monitor faders presents the COPY TO menu. Selecting a destination performs the same function as the COPY TO modifier described above.
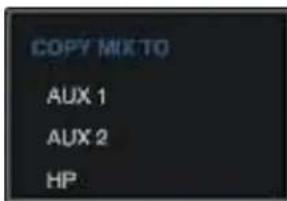
COPY TO menu
Info Bar
The Info Bar is always visible at the bottom of the Console window. It displays and provides access to several important functions.
The Tempo controls are only available in the Info Bar. The Sample Rate and Clock Source controls are also available in the Console Settings window. The UAD Resource Gauges have no controls; they are visual indicators only.
Refer to the diagram below for descriptions in this section.
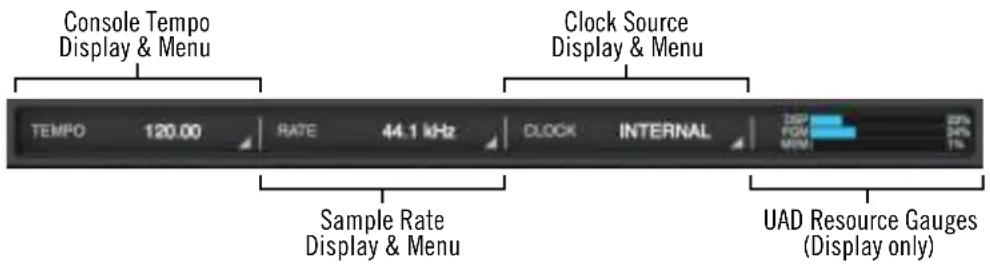
The Info Bar
Offline Hardware Display
If the Apollo Solo USB hardware is not properly connected or recognized, the sample rate and clock source will display OFFLINE as shown below.

Sample Rate and Clock show OFFLINE when Apollo Solo USB is not detected
Tempo Display
This area displays the Console tempo in beats per minute (BPM). Clicking the tempo display opens the Tempo popover, where a new tempo can be typed or tapped.
About Console Tempo
Console Tempo is used for time-based UAD plug-ins (such as delay and modulation) within Console that are set to use Tempo Sync. Console Tempo can be modified by typing a text value, tapping a tempo, or via MIDI.
Note: Console does not receive tempo information from the DAW.
The tempo value is saved within Console session files, and also within DAW files when the Console Recall plug-in is used within the DAW.
For details about how to use the feature with UAD plug-ins, see the Tempo Sync chapter.
Tempo Popover
To display the Tempo popover, click anywhere in the Tempo Display within the Info Bar.
The available tempo range is from 1.00 BPM to 999.00 BPM. The default tempo of a new session is 120 BPM.
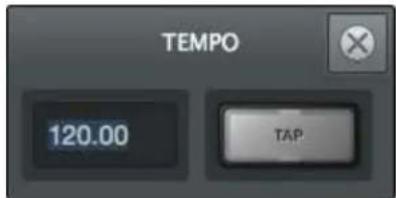
Adjusting Tempo
Text Entry
- Open the Tempo window by clicking the Tempo Display in the Info Bar
- Click the tempo text field, then type a numeric tempo value
- Press Return or Enter, or click the close button with the mouse
Tip: To leave the tempo unchanged after entering an (unwanted) value in the Tempo window, press the ESC key or close the popover with the mouse.
Tap Tempo
- Open the Tempo window by clicking the Tempo Display in the Info Bar
- With the mouse, click the TAP button at least four times to establish the tempo
- Press Return or Enter, or click the close button with the mouse
Changing tempo via MIDI
Tap tempo can be used to set a new tempo from incoming MIDI data. This method requires any external MIDI hardware and/or MIDI software that is recognized by the OS.
Note: MIDI drivers for the MIDI device may need to be installed and/or configured.
About external MIDI tap tempo control
- The MIDI device must be properly configured before it can be used by Console.
- MIDI note values or MIDI controller values can be used as the data source.
- Console cannot synchronize the tempo to incoming MIDI beat clock.
MIDI configuration/setup
- Verify the MIDI output device or MIDI software is properly configured and active.
- In the MIDI panel within the Console Settings window, set the values for DEVICE, TAP TEMPO CHANNEL, and TAP TEMPO EVENT to match the transmitted MIDI data.
- Transmit the MIDI note or controller (as specified in the previous step) at least four times to establish the tempo. The Tempo Display is RED during this period.
- After a new tempo value is established, the new tempo is used and the Tempo Display changes back to BLACK. Simply retransmit the MIDI data to apply further tempo updates.
Sample Rate Display
This area displays the current sample rate used for Apollo Solo USB's A/D-D/A conversion and UAD Powered Plug-Ins processing. When using UAD Powered Plug-Ins, higher sample rates require more UAD DSP resources.
Sample Rate Menu
Clicking the Sample Rate Display presents the Sample Rate Menu, where the current sample rate can be changed.
Important: When a DAW is used with Apollo Solo USB, the sample rate is typically changed within the DAW's settings. If the sample rate is changed to a different value within Console when a DAW is active, digital artifacts could occur due to a sample rate mismatch.
Hardware Clicks
When the sample rate is changed, hardware relays that mute the outputs are temporarily engaged to prevent audio artifacts. This action causes an acoustic clicking sound that can be heard within the hardware. These clicks are by design and can be safely ignored.
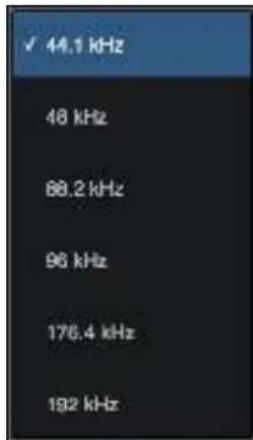
Clock Display
The Clock Display is used to select an external clock source when a Universal Audio Apollo audio interface is connected to the system.
Because Apollo Solo USB does not have digital connections for external clocking, the Clock Display always displays INTERNAL or OFFLINE when an Apollo is not connected.
UAD Resource Display
UAD plug-in loads are shown in the Resource Display at the far right of the Info Bar. These three gauges (DSP, PGM, and MEM) provide important visual feedback in realtime, by helping to determine which plug-ins to load if available UAD resources are limited.
The UAD resources are displayed as blue bar graphs and as percentages. These gauges have no controls; they are visual indicators only.
The UAD Resource Display mirrors the meters within the UAD Meter & Control Panel application. For detailed descriptions of all display elements, see UAD Resource Display in the UAD Meter & Control Panel chapter.
Channel Input Controls
Note: For related information, see the Channel Strips Overview.
Preamp Controls
Console's preamp controls correspond to the equivalent preamp controls on Apollo Solo USB's top panel. Adjusting Apollo Solo USB's top panel will update Console (and vice versa); see Interactions Between Console and Apollo Solo USBo Solo USB for details.
Unison Controls

Some preamp hardware controls (Gain, Low Cut, 48V, Pad, Polarity) are Unison parameters that interact with Unison plug-ins placed in the Unison insert slot.
Unison preamp controls in this section are indicated by the Unison icon at the left of above paragraph. See Unison for complete details.
Refer to the illustrations below for element descriptions in this section.
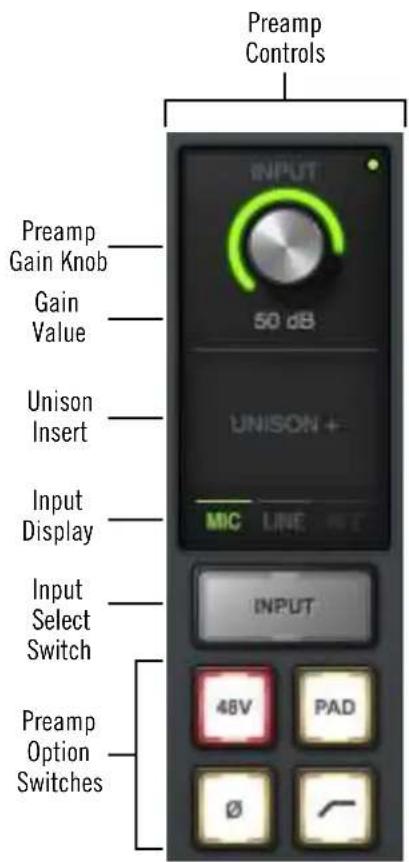
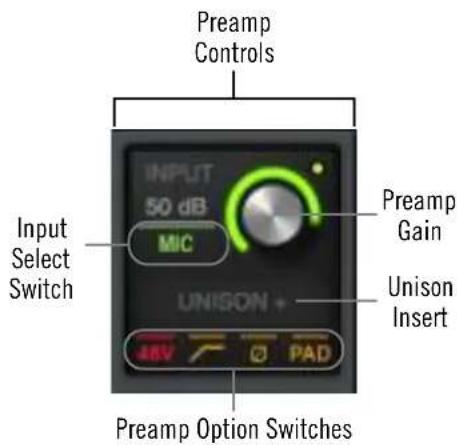
Console's preamp controls as they appear in vertically expanded (left) and condensed (above) views. Both views access and display the same functions.
Preamp Gain
The channel's preamp gain is adjusted with this knob. The input to be adjusted (Mic, Line, or Hi-Z) is determined by the state of the channel's Mic/Line switch or the Hi-Z input (if connected).
Rotating the knob clockwise increases preamp gain for the channel. The available gain range for all preamp channels is 10 dB to 65 dB for the Mic, Line, and Hi-Z inputs.
Gain Value
The specific amount of preamp gain in decibels is displayed in gray text near the gain control. The relative amount of preamp gain is indicated by the green LED ring surrounding the gain control in Console and the knob on Apollo Solo USB's top panel. The LED ring is a different color when Unison is active in the channel.
Front Panel Channel Selection Indicator Dot
Apollo Solo USB's channel selection can be changed using the top panel hardware controls. The small colored dot that appears next to the gain control (as shown at right, outlined in red) indicates the preamp channel that is currently selected with Apollo Solo USB's top panel.
Tip: The indicator dot in Console changes channels when the channel selection is changed with Apollo Solo USB's top panel knob.
Unison Insert

Unison is an exclusive analog/digital integration technology that's built into every Apollo microphone preamplifier. The preamp controls in Console (and the hardware unit) interact extensively with Unison plug-in parameters.
To add a Unison plug-in to the preamp channel, click the dedicated Unison insert slot located below the Gain control. See Unison for complete details.
Input Select
This switch switches between the mic and line inputs on Apollo Solo USB's rear panel. Click the Input Select switch or Input Select display to change the input type. The currently selected input type is highlighted. To switch the input type in condensed views, click the currently displayed input type (as shown at right, outlined in red).
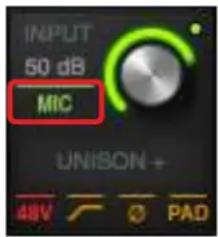
Note: Input Select has no effect if the Hi-Z input is connected, because preamp channels are automatically switched to the Hi-Z input when a 14 " mono (tip-sleeve only) cable is connected to Apollo Solo USB's front panel Hi-Z input jack.
Low Cut Filter

When enabled, the channel's input signal passes through a low cut (high pass) filter. This 2nd-order coincident-pole filter has a cutoff frequency of 75Hz with a slope of 12dB per octave by default (the filter can change when Unison is active in the channel).
The Low Cut filter effects the Mic, Line, and Hi-Z inputs. Low Cut is typically used to eliminate rumble and other unwanted low frequencies from the input signal.
48V

When enabled, the 48V switch is red and 48 volts of phantom power is supplied to the Apollo Solo USB channel's rear panel Mic input. Most modern condenser microphones require 48V phantom power to operate. This option can only be activated when the Mic/Line switch is set to Mic.
Caution: Activate 48V only with compatible equipment such as phantom powered microphones. Incompatible equipment can be damaged by the applied voltage.
Depending on the current configuration of Apollo Solo USB and Console, there may be a delay when changing the 48V state to minimize the clicks/pops that are inherent when engaging phantom power. The +48V LED on Apollo Solo USB's top panel flashes during any delay.
Pad

When enabled, the PAD switch is yellow and the channel's microphone input signal level is attenuated by 20 dB. Pad does not effect the Line or Hi-Z inputs.
Pad is used to reduce signal levels when overload distortion is present at low preamp gain levels, such as when particularly sensitive microphones are used on loud instruments, and/or if the A/D converter is clipping.
Tip: Activate PAD when the input is clipping but preamp gain is at minimum.
Alternately, reduce the output level (if available) of the device connected to Apollo Solo USB's input.
Polarity

When enabled, the polarity (aka “phase”) switch is yellow and the input channel’s signal is inverted. Polarity affects the Mic, Line, and Hi-Z inputs.
Tip: Polarity inversion can help reduce phase cancellations when more than one microphone is used to record a single source.
Console Plug-In Insert Controls
All Console plug-in insert slots operate the same way. For complete details on all insert functionality and operations, see Console Plug-In Inserts.
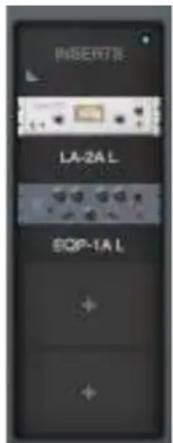
Console's plug-in inserts
Sends Popover
The Sends popover window is where all available sends for an individual channel can be adjusted. To access the Sends window, click the Sends display when Overview is active. See the Sends Overview for related information.
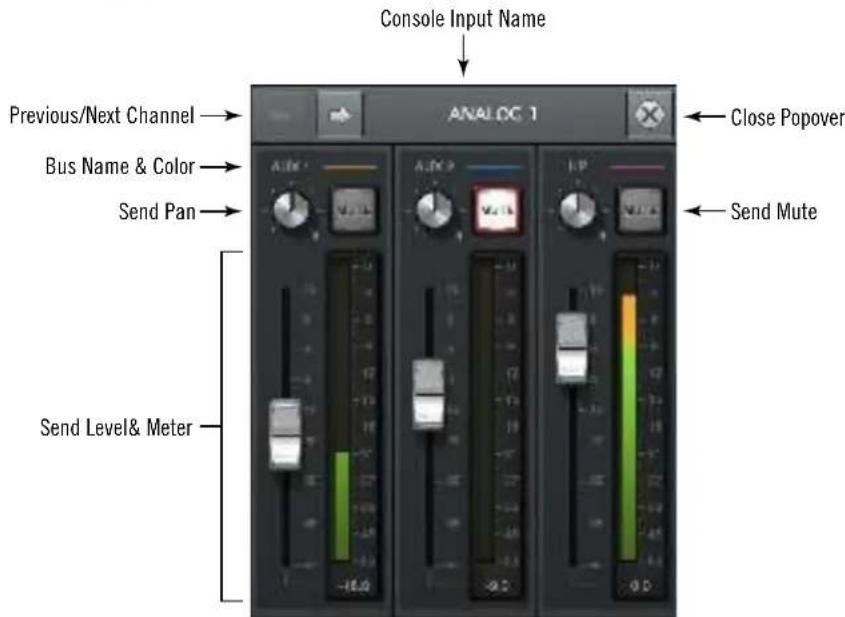
Sends popover
Sends Popover Window Descriptions
Input Name – The name of the Apollo Solo USB input is displayed as the window's title. If the input label is customized in Console, the custom name is displayed here.
Previous/Next Channel – These buttons switch the window to display the sends of adjacent channels. The “Command/Ctrl+Left/Right Arrow” keyboard shortcut can also be used to navigate channels.
Tip: To prevent the window from moving when these buttons are used, drag the Sends window to any location other than its default position.
Bus Name & Color – The bus name and its color are displayed above each send.
Tip: If the HP bus color is gray, the HP cue's SOURCE is set to MIX in the CUE OUTPUTS popover.
Send Pan – Adjusts the input's position in the stereo field of the send bus. The pan knobs are not displayed when the input is in stereo linked mode, which forces the stereo channels to automatically pan hard left/right.
Send Mute – The Mute button can be used to disable/re-enable the bus send. When the send is active, the button is lit.
Send Level – This fader adjusts the input channel's signal level sent to the bus.
Send Meter – The post-fader signal level of the Send is displayed here.
Monitor Mix Controls
The monitor mix controls within the input channel strips are for adjusting the signals at Apollo Solo USB's monitor outputs.
Note: Refer to the illustration at right for descriptions in this section.
Input Pan
This control adjusts the input's position in the stereo panorama of the monitor mix bus.
Stereo Input Pan
When an input is stereo linked, two pan knobs appear for the channel, enabling independent panning for both the left and right channels. When stereo link is activated, the default position of the dual pan knobs are hard left/right.
Pan with channels unlinked (left) and linked (right)
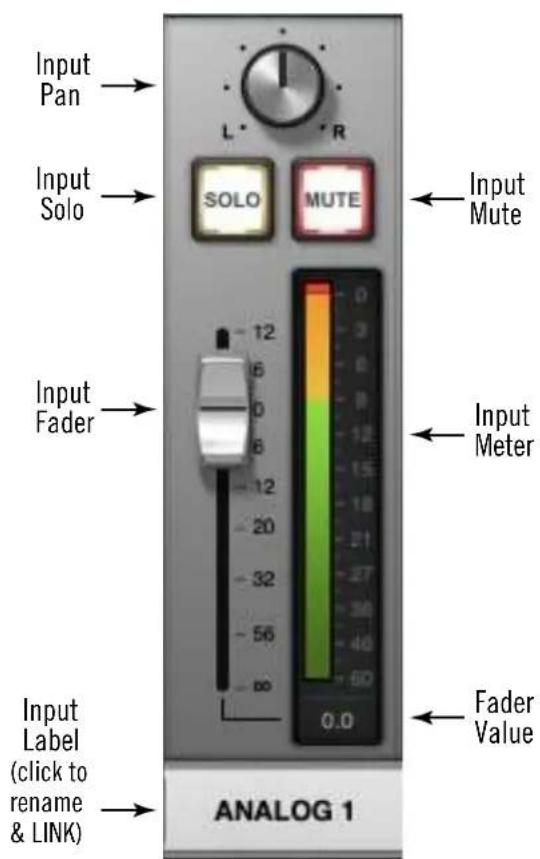
Monitor Mix Controls
Input Solo
Solo mutes all input signals, except for any inputs in solo mode. Solo is used to hear individual channels in the monitor mix without having to modify other channels.
Note: Input solo does not affect the channel's HP cue send, which is pre-fader.
Click the switch to toggle the solo state. The channel is in solo mode when its solo switch is highlighted in yellow. Note that activating mute has no effect if the channel is in solo mode.
Tip: Option-click the solo button to toggle solo on all input channels.
Inactive solo and mute switches
Input Mute
Mute prevents the input channel's signal from being routed to the monitor mix bus (and aux buses that are in POST mode), but not the HP cue mix bus.
Click the button to toggle the mute state. The channel is muted when its mute switch is highlighted in red.
Tip: Option-click the mute button to toggle mute on all input channels.
The input meter is still active when the channel is muted for a visual reference that there is still a signal coming into the channel, even though it isn't heard in the monitor mix.
Note: Input mute does not affect the channel's HP cue send, which is pre-fader. The cue send has its own mute switch.
If Solo is activated on the same channel when muted, the mute state is overridden and the channel is heard in the monitor mix.
Input Fader
This is the channel's main signal level control for the monitor mix. Changes to this control are reflected in the channel's level meter.
The input fader adjusts the channel's level in the monitor mix bus (the monitor outputs) and the aux mix buses (when set to POST mode), but not the cue mix buses.
Fader Scale
The numerical labels next to the fader represent the amount of gain or attenuation applied by the fader. Up to 12 dB of gain above 0 dB is available. A value of 0 dB of represents unity gain (no gain or attenuation).
Fader Value
The input fader's current setting is displayed beneath the input meter.
Copy Mix
All channel fader and pan values for all inputs (the entire monitor mix) can be copied simultaneously to any send mix bus.
To copy the monitor mix to a send mix bus, right-click (or Ctrl-click) any channel fader to display the copy mix menu, then select a destination bus for the mix.
Tip: This is the same function as the Sends COPY TO Modifier within the Sends View column.
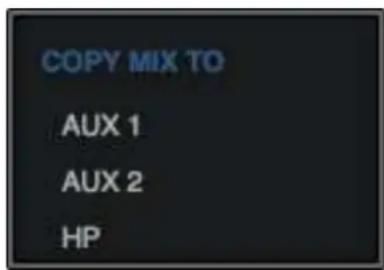
Copy Mix menu
Input Meter
The input meter always displays the signal level of the channel after UAD plug-in processing in the inserts. Depending on the state of the METERING option in the Display panel within the Console Settings window, (either pre-fader or post-fader), this meter will display the level going into the monitor mix bus (post-fader/post-inserts), or the level at the channel's hardware input (pre-fader/post inserts).
Tip: When recording into a DAW, it's usually best to keep metering set to PRE-FADER so the meters accurately represent the signal level at the DAW inputs when recording.
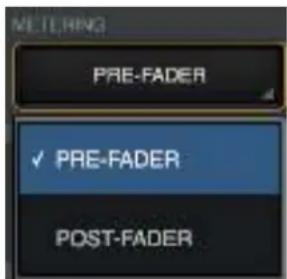
Pre/Post metering preference
Input Level Scale
The numerical labels next to the LED meters represent digital signal levels. "O" represents 0 dBFS (digital full scale, the maximum level before undesirable A/D clipping). If the level at the Apollo Solo USB input exceeds 0 dBFS, the meter's clip indicator illuminates.
Important: If clipping occurs, reduce the preamp gain, the output level of the device feeding the input, and/or the output gain(s) of UAD plug-in processing in the inserts to eliminate undesirable A/D clipping distortion.
Peak Hold
The input meters also have a peak hold feature, which holds signal peak values for a specified period of time. The clip and peak hold times can be adjusted in the Display panel within the Console Settings window.
Rename/Link Popover
The Rename/Link popover window is used for customizing input labels and stereo linking adjacent channels.
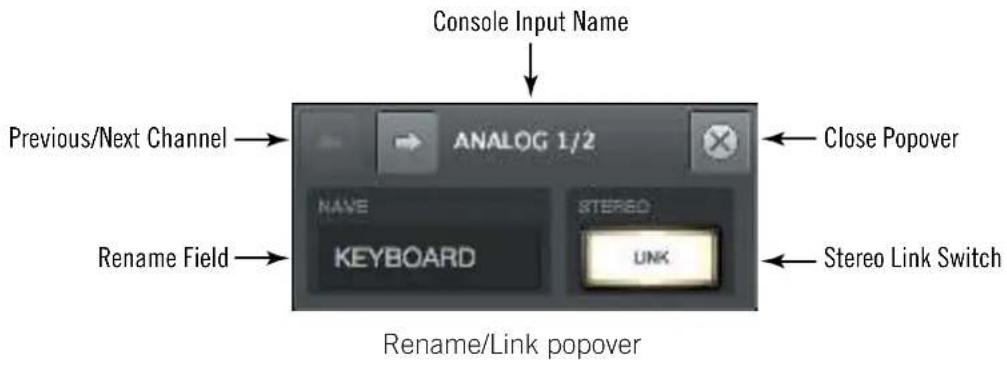
Input Label
By default, the name of the Apollo Solo USB hardware input is displayed beneath the channel's fader and meter. The input labels can be customized for convenient input identification.

Input labels showing customized input names
Input Label Menu
The Input Label Menu contains the same functions as the Rename/Link window, plus the ability to hide the input from view and Isolate the channel. To display the Input Label Menu, right-click any Input Label.
Tip: To re-show an input hidden via this menu, use the Show/Hide Inputs function.
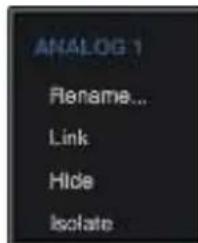
To customize a channel input name:
- Click an input label or choose "Rename" from the Input Label Menu. The Rename/Link popover window appears.
- Type a custom name for the input.
- Press Return/Enter or click the close button.
To return to the default name:
- Click an input label or choose "Rename" from the Input Label Menu. The Rename/Link popover window appears.
- Press the Delete key to remove the customized text from the NAME field.
- Press Return/Enter or click the close button.
Input label Notes
- To identify the hardware input when an input name is customized, click the input label. The hardware input name appears at the top of the Rename/Link popover.
- Input labels are stored in Console session files and the Console Recall plug-in.
- Auxiliary return labels cannot be customized.
- Custom input labels are visible within Console only.
- Input labels are not displayed within a DAW.
Show/Hide Inputs
Console can hide any input channel strip from view. This feature reduces the need for horizontal scrolling when the Console window is narrow (when all visible channels don't fit) and/or reduces visual distractions when there is no need to see a particular input.
How To Use Show/Hide Inputs
- Either choose "Show/Hide Inputs" from the View Menu, use the keyboard shortcut (Ctrl+I), or right-click (control-click) the Input Label Menu. Modifier icons appear on all Input Labels.

- Click or swipe across the Input Labels. The modifier toggles between green and gray. The input will be shown when its modifier is green, and hidden when gray.

- Click the DONE switch in the View Column or use the keyboard shortcut (Ctrl+I). The inputs with gray modifiers are hidden. To bring hidden inputs back into view, repeat the procedure.
Show/Hide Input Notes:
- A minimum of one input channel must be shown.
- All input channels remain active even if they are hidden from view.
• The Show Aux Returns switch is available to show/hide the aux return strips.
• Show/Hide status is stored in Console session files and the Console Recall plug-in.
Stereo Link
Adjacent channels (analog 1+2, virtual 1+2) can be linked to create a stereo input pair. When linked as a stereo pair, any control adjustments will affect both channels of the stereo signal identically.
Note: Only the same type of inputs can be linked (Mic+Mic or Line+Line), and the Hi-Z inputs cannot be linked.
Activation
Stereo pairs are created by activating LINK within the Rename/Link Popover. LINK performs the exact same function pressing the LINK button on Apollo Solo USB's top panel when the hardware is in PREAMP mode.
Tip: Option-click the LINK button to stereo link all channels.
When Link is activated:
• The LINK switch is lit instead of gray
- One set of controls is available for the stereo channel (except pan, as noted below)
- All current control settings of the left channel are copied to the right channel (except pan, as noted below)
- All inserted plug-ins in the left channel are converted to stereo (parameter values are retained)
- Pan changes to dual (left/right) pan
- The send pan knobs are hidden (pans are forced to hard left/right with stereo sends)
- The input level meter changes to a stereo meter
- Custom input labels revert to default input labels
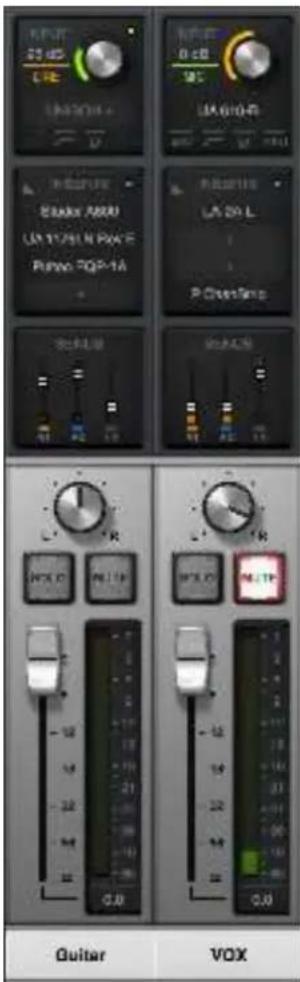

Before and after engaging LINK
Deactivation
A stereo pair is separated back into individual channels by clicking the LINK switch when it is active (the LINK switch is gray when deactivated). When LINK is deactivated, all current control settings and inserted plug-ins for the stereo channel remain on the first channel (except pan, which is centered) and the second channel reverts to a default state.
Link Constraints
- Only the same input jacks can be linked (for example, a Mic input cannot be linked to a Line input).
• The Hi-Z inputs cannot be linked.
Aux Returns
Aux Overview
Console has two stereo aux (auxiliary) mix buses. Signals are sent to the aux buses via the aux sends in Console's channel input strips. Console's aux returns are used to control and process the signals that are received from those sends.
The controls in Console's aux return strips are similar to the channel input strips, but instead of controlling a channel input, they control the output of the aux mix bus. Both stereo aux returns have four plug-in inserts for Realtime UAD Processing.
The aux sends can be post-fader and post-mute (input channel faders must be raised and un-muted to be routed to the aux bus, and the send levels will reflect channel fader changes), or pre-fader and pre-mute (input channel faders and mutes do not affect the aux bus).
The aux buses in Console are designed primarily for send/return processing using UAD plug-ins. Using aux buses for effects is a great way to conserve UAD resources. For example, by using an aux for reverb processing, only one reverb plug-in is needed on the aux return instead of putting a reverb plug-in on each individual input channel.
Show Aux Returns
By default, the aux returns are not visible. To show the aux returns, enable the AUX switch in the SHOW section of the monitor column.
The Show Aux switch in the monitor column
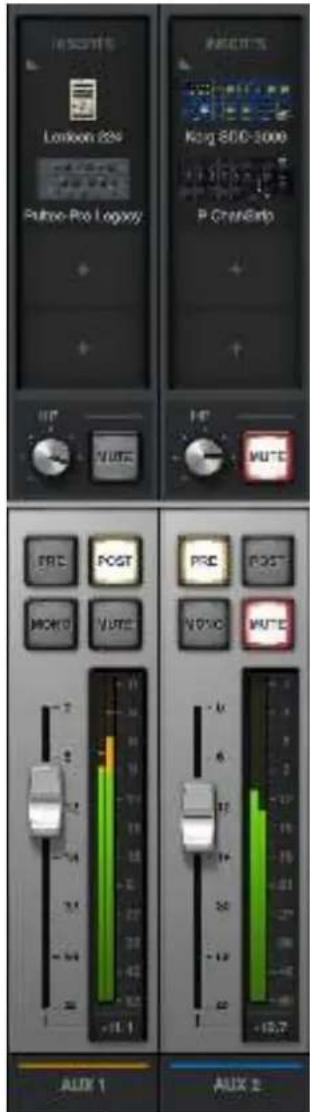
Aux returns
Aux Notes
- Aux 2 is unavailable at sample rates of 176.4 kHz and 192 kHz.
- The outputs of the aux buses have 69 samples of additional latency compared to the monitor outputs. This is necessary to maintain the lowest possible latency for the dry signals.
Aux Return Strips
Both of Console's aux return strips are identical. Most of the controls have identical functionality as their equivalent control in the channel input strips.
Refer to the diagram at right for descriptions in this section.
Aux Inserts
The aux inserts are operated using the same methods as the insert controls in the channel input strips. See Console Plug-In Inserts for complete descriptions of the aux insert controls.
Important: UAD plug-in processing in the aux inserts is always routed to the DAW (if the aux buses are routed as DAW inputs), regardless of the Insert Effects setting (aux insert processing is always recorded).
Aux HP Cue Send
The aux returns can be routed to the HP cue mix bus using the cue sends on the aux returns. There is no cue pan control on the aux returns, because the aux returns are stereo.
To send an aux signal to the HP cue mix bus, increase the HP knob in the aux return.
Note: When the HP Cue Source is set to HP in the CUE OUTPUTS popover, the aux return must be sent to the HP cue mix bus via this control for the aux to be heard in the cue mix.
Aux Pre
When the PRE switch is engaged (lit), the aux mix bus is pre-fader and pre-mute. In PRE mode, the input channel faders and mutes do not affect the aux bus.
Tip: Pre-fader mode is useful for configuring a mix bus that is independent of the monitor mix controls (for example, when creating a HP cue mix).
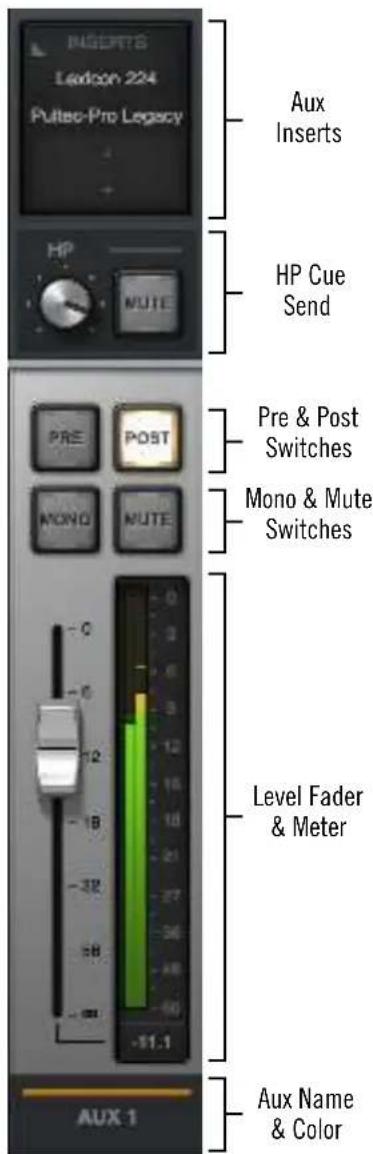
Aux Return Strip
Aux Post
Post-fader is the default setting for Aux 1 and Aux 2. When the POST switch is engaged (lit), the aux mix bus is post-fader and post-mute. In POST mode, the channel faders must be up and un-muted to be routed to the aux bus, and the aux send levels will reflect channel fader changes.
Tip: Post-fader mode is typically used when configuring an effect send mix so the effect sends will interact with the main channel controls.
Aux Mono
This switch sums the left and right channels of the stereo aux mix bus output into a monophonic signal. The aux return output is stereo when the button is gray and mono when the button is lit.
Aux Mute
The aux mute switch stops the aux return's signal from being routed to the monitor mix. The aux return output is active when the button is gray and muted when the button is lit.
Note: Aux mute does not mute the aux's HP cue send.
Aux Fader
This is the master signal level control for the aux bus return to the main monitor mix. It does not affect the aux bus return's cue send. Up to 12 dB of gain above 0 dB is available.
Aux Meter
The input meter always displays the signal level of the aux return after UAD plug-in processing in the aux inserts. Depending on the state of the METERING option in the Display panel within the Console Settings window (either pre-fader or post-fader), this meter will display the level going into the monitor mix bus (post-fader/post-inserts), or the level of the aux mix bus (pre-fader/post inserts).
Tip: When recording into a DAW, it's usually best to keep metering set to PRE-FADER so the meters accurately represent the signal level at the DAW inputs when recording.
Input Level Scale
The numerical labels next to the LED meters represent digital signal levels. "0" represents 0 dBFS (digital full scale, the maximum level before undesirable A/D clipping). If the level at the aux bus exceeds 0 dBFS, the meter's clip indicator illuminates.
Important: If clipping occurs, reduce the aux send levels from the input channels and/or the output gain(s) of UAD plug-in processing in the aux inserts.
Peak Hold
The aux meters also have a peak hold feature, which holds signal peak values for a specified period of time. The clip and peak hold times can be adjusted in the Display panel within the Console Settings window.
Monitor Column
The Monitor Column is always visible at the right side of the Console window. The Monitor Column contains elements related to monitor outputs, cue outputs, insert effect printing, and session file management.
Refer to the illustration at right for descriptions in this section.
Note: Settings in the Monitor Column are global functions. They are not saved with individual Console sessions files.
Monitor Meters
These meters display the levels of Apollo Solo USB's monitor mix bus. Levels displayed here mirror the state of the Monitor 1 – 2 LED meters on Apollo Solo USB's top panel.
These meters are before the monitor output level control (pre-fader) and reflect the level of the D/A converters at the monitor outputs.
Important: If clipping occurs, reduce levels feeding the monitor bus by lowering the channel faders and/or output gain(s) of UAD plug-ins within Console to eliminate undesirable D/A clipping distortion.
Meter Source
When the monitor output signals are changed with the Monitor Output Options, the levels displayed by the monitor meters reflect the changed monitor outputs source signal.
Monitor Level Scale
The numerical labels represent digital signal levels. "O" represents 0 dBFS (digital full scale, the maximum level before undesirable D/A clipping). If the level of the monitor bus exceeds 0 dBFS, the meter's clip indicator(s) illuminates.
Peak Hold
The monitor meters have a peak hold feature, which holds signal peak values for a specified period of time. The clip and peak hold times can be adjusted in the Display panel within the Console Settings window.
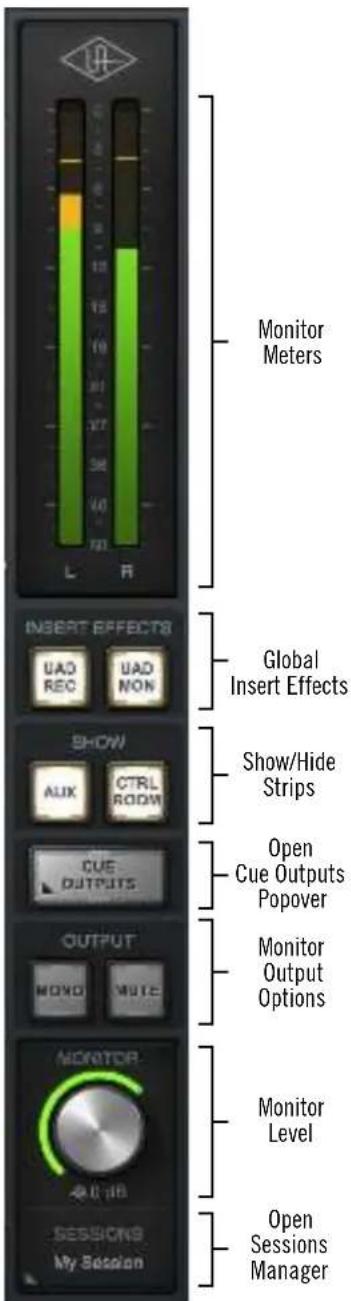
Monitor Column
Global Insert Effects
These buttons globally switch all Console inserts to either pass all UAD insert effect processing to the DAW (print wet) or not (monitor wet but print dry). See the Insert Effects Overview additional details.
Insert Effects can also be individually switched on a per-channel basis (see Channel Insert Effects). The Global Insert Effects switches override all the individual Channel Insert Effects settings.
Important: UAD plug-in processing in Console's Unison and auxiliary inserts is always routed to the DAW (when recording the AUX channels), regardless of the current Insert Effects setting (Unison and aux insert processing is always recorded).
UAD REC (print all wet)
When this switch is lit RED and the UAD MON switch is off, all insert effects on all channels are routed to the DAW.
UAD MON (print all dry)
When this switch is lit BLUE and the UAD REC switch is off, no insert effects on any input channels are routed to the DAW (except Unison and aux processing, which is always recorded).
Both UAD REC and UAD MON (print wet and dry)
When both switches are lit YELLOW, some individual channels are recorded with insert processing and some are recorded dry, as determined by the Channel Insert Effects switches. Clicking one of the global insert effects switches will override the individual channel insert effects settings.
Show Strips
These switches show and hide the visibility of the auxiliary return strips and/or the control room options strip. By default, these strips are not visible. The strips are visible when its SHOW switch is lit.
The SHOW switches off (left) and on (right)
Cue Outputs Menu
Clicking this switch opens the CUE OUTPUTS popover where the headphone output source (either the MON mix or the HP mix) is selected.
For complete details, see Cue Outputs Popover.
Monitor Output Options
The Mono and Mute options are controlled with the switches in the OUTPUT section.
Monitor Mono
This switch sums the left and right channels of the stereo monitor mix into a monophonic signal. The monitor output is stereo when the button is gray and mono when the button is lit.
Monitor Mute
This switch mutes Apollo Solo USB's monitor outputs. The monitor outputs are muted when the switch is lit. This switch performs the same function as pressing the MONITOR knob on Apollo Solo USB's top panel. The Monitor Level Indicator (the ring around the level knob) is red when the monitor outputs are muted.
Monitor Level
This is the master level control for Apollo Solo USB's monitor outputs. It performs the same function as the MONITOR hardware knob on Apollo Solo USB's top panel.
Note: When the ring around the knob is RED, the monitor outputs are muted.
Monitor Level Value
The specific monitor output attenuation value in dB is displayed beneath the Monitor Level control. The relative monitor output level is indicated by the colored ring around the Level control (as with the MONITOR knob's LED ring on Apollo Solo USB's top panel).
Monitor Level Indicator
In addition to indicating the relative signal level of the monitor outputs, the state of other functions is indicated by the color of the ring around the monitor level control:
Green – The main monitor outputs are active with variable level control (normal)
Red - The main monitor outputs are muted
Blinking – The monitor DIM and/or MONO functions are active
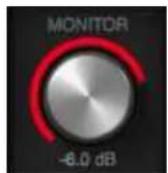
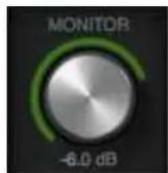
Monitor level indications (from left to right): Normal, Mute, and DIM/MONO
Monitor Dot
When the Monitor Level function is active on Apollo Solo USB's hardware (when its white MONITOR indicator is lit), a green dot is visible in Console adjacent to the MONITOR text label, as circled in red at right.
The dot provides a visual indication that the MONITOR level adjust function is active on the Apollo Solo USB hardware. When the dot is not visible, adjusting Apollo Solo USB's hardware level knob will not adjust the monitor level; instead, it adjusts the headphone output volume.
Sessions Switch
The Sessions switch, located below the Monitor Level knob, is used to access the Sessions Manager Popover (single-click) or the Sessions Menu (right-click), where Console configuration preset files are managed. For complete details about these features, see Console Sessions.
Cue Outputs Popover
Note: For an overview of Apollo Solo USB's HP cue mix bus, see HP Cue Overview.
The Cue Outputs popover window is where the source signal (either the main monitor mix or the HP cue mix) for Apollo Solo USB's front panel headphone jack is selected. To access the Cue Outputs Popover, click the CUE OUTPUTS button in the Monitor Column.
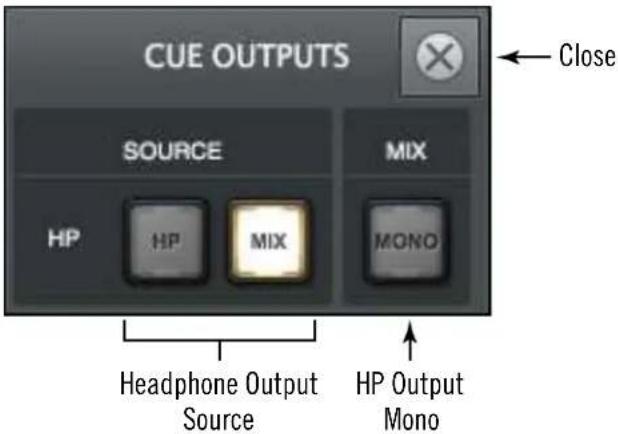
Cue Outputs popover
Cue Source Select
The HP and MIX switches select the signal source bus for the headphone output on Apollo Solo USB's front panel. The bus source name is on the switch. The source for the headphone output is active when its switch is lit.
The headphone output source can be either the HP cue mix bus or the main monitor mix bus. Both bus sources cannot be routed to the headphone output at the same time (the HP cue source is mutually exclusive).
Note: To allow selection of HP for the monitor outputs (via the control room Monitor Source Select switches), the HP source must not be set to MIX.
MIX
When set to MIX (the default), the headphone output signal is Console's main monitor mix, summed with all DAW outputs that are routed to the monitor outs (if applicable). Console's main monitor mix faders, mutes and solos are reflected in the headphone output in this mode.
HP
When set to HP, the headphone output source is the dedicated HP cue mix, summed with all DAW outputs that are routed to the HP outputs (if applicable).
In this mode, the mix of the HP cue bus is determined by the cue send controls in the input channel strips and the aux return strips.
Console's main monitor mix faders, mutes, and solos are not reflected in the headphone output when HP is selected, because Console's HP cue sends are always pre-fader.
Note: When HP is the selected cue source, signals must be sent to the HP cue mix bus (via the HP cue sends) for the signal(s) to be heard in the headphone outputs.
Cue Output Mono
This switch sums the left and right channels of the selected stereo source bus into a monophonic signal. The headphone output is stereo when the switch is gray, and mono when it is lit.
Tip: This switch only controls the headphone output. To hear the HP cue mix in mono when it is routed to the monitor outputs (via the Control Room Source switches), use the Monitor Mono switch instead.
Control Room Column
The control room column is where various options for the monitor outputs are configured and selected.
Show Column
By default, the control room column is not visible. To show the column, enable the CTRL ROOM switch in the SHOW section of the monitor column.
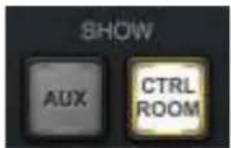
Show CTRL ROOM switch in monitor column
DIM Controls
DIM is used to quickly reduce the listening volume in the control room by a set amount and quickly return to the prior volume.
DIM Amount – This control adjusts the amount of attenuation that is applied to the main monitor mix when the DIM switch is engaged. The default value is -20 dB with an available range of 0 dB to -60 dB. The DIM value is displayed below the DIM knob.
Note: Although displayed DIM values are continuous, the actual amount of available attenuation is stepped.
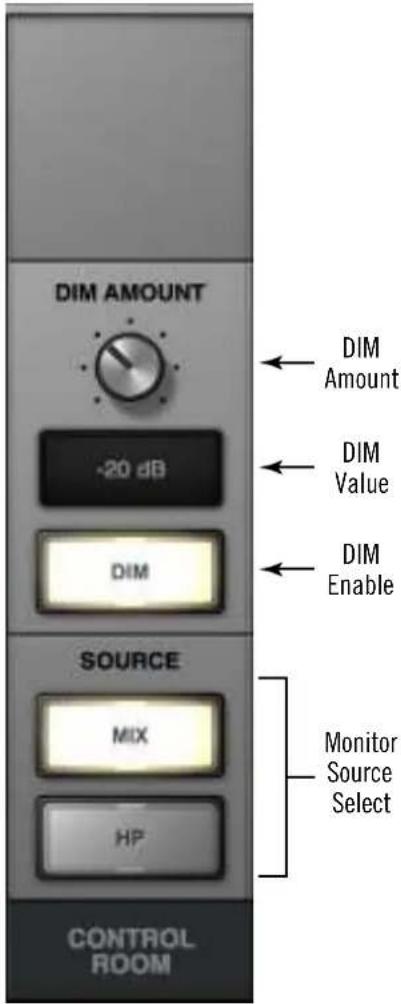
DIM Enable – When engaged (lit), the monitor outputs are attenuated by the DIM Amount.
Tip: Press DIM quickly to latch the DIM function. Press and hold DIM for 0.5 seconds to momentarily engage the function and deactivate DIM when the button is released.
Monitor Source Select
These switches select the mix bus (either main monitor mix or HP cue mix) that is sent to Apollo Solo USB's monitor outputs. The output source is selected when its switch is lit.
MIX
When MIX is selected, the main monitor mix, summed with any DAW outputs assigned monitor outputs (if applicable), is routed to the monitor outputs.
HP
When HP is selected, the HP cue mix, summed with any DAW outputs assigned to the respective HP or LINE 3/4 outputs (if applicable), is routed to the monitor outputs.
HP INACTIVE Dialog
HP can be selected as a monitor source only if the HP source in the Cue Outputs Popover is not set to MIX.
Allowing those settings would be the same as simply selecting MIX as the source with the monitor source switch, except that you wouldn't be able to determine the current HP routing without opening the cue outputs window.
If the HP INACTIVE dialog appears when attempting to enable HP as the monitor source:
- Close the HP INACTIVE dialog window by clicking OK
- Open the CUE OUTPUTS popover by clicking its button in the Monitor Column
- Switch the HP source from MIX to HP
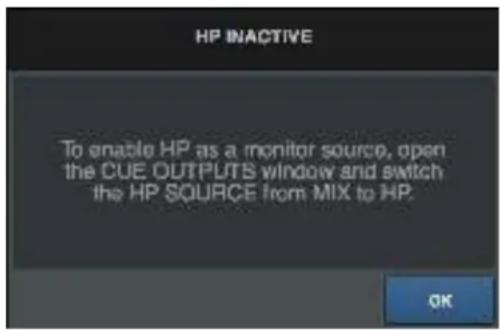
HP INACTIVE dialog
Console Sessions
The Sessions controls provide methods for managing complete Console configurations as session preset files. When a Console session file is saved, the current Console configuration is written to disk.
When a session file is subsequently reloaded, Console is returned to the exact same configuration state, regardless of any changes to Console that were made in the interim.
Content of Session Files
Console session files contain most, but not all, Console settings. The specific parameters saved and not saved are listed below:
Saved – All knob, slider, and menu values, all inserted UAD plug-ins, settings contained within the plug-ins, input labels, show/hide status, and settings in Console Settings window (except those listed below).
Not saved – Monitor Gain, Sample Rate, and Cue Outputs settings are global parameters that are not session-specific. Most of these settings are managed in the Console Settings window.
Default Session Files Location
By default, session files are saved to, and loaded from, the user's home folder at:
• C:\Users\UserName\AppData\Roaming\Universal Audio\Sessions
Although session files can be saved to (and loaded from) any location on disk, using the default location offers the most convenience, because Console always uses this location for the Sessions Manager window and also Open/Save dialogs presented by the OS.
Note: Session files must reside in the default location to appear in session lists within Console.
Sessions Sub-Folders
The Session Files folder can contain one level of sub-folders for additional session organization capability. The contents of sub-folders (if any) are displayed in the SUB-FOLDER column in the Sessions Manager Popover when a folder in the SESSION column is selected.
Session Files Suffix
Console's session files have the “.uadmix” suffix. The suffix is added to session files automatically when saving to disk; however, the suffix is not displayed in the file save dialog (the suffix should not be manually typed when saving a session file).
Note: Without the .uadmix suffix, the session files will not be visible in the "Open" file dialogs or the Sessions menu, and they won't be opened when they are double-clicked in the OS file system.
Session Files Access
Session files can be saved and loaded via several methods: The Modified Session Dialog, the File menu in the Application Menus, and/or the Sessions Menu.
Session Name
Session names are displayed in the Meter Bridge at the top of the main Console window (“My Session” in the screenshot at right), below the word SESSIONS within the Settings Switch, and at the top of the Sessions Manager window. Session names are created when the file is saved; they can also be renamed via the OS file system.
Modified Session Name
When any Console setting is changed after the session was saved, an asterisk (*) appears after the session name, as shown at right. This is a convenient visual reminder that the session is modified and may need to be saved for future use. To clear the asterisk, save the session.
SYNC Session Name
When a DAW project containing the Console Recall plug-in is opened that had the SYNC function in the plug-in enabled when the project was saved, the session name changes to “- Sync Session -” (as shown at right) indicating that the DAW has sent session settings to Console. See SYNC for related details.

Modified Session Dialog
If the current Console session has been modified and a new Console session is loaded, a dialog displaying the current session name in quotes appears with option switches (the session name in quotes does not appear if the session has never been saved). The behavior of the option switches in this dialog are detailed below.
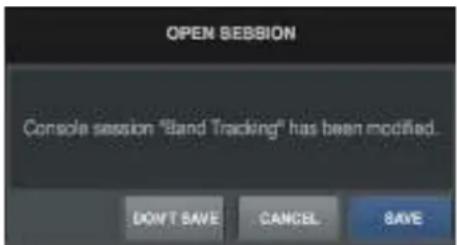
Important: This dialog does NOT appear when a Console session is loaded via the Console Recall plug-in's SYNC function. See SYNC for details.
Don't Save – All modifications to the current Console session are discarded and the session is loaded (or created, if creating a new session).
Cancel – The current Console session remains active and session loading is canceled.
Save – The current session is saved to disk and the session is loaded. If the session has never been saved to disk, this switch displays “Save As...” which opens the file save dialog.
Sessions Manager Popover
The Sessions Manager popover window is where Console session preset files are managed. The Sessions Manager window contains the SESSION and SUB-FOLDER columns and several function switches. The columns and switches are used to navigate and manage the session files.
Refer to the illustration below for descriptions in this section.
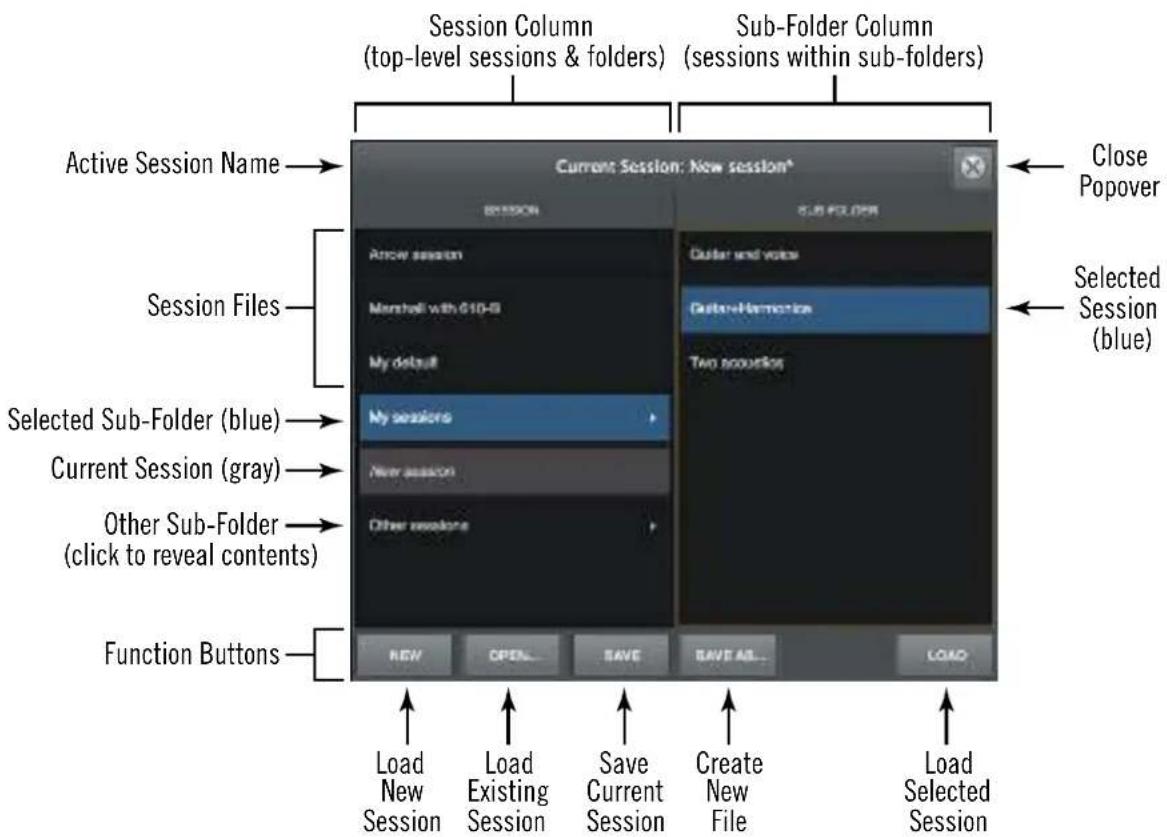
Sessions Manager popover
Sessions Access
To access the Sessions Manager popover, single-click the SESSIONS area at the bottom of the Monitor Column.
Click this area to open the Sessions Manager
Sessions Manager Contents
Session folder contents can be organized via the OS file system. File locations in the OS are reflected within the Sessions Manager.
Note: Reorganizing session files within subfolders can only be performed within the OS file system.
SESSION Column
All items within the Default Session Files Location are displayed in the SESSION column. If more sessions or folders reside in the column than are currently within view, a scroll bar appears.
Double-click any session in the SESSION column to load it, or click a sub-folder (if any) to display sessions within the sub-folder in the SUB-FOLDER column.
Note: Sub-folders are indicated in the SESSION column by small disclosure triangles near the right side of the SESSION column.
SUB-FOLDER Column
If the SESSION column contains one or more folders, selecting the folder will display its contents in the SUB-FOLDER column. Double-click any session in the SUB-FOLDER column to load it.
Sessions Manager Function Switches
The Sessions Manager contains switches that perform file management tasks. Click a switch to perform the operation on the currently selected preset or sub-folder.
New – Creates a new Console session with default settings (default settings cannot be changed). If the current session has been modified, a dialog appears allowing it to be saved first.
Open... – Opens the operating system's standard "Open File" dialog for loading existing session files from disk.
Tip: Session files can also be opened by double-clicking .uadmix files from within the operating system's file system.
Save – Saves the current modified preset file in place. If the preset was not previously saved (if the file doesn't exist), the Save As window appears.
Save As... – This option opens the operating system's standard file save dialog window so the current session can be named and saved to disk as a new session file.
Important: Session settings will not be properly saved if the “/” (forward slash) or “?” (question mark) characters are in the filename. Avoid these and other special characters when saving session files.
Load – Loads the session that is currently selected within the Presets Manager window (a session is selected when highlighted in blue).
Tip: A session can also be loaded by double-clicking the session or typing Return (or Enter) when the session is selected.
Sessions Menu
The Sessions Menu provides quick access to sessions functions without opening the Sessions Manager. Click any item in the menu to perform the function.
Items in the menu are divided into three sections. File management options are in the top section, existing session files and folders that reside on disk are listed in the center section, and cached (overwritten) sessions are listed in the bottom section.
Refer to the illustration below for descriptions in this section.
![Session File Functions New Open... Save Save As... Big Effects Marshall with 610-B My default ✓ New session My sessions Guitar and voice Two acoustics Other sessions Simple session Two guitar Vocal Acoustic [Sep 05, 2017 06:38:57 PM] - New Session [Aug 31, 2017 02:18:23 PM] - Arrow session [Aug 29, 2017 03:53:59 PM] - Arrow All Session Files & Folders in Default Session Location Top-Level Session Files Current Session (check mark) Sub-Folder Name (blue names) Sub-Folder Contents (beneath blue names) Cached Sessions (time stamped)](/content/2026/05/807951/images/cc725f9d6c9da207857a3b8c488d3b5fe7b7473422fb92a8a1695cdb1b652647.jpg)
Sessions Menu
Display Sessions Menu
To access the Sessions Menu, right-click the Sessions Switch located at the bottom of the Monitor Column, as shown at right. When the menu is displayed, clicking an item in the menu chooses that item.
Session File Functions
The New, Open, Save, and Save As functions listed here have the same functionality as the Sessions Manager Function Switches.
Sessions List
Existing session files that reside in the Default Session Files Location are displayed in the center section of the sessions menu. (Session names in diagram are examples only.)
Select a session from the list to load the session file. If the current session has been modified, the Modified Session Dialog appears.
Note: Session files must reside in the Default Session Files Location and have the .uadmix suffix to be visible in the Session Menu.
Sub-Folders
Sub-folder names in the Sessions Menu are displayed in blue. Session files within the sub-folder are displayed beneath the blue sub-folder name (session files not within sub-folders appear at the top of the sessions list).
Cached Sessions
Cached sessions (time stamped) appear in the bottom section of the Sessions Menu. Cached sessions are the same as session files, except they don't reside in session files on disk. Instead, these sessions are automatically created and stored in a temporary cache.
Why Cached Sessions Exist
When a DAW project containing the Console Recall plug-in is opened and the plug-in's SYNC function was enabled when the project was last saved, the Console settings contained in the DAW project overwrite the current Console settings. The cached sessions are used to recover the overwritten data if desired. See SYNC for details.
When Cached Sessions Appear
A cached session is automatically created every time a DAW project containing the Console Recall plug-in is opened and the plug-in's SYNC function was enabled when the project was last saved. In this scenario, the SYNC function loads the Console session contained in the DAW project, and the previously-active Console settings are moved into the cached sessions menu.
The previously-saved Console session's filename is retained in the cached session, and a time stamp is prefixed so it can be easily distinguished from other sessions. The five most-recently cached sessions appear in the list.
Window Title Bar
The Window Title Bar is the topmost strip in the Console and Console Settings windows, as shown below.

The Window Title Bar
Window Name – In the main Console window, the current session filename is displayed in the title bar. If the session has not yet been saved to disk, “Console” is displayed here.
Close – Clicking the "x" button closes the Console or Console Sessions window. If the window is the last open window in the application, Console is quit.
Note: Console's current settings are saved to disk when quit. When Console is subsequently launched, those settings are transferred to Apollo Solo USB.
Minimize – Clicking the “-” button reduces the window to the Windows Taskbar. The window can be restored by clicking the minimized window, or any method detailed in Accessing Console.
Zoom – Clicking the “+” button expands the Console window to the maximum size available on the screen.
Application Menus
Various Console functions can be accessed from the Application Menus. Selecting an item from the drop menus performs the function.

Console's Application Menus
Tip: Many menu functions can also be accessed using the Keyboard Shortcuts shown next to the item in the menu.
Menu Button
The Menu button displays the application menus. The button is located at the upper left of the main Console window, at the top of every View Column.
File Menu
Session Files Location
By default, all Console session files are stored at the following location within the OS file system (the same location used by the Sessions Manager Popover):
• C:\Users\UserName\AppData\Roaming\Universal Audio\Sessions
Tip: Console sessions can be organized via the operating system's file manager. File locations in the OS are reflected within the Sessions Manager.
New
Creates a new Console session with default settings (default settings cannot be changed). If the current session has been modified, a dialog appears allowing you to save it first.
Open...
Opens the operating system's standard "Open File" dialog for loading existing session files from disk.
Session files can also be opened by double-clicking .uadmix files from within the OS file system.
Save
If a session file was previously saved, selecting this option writes the current settings to the file with the same name, overwriting the previously saved file.
If the current session has never been saved, the operating system's standard "Save File" dialog appears so a new session file can be named and saved to disk.
Save As...
This option opens the operating system's standard "Save File" dialog so the current session can be named and saved to disk as a new session file.
Important: Session settings will not be saved if the “/” (forward slash) or “?” (question mark) characters are in the filename. Avoid these and other special characters when saving session files.
Edit Menu
Note: See Multiple Undo/Redo for an overview of Undo/Redo.
Undo
When a parameter value in the Console window is edited, the change can be reverted with the Undo command. By executing Undo again, edits can be stepped backwards repeatedly.
The number of Undo steps is essentially unlimited. The Undo cache is active until a new or different session is loaded or Console is quit.
Redo
When the Undo function (above) is executed, the original edit can be restored with the Redo command. By executing Redo again, previous Undo's can be restored repeatedly.
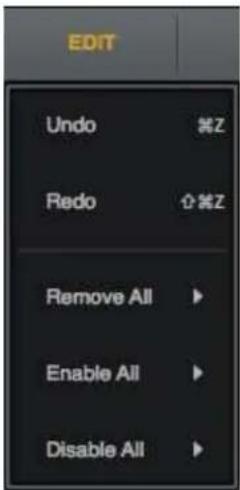
The number of Redo steps is essentially unlimited. The Redo cache is active until a new or different session is loaded.
Remove All
All plug-ins can be categorically deleted from Console by selecting an item from the sub menu.
Enable All
All plug-ins can be categorically enabled from Console by selecting an item from the sub menu.
Disable All
All plug-ins can be categorically enabled from Console by selecting an item from the sub menu.
Remove/Enable/Disable Sub-Menu
Plug-Ins – The function is performed on all Console plug-ins.
Insert Plug-Ins – The function is performed on all channel insert plug-ins. Aux and Unison plug-ins remain inserted.
Aux Plug-Ins— The function is performed on all auxiliary plug-ins. Channel and Unison plug-ins remain inserted.
Unison Plug-Ins– The function is performed on all Unison plug-ins. Channel and aux plug-ins remain inserted.
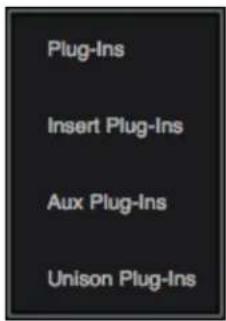
View Menu
Show/Hide Items
Show/Hide Aux Returns
Shows the aux returns when they are hidden, and hides them when they are visible. This item performs the same function as the Show Aux Returns switch in the monitor column.
Show/Hide Inputs

Allows unused Console inputs to be hidden from view. For details, see Show/Hide Inputs.
Show/Hide Offline Devices
Shows offline devices when they are hidden, and hides them when they are visible. This feature is typically used for adjusting Console sessions in multi-unit configurations when all devices are not currently connected.
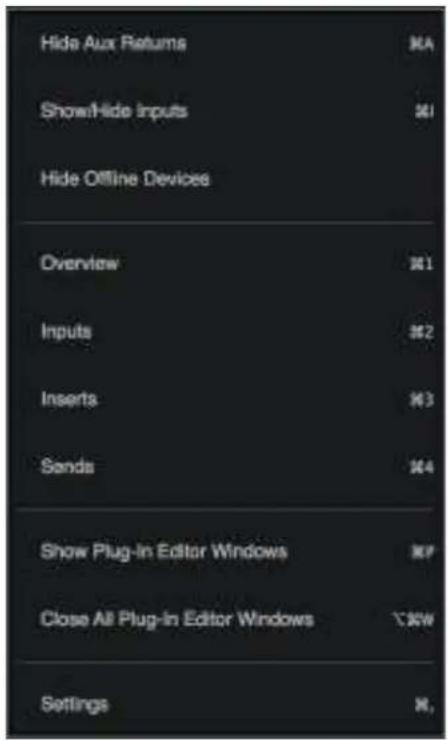
View Items
Note: Items in this section perform the same function as clicking the View switches in the View column.
Overview – Switches Console to Overview view.
Inputs – Switches Console to Inputs view.
Inserts – Switches Console to Inserts view.
Sends – Switches Console to Sends view.
Show Plug-In Editor Windows
Brings all open UAD plug-in editor windows to the foreground (if any). If ALWAYS ON TOP in the Display panel within the Console Settings window is set to PLUG-INS, this function has no effect (plug-in editors are always in the foreground in this mode).
Note: This function applies only to UAD plug-ins inserted in Console, not those inserted in a DAW.
Close All Plug-In Editor Windows
Closes all open UAD plug-in editor windows (if any).
Settings
Opens the Console Settings window, where various global parameters are configured. See Console Settings for details about the window.
Help Menu
Documentation
This item opens the local folder containing all Apollo Solo USB product documentation files. Consult the documentation when you need specific operational information.
After opening the folder, double-click a documentation file to open it.
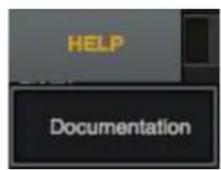
Tip: Use the search function within the PDF reader application to quickly find information about a particular topic.
Contents of the documentation folder:
- Apollo Solo USB Manual
• UAD Plug-Ins Manual - Direct Developer (3rd-party) plug-in manuals
The manuals below are not for Apollo Solo USB (the Apollo Solo USB Manual is self-contained):
- Apollo Software Manuals (one for each connection protocol)
- Apollo Hardware Manuals (one for each unique hardware model)
Note: For related information, see About Apollo Solo USB Documentation.
Console Plug-In Inserts
The UAD plug-in inserts within each input and auxiliary strip in Console is where UAD Powered Plug-Ins are selected and used for Realtime UAD Processing.
Both of Apollo Solo USB's analog preamp input channels have a dedicated Unison insert in addition to four standard inserts. Both virtual inputs, and both auxiliary returns, also have four standard inserts each. Therefore, up to five UAD plug-ins can be serially chained (stacked) per Console channel within the constraints of available DSP resources.
Note: Only UAD Powered Plug-Ins can be loaded in Console. However, tracks with non-UAD plug-ins used within a DAW can be routed into Console via Virtual I/O.
Insert Types
Two types of UAD plug-in inserts, Unison and Standard, are available within Console as shown at right. Additionally, a channels strip's complete plug-in setup can be saved and loaded as a channel strip.
Unison Insert
Apollo Solo USB's Unison technology is active when a Unison-enabled UAD plug-in is loaded in the dedicated Unison insert located above the preamp options.
The Unison insert is available on Apollo Solo USB's analog preamp channels (not Virtual or AUX channels). Unison inserts are operated exactly the same way as standard inserts. See Unison for related information.
Note: Audio on preamp channels is processed by the Unison insert (if active) before the channel inserts.
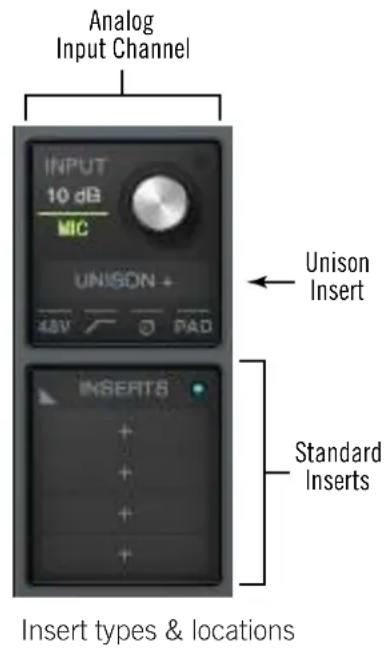
Standard Insert
All Console channel strips (analog, virtual, aux) have four standard insert slots.
Channel Strip
The complete collection of UAD plug-ins within a channel's inserts, along with the settings within the plug-ins, can be saved and loaded as a single channel preset to quickly recall a complete processing setup. For details, see Channel Strips.
Inserts Signal Flow
Audio signals in a Console channel flow through the inserts serially from top to bottom. Therefore, if more than one plug-in is inserted in a channel, the location of a plug-in within the inserts processing chain can impact the sound of the channel.
Tip: Console plug-ins can be reordered to change the serial signal processing order by dragging them to a different insert.
Inserting UAD Plug-Ins
To insert a UAD plug-in within Console, click the “+” symbol in any empty insert slot to display the Insert Assign Popover, where individual UAD plug-ins can be selected.
Removing UAD Plug-Ins
To remove UAD plug-ins from Console, right-click the insert containing the plug-in and choose Remove from the Insert Options Menu, or click the Remove function icon in the Insert Hover Options.
Editing UAD Plug-Ins
If the insert already contains an assigned plug-in, clicking the insert opens the Plug-In Editor Window, where plug-ins can be adjusted and/or plug-in presets can be managed.
Insert Assign Popover
Clicking any empty insert slot displays the Plug-Ins Manager popover window. Click any UAD plug-in from any category in the popover to load the plug-in into the insert.
Insert Assign popover
Inserts Display
The inserts display shows the name of currently loaded plug-ins (if any) and their active states. An abbreviated name may be shown for longer plug-in names due to space constraints. In expanded views, an icon representing the plug-in is also displayed.
Refer to the illustration below for element descriptions in this section.
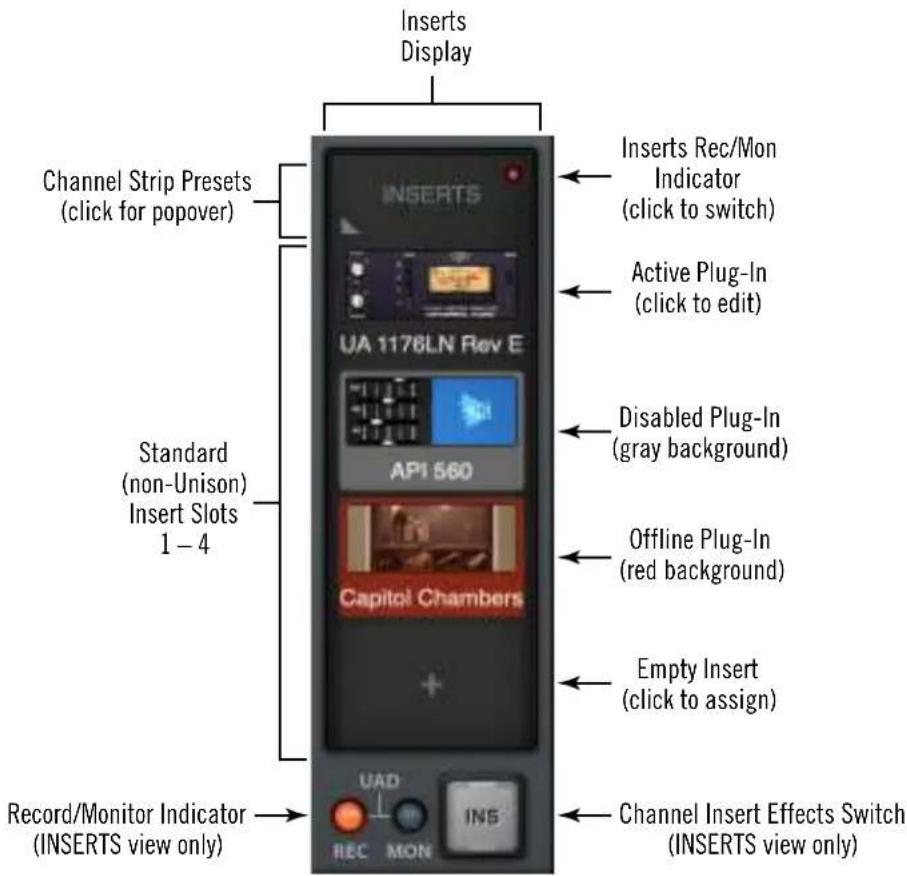
Standard Inserts Elements
Insert State Indicators
The state of a loaded plug-in within each insert can be determined by the background color of the slot. These states are defined below.
Active (dark gray) – The plug-in is active and processing audio. The Studer A800 plug-in insert at right indicates this state.
Disabled (light gray) – The plug-in has been disabled via the power switch in the header of the plug-in edit window (or via the disable function in the insert options menu). In this state, the plug-in is unloaded from the DSP, conserving UAD resources. The 1176LN plug-in insert at right indicates this state.
Note: Disabling a plug-in via the power control within its editor window (versus the Power switch in editor view) does not change the background color, because the plug-in remains loaded on the UAD DSP.
State Indications
Offline (red) – The plug-in is disabled because there are not enough UAD resources, it is unlicensed and the demo has expired or is not started, and/or the UAD authorization needs updating. The API 560 plug-in insert at right indicates this state.
Empty (+) – The insert is not populated with a plug-in. Click the”+” symbol to open the Assign popover for loading a UAD plug-in into the insert.
Insert Hover Options
When in Inserts view, commonly-used plug-in functions become available when the mouse cursor is hovered over any insert containing a plug-in.
The function icons appear on top of the plug-in name, as shown at right. To perform the function, click the associated hover switch.
Remove – Unloads the plug-in from the insert.
Assign – Opens the Assign popover to replace the current plug-in with a different plug-in.
Power – Disables/Enables plug-in processing and conserves UAD resources. The plug-in remains in the insert.
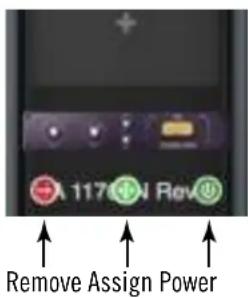
Insert Options Menu
To display the Insert Options menu, right-click (or control+click) any insert.
The options available in the menu vary depending on the state of the insert (e.g., empty or loaded) and contents of the copy/paste clipboard. Each insert option is described below.
The menu has two sections under blue headings: Plug-in options that apply to the individual insert, and Channel options that apply to all inserts in the Console strip.
Plug-In Options
Note: All copy/paste functions also copy/paste the current settings of the plug-in.
Copy – Copies the plug-in that is in the insert so it can be pasted into another insert. This option does not appear if a plug-in is not loaded in the insert.
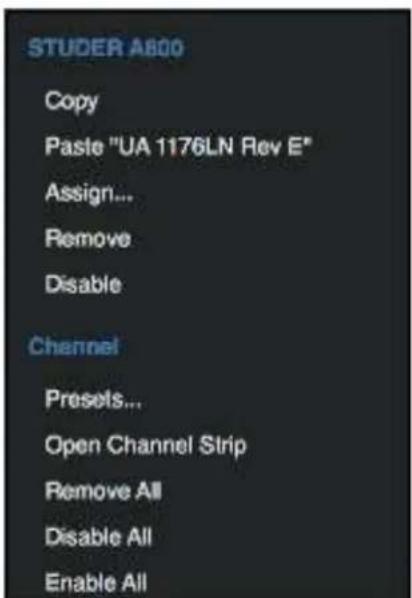
Insert Options Menu
Paste – Pastes a plug-in that was previously copied into the insert. This option does not appear if a plug-in was not previously copied.
Assign – Opens the Assign popover for selecting an insert plug-in. If the insert already contains a plug-in, the loaded plug-in is replaced with the newly-assigned plug-in.
Remove – Removes the plug-in from the insert.
Disable – Disables plug-in processing and conserves UAD resources, but the plug-in remains in the insert.
Channel Options
Presets – Opens the channel presets popover for managing channel presets.
Open Channel Strip – This feature groups and displays the interfaces of all plug-ins currently loaded in the standard inserts of a strip in a single window, offering a convenient method of organizing channel plug-in editors. The single window, containing up to four plug-in editors, can be moved and arranged on screen as desired in a single motion. See Channel Strips for details.
Remove All – Unloads all plug-ins from all standard inserts in the channel.
Disable All – Disables plug-in processing and conserves UAD resources for all plug-ins in the standard inserts, but the plug-ins remain in the inserts.
Enable All – Resumes plug-in processing for all disabled plug-ins in the standard inserts.
Channel Insert Effects
Note: See the Insert Effects Overview for details about the REC/MON functions.
Channel Insert Effects Switch
This switch determines whether or not Realtime UAD Processing occurring within an individual Console input is routed to its associated DAW input.
Tip: Insert Effects can be switched for all channels simultaneously with the Global Insert Effects switch.
Channel Insert Effects Switch (INSERTS view only)
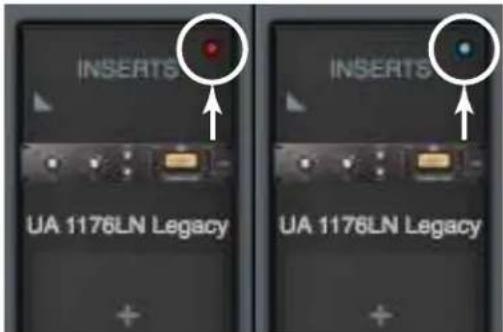
Channel Insert Effects Switch (OVERVIEW & INSERTS views)
Two channel insert effects switches are available in Console's inputs. The large channel insert effects switch (above left) is visible when INSERTS view is selected in the View Column. A smaller switch, in the form of a colored indicator dot (above right), is available in both OVERVIEW and INSERTS views. For either type of switch, click the switch to change the REC/MON state.
Switch Indicator Colors
REC (print wet) – The indicator is RED and UAD processing in all inserts in the channel is routed to the DAW.
MON (print dry) – The indicator is BLUE and the unprocessed signal is routed to the DAW and UAD processing is heard in monitor outputs only.
Important: UAD plug-in processing in Console's Unison insert(s) is always routed to the DAW regardless of the current Insert Effects setting (Unison processing is always recorded).
Plug-In Editor Window
Clicking any insert that contains a plug-in opens the editor window, where UAD plug-in parameters can be adjusted and/or plug-in presets are managed.
Multiple editor windows can be open simultaneously. By default, each opened editor window is offset so one window doesn't completely cover another.
Tip: To open each editor window at the same screen location, shift+click the insert.
Refer to the illustration below for element descriptions in this section.

flowchart
graph TD
    A["Close Minimize Console Channel Name Console Insert Slot"] --> B["VIRTUAL 2, Insert 1"]
    B --> C["Title Bar"]
    B --> D["Function Buttons"]
    B --> E["Plug-In Controls"]
    B --> F["UAD Toolbar"]
    C --> G["LITTLE LABS IBP"]
    D --> H["Channel Strip Enable/Disable"]
    D --> I["Insert Select/Assign Menu"]
    D --> J["Presets Manager Popover"]
    D --> K["Plug-In Power (disable)"]
    D --> L["Copy Plug-In Settings"]
    D --> M["Paste Plug-In Settings"]
    E --> N["(controls in main window area vary per UAD plug-in)"]
    F --> O["Preset Manager Menu (use within DAW)"]
    F --> P["14-Day Demo Status (if unlicensed)"]
    F --> Q["Information Menu (manual & web page)"]
    F --> R["Buy Plug-In (if unlicensed)"]
    F --> S["START DEMO"]
Plug-In editor window elements within Console
Title Bar
The editor window's title bar is displayed at the top of each editor window.
Console Channel Name – The Console strip containing the insert is displayed.
Console Insert Slot – The insert slot number (1 – 4) or Unison is displayed.
Close - Closes the editor window.
Minimize – Minimizes the editor window by placing it in the Windows Taskbar. Click the minimized window to restore.
Function Switches
The function switches are located between the title bar and the plug-in controls.
Channel Strip Enable/Disable
This switch engages Channel Strip mode, where all UAD plug-ins within the channel inserts can be controlled within a single window. For details, see Channel Strips.
Insert Select/Assign Menu
This switch presents the Select/Assign drop menu, where a different insert within the channel can be selected for editing, or a different plugin can be assigned to the current insert.
Select
When more than one standard insert is populated in the channel, choosing a different plug-in from the menu selects that plug-in for editing within the same window.
In the example at right, three of the channel's standard inserts are populated. If only one insert is populated, only the current plug-in is displayed.
Assign
Choosing this menu item opens the plug-in assign popover, for replacing the plug-in currently in the insert.
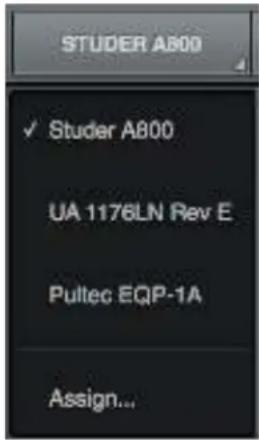
Select/Assign menu
Note: When a plug-in is replaced via the assign function, any customized settings in the replaced plug-in are lost (if they weren't saved as a preset). However, the settings can be recovered until a different Console session is loaded by using the Undo function.
Presets Manager Popover
This switch opens the Presets Manager popover, where plug-in settings can be saved and loaded. For details, see Presets Manager.
Note: With narrow plug-ins, the icon at right is displayed instead of PRESETS.

Plug-In Power
This switch deactivates the insert's plug-in by unloading it from the DSP. When deactivated, the plug-in no longer uses UAD resources.
Click the switch to change the state. The plug-in is enabled when the switch is orange, and deactivated when the switch is gray. A deactivated plug-in is indicated in the insert by a light gray background.
Tip: Because this function unloads and loads the plug-in from the DSP, audio artifacts can occur if the enable state is changed while audio is being processed by the plug-in. To disable individual plug-in processing without audio artifacts, use the power control within the plug-in interface instead, which keeps the plug-in loaded on the DSP.
Copy Plug-In Settings
This switch copies the parameter settings of the plug-in to the clipboard so they can be pasted into another instance of the same plug-in.
Paste Plug-In Settings
This switch pastes plug-in parameter settings, that were previously copied to the clipboard, into the current plug-in. If the switch is unavailable (gray), no settings are available in the clipboard or the plug-in title is different.
Note: Copied plug-in settings can only be pasted into the same plug-in title.
UAD Toolbar
The UAD Toolbar is displayed at the bottom of each UAD plug-in, including when the plug-in is used within a DAW (outside of Console).
For complete details, see UAD Toolbar.
Preset Manager Menu
This drop menu can be used to manage UAD presets within a DAW. To manage presets within Console, use the Presets Manager instead.
Note: The Presets Manager is recommended for managing presets within Console (instead of the UAD Toolbar) because of its improved functionality.
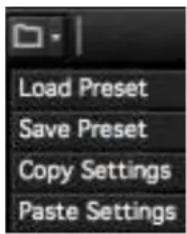
Information Menu
This drop-menu contains two shortcuts for accessing information about the UAD plug-in.
Manual – Opens the UAD Plug-Ins Manual for UA-developed plug-ins, or the manual provided by the developer for 3rd-party plug-ins.
Web Info – Opens the default web browser and goes to the plug-in product page on the Universal Audio website (internet connection required).
Buy Button
If the UAD plug-in is unlicensed, the “\$” button is visible, providing a fast way to purchase the license. Clicking the button launches the web browser and adds the plug-in to your cart at the UA online store.
Channel Strips
Channel Strips are where all UAD plug-ins within a channel's four standard inserts can be displayed and controlled within a single editor window.
Note: Unison plug-in editors in preamp channels are not included within Channel Strips. However, Unison plug-ins and their settings are stored within Channel Strip Presets.
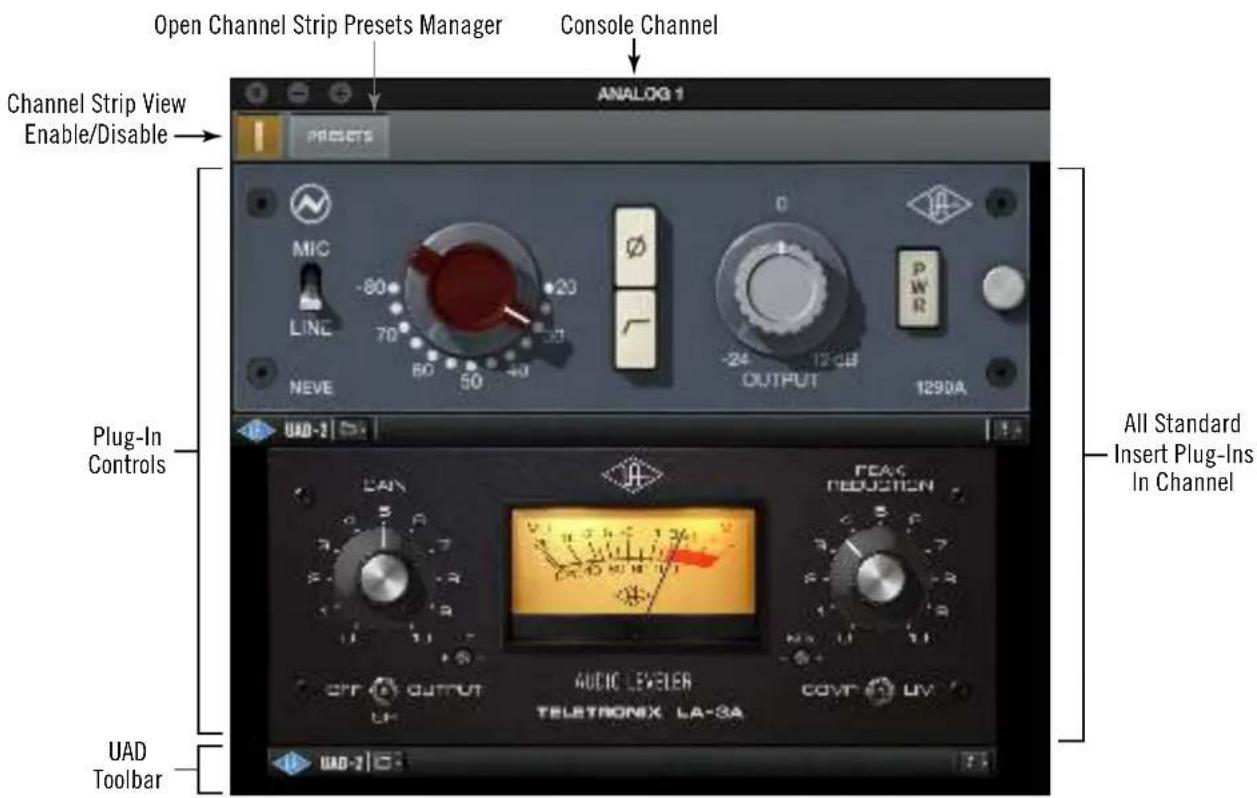
Channel Strip editor window
Channel Strip View Enable
To merge all of a channel's standard insert plug-ins into a single window, click the Channel Strip Enable switch within any plug-in in any channel insert.
To disable Channel Strip mode and return to viewing the channel plug-ins in individual windows, click the switch again.
Click the Enable switch to activate Channel Strip view
Channel Strip Presets
A Channel Strip preset contains all settings for all plug-ins within the channel strip. Channel strips presets are saved and/or loaded via the Presets Manager.
Note: Channel Strip presets include all standard insert plug-ins, and the Unison plug-in (if applicable), within an individual Console channel strip.
Accessing Channel Strip Presets
The Presets Manager for Channel Strips can be accessed with these two methods:
- Click the Presets Manager button ("PRESETS") within the Channel Strip editor window. This method requires at least one plug-in to already be loaded in a standard insert.
- Click anywhere near the Channel Strip Presets disclosure triangle or the word "INSERTS" above the channel inserts in OVERVIEW or INSERTS views (as shown below). This method can be used to load Channel Strip presets when plug-ins are not yet loaded in the standard inserts.
Click area outlined in red to access Channel Strip presets
Presets Manager
The Presets Manager is where individual UAD plug-in settings and Channel Strip settings are managed after a plug-in is inserted. Preset tasks are performed in the Presets Manager popovers, which are accessed from within the Plug-In Editor Window.
Presets Manager popovers
Presets Overview
A preset is a complete collection of settings for an individual plug-in that is saved as a disk file so the settings can be subsequently recalled. Presets are typically used to save and recall favorite plug-in settings. Thousands of factory presets are installed with the software, or they can be user-created. Preset files have the “.fxp” suffix.
Factory Presets
Factory presets are plug-in settings created by the plug-in developers for typical use case scenarios. All UAD plug-ins developed by Universal Audio include a batch of factory presets. They can be used as-is or modified as desired.
All factory presets, and factory preset folders, are read-only. They cannot be overwritten, renamed, deleted, or moved. However, factory presets/folders can be saved under a different name or in a different file location.
Factory presets/folders are indicated by a lock icon at the left of a preset or folder icon. User presets/folders do not have the icon.
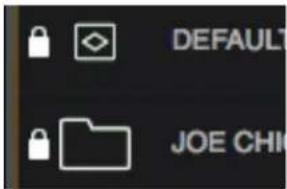
Factory preset & folder icons (indicated by lock) as they appear in the Presets Manager
Note: Not all UA Direct Developer (3rd-party) plug-ins include factory presets.
Presets Folder Location
All factory and user preset files for UAD plug-ins are stored at the following location within the operating system:
C:\Program Files (x86)\Universal Audio\Powered Plugins\Presets
Tip: User presets and folders can be organized via the operating system's file manager (i.e., Windows Explorer). File locations in the operating system are reflected within the Presets Manager.
Plug-In's Presets Folder
Inside the Presets folder above are folders named with the title of each UAD plug-in. Each of these folders contain all factory and user presets for that particular plug-in. This is the plug-in's presets folder. The contents of this folder is displayed in the PRESET column within the Presets Manager.
Note: User presets can only be saved to the plug-in's presets folder.
Presets Sub-Folders
Each plug-in's presets folder can contain one level of sub-folders for additional preset organization capability. The contents of sub-folders (if any) are displayed in the SUB-FOLDER column when a folder in the PRESET column is selected.
Channel Strip Presets
A Channel Strip preset is a complete collection of plug-ins within a single channel, and all parameter settings within those plug-ins, that is saved as a disk file so the channel strip preset can be subsequently recalled into the same or a different channel. Channel strip preset files have the “.uadchannel” suffix.
Tip: To activate Channel Strip view, click the Channel Strip icon in the Edit Window. Channel Strip mode is active when the switch is orange colored.
Channel Strip Presets Folder
All Channel Strip presets reside in the Channel Strips presets folder. The contents of this folder is displayed in the PRESET column within the Presets Manager.
Note: Channel Strip presets can only be saved to the Channel Strip presets folder.
Channel Strip Presets Folder Location
All Channel Strip files are stored at the following location within the operating system:
C:\Program Files (x86)\Universal Audio\Powered Plugins\Presets\Channel Strip
Tip: User presets and folders can be organized via the operating system's file manager (e.g., Windows Explorer). File locations in the operating system are reflected within the Presets Manager.
Channel Strip Presets Sub-Folders
The Channel Strip presets folder can contain one level of sub-folders for additional channel strip preset organization capability. The contents of sub-folders (if any) is displayed in the SUB-FOLDER column when a folder in the CHANNEL PRESET column is selected.
Presets Manager Popover
The Presets Manager popover window contains the PRESET and SUB-FOLDER columns and several function switches. The columns and switches are used to navigate and manage the preset files.
Tip: Plug-in settings are loaded instantly as they are selected in the columns so you can quickly audition presets while the popover is open.
Refer to the illustration below for descriptions in this section.
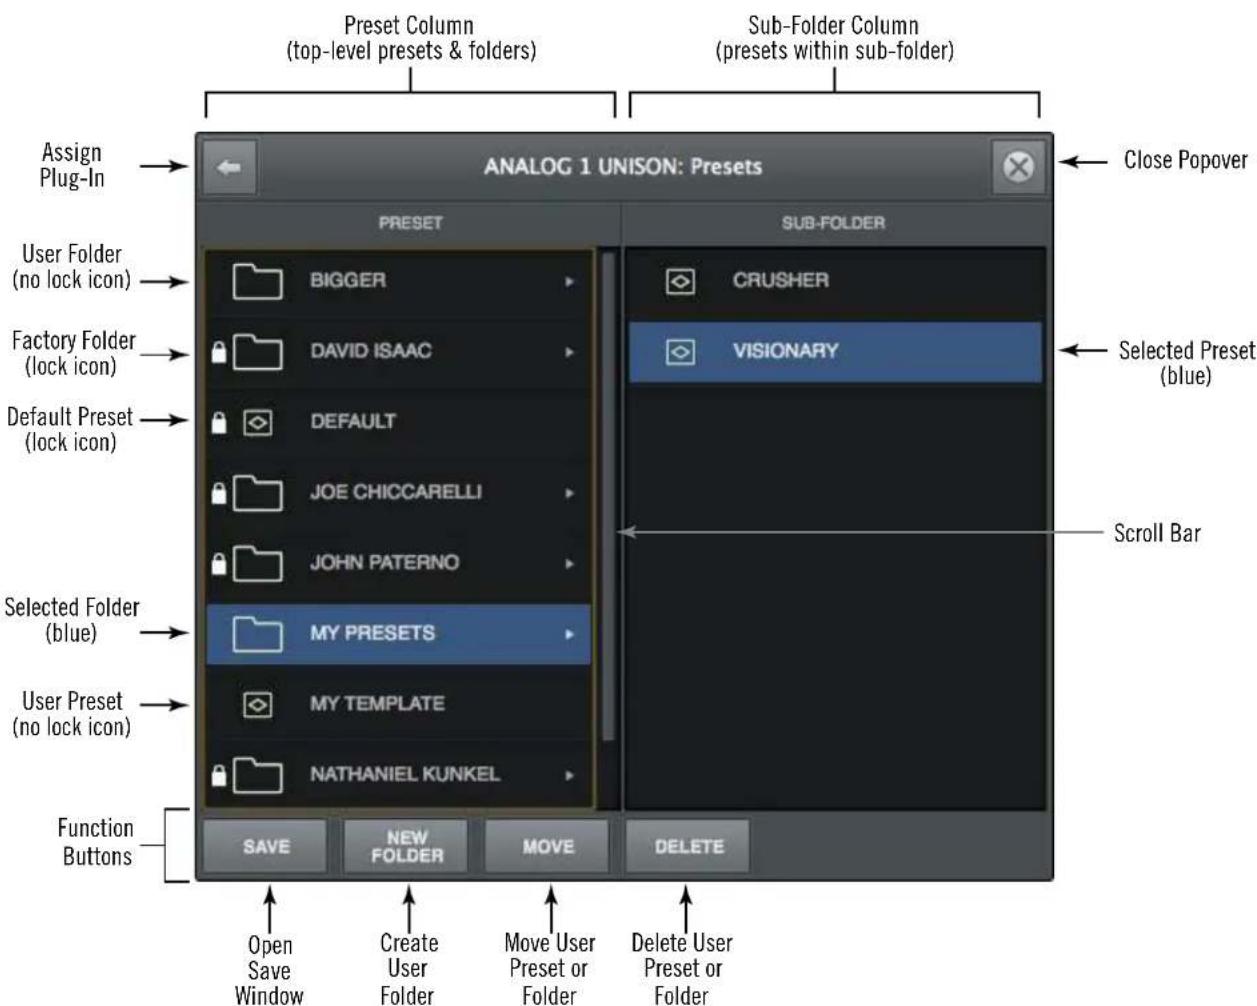
The Presets Manager popover
PRESET Column
All items within the plug-in's preset folder are displayed in the PRESET column.
Click any preset in the PRESET column to instantly load it, or click a sub-folder (if any) to display presets within the sub-folder in the SUB-FOLDER column. If more presets or folders reside in the column than are currently within view, a scroll bar appears.
SUB-FOLDER Column
If the PRESET column contains one or more folders, selecting the folder will display its contents in the SUB-FOLDER column. Click any preset in the SUB-FOLDER column to instantly load it. If more presets reside in the column than are currently within view, a scroll bar appears.
Presets Manager Function Buttons
The Presets Manager contains switches to save, name, and perform other file management tasks. Click a switch to perform the operation on the selected (blue) preset or sub-folder.
Save – Saves the current modified preset file in place. If the preset was not previously saved (if the file doesn't exist), the Save window appears.
New Folder – Creates a new sub-folder. Sub-folders appear in the left column of the Presets Manager.
Move - Opens the Save window where the selected preset can be moved to a different location within the presets folder, with the option to rename the preset.
Delete – Deletes the selected preset file from disk and removes it from the presets list. A confirmation dialog appears before the file is deleted.
Save Preset Popover
The Save Preset popover window is where presets and sub-folders can be named and moved. It appears when the Save or Move switches within the Presets Manager window are clicked.
Refer to the illustration below for descriptions in this section.

The Save Preset popover
Save Preset Popover Functions
Return – Returns to the main Presets Manager popover.
Close – Exits the Preset Manager and returns to the Plug-In Editor window.
Name Field – When creating a new preset or sub-folder, enter a unique name here.
Cancel – Cancels the operation and returns to the main Presets Manager popover.
Save – Creates the disk file or sub-folder.
Console Settings
Console Settings Overview
Global parameters for Apollo Solo USB and Console are configured in the Console Settings window. All Console Settings are detailed in this chapter.
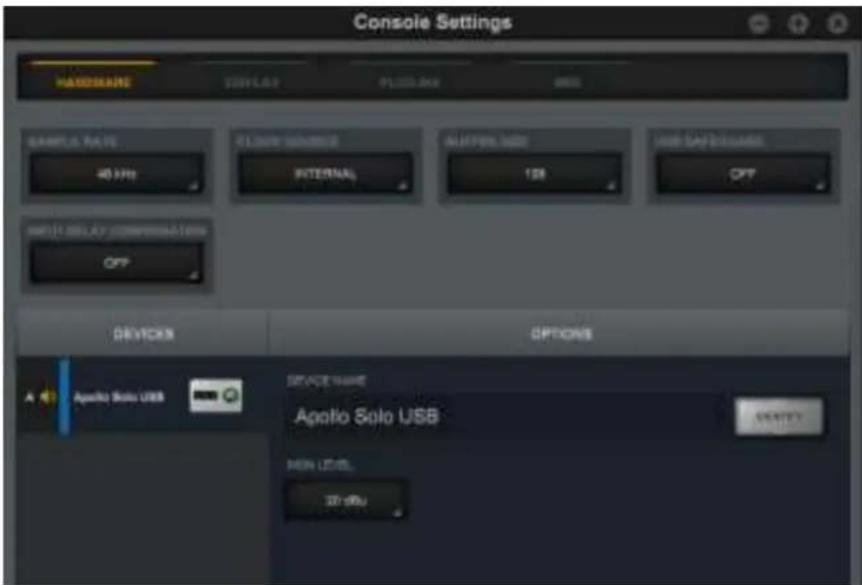
Console Settings window
Accessing Console Settings
The Console Settings window can be opened using any of these methods:
- Choose View>Settings from the Application Menus
- Click the SETTINGS switch at the bottom of the View Column
- Use the ctrl+comma keyboard shortcut
- Right-click the blue UA diamond logo in the Windows System Tray (in the taskbar at lower right of screen), then select Console Settings from the contextual menu
Settings switch in View Column
Console Settings Panels
Controls within the Console Settings window are arranged according to related functionality. Each set of related settings are contained within a single panel. Five panels are available in the Console Settings window:
Hardware – Settings related to Apollo Solo USB hardware device setup
Display – Settings related to how and what items are displayed in Console
Plug-Ins – Settings related to UAD plug-ins used within Console
MIDI – Settings for setting up MIDI control of Tap Tempo within Console
Accessing Settings Panels
Each of the five Console Settings panels is accessed by clicking the panel's name at the top of the Console Settings window. The panel is selected and displayed when its name is illuminated.

Panel names at top of Console Settings window with HARDWARE panel selected
Changing Settings
Unless otherwise noted, all values within the Console settings window are changed by either choosing a different value from a drop menu, or entering a new values directly.
Drop Menus – Values with drop menus are indicated by a disclosure triangle at the lower right of the value field. To change these settings, click the item and choose a different value from its drop menu.
Typical disclosure triangle
Direct Entry – Values with direct text or numerical entry have a lighter gray background and do not have a disclosure triangle at the lower right of the value field. To change these settings, click the field and type a new value with the keyboard, then type the Return/Enter key.
Available Settings
The parameters that are displayed in the Console Settings window can vary if Apollo hardware model(s) are currently connected to the system.
Only settings that apply to the currently connected hardware are displayed. Any settings that are unique to a particular hardware model are noted in the descriptions.
Hardware Settings Panel
The Hardware panel is where Apollo Solo USB's system-level audio interface I/O settings such as sample rate and output reference levels are configured. These settings are used by DAW applications when they are configured to use Apollo Solo USB as the audio interface. Even when Console is not open, these settings are stored by the Apollo Solo USB drivers for use by other host applications.
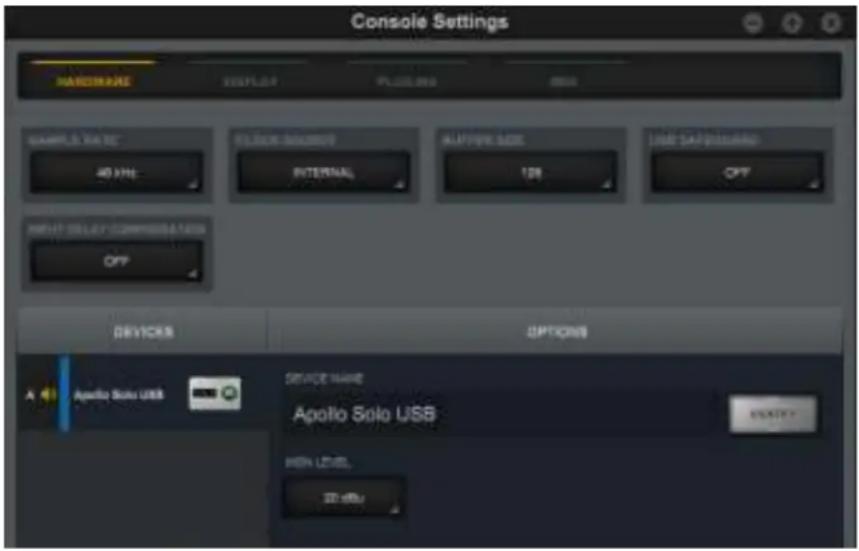
Hardware panel
Sample Rate
This setting defines the sample rate that is used for Apollo Solo USB A/D and D/A conversion and UAD Powered Plug-Ins processing. When using UAD Powered Plug-Ins, higher sample rates require more UAD DSP resources.
Note: When the sample rate is changed, hardware relays that mute the outputs are temporarily engaged to prevent audio artifacts. This action causes an acoustic clicking sound that can be heard within the hardware. These clicks are by design and can be safely ignored.
Host Control of Sample Rate
Behavior and control of the sample rate depends on the operating environment:
Without a DAW – Apollo Solo USB's sample rate is set within Console when a DAW is not used (when Console is the only host application).
With a DAW – The sample rate is usually changed within the DAW application's audio preferences.
Tip: Sample Rate can also be viewed and changed via Console's Info Bar.
Buffer Size
This setting determines the hardware I/O buffer size used by a DAW. As values are decreased, DAW throughput latency decreases, but the computer's CPU load increases. Conversely, as I/O buffer size values are increased, DAW throughput latency increases, and the computer's CPU load is reduced. For related information, see Latency Basics.
Available buffer size values are dependent on the current Sample Rate value. If values in the Buffer Size menu are gray and cannot be selected, change the Sample Rate value.
Note: If audio artifacts occur during DAW playback (clicks, pops, stuttering, etc), the buffer size may need to be increased.
Important: Buffer Size only applies when using ASIO and/or WDM audio with a DAW or other audio applications. It has no effect on Console's hardware monitoring features or Realtime UAD Processing within Console.
USB Safeguard
If audio artifacts occur during audio playback (clicks, pops, stuttering, etc), USB Safeguard may need to be set to ON. Enabling USB Safeguard increases DAW latency slightly, but it can help optimize audio playback when the host computer's CPU is taxed with high loads (for example, when running high track counts on slower systems).
Note: Stop WDM and ASIO playback before changing the USB Safeguard setting. Applications using audio may need to be relaunched if the setting is changed.
Important: USB Safeguard only applies when using ASIO and/or WDM audio with a DAW or other audio applications. It has no effect on Console's hardware monitoring features or Realtime UAD Processing within Console.
Input Delay Compensation
Input Delay Compensation maintains phase alignment across Console's analog and digital inputs when certain UAD plug-ins are used. See Input Delay Compensation in Console for a complete explanation of this feature.
When enabling Input Delay Compensation, it's usually best to start with the Short value (100 samples) to minimize latency. The default value is Medium.
| Input Delay Compensation Values | |
| Setting Name | Extra Delay (samples) |
| Off 0 | |
| Short 100 | |
| Medium 200 | |
| Medium-Long 300 | |
| Long 1000 | |
Note: Changes to this setting do not take effect until the DAW is quit.
Input Delay Compensation Exceeded Dialog
Input Delay Compensation Exceeded
To maintain input phase alignment, either increase the Input Delay Compensation value in the Hardware panel within the Console Settings window, or remove some UAD plug-ins from the "ANALOG 1" input.
A dialog will appear in Console if the compensation amount is exceeded on a channel. If this occurs, either increase the IDC value or reduce the number of upsampled plug-ins in the channel to maintain phase alignment.
Tip: For the lowest possible latency if not using multiple inputs for a single source, turn Input Delay Compensation OFF. Input Delay Compensation and phase alignment is only important when multiple Console inputs are used for a single source (such as a drum kit using multiple microphones).
Devices Column
Note: The Devices Column is typically used only when more than one Universal Audio audio interface is connected to the system.
This column lists all Arrow and Apollo audio interfaces in the system. It has four primary functions:
- Selects current unit to see device-specific options
- Designates the monitor unit in multi-unit setups
- Indicates which unit(s) are currently online
- Adds devices for offline configuration
Select Device
Clicking a unit in the column reveals its device-specific settings in the Options Column.
Device Letter
Each unit in the Devices list is designated with a sequential letter. These letters are used when multi-unit cascading to differentiate between Apollo devices. The device letters cannot be modified.
Device Color
Each unit in the Devices list is color coded for enhanced identification. These colors are used in the Meter Bridge when multi-unit cascading to differentiate between devices. The device colors cannot be modified.
Designate Monitor Unit
In multi-unit configurations (not available with Apollo Solo USB systems), the device at the top of the column is the designated monitor (master) unit. The monitor unit indicated by a speaker icon between the device letter and the device name. To change the monitor unit, drag a unit to the top of the device column.
Note: This operation reconfigures the system. There may be a delay before the operation is completed.
Add Device
Unit(s) can be manually added for offline configuration by clicking the “+” switch (below the devices in the column) to present the Add Device menu. Click a device in the menu to add it to the Device Column.
Note: When a device is properly connected and powered, it is automatically detected and added to the device list.
Options Column
Selecting a unit in the Devices column reveals its device-specific settings in the Options column. A device is currently selected when its text is not dim.
Note: Settings in the Options Column apply only to the specific unit currently selected in the Devices Column.
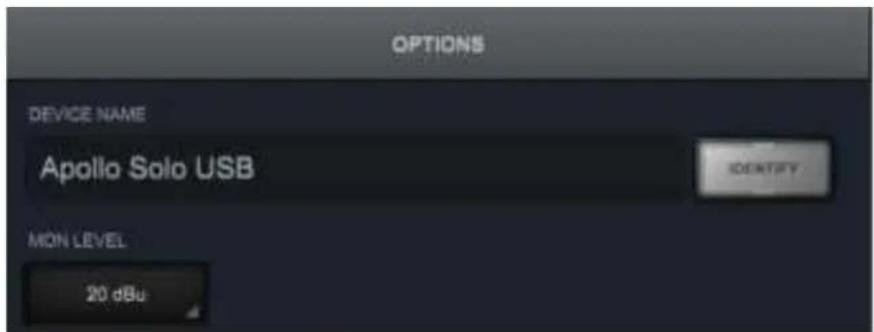
Apollo Solo USB device options
Device Name
Apollo Solo USB's default device name can be changed. The device name is displayed in the “Connecting to Apollo Solo USB” window that appears briefly during system connection and optionally in the Meter Bridge.
Note: Text in this field cannot be modified when the device is offline.
Identify
Clicking the Identify switch will cause the currently selected unit's front panel LEDs to flash in a pattern. This feature is typically used with multi-unit systems to distinguish units when making I/O connections.
Remove
In multi-unit configurations (when the device column contains more than one unit), if a device is offline, the REMOVE switch replaces the IDENTIFY switch in the options column.
Offline devices can be removed from the devices list. To remove an offline device, select the unit in the DEVICES column, then click the REMOVE switch in the OPTIONS column.
Note: If an expander unit is powered down or disconnected from the system, the expander unit must be removed before the sample rate can be changed to 176.4 kHz or 192 kHz.
Display Panel
Various Console display options are set within the Display panel.
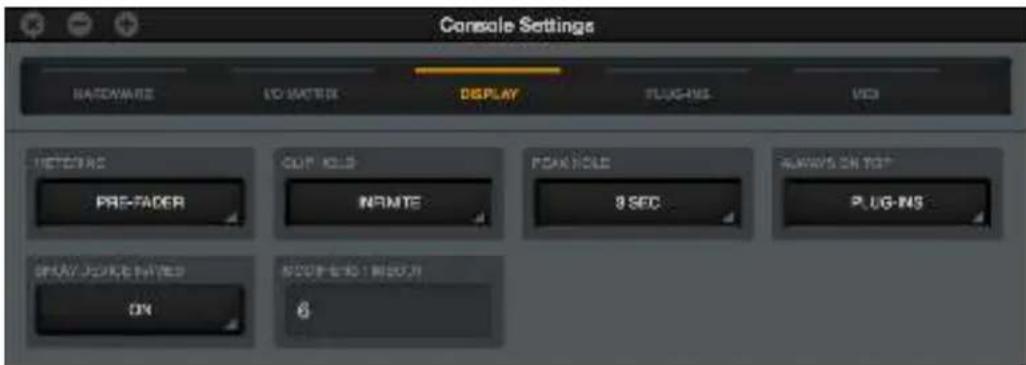
Display panel
Metering
Note: The Metering Menu affects the Channel Meters of Console's channel inputs only. It does not affect the Aux Meters or the Monitor Meters, or the level of signals being routed to the DAW.
Pre-Fader
When set to pre-fader, an input's Channel Meter indicates the level at the Apollo Solo USB input, regardless of the Channel Fader setting. With this setting, changing the fader level will not change the Channel Meter.
Tip: With this setting, the Channel Meters mirror signal levels being routed to the DAW. Pre-Fader metering allows you to monitor record levels from within Console.
Post-Fader
When set to post-fader, changing an input's Channel Fader will change the Channel Meter.
Important: When post-fader metering, the Channel Meters do not display signal levels being routed to the DAW, and input/recording levels should be monitored in the DAW mixer to detect signal clipping (if any).
Clip/Peak Hold
Tip: The Clip and Peak indicators can be cleared at any time with the CLEAR CLIPS button.
Clip Hold Time
This drop menu sets how long the red signal clip indicators in the input, send, and monitor meters are displayed before turning off. The available values are None, 1 second, 3 seconds (default), 5 seconds, 10 seconds, or Infinite.
Peak Hold Time
This drop menu sets how long the signal peak indicators in the input and send meters are displayed before turning off. The available values are None, 1 second, 3 seconds (default), 5 seconds, and 10 seconds.
Always On Top
When set to NONE (the default value), UAD plug-in editor windows can be covered by the Console window when Console is the foreground application.
When set to PLUG-INS, UAD plug-in editor windows always float on top of the Console and Console Settings windows (when Console is the foreground application), so they are always visible.
Note: This setting only affects UAD plug-in window behavior within Console. It does not apply to UAD plug-ins when they are used within a DAW.
Show Device Names
When set to ON, Apollo Solo USB's Device Name is displayed in the Meter Bridge.
This feature is intended primarily for use with multi-unit systems. When the Meter Bridge contains the inputs for more than one unit, this feature groups the input channels by device name for easier input identification.
Tip: This feature can also be accessed by right-clicking in the Meter Bridge.
Meter Bridge with Show Device Names OFF (left) and ON (right)
Modifiers Timeout
This option sets the duration, in seconds, used for Option Latch operations.
Plug-Ins Panel
Various UAD plug-in options are set within the Display panel.
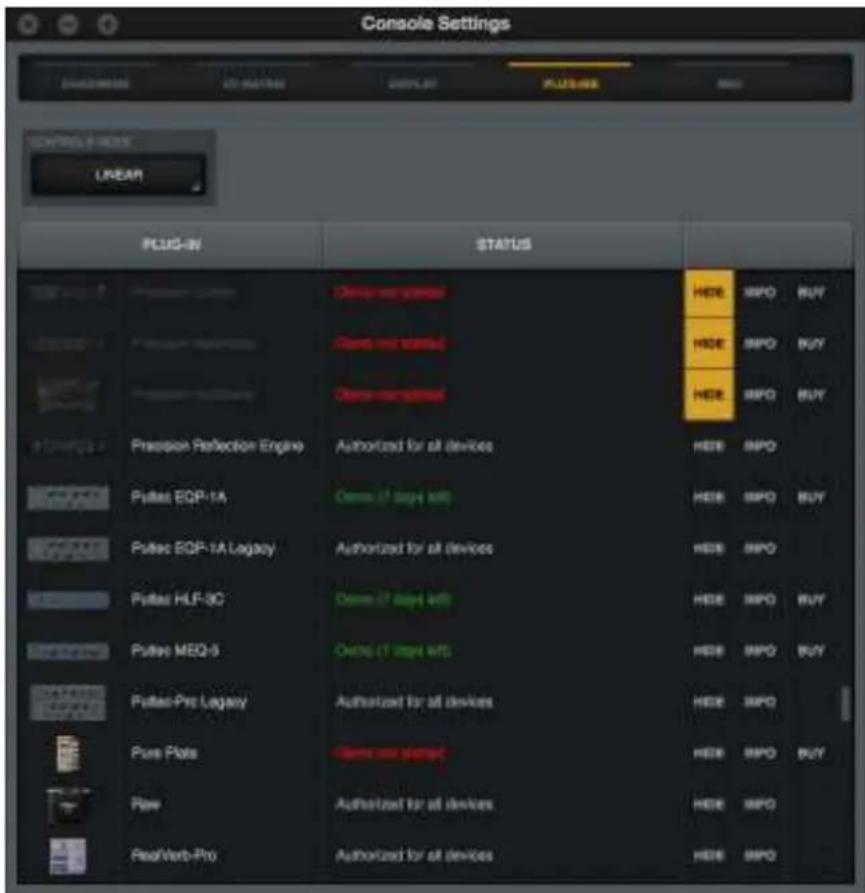
Plug-Ins panel
Controls Mode
This setting determines how UAD plug-in parameter knobs respond to adjustment. Three control modes are offered: Circular, Relative Circular, and Linear. The behavior of each mode is described below.
Tip: This setting is also available in the Configuration panel within the UAD Meter & Control Panel application.
Linear (slider) – In Linear mode, the knob is adjusted by dragging horizontally or vertically instead of by rotating. This behavior is similar to moving a physical fader.
Circular (jump) – In Circular mode, the software knobs behave similar to physical rotary knobs. Values are changed by clicking on the knob then rotating in a circular direction. When the edge of the knob is clicked, the parameter value jumps to the mouse position.
Relative Circular (grab) – Relative Circular mode operates similar to Circular mode, but the knob value does not jump to the mouse position when clicked. Instead, the knob value is modified relative to its original value.
In Relative Circular mode, click anywhere on the knob to make an adjustment originating at the original value (it's not necessary to click on the current knob position).
Tip: To increase adjustment resolution when adjusting rotary controls in circular and relative circular modes, increase the radius of the mouse relative to the knob while dragging (move the mouse farther away from the knob while dragging in a circular motion).
Plug-In Column
All installed UAD plug-ins are displayed in the list in alphabetical order. Settings for each UAD plug-in are contained within its row. Vertically scroll the list to see plug-ins that are not currently in view.
Status Column
The authorization status and/or demo state of the plug-in is displayed here. The status mirrors the status shown in the Plug-Ins panel within the UAD Meter & Control Panel application.
Tip: To start a 14-day plug-in demo, click START DEMO in the Plug-Ins panel within the UAD Meter & Control Panel application, or in the UAD Toolbar at the bottom of each UAD plug-in editor.
Hide Column
These switches prevent UAD plug-ins from being visible from within Console's Insert Assign popover. Click a plug-in's HIDE switch to toggle the state. The plug-in is hidden when HIDE is yellow and its title and icon are dim.
This function restricts the availability of assignable plug-ins. By default, all plug-ins are visible, even if they are unlicensed or the demo period is expired. By hiding plug-ins that are unlicensed or expired, only plug-ins that can process audio are exposed in the Insert Assign popover, which can be convenient for more rapid assignments.
Info Column
These switches open the plug-in's product page at UA's online store, providing a general overview the plug-in.
Tip: For detailed operational info for each plug-in, see the UAD Plug-Ins Manual.
Buy Column
Adds an unlicensed plug-in to the shopping cart at the UA online store. The switch is not visible for licensed plug-ins.
MIDI Panel
Console supports the ability to use MIDI to remotely set the tempo used for the Tempo Sync feature. The MIDI panel is where the specific MIDI controls are set. MIDI data is received by Console via the operating system.
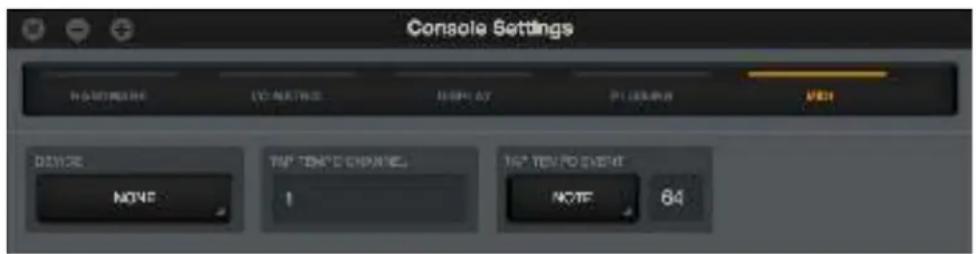
MIDI panel
MIDI Device
Sets the MIDI device to be used as the source for MIDI control. To set the device, click the MIDI DEVICE menu and choose a new device from the drop menu.
Note: Only devices configured in the operating system are available for selection in this menu.
Tap Tempo Channel
Specifies the MIDI channel to be used for MIDI control. To set the channel, click the field and enter a numerical value between 1 - 16.
Tap Tempo Event
Console can receive note or controller data for MIDI control of Tap Tempo. These two settings define the MIDI data type and value used for MIDI control. For instructions, see Changing tempo via MIDI.
MIDI Type Menu
Sets the MIDI data type to be used as the source for MIDI control. To set the data type, first click the drop menu then choose CONTROLLER or NOTE from the menu, or send the value from the MIDI controller.
MIDI Value Field
Sets the MIDI data value to be used as the source for MIDI control. To set the data value, first click the field then enter a numerical value between 0 - 127, or send the value from the MIDI controller.
MIDI Note Table
When NOTE is used as the MIDI type, the table below can be used as a reference for MIDI note values.
| Note | Octave | ||||||||||
| -1 | 0 | 1 | 2 | 3 | 4 | 5 | 6 | 7 | 8 | 9 | |
| C | 0 | 12 | 24 | 36 | 48 | 60 | 72 | 84 | 96 | 108 | 120 |
| C# | 1 | 13 | 25 | 37 | 49 | 61 | 73 | 85 | 97 | 109 | 121 |
| D | 2 | 14 | 26 | 38 | 50 | 62 | 74 | 86 | 98 | 110 | 122 |
| D# | 3 | 15 | 27 | 39 | 51 | 63 | 75 | 87 | 99 | 111 | 123 |
| E | 4 | 16 | 28 | 40 | 52 | 64 | 76 | 88 | 100 | 112 | 124 |
| F | 5 | 17 | 29 | 41 | 53 | 65 | 77 | 89 | 101 | 113 | 125 |
| F# | 6 | 18 | 30 | 42 | 54 | 66 | 78 | 90 | 102 | 114 | 126 |
| G | 7 | 19 | 31 | 43 | 55 | 67 | 79 | 91 | 103 | 115 | 127 |
| G# | 8 | 20 | 32 | 44 | 56 | 68 | 80 | 92 | 104 | 116 | |
| A | 9 | 21 | 33 | 45 | 57 | 69 | 81 | 93 | 105 | 117 | |
| A# | 10 | 22 | 34 | 46 | 58 | 70 | 82 | 94 | 106 | 118 | |
| B | 11 | 23 | 35 | 47 | 59 | 71 | 83 | 95 | 107 | 119 | |
MIDI note numbers by note name and octave
Unison
What is Unison?

Unison is an exclusive analog/digital integration system that's built into every Apollo preamplifier. It's the first and only way to truly emulate classic analog mic preamp, guitar amp, and pedal behaviors in an audio interface.
Unison is an audio processing breakthrough that starts right at the source, the input stage, allowing Apollo Solo USB's preamps to sound and behave like the world's most sought-after tube and solid state preamps, guitar amps, and pedals — including their all-important impedance, gain stage “sweet spots,” and component-level circuit behaviors.
Apollo Solo USB's preamps are designed for high resolution, ultra-transparent translation from microphone to converter. This clean hardware design is the foundation for adding software color with UAD plug-in processing.
Unison-enabled UAD preamp, guitar amp, and pedal plug-ins reconfigure the physical input impedance, gain staging response, and other parameters of Apollo Solo USB's mic preamp hardware to match the emulated hardware's design characteristics.
Because the hardware and software are intricately unified, Unison provides continuous, realtime, bidirectional control and interplay between Apollo Solo USB's physical mic preamp controls and the software settings in the Unison plug-in interface.
Controls on Apollo Solo USB's top panel dynamically adjust the Unison plug-in's parameters to match the target preamp/guitar amp/pedal behavior. Correspondingly, changing a setting in the Unison plug-in interface will modify Apollo Solo USB's panel settings.
Because Unison can be active on more than one mic channel, a complement of premium emulated hardware is available concurrently.
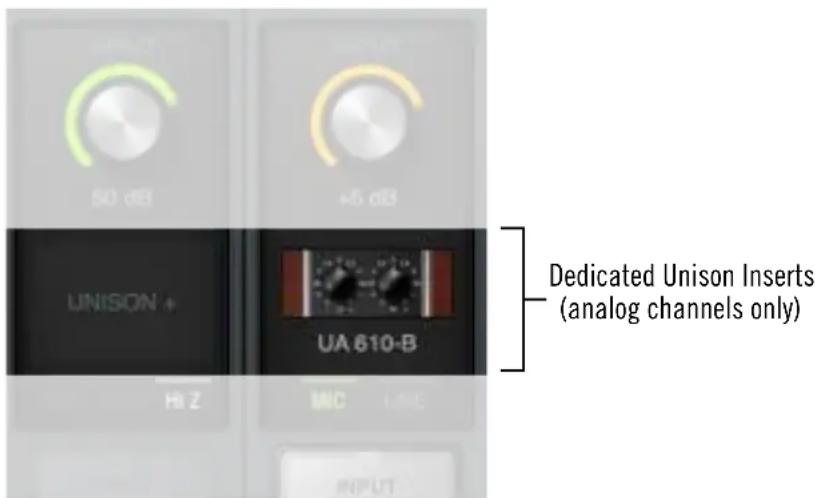
Unison is enabled by loading a UAD Unison plug-in into a dedicated Unison insert in Console
Unison Features
Unison technology enables these Apollo features, all with Realtime UAD Processing:
- Alternate microphone preamplifier sound – Apollo's ultra-transparent mic preamps inherit all the unique sonic and input characteristics of the emulated hardware preamp, guitar amp, or pedal, including the mic, line, and Hi-Z inputs.
- Realistic tandem control – Unison facilitates seamless interactive control of Unison preamp plug-in settings using Apollo's digitally-controlled hardware and/or the plug-in interface. All equivalent preamp controls (gain, pad, polarity, etc) are mirrored and bidirectional. The preamp controls respond to adjustments with precisely the same interplay behavior as the emulated hardware, including gain levels and clipping points.
- Hardware input impedance – All Apollo preamps feature variable input impedance in analog hardware that can be physically switched by Unison plug-ins for physical, microphone-to-preamp resistive interaction. This impedance switching enables Apollo's preamps to physically match the emulated unit's input impedance, which can significantly impact the sound of a microphone. Because the electrical loading occurs on input, prior to A/D conversion, the realism is faithful to the original target hardware preamp.
- Tactile gain staging – Apollo Solo USB's top panel preamp knob can independently adjust all gain and level parameters available within the Unison plug-in via Gain Stage Mode. The gain stage being adjusted can be remotely switched via Apollo Solo USB, so multiple gain levels and their associated colorations can be tuned from the hardware knob for precise physical tactile control, all without using the Unison plug-in's software interface.
Unison Plug-Ins
Note: In all descriptive text, "Unison plug-in" is defined as any Unison-enabled UAD mic preamp plug-in, UAD guitar/bass amp plug-in, or UAD pedal plug-in.
Unison-enabled UAD plug-ins are uniquely coded for Unison integration. Only UAD plug-ins that are Unison-enabled can be loaded in Console's Unison Insert Location.
For a complete list of all Unison-enabled UAD plug-ins, see “Unison Plug-Ins List” in the appendix at the back of the UAD Plug-Ins Manual.
Activating Unison
Unison is activated by inserting any Unison-enabled plug-in into the dedicated Unison insert available on Console's preamp input channels. Click the UNISON insert to select a Unison-enabled plug-in from the Insert Assign popover.
Tip: Unison can be active on more than one preamp channel at the same time.
Unison Insert Location
The Unison insert is located between the preamp gain knob and the standard channel inserts. The text "UNISON +" is overlaid on this insert.
Note: To make the Unison insert visible, choose OVERVIEW or INPUT from the View Column.
Unison Processing
Important: Unison processing in Console's Unison insert is always active on the channel's input signal, regardless of any subsequent channel routing options (HP cue, DAW I/O, etc). Therefore Unison processing is always recorded in the DAW, even if Console's Insert Effects switches are set to MON.
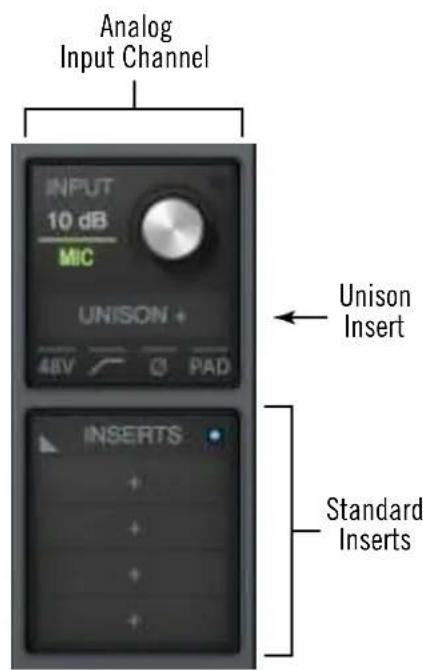
Click "UNISON +" to insert a Unison plug-in
Unison Plug-Ins with Standard Inserts
UAD plug-ins that support Unison can also be used Console's standard inserts and/or within a DAW via VST/AAX 64 (as with any UAD plug-in). However, when Unison plug-ins are used in standard inserts, there is no physical or electrical hardware interaction. Unison plug-ins function the same as non-Unison UAD plug-ins in this configuration.
Important: Unison features are available only when Unison-enabled UAD plug-ins are loaded within Console in the dedicated Unison inserts.
Unique Behavior of Unison Inserts
Console's Unison inserts have some operational differences compared to standard inserts, as described below.
Available UAD plug-ins
Only Unison plug-ins are available for selection from the Insert Assign Popover when inserting UAD plug-ins into the Unison insert. Non-Unison plug-ins are not visible in the Insert Assign popover with Unison inserts.
Note: All available Unison plug-ins are installed during the normal UAD Powered Plug-Ins software installation process (they are not separately installed).
Linked insert enable and plug-in enable controls
Console's Unison insert enable/disable switch and the Unison plug-in's on/off switch in the plug-in interface are linked. Changing either on/off setting will also change the other setting.
Disabled Unison plug-ins
When a Unison plug-in is unintentionally disabled (for example, when UAD-2 DSP resources are exceeded upon insertion), the red disabled indicator (see Insert State Indicators) does not appear as it does with non-Unison plug-ins. However, in this situation (unlike standard UAD plug-ins) the following indications do occur:
- The power switch within the Unison plug-in window is switched off
- The Unison insert's enable button is switched off
- Apollo Solo USB's top panel preamp gain level indicator color reverts to green
Note: The above functions can be re-enabled after adequate UAD resources are made available.
Controlling Unison Plug-Ins with Apollo Solo USB
When a Unison plug-in is inserted in Console's Unison insert, Apollo Solo USB's top panel preamp controls and the Unison plug-in's equivalent preamp controls are mirrored. Adjusting Apollo Solo USB's top panel preamp controls adjusts the Unison plug-in's preamp controls, and vice versa.
Plug-In Parameters
Unison plug-ins may contain parameters that are unavailable for hardware control via Apollo Solo USB. For example, the UA 610-B has EQ settings, but there are no EQ controls on Apollo Solo USB's hardware. To adjust these extra parameters, the Unison plug-in interface must be used.
Apollo Solo USB Top Panel Indication
Unison Active
When a Unison plug-in is inserted in a Console Unison insert and Apollo Solo USB's top panel channel select function is set to the same channel, the color of Apollo Solo USB's top panel level indicator (the LED ring around the knob) is orange instead of green.
Note: Apollo Solo USB's top panel must be in PREAMP mode and the channel selection indicator must match the Unison-enabled channel to see the top panel Unison indication.
The orange-colored ring indicates that the currently selected preamp channel is using a Unison plug-in within Console, and that Apollo Solo USB's top panel knob is controlling the first gain stage of the preamp plug-in (with pedal plug-ins, the knob is controlling the primary effect parameter, e.g., distortion).
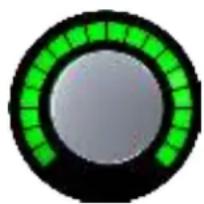
natural_image
Circular gauge with green segments and a gray center, no text or symbols visible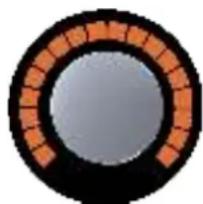
natural_image
Circular object with orange and black segments, resembling a stylized face or dial (no text or symbols)Apollo Solo USB's top panel preamp knob during normal operation (left) and when a Unison plug-in is in the Unison insert of Apollo Solo USB's selected channel (right)
Additional Gain Stages
More than one gain parameter within the Unison plug-in can be adjusted using Apollo Solo USB's top panel knob by activating Gain Stage Mode. When Gain Stage Mode is active, the color of Apollo Solo USB's top panel level indicator, and the target parameter within the Unison plug-in's interface, changes depending on which parameter is currently being controlled by the knob, and the parameter being controlled can be navigated remotely by pushing the knob's switch. See Gain Stage Mode for details.
Console Indications
Gain Level
When Unison is active in the channel, the color of Console's preamp gain level display (the colored ring around the gain knob), and the channel selection dot on the gain knob, is orange instead of green.
If the Unison plug-in is inactive (either via the insert disable switch or the power switch in the plug-in interface), the color reverts to green.
Note: Console's preamp gain control only adjusts the first gain stage of any Unison preamp plug-in, even when Apollo Solo USB is in Gain Stage Mode.
Gain Value Indicator
The preamp gain value display (the text value under the knob) always shows the current value of the main parameter within the Unison plug-in.
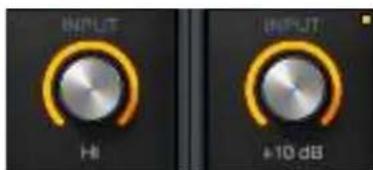
Additionally, the display is adapted to the parameter value and range of the first gain stage within the plug-in. For example, when the UA 610-A Tube Preamp plug-in is in the Unison insert, this field displays either “HI” or “LOW” because these are the only two values available in the first gain stage of this plug-in.
Note: This display shows “---” if the Apollo Solo USB hardware is not detected when a Unison plug-in is in the Unison insert and the insert is not disabled.
Top Panel Channel Selection
Level Knob Switch
In addition to the rotary control, Apollo Solo USB's top panel level knob has a switch function when the knob is pressed. The function of this switch varies depending on the active mode (either Channel Select Mode or Gain Stage Mode), as described below.
Channel Select Mode (standard operation)
Channel selection determines which input channel can be adjusted with Apollo Solo USB's top panel preamp controls. This is the standard behavior when a channel is not in Unison mode (top panel channel selection is not related to Unison functionality).
Either of these methods can be used for channel selection with Apollo Solo USB hardware:
- Preamp Switch – After the PREAMP switch has been pressed at least once to switch the unit to Input mode, pressing the PREAMP switch alternates the currently selected input channel (CH1 or CH2).
- Level Knob – After the PREAMP switch has been pressed at least once to switch the unit to Input mode, pressing the LEVEL knob alternates the currently selected input channel (CH1 or CH2).
An Apollo Solo USB channel is selected for adjustment when its channel selection indicator LED (CH1 or CH2, above the input meters) is lit. If stereo linking is active, both indicators LEDs (CH1 and CH2) are lit.
Gain Stage Select (Unison operation only)
When the currently selected Apollo Solo USB channel is in Gain Stage Mode, pushing the hardware level knob changes the Unison plug-in's gain parameter that is being controlled.
The color of Apollo Solo USB's top panel level indicator (the LED ring around the knob) changes to reflect the gain stage being controlled, and the gain stage is also indicated by the matching color of the indicator dot within the Unison plug-in's interface. For complete details, see Gain Stage Mode.
Gain Stage Mode
Unison plug-ins have either two or three gain parameters. By activating Gain Stage Mode, each of these gain stages can be independently adjusted using Apollo Solo USB's top panel gain knob.
Note: Gain Stage Mode can only be active on one preamp channel at a time.
Initially, when Unison is activated (before entering Gain Stage Mode), Apollo Solo USB's top panel gain knob controls the first gain parameter within the Unison plug-in. However, when Gain Stage Mode is active, pressing Apollo Solo USB's knob cycles through the available gain parameters in the plug-in.
Activating Gain Stage Mode
To enable Apollo Solo USB's Gain Stage Mode when using a Unison plug-in:
- In Console, confirm a Unison plug-in is inserted in the Unison insert of the Apollo Solo USB preamp channel to be controlled.
- Using Apollo Solo USB's top panel hardware, select the input channel to be controlled using Top Panel Channel Selection.
- Press AND HOLD Apollo Solo USB's top panel knob for at least two seconds.
The state of Gain Stage Mode is indicated on Apollo Solo USB and in the Unison plug-in, as detailed below.
Gain Stage Mode – Apollo Solo USB Top Panel Indication
Apollo Solo USB's top panel channel selection indicator (CH1 or CH2) flashes when Gain Stage Mode is active for the currently selected input channel.
Gain Stage Mode – Unison Plug-In Indication
A colored dot appears within the Unison plug-in interface on the target parameter being controlled by the hardware knob.
See Gain Stage Colors for related information.
Apollo Solo Top Panel: Flashing Channel Selection
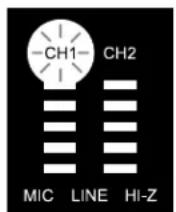
Unison Plug-In: Gain Parameter Outline

Gain Stage Mode indications — Hardware (left) and Software (right)
Deactivating Gain Stage Mode
Gain Stage Mode can be deactivated with any of these methods:
- Press and hold Apollo Solo USB's top panel knob for at least two seconds (Apollo Solo USB must be in Input mode by pressing the PREAMP button at least once)
- Disable the Unison plug-in via the plug-in editor window within Console
- Disable the Unison plug-in via the on/off parameter within the plug-in interface
- Remove the Unison plug-in from Console's Unison insert
- Change the selected channel by pressing the PREAMP switch on Apollo Solo USB's top panel
When Gain Stage Mode is deactivated, the following changes occur:
- The gain stage select function (pushing the top panel hardware knob) reverts to the channel select function
- The channel selection indicator on Apollo Solo USB's top panel stops flashing
- If a gain stage other than the first gain stage was being controlled, Apollo Solo USB's knob reverts to control of the first gain stage of the Unison plug-in, and the level indicator color reverts to orange
Controlling Individual Gain Stages
Selecting Gain Parameters For Control
When the currently selected Unison plug-in channel is in Gain Stage Mode (when its channel selection indicator is flashing), push Apollo Solo USB's knob to cycle through the available gain parameters within the Unison plug-in.
Note: Unlike Apollo Solo USB's top panel knob, Console's preamp gain control only adjusts the first gain stage of any Unison plug-in when Apollo Solo USB is in Gain Stage Mode. To adjust other gain stages from within Console, use Apollo Solo USB's gain knob or the Unison plug-in interface.
Gain Stage Colors
The gain stage being controlled is indicated by unique matching indicator colors on Apollo Solo USB's top panel and within the Unison plug-in's interface.
The color of the level indicator on Apollo Solo USB's top panel (the LED ring around the knob) changes with each gain stage, and the matching color dot within the Unison plugin's interface moves to the target gain parameter being controlled.
The gain stages available for control, and their associated colors, are:
- Orange – Gain stage one; the Gain parameter
- Amber – Gain stage two; the Level parameter
- Green – Gain stage three, the clean (non-modeled) output control
Note: Some Unison plug-ins have only two gain stages.
Matching Gain Stage Indicators
In Gain Stage Mode, Apollo Solo USB's level indicator (the colored ring around the top panel hardware knob) matches the colored dot on the target gain parameter in the Unison plug-in's interface, as shown below. The hardware and software controls are mirrored and the gain stage can be adjusted using either control.
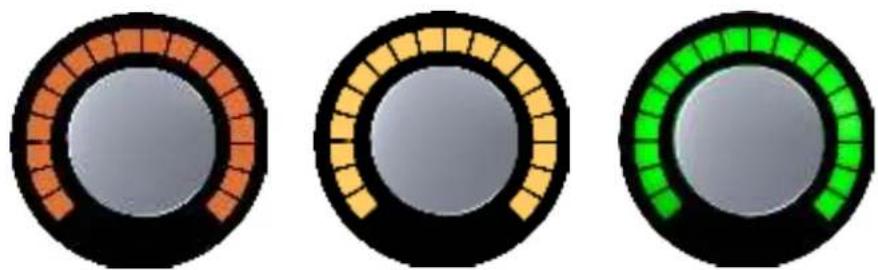
The color of Apollo Solo USB's level indicator changes to reflect the plug-in gain stage being controlled
natural_image
Close-up of a circular mechanical dial with numbered degrees and a pointer (no text or symbols visible)
The matching color dot on the parameter in the Unison plug-in interface indicates which gain stage is being controlled by Apollo Solo USB's top panel knob
Available Gain Stages
Unison plug-ins have up to three gain stage parameters. With Unison plug-ins that contain two gain parameters, only the available gain parameters are cycled and controlled in Gain Stage Mode.
Note: For details about the unique gain stage parameters available within individual Unison plug-in titles, refer to the UAD Plug-Ins Manual.
Unison Load/Save Behaviors
Caution: Apollo Solo USB hardware preamp settings (including +48V phantom power and PAD) can change when Console sessions are loaded. Details are explained in this section.
Loading Unison Plug-In Settings
When Unison plug-in settings are loaded in Console, the effect on currently active Unison plug-in settings varies depending on how the settings are loaded. It is important to understand this distinction, because critical preamp settings can be affected.
Note: When Unison plug-ins are used in Console's standard inserts and/or within a DAW, this section does not apply. Settings load behavior outside of the Unison insert is like all other (non-Unison) UAD plug-ins.
There are two ways Unison (and non-Unison) plug-in settings can be loaded in Console:
- Plug-In Presets – UAD Presets are loaded whenever a UAD plug-in is inserted (the default preset loads). Presets can be loaded from disk files via the Presets Manager or the UAD Toolbar. Preset files are used to save & load all settings of individual plug-in titles.
- Console Sessions – Console sessions are loaded from disk via the Sessions Manager Popover, the Console Recall plug-in within a DAW, or by double-clicking Console session files on disk. Console sessions are complete Apollo Solo USB configurations, containing all hardware and plug-in settings (i.e., Console sessions are Console presets).
Loading Presets: Hardware settings are inherited
When a Unison plug-in is loaded in the Unison insert and a preset is loaded into the plug-in, the plug-in inherits the current equivalent hardware settings of the Apollo Solo USB preamp, if those settings are available in the plug-in.
In other words, Apollo Solo USB's preamp settings always override a Unison plug-in's settings when a preset is loaded or the plug-in is inserted. This is done to prevent the plug-in's settings from switching the hardware to values that could cause extreme level changes and/or other unwanted circuit changes such as +48V phantom power.
For example, if the PAD is ON in the Apollo Solo USB preamp, when the Unison preset is loaded, the pad setting in the plug-in is enabled to prevent unexpected level increases.
Loading Sessions: Hardware settings are overridden
When a Console session is loaded (via Console Recall menu, DAW sessions containing the Console Recall plug-in, or double-clicking Console files on disk), ALL Console settings are overridden (changed) by the saved session, INCLUDING ALL Apollo Solo USB HARDWARE PREAMP SETTINGS such as PAD and +48V.
In other words, Console sessions always override Apollo Solo USB's preamp settings, even if potentially harmful preamp settings are contained in the session file. This is done because the very concept of Console session recall is to exactly reproduce all settings in the session.
For example, if PAD and +48V are OFF in the Apollo Solo USB preamp, when a Console session with PAD and +48V enabled is loaded, the PAD setting in the plug-in is disabled and +48V in the plug-in is enabled. In this case, sensitive equipment could be affected, such as speakers (level increases) and/or ribbon mics (+48V phantom power).
Unison Operation Notes
The operating notes in this section only apply to Unison functionality (when a Unison plug-in is loaded in Console's dedicated Unison insert).
These notes do NOT apply with Unison plug-ins that are used in Console's standard inserts, nor via VST/AAX 64 plug-ins within a DAW, even when a Unison plug-in title is used. In this scenario, Unison plug-ins function the same as all standard (non-Unison) UAD plug-in titles and there is no physical or electrical hardware interaction.
Note: Unison functionality is available only when Unison-enabled UAD plug-ins are loaded within Console in the dedicated Unison inserts.
- Caution: When a Console session is loaded (via Console Recall menu, DAW sessions containing the Console Recall plug-in, or double-clicking Console files on disk), ALL Console settings are overridden (changed) by the saved session, including all Apollo Solo USB hardware preamp settings such as +48V and PAD. See Loading Sessions: Hardware settings are overridden for additional details.
- Unison insert processing is always recorded in the DAW (regardless of the current Channel Insert Effects setting) because Unison plug-ins process the physical inputs.
- When a channel strip preset is saved from a preamp channel, the channel strip preset contains the state of the preamp channel's Unison insert.
- When a preamp channel strip preset is loaded into a preamp channel, the Unison insert state is replaced by the Unison instance state in the preamp channel strip preset. For example, if the preamp channel strip preset's Unison insert is empty, the Unison insert will be empty after loading the channel strip preset.
- Apollo Solo USB's top panel preamp controls are always current. Therefore, changes made to a Unison plug-in when the plug-in is bypassed are not retained when the plug-in is reactivated.
- A Unison plug-in's modeled behaviors and parameter ranges are used by the hardware controls whenever possible, even if the attribute is different than Apollo Solo USB's stock preamps. For example, if the Unison plug-in has a 15 dB pad, then Apollo Solo USB's top panel PAD button value will use the Unison plug-in's 15 dB value instead of Apollo Solo USB's stock 20 dB value.
- Default gain levels when a Unison plug-in is inserted can vary from Apollo Solo USB's default (non-Unison) preamp levels, and also between various Unison plug-in titles. This is a by-product of accurate preamp modeling. Because hardware preamp designs from each manufacturer vary, they all have different total gain amounts, control ranges, and control response curves, whether Mic, Line, or Hi-Z.
(Continued)
- If a Unison plug-in does not contain settings that are available on Apollo Solo (pad, low cut filter, etc), the Apollo Solo settings are not changed when the Unison plug-in settings are loaded, and the Apollo Solo settings are still available for control via Apollo Solo's top panel and/or Console channel.
- When a Unison plug-in is removed from the Unison insert, Apollo Solo's mic input impedance reverts to its default value of 5.4K Ohms.
- Apollo Solo's hardware preamp controls remain active even if the Unison plug-in is disabled.
- When the original hardware preamp being emulated by the Unison plug-in has a Hi-Z (instrument) input and associated Hi-Z input switch, this switch is unavailable in the Unison plug-in interface. Instead, the Unison plug-in's Hi-Z input is automatically selected when a mono (tip-sleeve) plug is inserted into the Unison channel's front panel Hi-Z input jack.
- A microphone, line input, or Hi-Z instrument source must be attached to the Apollo Solo input channel for Unison plug-in processing in the Unison insert to be audible.
Console Recall Plug-In
Console Recall is a unique DAW plug-in supplied in VST and AAX 64 formats. It is inserted and used within host DAWs as with any other plug-in.
The primary function of the Console Recall plug-in is to store Console's current setup within the DAW project via the SYNC (synchronize) switch in the plug-in. The plug-in can also be used to view and adjust Apollo Solo USB's monitor output level, mono, and mute states without having to leave the DAW.
Note: The Console Recall plug-in is not required to use the Apollo Solo USB interface hardware, the Console application, or a DAW.
SYNC
When a DAW project containing the Console Recall plug-in is saved and the SYNC switch is enabled in the plug-in, the currently active Console configuration is stored within the DAW project.
Note: The SYNC switch is not present within the Console application.
When the DAW project file is subsequently reloaded, Console is automatically restored to its configuration from when the DAW project was last saved, regardless of any changes to Console or Apollo Solo USB that were made in the interim.
Since plug-in settings are saved within DAW project files, using SYNC enables Console's current state to be stored within the DAW project file without saving or loading Console sessions presets via the Cached Sessions functions.
This feature ensures the DAW project will sound exactly the same when reloaded at a later date, even if Console contains customized settings that might affect the audio, such as send mixes, signal routings, and/or Realtime UAD Processing.
Console Recall plug-in interface
Console Recall Controls
Most Console Recall plug-in controls are duplicates of those found in the Console application. The exceptions are the SYNC switch, and the CONSOLE switch, which opens the Console application.
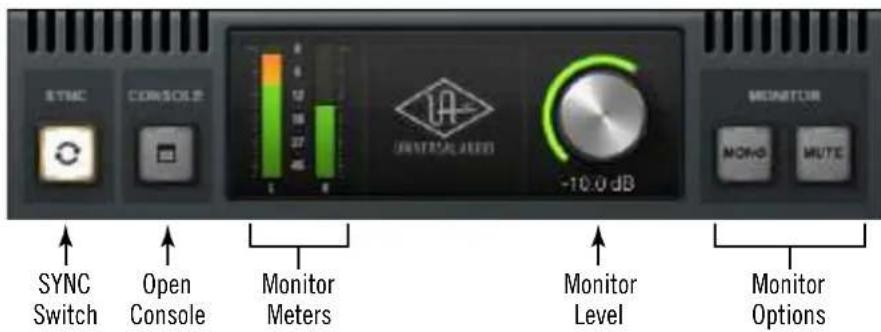
Console Recall plug-In controls
Monitor Controls
The exact same control descriptions in the Console application apply to the Console Recall plug-in controls. Refer to the Console Reference chapter for descriptions of the duplicated controls:
- Monitor Meters
- Monitor Level
• Monitor Output Options
Console Switch
The Console application can be opened by clicking the CONSOLE switch within the plug-in. Note that the Console application does not need to be open when using the DAW with the Console Recall plug-in. Console settings are always captured by the Console Recall plug-in as long as the SYNC switch is engaged.
How To Use Console Recall
To use Console Recall, simply place one instance of the Console Recall plug-in into any insert slot in the DAW project. The plug-in is installed to the same location as all other UAD plug-ins.
Note: The name of the plug-in is "Console Recall" (without the UAD prefix), so it's at the top of UAD plug-in lists within the DAW.
Important: To avoid unpredictable results, do not insert more than one occurrence of the Console Recall plug-in within any single DAW project.
Because the plug-in does not process audio in any way, the insert location isn't critical. Although it can be inserted in any location (audio track, virtual instrument track, aux bus, output, etc), inserting it in the master output is recommended for consistency because projects usually contain an output channel.
Upon instantiation, the plug-in's Monitor Level, Mono, and Mute controls mirror the equivalent controls in the Console application. Enabling SYNC causes the current Console settings to be stored within the DAW project.
Enabling SYNC
When Console Recall is first loaded, the SYNC switch is disabled (gray). To activate SYNC, click the switch so it is enabled (lit).
SYNC switch when disabled (left) and enabled (right)
Enabling SYNC does not change the Console settings. SYNC doesn't do anything until the DAW project file is saved and subsequently reloaded.
Important: SYNC saves Console's configuration within the DAW project, not the Console application. Therefore the DAW project file must be saved to disk to retain the Console settings in the project.
Effect on Session Name in Console
When a DAW project is loaded that contains the Console Recall plug-in with SYNC enabled, “- Sync Session -” is displayed in Console’s title bar.

Console session name when SYNC is enabled in DAW
Loading Synchronized DAW Projects
If SYNC was enabled when a DAW project containing Console Recall was saved, then loading that DAW project sends the Console settings saved in the plug-in to Console. If the current Console settings are different than the Console settings in the DAW plug-in, the Console settings that were active before the DAW project was loaded are overwritten.
Note: The Console settings that were active before the DAW project was loaded can be easily recovered if desired using the Cached Sessions feature in the Sessions Menu within the Console Application.
If SYNC was disabled when a DAW project file containing Console Recall was saved, then loading that project will not change the Console settings that were active before the DAW project was loaded.
Session State Parameter
The Console Recall plug-in has a parameter called “Session State” that is exposed for DAW automation but is not in the plug-in interface. Session State ensures all changes to Console settings and the DAW session are captured by the Console Recall plug-in. If something related to Session State appears in the DAW, it’s best to just ignore it.
Important: To ensure proper functionality when SYNC is enabled in Console Recall, do not create or edit DAW automations with the Session State parameter.
UAD Meter & Control Panel
The UAD Meter & Control Panel application is used to monitor and configure UAD device resources. It is also used to manually authorize UAD plug-ins after a purchase as the UA store. The application has two main windows: the UAD Meter, and the UAD Control Panel.
The UAD Meter displays the current DSP, program, and memory status of UAD devices in realtime. The UAD Control Panel has multiple panels that display and modify various system, plug-in, and global configuration parameters.
Note: The UAD Meter & Control Panel application is for all UAD device models (Arrow/Apollo audio interfaces and UAD-2 DSP Accelerators).
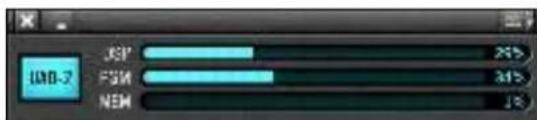
UAD Meter Window
The UAD Meter & Control Panel application can be launched or quit at any time. It does not need to be open or active to use Apollo Solo USB or UAD plug-ins. It is completely independent and does not require Console or a DAW. You can move the UAD Meter to a convenient location on your screen by dragging its window title bar.
Note: If “No Devices Found” appears in the UAD Meter window instead of the expected buttons and gauges, the UAD software is not communicating with the UAD hardware. If this occurs, double-check hardware and software installations and/or contact Technical Support.
Launching the Application
Either of these methods can be used to open the UAD Meter & Control Panel program:
- Right-click the blue UA diamond logo in the Windows System Tray (at lower right of screen), then select "Console" from the contextual menu
- Access the program from: Start Menu>All Programs>UAD Powered Plug-Ins>Console
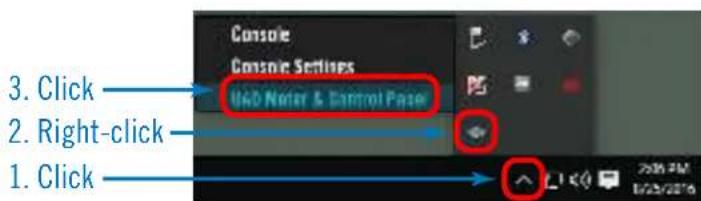

UAD Meter & Control Panel application icon
UAD Meter Window
Refer to the illustration below for descriptions in this section
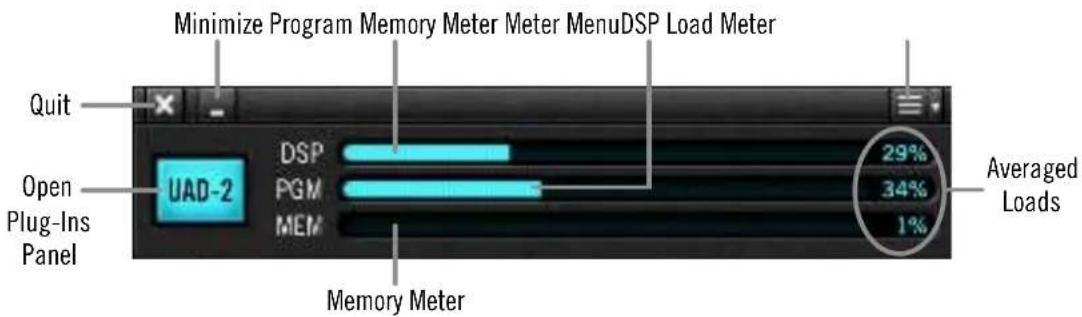
UAD Meter window elements
Title Bar
The Title Bar (the strip across the top of the UAD Meter window) contains buttons to quit the UAD Meter & Control panel application, minimize the UAD Meter window, and access the Meter Menu.
Note: The Quit, Minimize, and Menu button positions shown above are as they appear on Mac systems. These button positions are reversed on Windows systems, reflecting the OS conventions.
Plug-Ins Panel Button
Clicking this blue button opens the Plug-Ins panel. It has the same function as selecting "Plug-Ins..." from the Meter Menu.
UAD Resource Display
UAD plug-in loads are shown in the UAD Meter window. These three gauges (DSP, PGM, and MEM) provide visual feedback, helping to determine which UAD plug-ins to use if available UAD resources are limited.
The UAD resources are displayed as blue bar graphs and as percentages. These gauges have no controls; they are visual indicators only.
Tip: The UAD Resource Gauges are also displayed in the Info Bar within Console.
Averaged Loads
The load for each gauge represents the average for all UAD devices in use. For example, if a UAD-2 Satellite USB OCTO is connected, the UAD DSP load is an average of the eight DSP processors in the unit plus the single DSP within Apollo Solo USB. If additional UAD-2 accelerators are added, the average load is automatically adjusted.
Individual Loads
When additional UAD devices are added to the system, individual DSP loads within the individual units can be viewed in the System Information panel.
UAD Plug-In Loads
The amount of UAD resources used by UAD plug-ins vary with each individual plug-in; more complex algorithms require more resources.
UAD Instance Chart
The amount of DSP used by each individual UAD plug-in is available in the UAD instance count chart. The chart can help determine which to plug-ins to use with available resources. The chart is published online at help.uaudio.com.
Static Loads
Apollo Solo USB uses UAD DSP and memory for its internal digital mixer and Input Delay Compensation engine. Therefore, the meters will indicate loads when Apollo Solo USB is connected, even if UAD plug-ins are not inserted in Console or the DAW.
Note: Console's Input Delay Compensation can be disabled in Console Settings to slightly reduce UAD loads when IDC is not needed.
DSP
The DSP gauge indicates the amount of digital signal processing resources that are being used by all UAD devices in the system.
DSP is the primary hardware resource that powers the UAD plug-In algorithms. When UAD plug-ins are disabled, DSP requirements are decreased.
Note: When UAD plug-ins are disabled, DSP requirements are decreased EXCEPT when the plug-in is disabled using the soft bypass control within the plug-in interface. This control may be named bypass or power, depending on the plug-in.
Program
The Program (PGM) gauge indicates how much UAD program memory is in use. Program memory is an on-chip memory that is specific to the UAD-2 DSP processor and is used for certain UAD plug-in resources.
Each unique UAD plug-in uses a bit of program memory. If many different UAD plug-ins are loaded simultaneously, it is possible for this resource to run out before a DSP overload occurs. This threshold is considered and factored in by the automatic UAD load balancing routines.
Memory
The Memory (MEM) gauge indicates the percentage of UAD RAM that is currently in use. It indicates the total available UAD memory available, regardless of the number of DSP processors that are installed.
Memory is used for echo, delay lines, reverb, and other spatial processing. When UAD plug-ins are disabled but not unloaded, memory requirements are not decreased. In this case, the memory remains loaded so that reverb tails and delay lines are not cut off when the plug-in is disabled.
Meter Menu
The Meter Menu can be used to access the UAD Control Panels and Always On Top mode. To view the Meter Menu, click the menu button in the UAD Meter window title bar as shown below. After clicking the menu button, select an available function from the drop menu.
Tip: The Meter Menu functions can also be accessed by using the keyboard shortcuts listed in the menu.
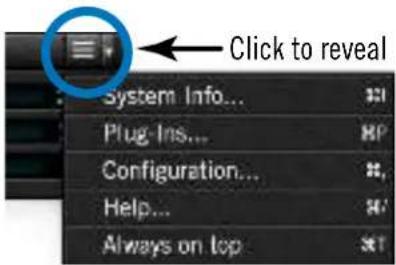
Accessing the Meter Menu
Control Panels
The UAD Control Panels (System Info, Plug-Ins, Configuration, Help) can be accessed by selecting them from the Meter Menu.
Always On Top
The UAD Meter & Control Panel application windows can be set to either normal or Always on top view modes.
In normal mode, the UAD Meter and UAD Control Panel windows are covered by the windows of the foreground application. Normal mode is active when the Always On Top menu item is unchecked
In Always On Top mode, the UAD Meter and UAD Control Panel windows always float on top of other windows, even when other applications are in the foreground. Always On Top is active when a check mark appears next to the item in the Meter Menu.
UAD Control Panels
The UAD Control Panels are where detailed system information is displayed and global UAD plug-in settings are modified. The main UAD Control panel window has four panels, organized by related functions: System Information, Plug-Ins, Configuration, and Help.
Accessing the Control Panels
The UAD Control Panel window is accessed from the UAD Meter window. To open the Control Panel, click the menu button in the UAD Meter window title bar as shown below. After clicking the menu button, the available functions are listed in the drop menu.
Tip: The UAD Control Panels can also be accessed by using the keyboard shortcuts listed in the Meter Menu.
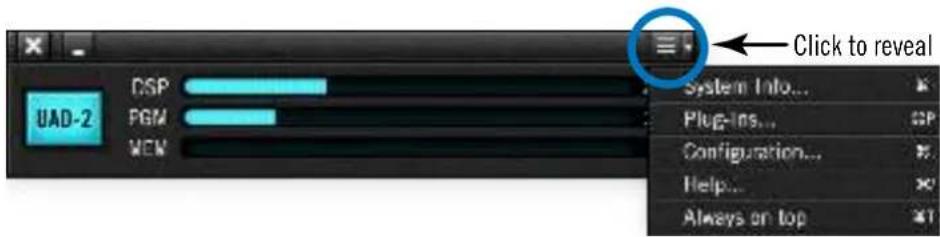
Control Panels drop menu
When the main UAD Control Panel window is open, the individual window panels are accessed by clicking the panel name buttons at the top of the Control Panels window or typing the keyboard shortcuts shown in the Control Panel drop menu.

Control Panel buttons with System Info panel selected
System Information Panel
The System Information panel displays detailed UAD software and hardware information and contains several useful buttons. Refer to the screenshot below for descriptions in this section.

Software Section
Version String
The currently installed version of UAD software is displayed here.
Check for Updates
This button checks the Universal Audio web servers for a newer version of the UAD software. Running the latest version of UAD Powered Plug-Ins is recommended for maximum stability and new platform features, such as the latest UAD plug-ins.
Plug-In Latency
UAD plug-in latency in the DAW, in samples and milliseconds, is displayed here when the DAW is running.
Note: These plug-in latency values are unrelated to UAD plug-ins used within Console.
The displayed values are calculated from the current audio I/O buffer size and the session sample rate when Extra Buffering is off. When Extra Buffering is on, the displayed latency is the I/O buffer size plus 64 samples.
The displayed latency value does not reflect the lowered latency when LiveTrack Mode is active in UAD plug-ins within a DAW.
Note: The displayed sample latency number does not include the extra samples produced by UAD plug-ins with additional latency. For more detailed information about the extra samples and latency, see Latency & Apollo Solo USB.
Hardware Section
Detailed information about each active UAD device and its DSP is displayed in the Hardware area. If several devices are installed, use the scroll bar to see the other devices if they are out of view.
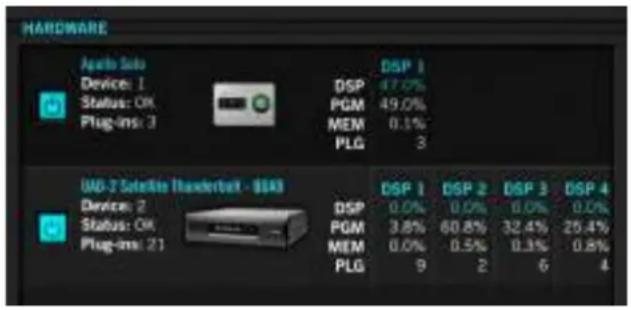
Hardware section as it appears with multiple UAD devices
Device Status
For each installed device, its status and a small hardware icon are displayed. When the device displays “Status: OK” the hardware is operating properly. The total number of UAD plug-ins loaded on each device is also displayed here.
Device Enabled
Individual UAD devices can be disabled using the Device Enabled button. This can be useful, for example, if creating a session on a system with multiple devices that will be transferred to a system with fewer devices, or to streamline performance of the host system when multiple devices are not needed.

Click the button to disable an individual device. The device is enabled when the button is blue. Devices remain disabled only while the UAD Meter & Control Panel application is open. When the UAD Meter & Control Panel is quit, disabled devices are re-enabled.
Note: Disabling devices does not disable plug-ins already running on the device; it only prevents additional plug-ins from being loaded onto the device.
Important: For optimum results, quit any host applications using UAD plug-ins before disabling/enabling devices.
DSP Load
If more than one UAD DSP is installed, information for each DSP is displayed. DSP, Program (PGM), and Memory (MEM) loads are displayed as a percentage of total available load for that processor. The number of UAD plug-ins (PLG) running on each individual processor is also displayed.
Save Detailed System Profile
Clicking this button will generate a detailed UAD system profile and prompt you for a location to save the text file to disk. This file contains an even greater level of detail than the System Information panel, which can be useful for troubleshooting or if UA Customer Support requests this document when providing assistance.
The profile lists the version strings of the individual UAD software components, installed device type(s) with serial and hardware ID numbers, host computer information, and detailed authorization status for all UAD plug-ins.
Plug-Ins Panel
The Plug-Ins panel displays the current authorization and demo status of all installed UAD plug-ins. Use the scroll bar to view plug-ins that are not visible in the list. Refer to the screenshot below for descriptions in this section.
Tip: The Plug-Ins panel can be accessed by clicking the blue Plug-Ins Panel Button labeled "UAD-2" in the UAD Meter window.
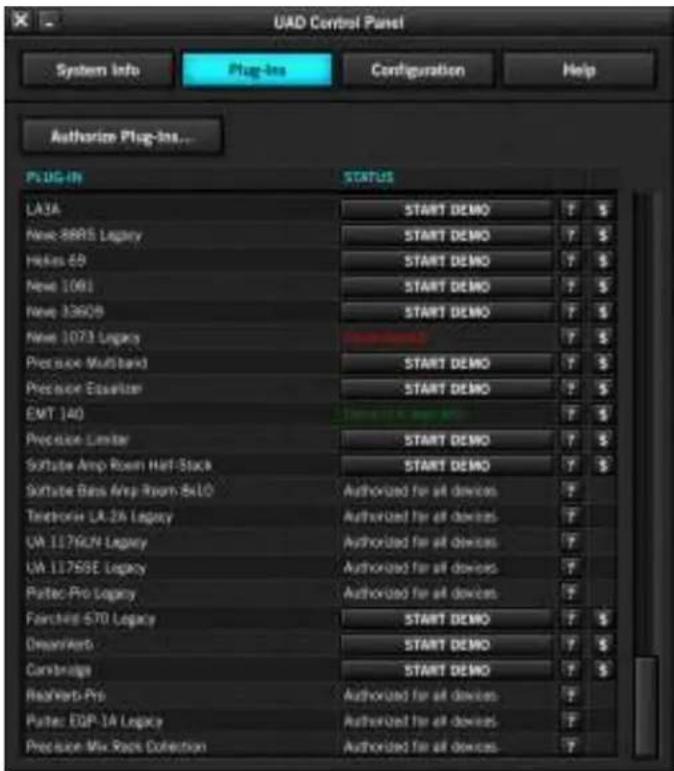
Authorize Plug-ins button
UAD plug-ins are automatically authorized each time the computer is started (internet connection required). This button links to your account at the UA online store to manually authorize licensed UAD plug-ins.
Note: Click this button whenever you buy a plug-in at the UA store to manually authorize your new plug-in purchase.
The complete procedure for manual UAD device authorization is detailed in the UAD Authorization Procedure. If the UAD computer is not connected to the internet, see Offline UAD Authorization.
Important: UAD plug-ins require authorization before they can be used.
Plug-In Column
All currently installed UAD plug-ins are displayed in the Plug-In column. Plug-Ins are listed by release order, with newest plug-ins at the top of the column.
Status Column
The Status column reflects the current authorization state of each UAD plug-in. After authorization, the status will show one of the following:
Authorized for all devices – When the plug-in is licensed and authorized to run on all devices in the system, “Authorized for all devices” is displayed in white text.
When a plug-in is licensed but not all devices in a multi-device system are authorized with the license (when the devices are not in the same UA account system), the Status column indicates which of the devices is authorized (for example, “Authorized for device 1 only”).
Start Demo – When this button is visible, the demo period has not been started for the plug-in. Click the START DEMO button to begin the 14-day trial period.
UAD plug-in demos can also be initiated by the START DEMO button in the UAD Toolbar at the bottom of the plug-in window. See Demo Mode for detailed information.
Important: The 14-day demo period can only be activated once, and cannot be stopped or restarted during this period. Don't activate demo mode unless you have adequate time to thoroughly evaluate its sound and functionality.
Demo Active (days remaining) – If the 14-day demo has been activated but is not yet expired, the number of days remaining in the trial period is displayed here in green text.
Demo Expired – If the 14-day trial period has ended, DEMO EXPIRED is displayed here in red text.
Help Column
Clicking the Help button (?) opens a link to the plug-in product page at the UA online store.

Buy Column
Clicking the Buy button (\$) adds the plug-in to your shopping cart at the UA online store. See Buying UAD Plug-Ins for details. This button does not appear if the plug-in is already licensed.

Tip: The BUY button provides a quick visual reference to determine which UAD plug-ins are unlicensed.
Configuration Panel
The UAD Configuration Panel is where most of the global UAD settings and preferences are specified for UAD devices. Refer to the screenshot below for descriptions in this section.
Note: Settings related specifically to Apollo Solo USB's audio interface functionality and Console are set in Console Settings.
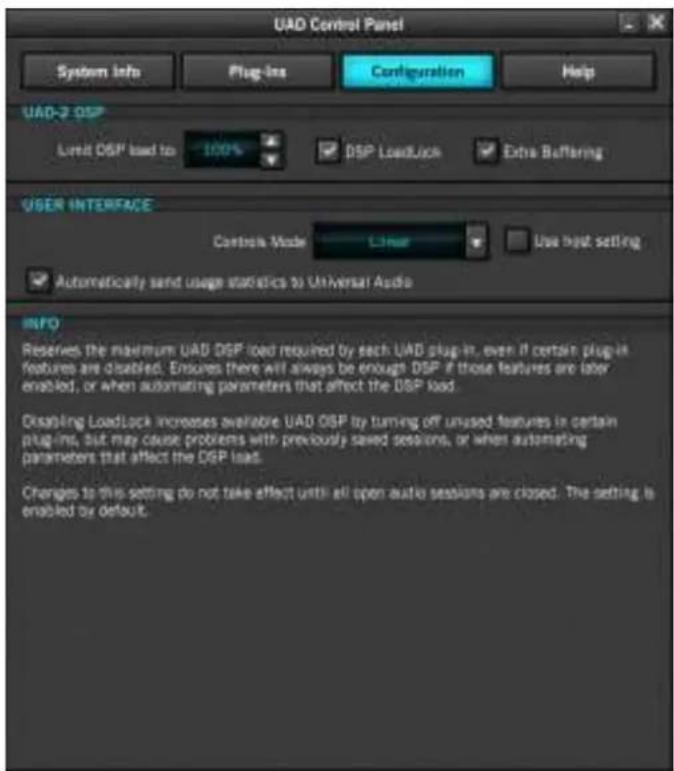
The settings displayed in the Configuration Panel depend on the UAD hardware that is currently installed.
Note: UAD settings apply to all UAD-2 DSP Accelerators and UA audio interfaces unless specifically noted otherwise.
UAD-2 DSP Settings
Overview
Without UAD plug-ins, overloading the host computer system with native (host CPU based) plug-ins can cause audio dropouts and other system issues. Some DAWs, for example, provide a switch that allows you to trade latency for stability when the system is overloaded. Similarly, the UAD DSP load cannot exceed 100% without unpredictable behavior.
With the Limit DSP Load feature, the UAD DSP can also be limited so the load cannot exceed 100%, thereby increasing overall system stability in high load situations. With very heavy UAD loads, DSP load limiting may also improve host CPU performance.
There are many variables that affect DSP load (sample rate, I/O buffer size, parameter values, mono/stereo, automation, host system performance, etc). Although these variables are taken into account, the resulting measurement cannot be absolutely accurate due to variations in system configurations, including computer bus loading, which is impossible to measure.
Systems that are heavily loaded due to the presence of other devices or suboptimal configurations may cause additional DSP loading that cannot be measured by the UAD plug-in load calculator. The DSP load limit should be reduced in this case.
It is possible for certain (atypical) conditions to be met where another UAD plug-in can't be added, even when the UAD Meter says you should have DSP available when compared to the DSP Load Limit value.
Note: When Limit DSP Load is enabled and the DSP load limit is exceeded when instantiating a new UAD plug-in, an overload message will appear and DISABLED will be displayed in the plug-in's UAD Toolbar. In this case, even though the UAD plug-in loads, it will not process audio.
Limit DSP Load
This setting determines the maximum UAD DSP load. If performance issues such as overloads, dropouts, stuttering, and/or other artifacts persist, change the UAD DSP load value by clicking the triangles to the right of the percentage display or entering a value directly with text entry.
Note: UAD-2 DSP load limiting is always on. 100% (the default value) is the maximum available setting.
DSP LoadLock
DSP LoadLock reserves the maximum UAD-2 DSP load required by each plug-in, even if certain plug-in features are disabled. This ensures there will always be enough DSP if those features are later enabled, or when automating parameters that affect the DSP load.
Disabling LoadLock increases available UAD-2 DSP by disabling unused features in certain plug-ins, but may cause problems with previously saved sessions that had all plug-in features enabled, or when automating parameters that affect the DSP load.
The specific UAD plug-ins that have the ability to reduce DSP use when certain features are disabled are listed in the UAD Instance Chart at help.uaudio.com. These plug-ins are marked with an asterisk (*) in the chart.
Enabling DSP LoadLock is recommended for optimum performance. Disable LoadLock only when you need to squeeze in that extra bit of DSP resources.
Note: Changes to this setting do not take effect until all open sessions containing UAD plug-ins are reloaded.
Extra Buffering
Extra Buffering adds an additional 64 samples of buffering for increased DAW compatibility.
Note: This setting is unrelated to UAD plug-ins used within Console.
If your DAW is incompatible with reduced latency when Extra Buffering is off, a dialog will be displayed indicating that Extra Buffering must be enabled. If this dialog does not appear, disable Extra Buffering to reduce latency in the DAW.
Note: Changes to this setting do not take effect until all open sessions containing UAD plug-ins are closed.
User Interface Settings
Controls Mode
This setting determines how UAD plug-in parameter knobs respond to adjustment. Three control modes are offered: Circular, Relative Circular, and Linear. Select the desired mode from the Controls Mode menu.
Tip: To increase control adjustment resolution when in adjusting rotary controls in circular and relative circular modes, increase the radius of the mouse relative to the knob while dragging (move the mouse farther away from the knob while dragging in a circular motion).
Linear (slider)
In Linear mode, the knob is adjusted by dragging horizontally or vertically instead of by rotating. This behavior is similar to moving a fader or other slider control.
Circular (jump)
In Circular mode, the software knobs behave like physical rotary knobs. Values are changed by clicking on the knob then rotating in a circular direction. When the edge of the knob is clicked, the parameter value instantly jumps to the mouse position.
Relative Circular (grab)
Relative Circular mode operates similar to Circular mode, but the knob value does not jump to the mouse position when clicked. Instead, the knob value is modified relative to its original value.
In this mode you can click anywhere on the knob to make an adjustment originating at the original value (it's not necessary to click on the current knob position).
Use Host Setting
When Use Host Setting is checked, the control mode that is set within the DAW's preferences is used (if this feature is supported by the DAW). This setting forces the DAW to override the control mode set here.
Note: When Use Host Setting is checked, the UAD Meter Controls Mode settings have no effect if the control mode can be set within the DAW.
Automatically send usage statistics to Universal Audio
Enabling this option helps make UAD software better. If checked, statistics will be periodically sent to Universal Audio in the interest of product improvement. These statistics are minimal, and do not impact your system performance. If this box is unchecked, statistics are not sent.
Info Display
This area displays helpful text about parameters in the Configuration panel. Hover the mouse over a Configuration setting to view the informational text.
Help Panel
The Help & Support Resources panel (shown below) contains helpful buttons to help you get the most out your Apollo Solo USB and UAD plug-ins experience.
The button names are self-explanatory. Click a button to open its page on the internet. If the UAD computer isn't online, much of the information is in the manual you're reading now; find the topic in the Table of Contents or the PDF reader's search feature.
Product Manuals is the only button that doesn't link to the internet. Instead, this button opens the UAD Documentation folder containing all UAD product operation manuals. See About Apollo Solo USB Documentation for related information.
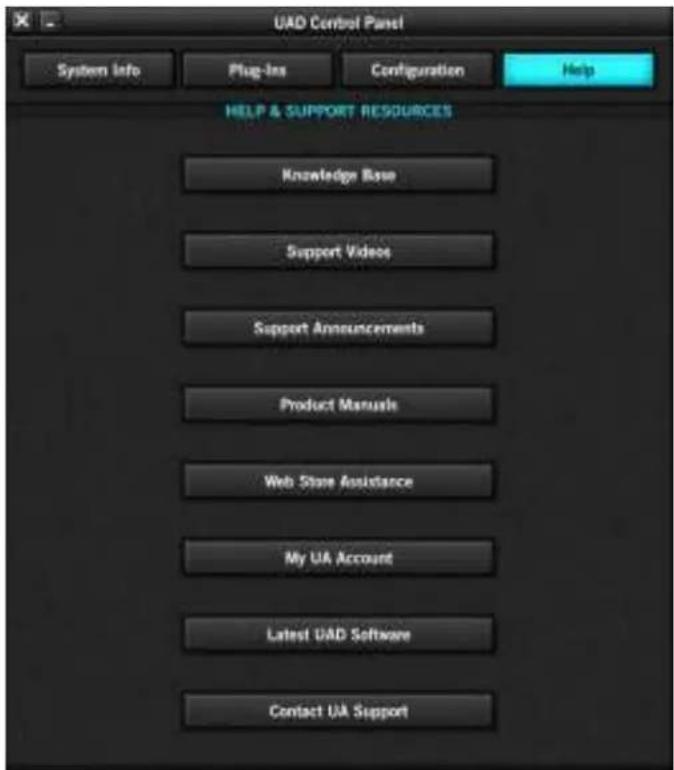
Using UAD Plug-Ins
Loading UAD Plug-Ins
Each plug-in host application (Console and/or a DAW) has its own methods for loading (aka instantiating, inserting, launching) and using plug-ins. To load UAD plug-ins within Console, see Inserting UAD Plug-Ins. To load UAD plug-ins within a DAW, consult the DAW documentation.
The UAD Plug-In Interface
One typical UAD plug-in interface is shown below. Each plug-in contains various control parameters for modifying the sound of the plug-in, display-only elements (such as meters) for visual feedback, and the UAD Toolbar. The UAD Toolbar is common to all UAD plug-ins, and is displayed at the bottom of the interface.
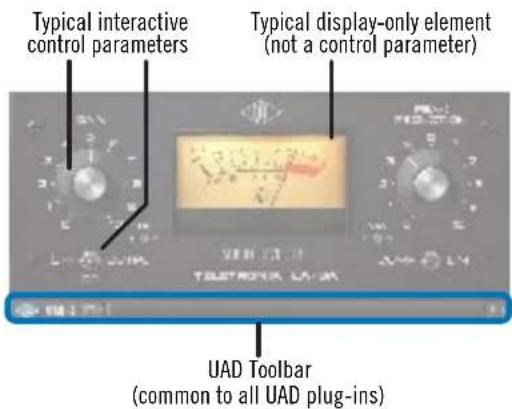
Typical UAD plug-in interface
Controls View
Some DAW applications have an alternate plug-in display mode feature called Controls View, Parameter Mode, or similar terminology. This mode displays the control parameters as a list with simple sliders, switches, and menus (the appearance is controlled by the DAW), which some users may prefer. Consult the DAW documentation for how to display this view. Controls view is not available within Console.
Typical UAD plug-in as displayed in controls view
UAD Toolbar
The UAD Toolbar is located at the bottom of every UAD plug-in (when the plug-in is not in Controls View). Refer to the illustration below for control descriptions in this section.
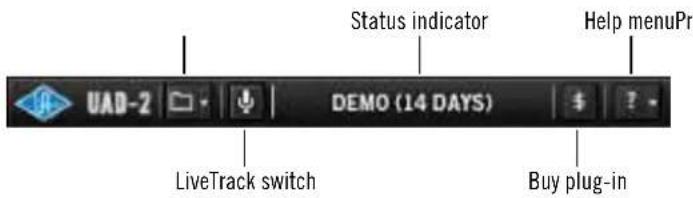
UAD Toolbar elements
Presets/Settings Menu
This menu can be used to manage UAD plug-in settings from within a DAW.
Tip: When using plug-in presets within Console, the Presets Manager within Console is recommended for managing presets (instead of the UAD Toolbar) because of its improved functionality.
The current settings within a UAD plug-in can be saved to disk as a preset file. The preset can then be subsequently loaded into another instance of the same UAD plug-in title and/or shared with other users. Current UAD plug-in settings can also be copied and pasted between instances of the same UAD plug-in title.
These functions are available via the Preset/Settings Menu.
Note: UAD plug-in settings are saved within a project session file by the DAW software and/or Console, and settings are recalled when the session is loaded. This occurs automatically without using the Preset/Settings Menu.
Additional Factory Presets
Many UAD plug-ins include additional factory presets that are not within the factory bank (factory bank presets are accessed directly within the DAW). The additional factory presets are automatically installed to the Default Preset Location.
To access the additional presets from within a DAW, use the Load Preset function in the Preset/Settings menu within the UAD Toolbar. the Presets Manager within Console.
Preset/Settings Compatibility
Load/save and copy/paste of parameter values between the same UAD plug-in title is allowed, as well as load/save/copy/paste between SE and standard plug-ins of the same title (for example, between Neve 33609 and Neve 33609SE).
Note: Presets and settings between Legacy titles and their newer equivalents with the same title are not compatible (e.g., Fairchild 670 Legacy and Fairchild 670).
Load/Save Preset
Preset/Settings Menu
The Preset/Settings menu is used to load/save plug-in presets and copy/paste plug-in settings when UAD plug-ins are used within a DAW.
To access the Preset/Settings menu, click the folder icon in the UAD Toolbar, then select an item from the drop menu.
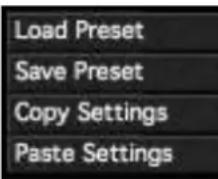
Tip: When using UAD plug-ins within Console, use Console's Presets Manager instead for its improved functionality.
The Preset load/save features support presets but not banks. To load and save banks, use the DAW's bank management feature (if available).
When Load Preset or Save Preset is selected from the Preset/Settings Menu, the standard operating system load/save file dialogs are presented. Preset files can then be loaded (if the plug-in is the same type), or saved to any disk location.
Copy/Paste Settings
Settings can copied and pasted directly between UAD plug-ins (within the Preset/Settings Compatibility guidelines) without using the interim step of creating a preset file.
To copy/paste settings between UAD plug-ins, select Copy Settings from the drop menu of the source plug-in, then select Paste Settings from the drop menu of the destination plug-in.
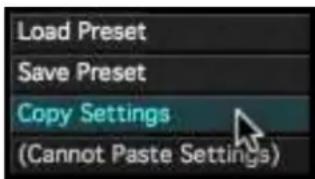
Note: If the menu displays “Cannot Paste Settings,” then settings were not copied first or the paste destination has incompatible settings.
Default Preset Location
When the load/save functions are used, the OS load/save file dialogs are automatically directed to the default preset location. Although UAD presets can be loaded from (and saved to) any disk location, using the default preset location automatically organizes all your presets of the same UAD plug-in title within the same folder.
The Presets folder path below is the parent folder for all UAD plug-in presets. Within the parent folder is a subfolder for each individual UAD plug-in title, and the subfolder contains all the presets for that UAD plug-in.
• C:\Program Files (x86)\Universal Audio\Powered Plugins\Presets
Status Indicator
The Status indicator in the UAD Toolbar displays information about the current state of the plug-in. Each state is described below.
Start Demo – When START DEMO is displayed, the 14-day trial period for the particular plug-in has never been activated. Clicking this button will start the demonstration period (you can also start the demo in the UAD Control Panel's Status Column.
Important: The 14-day demo period can only be activated once, and cannot be stopped or restarted during this period. Don't activate demo mode unless you have adequate time to thoroughly evaluate its sound and functionality.
Demo Active – After starting the demo, and when the plug-in is still within the active 14-day trial period, the number of days remaining in demo mode is displayed here.
Disabled – When DISABLED is displayed in red, the plug-in will not process audio. This can occur in two situations: either the demo period has expired (click the Buy button!), or the UAD DSP is overloaded and there are not enough UAD resources to run the plug-in.
Blank – When no text is displayed in the Status area, the plug-in is licensed and operating normally. In this state, the Buy button is not displayed.
Buy (\$)
If the UAD plug-in is unlicensed, the Buy (\) button is displayed. Clicking the “\” button opens the plug-in’s page at the UA store so you can purchase the license. See Buying UAD Plug-Ins for purchasing details.
Help (?) Menu
The Help drop menu contains two convenient shortcuts. To select the shortcuts, click the “?” button in the UAD Toolbar, then a choose shortcut from the menu.
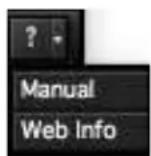
Manual – This option opens the UAD Plug-Ins Manual, where all features and functions of all individual UAD plug-ins developed by Universal Audio are documented.
Note: With Direct Developer (3rd-party) plug-ins, the manual provided by the developer is opened.
Web Info – This option opens the plug-in's page at the UA store so you can learn more about and/or buy the plug-in.
LiveTrack Mode
LiveTrack mode reduces latency on an active UAD plug-in to the lowest possible amount when the UAD plug-in is used within a DAW. This feature is useful for monitoring UAD-processed audio when recording live performances via software monitoring in the DAW.
Note: LiveTrack is not available for UAD plug-ins used within Console, where Realtime UAD Processing always minimizes latency.
Reduced latency with LiveTrack is accomplished by circumventing standard I/O buffering processes. In LiveTrack mode, UAD signal data is transferred and processed immediately instead of being buffered.
Note: LiveTrack mode is unavailable on all UAD-2 devices whenever any UAD-2 FireWire device is connected to the system.
Increased Host Loading
When LiveTrack is active, host CPU loading increases. The host load is directly proportional to the DSP load of the UAD plug-in(s) in LiveTrack mode. However, host CPU is never used for UAD plug-in processing with LiveTrack.
Extra Latency with LiveTrack
When Extra Buffering is enabled or when Upsampled UAD Plug-Ins are used with LiveTrack, latency is increased. Extra Buffering adds 64 samples, and each plug-in with additional latency using LiveTrack adds the value from the chart in the UAD Plug-Ins Manual.
Note: For more detailed information about latency and buffers, see Latency & Delay Compensation
LiveTrack Activation
To activate LiveTrack Mode, click the microphone icon switch in the UAD Toolbar. LiveTrack Mode is active when the mic icon is red.
LiveTrack Mode can be activated simultaneously on multiple UAD plug-ins. However, host system CPU loads will increase with each LiveTrack Mode instance.
LiveTrack switch as it appears when active
Adjusting Parameters
The parameter settings within each UAD plug-in can be adjusted to achieve a desired sonic effect. Parameter values are easily modified by dragging sliders, rotating knobs, clicking switches and buttons, or by selecting values from a drop menu. The functions of all individual UAD plug-in parameters are detailed in the UAD plug-in manuals.
The parameter adjustment style can be Circular, Relative Circular, or Linear. For descriptions of these options, see User Interface Settings.
Tip: To increase adjustment resolution when adjusting rotary controls in circular and relative circular modes, increase the radius of the mouse relative to the knob while dragging (i.e., move the mouse farther away from the knob while dragging).
Text Entry
Parameters that have a value display field can be modified directly with text entry. To enter a parameter value using text entry, single-click the parameter value text field. The text value will highlight, indicating it is ready to receive a new value. Type in a new value, then press Return, Enter, or Tab, or click outside of the text box. Press Esc if you want to revert to the prior setting without entering the new value.
Values entered via text entry are rounded to the closest significant digit. If an entered value is out of range, it will be ignored.
Time Values
To enter time values, the units must be specified; m = milliseconds, and s = seconds. For example: To enter 400 milliseconds, type 0.400s or 400m. To enter 1.5 seconds, type 1.5s or 1500m.
Mouse/Wheel Scroll
If your input device has a scroll function, it can be used to adjust knob and slider controls. Place the mouse cursor over any knob or slider control, then use the scroll function to change the parameter value.
Note: Some DAWs do not support parameter scrolling.
Shortcuts
The table below lists the keyboard shortcuts that are available for modifying UAD plug-in parameter values. When using keyboard shortcuts, the last edited control will be modified.
Note: Not all DAW applications support sending keystrokes to plug-ins.
UAD Plug-In Keyboard shortcuts
| Keyboard Action Result | |
| Shift + Drag Fine Control | |
| UpArrowRightArrowShift + PageUp | Increment Fine |
| DownArrowLeftArrowShift + PageDown | Decrement Fine |
| Shift + UpArrowShift + RightArrowPageUp | Increment Coarse |
| Shift + DownArrowShift + LeftArrowPageDown | Decrement Coarse |
| Control + Click parameter Toggle initial editor setting | (the value when the editor window was last opened) |
| Control + Shift + Click parameter Revert to initial editor setting | (the value when the editor window was last opened) |
DSP Loading Notes
- UAD devices feature either one, two, four, or eight (SOLO, DUO, QUAD, or OCTO) on-board DSP cores for UAD plug-in processing. Apollo Solo USB features UAD-2 SOLO core processing.
- UAD DSP use is proportional to the sample rate. Twice as many UAD plug-ins can be used at a 48 kHz sample rate versus a 96 kHz sample rate, and so forth.
- UAD plug-ins within Console can only run on Apollo Solo USB's built-in DSP. If a UAD-2 DSP accelerator is added to the system (such as UAD-2 Satellite), the additional DSP can be used for UAD plug-ins within a DAW, but not for Realtime UAD Processing within Console.
- Bypassing individual components within some UAD plug-ins can conserve UAD resources. For example, bypassing the compressor in the Precision Channel Strip when only the EQ is in use, and/or bypassing any of the unused bands of the Precision Channel Strip EQ will use less UAD DSP (unless DSP LoadLock is enabled).
- The UAD Instance Chart at help.uaudio.com lists the amount of DSP used by each UAD plug-in. The chart can help determine which UAD plug-ins to use within available UAD resources.
- Specific UAD plug-ins have the ability to conserve UAD resources when individual features within the plug-in are inactive. These plug-ins are marked with an asterisk (*) in the UAD Instance Chart at help.uaudio.com. Note that DSP LoadLock must be disabled to take advantage of this feature.
- Apollo Solo USB uses UAD DSP and memory for its internal digital mixer and Input Delay Compensation engine. Therefore, the UAD Meter gauges will indicate loads (when UAD hardware is connected) even if UAD plug-ins are not inserted in Console or the DAW.
- The host computer system memory and CPU are never used for UAD plug-in processing within a DAW. However, there will be a small additional load on the host CPU induced by data transfers and user interface operations. This is unavoidable when using any DSP device.
- When LiveTrack Mode is active, host CPU load is increased.
- Within a DAW, UAD plug-ins can run at the same time as native (host CPU based) plug-ins, and in any combination. However, native plug-ins cannot be loaded within Console.
Mono (m) UAD plug-ins
UAD VST plug-ins with “(m)” in the name are monophonic versions of the plug-in for use within VST-based DAWs.
Standard UAD VST plug-ins (which support both stereo and mono configurations) do not consume additional UAD DSP on mono sources when loaded in DAWs that use true-mono processing (for example, Avid Pro Tools and Steinberg Cubase).
Some DAWs (for example, Ableton Live and Cakewalk Sonar) do not use true-mono processing on mono signals. In these DAWs, using the mono (m) versions may conserve UAD DSP when used on mono sources.
Note: Apollo Solo USB's Console always uses true-mono processing, therefore Mono (m) UAD plug-ins are not available within Console.
UAD mono (m) plug-ins are not available in AAX 64 format. All major AAX 64 DAWs (e.g., Avid Pro Tools) support true-mono processing.
Note: Some UAD plug-ins do not consume less DSP even when used in a true-mono configuration. For details about mono vs. stereo DSP use, see the UAD Instance Count Chart.
Tempo Sync
The time-based parameters of some UAD plug-ins can be synchronized to the tempo of the host application using the Tempo Sync feature.
Note: Not all DAW applications support Tempo Sync. In these hosts, the tempo sync features will not function.
When Tempo Sync is activated, the time-based parameters that are available for synchronization are changed to note duration values, and will sync to the tempo of the host application using the displayed note value.
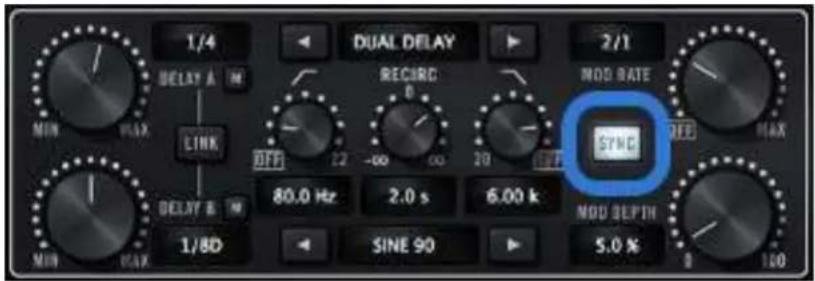
Tempo Sync switch within Precision Delay Mod
Tempo Sync Plug-Ins
The Tempo Sync feature is available with the UAD plug-ins listed below.
| CS-1 Channel Strip Moog Multimode Filter XL |
| Cooper Time Cube MXR Flanger/Doubler |
| Galaxy Tape Echo Precision Delay Mod |
| EP-34 Classic Tape Echo Precision Delay Mod L |
| Korg SDD-3000 Digital Delay Precision Reflection Engine |
| Moog Multimode Filter Roland RE-201 Space Echo |
| Moog Filter Multimode SE |
Note: This table does not include UAD Direct Developer (3rd-party) plug-ins.
Sync Activation
To activate Tempo Sync, click the "Sync" button within the plug-in interface. The Sync button LED will illuminate and the time parameters will change from a time-based display to a note value display.
Note: When Tempo Sync is activated, the plug-in will automatically switch the time or rate parameter(s) to the nearest available note value(s) given the range of the parameter in question and the current tempo.
Available Note Values
The note values that are available for selection are listed below. The values are listed in musical notation as a division of measures. For example, 1/4 = one quarter note, 1/1 = one whole note, 4/1 = four whole notes, and so forth.
The available note values were chosen to allow syncing to tempo in odd time signatures as well the common 4/4 time signature.
LFO rate parameters have their note values listed from longest to shortest, since long note values correspond to slow LFO rates.
Available Tempo Sync Note Values
| 1/64D* 1/8 5/8 4/1 | ||
| 1/64 5/32* 1/1T 5/1 | ||
| 1/32T 1/4T 1/2D 6/1 | ||
| 1/32 1/8D 1/1 8/1 | ||
| 1/16T 1/4 5/4 9/1 | ||
| 1/32D 5/16 1/1D 12/1 | ||
| 1/16 1/2T 7/4 16/1 | ||
| 1/8T 1/4D 2/1 | ||
| 1/16D 1/2 3/1 | ||
| D = DottedT = Triplet* = Galaxy Tape Echo & RE-201 only | ||
A quarter note is always a quarter note, independent of the time signature. In different time signatures a quarter note can represent different numbers of musical beats (e.g. 6/8) or different fractions of a bar (e.g. 5/4).
Example: The time signature is 6/8 and the delay time tempo sync note value is 1/4. If a sound occurs on beat one of the measure then its delay will occur on beat 3, which is 1/4 note (i.e., two 8th notes) later.
Note: The “beat” value in a sequencer’s BPM tempo setting always refers to a quarter note, independent of time signature.
Range Limits
Some Tempo Sync parameters cannot access the entire note range in Available Tempo Sync Note Values. Because the original (non-tempo sync) range of the time-based parameters within each plug-in is limited, if the host tempo is too fast or too slow, the tempo sync note value may not be able to be achieved within the constraints of the original parameter.
Out of range
When a parameter note value is out of range of the current tempo note value, the note value is displayed in parentheses. In this case, the parameter's minimum (slow tempo) or maximum (fast tempo) value is used instead of the displayed value.
Tempo Sync value out of range (parentheses)
Entering Values
In addition to adjusting the parameter control, the following methods can be used for entering Tempo Sync values.
Arrow Keys
After clicking the parameter to select it, the computer's arrow keys can be used to increment/decrement through available note values.
Text Entry
Any notation values can be entered (fraction or decimal), and the values are automatically converted to the nearest appropriate setting.
Example: If 3/4 or 6/8 is entered using text entry, 1/2D is displayed because a dotted half note equals three quarter notes, which is the duration of one measure in a time signature of 3/4 or 6/8. If 12/8 is entered with text entry, 1/1D is displayed because a dotted whole note equals six quarter notes, which is the duration of one measure in a time signature of 12/8 (or two measures in a time signature of 3/4 or 6/8).
This means you can create a tempo sync duration of one measure for any time signature by simply typing in the time signature (assuming there is a match in the beat table).
Similarly, if 1/12 is entered with text entry, 1/8T is displayed because an eighth note triplet is equivalent to one-twelfth of a measure (if in 4/4 time).
Precision Delay Modes with Tempo Sync
The UAD Precision Delay Mod and UAD Precision Delay Mod L plug-ins have a Mode menu that switches the plug-in operation between delay, chorus, and flanger mode. In these plug-ins, when the Mode is set to DUAL DELAY and PING PONG, the delay Time and modulation Rate parameters are simultaneously available for Tempo Sync.
However, when the plug-in is set to a CHORUS or FLANGER mode, only the Rate is available for Tempo Sync. This enables the more typical and musical chorus/flange effect by only syncing the modulation Rate to the tevmpo while the delay time remains constant.
Galaxy Tape Echo & Roland RE-201 Sync
When the Galaxy Tape Echo and Roland RE-201 plug-ins are in Tempo Sync mode, note values can be imprecise due to the fixed tape head relationships.
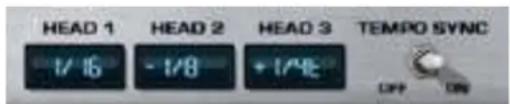
Values that are imprecise approximations (but are within the available delay time range) are displayed with a “+” or “-” symbol. The leading head in the current mode is accurately synced; the other values are based on the fixed tape head relationship.
Note: When a parameter note value is out of range of the current tempo note value in these plug-ins, the note value flashes instead of in being parentheses.
UA Account & Store
Account Overview
Your Universal Audio account is where all your UAD devices, and their associated UAD plug-ins, are registered and managed. A UA account is required to register and authorize your Apollo Solo USB hardware, download UAD software, and receive customer support.
Device Registration
The account creation and device registration process is triggered automatically whenever a new UAD device is recognized by the UAD software. Our web pages guide you through the process.
Accessing Your Account
To view your account pages, click the MY ACCOUNT link at the top of web of pages at www.uaudio.com.
When you're not already logged in, the LOG IN link appears instead of
the MY ACCOUNT link. In this case, click LOG IN to enter your email and password and access your account.
You have the option to stay logged in so you don't have to enter credentials with each visit. If you forgot your password, the store can email a password reset link to you.
Account Details
The My Account pages are available when logged in. These pages contain all details about the account such as registered UAD devices, licensed UAD plug-ins, and account preferences.
The account menu, shown at right, is used to navigate the account pages. Click an item in the menu to view that account page.
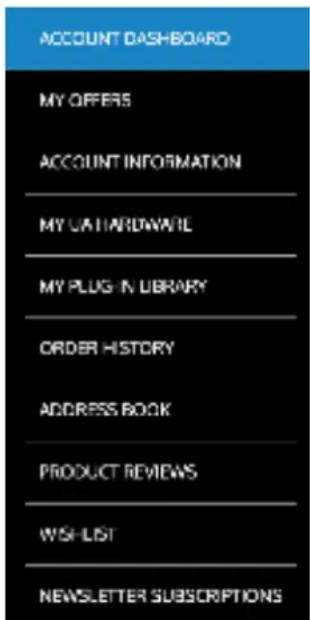
Store Overview
The Universal Audio online store is where optional UAD plug-in licenses are purchased and UA coupons are redeemed.
Bundled Plug-Ins
UAD plug-ins that are bundled (included) with Apollo Solo USB are automatically issued to your UA account when the device is registered. After registration is complete, authorize the UAD system to run the bundled plug-ins.
Note: UAD devices must be registered and authorized to use bundled plug-ins.
Optional Plug-Ins
UAD plug-ins that are not bundled with the UAD device require an optional license to run without restrictions. After purchasing a UAD plug-in, the UAD device(s) in the system need to be manually authorized to run the additional plug-in.
Our web pages guide you through the purchase and authorization process.
UAD Plug-Ins Are Already Installed
The UAD software installer always installs the complete suite of available UAD plug-ins during installation. When you purchase an optional license, you don't download that individual plug-in. Instead, you simply re-authorize your system, which activates the plug-in file that is already installed.
Important: Older versions of UAD software may not include all the latest UAD plug-ins. To ensure all UAD plug-ins are installed, and for optimum performance, update to the latest UAD version (see Check for Updates).
Coupons
Promotional coupons have dollar values that are as “good as cash” for buying UAD plug-ins. Coupons are applied to your UA account automatically. The coupon dollar amount is displayed in your account as a credit, ready to be applied to your store purchase.
Coupons expire after a limited time period, and they can be used only once.
Tip: Coupons are a great reason to sign up for UA's promotional email. These options are set in the Newsletter Subscriptions page in My Account.
UAD Authorization Overview
Note: This section is an overview of the UAD authorization system. For step-by-step authorization instructions, see UAD Authorization Procedure.
My Hardware
The UAD devices (Apollo Solo USB is a UAD device) and UAD plug-ins that you own are found on your MY HARDWARE page at www.uaudio.com/my/account/hardware. The My Hardware page keeps track of your registered UAD devices and UAD plug-in licenses and is managed automatically by the UA store and UAD software.
Tip: The current UAD plug-in license state is also shown in the Plug-Ins Panel within the UAD Meter & Control Panel application.
UAD System
All UAD devices registered to the UA account, and all UAD plug-in licenses for those devices, are grouped as a system on the My Hardware page. Licensed UAD plug-ins are only authorized to run on the UAD devices associated with the same account and system.
Account Creation and Device Registration
Creating a UA account and registering the UAD hardware is only needed once during initial device installation. After registration, authorization is performed automatically in the background by the UAD Meter & Control Panel application each time the computer is started.
Adding Additional UAD Devices
If a second (or more) UAD device is added to the computer that already has the UAD software installed, the new device(s) is automatically detected by the UAD software. Upon detection, the web browser opens, you are guided to register the new device, and the new device is added to your account.
Authorizing Newly-Purchased UAD Plug-Ins
When a UAD plug-in is purchased at the UA store, it needs to be manually authorized. The store guides you through the process, or see the UAD Authorization Procedure for instructions.
Authorizations Are Stored On UAD Device
During authorization, the UAD plug-in license state is stored on the UAD device. If the device is moved to another computer, it's not necessary to reauthorize the device.
Demo Mode
All unlicensed UAD plug-ins include a free 14-day trial evaluation period. When the demonstration mode is activated, the plug-in runs without functional limitations for 14 days. Demo mode can be activated once only. After the demo trial period has expired, demo mode cannot be activated again on the same UAD device.
If an unlicensed plug-in is loaded and its demo has never been started, a dialog appears with instructions to start the demo and the option to visit the UA store to purchase the license. If you don't start the demo or purchase a license, the plug-in interface appears and its controls can be manipulated, but audio is not processed by the plug-in.
Important: The 14 day demo period can only be activated once, and cannot be stopped or restarted during this period. Activate demo mode only when you have adequate time to thoroughly evaluate its sound and functionality.
Demo Reset
As a courtesy, each time a new UAD plug-in is purchased, all expired demo periods are automatically reset so all UAD plug-ins with expired demos can be evaluated again.
Demo Activation
To activate demo mode:
- Ensure the UAD hardware and software is already installed and properly configured.
- Open the Plug-Ins Panel within the UAD Meter & Control Panel application.
- Locate the row for the UAD plug-in you want to evaluate (scroll if necessary).
- In the Status Column, click the START DEMO button for the UAD plug-in. A confirmation window appears and the timed demo can be activated or demo activation can be cancelled.
Note: Manipulating the computer's system date and time may result in a decreased demo period.
Buying UAD Plug-Ins
To obtain optional UAD plug-in licenses, simply visit www.uaudio.com, browse the available plug-ins at the secure UA store, complete your purchase with several payment options, and authorize the new plug-in(s). You can also apply any coupon credit that is available from promotional offers.
Lots of product information such as features, specifications, audio/video examples, and reviews are available on the plug-in product pages to help you make informed buying decisions.
Purchase Procedure
To purchase optional UAD plug-in licenses:
- Visit the UA store at www.uaudio.com.
- Add the items you want to purchase to your shopping cart. You'll need to login to your UA account if not already logged in.
- When ready to complete your purchase, click the Shopping Cart icon at the top of the page, then click the CHECKOUT button. The payment page appears.
- Select payment method and provide payment details. If applicable, apply any discount coupon codes.
- Click the PLACE YOUR ORDER button once only. The transaction is processed, the order confirmation page appears, a confirmation email is sent, and the UAD plug-in license(s) is issued to your UA account.
- Authorize the UAD device(s) by following the instructions on the next page.
UAD Authorization Procedure
UAD plug-ins are automatically authorized each time the computer is started. However, the UAD system must be manually authorized whenever a plug-in is purchased from the UA store.
Note: Follow this procedure to manually authorize a new UAD plug-in purchase whenever you buy a plug-in at the UA store.
To manually authorize UAD plug-ins to run on the UAD device:
- Open the UAD Meter & Control Panel application (see Launching the Application for methods).
- Access the Plug-Ins Panel within the application by clicking the blue "UAD-2" button in the UAD Meter window.

- Click the "Authorize Plug-Ins" button in the Plug-Ins panel.
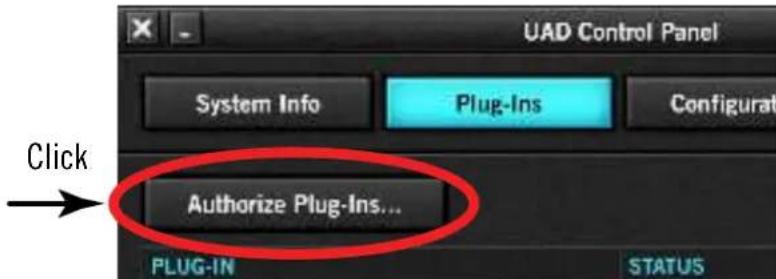
- After a few moments the Authorization Status window appears. Click OK to close the window.
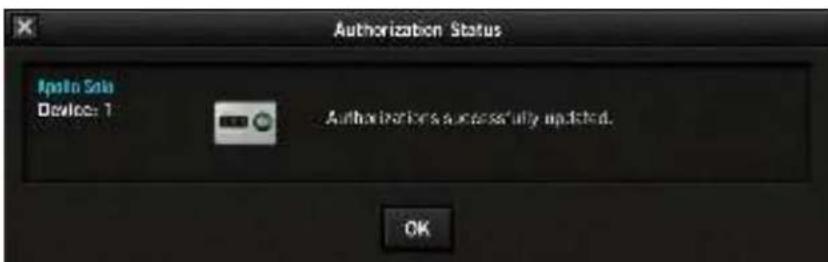
UAD plug-ins are now authorized and ready for use.
Offline UAD Authorization
Important: UAD devices must be registered and UAD plug-ins must be authorized before they can be used.
UAD plug-ins are automatically authorized each time the computer is started if the system is connected to the Internet. If the UAD computer is not connected to the Internet, you will need:
- Manually transfer a URL into the browser of a web-enabled computer
- Download an authorization file onto the web computer
- Transfer the authorization file back to the UAD computer
These steps are detailed below.
To obtain and apply the UAD authorization file if not connected to the internet:
- Install the UAD software and the UAD hardware before proceeding. The system must be operating properly. See for Getting Started details.
- Launch the UAD Meter & Control Panel application and open the Plug-Ins Panel.
- Click the Authorize Plug-ins button. The default web browser opens with the registration URL in the address bar (and you may get an error that the computer is not connected to the Internet).
- You must enter this URL into a web-connected computer, so either:
a. Drag the URL icon in the browser's address bar to the Desktop to create a weblink shortcut (preferred, to prevent transcription errors) then transfer the weblink shortcut to the internet computer via a storage device or network, OR
b. Copy/paste the URL into a file that can be transferred (or carefully write down the URL, EXACTLY as it appears in the address field).
- Click+Hold URL icon in browser address bar
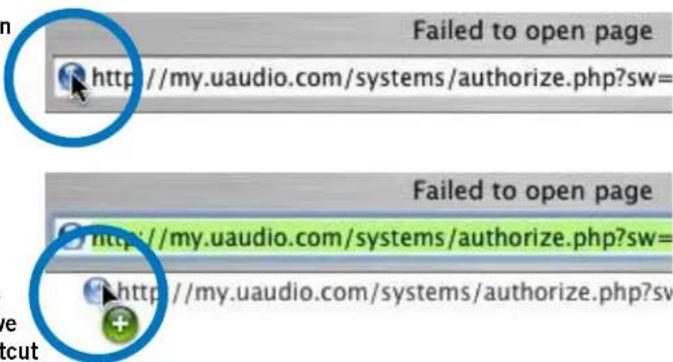
- Drag URL icon to Desktop or flash drive to create a link shortcut

Creating a web location shortcut on the offline UAD system for easier transfer of the URL file to an online system
-
Go to the URL using a web browser on an Internet-connected computer. Double-click the transferred weblink shortcut, or enter the URL as previously noted.
-
If you don't already have a UA account, you are directed to create one. Follow the online instructions.
-
If you already have a UA account, login with your email address and password. If your password is lost, the store can email password reset link to you.
-
Your device will be automatically registered and added to your My Hardware page, and your authorization file is generated.
- The authorization file named "auth.uad2" should begin downloading automatically (if not, click the download authorization link).
- Transfer the authorization file to the UAD computer via a storage device or network.
- For optimum results, quit all open audio host applications (DAWs).
- Double-click the authorization file. The authorization is loaded onto the UAD device(s) and after a few seconds the “Authorizations Status” window appears.
Offline UAD authorization is complete and UAD plug-ins are ready for use.
Latency & Apollo Solo USB
Delay Compensation with Apollo Solo USB
System latency encapsulates all latencies induced within the typical digital audio workstation environment. See Latency Basics for a detailed overview of where, when, and how latency (delay) is induced in the DAW environment.
Note: Upsampling latency, input latency, and all other system latencies are automatically compensated by Console and modern DAWs when delay compensation is enabled in the host application.
Driver Reporting
Any system latency that is induced by Apollo Solo USB's I/O, Console, and/or UAD plugins is reported by Apollo Solo USB's device drivers to the host audio software that is using the device.
The host software (e.g., Console and the DAW) uses this reported device latency for its automatic delay compensation (ADC) engine. When ADC is enabled in Console and the DAW, phase coherency (time alignment) is maintained throughout the recording, overdubbing, and mixing process.
Upsampled UAD Plug-Ins
Some UAD plug-ins are upsampled, meaning their internal sample rate is increased to achieve sonic design goals. Depending on the session sample rate, upsampled UAD plug-ins can add additional latency when used in the Console Mixer and/or a DAW.
Although the latency added by upsampled UAD plug-ins is negligible (typically between 0-300 samples, depending on the plug-in and sample rate), this extra latency can affect phase coherency in a session. However, phase alignment is managed automatically by Input Delay Compensation in Console and Automatic Delay Compensation in the DAW when these features are enabled.
Note: Specific upsampling latency values for UAD plug-ins are listed in the UAD Plug-Ins Manual.
Automatic Delay Compensation in the DAW
Generally speaking, ADC should always remain enabled in the DAW when using Apollo Solo USB (and any other audio interface), regardless of whether or not Console is used at the same time. The DAW's ADC engine performs all necessary housekeeping to keep tracks phase-aligned, regardless of the latency source (if any).
Input Delay Compensation in Console
Console has automatic Input Delay Compensation (IDC), which is controlled by the Input Delay Compensation menu in Console Settings. Console IDC maintains phase alignment across all Console inputs when upsampled UAD plug-ins are used in Console.
Console's IDC is useful when multiple Console inputs are used on a single source. For example: If two microphones are used on an acoustic source (such as a acoustic guitar) and an upsampled plug-in is used on one of the mic channels but not the other, without input delay compensation, the phase of the two mic channels would no longer be aligned (mics must be exactly equidistant from the sound source to remain phase aligned).
How Console IDC works
To maintain phase alignment, Console IDC automatically adds small amounts of delay to each Console input that is not delayed by Upsampled UAD Plug-Ins. In other words, all compensated inputs are automatically delayed by the same amount.
When To Use Console Input Delay Compensation
Console IDC is required to maintain phase alignment only when BOTH of the following conditions are active:
- Multiple Console inputs are used for a single source (such as a drum kit using multiple microphones), AND
- Any of those input channels contain upsampled UAD plug-ins.
Tip: When IDC is not needed, disable Console IDC for the lowest possible input latency.
Effect of Console's IDC setting
Note: Console's IDC value is set with the Input Delay Compensation menu in Console Settings. By default, Console IDC is enabled with the Short value of 100 samples.
In Console
In Console, the amount of delay added by the IDC engine is automatic. Only the minimum amount of delay actually required to compensate the input(s) is applied (up to the maximum value of the setting), maintaining the lowest possible latency for phase alignment at all times.
For example: When Console's IDC value is set to Short (100 samples – the default value) and only 31 samples is actually required to compensate, then only 31 samples of delay will be applied to the other Console inputs.
In the DAW
In the DAW, the amount of delay added by Console's IDC engine is static. The extra samples are always added to all inputs in the DAW, even if no upsampled plug-ins are active. However, this overall additional input latency is reported by Apollo Solo USB's drivers, so it is automatically compensated by the DAW's ADC.
For example: When Console's IDC value is set to Short (100 samples – the default value) and only 31 samples is actually required to compensate, 100 samples is still added to all inputs in the DAW. If using software monitoring via the DAW, the extra (unnecessary) delay could be detected.
Software monitoring with Console IDC
When software monitoring via the DAW and Console IDC is enabled, the lowest effective Console IDC setting is recommended to minimize monitoring latency. If using Console for monitoring and software monitoring via the DAW is disabled, the IDC value isn't as critical because Console will dynamically deliver the lowest possible monitoring latency.
UAD-2 DSP Resources
Console IDC uses a small percentage of Apollo Solo USB's DSP. To maximize UAD resources available for UAD plug-ins, disable Console IDC if it is not needed.
Special Cases: Precision Multiband, Ampex ATR-102, and AKG BX 20
These three UAD plug-ins have extra latency values that exceed the capacity of Console's IDC engine even at the maximum setting (Long). These plug-ins are designed to be used on the outputs of a DAW during mixdown, where latency is not a consideration. If using these plug-ins in Console, the Input Delay Compensation feature may need to be disabled or ignored.
Minimizing UAD Input Latency When Software Monitoring
If the DAW's I/O buffered software monitoring is used when performing and UAD plug-ins are used within the DAW, input latency can be much higher versus using Console for hardware input monitoring. However, there are ways to mitigate the additional input latency if software monitoring is preferred.
When software monitoring, input latency is determined by the session sample rate, the DAW's buffer size setting, and the number of serial (i.e., stacked or chained) UAD plug-ins. To minimize input latency, try any or all of these mitigations:
- Use a higher session sample rate
- Use a lower I/O buffer size
- Use fewer serially inserted (stacked/chained) UAD plug-ins
• Use UAD-2 LiveTrack Mode
UAD-2 LiveTrack Mode
UAD-2 PCIe cards, UAD-2 Satellite USB, Apollo Twin USB, Apollo Solo USB, and Thunderbolt-equipped Apollo audio interfaces (all UAD devices except UAD FireWire devices) offer an advanced buffering architecture that delivers reduced latency when tracking through UAD plug-ins that are loaded in a DAW. To enable the feature, activate LiveTrack Mode on the UAD plug-in(s) when software input monitoring. LiveTrack Mode is enabled by clicking the mic button in the UAD Toolbar at the bottom of the UAD plug-in interface. LiveTrack is active when the mic button is red.
Latency Basics
Latency (delay) is an inherent factor in digital audio systems because of A/D-D/A conversion, I/O buffering in the DAW, plug-in signal processing, and other aspects.
Although there are ways to mitigate latency (such as delay compensation and/or low-latency monitoring), it always exists to some degree when working with systems that combine analog and digital audio. These concepts are explained in greater detail below.
Audio Interface Latency
Every audio interface that performs A/D and/or D/A conversion induces latency as a result of the conversion process. This inherent A/D–D/A latency is essentially undetectable. A/D–D/A latency usually depends on the sample rate, with higher sample rates inducing less latency (higher rates = less time required for conversion).
An audio interface's “analog I/O round-trip latency” specification refers to how long it takes for an analog signal at an interface input to reappear at the same interface's analog output after both A/D and D/A conversion. Apollo Solo USB's audio interface analog I/O round-trip latency is 1.1 milliseconds at a sample rate of 96 kHz.
DAW Latency
Most DAWs use hardware I/O buffering to shuttle audio data back and forth between the audio interface and the DAW. This I/O buffering induces additional latency with any audio interface (not just Apollo Solo USB).
I/O Buffer Size
The amount of DAW latency is usually determined by the DAW's I/O interface buffer size setting. With Apollo Solo USB, the buffer is set in the Hardware panel within Console Settings. Low buffer sizes reduce latency, but increase the host computer's CPU loading. If the buffer size is set too low, host CPU overloads and/or audio artifacts such as clicks, distortion, or dropouts can occur.
Monitoring Live Performance During Recording
DAW latency can be a problem during recording when software monitoring via the DAW's mixer, because the buffering delay is a distraction; an artist cannot hear their performance in realtime. DAW latency when recording with Apollo Solo USB is mitigated by using Console for live performance input monitoring, where I/O buffering latency does not apply.
Time-Alignment Of Newly-Recorded Tracks With Previously-Recorded Tracks
Dealing with latency is also important with DAWs for time-alignment of newly-recorded tracks and previously-recorded tracks which are inevitably shifted from the I/O buffering process.
The solution is to use the automatic delay compensation (ADC) feature of the DAW. Modern DAWs, and Console, have automatic delay compensation. For more information about system latency and its compensation, see Delay Compensation with Apollo Solo USB USB.
Console Latency
Apollo Solo USB's Console mixer is used for low-latency input monitoring (cue mixing) of Apollo Solo USB's analog inputs. Using Console to monitor Apollo Solo USB's inputs may or may not add to the inherent analog I/O round-trip latency, depending on how it is configured, as described below:
Console without UAD plug-ins – When Console is used without UAD plug-ins, monitoring Apollo Solo USB's inputs via Console does not add any latency. In this configuration, Apollo Solo USB's analog I/O round-trip latency is still 1.1 milliseconds at 96 kHz.
Console with Realtime UAD Processing – When Console is used for Realtime UAD Processing with UAD plug-ins that are not upsampled, monitoring Apollo Solo USB's inputs via Console does not add any latency.
In this configuration, Apollo Solo USB's analog I/O round-trip latency is still 1.1 milliseconds at 96 kHz, even if up to five UAD (non-upsampled) plug-ins are serially inserted (chained) on a single Apollo Solo USB input.
Multiple Apollo Solo USB inputs can have up to five UAD (non-upsampled) plug-ins each (up to the limit of available DSP resources), and this configuration also does not add any latency.
Note: Upsampled UAD plug-ins add latency when used in Console or a DAW. See Upsampled UAD Plug-Ins for details.
Console Auxiliary Buses – The outputs of the auxiliary buses in Console have 32 samples of additional latency. This is necessary to maintain the lowest possible input latency.
DAW UAD-2 DSP Latency
When UAD plug-ins are used within a DAW (not Console), I/O buffering is used to shuttle audio data back and forth between the UAD-2 inside Apollo Solo USB and the DAW, which induces additional latency.
UAD-2 DSP latency from UAD plug-ins within the DAW is determined by the DAW's I/O Buffer Size setting. This latency is unrelated to the (indiscernible) audio interface I/O latency — they are separate processes.
DAW UAD-2 DSP latency makes tracking through UAD plug-ins in the DAW via software monitoring problematic for the performer because an artist cannot hear their performance in realtime.
The issue of UAD-2 DSP latency when recording with Apollo Solo USB is eliminated by using Console for live performance input monitoring with optional Realtime UAD Processing, where buffering latency does not apply.
Does all this latency stuff matter?
With Apollo Solo USB, not really. Performance input latency is not a factor because of Console's low latency hardware input monitoring, and recording (track alignment) latency during recording, overdubbing, and mixing is automatically compensated by Apollo Solo USB's device drivers and the DAW's automatic delay compensation engine.
Device Drivers
Apollo Solo USB Drivers Overview
The Apollo Solo USB device drivers are low-level system software files that instruct the computer's operating system about how to communicate with the Apollo Solo USB hardware. Apollo Solo USB's drivers control Apollo Solo USB's audio interface, Console, and UAD-2 functionality.
The drivers are loaded during computer system startup so that whenever Apollo Solo USB is connected, the device is ready to accept instructions from the OS and audio applications.
ASIO
Apollo Solo USB's audio drivers use the ASIO APIs. Apollo Solo USB's normal (non-DSP) audio interface features are simply seen as an ASIO device; therefore any ASIO compliant software can use Apollo Solo USB for audio I/O.
UAD Mixer Engine
The Console application and Console Recall plug-in don't actually communicate directly with Apollo Solo USB. Instead, they communicate with the UAD Mixer Engine, which is the central software hub for all Console and Console Recall functionality. The UAD Mixer Engine behaves as a server for Apollo Solo USB's internal DSP mixer that runs in the background, so Console does not have to be open for Apollo Solo USB to function.
The UAD Mixer Engine is a system-level application that is automatically launched during system startup and is always running during normal operation. The UAD System Menu is it's only interface, which can be accessed from the Windows System Tray.
Driver I/O Complement
The specific inputs and outputs that are available to the DAW depends on the active configuration. The I/O complement changes at high sample rates and when multi-unit cascading. Default I/O values are listed in the Driver I/O Table in this chapter.
Driver Names and Numbers
Apollo Solo USB's drivers describe all I/O channels by name and number, but what is actually displayed in the DAW's I/O assignment lists depends on each particular DAW. Names are not displayed by all DAWs (e.g., Ableton Live), or the driver name display mode may need to be changed in the DAW.
Virtual I/O
Apollo Solo USB's device drivers carry various virtual (software only) input and output channels in addition to those directly associated with the hardware inputs and outputs. The virtual channels consist of all of Console's mix bus outputs (the main monitor mix, HP mix, and AUX mixes) and Console's virtual inputs. Virtual I/O facilitates highly flexible signal routing via the DAW. See Virtual I/O for details about this feature.
Driver I/O Table
The table below lists the I/O channel numbers and names for all available ASIO streams.
Tip: For convenient reference with DAWs that don't display driver I/O channels by name, print this page.
Driver I/O Table Notes
- The number at the left of both columns is the channel number used by the DAW if the channel names are not displayed by the DAW.
- At sample rates of 176.4 kHz and 192 kHz, AUX 2 and VIRTUAL channels are unavailable.
| Apollo Solo USB Default I/O Table | |
| INPUTS OUTPUTS | |
| 1 MIC/LINE/Hi-Z 1 1 MON L | N L |
| 2 MIC/LINE 2 2 MON R | |
| 3 MON L* 3 VIRTUAL 1† | |
| 4 MON R* 4 VIRTUAL 2† | |
| 5 VIRTUAL 1* 5 HP L | |
| 6 VIRTUAL 2* 6 HP R | |
| 7 AUX1 L* | |
| 8 AUX1 R* | |
| 9 AUX2 L* | |
| 10 AUX2 R* | |
| *Software Outputs(for DAW inputs) | †Software Outputs(for Console inputs) |
Troubleshooting
If Apollo Solo USB isn't behaving as expected, some common troubleshooting items to confirm are below. If you are still experiencing issues after performing these checks, contact Technical Support.
| SYMPTOM ITEMS TO CHECK | |
| Unit won't power on | Confirm USB 3 cable is connected to Apollo Solo USBConfirm Apollo Solo USB is connected to built-in USB 3 port on computerConfirm computer is startedTry a different USB 3 SuperSpeed cableNote that not all USB 3 cables are SuperSpeed cables |
| Unit is not recognized by computer | Confirm USB 3 SuperSpeed cable is fully inserted at both endsConfirm latest Apollo Solo USB software is installed (reinstall if necessary)Confirm computer port is USB 3 SuperSpeed port |
| No monitor output | Confirm connections, power, and volume of monitoring systemConfirm Apollo Solo USB monitor level is turned upConfirm monitor outputs are not muted (push MUTE button when in monitor mode)Confirm monitor LEDs are displaying signal activity (check signal flows) |
| Can't hear mic or line input(s) | Confirm mic/line switch setting is correct for the channelConfirm preamp gain is turned up for the channel(s)On channel 1, confirm nothing is plugged into the Hi-Z input |
| Can't hear mic input(s) • Confirm +48V phantom power is enabled if required by microphone | |
| Can't hear Hi-Z input | Confirm volume on connected device is turned upConfirm Hi-Z input cable is 1/4" TS (TRS cables cannot be used with Hi-Z input) |
| Preamp controls have no effect on channel | Confirm desired channel is selected for control (push PREAMP button to select channel when in PREAMP mode) |
| Audio glitches and/or dropouts during DAW playback | Increase hardware I/O buffer size value in Console |
| Undesirable echo/phasing • Confirm input monitoring is not enabled in both Console and DAW | |
| Static and/or white noise is heard when nothing is plugged in | Mute or lower preamp gain to minimum on unused preamp channels (mic preamps can emit noise even when nothing is plugged in)Some UAD plug-ins model the noise characteristics of the original equipment (defeat the noise model in the UAD plug-in interface, or mute the channel containing the plug-in to temporarily mute the noise) |
| Various LEDs inside the unit are blinking | This is normal operational behavior and can be safely ignored |
| Acoustic clicking heard within hardware unit when powering on and/or changing settings | This is normal operational behavior and can be safely ignored; mechanical relays are temporarily muting the outputs |
| Apollo Solo USB is behaving unexpectedly | As a last resort, perform a hardware reset on the unit by following these steps:Power off Apollo Solo USBPress and hold the main LEVEL knob, FILTER button, and POLARITY button while powering on Apollo Solo USBAfter all front panel LEDs ash rapidly for several seconds, release the controls. |
Glossary
A/D An acronym for “Analog to Digital,” which refers to the conversion of analog signals to digital data.
Acronym A word formed from the first letters of other words (e.g., GUI, ADAT, TRS, etc.).
ADAT An acronym for “Alesis Digital Audio Tape.” ADAT was the name given to the Alesis-branded products of the 1990s which recorded eight tracks of digital audio on a standard S-VHS video cassette. The term now generally refers to the 8-channel optical “Lightpipe” connection that is used in a wide range of digital products from many manufacturers.
AES (sometimes written as “AES/EBU”) The name of a digital audio transfer standard jointly developed by the American-based Audio Engineering Society and the European Broadcast Union. Designed to carry two channels of 16-, 20- or, 24-bit digital audio at sampling rates of up to 192kHz, the most common AES physical interconnect utilizes a 3-conductor 110 ohm twisted pair cable, terminating at standard XLR connectors. (See “Dual Wire” and “Single Wire”)
Analog Literally, an analog is a replica or representation of something. In audio signals, changes in voltage are used to represent changes in acoustic sound pressure. Note that analog audio is a continuous representation, as opposed to the quantized, or discrete “stepped” representation created by digital devices. (See “Digital”)
API Acronym for Application Programming Interface. A software layer between an operating system and third-party hardware (such as an audio interface) and/or software (such as a DAW). For example, a computer OS's audio API enables audio hardware and audio software from different vendors to communicate with the OS and each other.
Apollo Universal Audio's line of high-resolution audio interface products featuring low-latency monitoring of hardware inputs with Realtime UAD Processing.
Apollo Expanded Universal Audio's name for connecting more than one Apollo device together via Thunderbolt in a multi-unit cascading setup for increased I/O.
Arrow Universal Audio's entry-level audio interface featuring Realtime UAD Processing.
ASIO Acronym for Audio Stream Input/Output. ASIO is an audio interface driver protocol for Windows operating systems developed by Steinberg GmbH.
Balanced Audio cabling that uses two twisted conductors enclosed in a single shield, thus allowing relatively long cable runs with minimal signal loss and reduced induced noise such as hum.
Bit A contraction of the words “binary” and “digit,” a bit is a number used in a digital system, and it can have only one of two values: 0 or 1. The number of bits in each sample determines the theoretical maximum dynamic range of the audio data, regardless of sample rate being used. Each additional bit adds approximately 6 dB to the dynamic range of the audio. In addition, the use of more bits helps capture quieter signal more accurately. (See “Sample” and “Dynamic range”)
Bit Depth (See "Bit Resolution")
Bit Resolution Often used interchangeably with “bit depth,” this is a term used to describe the number of bits used in a digital recording. Apollo converts analog audio and transmits digital audio with a resolution of 24 bits (thus yielding a theoretical dynamic range of approximately 145 dB), the highest audio interface resolution in common use today. (See “Dynamic Range”)
BNC A bayonet-type coaxial connector often found on video and digital audio equipment, as well as on test devices like oscilloscopes. In digital audio equipment, BNC connectors are normally used to carry word clock signals between devices. BNC connectors are named for their type (Bayonet), and their inventors, Paul Neil and Carl Concelman. (See "Word Clock")
Buffer, buffers, buffering The transference of data in small batches instead of continuously. Buffering induces latency (delay) and is inherent in most digital audio systems.
Bus A signal path that carries more than one signal, e.g., a mix bus, auxiliary bus, headphone cue bus, etc.
Channel Input Strip A group of controls that pertain only to the functions contained within a particular mixer input channel. In most mixing consoles, the “strips” are duplicated for each input.
Class A One design technique used in electronic devices such that their active components are drawing current and working throughout the full signal cycle, thus yielding a more linear response. This increased linearity results in fewer harmonics generated, hence lower distortion in the output signal.
Condenser Microphone A microphone design that utilizes an electrically charged thin conductive diaphragm stretched close to a metal disk called a backplate. Incoming sound pressure causes the diaphragm to vibrate, in turn causing the capacitance to vary in a like manner, which causes a variance in its output voltage. Condenser microphones tend to have excellent transient response but require an external voltage source, most often in the form of 48 volts of “phantom power.”
Clock In digital audio or video, a clock serves as a timing reference for a system. Every digital device must carry out specified numbers of operations per period of time and at a consistent speed in order for the device to work properly. Digital audio devices such as Apollo normally have an internal clock, and are also capable of locking to external clock routed from other digital devices. In order to avoid signal degradation or undesirable audible artifacts, it is absolutely critical that all digital devices that are interconnected in a system be locked to the same clock.
Clock Distribution Refers to the process of routing a master clock signal (either from an internal clock or an external source) to multiple devices by means of multiple outputs, thus removing the need to cascade the clock through external devices, which can degrade the signal.
Core Audio The audioAPI for macOS.
D/A Acronym for “Digital to Analog,” which refers to the conversion of a digital data to an analog signal.
DAW Acronym for “Digital Audio Workstation” – that is, any device or software that can record, play back, edit, and process digital audio.
dB Abbreviation for “decibel,” a logarithmic unit of measure used to determine, among other things, power ratios, voltage gain, and sound pressure levels.
dBm Abbreviation for “decibels as referenced to milliwatt,” dissipated in a standard load of 600 ohms. 1 dBm into 600 ohms results in 0.775 volts RMS.
dBV Abbreviation for “decibels as referenced to voltage,” without regard for impedance; thus, one volt equals one dBV.
DI Acronym for “Direct Inject” or “Direct Input,” a recording technique whereby the signal from a high-impedance instrument such as electric guitar or bass is routed to an input. DI into mixer or tape recorder inputs often employ use of a “DI box,” which raises the signal to the correct voltage level at the right impedance.
Digital Information or data that is stored or communicated as a series of bits (binary digits, with values of 0 or 1). Digital audio refers to the representation of varying sound pressure levels by means of a series of numbers. (See “Analog” and “Bit”)
Dither Minute amounts of shaped noise added intentionally to a digital recording in order to reduce a form of distortion known as “quantization noise” and aid in low level sound resolution.
Dry Refers to a signal that is unprocessed, e.g., recording a dry signal. The antonym of a “wet” signal.
DSP Acronym for “Digital Signal Processing” (or “Digital Signal Processor.”)
DSP Accelerator A device dedicated to digital signal processing. UAD-2 devices are DSP accelerators.
Dynamic Microphone A type of microphone that generates signal with the use of a very thin, light diaphragm which moves in response to sound pressure. That motion in turn causes a voice coil which is suspended in a magnetic field to move, generating a small electric current. Dynamic mics are generally less expensive than condenser or ribbon mics and do not require external power to operate.
Dynamic Range The difference between the loudest sections of a piece of music and the softest ones. The dynamic range of human hearing (that is, the difference between the very softest passages we can discern and the very loudest ones we can tolerate) is considered to be approximately 120 dB. (See “Bit resolution”)
EQ Abbreviation for “Equalization,” a circuit that allows selected frequency areas in an audio signal to be attenuated or boosted.
External Clock A clock signal derived from an external source. (See "Clock")
FET Acronym for “Field Effect Transistor.” A type of transistor that relies on an electric field to control the shape, and hence the conductivity, of a “channel” in a semiconductor material.
Firmware Software that is embedded in hardware.
Flex Routing Apollo technology that enables its physical inputs to be routed to various physical outputs. Compare to Virtual I/O.
FPGA Acronym for “Field Programmable Gate Array.” A type of integrated circuit that can be programmed after manufacturing (“in the field”) to perform specialized functions.
Front End Refers to a device that provides analog and digital input/output (I/O) to a digital audio workstation (DAW). Apollo is a front end.
Graphical User Interface A software window, panel, or screen containing controls where parameters are adjusted by the user. (See "GUI")
GUI Acronym for Graphical User Interface.
Hi-Z Abbreviation for "High Impedance." Apollo's Hi-Z input allows direct connection of an instrument such as electric guitar or bass via a standard unbalanced 14 " jack.
High Resolution In digital audio, refers to 24-bit signals at sampling rates of 88.2 kHz or higher.
Hz Abbreviation for “Hertz,” a unit of measurement describing a single analog audio cycle (or digital sample) per second.
Impedance A description of a circuit's resistance to a signal, as measured in ohms, thousands of ohms (Kilohms), or millions of ohms (megohms).
Internal Clock A clock signal derived from onboard circuitry. (See "Clock")
I/O Acronym for "input/output."
I/O Matrix Apollo technology that enables customized I/O mapping at the Core Audio / ASIO driver level.
kHz Abbreviation for “kiloHertz” (a thousand Hertz), a unit of measurement describing a thousand analog audio cycles (or digital samples) per second. (See “Hz”)
JFET Acronym for Junction Field Effect Transistor, a specific type of FET which has some similarities to traditional bipolar transistor designs that can make it more appropriate for use in some audio circuit designs. (See “FET”)
Jitter Refers to short-term variations in the edges of a clock signal, caused by a bad source clock, inferior cabling or improper cable termination, and/or signal-induced noise. A jittery signal will contain spurious tones at random, inharmonic frequencies. Usually, the jitter will be worse with higher signal frequencies. The internal digital clock of Apollo was designed for extreme stability and jitter-free operation, and its onboard phase aligned clock conditioner circuitry removes jitter from external sources, so conversion quality is unaffected by clock source.
Lightpipe A digital connection made with optical cable. This was a phrase coined by Alesis to make a distinction between the proprietary 8-channel optical network used in their ADAT products and standard stereo optical connectors used on CD players and other consumer products.
Line Level Refers to the voltages used by audio devices such as mixers, signal processors, tape recorders, and DAWs. Professional audio systems typically utilize line level signals of +4 dBm (which translates to 1.23 volts), while consumer and semiprofessional audio equipment typically utilize line level signals of -10 dBV (which translates to 0.316 volts).
Low Cut Filter An equalizer circuit that cuts signal below a particular frequency. Same as "high pass filter."
Mic Level Refers to the very low level signal output from microphones, typically around 2 millivolts (2 thousandths of a volt).
Mic Preamp The output level of microphones is very low and therefore requires specially designed mic preamplifiers to raise (amplify) their level to that needed by a mixing console, tape recorder, or digital audio workstation (DAW).
Mute “Turn off the signal.” Mute stops the signal from being routed.
Native Refers to computer-based digital audio recording software controlled by the computer's onboard processor, as opposed to software that requires external hardware to run.
OS Acronym for Operating System. The OS is the software used to control the computer hardware, such as macOS (Mac) and Windows 10 (PC).
Pan Abbreviation for “Panorama” or “Panoramic.” A pan control determines a monophonic signal’s positioning in the stereo field.
Patch Bay A passive, central routing station for audio signals. In most recording studios, the line-level inputs and outputs of all devices are connected to a patch bay, making it an easy matter to re-route signal with the use of patch cords.
Patch Cord A short audio cable with connectors on each end, typically used to interconnect components wired to a patch bay.
PDF Acronym for “Portable Document Format.” PDF is the standardized file format used for distribution of documentation in electronic form. Various applications can open PDF files; one such “reader” application is available for free at www.adobe.com.
Plug-In Software components that are added to host software applications to enhance their functionality and/or performance.
Powered Plug-Ins High-quality audio processing plug-ins, developed and sold by Universal Audio, that run exclusively on UAD DSP accelerator products.
Quantization Noise A form of digital distortion caused by mathematical rounding-off errors in the analog to digital conversion process. Quantization noise can be reduced dramatically by dithering the digital signal. (See "Dither")
Realtime UAD Processing Universal Audio's DSP + FPGA technology that enables UAD Powered Plug-Ins to run with latencies in the sub-2ms range on input with UA's Arrow and Apollo line of audio interface models. Realtime UAD processing provides the ultimate sonic experience while monitoring and/or tracking. Realtime UAD processing is a special function that is available only within the Apollo/Arrow Console application.
Ribbon Microphone A type of microphone that works by loosely suspending a small element (usually a corrugated strip of metal) in a strong magnetic field. This “ribbon” is moved by the motion of air molecules and in doing so it cuts across the magnetic lines of flux, causing an electrical signal to be generated. Ribbon microphones tend to be delicate and somewhat expensive, but often have very flat frequency response.
Sample A digital “snapshot” of the amplitude of a sound at a single instant in time. The number of samples taken per second is determined by the device’s sample rate. (See “Sample rate”)
Sample Rate The number of samples per second. In digital audio, there are six commonly used sample rates: 44.1 kHz (used by audio CDs), 48 kHz, 88.2 kHz (2 x 44.1 kHz), 96 kHz (2 x 48 kHz, used by DVDs), 176.4 kHz (4 x 44.1 kHz), and 192 kHz (4 x 48 kHz). The higher the sample rate, the greater the frequency response of the resulting signal; however, higher sample rates require more storage space. (See “kHz”)
Sample Rate Conversion The process of altering a digital signal's sample rate to a different sample rate.
S/MUX (sometimes written as “S-MUX”) Abbreviation for Sample Multiplexing. S/MUX is a method for transmitting two channels of high sample rate (88.2, 96, 176.4, or 192 kHz) 24-bit digital audio over a legacy optical “lightpipe” ADAT connection, which was originally designed to carry eight channels of 16-, 20- or 24-bit audio at 44.1 kHz or 48 kHz sampling rate. (See “ADAT” and “Lightpipe”)
SPDIF (sometimes written as “S/PDIF”) An acronym for “Sony/Philips Digital Interface Format,” a digital audio transfer standard largely based on the AES/EBU standard. Designed to carry two channels of 16-, 20- or, 24-bit digital audio at sampling rates of up to 192 kHz, the most common SPDIF physical interconnect utilizes unbalanced, 75 ohm video-type coaxial cables terminating at phono (RCA-type) connectors. (See “AES”)
Superclock A proprietary format used by some early Pro Tools systems to distribute clock signal running at 256x the system's sample rate, thus matching the internal timing resolution of the software. (See “Clock” and “Pro Tools”)
Transcoding Converting one type of digital signal to another (i.e, from AES to SPDIF, or from ADAT to AES).
Transformer An electronic component consisting of two or more coils of wire wound on a common core of magnetically permeable material. Audio transformers operate on audible signal and are designed to step voltages up and down and to send signal between microphones and line-level devices such as mixing consoles, recorders, and DAWs.
Transient A relatively high volume pitchless sound impulse of extremely brief duration, such as a pop. Consonants in singing and speech, and the attacks of musical instruments (particularly percussive instruments), are examples of transients.
Transimpedance Preamplifier A transformerless solid-state preamplifier utilizing a transistor configuration that employs current feedback for ultra-low distortion and the highest possible quality of signal from input to output. The transimpedance design allows audio from 4 Hz to 150 kHz to pass through without altering the phase relationships between fundamental frequencies and overtones. Noise and distortion are kept to near-theoretical minimums so critical signals may be generously amplified without degrading the quality or character of the sound source.
TRS Acronym for Tip-Ring-Sleeve. A 14 " phone connector with three conductors, typically used for balanced signal connections (e.g., I/O) or carrying two unbalanced signals (e.g., headphones).
TS Acronym for Tip-Sleeve. A 14 " phone connector with two conductors, typically used for unbalanced signal connections. Note that TS, like TRS and XLR, denotes the connector only and does not necessarily indicate the signal level of the connection. TS/TRS/XLR cables are used for both low-level (e.g., microphones and instruments) and line-level connections.
UAD Acronym for “Universal Audio Digital.” Used in reference to digital products created by Universal Audio.
UAD-2 A line of DSP accelerator products developed and manufactured by Universal Audio.
Unison Universal Audio's exclusive preamp hardware/software integration technology that enables UAD preamp plug-ins reconfigure the physical input impedance, gain staging response, and other parameters of Apollo's mic preamp hardware to match the emulated preamp's hardware design characteristics with bi-directional hardware and software control.
Virtual I/O Apollo audio inputs and outputs that exist in software but not in hardware. Virtual I/O is used to route digital audio channels between Console and other audio applications.
Wet Refers to a signal that is processed, e.g., recording a wet signal. The antonym of a "dry" signal.
Word Clock A dedicated clock signal based on the transmitting device's sample rate or the speed with which sample words are sent over a digital connection. (See "Clock")
XLR A standard three-pin connector used by many audio devices, with pin 1 typically connected to the shield of the cabling, thus providing ground. Pins 2 and 3 are used to carry audio signal, normally in a balanced (out of phase) configuration.
Specifications
All specifications are typical performance unless otherwise noted, tested under the following conditions: 48 kHz internal sample rate, 24-bit sample depth, 20 kHz measurement bandwidth, with balanced inputs and outputs.
| SYSTEM | |
| I/O Complement | |
| Microphone Inputs Two | |
| Analog Line Inputs Two | |
| Hi-Z Instrument Inputs One | |
| Analog Monitor Outputs Two (one stereo pair) | |
| Headphone Outputs One stereo | |
| USB 3 SuperSpeed Port One USB-C Type-C connector | |
| A/D – D/A Conversion | |
| Supported Sample Rates (kHz) 44.1, 48, 88.2, 96, 176.4, 192 | |
| Bit Depth Per Sample 24 | |
| Simultaneous A/D conversion Two channels | |
| Simultaneous D/A conversion Four channels | |
| Analog Round-Trip Latency 1.1 milliseconds @ 96 kHz sample rate | |
| Analog Round-Trip Latency with up to five serial UAD Powered Plug-Ins via Console application | 1.1 milliseconds @ 96 kHz sample rate |
(continued)
ANALOG I/O
| Frequency Response 20 Hz – 20 kHz, ±0.1 dB |
Line Inputs 1 & 2
| Connector Type 1/4" Female TRS Balanced (Combo XLR/TRS) |
| Dynamic Range 118 dB (A-weighting) |
| Total Harmonic Distortion + Noise -107 dBFS |
| Input Impedance 10K Ohms (differential) |
| Gain Range +10 dB to +65 dB |
| Maximum Input Level (600 Ohm source) +20.7 dBu |
Microphone Inputs 1 & 2
| Connector Type XLR Female, pin 2 positive (Combo XLR/TRS) |
| Phantom Power +48V (switchable per mic input) |
| Dynamic Range 118 dB (A-weighting) |
| Total Harmonic Distortion + Noise -108 dBFS |
| Default Input Impedance 5.5K Ohms (variable via Unison plug-ins) |
| Gain Range +10 dB to +65 dB |
| Pad Attenuation (switchable per input) 20 dB (variable via Unison plug-ins) |
| Maximum Input Level +25.2 dBu (minimum gain, pad engaged) |
Hi-Z Instrument Input
| Connector Type Female 1/4" TS Unbalanced |
| Dynamic Range 118 dB (A-weighting) |
| Total Harmonic Distortion + Noise -105 dBFS |
| Input Impedance (variable via Unison plug-ins) 1M Ohms |
| Gain Range +10 dB to +65 dB |
| Maximum Input Level (@ minimum gain) +12.5 dBu |
Outputs 1 & 2
| Connector Type 1/4" Female TRS Balanced |
| Output Impedance 100 Ohms (differential) |
| Dynamic Range 115 dB (A-weighting) |
| Total Harmonic Distortion + Noise -106 dBFS |
| Stereo Level Balance | ±0.05 dB |
| Maximum Output Level | +20.7 dBu |
| Operating Reference Level | +14 dBu, +20 dBu (selectable) |
(continued)
ANALOG I/O
Stereo Headphones Output
| Connector Type 1/4" Female TRS Stereo | |
| Dynamic Range (A-weighting) | 115 dB (600 Ohm load) |
| 114 dB (32 Ohm load) | |
| Total Harmonic Distortion + Noise (A-weighting) | -97 dB (600 Ohm load) |
| -88 dB (32 Ohm load) | |
| Maximum Output Power | 62 mW (300 Ohm load) |
| 240 mW (32 Ohm load) | |
ELECTRICAL
| Power Supply External AC to DC |
| AC Connector Type Changeable blades (UL, VDE, UK, SSA, CCC) |
| AC Requirements 100V – 240V AC, 50 – 60 Hz |
| DC Connector Type Male plug, 2.1 mm x 5.5 mm, center positive |
| DC Requirements 12 VDC, ± 5% |
| Maximum Power Consumption 10 Watts |
ENVIRONMENTAL
| Operating Temperature Range 32° to 95° Fahrenheit (0° to 35° Celsius) |
| Storage Temperature Range -40° to 176° Fahrenheit (-40° to 80° Celsius) |
| Operating Humidity Range 20% to 80% |
MECHANICAL
Dimensions
| Width 7.1" (179.9 mm) | |
| Height (front) 1.0" (25.2 mm) | |
| Height (rear) 1.8" (46.7 mm) | |
| Depth | 4.8" (121.1 mm) |
| Shipping Box (Length x Width x Height) | 8.5 x 6.4 x 2.63 (inches), 216 x 162 x 68 (mm) |
Weight
| Weight (bare unit) | 1.38 lbs (0.63 Kg) |
| Shipping Weight (with box) | 4 lbs (1.8 Kg) |
Package Contents
| Apollo Solo USB 3 Audio Interface |
| External power supply with changeable region-specific AC connectors |
| Getting Started URL Card |
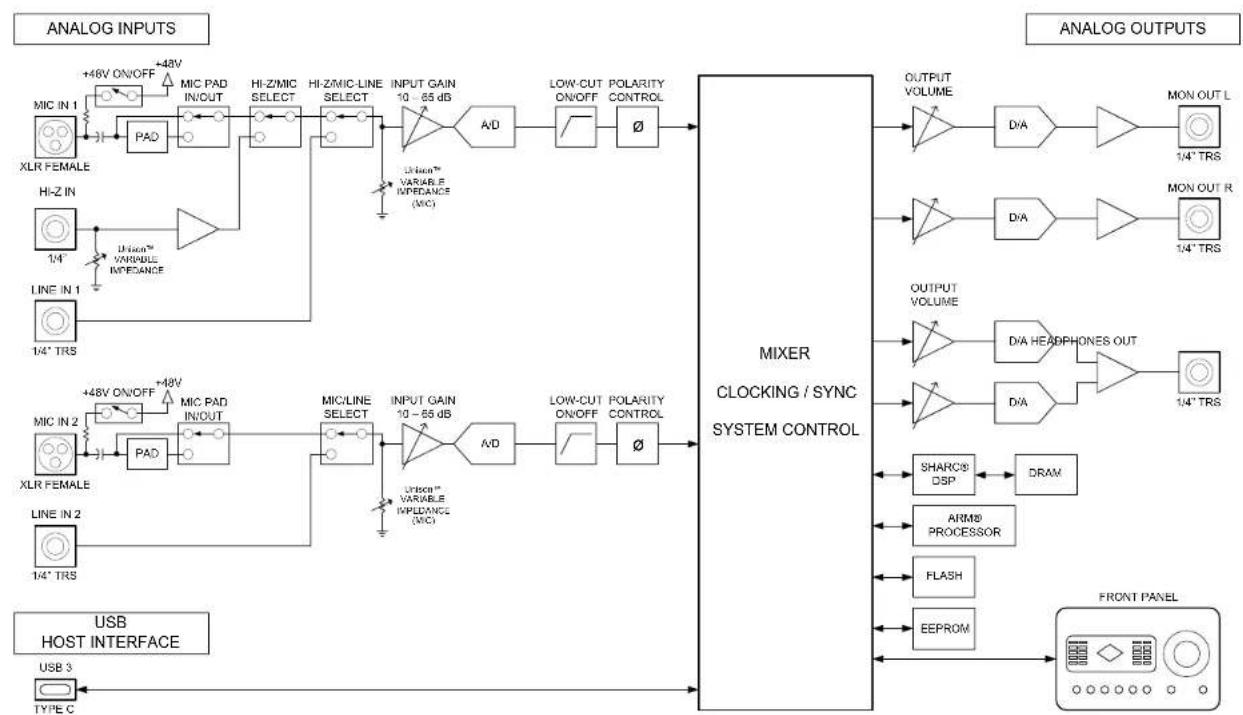
flowchart
graph LR
    subgraph Analog Inputs
        A["XL R FEMALE"] --> B["+48V ON/OFF"]
        C["HI-Z IN"] --> D["1/4" Variable Impedance"]
        E["LINE IN 1"] --> F["1/4" TRS"]
    end

    subgraph Outputs
        G["MIXER CLOCKING / SYNC SYSTEM CONTROL"] --> H["OUTPUT VOLUME"]
        H --> I["D/A"]
        I --> J["MON OUT L"]
        H --> K["D/A"]
        K --> L["MON OUT R"]
    end

    subgraph Interface
        M["USB HOST INTERFACE"] --> N["USB 3"]
        N --> O["TYPE C"]
    end

    A --> P["PAD"]
    P --> Q["+48V ON/OFF"]
    Q --> R["MIC PAD IN/OUT"]
    R --> S["HI-Z/MIC SELECT"]
    S --> T["HI-Z/MIC-LINE SELECT"]
    T --> U["INPUT GAIN 10 - 65 dB"]
    U --> V["A/D"]
    V --> W["LOW-CUT ON/OFF"]
    W --> X["Polarity CONTROL"]
    X --> Y["∅"]

    Z["MicroTM VARIABLE IMPEDANCE (MIC)"] --> AA["+48V ON/OFF"]
    AA --> AB["MIC PAD IN/OUT"]
    AB --> AC["MIC/LINE SELECT"]
    AC --> AD["INPUT GAIN 10 - 65 dB"]
    AD --> AE["A/D"]
    AE --> AF["LOW-CUT ON/OFF"]
    AF --> AG["Polarity CONTROL"]
    AG --> AH["∅"]

    AI["SHARCS DSP"] --> AJ["DRAM"]
    AK["ARM9 PROCESSOR"] --> AL["FLASH"]
    AM["EEPROM"] --> AN["FRONT PANEL"]
Apollo Solo USB Hardware Block Diagram
Hardware Block Diagram
Universal Audio History

natural_image
Collage of vintage-style black-and-white photos showing people in various indoor settings, including a man in a hat and a woman in a jacket, with no visible text or symbols.Pioneering audio recording for more than 50 years.
Founded in 1958 by Bill Putnam Sr., Universal Audio has been synonymous with innovative recording products since its inception. A favorite engineer of Frank Sinatra, Nat King Cole, Ray Charles and more, the late Bill Putnam Sr. was a passionate innovator who is widely regarded as the father of modern recording — with many of his legendary studio and equipment designs still in use today.
Specifically, Putnam was the inventor of the modern recording console, the multi-band audio equalizer, and the vocal booth, and he was the first engineer to use artificial reverberation in commercial recording. Alongside his friend Les Paul, Putnam was also involved in the early development of stereophonic recording.
Putnam, a natural entrepreneur, started three audio product companies during his long career: Universal Audio, Studio Electronics, and UREI. All three companies built equipment that remains widely used decades after their introduction, including the ubiquitous LA-2A and 1176 compressors, and the 610 tube recording console. The 610 console in particular stands as one of the most beloved designs in audio history, used to record everyone from Sinatra to the Beach Boys to Van Halen's eponymous debut.

natural_image
Historical black-and-white collage showing vintage office scenes: a man operating a vintage computer, a man in a hat with bowler, and a man working at a control console with multiple motors (no visible text or symbols)Re-founded in 1999
Universal Audio was re-founded in 1999 by Bill's sons, James Putnam and Bill Putnam Jr., with two main goals: to faithfully reproduce classic analog recording equipment in the tradition of their father; and to design new digital recording tools in with the sound and spirit of vintage analog technology. To that end, Universal Audio employs the world's brightest DSP engineers and digital modeling authorities to develop our award-winning UAD Powered Plug-Ins platform. Featuring the most authentic analog emulation plug-ins in the industry, our DSP gurus work with the original hardware manufacturers — using their exact schematics, golden units, and experienced ears — to give UAD plug-ins warmth and harmonics in all the right places, just like analog.
Nothing better represents the merging of our analog heritage and groundbreaking digital designs than the award-winning Apollo audio interface. Introduced in 2012, Apollo has become the new worldwide standard for professional music production, and has been used to record breakthrough albums by artists such as Kendrick Lamar, Coldplay, Dr. Dre, Brad Paisley, and many more.
With 165 employees and offices in Los Angeles, Colorado, and Amsterdam, Universal Audio is headquartered near Silicon Valley in Scotts Valley, California — where our classic analog gear is still hand-built, one unit at a time.
Software or hardware, every Universal Audio product is backed by a decades long legacy of innovation, superlative quality, and technical passion.
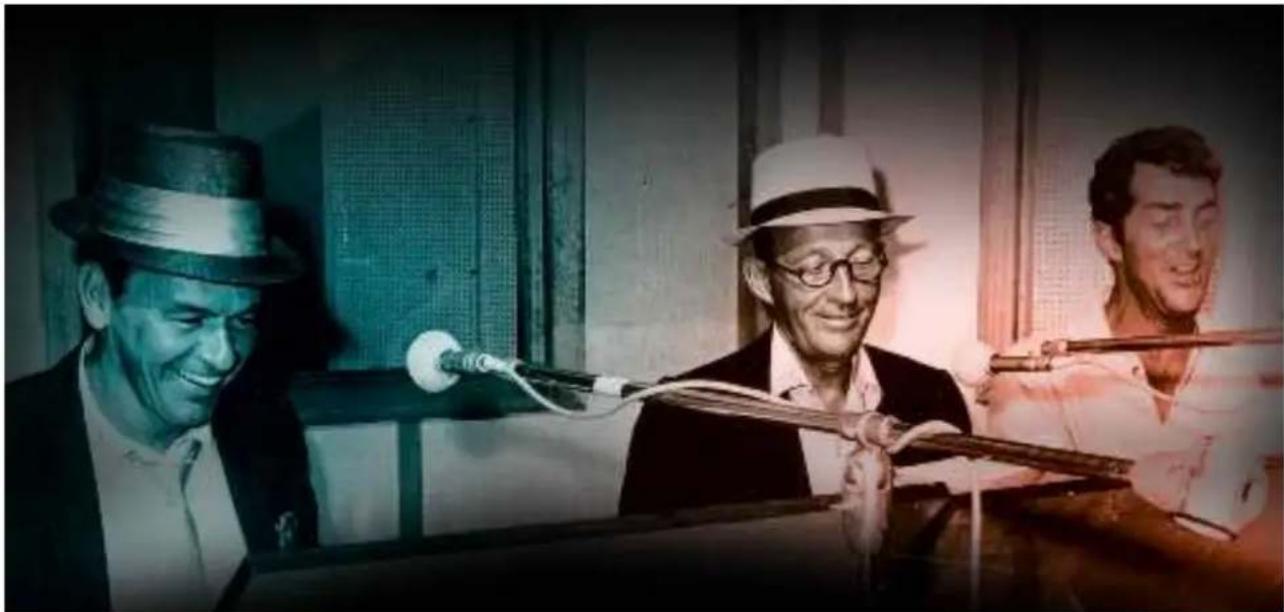
natural_image
Historical black-and-white photo of three men in hats and casual attire playing musical instruments, no visible text or symbolsBill Putnam Sr.
The name M.T. “Bill” Putnam retains a unique status in the audio industry hall of fame- it’s legendary even among those who are considered to be legends themselves. Called the “father of modern recording” by no less a luminary than Bruce Swedien, and a “visionary, responsible for motivating new thinking,” by respected studio engineer Tom Hidley, Putnam was a true renaissance man in the world of sound and music.
As a record producer, engineer, inventor, writer, singer, technician, studio owner and businessman, he excelled at combining his talents in a creative way. A pioneer in recording studio acoustics, Putnam is acknowledged to be the first person to use artificial reverberation for commercial recordings. He also developed the first multi-band equalizers, and with his company Universal Audio, was responsible for the development of classic equipment like the 1176LN and UREI® Time Align monitors. He was involved in the early development of stereophonic recording, and founded studios in Chicago, Hollywood and San Francisco whose legacy still lives on today.
Early Interests Born in 1920 in Danville, Illinois, he was influenced by his father, a businessman who also put on radio programs, including a number one country music show. Young Putnam's interests surfaced early; in Boy Scouts he earned a merit badge in wireless, building a crystal set and a one-tube radio. By 15 he was taking the ham radio operator's exam and constructing his own equipment. In high school both his artistic and technical sides emerged full on. He worked repairing radios and renting out P.A. systems, while also singing on weekends with dance bands (for five dollars a night, which included the P.A. rental!), developing his interest in the music business, and realizing, as he has said, that "musicians were my favorite people."
Universal Recording Corp. Opens in Chicago Technical college followed, then work at radio stations, and radio engineering work for the Army during World War II. In 1946 Putnam started his own recording studio, Universal Recording Corp., in Evanston Illinois. His goals at the time, besides having a successful business, were the development of new recording techniques and specialized equipment for recording studios.
To that end the manufacturing company Universal Audio, which later became UREI®, was formed. Most of the equipment, including the console, for Universal Recording was built by Universal Audio. It wasn't long before the company relocated to Chicago, and it was there, in 1947, that Putnam recorded what is generally accepted to be the first "pop" record to use artificial reverberation. The founder of the group The Harmonicats, Jerry Murad, wanted to record using an echo chamber like he'd heard on effects in spooky radio mysteries. Putnam not only financed the record for a piece of the profits, he came up with the idea of using the tiled men's room at Universal Recording to create that echo. The Harmonicats song "Peg-O-My-Heart," became the first million seller smash with more than 1,400,000 copies sold, and the rest was, well, history.
Landmark Recordings Bruce Swedien, a teenager at the time, recalls that the sound on “Peg-O-My-Heart” was a seminal influence on him. “It was the first pop music recording where artificially controlled reverb was used for artistic effect,” he explains. “Many of the recordings that were done prior to that had reverb, but it was part of the acoustics of the recording environment. Bill’s contribution to the art was that he literally came up with the design of the way the echo or reverb sound is sent from the recording desk and the way it’s returned to the mix so that it can be used in a variable amount.
"I was a youngster in Minneapolis in the early 50s when I first heard “Peg-O-My-Heart,” Swedien continues, “And I can remember it like it was yesterday. It had an extraordinary effect on me. I didn’t understand how the techniques were done, but I knew it had tremendous artistic impact.”
Putnam's engineering credits grew quickly; at that time he worked with artists such as Patti Page, Vic Damone and Dinah Washington, and had a million selling record on his own Universal Records label with “Jealous Heart” by Al Morgan. A number of firsts occurred at Universal: the first use of tape repeat, the first vocal booth, the first multiple voice recording, the first 8-track recording trials and experiments with half speed disc mastering.
Universal was becoming famous, doing recordings for the Chicago based labels VeeJay, Mercury and Chess. It was a hub for rhythm and blues recordings including cuts for Muddy Waters, Willie Dixon, Bo Diddley, Little Walter, and Chuck Berry. Jazz artists recorded by Putnam included Stan Kenton, Tommy Dorsey, Count Basie, Dizzy Gillespie, Ella Fitzgerald, Sarah Vaughn, Nat King Cole, and the master, Duke Ellington. Putnam was also producing records for Decca, as well as writing songs and lyrics.
natural_image
Black-and-white photo of two men in a vintage office setting, one standing and one seated at a table (no visible text or symbols)With all this success, Universal Recording went through several incarnations, with the dream version completed in 1955. At that time it was the most advanced and largest independent recording facility in the country attracting top producers like Nelson Riddle, Mitch Miller and Quincy Jones. It was also at that time that Bruce Swedien went to work for the studio.
"It's absolutely true," he states. "Bill Putnam was the father of recording as we know it today. The processes and designs which we take for granted -- the design of modern recording desks, the way components are laid out and the way they function, console design, cue sends, echo returns, multitrack switching -- they all originated in Bill's imagination."
Murray Allen, who purchased Chicago's Universal Recording from Putnam in 1972 elaborates. “Bill was a brilliant person, highly talented, with a great set of ears,” he says. “He was Duke Ellington’s favorite engineer, among many, and at one time he had more singles in the top 40 than anybody else. At the time, if you needed something in sound, he was the guy. He designed systems for the Sands and other big showrooms in Las Vegas; John Kennedy flew him out to arrange the sound for the broadcast of his inauguration. He did it all.”
Moving West- United Recording Corp. With his Chicago studio so successful, Putnam's clients began urging him to open a facility on the West Coast, and finally he was convinced. In 1957 he sold his interest in Universal Recording, started a new company called United Recording Corp. and moved to Hollywood, taking over a building at 6050 Sunset and starting construction on new studios. Stereo was taking off, and Putnam was determined to incorporate as many technological innovations into the complex as possible.
In 1958, Studio B was completed along with two reverb chambers. The facility soon grew to three studios, a mixdown room, three mastering rooms including one with stereo, and a small manufacturing plant, all in 15,000 square feet. The studios were busy around the clock, with projects from Ricky Nelson to voice-overs for Hanna Barbera cartoons like the Flintstones.
In the early 60s Western Recorders, one block away at 6000 Sunset, was acquired and remodeled. The studio was renamed United Western, and business continued to grow. The talent behind and in front of the glass in those days reads like a who's who of classic recording: Bones Howe, Wally Heider and Lee Hirschberg were on staff.
During the 60s and 70s the studios were jumping 24 hours a day, seven days a week with artists like Frank Sinatra, Bing Crosby, Dean Martin, Sammy Davis, Nat King Cole, Johnny Mercer and Ray Charles. Charles classic “I Can’t Stop Loving You” was recorded there, as well as Sinatra’s “It Was A Very Good Year,” and The Mamas and The Papas’ “California Dreamin.” The United Western studios, still in existence today as both Cello Studios and Allen Sides’ Ocean Way Recording, are still considered to be some of the best sounding rooms ever built.
natural_image
Two men working at a vintage computer workstation with monitors and keyboard (no visible text or symbols)
natural_image
Black-and-white photo of a music ensemble performing on stage with violinists and violins (no visible text or symbols)Universal Audio and UREI Meanwhile, upstairs in the 6050 Sunset building Universal Audio was thriving, and changing names. Now called UREI®, the company had acquired the patent rights to the LA-2A leveling amplifier, and also to National Intertel, which became the Teletronix division of UREI®. It was a unique situation; Putnam was always searching for better ways to do things and the combination of studios and manufacturing led readily to new product ideas. Out of this synergy came the 1176LN leveling amplifier, the 1108 FET preamp and, in conjunction with Ed Long, the 813 family of speakers.
Mentor and Innovator Allen Sides, currently owner of Ocean Way Recording, whose studios today encompass almost unchanged what was part of United Western, calls Putnam “my best friend.” “When Bill started designing control rooms they were about eight feet by six feet and they were calling them booths,” he says. “He built the first of what we now call conventional control rooms, with speakers above the windows. The whole control room concept we think of today was Bill’s. The first console that had equalizers in every channel was Bill’s, the feedback equalizer was Bill’s creation, he built all his own limiters, his own consoles, he could tune his own pianos; he basically did the whole deal.
natural_image
Black-and-white photo of a vintage control room with operator console and control panel (no visible text or symbols)"Around 1962 he was doing half speed cutting, to get the high frequencies on the discs," recalls Sides. "He'd designed his own mastering systems, because you couldn't do it any other way. He was recording on custom made 30 IPS machines and he was doing all the super hi fi stuff, like the Mercury Living Presence series."
Sides, who is renowned for both his golden ears and his abilities in the ‘art of the deal,’ appreciated Putnam on many levels. “He was an exceptional businessman, with a tremendous understanding of things,” he says. “If I had a complex deal and I couldn’t quite figure out how to approach it, I’d sit down with Bill and he’d reason it out in the most amazing way.
"There's a great story about when stereo was coming on. The record companies really weren't that interested -- everyone was cost conscious. They didn't want to spend any more money and they were saying that stereo was a waste of time. But Bill could see the potential, and around 1959 he started recording everything with feeds to two control rooms, one for a stereo mix, one for a mono mix. In late '58, '59 and '60 everything Bill did was recorded in both stereo and mono.
"When stereo hit big around '61, none of the record companies had any catalog. But Bill did -- he had two and one half years worth. It was a lot of material -- understand at that period of time he was doing about \$200,000 a month in the United Western Complex -- which is like a million dollars a month now.
"So the record companies came to Bill and said, 'We'll pay you for the tape.' And he said, 'No, you can't pay for the tape, but if you repay me all the studio time that was used in the last two and a half years you have a deal.' And they did. They wrote him a check for the whole thing."
It's recollections like these that bring home Putnam's visionary and entrepreneurial style. An undisputed leader in music recording and in recording technology, with innumerable accolades to his credit, it's his son, Bill Putnam, who perhaps sums it up best, in a way Bill Sr. himself might like. Bill Jr. says, simply, "He was a guy who built equipment to solve problems in the studio."
"There's a whole school of what I'd call Bill Putnam engineers out there," concludes Murray Allen. "People like Allen Sides and Bruce Swedien who worked with him and who really understood what recording sound should be about. They've carried on his tradition, and I think we all agree that it's very important for people to know what he contributed."
natural_image
Two technicians working at a technical lab bench with electronic equipment (no visible text or symbols)Classic Compressors
The LA-2A and 1176 compressor/limiters long ago achieved classic status. They're a given in almost any studio in the world -- relied upon daily by engineers whose styles range from rock to rap, classical to country and everything in between. With so many newer products on the market to choose from, it's worth looking at the reasons why these classics remain a necessary part of any professional studio's outboard equipment collection.
The basic concept of a compressor/limiter, is of course, relatively simple. It's a device in which the gain of a circuit is automatically adjusted using a predetermined ratio that acts in response to the input signal level. A compressor/limiter “rides gain” like a recording engineer does by hand with the fader of a console: it keeps the volume up during softer sections and brings it down when the signal gets louder. The dynamic processing that occurs at ratios below 10 or 12 to one is generally referred to as compression; above that it's known as limiting.
Modern day compressors offer a great degree of programmability and flexibility - older devices such as the 1176 and the LA-2A are more straightforward in their design. Perhaps it is this fact that has contributed to their appealing sound and the longevity of their popularity.
LA-2A
The LA-2A leveling amplifier, a tube unit with hand wired components and three simple controls, was introduced in the mid-1960s. It utilized a system of electro-luminescent optical gain control that was quite revolutionary. Gain reduction was controlled by applying the audio voltage to a luminescent driver amplifier, with a second matched photoconductive cell used to control the metering section.
With its 0 to 40 dB of gain limiting, a balanced stereo interconnection, flat frequency response of 0.1 dB from 30-15,000 Hz and a low noise level (better than 70 dB below plus 10 dBm output), the LA-2A quickly became a studio standard. Originally patented by Jim Lawrence, it was produced by Teletronix in Pasadena, California, which became a division of Babcock Electronics Corporation in 1965. In 1967 Babcock's broadcast division was acquired by the legendary Bill Putnam's company, Studio Electronics Corporation shortly before he changed the company's name to UREI®. Three different versions of the LA-2A were produced under the auspices of these different companies before production was discontinued around 1969.
1176LN
It was Bill Putnam himself who, in 1966, was responsible for the initial design of the 1176. Its circuit was rooted in the 1108 preamplifier which was also designed by Putnam. As is evident from entries and schematics in his
design notebook, he experimented with the recently developed Field Effect Transistor (F.E.T.) in various configurations to control the gain reduction in the circuit. He began using F.E.T.s as voltage variable resistors, in which the resistance between the drain and the source terminals is controlled by a voltage applied to the gate. His greatest challenge was to ensure that distortion was minimized by operating the F.E.T.s within a linear region of operation.
After several unsuccessful attempts at using F.E.T.s in gain reduction circuits, Putnam settled upon the straightforward approach of using the F.E.T. as the bottom leg in a voltage divider circuit, which is placed ahead of a preamp stage.
The output stage of the 1176 is a carefully crafted class A line level amplifier, designed to work with the (then) standard load of 600 ohms. The heart of this stage is the output transformer, whose design and performance is critical. Its primary function is to convert the unbalanced nature of the 1176 circuit to a balanced line output, and to provide the proper impedance matching to drive the line impedance of 600 ohms. These two jobs are accomplished by the primary and secondary windings whose turns' ratio defines the impedance ratio.
This transformer is critical due to the fact that it uses several additional sets of windings to provide feedback, which makes it an integral component in the operation of the output amplifier. Putnam spent a great deal of time perfecting the design of this tricky transformer and carefully qualified the few vendors capable of producing it.
The first major modification to the 1176 circuit was designed by Brad Plunkett in an effort to reduce noise--hence the birth of the 1176LN, whose LN stands for low noise. Numerous design improvements followed, resulting in at least 13 revisions of the 1176. Legend has it that the D and E blackface revisions sound the most “authentic”.
The original Universal Audio 1176LN designed by Bill Putnam was a major breakthrough in limiter technology - the first true peak limiter with all transistor circuitry offering superior performance and a signature sound. Evolved from the popular Universal Audio 175 and 176 vacuum tube limiters, the 1176LN retained the proven qualities of these industry leaders, and set the standard for all limiters to follow.
Pros Talk UA
Both the 1176 and the LA-2A remain in daily use. Busy engineers and producers' comments about both the 1176 and the LA-2A demonstrate their impact on the industry:
Mike Shipley
Mike Shipley (Def Leppard, Shania Twain, Blondie): "I grew up using 1176s - in England they were the compressor of choice. They're especially good for vocals, which is also what I primarily use the LA-2 for. Most anything else I can do without, but I can't be without at least a pair of 1176s and an LA-2A. For example, on the Enrique Iglesias project I'm currently mixing, I'm using both an 1176 and an LA2 on his voice, which is not unusual for me.
"The 1176 absolutely adds a bright character to a sound, and you can set the attack so it's got a nice bite to it. I usually use them on four to one, with quite a lot of gain reduction. I like how variable the attack and release is; there's a sound on the attack and release which I don't think you can get with any other compressor. I listen for how it affects the vocal, and depending on the song I set the attack or release - faster attack if I want a bit more bite. My preference is for the black face model, the 4000 series - I think the top end is especially clean.
"The LA-2A is not as versatile, but it also has a sound that I really like. On certain voices you can crank it heavily, to where you almost want to put a piece of tape over the meter because there's so much gain reduction that you don't want anyone else to see it! I'm not particularly into overcompression, but when you use it that way there's something about it that just sounds really great. It does depend how it's set on the back, where there's a flat control that can be set to roll off certain frequencies when you reduce more gain. If you have a singer with an intensely piercing voice I find that compressor a good one, incredibly useful. It makes things warmer, especially when you crank it, and for thinner voices that can be just the ticket."
Allen Sides
Allen Sides has always been known for having golden ears when it comes to the sound of equipment. The owner of Ocean Way Studios in Los Angeles and Nashville, he's also a speaker designer and engineer who is especially respected for his work with live musicians, including orchestra and string dates. Among his recent credits are work with the Goo Goo Dolls, Alanis Morissette and Green Day. Sides brings his different perspectives into play when he talks about using the 1176.
"The 1176 is standard equipment for my sessions. I just used them last night, as a matter of fact, on a project for singer Lisa Bonet that Rob Cavallo was producing at Ocean Way. We were recording drums and I used them on the left/right overheads as effects limiters. It's something I learned from (engineer) Don Landy, who worked with Randy Newman a lot. I mult the left and right overheads and bring them back on the console, then insert a pair of 1176s into a pair of the mults. Push in 20 to one and four to one simultaneously and it puts the unit into overdrive creating a very impressive sound."
natural_image
Black-and-white photo of a man in a suit speaking into a microphone (no visible text or symbols)Murray Allen
Murray Allen is a veteran engineer and Director of Post Production for the San Francisco Bay Area company Electronic Arts. He has a fascination for gear both old and new and he explains why he thinks the 1176 has been so popular for so long. "It has a unique sound to it that people like, it's very easy to operate, and it does a great job. You have just two controls relative to the ratio of compression. You have input and output and you have attack and release. That's all there is. It's still my favorite limiter for Fender basses and string basses, because you don't know it's working. It doesn't change the way the bass sounds, it just keeps the level at a more controllable place.
Ken Kessie
Mixer Ken Kessie (En Vogue, Tony! Toni! Tone!, Celine Dion) is known for being experimental. “Seems like everybody knows the basic tricks for the 1176,” he says, “But here are two that might be lesser known. If you turn the attack knob fully counterclockwise until it clicks, the 1176 ceases to be a compressor and acts only as an amplifier. Sometimes this is the perfect sound for a vocal. And of course the unit can be overdriven, adding another flavor of distortion in case your plug-ins are maxed out!
"Then, for that hard-to-tame lead vocalist (the one that backs up from the mic to whisper and leans in for the big ending chorus), try an 1176 followed by a DBX 165. Use the 1176 as a compressor, and the DBX as a peak limiter...it's guaranteed to be smooth as silk."
Jim Scott
Jim Scott shared a Grammy for Best Engineered Album for Tom Petty's Wildflowers. He's also known for his work with Red Hot Chili Peppers, Natalie Merchant and Wilco. "I use 1176s real conservatively and they still do amazing things," he comments. "I'm always on the four to one button, and the Dr. Pepper - you know, 10 o'clock, 2 o'clock, and it does everything I need.
"I always use them on vocals. I use them on room mics, on acoustic guitars-- sometimes in mixing I'll sneak a little on a snare drum or a separated channel of a snare drum. I'm not one of those guys who leaves it on everything, but I'd have to say I've used an1176 on everything at one time or another.
"They have an equalizer kind of effect, adding a coloration that's bright and clear. Not only do they give you a little more impact from the compression,
natural_image
Black-and-white photo of a woman holding a book, looking upward (no visible text or symbols)they also sort of clear things up; maybe a little bottom end gets squeezed out or maybe they are just sort of excitingly solid state or whatever they are. The big thing for me is the clarity, and the improvement in the top end.
"The 1176 has that same kind of phenomenon, where, when you patch something through a Neve equalizer and you don't even engage the EQ, it sounds better. It's just a combination of the amps.
"I also use LA-2As all the time. I use them on bass, and it's one of the compressors I use for reverb. Often I'll send a bunch of things to one LA2A and bring it back into the console like a return - it's great for drums, great for kick drum especially.
"LA-2As warm things up. They're the opposite of the 1176--they EQ all the warmth and low mids and bass. When you put bass and drums in them they get fatter and bigger. And unless you hit them way hard and make the tubes sizzle they don't really distort. Of course, you can get them to sound like an AC30 if you want to, just turn them all the way up. They are very loud, powerful amplifiers.
"I've also used both the 1176 and the LA-2A for stereo buss compressors - you just have to be a little bit careful that your mixes don't go one sided. Tom's [Petty's] records have often been mixed through 1176s. I've also done that with LA-2As - they are of course, more inconsistent piece to piece than the 1176s, because of the tubes and the difference in fatigue of the tubes.
"My big mentors were Andy Johns and Lee DeCarlo and Ron Nevision because they were all Record Plant guys. I learned how to make a rock and roll record from them. Although over the years it's become my own thing, my style still tends to be that Record Plant style, U87s, 1176s, LA-2As, 47 F.E.T.s...it's what I like."
Mike Clink
Producer/Engineer Mike Clink (Guns N' Roses, Sammy Hagar, Pushmonkey) also comes from the Record Plant school of recording. "I find that I actually use 1176s more now than I ever did," he comments. "I like them because they bring out the brightness and presence of a sound - they give it an energy. It seems like when I'm mixing I end up using an 1176 on the vocals every time. And if I want to compress a room sound I'll take a mono room mic, put an 1176 across it and push in all the buttons."
natural_image
Black-and-white photo of two men in suits examining equipment in a factory setting (no visible text or symbols)Bruce Swedien
Bruce Swedien is a master engineer who needs no introduction. He also is a die-hard 1176 fan. “I have two silverface 1176LNs in my rack that Bill Putnam personally picked out for me,” he says. “I remember sitting at Bill’s place in the Channel Islands, and talking about the 1176 and how I wanted a pair. The next time we went over he’d picked this pair out and they were sitting in his garage waiting for me. I love them on vocals. All of the Michael Jackson and James Ingram vocals that everyone has heard so much were done with at least one of those 1176s. I couldn’t part with them for anything. They sound fabulous.”
natural_image
Group photo of five people in formal attire, one holding a trophy (no visible text or symbols)Thank You
We would like to thank you again for becoming a Universal Audio customer. We encourage you subscribe to our email lists in your account profile at www.uaudio.com so we can keep you informed about UA product developments and promotions.
The Universal Audio Team

natural_image
Group photo of a large outdoor gathering with multiple people, dogs, and trees in the background (no visible text or symbols)Notices
Warranty
Universal Audio provides a limited warranty on all hardware products. To learn more, please visit help.uaudio.com. The limited warranty gives you specific legal rights. You may also have other rights which vary by state or country.
Repair Service
If you are having trouble with Apollo Solo USB, first check all system setups, connections, software installations, operating instructions, and the Troubleshooting chart. If that doesn't help, contact our technical support team. To contact technical support or learn more about repair service, please visit help.uaudio.com.

Maintenance
Apollo Solo USB does not contain a fuse or any other user-replaceable parts. The unit is internally calibrated at the factory. No internal user adjustments are available.

Caution
Any changes or modifications to the device not expressly approved by Universal Audio could void the user's right to operate the equipment.
Important Safety Information

Before using this unit, be sure to carefully read the applicable items of these operating instructions and the safety suggestions. Afterwards, keep them handy for future reference. Take special care to follow the warnings indicated on the unit, as well as in the operating instructions.
1) Read these instructions.
2) Keep these instructions.
3) Heed all warnings.
4) Follow all instructions.
5) Do not use this apparatus near water.
6) Clean only with dry cloth.
7) Do not block any ventilation openings. Install in accordance with the manufacturer's instructions.
8) Do not install near any heat source such as radiators, heat registers, stoves, or other apparatus (including amplifiers) that produce heat.
9) Do not defeat the safety purpose of the polarized or grounding-type plug. A polarized plug has two blades with one wider than the other. A grounding type plug has two blades and a third grounding prong. The wide blade or the third prong are provided for your safety. If the provided plug does not fit into your outlet, consult an electrician for replacement of the obsolete outlet.
10) Protect the power cord from being walked on or pinched particularly at plugs, convenience receptacles, and the point where they exit from the apparatus.
11) Only use with attachments/accessories specified by the manufacturer.
12) Use only with the cart, stand, tripod, bracket, or table specified by the manufacturer, or sold with the apparatus. When a cart is used, use the caution when moving the cart/ apparatus combination to avoid injury from tip-over.
13) Unplug this apparatus during lightning storms or when unused for long periods of time.
14) Refer all servicing to qualified service personnel. Servicing is required when the apparatus has been damaged in any way, such as power-supply cord or plug is damaged, liquid has been spilled or objects have fallen into the apparatus, the apparatus has been exposed to rain or moisture, does not operate normally, or has been dropped.
Description of symbols used

The lightning flash represented by the arrow symbol in an equilateral triangle is intended to alert users to the presence of high voltage within the unit that could cause an electrical shock hazard.

The exclamation mark in an equilateral triangle is intended to alert users to the existence of important instructions in the manual relating to the use and maintenance of the unit.
Compliance
United States Class B Manual Statement
NOTE: This equipment has been tested and found to comply with the limits for a Class B digital device pursuant to Part 15 of the FCC Rules. These limits are designed to provide reasonable protection against harmful interference in a residential installation. This equipment generates, uses, and can radiate radio frequency energy and, if not installed and used in accordance with the instructions, may cause harmful interference to radio communications. However, there is no guarantee that interference will not occur in a particular installation. If this equipment does cause harmful interference to radio or television reception, which can be determined by turning the equipment off and on, the user is encouraged to try and correct the interference by one or more of the following measures:
- Reorient or relocate the receiving antenna.
- Increase the separation between the equipment and the receiver.
- Connect the equipment into an outlet on a circuit different from that to which the receiver is connected.
- Consult the dealer or an experienced radio/TV technician for help.
International Class B Statements
- Canada: Innovation, Science and Economic Development Canada Interference Causing Equipment Standard ICES-003, “Information Technology Equipment (ITE)-Limits and methods of measurement”, Issue 6, dated January 2016 (class B)
- Japan: VCCI-CISOR 32:2016 “Technical Requirements” for multimedia equipment (class B). Japanese Class B Manual Statement:
(Translation: This is Class B equipment. Although this equipment is intended for use in residential environment, it could cause poor reception if used near a radio television receiver. Please follow instructions in the instruction manual.)
- EN 55022:2010, “Information technology equipment – Radio disturbance characteristics-Limits and method of measurements (Class B)
- CISPR 22:2008, “Information technology equipment- Radio disturbance characteristics – Limits and method of measurement” (Class B)
- EN 55032:2012, “Electromagnetic compatibility of multimedia equipment – Emission Requirements”
- CISPR 32:2012, “Electromagnetic compatibility of multimedia equipment- Emissions requirements”
- EN 55024:2010 “Information technology equipment – Immunity characteristics. Limits and method of measurement”
- CISPR 24:2010 +A1:2015 “Information technology equipment- Immunity characteristics. Limits and method of measurement.”
- EN 55035:2017 “Electromagnetic compatibility of multimedia equipment – Immunity requirements”
- TCVN 7189:2009 "Information technology equipment- Radio disturbance characteristics – Limits and method of measurements".
- Korea: KN32/KN35 2015 “Electromagnetic compatibility of multimedia equipment -Emissions and Immunity requirements” Class B
Disclaimer
The information contained in this manual is subject to change without notice. Universal Audio, Inc. makes no warranties of any kind with regard to this manual, including, but not limited to, the implied warranties of merchantability and fitness for a particular purpose. Universal Audio, Inc. shall not be liable for errors contained herein or direct, indirect, special, incidental, or consequential damages in connection with the furnishing, performance, or use of this material.
End User License Agreement
Your rights to the Software are governed by the accompanying End User License Agreement, a copy of which can be found at: www.uaudio.com/eula
Trademarks
Universal Audio, the Universal Audio diamond logo, UAD, UAD Series, UAD-1, UAD-2, UAD-2 SOLO, UAD-2 DUO, UAD-2 QUAD, UAD-2 OCTO, Powered Plug-Ins, 1176LN, 1176SE, Teletronix, LA-2A, LA-3A, LA-610, LA-610MkII, 2-1176, 610, 2-610, 6176, 710 Twin-Finity, 2192, 4-710d, Cambridge EQ, DreamVerb, Plate 140, Precision Limiter, RealVerb Pro, Precision Buss Compressor, Precision De-Esser, Precision Maximizer, Century Tube Channel Strip, OX, UAD-2 Live Rack, Satellite, Satellite DUO, Satellite QUAD, Apollo, Apollo DUO, Apollo QUAD, Apollo Twin, Apollo 16, Arrow Analog Ears I Digital Minds, Helios, LUNA, 175-B and 176, are trademarks or registered trademarks of Universal Audio, Inc.
Other company and product names mentioned herein are trademarks of their respective owners.
ASIO is a trademark and software of Steinberg Media Technologies GmbH.
Copyright
Copyright ©2020 Universal Audio, Inc. All rights reserved.
This manual and any associated software, artwork, product designs, and design concepts are subject to copyright protection. No part of this document may be reproduced, in any form, without prior written permission of Universal Audio, Inc.
Technical Support
Universal Audio Knowledge Base
The UA Knowledge Base is your complete online technical resource for configuring, operating, troubleshooting, and repairing all UA products.
You can watch helpful support videos, search the Knowledge Base for answers, get updated technical information that may not be available elsewhere, and more.
UA Knowledge Base
YouTube Support Channel
The Universal Audio Support Channel at youtube.com includes helpful support videos for setting up and using UA products.
UA YouTube Support Channel
Universal Audio Community Forums
The unofficial UA discussion forums are a valuable resource for all Universal Audio product users. This website is independently owned and operated.
www.uadforum.com
Contact Universal Audio Support
To contact the UA support team for technical or repair assistance, please visit:
help.uaudio.com
UNIVERSAL AUDIO
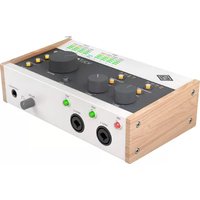
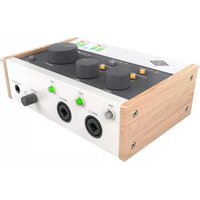


- Apollo Solo USB Manual
- Table Of Contents
- A Letter from Bill Putnam Jr. 7
- Introducing Apollo Solo USB 8
- Getting Started....16
- Hardware Controls & Connectors 23
- Apollo Solo USB System Overview 33
- Working With Apollo Solo USB 41
- Console Overview....62
- Console Reference 89
- Console Plug-In Inserts 136
- Console Settings.... 153
- Unison.... 166
- Console Recall Plug-In 179
- UAD Meter & Control Panel 183
- Using UAD Plug-Ins....198
- Tempo Sync 207
- UA Account & Store 211
- Latency & Apollo Solo USB....219
- Device Drivers 224
- Troubleshooting 226
- Glossary....227
- Specifications 234
- Hardware Block Diagram 237
- Universal Audio History 238
- Notices....252
- Technical Support 256
- A Letter from Bill Putnam Jr.
- Introducing Apollo Solo USB
- Shape your Recordings Into Records with Genuine UA Conversion and Classic Studio Sounds.
- Now You Can:
- Unison™ Technology for Stunning Mic and Guitar Preamp Emulations
- A Full Suite of Classic Studio Processing Onboard
- Access the World of UAD Powered Plug-Ins
- Vintage Guitar and Bass Amps
- Best-in-Class Headphone Amplifier
- Ready to Go
- Apollo Solo USB Hardware Features
- Key Features
- Audio Interface
- Microphone Preamplifiers
- Monitoring
- UAD-2 Inside
- Other
- Package Contents
- Apollo Solo USB Software Features
- Console Application
- General:
- Realtime UAD Processing:
- Channel Inputs:
- Monitoring:
- Auxiliary Buses:
- Metering:
- Console Recall plug-in
- UAD Powered Plug-Ins
- UAD Meter & Control Panel application
- Device Drivers
- UAD Powered Plug-In Features
- About Apollo Solo USB Documentation
- UAD Plug-Ins Manual
- Direct Developer Plug-In Manuals
- Accessing Installed Documentation
- Host DAW Documentation
- Glossary
- Hyperlinks
- Technical Support
- Getting Started
- Overview
- Apollo Solo USB System Requirements
- \*Notes
- Hardware Setup
- Choose a Suitable Location
- USB 3 Cable Length
- Connect to Computer and Power
- Software Setup
- Our Web Pages Guide You
- www.uaudio.com/register
- Installation, Registration, and Authorization Procedure
- Firmware Update Procedure
- Windows Setup
- Disable Windows Notification Sounds
- Additional Windows Optimizations
- Audio Setup
- Connect to Input Sources and Monitor System
- Audio Connection Notes
- Setting Hardware Input/Output Levels
- Set Input Gains
- Adjust Output Volumes
- Mute (and Unmute) Monitor Outputs
- Notes:
- What Next?
- Hardware Controls & Connectors
- Apollo Solo USB System Overview
- Using Apollo Solo USB's Unique Features
- Operating UAD Plug-Ins
- Controls Overview
- Operating Modes
- PREAMP Mode
- Preamp Channels
- Preamp Controls
- Selected Channel
- Changing Channels
- Input Source
- Preamp Gain
- Preamp Options
- MONITOR Mode
- Stereo Outputs
- Output Volume
- Output Selection
- Monitor Mute
- Top Panel
- LEVEL Knob & Switch
- Unison Integration
- PREAMP Gain & Volume Level Indicator LEDs
- MONITOR Button
- PREAMP Button
- Preamp Option Buttons
- Display Panel
- INPUT Select
- FILTER
- +48V
- PAD
- POLARITY ∅
- LINK
- Display Panel
- Channel Selection Indicators
- Input Meters
- Input Source Indicators
- Monitor Selected Indicator
- Stereo Output Meters
- Headphone Selected Indicator
- Preamp Options Display
- Front Panel
- Hi-Z Instrument Input
- Headphone Output
- Rear Panel
- Power Switch
- Power Supply Input
- USB 3 Port
- Monitor Outputs
- Mic/Line Inputs 1 & 2
- Apollo Solo USB Hardware
- USB 3 Audio Interface for Windows
- Integrated UAD-2 DSP Accelerator
- System Expansion
- Apollo Solo USB Software
- Realtime UAD Processing
- Unison Technology
- UAD Meter
- UAD Control Panels
- The Authentic Sound of Analog
- Plug-In Host Applications
- Bundled & Optional Plug-Ins
- Try Before You Buy
- Apollo Audio Interfaces
- UAD Software Installer
- UA Account & Store
- UA Account
- UA Store
- UAD Authorization
- UA Website
- UA Blog
- UA Knowledge Base
- Working With Apollo Solo USB
- In This Chapter:
- Essential Apollo Solo USB Concepts 42
- Setting the DAW to use Apollo Solo USB I/O 44
- Accessing Apollo Solo USB's I/O in the DAW 46
- Input Monitoring with the DAW 48
- Using Console with the DAW 52
- UAD Plug-Ins: Console versus DAW 54
- Virtual I/O 56
- Using Apollo Solo USB for System Sound I/O 59
- Using Apollo Solo USB Without Audio Software 61
- Essential Apollo Solo USB Concepts
- The DAW Environment
- Input Monitoring
- Input Latency
- I/O Buffering
- Software Input Monitoring
- Hardware Input Monitoring
- Delay Compensation
- Setting the DAW to use Apollo Solo USB I/O
- Specifying the Audio Interface Device
- Steinberg Cubase
- Ableton Live
- Avid Pro Tools
- Accessing Apollo Solo USB's I/O in the DAW
- Selecting Apollo Solo USB's Inputs and Outputs
- Available I/O
- Default Outputs
- Apollo Solo USB I/O Driver Names
- I/O Numbers versus Names
- Input Monitoring with the DAW
- Use Software OR Hardware Input Monitoring
- Disable Unused Input Monitoring System
- How To Disable Software Input Monitoring
- Steinberg Cubase Auto Monitoring
- Ableton Live Monitor Mode
- Avid Pro Tools Low Latency Monitoring
- How To Disable Hardware Input Monitoring
- Input Monitoring Tips
- Using Console with the DAW
- Disable DAW Input Monitoring when Input Monitoring via Console
- Disable Console Input Monitoring when Input Monitoring via DAW
- Controlling Apollo Solo USB's Unique Functions
- Sharing UAD Resources
- Saving Console Setups Within DAW
- Routing and Recording Console I/O
- Recording Console Inputs
- Recording Console Outputs
- Route DAW Outputs Into Console
- Recording Realtime UAD Processing
- DAW Mixdown and Console
- UAD Plug-Ins: Console versus DAW
- UAD Processing in Console (Realtime)
- Console Processing Notes
- UAD Processing in DAW (Buffered)
- DAW Processing Notes
- UAD Processing in both Console and DAW
- Bypass UAD plug-ins within DAW when monitoring with Console
- Bypass Console plug-ins when mixing in DAW
- Virtual I/O
- Flexible, Pristine Signal Routing
- Virtual Inputs into Console
- Virtual Outputs into DAW
- Routing DAW Outputs to Console Inputs
- Routing Console Outputs to DAW Inputs
- Virtual I/O Examples
- Adjust DAW Levels Within Console
- Reduce UAD Processing Latency on Virtual Instruments
- Using Apollo Solo USB for System Sound I/O
- System Sound Routing
- System Sound Output
- System Sound Input
- Setting System Sound I/O
- To use Apollo Solo USB I/O for system sound:
- Windows ASIO versus WDM
- Windows WDM System Sound Notes
- Using Apollo Solo USB Without Audio Software
- Console Overview
- What is Console?
- Console Functions
- Global Functions
- When To Use Console
- Interactions Between Console and Apollo Solo USB
- Accessing Console
- Quitting Console
- Console Layout
- Dynamic Window Size
- Width
- Height
- Global Window Elements
- Meter Bridge Overview
- Info Bar Overview
- Tempo
- Sample Rate
- UAD Resource Gauges
- Current Bank Overview
- View Column Overview
- Views
- View Selectors
- View Options
- Application Menus
- Clear
- Settings
- View Elements
- Monitor Column Overview
- Monitor Meters
- Global Insert Effects
- Show Strips
- Cue Outputs Popover
- Monitor Output Options
- Monitor Level
- Sessions Menu
- Channel Strips Overview
- Signal Flow
- Input Types
- Preamp Inputs
- Virtual Inputs
- Console Plug-In Inserts Overview
- Unison Insert
- Insert Effects Overview
- Function of the Insert Effects Switch
- Record With Effects
- Monitor With Effects
- Individual Channel Insert Effects
- Popover Windows
- HP Cue Overview
- HP Cue Label
- Cue Components
- Cue Count
- Sends Overview
- Stereo Mix Buses
- AUX 1 & AUX 2
- HP Cue
- Mix Bus Returns
- AUX
- Sends Access
- Overview View
- Sends View
- Show All Sends Option
- Console Sessions Overview
- Console Settings Overview
- Console Settings Panels
- Accessing Console Settings
- Multiple Undo/Redo
- Undo/Redo Cache
- Keyboard Focus & Control
- Focus Indication
- Focus Navigation
- Focus Control
- Adjusting Console Controls
- Controls Shortcuts
- Keyboard Shortcuts
- Console Reference
- Meter Bridge
- Input Channels
- Channel Meters
- Bank Bar
- Current Bank
- Changing the Current Bank
- Meter Bridge Menu
- View Column
- Available Views
- Common View Elements
- View Column Options
- Global View Column Controls
- Menu Switch
- Default Switch
- Clear Switches
- CLEAR CLIPS
- CLEAR SOLO
- Settings Switch
- Modifiers Overview
- Option Latch
- Option Unlatch
- Modifiers Timeout
- Modifiers
- Modifier Swipe Shortcuts
- Overview, Inputs, & Inserts View Options
- Power Modifier
- Remove Modifier
- Copy/Paste Modifier
- Copy Individual Plug-In
- Copy Channel Strip
- Paste Modifier
- Paste Individual Plug-In
- Paste Channel Strip
- Isolate Modifier
- Sends View Options
- Available Sends
- Show Sends
- Sends COPY TO Modifier
- COPY TO Menu
- Info Bar
- Offline Hardware Display
- Tempo Display
- About Console Tempo
- Tempo Popover
- Adjusting Tempo
- Text Entry
- Tap Tempo
- Changing tempo via MIDI
- About external MIDI tap tempo control
- MIDI configuration/setup
- Sample Rate Display
- Sample Rate Menu
- Hardware Clicks
- Clock Display
- UAD Resource Display
- Channel Input Controls
- Unison Controls
- Gain Value
- Front Panel Channel Selection Indicator Dot
- Input Select
- Low Cut Filter
- 48V
- Pad
- Polarity
- Console Plug-In Insert Controls
- Sends Popover
- Sends Popover Window Descriptions
- Monitor Mix Controls
- Input Pan
- Stereo Input Pan
- Input Solo
- Input Mute
- Input Fader
- Fader Scale
- Fader Value
- Copy Mix
- Input Meter
- Input Level Scale
- Peak Hold
- Rename/Link Popover
- Input Label
- Input Label Menu
- To customize a channel input name:
- To return to the default name:
- Input label Notes
- Show/Hide Inputs
- How To Use Show/Hide Inputs
- Show/Hide Input Notes:
- Stereo Link
- Activation
- When Link is activated:
- Deactivation
- Link Constraints
- Aux Returns
- Aux Overview
- Show Aux Returns
- Aux Notes
- Aux Return Strips
- Aux Inserts
- Aux HP Cue Send
- Aux Pre
- Aux Post
- Aux Mono
- Aux Mute
- Aux Fader
- Aux Meter
- Monitor Column
- Meter Source
- Monitor Level Scale
- UAD REC (print all wet)
- UAD MON (print all dry)
- Both UAD REC and UAD MON (print wet and dry)
- Cue Outputs Menu
- Monitor Mono
- Monitor Level Value
- Monitor Level Indicator
- Monitor Dot
- Sessions Switch
- Cue Source Select
- MIX
- HP
- Cue Output Mono
- Control Room Column
- Show Column
- DIM Controls
- Monitor Source Select
- HP INACTIVE Dialog
- Console Sessions
- Content of Session Files
- Default Session Files Location
- Sessions Sub-Folders
- Session Files Suffix
- Session Files Access
- Session Name
- Modified Session Name
- SYNC Session Name
- Modified Session Dialog
- Sessions Manager Popover
- Sessions Access
- Sessions Manager Contents
- SESSION Column
- SUB-FOLDER Column
- Sessions Manager Function Switches
- Display Sessions Menu
- Session File Functions
- Sessions List
- Sub-Folders
- Cached Sessions
- Why Cached Sessions Exist
- When Cached Sessions Appear
- Window Title Bar
- Menu Button
- File Menu
- Session Files Location
- New
- Open...
- Save
- Save As...
- Edit Menu
- Undo
- Redo
- Remove All
- Enable All
- Disable All
- Remove/Enable/Disable Sub-Menu
- View Menu
- Show/Hide Items
- Show/Hide Aux Returns
- Show/Hide Offline Devices
- View Items
- Show Plug-In Editor Windows
- Close All Plug-In Editor Windows
- Help Menu
- Documentation
- Contents of the documentation folder:
- Console Plug-In Inserts
- Insert Types
- Standard Insert
- Channel Strip
- Inserts Signal Flow
- Inserting UAD Plug-Ins
- Removing UAD Plug-Ins
- Editing UAD Plug-Ins
- Insert Assign Popover
- Inserts Display
- Insert State Indicators
- Insert Hover Options
- Insert Options Menu
- Plug-In Options
- Channel Options
- Channel Insert Effects
- Channel Insert Effects Switch
- Switch Indicator Colors
- Plug-In Editor Window
- Title Bar
- Function Switches
- Channel Strip Enable/Disable
- Insert Select/Assign Menu
- Select
- Assign
- Presets Manager Popover
- Plug-In Power
- Copy Plug-In Settings
- Paste Plug-In Settings
- UAD Toolbar
- Preset Manager Menu
- Information Menu
- Buy Button
- Channel Strips
- Channel Strip View Enable
- Channel Strip Presets
- Accessing Channel Strip Presets
- Presets Manager
- Presets Overview
- Factory Presets
- Presets Folder Location
- Plug-In's Presets Folder
- Presets Sub-Folders
- Channel Strip Presets Folder
- Channel Strip Presets Folder Location
- Channel Strip Presets Sub-Folders
- PRESET Column
- Presets Manager Function Buttons
- Save Preset Popover
- Save Preset Popover Functions
- Console Settings
- Accessing Settings Panels
- Changing Settings
- Available Settings
- Hardware Settings Panel
- Host Control of Sample Rate
- Buffer Size
- USB Safeguard
- Input Delay Compensation
- Input Delay Compensation Exceeded Dialog
- Input Delay Compensation Exceeded
- Devices Column
- Select Device
- Device Letter
- Device Color
- Designate Monitor Unit
- Add Device
- Options Column
- Device Name
- Identify
- Remove
- Metering
- Pre-Fader
- Post-Fader
- Clip/Peak Hold
- Clip Hold Time
- Peak Hold Time
- Always On Top
- Show Device Names
- Plug-Ins Panel
- Controls Mode
- Plug-In Column
- Status Column
- Hide Column
- Info Column
- Buy Column
- MIDI Panel
- MIDI Device
- Tap Tempo Channel
- Tap Tempo Event
- MIDI Type Menu
- MIDI Value Field
- MIDI Note Table
- Unison
- What is Unison?
- Unison Features
- Unison Plug-Ins
- Activating Unison
- Unison Insert Location
- Unison Processing
- Unison Plug-Ins with Standard Inserts
- Unique Behavior of Unison Inserts
- Available UAD plug-ins
- Linked insert enable and plug-in enable controls
- Disabled Unison plug-ins
- Controlling Unison Plug-Ins with Apollo Solo USB
- Plug-In Parameters
- Apollo Solo USB Top Panel Indication
- Unison Active
- Additional Gain Stages
- Console Indications
- Gain Level
- Gain Value Indicator
- Top Panel Channel Selection
- Level Knob Switch
- Channel Select Mode (standard operation)
- Gain Stage Select (Unison operation only)
- Gain Stage Mode
- Activating Gain Stage Mode
- To enable Apollo Solo USB's Gain Stage Mode when using a Unison plug-in:
- Gain Stage Mode – Apollo Solo USB Top Panel Indication
- Gain Stage Mode – Unison Plug-In Indication
- Deactivating Gain Stage Mode
- Gain Stage Mode can be deactivated with any of these methods:
- When Gain Stage Mode is deactivated, the following changes occur:
- Controlling Individual Gain Stages
- Selecting Gain Parameters For Control
- Gain Stage Colors
- Matching Gain Stage Indicators
- Available Gain Stages
- Unison Load/Save Behaviors
- Loading Unison Plug-In Settings
- Loading Presets: Hardware settings are inherited
- Loading Sessions: Hardware settings are overridden
- Unison Operation Notes
- SYNC
- Console Recall Controls
- Monitor Controls
- Console Switch
- How To Use Console Recall
- Enabling SYNC
- Effect on Session Name in Console
- Loading Synchronized DAW Projects
- Session State Parameter
- UAD Meter & Control Panel
- Launching the Application
- UAD Meter Window
- Plug-Ins Panel Button
- Averaged Loads
- Individual Loads
- UAD Plug-In Loads
- UAD Instance Chart
- Static Loads
- DSP
- Program
- Memory
- Meter Menu
- Control Panels
- Accessing the Control Panels
- System Information Panel
- Software Section
- Version String
- Check for Updates
- Plug-In Latency
- Hardware Section
- Device Status
- Device Enabled
- DSP Load
- Save Detailed System Profile
- Authorize Plug-ins button
- Help Column
- Configuration Panel
- UAD-2 DSP Settings
- Limit DSP Load
- DSP LoadLock
- Extra Buffering
- User Interface Settings
- Linear (slider)
- Circular (jump)
- Relative Circular (grab)
- Use Host Setting
- Automatically send usage statistics to Universal Audio
- Info Display
- Help Panel
- Using UAD Plug-Ins
- Loading UAD Plug-Ins
- The UAD Plug-In Interface
- Controls View
- Presets/Settings Menu
- Additional Factory Presets
- Preset/Settings Compatibility
- Load/Save Preset
- Preset/Settings Menu
- Copy/Paste Settings
- Default Preset Location
- Status Indicator
- Buy (\$)
- Help (?) Menu
- LiveTrack Mode
- Increased Host Loading
- Extra Latency with LiveTrack
- LiveTrack Activation
- Adjusting Parameters
- Time Values
- Mouse/Wheel Scroll
- Shortcuts
- DSP Loading Notes
- Mono (m) UAD plug-ins
- Tempo Sync
- Tempo Sync Plug-Ins
- Sync Activation
- Available Note Values
- Range Limits
- Out of range
- Entering Values
- Arrow Keys
- Precision Delay Modes with Tempo Sync
- Galaxy Tape Echo & Roland RE-201 Sync
- Account Overview
- Device Registration
- Accessing Your Account
- Account Details
- Store Overview
- Bundled Plug-Ins
- Optional Plug-Ins
- UAD Plug-Ins Are Already Installed
- Coupons
- UAD Authorization Overview
- My Hardware
- UAD System
- Account Creation and Device Registration
- Adding Additional UAD Devices
- Authorizing Newly-Purchased UAD Plug-Ins
- Authorizations Are Stored On UAD Device
- Demo Mode
- Demo Reset
- Demo Activation
- To activate demo mode:
- Buying UAD Plug-Ins
- Purchase Procedure
- To purchase optional UAD plug-in licenses:
- UAD Authorization Procedure
- To manually authorize UAD plug-ins to run on the UAD device:
- Offline UAD Authorization
- To obtain and apply the UAD authorization file if not connected to the internet:
- Latency & Apollo Solo USB
- Delay Compensation with Apollo Solo USB
- Driver Reporting
- Upsampled UAD Plug-Ins
- Automatic Delay Compensation in the DAW
- Input Delay Compensation in Console
- How Console IDC works
- When To Use Console Input Delay Compensation
- Effect of Console's IDC setting
- In Console
- In the DAW
- Software monitoring with Console IDC
- UAD-2 DSP Resources
- Special Cases: Precision Multiband, Ampex ATR-102, and AKG BX 20
- Minimizing UAD Input Latency When Software Monitoring
- UAD-2 LiveTrack Mode
- Latency Basics
- Audio Interface Latency
- DAW Latency
- I/O Buffer Size
- Monitoring Live Performance During Recording
- Time-Alignment Of Newly-Recorded Tracks With Previously-Recorded Tracks
- Console Latency
- DAW UAD-2 DSP Latency
- Does all this latency stuff matter?
- Apollo Solo USB Drivers Overview
- ASIO
- UAD Mixer Engine
- Driver I/O Complement
- Driver Names and Numbers
- Driver I/O Table
- Driver I/O Table Notes
- Troubleshooting
- Bit Depth (See "Bit Resolution")
- Specifications
- Universal Audio History
- Pioneering audio recording for more than 50 years.
- Re-founded in 1999
- Bill Putnam Sr.
- Classic Compressors
- LA-2A
- 1176LN
- Pros Talk UA
- Mike Shipley
- Allen Sides
- Murray Allen
- Ken Kessie
- Jim Scott
- Mike Clink
- Bruce Swedien
- Thank You
- Notices
- Warranty
- Repair Service
- Maintenance
- Caution
- Important Safety Information
- Description of symbols used
- Compliance
- United States Class B Manual Statement
- International Class B Statements
- Disclaimer
- End User License Agreement
- Trademarks
- Copyright
- Universal Audio Knowledge Base
- YouTube Support Channel
- UA YouTube Support Channel
- Universal Audio Community Forums
- Contact Universal Audio Support
Brand : Universal Audio
Model : Apollo Solo USB
Category : DJ Equipment